
:max_bytes(150000):strip_icc():format(webp)/Robothandholdinganapple-fbe6ff482ed641e188dd6650b9ac132e.jpg)
Methods to Make Photo Motion Effect Online for 2024
Methods to Make Photo Motion Effect Online?
Versatile Video Editor - Wondershare Filmora
An easy yet powerful editor
Numerous effects to choose from
Detailed tutorials provided by the official channel
It’s no wonder that the latest technology involving animated images or GIFs has become the prominent attraction center.
These loops are hilarious sometimes and can be used to express what words can’t. What if you wish to create a photo motion effect online with free-to-use animated video software of your choice? Are you also looking for the same?
Well! You can do this yourself now. With the help of this guide article, we will discuss some beneficial motion blur effect online makers that will provide information on how to animate a picture or add a photo motion effect online. So, let’s begin working on those tools and start making our GIFs.
In this article
01 [What is the photo motion effect?](#Part 1)
02 [Websites for photo motion effect online](#Part 2)
03 [Samples for a photo motion effect](#Part 3)
Part 1 What is the photo motion effect?
The photo motion effect online is ideal for creating an animation with your DSLR or still camera. It is just as it feels, the motion through photographs. Usually, with moving photo effects online, the camera is the one moving, along with its subjects. But, we aren’t concerned with the camera usage here as we’re just looking for the effect.
These are a little different than stop-motion, which generally has the fixed subjects are the only things moving bit by bit.
1. Create a Plan
Consider shooting an event or location. Also, ensure there will be lots of movement and motion and movement if it’s an event. Also, consider or brainstorm how you want the camera to move about the space if you’re shooting at a particular location. It could be you only hovering around with the camera, or you could strap it to a bike and take a ride.
2. Click lots of Photos
Keep shooting lots of photos! Most cameras consist of a burst setting, where you can set it to click an image every few seconds. Or, you may tap the shutter button yourself.
3. Import & Edit
Once you finish shooting tons of images, you must get them on your PC to animate them. And, this is where the need for photo motion effect online maker comes in handy. So, let’s discuss them more in further sections without any delay!
Part 2 Websites for photo motion effect online
The following photo motion effect online makers help you transform a static image into a dynamic image in just a few minutes. Some of them even allow you to add or remove things that weren’t in the original shape to your photos. And, they are helpful for both professional designers and beginner photographers or editors.
1. Movepic – Photo Motion

Price: Free, VIP subscription begins from $1.99 per month and consists of a 7-day free trial.
Movepic is a beginner-friendly photo motion effect online maker that you’ll love most probably. Inside the app, you’ll find the standard tools like directional animation, camera motion, and speed controls.
The software also contains a vast gallery of effects that you can use to improve and entirely convert your photo into a dynamic animation. The software recognizes photo elements like the water or sky and contains a variety of animated filters to convert scenery into one from another world.
The only downside is its watermark over your animated picture while you export the project through the accessible version of the app.
2. PixaMotion

Price: Free.
PixaMotion is a free photo motion effect online maker that can do it all pretty much well. Thanks to the sleek modern design, the app is also simple to use. You can animate your photo, add moving elements and audio, and different filters from the app’s gallery to it. The main agenda behind the app is making short loop animations.
PixaMotion contains a few different animation modes. For example, you can select whether you want to animate the entire photo or just some of your photo elements.
You can also select to save it as GIF or video after you’re ok with the completed animated picture. PixaMotion includes a paid subscription, but even the app’s free version allows you to download your photos without a watermark.
3. GIFMaker.me
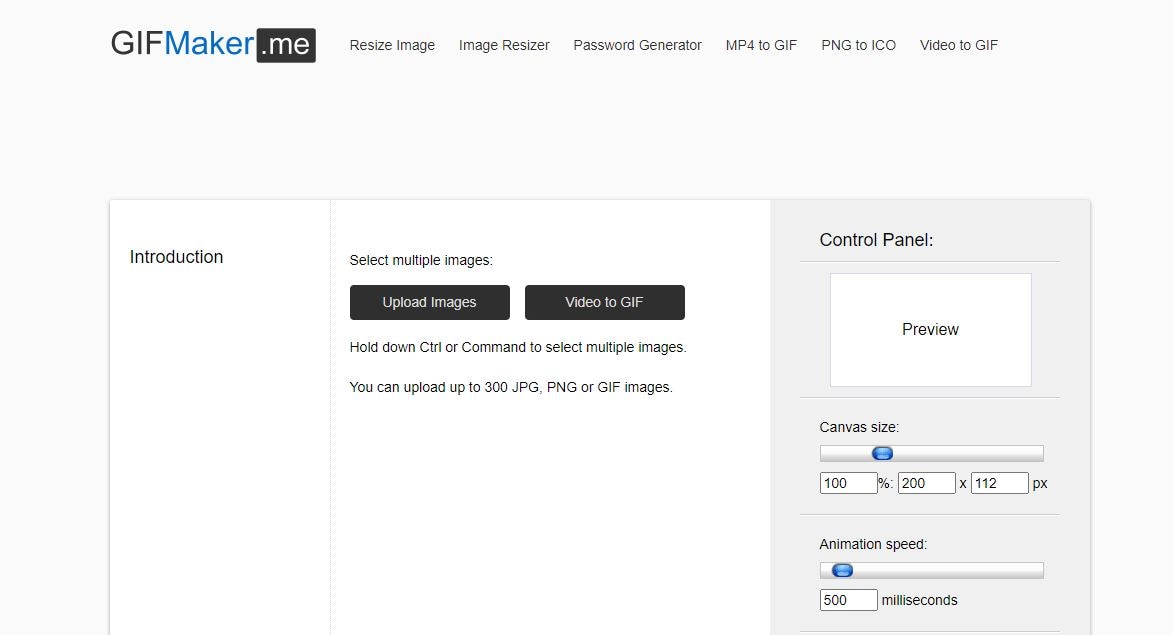
Price: Free.
If you don’t wish to download any apps or hustle through the registration process, you can use GIFMaker.me as another photo motion effect online maker. This tool helps you to animate still images online as well as transform videos into GIFs.
Compared to different apps available on this list, GIFMaker. I am less sophisticated. The app needs you to upload each image or frame separately to create an animated GIF. The 300 is the maximum number of images you can upload here with ease.
Select the desirable canvas size, animation speed, how many times you want the loop to repeat, and hit the Create GIF Animation tab after you’re all done and ready to upload. Moreover, you can upload an audio URL to add music to your GIF.
Part 3 Samples for a photo motion effect
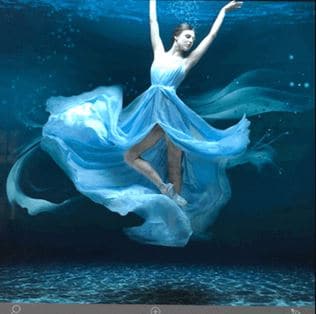
1. Cinemagraphs

This effect has been around since about 2011, so you’ve probably seen a few already. It has all the photo properties, except there’s always some little piece of it that feels to be moving magically. The only technique for getting this photo motion effect online is to take a little bit of video and work on it.
2. Plotagraph
A Plotagraph, at first glance, is an essence of morphing technique that can seem a bit like a Cinemagraph, the effect mentioned above. The difference is that you start with a photograph in this Plotagraph and not a video. And instead of pulling a video’s piece to use as animated sections, you’re making the animation out of your image.
3. Photoshop Timeline
Many people don’t realize that Photoshop has assisted you in importing and working on a video for five years. This sample is so great because Photoshop is a much more intuitive and deep program for us photographers. You can go with elements like masks, layers, and retouching in it. Or, you can use any moving photo effect online makers mentioned above to recreate an almost similar effect with fewer complexities.
Wondershare Filmora
Get started easily with Filmora’s powerful performance, intuitive interface, and countless effects!
Try It Free Try It Free Try It Free Learn More >

AI Portrait – The best feature of Wondershare Filmora for gameplay editing
The AI Portrait is a new add-on in Wondershare Filmora. It can easily remove video backgrounds without using a green screen or chroma key, allowing you to add borders, glitch effects, pixelated, noise, or segmentation video effects.

Conclusion
At last, we hope your question, “how to find the best photo motion effect online maker,” has the answer now. We gave multiple solutions to this question, and not one. With these motion blur effect online makers, you can quickly get what you long for. Despite these, you can also consider using Filmora that can be valuable on different platforms for animations. So enjoy doing animations and creating funny and helpful GIFs. Thanks for reading this article!
It’s no wonder that the latest technology involving animated images or GIFs has become the prominent attraction center.
These loops are hilarious sometimes and can be used to express what words can’t. What if you wish to create a photo motion effect online with free-to-use animated video software of your choice? Are you also looking for the same?
Well! You can do this yourself now. With the help of this guide article, we will discuss some beneficial motion blur effect online makers that will provide information on how to animate a picture or add a photo motion effect online. So, let’s begin working on those tools and start making our GIFs.
In this article
01 [What is the photo motion effect?](#Part 1)
02 [Websites for photo motion effect online](#Part 2)
03 [Samples for a photo motion effect](#Part 3)
Part 1 What is the photo motion effect?
The photo motion effect online is ideal for creating an animation with your DSLR or still camera. It is just as it feels, the motion through photographs. Usually, with moving photo effects online, the camera is the one moving, along with its subjects. But, we aren’t concerned with the camera usage here as we’re just looking for the effect.
These are a little different than stop-motion, which generally has the fixed subjects are the only things moving bit by bit.
1. Create a Plan
Consider shooting an event or location. Also, ensure there will be lots of movement and motion and movement if it’s an event. Also, consider or brainstorm how you want the camera to move about the space if you’re shooting at a particular location. It could be you only hovering around with the camera, or you could strap it to a bike and take a ride.
2. Click lots of Photos
Keep shooting lots of photos! Most cameras consist of a burst setting, where you can set it to click an image every few seconds. Or, you may tap the shutter button yourself.
3. Import & Edit
Once you finish shooting tons of images, you must get them on your PC to animate them. And, this is where the need for photo motion effect online maker comes in handy. So, let’s discuss them more in further sections without any delay!
Part 2 Websites for photo motion effect online
The following photo motion effect online makers help you transform a static image into a dynamic image in just a few minutes. Some of them even allow you to add or remove things that weren’t in the original shape to your photos. And, they are helpful for both professional designers and beginner photographers or editors.
1. Movepic – Photo Motion
Price: Free, VIP subscription begins from $1.99 per month and consists of a 7-day free trial.
Movepic is a beginner-friendly photo motion effect online maker that you’ll love most probably. Inside the app, you’ll find the standard tools like directional animation, camera motion, and speed controls.
The software also contains a vast gallery of effects that you can use to improve and entirely convert your photo into a dynamic animation. The software recognizes photo elements like the water or sky and contains a variety of animated filters to convert scenery into one from another world.
The only downside is its watermark over your animated picture while you export the project through the accessible version of the app.
2. PixaMotion
Price: Free.
PixaMotion is a free photo motion effect online maker that can do it all pretty much well. Thanks to the sleek modern design, the app is also simple to use. You can animate your photo, add moving elements and audio, and different filters from the app’s gallery to it. The main agenda behind the app is making short loop animations.
PixaMotion contains a few different animation modes. For example, you can select whether you want to animate the entire photo or just some of your photo elements.
You can also select to save it as GIF or video after you’re ok with the completed animated picture. PixaMotion includes a paid subscription, but even the app’s free version allows you to download your photos without a watermark.
3. GIFMaker.me
Price: Free.
If you don’t wish to download any apps or hustle through the registration process, you can use GIFMaker.me as another photo motion effect online maker. This tool helps you to animate still images online as well as transform videos into GIFs.
Compared to different apps available on this list, GIFMaker. I am less sophisticated. The app needs you to upload each image or frame separately to create an animated GIF. The 300 is the maximum number of images you can upload here with ease.
Select the desirable canvas size, animation speed, how many times you want the loop to repeat, and hit the Create GIF Animation tab after you’re all done and ready to upload. Moreover, you can upload an audio URL to add music to your GIF.
Part 3 Samples for a photo motion effect
1. Cinemagraphs
This effect has been around since about 2011, so you’ve probably seen a few already. It has all the photo properties, except there’s always some little piece of it that feels to be moving magically. The only technique for getting this photo motion effect online is to take a little bit of video and work on it.
2. Plotagraph
A Plotagraph, at first glance, is an essence of morphing technique that can seem a bit like a Cinemagraph, the effect mentioned above. The difference is that you start with a photograph in this Plotagraph and not a video. And instead of pulling a video’s piece to use as animated sections, you’re making the animation out of your image.
3. Photoshop Timeline
Many people don’t realize that Photoshop has assisted you in importing and working on a video for five years. This sample is so great because Photoshop is a much more intuitive and deep program for us photographers. You can go with elements like masks, layers, and retouching in it. Or, you can use any moving photo effect online makers mentioned above to recreate an almost similar effect with fewer complexities.
Wondershare Filmora
Get started easily with Filmora’s powerful performance, intuitive interface, and countless effects!
Try It Free Try It Free Try It Free Learn More >
AI Portrait – The best feature of Wondershare Filmora for gameplay editing
The AI Portrait is a new add-on in Wondershare Filmora. It can easily remove video backgrounds without using a green screen or chroma key, allowing you to add borders, glitch effects, pixelated, noise, or segmentation video effects.
Conclusion
At last, we hope your question, “how to find the best photo motion effect online maker,” has the answer now. We gave multiple solutions to this question, and not one. With these motion blur effect online makers, you can quickly get what you long for. Despite these, you can also consider using Filmora that can be valuable on different platforms for animations. So enjoy doing animations and creating funny and helpful GIFs. Thanks for reading this article!
Top Claymation Shows That Make Your Memories Unforgettable
Best Claymation Shows That Make Your Memories Unforgettable
An easy yet powerful editor
Numerous effects to choose from
Detailed tutorials provided by the official channel
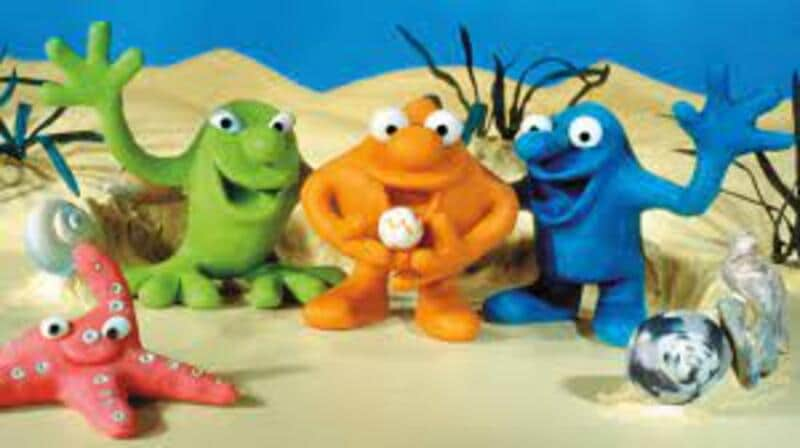
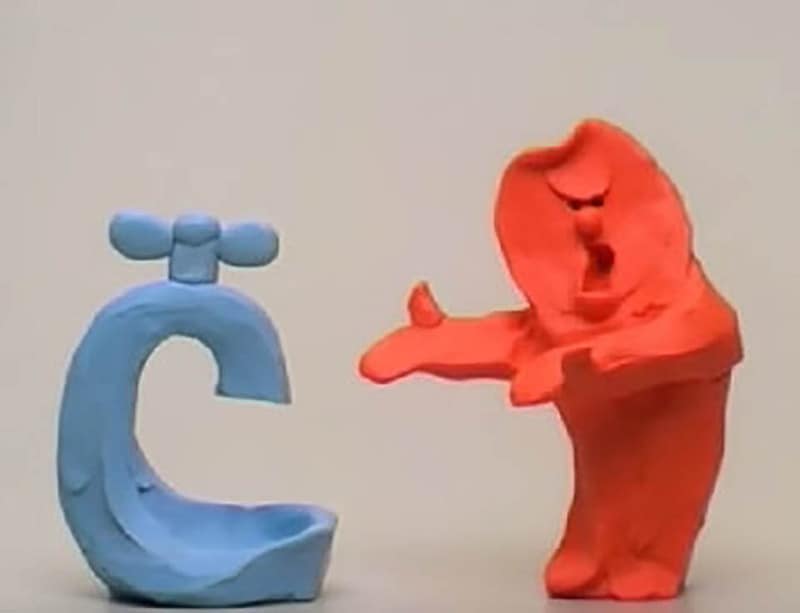
There are plenty of things that the 90s have given us. And when we revisit them now, it gives us an inimitable feeling of nostalgia which we would like to store forever with us. And one of the things that can bring back tons of cherished memories from the 90s is the claymation tv shows.
The claymation shows were called the clay animation shows. The reason for such a name was because the characters in the shows were made from malleable or deformable materials, especially out of clay. They have been one of the most revolutionary and entertaining components of that time.
These shows were one of the forms among the numerous forms of stop-motion animations. We will cover what these shows were about, their cast, and where you can watch them today. And in the following discussion, we will be discussing the ten best 90s claymation shows to bring back wonderful nostalgic memories.

Here is the list of the top claymation tv shows and all the information, including the sites and apps you can watch even today!
01Plasmo
Plasmo was an Australian science fiction TV series about a two and a half-year-old space orphan. The show first premiered in 199starring Abbe Holmes, Phillip Houghton and Pia Morley. You can watch this show on YouTube.

02Plonsters
The Plonsters was a show that premiered in 19which showed the characters Plif, Plops and Plummy, babble and morph, and their wonderful adventures. The show starred Ralph Thiekötter, and you can watch this show on Netflix and Tubi.
04Rex the Runt
Rex the Runt was a comedy show that premiered in 199The show was about the adventures of intrepid Rex and his plasticine companions. It starred about nine celebrities. Steve Box, Elisabeth Hadley, Andrew Jeffers, and Kevin Wrench were among them. You can watch this show even today on Amazon Prime.

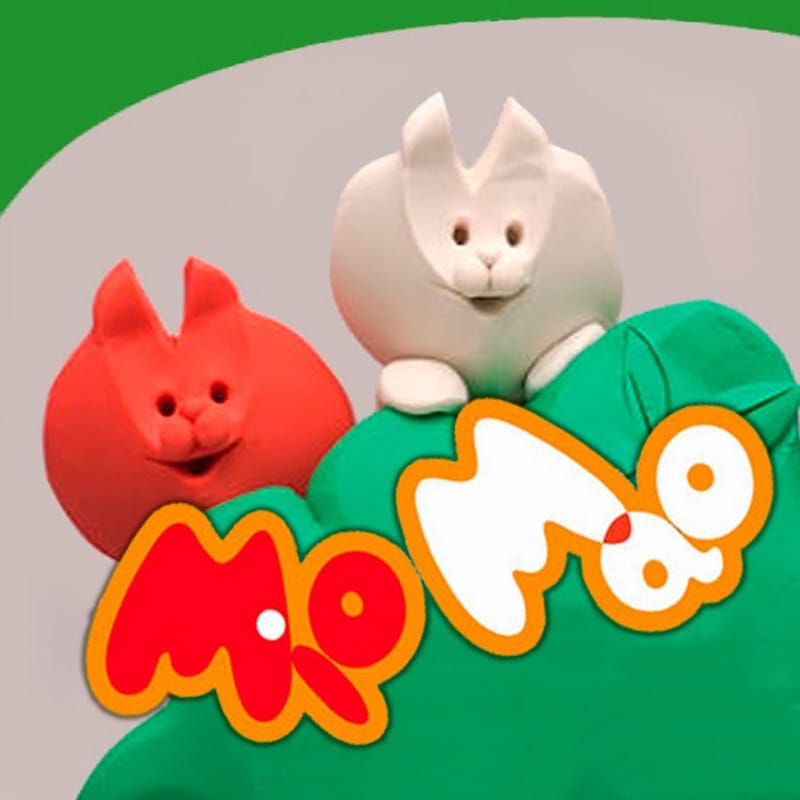
05Mio Mao
Mia Mao first premiered in 197starring Derek Griffiths as cast. The show was about two plasticine kittens, Mia and Mao, exploring and finding different objects and animals who hide in their garden. You can watch this show on Amazon Prime.
06Celebrity Death
The Celebrity Deathmatch featured numerous celebrities who were shown as clay-animated characters. Their characters would have quite an intense fight in a boxing ring, and the match would be pretty different from the ordinary boxing matches.
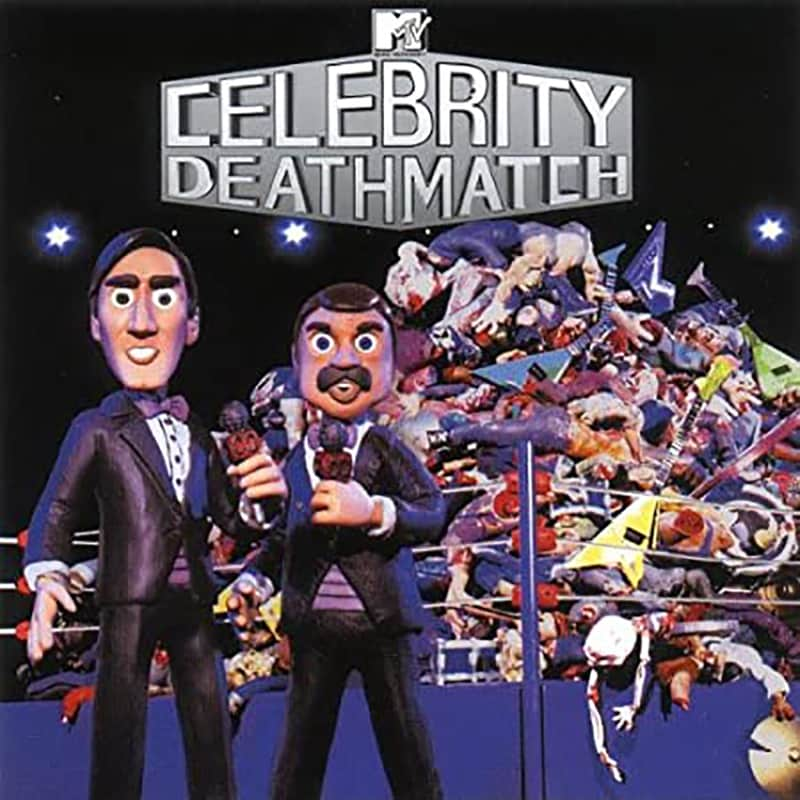
Most of the boxing matches ended with the death of the celebrities, which was the reason for the show to get its name “Celebrity Deathmatch”. It was one of the most favourite and popular 9claymation shows on MTV, an absolute treat and entertainment to watch.
The show premiered on January 2199and it continued to air till the year 2007., with its final episode on March 3200Its cast included a series of celebrities, including Maurice Schlafer, Lean Maxwell, Mills Lane, David Wills, Steve Austin, Masasa Moyo and several other celebrities.
You can readily watch this show today on Amazon Instant Video, iTunes, Paramount+ or Amazon Prime Video.
07The Gumby Show
The Gumby Show was yet another popular tv show of the 9that premiered first on March 1195It featured a green-titular character, a humanoid that was a creation and the model of Art Clokey.
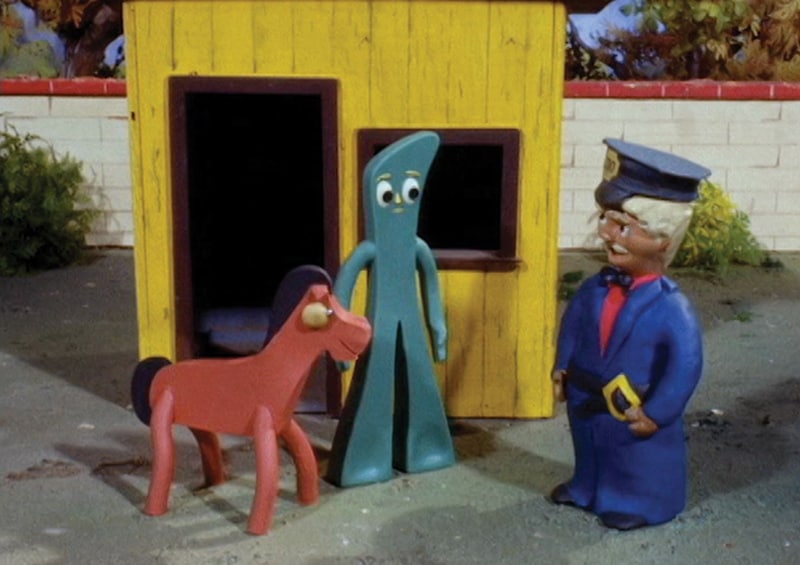
This character has been the reason behind two tv series, another feature-length movie and several other media. The ones to star in this tv show are Dal McKennon and Dick Beals. The show is about Gumby experiencing different adventures through various times and environments in history. The show also features his constant companion, a titular, red coloured talking pony named Pokey.
You can watch the show on Netflix and Amazon Prime.
08Pat & Mat
Pat & Mat was an entertaining and fun-to-watch television show of the 90s. The show first premiered in 19and starred David Nykl and Peter Alton, who played the role of Pat and Mat, respectively.
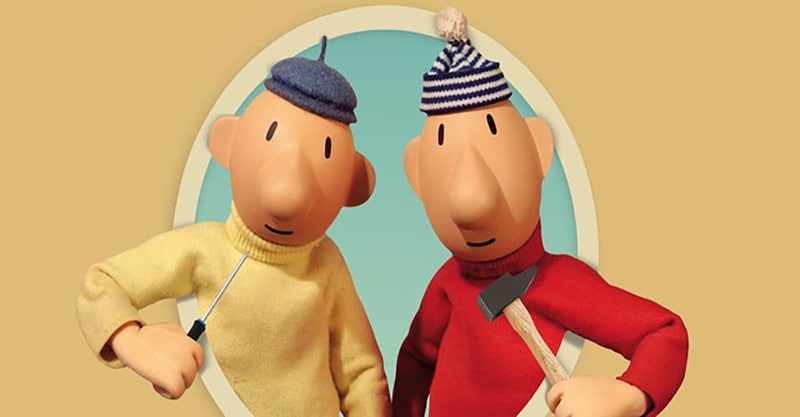
The show was about two neighbours, Pat and Mat, who faced self-created problems. And then, they solved these problems through any possible and impossible remedy.
You can watch this show now on Zee5 and Mx Player for free.
09Pingu
Pingu was a television show about a clumsy yet sweet penguin who lived with his family in the polar ice cap of Antarctica. Pingu, along with his seal friend Robby and sister, Punga, go on different adventures.
This show first premiered on May 2198with Carlo Bonomi, David Sant and Marcello Magni starring in it. You can watch the episodes of this unforgettable and entertaining tv show on ITV Hub and Amazon Prime.
10The Red and the Blue
The Red and the Blue was an Italian television series for children that first premiered in 197The show was about two antagonist clay shape-shifting characters who detected against an undifferentiated background, white.
The cast of this tv show included Carlo Bonomi, and you can see this show today on YouTube.
11The PJs
The PJs was a popular and loved tv show that premiered on 10th January 199About twenty celebrities were starring in this show, and naming a few among them were Eddie Murphy, Ja’Net DuBois, Loretta Devine, Shawn Michael Howard, Snoop Dog and many more.
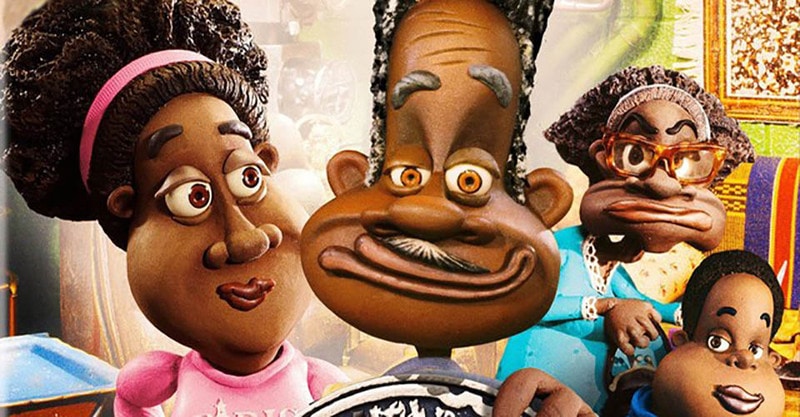
The show was about Thurgood Stubbs, the superintendent of Lawrence Hilton-Jacobs housing project and lived with his wife, Muriel. This comedy show satirically featured the difficulties one faces in a big-city housing project, which the protagonist Thurgood Stubbs and his friends faced.
You can watch this show on Peacock Tv.
● Bonus:
Now, without video editing, these fantastic shows of the 9could not have been created. But To your surprise, you too can create such incredible videos effortlessly. And that can be possible through an efficient and effective video editing tool.
You can find innumerable video editing tools available in this present world, but you must choose the best. So, let us introduce you to the best video editing tool, with which you can showcase all your editing skills and creativity-Wondershare Filmora Video Editor !
We call this tool the best video editing tool because its numerous features make it the most proficient video editing tool. Let us now look into its numerous effective features below.
● Professional editing tools
Filmora is the video editing tool that incorporates all the professional editing features to make your videos of the best and the professional quality. The elements envelop every aspect of the finest quality video editing works, which brings out the best of skills and creativity in you.
● Easy to use
Although Filmora has every professional editing tool, you will face no difficulty figuring out how the tools work. Even if you are a beginner, you can effortlessly use this editing tool to not only initiate your video editing journey but also enrich your skills.
● Free trial
You need not buy the proceed features on your first try. You can readily avail of the free trial of Filmora and its paid features. And as you try and find the features pleasing, you can proceed to purchase the aid features.
● Personalize and edit your videos
You can avail of the various features such as rotating, cropping, trimming and splitting the videos to edit. Also, there are other features where you can change the speed of the videos. Therefore, the features you get in these tools are of the most proficient quality.
● Over 8effects
The Filmora editing tool offers you more than 8editing effects that will never make you feel lacking any features and effects you need. And this helps you in making the best videos most effortlessly.
● Get the tool on any devices
Filmora believes that editing skills should be made discoverable anywhere and everywhere. Thus, you can download or use this tool on any device that you use. So, you need not have any specific device to avail of this incredible video editing tool, and you can make and edit videos on any device you want.
● Key Takeaways from This Episode →
● These are the best ten claymation tv shows and series that you can watch even today to bring back all the memories and revisit your early days of the 90s. So, to wrap up our discussion, we would conclude by retracing the aspects and factors that we covered in our discussion. We had enveloped the following topics effectively.
● We discussed the claymation picture through a little interdiction.
● Then, we discussed the ten best claymation TV shows popular in the 90s. We discussed their stories, their casts, their premieres and also the sites and apps where you can watch them even today.
● Lastly, we introduced you to the best editing tool, Filmora, that will help you edit any video of your choice and explore your video editing skills with the finest professional features and infinite effects.
There are plenty of things that the 90s have given us. And when we revisit them now, it gives us an inimitable feeling of nostalgia which we would like to store forever with us. And one of the things that can bring back tons of cherished memories from the 90s is the claymation tv shows.
The claymation shows were called the clay animation shows. The reason for such a name was because the characters in the shows were made from malleable or deformable materials, especially out of clay. They have been one of the most revolutionary and entertaining components of that time.
These shows were one of the forms among the numerous forms of stop-motion animations. We will cover what these shows were about, their cast, and where you can watch them today. And in the following discussion, we will be discussing the ten best 90s claymation shows to bring back wonderful nostalgic memories.
Here is the list of the top claymation tv shows and all the information, including the sites and apps you can watch even today!
01Plasmo
Plasmo was an Australian science fiction TV series about a two and a half-year-old space orphan. The show first premiered in 199starring Abbe Holmes, Phillip Houghton and Pia Morley. You can watch this show on YouTube.
02Plonsters
The Plonsters was a show that premiered in 19which showed the characters Plif, Plops and Plummy, babble and morph, and their wonderful adventures. The show starred Ralph Thiekötter, and you can watch this show on Netflix and Tubi.
04Rex the Runt
Rex the Runt was a comedy show that premiered in 199The show was about the adventures of intrepid Rex and his plasticine companions. It starred about nine celebrities. Steve Box, Elisabeth Hadley, Andrew Jeffers, and Kevin Wrench were among them. You can watch this show even today on Amazon Prime.
05Mio Mao
Mia Mao first premiered in 197starring Derek Griffiths as cast. The show was about two plasticine kittens, Mia and Mao, exploring and finding different objects and animals who hide in their garden. You can watch this show on Amazon Prime.
06Celebrity Death
The Celebrity Deathmatch featured numerous celebrities who were shown as clay-animated characters. Their characters would have quite an intense fight in a boxing ring, and the match would be pretty different from the ordinary boxing matches.
Most of the boxing matches ended with the death of the celebrities, which was the reason for the show to get its name “Celebrity Deathmatch”. It was one of the most favourite and popular 9claymation shows on MTV, an absolute treat and entertainment to watch.
The show premiered on January 2199and it continued to air till the year 2007., with its final episode on March 3200Its cast included a series of celebrities, including Maurice Schlafer, Lean Maxwell, Mills Lane, David Wills, Steve Austin, Masasa Moyo and several other celebrities.
You can readily watch this show today on Amazon Instant Video, iTunes, Paramount+ or Amazon Prime Video.
07The Gumby Show
The Gumby Show was yet another popular tv show of the 9that premiered first on March 1195It featured a green-titular character, a humanoid that was a creation and the model of Art Clokey.
This character has been the reason behind two tv series, another feature-length movie and several other media. The ones to star in this tv show are Dal McKennon and Dick Beals. The show is about Gumby experiencing different adventures through various times and environments in history. The show also features his constant companion, a titular, red coloured talking pony named Pokey.
You can watch the show on Netflix and Amazon Prime.
08Pat & Mat
Pat & Mat was an entertaining and fun-to-watch television show of the 90s. The show first premiered in 19and starred David Nykl and Peter Alton, who played the role of Pat and Mat, respectively.
The show was about two neighbours, Pat and Mat, who faced self-created problems. And then, they solved these problems through any possible and impossible remedy.
You can watch this show now on Zee5 and Mx Player for free.
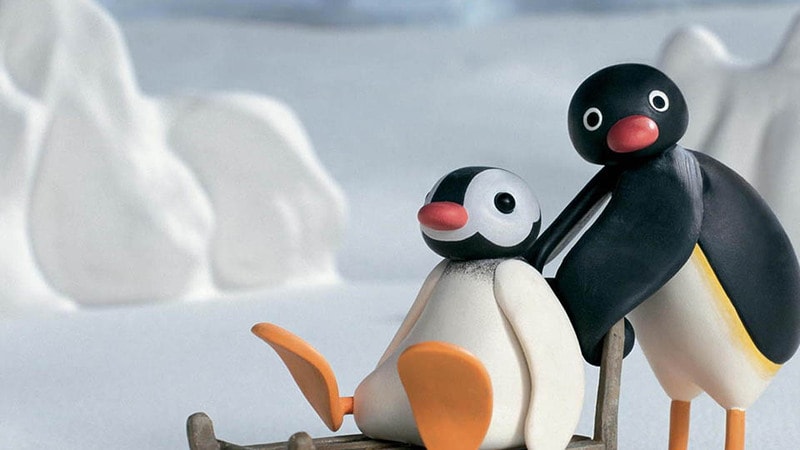
09Pingu
Pingu was a television show about a clumsy yet sweet penguin who lived with his family in the polar ice cap of Antarctica. Pingu, along with his seal friend Robby and sister, Punga, go on different adventures.
This show first premiered on May 2198with Carlo Bonomi, David Sant and Marcello Magni starring in it. You can watch the episodes of this unforgettable and entertaining tv show on ITV Hub and Amazon Prime.
10The Red and the Blue
The Red and the Blue was an Italian television series for children that first premiered in 197The show was about two antagonist clay shape-shifting characters who detected against an undifferentiated background, white.
The cast of this tv show included Carlo Bonomi, and you can see this show today on YouTube.
11The PJs
The PJs was a popular and loved tv show that premiered on 10th January 199About twenty celebrities were starring in this show, and naming a few among them were Eddie Murphy, Ja’Net DuBois, Loretta Devine, Shawn Michael Howard, Snoop Dog and many more.
The show was about Thurgood Stubbs, the superintendent of Lawrence Hilton-Jacobs housing project and lived with his wife, Muriel. This comedy show satirically featured the difficulties one faces in a big-city housing project, which the protagonist Thurgood Stubbs and his friends faced.
You can watch this show on Peacock Tv.
● Bonus:
Now, without video editing, these fantastic shows of the 9could not have been created. But To your surprise, you too can create such incredible videos effortlessly. And that can be possible through an efficient and effective video editing tool.
You can find innumerable video editing tools available in this present world, but you must choose the best. So, let us introduce you to the best video editing tool, with which you can showcase all your editing skills and creativity-Wondershare Filmora Video Editor !
We call this tool the best video editing tool because its numerous features make it the most proficient video editing tool. Let us now look into its numerous effective features below.
● Professional editing tools
Filmora is the video editing tool that incorporates all the professional editing features to make your videos of the best and the professional quality. The elements envelop every aspect of the finest quality video editing works, which brings out the best of skills and creativity in you.
● Easy to use
Although Filmora has every professional editing tool, you will face no difficulty figuring out how the tools work. Even if you are a beginner, you can effortlessly use this editing tool to not only initiate your video editing journey but also enrich your skills.
● Free trial
You need not buy the proceed features on your first try. You can readily avail of the free trial of Filmora and its paid features. And as you try and find the features pleasing, you can proceed to purchase the aid features.
● Personalize and edit your videos
You can avail of the various features such as rotating, cropping, trimming and splitting the videos to edit. Also, there are other features where you can change the speed of the videos. Therefore, the features you get in these tools are of the most proficient quality.
● Over 8effects
The Filmora editing tool offers you more than 8editing effects that will never make you feel lacking any features and effects you need. And this helps you in making the best videos most effortlessly.
● Get the tool on any devices
Filmora believes that editing skills should be made discoverable anywhere and everywhere. Thus, you can download or use this tool on any device that you use. So, you need not have any specific device to avail of this incredible video editing tool, and you can make and edit videos on any device you want.
● Key Takeaways from This Episode →
● These are the best ten claymation tv shows and series that you can watch even today to bring back all the memories and revisit your early days of the 90s. So, to wrap up our discussion, we would conclude by retracing the aspects and factors that we covered in our discussion. We had enveloped the following topics effectively.
● We discussed the claymation picture through a little interdiction.
● Then, we discussed the ten best claymation TV shows popular in the 90s. We discussed their stories, their casts, their premieres and also the sites and apps where you can watch them even today.
● Lastly, we introduced you to the best editing tool, Filmora, that will help you edit any video of your choice and explore your video editing skills with the finest professional features and infinite effects.
There are plenty of things that the 90s have given us. And when we revisit them now, it gives us an inimitable feeling of nostalgia which we would like to store forever with us. And one of the things that can bring back tons of cherished memories from the 90s is the claymation tv shows.
The claymation shows were called the clay animation shows. The reason for such a name was because the characters in the shows were made from malleable or deformable materials, especially out of clay. They have been one of the most revolutionary and entertaining components of that time.
These shows were one of the forms among the numerous forms of stop-motion animations. We will cover what these shows were about, their cast, and where you can watch them today. And in the following discussion, we will be discussing the ten best 90s claymation shows to bring back wonderful nostalgic memories.
Here is the list of the top claymation tv shows and all the information, including the sites and apps you can watch even today!
01Plasmo
Plasmo was an Australian science fiction TV series about a two and a half-year-old space orphan. The show first premiered in 199starring Abbe Holmes, Phillip Houghton and Pia Morley. You can watch this show on YouTube.
02Plonsters
The Plonsters was a show that premiered in 19which showed the characters Plif, Plops and Plummy, babble and morph, and their wonderful adventures. The show starred Ralph Thiekötter, and you can watch this show on Netflix and Tubi.
04Rex the Runt
Rex the Runt was a comedy show that premiered in 199The show was about the adventures of intrepid Rex and his plasticine companions. It starred about nine celebrities. Steve Box, Elisabeth Hadley, Andrew Jeffers, and Kevin Wrench were among them. You can watch this show even today on Amazon Prime.
05Mio Mao
Mia Mao first premiered in 197starring Derek Griffiths as cast. The show was about two plasticine kittens, Mia and Mao, exploring and finding different objects and animals who hide in their garden. You can watch this show on Amazon Prime.
06Celebrity Death
The Celebrity Deathmatch featured numerous celebrities who were shown as clay-animated characters. Their characters would have quite an intense fight in a boxing ring, and the match would be pretty different from the ordinary boxing matches.
Most of the boxing matches ended with the death of the celebrities, which was the reason for the show to get its name “Celebrity Deathmatch”. It was one of the most favourite and popular 9claymation shows on MTV, an absolute treat and entertainment to watch.
The show premiered on January 2199and it continued to air till the year 2007., with its final episode on March 3200Its cast included a series of celebrities, including Maurice Schlafer, Lean Maxwell, Mills Lane, David Wills, Steve Austin, Masasa Moyo and several other celebrities.
You can readily watch this show today on Amazon Instant Video, iTunes, Paramount+ or Amazon Prime Video.
07The Gumby Show
The Gumby Show was yet another popular tv show of the 9that premiered first on March 1195It featured a green-titular character, a humanoid that was a creation and the model of Art Clokey.
This character has been the reason behind two tv series, another feature-length movie and several other media. The ones to star in this tv show are Dal McKennon and Dick Beals. The show is about Gumby experiencing different adventures through various times and environments in history. The show also features his constant companion, a titular, red coloured talking pony named Pokey.
You can watch the show on Netflix and Amazon Prime.
08Pat & Mat
Pat & Mat was an entertaining and fun-to-watch television show of the 90s. The show first premiered in 19and starred David Nykl and Peter Alton, who played the role of Pat and Mat, respectively.
The show was about two neighbours, Pat and Mat, who faced self-created problems. And then, they solved these problems through any possible and impossible remedy.
You can watch this show now on Zee5 and Mx Player for free.
09Pingu
Pingu was a television show about a clumsy yet sweet penguin who lived with his family in the polar ice cap of Antarctica. Pingu, along with his seal friend Robby and sister, Punga, go on different adventures.
This show first premiered on May 2198with Carlo Bonomi, David Sant and Marcello Magni starring in it. You can watch the episodes of this unforgettable and entertaining tv show on ITV Hub and Amazon Prime.
10The Red and the Blue
The Red and the Blue was an Italian television series for children that first premiered in 197The show was about two antagonist clay shape-shifting characters who detected against an undifferentiated background, white.
The cast of this tv show included Carlo Bonomi, and you can see this show today on YouTube.
11The PJs
The PJs was a popular and loved tv show that premiered on 10th January 199About twenty celebrities were starring in this show, and naming a few among them were Eddie Murphy, Ja’Net DuBois, Loretta Devine, Shawn Michael Howard, Snoop Dog and many more.
The show was about Thurgood Stubbs, the superintendent of Lawrence Hilton-Jacobs housing project and lived with his wife, Muriel. This comedy show satirically featured the difficulties one faces in a big-city housing project, which the protagonist Thurgood Stubbs and his friends faced.
You can watch this show on Peacock Tv.
● Bonus:
Now, without video editing, these fantastic shows of the 9could not have been created. But To your surprise, you too can create such incredible videos effortlessly. And that can be possible through an efficient and effective video editing tool.
You can find innumerable video editing tools available in this present world, but you must choose the best. So, let us introduce you to the best video editing tool, with which you can showcase all your editing skills and creativity-Wondershare Filmora Video Editor !
We call this tool the best video editing tool because its numerous features make it the most proficient video editing tool. Let us now look into its numerous effective features below.
● Professional editing tools
Filmora is the video editing tool that incorporates all the professional editing features to make your videos of the best and the professional quality. The elements envelop every aspect of the finest quality video editing works, which brings out the best of skills and creativity in you.
● Easy to use
Although Filmora has every professional editing tool, you will face no difficulty figuring out how the tools work. Even if you are a beginner, you can effortlessly use this editing tool to not only initiate your video editing journey but also enrich your skills.
● Free trial
You need not buy the proceed features on your first try. You can readily avail of the free trial of Filmora and its paid features. And as you try and find the features pleasing, you can proceed to purchase the aid features.
● Personalize and edit your videos
You can avail of the various features such as rotating, cropping, trimming and splitting the videos to edit. Also, there are other features where you can change the speed of the videos. Therefore, the features you get in these tools are of the most proficient quality.
● Over 8effects
The Filmora editing tool offers you more than 8editing effects that will never make you feel lacking any features and effects you need. And this helps you in making the best videos most effortlessly.
● Get the tool on any devices
Filmora believes that editing skills should be made discoverable anywhere and everywhere. Thus, you can download or use this tool on any device that you use. So, you need not have any specific device to avail of this incredible video editing tool, and you can make and edit videos on any device you want.
● Key Takeaways from This Episode →
● These are the best ten claymation tv shows and series that you can watch even today to bring back all the memories and revisit your early days of the 90s. So, to wrap up our discussion, we would conclude by retracing the aspects and factors that we covered in our discussion. We had enveloped the following topics effectively.
● We discussed the claymation picture through a little interdiction.
● Then, we discussed the ten best claymation TV shows popular in the 90s. We discussed their stories, their casts, their premieres and also the sites and apps where you can watch them even today.
● Lastly, we introduced you to the best editing tool, Filmora, that will help you edit any video of your choice and explore your video editing skills with the finest professional features and infinite effects.
Tutorials for Animating Picture Online Without Learning From Scratch
How to Animate Picture Online Without Learning from Scratch
An easy yet powerful editor
Numerous effects to choose from
Detailed tutorials provided by the official channel
The Internet is flooded with thousands of tools that aim to provide the best-animated video. But trusting all of them every time is not a go-to thing for everyone.

If you also fall into the same category of people who are looking to add animation to designs but are not able to find the best tools, you are on the right page.
In this article
01 [Ready to Add Animation to Your Designs?](#Part 1)
02 [The Secret of Animating Pictures Online](#Part 2)
Part 1 Ready to Add Animation to Your Designs?
Here we are discussing the top three Animated picture maker that is used for creating different videos with differnt types of online picture tools. These are as follows:
1. Powtoon
Powtoon is an interactive yet simple tool available to add animation to designs. It has all the basic functions available for motion graphics that are useful for presentation. It has a variety of characters and animations available, along with simple textual animation. A user can easily prepare the video with full animation.
(This video indicates how to use the Powtoon tool for creating the best-animated videos, along with an example.)
1. Animaker
Animaker is one of the wonderful animation programs to add animation to designs in an interactive yet simple manner. It has all the best features integrated into it, which let a user create the video of their choice. It is safe to use and, being a web-based program, offers all the options.
(This video indicates how to use the Animaker tool for creating the best-animated videos, along with an example.)
3. Moovly
Moovly is also one of the best animation tools available to add animation to the content. On the main page, the “add content” option is available from where a user can simply update the video and add animation to it.
(This video indicates how to use the Moovly tool for creating the best-animated videos, along with an example.)
Note: These tools are among those that even a layman can use. But some users are still not happy with the interface of these animate picture online tools and feel like they are lacking features. For all those out there, we have some other options too.
Part 2 The Secret of Animating Pictures Online
The secret behind animating pictures online is to save time and effort. With the help of online tools, one can get the outcome with the help of inbuilt templates. There will be no need to install any application or plugin when they wish to add any particular animation to the content. Some tools you can consider using to add animation to designs are as follows:
1. Pixtellar
Pixtellar is a great tool that helps in creating animated videos and images too. Along with creating animated videos and images, one can easily create posters, logos, photo collages, and so on.
However, before using it, be sure to do the registration, as without it, using it is impossible. After registering, the steps you need to follow to use it are as follows:
Step 1Create from Scratch
Choose the template of your choice or click on “Create from Scratch”. Here we are choosing the templates.

Step 2Choose social media
It will be redirected to the next page where you will find out templates according to the selected category. (Here we choose social media).

Step 3Click on “Animate”
Choose any of them based on your preferences. You will head to the next page where you can do the editing as per your needs by clicking on “Animate”.

Step 4Save the image
After making the changes and adding the animations, you are all set to save the image. The “Save” button is right at the top of the page!

2. Adobe Spark
Adobe Spark is a tool that has pre-built templates available for adding animations to the designs. From adding animations to editing the image and video, all the options are featured in this. It also gives users an idea of how they can simply create the video and images with the help of animations and other effects.
However, when you are using it, registration is a must. After performing the registration, you are all set to use it. The steps you need to follow to use this tool are as follows:
Step 1Start editing
After completing the registration, you will reach the main page where you can choose the option of your choice and start editing. Here we have chosen the template option.

Step 2Create From This Template
It asks you to be sure and click on “Create From This Template.”

Step 3Do the editing
It takes a few seconds to present the same in front of you. On this page, you are all set to do the editing as per your needs.

Step 4Save the image
After doing all the editing, you are all set to save the image. The “Save” button is right there at the top. Click on it and save the image!

3. Crello or VistaCreate
Crello, which turns out to be VistaCreate, is one of the most famous tools for adding motion to images. It has almost 8,000+ animated designs and motion graphics available, which are helpful in creating eye-catching videos.
When you are using this feature, registration or sign-up is important. On the main page, the signup option is available, helping users do it. After that, the steps are as follows:
Step 1Click on the “Template”
On the home page, you can either create your own or click on the “Template” option available. (We chose the template option here).

Step 2Select the template
Now select the template of your choice. Here we have selected the Happy New Year one.

Step 3Do the editing as required
Now you are all set to do the editing as required. Here all the options are available, which help in adding all the basic to advanced details to the image. You can use it.

Step 4Download the image
After doing the editing, you are all set to download the image. The downloading button is right there at the top.

Key Takeaways from This Episode
● Animated videos are eye-catching, and tools are helpful in making them more enhanced.
● Animation tools are very easy to use and precisely make the video.
● Editing options are available in the tools, which are helpful in adding extra effects to the image.
● The tools are free to use with all the in-built templates and other features.
The Internet is flooded with thousands of tools that aim to provide the best-animated video. But trusting all of them every time is not a go-to thing for everyone.
If you also fall into the same category of people who are looking to add animation to designs but are not able to find the best tools, you are on the right page.
In this article
01 [Ready to Add Animation to Your Designs?](#Part 1)
02 [The Secret of Animating Pictures Online](#Part 2)
Part 1 Ready to Add Animation to Your Designs?
Here we are discussing the top three Animated picture maker that is used for creating different videos with differnt types of online picture tools. These are as follows:
1. Powtoon
Powtoon is an interactive yet simple tool available to add animation to designs. It has all the basic functions available for motion graphics that are useful for presentation. It has a variety of characters and animations available, along with simple textual animation. A user can easily prepare the video with full animation.
(This video indicates how to use the Powtoon tool for creating the best-animated videos, along with an example.)
1. Animaker
Animaker is one of the wonderful animation programs to add animation to designs in an interactive yet simple manner. It has all the best features integrated into it, which let a user create the video of their choice. It is safe to use and, being a web-based program, offers all the options.
(This video indicates how to use the Animaker tool for creating the best-animated videos, along with an example.)
3. Moovly
Moovly is also one of the best animation tools available to add animation to the content. On the main page, the “add content” option is available from where a user can simply update the video and add animation to it.
(This video indicates how to use the Moovly tool for creating the best-animated videos, along with an example.)
Note: These tools are among those that even a layman can use. But some users are still not happy with the interface of these animate picture online tools and feel like they are lacking features. For all those out there, we have some other options too.
Part 2 The Secret of Animating Pictures Online
The secret behind animating pictures online is to save time and effort. With the help of online tools, one can get the outcome with the help of inbuilt templates. There will be no need to install any application or plugin when they wish to add any particular animation to the content. Some tools you can consider using to add animation to designs are as follows:
1. Pixtellar
Pixtellar is a great tool that helps in creating animated videos and images too. Along with creating animated videos and images, one can easily create posters, logos, photo collages, and so on.
However, before using it, be sure to do the registration, as without it, using it is impossible. After registering, the steps you need to follow to use it are as follows:
Step 1Create from Scratch
Choose the template of your choice or click on “Create from Scratch”. Here we are choosing the templates.
Step 2Choose social media
It will be redirected to the next page where you will find out templates according to the selected category. (Here we choose social media).
Step 3Click on “Animate”
Choose any of them based on your preferences. You will head to the next page where you can do the editing as per your needs by clicking on “Animate”.
Step 4Save the image
After making the changes and adding the animations, you are all set to save the image. The “Save” button is right at the top of the page!
2. Adobe Spark
Adobe Spark is a tool that has pre-built templates available for adding animations to the designs. From adding animations to editing the image and video, all the options are featured in this. It also gives users an idea of how they can simply create the video and images with the help of animations and other effects.
However, when you are using it, registration is a must. After performing the registration, you are all set to use it. The steps you need to follow to use this tool are as follows:
Step 1Start editing
After completing the registration, you will reach the main page where you can choose the option of your choice and start editing. Here we have chosen the template option.
Step 2Create From This Template
It asks you to be sure and click on “Create From This Template.”
Step 3Do the editing
It takes a few seconds to present the same in front of you. On this page, you are all set to do the editing as per your needs.
Step 4Save the image
After doing all the editing, you are all set to save the image. The “Save” button is right there at the top. Click on it and save the image!
3. Crello or VistaCreate
Crello, which turns out to be VistaCreate, is one of the most famous tools for adding motion to images. It has almost 8,000+ animated designs and motion graphics available, which are helpful in creating eye-catching videos.
When you are using this feature, registration or sign-up is important. On the main page, the signup option is available, helping users do it. After that, the steps are as follows:
Step 1Click on the “Template”
On the home page, you can either create your own or click on the “Template” option available. (We chose the template option here).
Step 2Select the template
Now select the template of your choice. Here we have selected the Happy New Year one.
Step 3Do the editing as required
Now you are all set to do the editing as required. Here all the options are available, which help in adding all the basic to advanced details to the image. You can use it.
Step 4Download the image
After doing the editing, you are all set to download the image. The downloading button is right there at the top.
Key Takeaways from This Episode
● Animated videos are eye-catching, and tools are helpful in making them more enhanced.
● Animation tools are very easy to use and precisely make the video.
● Editing options are available in the tools, which are helpful in adding extra effects to the image.
● The tools are free to use with all the in-built templates and other features.
Little Known Techniques of Motion Graphics in Premiere Pro
Little Known Techniques of Motion Graphics in Premiere Pro
An easy yet powerful editor
Numerous effects to choose from
Detailed tutorials provided by the official channel
Video editing has recently gained momentum in content design, and with Motion Graphics Premiere Pro editing templates, it has all the fun in the house.
In this article
01 [5 Editing Motion Graphics Techniques in Adobe Premiere Pro](#Part 1)
02 [10 Free Motion Graphics Templates for Premiere Pro](#Part 2)
03 [How to Use Motion Graphics Templates in Premiere Pro](#Part 3)
Part 1 5 Editing Motion Graphics Techniques in Adobe Premiere Pro
A variety of editing techniques of motion graphics for Premiere Pro are ready to give a classy touch to your videos. Let’s brush up through the best you can have.
01Cropping Clips
Cropping your videos allows you to fit them into your required size frames. To remove any unwanted portions of your edits, crop them in adobe Premiere Pro with your desired aspect ratio to give that ‘just perfect’ look to your edits.
Start from importing and adding your footage to your project panel, followed by creating a fresh composition. Now, choose ‘Crop’ from the Effects panel to add it to your clip, either by double-clicking or dragging and dropping.
02Trimming Clips
If you want to adjust the ‘In and Out’ play back sequence of your edited clips, you can go for trimming them. You can trim your clips in the Source and Program monitors, or even in the Premiere Pro timeline. You can choose from the standard cut, jump cut, B-roll cut etc, to suit your editing needs and styles.
All you need to do is open the clip, mark the In and Out points, adjust their sequence with previous or next edits in your cue and that’s it. You can also use keyboard shortcuts for this purpose. However, you need to preset these shortcuts before you begin editing your clips.
03Adding Text
You can try adding simple and formatted texts to enhance your video outlook. This comes handy when you are aiming to deliver specific messages to your audience. You can add normal write-ups, callout quotations and customize your text in a number of exciting styles. Just go to the Type tool, format your text in the Text Box and you’re done!
04Audio Level Adjustment
Want to add spark to your clips with a synchronized audio visual effect? After you finish trimming and cropping, consider opting for an in-line audio adjustment. This will definitely enhance your video and take your craft to the next level.
All you need to do is select an audio clip, click on ‘Audio Gain’ in the drop down menu, set desired Decibel count in the Audio Gain Box and select ‘OK’.
05Exporting Videos
Once you are done with your video craft, you should certainly look forward to making it available for social exposure. To do this, select appropriate sequence constraints in the Export window, choose the export platform, format and Codec, make fine tuning and bit rate adjustments and finish export either in Premiere Pro or Media Encoder. You may also save these settings for your next exports.
Part 2 Free Motion Graphics Templates for Premiere Pro
Let’s have a look into your best choices of free motion graphic templates for Premiere Pro:
0114 Premiere Pro Lumetri Looks
Want to enhance your video creativity with that amazing Hollywood feel? You can undoubtedly opt for the Premiere Lumetri Looks template that gives you the liberty to provide a Hollywood oriented color scheme to your videos, just like those incredible color patterns one would see in Dr. Strangelove, The Martian and many more famous Hollywood flicks.

0215 Animated Lower Thirds
This template comes handy when you need to add lower thirds to your videos, either to introduce different content varieties or to objectify your video components. You can use this template with ease in your personal as well as commercial videos to give them that explicit professional touch.

03Horror Trailer Titles
If horror videos turn you on, use this template in video creations to customize them with that intense and scary feel! This template helps you add scary title slates that are just enough to add a terrifying quotient to your videos. From personal to professional, this template can add intensity to any video type.
04Instagram Stories Premiere Pro Template
This template is a definite catch for those Instagram lovers who constantly experiment to post engaging stories on the platform. If you want your IG stories to grab the talk, go for this animation template to customize photos and text so that they get the buzz among your followers.

05Dust Overlays
Comprising of studio-like effects, this template allows you to enhance your films with high quality dynamic animation in appealing texture variations. Use this template to create videos with those attractive misty backgrounds with cohesive variations in lighting with adjustable power effects.
06Travel Stories Premiere Pro Template
If you are into travel blogging and trying to add spunk to your stories and videos, this template is there to help you out with its catchy text animations and flowy transitions. Available in an upgraded configuration, this template is everything you need to make your travel blogs hover the trending charts.

07Digital Slideshow
Go for this template to add spark to your graphic presentations. Designed primarily for professional usage, it is equally effective in personal projects also. Developed by Evanto Elements, the company offers unlimited access on subscription.

08Free Quotes Premiere Pro Template
If you want to add animated quotes to your video creations, this template is a must try for you. Providing 6 quoting options and a ‘click to change’ text and color interface with convenient customizability keeps it among the top choices for hastle free motion editing.

09Cinematic Title Style Library
If you are bored with those conventional Premiere Pro titles but don’t want to invest time in creating styles of your own, you can use the modernized title styles from this library to enhance your creations with that intense cinematic feel. You can use them comfortably for personal and commercial purposes.

10Space Background Elements
This set of background templates is designed to provide realistic settings to video creators who work on science fiction and space oriented themes. Loaded with different real-time effects, this template provides the ultimate feel of a space travel in 4K.

Part 2 Alternatives to Premiere Pro: Filmora
If not Premiere Pro, you can go for Filmora as a dependable alternative. It’s an exquisite set of amazing and top-notch tools for creating g and editing videos. Wondershare introduced Filmora as an effective, easy-to-use editing software that’s equally caters to the editing pace of beginners as well as experts. You can use Filmora with Windows and macOS.
Packed with a range of appealing customization choices, Filmora comes to you in four principal versions:
● Wondershare Filmora Video Editor
Suitable for beginners, this is the basic and the simplest version having inbuilt editing templates. It’s desktop compatible software.
For Win 7 or later (64-bit)
For macOS 10.12 or later
● Filmora
Android and iOS compatibility in this version of Filmora brought video editing from PCs and laptops into smartphones.

● FilmoraScrn
This version allows you to record your editing screen if you’re a working on Windows.

Part 4 How to Use Motion Graphics Templates in Premiere Pro
After getting familiar with Premiere Pro editing and templates, let’s get into using these adobe premiere motion graphics templates for an exemplary video creating experience. Take up the following steps to get started.
● Go to Premiere Pro Essential Graphics Panel
In the Premiere Pro startup page, select ‘Window’ from the toolbar and select ‘Essential Graphics’ from the drop down menu.
● Add Motion Graphics Templates to Library
Click the ‘Import’ button present at the bottom in the right side of the Essential Graphics Panel. Go to and choose your downloaded motion graphics template file and select ‘Open’. Your file is added to the Essential Graphics Library.
● Drag-Drop the MOGRT to Timeline
‘Drag’ your motion graphics template from the library and ‘Drop’ it on your Timeline.
● Customize Your Template
Go to the ‘Edit’ option in the Essential Graphics Panel to look for customization choices available for your selected motion graphics adobe template.
● Key Takeaways from This Episode →
● Adobe Premiere Pro is an amazing video creation and editing tool that ensures to give a professional class to your edits. Be it personal creativity or professional expertise, this software is all set to give you a wholesome editing experience you will never forget.
● Loaded with an extensive variety of editing templates, available for free and on subscription, adobe premiere pro is a one stop access to all your editing concerns. Its customizable effects will certainly make your creations stand out in the league.
● Video editing is a high in demand craft of excellence. With advancements in software developments, the creative market offers you a pool of over the top editing software that is ready to give that classy spunk to your videos. So just your own from the pool and go on a spree of creating trend setting videos that never miss out on grabbing the attention of everyone around!
Video editing has recently gained momentum in content design, and with Motion Graphics Premiere Pro editing templates, it has all the fun in the house.
In this article
01 [5 Editing Motion Graphics Techniques in Adobe Premiere Pro](#Part 1)
02 [10 Free Motion Graphics Templates for Premiere Pro](#Part 2)
03 [How to Use Motion Graphics Templates in Premiere Pro](#Part 3)
Part 1 5 Editing Motion Graphics Techniques in Adobe Premiere Pro
A variety of editing techniques of motion graphics for Premiere Pro are ready to give a classy touch to your videos. Let’s brush up through the best you can have.
01Cropping Clips
Cropping your videos allows you to fit them into your required size frames. To remove any unwanted portions of your edits, crop them in adobe Premiere Pro with your desired aspect ratio to give that ‘just perfect’ look to your edits.
Start from importing and adding your footage to your project panel, followed by creating a fresh composition. Now, choose ‘Crop’ from the Effects panel to add it to your clip, either by double-clicking or dragging and dropping.
02Trimming Clips
If you want to adjust the ‘In and Out’ play back sequence of your edited clips, you can go for trimming them. You can trim your clips in the Source and Program monitors, or even in the Premiere Pro timeline. You can choose from the standard cut, jump cut, B-roll cut etc, to suit your editing needs and styles.
All you need to do is open the clip, mark the In and Out points, adjust their sequence with previous or next edits in your cue and that’s it. You can also use keyboard shortcuts for this purpose. However, you need to preset these shortcuts before you begin editing your clips.
03Adding Text
You can try adding simple and formatted texts to enhance your video outlook. This comes handy when you are aiming to deliver specific messages to your audience. You can add normal write-ups, callout quotations and customize your text in a number of exciting styles. Just go to the Type tool, format your text in the Text Box and you’re done!
04Audio Level Adjustment
Want to add spark to your clips with a synchronized audio visual effect? After you finish trimming and cropping, consider opting for an in-line audio adjustment. This will definitely enhance your video and take your craft to the next level.
All you need to do is select an audio clip, click on ‘Audio Gain’ in the drop down menu, set desired Decibel count in the Audio Gain Box and select ‘OK’.
05Exporting Videos
Once you are done with your video craft, you should certainly look forward to making it available for social exposure. To do this, select appropriate sequence constraints in the Export window, choose the export platform, format and Codec, make fine tuning and bit rate adjustments and finish export either in Premiere Pro or Media Encoder. You may also save these settings for your next exports.
Part 2 Free Motion Graphics Templates for Premiere Pro
Let’s have a look into your best choices of free motion graphic templates for Premiere Pro:
0114 Premiere Pro Lumetri Looks
Want to enhance your video creativity with that amazing Hollywood feel? You can undoubtedly opt for the Premiere Lumetri Looks template that gives you the liberty to provide a Hollywood oriented color scheme to your videos, just like those incredible color patterns one would see in Dr. Strangelove, The Martian and many more famous Hollywood flicks.
0215 Animated Lower Thirds
This template comes handy when you need to add lower thirds to your videos, either to introduce different content varieties or to objectify your video components. You can use this template with ease in your personal as well as commercial videos to give them that explicit professional touch.
03Horror Trailer Titles
If horror videos turn you on, use this template in video creations to customize them with that intense and scary feel! This template helps you add scary title slates that are just enough to add a terrifying quotient to your videos. From personal to professional, this template can add intensity to any video type.
04Instagram Stories Premiere Pro Template
This template is a definite catch for those Instagram lovers who constantly experiment to post engaging stories on the platform. If you want your IG stories to grab the talk, go for this animation template to customize photos and text so that they get the buzz among your followers.
05Dust Overlays
Comprising of studio-like effects, this template allows you to enhance your films with high quality dynamic animation in appealing texture variations. Use this template to create videos with those attractive misty backgrounds with cohesive variations in lighting with adjustable power effects.
06Travel Stories Premiere Pro Template
If you are into travel blogging and trying to add spunk to your stories and videos, this template is there to help you out with its catchy text animations and flowy transitions. Available in an upgraded configuration, this template is everything you need to make your travel blogs hover the trending charts.
07Digital Slideshow
Go for this template to add spark to your graphic presentations. Designed primarily for professional usage, it is equally effective in personal projects also. Developed by Evanto Elements, the company offers unlimited access on subscription.
08Free Quotes Premiere Pro Template
If you want to add animated quotes to your video creations, this template is a must try for you. Providing 6 quoting options and a ‘click to change’ text and color interface with convenient customizability keeps it among the top choices for hastle free motion editing.
09Cinematic Title Style Library
If you are bored with those conventional Premiere Pro titles but don’t want to invest time in creating styles of your own, you can use the modernized title styles from this library to enhance your creations with that intense cinematic feel. You can use them comfortably for personal and commercial purposes.
10Space Background Elements
This set of background templates is designed to provide realistic settings to video creators who work on science fiction and space oriented themes. Loaded with different real-time effects, this template provides the ultimate feel of a space travel in 4K.
Part 2 Alternatives to Premiere Pro: Filmora
If not Premiere Pro, you can go for Filmora as a dependable alternative. It’s an exquisite set of amazing and top-notch tools for creating g and editing videos. Wondershare introduced Filmora as an effective, easy-to-use editing software that’s equally caters to the editing pace of beginners as well as experts. You can use Filmora with Windows and macOS.
Packed with a range of appealing customization choices, Filmora comes to you in four principal versions:
● Wondershare Filmora Video Editor
Suitable for beginners, this is the basic and the simplest version having inbuilt editing templates. It’s desktop compatible software.
For Win 7 or later (64-bit)
For macOS 10.12 or later
● Filmora
Android and iOS compatibility in this version of Filmora brought video editing from PCs and laptops into smartphones.
● FilmoraScrn
This version allows you to record your editing screen if you’re a working on Windows.
Part 4 How to Use Motion Graphics Templates in Premiere Pro
After getting familiar with Premiere Pro editing and templates, let’s get into using these adobe premiere motion graphics templates for an exemplary video creating experience. Take up the following steps to get started.
● Go to Premiere Pro Essential Graphics Panel
In the Premiere Pro startup page, select ‘Window’ from the toolbar and select ‘Essential Graphics’ from the drop down menu.
● Add Motion Graphics Templates to Library
Click the ‘Import’ button present at the bottom in the right side of the Essential Graphics Panel. Go to and choose your downloaded motion graphics template file and select ‘Open’. Your file is added to the Essential Graphics Library.
● Drag-Drop the MOGRT to Timeline
‘Drag’ your motion graphics template from the library and ‘Drop’ it on your Timeline.
● Customize Your Template
Go to the ‘Edit’ option in the Essential Graphics Panel to look for customization choices available for your selected motion graphics adobe template.
● Key Takeaways from This Episode →
● Adobe Premiere Pro is an amazing video creation and editing tool that ensures to give a professional class to your edits. Be it personal creativity or professional expertise, this software is all set to give you a wholesome editing experience you will never forget.
● Loaded with an extensive variety of editing templates, available for free and on subscription, adobe premiere pro is a one stop access to all your editing concerns. Its customizable effects will certainly make your creations stand out in the league.
● Video editing is a high in demand craft of excellence. With advancements in software developments, the creative market offers you a pool of over the top editing software that is ready to give that classy spunk to your videos. So just your own from the pool and go on a spree of creating trend setting videos that never miss out on grabbing the attention of everyone around!
Guide on How to Create GIF in WhatsApp iPhone
2024 Guide on How to Create GIF in WhatsApp iPhone
An easy yet powerful editor
Numerous effects to choose from
Detailed tutorials provided by the official channel
Standing for Graphics Interchange Format, GIF is short animated images that you can see all over social media sites and other online platforms. These interesting animations can also be shared during your conversations on WhatsApp.

So, if you too are looking for ways to create as well as send GIFs on WhatsApp iPhone, you are on the right page. Keep reading to know all the possible ways to send WhatsApp GIFs on iPhone.
In this article
01 [How to send WhatsApp GIF from the integrated library on iPhone](#Part 1)
02 [How to send Live Photos as WhatsApp GIF on iPhone](#Part 2)
03 [How to create WhatsApp GIF using videos on iPhone](#Part 3)
04 [How to create excellent GIF effortlessly using Wondershare Filmora- All in One video editing software](#Part 4)
Part 1 How to send WhatsApp GIF from the integrated library on iPhone
If you have the latest version of WhatsApp installed on your phone, you can easily and quickly send the GIF from the integrated library having a collection of GIFs in several categories. The steps to send GIF in WhatsApp iPhone are as below.
Step 1. On your iPhone, launch WhatsApp and open the contact or a group to which you wish to send the GIF.
Step 2. Click on the Stickers icon at the typing section and then choose the GIF option at the bottom.
Step 3. Multiple GIFs in different categories will appear. You can further search for the desired GIF using a keyword at the search icon at the bottom-left corner. The list of the Recents and the Favorites can also be searched using their respective icons.
Note: To save any particular GIF in the favorites list, tap and hold the GIF and then click on Add To Favorites option.
StepTap on the selected GIF and then click on the Send icon at the bottom-right corner. Your WhatsApp GIF iPhone will be sent.

Part 2 How to send Live Photos as WhatsApp GIF on iPhone
Live Photos on your iPhone can also be sent as GIFs in WhatsApp conversations and the steps for the same are as below.
Note: The feature is available for users having iPhone 6 or later versions.
Step 1.Open the WhatsApp contact on your iPhone to whom you wish to send the GIF. Click on the + icon and then choose the option of Photo & Video Library.
Step 2. Search for the Live photo in your gallery and then press it. When the image pops out, slide upwards and then click on the Select as GIF option.
Step 3. Tap on the Send icon to share the selected Live photo as GIF.

Part 3 How to create WhatsApp GIF using videos on iPhone
In addition to the integrated library, you can also convert the videos on your iPhone to GIF and share them on WhatsApp. To be used as GIF, the length of the videos cannot be more than 6 seconds. Thus, for a larger video, you need to trim it to be under 6 seconds. Steps to get the task done are as follows.
Step 1.Launch WhatsApp on your iPhone and select the contact to which you want to share the GIF. Next, click on + sign and then choose Photo & Video Library option.
Step 2.Select the desired video from your phone gallery.
Step 3.After the video is added, an editing screen will open. Here you can trim the video to make it under 6 seconds using the slider at the top. Further changes can be made like adding a sticker, text, or making a freehand drawing.
Step 4.After all customizations are done, click on the GIF button.
Step 5.Finally, tap on the Send icon at the bottom-right corner to send the edited video as GIF.

Part 4 How to create excellent GIF effortlessly using Wondershare Filmora- All in One video editing software
WhatsApp in your iPhone has a built-in option to create GIFs using the videos on the device. Though the process is simple, the option for editing and customizations are limited. So, if you want to create GIFs using videos online and with advanced editing tools, we suggest using Wondershare Filmora Video Editor .
This all-in-one video editing software will let you edit and customize your files in several ways and in a few simple steps, your desired GIF will be ready.
Wondershare Filmora
Get started easily with Filmora’s powerful performance, intuitive interface, and countless effects!
Try It Free Try It Free Try It Free Learn More >
Key features of the software
● Add media files in all ley formats like MP4, MOV, MKV, PNG, and others to create GIFs.
● Simple and quick steps for creating the desired animation.
● Allows to customize the GIF using functions like slow-down, crop, rotate, and many more.
● Allows adding text, voice, and other elements.
● Option to share the created GIF to Vimeo, and YouTube directly.
● Software support to all latest Windows and Mac systems.
Steps to create WhatsApp GIF using Wondershare Filmora.
Step 1.Open the installed software on your system and import the desired images and videos from your system.
Step 2.Drag and drop the added videos and images to the timeline.

Step 3.Edit the file using features like crop, rotate, split, and others.
Step 4.Add text and other elements as needed.

Step 5.At the Local tab, save the customized media as GIF. Select the file name and the destination and then finally, click on the EXPORT button to start processing.
● Key Takeaways from This Episode →
●Gifs for WhatsApp iPhone can be added from the integrated library.
●Live Photos, as well as videos, can also be used to create and share them as GIF.
●For creating interesting and funny GIF in a hassle-free manner, Wondershare Filmora works as the best software.
Standing for Graphics Interchange Format, GIF is short animated images that you can see all over social media sites and other online platforms. These interesting animations can also be shared during your conversations on WhatsApp.
So, if you too are looking for ways to create as well as send GIFs on WhatsApp iPhone, you are on the right page. Keep reading to know all the possible ways to send WhatsApp GIFs on iPhone.
In this article
01 [How to send WhatsApp GIF from the integrated library on iPhone](#Part 1)
02 [How to send Live Photos as WhatsApp GIF on iPhone](#Part 2)
03 [How to create WhatsApp GIF using videos on iPhone](#Part 3)
04 [How to create excellent GIF effortlessly using Wondershare Filmora- All in One video editing software](#Part 4)
Part 1 How to send WhatsApp GIF from the integrated library on iPhone
If you have the latest version of WhatsApp installed on your phone, you can easily and quickly send the GIF from the integrated library having a collection of GIFs in several categories. The steps to send GIF in WhatsApp iPhone are as below.
Step 1. On your iPhone, launch WhatsApp and open the contact or a group to which you wish to send the GIF.
Step 2. Click on the Stickers icon at the typing section and then choose the GIF option at the bottom.
Step 3. Multiple GIFs in different categories will appear. You can further search for the desired GIF using a keyword at the search icon at the bottom-left corner. The list of the Recents and the Favorites can also be searched using their respective icons.
Note: To save any particular GIF in the favorites list, tap and hold the GIF and then click on Add To Favorites option.
StepTap on the selected GIF and then click on the Send icon at the bottom-right corner. Your WhatsApp GIF iPhone will be sent.
Part 2 How to send Live Photos as WhatsApp GIF on iPhone
Live Photos on your iPhone can also be sent as GIFs in WhatsApp conversations and the steps for the same are as below.
Note: The feature is available for users having iPhone 6 or later versions.
Step 1.Open the WhatsApp contact on your iPhone to whom you wish to send the GIF. Click on the + icon and then choose the option of Photo & Video Library.
Step 2. Search for the Live photo in your gallery and then press it. When the image pops out, slide upwards and then click on the Select as GIF option.
Step 3. Tap on the Send icon to share the selected Live photo as GIF.
Part 3 How to create WhatsApp GIF using videos on iPhone
In addition to the integrated library, you can also convert the videos on your iPhone to GIF and share them on WhatsApp. To be used as GIF, the length of the videos cannot be more than 6 seconds. Thus, for a larger video, you need to trim it to be under 6 seconds. Steps to get the task done are as follows.
Step 1.Launch WhatsApp on your iPhone and select the contact to which you want to share the GIF. Next, click on + sign and then choose Photo & Video Library option.
Step 2.Select the desired video from your phone gallery.
Step 3.After the video is added, an editing screen will open. Here you can trim the video to make it under 6 seconds using the slider at the top. Further changes can be made like adding a sticker, text, or making a freehand drawing.
Step 4.After all customizations are done, click on the GIF button.
Step 5.Finally, tap on the Send icon at the bottom-right corner to send the edited video as GIF.
Part 4 How to create excellent GIF effortlessly using Wondershare Filmora- All in One video editing software
WhatsApp in your iPhone has a built-in option to create GIFs using the videos on the device. Though the process is simple, the option for editing and customizations are limited. So, if you want to create GIFs using videos online and with advanced editing tools, we suggest using Wondershare Filmora Video Editor .
This all-in-one video editing software will let you edit and customize your files in several ways and in a few simple steps, your desired GIF will be ready.
Wondershare Filmora
Get started easily with Filmora’s powerful performance, intuitive interface, and countless effects!
Try It Free Try It Free Try It Free Learn More >
Key features of the software
● Add media files in all ley formats like MP4, MOV, MKV, PNG, and others to create GIFs.
● Simple and quick steps for creating the desired animation.
● Allows to customize the GIF using functions like slow-down, crop, rotate, and many more.
● Allows adding text, voice, and other elements.
● Option to share the created GIF to Vimeo, and YouTube directly.
● Software support to all latest Windows and Mac systems.
Steps to create WhatsApp GIF using Wondershare Filmora.
Step 1.Open the installed software on your system and import the desired images and videos from your system.
Step 2.Drag and drop the added videos and images to the timeline.
Step 3.Edit the file using features like crop, rotate, split, and others.
Step 4.Add text and other elements as needed.
Step 5.At the Local tab, save the customized media as GIF. Select the file name and the destination and then finally, click on the EXPORT button to start processing.
● Key Takeaways from This Episode →
●Gifs for WhatsApp iPhone can be added from the integrated library.
●Live Photos, as well as videos, can also be used to create and share them as GIF.
●For creating interesting and funny GIF in a hassle-free manner, Wondershare Filmora works as the best software.
Top 12 Illusion Gifs: Top Picks
Best 12 Illusion Gifs: Top Picks
An easy yet powerful editor
Numerous effects to choose from
Detailed tutorials provided by the official channel
Do you know that these are reaching heights and people are very happy in sharing them? If you are unaware of it, don’t worry and keep reading. Thorugh today’s post, we will discuss illusion GIF in detail yo make it easy for you to make up your mind and try your hands on it.
In this article
01 [What Is GIF Illustration?](#Part 1)
02 [Best 12 Illusion Gifs](#Part 2)
Part 1 What Is GIF Illustration?
GIFs are a form of digital media that is used to show animations and other types of visuals. It is a type of file format that can be created with different editing software. These are usually used for short videos or images on the internet and social media.
Furthermore, GIFs are an excellent way to create visual content for social media posts or as an animated overlay on a video.
These are now used as everything from advertisements to commentary from all walks of life. The users of GIFs seem to be endless! They can be used in many different ways, such as to add visual interest, provide context or even humor, and so on. It is totally on the user how they are considering it to make the things more relevant to the context for which they have created or shared the GIF.
Part 2 Best 12 Illusion Gifs
This curated list will help you to know the best Illusion GIF that is still ruling out the market. This includes:-
01Van Gogh Stare GIF
The Van Gogh Stare, also known as the “dazzle camouflage,” is an optical illusion created by artist Vincent van Gogh. It was likely intended to represent the eye’s instability and movement. The image has been used in a variety of ways, including on social media sites like Tumblr. In general, this GIF illusion is a demonstration of the Van Gogh Stare.
02This brain-busting rotation
We are all used to seeing the world around us in two dimensions. But what if we could see it in three dimensions? Well, now you can! This GIF shows a rotating 3D object that appears to be made of cubes. The illusion is created by the fact that the camera rotates around the object, but you can’t see it from every angle.
03This loop tea GIF
This GIF illusion is a perfect example of how our brain works. When we see something that doesn’t make sense, we try to make sense of it by filling in the gaps with what we believe it should look like. The GIF illusion consists of two frames. The first frame shows a woman drinking tea from a cup, and the second frame shows her drinking from an empty cup. When our brain tries to fill in the gaps, it assumes that the woman drank all of the tea and sees her as drinking from an empty cup even though she is actually drinking from a full one.
04No smkoing! Well, you should never
The GIF illusion consists of two images: one of a cloud and another of cauliflower. The animation starts with the cloud and then switches to the cauliflower. But if you take a closer look, you’ll notice that there’s actually no smoke in the first image, just the cauliflower. And it’s not really a head either - it’s just an ordinary cauliflower from behind.
The reason why this illusion works is that our brains are wired to see patterns and shapes in things that aren’t always there - for example, when we see faces in random objects or shapes in clouds. This GIF takes advantage of that by showing two images where these are
05The never-ending corridor
The GIF illusion is a rather simple illusion that takes advantage of the way our brains perceive motion. Our brains are programmed to see a moving object as a single object in order to make sense of the world around us. This means that when we see an object moving, we perceive it as one solid thing instead of many separate objects.
This GIF illusion is a perfect example of how the human brain works. The brain can’t process that the two images are different, and instead, it sees them as a single image.
06Now, this, the eye-pleaser
The illusion works on the principle of depth perception and how our eyes are not able to accurately process all of the information that they receive from our surroundings. The black lines on the white background make it seem like there are two rows of lines, but there’s only one row that appears to be moving back and forth.
07Commercial At design GIF
The GIF illusion is a simple design that tricks the brain into thinking that it is 3D. The design consists of two circles, one inside the other, with three arrows pointing inwards. The outside circle has a white background and the inside circle has a black background. When you look at this design from different angles, you will see that the arrows point outwards and not inwards as they should be doing.
08Wait what? Is this truly a reflection?
This illusion works because our brain recognizes that the mirror image is not what’s really happening and flips the image in our head to make it right-side up.
It’s also possible that we are tricked by the fact that we know mirrors flip images, so when we see an upside-down image in front of us, we automatically assume it’s just inverted.
09This haunting tableau (Not exactly a GIF but worth sharing)
The GIF illusion is a type of optical illusion that can be explained by the Gestalt Principles. The Gestalt Principles are guidelines for how we perceive and organize visual information. This optical illusion is created by overlapping two similar images on top of each other in the same place but with different colors. Our brain perceives this as a single image, and our eyes try to make sense of it by looking for visual cues in the image. When we focus on one image, it looks like a triangle with a red line going through it. But when we focus on the other image, it looks like an arrow pointing up that has been cut in half with a red line through it.
10This safety hazard
This GIF illusion is a safety hazard because it tricks the brain into thinking that the person in front of them is standing still. When you stare at this GIF for too long, the person will appear to be moving backward. This illusion can cause accidents if you believe that a person is still when they are actually approaching you.
11Welcome to the 3d World
It’s an illusion created by the use of perspective. The camera is positioned in such a way that it appears that the three-dimensional cube is only two-dimensional.
The camera is positioned in such a way that it appears that the three-dimensional cube is only two-dimensional.
12I will keep this table forever
The GIF illusion is an optical illusion that makes the table in the background appear to be bigger than it actually is. The table in front of the window appears to be smaller and closer to the viewer. There are two factors that make this illusion happen. One of them is perspective, which makes objects appear larger as they get closer and smaller as they get farther away. The other factor is size constancy, which makes objects look about the same size regardless of how far away they are from you.
Part 3 How Do You Make a GIF Illustration?
If you are someone who is curious to make a GIF illustration but have no clue how to make it, then the online portals are catering to all your needs. Right now, there are multiple tools available that will help you to create the illustration seamlessly. Among all of them, we suggest you try your hands on Filmora.
Wondershare Filmora Video Editor is one of the best tools available to make the gift illustration as you want. You just need to upload the content, and then you are all set to edit it at your convenience. The best part is the interface of the tool is very simple to understand, which simply means there will be no need for you to belong to any technical background to use this tool.

Wondershare Filmora - Best Video Editor for Mac/Windows
5,481,435 people have downloaded it.
Build unique custom animations without breaking a sweat.
Focus on creating epic stories and leave the details to Filmora’s auto features.
Start a creative adventure with drag & drop effects and endless possibilities.
Filmora simplifies advanced features to save you time and effort.
Filmora cuts out repetition so you can move on to your next creative breakthrough.
Along with creating the GIF files, it also help you to do the editing as you wanted. For example, if you are looking forward to reading on any text to the GIF file, you can also do it seamlessly. The interface will help you to understand how you can do it so that there will be no problem in creating the content as you want.
● Key Takeaways from This Episode →
● Filmora is the best tool to create illusion GIF.
●Illusion GIF are in use for advertisement.
●Creating illusion GIF is just a matter of few steps.
Do you know that these are reaching heights and people are very happy in sharing them? If you are unaware of it, don’t worry and keep reading. Thorugh today’s post, we will discuss illusion GIF in detail yo make it easy for you to make up your mind and try your hands on it.
In this article
01 [What Is GIF Illustration?](#Part 1)
02 [Best 12 Illusion Gifs](#Part 2)
Part 1 What Is GIF Illustration?
GIFs are a form of digital media that is used to show animations and other types of visuals. It is a type of file format that can be created with different editing software. These are usually used for short videos or images on the internet and social media.
Furthermore, GIFs are an excellent way to create visual content for social media posts or as an animated overlay on a video.
These are now used as everything from advertisements to commentary from all walks of life. The users of GIFs seem to be endless! They can be used in many different ways, such as to add visual interest, provide context or even humor, and so on. It is totally on the user how they are considering it to make the things more relevant to the context for which they have created or shared the GIF.
Part 2 Best 12 Illusion Gifs
This curated list will help you to know the best Illusion GIF that is still ruling out the market. This includes:-
01Van Gogh Stare GIF
The Van Gogh Stare, also known as the “dazzle camouflage,” is an optical illusion created by artist Vincent van Gogh. It was likely intended to represent the eye’s instability and movement. The image has been used in a variety of ways, including on social media sites like Tumblr. In general, this GIF illusion is a demonstration of the Van Gogh Stare.
02This brain-busting rotation
We are all used to seeing the world around us in two dimensions. But what if we could see it in three dimensions? Well, now you can! This GIF shows a rotating 3D object that appears to be made of cubes. The illusion is created by the fact that the camera rotates around the object, but you can’t see it from every angle.
03This loop tea GIF
This GIF illusion is a perfect example of how our brain works. When we see something that doesn’t make sense, we try to make sense of it by filling in the gaps with what we believe it should look like. The GIF illusion consists of two frames. The first frame shows a woman drinking tea from a cup, and the second frame shows her drinking from an empty cup. When our brain tries to fill in the gaps, it assumes that the woman drank all of the tea and sees her as drinking from an empty cup even though she is actually drinking from a full one.
04No smkoing! Well, you should never
The GIF illusion consists of two images: one of a cloud and another of cauliflower. The animation starts with the cloud and then switches to the cauliflower. But if you take a closer look, you’ll notice that there’s actually no smoke in the first image, just the cauliflower. And it’s not really a head either - it’s just an ordinary cauliflower from behind.
The reason why this illusion works is that our brains are wired to see patterns and shapes in things that aren’t always there - for example, when we see faces in random objects or shapes in clouds. This GIF takes advantage of that by showing two images where these are
05The never-ending corridor
The GIF illusion is a rather simple illusion that takes advantage of the way our brains perceive motion. Our brains are programmed to see a moving object as a single object in order to make sense of the world around us. This means that when we see an object moving, we perceive it as one solid thing instead of many separate objects.
This GIF illusion is a perfect example of how the human brain works. The brain can’t process that the two images are different, and instead, it sees them as a single image.
06Now, this, the eye-pleaser
The illusion works on the principle of depth perception and how our eyes are not able to accurately process all of the information that they receive from our surroundings. The black lines on the white background make it seem like there are two rows of lines, but there’s only one row that appears to be moving back and forth.
07Commercial At design GIF
The GIF illusion is a simple design that tricks the brain into thinking that it is 3D. The design consists of two circles, one inside the other, with three arrows pointing inwards. The outside circle has a white background and the inside circle has a black background. When you look at this design from different angles, you will see that the arrows point outwards and not inwards as they should be doing.
08Wait what? Is this truly a reflection?
This illusion works because our brain recognizes that the mirror image is not what’s really happening and flips the image in our head to make it right-side up.
It’s also possible that we are tricked by the fact that we know mirrors flip images, so when we see an upside-down image in front of us, we automatically assume it’s just inverted.
09This haunting tableau (Not exactly a GIF but worth sharing)
The GIF illusion is a type of optical illusion that can be explained by the Gestalt Principles. The Gestalt Principles are guidelines for how we perceive and organize visual information. This optical illusion is created by overlapping two similar images on top of each other in the same place but with different colors. Our brain perceives this as a single image, and our eyes try to make sense of it by looking for visual cues in the image. When we focus on one image, it looks like a triangle with a red line going through it. But when we focus on the other image, it looks like an arrow pointing up that has been cut in half with a red line through it.
10This safety hazard
This GIF illusion is a safety hazard because it tricks the brain into thinking that the person in front of them is standing still. When you stare at this GIF for too long, the person will appear to be moving backward. This illusion can cause accidents if you believe that a person is still when they are actually approaching you.
11Welcome to the 3d World
It’s an illusion created by the use of perspective. The camera is positioned in such a way that it appears that the three-dimensional cube is only two-dimensional.
The camera is positioned in such a way that it appears that the three-dimensional cube is only two-dimensional.
12I will keep this table forever
The GIF illusion is an optical illusion that makes the table in the background appear to be bigger than it actually is. The table in front of the window appears to be smaller and closer to the viewer. There are two factors that make this illusion happen. One of them is perspective, which makes objects appear larger as they get closer and smaller as they get farther away. The other factor is size constancy, which makes objects look about the same size regardless of how far away they are from you.
Part 3 How Do You Make a GIF Illustration?
If you are someone who is curious to make a GIF illustration but have no clue how to make it, then the online portals are catering to all your needs. Right now, there are multiple tools available that will help you to create the illustration seamlessly. Among all of them, we suggest you try your hands on Filmora.
Wondershare Filmora Video Editor is one of the best tools available to make the gift illustration as you want. You just need to upload the content, and then you are all set to edit it at your convenience. The best part is the interface of the tool is very simple to understand, which simply means there will be no need for you to belong to any technical background to use this tool.
Wondershare Filmora - Best Video Editor for Mac/Windows
5,481,435 people have downloaded it.
Build unique custom animations without breaking a sweat.
Focus on creating epic stories and leave the details to Filmora’s auto features.
Start a creative adventure with drag & drop effects and endless possibilities.
Filmora simplifies advanced features to save you time and effort.
Filmora cuts out repetition so you can move on to your next creative breakthrough.
Along with creating the GIF files, it also help you to do the editing as you wanted. For example, if you are looking forward to reading on any text to the GIF file, you can also do it seamlessly. The interface will help you to understand how you can do it so that there will be no problem in creating the content as you want.
● Key Takeaways from This Episode →
● Filmora is the best tool to create illusion GIF.
●Illusion GIF are in use for advertisement.
●Creating illusion GIF is just a matter of few steps.
Also read:
- 15 Forgotten Cartoon Characters of All Time for 2024
- New 10 Best Tools to Make Pic Collage for Windows
- New Little Known Techniques of Motion Graphics in Premiere Pro
- In 2024, How to Combine Two/More GIFs Into One GIF Mergers Offered
- 2024 Approved Easy Shortcut to Convert Videos to Gifs on iPhone
- Updated 2024 Approved Animate Your Photo Online with These Awesome Tools
- Updated Cartoon Fundamentals How to Learn Cartoon Characters Sketch Quickly for 2024
- New In-Depth Study of Cartoon Painting Starts
- How to Animate - Adobe Animate Tutorias
- Updated 2024 Approved 5 Ways You Never Heard of for Converting MP4 to GIF in Photoshop
- 2024 Approved Ways to Stop Animation From Looping in Unity
- New In 2024, Top 7 Animated GIF Text Makers
- 2024 Approved How to Create YouTube Intro Animation Like a Pro
- 2024 Approved Best 12 Illusion Gifs Top Picks
- Updated Interesting Fundamentals and Ultimate Guide to Animated Characters Drawings
- New In 2024, 10 Must-Use MP4 to GIF Converters to Get Perfect-Made GIF
- Updated In 2024, What Wikipedia Wont Tell You About Character Rigging
- Animate Pictures in Canva for 2024
- The Best 10 Sketch Animation Video Makers
- Amazing Ideas About Creating Personalised WhatsApp GIF Sticker
- New 2024 Approved Most Effective Tactics to Set WhatsApp Status
- In 2024, 10 Caricature Makers to Turn Your Photo to Caricature Effects
- Best Android Data Recovery - undelete lost call logs from Motorola Edge 40 Pro
- Ultimate Guide from Tecno Phantom V Fold FRP Bypass
- Full Guide to Bypass Infinix FRP
- In 2024, 8 Best Apps for Screen Mirroring HTC U23 Pro PC | Dr.fone
- Guide to Mirror Your Oppo Reno 11 5G to Other Android devices | Dr.fone
- 4 Most-Known Ways to Find Someone on Tinder For Tecno Spark 10 4G by Name | Dr.fone
- Mastering Lock Screen Settings How to Enable and Disable on Vivo X Flip
- How to Transfer Photos From Realme Narzo N55 to Samsung Galaxy S21 Ultra | Dr.fone
- 8 Best Apps for Screen Mirroring Xiaomi Redmi A2 PC | Dr.fone
- In 2024, How Can I Screen Mirroring Apple iPhone SE (2022) to TV/Laptop? | Dr.fone
- The way to recover deleted contacts on Galaxy S24 without backup.
- In 2024, How To Unlock Infinix Smart 8 HD Phone Without Password?
- How To Transfer WhatsApp From Apple iPhone 14 Pro to other iPhone 11 Pro Max devices? | Dr.fone
- Sign Word Documents Online for Free
- What is the best Pokemon for pokemon pvp ranking On Nubia Red Magic 8S Pro? | Dr.fone
- Fix App Not Available in Your Country Play Store Problem on Oppo Reno 10 Pro+ 5G | Dr.fone
- Title: Methods to Make Photo Motion Effect Online for 2024
- Author: Elon
- Created at : 2024-05-19 03:04:58
- Updated at : 2024-05-20 03:04:58
- Link: https://animation-videos.techidaily.com/methods-to-make-photo-motion-effect-online-for-2024/
- License: This work is licensed under CC BY-NC-SA 4.0.
