
:max_bytes(150000):strip_icc():format(webp)/F8conferencelogo-7ec4475dc6624114aea076c2611df199.jpg)
New 10 Best Photoshop Cartoon Effects For Creatives for 2024
10 Best Photoshop Cartoon Effects For Creatives
10 Photoshop Cartoon Effects For Creatives
An easy yet powerful editor
Numerous effects to choose from
Detailed tutorials provided by the official channel
Whether cartoon lover or not, photo cartoon effects is admired by everyone nowadays. People want to use Photoshop cartoon effects.
Using Photoshop applications lets, you know that editing and applying effects are often time-consuming. Adjusting the color, resizing the image, applying effects is lengthy, requires focus, and sometimes may be boring. Thus, we have some Photoshop cartoon effects that will save your time and provide you with desired results.
In this article
01 [11 Best Photoshop Cartoon Effects](#Part 1)
02 [How To Create A Photo To Cartoon Effect In A Photoshop](#Part 2)
Part 1 Best Photoshop Cartoon Effects
If you prefer to download the cartoon effect app or want to edit the photo online without editing, here’s is a list of some of the best Photoshop or Premiere Pro cartoon effects:
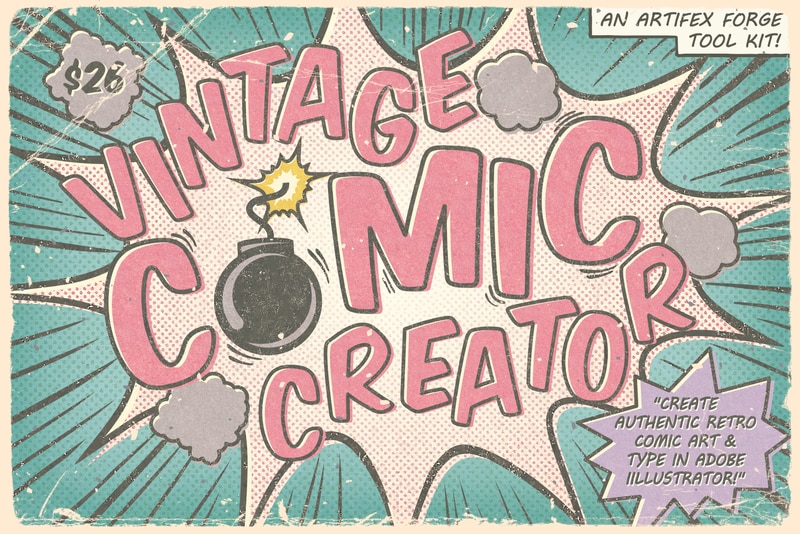
01Vintage Comic Creator
Vintage Comic Creator allows users to add After Effects in cartoon effects in photographs and texts. This can be the best choice if you want to add some shape effects, color, and change texture.
Along with cartoon edit text, an individual can also download overlays, pattern styles, and layer styles to make it comic book text. All the downloaded versions of templates are popular and editable as per the user’s requirement.
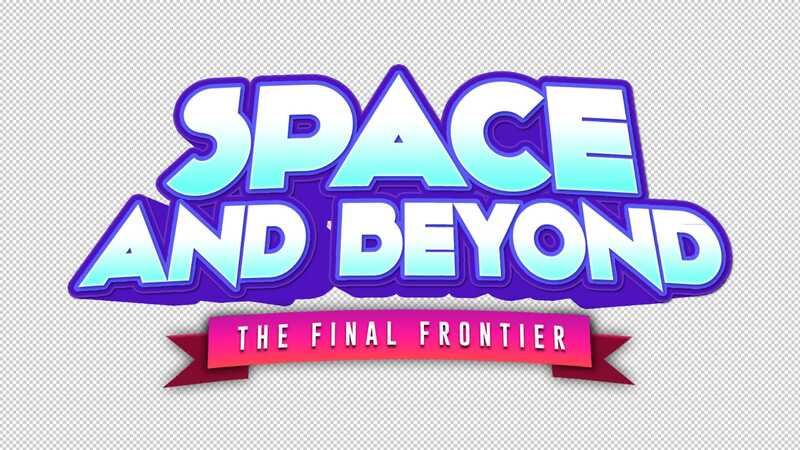
02Ultra Realistic 3D Space effect
Are you a space lover and looking for space inspires cartoon edits? Here’s a Solution. Ultra Realistic 3D Space cartoon effect allows the users to create editable fun cartoon text and Space themes.
Since it provides a variety of themes and ideas doesn’t limit the user when it comes to editing.
It provides you with a file with an example to make it easy to apply the cartoon effect online according to your wish.
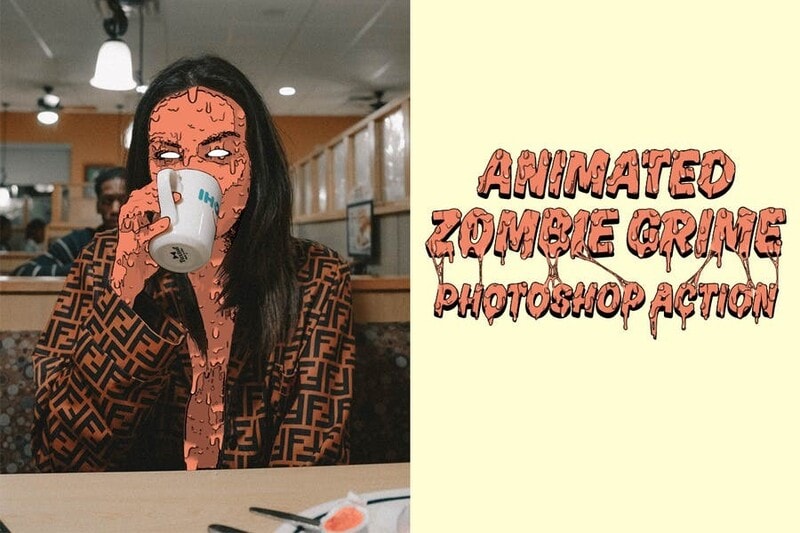
03Animated Zombie Grime Art Photoshop action
To the fans of all the zombie movies, here’s something you should try out!
Animated Zombie Grime Art provides features in which users can edit their photographs with zombie cartoon effects and experience how they will look like a zombie with zero effort. It also provides the option to create and save GIFs or videos. One can easily use them on their social media accounts.
04Cartoon art Photoshop action
A quick and easy online cartoon effect helps individuals edit their photographs into paintings or cartoon characters. With only a few simple actions, users can easily edit their pictures. It provides editing in paintings, cartoons, oil pastels, oil paintings, etc.
05Soft Photoshop cartoon effects
Soft Photoshop cartoon effects help the users edit the photos into cartoon effects and allow them to add smooth effects to them. With just one click, you can add different colors to your image can adjust the brightness, contrast, highlight, texture, etc. It includes layers and smart filters, thus providing various editing options.
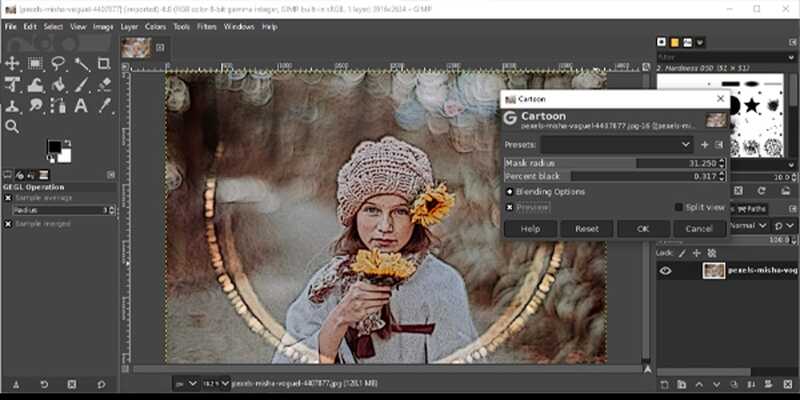
06Gimp cartoon effect
It is one of the fastest methods to edit your photographs into cartoon effects. Within a single click, you can cartoonify your pictures. With the help of the Gimp cartoon effect, the user can readjust brightness, contrast, light, etc. You can try soft burn, burn and overlay and can invert colors. It provides different filters with special effects that users can use free of cost.
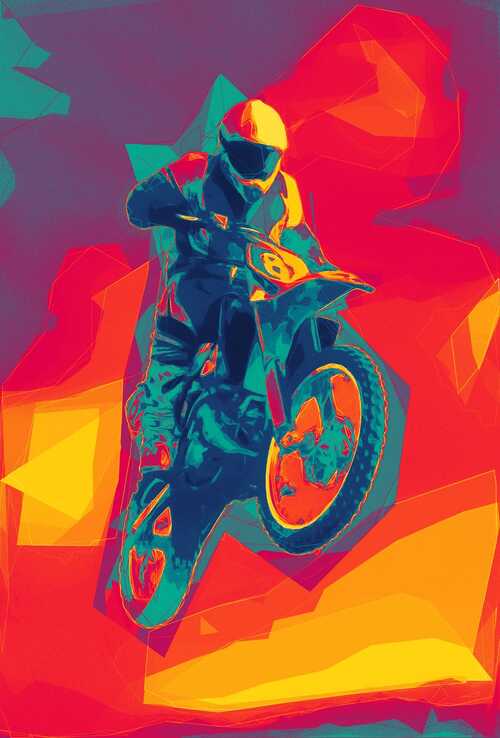
07Pop art Photoshop action
Pop art Photoshop action easily converts any photograph into a retro cartoon photo effect. It transforms the picture into a cartoon customized painting within one click. Users can enjoy the features of adjusting colors and can change the background according to their wishes.

08Cell shader Photoshop action
If you want to convert photos into cartoon effects and at the same time want to apply cell shading, then here’s a magic photo cartoon effect. Cartooning your picture along with cell shading can be time-consuming sometimes. Cell shader Photoshop allows the user to shade the image with a single click. You can try it on any picture.
093D cartoon text effect
This cartoon effect app helped change the text or the style of the text by adding specific animations or filters. It includes different forms and types in which users can edit the text and make it look fantastic. This 3D animation you can use in your document in animation or simple editing.
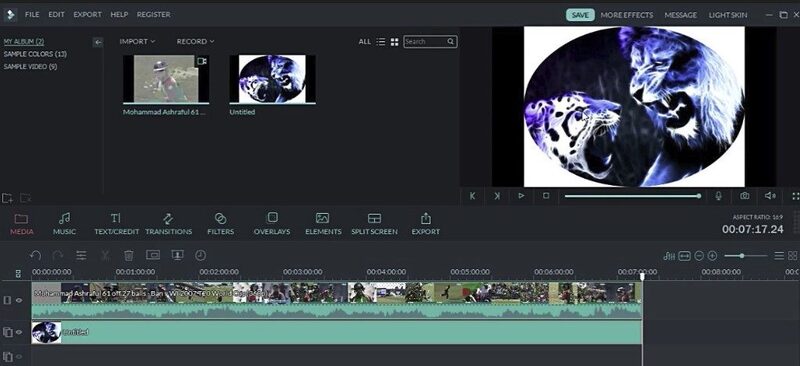
10Filmora cartoon effects
With Wondershare Filmora Video Editor , users can take a new picture or add a photo from their phone’s gallery. Once the image is ready for editing, you should tap on the Apply Cartoon Effect button. It contains 12 different cartoon photo effect styles; thus, users can choose any style they want to insert in their picture. You can also add motion to images, videos, and unlimited editing features with the latest updates.
For Win 7 or later (64-bit)
For macOS 10.12 or later
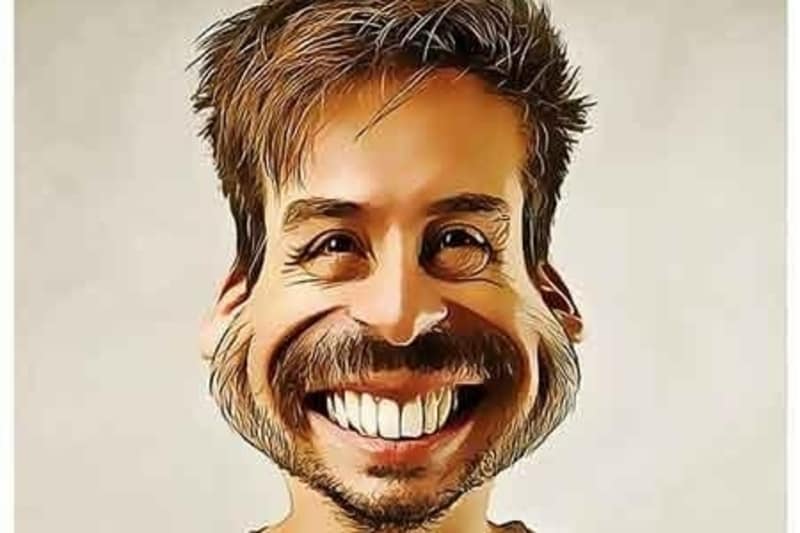
11 Caricature maker Photoshop action
You can turn your photographs into caricatures and make them look awesome. With the help of this After Effects, cartoon animation converts a simple picture into a fun carriage with just one click. You can adjust colors, size, and shape and add more features.
Part 2 How To Create A Photo To Cartoon Effect In A Photoshop
Below is a guide that will help you know more about Photoshop’s cartoon effect.
● Step 1: Select Image
Now, choose an image you want to cartoonize.
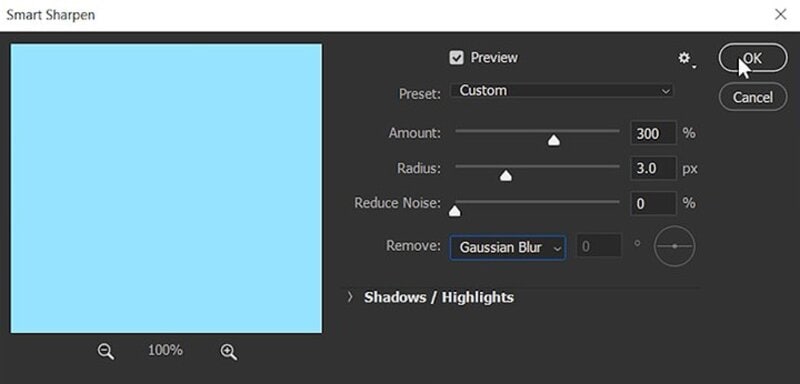
● Step 2: Apply Filter-Sharpen
Go to Filter to sharpen the image. Select the Gaussian Blur from the Remove drop-down list
Press OK.
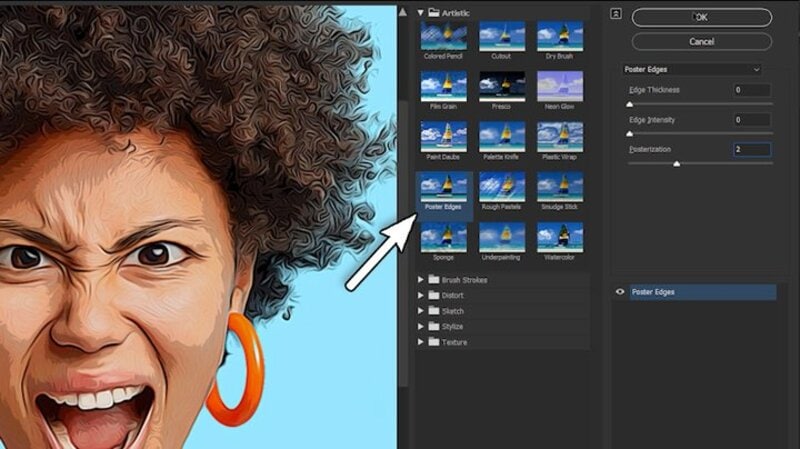
● Step 3: Apply Filter-Stylize
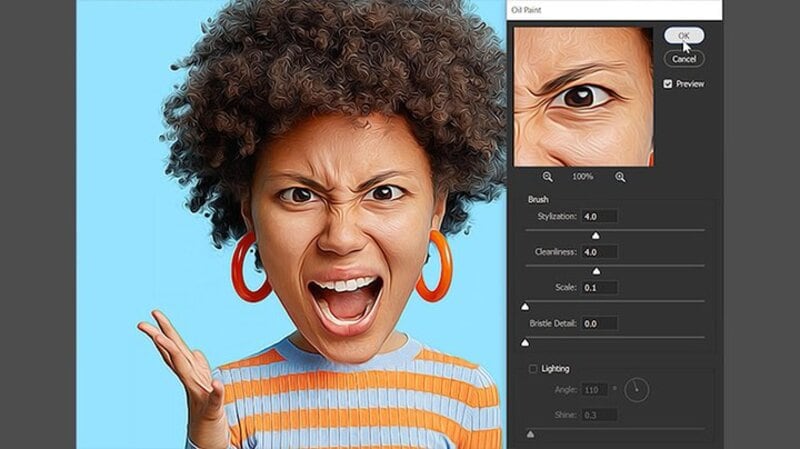
Go to Filter, then apply stylization and Oil paint.
● Step 4: Choose Poster Edges
Choose from the list of effects on the filter gallery, click on Poster Edges and click OK.
● Step 5: Blur
It will start to resemble a cartoon, but there’s still more to do, so use the Filter > Blur Menu to add a Surface Blur. Set the Threshold to 15 pixels and the Radius to 12 pixels. This effect gives the skin a considerably smoother and cleaner appearance. Select OK.
● Step 6: Unsharp Mask
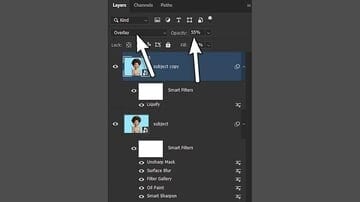
You can add some sharpness and increase particular highlights by going to Filter > Sharpen > Unsharp Mask.
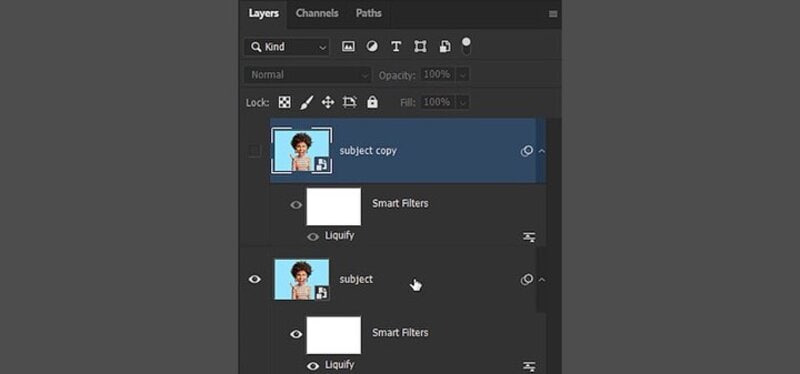
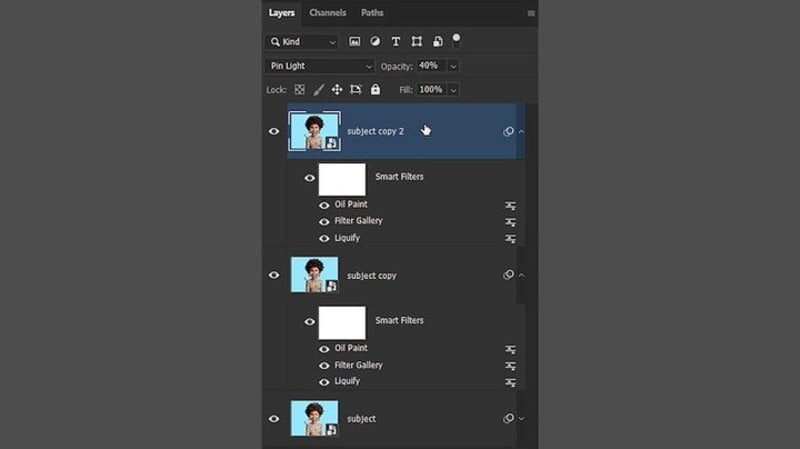
Unhide the second Smart Object layer and change its blending mode to Overlay. Then, reduce the layer’s Opacity to 55 percent.
Now, it will start to resemble a cartoon, but there’s still more to do, so use the Filter > Blur Menu to add a Surface Blur. Set the Threshold to 12 pixels and the Radius to 12 pixels.
● Step 7: Apply the Oil paint filter again
Return to Filter > Filter Gallery and select Poster Edges once more. These will draw attention to certain aspects of the portrait.
Choose the Oil Paint Filter from Filter > Stylize. Select OK.
● Step 8: Double-click on Filter Gallery
Click OK after double-clicking the Filter Gallery Smart Filter already on this layer.
Carry on with the same steps for the Oil Paint Filter.
Select OK.
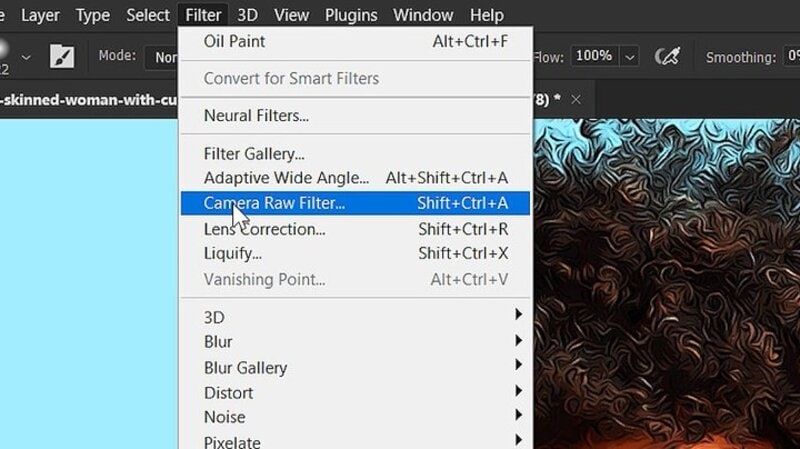
● Step 9: Choose the Raw filter option
Let’s take this photo cartoon effect to the next level with a simple method! To make a Stamp Visible Layer, choose the very top layer and press Control-Shift-Alt-E. When you wish to merge all the layers in a document onto a new layer, this shortcut comes in handy.
Lastly, convert the new layer to a Smart Object by right-clicking on it.
Select the Camera Raw Filter option from the Filter menu.
● Ending Thoughts →
● After visiting this article, I’m sure you have plenty of options for cartoon effects according to your choice. In this technological world, it’s hard to find the Photoshop cartoon effect of your desire, which helps save time.
● The above is one of the best After Effects cartoon animations you can use as a cartoon lover. Besides, you can also try out our recommended Filmora – the editor in vogue for its world-class editing features to help enhance your data.
Whether cartoon lover or not, photo cartoon effects is admired by everyone nowadays. People want to use Photoshop cartoon effects.
Using Photoshop applications lets, you know that editing and applying effects are often time-consuming. Adjusting the color, resizing the image, applying effects is lengthy, requires focus, and sometimes may be boring. Thus, we have some Photoshop cartoon effects that will save your time and provide you with desired results.
In this article
01 [11 Best Photoshop Cartoon Effects](#Part 1)
02 [How To Create A Photo To Cartoon Effect In A Photoshop](#Part 2)
Part 1 Best Photoshop Cartoon Effects
If you prefer to download the cartoon effect app or want to edit the photo online without editing, here’s is a list of some of the best Photoshop or Premiere Pro cartoon effects:
01Vintage Comic Creator
Vintage Comic Creator allows users to add After Effects in cartoon effects in photographs and texts. This can be the best choice if you want to add some shape effects, color, and change texture.
Along with cartoon edit text, an individual can also download overlays, pattern styles, and layer styles to make it comic book text. All the downloaded versions of templates are popular and editable as per the user’s requirement.
02Ultra Realistic 3D Space effect
Are you a space lover and looking for space inspires cartoon edits? Here’s a Solution. Ultra Realistic 3D Space cartoon effect allows the users to create editable fun cartoon text and Space themes.
Since it provides a variety of themes and ideas doesn’t limit the user when it comes to editing.
It provides you with a file with an example to make it easy to apply the cartoon effect online according to your wish.
03Animated Zombie Grime Art Photoshop action
To the fans of all the zombie movies, here’s something you should try out!
Animated Zombie Grime Art provides features in which users can edit their photographs with zombie cartoon effects and experience how they will look like a zombie with zero effort. It also provides the option to create and save GIFs or videos. One can easily use them on their social media accounts.
04Cartoon art Photoshop action
A quick and easy online cartoon effect helps individuals edit their photographs into paintings or cartoon characters. With only a few simple actions, users can easily edit their pictures. It provides editing in paintings, cartoons, oil pastels, oil paintings, etc.
05Soft Photoshop cartoon effects
Soft Photoshop cartoon effects help the users edit the photos into cartoon effects and allow them to add smooth effects to them. With just one click, you can add different colors to your image can adjust the brightness, contrast, highlight, texture, etc. It includes layers and smart filters, thus providing various editing options.
06Gimp cartoon effect
It is one of the fastest methods to edit your photographs into cartoon effects. Within a single click, you can cartoonify your pictures. With the help of the Gimp cartoon effect, the user can readjust brightness, contrast, light, etc. You can try soft burn, burn and overlay and can invert colors. It provides different filters with special effects that users can use free of cost.
07Pop art Photoshop action
Pop art Photoshop action easily converts any photograph into a retro cartoon photo effect. It transforms the picture into a cartoon customized painting within one click. Users can enjoy the features of adjusting colors and can change the background according to their wishes.
08Cell shader Photoshop action
If you want to convert photos into cartoon effects and at the same time want to apply cell shading, then here’s a magic photo cartoon effect. Cartooning your picture along with cell shading can be time-consuming sometimes. Cell shader Photoshop allows the user to shade the image with a single click. You can try it on any picture.
093D cartoon text effect
This cartoon effect app helped change the text or the style of the text by adding specific animations or filters. It includes different forms and types in which users can edit the text and make it look fantastic. This 3D animation you can use in your document in animation or simple editing.
10Filmora cartoon effects
With Wondershare Filmora Video Editor , users can take a new picture or add a photo from their phone’s gallery. Once the image is ready for editing, you should tap on the Apply Cartoon Effect button. It contains 12 different cartoon photo effect styles; thus, users can choose any style they want to insert in their picture. You can also add motion to images, videos, and unlimited editing features with the latest updates.
For Win 7 or later (64-bit)
For macOS 10.12 or later
11 Caricature maker Photoshop action
You can turn your photographs into caricatures and make them look awesome. With the help of this After Effects, cartoon animation converts a simple picture into a fun carriage with just one click. You can adjust colors, size, and shape and add more features.
Part 2 How To Create A Photo To Cartoon Effect In A Photoshop
Below is a guide that will help you know more about Photoshop’s cartoon effect.
● Step 1: Select Image
Now, choose an image you want to cartoonize.
● Step 2: Apply Filter-Sharpen
Go to Filter to sharpen the image. Select the Gaussian Blur from the Remove drop-down list
Press OK.
● Step 3: Apply Filter-Stylize
Go to Filter, then apply stylization and Oil paint.
● Step 4: Choose Poster Edges
Choose from the list of effects on the filter gallery, click on Poster Edges and click OK.
● Step 5: Blur
It will start to resemble a cartoon, but there’s still more to do, so use the Filter > Blur Menu to add a Surface Blur. Set the Threshold to 15 pixels and the Radius to 12 pixels. This effect gives the skin a considerably smoother and cleaner appearance. Select OK.
● Step 6: Unsharp Mask
You can add some sharpness and increase particular highlights by going to Filter > Sharpen > Unsharp Mask.
Unhide the second Smart Object layer and change its blending mode to Overlay. Then, reduce the layer’s Opacity to 55 percent.
Now, it will start to resemble a cartoon, but there’s still more to do, so use the Filter > Blur Menu to add a Surface Blur. Set the Threshold to 12 pixels and the Radius to 12 pixels.
● Step 7: Apply the Oil paint filter again
Return to Filter > Filter Gallery and select Poster Edges once more. These will draw attention to certain aspects of the portrait.
Choose the Oil Paint Filter from Filter > Stylize. Select OK.
● Step 8: Double-click on Filter Gallery
Click OK after double-clicking the Filter Gallery Smart Filter already on this layer.
Carry on with the same steps for the Oil Paint Filter.
Select OK.
● Step 9: Choose the Raw filter option
Let’s take this photo cartoon effect to the next level with a simple method! To make a Stamp Visible Layer, choose the very top layer and press Control-Shift-Alt-E. When you wish to merge all the layers in a document onto a new layer, this shortcut comes in handy.
Lastly, convert the new layer to a Smart Object by right-clicking on it.
Select the Camera Raw Filter option from the Filter menu.
● Ending Thoughts →
● After visiting this article, I’m sure you have plenty of options for cartoon effects according to your choice. In this technological world, it’s hard to find the Photoshop cartoon effect of your desire, which helps save time.
● The above is one of the best After Effects cartoon animations you can use as a cartoon lover. Besides, you can also try out our recommended Filmora – the editor in vogue for its world-class editing features to help enhance your data.
Learn How to Draw Cartoons Step by Step with This Guide
Learn How to Draw Cartoons Step by Step with This Guide
An easy yet powerful editor
Numerous effects to choose from
Detailed tutorials provided by the official channel
Cartoon character drawing is usually a vital aspect of any child’s life who loves to watch cartoon series and can sometimes be someone’s favorite thing in the world.

A cartoon character is a series of single drawings that tell a joke or story. Although cartoons are mostly drawn, they can sometimes be animated. Kids like comics which makes them an essential part of every child’s life. Cartoons are not only used for entertainment purposes but also help kids and young children learn more about the world around them. For example, children learn about love, loss, friendship, and other essential life issues about life by watching cartoons.
However, cartoons are not only limited to children but are also for adults. In addition, cartoons created for an adult audience go deeper into real-life problems and explore darker themes. They aim to create content that matches the maturity and age of the audience. Watching cartoons is fun. But what if you could make them? This article will provide you with a guide on producing cool cartoon drawings that will match different audiences, both older and younger.
In this article
01 [How to Draw Cartoon Characters Step by Step](#Part 1)
02 [Cartoon Easy Drawing with Colour Step by Step](#Part 2)
03 [Cartoon Easy Sketch Drawing Step by Step](#Part 3)
Part 1 How to Draw Cartoon Characters Step by Step
Note that in the world we live in, Professionals were once students, and experts were once beginners. This means that everyone has a starting point, and they all have one thing in common: “learning.” Whether you are aspiring to become an English teacher, an astrophysicist, an artist, or a physician’s assistant, you must first learn the ins and outs of the field.
Those aspiring to become animators and cartoonists must first learn the basics of cartoon character drawing and practice some easy, simple cartoon drawing before cranking out the Mickey-Mouses of the entertainment world. However, we will cover the basic principles of easy cartoon drawing for beginners step by step to get your learning process started. Here is how to draw a Micky-Mouse perfectly:

Step 1:
● Use a pencil to begin your drawing.
● First, create a circle for the head and a curved line on the left side.
● Draw a horizontal line at the center.
Step 2: Next, draw an oval shape for the mouth and a “U” shape added to the bottom, and then you can add another parallel “U” shape and connect it with the oval.
Step 3: Draw the eye using two upside-down “U” shapes, and then you add his large ear on the right and a small one at the top of the head.
Step 4: You can draw a bean shape and another smaller one inside for the body.
Step 5: Add oval shapes for his feet to draw his legs and draw his tail on the right side just above the leg.
Step 6: Draw two elongated shapes for his arms, a small oval for the hand and a basic shape of his fingers.
Step 7: Draw the cheese and add a few small circles inside.
Step 8: Also include the facial features by drawing the inside of the nose, eyebrows, eyes, and whiskers.
Step 9:
● Draw his fingers and hair between his ears.
● Trace your pencil lines with a sharpie.
● Erase the pencil afterward.
Step 10: Finally, you can color your drawing and upload it to your website.
Part 1 Cartoon Easy Drawing with Colour Step by Step
Applying color to a drawing is very important to beautify your drawing and make it look stunning and attractive. Here is how to cartoon easy drawing a flower using a colored pencil:
Step 1: Using a color photocopy of a reference photo, crop and rearrange elements of the poppy composition. With light pressure and HB pencil, draw a composition onto a four-ply, 100% cotton museum board frequently found among framing supplies.
Step 2: With very light pressure, apply the first colored pencil layer and add more emphasis where the values will be deeper. While doing this, note that the pencil application will still appear granular, and the texture of the museum board is still visible.

Step 3: Create the veins in the leaves and the fuzzy texture of the stem and pod, and also, as the individual strands of stamens, put down a sheet of translucent drafting paper. Use heavy tracing paper with a very sharp 7H graphite pencil and apply heavy pressure in drawing the lines for stamens, fuzz, and veins on the drafting paper and impress them into the surface of the museum board. Then, with a contrasting layer of darker color, these features dramatically show up on the stem, leaves, center of the flower, pod, and center of the flower. Then add deeper values of rose in the shadowed areas of the flower petals.

Step 4: To make them appear less granular and intensify the colors, start by blending with a clear, alcohol-based blending marker. The solvent, wax, or vegetable oil then dissolves the binder in the colored pencil layer and fluidly releases the pigment. This will also help to “fill in” the dots of the tooth of the paper and make the color appear denser.

Step 5: Continue to intensify the color by using a non-pigmented blending pencil over a previous layer and repeat a layer or two of color, much like a “color sandwich.” Repeat this “ burnishing “ process for subsequent layerings of color, like a double-decker or triple-decker sandwich.
Also, make sure the rich, dark negative space is carried out the same way, layering colors and burnishing, then repeating the colors for deep, rich saturation.
Render the deep, smeary flecks of pollen by heavily applying “freckles” of burgundy, then slightly smudge them with the tip of a blending marker. Lastly, scratch a few of the tiny wisps of fuzz on the pod and stem carefully into the board via a sharp X-acto knife for a striking contrast of light against the deep background.

Part 2 Cartoon Easy Sketch Drawing Step by Step
This is the initial stage of the drawing process. It requires you to create an outline of the concept you want to draw before adding color. However, it is also referred to as a technique in shading. For example, if you’re going to sketch a cherry fruit, there are a few things to note here.
Try not to look at the cherry as a whole but look at its shapes and name them. This way, you are looking at the parts to the whole and not the entire piece.

Step 1: Draw two overlapping circles and draw two curved lines from each of the circles.
Step 2: Make a small rectangle at the top to join the two stems and draw a second set of curved lines.
Step 3: Draw thick lines inside the rectangle for the bumps and darken the lines and use your finger to smudge them a bit for the shaded effect.
Step 4: Draw a curved line from the stem on the right to the circle’s edge to create the bump.
Step 5: Holding your pencil at an angle, make light strokes going across the front of both cherries. Take note of the places where there is no light. This is where the light source is hitting the cherry the most.
Step 6: To darken, a shade over those places again, keep layering the shading technique until you get the effect you see on the cherries.
Step 7: Use the same technique to shade under the cherries, but use your finger to smudge it to smoother the shadow.
●Bonus:
You can add color, effect, or animate to your cartoon character drawing by using Wondershare Filmora Video Editor , the best editor on the internet. Filmora is a free software program with the same creating abilities and imaging editing similar to Adobe Illustrator. It is open software that runs on various programs, such as Windows, Mac, and Linux. Please get to know more about this exclusive tool from Wondershare on their official website.
For Win 7 or later (64-bit)
For macOS 10.12 or later
● Ending Thoughts →
● A step-by-step guide on drawing easy cartoons for painting and how to sketch your drawing correctly.
● Cartoon character drawings in easy and quick steps.
● Easy cartoon drawing for beginners.
● Lastly, to add color to your drawing, use Filmora software.
● So, use the tips and tricks to make your presentation’s best cartoon characters come alive and be a pro with Filmora.
Cartoon character drawing is usually a vital aspect of any child’s life who loves to watch cartoon series and can sometimes be someone’s favorite thing in the world.
A cartoon character is a series of single drawings that tell a joke or story. Although cartoons are mostly drawn, they can sometimes be animated. Kids like comics which makes them an essential part of every child’s life. Cartoons are not only used for entertainment purposes but also help kids and young children learn more about the world around them. For example, children learn about love, loss, friendship, and other essential life issues about life by watching cartoons.
However, cartoons are not only limited to children but are also for adults. In addition, cartoons created for an adult audience go deeper into real-life problems and explore darker themes. They aim to create content that matches the maturity and age of the audience. Watching cartoons is fun. But what if you could make them? This article will provide you with a guide on producing cool cartoon drawings that will match different audiences, both older and younger.
In this article
01 [How to Draw Cartoon Characters Step by Step](#Part 1)
02 [Cartoon Easy Drawing with Colour Step by Step](#Part 2)
03 [Cartoon Easy Sketch Drawing Step by Step](#Part 3)
Part 1 How to Draw Cartoon Characters Step by Step
Note that in the world we live in, Professionals were once students, and experts were once beginners. This means that everyone has a starting point, and they all have one thing in common: “learning.” Whether you are aspiring to become an English teacher, an astrophysicist, an artist, or a physician’s assistant, you must first learn the ins and outs of the field.
Those aspiring to become animators and cartoonists must first learn the basics of cartoon character drawing and practice some easy, simple cartoon drawing before cranking out the Mickey-Mouses of the entertainment world. However, we will cover the basic principles of easy cartoon drawing for beginners step by step to get your learning process started. Here is how to draw a Micky-Mouse perfectly:
Step 1:
● Use a pencil to begin your drawing.
● First, create a circle for the head and a curved line on the left side.
● Draw a horizontal line at the center.
Step 2: Next, draw an oval shape for the mouth and a “U” shape added to the bottom, and then you can add another parallel “U” shape and connect it with the oval.
Step 3: Draw the eye using two upside-down “U” shapes, and then you add his large ear on the right and a small one at the top of the head.
Step 4: You can draw a bean shape and another smaller one inside for the body.
Step 5: Add oval shapes for his feet to draw his legs and draw his tail on the right side just above the leg.
Step 6: Draw two elongated shapes for his arms, a small oval for the hand and a basic shape of his fingers.
Step 7: Draw the cheese and add a few small circles inside.
Step 8: Also include the facial features by drawing the inside of the nose, eyebrows, eyes, and whiskers.
Step 9:
● Draw his fingers and hair between his ears.
● Trace your pencil lines with a sharpie.
● Erase the pencil afterward.
Step 10: Finally, you can color your drawing and upload it to your website.
Part 1 Cartoon Easy Drawing with Colour Step by Step
Applying color to a drawing is very important to beautify your drawing and make it look stunning and attractive. Here is how to cartoon easy drawing a flower using a colored pencil:
Step 1: Using a color photocopy of a reference photo, crop and rearrange elements of the poppy composition. With light pressure and HB pencil, draw a composition onto a four-ply, 100% cotton museum board frequently found among framing supplies.
Step 2: With very light pressure, apply the first colored pencil layer and add more emphasis where the values will be deeper. While doing this, note that the pencil application will still appear granular, and the texture of the museum board is still visible.
Step 3: Create the veins in the leaves and the fuzzy texture of the stem and pod, and also, as the individual strands of stamens, put down a sheet of translucent drafting paper. Use heavy tracing paper with a very sharp 7H graphite pencil and apply heavy pressure in drawing the lines for stamens, fuzz, and veins on the drafting paper and impress them into the surface of the museum board. Then, with a contrasting layer of darker color, these features dramatically show up on the stem, leaves, center of the flower, pod, and center of the flower. Then add deeper values of rose in the shadowed areas of the flower petals.
Step 4: To make them appear less granular and intensify the colors, start by blending with a clear, alcohol-based blending marker. The solvent, wax, or vegetable oil then dissolves the binder in the colored pencil layer and fluidly releases the pigment. This will also help to “fill in” the dots of the tooth of the paper and make the color appear denser.
Step 5: Continue to intensify the color by using a non-pigmented blending pencil over a previous layer and repeat a layer or two of color, much like a “color sandwich.” Repeat this “ burnishing “ process for subsequent layerings of color, like a double-decker or triple-decker sandwich.
Also, make sure the rich, dark negative space is carried out the same way, layering colors and burnishing, then repeating the colors for deep, rich saturation.
Render the deep, smeary flecks of pollen by heavily applying “freckles” of burgundy, then slightly smudge them with the tip of a blending marker. Lastly, scratch a few of the tiny wisps of fuzz on the pod and stem carefully into the board via a sharp X-acto knife for a striking contrast of light against the deep background.
Part 2 Cartoon Easy Sketch Drawing Step by Step
This is the initial stage of the drawing process. It requires you to create an outline of the concept you want to draw before adding color. However, it is also referred to as a technique in shading. For example, if you’re going to sketch a cherry fruit, there are a few things to note here.
Try not to look at the cherry as a whole but look at its shapes and name them. This way, you are looking at the parts to the whole and not the entire piece.
Step 1: Draw two overlapping circles and draw two curved lines from each of the circles.
Step 2: Make a small rectangle at the top to join the two stems and draw a second set of curved lines.
Step 3: Draw thick lines inside the rectangle for the bumps and darken the lines and use your finger to smudge them a bit for the shaded effect.
Step 4: Draw a curved line from the stem on the right to the circle’s edge to create the bump.
Step 5: Holding your pencil at an angle, make light strokes going across the front of both cherries. Take note of the places where there is no light. This is where the light source is hitting the cherry the most.
Step 6: To darken, a shade over those places again, keep layering the shading technique until you get the effect you see on the cherries.
Step 7: Use the same technique to shade under the cherries, but use your finger to smudge it to smoother the shadow.
●Bonus:
You can add color, effect, or animate to your cartoon character drawing by using Wondershare Filmora Video Editor , the best editor on the internet. Filmora is a free software program with the same creating abilities and imaging editing similar to Adobe Illustrator. It is open software that runs on various programs, such as Windows, Mac, and Linux. Please get to know more about this exclusive tool from Wondershare on their official website.
For Win 7 or later (64-bit)
For macOS 10.12 or later
● Ending Thoughts →
● A step-by-step guide on drawing easy cartoons for painting and how to sketch your drawing correctly.
● Cartoon character drawings in easy and quick steps.
● Easy cartoon drawing for beginners.
● Lastly, to add color to your drawing, use Filmora software.
● So, use the tips and tricks to make your presentation’s best cartoon characters come alive and be a pro with Filmora.
Ways to Get the Most up to Date Cartoon Character Design Tips
Ways to Make Sure You Get the Most up to Date Cartoon Character Design Tips
An easy yet powerful editor
Numerous effects to choose from
Detailed tutorials provided by the official channel
Making an overall excellent and unique character design cartoon art style is sometimes hard. The truth is that everyone has a favorite cartoon character, but the question is, how does this character come to life? While you are about to start copying other well-known cartoon or comic characters, you will eventually branch out and come with your own. In addition, there are several ways to come up with ideas for cartoon characters’ concept art to draw. Any of these ways can get you started on populating your world of cartoons.
More so, the process of tackling your character design is often full of hurdles. This process requires a lot of creative thinking to create one’s character from the beginning, although many well-known characters from films, advertising, and cartoons look straightforward. But need to exert a vast amount of skill and effort to make them effective.
In this article
01 [10 Tips for Brilliant Cartoon Character Design](#Part 1)
02 [How to Apply Cartoon Character Design to Filmora Video Editing?](#Part 2)
Part 1 Tips for Brilliant Cartoon Character Design
As a cartoon character designer, here are 10 tips you need to put in place to make a brilliant cartoon character design. They are;
● Do not lose the magic
Make sure you try not to polish all the charm from your characters. Many character designers usually begin their project with a sketch and agree that this is often where the essence of the character gets captured. Therefore, when you start working up a design, make sure you do not lose that magic.
The first thing is to decide what you are trying to communicate and then create loose sketches with flow, acting, and movement. As soon as you tighten up the drawing, some of the dynamics will automatically loosen, so it is crucial to have as much life in the early stages as possible. In addition, movement is all but impossible to add later. Thus, you need to ensure that it is in the initial sketch.
● Avoid reference material
Although inspiration needs to come from somewhere, the aim is to create something original, and you shouldn’t have the reference material right in front of you as you work.
Also, if you take a look at something and when you try and hazily remember it in your mind, that is when you can end up making something new, rather than making a pastiche of something.
● Make research on other characters
For guidance purposes, it can be much help when you try to deconstruct why certain character designs work and why some do not work. Also, there is no shortage of research material to be found, as illustrated characters are appearing everywhere like stickers on fruit, TV commercials, shop signs, cereal boxes, animations on mobile phones, etc. Make sure you study these character designs and think about what makes some successful and the particular thing you like about them.
● Also, take a look elsewhere
It is also a great idea to look beyond some character designs when hunting for inspiration because most times, when you begin a project, you might start with the feeling to evoke. The process usually starts with the designer taking a video of himself as a reference and capturing something of the character’s posture or idea’s movement.
● Try not to lose sight of the original idea
It is elementary to allow your favorite designs to influence you subconsciously. Sometimes when you look back at your initial artworks, it will bring back the feeling you had when you were creating them, and the project you are trying to develop will shift back on track.
● Exaggerate
When you exaggerate the defining features of your character design, it will help it appear larger than real life. Also, exaggerated features help viewers identify the characters’ essential qualities. Exaggeration is key in cartoon caricatures and also helps emphasize certain personality traits. In addition, if your character is strong, try not to give it normal-sized bulging arms, but soup them up so that they are five times as big as they should be. Note that the technique of exaggeration can also apply to characteristics.
● Decide the aim of your character design
When creating a character design, consider your audience as character designs mainly aim at young children, typically designed around bright colors and basic shapes. Also, commissioned character designs are no less creative but are usually more restrictive. Most clients usually have specific needs but want you to do your ‘thing.’ Usually, you need to break down the core features and personality. For example, if the eyes are essential, you will focus the whole design around the face, making this the key element that stands out.
● Make your character distinctive
Whether you are creating a monkey, monster, or robot, you can guarantee that there will be a hundred other similar creations out there. Therefore, your character design is required to be exciting and robust in a visual sense to captivate people’s attention.
● Create clear silhouettes
A silhouette is required to help you understand the character’s gesture which is another good way to differentiate your character and improve its pose. This lets you see how the character ‘reads’ and requires you to make the gesture clearer. It answers the question of; can things be simplified? Do you have a basic understanding of character, emotions, and how the line of action works? In addition, try not to overlap everything and keep the limbs separately.
● Consider line quality
Finally, curved and straight curved lines read by your eyes are at different speeds. The lines drawn are from which your character design is composed can go some way to describing it. Soft, thick, round, and even lines may suggest acute and approachable character, whereas sharp, uneven, scratchy lines may indicate an erratic and uneasy character.
Part 3 How to Apply Cartoon Character Design to Filmora Video Editing?
You can cartoon your character background design in your Video Editing turn a video into a cartoon depending on your device. If you are working on your mobile phone, then you can convert any number of your social media accounts that include film or photos to some degree. The detail or performance level will not be great most of the time.
But if you wish to do it professionally using your PC, then the best video to the cartoon software program for both Windows and Mac is Filmora. Filmora is the best software to convert video to a Cartoon background easily. It will enable you the requisite tools that will act as the right approach to create cartoon characters with appropriate locations and video.
The Wondershare Filmora Video Editor professional video editing software allows you to turn your videos into cartoons easily. The process by which videos get converted into cartoon style on Filmora is straightforward.
Step 1: Import the videos into Filmora
From the official website of Filmora, you will get the link to download, install and launch. Then from the main interface, import your video to it.
Step 2: Add the Cartoon effect under Stylize
You can add different effects or use the Stylize animation effects to your cartoon character.
Step 3: Adjust the cartoon settings and do some basic color corrections to perfect the cartoon result.
Go through different settings to provide the exemplary cartoon character, its background, and full-fledged video edited with Filmora.
For Win 7 or later (64-bit)
For macOS 10.12 or later
● Ending Thoughts →
● This article explained all you require to get the most up-to-date cartoon character design tips. A section of the report gave a list of the information you need to put in place to achieve this. Another area recommended the best video to cartoon editing tools used by cartoon character designers to get the most out of their character design.
● Also, Filmora acts as the right tool to cover up all the necessary editing you might need to create your cartoon character with related background and artistic pieces of equipment.
Popular Female & Male Disney Cartoon Characters To Empower You
Popular Female & Male Disney Cartoon Characters To Empower You
An easy yet powerful editor
Numerous effects to choose from
Detailed tutorials provided by the official channel
Making your Disney cartoons is easy with various applications. Learn about cute Disney princess cartoon characters. See new look of old Disney characters.
Cartoon characters are not only favorite to the small age group kids or toddlers, but they are loved by the elders also. We all have grown up watching our favorite cartoon characters like Cinderella, Jasmine-Aladdin, tom-jerry and snow white. These cartoon characters have been like a friend to the kids at their growing ages. Most of the Disney channel cartoon characters are known for their courage, strength, intelligence and many other attributes. These characters help the kids to learn so many things along with fun.
In this article
01 [Top Pick for the Cutest Female Disney Characters](#Part 1)
02 [The 5 Hottest Disney Animated Men](#Part 2)
03 [Is It Possible to Use Disney Cartoon Material in Filmora?](#Part 3)
Part 1 Top Pick for the Cutest Female Disney Characters
No doubt HD techniques and animations have brought some new and amazing cartoon characters that can make anyone fall in love with them. But the craziness of kids for old cartoon characters has not changed yet. You or your kid may not be familiar with all characters of cartoon world, so here is a compilation of some of the best and well-known cartoon characters in both male and female characters. Let**’**s see first female disney cartoon characters:
01Elsa-Frozen
Voice actor: Idina Menzel
Film’s Year of Release: 2013
Imdb Ratings: 6.8/10
Character Story Description: Elsa is one of the beautiful and strongest characters of Disney. The specialty of this cute character is that she can freeze anything and make ice. Not only pretty but she is also good at heart. The only thing which makes her different is that she cannot control her power, so she needs to be away from people. Her sister helps her to get back to normal state.
02Jasmine – Aladdin
Voice actor: Mena Massoud
Film’s Year of Release: 2019
Imdb Ratings: 6.9/10
Character Story Description: If Aladdin is favorite character of boys, Jasmine is adored by girls. Although from a royal family, she loves to do silly things that make her happy. Small girls love to dress up like Jasmine and act like her. She is no doubt a beautiful female Disney cartoon character.
033. Belle – The Beauty and the Beast
Voice actor: Emma Watson
Film’s Year of Release: 2017
Imdb Ratings: 7.1/10
Character Story Description: Belle is a sweet gild and fond of books. Being a simple and kind hearted does not make her weak and it**’**s not like she cannot protect herself. In the movie Gaston tries to be flirty with her, but she remained strong and kept him away from the home number of times. She always sees the good nature of a person than the appearance of a person.
04Snow White – Snow White and the Seven Dwarves
Voice actor: Adriana Caselotti
Film’s Year of Release: 1938
Imdb Ratings: 7.6/10
Character Story Description: Snow white is the first princess cartoon character from Disney that appears on the big screen. As her name suggest she is as beautiful like snow. But she has a bad step mother who hates her and tries to mess all the things related to snow white. The story is about how snow white gets a way to be free from her step mother and live happily ever.
05Helen Parr – The Incredibles
Voice actor: Holly Hunter
Film’s Year of Release: 2004
Imdb Ratings: 8.1/10
Character Story Description: Helen Parr in the movie has super power to be elastic as she wants. She can change her body shape to anything as she desires. She is having a special and powerful suit that she wears while fighting with the other supers. She is also known as Mrs. Incredible. Eventually her suit gets damages but she gets it back and once again becomes a super power**.**
Part 2 The 5 Hottest Disney Animated Men
Male Disney cartoon characters have varieties like some of them are king, while some are the super heroes and some are cute to be loved. With the changing trend of the cartoon world, kids are more inclined to super heroes and marvel heroes. But we have some of the top old Disney cartoon characters along with some new ones. Here is the list.
01Simba- The Lion King
Voice actor: Mathew Broderick
Film’s Year of Release: 1994
Imdb Ratings: 1/10
Character Story Description: Simba was the main character of the movie, which left the kingdom of his father thinking that he is the reason for his father death. The misconception of his father death was created by a bad character in the story called Uncle Scar. However, Nala, a popular cartoon character inside the movie encouraged Simba to return back and conquer the kingdom.
02Prince Eric- The Little Mermaid
Voice actor: Christopher Daniel Barnes
Film’s Year of Release: 1989
Imdb Ratings: 6/10
Character Story Description: Prince Eric is one of the sweetest cartoon characters of Disney. The movie narrates a story of mermaid who wishes to live her life with human and falls in love with Prince Eric. Eric is handsome and charming guy. He is unaware about the mysteries of sea world. His life chances when he was saved by mermaid Ariel in a storm. It**’**s all about how they fall in love with each other.
03Aladdin- Aladdin
Voice actor: Scott Weinger
Film’s Year of Release: 1992
Imdb Ratings: 8/10
Character Story Description: Aladdin is probably one of the cute disney cartoon characters. His charming smile makes him more attractive. The way he handles the adverse situations makes him a great hero. He inspires the people from his deeds. He has a magical lamp called genie that fulfill his wishes. He tries to impress the princess Jasmine and at last marries her.
04Hercules
Voice actor: Tate Donovan
Film’s Year of Release: 1997
Imdb Ratings: 3/10
Character Story Description: Hercules is a cartoon character with good physical structure. The way he reaches Mount Olympus is inspirational for the kids. Hercules is son of God, but he was taken away by Hades and was living a life of half god and half man. He is a strong man and fights with evil creatures in the earth.
05Tarzan-Tarzan
Voice actor: Tony Goldwyn
Film’s Year of Release: 1999
Imdb Ratings: 3/10
Character Story Description: The character of Tarzan is more like a Jungle man. He is an orphan, spend his childhood in jungle. His life turned when he moved away from jungle. He struggled to live a normal life. The story of this cartoon character is inspiring and motivates others. This character is so memorable and lovable.
Part 3 Is It Possible to Use Disney Cartoon Material in Wondershare Filmora Video Editor ?
For Win 7 or later (64-bit)
For macOS 10.12 or later
Now the kids of present time not only enjoy watching the cartoon characters but they love to draw them also. One can easily learn Disney cartoon characters to draw in simple and easy steps. There are number of applications which can be used to learn drawing your favorite Disney Cartoons. One of them is Filmora. Let**’**s know about it.
Introduction & Description: Filmora is amazing software used for making pictures, videos, animated pictures and video editing. It is a good application and software for those who love creativity. This software is very helpful in film making and performing necessary editing works. One can not only create pictures and videos but can also add special effects in them. The application can be easily downloaded and can be run on phones as well as personal computers. Trail version of the application can help the beginners to know more about the application and how useful it is.
Filmora can also be used for Disney cartoon characters drawing. There are various ways one can learn to draw Disney or other cartoon characters. Some of them are Cartoon Character Sketches, Drawing cartoons with colors and Disney cartoon characters drawing. Among all Disney cartoon drawing are the simplest and easy to learn as it uses only geometric shapes. Those who are beginners, they can start drawing Walt Disney cartoon characters from this application.
● Ending Thoughts →
● Cartoon characters are the most fascinating part of any person. They grow and get inspire with those cartoon characters. Although there are many cartoon characters, but disney cartoon characters names are always on the top of people favorite list. They are loved by everyone.
● The Disney cartoon characters are categorized into male and female characters. Disney princess cartoon characters and superheroes are some of the best one from Disney house. Some of female Disney cartoon characters are Elsa from Frozen, Jasmine from Aladin, Belle from The Beauty and the Beast and Helen Parr from The Incredibles. The best male animated cartoons Simba from the Lion King, Tarzan from the movie Tarzan and Aladdin.
● Filmora can be the best platform to learn and draw cartoons. The Disney cartoon characters can be used as a material for creating some amazing pictures and videos. One can easily download the application and learn to draw cartoon characters with free Video Tutorials.
How to Make Whiteboard Animation Videos
Whiteboard animation simply refers to the process of story telling using pictures and drawn resources on a whiteboard or a plane white surface. Its simply the creation of conventional story telling procedure where text, images, diagrams, figures, etc are drawn onto a white surface.
Whiteboard animation video usually work with audio, visual and most times a combination of both audio and visual to sell a particular information to the audience. Another name it has gotten over time which you may come across while surfing the internet is doodle videos.

In creating this type of videos, script writes are usually employed because of the dynamics involved in creating them. The major users of whiteboard animation video are business owners and people in the education fields. Other people make use of it but these two groups are the major users.
Whiteboard animation is important because it helps viewers remember the contents of what they watched better than looking at an image that contains a lot of information that may not always be organized.
Over time, whiteboard videos have become a more compelling and innovative method of dissemination information. They work so well because it’s a more relatable and fun way of making videos. It goes outside the conventional video making techniques and employs the animation standards which is fun to watch, engaging and still maintains the ability to effective pass the required information to the viewers.
Also, it uses a unique style to mix text, animations, and colors to drive the point home. Viewers are usually glued to their screen while watching it. The usual white background equally makes the information being displayed to effective contrast with each other. However, there is a recent movement from the usual white background to any color of choice while still maintaining the contrasting quality of the videos.
Finally, people tend to remember events or information if they are told as stories. This is one of the major objectives of whiteboard animation videos. They use graphics and animations to tell stories, sell products and services while maintaining the fun in it.
Whiteboard animation video usually takes time to create. Its not always as easy as it may seem. It takes dedication and patience before you perfect the video. if you’re new to this, its ok to not have that perfect video immediately. What matters is your will to grow and get better.
Below is an example of a whiteboard animation video created using Animaker. We’ll still look at the various software applications used for creating whiteboard animation videos.
How to Create Your Video
Step1 The first step to creating your whiteboard animation video is to know your topic of choice. Determining your choice topic is based on the purpose of the video. You have to know the reason why the video is being created in the first place to enable you decide the contents, the outlook, the font style and size and the colors to use.
Step2 The next step after you’ve getting your topic is execution of the idea. This involves having a script which usually involves the step-by-step procedure you are to follow to achieve your goal. Writing the script is arguable the most difficult process. However, once you get it right, all the other processes become relatively easy to execute. You might need to employ a professional script writer depending on your budget for the project.
Step3 After that, the next thing is to deicide whether or not to use your own voice or computer voice. This is also called a voice over. Most software provides a text to speech voice over option which usually comes with various alternatives. There is also another option of using your own voice to finish the project.
Step4 Add text, graphics and animation. This step is usually easier when you are working with the script already provided. You include the text, animations, figures, etc. sometimes you might need to import additional resources to complete this task. However, not all software provides for this.
Step5 Organize your work. In organizing your work, you must ensure that you voice over matches properly with what is on display. Check your spellings, grammar, composition and other ‘little’ details that may give your work a bad look.
Step6 Save your work and export. Once your done with your work, you have to save it on your local disk. This also means downloading the work from the website or software onto a local disk. You can now share the video on any social media of your choice. The most popular place to share it is on YouTube which is the most widely used video watching application.
Top 3 Whiteboard Animation Software
When considering which software is best for whiteboard animation creation needs, the most important factor to have at the back of your mind is flexibility and cost. Some software are really flexible to use but cost more than many people can afford. Others are cheap to purchase but do not have all the necessary resources needed to make a great video.
We’ll be looking at various software that combines cost effectiveness and flexibility. Note however that this list is not exhaustive of the software that combines these two features but are worthy of mention for the purpose of this article.
Filmora
At the top of our list is Filmora . This does not make them the best. However, they are relatively easy to use and have a combination of the two features mentioned above. Finally on our list is Filmora. This software offers much more than just whiteboard animation. It’s your go-to software for your video creation and video editing needs. One of the best parts of this software is that it supports 2D and 3D animation.

Free Download For Win 7 or later(64-bit)
Free Download For macOS 10.14 or later
Animaker
It has a lot of free resources which are made available to users after creating and account with them and verifying your email. However, like most other software, the juicy parts of it are locked and can be unlocked with a monthly or yearly subscription. They are 3 packages; Basic which cost $10 per month and $120 per year, starter package which cost $19 per month and $228 per year and the pro package which costs $49 per month and $588 per year.

This software is at the top of our list because the free resources it provides is adequate to make a decent whiteboard animation. Note that it comes with their watermark which cannot be removed without a paid subscription.
Doodly
Doodly is one of the most popular software applications for creating whiteboard videos. Its popularity comes from the fact that no prior skills is needed to use the software other than basic computer and internet usage. A lot of processes are already automated for users. If you’re a user that is concerned about quick responses from their customer care/support, doodly covers you. They have a record time response to issues from their users. Visit https://www.doodly.com/pricing/ to view their pricing.

Conclusion
If you’re wondering why you should chose whiteboard animation over the conventional video creating technique, then you should probably try it out. Animation easily captures the interest of viewers and the slide-by-slide transitioning equally makes it better. You can always try out other software applications to know the one that fits you best.
How to Create Your Video
Step1 The first step to creating your whiteboard animation video is to know your topic of choice. Determining your choice topic is based on the purpose of the video. You have to know the reason why the video is being created in the first place to enable you decide the contents, the outlook, the font style and size and the colors to use.
Step2 The next step after you’ve getting your topic is execution of the idea. This involves having a script which usually involves the step-by-step procedure you are to follow to achieve your goal. Writing the script is arguable the most difficult process. However, once you get it right, all the other processes become relatively easy to execute. You might need to employ a professional script writer depending on your budget for the project.
Step3 After that, the next thing is to deicide whether or not to use your own voice or computer voice. This is also called a voice over. Most software provides a text to speech voice over option which usually comes with various alternatives. There is also another option of using your own voice to finish the project.
Step4 Add text, graphics and animation. This step is usually easier when you are working with the script already provided. You include the text, animations, figures, etc. sometimes you might need to import additional resources to complete this task. However, not all software provides for this.
Step5 Organize your work. In organizing your work, you must ensure that you voice over matches properly with what is on display. Check your spellings, grammar, composition and other ‘little’ details that may give your work a bad look.
Step6 Save your work and export. Once your done with your work, you have to save it on your local disk. This also means downloading the work from the website or software onto a local disk. You can now share the video on any social media of your choice. The most popular place to share it is on YouTube which is the most widely used video watching application.
Top 3 Whiteboard Animation Software
When considering which software is best for whiteboard animation creation needs, the most important factor to have at the back of your mind is flexibility and cost. Some software are really flexible to use but cost more than many people can afford. Others are cheap to purchase but do not have all the necessary resources needed to make a great video.
We’ll be looking at various software that combines cost effectiveness and flexibility. Note however that this list is not exhaustive of the software that combines these two features but are worthy of mention for the purpose of this article.
Filmora
At the top of our list is Filmora . This does not make them the best. However, they are relatively easy to use and have a combination of the two features mentioned above. Finally on our list is Filmora. This software offers much more than just whiteboard animation. It’s your go-to software for your video creation and video editing needs. One of the best parts of this software is that it supports 2D and 3D animation.
Free Download For Win 7 or later(64-bit)
Free Download For macOS 10.14 or later
Animaker
It has a lot of free resources which are made available to users after creating and account with them and verifying your email. However, like most other software, the juicy parts of it are locked and can be unlocked with a monthly or yearly subscription. They are 3 packages; Basic which cost $10 per month and $120 per year, starter package which cost $19 per month and $228 per year and the pro package which costs $49 per month and $588 per year.
This software is at the top of our list because the free resources it provides is adequate to make a decent whiteboard animation. Note that it comes with their watermark which cannot be removed without a paid subscription.
Doodly
Doodly is one of the most popular software applications for creating whiteboard videos. Its popularity comes from the fact that no prior skills is needed to use the software other than basic computer and internet usage. A lot of processes are already automated for users. If you’re a user that is concerned about quick responses from their customer care/support, doodly covers you. They have a record time response to issues from their users. Visit https://www.doodly.com/pricing/ to view their pricing.
Conclusion
If you’re wondering why you should chose whiteboard animation over the conventional video creating technique, then you should probably try it out. Animation easily captures the interest of viewers and the slide-by-slide transitioning equally makes it better. You can always try out other software applications to know the one that fits you best.
Ideas That Will Help You Out in Learning How to Send WhatsApp Animated Gifs
Ideas That Will Help You Out in Learning How to Send WhatsApp Animated Gifs
An easy yet powerful editor
Numerous effects to choose from
Detailed tutorials provided by the official channel
While chatting on WhatsApp, expressing your thoughts, suggestions, and situations become easier if assisted with some animations and for this GIFs are available.

So, if you too are keen to try these animated images but clueless about how to use them, we are here to help you. Learn about different ways to send WhatsApp animated GIFs in the following parts.
In this article
01 [How to send WhatsApp GIF using Integrated library](#Part 1)
02 [How to send GIF Stored on your device](#Part 2)
03 [How to create WhatsApp GIF using videos](#Part 3)
04 [Best tool for creating interesting GIFs in a hassle-free manner- Wondershare Filmora](#Part 4)
Part 1 How to send WhatsApp GIF using Integrated library
The WhatsApp feature on your iPhone as well as Android devices comes integrated with a GIF library powered by Tenor that allows you to search for GIFs using desired keywords. The steps to send GIFs through the method for both iPhone, as well as Android, are almost the same.
Step 1. Open WhatsApp and select the contact or the group chat to whom you wish to send the GIF.
On your Android phone, click on the smiley emoji at the input section and then choose GIF at the bottom of the screen. A sample of GIF will appear. On your iPhone, you need to click on the sticker icon to launch GIF options.
Step 2. Enter the desired keyword at the search icon to look out for a more specific GIF.
Step 3. Tap on the selected GIF and then if needed add a caption as well.
Step 4. Finally, click on the Send icon to share the GIF to the chat.
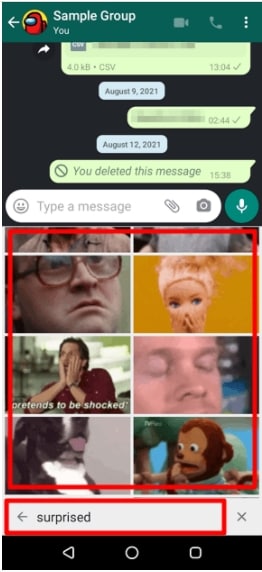
Part 2 How to send GIF Stored on your device
Several third-party apps can let you create GIFs as needed. Moreover, you can also download these animations from online sites to your device.
Once you have done WhatsApp animated GIF download to your device, these GIF files can be sent on WhatsApp by attaching them like any other image or video.
Step 1. Launch WhatsApp and select the desired contact. Click on the attach or gallery icon at the input area to browse and add the saved GIF.
Note: The size of the GIF has to be less than 16MB.
Step 2. Add a caption if needed.
Step 3. Click on the Send icon.
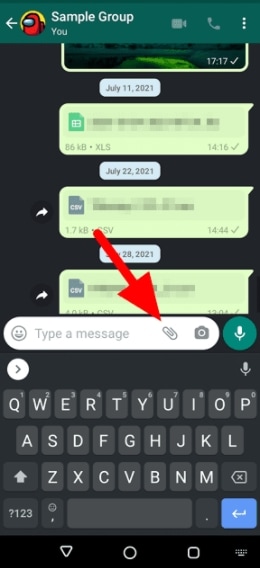
Part 3 How to create WhatsApp GIF using videos
Another way is by creating GIFs using the videos on your device. The videos to be shared as GIF has to be less than 6 seconds and thus the longer videos need to be trimmed.
Steps to create WhatsApp GIF using videos
Step 1. Launch the WhatsApp chat to which you want to send the GIF. Click on the gallery icon to browse and add the video from the device. Alternatively, you can also record a video to be used as GIF.
Step 2. After the video is added, trim it under 6 seconds using the slider at the top. Add the caption or other available elements if needed.
Step 3. Click on the GIF button and then tap on the Send icon.
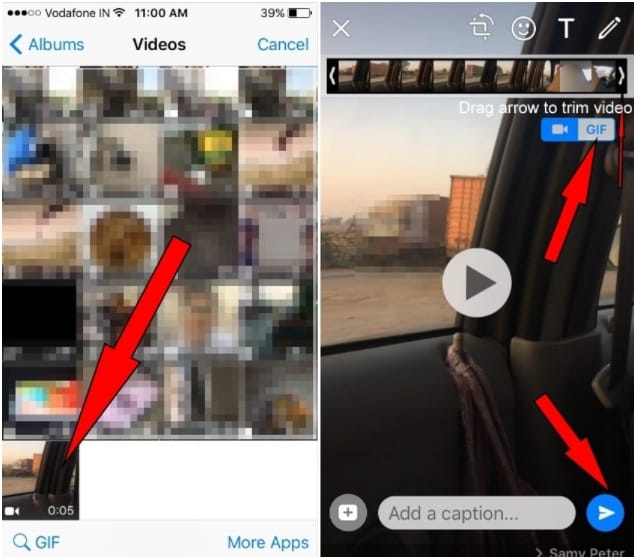
Part 4 Best tool for creating interesting GIFs in a hassle-free manner- Wondershare Filmora
Above we have mentioned in part 2 that there are several third-party apps available that can be used for creating GIFs. Among the myriad of options available, we suggest Wondershare Filmora Video Editor owing to its user-friendly interface and fast processing.
Wondershare Filmora
Get started easily with Filmora’s powerful performance, intuitive interface, and countless effects!
Try It Free Try It Free Try It Free Learn More >

Using the software, you can quickly create animated GIF stickers for WhatsApp using images and videos in all key formats. Several elements to further pep up your animations can be added like text, sound, effects, and more. Additionally, you can even edit the added media files using features like rotate, split, trim, speed-up, speed-down, and more.
Once installed on your Windows or Mac devices, Wondershare Filmora works as a complete video editing tool.
Steps to create Animated WhatsApp GIF using Wondershare Filmora
Step 1. Run the software on your system, browse and import the images and videos from which animations have to be created.
Step 2. Next, drag and move the media files to the timeline of the tool.
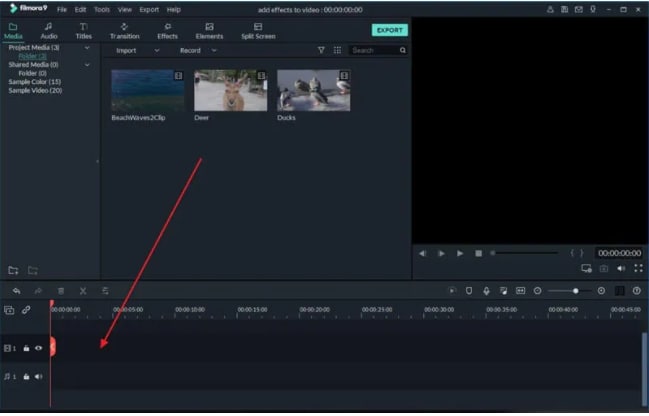
Step 3. Next, add effects, text, and other elements as needed..
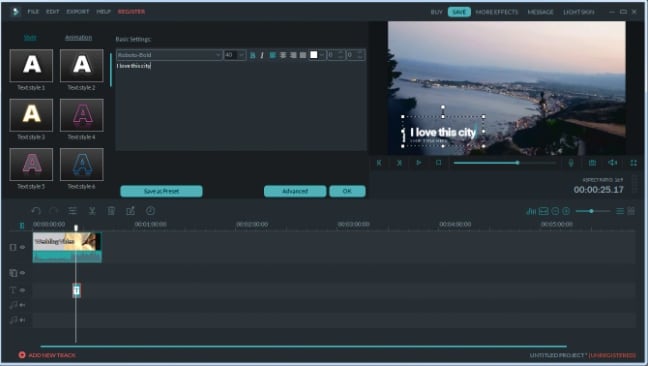
Step 4. At the Local section, save the created media file as GIF. Give the desired name and then select the desktop location. Click on the EXPORT button to start processing.
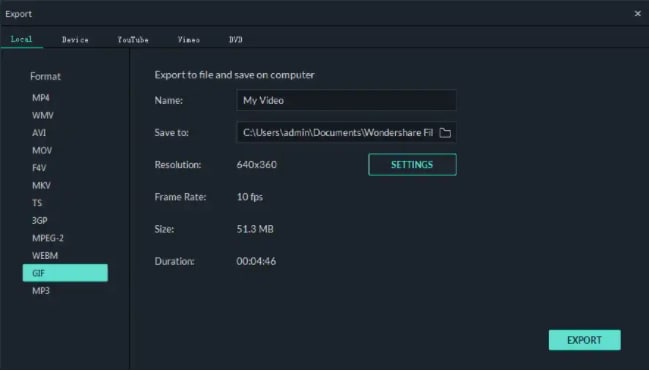
● Key Takeaways from This Episode →
●WhatsApp GIFs on your phone can be sent by either searching them from the integrated library or using the ones saved to your device.
●GIFs can also be created using videos.
●Wondershare Filmora is the best third-party app for effortlessly creating impressing GIFs.
While chatting on WhatsApp, expressing your thoughts, suggestions, and situations become easier if assisted with some animations and for this GIFs are available.
So, if you too are keen to try these animated images but clueless about how to use them, we are here to help you. Learn about different ways to send WhatsApp animated GIFs in the following parts.
In this article
01 [How to send WhatsApp GIF using Integrated library](#Part 1)
02 [How to send GIF Stored on your device](#Part 2)
03 [How to create WhatsApp GIF using videos](#Part 3)
04 [Best tool for creating interesting GIFs in a hassle-free manner- Wondershare Filmora](#Part 4)
Part 1 How to send WhatsApp GIF using Integrated library
The WhatsApp feature on your iPhone as well as Android devices comes integrated with a GIF library powered by Tenor that allows you to search for GIFs using desired keywords. The steps to send GIFs through the method for both iPhone, as well as Android, are almost the same.
Step 1. Open WhatsApp and select the contact or the group chat to whom you wish to send the GIF.
On your Android phone, click on the smiley emoji at the input section and then choose GIF at the bottom of the screen. A sample of GIF will appear. On your iPhone, you need to click on the sticker icon to launch GIF options.
Step 2. Enter the desired keyword at the search icon to look out for a more specific GIF.
Step 3. Tap on the selected GIF and then if needed add a caption as well.
Step 4. Finally, click on the Send icon to share the GIF to the chat.
Part 2 How to send GIF Stored on your device
Several third-party apps can let you create GIFs as needed. Moreover, you can also download these animations from online sites to your device.
Once you have done WhatsApp animated GIF download to your device, these GIF files can be sent on WhatsApp by attaching them like any other image or video.
Step 1. Launch WhatsApp and select the desired contact. Click on the attach or gallery icon at the input area to browse and add the saved GIF.
Note: The size of the GIF has to be less than 16MB.
Step 2. Add a caption if needed.
Step 3. Click on the Send icon.
Part 3 How to create WhatsApp GIF using videos
Another way is by creating GIFs using the videos on your device. The videos to be shared as GIF has to be less than 6 seconds and thus the longer videos need to be trimmed.
Steps to create WhatsApp GIF using videos
Step 1. Launch the WhatsApp chat to which you want to send the GIF. Click on the gallery icon to browse and add the video from the device. Alternatively, you can also record a video to be used as GIF.
Step 2. After the video is added, trim it under 6 seconds using the slider at the top. Add the caption or other available elements if needed.
Step 3. Click on the GIF button and then tap on the Send icon.
Part 4 Best tool for creating interesting GIFs in a hassle-free manner- Wondershare Filmora
Above we have mentioned in part 2 that there are several third-party apps available that can be used for creating GIFs. Among the myriad of options available, we suggest Wondershare Filmora Video Editor owing to its user-friendly interface and fast processing.
Wondershare Filmora
Get started easily with Filmora’s powerful performance, intuitive interface, and countless effects!
Try It Free Try It Free Try It Free Learn More >
Using the software, you can quickly create animated GIF stickers for WhatsApp using images and videos in all key formats. Several elements to further pep up your animations can be added like text, sound, effects, and more. Additionally, you can even edit the added media files using features like rotate, split, trim, speed-up, speed-down, and more.
Once installed on your Windows or Mac devices, Wondershare Filmora works as a complete video editing tool.
Steps to create Animated WhatsApp GIF using Wondershare Filmora
Step 1. Run the software on your system, browse and import the images and videos from which animations have to be created.
Step 2. Next, drag and move the media files to the timeline of the tool.
Step 3. Next, add effects, text, and other elements as needed..
Step 4. At the Local section, save the created media file as GIF. Give the desired name and then select the desktop location. Click on the EXPORT button to start processing.
● Key Takeaways from This Episode →
●WhatsApp GIFs on your phone can be sent by either searching them from the integrated library or using the ones saved to your device.
●GIFs can also be created using videos.
●Wondershare Filmora is the best third-party app for effortlessly creating impressing GIFs.
15 Best Stop Motion Animation Kits to Fuel Creativity
15 Best Stop Motion Animation Kits to Fuel Creativity (2024 Guide)
An easy yet powerful editor
Numerous effects to choose from
Detailed tutorials provided by the official channel
Stop motion animation is becoming more famous by the year, and it’s not even a surprising thing. Creating animated films takes objects, either soft clay items or dolls with joints, and manipulates them.
If you wish to make this type of animation, then you want to find the best Stop Motion Animation Kits that you can find. Some options out there are even free. This article will share the eight best options for stop motion animation software, separating them by whether they are for Macs or PC.
In this article
01 [15 Best Stop Motion Animation Kits](#Part 1)
02 [How to Pick the Best Animation Kits for Kids?](#Part 2)
Part 1 15 Best Stop Motion Animation Kits
After introducing you to the concept of Stop Motion Animation Kits, we’ve gathered a list of the top Stop Motion Animation Kits that best suits the kids as follows:
01Hue Animation Studio
The Hue Animation Studio kit is unique because it can be helpful with any clay or toys you may have. The equipment is ideal for animations featuring anything from Playmobil toys, Lego, or even clay animations.
Features
● The kit includes the guidebook,
● It includes a HUE HD USB camera with a microphone.
● The kit Consists of a license of Stop Motion Animation software.
● There’s a mini stage with a green screen and background.
● The system requirements are Windows or Mac OS 10.5+.
Pros
● Less learning curve
● With an HD camera
● Easy to create time-lapse videos and special effects
Cons
● Old-fashioned interface
● Not ideal for beginners
● Requires a license to buy
02LEGO Make Your Own Movie Activity Kit
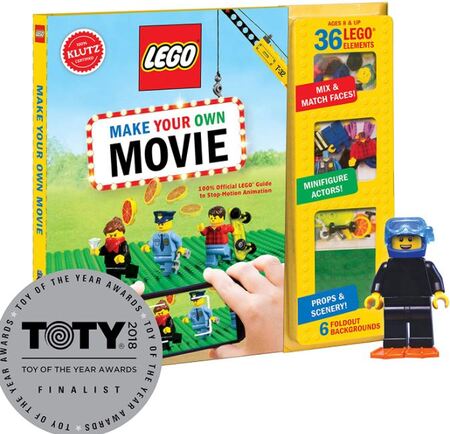
LEGO is one of the top players in the animation industry, and its Stop Motion Animation kit is phenomenal to the mark. The kit offers a complete guide to making your stop motion animations and includes several props and other goodies, as described in the Features below.
Features
● Includes an 8pages book to use while animating.
● It contains official LEGO props and Minifigures.
● You get punch-out animation frames.
● It involves foldout paper backgrounds.
● Best applicable to kids above eight years.
Pros
● Good for beginners
● Great accessories
● Informative book
Cons
● Only basics in the book
● Not all the accessories are there
● No app available
03I Can Animate It Studio
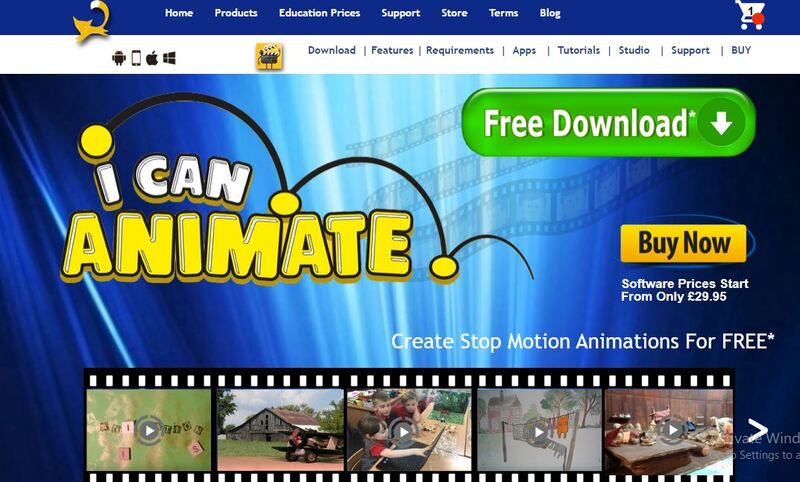
I Can Animate It Studio is another Stop Motion Animation kit by Kudlian. However, the kit looks a little offbeat since it doesn’t come with a guide. However, Kudlian offers instructions and guidelines online to simplify the tasks.
Features
● This animation kit includes a separate webcam for shooting.
● It has an onion skin feature for getting the best results at animation.
● Involves an element to edit with a green screen.
● It also helps create stop-frame animation by creating drawings.
● Compatible with both Windows and Mac OS.
Pros
● Available as App
● Interactive user interface
● Easy to create cute videos
Cons
● Difficult to use the animator pack
● Slow processing
● May need to pay for premium Features
04ZuAnimation Kit

Zuis among the best stop motion animation kits developed by HUE’s initial software. And, it’s the kit that is already usual with kids. So, it generally means that it will involve less learning curve comparatively. And, it has some tiny Features which may leave all other toys in the category.
Features
● A lifetime software with two perpetual licenses.
● Includes a green screen for keying background.
● It Consists of an animation handbook to offer you fantastic tips and advice.
● It contains a webcam with a metal base.
● You get a modeling clay to design characters and a mini set to hold them.
Pros
● Good pack of sound effects, artwork, and more
● Interactive interface
● With animation handbook
Cons
● Some defects with cameras, so check them earlier
● Lack of video signals
● Limited animation Features
05Stop Motion Explosion Animation Kit
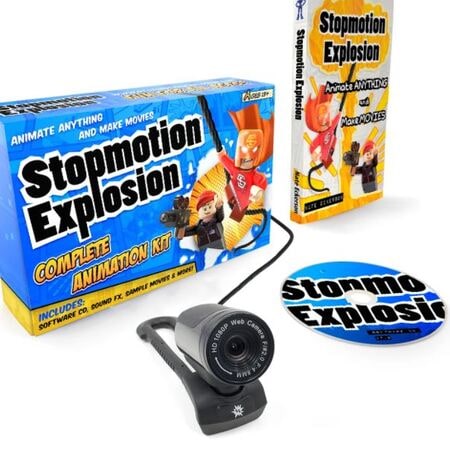
The Stop Motion Explosion complete HD stop motion animation is another rival in the industry for the big competitors playing out. The kit also contains an inbuilt microphone to record your audio. And, there’s a precious 29pages book included to provide you a lot. Let’s see more of its Features below.
Features
● It comes with an HD camera and flexible stand with a microphone and manual zoom control.
● It contains a CD with animation software.
● The kit involves a quick start guide.
● It includes lots of free tutorials.
● It Consists of a 29pages book with in-depth information.
Pros
● Interactive user interface
● Contains guided information book
● Lots of free tutorials
Cons
● Lack of fast processing
● Need to use the app alongside book
● High learning curve
06EyeThink BusyBody Animation Toy
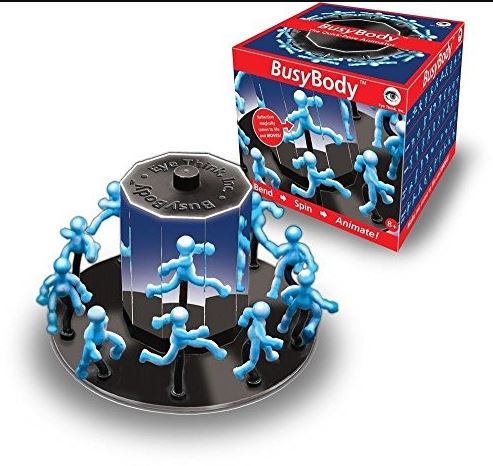
As the name also signifies, the kit is pretty different from other stop motion animation kits. It’s one of the coolest of its kind also occupied with the attention of Victorian children in the days gone by. The kit doesn’t include any camera. Instead, it works on the principle of ‘persistence of vision.’ Please scroll below to reveal more of its Features.
Features
● You will get a central snipping base with mirrors.
● It contains bendable figures for easy posing.
● It includes a complete hands-on stop motion animation kit without any complications.
● Includes instructions to give you detailed images on how to pose figures.
● Works on the principle of ‘persistence of vision’ without any camera.
Pros
● Easy to use with good accessibility
● Scalable to younger kids
● Works without a camera
Cons
● More of subjective task
● Maybe hard to understand
● A very different concept of animation
07OgoBild Animate It
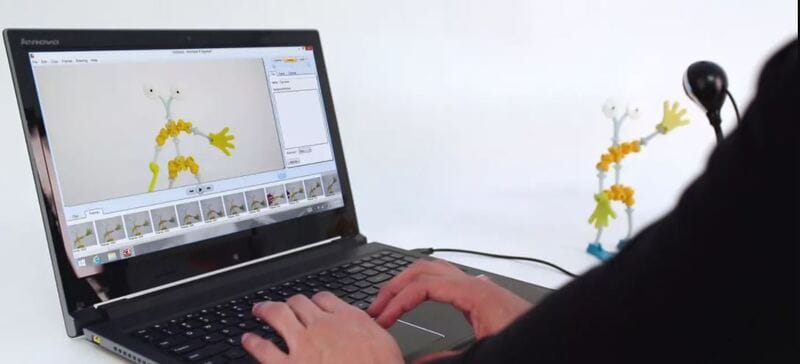
Brought to you from Gromet and Wallace’s creators, this is a super simple Stop Motion Animation kit. It includes hundreds of Construction pieces to begin with. Also, you will get a webcam and stop motion animation software ideally geared towards kids aged 8-years old.
Features
● Compatible with the Windows operating system.
● It contains a camera with an articulated stand to capture from better angles.
● It includes an easy upload to YouTube feature for social sharing.
Pros
● Good for social sharing
● Better accessories
● Ideal for beginners
Cons
● A pretty confusing interface
● Only compatible with Windows
● Slow processing software
08Dragonframe 5
Again, this stop-animation kit isn’t that fancy, but it can compete with all the rivals out there. It only contains Software, though, with a list of functions including Cinematography, Animation, vector-based drawings, and much more.
Features
● It includes Animation and Cinematography tools.
● It contains a frame-based timeline editor.
● Dragonframe 5 includes a lip-sync system for the best audio recording.
● It includes Motion Control and Vector-based drawing tools.
● This kit Consists of a configurable X-sheet.
Pros
● Lots of functions
● Not just a toy
● Friendly and effective to deal with.
Cons
● Too hard for the young kids
● Expensive
● Confusing interface
09VidBox Stop Motion Studio
VidBox Stop Motion Studio has similar software to Dragonframe but it is more suitable for younger kids. Well, you can readily go for this kit if you already have a camera. It also contains the option to upload creations to Facebook and YouTube directly.
Features
● It can create output in different formats, including WMV, MPEG HD resolution, etc.
● It contains an adjustable frame rate to control the video’s speed.
● The Chroma binding effect creates the best setting for the background.
● It includes DSLR camera support.
● It contains Image Editor, String Removal, and Overlay Frames tool to add special effects.
Pros
● It gives detailed instructions
● Too basic Features
● Difficult to handle toys
Cons
● Too much info is intimidating
● Slow process
● Some issues with the Chroma effect
10Animation Studio by Helen Piercy – A Book
As the name suggests, this stop motion studio book isby Helen Piercy, an animator with lots of experience in the field. You will also get all the required Features, such as editing the green screen and more. In addition, tutorials regarding and techniques on puppets are also in the kit.
Features
● You get a mini stage set.
● It involves a press-out puppet monster with movable parts.
● It contains storyboard samples and sheets.
● The book contains an engaging animation handbook.
● It Consists of a variety of press-out props.
Pros
● A highly informative book
● Contains easy to understand animation scenes
● Various and techniques
Cons
● Hard to understand info
● Only a book
● It cannot get you through real practical
11- Minecraft Stop Motion Animation Studio
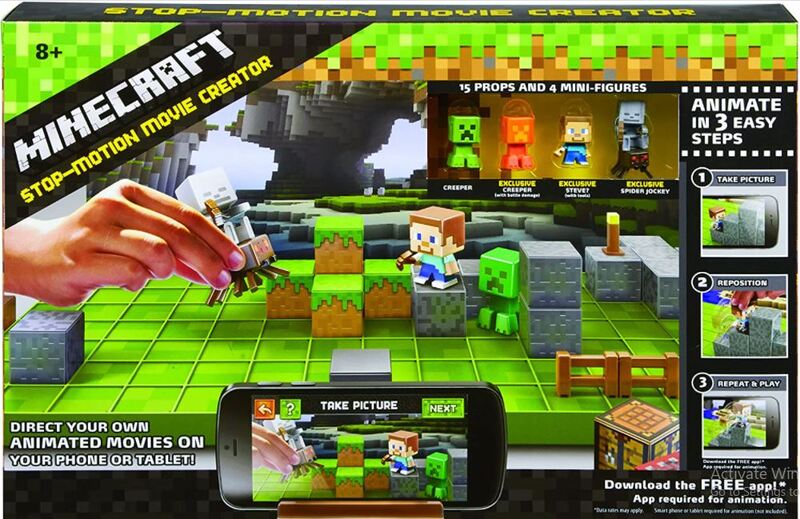
Though it seems usual to many kids out, there are valid reasons behind that. First, it is different from other Stop Motion Animation kits as it is available in an app rather than any software. Thus, you can use it on a tablet or phone and edit whatever you shoot.
Features
● It includes a variety of props.
● It contains six different backgrounds.
● This kit involves one movie stage.
● It Consists of a device holder.
● Minecraft contains 1additional accessories.
Pros
● No need of a powerful PC
● Lots of accessories
● With different backgrounds
Cons
● The app contains compatibility issues
● Less number of props in quantity
● Lack of software integration
12- Zing StikBot Zanimation Studio Pro
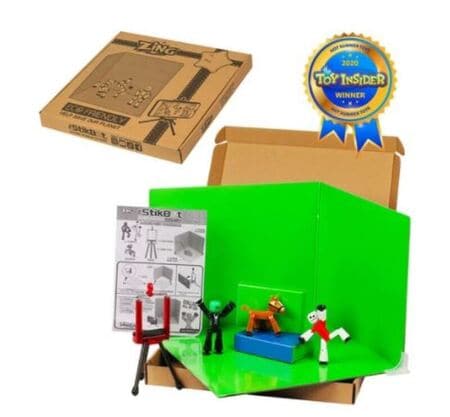
This stop animation kit is a reasonably priced and excellent little package. With this kit, however, you will need your camera. You can manipulate this kit into different poses as the figures have small suction cups on the feet and hands.
Features
● It includes two posable StikBot figures.
● Works on an animation app to record frames.
● It contains a Blue screen or reversible green screen stage.
● It Consists of a tripod stand for a tablet or smartphone camera.
Pros
Simple software
Lots of functions
Included software
Cons
● Lack of app availability
● Not compatible with Linux systems
● Only for Windows and Mac
13- Honestech Stop Motion Studio 4.0
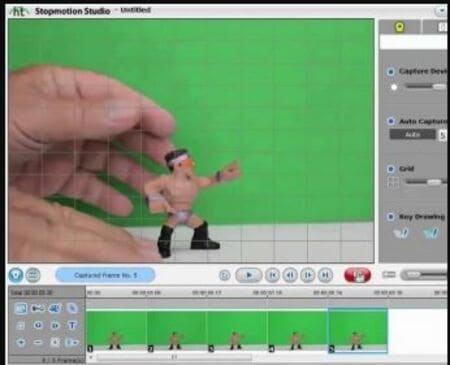
It’s a great entry-level stop motion animation kit that includes a blue or green screen. It also contains accessible Features for background editing, sound effects, background music, etc. Given below are more of its parts.
● A super simple editing interface is appealing to beginner kids.
● String Removal feature for more delicacy and effects.
● Chroma Key and Audio Recording.
● YouTube/Facebook upload feature.
● DSLR camera support.
Pros
● The great Chroma keying feature
● Simple user interface
● Lots of other Features
Cons
● Not for advanced kids
● A bit slow software
● Certain issues with camera integration
14- Crayola Color Alive Easy Animation Studio
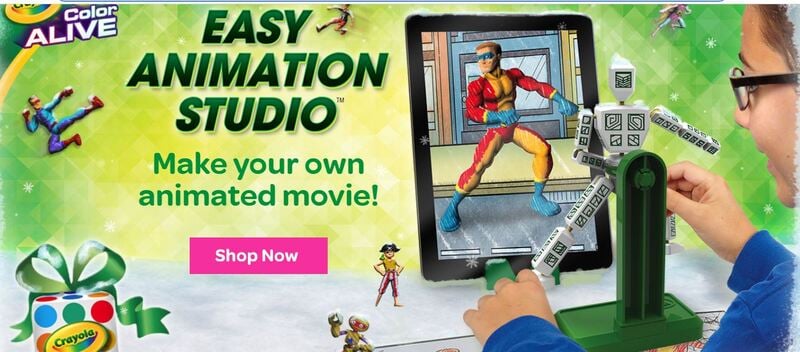
It’s another basic Stop Motion Animation kit to easily create custom animated videos by kids. It also includes easy drawing coloring book characters. And, there are tracking markers to make the job easier for kids.
Features
● Design and color characters pose and capture.
● It includes a stand and mannequin.
● It contains a 30-page booklet with the required information.
● It is compatible with Android and iOS.
● Crayola contains 1twistable color pencils with the device’s stand.
Pros
● Ideal for beginners
● Detailed info book
● Great accessories
Cons
● Slow processing UI
● Inefficient tracking markers
● The app may run certain compatibility issues
15- Claytoon Clay Project Studio
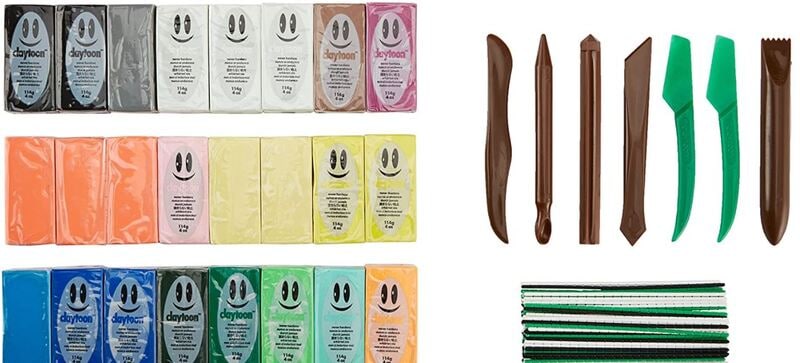
Young kids can easily use this Clay Studio and create impressive figures for their stop motion animation. It has bright colored clays, which are non-hardening and thus suitable for animation projects. And, there’s a good choice in colors with valuable instructions, index cards, and accessories.
Features
● Non-hardening clay material
● Brilliant color range to create amazing characters
● Intermixable clays
● Simple to follow instruction cards
● 5 modeling tools and clay knife
Pros
● Hard clay
● Perfect colors
● Professional for adult usage
Cons
● Maybe be crumbled clays
● Oily material
● It may not contain all the desired colors
Part 2 How to pick the best animation kits for kids?
Below are the factors you need to Consider before buying Stop Motion Animation kits. So, let’s dive into each element in detail.
01Recommended Age
Producing something creative with a Stop Motion Animation kit will be a lengthy process that will involve patience and some informational content to use the Kits properly. So while selecting the best Animation Kit, keep in mind the Recommended Age that the company has specified. If the product is for the young generation, the younger ones might have difficulty using the product.
02Different forms of Kits
You may check a few of them with different Features for the best stop animation kits. However, the significant difference between them is whether they come as complete kits or not. If you buy a complete kit, you will have a camera and other elements with the product.
The only thing you will require other than the entire animation kit would be a computer for software purposes. Moreover, you can also select Kits that do not come with a camera individually.
For this, you must use a smartphone to record the video. Conclusively, the kits present on the market are zoetrope-type kits. However, they are not available with electronics. So you won’t be able to create full films with this one.
03Extra Features
As extra Features, you get Props and full-on sets included with some of the kits. These allow you to create the scenes that you are looking for. You can also transform the orientation of some of the props, which gives you extra functionality.
04Apps
When you’re in the hustle to create a Stop Motion Animation, you need a few things. One of them is the smartphone or a camera. At the same time, the other one will be the App on your phone that will help you merge everything the way you wish it to be.
Some of the companies out there will create their apps, and it will assist you with different integration procedures, but if the kit you select is not available with a dedicated app. There are a lot of good apps on the market right now that you can go for. These 3rd party apps are unique and will get your job done too.
05 Software
You will either need an App or Proper Software for the putting-together part. This Software will need hardware such as either a laptop or a PC. Before deciding on an animation kit, make sure you know the system requirements if the kit is only supported through software.
06Bonus: Create an easy stop motion video via Wondershare Filmora Video Editor
In old times, making stop motion videos was a very hectic task, and sometimes it could take several days to make such videos. With the advancement of technology and editing software like Filmora, it has become effortless. All you need is a camera and video editing software to create your stop motion animations.
For Win 7 or later (64-bit)
For macOS 10.12 or later
Let’s dig deep into the stop motion animations and learn how to create these videos on your own.
07Steps For Making Stop-Motion Video
If you want to create your stop motion animation, follow this step-by-guide.
● Capture The Shots
Move an object and capture its movement frame by frame. Suppose we are making a stop motion video of bottle spin. Place your camera in a steady place, and bring your object in the frame. Move your object slightly and take a shot. Keep doing this until you have at least 12,23or photos of the object’s movement. We took the bottle spin only as an example. You can create your ideas here.
● Download And Start Filmora X
If you haven’t downloaded the Filmora in your system, download it from their official website. If it is already on your PC, then run the program.
● Choose The Suitable Frame Rate In Project Settings.
Begin a new project by hitting the File and selecting the full-wide resolution.
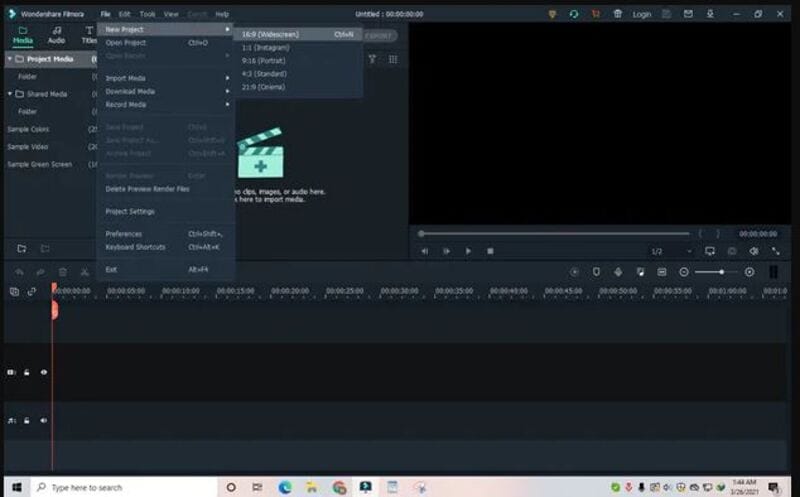
Once you select the resolution, click on the File and go to project settings.
Now select the frame rate you captured the video, i.e., 236etc. If you didn’t Consider the frame rate when taking shots, you could select 24.

● Import The Media Files
Once you have done with the settings above, import the captured images using the import option from the file menu.
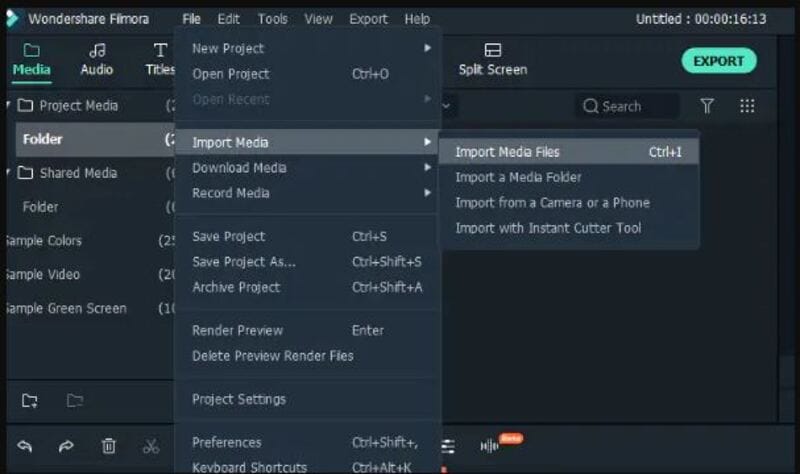
● Adjust the Preferences
Go to File and click select preferences from the menu or press the shortcut key Ctrl+Shift+,
A window will appear on your screen. Click on editing and adjust the photo duration anywhere between 0.2 - 0.5 seconds.
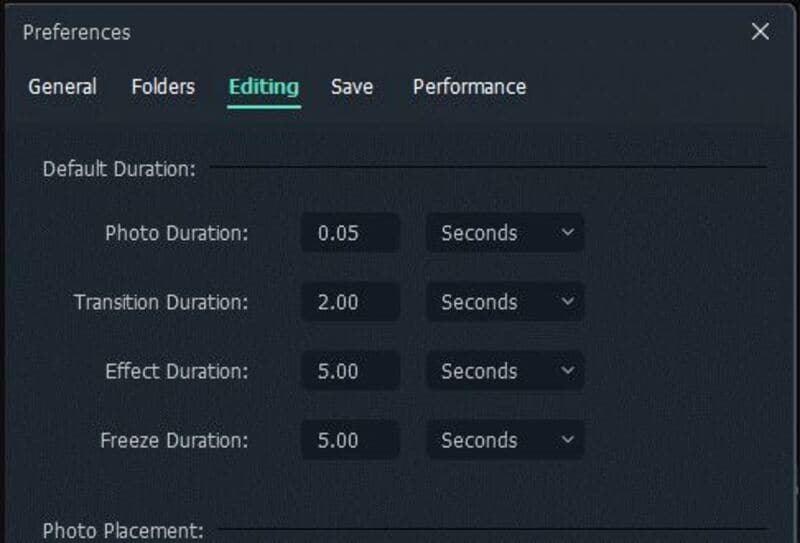
● Create and Export.
Once you complete all the settings mentioned above, import all images timeline-track, and click on play, you will notice that your stop motion animation has been created.
Now click on the export button, select the desired video format, export the video, and share it with your friends.
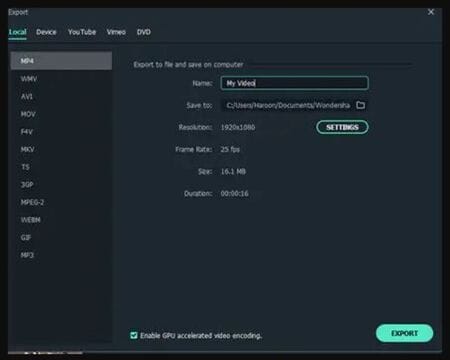
Ok, this is very easy. It’s just time-Consuming if you want to make a big enough project. Here is the result.
Filmora is one of the most straightforward software you can use to create your stop motion animation videos. This magic can be easily created by following the steps mentioned above, even if you have no video editing experience.
● Key Takeaways from This Episode →
● Stop-motion animation kits are a form of art, and with all of the access we have to such technology via our computers, it is a big deal to get started with it. Most of them include Stop Motion animation starter kits as well. That’s why you want to be sure that you look at everything in depth and see what you like. Then, determine which kits will be best for your purposes and see why it makes such a big difference for you and everything you want to accomplish in the long run.
Stop motion animation is becoming more famous by the year, and it’s not even a surprising thing. Creating animated films takes objects, either soft clay items or dolls with joints, and manipulates them.
If you wish to make this type of animation, then you want to find the best Stop Motion Animation Kits that you can find. Some options out there are even free. This article will share the eight best options for stop motion animation software, separating them by whether they are for Macs or PC.
In this article
01 [15 Best Stop Motion Animation Kits](#Part 1)
02 [How to Pick the Best Animation Kits for Kids?](#Part 2)
Part 1 15 Best Stop Motion Animation Kits
After introducing you to the concept of Stop Motion Animation Kits, we’ve gathered a list of the top Stop Motion Animation Kits that best suits the kids as follows:
01Hue Animation Studio
The Hue Animation Studio kit is unique because it can be helpful with any clay or toys you may have. The equipment is ideal for animations featuring anything from Playmobil toys, Lego, or even clay animations.
Features
● The kit includes the guidebook,
● It includes a HUE HD USB camera with a microphone.
● The kit Consists of a license of Stop Motion Animation software.
● There’s a mini stage with a green screen and background.
● The system requirements are Windows or Mac OS 10.5+.
Pros
● Less learning curve
● With an HD camera
● Easy to create time-lapse videos and special effects
Cons
● Old-fashioned interface
● Not ideal for beginners
● Requires a license to buy
02LEGO Make Your Own Movie Activity Kit
LEGO is one of the top players in the animation industry, and its Stop Motion Animation kit is phenomenal to the mark. The kit offers a complete guide to making your stop motion animations and includes several props and other goodies, as described in the Features below.
Features
● Includes an 8pages book to use while animating.
● It contains official LEGO props and Minifigures.
● You get punch-out animation frames.
● It involves foldout paper backgrounds.
● Best applicable to kids above eight years.
Pros
● Good for beginners
● Great accessories
● Informative book
Cons
● Only basics in the book
● Not all the accessories are there
● No app available
03I Can Animate It Studio
I Can Animate It Studio is another Stop Motion Animation kit by Kudlian. However, the kit looks a little offbeat since it doesn’t come with a guide. However, Kudlian offers instructions and guidelines online to simplify the tasks.
Features
● This animation kit includes a separate webcam for shooting.
● It has an onion skin feature for getting the best results at animation.
● Involves an element to edit with a green screen.
● It also helps create stop-frame animation by creating drawings.
● Compatible with both Windows and Mac OS.
Pros
● Available as App
● Interactive user interface
● Easy to create cute videos
Cons
● Difficult to use the animator pack
● Slow processing
● May need to pay for premium Features
04ZuAnimation Kit
Zuis among the best stop motion animation kits developed by HUE’s initial software. And, it’s the kit that is already usual with kids. So, it generally means that it will involve less learning curve comparatively. And, it has some tiny Features which may leave all other toys in the category.
Features
● A lifetime software with two perpetual licenses.
● Includes a green screen for keying background.
● It Consists of an animation handbook to offer you fantastic tips and advice.
● It contains a webcam with a metal base.
● You get a modeling clay to design characters and a mini set to hold them.
Pros
● Good pack of sound effects, artwork, and more
● Interactive interface
● With animation handbook
Cons
● Some defects with cameras, so check them earlier
● Lack of video signals
● Limited animation Features
05Stop Motion Explosion Animation Kit
The Stop Motion Explosion complete HD stop motion animation is another rival in the industry for the big competitors playing out. The kit also contains an inbuilt microphone to record your audio. And, there’s a precious 29pages book included to provide you a lot. Let’s see more of its Features below.
Features
● It comes with an HD camera and flexible stand with a microphone and manual zoom control.
● It contains a CD with animation software.
● The kit involves a quick start guide.
● It includes lots of free tutorials.
● It Consists of a 29pages book with in-depth information.
Pros
● Interactive user interface
● Contains guided information book
● Lots of free tutorials
Cons
● Lack of fast processing
● Need to use the app alongside book
● High learning curve
06EyeThink BusyBody Animation Toy
As the name also signifies, the kit is pretty different from other stop motion animation kits. It’s one of the coolest of its kind also occupied with the attention of Victorian children in the days gone by. The kit doesn’t include any camera. Instead, it works on the principle of ‘persistence of vision.’ Please scroll below to reveal more of its Features.
Features
● You will get a central snipping base with mirrors.
● It contains bendable figures for easy posing.
● It includes a complete hands-on stop motion animation kit without any complications.
● Includes instructions to give you detailed images on how to pose figures.
● Works on the principle of ‘persistence of vision’ without any camera.
Pros
● Easy to use with good accessibility
● Scalable to younger kids
● Works without a camera
Cons
● More of subjective task
● Maybe hard to understand
● A very different concept of animation
07OgoBild Animate It
Brought to you from Gromet and Wallace’s creators, this is a super simple Stop Motion Animation kit. It includes hundreds of Construction pieces to begin with. Also, you will get a webcam and stop motion animation software ideally geared towards kids aged 8-years old.
Features
● Compatible with the Windows operating system.
● It contains a camera with an articulated stand to capture from better angles.
● It includes an easy upload to YouTube feature for social sharing.
Pros
● Good for social sharing
● Better accessories
● Ideal for beginners
Cons
● A pretty confusing interface
● Only compatible with Windows
● Slow processing software
08Dragonframe 5
Again, this stop-animation kit isn’t that fancy, but it can compete with all the rivals out there. It only contains Software, though, with a list of functions including Cinematography, Animation, vector-based drawings, and much more.
Features
● It includes Animation and Cinematography tools.
● It contains a frame-based timeline editor.
● Dragonframe 5 includes a lip-sync system for the best audio recording.
● It includes Motion Control and Vector-based drawing tools.
● This kit Consists of a configurable X-sheet.
Pros
● Lots of functions
● Not just a toy
● Friendly and effective to deal with.
Cons
● Too hard for the young kids
● Expensive
● Confusing interface
09VidBox Stop Motion Studio
VidBox Stop Motion Studio has similar software to Dragonframe but it is more suitable for younger kids. Well, you can readily go for this kit if you already have a camera. It also contains the option to upload creations to Facebook and YouTube directly.
Features
● It can create output in different formats, including WMV, MPEG HD resolution, etc.
● It contains an adjustable frame rate to control the video’s speed.
● The Chroma binding effect creates the best setting for the background.
● It includes DSLR camera support.
● It contains Image Editor, String Removal, and Overlay Frames tool to add special effects.
Pros
● It gives detailed instructions
● Too basic Features
● Difficult to handle toys
Cons
● Too much info is intimidating
● Slow process
● Some issues with the Chroma effect
10Animation Studio by Helen Piercy – A Book
As the name suggests, this stop motion studio book isby Helen Piercy, an animator with lots of experience in the field. You will also get all the required Features, such as editing the green screen and more. In addition, tutorials regarding and techniques on puppets are also in the kit.
Features
● You get a mini stage set.
● It involves a press-out puppet monster with movable parts.
● It contains storyboard samples and sheets.
● The book contains an engaging animation handbook.
● It Consists of a variety of press-out props.
Pros
● A highly informative book
● Contains easy to understand animation scenes
● Various and techniques
Cons
● Hard to understand info
● Only a book
● It cannot get you through real practical
11- Minecraft Stop Motion Animation Studio
Though it seems usual to many kids out, there are valid reasons behind that. First, it is different from other Stop Motion Animation kits as it is available in an app rather than any software. Thus, you can use it on a tablet or phone and edit whatever you shoot.
Features
● It includes a variety of props.
● It contains six different backgrounds.
● This kit involves one movie stage.
● It Consists of a device holder.
● Minecraft contains 1additional accessories.
Pros
● No need of a powerful PC
● Lots of accessories
● With different backgrounds
Cons
● The app contains compatibility issues
● Less number of props in quantity
● Lack of software integration
12- Zing StikBot Zanimation Studio Pro
This stop animation kit is a reasonably priced and excellent little package. With this kit, however, you will need your camera. You can manipulate this kit into different poses as the figures have small suction cups on the feet and hands.
Features
● It includes two posable StikBot figures.
● Works on an animation app to record frames.
● It contains a Blue screen or reversible green screen stage.
● It Consists of a tripod stand for a tablet or smartphone camera.
Pros
Simple software
Lots of functions
Included software
Cons
● Lack of app availability
● Not compatible with Linux systems
● Only for Windows and Mac
13- Honestech Stop Motion Studio 4.0
It’s a great entry-level stop motion animation kit that includes a blue or green screen. It also contains accessible Features for background editing, sound effects, background music, etc. Given below are more of its parts.
● A super simple editing interface is appealing to beginner kids.
● String Removal feature for more delicacy and effects.
● Chroma Key and Audio Recording.
● YouTube/Facebook upload feature.
● DSLR camera support.
Pros
● The great Chroma keying feature
● Simple user interface
● Lots of other Features
Cons
● Not for advanced kids
● A bit slow software
● Certain issues with camera integration
14- Crayola Color Alive Easy Animation Studio
It’s another basic Stop Motion Animation kit to easily create custom animated videos by kids. It also includes easy drawing coloring book characters. And, there are tracking markers to make the job easier for kids.
Features
● Design and color characters pose and capture.
● It includes a stand and mannequin.
● It contains a 30-page booklet with the required information.
● It is compatible with Android and iOS.
● Crayola contains 1twistable color pencils with the device’s stand.
Pros
● Ideal for beginners
● Detailed info book
● Great accessories
Cons
● Slow processing UI
● Inefficient tracking markers
● The app may run certain compatibility issues
15- Claytoon Clay Project Studio
Young kids can easily use this Clay Studio and create impressive figures for their stop motion animation. It has bright colored clays, which are non-hardening and thus suitable for animation projects. And, there’s a good choice in colors with valuable instructions, index cards, and accessories.
Features
● Non-hardening clay material
● Brilliant color range to create amazing characters
● Intermixable clays
● Simple to follow instruction cards
● 5 modeling tools and clay knife
Pros
● Hard clay
● Perfect colors
● Professional for adult usage
Cons
● Maybe be crumbled clays
● Oily material
● It may not contain all the desired colors
Part 2 How to pick the best animation kits for kids?
Below are the factors you need to Consider before buying Stop Motion Animation kits. So, let’s dive into each element in detail.
01Recommended Age
Producing something creative with a Stop Motion Animation kit will be a lengthy process that will involve patience and some informational content to use the Kits properly. So while selecting the best Animation Kit, keep in mind the Recommended Age that the company has specified. If the product is for the young generation, the younger ones might have difficulty using the product.
02Different forms of Kits
You may check a few of them with different Features for the best stop animation kits. However, the significant difference between them is whether they come as complete kits or not. If you buy a complete kit, you will have a camera and other elements with the product.
The only thing you will require other than the entire animation kit would be a computer for software purposes. Moreover, you can also select Kits that do not come with a camera individually.
For this, you must use a smartphone to record the video. Conclusively, the kits present on the market are zoetrope-type kits. However, they are not available with electronics. So you won’t be able to create full films with this one.
03Extra Features
As extra Features, you get Props and full-on sets included with some of the kits. These allow you to create the scenes that you are looking for. You can also transform the orientation of some of the props, which gives you extra functionality.
04Apps
When you’re in the hustle to create a Stop Motion Animation, you need a few things. One of them is the smartphone or a camera. At the same time, the other one will be the App on your phone that will help you merge everything the way you wish it to be.
Some of the companies out there will create their apps, and it will assist you with different integration procedures, but if the kit you select is not available with a dedicated app. There are a lot of good apps on the market right now that you can go for. These 3rd party apps are unique and will get your job done too.
05 Software
You will either need an App or Proper Software for the putting-together part. This Software will need hardware such as either a laptop or a PC. Before deciding on an animation kit, make sure you know the system requirements if the kit is only supported through software.
06Bonus: Create an easy stop motion video via Wondershare Filmora Video Editor
In old times, making stop motion videos was a very hectic task, and sometimes it could take several days to make such videos. With the advancement of technology and editing software like Filmora, it has become effortless. All you need is a camera and video editing software to create your stop motion animations.
For Win 7 or later (64-bit)
For macOS 10.12 or later
Let’s dig deep into the stop motion animations and learn how to create these videos on your own.
07Steps For Making Stop-Motion Video
If you want to create your stop motion animation, follow this step-by-guide.
● Capture The Shots
Move an object and capture its movement frame by frame. Suppose we are making a stop motion video of bottle spin. Place your camera in a steady place, and bring your object in the frame. Move your object slightly and take a shot. Keep doing this until you have at least 12,23or photos of the object’s movement. We took the bottle spin only as an example. You can create your ideas here.
● Download And Start Filmora X
If you haven’t downloaded the Filmora in your system, download it from their official website. If it is already on your PC, then run the program.
● Choose The Suitable Frame Rate In Project Settings.
Begin a new project by hitting the File and selecting the full-wide resolution.
Once you select the resolution, click on the File and go to project settings.
Now select the frame rate you captured the video, i.e., 236etc. If you didn’t Consider the frame rate when taking shots, you could select 24.
● Import The Media Files
Once you have done with the settings above, import the captured images using the import option from the file menu.
● Adjust the Preferences
Go to File and click select preferences from the menu or press the shortcut key Ctrl+Shift+,
A window will appear on your screen. Click on editing and adjust the photo duration anywhere between 0.2 - 0.5 seconds.
● Create and Export.
Once you complete all the settings mentioned above, import all images timeline-track, and click on play, you will notice that your stop motion animation has been created.
Now click on the export button, select the desired video format, export the video, and share it with your friends.
Ok, this is very easy. It’s just time-Consuming if you want to make a big enough project. Here is the result.
Filmora is one of the most straightforward software you can use to create your stop motion animation videos. This magic can be easily created by following the steps mentioned above, even if you have no video editing experience.
● Key Takeaways from This Episode →
● Stop-motion animation kits are a form of art, and with all of the access we have to such technology via our computers, it is a big deal to get started with it. Most of them include Stop Motion animation starter kits as well. That’s why you want to be sure that you look at everything in depth and see what you like. Then, determine which kits will be best for your purposes and see why it makes such a big difference for you and everything you want to accomplish in the long run.
Also read:
- How to Create a Whiteboard Video Step by Step for 2024
- 2024 Approved Ways to Get the Most up to Date Cartoon Character Design Tips
- New 2024 Approved 15 Best Stop Motion Animation Kits to Fuel Creativity
- Step-by-Step Guide to Send Gif WhatsApp on Android for 2024
- Top 20+ Best Free GIF Makers Online to Quickly Edit GIF
- 2024 Approved 5 Foolproof Amazing Anime Text to Speech Tips
- New In 2024, Top 10 Sketch Animation Video Makers
- 2024 Approved 10 of the Best Disney Animated Shows
- 2024 Approved How to Insert a GIF Into Powerpoint
- In 2024, Top 10 Animated DP for WhatsApp
- New 2024 Approved Top 12 Video to GIF Converters High Quality to Check Out
- How to Make Slideshow in LinkedIn for 2024
- New Animate Graphics in Canva for 2024
- Updated In 2024, The Best 20 Motion Graphics Companies & Studios
- Updated You Can Turn a TikTok Into a GIF Now. Heres How for 2024
- Updated 2024 Approved The Only Guide Youll Need to Learn About GIF Video Downloader
- Updated Top 10 Websites to Download Anime Subtitles for Free
- New In 2024, Best Canva 10 Animated Templates
- New 2024 Approved 18 Best Tools and Services to Create Animated Videos for Business 2023
- Updated 2024 Approved 5 Best Adobe Animate Courses & Classes | Beginners Complete Tutorial
- Updated In 2024, Ideas of Learning How to Send WhatsApp Animated Gifs
- New Easy Shortcut to Convert Videos to Gifs on iPhone for 2024
- Updated In 2024, How To Remove The Endless Loop From Animated GIF
- Updated 2024 Approved How to Make GIF Stickers for WhatsApp 100 The Simple Way
- Ways to Create an Animated Sticky Navbar
- Animated Collage Maker Tips for 2024
- In 2024, The Coolest Anime Characters Ever| List of Top Favorites
- Updated 10 Popular Cartoon Characters That You Wont Want to Miss
- 2024 Approved What Is Still Motion Animation?
- Updated 2024 Approved How to Convert Video to GIF Fast & Easy
- Updated 20 Free After Effects Logo Reveal Templates You Will Want to Know
- Convert Animated GIF From Video for 2024
- In 2024, How to Send and Add Snapchat GIFs 100 The Easy Way
- 12 Aesthetic GIF Instagram for Marketers and Creatives
- Turning Off Two Factor Authentication On iPhone XR? 5 Tips You Must Know
- In 2024, What You Want To Know About Two-Factor Authentication for iCloud On your Apple iPhone 14 Plus
- How Can Samsung Galaxy A24Mirror Share to PC? | Dr.fone
- A Detailed Guide on Faking Your Location in Mozilla Firefox On ZTE Axon 40 Lite | Dr.fone
- How to Change your Asus ROG Phone 8 Pro Location on Twitter | Dr.fone
- Wireless Methods to MirrorApple iPhone 7 Plus & iPad to Fire Stick With Ease | Dr.fone
- In 2024, How to Remove and Reset Face ID on Apple iPhone 12 | Dr.fone
- Getting the Pokemon Go GPS Signal Not Found 11 Error in Asus ROG Phone 7 Ultimate | Dr.fone
- Top 10 Best Spy Watches For your Vivo Y56 5G | Dr.fone
- 9 Mind-Blowing Tricks to Hatch Eggs in Pokemon Go Without Walking On HTC U23 | Dr.fone
- In 2024, How to Bypass iCloud Lock from Apple iPhone 8
- How to Come up With the Best Pokemon Team On Realme GT 5? | Dr.fone
- Android Unlock Code Sim Unlock Your Honor Play 8T Phone and Remove Locked Screen
- Android Unlock Code Sim Unlock Your Realme 12+ 5G Phone and Remove Locked Screen
- In 2024, iPhone 15 Backup Password Never Set But Still Asking? Heres the Fix
- Easy steps to recover deleted data from Oppo Find X7 Ultra
- In 2024, How to Transfer Data from Samsung Galaxy A34 5G to Other Android Devices? | Dr.fone
- Spotify Keeps Crashing A Complete List of Fixes You Can Use on Motorola Moto G24 | Dr.fone
- In 2024, Catch or Beat Sleeping Snorlax on Pokemon Go For Apple iPhone XS Max | Dr.fone
- How to Hard Reset Infinix Zero 30 5G Without Password | Dr.fone
- The way to get back lost messages from Motorola Edge 40
- How to Unlock a Network Locked Realme Narzo 60x 5G Phone?
- Mastering Lock Screen Settings How to Enable and Disable on Realme V30T
- In 2024, Ultimate Guide on Tecno Spark 20 Pro FRP Bypass
- Unlocking Made Easy The Best 10 Apps for Unlocking Your Samsung Galaxy F34 5G Device
- Title: New 10 Best Photoshop Cartoon Effects For Creatives for 2024
- Author: Elon
- Created at : 2024-05-19 03:05:46
- Updated at : 2024-05-20 03:05:46
- Link: https://animation-videos.techidaily.com/new-10-best-photoshop-cartoon-effects-for-creatives-for-2024/
- License: This work is licensed under CC BY-NC-SA 4.0.
