
:max_bytes(150000):strip_icc():format(webp)/GettyImages-585151372-a659baf0c7b441b9b7e7896716b12784.jpg)
New 10 Caricature Makers to Turn Photo to Caricature Effects
10 Caricature Makers to Turn Photo to Caricature Effects
10 Caricature Makers to Turn Your Photo to Caricature Effects
An easy yet powerful editor
Numerous effects to choose from
Detailed tutorials provided by the official channel
We certainly have a couple of recommendations to offer to you. There’s a surprisingly large amount of both caricature photo maker apps and online caricature maker tools.
Today, we’ll be focusing on the apps, to keep things easily accessible. And, in the end, we’ve even included a quick step-by-step guide on how to make a caricature of a photo.
In this article
01 [The 10 Best Makers to Turn Photos to Caricature Effects](#Part 1)
02 [How to Draw a Caricature — Step by Step Guide](#Part 2)
Part 1 The 10 Best Makers to Turn Photos to Caricature Effects
As promised, part one of this article is devoted to a list of the 10 best caricature maker apps that we can find. We’ll be focusing on the Apple App Store, in this case, but it’s important to note that most of these are available on the Google play store as well. (A link to the app has been provided for your convenience as well.)
011. MomentCam Cartoons & Stickers
The first of the caricature maker apps on our list is ‘MomentCam Cartoon & Stickers’ — this app is part of another tool called ‘Avatar Maker Bundle’, but it can be used on its own to create caricature versions of yourself that you can use to express emotions (an avatar, if you will).
This app was made primarily to help the user to create an avatar that matches their look (with accessorization features to complete the set). However, you can interact with other members of the community to create multiple avatars if you wish. Or, you can share your caricature pictures on social media.
URL: https://apps.apple.com/ca/app/momentcam-cartoons-stickers/id687624831

02Color Cartoon Caricature Maker
This next caricature maker app uses a more realistic style akin to what is usually used for a political caricature of famous individuals and politicians. It’s called ‘Color Cartoon Caricature Maker’ and, while not as extensive in its features as the previous app, it can be used to turn an image completely into a caricature (which means that it can be used for photographs with more than one person or focus.)
URL: https://apps.apple.com/ca/app/color-cartoon-caricature-maker/id1448093448

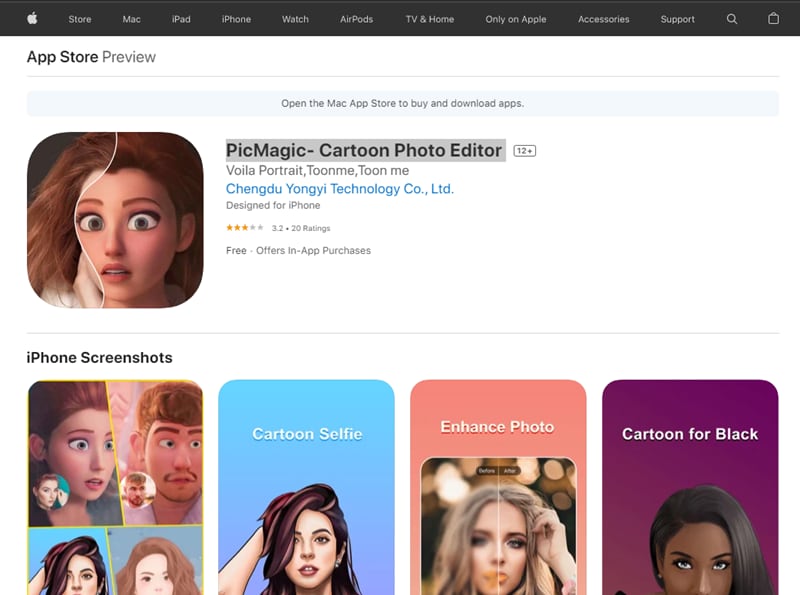
03PicMagic- Cartoon Photo Editor
Up next, we have ‘Pic Magic’ which is better described as a ‘cartoon photo editor’ but still works as a serviceable caricature maker if all you’re looking for is a subtle enhancement of features (unlike what was shown in the political caricature maker we showed previously.)
Much like the second app, while it’s more suitable for enhancing the features of one person, it does work for group pictures as well.
URL: https://apps.apple.com/ca/app/picmagic-cartoon-photo-editor/id1491645007
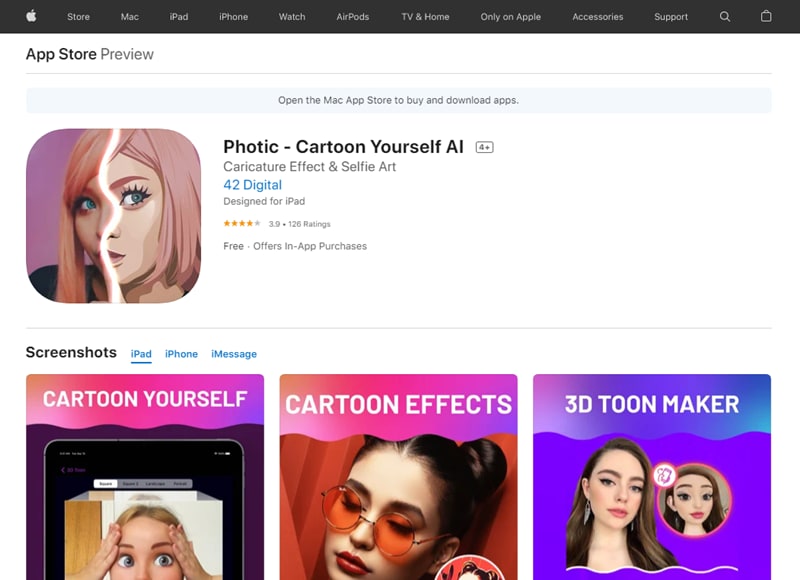
04Photic - Cartoon Yourself AI
This next app, called ‘Photic’ is much like our previously listed app, PicMagic. As you can see from the image provided, it can make a caricature of a photo but in a subtle way that is undeniably more of a ‘cartoony’ style than what you might be looking for. Keep that in mind.
The best part of it is that you can use it along with iMessage — making it very easy to share your finished caricature pictures with friends and family. The downside? It is best used for solo picture caricature-like only.
URL: https://apps.apple.com/ca/app/photic-cartoon-yourself-ai/id1484108330
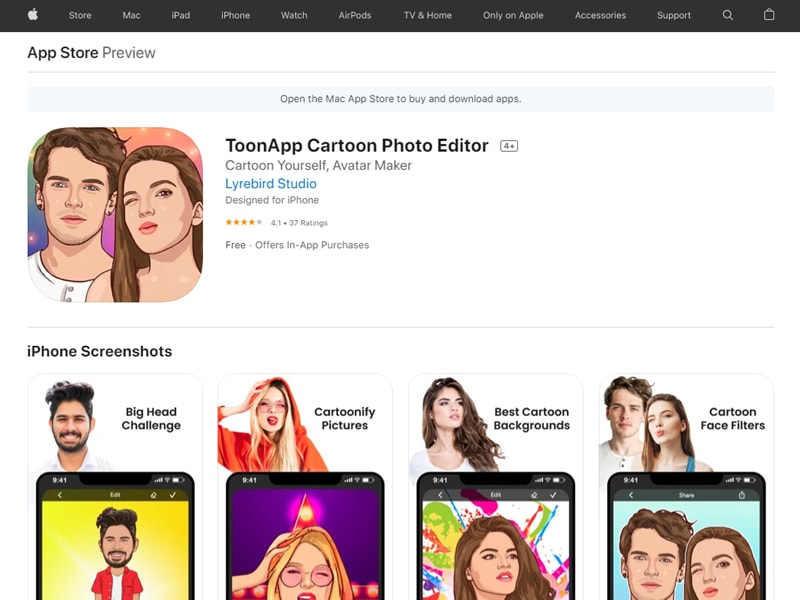
05ToonApp Cartoon Photo Editor
‘ToonApp’ is the next caricature maker on our list. As you can see from the image provided, the style of caricature is a lot more realistic here. Very similar to what you normally see of western comics (which only subtly changes the features of a person to look more rendered.) The best part of this app? Well, unlike some of the other options on this list, it works great for group pictures.
URL: https://apps.apple.com/ca/app/toonapp-cartoon-photo-editor/id1540719743
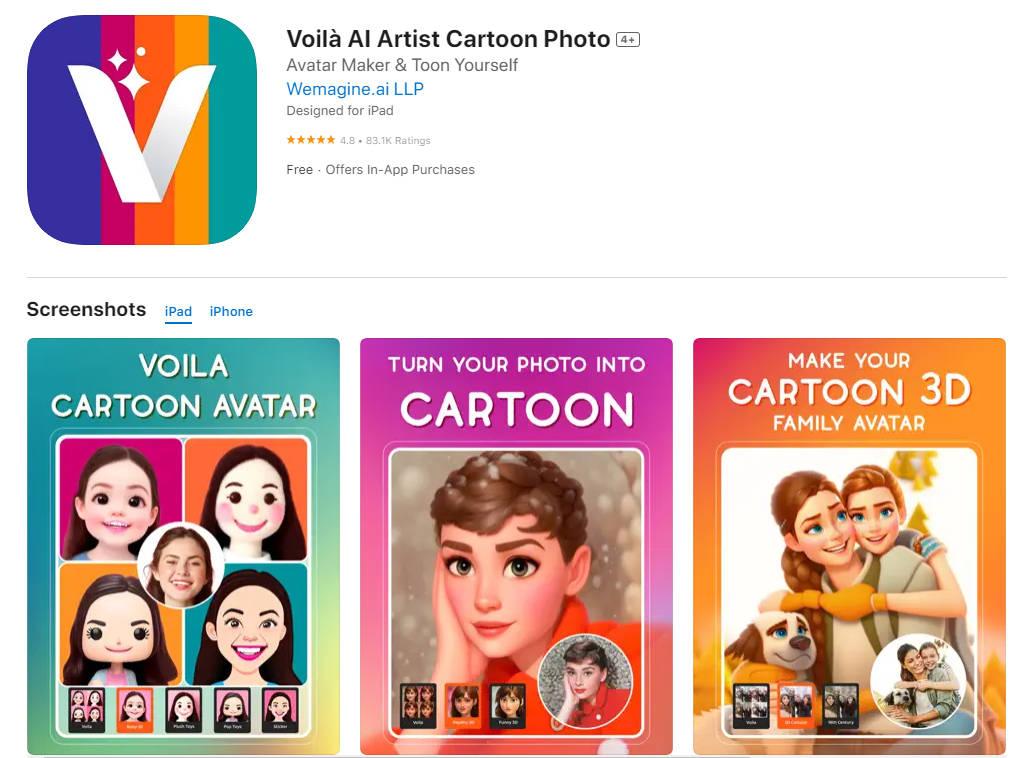
06Voilà AI Artist Cartoon Photo
This next app is very similar to the previous one we introduced. It’s called ‘Voilà AI Artist Cartoon Photo’ and the main difference between it and the ToonApp app that we introduced earlier is that it uses a different caricature style. Not unlike what you see from 3D animations — which is a mix of realism and cartoony.
This tool, much like a lot of other alternatives, is best used for selfies.
URL: https://apps.apple.com/us/app/voil%C3%A0-ai-artist-cartoon-photo/id1558421405
07Caricature Hyper Face Morph
Now we go back to what most people usually consider ‘caricature’ with the ‘Caricature Hyper Face Morph’ app. This app, as you can see from the image below, allows you to morph a photograph into something more exaggerated (turning it into a true-to-form caricature; like what you would see in political caricature segments in newspapers or old animated short films.)
It works for group photographs surprisingly well as well. With the AI recognizing and applying the ‘morph’ effect to everyone.
URL: https://apps.apple.com/ca/app/caricature-hyper-face-morph-from-photos-camera-shots/id587429629
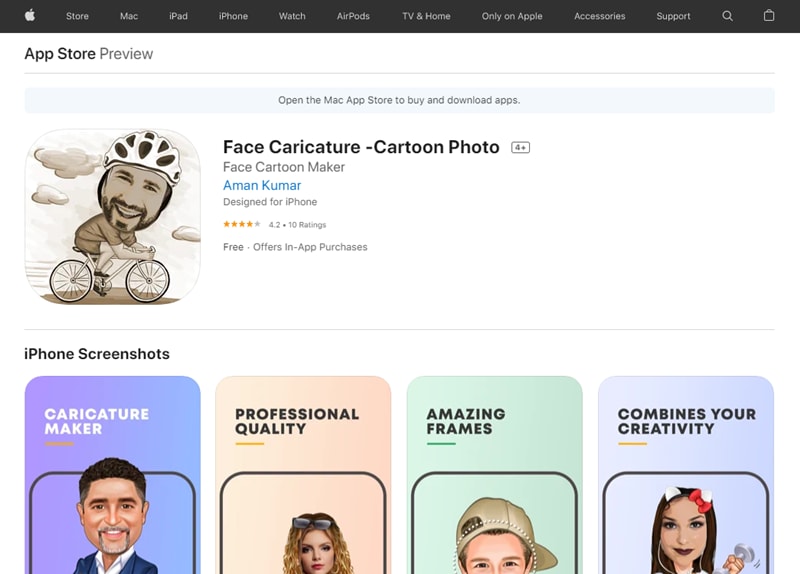
08Face Caricature
The next caricature maker on our list is the app called ‘Face Caricature.’ The best part of this app, undoubtedly, is the fact that it offers several ‘caricature’ styles that you can choose from. So, you aren’t stuck with just one cartoon style. It’s better for selfies, however — it doesn’t work as well as a group picture caricature maker.
URL: https://apps.apple.com/ca/app/face-caricature-cartoon-photo/id1007143753
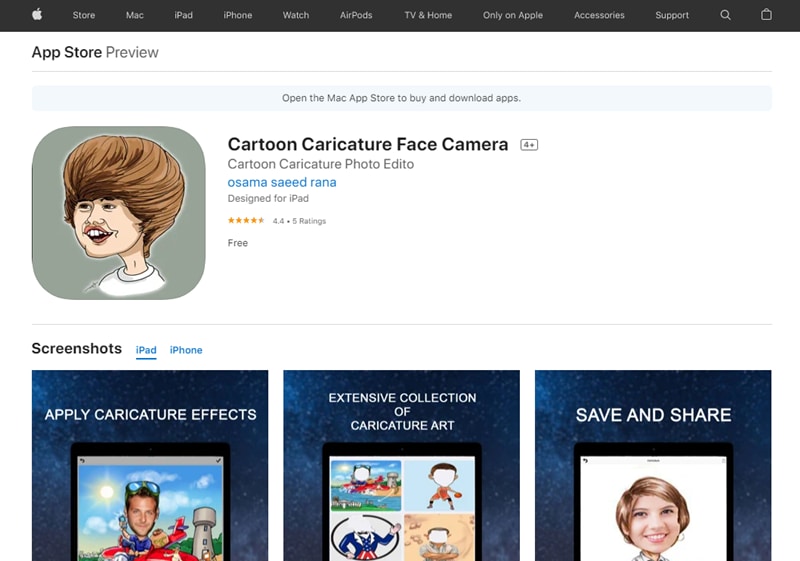
09Cartoon Caricature Face Camera
This is a camera tool that you can use in order to take photographs and turn them into caricatures. There are several caricature art styles for you to choose from, which are always fun. Plus, it offers easy save-and-share features. As a final note, this app works best as a selfie app.
URL: https://apps.apple.com/ca/app/cartoon-caricature-face-camera/id1424277519
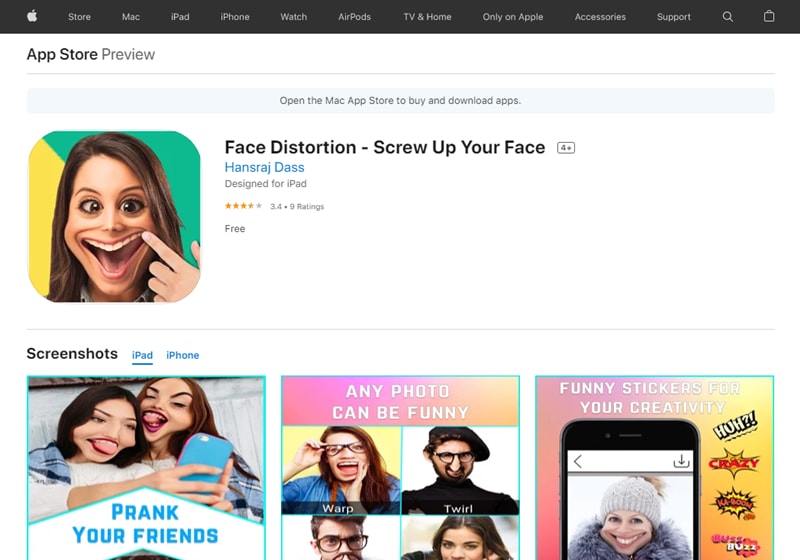
10Face Distortion - Screw Up Your Face
Though this app isn’t exactly a ‘caricature maker‘ it does work like one. It’s just a matter of finding the right distortive effect to mimic the look of an actual caricature sketch. The best part about it is that it’s basically a custom caricature maker — one that allows you to control exactly what features are exaggerated.
URL: https://apps.apple.com/ca/app/face-distortion-screw-up-your-face/id1188623179
Part 2 How to Draw a Caricature — Step by Step Guide
Now for our promised tutorial. Here, we introduce a quick and easy way to draw caricatures. Take it more as an overview of what exactly caricatures are and how you can create them by following a specific set of steps. Ah, but of course, just to make sure that you are getting something out of it, we’ve also included a recommendation for a tool that you can use in order to step up your caricature creation.
Step 1: Get a Reference Photo.
Any good caricature starts with a good reference photo. If you’re not familiar with the term, a reference photo is basically any photograph that you use in order to draw inspiration from.
When making a caricature, that usually means finding a portrait (like the one below) that you can directly refer to when making your caricature sketch.

Step 2: Exaggerate Features.
What is the point of caricatures? Well, it all comes down to the exaggeration of features. Whether that’s enlarging the person’s head to be half the size of a person or distorting the features of their face to make one more prominent than another. There’s an endless number of ways you can go about doing it.
Just remember, when making a caricature sketch, there are no such things as rules. While you do have a reference photo in front of you, you don’t have to draw it exactly as you see it. Make the eyes farther apart, exaggerate the lift of the eyebrows, give them a teeny tiny nose, etc., etc..
Just let your imagination run wild.
Step 3: Find a Reliable Tool.
And, finally, if you really want to take your caricatures to the next level, consider animating them. That is the main point of caricatures, after all.
And, if you’re going to go about doing such a thing, make sure that you have a reliable tool on your side. For example, having something like Wondershare Filmora Video Editor , a video editor that has an endless amount of presets and effects that you can choose from, may prove to be exactly what you need to get to the next stage of your caricature creation.
For Win 7 or later (64-bit)
For macOS 10.12 or later
● Key Takeaways from This Episode →
● Photo to Caricature is now possible in an instant with the use of a caricature maker app. These tools render an existing photograph with the use of filters and effects to create a caricature sketch worthy of any artist’s skill.
● There’s a lot of these caricature makers for you to choose from as well. Proven by the fact that we were able to easily find at least ten — all of which you can use (some in different ways) to transform your photographs into caricature works.
● Of course, if you want to take the traditional route and draw caricatures yourself, that’s possible too. Just remember the three tips that we outlined above: get a reference, exaggerate, and use good tools.
We certainly have a couple of recommendations to offer to you. There’s a surprisingly large amount of both caricature photo maker apps and online caricature maker tools.
Today, we’ll be focusing on the apps, to keep things easily accessible. And, in the end, we’ve even included a quick step-by-step guide on how to make a caricature of a photo.
In this article
01 [The 10 Best Makers to Turn Photos to Caricature Effects](#Part 1)
02 [How to Draw a Caricature — Step by Step Guide](#Part 2)
Part 1 The 10 Best Makers to Turn Photos to Caricature Effects
As promised, part one of this article is devoted to a list of the 10 best caricature maker apps that we can find. We’ll be focusing on the Apple App Store, in this case, but it’s important to note that most of these are available on the Google play store as well. (A link to the app has been provided for your convenience as well.)
011. MomentCam Cartoons & Stickers
The first of the caricature maker apps on our list is ‘MomentCam Cartoon & Stickers’ — this app is part of another tool called ‘Avatar Maker Bundle’, but it can be used on its own to create caricature versions of yourself that you can use to express emotions (an avatar, if you will).
This app was made primarily to help the user to create an avatar that matches their look (with accessorization features to complete the set). However, you can interact with other members of the community to create multiple avatars if you wish. Or, you can share your caricature pictures on social media.
URL: https://apps.apple.com/ca/app/momentcam-cartoons-stickers/id687624831
02Color Cartoon Caricature Maker
This next caricature maker app uses a more realistic style akin to what is usually used for a political caricature of famous individuals and politicians. It’s called ‘Color Cartoon Caricature Maker’ and, while not as extensive in its features as the previous app, it can be used to turn an image completely into a caricature (which means that it can be used for photographs with more than one person or focus.)
URL: https://apps.apple.com/ca/app/color-cartoon-caricature-maker/id1448093448
03PicMagic- Cartoon Photo Editor
Up next, we have ‘Pic Magic’ which is better described as a ‘cartoon photo editor’ but still works as a serviceable caricature maker if all you’re looking for is a subtle enhancement of features (unlike what was shown in the political caricature maker we showed previously.)
Much like the second app, while it’s more suitable for enhancing the features of one person, it does work for group pictures as well.
URL: https://apps.apple.com/ca/app/picmagic-cartoon-photo-editor/id1491645007
04Photic - Cartoon Yourself AI
This next app, called ‘Photic’ is much like our previously listed app, PicMagic. As you can see from the image provided, it can make a caricature of a photo but in a subtle way that is undeniably more of a ‘cartoony’ style than what you might be looking for. Keep that in mind.
The best part of it is that you can use it along with iMessage — making it very easy to share your finished caricature pictures with friends and family. The downside? It is best used for solo picture caricature-like only.
URL: https://apps.apple.com/ca/app/photic-cartoon-yourself-ai/id1484108330
05ToonApp Cartoon Photo Editor
‘ToonApp’ is the next caricature maker on our list. As you can see from the image provided, the style of caricature is a lot more realistic here. Very similar to what you normally see of western comics (which only subtly changes the features of a person to look more rendered.) The best part of this app? Well, unlike some of the other options on this list, it works great for group pictures.
URL: https://apps.apple.com/ca/app/toonapp-cartoon-photo-editor/id1540719743
06Voilà AI Artist Cartoon Photo
This next app is very similar to the previous one we introduced. It’s called ‘Voilà AI Artist Cartoon Photo’ and the main difference between it and the ToonApp app that we introduced earlier is that it uses a different caricature style. Not unlike what you see from 3D animations — which is a mix of realism and cartoony.
This tool, much like a lot of other alternatives, is best used for selfies.
URL: https://apps.apple.com/us/app/voil%C3%A0-ai-artist-cartoon-photo/id1558421405
07Caricature Hyper Face Morph
Now we go back to what most people usually consider ‘caricature’ with the ‘Caricature Hyper Face Morph’ app. This app, as you can see from the image below, allows you to morph a photograph into something more exaggerated (turning it into a true-to-form caricature; like what you would see in political caricature segments in newspapers or old animated short films.)
It works for group photographs surprisingly well as well. With the AI recognizing and applying the ‘morph’ effect to everyone.
URL: https://apps.apple.com/ca/app/caricature-hyper-face-morph-from-photos-camera-shots/id587429629
08Face Caricature
The next caricature maker on our list is the app called ‘Face Caricature.’ The best part of this app, undoubtedly, is the fact that it offers several ‘caricature’ styles that you can choose from. So, you aren’t stuck with just one cartoon style. It’s better for selfies, however — it doesn’t work as well as a group picture caricature maker.
URL: https://apps.apple.com/ca/app/face-caricature-cartoon-photo/id1007143753
09Cartoon Caricature Face Camera
This is a camera tool that you can use in order to take photographs and turn them into caricatures. There are several caricature art styles for you to choose from, which are always fun. Plus, it offers easy save-and-share features. As a final note, this app works best as a selfie app.
URL: https://apps.apple.com/ca/app/cartoon-caricature-face-camera/id1424277519
10Face Distortion - Screw Up Your Face
Though this app isn’t exactly a ‘caricature maker‘ it does work like one. It’s just a matter of finding the right distortive effect to mimic the look of an actual caricature sketch. The best part about it is that it’s basically a custom caricature maker — one that allows you to control exactly what features are exaggerated.
URL: https://apps.apple.com/ca/app/face-distortion-screw-up-your-face/id1188623179
Part 2 How to Draw a Caricature — Step by Step Guide
Now for our promised tutorial. Here, we introduce a quick and easy way to draw caricatures. Take it more as an overview of what exactly caricatures are and how you can create them by following a specific set of steps. Ah, but of course, just to make sure that you are getting something out of it, we’ve also included a recommendation for a tool that you can use in order to step up your caricature creation.
Step 1: Get a Reference Photo.
Any good caricature starts with a good reference photo. If you’re not familiar with the term, a reference photo is basically any photograph that you use in order to draw inspiration from.
When making a caricature, that usually means finding a portrait (like the one below) that you can directly refer to when making your caricature sketch.
Step 2: Exaggerate Features.
What is the point of caricatures? Well, it all comes down to the exaggeration of features. Whether that’s enlarging the person’s head to be half the size of a person or distorting the features of their face to make one more prominent than another. There’s an endless number of ways you can go about doing it.
Just remember, when making a caricature sketch, there are no such things as rules. While you do have a reference photo in front of you, you don’t have to draw it exactly as you see it. Make the eyes farther apart, exaggerate the lift of the eyebrows, give them a teeny tiny nose, etc., etc..
Just let your imagination run wild.
Step 3: Find a Reliable Tool.
And, finally, if you really want to take your caricatures to the next level, consider animating them. That is the main point of caricatures, after all.
And, if you’re going to go about doing such a thing, make sure that you have a reliable tool on your side. For example, having something like Wondershare Filmora Video Editor , a video editor that has an endless amount of presets and effects that you can choose from, may prove to be exactly what you need to get to the next stage of your caricature creation.
For Win 7 or later (64-bit)
For macOS 10.12 or later
● Key Takeaways from This Episode →
● Photo to Caricature is now possible in an instant with the use of a caricature maker app. These tools render an existing photograph with the use of filters and effects to create a caricature sketch worthy of any artist’s skill.
● There’s a lot of these caricature makers for you to choose from as well. Proven by the fact that we were able to easily find at least ten — all of which you can use (some in different ways) to transform your photographs into caricature works.
● Of course, if you want to take the traditional route and draw caricatures yourself, that’s possible too. Just remember the three tips that we outlined above: get a reference, exaggerate, and use good tools.
Adobe Animate Rigging’s PROPER Tutorial for You
Adobe Animate Rigging’s PROPER Tutorial for You
An easy yet powerful editor
Numerous effects to choose from
Detailed tutorials provided by the official channel
Character rigging involves some easy steps. And the best way for it is Adobe animate rigging. We have laid down the following discussion to help you learn the easiest method of character rigging. And along with it, we will also help you understand both 2D and 3D character designing most effortlessly.
Lastly, and most importantly, it is vital to opt for the simplest yet feature-loaded tool for any animation work. Thus, we will also mention the best tool for animation and video editing. So, without any further wait, let us start our discussion.
In this article
01 [How to Rig a Simple Character | Adobe Animate Tutorial](#Part 1)
02 [Step by Step to Help You Understand 2D/3D Character Design](#Part 2)
Part 1 How to Rig a Simple Character | Adobe Animate Tutorial
Character rigging in Adobe is effortless and straightforward. There are a few steps for rigging in adobe animate, and we will be discussing and explaining the different steps that will help you learn rigging characters for your animation works.
The following are the steps to help you create a rig in Adobe animate.
Step 1: The first step involves selecting the shape for rigging. Otherwise, you can also use bitmap on stage for it.
**Step 2:**Look for the “Asset warp tool” present in the tool panel. This tool will help you in the process of rigging.

Step 3: Create the first joint using the “Asset warp tool” by clicking on the image or the bitmap with the tool. You will see that a triangular mesh-like structure has been formed on your image or bitmap. And the part where you clicked on the image or the bitmap with the “Asset warp tool” forms the first joint.

Step 4: The next step involves making more joints on the image and instilling bones between the joints. For that, go to the “Warp Options” and choose the “Tools” tab. There you will see the option of “Create bones”. Ensure to enable the “Create bones” option; otherwise, you will not create bones between the different joints.

Step 5: Complete the rig formation by joining all the joints correctly with each other with the help of the bones.

The above steps would help you create the rig for the image or bitmap you want to animate. And now, the following steps will help you learn the steps for modifying the rig as well as tweening.
The first process for it is deformation. So, the following are the steps that help you perform the process of deformation in animation.
Step 6: You need to deform the mesh, and you can do so by holding and dragging the joint with the help of the “Asset warp tool”.

**Step 7:**You can also rotate a bone by clicking and dragging the bone you want to rotate when you drag a joint, the size of the joint changes, which is not the case when you drag a bone. Its size remains constant.

Now, we will help you learn to work with the different keyframes. The keyframes enable the image or the bitmap to acquire different poses, vital for animation. The “Edit Multiple Frames” mode helps you work with different keyframes.
You can readily create new keyframes and deform the image through joints or bones. Each keyframe retains its own set, and you can integrate different transforms after setting one pose for the image in the keyframe.

Part 2 Step by Step to Help You Understand 2D/Character Design
Animation is immensely enjoyable and takes the best of our creativity. And as we know, there are two major and most renowned types of it. One is the 2-dimensional animation, which we know as the animation. And the other one is 3-dimensional, better known as animation.
Now, there are different aspects that are essential for anyone aspiring to animate, whether in or 3D, to know. One of the aspects is designing characters for animation. And we have ideally put forth a discussion about the different factors you need to know about character designing in and animation.
01Animate Character Design
There are some steps involved in the designing a character for animation. And those steps are pretty diverse. So, we have enlisted all the required steps and factors to help you learn and understand character designing for animation. The list is as follows.
02Understanding your audience
To create the best character design, it is essential that you understand your target audience. If your target audience includes the kids and the children, your character design will primarily be based on cartoons.
Ensure which genre of animation does your audience prefer? If it is funny or mythological or any other genre, you design your characters accordingly.

03Understand the type of characters or animation you are going to create
There are different types of animation or characters in animation. Different types serve different purposes and genres. So, let us know about the different types of animations, and this will help you understand which one would suit your requirements.
● Pop-style Characters
The characters you see in the comics and superhero animation movies are pop-style characters. They are highly expressive, become the centre of attraction and always are dominant on the screen. They tend to deliver an energy that reaches the audience impeccably.

● Iconic design
These characters are less fancy but highly expressive. They usually have a block face yet connect to an audience of all types. They are generally best for the corporate videos and those with some messages to be delivered.

● Editorial Style Characters
These characters are highly elegant and bold. These are characters that we see in different publications. They consist of great style, realisticity and cleanliness. They are mainly used to express the quality of presence.

● Sketch and experiment
Now that you know about the different character types, it will help you understand which one would match the genre of animation you prefer to work on. So, start sketching your imagination in a draft.
Decide on the different poses your character might have. Track them down in a draft. It helps you become organised and put down your plan and creativity collectively.
Trial and error are one of the best ways to achieve perfection. So, it is crucial to sketch and then take feedback. If they do not appear praiseworthy, continue sketching and then get feedback again.
● Animate and execute
Lastly, it would be best to execute all your drafts and imaginations. Try using the animation tools that suit your skill capacity and genre of animation the best.
04Animate Character Design
There are five simple steps that will help you animate a character design in 3D. The steps are as follows.
● Contrivance the ideas
Try to include such characters that include several layers. It helps in better animation and also makes your creativity sphere widen.

● Designing the character
Your main character has a large to play. So, use all the necessary tools, starting from photoshop to all the other significant factors, to make your character attain all the features necessary for standing out. It also ensures that you can readily apply all the animation techniques and give your creativity shape.

● Modelling the environment
Adding props to the background is an option. You may choose not to include any props as well. You can add the required props and accessories to your main characters. It includes clothes, scars and the like.

● Animation
It is the main step. Use the best tool for animation and instill all the necessary animation processes. Use the different layers in your main character. Set up the primary constraints and animate the background and the props. Ensure proper light settings and set the handheld camera movements as well.

● Playblast settings
Here you choose the appropriate size of your animation video. It is also an important step, which completes your animation of the character in animation.

Now that we know about the different essential aspects of and animation and character design knowing which tool can help us in the most effortless yet best quality video editing. So, as promised before, we will now discuss the best video editing tool, Wondershare Filmora Video Editor !
Here are the best features of Filmora that can ideally help you in video editing.
● Professional quality video editing tools include video stabilization, noise removal, colour tuning, audio mixer, advanced text editor, editing support, scene detection, and an audio equalizer.
● Although it is ideal for professional use, the tool is simple and effortless ot use. You face no difficulties in understating the features of the tool.
● There are over 8effects available that you can use in your videos.
● You can download it for free!
● You can readily opt for its free trial that enables you to be sure of what you are using before buying it!

For Win 7 or later (64-bit)
For macOS 10.12 or later
● Key Takeaways from This Episode →
● A piece of general information about character rigging in animation and how it is beneficial.
● A simple tutorial for character designing in and animation
● The features of the best video editing tool- Filmora.
Character rigging involves some easy steps. And the best way for it is Adobe animate rigging. We have laid down the following discussion to help you learn the easiest method of character rigging. And along with it, we will also help you understand both 2D and 3D character designing most effortlessly.
Lastly, and most importantly, it is vital to opt for the simplest yet feature-loaded tool for any animation work. Thus, we will also mention the best tool for animation and video editing. So, without any further wait, let us start our discussion.
In this article
01 [How to Rig a Simple Character | Adobe Animate Tutorial](#Part 1)
02 [Step by Step to Help You Understand 2D/3D Character Design](#Part 2)
Part 1 How to Rig a Simple Character | Adobe Animate Tutorial
Character rigging in Adobe is effortless and straightforward. There are a few steps for rigging in adobe animate, and we will be discussing and explaining the different steps that will help you learn rigging characters for your animation works.
The following are the steps to help you create a rig in Adobe animate.
Step 1: The first step involves selecting the shape for rigging. Otherwise, you can also use bitmap on stage for it.
**Step 2:**Look for the “Asset warp tool” present in the tool panel. This tool will help you in the process of rigging.
Step 3: Create the first joint using the “Asset warp tool” by clicking on the image or the bitmap with the tool. You will see that a triangular mesh-like structure has been formed on your image or bitmap. And the part where you clicked on the image or the bitmap with the “Asset warp tool” forms the first joint.
Step 4: The next step involves making more joints on the image and instilling bones between the joints. For that, go to the “Warp Options” and choose the “Tools” tab. There you will see the option of “Create bones”. Ensure to enable the “Create bones” option; otherwise, you will not create bones between the different joints.
Step 5: Complete the rig formation by joining all the joints correctly with each other with the help of the bones.
The above steps would help you create the rig for the image or bitmap you want to animate. And now, the following steps will help you learn the steps for modifying the rig as well as tweening.
The first process for it is deformation. So, the following are the steps that help you perform the process of deformation in animation.
Step 6: You need to deform the mesh, and you can do so by holding and dragging the joint with the help of the “Asset warp tool”.
**Step 7:**You can also rotate a bone by clicking and dragging the bone you want to rotate when you drag a joint, the size of the joint changes, which is not the case when you drag a bone. Its size remains constant.
Now, we will help you learn to work with the different keyframes. The keyframes enable the image or the bitmap to acquire different poses, vital for animation. The “Edit Multiple Frames” mode helps you work with different keyframes.
You can readily create new keyframes and deform the image through joints or bones. Each keyframe retains its own set, and you can integrate different transforms after setting one pose for the image in the keyframe.
Part 2 Step by Step to Help You Understand 2D/Character Design
Animation is immensely enjoyable and takes the best of our creativity. And as we know, there are two major and most renowned types of it. One is the 2-dimensional animation, which we know as the animation. And the other one is 3-dimensional, better known as animation.
Now, there are different aspects that are essential for anyone aspiring to animate, whether in or 3D, to know. One of the aspects is designing characters for animation. And we have ideally put forth a discussion about the different factors you need to know about character designing in and animation.
01Animate Character Design
There are some steps involved in the designing a character for animation. And those steps are pretty diverse. So, we have enlisted all the required steps and factors to help you learn and understand character designing for animation. The list is as follows.
02Understanding your audience
To create the best character design, it is essential that you understand your target audience. If your target audience includes the kids and the children, your character design will primarily be based on cartoons.
Ensure which genre of animation does your audience prefer? If it is funny or mythological or any other genre, you design your characters accordingly.
03Understand the type of characters or animation you are going to create
There are different types of animation or characters in animation. Different types serve different purposes and genres. So, let us know about the different types of animations, and this will help you understand which one would suit your requirements.
● Pop-style Characters
The characters you see in the comics and superhero animation movies are pop-style characters. They are highly expressive, become the centre of attraction and always are dominant on the screen. They tend to deliver an energy that reaches the audience impeccably.
● Iconic design
These characters are less fancy but highly expressive. They usually have a block face yet connect to an audience of all types. They are generally best for the corporate videos and those with some messages to be delivered.
● Editorial Style Characters
These characters are highly elegant and bold. These are characters that we see in different publications. They consist of great style, realisticity and cleanliness. They are mainly used to express the quality of presence.
● Sketch and experiment
Now that you know about the different character types, it will help you understand which one would match the genre of animation you prefer to work on. So, start sketching your imagination in a draft.
Decide on the different poses your character might have. Track them down in a draft. It helps you become organised and put down your plan and creativity collectively.
Trial and error are one of the best ways to achieve perfection. So, it is crucial to sketch and then take feedback. If they do not appear praiseworthy, continue sketching and then get feedback again.
● Animate and execute
Lastly, it would be best to execute all your drafts and imaginations. Try using the animation tools that suit your skill capacity and genre of animation the best.
04Animate Character Design
There are five simple steps that will help you animate a character design in 3D. The steps are as follows.
● Contrivance the ideas
Try to include such characters that include several layers. It helps in better animation and also makes your creativity sphere widen.
● Designing the character
Your main character has a large to play. So, use all the necessary tools, starting from photoshop to all the other significant factors, to make your character attain all the features necessary for standing out. It also ensures that you can readily apply all the animation techniques and give your creativity shape.
● Modelling the environment
Adding props to the background is an option. You may choose not to include any props as well. You can add the required props and accessories to your main characters. It includes clothes, scars and the like.
● Animation
It is the main step. Use the best tool for animation and instill all the necessary animation processes. Use the different layers in your main character. Set up the primary constraints and animate the background and the props. Ensure proper light settings and set the handheld camera movements as well.
● Playblast settings
Here you choose the appropriate size of your animation video. It is also an important step, which completes your animation of the character in animation.
Now that we know about the different essential aspects of and animation and character design knowing which tool can help us in the most effortless yet best quality video editing. So, as promised before, we will now discuss the best video editing tool, Wondershare Filmora Video Editor !
Here are the best features of Filmora that can ideally help you in video editing.
● Professional quality video editing tools include video stabilization, noise removal, colour tuning, audio mixer, advanced text editor, editing support, scene detection, and an audio equalizer.
● Although it is ideal for professional use, the tool is simple and effortless ot use. You face no difficulties in understating the features of the tool.
● There are over 8effects available that you can use in your videos.
● You can download it for free!
● You can readily opt for its free trial that enables you to be sure of what you are using before buying it!
For Win 7 or later (64-bit)
For macOS 10.12 or later
● Key Takeaways from This Episode →
● A piece of general information about character rigging in animation and how it is beneficial.
● A simple tutorial for character designing in and animation
● The features of the best video editing tool- Filmora.
10 Amazing Cartoon Music Examples You Need to Bookmark
10 Amazing Cartoon Music Examples You Need to Bookmark in 2022
An easy yet powerful editor
Numerous effects to choose from
Detailed tutorials provided by the official channel
If cartoon music turns you on, this is preferably the right place for you! Stay tuned to learn about the top 10 exciting alternatives of cartoon audios!
In this article
01 [Top 10 Cartoon Music](#Part 1)
02 [How to Add Cartoon Music in Video Editing Clips](#Part 2)
Part 1 Top 10 Cartoon Music
Talking of the fascinating and exciting world of cartoons, the subject is an evergreen source of entertainment for almost all age groups; after all, the essence of enjoying something cannot be limited within age boundaries. Diving into some specific details, the fundamental reason behind the extreme popularity of cartoon films and television series is, without any doubt, the stunning graphics and catchy background music.
Speaking of the sound credibility in particular, the following section presents a discussion on some of the choicest audio alternatives from cartoon media creations. If you have enjoyed the bliss of streaming those century old classic opera songs, you can easily relate to the entries in the upcoming list:
01Tales from the Vienna Woods
This was a masterpiece in the world of cartoon music, originally heard in the caricature series, A Corny Concerto in 1943, directed by Bob Clampett under the globally known Disney production house. The composition is essentially a repetition of Fantasia, which was released in 1940.
Talking about the exact music placement within the storyline, the inaugural audio segment, with a special emphasis on the ‘’wythm of woodwinds’’, when Porky Pig, the hero of the storyline, along with his obedient dog, traverses in search of Bugs.
Concerning on the popularity of the music, the latter has received positive music reviews from almost all the leading media critic platforms.
02The Blue Danube
Again an inclusion of the 1943 release, A corny Concerto, this was predominantly a comic version of the original track. It was used to complement the second stage of the storyline, where, a mother swan is seen humming the music to her little ones, giving the classic melody, the feel of a birdsong cover. As the audio swings in, the toddler Daffy Duck is seen paddling over an unwanted honking, while his mother is worried until everything ends up to be fine.
On the take of preference credibility, the music was quite well appreciated by the globally known media critics.
03Dance of the Comedians
This music piece originally belongs to the music album, The Bartered Bride, and was first used in Zoom and Bored in 1957, to uplift the combating theme of the cartoon series. While aptly supplementing the quest of Wile E. Coyote, the protagonist of the story, against Road Runner, his nasty opponent, the climax of the music turns out to be the most loved operas of Czech origin.
About the fan base of the audio snippet, the composition claimed welcoming responses from a worldwide audience.
04Minute Waltz in D-Flat
This one was an explicitly stunning piece of background audio, which was added to the Hyde and Hare cartoon series of 1955, to complement the latter’s storyline with the best suited sound effects.
Entering into the storyline, you will find Bugs, the cutest of rabbits, tends to locate a piano in Dr. Jekyll’s yard, and the latter being the most sophisticated lagomorph ever; begins to explore his musical skills on the instrument. Things however, take an unwanted turn when Mr. Hyde, the antagonist barges in with an attempt of destroying everything.
While the music piece came to be known as the favorite pick of Waltz lovers, the latter received considerable applaud from other media critics as well.
05Morning, Noon and Night in Vienna
This audio background was an exclusive media add-on to Baton Bunny, the 1959 released musical cartoon movies series, which was a further episode of Bugs’ journey that features this adorable, broad toothed rabbit, taking on a conducting task in the land of Vienna.
It is interesting to note that von Suppe, the developer of this music piece, also happened to work on a conducting profile, although on a comic note, the latter did not receive any appreciation for running behind odd smelling flies amid his performance!
Talking of the audience credibility, this one was a musical masterpiece, which received a large scale appreciation from listeners across the globe for featuring the most funny cartoon music ever!
06The Barber of Seville Overture
Like its aforesaid counterparts, this one was also an appreciated piece of audio, first heard in The Rabbit of Seville cartoon series, released in 1950. The musical luxury aims to compliment the combat Bugs, the adorable rabbit, against Elmer Fudd, the antagonist of the storyline, after the latter chases Bugs to a local stage. The music piece is a classic opera composition by Rossini that fails to miss out on a single beat or encounter a tempo breakdown.
The composition was fortunate enough to gain a positive critical acclaim from global audience as well as renowned critics of the artwork.
07Beethoven’s 7th
This music piece is an addition to the list of classic opera melodies by Beethoven. Talking of the inaugural release, the operatic audio was first heard in A Ham in a Role, the 1949 cartoon series. The storyline of the show talks of a speech fluent dog, longing for recognition in theatres commemorating the Shakespearean era, who is forced to lay back with his plans, thanks to the nasty pranks of the Goofy Gophers.
One of the antagonists attiring up like our poor dog, takes the credit of the efforts made by the latter and manages to get cast for a thrilling ghost scene in the Shakespearean tragedy of Hamlet.
Talking of the appreciation catered by the melody, the snippet was a somewhat strange composition, which made the critics, think of Beethoven being in a drunk state while creating the same.
08Traumerei Dreaming
This one is a short 38 seconds snippet on a tender theme, which runs to supplement the assumption of Bugs, the protagonist bunny as dead by Oalfish Canine, the latter’s newest opponent. The cult line of the music piece was gloomy enough to get a removal from the censor board, leading to a considerable edit of the audio before its theatrical showcase. The final audio was, however, still too heavy on the modernized audience to undertake.
As is evident, critics of the audio regard it to be a bit hefty, though the sound is somewhat appealing to opera lovers.
09Largo al Factotum
This high end opera was a rehearsal favorite of Giovanni Jones, the famous opera singer in The Long-Haired Hare, a well-known cartoon classic released in 1949. The star is supported in his streak by our adorable Bugs, who strums out loud on his banjo at a little distance.
All seemed well until Jones, in an annoyed state barges into break the poor rabbit’s instruments, while stretching him upwards through his long and pointed ears. The incident eventually transforms into war by the adorable bunny, who had been enraged by the time.
The music piece is catchy and captivating, considering the fact that it is a popular opera classic sung by a music star in the series.
10Johannes Brahms’ Hungarian Dances
This musical masterpiece was a part of the set of 21 Hungarian Dance compositions to supplement the country’s folk music. First heard in the cartoon series released under the name of Pigs in a Polka in 1943, the melody is essentially a miscellany of the aforesaid 21 music pieces, highlighting the catchiest elements from each.
Considering the fact that the musical delight is an assortment of some of the already best compositions, this excellent audio snippet was bound to receive a welcoming critical acclaim, and was greatly enjoyed by different sets of audiences across the world.
Part 2 How to Add Cartoon Music in Video Editing Clips
Having a significant insight of the stunning varieties of cartoon music, you can try hands at creating a masterpiece of your own by adding appealing caricature music to your video footage and clips. If you are concerned about the take away of the process, rest assured and see through the following section to understand the stepwise method to complement your video with appropriate cartoon music.
Before entering into the music adding process, let us have a formal acquaintance with Filmora, that is, the video editing software being used to cater to the aforesaid concern.
Wondershare Filmora Video Editor

Wondershare Filmora - Best Video Editor for Mac/Windows
5,481,435 people have downloaded it.
Build unique custom animations without breaking a sweat.
Focus on creating epic stories and leave the details to Filmora’s auto features.
Start a creative adventure with drag & drop effects and endless possibilities.
Filmora simplifies advanced features to save you time and effort.
Filmora cuts out repetition so you can move on to your next creative breakthrough.
To begin with, this one is the most reliable audio visual editing program, which you can use to add that extra spunk and a classic professional touch to your normal video footage. The software grants you complete liberty to explore your graphic editing skills and create visual masterpieces by choosing the perfect effects and filters from the latter’s extensive media library.
The program interface is the sweetest of all, making you cling to the editing fun in videos on a roll. Apart from this, the software is quick and smart, allowing you to create beautiful and stunning audio visual artworks within a few seconds.
User’s Guide to Add Cartoon Music to Video Clips in Filmora
Step 1: Download and Install Filmora
From the program’s official website, undertake a free download of Filmora into your MacOs or Windows supported PC or desktop.
Step 2: Import Your Video
After a successful installation of the Filmora Video Editor program in your system, proceed to launch the same in your device, followed by click on ‘Import’ in the app’s opening interface. This will allow you to select and upload any desired videos from your device to the program’s media album.
As an alternative, you can always prefer the ‘Drag and Drop’ method to upload selected video files. Your uploaded footage will be shown in the media panel at the left of the main editor window. Additional to video clips, you can also add still captures to complement them with appropriate audio.
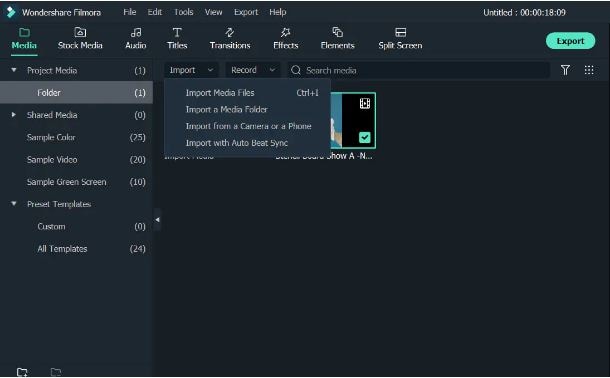
Step 3: Adding a Suitable Cartoon Music
Start with dragging the uploaded video files, one at a time, from Filmora’s media album to its timeline tracks. Take caution of the serial and non-redundant arrangement of the footage files in cohesion with the desired play sequence.
Next, proceed with adding the desired cartoon background music track above the already created video track, by using the conventional ‘Drag and Drop’ method. Check for any trimming requirements for adjusting the audio track length and position to be in concord with the video play time. While making position adjustments, you can simultaneously examine your changes in the editor’s ‘Preview Window’ and fine tune the same in real time.
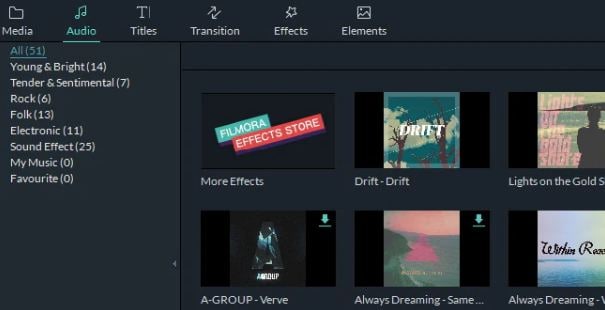
Step 4: Editing the Cartoon Music
To edit your music, open the audio editing panel by double clicking the music file in the editor’s audio track. The feature allows you to enhance your cartoon music track by adding a variety of sound effects, like, fade in, fade out, volume adjustment, pitch tuning and setting up the Audio Equalizer.
You can also try hands on making a slow motion or fast forward version of the footage by varying the audio speed, while applying the ‘Reverse Speed’ effect for a reverse playback of the audio.
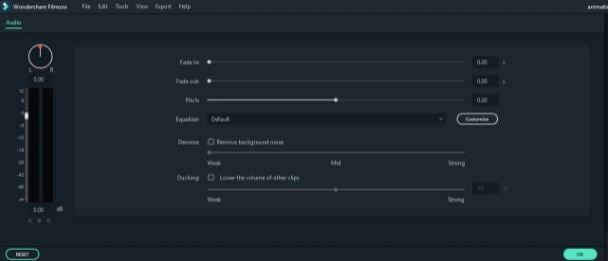
Step 5: Export Your Creation
When you are happy with your work, navigate to and click on the ‘Export’ tab at the bottom right corner of the program’s editor timeline. Save the edited cartoon music video to your device in any preferred file format in the pop-up window that appears next.
You can additionally create videos for iOS devices as well as upload your creations to various media sharing platforms, while also conveniently burning the same to a DVD for a television watch. For looping the cartoon music, just drag the audio clip to the exact length of the video footage.
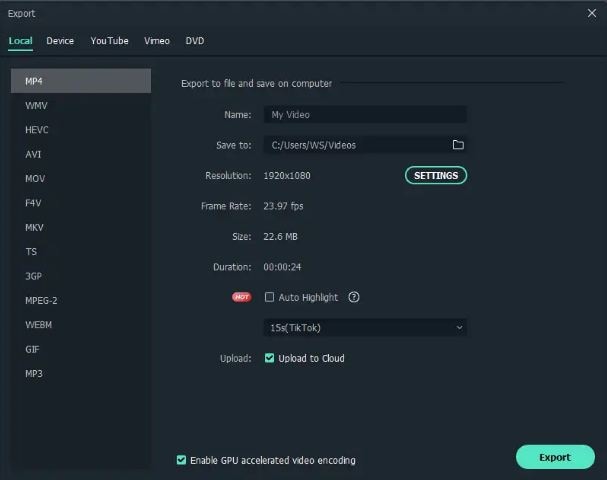
● Ending Thoughts →
● The extreme craze of cartoon music has achieved an evergreen essence over decades of release.
● Among the plethora of music varieties, some specific tracks have maintained a separate fan base.
● When experimenting on creating your own video edits with cartoon music, the Filmora Video Editor is the best tool you can pick.
If cartoon music turns you on, this is preferably the right place for you! Stay tuned to learn about the top 10 exciting alternatives of cartoon audios!
In this article
01 [Top 10 Cartoon Music](#Part 1)
02 [How to Add Cartoon Music in Video Editing Clips](#Part 2)
Part 1 Top 10 Cartoon Music
Talking of the fascinating and exciting world of cartoons, the subject is an evergreen source of entertainment for almost all age groups; after all, the essence of enjoying something cannot be limited within age boundaries. Diving into some specific details, the fundamental reason behind the extreme popularity of cartoon films and television series is, without any doubt, the stunning graphics and catchy background music.
Speaking of the sound credibility in particular, the following section presents a discussion on some of the choicest audio alternatives from cartoon media creations. If you have enjoyed the bliss of streaming those century old classic opera songs, you can easily relate to the entries in the upcoming list:
01Tales from the Vienna Woods
This was a masterpiece in the world of cartoon music, originally heard in the caricature series, A Corny Concerto in 1943, directed by Bob Clampett under the globally known Disney production house. The composition is essentially a repetition of Fantasia, which was released in 1940.
Talking about the exact music placement within the storyline, the inaugural audio segment, with a special emphasis on the ‘’wythm of woodwinds’’, when Porky Pig, the hero of the storyline, along with his obedient dog, traverses in search of Bugs.
Concerning on the popularity of the music, the latter has received positive music reviews from almost all the leading media critic platforms.
02The Blue Danube
Again an inclusion of the 1943 release, A corny Concerto, this was predominantly a comic version of the original track. It was used to complement the second stage of the storyline, where, a mother swan is seen humming the music to her little ones, giving the classic melody, the feel of a birdsong cover. As the audio swings in, the toddler Daffy Duck is seen paddling over an unwanted honking, while his mother is worried until everything ends up to be fine.
On the take of preference credibility, the music was quite well appreciated by the globally known media critics.
03Dance of the Comedians
This music piece originally belongs to the music album, The Bartered Bride, and was first used in Zoom and Bored in 1957, to uplift the combating theme of the cartoon series. While aptly supplementing the quest of Wile E. Coyote, the protagonist of the story, against Road Runner, his nasty opponent, the climax of the music turns out to be the most loved operas of Czech origin.
About the fan base of the audio snippet, the composition claimed welcoming responses from a worldwide audience.
04Minute Waltz in D-Flat
This one was an explicitly stunning piece of background audio, which was added to the Hyde and Hare cartoon series of 1955, to complement the latter’s storyline with the best suited sound effects.
Entering into the storyline, you will find Bugs, the cutest of rabbits, tends to locate a piano in Dr. Jekyll’s yard, and the latter being the most sophisticated lagomorph ever; begins to explore his musical skills on the instrument. Things however, take an unwanted turn when Mr. Hyde, the antagonist barges in with an attempt of destroying everything.
While the music piece came to be known as the favorite pick of Waltz lovers, the latter received considerable applaud from other media critics as well.
05Morning, Noon and Night in Vienna
This audio background was an exclusive media add-on to Baton Bunny, the 1959 released musical cartoon movies series, which was a further episode of Bugs’ journey that features this adorable, broad toothed rabbit, taking on a conducting task in the land of Vienna.
It is interesting to note that von Suppe, the developer of this music piece, also happened to work on a conducting profile, although on a comic note, the latter did not receive any appreciation for running behind odd smelling flies amid his performance!
Talking of the audience credibility, this one was a musical masterpiece, which received a large scale appreciation from listeners across the globe for featuring the most funny cartoon music ever!
06The Barber of Seville Overture
Like its aforesaid counterparts, this one was also an appreciated piece of audio, first heard in The Rabbit of Seville cartoon series, released in 1950. The musical luxury aims to compliment the combat Bugs, the adorable rabbit, against Elmer Fudd, the antagonist of the storyline, after the latter chases Bugs to a local stage. The music piece is a classic opera composition by Rossini that fails to miss out on a single beat or encounter a tempo breakdown.
The composition was fortunate enough to gain a positive critical acclaim from global audience as well as renowned critics of the artwork.
07Beethoven’s 7th
This music piece is an addition to the list of classic opera melodies by Beethoven. Talking of the inaugural release, the operatic audio was first heard in A Ham in a Role, the 1949 cartoon series. The storyline of the show talks of a speech fluent dog, longing for recognition in theatres commemorating the Shakespearean era, who is forced to lay back with his plans, thanks to the nasty pranks of the Goofy Gophers.
One of the antagonists attiring up like our poor dog, takes the credit of the efforts made by the latter and manages to get cast for a thrilling ghost scene in the Shakespearean tragedy of Hamlet.
Talking of the appreciation catered by the melody, the snippet was a somewhat strange composition, which made the critics, think of Beethoven being in a drunk state while creating the same.
08Traumerei Dreaming
This one is a short 38 seconds snippet on a tender theme, which runs to supplement the assumption of Bugs, the protagonist bunny as dead by Oalfish Canine, the latter’s newest opponent. The cult line of the music piece was gloomy enough to get a removal from the censor board, leading to a considerable edit of the audio before its theatrical showcase. The final audio was, however, still too heavy on the modernized audience to undertake.
As is evident, critics of the audio regard it to be a bit hefty, though the sound is somewhat appealing to opera lovers.
09Largo al Factotum
This high end opera was a rehearsal favorite of Giovanni Jones, the famous opera singer in The Long-Haired Hare, a well-known cartoon classic released in 1949. The star is supported in his streak by our adorable Bugs, who strums out loud on his banjo at a little distance.
All seemed well until Jones, in an annoyed state barges into break the poor rabbit’s instruments, while stretching him upwards through his long and pointed ears. The incident eventually transforms into war by the adorable bunny, who had been enraged by the time.
The music piece is catchy and captivating, considering the fact that it is a popular opera classic sung by a music star in the series.
10Johannes Brahms’ Hungarian Dances
This musical masterpiece was a part of the set of 21 Hungarian Dance compositions to supplement the country’s folk music. First heard in the cartoon series released under the name of Pigs in a Polka in 1943, the melody is essentially a miscellany of the aforesaid 21 music pieces, highlighting the catchiest elements from each.
Considering the fact that the musical delight is an assortment of some of the already best compositions, this excellent audio snippet was bound to receive a welcoming critical acclaim, and was greatly enjoyed by different sets of audiences across the world.
Part 2 How to Add Cartoon Music in Video Editing Clips
Having a significant insight of the stunning varieties of cartoon music, you can try hands at creating a masterpiece of your own by adding appealing caricature music to your video footage and clips. If you are concerned about the take away of the process, rest assured and see through the following section to understand the stepwise method to complement your video with appropriate cartoon music.
Before entering into the music adding process, let us have a formal acquaintance with Filmora, that is, the video editing software being used to cater to the aforesaid concern.
Wondershare Filmora Video Editor
Wondershare Filmora - Best Video Editor for Mac/Windows
5,481,435 people have downloaded it.
Build unique custom animations without breaking a sweat.
Focus on creating epic stories and leave the details to Filmora’s auto features.
Start a creative adventure with drag & drop effects and endless possibilities.
Filmora simplifies advanced features to save you time and effort.
Filmora cuts out repetition so you can move on to your next creative breakthrough.
To begin with, this one is the most reliable audio visual editing program, which you can use to add that extra spunk and a classic professional touch to your normal video footage. The software grants you complete liberty to explore your graphic editing skills and create visual masterpieces by choosing the perfect effects and filters from the latter’s extensive media library.
The program interface is the sweetest of all, making you cling to the editing fun in videos on a roll. Apart from this, the software is quick and smart, allowing you to create beautiful and stunning audio visual artworks within a few seconds.
User’s Guide to Add Cartoon Music to Video Clips in Filmora
Step 1: Download and Install Filmora
From the program’s official website, undertake a free download of Filmora into your MacOs or Windows supported PC or desktop.
Step 2: Import Your Video
After a successful installation of the Filmora Video Editor program in your system, proceed to launch the same in your device, followed by click on ‘Import’ in the app’s opening interface. This will allow you to select and upload any desired videos from your device to the program’s media album.
As an alternative, you can always prefer the ‘Drag and Drop’ method to upload selected video files. Your uploaded footage will be shown in the media panel at the left of the main editor window. Additional to video clips, you can also add still captures to complement them with appropriate audio.
Step 3: Adding a Suitable Cartoon Music
Start with dragging the uploaded video files, one at a time, from Filmora’s media album to its timeline tracks. Take caution of the serial and non-redundant arrangement of the footage files in cohesion with the desired play sequence.
Next, proceed with adding the desired cartoon background music track above the already created video track, by using the conventional ‘Drag and Drop’ method. Check for any trimming requirements for adjusting the audio track length and position to be in concord with the video play time. While making position adjustments, you can simultaneously examine your changes in the editor’s ‘Preview Window’ and fine tune the same in real time.
Step 4: Editing the Cartoon Music
To edit your music, open the audio editing panel by double clicking the music file in the editor’s audio track. The feature allows you to enhance your cartoon music track by adding a variety of sound effects, like, fade in, fade out, volume adjustment, pitch tuning and setting up the Audio Equalizer.
You can also try hands on making a slow motion or fast forward version of the footage by varying the audio speed, while applying the ‘Reverse Speed’ effect for a reverse playback of the audio.
Step 5: Export Your Creation
When you are happy with your work, navigate to and click on the ‘Export’ tab at the bottom right corner of the program’s editor timeline. Save the edited cartoon music video to your device in any preferred file format in the pop-up window that appears next.
You can additionally create videos for iOS devices as well as upload your creations to various media sharing platforms, while also conveniently burning the same to a DVD for a television watch. For looping the cartoon music, just drag the audio clip to the exact length of the video footage.
● Ending Thoughts →
● The extreme craze of cartoon music has achieved an evergreen essence over decades of release.
● Among the plethora of music varieties, some specific tracks have maintained a separate fan base.
● When experimenting on creating your own video edits with cartoon music, the Filmora Video Editor is the best tool you can pick.
5 Foolproof Amazing Anime Text to Speech Tips
5 Foolproof Amazing Anime Text to Speech Tips for Makers
An easy yet powerful editor
Numerous effects to choose from
Detailed tutorials provided by the official channel
Our topic for today’s article is on that exact same subject. Or, rather, more specifically, anime text-to-speech.
For those who want more than the usual robotic text-to-speech AI that you see in more professional software. Learn more about all this below, we’ve prepared an entire guide for you!
In this article
01 [What is the Most Realistic Sounding Text to Speech & How to Do It?](#Part 1)
02 [How to Make Your Own Text to Speech Videos for Youtube](#Part 2)
03 [How to Get More Voices for Text to Speech?](#Part 3)
04 [Top 5 Tips on Anime Text to Speech](#Part 4)
Part 1 What is the Most Realistic Sounding Text to Speech & How to Do It?
To start off, we’ve included this little second on need-to-know information regarding text-to-speech. Starting with:
01How did text to speech get popular?
Perhaps unsurprisingly, the text-to-speech function was developed to increase accessibility for those who have trouble reading on screen-text. Either as a result of visual impairment, are blindness. However, with its emergence came popular programs like Audible, which introduced even those without accessibility problems to its convenience for multi-tasking purposes.
02How to get the most realistic sounding text to speech?
There are several ways you can increase the natural sound of your text-to-speech:
● You can choose a tone that suits your taste.
● You can choose a voice gender that you are more comfortable with.
● And you can increase the speed of the text to reduce the awkward, and unnatural pauses that occur after each word.
In the end, though, the best way to get realistic speech is to find a tool that offers high-quality audio options. Which is what we’ll be introducing in the latter sections:
Part 2 How to Make Your Own Text to Speech Videos for YouTube
If you want to create your own anime text-to-speech for your YouTube videos (which is popular with a lot of YouTubers these days), the process is about the same no matter what text-to-speech option you end up choosing in the end. For our examples below, we will be using Natural Readers though, which is a FREE tool, making it a good choice for those who are just looking to try it out.
Step 1: Compose Your Text
The first step is to compose your text! You might prefer to do this on Google Docs or Word, but a lot of text-to-speech tools do offer you a way of composing your text along with them (like the online tool Natural Readers):

Step 2: Choose Voice / Reader
Next, it’s time to choose the reader that you want your text to be read by!
Usually, there are options for different types of accents and languages offered. So, if you want your text to speech to match that of your desired anime characters, you should play around with these options to get the right one.

Step 3: Choose Reading Speed!
Next, it’s time to choose your desired reading speed!
Most readers start off at 1X speed on average, but we personally recommend going for at least 1.25X - 1.5X for an instantly more natural-sounding text-to-speech anime characters.

Step 4: Choose Output Format
And finally, to finish us off, it’s time to choose what output format you want your text-to-speech audio to be! To keep this simple for uploading to YouTube, we recommend sticking with MP3, which most editors accept.

Part 3 How to Get More Voices for Text to Speech?
If you think that the available cartoon characters text-to-speech voices you have are not quite doing it for your project, then you can always explore alternative, third-party options! There are many of these available. Although, you’ll have to check with your text-to-speech reader or maker to make sure that it allows for such a feat:
01Method 1: Windows Text-to-Speech Voices
If you’re looking to change your computer’s text-to-speech voice, then the place to look for this is on ‘Control Panel > Speech’. There, not only can you choose from a variety of different voice options, but you can also change voice speed and voice pitch (how high or low the pitch is), which is a great way of getting a very specific kind of tone for your anime text-to-speech creations.

02Method 2: Third-Party Voices (Screaming Bee)
Next is the third-party resource, Screaming Bee , which offers a good variety of text-to-speech voices that you can try out as well! Using this method will, of course, require downloading and applying these voices for your chosen text-to-speech reader. For example, if you want to use the Windows reader, go to the Control Panel > Speech page for the option to apply it there.

03Method 3: Third-Party Voices (Cepstral Voices)
Another resource that you can check out is Cepstral Voices . Just like Screaming Bee, it offers a range of text-to-speech voices that you can try out to see which one suits your taste most. This includes text-to-speech cartoon characters and text-to-speech anime characters voices!

Part 4 Top 5 Tips on Anime Text to Speech
Now, onto some more anime text-to-speech options that you can try in order to make your text-to-speech script sound exactly like your favorite cartoon or anime characters! For this list, we’ve not only included a description of each reader but also why you might want to try it out:
01Flixier
Flixier is the first anime text-to-speech maker on this list! It is not a free solution. You can try it out for FREE, but if you want to use it for its full capacity, then you’ll need to pay for one of their subscription packages, which start at $10 per month (for access to longer audios, unlimited projects, and more advanced export options.)
● Flixier comes with many different voice options.
● It is an online tool, so no download or installation is required.
● It comes with advanced team functionalities.

02Woord
Woord is our next pick because it works very efficiently at turning text into speech. All you need to do is plug in your text and it will convert it immediately! Much like Flixier, however, it is a freemium tool. So, while you can try it out for free, if you truly want to use it for creating professional projects, you’ll need to unlock one of its subscription packages (which start at $25 per month!)
● Instant text-to-speech maker.
● An online tool, no need for download or installation.
● Lots of natural-sounding voices to choose from.

03Speechelo
Speechelo is a bit different from the two text-to-speech makers on this list. However, that may just mean that it is a more preferable option for some. More specifically, it’s really more of a ‘voice-over-maker’. It does still use AI in order to create human-like voiceovers, with several different options to voice and language. The difference then lies in the fact that it is a one-time payment software that normally costs around $100. In this way, you can avoid long-term ongoing subscription plans. But it is a heavier commitment from the get-go.
● High-quality AI voices for creating realistic voice-overs.
● One-time payment only! No Subscription fees are needed.
● Works in several different languages.

04Cartoon Animator 4
Cartoon Animator 4 is a good option if you’re really looking for that anime or character style for your audio. It works just like your average text-to-speech maker, generally, although it does also offer a couple of more advanced features for those who are looking into animation.
● Free-to-use text-to-speech anime character
● Adjustable volume, pitch, and speed voice parameters.
● A wide variety of voice options to choose from.

05TTS Reader
TTSReader, much like Cartoon Animator 4, is a FREE online tool that you can use in order to create quick and easy text-to-speech audio for your cartoon/anime characters. It doesn’t have as many advanced features as some of the other tools out there, but it can get the job done if all you’re looking for is something easy to use.
● Available to use online for FREE.
● Variety of different voice options.
● Adjustable speed for voice.

Key Takeaways from This Episode
● If you’re looking to increase conversions with better-sounding voiceovers for your video content, then it’s important that you’re aware of all the different options out there!
● Most of these text-to-speech tools work in the same way, but you’ll notice that some of them offer more advanced tools than others.
● In the end, you’ll have to find one that works with your budget and learn how to play around with its settings to make sure that you are getting the most out of your text-to-speech maker.
Our topic for today’s article is on that exact same subject. Or, rather, more specifically, anime text-to-speech.
For those who want more than the usual robotic text-to-speech AI that you see in more professional software. Learn more about all this below, we’ve prepared an entire guide for you!
In this article
01 [What is the Most Realistic Sounding Text to Speech & How to Do It?](#Part 1)
02 [How to Make Your Own Text to Speech Videos for Youtube](#Part 2)
03 [How to Get More Voices for Text to Speech?](#Part 3)
04 [Top 5 Tips on Anime Text to Speech](#Part 4)
Part 1 What is the Most Realistic Sounding Text to Speech & How to Do It?
To start off, we’ve included this little second on need-to-know information regarding text-to-speech. Starting with:
01How did text to speech get popular?
Perhaps unsurprisingly, the text-to-speech function was developed to increase accessibility for those who have trouble reading on screen-text. Either as a result of visual impairment, are blindness. However, with its emergence came popular programs like Audible, which introduced even those without accessibility problems to its convenience for multi-tasking purposes.
02How to get the most realistic sounding text to speech?
There are several ways you can increase the natural sound of your text-to-speech:
● You can choose a tone that suits your taste.
● You can choose a voice gender that you are more comfortable with.
● And you can increase the speed of the text to reduce the awkward, and unnatural pauses that occur after each word.
In the end, though, the best way to get realistic speech is to find a tool that offers high-quality audio options. Which is what we’ll be introducing in the latter sections:
Part 2 How to Make Your Own Text to Speech Videos for YouTube
If you want to create your own anime text-to-speech for your YouTube videos (which is popular with a lot of YouTubers these days), the process is about the same no matter what text-to-speech option you end up choosing in the end. For our examples below, we will be using Natural Readers though, which is a FREE tool, making it a good choice for those who are just looking to try it out.
Step 1: Compose Your Text
The first step is to compose your text! You might prefer to do this on Google Docs or Word, but a lot of text-to-speech tools do offer you a way of composing your text along with them (like the online tool Natural Readers):
Step 2: Choose Voice / Reader
Next, it’s time to choose the reader that you want your text to be read by!
Usually, there are options for different types of accents and languages offered. So, if you want your text to speech to match that of your desired anime characters, you should play around with these options to get the right one.
Step 3: Choose Reading Speed!
Next, it’s time to choose your desired reading speed!
Most readers start off at 1X speed on average, but we personally recommend going for at least 1.25X - 1.5X for an instantly more natural-sounding text-to-speech anime characters.
Step 4: Choose Output Format
And finally, to finish us off, it’s time to choose what output format you want your text-to-speech audio to be! To keep this simple for uploading to YouTube, we recommend sticking with MP3, which most editors accept.
Part 3 How to Get More Voices for Text to Speech?
If you think that the available cartoon characters text-to-speech voices you have are not quite doing it for your project, then you can always explore alternative, third-party options! There are many of these available. Although, you’ll have to check with your text-to-speech reader or maker to make sure that it allows for such a feat:
01Method 1: Windows Text-to-Speech Voices
If you’re looking to change your computer’s text-to-speech voice, then the place to look for this is on ‘Control Panel > Speech’. There, not only can you choose from a variety of different voice options, but you can also change voice speed and voice pitch (how high or low the pitch is), which is a great way of getting a very specific kind of tone for your anime text-to-speech creations.
02Method 2: Third-Party Voices (Screaming Bee)
Next is the third-party resource, Screaming Bee , which offers a good variety of text-to-speech voices that you can try out as well! Using this method will, of course, require downloading and applying these voices for your chosen text-to-speech reader. For example, if you want to use the Windows reader, go to the Control Panel > Speech page for the option to apply it there.
03Method 3: Third-Party Voices (Cepstral Voices)
Another resource that you can check out is Cepstral Voices . Just like Screaming Bee, it offers a range of text-to-speech voices that you can try out to see which one suits your taste most. This includes text-to-speech cartoon characters and text-to-speech anime characters voices!
Part 4 Top 5 Tips on Anime Text to Speech
Now, onto some more anime text-to-speech options that you can try in order to make your text-to-speech script sound exactly like your favorite cartoon or anime characters! For this list, we’ve not only included a description of each reader but also why you might want to try it out:
01Flixier
Flixier is the first anime text-to-speech maker on this list! It is not a free solution. You can try it out for FREE, but if you want to use it for its full capacity, then you’ll need to pay for one of their subscription packages, which start at $10 per month (for access to longer audios, unlimited projects, and more advanced export options.)
● Flixier comes with many different voice options.
● It is an online tool, so no download or installation is required.
● It comes with advanced team functionalities.
02Woord
Woord is our next pick because it works very efficiently at turning text into speech. All you need to do is plug in your text and it will convert it immediately! Much like Flixier, however, it is a freemium tool. So, while you can try it out for free, if you truly want to use it for creating professional projects, you’ll need to unlock one of its subscription packages (which start at $25 per month!)
● Instant text-to-speech maker.
● An online tool, no need for download or installation.
● Lots of natural-sounding voices to choose from.
03Speechelo
Speechelo is a bit different from the two text-to-speech makers on this list. However, that may just mean that it is a more preferable option for some. More specifically, it’s really more of a ‘voice-over-maker’. It does still use AI in order to create human-like voiceovers, with several different options to voice and language. The difference then lies in the fact that it is a one-time payment software that normally costs around $100. In this way, you can avoid long-term ongoing subscription plans. But it is a heavier commitment from the get-go.
● High-quality AI voices for creating realistic voice-overs.
● One-time payment only! No Subscription fees are needed.
● Works in several different languages.
04Cartoon Animator 4
Cartoon Animator 4 is a good option if you’re really looking for that anime or character style for your audio. It works just like your average text-to-speech maker, generally, although it does also offer a couple of more advanced features for those who are looking into animation.
● Free-to-use text-to-speech anime character
● Adjustable volume, pitch, and speed voice parameters.
● A wide variety of voice options to choose from.
05TTS Reader
TTSReader, much like Cartoon Animator 4, is a FREE online tool that you can use in order to create quick and easy text-to-speech audio for your cartoon/anime characters. It doesn’t have as many advanced features as some of the other tools out there, but it can get the job done if all you’re looking for is something easy to use.
● Available to use online for FREE.
● Variety of different voice options.
● Adjustable speed for voice.
Key Takeaways from This Episode
● If you’re looking to increase conversions with better-sounding voiceovers for your video content, then it’s important that you’re aware of all the different options out there!
● Most of these text-to-speech tools work in the same way, but you’ll notice that some of them offer more advanced tools than others.
● In the end, you’ll have to find one that works with your budget and learn how to play around with its settings to make sure that you are getting the most out of your text-to-speech maker.
How to Create a YouTube Intro Animation Like a Pro
How to Create a YouTube Intro Animation like a Pro
An easy yet powerful editor
Numerous effects to choose from
Detailed tutorials provided by the official channel
YouTube video intro animation is the short introductory clips and plays at the beginning of a YouTube video. YouTube intro videos as in almost everywhere, most times probably without giving them a second chance or understanding what their purpose is. There is no difference in YouTube videos, as without a proper setup, even if the content is excellent, your audience is not likely to hang around.
There is some free animation intro for YouTube that you can choose from to create your own YouTube intro. In this article, we will show a comprehensive guide on how to get an intro animation template free download and create your own free YouTube animation intro like a professional. So, let’s move on to explore how is the YouTube intro animation download process works using YouTube Intro Animation Makers through this article.
In this article
01 [What is YouTube Intro Animation?](#Part 1)
02 [How does YouTube Intro Animation Maker works?](#Part 2)
03 [5 of YouTube Intro Animation examples (2022)](#Part 3)
04 [How to Create a YouTube Intro Animation FAST](#Part 4)
Part 1 What is YouTube Intro Animation?
An animation video for YouTube intro is a short animated clip usually 5 to seconds in length and plays before the main YouTube video content. The intro YouTube animation is the primary step to creating your online persona and branding your content on YouTube. You can get YouTube intro animation for free online and include them in your YouTube content. A YouTube intro easily and quickly provides viewers insight into what they should expect from the channel. It is used to familiarize the viewer with the channel’s theme, feel, and look, which gives them context before reaching the main content.
Intro animation YouTube is sometimes called video bumpers, as they catch viewers’ attention and help reinforce your brand. In the general video, intros boost the video quality. You can also get a good video intro from intro animation free download websites for your YouTube content.
Part 2 How do YouTube Intro Animation Maker works?
You can create compelling, engaging, and best intro animation on YouTube by using free animation intro for YouTube or creating a YouTube intro animation by yourself. You don’t need be a pro in video editing or a creator to make animated video intros for your YouTube channel if you have the best intro animation software to create intro videos like a professional. Here are some benefits of YouTube intro animation maker and how it works:
● A YouTube intro animation maker has a built-in editor in your browser
● A YouTube intro animation maker is affordable, fast, and easy to use
● A YouTube intro animation maker can broadcast-quality logo animation and intros
● A YouTube intro animation maker has a wide variety of templates to make your YouTube animation intro
Using a YouTube intro animation maker, you are ready to create unskippable YouTube intros using the most versatile tool to turn your viewers into lifelong channel subscribers.
Part 3 5 of YouTube Intro Animation examples (2022)
To be successful on YouTube, capture and retain your viewers’ attention and increase your conversions. The best method to achieve this is by using an excellent YouTube animated intro to create a lasting impression to make your video worth watching. You can also get Professional YouTube animated intro from intro animation download websites. This action will look at 5 make YouTube intro animation examples and ideas from where you can draw your inspiration in 2022.
01Ted Talk
Ted Talk, free fire intro animation, is a perfect example of a beautiful and captured sequence that helps to tell the audience what the brand is all about and their ideas and worth spreading. The good news about this intro is that you don’t need to be a professional, hire an animator, or invest in any flashy or expensive animation to show your brand on YouTube.
To achieve this intro, all you require is some intro animation in After Effects template free that can work for your brand so that you’ll be able to retain your audience and make them wanting to come back for more.
02Jazza
Jazza is a perfect example of free intro animation templates that you can use all over again to showcase your brand. The main idea for making a gaming intro animation video free download is to bring about an attractive, eye-capturing video intro through it.
This intro communicates a passion for teaching people to paint, animate, and draw. This same template can also create a vlog animation intro for the Jazza language lesson website, as it is a tremendous sequential presentation that represents Jazza mission.
03Salma Jafra
Salma Jafra Video intro tells a short story about the video’s main takeaways and includes an 8 seconds vlog intro animation sequence. Everything, including a brand color, is purple, which helps the audience recognize our videos on YouTube.
In addition to the free animation for YouTube intro, she plugged in her content to the end of the video or outro to generate enough traffic and adhere to SEO guidelines to ensure that the targeted audience finds the videos.
04SciShow
SciShow enables viewers to understand the brand and the kind of free YouTube intro animation video. The main trick of the video is to instantly grab viewers’ attention and convince them that the video is for them.
This intro animation video free download is a perfect example of how you can introduce your theme, tone, and brand name into your YouTube animation intro video download. This type of intro allows viewers to know what to expect quickly, and superb animation and design show off the value of production. Examples of a brand that can benefit from this type of YouTube animation intro download template is sleep studies.
05”Pump Red” Cinema Template

“Pump Red” Cinema Template is perfect for capturing reviewers’ imagination with an eye-catching, captivating, and intelligent video intro. By following the examples in this Minecraft animation intro template, you are more likely to retain your visitors or viewers from the moment they hit the play button on your YouTube video by using a catching soundtrack, on-brand messaging, and exciting visuals.
Part 4 How to Create a YouTube Intro Animation FAST
Whether you are using any streaming channel, YouTube, or selling videos on any e-commerce website, making animation for YouTube intro plays a vital role in promoting your brand. With it, creating an introduction may not seem as complicated as it sounds.
The section explains in detail how to make a YouTube intro animation free with the Wondershare Filmora Video Editor video editor from animated intro download templates or create a custom intro from scratch even if there is no existing footage or image to begin with. The following method will guide you through the process, and then you can keep your video saved for reuse in all creations to maintain consistency and give your brand a unique identity:
Wondershare Filmora
Get started easily with Filmora’s powerful performance, intuitive interface, and countless effects!
Try It Free Try It Free Try It Free Learn More >

01Step Launch Intro Animation Software
Launch Wondershare Filmora Video Editor editor, add intro background to Filmora by going to the media tab at the top and selecting any sample colors category from the left pane. All the solid and gradient colors in the media library are available at the right, then over the mouse to the color title you want to use as a background and click on the + icon in the middle to add it to the timeline.
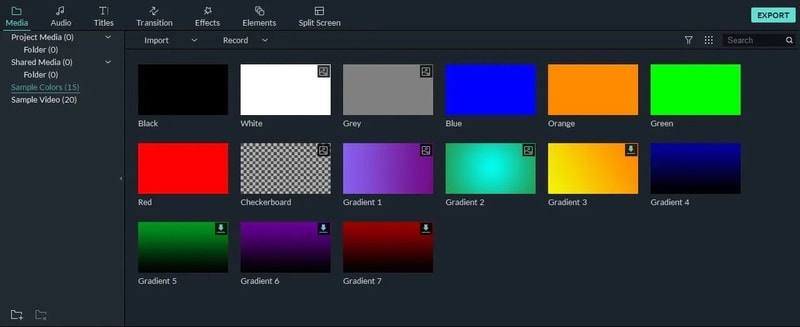
02Step Add Different effects
Add sound effects or audio to YouTube animated intro to make it more recognizable. In Wondershare Filmora Video Editor , visit the built-in audio library by double-clicking the audio thumbnail from the library and listening to the soundtrack. Repeat the process to find the perfect sound effects or background music for your video intro. D-and-drop the audio to the video.

03Step Adding Branding Element
In the animated video intro, add the company name, branding element, and channel name to create brand awareness by clicking on the title tab and hovering the mouse to the text you want to use. Then drag and drop it to track above the video.
Go to the Effects tab and select category from the top left pane. Click and drag your preferred effects from the library effects to the timeline.
04Step Export
Once you finish creating your animated video intro with all the required ingredients, go to Export at the top center area of the interface to export the animated video intro, and once done, share it on social media.
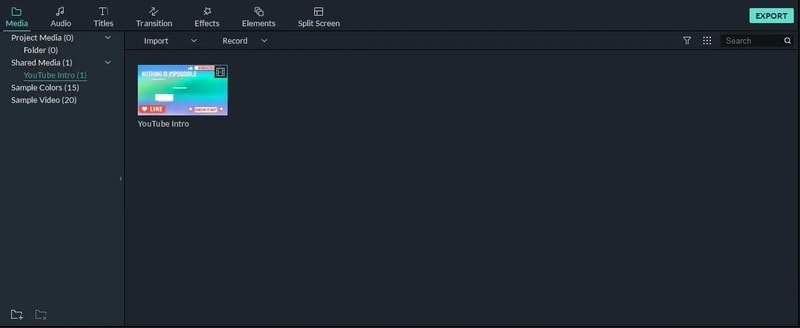
To make YouTube intro animation templates free download with Filmora templates, follow the steps listed below:
Step Select Effects
Log onto the Filmora effects page on filmstock with the same wsid used on Filmora and select the effect you want
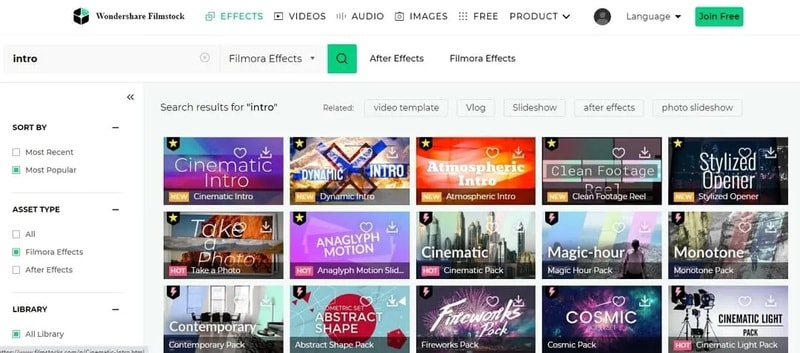
Step Select template
Select the preferred intro templates by clicking on the download now and following the instructions on the screen to attend a download template. After downloading, see in red cycle under the transition, titles, and filter based on the element included in the effect part. Add this downloaded title or transition to the animated intro video.
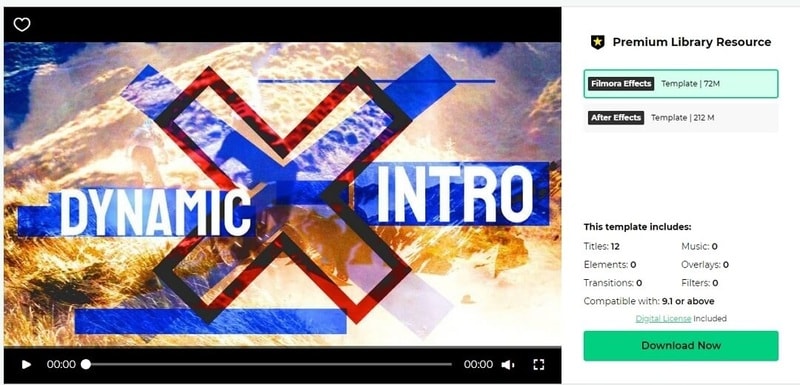
Step Finalization
Delete your animated video intro from the templates that you selected.
● Key Takeaways from This Episode →
● Introduction about what is YouTube Intro?
● How Intro Animation Maker works with examples.
● The process to develop your own YouTube intro animation for free with Wondershare Filmora Video Editor .
YouTube video intro animation is the short introductory clips and plays at the beginning of a YouTube video. YouTube intro videos as in almost everywhere, most times probably without giving them a second chance or understanding what their purpose is. There is no difference in YouTube videos, as without a proper setup, even if the content is excellent, your audience is not likely to hang around.
There is some free animation intro for YouTube that you can choose from to create your own YouTube intro. In this article, we will show a comprehensive guide on how to get an intro animation template free download and create your own free YouTube animation intro like a professional. So, let’s move on to explore how is the YouTube intro animation download process works using YouTube Intro Animation Makers through this article.
In this article
01 [What is YouTube Intro Animation?](#Part 1)
02 [How does YouTube Intro Animation Maker works?](#Part 2)
03 [5 of YouTube Intro Animation examples (2022)](#Part 3)
04 [How to Create a YouTube Intro Animation FAST](#Part 4)
Part 1 What is YouTube Intro Animation?
An animation video for YouTube intro is a short animated clip usually 5 to seconds in length and plays before the main YouTube video content. The intro YouTube animation is the primary step to creating your online persona and branding your content on YouTube. You can get YouTube intro animation for free online and include them in your YouTube content. A YouTube intro easily and quickly provides viewers insight into what they should expect from the channel. It is used to familiarize the viewer with the channel’s theme, feel, and look, which gives them context before reaching the main content.
Intro animation YouTube is sometimes called video bumpers, as they catch viewers’ attention and help reinforce your brand. In the general video, intros boost the video quality. You can also get a good video intro from intro animation free download websites for your YouTube content.
Part 2 How do YouTube Intro Animation Maker works?
You can create compelling, engaging, and best intro animation on YouTube by using free animation intro for YouTube or creating a YouTube intro animation by yourself. You don’t need be a pro in video editing or a creator to make animated video intros for your YouTube channel if you have the best intro animation software to create intro videos like a professional. Here are some benefits of YouTube intro animation maker and how it works:
● A YouTube intro animation maker has a built-in editor in your browser
● A YouTube intro animation maker is affordable, fast, and easy to use
● A YouTube intro animation maker can broadcast-quality logo animation and intros
● A YouTube intro animation maker has a wide variety of templates to make your YouTube animation intro
Using a YouTube intro animation maker, you are ready to create unskippable YouTube intros using the most versatile tool to turn your viewers into lifelong channel subscribers.
Part 3 5 of YouTube Intro Animation examples (2022)
To be successful on YouTube, capture and retain your viewers’ attention and increase your conversions. The best method to achieve this is by using an excellent YouTube animated intro to create a lasting impression to make your video worth watching. You can also get Professional YouTube animated intro from intro animation download websites. This action will look at 5 make YouTube intro animation examples and ideas from where you can draw your inspiration in 2022.
01Ted Talk
Ted Talk, free fire intro animation, is a perfect example of a beautiful and captured sequence that helps to tell the audience what the brand is all about and their ideas and worth spreading. The good news about this intro is that you don’t need to be a professional, hire an animator, or invest in any flashy or expensive animation to show your brand on YouTube.
To achieve this intro, all you require is some intro animation in After Effects template free that can work for your brand so that you’ll be able to retain your audience and make them wanting to come back for more.
02Jazza
Jazza is a perfect example of free intro animation templates that you can use all over again to showcase your brand. The main idea for making a gaming intro animation video free download is to bring about an attractive, eye-capturing video intro through it.
This intro communicates a passion for teaching people to paint, animate, and draw. This same template can also create a vlog animation intro for the Jazza language lesson website, as it is a tremendous sequential presentation that represents Jazza mission.
03Salma Jafra
Salma Jafra Video intro tells a short story about the video’s main takeaways and includes an 8 seconds vlog intro animation sequence. Everything, including a brand color, is purple, which helps the audience recognize our videos on YouTube.
In addition to the free animation for YouTube intro, she plugged in her content to the end of the video or outro to generate enough traffic and adhere to SEO guidelines to ensure that the targeted audience finds the videos.
04SciShow
SciShow enables viewers to understand the brand and the kind of free YouTube intro animation video. The main trick of the video is to instantly grab viewers’ attention and convince them that the video is for them.
This intro animation video free download is a perfect example of how you can introduce your theme, tone, and brand name into your YouTube animation intro video download. This type of intro allows viewers to know what to expect quickly, and superb animation and design show off the value of production. Examples of a brand that can benefit from this type of YouTube animation intro download template is sleep studies.
05”Pump Red” Cinema Template
“Pump Red” Cinema Template is perfect for capturing reviewers’ imagination with an eye-catching, captivating, and intelligent video intro. By following the examples in this Minecraft animation intro template, you are more likely to retain your visitors or viewers from the moment they hit the play button on your YouTube video by using a catching soundtrack, on-brand messaging, and exciting visuals.
Part 4 How to Create a YouTube Intro Animation FAST
Whether you are using any streaming channel, YouTube, or selling videos on any e-commerce website, making animation for YouTube intro plays a vital role in promoting your brand. With it, creating an introduction may not seem as complicated as it sounds.
The section explains in detail how to make a YouTube intro animation free with the Wondershare Filmora Video Editor video editor from animated intro download templates or create a custom intro from scratch even if there is no existing footage or image to begin with. The following method will guide you through the process, and then you can keep your video saved for reuse in all creations to maintain consistency and give your brand a unique identity:
Wondershare Filmora
Get started easily with Filmora’s powerful performance, intuitive interface, and countless effects!
Try It Free Try It Free Try It Free Learn More >
01Step Launch Intro Animation Software
Launch Wondershare Filmora Video Editor editor, add intro background to Filmora by going to the media tab at the top and selecting any sample colors category from the left pane. All the solid and gradient colors in the media library are available at the right, then over the mouse to the color title you want to use as a background and click on the + icon in the middle to add it to the timeline.
02Step Add Different effects
Add sound effects or audio to YouTube animated intro to make it more recognizable. In Wondershare Filmora Video Editor , visit the built-in audio library by double-clicking the audio thumbnail from the library and listening to the soundtrack. Repeat the process to find the perfect sound effects or background music for your video intro. D-and-drop the audio to the video.
03Step Adding Branding Element
In the animated video intro, add the company name, branding element, and channel name to create brand awareness by clicking on the title tab and hovering the mouse to the text you want to use. Then drag and drop it to track above the video.
Go to the Effects tab and select category from the top left pane. Click and drag your preferred effects from the library effects to the timeline.
04Step Export
Once you finish creating your animated video intro with all the required ingredients, go to Export at the top center area of the interface to export the animated video intro, and once done, share it on social media.
To make YouTube intro animation templates free download with Filmora templates, follow the steps listed below:
Step Select Effects
Log onto the Filmora effects page on filmstock with the same wsid used on Filmora and select the effect you want
Step Select template
Select the preferred intro templates by clicking on the download now and following the instructions on the screen to attend a download template. After downloading, see in red cycle under the transition, titles, and filter based on the element included in the effect part. Add this downloaded title or transition to the animated intro video.
Step Finalization
Delete your animated video intro from the templates that you selected.
● Key Takeaways from This Episode →
● Introduction about what is YouTube Intro?
● How Intro Animation Maker works with examples.
● The process to develop your own YouTube intro animation for free with Wondershare Filmora Video Editor .
What Is Motion Graphics
What is Motion Graphics
An easy yet powerful editor
Numerous effects to choose from
Detailed tutorials provided by the official channel
Are you new to motion graphics and looking to learn everything about animated motion then you are at the right webpage. In this article, we will cover everything about motion graphic videos.
In this article
01 [What is Motion Graphics? (Motion Graphics Definition)](#Part 1)
02 [5 Motion Graphics Animation Trends You Need to Know About](#Part 2)
03 [History of Motion Graphics](#Part 3)
04 [Uses of Motion Graphics Today (motion Graphics Examples)](#Part 4)
05 [ Motion Graphics Vs. Animation: What’s the Difference?](#Part 5)
05 [How to Make Motion Graphics?](#Part 5)
Part 1 What is Motion Graphics?
Motion graphics is known as videos with the mix-up of the text, effect, stickers, and many other types of components. It’s known as an animated graphic design as well. Motion graphics are a great way to communicate with the target audience with the help of video, text, and emotions in the videos. The motion graphics videos with the music, effects, and text can give a great message to the audience.
Part 2 5 Motion Graphics Animation Trends You Need to Know About
01Mix up the and 3D
Mixing up the and animations in the videos is still getting momentum. People love the way the motion graphic designer explains the video using the mixing of and 3D. This trend is also used in the hundreds of costly advertisements.
02Trend of Broken Text in Videos
The broken text trend is also used in thousands of videos and it helps designers to show the poetic meaning of the client video they are making. People take it positively and understand the video with just the broken text at the right place.
03Adding VFX in the Videos
02Trend of Broken Text in Videos
VFX trend is catching people a lot now a day. The complex visual effects in the videos get the attention of the audience very quickly. While browsing videos over the internet you can also observe the VFX effects in the case of the firestorm, explosions, etc in the videos.
04Animated Logos of Companies
Animated logos are in huge demand even by the biggest companies around the globe. Animated logos are also used in the motion graphic videos while showing the company products or in the marketing videos. The animated logos capture the attention of people very quickly.
05Thin Lines in the Videos
In animated motion graphics videos lines also plays a very important role as they can easily help viewers to understand the shape, directions, and many more other things. Designers are now drawing the thin lines in their videos.
Part 3 History of Motion Graphics
Previously, before the presence of motion graphics in the world of technology the graphics worked just the images in the un-moving and flat formats.
Motion graphics first came into the scene when Oskar Fischinger and Norman McLaren were doing some experimental work. Later in 195some designers introduced motion graphics to the public in a bigger way. The designers later used in a few films that time and these films are still a great example of the motion graphics used at that time. Motion graphics in these films presented information such as the product company, actors, film directors, movie title, and many other things about the films in a very creative way.
Playing with the words or graphic elements was never seen by the people before the motion graphics. Later it’s started used in mostly all films and ad videos.
Now a day in the few years the advancement of animation software’s and the improvements in designs allowed people to learn more about motion graphics and try to produce new and eye-catching graphics.
Part 4 Uses of Motion Graphics Today
Now a day due to the new technology every day the presence of the screen in multiple devices has extended the usage of motion graphics. Motion graphics are generally used in every device that has a screen such as opening the TV, introducing the information with the bumpers, and many other things. Below are a few examples where motion graphics are mainly used:
01Branding
Branding is the biggest channel and branding owners were looking for something different to refresh their brand and make it different from the other SKY channels. The Nerdo Creative Studio used motion graphics in their channel video and created a beautiful video with typography and text effects. This video makes it different from the other channels which generally people don’t see every day on television.

02Sharing Product Information Or Promotion Video
The main usage of motion graphics is promoting the products using the product videos created with the help of beautiful motion graphic backgrounds and texts. This helps brands to promote their products in front of customers in a clear way and get more sales. In the product videos, the animated motion graphics can help you a lot in creating entertaining, fun, and engaging eye-catching product videos.

03Telling a Story to the Audience
Storytelling about a brand or anything is a very complicated task because your story must be to the point and understandable by the viewers. In this case, motion graphics help a lot. For example, you can view the above video on the URL with clear images, text, icons, and great background music. This is a great concept and you can even use it for making ads for your products or for making short films.

04Explaining A Concept To Your Students Or In The Company Meetings
Motion graphics are a great way to make the explainer videos for your products or the new concepts to your students in the school or college. Motion graphic videos can more clearly explain the concepts to the audience instead of using a presentation. The YouTube video link above shows how beautifully the designer has explained the concept of blockchain in the video.

05Creating Awareness About Something
The above video is about empowering women and girls where motion graphics are used. This awareness video doesn’t have any fancy design or great colors but still, it clears its message to the people.

Part 5 Motion Graphics vs. Animation: What’s the Difference?
Motion graphics are generally represented with moving images, text, and other objects and these graphics can easily display information with the help of moving objects such as the moving website logo, blurring text, bars in graphs, etc. Simply we can say the motion graphics can display the letters and shapes in the motion of the user’s choice. Sometimes things are very hard to explain with the still images whereas with the help of a few seconds of motion graphics you can clear everything perfectly.
If we talk about animation then this is a term under which motion graphics falls. Animation is used for more than 1years. So, we can say motion graphics are a part of animation itself. Any technique in the world which helps users to move static images or objects is known as animation. It can be Claymation, anime, cartoons, or motion graphics.
Mainly the content separates the motion graphics from the other types of animations because, in the motion graphic text, objects are associated with the other graphic designs.
Part 6 How to Make Motion Graphics?
Wondershare Filmora Video Editor
Wondershare Filmora is desktop software that allows you to quickly make beautiful motion graphic videos without doing any effort. This motion graphics video maker program is available for windows as well as the Mac operating system computers. Wondershare Filmora is capable of making the best videos very easily even you can apply motion tracking in the videos with this software. It allows you to edit the videos from scratch and create the end-level best videos. It offers you several features such as video effects, split screen, green screen, and color grading and controlling the speed of your videos. Finally, this is a complete solution for all your video editing and motion graphic problems.
For Win 7 or later (64-bit)
For macOS 10.12 or later
● Key Takeaways from This Episode →
● This is the information about what motion graphics is and how to create the best motion graphics video on your computer with the help of Wondershare Filmora.
● There are hundreds of other motion graphics video maker software and apps available over the internet but not any app can design the best videos as compared to the Wondershare Filmora.
● The best part is that it is very easy to use and you can quickly make motion graphics videos even if you are a newbie.
Are you new to motion graphics and looking to learn everything about animated motion then you are at the right webpage. In this article, we will cover everything about motion graphic videos.
In this article
01 [What is Motion Graphics? (Motion Graphics Definition)](#Part 1)
02 [5 Motion Graphics Animation Trends You Need to Know About](#Part 2)
03 [History of Motion Graphics](#Part 3)
04 [Uses of Motion Graphics Today (motion Graphics Examples)](#Part 4)
05 [ Motion Graphics Vs. Animation: What’s the Difference?](#Part 5)
05 [How to Make Motion Graphics?](#Part 5)
Part 1 What is Motion Graphics?
Motion graphics is known as videos with the mix-up of the text, effect, stickers, and many other types of components. It’s known as an animated graphic design as well. Motion graphics are a great way to communicate with the target audience with the help of video, text, and emotions in the videos. The motion graphics videos with the music, effects, and text can give a great message to the audience.
Part 2 5 Motion Graphics Animation Trends You Need to Know About
01Mix up the and 3D
Mixing up the and animations in the videos is still getting momentum. People love the way the motion graphic designer explains the video using the mixing of and 3D. This trend is also used in the hundreds of costly advertisements.
02Trend of Broken Text in Videos
The broken text trend is also used in thousands of videos and it helps designers to show the poetic meaning of the client video they are making. People take it positively and understand the video with just the broken text at the right place.
03Adding VFX in the Videos
02Trend of Broken Text in Videos
VFX trend is catching people a lot now a day. The complex visual effects in the videos get the attention of the audience very quickly. While browsing videos over the internet you can also observe the VFX effects in the case of the firestorm, explosions, etc in the videos.
04Animated Logos of Companies
Animated logos are in huge demand even by the biggest companies around the globe. Animated logos are also used in the motion graphic videos while showing the company products or in the marketing videos. The animated logos capture the attention of people very quickly.
05Thin Lines in the Videos
In animated motion graphics videos lines also plays a very important role as they can easily help viewers to understand the shape, directions, and many more other things. Designers are now drawing the thin lines in their videos.
Part 3 History of Motion Graphics
Previously, before the presence of motion graphics in the world of technology the graphics worked just the images in the un-moving and flat formats.
Motion graphics first came into the scene when Oskar Fischinger and Norman McLaren were doing some experimental work. Later in 195some designers introduced motion graphics to the public in a bigger way. The designers later used in a few films that time and these films are still a great example of the motion graphics used at that time. Motion graphics in these films presented information such as the product company, actors, film directors, movie title, and many other things about the films in a very creative way.
Playing with the words or graphic elements was never seen by the people before the motion graphics. Later it’s started used in mostly all films and ad videos.
Now a day in the few years the advancement of animation software’s and the improvements in designs allowed people to learn more about motion graphics and try to produce new and eye-catching graphics.
Part 4 Uses of Motion Graphics Today
Now a day due to the new technology every day the presence of the screen in multiple devices has extended the usage of motion graphics. Motion graphics are generally used in every device that has a screen such as opening the TV, introducing the information with the bumpers, and many other things. Below are a few examples where motion graphics are mainly used:
01Branding
Branding is the biggest channel and branding owners were looking for something different to refresh their brand and make it different from the other SKY channels. The Nerdo Creative Studio used motion graphics in their channel video and created a beautiful video with typography and text effects. This video makes it different from the other channels which generally people don’t see every day on television.
02Sharing Product Information Or Promotion Video
The main usage of motion graphics is promoting the products using the product videos created with the help of beautiful motion graphic backgrounds and texts. This helps brands to promote their products in front of customers in a clear way and get more sales. In the product videos, the animated motion graphics can help you a lot in creating entertaining, fun, and engaging eye-catching product videos.
03Telling a Story to the Audience
Storytelling about a brand or anything is a very complicated task because your story must be to the point and understandable by the viewers. In this case, motion graphics help a lot. For example, you can view the above video on the URL with clear images, text, icons, and great background music. This is a great concept and you can even use it for making ads for your products or for making short films.
04Explaining A Concept To Your Students Or In The Company Meetings
Motion graphics are a great way to make the explainer videos for your products or the new concepts to your students in the school or college. Motion graphic videos can more clearly explain the concepts to the audience instead of using a presentation. The YouTube video link above shows how beautifully the designer has explained the concept of blockchain in the video.
05Creating Awareness About Something
The above video is about empowering women and girls where motion graphics are used. This awareness video doesn’t have any fancy design or great colors but still, it clears its message to the people.
Part 5 Motion Graphics vs. Animation: What’s the Difference?
Motion graphics are generally represented with moving images, text, and other objects and these graphics can easily display information with the help of moving objects such as the moving website logo, blurring text, bars in graphs, etc. Simply we can say the motion graphics can display the letters and shapes in the motion of the user’s choice. Sometimes things are very hard to explain with the still images whereas with the help of a few seconds of motion graphics you can clear everything perfectly.
If we talk about animation then this is a term under which motion graphics falls. Animation is used for more than 1years. So, we can say motion graphics are a part of animation itself. Any technique in the world which helps users to move static images or objects is known as animation. It can be Claymation, anime, cartoons, or motion graphics.
Mainly the content separates the motion graphics from the other types of animations because, in the motion graphic text, objects are associated with the other graphic designs.
Part 6 How to Make Motion Graphics?
Wondershare Filmora Video Editor
Wondershare Filmora is desktop software that allows you to quickly make beautiful motion graphic videos without doing any effort. This motion graphics video maker program is available for windows as well as the Mac operating system computers. Wondershare Filmora is capable of making the best videos very easily even you can apply motion tracking in the videos with this software. It allows you to edit the videos from scratch and create the end-level best videos. It offers you several features such as video effects, split screen, green screen, and color grading and controlling the speed of your videos. Finally, this is a complete solution for all your video editing and motion graphic problems.
For Win 7 or later (64-bit)
For macOS 10.12 or later
● Key Takeaways from This Episode →
● This is the information about what motion graphics is and how to create the best motion graphics video on your computer with the help of Wondershare Filmora.
● There are hundreds of other motion graphics video maker software and apps available over the internet but not any app can design the best videos as compared to the Wondershare Filmora.
● The best part is that it is very easy to use and you can quickly make motion graphics videos even if you are a newbie.
How to Draw Cartoons Step by Step with This Guide
Learn How to Draw Cartoons Step by Step with This Guide
An easy yet powerful editor
Numerous effects to choose from
Detailed tutorials provided by the official channel
Cartoon character drawing is usually a vital aspect of any child’s life who loves to watch cartoon series and can sometimes be someone’s favorite thing in the world.

A cartoon character is a series of single drawings that tell a joke or story. Although cartoons are mostly drawn, they can sometimes be animated. Kids like comics which makes them an essential part of every child’s life. Cartoons are not only used for entertainment purposes but also help kids and young children learn more about the world around them. For example, children learn about love, loss, friendship, and other essential life issues about life by watching cartoons.
However, cartoons are not only limited to children but are also for adults. In addition, cartoons created for an adult audience go deeper into real-life problems and explore darker themes. They aim to create content that matches the maturity and age of the audience. Watching cartoons is fun. But what if you could make them? This article will provide you with a guide on producing cool cartoon drawings that will match different audiences, both older and younger.
In this article
01 [How to Draw Cartoon Characters Step by Step](#Part 1)
02 [Cartoon Easy Drawing with Colour Step by Step](#Part 2)
03 [Cartoon Easy Sketch Drawing Step by Step](#Part 3)
Part 1 How to Draw Cartoon Characters Step by Step
Note that in the world we live in, Professionals were once students, and experts were once beginners. This means that everyone has a starting point, and they all have one thing in common: “learning.” Whether you are aspiring to become an English teacher, an astrophysicist, an artist, or a physician’s assistant, you must first learn the ins and outs of the field.
Those aspiring to become animators and cartoonists must first learn the basics of cartoon character drawing and practice some easy, simple cartoon drawing before cranking out the Mickey-Mouses of the entertainment world. However, we will cover the basic principles of easy cartoon drawing for beginners step by step to get your learning process started. Here is how to draw a Micky-Mouse perfectly:

Step 1:
● Use a pencil to begin your drawing.
● First, create a circle for the head and a curved line on the left side.
● Draw a horizontal line at the center.
Step 2: Next, draw an oval shape for the mouth and a “U” shape added to the bottom, and then you can add another parallel “U” shape and connect it with the oval.
Step 3: Draw the eye using two upside-down “U” shapes, and then you add his large ear on the right and a small one at the top of the head.
Step 4: You can draw a bean shape and another smaller one inside for the body.
Step 5: Add oval shapes for his feet to draw his legs and draw his tail on the right side just above the leg.
Step 6: Draw two elongated shapes for his arms, a small oval for the hand and a basic shape of his fingers.
Step 7: Draw the cheese and add a few small circles inside.
Step 8: Also include the facial features by drawing the inside of the nose, eyebrows, eyes, and whiskers.
Step 9:
● Draw his fingers and hair between his ears.
● Trace your pencil lines with a sharpie.
● Erase the pencil afterward.
Step 10: Finally, you can color your drawing and upload it to your website.
Part 1 Cartoon Easy Drawing with Colour Step by Step
Applying color to a drawing is very important to beautify your drawing and make it look stunning and attractive. Here is how to cartoon easy drawing a flower using a colored pencil:
Step 1: Using a color photocopy of a reference photo, crop and rearrange elements of the poppy composition. With light pressure and HB pencil, draw a composition onto a four-ply, 100% cotton museum board frequently found among framing supplies.
Step 2: With very light pressure, apply the first colored pencil layer and add more emphasis where the values will be deeper. While doing this, note that the pencil application will still appear granular, and the texture of the museum board is still visible.

Step 3: Create the veins in the leaves and the fuzzy texture of the stem and pod, and also, as the individual strands of stamens, put down a sheet of translucent drafting paper. Use heavy tracing paper with a very sharp 7H graphite pencil and apply heavy pressure in drawing the lines for stamens, fuzz, and veins on the drafting paper and impress them into the surface of the museum board. Then, with a contrasting layer of darker color, these features dramatically show up on the stem, leaves, center of the flower, pod, and center of the flower. Then add deeper values of rose in the shadowed areas of the flower petals.

Step 4: To make them appear less granular and intensify the colors, start by blending with a clear, alcohol-based blending marker. The solvent, wax, or vegetable oil then dissolves the binder in the colored pencil layer and fluidly releases the pigment. This will also help to “fill in” the dots of the tooth of the paper and make the color appear denser.

Step 5: Continue to intensify the color by using a non-pigmented blending pencil over a previous layer and repeat a layer or two of color, much like a “color sandwich.” Repeat this “ burnishing “ process for subsequent layerings of color, like a double-decker or triple-decker sandwich.
Also, make sure the rich, dark negative space is carried out the same way, layering colors and burnishing, then repeating the colors for deep, rich saturation.
Render the deep, smeary flecks of pollen by heavily applying “freckles” of burgundy, then slightly smudge them with the tip of a blending marker. Lastly, scratch a few of the tiny wisps of fuzz on the pod and stem carefully into the board via a sharp X-acto knife for a striking contrast of light against the deep background.

Part 2 Cartoon Easy Sketch Drawing Step by Step
This is the initial stage of the drawing process. It requires you to create an outline of the concept you want to draw before adding color. However, it is also referred to as a technique in shading. For example, if you’re going to sketch a cherry fruit, there are a few things to note here.
Try not to look at the cherry as a whole but look at its shapes and name them. This way, you are looking at the parts to the whole and not the entire piece.

Step 1: Draw two overlapping circles and draw two curved lines from each of the circles.
Step 2: Make a small rectangle at the top to join the two stems and draw a second set of curved lines.
Step 3: Draw thick lines inside the rectangle for the bumps and darken the lines and use your finger to smudge them a bit for the shaded effect.
Step 4: Draw a curved line from the stem on the right to the circle’s edge to create the bump.
Step 5: Holding your pencil at an angle, make light strokes going across the front of both cherries. Take note of the places where there is no light. This is where the light source is hitting the cherry the most.
Step 6: To darken, a shade over those places again, keep layering the shading technique until you get the effect you see on the cherries.
Step 7: Use the same technique to shade under the cherries, but use your finger to smudge it to smoother the shadow.
●Bonus:
You can add color, effect, or animate to your cartoon character drawing by using Wondershare Filmora Video Editor , the best editor on the internet. Filmora is a free software program with the same creating abilities and imaging editing similar to Adobe Illustrator. It is open software that runs on various programs, such as Windows, Mac, and Linux. Please get to know more about this exclusive tool from Wondershare on their official website.
For Win 7 or later (64-bit)
For macOS 10.12 or later
● Ending Thoughts →
● A step-by-step guide on drawing easy cartoons for painting and how to sketch your drawing correctly.
● Cartoon character drawings in easy and quick steps.
● Easy cartoon drawing for beginners.
● Lastly, to add color to your drawing, use Filmora software.
● So, use the tips and tricks to make your presentation’s best cartoon characters come alive and be a pro with Filmora.
Cartoon character drawing is usually a vital aspect of any child’s life who loves to watch cartoon series and can sometimes be someone’s favorite thing in the world.
A cartoon character is a series of single drawings that tell a joke or story. Although cartoons are mostly drawn, they can sometimes be animated. Kids like comics which makes them an essential part of every child’s life. Cartoons are not only used for entertainment purposes but also help kids and young children learn more about the world around them. For example, children learn about love, loss, friendship, and other essential life issues about life by watching cartoons.
However, cartoons are not only limited to children but are also for adults. In addition, cartoons created for an adult audience go deeper into real-life problems and explore darker themes. They aim to create content that matches the maturity and age of the audience. Watching cartoons is fun. But what if you could make them? This article will provide you with a guide on producing cool cartoon drawings that will match different audiences, both older and younger.
In this article
01 [How to Draw Cartoon Characters Step by Step](#Part 1)
02 [Cartoon Easy Drawing with Colour Step by Step](#Part 2)
03 [Cartoon Easy Sketch Drawing Step by Step](#Part 3)
Part 1 How to Draw Cartoon Characters Step by Step
Note that in the world we live in, Professionals were once students, and experts were once beginners. This means that everyone has a starting point, and they all have one thing in common: “learning.” Whether you are aspiring to become an English teacher, an astrophysicist, an artist, or a physician’s assistant, you must first learn the ins and outs of the field.
Those aspiring to become animators and cartoonists must first learn the basics of cartoon character drawing and practice some easy, simple cartoon drawing before cranking out the Mickey-Mouses of the entertainment world. However, we will cover the basic principles of easy cartoon drawing for beginners step by step to get your learning process started. Here is how to draw a Micky-Mouse perfectly:
Step 1:
● Use a pencil to begin your drawing.
● First, create a circle for the head and a curved line on the left side.
● Draw a horizontal line at the center.
Step 2: Next, draw an oval shape for the mouth and a “U” shape added to the bottom, and then you can add another parallel “U” shape and connect it with the oval.
Step 3: Draw the eye using two upside-down “U” shapes, and then you add his large ear on the right and a small one at the top of the head.
Step 4: You can draw a bean shape and another smaller one inside for the body.
Step 5: Add oval shapes for his feet to draw his legs and draw his tail on the right side just above the leg.
Step 6: Draw two elongated shapes for his arms, a small oval for the hand and a basic shape of his fingers.
Step 7: Draw the cheese and add a few small circles inside.
Step 8: Also include the facial features by drawing the inside of the nose, eyebrows, eyes, and whiskers.
Step 9:
● Draw his fingers and hair between his ears.
● Trace your pencil lines with a sharpie.
● Erase the pencil afterward.
Step 10: Finally, you can color your drawing and upload it to your website.
Part 1 Cartoon Easy Drawing with Colour Step by Step
Applying color to a drawing is very important to beautify your drawing and make it look stunning and attractive. Here is how to cartoon easy drawing a flower using a colored pencil:
Step 1: Using a color photocopy of a reference photo, crop and rearrange elements of the poppy composition. With light pressure and HB pencil, draw a composition onto a four-ply, 100% cotton museum board frequently found among framing supplies.
Step 2: With very light pressure, apply the first colored pencil layer and add more emphasis where the values will be deeper. While doing this, note that the pencil application will still appear granular, and the texture of the museum board is still visible.
Step 3: Create the veins in the leaves and the fuzzy texture of the stem and pod, and also, as the individual strands of stamens, put down a sheet of translucent drafting paper. Use heavy tracing paper with a very sharp 7H graphite pencil and apply heavy pressure in drawing the lines for stamens, fuzz, and veins on the drafting paper and impress them into the surface of the museum board. Then, with a contrasting layer of darker color, these features dramatically show up on the stem, leaves, center of the flower, pod, and center of the flower. Then add deeper values of rose in the shadowed areas of the flower petals.
Step 4: To make them appear less granular and intensify the colors, start by blending with a clear, alcohol-based blending marker. The solvent, wax, or vegetable oil then dissolves the binder in the colored pencil layer and fluidly releases the pigment. This will also help to “fill in” the dots of the tooth of the paper and make the color appear denser.
Step 5: Continue to intensify the color by using a non-pigmented blending pencil over a previous layer and repeat a layer or two of color, much like a “color sandwich.” Repeat this “ burnishing “ process for subsequent layerings of color, like a double-decker or triple-decker sandwich.
Also, make sure the rich, dark negative space is carried out the same way, layering colors and burnishing, then repeating the colors for deep, rich saturation.
Render the deep, smeary flecks of pollen by heavily applying “freckles” of burgundy, then slightly smudge them with the tip of a blending marker. Lastly, scratch a few of the tiny wisps of fuzz on the pod and stem carefully into the board via a sharp X-acto knife for a striking contrast of light against the deep background.
Part 2 Cartoon Easy Sketch Drawing Step by Step
This is the initial stage of the drawing process. It requires you to create an outline of the concept you want to draw before adding color. However, it is also referred to as a technique in shading. For example, if you’re going to sketch a cherry fruit, there are a few things to note here.
Try not to look at the cherry as a whole but look at its shapes and name them. This way, you are looking at the parts to the whole and not the entire piece.
Step 1: Draw two overlapping circles and draw two curved lines from each of the circles.
Step 2: Make a small rectangle at the top to join the two stems and draw a second set of curved lines.
Step 3: Draw thick lines inside the rectangle for the bumps and darken the lines and use your finger to smudge them a bit for the shaded effect.
Step 4: Draw a curved line from the stem on the right to the circle’s edge to create the bump.
Step 5: Holding your pencil at an angle, make light strokes going across the front of both cherries. Take note of the places where there is no light. This is where the light source is hitting the cherry the most.
Step 6: To darken, a shade over those places again, keep layering the shading technique until you get the effect you see on the cherries.
Step 7: Use the same technique to shade under the cherries, but use your finger to smudge it to smoother the shadow.
●Bonus:
You can add color, effect, or animate to your cartoon character drawing by using Wondershare Filmora Video Editor , the best editor on the internet. Filmora is a free software program with the same creating abilities and imaging editing similar to Adobe Illustrator. It is open software that runs on various programs, such as Windows, Mac, and Linux. Please get to know more about this exclusive tool from Wondershare on their official website.
For Win 7 or later (64-bit)
For macOS 10.12 or later
● Ending Thoughts →
● A step-by-step guide on drawing easy cartoons for painting and how to sketch your drawing correctly.
● Cartoon character drawings in easy and quick steps.
● Easy cartoon drawing for beginners.
● Lastly, to add color to your drawing, use Filmora software.
● So, use the tips and tricks to make your presentation’s best cartoon characters come alive and be a pro with Filmora.
Also read:
- New In 2024, What Is Still Motion Animation and How Does It Work?
- In 2024, Thousands Already Found 15 Best Sites to Watch Cartoons Online Free And So Can You
- Methods to Make Photo Motion Effect Online for 2024
- 2024 Approved Top 7 Best Free GIF Apps for Android
- Updated 2024 Approved 12+ Stunning Instagram GIF Stickers
- New 2024 Approved Top Tips for Effortless Unity 3D Animation
- Updated Animated Collage Maker Tips for 2024
- New In 2024, 8 Free GIF Animators to Make Your Own GIF
- 12 Top Stop Motion Studios Worth Recommending
- New Methods to Make Photo Motion Effect Online for 2024
- New How to Create Animated Video on Canva for 2024
- Updated What Wikipedia Cant Tell You About the 10 Best Batman Cartoons for 2024
- Updated How to Learn Cartoon Characters Sketch Quickly
- New 10 Awesome Moving Animation PowerPoint Techniques
- In 2024, Know All About Animated Business Logos and the Best Tools to Create One
- In 2024, Top Claymation Shows That Make Your Memories Unforgettable
- New In 2024, 15 Forgotten Cartoon Characters of All Time
- New In 2024, 12 Best Stop Motion Studios Worth Recommending
- Updated 2024 Approved Handy Tip From Adobe Animate Rigging Tutorial for All Learners
- New In 2024, Little Known Techniques of Motion Graphics in Premiere Pro
- Updated In 2024, How to Get Started in Stop Motion Claymation
- New 10 Best Animation Makers for Kids to Have Fun for 2024
- Tips That Show Anybody How to Get Awesome Background for Slideshow in PowerPoint for 2024
- New Learn How to Make Your Characters Interactive in Unity Animation Rigging for 2024
- New In 2024, What Is Anime? Anime VS Manga VS Cartoon
- In 2024, Amazing Ideas About Creating Personalised WhatsApp GIF Sticker
- In 2024, Best GIF Resizers to Reduce GIF Size
- Updated How to Animate Image on Scroll and Text on Scroll, In 2024
- 10 Realistic Cartoon Characters You Would Run Away From if You Met in Real Life for 2024
- Top 10 Classical Animated Cartoon Types With Examples for 2024
- New Animate Your Photo Online with These Awesome Tools for 2024
- New How to Create a YouTube Intro Animation Like a Pro for 2024
- 2024 Approved Simple Shortcut to Convert Videos to Gifs on iPhone
- Updated In 2024, Amazing Ways to Find Suitable Animated Graphic Maker
- How To Simulate GPS Movement With Location Spoofer On Oppo F25 Pro 5G? | Dr.fone
- In 2024, Resolve Your iPhone 13 Pro Max Keeps Asking for Outlook Password | Dr.fone
- How to Reset Oppo Find N3 Flip Without the Home Button | Dr.fone
- In 2024, Is pgsharp legal when you are playing pokemon On Apple iPhone 6s? | Dr.fone
- How to Fix Apple iPhone 12 Passcode not Working?
- In 2024, How to Change/Add Location Filters on Snapchat For your Lava Blaze 2 Pro | Dr.fone
- How To Bypass FRP on Asus ROG Phone 8
- iPogo will be the new iSpoofer On Honor 100 Pro? | Dr.fone
- In 2024, 9 Best Phone Monitoring Apps for Realme 11 Pro | Dr.fone
- In 2024, How To Use Allshare Cast To Turn On Screen Mirroring On Nubia Red Magic 9 Pro+ | Dr.fone
- 3 Solutions to Find Your Tecno Spark 10 Pro Current Location of a Mobile Number | Dr.fone
- Here Are Some Reliable Ways to Get Pokemon Go Friend Codes For Vivo Y78t | Dr.fone
- How to Rescue Lost Photos from Smart 8?
- How to share/fake gps on Uber for Realme C53 | Dr.fone
- In 2024, Tips and Tricks for Setting Up your Vivo T2x 5G Phone Pattern Lock
- 4 Ways to Fix Android Blue Screen of Death On Xiaomi Redmi 13C | Dr.fone
- Best Methods for Realme V30 Wont Turn On | Dr.fone
- Recover your messages after Xiaomi 13T Pro has been deleted
- How to Bypass Android Lock Screen Using Emergency Call On Oppo Reno 11 5G?
- In 2024, Chrome Video Translators Top 5 Video Translation Chrome Extensions
- In 2024, Top 6 Apps/Services to Trace Any Lava Yuva 3 Pro Location By Mobile Number | Dr.fone
- How to Quickly Fix Bluetooth Not Working on Xiaomi Redmi A2+ | Dr.fone
- In 2024, Top 6 Apps/Services to Trace Any Apple iPhone 13 Pro Max Location By Mobile Number | Dr.fone
- In 2024, Easy Guide How To Bypass Itel FRP Android 10/11/12/13
- In 2024, Resolve Your Apple iPhone SE (2022) Keeps Asking for Outlook Password | Dr.fone
- How to Fix OnePlus 12R Find My Friends No Location Found? | Dr.fone
- Possible solutions to restore deleted contacts from Samsung Galaxy A05s.
- Unlock android phone if you forget the Itel P40 password or pattern lock
- Title: New 10 Caricature Makers to Turn Photo to Caricature Effects
- Author: Elon
- Created at : 2024-05-19 03:04:44
- Updated at : 2024-05-20 03:04:44
- Link: https://animation-videos.techidaily.com/new-10-caricature-makers-to-turn-photo-to-caricature-effects/
- License: This work is licensed under CC BY-NC-SA 4.0.
