
:max_bytes(150000):strip_icc():format(webp)/001_the-16-best-shows-to-watch-on-discovery-plus-right-now-5116795-b17411d87cfd4bd690fda5be50ea188c.jpg)
New 15 Horror Animes That Will Trigger a Heart Attack for 2024
15 Horror Animes That Will Trigger a Heart Attack
15 Horror Animes That Will Trigger a Heart Attack

Shanoon Cox
Mar 27, 2024• Proven solutions
Horror anime is a sub-genre of anime series. It is based on scary stories, often featuring bloody and grotesque scenes, not for the faint of heart—the horror anime series range from emotional murder mysteries to violent paranormal thrillers.
People who like to experience the thrill of a good scare generally prefer watching horror anime series. The best horror anime can actually terrify you, and many people enjoy being scared. Since there are a lot of scary anime series on the web, you might have trouble finding the best horror anime to pass your weekend. If that’s the case, dive right in and get prepared to be scared.
Best 15 Horror Animes of All Time
Here, we have picked out some of the best horror anime series of all time that are definitely going to creep you out. Test your bravery and watch a terrifying horror anime from our list.
1. Monster
Monster is a horror anime series based on a popular Manga by Naoki Urasawa. It is an impressive thriller based on a top-notch brain surgeon working in a hospital. The young surgeon is faced with an ethical dilemma when forced to abandon the surgery of a boy to save a mayor’s life. But Dr. Tenma chooses to save the boy. This scary anime unfolds as Tenma, at the pinnacle of his medical career, is haunted by a series of death that involves the boy he saved all those years ago. This is the best horror anime series featuring a psychopath’s killing streak.
 </p
</p
2. Hell Girl
This horror anime series revolves around the subject of hate, revenge, and vengeance. With every new episode of this horror anime, you will witness a new story. The plot is unique and based on supernatural powers. Through a mysterious website, people are able to exact revenge on their tormentors, but there is always a price to pay. In the list of the best horror anime series, Hell Girl takes the lead due to thrilling scenes with the fusion of emotional storylines. As opposed to many horror anime series, this one isn’t very gory, but it portrays horror through the plot, showing the evil side of humans.
 </p
</p
3. Corpse Party
A very gruesome and horror anime is Corpse Party. This horror anime series is based on just 4 episodes, all of which are filled with terror. As the students of Kisaragi Academy perform a ritual on the grounds of their school, they are taken into another dimension where they end up in the Heavenly Host Elementary whose students and staff were murdered years ago. The terrifying ghosts and gory corpses in this scary anime are enough to terrify anyone. It is short and action-packed, guaranteeing that every scene is full of terror.
 </p
</p
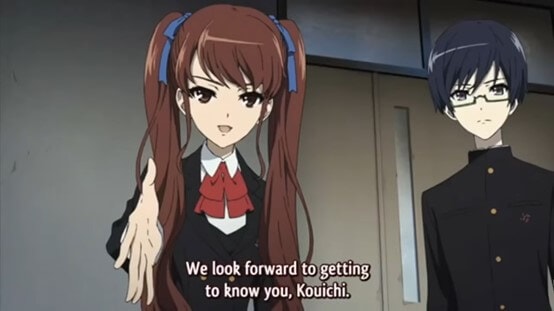
4. Another
Another is the best horror anime series with terrifying deaths, much like seen in the movie’ Final Destination’. As the death curse takes the lives of the students of a class, the protagonist, a newly transferred student Kouichi, and a girl with an eye patch must get to the bottom of this. The horror anime slowly unravels scary truths about the incident that resulted in the death of Mei Misaki. Together, Kouichi and Mei try to dig out the root of the problem. Every scene is packed with suspense and horror, keep viewers scared and glued to the screens.
 </p
</p
5. Shiki
Based on the hot topic of vampires, this horror anime takes vampire stories to the next level. Shiki is an excellent scary movie with a twisting plot that follows the lives of the villagers facing the vampire curse. As the dead rise, a young doctor takes it upon himself to uncover the reality. This chilling yet adventurous horror anime is an amazing watch with a great storyline that is gripping and suspenseful, all at the same time.
 </p
</p
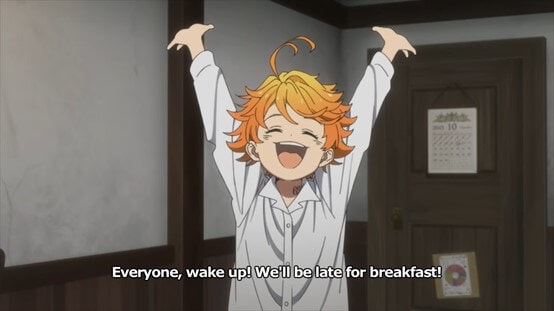
6. The Promised Neverland
This horror anime has a very emotional plot. The kids of Grace Field House Orphanage are very happy and content until one day, some of them break the most important rule. When the kids go out of the orphanage, they discover the truth and the sinister future awaiting them. From cheerful kids to responsible, brave kids, this is the best horror anime that keeps the viewers glued to the screens. As the kids try to escape their deadly fate, will they be able to go free or end up becoming demon food?
 </p
</p
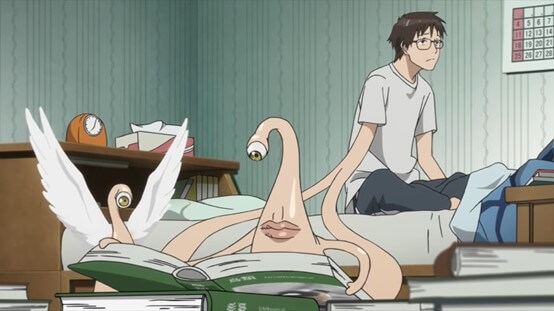
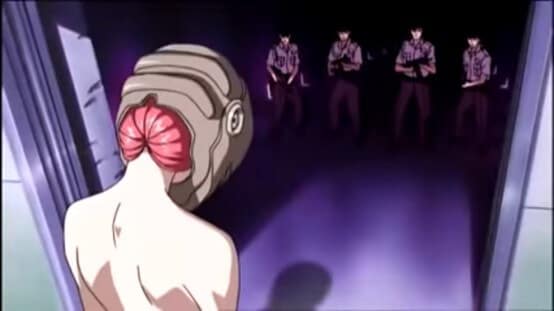
7. Parasyte: The Maxim
As the name suggests, this horror anime series is based on a parasite that takes over human hosts. In this horror anime, the parasite is an alien species. However, this anime revolves around the protagonist, whose hand is taken over by Migi, also an alien. But as the other parasites go on a deadly streak, opening their heads and eating any human that stands in their way, the boy and Migi try to fight them off. This is a very compelling yet gory and scary anime showing gruesome murders and action scenes to keep you on edge at all times.
 </p
</p
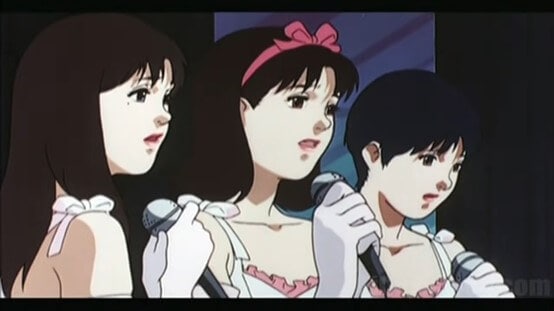
8. Perfect Blue
Perfect Blue has been categorized as one of the best horror anime based on reality. This is an epic psychological thriller with scenes that are mind-bending. As a pop singer switches her career to become an actress, an obsessed stalker becomes a nightmare for her. She is exposed, and every move she makes is being watched. Mysterious murders start surrounding her, and she starts losing her mind. The lines between delusion and reality are blurred. This horror anime is also an excellent suspense thriller that will keep you guessing what the next move will be.
 </p
</p
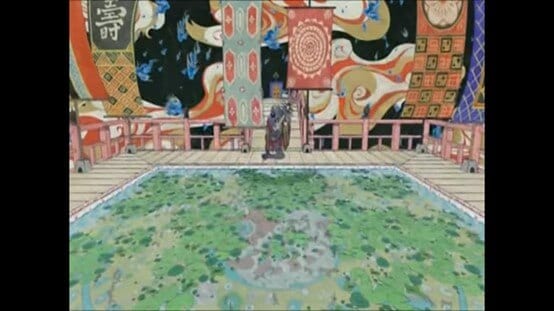
9. Mononoke
Mononoke has a unique visual appeal as it is themed on old Japanese culture with vibrant animations. The protagonist, commonly known as the ‘Medicine Seller,’ goes around feudal Japan looking for evil, known as Mononoke. Somehow, the medicine seller has a special power and a sword to slay the evil. But the twist is that the medicine seller must first learn the details about the Mononoke. Unless he discovers its true form and reason, he cannot have the sword to end it. This horror anime unfolds in a very thrilling manner as the protagonist uncovers the evil and saves feudal Japan.
 </p
</p
10. Tokyo Ghoul
One of the greatest horror anime series ever, Tokyo Ghoul features an amazing storyline. When the college student Ken falls victim to his ghoul date, he is saved by doctors. But, his rebirth is as a hybrid of humans and ghouls. This horror anime series is not for the faint-hearted as it shows grotesque scenes of body horror as the ghouls devour human flesh. However, Tokyo Ghoul also portrays how Ken is forced to control his flesh-eating desires. Would the hybrid lean more towards his human trait or the evil side? We recommend watching this very scary anime to find out how Ken survives as a hybrid and does he give in to his ghoul nature?
 </p
</p
11. Elfen Lied
This horror anime is about a mutant human born, Lucy. The extremely powerful mutant, Diclonius, is being experimented upon when one day she has had enough. As she finally breaks free of captivity, it results in a huge bloodbath and a terrifying battle. With time, Lucy tries to adjust to the world. Given her dual personality, it is hard to hide her true nature. This horror anime series is packed with bloody scenes and violence, yet it also displays moments of emotional attachments and friendships when Lucy’s adorable personality is dominant.
 </p
</p
12. Ghost Hunt
As can be guessed by the name, this horror anime series is based on ghost hunting. It doesn’t involve many bloody or gory scenes, but it definitely has terrifying scenes. A group of adventurous people teamed up with the psychic research facility are investigating the paranormal activities in a building when they are faced with horrifying paranormal beings. This is a story about finding out the truth, sticking together, and making it out of the building alive. This isn’t the most horror anime on the list, but it does give very scary and creepy vibes as the team stumbles upon deadly beings.
 </p
</p
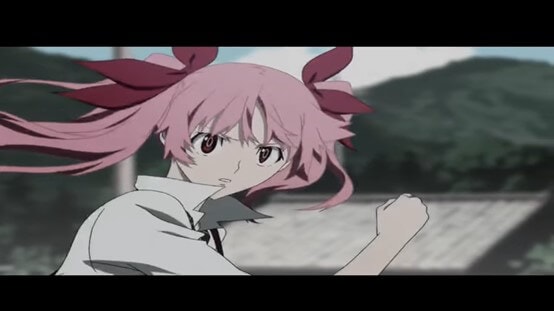
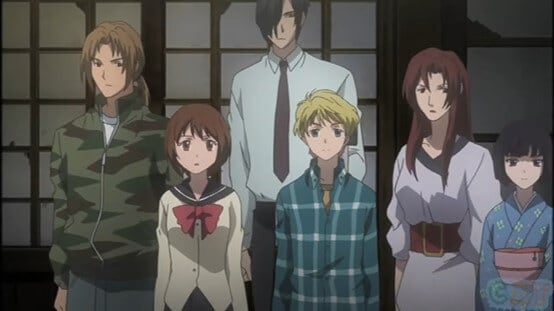
13. Higurashi When They Cry
The start of this horror anime is unlike any other. One might think it is a cheerful school drama, but it’s actually the best horror anime based on a murder mystery. The students in a rural village start killing each other in grotesque ways, and there are even scenes of torture and bloody violence. The viewer must figure out what suddenly took over the village to cause such gruesome murders. If you are looking for a good scare, this horror anime will be your best pick with its thriller-packed scenes. Are the murderers possessed, or is it something else? Watch this scary anime if you have the guts and find out.
 </p
</p
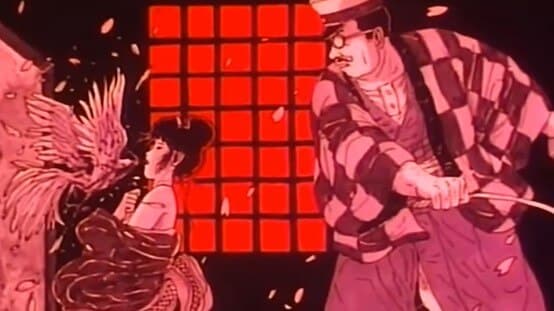
14. Shoujo Tsubaki
Shoujo Tsubaki is an adult horror anime that revolves around the life of an orphan girl. Midori is tricked by a circus master to join his show, but a horrifying future awaits her. She is raped and abused continually and is about to give up when a magician joins the club. As she sees a ray of hope, will she be able to escape her horrid fate? With a heart-wrenching storyline, this horror anime is a great watch to feel the chills of being alone and tortured.
 </p
</p
15. Angels of Death
The Angels of Death is a very intriguing horror anime that shows an amnesiac girl awaking in the basement of an abandoned building. As she tries to escape the building, she is met with psychotic killers and crazy people on each floor. However, Rachel and the serial killer Zack strike up a relationship in which Zack promises to kill her if she helps him escape the building. This scary anime certainly has some bone-chilling and gory scenes to get you creeped out.
 </p
</p
Bonus Tip-The Best Anime Movie Recorder-Wondershare Filmora
Wondershare Filmora is a powerful video editor that is perfect for both beginners and professional editors. It has tons of editing tools that are fully customizable and also offer presets to help users quickly add professional-grade cinematic effects to their videos.
With Filmora, it is easy to apply motion tracking, color grading, motion blur, green screen effect, and much more. The creative possibilities at Filmora are endless. And most of these tools are very intuitive to use. Better yet, Filmora allows users to share their videos directly to social media.
In addition, you can also use Filmora to record your favorite horror anime, make edits, add captions, and share with your friends. You can record your screen and adjust advanced settings that will allow you to set a timer, select the screen size, audio source, and much more. You can also select whether you want to display the cursor and choose its color. With a Hot Key, you can stop recording instantly, and the file will be immediately saved to your PC.
After recording, you can make further edits to the video by adding captions or special effects to enhance it. In short, with Filmora, you can record with ease and make wonderful edits to the video.


Are Horror Animes Really Horrifying?
The horror anime series are hand-drawn illustrations, and it is quite possible to portray supernatural, horrifying, and unusual creatures with ease. From our list, you will see that among the best horror anime series, most of them feature otherworldly creatures that are both terrifying and creepy to look at.
In addition, the extremely graphic nature of a scary anime further adds to its ability to scare viewers. Violence, bloodbath, and cannibalism is a common theme in majority of the scary anime series, serving as the perfect way to portray bone-chilling horror scenes.
Try out our list to find your best horror anime series and have a good scare.
Shanoon Cox
Shanoon Cox is a writer and a lover of all things video.
Follow @Shanoon Cox
Shanoon Cox
Mar 27, 2024• Proven solutions
Horror anime is a sub-genre of anime series. It is based on scary stories, often featuring bloody and grotesque scenes, not for the faint of heart—the horror anime series range from emotional murder mysteries to violent paranormal thrillers.
People who like to experience the thrill of a good scare generally prefer watching horror anime series. The best horror anime can actually terrify you, and many people enjoy being scared. Since there are a lot of scary anime series on the web, you might have trouble finding the best horror anime to pass your weekend. If that’s the case, dive right in and get prepared to be scared.
Best 15 Horror Animes of All Time
Here, we have picked out some of the best horror anime series of all time that are definitely going to creep you out. Test your bravery and watch a terrifying horror anime from our list.
1. Monster
Monster is a horror anime series based on a popular Manga by Naoki Urasawa. It is an impressive thriller based on a top-notch brain surgeon working in a hospital. The young surgeon is faced with an ethical dilemma when forced to abandon the surgery of a boy to save a mayor’s life. But Dr. Tenma chooses to save the boy. This scary anime unfolds as Tenma, at the pinnacle of his medical career, is haunted by a series of death that involves the boy he saved all those years ago. This is the best horror anime series featuring a psychopath’s killing streak.
</p
2. Hell Girl
This horror anime series revolves around the subject of hate, revenge, and vengeance. With every new episode of this horror anime, you will witness a new story. The plot is unique and based on supernatural powers. Through a mysterious website, people are able to exact revenge on their tormentors, but there is always a price to pay. In the list of the best horror anime series, Hell Girl takes the lead due to thrilling scenes with the fusion of emotional storylines. As opposed to many horror anime series, this one isn’t very gory, but it portrays horror through the plot, showing the evil side of humans.
</p
3. Corpse Party
A very gruesome and horror anime is Corpse Party. This horror anime series is based on just 4 episodes, all of which are filled with terror. As the students of Kisaragi Academy perform a ritual on the grounds of their school, they are taken into another dimension where they end up in the Heavenly Host Elementary whose students and staff were murdered years ago. The terrifying ghosts and gory corpses in this scary anime are enough to terrify anyone. It is short and action-packed, guaranteeing that every scene is full of terror.
</p
4. Another
Another is the best horror anime series with terrifying deaths, much like seen in the movie’ Final Destination’. As the death curse takes the lives of the students of a class, the protagonist, a newly transferred student Kouichi, and a girl with an eye patch must get to the bottom of this. The horror anime slowly unravels scary truths about the incident that resulted in the death of Mei Misaki. Together, Kouichi and Mei try to dig out the root of the problem. Every scene is packed with suspense and horror, keep viewers scared and glued to the screens.
</p
5. Shiki
Based on the hot topic of vampires, this horror anime takes vampire stories to the next level. Shiki is an excellent scary movie with a twisting plot that follows the lives of the villagers facing the vampire curse. As the dead rise, a young doctor takes it upon himself to uncover the reality. This chilling yet adventurous horror anime is an amazing watch with a great storyline that is gripping and suspenseful, all at the same time.
</p
6. The Promised Neverland
This horror anime has a very emotional plot. The kids of Grace Field House Orphanage are very happy and content until one day, some of them break the most important rule. When the kids go out of the orphanage, they discover the truth and the sinister future awaiting them. From cheerful kids to responsible, brave kids, this is the best horror anime that keeps the viewers glued to the screens. As the kids try to escape their deadly fate, will they be able to go free or end up becoming demon food?
</p
7. Parasyte: The Maxim
As the name suggests, this horror anime series is based on a parasite that takes over human hosts. In this horror anime, the parasite is an alien species. However, this anime revolves around the protagonist, whose hand is taken over by Migi, also an alien. But as the other parasites go on a deadly streak, opening their heads and eating any human that stands in their way, the boy and Migi try to fight them off. This is a very compelling yet gory and scary anime showing gruesome murders and action scenes to keep you on edge at all times.
</p
8. Perfect Blue
Perfect Blue has been categorized as one of the best horror anime based on reality. This is an epic psychological thriller with scenes that are mind-bending. As a pop singer switches her career to become an actress, an obsessed stalker becomes a nightmare for her. She is exposed, and every move she makes is being watched. Mysterious murders start surrounding her, and she starts losing her mind. The lines between delusion and reality are blurred. This horror anime is also an excellent suspense thriller that will keep you guessing what the next move will be.
</p
9. Mononoke
Mononoke has a unique visual appeal as it is themed on old Japanese culture with vibrant animations. The protagonist, commonly known as the ‘Medicine Seller,’ goes around feudal Japan looking for evil, known as Mononoke. Somehow, the medicine seller has a special power and a sword to slay the evil. But the twist is that the medicine seller must first learn the details about the Mononoke. Unless he discovers its true form and reason, he cannot have the sword to end it. This horror anime unfolds in a very thrilling manner as the protagonist uncovers the evil and saves feudal Japan.
</p
10. Tokyo Ghoul
One of the greatest horror anime series ever, Tokyo Ghoul features an amazing storyline. When the college student Ken falls victim to his ghoul date, he is saved by doctors. But, his rebirth is as a hybrid of humans and ghouls. This horror anime series is not for the faint-hearted as it shows grotesque scenes of body horror as the ghouls devour human flesh. However, Tokyo Ghoul also portrays how Ken is forced to control his flesh-eating desires. Would the hybrid lean more towards his human trait or the evil side? We recommend watching this very scary anime to find out how Ken survives as a hybrid and does he give in to his ghoul nature?
</p
11. Elfen Lied
This horror anime is about a mutant human born, Lucy. The extremely powerful mutant, Diclonius, is being experimented upon when one day she has had enough. As she finally breaks free of captivity, it results in a huge bloodbath and a terrifying battle. With time, Lucy tries to adjust to the world. Given her dual personality, it is hard to hide her true nature. This horror anime series is packed with bloody scenes and violence, yet it also displays moments of emotional attachments and friendships when Lucy’s adorable personality is dominant.
</p
12. Ghost Hunt
As can be guessed by the name, this horror anime series is based on ghost hunting. It doesn’t involve many bloody or gory scenes, but it definitely has terrifying scenes. A group of adventurous people teamed up with the psychic research facility are investigating the paranormal activities in a building when they are faced with horrifying paranormal beings. This is a story about finding out the truth, sticking together, and making it out of the building alive. This isn’t the most horror anime on the list, but it does give very scary and creepy vibes as the team stumbles upon deadly beings.
</p
13. Higurashi When They Cry
The start of this horror anime is unlike any other. One might think it is a cheerful school drama, but it’s actually the best horror anime based on a murder mystery. The students in a rural village start killing each other in grotesque ways, and there are even scenes of torture and bloody violence. The viewer must figure out what suddenly took over the village to cause such gruesome murders. If you are looking for a good scare, this horror anime will be your best pick with its thriller-packed scenes. Are the murderers possessed, or is it something else? Watch this scary anime if you have the guts and find out.
</p
14. Shoujo Tsubaki
Shoujo Tsubaki is an adult horror anime that revolves around the life of an orphan girl. Midori is tricked by a circus master to join his show, but a horrifying future awaits her. She is raped and abused continually and is about to give up when a magician joins the club. As she sees a ray of hope, will she be able to escape her horrid fate? With a heart-wrenching storyline, this horror anime is a great watch to feel the chills of being alone and tortured.
</p
15. Angels of Death
The Angels of Death is a very intriguing horror anime that shows an amnesiac girl awaking in the basement of an abandoned building. As she tries to escape the building, she is met with psychotic killers and crazy people on each floor. However, Rachel and the serial killer Zack strike up a relationship in which Zack promises to kill her if she helps him escape the building. This scary anime certainly has some bone-chilling and gory scenes to get you creeped out.
</p
Bonus Tip-The Best Anime Movie Recorder-Wondershare Filmora
Wondershare Filmora is a powerful video editor that is perfect for both beginners and professional editors. It has tons of editing tools that are fully customizable and also offer presets to help users quickly add professional-grade cinematic effects to their videos.
With Filmora, it is easy to apply motion tracking, color grading, motion blur, green screen effect, and much more. The creative possibilities at Filmora are endless. And most of these tools are very intuitive to use. Better yet, Filmora allows users to share their videos directly to social media.
In addition, you can also use Filmora to record your favorite horror anime, make edits, add captions, and share with your friends. You can record your screen and adjust advanced settings that will allow you to set a timer, select the screen size, audio source, and much more. You can also select whether you want to display the cursor and choose its color. With a Hot Key, you can stop recording instantly, and the file will be immediately saved to your PC.
After recording, you can make further edits to the video by adding captions or special effects to enhance it. In short, with Filmora, you can record with ease and make wonderful edits to the video.
Are Horror Animes Really Horrifying?
The horror anime series are hand-drawn illustrations, and it is quite possible to portray supernatural, horrifying, and unusual creatures with ease. From our list, you will see that among the best horror anime series, most of them feature otherworldly creatures that are both terrifying and creepy to look at.
In addition, the extremely graphic nature of a scary anime further adds to its ability to scare viewers. Violence, bloodbath, and cannibalism is a common theme in majority of the scary anime series, serving as the perfect way to portray bone-chilling horror scenes.
Try out our list to find your best horror anime series and have a good scare.
Shanoon Cox
Shanoon Cox is a writer and a lover of all things video.
Follow @Shanoon Cox
10 2D/3D Animation Tips & Tricks to Bring New Ideas to You
10 2D/3D Animation Tips & Tricks to Bring New Ideas to You
Shanoon Cox
Mar 27, 2024• Proven solutions
Animation is a skill that you need years to practice. However, the learning process can be boosted if you master some animation tips. If you’re looking for great 2D/3D animation tips and tricks, this is what we will offer here.
There are some overlaps between 2D and 3D animation tips like practicing and object pose, but in essence, animation tips can be learned commonly.
These animation tips will help you make your 2D and 3D animations as bold and creative as possible, while reduce your workload and enable you to get your work out into the world quicker with excellent animation software . Let’s take a look at the top 10 2D/3D animation tips and tricks right now.
- Part 1: 2D Animation Tips for Beginners
- Part 2: 3D Animation Tips for Beginners
- Part 3: Frequently Asked Questions about Animation Tips
You may also like: Top 10 Anime Websites to Watch Anime Free
Part 1: 2D Animation Tips for Beginners
1. Find a reference in the real world
This first 2D animation tip is to find a reference. Using a real-world reference can help you animate faces effectively. When studios work with voice-over artists , they often record their facial movements so 2D animators can work with them and ensure their expressions are captured convincingly.
If this isn’t possible, consider using your face, so you have something to refer back to. You could use a mirror and speak the words your character will be saying into it. This can help you get the animated expressions just right.

2. Observe real life
The second animation tip is about observation. One of the key aspects of 2D animation is bringing life to animate objections. You need to think hard about how emotion can be portrayed and choose each movement carefully.
Spend time watching how people in real-life environments talk and interact with each one another, how they move, and how they express emotion. People-watching can be worth its weight in gold when it comes to preparing animations for 2D. Don’t be afraid to spend a great deal of time doing this, as it can be counted as valuable research.

3. Simplicity is the key
2D animation is never complicated compared with 3D. Think carefully before making a scene too complex. If there is too much information to digest, the overall effect can be one of confusion, and you may even find yourself compromising the realism of the scene. Try not to litter the scene with too many pose changes or other elements, and keep it authentic.

4. Draw animation again and again
Drawing animation takes a lot of time. It can’t be finished within one day, so you better know deep down that one piece of work only can be done after you have revised it many times. For 2D animation, it means you need to draw objects on paper many times.
In other words, the animation is a skill that needs practice and time. You can’t master it quickly. Luckily, all pains will be rewarded someday.

5. Feedback is crucial
Feedback is an essential part of artistic development . It’s wise to actively seek out commentary from knowledgeable figures who can help you improve. Naturally, we may see work we have invested a great deal of time and effort indifferently to someone not so involved in the creative process. Feedback can equate to a valuable learning opportunity that will help you make the result hit the spot much more convincingly.

Part 2: 3D Animation Tips for Beginners
Speaking of 3D animation, we think it is not easy to start at first. In this case, you need more tips and tricks.
6. Carefully use keyframing
3D Animation is all about poses. Remember, this animation tip is crucial. Individual frames come together to create movement and tell a story. The keyframes in 3D animation videos are the first and last movements in any sequence. You need to create strong first and last poses for your movements before deciding what happens between them. You must make these poses as memorable and powerful as you can.

7. Evaluate constructive criticism
It’s vital to pay attention to constructive criticism rather than simply choosing to ignore it. Most examples of constructive criticism aren’t about offending you, and friendly advice can play a pivotal role in helping you get the results that you are looking for.
This 3D animation tip can take years to reach the level you want to when it comes to the animation industry. Even if you don’t receive a great deal of or even any positive feedback, the people offering their comments may simply be trying to help you so you can improve. You may find that the criticism is being made purely because of personal preference on the part of the commentator.

8. Take the rhythm in animation
For 3D stop motion animation video, rhythm is an element to do storytelling. The best 3D animations have a strong sense of rhythm and a natural movement flow. Many inexperienced animators have found themselves animating too fast or slow. Don’t worry if you have this problem in the early days, as chances are you’ll start to get it right with time. Timing and spacing between your frames create movement in your animation. With time, you will get a better idea of how many frames you need to move the object from point A to B.

9. Basic model
You may see your system working too hard when you use a high-res model , and this can dramatically slow down the animation process. When you playback the animation in real-time, you may not see every frame. If you are working on the motion of a character, use a simple proxy 3D model to prevent this problem. You can then work more effectively with movement and return the more complex model to the process later.

10. Use ‘shark fin’
This is a advanced 3D animation tip for you. A curve known as the ‘shark fin’ is often used for facial animation processes. This can help you represent rapid facial movements, including those involving the lips and eyebrows. Faces can move very quickly, so it’s wise to make expressions occur within just one or two frames, or three if the spacing demands it.

Part 3: Frequently Asked Questions about Animation Tips
Below are four FAQs about 2D and 3D animation tips that people have asked many times. Hope they are helpful.
1. Are there any animation tricks to use?
We must say muting dialogue is one trick you should know. If your audio is on, you need to listen to it again and again. Thus, audio can disturb your creating process. After you finished the animation, you can turn audio on to revise the animation.
Besides, when you do animation, another trick is you can pause the post before the character goes into the next pose. It is a commonly used trick used by professionals, so you might think it is useful.
2. Is animation hard to learn?
Many beginners are wondering is it difficult to learn animation. The answer is NO if you are about to learn 2D animation. Many tutorials and lessons are easy to find in the market. However, if you start on 3D animation, it will be much harder than you thought. In this case, we recommend you learning 2D animation first.
3. Can I learn animation on my own?
You can learn animation on your own, but that’s not the best way. We recommend you learning animation by attending a training class , especially if you are a starter. You can build a solid animation knowledge base fast compared with learning on your own.
4. How can I get better at animation?
The best answer to get better is to imitate and practice. This tip is the most useful, practical, but difficult to complete one. If you can practice like half a year, you will get much better at animation.
Conclusion
By taking the above animation tips, you can create engaging, inspiring, and unforgettable animations that will captivate your audience. Why not get started following these animation tips right now?
Shanoon Cox
Shanoon Cox is a writer and a lover of all things video.
Follow @Shanoon Cox
Shanoon Cox
Mar 27, 2024• Proven solutions
Animation is a skill that you need years to practice. However, the learning process can be boosted if you master some animation tips. If you’re looking for great 2D/3D animation tips and tricks, this is what we will offer here.
There are some overlaps between 2D and 3D animation tips like practicing and object pose, but in essence, animation tips can be learned commonly.
These animation tips will help you make your 2D and 3D animations as bold and creative as possible, while reduce your workload and enable you to get your work out into the world quicker with excellent animation software . Let’s take a look at the top 10 2D/3D animation tips and tricks right now.
- Part 1: 2D Animation Tips for Beginners
- Part 2: 3D Animation Tips for Beginners
- Part 3: Frequently Asked Questions about Animation Tips
You may also like: Top 10 Anime Websites to Watch Anime Free
Part 1: 2D Animation Tips for Beginners
1. Find a reference in the real world
This first 2D animation tip is to find a reference. Using a real-world reference can help you animate faces effectively. When studios work with voice-over artists , they often record their facial movements so 2D animators can work with them and ensure their expressions are captured convincingly.
If this isn’t possible, consider using your face, so you have something to refer back to. You could use a mirror and speak the words your character will be saying into it. This can help you get the animated expressions just right.
2. Observe real life
The second animation tip is about observation. One of the key aspects of 2D animation is bringing life to animate objections. You need to think hard about how emotion can be portrayed and choose each movement carefully.
Spend time watching how people in real-life environments talk and interact with each one another, how they move, and how they express emotion. People-watching can be worth its weight in gold when it comes to preparing animations for 2D. Don’t be afraid to spend a great deal of time doing this, as it can be counted as valuable research.
3. Simplicity is the key
2D animation is never complicated compared with 3D. Think carefully before making a scene too complex. If there is too much information to digest, the overall effect can be one of confusion, and you may even find yourself compromising the realism of the scene. Try not to litter the scene with too many pose changes or other elements, and keep it authentic.
4. Draw animation again and again
Drawing animation takes a lot of time. It can’t be finished within one day, so you better know deep down that one piece of work only can be done after you have revised it many times. For 2D animation, it means you need to draw objects on paper many times.
In other words, the animation is a skill that needs practice and time. You can’t master it quickly. Luckily, all pains will be rewarded someday.
5. Feedback is crucial
Feedback is an essential part of artistic development . It’s wise to actively seek out commentary from knowledgeable figures who can help you improve. Naturally, we may see work we have invested a great deal of time and effort indifferently to someone not so involved in the creative process. Feedback can equate to a valuable learning opportunity that will help you make the result hit the spot much more convincingly.
Part 2: 3D Animation Tips for Beginners
Speaking of 3D animation, we think it is not easy to start at first. In this case, you need more tips and tricks.
6. Carefully use keyframing
3D Animation is all about poses. Remember, this animation tip is crucial. Individual frames come together to create movement and tell a story. The keyframes in 3D animation videos are the first and last movements in any sequence. You need to create strong first and last poses for your movements before deciding what happens between them. You must make these poses as memorable and powerful as you can.
7. Evaluate constructive criticism
It’s vital to pay attention to constructive criticism rather than simply choosing to ignore it. Most examples of constructive criticism aren’t about offending you, and friendly advice can play a pivotal role in helping you get the results that you are looking for.
This 3D animation tip can take years to reach the level you want to when it comes to the animation industry. Even if you don’t receive a great deal of or even any positive feedback, the people offering their comments may simply be trying to help you so you can improve. You may find that the criticism is being made purely because of personal preference on the part of the commentator.
8. Take the rhythm in animation
For 3D stop motion animation video, rhythm is an element to do storytelling. The best 3D animations have a strong sense of rhythm and a natural movement flow. Many inexperienced animators have found themselves animating too fast or slow. Don’t worry if you have this problem in the early days, as chances are you’ll start to get it right with time. Timing and spacing between your frames create movement in your animation. With time, you will get a better idea of how many frames you need to move the object from point A to B.
9. Basic model
You may see your system working too hard when you use a high-res model , and this can dramatically slow down the animation process. When you playback the animation in real-time, you may not see every frame. If you are working on the motion of a character, use a simple proxy 3D model to prevent this problem. You can then work more effectively with movement and return the more complex model to the process later.
10. Use ‘shark fin’
This is a advanced 3D animation tip for you. A curve known as the ‘shark fin’ is often used for facial animation processes. This can help you represent rapid facial movements, including those involving the lips and eyebrows. Faces can move very quickly, so it’s wise to make expressions occur within just one or two frames, or three if the spacing demands it.
Part 3: Frequently Asked Questions about Animation Tips
Below are four FAQs about 2D and 3D animation tips that people have asked many times. Hope they are helpful.
1. Are there any animation tricks to use?
We must say muting dialogue is one trick you should know. If your audio is on, you need to listen to it again and again. Thus, audio can disturb your creating process. After you finished the animation, you can turn audio on to revise the animation.
Besides, when you do animation, another trick is you can pause the post before the character goes into the next pose. It is a commonly used trick used by professionals, so you might think it is useful.
2. Is animation hard to learn?
Many beginners are wondering is it difficult to learn animation. The answer is NO if you are about to learn 2D animation. Many tutorials and lessons are easy to find in the market. However, if you start on 3D animation, it will be much harder than you thought. In this case, we recommend you learning 2D animation first.
3. Can I learn animation on my own?
You can learn animation on your own, but that’s not the best way. We recommend you learning animation by attending a training class , especially if you are a starter. You can build a solid animation knowledge base fast compared with learning on your own.
4. How can I get better at animation?
The best answer to get better is to imitate and practice. This tip is the most useful, practical, but difficult to complete one. If you can practice like half a year, you will get much better at animation.
Conclusion
By taking the above animation tips, you can create engaging, inspiring, and unforgettable animations that will captivate your audience. Why not get started following these animation tips right now?
Shanoon Cox
Shanoon Cox is a writer and a lover of all things video.
Follow @Shanoon Cox
Adobe Animate CC: Everything You Need to Know
Adobe Animate CC: Everything You Need to Know

Liza Brown
Mar 27, 2024• Proven solutions
In this article, we are going to clue you in on the new features of 2D animation maker Adobe Animate CC. So, if you are confused about flash animation tool and you are up to a project, just go for Animate CC.
You might also like: 10 Best 2D Animation Software in 2020 [Free/Paid]
What is Adobe Animate CC?
The animation lovers when seeking to serve the purpose, must have used and heard about Adobe Flash, but now we would here inform you that Adobe Animate CC has now replaced the old Adobe Flash.
Along with renaming the tool, the evolution from Flash to Adobe Animate CC has added a wide range of advanced functionalities like support to WebGL and HTML5 canvas.
You will not regret your decision after reading this article and will find that using Adobe Animate CC is a wise choice. Hence, let’s begin to get enlightened on the features.
New features of Adobe Animate CC
1. Adobe Animate Camera
Adobe Animate CC introduces virtual camera functionality unlike other animation software . With the help of this feature, you can easily stimulate your camera’s movement giving your animation a more realistic view.
Making it simpler, you can effortlessly execute panning, zooming and rotating to your animations if you wish. Using the virtual camera in Animate CC, you will be enabling to add more dramatic effects while creating an animation.
For instance, if there’s a fighting scene in our animated movie, you can rotate at the moment the scene shows destruction to give it a dramatic effect or you can zoom in or out and change the viewer’s attention from one point to the other.
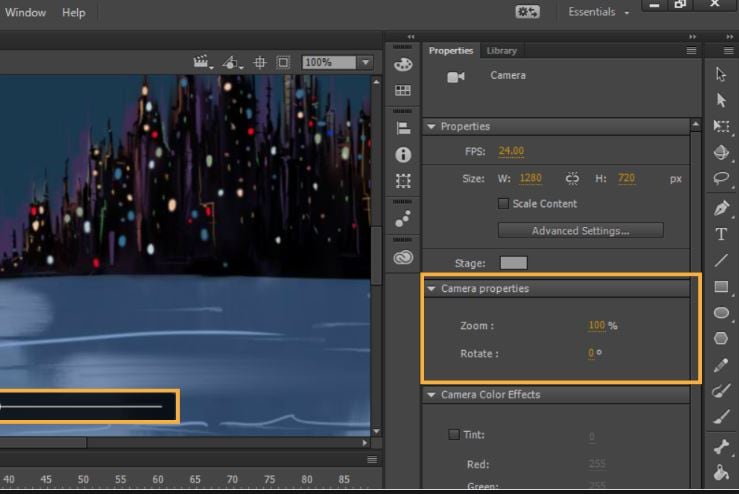
2. Export format
Adobe Animate CC has adapted the web standards for the exporting your animation which makes it easier for everyone to view it from desktop to mobile device.
This tweak has revolutionized the web based flash animation by simply eliminating the annoying “need to install a flash player plug-in” which was in case of Flash Professional Platform. With Adobe Animate, users can export content for WebGL, HTML5 Canvas, 4k video easily.
Moreover, you can generate the keyframes based sprite-sheet and animate them accordingly using the CSS. Adapting web standards doesn’t mean that Adobe Animate CC has entirely abandoned the SWF format.
Users do have a privilege to export their files to Flash Player format. Furthermore, a new OAM packaging is also introduced by new Adobe Animate CC which enables you to package assets in .zip format.

3. Vector brushes
Another important functionality that Adobe Animate has brought is giving the opportunity to create vector brushes. This is kind of same as that used in Adobe Illustrator. With this update in brushing tools, one can have pressure and tilt functionalities on drawing of lines and strokes with the help of pen or stylus.
This is helpful in creating strokes in touch-sensitive devices. The width can be changed according to how much pressure you apply when creating patterns. So, if you wish to create 2D vector graphics using shapes, patterns, curves etc. Animate CC would be a good choice.
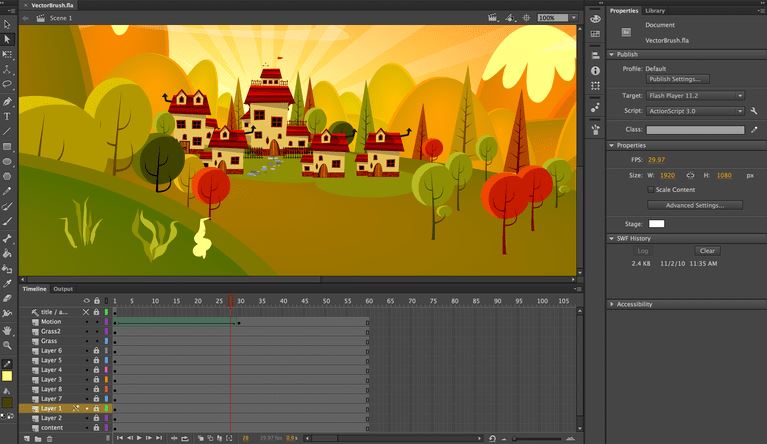
4. Audio Syncing
The timeline feature of the tool will now allow the users to sync audios in their animations and this is a yet another feature that Animate CC has added. This means you can do audio synchronization for your animation series.
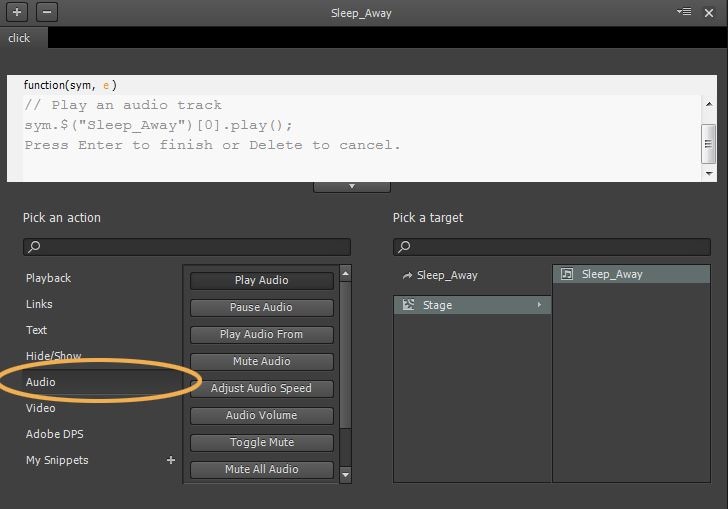
Nevertheless, doing this can be a little demanding as well as time-consuming with HTML5 alone. In addition, you also get enabled for audio loop control with the Adobe Animate CC’s timeline feature.
5. Font
Adobe Animate CC comes now with integration of Typekit where you get countless premium web fonts. These web fonts will be present for HTML5 canvas documents in the tool. Users can pick out from thousands of high-quality fonts via a subscription plan.
Putting in different words, first you can try some selected fonts available in the Typekit library via any level of Creative Cloud plan. Then when you subscribe by spending some money, you can then get access to complete Typekit library where there are thousands of premium fonts for HTML5 canvas.

Final Verdict
Animation industry is no doubt a very interesting one and having the best tool can make it more interesting and fun. After making you familiarize with the top functionalities that are coming with Adobe Animate CC, we feel it would be fair to end the discussion here. Hope you will not give a second thought on Animate CC when need to do flash animation.
Before ending, one more thing that we would like to give the other thought by introducing you Filmora.
No, this is a not another feature, but an interesting yet powerful video editing software created by Wondershare, one of the leading brand in multimedia field. You can use this tool and get your animated videos edited using its extraordinary effects.
Liza Brown
Liza Brown is a writer and a lover of all things video.
Follow @Liza Brown
Liza Brown
Mar 27, 2024• Proven solutions
In this article, we are going to clue you in on the new features of 2D animation maker Adobe Animate CC. So, if you are confused about flash animation tool and you are up to a project, just go for Animate CC.
You might also like: 10 Best 2D Animation Software in 2020 [Free/Paid]
What is Adobe Animate CC?
The animation lovers when seeking to serve the purpose, must have used and heard about Adobe Flash, but now we would here inform you that Adobe Animate CC has now replaced the old Adobe Flash.
Along with renaming the tool, the evolution from Flash to Adobe Animate CC has added a wide range of advanced functionalities like support to WebGL and HTML5 canvas.
You will not regret your decision after reading this article and will find that using Adobe Animate CC is a wise choice. Hence, let’s begin to get enlightened on the features.
New features of Adobe Animate CC
1. Adobe Animate Camera
Adobe Animate CC introduces virtual camera functionality unlike other animation software . With the help of this feature, you can easily stimulate your camera’s movement giving your animation a more realistic view.
Making it simpler, you can effortlessly execute panning, zooming and rotating to your animations if you wish. Using the virtual camera in Animate CC, you will be enabling to add more dramatic effects while creating an animation.
For instance, if there’s a fighting scene in our animated movie, you can rotate at the moment the scene shows destruction to give it a dramatic effect or you can zoom in or out and change the viewer’s attention from one point to the other.
2. Export format
Adobe Animate CC has adapted the web standards for the exporting your animation which makes it easier for everyone to view it from desktop to mobile device.
This tweak has revolutionized the web based flash animation by simply eliminating the annoying “need to install a flash player plug-in” which was in case of Flash Professional Platform. With Adobe Animate, users can export content for WebGL, HTML5 Canvas, 4k video easily.
Moreover, you can generate the keyframes based sprite-sheet and animate them accordingly using the CSS. Adapting web standards doesn’t mean that Adobe Animate CC has entirely abandoned the SWF format.
Users do have a privilege to export their files to Flash Player format. Furthermore, a new OAM packaging is also introduced by new Adobe Animate CC which enables you to package assets in .zip format.
3. Vector brushes
Another important functionality that Adobe Animate has brought is giving the opportunity to create vector brushes. This is kind of same as that used in Adobe Illustrator. With this update in brushing tools, one can have pressure and tilt functionalities on drawing of lines and strokes with the help of pen or stylus.
This is helpful in creating strokes in touch-sensitive devices. The width can be changed according to how much pressure you apply when creating patterns. So, if you wish to create 2D vector graphics using shapes, patterns, curves etc. Animate CC would be a good choice.
4. Audio Syncing
The timeline feature of the tool will now allow the users to sync audios in their animations and this is a yet another feature that Animate CC has added. This means you can do audio synchronization for your animation series.
Nevertheless, doing this can be a little demanding as well as time-consuming with HTML5 alone. In addition, you also get enabled for audio loop control with the Adobe Animate CC’s timeline feature.
5. Font
Adobe Animate CC comes now with integration of Typekit where you get countless premium web fonts. These web fonts will be present for HTML5 canvas documents in the tool. Users can pick out from thousands of high-quality fonts via a subscription plan.
Putting in different words, first you can try some selected fonts available in the Typekit library via any level of Creative Cloud plan. Then when you subscribe by spending some money, you can then get access to complete Typekit library where there are thousands of premium fonts for HTML5 canvas.
Final Verdict
Animation industry is no doubt a very interesting one and having the best tool can make it more interesting and fun. After making you familiarize with the top functionalities that are coming with Adobe Animate CC, we feel it would be fair to end the discussion here. Hope you will not give a second thought on Animate CC when need to do flash animation.
Before ending, one more thing that we would like to give the other thought by introducing you Filmora.
No, this is a not another feature, but an interesting yet powerful video editing software created by Wondershare, one of the leading brand in multimedia field. You can use this tool and get your animated videos edited using its extraordinary effects.
Liza Brown
Liza Brown is a writer and a lover of all things video.
Follow @Liza Brown
Tutorial Guide to Animate Pictures in Canva
Versatile Video Editor - Wondershare Filmora
An easy yet powerful editor
Numerous effects to choose from
Detailed tutorials provided by the official channel
With the rapid rise of social media worldwide, animated posts (like GIFs) are becoming famous. They have become a replacement to other modes like JPEG and .Png
Famous designing tools like Canva introduced an animation feature in the light of its popularity. The feature allows you to step up your social media game and creates animated visuals in a blink! It is also efficient for both professional and amateur users.
Besides social media content, Canva is also useful to design birthday cards, event invites, inspirational quotes, and more! Let’s learn about how to animate pictures in Canva in detail.
In this article
01 What Canva Pictures Can Be Used For?
02 How to Animate Pictures in Canva?
03 Tips: Animate Pictures In Video
Part 1: What Canva Pictures Can Be Used For?
Be it for marketing campaigns or projects, Canva is the best tool for all designing work. It is a foolproof platform where you do not need prior designing experience. Canva is useful for

Social media/Instagram Posts: You can build your Instagram presence by creating posts through Canva. It has multiple templates and features to make alluring Instagram posts. It also has drag-and-drop free images to add customized designs to the template.
Facebook Covers: You can make Facebook covers on Canva by choosing a layout and adding other elements. You can include colors, fonts, and pictures on the cover. Canva has templates for all themes, moods, and styles!
Event Invites: Canva has hundreds of free layouts and libraries to create event invites. You can choose the appropriate template and incorporate party-oriented photos, icons, stickers, illustrations, and graphics. It also has a personalizing option to add personal pictures and artwork in the editor.
Inspirational Quotes: Canva allows you to curate inspirational quotes and dispense motivation in people. It has templates to modify the elements like font size, text size, borders, images, and more!
Collages: It helps create a collage where you can combine multiple pictures in one frame. Canva offers various grids with a capacity of 12 pictures and different sizes.
Part 2: How to Animate Pictures in Canva?
Canva helps you add instant animation in presentations, social media posts, and more. To know how to animate images in Canva, follow the below steps:

Step 1: Add Static Elements
Start by creating an image through static elements. To make the design attractive, you can add sample texts, illustrations, doodles, and other entities.
Try to stimulate your creativity and come up with a layout beforehand. If possible, sketch on paper and replicate the same.
Step 2: Animate Your Design
Take a final glance at the layout. Make sure it’s perfect. Once all the elements are placed as per your design, it’s time to animate them. For that:
- Click on the white background page
- Go to the “Toolbar” section
- Select the “Animate” button
Step 3: Select Page Animation Style
Canva offers six animation styles, where five are for free users, and one is for pro users. To access the five animation styles, follow these steps.
- Press the “Animate” Button
- Select “Page Animations”
- There you will find options like Block, Pan, Fade, Rise, and Tumble
- Select the style as per your design
Step 4: Preview and Download
After selecting a page animation style, it will preview the effect. If you find it good, move on to downloading the GIF. Here’s how to do so
- Go to the “Toolbar” option (present on your upper right hand)
- Choose GIF as the file type
- Check the page number and verify if it’s correct
- Press the “Done” button
Step 5: Final GIF
After clicking on the “Done” button, your GIF will be downloaded. You will be able to see a display for five seconds. If you want to edit the image after this, click on the time button (near the “Animate” button).
So, that was all about how to animate a photo in Canva.
Drawbacks of Canva
Despite efficient features and easy interface, there are certain areas where Canva lacks. This includes
- It does not have any local file storage.
- As too many people use Canva, your template may look the same as others.
- Some of its best features are not free to access.
- The mobile app version lacks certain elements and features.
Out of all these drawbacks, repetitions of templates are a big issue. That’s because everyone wants their posts to look unique and irreplaceable. However, common Canva templates may prevent that from happening.
Fortunately, there are ways to combat such issues. Let’s learn about them in the next section.
Tips: Animate Pictures In Video
You can also animate pictures in the video to make them more lively. For that, you can use Wondershare Filmora Pro Video Editor. It’s also efficient if you don’t know how to animate a picture in Canva:
Wondershare Filmora Video Editor
Filmora by Wondershare is a video editing software that helps you build custom animations easily. It has auto features to make epic stories and posts.
Wondershare Filmora
Get started easily with Filmora’s powerful performance, intuitive interface, and countless effects!
Try It Free Try It Free Try It Free Learn More about Filmora>

Its drag and drop effect makes designing simple and quick. Due to its outstanding attributes, options, and styles, Filmora has 77+ million happy users!
It’s a power-packed integration of functionality, performance, and more! In fact, it resolves the repeated template issue of Canva. The software has top-notch functions and innovative filters that add authenticity to the designs.
Till now, you learned about how to animate a picture on Canva. Now, let’s comprehend the right way to use Filmora for animating and adding images in the video.
Before using, make sure to update the software to its latest version. Follow separate methods for both Windows and Mac.
For Win
Step 1: Adding Image to Video Track
With Filmora, adding images to video is a matter of seconds! Start by:
- Identify the position where you want to add the image and place the Playhead there.
- Right-click on the picture from the media library. Click on the “Insert” option. Your image will be added. Select the “Append” option, if you want to add an image at the video end.

Note: How to Remove Black Bars around the Image?
- Go to “Settings” from the File section.
- Click on the “Editing” tab and select “Photo Placement.”
- Choose from the “Crop to Fit” or “Pan To Zoom” option. The black bars will be removed.
To add the image in between the video clip, split them. Now, add the image between the split parts.
Step 2: Add Images as Overlays
To add images as overlays, drag the image to a video track above the main track. The main track consists of your video.
Track 1 (or the track with a video clip) is the base of your video. If you add anything else, it will be displayed above this track as video track 2, 3, and so on. Overall, you can add 100 video tracks.
Step 3: Edit Your Image
If you know how to animate an image in Canva, editing images on Filmora is even easier. You can try the following methods:
Animate Your Images
- To add animation presets to the image, click on the image twice.
- Go to the “Animation Tab” and look for an animation preset.
- Drag the presets to the image for its effect

Make Image Color Adjustments
- Double-click on the image
- Go to the “Color” tab and then the “Color” section
- Customize the temperature, saturation, brightness, etc., as per your need.
- Press Ok.
Change Image Duration
You can increase the image duration to more than the default timing of 5 seconds. For that:
- Click on the image and select the “Duration” option.
- Go to the “Duration Setting” panel.
- Add the new duration timing.

Adjust Position, Rotate/Flip, and Opacity
- You can resize the image position through the circles and squares at the image edges.
- To flip or rotate the image, double-click on the picture. From the “Image Panel,” go to “Transform” and then click on “Rotate.” You can choose either “Horizontal Flip” or “Vertical Flip” to flip the images.
- Double-click on the image and click on the “Composting” option to add opacity. You can choose the blending mode or adjust the “Opacity” accordingly.

For Mac
Filmora for Mac comes with a drag and drop feature to add transitions, animated titles, and effects. You can start a new project from scratch by clicking on “New Project”. The entire process is the same as that for Windows users.
To apply animation in the images, use the motion effects option. For that,
- Click on the Image
- Go to Motion Tab
- Select a motion effect
- Double-click to apply the effect

Conclusion
So that’s how to animate photos in Canva. Hopefully, our steps will help you revamp your posts like a pro! If not Canva, you can use its alternative Filmora. It’s equally prominent, user-friendly, and feature-rich.
Versatile Video Editor - Wondershare Filmora
An easy yet powerful editor
Numerous effects to choose from
Detailed tutorials provided by the official channel
With the rapid rise of social media worldwide, animated posts (like GIFs) are becoming famous. They have become a replacement to other modes like JPEG and .Png
Famous designing tools like Canva introduced an animation feature in the light of its popularity. The feature allows you to step up your social media game and creates animated visuals in a blink! It is also efficient for both professional and amateur users.
Besides social media content, Canva is also useful to design birthday cards, event invites, inspirational quotes, and more! Let’s learn about how to animate pictures in Canva in detail.
In this article
01 What Canva Pictures Can Be Used For?
02 How to Animate Pictures in Canva?
03 Tips: Animate Pictures In Video
Part 1: What Canva Pictures Can Be Used For?
Be it for marketing campaigns or projects, Canva is the best tool for all designing work. It is a foolproof platform where you do not need prior designing experience. Canva is useful for
Social media/Instagram Posts: You can build your Instagram presence by creating posts through Canva. It has multiple templates and features to make alluring Instagram posts. It also has drag-and-drop free images to add customized designs to the template.
Facebook Covers: You can make Facebook covers on Canva by choosing a layout and adding other elements. You can include colors, fonts, and pictures on the cover. Canva has templates for all themes, moods, and styles!
Event Invites: Canva has hundreds of free layouts and libraries to create event invites. You can choose the appropriate template and incorporate party-oriented photos, icons, stickers, illustrations, and graphics. It also has a personalizing option to add personal pictures and artwork in the editor.
Inspirational Quotes: Canva allows you to curate inspirational quotes and dispense motivation in people. It has templates to modify the elements like font size, text size, borders, images, and more!
Collages: It helps create a collage where you can combine multiple pictures in one frame. Canva offers various grids with a capacity of 12 pictures and different sizes.
Part 2: How to Animate Pictures in Canva?
Canva helps you add instant animation in presentations, social media posts, and more. To know how to animate images in Canva, follow the below steps:
Step 1: Add Static Elements
Start by creating an image through static elements. To make the design attractive, you can add sample texts, illustrations, doodles, and other entities.
Try to stimulate your creativity and come up with a layout beforehand. If possible, sketch on paper and replicate the same.
Step 2: Animate Your Design
Take a final glance at the layout. Make sure it’s perfect. Once all the elements are placed as per your design, it’s time to animate them. For that:
- Click on the white background page
- Go to the “Toolbar” section
- Select the “Animate” button
Step 3: Select Page Animation Style
Canva offers six animation styles, where five are for free users, and one is for pro users. To access the five animation styles, follow these steps.
- Press the “Animate” Button
- Select “Page Animations”
- There you will find options like Block, Pan, Fade, Rise, and Tumble
- Select the style as per your design
Step 4: Preview and Download
After selecting a page animation style, it will preview the effect. If you find it good, move on to downloading the GIF. Here’s how to do so
- Go to the “Toolbar” option (present on your upper right hand)
- Choose GIF as the file type
- Check the page number and verify if it’s correct
- Press the “Done” button
Step 5: Final GIF
After clicking on the “Done” button, your GIF will be downloaded. You will be able to see a display for five seconds. If you want to edit the image after this, click on the time button (near the “Animate” button).
So, that was all about how to animate a photo in Canva.
Drawbacks of Canva
Despite efficient features and easy interface, there are certain areas where Canva lacks. This includes
- It does not have any local file storage.
- As too many people use Canva, your template may look the same as others.
- Some of its best features are not free to access.
- The mobile app version lacks certain elements and features.
Out of all these drawbacks, repetitions of templates are a big issue. That’s because everyone wants their posts to look unique and irreplaceable. However, common Canva templates may prevent that from happening.
Fortunately, there are ways to combat such issues. Let’s learn about them in the next section.
Tips: Animate Pictures In Video
You can also animate pictures in the video to make them more lively. For that, you can use Wondershare Filmora Pro Video Editor. It’s also efficient if you don’t know how to animate a picture in Canva:
Wondershare Filmora Video Editor
Filmora by Wondershare is a video editing software that helps you build custom animations easily. It has auto features to make epic stories and posts.
Wondershare Filmora
Get started easily with Filmora’s powerful performance, intuitive interface, and countless effects!
Try It Free Try It Free Try It Free Learn More about Filmora>
Its drag and drop effect makes designing simple and quick. Due to its outstanding attributes, options, and styles, Filmora has 77+ million happy users!
It’s a power-packed integration of functionality, performance, and more! In fact, it resolves the repeated template issue of Canva. The software has top-notch functions and innovative filters that add authenticity to the designs.
Till now, you learned about how to animate a picture on Canva. Now, let’s comprehend the right way to use Filmora for animating and adding images in the video.
Before using, make sure to update the software to its latest version. Follow separate methods for both Windows and Mac.
For Win
Step 1: Adding Image to Video Track
With Filmora, adding images to video is a matter of seconds! Start by:
- Identify the position where you want to add the image and place the Playhead there.
- Right-click on the picture from the media library. Click on the “Insert” option. Your image will be added. Select the “Append” option, if you want to add an image at the video end.
Note: How to Remove Black Bars around the Image?
- Go to “Settings” from the File section.
- Click on the “Editing” tab and select “Photo Placement.”
- Choose from the “Crop to Fit” or “Pan To Zoom” option. The black bars will be removed.
To add the image in between the video clip, split them. Now, add the image between the split parts.
Step 2: Add Images as Overlays
To add images as overlays, drag the image to a video track above the main track. The main track consists of your video.
Track 1 (or the track with a video clip) is the base of your video. If you add anything else, it will be displayed above this track as video track 2, 3, and so on. Overall, you can add 100 video tracks.
Step 3: Edit Your Image
If you know how to animate an image in Canva, editing images on Filmora is even easier. You can try the following methods:
Animate Your Images
- To add animation presets to the image, click on the image twice.
- Go to the “Animation Tab” and look for an animation preset.
- Drag the presets to the image for its effect
Make Image Color Adjustments
- Double-click on the image
- Go to the “Color” tab and then the “Color” section
- Customize the temperature, saturation, brightness, etc., as per your need.
- Press Ok.
Change Image Duration
You can increase the image duration to more than the default timing of 5 seconds. For that:
- Click on the image and select the “Duration” option.
- Go to the “Duration Setting” panel.
- Add the new duration timing.
Adjust Position, Rotate/Flip, and Opacity
- You can resize the image position through the circles and squares at the image edges.
- To flip or rotate the image, double-click on the picture. From the “Image Panel,” go to “Transform” and then click on “Rotate.” You can choose either “Horizontal Flip” or “Vertical Flip” to flip the images.
- Double-click on the image and click on the “Composting” option to add opacity. You can choose the blending mode or adjust the “Opacity” accordingly.
For Mac
Filmora for Mac comes with a drag and drop feature to add transitions, animated titles, and effects. You can start a new project from scratch by clicking on “New Project”. The entire process is the same as that for Windows users.
To apply animation in the images, use the motion effects option. For that,
- Click on the Image
- Go to Motion Tab
- Select a motion effect
- Double-click to apply the effect
Conclusion
So that’s how to animate photos in Canva. Hopefully, our steps will help you revamp your posts like a pro! If not Canva, you can use its alternative Filmora. It’s equally prominent, user-friendly, and feature-rich.
Versatile Video Editor - Wondershare Filmora
An easy yet powerful editor
Numerous effects to choose from
Detailed tutorials provided by the official channel
The Ultimate Cheatsheet to 15 Adobe Animate Alternatives
The Ultimate Cheatsheet to 15 Adobe Animate Alternatives in 2024
An easy yet powerful editor
Numerous effects to choose from
Detailed tutorials provided by the official channel
Like all other Adobe premium software like Photoshop, illustrator, and premiere pro, Adobe Animate is designed for professionals.
No need to feel discouraged as there are plenty of Adobe Animate free alternatives with which you can polish the animator in you. Let’s check them out.
In this article
01 [Adobe Animate - How It Became a Good Option Without Hesitation?](#Part 1)
02 [Top 10 Adobe Animate Alternatives to Improve Animation Experience](#Part 2)
03 [The Most Comprehensive All-round Comparison Among All Alternatives](#Part 3)
Part 1 Adobe Animate - How It Became a Good Option Without Hesitation?
1. How Much Do You Know About Adobe Animate Key Features?
The Adobe Creative Cloud is constantly updating its range of virtual tools with new features which give users twice more incentive to subscribe. Adobe Animate CC, which is basically the new Adobe Flash, has also received an update recently which installed a bundle of new features to its interface, making it even more irresistible to animators.
What’s new with Adobe Animate?
● Adobe Animate Camera
Adding to Adobe’s line of exclusivity is its all-new Adobe Virtual Camera. Using this feature, Adobe animate users can now control their animation camera movements giving your animation videos a more realistic feel.
● Export any Format
Exporting your animations to your desktop is a convenience every software should provide.
● Audio Syncing
Adobe Animate enables you to synchronize audio to your animations completely easily which is yet another feature that has been recently added.
● Vector Brushes
Though it resembles the same functionality with Adobe Illustrator, Adobe Animate has renewed the tool with the ability to use tilt and pressure effects when drawing with a stylus or pen.
● Web Fonts
Now you can use a vast library of Adobe web fonts with Adobe Animate. These high-quality fonts are available in HTML5 canvas documents.
2. What Lay Behind Adobe Animate Alternative?
When it comes to choosing the best premium animation software, Adobe Animate CC is the obvious choice, but what makes beginners hesitant in using Adobe Animate is the fact that you need to subscribe to Adobe Creative Cloud.
This becomes an obstacle to those who are just starting out and are not that confident in getting their hands on a professional league interface like Animate. It also lacks sufficient facilities for practicing 3D animations.
This is exactly where free Alternatives to Adobe Animate enters the scene. Check out our list and find out which alternative suits your level of animation skills.
Part 2 Top 10 Adobe Animate Alternatives to Improve Animation Experience
No. 1 Krita

The first free-to-use Adobe Alternative on our list is ‘Krita’. It is an open-source animator with an intuitive drag and drop panel which gives users complete flexibility.
Krita llll➤
● UI
It offers over 30 different Dockers which are like toolkits for the program.
● Features
Freehand path tool+Object manipulation+HDR support+Layer Management+Enhanced OpenGL
● Compatibility
Supports various metadata formats like ORA, KRA, PSD, JPEG and PNG files.
● Popularity
Krita has a 4.3 start popularity rating at G2.com.
● Operating System
Compatible with Windows 8 or higher, macOS X 10.12 and Linux Basic.
● Pricing
Free to use.
● Who is Best For?
Krita is an excellent alternative for beginners who are looking to not get overwhelmed by comprehensive features.
● Reviewers say compared to Adobe Animate
Many reviewers have preferred Krita’s simplistic approach to Adobe Animate.
● Verdict
It is an excellent image editor and animator but can be limiting in its professional application.
Strengths
100 preloaded brushes: You can use brush tools in categories like digital, ink, paint, and sketch.
Onion Layer Editing: You can go back and check your previous drawing before moving on to the next.
Counteractive Tools: Efficiently compatible with pressure-sensitive tablets.
Weaknesses
Pixel-based Drawings: Its drawings are pixelated making it harder to achieve precisions around the rough edges.
Added Support: Exporting animation files requires support from a secondary application.
No. 2 Open Toonz

A friendlier platform for cartoon animation lovers and yet another free Adobe Animate Alternative. An open-source platform whose code can be modified by the user to add new features and graphics.
Open Toonz llll➤
● UI
Its interface has separate organized rooms called ‘workspaces’. The tools and windows in each room are different and fulfill a separate function.
● Features
Indexed Colour Palettes+Motion Tracking+Effects and Composting+Effects and Composting+Effects and Composting
● Compatibility
Opentoonz supports a plethora of file formats like AVI, 3GP, BMP, JPG, GIF, MOV, NOL, RGB, SGI, TGA, TIF, and TIFF.
● Popularity
OpenToonz has a standard rating of 4.1 stars on G2.
● Operating System
Compatible with macOS X 10.9, Windows 7 or higher.
● Pricing
Free to use.
● Who is Best For?
Can be used by both professionals and beginners alike.
● Reviewers say compared to Adobe Animate
It is a great platform to familiarize yourself with basic animation.
● Verdict
OpenToonz is an excellent animation tool for beginners but lacks some of the higher-performing functions demanded by professionals.
Strengths
TWAIN Standard Compatible: Images captured on OpenToonx using its digital camera and scanners can be used in animations.
Choose from different animation types: You can choose between standard animation and skeletal animations.
100s of Special Effects: Change the effects of your image however you want using effects like incident light or distortion waves.
Weaknesses
Suitable only for beginners: OpenToonz may still require some work in order to muster the attention of pros.
Lack of automated syncing: You may find it difficult to sync the voices of your characters.
No. 3 Toon Boom

Toon Boom is a more popular alternative to Adobe Animate and is recognized by professional animation studios worldwide. Toon Boom even has its own pro-grade animation software called Harmony which has been used to create various popular TV animated series.
Toon Boom llll➤
● UI
The extremely instinctive interface where you can navigate using various effects like zoom in & out, pan and reset your views.
● Features
Advanced Cut out+Bitmap and Vector Drawing+Bitmap and Vector Drawing+Access to Harmony Server+Access to Harmony Server
● Compatibility
Toon Boom can import dozens of different file formats like BMP, JPEG, PSD, TGA, SGI, TIFF, TVG and PAL.
● Popularity
Toom Boom is rated excellent on G2 with 4.7 stars.
● Operating System
Can run with Windows 7 & 10, macOS High Sierra, Catalina, Mojave.
● Pricing
Basic - $25/month; Advanced - $63/month; Premium - $115/month.
● Who is Best For?
Superb animation software with dozens of features that would attract freelance animators and professionals.
● Reviewers say compared to Adobe Animate
The common opinion amongst reviewers is that Toon Boom offers many more features than Adobe Animate.
● Verdict
Toon Boom is premium software that is excellent for pro-league animators and is one of Adobe Animates biggest competitors.
Strengths
Onion Skinning Feature: You can view your drawings in layers.
Import & Export Different types of files: You can export and import files like paper drawings, digital drawings and 13 other file types.
Peg Animations: You can chart your character’s movements using pegs between two points.
Weaknesses
Lacks Audio Features: You require an external audio application to include audio in your animations.
Do not include pre-made characters: You would need to create your characters from scratch.
No. 4 TVPaint Animation

TVPaint has been a household animation software that has been around for a while. It has considerable features which are great for creating versatile 2D animations.
TVPaint Animation llll➤
● UI
The TVPaint Interface is not too complex and has a wide range of bitmap drawing tools for 2D all 2D animation processes.
● Features
Bitmap Drawing Tools+Bitmap Drawing Tools+Layer Management+Layer Management+Layer Management
● Compatibility
Can import image and video files like WMV, AVI, MOV, MPEG, GIF, JPEG, PNG, and TIFF.
● Popularity
TVPaint has been around for a long while and has a 5-star G2 rating.
● Operating System
Later versions of TVPaint are compatible with Microsoft Windows, macOS X, Android, and Linux.
● Pricing
Standard version 11.0 costs €500; Professional version 11.0 costs €1250.
● Who is Best For?
It is traditionally acclaimed 2D animation software superb for professional animation studios.
● Reviewers say compared to Adobe Animate
Both TV Paint and Animate cc has the ability to perfect frame to frame animation with minor differences in the choice of tools.
● Verdict
TV Paint is a fantastic software amongst animators who wish to perfect their craft.
Strengths
Versatile Drawing Tools: You have access to all essential drawing tools like brushes, color palettes, textures and more.
Strong Painting Engine: Powerful painting tool for sketching and painting backgrounds.
Colour & Texture Generator: This tool provides an enhanced spectrum of colors.
Weaknesses
Learning Curve: TVPaint has its own learning curve as the interface is dissimilar from average animators.
Limited to Bitmap: You can only edit images in Bitmap format.
No. 5 Synfig Studio

Synfig is yet another free-to-use Adobe Animate alternative but is quite powerful in creating fabulous vector animations which are flawless to look at it.
Synfig Studio llll➤
● UI
Synfig is yet another free-to-use Adobe Animate alternative but is quite powerful in creating fabulous vector animations which are flawless to look at it.
● Features
Various different layers+Sound Support+Dozens of Drawing Tools+Dozens of Drawing Tools+Import Facility
● Compatibility
You can render multiple video formats like AVI, MPEG, GIF, and MNG.
● Popularity
Excellent Rating 5 stars for Vector Graphics on G2.
● Operating System
Can run on Windows 7 and above, macOS X 10.8 and Linux.
● Pricing
Free to use.
● Who is Best For?
Synfig is a bit complex but great for animators who are willing to learn.
● Reviewers say compared to Adobe Animate
Much more convenient interface.
● Verdict
Synfig Studios is a great program for animating vector graphics.
Strengths
Vector Tweening: Change the shape of your vectors automatically.
50+ Layers: Choose from multiple gradients, filters, distortions, geometrics and fractals.
Auto Lip-Sync: Your audio will be automatically paired with your characters.
Weaknesses
Continuous Saving: You will need to manually save your files each time.
Learning Curve: The program takes some time to master.
No. 6 Cacani

Here comes CACANi, a new chip off the old block for anime lovers. It has awesome features for drawing vector animations.
Cacani llll➤
● UI
Excellent vector drawing interface which reduces your effort and time by auto-generating drawings.
● Features
Auto-generated Drawings+Personal Drawing Assistant+Max Artist Control+Max Artist Control+Shortcut Customization
● Compatibility
BMP, PNG, JPG, TGA, and TIFF files can all be imported.
● Popularity
Relatively new to the market but is growing in popularity.
● Operating System
Compatible with Windows 7, 8, 10, or higher.
● Pricing
30-day license $20; Yearlong license $180; Lifelong license $499; Team Plans start at $399 for 4 devices; Perpetual Team Plan $799
● Who is Best For?
Animators looking to work with a more powerful set of tools and are willing to pay for it can opt for Cacani.
● Reviewers say compared to Adobe Animate
An advanced tool provides excellent support for smooth and curve drawings.
● Verdict
A premium tool meant for advanced usage and is excellent for instinctive users and animators.
Strengths
Painting Assistance: You can paint one sequence and your color combination will be carried forward to the next sequence.
Drawing Tools: Simplifies all types of vector drawings.
Stroke Correction: You can correct problems in-between frames.
Weaknesses
Cost-effective for individual use: Teams and businesses may find it a bit above budget.
Cost-effective for individual use: Teams and businesses may find it a bit above budget.
No. 7 Wick Editor

Wick Editor is a free-to-use open-source platform that is great for creating standard flash-based animations. It was incepted with the purpose to provide animators with a free platform equipped with easy-to-use toolkits.
Wick Editor llll➤
● UI
Wick’s interface includes a combination of programming and animation systems using tools like Flash and Scratch and HyperCard.
● Features
Interactive Interface+Browser Operated+Browser Operated+Includes Guides and Tutorials
● Compatibility
Requires third-party assistance to convert wick files to GIF, ZIP or HTML.
● Popularity
Moderately rate by first-time users.
● Operating System
Can run online through browsers like Firefox or Chrome.
● Pricing
Free to use.
● Who is Best For?
Suitable marketing animators and freelancers.
● Reviewers say compared to Adobe Animate
Not as comprehensive as Adobe Animate.
● Verdict
Wick Editor is more suited for animating basic promotions but not meant for professional use.
Strengths
User Friendly: Icons, texts, and labels are enlarged for convenience.
Includes Basic Programming: Combines animation elements with a programming interface.
Export to multiple formats: You can use export wick projects in multiple formats.
Weaknesses
Incompatible with Mobile Devices: It is not available for use on mobile devices.
Incompatible with Mobile Devices: It is not available for use on mobile devices.
No. 8 Blender

Animators who are looking to specialize in 3D animations can get their hands on Blender. It is a highly popular open-source 3D animation software.
Blender llll➤
● UI
Animators who are looking to specialize in 3D animations can get their hands on Blender. It is a highly popular open-source 3D animation software.
● Features
3D modelling+Raster Graphics Editing+Fluid and Smoke Simulation+Raster Graphics Editing+Rigging & Skinning
● Compatibility
Blender is compatible with a wide range of file formats namely OBJ, 3DS, FBX, STL, PLY and so on.
● Popularity
Blender has an excellent rating of 4.5 on G2.
● Operating System
Compatible for Windows 10 or higher, macOS 10.13 and Linux.
● Pricing
Free to use.
● Who is Best For?
Blender is used by animators worldwide to create professional animation productions.
● Reviewers say compared to Adobe Animate.
Adobe Animate is comparatively easier to use, but Blender is great for small-scale animation businesses.
● Verdict
An excellent diverse animation tool for small-scale studios, freelancers and hobbyists.
Strengths
Sync Sound: Match your audios with your visuals with auto-sync.
Preset Shortcuts: You can memorize a list of hotkeys for convenient use.
Shape Keys: You can add more detail with the help of shape keys like skeletal rigging.
Weaknesses
Complicated User interface: There are dozens of duplicate buttons which uncoordinated.
Glitches: Open source software is known to be glitchy as they lack premium security.
No. 9 Autodesk Maya

Maya is a well-known 3D graphics editor which is absolutely jam-packed with features and functions like 3D animation, rendering, simulation, composting, modeling and visualization. It can be considered the next level in animation after Adobe Animate.
Krita llll➤
● UI
Maya is a well-known 3D graphics editor which is absolutely jam-packed with features and functions like 3D animation, rendering, simulation, composting, modeling and visualization. It can be considered the next level in animation after Adobe Animate.
● Features
Ready to use graphs+Ready to use graphs+Bifrost Programming Environment+Ocean Simulation Systems+Seamless Import and Export
● Compatibility
Maya can import various file formats, including mayaBinary, mayaLT, mayaAscii, OBJ, audio, EPS, Adobe Illustrator, Image, FBX.
● Popularity
Maya has a standard 4.3 rating on G2.
● Operating System
Compatible with macOS X 10.13, Windows 10 or higher and Linux.
● Pricing
Annual Subscription $1700.
● Who is Best For?
Maya is equipped with a substantial number of features and requires animators to take time learn therefore grooming their animation skills.
● Reviewers say compared to Adobe Animate
Adobe animate has a much more convenient interface when compared to Autodesk Maya but it is more alluring for professional studios.
● Verdict
Autodesk Maya is mighty fine 3D animation software that opens more doors for animators with a keen sense of detail.
Strengths
A complete 3D animation package: Maya hasn’t left any stone unturned in terms of features.
One of the best in the Industry: Simple to create any type of animation.
Python API: Convenient for creating plugins and scripts.
Weaknesses
Lacks Convenient Interface: Maya’s toolkit is a bit more complex than Animate CC.
No. 10 Filmora Pro

Filmora Pro is an excellent Adobe Animate alternative in terms of convenience, versatility and the variation animation features you can explore on its super intuitive interface.
Krita llll➤
● UI
Filmora Pro is basically a video editing software with a unique interface that is simple to understand and master.
● Features
Length Adjustment+Gradient Tool+Evaporate+Linear Wipe+Pinwheel
● Compatibility
You can import a wide range of video files like MP4, MOV, WMV, AVI, F4V, MKV, TS, MPEG-2, GIF, MP3 and WEBM.
● Popularity
Filmora Pro is rated at a whopping 4.6 stars.
● Operating System
Compatible with Windows 7, 8, 10, 11, macOS 10.15, 11, 13, 14.
● Pricing
Per Year subscription $51.99; time Purchase $79.99
● Who is Best For?
Filmora Pro from Wondershare is ideal for users, from vloggers and freelancers to hobbyists and professionals.
● Reviewers say compared to Adobe Animate.
According to most reviewers, Filmora Pro has an easier-to-use interface and an abundance of features compared to Adobe Animate CC. Still, it is essentially a video editing software nonetheless.
● Verdict
Filmora Pro is an all-in-one video editing software that offers tons of editing features for all types of videos.
Strengths
Preset Options: You can experiment with a wide range of presets to edit animations quickly.
Easy Media Upload: Filmora supports a wide range of file formats.
4K video: You can also use Filmora to edit 4K videos.
Weaknesses
Lacks Shortcut Options: It may get a bit difficult to navigate on Filmora.
Cartoonish Transitions: Transition between cuts can require extra care.
Part 1 The Most Comprehensive All-round Comparison Among All Alternatives
| Tools | UI | G2 Rating | OS | Pricing |
|---|---|---|---|---|
| Krita | Versatile | 4.3 | Windows 8 or higher, macOS X 10.12 and Linux | Free |
| Open Toonz | Compartmentalized | 4.1 | MacOS X 10.9, Windows 7 or higher | Free |
| Toon Boom | Instinctive | 4.7 | Windows 7 & 10, macOS High Sierra, Catalina, Mojave | Basic – $25/month; Advanced - $63/month; Premium - $115/month |
| TVPaint Animation | Comprehensive | 5 | Windows, macOS X, Android and Linux. | Standard Version – €500; Pro Version – €1250 |
| Synfig Studio | Versatile | 5 | Windows 7 and above, macOS X 10.8 and Linux | Free |
| Cacani | Effortless | NIL | Windows 7, 8, 10 or higher | 30-day license $20; Yearlong license $180; Lifelong license $499; Team Plans start at $399 for 4 devices; Perpetual Team Plan $799 |
| Wick Editor | Hybrid | NIL | Firefox or Chrome. | Free |
| Blender | Changing | 4.5 | Windows 10 or higher, macOS 10.13 and Linux. | Free |
| Maya | Comprehensive | 4.3 | MacOS X 10.13, Windows 10 or higher and Linux. | Annual Subscription $1700 |
| Filmora Pro | Versatile | 4.6 | Windows 7, 8, 10, 11, macOS 10.15, 11, 13, 14. | Yearly – $51.99; One Time –$79.99 |

Wondershare Filmora - Best Video Editor for Mac/Windows
5,481,435 people have downloaded it.
Build unique custom animations without breaking a sweat.
Focus on creating epic stories and leave the details to Filmora’s auto features.
Start a creative adventure with drag & drop effects and endless possibilities.
Filmora simplifies advanced features to save you time and effort.
Filmora cuts out repetition so you can move on to your next creative breakthrough.
Key Takeaways from This Episode
● There are dozens of free and paid animation software out there, but only a few are ideal Adobe Animate Alternatives.
● Adobe Animate is one of the best 2D and 3D animation software in the market, with versatile tools and many plug-in options.
● You need a monthly or yearly subscription to Adobe Creative Cloud to use Animate CC, which is why we have complied a list of the best Adobe Animate Alternatives.
Like all other Adobe premium software like Photoshop, illustrator, and premiere pro, Adobe Animate is designed for professionals.
No need to feel discouraged as there are plenty of Adobe Animate free alternatives with which you can polish the animator in you. Let’s check them out.
In this article
01 [Adobe Animate - How It Became a Good Option Without Hesitation?](#Part 1)
02 [Top 10 Adobe Animate Alternatives to Improve Animation Experience](#Part 2)
03 [The Most Comprehensive All-round Comparison Among All Alternatives](#Part 3)
Part 1 Adobe Animate - How It Became a Good Option Without Hesitation?
1. How Much Do You Know About Adobe Animate Key Features?
The Adobe Creative Cloud is constantly updating its range of virtual tools with new features which give users twice more incentive to subscribe. Adobe Animate CC, which is basically the new Adobe Flash, has also received an update recently which installed a bundle of new features to its interface, making it even more irresistible to animators.
What’s new with Adobe Animate?
● Adobe Animate Camera
Adding to Adobe’s line of exclusivity is its all-new Adobe Virtual Camera. Using this feature, Adobe animate users can now control their animation camera movements giving your animation videos a more realistic feel.
● Export any Format
Exporting your animations to your desktop is a convenience every software should provide.
● Audio Syncing
Adobe Animate enables you to synchronize audio to your animations completely easily which is yet another feature that has been recently added.
● Vector Brushes
Though it resembles the same functionality with Adobe Illustrator, Adobe Animate has renewed the tool with the ability to use tilt and pressure effects when drawing with a stylus or pen.
● Web Fonts
Now you can use a vast library of Adobe web fonts with Adobe Animate. These high-quality fonts are available in HTML5 canvas documents.
2. What Lay Behind Adobe Animate Alternative?
When it comes to choosing the best premium animation software, Adobe Animate CC is the obvious choice, but what makes beginners hesitant in using Adobe Animate is the fact that you need to subscribe to Adobe Creative Cloud.
This becomes an obstacle to those who are just starting out and are not that confident in getting their hands on a professional league interface like Animate. It also lacks sufficient facilities for practicing 3D animations.
This is exactly where free Alternatives to Adobe Animate enters the scene. Check out our list and find out which alternative suits your level of animation skills.
Part 2 Top 10 Adobe Animate Alternatives to Improve Animation Experience
No. 1 Krita
The first free-to-use Adobe Alternative on our list is ‘Krita’. It is an open-source animator with an intuitive drag and drop panel which gives users complete flexibility.
Krita llll➤
● UI
It offers over 30 different Dockers which are like toolkits for the program.
● Features
Freehand path tool+Object manipulation+HDR support+Layer Management+Enhanced OpenGL
● Compatibility
Supports various metadata formats like ORA, KRA, PSD, JPEG and PNG files.
● Popularity
Krita has a 4.3 start popularity rating at G2.com.
● Operating System
Compatible with Windows 8 or higher, macOS X 10.12 and Linux Basic.
● Pricing
Free to use.
● Who is Best For?
Krita is an excellent alternative for beginners who are looking to not get overwhelmed by comprehensive features.
● Reviewers say compared to Adobe Animate
Many reviewers have preferred Krita’s simplistic approach to Adobe Animate.
● Verdict
It is an excellent image editor and animator but can be limiting in its professional application.
Strengths
100 preloaded brushes: You can use brush tools in categories like digital, ink, paint, and sketch.
Onion Layer Editing: You can go back and check your previous drawing before moving on to the next.
Counteractive Tools: Efficiently compatible with pressure-sensitive tablets.
Weaknesses
Pixel-based Drawings: Its drawings are pixelated making it harder to achieve precisions around the rough edges.
Added Support: Exporting animation files requires support from a secondary application.
No. 2 Open Toonz
A friendlier platform for cartoon animation lovers and yet another free Adobe Animate Alternative. An open-source platform whose code can be modified by the user to add new features and graphics.
Open Toonz llll➤
● UI
Its interface has separate organized rooms called ‘workspaces’. The tools and windows in each room are different and fulfill a separate function.
● Features
Indexed Colour Palettes+Motion Tracking+Effects and Composting+Effects and Composting+Effects and Composting
● Compatibility
Opentoonz supports a plethora of file formats like AVI, 3GP, BMP, JPG, GIF, MOV, NOL, RGB, SGI, TGA, TIF, and TIFF.
● Popularity
OpenToonz has a standard rating of 4.1 stars on G2.
● Operating System
Compatible with macOS X 10.9, Windows 7 or higher.
● Pricing
Free to use.
● Who is Best For?
Can be used by both professionals and beginners alike.
● Reviewers say compared to Adobe Animate
It is a great platform to familiarize yourself with basic animation.
● Verdict
OpenToonz is an excellent animation tool for beginners but lacks some of the higher-performing functions demanded by professionals.
Strengths
TWAIN Standard Compatible: Images captured on OpenToonx using its digital camera and scanners can be used in animations.
Choose from different animation types: You can choose between standard animation and skeletal animations.
100s of Special Effects: Change the effects of your image however you want using effects like incident light or distortion waves.
Weaknesses
Suitable only for beginners: OpenToonz may still require some work in order to muster the attention of pros.
Lack of automated syncing: You may find it difficult to sync the voices of your characters.
No. 3 Toon Boom
Toon Boom is a more popular alternative to Adobe Animate and is recognized by professional animation studios worldwide. Toon Boom even has its own pro-grade animation software called Harmony which has been used to create various popular TV animated series.
Toon Boom llll➤
● UI
The extremely instinctive interface where you can navigate using various effects like zoom in & out, pan and reset your views.
● Features
Advanced Cut out+Bitmap and Vector Drawing+Bitmap and Vector Drawing+Access to Harmony Server+Access to Harmony Server
● Compatibility
Toon Boom can import dozens of different file formats like BMP, JPEG, PSD, TGA, SGI, TIFF, TVG and PAL.
● Popularity
Toom Boom is rated excellent on G2 with 4.7 stars.
● Operating System
Can run with Windows 7 & 10, macOS High Sierra, Catalina, Mojave.
● Pricing
Basic - $25/month; Advanced - $63/month; Premium - $115/month.
● Who is Best For?
Superb animation software with dozens of features that would attract freelance animators and professionals.
● Reviewers say compared to Adobe Animate
The common opinion amongst reviewers is that Toon Boom offers many more features than Adobe Animate.
● Verdict
Toon Boom is premium software that is excellent for pro-league animators and is one of Adobe Animates biggest competitors.
Strengths
Onion Skinning Feature: You can view your drawings in layers.
Import & Export Different types of files: You can export and import files like paper drawings, digital drawings and 13 other file types.
Peg Animations: You can chart your character’s movements using pegs between two points.
Weaknesses
Lacks Audio Features: You require an external audio application to include audio in your animations.
Do not include pre-made characters: You would need to create your characters from scratch.
No. 4 TVPaint Animation
TVPaint has been a household animation software that has been around for a while. It has considerable features which are great for creating versatile 2D animations.
TVPaint Animation llll➤
● UI
The TVPaint Interface is not too complex and has a wide range of bitmap drawing tools for 2D all 2D animation processes.
● Features
Bitmap Drawing Tools+Bitmap Drawing Tools+Layer Management+Layer Management+Layer Management
● Compatibility
Can import image and video files like WMV, AVI, MOV, MPEG, GIF, JPEG, PNG, and TIFF.
● Popularity
TVPaint has been around for a long while and has a 5-star G2 rating.
● Operating System
Later versions of TVPaint are compatible with Microsoft Windows, macOS X, Android, and Linux.
● Pricing
Standard version 11.0 costs €500; Professional version 11.0 costs €1250.
● Who is Best For?
It is traditionally acclaimed 2D animation software superb for professional animation studios.
● Reviewers say compared to Adobe Animate
Both TV Paint and Animate cc has the ability to perfect frame to frame animation with minor differences in the choice of tools.
● Verdict
TV Paint is a fantastic software amongst animators who wish to perfect their craft.
Strengths
Versatile Drawing Tools: You have access to all essential drawing tools like brushes, color palettes, textures and more.
Strong Painting Engine: Powerful painting tool for sketching and painting backgrounds.
Colour & Texture Generator: This tool provides an enhanced spectrum of colors.
Weaknesses
Learning Curve: TVPaint has its own learning curve as the interface is dissimilar from average animators.
Limited to Bitmap: You can only edit images in Bitmap format.
No. 5 Synfig Studio
Synfig is yet another free-to-use Adobe Animate alternative but is quite powerful in creating fabulous vector animations which are flawless to look at it.
Synfig Studio llll➤
● UI
Synfig is yet another free-to-use Adobe Animate alternative but is quite powerful in creating fabulous vector animations which are flawless to look at it.
● Features
Various different layers+Sound Support+Dozens of Drawing Tools+Dozens of Drawing Tools+Import Facility
● Compatibility
You can render multiple video formats like AVI, MPEG, GIF, and MNG.
● Popularity
Excellent Rating 5 stars for Vector Graphics on G2.
● Operating System
Can run on Windows 7 and above, macOS X 10.8 and Linux.
● Pricing
Free to use.
● Who is Best For?
Synfig is a bit complex but great for animators who are willing to learn.
● Reviewers say compared to Adobe Animate
Much more convenient interface.
● Verdict
Synfig Studios is a great program for animating vector graphics.
Strengths
Vector Tweening: Change the shape of your vectors automatically.
50+ Layers: Choose from multiple gradients, filters, distortions, geometrics and fractals.
Auto Lip-Sync: Your audio will be automatically paired with your characters.
Weaknesses
Continuous Saving: You will need to manually save your files each time.
Learning Curve: The program takes some time to master.
No. 6 Cacani
Here comes CACANi, a new chip off the old block for anime lovers. It has awesome features for drawing vector animations.
Cacani llll➤
● UI
Excellent vector drawing interface which reduces your effort and time by auto-generating drawings.
● Features
Auto-generated Drawings+Personal Drawing Assistant+Max Artist Control+Max Artist Control+Shortcut Customization
● Compatibility
BMP, PNG, JPG, TGA, and TIFF files can all be imported.
● Popularity
Relatively new to the market but is growing in popularity.
● Operating System
Compatible with Windows 7, 8, 10, or higher.
● Pricing
30-day license $20; Yearlong license $180; Lifelong license $499; Team Plans start at $399 for 4 devices; Perpetual Team Plan $799
● Who is Best For?
Animators looking to work with a more powerful set of tools and are willing to pay for it can opt for Cacani.
● Reviewers say compared to Adobe Animate
An advanced tool provides excellent support for smooth and curve drawings.
● Verdict
A premium tool meant for advanced usage and is excellent for instinctive users and animators.
Strengths
Painting Assistance: You can paint one sequence and your color combination will be carried forward to the next sequence.
Drawing Tools: Simplifies all types of vector drawings.
Stroke Correction: You can correct problems in-between frames.
Weaknesses
Cost-effective for individual use: Teams and businesses may find it a bit above budget.
Cost-effective for individual use: Teams and businesses may find it a bit above budget.
No. 7 Wick Editor
Wick Editor is a free-to-use open-source platform that is great for creating standard flash-based animations. It was incepted with the purpose to provide animators with a free platform equipped with easy-to-use toolkits.
Wick Editor llll➤
● UI
Wick’s interface includes a combination of programming and animation systems using tools like Flash and Scratch and HyperCard.
● Features
Interactive Interface+Browser Operated+Browser Operated+Includes Guides and Tutorials
● Compatibility
Requires third-party assistance to convert wick files to GIF, ZIP or HTML.
● Popularity
Moderately rate by first-time users.
● Operating System
Can run online through browsers like Firefox or Chrome.
● Pricing
Free to use.
● Who is Best For?
Suitable marketing animators and freelancers.
● Reviewers say compared to Adobe Animate
Not as comprehensive as Adobe Animate.
● Verdict
Wick Editor is more suited for animating basic promotions but not meant for professional use.
Strengths
User Friendly: Icons, texts, and labels are enlarged for convenience.
Includes Basic Programming: Combines animation elements with a programming interface.
Export to multiple formats: You can use export wick projects in multiple formats.
Weaknesses
Incompatible with Mobile Devices: It is not available for use on mobile devices.
Incompatible with Mobile Devices: It is not available for use on mobile devices.
No. 8 Blender
Animators who are looking to specialize in 3D animations can get their hands on Blender. It is a highly popular open-source 3D animation software.
Blender llll➤
● UI
Animators who are looking to specialize in 3D animations can get their hands on Blender. It is a highly popular open-source 3D animation software.
● Features
3D modelling+Raster Graphics Editing+Fluid and Smoke Simulation+Raster Graphics Editing+Rigging & Skinning
● Compatibility
Blender is compatible with a wide range of file formats namely OBJ, 3DS, FBX, STL, PLY and so on.
● Popularity
Blender has an excellent rating of 4.5 on G2.
● Operating System
Compatible for Windows 10 or higher, macOS 10.13 and Linux.
● Pricing
Free to use.
● Who is Best For?
Blender is used by animators worldwide to create professional animation productions.
● Reviewers say compared to Adobe Animate.
Adobe Animate is comparatively easier to use, but Blender is great for small-scale animation businesses.
● Verdict
An excellent diverse animation tool for small-scale studios, freelancers and hobbyists.
Strengths
Sync Sound: Match your audios with your visuals with auto-sync.
Preset Shortcuts: You can memorize a list of hotkeys for convenient use.
Shape Keys: You can add more detail with the help of shape keys like skeletal rigging.
Weaknesses
Complicated User interface: There are dozens of duplicate buttons which uncoordinated.
Glitches: Open source software is known to be glitchy as they lack premium security.
No. 9 Autodesk Maya
Maya is a well-known 3D graphics editor which is absolutely jam-packed with features and functions like 3D animation, rendering, simulation, composting, modeling and visualization. It can be considered the next level in animation after Adobe Animate.
Krita llll➤
● UI
Maya is a well-known 3D graphics editor which is absolutely jam-packed with features and functions like 3D animation, rendering, simulation, composting, modeling and visualization. It can be considered the next level in animation after Adobe Animate.
● Features
Ready to use graphs+Ready to use graphs+Bifrost Programming Environment+Ocean Simulation Systems+Seamless Import and Export
● Compatibility
Maya can import various file formats, including mayaBinary, mayaLT, mayaAscii, OBJ, audio, EPS, Adobe Illustrator, Image, FBX.
● Popularity
Maya has a standard 4.3 rating on G2.
● Operating System
Compatible with macOS X 10.13, Windows 10 or higher and Linux.
● Pricing
Annual Subscription $1700.
● Who is Best For?
Maya is equipped with a substantial number of features and requires animators to take time learn therefore grooming their animation skills.
● Reviewers say compared to Adobe Animate
Adobe animate has a much more convenient interface when compared to Autodesk Maya but it is more alluring for professional studios.
● Verdict
Autodesk Maya is mighty fine 3D animation software that opens more doors for animators with a keen sense of detail.
Strengths
A complete 3D animation package: Maya hasn’t left any stone unturned in terms of features.
One of the best in the Industry: Simple to create any type of animation.
Python API: Convenient for creating plugins and scripts.
Weaknesses
Lacks Convenient Interface: Maya’s toolkit is a bit more complex than Animate CC.
No. 10 Filmora Pro
Filmora Pro is an excellent Adobe Animate alternative in terms of convenience, versatility and the variation animation features you can explore on its super intuitive interface.
Krita llll➤
● UI
Filmora Pro is basically a video editing software with a unique interface that is simple to understand and master.
● Features
Length Adjustment+Gradient Tool+Evaporate+Linear Wipe+Pinwheel
● Compatibility
You can import a wide range of video files like MP4, MOV, WMV, AVI, F4V, MKV, TS, MPEG-2, GIF, MP3 and WEBM.
● Popularity
Filmora Pro is rated at a whopping 4.6 stars.
● Operating System
Compatible with Windows 7, 8, 10, 11, macOS 10.15, 11, 13, 14.
● Pricing
Per Year subscription $51.99; time Purchase $79.99
● Who is Best For?
Filmora Pro from Wondershare is ideal for users, from vloggers and freelancers to hobbyists and professionals.
● Reviewers say compared to Adobe Animate.
According to most reviewers, Filmora Pro has an easier-to-use interface and an abundance of features compared to Adobe Animate CC. Still, it is essentially a video editing software nonetheless.
● Verdict
Filmora Pro is an all-in-one video editing software that offers tons of editing features for all types of videos.
Strengths
Preset Options: You can experiment with a wide range of presets to edit animations quickly.
Easy Media Upload: Filmora supports a wide range of file formats.
4K video: You can also use Filmora to edit 4K videos.
Weaknesses
Lacks Shortcut Options: It may get a bit difficult to navigate on Filmora.
Cartoonish Transitions: Transition between cuts can require extra care.
Part 1 The Most Comprehensive All-round Comparison Among All Alternatives
| Tools | UI | G2 Rating | OS | Pricing |
|---|---|---|---|---|
| Krita | Versatile | 4.3 | Windows 8 or higher, macOS X 10.12 and Linux | Free |
| Open Toonz | Compartmentalized | 4.1 | MacOS X 10.9, Windows 7 or higher | Free |
| Toon Boom | Instinctive | 4.7 | Windows 7 & 10, macOS High Sierra, Catalina, Mojave | Basic – $25/month; Advanced - $63/month; Premium - $115/month |
| TVPaint Animation | Comprehensive | 5 | Windows, macOS X, Android and Linux. | Standard Version – €500; Pro Version – €1250 |
| Synfig Studio | Versatile | 5 | Windows 7 and above, macOS X 10.8 and Linux | Free |
| Cacani | Effortless | NIL | Windows 7, 8, 10 or higher | 30-day license $20; Yearlong license $180; Lifelong license $499; Team Plans start at $399 for 4 devices; Perpetual Team Plan $799 |
| Wick Editor | Hybrid | NIL | Firefox or Chrome. | Free |
| Blender | Changing | 4.5 | Windows 10 or higher, macOS 10.13 and Linux. | Free |
| Maya | Comprehensive | 4.3 | MacOS X 10.13, Windows 10 or higher and Linux. | Annual Subscription $1700 |
| Filmora Pro | Versatile | 4.6 | Windows 7, 8, 10, 11, macOS 10.15, 11, 13, 14. | Yearly – $51.99; One Time –$79.99 |
Wondershare Filmora - Best Video Editor for Mac/Windows
5,481,435 people have downloaded it.
Build unique custom animations without breaking a sweat.
Focus on creating epic stories and leave the details to Filmora’s auto features.
Start a creative adventure with drag & drop effects and endless possibilities.
Filmora simplifies advanced features to save you time and effort.
Filmora cuts out repetition so you can move on to your next creative breakthrough.
Key Takeaways from This Episode
● There are dozens of free and paid animation software out there, but only a few are ideal Adobe Animate Alternatives.
● Adobe Animate is one of the best 2D and 3D animation software in the market, with versatile tools and many plug-in options.
● You need a monthly or yearly subscription to Adobe Creative Cloud to use Animate CC, which is why we have complied a list of the best Adobe Animate Alternatives.
Top 3 Ways to Create Gif with Great 3D Gif Maker
Top 3 Ways to Create Gif Images with Great 3D Gif Maker
An easy yet powerful editor
Numerous effects to choose from
Detailed tutorials provided by the official channel
If what you’re searching for is a 3D GIF Maker, then we’ve got your back. Below, we’ve not only listed the three best ways to create 3D animated GIFs, but we’ve also included a brief tutorial that you can reference when creating your very own GIF images.
In this article
01 [Best 3 Ways to Create 3D Animated GIFs](#Part 1)
02 [Create 3D animated GIFs online with Filmora](#Part 2)
Part 1 Best 3 Ways to Create 3D Animated GIFs
First off, as promised, we have a brief list of some 3D GIF Maker tools that you can try. We’ve made sure to pick a unique set of 3D GIF Maker tools and 3D GIF Generator tools in order to give you a variety to choose from. It won’t be the most comprehensive list, but it should help you on your way to understanding how these 3D GIF makers usually work and how you can use them in order to create GIF images that you can share with your friends, family, and colleagues.
01 Wondershare Filmora Video Editor
The first 3D GIF Maker on our list is Filmora. It’s probably not the first one that you’d naturally think of as a 3D GIF Maker, seeing as it was developed to be more than that. But, it doesn’t discount the fact that it can be used in order to create and edit your own GIFs.
Wondershare Filmora is available for both Windows and Mac users. It allows you to create a GIF with images or video easily and even gives you the tools needed to edit and perfect it before you export it for use (a process that we’ll be showing off in more detail in the tutorial section below if you’re interested in learning more.)
For Win 7 or later (64-bit)
For macOS 10.12 or later
022. Adobe Photoshop
Adobe Photoshop, much like Filmora, is probably not, first and foremost, considered a mere 3D GIF Maker. However, it doesn’t erase its 3D GIF Creator functions. This tool, if used correctly, can make just about anything you want.
The process of using it, of course, is a little fussier than other alternatives (you’ll probably want to look up a more detailed explanation on the subject), but the fussiness does also mean that you can control every detail of your project and get it to look exactly how you want it to look.
03EaseUS Video Editor
Similar to Filmora, EaseUS Video Editor is an advanced video editing tool that you can use as a 3D GIF Creator quite easily. It comes built-in with templates, filters, design elements, transition effects, music, and so much more — allowing you to freely design your GIF images so that they can be ready for publishing right off the bat.
The beauty of it, of course, is that, much like with all the other options that we introduced today, you can use the program for more than just 3D GIF creation after the fact — opening yourself up for different and more complex projects in the future (be they image, audio, or video-related.)
Part 2 Create 3D Animated Gifs Online With Wondershare Filmora Video Editor
Now, as promised, we’ve also included a tutorial that you can follow along with to create your own 3D Animated GIFs with the tool, Wondershare Filmora Video Editor . With this tool, we’ll be showing you the basic way to do it (by using a premade video that you can edit and then convert into GIF format). But, feel free to explore the tool and use it as you wish (i.e., as a 3D spinning GIF creator, 3D rotating text GIF maker, 3D cube GIF maker, and so on.)
01Step 1: Launch Filmora Video Editor
First things first, launch the 3D GIF maker that you intend to use. In our case, that is Filmora (a screenshot has been provided below for your edification and reference. We’ll be using Filmora as our example.)
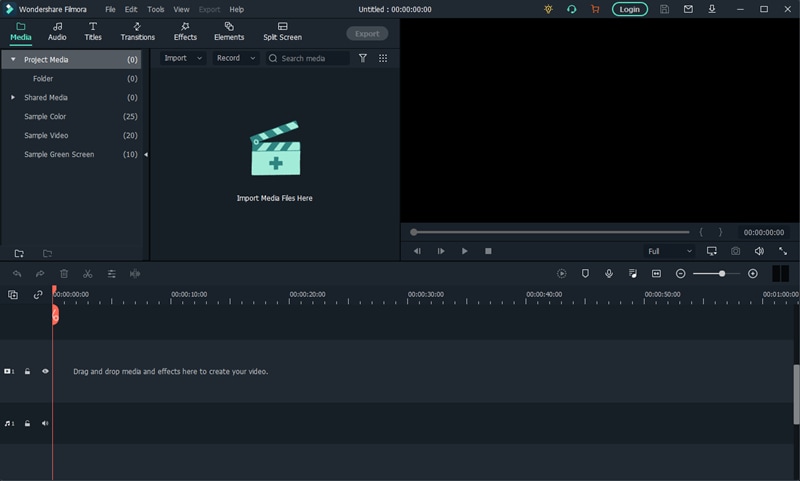
02Step 2: Upload File(s)
Next, upload the file or files that you want to turn into a GIF.
As mentioned in the introduction, we’ll be using a pre-made video, but you can use whatever you wish (i.e., images). In order to upload, we clicked the File tab (pointed out in the image below) and selected Import Media > Import Media File. However, you can also drag and drop your file(s) on the designated area of the UI..
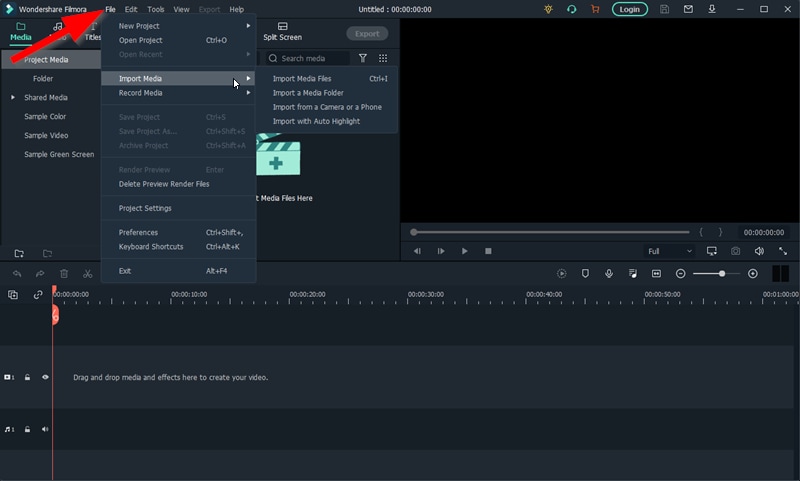
03Step 3: Drag Uploaded Media to Timeline
To create a GIF withFilmora , you’ll need to first create a video. Don’t worry, this is simple. Just drag and drop the media that you want to use onto the timeline.
Note: Any uploaded media will be in the media folder (marked [1] in the image below). Drag media from there onto the timeline (marked [2] in the image below) in order to create a video.
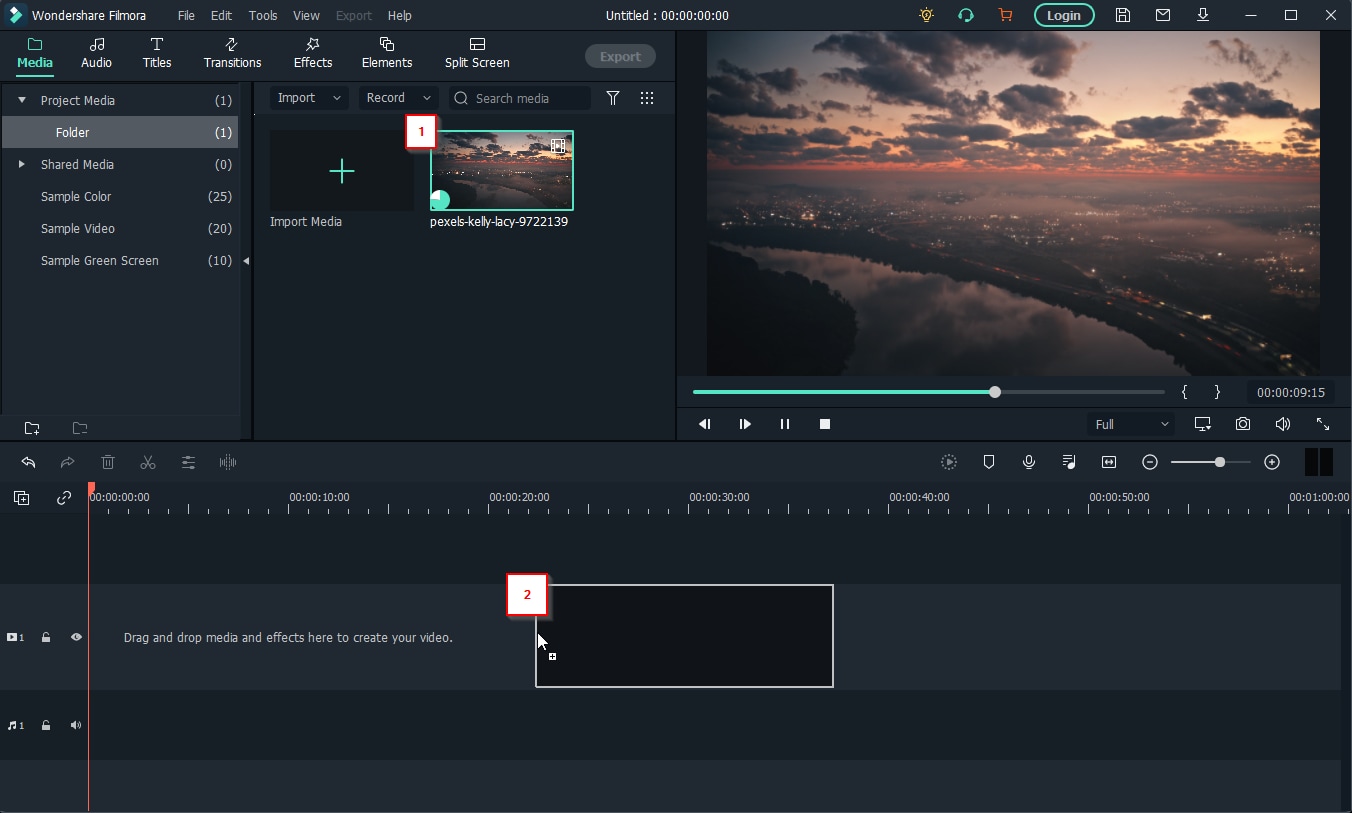
04Step 4: (Optional) Edit Video
If you want, take this opportunity to work on your video some more before converting it into a GIF. Filmora is set up to help you with this. Providing all the following features:
●Trim or Cut features to trim down the video.
●Add Text or audio to video.
●Use templates, filters, or other elements to design videos.
●Add transitions for better video flow.
And then some. In our case, we used the ‘Trim’ feature to cut down our video for a cleaner look.
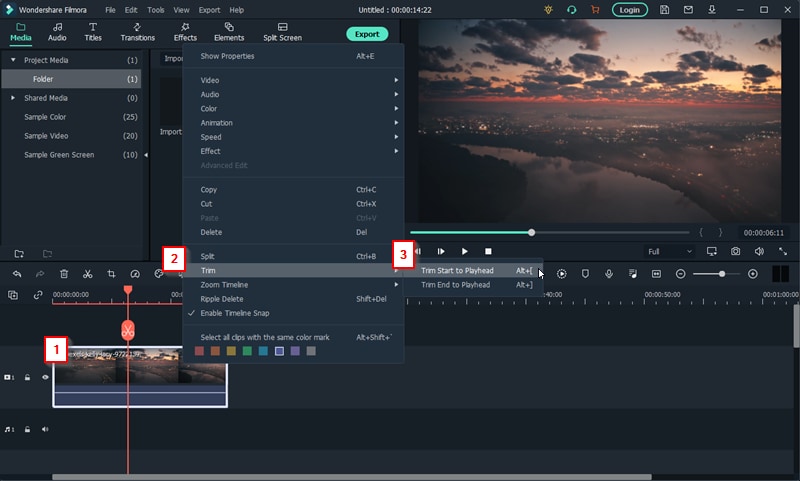
05Step 5: Create Video > GIF
Once you’re done editing your video, you can now convert it to a GIF.
This is easy enough to do. Just click the ‘Export’ tab and select the ‘Create Video’ option. That will allow you to choose to convert your finished video into a GIF file that you can share with your friends.
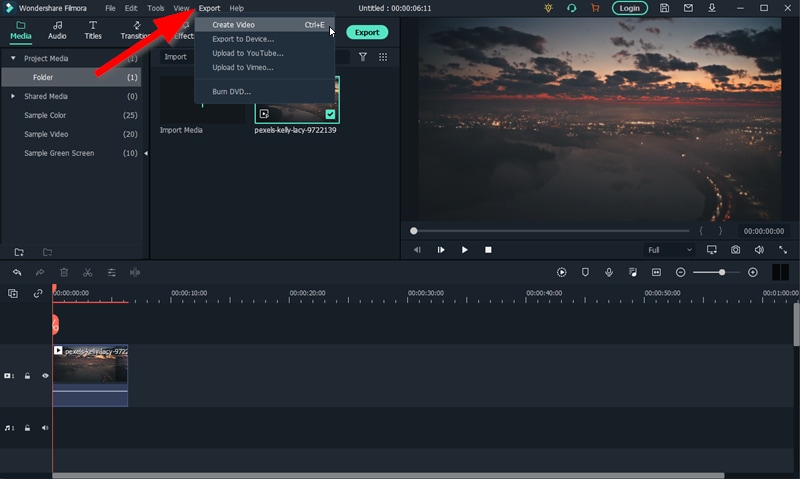
● Key Takeaways from This Episode →
● GIFs are a great way of sharing fun moments with friends and family. And, these days, it’s easier than ever to create them.
● There are 3D GIF Makers available everywhere online. Each one is a little different, of course. But capable of allowing you to create GIFs with images and videos that you can eventually share.
● One such example is the 3D GIF Maker, Filmora. It was the first one that we introduced on our list of the best 3D GIf Makers.
● We also included a tutorial on how you can use Filmora as a 3D GIF Generator for your reference. You can try out the program today if you like. Wondershare offers a FREE trial that you can use in order to explore the many functions of the software before you commit to buying out the perpetual license or signing up for one of their subscription packages.
If what you’re searching for is a 3D GIF Maker, then we’ve got your back. Below, we’ve not only listed the three best ways to create 3D animated GIFs, but we’ve also included a brief tutorial that you can reference when creating your very own GIF images.
In this article
01 [Best 3 Ways to Create 3D Animated GIFs](#Part 1)
02 [Create 3D animated GIFs online with Filmora](#Part 2)
Part 1 Best 3 Ways to Create 3D Animated GIFs
First off, as promised, we have a brief list of some 3D GIF Maker tools that you can try. We’ve made sure to pick a unique set of 3D GIF Maker tools and 3D GIF Generator tools in order to give you a variety to choose from. It won’t be the most comprehensive list, but it should help you on your way to understanding how these 3D GIF makers usually work and how you can use them in order to create GIF images that you can share with your friends, family, and colleagues.
01 Wondershare Filmora Video Editor
The first 3D GIF Maker on our list is Filmora. It’s probably not the first one that you’d naturally think of as a 3D GIF Maker, seeing as it was developed to be more than that. But, it doesn’t discount the fact that it can be used in order to create and edit your own GIFs.
Wondershare Filmora is available for both Windows and Mac users. It allows you to create a GIF with images or video easily and even gives you the tools needed to edit and perfect it before you export it for use (a process that we’ll be showing off in more detail in the tutorial section below if you’re interested in learning more.)
For Win 7 or later (64-bit)
For macOS 10.12 or later
022. Adobe Photoshop
Adobe Photoshop, much like Filmora, is probably not, first and foremost, considered a mere 3D GIF Maker. However, it doesn’t erase its 3D GIF Creator functions. This tool, if used correctly, can make just about anything you want.
The process of using it, of course, is a little fussier than other alternatives (you’ll probably want to look up a more detailed explanation on the subject), but the fussiness does also mean that you can control every detail of your project and get it to look exactly how you want it to look.
03EaseUS Video Editor
Similar to Filmora, EaseUS Video Editor is an advanced video editing tool that you can use as a 3D GIF Creator quite easily. It comes built-in with templates, filters, design elements, transition effects, music, and so much more — allowing you to freely design your GIF images so that they can be ready for publishing right off the bat.
The beauty of it, of course, is that, much like with all the other options that we introduced today, you can use the program for more than just 3D GIF creation after the fact — opening yourself up for different and more complex projects in the future (be they image, audio, or video-related.)
Part 2 Create 3D Animated Gifs Online With Wondershare Filmora Video Editor
Now, as promised, we’ve also included a tutorial that you can follow along with to create your own 3D Animated GIFs with the tool, Wondershare Filmora Video Editor . With this tool, we’ll be showing you the basic way to do it (by using a premade video that you can edit and then convert into GIF format). But, feel free to explore the tool and use it as you wish (i.e., as a 3D spinning GIF creator, 3D rotating text GIF maker, 3D cube GIF maker, and so on.)
01Step 1: Launch Filmora Video Editor
First things first, launch the 3D GIF maker that you intend to use. In our case, that is Filmora (a screenshot has been provided below for your edification and reference. We’ll be using Filmora as our example.)
02Step 2: Upload File(s)
Next, upload the file or files that you want to turn into a GIF.
As mentioned in the introduction, we’ll be using a pre-made video, but you can use whatever you wish (i.e., images). In order to upload, we clicked the File tab (pointed out in the image below) and selected Import Media > Import Media File. However, you can also drag and drop your file(s) on the designated area of the UI..
03Step 3: Drag Uploaded Media to Timeline
To create a GIF withFilmora , you’ll need to first create a video. Don’t worry, this is simple. Just drag and drop the media that you want to use onto the timeline.
Note: Any uploaded media will be in the media folder (marked [1] in the image below). Drag media from there onto the timeline (marked [2] in the image below) in order to create a video.
04Step 4: (Optional) Edit Video
If you want, take this opportunity to work on your video some more before converting it into a GIF. Filmora is set up to help you with this. Providing all the following features:
●Trim or Cut features to trim down the video.
●Add Text or audio to video.
●Use templates, filters, or other elements to design videos.
●Add transitions for better video flow.
And then some. In our case, we used the ‘Trim’ feature to cut down our video for a cleaner look.
05Step 5: Create Video > GIF
Once you’re done editing your video, you can now convert it to a GIF.
This is easy enough to do. Just click the ‘Export’ tab and select the ‘Create Video’ option. That will allow you to choose to convert your finished video into a GIF file that you can share with your friends.
● Key Takeaways from This Episode →
● GIFs are a great way of sharing fun moments with friends and family. And, these days, it’s easier than ever to create them.
● There are 3D GIF Makers available everywhere online. Each one is a little different, of course. But capable of allowing you to create GIFs with images and videos that you can eventually share.
● One such example is the 3D GIF Maker, Filmora. It was the first one that we introduced on our list of the best 3D GIf Makers.
● We also included a tutorial on how you can use Filmora as a 3D GIF Generator for your reference. You can try out the program today if you like. Wondershare offers a FREE trial that you can use in order to explore the many functions of the software before you commit to buying out the perpetual license or signing up for one of their subscription packages.
Little Known Techniques of Motion Graphics in Premiere Pro
Little Known Techniques of Motion Graphics in Premiere Pro
An easy yet powerful editor
Numerous effects to choose from
Detailed tutorials provided by the official channel
Video editing has recently gained momentum in content design, and with Motion Graphics Premiere Pro editing templates, it has all the fun in the house.
In this article
01 [5 Editing Motion Graphics Techniques in Adobe Premiere Pro](#Part 1)
02 [10 Free Motion Graphics Templates for Premiere Pro](#Part 2)
03 [How to Use Motion Graphics Templates in Premiere Pro](#Part 3)
Part 1 5 Editing Motion Graphics Techniques in Adobe Premiere Pro
A variety of editing techniques of motion graphics for Premiere Pro are ready to give a classy touch to your videos. Let’s brush up through the best you can have.
01Cropping Clips
Cropping your videos allows you to fit them into your required size frames. To remove any unwanted portions of your edits, crop them in adobe Premiere Pro with your desired aspect ratio to give that ‘just perfect’ look to your edits.
Start from importing and adding your footage to your project panel, followed by creating a fresh composition. Now, choose ‘Crop’ from the Effects panel to add it to your clip, either by double-clicking or dragging and dropping.
02Trimming Clips
If you want to adjust the ‘In and Out’ play back sequence of your edited clips, you can go for trimming them. You can trim your clips in the Source and Program monitors, or even in the Premiere Pro timeline. You can choose from the standard cut, jump cut, B-roll cut etc, to suit your editing needs and styles.
All you need to do is open the clip, mark the In and Out points, adjust their sequence with previous or next edits in your cue and that’s it. You can also use keyboard shortcuts for this purpose. However, you need to preset these shortcuts before you begin editing your clips.
03Adding Text
You can try adding simple and formatted texts to enhance your video outlook. This comes handy when you are aiming to deliver specific messages to your audience. You can add normal write-ups, callout quotations and customize your text in a number of exciting styles. Just go to the Type tool, format your text in the Text Box and you’re done!
04Audio Level Adjustment
Want to add spark to your clips with a synchronized audio visual effect? After you finish trimming and cropping, consider opting for an in-line audio adjustment. This will definitely enhance your video and take your craft to the next level.
All you need to do is select an audio clip, click on ‘Audio Gain’ in the drop down menu, set desired Decibel count in the Audio Gain Box and select ‘OK’.
05Exporting Videos
Once you are done with your video craft, you should certainly look forward to making it available for social exposure. To do this, select appropriate sequence constraints in the Export window, choose the export platform, format and Codec, make fine tuning and bit rate adjustments and finish export either in Premiere Pro or Media Encoder. You may also save these settings for your next exports.
Part 2 Free Motion Graphics Templates for Premiere Pro
Let’s have a look into your best choices of free motion graphic templates for Premiere Pro:
0114 Premiere Pro Lumetri Looks
Want to enhance your video creativity with that amazing Hollywood feel? You can undoubtedly opt for the Premiere Lumetri Looks template that gives you the liberty to provide a Hollywood oriented color scheme to your videos, just like those incredible color patterns one would see in Dr. Strangelove, The Martian and many more famous Hollywood flicks.

0215 Animated Lower Thirds
This template comes handy when you need to add lower thirds to your videos, either to introduce different content varieties or to objectify your video components. You can use this template with ease in your personal as well as commercial videos to give them that explicit professional touch.

03Horror Trailer Titles
If horror videos turn you on, use this template in video creations to customize them with that intense and scary feel! This template helps you add scary title slates that are just enough to add a terrifying quotient to your videos. From personal to professional, this template can add intensity to any video type.
04Instagram Stories Premiere Pro Template
This template is a definite catch for those Instagram lovers who constantly experiment to post engaging stories on the platform. If you want your IG stories to grab the talk, go for this animation template to customize photos and text so that they get the buzz among your followers.

05Dust Overlays
Comprising of studio-like effects, this template allows you to enhance your films with high quality dynamic animation in appealing texture variations. Use this template to create videos with those attractive misty backgrounds with cohesive variations in lighting with adjustable power effects.
06Travel Stories Premiere Pro Template
If you are into travel blogging and trying to add spunk to your stories and videos, this template is there to help you out with its catchy text animations and flowy transitions. Available in an upgraded configuration, this template is everything you need to make your travel blogs hover the trending charts.

07Digital Slideshow
Go for this template to add spark to your graphic presentations. Designed primarily for professional usage, it is equally effective in personal projects also. Developed by Evanto Elements, the company offers unlimited access on subscription.

08Free Quotes Premiere Pro Template
If you want to add animated quotes to your video creations, this template is a must try for you. Providing 6 quoting options and a ‘click to change’ text and color interface with convenient customizability keeps it among the top choices for hastle free motion editing.

09Cinematic Title Style Library
If you are bored with those conventional Premiere Pro titles but don’t want to invest time in creating styles of your own, you can use the modernized title styles from this library to enhance your creations with that intense cinematic feel. You can use them comfortably for personal and commercial purposes.

10Space Background Elements
This set of background templates is designed to provide realistic settings to video creators who work on science fiction and space oriented themes. Loaded with different real-time effects, this template provides the ultimate feel of a space travel in 4K.

Part 2 Alternatives to Premiere Pro: Filmora
If not Premiere Pro, you can go for Filmora as a dependable alternative. It’s an exquisite set of amazing and top-notch tools for creating g and editing videos. Wondershare introduced Filmora as an effective, easy-to-use editing software that’s equally caters to the editing pace of beginners as well as experts. You can use Filmora with Windows and macOS.
Packed with a range of appealing customization choices, Filmora comes to you in four principal versions:
● Wondershare Filmora Video Editor
Suitable for beginners, this is the basic and the simplest version having inbuilt editing templates. It’s desktop compatible software.
For Win 7 or later (64-bit)
For macOS 10.12 or later
● Filmora
Android and iOS compatibility in this version of Filmora brought video editing from PCs and laptops into smartphones.

● FilmoraScrn
This version allows you to record your editing screen if you’re a working on Windows.

Part 4 How to Use Motion Graphics Templates in Premiere Pro
After getting familiar with Premiere Pro editing and templates, let’s get into using these adobe premiere motion graphics templates for an exemplary video creating experience. Take up the following steps to get started.
● Go to Premiere Pro Essential Graphics Panel
In the Premiere Pro startup page, select ‘Window’ from the toolbar and select ‘Essential Graphics’ from the drop down menu.
● Add Motion Graphics Templates to Library
Click the ‘Import’ button present at the bottom in the right side of the Essential Graphics Panel. Go to and choose your downloaded motion graphics template file and select ‘Open’. Your file is added to the Essential Graphics Library.
● Drag-Drop the MOGRT to Timeline
‘Drag’ your motion graphics template from the library and ‘Drop’ it on your Timeline.
● Customize Your Template
Go to the ‘Edit’ option in the Essential Graphics Panel to look for customization choices available for your selected motion graphics adobe template.
● Key Takeaways from This Episode →
● Adobe Premiere Pro is an amazing video creation and editing tool that ensures to give a professional class to your edits. Be it personal creativity or professional expertise, this software is all set to give you a wholesome editing experience you will never forget.
● Loaded with an extensive variety of editing templates, available for free and on subscription, adobe premiere pro is a one stop access to all your editing concerns. Its customizable effects will certainly make your creations stand out in the league.
● Video editing is a high in demand craft of excellence. With advancements in software developments, the creative market offers you a pool of over the top editing software that is ready to give that classy spunk to your videos. So just your own from the pool and go on a spree of creating trend setting videos that never miss out on grabbing the attention of everyone around!
Video editing has recently gained momentum in content design, and with Motion Graphics Premiere Pro editing templates, it has all the fun in the house.
In this article
01 [5 Editing Motion Graphics Techniques in Adobe Premiere Pro](#Part 1)
02 [10 Free Motion Graphics Templates for Premiere Pro](#Part 2)
03 [How to Use Motion Graphics Templates in Premiere Pro](#Part 3)
Part 1 5 Editing Motion Graphics Techniques in Adobe Premiere Pro
A variety of editing techniques of motion graphics for Premiere Pro are ready to give a classy touch to your videos. Let’s brush up through the best you can have.
01Cropping Clips
Cropping your videos allows you to fit them into your required size frames. To remove any unwanted portions of your edits, crop them in adobe Premiere Pro with your desired aspect ratio to give that ‘just perfect’ look to your edits.
Start from importing and adding your footage to your project panel, followed by creating a fresh composition. Now, choose ‘Crop’ from the Effects panel to add it to your clip, either by double-clicking or dragging and dropping.
02Trimming Clips
If you want to adjust the ‘In and Out’ play back sequence of your edited clips, you can go for trimming them. You can trim your clips in the Source and Program monitors, or even in the Premiere Pro timeline. You can choose from the standard cut, jump cut, B-roll cut etc, to suit your editing needs and styles.
All you need to do is open the clip, mark the In and Out points, adjust their sequence with previous or next edits in your cue and that’s it. You can also use keyboard shortcuts for this purpose. However, you need to preset these shortcuts before you begin editing your clips.
03Adding Text
You can try adding simple and formatted texts to enhance your video outlook. This comes handy when you are aiming to deliver specific messages to your audience. You can add normal write-ups, callout quotations and customize your text in a number of exciting styles. Just go to the Type tool, format your text in the Text Box and you’re done!
04Audio Level Adjustment
Want to add spark to your clips with a synchronized audio visual effect? After you finish trimming and cropping, consider opting for an in-line audio adjustment. This will definitely enhance your video and take your craft to the next level.
All you need to do is select an audio clip, click on ‘Audio Gain’ in the drop down menu, set desired Decibel count in the Audio Gain Box and select ‘OK’.
05Exporting Videos
Once you are done with your video craft, you should certainly look forward to making it available for social exposure. To do this, select appropriate sequence constraints in the Export window, choose the export platform, format and Codec, make fine tuning and bit rate adjustments and finish export either in Premiere Pro or Media Encoder. You may also save these settings for your next exports.
Part 2 Free Motion Graphics Templates for Premiere Pro
Let’s have a look into your best choices of free motion graphic templates for Premiere Pro:
0114 Premiere Pro Lumetri Looks
Want to enhance your video creativity with that amazing Hollywood feel? You can undoubtedly opt for the Premiere Lumetri Looks template that gives you the liberty to provide a Hollywood oriented color scheme to your videos, just like those incredible color patterns one would see in Dr. Strangelove, The Martian and many more famous Hollywood flicks.
0215 Animated Lower Thirds
This template comes handy when you need to add lower thirds to your videos, either to introduce different content varieties or to objectify your video components. You can use this template with ease in your personal as well as commercial videos to give them that explicit professional touch.
03Horror Trailer Titles
If horror videos turn you on, use this template in video creations to customize them with that intense and scary feel! This template helps you add scary title slates that are just enough to add a terrifying quotient to your videos. From personal to professional, this template can add intensity to any video type.
04Instagram Stories Premiere Pro Template
This template is a definite catch for those Instagram lovers who constantly experiment to post engaging stories on the platform. If you want your IG stories to grab the talk, go for this animation template to customize photos and text so that they get the buzz among your followers.
05Dust Overlays
Comprising of studio-like effects, this template allows you to enhance your films with high quality dynamic animation in appealing texture variations. Use this template to create videos with those attractive misty backgrounds with cohesive variations in lighting with adjustable power effects.
06Travel Stories Premiere Pro Template
If you are into travel blogging and trying to add spunk to your stories and videos, this template is there to help you out with its catchy text animations and flowy transitions. Available in an upgraded configuration, this template is everything you need to make your travel blogs hover the trending charts.
07Digital Slideshow
Go for this template to add spark to your graphic presentations. Designed primarily for professional usage, it is equally effective in personal projects also. Developed by Evanto Elements, the company offers unlimited access on subscription.
08Free Quotes Premiere Pro Template
If you want to add animated quotes to your video creations, this template is a must try for you. Providing 6 quoting options and a ‘click to change’ text and color interface with convenient customizability keeps it among the top choices for hastle free motion editing.
09Cinematic Title Style Library
If you are bored with those conventional Premiere Pro titles but don’t want to invest time in creating styles of your own, you can use the modernized title styles from this library to enhance your creations with that intense cinematic feel. You can use them comfortably for personal and commercial purposes.
10Space Background Elements
This set of background templates is designed to provide realistic settings to video creators who work on science fiction and space oriented themes. Loaded with different real-time effects, this template provides the ultimate feel of a space travel in 4K.
Part 2 Alternatives to Premiere Pro: Filmora
If not Premiere Pro, you can go for Filmora as a dependable alternative. It’s an exquisite set of amazing and top-notch tools for creating g and editing videos. Wondershare introduced Filmora as an effective, easy-to-use editing software that’s equally caters to the editing pace of beginners as well as experts. You can use Filmora with Windows and macOS.
Packed with a range of appealing customization choices, Filmora comes to you in four principal versions:
● Wondershare Filmora Video Editor
Suitable for beginners, this is the basic and the simplest version having inbuilt editing templates. It’s desktop compatible software.
For Win 7 or later (64-bit)
For macOS 10.12 or later
● Filmora
Android and iOS compatibility in this version of Filmora brought video editing from PCs and laptops into smartphones.
● FilmoraScrn
This version allows you to record your editing screen if you’re a working on Windows.
Part 4 How to Use Motion Graphics Templates in Premiere Pro
After getting familiar with Premiere Pro editing and templates, let’s get into using these adobe premiere motion graphics templates for an exemplary video creating experience. Take up the following steps to get started.
● Go to Premiere Pro Essential Graphics Panel
In the Premiere Pro startup page, select ‘Window’ from the toolbar and select ‘Essential Graphics’ from the drop down menu.
● Add Motion Graphics Templates to Library
Click the ‘Import’ button present at the bottom in the right side of the Essential Graphics Panel. Go to and choose your downloaded motion graphics template file and select ‘Open’. Your file is added to the Essential Graphics Library.
● Drag-Drop the MOGRT to Timeline
‘Drag’ your motion graphics template from the library and ‘Drop’ it on your Timeline.
● Customize Your Template
Go to the ‘Edit’ option in the Essential Graphics Panel to look for customization choices available for your selected motion graphics adobe template.
● Key Takeaways from This Episode →
● Adobe Premiere Pro is an amazing video creation and editing tool that ensures to give a professional class to your edits. Be it personal creativity or professional expertise, this software is all set to give you a wholesome editing experience you will never forget.
● Loaded with an extensive variety of editing templates, available for free and on subscription, adobe premiere pro is a one stop access to all your editing concerns. Its customizable effects will certainly make your creations stand out in the league.
● Video editing is a high in demand craft of excellence. With advancements in software developments, the creative market offers you a pool of over the top editing software that is ready to give that classy spunk to your videos. So just your own from the pool and go on a spree of creating trend setting videos that never miss out on grabbing the attention of everyone around!
Also read:
- New How to Create Benime Whiteboard Animation in Android for 2024
- Updated 2024 Approved How to Obtain and Create Animated GIF Icons Like a Pro?
- Create Animated Video on Canva for 2024
- Updated Best 10 Old Cartoons From Cartoon Network That You Miss
- Updated 2024 Approved How to Create Photo Collage Frame for Free in Minutes?
- Updated 2024 Approved How to Turn Yourself Into a WhatsApp Cartoon
- Updated In 2024, Before You Learn 3D Animation Some Things You Should Know
- Top 10 Sketch Animation Video Makers
- Updated Everything You Need to Know About Becoming a Motion Graphic Designer for 2024
- New 2024 Approved Top 10 Classical Animated Cartoon Types With Examples
- New How to Create A GIF with Sound for 2024
- New 2024 Approved The Top Free 12 GIF Meme Maker at a Glance
- 2024 Approved Learn All About 3D Logo Animation and Templates
- New 2024 Approved Top 7 Animated GIF Text Makers
- Updated How to Animate Image on Scroll for 2024
- New 2024 Approved The Most Efficient Techniques for You to Make 3D Animation Character
- New In 2024, Before You Learn 3D Animation Things You Should Know
- 8 Best Motion Graphics Online Tools for Your Inspiration
- New Tutorials to Make Animated Images for 2024
- New Animate Your Photo Online with These Awesome Tools
- New The Most Efficient Techniques for You to Make 3D Animation Character for 2024
- What Is Still Motion Animation and How Does It Work, In 2024
- The 15 Most Efficient Photo to Cartoon Apps for Android for 2024
- New In 2024, Best 15 Anime Fonts-Find Your Favorite One
- New Most Popular Tips on Learning Animate Rigging
- Updated In 2024, Best 10 Animated DP for WhatsApp
- Updated Simple Shortcut to Convert Videos to Gifs on iPhone
- In 2024, 15 Animated Characters We All Had A Crush On
- In 2024, 5 Websites with Animated Logos That Catch Your Eyes
- 10 Trendy Free Logo Animation Templates for 2024
- Updated 2024 Approved How to Create a Whiteboard Animation Video
- Updated Top Claymation Shows That Make Your Memories Unforgettable for 2024
- Updated Tips for GIF to Animated PNG You Should Know
- Updated Learn How to Make Architecture Animation
- Updated 2024 Approved How to Animate - Adobe Animate Tutorias
- 15 Best Stop Motion Animation Kits to Fuel Creativity (2024 Guide)
- How to Make GIF Instagram for 2024
- Updated Make Well Done Animated GIF for 2024
- New 10 Stunning Stop Motion Movies You Should Not Miss
- New In 2024, Ideas of Learning How to Send WhatsApp Animated Gifs
- New 5 Websites with Animated Logos That Can Catch Your Eyes for 2024
- Top-Notch Solutions for Disabled Apple ID From iPhone SE (2022) Making It Possible
- All Things You Need to Know about Wipe Data/Factory Reset For Vivo V30 Lite 5G | Dr.fone
- In 2024, Here are Some Pro Tips for Pokemon Go PvP Battles On Nokia 105 Classic | Dr.fone
- Unlock Your Disabled iPhone 7 Plus Without iTunes in 5 Ways | Dr.fone
- Remove Google FRP Lock on Blaze 2
- Simple Solutions to Fix Android SystemUI Has Stopped Error For Meizu 21 | Dr.fone
- In 2024, Does PokeGo++ still work on Apple iPhone 11/iPad? | Dr.fone
- How To Unbrick a Dead Lava Blaze 2 | Dr.fone
- In 2024, How To Do Tecno Pop 7 Pro Screen Sharing | Dr.fone
- In 2024, How to Unlock Samsung Galaxy S24 Ultra Bootloader Easily
- Methods to Change GPS Location On Itel S23 | Dr.fone
- Hassle-Free Ways to Remove FRP Lock on Meizuwith/without a PC
- How to Detect and Stop mSpy from Spying on Your Samsung Galaxy Z Flip 5 | Dr.fone
- How to Resolve Xiaomi Redmi Note 12 4G Screen Not Working | Dr.fone
- Simple ways to get lost files back from Note 30i
- 4 Most-Known Ways to Find Someone on Tinder For HTC U23 Pro by Name | Dr.fone
- Best Android Data Recovery - Undelete Lost Messages from Nokia C110
- Where Is the Best Place to Catch Dratini On Apple iPhone 12 Pro | Dr.fone
- How Can I Recover Corrupted Excel File 2003
- In 2024, Complete Tutorial to Use VPNa to Fake GPS Location On Nubia Red Magic 9 Pro | Dr.fone
- How To Do OnePlus 12 Screen Sharing | Dr.fone
- Complete Tutorial for Samsung Galaxy F54 5G Hard Reset | Dr.fone
- How to Vivo S17 Get Deleted Pictures Back with Ease and Safety?
- 3 Facts You Need to Know about Screen Mirroring Samsung Galaxy F54 5G | Dr.fone
- Everything You Need To Know About Unlocked Apple iPhone X | Dr.fone
- How to Flash Dead Infinix Smart 8 HD Safely | Dr.fone
- In 2024, Top 10 Fingerprint Lock Apps to Lock Your Xiaomi Redmi Note 13 Pro+ 5G Phone
- Does Life360 Notify When You Log Out On Realme C55? | Dr.fone
- Life360 Circle Everything You Need to Know On Oppo A79 5G | Dr.fone
- How to Mirror PC Screen to Tecno Spark 20 Pro Phones? | Dr.fone
- In 2024, Complete Guide For iPhone X Lock Screen
- Top 9 Xiaomi Redmi Note 13 5G Monitoring Apps for Parental Controls | Dr.fone
- Fixing Foneazy MockGo Not Working On Lava Blaze 2 5G | Dr.fone
- Top 5 Tecno Camon 30 Pro 5G Bypass FRP Tools for PC That Actually Work
- 5 Quick Methods to Bypass Nubia Z50 Ultra FRP
- In 2024, 2 Ways to Monitor Oppo Reno 8T 5G Activity | Dr.fone
- In 2024, iPhone Is Disabled? Here Is The Way To Unlock Disabled Apple iPhone 11 Pro
- Top IMEI Unlokers for Your Vivo V29 Phone
- In 2024, 9 Best Free Android Monitoring Apps to Monitor Phone Remotely For your Xiaomi Redmi Note 12 Pro 5G | Dr.fone
- Title: New 15 Horror Animes That Will Trigger a Heart Attack for 2024
- Author: Elon
- Created at : 2024-05-19 03:05:12
- Updated at : 2024-05-20 03:05:12
- Link: https://animation-videos.techidaily.com/new-15-horror-animes-that-will-trigger-a-heart-attack-for-2024/
- License: This work is licensed under CC BY-NC-SA 4.0.
