

New 2024 Approved 10 Great Apps to Turn Funny Animated Images Into Comics
10 Great Apps to Turn Funny Animated Images Into Comics
10 Great Apps for Turning Funny Animated Images into Comics
An easy yet powerful editor
Numerous effects to choose from
Detailed tutorials provided by the official channel
There are several apps available that can let you create interesting funny animated images, cartoons, and comics by adding speech bubbles, animations, and other effects.

In this article
01 [Top apps to turn pictures into cartoons](#Part 1)
02 [Best Alternative to Cartoon Apps- Wondershare Filmorapro](#Part 2)
03 [Key Takeaways](#Part 3)
Part 1 Top apps to turn pictures into cartoons
To add some fun elements to your regular images and make them even more interesting you can convert them into cartoons and comics. The task of conversion can seem to be difficult and tricky but with the availability of several apps and programs, you can achieve the desired results in just a few clicks.
With multiple options available, you are bound to get confused while selecting an app. Helping you with the same, we have shortlisted the top 10 apps in the category as below.
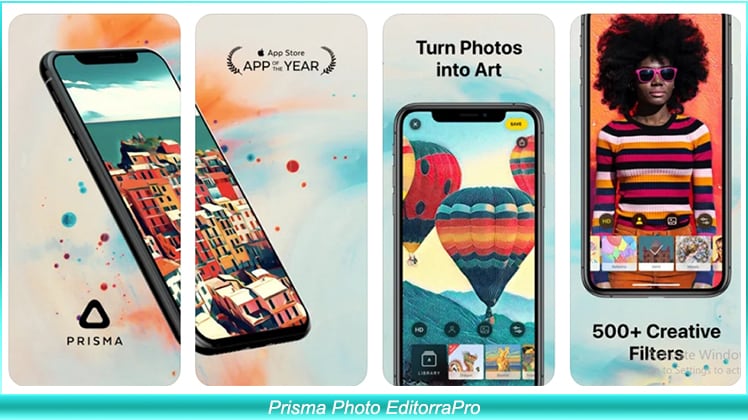
01 Prisma Photo Editor
Available for download on Android and iOS devices this is an excellent photo editing app that comes with over 300 art filters and animations. You can quickly convert your images into funny and interesting cartoons using the app in no time. Additionally, several image parameters like sharpness, exposure, brightness, and others can also be adjusted as needed.
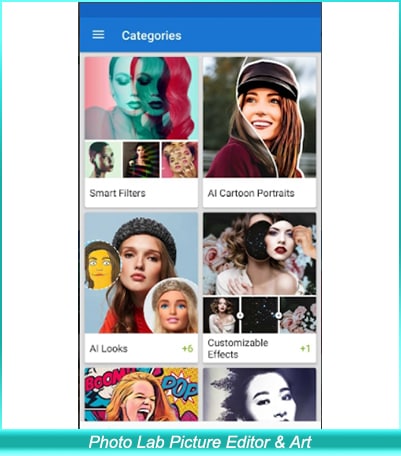
02 Photo Lab Picture Editor
This is free to use app on the Google Play Store with the IAP option. With a 4.6 high rating, the app is simple to use and offers more than 900 funny and stylish effects that can be added to your images. You can choose from photo montages, animations, filters, and other effects that match your requirements. You can even add photo frames to make your image look impressive. Create professional-looking cartoons in no time using this wonderful app.
03 MomentCam Cartoons & Stickers
This free app on Google Play Store with a 4 rating is just perfect for creating interesting cartoons and emoticons using images. The process is simple and quick where you just need to add the image and create its personalized avatar. Interesting background can also be added to further enhance the cartoon. The app also gives you the option to share the created cartoon on social media sites.

04 ToonMe
Create cartoons using your selfies and other images on your phone in just a few clicks using this high-rated app on Google Play Store. The AI of the app allows the creation of interesting full-body cartoons as well as vector portrait templates. Multiple layouts and designs are also available to choose from. The interface is simple and the app is also available for download Apple Play Store.

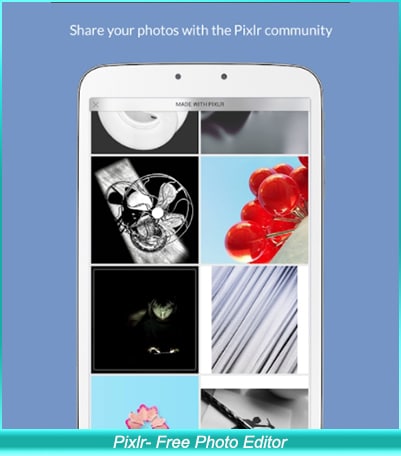
05 Pixlr- Free Photo Editor
This is a widely used image editing app that is simple and free to use. A wide range of image editing features and filters are available with the app including cartoon filters that will let you unleash your creativity and design impressive cartoons and other images. Also available for iOS devices the app also facilitates sharing the created images over social media and emails. Additional features include auto-fix, double exposure, adjusting image tone, and others.
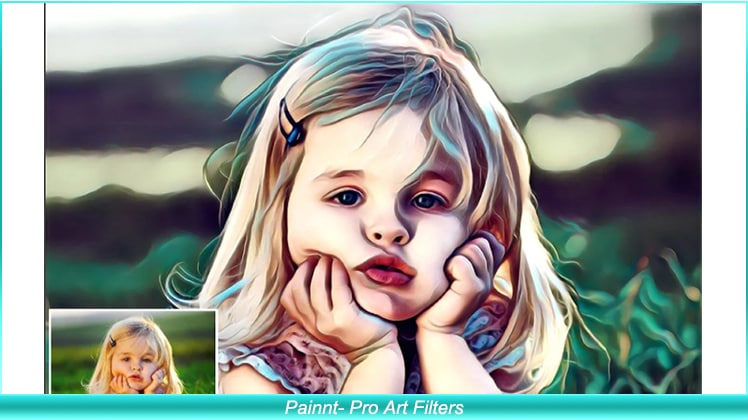
06 Painnt- Pro Art Filters
This feature-packed app on Google Store lets you create professional-looking art pieces from the images using filters and animations. With more than 1000 filters in several categories including cartoons, classical, abstract, and others you can have a creation of your choice. App uses AI and also has an option for preview and fine-tuning. You can even share your creations with the app community and over social networking sites.
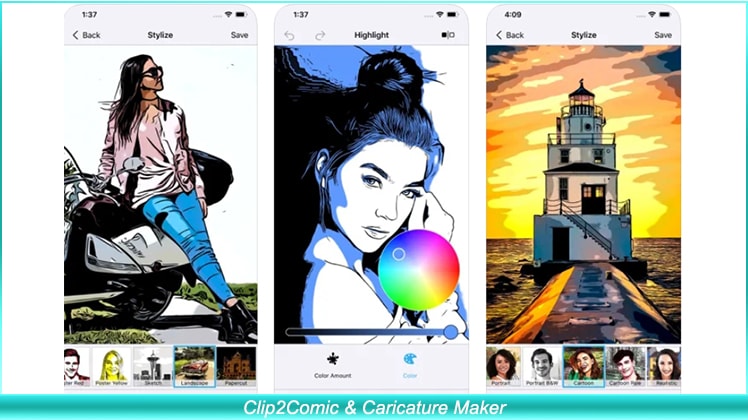
07 Clip2Comic & Caricature Maker
This is among the best app for iPhone users that allows creating funny and interesting cartoons, caricatures, and other artwork using images. Several other editing tools and filters are also available that support customizing high-quality and high-resolution images. Additionally, the app also supports editing the videos and converting them into animated clippings. The deformation filter further makes your creation look funny and interesting.
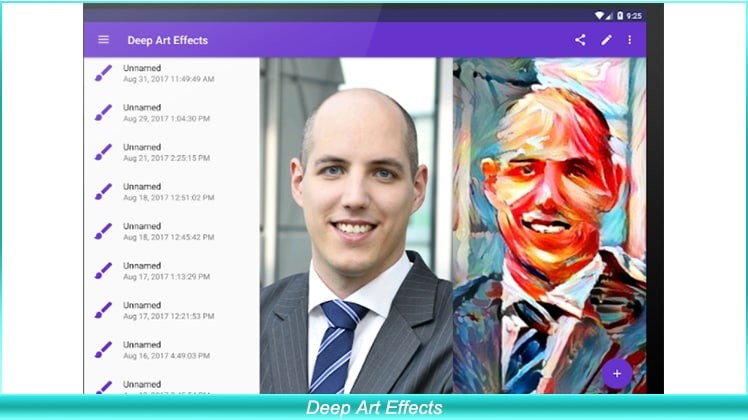
08 Deep Art Effects
This free app for Android and iOS devices comes with more than 100 effects and filters of different types including cartoon-based. Using the AI of the app, you can create impressive artwork in HD resolution. The app supports fast image processing and also supports sharing the artwork with the community. A paid premium version of the app is also available that has no ads, watermark, allows creating own filters, and has additional features.
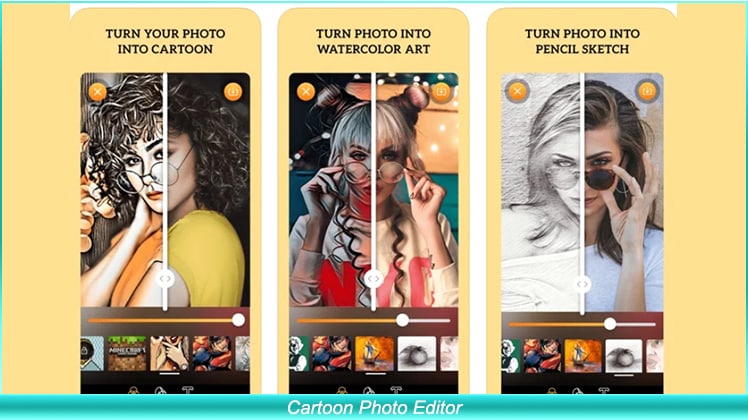
09 Cartoon Photo Editor
This free app for iOS devices will let you turn your images into cartoons like a pro. The app comes with more than 15 cartoon filters to choose from and you can even choose the art style as a retro cartoon, Minecraft, and others. The images from the device can be added to the app or you can even capture one using the camera. The created cartoons can also be shared over social media sites using the app. The pro-paid version offers additional features and functions.
10 Comica- Comics and cartoon maker
As the name suggests, this is a comics and cartoon creating an app on Google Play Store. This lightweight app is free to use and comes with legit-looking effects and allows adding speech balloons. You can even create your memes using the app and take your creativity to a new level.

Key Takeaways from This Episode
● Check out the images on your smartphone or system that can be used for creating interesting cartoons.
● Analyze multiple apps and programs that can let you add cartoon and comic effects to your selected images.
● Finalize the tool that offers the best features, is simple to use, and can quickly convert your images to funny animated images and cartoons with added functionalities.
There are several apps available that can let you create interesting funny animated images, cartoons, and comics by adding speech bubbles, animations, and other effects.
In this article
01 [Top apps to turn pictures into cartoons](#Part 1)
02 [Best Alternative to Cartoon Apps- Wondershare Filmorapro](#Part 2)
03 [Key Takeaways](#Part 3)
Part 1 Top apps to turn pictures into cartoons
To add some fun elements to your regular images and make them even more interesting you can convert them into cartoons and comics. The task of conversion can seem to be difficult and tricky but with the availability of several apps and programs, you can achieve the desired results in just a few clicks.
With multiple options available, you are bound to get confused while selecting an app. Helping you with the same, we have shortlisted the top 10 apps in the category as below.
01 Prisma Photo Editor
Available for download on Android and iOS devices this is an excellent photo editing app that comes with over 300 art filters and animations. You can quickly convert your images into funny and interesting cartoons using the app in no time. Additionally, several image parameters like sharpness, exposure, brightness, and others can also be adjusted as needed.
02 Photo Lab Picture Editor
This is free to use app on the Google Play Store with the IAP option. With a 4.6 high rating, the app is simple to use and offers more than 900 funny and stylish effects that can be added to your images. You can choose from photo montages, animations, filters, and other effects that match your requirements. You can even add photo frames to make your image look impressive. Create professional-looking cartoons in no time using this wonderful app.
03 MomentCam Cartoons & Stickers
This free app on Google Play Store with a 4 rating is just perfect for creating interesting cartoons and emoticons using images. The process is simple and quick where you just need to add the image and create its personalized avatar. Interesting background can also be added to further enhance the cartoon. The app also gives you the option to share the created cartoon on social media sites.
04 ToonMe
Create cartoons using your selfies and other images on your phone in just a few clicks using this high-rated app on Google Play Store. The AI of the app allows the creation of interesting full-body cartoons as well as vector portrait templates. Multiple layouts and designs are also available to choose from. The interface is simple and the app is also available for download Apple Play Store.
05 Pixlr- Free Photo Editor
This is a widely used image editing app that is simple and free to use. A wide range of image editing features and filters are available with the app including cartoon filters that will let you unleash your creativity and design impressive cartoons and other images. Also available for iOS devices the app also facilitates sharing the created images over social media and emails. Additional features include auto-fix, double exposure, adjusting image tone, and others.
06 Painnt- Pro Art Filters
This feature-packed app on Google Store lets you create professional-looking art pieces from the images using filters and animations. With more than 1000 filters in several categories including cartoons, classical, abstract, and others you can have a creation of your choice. App uses AI and also has an option for preview and fine-tuning. You can even share your creations with the app community and over social networking sites.
07 Clip2Comic & Caricature Maker
This is among the best app for iPhone users that allows creating funny and interesting cartoons, caricatures, and other artwork using images. Several other editing tools and filters are also available that support customizing high-quality and high-resolution images. Additionally, the app also supports editing the videos and converting them into animated clippings. The deformation filter further makes your creation look funny and interesting.
08 Deep Art Effects
This free app for Android and iOS devices comes with more than 100 effects and filters of different types including cartoon-based. Using the AI of the app, you can create impressive artwork in HD resolution. The app supports fast image processing and also supports sharing the artwork with the community. A paid premium version of the app is also available that has no ads, watermark, allows creating own filters, and has additional features.
09 Cartoon Photo Editor
This free app for iOS devices will let you turn your images into cartoons like a pro. The app comes with more than 15 cartoon filters to choose from and you can even choose the art style as a retro cartoon, Minecraft, and others. The images from the device can be added to the app or you can even capture one using the camera. The created cartoons can also be shared over social media sites using the app. The pro-paid version offers additional features and functions.
10 Comica- Comics and cartoon maker
As the name suggests, this is a comics and cartoon creating an app on Google Play Store. This lightweight app is free to use and comes with legit-looking effects and allows adding speech balloons. You can even create your memes using the app and take your creativity to a new level.
Key Takeaways from This Episode
● Check out the images on your smartphone or system that can be used for creating interesting cartoons.
● Analyze multiple apps and programs that can let you add cartoon and comic effects to your selected images.
● Finalize the tool that offers the best features, is simple to use, and can quickly convert your images to funny animated images and cartoons with added functionalities.
Best 8 Tools Tell You How to Make Slideshows for Instagram
Top 8 Tools Tell You How to Make Slideshows for Instagram
An easy yet powerful editor
Numerous effects to choose from
Detailed tutorials provided by the official channel
Instagram slideshows land among the latest social media trends of fun and entertainment. Learn how to attract jaw dropping peer attention with creating the same!
In this article
01 [When Should You Use an Instagram Slideshow?](#Part 1)
02 [How to Make an Instagram Slideshow with Music?](#Part 2)
03 [8 Best Instagram Slideshow Apps for Creating Outstanding Slideshow](#Part 3)
Part 1 When Should You Use an Instagram Slideshow?
Revolutions in technology has opened doors to a plenty of new and exciting means of information sharing, entertainment and communication. Playing its part in the game, Instagram slideshow has emerged as an exciting means of quick and impactful content sharing. Diving deeper into the discussion, let us talk about the different areas of working with an Instagram slide show in the following section:
01Explanatory Product Demonstrations and Stepwise Tutorials
Considering the diverse media collaboration entertained by this social media platform, you get the liberty to include 10 media files of videos and images while creating a slideshow on Instagram. This is an affordably sufficient media space to demonstrate your newly launched product in front of the target audience.
The aforesaid characteristic of a slideshow for Instagram can be put to another use of creating detailed, step by step guides and product usage tutorials to create an increased and confident customer reach and brand applicability. A few examples include the presentations of recipes by food blogs and chefs, or a detailed look of the day’s outfit by fashion bloggers.
02Interactive Storytelling or Recreate an Event
Gone are the times when stories and events were restricted to a single image or video with a limited scope of understanding and explanation. You can now work with a combination of multiple images and videos to create more vivid and graphical descriptions of stories, narratives and events.
You can work on creating an engaging slideshow for Instagram to tell an amazing story, voice a narration from the beginning to the end, or share your best moments with your cherished audience, which will surely give them the feel of enjoying the adventure along with you.
03Create a Collection
You can now use a slide show for Instagram to design and present a collection of manifold ideas and products within a single post. You can improvise the collection with displaying a series of related products, showcasing a summary of your different blog posts through the week, or simply present a list of your most reliable inspirations, resources and influencers.
04Exciting Video Teasers
If you have a scheduled video release to entertain your audience, try working with interactive slideshows for Instagram to create some sensational teaser content of the upcoming release to imbibe a natural sense of curiosity within your audience.
You can experiment with releasing a mini photoshoot tour of your filming set, share close up progression details, or include a cliffhanger in the end of your Instagram slideshow to ensure the retrieval of your audience towards watching the release of the actual big content. You can use these short teasers as effective means of creating a campaign buzz, while building a closer connect with your audience.
Part 2 How to Make an Instagram Slideshow with Music?
By now, you must have gathered enough knowledge regarding the credibility of Instagram slideshows in catering to a diversity of commercial, professional and personal content sharing needs. Considering the same, you may conveniently feel motivated to try hands at creating stunning slideshow presentations for Instagram on your own.
Adhering to the concern, let us move ahead with our discussion, while talking about how to make a slideshow for Instagram and supplement the same with adaptable background music to develop amazing content masterpieces and share them with social media peers, while grabbing their obvious attention.
While there are a number of choices in the software market to choose your Instagram slideshow creator tool, the FlexClip tool can be a reliable option. Read though the following section to learn the slideshow creation process in the program with a comprehensive and stepwise tutorial guide:
Step 1: Download the Slideshow Creator Tool
Visit the official website of FlexClip to download and install the slideshow maker software in your preferred device.

Step 2: Start from Scratch
After a successful installation, proceed to launch the tool in your system and wait till the software greets you with its welcome interface. Here, you will have to reach to and tap the ‘Start to Create’ button to begin with the slideshow creation process. You can also select a preset template to work on your slideshow if nothing new clicks in your mind.
Step 3: Select an Aspect Ratio
In the tool’s creator window, navigate to the ‘Options Panel’ at the left and click on ‘More’ to select a suitable aspect ratio. Picking the 9:16 ratio would be a good choice.

Step 4: Upload Your Media
In the same ‘Options Panel’, click on ‘Media’ for dragging and dropping the desired video and image files from your device to the program’s media timeline, followed by applying them to the tool’s storyboard. You can alternatively, choose to directly work with media pages of any preset slideshow template.

Step 5: Customize Your Media
You can now proceed to improvise your media files with amazing texts, filters, stickers, emojis, widgets, etc., by clicking on specific object categories from the ‘Options Panel’.

Step 6: Include Seamless Transitions
Proceed to uplift your creation to the next level with the application of stunning image and video transitions. Navigate to the ‘Options Panel’ and tap ‘Elements’. A variety of transition effects will be displayed to choose from. Select the one you like to add it to your slideshow.

Step 7: Add a Background Music
An in line background audio is the best way to set the mood of your slideshow. Choose to add the same to your creation for making a more engaging impact on the audience. Visit the ‘Options Panel’ again and click on ‘Music’ to open the program’s audio library and select a perfect background music from the huge variety of choices, to include in your slideshow.

Step 8: Preview Your Creation
When you have finished customizing your slideshow, navigate to the top right corner of the editor’s storyboard and hit the ‘Preview’ button to visualize and ensure that your slideshow has everything at the right place. You can continue editing if there is a need to make some changes.
Step 9: Time to Save and Share!
When you are happy with your work, consider saving it either to your device or Google Dropbox, from where you can easily upload the same to your Instagram handle.
Part 3 Best Instagram Slideshow Apps for Creating Outstanding Slideshow
Social media is the talk of the trend in today’s times, which has extended its boundaries to visibly everything around us. Speaking in the light of the fact, slideshow presentations are no exception. Social media platforms today have come up with amazing tools and applications to create and share a stunning slideshow Instagram story with utmost ease and within an affordable time span.
Now that you have developed a comprehensive understanding of the credibility of working with Instagram slideshows and their creation process with the inclusion of complementary background music, let us dive into learning about some of the best and most popular Instagram apps for creating awesome slideshow presentations in the following section:
01Filme Lite
This tool lands among the leading user preferences to work on creating slideshow presentations. The application software is packed with a heap of latest features that form the Instagram trends in current times.
Apart from complementing your slideshow creations with tons of features, this slideshow maker for Instagram grants you the liberty to include your most loved videos and images within your presentation and customize them with a diverse range of effects, along with adjusting their play duration within the slideshow. Additional to image and video customization, you are also allowed to choose the image transition style that perfectly suits your content arrangement within the slides.
Working with the tool, you can be sure of getting an unparalleled slideshow creation experience with a very interactive and user oriented design interface, that is simple enough to be easily understood and worked upon by a newbie to the creative world.
02VivaVideo
If you are working on a detailed presentation and wish to spark up your creation with stunning varieties of jaw dropping special effects, consider creating your PowerPoint slideshows in this application. The tool’s effect library is a storehouse of the most amazing special effects that promise of transforming your slideshow into a visual masterpiece.
You can separately apply these effects to each of the slideshow images or choose to work on a combination of selected effects to include within a single video. Apart from this, you are free to choose an apt background music for your presentation slides from the extensive audio library of the software. The bottom line is; you are assured to a complete fun experience while creating slideshows with this tool.
03Movavi
If you are familiar enough with the fundamental concepts and the trivial anecdotes of working with slideshow presentations and want to take your graphic creativity to the next level, you can try hands at using the Movavi slideshow creator software to design high end PowerPoint presentations of professional quality. The best thing about the tool is, it works online and does not require a software download for usage concerns.
Along with creating online slideshow presentations with ease, the tool permits you to create online videos within minutes and instantly download the same for specific usage. You can further, pop up your presentation slides with wonderful transition and animation effects and also make adjustments in the play duration of each slide. The tool lets you choose and add a perfect background music to your presentation from its conveniently vast audio library.
04Slideshow Lab
If you have just landed into the world of creating slideshow presentations and are looking for easy solutions on how to make a slideshow on Instagram, consider working with this software to polish your design creativity. The simple and user cohesive interface of the tool is best for beginners to understand and get customary with the creation process, that takes the minimum possible time to render an appreciable PowerPoint presentation.
Talking about the slideshow design process, you will need to start with selecting a set of desired images, followed by uploading the same into the tool’s slideshow creator timeline. The next step is to arrange the images in the sequential order of appearance, select an appealing background music and apply smooth image transitions. When you are done with everything, proceed to save the presentation to your device.
05MoShow
While you can choose to create stunning slideshow presentations with almost any class of images, the aforesaid app works best to render Instagram images into a top rated Instagram photo slideshow without compromising with the high resolution image quality of Instagram photos. The application integrates motion pictures and lighting effects to transform the otherwise regular images into lively still captures.
Considering the credibility of the tool in overall user experience, its indeed a thumbs up from graphic creators across the globe, thanks to its smart and interactive interface, in time performance and outstanding creation outputs.
06InVideo Editor
Put an end to your search of effective solutions on how to do a slideshow on Instagram with the InVideo Editor, a smart video and graphic editor that can also be employed to adhere to the requirement of creating amazing slideshow presentations from Instagram media. While the creation process hardly takes a few minutes, you can work with the application to explore your editing creativity to the finest levels. The tool works well with any of your MacOs and Windows compatible devices.
The editor’s effects library is loaded with tons of graphic transitions and filters that are dedicated to enhance the contents of your presentation with utmost ease. You can add creative modifications to the slideshow media, such as, cut, crop and trim videos and images and add the most convincing music, overlays, fonts, etc., and enjoy an additional free access to hundreds of stock videos and slideshow templates.
07LightMV
This one is an online slideshow creator utility that works well with almost any operating system including Windows, iOS, Android and Mac. Essentially a cloud centered editor program, this tool caters to your high quality slideshow creation needs in the most effective way. The design process is quite simple, where you only need to add the images and videos, design your presentation and wait till everything comes to place.
What’s more appealing factor about the tool is that you will never need to download the program in your device or purchase a subscription plan to use the application. All you need to do is land into the tool’s website in your favorite browser and tap on the ‘Slideshow’ option to begin with the creation process. You can select from a heap of preset stunning slideshow templates to create the most enhanced PowerPoint presentation.
08Fliptastic
The Fliptastic slideshow creator app is exclusively developed to adhere to the graphic design concerns of iOS users. This one is a no cost graphic utility with a plethora of versatile features and considerable user backup. The app’s effect library is packed with a unique set of slideshow design templates, transitions, background music choices and filters that work to compliment your presentation with the subtlest look ever.
Paying a bit extra attention to the audio inclusion within the slides, the app offers you a range of free music files to work with, while additionally allowing you to upload and use one from your device or the internet.
09Creating Instagram Slideshows With Filmora
Talking exclusively within the domain of video creation and editing, the credibility of the Wondershare Filmora Video Editor software needs no introduction. Moving ahead with our discussion, let us learn about the process of creating awesome Instagram slideshows with Filmora in the following section:
Step 1: Download and Install the Program
To begin with addressing the concern of how to make a slideshow on Instagram story, navigate to the official Wondershare website and download the Wondershare Filmora Video Editor to your preferred system and proceed to install the same.

Wondershare Filmora - Best Video Editor for Mac/Windows
5,481,435 people have downloaded it.
Build unique custom animations without breaking a sweat.
Focus on creating epic stories and leave the details to Filmora’s auto features.
Start a creative adventure with drag & drop effects and endless possibilities.
Filmora simplifies advanced features to save you time and effort.
Filmora cuts out repetition so you can move on to your next creative breakthrough.
Step 2: Import Your Media
Launch the editor program and wait for the latter’s welcome screen to appear. Here, you need to import the images, videos and other media files to the editor timeline for including them in your slideshow. It is recommended to collect all the image and video files into one single folder before opening a new slideshow design project.
In the editor’s welcome screen, navigate to the ‘Media’ tab at the top left corner and click on the same to open the ‘Import’ menu. From here, you need to choose the ‘Import a Media Folder’ option, followed by navigating to the folder that contains the to be imported media files. When you have reached to the required folder, select it and tap ‘OK’ to import the same into the project timeline. When all the files have been imported, you can see them in the ‘Project Media’ panel.

Step 3: Timeline Positioning of Media Files
Reach to the ‘File’ menu and choose ‘Preferences’ from the latter’s dropdown menu. In the ‘Preferences’ window, hit the ‘Editing’ tab and tap on ‘Photo Preferences’. From the drop down menu that follows, choose the ‘Crop to Fit’ option to adjust the aspect ratio of your imported images in line with the slideshow project. In case your images have the 9:16 vertical aspect ratio, select the ‘Fit’ option to make a proper screen fit.

You can proceed to include the image zoom and camera pan features within your project by clicking on the ‘Pan & Zoom’ option. You can further, modify the preset durations of transitions, effects and photos in the ‘Editing’ tab itself before adding them to the editor timeline. Another way of doing the same is to drag the ends of the media files inward or outward, post the timeline adding process.

When you have finished making the required adjustments, navigate back the ‘Media Panel’ to include the imported media files within the project timeline. You can either click on the files to add them, or choose to ‘Drag and Drop’ the same at a preferred place within the timeline.
When all the images and videos have been added, proceed to arrange them in the desired order of appearance in the slideshow, followed by adjusting their screen time and play durations through any of the methods explained above.
Step 4: Add Transitions to Eliminate Hard Cuts
The smooth play of a slideshow is often distorted by hard cuts, which can be escaped by applying smooth transition effects to the slides. Consider exploring the ‘Transitions’ tab of Filmora to choose from a diversity of easily customizable transition effects and place them at the intersection point of the respective slides in the project timeline.
Instead of applying the same transition to every slide, prefer choosing the one that exclusively suits the content arrangement and flow within particular slides. This would save your slideshow from getting a repetitive look.

Post the timeline adding of a transition, you can double click on the same to reach the ‘Transition Setting Window’, where you are allowed to customize the play duration and select its ‘Transition Mode’. Play durations can alternatively be customised in the project timeline by dragging the slider in a left or right direction.
Step 5: Add Overlays and Filters for an Improvised Colour Scheme
To enhance the thematic appeal of your slideshow, consider desaturating the colours of the included images with the extensive range of visual effects and overlays available in the ‘Effects’ tab of the software’s editing timeline. Opening the tab, you are exposed to a series of ‘Filter and Overlay’ categories, that have further subdivisions of Light Leaks, Sepia Tone and Lomography.
To add a particular effect, place it in the timeline track above the desired clip or image. Observe the changes in the ‘Preview Panel’ and proceed to adjust the effect settings if required, by double clicking on the particular effect.

Step 6: Include Motion Graphic Elements
To supplement your slideshow with elegant motion graphics, navigate to the ‘Elements’ tab in the editor timeline. From here, you can access and choose any suitable motion graphic template from a diversity of available choices, to include within the project timeline. The step is completely optional and you should pay attention to the style of content presentation and the cause of creation of your slideshow when choosing to add these elements to the same.

Step 7: Record Voiceovers and Create Soundtracks
To record a voiceover for your slideshow, navigate to the ‘Media’ tab and tap the ‘Record’ dropdown menu. Click on ‘Record Voiceover’ in the list of options that appears. The ‘Record Audio’ icon pops up and you now need to select a microphone to be used in the recording process. When you are ready, tap the ‘Record’ button to let the recording begin.

You can now see your voice recording appear in the ‘Media’ tab with the previously imported media files, ready to be placed within the audio track of the project timeline. Filmora’s audio library is a storehouse of free access music and audio effects. To add one to your slideshow, navigate and click on the ‘Audio’ tab to select from the extensive Rock, Young & Bright, Electronic, etc., music subcategories till you get the perfect match for your presentation.

Once you have selected all the music tracks, place them one by one on the project timeline and move ahead with adjusting their play durations.
Step 8: Export Your Creation
When you are satisfied with your work, you can export the slideshow directly from Filmora to a number of media sharing platforms. All you need to do is, navigate to and tap the ‘Export’ button in the top right corner of the editor screen and proceed to set the resolution and frame rate, and select the output file format of your created slideshow in the ‘Export Window’ that appears.

When you are ready with everything, click on the ‘Export’ button at the bottom right corner of the screen to share your slideshow across different platforms, including YouTube, Instagram, Vimeo, etc.
The time required by Filmora to render your slideshow on the chosen platform will depend on the output file size. Considering the fact that larger files require a much longer time to be rendered, it would be a smart decision to limit the file size of your slideshow within 500 MB.
● Ending Thoughts →
● Instagram slideshows are exciting means of diving into fun-filled entertainment with your social media peers.
● When looking for solutions on how to create a slideshow on Instagram, there are loads of choices in the software market.
● Talking of best creator alternatives, you can pick the Wondershare Filmora slideshow developer program to make an amazing Insta story slideshow.
Instagram slideshows land among the latest social media trends of fun and entertainment. Learn how to attract jaw dropping peer attention with creating the same!
In this article
01 [When Should You Use an Instagram Slideshow?](#Part 1)
02 [How to Make an Instagram Slideshow with Music?](#Part 2)
03 [8 Best Instagram Slideshow Apps for Creating Outstanding Slideshow](#Part 3)
Part 1 When Should You Use an Instagram Slideshow?
Revolutions in technology has opened doors to a plenty of new and exciting means of information sharing, entertainment and communication. Playing its part in the game, Instagram slideshow has emerged as an exciting means of quick and impactful content sharing. Diving deeper into the discussion, let us talk about the different areas of working with an Instagram slide show in the following section:
01Explanatory Product Demonstrations and Stepwise Tutorials
Considering the diverse media collaboration entertained by this social media platform, you get the liberty to include 10 media files of videos and images while creating a slideshow on Instagram. This is an affordably sufficient media space to demonstrate your newly launched product in front of the target audience.
The aforesaid characteristic of a slideshow for Instagram can be put to another use of creating detailed, step by step guides and product usage tutorials to create an increased and confident customer reach and brand applicability. A few examples include the presentations of recipes by food blogs and chefs, or a detailed look of the day’s outfit by fashion bloggers.
02Interactive Storytelling or Recreate an Event
Gone are the times when stories and events were restricted to a single image or video with a limited scope of understanding and explanation. You can now work with a combination of multiple images and videos to create more vivid and graphical descriptions of stories, narratives and events.
You can work on creating an engaging slideshow for Instagram to tell an amazing story, voice a narration from the beginning to the end, or share your best moments with your cherished audience, which will surely give them the feel of enjoying the adventure along with you.
03Create a Collection
You can now use a slide show for Instagram to design and present a collection of manifold ideas and products within a single post. You can improvise the collection with displaying a series of related products, showcasing a summary of your different blog posts through the week, or simply present a list of your most reliable inspirations, resources and influencers.
04Exciting Video Teasers
If you have a scheduled video release to entertain your audience, try working with interactive slideshows for Instagram to create some sensational teaser content of the upcoming release to imbibe a natural sense of curiosity within your audience.
You can experiment with releasing a mini photoshoot tour of your filming set, share close up progression details, or include a cliffhanger in the end of your Instagram slideshow to ensure the retrieval of your audience towards watching the release of the actual big content. You can use these short teasers as effective means of creating a campaign buzz, while building a closer connect with your audience.
Part 2 How to Make an Instagram Slideshow with Music?
By now, you must have gathered enough knowledge regarding the credibility of Instagram slideshows in catering to a diversity of commercial, professional and personal content sharing needs. Considering the same, you may conveniently feel motivated to try hands at creating stunning slideshow presentations for Instagram on your own.
Adhering to the concern, let us move ahead with our discussion, while talking about how to make a slideshow for Instagram and supplement the same with adaptable background music to develop amazing content masterpieces and share them with social media peers, while grabbing their obvious attention.
While there are a number of choices in the software market to choose your Instagram slideshow creator tool, the FlexClip tool can be a reliable option. Read though the following section to learn the slideshow creation process in the program with a comprehensive and stepwise tutorial guide:
Step 1: Download the Slideshow Creator Tool
Visit the official website of FlexClip to download and install the slideshow maker software in your preferred device.
Step 2: Start from Scratch
After a successful installation, proceed to launch the tool in your system and wait till the software greets you with its welcome interface. Here, you will have to reach to and tap the ‘Start to Create’ button to begin with the slideshow creation process. You can also select a preset template to work on your slideshow if nothing new clicks in your mind.
Step 3: Select an Aspect Ratio
In the tool’s creator window, navigate to the ‘Options Panel’ at the left and click on ‘More’ to select a suitable aspect ratio. Picking the 9:16 ratio would be a good choice.
Step 4: Upload Your Media
In the same ‘Options Panel’, click on ‘Media’ for dragging and dropping the desired video and image files from your device to the program’s media timeline, followed by applying them to the tool’s storyboard. You can alternatively, choose to directly work with media pages of any preset slideshow template.
Step 5: Customize Your Media
You can now proceed to improvise your media files with amazing texts, filters, stickers, emojis, widgets, etc., by clicking on specific object categories from the ‘Options Panel’.
Step 6: Include Seamless Transitions
Proceed to uplift your creation to the next level with the application of stunning image and video transitions. Navigate to the ‘Options Panel’ and tap ‘Elements’. A variety of transition effects will be displayed to choose from. Select the one you like to add it to your slideshow.
Step 7: Add a Background Music
An in line background audio is the best way to set the mood of your slideshow. Choose to add the same to your creation for making a more engaging impact on the audience. Visit the ‘Options Panel’ again and click on ‘Music’ to open the program’s audio library and select a perfect background music from the huge variety of choices, to include in your slideshow.
Step 8: Preview Your Creation
When you have finished customizing your slideshow, navigate to the top right corner of the editor’s storyboard and hit the ‘Preview’ button to visualize and ensure that your slideshow has everything at the right place. You can continue editing if there is a need to make some changes.
Step 9: Time to Save and Share!
When you are happy with your work, consider saving it either to your device or Google Dropbox, from where you can easily upload the same to your Instagram handle.
Part 3 Best Instagram Slideshow Apps for Creating Outstanding Slideshow
Social media is the talk of the trend in today’s times, which has extended its boundaries to visibly everything around us. Speaking in the light of the fact, slideshow presentations are no exception. Social media platforms today have come up with amazing tools and applications to create and share a stunning slideshow Instagram story with utmost ease and within an affordable time span.
Now that you have developed a comprehensive understanding of the credibility of working with Instagram slideshows and their creation process with the inclusion of complementary background music, let us dive into learning about some of the best and most popular Instagram apps for creating awesome slideshow presentations in the following section:
01Filme Lite
This tool lands among the leading user preferences to work on creating slideshow presentations. The application software is packed with a heap of latest features that form the Instagram trends in current times.
Apart from complementing your slideshow creations with tons of features, this slideshow maker for Instagram grants you the liberty to include your most loved videos and images within your presentation and customize them with a diverse range of effects, along with adjusting their play duration within the slideshow. Additional to image and video customization, you are also allowed to choose the image transition style that perfectly suits your content arrangement within the slides.
Working with the tool, you can be sure of getting an unparalleled slideshow creation experience with a very interactive and user oriented design interface, that is simple enough to be easily understood and worked upon by a newbie to the creative world.
02VivaVideo
If you are working on a detailed presentation and wish to spark up your creation with stunning varieties of jaw dropping special effects, consider creating your PowerPoint slideshows in this application. The tool’s effect library is a storehouse of the most amazing special effects that promise of transforming your slideshow into a visual masterpiece.
You can separately apply these effects to each of the slideshow images or choose to work on a combination of selected effects to include within a single video. Apart from this, you are free to choose an apt background music for your presentation slides from the extensive audio library of the software. The bottom line is; you are assured to a complete fun experience while creating slideshows with this tool.
03Movavi
If you are familiar enough with the fundamental concepts and the trivial anecdotes of working with slideshow presentations and want to take your graphic creativity to the next level, you can try hands at using the Movavi slideshow creator software to design high end PowerPoint presentations of professional quality. The best thing about the tool is, it works online and does not require a software download for usage concerns.
Along with creating online slideshow presentations with ease, the tool permits you to create online videos within minutes and instantly download the same for specific usage. You can further, pop up your presentation slides with wonderful transition and animation effects and also make adjustments in the play duration of each slide. The tool lets you choose and add a perfect background music to your presentation from its conveniently vast audio library.
04Slideshow Lab
If you have just landed into the world of creating slideshow presentations and are looking for easy solutions on how to make a slideshow on Instagram, consider working with this software to polish your design creativity. The simple and user cohesive interface of the tool is best for beginners to understand and get customary with the creation process, that takes the minimum possible time to render an appreciable PowerPoint presentation.
Talking about the slideshow design process, you will need to start with selecting a set of desired images, followed by uploading the same into the tool’s slideshow creator timeline. The next step is to arrange the images in the sequential order of appearance, select an appealing background music and apply smooth image transitions. When you are done with everything, proceed to save the presentation to your device.
05MoShow
While you can choose to create stunning slideshow presentations with almost any class of images, the aforesaid app works best to render Instagram images into a top rated Instagram photo slideshow without compromising with the high resolution image quality of Instagram photos. The application integrates motion pictures and lighting effects to transform the otherwise regular images into lively still captures.
Considering the credibility of the tool in overall user experience, its indeed a thumbs up from graphic creators across the globe, thanks to its smart and interactive interface, in time performance and outstanding creation outputs.
06InVideo Editor
Put an end to your search of effective solutions on how to do a slideshow on Instagram with the InVideo Editor, a smart video and graphic editor that can also be employed to adhere to the requirement of creating amazing slideshow presentations from Instagram media. While the creation process hardly takes a few minutes, you can work with the application to explore your editing creativity to the finest levels. The tool works well with any of your MacOs and Windows compatible devices.
The editor’s effects library is loaded with tons of graphic transitions and filters that are dedicated to enhance the contents of your presentation with utmost ease. You can add creative modifications to the slideshow media, such as, cut, crop and trim videos and images and add the most convincing music, overlays, fonts, etc., and enjoy an additional free access to hundreds of stock videos and slideshow templates.
07LightMV
This one is an online slideshow creator utility that works well with almost any operating system including Windows, iOS, Android and Mac. Essentially a cloud centered editor program, this tool caters to your high quality slideshow creation needs in the most effective way. The design process is quite simple, where you only need to add the images and videos, design your presentation and wait till everything comes to place.
What’s more appealing factor about the tool is that you will never need to download the program in your device or purchase a subscription plan to use the application. All you need to do is land into the tool’s website in your favorite browser and tap on the ‘Slideshow’ option to begin with the creation process. You can select from a heap of preset stunning slideshow templates to create the most enhanced PowerPoint presentation.
08Fliptastic
The Fliptastic slideshow creator app is exclusively developed to adhere to the graphic design concerns of iOS users. This one is a no cost graphic utility with a plethora of versatile features and considerable user backup. The app’s effect library is packed with a unique set of slideshow design templates, transitions, background music choices and filters that work to compliment your presentation with the subtlest look ever.
Paying a bit extra attention to the audio inclusion within the slides, the app offers you a range of free music files to work with, while additionally allowing you to upload and use one from your device or the internet.
09Creating Instagram Slideshows With Filmora
Talking exclusively within the domain of video creation and editing, the credibility of the Wondershare Filmora Video Editor software needs no introduction. Moving ahead with our discussion, let us learn about the process of creating awesome Instagram slideshows with Filmora in the following section:
Step 1: Download and Install the Program
To begin with addressing the concern of how to make a slideshow on Instagram story, navigate to the official Wondershare website and download the Wondershare Filmora Video Editor to your preferred system and proceed to install the same.
Wondershare Filmora - Best Video Editor for Mac/Windows
5,481,435 people have downloaded it.
Build unique custom animations without breaking a sweat.
Focus on creating epic stories and leave the details to Filmora’s auto features.
Start a creative adventure with drag & drop effects and endless possibilities.
Filmora simplifies advanced features to save you time and effort.
Filmora cuts out repetition so you can move on to your next creative breakthrough.
Step 2: Import Your Media
Launch the editor program and wait for the latter’s welcome screen to appear. Here, you need to import the images, videos and other media files to the editor timeline for including them in your slideshow. It is recommended to collect all the image and video files into one single folder before opening a new slideshow design project.
In the editor’s welcome screen, navigate to the ‘Media’ tab at the top left corner and click on the same to open the ‘Import’ menu. From here, you need to choose the ‘Import a Media Folder’ option, followed by navigating to the folder that contains the to be imported media files. When you have reached to the required folder, select it and tap ‘OK’ to import the same into the project timeline. When all the files have been imported, you can see them in the ‘Project Media’ panel.
Step 3: Timeline Positioning of Media Files
Reach to the ‘File’ menu and choose ‘Preferences’ from the latter’s dropdown menu. In the ‘Preferences’ window, hit the ‘Editing’ tab and tap on ‘Photo Preferences’. From the drop down menu that follows, choose the ‘Crop to Fit’ option to adjust the aspect ratio of your imported images in line with the slideshow project. In case your images have the 9:16 vertical aspect ratio, select the ‘Fit’ option to make a proper screen fit.
You can proceed to include the image zoom and camera pan features within your project by clicking on the ‘Pan & Zoom’ option. You can further, modify the preset durations of transitions, effects and photos in the ‘Editing’ tab itself before adding them to the editor timeline. Another way of doing the same is to drag the ends of the media files inward or outward, post the timeline adding process.
When you have finished making the required adjustments, navigate back the ‘Media Panel’ to include the imported media files within the project timeline. You can either click on the files to add them, or choose to ‘Drag and Drop’ the same at a preferred place within the timeline.
When all the images and videos have been added, proceed to arrange them in the desired order of appearance in the slideshow, followed by adjusting their screen time and play durations through any of the methods explained above.
Step 4: Add Transitions to Eliminate Hard Cuts
The smooth play of a slideshow is often distorted by hard cuts, which can be escaped by applying smooth transition effects to the slides. Consider exploring the ‘Transitions’ tab of Filmora to choose from a diversity of easily customizable transition effects and place them at the intersection point of the respective slides in the project timeline.
Instead of applying the same transition to every slide, prefer choosing the one that exclusively suits the content arrangement and flow within particular slides. This would save your slideshow from getting a repetitive look.
Post the timeline adding of a transition, you can double click on the same to reach the ‘Transition Setting Window’, where you are allowed to customize the play duration and select its ‘Transition Mode’. Play durations can alternatively be customised in the project timeline by dragging the slider in a left or right direction.
Step 5: Add Overlays and Filters for an Improvised Colour Scheme
To enhance the thematic appeal of your slideshow, consider desaturating the colours of the included images with the extensive range of visual effects and overlays available in the ‘Effects’ tab of the software’s editing timeline. Opening the tab, you are exposed to a series of ‘Filter and Overlay’ categories, that have further subdivisions of Light Leaks, Sepia Tone and Lomography.
To add a particular effect, place it in the timeline track above the desired clip or image. Observe the changes in the ‘Preview Panel’ and proceed to adjust the effect settings if required, by double clicking on the particular effect.
Step 6: Include Motion Graphic Elements
To supplement your slideshow with elegant motion graphics, navigate to the ‘Elements’ tab in the editor timeline. From here, you can access and choose any suitable motion graphic template from a diversity of available choices, to include within the project timeline. The step is completely optional and you should pay attention to the style of content presentation and the cause of creation of your slideshow when choosing to add these elements to the same.
Step 7: Record Voiceovers and Create Soundtracks
To record a voiceover for your slideshow, navigate to the ‘Media’ tab and tap the ‘Record’ dropdown menu. Click on ‘Record Voiceover’ in the list of options that appears. The ‘Record Audio’ icon pops up and you now need to select a microphone to be used in the recording process. When you are ready, tap the ‘Record’ button to let the recording begin.
You can now see your voice recording appear in the ‘Media’ tab with the previously imported media files, ready to be placed within the audio track of the project timeline. Filmora’s audio library is a storehouse of free access music and audio effects. To add one to your slideshow, navigate and click on the ‘Audio’ tab to select from the extensive Rock, Young & Bright, Electronic, etc., music subcategories till you get the perfect match for your presentation.
Once you have selected all the music tracks, place them one by one on the project timeline and move ahead with adjusting their play durations.
Step 8: Export Your Creation
When you are satisfied with your work, you can export the slideshow directly from Filmora to a number of media sharing platforms. All you need to do is, navigate to and tap the ‘Export’ button in the top right corner of the editor screen and proceed to set the resolution and frame rate, and select the output file format of your created slideshow in the ‘Export Window’ that appears.
When you are ready with everything, click on the ‘Export’ button at the bottom right corner of the screen to share your slideshow across different platforms, including YouTube, Instagram, Vimeo, etc.
The time required by Filmora to render your slideshow on the chosen platform will depend on the output file size. Considering the fact that larger files require a much longer time to be rendered, it would be a smart decision to limit the file size of your slideshow within 500 MB.
● Ending Thoughts →
● Instagram slideshows are exciting means of diving into fun-filled entertainment with your social media peers.
● When looking for solutions on how to create a slideshow on Instagram, there are loads of choices in the software market.
● Talking of best creator alternatives, you can pick the Wondershare Filmora slideshow developer program to make an amazing Insta story slideshow.
The Best 8 Places for High-Quality Royalty Free Gifs (Paid and Free)
The Best 8 Places for High-Quality Royalty Free Gifs (Paid and Free)
An easy yet powerful editor
Numerous effects to choose from
Detailed tutorials provided by the official channel
Our list of the top 8 beats places to download royalty-free GIFs. You may get a lot of GIF libraries free by visiting these websites. These websites allow animated GIFs for various purposes, including personal, educational, and commercial ones. You can use the GIFs you download on your websites, blogs, presentations, and emails, among other things. The most excellent part about most of these websites is that you don’t have to pay anything or give them credit in exchange for royalty-free GIFs. These websites include trendy and attractive GIFs, while others only have older royalty-free GIFs. The GIFs on these websites are similarly free of any watermark.
There are numerous websites to download royalty GIFs with stock sound effects and photographs. However, when it comes to copyright-free GIFs, only a few websites offer them up for download. So, after spending a much time on the internet, I’ve found five websites that can assist you in doing the same. Two of the websites, “Best Animations” and “Animate It,” only enable you to use the GIFs you download for personal use.
In this article
01 [Is GIFs Royalty Free?](#Part 1)
02 [Are GIFs on Giphy Free to Use?](#Part 2)
03 [The Best 8 Places for High-Quality Royalty Free Gifs (Paid and Free)](#Part 3)
Part 1 Is GIFs Royalty Free?
There is no legal method to licensing the usage of GIFs for business purposes. Given the preceding, commercial companies’ use of GIFs remains a bit of a grey area.
The following are some excellent general guidelines to follow for royalty-free GIFs:
● Avoid using GIFs in a way that can irritate the copyright holder. In most cases, you can determine fair use by context rather than content. A reasonable rule of thumb is to put yourself in the position of the copyright owner and ask yourself, “Would I disprove this to the point of commencing litigation?”
● Provide acknowledgment to the original owner where GIFs are “stolen” from known copyright content (e.g., Credit: Universal Studios)
● If in doubt, stay away from GIFs derived from extremely litigious sources, and search out alternatives (or develop your own!)
Part 2 Are GIFs on Giphy Free to Use?
All property rights in the Services are owned and retained by Giphy and their licensors, and hence these are not copyright-free GIFs. However, Giphy grants users a limited, non-exclusive, non-transferable, and revocable license to use Gifs on Giphy, subject to these Terms. You may find copyrighted material (such as text, graphics, pictures, images, and illustrations), trademarks, and other proprietary information and materials of Giphy and their licensors on the Services. You may not copy, modify, publish, transmit, distribute, perform, or display any content for commercial purposes or in any way violate these Terms of Service. Except for content in the public domain or the content you have permission to use in connection with the use of the Services and compliance with these Terms of Service.
Copyright laws in the United States and around the world protect their Services. Giphy has the right (but not the obligation) to remove, block, edit, or alter any content any time, without any notice, for any reason or no reason at all. Giphy, however, reserves the right to access, read, store, and disclose any information that we reasonably believe is required to comply with applicable laws or protect our, our users’ and the public’s rights, property, or safety.
Part 3 The Best 8 Places for High-Quality Royalty Free Gifs (Paid and Free)
Here are the best 8 places to get free to use GIFs for commercial use
01MOTION ELEMENT
Features:
● You can experience animation from the inside out.
● Change the GIFs Duration with a single click.
● This royalty-free GIF website allows you to change colors with a single click.
● You can also edit the backgrounds.
● The style is a simple drag-and-drop motion.
02SEVENOAKS
Features:
● Sevenoaks copyright-free GIFs are high-quality and old.
● All the GIFs are three-dimensional.
● It offers tons of GIFs scattered across 25+ categories.
● You can download GIFs free to use.
● The process can be over in a click.
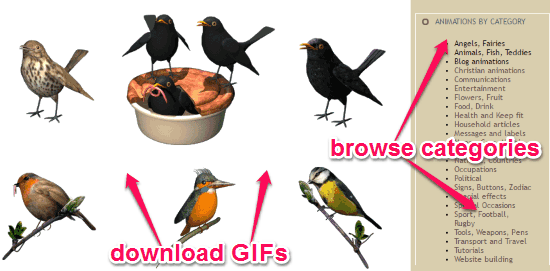
03BEST ANIMATIONS
Features
● This site with GIF images free to download provides more than 20 categories for its users.
● It offers a variety of GIFs.
● However, GIFs are only useful for personal use.
● Easy-to-download gif in a few clicks.
● Directly share the GIFs via social networks.
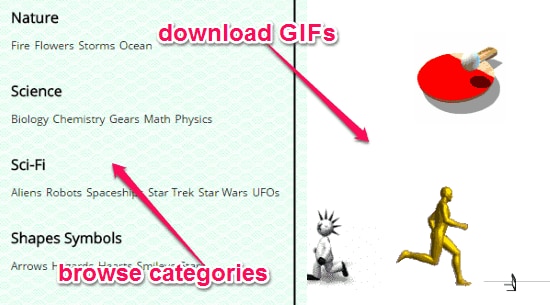
04GIFGIFS
Features
● GIFGIFs offers hundreds of royalty-free GIFs.
● But it offers low-quality and old files.
● This GIF library for free serves various purposes.
● It also provides the direct link, HTML code, and BBCode for every GIF file.
● Change background in simple clicks.
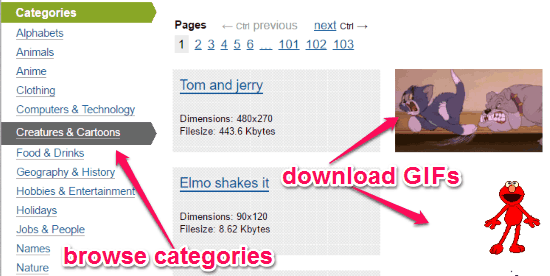
05ANIMATE IT
Features
● More than 50 categories of GIF images are free to download.
● GIFs with both good and bad resolutions are available.
● It has a mixture of old and modern GIFs.
● GIFs with Animate are for personal use only.
● You can get your choice of free-to-use GIF with one click.
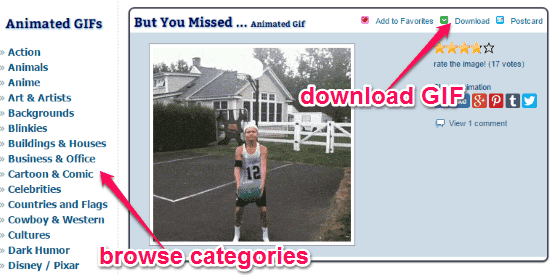
06GIPHY
Features:
● Download GIF in one click
● Varieties of GIFs to leverage on.
● Directly share to social media.
● Giphy offers some modern royalty-free GIFs.
● One of the top high quality and resolution offering GIF websites.
07PIXABAY.COM
Features:
● One of the top websites with free-to-use GIFs.
● Download in a few clicks
● High quality with the best resolution
● You get various types of GIFs for a variety of purpose
● Exclusive GIF library for free with Modern GIFs.

08STOCKSNAP
Features:
● Highest quality, highest resolution pictures with Stocksnap.
● All photos uploaded to the site get released under Creative Commons.
● Photos do not require attribution.
● Curate the top stock photos from around the web
● Select images from several daily submissions.
If you want to generate a GIF online, though, Filmora’s online meme maker is the best option. It is possible to create a watermark-free photo, GIF, and video memes with it. It’s completely free to use, and there’s no need to sign up. You can adjust the text size, color, and position while editing a caption. You can also add text to the inside or outside of a GIF.
GIFs may be made from a collection of still photos or even moving movies, and the procedure is straightforward enough for anyone to undertake. To do this task fast and efficiently, we recommend Wondershare Filmora Video Editor . The user-friendly and engaging interface of the software product is the basis for this recommendation. Filmora allows you to swiftly combine many still images into GIFs or convert tiny films into GIFs. Furthermore, the Filmora platform will enable users to easily customize GIFs by adding overlays, components, and text to their GIFs.
Wondershare Filmora
Get started easily with Filmora’s powerful performance, intuitive interface, and countless effects!
Try It Free Try It Free Try It Free Learn More >

● Key Takeaways from This Episode →
● Now that you’ve gathered information on the best places to get e-commerce GIFs from different websites and free GIF apps, you can now go-ahead to explore these free GIFs for commercial use and personal use.
● Notwithstanding, you can still check out a recommendable free GIF app, Filmora by Wondershare, and be sure to meet your need for a unique GIF.
Our list of the top 8 beats places to download royalty-free GIFs. You may get a lot of GIF libraries free by visiting these websites. These websites allow animated GIFs for various purposes, including personal, educational, and commercial ones. You can use the GIFs you download on your websites, blogs, presentations, and emails, among other things. The most excellent part about most of these websites is that you don’t have to pay anything or give them credit in exchange for royalty-free GIFs. These websites include trendy and attractive GIFs, while others only have older royalty-free GIFs. The GIFs on these websites are similarly free of any watermark.
There are numerous websites to download royalty GIFs with stock sound effects and photographs. However, when it comes to copyright-free GIFs, only a few websites offer them up for download. So, after spending a much time on the internet, I’ve found five websites that can assist you in doing the same. Two of the websites, “Best Animations” and “Animate It,” only enable you to use the GIFs you download for personal use.
In this article
01 [Is GIFs Royalty Free?](#Part 1)
02 [Are GIFs on Giphy Free to Use?](#Part 2)
03 [The Best 8 Places for High-Quality Royalty Free Gifs (Paid and Free)](#Part 3)
Part 1 Is GIFs Royalty Free?
There is no legal method to licensing the usage of GIFs for business purposes. Given the preceding, commercial companies’ use of GIFs remains a bit of a grey area.
The following are some excellent general guidelines to follow for royalty-free GIFs:
● Avoid using GIFs in a way that can irritate the copyright holder. In most cases, you can determine fair use by context rather than content. A reasonable rule of thumb is to put yourself in the position of the copyright owner and ask yourself, “Would I disprove this to the point of commencing litigation?”
● Provide acknowledgment to the original owner where GIFs are “stolen” from known copyright content (e.g., Credit: Universal Studios)
● If in doubt, stay away from GIFs derived from extremely litigious sources, and search out alternatives (or develop your own!)
Part 2 Are GIFs on Giphy Free to Use?
All property rights in the Services are owned and retained by Giphy and their licensors, and hence these are not copyright-free GIFs. However, Giphy grants users a limited, non-exclusive, non-transferable, and revocable license to use Gifs on Giphy, subject to these Terms. You may find copyrighted material (such as text, graphics, pictures, images, and illustrations), trademarks, and other proprietary information and materials of Giphy and their licensors on the Services. You may not copy, modify, publish, transmit, distribute, perform, or display any content for commercial purposes or in any way violate these Terms of Service. Except for content in the public domain or the content you have permission to use in connection with the use of the Services and compliance with these Terms of Service.
Copyright laws in the United States and around the world protect their Services. Giphy has the right (but not the obligation) to remove, block, edit, or alter any content any time, without any notice, for any reason or no reason at all. Giphy, however, reserves the right to access, read, store, and disclose any information that we reasonably believe is required to comply with applicable laws or protect our, our users’ and the public’s rights, property, or safety.
Part 3 The Best 8 Places for High-Quality Royalty Free Gifs (Paid and Free)
Here are the best 8 places to get free to use GIFs for commercial use
01MOTION ELEMENT
Features:
● You can experience animation from the inside out.
● Change the GIFs Duration with a single click.
● This royalty-free GIF website allows you to change colors with a single click.
● You can also edit the backgrounds.
● The style is a simple drag-and-drop motion.
02SEVENOAKS
Features:
● Sevenoaks copyright-free GIFs are high-quality and old.
● All the GIFs are three-dimensional.
● It offers tons of GIFs scattered across 25+ categories.
● You can download GIFs free to use.
● The process can be over in a click.
03BEST ANIMATIONS
Features
● This site with GIF images free to download provides more than 20 categories for its users.
● It offers a variety of GIFs.
● However, GIFs are only useful for personal use.
● Easy-to-download gif in a few clicks.
● Directly share the GIFs via social networks.
04GIFGIFS
Features
● GIFGIFs offers hundreds of royalty-free GIFs.
● But it offers low-quality and old files.
● This GIF library for free serves various purposes.
● It also provides the direct link, HTML code, and BBCode for every GIF file.
● Change background in simple clicks.
05ANIMATE IT
Features
● More than 50 categories of GIF images are free to download.
● GIFs with both good and bad resolutions are available.
● It has a mixture of old and modern GIFs.
● GIFs with Animate are for personal use only.
● You can get your choice of free-to-use GIF with one click.
06GIPHY
Features:
● Download GIF in one click
● Varieties of GIFs to leverage on.
● Directly share to social media.
● Giphy offers some modern royalty-free GIFs.
● One of the top high quality and resolution offering GIF websites.
07PIXABAY.COM
Features:
● One of the top websites with free-to-use GIFs.
● Download in a few clicks
● High quality with the best resolution
● You get various types of GIFs for a variety of purpose
● Exclusive GIF library for free with Modern GIFs.
08STOCKSNAP
Features:
● Highest quality, highest resolution pictures with Stocksnap.
● All photos uploaded to the site get released under Creative Commons.
● Photos do not require attribution.
● Curate the top stock photos from around the web
● Select images from several daily submissions.
If you want to generate a GIF online, though, Filmora’s online meme maker is the best option. It is possible to create a watermark-free photo, GIF, and video memes with it. It’s completely free to use, and there’s no need to sign up. You can adjust the text size, color, and position while editing a caption. You can also add text to the inside or outside of a GIF.
GIFs may be made from a collection of still photos or even moving movies, and the procedure is straightforward enough for anyone to undertake. To do this task fast and efficiently, we recommend Wondershare Filmora Video Editor . The user-friendly and engaging interface of the software product is the basis for this recommendation. Filmora allows you to swiftly combine many still images into GIFs or convert tiny films into GIFs. Furthermore, the Filmora platform will enable users to easily customize GIFs by adding overlays, components, and text to their GIFs.
Wondershare Filmora
Get started easily with Filmora’s powerful performance, intuitive interface, and countless effects!
Try It Free Try It Free Try It Free Learn More >
● Key Takeaways from This Episode →
● Now that you’ve gathered information on the best places to get e-commerce GIFs from different websites and free GIF apps, you can now go-ahead to explore these free GIFs for commercial use and personal use.
● Notwithstanding, you can still check out a recommendable free GIF app, Filmora by Wondershare, and be sure to meet your need for a unique GIF.
Ways on How to Get Started in Stop Motion Claymation
How to Get Started in Stop Motion Claymation
An easy yet powerful editor
Numerous effects to choose from
Detailed tutorials provided by the official channel
Stop Motion Claymation is not a new concept. It has been floating around the media industry since the 1950 and many creators have utilized it to tell their stories to the world. If you haven’t heard about claymations so far, you are not alone. Unfortunately, a wide range of the global population is unfamiliar with the concept of stop motion claymation.

But, if you are someone who wants to get into animation, but don’t have an expensive budget, claymations can be a great tool to share your story with the world and attract a global audience. In this guide, we are going to talk about claymations, some of the most popular claymation websites, and the best ways to get started with stop motion claymation. So, if you also want to explore your creative side and be unique with the approach, continue reading. By the end of this guide, you’ll be running out to buy clay and make some high-quality clay stop-motion animations.
In this article
01 [Ways to Make Stop Motion Videos with Clay Using Your Phone](#Part 1)
02 [How to Edit a Stop Motion Claymation Animation](#Part 2)
03 [Best 5 Clay for Stop Motion and Ways to Get Started](#Part 3)
Part 1 Ways to Make Stop Motion Videos with Clay Using Your Phone
So, now that you are familiar with the basic concept of clay stop animation, let’s understand how you can get started with claymation animations. Ideally, if you are an absolute beginner, you would want to start by understanding the dynamics of creating clay models first. Whether you are going to create a animation or a simple stop motion clip, the models will play a major role in the story and it would be important that these models look appealing.
When it comes to capturing the motion, you don’t need any expensive cameras. You can easily shoot the entire motion on your phone as well. Today, even the basic smartphones come with recording features and they are enough to capture the movement of your clay models. However, if you want to keep the production quality as high as possible, make sure to invest in a decent tripod. A tripod will ensure that your stop motion claymation doesn’t feel jerky at all.
After you have crafted the clay models and purchased the tripod, the next step would be to write down a script for the animation. Whether you are creating a short video or a 3-hour long movie, a script will ensure that you don’t miss out on any important scenes while recording the animation. There are multiple script writing software you can find online that’ll speed up the entire process. However, as a beginner, you can also pen down your script in a regular MS Word document. Lack of resources should never come between your creativity.
Once the script is final, the next phase would be to record the stop motion animation claymation. This is the stage where you have to be extra careful because you’ll practically be recording the storyline of your animation. Simply fire up the smartphone’s camera and start shooting each frame one-by-one. Keep in mind that shooting a stop motion animation is pretty time-consuming and it can even take up to 5-7 hours to get the job done. So, make sure to grab your cup of coffee and stay patient throughout the process.
Part 2 How to Edit a Stop Motion Claymation Animation
At this point, you would have several hundred photographs and a script in mind to make your stop motion claymation. So, the next part would be to turn these raw images into an animation. To do this, you can use different types of video editing applications. However, we recommend using Wondershare Wondershare Filmora Video Editor for the job.
It’s a full-scale cross-platform video editing tool that’s designed to help creators showcase their creativity by turning RAW images/clips into visually engaging videos. Filmora is targeted towards a wide variety of creators such as YouTubers, social media influencers, production artists, and even animators. For an animator, Filmora is nothing short of an oasis.
The tool comes with a built-in media library where you’ll find hundreds of ready-to-use animation templates. These templates could be integrated into your video with a single click. The best part is all these templates are fully customizable, which means you can modify them to meet the overall theme of your claymation.
Filmora boasts a timeline-based interface that makes the editing process a hassle-free task, especially when you have hundreds of images to edit. You can simply bring all the images to the timeline and merge them together to make a stunning animation within a few minutes. The tool also comes with a dedicated audio editing panel where you can add the voiceover or background tracks to bring life to your stop animation claymation. If you have edited any videos in the past, you may already know that the audio is the backbone for any video, even if you are editing a stop motion animation using clay.
Here’s a quick recap of all the features that make Wondershare Filmora an ideal video editing software for stop motion claymation animation.
● Timeline based user interface for more convenient editing
● Built-in media library to find graphic, animation, and audio templates
● Export videos directly to YouTube and other social media platforms
● Available for both Windows and macOS
So, if you are also ready with your clay models and smartphone’s camera, get started with the shooting process and use Filmora to turn the RAW images to a visually enticing stop motion claymation.
Part 3 Best 5 Clay for Stop Motion and Ways to Get Started
In case you are getting serious about stop motion claymations, you would also want to understand which clays are best for such animations. To be honest, you can find dozens of clays in the market. But, not every clay is worth using in a claymation. Here are 5 of the best clays for stop motion animations you can use in your projects.
01Puppet Putty
Puppet Putty is one of the most popular clay brands that’s specifically marketed towards claymation fanatics. As compared to other available options, the Puppet Putty is comparatively softer, which means you can easily mold it into different shapes using your hands only. While the Puppet Putty works great by itself, you can also combine it with other types of clay to make your clay models more appealing.
02Van Aken
Van Aken is another popular clay brand that’s ideal for claymation animations. It’s one of the inexpensive clays and that’s the reason why many claymation fanatics use it to create clay models for their projects. One of the best features of the Van Aken clay is that it’s available in different colors, which means you can get creative with your models by mixing different color combinations. Some animators also mix Van Aken with Pupper Putty to make the characters look more stunning under the perfect lighting conditions.
03Sargent Art
Sargent Art is a brand that primarily designs clays for sculpting. However, you can also use it to create clay models for your claymations. Sargent Art’s clay has the perfect blend of Wax and Oil, which makes it quite easier for the animator to sculpt different models.
04Sculpey
Sculpey is a clay brand that designs polymer-based clays that are relatively better than the traditional ceramic mud clays. This type of clay is made up of plastic and it’s comparatively more pliable than any regular clay. And, once you have your sculpture ready, you can simply place the cay model in an oven and make it rock solid within a few minutes.
05Plastilina
Finally, Plastilina is also a great option for stop motion claymation models. You can use Plastilina to design parts of the model that need to look as natural as possible. For example, you can use Plastilina to create parts such as teeth, eyes, and tongue so that your animation characters don’t contain any distortions.
● Key Takeaways from This Episode →
● Stop motion claymation animations are a great way to create stunning animations and share your creative stories with the world.
● To get started with claymations, you’ll need the right type of clay, an editing software like Wondershare Filmora Video Editor , and a storyline.
● There are different types of clays you can use to create clay models for your animations. To make your animations look more natural, you can also mix different types of clays together. This will also allow you to create personalized color combinations for your animation projects.
Stop Motion Claymation is not a new concept. It has been floating around the media industry since the 1950 and many creators have utilized it to tell their stories to the world. If you haven’t heard about claymations so far, you are not alone. Unfortunately, a wide range of the global population is unfamiliar with the concept of stop motion claymation.
But, if you are someone who wants to get into animation, but don’t have an expensive budget, claymations can be a great tool to share your story with the world and attract a global audience. In this guide, we are going to talk about claymations, some of the most popular claymation websites, and the best ways to get started with stop motion claymation. So, if you also want to explore your creative side and be unique with the approach, continue reading. By the end of this guide, you’ll be running out to buy clay and make some high-quality clay stop-motion animations.
In this article
01 [Ways to Make Stop Motion Videos with Clay Using Your Phone](#Part 1)
02 [How to Edit a Stop Motion Claymation Animation](#Part 2)
03 [Best 5 Clay for Stop Motion and Ways to Get Started](#Part 3)
Part 1 Ways to Make Stop Motion Videos with Clay Using Your Phone
So, now that you are familiar with the basic concept of clay stop animation, let’s understand how you can get started with claymation animations. Ideally, if you are an absolute beginner, you would want to start by understanding the dynamics of creating clay models first. Whether you are going to create a animation or a simple stop motion clip, the models will play a major role in the story and it would be important that these models look appealing.
When it comes to capturing the motion, you don’t need any expensive cameras. You can easily shoot the entire motion on your phone as well. Today, even the basic smartphones come with recording features and they are enough to capture the movement of your clay models. However, if you want to keep the production quality as high as possible, make sure to invest in a decent tripod. A tripod will ensure that your stop motion claymation doesn’t feel jerky at all.
After you have crafted the clay models and purchased the tripod, the next step would be to write down a script for the animation. Whether you are creating a short video or a 3-hour long movie, a script will ensure that you don’t miss out on any important scenes while recording the animation. There are multiple script writing software you can find online that’ll speed up the entire process. However, as a beginner, you can also pen down your script in a regular MS Word document. Lack of resources should never come between your creativity.
Once the script is final, the next phase would be to record the stop motion animation claymation. This is the stage where you have to be extra careful because you’ll practically be recording the storyline of your animation. Simply fire up the smartphone’s camera and start shooting each frame one-by-one. Keep in mind that shooting a stop motion animation is pretty time-consuming and it can even take up to 5-7 hours to get the job done. So, make sure to grab your cup of coffee and stay patient throughout the process.
Part 2 How to Edit a Stop Motion Claymation Animation
At this point, you would have several hundred photographs and a script in mind to make your stop motion claymation. So, the next part would be to turn these raw images into an animation. To do this, you can use different types of video editing applications. However, we recommend using Wondershare Wondershare Filmora Video Editor for the job.
It’s a full-scale cross-platform video editing tool that’s designed to help creators showcase their creativity by turning RAW images/clips into visually engaging videos. Filmora is targeted towards a wide variety of creators such as YouTubers, social media influencers, production artists, and even animators. For an animator, Filmora is nothing short of an oasis.
The tool comes with a built-in media library where you’ll find hundreds of ready-to-use animation templates. These templates could be integrated into your video with a single click. The best part is all these templates are fully customizable, which means you can modify them to meet the overall theme of your claymation.
Filmora boasts a timeline-based interface that makes the editing process a hassle-free task, especially when you have hundreds of images to edit. You can simply bring all the images to the timeline and merge them together to make a stunning animation within a few minutes. The tool also comes with a dedicated audio editing panel where you can add the voiceover or background tracks to bring life to your stop animation claymation. If you have edited any videos in the past, you may already know that the audio is the backbone for any video, even if you are editing a stop motion animation using clay.
Here’s a quick recap of all the features that make Wondershare Filmora an ideal video editing software for stop motion claymation animation.
● Timeline based user interface for more convenient editing
● Built-in media library to find graphic, animation, and audio templates
● Export videos directly to YouTube and other social media platforms
● Available for both Windows and macOS
So, if you are also ready with your clay models and smartphone’s camera, get started with the shooting process and use Filmora to turn the RAW images to a visually enticing stop motion claymation.
Part 3 Best 5 Clay for Stop Motion and Ways to Get Started
In case you are getting serious about stop motion claymations, you would also want to understand which clays are best for such animations. To be honest, you can find dozens of clays in the market. But, not every clay is worth using in a claymation. Here are 5 of the best clays for stop motion animations you can use in your projects.
01Puppet Putty
Puppet Putty is one of the most popular clay brands that’s specifically marketed towards claymation fanatics. As compared to other available options, the Puppet Putty is comparatively softer, which means you can easily mold it into different shapes using your hands only. While the Puppet Putty works great by itself, you can also combine it with other types of clay to make your clay models more appealing.
02Van Aken
Van Aken is another popular clay brand that’s ideal for claymation animations. It’s one of the inexpensive clays and that’s the reason why many claymation fanatics use it to create clay models for their projects. One of the best features of the Van Aken clay is that it’s available in different colors, which means you can get creative with your models by mixing different color combinations. Some animators also mix Van Aken with Pupper Putty to make the characters look more stunning under the perfect lighting conditions.
03Sargent Art
Sargent Art is a brand that primarily designs clays for sculpting. However, you can also use it to create clay models for your claymations. Sargent Art’s clay has the perfect blend of Wax and Oil, which makes it quite easier for the animator to sculpt different models.
04Sculpey
Sculpey is a clay brand that designs polymer-based clays that are relatively better than the traditional ceramic mud clays. This type of clay is made up of plastic and it’s comparatively more pliable than any regular clay. And, once you have your sculpture ready, you can simply place the cay model in an oven and make it rock solid within a few minutes.
05Plastilina
Finally, Plastilina is also a great option for stop motion claymation models. You can use Plastilina to design parts of the model that need to look as natural as possible. For example, you can use Plastilina to create parts such as teeth, eyes, and tongue so that your animation characters don’t contain any distortions.
● Key Takeaways from This Episode →
● Stop motion claymation animations are a great way to create stunning animations and share your creative stories with the world.
● To get started with claymations, you’ll need the right type of clay, an editing software like Wondershare Filmora Video Editor , and a storyline.
● There are different types of clays you can use to create clay models for your animations. To make your animations look more natural, you can also mix different types of clays together. This will also allow you to create personalized color combinations for your animation projects.
Ways to Create an Animated Sticky Navbar
How to Create an Animated Sticky Navbar
An easy yet powerful editor
Numerous effects to choose from
Detailed tutorials provided by the official channel
While there are different ways to enhance the overall user experience of a website, using an animated sticky navbar is the most ideal solution to get the job done.
In this article, we’ll walk you through some of the top benefits of animated sticky navbars and why you should incorporate them in your website’s design. So, without any further ado, let’s get started.
In this article
01 [What is an Animated Sticky Navbar?](#Part 1)
02 [What Are the Benefits of An Animated Sticky Navbar?](#Part 2)
03 [8 Fixed Sticky Navbars That’ll Grab Your Attention](#Part 3)
04 [Want To Create More Professional and Amazing Animations?](#Part 4)
Part 1 What is an Animated Sticky Navbar?
To put it in simple words, an animated sticky navbar is a dedicated header that stays fixed on the website, irrespective of the web page you’re accessing. Ideally, designers use a sticky navbar to allow website visitors to visit any web page within 2-3 clicks.
The animated navbar also incorporates a few animations that uplift the overall visual appearance of the website. It doesn’t matter if you are planning to design an e-commerce store or a simple service-based website, the animated navbar will allow you to make your website more user-friendly for the end-users.
Part 2 What Are the Benefits of An Animated Sticky Navbar?
Now, there are endless benefits of using an animated sticky navbar on your website. However, these are a few factors that make animated sticky navbars the most useful on-page element of a website.
01Quick Navigation
As we mentioned earlier, easy navigation is one of the key features of a sticky navbar. You can place links to all the other web pages within the navbar in the form of drop-down menus and ensure that users can visit any webpage within a single click. This will enhance the overall user experience and you’ll be able to encourage one-time visitors to spend more time on your website. Using the navbar will also improve your search engine rankings because the search engine crawler will be able to crawl all the web pages easily.
02Aesthetically Pleasing
The way your website looks has a huge impact on whether you’re going to retain the website visitors or not. An animated sticky navbar will make your website look aesthetically pleasing and captivate the visitors more effectively. You can add different animations and visual elements to the navbar and make them match your website’s overall color scheme.
03Better User Experience
Another reason why you would want to place an animated sticky navbar on your website is that it’ll uplift the overall user experience for the website visitors. From finding easy navigation to all the web pages to ensuring that all the web pages offer the same browsing experience, a navbar will make your website engaging and it’ll become easier to captivate the users.
Part 3 8 Fixed Sticky Navbars That’ll Grab Your Attention
So, now that you are familiar with the benefits of animated sticky navbars, here are the top examples that explain the best ways to use navigation bars on a website.
01Search Engine Journal

Search Engine Journal is an online knowledge hub where users can find every bit of information about digital marketing. The website publishes regular guides on SEO, PPC, Social Media Marketing, etc to help people get detailed insight into the benefits of digital marketing.
Since there are thousands of articles on the website, it could easily get chaotic for users to find the guide they are looking for. But, with an easy-to-navigate animated sticky navbar, Search Engine Journal has divided all the articles into their respective categories using simple drop-down menus
02AirBnB

Airbnb is one of the most popular platforms to find vacation homes in a different city/country to enjoy your holiday in complete comfort. One of the major reasons behind AirBnB’s immense success is its high-quality and easy-to-use website.
As you continue to scroll down the website, the sticky navbar stays fixed at the top with a dedicated search bar and a “Become a Host” Call-to-Action button. This way it doesn’t matter if a user is looking for a place to rent or simply wants to become a host, they’ll be able to get the job done within a few clicks.
03Graz Secrets
Graz Secrets is the perfect example of how you can use a sticky bar in the simplest manner and still grab users’ attention easily. The website uses a black-colored simple navigation bar with a “Download Now” button at the center. The button continues to illuminate due to the background animation even if you scroll to the end of the web page. The overall black design of the navbar adds more visual factors to the website and engages the visitors more effectively.
04Adobe
Adobe’s navigation bar is also a great example of how to use sticky navbars to uplift the overall user experience for website visitors. Even though the website doesn’t stay at its place when you scroll down, it immediately comes back as soon as you scroll up once.
Moreover, the navbar has links to all the Adobe products, which means users can visit any product page they want right away. It’s also worth understanding that Adobe has added a dedicated “Sign-in” button in the navigation bar to allow visitors to sign in to the Adobe cloud account straightaway.
05Daniel Filler
Daniel Filler’s website uses the navigation bar in the simplest way possible - yet manages to draw the viewers’ attention without any hassle. The designers have placed a pretty small navigation bar with links to all the important web pages.
The smaller size of the navigation bar doesn’t make the website look cluttered and still manages to do its job easily. In addition to this, the designers have also placed a dedicated logo and the “Up” button to allow users to directly go to the top of the web page with one click.
06Mind Inventory
Mind Inventory is an Indian software development company working towards designing high-quality websites and mobile applications. Their website is a perfect example of how one should use navigation bars in a website to improve the overall design scheme. In addition to placing links to all the important web pages, Mind Inventory has also introduced dedicated animations to make the drop-down menu appearance more pleasing.
07FHOKE
FHOKE’s navigation bar is one of the most aesthetically pleasing animated navbars that you can replicate on your website to maximize its performance. A white-colored navbar automatically turns gray as soon as you scroll down to maintain the contrast of the entire web page.
There are dedicated links to other web pages as well. However, you won’t find any drop-down menus. In case your website also has limited web pages, you can also replicate this animated sticky navbar to make it more appealing.
08H&M
Last but certainly not least, H&M is a clothing brand that’s popular across the globe. At first, H&M’s official website may look pretty basic, but its navigation bar is backed by a great marketing strategy. The bar contains all the product page categories that’ll direct you to any product page within a single click.
Key Takeaways from This Episode
● Animated sticky navbars are one of the most useful on-page elements that could help you grab user’s attention easily
● There are different ways to use animated navbars and it mainly depends on your website requirements.
● Like your website, you can also uplift the quality of your videos by adding animations and high-quality transitions
While there are different ways to enhance the overall user experience of a website, using an animated sticky navbar is the most ideal solution to get the job done.
In this article, we’ll walk you through some of the top benefits of animated sticky navbars and why you should incorporate them in your website’s design. So, without any further ado, let’s get started.
In this article
01 [What is an Animated Sticky Navbar?](#Part 1)
02 [What Are the Benefits of An Animated Sticky Navbar?](#Part 2)
03 [8 Fixed Sticky Navbars That’ll Grab Your Attention](#Part 3)
04 [Want To Create More Professional and Amazing Animations?](#Part 4)
Part 1 What is an Animated Sticky Navbar?
To put it in simple words, an animated sticky navbar is a dedicated header that stays fixed on the website, irrespective of the web page you’re accessing. Ideally, designers use a sticky navbar to allow website visitors to visit any web page within 2-3 clicks.
The animated navbar also incorporates a few animations that uplift the overall visual appearance of the website. It doesn’t matter if you are planning to design an e-commerce store or a simple service-based website, the animated navbar will allow you to make your website more user-friendly for the end-users.
Part 2 What Are the Benefits of An Animated Sticky Navbar?
Now, there are endless benefits of using an animated sticky navbar on your website. However, these are a few factors that make animated sticky navbars the most useful on-page element of a website.
01Quick Navigation
As we mentioned earlier, easy navigation is one of the key features of a sticky navbar. You can place links to all the other web pages within the navbar in the form of drop-down menus and ensure that users can visit any webpage within a single click. This will enhance the overall user experience and you’ll be able to encourage one-time visitors to spend more time on your website. Using the navbar will also improve your search engine rankings because the search engine crawler will be able to crawl all the web pages easily.
02Aesthetically Pleasing
The way your website looks has a huge impact on whether you’re going to retain the website visitors or not. An animated sticky navbar will make your website look aesthetically pleasing and captivate the visitors more effectively. You can add different animations and visual elements to the navbar and make them match your website’s overall color scheme.
03Better User Experience
Another reason why you would want to place an animated sticky navbar on your website is that it’ll uplift the overall user experience for the website visitors. From finding easy navigation to all the web pages to ensuring that all the web pages offer the same browsing experience, a navbar will make your website engaging and it’ll become easier to captivate the users.
Part 3 8 Fixed Sticky Navbars That’ll Grab Your Attention
So, now that you are familiar with the benefits of animated sticky navbars, here are the top examples that explain the best ways to use navigation bars on a website.
01Search Engine Journal
Search Engine Journal is an online knowledge hub where users can find every bit of information about digital marketing. The website publishes regular guides on SEO, PPC, Social Media Marketing, etc to help people get detailed insight into the benefits of digital marketing.
Since there are thousands of articles on the website, it could easily get chaotic for users to find the guide they are looking for. But, with an easy-to-navigate animated sticky navbar, Search Engine Journal has divided all the articles into their respective categories using simple drop-down menus
02AirBnB
Airbnb is one of the most popular platforms to find vacation homes in a different city/country to enjoy your holiday in complete comfort. One of the major reasons behind AirBnB’s immense success is its high-quality and easy-to-use website.
As you continue to scroll down the website, the sticky navbar stays fixed at the top with a dedicated search bar and a “Become a Host” Call-to-Action button. This way it doesn’t matter if a user is looking for a place to rent or simply wants to become a host, they’ll be able to get the job done within a few clicks.
03Graz Secrets
Graz Secrets is the perfect example of how you can use a sticky bar in the simplest manner and still grab users’ attention easily. The website uses a black-colored simple navigation bar with a “Download Now” button at the center. The button continues to illuminate due to the background animation even if you scroll to the end of the web page. The overall black design of the navbar adds more visual factors to the website and engages the visitors more effectively.
04Adobe
Adobe’s navigation bar is also a great example of how to use sticky navbars to uplift the overall user experience for website visitors. Even though the website doesn’t stay at its place when you scroll down, it immediately comes back as soon as you scroll up once.
Moreover, the navbar has links to all the Adobe products, which means users can visit any product page they want right away. It’s also worth understanding that Adobe has added a dedicated “Sign-in” button in the navigation bar to allow visitors to sign in to the Adobe cloud account straightaway.
05Daniel Filler
Daniel Filler’s website uses the navigation bar in the simplest way possible - yet manages to draw the viewers’ attention without any hassle. The designers have placed a pretty small navigation bar with links to all the important web pages.
The smaller size of the navigation bar doesn’t make the website look cluttered and still manages to do its job easily. In addition to this, the designers have also placed a dedicated logo and the “Up” button to allow users to directly go to the top of the web page with one click.
06Mind Inventory
Mind Inventory is an Indian software development company working towards designing high-quality websites and mobile applications. Their website is a perfect example of how one should use navigation bars in a website to improve the overall design scheme. In addition to placing links to all the important web pages, Mind Inventory has also introduced dedicated animations to make the drop-down menu appearance more pleasing.
07FHOKE
FHOKE’s navigation bar is one of the most aesthetically pleasing animated navbars that you can replicate on your website to maximize its performance. A white-colored navbar automatically turns gray as soon as you scroll down to maintain the contrast of the entire web page.
There are dedicated links to other web pages as well. However, you won’t find any drop-down menus. In case your website also has limited web pages, you can also replicate this animated sticky navbar to make it more appealing.
08H&M
Last but certainly not least, H&M is a clothing brand that’s popular across the globe. At first, H&M’s official website may look pretty basic, but its navigation bar is backed by a great marketing strategy. The bar contains all the product page categories that’ll direct you to any product page within a single click.
Key Takeaways from This Episode
● Animated sticky navbars are one of the most useful on-page elements that could help you grab user’s attention easily
● There are different ways to use animated navbars and it mainly depends on your website requirements.
● Like your website, you can also uplift the quality of your videos by adding animations and high-quality transitions
How to Make a GIF in Photoshop
How to Make a GIF in Photoshop

Shanoon Cox
Mar 27, 2024• Proven solutions
We all love GIFs and their impressive style of delivering stories. They not only contain set of frames rather they wrap inside lots of emotions and thoughts of creators. You can easily find numbers of eye catching GIF collections over social media sites.
If you love these animated images then probably you might have initiated a search over internet about how to create GIFs. And search engine must have shown you a path to unlimited GIF creator tools . That’s common. But here we are going to talk about one professional recommendation for GIF creation. Yeah, it is Photoshop and it can instantly generate appealing animated Gifs for you.
Below you will be able to learn strategies to create GIF images with latest version of Photoshop:
How to make a GIF in Photoshop
Method 1: Make a GIF from Video in Photoshop
Step 1: Launch your software
Once you have downloaded your Photoshop software tool on your device then simply run it. Note that CS6 versions of Photoshop provide full support to animated files.
Step 2: Get your video clip imported
As your software timeline is available on screen, now you have to import your desired video file to this platform. Simple go to File option from top left corner of toolbar and then from drop down menu select import. Further select, video frames to layers. Choose your video file and soon all its frames will appear on screen. Photoshop also allows users to work on clipped versions of video files; in that case you can use slider to limit the frames at the time of uploading process.
Step 3: Adjust file Import Settings
You will be glad to know that Photoshop offers creative editing features where you can also make color balance adjustments. When you are done with the frame adjustments then go to File and now choose Save for Web from drop down menu.
It will immediately open one new window containing all advanced settings that can assist in better customization of your GIF image. As users need small file size for web uploading needs so you can adjust all these parameters below to get best results:
Colors: Colors are most important descriptive elements for any video so their selection must be done wisely. As more colors can ensure better view but for reducing file size at the same time you can prefer to drop this selection up to 128.
Dither: The dithering process is used to scatter so many colour rich pixels into image so that even a limited colour package can develop intermediate colours over it. If you pick higher number of colours then definitely the image will look finer but at the cost of higher file size.
Lossy: If you want to add some internal drop in the quality of image then this setting is useful. But try to keep it lower because higher range may destroy actual information from image whereas smaller value is good if you want to just reduce the file size.
Size: Users can prefer to change overall dimensions of their GIF that ultimately leads to huge impact on file size.
Step 4: Time to Save your GIF file
When you are done with the editing process and want to save the newly created GIF image then simply move to the File menu available on top left corner of software window and from drop down menu choose “Save for Web” option. It will further ask you to adjust the output file parameters ahead, make changes as per need of your project and finally get it saved to your device.
Check this video to know more:
Method 2: Make a GIF from Still Photos in Photoshop
It is also possible to develop animated GIF images from collection of still images in Photoshop. In this method, users simply need to maintain layers of each frame and then they are sequenced using timeline tool or Photoshop’s animation based editing. Here are few simple to follow steps to get best results:
1. Step 1
First of all, user is advised to bring all desired still images into a single folder in his computer. Then go to the software window, move to Files option and further choose Scripts. It will provide you an option for Load Files into Stack. Now hit browse button and choose your images from desktop folder that you further want to use for development of GIF image. Hit OK. It will immediately open a new composition on screen and all these stills will appear like individual layers of a new single image.
Users can reorder or rearrange these frames as per their desired GIF animation but note that the frame that you want to place at first position in your final GIF must appear at bottom layer and others must follow the same sequence upwards.
All these GIF layers can also be created individually by user using Photoshop tools. To do this, simply run your Photoshop and then use File > New option to start working with a new project. Hit Ok. It is time to unlock the background layer; you can do this by simply double clicking on the lock icon available on screen. Now in order to create a new layer over it, move to Layer option and press New button. You can design all your new layers with this process. As soon as all your images get created then arrange them in bottom to top order same as the previous method.
Note that, this process becomes effective only if you are working on the older version of software and it does not have “Load Files into Stack” feature. You can simply load all your desired stills on Photoshop platform and then drag them to new project window. The free transform tool of Photoshop can help you to resize all the added layers as per need. Use shortcut keys: Ctrl+T to make changes faster.
2. Step 2
Now as your entire GIF image layers have been arranged so next task is to start sequencing. If you are working on CS5 or lower version of Photoshop then you van move to animation window by using Window plus Animation option. On the other side, CS6 or CC users need to click over Window + Timeline option.
As soon as sequencing tool appears on your screen, you will find a small right facing arrow on upper right corner of your screen. Hit this arrow and then choose “Make Frames from Layer” option. The eye icon can be used to hide all unwanted layers. From bottom menu, you can choose looping sequence for your image.
3. Step 3
Finally your animated GIF image is ready and now you can export it to your computer. Hit File option and then Chose Save for Web from drop down menu. But note that for web uploading a file size less then 1MB is acceptable. You can alter it by changing, loss, dither, color and size settings. At last hit Save button and now you can upload your GIF.
Read More to Get : the ultimate guide on How to Convert GIF to Video on your laptop or phone.
Conclusion
If you feel like Photoshop is difficult to learn, Filmora meme maker is your ultimate solution. It helps you make image, GIF and video memes directly without watermark. It is totally FREE to use and no sign up. You can change text size, color and position to create caption when you are editing. You can also put text inside or outside in GIF. Just with a few clicks, your GIF is done . Try it now!
Shanoon Cox
Shanoon Cox is a writer and a lover of all things video.
Follow @Shanoon Cox
Shanoon Cox
Mar 27, 2024• Proven solutions
We all love GIFs and their impressive style of delivering stories. They not only contain set of frames rather they wrap inside lots of emotions and thoughts of creators. You can easily find numbers of eye catching GIF collections over social media sites.
If you love these animated images then probably you might have initiated a search over internet about how to create GIFs. And search engine must have shown you a path to unlimited GIF creator tools . That’s common. But here we are going to talk about one professional recommendation for GIF creation. Yeah, it is Photoshop and it can instantly generate appealing animated Gifs for you.
Below you will be able to learn strategies to create GIF images with latest version of Photoshop:
How to make a GIF in Photoshop
Method 1: Make a GIF from Video in Photoshop
Step 1: Launch your software
Once you have downloaded your Photoshop software tool on your device then simply run it. Note that CS6 versions of Photoshop provide full support to animated files.
Step 2: Get your video clip imported
As your software timeline is available on screen, now you have to import your desired video file to this platform. Simple go to File option from top left corner of toolbar and then from drop down menu select import. Further select, video frames to layers. Choose your video file and soon all its frames will appear on screen. Photoshop also allows users to work on clipped versions of video files; in that case you can use slider to limit the frames at the time of uploading process.
Step 3: Adjust file Import Settings
You will be glad to know that Photoshop offers creative editing features where you can also make color balance adjustments. When you are done with the frame adjustments then go to File and now choose Save for Web from drop down menu.
It will immediately open one new window containing all advanced settings that can assist in better customization of your GIF image. As users need small file size for web uploading needs so you can adjust all these parameters below to get best results:
Colors: Colors are most important descriptive elements for any video so their selection must be done wisely. As more colors can ensure better view but for reducing file size at the same time you can prefer to drop this selection up to 128.
Dither: The dithering process is used to scatter so many colour rich pixels into image so that even a limited colour package can develop intermediate colours over it. If you pick higher number of colours then definitely the image will look finer but at the cost of higher file size.
Lossy: If you want to add some internal drop in the quality of image then this setting is useful. But try to keep it lower because higher range may destroy actual information from image whereas smaller value is good if you want to just reduce the file size.
Size: Users can prefer to change overall dimensions of their GIF that ultimately leads to huge impact on file size.
Step 4: Time to Save your GIF file
When you are done with the editing process and want to save the newly created GIF image then simply move to the File menu available on top left corner of software window and from drop down menu choose “Save for Web” option. It will further ask you to adjust the output file parameters ahead, make changes as per need of your project and finally get it saved to your device.
Check this video to know more:
Method 2: Make a GIF from Still Photos in Photoshop
It is also possible to develop animated GIF images from collection of still images in Photoshop. In this method, users simply need to maintain layers of each frame and then they are sequenced using timeline tool or Photoshop’s animation based editing. Here are few simple to follow steps to get best results:
1. Step 1
First of all, user is advised to bring all desired still images into a single folder in his computer. Then go to the software window, move to Files option and further choose Scripts. It will provide you an option for Load Files into Stack. Now hit browse button and choose your images from desktop folder that you further want to use for development of GIF image. Hit OK. It will immediately open a new composition on screen and all these stills will appear like individual layers of a new single image.
Users can reorder or rearrange these frames as per their desired GIF animation but note that the frame that you want to place at first position in your final GIF must appear at bottom layer and others must follow the same sequence upwards.
All these GIF layers can also be created individually by user using Photoshop tools. To do this, simply run your Photoshop and then use File > New option to start working with a new project. Hit Ok. It is time to unlock the background layer; you can do this by simply double clicking on the lock icon available on screen. Now in order to create a new layer over it, move to Layer option and press New button. You can design all your new layers with this process. As soon as all your images get created then arrange them in bottom to top order same as the previous method.
Note that, this process becomes effective only if you are working on the older version of software and it does not have “Load Files into Stack” feature. You can simply load all your desired stills on Photoshop platform and then drag them to new project window. The free transform tool of Photoshop can help you to resize all the added layers as per need. Use shortcut keys: Ctrl+T to make changes faster.
2. Step 2
Now as your entire GIF image layers have been arranged so next task is to start sequencing. If you are working on CS5 or lower version of Photoshop then you van move to animation window by using Window plus Animation option. On the other side, CS6 or CC users need to click over Window + Timeline option.
As soon as sequencing tool appears on your screen, you will find a small right facing arrow on upper right corner of your screen. Hit this arrow and then choose “Make Frames from Layer” option. The eye icon can be used to hide all unwanted layers. From bottom menu, you can choose looping sequence for your image.
3. Step 3
Finally your animated GIF image is ready and now you can export it to your computer. Hit File option and then Chose Save for Web from drop down menu. But note that for web uploading a file size less then 1MB is acceptable. You can alter it by changing, loss, dither, color and size settings. At last hit Save button and now you can upload your GIF.
Read More to Get : the ultimate guide on How to Convert GIF to Video on your laptop or phone.
Conclusion
If you feel like Photoshop is difficult to learn, Filmora meme maker is your ultimate solution. It helps you make image, GIF and video memes directly without watermark. It is totally FREE to use and no sign up. You can change text size, color and position to create caption when you are editing. You can also put text inside or outside in GIF. Just with a few clicks, your GIF is done . Try it now!
Shanoon Cox
Shanoon Cox is a writer and a lover of all things video.
Follow @Shanoon Cox
5 Best Adobe Animate Courses & Classes | Beginners Complete Tutorial
5 Best Adobe Animate Courses & Classes | Beginners Complete Tutorial
An easy yet powerful editor
Numerous effects to choose from
Detailed tutorials provided by official channel
Professional animation is hence one of the fields that has a bright future. Willing to learn more about animation?

Don’t worry! We’ve got you covered, follow this article and find out more about the best 5 Adobe animate courses.
In this article
01 [What is Adobe Animate CC?](#Part 1)
02 [Top 8 FULL ADOBE ANIMATE COURSES | Beginners Complete Tutorial](#Part 2)
03 [How to Quickly Learn the Skills of Adobe Animate Course](#Part 3)
Part 1 What is Adobe Animate CC?
1. Who should take Adobe Animate course?
Learning is never bound. Anyone willing to learn can put in effort and time. As long as you wish to learn, and have an interest in it you can take it up. Those of you who wish to make a career in animation are highly recommended to take up this course. The Adobe animate course can help you kickstart your career as a professional animator.
2. Are there prerequisites to Adobe Animate course?
Animation is one such field that does not require a lot of prerequisites. In fact, even a beginner who has absolutely no idea about animation can take up the adobe animate course.
Part 2 Top 5 FULL ADOBE ANIMATE COURSES | Beginners Complete Tutorial
1. Adobe animate CC 2018- HTML5 Banner Ads
Adobe animate CC 2018- HTML5 Banner Ads is one of the most comprehensive courses on adobe animate. It teaches you several relevant skills associated with animation and marketing (one of the primary applications of animation).

Skills you will learn:
● Basics of HTML5 banner ads using adobe animate
● Understanding the importance of Adobe animate CC in web advertisements
● Through this course, you’d become an expert at publishing ad networks
● The course will help you explore tools and techniques related to banner advertising
Udemy: Udemy Duration: About 5 hours
Pros
The course is beginner-friendly; it helps you advance your career in animation from scratch.
The course covers even complex concepts.
You receive a course completion certificate
Cons
The course is paid and you need to pay a nominal fee in order to access the lecture videos.
The course is monotonous i.e. there is no live teaching.
2. 2D animation for beginners with adobe animate, Walt Wonderwolk
If you’re looking for a well-designed course that covers almost all the necessary concepts, then this course is just the right one for you. Through this course, you can learn all about Adobe animate. All the primary concepts are explained in detail in this course.

Skills you will learn:
● All the primary concepts of computer-generated animations using Adobe animate.
● You will learn important concepts such as eases, symbols, vector drawings, tweens, and key frames.
● You will also learn how to add sound to your animation
● You will gain hands-on knowledge about drawing, composition, and animation of characters.
Udemy: skillshare
Pros
The course is great for beginners to start learning about Adobe animate
The course covers fundamental concepts of animation
Cons
You need a skillshare membership in order to access the lecture videos.
You need to pay in order to get a skillshare membership
You do not get a course completion certificate
3. Rigging and animating in Adobe animate
Looking for a quick crash course about Adobe animate? Well, this course is perfect for you. As the name suggests, in this course you shall learn all about rigging and animating 2d characters.

Skills you will learn:
● rigging and animating adobe animate
● Through this course, you will know how to efficiently animate any character
● Discover the utilization of vectors and images for rigging
● You will get a clear understanding of important concepts such as layer parenting, motion tweening, and symbols.
Udemy: Udemy Duration: around 4 hours
Pros
You will learn the major concepts of animation.
You will learn about rigging in detail, one of the core concepts of animation.
The course is available on Udemy, one of the most accessible platforms.
Cons
The course is not free, you need to pay a nominal amount to access the course.
It is not a renowned course.
The course is not Beginner friendly, it needs you to have some understanding of animation.
4. Learning Adobe Animate CC: Animation, LinkedIn learning
LinkedIn’s new platform, LinkedIn learning has several professional courses. Learning Adobe animate CC is one of the courses available on LinkedIn learning. It teaches you all about digital transformations. By the end of this course, you will be able to create a handy bit of animation.

Skills you will learn:
● Fundamentals of digital animation on Adobe animate CC
● Understanding and implementation of concepts such as keyframes, symbols, tweening, and drawing tools.
● Understand about the creation of natural effects and shape tweens.
● Adding music and sound effects to your animation.
Udemy: LinkedIn learning Duration: Around 3 hours
Pros
The course duration is considerably shorter.
All the primary concepts of animation are given importance in this course.
You get additional quizzes and study material along with the lecture videos
Cons
You need to have an active LinkedIn learning membership.
You need to pay for the LinkedIn learning membership.
The course is fast-paced, you need to grasp the concepts quickly.
5. Animate a walk cycle frame by frame in Adobe animate
This hands-on course is perfect for those who prefer experimenting as they watch the lecture videos. The course teaches you how to animate 2D and 3D characters smoothly. As you near the end of this course, you will have a clear understanding of how animation works and how to animate a hand-drawn character from scratch.

Skills you will learn:
● You will learn how to animate a hand-drawn character from scratch.
● You shall learn how to set up a working canvas and design a character.
● You will learn about the essential features of designing such as color fills, overlapping actions, shadows, and cleanup strokes.
Udemy: skillshare
Pros
The course focuses on the design aspect of animated characters.
The course gives you a hands-on experience with animation tools.
The course helps you learn how to create creative hand drawn characters.
Cons
You need an active skillshare membership to access the lecture videos
Skillshare membership is a paid one.
There are courses from more popular counterparts such as Udemy.
Part 3 How to Quickly Learn the Skills of Adobe Animate Course
Now that you’ve decided to get your hands dirty by dwelling into animation, you must give Wondershare Filmora Pro a try. What’s Wondershare Filmora ?
It’s essentially a one-stop shop for all your video editing needs. From video editing to rigging Wwondershare Filmora Pro has got it all. Using this platform, even a beginner can create exquisite animated videos.
The platform offers you several tools that are easy to use.
Even a neophyte could easily create beautiful animations by using Wondershare Filmora Pro. Using Wondershare Filmora Pro, you can not only animate characters but also define their motion, add sound effects, and edit videos. Filmora Pro offers you animation tools that are easier to operate and resultantly help you make amazing animated videos.
Wondershare Filmora
Get started easily with Filmora’s powerful performance, intuitive interface, and countless effects!
Try It Free Try It Free Try It Free Learn More >
Key Takeaways from This Episode
● As we see, today we’ve taken a look at a few of the best Adobe animate courses.
● Each of the courses can help you learn the basics of animation.
● Animation is indeed one of the budding fields, and with these fruitful courses, you can learn all about animation and possibly begin your journey as a freelancer or a professional in animation.
● Through these courses, you can create animated advertisement videos with ease. Wondershare Filmora Pro however can make your job easier by offering you amazing tools for generating animated videos!<
● Well, on this note we shall take leave! Wishing you good luck on your journey as an animator!
Professional animation is hence one of the fields that has a bright future. Willing to learn more about animation?
Don’t worry! We’ve got you covered, follow this article and find out more about the best 5 Adobe animate courses.
In this article
01 [What is Adobe Animate CC?](#Part 1)
02 [Top 8 FULL ADOBE ANIMATE COURSES | Beginners Complete Tutorial](#Part 2)
03 [How to Quickly Learn the Skills of Adobe Animate Course](#Part 3)
Part 1 What is Adobe Animate CC?
1. Who should take Adobe Animate course?
Learning is never bound. Anyone willing to learn can put in effort and time. As long as you wish to learn, and have an interest in it you can take it up. Those of you who wish to make a career in animation are highly recommended to take up this course. The Adobe animate course can help you kickstart your career as a professional animator.
2. Are there prerequisites to Adobe Animate course?
Animation is one such field that does not require a lot of prerequisites. In fact, even a beginner who has absolutely no idea about animation can take up the adobe animate course.
Part 2 Top 5 FULL ADOBE ANIMATE COURSES | Beginners Complete Tutorial
1. Adobe animate CC 2018- HTML5 Banner Ads
Adobe animate CC 2018- HTML5 Banner Ads is one of the most comprehensive courses on adobe animate. It teaches you several relevant skills associated with animation and marketing (one of the primary applications of animation).
Skills you will learn:
● Basics of HTML5 banner ads using adobe animate
● Understanding the importance of Adobe animate CC in web advertisements
● Through this course, you’d become an expert at publishing ad networks
● The course will help you explore tools and techniques related to banner advertising
Udemy: Udemy Duration: About 5 hours
Pros
The course is beginner-friendly; it helps you advance your career in animation from scratch.
The course covers even complex concepts.
You receive a course completion certificate
Cons
The course is paid and you need to pay a nominal fee in order to access the lecture videos.
The course is monotonous i.e. there is no live teaching.
2. 2D animation for beginners with adobe animate, Walt Wonderwolk
If you’re looking for a well-designed course that covers almost all the necessary concepts, then this course is just the right one for you. Through this course, you can learn all about Adobe animate. All the primary concepts are explained in detail in this course.
Skills you will learn:
● All the primary concepts of computer-generated animations using Adobe animate.
● You will learn important concepts such as eases, symbols, vector drawings, tweens, and key frames.
● You will also learn how to add sound to your animation
● You will gain hands-on knowledge about drawing, composition, and animation of characters.
Udemy: skillshare
Pros
The course is great for beginners to start learning about Adobe animate
The course covers fundamental concepts of animation
Cons
You need a skillshare membership in order to access the lecture videos.
You need to pay in order to get a skillshare membership
You do not get a course completion certificate
3. Rigging and animating in Adobe animate
Looking for a quick crash course about Adobe animate? Well, this course is perfect for you. As the name suggests, in this course you shall learn all about rigging and animating 2d characters.
Skills you will learn:
● rigging and animating adobe animate
● Through this course, you will know how to efficiently animate any character
● Discover the utilization of vectors and images for rigging
● You will get a clear understanding of important concepts such as layer parenting, motion tweening, and symbols.
Udemy: Udemy Duration: around 4 hours
Pros
You will learn the major concepts of animation.
You will learn about rigging in detail, one of the core concepts of animation.
The course is available on Udemy, one of the most accessible platforms.
Cons
The course is not free, you need to pay a nominal amount to access the course.
It is not a renowned course.
The course is not Beginner friendly, it needs you to have some understanding of animation.
4. Learning Adobe Animate CC: Animation, LinkedIn learning
LinkedIn’s new platform, LinkedIn learning has several professional courses. Learning Adobe animate CC is one of the courses available on LinkedIn learning. It teaches you all about digital transformations. By the end of this course, you will be able to create a handy bit of animation.
Skills you will learn:
● Fundamentals of digital animation on Adobe animate CC
● Understanding and implementation of concepts such as keyframes, symbols, tweening, and drawing tools.
● Understand about the creation of natural effects and shape tweens.
● Adding music and sound effects to your animation.
Udemy: LinkedIn learning Duration: Around 3 hours
Pros
The course duration is considerably shorter.
All the primary concepts of animation are given importance in this course.
You get additional quizzes and study material along with the lecture videos
Cons
You need to have an active LinkedIn learning membership.
You need to pay for the LinkedIn learning membership.
The course is fast-paced, you need to grasp the concepts quickly.
5. Animate a walk cycle frame by frame in Adobe animate
This hands-on course is perfect for those who prefer experimenting as they watch the lecture videos. The course teaches you how to animate 2D and 3D characters smoothly. As you near the end of this course, you will have a clear understanding of how animation works and how to animate a hand-drawn character from scratch.
Skills you will learn:
● You will learn how to animate a hand-drawn character from scratch.
● You shall learn how to set up a working canvas and design a character.
● You will learn about the essential features of designing such as color fills, overlapping actions, shadows, and cleanup strokes.
Udemy: skillshare
Pros
The course focuses on the design aspect of animated characters.
The course gives you a hands-on experience with animation tools.
The course helps you learn how to create creative hand drawn characters.
Cons
You need an active skillshare membership to access the lecture videos
Skillshare membership is a paid one.
There are courses from more popular counterparts such as Udemy.
Part 3 How to Quickly Learn the Skills of Adobe Animate Course
Now that you’ve decided to get your hands dirty by dwelling into animation, you must give Wondershare Filmora Pro a try. What’s Wondershare Filmora ?
It’s essentially a one-stop shop for all your video editing needs. From video editing to rigging Wwondershare Filmora Pro has got it all. Using this platform, even a beginner can create exquisite animated videos.
The platform offers you several tools that are easy to use.
Even a neophyte could easily create beautiful animations by using Wondershare Filmora Pro. Using Wondershare Filmora Pro, you can not only animate characters but also define their motion, add sound effects, and edit videos. Filmora Pro offers you animation tools that are easier to operate and resultantly help you make amazing animated videos.
Wondershare Filmora
Get started easily with Filmora’s powerful performance, intuitive interface, and countless effects!
Try It Free Try It Free Try It Free Learn More >
Key Takeaways from This Episode
● As we see, today we’ve taken a look at a few of the best Adobe animate courses.
● Each of the courses can help you learn the basics of animation.
● Animation is indeed one of the budding fields, and with these fruitful courses, you can learn all about animation and possibly begin your journey as a freelancer or a professional in animation.
● Through these courses, you can create animated advertisement videos with ease. Wondershare Filmora Pro however can make your job easier by offering you amazing tools for generating animated videos!<
● Well, on this note we shall take leave! Wishing you good luck on your journey as an animator!
Also read:
- Top 8 Anime Name Generators Online-Get Cool Anime Names
- New In 2024, How To Learn Cartoon Sketch Drawing
- Updated Can I Still Do Animated Logo Design Without Design Skills for 2024
- Updated Top 10 Sketch Animation Video Makers for 2024
- Top Tips for Effortless Unity 3D Animation
- New How to Create an Animated Sticky Navbar for 2024
- New 2024 Approved Top 10 Cartoon Canvas Painting Ideas for Total Beginners
- Top 10 Websites to Download Anime Subtitles for Free
- New 2024 Approved How to Get Started in Stop Motion Claymation
- How to Make GIF Stickers for WhatsApp 100 The Easy Way
- Updated How to Reduce GIF Size and Best GIF Resizers for 2024
- In 2024, How to Draw Cartoons Step by Step with This Guide
- Updated 12 Aesthetic GIF Instagram for Marketers
- In 2024, 15 Best Apps to Turn Photos Into Cartoons and Sketches
- 2024 Approved How to Animate - Adobe Animate Tutorial for All
- New In 2024, Best 15 Classics Animated Cartoon Movies
- Fuel Your Creativity with 10 Awesome Collection of 2D Animation Examples
- Updated In 2024, 12 Captivating Websites with Triggered Animate on Scroll Examples
- 10 Caricature Makers to Turn Your Photo to Caricature Effects for 2024
- Christmas Is Coming! How to Find & Make Animated Christmas GIFs for 2024
- 6 Unexpected Ways Gif Animation Maker That Affect Your Marketing
- Most Popular Tips on Learning Animate Rigging
- Updated Tutorials for Animating Picture Online Without Learning From Scratch
- New Tips on How to Get Awesome Background for Slideshow in PowerPoint
- New In 2024, How to Make GIF Stickers for WhatsApp 100 The Easy Way
- A How-To Guide on Bypassing the Apple iPhone X iCloud Lock
- In 2024, How to Unlock iCloud lock from your Apple iPhone SE (2022) and iPad?
- How to Transfer Videos from Samsung Galaxy F34 5G to iPad | Dr.fone
- How to Reset a Locked Realme V30T Phone
- Android Unlock Code Sim Unlock Your Nokia C02 Phone and Remove Locked Screen
- How to Factory Reset Vivo S17e in 5 Easy Ways | Dr.fone
- 3uTools Virtual Location Not Working On Samsung Galaxy F15 5G? Fix Now | Dr.fone
- In 2024, Why Apple Account Disabled On your iPhone 15 Pro? How to Fix
- 4 Most-Known Ways to Find Someone on Tinder For Samsung Galaxy A25 5G by Name | Dr.fone
- In 2024, How and Where to Find a Shiny Stone Pokémon For Xiaomi Redmi A2? | Dr.fone
- In 2024, How and Where to Find a Shiny Stone Pokémon For Tecno Spark 10 Pro? | Dr.fone
- Title: New 2024 Approved 10 Great Apps to Turn Funny Animated Images Into Comics
- Author: Elon
- Created at : 2024-06-30 12:27:59
- Updated at : 2024-07-01 12:27:59
- Link: https://animation-videos.techidaily.com/new-2024-approved-10-great-apps-to-turn-funny-animated-images-into-comics/
- License: This work is licensed under CC BY-NC-SA 4.0.
