
:max_bytes(150000):strip_icc():format(webp)/GettyImages-1443716794-411cf2c5404b4f35b2a1153826e5a280.jpg)
New 2024 Approved 20 Free After Effects Logo Reveal Templates You Will Want to Know
20 Free After Effects Logo Reveal Templates
20 Free After Effects Logo Reveal Templates You Will Want to Know
An easy yet powerful editor
Numerous effects to choose from
Detailed tutorials provided by the official channel
The free After Effects logo reveals templates is a creative and clean animation that is very easy to use and customizable in just a few clicks. This template allows you to change the color, edit the text, add your logo, and click on render and contains two different logo animations for you to choose from. It does not require any plugin, and you can use it for your following modern and professional logo animation.
![]()
By incorporating a logo animation into your video, you can make your brand memorable and choose a suitable template for your brand personality. So, get ready for all the free logo reveal templates in this article.
In this article
01 [20 Best Logo Reveal Templates for After Effects 2022](#Part 1)
02 [Learn How to Use After Effects Logo Reveal Templates](#Part 2)
Part 1 Best Logo Reveal Templates for After Effects 2022
You can use an animated logo reveal if you need to add spice to your marketing campaigns and branded videos. An animated logo reveal is explained as a Great way to capture your audience’s attention as they screw through their newsfeed and stand you out from the competition. This section of the article will give you After Effects logo reveal templates for free that you can choose from this 2022:
![]()
01[Fast Flip Logo Reveal Template](https://dsqqu7oxq6o1v.cloudfront.net/preview-215084-pWlBMUhYg4-high.mp4 target=)
Fast Flip logo reveal template free to download is perfect for those on a budget and uses stock photography which can be replaced with photos of a company or team to review and an elegant logo at the end. All that is required is to customize the color, replace the images, and add your logo.
02Logo Web Search
Logo Web Search is an easy-to-use, stylish and simple animation for a company website. It allows you to change colors quickly and free sound effects, and all you need to do is change the logo text and click on render.
03Search Logo Reveal
Search Logo Reveal After Effect template for free allows you to customize the text and easily drag and drop in your logo. It provides a unique way to review your logo by using an animated search bar with a sample question and bringing up your logo as the answer. It can be a great add on to websites with search options.
04Colors Logo Reveal
Colors Logo Reveal is a super clean and straightforward After Effects logo reveal template that is very easy to use for designers and creators. It contains two different logos animations that you can choose from and requires no plugin. Add your logo, change the color, edit the text, and click on render.
05Logo Reveal
Logo Reveal is perfect for small business companies and startups with an easy-to-use template that comes with detailed instruction on how to customize and render your logo reveal Project.
06Unlock Phone Logo Reveal
Unlock Phone Logo Reveal is one of the dynamic logo reveal After Effects templates for free with a modern design, smooth transition effects, and simple text animation that is super easy to use. All that is required is to edit the text, drag and drop in your media, and click on render. It comprises a cool intro or opener to presentations, slideshows, promotions, and event videos to impress your audience.
07Orbital Free HUD Logo Reveal
Orbital Free HUD Logo Reveal is perfect for any tech company, and it’s done up in futuristic style and includes the complete. AEP project file with background texture and elements.
08Corporate logo reveal
Corporate Logo Reveal template is a stylish and contemporary template that features a simple shape that is elegantly animated and combined with reviewing your logo. It has one logo placeholder, editable text layers, and an easy-to-use color controller. An excellent logo reveals the Premiere Pro template free to download for companies like stockbrokers.
09White Scroll Logo Reveals
White Scroll Logo Reveals perfect for a more classic logo opener and comes with three background versions and three different logo placement options.
10Shape Logo Reveal
Shape Logo Reveal is a stylish logo reveal template with colorful shape layers and lines that beautifully form a clean-looking logo reveal. It is a short intro for a business slideshow, promotions, events, TV shows, videos, commercials, corporate presentations, etc.
11Free Animated Logo Reveals
Free Animated Logo Reveals is packed with three different logos reveal, which a suitable for corporates and an excellent option for one who wants a modern and professional logo show.
12Clean Titles And Logo Reveal
Clean Titles and Logo Reveal offers stylish templates which an eye-catching design and contains two text placeholders and one logo placeholder. It is effortless to use and a short introduction to TV shows, commercials, slideshows, promotions, Facebook and YouTube videos, etc.
13Hi-Tech Logo Reveal 02
Hi-Tech Logo Reveal is a premium animated logo reveal that features a dark blue background joint with light blue HUD elements and a perfect logo reveal template for a company that wants to stand out online.
14Testimonials Logo Reveal
Testimonials logo Reveal is a stylish and clean project that is perfect for displaying the company’s testimonials and reviews. This After Effects logo reveal template for free features six title placeholders, one logo holder, and six photo placeholders, requiring no plugin.
15Elegant Logo Reveal
Elegant logo Reveals perfect for a feminine background. It features chrome logo pens with a silky dark background, enabling you to easily add your text, insert your logo, and change the colors.
16Logo Web Search II
Logo Web Search II is a stylish and straightforward animation mainly for company websites. It is elementary to use.
17Battle Logo Reveal
Blue Action Logo Reveal is for those looking for a minimalist logo opener and features a dynamic animation style, including an editable text layer and a logo placeholder. It also allows you to adjust the colors easily.
18Blue Action Logo Reveal
Blue Action Logo Reveal is majorly for those looking for a minimalist logo opener and features a dynamic animation style including an editable text layer and a logo placeholder. It also allows you to easily adjust the colors.
19Logo Introduction Template
Logo Introduction Template is a free logo reveal from Premiere Pro. It is perfect for the ones looking for a Tudor style logo reveal and allows you to easily customize the colors and insert your logo with a detailed help file.
20Minimal Logo Klick
Minimal Logo Klick comes in a sleek and modern design with playful animation. It encompasses a logo placeholder, an editable text layer, and an intelligent color controller. If you are searching for an unfussy and free logo reveal online, this one is for you.
Part 2 Learn How to Use After Effects Logo Reveal Templates
This section provides you with a basic tutorial on using the logo reveal After Effects template for free. However, this is a professional video editing software, but if video editing is new to you, you can try out Filmora, which is powerful, easy to use for new users. In Filmora, you will use the logo reveal template as a professional even if you are a beginner.
Below is how to use the After Effects logo reveals template:
01Open After Effects and Begin
Open your After Effect software and set up your Project ready. To begin face, create a composition using composition>New. You can also search the web resolution to 3x 2for this Project.
![]()
02Start Creating Logo
Next is to create a solid layer for your logo by using layers>new>solid, and select an appropriate color to match your composition.
![]()
Next is the creator logo by adding the pre-prepared logo artwork. Go to layer>new>text to create a text layer and adjust the text size and color to see.
![]()
03Add Animation to Logo
Manipulate your logo to create an animation and ensure that everything is right where you want it.
![]()
04Add Effects and Keyframe
Add Effect by going to Effect>Simulation>CC Particle World or click on Effects and Presets panel on the right to drag the CC Particle World effect onto your solid layer.
![]()
Set off your animation by adding a keyframe and controlling the animation of the particles effect through the birth rate setting, which is found by expanding the settings in the timeline panel for the solid layer.
![]()
05Import Vector Graphics and Finish
Finally, import your vector graphics into the After Effects by dragging and dropping the file into the Project panel, which brings up an import dialogue.
For Win 7 or later (64-bit)
For macOS 10.12 or later
That’s it! You successfully made use of the logo reveal maker.
● Key Takeaways from This Episode →
● The top 20 logo reveal Premiere Pro templates free to download.
● THow to make logo with After Effects – the logo reveal maker.
● TLastly, the logo reveal, free online tool, Filmora.
● TI hope I’ve gave you a few ideas on the After Effects logo reveal template for your Project and provided a breakdown of other software you can use for free logo reveal, such as Filmora. The article also lists the best logo reveal templates for after-effects that you can choose from this 202You can also use other software for your free logo reveal, but we all need to start somewhere.
You Can Turn a TikTok Into a GIF Now. Here’s How
You Can Turn a TikTok Into a GIF Now. Here’s How
An easy yet powerful editor
Numerous effects to choose from
Detailed tutorials provided by the official channel
Want to add sharing flexibility to TikTok videos? Convert them into GIFs!
In this article
01 [What is GIF TikTok?](#Part 1)
02 [How to Make a GIF From a TikTok Video](#Part 2)
Part 1 What Is TikTok GIF?
In today’s IT enhanced lifestyle, having a profound reach on social media is the new name of popularity. Everyone out there is profusely keen on creating and sharing a plethora of content varieties; memes, videos, animations and what not, across social communities. However, TikTok videos lag behind in this race; often lack the ‘Share’ flexibility.
To match up, there are solutions to convert TikTok video into GIFs. A TikTok GIF is a short, impactful and to the point clip that’s here to share fun and exciting content in the most interesting ways. If you have a bunch of TikTok videos to share with your peers, but missing out on an effective sharing solution, you can conveniently look forward to convert those videos into catchy and interesting GIFs that will definitely hold the attention of your viewers.
Feel motivated? See through the rest of this article to know some quick and easy TikTok to GIF conversion tools and software!
Part 2 How to Make a GIF From a TikTok Video
When looking through solutions to create GIF TikTok videos, you will find a pool of methods and tools available on the internet. All you need to do is select the best one for yourself and get started with converting TikTok Videos into GIFs. Given below are some of the best solutions adhering to the aforesaid concern:
01Filmora
Wondershare Filmora Video Editor is one of the best application software to create a TikTok GIF. This is a simple and smart converter application that caters to your concern in just a few minutes. What’s best is that this app is absolutely free to use and is compatible with your PC, smartphone and a variety of other devices. Here’s how you can use Filmora to convert your TikTok videos into GIFs:

Step 1: Import Your Video
Start with importing a desired TikTok video file to the Filmora timeline. You can also ‘Drag and Drop’ the video file to the editor timeline. Using this application, you have the flexibility to import your clip in almost any video format.

Step 2: Edit Your Clip
Suited to your content preferences, you can edit and enhance your clips with a variety of effects, like, cut, trim, rotate, split, etc., and make appropriate speed adjustments. You can even include text messages to make your GIF more impactful.

Wondershare Filmora
Get started easily with Filmora’s powerful performance, intuitive interface, and countless effects!
Try It Free Try It Free Try It Free Learn More >

Step 3: Let’s Save and Share!
When you are happy, save your work using the .gif file extension. That’s it! You are ready to share your creation with your social media peers.

02TikTok’s Inbuilt GIF Converter
TikTok allows you to directly convert its videos into GIFs. You can use the TikTok application in your smartphone to take up the conversion process. All you need to do is follow the steps given below:
Step 1: Select Your TikTok Video
To get started, open the TikTok application in your smartphone and select the video you want to convert into GIF.
Step 2: Share the Video
Click the ‘Share’ icon at the right of the video screen.

Step 3: Format Selection
Scroll down to the bottom of the screen and choose the ‘Share as GIF’ option. This will automatically convert your TikTok video into GIF in a few seconds.

Step 4: Save and Export
Click on the ‘Save Image’ option to save the GIF in your phone’s gallery. You can also export your creation to different social media platforms.
03Wondershare UniConverter
This one is a handy toolbox loaded with a variety of features that allow you to play with your video creativity. Using this tool, you can quickly create GIF for TikTok and also fix the size and duration of the same. This software supports almost all video formats and comes with an inbuilt editor that you can use to add effects and make your GIFs all the more interesting. This is compatible with your Windows or MacOS PC.
Take the following steps to create GIFs from TikTok videos using this software:

Step 1: Download and Launch the Application
Download the Wondershare UniConverter application to your PC from the software’s official website.
Step 2: Open GIF Maker
In the app’s welcome screen, navigate to the ‘Toolbox’ tab and select ‘GIF Maker’ from the panel that gets displayed.
Step 3: Upload Your TikTok Video
In the next pop-up window, select ‘Video to GIF’ and click on the (+) icon in the centre. You can also click on ‘Add Files’ in the top left and choose a saved TikTok video from your PC to upload.

Step 4: Trim Your Video
Trim the uploaded video to the desired portion from where you wish to create the GIF and set adequate time frames for the same. You can even drag the video thumbnail slider to trim the video.

Step 5: Let’s Get Creating!
Set the final size and frame rate from the ‘Output Size’ and ‘Frame Rate’ tabs respectively. To save your creation, browse and choose the desired system folder by clicking on the ‘Save to:’ tab. Lastly, select ‘Create GIF’ to start the conversion process.

04Kapwing GIF Maker
There may be instances where you cannot save or share TikTok videos. To cut the rush in such cases, you can use Kapwing’s GIF Maker to convert videos from TikTok to GIF online. This one is a free video editing tool that works with almost all internet enabled smartphones and supports almost all common video formats. Here’s what you need to do for making GIFs from TikTok videos using this tool:
Step 1: Copy a Video Link
Search your desired TikTok video and click on the ‘Share’ icon. In the drop down menu, select ‘Copy Link’ to save the video link in your device memory. Once this happens, you will get a confirmation message that says, ‘Copied’.

Step 2: Open GIF Maker
Open the GIF Maker tool in your browser and paste the saved TikTok video link in the editor’s URL bar. This will automatically redirect you to the Kapwing Studio, where you have the liberty to trim, crop or split your video clip to the desired time frame. It is better to set a play span of 3-5 seconds.
You can trim the clip by dragging its ends or introduce cuts at specific points using the split button above the editor timeline. To make volume adjustments, select the video layer and click on ‘Edit Video’ and move the adjuster circle to the left or right to decrease, increase and mute the video volume.


Step 3: Download and Share Your Creation
To save your work, tap ‘Export Video’ at the top and select ‘Export as GIF’ from the drop down menu. Wait for the conversion process to finish and click ‘Download’. This will save the GIF to your device.
You will find a watermark at the corner of your clip. Click ‘Sign In to Remove the Watermark’ to remove it. A workspace for the present and later projects will be created, where you can save you work for a couple of days with Kapwing’s free version. To export your work to social media, click ‘Share’. You can even host your creation on websites. Just copy the video link and select ‘Embed’.

05TT Downloader
This one is another online tool you can use to create GIFs from TikTok videos. This is a quick converter tool that transforms TikTok videos to GIFs in 5 easy steps within minutes. It is a browser tool and does not require a software download. All you need to do is explained in the following steps:

Step 1:
Visit the official site of the tool.
Step 2:
Select ‘TikTok to GIF’ to get redirected to the TikTok to GIF Converter home page.
Step 3:
Copy and paste the desired TikTok video link in the converter’s URL bar. To proceed further, click on ‘Get Video’.

Step 4:
Trim your clip within a time frame of 1-10 seconds.
Step 5:
Click ‘Done’ to initiate the conversion process. Once it finishes, you can download the converted GIF to your device.
06MiniTool MovieMaker
You can prefer this tool to convert TikTok videos in your PC into GIFs. This tool gives you the liberty to trim, cut, reverse and rotate GIFs and even add text and filters to them. Here’s how you can use this tool to transform TikTok videos into interesting GIFs:
Step 1:
Download and install this GIF maker tool in your PC. Launch the same when you are done with the installation process.
Step 2:
In the converter window, import and add your desired TikTok clip into the converter timeline.

Step 3:
You are now free to edit and add text to your video.
Step 4:
Once you finish, tap ‘Export’ and choose your output format as GIF.
Step 5:
Hit ‘Export’ to let the conversion process begin.
● Key Takeaways from This Episode →
● TikTok videos often lack the save and share features, which is an obvious necessity of today’s social outlook.
● Varieties of online tools and software are available for converting TikTok videos to GIFs to increase the sharing flexibility.
● Filmora is a quick and intelligent choice to take up the conversion process within a catch of few clicks.
Want to add sharing flexibility to TikTok videos? Convert them into GIFs!
In this article
01 [What is GIF TikTok?](#Part 1)
02 [How to Make a GIF From a TikTok Video](#Part 2)
Part 1 What Is TikTok GIF?
In today’s IT enhanced lifestyle, having a profound reach on social media is the new name of popularity. Everyone out there is profusely keen on creating and sharing a plethora of content varieties; memes, videos, animations and what not, across social communities. However, TikTok videos lag behind in this race; often lack the ‘Share’ flexibility.
To match up, there are solutions to convert TikTok video into GIFs. A TikTok GIF is a short, impactful and to the point clip that’s here to share fun and exciting content in the most interesting ways. If you have a bunch of TikTok videos to share with your peers, but missing out on an effective sharing solution, you can conveniently look forward to convert those videos into catchy and interesting GIFs that will definitely hold the attention of your viewers.
Feel motivated? See through the rest of this article to know some quick and easy TikTok to GIF conversion tools and software!
Part 2 How to Make a GIF From a TikTok Video
When looking through solutions to create GIF TikTok videos, you will find a pool of methods and tools available on the internet. All you need to do is select the best one for yourself and get started with converting TikTok Videos into GIFs. Given below are some of the best solutions adhering to the aforesaid concern:
01Filmora
Wondershare Filmora Video Editor is one of the best application software to create a TikTok GIF. This is a simple and smart converter application that caters to your concern in just a few minutes. What’s best is that this app is absolutely free to use and is compatible with your PC, smartphone and a variety of other devices. Here’s how you can use Filmora to convert your TikTok videos into GIFs:
Step 1: Import Your Video
Start with importing a desired TikTok video file to the Filmora timeline. You can also ‘Drag and Drop’ the video file to the editor timeline. Using this application, you have the flexibility to import your clip in almost any video format.
Step 2: Edit Your Clip
Suited to your content preferences, you can edit and enhance your clips with a variety of effects, like, cut, trim, rotate, split, etc., and make appropriate speed adjustments. You can even include text messages to make your GIF more impactful.
Wondershare Filmora
Get started easily with Filmora’s powerful performance, intuitive interface, and countless effects!
Try It Free Try It Free Try It Free Learn More >
Step 3: Let’s Save and Share!
When you are happy, save your work using the .gif file extension. That’s it! You are ready to share your creation with your social media peers.
02TikTok’s Inbuilt GIF Converter
TikTok allows you to directly convert its videos into GIFs. You can use the TikTok application in your smartphone to take up the conversion process. All you need to do is follow the steps given below:
Step 1: Select Your TikTok Video
To get started, open the TikTok application in your smartphone and select the video you want to convert into GIF.
Step 2: Share the Video
Click the ‘Share’ icon at the right of the video screen.
Step 3: Format Selection
Scroll down to the bottom of the screen and choose the ‘Share as GIF’ option. This will automatically convert your TikTok video into GIF in a few seconds.
Step 4: Save and Export
Click on the ‘Save Image’ option to save the GIF in your phone’s gallery. You can also export your creation to different social media platforms.
03Wondershare UniConverter
This one is a handy toolbox loaded with a variety of features that allow you to play with your video creativity. Using this tool, you can quickly create GIF for TikTok and also fix the size and duration of the same. This software supports almost all video formats and comes with an inbuilt editor that you can use to add effects and make your GIFs all the more interesting. This is compatible with your Windows or MacOS PC.
Take the following steps to create GIFs from TikTok videos using this software:
Step 1: Download and Launch the Application
Download the Wondershare UniConverter application to your PC from the software’s official website.
Step 2: Open GIF Maker
In the app’s welcome screen, navigate to the ‘Toolbox’ tab and select ‘GIF Maker’ from the panel that gets displayed.
Step 3: Upload Your TikTok Video
In the next pop-up window, select ‘Video to GIF’ and click on the (+) icon in the centre. You can also click on ‘Add Files’ in the top left and choose a saved TikTok video from your PC to upload.
Step 4: Trim Your Video
Trim the uploaded video to the desired portion from where you wish to create the GIF and set adequate time frames for the same. You can even drag the video thumbnail slider to trim the video.
Step 5: Let’s Get Creating!
Set the final size and frame rate from the ‘Output Size’ and ‘Frame Rate’ tabs respectively. To save your creation, browse and choose the desired system folder by clicking on the ‘Save to:’ tab. Lastly, select ‘Create GIF’ to start the conversion process.
04Kapwing GIF Maker
There may be instances where you cannot save or share TikTok videos. To cut the rush in such cases, you can use Kapwing’s GIF Maker to convert videos from TikTok to GIF online. This one is a free video editing tool that works with almost all internet enabled smartphones and supports almost all common video formats. Here’s what you need to do for making GIFs from TikTok videos using this tool:
Step 1: Copy a Video Link
Search your desired TikTok video and click on the ‘Share’ icon. In the drop down menu, select ‘Copy Link’ to save the video link in your device memory. Once this happens, you will get a confirmation message that says, ‘Copied’.
Step 2: Open GIF Maker
Open the GIF Maker tool in your browser and paste the saved TikTok video link in the editor’s URL bar. This will automatically redirect you to the Kapwing Studio, where you have the liberty to trim, crop or split your video clip to the desired time frame. It is better to set a play span of 3-5 seconds.
You can trim the clip by dragging its ends or introduce cuts at specific points using the split button above the editor timeline. To make volume adjustments, select the video layer and click on ‘Edit Video’ and move the adjuster circle to the left or right to decrease, increase and mute the video volume.
Step 3: Download and Share Your Creation
To save your work, tap ‘Export Video’ at the top and select ‘Export as GIF’ from the drop down menu. Wait for the conversion process to finish and click ‘Download’. This will save the GIF to your device.
You will find a watermark at the corner of your clip. Click ‘Sign In to Remove the Watermark’ to remove it. A workspace for the present and later projects will be created, where you can save you work for a couple of days with Kapwing’s free version. To export your work to social media, click ‘Share’. You can even host your creation on websites. Just copy the video link and select ‘Embed’.
05TT Downloader
This one is another online tool you can use to create GIFs from TikTok videos. This is a quick converter tool that transforms TikTok videos to GIFs in 5 easy steps within minutes. It is a browser tool and does not require a software download. All you need to do is explained in the following steps:
Step 1:
Visit the official site of the tool.
Step 2:
Select ‘TikTok to GIF’ to get redirected to the TikTok to GIF Converter home page.
Step 3:
Copy and paste the desired TikTok video link in the converter’s URL bar. To proceed further, click on ‘Get Video’.
Step 4:
Trim your clip within a time frame of 1-10 seconds.
Step 5:
Click ‘Done’ to initiate the conversion process. Once it finishes, you can download the converted GIF to your device.
06MiniTool MovieMaker
You can prefer this tool to convert TikTok videos in your PC into GIFs. This tool gives you the liberty to trim, cut, reverse and rotate GIFs and even add text and filters to them. Here’s how you can use this tool to transform TikTok videos into interesting GIFs:
Step 1:
Download and install this GIF maker tool in your PC. Launch the same when you are done with the installation process.
Step 2:
In the converter window, import and add your desired TikTok clip into the converter timeline.
Step 3:
You are now free to edit and add text to your video.
Step 4:
Once you finish, tap ‘Export’ and choose your output format as GIF.
Step 5:
Hit ‘Export’ to let the conversion process begin.
● Key Takeaways from This Episode →
● TikTok videos often lack the save and share features, which is an obvious necessity of today’s social outlook.
● Varieties of online tools and software are available for converting TikTok videos to GIFs to increase the sharing flexibility.
● Filmora is a quick and intelligent choice to take up the conversion process within a catch of few clicks.
Top 10 Websites to Download Anime Subtitles for Free
Top 10 Websites to Download Anime Subtitles for Free

Shanoon Cox
Mar 27, 2024• Proven solutions
Subtitles are sometimes a distraction, but one cannot deny the fact that English anime subtitles are best for understanding a video properly in a different language. To watch your favorite Anime series, you would need to download anime subtitles. The idea behind anime subtitles is to not bind an anime series in a different language. In this article, you will learn about a few websites to download English as well as Japanese anime subtitles for free. When a dubbed version of your favorite anime series is not available you would simply need to put subtitles at work. Let’s dive into the article and find some exciting websites to download anime subtitles. You are going to learn:
- Part 1: Top10 Websites to Download Anime Subtitles
- Part 2: The Best Video Editor to Add Subtitles to an Anime
You may also like:
- Best Free Anime Streaming Sites to Download Anime
- Best Anime Series of All Time
- Top 4 Websites to Get Anime Footage for Free
Part 1: Top 10 Websites to Download Anime Subtitles
Here is a list of some amazing websites that have all the anime subtitles you can download at the moment. The best part about this guide is that it provides you with not only the anime English subtitles but also the entire anime series that you can download and watch.
- 1. OpenSubtitles
- 2. Kitsunekho
- 3. Subscene
- 4. SubDb
- 5. Addic7ed
- 6. Subtitles.hr
- 7. iSubtitles
- 8. Animetosho
- 9. CD Japan
- 10. AniSubs
1. OpenSubtitles
OpenSubtitles is one of the topmost subtitle websites where you can find all the latest as well old subtitles in multi-languages. The site is very normal in terms of the interface and looks like an old school website however the archives are huge. You can easily download anime subtitles from this website by clicking on the anime or series name and then click on the download option. It might ask you simple questions or to fill the captcha as a standard security check but that will be smooth.
The site is good, but sometimes the ads might annoy you a bit if you don’t like to surf a webpage with ads. And you need to become their VIP member to get rid of the annoying ads.
2. Kitsunekho
This is one of the best websites to download anime subtitles in different languages for free. The simple and easy interface lets you select from multiple options and series online. You can click on the series name and download the subtitle file in just a click. One can download subtitles in English, Japanese, Chinese and Korean language without going much deeper into finding the language options. All the subtitles are aggregated according to genre and language.
The interface of this website is super smooth, and there are no ads to annoy you.
3. Subscene
If you are looking for movies and anime at the same time so Subscene is a great website to download subtitles. One can easily download anime subtitles by searching their favorite series on the search bar and clicking on it to get the download options. Language is no bar on this website as almost all the languages are covered. The best part is that when you click on a series name your screen will get flooded with a lot of random subtitles in different languages.

Apart from some ads, the website is awesome.
4. SubDb
Subb is an open-source and free website with a huge database of subtitles. Being an open-source website, it’s a peer-to-peer network on which both the uploads and downloads are made by the user. This website has subtitles in different languages like English, Espanol, Italiano, Polski, and many more. You can only download the subtitles if you know how to run an API on your system.
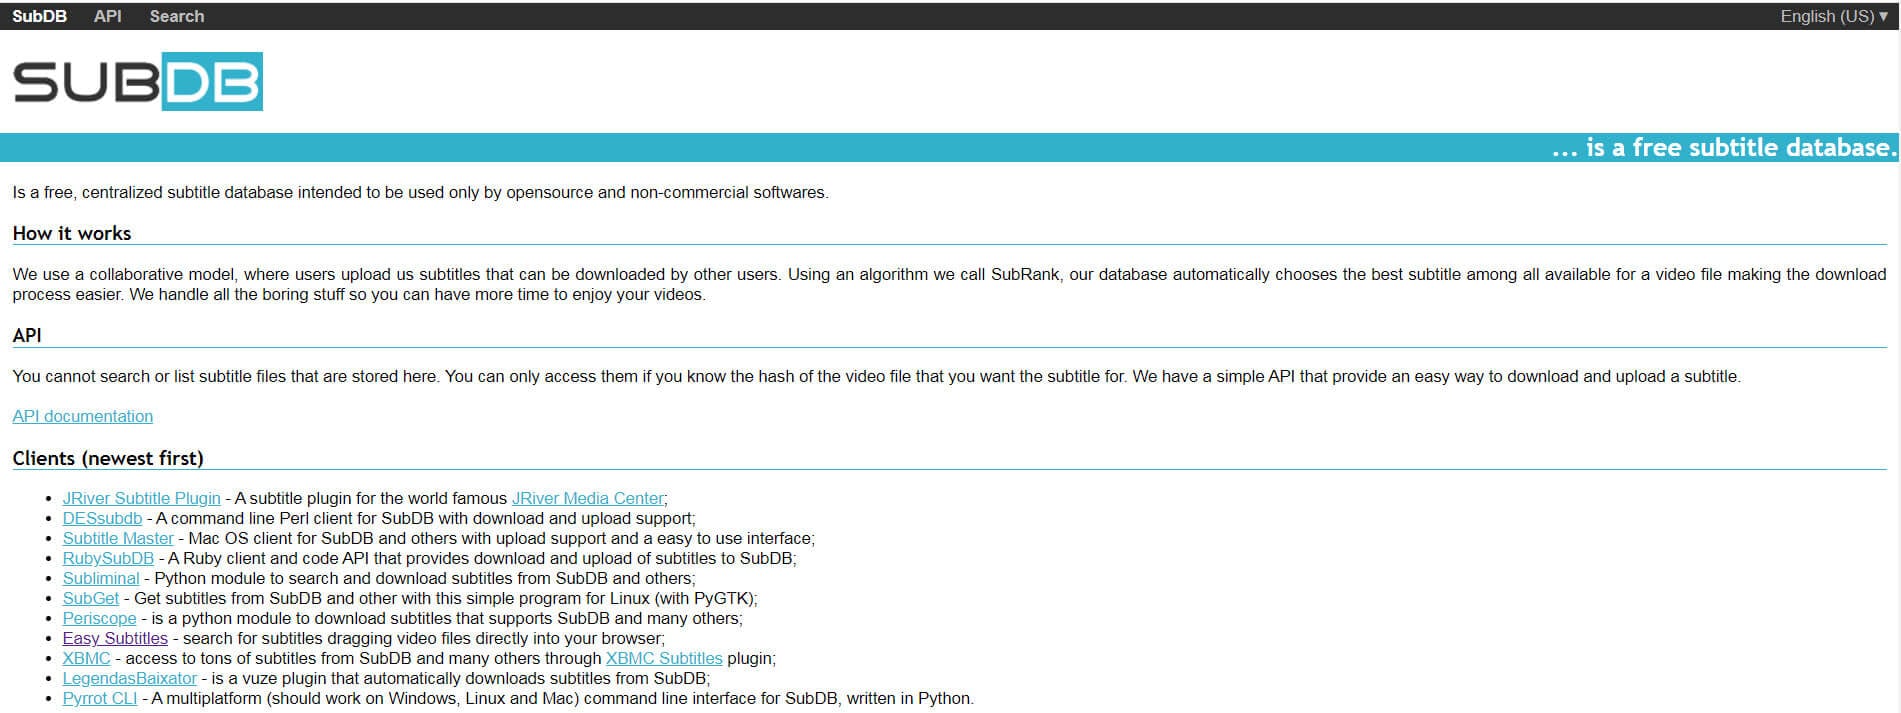
The website is good but there is no search bar and a newbie with no tech knowledge cannot look for any file on this website.
5. Addic7ed
As the name suggests, you might get addicted to this site because of the multiple collections it has to download subtitles. You can download the subtitles on this website by clicking on the series name and there would be different subtitle files in many languages to download. There are many languages supported such as Japanese, English, Arabic, and many more to download subtitles.
The website has some good collections but the lack of search bar and too many irrelevant ads might irritate you.
6. Subtitles. hr
If you are looking for videos, software, and subtitles simultaneously, then Subtitles. hr is a great website where you can download subtitles in different languages. The concept of this website is also useful to the user where people upload the content and consume it. One can easily download the subtitles by clicking on the download button given on the website.
The website is good however the language icons are very small to recognize and it becomes difficult for a person to detect what exactly they are downloading.
7. iSubtitles
iSubtitles is a free website to download subtitles of your favorite anime series and movies. The website looks simple and has a search bar to put queries and get the result. Subtitles here are available in different languages from Arabic to Parsi and English to Japanese. Subtitle files are very easy to download as you only need to click on the anime series name and all the formats and languages available will be provided to you.
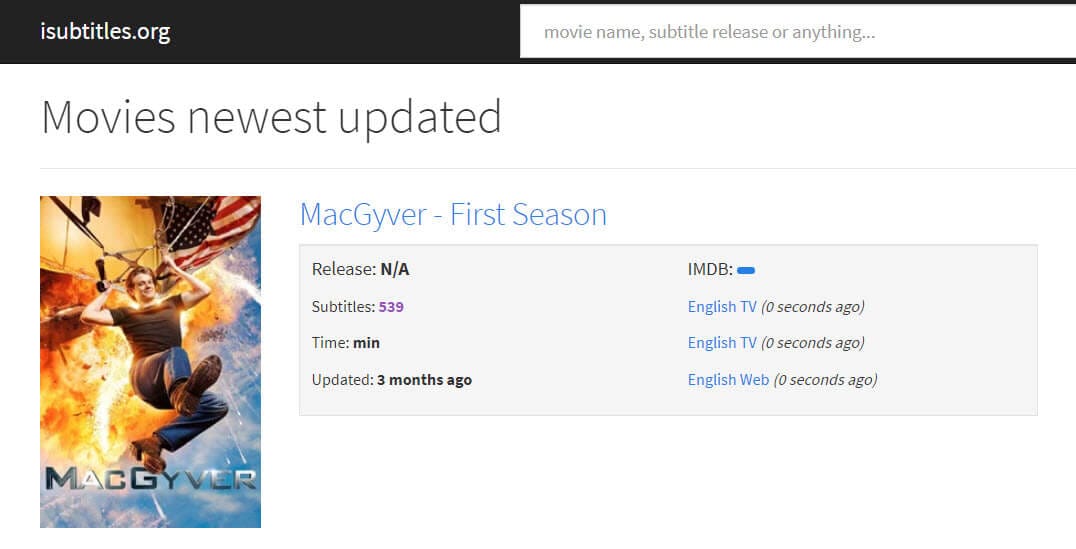
The website is good however there are a lot of ads to disturb you.
8. Animetosho
Animetosho is an old-school kind of website but the information here to vast to share. The website has a huge library of anime series, and you can download the entire anime series with all the subtitles on torrent/magnet. You can download the file and all the subtitle files are included in the same file.
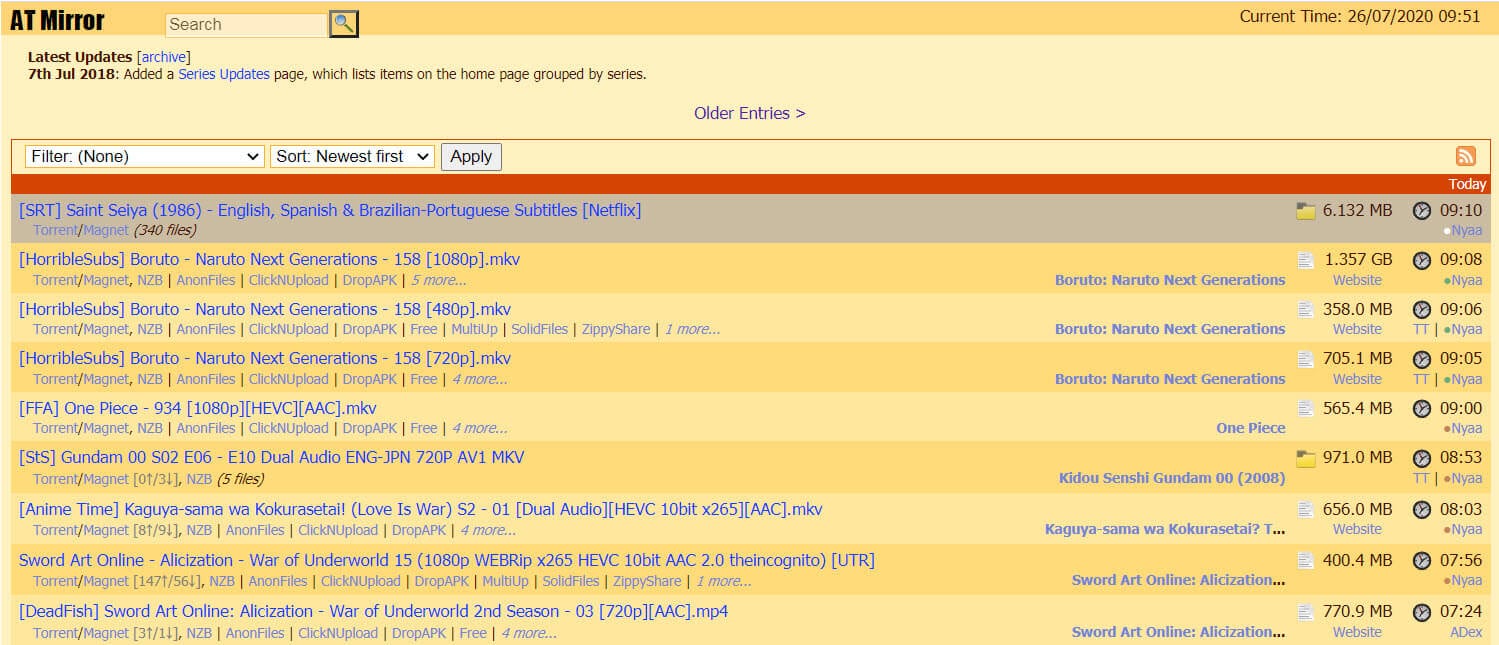
There is a lot of information but it might look spammy to new users who are new to the internet industry.
9. CD Japan
This is a multi-niche website that covers content niches such as Music, Lifestyle, Anime, Apparel, and much more. The content on this website is more than huge and if you want to download anime subtitles then you might have to use the search bar or look for the anime tab on the menu. There is a lot of anime series in multiple languages available on this website.
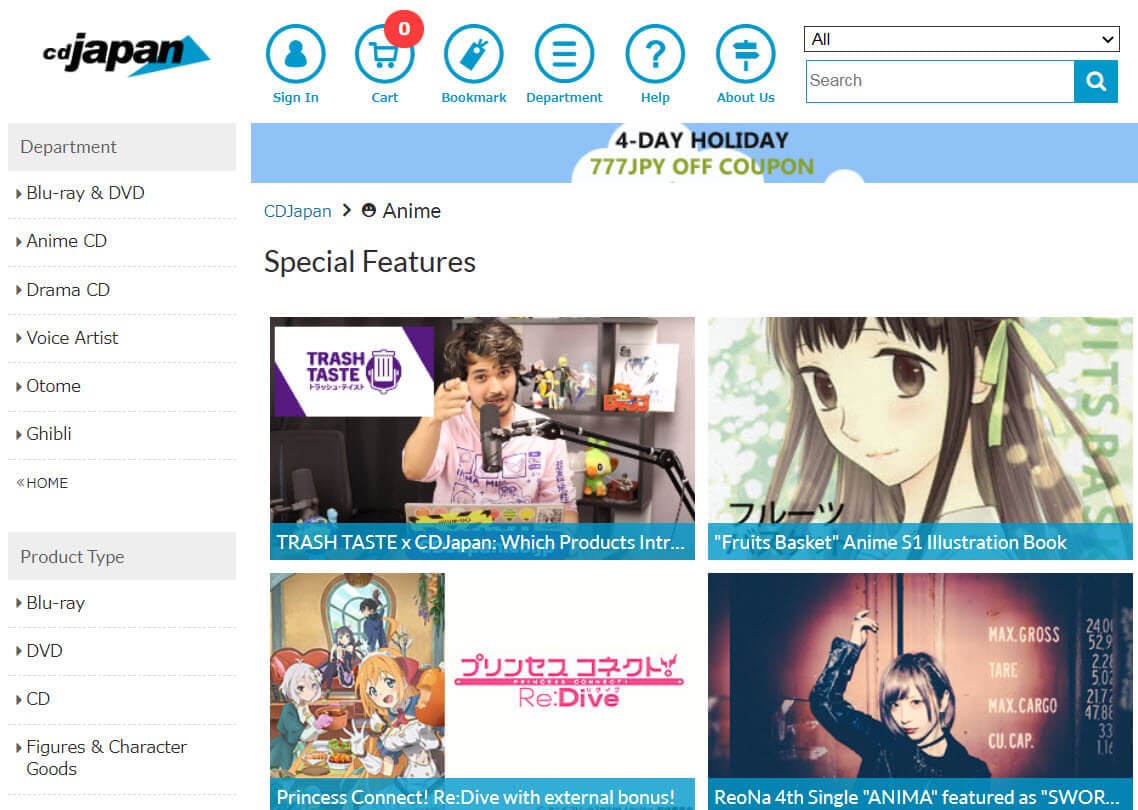
Most of the anime series available here are paid and you need to purchase them to watch.
10. AniSubs
This website is only dedicated to download anime subtitles and you can find a lot of subtitle files here absolutely free. You can simply click on the anime series name and click on the download button to directly open the file into Google Drive or download it as a file on your computer. This site has subtitles in multiple languages depending upon the type and genre of anime series.

The website is good however a lot of ads might confuse you to differentiate between ads and content.
Part 2: The Best Video Editor to Add Subtitles to an Anime Video
Filmora is a great tool with endless effects and different ways to express creativity. Loaded with a lot of filters, overlays, transitions, video stabilization, and a lot of other features to create an amazing video. In terms of Anime, there is a lot of wonderful animation tool that you can use to add transitions and subtitles to your anime video. And Filmora has timeline-based video editing that allows you to drag and drop everything on the timeline and export the file to your computer or directly upload it to your YouTube Channel.
Step by step guide to add subtitles with Wondershare Filmora:
Step 1: Download and install Wondershare Filmora on your computer. Filmora is compatible with both Windows and macOS. To learn more about Filmora, you can visit Wondershare Video Community . If you don’t have time to read the text, just watch the below videos.


Step 2: To start with the editing and adding subtitles, import your anime video file by clicking on Import to upload media files. Then drop and drag it to the timeline.
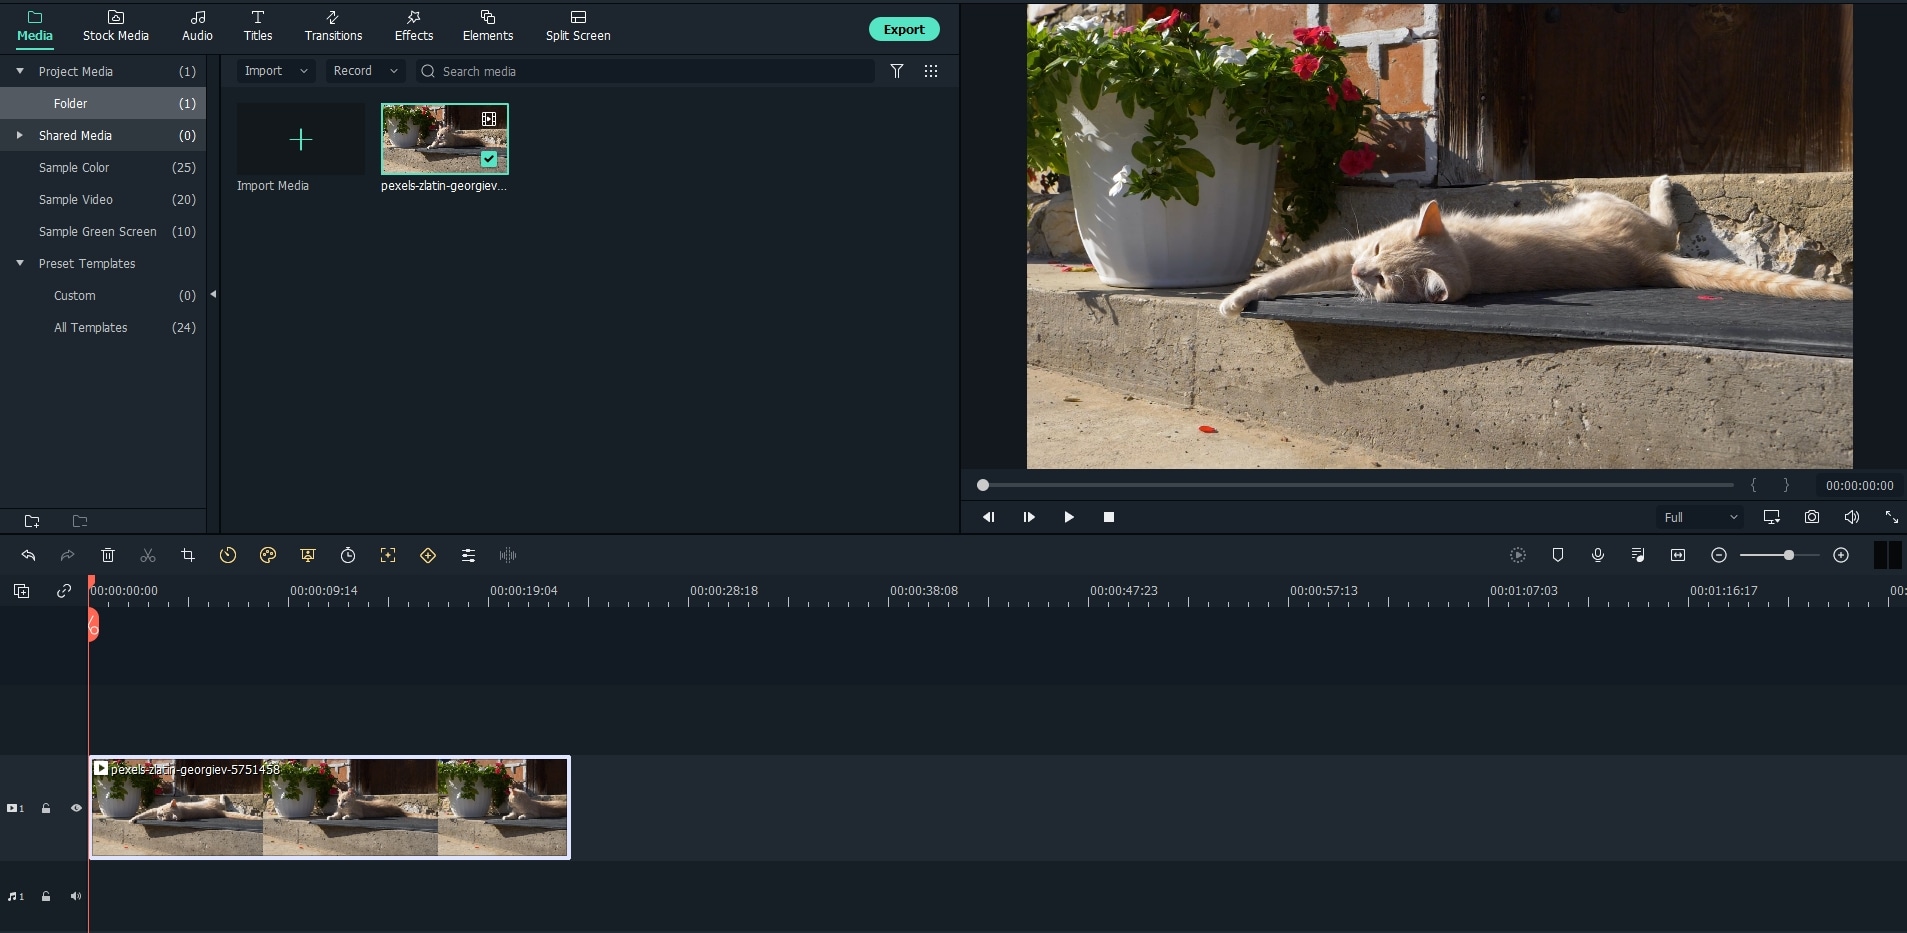
Step 3: Now, go to the Titles tab and select the template that you want to use on your video for subtitles. You can easily drag and drop your favorite template and start editing the text that you want to publish on your video. There are several text editing templates that you can use here.
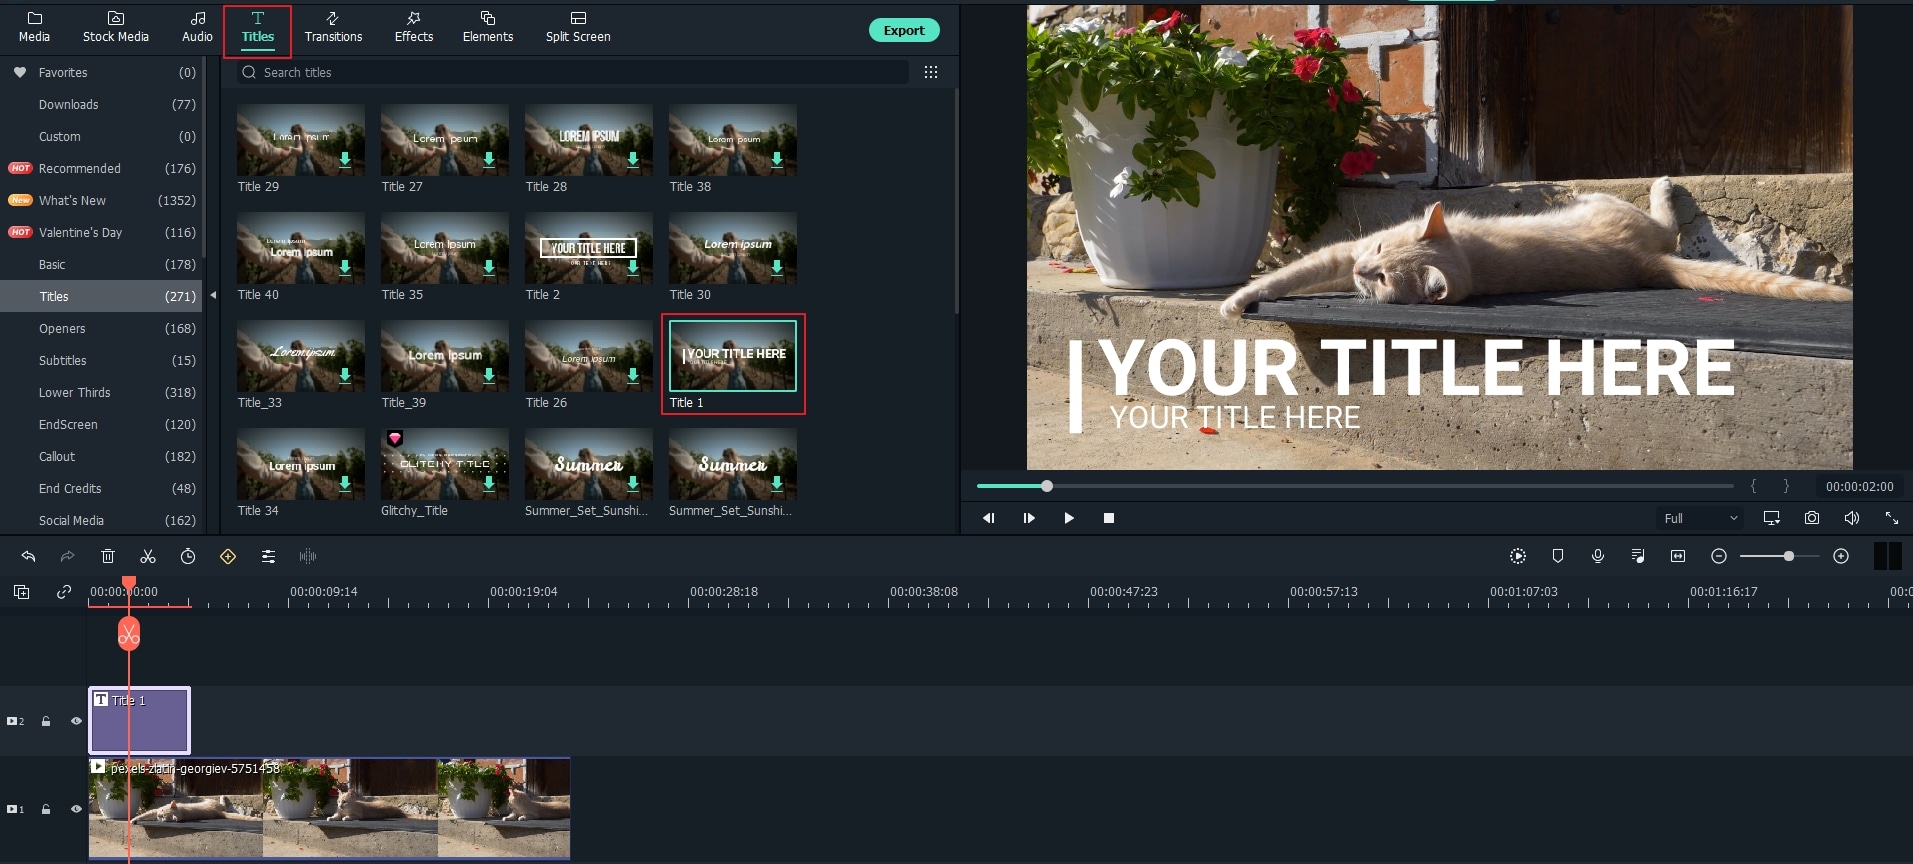
Step 4: If you want to add your own texts then double click on the Text on the timeline and input your text with colors, fonts, style, and animations.
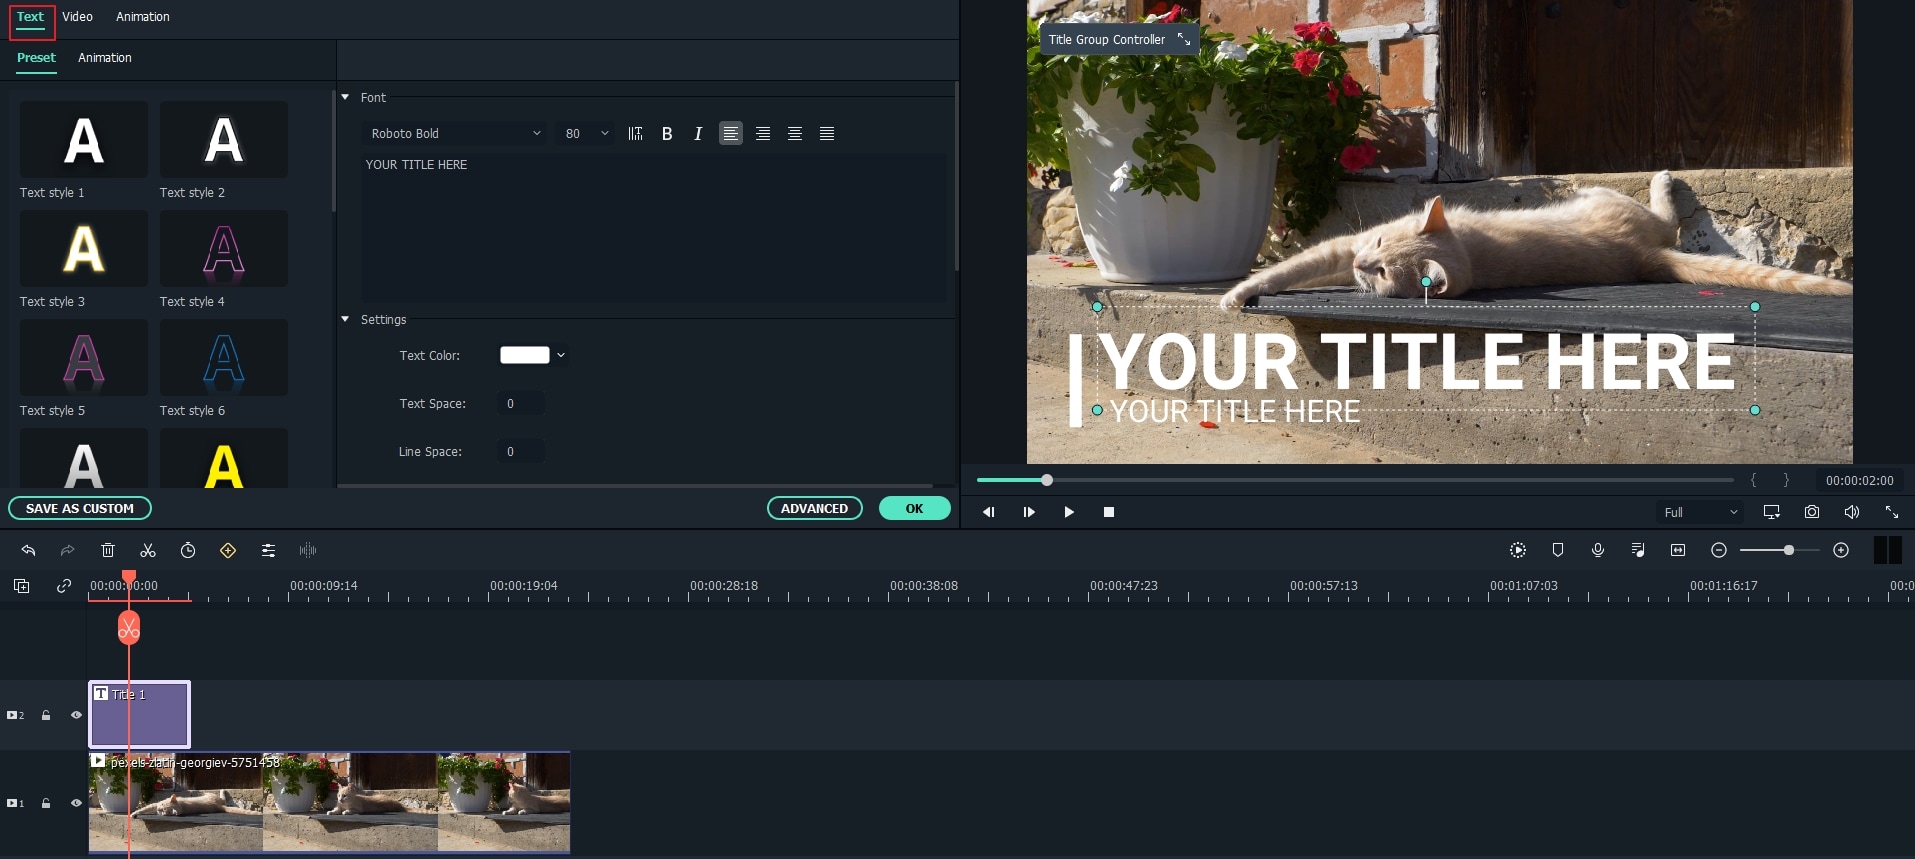
Step 5: To get more advanced results, you can use the Advanced button the timeline to enter the advanced editing tab, and here you can add animation, shadow, shapes, and borders to your text.
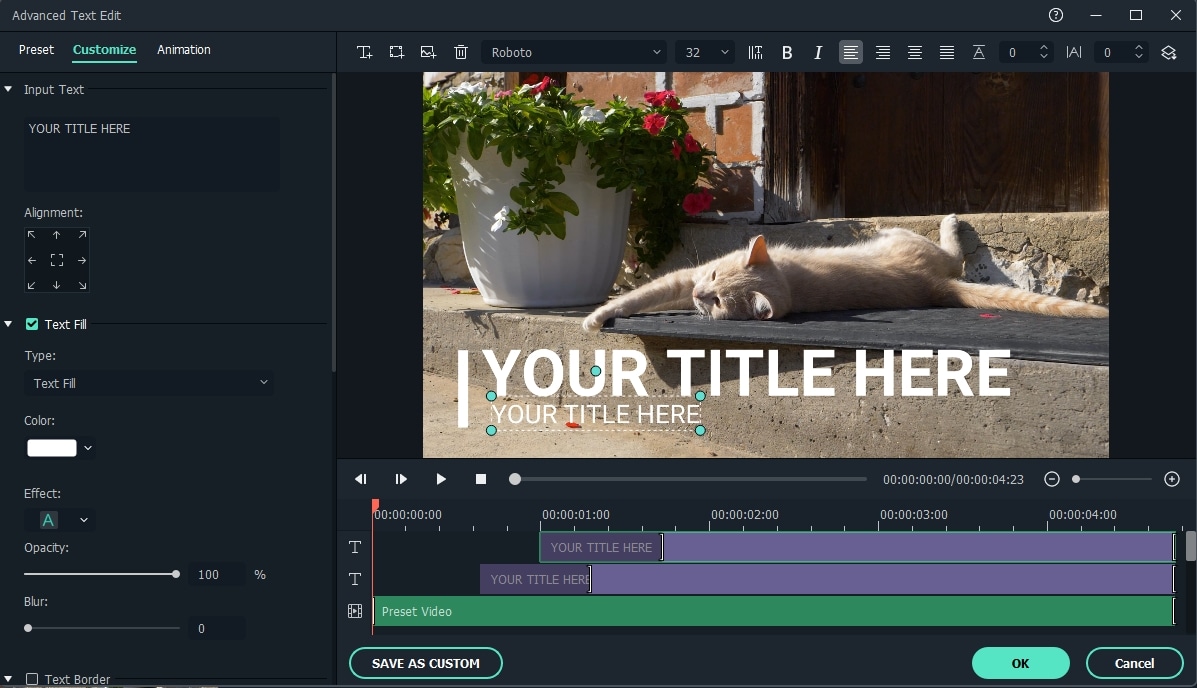
Step 6: Finally, when you are done, you can simply export the final version of your video clip in different available formats or you can directly upload your video to the YouTube channel.
So, using these simple steps you can create your texts and subtitles on the anime video clip.
Conclusion
Downloading anime subtitles is not an easy task but after reading this article you are in a position to use different websites to download anime subtitles. Anime subtitles are a must-have to understand the story if the anime is not in your native language. Also, if you are an anime enthusiast and want to edit an anime video in your style Wondershare Filmora is the best choice where you can use your skills and creativity to give a new shape to the anime video. All the creatives and features are available on Filmora that are powerful and capable of making any changes to an anime. Just drop a comment about the site you liked for subtitles and share this article with your friends who are anime lovers like you.
Shanoon Cox
Shanoon Cox is a writer and a lover of all things video.
Follow @Shanoon Cox
Shanoon Cox
Mar 27, 2024• Proven solutions
Subtitles are sometimes a distraction, but one cannot deny the fact that English anime subtitles are best for understanding a video properly in a different language. To watch your favorite Anime series, you would need to download anime subtitles. The idea behind anime subtitles is to not bind an anime series in a different language. In this article, you will learn about a few websites to download English as well as Japanese anime subtitles for free. When a dubbed version of your favorite anime series is not available you would simply need to put subtitles at work. Let’s dive into the article and find some exciting websites to download anime subtitles. You are going to learn:
- Part 1: Top10 Websites to Download Anime Subtitles
- Part 2: The Best Video Editor to Add Subtitles to an Anime
You may also like:
- Best Free Anime Streaming Sites to Download Anime
- Best Anime Series of All Time
- Top 4 Websites to Get Anime Footage for Free
Part 1: Top 10 Websites to Download Anime Subtitles
Here is a list of some amazing websites that have all the anime subtitles you can download at the moment. The best part about this guide is that it provides you with not only the anime English subtitles but also the entire anime series that you can download and watch.
- 1. OpenSubtitles
- 2. Kitsunekho
- 3. Subscene
- 4. SubDb
- 5. Addic7ed
- 6. Subtitles.hr
- 7. iSubtitles
- 8. Animetosho
- 9. CD Japan
- 10. AniSubs
1. OpenSubtitles
OpenSubtitles is one of the topmost subtitle websites where you can find all the latest as well old subtitles in multi-languages. The site is very normal in terms of the interface and looks like an old school website however the archives are huge. You can easily download anime subtitles from this website by clicking on the anime or series name and then click on the download option. It might ask you simple questions or to fill the captcha as a standard security check but that will be smooth.
The site is good, but sometimes the ads might annoy you a bit if you don’t like to surf a webpage with ads. And you need to become their VIP member to get rid of the annoying ads.
2. Kitsunekho
This is one of the best websites to download anime subtitles in different languages for free. The simple and easy interface lets you select from multiple options and series online. You can click on the series name and download the subtitle file in just a click. One can download subtitles in English, Japanese, Chinese and Korean language without going much deeper into finding the language options. All the subtitles are aggregated according to genre and language.
The interface of this website is super smooth, and there are no ads to annoy you.
3. Subscene
If you are looking for movies and anime at the same time so Subscene is a great website to download subtitles. One can easily download anime subtitles by searching their favorite series on the search bar and clicking on it to get the download options. Language is no bar on this website as almost all the languages are covered. The best part is that when you click on a series name your screen will get flooded with a lot of random subtitles in different languages.
Apart from some ads, the website is awesome.
4. SubDb
Subb is an open-source and free website with a huge database of subtitles. Being an open-source website, it’s a peer-to-peer network on which both the uploads and downloads are made by the user. This website has subtitles in different languages like English, Espanol, Italiano, Polski, and many more. You can only download the subtitles if you know how to run an API on your system.
The website is good but there is no search bar and a newbie with no tech knowledge cannot look for any file on this website.
5. Addic7ed
As the name suggests, you might get addicted to this site because of the multiple collections it has to download subtitles. You can download the subtitles on this website by clicking on the series name and there would be different subtitle files in many languages to download. There are many languages supported such as Japanese, English, Arabic, and many more to download subtitles.
The website has some good collections but the lack of search bar and too many irrelevant ads might irritate you.
6. Subtitles. hr
If you are looking for videos, software, and subtitles simultaneously, then Subtitles. hr is a great website where you can download subtitles in different languages. The concept of this website is also useful to the user where people upload the content and consume it. One can easily download the subtitles by clicking on the download button given on the website.
The website is good however the language icons are very small to recognize and it becomes difficult for a person to detect what exactly they are downloading.
7. iSubtitles
iSubtitles is a free website to download subtitles of your favorite anime series and movies. The website looks simple and has a search bar to put queries and get the result. Subtitles here are available in different languages from Arabic to Parsi and English to Japanese. Subtitle files are very easy to download as you only need to click on the anime series name and all the formats and languages available will be provided to you.
The website is good however there are a lot of ads to disturb you.
8. Animetosho
Animetosho is an old-school kind of website but the information here to vast to share. The website has a huge library of anime series, and you can download the entire anime series with all the subtitles on torrent/magnet. You can download the file and all the subtitle files are included in the same file.
There is a lot of information but it might look spammy to new users who are new to the internet industry.
9. CD Japan
This is a multi-niche website that covers content niches such as Music, Lifestyle, Anime, Apparel, and much more. The content on this website is more than huge and if you want to download anime subtitles then you might have to use the search bar or look for the anime tab on the menu. There is a lot of anime series in multiple languages available on this website.
Most of the anime series available here are paid and you need to purchase them to watch.
10. AniSubs
This website is only dedicated to download anime subtitles and you can find a lot of subtitle files here absolutely free. You can simply click on the anime series name and click on the download button to directly open the file into Google Drive or download it as a file on your computer. This site has subtitles in multiple languages depending upon the type and genre of anime series.
The website is good however a lot of ads might confuse you to differentiate between ads and content.
Part 2: The Best Video Editor to Add Subtitles to an Anime Video
Filmora is a great tool with endless effects and different ways to express creativity. Loaded with a lot of filters, overlays, transitions, video stabilization, and a lot of other features to create an amazing video. In terms of Anime, there is a lot of wonderful animation tool that you can use to add transitions and subtitles to your anime video. And Filmora has timeline-based video editing that allows you to drag and drop everything on the timeline and export the file to your computer or directly upload it to your YouTube Channel.
Step by step guide to add subtitles with Wondershare Filmora:
Step 1: Download and install Wondershare Filmora on your computer. Filmora is compatible with both Windows and macOS. To learn more about Filmora, you can visit Wondershare Video Community . If you don’t have time to read the text, just watch the below videos.
Step 2: To start with the editing and adding subtitles, import your anime video file by clicking on Import to upload media files. Then drop and drag it to the timeline.
Step 3: Now, go to the Titles tab and select the template that you want to use on your video for subtitles. You can easily drag and drop your favorite template and start editing the text that you want to publish on your video. There are several text editing templates that you can use here.
Step 4: If you want to add your own texts then double click on the Text on the timeline and input your text with colors, fonts, style, and animations.
Step 5: To get more advanced results, you can use the Advanced button the timeline to enter the advanced editing tab, and here you can add animation, shadow, shapes, and borders to your text.
Step 6: Finally, when you are done, you can simply export the final version of your video clip in different available formats or you can directly upload your video to the YouTube channel.
So, using these simple steps you can create your texts and subtitles on the anime video clip.
Conclusion
Downloading anime subtitles is not an easy task but after reading this article you are in a position to use different websites to download anime subtitles. Anime subtitles are a must-have to understand the story if the anime is not in your native language. Also, if you are an anime enthusiast and want to edit an anime video in your style Wondershare Filmora is the best choice where you can use your skills and creativity to give a new shape to the anime video. All the creatives and features are available on Filmora that are powerful and capable of making any changes to an anime. Just drop a comment about the site you liked for subtitles and share this article with your friends who are anime lovers like you.
Shanoon Cox
Shanoon Cox is a writer and a lover of all things video.
Follow @Shanoon Cox
Ways to Create Animated Clipart in PowerPoint
How To Create Animated Clipart in PowerPoint
An easy yet powerful editor
Numerous effects to choose from
Detailed tutorials provided by the official channel
Clipart is a special type of graphic art. There are pre-made images that are used to illustrate all sorts of things.

The use of animated clipart is increasing day by day. Here, we will discuss the steps of creating animated clipart for PowerPoint.
In this article
01 [What is Moving Clipart Called?](#Part 1)
02 [Where Can I Find Free Animated Clipart?](#Part 2)
03 [How Do You Add an Animated Clipart to a Slide?](#Part 3)
Part 1 What is Moving Clipart Called?
The moving clipart is basically called animated clipart or Animated Gifs. These are easy and quick ways to present contents that are dynamic, especially on Web pages. The sizes of these files are small compared to the other alternatives for creating dynamic content like Flash and Java. If you would like to learn more about video animation , you can watch this tutorial:
For Win 7 or later (64-bit)
For macOS 10.12 or later
These are several images that are encoded in GIF or Graphic interchange format. This contains a number of frames or images within a single file and can be described by the graphic control extension of its own.

Part 2 Where Can I Find Free Animated Clipart?
We all love to use different types of images to express ourselves. However, the process of finding out better quality, copyright > free and also high > resolution free images a really tough task. To make sure that you can find the right one for you, you can go through some really amazing image resources.
These image resources have a huge collection of CCO or Creative Commons licensed and high > quality pictures to meet your different types of needs. Also, keep in mind to check on to the page that is licensed before using any clipart or animated clip art for copyright infringement.
01 Upsplash

Unsplash is a special site that was launched in the year 2013. This site posts ten photos that are handpicked every ten days. These photos are free of charge. As categorized under CCO, this site offers high > quality resolution images that can add beauty as well as credibility to your work.
02 Pixabay

Pixabay was launched in the year 2016 and has 550,000 free illustrations, photos, and vectors. It is equipped with a search engine that is versatile and can easily customize and broaden the search. Thus, this can offer you accurate results regarding your searches.
If you wish to use high > quality public domain pictures or animated clip art, this site can be your perfect option.
03 Public Domain

This website known as Public Domain has a collection of various high > quality pictures, images, and vectors that you can easily use for your animated videos. Especially, vectors are available here in a big number.
04 Openclipart

Though there are many websites where you can get clip arts, very few of them can provide clip arts of excellent quality. This website known as Openclipart is a reliable source of 11,000 designed clip arts that you can easily use in your animation videos.
05 Bing

Bing is no doubt an extensive search engine that can work similarly to Google. Bing has a special filter that has a large number of superior quality public domain images, vectors, clip arts, and illustrations to amaze you.
06 Photopin

As Photopin has millions of free images, many bloggers prefer to use this for their blog posts. However, Photopin does not come under the CCO license. So, you can use their images but you need to add a link to their website.
07 Pond5 creative

Pond5 is the largest online marketplace of the world for royalty–free stock music has now released the creative common category for media with the target to make it easily accessible to their users.
This site offers not only some superior quality free images, but you can also find some special characters, effects, vectors, sounds, animated clip art, 3D models, and many more. You just have to use the filter showing “Public domain only” to get those free licensed images.
08 Clker.com

Clker is mainly used for clip arts. You can easily get numerous clip arts of different sizes without any charges. This is an amazing source of free graphics, vectors, illustrations, etc. Moreover, this site is also licensed under CCO.
Part 3 How Do You Add an Animated Clipart to a Slide?

You can easily add animated clip art or GIF into the Google slides, to make your creation more visually attractive. To do this task you can choose multiple methods, but the easiest of them is using a GIF URL.
Here is the complete process of how to add a GIF to Google slides using a URL.
01 How to add a GIF to Google Slides using a URL

Step 1Open Your Presentation
Firstly, you need to go to slides.google.com and then open your presentation, or you can also create a new one.
Step 2Choose GIF That You Want to Insert
Click the slide that you want to insert the GIF onto in the sidebar located on the left side.
Step 3Image
In the top toolbar, just select “Insert”, then the “Image” option. After that, select “By URL”.
Step 4Paste URL
Just paste the URL into that box.
Step 5Insert
After that, the GIF will pop up, at that time just click on “Insert”.
02 Can you animate objects in PowerPoint?

How to add animations to the pictures, shapes, texts in a PowerPoint presentation?
Step 1Select the Text
First of all, you have to select the text or object that you wish to animate.
Step 2Select “Animations”
Next, Select “Animations” and choose an animation.
Step 3Choose “Effect Options”
Just choose “Effect Options” and select an effect.
How to manage effects and animations?
● With Previous
You can play an animation simultaneously as the previous animation in you the sequence.
● After previous
You can start an animation right after the previous ones starts.
● On click
You can start an animation or move the animated clip art while you click a slide.
● Delay
You may add time before an effect starts to run.
● Duration
You can also shorten or lengthen an effect.
How to change the order of animations?
● Move the option you desire Later
You can make an animation happen later in the sequence.
● Move the option you desire earlier
You can make an animation appear earlier in the sequence.
How to add animation to the grouped objects?
● Step 1
You need to press “Ctrl” and select the objects you want.
● Step 2
Select “Format> Group> Group” to group those objects or texts.
● Step 3
Select “Animations” and choose an animation.
03 How to Add Animated Clipart in Powerpoint?

Here is the detailed process for you.
Step 1Choose a Clip art image
You need to select the desired image. You can either select an image from the default option in PowerPoint showing Office clipart or you can search for images online or insert your own collection of photos.
Step 2Select an animation effect
You have to go to the “Animation “ tab and click on the option that shows “Add Animation”. From that drop-down menu, you will get several animation effects to animate your static image and create your animated clipart for PowerPoint.
Step 3Choose among different effects
PowerPoint offers animation effects of different types, like motion paths, entrance effects, entrance effects and emphasis effects.
Step 4Bringing transition effects
After creating animated clipart, you can also choose a transition effect to offer a special look to your presentation. In this case, when the slide is revealed this transition effect can easily complement your animation.
04 How Do I Make an Animated Video in Powerpoint?
When you wish to create an animated video for PowerPoint, you can do this easily. The steps are:
Step 1Insert the video into a slide
Insert the video into a slide and then click on “Insert “and select the option “Video”.
Click on the video and align it to the right position and size. Open “Animation Pane”.
Step 2Create a speech bubble
It is not necessary to interrupt your video while inserting an animation. So, it’s important to create a speech bubble.
Click “Shapes” and choose between different arrows, shapes, flow charts, that you can insert into the video.
Step 3Select “Animation Pane”
Click on the speech bubble. Go to “Animations” and select “Animation Pane”.
The animations can be inserted from the “Entrance” area.
Step 4Choose “Inbox”
Click on the speech bubble and choose “Inbox” and then “Fly-In”. The effects will appear in the area of the animation.
By moving the animation on this you can select the time when the animation will appear in the video.
Step 5Play the video
Right-click on “Start With Previous” to allow the animation to start and move.
The speech bubble will appear in the video after just 30 seconds, so move the animation until 30 sec. If you wish to stop the video in just 30 sec, click on the video and add “Play”.
Step 6Move the animation
Click right and choose the “Start With Previous” option. Move the animation to 0 seconds. Add “Pause”.
Click on “Add Animation” and then “Pause”. Then click right and choose “Start With Previous Again”. Move the animation to 30 sec as you need to stop the video from there. You can change the length by inserting the animation “Pause” again.
Step 7Run the video
Click right and select “Start With Previous”. While the continuation of the video, if you want the speech bubble to disappear, click on the bubble and on “Add Animation” and then “Exit” and choose “Fly Out”.
Click right and choose “Start With Previous “again. Move the animation to 60 seconds, as the video will start to run there.
Clipart is a special type of graphic art. There are pre-made images that are used to illustrate all sorts of things.
The use of animated clipart is increasing day by day. Here, we will discuss the steps of creating animated clipart for PowerPoint.
In this article
01 [What is Moving Clipart Called?](#Part 1)
02 [Where Can I Find Free Animated Clipart?](#Part 2)
03 [How Do You Add an Animated Clipart to a Slide?](#Part 3)
Part 1 What is Moving Clipart Called?
The moving clipart is basically called animated clipart or Animated Gifs. These are easy and quick ways to present contents that are dynamic, especially on Web pages. The sizes of these files are small compared to the other alternatives for creating dynamic content like Flash and Java. If you would like to learn more about video animation , you can watch this tutorial:
For Win 7 or later (64-bit)
For macOS 10.12 or later
These are several images that are encoded in GIF or Graphic interchange format. This contains a number of frames or images within a single file and can be described by the graphic control extension of its own.
Part 2 Where Can I Find Free Animated Clipart?
We all love to use different types of images to express ourselves. However, the process of finding out better quality, copyright > free and also high > resolution free images a really tough task. To make sure that you can find the right one for you, you can go through some really amazing image resources.
These image resources have a huge collection of CCO or Creative Commons licensed and high > quality pictures to meet your different types of needs. Also, keep in mind to check on to the page that is licensed before using any clipart or animated clip art for copyright infringement.
01 Upsplash
Unsplash is a special site that was launched in the year 2013. This site posts ten photos that are handpicked every ten days. These photos are free of charge. As categorized under CCO, this site offers high > quality resolution images that can add beauty as well as credibility to your work.
02 Pixabay
Pixabay was launched in the year 2016 and has 550,000 free illustrations, photos, and vectors. It is equipped with a search engine that is versatile and can easily customize and broaden the search. Thus, this can offer you accurate results regarding your searches.
If you wish to use high > quality public domain pictures or animated clip art, this site can be your perfect option.
03 Public Domain
This website known as Public Domain has a collection of various high > quality pictures, images, and vectors that you can easily use for your animated videos. Especially, vectors are available here in a big number.
04 Openclipart
Though there are many websites where you can get clip arts, very few of them can provide clip arts of excellent quality. This website known as Openclipart is a reliable source of 11,000 designed clip arts that you can easily use in your animation videos.
05 Bing
Bing is no doubt an extensive search engine that can work similarly to Google. Bing has a special filter that has a large number of superior quality public domain images, vectors, clip arts, and illustrations to amaze you.
06 Photopin
As Photopin has millions of free images, many bloggers prefer to use this for their blog posts. However, Photopin does not come under the CCO license. So, you can use their images but you need to add a link to their website.
07 Pond5 creative
Pond5 is the largest online marketplace of the world for royalty–free stock music has now released the creative common category for media with the target to make it easily accessible to their users.
This site offers not only some superior quality free images, but you can also find some special characters, effects, vectors, sounds, animated clip art, 3D models, and many more. You just have to use the filter showing “Public domain only” to get those free licensed images.
08 Clker.com
Clker is mainly used for clip arts. You can easily get numerous clip arts of different sizes without any charges. This is an amazing source of free graphics, vectors, illustrations, etc. Moreover, this site is also licensed under CCO.
Part 3 How Do You Add an Animated Clipart to a Slide?
You can easily add animated clip art or GIF into the Google slides, to make your creation more visually attractive. To do this task you can choose multiple methods, but the easiest of them is using a GIF URL.
Here is the complete process of how to add a GIF to Google slides using a URL.
01 How to add a GIF to Google Slides using a URL
Step 1Open Your Presentation
Firstly, you need to go to slides.google.com and then open your presentation, or you can also create a new one.
Step 2Choose GIF That You Want to Insert
Click the slide that you want to insert the GIF onto in the sidebar located on the left side.
Step 3Image
In the top toolbar, just select “Insert”, then the “Image” option. After that, select “By URL”.
Step 4Paste URL
Just paste the URL into that box.
Step 5Insert
After that, the GIF will pop up, at that time just click on “Insert”.
02 Can you animate objects in PowerPoint?
How to add animations to the pictures, shapes, texts in a PowerPoint presentation?
Step 1Select the Text
First of all, you have to select the text or object that you wish to animate.
Step 2Select “Animations”
Next, Select “Animations” and choose an animation.
Step 3Choose “Effect Options”
Just choose “Effect Options” and select an effect.
How to manage effects and animations?
● With Previous
You can play an animation simultaneously as the previous animation in you the sequence.
● After previous
You can start an animation right after the previous ones starts.
● On click
You can start an animation or move the animated clip art while you click a slide.
● Delay
You may add time before an effect starts to run.
● Duration
You can also shorten or lengthen an effect.
How to change the order of animations?
● Move the option you desire Later
You can make an animation happen later in the sequence.
● Move the option you desire earlier
You can make an animation appear earlier in the sequence.
How to add animation to the grouped objects?
● Step 1
You need to press “Ctrl” and select the objects you want.
● Step 2
Select “Format> Group> Group” to group those objects or texts.
● Step 3
Select “Animations” and choose an animation.
03 How to Add Animated Clipart in Powerpoint?
Here is the detailed process for you.
Step 1Choose a Clip art image
You need to select the desired image. You can either select an image from the default option in PowerPoint showing Office clipart or you can search for images online or insert your own collection of photos.
Step 2Select an animation effect
You have to go to the “Animation “ tab and click on the option that shows “Add Animation”. From that drop-down menu, you will get several animation effects to animate your static image and create your animated clipart for PowerPoint.
Step 3Choose among different effects
PowerPoint offers animation effects of different types, like motion paths, entrance effects, entrance effects and emphasis effects.
Step 4Bringing transition effects
After creating animated clipart, you can also choose a transition effect to offer a special look to your presentation. In this case, when the slide is revealed this transition effect can easily complement your animation.
04 How Do I Make an Animated Video in Powerpoint?
When you wish to create an animated video for PowerPoint, you can do this easily. The steps are:
Step 1Insert the video into a slide
Insert the video into a slide and then click on “Insert “and select the option “Video”.
Click on the video and align it to the right position and size. Open “Animation Pane”.
Step 2Create a speech bubble
It is not necessary to interrupt your video while inserting an animation. So, it’s important to create a speech bubble.
Click “Shapes” and choose between different arrows, shapes, flow charts, that you can insert into the video.
Step 3Select “Animation Pane”
Click on the speech bubble. Go to “Animations” and select “Animation Pane”.
The animations can be inserted from the “Entrance” area.
Step 4Choose “Inbox”
Click on the speech bubble and choose “Inbox” and then “Fly-In”. The effects will appear in the area of the animation.
By moving the animation on this you can select the time when the animation will appear in the video.
Step 5Play the video
Right-click on “Start With Previous” to allow the animation to start and move.
The speech bubble will appear in the video after just 30 seconds, so move the animation until 30 sec. If you wish to stop the video in just 30 sec, click on the video and add “Play”.
Step 6Move the animation
Click right and choose the “Start With Previous” option. Move the animation to 0 seconds. Add “Pause”.
Click on “Add Animation” and then “Pause”. Then click right and choose “Start With Previous Again”. Move the animation to 30 sec as you need to stop the video from there. You can change the length by inserting the animation “Pause” again.
Step 7Run the video
Click right and select “Start With Previous”. While the continuation of the video, if you want the speech bubble to disappear, click on the bubble and on “Add Animation” and then “Exit” and choose “Fly Out”.
Click right and choose “Start With Previous “again. Move the animation to 60 seconds, as the video will start to run there.
Learn What Are Differences Between 2D And 3D Animation
What Are Differences Between 2D And 3D Animation
An easy yet powerful editor
Numerous effects to choose from
Detailed tutorials provided by the official channel
Creating an animation requires multiple processes and tasks to get that final result that we enjoy on the screen. Irrespective of the type of animations like stop-motion, sketch, computer, and others, all of them majorly falls under two main categories- 2D animation and 3D animation. The popular cartoons like Mickey Mouse, Tom & Jerry, and others that became an integral part of all childhood were 2D animations and with technological advancement and 3D animation in use, they are more like aged-veterans.
Toy Story was the first 3D animation movie and after that, there is no stopping. Though 3D animations are more interesting and engaging, they are fields where 2D animations work better. This article will help you to learn in detail about 2D 3D animation, their differences, uses, and other aspects.
In this article
01 [Definition of 2D Animation 3D Animation?](#Part 1)
02 [Key Differences Between 2D Animations and 3D Animations](#Part 2)
03 [Selecting Between 2D Animation and 3D Animation?](#Part 3)
04 [Merging 2D Animation and 3D Animation](#Part 4)
Part 1 Part Definition Of 2D And 3D Animation
012D Animation
The traditional method of animation is termed 2D animation and it has been in use for a long time. A 2D animated video has multiple images in different positions which when moved quickly one after the other simulates a movement. The flipping of the images creates an illusion of movement. Earlier 2D animations were created using hands but now there is advanced computer software that can create these animations in just a few simple clicks. The term 2D means 2 dimensional which means that an image for the animation can be moved in two-dimensional space that is X-axis and Y-axis.
023D Animation
In simplest terms, a 3D animation is an animation that is created in three-dimensional space which makes the characters and objects appear realistic and lively. Thus, a 3D animation has height, width as well as depth. These animations are more complex and the process of creating them is totally different from that of 2D animations. Though 3D animations are used in different industries and platforms these days, majorly they can be found for creating movies, games, and cartoons.
Part 2 Part Key Differences Between 2d Animations and 3d Animations
The major difference between a 2D animation and 3D animation lies in the final appearance. While a 2D animation appears like a flat animation which can be an image or a photograph at a fast movement while a 3D animation looks like real objects that can be seen from all angles and have their front, back, top, as well as the bottom.
The table below will differentiate both these animations on various parameters.
| Features/Type of Animation | 2D Animation | 3D Animation |
|---|---|---|
| Full-Form | Two-dimensional | Three-dimensional |
| Meaning | These animations with 2-dimensional objects appear to be moving when the images are moved at a fast speed. | The objects and characters in these animations look more realistic as their appear in 3-dimensional space. |
| Supported Aspects and axis | Length and height (X-axis and Y-axis) | Length, height, and width (X-axis, Y-axis and Z-axis) |
| Appearance | Appear as flat | Appear lively and realistic |
| Basic elements | It’s all about frames | The animation is all about movements |
| Axis | Images appear at X-axis, and Y axis | Objects appear at X-axis, Y-axis, and Z-axis. |
| Use and target audience | Used for social media sites, demos, animated whiteboard videos, and similar others. | Used for movies, cartoons, video games. |
| Use of software | Hand-drawn images or computer-generated images can be used. | Complex software is needed. |
| Cost | Cheaper than 3D animations | Expensive |
| Examples | Snow White, The Jungle Book, Mickey Mouse, Tom & Jerry, and more. | The Toy Story, Transformers, Incredibles, and more. |
Part 3 Selecting Between 2D Animation and 3D Animation?
Confused between 2D animation and 3D animation? Several factors can be considered to select between the two types of animations. Major ones are enlisted below.
● Target audience: For general explanation and use, 2D animations are a good choice as they are interesting, engaging, and also pocket-friendly. If the target audience is professional people that need in-depth and important information about something, 3D animations are a better choice.
● Availability of software: There are different software used for different types of animations. The availability of the software can also be a deciding factor for selecting between a 2D animation or 3D animation.
● Budget: This is another important factor to be considered. Since 3D animation requires more complex tools and procedures, creating them is expensive. So, depending on how much you are willing to spend, you can choose between the two.
Part 4 Part Merging 2D Animation and 3D Animation
Why choose one, when both can be used? Yes, to get the best of both worlds, 2D animations can be used along with 3D animations depending on the type of the project. Both the styles can be adjusted as per the requirements and for this, good professional software is needed.
We here suggest Wondershare Filmora Video Editor as the best tool as it not only comes equipped with all the latest features but the entire process is also quick and hassle-free. Majorly working as an excellent video editing software, the program supports multiple functions supporting animated videos. Using this Windows and Mac-based tool yon create dynamic animated videos and also edit them and customize them to suit your requirements.
For Win 7 or later (64-bit)
For macOS 10.12 or later
Key features of the software
● Create interesting and engaging animated and other videos using more than 100 media layers, composting tools, and dynamic effects.
● Apply motion elements, filters, and transitions for dynamic videos.
● Audio functions like background noise removal, audio equalizer, keyframe audio editing, and others are supported.
● Fast import, export, and rendering.
● Option to preview the files in high resolution.
● Features like fisheye correction, speed control, stabilization, advanced color correction, 3D LUTs, and others are supported.
● Additional supported functions include import from social media sites, portrait support, camera shake, audio-mixing, screen recording, auto-crop, and others.
● Windows and Mac support.
● Key Takeaways from This Episode →
● 2D and 3D animation are the two major types of animations created for different uses.
● A 2D animation appears in two-dimensional space while a 3D animation appears in a three-dimensional space and looks livelier and more realistic.
● Both 2D and 3D animations can be merged using professional software like Wondershare Filmora Video Editor that supports a wide range of other functions as well.
Animate Pictures in Canva
Versatile Video Editor - Wondershare Filmora
An easy yet powerful editor
Numerous effects to choose from
Detailed tutorials provided by the official channel
With the rapid rise of social media worldwide, animated posts (like GIFs) are becoming famous. They have become a replacement to other modes like JPEG and .Png
Famous designing tools like Canva introduced an animation feature in the light of its popularity. The feature allows you to step up your social media game and creates animated visuals in a blink! It is also efficient for both professional and amateur users.
Besides social media content, Canva is also useful to design birthday cards, event invites, inspirational quotes, and more! Let’s learn about how to animate pictures in Canva in detail.
In this article
01 What Canva Pictures Can Be Used For?
02 How to Animate Pictures in Canva?
03 Tips: Animate Pictures In Video
Part 1: What Canva Pictures Can Be Used For?
Be it for marketing campaigns or projects, Canva is the best tool for all designing work. It is a foolproof platform where you do not need prior designing experience. Canva is useful for

Social media/Instagram Posts: You can build your Instagram presence by creating posts through Canva. It has multiple templates and features to make alluring Instagram posts. It also has drag-and-drop free images to add customized designs to the template.
Facebook Covers: You can make Facebook covers on Canva by choosing a layout and adding other elements. You can include colors, fonts, and pictures on the cover. Canva has templates for all themes, moods, and styles!
Event Invites: Canva has hundreds of free layouts and libraries to create event invites. You can choose the appropriate template and incorporate party-oriented photos, icons, stickers, illustrations, and graphics. It also has a personalizing option to add personal pictures and artwork in the editor.
Inspirational Quotes: Canva allows you to curate inspirational quotes and dispense motivation in people. It has templates to modify the elements like font size, text size, borders, images, and more!
Collages: It helps create a collage where you can combine multiple pictures in one frame. Canva offers various grids with a capacity of 12 pictures and different sizes.
Part 2: How to Animate Pictures in Canva?
Canva helps you add instant animation in presentations, social media posts, and more. To know how to animate images in Canva, follow the below steps:

Step 1: Add Static Elements
Start by creating an image through static elements. To make the design attractive, you can add sample texts, illustrations, doodles, and other entities.
Try to stimulate your creativity and come up with a layout beforehand. If possible, sketch on paper and replicate the same.
Step 2: Animate Your Design
Take a final glance at the layout. Make sure it’s perfect. Once all the elements are placed as per your design, it’s time to animate them. For that:
- Click on the white background page
- Go to the “Toolbar” section
- Select the “Animate” button
Step 3: Select Page Animation Style
Canva offers six animation styles, where five are for free users, and one is for pro users. To access the five animation styles, follow these steps.
- Press the “Animate” Button
- Select “Page Animations”
- There you will find options like Block, Pan, Fade, Rise, and Tumble
- Select the style as per your design
Step 4: Preview and Download
After selecting a page animation style, it will preview the effect. If you find it good, move on to downloading the GIF. Here’s how to do so
- Go to the “Toolbar” option (present on your upper right hand)
- Choose GIF as the file type
- Check the page number and verify if it’s correct
- Press the “Done” button
Step 5: Final GIF
After clicking on the “Done” button, your GIF will be downloaded. You will be able to see a display for five seconds. If you want to edit the image after this, click on the time button (near the “Animate” button).
So, that was all about how to animate a photo in Canva.
Drawbacks of Canva
Despite efficient features and easy interface, there are certain areas where Canva lacks. This includes
- It does not have any local file storage.
- As too many people use Canva, your template may look the same as others.
- Some of its best features are not free to access.
- The mobile app version lacks certain elements and features.
Out of all these drawbacks, repetitions of templates are a big issue. That’s because everyone wants their posts to look unique and irreplaceable. However, common Canva templates may prevent that from happening.
Fortunately, there are ways to combat such issues. Let’s learn about them in the next section.
Tips: Animate Pictures In Video
You can also animate pictures in the video to make them more lively. For that, you can use Wondershare Filmora Pro Video Editor. It’s also efficient if you don’t know how to animate a picture in Canva:
Wondershare Filmora Video Editor
Filmora by Wondershare is a video editing software that helps you build custom animations easily. It has auto features to make epic stories and posts.
Wondershare Filmora
Get started easily with Filmora’s powerful performance, intuitive interface, and countless effects!
Try It Free Try It Free Try It Free Learn More about Filmora>
Its drag and drop effect makes designing simple and quick. Due to its outstanding attributes, options, and styles, Filmora has 77+ million happy users!
It’s a power-packed integration of functionality, performance, and more! In fact, it resolves the repeated template issue of Canva. The software has top-notch functions and innovative filters that add authenticity to the designs.
Till now, you learned about how to animate a picture on Canva. Now, let’s comprehend the right way to use Filmora for animating and adding images in the video.
Before using, make sure to update the software to its latest version. Follow separate methods for both Windows and Mac.
For Win
Step 1: Adding Image to Video Track
With Filmora, adding images to video is a matter of seconds! Start by:
- Identify the position where you want to add the image and place the Playhead there.
- Right-click on the picture from the media library. Click on the “Insert” option. Your image will be added. Select the “Append” option, if you want to add an image at the video end.

Note: How to Remove Black Bars around the Image?
- Go to “Settings” from the File section.
- Click on the “Editing” tab and select “Photo Placement.”
- Choose from the “Crop to Fit” or “Pan To Zoom” option. The black bars will be removed.
To add the image in between the video clip, split them. Now, add the image between the split parts.
Step 2: Add Images as Overlays
To add images as overlays, drag the image to a video track above the main track. The main track consists of your video.
Track 1 (or the track with a video clip) is the base of your video. If you add anything else, it will be displayed above this track as video track 2, 3, and so on. Overall, you can add 100 video tracks.
Step 3: Edit Your Image
If you know how to animate an image in Canva, editing images on Filmora is even easier. You can try the following methods:
Animate Your Images
- To add animation presets to the image, click on the image twice.
- Go to the “Animation Tab” and look for an animation preset.
- Drag the presets to the image for its effect

Make Image Color Adjustments
- Double-click on the image
- Go to the “Color” tab and then the “Color” section
- Customize the temperature, saturation, brightness, etc., as per your need.
- Press Ok.
Change Image Duration
You can increase the image duration to more than the default timing of 5 seconds. For that:
- Click on the image and select the “Duration” option.
- Go to the “Duration Setting” panel.
- Add the new duration timing.

Adjust Position, Rotate/Flip, and Opacity
- You can resize the image position through the circles and squares at the image edges.
- To flip or rotate the image, double-click on the picture. From the “Image Panel,” go to “Transform” and then click on “Rotate.” You can choose either “Horizontal Flip” or “Vertical Flip” to flip the images.
- Double-click on the image and click on the “Composting” option to add opacity. You can choose the blending mode or adjust the “Opacity” accordingly.

For Mac
Filmora for Mac comes with a drag and drop feature to add transitions, animated titles, and effects. You can start a new project from scratch by clicking on “New Project”. The entire process is the same as that for Windows users.
To apply animation in the images, use the motion effects option. For that,
- Click on the Image
- Go to Motion Tab
- Select a motion effect
- Double-click to apply the effect

Conclusion
So that’s how to animate photos in Canva. Hopefully, our steps will help you revamp your posts like a pro! If not Canva, you can use its alternative Filmora. It’s equally prominent, user-friendly, and feature-rich.
Versatile Video Editor - Wondershare Filmora
An easy yet powerful editor
Numerous effects to choose from
Detailed tutorials provided by the official channel
With the rapid rise of social media worldwide, animated posts (like GIFs) are becoming famous. They have become a replacement to other modes like JPEG and .Png
Famous designing tools like Canva introduced an animation feature in the light of its popularity. The feature allows you to step up your social media game and creates animated visuals in a blink! It is also efficient for both professional and amateur users.
Besides social media content, Canva is also useful to design birthday cards, event invites, inspirational quotes, and more! Let’s learn about how to animate pictures in Canva in detail.
In this article
01 What Canva Pictures Can Be Used For?
02 How to Animate Pictures in Canva?
03 Tips: Animate Pictures In Video
Part 1: What Canva Pictures Can Be Used For?
Be it for marketing campaigns or projects, Canva is the best tool for all designing work. It is a foolproof platform where you do not need prior designing experience. Canva is useful for
Social media/Instagram Posts: You can build your Instagram presence by creating posts through Canva. It has multiple templates and features to make alluring Instagram posts. It also has drag-and-drop free images to add customized designs to the template.
Facebook Covers: You can make Facebook covers on Canva by choosing a layout and adding other elements. You can include colors, fonts, and pictures on the cover. Canva has templates for all themes, moods, and styles!
Event Invites: Canva has hundreds of free layouts and libraries to create event invites. You can choose the appropriate template and incorporate party-oriented photos, icons, stickers, illustrations, and graphics. It also has a personalizing option to add personal pictures and artwork in the editor.
Inspirational Quotes: Canva allows you to curate inspirational quotes and dispense motivation in people. It has templates to modify the elements like font size, text size, borders, images, and more!
Collages: It helps create a collage where you can combine multiple pictures in one frame. Canva offers various grids with a capacity of 12 pictures and different sizes.
Part 2: How to Animate Pictures in Canva?
Canva helps you add instant animation in presentations, social media posts, and more. To know how to animate images in Canva, follow the below steps:
Step 1: Add Static Elements
Start by creating an image through static elements. To make the design attractive, you can add sample texts, illustrations, doodles, and other entities.
Try to stimulate your creativity and come up with a layout beforehand. If possible, sketch on paper and replicate the same.
Step 2: Animate Your Design
Take a final glance at the layout. Make sure it’s perfect. Once all the elements are placed as per your design, it’s time to animate them. For that:
- Click on the white background page
- Go to the “Toolbar” section
- Select the “Animate” button
Step 3: Select Page Animation Style
Canva offers six animation styles, where five are for free users, and one is for pro users. To access the five animation styles, follow these steps.
- Press the “Animate” Button
- Select “Page Animations”
- There you will find options like Block, Pan, Fade, Rise, and Tumble
- Select the style as per your design
Step 4: Preview and Download
After selecting a page animation style, it will preview the effect. If you find it good, move on to downloading the GIF. Here’s how to do so
- Go to the “Toolbar” option (present on your upper right hand)
- Choose GIF as the file type
- Check the page number and verify if it’s correct
- Press the “Done” button
Step 5: Final GIF
After clicking on the “Done” button, your GIF will be downloaded. You will be able to see a display for five seconds. If you want to edit the image after this, click on the time button (near the “Animate” button).
So, that was all about how to animate a photo in Canva.
Drawbacks of Canva
Despite efficient features and easy interface, there are certain areas where Canva lacks. This includes
- It does not have any local file storage.
- As too many people use Canva, your template may look the same as others.
- Some of its best features are not free to access.
- The mobile app version lacks certain elements and features.
Out of all these drawbacks, repetitions of templates are a big issue. That’s because everyone wants their posts to look unique and irreplaceable. However, common Canva templates may prevent that from happening.
Fortunately, there are ways to combat such issues. Let’s learn about them in the next section.
Tips: Animate Pictures In Video
You can also animate pictures in the video to make them more lively. For that, you can use Wondershare Filmora Pro Video Editor. It’s also efficient if you don’t know how to animate a picture in Canva:
Wondershare Filmora Video Editor
Filmora by Wondershare is a video editing software that helps you build custom animations easily. It has auto features to make epic stories and posts.
Wondershare Filmora
Get started easily with Filmora’s powerful performance, intuitive interface, and countless effects!
Try It Free Try It Free Try It Free Learn More about Filmora>
Its drag and drop effect makes designing simple and quick. Due to its outstanding attributes, options, and styles, Filmora has 77+ million happy users!
It’s a power-packed integration of functionality, performance, and more! In fact, it resolves the repeated template issue of Canva. The software has top-notch functions and innovative filters that add authenticity to the designs.
Till now, you learned about how to animate a picture on Canva. Now, let’s comprehend the right way to use Filmora for animating and adding images in the video.
Before using, make sure to update the software to its latest version. Follow separate methods for both Windows and Mac.
For Win
Step 1: Adding Image to Video Track
With Filmora, adding images to video is a matter of seconds! Start by:
- Identify the position where you want to add the image and place the Playhead there.
- Right-click on the picture from the media library. Click on the “Insert” option. Your image will be added. Select the “Append” option, if you want to add an image at the video end.
Note: How to Remove Black Bars around the Image?
- Go to “Settings” from the File section.
- Click on the “Editing” tab and select “Photo Placement.”
- Choose from the “Crop to Fit” or “Pan To Zoom” option. The black bars will be removed.
To add the image in between the video clip, split them. Now, add the image between the split parts.
Step 2: Add Images as Overlays
To add images as overlays, drag the image to a video track above the main track. The main track consists of your video.
Track 1 (or the track with a video clip) is the base of your video. If you add anything else, it will be displayed above this track as video track 2, 3, and so on. Overall, you can add 100 video tracks.
Step 3: Edit Your Image
If you know how to animate an image in Canva, editing images on Filmora is even easier. You can try the following methods:
Animate Your Images
- To add animation presets to the image, click on the image twice.
- Go to the “Animation Tab” and look for an animation preset.
- Drag the presets to the image for its effect
Make Image Color Adjustments
- Double-click on the image
- Go to the “Color” tab and then the “Color” section
- Customize the temperature, saturation, brightness, etc., as per your need.
- Press Ok.
Change Image Duration
You can increase the image duration to more than the default timing of 5 seconds. For that:
- Click on the image and select the “Duration” option.
- Go to the “Duration Setting” panel.
- Add the new duration timing.
Adjust Position, Rotate/Flip, and Opacity
- You can resize the image position through the circles and squares at the image edges.
- To flip or rotate the image, double-click on the picture. From the “Image Panel,” go to “Transform” and then click on “Rotate.” You can choose either “Horizontal Flip” or “Vertical Flip” to flip the images.
- Double-click on the image and click on the “Composting” option to add opacity. You can choose the blending mode or adjust the “Opacity” accordingly.
For Mac
Filmora for Mac comes with a drag and drop feature to add transitions, animated titles, and effects. You can start a new project from scratch by clicking on “New Project”. The entire process is the same as that for Windows users.
To apply animation in the images, use the motion effects option. For that,
- Click on the Image
- Go to Motion Tab
- Select a motion effect
- Double-click to apply the effect
Conclusion
So that’s how to animate photos in Canva. Hopefully, our steps will help you revamp your posts like a pro! If not Canva, you can use its alternative Filmora. It’s equally prominent, user-friendly, and feature-rich.
Versatile Video Editor - Wondershare Filmora
An easy yet powerful editor
Numerous effects to choose from
Detailed tutorials provided by the official channel
The Top Free 12 GIF Meme Maker at a Glance
The Best Free 12 GIF Meme Maker at a Glance
An easy yet powerful editor
Numerous effects to choose from
Detailed tutorials provided by the official channel
Do you want to make a meme out of a photo? You can do so with the aid of GIF meme maker, which provides an extensive range of templates, including popular ones and meme fonts and a dedicated interface. Let’s look at some of the excellent meme GIF generators for Android, iPhone, online tools, and desktop computers.
In this article
01 [What Is the Meme GIF Maker?](#Part 1)
02 [How Do You Make a GIF Meme on iPhone?](#Part 2)
03 [12 Meme Generators to Create Your Memes](#Part 3)
Part 1 What Is the Meme GIF Maker?
GIF meme maker allows users to make GIFs from the ground up by collecting or submitting videos or photographs. These GIF caption meme-makers enable users to add different creative effects like emojis, photos, text, filters, and backdrops for added customization. They can also export files, and some of them integrate directly with social networking networks to make uploading more convenient.
Each tool here has its own set of features, so read the entire article before determining which GIF meme generator is ideal for your personal or professional needs.
Part 2 How Do You Make a GIF Meme on iPhone?
Make a unique GIF meme on your iPhone following these few steps:
Step 1: Download and install a GIF maker
On your iPhone, install the GIF meme maker. Not only can you use this meme GIF generator to locate animated GIFs, but you can also use it to make your GIF memes from the start. Go to the Apple store, type GIF maker of your choice into the search field. Now select Get or Install from the drop-down menu.

Step 2: Create an account.
Create an account or log in. Fill in the text boxes with your email address, username, and password. Then press the Sign Up button.
Tap Log In, enter your email address with password if you already have an account.

Step 3: Select a photo or video to use for your GIF
Now it’s your turn to get inventive: Simply tap any of the effects tiles at the bottom of the screen to Construct a meme of a stupid selfie or photo with effects, then swipe left/right to navigate between effects. Press and hold the Shutter option to start a movie, or tap once to snap a shot.
p Create. This is locatedht corner.[1]

Step 4: Add text to meme
Put your meme text here. It’s critical to add your content to the meme because that’s what makes it a meme! To access the text tool, tap the Aa icon and type some text for the meme. Tap Done when you’re finished.
Resize and move your text. After you’ve tapped “Done” and are happy with your text, you can tap, hold, and drag it about your GIF. To alter the size, pinch two fingers together.


Step 5: Save and share
When you complete, tap the purple arrow. Tap this button in the bottom right corner once you’re happy with your meme GIF.
Select the Share GIF from the drop-down menu. If you wish to save the GIF to your camera roll, tap Save GIF.


Part 3 Meme Generators to Create Your Memes
Here are 12 meme generators that you can try out
01IMGFlip (Web)

Features:
• It has many meme templates
• You can easily build memes with your photographs.
• You can make changes to your memes
• It includes over 1000 meme templates.
• Allows you to find the meme template you want quickly.
Pros
• Many templates
• Fonts that you can customize.
• Memes on video
Cons
• Adds a watermark to the image
To make a meme with IMGFlip, follow these steps:
Step 1: Begin by making something.
Go to the website and click the “Create” button to get started. From the menu, select “Make a meme.”
Step 2: Pick a design template
To select the proper template for your meme, use the Search box. Alternatively, you can add your image to the app by clicking “Upload new template.”
Step 3: Insert text
Fill in the blanks with the meme text.
Next, click the options toggle to change the text next to each field. Save the image.
02DrMemes (Web)

Features
• You can easily produce memes for free.
• Create memes without a watermark.
• Change fonts easily
• Add emojis and stickers easily to memes.
• You can turn your photos into a GIF meme.
Pros
• User-friendly interface
• Personalization of fonts
• There is no watermark.
Cons
• A smaller number of templates
Follow these simple steps to make a meme using this website:
Step 1: Select a template
Open drmemes.com and select “Choose meme template” or “Upload picture,” depending on how you want to Construct a meme.
Step 2: Type in your text
Add Text from the side boxes. To change the font, use the settings toggle.
03ILoveIMG (Web)

Features
• Provides a variety of templates
• Allows you to alter the size and style of the font
• It generates memes that are free of watermarks.
• You may also choose whether you want the text to be forced into the image.
Pros
• An extensive library of free templates
• There is no watermark.
• Simple to use
• Can compress, resize, crop, and perform other image-editing activities.
Cons
• You can’t change the font.
Follow these steps to make memes using ILoveIMG:
Step 1: Go to the website.
In a browser, go to the website.
Step 2: Pick a design template
“Select meme template” or “Upload image” are the options.
Step 3: Type in your text
Fill in the blanks with your text.
04Meme Generator (Android/iOS)

Features:
● Over 500 high-quality memes and caption examples included.
● You can change size and color.
● There are a variety of fonts to pick from.
● Use the search or filter options to discover the memes you’re looking for quickly.
● There are no watermarks.
Pros
• Many templates
• Crop, rotate and flip images
• Personalize it with a custom image, font style, and sticker.
image
• There is no watermark.
Cons
• Lots of ads
Follow these simple steps to create a meme using the Meme Generator
Step 1: Add Image
Tap “Custom meme Gallery” to add an image from the gallery or select a meme template in the app.
Step 2: Crop Meme
Using the choices at the top of the app, you can crop the meme or rotate/flip the images.
Step 3: Customize font and Save
Change the font style, color, and alignment by tapping on it. You can also decorate it with a sticker.
When done, tap on “Save” to download the meme or hit “Share” to send it to social media apps.
05Meme Creator (Android)

Features
● A large collection of stock pictures and memes
● Add your quotes to the close captions.
● You can add your watermark.
● There are some fantastic stickers available.
● Simple to use
Pros
● No watermark
● Meme categories
● Custom fonts
Cons
● Occasional ads
Here is a simple step guide:
Step 1: Add Image
The program begins with a gallery of meme template categories, including animals, celebrities, cartoons, and more.
To add your original image, tap on one of these templates or hit the “Gallery” icon at the top.
Step 2: Change font size
Fill in the “Top” and “Bottom” text areas with the meme content. Using the options icon next to the text, change the font style.
Step 3: Save and Share
Use the “Save” or “Share” button at the bottom to download or send memes.
06Video & GIF Memes (Android)

Features
● It enables you to make memes from movies, GIFs and photos.
● No watermarks
● Easy to use
● Compatible on device
● Several stickers for users to leverage on
Pros
● There is no watermark.
● Tenor GIF database access
● You can video cut.
Cons
● Too many ads
There are no image memes.
Here are a few steps to follow:
Step 1: Select file
To begin, open the app and select the source file type.
Step 2: Customize text
When asked, trim the video, and add customizable meme text.
Save the video or GIF joke after changing video characteristics such as frame rate, speed, and quality.
07GIF Maker – Meme GIF Creator (iOS)

Features:
● Make as many GIFs as you like from your videos.
● Make an unlimited number of GIFs from your photos.
● Make an infinite number of memes.
● Filters, Stickers, and Fonts of the highest quality.
● Easy to use
Pros
● There is no watermark.
● User-friendly interphase.
● There are some fantastic stickers available.
Cons
● As others, ads.
Follow these simple steps to make use of this amazing tool:
Step 1: Choose the desired video
After running the app, select “Video to GIF” from the menu and select your video.
If necessary, trim it.
Step 2: Add text
To add amusing meme text to your video, tap “Add text.”
Step 3: Download and Share
To download the video or share it directly with social networking apps, click the Share icon.
08Memeto – Meme Maker & Creator (iOS)

Features:
● Create memes with your picture templates, blank memes, and popular templates.
● Customize options available
● Several different meme text styles to choose from.
● 1000+ stickers.
● Choose your photo from your Photo Gallery to be used as background
Pros
● There is no watermark.
● Various types of memes
Cons
● It lacks a search function.
Step 1: Choose a template
Select a meme template in the app, select the meme, and then hit the “Text” option to add and style meme text.
Step 2: Save and Share
Tap the Share button when you finish to save it to your device.
09Meme Generator Suite (Windows)

Features:
● Thousands of memes are available online
● Make memes out of your photos.
● Make posters with the phrase “KEEP CALM” and Jo Baka memes.
● You can move text, resized, and colored.
● There’s also an Offline Collection with over 300 memes that’s always ready to go!
Pros
• Many memes
• Effective search
• Collection in the offline mode
• There is no watermark.
Cons
• Advertisements
Follow these simple are guide:
Step 1: Select template or photo
Start using a pre-loaded meme template from the app or upload your image by selecting “From gallery.”
Step 2: Download and Save
Change the text settings and click the Save icon to download the image.
You can also immediately submit the image to IMGur or social networking apps.
10Meme Generator

Features:
● Get over 500 high-quality memes and caption examples.
● Size and color are changeable.
● There are a variety of fonts to pick from.
● Search or filter options to discover the memes you’re looking for.
● There are no watermarks.
Pros
• Examples of memes
• There is no watermark.
Cons
• Cannot share straight to social networking apps
Step 1: Click on Meme
To begin editing a meme, click on it.
Step 2: Change font
Change the font color and style of the meme text on the meme editing screen.
1111. Deal With It - GIF Maker

Features :
● This online GIF creator is simple to use.
● No third-party software is required to use this GIF maker.
● This website will complete the GIF conversion promptly.
● This GIF generator website is beneficial to new users.
Pros
● The website’s design is simplistic, making this GIF banner maker too simple to manage and utilize.
● It also intensifies the GIF maker, significantly improving the overall effect of the GIF in question.
Cons
● Because the pace of GIF makers is too slow, users sometimes opt to download installable GIF makers.
● GIF makers cannot create animated GIFs, so it is impossible to utilize this tool.
How to Use this Online GIF Maker
Visit the GIF maker’s official homepage.
Step 1: Choose an image
Because it can also be helpful to create GIFs from photos, you may use the Load Image option to upload an image from your computer.
Step 2: Editing
After that, you may add a phrase and glasses to the loaded image.
12LunaPic

Features:
● This online animated GIF creator has a very user-friendly design.
● No other third-party programs are required to use this online animated GIF creator.
● This website can also be valuable to creating GIF banners.
● You may create animated GIFs from several photographs with this website.
Pros
● With the aid of this program, the user can experience the GIF maker mobile feature; hence it is highly recommended.
● Because the tool is so simple, this banner GIF maker gets the job done in style and according to the user’s specifications.
Cons
● Like the GIF icon maker, this application lacks critical features like speed and accuracy necessary for GIF creation.
● Because this program can’t edit GIFs, it doesn’t have any of the GIF edit maker’s features.
How to use LunaPic
Step 1: Upload Image
To get started, go to LunaPic’s official website. To submit photographs from your computer to this online animated GIF maker, click the Upload button.
Step 2: Enhance the image
With this online GIF creator, you can now alter the images.
Step 3: Save the animated GIF
To save the produced GIF, select GIF as the output and click the Save button at the bottom.
Creating your animated GIF from any video or photo is a fascinating and entertaining undertaking. A video scene can be brutal to manage to owe to its vast size, but GIF forms are ideal for profile posts and sharing with friends in the form of simple jokes.
If you want to generate a GIF online, though, Wondershare Filmora Video Editor ‘s online meme maker is the best option. It allows you to create a watermark-free picture, GIF, and video memes. It is entirely free to use and requires no registration. When creating a caption, you can edit the text size, color, and position to make a caption while you are editing. You can also add text inside or outside in GIF. Just with some clicks, your GIF will be complete. Try it now!

Wondershare Filmora - Best Video Editor for Mac/Windows
5,481,435 people have downloaded it.
Build unique custom animations without breaking a sweat.
Focus on creating epic stories and leave the details to Filmora’s auto features.
Start a creative adventure with drag & drop effects and endless possibilities.
Filmora simplifies advanced features to save you time and effort.
Filmora cuts out repetition so you can move on to your next creative breakthrough.
● Key Takeaways from This Episode →
● Now that you know about the 12 best GIF meme generators and how to use them to make a unique and customized GIF with the simple step guide, you can now try your hands on new things.
● However, Wondershare Filmora is your sure best GIF caption meme maker to help you achieve excellent results as a GIF meme creator. So go for it!
Do you want to make a meme out of a photo? You can do so with the aid of GIF meme maker, which provides an extensive range of templates, including popular ones and meme fonts and a dedicated interface. Let’s look at some of the excellent meme GIF generators for Android, iPhone, online tools, and desktop computers.
In this article
01 [What Is the Meme GIF Maker?](#Part 1)
02 [How Do You Make a GIF Meme on iPhone?](#Part 2)
03 [12 Meme Generators to Create Your Memes](#Part 3)
Part 1 What Is the Meme GIF Maker?
GIF meme maker allows users to make GIFs from the ground up by collecting or submitting videos or photographs. These GIF caption meme-makers enable users to add different creative effects like emojis, photos, text, filters, and backdrops for added customization. They can also export files, and some of them integrate directly with social networking networks to make uploading more convenient.
Each tool here has its own set of features, so read the entire article before determining which GIF meme generator is ideal for your personal or professional needs.
Part 2 How Do You Make a GIF Meme on iPhone?
Make a unique GIF meme on your iPhone following these few steps:
Step 1: Download and install a GIF maker
On your iPhone, install the GIF meme maker. Not only can you use this meme GIF generator to locate animated GIFs, but you can also use it to make your GIF memes from the start. Go to the Apple store, type GIF maker of your choice into the search field. Now select Get or Install from the drop-down menu.
Step 2: Create an account.
Create an account or log in. Fill in the text boxes with your email address, username, and password. Then press the Sign Up button.
Tap Log In, enter your email address with password if you already have an account.
Step 3: Select a photo or video to use for your GIF
Now it’s your turn to get inventive: Simply tap any of the effects tiles at the bottom of the screen to Construct a meme of a stupid selfie or photo with effects, then swipe left/right to navigate between effects. Press and hold the Shutter option to start a movie, or tap once to snap a shot.
p Create. This is locatedht corner.[1]
Step 4: Add text to meme
Put your meme text here. It’s critical to add your content to the meme because that’s what makes it a meme! To access the text tool, tap the Aa icon and type some text for the meme. Tap Done when you’re finished.
Resize and move your text. After you’ve tapped “Done” and are happy with your text, you can tap, hold, and drag it about your GIF. To alter the size, pinch two fingers together.
Step 5: Save and share
When you complete, tap the purple arrow. Tap this button in the bottom right corner once you’re happy with your meme GIF.
Select the Share GIF from the drop-down menu. If you wish to save the GIF to your camera roll, tap Save GIF.
Part 3 Meme Generators to Create Your Memes
Here are 12 meme generators that you can try out
01IMGFlip (Web)
Features:
• It has many meme templates
• You can easily build memes with your photographs.
• You can make changes to your memes
• It includes over 1000 meme templates.
• Allows you to find the meme template you want quickly.
Pros
• Many templates
• Fonts that you can customize.
• Memes on video
Cons
• Adds a watermark to the image
To make a meme with IMGFlip, follow these steps:
Step 1: Begin by making something.
Go to the website and click the “Create” button to get started. From the menu, select “Make a meme.”
Step 2: Pick a design template
To select the proper template for your meme, use the Search box. Alternatively, you can add your image to the app by clicking “Upload new template.”
Step 3: Insert text
Fill in the blanks with the meme text.
Next, click the options toggle to change the text next to each field. Save the image.
02DrMemes (Web)
Features
• You can easily produce memes for free.
• Create memes without a watermark.
• Change fonts easily
• Add emojis and stickers easily to memes.
• You can turn your photos into a GIF meme.
Pros
• User-friendly interface
• Personalization of fonts
• There is no watermark.
Cons
• A smaller number of templates
Follow these simple steps to make a meme using this website:
Step 1: Select a template
Open drmemes.com and select “Choose meme template” or “Upload picture,” depending on how you want to Construct a meme.
Step 2: Type in your text
Add Text from the side boxes. To change the font, use the settings toggle.
03ILoveIMG (Web)
Features
• Provides a variety of templates
• Allows you to alter the size and style of the font
• It generates memes that are free of watermarks.
• You may also choose whether you want the text to be forced into the image.
Pros
• An extensive library of free templates
• There is no watermark.
• Simple to use
• Can compress, resize, crop, and perform other image-editing activities.
Cons
• You can’t change the font.
Follow these steps to make memes using ILoveIMG:
Step 1: Go to the website.
In a browser, go to the website.
Step 2: Pick a design template
“Select meme template” or “Upload image” are the options.
Step 3: Type in your text
Fill in the blanks with your text.
04Meme Generator (Android/iOS)
Features:
● Over 500 high-quality memes and caption examples included.
● You can change size and color.
● There are a variety of fonts to pick from.
● Use the search or filter options to discover the memes you’re looking for quickly.
● There are no watermarks.
Pros
• Many templates
• Crop, rotate and flip images
• Personalize it with a custom image, font style, and sticker.
image
• There is no watermark.
Cons
• Lots of ads
Follow these simple steps to create a meme using the Meme Generator
Step 1: Add Image
Tap “Custom meme Gallery” to add an image from the gallery or select a meme template in the app.
Step 2: Crop Meme
Using the choices at the top of the app, you can crop the meme or rotate/flip the images.
Step 3: Customize font and Save
Change the font style, color, and alignment by tapping on it. You can also decorate it with a sticker.
When done, tap on “Save” to download the meme or hit “Share” to send it to social media apps.
05Meme Creator (Android)
Features
● A large collection of stock pictures and memes
● Add your quotes to the close captions.
● You can add your watermark.
● There are some fantastic stickers available.
● Simple to use
Pros
● No watermark
● Meme categories
● Custom fonts
Cons
● Occasional ads
Here is a simple step guide:
Step 1: Add Image
The program begins with a gallery of meme template categories, including animals, celebrities, cartoons, and more.
To add your original image, tap on one of these templates or hit the “Gallery” icon at the top.
Step 2: Change font size
Fill in the “Top” and “Bottom” text areas with the meme content. Using the options icon next to the text, change the font style.
Step 3: Save and Share
Use the “Save” or “Share” button at the bottom to download or send memes.
06Video & GIF Memes (Android)
Features
● It enables you to make memes from movies, GIFs and photos.
● No watermarks
● Easy to use
● Compatible on device
● Several stickers for users to leverage on
Pros
● There is no watermark.
● Tenor GIF database access
● You can video cut.
Cons
● Too many ads
There are no image memes.
Here are a few steps to follow:
Step 1: Select file
To begin, open the app and select the source file type.
Step 2: Customize text
When asked, trim the video, and add customizable meme text.
Save the video or GIF joke after changing video characteristics such as frame rate, speed, and quality.
07GIF Maker – Meme GIF Creator (iOS)
Features:
● Make as many GIFs as you like from your videos.
● Make an unlimited number of GIFs from your photos.
● Make an infinite number of memes.
● Filters, Stickers, and Fonts of the highest quality.
● Easy to use
Pros
● There is no watermark.
● User-friendly interphase.
● There are some fantastic stickers available.
Cons
● As others, ads.
Follow these simple steps to make use of this amazing tool:
Step 1: Choose the desired video
After running the app, select “Video to GIF” from the menu and select your video.
If necessary, trim it.
Step 2: Add text
To add amusing meme text to your video, tap “Add text.”
Step 3: Download and Share
To download the video or share it directly with social networking apps, click the Share icon.
08Memeto – Meme Maker & Creator (iOS)
Features:
● Create memes with your picture templates, blank memes, and popular templates.
● Customize options available
● Several different meme text styles to choose from.
● 1000+ stickers.
● Choose your photo from your Photo Gallery to be used as background
Pros
● There is no watermark.
● Various types of memes
Cons
● It lacks a search function.
Step 1: Choose a template
Select a meme template in the app, select the meme, and then hit the “Text” option to add and style meme text.
Step 2: Save and Share
Tap the Share button when you finish to save it to your device.
09Meme Generator Suite (Windows)
Features:
● Thousands of memes are available online
● Make memes out of your photos.
● Make posters with the phrase “KEEP CALM” and Jo Baka memes.
● You can move text, resized, and colored.
● There’s also an Offline Collection with over 300 memes that’s always ready to go!
Pros
• Many memes
• Effective search
• Collection in the offline mode
• There is no watermark.
Cons
• Advertisements
Follow these simple are guide:
Step 1: Select template or photo
Start using a pre-loaded meme template from the app or upload your image by selecting “From gallery.”
Step 2: Download and Save
Change the text settings and click the Save icon to download the image.
You can also immediately submit the image to IMGur or social networking apps.
10Meme Generator
Features:
● Get over 500 high-quality memes and caption examples.
● Size and color are changeable.
● There are a variety of fonts to pick from.
● Search or filter options to discover the memes you’re looking for.
● There are no watermarks.
Pros
• Examples of memes
• There is no watermark.
Cons
• Cannot share straight to social networking apps
Step 1: Click on Meme
To begin editing a meme, click on it.
Step 2: Change font
Change the font color and style of the meme text on the meme editing screen.
1111. Deal With It - GIF Maker
Features :
● This online GIF creator is simple to use.
● No third-party software is required to use this GIF maker.
● This website will complete the GIF conversion promptly.
● This GIF generator website is beneficial to new users.
Pros
● The website’s design is simplistic, making this GIF banner maker too simple to manage and utilize.
● It also intensifies the GIF maker, significantly improving the overall effect of the GIF in question.
Cons
● Because the pace of GIF makers is too slow, users sometimes opt to download installable GIF makers.
● GIF makers cannot create animated GIFs, so it is impossible to utilize this tool.
How to Use this Online GIF Maker
Visit the GIF maker’s official homepage.
Step 1: Choose an image
Because it can also be helpful to create GIFs from photos, you may use the Load Image option to upload an image from your computer.
Step 2: Editing
After that, you may add a phrase and glasses to the loaded image.
12LunaPic
Features:
● This online animated GIF creator has a very user-friendly design.
● No other third-party programs are required to use this online animated GIF creator.
● This website can also be valuable to creating GIF banners.
● You may create animated GIFs from several photographs with this website.
Pros
● With the aid of this program, the user can experience the GIF maker mobile feature; hence it is highly recommended.
● Because the tool is so simple, this banner GIF maker gets the job done in style and according to the user’s specifications.
Cons
● Like the GIF icon maker, this application lacks critical features like speed and accuracy necessary for GIF creation.
● Because this program can’t edit GIFs, it doesn’t have any of the GIF edit maker’s features.
How to use LunaPic
Step 1: Upload Image
To get started, go to LunaPic’s official website. To submit photographs from your computer to this online animated GIF maker, click the Upload button.
Step 2: Enhance the image
With this online GIF creator, you can now alter the images.
Step 3: Save the animated GIF
To save the produced GIF, select GIF as the output and click the Save button at the bottom.
Creating your animated GIF from any video or photo is a fascinating and entertaining undertaking. A video scene can be brutal to manage to owe to its vast size, but GIF forms are ideal for profile posts and sharing with friends in the form of simple jokes.
If you want to generate a GIF online, though, Wondershare Filmora Video Editor ‘s online meme maker is the best option. It allows you to create a watermark-free picture, GIF, and video memes. It is entirely free to use and requires no registration. When creating a caption, you can edit the text size, color, and position to make a caption while you are editing. You can also add text inside or outside in GIF. Just with some clicks, your GIF will be complete. Try it now!
Wondershare Filmora - Best Video Editor for Mac/Windows
5,481,435 people have downloaded it.
Build unique custom animations without breaking a sweat.
Focus on creating epic stories and leave the details to Filmora’s auto features.
Start a creative adventure with drag & drop effects and endless possibilities.
Filmora simplifies advanced features to save you time and effort.
Filmora cuts out repetition so you can move on to your next creative breakthrough.
● Key Takeaways from This Episode →
● Now that you know about the 12 best GIF meme generators and how to use them to make a unique and customized GIF with the simple step guide, you can now try your hands on new things.
● However, Wondershare Filmora is your sure best GIF caption meme maker to help you achieve excellent results as a GIF meme creator. So go for it!
Also read:
- Updated Stunning Ideas About Creating Personalised WhatsApp GIF Sticker for 2024
- Updated 2024 Approved How to Make Photo 3D Cartoon Online
- Updated What This Post Can Teach You About Clay Animation
- New How to Convert Video to GIF Fast & Easy
- New 5 Best Adobe Animate Courses & Classes | Beginners Complete Tutorial
- Tips for Canva Animated Elements
- In 2024, The Complete Guide to Whiteboard Animation
- New Adobe Animate Riggings Tutorial for You
- Updated 2024 Approved Incredible Ways to Find Suitable Animated Graphic Maker
- Updated Tips for Canva Animated Elements
- New How to Make Well Done Animated GIF By Yourself, In 2024
- The Best 10 Sketch Animation Video Makers
- Updated 2024 Approved Apps to Animate Still Pictures
- Updated 2024 Approved The 15 Best Apps to Turn Photos Into Cartoons and Sketches
- New Top 10 Apps to Enhance Your Instagram Story Slideshow for 2024
- Updated In 2024, The Definitive Guide to Whiteboard Animation
- New Obtain and Create Animated GIF Icons
- Best GIF Maker Software for Windows and Mac
- Updated How to Analyze an Editorial Cartoon Easily
- New 2024 Approved Simple Shortcut to Convert Videos to Gifs on iPhone
- Updated 10 Cartoon Character Makers to Create Animated Characters for 2024
- In 2024, Looking for Love Animated GIFs? Here Are 5 Free Sources For You
- Updated Step-by-Step Guide to Send Gif WhatsApp on Android for 2024
- Animate Graphics in Canva
- Updated 2024 Approved The Only Guide Youll Ever Need to Learn About GIF Video Downloader
- New How to Convert Video to GIF Fast & Easy for 2024
- 2024 Approved Samples of Cartoon Character Face to Inspire You
- New How to Create an Animated Sticky Navbar
- 15 Best Apps to Turn Photos Into Cartoons and Sketches
- How to Make Your GIF on WhatsApp in Simple Ways
- New 2024 Approved How to Insert a GIF Into Powerpoint
- In 2024, How to Transfer Data from Samsung Galaxy A23 5G to Other Android Devices? | Dr.fone
- 3uTools Virtual Location Not Working On Realme 12 Pro+ 5G? Fix Now | Dr.fone
- In 2024, Hacks to do pokemon go trainer battles For Realme V30T | Dr.fone
- Remove Google FRP Lock on Infinix Hot 30 5G
- Does Life360 Notify When You Log Out On Apple iPhone 11 Pro? | Dr.fone
- CatchEmAll Celebrate National Pokémon Day with Virtual Location On Samsung Galaxy A14 5G | Dr.fone
- In 2024, How to Bypass Android Lock Screen Using Emergency Call On Nokia XR21?
- 4 Ways to Unlock iPhone 14 to Use USB Accessories Without Passcode | Dr.fone
- In 2024, Ultimate Guide on Sony Xperia 1 V FRP Bypass
- Undeleted lost videos from Infinix GT 10 Pro
- Simple and Effective Ways to Change Your Country on YouTube App Of your Asus ROG Phone 8 Pro | Dr.fone
- Sim Unlock Lenovo Phones without Code 2 Ways to Remove Android Sim Lock
- New 2024 Approved Speech-to-Speech Voice Cloning A Breakthrough in AI Voice Industry
- In 2024, Two Ways to Track My Boyfriends Motorola Moto G23 without Him Knowing | Dr.fone
- How to Change Netflix Location to Get More Country Version On Lava Blaze 2 | Dr.fone
- Is GSM Flasher ADB Legit? Full Review To Bypass Your OnePlus Nord CE 3 5G Phone FRP Lock
- In 2024, 5 Ways To Teach You To Transfer Files from Poco M6 Pro 5G to Other Android Devices Easily | Dr.fone
- In 2024, Universal Unlock Pattern for Itel A60s
- How to Remove an AirTag from Your Apple ID Account From iPhone 12 Pro?
- In 2024, How To Pause Life360 Location Sharing For Realme C67 4G | Dr.fone
- Title: New 2024 Approved 20 Free After Effects Logo Reveal Templates You Will Want to Know
- Author: Elon
- Created at : 2024-05-19 03:05:12
- Updated at : 2024-05-20 03:05:12
- Link: https://animation-videos.techidaily.com/new-2024-approved-20-free-after-effects-logo-reveal-templates-you-will-want-to-know/
- License: This work is licensed under CC BY-NC-SA 4.0.
