
:max_bytes(150000):strip_icc():format(webp)/Nightbooks-93aa15da6f37406fa34e8c155b1067b3.jpg)
New 2024 Approved Best 10 Video to GIF Converters Top Picks
Best 10 Video to GIF Converters: Top Picks
Best 10 Video to GIF Converters: Top Picks
An easy yet powerful editor
Numerous effects to choose from
Detailed tutorials provided by the official channel
Having trouble converting your videos to GIF? Browse the top 10 converters to sort this out!
In this article
01 [Why GIFs are Widely Used and Popular?](#Part 1)
02 [Top 10 Ways to Turn Video into GIF](#Part 2)
Part 1 Why GIFs are Widely Used and Popular?
If you take a poll on the watch preference of GIF versus videos, most of votes you get would be in favor of watching GIFs. There are obvious reasons to the fact that anyone would prefer watching a GIF over a video, irrespective of its length. Some major ones that make it quite annoying to watch videos include the following:
● To begin with, you need to turn the video on and off, depending on your choice of watching a video or surfing through stories and feeds, failing which you get to hear additional sounds through your feed from the already running video. You further need to stop the music or go for a volume control in case you are not interested to watch the video.
● Most of the videos you run turn up to be irrelevant or uninteresting through the middle, but you don’t have a choice to make bit adjustments. If however possible, the method is not quite convenient. You may need to visit a different site in case you run a video that is not integrated with webpage of your searched content, wait for the portal’s interface to load or watch an advertisement.
● GIFs, on the other hand, do not require pausing or turning off, and run automatically. You also don’t need to mute any sounds. These ensure to-the-point message delivery and don’t divert your attention from the primary content you visit the webpage for.
Owing to the above, most of us are now much interested to convert videos to GIFs for an exact, impactful and to the point content creation and sharing. See through the next sections of this article to learn about the best video to GIF conversion tools and software.
Part 1 Top 10 Ways to Turn Video into GIF
Considering the credibility of GIFs, you may often require to convert your long videos into short and content specific GIFs. Given below are the 10 best methods to cater to the need of video to GIF conversion:
01Filmora
Wondershare Filmora Video Editor is one among the most popular and easy methods to convert videos to GIFs. It is compatible with almost all common video formats and is loaded with a plethora of exciting effects and editing tools. Take the following steps to create GIFs from videos using this application:
Wondershare Filmora
Get started easily with Filmora’s powerful performance, intuitive interface, and countless effects!
Try It Free Try It Free Try It Free Learn More >


Step 1: Import Your Video
Launch Filmora and import your desired video in the app’s welcome window. To do this, click on ‘New Project’ followed by ‘Import’ option from the drop down menu to add your video to the Filmora.

Step 2: Timeline Dragging
Add your video to the app’s timeline using the ‘Drag and Drop’ method. You can also extract video frames by taking screenshots and merge these images into your GIF from the media library.

Step 3: Explore Your Editing Skills
You can now edit the imported video in the timeline using a range of interesting effects. Crop, trim, split or make speed adjustments to give your video a catchy look.

Step 4: Include Messages
Try adding texts and supplementary elements to deliver impactful messages through your creation.

Step 5: It’s Time to Share!
Click ‘Export’ to save your GIF to your device. You are now ready to post your work in your social communities to get the most deserved attention of your peers!

02YouTube to GIF
This one is a simple and user-friendly video to GIF converter. You can convert videos to GIFs from your PC or other online platforms with this converter. The converter allows you to play with a variety of editing effects to make your creation more interesting. All you need to do is the following:
● In the video URL bar, type ‘gif’ after ‘www.’ and you will be redirected to converter’s working window. Set the GIF time interval or apply specific effects using the tools from the panel in the left of the working window.


● To set the video time frame, highlight it in the video timeline. Set the desired interval using the ‘Start Time’ and ‘End Time’ options.

● To add a new visual effect, select it from the menu. Below the video timeline, a row of parameters will get displayed. Set the effect parameters to make desired changes.
● Click ‘Create GIF’. In the ‘Settings’ menu, you can rename and add tags to your creation and even make it private.

● That’s it! You can download your GIF now. You may get a converter purchase offer for enabling advanced features. While most users prefer sticking to the free version, it is up to you whether to decline or accept the purchase offer.
● The ‘Download’ feature is exclusive to registered users. However, if you don’t prefer creating an account, just open the GIF download link in a separate tab’s ‘Direct Link’ row. Alternatively, you can replace ‘gif’ with ‘conv’ in the video URL bar and choose ‘Convert to GIF’. However, this process may take some extra minutes.

03Giphy GIF Maker
This is an editing tool that you can use to convert video to GIF online. This one is a reliable converter tool with a user-cohesive interface. It is a simple video editor that is available to you for free. All you need to do is mentioned below:
Step 1: Load your Video
Go to the official app website and paste your desired video link in the search bar. Your video gets uploaded to the app’s editor screen. Specify the time frame and check out your GIF’s preview.

Step 2: Let’s Go Editing!
Select ‘Continue to Decorate’ to edit your GIF with texts, effects, frames and filters. You can even go for a straight upload if your video doesn’t require customization.

Step 3: Time to Share!
Select ‘Continue to Upload’ and add required tags. Tap ‘Upload to Giphy’ to make a social media post or add it to the app’s website through a specific share code.
04Wondershare TunesGo
This is an effective video to GIF creator tool, loaded with extensive features. You can use this application to convert videos, live photos and multiple snaps into interesting GIFs. TunesGo gives you the freedom to edit your work in your own style with a variety of effects. Here’s what you need to do:

Step 1: Launch TunesGo
Download, install and launch the app into your PC. You may be asked for a device connection setup, but you can skip that in case GIF creation is your only requirement.

Step 2: Upload your Video
In the app’s welcome screen, navigate to ‘Toolbox’ at the top. From the drop down interface, choose ‘GIF Maker’. In the new window that pops-up next, click on ‘Add’ to upload the desired video to the app from your PC.

Step 3: Let’s Create!
Set the required time frame for your GIF in the app’s timeline and tap the ‘Create GIF’ button to start the conversion process. On completion, your work gets automatically saved in the ‘Pictures’ folder in your PC. You can also customize your target location.

05Vimeo
Vimeo is also a quick, 3-stepvideo to GIF converter. However, you need to have a Vimeo account to take up the conversion process. This is an easy and hassle free GIF creator, that adheres to your creation needs within minutes. Here’s what you need to do:
Step 1: Upload Your Video
Log in to your Vimeo account. In the opening window, select ’Upload’ from the toolbar at the top. ‘Drag and Drop’ or click ‘Choose Files’ to upload the desired video from your device.

Step 2: Create Your GIF
After you are done uploading the video, select ‘Create a GIF’ from the sidebar at the left. You will be directed to the GIF Editor window. Select a loop section from the video and set a time frame of maximum 6 seconds in the video timeline. Now click ‘Create GIF’.


Step 3: Export Your Creation
Your GIF is ready to download and share. You can also embed your GIF by generating embed codes for specific platforms.
06 Adobe Photoshop
This one is one f the most popular editing applications you can use to make GIF out of video. It’s simple and user-friendly interface does not require you to possess a Photoshop mastery for the conversion purpose. Here’s what you need to follow:
Step 1: Search Your Video
Find a video of your choice from a desired platform. In case you want a YouTube video, add ‘ss’ prior to the video’s service name in YouTube’s URL bar.
STEP 2: Edit Your Video
Use any preferable video splitters and editors to crop, trim and add interesting effects to your video and set a maximum time frame of 3 seconds.
Step 3: Create GIF
Open your edited video in Adobe Photoshop and tap ‘File Import-Video frames into layers’.

Step 4: Adjust Settings
Make required setting adjustments and click on ‘File-Save for Web’. Try adjusting image resolution and color range if your file size exceeds 10 MB.

Step 5: Save Your Work
In the ’Files’ tab at the top, select ‘Save’ and choose the ‘.gif’ extension in the ‘File Type’ dialog box to save your creation to your PC.
07Convertio
This converter provides a simple, 3-step process to create GIF from video. Either use it as a browser extension or download it from Google Chrome Webstore. Take the following steps to convert videos to GIF online.
● Upload your desired video to the service timeline. You can either choose files directly or ‘Drag and Drop’ them from your device.
● Select ‘Convert’ to make GIF from your uploaded video.
● Tap ‘Download’ to save your creation.

You can use this service to make different format conversions. However, this converter does not allow you to edit or add effects your GIF.
08MakeAGif
You can use this tool as a GIF video maker online to create, exchange and share GIFs on different platforms. Additionally, you also get the flexibility to use already saved images in your device to add them to your GIF. The app’s basic version allows you to create GIFs without watermarks. To add watermarks, you will need an account on the app. To convert videos to GIFs using this tool, you should take the following steps:
Step 1: Upload Your Video
In the app’s welcome screen, click on ‘Video to GIF’ and upload a desired video in the editor timeline. Add effects and make speed and time frame adjustments. When satisfied, tap ‘Continue to Publishing’.

Step 2: Add Names and Tags
In the publishing window, give a suitable name and add required tags to your edited video to make it easily identifiable. When you are done, click on ‘Create a GIF’ from the bottom right.

Step 3: Ready to Share!
You can now share your created GIF across social media platforms.

09Adobe Premiere
Similar to Adobe Photoshop, Adobe Premiere too is quite a preferred application for creating GIFs from videos. This is a simple, quick and free application that converts your videos to GIFs in a span of few minutes. Here’s what you need to do to go about the process:

Step 1: Edit your Video
Add a video of your choice in the Adobe Premiere timeline and play with your editing creativity to add desired effects and filters to it. Make sure to set requisite time frames to your edit.

Step 2: Prepare an Export
Click into the app’s video timeline, and prepare a file export using the following path:
File> Export> Media

Step 3: Settings Adjustments
In the Media Export window, navigate to the ‘Format’ tab. From the drop down menu, choose ‘Animated GIF’. Here, you can add your gif file, select its target destination and adjust the required settings.

Step 4: Export Your Work
Click ‘Export’ to share your creation on social media or click on ‘Queue’ to send your GIF to a specific media encoder.

1010. Movavi Video Converter
This is one of the latest video converter software you can rely on to make GIF from video files. This software allows you to create top quality animated GIFs and is compatible with a variety of video formats. Using this converter, you can create amazing GIFs in 5 quick steps: here’s what you need to follow:
Step 1: Download and Install the Software
To begin, download the converter software from its official site and adhere to the user instructions to install the same in your system.
Step 2: Upload Your Video
In the software’s opening window, click on ‘Add Media’ followed by ‘Add Video’ and select a desired video from your system to upload on the Movavi video timeline.

Step 3: Trim Your Video
Select ‘Edit’ from the right of your video file. In the editing window, specify the initial cut of the video by displacing the marker to the desired point. Click on ‘Scissors’ to add multiple cut points to your video. You can even drag the cut points around the editor timeline. Choose the unvented sections and click ‘Trash Can’. When the result satisfies you, click ‘Done’.

Step 4: Choose a Conversion Format
Navigate to the ‘Images’ tab and select ‘GIF’ and set an adequate size for the GIF. Here, you can adjust quality, frame size and rate and resize method using the ‘Cogwheel’ tool.

Step 5: Let’s Get Converting!
Tap ‘Convert’ and wait for the conversion to finish. You will be automatically directed to the folder where your converted files get saved.

● Key Takeaways from This Episode →
● GIFs are short, to the point and convenient to access, providing exact and impactful message delivery.
● The software market is flooded with a variety of editing tools to convert your dull videos to catchy GIFs.
● Filmora is a quick and smart editing tool that envisages your GIF creating experience with a range of exciting features.
Having trouble converting your videos to GIF? Browse the top 10 converters to sort this out!
In this article
01 [Why GIFs are Widely Used and Popular?](#Part 1)
02 [Top 10 Ways to Turn Video into GIF](#Part 2)
Part 1 Why GIFs are Widely Used and Popular?
If you take a poll on the watch preference of GIF versus videos, most of votes you get would be in favor of watching GIFs. There are obvious reasons to the fact that anyone would prefer watching a GIF over a video, irrespective of its length. Some major ones that make it quite annoying to watch videos include the following:
● To begin with, you need to turn the video on and off, depending on your choice of watching a video or surfing through stories and feeds, failing which you get to hear additional sounds through your feed from the already running video. You further need to stop the music or go for a volume control in case you are not interested to watch the video.
● Most of the videos you run turn up to be irrelevant or uninteresting through the middle, but you don’t have a choice to make bit adjustments. If however possible, the method is not quite convenient. You may need to visit a different site in case you run a video that is not integrated with webpage of your searched content, wait for the portal’s interface to load or watch an advertisement.
● GIFs, on the other hand, do not require pausing or turning off, and run automatically. You also don’t need to mute any sounds. These ensure to-the-point message delivery and don’t divert your attention from the primary content you visit the webpage for.
Owing to the above, most of us are now much interested to convert videos to GIFs for an exact, impactful and to the point content creation and sharing. See through the next sections of this article to learn about the best video to GIF conversion tools and software.
Part 1 Top 10 Ways to Turn Video into GIF
Considering the credibility of GIFs, you may often require to convert your long videos into short and content specific GIFs. Given below are the 10 best methods to cater to the need of video to GIF conversion:
01Filmora
Wondershare Filmora Video Editor is one among the most popular and easy methods to convert videos to GIFs. It is compatible with almost all common video formats and is loaded with a plethora of exciting effects and editing tools. Take the following steps to create GIFs from videos using this application:
Wondershare Filmora
Get started easily with Filmora’s powerful performance, intuitive interface, and countless effects!
Try It Free Try It Free Try It Free Learn More >
Step 1: Import Your Video
Launch Filmora and import your desired video in the app’s welcome window. To do this, click on ‘New Project’ followed by ‘Import’ option from the drop down menu to add your video to the Filmora.
Step 2: Timeline Dragging
Add your video to the app’s timeline using the ‘Drag and Drop’ method. You can also extract video frames by taking screenshots and merge these images into your GIF from the media library.
Step 3: Explore Your Editing Skills
You can now edit the imported video in the timeline using a range of interesting effects. Crop, trim, split or make speed adjustments to give your video a catchy look.
Step 4: Include Messages
Try adding texts and supplementary elements to deliver impactful messages through your creation.
Step 5: It’s Time to Share!
Click ‘Export’ to save your GIF to your device. You are now ready to post your work in your social communities to get the most deserved attention of your peers!
02YouTube to GIF
This one is a simple and user-friendly video to GIF converter. You can convert videos to GIFs from your PC or other online platforms with this converter. The converter allows you to play with a variety of editing effects to make your creation more interesting. All you need to do is the following:
● In the video URL bar, type ‘gif’ after ‘www.’ and you will be redirected to converter’s working window. Set the GIF time interval or apply specific effects using the tools from the panel in the left of the working window.
● To set the video time frame, highlight it in the video timeline. Set the desired interval using the ‘Start Time’ and ‘End Time’ options.
● To add a new visual effect, select it from the menu. Below the video timeline, a row of parameters will get displayed. Set the effect parameters to make desired changes.
● Click ‘Create GIF’. In the ‘Settings’ menu, you can rename and add tags to your creation and even make it private.
● That’s it! You can download your GIF now. You may get a converter purchase offer for enabling advanced features. While most users prefer sticking to the free version, it is up to you whether to decline or accept the purchase offer.
● The ‘Download’ feature is exclusive to registered users. However, if you don’t prefer creating an account, just open the GIF download link in a separate tab’s ‘Direct Link’ row. Alternatively, you can replace ‘gif’ with ‘conv’ in the video URL bar and choose ‘Convert to GIF’. However, this process may take some extra minutes.
03Giphy GIF Maker
This is an editing tool that you can use to convert video to GIF online. This one is a reliable converter tool with a user-cohesive interface. It is a simple video editor that is available to you for free. All you need to do is mentioned below:
Step 1: Load your Video
Go to the official app website and paste your desired video link in the search bar. Your video gets uploaded to the app’s editor screen. Specify the time frame and check out your GIF’s preview.
Step 2: Let’s Go Editing!
Select ‘Continue to Decorate’ to edit your GIF with texts, effects, frames and filters. You can even go for a straight upload if your video doesn’t require customization.
Step 3: Time to Share!
Select ‘Continue to Upload’ and add required tags. Tap ‘Upload to Giphy’ to make a social media post or add it to the app’s website through a specific share code.
04Wondershare TunesGo
This is an effective video to GIF creator tool, loaded with extensive features. You can use this application to convert videos, live photos and multiple snaps into interesting GIFs. TunesGo gives you the freedom to edit your work in your own style with a variety of effects. Here’s what you need to do:
Step 1: Launch TunesGo
Download, install and launch the app into your PC. You may be asked for a device connection setup, but you can skip that in case GIF creation is your only requirement.
Step 2: Upload your Video
In the app’s welcome screen, navigate to ‘Toolbox’ at the top. From the drop down interface, choose ‘GIF Maker’. In the new window that pops-up next, click on ‘Add’ to upload the desired video to the app from your PC.
Step 3: Let’s Create!
Set the required time frame for your GIF in the app’s timeline and tap the ‘Create GIF’ button to start the conversion process. On completion, your work gets automatically saved in the ‘Pictures’ folder in your PC. You can also customize your target location.
05Vimeo
Vimeo is also a quick, 3-stepvideo to GIF converter. However, you need to have a Vimeo account to take up the conversion process. This is an easy and hassle free GIF creator, that adheres to your creation needs within minutes. Here’s what you need to do:
Step 1: Upload Your Video
Log in to your Vimeo account. In the opening window, select ’Upload’ from the toolbar at the top. ‘Drag and Drop’ or click ‘Choose Files’ to upload the desired video from your device.
Step 2: Create Your GIF
After you are done uploading the video, select ‘Create a GIF’ from the sidebar at the left. You will be directed to the GIF Editor window. Select a loop section from the video and set a time frame of maximum 6 seconds in the video timeline. Now click ‘Create GIF’.
Step 3: Export Your Creation
Your GIF is ready to download and share. You can also embed your GIF by generating embed codes for specific platforms.
06 Adobe Photoshop
This one is one f the most popular editing applications you can use to make GIF out of video. It’s simple and user-friendly interface does not require you to possess a Photoshop mastery for the conversion purpose. Here’s what you need to follow:
Step 1: Search Your Video
Find a video of your choice from a desired platform. In case you want a YouTube video, add ‘ss’ prior to the video’s service name in YouTube’s URL bar.
STEP 2: Edit Your Video
Use any preferable video splitters and editors to crop, trim and add interesting effects to your video and set a maximum time frame of 3 seconds.
Step 3: Create GIF
Open your edited video in Adobe Photoshop and tap ‘File Import-Video frames into layers’.
Step 4: Adjust Settings
Make required setting adjustments and click on ‘File-Save for Web’. Try adjusting image resolution and color range if your file size exceeds 10 MB.
Step 5: Save Your Work
In the ’Files’ tab at the top, select ‘Save’ and choose the ‘.gif’ extension in the ‘File Type’ dialog box to save your creation to your PC.
07Convertio
This converter provides a simple, 3-step process to create GIF from video. Either use it as a browser extension or download it from Google Chrome Webstore. Take the following steps to convert videos to GIF online.
● Upload your desired video to the service timeline. You can either choose files directly or ‘Drag and Drop’ them from your device.
● Select ‘Convert’ to make GIF from your uploaded video.
● Tap ‘Download’ to save your creation.
You can use this service to make different format conversions. However, this converter does not allow you to edit or add effects your GIF.
08MakeAGif
You can use this tool as a GIF video maker online to create, exchange and share GIFs on different platforms. Additionally, you also get the flexibility to use already saved images in your device to add them to your GIF. The app’s basic version allows you to create GIFs without watermarks. To add watermarks, you will need an account on the app. To convert videos to GIFs using this tool, you should take the following steps:
Step 1: Upload Your Video
In the app’s welcome screen, click on ‘Video to GIF’ and upload a desired video in the editor timeline. Add effects and make speed and time frame adjustments. When satisfied, tap ‘Continue to Publishing’.
Step 2: Add Names and Tags
In the publishing window, give a suitable name and add required tags to your edited video to make it easily identifiable. When you are done, click on ‘Create a GIF’ from the bottom right.
Step 3: Ready to Share!
You can now share your created GIF across social media platforms.
09Adobe Premiere
Similar to Adobe Photoshop, Adobe Premiere too is quite a preferred application for creating GIFs from videos. This is a simple, quick and free application that converts your videos to GIFs in a span of few minutes. Here’s what you need to do to go about the process:
Step 1: Edit your Video
Add a video of your choice in the Adobe Premiere timeline and play with your editing creativity to add desired effects and filters to it. Make sure to set requisite time frames to your edit.
Step 2: Prepare an Export
Click into the app’s video timeline, and prepare a file export using the following path:
File> Export> Media
Step 3: Settings Adjustments
In the Media Export window, navigate to the ‘Format’ tab. From the drop down menu, choose ‘Animated GIF’. Here, you can add your gif file, select its target destination and adjust the required settings.
Step 4: Export Your Work
Click ‘Export’ to share your creation on social media or click on ‘Queue’ to send your GIF to a specific media encoder.
1010. Movavi Video Converter
This is one of the latest video converter software you can rely on to make GIF from video files. This software allows you to create top quality animated GIFs and is compatible with a variety of video formats. Using this converter, you can create amazing GIFs in 5 quick steps: here’s what you need to follow:
Step 1: Download and Install the Software
To begin, download the converter software from its official site and adhere to the user instructions to install the same in your system.
Step 2: Upload Your Video
In the software’s opening window, click on ‘Add Media’ followed by ‘Add Video’ and select a desired video from your system to upload on the Movavi video timeline.
Step 3: Trim Your Video
Select ‘Edit’ from the right of your video file. In the editing window, specify the initial cut of the video by displacing the marker to the desired point. Click on ‘Scissors’ to add multiple cut points to your video. You can even drag the cut points around the editor timeline. Choose the unvented sections and click ‘Trash Can’. When the result satisfies you, click ‘Done’.
Step 4: Choose a Conversion Format
Navigate to the ‘Images’ tab and select ‘GIF’ and set an adequate size for the GIF. Here, you can adjust quality, frame size and rate and resize method using the ‘Cogwheel’ tool.
Step 5: Let’s Get Converting!
Tap ‘Convert’ and wait for the conversion to finish. You will be automatically directed to the folder where your converted files get saved.
● Key Takeaways from This Episode →
● GIFs are short, to the point and convenient to access, providing exact and impactful message delivery.
● The software market is flooded with a variety of editing tools to convert your dull videos to catchy GIFs.
● Filmora is a quick and smart editing tool that envisages your GIF creating experience with a range of exciting features.
The Only Guide to Make 2D Rigging Clear to You
The Only Guide You’ll Ever Need to Learn That Make 2D Rigging Clear to You
An easy yet powerful editor
Numerous effects to choose from
Detailed tutorials provided by the official channel
If you’re looking to get a head start in 2D Rigging or 2D Animation in general, then this guide should get you to where you need to go.
We’ll be introducing 2D Rigging in a comprehensive way — perfect for beginners who aren’t familiar with the subject and want something more solid as their foundation.
In this article
01 [All You Need to Know About 2D Rigging](#Part 1)
02 [What is the Difference and Connection Between 2D and 3D](#Part 2)
03 [What Are the Best 2D Rigging Animation Tools?](#Part 3)
Part 1 All You Need to Know About Rigging
For this first part, we’re going to talk about Rigging in a general way. Think of it as an introduction to the subject. One that should, hopefully, set you off on the right foot. It should also help clarify things that you might need to know as we delve into deeper and more advanced subjects in the next sections of this article.
01What is the Meaning of Rigging in Animation?
Alright, so what does rigging 2D characters actually do? What meaning, or effect, does it have? These questions can be quickly answered with this: Rigging (whether it’s or 3D) is the practice of attaching ‘bones’ to a character model. Bones that, in the future, you can use to create motion.
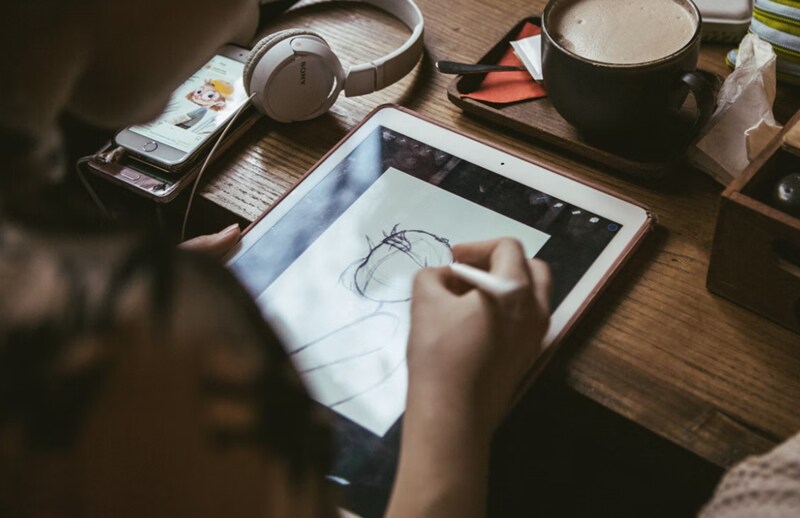
If you’re an artist, then you’re probably familiar with the concept of creating an initial sketch that you put the final drawing on top of — done with the sole purpose of creating a structure that will allow you to move forward more easily in your art.
That’s exactly what you do when Rigging. You’re building a structure that will allow you to easily create animated characters that you can move at will in the future.
02Why Use Animation?
Alright, so what’s the difference between creating a Face Rig and a Face Rig? Is there any? To answer this, the simple answer is, yes. There is quite the difference.
A lot of animators prefer to practice Animation over Animation because it is more traditional and requires less complicated software (not that it doesn’t come with complications of its own.) Specifically, animation requires quite a lengthy character creation and rigging process.
You should consider the subject more based on what project you’re working on. Things that you might want to keep in mind include your project timeline, project budget, character rig usability in the future, length of the project, and so on.
(There’s also a more in-depth breakdown of this in of this guide.)
03What is Animation Rigging Software?
Now, for the last section of this Rigging overview, let’s talk about Rigging Animation Software. You should be able to guess what it’s meant for, but how you can use it is a little different, especially with the many different varieties of Rigging Animation Software available.
We’ll be introducing some in the third part of this guide — so you can learn more about the differences there. For now, all you need to know is that it usually comes with advanced rigging and character deformer tools that you can use to easily (and efficiently) animate your characters.
Part 2 What is the Difference and Connection Between and 3D
As promised, this next section will be devoted to clarifying the differences and similarities between Animation and Animation. As we mentioned previously, most animators prefer Animation. But, more often than not, they switch between both forms in order to create something suitable for their current project.
01How and Animations Are Created
First, let’s talk about the process involved. In the end, this can be described simply as: it starts off the same, but then becomes significantly more and more dissimilar the further you go along. More specifically, whether you’re working on a or Animation, you usually start with working through your vision for the project.
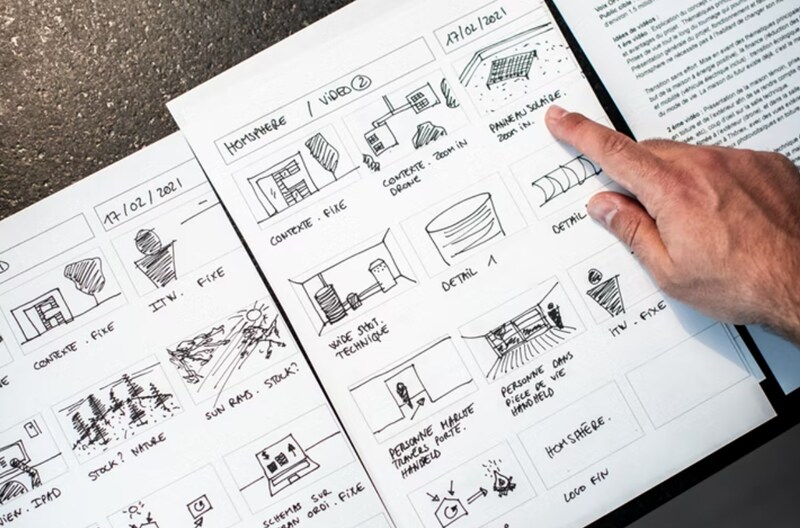
That means exploring ideas and creating hand-illustrated storyboards (which will serve as the foundation for the project as a whole). Then, the next steps involve media gathering (i.e., character creation, sound clips, voice-overs, sound effects, etc.) So that everything would be ready for the project.
This is when the difference starts. Animation involves hand-drawing characters in different poses and angles (with the standard being frames for a second) and can be completed with basic rigging (i.e., face rig for moving mouths or eyes). It’s normal in Animation as well for characters to remain static for several frames. While, with 3D, it is the exact opposite — the characters must be in constant motion so as to remain realistic (which can be done with extensive rigging.)
02Time Investments for Creating and Animations
Next, let’s talk about time investments. This can be a bit tricky to differentiate. Animations, as mentioned, are generally easier to create because it requires less rigging (but more drawings for certain scenes and angles makes it take more time). Meanwhile, Animation usually involves a front-heavy timeline — since you’re looking at intensive character creation and rigging. Once all this is set up though? The rest of the process is much faster than Animation.
You’ll also have to consider the work that you have to put in after your animations have been created. For example, the work you’ll need to put into finalizing your project with a video editor like Wondershare Filmora Video Editor (which would work great with animations especially, as it will allow you to actively add into the timeline as you go.)
For Win 7 or later (64-bit)
For macOS 10.12 or later
Part 3 What Are the Best Rigging Animation Tools?
For this final section of the guide, we’re finally moving on to our introduction to Rigging Animation Software. As mentioned, we’ve picked quite the variety to make sure that you have a good idea of how each will work. (A sample video has also been attached to make sure that you know what kind of projects can be created with these Rigging tools. Take the opportunity to explore those, too. If only for further edification.)
01Reallusion – Cartoon Animator 4
The first of the Rigging Animation Software on this list is Reallusion’s Cartoon Animator 4 (previously known as CrazyTalk Animator). This software was originally developed in order to allow everyone (from beginners to professionals) to create advanced animations with very little effort. To that end, it comes with a lot of motion templates and Auto Rig functions (i.e., audio lip-syncing) that the user can use to seriously cut down on the work required.
02Harmony ToonBoom
Harmony ToonBoom is well-known in the Rigging Animation Software industry. It’s the software that is used by many professionals. According to the Toon Boom Harmony website, this software was even used to create popular television shows like Rick and Morty, Bob’s Burgers, The Simpsons, and Futurama. It’s considerably more difficult to use for beginners, but it comes with many advanced functions that allow its users to create truly complex and beautiful Animations.
03Synfig Studio
The best thing about Synfig Studio (right from the onset), is that it is FREE. There are two versions of this tool — one that is ‘stable’ and the other in ‘development.’ The developmental version offers more advanced functions, of course, but for most beginners, the ‘stable’ version would serve just as well.
04Adobe Animate
Adobe Animate is software that belongs in Adobe’s long line of professional-level products. It’s a part of the classic ‘Adobe Suite.’ As a professional software, however, keep in mind that it might be more difficult to get used to at first (there’s a steep, learning curve right off the bat). But, if used correctly, it can be used to create quite impressive and eye-catching interactive animations (i.e., game content or website elements.)
05Animaker
Animaker is quite popular for beginners. It offers templates, so you can start off with an easy project if that’s what you’d like. But it also offers a lot of custom-creation tools that can be used for creating complex and professional Animations — although perhaps not at the level as the ones you might see from other alternatives (this software is most suitable for simple animations.)
06Moho Pro
Moho Pro (previously known as Anime Studio Pro) is a popular Animation program that fans of anime really love. This is one of the best software to use if you’re more interested in traditional animation (which involves a lot of free-hand drawing). Although, despite that fact, it has many advanced rigging functions as well (so you can create a mix of traditional and modern animation if you wish.)
07Pencil 2D
Pencil 2D, much like Synfig Studio, is FREE, cross-platform software. It’s quite old, but it’s matured over the years to include more and more functions (you might already be personally aware of it, in fact. It had its time to shine in the early 2010s.) The important thing to remember though is the fact that this is definitely more of a ‘traditional animation’ software. It does offer some basic rigging, but it’s best used by those who would prefer to practice the art of frame-by-frame animation.
08OpenToonz
OpenToonz is another free Rigging Animation Software (although it should be noted that there is a premium version, called Toonz, that is quite well known.) The best part about it is that it is a combination of software. One that you can use both for traditional animation and Animation. It’s also pretty easy to use, making it a good option for those just starting out.
● Key Takeaways from This Episode →
● 2D Rigging is the practice of creating ‘structure’ or ‘bones’ from which you can move characters or models. In these are usually ‘pins’ placed in bendable areas (i.e., the elbow, for bending the arm.)
● There are many differences between Animation and Animation. What you end up choosing should be decided by your project.
● Remember though, that Animations usually take longer to create even though Animations require more complex riggings.
● If you’re serious about getting into Rigging, make sure to consider the Rigging Animation Software that you choose to use very carefully. Each one has its own pros and cons.
If you’re looking to get a head start in 2D Rigging or 2D Animation in general, then this guide should get you to where you need to go.
We’ll be introducing 2D Rigging in a comprehensive way — perfect for beginners who aren’t familiar with the subject and want something more solid as their foundation.
In this article
01 [All You Need to Know About 2D Rigging](#Part 1)
02 [What is the Difference and Connection Between 2D and 3D](#Part 2)
03 [What Are the Best 2D Rigging Animation Tools?](#Part 3)
Part 1 All You Need to Know About Rigging
For this first part, we’re going to talk about Rigging in a general way. Think of it as an introduction to the subject. One that should, hopefully, set you off on the right foot. It should also help clarify things that you might need to know as we delve into deeper and more advanced subjects in the next sections of this article.
01What is the Meaning of Rigging in Animation?
Alright, so what does rigging 2D characters actually do? What meaning, or effect, does it have? These questions can be quickly answered with this: Rigging (whether it’s or 3D) is the practice of attaching ‘bones’ to a character model. Bones that, in the future, you can use to create motion.
If you’re an artist, then you’re probably familiar with the concept of creating an initial sketch that you put the final drawing on top of — done with the sole purpose of creating a structure that will allow you to move forward more easily in your art.
That’s exactly what you do when Rigging. You’re building a structure that will allow you to easily create animated characters that you can move at will in the future.
02Why Use Animation?
Alright, so what’s the difference between creating a Face Rig and a Face Rig? Is there any? To answer this, the simple answer is, yes. There is quite the difference.
A lot of animators prefer to practice Animation over Animation because it is more traditional and requires less complicated software (not that it doesn’t come with complications of its own.) Specifically, animation requires quite a lengthy character creation and rigging process.
You should consider the subject more based on what project you’re working on. Things that you might want to keep in mind include your project timeline, project budget, character rig usability in the future, length of the project, and so on.
(There’s also a more in-depth breakdown of this in of this guide.)
03What is Animation Rigging Software?
Now, for the last section of this Rigging overview, let’s talk about Rigging Animation Software. You should be able to guess what it’s meant for, but how you can use it is a little different, especially with the many different varieties of Rigging Animation Software available.
We’ll be introducing some in the third part of this guide — so you can learn more about the differences there. For now, all you need to know is that it usually comes with advanced rigging and character deformer tools that you can use to easily (and efficiently) animate your characters.
Part 2 What is the Difference and Connection Between and 3D
As promised, this next section will be devoted to clarifying the differences and similarities between Animation and Animation. As we mentioned previously, most animators prefer Animation. But, more often than not, they switch between both forms in order to create something suitable for their current project.
01How and Animations Are Created
First, let’s talk about the process involved. In the end, this can be described simply as: it starts off the same, but then becomes significantly more and more dissimilar the further you go along. More specifically, whether you’re working on a or Animation, you usually start with working through your vision for the project.
That means exploring ideas and creating hand-illustrated storyboards (which will serve as the foundation for the project as a whole). Then, the next steps involve media gathering (i.e., character creation, sound clips, voice-overs, sound effects, etc.) So that everything would be ready for the project.
This is when the difference starts. Animation involves hand-drawing characters in different poses and angles (with the standard being frames for a second) and can be completed with basic rigging (i.e., face rig for moving mouths or eyes). It’s normal in Animation as well for characters to remain static for several frames. While, with 3D, it is the exact opposite — the characters must be in constant motion so as to remain realistic (which can be done with extensive rigging.)
02Time Investments for Creating and Animations
Next, let’s talk about time investments. This can be a bit tricky to differentiate. Animations, as mentioned, are generally easier to create because it requires less rigging (but more drawings for certain scenes and angles makes it take more time). Meanwhile, Animation usually involves a front-heavy timeline — since you’re looking at intensive character creation and rigging. Once all this is set up though? The rest of the process is much faster than Animation.
You’ll also have to consider the work that you have to put in after your animations have been created. For example, the work you’ll need to put into finalizing your project with a video editor like Wondershare Filmora Video Editor (which would work great with animations especially, as it will allow you to actively add into the timeline as you go.)
For Win 7 or later (64-bit)
For macOS 10.12 or later
Part 3 What Are the Best Rigging Animation Tools?
For this final section of the guide, we’re finally moving on to our introduction to Rigging Animation Software. As mentioned, we’ve picked quite the variety to make sure that you have a good idea of how each will work. (A sample video has also been attached to make sure that you know what kind of projects can be created with these Rigging tools. Take the opportunity to explore those, too. If only for further edification.)
01Reallusion – Cartoon Animator 4
The first of the Rigging Animation Software on this list is Reallusion’s Cartoon Animator 4 (previously known as CrazyTalk Animator). This software was originally developed in order to allow everyone (from beginners to professionals) to create advanced animations with very little effort. To that end, it comes with a lot of motion templates and Auto Rig functions (i.e., audio lip-syncing) that the user can use to seriously cut down on the work required.
02Harmony ToonBoom
Harmony ToonBoom is well-known in the Rigging Animation Software industry. It’s the software that is used by many professionals. According to the Toon Boom Harmony website, this software was even used to create popular television shows like Rick and Morty, Bob’s Burgers, The Simpsons, and Futurama. It’s considerably more difficult to use for beginners, but it comes with many advanced functions that allow its users to create truly complex and beautiful Animations.
03Synfig Studio
The best thing about Synfig Studio (right from the onset), is that it is FREE. There are two versions of this tool — one that is ‘stable’ and the other in ‘development.’ The developmental version offers more advanced functions, of course, but for most beginners, the ‘stable’ version would serve just as well.
04Adobe Animate
Adobe Animate is software that belongs in Adobe’s long line of professional-level products. It’s a part of the classic ‘Adobe Suite.’ As a professional software, however, keep in mind that it might be more difficult to get used to at first (there’s a steep, learning curve right off the bat). But, if used correctly, it can be used to create quite impressive and eye-catching interactive animations (i.e., game content or website elements.)
05Animaker
Animaker is quite popular for beginners. It offers templates, so you can start off with an easy project if that’s what you’d like. But it also offers a lot of custom-creation tools that can be used for creating complex and professional Animations — although perhaps not at the level as the ones you might see from other alternatives (this software is most suitable for simple animations.)
06Moho Pro
Moho Pro (previously known as Anime Studio Pro) is a popular Animation program that fans of anime really love. This is one of the best software to use if you’re more interested in traditional animation (which involves a lot of free-hand drawing). Although, despite that fact, it has many advanced rigging functions as well (so you can create a mix of traditional and modern animation if you wish.)
07Pencil 2D
Pencil 2D, much like Synfig Studio, is FREE, cross-platform software. It’s quite old, but it’s matured over the years to include more and more functions (you might already be personally aware of it, in fact. It had its time to shine in the early 2010s.) The important thing to remember though is the fact that this is definitely more of a ‘traditional animation’ software. It does offer some basic rigging, but it’s best used by those who would prefer to practice the art of frame-by-frame animation.
08OpenToonz
OpenToonz is another free Rigging Animation Software (although it should be noted that there is a premium version, called Toonz, that is quite well known.) The best part about it is that it is a combination of software. One that you can use both for traditional animation and Animation. It’s also pretty easy to use, making it a good option for those just starting out.
● Key Takeaways from This Episode →
● 2D Rigging is the practice of creating ‘structure’ or ‘bones’ from which you can move characters or models. In these are usually ‘pins’ placed in bendable areas (i.e., the elbow, for bending the arm.)
● There are many differences between Animation and Animation. What you end up choosing should be decided by your project.
● Remember though, that Animations usually take longer to create even though Animations require more complex riggings.
● If you’re serious about getting into Rigging, make sure to consider the Rigging Animation Software that you choose to use very carefully. Each one has its own pros and cons.
10 Best Photoshop Cartoon Effects For Creatives
10 Photoshop Cartoon Effects For Creatives
An easy yet powerful editor
Numerous effects to choose from
Detailed tutorials provided by the official channel
Whether cartoon lover or not, photo cartoon effects is admired by everyone nowadays. People want to use Photoshop cartoon effects.
Using Photoshop applications lets, you know that editing and applying effects are often time-consuming. Adjusting the color, resizing the image, applying effects is lengthy, requires focus, and sometimes may be boring. Thus, we have some Photoshop cartoon effects that will save your time and provide you with desired results.
In this article
01 [11 Best Photoshop Cartoon Effects](#Part 1)
02 [How To Create A Photo To Cartoon Effect In A Photoshop](#Part 2)
Part 1 Best Photoshop Cartoon Effects
If you prefer to download the cartoon effect app or want to edit the photo online without editing, here’s is a list of some of the best Photoshop or Premiere Pro cartoon effects:
01Vintage Comic Creator
Vintage Comic Creator allows users to add After Effects in cartoon effects in photographs and texts. This can be the best choice if you want to add some shape effects, color, and change texture.
Along with cartoon edit text, an individual can also download overlays, pattern styles, and layer styles to make it comic book text. All the downloaded versions of templates are popular and editable as per the user’s requirement.
02Ultra Realistic 3D Space effect
Are you a space lover and looking for space inspires cartoon edits? Here’s a Solution. Ultra Realistic 3D Space cartoon effect allows the users to create editable fun cartoon text and Space themes.
Since it provides a variety of themes and ideas doesn’t limit the user when it comes to editing.
It provides you with a file with an example to make it easy to apply the cartoon effect online according to your wish.
03Animated Zombie Grime Art Photoshop action
To the fans of all the zombie movies, here’s something you should try out!
Animated Zombie Grime Art provides features in which users can edit their photographs with zombie cartoon effects and experience how they will look like a zombie with zero effort. It also provides the option to create and save GIFs or videos. One can easily use them on their social media accounts.
04Cartoon art Photoshop action
A quick and easy online cartoon effect helps individuals edit their photographs into paintings or cartoon characters. With only a few simple actions, users can easily edit their pictures. It provides editing in paintings, cartoons, oil pastels, oil paintings, etc.
05Soft Photoshop cartoon effects
Soft Photoshop cartoon effects help the users edit the photos into cartoon effects and allow them to add smooth effects to them. With just one click, you can add different colors to your image can adjust the brightness, contrast, highlight, texture, etc. It includes layers and smart filters, thus providing various editing options.
06Gimp cartoon effect
It is one of the fastest methods to edit your photographs into cartoon effects. Within a single click, you can cartoonify your pictures. With the help of the Gimp cartoon effect, the user can readjust brightness, contrast, light, etc. You can try soft burn, burn and overlay and can invert colors. It provides different filters with special effects that users can use free of cost.
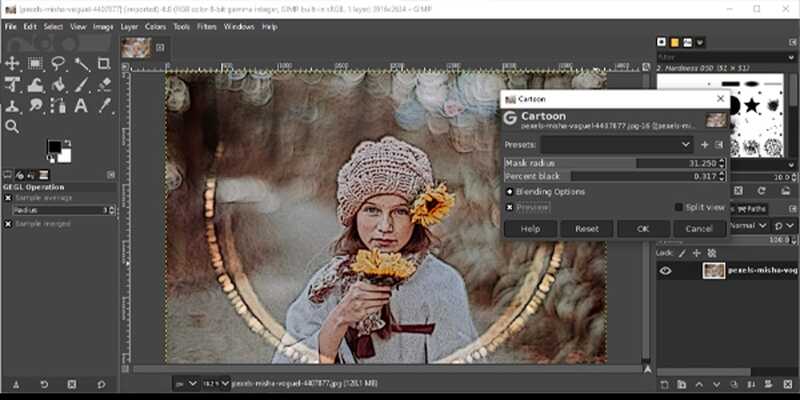
07Pop art Photoshop action
Pop art Photoshop action easily converts any photograph into a retro cartoon photo effect. It transforms the picture into a cartoon customized painting within one click. Users can enjoy the features of adjusting colors and can change the background according to their wishes.

08Cell shader Photoshop action
If you want to convert photos into cartoon effects and at the same time want to apply cell shading, then here’s a magic photo cartoon effect. Cartooning your picture along with cell shading can be time-consuming sometimes. Cell shader Photoshop allows the user to shade the image with a single click. You can try it on any picture.
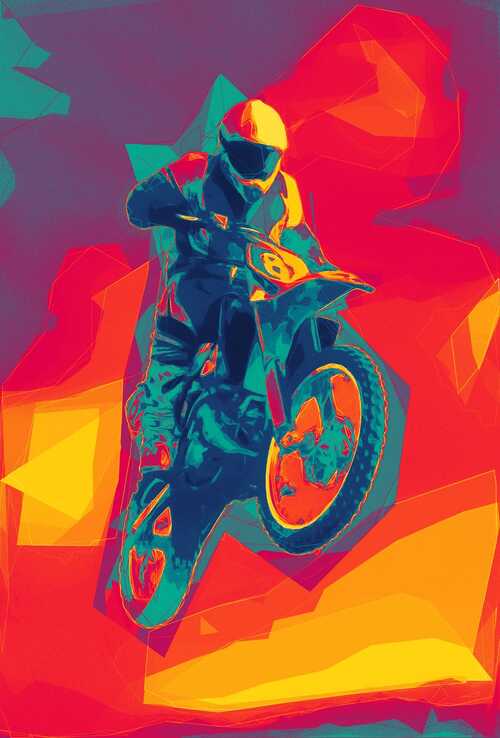
093D cartoon text effect
This cartoon effect app helped change the text or the style of the text by adding specific animations or filters. It includes different forms and types in which users can edit the text and make it look fantastic. This 3D animation you can use in your document in animation or simple editing.
10Filmora cartoon effects
With Wondershare Filmora Video Editor , users can take a new picture or add a photo from their phone’s gallery. Once the image is ready for editing, you should tap on the Apply Cartoon Effect button. It contains 12 different cartoon photo effect styles; thus, users can choose any style they want to insert in their picture. You can also add motion to images, videos, and unlimited editing features with the latest updates.
For Win 7 or later (64-bit)
For macOS 10.12 or later
11 Caricature maker Photoshop action
You can turn your photographs into caricatures and make them look awesome. With the help of this After Effects, cartoon animation converts a simple picture into a fun carriage with just one click. You can adjust colors, size, and shape and add more features.
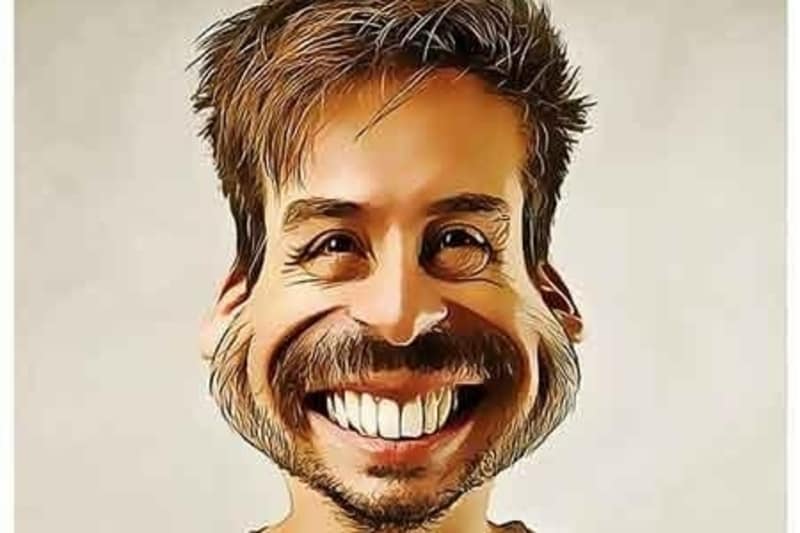
Part 2 How To Create A Photo To Cartoon Effect In A Photoshop
Below is a guide that will help you know more about Photoshop’s cartoon effect.
● Step 1: Select Image
Now, choose an image you want to cartoonize.
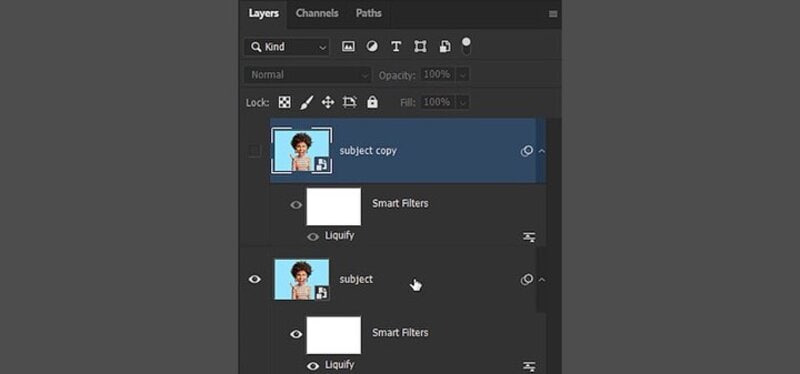
● Step 2: Apply Filter-Sharpen
Go to Filter to sharpen the image. Select the Gaussian Blur from the Remove drop-down list
Press OK.
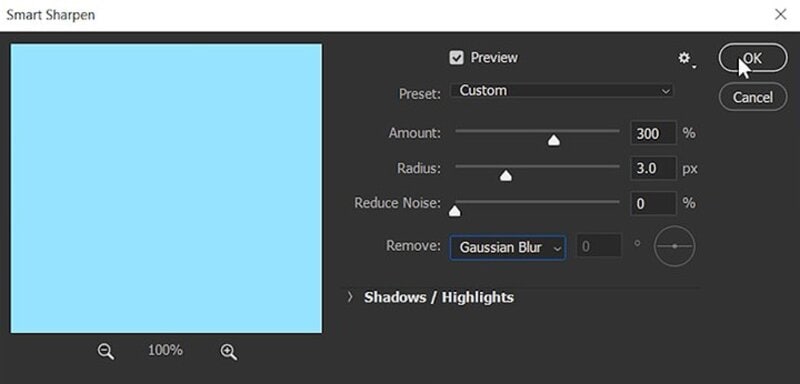
● Step 3: Apply Filter-Stylize
Go to Filter, then apply stylization and Oil paint.
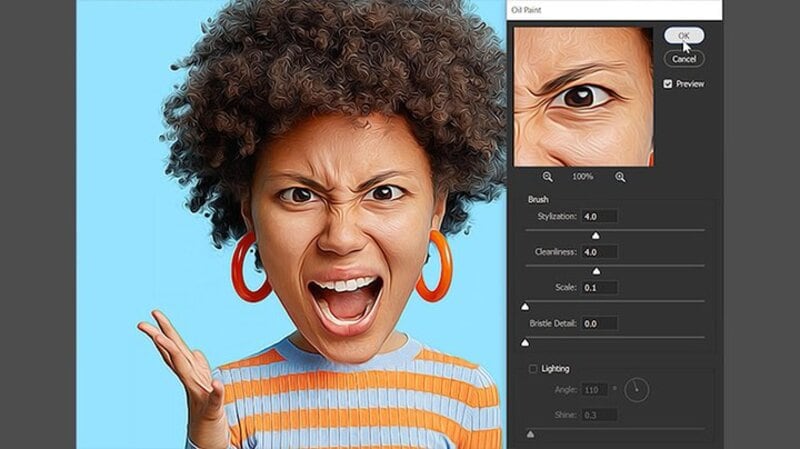
● Step 4: Choose Poster Edges
Choose from the list of effects on the filter gallery, click on Poster Edges and click OK.
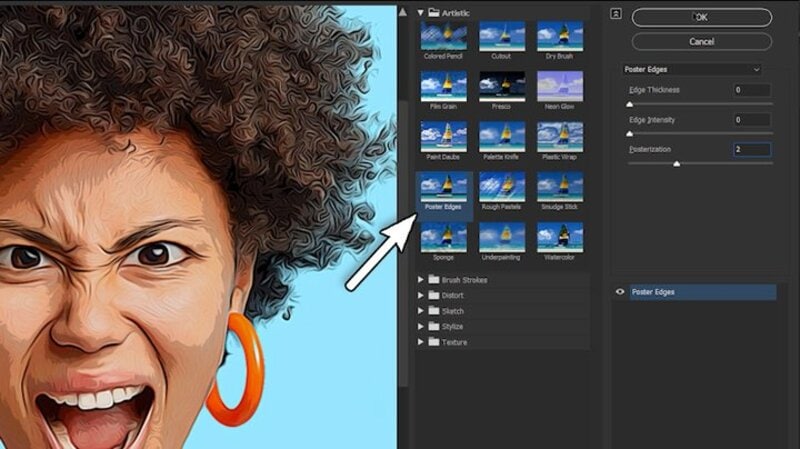
● Step 5: Blur
It will start to resemble a cartoon, but there’s still more to do, so use the Filter > Blur Menu to add a Surface Blur. Set the Threshold to 15 pixels and the Radius to 12 pixels. This effect gives the skin a considerably smoother and cleaner appearance. Select OK.
● Step 6: Unsharp Mask
You can add some sharpness and increase particular highlights by going to Filter > Sharpen > Unsharp Mask.
Unhide the second Smart Object layer and change its blending mode to Overlay. Then, reduce the layer’s Opacity to 55 percent.
Now, it will start to resemble a cartoon, but there’s still more to do, so use the Filter > Blur Menu to add a Surface Blur. Set the Threshold to 12 pixels and the Radius to 12 pixels.
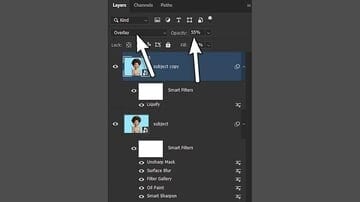
● Step 7: Apply the Oil paint filter again
Return to Filter > Filter Gallery and select Poster Edges once more. These will draw attention to certain aspects of the portrait.
Choose the Oil Paint Filter from Filter > Stylize. Select OK.
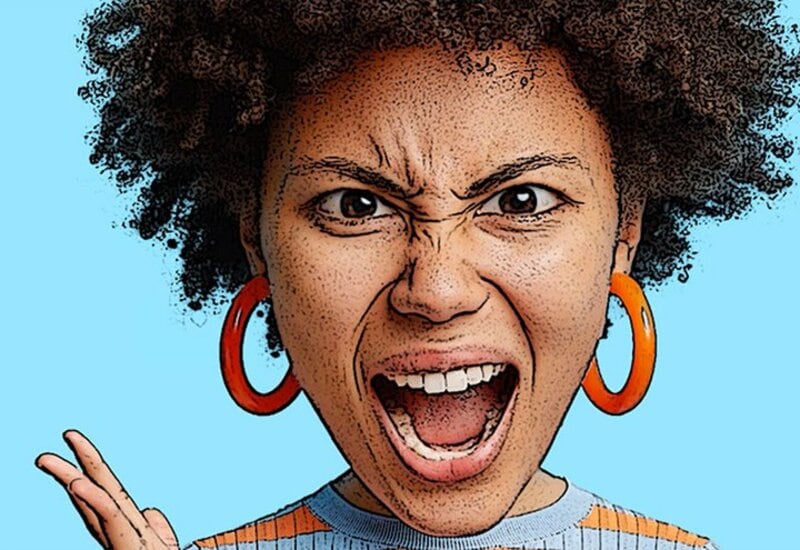
● Step 8: Double-click on Filter Gallery
Click OK after double-clicking the Filter Gallery Smart Filter already on this layer.
Carry on with the same steps for the Oil Paint Filter.
Select OK.
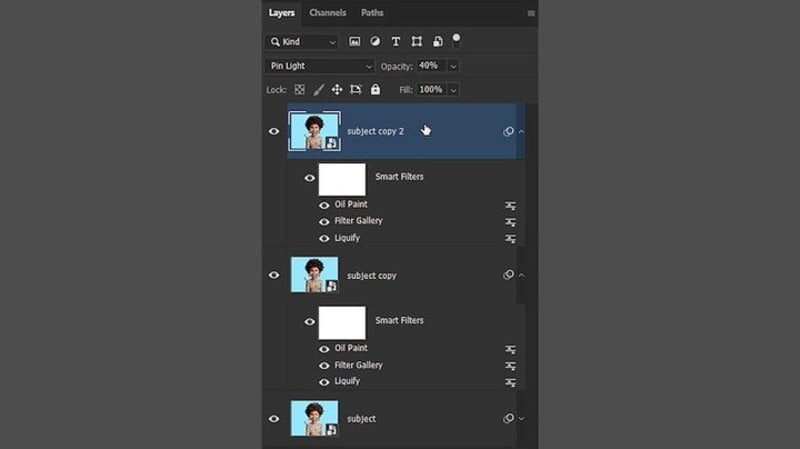
● Step 9: Choose the Raw filter option
Let’s take this photo cartoon effect to the next level with a simple method! To make a Stamp Visible Layer, choose the very top layer and press Control-Shift-Alt-E. When you wish to merge all the layers in a document onto a new layer, this shortcut comes in handy.
Lastly, convert the new layer to a Smart Object by right-clicking on it.
Select the Camera Raw Filter option from the Filter menu.
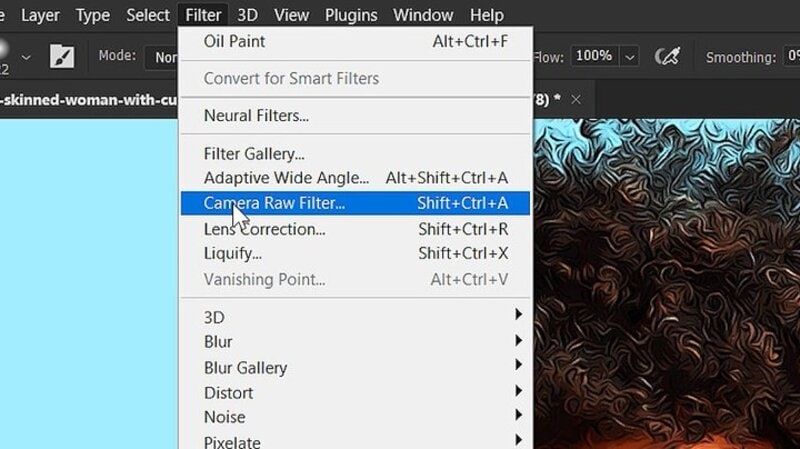
● Ending Thoughts →
● After visiting this article, I’m sure you have plenty of options for cartoon effects according to your choice. In this technological world, it’s hard to find the Photoshop cartoon effect of your desire, which helps save time.
● The above is one of the best After Effects cartoon animations you can use as a cartoon lover. Besides, you can also try out our recommended Filmora – the editor in vogue for its world-class editing features to help enhance your data.
Whether cartoon lover or not, photo cartoon effects is admired by everyone nowadays. People want to use Photoshop cartoon effects.
Using Photoshop applications lets, you know that editing and applying effects are often time-consuming. Adjusting the color, resizing the image, applying effects is lengthy, requires focus, and sometimes may be boring. Thus, we have some Photoshop cartoon effects that will save your time and provide you with desired results.
In this article
01 [11 Best Photoshop Cartoon Effects](#Part 1)
02 [How To Create A Photo To Cartoon Effect In A Photoshop](#Part 2)
Part 1 Best Photoshop Cartoon Effects
If you prefer to download the cartoon effect app or want to edit the photo online without editing, here’s is a list of some of the best Photoshop or Premiere Pro cartoon effects:
01Vintage Comic Creator
Vintage Comic Creator allows users to add After Effects in cartoon effects in photographs and texts. This can be the best choice if you want to add some shape effects, color, and change texture.
Along with cartoon edit text, an individual can also download overlays, pattern styles, and layer styles to make it comic book text. All the downloaded versions of templates are popular and editable as per the user’s requirement.
02Ultra Realistic 3D Space effect
Are you a space lover and looking for space inspires cartoon edits? Here’s a Solution. Ultra Realistic 3D Space cartoon effect allows the users to create editable fun cartoon text and Space themes.
Since it provides a variety of themes and ideas doesn’t limit the user when it comes to editing.
It provides you with a file with an example to make it easy to apply the cartoon effect online according to your wish.
03Animated Zombie Grime Art Photoshop action
To the fans of all the zombie movies, here’s something you should try out!
Animated Zombie Grime Art provides features in which users can edit their photographs with zombie cartoon effects and experience how they will look like a zombie with zero effort. It also provides the option to create and save GIFs or videos. One can easily use them on their social media accounts.
04Cartoon art Photoshop action
A quick and easy online cartoon effect helps individuals edit their photographs into paintings or cartoon characters. With only a few simple actions, users can easily edit their pictures. It provides editing in paintings, cartoons, oil pastels, oil paintings, etc.
05Soft Photoshop cartoon effects
Soft Photoshop cartoon effects help the users edit the photos into cartoon effects and allow them to add smooth effects to them. With just one click, you can add different colors to your image can adjust the brightness, contrast, highlight, texture, etc. It includes layers and smart filters, thus providing various editing options.
06Gimp cartoon effect
It is one of the fastest methods to edit your photographs into cartoon effects. Within a single click, you can cartoonify your pictures. With the help of the Gimp cartoon effect, the user can readjust brightness, contrast, light, etc. You can try soft burn, burn and overlay and can invert colors. It provides different filters with special effects that users can use free of cost.
07Pop art Photoshop action
Pop art Photoshop action easily converts any photograph into a retro cartoon photo effect. It transforms the picture into a cartoon customized painting within one click. Users can enjoy the features of adjusting colors and can change the background according to their wishes.
08Cell shader Photoshop action
If you want to convert photos into cartoon effects and at the same time want to apply cell shading, then here’s a magic photo cartoon effect. Cartooning your picture along with cell shading can be time-consuming sometimes. Cell shader Photoshop allows the user to shade the image with a single click. You can try it on any picture.
093D cartoon text effect
This cartoon effect app helped change the text or the style of the text by adding specific animations or filters. It includes different forms and types in which users can edit the text and make it look fantastic. This 3D animation you can use in your document in animation or simple editing.
10Filmora cartoon effects
With Wondershare Filmora Video Editor , users can take a new picture or add a photo from their phone’s gallery. Once the image is ready for editing, you should tap on the Apply Cartoon Effect button. It contains 12 different cartoon photo effect styles; thus, users can choose any style they want to insert in their picture. You can also add motion to images, videos, and unlimited editing features with the latest updates.
For Win 7 or later (64-bit)
For macOS 10.12 or later
11 Caricature maker Photoshop action
You can turn your photographs into caricatures and make them look awesome. With the help of this After Effects, cartoon animation converts a simple picture into a fun carriage with just one click. You can adjust colors, size, and shape and add more features.
Part 2 How To Create A Photo To Cartoon Effect In A Photoshop
Below is a guide that will help you know more about Photoshop’s cartoon effect.
● Step 1: Select Image
Now, choose an image you want to cartoonize.
● Step 2: Apply Filter-Sharpen
Go to Filter to sharpen the image. Select the Gaussian Blur from the Remove drop-down list
Press OK.
● Step 3: Apply Filter-Stylize
Go to Filter, then apply stylization and Oil paint.
● Step 4: Choose Poster Edges
Choose from the list of effects on the filter gallery, click on Poster Edges and click OK.
● Step 5: Blur
It will start to resemble a cartoon, but there’s still more to do, so use the Filter > Blur Menu to add a Surface Blur. Set the Threshold to 15 pixels and the Radius to 12 pixels. This effect gives the skin a considerably smoother and cleaner appearance. Select OK.
● Step 6: Unsharp Mask
You can add some sharpness and increase particular highlights by going to Filter > Sharpen > Unsharp Mask.
Unhide the second Smart Object layer and change its blending mode to Overlay. Then, reduce the layer’s Opacity to 55 percent.
Now, it will start to resemble a cartoon, but there’s still more to do, so use the Filter > Blur Menu to add a Surface Blur. Set the Threshold to 12 pixels and the Radius to 12 pixels.
● Step 7: Apply the Oil paint filter again
Return to Filter > Filter Gallery and select Poster Edges once more. These will draw attention to certain aspects of the portrait.
Choose the Oil Paint Filter from Filter > Stylize. Select OK.
● Step 8: Double-click on Filter Gallery
Click OK after double-clicking the Filter Gallery Smart Filter already on this layer.
Carry on with the same steps for the Oil Paint Filter.
Select OK.
● Step 9: Choose the Raw filter option
Let’s take this photo cartoon effect to the next level with a simple method! To make a Stamp Visible Layer, choose the very top layer and press Control-Shift-Alt-E. When you wish to merge all the layers in a document onto a new layer, this shortcut comes in handy.
Lastly, convert the new layer to a Smart Object by right-clicking on it.
Select the Camera Raw Filter option from the Filter menu.
● Ending Thoughts →
● After visiting this article, I’m sure you have plenty of options for cartoon effects according to your choice. In this technological world, it’s hard to find the Photoshop cartoon effect of your desire, which helps save time.
● The above is one of the best After Effects cartoon animations you can use as a cartoon lover. Besides, you can also try out our recommended Filmora – the editor in vogue for its world-class editing features to help enhance your data.
10 Great Moving Animation PowerPoint Techniques
10 Awesome Moving Animation PowerPoint Techniques
An easy yet powerful editor
Numerous effects to choose from
Detailed tutorials provided by the official channel
PowerPoints can be quite dull without anything to spice it up. So, this question is more than 100% warranted. Fortunately, we were able to pull together a tutorial on creating moving animation PowerPoint presentations.
Complete with some templates that you can start off with (if you’d prefer to make it as simple as possible for yourself.)
In this article
01 [6 Animated Powerpoint Templates with Interactive Features](#Part 1)
02 [How to Create a Moving Animation in Powerpoint](#Part 2)
03 [10 Moving Animation Powerpoint Techniques](#Part 3)
Part 1 6 Animated PowerPoint Templates with Interactive Features
The default people tend to-go-to when it comes to presentations are videos. As they tend to be more engaging on their own. For that, you’ll see people gravitating towards software like Filmora, which can create beautiful, eye-catching presentations that you can easily and quickly share. Not just to an immediate audience, but also on social media and the like.
However, of course, sometimes a personal touch is important in a presentation — important to have a ‘voice’ attached to the image on the screen. But just because this is the case, doesn’t mean that you shouldn’t go all out on your presentation. Hence, why moving animation PowerPoint templates are such a big deal:
01Company Presentation PowerPoint Template
For the first of the Moving Animation PowerPoint templates that we have to introduce, we chose the ‘Company Presentation PowerPoint Template.’ As you can perhaps guess from the name, it’s a very professional template. It comes with a total of 500 sample slides that you can choose from (50 of which are unique), and it’s set up with professional animations that can spice up your presentation without making it look gaudy or over-the-top.

02Move Animated PowerPoint Template
Next is the modern, minimalistic template called “Move Animated.” This one is a lot more versatile, with every single one of the 144 unique slides available suitably animated. The best part of it is definitely the easy way in which it can be used. With the modern, minimalistic style, it’s easy enough to remove the presets and replace them with suitable company or product images to promote your content, idea, or project.

0340 Animated Conceptual Slides for PowerPoint
Again, we have another modern and minimalistic kind of PowerPoint template with ‘40 Animated Conceptual Slides for PowerPoint.’ It comes with 40 modern slides, all of which come fully animated are easy enough to customize with your own branding or content.

04UNIGRAPH - Animated & Creative Template (PPTX)
For a bit more fun, our next template is “UNIGRAPH.” This still definitely fits the description ‘minimalistic’ but the pop of color and effects that it brings to the table gives it a different kind of vibe from all the others. No less professional, but certainly more fun. Of course, most importantly, perhaps, is the fact that each slide is smoothly animated.

05Graph & Charts PowerPoint Presentation
For this next one, we introduce a template set called “Graphs & Charts” for those who may want to present their products, projects, ideas, etc. in the shape of graphs and charts. It’s perfect for professionals, certainly. Especially with its clean look, brightened only by occasional pops of color that can be seen from the graphs and charts that it comes with.

06Laststyle - PowerPoint Template
This next PowerPoint template is most suited for businesses looking to promote their products. The creator of the template has provided five different colored versions of the template, each with 30 unique slides that were carefully sectioned with suitable animations.

Part 2 How to Create a Moving Animation in PowerPoint
Now we come to the point of the article where we speak directly to those who may want to experiment more by personally creating a moving animation PowerPoint. For this example, we’ll be teaching you how to create a path animation PowerPoint with the available tools that the software offers under ‘Animation.’ Stick around if you want to learn more.
01Step 1. Open Project.
First things first, of course. Start a new project. When you’ve started, move on to the Animation tab (which we’ve pointed out in the image below.)

02Step 2. Add Animation.
Then, make sure to select the object or model that you want to animate (in this case, we’ve inserted a 2D model of a businessman), and then click the ‘Add Animation’ button (shown in the image below.)

03Step 3. Choose Animation.
Under ‘Add Animation’ you’ll find several different options for animations that you can choose from. Of course, since our goal is to create a PowerPoint Motion Path Animation, we have selected one of the ‘Motion Path’ options.

04Step 4. Choose Motion Path Animation
In order to make motion animation in PowerPoint, you must select one of the offered ‘Motion Paths’ (i.e., Bounce, Line, Arcs, etc.) and then use the motion path tool that appears to control the direction you wish to make your character move.
In this example, we chose the ‘Lines’ motion path (1) and then used the line tool to create a path for our businessman model. To walk from the right side of the screen towards the left.

05Step 5. Adjust Animation.
With path animation PowerPoint complete, you can adjust as needed with the tools provided. For example, you can have the character start moving as soon as the slide opens, or wait until a minute has passed, you can extend the animation by changing duration, etc.

Part 3 10 Moving Animation PowerPoint Techniques
For this last step, we break down some important PowerPoint 3D Animation need-to-knows. Including the specifics provided by each of the options made available to you and why it’s important to explore every single one to create better and more professional-looking presentations.
01Transitions
When it comes to PowerPoint presentations, most people are no doubt the most familiar with ‘Transitions’ when talking in terms of adding animation into a presentation. This one decides whether you want to shift from one slide to another smoothly, or if you want the previous slide to break into splinters, or rotate into the next slide, and so on and so forth. It’s an ‘in-between’ animation that signals where one ends and the other begins.

02Animations
Now, for the ‘Animations’ tab, we focus on animations that occur in the slide (not in-between like transitions). This can include a wide array of things. Whether it be characters moving (like shown in the tutorial we provided), text boxes appearing and disappearing in short order, images bouncing into view in dramatic fashion, and so on and so forth. There’s lots of potential here.

03Animation - Start
We mentioned this previously in the tutorial, but PowerPoint (which does not offer the more advanced 3D customization options), does still give you the freedom to choose how you want certain animations to work.
In the case of the ‘Animations-Start’ option, the goal is to decide when an animation starts playing. Do you want it to start after a click? Or maybe you want it to start up immediately? Whatever the case may be, this function will let you choose the specifics.

044. Animation - Duration
Next, we decide how long you want the animation to last. For example, if you chose to add a PowerPoint 3D rotation animation into a character, how long do you want it to spin before it settles into place? Perhaps only a second? Perhaps more? Whatever you chose, this is the option that will let you finalize that.

05Animation - Delay
This one is self-explanatory as well. But suffice to say, the ‘Delay’ option is for deciding how much an animation is delayed before starting. For example, if you chose to start it ‘On Click’ you can increase the delay to keep it from playing immediately on click.

06Break Up Presentation into Sections
A lot of PowerPoint templates, you’ll find, are naturally broken into sections. This is because it is easier to consume it in that way. It’s also a good signal to your audience as to what point of the presentation you are on. Are you in the beginning? The middle? Near the end? Etc. In this case, the best option for showing it is transitions that separate the sections from one another.

07Add Animation - Entrance
As promised earlier, we’ll be going through each type of animation is available under the ‘Add Animation’ option. The first is “Entrance” animations. This one is pretty easy to guess. It makes up a variety of animations that serve as its entrance animation. Here are some examples:
● Appear: To have objects appear without any other effect.
● Fade: To have objects fade into view.
● Bounce: To have objects bounce into view.
● Swivel: To have objects swivel into view.

08Add Animation - Emphasis
This next animation style is to give emphasis to an already-present object. For example, at a click, you can have a text box ‘Pulse’ and become the center of attention. You can change ‘Object Color’ to make it stand out. And so on.

099. Add Animation - Exit
Opposite of the ‘Entrance’ animations are the ‘Exit’ animations. You’ll notice that the style of animations is the same here. The only difference is that the animations occur to exit the project out of the presentation. For example, an image exiting to reveal text. Or text flying out to be replaced with more text, etc.

10Add Animation - Motion Path
We’ve already mentioned the PowerPoint Motion Path animation style previously, but just to reiterate some things, this is the most customizable animation feature on PowerPoint. One that allows you to move objects across the slide in whatever way you wish. In our example, we created a motion path animation that took the character from the center of the screen to the left of the screen.

● Key Takeaways from This Episode →
● While videos are the most popular way to share information, there are some presentations that require a heavier guiding hand.
● In these situations, a PowerPoint presentation, carefully animated, can serve in place of an edited video.
● There are templates available that you can take advantage of if you’d prefer to start with something to work from. We introduced some in this article that we think were particularly notable.
● But, of course, more careful personalization is sometimes necessary. In that case, we hope that you find our tutorial and our list of PowerPoint techniques helpful.
PowerPoints can be quite dull without anything to spice it up. So, this question is more than 100% warranted. Fortunately, we were able to pull together a tutorial on creating moving animation PowerPoint presentations.
Complete with some templates that you can start off with (if you’d prefer to make it as simple as possible for yourself.)
In this article
01 [6 Animated Powerpoint Templates with Interactive Features](#Part 1)
02 [How to Create a Moving Animation in Powerpoint](#Part 2)
03 [10 Moving Animation Powerpoint Techniques](#Part 3)
Part 1 6 Animated PowerPoint Templates with Interactive Features
The default people tend to-go-to when it comes to presentations are videos. As they tend to be more engaging on their own. For that, you’ll see people gravitating towards software like Filmora, which can create beautiful, eye-catching presentations that you can easily and quickly share. Not just to an immediate audience, but also on social media and the like.
However, of course, sometimes a personal touch is important in a presentation — important to have a ‘voice’ attached to the image on the screen. But just because this is the case, doesn’t mean that you shouldn’t go all out on your presentation. Hence, why moving animation PowerPoint templates are such a big deal:
01Company Presentation PowerPoint Template
For the first of the Moving Animation PowerPoint templates that we have to introduce, we chose the ‘Company Presentation PowerPoint Template.’ As you can perhaps guess from the name, it’s a very professional template. It comes with a total of 500 sample slides that you can choose from (50 of which are unique), and it’s set up with professional animations that can spice up your presentation without making it look gaudy or over-the-top.
02Move Animated PowerPoint Template
Next is the modern, minimalistic template called “Move Animated.” This one is a lot more versatile, with every single one of the 144 unique slides available suitably animated. The best part of it is definitely the easy way in which it can be used. With the modern, minimalistic style, it’s easy enough to remove the presets and replace them with suitable company or product images to promote your content, idea, or project.
0340 Animated Conceptual Slides for PowerPoint
Again, we have another modern and minimalistic kind of PowerPoint template with ‘40 Animated Conceptual Slides for PowerPoint.’ It comes with 40 modern slides, all of which come fully animated are easy enough to customize with your own branding or content.
04UNIGRAPH - Animated & Creative Template (PPTX)
For a bit more fun, our next template is “UNIGRAPH.” This still definitely fits the description ‘minimalistic’ but the pop of color and effects that it brings to the table gives it a different kind of vibe from all the others. No less professional, but certainly more fun. Of course, most importantly, perhaps, is the fact that each slide is smoothly animated.
05Graph & Charts PowerPoint Presentation
For this next one, we introduce a template set called “Graphs & Charts” for those who may want to present their products, projects, ideas, etc. in the shape of graphs and charts. It’s perfect for professionals, certainly. Especially with its clean look, brightened only by occasional pops of color that can be seen from the graphs and charts that it comes with.
06Laststyle - PowerPoint Template
This next PowerPoint template is most suited for businesses looking to promote their products. The creator of the template has provided five different colored versions of the template, each with 30 unique slides that were carefully sectioned with suitable animations.
Part 2 How to Create a Moving Animation in PowerPoint
Now we come to the point of the article where we speak directly to those who may want to experiment more by personally creating a moving animation PowerPoint. For this example, we’ll be teaching you how to create a path animation PowerPoint with the available tools that the software offers under ‘Animation.’ Stick around if you want to learn more.
01Step 1. Open Project.
First things first, of course. Start a new project. When you’ve started, move on to the Animation tab (which we’ve pointed out in the image below.)
02Step 2. Add Animation.
Then, make sure to select the object or model that you want to animate (in this case, we’ve inserted a 2D model of a businessman), and then click the ‘Add Animation’ button (shown in the image below.)
03Step 3. Choose Animation.
Under ‘Add Animation’ you’ll find several different options for animations that you can choose from. Of course, since our goal is to create a PowerPoint Motion Path Animation, we have selected one of the ‘Motion Path’ options.
04Step 4. Choose Motion Path Animation
In order to make motion animation in PowerPoint, you must select one of the offered ‘Motion Paths’ (i.e., Bounce, Line, Arcs, etc.) and then use the motion path tool that appears to control the direction you wish to make your character move.
In this example, we chose the ‘Lines’ motion path (1) and then used the line tool to create a path for our businessman model. To walk from the right side of the screen towards the left.
05Step 5. Adjust Animation.
With path animation PowerPoint complete, you can adjust as needed with the tools provided. For example, you can have the character start moving as soon as the slide opens, or wait until a minute has passed, you can extend the animation by changing duration, etc.
Part 3 10 Moving Animation PowerPoint Techniques
For this last step, we break down some important PowerPoint 3D Animation need-to-knows. Including the specifics provided by each of the options made available to you and why it’s important to explore every single one to create better and more professional-looking presentations.
01Transitions
When it comes to PowerPoint presentations, most people are no doubt the most familiar with ‘Transitions’ when talking in terms of adding animation into a presentation. This one decides whether you want to shift from one slide to another smoothly, or if you want the previous slide to break into splinters, or rotate into the next slide, and so on and so forth. It’s an ‘in-between’ animation that signals where one ends and the other begins.
02Animations
Now, for the ‘Animations’ tab, we focus on animations that occur in the slide (not in-between like transitions). This can include a wide array of things. Whether it be characters moving (like shown in the tutorial we provided), text boxes appearing and disappearing in short order, images bouncing into view in dramatic fashion, and so on and so forth. There’s lots of potential here.
03Animation - Start
We mentioned this previously in the tutorial, but PowerPoint (which does not offer the more advanced 3D customization options), does still give you the freedom to choose how you want certain animations to work.
In the case of the ‘Animations-Start’ option, the goal is to decide when an animation starts playing. Do you want it to start after a click? Or maybe you want it to start up immediately? Whatever the case may be, this function will let you choose the specifics.
044. Animation - Duration
Next, we decide how long you want the animation to last. For example, if you chose to add a PowerPoint 3D rotation animation into a character, how long do you want it to spin before it settles into place? Perhaps only a second? Perhaps more? Whatever you chose, this is the option that will let you finalize that.
05Animation - Delay
This one is self-explanatory as well. But suffice to say, the ‘Delay’ option is for deciding how much an animation is delayed before starting. For example, if you chose to start it ‘On Click’ you can increase the delay to keep it from playing immediately on click.
06Break Up Presentation into Sections
A lot of PowerPoint templates, you’ll find, are naturally broken into sections. This is because it is easier to consume it in that way. It’s also a good signal to your audience as to what point of the presentation you are on. Are you in the beginning? The middle? Near the end? Etc. In this case, the best option for showing it is transitions that separate the sections from one another.
07Add Animation - Entrance
As promised earlier, we’ll be going through each type of animation is available under the ‘Add Animation’ option. The first is “Entrance” animations. This one is pretty easy to guess. It makes up a variety of animations that serve as its entrance animation. Here are some examples:
● Appear: To have objects appear without any other effect.
● Fade: To have objects fade into view.
● Bounce: To have objects bounce into view.
● Swivel: To have objects swivel into view.
08Add Animation - Emphasis
This next animation style is to give emphasis to an already-present object. For example, at a click, you can have a text box ‘Pulse’ and become the center of attention. You can change ‘Object Color’ to make it stand out. And so on.
099. Add Animation - Exit
Opposite of the ‘Entrance’ animations are the ‘Exit’ animations. You’ll notice that the style of animations is the same here. The only difference is that the animations occur to exit the project out of the presentation. For example, an image exiting to reveal text. Or text flying out to be replaced with more text, etc.
10Add Animation - Motion Path
We’ve already mentioned the PowerPoint Motion Path animation style previously, but just to reiterate some things, this is the most customizable animation feature on PowerPoint. One that allows you to move objects across the slide in whatever way you wish. In our example, we created a motion path animation that took the character from the center of the screen to the left of the screen.
● Key Takeaways from This Episode →
● While videos are the most popular way to share information, there are some presentations that require a heavier guiding hand.
● In these situations, a PowerPoint presentation, carefully animated, can serve in place of an edited video.
● There are templates available that you can take advantage of if you’d prefer to start with something to work from. We introduced some in this article that we think were particularly notable.
● But, of course, more careful personalization is sometimes necessary. In that case, we hope that you find our tutorial and our list of PowerPoint techniques helpful.
10 Amazing Cartoon Music Examples You Need to Bookmark
10 Amazing Cartoon Music Examples You Need to Bookmark in 2022
An easy yet powerful editor
Numerous effects to choose from
Detailed tutorials provided by the official channel
If cartoon music turns you on, this is preferably the right place for you! Stay tuned to learn about the top 10 exciting alternatives of cartoon audios!
In this article
01 [Top 10 Cartoon Music](#Part 1)
02 [How to Add Cartoon Music in Video Editing Clips](#Part 2)
Part 1 Top 10 Cartoon Music
Talking of the fascinating and exciting world of cartoons, the subject is an evergreen source of entertainment for almost all age groups; after all, the essence of enjoying something cannot be limited within age boundaries. Diving into some specific details, the fundamental reason behind the extreme popularity of cartoon films and television series is, without any doubt, the stunning graphics and catchy background music.
Speaking of the sound credibility in particular, the following section presents a discussion on some of the choicest audio alternatives from cartoon media creations. If you have enjoyed the bliss of streaming those century old classic opera songs, you can easily relate to the entries in the upcoming list:
01Tales from the Vienna Woods
This was a masterpiece in the world of cartoon music, originally heard in the caricature series, A Corny Concerto in 1943, directed by Bob Clampett under the globally known Disney production house. The composition is essentially a repetition of Fantasia, which was released in 1940.
Talking about the exact music placement within the storyline, the inaugural audio segment, with a special emphasis on the ‘’wythm of woodwinds’’, when Porky Pig, the hero of the storyline, along with his obedient dog, traverses in search of Bugs.
Concerning on the popularity of the music, the latter has received positive music reviews from almost all the leading media critic platforms.
02The Blue Danube
Again an inclusion of the 1943 release, A corny Concerto, this was predominantly a comic version of the original track. It was used to complement the second stage of the storyline, where, a mother swan is seen humming the music to her little ones, giving the classic melody, the feel of a birdsong cover. As the audio swings in, the toddler Daffy Duck is seen paddling over an unwanted honking, while his mother is worried until everything ends up to be fine.
On the take of preference credibility, the music was quite well appreciated by the globally known media critics.
03Dance of the Comedians
This music piece originally belongs to the music album, The Bartered Bride, and was first used in Zoom and Bored in 1957, to uplift the combating theme of the cartoon series. While aptly supplementing the quest of Wile E. Coyote, the protagonist of the story, against Road Runner, his nasty opponent, the climax of the music turns out to be the most loved operas of Czech origin.
About the fan base of the audio snippet, the composition claimed welcoming responses from a worldwide audience.
04Minute Waltz in D-Flat
This one was an explicitly stunning piece of background audio, which was added to the Hyde and Hare cartoon series of 1955, to complement the latter’s storyline with the best suited sound effects.
Entering into the storyline, you will find Bugs, the cutest of rabbits, tends to locate a piano in Dr. Jekyll’s yard, and the latter being the most sophisticated lagomorph ever; begins to explore his musical skills on the instrument. Things however, take an unwanted turn when Mr. Hyde, the antagonist barges in with an attempt of destroying everything.
While the music piece came to be known as the favorite pick of Waltz lovers, the latter received considerable applaud from other media critics as well.
05Morning, Noon and Night in Vienna
This audio background was an exclusive media add-on to Baton Bunny, the 1959 released musical cartoon movies series, which was a further episode of Bugs’ journey that features this adorable, broad toothed rabbit, taking on a conducting task in the land of Vienna.
It is interesting to note that von Suppe, the developer of this music piece, also happened to work on a conducting profile, although on a comic note, the latter did not receive any appreciation for running behind odd smelling flies amid his performance!
Talking of the audience credibility, this one was a musical masterpiece, which received a large scale appreciation from listeners across the globe for featuring the most funny cartoon music ever!
06The Barber of Seville Overture
Like its aforesaid counterparts, this one was also an appreciated piece of audio, first heard in The Rabbit of Seville cartoon series, released in 1950. The musical luxury aims to compliment the combat Bugs, the adorable rabbit, against Elmer Fudd, the antagonist of the storyline, after the latter chases Bugs to a local stage. The music piece is a classic opera composition by Rossini that fails to miss out on a single beat or encounter a tempo breakdown.
The composition was fortunate enough to gain a positive critical acclaim from global audience as well as renowned critics of the artwork.
07Beethoven’s 7th
This music piece is an addition to the list of classic opera melodies by Beethoven. Talking of the inaugural release, the operatic audio was first heard in A Ham in a Role, the 1949 cartoon series. The storyline of the show talks of a speech fluent dog, longing for recognition in theatres commemorating the Shakespearean era, who is forced to lay back with his plans, thanks to the nasty pranks of the Goofy Gophers.
One of the antagonists attiring up like our poor dog, takes the credit of the efforts made by the latter and manages to get cast for a thrilling ghost scene in the Shakespearean tragedy of Hamlet.
Talking of the appreciation catered by the melody, the snippet was a somewhat strange composition, which made the critics, think of Beethoven being in a drunk state while creating the same.
08Traumerei Dreaming
This one is a short 38 seconds snippet on a tender theme, which runs to supplement the assumption of Bugs, the protagonist bunny as dead by Oalfish Canine, the latter’s newest opponent. The cult line of the music piece was gloomy enough to get a removal from the censor board, leading to a considerable edit of the audio before its theatrical showcase. The final audio was, however, still too heavy on the modernized audience to undertake.
As is evident, critics of the audio regard it to be a bit hefty, though the sound is somewhat appealing to opera lovers.
09Largo al Factotum
This high end opera was a rehearsal favorite of Giovanni Jones, the famous opera singer in The Long-Haired Hare, a well-known cartoon classic released in 1949. The star is supported in his streak by our adorable Bugs, who strums out loud on his banjo at a little distance.
All seemed well until Jones, in an annoyed state barges into break the poor rabbit’s instruments, while stretching him upwards through his long and pointed ears. The incident eventually transforms into war by the adorable bunny, who had been enraged by the time.
The music piece is catchy and captivating, considering the fact that it is a popular opera classic sung by a music star in the series.
10Johannes Brahms’ Hungarian Dances
This musical masterpiece was a part of the set of 21 Hungarian Dance compositions to supplement the country’s folk music. First heard in the cartoon series released under the name of Pigs in a Polka in 1943, the melody is essentially a miscellany of the aforesaid 21 music pieces, highlighting the catchiest elements from each.
Considering the fact that the musical delight is an assortment of some of the already best compositions, this excellent audio snippet was bound to receive a welcoming critical acclaim, and was greatly enjoyed by different sets of audiences across the world.
Part 2 How to Add Cartoon Music in Video Editing Clips
Having a significant insight of the stunning varieties of cartoon music, you can try hands at creating a masterpiece of your own by adding appealing caricature music to your video footage and clips. If you are concerned about the take away of the process, rest assured and see through the following section to understand the stepwise method to complement your video with appropriate cartoon music.
Before entering into the music adding process, let us have a formal acquaintance with Filmora, that is, the video editing software being used to cater to the aforesaid concern.
Wondershare Filmora Video Editor

Wondershare Filmora - Best Video Editor for Mac/Windows
5,481,435 people have downloaded it.
Build unique custom animations without breaking a sweat.
Focus on creating epic stories and leave the details to Filmora’s auto features.
Start a creative adventure with drag & drop effects and endless possibilities.
Filmora simplifies advanced features to save you time and effort.
Filmora cuts out repetition so you can move on to your next creative breakthrough.
To begin with, this one is the most reliable audio visual editing program, which you can use to add that extra spunk and a classic professional touch to your normal video footage. The software grants you complete liberty to explore your graphic editing skills and create visual masterpieces by choosing the perfect effects and filters from the latter’s extensive media library.
The program interface is the sweetest of all, making you cling to the editing fun in videos on a roll. Apart from this, the software is quick and smart, allowing you to create beautiful and stunning audio visual artworks within a few seconds.
User’s Guide to Add Cartoon Music to Video Clips in Filmora
Step 1: Download and Install Filmora
From the program’s official website, undertake a free download of Filmora into your MacOs or Windows supported PC or desktop.
Step 2: Import Your Video
After a successful installation of the Filmora Video Editor program in your system, proceed to launch the same in your device, followed by click on ‘Import’ in the app’s opening interface. This will allow you to select and upload any desired videos from your device to the program’s media album.
As an alternative, you can always prefer the ‘Drag and Drop’ method to upload selected video files. Your uploaded footage will be shown in the media panel at the left of the main editor window. Additional to video clips, you can also add still captures to complement them with appropriate audio.
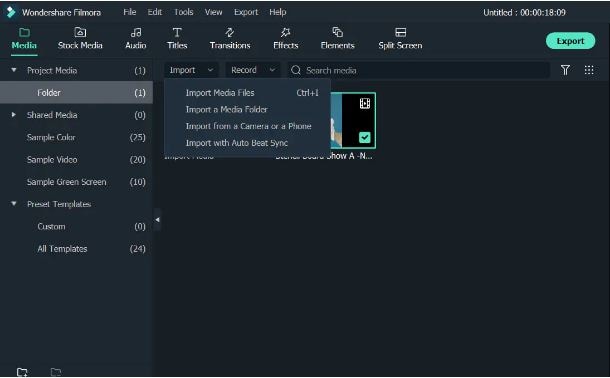
Step 3: Adding a Suitable Cartoon Music
Start with dragging the uploaded video files, one at a time, from Filmora’s media album to its timeline tracks. Take caution of the serial and non-redundant arrangement of the footage files in cohesion with the desired play sequence.
Next, proceed with adding the desired cartoon background music track above the already created video track, by using the conventional ‘Drag and Drop’ method. Check for any trimming requirements for adjusting the audio track length and position to be in concord with the video play time. While making position adjustments, you can simultaneously examine your changes in the editor’s ‘Preview Window’ and fine tune the same in real time.
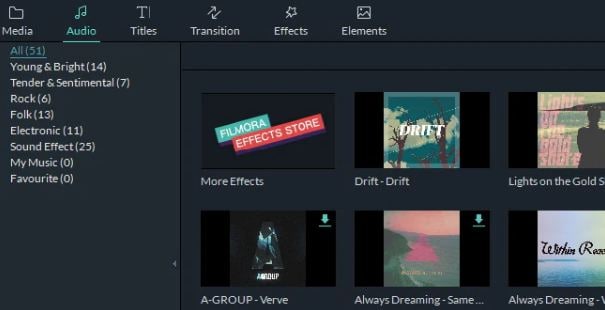
Step 4: Editing the Cartoon Music
To edit your music, open the audio editing panel by double clicking the music file in the editor’s audio track. The feature allows you to enhance your cartoon music track by adding a variety of sound effects, like, fade in, fade out, volume adjustment, pitch tuning and setting up the Audio Equalizer.
You can also try hands on making a slow motion or fast forward version of the footage by varying the audio speed, while applying the ‘Reverse Speed’ effect for a reverse playback of the audio.
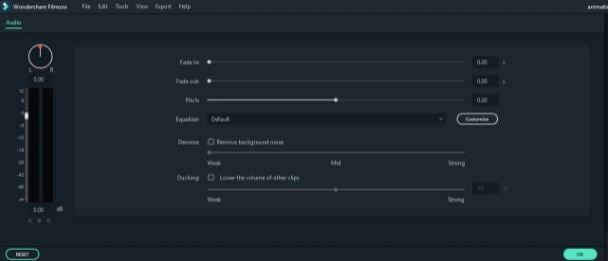
Step 5: Export Your Creation
When you are happy with your work, navigate to and click on the ‘Export’ tab at the bottom right corner of the program’s editor timeline. Save the edited cartoon music video to your device in any preferred file format in the pop-up window that appears next.
You can additionally create videos for iOS devices as well as upload your creations to various media sharing platforms, while also conveniently burning the same to a DVD for a television watch. For looping the cartoon music, just drag the audio clip to the exact length of the video footage.
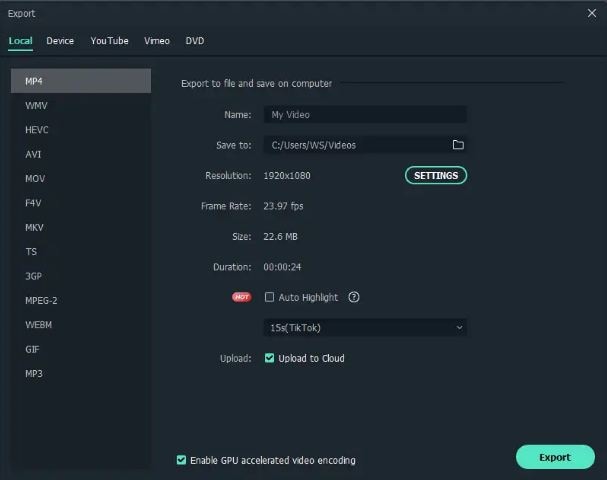
● Ending Thoughts →
● The extreme craze of cartoon music has achieved an evergreen essence over decades of release.
● Among the plethora of music varieties, some specific tracks have maintained a separate fan base.
● When experimenting on creating your own video edits with cartoon music, the Filmora Video Editor is the best tool you can pick.
If cartoon music turns you on, this is preferably the right place for you! Stay tuned to learn about the top 10 exciting alternatives of cartoon audios!
In this article
01 [Top 10 Cartoon Music](#Part 1)
02 [How to Add Cartoon Music in Video Editing Clips](#Part 2)
Part 1 Top 10 Cartoon Music
Talking of the fascinating and exciting world of cartoons, the subject is an evergreen source of entertainment for almost all age groups; after all, the essence of enjoying something cannot be limited within age boundaries. Diving into some specific details, the fundamental reason behind the extreme popularity of cartoon films and television series is, without any doubt, the stunning graphics and catchy background music.
Speaking of the sound credibility in particular, the following section presents a discussion on some of the choicest audio alternatives from cartoon media creations. If you have enjoyed the bliss of streaming those century old classic opera songs, you can easily relate to the entries in the upcoming list:
01Tales from the Vienna Woods
This was a masterpiece in the world of cartoon music, originally heard in the caricature series, A Corny Concerto in 1943, directed by Bob Clampett under the globally known Disney production house. The composition is essentially a repetition of Fantasia, which was released in 1940.
Talking about the exact music placement within the storyline, the inaugural audio segment, with a special emphasis on the ‘’wythm of woodwinds’’, when Porky Pig, the hero of the storyline, along with his obedient dog, traverses in search of Bugs.
Concerning on the popularity of the music, the latter has received positive music reviews from almost all the leading media critic platforms.
02The Blue Danube
Again an inclusion of the 1943 release, A corny Concerto, this was predominantly a comic version of the original track. It was used to complement the second stage of the storyline, where, a mother swan is seen humming the music to her little ones, giving the classic melody, the feel of a birdsong cover. As the audio swings in, the toddler Daffy Duck is seen paddling over an unwanted honking, while his mother is worried until everything ends up to be fine.
On the take of preference credibility, the music was quite well appreciated by the globally known media critics.
03Dance of the Comedians
This music piece originally belongs to the music album, The Bartered Bride, and was first used in Zoom and Bored in 1957, to uplift the combating theme of the cartoon series. While aptly supplementing the quest of Wile E. Coyote, the protagonist of the story, against Road Runner, his nasty opponent, the climax of the music turns out to be the most loved operas of Czech origin.
About the fan base of the audio snippet, the composition claimed welcoming responses from a worldwide audience.
04Minute Waltz in D-Flat
This one was an explicitly stunning piece of background audio, which was added to the Hyde and Hare cartoon series of 1955, to complement the latter’s storyline with the best suited sound effects.
Entering into the storyline, you will find Bugs, the cutest of rabbits, tends to locate a piano in Dr. Jekyll’s yard, and the latter being the most sophisticated lagomorph ever; begins to explore his musical skills on the instrument. Things however, take an unwanted turn when Mr. Hyde, the antagonist barges in with an attempt of destroying everything.
While the music piece came to be known as the favorite pick of Waltz lovers, the latter received considerable applaud from other media critics as well.
05Morning, Noon and Night in Vienna
This audio background was an exclusive media add-on to Baton Bunny, the 1959 released musical cartoon movies series, which was a further episode of Bugs’ journey that features this adorable, broad toothed rabbit, taking on a conducting task in the land of Vienna.
It is interesting to note that von Suppe, the developer of this music piece, also happened to work on a conducting profile, although on a comic note, the latter did not receive any appreciation for running behind odd smelling flies amid his performance!
Talking of the audience credibility, this one was a musical masterpiece, which received a large scale appreciation from listeners across the globe for featuring the most funny cartoon music ever!
06The Barber of Seville Overture
Like its aforesaid counterparts, this one was also an appreciated piece of audio, first heard in The Rabbit of Seville cartoon series, released in 1950. The musical luxury aims to compliment the combat Bugs, the adorable rabbit, against Elmer Fudd, the antagonist of the storyline, after the latter chases Bugs to a local stage. The music piece is a classic opera composition by Rossini that fails to miss out on a single beat or encounter a tempo breakdown.
The composition was fortunate enough to gain a positive critical acclaim from global audience as well as renowned critics of the artwork.
07Beethoven’s 7th
This music piece is an addition to the list of classic opera melodies by Beethoven. Talking of the inaugural release, the operatic audio was first heard in A Ham in a Role, the 1949 cartoon series. The storyline of the show talks of a speech fluent dog, longing for recognition in theatres commemorating the Shakespearean era, who is forced to lay back with his plans, thanks to the nasty pranks of the Goofy Gophers.
One of the antagonists attiring up like our poor dog, takes the credit of the efforts made by the latter and manages to get cast for a thrilling ghost scene in the Shakespearean tragedy of Hamlet.
Talking of the appreciation catered by the melody, the snippet was a somewhat strange composition, which made the critics, think of Beethoven being in a drunk state while creating the same.
08Traumerei Dreaming
This one is a short 38 seconds snippet on a tender theme, which runs to supplement the assumption of Bugs, the protagonist bunny as dead by Oalfish Canine, the latter’s newest opponent. The cult line of the music piece was gloomy enough to get a removal from the censor board, leading to a considerable edit of the audio before its theatrical showcase. The final audio was, however, still too heavy on the modernized audience to undertake.
As is evident, critics of the audio regard it to be a bit hefty, though the sound is somewhat appealing to opera lovers.
09Largo al Factotum
This high end opera was a rehearsal favorite of Giovanni Jones, the famous opera singer in The Long-Haired Hare, a well-known cartoon classic released in 1949. The star is supported in his streak by our adorable Bugs, who strums out loud on his banjo at a little distance.
All seemed well until Jones, in an annoyed state barges into break the poor rabbit’s instruments, while stretching him upwards through his long and pointed ears. The incident eventually transforms into war by the adorable bunny, who had been enraged by the time.
The music piece is catchy and captivating, considering the fact that it is a popular opera classic sung by a music star in the series.
10Johannes Brahms’ Hungarian Dances
This musical masterpiece was a part of the set of 21 Hungarian Dance compositions to supplement the country’s folk music. First heard in the cartoon series released under the name of Pigs in a Polka in 1943, the melody is essentially a miscellany of the aforesaid 21 music pieces, highlighting the catchiest elements from each.
Considering the fact that the musical delight is an assortment of some of the already best compositions, this excellent audio snippet was bound to receive a welcoming critical acclaim, and was greatly enjoyed by different sets of audiences across the world.
Part 2 How to Add Cartoon Music in Video Editing Clips
Having a significant insight of the stunning varieties of cartoon music, you can try hands at creating a masterpiece of your own by adding appealing caricature music to your video footage and clips. If you are concerned about the take away of the process, rest assured and see through the following section to understand the stepwise method to complement your video with appropriate cartoon music.
Before entering into the music adding process, let us have a formal acquaintance with Filmora, that is, the video editing software being used to cater to the aforesaid concern.
Wondershare Filmora Video Editor
Wondershare Filmora - Best Video Editor for Mac/Windows
5,481,435 people have downloaded it.
Build unique custom animations without breaking a sweat.
Focus on creating epic stories and leave the details to Filmora’s auto features.
Start a creative adventure with drag & drop effects and endless possibilities.
Filmora simplifies advanced features to save you time and effort.
Filmora cuts out repetition so you can move on to your next creative breakthrough.
To begin with, this one is the most reliable audio visual editing program, which you can use to add that extra spunk and a classic professional touch to your normal video footage. The software grants you complete liberty to explore your graphic editing skills and create visual masterpieces by choosing the perfect effects and filters from the latter’s extensive media library.
The program interface is the sweetest of all, making you cling to the editing fun in videos on a roll. Apart from this, the software is quick and smart, allowing you to create beautiful and stunning audio visual artworks within a few seconds.
User’s Guide to Add Cartoon Music to Video Clips in Filmora
Step 1: Download and Install Filmora
From the program’s official website, undertake a free download of Filmora into your MacOs or Windows supported PC or desktop.
Step 2: Import Your Video
After a successful installation of the Filmora Video Editor program in your system, proceed to launch the same in your device, followed by click on ‘Import’ in the app’s opening interface. This will allow you to select and upload any desired videos from your device to the program’s media album.
As an alternative, you can always prefer the ‘Drag and Drop’ method to upload selected video files. Your uploaded footage will be shown in the media panel at the left of the main editor window. Additional to video clips, you can also add still captures to complement them with appropriate audio.
Step 3: Adding a Suitable Cartoon Music
Start with dragging the uploaded video files, one at a time, from Filmora’s media album to its timeline tracks. Take caution of the serial and non-redundant arrangement of the footage files in cohesion with the desired play sequence.
Next, proceed with adding the desired cartoon background music track above the already created video track, by using the conventional ‘Drag and Drop’ method. Check for any trimming requirements for adjusting the audio track length and position to be in concord with the video play time. While making position adjustments, you can simultaneously examine your changes in the editor’s ‘Preview Window’ and fine tune the same in real time.
Step 4: Editing the Cartoon Music
To edit your music, open the audio editing panel by double clicking the music file in the editor’s audio track. The feature allows you to enhance your cartoon music track by adding a variety of sound effects, like, fade in, fade out, volume adjustment, pitch tuning and setting up the Audio Equalizer.
You can also try hands on making a slow motion or fast forward version of the footage by varying the audio speed, while applying the ‘Reverse Speed’ effect for a reverse playback of the audio.
Step 5: Export Your Creation
When you are happy with your work, navigate to and click on the ‘Export’ tab at the bottom right corner of the program’s editor timeline. Save the edited cartoon music video to your device in any preferred file format in the pop-up window that appears next.
You can additionally create videos for iOS devices as well as upload your creations to various media sharing platforms, while also conveniently burning the same to a DVD for a television watch. For looping the cartoon music, just drag the audio clip to the exact length of the video footage.
● Ending Thoughts →
● The extreme craze of cartoon music has achieved an evergreen essence over decades of release.
● Among the plethora of music varieties, some specific tracks have maintained a separate fan base.
● When experimenting on creating your own video edits with cartoon music, the Filmora Video Editor is the best tool you can pick.
How to Create Animated Video on Canva?
Canva is a simple way—without any graphic design experience—to make professional graphics for social media, newsletters, presentations, business cards, gift certificates, brochures, and more. Flexible design templates offer the ideal layout for your target destination, letting you aim over the design, not the file formatting or the size.
So, can you make an animated video on Canva?
Yes, because Canva lives on the cloud, you can access your graphics from anywhere you can get online while using Canva on the cloud. Learn how you can play, get up, and run with Canva in this short, fun tutorial guide. We’ll discuss adding and editing images, using inbuilt design templates, and working with typography to build your next project with Canva.
In the subsequent sections, we shall learn more about Canva animated videos and how to create one easily on your PC.
In this article
01 [Create an animated video with a Canva template](#Part 1)
02 [Create Canva animated video with your video](#Part 2)
Part 1 Create an animated video with a Canva template
In this section, we’ll explore how to make animated video on Canva, which applies to both the free and pro account of Canva. However, the steps given below got created from Canva’s free account. We suppose that you’ve already created an account on Canva and logged into the platform. So, further steps will proceed as follows:
Go to the Video tab given in the top front panel of Canva and choose any template of your desire. Let’s say we’ve selected the very first template, 1920 × 1080 pixels. There are lots of options provided by Canva from where you can choose your favorites. You can also create a template with a custom size.

After you enter the editing panel, you have the choice of different templates on the left-hand panel. You can search for a template of your choice among them and can create other pages, as shown below. To preview the templates, you can click the Play button with mentioned time duration on the top right corner of the editing screen.

Now, it’s time to add creativity and explore more editing elements within the Canva. You can modify the entire template given and add something of your own.

Now, you can explore various editing Elements given on the left-hand panel, as shown below. There are multiple options available here as well.

You can add some text within the Canva template, and you can search from the left-hand panel. Given above are various options by which you can bold, italicize, and underline the text.

Now, let’s add some music to the video. So, go to the Audio tab and select any one of the options among them. There are different choices for you to explore here as well.

After you’re done, you can hit the Preview Play button on the top and see your project, as shown below.
It’s all done, and you can proceed with the next section.
Part 2 Create Canva animated video with your video
We’ll discuss how to create an animated video by uploading our video in Canva without using any template in this section. After logging in to the Canva account credentials, select the Video tab and choose the different templates offered.
We’ve selected a blank template for the purpose as follows.

Now, you need to head directly towards the Uploads tab and upload your video created over here.

By now, you have most probably got over with uploading your media. Click the uploaded video, and it will automatically enter within the editing panel of Canva, as shown below.

You’re all done now, and it’s all finished! Even though template usage is quite simple, it’s pretty straightforward when you don’t use any ready-made template. However, you can still beautify this simple video with different elements like text, music, etc.
Animation style videos influence people of all ages to whatever generation, or the kind you belong to will be one of them for sure.
Animated ones provoke diverse impacts instead of ordinary videos on the audience utilizing illustration, kinesthetic, etc. But the fact is, due to technological advancements and overexposure to social media sites, we have forgotten its significance.
Want to know some other most accessible software tools that can bring out the artist in you? Here is an alternative that is all you need.
Are you surprised to find that you can go with various animation styles to boost your business or bring out your talents? But are you confused about how to revamp your story and effectively film it? Why should you worry when the best animation maker and Canva’s alternative Wondershare Filmora is here exclusively for you to create fantastic animation videos that could stand out of the box?
Conclusion
Do you aspire to paint with bright colors to videos or want to become an animator? Then, choose animation styles that you most enjoy, find attractive today, start working on them, or create Canva animated videos as the tutorial indicates above. Lastly, don’t forget to give Filmora a chance to upscale your creation and give your animation style a life!
02 [Create Canva animated video with your video](#Part 2)
Part 1 Create an animated video with a Canva template
In this section, we’ll explore how to make animated video on Canva, which applies to both the free and pro account of Canva. However, the steps given below got created from Canva’s free account. We suppose that you’ve already created an account on Canva and logged into the platform. So, further steps will proceed as follows:
Go to the Video tab given in the top front panel of Canva and choose any template of your desire. Let’s say we’ve selected the very first template, 1920 × 1080 pixels. There are lots of options provided by Canva from where you can choose your favorites. You can also create a template with a custom size.
After you enter the editing panel, you have the choice of different templates on the left-hand panel. You can search for a template of your choice among them and can create other pages, as shown below. To preview the templates, you can click the Play button with mentioned time duration on the top right corner of the editing screen.
Now, it’s time to add creativity and explore more editing elements within the Canva. You can modify the entire template given and add something of your own.
Now, you can explore various editing Elements given on the left-hand panel, as shown below. There are multiple options available here as well.
You can add some text within the Canva template, and you can search from the left-hand panel. Given above are various options by which you can bold, italicize, and underline the text.
Now, let’s add some music to the video. So, go to the Audio tab and select any one of the options among them. There are different choices for you to explore here as well.
After you’re done, you can hit the Preview Play button on the top and see your project, as shown below.
It’s all done, and you can proceed with the next section.
Part 2 Create Canva animated video with your video
We’ll discuss how to create an animated video by uploading our video in Canva without using any template in this section. After logging in to the Canva account credentials, select the Video tab and choose the different templates offered.
We’ve selected a blank template for the purpose as follows.
Now, you need to head directly towards the Uploads tab and upload your video created over here.
By now, you have most probably got over with uploading your media. Click the uploaded video, and it will automatically enter within the editing panel of Canva, as shown below.
You’re all done now, and it’s all finished! Even though template usage is quite simple, it’s pretty straightforward when you don’t use any ready-made template. However, you can still beautify this simple video with different elements like text, music, etc.
Animation style videos influence people of all ages to whatever generation, or the kind you belong to will be one of them for sure.
Animated ones provoke diverse impacts instead of ordinary videos on the audience utilizing illustration, kinesthetic, etc. But the fact is, due to technological advancements and overexposure to social media sites, we have forgotten its significance.
Want to know some other most accessible software tools that can bring out the artist in you? Here is an alternative that is all you need.
Are you surprised to find that you can go with various animation styles to boost your business or bring out your talents? But are you confused about how to revamp your story and effectively film it? Why should you worry when the best animation maker and Canva’s alternative Wondershare Filmora is here exclusively for you to create fantastic animation videos that could stand out of the box?
Conclusion
Do you aspire to paint with bright colors to videos or want to become an animator? Then, choose animation styles that you most enjoy, find attractive today, start working on them, or create Canva animated videos as the tutorial indicates above. Lastly, don’t forget to give Filmora a chance to upscale your creation and give your animation style a life!
OBS Animated Alternatives
OBS Animated Lower Thirds Alternatives
An easy yet powerful editor
Numerous effects to choose from
Detailed tutorials provided by the official channel
It’s worth noting that people commonly use built-in OBS animated lower thirds for the job, but you can also use other editing tools to create custom animations and import them in your OBS Livestream.
This guide will walk you through everything you need to know about OBS animated lower thirds and their best alternatives you can use in 2022 and beyond.
In this article
01 [What are Lower Thirds in Animation?](#Part 1)
02 [How To Set Up An Animated Lower Third In OBS Studio](#Part 2)
03 [8 AMAZING OBS Animated Lower Thirds Alternatives](#Part 3)
Part 1 What is Lower Thirds in Animation?
To put it in simple words, a lower third is simply a graphic overlay that appears on top of the actual footage. As the name implies, the contents of the lower third usually occur at the lower end of the screen, but streamers can also configure the OBS settings to change their position within the screen. Ideally, lower third animations are utilized to give a context of the overall video.
Let’s say you are life streaming your GTA V gameplay on YouTube. So, to help first-time viewers get the overall context, you can add GTA-related elements in the lower third animation and maximize viewer acquisition. In addition to this, you can also use OBS animated lower-thirds to display exclusive offers and discounts throughout the live stream.
Part 2 How To Set Up An Animated Lower Third In OBS Studio
So, now that you know the major benefits of using animated lower thirds in OBS studio, let’s understand how to set them up to make your live streams more engaging. It’s worth noting that OBS works around the concept of layers that you can manage individually to run your live streams. So, to add an animated lower third in OBS studio, all you have to do is add a dedicated layer and place it right above the video layer.
When it comes to setting up the lower-third, you’ll first need to create the graphics you want to display on top of the live streams. You can use Photoshop to design a custom lower-third animation if you are a professional designer. But, if you have just stepped into the world of live streams and don’t have any prior experience with Photoshop, you can also purchase one of the ready-to-use lower-third packages and import them directly to OBS.
Either way, it would be crucial to ensure that your OBS animated lower-third graphics do not interfere with the actual video. Why? Because this will make the video look more cluttered, and you’ll end up losing potential viewers.
Here’s a YouTube video that’ll walk you through the step-by-step procedure of creating lower-third animations in OBS Studio.
Part 3 8 AMAZING OBS Animated Lower Thirds Alternatives
While OBS is a great tool to add lower-third animations to your live streams, it has its fair share of drawbacks. For instance, OBS has a pretty complicated interface, which means if you are an absolute beginner, you may not easily set up your live streams. Not to mention, OBS is heavy software - so if you don’t have a high-configuration system, you won’t be able to run the tool at all.
So, what’s your next best option? Fortunately, there are several OBS alternatives that you can use to set up OBS animated lower-third graphics and enhance the overall quality of your live streams. To make your job easier, we have cherry-picked 8 of the most reliable OBS alternatives that you can use to add lower-third animations to a Livestream video.
01Wirecast

Like OBS, Wirecast is a popular video streaming platform that many content creators use to live stream on their social media handles. It also offers a layer-based architecture, which means users can add multiple layers separately and manage them through an easy-to-navigate panel.
One of the key reasons Wirecast is an ideal choice to add animated lower-third graphics to your live streams is its built-in collections. The tool already has several ready-to-integrate lower-third animations that one could import into their project without any hassle.
Pros:
● Built-in lower-third graphic templates
● Easy-to-use Interface
● Switch between multiple camera angles with one click
Cons:
● Unlike OBS Studio, Wirecast isn’t available for free
Why Do We Recommend Wirecast?
Wirecast is a fully functional video streaming platform where you can easily manage all your live streams. Wirecast offers far better functionality than OBS Studio despite having a relatively easy-to-use UI.
02vMix

vMix is a feature-rich video production software that offers everything one would need to create stunning videos. However, it also has a dedicated live stream manager to manage your live streams, switch between multiple camera angles, and add overlay animations to keep the viewers engaged. Unlike OBS Studio, vMix doesn’t have a layering system, which means you can overlay multiple channels easily.
As far as OBS animated lower-thirds are concerned, there are different ways you can add these animations to your live streams. You can either import dedicated PSD files, embed HTML codes, or choose one of the ready-to-use lower-third templates to do the job. In either case, vMix will help you add stunning lower-third animations within a few minutes.
Pros:
● Full-scale video production software
● Built-in support for audio mixing
● Add and Manage Multiple Camera Inputs
Cons:
● If you want to relish all the benefits of vMix, you would have to purchase its pro version, which costs $1200. As compared to other available options, vMix is significantly expensive.
Why Do We Recommend vMix?
vMix is ideal for users who want to upgrade from OBS and can spend $1200 on a live stream manager. It’ll provide everything you need to live stream across different social media platforms.
03Restream Studio

Restream Studio is a browser-based live stream tool that offers an easy-to-navigate panel to manage your live streams. Restream is ideal for beginners who don’t want to spend a hefty amount on their live streaming software. With restream, you can upload your brand logos, graphic overlays, and text details and save them in the “Favorites” tab for future use.
This way, whenever you are live streaming, you can directly choose one of these overlays and switch between them easily. The tool also has a dedicated “Hide/Show” button that’ll allow you to change the display status of the lower-third animations.
Pros:
● Cross-platform Compatibility
● Ideal for Beginners and Novice YouTubers
● Save Multiple Graphic Overlays for Future Use
Cons:
● You won’t get any advanced functionality like Wirecast or OBS Studio
Why Do We Recommend Restream Studio?
Restream Studio is the perfect solution for users who don’t want to get overwhelmed with the complex features of OBS Studio. With its browser-friendly UI, you’ll be able to run Restream Studio across different platforms and add OBS animated lower-third graphics to your live streams easily.
04Lightstream

Lightstream is another free live stream manager that offers many features to execute hassle-free live streams across different platforms, including YouTube, Facebook, and Twitch. Even though the tool doesn’t provide advanced features like OBS Studio or Wirecast, it has everything you require to stream live on your social media handles. One of the key features of Lightstream is that you can add multiple scenes/overlays and switch between them with a single click.
Pros:
● Being open-source, Lightstream is available for free
● Lightstream is a cloud-based tool, which means it offers cross-platform compatibility
● Easy to set up, even if you are a beginner
Cons:
● Lacks advanced editing features
Why Do We Recommend Lightstream?
Lightstream is the most reliable live stream manager for users looking for a simple and cross-platform tool to manage live streams and add overlays.
05Adobe Photoshop

Before you act surprised, let us clarify that Adobe Photoshop isn’t an alternative to OBS Studio. However, you can use it to create customized overlays and lower-third graphics to add a personal touch to your live streams. Suppose you are already familiar with Photoshop and have been using it for a few years. In that case, it’ll allow you to design personalized text overlays, graphics, animations, and logos for your live streams.
And, once you have successfully designed the lower-third overlays, you can use any of the live stream managers to add them to your live streams.
Pros:
● Design custom overlays for your social media live streams
● Offers advanced editing options to customize logos and lower-third graphics
Cons:
● Photoshop has a steep learning curve, and if you are not an experienced designer, you won’t be able to design custom overlays
Why Do We Recommend Adobe Photoshop?
Adobe Photoshop is a reliable choice for creators who find the built-in media libraries of a live stream manager limited. With Photoshop, you’ll be able to design custom overlays for your live streams.
06ShareX

ShareX is also an open-source screen recorder and lives stream manager that offers all the OBS features you’ll need to manage your live streams and add multiple lower-third overlays. The only downside of ShareX is that it has a complicated user interface. Even if you have used OBS in the past, you’ll find ShareX’s user interface relatively complex. So, you should only sign up for ShareX if you are comfortable with complex user interfaces.
Pros:
● Upload and save pictures, videos, logos for lower-third overlays
● Record your entire screen or a specific window
● Assign hotkeys to switch between multiple windows during the Livestream
Cons:
● The user interface isn’t as friendly as other available options
Why Do We Recommend ShareX?
ShareX is an ideal OBS animated lower-third alternative for users who need a free-of-cost solution to manage their live streams.
07Canva

Again, Canva doesn’t support live stream management at all. However, like Adobe Photoshop, you can use Canva to create stunning lower-third overlays for your Livestream sessions. The major benefit of using Canva is that it has thousands of pre-made templates that you can import to your design with one click. All these templates are fully customizable - so you’ll be able to design custom lower-third overlays for your live streams.
Pros:
● Comparatively less complicated than Adobe Photoshop
● Canva is affordable
● Being a web-based designing tool, you can access Canva on any device
Cons:
● The premium version of Canva is relatively expensive than its competitors.
Why Do We Recommend Canva?
Canva is a one-stop solution for content creators looking for an additional designing tool to create custom OBS animated lower thirds for their live streams.
Key Takeaways from This Episode
● OBS animated lower-thirds are one of the most effective ways to share the context of a live stream with your viewers
● With OBS Studio, you have the liberty to import custom animated lower-third animations and overlays and add them to the live stream through its layered architecture
● Apart from OBS Studio, there are several other tools (such as Wondershare Filmora Pro) to add animated lower-thirds to live streams.
It’s worth noting that people commonly use built-in OBS animated lower thirds for the job, but you can also use other editing tools to create custom animations and import them in your OBS Livestream.
This guide will walk you through everything you need to know about OBS animated lower thirds and their best alternatives you can use in 2022 and beyond.
In this article
01 [What are Lower Thirds in Animation?](#Part 1)
02 [How To Set Up An Animated Lower Third In OBS Studio](#Part 2)
03 [8 AMAZING OBS Animated Lower Thirds Alternatives](#Part 3)
Part 1 What is Lower Thirds in Animation?
To put it in simple words, a lower third is simply a graphic overlay that appears on top of the actual footage. As the name implies, the contents of the lower third usually occur at the lower end of the screen, but streamers can also configure the OBS settings to change their position within the screen. Ideally, lower third animations are utilized to give a context of the overall video.
Let’s say you are life streaming your GTA V gameplay on YouTube. So, to help first-time viewers get the overall context, you can add GTA-related elements in the lower third animation and maximize viewer acquisition. In addition to this, you can also use OBS animated lower-thirds to display exclusive offers and discounts throughout the live stream.
Part 2 How To Set Up An Animated Lower Third In OBS Studio
So, now that you know the major benefits of using animated lower thirds in OBS studio, let’s understand how to set them up to make your live streams more engaging. It’s worth noting that OBS works around the concept of layers that you can manage individually to run your live streams. So, to add an animated lower third in OBS studio, all you have to do is add a dedicated layer and place it right above the video layer.
When it comes to setting up the lower-third, you’ll first need to create the graphics you want to display on top of the live streams. You can use Photoshop to design a custom lower-third animation if you are a professional designer. But, if you have just stepped into the world of live streams and don’t have any prior experience with Photoshop, you can also purchase one of the ready-to-use lower-third packages and import them directly to OBS.
Either way, it would be crucial to ensure that your OBS animated lower-third graphics do not interfere with the actual video. Why? Because this will make the video look more cluttered, and you’ll end up losing potential viewers.
Here’s a YouTube video that’ll walk you through the step-by-step procedure of creating lower-third animations in OBS Studio.
Part 3 8 AMAZING OBS Animated Lower Thirds Alternatives
While OBS is a great tool to add lower-third animations to your live streams, it has its fair share of drawbacks. For instance, OBS has a pretty complicated interface, which means if you are an absolute beginner, you may not easily set up your live streams. Not to mention, OBS is heavy software - so if you don’t have a high-configuration system, you won’t be able to run the tool at all.
So, what’s your next best option? Fortunately, there are several OBS alternatives that you can use to set up OBS animated lower-third graphics and enhance the overall quality of your live streams. To make your job easier, we have cherry-picked 8 of the most reliable OBS alternatives that you can use to add lower-third animations to a Livestream video.
01Wirecast
Like OBS, Wirecast is a popular video streaming platform that many content creators use to live stream on their social media handles. It also offers a layer-based architecture, which means users can add multiple layers separately and manage them through an easy-to-navigate panel.
One of the key reasons Wirecast is an ideal choice to add animated lower-third graphics to your live streams is its built-in collections. The tool already has several ready-to-integrate lower-third animations that one could import into their project without any hassle.
Pros:
● Built-in lower-third graphic templates
● Easy-to-use Interface
● Switch between multiple camera angles with one click
Cons:
● Unlike OBS Studio, Wirecast isn’t available for free
Why Do We Recommend Wirecast?
Wirecast is a fully functional video streaming platform where you can easily manage all your live streams. Wirecast offers far better functionality than OBS Studio despite having a relatively easy-to-use UI.
02vMix
vMix is a feature-rich video production software that offers everything one would need to create stunning videos. However, it also has a dedicated live stream manager to manage your live streams, switch between multiple camera angles, and add overlay animations to keep the viewers engaged. Unlike OBS Studio, vMix doesn’t have a layering system, which means you can overlay multiple channels easily.
As far as OBS animated lower-thirds are concerned, there are different ways you can add these animations to your live streams. You can either import dedicated PSD files, embed HTML codes, or choose one of the ready-to-use lower-third templates to do the job. In either case, vMix will help you add stunning lower-third animations within a few minutes.
Pros:
● Full-scale video production software
● Built-in support for audio mixing
● Add and Manage Multiple Camera Inputs
Cons:
● If you want to relish all the benefits of vMix, you would have to purchase its pro version, which costs $1200. As compared to other available options, vMix is significantly expensive.
Why Do We Recommend vMix?
vMix is ideal for users who want to upgrade from OBS and can spend $1200 on a live stream manager. It’ll provide everything you need to live stream across different social media platforms.
03Restream Studio
Restream Studio is a browser-based live stream tool that offers an easy-to-navigate panel to manage your live streams. Restream is ideal for beginners who don’t want to spend a hefty amount on their live streaming software. With restream, you can upload your brand logos, graphic overlays, and text details and save them in the “Favorites” tab for future use.
This way, whenever you are live streaming, you can directly choose one of these overlays and switch between them easily. The tool also has a dedicated “Hide/Show” button that’ll allow you to change the display status of the lower-third animations.
Pros:
● Cross-platform Compatibility
● Ideal for Beginners and Novice YouTubers
● Save Multiple Graphic Overlays for Future Use
Cons:
● You won’t get any advanced functionality like Wirecast or OBS Studio
Why Do We Recommend Restream Studio?
Restream Studio is the perfect solution for users who don’t want to get overwhelmed with the complex features of OBS Studio. With its browser-friendly UI, you’ll be able to run Restream Studio across different platforms and add OBS animated lower-third graphics to your live streams easily.
04Lightstream
Lightstream is another free live stream manager that offers many features to execute hassle-free live streams across different platforms, including YouTube, Facebook, and Twitch. Even though the tool doesn’t provide advanced features like OBS Studio or Wirecast, it has everything you require to stream live on your social media handles. One of the key features of Lightstream is that you can add multiple scenes/overlays and switch between them with a single click.
Pros:
● Being open-source, Lightstream is available for free
● Lightstream is a cloud-based tool, which means it offers cross-platform compatibility
● Easy to set up, even if you are a beginner
Cons:
● Lacks advanced editing features
Why Do We Recommend Lightstream?
Lightstream is the most reliable live stream manager for users looking for a simple and cross-platform tool to manage live streams and add overlays.
05Adobe Photoshop
Before you act surprised, let us clarify that Adobe Photoshop isn’t an alternative to OBS Studio. However, you can use it to create customized overlays and lower-third graphics to add a personal touch to your live streams. Suppose you are already familiar with Photoshop and have been using it for a few years. In that case, it’ll allow you to design personalized text overlays, graphics, animations, and logos for your live streams.
And, once you have successfully designed the lower-third overlays, you can use any of the live stream managers to add them to your live streams.
Pros:
● Design custom overlays for your social media live streams
● Offers advanced editing options to customize logos and lower-third graphics
Cons:
● Photoshop has a steep learning curve, and if you are not an experienced designer, you won’t be able to design custom overlays
Why Do We Recommend Adobe Photoshop?
Adobe Photoshop is a reliable choice for creators who find the built-in media libraries of a live stream manager limited. With Photoshop, you’ll be able to design custom overlays for your live streams.
06ShareX
ShareX is also an open-source screen recorder and lives stream manager that offers all the OBS features you’ll need to manage your live streams and add multiple lower-third overlays. The only downside of ShareX is that it has a complicated user interface. Even if you have used OBS in the past, you’ll find ShareX’s user interface relatively complex. So, you should only sign up for ShareX if you are comfortable with complex user interfaces.
Pros:
● Upload and save pictures, videos, logos for lower-third overlays
● Record your entire screen or a specific window
● Assign hotkeys to switch between multiple windows during the Livestream
Cons:
● The user interface isn’t as friendly as other available options
Why Do We Recommend ShareX?
ShareX is an ideal OBS animated lower-third alternative for users who need a free-of-cost solution to manage their live streams.
07Canva
Again, Canva doesn’t support live stream management at all. However, like Adobe Photoshop, you can use Canva to create stunning lower-third overlays for your Livestream sessions. The major benefit of using Canva is that it has thousands of pre-made templates that you can import to your design with one click. All these templates are fully customizable - so you’ll be able to design custom lower-third overlays for your live streams.
Pros:
● Comparatively less complicated than Adobe Photoshop
● Canva is affordable
● Being a web-based designing tool, you can access Canva on any device
Cons:
● The premium version of Canva is relatively expensive than its competitors.
Why Do We Recommend Canva?
Canva is a one-stop solution for content creators looking for an additional designing tool to create custom OBS animated lower thirds for their live streams.
Key Takeaways from This Episode
● OBS animated lower-thirds are one of the most effective ways to share the context of a live stream with your viewers
● With OBS Studio, you have the liberty to import custom animated lower-third animations and overlays and add them to the live stream through its layered architecture
● Apart from OBS Studio, there are several other tools (such as Wondershare Filmora Pro) to add animated lower-thirds to live streams.
Also read:
- New How to Make Animated Videos for Business – an Ultimate Guide
- Updated Most Effective Ways to Set WhatsApp Status for 2024
- New 2024 Approved Can I Do Animated Logo Design Without Design Skills?
- Updated 10 Most Memorable Japanese Cat Cartoons for 2024
- How to Find 3D Animation Studio Meeting All Your Inspiring Needs for 2024
- 2024 Approved Top 12 Illusion Gifs Top Picks
- The 15 Most Efficient Photo to Cartoon Software for Android for 2024
- Updated 10 Stunning Stop Motion Movies You Should Not Miss
- New In 2024, 10 Amazing Wallpaper Collage Ideas and Photos
- Updated Learn How to Make Architecture Animation
- New Before You Learn 3D Animation Things You Should Know
- New Methods to Make Photo Motion Effect Online, In 2024
- New 2024 Approved Top 7 Best Animated Lyric Video Software for FREE
- New In 2024, 10 Realistic Cartoon Characters You Will Run Away From if You Met in R
- Updated 2024 Approved Learn How to Make Your Characters Interactive in Unity Animation Rigging
- In 2024, Some Techniques for Creating Animated Logo That Few People Know About
- Updated 2024 Approved 10 Great Apps for Turning Funny Animated Images Into Comics
- New In 2024, How to Make a Video a Live Photo 2023
- How to Make Your Own GIF on WhatsApp in Simple Ways
- Updated Secret Source to Make a Great Stop Motion Puppet
- How to Liven Up Your Animate Website on Scroll for 2024
- 2024 Approved Why These 10+ Top Text Motion Templates Are Worth Your Attention
- 15 Best Pics Collage Apps Top Picks for 2024
- Updated In 2024, In-Depth Study of Cartoon Painting Starts From Learning to Draw It
- Updated Tutorials for Animating Picture Online Without Learning From Scratch
- Updated 2024 Approved How to Draw Skeleton Cartoon – A Step by Step Guide
- In 2024, How to Make a Photoshop Collage in EASY Steps
- In 2024, The Most Efficient Techniques to Make 3D Animation Character
- Updated 2024 Approved Amazing Techniques of Motion Graphics in Premiere Pro
- Updated What Is A GIF for 2024
- Updated 2024 Approved Adobe Auto Rigger Is AWESOME
- Updated 4 Smart Solutions to Create or Find Good Morning/Night GIFs
- How to Create Picsart Cartoon in Simple Ways for 2024
- Updated How to Send and Add Snapchat GIFs 100 in Easy Way
- Updated 2024 Approved 10 Best Free GIF Apps for iPhone and iPad
- Updated Handy Tips From Adobe Animate Rigging Tutorial for All Learners
- In-Depth Study of Cartoon Painting Starts From Learning to Draw It
- Updated In 2024, Best 10 Apps to Enhance Your Instagram Story Slideshow
- Top 12 2D Animation Studios All Should Check Out
- New 15 Best Stop Motion Animation Kits to Fuel Creativity for 2024
- Updated 2024 Approved Best 12 Evil Cartoon Characters of All Time
- New In 2024, 10 Stunning Stop Motion Movies That You Should Not Miss
- Updated Learn All About Lip-Syncing in Animation for 2024
- 2024 Approved 5 Foolproof Amazing Anime Text to Speech Tips
- In 2024, How To Stream Anything From Nubia Red Magic 9 Pro to Apple TV | Dr.fone
- Best Fixes For Vivo X100 Pro Hard Reset | Dr.fone
- Android Unlock Code Sim Unlock Your Motorola Moto E13 Phone and Remove Locked Screen
- In 2024, 3 Facts You Need to Know about Screen Mirroring Xiaomi 13T Pro | Dr.fone
- Bypassing Google Account With vnROM Bypass For Realme C67 4G
- How to Retrieve Deleted Calendar Events iPhone XS Max? | Stellar
- FRP Hijacker by Hagard Download and Bypass your Samsung Galaxy S23 Tactical Edition FRP Locks
- Recover your music after Realme GT 5 has been deleted
- In 2024, How to Migrate Android Data From Vivo V27 to New Android Phone? | Dr.fone
- 3 Ways to Change Location on Facebook Marketplace for Realme 11 Pro+ | Dr.fone
- Read This Guide to Find a Reliable Alternative to Fake GPS On Lava Blaze Pro 5G | Dr.fone
- Complete Guide to Hard Reset Your Motorola G24 Power | Dr.fone
- Complete guide for recovering contacts files on Realme 11 5G.
- How to Resolve Infinix Zero 5G 2023 Turbo Screen Not Working | Dr.fone
- How to Reset a Poco M6 5G Phone that is Locked?
- Easy Guide How To Bypass Nokia C12 Pro FRP Android 10/11/12/13
- In 2024, How to Track WhatsApp Messages on Motorola Defy 2 Without Them Knowing? | Dr.fone
- 3 Ways to Fake GPS Without Root On Apple iPhone XR | Dr.fone
- Title: New 2024 Approved Best 10 Video to GIF Converters Top Picks
- Author: Elon
- Created at : 2024-05-19 03:05:25
- Updated at : 2024-05-20 03:05:25
- Link: https://animation-videos.techidaily.com/new-2024-approved-best-10-video-to-gif-converters-top-picks/
- License: This work is licensed under CC BY-NC-SA 4.0.
