

New 2024 Approved Christmas Is Coming! How to Find & Make Animated Christmas GIFs?
Christmas Is Coming! How to Find & Make Animated Christmas GIFs?
Versatile Video Editor - Wondershare Filmora
An easy yet powerful editor
Numerous effects to choose from
Detailed tutorials provided by the official channel
Since Christmas is just around the corner, you must be looking for all kinds of GIFs and video greetings to wish your loved ones on this special occasion. Ideally, sending an animated Christmas GIF is one of the best ways to expect them during the festive season. If you are running short on time, then you can find a readily available Merry Christmas funny GIF or can come up with a customized Christmas wishes GIF as well. Here, I will let you know how to find and make free Christmas GIFs like a pro.

In this article
01 [5 Best Places to Find Animated Christmas GIFs for Free](#Part 1)
02 [How to Create your Animated Christmas GIFs (with Music): A DIY Guide](#Part 2)
03 [Pro Tip: Customize your GIFs on the Go with Filmora Meme Maker](#Part 3)
Part 1 5 Best Places to Find Animated Christmas GIFs for Free
While there are plenty of websites and apps, I would recommend exploring the following sources to find Merry Christmas animated GIFs for free.
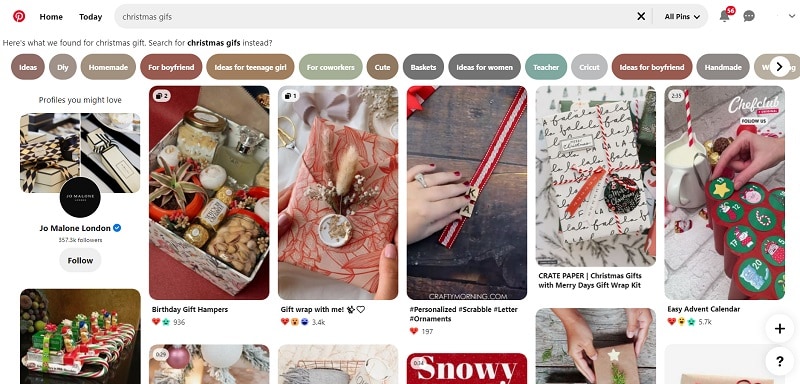
1. Pinterest
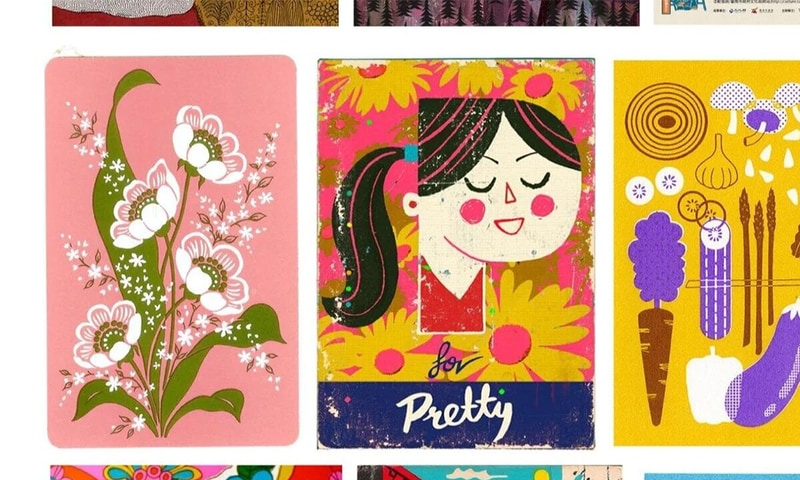
Pinterest has to be one of the best sources to get free Christmas GIFs of all kinds. While some GIFs can readily be downloaded from Pinterest, you might be redirected to third-party websites at times. Also, before you use any GIF from Pinterest, make sure you check its copyright policy.
Mostly, you would find aesthetically pleasing Merry Christmas wishes GIFs on Pinterest about DIY activities, food, animations, and so on. The only issue is that the range of GIFs at Pinterest is pretty extensive, and there are no inbuilt categories or filters.
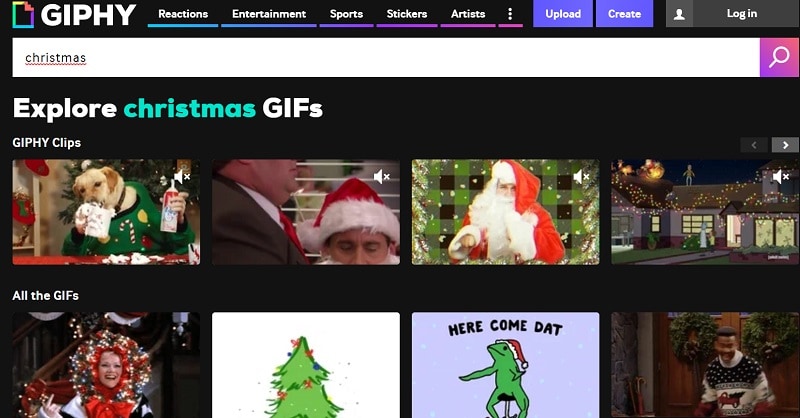
2. Giphy
If you are looking for funny Christmas GIFs, then Giphy would be one of the best places to explore. It has some of the most extensive GIFs collections of all styles, including Christmas wishes GIFs.
You can head to the website of Giphy or use its mobile application to find all sorts of animated Christmas GIFs as per your needs. There are tons of stickers, animated stories, and funny GIFs related to pop cultures that you would also find on Giphy.
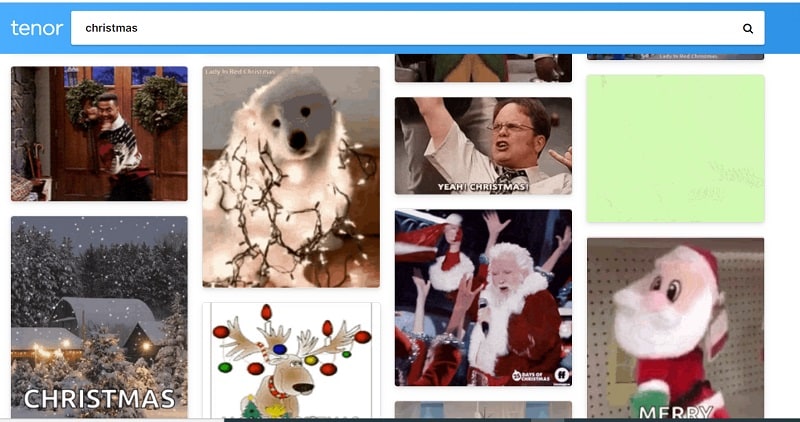
3. Tenor
Tenor is another clean and user-friendly website where you can find different types of funny Merry Christmas GIFs for free. You can look for stickers and GIFs by simply entering keywords of your choice on Tenor.
Once you load an animated Christmas GIF, you can save it offline or generate its shareable link. In this way, you can directly share the Merry Christmas wishes GIF to your loved ones on platforms like WhatsApp, Telegram, Messenger, and so on.
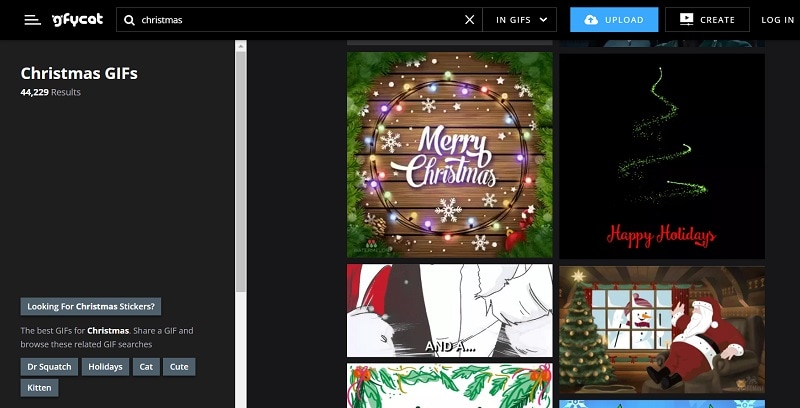
4. GyfCat
Having thousands of anime Christmas GIFs, GyfCat is another popular online source that you should check out. Most of the free Christmas GIFs here are animated or related to pop culture videos.
You can enter multiple keywords and hashtags on the search bar of GyfCat to find specific Christmas wishes GIFs. Most of the results here are ideal for funny Xmas GIFs that are bound to make your friends and family smile.
5. Funimada
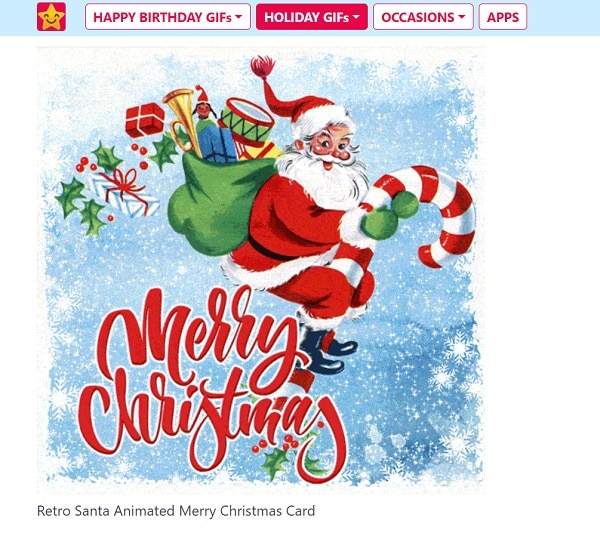
From elves to Santa Claus and reindeers to fireworks, you can find funny Christmas GIFs of all kinds in Funimada. Unlike other places, Funimada has a curated list of animated Christmas GIFs that you can explore on its website.
Once you find a perfect anime Christmas GIF at Funimada, you can download it on your device or system and share it with others however you like.
Part 2 How to Create your Animated Christmas GIFs (with Music): A DIY Guide
Most of these readily available animated Christmas GIFs are quite generic and lack a customized appeal. Therefore, if you want to come up with some customized Christmas wishes GIFs, then consider using a dedicated editing tool like Wondershare Filmora.
Since it is a user-friendly video and media editing tool, you won’t encounter issues working on an animated Christmas GIF. You can explore and use the wide range of media assets of Filmora or import anything from your system. Besides that, tons of transitions, filters, captions, and other effects would let you come up with some customized Merry Christmas wishes GIFs via Filmora in the following way.
Step 1 Load the Media Files of your Choice on Filmora
You can start by installing Wondershare Filmora on your system and launch it whenever you want to work on any animated Christmas GIF. Afterward, you can drag and drop your media files to it or go to its Menu > File > Import Media to browse and load your files.
For Win 7 or later (64-bit)
For macOS 10.12 or later

Step2 Create your Animated Christmas GIFs with Filmora
Great! Once you have loaded your media files, you can drag and drop them to the timeline at the bottom to start editing them. If you want to clip out any unwanted parts from a video, then hover the mouse at the end. This will let you use its trimming tool to clip out any part of the file.

There are tons of other editing options that are available on Filmora. For instance, once you select a video, you can go to its properties to apply all sorts of transformations such as rotation, flipping, scaling, repositioning, and so on.

Many people would like to add captions to their animated Christmas GIFs to wish others personally. You can do the same by visiting the “Titles” section of Filmora and exploring different styles of caption effects. You can drag and drop any caption effect and add your text here to customize it.

To further improve the visual appeal of your Christmas wishes GIF, you can explore and apply tons of transitions, filters, overlays, and other effects that are available in Filmora.

If you want to add music to your Merry Christmas wishes GIF, you can add any soundtrack to your project. You can also go to the “Audio” section of Filmora, where you can browse several sound effects and drag and drop your media files. If you want, you can also record voiceovers for your videos using the native feature on Filmora.

Step 3 Export your Christmas Wishes GIFs from Filmora
Lastly, you can get a preview of your funny Merry Christmas GIF on Filmora and can click on the “Export” button to save it. Here, you can select a preferred format (like GIF or MP4) in which you want to keep your media file on your system. If you have included music in your project, consider exporting it as an MP4 file instead of a GIF.

Part 3 Pro Tip: Customize your GIFs on the Go with Filmora Meme Maker
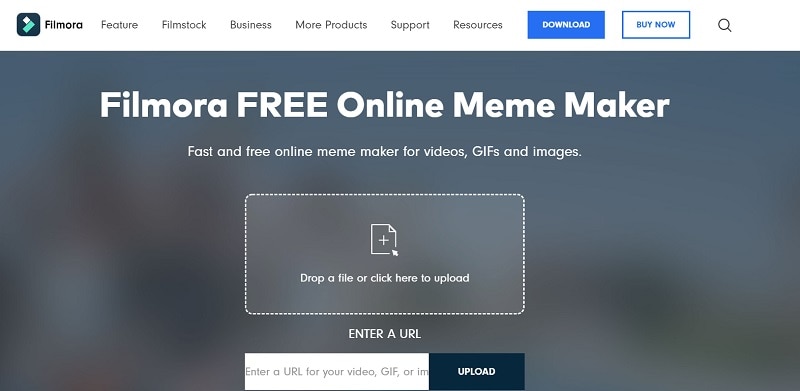
If you already have a Merry Christmas GIF and want to customize it further, you can also check the online Filmora Meme Maker . You can go to its website and upload a video, GIF, or image of your choice. If you have found a funny Christmas GIF online, you can paste its exact URL. Later, you can add texts to your GIFs and export them to your system in a preferred format.
Wondershare Filmora
Get started easily with Filmora’s powerful performance, intuitive interface, and countless effects!
Try It Free Try It Free Try It Free Learn More >

AI Portrait – The best feature of Wondershare Filmora for gameplay editing
The AI Portrait is a new add-on in Wondershare Filmora. It can easily remove video backgrounds without using a green screen or chroma key, allowing you to add borders, glitch effects, pixelated, noise, or segmentation video effects.

Conclusion
So, what are you waiting for? Now when you know where to find animated Christmas GIFs, you can explore the above-listed websites on your own. Apart from using these readily available options, you can also create some customized, funny Merry Christmas GIFs. For that, you can take the assistance of Wondershare Filmora and make the most of its professional features to create, customize, and export your GIFs with music and tons of other effects. Feel free to explore Filmora and wish your loved ones a joyous Christmas in style!
Since Christmas is just around the corner, you must be looking for all kinds of GIFs and video greetings to wish your loved ones on this special occasion. Ideally, sending an animated Christmas GIF is one of the best ways to expect them during the festive season. If you are running short on time, then you can find a readily available Merry Christmas funny GIF or can come up with a customized Christmas wishes GIF as well. Here, I will let you know how to find and make free Christmas GIFs like a pro.
In this article
01 [5 Best Places to Find Animated Christmas GIFs for Free](#Part 1)
02 [How to Create your Animated Christmas GIFs (with Music): A DIY Guide](#Part 2)
03 [Pro Tip: Customize your GIFs on the Go with Filmora Meme Maker](#Part 3)
Part 1 5 Best Places to Find Animated Christmas GIFs for Free
While there are plenty of websites and apps, I would recommend exploring the following sources to find Merry Christmas animated GIFs for free.
1. Pinterest
Pinterest has to be one of the best sources to get free Christmas GIFs of all kinds. While some GIFs can readily be downloaded from Pinterest, you might be redirected to third-party websites at times. Also, before you use any GIF from Pinterest, make sure you check its copyright policy.
Mostly, you would find aesthetically pleasing Merry Christmas wishes GIFs on Pinterest about DIY activities, food, animations, and so on. The only issue is that the range of GIFs at Pinterest is pretty extensive, and there are no inbuilt categories or filters.
2. Giphy
If you are looking for funny Christmas GIFs, then Giphy would be one of the best places to explore. It has some of the most extensive GIFs collections of all styles, including Christmas wishes GIFs.
You can head to the website of Giphy or use its mobile application to find all sorts of animated Christmas GIFs as per your needs. There are tons of stickers, animated stories, and funny GIFs related to pop cultures that you would also find on Giphy.
3. Tenor
Tenor is another clean and user-friendly website where you can find different types of funny Merry Christmas GIFs for free. You can look for stickers and GIFs by simply entering keywords of your choice on Tenor.
Once you load an animated Christmas GIF, you can save it offline or generate its shareable link. In this way, you can directly share the Merry Christmas wishes GIF to your loved ones on platforms like WhatsApp, Telegram, Messenger, and so on.
4. GyfCat
Having thousands of anime Christmas GIFs, GyfCat is another popular online source that you should check out. Most of the free Christmas GIFs here are animated or related to pop culture videos.
You can enter multiple keywords and hashtags on the search bar of GyfCat to find specific Christmas wishes GIFs. Most of the results here are ideal for funny Xmas GIFs that are bound to make your friends and family smile.
5. Funimada
From elves to Santa Claus and reindeers to fireworks, you can find funny Christmas GIFs of all kinds in Funimada. Unlike other places, Funimada has a curated list of animated Christmas GIFs that you can explore on its website.
Once you find a perfect anime Christmas GIF at Funimada, you can download it on your device or system and share it with others however you like.
Part 2 How to Create your Animated Christmas GIFs (with Music): A DIY Guide
Most of these readily available animated Christmas GIFs are quite generic and lack a customized appeal. Therefore, if you want to come up with some customized Christmas wishes GIFs, then consider using a dedicated editing tool like Wondershare Filmora.
Since it is a user-friendly video and media editing tool, you won’t encounter issues working on an animated Christmas GIF. You can explore and use the wide range of media assets of Filmora or import anything from your system. Besides that, tons of transitions, filters, captions, and other effects would let you come up with some customized Merry Christmas wishes GIFs via Filmora in the following way.
Step 1 Load the Media Files of your Choice on Filmora
You can start by installing Wondershare Filmora on your system and launch it whenever you want to work on any animated Christmas GIF. Afterward, you can drag and drop your media files to it or go to its Menu > File > Import Media to browse and load your files.
For Win 7 or later (64-bit)
For macOS 10.12 or later
Step2 Create your Animated Christmas GIFs with Filmora
Great! Once you have loaded your media files, you can drag and drop them to the timeline at the bottom to start editing them. If you want to clip out any unwanted parts from a video, then hover the mouse at the end. This will let you use its trimming tool to clip out any part of the file.
There are tons of other editing options that are available on Filmora. For instance, once you select a video, you can go to its properties to apply all sorts of transformations such as rotation, flipping, scaling, repositioning, and so on.
Many people would like to add captions to their animated Christmas GIFs to wish others personally. You can do the same by visiting the “Titles” section of Filmora and exploring different styles of caption effects. You can drag and drop any caption effect and add your text here to customize it.
To further improve the visual appeal of your Christmas wishes GIF, you can explore and apply tons of transitions, filters, overlays, and other effects that are available in Filmora.
If you want to add music to your Merry Christmas wishes GIF, you can add any soundtrack to your project. You can also go to the “Audio” section of Filmora, where you can browse several sound effects and drag and drop your media files. If you want, you can also record voiceovers for your videos using the native feature on Filmora.
Step 3 Export your Christmas Wishes GIFs from Filmora
Lastly, you can get a preview of your funny Merry Christmas GIF on Filmora and can click on the “Export” button to save it. Here, you can select a preferred format (like GIF or MP4) in which you want to keep your media file on your system. If you have included music in your project, consider exporting it as an MP4 file instead of a GIF.
Part 3 Pro Tip: Customize your GIFs on the Go with Filmora Meme Maker
If you already have a Merry Christmas GIF and want to customize it further, you can also check the online Filmora Meme Maker . You can go to its website and upload a video, GIF, or image of your choice. If you have found a funny Christmas GIF online, you can paste its exact URL. Later, you can add texts to your GIFs and export them to your system in a preferred format.
Wondershare Filmora
Get started easily with Filmora’s powerful performance, intuitive interface, and countless effects!
Try It Free Try It Free Try It Free Learn More >
AI Portrait – The best feature of Wondershare Filmora for gameplay editing
The AI Portrait is a new add-on in Wondershare Filmora. It can easily remove video backgrounds without using a green screen or chroma key, allowing you to add borders, glitch effects, pixelated, noise, or segmentation video effects.
Conclusion
So, what are you waiting for? Now when you know where to find animated Christmas GIFs, you can explore the above-listed websites on your own. Apart from using these readily available options, you can also create some customized, funny Merry Christmas GIFs. For that, you can take the assistance of Wondershare Filmora and make the most of its professional features to create, customize, and export your GIFs with music and tons of other effects. Feel free to explore Filmora and wish your loved ones a joyous Christmas in style!
10 Trendy Free Logo Animation Templates
10 Trendy & Stylish Free Logo Animation Templates in 2024
An easy yet powerful editor
Numerous effects to choose from
Detailed tutorials provided by the official channel
The logo animation of your video or presentation sets the tone for how your audience will perceive your brand. There are many stylish and trendy free logo animation templates that you can use to create an inspiring impression of your brand. The basic is to make sure your logo animation grabs your viewer’s attention and is catchy to make them remember your company’s name. This article will guide you through complete logo animation
![]()
This article will guide you through complete logo animation templates. We have also included various logo animations that you can choose from for your brand. Along with that, you will also see how logo motion graphics and 3D logo effects come out to be a wonder to promote your business to the next level following After Effects logo templates and free logo intro templates. The article also guides you through proper steps to apply logo motion effectively with respective screenshots.
In this article
01 [What an Animated Logo Can Do for Your Business](#Part 1)
02 [10 Top Quality Free Logo Animation Templates](#Part 2)
03 [5 Techniques for Custom Logo Animation in After Effects](#Part 3)
04 [How to Make a Logo Animation for Free in Just 3 Minutes](#Part 4)
Part 1 What an Animated Logo Can Do for Your Business
It is widespread info that logo animation is often an effective promotional tool. Here are some of the fantastic purposes or benefits of an animated logo to your Business is that:
● It helps to increase the memorability of the brand.
● Stop motion logo helps in advertising and creating brand awareness.
● Logo animation on YouTube can improve storytelling, i.e., your animated video can tell a story about your brand.
● logo intro starts an original image for your brand’s growth.
To make animated logo work for your Business perfectly and efficiently, consider the following factors:
● Critically analyze the business goal and think of the brand’s personality.
● The logo animation should orient to the user’s preference. Therefore make sure you carry out user research.
● Create an unpredictable animation logo. Try to make your audience surprised so that the final results are unexpected in the first few seconds.
● After Effects logo animation templates should not be too long; therefore, try not to make your animated logo complex and keep it short. The recommendation is for it to stay under seconds.
![]()
Part 1 Top Quality Free Logo Animation Templates
This article section will provide a top-quality template for free logo animation on YouTube and other platforms for your business growth. From the list, you can select the logo animation templates free download that matches your need:
![]()
01Web Series
Web Series logo animation can be helpful on a web series Project. The pictures include some cool effects with minimal and captivating design to wow your audience.
02VHS 8Logo Intro
VHS 8Logo templates will take you back to the time of kung-fu movies and arcade 8-bit games. It is easy to edit and comes with a video tutorial featuring distortion effects, broken videotape, and lousy TV.
03Comic Logo
Comic Logo can be used in cartoons, comics, and kids theme video projects and comes in very handy. It has a cartoon style animation, is very colorful, and will be appreciated and loved by your audience
04Zero Glitch
Zero GlitchCan be used to give a glitch introduction to your video. It has an industrial and unique draft design that can perfectly fit any project that needs a techno logo opening.
05Quick bling
Quick bling is an elegant and simple logo animation template for upcoming projects. This logo template is easily customized and has a tutorial if you encounter any problems.
06Rise From The Dark
Rise from Dark comes up with some eye-grabbing yet simple After Effect logo animation template free download that can fit any video content. This logo template is perfect whether you need a logo intro for an event opener, TV show, or promo.
07Sports Logo Template
Sports Logo Template includes pre-rendering footage with an easy customization option. It doesn’t require any plugins.
08Holi Festival Logo Templates
Holi Festival Logo Templates are perfect when you want to grab your audience’s attention. A juicy bright explosion of color and features seven sounds of vibrant animation. It is super easy to use in animating your logo.
09Light City Logo Templates
Light City Logo Templates is a stunning logo animation template that features a luminescent cityscape and golden lions against a dark background specially designed for a dramatic and mysterious luxurious feel.
10Drifting Car Logo Templates
Drifting Car Logo Templates is the perfect answer for a movie project. It has seconds of footage with a funky sports car.
Part 3 5 Techniques for Custom Logo Animation in After Effects
A perfect way to capture your viewers’ attention and remind them who made the video is by creating a striking and simple logo animation After Effects template free download for your video project and using the After Effects logo animation template in an absolute sense. In this article, we will throw away tools that you will need to animate your logo from scratch in After Effects:
![]()
01Technique 1: Separate the Layers
Separate the layers in Photoshop or illustrator and check if they are all separated and correctly named
![]()
Steps: Next, import your logo into after-effects as footage correctly. Otherwise, cannot access the individual layers in your logo:
● For illustrator make sure the logo elements are on a separate layer.
● If the element is grouped, that is the same way they will be in After Effect.
● To simplify this process, select the group in AI. Using the layer menu, click on the release to layers>sequence.
● Click on import and select your logo design file.
● Select composition>retain layer sizes
● Click on import, and your logo will appear in your media browser as a comp containing its layer and include the folder of those layers.
02Technique 2: Editing Properly
If you made a mistake and important your file as a footer is better than a composition, here is how to fix it:
● Drag your single a high elements to the timeline from the browser media
● Right click>create>convert to layered comp
● Now your Design file will be accessible in layers
03Technique 3: Transitions
You can opt for different available transitions out of the logo intro template After Effects to modify your logo. Then, you can go with the dual Effect of logo animation with a transition effect.
![]()
04Technique 4: Logo Animation
Animate each layer using the straight-forward property scale, rotation, position, and opacity properties
● Select the layer in the timeline to add a keyframe to your layers
● Create and finish a keyframe by placing your Playhead on the frame you want
● Create where you want the animation to start by moving several frames backward from your first keyframe
● Change the value of the keyframe property until you are satisfied with the look
● Continue with each of the layers in turn until you feel happy with the effects
![]()
05Technique 5: Title Animation
Animate the title using the varieties of animation styles in After Effects if you can edit a text layer.
● Remove any AI text objects that you want to replace with after effects text layer.
● Create a fresh After Effects text layer.
● Copy-paste the text from AI to after-effects. In doing this, it will use the same font, color, and sizes is when you paste it in
● Go to the effects browser, choose your title animation, and drag and drop it to your new title.
● View all keyframes by pressing U and select the layer in the timeline, then adjust as you like.
Part 4 How to Make a Logo Animation for Free in Just 3 Minutes
Filmora is one of the best software editing tools for beginners to design logo animation and logo intro template free download easily and quickly with keyframing. It produces high-quality and smoothly animated logos with motion blur that gives your logo animation more touch-up. The logo intro-free animation in Filmora is simple to replicate if you get some logo inspiration and then conclude how you will execute your animation. All the editing tools like shape, elements, etc., are available in Filmora software.
![]()
01Step 1: Create Logo
First, you need to create the logo or have a png logo image using any photo editing software like Photoshop or Canva.

Wondershare Filmora - Best Video Editor for Mac/Windows
5,481,435 people have downloaded it.
Build unique custom animations without breaking a sweat.
Focus on creating epic stories and leave the details to Filmora’s auto features.
Start a creative adventure with drag & drop effects and endless possibilities.
Filmora simplifies advanced features to save you time and effort.
Filmora cuts out repetition so you can move on to your next creative breakthrough.
02Step 2: Import background
After you have edited your logo on Photoshop, import background video and logo in Filmora and Use the key-framing feature to animate your logo
03Step 3: Add effects
Add other effects to your logo animation to make it perfect by adding colors, text, etc., to wow your logo animations. Add shapes to the image to give it some effect then add the motions to these shapes.
04Step 4: Export
Once you are satisfied with the trendy and stylish free logo, you can export and share them on your social media platform.
● Key Takeaways from This Episode →
● Impact of animated logo for business
● Top-quality free logo animation
● Steps to make logo through Premiere Pro logo animation template for free.
The logo animation of your video or presentation sets the tone for how your audience will perceive your brand. There are many stylish and trendy free logo animation templates that you can use to create an inspiring impression of your brand. The basic is to make sure your logo animation grabs your viewer’s attention and is catchy to make them remember your company’s name. This article will guide you through complete logo animation
![]()
This article will guide you through complete logo animation templates. We have also included various logo animations that you can choose from for your brand. Along with that, you will also see how logo motion graphics and 3D logo effects come out to be a wonder to promote your business to the next level following After Effects logo templates and free logo intro templates. The article also guides you through proper steps to apply logo motion effectively with respective screenshots.
In this article
01 [What an Animated Logo Can Do for Your Business](#Part 1)
02 [10 Top Quality Free Logo Animation Templates](#Part 2)
03 [5 Techniques for Custom Logo Animation in After Effects](#Part 3)
04 [How to Make a Logo Animation for Free in Just 3 Minutes](#Part 4)
Part 1 What an Animated Logo Can Do for Your Business
It is widespread info that logo animation is often an effective promotional tool. Here are some of the fantastic purposes or benefits of an animated logo to your Business is that:
● It helps to increase the memorability of the brand.
● Stop motion logo helps in advertising and creating brand awareness.
● Logo animation on YouTube can improve storytelling, i.e., your animated video can tell a story about your brand.
● logo intro starts an original image for your brand’s growth.
To make animated logo work for your Business perfectly and efficiently, consider the following factors:
● Critically analyze the business goal and think of the brand’s personality.
● The logo animation should orient to the user’s preference. Therefore make sure you carry out user research.
● Create an unpredictable animation logo. Try to make your audience surprised so that the final results are unexpected in the first few seconds.
● After Effects logo animation templates should not be too long; therefore, try not to make your animated logo complex and keep it short. The recommendation is for it to stay under seconds.
![]()
Part 1 Top Quality Free Logo Animation Templates
This article section will provide a top-quality template for free logo animation on YouTube and other platforms for your business growth. From the list, you can select the logo animation templates free download that matches your need:
![]()
01Web Series
Web Series logo animation can be helpful on a web series Project. The pictures include some cool effects with minimal and captivating design to wow your audience.
02VHS 8Logo Intro
VHS 8Logo templates will take you back to the time of kung-fu movies and arcade 8-bit games. It is easy to edit and comes with a video tutorial featuring distortion effects, broken videotape, and lousy TV.
03Comic Logo
Comic Logo can be used in cartoons, comics, and kids theme video projects and comes in very handy. It has a cartoon style animation, is very colorful, and will be appreciated and loved by your audience
04Zero Glitch
Zero GlitchCan be used to give a glitch introduction to your video. It has an industrial and unique draft design that can perfectly fit any project that needs a techno logo opening.
05Quick bling
Quick bling is an elegant and simple logo animation template for upcoming projects. This logo template is easily customized and has a tutorial if you encounter any problems.
06Rise From The Dark
Rise from Dark comes up with some eye-grabbing yet simple After Effect logo animation template free download that can fit any video content. This logo template is perfect whether you need a logo intro for an event opener, TV show, or promo.
07Sports Logo Template
Sports Logo Template includes pre-rendering footage with an easy customization option. It doesn’t require any plugins.
08Holi Festival Logo Templates
Holi Festival Logo Templates are perfect when you want to grab your audience’s attention. A juicy bright explosion of color and features seven sounds of vibrant animation. It is super easy to use in animating your logo.
09Light City Logo Templates
Light City Logo Templates is a stunning logo animation template that features a luminescent cityscape and golden lions against a dark background specially designed for a dramatic and mysterious luxurious feel.
10Drifting Car Logo Templates
Drifting Car Logo Templates is the perfect answer for a movie project. It has seconds of footage with a funky sports car.
Part 3 5 Techniques for Custom Logo Animation in After Effects
A perfect way to capture your viewers’ attention and remind them who made the video is by creating a striking and simple logo animation After Effects template free download for your video project and using the After Effects logo animation template in an absolute sense. In this article, we will throw away tools that you will need to animate your logo from scratch in After Effects:
![]()
01Technique 1: Separate the Layers
Separate the layers in Photoshop or illustrator and check if they are all separated and correctly named
![]()
Steps: Next, import your logo into after-effects as footage correctly. Otherwise, cannot access the individual layers in your logo:
● For illustrator make sure the logo elements are on a separate layer.
● If the element is grouped, that is the same way they will be in After Effect.
● To simplify this process, select the group in AI. Using the layer menu, click on the release to layers>sequence.
● Click on import and select your logo design file.
● Select composition>retain layer sizes
● Click on import, and your logo will appear in your media browser as a comp containing its layer and include the folder of those layers.
02Technique 2: Editing Properly
If you made a mistake and important your file as a footer is better than a composition, here is how to fix it:
● Drag your single a high elements to the timeline from the browser media
● Right click>create>convert to layered comp
● Now your Design file will be accessible in layers
03Technique 3: Transitions
You can opt for different available transitions out of the logo intro template After Effects to modify your logo. Then, you can go with the dual Effect of logo animation with a transition effect.
![]()
04Technique 4: Logo Animation
Animate each layer using the straight-forward property scale, rotation, position, and opacity properties
● Select the layer in the timeline to add a keyframe to your layers
● Create and finish a keyframe by placing your Playhead on the frame you want
● Create where you want the animation to start by moving several frames backward from your first keyframe
● Change the value of the keyframe property until you are satisfied with the look
● Continue with each of the layers in turn until you feel happy with the effects
![]()
05Technique 5: Title Animation
Animate the title using the varieties of animation styles in After Effects if you can edit a text layer.
● Remove any AI text objects that you want to replace with after effects text layer.
● Create a fresh After Effects text layer.
● Copy-paste the text from AI to after-effects. In doing this, it will use the same font, color, and sizes is when you paste it in
● Go to the effects browser, choose your title animation, and drag and drop it to your new title.
● View all keyframes by pressing U and select the layer in the timeline, then adjust as you like.
Part 4 How to Make a Logo Animation for Free in Just 3 Minutes
Filmora is one of the best software editing tools for beginners to design logo animation and logo intro template free download easily and quickly with keyframing. It produces high-quality and smoothly animated logos with motion blur that gives your logo animation more touch-up. The logo intro-free animation in Filmora is simple to replicate if you get some logo inspiration and then conclude how you will execute your animation. All the editing tools like shape, elements, etc., are available in Filmora software.
![]()
01Step 1: Create Logo
First, you need to create the logo or have a png logo image using any photo editing software like Photoshop or Canva.
Wondershare Filmora - Best Video Editor for Mac/Windows
5,481,435 people have downloaded it.
Build unique custom animations without breaking a sweat.
Focus on creating epic stories and leave the details to Filmora’s auto features.
Start a creative adventure with drag & drop effects and endless possibilities.
Filmora simplifies advanced features to save you time and effort.
Filmora cuts out repetition so you can move on to your next creative breakthrough.
02Step 2: Import background
After you have edited your logo on Photoshop, import background video and logo in Filmora and Use the key-framing feature to animate your logo
03Step 3: Add effects
Add other effects to your logo animation to make it perfect by adding colors, text, etc., to wow your logo animations. Add shapes to the image to give it some effect then add the motions to these shapes.
04Step 4: Export
Once you are satisfied with the trendy and stylish free logo, you can export and share them on your social media platform.
● Key Takeaways from This Episode →
● Impact of animated logo for business
● Top-quality free logo animation
● Steps to make logo through Premiere Pro logo animation template for free.
Tips on How to Learn Graphics Animation
Tips for Learning Graphics Animation
An easy yet powerful editor
Numerous effects to choose from
Detailed tutorials provided by the official channel
In the recent few years, videos have become the primary tool for marketers to attract their target customers. Unlike banners and pamphlets, videos are relatively more engaging and make it easier for marketers to establish a connection with the viewers. Now, each brand has different preferences when it comes to choosing the right video marketing strategy.
While some brands opt for conventional video advertisements, others get a bit creative and introduce graphics animation to their videos to make them more captivating. Of course, if you want to maximize the user’s attention and retain more customers, you would prefer the latter. Animated videos are more engaging and also sets the brand apart from the rest of the crowd.
In this article
01 [Why Study Graphic Design and Animation?](#Part 1)
02 [What’s the Difference Between Motion Graphics and Animation?](#Part 2)
03 [5 Graphic Design Techniques for Motion Graphics](#Part 3)
04 [How to Create Animated Graphics That Stand Out](#Part 4)
Part 1 Why Study Graphic Design and Animation?
So, why should you care about graphic design and animation? The answer is pretty simple - because these two concepts can help you step up your brand’s marketing game and attract maximum leads. By incorporating graphics and animations into your videos, you’ll be able to make them highly engaging.
However, user engagement isn’t the only reason why graphics and animations should be a part of your marketing strategy. They can also be used to simplify complex topics and explain them in an interactive manner. Let’s say you want to explain the overall working of a particular product. Instead of creating a boring tutorial, you can design explainer white paper animations to explain each step in detail and help viewers understand the overall dynamics of the product more conveniently.
Similarly, the applications of animated videos are endless. From product promotion to everyday marketing, they can help businesses in different scenarios and maximize the results.
Part 2 What’s the Difference Between Motion Graphics and Animation?
Now, whenever we talk about graphic animation videos, people often get confused between motion graphics and simple animations. While both these terms are in correlation, there are certain factors that separate motion graphics from animations. In layman terms, all motion graphics are animations, but not all animations are motion graphics. To give you a better clarity, we have explained both motion graphics and animations in detail.
01Motion Graphics
Motion Graphics are one of the sub-categories of animations that are primarily created to add motion to still images. The flashing logos you see on different websites are the perfect example of motion graphics. The primary objective of motion graphics is to make designs more appealing. A traditional website logo may not grab the visitor’s attention, but if it has a slight movement, it’ll most likely draw the eyeballs, even if someone is visiting the website for the first time. In general, designers apply motion graphics to objects and texts to enhance their visual appearance.
Moreover, motion graphics can also make it easier to educate people on a certain topic. For instance, a still image may not clarify the overall USPs of your brand. However, by designing a dedicated motion graphics, you’ll be able to explain everything and connect with the potential customers more effectively. Some designers also use motion graphics to simply uplift the overall visual appearance of their designs.
Whatever the reason, using motion graphics in 20can make you reach your marketing objectives more conveniently.
02Animations
Animation, on the other hand, is a general broader Umbrella term that’s used to define a wide variety of visual representations. As we mentioned earlier, motion graphics are also a part of graphics animations. However, animations aren’t just limited to moving text/objects. According to the official definition, an animation can be explained as a video in which motion is introduced to make static objects move in the landscape.
The general idea of an animation is to convey a storyline in an interactive manner while keeping the customers engaged. Animations are usually divided into two categories, i.e., animations and animations. White paper animations are a great example of animations as the entire movement is in a two-dimensional landscape. In animations, on the other hand, the movement is not restricted to two dimensions only. Cartoons and animated series are the perfect example of animations as the objects are allowed to move in a three dimensional landscape.
Part 3 5 Graphic Design Techniques for Motion Graphics
So, now that you know how motion graphics differ from the regular animations, let’s understand the tactics to design motion graphics as a beginner. Of course, if you are planning to step into the world of animated videos, you are less likely to start with graphic animation videos. A better starting point would be something as simple as a motion graphics animation. Here are 5 tactics that’ll guide you the right way while creating a motion graphics animation for the first time.
01Start With a Template
Now, when it comes to designing a motion graphics animation, you can either start on a blank canvas or choose one of the ready-to-use templates to speed up the entire designing process. As an absolute beginner, it would be better to choose the latter as it’ll require less designing from your part.
Working on a blank canvas is quite a challenging task, especially when you don’t have years of experience as a designer. But, with a ready made template, you can start with the editing process right away. There are a plethora of editing platforms like Canva, PicArt, and Visme where you’ll find motion graphics templates. These templates are fully customizable, which means you can manipulate their design to meet your specific brand requirements.
02Be Subtle With Personal Branding
Now, even if you are choosing a built-in template, it would be crucial to customize its color scheme so that it matches the overall theme of your brand. Let’s say you are using red and white colors on your website. So, while designing the motion graphics, make sure to change its existing color scheme with red and white so that it can go with your website in a hassle-free manner.
In addition to the color scheme, you can also use other visual elements that represent your brand in the digital landscape. However, do not overdo the personal branding as it may also backfire and affect the quality of your motion graphics animation.
03Do Not Add Unnecessary Elements
It’s also worth noting that any unnecessary element in your motion graphics design will only make it cluttered and damage the overall user experience. Before you publish the motion graphics on any online portal, make sure to analyze it from users’ point-of-view. In case you find any invaluable elements, go ahead and remove them from the design.
04Design Multiple Variations
It’s not necessary that the first motion graphic you design will be worth publishing on your website. That’s why it’s always necessary to design multiple variations so that you can upload the most appealing design on your website. Some designers also A/B test their motion graphics design to choose the best design among all the variations. In any case, having multiple variations will only help you maintain the high market standards.
05Use GIF Format
Finally, once your motion graphics animation is ready, go ahead and save it in GIF format. With GIF format, you’ll be able to upload the picture across all platforms and ensure that the object movement inside the motion graphics doesn’t get affected at all.
Part 5 How to Create Animated Graphics That Stand out
At this point, you already know that designing a graphics animation requires a professional editing tool. While there are different options to choose from, we recommend using Wondershare Wondershare Filmora Video Editor . It’s a professional video editing tool that comes with a built-in media library where you’ll find hundreds of ready-to-use animation templates.
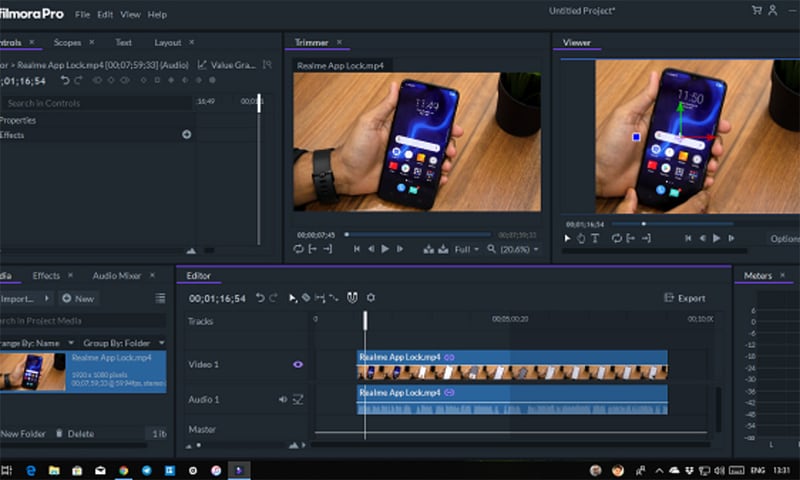
These templates are one-click away from being integrated into your videos, which means you’ll be able to design graphic animation videos in no time. The tool offers a timeline based editing panel that speeds up the entire editing process and makes your workflow much smoother. All the animation templates in Filmora are completely customizable. So, as an editor, you’ll be able to edit the template and customize it to match the overall storyline of your video.
Filmora is an ideal editing software for editors who want to add motion graphics and animations directly to their videos. Instead of switching to a different editing tool, Filmora will allow you to integrate the animations directly to your video and enjoy an uninterrupted workflow.
Some of the key features that make Filmora the perfect editing tool for motion graphics animation include:
● Built-in media library containing several animation templates
● Advanced editing features such as keyframing and motion graphics design
● Timeline-based user interface for quick editing
● Cross-platform compatibility
\
● Key Takeaways from This Episode →
● Graphic animations and motion graphics have become the new go-to tool for marketers to promote their product/services
● A simple motion graphics can help you maximize the retention rate of your marketing campaigns due to their higher customer engagement
● If you want to add graphics animation to videos, install Wondershare Wondershare Filmora Video Editor on your system. With its ready-to-use animation templates, you’ll be able to create high-quality and visually stunning graphic animations in no time
In the recent few years, videos have become the primary tool for marketers to attract their target customers. Unlike banners and pamphlets, videos are relatively more engaging and make it easier for marketers to establish a connection with the viewers. Now, each brand has different preferences when it comes to choosing the right video marketing strategy.
While some brands opt for conventional video advertisements, others get a bit creative and introduce graphics animation to their videos to make them more captivating. Of course, if you want to maximize the user’s attention and retain more customers, you would prefer the latter. Animated videos are more engaging and also sets the brand apart from the rest of the crowd.
In this article
01 [Why Study Graphic Design and Animation?](#Part 1)
02 [What’s the Difference Between Motion Graphics and Animation?](#Part 2)
03 [5 Graphic Design Techniques for Motion Graphics](#Part 3)
04 [How to Create Animated Graphics That Stand Out](#Part 4)
Part 1 Why Study Graphic Design and Animation?
So, why should you care about graphic design and animation? The answer is pretty simple - because these two concepts can help you step up your brand’s marketing game and attract maximum leads. By incorporating graphics and animations into your videos, you’ll be able to make them highly engaging.
However, user engagement isn’t the only reason why graphics and animations should be a part of your marketing strategy. They can also be used to simplify complex topics and explain them in an interactive manner. Let’s say you want to explain the overall working of a particular product. Instead of creating a boring tutorial, you can design explainer white paper animations to explain each step in detail and help viewers understand the overall dynamics of the product more conveniently.
Similarly, the applications of animated videos are endless. From product promotion to everyday marketing, they can help businesses in different scenarios and maximize the results.
Part 2 What’s the Difference Between Motion Graphics and Animation?
Now, whenever we talk about graphic animation videos, people often get confused between motion graphics and simple animations. While both these terms are in correlation, there are certain factors that separate motion graphics from animations. In layman terms, all motion graphics are animations, but not all animations are motion graphics. To give you a better clarity, we have explained both motion graphics and animations in detail.
01Motion Graphics
Motion Graphics are one of the sub-categories of animations that are primarily created to add motion to still images. The flashing logos you see on different websites are the perfect example of motion graphics. The primary objective of motion graphics is to make designs more appealing. A traditional website logo may not grab the visitor’s attention, but if it has a slight movement, it’ll most likely draw the eyeballs, even if someone is visiting the website for the first time. In general, designers apply motion graphics to objects and texts to enhance their visual appearance.
Moreover, motion graphics can also make it easier to educate people on a certain topic. For instance, a still image may not clarify the overall USPs of your brand. However, by designing a dedicated motion graphics, you’ll be able to explain everything and connect with the potential customers more effectively. Some designers also use motion graphics to simply uplift the overall visual appearance of their designs.
Whatever the reason, using motion graphics in 20can make you reach your marketing objectives more conveniently.
02Animations
Animation, on the other hand, is a general broader Umbrella term that’s used to define a wide variety of visual representations. As we mentioned earlier, motion graphics are also a part of graphics animations. However, animations aren’t just limited to moving text/objects. According to the official definition, an animation can be explained as a video in which motion is introduced to make static objects move in the landscape.
The general idea of an animation is to convey a storyline in an interactive manner while keeping the customers engaged. Animations are usually divided into two categories, i.e., animations and animations. White paper animations are a great example of animations as the entire movement is in a two-dimensional landscape. In animations, on the other hand, the movement is not restricted to two dimensions only. Cartoons and animated series are the perfect example of animations as the objects are allowed to move in a three dimensional landscape.
Part 3 5 Graphic Design Techniques for Motion Graphics
So, now that you know how motion graphics differ from the regular animations, let’s understand the tactics to design motion graphics as a beginner. Of course, if you are planning to step into the world of animated videos, you are less likely to start with graphic animation videos. A better starting point would be something as simple as a motion graphics animation. Here are 5 tactics that’ll guide you the right way while creating a motion graphics animation for the first time.
01Start With a Template
Now, when it comes to designing a motion graphics animation, you can either start on a blank canvas or choose one of the ready-to-use templates to speed up the entire designing process. As an absolute beginner, it would be better to choose the latter as it’ll require less designing from your part.
Working on a blank canvas is quite a challenging task, especially when you don’t have years of experience as a designer. But, with a ready made template, you can start with the editing process right away. There are a plethora of editing platforms like Canva, PicArt, and Visme where you’ll find motion graphics templates. These templates are fully customizable, which means you can manipulate their design to meet your specific brand requirements.
02Be Subtle With Personal Branding
Now, even if you are choosing a built-in template, it would be crucial to customize its color scheme so that it matches the overall theme of your brand. Let’s say you are using red and white colors on your website. So, while designing the motion graphics, make sure to change its existing color scheme with red and white so that it can go with your website in a hassle-free manner.
In addition to the color scheme, you can also use other visual elements that represent your brand in the digital landscape. However, do not overdo the personal branding as it may also backfire and affect the quality of your motion graphics animation.
03Do Not Add Unnecessary Elements
It’s also worth noting that any unnecessary element in your motion graphics design will only make it cluttered and damage the overall user experience. Before you publish the motion graphics on any online portal, make sure to analyze it from users’ point-of-view. In case you find any invaluable elements, go ahead and remove them from the design.
04Design Multiple Variations
It’s not necessary that the first motion graphic you design will be worth publishing on your website. That’s why it’s always necessary to design multiple variations so that you can upload the most appealing design on your website. Some designers also A/B test their motion graphics design to choose the best design among all the variations. In any case, having multiple variations will only help you maintain the high market standards.
05Use GIF Format
Finally, once your motion graphics animation is ready, go ahead and save it in GIF format. With GIF format, you’ll be able to upload the picture across all platforms and ensure that the object movement inside the motion graphics doesn’t get affected at all.
Part 5 How to Create Animated Graphics That Stand out
At this point, you already know that designing a graphics animation requires a professional editing tool. While there are different options to choose from, we recommend using Wondershare Wondershare Filmora Video Editor . It’s a professional video editing tool that comes with a built-in media library where you’ll find hundreds of ready-to-use animation templates.
These templates are one-click away from being integrated into your videos, which means you’ll be able to design graphic animation videos in no time. The tool offers a timeline based editing panel that speeds up the entire editing process and makes your workflow much smoother. All the animation templates in Filmora are completely customizable. So, as an editor, you’ll be able to edit the template and customize it to match the overall storyline of your video.
Filmora is an ideal editing software for editors who want to add motion graphics and animations directly to their videos. Instead of switching to a different editing tool, Filmora will allow you to integrate the animations directly to your video and enjoy an uninterrupted workflow.
Some of the key features that make Filmora the perfect editing tool for motion graphics animation include:
● Built-in media library containing several animation templates
● Advanced editing features such as keyframing and motion graphics design
● Timeline-based user interface for quick editing
● Cross-platform compatibility
\
● Key Takeaways from This Episode →
● Graphic animations and motion graphics have become the new go-to tool for marketers to promote their product/services
● A simple motion graphics can help you maximize the retention rate of your marketing campaigns due to their higher customer engagement
● If you want to add graphics animation to videos, install Wondershare Wondershare Filmora Video Editor on your system. With its ready-to-use animation templates, you’ll be able to create high-quality and visually stunning graphic animations in no time
How to Make Your Characters Interactive in Unity Animation Rigging
Learn How to Make Your Characters Interactive in Unity Animation Rigging
An easy yet powerful editor
Numerous effects to choose from
Detailed tutorials provided by the official channel
Animation is one such aspect that is formed from the integration of several varied factors and processes. One of the most vital ones is the process of rigging. Thus, we will be discussing Unity character rigging as Unity is one of the most efficient platforms for animation.
Additionally, we will introduce you to one of the best tools you can use to edit videos and nurture the creative skills you carry in yourself. So, without any further delay, let us start our discussion.
In this article
01 [What is Unity Rigging?](#Part 1)
02 [Is It Better to Rig in Unity or Blender?](#Part 2)
03 [How To Use Animation Rigging In Unity](#Part 3)
Part 1 What is Unity Rigging?
To understand what Unity rigging is, we must start our discussion first by discussing rigging in animation. In animation, rigging is the process in which your animation characters are separated into two parts. One is the mesh-like structure of the characters. And the other is the skeletal structure given to the characters.
You integrate bones and joints and join them accordingly in the characters present in your animation. It is similar to the presence of the human skeletal system. Moreover, just like the skeletal system in humans helps in the movements of the different parts of the body, the bone and joint structure through rigging also enables the characters in animation to move.
Therefore, we can say that rigging is the process by which you can enable your characters’ in animation to move and show different facial expressions, etc. So, it is obvious that without the process of rigging, the animation is impossible, which makes rigging one of the most crucial aspects of animation.
Now that we know what rigging in animation is, we will be discussing what is animation rigging in Unity. Unity technologies have developed a cross-platform gaming engine called ‘Unity’. And this platform also offers the ones interested in animation to learn animation rigging.
The Unity platform offers robust and effective tools for animation rigging. And these tools assist the animators to create real-time rigs in Unity. Most commonly, the set of tools in Unity for rigging is used on the characters. But, if one likes, they can also use the tools on ani Game Object that includes animations and skeletons.
Therefore, when you utilise the platform of Unity or the toolsets of Unity to perform rigging in animation, it can be referred to as unity rigging. It is one of the most powerful and renowned platforms for animation, creating the finest and most professional animation creations.

Part 2 Is It Better to Rig in Unity or Blender?
Another platform that can ideally assist you in animation is Blender. A common question arises as to whether one should choose blender rigging over Unity or vice versa. We have laid down the following table to compare the different features of Blender with that of Unity.
| | Unity | Blender | |
| ——————- | ————————————————————————————————————————- | ————————————————————————————————————————————— |
| About | It is a game engine that enables you in creating human-machine interfaces, AR simulations, customize splash screens, etc. | It is a computer graphics software that is open source and is mainly used for creating 3D models. |
| Types Supported | Supports 3D | |
| Best Purpose | Ideal for film, architecture, automotive, transportation, and other industries | Ideal for animation and design that assists in VFX, simulation, organizations of all sizes with rendering, modeling, and video editing. |
There are many features that Blender lacks, but Unity includes. The features included in Unity but are absent in Blender are as follows.
● Drawing
● Games
● In-Game Analytics
● Multi-player Gaming Network
● Player Management
● Virtual Reality
● IT Asset Management
● Prototype Creation
Therefore, it is preferred to opt for Unity rigging than Blender rigging, as Blender lacks a considerable number of features.
Part 3 How To Use Animation Rigging In Unity
Now, we will be introducing you to the different steps that will help you in unity rig animation. The following list includes the steps in the sequence that, when you deploy, will help you rig in the platform of Unity.
Step 1Installation
The first step is to install the “animation rigging package” of Unity. You will get the animation rigging package in the “Package Manager”. You will be able to avail of this animation package in Unity 2019.1 and above.
This package offers you a library that consists of rig constraints. And this library of rig constraints enables you to create procedural motion during the runtime. And the general term used for this is called “runtime rigging”.
The “Asset’s Animator Root” consist of the “Rig Builder Component”, which is the source where the rigs are accumulated. The rigs here are the constraints put together in groups. With these steps you will be able to create Unity humanoid rig that will make your animation creations look the finest, most realistic and most professional.

Step 2Rig Builder set-up
After installing the unity animation rigging package, the next step is to set up the rig builder. You will have to use the “Animator component” in this step. Using the “Animator component”, integrate the “Rig Builder component” with the “GameObject”. Generally, in the hierarchy of rig, it is the topmost “Transform”.
Then, you will have to make a new child GameObject. To which, you will have to integrate the “Rig component”. After this step, you need to access the “Animator root”, where you will find the “Rig Builder component”. In the “Rig Builder component”, you need to assign the “Rig to the Rig Layers” list.
It will complete the task of creating the most basic rig. The further steps will help you install the required behaviours in the character or characters.

Step 3Bone Rendering
Whether it is unity rigging or 3D, bone rendering is the most crucial step to enable your animation characters to gain movement. The “Unity Editor” will help you interact and work with the character’s skeleton in the “Scene view.”
You can add “Transform” lists and then display them in various visual styles with the help of the “Bone Renderer: component. It enables you to integrate numerous “Bone Renderer” components, each of them having its unique style of display. As a result, gameplay debugging, rig setup, keyframing, and other artist workflows are facilitated.

Step 4Adding Rig Effectors
This step enables one to add Gizmos to Transforms, facilitating selection and visualisation. The “Effector” are invisible during “Game View”, and this step enhances the quality of the character animation.

Step 5Managing the Rig Constraints
Your characters gain “runtime animation” through the rig constraints, and thus, these are the building blocks facilitating assembling the rigs. The rigs are combined in multiple and varied ways to obtain the desired motions and movements in the characters.

Step 6Working with the Two Bone IK Constraint
The first step here is to rest your character to the “Bind Pose.” you can do so by opting for the “Menu Bar” and selecting the “Animation Rigging” option. You will find the “Bind Pose” option there, and you will have to click on it.

Then add a child GameObject below “Character Rig”. Then add a new child GameObject below “Right Arm IK”. Integrate two new child GameObjects beneath the “Right Arm Ik” by naming the first and the second one “RH IK Target” and “RH IK Hint”, respectively.

Integrate the “Rig Builder Component” with the “Animator root GameObject”. Then proceed with selecting the “CharecterRig GameObject” and integrating a “Rig Component”. Select “Two Bone IK Contrainst” to the “Right Arm IK.”

Then, incorporate a “Box Effector” to the RH IK Target. Integrate a “Ball Effector” to the “RH IK Hint”.

Then select the “RH IK Hint” and “Right Elbow”. Select “Animation Rigging>align Transform”. Move away from the “Ball Effector”. Select the “Right Arm IK GameObject” and integrate the required bones. Integrate the Character Rig GameObkect with Rig Layer list by selecting the option of “Ninja”. Then press “Play” and see your creation come to life.

Now, you might as well want to showcase your creativity in editing and video making. For that, we have the best tool for you- FILMORA. This is the finest video editing tool with the most proficient features included in the following list.
● Over 8effects for editing videos
● Keyboard shortcut, audio ducking colour, colour match
● You can also change the speed of the videos
● Every professional-level video editing tool that you need is included in Wondershare Filmora Video Editor
The features are innumerable and so can not be possibly listed differently. So, you can readily try out this tool yourself, and if you do not want to purchase in the first instance, you can easily avail of its free trial. Although, we can guarantee that after using its free trial, you would definitely want to use every avail feature of the tool!

For Win 7 or later (64-bit)
For macOS 10.12 or later
● Key Takeaways from This Episode →
● A short introduction to the process of rigging, with which we proceeded on describing and understanding what unity rigging is. We also stated how important it is in the sphere of animation.
● Next, we compared rigging in Blender and Unity. After comparing the different factors, we decided that it is optimum to choose Unity for character rigging because of the lack of features in Blender.
● Lastly, we introduced you to the best video editing tool that will equally assist you in nurturing your creativity, video editing, and animation skills.
Animation is one such aspect that is formed from the integration of several varied factors and processes. One of the most vital ones is the process of rigging. Thus, we will be discussing Unity character rigging as Unity is one of the most efficient platforms for animation.
Additionally, we will introduce you to one of the best tools you can use to edit videos and nurture the creative skills you carry in yourself. So, without any further delay, let us start our discussion.
In this article
01 [What is Unity Rigging?](#Part 1)
02 [Is It Better to Rig in Unity or Blender?](#Part 2)
03 [How To Use Animation Rigging In Unity](#Part 3)
Part 1 What is Unity Rigging?
To understand what Unity rigging is, we must start our discussion first by discussing rigging in animation. In animation, rigging is the process in which your animation characters are separated into two parts. One is the mesh-like structure of the characters. And the other is the skeletal structure given to the characters.
You integrate bones and joints and join them accordingly in the characters present in your animation. It is similar to the presence of the human skeletal system. Moreover, just like the skeletal system in humans helps in the movements of the different parts of the body, the bone and joint structure through rigging also enables the characters in animation to move.
Therefore, we can say that rigging is the process by which you can enable your characters’ in animation to move and show different facial expressions, etc. So, it is obvious that without the process of rigging, the animation is impossible, which makes rigging one of the most crucial aspects of animation.
Now that we know what rigging in animation is, we will be discussing what is animation rigging in Unity. Unity technologies have developed a cross-platform gaming engine called ‘Unity’. And this platform also offers the ones interested in animation to learn animation rigging.
The Unity platform offers robust and effective tools for animation rigging. And these tools assist the animators to create real-time rigs in Unity. Most commonly, the set of tools in Unity for rigging is used on the characters. But, if one likes, they can also use the tools on ani Game Object that includes animations and skeletons.
Therefore, when you utilise the platform of Unity or the toolsets of Unity to perform rigging in animation, it can be referred to as unity rigging. It is one of the most powerful and renowned platforms for animation, creating the finest and most professional animation creations.
Part 2 Is It Better to Rig in Unity or Blender?
Another platform that can ideally assist you in animation is Blender. A common question arises as to whether one should choose blender rigging over Unity or vice versa. We have laid down the following table to compare the different features of Blender with that of Unity.
| | Unity | Blender | |
| ——————- | ————————————————————————————————————————- | ————————————————————————————————————————————— |
| About | It is a game engine that enables you in creating human-machine interfaces, AR simulations, customize splash screens, etc. | It is a computer graphics software that is open source and is mainly used for creating 3D models. |
| Types Supported | Supports 3D | |
| Best Purpose | Ideal for film, architecture, automotive, transportation, and other industries | Ideal for animation and design that assists in VFX, simulation, organizations of all sizes with rendering, modeling, and video editing. |
There are many features that Blender lacks, but Unity includes. The features included in Unity but are absent in Blender are as follows.
● Drawing
● Games
● In-Game Analytics
● Multi-player Gaming Network
● Player Management
● Virtual Reality
● IT Asset Management
● Prototype Creation
Therefore, it is preferred to opt for Unity rigging than Blender rigging, as Blender lacks a considerable number of features.
Part 3 How To Use Animation Rigging In Unity
Now, we will be introducing you to the different steps that will help you in unity rig animation. The following list includes the steps in the sequence that, when you deploy, will help you rig in the platform of Unity.
Step 1Installation
The first step is to install the “animation rigging package” of Unity. You will get the animation rigging package in the “Package Manager”. You will be able to avail of this animation package in Unity 2019.1 and above.
This package offers you a library that consists of rig constraints. And this library of rig constraints enables you to create procedural motion during the runtime. And the general term used for this is called “runtime rigging”.
The “Asset’s Animator Root” consist of the “Rig Builder Component”, which is the source where the rigs are accumulated. The rigs here are the constraints put together in groups. With these steps you will be able to create Unity humanoid rig that will make your animation creations look the finest, most realistic and most professional.
Step 2Rig Builder set-up
After installing the unity animation rigging package, the next step is to set up the rig builder. You will have to use the “Animator component” in this step. Using the “Animator component”, integrate the “Rig Builder component” with the “GameObject”. Generally, in the hierarchy of rig, it is the topmost “Transform”.
Then, you will have to make a new child GameObject. To which, you will have to integrate the “Rig component”. After this step, you need to access the “Animator root”, where you will find the “Rig Builder component”. In the “Rig Builder component”, you need to assign the “Rig to the Rig Layers” list.
It will complete the task of creating the most basic rig. The further steps will help you install the required behaviours in the character or characters.
Step 3Bone Rendering
Whether it is unity rigging or 3D, bone rendering is the most crucial step to enable your animation characters to gain movement. The “Unity Editor” will help you interact and work with the character’s skeleton in the “Scene view.”
You can add “Transform” lists and then display them in various visual styles with the help of the “Bone Renderer: component. It enables you to integrate numerous “Bone Renderer” components, each of them having its unique style of display. As a result, gameplay debugging, rig setup, keyframing, and other artist workflows are facilitated.
Step 4Adding Rig Effectors
This step enables one to add Gizmos to Transforms, facilitating selection and visualisation. The “Effector” are invisible during “Game View”, and this step enhances the quality of the character animation.
Step 5Managing the Rig Constraints
Your characters gain “runtime animation” through the rig constraints, and thus, these are the building blocks facilitating assembling the rigs. The rigs are combined in multiple and varied ways to obtain the desired motions and movements in the characters.
Step 6Working with the Two Bone IK Constraint
The first step here is to rest your character to the “Bind Pose.” you can do so by opting for the “Menu Bar” and selecting the “Animation Rigging” option. You will find the “Bind Pose” option there, and you will have to click on it.
Then add a child GameObject below “Character Rig”. Then add a new child GameObject below “Right Arm IK”. Integrate two new child GameObjects beneath the “Right Arm Ik” by naming the first and the second one “RH IK Target” and “RH IK Hint”, respectively.
Integrate the “Rig Builder Component” with the “Animator root GameObject”. Then proceed with selecting the “CharecterRig GameObject” and integrating a “Rig Component”. Select “Two Bone IK Contrainst” to the “Right Arm IK.”
Then, incorporate a “Box Effector” to the RH IK Target. Integrate a “Ball Effector” to the “RH IK Hint”.
Then select the “RH IK Hint” and “Right Elbow”. Select “Animation Rigging>align Transform”. Move away from the “Ball Effector”. Select the “Right Arm IK GameObject” and integrate the required bones. Integrate the Character Rig GameObkect with Rig Layer list by selecting the option of “Ninja”. Then press “Play” and see your creation come to life.
Now, you might as well want to showcase your creativity in editing and video making. For that, we have the best tool for you- FILMORA. This is the finest video editing tool with the most proficient features included in the following list.
● Over 8effects for editing videos
● Keyboard shortcut, audio ducking colour, colour match
● You can also change the speed of the videos
● Every professional-level video editing tool that you need is included in Wondershare Filmora Video Editor
The features are innumerable and so can not be possibly listed differently. So, you can readily try out this tool yourself, and if you do not want to purchase in the first instance, you can easily avail of its free trial. Although, we can guarantee that after using its free trial, you would definitely want to use every avail feature of the tool!
For Win 7 or later (64-bit)
For macOS 10.12 or later
● Key Takeaways from This Episode →
● A short introduction to the process of rigging, with which we proceeded on describing and understanding what unity rigging is. We also stated how important it is in the sphere of animation.
● Next, we compared rigging in Blender and Unity. After comparing the different factors, we decided that it is optimum to choose Unity for character rigging because of the lack of features in Blender.
● Lastly, we introduced you to the best video editing tool that will equally assist you in nurturing your creativity, video editing, and animation skills.
How to Insert a GIF Into Powerpoint
How to Insert a GIF into Powerpoint

Shanoon Cox
Mar 27, 2024• Proven solutions
Microsoft Powerpoint has been on the Internet for quite some time now. People who use this application make a common mistake of using too many slides with huge amounts of text and that is a major turnoff for the audience. Huge text is seen as a disaster. You should be able to convey an interesting story to your attentive audience without explaining every single detail on your slides for your presentation. Using a GIF to explain complicate things or just set it as a background can be much interesting.
You may also like: Top 26 Best Free GIF Makers Online >>
Why we need to insert GIF into the Powerpoint
- It allows us to instantly grab the audience’s short attention span.
- It allows the presentation to answer a lot of preconceived notion from the audience with less words.
- It is a good guide to bring up a pressing issue.
Tips when adding gif to your Powerpoint presentation
- Keep it easy to follow along.
- Make use of humor
- Combine GIF images with your text together.
Part 1: Make GIFs by yourself
There are many animated gif images on the internet, you can also make one by yourself. Wondershare Filmora is a powerful editing tools that allow you to convert video into GIF images, no matter what kind of video formats you got, including MKV, FLV, WMV, MP4, etc. You can also add advanced elements, animations, text, overlays to personlize your GIFs.
However, if you want to make a GIF online, Filmora meme maker is your ultimate solution. It helps you make image, GIF and video memes directly without watermark. It is totally FREE to use and no sign up. You can change text size, color and position to create caption when you are editing. You can also put text inside or outside in GIF. Just with a few clicks, your GIF is done . Try it now!
 Download Mac Version ](https://tools.techidaily.com/wondershare/filmora/download/ )
Part 2: How to Insert a GIF into Powerpoint
There are three main methods on using Microsoft Powerpoint to your advantage when you are trying to insert a GIF image into your presentation.
Method 1: Powerpoint Picture Insert Utility
Select the Insert tab located at the top of the Powerpoint application.
The next step is to select the Picture icon located in the Images ribbon area located also at the top of the computer window. Look for the image that you desire to add to the Powerpoint slide, then make sure to double click on the file to successfully insert your image.
You also have the option to move the GIF image on the page by clicking and dragging the image to the location that you want to place the picture.
Method 2: Copy and Paste
A helpful step is to first locate your desired GIF image, using Control + C to copy it first. Then, paste your image on the Powerpoint slide by pressing Control + V.
You can also highlight the file name, and then use the drag and drop feature to put your image directly into the Powerpoint slide of your choice.
Method 3: Embedding GIF’s from the web
The final method is to embed GIF images on the Internet into a Powerpoint slide. You can achieve this function by using the Insert Ribbon’s Pictures icon.
Select Pictures, then write in the image URL directly in the File input box. Then, select Insert. The Powerpoint application will download the GIF image that you selected into the current Powerpoint slide for your presentation. The GIF image is still available for you to access anytime if you are not connected to the Internet. It is due to being embedded.
Here we recommend the method 1 and 2, the method 3 will take a little time while Powerpoint downloading the GIF picture.
Customize the GIFs in Powerpoint
There are some important ways to customize your GIF images in the Powerpoint application.
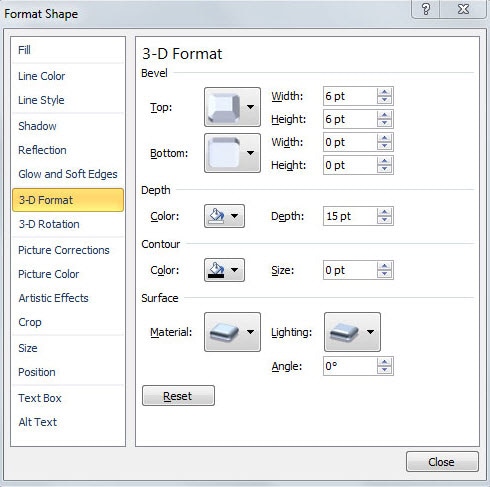
If you desire on changing the physical size of your GIF file or changing the appearance of the image, you can right click on your desired image and select Format Pictures. It will open up a brand new Format Picture window that will have a good variety of image editing menus at your fingertips at the left side of the computer window.
There is a feature where you can change the brightness and contrast on your images by selecting the Picture Corrections icon. Experiment and have fun.
Shanoon Cox
Shanoon Cox is a writer and a lover of all things video.
Follow @Shanoon Cox
Shanoon Cox
Mar 27, 2024• Proven solutions
Microsoft Powerpoint has been on the Internet for quite some time now. People who use this application make a common mistake of using too many slides with huge amounts of text and that is a major turnoff for the audience. Huge text is seen as a disaster. You should be able to convey an interesting story to your attentive audience without explaining every single detail on your slides for your presentation. Using a GIF to explain complicate things or just set it as a background can be much interesting.
You may also like: Top 26 Best Free GIF Makers Online >>
Why we need to insert GIF into the Powerpoint
- It allows us to instantly grab the audience’s short attention span.
- It allows the presentation to answer a lot of preconceived notion from the audience with less words.
- It is a good guide to bring up a pressing issue.
Tips when adding gif to your Powerpoint presentation
- Keep it easy to follow along.
- Make use of humor
- Combine GIF images with your text together.
Part 1: Make GIFs by yourself
There are many animated gif images on the internet, you can also make one by yourself. Wondershare Filmora is a powerful editing tools that allow you to convert video into GIF images, no matter what kind of video formats you got, including MKV, FLV, WMV, MP4, etc. You can also add advanced elements, animations, text, overlays to personlize your GIFs.
However, if you want to make a GIF online, Filmora meme maker is your ultimate solution. It helps you make image, GIF and video memes directly without watermark. It is totally FREE to use and no sign up. You can change text size, color and position to create caption when you are editing. You can also put text inside or outside in GIF. Just with a few clicks, your GIF is done . Try it now!
Download Mac Version ](https://tools.techidaily.com/wondershare/filmora/download/ )
Part 2: How to Insert a GIF into Powerpoint
There are three main methods on using Microsoft Powerpoint to your advantage when you are trying to insert a GIF image into your presentation.
Method 1: Powerpoint Picture Insert Utility
Select the Insert tab located at the top of the Powerpoint application.
The next step is to select the Picture icon located in the Images ribbon area located also at the top of the computer window. Look for the image that you desire to add to the Powerpoint slide, then make sure to double click on the file to successfully insert your image.
You also have the option to move the GIF image on the page by clicking and dragging the image to the location that you want to place the picture.
Method 2: Copy and Paste
A helpful step is to first locate your desired GIF image, using Control + C to copy it first. Then, paste your image on the Powerpoint slide by pressing Control + V.
You can also highlight the file name, and then use the drag and drop feature to put your image directly into the Powerpoint slide of your choice.
Method 3: Embedding GIF’s from the web
The final method is to embed GIF images on the Internet into a Powerpoint slide. You can achieve this function by using the Insert Ribbon’s Pictures icon.
Select Pictures, then write in the image URL directly in the File input box. Then, select Insert. The Powerpoint application will download the GIF image that you selected into the current Powerpoint slide for your presentation. The GIF image is still available for you to access anytime if you are not connected to the Internet. It is due to being embedded.
Here we recommend the method 1 and 2, the method 3 will take a little time while Powerpoint downloading the GIF picture.
Customize the GIFs in Powerpoint
There are some important ways to customize your GIF images in the Powerpoint application.
If you desire on changing the physical size of your GIF file or changing the appearance of the image, you can right click on your desired image and select Format Pictures. It will open up a brand new Format Picture window that will have a good variety of image editing menus at your fingertips at the left side of the computer window.
There is a feature where you can change the brightness and contrast on your images by selecting the Picture Corrections icon. Experiment and have fun.
Shanoon Cox
Shanoon Cox is a writer and a lover of all things video.
Follow @Shanoon Cox
Learn How to Do Funny Cartoon Drawings
The Art of Comics - Learn How to Do Funny Cartoon Drawings
An easy yet powerful editor
Numerous effects to choose from
Detailed tutorials provided by the official channel
Whether you want to use a simple short video or an accessible online lesson, you will find everything that you need to learn how to create comic cartoon drawing on this website. This website article contains all the tutorials you need, ranging from your favorite wild animals, places, objects, farm animals, characters, vehicles, and food.

Do not forget that practicing is the key to success, so don’t hesitate to try several drawing lessons to help you improve your abilities. Start today to learn how to draw funny cartoons online at your own pace and comfort with this step-by-step tutorial.
In this article
01 [How to Draw Funny Cartoon Faces](#Part 1)
02 [How to Draw Your Own Cartoon Character](#Part 2)
Part 1 How to Draw Funny Cartoon Faces
Drawing funny faces in cartoons is very easy compared to other drawing styles or drawing complete parts of the comic. All that is need is practice and experiment with different combinations of shapes. This article will guide on how to draw funny cartoon faces of various types using six other steps:
Step 1: To begin, you need to first draw the face outline by drawing the following;
● Any Perfect type of round shape like a circle.
● Any pear shapes
● An upside-down triangle
● A quadrilateral like a trapezium, a square, or any of your choice

Step 2: To draw the nose in the middle of the face, draw somewhere any of the following;
● A round shape that is bulgy
● A U-shape
● A V-shape
● A small dash.

Step 3: Next is that you draw two round shapes for the eyes, and each of them should have a smaller round or dot (for the pupil), which is above the nose. This eye can be in the shape of any of the following;
● Two large circles
● An ovals
● A curvy “M,” like the one you can see in the “McDonalds” logo.

Step 4: You can draw the mouth just below the nose and draw any of the shapes from the list given below. In addition, to make the mouth funnier, you should then add teeth by either drawing a small square sticking out inside the mouth from the upper side, at the roof of the mouth, or a straight horizontal line which is across the mouth and several vertical lines used to form a grid having two rows and many columns.
● A U-shaped curve that is large
● A triangle like a right-angled one which is most preferred
● A circle or an oval shape
● A rectangle shapes
● A straight line shapes

Step 5: You can add any other “extra fittings” such as the ears (in cartoons, ears generally considered to be ‘extra’), wrinkles, collar, hat, hair, etc.

Step 6: Finally, your cartoon face drawing is ready! You can also add different colors to the picture with different funky shades to make it attractive.

Part 2 How to Draw Your Own Cartoon Character
Are you bored? Why not take up a pencil and draw your cartoon comic drawing character? Note that drawing will be a relief from boredom, and it also helps your creativity fly very high.
However, you can easily add some colors and designs or even animate your cartoon character using this free software known as Filmora. Wondershare Filmora Video Editor is the best software to make you cartoon your picture or animate your cartoon characters with tons of filters and effects and its keyframing feature, which allows this with ease.
For Win 7 or later (64-bit)
For macOS 10.12 or later
Read this article on how to draw the perfect cartoon character yourself:
Step 1: The first is to have an idea of what you want to draw, i.e., the picture you want to draw. You can pick any character to draw from your favorite website or WeeWorld.com.
● First, you draw the face but make sure you don’t add a nose but do a black outline.
● Next, you can draw the other features but make sure you don’t use colored pencils. Only use your main writing utensil.
● Then, remember to use your imagination to add the clothes and hairstyle.
● Finally, you can delete any unwanted lines and color with artist utensils, such as crayons, paintbrushes, colored pencils, etc. Also, remember that you can add some detail to your character to make it pop out and be beautiful.

Step 2: Now you have officially made your cartoon, how does it feel?

Step 3: Next, you want to go back and draw again, but this time, not an imitation.

Step 4: Pick up a new piece of paper to be used to draw another character. But this time, you need to change the features. You can decide to make the eyes bigger, neon skin, and maybe crazy hair. You can try clothes that you would love to wear, or ones you wish you could get. Also, try to change the size around to make the features look different and add a nose, and then you can finally color your creation.

Step 5: Now, you can compare the two drawings to notice the difference. You will realize that one is an imitation while the other is all you! Now, you can grab a new piece of notebook paper.

Step 6: Next is that you begin to jot down different ideas. For example, you may want to draw a cute little puppy or a cute baby. Sometimes you can decide that your cartoon could be about a talking apple or something different.

Step 7: Grab another piece of paper and draw any other character you can imagine. You can try using a Sharpie marker for the outline by carefully tracing the pencil. Then you can erase any stray marks on the piece of paper. Next, you can also use any writing utensils like markers, crayons, colored pencils, pastels, or even paint, as it also works well.

Step 8: You can grab your notebook sheet again and then jot down any idea of a comic series. Also, make a plot or funny lines that you could use or any other characters.

Step 9: Next, you fold the blank sheet of paper and make it into about four lines. And then you can draw your main character by just using a pencil first.

Step 10: You can then draw the other characters and all the basic outlines in the drawing.

Step 11: Next is that you can draw the furniture and background, such as trees or anything else, to beautify your drawing.

Step 12: You can go back and add details and outline with Sharpie or black marker and delete any stray marks. You can also color if wanted.

Step 13: Next is for you to add dialogue and actively work with your character drawing.

Step 14: Finally, and there you have it. Congratulation! You now have your perfect, awesome, beautiful, and YOUR cartoon.

● Ending Thoughts →
● This article explained all you need to know about learning how to do funny cartoon drawings very quickly. You can also use these methods to create funny cat cartoon drawings or any other drawing you want for cat lovers.
● However, you can decide to animate your graphic using the best software to carry it out quickly, i.e., Filmora.
Whether you want to use a simple short video or an accessible online lesson, you will find everything that you need to learn how to create comic cartoon drawing on this website. This website article contains all the tutorials you need, ranging from your favorite wild animals, places, objects, farm animals, characters, vehicles, and food.
Do not forget that practicing is the key to success, so don’t hesitate to try several drawing lessons to help you improve your abilities. Start today to learn how to draw funny cartoons online at your own pace and comfort with this step-by-step tutorial.
In this article
01 [How to Draw Funny Cartoon Faces](#Part 1)
02 [How to Draw Your Own Cartoon Character](#Part 2)
Part 1 How to Draw Funny Cartoon Faces
Drawing funny faces in cartoons is very easy compared to other drawing styles or drawing complete parts of the comic. All that is need is practice and experiment with different combinations of shapes. This article will guide on how to draw funny cartoon faces of various types using six other steps:
Step 1: To begin, you need to first draw the face outline by drawing the following;
● Any Perfect type of round shape like a circle.
● Any pear shapes
● An upside-down triangle
● A quadrilateral like a trapezium, a square, or any of your choice
Step 2: To draw the nose in the middle of the face, draw somewhere any of the following;
● A round shape that is bulgy
● A U-shape
● A V-shape
● A small dash.
Step 3: Next is that you draw two round shapes for the eyes, and each of them should have a smaller round or dot (for the pupil), which is above the nose. This eye can be in the shape of any of the following;
● Two large circles
● An ovals
● A curvy “M,” like the one you can see in the “McDonalds” logo.
Step 4: You can draw the mouth just below the nose and draw any of the shapes from the list given below. In addition, to make the mouth funnier, you should then add teeth by either drawing a small square sticking out inside the mouth from the upper side, at the roof of the mouth, or a straight horizontal line which is across the mouth and several vertical lines used to form a grid having two rows and many columns.
● A U-shaped curve that is large
● A triangle like a right-angled one which is most preferred
● A circle or an oval shape
● A rectangle shapes
● A straight line shapes
Step 5: You can add any other “extra fittings” such as the ears (in cartoons, ears generally considered to be ‘extra’), wrinkles, collar, hat, hair, etc.
Step 6: Finally, your cartoon face drawing is ready! You can also add different colors to the picture with different funky shades to make it attractive.
Part 2 How to Draw Your Own Cartoon Character
Are you bored? Why not take up a pencil and draw your cartoon comic drawing character? Note that drawing will be a relief from boredom, and it also helps your creativity fly very high.
However, you can easily add some colors and designs or even animate your cartoon character using this free software known as Filmora. Wondershare Filmora Video Editor is the best software to make you cartoon your picture or animate your cartoon characters with tons of filters and effects and its keyframing feature, which allows this with ease.
For Win 7 or later (64-bit)
For macOS 10.12 or later
Read this article on how to draw the perfect cartoon character yourself:
Step 1: The first is to have an idea of what you want to draw, i.e., the picture you want to draw. You can pick any character to draw from your favorite website or WeeWorld.com.
● First, you draw the face but make sure you don’t add a nose but do a black outline.
● Next, you can draw the other features but make sure you don’t use colored pencils. Only use your main writing utensil.
● Then, remember to use your imagination to add the clothes and hairstyle.
● Finally, you can delete any unwanted lines and color with artist utensils, such as crayons, paintbrushes, colored pencils, etc. Also, remember that you can add some detail to your character to make it pop out and be beautiful.
Step 2: Now you have officially made your cartoon, how does it feel?
Step 3: Next, you want to go back and draw again, but this time, not an imitation.
Step 4: Pick up a new piece of paper to be used to draw another character. But this time, you need to change the features. You can decide to make the eyes bigger, neon skin, and maybe crazy hair. You can try clothes that you would love to wear, or ones you wish you could get. Also, try to change the size around to make the features look different and add a nose, and then you can finally color your creation.
Step 5: Now, you can compare the two drawings to notice the difference. You will realize that one is an imitation while the other is all you! Now, you can grab a new piece of notebook paper.
Step 6: Next is that you begin to jot down different ideas. For example, you may want to draw a cute little puppy or a cute baby. Sometimes you can decide that your cartoon could be about a talking apple or something different.
Step 7: Grab another piece of paper and draw any other character you can imagine. You can try using a Sharpie marker for the outline by carefully tracing the pencil. Then you can erase any stray marks on the piece of paper. Next, you can also use any writing utensils like markers, crayons, colored pencils, pastels, or even paint, as it also works well.
Step 8: You can grab your notebook sheet again and then jot down any idea of a comic series. Also, make a plot or funny lines that you could use or any other characters.
Step 9: Next, you fold the blank sheet of paper and make it into about four lines. And then you can draw your main character by just using a pencil first.
Step 10: You can then draw the other characters and all the basic outlines in the drawing.
Step 11: Next is that you can draw the furniture and background, such as trees or anything else, to beautify your drawing.
Step 12: You can go back and add details and outline with Sharpie or black marker and delete any stray marks. You can also color if wanted.
Step 13: Next is for you to add dialogue and actively work with your character drawing.
Step 14: Finally, and there you have it. Congratulation! You now have your perfect, awesome, beautiful, and YOUR cartoon.
● Ending Thoughts →
● This article explained all you need to know about learning how to do funny cartoon drawings very quickly. You can also use these methods to create funny cat cartoon drawings or any other drawing you want for cat lovers.
● However, you can decide to animate your graphic using the best software to carry it out quickly, i.e., Filmora.
5 Photoshop Alternatives to Animate Your Logo
5 Photoshop Alternatives to Animate Logo
An easy yet powerful editor
Numerous effects to choose from
Detailed tutorials provided by the official channel
Photoshop offers everything that you can use to create a high-quality animated logo and use it to maximize your brand visibility.
![]()
How can you animate your logo in Photoshop? For people who are not familiar with the photo editing tool, it’s always a bit challenging to get started with logo animation.
In this article
01 [Why Do You Need a Gif Logo](#Part 1)
02 [A Step-by-step Guide to Logo Animation in Photoshop](#Part 2)
03 [Most Effective Tactics to Animate Logo with These 5 Photoshop Alternatives](#Part 3)
Part 1 Why Do You Need a Gif Logo
Now, before we start with the guide to animate your logo in Photoshop, let’s first understand how an animation logo can help your brand. The truth is an animated logo has the desired uniqueness factor that’ll help your brand establish a strong digital presence. An animated logo will also set you apart in the crowd, considering other companies will be using simple one-dimensional logos.
Not to mention, you can also use an animated logo in your promotional videos and apply visual effects to enhance the overall production quality of the videos. In a nutshell, there are endless possibilities of using animated logos - all you have to do is unleash your creativity and animate a logo without any hassle.
Part 2 A Step-by-step Guide to Logo Animation in Photoshop
So, now that you know the top reasons why it’s important to use an animated logo, let’s start with the step-by-step guide to animate your logo in Photoshop. It’s worth understanding that animating a logo in Photoshop is not a challenging process. However, it may take a few minutes for you to get the job done because the process is quite time-consuming.
Step 1Open Adobe Photoshop
Open Adobe Photoshop on your computer. Click “File > Scripts” and then tap “Load Files into Stack”.
![]()
Step 2Browse
On the next screen, click “Browse” and load all the JPEG files that you want to use to animate the logo.
![]()
Step 3Timeline
Wait for pictures to load into Photoshop’s timeline. Then, click “Windows” and select “Timeline” from the drop-down menu.
![]()
Step 4Make Frames from Layers
Select all the layers and tap the little “Animation” icon. Click “Make Frames from Layers” to proceed further.
![]()
Step 5Adjust the time span
Select all the frames to adjust the time span for the animation.
Step 6Select looping options
Click on “Select Looping Options” and specify the number of times you want the animation to play itself in the loop.
![]()
Step 7Final export
Your GIF animation is ready for the final export. Simply click “File>Save for Web” and then choose the final output format to export the logo in GIF format.
Part 3 Most Effective Tactics to Animate Logo with These 4 Photoshop Alternatives
Even though Photoshop is a great software to create animated logos, it’s no secret that its complex UI might seem overwhelming for some users. If that’s the case, you can look for Photoshop alternatives and use them to animate your logo online. Here we have shared five of the best alternatives to Photoshop that offer all the essential tools to animate a logo with fewer complications. All these tools have an intuitive interface and allow users to create animated logos within a few minutes.
These Photoshop alternatives include:
01 Figma
![]()
Figma is undoubtedly one of the best editing tools that you can use to animate your logos for free. Even though the tool isn’t as feature-loaded as Photoshop, it’s still one of the best Photoshop alternatives you can use to create animated logos. The tool offers a user-friendly interface where everything you need is right on your screen. Since there aren’t too many hidden menus, you’ll find it quite easier to animate your logos in Figma. There are pre-installed animation templates and transitions that you can customize to meet your business requirements and accelerate the entire designing process.
Key Features:
● Intuitive User Interface
● Support for Team Collaboration
● Can be used for UX/UI designing too
Pros
Dedicated free version for one-time users
Perfect for Novice Designers
Can be used within a professional organization for advanced editing
Cons
You will not get all the features with the free model
If you are looking to design animated logos with keyframes, Figma may not be the right choice for the job
02 Canva
![]()
Canva is another popular online editing tool that’s designed to help users fulfill different editing needs right on their browsers. Whether you want to create a banner for an event or an animated logo for your website, Canva will help you get the job done in every situation.
Being a web-based tool, Canva supports cross-platform compatibility, which means you can access it on any device you want. There are even dedicated iOS and Android apps for Canva that’ll allow you to edit logos right on your smartphone. Basically, if you want to animate your logos online free, Canva is the most suitable solution. You can also use Canva if you are looking for a long-term logo maker.
Key Features:
●Cross-Platform Compatibility
●Thousands of built-in templates with customization support
●The media library gets updated regularly
Pros
All the basic features are available in the free version
One-account to access Canva on any device you want
Ideal for one-time use as well
Cons
When it comes to customization, Canva has limited features
You won’t find advanced editing options like Photoshop
03 Luminar
![]()
Luminar is a paid editing tool that comes with built-in AI support for high-quality editing. Basically, its AI feature can automatically analyze the pictures and suggest you with the best animation templates accordingly. While many users are skeptical about the AI-support, stay assured that it’ll prove to be helpful in 80% of the situations. And, even if you don’t like the suggested templates, you can always go back to the media library and pick a template by yourself.
With AI coming into the picture, Luminar instantly speeds up the entire editing process. You won’t have to spend several hours browsing through the template options. Simply select one of the suggested templates and you’ll be able to initiate the editing process instantly.
Key Features:
●An extensive built-in media library
●Dedicated AI support for precise editing
●Edit your RAW images and add logos easily
Pros
Luminar is an ideal choice for long-time users
Available for both Windows and macOS
Apply templates to multiple images with one click
Cons
With $99 price tag, Luminar is certainly expensive
In the beginning, you may find the user interface a bit overwhelming
04 Fotor
![]()
Fotor is also an online editing tool that can be used to animate your logos online for free. Being a simple online editor, you can’t expect Fotor to offer advanced editing features like some of the other tools we have mentioned in the list.
However, stay assured that when it comes to animating logos, Fotor has everything you’ll need to get the job done. The web-based tool offers 100,000 templates that are designed for different industries. You can choose any of these templates, customize them, and create bespoke animated logos for your brand.
Key Features:
● Different templates to choose from
● Easy drag-&-drop compatibility
● Ideal for first-time as well as professional users
Pros
Available for free
Perfect for social media managers
Customizable templates
Cons
Lacks advanced editing support
The premium version doesn’t have too many useful features
Key Takeaways from This Episode
● Animate your logo in Photoshop and make it visually appealing with 5-easy steps
● If you want to integrate your animated logo into a video, you can use Wondershare Filmora Pro to get the job done within a few minutes
● If you are a beginner, you can also use web-based editing tools to animate your logo online for free.
Also read:
- Updated How to Turn Yourself Into a WhatsApp Cartoon
- 2024 Approved Adobe Rigger Is AWESOME
- 10 Amazing Wallpaper Collage Ideas and Photos
- Updated 2024 Approved How to Create Picsart Cartoon in Simple Ways
- New No. 1 Maker to Animate Your Logo Online Free
- Updated Learn All About 3D Logo Animation and Templates for 2024
- New 2024 Approved 8 Blender 3D Animation Tutorials for Beginners
- Tutorial Guide to Animate Pictures in Canva
- Amazing Techniques of Motion Graphics in Premiere Pro
- 2024 Approved All About 3D Medical Animation And Its Uses
- Updated How to Create Your Own Avatar Free
- New 2024 Approved How to Find Some Different Ways to Animated Cartoon of Yourself
- New In 2024, 8 Blender 3D Animation Tutorials for Beginners
- Updated 2024 Approved 15 Animated Characters We All Had A Crush On
- The Best 8 Places for High-Quality Royalty Free Gifs (Paid and Free)
- 5 Recommended Websites for Text GIF Maker
- New Learn What Are Differences Between 2D And 3D Animation
- New 10 Cartoon Characters That Should Top Your List
- Updated 2024 Approved What Wikipedia Cant Tell You About the 10 Best Batman Cartoons
- New 5 Different Animation Styles A Simple but Complete Guide
- New 2024 Approved Ways You Can Master to Make Claymation Videos
- Updated In 2024, Best 12 Illusion Gifs Top Picks
- 4 Things You Need to Know About Pinterest GIF
- New In 2024, 10 Cartoon Character Makers to Create Animated Characters
- New In 2024, Pencil2D Animation Tutorial Overview
- Updated In 2024, How You Can Turn Yourself Into Anime Character Using Anime Filter
- Updated In 2024, Types of Cartoon Styles You May Use for The Next Marketing Project
- In 2024, The Top Free 12 GIF Meme Maker at a Glance
- Updated In 2024, Amazing Ideas About Creating Personalised WhatsApp GIF Sticker
- In 2024, Best 8 Tools Tell You How to Make Slideshows for Instagram
- 5 Free Animated Gif Sources You Must Check
- The 15 Most Efficient Photo to Cartoon Apps for Android for 2024
- Updated A Roster of 15 Top Disney Channel Cartoons
- Updated 2024 Approved Know All About Animated Business Logos and the Best Tools to Create One
- Updated Secret Source to Make a Stop Motion Puppet for 2024
- Updated 5 Different Animation Styles A Simple but Comprehensive Guide for 2024
- All About 3D Medical Animation And Its Uses for 2024
- Top 12 Illusion Gifs Top Picks for 2024
- In 2024, 18 Best Tools and Services to Create Animated Videos for Business 2023
- Updated Learn Simple Blender Rigging in Only 2 Minutes
- Step-by-Step Guide to Send Gif WhatsApp on Android for 2024
- Updated 2024 Approved Learn Easy Blender Rigging in Only 2 Minutes
- 5 Techniques You Never Heard of for Converting MP4 to GIF in Photoshop
- Nurturing the Spirit Through the Top 10 Intellectual Anime Websites
- In 2024, How To Stream Anything From Xiaomi Redmi Note 12 5G to Apple TV | Dr.fone
- Android Safe Mode - How to Turn off Safe Mode on Honor X9b? | Dr.fone
- 2024 Approved Narakeet Review Convenient Text to Speech Voice Maker
- What is Fake GPS Location Pro and Is It Good On Nubia Z50S Pro? | Dr.fone
- Possible solutions to restore deleted contacts from Asus ROG Phone 7 Ultimate.
- Lock Your Vivo V29 Phone in Style The Top 5 Gesture Lock Screen Apps
- In 2024, Full Guide on Mirroring Your Oppo A38 to Your PC/Mac | Dr.fone
- Easy steps to recover deleted music from Honor 90 GT
- How To Restore Missing Contacts Files from ZTE Blade A73 5G.
- In 2024, How To Change Country on App Store for iPhone SE With 7 Methods | Dr.fone
- How to Show Wi-Fi Password on Samsung Galaxy S23 FE
- In 2024, How to Transfer Contacts from Realme C53 to Other Android Devices Devices? | Dr.fone
- How to Mirror PC Screen to Samsung Galaxy M14 5G Phones? | Dr.fone
- Undelete lost data from Note 30i
- How to Track Oppo A78 5G by Phone Number | Dr.fone
- How to Unlock Verizon iPhone XS Max
- Full Tutorial to Bypass Your Realme 11 Pro+ Face Lock?
- How to Reset a Oppo Find X6 Phone That Is Locked | Dr.fone
- How To Pause Life360 Location Sharing For Huawei Nova Y91 | Dr.fone
- The way to recover deleted contacts on Google Pixel Fold without backup.
- How Can I Use a Fake GPS Without Mock Location On OnePlus 12R? | Dr.fone
- Title: New 2024 Approved Christmas Is Coming! How to Find & Make Animated Christmas GIFs?
- Author: Elon
- Created at : 2024-06-15 11:22:47
- Updated at : 2024-06-16 11:22:47
- Link: https://animation-videos.techidaily.com/new-2024-approved-christmas-is-coming-how-to-find-and-make-animated-christmas-gifs/
- License: This work is licensed under CC BY-NC-SA 4.0.
