

New 2024 Approved Have You Seen the Facebook Cartoon App Everyones Using Lately
Have You Seen the Facebook Cartoon App Everyone’s Using Recently
Have You Seen the Facebook Cartoon App Everyone’s Using Lately
An easy yet powerful editor
Numerous effects to choose from
Detailed tutorials provided by the official channel
Facebook cartooning has lately gained momentum in the realm of social media entertainment. Level up your graphic skills with the most recent cartoon app for Facebook!
In this article
01 [How to Make a Facebook Avatar](#Part 1)
02 [Facebook: How to Do the Cartoon Filter Challenge](#Part 2)
Part 1 How to Make a Facebook Avatar
Cartooning and caricature drawing has earned an ultimate preference of graphic designers since times as old as the retro cartoon strips to the modern day digitally created caricaturized avatars, which have by now imbibed usage credibility within almost any and every sector, regardless of the central theme of pr productivity.
Owing to their highly expressive avatars and the inherent ability to transmit information via a characteristic fun element, these have become potential sources of information sharing and entertainment. When it comes to social media, these graphic masterpieces become more vibrant and exportable. Talking of the current trends, caricature avatars on the Facebook cartoon app have created a buzz among the users of the app.
This one is a recently launched feature of Facebook that allows you to cartoonize your real time image with a diversity of customization options. Diving into the creation pool, see through the following section to learn the knowhow of creating amazing caricature avatars using the Facebook app:
User’s Guide to Create a Facebook Avatar
Step 1: You Need the Facebook Application
As the first step, you will need to download and launch the Facebook app in your preferred Android, Windows or MacOs device.
Step 2: Setting Up the Utility
After a successful launch of the app in your device, navigate to the bottom right corner of Facebook’s welcome interface and tap the ‘Three Lines’ icon.

Step 3: Choosing Your Avatar
As you tap on the icon mentioned in Step 2, a drop down menu appears. Click on the ‘See More’ option in the menu and tap ‘Avatars’ in the list of options that follows.

Step 4: Do as Directed
Once you have selected the ‘Avatar’ feature, a number of prompts will appear sin series, asking you to make selections of your hair style, skin tone and related features for customization. In case you are not able to locate all the options, tap the bar at the top of each option and also below your progressing avatar.


Step 5: Adding Further Details
You can additionally explore your editing creativity by customizing the eye, nose and body shape, eyebrows and outfit of your avatar.


Step 6: Almost There!
When you are satisfied with the look of your avatar, navigate to upper right corner of the app screen and click on the ‘Checkmark’ to finalize your changes. Go for a comparison of the created avatar with your real time photo by clicking on the ‘Selfie’ button beneath your avatar.

Step 7: Share Your Work
The created avatars get automatically saved locally in your device; from you can share and export them to any media sharing platforms, like amplifying your chat comments or sending stickers in different apps with utmost convenience using the ‘Share’ button.


Part 2 Facebook: How to Do the Cartoon Filter Challenge
Now that you are accustomed to the fun and excitement of creating cartoonized avatars on the cartoon app on Facebook, it would be an absolute merry to try hands on taking up the trending Facebook Cartoon Filter Challenge, which is the current buzz on social media. Let us enter into the challenge with the quick and easy process discussed in the following section:
Steps to Take Up the Cartoon Filter Challenge
Step 1: Download the Required Application
Begin with downloading the Voila AI Artist Cartoon Photo application to your system by visiting the latter’s official website.
Step 2: Launch the Application
Post a successful installation, launch the app in your system and tap ‘3D Cartoon’ in the latter’s opening interface.
Step 3: Grant App Permissions
You will now be asked to grant certain access permissions by the app to use your device media. Grant the same by tapping the ‘Allow Access’ option, followed by clicking on ‘Select Photos’.
Step 4: Make Your Selection
Browse your device gallery to choose a desired photo for cartoonizing.
Step 5: View the Transformation
When you are done with selecting and uploading the photo, tap on the same to let the app transform your selection to a caricature image grid.
Step 6: Save Your Avatar
Once the conversion process is over, navigate to the ’Arrow’ in the right corner of the screen to save your caricature image in your device gallery.
Step 7: Ready to Export
Saving your work permits you to export and share your creation on Facebook.
Filmora Cartoon Creator
Creating cartoonized images is already an absolute fun, which gets further leveled up when you pick the Wondershare Filmora Video Editor Cartoon Creator to work on caricature avatars. This one is an excellent choice to adhere to the purpose of making and customizing cartoonized versions of real time photos. Launched by Wondershare, the Filmora app is known to not only create, but also texturise and beautify your cartoon avatars with its extensive effects library in almost no time.
For Win 7 or later (64-bit)
For macOS 10.12 or later
● Ending Thoughts →
● Facebook has recently introduced a new cartoon avatar feature that creates cartoonized versions of your real-time photos.
● You can take part in the Cartoon Filter Challenge on Facebook to create and share amazing cartoon images.
● You can alternatively depend on the Filmora Cartoon Creator app to create and customize cartoon avatars within a blink.
Facebook cartooning has lately gained momentum in the realm of social media entertainment. Level up your graphic skills with the most recent cartoon app for Facebook!
In this article
01 [How to Make a Facebook Avatar](#Part 1)
02 [Facebook: How to Do the Cartoon Filter Challenge](#Part 2)
Part 1 How to Make a Facebook Avatar
Cartooning and caricature drawing has earned an ultimate preference of graphic designers since times as old as the retro cartoon strips to the modern day digitally created caricaturized avatars, which have by now imbibed usage credibility within almost any and every sector, regardless of the central theme of pr productivity.
Owing to their highly expressive avatars and the inherent ability to transmit information via a characteristic fun element, these have become potential sources of information sharing and entertainment. When it comes to social media, these graphic masterpieces become more vibrant and exportable. Talking of the current trends, caricature avatars on the Facebook cartoon app have created a buzz among the users of the app.
This one is a recently launched feature of Facebook that allows you to cartoonize your real time image with a diversity of customization options. Diving into the creation pool, see through the following section to learn the knowhow of creating amazing caricature avatars using the Facebook app:
User’s Guide to Create a Facebook Avatar
Step 1: You Need the Facebook Application
As the first step, you will need to download and launch the Facebook app in your preferred Android, Windows or MacOs device.
Step 2: Setting Up the Utility
After a successful launch of the app in your device, navigate to the bottom right corner of Facebook’s welcome interface and tap the ‘Three Lines’ icon.
Step 3: Choosing Your Avatar
As you tap on the icon mentioned in Step 2, a drop down menu appears. Click on the ‘See More’ option in the menu and tap ‘Avatars’ in the list of options that follows.
Step 4: Do as Directed
Once you have selected the ‘Avatar’ feature, a number of prompts will appear sin series, asking you to make selections of your hair style, skin tone and related features for customization. In case you are not able to locate all the options, tap the bar at the top of each option and also below your progressing avatar.
Step 5: Adding Further Details
You can additionally explore your editing creativity by customizing the eye, nose and body shape, eyebrows and outfit of your avatar.
Step 6: Almost There!
When you are satisfied with the look of your avatar, navigate to upper right corner of the app screen and click on the ‘Checkmark’ to finalize your changes. Go for a comparison of the created avatar with your real time photo by clicking on the ‘Selfie’ button beneath your avatar.
Step 7: Share Your Work
The created avatars get automatically saved locally in your device; from you can share and export them to any media sharing platforms, like amplifying your chat comments or sending stickers in different apps with utmost convenience using the ‘Share’ button.
Part 2 Facebook: How to Do the Cartoon Filter Challenge
Now that you are accustomed to the fun and excitement of creating cartoonized avatars on the cartoon app on Facebook, it would be an absolute merry to try hands on taking up the trending Facebook Cartoon Filter Challenge, which is the current buzz on social media. Let us enter into the challenge with the quick and easy process discussed in the following section:
Steps to Take Up the Cartoon Filter Challenge
Step 1: Download the Required Application
Begin with downloading the Voila AI Artist Cartoon Photo application to your system by visiting the latter’s official website.
Step 2: Launch the Application
Post a successful installation, launch the app in your system and tap ‘3D Cartoon’ in the latter’s opening interface.
Step 3: Grant App Permissions
You will now be asked to grant certain access permissions by the app to use your device media. Grant the same by tapping the ‘Allow Access’ option, followed by clicking on ‘Select Photos’.
Step 4: Make Your Selection
Browse your device gallery to choose a desired photo for cartoonizing.
Step 5: View the Transformation
When you are done with selecting and uploading the photo, tap on the same to let the app transform your selection to a caricature image grid.
Step 6: Save Your Avatar
Once the conversion process is over, navigate to the ’Arrow’ in the right corner of the screen to save your caricature image in your device gallery.
Step 7: Ready to Export
Saving your work permits you to export and share your creation on Facebook.
Filmora Cartoon Creator
Creating cartoonized images is already an absolute fun, which gets further leveled up when you pick the Wondershare Filmora Video Editor Cartoon Creator to work on caricature avatars. This one is an excellent choice to adhere to the purpose of making and customizing cartoonized versions of real time photos. Launched by Wondershare, the Filmora app is known to not only create, but also texturise and beautify your cartoon avatars with its extensive effects library in almost no time.
For Win 7 or later (64-bit)
For macOS 10.12 or later
● Ending Thoughts →
● Facebook has recently introduced a new cartoon avatar feature that creates cartoonized versions of your real-time photos.
● You can take part in the Cartoon Filter Challenge on Facebook to create and share amazing cartoon images.
● You can alternatively depend on the Filmora Cartoon Creator app to create and customize cartoon avatars within a blink.
The 15 Most Efficient Photo to Cartoon Software for Android
The 15 Most Efficient Photo to Cartoon Apps for Android
An easy yet powerful editor
Numerous effects to choose from
Detailed tutorials provided by the official channel
It’s usually better to start with a free cartoon app for Android, whether you want to make a cartoon avatar of yourself or add humorous cartoons and live artistic effects to your photos.
In today’s digital age, your smartphone can serve as a portable cartoon picture editor, allowing you to apply cool and artistic effects to new or current photos. Finding an excellent cartoon-making app for Android is difficult because there are so many unique possibilities.
To assist you, we’ve compiled a list of the top cartoon picture apps for Android and iPhone that can help you turn your photo into a cartoon in seconds. Let’s get started without further ado.
In this article
01 [10 Apps to Kickstart Your Need to Photo to Cartoon](#Part 1)
02 [Top 5 iOS Apps to Turn Photo into Cartoon](#Part 2)
Part 1 Apps to Kickstart Your Need to Photo to Cartoon
In this part, you will have a chance to familiarize yourself with the best cartoon apps for Android, along with all the relevant information that matches your need.
01Cartoon Photo Editor
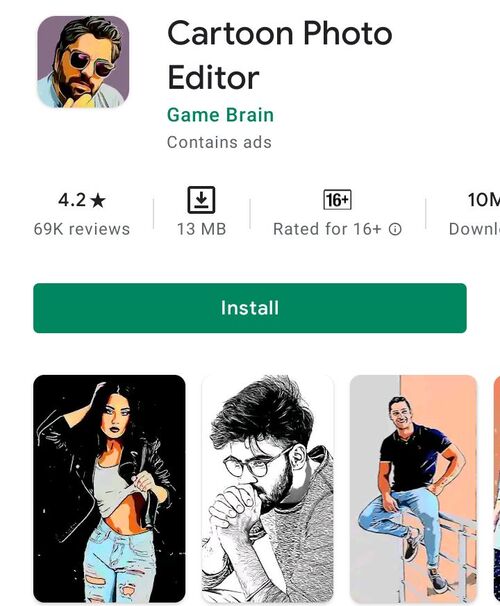
This free image to cartoon app has been a favorite for many years, making it an obvious choice for the top slot.
This cartoon pic software could be the ideal choice for you to add fantastic artistic and cartoon effects to your new or current photos.
Features:
• Add fantastic cartoon effects to your phone’s gallery photos.
• With a single tap of your finger, save images or take an image instantly.
• The autofocus feature (click anywhere on the screen)
• Several eye-catching effects, including a cartoon, oil painting, thermal vision, drawing, and more.
Compatibility:- Android 4.4 or above
Rating: 4.2
Price:- Free
02Camart – Cartoon Photo
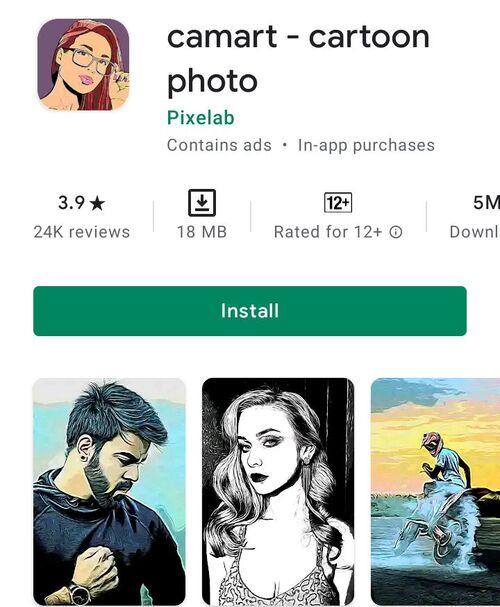
This one is extensively used photos to cartoon picture apps for Android users.
Cartoon Photo is the ideal program for instantly applying the most spectacular cartoon effects to your images!
With an intelligent cartoon camera, you can effortlessly turn your most fabulous selfies and recorded films into live paints.
Features:
• Use your phone’s camera to take photos, selfies, and movies, then apply real-time artistic effects.
• There are many fantastic artistic filters to pick from (cartoon, pencil, comics, sketch, oil painting, watercolor, and many more).
• Use autofocus, pinch to zoom, and more by tapping on the screen.
• Email or post photos to popular social networking sites to share with your friends.
Compatibility:- Android 4.4 or above
Price:- Free
Rating: 3.9
03Cartoon Pictures – Cartoon Photo Editor
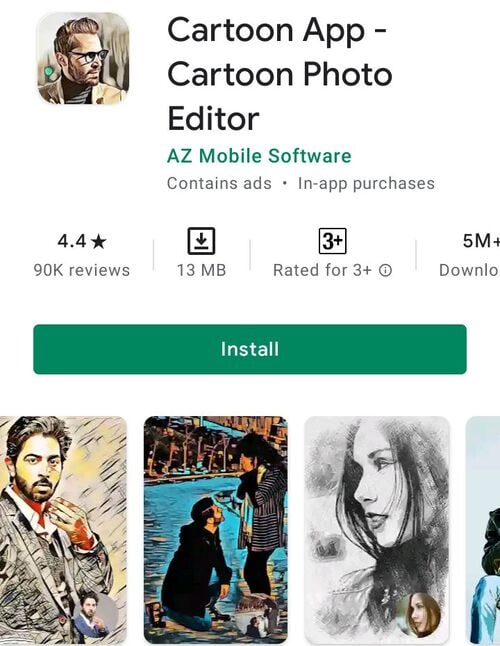
Cartoon Pictures - Cartoon Photo Editor makes as the best Android photos to cartoon apps for adding cartoon effects, oil paintings, and canvas artwork.
It has a wide range of cartoon animation effects, pencil sketch effects, smooth art filters, and painting effects that will transform your regular photos into beautiful works of art.
Features:
• A cartoon picture conversion program with a beautiful look.
• Hundreds of incredible cartoon photo effects
• A powerful selfie camera that allows you to edit photos in real-time.
• Post your sketch styles and artwork to social media sites like Facebook, Instagram, Pinterest, and Twitter.
Compatibility:- Android 5.0 or later
Price:- Free
Rating: 4.4
04Cartoon Photo – Pictures Cartoon Drawing
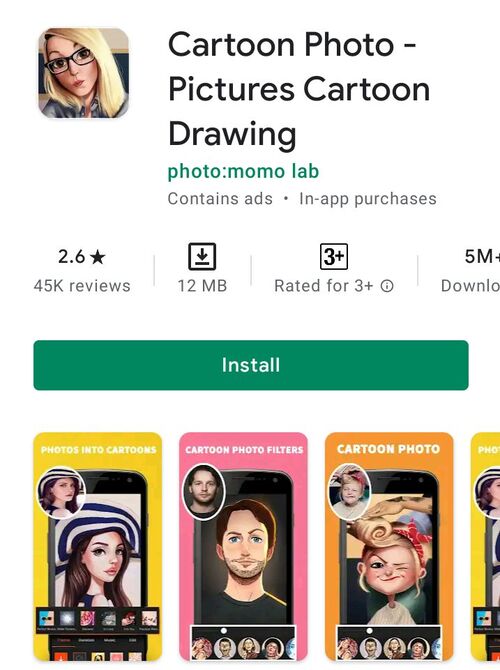
It combines all distinctive cartoon effects and art filters into one software, allowing you to instantly transform your photographs into grey cartoons, smooth pencil sketches and drawings, oil paintings, and pixel art.
Although the Google Play market is overflowing with cartoon-type editing apps, this is the best cartoon-making app for Android. You can now be your cartoonist.
Features:
• Create cartoon drawings from any new or old photos.
• Selfie camera with powerful cartoon snaps, creative photo combining, and cartoon filters
• A plethora of contemporary artistic filters to pick from (cartoon yourself, a cartoon photo maker, photo to caricature, and many more)
Compatibility:- Android 4.1 or above
Price:- Free
Rating: 2.6
05Cartoon Photo Editor – Pencil Sketch Art
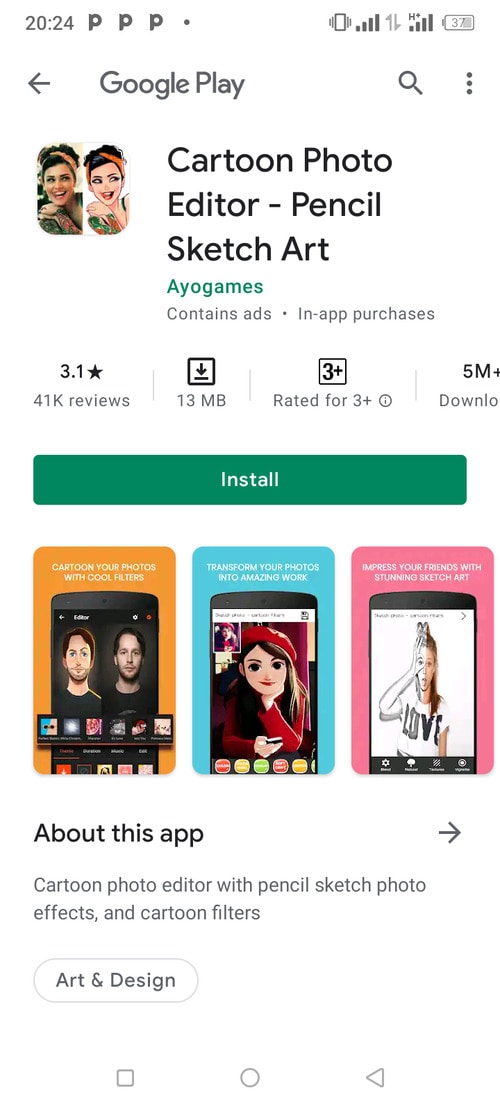
If you need a way to turn your favorite photos into cartoon drawings, this cartoon camera is the way to go.
This most excellent comedy picture software attempts to provide a plethora of fantastic cartoon graphics filters to help your photos stand out.
Features:
• Create cartoons and oil paintings from any photo
• Use the ‘Cartoon yourself’ function to turn your images into masterpieces.
• Photo editor for cartoons/photo creator for cartoons
Compatibility:- Requires 4.1 or more Android
Price:- Free
Rating: 3.1
06Art Camera – Cartoon, Pencil Sketch Art Effect Photo
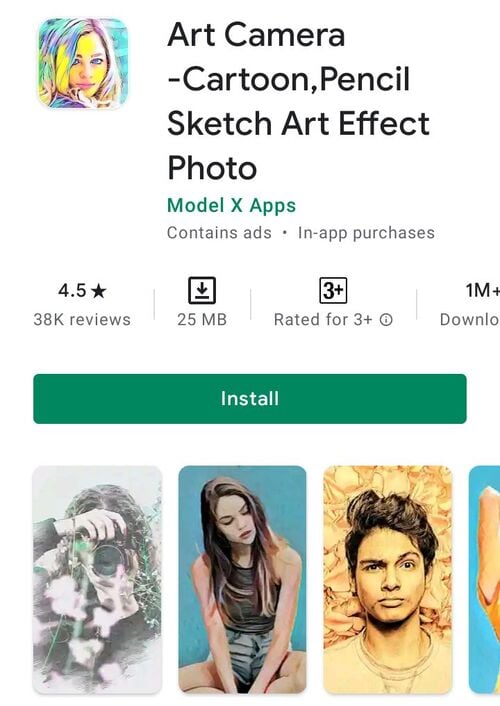
Do you enjoy sketching? This greatest photo to cartoon app from Model X is a must-have for everyone who wants to add pencil sketches and fantastic artistic and cartoon effects to existing photos.
It also serves as a useful photo organizer, allowing you to organize and manage your photos using date and time tags. With the help of our top-rated convert photo to cartoon app, you can now be the center of attention.
Features:
• A vast range of picture effects and filters inspired by oil paintings and cartoons
• A plethora of photo editing and adjusting options, such as contrast, brightness, and saturation
• UHD camera, HD selfie, auto-focus, HDR, and silent capture mode, among other features.
Compatibility:- Android 4.2+
Price:- Free
Rating: 4.5
07Tooncam – Cartoon, Pencil Sketch Pic
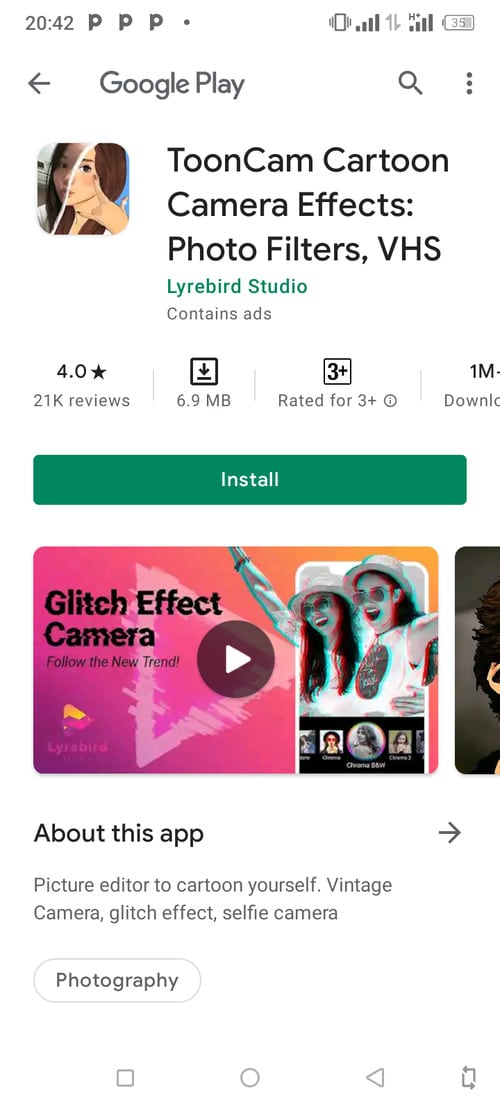
Do you want to make cartoons out of your most extraordinary selfies? If that’s the case, the finest cartoon picture editor app for Android is all you’ll need. What could be better than Tooncam?
With this picture-to cartoon app at your disposal, you can quickly turn your images into spectacular cartoons.
Features:
• With a few clicks of your finger, make fantastic web-based comics.
• Transforms your regular photos into adorable cartoon selfies
• More than 15 different cartoon effects
Compatibility:- Android 4.4+ and iOS
Price:- Free
Rating: 4.0
08Prisma Art Effect Photo Editor
Prisma was the most popular cartoon animation app on the market only a few years ago. Even though this app isn’t as famous as it once was, it still has some absorbing art filters that can make your shot look like some of history’s greatest artists created it.
The best part is that new filters come every day, so you’ll never run out of cartoon photo ideas. Furthermore, the software has various special photo effects and the ability to save your works in both SD and HD resolution.
Features:
● Every day, you get new cartoon effects.
● You will get more than 300 filters.
● Cartooning is the only option.
● Easily cartoon the photo.
Price: Free, though in-app purchases
Compatibility: Android
Ratings: 4.6
09Cartoon Yourself
Even if you can’t record videos or shoot images with the Cartoon Yourself app for Android, it’s still a good option to quickly turn a photo into a cartoon. Select a picture with the ‘Add a Photo’ button, then hit the ‘Apply Effect’ button to begin browsing the app’s extensive library of stickers and cartoon effects.
After the photo has been cartoonized, you can save it to your phone or share it on social media with your friends. The Cartoon Yourself app also provides basic photo editing features, such as cropping, mirroring, and rotating images.
Features:
● For novices, a primary and easy-to-use photo-to-cartoon app
● It has some excellent and lovely cartoon effects.
● Limited Free filters and effects
Price: Free, but with in-app purchases.
Compatibility: Android
Rating: 3.1
10Painnt – Art & Cartoon Filters
Painnt is easily one of the greatest cartoons yourself apps on the market, with over a thousand filters and effects. Because this picture editor allows you to change the transparency, saturation, and brightness of all your images, you can manipulate them in almost any way you desire. Painnt is also a creative community where you can find and meet others who share your art interests.
However, the accessible version of the program limits the size of the photos you may export, and you must subscribe to one of the subscription plans to process pictures in HD. The cost of a yearly subscription is only $9.99.
Features:
• Version is updated regularly to include more filters.
• Change the parameters of the cartoon filters to make them your own.
• Advanced AI technology.
Price: Free(in-app purchases)
Compatibility: Android
Rating: 3.8
Part 2 Top 5 iOS Apps to Turn Photo into Cartoon
Here, we have some of the best iOS applications that will assist you in turning photos into cartoons quickly.
01Cartoon Yourself Video Effects
Even if you aren’t a fan of the best cartoon video maker app download for iOS, this incredible photo-to cartoon app will convert you into one.
It features a user-friendly screen and an extensive range of amusing picture effects to help you build a cartoon avatar of yourself.
Features:
• Convert any snapshot of a person into an animated animation.
• Use a variety of authentic facial expressions (squint eyes, flirty wink, sad face, nice smile, etc.)
• Use dozens of humorous photo effects to turn your face into an alien, hideous, bulb-headed person, and more.
02Cartoon Camera Free
Apart from the Cartoon and Pencil Sketch effects, this little program doesn’t offer anything else. You may either use photos from your phone or take new ones and turn them into fantastic cartoons. The images you modify with the Cartoon Camera Free app can be saved to your camera roll or shared on social media.
However, because the process of turning your photos into cartoons is fully automated, you won’t have much control over how the final version of your cartoon photo will appear.
Features
● You can quickly draw a caricature of yourself on your phone.
● This fantastic photo-to cartoon tool will provide you with a realistic cartoon effect in real-time.
● It is updated regularly. Thus, you won’t use the most recent effects.
03Photo To Cartoon Yourself Edit
Photo To Cartoon Yourself is a popular cartoon photo programs, allowing you to create avatars or a cartoon of yourself quickly.
Capture a photo from your phone’s gallery or take a fresh one with the camera and turn it into a fantastic cartoon straight away for free. It is the most powerful program on this list for converting a photo into a cartoon AVATAR with the least amount of work and time. Furthermore, it includes many fascinating elements that will give your shot a realistic cartoon ethos.
Features:
● Choose images from your photo library.
● Turn your images into cartoons and send them via email.
● No picture shrinking or stretching; create cartoon images in high definition in seconds.
● Free to access
04Clip2Comic & Caricature Maker
Clip2Comic & Caricature Maker comes with a friendly interface that works wonders while converting a photo into caricatures, sketches, or cartoons.
Clip2Comic also allows you to make your cartoon videos in a matter of seconds using its real-time preview camera.
Features:
• Choose an image or video clip from your photo album to use.
• A wide range of free cartoon, drawing, caricature, and poster effects are available.
• Customization tools allow you to tweak your image’s outlines and blacks.
• Use several color filters to put your cartoon faces in the appropriate mood.
05MomentCam Cartoons & Stickers
MomentCam allows you to create your bitmoji based on your preferences. MomentCam is one of the most popular photo-to-cartoon apps on the market right now, with over 300 million downloads.
It allows you to create personalized emoticons and funny cartoons to convey your emotions in the most amusing way imaginable. Thousands of realistic effects and filters are available to give your shot an authentic cartoon feel. You can make a better version of yourself with MomentCam.
MomentCam may be at the bottom of the list of the best cartoon camera applications for iPhone and iPad, but it is well worth a look.
Features:
● Turn yourself into witty cartoons and glistening emoticons.
● Add text bubbles to some jokes and phrases to make your cartoons more entertaining
● Alter your caricatures’ facial expressions.
● You can get great prizes by sharing your amusing creations with millions of people all around the world.
****Wondershare Filmora Video Editor - Best Application**
With the rise in popularity of cartoonizing photo apps for Android, we’d like to introduce you to a fantastic app that will assist you in creating cartoon animation. Following its incredible characteristics in no time. Wondershare Filmora Animation software is a new Wondershare product that includes several downloadable animated characters and elements.
Most significantly, this software offers a user-friendly interface, an intelligent editing workflow, is lightweight, has a quick video rendering speed, and much more.
● Ending Thoughts →
● Now that you’ve found the best cartoon video maker app for Android, choose the one that’s right for you. Whether on Android or iOS devices, these animation movie creators will turn the world upside down in just a few clicks, so give it a try today!
● You can also try out a fantastic app, Filmora. It is a perfect cartoon-making app for Android and iOS. Change your photo to cartoon in a few clicks.
It’s usually better to start with a free cartoon app for Android, whether you want to make a cartoon avatar of yourself or add humorous cartoons and live artistic effects to your photos.
In today’s digital age, your smartphone can serve as a portable cartoon picture editor, allowing you to apply cool and artistic effects to new or current photos. Finding an excellent cartoon-making app for Android is difficult because there are so many unique possibilities.
To assist you, we’ve compiled a list of the top cartoon picture apps for Android and iPhone that can help you turn your photo into a cartoon in seconds. Let’s get started without further ado.
In this article
01 [10 Apps to Kickstart Your Need to Photo to Cartoon](#Part 1)
02 [Top 5 iOS Apps to Turn Photo into Cartoon](#Part 2)
Part 1 Apps to Kickstart Your Need to Photo to Cartoon
In this part, you will have a chance to familiarize yourself with the best cartoon apps for Android, along with all the relevant information that matches your need.
01Cartoon Photo Editor
This free image to cartoon app has been a favorite for many years, making it an obvious choice for the top slot.
This cartoon pic software could be the ideal choice for you to add fantastic artistic and cartoon effects to your new or current photos.
Features:
• Add fantastic cartoon effects to your phone’s gallery photos.
• With a single tap of your finger, save images or take an image instantly.
• The autofocus feature (click anywhere on the screen)
• Several eye-catching effects, including a cartoon, oil painting, thermal vision, drawing, and more.
Compatibility:- Android 4.4 or above
Rating: 4.2
Price:- Free
02Camart – Cartoon Photo
This one is extensively used photos to cartoon picture apps for Android users.
Cartoon Photo is the ideal program for instantly applying the most spectacular cartoon effects to your images!
With an intelligent cartoon camera, you can effortlessly turn your most fabulous selfies and recorded films into live paints.
Features:
• Use your phone’s camera to take photos, selfies, and movies, then apply real-time artistic effects.
• There are many fantastic artistic filters to pick from (cartoon, pencil, comics, sketch, oil painting, watercolor, and many more).
• Use autofocus, pinch to zoom, and more by tapping on the screen.
• Email or post photos to popular social networking sites to share with your friends.
Compatibility:- Android 4.4 or above
Price:- Free
Rating: 3.9
03Cartoon Pictures – Cartoon Photo Editor
Cartoon Pictures - Cartoon Photo Editor makes as the best Android photos to cartoon apps for adding cartoon effects, oil paintings, and canvas artwork.
It has a wide range of cartoon animation effects, pencil sketch effects, smooth art filters, and painting effects that will transform your regular photos into beautiful works of art.
Features:
• A cartoon picture conversion program with a beautiful look.
• Hundreds of incredible cartoon photo effects
• A powerful selfie camera that allows you to edit photos in real-time.
• Post your sketch styles and artwork to social media sites like Facebook, Instagram, Pinterest, and Twitter.
Compatibility:- Android 5.0 or later
Price:- Free
Rating: 4.4
04Cartoon Photo – Pictures Cartoon Drawing
It combines all distinctive cartoon effects and art filters into one software, allowing you to instantly transform your photographs into grey cartoons, smooth pencil sketches and drawings, oil paintings, and pixel art.
Although the Google Play market is overflowing with cartoon-type editing apps, this is the best cartoon-making app for Android. You can now be your cartoonist.
Features:
• Create cartoon drawings from any new or old photos.
• Selfie camera with powerful cartoon snaps, creative photo combining, and cartoon filters
• A plethora of contemporary artistic filters to pick from (cartoon yourself, a cartoon photo maker, photo to caricature, and many more)
Compatibility:- Android 4.1 or above
Price:- Free
Rating: 2.6
05Cartoon Photo Editor – Pencil Sketch Art
If you need a way to turn your favorite photos into cartoon drawings, this cartoon camera is the way to go.
This most excellent comedy picture software attempts to provide a plethora of fantastic cartoon graphics filters to help your photos stand out.
Features:
• Create cartoons and oil paintings from any photo
• Use the ‘Cartoon yourself’ function to turn your images into masterpieces.
• Photo editor for cartoons/photo creator for cartoons
Compatibility:- Requires 4.1 or more Android
Price:- Free
Rating: 3.1
06Art Camera – Cartoon, Pencil Sketch Art Effect Photo
Do you enjoy sketching? This greatest photo to cartoon app from Model X is a must-have for everyone who wants to add pencil sketches and fantastic artistic and cartoon effects to existing photos.
It also serves as a useful photo organizer, allowing you to organize and manage your photos using date and time tags. With the help of our top-rated convert photo to cartoon app, you can now be the center of attention.
Features:
• A vast range of picture effects and filters inspired by oil paintings and cartoons
• A plethora of photo editing and adjusting options, such as contrast, brightness, and saturation
• UHD camera, HD selfie, auto-focus, HDR, and silent capture mode, among other features.
Compatibility:- Android 4.2+
Price:- Free
Rating: 4.5
07Tooncam – Cartoon, Pencil Sketch Pic
Do you want to make cartoons out of your most extraordinary selfies? If that’s the case, the finest cartoon picture editor app for Android is all you’ll need. What could be better than Tooncam?
With this picture-to cartoon app at your disposal, you can quickly turn your images into spectacular cartoons.
Features:
• With a few clicks of your finger, make fantastic web-based comics.
• Transforms your regular photos into adorable cartoon selfies
• More than 15 different cartoon effects
Compatibility:- Android 4.4+ and iOS
Price:- Free
Rating: 4.0
08Prisma Art Effect Photo Editor
Prisma was the most popular cartoon animation app on the market only a few years ago. Even though this app isn’t as famous as it once was, it still has some absorbing art filters that can make your shot look like some of history’s greatest artists created it.
The best part is that new filters come every day, so you’ll never run out of cartoon photo ideas. Furthermore, the software has various special photo effects and the ability to save your works in both SD and HD resolution.
Features:
● Every day, you get new cartoon effects.
● You will get more than 300 filters.
● Cartooning is the only option.
● Easily cartoon the photo.
Price: Free, though in-app purchases
Compatibility: Android
Ratings: 4.6
09Cartoon Yourself
Even if you can’t record videos or shoot images with the Cartoon Yourself app for Android, it’s still a good option to quickly turn a photo into a cartoon. Select a picture with the ‘Add a Photo’ button, then hit the ‘Apply Effect’ button to begin browsing the app’s extensive library of stickers and cartoon effects.
After the photo has been cartoonized, you can save it to your phone or share it on social media with your friends. The Cartoon Yourself app also provides basic photo editing features, such as cropping, mirroring, and rotating images.
Features:
● For novices, a primary and easy-to-use photo-to-cartoon app
● It has some excellent and lovely cartoon effects.
● Limited Free filters and effects
Price: Free, but with in-app purchases.
Compatibility: Android
Rating: 3.1
10Painnt – Art & Cartoon Filters
Painnt is easily one of the greatest cartoons yourself apps on the market, with over a thousand filters and effects. Because this picture editor allows you to change the transparency, saturation, and brightness of all your images, you can manipulate them in almost any way you desire. Painnt is also a creative community where you can find and meet others who share your art interests.
However, the accessible version of the program limits the size of the photos you may export, and you must subscribe to one of the subscription plans to process pictures in HD. The cost of a yearly subscription is only $9.99.
Features:
• Version is updated regularly to include more filters.
• Change the parameters of the cartoon filters to make them your own.
• Advanced AI technology.
Price: Free(in-app purchases)
Compatibility: Android
Rating: 3.8
Part 2 Top 5 iOS Apps to Turn Photo into Cartoon
Here, we have some of the best iOS applications that will assist you in turning photos into cartoons quickly.
01Cartoon Yourself Video Effects
Even if you aren’t a fan of the best cartoon video maker app download for iOS, this incredible photo-to cartoon app will convert you into one.
It features a user-friendly screen and an extensive range of amusing picture effects to help you build a cartoon avatar of yourself.
Features:
• Convert any snapshot of a person into an animated animation.
• Use a variety of authentic facial expressions (squint eyes, flirty wink, sad face, nice smile, etc.)
• Use dozens of humorous photo effects to turn your face into an alien, hideous, bulb-headed person, and more.
02Cartoon Camera Free
Apart from the Cartoon and Pencil Sketch effects, this little program doesn’t offer anything else. You may either use photos from your phone or take new ones and turn them into fantastic cartoons. The images you modify with the Cartoon Camera Free app can be saved to your camera roll or shared on social media.
However, because the process of turning your photos into cartoons is fully automated, you won’t have much control over how the final version of your cartoon photo will appear.
Features
● You can quickly draw a caricature of yourself on your phone.
● This fantastic photo-to cartoon tool will provide you with a realistic cartoon effect in real-time.
● It is updated regularly. Thus, you won’t use the most recent effects.
03Photo To Cartoon Yourself Edit
Photo To Cartoon Yourself is a popular cartoon photo programs, allowing you to create avatars or a cartoon of yourself quickly.
Capture a photo from your phone’s gallery or take a fresh one with the camera and turn it into a fantastic cartoon straight away for free. It is the most powerful program on this list for converting a photo into a cartoon AVATAR with the least amount of work and time. Furthermore, it includes many fascinating elements that will give your shot a realistic cartoon ethos.
Features:
● Choose images from your photo library.
● Turn your images into cartoons and send them via email.
● No picture shrinking or stretching; create cartoon images in high definition in seconds.
● Free to access
04Clip2Comic & Caricature Maker
Clip2Comic & Caricature Maker comes with a friendly interface that works wonders while converting a photo into caricatures, sketches, or cartoons.
Clip2Comic also allows you to make your cartoon videos in a matter of seconds using its real-time preview camera.
Features:
• Choose an image or video clip from your photo album to use.
• A wide range of free cartoon, drawing, caricature, and poster effects are available.
• Customization tools allow you to tweak your image’s outlines and blacks.
• Use several color filters to put your cartoon faces in the appropriate mood.
05MomentCam Cartoons & Stickers
MomentCam allows you to create your bitmoji based on your preferences. MomentCam is one of the most popular photo-to-cartoon apps on the market right now, with over 300 million downloads.
It allows you to create personalized emoticons and funny cartoons to convey your emotions in the most amusing way imaginable. Thousands of realistic effects and filters are available to give your shot an authentic cartoon feel. You can make a better version of yourself with MomentCam.
MomentCam may be at the bottom of the list of the best cartoon camera applications for iPhone and iPad, but it is well worth a look.
Features:
● Turn yourself into witty cartoons and glistening emoticons.
● Add text bubbles to some jokes and phrases to make your cartoons more entertaining
● Alter your caricatures’ facial expressions.
● You can get great prizes by sharing your amusing creations with millions of people all around the world.
****Wondershare Filmora Video Editor - Best Application**
With the rise in popularity of cartoonizing photo apps for Android, we’d like to introduce you to a fantastic app that will assist you in creating cartoon animation. Following its incredible characteristics in no time. Wondershare Filmora Animation software is a new Wondershare product that includes several downloadable animated characters and elements.
Most significantly, this software offers a user-friendly interface, an intelligent editing workflow, is lightweight, has a quick video rendering speed, and much more.
● Ending Thoughts →
● Now that you’ve found the best cartoon video maker app for Android, choose the one that’s right for you. Whether on Android or iOS devices, these animation movie creators will turn the world upside down in just a few clicks, so give it a try today!
● You can also try out a fantastic app, Filmora. It is a perfect cartoon-making app for Android and iOS. Change your photo to cartoon in a few clicks.
Ways to Stop Animation From Looping in Unity
How to Stop Animation from Looping in Unity
An easy yet powerful editor
Numerous effects to choose from
Detailed tutorials provided by the official channel
Unity is an IDE interface all designed exclusively for game developers. However, you can do much more with Unity than game development. But, our main concern here is something else than this subject. You’re looking for easy tutorials on Unity stop animation!

And luckily, we’ve got you covered as we’ve briefly explained how to perform Unity stop animation from looping and the steps to make a smooth animation.
In this article
01 [What is Unity Used for?](#Part 1)
02 [How to Stop Animation Playing in Loop in Unity?](#Part 2)
03 [How to Smooth an Animation in Unity?](#Part 3)
Part 1 What is Unity Used for?
Unity is a software tool friendly to all the game developers out there. This tool is used by the large community of game developers to power and create their game development projects. And, the software is more of a professional means and not a simple pared-down ‘game builder .’Unity also offers one of the most significant inbuilt features like rendering, physics, and collision detection. Thus, one of the powerful aspects of Unity is that game developers need not go out of the box and create everything from scratch. Instead, they are available with the physics engine required to develop games quickly. Another robust feature of Unity is that it includes an excellent ‘Asset Store’ where developers can upload their creations and showcase them to the whole community. So, that’s Unity and its uses in a broader scope!
Before we take you through the next section, it’s important to mention that Unity is also known as cross-platform IDE, where IDE stands for ‘integrated development environment.’ So, it can be called more of an interface with access to all the tools and resources required to develop games.
Apart from the game development, Unity is known for other excellent usage purposes as:
● Simulations
● Animation
● Architectural Visualization
● Previsualization for Film
● Interactive Experiences
Among these features only, we’ll describe Unity stop animation from looping in detail.
Part 2 How to Stop Animation Playing in Loop in Unity?
As we said, we’ll describe to you the most accessible definition of how to stop Animation in Unity. Thus, there are simple steps that we’d like to define firsthand before explaining the whole procedure with an image-centric step-by-step guide.
So, those simple steps to stop motion animation in After Effects in the loop also go like below:
Step 1 Go to the Project tab and select Animation.
Step 2 Open the Inspector tab.
Step 3 Uncheck the checkbox Loop Time, and you’re good to go!
We’ll describe the same, i.e., Unity stop animation from looping through the step guide below.
In this guide, we’ll explain right from applying the Animation so that you’d understand better. So, let’s begin without any further ado!
01Step 1 Delete animation folder
We have already created an animation folder in the folder named as own Animation, so click that folder, click the animation folder, and then another folder along with as shown below. Hold the Shift key and click another folder. Then, right-click the Delete tab as depicted below.
Similarly, you can also delete the Animation if you wish.

02Step 2 Create an animation for the subject
Now, you may have different subjects. We’re creating Animation on Mobile Joystick for reference, as shown below.

Now, hit the Create tab on the Unity panel below. Then, proceed to save your Animation in the folder you’ve already created for the same.

03Step 3 Give positions to the animation
Firstly, hit the red-icon button used for recording, as shown below.

Give the position on the left side after you click the button. And, then, clicking almost near to 3you can give the position to the right-hand side as shown below.

Now, the animation has been set. You can see the animation from left to right if you click the Play button. So, here, you can see the results of infinite loop animation, which won’t stop.

You can follow two ways to stop this Animation in Unity from looping, and we’ll describe both methods below.
04Step 4 Stop animation Unity Way 1
Go to the animation folder where you’ve created the animation and click the New Animation icon as shown below.

Now, you have to uncheck the Loop Time tab on the top-right corner of the Unity panel.

05Step 5 Stop animation Unity Way 2
Alternatively, you can click the Animator tab on the top of the Unity panel and double-tap the New Animation button. Then, it will also delete or uncheck the loop time, as shown below.

These were all the steps to stop animation Unity.
Part 3 How to Smooth an Animation in Unity?
After done with Unity stop animation, it’s time to smooth your Unity animation. Again, we will describe it simply if you’re used to the Unity platform and then with a step guide with respective screenshots.
So, stay tuned until the end to reveal the easy steps of smoothing an animation in Unity.
Select the Dopesheet at the bottom of the animation window. Then, you need to switch to the ‘Curves’ view once you create your Animation in the Dopesheet. These animation curves help you accelerate and decelerate animations so that the movement and other things can stop and start smoothly.
So, let’s begin with the step guide tutorial on the same as follows:
For reference, take an example of a metronome object imported from Blender to Unity. Here, we’ve grouped all the pendulum objects under one rotation so that when we move the pendulum, it pivots to the correct point, as shown below.

01Add the animator
So, the first step begins with adding the Animator component to the parent object. You can do this by clicking the Add Component tab on the Unity panel’s left side, searching for Animator, and clicking the Animator.
You will also need a controller to control the animations. Go to your animation folder, right-click, and select Create> Animator Controller tab.

Let’s call or give it a name metronome animator as shown below.
Then, you need to drag this into your animator component. Again, you need to go to your animations folder, right-click, select Create> Animations tab.
Now, give this a name pendulum full swing.
02Open the animator tab
Now, open the animator tab, drag this pendulum swing animation to that panel, and double-tap the yellow-colored New Animation button.

03Create an animation
With the game object selected, the animated metronome pendulum, in this case, we’d like to animate the X component of the rotation. So, you need to click Add Property> Transform> Rotation tab and click the + sign on its right, as shown below.
Now, click the plus sign automatically to set two keyframes, one at the beginning and one at the end. Now, click on end select all, and then delete for now.

04Add keyframes to rotate the pendulum
With the first set of keyframes and the pendulum all way to the right, go halfway and change the rotation to the left on the left panel of Unity. Then, add another keyframe.

05Slow down the animation
As you can observe, the Animation of this pendulum is in a straight line and feels unnatural to the eyes. Thus, we’re required to smooth this Animation now! For this purpose, go to the Curves; you can see the pink properties of rotation as going from one side to another.

Now, you need to adjust these pink curves. Start by adding a key to one of its sides, as shown below. After that, it is all on you how slow or fasts you want these values to be.
Here, you’re all done smoothing the animation in Unity after learning the stop-animation Unity tutorial.
You can even stop motion animation on Photoshop with the above tutorial.
06Bonus Tip:
We want to introduce an excellent video editor software called Filmora Video Editor . It is from the house of Wondershare, a well-known software company worldwide.

Wondershare Filmora - Best Video Editor for Mac/Windows
5,481,435 people have downloaded it.
Build unique custom animations without breaking a sweat.
Focus on creating epic stories and leave the details to Filmora’s auto features.
Start a creative adventure with drag & drop effects and endless possibilities.
Filmora simplifies advanced features to save you time and effort.
Filmora cuts out repetition so you can move on to your next creative breakthrough.
With Filmora, you can easily add Animation and edit your videos to make them look world-class. The latest version and new updates are eye-candy and quick fix for beginner video editors.
So, please pay a visit to the Filmora website and check out its Mac and Windows version for free today.
● Key Takeaways from This Episode →
● Learning the concept and usage of Unity
● A tutorial on how to stop animation in Unity from looping
● A tutorial on how to smooth animation in Unity
● Introduction to Filmora, the top-most video editor software for beginners.
Unity is an IDE interface all designed exclusively for game developers. However, you can do much more with Unity than game development. But, our main concern here is something else than this subject. You’re looking for easy tutorials on Unity stop animation!
And luckily, we’ve got you covered as we’ve briefly explained how to perform Unity stop animation from looping and the steps to make a smooth animation.
In this article
01 [What is Unity Used for?](#Part 1)
02 [How to Stop Animation Playing in Loop in Unity?](#Part 2)
03 [How to Smooth an Animation in Unity?](#Part 3)
Part 1 What is Unity Used for?
Unity is a software tool friendly to all the game developers out there. This tool is used by the large community of game developers to power and create their game development projects. And, the software is more of a professional means and not a simple pared-down ‘game builder .’Unity also offers one of the most significant inbuilt features like rendering, physics, and collision detection. Thus, one of the powerful aspects of Unity is that game developers need not go out of the box and create everything from scratch. Instead, they are available with the physics engine required to develop games quickly. Another robust feature of Unity is that it includes an excellent ‘Asset Store’ where developers can upload their creations and showcase them to the whole community. So, that’s Unity and its uses in a broader scope!
Before we take you through the next section, it’s important to mention that Unity is also known as cross-platform IDE, where IDE stands for ‘integrated development environment.’ So, it can be called more of an interface with access to all the tools and resources required to develop games.
Apart from the game development, Unity is known for other excellent usage purposes as:
● Simulations
● Animation
● Architectural Visualization
● Previsualization for Film
● Interactive Experiences
Among these features only, we’ll describe Unity stop animation from looping in detail.
Part 2 How to Stop Animation Playing in Loop in Unity?
As we said, we’ll describe to you the most accessible definition of how to stop Animation in Unity. Thus, there are simple steps that we’d like to define firsthand before explaining the whole procedure with an image-centric step-by-step guide.
So, those simple steps to stop motion animation in After Effects in the loop also go like below:
Step 1 Go to the Project tab and select Animation.
Step 2 Open the Inspector tab.
Step 3 Uncheck the checkbox Loop Time, and you’re good to go!
We’ll describe the same, i.e., Unity stop animation from looping through the step guide below.
In this guide, we’ll explain right from applying the Animation so that you’d understand better. So, let’s begin without any further ado!
01Step 1 Delete animation folder
We have already created an animation folder in the folder named as own Animation, so click that folder, click the animation folder, and then another folder along with as shown below. Hold the Shift key and click another folder. Then, right-click the Delete tab as depicted below.
Similarly, you can also delete the Animation if you wish.
02Step 2 Create an animation for the subject
Now, you may have different subjects. We’re creating Animation on Mobile Joystick for reference, as shown below.
Now, hit the Create tab on the Unity panel below. Then, proceed to save your Animation in the folder you’ve already created for the same.
03Step 3 Give positions to the animation
Firstly, hit the red-icon button used for recording, as shown below.
Give the position on the left side after you click the button. And, then, clicking almost near to 3you can give the position to the right-hand side as shown below.
Now, the animation has been set. You can see the animation from left to right if you click the Play button. So, here, you can see the results of infinite loop animation, which won’t stop.
You can follow two ways to stop this Animation in Unity from looping, and we’ll describe both methods below.
04Step 4 Stop animation Unity Way 1
Go to the animation folder where you’ve created the animation and click the New Animation icon as shown below.
Now, you have to uncheck the Loop Time tab on the top-right corner of the Unity panel.
05Step 5 Stop animation Unity Way 2
Alternatively, you can click the Animator tab on the top of the Unity panel and double-tap the New Animation button. Then, it will also delete or uncheck the loop time, as shown below.
These were all the steps to stop animation Unity.
Part 3 How to Smooth an Animation in Unity?
After done with Unity stop animation, it’s time to smooth your Unity animation. Again, we will describe it simply if you’re used to the Unity platform and then with a step guide with respective screenshots.
So, stay tuned until the end to reveal the easy steps of smoothing an animation in Unity.
Select the Dopesheet at the bottom of the animation window. Then, you need to switch to the ‘Curves’ view once you create your Animation in the Dopesheet. These animation curves help you accelerate and decelerate animations so that the movement and other things can stop and start smoothly.
So, let’s begin with the step guide tutorial on the same as follows:
For reference, take an example of a metronome object imported from Blender to Unity. Here, we’ve grouped all the pendulum objects under one rotation so that when we move the pendulum, it pivots to the correct point, as shown below.
01Add the animator
So, the first step begins with adding the Animator component to the parent object. You can do this by clicking the Add Component tab on the Unity panel’s left side, searching for Animator, and clicking the Animator.
You will also need a controller to control the animations. Go to your animation folder, right-click, and select Create> Animator Controller tab.
Let’s call or give it a name metronome animator as shown below.
Then, you need to drag this into your animator component. Again, you need to go to your animations folder, right-click, select Create> Animations tab.
Now, give this a name pendulum full swing.
02Open the animator tab
Now, open the animator tab, drag this pendulum swing animation to that panel, and double-tap the yellow-colored New Animation button.
03Create an animation
With the game object selected, the animated metronome pendulum, in this case, we’d like to animate the X component of the rotation. So, you need to click Add Property> Transform> Rotation tab and click the + sign on its right, as shown below.
Now, click the plus sign automatically to set two keyframes, one at the beginning and one at the end. Now, click on end select all, and then delete for now.
04Add keyframes to rotate the pendulum
With the first set of keyframes and the pendulum all way to the right, go halfway and change the rotation to the left on the left panel of Unity. Then, add another keyframe.
05Slow down the animation
As you can observe, the Animation of this pendulum is in a straight line and feels unnatural to the eyes. Thus, we’re required to smooth this Animation now! For this purpose, go to the Curves; you can see the pink properties of rotation as going from one side to another.
Now, you need to adjust these pink curves. Start by adding a key to one of its sides, as shown below. After that, it is all on you how slow or fasts you want these values to be.
Here, you’re all done smoothing the animation in Unity after learning the stop-animation Unity tutorial.
You can even stop motion animation on Photoshop with the above tutorial.
06Bonus Tip:
We want to introduce an excellent video editor software called Filmora Video Editor . It is from the house of Wondershare, a well-known software company worldwide.
Wondershare Filmora - Best Video Editor for Mac/Windows
5,481,435 people have downloaded it.
Build unique custom animations without breaking a sweat.
Focus on creating epic stories and leave the details to Filmora’s auto features.
Start a creative adventure with drag & drop effects and endless possibilities.
Filmora simplifies advanced features to save you time and effort.
Filmora cuts out repetition so you can move on to your next creative breakthrough.
With Filmora, you can easily add Animation and edit your videos to make them look world-class. The latest version and new updates are eye-candy and quick fix for beginner video editors.
So, please pay a visit to the Filmora website and check out its Mac and Windows version for free today.
● Key Takeaways from This Episode →
● Learning the concept and usage of Unity
● A tutorial on how to stop animation in Unity from looping
● A tutorial on how to smooth animation in Unity
● Introduction to Filmora, the top-most video editor software for beginners.
Is It That Easy to Make My Own Animated Character?
Is It That Easy to Make My Own Animated Character?
An easy yet powerful editor
Numerous effects to choose from
Detailed tutorials provided by the official channel
Using animated characters and avatars is a fun way to present your profile. Character animation is a unique ability that entails bringing animated characters to life. It creates an illusion of thoughts, emotions, and personality.
Everyone has a question, how to make my own animated character. This tutorial will help create an animated character of yourself.
In this article
01 [Can I Create My Own GIF?](#Part 1)
02 [How Can I Make My Picture a Cartoon Character?](#Part 2)
Part 1 Can I Create My Own GIF?
Despite being 30 years old, GIFs are still famously used by many in chats and many ways in phones, computers, etc. There are many online websites and software to create GIFs. Animated visuals make a brand’s communication with its customers more charismatic and engaging. With the correct visual stimuli, a GIF’s usefulness can be increased even more. Finding GIFs to publish is simple, but creating your own is more complicated. You can make a GIF on your mobile or computer without needing Photoshop in various ways.
We use paper and pencils or software to do character animations. A thoroughly analyzed concept, a great deal of discussion, study, and critical decisions go into producing an animated cartoon or GIF character, ensuring that the ideas come to life in the greatest possible way.
To understand how you can create your GIF, let’s discuss converting a video or multiple photos to GIF online. With the help of ezgif.com, which works on both mobile and computer.
01Converting Images to GIF
● Step 1: To convert Images to GIFs, click on “GIF maker” on the home page
● Step 2: You can select on the image or multiple images to convert it into GIF
● Step 3: Click on “Upload and made as GIF”
● Step 4: Later, you can make necessary changes like changing the order, time for each image, resizing the image, setting loop count, and many additional effects. Now, click on create GIF.
● Step 5: Finally, the GIF you created will be previewable in a box at the corner.
02Converting Videos to GIF
● Step 1: First, you need to choose the ‘video to gif’ option.
● Step 2: Choose the video that must be converted to GIF and click on “Upload.”
● Step 3: You can make desired changes like splitting, cutting, cropping the video. Enter the start and end times of the video.
● Step 4: After you’ve finished with all of the effects, click “Make GIF.” A preview of the GIF will appear below, depending on the size of the video.
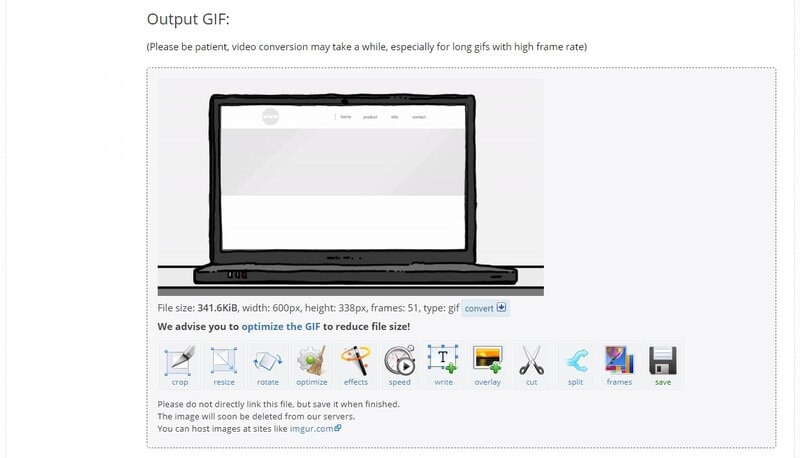
Part 2 How Can I Make My Picture a Cartoon Character
01What App Turns You into a Disney Character
Let us learn how to design your own animated character in this part.
● Voila AI Artist
Moho supports both Windows and macOS. Moho is a motion graphics program that includes tools for working with 2D vector animation and other animation effects. Moho assists you to create graphics on a tablet and use the built-in graphics editor to construct storyboards and control objects in layers. The software includes various graphic elements and characters, realistic physics, and Unity integration.
Moho has a rating of 5 on Amazon.
Through this YouTube tutorial, you will design your own animated character.
02What app is Best for Animation
● Moho
Moho supports both Windows and macOS. Moho is a motion graphics program that includes tools for working with 2D vector animation and other animation effects. Moho allows you to create graphics on a tablet and use the built-in graphics editor to construct storyboards and control objects in layers. The software includes a variety of graphic elements and characters, as well as realistic physics and Unity integration. Moho has a rating of 5 on Amazon.
● OpenTooz
OpenTooz supports both Windows and macOS. Being a professional animation cartoon-making applications suite, it produced Futurama and Sponge Bob. OpenToonz has a lot of drawing tools, effects and also a skeletal character animation feature. It also allows you to transfer photos from tracing, make a sketch, and has a large set of drawing tools and effects.
This app has a rating of 8.2 out of 10.
● Cinema 4D
Cinema 4D supports both Windows and macOS. Cinema 4D is a professional solution for producing 3D models, dynamic graphics, and realistic renderings with an elementary interface that even a beginner can comprehend. Basic capabilities, procedural and polygonal modeling, are supported, and a variety of package modules for various uses, such as scene visualization, object dynamics simulation, character animation, and more.
This app has a rating of 8 out of 10.
03Which app is the Best for Animation Free
● Adobe Animate
Both Windows and macOS are compatible with Adobe Animate. This is a powerful web design program and Adobe’s best iPad animation app, allowing even novices to create professional-looking vector graphics and animations. It’s just as simple to process a finished image as it is to create one from scratch with Animate. Good overlay, 3D models, and interfaces are all supported by the app. The content can be helpful on websites, online movies, and games once exported.
● Pencil2D
Pencil2D supports both Windows and macOS. This open-source animation software for mobile apps is a lightweight tool for working with simple 2D visuals. Allows you to sketch pixel and animate characters on the fly without putting your creativity at risk. You can add effects and filters by efficiently processing vector and raster graphics. It also includes valuable hints and examples to assist aspiring artists in getting started. It’s fun to experiment with free iPad animation applications and computer animation apps.
● Synfig Studio
Synfig Studio supports Windows and macOS. Synfig is a simple, easy open-source 2D animation editor that lets you make animations, add filters, shading and morphing effects, and more. Skeletal animation is supported, allowing you to build cartoon figures, which is lovely. The finished product can be rendered later or on a different computer entirely.
All these applications will be helpful to create an animated character of yourself.
● Wondershare Filmora Video Editor
We propose Wondershare Filmora, in this case, create animation videos by adding keyframes, resulting in a smooth and natural animation. Wondershare Filmora has various animation effects that cover a wide range of animated transitions with multiple versions. You can change the revealed length, conceal length, gradient size, and direction or position to get different outcomes.
To get started with animation, all you need is a white plane. Aside from that, color correction and an audio mixer will take your animation video to the next level. Download it for free to give it a try! Below is a tutorial on how to make animation using Filmora.
For Win 7 or later (64-bit)
For macOS 10.12 or later
● Key Takeaways from This Episode →
● Discussed an app that converts images or videos into GIFs
● Best apps for animations
● The proposal of the best software for animation, which is Wondershare Filmora Video Editor .
Using animated characters and avatars is a fun way to present your profile. Character animation is a unique ability that entails bringing animated characters to life. It creates an illusion of thoughts, emotions, and personality.
Everyone has a question, how to make my own animated character. This tutorial will help create an animated character of yourself.
In this article
01 [Can I Create My Own GIF?](#Part 1)
02 [How Can I Make My Picture a Cartoon Character?](#Part 2)
Part 1 Can I Create My Own GIF?
Despite being 30 years old, GIFs are still famously used by many in chats and many ways in phones, computers, etc. There are many online websites and software to create GIFs. Animated visuals make a brand’s communication with its customers more charismatic and engaging. With the correct visual stimuli, a GIF’s usefulness can be increased even more. Finding GIFs to publish is simple, but creating your own is more complicated. You can make a GIF on your mobile or computer without needing Photoshop in various ways.
We use paper and pencils or software to do character animations. A thoroughly analyzed concept, a great deal of discussion, study, and critical decisions go into producing an animated cartoon or GIF character, ensuring that the ideas come to life in the greatest possible way.
To understand how you can create your GIF, let’s discuss converting a video or multiple photos to GIF online. With the help of ezgif.com, which works on both mobile and computer.
01Converting Images to GIF
● Step 1: To convert Images to GIFs, click on “GIF maker” on the home page
● Step 2: You can select on the image or multiple images to convert it into GIF
● Step 3: Click on “Upload and made as GIF”
● Step 4: Later, you can make necessary changes like changing the order, time for each image, resizing the image, setting loop count, and many additional effects. Now, click on create GIF.
● Step 5: Finally, the GIF you created will be previewable in a box at the corner.
02Converting Videos to GIF
● Step 1: First, you need to choose the ‘video to gif’ option.
● Step 2: Choose the video that must be converted to GIF and click on “Upload.”
● Step 3: You can make desired changes like splitting, cutting, cropping the video. Enter the start and end times of the video.
● Step 4: After you’ve finished with all of the effects, click “Make GIF.” A preview of the GIF will appear below, depending on the size of the video.
Part 2 How Can I Make My Picture a Cartoon Character
01What App Turns You into a Disney Character
Let us learn how to design your own animated character in this part.
● Voila AI Artist
Moho supports both Windows and macOS. Moho is a motion graphics program that includes tools for working with 2D vector animation and other animation effects. Moho assists you to create graphics on a tablet and use the built-in graphics editor to construct storyboards and control objects in layers. The software includes various graphic elements and characters, realistic physics, and Unity integration.
Moho has a rating of 5 on Amazon.
Through this YouTube tutorial, you will design your own animated character.
02What app is Best for Animation
● Moho
Moho supports both Windows and macOS. Moho is a motion graphics program that includes tools for working with 2D vector animation and other animation effects. Moho allows you to create graphics on a tablet and use the built-in graphics editor to construct storyboards and control objects in layers. The software includes a variety of graphic elements and characters, as well as realistic physics and Unity integration. Moho has a rating of 5 on Amazon.
● OpenTooz
OpenTooz supports both Windows and macOS. Being a professional animation cartoon-making applications suite, it produced Futurama and Sponge Bob. OpenToonz has a lot of drawing tools, effects and also a skeletal character animation feature. It also allows you to transfer photos from tracing, make a sketch, and has a large set of drawing tools and effects.
This app has a rating of 8.2 out of 10.
● Cinema 4D
Cinema 4D supports both Windows and macOS. Cinema 4D is a professional solution for producing 3D models, dynamic graphics, and realistic renderings with an elementary interface that even a beginner can comprehend. Basic capabilities, procedural and polygonal modeling, are supported, and a variety of package modules for various uses, such as scene visualization, object dynamics simulation, character animation, and more.
This app has a rating of 8 out of 10.
03Which app is the Best for Animation Free
● Adobe Animate
Both Windows and macOS are compatible with Adobe Animate. This is a powerful web design program and Adobe’s best iPad animation app, allowing even novices to create professional-looking vector graphics and animations. It’s just as simple to process a finished image as it is to create one from scratch with Animate. Good overlay, 3D models, and interfaces are all supported by the app. The content can be helpful on websites, online movies, and games once exported.
● Pencil2D
Pencil2D supports both Windows and macOS. This open-source animation software for mobile apps is a lightweight tool for working with simple 2D visuals. Allows you to sketch pixel and animate characters on the fly without putting your creativity at risk. You can add effects and filters by efficiently processing vector and raster graphics. It also includes valuable hints and examples to assist aspiring artists in getting started. It’s fun to experiment with free iPad animation applications and computer animation apps.
● Synfig Studio
Synfig Studio supports Windows and macOS. Synfig is a simple, easy open-source 2D animation editor that lets you make animations, add filters, shading and morphing effects, and more. Skeletal animation is supported, allowing you to build cartoon figures, which is lovely. The finished product can be rendered later or on a different computer entirely.
All these applications will be helpful to create an animated character of yourself.
● Wondershare Filmora Video Editor
We propose Wondershare Filmora, in this case, create animation videos by adding keyframes, resulting in a smooth and natural animation. Wondershare Filmora has various animation effects that cover a wide range of animated transitions with multiple versions. You can change the revealed length, conceal length, gradient size, and direction or position to get different outcomes.
To get started with animation, all you need is a white plane. Aside from that, color correction and an audio mixer will take your animation video to the next level. Download it for free to give it a try! Below is a tutorial on how to make animation using Filmora.
For Win 7 or later (64-bit)
For macOS 10.12 or later
● Key Takeaways from This Episode →
● Discussed an app that converts images or videos into GIFs
● Best apps for animations
● The proposal of the best software for animation, which is Wondershare Filmora Video Editor .
Secret Source to Make a Great Stop Motion Puppet
Secret Source to Make a Stop Motion Puppetd
An easy yet powerful editor
Numerous effects to choose from
Detailed tutorials provided by the official channel
The significant difference between a stop-motion puppet and other types is that they have an armature inside. An armature is the puppet’s skeleton, a must to hold its position without sleeping for each captured frame. The stop motion puppet makeover should be precise to prevent it from breaking down or falling quickly. In addition, buying a stop-motion puppet armature might be pretty expensive, so making them by yourself is much more fun and cheaper.

To prevent any mishap during your stop-motion puppet making, your pupils should be as durable and lightweight as possible, and they must be designed based on what you will be doing and what kind of movement will be required of them. In essence, your story’s overall purpose for creating the animation will be the ultimate factor in how your character is built and designed.
In this article
01 [8 Popular Stop Motion Puppet Examples](#Part 1)
02 [How to Make a Stop Motion Puppet](#Part 2)
Part 1 8 Popular Stop Motion Puppet Examples
While wandering all through the web world, you will encounter many famous stop motion puppets. Some of them are very popular stop-motion puppets for sale, and this section of the article is about to explore eight (of them and what they stand for:
01Rudolph the Red-Nosed Reindeer

Rudolph, the Red-Nosed Reindeer, is a pleasant Christmas stop motion animated TV special in 19produced by video craft international limited. These figures starred in the perennially beloved stop motion animation Christmas special.
02Nestor the Long-Eared Christmas Donkey

The Long-Eared Christmas Donkey, Nestor is a Christmas stop motion animated TV special in 19produced by Rankin-Bass productions. The story is back in the Roman Empire days when miniature donkeys were born with very long years and kept getting into trouble. When the owner decides to throw him out of the stable, his mother sacrifices her life to save him from a blizzard.
03Santa Claus is Comin’ to Town

This is a stop-motion animation TV special in 19made by Rankin-bass productions. The story tells all about Santa Claus when he was a baby and growing up with the Kringles. The story is told and sang by a special delivery Kluger voiced by Fred Astaire.
04Negative Space
This one is one of the world’s wide appreciated and Oscar-nominated stop motion puppet animations that reflect the son and father relationship in an interactive way. It is a must to watch animation effects.

05Fantastic Mr. Fox

Fantastic Mr. Fox is a 20puppet animation movie that talks about an urban fox that cannot resist returning to his farm and must help his community survive the farmer’s retaliation.
06Coraline

Coraline is a 20Pope x animation TV series that talks about an adventurous 11-year-old girl that finds another strange world that is an idealized version of her frustrating home.
07The Nightmare before Christmas

The nightmare before Christmas is a puppet animation TV series that talks about Jack Skellington, the king of Halloween Town, and discovers Christmas town but his attempts to bring Christmas to his home result in confusion.
07Corpse bride

Corpse Bride is a puppet animated family TV series in 20talks about a shy groom practicing his wedding vow in the inadvertent presence of a deceased young woman as she rises from the grave, assuming that he has married her.
Part 2 How to Make a Stop Motion Puppet
Do you have a story, and you need some puppets to take the place of your actors, and you want to double in stop motion animation. The fact is there are different ways to create your Stop Motion Puppet, and as per your storyboard requirement, you can go with other methods. Such as, you can either use tools to build your puppet armature, otherwise can make some puppets from clothes and threads to give it a structure, else can use clay to assign a static puppet structure. It’s all your choice, so all in all what you need is:
● A Storyboard
● Puppet armature tools
● Camera setup
● Editing Software (in our case, we are going to use Wondershare Filmora Video Editor )
In this tutorial, we will be teaching you how to make stop-motion puppets in a way that is relatively cost-effective to produce durable means whose construction requires little or no time or extra equipment:
Wondershare Filmora - Best Video Editor for Mac/Windows
5,481,435 people have downloaded it.
Build unique custom animations without breaking a sweat.
Focus on creating epic stories and leave the details to Filmora’s auto features.
Start a creative adventure with drag & drop effects and endless possibilities.
Filmora simplifies advanced features to save you time and effort.
Filmora cuts out repetition so you can move on to your next creative breakthrough.
Materials:
● Ball head screws (M2.5)
● Small screws (M3)
● Ball head screws (2xand brass pipes whose diameter is less than ball head screws
● Brass plate (strips 2mm thick)
Tools:
● M3 thread tap
● M2.5 thread tap
● Screwdriver
● Pliers
● Drill press
● Drills of 2.5 mm, 2 mm, 3 mm
● Power sander
● Loctite
● File
● Bandsaw
Step
● Use the brass to mark the length of the bone
● Cut the tube according to the length
● Sandpaper or file it Square
● On both sides of the tube, use the tap to cause the tread
● Use the screws in the brass tube to screw the ball head

Step 2:
● On each sides of the brass strip, drill 2.5 mm holes
● Then, between holes of the holes you drill, drill 2.5 mm holes
● Between the other 2.5 mm holes, drill 3mm holes

Step 3:
● On the 2.5 mm holes on the sides, use the 3mm drill to create some cup
● With the 3 mm tap, cut the thread in the 2 mm holes in the middle

Step 4:
● Without damaging the holes, file the end of the strip with all the holes as close to the first 3
● From the strip, cut the parts with the first three holes
● Also, as close to the most used flyer to file the other side.
Note: Make sure you are careful while filing as this will get very hot

**Step 5:**Join all the parts together and make sure that the cup on the outer holes of the two plates is two words each other and tighten the bolts to hold the bones

Step 6: Join to strip of bras together and form a torso. Then cut the torso and form the feet

Step 7: When your puppet is the way you want it, lock teeth styles by fixing the ball head screw in place

Animation Editing:
Also, you can make a stop motion video on Filmora by considering the following factors:
● Camera Steadiness is a must for every shot you plan for Stop Motion Video. Shaking a camera is not good. Else, your video won’t be smooth.
● Ensure capture the shot under consistent light and prevent light exposure from changing on the object; otherwise, there will be inconsistency in the video.
● To make it easier, play the film in advance, as the more friends your video, the smoother the video will be.
Here are steps to make a stop motion video on Filmora:
Step 1 Place the camera steady and bring your object in the frame. Lightly move your things and capture the movement frame by frame.

Step 2 Download and start, or if you have already installed, run the Filmora program and choose a suitable frame rate in the project settings. After selecting the resolution, click on the file and go to the project setting.

Step 3 Now import the media file using the import option from the file menu and import the captured images.

Step 4 Adjust the menu’s preference or press the shortcut key Ctrl+Shift+, and a window will appear on your screen. Select the editing panel and change the photo duration between 0.2 to 0.5 seconds.

Step 5 Once done with all the settings and satisfied with the results, click on export and select your desired video format. Your video will be exported and saved in your library so you can share it with friends.

● Key Takeaways from This Episode →
● Get to know about what is stop motion puppets.
● Different examples of how dinosaur stop motion puppet or other puppet animation form works.
● The process to create your stop motion puppet and how Filmora will assist you in it.
The significant difference between a stop-motion puppet and other types is that they have an armature inside. An armature is the puppet’s skeleton, a must to hold its position without sleeping for each captured frame. The stop motion puppet makeover should be precise to prevent it from breaking down or falling quickly. In addition, buying a stop-motion puppet armature might be pretty expensive, so making them by yourself is much more fun and cheaper.
To prevent any mishap during your stop-motion puppet making, your pupils should be as durable and lightweight as possible, and they must be designed based on what you will be doing and what kind of movement will be required of them. In essence, your story’s overall purpose for creating the animation will be the ultimate factor in how your character is built and designed.
In this article
01 [8 Popular Stop Motion Puppet Examples](#Part 1)
02 [How to Make a Stop Motion Puppet](#Part 2)
Part 1 8 Popular Stop Motion Puppet Examples
While wandering all through the web world, you will encounter many famous stop motion puppets. Some of them are very popular stop-motion puppets for sale, and this section of the article is about to explore eight (of them and what they stand for:
01Rudolph the Red-Nosed Reindeer
Rudolph, the Red-Nosed Reindeer, is a pleasant Christmas stop motion animated TV special in 19produced by video craft international limited. These figures starred in the perennially beloved stop motion animation Christmas special.
02Nestor the Long-Eared Christmas Donkey
The Long-Eared Christmas Donkey, Nestor is a Christmas stop motion animated TV special in 19produced by Rankin-Bass productions. The story is back in the Roman Empire days when miniature donkeys were born with very long years and kept getting into trouble. When the owner decides to throw him out of the stable, his mother sacrifices her life to save him from a blizzard.
03Santa Claus is Comin’ to Town
This is a stop-motion animation TV special in 19made by Rankin-bass productions. The story tells all about Santa Claus when he was a baby and growing up with the Kringles. The story is told and sang by a special delivery Kluger voiced by Fred Astaire.
04Negative Space
This one is one of the world’s wide appreciated and Oscar-nominated stop motion puppet animations that reflect the son and father relationship in an interactive way. It is a must to watch animation effects.
05Fantastic Mr. Fox
Fantastic Mr. Fox is a 20puppet animation movie that talks about an urban fox that cannot resist returning to his farm and must help his community survive the farmer’s retaliation.
06Coraline
Coraline is a 20Pope x animation TV series that talks about an adventurous 11-year-old girl that finds another strange world that is an idealized version of her frustrating home.
07The Nightmare before Christmas
The nightmare before Christmas is a puppet animation TV series that talks about Jack Skellington, the king of Halloween Town, and discovers Christmas town but his attempts to bring Christmas to his home result in confusion.
07Corpse bride
Corpse Bride is a puppet animated family TV series in 20talks about a shy groom practicing his wedding vow in the inadvertent presence of a deceased young woman as she rises from the grave, assuming that he has married her.
Part 2 How to Make a Stop Motion Puppet
Do you have a story, and you need some puppets to take the place of your actors, and you want to double in stop motion animation. The fact is there are different ways to create your Stop Motion Puppet, and as per your storyboard requirement, you can go with other methods. Such as, you can either use tools to build your puppet armature, otherwise can make some puppets from clothes and threads to give it a structure, else can use clay to assign a static puppet structure. It’s all your choice, so all in all what you need is:
● A Storyboard
● Puppet armature tools
● Camera setup
● Editing Software (in our case, we are going to use Wondershare Filmora Video Editor )
In this tutorial, we will be teaching you how to make stop-motion puppets in a way that is relatively cost-effective to produce durable means whose construction requires little or no time or extra equipment:
Wondershare Filmora - Best Video Editor for Mac/Windows
5,481,435 people have downloaded it.
Build unique custom animations without breaking a sweat.
Focus on creating epic stories and leave the details to Filmora’s auto features.
Start a creative adventure with drag & drop effects and endless possibilities.
Filmora simplifies advanced features to save you time and effort.
Filmora cuts out repetition so you can move on to your next creative breakthrough.
Materials:
● Ball head screws (M2.5)
● Small screws (M3)
● Ball head screws (2xand brass pipes whose diameter is less than ball head screws
● Brass plate (strips 2mm thick)
Tools:
● M3 thread tap
● M2.5 thread tap
● Screwdriver
● Pliers
● Drill press
● Drills of 2.5 mm, 2 mm, 3 mm
● Power sander
● Loctite
● File
● Bandsaw
Step
● Use the brass to mark the length of the bone
● Cut the tube according to the length
● Sandpaper or file it Square
● On both sides of the tube, use the tap to cause the tread
● Use the screws in the brass tube to screw the ball head
Step 2:
● On each sides of the brass strip, drill 2.5 mm holes
● Then, between holes of the holes you drill, drill 2.5 mm holes
● Between the other 2.5 mm holes, drill 3mm holes
Step 3:
● On the 2.5 mm holes on the sides, use the 3mm drill to create some cup
● With the 3 mm tap, cut the thread in the 2 mm holes in the middle
Step 4:
● Without damaging the holes, file the end of the strip with all the holes as close to the first 3
● From the strip, cut the parts with the first three holes
● Also, as close to the most used flyer to file the other side.
Note: Make sure you are careful while filing as this will get very hot
**Step 5:**Join all the parts together and make sure that the cup on the outer holes of the two plates is two words each other and tighten the bolts to hold the bones
Step 6: Join to strip of bras together and form a torso. Then cut the torso and form the feet
Step 7: When your puppet is the way you want it, lock teeth styles by fixing the ball head screw in place
Animation Editing:
Also, you can make a stop motion video on Filmora by considering the following factors:
● Camera Steadiness is a must for every shot you plan for Stop Motion Video. Shaking a camera is not good. Else, your video won’t be smooth.
● Ensure capture the shot under consistent light and prevent light exposure from changing on the object; otherwise, there will be inconsistency in the video.
● To make it easier, play the film in advance, as the more friends your video, the smoother the video will be.
Here are steps to make a stop motion video on Filmora:
Step 1 Place the camera steady and bring your object in the frame. Lightly move your things and capture the movement frame by frame.
Step 2 Download and start, or if you have already installed, run the Filmora program and choose a suitable frame rate in the project settings. After selecting the resolution, click on the file and go to the project setting.
Step 3 Now import the media file using the import option from the file menu and import the captured images.
Step 4 Adjust the menu’s preference or press the shortcut key Ctrl+Shift+, and a window will appear on your screen. Select the editing panel and change the photo duration between 0.2 to 0.5 seconds.
Step 5 Once done with all the settings and satisfied with the results, click on export and select your desired video format. Your video will be exported and saved in your library so you can share it with friends.
● Key Takeaways from This Episode →
● Get to know about what is stop motion puppets.
● Different examples of how dinosaur stop motion puppet or other puppet animation form works.
● The process to create your stop motion puppet and how Filmora will assist you in it.
How to Make Animation Characters with the Best Character Creators
How-to Guide: Make Animation Characters with the Best Animated Character Creators
An easy yet powerful editor
Numerous effects to choose from
Detailed tutorials provided by the official channel
Are you a marketer and don’t know where to start? You can start with character animation?
This article will engage you with many software to create your own animated character. Plus, some easy ways too for those novices in this field with simple apps to create your own animated character.
In this article
01 [How to Choose the Right Character Animation Maker?](#Part 1)
02 [Top 8 Software to make Character Animation. ](#Part 2)
03 [3 Easy Ways to Make Your Own Cartoon Character (For Beginners/Non-Illustrators)](#Part 3)
Part 1 How to Choose the Right Character Animation Maker?
If you are concerned about which character animation maker to choose, be aware of the analysis and alternatives you need to know. After knowing the needs of the animation as going to be mentioned below, your chances of selecting the software correctly will increase.
At first, you need to know what are you creating, what kind of animation software you want to produce? What are the objectives of videos marketing or movies? By answering these questions, you can choose the correct software.
You need to decide the features you require in the software. You may not require all the advanced features. If you are doing a simple animated video, you require only simple features but enough to complete your project.
There is a separate type of software for 2D and 3D, and you need to choose your requirement to complete the project
Now that you have known all the features you need to consider before choosing software choose it wisely and enjoy creating character animation. We’ll go over a considerable number of animation software in this journal, and you can choose one of them.
Part 2 Top 8 software to Create Character Animation
Due to the difficulty in selecting character animation software, we have sorted out some of the most beneficial and user-friendly options.
01 Animaker
The best part of this software is its versatility and flexibility. Animaker is valuable software for every kind of business animation, and it involves multiple features. It is a feature-rich free animated character creator.
●You may create six different styles using Animaker: 2D, 2.5D, typography, infographic, whiteboard, and handcrafts.
●100 charts, 1000 icons, and 3000 maps are in the animated infographic.
●You can use advanced animation features like a record, multi-move, curve, transition effects, camera in and out, and enter/exit effects.
●Animaker supports audio features like text to speech, sound effects, voice recording, and creating custom sounds.
●Also, it comes along with pre-designed transition effects and supports HD videos.
This is free software for simple basic features, but in the case of professional uses, the price ranges from $12 - $99 based on the features required.
02Stop Motion Studio
If you are a beginner, this software would be helpful. After creating high-quality 2K stop motion animations videos, you can mix them with 2D drawings. The disadvantage does not have any free features.
●It runs on different operating systems like iOS, macOS, Android, and Windows.
●It has DSLR camera support.
●There is a green screen option to change the background of the video or animation.
●Other handy tools like paint tools, magic erasers, and sound effects.
●This is an effortless editing app.
The price of the Stop Motion Studio varies based on the operating system. For Windows, it is $1.99; for iOS and Android, the price is $4.99; and for Mac, the cost is $9.99.
03Vyond
With Vyond, you can create an array of handy and professional animated character creator videos. Users from pro to beginners can easily access this software for creating an explainer video and whiteboard animations using this feature-rich software.
●It offers a wide range of entering/exit effects for static images.
●Convenient drag and drop features for beginners to access quickly.
●One of the unique features here is automatic lip-syncing.
●There is a built-in library that you can customize.
●Vyond supports team collaboration and camera tools like camera angles and pan zooms.
Vyond offers a free trial of 14 days to check the features and friendliness. You can get the active features for a month or a year by paying $49 and $999 based on the specs you require.
04Wideo
This is an excellent online tool designed for beginners to develop animated videos. Here, you can create an animated character and use that in animated videos, presentations, and promotions with the animated character creator, the best tool for beginners.
●‘Wideo’ provides HD support for the users.
●You may use an extensive library of templates to make videos for various reasons.
●Add music and soundtracks to your videos.
●Publish the final animated videos directly to YouTube.
●The length of your videos and the amount of storage space depend on your plan.
The licensing plan of Wideo varies based on the expertise and features required. It ranges from $19 to $79 per month. Also, it has a free trial of 7 days.
05Blender
Blender is open-source software used to create animated characters online to create video games, models, renderings, etc. Blender has a rich animation feature, helping everyone to make all levels of animation.
●Blender is compatible with Mac OS X, Windows, and Linux.
●Advanced modeling, sculpting, and UV tools are included.
●Provided with rigging as well as animation in advanced mode.
●Enjoy other features like sculpt brush strokes, onion skinning, layers, and colors for the stroke and fill.
●It creates a very smooth animation video.
This is free animated character creator software. Thus, you need not pay to access any tools or features in Blender. It will be more beneficial for personal use without any investment.
06’Mango Animate’ Character Maker
‘Mango Animate’ Character Maker is the most excellent beginner character animating software available.
●It includes several action skeletons templates that make it simple to turn several PNG/PSD photos into realistic 2D animated creatures.
●Mango Animate CM comes with an extensive library of predefined motions, allowing users to animate their chosen character quickly and effortlessly.
●It may also personalize animated characters by changing their clothing or skin tone.
●Add facial expressions to tell fantastic stories.
●It can be operated by beginners also easily.
The ‘Mango Animate’ Character Maker price ranges from $ 4.08 to $16.58 per month based on the level of animation you are going to make (starter, pro, and enterprise).
01iClone
How about a character animation software whose name links to well-known companies like Ford and Microsoft?
●iClone is precisely that software with completely customizable 3D characters.
●And a wide range of lip-sync options.
●It’s a favorite among animators looking for a program that includes facial animation, motion key editing, and soft fabric physics simulation.
●Furthermore, thanks to its enhanced shadowing and lighting effects.
●Creating a realistic environment for characters has never been easier.
The price of iClone software is $398 for the character animation essential bundle and $199 for the standard package.
08Auto Desk Maya
Professional animation designers will find Autodesk Maya to be the ideal toolkit.
●It is a medium for channeling your technical and artistic abilities into fascinating 3D animations.
●Since it is a comprehensive program, it covers rendering, simulation, and modeling simultaneously.
●Clump modifier, MASH nodes, UV editor, and After Effects Live Link is significant characteristics worth highlighting in their innovative features.
●You can easily shape 3D objects and scenes with institutive modeling tools.
●It creates realistic effects from explosions to cloth simulation.
Auto Desk Maya is a costly software with a price of $215 per month and $4845 for three years.
Part 3 3 Easy Ways to Create Your Own Cartoon Character (For Beginners/Non-Illustrators)
Using the right yet easy tool is the right approach for those pretty new in creating their cartoon character. So, here we shall reveal about such easy ways to make your cartoon character.
01Online Avatar Builders
To create animated characters online, an avatar with avatar builders is a fun approach to a unique look for yourself. Because these tools are frequently online, you won’t need to install any software. In most circumstances, you won’t need to register to utilize the service. Online avatar generators have several advantages, including that they are either free or inexpensive to use. One significant disadvantage is that they can only acquire a hazy resemblance to you.
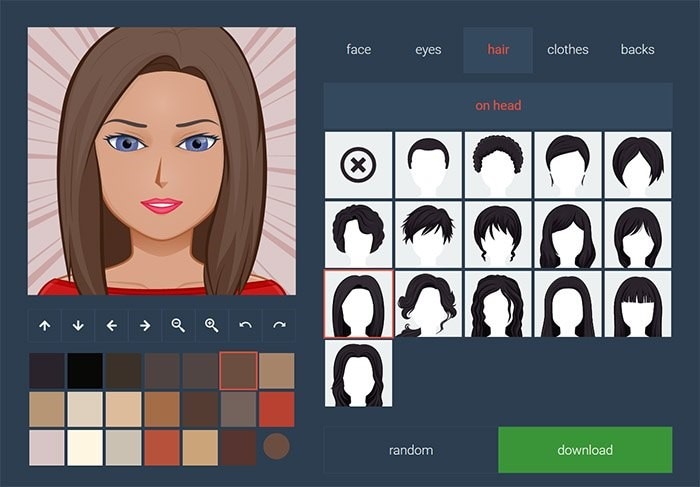
01Character Creator
With this online tool, create your own animated character, a custom female or male vector character. Aside from facial customization, you get access to a vast wardrobe of clothing, shoes, and body accessories. The character creator is ideal for generating a muscular, alternative “video game type” identity.
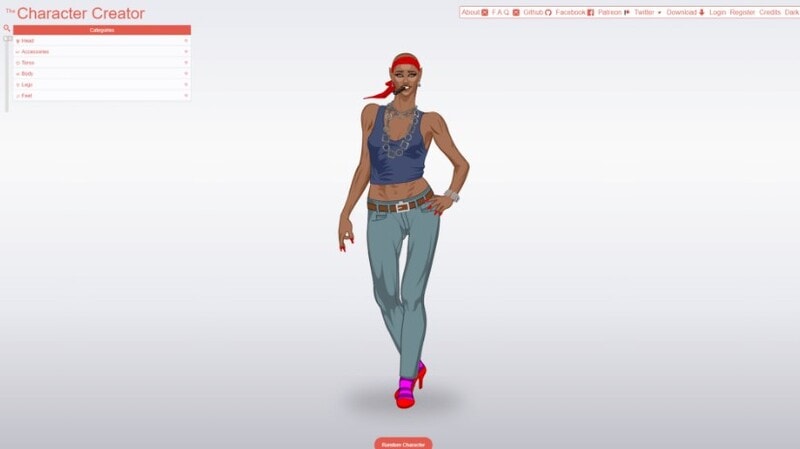
03Wondershare Wondershare Filmora Video Editor
Wondershare Wondershare Filmora Video Editor is an excellent option if you want simple but strong video editing tools. The keyframing tools will assist you in creating smooth and precise cartoon effects. With one click, you can quickly turn a photo into a comic. Additionally, you can choose from a variety of header templates and transitions. This is a free animated character creator.
For Win 7 or later (64-bit)
For macOS 10.12 or later
This YouTube tutorial will help you learn about keyframes and different templates. In comparison to the other ten ways listed above, we recommend Wondershare Filmora Video Editor .
● Key Takeaways from This Episode →
● Understanding how to choose the right character animator
● Eight software to create your own character animation
● Some of the simple ways to create cartoon characters.
Are you a marketer and don’t know where to start? You can start with character animation?
This article will engage you with many software to create your own animated character. Plus, some easy ways too for those novices in this field with simple apps to create your own animated character.
In this article
01 [How to Choose the Right Character Animation Maker?](#Part 1)
02 [Top 8 Software to make Character Animation. ](#Part 2)
03 [3 Easy Ways to Make Your Own Cartoon Character (For Beginners/Non-Illustrators)](#Part 3)
Part 1 How to Choose the Right Character Animation Maker?
If you are concerned about which character animation maker to choose, be aware of the analysis and alternatives you need to know. After knowing the needs of the animation as going to be mentioned below, your chances of selecting the software correctly will increase.
At first, you need to know what are you creating, what kind of animation software you want to produce? What are the objectives of videos marketing or movies? By answering these questions, you can choose the correct software.
You need to decide the features you require in the software. You may not require all the advanced features. If you are doing a simple animated video, you require only simple features but enough to complete your project.
There is a separate type of software for 2D and 3D, and you need to choose your requirement to complete the project
Now that you have known all the features you need to consider before choosing software choose it wisely and enjoy creating character animation. We’ll go over a considerable number of animation software in this journal, and you can choose one of them.
Part 2 Top 8 software to Create Character Animation
Due to the difficulty in selecting character animation software, we have sorted out some of the most beneficial and user-friendly options.
01 Animaker
The best part of this software is its versatility and flexibility. Animaker is valuable software for every kind of business animation, and it involves multiple features. It is a feature-rich free animated character creator.
●You may create six different styles using Animaker: 2D, 2.5D, typography, infographic, whiteboard, and handcrafts.
●100 charts, 1000 icons, and 3000 maps are in the animated infographic.
●You can use advanced animation features like a record, multi-move, curve, transition effects, camera in and out, and enter/exit effects.
●Animaker supports audio features like text to speech, sound effects, voice recording, and creating custom sounds.
●Also, it comes along with pre-designed transition effects and supports HD videos.
This is free software for simple basic features, but in the case of professional uses, the price ranges from $12 - $99 based on the features required.
02Stop Motion Studio
If you are a beginner, this software would be helpful. After creating high-quality 2K stop motion animations videos, you can mix them with 2D drawings. The disadvantage does not have any free features.
●It runs on different operating systems like iOS, macOS, Android, and Windows.
●It has DSLR camera support.
●There is a green screen option to change the background of the video or animation.
●Other handy tools like paint tools, magic erasers, and sound effects.
●This is an effortless editing app.
The price of the Stop Motion Studio varies based on the operating system. For Windows, it is $1.99; for iOS and Android, the price is $4.99; and for Mac, the cost is $9.99.
03Vyond
With Vyond, you can create an array of handy and professional animated character creator videos. Users from pro to beginners can easily access this software for creating an explainer video and whiteboard animations using this feature-rich software.
●It offers a wide range of entering/exit effects for static images.
●Convenient drag and drop features for beginners to access quickly.
●One of the unique features here is automatic lip-syncing.
●There is a built-in library that you can customize.
●Vyond supports team collaboration and camera tools like camera angles and pan zooms.
Vyond offers a free trial of 14 days to check the features and friendliness. You can get the active features for a month or a year by paying $49 and $999 based on the specs you require.
04Wideo
This is an excellent online tool designed for beginners to develop animated videos. Here, you can create an animated character and use that in animated videos, presentations, and promotions with the animated character creator, the best tool for beginners.
●‘Wideo’ provides HD support for the users.
●You may use an extensive library of templates to make videos for various reasons.
●Add music and soundtracks to your videos.
●Publish the final animated videos directly to YouTube.
●The length of your videos and the amount of storage space depend on your plan.
The licensing plan of Wideo varies based on the expertise and features required. It ranges from $19 to $79 per month. Also, it has a free trial of 7 days.
05Blender
Blender is open-source software used to create animated characters online to create video games, models, renderings, etc. Blender has a rich animation feature, helping everyone to make all levels of animation.
●Blender is compatible with Mac OS X, Windows, and Linux.
●Advanced modeling, sculpting, and UV tools are included.
●Provided with rigging as well as animation in advanced mode.
●Enjoy other features like sculpt brush strokes, onion skinning, layers, and colors for the stroke and fill.
●It creates a very smooth animation video.
This is free animated character creator software. Thus, you need not pay to access any tools or features in Blender. It will be more beneficial for personal use without any investment.
06’Mango Animate’ Character Maker
‘Mango Animate’ Character Maker is the most excellent beginner character animating software available.
●It includes several action skeletons templates that make it simple to turn several PNG/PSD photos into realistic 2D animated creatures.
●Mango Animate CM comes with an extensive library of predefined motions, allowing users to animate their chosen character quickly and effortlessly.
●It may also personalize animated characters by changing their clothing or skin tone.
●Add facial expressions to tell fantastic stories.
●It can be operated by beginners also easily.
The ‘Mango Animate’ Character Maker price ranges from $ 4.08 to $16.58 per month based on the level of animation you are going to make (starter, pro, and enterprise).
01iClone
How about a character animation software whose name links to well-known companies like Ford and Microsoft?
●iClone is precisely that software with completely customizable 3D characters.
●And a wide range of lip-sync options.
●It’s a favorite among animators looking for a program that includes facial animation, motion key editing, and soft fabric physics simulation.
●Furthermore, thanks to its enhanced shadowing and lighting effects.
●Creating a realistic environment for characters has never been easier.
The price of iClone software is $398 for the character animation essential bundle and $199 for the standard package.
08Auto Desk Maya
Professional animation designers will find Autodesk Maya to be the ideal toolkit.
●It is a medium for channeling your technical and artistic abilities into fascinating 3D animations.
●Since it is a comprehensive program, it covers rendering, simulation, and modeling simultaneously.
●Clump modifier, MASH nodes, UV editor, and After Effects Live Link is significant characteristics worth highlighting in their innovative features.
●You can easily shape 3D objects and scenes with institutive modeling tools.
●It creates realistic effects from explosions to cloth simulation.
Auto Desk Maya is a costly software with a price of $215 per month and $4845 for three years.
Part 3 3 Easy Ways to Create Your Own Cartoon Character (For Beginners/Non-Illustrators)
Using the right yet easy tool is the right approach for those pretty new in creating their cartoon character. So, here we shall reveal about such easy ways to make your cartoon character.
01Online Avatar Builders
To create animated characters online, an avatar with avatar builders is a fun approach to a unique look for yourself. Because these tools are frequently online, you won’t need to install any software. In most circumstances, you won’t need to register to utilize the service. Online avatar generators have several advantages, including that they are either free or inexpensive to use. One significant disadvantage is that they can only acquire a hazy resemblance to you.
01Character Creator
With this online tool, create your own animated character, a custom female or male vector character. Aside from facial customization, you get access to a vast wardrobe of clothing, shoes, and body accessories. The character creator is ideal for generating a muscular, alternative “video game type” identity.
03Wondershare Wondershare Filmora Video Editor
Wondershare Wondershare Filmora Video Editor is an excellent option if you want simple but strong video editing tools. The keyframing tools will assist you in creating smooth and precise cartoon effects. With one click, you can quickly turn a photo into a comic. Additionally, you can choose from a variety of header templates and transitions. This is a free animated character creator.
For Win 7 or later (64-bit)
For macOS 10.12 or later
This YouTube tutorial will help you learn about keyframes and different templates. In comparison to the other ten ways listed above, we recommend Wondershare Filmora Video Editor .
● Key Takeaways from This Episode →
● Understanding how to choose the right character animator
● Eight software to create your own character animation
● Some of the simple ways to create cartoon characters.
Easy Shortcut to Convert Videos to Gifs on iPhone
Simple Shortcut to Convert Videos to Gifs on iPhone
An easy yet powerful editor
Numerous effects to choose from
Detailed tutorials provided by the official channel
To create iPhone video to GIF there are several third-party apps available. You can even choose the online sites for the task, but the editing and other options will be limited. The GIFs on your iPhone can be created using videos as well as Live photos.

One of the best ways to create a GIF is using the Shortcuts app that comes pre-installed on devices running on iOS 13 and later versions of the OS. The app has shortcuts to accomplish several tasks on your iPhone including GIF creation. Learn about using Shortcuts and other tools for creating a GIF on iPhone.
In this article
01 [How to make GIF from Video on iPhone using Shortcut App](#Part 1)
02 [How to save Live Photos as GIF on iPhone](#Part 2)
03 [How to save Live Photos as GIF on iPhone](#Part 3)
04 [How to save videos as live photos on your iPhone?](#Part 4)
05 [Best tool for creating GIFs and video editing on your Windows and Mac- Wondershare Filmora](#Part 5)
Part 1 How to make GIF from Video on iPhone using Shortcut App
One of the easiest ways to convert video GIF iPhone is by using the Shortcuts app. If you have deleted the app, you can reinstall it from the app store. Once the app is installed, you would next need to allow the untrusted shortcuts and for this go to Settings > Shortcuts> toggle Add Untrusted Shortcuts to add the shortcuts created by the user. The further steps for converting video to GIF iPhone are as follows.
Step 1. On your iPhone, download the Video to GIF shortcut. You can download it using iCloud or RoutineHub. Find the shortcut and click on Get Shortcut will let you check the action of the shortcut.
Move down and click on the red Add Untrusted Shortcut button that will add the shortcut for the library.

Step 2. Go to the My Shortcuts tab and click on the Video to GIF section. If you are using it for the first time, you need to grant permission to use the videos and photos. Click on the OK button and continue.

Step 3. Next, browse and add the video from which you wish to create the GIF. Since GIF animations are short, it is always recommended to use short videos.
Step 4. Video processing will start and during this, the Video to GIF shortcut will be greyed out.

Step 5. Once done, the preview of the GIF will appear on the screen. Finally, you can save the GIF to your Photos app on iPhone or can also share it through email, AirDrop, iMessage, and other third-party services as needed.

Part 2 How to save Live Photos as GIF on iPhone
Live Photo is an interesting feature of the iPhone where an image is captured in an animated form for a couple of seconds. These Live Photos can be easily converted to GIFs using the steps below.
Step 1. On your iPhone Photo app, open the Live Photo that you want to save as GIF.
Step 2. Darg the selected photo upwards and will see multiple effects options along with other image details.
Step 3 To save the selected image as GIF, choose Loop or Bounce animation. Once done, share the image on mail and other services listed or save it to the device.

Part 3 How to save Live Photo as video on iPhone
You can also convert your live photos to videos and then use them for making GIFs and for other uses. The steps for iPhone live photo to video are as follows.
Step 1. On your iPhone, open the Photos app and choose the Live Photo that you want to convert.
Step 2. Next, click on the share button at the bottom of the screen and multiple options will be seen.
Step 3. Scroll down and choose Save as Video option and with this, the live photo will be saved as a Video.
Additionally, you can also convert the LivePhotos to videos using the shortcut app.

Part 4 How to save videos as live photos on your iPhone?
If you need to convert your videos to live photos on iPhone, there are several third-party tools available and one of the widely used is IntoLive. Using this app, videos, as well as GIFs, can be converted into live photos.
Steps on how to turn a video into a live photo iPhone
Step 1. Download, install and launch the IntoLive app from the app store.
Step 2. Next, browse and add the desired video.
Step 3. If needed, the added video can be customized using several supported features.
Step 4. Next, click on the Make option at the top-right corner and then choose the repeats you want for a Live Photo.
Step 5. Finally, click on the Live Photo and your Live Photo will be saved to the device.

Part 5 Best tool for creating GIFs and video editing on your Windows and Mac- Wondershare Filmora
Above we have listed several ways to create GIFs on your iPhone and also to convert videos to LivePhotos and vice-versa. Installing different tools for different tasks is a hassle and also a time-consuming task. So, if you are looking for an all-in-one tool that allows you to create GIFs, and professionally edit your media files, Wondershare Filmora Video Editor is the best tool to consider. Available for quick download on your Windows and Mac system, this feature-packed software has an intuitive and user-friendly interface.
Wondershare Filmora
Get started easily with Filmora’s powerful performance, intuitive interface, and countless effects!
Try It Free Try It Free Try It Free Learn More >

Media files in all key formats are supported by the tool and there are multiple options for editing and video creation like splitting, rotating, cutting, adding effects, sounds, text, and other elements. In a few simple steps, your customized GIF and other professional-looking media files will be ready.
Steps to create GIF using Wondershare Filmora
Step 1. Launch the installed software on your system and add the video or images from the system.
Step 2. The added media files next need to be dragged and dropped to the timeline at the bottom of the interface.
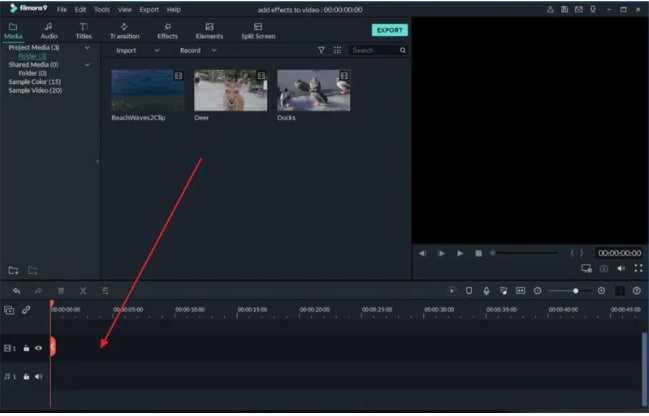
Step 3. After the files are moved, you can customize them using several editing tools like rotate, crop, cut, and more.
Step 4. Next, add text, effects, sound, and other elements as needed.

Step 5. Finally choose to export the file and then from the Local tab, select the GIF option. Choose a file name and location and then finally click on the EXPORT button.

● Key Takeaways from This Episode →
●There are several ways to turn video into GIF iPhone.
●Using shortcuts is one of the most straightforward methods for creating GIFs using videos.
●You can also convert videos to LivePhoto and vice versa on your iPhone using third-party apps.
●Wondershare Filmora is an excellent software to make GIFs and professionally edit media files.
To create iPhone video to GIF there are several third-party apps available. You can even choose the online sites for the task, but the editing and other options will be limited. The GIFs on your iPhone can be created using videos as well as Live photos.
One of the best ways to create a GIF is using the Shortcuts app that comes pre-installed on devices running on iOS 13 and later versions of the OS. The app has shortcuts to accomplish several tasks on your iPhone including GIF creation. Learn about using Shortcuts and other tools for creating a GIF on iPhone.
In this article
01 [How to make GIF from Video on iPhone using Shortcut App](#Part 1)
02 [How to save Live Photos as GIF on iPhone](#Part 2)
03 [How to save Live Photos as GIF on iPhone](#Part 3)
04 [How to save videos as live photos on your iPhone?](#Part 4)
05 [Best tool for creating GIFs and video editing on your Windows and Mac- Wondershare Filmora](#Part 5)
Part 1 How to make GIF from Video on iPhone using Shortcut App
One of the easiest ways to convert video GIF iPhone is by using the Shortcuts app. If you have deleted the app, you can reinstall it from the app store. Once the app is installed, you would next need to allow the untrusted shortcuts and for this go to Settings > Shortcuts> toggle Add Untrusted Shortcuts to add the shortcuts created by the user. The further steps for converting video to GIF iPhone are as follows.
Step 1. On your iPhone, download the Video to GIF shortcut. You can download it using iCloud or RoutineHub. Find the shortcut and click on Get Shortcut will let you check the action of the shortcut.
Move down and click on the red Add Untrusted Shortcut button that will add the shortcut for the library.
Step 2. Go to the My Shortcuts tab and click on the Video to GIF section. If you are using it for the first time, you need to grant permission to use the videos and photos. Click on the OK button and continue.
Step 3. Next, browse and add the video from which you wish to create the GIF. Since GIF animations are short, it is always recommended to use short videos.
Step 4. Video processing will start and during this, the Video to GIF shortcut will be greyed out.
Step 5. Once done, the preview of the GIF will appear on the screen. Finally, you can save the GIF to your Photos app on iPhone or can also share it through email, AirDrop, iMessage, and other third-party services as needed.
Part 2 How to save Live Photos as GIF on iPhone
Live Photo is an interesting feature of the iPhone where an image is captured in an animated form for a couple of seconds. These Live Photos can be easily converted to GIFs using the steps below.
Step 1. On your iPhone Photo app, open the Live Photo that you want to save as GIF.
Step 2. Darg the selected photo upwards and will see multiple effects options along with other image details.
Step 3 To save the selected image as GIF, choose Loop or Bounce animation. Once done, share the image on mail and other services listed or save it to the device.
Part 3 How to save Live Photo as video on iPhone
You can also convert your live photos to videos and then use them for making GIFs and for other uses. The steps for iPhone live photo to video are as follows.
Step 1. On your iPhone, open the Photos app and choose the Live Photo that you want to convert.
Step 2. Next, click on the share button at the bottom of the screen and multiple options will be seen.
Step 3. Scroll down and choose Save as Video option and with this, the live photo will be saved as a Video.
Additionally, you can also convert the LivePhotos to videos using the shortcut app.
Part 4 How to save videos as live photos on your iPhone?
If you need to convert your videos to live photos on iPhone, there are several third-party tools available and one of the widely used is IntoLive. Using this app, videos, as well as GIFs, can be converted into live photos.
Steps on how to turn a video into a live photo iPhone
Step 1. Download, install and launch the IntoLive app from the app store.
Step 2. Next, browse and add the desired video.
Step 3. If needed, the added video can be customized using several supported features.
Step 4. Next, click on the Make option at the top-right corner and then choose the repeats you want for a Live Photo.
Step 5. Finally, click on the Live Photo and your Live Photo will be saved to the device.
Part 5 Best tool for creating GIFs and video editing on your Windows and Mac- Wondershare Filmora
Above we have listed several ways to create GIFs on your iPhone and also to convert videos to LivePhotos and vice-versa. Installing different tools for different tasks is a hassle and also a time-consuming task. So, if you are looking for an all-in-one tool that allows you to create GIFs, and professionally edit your media files, Wondershare Filmora Video Editor is the best tool to consider. Available for quick download on your Windows and Mac system, this feature-packed software has an intuitive and user-friendly interface.
Wondershare Filmora
Get started easily with Filmora’s powerful performance, intuitive interface, and countless effects!
Try It Free Try It Free Try It Free Learn More >
Media files in all key formats are supported by the tool and there are multiple options for editing and video creation like splitting, rotating, cutting, adding effects, sounds, text, and other elements. In a few simple steps, your customized GIF and other professional-looking media files will be ready.
Steps to create GIF using Wondershare Filmora
Step 1. Launch the installed software on your system and add the video or images from the system.
Step 2. The added media files next need to be dragged and dropped to the timeline at the bottom of the interface.
Step 3. After the files are moved, you can customize them using several editing tools like rotate, crop, cut, and more.
Step 4. Next, add text, effects, sound, and other elements as needed.
Step 5. Finally choose to export the file and then from the Local tab, select the GIF option. Choose a file name and location and then finally click on the EXPORT button.
● Key Takeaways from This Episode →
●There are several ways to turn video into GIF iPhone.
●Using shortcuts is one of the most straightforward methods for creating GIFs using videos.
●You can also convert videos to LivePhoto and vice versa on your iPhone using third-party apps.
●Wondershare Filmora is an excellent software to make GIFs and professionally edit media files.
Also read:
- Updated Adobe Animate Text Effects Skills You Need to Know
- Updated How to Make Your Own GIF on WhatsApp in Simple Ways for 2024
- Finding The Best Animated Profile Picture Maker
- Updated In 2024, 5 Different Animation Styles A Simple but Complete Guide
- Updated 2024 Approved Popular Female & Male Disney Cartoon Characters
- New In 2024, The 15 Most Efficient Photo to Cartoon Apps for Android
- New 2024 Approved 10 Caricature Makers to Turn Photo to Caricature Effects
- New The Most Efficient Techniques to Make 3D Animation Character for 2024
- Updated 12 Aesthetic GIF Instagram for Marketers
- In 2024, What Wikipedia Wont Tell You Specifically About Character Rigging
- Tips for GIF to Animated PNG
- Updated Animate Pictures in Canva for 2024
- In 2024, Learn How to Do Funny Cartoon Drawings
- New Tutorials to Make Animated Images – Even if Youre Just Starting Out
- Updated Complete Guide to Send Gif WhatsApp on Android for 2024
- Updated In 2024, 4 Smart Solutions to Create or Find Good Morning/Night GIFs
- Updated In 2024, How to Make a Video a Live Photo 2023
- New Most Effective Tactics to Set WhatsApp Status for 2024
- In 2024, How to Combine Multiple GIFs Into One with GIF Combiner
- New How to Cartoonize Photo Photoshop in Easy Steps for 2024
- Best 15 Anime Shows That Are Great to Binge Watch for 2024
- Updated In 2024, Adobe Auto Rigger Is AWESOME
- Updated In 2024, Top 10 Sketch Animation Video Makers
- New Step-by-Step Guide to Send Gif WhatsApp on Android for 2024
- New 2024 Approved Are You Ready to Animate Game Character From Scratch?
- Updated In 2024, Best Practices on Online 3D Avatar Creator
- Updated 4 Things You Should Know About Pinterest GIF
- New 2024 Approved 10 Popular Cartoon Characters That You Wont Want to Miss
- New 5 Best Adobe Animate Courses & Classes | Beginners Complete Tutorial for 2024
- New In 2024, Can I Still Do Animated Logo Design Without Design Skills?
- 2024 Approved 5 Must Try Ways to Add and Send GIF in Text Message on Android
- New Best Guide for Beginners on 2D Animation Making for 2024
- New 12 Animated Slideshow PowerPoint Templates and Tools to Make Them
- In 2024, Ways to trade pokemon go from far away On Apple iPhone 15? | Dr.fone
- Why Your WhatsApp Live Location is Not Updating and How to Fix on your Realme GT 3 | Dr.fone
- In 2024, 10 Fake GPS Location Apps on Android Of your Vivo Y100 5G | Dr.fone
- Does find my friends work on Tecno Pova 5 Pro | Dr.fone
- How To Unlock A Found iPhone 7?
- In 2024, Which Pokémon can Evolve with a Moon Stone For Vivo V27? | Dr.fone
- Fix Cant Take Screenshot Due to Security Policy on Samsung Galaxy M14 4G | Dr.fone
- In 2024, Complete Guide For Apple iPhone XS Max Lock Screen | Dr.fone
- In 2024, How To Change Your Apple ID Password On your iPhone SE (2022)
- How to recover data from dead iPhone 11 | Stellar
- How to Unlock iCloud lock from your iPhone SE and iPad?
- 15 Best Strongest Pokémon To Use in Pokémon GO PvP Leagues For Vivo Y100 5G | Dr.fone
- Fix Cant Take Screenshot Due to Security Policy on Vivo V27 | Dr.fone
- Hard Reset Infinix Smart 7 in 3 Efficient Ways | Dr.fone
- 3uTools Virtual Location Not Working On Vivo V30 Pro? Fix Now | Dr.fone
- Downloading SamFw FRP Tool 3.0 for Tecno Camon 30 Pro 5G
- In 2024, Unlock Apple ID without Phone Number From iPhone SE (2020)
- Recover your contacts after Honor X50i+ has been deleted.
- Easy Steps to Make Excel 2021 Hyperlinks Working | Stellar
- In 2024, How to Unlock Apple ID Activation Lock On Apple iPhone 15?
- Wondering the Best Alternative to Hola On Apple iPhone 15? Here Is the Answer | Dr.fone
- Planning to Use a Pokemon Go Joystick on Lava Agni 2 5G? | Dr.fone
- How to Transfer Text Messages from Honor X50 GT to New Phone | Dr.fone
- In 2024, Forgotten The Voicemail Password Of Samsung Galaxy A23 5G? Try These Fixes
- Complete Review & Guide to Techeligible FRP Bypass and More For Xiaomi Redmi Note 12R
- 2024 Approved Top 10 AI Script Writers to Choose
- In 2024, Does Airplane Mode Turn off GPS Location On Xiaomi Redmi K70 Pro? | Dr.fone
- Fake Android Location without Rooting For Your Motorola Moto G84 5G | Dr.fone
- In 2024, How To Leave a Life360 Group On Realme 12+ 5G Without Anyone Knowing? | Dr.fone
- The way to recover deleted contacts on Itel S23 without backup.
- In 2024, How To Remove or Bypass Knox Enrollment Service On Vivo X Flip
- Title: New 2024 Approved Have You Seen the Facebook Cartoon App Everyones Using Lately
- Author: Elon
- Created at : 2024-06-15 11:23:02
- Updated at : 2024-06-16 11:23:02
- Link: https://animation-videos.techidaily.com/new-2024-approved-have-you-seen-the-facebook-cartoon-app-everyones-using-lately/
- License: This work is licensed under CC BY-NC-SA 4.0.
