
:max_bytes(150000):strip_icc():format(webp)/laptop-2443739-5b55bc7c46e0fb00378df55b.jpg)
New 2024 Approved How to Find & Make Animated Christmas GIFs?
How to Find & Make Animated Christmas GIFs?
Versatile Video Editor - Wondershare Filmora
An easy yet powerful editor
Numerous effects to choose from
Detailed tutorials provided by the official channel
Since Christmas is just around the corner, you must be looking for all kinds of GIFs and video greetings to wish your loved ones on this special occasion. Ideally, sending an animated Christmas GIF is one of the best ways to expect them during the festive season. If you are running short on time, then you can find a readily available Merry Christmas funny GIF or can come up with a customized Christmas wishes GIF as well. Here, I will let you know how to find and make free Christmas GIFs like a pro.

In this article
01 [5 Best Places to Find Animated Christmas GIFs for Free](#Part 1)
02 [How to Create your Animated Christmas GIFs (with Music): A DIY Guide](#Part 2)
03 [Pro Tip: Customize your GIFs on the Go with Filmora Meme Maker](#Part 3)
Part 1 5 Best Places to Find Animated Christmas GIFs for Free
While there are plenty of websites and apps, I would recommend exploring the following sources to find Merry Christmas animated GIFs for free.
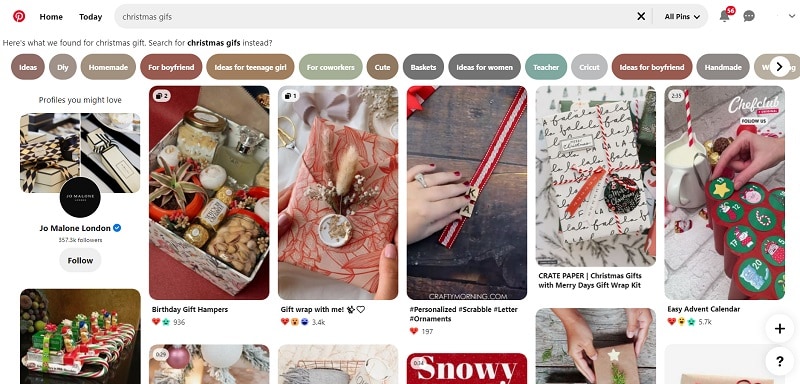
1. Pinterest
Pinterest has to be one of the best sources to get free Christmas GIFs of all kinds. While some GIFs can readily be downloaded from Pinterest, you might be redirected to third-party websites at times. Also, before you use any GIF from Pinterest, make sure you check its copyright policy.
Mostly, you would find aesthetically pleasing Merry Christmas wishes GIFs on Pinterest about DIY activities, food, animations, and so on. The only issue is that the range of GIFs at Pinterest is pretty extensive, and there are no inbuilt categories or filters.
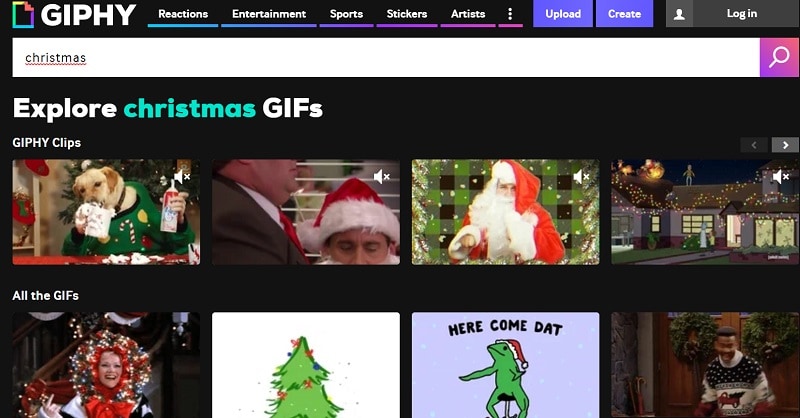
2. Giphy
If you are looking for funny Christmas GIFs, then Giphy would be one of the best places to explore. It has some of the most extensive GIFs collections of all styles, including Christmas wishes GIFs.
You can head to the website of Giphy or use its mobile application to find all sorts of animated Christmas GIFs as per your needs. There are tons of stickers, animated stories, and funny GIFs related to pop cultures that you would also find on Giphy.
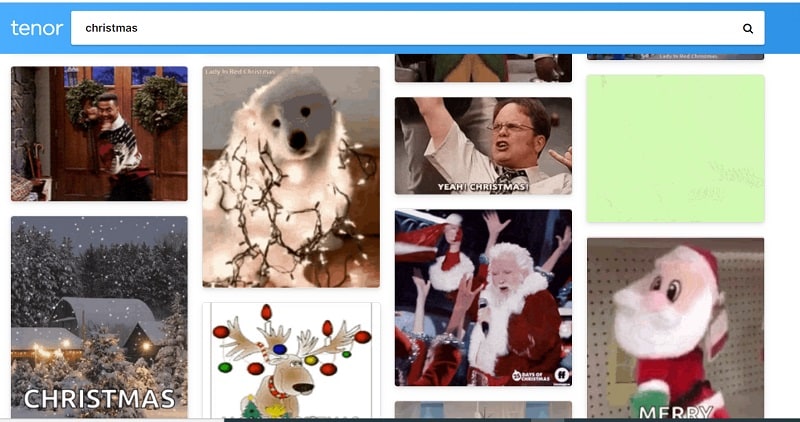
3. Tenor
Tenor is another clean and user-friendly website where you can find different types of funny Merry Christmas GIFs for free. You can look for stickers and GIFs by simply entering keywords of your choice on Tenor.
Once you load an animated Christmas GIF, you can save it offline or generate its shareable link. In this way, you can directly share the Merry Christmas wishes GIF to your loved ones on platforms like WhatsApp, Telegram, Messenger, and so on.
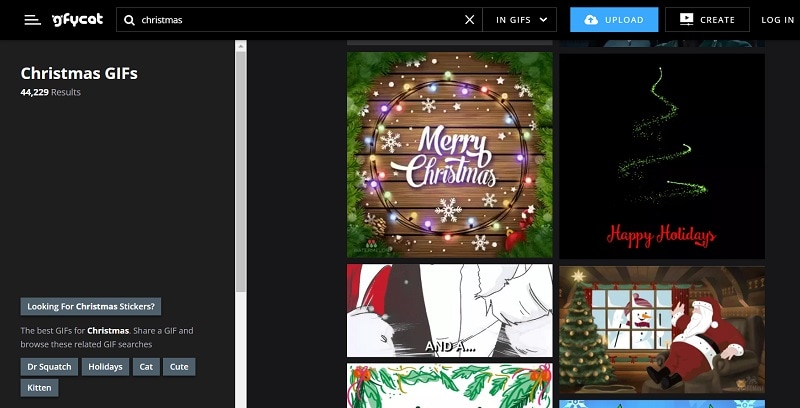
4. GyfCat
Having thousands of anime Christmas GIFs, GyfCat is another popular online source that you should check out. Most of the free Christmas GIFs here are animated or related to pop culture videos.
You can enter multiple keywords and hashtags on the search bar of GyfCat to find specific Christmas wishes GIFs. Most of the results here are ideal for funny Xmas GIFs that are bound to make your friends and family smile.
5. Funimada
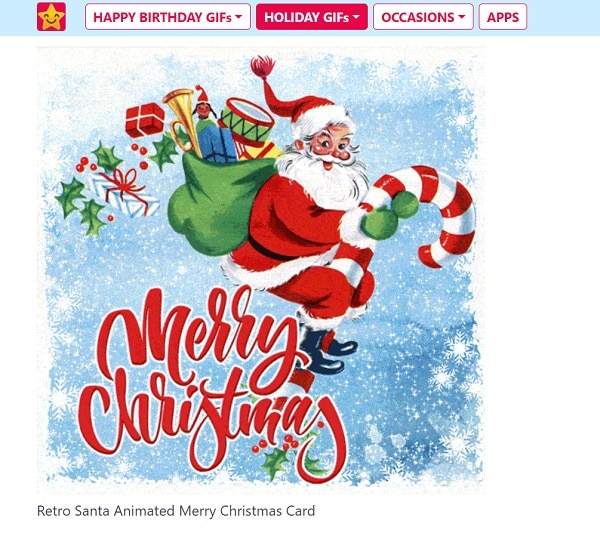
From elves to Santa Claus and reindeers to fireworks, you can find funny Christmas GIFs of all kinds in Funimada. Unlike other places, Funimada has a curated list of animated Christmas GIFs that you can explore on its website.
Once you find a perfect anime Christmas GIF at Funimada, you can download it on your device or system and share it with others however you like.
Part 2 How to Create your Animated Christmas GIFs (with Music): A DIY Guide
Most of these readily available animated Christmas GIFs are quite generic and lack a customized appeal. Therefore, if you want to come up with some customized Christmas wishes GIFs, then consider using a dedicated editing tool like Wondershare Filmora.
Since it is a user-friendly video and media editing tool, you won’t encounter issues working on an animated Christmas GIF. You can explore and use the wide range of media assets of Filmora or import anything from your system. Besides that, tons of transitions, filters, captions, and other effects would let you come up with some customized Merry Christmas wishes GIFs via Filmora in the following way.
Step 1 Load the Media Files of your Choice on Filmora
You can start by installing Wondershare Filmora on your system and launch it whenever you want to work on any animated Christmas GIF. Afterward, you can drag and drop your media files to it or go to its Menu > File > Import Media to browse and load your files.
For Win 7 or later (64-bit)
For macOS 10.12 or later

Step2 Create your Animated Christmas GIFs with Filmora
Great! Once you have loaded your media files, you can drag and drop them to the timeline at the bottom to start editing them. If you want to clip out any unwanted parts from a video, then hover the mouse at the end. This will let you use its trimming tool to clip out any part of the file.

There are tons of other editing options that are available on Filmora. For instance, once you select a video, you can go to its properties to apply all sorts of transformations such as rotation, flipping, scaling, repositioning, and so on.

Many people would like to add captions to their animated Christmas GIFs to wish others personally. You can do the same by visiting the “Titles” section of Filmora and exploring different styles of caption effects. You can drag and drop any caption effect and add your text here to customize it.

To further improve the visual appeal of your Christmas wishes GIF, you can explore and apply tons of transitions, filters, overlays, and other effects that are available in Filmora.

If you want to add music to your Merry Christmas wishes GIF, you can add any soundtrack to your project. You can also go to the “Audio” section of Filmora, where you can browse several sound effects and drag and drop your media files. If you want, you can also record voiceovers for your videos using the native feature on Filmora.

Step 3 Export your Christmas Wishes GIFs from Filmora
Lastly, you can get a preview of your funny Merry Christmas GIF on Filmora and can click on the “Export” button to save it. Here, you can select a preferred format (like GIF or MP4) in which you want to keep your media file on your system. If you have included music in your project, consider exporting it as an MP4 file instead of a GIF.

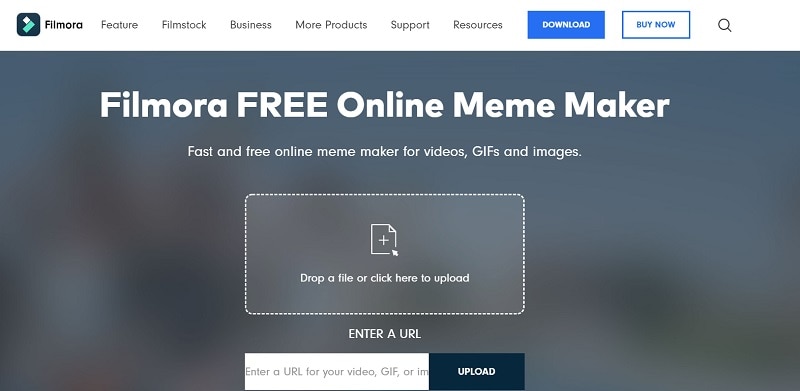
Part 3 Pro Tip: Customize your GIFs on the Go with Filmora Meme Maker
If you already have a Merry Christmas GIF and want to customize it further, you can also check the online Filmora Meme Maker . You can go to its website and upload a video, GIF, or image of your choice. If you have found a funny Christmas GIF online, you can paste its exact URL. Later, you can add texts to your GIFs and export them to your system in a preferred format.
Wondershare Filmora
Get started easily with Filmora’s powerful performance, intuitive interface, and countless effects!
Try It Free Try It Free Try It Free Learn More >

AI Portrait – The best feature of Wondershare Filmora for gameplay editing
The AI Portrait is a new add-on in Wondershare Filmora. It can easily remove video backgrounds without using a green screen or chroma key, allowing you to add borders, glitch effects, pixelated, noise, or segmentation video effects.

Conclusion
So, what are you waiting for? Now when you know where to find animated Christmas GIFs, you can explore the above-listed websites on your own. Apart from using these readily available options, you can also create some customized, funny Merry Christmas GIFs. For that, you can take the assistance of Wondershare Filmora and make the most of its professional features to create, customize, and export your GIFs with music and tons of other effects. Feel free to explore Filmora and wish your loved ones a joyous Christmas in style!
Since Christmas is just around the corner, you must be looking for all kinds of GIFs and video greetings to wish your loved ones on this special occasion. Ideally, sending an animated Christmas GIF is one of the best ways to expect them during the festive season. If you are running short on time, then you can find a readily available Merry Christmas funny GIF or can come up with a customized Christmas wishes GIF as well. Here, I will let you know how to find and make free Christmas GIFs like a pro.
In this article
01 [5 Best Places to Find Animated Christmas GIFs for Free](#Part 1)
02 [How to Create your Animated Christmas GIFs (with Music): A DIY Guide](#Part 2)
03 [Pro Tip: Customize your GIFs on the Go with Filmora Meme Maker](#Part 3)
Part 1 5 Best Places to Find Animated Christmas GIFs for Free
While there are plenty of websites and apps, I would recommend exploring the following sources to find Merry Christmas animated GIFs for free.
1. Pinterest
Pinterest has to be one of the best sources to get free Christmas GIFs of all kinds. While some GIFs can readily be downloaded from Pinterest, you might be redirected to third-party websites at times. Also, before you use any GIF from Pinterest, make sure you check its copyright policy.
Mostly, you would find aesthetically pleasing Merry Christmas wishes GIFs on Pinterest about DIY activities, food, animations, and so on. The only issue is that the range of GIFs at Pinterest is pretty extensive, and there are no inbuilt categories or filters.
2. Giphy
If you are looking for funny Christmas GIFs, then Giphy would be one of the best places to explore. It has some of the most extensive GIFs collections of all styles, including Christmas wishes GIFs.
You can head to the website of Giphy or use its mobile application to find all sorts of animated Christmas GIFs as per your needs. There are tons of stickers, animated stories, and funny GIFs related to pop cultures that you would also find on Giphy.
3. Tenor
Tenor is another clean and user-friendly website where you can find different types of funny Merry Christmas GIFs for free. You can look for stickers and GIFs by simply entering keywords of your choice on Tenor.
Once you load an animated Christmas GIF, you can save it offline or generate its shareable link. In this way, you can directly share the Merry Christmas wishes GIF to your loved ones on platforms like WhatsApp, Telegram, Messenger, and so on.
4. GyfCat
Having thousands of anime Christmas GIFs, GyfCat is another popular online source that you should check out. Most of the free Christmas GIFs here are animated or related to pop culture videos.
You can enter multiple keywords and hashtags on the search bar of GyfCat to find specific Christmas wishes GIFs. Most of the results here are ideal for funny Xmas GIFs that are bound to make your friends and family smile.
5. Funimada
From elves to Santa Claus and reindeers to fireworks, you can find funny Christmas GIFs of all kinds in Funimada. Unlike other places, Funimada has a curated list of animated Christmas GIFs that you can explore on its website.
Once you find a perfect anime Christmas GIF at Funimada, you can download it on your device or system and share it with others however you like.
Part 2 How to Create your Animated Christmas GIFs (with Music): A DIY Guide
Most of these readily available animated Christmas GIFs are quite generic and lack a customized appeal. Therefore, if you want to come up with some customized Christmas wishes GIFs, then consider using a dedicated editing tool like Wondershare Filmora.
Since it is a user-friendly video and media editing tool, you won’t encounter issues working on an animated Christmas GIF. You can explore and use the wide range of media assets of Filmora or import anything from your system. Besides that, tons of transitions, filters, captions, and other effects would let you come up with some customized Merry Christmas wishes GIFs via Filmora in the following way.
Step 1 Load the Media Files of your Choice on Filmora
You can start by installing Wondershare Filmora on your system and launch it whenever you want to work on any animated Christmas GIF. Afterward, you can drag and drop your media files to it or go to its Menu > File > Import Media to browse and load your files.
For Win 7 or later (64-bit)
For macOS 10.12 or later
Step2 Create your Animated Christmas GIFs with Filmora
Great! Once you have loaded your media files, you can drag and drop them to the timeline at the bottom to start editing them. If you want to clip out any unwanted parts from a video, then hover the mouse at the end. This will let you use its trimming tool to clip out any part of the file.
There are tons of other editing options that are available on Filmora. For instance, once you select a video, you can go to its properties to apply all sorts of transformations such as rotation, flipping, scaling, repositioning, and so on.
Many people would like to add captions to their animated Christmas GIFs to wish others personally. You can do the same by visiting the “Titles” section of Filmora and exploring different styles of caption effects. You can drag and drop any caption effect and add your text here to customize it.
To further improve the visual appeal of your Christmas wishes GIF, you can explore and apply tons of transitions, filters, overlays, and other effects that are available in Filmora.
If you want to add music to your Merry Christmas wishes GIF, you can add any soundtrack to your project. You can also go to the “Audio” section of Filmora, where you can browse several sound effects and drag and drop your media files. If you want, you can also record voiceovers for your videos using the native feature on Filmora.
Step 3 Export your Christmas Wishes GIFs from Filmora
Lastly, you can get a preview of your funny Merry Christmas GIF on Filmora and can click on the “Export” button to save it. Here, you can select a preferred format (like GIF or MP4) in which you want to keep your media file on your system. If you have included music in your project, consider exporting it as an MP4 file instead of a GIF.
Part 3 Pro Tip: Customize your GIFs on the Go with Filmora Meme Maker
If you already have a Merry Christmas GIF and want to customize it further, you can also check the online Filmora Meme Maker . You can go to its website and upload a video, GIF, or image of your choice. If you have found a funny Christmas GIF online, you can paste its exact URL. Later, you can add texts to your GIFs and export them to your system in a preferred format.
Wondershare Filmora
Get started easily with Filmora’s powerful performance, intuitive interface, and countless effects!
Try It Free Try It Free Try It Free Learn More >
AI Portrait – The best feature of Wondershare Filmora for gameplay editing
The AI Portrait is a new add-on in Wondershare Filmora. It can easily remove video backgrounds without using a green screen or chroma key, allowing you to add borders, glitch effects, pixelated, noise, or segmentation video effects.
Conclusion
So, what are you waiting for? Now when you know where to find animated Christmas GIFs, you can explore the above-listed websites on your own. Apart from using these readily available options, you can also create some customized, funny Merry Christmas GIFs. For that, you can take the assistance of Wondershare Filmora and make the most of its professional features to create, customize, and export your GIFs with music and tons of other effects. Feel free to explore Filmora and wish your loved ones a joyous Christmas in style!
How to Create Slideshow in LinkedIn
How to Create Slideshow in LinkedIn
An easy yet powerful editor
Numerous effects to choose from
Detailed tutorials provided by the official channel
LinkedIn slideshows are interesting means of professional content presentations in an elusive and catchy style. Stay tuned to learn everything about LinkedIn slideshows!
In this article
01 [Why Should You Care LinkedIn Slideshow?](#Part 1)
02 [What Are the Specs & Dimensions of LinkedIn Slideshow?](#Part 2)
03 [Examples of LinkedIn Slideshow](#Part 3)
04 [How to Create Slideshow in LinkedIn?](#Part 4)
Part 1 Why Should You Care LinkedIn Slideshow?
Today’s IT revolutionized era has a technology infused solution to everything and employment is no exception. Defining the platform, LinkedIn is a professional social networking site that allows you to put forward your qualifications, education, skills, expertise and experience to address your job oriented concerns. The platform is a market leader in hiring professionals to a diversity of work profiles, while increasing the number of potential audiences.
The social media platform essentially works to keep the job realm informed about you with the most detailed aspects. This is why, creating a LinkedIn profile turns out to be a significant step in the professional world. Let us get into understanding some more beneficial aspects of a LinkedIn recognition in the following section:
01Establishing Professional Connections
Making yourself available on the professional front through a LinkedIn profile lets you know about the diversities of recruitment prerequisites, connect with professionals belonging to different domains, backgrounds and industries, while getting numerous opportunities to meet people who share a similar work perspective as yours.
02Being Informed About Job Postings
A LinkedIn profile caters most effectively to your concern of getting regular updates about employment opportunities in a diverse range of industrial and business corporations, companies and recruiting agencies. You can use the platform to create a professional account and follow the respective company pages that match with your qualifications and expertise, to get the latest updates of their job postings and vacancy announcements.
03Recruiter’s Search Visibility
Having a LinkedIn profile affordably means that you are entitled to a recognition in the recruiter’s search results on Google, thus giving a considerable boost to your chances of being viewed and hired. This is additionally beneficial for the recruiting agencies as well, who get the maximum fruit with the least effort.
04Globalization
Creating a comprehensive LinkedIn profile with the correct choice of keywords and exact content opens up employment opportunities beyond the cross country borders, thanks to the platform’s global reach and credibility. This in turn, causes your professional integrity to be presented in front of a large scale audience diversity.
05Personal Branding
Being active on LinkedIn lets you become a brand for yourself through its endorsement and recommendation features. Seeing your LinkedIn profile, your akin, coworkers and professionally senior acquaintances of the past can write a positive testimonial on your expertise, thus increasing your chances of being hired to a new job post.
06A Valuable Asset
You can conveniently regard a LinkedIn profile as your professional diary, where you can update your latest corporate or industrial achievements, awards, project undertakings and voluntary activities. This will facilitate your recruiter with the latest and exact information about your corporate capabilities, which would further aid the latter to consider on hiring you.
07Real and Trustworthy Platform
Creating a LinkedIn profile essentially requires furnishing real and authentic details of education, skills and professional backgrounds for getting relevant opportunities in their respective fields. Uploading false information and fake details will anyway result in beating around the bush, without any significant gain and hence, this practice is essentially avoided by LinkedIn users.
08Active Job Search
Instead of following the conventional passive job seeker pattern of sending resume and waiting for the HR response, LinkedIn allows you to be in regular touch with the recruiter of your chosen company for latest updates on the hiring process. If you are worried of getting the ‘desperate’ tag, rest assured as the platform will rather present you as a proactive professional.
Part 2 What Are the Specs & Dimensions of LinkedIn Slideshow?
Now that you are familiar with the credibility of a LinkedIn carousel post in the professional world, let us get into some more details of the utility with proceeding towards a discussion of the different specifications and dimensions of a LinkedIn slideshow and the professional aspects of the same in the following section:
● Take Care of the File Size
The credibility of LinkedIn carousel posts lies in the engaging presentation of your static and monotonous text to make them stand out of the crowded newsfeed. True that your creative skills are sufficient enough to design a graphic masterpiece, yet you should take care to remain within an affordable limit, lest you would end up with a large file that gets difficult to upload and process. Most reliably, a 100 MB file size would easily fit into the bill.
● Restrict Your Slide Count
When creating a slideshow LinkedIn presentation, it is normal to get a bit over the line while including the most exemplary and comprehensive details about your professional qualifications, skills and background. Relax, that’s nothing wrong! However, all you need to care about is limiting the slide count of your slideshow to a maximum of 300 pages. As a genuine approach, no one would bother going beyond that to read about you anyway!
● Use a Commendable File Format
You would ideally want the documents and media files in your slideshow to have the finest quality. LinkedIn allows you to create and share your graphic presentations in the PDF, DOCX, DOC, PPTX and PPT file formats. If you want the assurance of your slideshows having the highest resolution and appreciable output quality, it is recommended to save them in the PDF file format.
● Make a Careful Upload
When you are ready to upload your presentation, consider taking a close preview of its contents to make sure that you have not missed out on anything. This becomes all the more necessary, owing to the fact that, you are not allowed to edit your post in anyway after it gets uploaded on your LinkedIn profile.
● Bonus Tip
To include the latest and up-to-date information within your presentation, consider visiting the LinkedIn official webpage directly from your platform account.
Part 3 Examples of LinkedIn Slideshow
Creating a LinkedIn slide show can be both, exciting as well as advantageous on the professional front. After having an insight of the significance, dimensions and specifications, let us now move towards browsing through some of the most excellent examples of LinkedIn slideshow presentations in the following section:
● Share Numbers, Infographics and Statistics
The utility of the LinkedIn platform to share documents has been worked upon by Brian Wallace, an infographic agency owner, to present his professional excellence in front of the target audiences through useful statistics and examples. Opening his work profile, you would firstly get to see an infographic PDF export, which are later uploaded as document files on a LinkedIn post that speaks in favor of the statistics.
● Share Action Oriented Business Modules
Travis Lachner, the CEO of a renowned business enterprise, has worked upon the clever idea of designing appealing, call to action presentations to encourage the participation of his potential audiences in the business module through a graphical arrow desisgn, asking them to share their opinions via relatable comments.
● Stepwise Instructions and Design Frameworks
This LinkedIn feature is utilized by Demodesk to present a stepwise demonstration of its newly launched ‘One Feature Framework’ through a slideshow presentation. You can work with the facility to share documents comprising of market oriented case studies, business reports, frameworks, etc., from your company’s official webpage.
● Conference Presentations and Event Contents
LinkedIn slideshows are indeed the most expressive means of sharing conference essentials and event marketing. Such presentations have been perfectly put to use by Jens Hilgers, the eSports creator and entrepreneur, to help viewers and players in navigating through his game landscapes. You can also choose a simple task of creating a buzz of your upcoming event among your audience, like Garter did to inform about the CFO & Executive Conference.
● Content Promotion
You can use a LinkedIn slideshow post to effectively promote your content among a global audience like Matheos Simou, a graphic designer cum recruitment strategist, who utilized LinkedIn presentations to educate his target audience about the significance of graphic desisgn and product branding outsources through his slideshow post titled ‘Flipping Pointless Brand Identity’.
Part 4 How to Create Slideshow in LinkedIn?
Having talked enough about LinkedIn slideshows and their market credibility, let us now make an attempt to try hands at creating professionally useful LinkedIn presentations. The following section describes a detailed, stepwise tutorial to adhere to the aforesaid purpose within a quick time span and utmost ease:
● User’s Guide to Create a LinkedIn Slideshow
Step 1: Open Your LinkedIn Profile
Start with logging in to your LinkedIn profile in any preferred device.
Step 2: Create a Google Slide Deck
Launch Google Slides in your device and proceed to design a slide deck on the same.

Step 3: Add Content to the Inaugural Slide
Populate the first slide of your presentation with the opening content, like the titles and subtitles of slideshow creation objective, company name, profile and expertise, etc.

As far as designing the subsequent slides is concerned, it would be a smart idea to clone the first slide to maintain an overall homogeneity.

Step 4: Save Your Work
When you are done with creating the presentation, choose to save it on your profile in the PDF file format for ensuring a high output quality.

Step 5: Sharing Your Creation
Create a document post on your profile to share the slideshow presentation with fellow LinkedIn users.

Step 6: Describe Your Post
The last step is to supplement your post with a suitable description and a few catchy hashtags. When you are happy with your work, navigate to the bottom right of the profile screen and tap ‘Post’.

● Creating LinkedIn Slideshows with Wondershare Filmora
When looking for a convenient and easy to use slideshow creator to design your LinkedIn presentations, you can rely on the Wondershare Filmora Video Editor Slideshow Creator software program to make high end, professional quality slide shows in a commendable resolution, and supplement them with a diversity of cohesive graphic effects.
For Win 7 or later (64-bit)
For macOS 10.12 or later
● Ending Thoughts →
● LinkedIn slideshows are highly useful in creating a notable impact of your professional skills and capabilities in front of job recruiters.
● There are some essential aspects of LinkedIn slideshows, which you should consider while designing your presentation.
● Wondershare Filmora is certainly one among the best software solutions to create LinkedIn slideshows with high end professional excellence.
LinkedIn slideshows are interesting means of professional content presentations in an elusive and catchy style. Stay tuned to learn everything about LinkedIn slideshows!
In this article
01 [Why Should You Care LinkedIn Slideshow?](#Part 1)
02 [What Are the Specs & Dimensions of LinkedIn Slideshow?](#Part 2)
03 [Examples of LinkedIn Slideshow](#Part 3)
04 [How to Create Slideshow in LinkedIn?](#Part 4)
Part 1 Why Should You Care LinkedIn Slideshow?
Today’s IT revolutionized era has a technology infused solution to everything and employment is no exception. Defining the platform, LinkedIn is a professional social networking site that allows you to put forward your qualifications, education, skills, expertise and experience to address your job oriented concerns. The platform is a market leader in hiring professionals to a diversity of work profiles, while increasing the number of potential audiences.
The social media platform essentially works to keep the job realm informed about you with the most detailed aspects. This is why, creating a LinkedIn profile turns out to be a significant step in the professional world. Let us get into understanding some more beneficial aspects of a LinkedIn recognition in the following section:
01Establishing Professional Connections
Making yourself available on the professional front through a LinkedIn profile lets you know about the diversities of recruitment prerequisites, connect with professionals belonging to different domains, backgrounds and industries, while getting numerous opportunities to meet people who share a similar work perspective as yours.
02Being Informed About Job Postings
A LinkedIn profile caters most effectively to your concern of getting regular updates about employment opportunities in a diverse range of industrial and business corporations, companies and recruiting agencies. You can use the platform to create a professional account and follow the respective company pages that match with your qualifications and expertise, to get the latest updates of their job postings and vacancy announcements.
03Recruiter’s Search Visibility
Having a LinkedIn profile affordably means that you are entitled to a recognition in the recruiter’s search results on Google, thus giving a considerable boost to your chances of being viewed and hired. This is additionally beneficial for the recruiting agencies as well, who get the maximum fruit with the least effort.
04Globalization
Creating a comprehensive LinkedIn profile with the correct choice of keywords and exact content opens up employment opportunities beyond the cross country borders, thanks to the platform’s global reach and credibility. This in turn, causes your professional integrity to be presented in front of a large scale audience diversity.
05Personal Branding
Being active on LinkedIn lets you become a brand for yourself through its endorsement and recommendation features. Seeing your LinkedIn profile, your akin, coworkers and professionally senior acquaintances of the past can write a positive testimonial on your expertise, thus increasing your chances of being hired to a new job post.
06A Valuable Asset
You can conveniently regard a LinkedIn profile as your professional diary, where you can update your latest corporate or industrial achievements, awards, project undertakings and voluntary activities. This will facilitate your recruiter with the latest and exact information about your corporate capabilities, which would further aid the latter to consider on hiring you.
07Real and Trustworthy Platform
Creating a LinkedIn profile essentially requires furnishing real and authentic details of education, skills and professional backgrounds for getting relevant opportunities in their respective fields. Uploading false information and fake details will anyway result in beating around the bush, without any significant gain and hence, this practice is essentially avoided by LinkedIn users.
08Active Job Search
Instead of following the conventional passive job seeker pattern of sending resume and waiting for the HR response, LinkedIn allows you to be in regular touch with the recruiter of your chosen company for latest updates on the hiring process. If you are worried of getting the ‘desperate’ tag, rest assured as the platform will rather present you as a proactive professional.
Part 2 What Are the Specs & Dimensions of LinkedIn Slideshow?
Now that you are familiar with the credibility of a LinkedIn carousel post in the professional world, let us get into some more details of the utility with proceeding towards a discussion of the different specifications and dimensions of a LinkedIn slideshow and the professional aspects of the same in the following section:
● Take Care of the File Size
The credibility of LinkedIn carousel posts lies in the engaging presentation of your static and monotonous text to make them stand out of the crowded newsfeed. True that your creative skills are sufficient enough to design a graphic masterpiece, yet you should take care to remain within an affordable limit, lest you would end up with a large file that gets difficult to upload and process. Most reliably, a 100 MB file size would easily fit into the bill.
● Restrict Your Slide Count
When creating a slideshow LinkedIn presentation, it is normal to get a bit over the line while including the most exemplary and comprehensive details about your professional qualifications, skills and background. Relax, that’s nothing wrong! However, all you need to care about is limiting the slide count of your slideshow to a maximum of 300 pages. As a genuine approach, no one would bother going beyond that to read about you anyway!
● Use a Commendable File Format
You would ideally want the documents and media files in your slideshow to have the finest quality. LinkedIn allows you to create and share your graphic presentations in the PDF, DOCX, DOC, PPTX and PPT file formats. If you want the assurance of your slideshows having the highest resolution and appreciable output quality, it is recommended to save them in the PDF file format.
● Make a Careful Upload
When you are ready to upload your presentation, consider taking a close preview of its contents to make sure that you have not missed out on anything. This becomes all the more necessary, owing to the fact that, you are not allowed to edit your post in anyway after it gets uploaded on your LinkedIn profile.
● Bonus Tip
To include the latest and up-to-date information within your presentation, consider visiting the LinkedIn official webpage directly from your platform account.
Part 3 Examples of LinkedIn Slideshow
Creating a LinkedIn slide show can be both, exciting as well as advantageous on the professional front. After having an insight of the significance, dimensions and specifications, let us now move towards browsing through some of the most excellent examples of LinkedIn slideshow presentations in the following section:
● Share Numbers, Infographics and Statistics
The utility of the LinkedIn platform to share documents has been worked upon by Brian Wallace, an infographic agency owner, to present his professional excellence in front of the target audiences through useful statistics and examples. Opening his work profile, you would firstly get to see an infographic PDF export, which are later uploaded as document files on a LinkedIn post that speaks in favor of the statistics.
● Share Action Oriented Business Modules
Travis Lachner, the CEO of a renowned business enterprise, has worked upon the clever idea of designing appealing, call to action presentations to encourage the participation of his potential audiences in the business module through a graphical arrow desisgn, asking them to share their opinions via relatable comments.
● Stepwise Instructions and Design Frameworks
This LinkedIn feature is utilized by Demodesk to present a stepwise demonstration of its newly launched ‘One Feature Framework’ through a slideshow presentation. You can work with the facility to share documents comprising of market oriented case studies, business reports, frameworks, etc., from your company’s official webpage.
● Conference Presentations and Event Contents
LinkedIn slideshows are indeed the most expressive means of sharing conference essentials and event marketing. Such presentations have been perfectly put to use by Jens Hilgers, the eSports creator and entrepreneur, to help viewers and players in navigating through his game landscapes. You can also choose a simple task of creating a buzz of your upcoming event among your audience, like Garter did to inform about the CFO & Executive Conference.
● Content Promotion
You can use a LinkedIn slideshow post to effectively promote your content among a global audience like Matheos Simou, a graphic designer cum recruitment strategist, who utilized LinkedIn presentations to educate his target audience about the significance of graphic desisgn and product branding outsources through his slideshow post titled ‘Flipping Pointless Brand Identity’.
Part 4 How to Create Slideshow in LinkedIn?
Having talked enough about LinkedIn slideshows and their market credibility, let us now make an attempt to try hands at creating professionally useful LinkedIn presentations. The following section describes a detailed, stepwise tutorial to adhere to the aforesaid purpose within a quick time span and utmost ease:
● User’s Guide to Create a LinkedIn Slideshow
Step 1: Open Your LinkedIn Profile
Start with logging in to your LinkedIn profile in any preferred device.
Step 2: Create a Google Slide Deck
Launch Google Slides in your device and proceed to design a slide deck on the same.
Step 3: Add Content to the Inaugural Slide
Populate the first slide of your presentation with the opening content, like the titles and subtitles of slideshow creation objective, company name, profile and expertise, etc.
As far as designing the subsequent slides is concerned, it would be a smart idea to clone the first slide to maintain an overall homogeneity.
Step 4: Save Your Work
When you are done with creating the presentation, choose to save it on your profile in the PDF file format for ensuring a high output quality.
Step 5: Sharing Your Creation
Create a document post on your profile to share the slideshow presentation with fellow LinkedIn users.
Step 6: Describe Your Post
The last step is to supplement your post with a suitable description and a few catchy hashtags. When you are happy with your work, navigate to the bottom right of the profile screen and tap ‘Post’.
● Creating LinkedIn Slideshows with Wondershare Filmora
When looking for a convenient and easy to use slideshow creator to design your LinkedIn presentations, you can rely on the Wondershare Filmora Video Editor Slideshow Creator software program to make high end, professional quality slide shows in a commendable resolution, and supplement them with a diversity of cohesive graphic effects.
For Win 7 or later (64-bit)
For macOS 10.12 or later
● Ending Thoughts →
● LinkedIn slideshows are highly useful in creating a notable impact of your professional skills and capabilities in front of job recruiters.
● There are some essential aspects of LinkedIn slideshows, which you should consider while designing your presentation.
● Wondershare Filmora is certainly one among the best software solutions to create LinkedIn slideshows with high end professional excellence.
Some Must-Know Useful Lego Animation Ideas for You
Some Must-know Useful Lego Animation ideas for you
An easy yet powerful editor
Numerous effects to choose from
Detailed tutorials provided by the official channel
There are so many things to learn in creating a LEGO movie, including the software and stop motion animation. There are tons of Lego animation software data for beginners and professionals. Many beginners make classic mistakes in brickfilming, and as a result, they don’t get the most out of their effort.
Do you want to create a stop motion LEGO movie and determine the kind of tool you will have to apply to Lego city animation? Worry not, as this Lego animation tutorial will guide you through some more useful LEGO animation ideas for beginners and professionals. And, you will get to know how Lego animation videos and Lego ww2 animation goes hand in hand with the help of different Lego Animation Makers here under Lego animation class. In addition to that, some excellent Lego animation movie examples will give you a better idea of how Lego Animation works in reality.
In this article
01 [Best LEGO Animation Makers in 2022](#Part 1)
02 [Three Sharing of LEGO Animation Examples worth Learning from](#Part 2)
03 [Advanced LEGO Animation Tips for You](#Part 3)
Part 1 LEGO Animation Makers for Windows/Mac
01**Wondershare Filmora Video Editor **

Wondershare Filmora - Best Video Editor for Mac/Windows
5,481,435 people have downloaded it.
Build unique custom animations without breaking a sweat.
Focus on creating epic stories and leave the details to Filmora’s auto features.
Start a creative adventure with drag & drop effects and endless possibilities.
Filmora simplifies advanced features to save you time and effort.
Filmora cuts out repetition so you can move on to your next creative breakthrough.
Filmora Video Editor is the best LEGO stop motion movie maker available for windows and Mac and highly recommended video editing software. This software is suitable for making LEGO among us animation because of its exclusive features:
● LEGO stop-motion movies are done quickly on this software
● It uses the editing tools like cropping, trimming, combing, rotating, and splitting videos.
● It has various effects that you can use to style your video and make a masterpiece.
● It supports Windows (bits), and MacOs 10.(High Sierra), Mac OS 10.(Sierra), OS X 10.(El Capitan), OS X 10.(Yosemite)
● Your LEGO stop-motion movie can be directly online using this software.
02FrameByFrame
FrameByFrame is a free LEGO mouth animation maker available for Mac users. It is an introductory video creation program that uses a webcam to create stop motion. It is elementary to use, and you need to have cameras such as i-sight connected with your Mac device to take shots by pressing the camera button. This software displays what you took by the camera and the frame superimposed to create the stop motion movie. It is light, easy to use, and you can trim the unwanted parts if needed.
03Boinx iStopMotion
Boinx iStopMotion is a paid LEGO stop-motion movie-maker ideal for higher-level Mac devices. It can create a shot-by-shot sequence using stop motion and time-lapse. With the help of the menu, it is perfect for kids and features onion skinning. It allows you to create a LEGO movie from your imagination and creativity, which features overlay, zooming, blinking to make movement more visible, etc. After creating or using this software, you can export your video and enjoy it on your movie player.
04Stop Motion Pro Eclipse
Stop Motion Pro Eclipse is a paid video creation software available for Windows to help you create LEGO stop motion animation movies. It is highly compatible with many popular video webcams and cameras that can capture and paste pictures and turn them into lovely stories with animated characters. It allows you to play up to frames per second, and while you can lay back to stop moving animation, you can also record audio. It also allows you to plan and track the movement of the movie characters and Lego friends animation.
05IKITMovie
IKITMovie is a paid Lego animations 63movie maker for Windows devices that helps solve the problem of making good LEGO stop motion animation videos. It is easy to use in any age range and has thousands of background audio tracks. It is perfect for creating LEGO animation or clay motion by using the green screen feature to replace the original background of the video with still or moving images.
Part 2 LEGO Animation Makers for Android and iPhone
01Stop Motion Studio
Stop Motion Studio is best for iOS and Android devices equipped with a versatile set of animated stop-motion tools and Grant complete control over all camera settings. It allows you to create LEGO stop-motion animated movies instantly and anywhere using your mobile phone free of charge but requires in-app purchases if you would want to export your project in resolution or import pics into the app.
02Clayframes
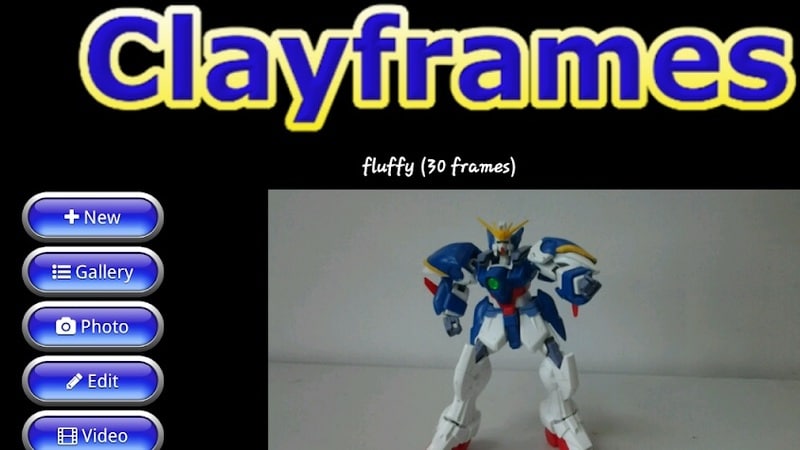
Clayframes is the best LEGO stop motion app 4 Android devices to capture new footage or import images you want to use and arrange them the way you want. The eraser tool in the app allows you to remove objects you don’t want to keep in the shot and Rigs.
03iMotion
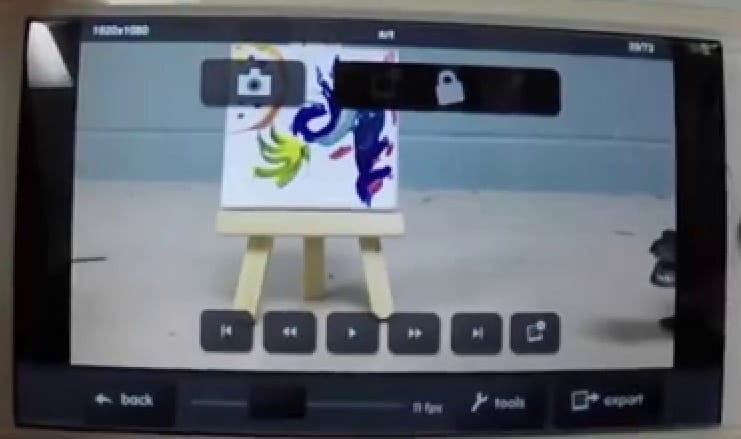
iMotion is available for iPad and iPhone users to create LEGO stop motion videos from an app. It’s has a Wi-Fi remote, photo library import mods, and time-lapse that you can choose the best to meet the demand of your project.
04Life Lapse Stop Motion Maker

Life Lapse Stop Motion Maker offers an all-in-one tool you need to edit and shoot a LEGO stop motion animation available on Android and iPhone devices. While shooting in LEGO stop motion video, you can focus on white balance and exposure lock ghosted image overlay, or time intervals.
05I Can Animate
I Can Animate is a straightforward app to create a LEGO stop motion video within a few steps and is available for Android and iOS devices. Post launching the app, you can click on Design, and a device camera will open to start creating your video.
Part 3 Three Sharing of LEGO Animation Examples worth Learning from
This section of the article will share three LEGO animation examples that are worth learning from:
01Minecraft LEGO Animation
Minecraft LEGO brings one of the most popular lego Minecraft animation video games into the real world with authentic characters and features. Minecraft Lego animation videos are a limitless possibility to build play and display, and the perfect way to expand play is creative fun.
02Ninjago LEGO Animation
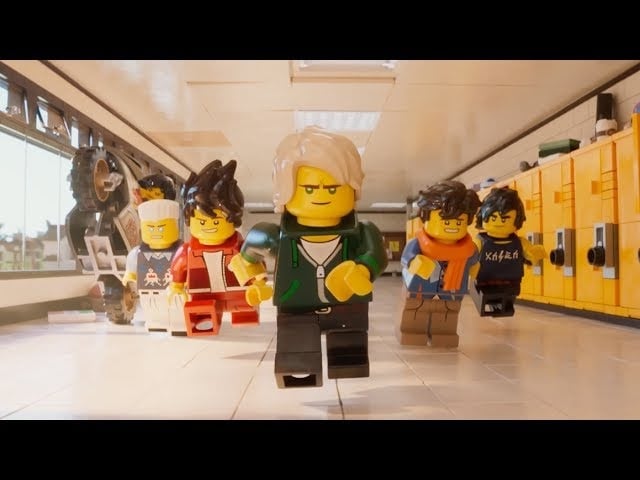
Ninjago LEGO is a cartoon Network series inspired by Japanese and Chinese culture and myths in a fictional world. The Lego Ninjago animation theme enjoyed popularity and success in the first and two years before planned discontinuation in 2013.
03Blender LEGO Animation

Blender LEGO is an add-on known as a bricker to convert a mesh into a real photo brick model. Bricker is a fun and stylish plugin for Lego blender animation with specific tools for designing alternative LEGO sets.
Part 4 Advanced LEGO Animation Tips for You
This section provides the top LEGO animation movies ranked in 20and also offer a guide on how to make a Lego star wars animation:
LEGO Animation Movies Ranked in 2022
01Battle of the Brick

This LEGO animation video follows the epic battle between blue and red and a recreation of the Zanzibar map of the halo franchise
02Lego Thriller

This video is from Berlin in Germany and uses LEGO as pixel instead of stop motion characters in the creation of fantastic effects
03Adventure Time Title in LEGO
This is a LEGO recreation of cartoon series that comprises stunning detail and complexity.
04Lego Cl!ck

This LEGO stop motion video shows what happens when ideas click and integrate human and non-human elements.
05Lego Arcade

This is a LEGO stop motion video that recreation classic arcade games.
Part 5 How to Make a LEGO Animation
Once the production stage is complete, it is time to move to the post-production stage in Filmora, where your LEGO animated stop motion video will get to its final form:
For Win 7 or later (64-bit)
For macOS 10.12 or later
01Step Arrange images
The first thing is to place all the images you want to use in the final production of the video into a folder. Then arrange them accordingly in the same ways they should appear in the video.
02Step Launch Software
Launch Filmora and click on create a new project and add the project you made to the Filmora media tab. Also, import all audio files you want to use in your project before doing any actual editing.
03Step Edit Media
Move to the File menu, click on the preferred option, and go to the edit tab to set the maximum duration of a photo in the video you are creating. The value you are inserting into the photo duration box is determined by the number of frames in your video.
Please note that Filmora does not allow you to reduce a video frame rate below 23.97FPS. Therefore if you want your LEGO animation to have frame-per-second, you should send the photo duration value to 00:00:04.
04Step Preview
After that, you can add your media access to the timeline and click on the Play button to preview the results. When satisfied with the results, you can export your LEGO animated video from Filmora.
● Key Takeaways from This Episode →
● Some of the best LEGO Animation makers
● LEGO animation maker for different devices
● Some of the critical tips for creating LEGO animation videos
● If you are a beginner in LEGO animation, this article completely breaks down everything. You learned about LEGO animation and the best LEGO animation software that you can use effectively. Some parts of the report also give ideas on some LEGO animation that you can copy while working on yours.
There are so many things to learn in creating a LEGO movie, including the software and stop motion animation. There are tons of Lego animation software data for beginners and professionals. Many beginners make classic mistakes in brickfilming, and as a result, they don’t get the most out of their effort.
Do you want to create a stop motion LEGO movie and determine the kind of tool you will have to apply to Lego city animation? Worry not, as this Lego animation tutorial will guide you through some more useful LEGO animation ideas for beginners and professionals. And, you will get to know how Lego animation videos and Lego ww2 animation goes hand in hand with the help of different Lego Animation Makers here under Lego animation class. In addition to that, some excellent Lego animation movie examples will give you a better idea of how Lego Animation works in reality.
In this article
01 [Best LEGO Animation Makers in 2022](#Part 1)
02 [Three Sharing of LEGO Animation Examples worth Learning from](#Part 2)
03 [Advanced LEGO Animation Tips for You](#Part 3)
Part 1 LEGO Animation Makers for Windows/Mac
01**Wondershare Filmora Video Editor **
Wondershare Filmora - Best Video Editor for Mac/Windows
5,481,435 people have downloaded it.
Build unique custom animations without breaking a sweat.
Focus on creating epic stories and leave the details to Filmora’s auto features.
Start a creative adventure with drag & drop effects and endless possibilities.
Filmora simplifies advanced features to save you time and effort.
Filmora cuts out repetition so you can move on to your next creative breakthrough.
Filmora Video Editor is the best LEGO stop motion movie maker available for windows and Mac and highly recommended video editing software. This software is suitable for making LEGO among us animation because of its exclusive features:
● LEGO stop-motion movies are done quickly on this software
● It uses the editing tools like cropping, trimming, combing, rotating, and splitting videos.
● It has various effects that you can use to style your video and make a masterpiece.
● It supports Windows (bits), and MacOs 10.(High Sierra), Mac OS 10.(Sierra), OS X 10.(El Capitan), OS X 10.(Yosemite)
● Your LEGO stop-motion movie can be directly online using this software.
02FrameByFrame
FrameByFrame is a free LEGO mouth animation maker available for Mac users. It is an introductory video creation program that uses a webcam to create stop motion. It is elementary to use, and you need to have cameras such as i-sight connected with your Mac device to take shots by pressing the camera button. This software displays what you took by the camera and the frame superimposed to create the stop motion movie. It is light, easy to use, and you can trim the unwanted parts if needed.
03Boinx iStopMotion
Boinx iStopMotion is a paid LEGO stop-motion movie-maker ideal for higher-level Mac devices. It can create a shot-by-shot sequence using stop motion and time-lapse. With the help of the menu, it is perfect for kids and features onion skinning. It allows you to create a LEGO movie from your imagination and creativity, which features overlay, zooming, blinking to make movement more visible, etc. After creating or using this software, you can export your video and enjoy it on your movie player.
04Stop Motion Pro Eclipse
Stop Motion Pro Eclipse is a paid video creation software available for Windows to help you create LEGO stop motion animation movies. It is highly compatible with many popular video webcams and cameras that can capture and paste pictures and turn them into lovely stories with animated characters. It allows you to play up to frames per second, and while you can lay back to stop moving animation, you can also record audio. It also allows you to plan and track the movement of the movie characters and Lego friends animation.
05IKITMovie
IKITMovie is a paid Lego animations 63movie maker for Windows devices that helps solve the problem of making good LEGO stop motion animation videos. It is easy to use in any age range and has thousands of background audio tracks. It is perfect for creating LEGO animation or clay motion by using the green screen feature to replace the original background of the video with still or moving images.
Part 2 LEGO Animation Makers for Android and iPhone
01Stop Motion Studio
Stop Motion Studio is best for iOS and Android devices equipped with a versatile set of animated stop-motion tools and Grant complete control over all camera settings. It allows you to create LEGO stop-motion animated movies instantly and anywhere using your mobile phone free of charge but requires in-app purchases if you would want to export your project in resolution or import pics into the app.
02Clayframes
Clayframes is the best LEGO stop motion app 4 Android devices to capture new footage or import images you want to use and arrange them the way you want. The eraser tool in the app allows you to remove objects you don’t want to keep in the shot and Rigs.
03iMotion
iMotion is available for iPad and iPhone users to create LEGO stop motion videos from an app. It’s has a Wi-Fi remote, photo library import mods, and time-lapse that you can choose the best to meet the demand of your project.
04Life Lapse Stop Motion Maker
Life Lapse Stop Motion Maker offers an all-in-one tool you need to edit and shoot a LEGO stop motion animation available on Android and iPhone devices. While shooting in LEGO stop motion video, you can focus on white balance and exposure lock ghosted image overlay, or time intervals.
05I Can Animate
I Can Animate is a straightforward app to create a LEGO stop motion video within a few steps and is available for Android and iOS devices. Post launching the app, you can click on Design, and a device camera will open to start creating your video.
Part 3 Three Sharing of LEGO Animation Examples worth Learning from
This section of the article will share three LEGO animation examples that are worth learning from:
01Minecraft LEGO Animation
Minecraft LEGO brings one of the most popular lego Minecraft animation video games into the real world with authentic characters and features. Minecraft Lego animation videos are a limitless possibility to build play and display, and the perfect way to expand play is creative fun.
02Ninjago LEGO Animation
Ninjago LEGO is a cartoon Network series inspired by Japanese and Chinese culture and myths in a fictional world. The Lego Ninjago animation theme enjoyed popularity and success in the first and two years before planned discontinuation in 2013.
03Blender LEGO Animation
Blender LEGO is an add-on known as a bricker to convert a mesh into a real photo brick model. Bricker is a fun and stylish plugin for Lego blender animation with specific tools for designing alternative LEGO sets.
Part 4 Advanced LEGO Animation Tips for You
This section provides the top LEGO animation movies ranked in 20and also offer a guide on how to make a Lego star wars animation:
LEGO Animation Movies Ranked in 2022
01Battle of the Brick
This LEGO animation video follows the epic battle between blue and red and a recreation of the Zanzibar map of the halo franchise
02Lego Thriller
This video is from Berlin in Germany and uses LEGO as pixel instead of stop motion characters in the creation of fantastic effects
03Adventure Time Title in LEGO
This is a LEGO recreation of cartoon series that comprises stunning detail and complexity.
04Lego Cl!ck
This LEGO stop motion video shows what happens when ideas click and integrate human and non-human elements.
05Lego Arcade
This is a LEGO stop motion video that recreation classic arcade games.
Part 5 How to Make a LEGO Animation
Once the production stage is complete, it is time to move to the post-production stage in Filmora, where your LEGO animated stop motion video will get to its final form:
For Win 7 or later (64-bit)
For macOS 10.12 or later
01Step Arrange images
The first thing is to place all the images you want to use in the final production of the video into a folder. Then arrange them accordingly in the same ways they should appear in the video.
02Step Launch Software
Launch Filmora and click on create a new project and add the project you made to the Filmora media tab. Also, import all audio files you want to use in your project before doing any actual editing.
03Step Edit Media
Move to the File menu, click on the preferred option, and go to the edit tab to set the maximum duration of a photo in the video you are creating. The value you are inserting into the photo duration box is determined by the number of frames in your video.
Please note that Filmora does not allow you to reduce a video frame rate below 23.97FPS. Therefore if you want your LEGO animation to have frame-per-second, you should send the photo duration value to 00:00:04.
04Step Preview
After that, you can add your media access to the timeline and click on the Play button to preview the results. When satisfied with the results, you can export your LEGO animated video from Filmora.
● Key Takeaways from This Episode →
● Some of the best LEGO Animation makers
● LEGO animation maker for different devices
● Some of the critical tips for creating LEGO animation videos
● If you are a beginner in LEGO animation, this article completely breaks down everything. You learned about LEGO animation and the best LEGO animation software that you can use effectively. Some parts of the report also give ideas on some LEGO animation that you can copy while working on yours.
How to Stop Animation From Looping in Unity
How to Stop Animation from Looping in Unity
An easy yet powerful editor
Numerous effects to choose from
Detailed tutorials provided by the official channel
Unity is an IDE interface all designed exclusively for game developers. However, you can do much more with Unity than game development. But, our main concern here is something else than this subject. You’re looking for easy tutorials on Unity stop animation!

And luckily, we’ve got you covered as we’ve briefly explained how to perform Unity stop animation from looping and the steps to make a smooth animation.
In this article
01 [What is Unity Used for?](#Part 1)
02 [How to Stop Animation Playing in Loop in Unity?](#Part 2)
03 [How to Smooth an Animation in Unity?](#Part 3)
Part 1 What is Unity Used for?
Unity is a software tool friendly to all the game developers out there. This tool is used by the large community of game developers to power and create their game development projects. And, the software is more of a professional means and not a simple pared-down ‘game builder .’Unity also offers one of the most significant inbuilt features like rendering, physics, and collision detection. Thus, one of the powerful aspects of Unity is that game developers need not go out of the box and create everything from scratch. Instead, they are available with the physics engine required to develop games quickly. Another robust feature of Unity is that it includes an excellent ‘Asset Store’ where developers can upload their creations and showcase them to the whole community. So, that’s Unity and its uses in a broader scope!
Before we take you through the next section, it’s important to mention that Unity is also known as cross-platform IDE, where IDE stands for ‘integrated development environment.’ So, it can be called more of an interface with access to all the tools and resources required to develop games.
Apart from the game development, Unity is known for other excellent usage purposes as:
● Simulations
● Animation
● Architectural Visualization
● Previsualization for Film
● Interactive Experiences
Among these features only, we’ll describe Unity stop animation from looping in detail.
Part 2 How to Stop Animation Playing in Loop in Unity?
As we said, we’ll describe to you the most accessible definition of how to stop Animation in Unity. Thus, there are simple steps that we’d like to define firsthand before explaining the whole procedure with an image-centric step-by-step guide.
So, those simple steps to stop motion animation in After Effects in the loop also go like below:
Step 1 Go to the Project tab and select Animation.
Step 2 Open the Inspector tab.
Step 3 Uncheck the checkbox Loop Time, and you’re good to go!
We’ll describe the same, i.e., Unity stop animation from looping through the step guide below.
In this guide, we’ll explain right from applying the Animation so that you’d understand better. So, let’s begin without any further ado!
01Step 1 Delete animation folder
We have already created an animation folder in the folder named as own Animation, so click that folder, click the animation folder, and then another folder along with as shown below. Hold the Shift key and click another folder. Then, right-click the Delete tab as depicted below.
Similarly, you can also delete the Animation if you wish.

02Step 2 Create an animation for the subject
Now, you may have different subjects. We’re creating Animation on Mobile Joystick for reference, as shown below.

Now, hit the Create tab on the Unity panel below. Then, proceed to save your Animation in the folder you’ve already created for the same.

03Step 3 Give positions to the animation
Firstly, hit the red-icon button used for recording, as shown below.

Give the position on the left side after you click the button. And, then, clicking almost near to 3you can give the position to the right-hand side as shown below.

Now, the animation has been set. You can see the animation from left to right if you click the Play button. So, here, you can see the results of infinite loop animation, which won’t stop.

You can follow two ways to stop this Animation in Unity from looping, and we’ll describe both methods below.
04Step 4 Stop animation Unity Way 1
Go to the animation folder where you’ve created the animation and click the New Animation icon as shown below.

Now, you have to uncheck the Loop Time tab on the top-right corner of the Unity panel.

05Step 5 Stop animation Unity Way 2
Alternatively, you can click the Animator tab on the top of the Unity panel and double-tap the New Animation button. Then, it will also delete or uncheck the loop time, as shown below.

These were all the steps to stop animation Unity.
Part 3 How to Smooth an Animation in Unity?
After done with Unity stop animation, it’s time to smooth your Unity animation. Again, we will describe it simply if you’re used to the Unity platform and then with a step guide with respective screenshots.
So, stay tuned until the end to reveal the easy steps of smoothing an animation in Unity.
Select the Dopesheet at the bottom of the animation window. Then, you need to switch to the ‘Curves’ view once you create your Animation in the Dopesheet. These animation curves help you accelerate and decelerate animations so that the movement and other things can stop and start smoothly.
So, let’s begin with the step guide tutorial on the same as follows:
For reference, take an example of a metronome object imported from Blender to Unity. Here, we’ve grouped all the pendulum objects under one rotation so that when we move the pendulum, it pivots to the correct point, as shown below.

01Add the animator
So, the first step begins with adding the Animator component to the parent object. You can do this by clicking the Add Component tab on the Unity panel’s left side, searching for Animator, and clicking the Animator.
You will also need a controller to control the animations. Go to your animation folder, right-click, and select Create> Animator Controller tab.

Let’s call or give it a name metronome animator as shown below.
Then, you need to drag this into your animator component. Again, you need to go to your animations folder, right-click, select Create> Animations tab.
Now, give this a name pendulum full swing.
02Open the animator tab
Now, open the animator tab, drag this pendulum swing animation to that panel, and double-tap the yellow-colored New Animation button.

03Create an animation
With the game object selected, the animated metronome pendulum, in this case, we’d like to animate the X component of the rotation. So, you need to click Add Property> Transform> Rotation tab and click the + sign on its right, as shown below.
Now, click the plus sign automatically to set two keyframes, one at the beginning and one at the end. Now, click on end select all, and then delete for now.

04Add keyframes to rotate the pendulum
With the first set of keyframes and the pendulum all way to the right, go halfway and change the rotation to the left on the left panel of Unity. Then, add another keyframe.

05Slow down the animation
As you can observe, the Animation of this pendulum is in a straight line and feels unnatural to the eyes. Thus, we’re required to smooth this Animation now! For this purpose, go to the Curves; you can see the pink properties of rotation as going from one side to another.

Now, you need to adjust these pink curves. Start by adding a key to one of its sides, as shown below. After that, it is all on you how slow or fasts you want these values to be.
Here, you’re all done smoothing the animation in Unity after learning the stop-animation Unity tutorial.
You can even stop motion animation on Photoshop with the above tutorial.
06Bonus Tip:
We want to introduce an excellent video editor software called Filmora Video Editor . It is from the house of Wondershare, a well-known software company worldwide.
Wondershare Filmora - Best Video Editor for Mac/Windows
5,481,435 people have downloaded it.
Build unique custom animations without breaking a sweat.
Focus on creating epic stories and leave the details to Filmora’s auto features.
Start a creative adventure with drag & drop effects and endless possibilities.
Filmora simplifies advanced features to save you time and effort.
Filmora cuts out repetition so you can move on to your next creative breakthrough.
With Filmora, you can easily add Animation and edit your videos to make them look world-class. The latest version and new updates are eye-candy and quick fix for beginner video editors.
So, please pay a visit to the Filmora website and check out its Mac and Windows version for free today.
● Key Takeaways from This Episode →
● Learning the concept and usage of Unity
● A tutorial on how to stop animation in Unity from looping
● A tutorial on how to smooth animation in Unity
● Introduction to Filmora, the top-most video editor software for beginners.
Unity is an IDE interface all designed exclusively for game developers. However, you can do much more with Unity than game development. But, our main concern here is something else than this subject. You’re looking for easy tutorials on Unity stop animation!
And luckily, we’ve got you covered as we’ve briefly explained how to perform Unity stop animation from looping and the steps to make a smooth animation.
In this article
01 [What is Unity Used for?](#Part 1)
02 [How to Stop Animation Playing in Loop in Unity?](#Part 2)
03 [How to Smooth an Animation in Unity?](#Part 3)
Part 1 What is Unity Used for?
Unity is a software tool friendly to all the game developers out there. This tool is used by the large community of game developers to power and create their game development projects. And, the software is more of a professional means and not a simple pared-down ‘game builder .’Unity also offers one of the most significant inbuilt features like rendering, physics, and collision detection. Thus, one of the powerful aspects of Unity is that game developers need not go out of the box and create everything from scratch. Instead, they are available with the physics engine required to develop games quickly. Another robust feature of Unity is that it includes an excellent ‘Asset Store’ where developers can upload their creations and showcase them to the whole community. So, that’s Unity and its uses in a broader scope!
Before we take you through the next section, it’s important to mention that Unity is also known as cross-platform IDE, where IDE stands for ‘integrated development environment.’ So, it can be called more of an interface with access to all the tools and resources required to develop games.
Apart from the game development, Unity is known for other excellent usage purposes as:
● Simulations
● Animation
● Architectural Visualization
● Previsualization for Film
● Interactive Experiences
Among these features only, we’ll describe Unity stop animation from looping in detail.
Part 2 How to Stop Animation Playing in Loop in Unity?
As we said, we’ll describe to you the most accessible definition of how to stop Animation in Unity. Thus, there are simple steps that we’d like to define firsthand before explaining the whole procedure with an image-centric step-by-step guide.
So, those simple steps to stop motion animation in After Effects in the loop also go like below:
Step 1 Go to the Project tab and select Animation.
Step 2 Open the Inspector tab.
Step 3 Uncheck the checkbox Loop Time, and you’re good to go!
We’ll describe the same, i.e., Unity stop animation from looping through the step guide below.
In this guide, we’ll explain right from applying the Animation so that you’d understand better. So, let’s begin without any further ado!
01Step 1 Delete animation folder
We have already created an animation folder in the folder named as own Animation, so click that folder, click the animation folder, and then another folder along with as shown below. Hold the Shift key and click another folder. Then, right-click the Delete tab as depicted below.
Similarly, you can also delete the Animation if you wish.
02Step 2 Create an animation for the subject
Now, you may have different subjects. We’re creating Animation on Mobile Joystick for reference, as shown below.
Now, hit the Create tab on the Unity panel below. Then, proceed to save your Animation in the folder you’ve already created for the same.
03Step 3 Give positions to the animation
Firstly, hit the red-icon button used for recording, as shown below.
Give the position on the left side after you click the button. And, then, clicking almost near to 3you can give the position to the right-hand side as shown below.
Now, the animation has been set. You can see the animation from left to right if you click the Play button. So, here, you can see the results of infinite loop animation, which won’t stop.
You can follow two ways to stop this Animation in Unity from looping, and we’ll describe both methods below.
04Step 4 Stop animation Unity Way 1
Go to the animation folder where you’ve created the animation and click the New Animation icon as shown below.
Now, you have to uncheck the Loop Time tab on the top-right corner of the Unity panel.
05Step 5 Stop animation Unity Way 2
Alternatively, you can click the Animator tab on the top of the Unity panel and double-tap the New Animation button. Then, it will also delete or uncheck the loop time, as shown below.
These were all the steps to stop animation Unity.
Part 3 How to Smooth an Animation in Unity?
After done with Unity stop animation, it’s time to smooth your Unity animation. Again, we will describe it simply if you’re used to the Unity platform and then with a step guide with respective screenshots.
So, stay tuned until the end to reveal the easy steps of smoothing an animation in Unity.
Select the Dopesheet at the bottom of the animation window. Then, you need to switch to the ‘Curves’ view once you create your Animation in the Dopesheet. These animation curves help you accelerate and decelerate animations so that the movement and other things can stop and start smoothly.
So, let’s begin with the step guide tutorial on the same as follows:
For reference, take an example of a metronome object imported from Blender to Unity. Here, we’ve grouped all the pendulum objects under one rotation so that when we move the pendulum, it pivots to the correct point, as shown below.
01Add the animator
So, the first step begins with adding the Animator component to the parent object. You can do this by clicking the Add Component tab on the Unity panel’s left side, searching for Animator, and clicking the Animator.
You will also need a controller to control the animations. Go to your animation folder, right-click, and select Create> Animator Controller tab.
Let’s call or give it a name metronome animator as shown below.
Then, you need to drag this into your animator component. Again, you need to go to your animations folder, right-click, select Create> Animations tab.
Now, give this a name pendulum full swing.
02Open the animator tab
Now, open the animator tab, drag this pendulum swing animation to that panel, and double-tap the yellow-colored New Animation button.
03Create an animation
With the game object selected, the animated metronome pendulum, in this case, we’d like to animate the X component of the rotation. So, you need to click Add Property> Transform> Rotation tab and click the + sign on its right, as shown below.
Now, click the plus sign automatically to set two keyframes, one at the beginning and one at the end. Now, click on end select all, and then delete for now.
04Add keyframes to rotate the pendulum
With the first set of keyframes and the pendulum all way to the right, go halfway and change the rotation to the left on the left panel of Unity. Then, add another keyframe.
05Slow down the animation
As you can observe, the Animation of this pendulum is in a straight line and feels unnatural to the eyes. Thus, we’re required to smooth this Animation now! For this purpose, go to the Curves; you can see the pink properties of rotation as going from one side to another.
Now, you need to adjust these pink curves. Start by adding a key to one of its sides, as shown below. After that, it is all on you how slow or fasts you want these values to be.
Here, you’re all done smoothing the animation in Unity after learning the stop-animation Unity tutorial.
You can even stop motion animation on Photoshop with the above tutorial.
06Bonus Tip:
We want to introduce an excellent video editor software called Filmora Video Editor . It is from the house of Wondershare, a well-known software company worldwide.
Wondershare Filmora - Best Video Editor for Mac/Windows
5,481,435 people have downloaded it.
Build unique custom animations without breaking a sweat.
Focus on creating epic stories and leave the details to Filmora’s auto features.
Start a creative adventure with drag & drop effects and endless possibilities.
Filmora simplifies advanced features to save you time and effort.
Filmora cuts out repetition so you can move on to your next creative breakthrough.
With Filmora, you can easily add Animation and edit your videos to make them look world-class. The latest version and new updates are eye-candy and quick fix for beginner video editors.
So, please pay a visit to the Filmora website and check out its Mac and Windows version for free today.
● Key Takeaways from This Episode →
● Learning the concept and usage of Unity
● A tutorial on how to stop animation in Unity from looping
● A tutorial on how to smooth animation in Unity
● Introduction to Filmora, the top-most video editor software for beginners.
10 Best Tools to Make Pic Collage for Windows
10 Best Tools to Make Pic Collage for Windows
An easy yet powerful editor
Numerous effects to choose from
Detailed tutorials provided by the official channel
Collages are a great way to assemble all your favorite pictures in one place. You can share these collages with your friends, relatives, and dear ones or can also use them for posting on social media sites and other online platforms. Though creating a collage may sound simple, a lot of considerations need to be taken for creating an interesting and eye-catchy collage, and for this, a help of a professional tool can be taken. In the following parts of the topic, you can learn about the best tools for photo collage Windows 10 and other OS.

In the following parts of the topic, you can learn about the best tools for photo collage Windows 10 and other OS.
In this article
01 [Top 10 Pic Collage for Windows Tools](#Part 1)
02 [The Best Tool to Get Stock Images for Creating Collages](#Part 2)
Part 1 Top 10 Pic Collage for Windows Tools
Checkout the best collage for Windows below.
01PhotoPad Photo Editing Software
This is a complete photo editing tool supporting an array of features including the creation of a photo collage. This software from NCH software can let you add the desired images manually and also support using the auto grid to add an unlimited number of pictures. The tool also lets you choose the collage orientation size and set the background as needed.
Pros:
● Create collage Windows manually or automatically.
● Allows adding a background color, image, or from the available background options.
● Spacing and corners between the images can be selected.
● The size of the tool is small.
Cons:
● Stickers and filters to individual images cannot be added.
● Cannot choose a custom collage size.

02PhotoScapeX
Available for download on Windows 10 and higher versions this is another widely used photo editing tool that can also let you create collages manually as well as automatically. Multiple frames are available that can be selected as desired and there are additional features like adding filters, and also edit them in multiple ways.
Pros:
● Allows creating collage manually and automatically.
● Multiple editing tools for customization like filters, crop, zoom, doodle, and more.
● Picture alignment can be done in 3 modes- vertical, horizontal, and tile.
● Option to change and customize image size, spacing, margin, and others.
Cons:
● Limited photos can be added.
● The size of the tool is large in comparison to other tools.

03Phototastic Collage
This is free to use Windows-based tool that can create impressive collages in no time. Multiple designs, frames, and other options are available to create a customized collage as needed.
Pros:
● Multiple customization options are available for creating the desired collage.
● User-friendly and simple interface.
● An array of templates is available.
Cons:
● The free version has limited features.
● Limitation to the number of images that can be added.
● Ads in the app.

04PicCollage
Unleash your creativity by creating an interesting collage using this excellent collage-making app. There are multiple templates and customization options supports.
Pros
● Create collage manually or automatically
● The earlier created collage can be edited.
● Allows creating a collage in 3 options- grid, template, freestyle.
Cons
● Watermark on the created collage.
● The image size cannot be customized.

05Collage Maker-Photo Grid and Montage
Using this free Windows tool, you can create an interesting photo collage or a free-styled montage as needed. A wide range of layouts and templates are available that can be further customized to get the desired collage.
Pros:
● Free Windows software.
● Come with multiple filters, layout, and editing tools.
● The user interface is easy.
● Preview option available.
Cons:
● Performance glitches due to bugs.
● Custom collage size cannot be set.
● Watermark on the collage.

06Fotor
If you are looking for a simple and basic collage-making tool, Fotor is the right choice. Collage in the grid, freestyle, and photo-stitch style can be created and basic customization features are supported.
Pros:
● Simple to use tool that is apt for beginners.
● Border can be changed from a solid color to a background.
Cons:
● Customization options are limited.
● Border and the image size cannot be changed.

07El Collagero
Just like its name, this is an interesting Windows-based tool for creating a collage of your choice. A wide range of options for customization is available that can let you edit the images, choose a template and then also edit the file.
Pros:
● A wide range of templates and designs for collages is available.
● Allows adding text, symbols, and other elements.
● Created collage can be shared on social media sites.
Cons:
● In comparison to other professional tools, the functions are limited.

08Atlantas Photo Collage Studio
This Windows-based tool will let you create collages of all types and for all occasions. You can choose from over 100 templates that best match your collage theme and image content.
Pros:
● More than 100 templates for collage designs are available.
● The size of the layout can be changed.
● Multiple editing and customization options are supported like zoom, opacity selection, and more.
Cons:
● Limitation of adding 45 images.
● For the advanced functions, need to subscribe to the paid version.

09PhotoJoiner
Using this Windows tool, pick up your favorite images and turn them into a beautiful collage with customized design and style.
Pros:
● A simple and basic tool for creating a collage.
● Created collage can be saved or shared to the social media site.
● Change the order of the images, margins, and other aspects.
Cons
● Collage templates are limited.
● Advanced features are missing.

1010. Blend Photo
To create a collage of images with a blending effect, this is the right tool to use. Available for download on the Windows system this tool lets you create collages telling interesting stories.
Pros:
● Simple and easy collage-making tool.
● Add blending effect to your collages.
● Over 50 custom shapes for image cropping are available along with the option for free-hand cropping.
● Multiple filters can be added.
Cons:
● Limited Editing and customization options.

Part 2 The Best Tool to Get Stock Images for Creating Collages
Several times, the captured and stored images may not fit in the collage theme you wish to create and, in such situations, you can use the stock images available online at several sites. One of the best tools where you can check out the images in different categories is Wondershare Filmora. This versatile software from Wondershare Filmora Video Editor is an advanced video editing tool that also has a huge collection of stock media including images.
Additionally, the split-screen feature of the software can be used for creating a video collage. Available for Windows and Mac systems, Wondershare Filmora will look after all your advanced video editing and customized requirements.
Wondershare Filmora - Best Video Editor for Mac/Windows
5,481,435 people have downloaded it.
Build unique custom animations without breaking a sweat.
Focus on creating epic stories and leave the details to Filmora’s auto features.
Start a creative adventure with drag & drop effects and endless possibilities.
Filmora simplifies advanced features to save you time and effort.
Filmora cuts out repetition so you can move on to your next creative breakthrough.
● Key Takeaways from This Episode →
● Collage-making tools help in creating an interesting and eye-catchy collage in a hassle-free manner.
●Several Windows-based tools are available for quick download.
●Wondershare Filmora is a great software to find a collection of stock images in different categories.
Collages are a great way to assemble all your favorite pictures in one place. You can share these collages with your friends, relatives, and dear ones or can also use them for posting on social media sites and other online platforms. Though creating a collage may sound simple, a lot of considerations need to be taken for creating an interesting and eye-catchy collage, and for this, a help of a professional tool can be taken. In the following parts of the topic, you can learn about the best tools for photo collage Windows 10 and other OS.
In the following parts of the topic, you can learn about the best tools for photo collage Windows 10 and other OS.
In this article
01 [Top 10 Pic Collage for Windows Tools](#Part 1)
02 [The Best Tool to Get Stock Images for Creating Collages](#Part 2)
Part 1 Top 10 Pic Collage for Windows Tools
Checkout the best collage for Windows below.
01PhotoPad Photo Editing Software
This is a complete photo editing tool supporting an array of features including the creation of a photo collage. This software from NCH software can let you add the desired images manually and also support using the auto grid to add an unlimited number of pictures. The tool also lets you choose the collage orientation size and set the background as needed.
Pros:
● Create collage Windows manually or automatically.
● Allows adding a background color, image, or from the available background options.
● Spacing and corners between the images can be selected.
● The size of the tool is small.
Cons:
● Stickers and filters to individual images cannot be added.
● Cannot choose a custom collage size.
02PhotoScapeX
Available for download on Windows 10 and higher versions this is another widely used photo editing tool that can also let you create collages manually as well as automatically. Multiple frames are available that can be selected as desired and there are additional features like adding filters, and also edit them in multiple ways.
Pros:
● Allows creating collage manually and automatically.
● Multiple editing tools for customization like filters, crop, zoom, doodle, and more.
● Picture alignment can be done in 3 modes- vertical, horizontal, and tile.
● Option to change and customize image size, spacing, margin, and others.
Cons:
● Limited photos can be added.
● The size of the tool is large in comparison to other tools.
03Phototastic Collage
This is free to use Windows-based tool that can create impressive collages in no time. Multiple designs, frames, and other options are available to create a customized collage as needed.
Pros:
● Multiple customization options are available for creating the desired collage.
● User-friendly and simple interface.
● An array of templates is available.
Cons:
● The free version has limited features.
● Limitation to the number of images that can be added.
● Ads in the app.
04PicCollage
Unleash your creativity by creating an interesting collage using this excellent collage-making app. There are multiple templates and customization options supports.
Pros
● Create collage manually or automatically
● The earlier created collage can be edited.
● Allows creating a collage in 3 options- grid, template, freestyle.
Cons
● Watermark on the created collage.
● The image size cannot be customized.
05Collage Maker-Photo Grid and Montage
Using this free Windows tool, you can create an interesting photo collage or a free-styled montage as needed. A wide range of layouts and templates are available that can be further customized to get the desired collage.
Pros:
● Free Windows software.
● Come with multiple filters, layout, and editing tools.
● The user interface is easy.
● Preview option available.
Cons:
● Performance glitches due to bugs.
● Custom collage size cannot be set.
● Watermark on the collage.
06Fotor
If you are looking for a simple and basic collage-making tool, Fotor is the right choice. Collage in the grid, freestyle, and photo-stitch style can be created and basic customization features are supported.
Pros:
● Simple to use tool that is apt for beginners.
● Border can be changed from a solid color to a background.
Cons:
● Customization options are limited.
● Border and the image size cannot be changed.
07El Collagero
Just like its name, this is an interesting Windows-based tool for creating a collage of your choice. A wide range of options for customization is available that can let you edit the images, choose a template and then also edit the file.
Pros:
● A wide range of templates and designs for collages is available.
● Allows adding text, symbols, and other elements.
● Created collage can be shared on social media sites.
Cons:
● In comparison to other professional tools, the functions are limited.
08Atlantas Photo Collage Studio
This Windows-based tool will let you create collages of all types and for all occasions. You can choose from over 100 templates that best match your collage theme and image content.
Pros:
● More than 100 templates for collage designs are available.
● The size of the layout can be changed.
● Multiple editing and customization options are supported like zoom, opacity selection, and more.
Cons:
● Limitation of adding 45 images.
● For the advanced functions, need to subscribe to the paid version.
09PhotoJoiner
Using this Windows tool, pick up your favorite images and turn them into a beautiful collage with customized design and style.
Pros:
● A simple and basic tool for creating a collage.
● Created collage can be saved or shared to the social media site.
● Change the order of the images, margins, and other aspects.
Cons
● Collage templates are limited.
● Advanced features are missing.
1010. Blend Photo
To create a collage of images with a blending effect, this is the right tool to use. Available for download on the Windows system this tool lets you create collages telling interesting stories.
Pros:
● Simple and easy collage-making tool.
● Add blending effect to your collages.
● Over 50 custom shapes for image cropping are available along with the option for free-hand cropping.
● Multiple filters can be added.
Cons:
● Limited Editing and customization options.
Part 2 The Best Tool to Get Stock Images for Creating Collages
Several times, the captured and stored images may not fit in the collage theme you wish to create and, in such situations, you can use the stock images available online at several sites. One of the best tools where you can check out the images in different categories is Wondershare Filmora. This versatile software from Wondershare Filmora Video Editor is an advanced video editing tool that also has a huge collection of stock media including images.
Additionally, the split-screen feature of the software can be used for creating a video collage. Available for Windows and Mac systems, Wondershare Filmora will look after all your advanced video editing and customized requirements.
Wondershare Filmora - Best Video Editor for Mac/Windows
5,481,435 people have downloaded it.
Build unique custom animations without breaking a sweat.
Focus on creating epic stories and leave the details to Filmora’s auto features.
Start a creative adventure with drag & drop effects and endless possibilities.
Filmora simplifies advanced features to save you time and effort.
Filmora cuts out repetition so you can move on to your next creative breakthrough.
● Key Takeaways from This Episode →
● Collage-making tools help in creating an interesting and eye-catchy collage in a hassle-free manner.
●Several Windows-based tools are available for quick download.
●Wondershare Filmora is a great software to find a collection of stock images in different categories.
5 Photoshop Alternatives to Animate Your Logo
5 Photoshop Alternatives to Animate Logo
An easy yet powerful editor
Numerous effects to choose from
Detailed tutorials provided by the official channel
Photoshop offers everything that you can use to create a high-quality animated logo and use it to maximize your brand visibility.
![]()
How can you animate your logo in Photoshop? For people who are not familiar with the photo editing tool, it’s always a bit challenging to get started with logo animation.
In this article
01 [Why Do You Need a Gif Logo](#Part 1)
02 [A Step-by-step Guide to Logo Animation in Photoshop](#Part 2)
03 [Most Effective Tactics to Animate Logo with These 5 Photoshop Alternatives](#Part 3)
Part 1 Why Do You Need a Gif Logo
Now, before we start with the guide to animate your logo in Photoshop, let’s first understand how an animation logo can help your brand. The truth is an animated logo has the desired uniqueness factor that’ll help your brand establish a strong digital presence. An animated logo will also set you apart in the crowd, considering other companies will be using simple one-dimensional logos.
Not to mention, you can also use an animated logo in your promotional videos and apply visual effects to enhance the overall production quality of the videos. In a nutshell, there are endless possibilities of using animated logos - all you have to do is unleash your creativity and animate a logo without any hassle.
Part 2 A Step-by-step Guide to Logo Animation in Photoshop
So, now that you know the top reasons why it’s important to use an animated logo, let’s start with the step-by-step guide to animate your logo in Photoshop. It’s worth understanding that animating a logo in Photoshop is not a challenging process. However, it may take a few minutes for you to get the job done because the process is quite time-consuming.
Step 1Open Adobe Photoshop
Open Adobe Photoshop on your computer. Click “File > Scripts” and then tap “Load Files into Stack”.
![]()
Step 2Browse
On the next screen, click “Browse” and load all the JPEG files that you want to use to animate the logo.
![]()
Step 3Timeline
Wait for pictures to load into Photoshop’s timeline. Then, click “Windows” and select “Timeline” from the drop-down menu.
![]()
Step 4Make Frames from Layers
Select all the layers and tap the little “Animation” icon. Click “Make Frames from Layers” to proceed further.
![]()
Step 5Adjust the time span
Select all the frames to adjust the time span for the animation.
Step 6Select looping options
Click on “Select Looping Options” and specify the number of times you want the animation to play itself in the loop.
![]()
Step 7Final export
Your GIF animation is ready for the final export. Simply click “File>Save for Web” and then choose the final output format to export the logo in GIF format.
Part 3 Most Effective Tactics to Animate Logo with These 4 Photoshop Alternatives
Even though Photoshop is a great software to create animated logos, it’s no secret that its complex UI might seem overwhelming for some users. If that’s the case, you can look for Photoshop alternatives and use them to animate your logo online. Here we have shared five of the best alternatives to Photoshop that offer all the essential tools to animate a logo with fewer complications. All these tools have an intuitive interface and allow users to create animated logos within a few minutes.
These Photoshop alternatives include:
01 Figma
![]()
Figma is undoubtedly one of the best editing tools that you can use to animate your logos for free. Even though the tool isn’t as feature-loaded as Photoshop, it’s still one of the best Photoshop alternatives you can use to create animated logos. The tool offers a user-friendly interface where everything you need is right on your screen. Since there aren’t too many hidden menus, you’ll find it quite easier to animate your logos in Figma. There are pre-installed animation templates and transitions that you can customize to meet your business requirements and accelerate the entire designing process.
Key Features:
● Intuitive User Interface
● Support for Team Collaboration
● Can be used for UX/UI designing too
Pros
Dedicated free version for one-time users
Perfect for Novice Designers
Can be used within a professional organization for advanced editing
Cons
You will not get all the features with the free model
If you are looking to design animated logos with keyframes, Figma may not be the right choice for the job
02 Canva
![]()
Canva is another popular online editing tool that’s designed to help users fulfill different editing needs right on their browsers. Whether you want to create a banner for an event or an animated logo for your website, Canva will help you get the job done in every situation.
Being a web-based tool, Canva supports cross-platform compatibility, which means you can access it on any device you want. There are even dedicated iOS and Android apps for Canva that’ll allow you to edit logos right on your smartphone. Basically, if you want to animate your logos online free, Canva is the most suitable solution. You can also use Canva if you are looking for a long-term logo maker.
Key Features:
●Cross-Platform Compatibility
●Thousands of built-in templates with customization support
●The media library gets updated regularly
Pros
All the basic features are available in the free version
One-account to access Canva on any device you want
Ideal for one-time use as well
Cons
When it comes to customization, Canva has limited features
You won’t find advanced editing options like Photoshop
03 Luminar
![]()
Luminar is a paid editing tool that comes with built-in AI support for high-quality editing. Basically, its AI feature can automatically analyze the pictures and suggest you with the best animation templates accordingly. While many users are skeptical about the AI-support, stay assured that it’ll prove to be helpful in 80% of the situations. And, even if you don’t like the suggested templates, you can always go back to the media library and pick a template by yourself.
With AI coming into the picture, Luminar instantly speeds up the entire editing process. You won’t have to spend several hours browsing through the template options. Simply select one of the suggested templates and you’ll be able to initiate the editing process instantly.
Key Features:
●An extensive built-in media library
●Dedicated AI support for precise editing
●Edit your RAW images and add logos easily
Pros
Luminar is an ideal choice for long-time users
Available for both Windows and macOS
Apply templates to multiple images with one click
Cons
With $99 price tag, Luminar is certainly expensive
In the beginning, you may find the user interface a bit overwhelming
04 Fotor
![]()
Fotor is also an online editing tool that can be used to animate your logos online for free. Being a simple online editor, you can’t expect Fotor to offer advanced editing features like some of the other tools we have mentioned in the list.
However, stay assured that when it comes to animating logos, Fotor has everything you’ll need to get the job done. The web-based tool offers 100,000 templates that are designed for different industries. You can choose any of these templates, customize them, and create bespoke animated logos for your brand.
Key Features:
● Different templates to choose from
● Easy drag-&-drop compatibility
● Ideal for first-time as well as professional users
Pros
Available for free
Perfect for social media managers
Customizable templates
Cons
Lacks advanced editing support
The premium version doesn’t have too many useful features
Key Takeaways from This Episode
● Animate your logo in Photoshop and make it visually appealing with 5-easy steps
● If you want to integrate your animated logo into a video, you can use Wondershare Filmora Pro to get the job done within a few minutes
● If you are a beginner, you can also use web-based editing tools to animate your logo online for free.
Also read:
- Updated In 2024, 26 Cool Anime Girl Names and Their Meanings
- New 10 Cartoon Characters That Should Top Your List
- Best 15 Female Anime Characters-Who Is Your Favorite?
- Updated 2024 Approved How to Make a Video a Live Photo
- Updated In 2024, 8 Blender 3D Animation Tutorials
- New In 2024, 5 Best Adobe Animate Courses & Classes | Beginners Complete Tutorial
- Updated 18 Best Tools and Services to Create Animated Videos for Business 2023
- Updated What Is the Best Collage Photo Grid Maker - Experts Choice
- Updated In 2024, Know All About Animated Business Logos and the Best Tools to Create One
- Updated How to Turn Yourself Into WhatsApp Cartoon for 2024
- New In 2024, Formula to Animate Photos From 10 Animate Pictures App
- 10 Caricature Makers to Turn Photo to Caricature Effects for 2024
- Make Creative Animation Videos for 2024
- Top 12 Video to GIF Converters High Quality to Check Out for 2024
- New 2024 Approved Creative Ways to Make iPhone Text GIF
- In 2024, The Secret Sauce for Making GIF Instagram Story More Aesthetic
- In 2024, Before You Learn 3D Animation Things You Should Know
- In 2024, Stunning Ideas About Creating Personalised WhatsApp GIF Sticker
- 2024 Approved Top 10 Online Animated Logo Makers Everyone Should Know
- New Top 12 Evil Cartoon Characters of All Time
- Top 10 Video to GIF Converters Top Picks
- 2024 Approved Beginner Tutorial on Making Unity 2D Animation
- DP Animation Maker Tutorial for Finding The Best Animated Profile Picture Maker
- Updated 2024 Approved How to Make Your Characters Interactive in Unity Animation Rigging
- 2024 Approved 12 Top Stop Motion Studios Worth Recommending
- Here Are Some Reliable Ways to Get Pokemon Go Friend Codes For OnePlus Ace 3 | Dr.fone
- Recommended Best Applications for Mirroring Your Realme 11 Pro Screen | Dr.fone
- How to Unlock Infinix Smart 8 Pro PIN Code/Pattern Lock/Password
- How to Mirror PC to Apple iPhone SE? | Dr.fone
- Here are Some Pro Tips for Pokemon Go PvP Battles On Motorola G24 Power | Dr.fone
- 5 Hassle-Free Solutions to Fake Location on Find My Friends Of Asus ROG Phone 7 | Dr.fone
- In 2024, 8 Best Apps for Screen Mirroring OnePlus Nord CE 3 Lite 5G PC | Dr.fone
- How To Upgrade or Downgrade Apple iPhone 12 Without Data Loss? | Dr.fone
- How to Update Apple iPhone 7 Plus without Losing Anything? | Dr.fone
- Fix App Not Available in Your Country Play Store Problem on Realme Narzo 60x 5G | Dr.fone
- In 2024, 9 Best Phone Monitoring Apps for Motorola Edge 40 Pro | Dr.fone
- How to Perform Hard Reset on Vivo X90S? | Dr.fone
- In 2024, How to Unlock Vivo Y78 5G Bootloader Easily
- Apply These Techniques to Improve How to Detect Fake GPS Location On Honor X9a | Dr.fone
- Guide on How To Change Your Apple ID Email Address On iPhone 12 Pro Max | Dr.fone
- In 2024, How To Use Special Features - Virtual Location On Apple iPhone 13 Pro Max? | Dr.fone
- Pokemon Go Error 12 Failed to Detect Location On Honor 90 Lite? | Dr.fone
- Title: New 2024 Approved How to Find & Make Animated Christmas GIFs?
- Author: Elon
- Created at : 2024-05-19 03:05:21
- Updated at : 2024-05-20 03:05:21
- Link: https://animation-videos.techidaily.com/new-2024-approved-how-to-find-and-make-animated-christmas-gifs/
- License: This work is licensed under CC BY-NC-SA 4.0.
