
:max_bytes(150000):strip_icc():format(webp)/GettyImages-1198110246-e12a30f2b10645edb984dc66113911c9.jpg)
New 2024 Approved How to Make an Animated Travel Map Video?
How to Make an Animated Travel Map Video?
How to Make an Animated Travel Map Video?

Benjamin Arango
Mar 27, 2024• Proven solutions
Animated travel map videos make it easy for the viewers to follow the routes from the source to destination locations right on the single screen. While the static maps would only allow the audience to see the markers from where the journey would start and is expected to end, the animated ones show the real-time movements and therefore look more interactive when viewed.
That said, here you will learn how to create an attractive and engaging animated travel map video using one of the easiest post-production applications, Wondershare Filmora, which is widely appreciated by amateurs and professionals throughout the globe. In another section, you will also learn about an alternative program that might be of some help in case you are more into online designing.
- Method 1: Make Animated Travel Map Videos with Location Video Maker - [Video Tutorial]
- Method 2: Make Interactive Animated Travel Map with Pictramap
- Method 3: Create Animated Travel Map Using Multidev
Method 1 Make Animated Travel Map Videos with Location Video Maker
The entire process of creating an animated travel map video in Wondershare’s Filmora is categorized into two parts, wherein the first part you will collect all the ingredients that are needed to get started, and in the second part you will actually make an animated map using the tools and features present in Filmora.
Watch a video tutorial to see how to make an animated map for a video:
For Win 7 or later (64-bit)
 Secure Download
For macOS 10.14 or later
Secure Download


Part 1: Prepare the Travel Map Materials
Following are the ingredients and the methods to collect them for animated travel map preparation:
Step 1: Get the Map
The first thing that you would need to prepare an animated map is an image of a realistic map. Thanks to Google and Microsoft, these things are now pretty easy to arrange. The process is given below:
- Launch your preferred web browser
- Type google.com in the address bar or the search box and hit Enter
- Scroll to zoom out so you can see the entire world map on one screen

- Type Snipping Tool in the Cortana search box present on the left side of the Taskbar
- Launch Snipping Tool, and use it to capture the screenshot of the map
Note: Snipping Tool is a built-in app in Windows 10 and is available for free. If you are using any other operating system, or have a different program to capture the screenshots, feel free to use it according to your convenience.
- Save the screenshot you captured as a JPG file on your PC
Step 2: Mark Out the Map Path
The next step in the process of preparing an animated travel map is to mark your route on it. To do so, you can use any of your preferred photo editing tools. However, to keep this illustration simple, Microsoft Paint is used here, and the method is given below:
- Right-click the screenshot you just captured
- Go to Open with on the context menu, and then click Paint from the submenu that appears
- Pick your preferred color from the pallet of the Paint interface. It is advisable to use an eye-catchy shade such as Red
- Use the Sphere shape tool to draw a circle over the source and destination locations on the map
- Use the Line tool to draw a line from the source point to the destination. Try giving the line a few turns to make it look realistic
- Go to File > Save As, and save the marked image with a different name
Note: Once this is done, you should have two image files of the map, i.e., one without the marks and one with it
Step 3: Download Some Travel Icons
Another important ingredient in an effective travel map animation is touring icons such as location marker image, a traveling medium symbol like a helicopter, airplane, car/bike (for short distances), etc. A couple of websites that offer royalty-free stock photos at absolutely no cost are listed below:
Note: Although the websites given above allow you to download and use their stock images and icons for free, you may need to give credits to the designers/creators of the symbols while using their objects. Therefore, you are suggested to check the Terms & Conditions and norms of usage of the elements before downloading and adding them to your projects.
Part 2: Make Animated Travel Map Videos with Filmora
After you have gathered all the necessary ingredients that are required to create a travel map animation, it is now time to get to work. The following instructions would guide you through the step-by-step process of preparing a decent and realistic animated travel map in Wondershare Filmora :
For Win 7 or later (64-bit)
Secure Download
For macOS 10.14 or later
Secure Download
Step 1: Import Ingredients to Filmora and Add Them to the Timeline
Launch the video editor on your computer, click anywhere inside the Media window at the upper-left area, and import all the images and icons that you collected earlier to program. Next, drag both the images of the map, i.e., with and without the marks to the Timeline, and ensure that they are of the same duration and are placed on the same track.

Note: Be sure to put the map without the marks first, and then the one with the marks. Also note that the images have the playback duration of 5 seconds in the Timeline by default, and this tenure can be reduced or increased by dragging the side handle of the media to the left or right respectively.
Step 2: Add Transition for Illusion of Route Appearance
Go to Transition from the standard toolbar at the top, locate the Erase Slide transition effect from the available presets, and place it in between the two image files that you earlier added to the Timeline. Next, click and drag either of the side handles of the transition to the end of the media clip. Notice how the other side of the effect is expanded in equal proportion.

Step 3: Preview and Export
Press the Spacebar on the keyboard to preview the video and see if the route appears as if it is being drawn on the map. Once the animation looks acceptable, click EXPORT from the top-center, go to the Local tab on the Export window, select MP4 from the formats list in the left, and click EXPORT from the bottom-right corner to export the current animation to MP4.
Step 4: Customize the Travel Map Media
Either start a new project and import the video of the map you exported in the previous step to the app and then to the Timeline, or remove the existing media from the Timeline in the same project, and add the exported video to it for convenience.

For Win 7 or later (64-bit)
Secure Download
For macOS 10.14 or later
Secure Download
Next, position the Skimmer (Playhead) a couple of frames before the one the route line appears and starts stretching from, and click the Split icon from the editing toolbar above the Timeline itself. Repeat this process for the other side of the media, i.e., position the Skimmer a couple of frames after the route line reaches the destination location, and click the Split icon again. Then remove the separated segments from both the sides by selecting them and pressing Delete on the keyboard, leaving only the portion where the animation is visible.

Optionally, right-click the media that is left behind in the Timeline, and go to Speed and Duration from the context menu. On the Custom Speed box, drag the Speed slider to the left to decrease the playback speed resulting in the increased duration of the media. Alternatively, you can manually enter a value in the Speed box to get precise tenure. Click OK when you are done.

Step 5: Add Animations to Travel Map
Right-click the media in the Timeline, and go to Add Animation from the context menu. Make sure that the Skimmer is on the first frame, and add several keyframes as explained below:
- Click Add to add the first keyframe

- Move a couple of frames further, and click Add one more time. Now, while you are on this second keyframe, use the Scale slider to zoom in to the map so the source location remains within focus.

- Next, move the Playhead further and add another keyframe a couple of frames before the route line hits the edge of the window.
- After this, move the Playhead again and position it where the route line reaches its destination location. Add another keyframe here as well, and move the map in the Preview window so the focus is now on the destination.
- Move the Playhead a few frames further, add another keyframe, and use the Scale slider to zoom a bit more into the map to make the entire animation look realistic. Click OK to save the changes.
Step 6: Add Icons and Titles, and Export the Project
Drag the image of the traveling medium to the Timeline, and place it on the frame the route line starts from. Make sure to place the image on the track above the map, and stretch it to the end so it remains visible throughout the animation. Next, use the method explained above to add keyframes to move the medium along with the route line from the source to the destination. Optionally, add the image of the location marker at the destination point, go to Transition, and add your preferred transition effect, preferably Dissolve, to the marker track in the Timeline so it looks as if it has appeared as the medium arrived the destination.
For Win 7 or later (64-bit)
Secure Download
For macOS 10.14 or later
Secure Download
Get back to the first frame in the Timeline, go to Titles on the standard toolbar, and add a title preset somewhere near the source location. Resize the text, change the format as needed, and add your preferred caption to it such as the start time, name, etc. Reduce the duration of the track so the title appears for a few frames, preferably before the map animation starts. Click OK when done. Repeat this process for the destination point as well.
Once everything is complete, click the Play button in the Preview window to review your work. If the video looks acceptable, click EXPORT from the top-center of the interface, and use the method explained earlier to export the animated travel map in your preferred format.
![]()
Method 2 How to Make Interactive Animated Travel Map with Pictramap
If you don’t want to install a dedicated animation software on your computer due to limited hardware resources or some other reason, there is an online solution called Pictramap to create a travel map animation using a web browser. The web app offers a lucrative interface that could be easily understood and worked with to produce an animated map for free.
The process to create an animated travel map with Pictramap is given below:
Step 1: Create a Project
Launch your favorite web browser, go to https://www.pictramap.com/ , click Create yours now, it’s free, and sign up to Pictramap using your preferred method. When you are on the Dashboard, enter a name in the field available under the My Projects section, and click Create to create a new project (the animated map).

Step 2: Define the Locations and Method of Commute
On the map, right-click the location you want to start your journey from, enter the name of the location or any other significant title, and click Add. Click the location marker, click the Travel Mode icon, and select your preferred mode of traveling. Repeat this process to mark the destination location as well.

Step 3: Preview the Animation
Click the View Animation button from the upper-right corner of the page to see the animated travel map.

Downsides of Using Pictramap to Create Animated Travel Map Video
Although Pictramap allows you to create a travel map animation with ease and extremely quickly, at the time of this writing, it offers no way of downloading the animation to your PC, and therefore it couldn’t be used in your projects.
If you are using Wondershare Filmora, you can use its built-in screen recording feature to record the animation that Pictramap plays, and then save the captured footage as MP4 or any other format on your computer. This video can then be imported to your projects for further uses.
![]()
A cross-platform for making videos anywhere for all creators

Why your video editing isn’t good enough? How about some creative inspo?
- 100 Million+ Users
- 150+ Countries and Regions
- 4 Million+ Social Media Followers
- 5 Million+ Stock Media for Use
* Secure Download

Method 3 How To Make Animated Travel Map Using Multidev
Multi.dev is still a new web-based application to build awesome animated maps, but it’s good! The application helps you create presentations about all your recent and previous trips. And the interface is also hassle-free.
So, follow this step-by-step guide to making animated maps with Multi.dev.
Step 1: Open Multi.dev
Visit Multi.dev from your internet browser.

Once the tool gets open, you will see a demo video. This example clip will have animated maps of different locations. So it is up to you whether to use the same example and edit the places you have been to or are planning to visit. Or, simply create a new animated map from scratch.
Step 2: Choose Your First Location
Take your mouse cursor on the left side of the application and type the first location in the search bar. As soon as you do it, you will see that the “travel arrow” will automatically begin from there. Likewise, type and select the next location through the search bar.
Once you type the location, you will see 8 travel modes, including airplane, bus, and train. You can select the same mode for all sites or a different mode for another place. Totally up to you!

Step 3: Select Map Themes
All your chosen places will be highlighted in the software’s minimalistic map.

Step 4: Download Map on Your Computer
If you’re happy with the animated map, click the “Create Video” button to save the animated map on your computer in a few minutes.


Contrarily, you can also share the animation by choosing the “Share Animation” option.
Conclusion
An animated travel map plays an important role to add a realistic touring effect to your motion picture projects. While you can use a web app like Pictramap to create such an animation online easily and for free, the limitations it comes along with might keep you from choosing this method.
Instead, you may want to get more inclined toward a dedicated post-production software like Wondershare Filmora that gives you full control over the process, and the freedom to choose your preferred format to export the animation to for independent usage.
For Win 7 or later (64-bit)
Secure Download
For macOS 10.14 or later
Secure Download
Benjamin Arango
Benjamin Arango is a writer and a lover of all things video.
Follow @Benjamin Arango
Benjamin Arango
Mar 27, 2024• Proven solutions
Animated travel map videos make it easy for the viewers to follow the routes from the source to destination locations right on the single screen. While the static maps would only allow the audience to see the markers from where the journey would start and is expected to end, the animated ones show the real-time movements and therefore look more interactive when viewed.
That said, here you will learn how to create an attractive and engaging animated travel map video using one of the easiest post-production applications, Wondershare Filmora, which is widely appreciated by amateurs and professionals throughout the globe. In another section, you will also learn about an alternative program that might be of some help in case you are more into online designing.
- Method 1: Make Animated Travel Map Videos with Location Video Maker - [Video Tutorial]
- Method 2: Make Interactive Animated Travel Map with Pictramap
- Method 3: Create Animated Travel Map Using Multidev
Method 1 Make Animated Travel Map Videos with Location Video Maker
The entire process of creating an animated travel map video in Wondershare’s Filmora is categorized into two parts, wherein the first part you will collect all the ingredients that are needed to get started, and in the second part you will actually make an animated map using the tools and features present in Filmora.
Watch a video tutorial to see how to make an animated map for a video:
For Win 7 or later (64-bit)
Secure Download
For macOS 10.14 or later
Secure Download
Part 1: Prepare the Travel Map Materials
Following are the ingredients and the methods to collect them for animated travel map preparation:
Step 1: Get the Map
The first thing that you would need to prepare an animated map is an image of a realistic map. Thanks to Google and Microsoft, these things are now pretty easy to arrange. The process is given below:
- Launch your preferred web browser
- Type google.com in the address bar or the search box and hit Enter
- Scroll to zoom out so you can see the entire world map on one screen
- Type Snipping Tool in the Cortana search box present on the left side of the Taskbar
- Launch Snipping Tool, and use it to capture the screenshot of the map
Note: Snipping Tool is a built-in app in Windows 10 and is available for free. If you are using any other operating system, or have a different program to capture the screenshots, feel free to use it according to your convenience.
- Save the screenshot you captured as a JPG file on your PC
Step 2: Mark Out the Map Path
The next step in the process of preparing an animated travel map is to mark your route on it. To do so, you can use any of your preferred photo editing tools. However, to keep this illustration simple, Microsoft Paint is used here, and the method is given below:
- Right-click the screenshot you just captured
- Go to Open with on the context menu, and then click Paint from the submenu that appears
- Pick your preferred color from the pallet of the Paint interface. It is advisable to use an eye-catchy shade such as Red
- Use the Sphere shape tool to draw a circle over the source and destination locations on the map
- Use the Line tool to draw a line from the source point to the destination. Try giving the line a few turns to make it look realistic
- Go to File > Save As, and save the marked image with a different name
Note: Once this is done, you should have two image files of the map, i.e., one without the marks and one with it
Step 3: Download Some Travel Icons
Another important ingredient in an effective travel map animation is touring icons such as location marker image, a traveling medium symbol like a helicopter, airplane, car/bike (for short distances), etc. A couple of websites that offer royalty-free stock photos at absolutely no cost are listed below:
Note: Although the websites given above allow you to download and use their stock images and icons for free, you may need to give credits to the designers/creators of the symbols while using their objects. Therefore, you are suggested to check the Terms & Conditions and norms of usage of the elements before downloading and adding them to your projects.
Part 2: Make Animated Travel Map Videos with Filmora
After you have gathered all the necessary ingredients that are required to create a travel map animation, it is now time to get to work. The following instructions would guide you through the step-by-step process of preparing a decent and realistic animated travel map in Wondershare Filmora :
For Win 7 or later (64-bit)
Secure Download
For macOS 10.14 or later
Secure Download
Step 1: Import Ingredients to Filmora and Add Them to the Timeline
Launch the video editor on your computer, click anywhere inside the Media window at the upper-left area, and import all the images and icons that you collected earlier to program. Next, drag both the images of the map, i.e., with and without the marks to the Timeline, and ensure that they are of the same duration and are placed on the same track.
Note: Be sure to put the map without the marks first, and then the one with the marks. Also note that the images have the playback duration of 5 seconds in the Timeline by default, and this tenure can be reduced or increased by dragging the side handle of the media to the left or right respectively.
Step 2: Add Transition for Illusion of Route Appearance
Go to Transition from the standard toolbar at the top, locate the Erase Slide transition effect from the available presets, and place it in between the two image files that you earlier added to the Timeline. Next, click and drag either of the side handles of the transition to the end of the media clip. Notice how the other side of the effect is expanded in equal proportion.
Step 3: Preview and Export
Press the Spacebar on the keyboard to preview the video and see if the route appears as if it is being drawn on the map. Once the animation looks acceptable, click EXPORT from the top-center, go to the Local tab on the Export window, select MP4 from the formats list in the left, and click EXPORT from the bottom-right corner to export the current animation to MP4.
Step 4: Customize the Travel Map Media
Either start a new project and import the video of the map you exported in the previous step to the app and then to the Timeline, or remove the existing media from the Timeline in the same project, and add the exported video to it for convenience.
For Win 7 or later (64-bit)
Secure Download
For macOS 10.14 or later
Secure Download
Next, position the Skimmer (Playhead) a couple of frames before the one the route line appears and starts stretching from, and click the Split icon from the editing toolbar above the Timeline itself. Repeat this process for the other side of the media, i.e., position the Skimmer a couple of frames after the route line reaches the destination location, and click the Split icon again. Then remove the separated segments from both the sides by selecting them and pressing Delete on the keyboard, leaving only the portion where the animation is visible.
Optionally, right-click the media that is left behind in the Timeline, and go to Speed and Duration from the context menu. On the Custom Speed box, drag the Speed slider to the left to decrease the playback speed resulting in the increased duration of the media. Alternatively, you can manually enter a value in the Speed box to get precise tenure. Click OK when you are done.
Step 5: Add Animations to Travel Map
Right-click the media in the Timeline, and go to Add Animation from the context menu. Make sure that the Skimmer is on the first frame, and add several keyframes as explained below:
- Click Add to add the first keyframe
- Move a couple of frames further, and click Add one more time. Now, while you are on this second keyframe, use the Scale slider to zoom in to the map so the source location remains within focus.
- Next, move the Playhead further and add another keyframe a couple of frames before the route line hits the edge of the window.
- After this, move the Playhead again and position it where the route line reaches its destination location. Add another keyframe here as well, and move the map in the Preview window so the focus is now on the destination.
- Move the Playhead a few frames further, add another keyframe, and use the Scale slider to zoom a bit more into the map to make the entire animation look realistic. Click OK to save the changes.
Step 6: Add Icons and Titles, and Export the Project
Drag the image of the traveling medium to the Timeline, and place it on the frame the route line starts from. Make sure to place the image on the track above the map, and stretch it to the end so it remains visible throughout the animation. Next, use the method explained above to add keyframes to move the medium along with the route line from the source to the destination. Optionally, add the image of the location marker at the destination point, go to Transition, and add your preferred transition effect, preferably Dissolve, to the marker track in the Timeline so it looks as if it has appeared as the medium arrived the destination.
For Win 7 or later (64-bit)
Secure Download
For macOS 10.14 or later
Secure Download
Get back to the first frame in the Timeline, go to Titles on the standard toolbar, and add a title preset somewhere near the source location. Resize the text, change the format as needed, and add your preferred caption to it such as the start time, name, etc. Reduce the duration of the track so the title appears for a few frames, preferably before the map animation starts. Click OK when done. Repeat this process for the destination point as well.
Once everything is complete, click the Play button in the Preview window to review your work. If the video looks acceptable, click EXPORT from the top-center of the interface, and use the method explained earlier to export the animated travel map in your preferred format.
![]()
Method 2 How to Make Interactive Animated Travel Map with Pictramap
If you don’t want to install a dedicated animation software on your computer due to limited hardware resources or some other reason, there is an online solution called Pictramap to create a travel map animation using a web browser. The web app offers a lucrative interface that could be easily understood and worked with to produce an animated map for free.
The process to create an animated travel map with Pictramap is given below:
Step 1: Create a Project
Launch your favorite web browser, go to https://www.pictramap.com/ , click Create yours now, it’s free, and sign up to Pictramap using your preferred method. When you are on the Dashboard, enter a name in the field available under the My Projects section, and click Create to create a new project (the animated map).
Step 2: Define the Locations and Method of Commute
On the map, right-click the location you want to start your journey from, enter the name of the location or any other significant title, and click Add. Click the location marker, click the Travel Mode icon, and select your preferred mode of traveling. Repeat this process to mark the destination location as well.
Step 3: Preview the Animation
Click the View Animation button from the upper-right corner of the page to see the animated travel map.
Downsides of Using Pictramap to Create Animated Travel Map Video
Although Pictramap allows you to create a travel map animation with ease and extremely quickly, at the time of this writing, it offers no way of downloading the animation to your PC, and therefore it couldn’t be used in your projects.
If you are using Wondershare Filmora, you can use its built-in screen recording feature to record the animation that Pictramap plays, and then save the captured footage as MP4 or any other format on your computer. This video can then be imported to your projects for further uses.
![]()
A cross-platform for making videos anywhere for all creators
Why your video editing isn’t good enough? How about some creative inspo?
- 100 Million+ Users
- 150+ Countries and Regions
- 4 Million+ Social Media Followers
- 5 Million+ Stock Media for Use
* Secure Download
Method 3 How To Make Animated Travel Map Using Multidev
Multi.dev is still a new web-based application to build awesome animated maps, but it’s good! The application helps you create presentations about all your recent and previous trips. And the interface is also hassle-free.
So, follow this step-by-step guide to making animated maps with Multi.dev.
Step 1: Open Multi.dev
Visit Multi.dev from your internet browser.
Once the tool gets open, you will see a demo video. This example clip will have animated maps of different locations. So it is up to you whether to use the same example and edit the places you have been to or are planning to visit. Or, simply create a new animated map from scratch.
Step 2: Choose Your First Location
Take your mouse cursor on the left side of the application and type the first location in the search bar. As soon as you do it, you will see that the “travel arrow” will automatically begin from there. Likewise, type and select the next location through the search bar.
Once you type the location, you will see 8 travel modes, including airplane, bus, and train. You can select the same mode for all sites or a different mode for another place. Totally up to you!
Step 3: Select Map Themes
All your chosen places will be highlighted in the software’s minimalistic map.
Step 4: Download Map on Your Computer
If you’re happy with the animated map, click the “Create Video” button to save the animated map on your computer in a few minutes.
Contrarily, you can also share the animation by choosing the “Share Animation” option.
Conclusion
An animated travel map plays an important role to add a realistic touring effect to your motion picture projects. While you can use a web app like Pictramap to create such an animation online easily and for free, the limitations it comes along with might keep you from choosing this method.
Instead, you may want to get more inclined toward a dedicated post-production software like Wondershare Filmora that gives you full control over the process, and the freedom to choose your preferred format to export the animation to for independent usage.
For Win 7 or later (64-bit)
Secure Download
For macOS 10.14 or later
Secure Download
Benjamin Arango
Benjamin Arango is a writer and a lover of all things video.
Follow @Benjamin Arango
How to Create Free Photo Collage Frame in Minutes?
How to Create Photo Collage Frame for Free in Minutes?
An easy yet powerful editor
Numerous effects to choose from
Detailed tutorials provided by the official channel
Decoration of pictures and collages can be done by making beautiful and stylish frames. A family picture or collage can be beautified by adding an attractive frame to it. Know about Best App for Photo Frames Online so you can create photo collages easily in minutes.
In this article
01 [How Do You Make a Collage Picture Frame?](#Part 1)
02 [What is the Best App for Photo Frames?](#Part 2)
Part 1 How Do You Make a Collage Picture Frame?
A beautiful collage without a stylish frame will not be attractive. When a family collage is accompanied by an artistic frame, it adds beauty to it and will be an attraction point for the visitors in the home. Wondering where to get it from? You can do it easily through some most popular apps. Yes, you can get your photo collage framed by yourself.

A wall can be decorated with collage picture frames by following just a few simple steps. Let’s begin with!!!
● Selection of the place where the collage frame is required to be hung: The place should be selected based on certain factors such as being easily approachable, proper lighting, and matching with the theme of the home. The place should be sufficient to add on some more picture frames in the future. The wall picture collage frames shall be created based on the room themes like kid’s room, living room, or bedroom. The position of the frames should be marked with tape so that the exact dimension can be known.
● 2. Select the online application to create frames: There are many applications available online that offer pictures collage frames. Choose one application as per the interest and explore it over the phone or desktop. There are various collage picture frame templates available at the application.
● 3. Uploading the pictures: Select the frame that is best for the picture. The frames shall be selected as per the size of the collage. Several pictures can be selected to make a collage and fix the frame. The frame style can be changed that suits best to the picture or collage. A family picture can be uploaded to create a beautiful and perfect size family photo frame collage.
● 4. Customization: The Photo Collage Frame can be even made better with customization over online applications. Text and style can be included in the frames to give it a better look. Grid frame for picture collage is also available which can be created that fits perfectly to the pictures.
● 5. A collage photo frame is ready to hang on the wall & share: The photo collage with frame can be downloaded from the application. A beautiful picture frame collage wall can be hung in the living room or can be shared online with family and friends to print the same. More frames can be added in the future by choosing the same theme and customization.
Part 2 Part2 what is the Best App for Photo Frames?
Selecting the best App for a photo frame enhances the appearance of any ordinary picture. Some of the top Applications used for frame collage wall are as mentioned:

02 PhotoDirector
This app is popular due to its great AI tools, attractive picture effects, and advanced color control. It has a massive collection of frames that fits perfectly for a single picture as well as a collage. The style options of frames available on the app are classic, modern, and whimsical. Animation and glitch effects add an extra feature to this app.
Pros:
1. Wide range of frames is available.
2. It is easy to use as it can work on Android, iOS, macOS, and Windows devices.
3. Free version is available and photo frames can be shared over social media platforms.
Cons:
1. a Large number of editing options makes it confusing.
2. Fewer features are available.
3. Difficulty in finding plug-in features.

03PicsArt-Our Choice
PicsArt-Our Choice app is having a good combination best photo frames and multi-functional photo editing tools. Clip art, text option, frame editing, and making attractive collages make this app a masterpiece. This app can be used over smartphones and the pictures can be easily shared over social media platforms.
Pros:
1. Availability of tools to make clipart and collages.
2. Option to edit frames and objects.
3. Fully packed with a lot of stickers, frames, and filter options.
Cons:
1. The processing of images is slower.
2. Frequent ads disturb the process of editing and frame creation.
3. The application requires more space on downloading over the phone

04 PicFrame
This application has features to combine multiple pictures in one frame and the created frames can be easily shared over social media platforms. A great artwork can be done by using advanced tools such as filters, attractive frames, and drawing tools. The adjustable photo effects, background patterns and fully customized frames allow creating some attractive pictures and collage frame design.
Pros:
1. Option to save pictures in different resolutions.
2. Great tools for reshaping pictures and wide frame patterns
3. Work also on iPhone and iPad.
Cons:
1. With more new and advanced apps, it has become slightly outdated.
2. It closes very frequently, so sometimes work done on the application is lost.
3. Time to create frames is longer.

05Photo Grid
Photo Grid is an App that offers great photo editing features with more than three hundred layouts to give an attractive look to a picture. The users can transform their various pictures into beautiful collages. Filters, stickers, makeup tools, animated emoticons, and customized background features have made this app a bit popular. Extra pages can be added and the Lightbox feature makes it good for presentation.
Pros:
1. Massive collection of photo frames with customized features
2. Easy to use.
3. Various photo editing option
Cons:
1. It comes with various ads that trouble making frames and collages.
2. Lot of flexibility is not there regarding making videos with pictures.
3. Own frames cannot be created.

06ImgLabs
ImgLabs is one of the best applications to decorate photos and add creativity to them. Easy editing, beautify and stickers can be done over pictures and can be easily shared over Instagram and Facebook. More than twenty images can be added along with beautiful frames through this app. Cool photo filters, drawing tools, collage photo frame design tools, and texture effects make it a great photo frame application.
Pros:
1. The Android and iOS versions of the app are easy to use.
2. Attractive blurring and background effects give an attractive look to the images and picture frames.
3. Well-developed photo editing tools are available.
Cons:
1. The frames available are less as compared to other photo & frame editing applications.
2. Difference in functions is noticed in iOS and Android apps.
3. Installation issues in photo edit and stickers

So, these were some of the applications that offer to make some creative photo edits, collages, and frames. Turning to high definition of pictures and frames, most of the applications are coming up with new and advanced features to give the best picture experience to people. One of the applications which any creative person loves to use is Filmora.
****Wondershare Filmora Video Editor ** that creates attractive and professional quality videos for both business and personal purposes. It transforms the video by adding various stylish effects. One can edit the clips, add watermarks, and can adjust the brightness of the videos in simple steps. A wide range of stickers, animated texts, sound effects, filters, and inserting colorful borders over videos make it a great app.
For Win 7 or later (64-bit)
For macOS 10.12 or later
The videos can be made in different file formats such as mp4, wmv, avi, gif, and mp3 and can be easily shared over social media platforms. This app has great importance for business as it offers various facilities such as Multi-channel marketing, social advertising, and social promotion. It is good for user and brand management also.
So, making any video from pictures or movies through Filmora app will be an amazing idea. With advanced texting, color tuning, and 3D effects, one can be so creative. Even Filmora can be used to create video projects.
● Key Takeaways from This Episode →
● Simple pictures or collages can be taken to next level by adding alluring frames to them. With advanced drawing tools, pictures, and light effects, a stylish collage photo frame design can be created online. It allows bringing so many memories of people in one beautiful frame.
● Photo frame collage wall can be created over many applications. There are Android applications that offer many advanced features required to give a fine touch to the pictures, collages, and frames. They can be used and frames for family pictures can be made easily by following simple steps.
● he selection of the application should be made based on the several options available with the app. For example, an app that has easy to use, is good for all devices, has great editing features, eye-catching eye work and mesmerizing effect shall be preferred.
● So, try some amazing and advanced online Apps to create beautiful picture frames for you and your family now!!!
Decoration of pictures and collages can be done by making beautiful and stylish frames. A family picture or collage can be beautified by adding an attractive frame to it. Know about Best App for Photo Frames Online so you can create photo collages easily in minutes.
In this article
01 [How Do You Make a Collage Picture Frame?](#Part 1)
02 [What is the Best App for Photo Frames?](#Part 2)
Part 1 How Do You Make a Collage Picture Frame?
A beautiful collage without a stylish frame will not be attractive. When a family collage is accompanied by an artistic frame, it adds beauty to it and will be an attraction point for the visitors in the home. Wondering where to get it from? You can do it easily through some most popular apps. Yes, you can get your photo collage framed by yourself.
A wall can be decorated with collage picture frames by following just a few simple steps. Let’s begin with!!!
● Selection of the place where the collage frame is required to be hung: The place should be selected based on certain factors such as being easily approachable, proper lighting, and matching with the theme of the home. The place should be sufficient to add on some more picture frames in the future. The wall picture collage frames shall be created based on the room themes like kid’s room, living room, or bedroom. The position of the frames should be marked with tape so that the exact dimension can be known.
● 2. Select the online application to create frames: There are many applications available online that offer pictures collage frames. Choose one application as per the interest and explore it over the phone or desktop. There are various collage picture frame templates available at the application.
● 3. Uploading the pictures: Select the frame that is best for the picture. The frames shall be selected as per the size of the collage. Several pictures can be selected to make a collage and fix the frame. The frame style can be changed that suits best to the picture or collage. A family picture can be uploaded to create a beautiful and perfect size family photo frame collage.
● 4. Customization: The Photo Collage Frame can be even made better with customization over online applications. Text and style can be included in the frames to give it a better look. Grid frame for picture collage is also available which can be created that fits perfectly to the pictures.
● 5. A collage photo frame is ready to hang on the wall & share: The photo collage with frame can be downloaded from the application. A beautiful picture frame collage wall can be hung in the living room or can be shared online with family and friends to print the same. More frames can be added in the future by choosing the same theme and customization.
Part 2 Part2 what is the Best App for Photo Frames?
Selecting the best App for a photo frame enhances the appearance of any ordinary picture. Some of the top Applications used for frame collage wall are as mentioned:
02 PhotoDirector
This app is popular due to its great AI tools, attractive picture effects, and advanced color control. It has a massive collection of frames that fits perfectly for a single picture as well as a collage. The style options of frames available on the app are classic, modern, and whimsical. Animation and glitch effects add an extra feature to this app.
Pros:
1. Wide range of frames is available.
2. It is easy to use as it can work on Android, iOS, macOS, and Windows devices.
3. Free version is available and photo frames can be shared over social media platforms.
Cons:
1. a Large number of editing options makes it confusing.
2. Fewer features are available.
3. Difficulty in finding plug-in features.
03PicsArt-Our Choice
PicsArt-Our Choice app is having a good combination best photo frames and multi-functional photo editing tools. Clip art, text option, frame editing, and making attractive collages make this app a masterpiece. This app can be used over smartphones and the pictures can be easily shared over social media platforms.
Pros:
1. Availability of tools to make clipart and collages.
2. Option to edit frames and objects.
3. Fully packed with a lot of stickers, frames, and filter options.
Cons:
1. The processing of images is slower.
2. Frequent ads disturb the process of editing and frame creation.
3. The application requires more space on downloading over the phone
04 PicFrame
This application has features to combine multiple pictures in one frame and the created frames can be easily shared over social media platforms. A great artwork can be done by using advanced tools such as filters, attractive frames, and drawing tools. The adjustable photo effects, background patterns and fully customized frames allow creating some attractive pictures and collage frame design.
Pros:
1. Option to save pictures in different resolutions.
2. Great tools for reshaping pictures and wide frame patterns
3. Work also on iPhone and iPad.
Cons:
1. With more new and advanced apps, it has become slightly outdated.
2. It closes very frequently, so sometimes work done on the application is lost.
3. Time to create frames is longer.
05Photo Grid
Photo Grid is an App that offers great photo editing features with more than three hundred layouts to give an attractive look to a picture. The users can transform their various pictures into beautiful collages. Filters, stickers, makeup tools, animated emoticons, and customized background features have made this app a bit popular. Extra pages can be added and the Lightbox feature makes it good for presentation.
Pros:
1. Massive collection of photo frames with customized features
2. Easy to use.
3. Various photo editing option
Cons:
1. It comes with various ads that trouble making frames and collages.
2. Lot of flexibility is not there regarding making videos with pictures.
3. Own frames cannot be created.
06ImgLabs
ImgLabs is one of the best applications to decorate photos and add creativity to them. Easy editing, beautify and stickers can be done over pictures and can be easily shared over Instagram and Facebook. More than twenty images can be added along with beautiful frames through this app. Cool photo filters, drawing tools, collage photo frame design tools, and texture effects make it a great photo frame application.
Pros:
1. The Android and iOS versions of the app are easy to use.
2. Attractive blurring and background effects give an attractive look to the images and picture frames.
3. Well-developed photo editing tools are available.
Cons:
1. The frames available are less as compared to other photo & frame editing applications.
2. Difference in functions is noticed in iOS and Android apps.
3. Installation issues in photo edit and stickers
So, these were some of the applications that offer to make some creative photo edits, collages, and frames. Turning to high definition of pictures and frames, most of the applications are coming up with new and advanced features to give the best picture experience to people. One of the applications which any creative person loves to use is Filmora.
****Wondershare Filmora Video Editor ** that creates attractive and professional quality videos for both business and personal purposes. It transforms the video by adding various stylish effects. One can edit the clips, add watermarks, and can adjust the brightness of the videos in simple steps. A wide range of stickers, animated texts, sound effects, filters, and inserting colorful borders over videos make it a great app.
For Win 7 or later (64-bit)
For macOS 10.12 or later
The videos can be made in different file formats such as mp4, wmv, avi, gif, and mp3 and can be easily shared over social media platforms. This app has great importance for business as it offers various facilities such as Multi-channel marketing, social advertising, and social promotion. It is good for user and brand management also.
So, making any video from pictures or movies through Filmora app will be an amazing idea. With advanced texting, color tuning, and 3D effects, one can be so creative. Even Filmora can be used to create video projects.
● Key Takeaways from This Episode →
● Simple pictures or collages can be taken to next level by adding alluring frames to them. With advanced drawing tools, pictures, and light effects, a stylish collage photo frame design can be created online. It allows bringing so many memories of people in one beautiful frame.
● Photo frame collage wall can be created over many applications. There are Android applications that offer many advanced features required to give a fine touch to the pictures, collages, and frames. They can be used and frames for family pictures can be made easily by following simple steps.
● he selection of the application should be made based on the several options available with the app. For example, an app that has easy to use, is good for all devices, has great editing features, eye-catching eye work and mesmerizing effect shall be preferred.
● So, try some amazing and advanced online Apps to create beautiful picture frames for you and your family now!!!
10 Realistic Cartoon Characters You Would Run Away From if You Met in Real Life
10 Realistic Cartoon Characters You Would Run Away From if You Met in Real Life
An easy yet powerful editor
Numerous effects to choose from
Detailed tutorials provided by the official channel
Remember watching a cartoon reality show on the Cartoon Network? We all grew up watching cartoons. Cartoons are an unforgettable part of our childhood. But have you ever wondered what would your favorite cartoon characters look like in real life? Many cartoon characters like Popeye, Sponge Bob, Mickey Mouse, etc. look funny in their 2D images. Watching them do funny things and their funny expressions have always been fun.
But with the advancement in technology and the passage of time, we have some digital artists like Tatiana and Miguel Vasquez, who have recreated your famous cartoon characters into 3D. They have given them a realistic look that will scare you. These realistic cartoon faces will blow your mind.
In this article
01 [What’s a Realistic Cartoon?](#Part 1)
02 [10 Realistic Cartoon Characters You Would Run Away From If You Met In Real Life](#Part 2)
03 [How Do Cartoon Characters Reimagined As Realistic 3D Animation](#Part 3)
Part 1 What’s Realistic Cartoon?
Before moving towards the list of realistic cartoon characters, you must first know what a realistic cartoon is. As we all know, any animated drawing or illustration is a cartoon, it can either be non-realistic or semi-realistic. Earlier artists used to draw these cartoon characters on paper, but now technology has evolved.
With the introduction of different AI tools, many digital artists have recreated 3D versions of your favorite cartoon characters. These 3D versions of different cartoons are known as realistic cartoons. This can be done easily with help of AI technology and Digital Software.
Part 2 Realistic Cartoon Characters You Would Run Away From If You Met In Real Life
Have you ever thought how would your favorite cartoon character sponge bob looks like in real life? We will show you realistic versions of your favorite cartoon characters. Stay tuned for great fun waiting for you in this article!
01Sponge Bob (Sponge Bob Square Pants)
Sponge Bob Square Pants is an animated series full of fun and comedy. This show currently runs on Nickelodeon. Sponge Bob is a yellow-colored sea sponge and the main protagonist of the show. He is a cook at a restaurant named Krusty Krab. He often goes on adventures with his best friend Patrick Star. He mainly focuses on and aims at getting a boat-driving license from Mr. Puff’s boating school.
Have a look at the 3D recreation of this funny creature.
02Sid the Sloth (Ice Age)
Ice Age is one of the most popular animated series that revolves around the lives of a mammoth, tiger, sloth, and a scrat. A scrat is a combination of a squirrel and a rat. This series became so popular among the children that it was even nominated for an Oscar award.
It has a character called Sid. He is an abandoned sloth. His mother left him for some good to happen with him during the migration. His character in the entire series exhibits a friendly and carefree nature. Sometimes, he also acts as dumb and naïve.
Look at the funny recreation of this dumb-witted character. Does this recreation scare you?
03Mr. Krabs (Sponge Bob Square Pants)
Sponge Bob Square Pants is one of the cartoons that have many different and funny-looking creatures. Mr. Krabs is one of those characters. He is a money-minded and miserly creature. He is the owner of the Krusty Krab fast food restaurant, where Sponge Bob works as a cook. He has a teenage daughter named Pearl and he can do anything to see her happy. He exhibits romantic feelings for Mrs. Puff.
Does this funny creature from the Sponge Bob series look funny in real life too?

04Patrick Star (Sponge Bob Square Pants)
Patrick Star is again a character from the cartoon show Sponge Bob Square Pants. He is the best friend of the main protagonist Sponge Bob, who lives 2 houses away from Sponge Bob’s house. He is a lazy, fat, and stupid pink-colored starfish. His character makes the show funnier and more interesting for kids.
How would you react when you will see this funny creature from Sponge Bob in real life? His 3D recreation seems a bit scary like a monster in real life.
05Plankton (Sponge Bob Square Pants)
Plankton was once the best friend of Mr. Krabs but now they both share a rivalry bond. He is married to Karen and owns a fast food restaurant named Chum Bucket Restaurant in competition with Mr. Krabs’ Restaurant. He plays the antagonist character in the series. His restaurant doesn’t work as successfully as Krusty Krab Restaurant. In rivalry, he often comes up with different plans and tricks to outwit Mr. Krabs and steal the secret recipe of his famous Krabby Patty Burger, but never succeeds.
Have a look at the 3D recreation of this funny character from the series.
06Homer (The Simpsons)
The Simpsons is an animated series that revolves around the life of an American family. The Simpson family has five members named Homer, Marge, Bart, Lisa, and Maggie. Homer Simpson is the main character of this series. He lives in Springfield and is employed as a Safety Inspector at Springfield Nuclear Power Plant. He is married to Marge and is the father of three children – Bart, Lisa, and Maggie. The series depicts a strong bond of love and care for each other in the family.
Have a look at this realistic 3D recreation of Homer Simpson.
07Bugs Bunny (Looney Tunes)
Looney Tunes is entertaining people of all ages due to its great and funny characters. Bugs Bunny is one of our favorite characters from the animated cartoon show Looney Tunes. He is the main protagonist and the most popular character of the series. Kids love him the most because of his mischievous acts in the show. He looks too funny with a mouth filled with carrots and wearing funny costumes. This unique character has a great fan following all over the world.
The 3D recreation of this famous cartoon character is funny and scary at the same time.
08Sally (The Nightmare Before Christmas)
As the name suggests, The Nightmare Before Christmas is an American dark fantasy animated movie. This animated movie has received great financial success and appreciation for its wonderful characters and music.
Sally is a shy ragdoll created by a scientist Doctor Finkelstein. She secretly loves Jack – the main Protagonist of the movie. She tells him not to mix the preparation of Christmas with the Halloween party.
Look at her realistic 3D recreation by Tatiana, popularly known as TatiMoons.

09Stitch (Lilo and Stitch)
Lilo and Stitch is also an animated American movie. It is a science fiction and comedy movie that attracts the interest of people of all age groups. The story of this animated movie revolves around the two main characters named Lilo and Stitch. Lilo is a 7-year old orphan girl whose parents died in a car accident. She has a pet named Stitch.
The original name of Stitch is Experiment 626. He was illegally created by a scientist Jumba Jokiba through a genetic experiment. Lilo adopts him thinking that he is an innocent creature, she doesn’t know about his birth and origin.
Have a look at this realistic 3D recreation of Stitch’s character. Isn’t it scary?

10 Popeye (Popeye – The Sailor Man)
Popeye – The Sailor Man is another famous cartoon series. Popeye is the main protagonist of this series. He has a girlfriend named Olive Oyl. This series depicts the love triangle between Popeye, Olive, and Bluto. He is an uneducated sailor man who gets energy by eating spinach. He often comes up with non-realistic solutions to different problems and helps the police by investigating different cases. He has a versatile tobacco smoking pipe that sometimes acts as a whistle, and he even intakes the spinach through his pipe.
In the cartoon films, he looks funny, but this 3D recreation of his character is a bit scary.

Part 2 How Do Cartoon Characters Reimagined As Realistic 3D Animation
Nowadays, it has become easier to create and turn your imagination into a cartoon character with different online 3D animators. This makes storytelling easier and funny and it is a great way to engage children. Out of all the 3D animation tools, Filmora will assist you to create the best 3D version of your favorite cartoon character.
Filmora has various smart features that help you to turn any image into realistic 3D animation. You can create great animations using Wondershare Filmora Video Editor within a couple of hours. It offers you many different features that help in convenient customization.
● Ending Thoughts →
● Being a cartoon lover, we hope that you would have liked the 3D recreation of your favorite cartoons. Some of these 3D recreations are so scary that you would just run away from them in real life and some look like real monster cartoons.
● AI combined with digital software like Filmora makes it easier to create these 3D versions of famous cartoon characters.
● With Filmora, you don’t need to spend hours sketching cartoon characters on paper. You can easily create great and realistic animations digitally.
Remember watching a cartoon reality show on the Cartoon Network? We all grew up watching cartoons. Cartoons are an unforgettable part of our childhood. But have you ever wondered what would your favorite cartoon characters look like in real life? Many cartoon characters like Popeye, Sponge Bob, Mickey Mouse, etc. look funny in their 2D images. Watching them do funny things and their funny expressions have always been fun.
But with the advancement in technology and the passage of time, we have some digital artists like Tatiana and Miguel Vasquez, who have recreated your famous cartoon characters into 3D. They have given them a realistic look that will scare you. These realistic cartoon faces will blow your mind.
In this article
01 [What’s a Realistic Cartoon?](#Part 1)
02 [10 Realistic Cartoon Characters You Would Run Away From If You Met In Real Life](#Part 2)
03 [How Do Cartoon Characters Reimagined As Realistic 3D Animation](#Part 3)
Part 1 What’s Realistic Cartoon?
Before moving towards the list of realistic cartoon characters, you must first know what a realistic cartoon is. As we all know, any animated drawing or illustration is a cartoon, it can either be non-realistic or semi-realistic. Earlier artists used to draw these cartoon characters on paper, but now technology has evolved.
With the introduction of different AI tools, many digital artists have recreated 3D versions of your favorite cartoon characters. These 3D versions of different cartoons are known as realistic cartoons. This can be done easily with help of AI technology and Digital Software.
Part 2 Realistic Cartoon Characters You Would Run Away From If You Met In Real Life
Have you ever thought how would your favorite cartoon character sponge bob looks like in real life? We will show you realistic versions of your favorite cartoon characters. Stay tuned for great fun waiting for you in this article!
01Sponge Bob (Sponge Bob Square Pants)
Sponge Bob Square Pants is an animated series full of fun and comedy. This show currently runs on Nickelodeon. Sponge Bob is a yellow-colored sea sponge and the main protagonist of the show. He is a cook at a restaurant named Krusty Krab. He often goes on adventures with his best friend Patrick Star. He mainly focuses on and aims at getting a boat-driving license from Mr. Puff’s boating school.
Have a look at the 3D recreation of this funny creature.
02Sid the Sloth (Ice Age)
Ice Age is one of the most popular animated series that revolves around the lives of a mammoth, tiger, sloth, and a scrat. A scrat is a combination of a squirrel and a rat. This series became so popular among the children that it was even nominated for an Oscar award.
It has a character called Sid. He is an abandoned sloth. His mother left him for some good to happen with him during the migration. His character in the entire series exhibits a friendly and carefree nature. Sometimes, he also acts as dumb and naïve.
Look at the funny recreation of this dumb-witted character. Does this recreation scare you?
03Mr. Krabs (Sponge Bob Square Pants)
Sponge Bob Square Pants is one of the cartoons that have many different and funny-looking creatures. Mr. Krabs is one of those characters. He is a money-minded and miserly creature. He is the owner of the Krusty Krab fast food restaurant, where Sponge Bob works as a cook. He has a teenage daughter named Pearl and he can do anything to see her happy. He exhibits romantic feelings for Mrs. Puff.
Does this funny creature from the Sponge Bob series look funny in real life too?
04Patrick Star (Sponge Bob Square Pants)
Patrick Star is again a character from the cartoon show Sponge Bob Square Pants. He is the best friend of the main protagonist Sponge Bob, who lives 2 houses away from Sponge Bob’s house. He is a lazy, fat, and stupid pink-colored starfish. His character makes the show funnier and more interesting for kids.
How would you react when you will see this funny creature from Sponge Bob in real life? His 3D recreation seems a bit scary like a monster in real life.
05Plankton (Sponge Bob Square Pants)
Plankton was once the best friend of Mr. Krabs but now they both share a rivalry bond. He is married to Karen and owns a fast food restaurant named Chum Bucket Restaurant in competition with Mr. Krabs’ Restaurant. He plays the antagonist character in the series. His restaurant doesn’t work as successfully as Krusty Krab Restaurant. In rivalry, he often comes up with different plans and tricks to outwit Mr. Krabs and steal the secret recipe of his famous Krabby Patty Burger, but never succeeds.
Have a look at the 3D recreation of this funny character from the series.
06Homer (The Simpsons)
The Simpsons is an animated series that revolves around the life of an American family. The Simpson family has five members named Homer, Marge, Bart, Lisa, and Maggie. Homer Simpson is the main character of this series. He lives in Springfield and is employed as a Safety Inspector at Springfield Nuclear Power Plant. He is married to Marge and is the father of three children – Bart, Lisa, and Maggie. The series depicts a strong bond of love and care for each other in the family.
Have a look at this realistic 3D recreation of Homer Simpson.
07Bugs Bunny (Looney Tunes)
Looney Tunes is entertaining people of all ages due to its great and funny characters. Bugs Bunny is one of our favorite characters from the animated cartoon show Looney Tunes. He is the main protagonist and the most popular character of the series. Kids love him the most because of his mischievous acts in the show. He looks too funny with a mouth filled with carrots and wearing funny costumes. This unique character has a great fan following all over the world.
The 3D recreation of this famous cartoon character is funny and scary at the same time.
08Sally (The Nightmare Before Christmas)
As the name suggests, The Nightmare Before Christmas is an American dark fantasy animated movie. This animated movie has received great financial success and appreciation for its wonderful characters and music.
Sally is a shy ragdoll created by a scientist Doctor Finkelstein. She secretly loves Jack – the main Protagonist of the movie. She tells him not to mix the preparation of Christmas with the Halloween party.
Look at her realistic 3D recreation by Tatiana, popularly known as TatiMoons.
09Stitch (Lilo and Stitch)
Lilo and Stitch is also an animated American movie. It is a science fiction and comedy movie that attracts the interest of people of all age groups. The story of this animated movie revolves around the two main characters named Lilo and Stitch. Lilo is a 7-year old orphan girl whose parents died in a car accident. She has a pet named Stitch.
The original name of Stitch is Experiment 626. He was illegally created by a scientist Jumba Jokiba through a genetic experiment. Lilo adopts him thinking that he is an innocent creature, she doesn’t know about his birth and origin.
Have a look at this realistic 3D recreation of Stitch’s character. Isn’t it scary?
10 Popeye (Popeye – The Sailor Man)
Popeye – The Sailor Man is another famous cartoon series. Popeye is the main protagonist of this series. He has a girlfriend named Olive Oyl. This series depicts the love triangle between Popeye, Olive, and Bluto. He is an uneducated sailor man who gets energy by eating spinach. He often comes up with non-realistic solutions to different problems and helps the police by investigating different cases. He has a versatile tobacco smoking pipe that sometimes acts as a whistle, and he even intakes the spinach through his pipe.
In the cartoon films, he looks funny, but this 3D recreation of his character is a bit scary.
Part 2 How Do Cartoon Characters Reimagined As Realistic 3D Animation
Nowadays, it has become easier to create and turn your imagination into a cartoon character with different online 3D animators. This makes storytelling easier and funny and it is a great way to engage children. Out of all the 3D animation tools, Filmora will assist you to create the best 3D version of your favorite cartoon character.
Filmora has various smart features that help you to turn any image into realistic 3D animation. You can create great animations using Wondershare Filmora Video Editor within a couple of hours. It offers you many different features that help in convenient customization.
● Ending Thoughts →
● Being a cartoon lover, we hope that you would have liked the 3D recreation of your favorite cartoons. Some of these 3D recreations are so scary that you would just run away from them in real life and some look like real monster cartoons.
● AI combined with digital software like Filmora makes it easier to create these 3D versions of famous cartoon characters.
● With Filmora, you don’t need to spend hours sketching cartoon characters on paper. You can easily create great and realistic animations digitally.
Best GIF Maker Software for Windows and Mac
Best GIF Maker Software for Windows and Mac

Shanoon Cox
Mar 27, 2024• Proven solutions
GIFs can delivery stories with effectiveness and added emotions. When we view that sequence of memories with animations then they add a different feeling to viewer’s heart. The best part is that these GIF creations use to be light weight files that mean they can be easily shared on other platforms. You can easily send them to popular social media sites or prefer to share them via Whatsapp and even using MMS. If you are working on a desktop and need a compatible GIF creator tool then here are few user friendly desktop application suggestions for you. You can easily pick any of these tools and start creating your own animated GIF to impress your friends around.
GIF Maker Software for Windows and Mac
The article below contains details about 10 most popular GIF makers where first five are compatible with Windows platform and rest are dedicated to Mac devices. Using these advanced software tools, you can easily create animated GIF from sequence of images or from videos that are downloaded from internet. It is also possible to adjust timing between frames or users can also customize frame rotation effects, loop animations, or apply overlays. These software tools can support almost all file types like TIF, TGA, PNG BMP, GIF and JPG etc. Some of these software tools are also able to process webcam results instantly and will save files in form of high quality GIFs. If you are ready to develop your own GIF image then read the reviews below and choose your tool to get best results.
A. Best GIF Maker For Windows
Best Recommendation
If you are not satisfied with the collection discussed above then professionals recommend Wondershare Filmora as most trustworthy tool for your GIF conversion needs. This software can work on Windows as well as Mac devices with full feature support.
If you want to make GIF easily, Filmora will also offer you an online solution for making a GIF. Filmora meme maker can help you make image, GIF and video memes directly without watermark. It is totally FREE and no sign up. You can change text size, color and position to create caption. You can also put text inside or outside in GIF. Try it now!
 Download Mac Version ](https://tools.techidaily.com/wondershare/filmora/download/ )
Key Features:
- This interactive interface can process more than 150 file formats with ease
- It can easily convert any video file into GIF format.
- Wondershare Filmora can be used to adjust frame size, captions, resolution of images while adding classic animation effects and advanced filters to processes images.
1. Photoscape

Here is your personal GIF creator tool that possesses abilities of a multi-purpose photo editor. This tool comes with so many advanced capabilities like it can behave as a raw converter, screen capturer, editor, viewer or can also rename details. Photoscape is commonly used for GIF image creation where users can easily set timings between frames.
Pros:
- It is much easier to use with intuitive interface.
- Offers adjustable canvas size along with easy customization capabilities for photo alignment, background colour and transition effects.
Cons:
- It can create bug trouble if you want to process large size files.
2. Microsoft GIF Animator
This software is also available free of cost and it can generate animated GIF files instantly. Its drag and drop type media interface can assist users in easy processing of large number of files. Further, you can easily set time duration of frames, set transparency, re order images and make changes for looping effect.
Pros:
- Its drag and drop feature provides it higher ranking.
- One can easily customize all detailed like transparency, frame order, time duration etc.
Cons:
- Microsoft has now stopped designing this software.
3. SSuite GIF Animator

SSuite GIF animator can be used to develop high quality GIF images within very less time. It can easily process raw files in form of BMP, JPEG and JPG extension whereas frame interval can be manually reduced up to few milliseconds. Created GIFs can be further used for easy sharing on other social media websites.
Pros:
- Interactive and simple GUI.
- Takes lesser time for installation and small space in your device memory.
Cons:
- Supported limited file formats and has limited functions.
4. KickMyGraphics

KickMyGraphics is an easy to use GIF animator and allows users to work with a slider so that frames can be adjusted with desired timing sequence. It also assists in other professional level settings such as out quality, zoom and transparency etc. It is also possible to rotate any selected frame with 90 degree motion.
Pros:
- Offers 90 degree image rotation facility.
- Comes with professional level settings.
Cons:
- Complicated for beginners.
5. GiftedMotion

This open source and interactive GIF animation developer application is available for free on Window platforms. It can be used process set of images as well as videos with additional animation effects. Note that, your system must have Java preinstalled if you want to run GiftedMotion on it.
Pros:
- It does not demand installation and download file size is also very small.
- Offers preview facility.
Cons:
- Limited features with time consuming image loading process.
B. Best GIF maker For Mac
1. PicGIF - $19.99:
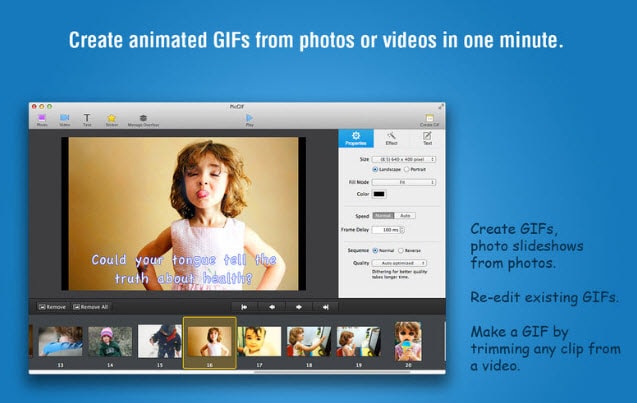
This paid software tool can be used to turn sequence of snapshots into high quality animated GIFs within few seconds. Users can also re-edit their changes in existing GIF files by adjusting its size, text formatting and speed etc. It is also possible to transfer variety of short videos into animated smooth GIFs. It allows users personalize graphics with so many special image effects and color settings.
2. GIPHY Capture – Free:
Giphy Capture is available for free for all Mac users and it offers wide range of powerful, intuitive yet simple to use feature set. There are so many incredible things that you can manage in this single platform while editing your GIF sequences. It can easily capture your screen while processing all images with adjustable size, captions and text values. Finally the created GIFs can be easily shared with friends on social media.
3. Image GIF:

This simple and easy to use application can do many miracles for you. You can simply drag and drop lots of image files to this platform and then process them on timeline with advanced feature set. The animation effects and file control capabilities are really interesting that allow easy modification over content. Image GIF is best solution for beginners as it possesses intuitive and user friendly interface.
Shanoon Cox
Shanoon Cox is a writer and a lover of all things video.
Follow @Shanoon Cox
Shanoon Cox
Mar 27, 2024• Proven solutions
GIFs can delivery stories with effectiveness and added emotions. When we view that sequence of memories with animations then they add a different feeling to viewer’s heart. The best part is that these GIF creations use to be light weight files that mean they can be easily shared on other platforms. You can easily send them to popular social media sites or prefer to share them via Whatsapp and even using MMS. If you are working on a desktop and need a compatible GIF creator tool then here are few user friendly desktop application suggestions for you. You can easily pick any of these tools and start creating your own animated GIF to impress your friends around.
GIF Maker Software for Windows and Mac
The article below contains details about 10 most popular GIF makers where first five are compatible with Windows platform and rest are dedicated to Mac devices. Using these advanced software tools, you can easily create animated GIF from sequence of images or from videos that are downloaded from internet. It is also possible to adjust timing between frames or users can also customize frame rotation effects, loop animations, or apply overlays. These software tools can support almost all file types like TIF, TGA, PNG BMP, GIF and JPG etc. Some of these software tools are also able to process webcam results instantly and will save files in form of high quality GIFs. If you are ready to develop your own GIF image then read the reviews below and choose your tool to get best results.
A. Best GIF Maker For Windows
Best Recommendation
If you are not satisfied with the collection discussed above then professionals recommend Wondershare Filmora as most trustworthy tool for your GIF conversion needs. This software can work on Windows as well as Mac devices with full feature support.
If you want to make GIF easily, Filmora will also offer you an online solution for making a GIF. Filmora meme maker can help you make image, GIF and video memes directly without watermark. It is totally FREE and no sign up. You can change text size, color and position to create caption. You can also put text inside or outside in GIF. Try it now!
Download Mac Version ](https://tools.techidaily.com/wondershare/filmora/download/ )
Key Features:
- This interactive interface can process more than 150 file formats with ease
- It can easily convert any video file into GIF format.
- Wondershare Filmora can be used to adjust frame size, captions, resolution of images while adding classic animation effects and advanced filters to processes images.
1. Photoscape
Here is your personal GIF creator tool that possesses abilities of a multi-purpose photo editor. This tool comes with so many advanced capabilities like it can behave as a raw converter, screen capturer, editor, viewer or can also rename details. Photoscape is commonly used for GIF image creation where users can easily set timings between frames.
Pros:
- It is much easier to use with intuitive interface.
- Offers adjustable canvas size along with easy customization capabilities for photo alignment, background colour and transition effects.
Cons:
- It can create bug trouble if you want to process large size files.
2. Microsoft GIF Animator
This software is also available free of cost and it can generate animated GIF files instantly. Its drag and drop type media interface can assist users in easy processing of large number of files. Further, you can easily set time duration of frames, set transparency, re order images and make changes for looping effect.
Pros:
- Its drag and drop feature provides it higher ranking.
- One can easily customize all detailed like transparency, frame order, time duration etc.
Cons:
- Microsoft has now stopped designing this software.
3. SSuite GIF Animator
SSuite GIF animator can be used to develop high quality GIF images within very less time. It can easily process raw files in form of BMP, JPEG and JPG extension whereas frame interval can be manually reduced up to few milliseconds. Created GIFs can be further used for easy sharing on other social media websites.
Pros:
- Interactive and simple GUI.
- Takes lesser time for installation and small space in your device memory.
Cons:
- Supported limited file formats and has limited functions.
4. KickMyGraphics
KickMyGraphics is an easy to use GIF animator and allows users to work with a slider so that frames can be adjusted with desired timing sequence. It also assists in other professional level settings such as out quality, zoom and transparency etc. It is also possible to rotate any selected frame with 90 degree motion.
Pros:
- Offers 90 degree image rotation facility.
- Comes with professional level settings.
Cons:
- Complicated for beginners.
5. GiftedMotion
This open source and interactive GIF animation developer application is available for free on Window platforms. It can be used process set of images as well as videos with additional animation effects. Note that, your system must have Java preinstalled if you want to run GiftedMotion on it.
Pros:
- It does not demand installation and download file size is also very small.
- Offers preview facility.
Cons:
- Limited features with time consuming image loading process.
B. Best GIF maker For Mac
1. PicGIF - $19.99:
This paid software tool can be used to turn sequence of snapshots into high quality animated GIFs within few seconds. Users can also re-edit their changes in existing GIF files by adjusting its size, text formatting and speed etc. It is also possible to transfer variety of short videos into animated smooth GIFs. It allows users personalize graphics with so many special image effects and color settings.
2. GIPHY Capture – Free:
Giphy Capture is available for free for all Mac users and it offers wide range of powerful, intuitive yet simple to use feature set. There are so many incredible things that you can manage in this single platform while editing your GIF sequences. It can easily capture your screen while processing all images with adjustable size, captions and text values. Finally the created GIFs can be easily shared with friends on social media.
3. Image GIF:
This simple and easy to use application can do many miracles for you. You can simply drag and drop lots of image files to this platform and then process them on timeline with advanced feature set. The animation effects and file control capabilities are really interesting that allow easy modification over content. Image GIF is best solution for beginners as it possesses intuitive and user friendly interface.
Shanoon Cox
Shanoon Cox is a writer and a lover of all things video.
Follow @Shanoon Cox
How to Create Your Own Avatar Free
How to Create Your Own Avatar Free
An easy yet powerful editor
Numerous effects to choose from
Detailed tutorials provided by the official channel
As a profile image, you can use your Facebook avatar. You can choose from a range of faces, hairstyles, and costumes for your avatar.
This article will help in creating your own avatar app and let you understand how to make your own my little pony avatar.
In this article
01 [Avatar Maker Tutorial | Create your Avatar for Free](#Part 1)
02 [5 Apps to Build Your Avatar](#Part 2)
Part 1 Avatar Maker Tutorial | Create your Avatar for Free
Adobe Creative Cloud Express is an online tool to make your own avatars for free. With Adobe, you can create a handcrafted avatar to match your personality for your social media profiles, YouTube videos, and so much more. Adobe lets you think out of the box, easy as choosing a template and sharing. Let us discuss the steps to create your own avatar for free using Adobe.
![]()
01Step 1: Start with Inspiration
You can never start from an empty canvas; there are several templates available you can choose any one of them by browsing with color, aesthetic, mood, and many other categories to have an idea of creating an avatar. Once you find a suitable graphic, you can click or tap on it starts editing as a document in the editor.
![]()
02Step 2: Remix
You can customize your avatar templates in a variety of ways. Change the font and copy. Substitute your photos for the imagery. Alternatively, you can use Creative Cloud Express to search through thousands of free pictures. Design your own by spending as little time as you wish.
![]()
03Step 3: Amplify Up the Flair
You can be as creative as you can by adding flair and personality to your projects with design assets. Add animated text and GIF to your project in one tap. They have cleared all the other technical issues to focus on your style and message.
![]()
04Step 4: Resize
The days where you have to remember the dimension of the image are gone. Once you have selected the design, you can modify and resize using the Auto magical resize available feature. Duplicate the project, select “Hit Resize,” and choose the platform to adapt it, and our AI will take care of the rest. Enjoy sharing it on other media.
[Well, this feature is a premium feature, so if you wish to access it, you need to do a subscription.]
![]()
05Step 5: Save and Share
Once you have applied all your creativity to your project, click on the “Publish” button and share your creations. Creative Cloud saves your project in your profile so that you can revisit and edit your projects whenever required.
Explore these professional templates to make your own avatar-free. Browse for themes like logos, icons, personalized fonts, and other elements to create an authentic look.
![]()
Part 2 5 Apps to Build Your Avatars
Having your avatar as your profile picture is freaking excellent and fun. There are many apps to create your avatars; let’s discuss some of them.
01Boo App–3D Avatar Emoji
Boo creates 3D characters that look similar to you within minutes. There are plenty of outfit options that can be customized separately for your styles to match your daily fashion. With this app, make your own avatars for free.
Highlights
●It offers a ton of features like skin tones, hair colors, eye colors, and hairstyles
●It assists in making your own my little pony avatar to give a unique style.
●New items are updated regularly.
Limits
●Limited color options
●Background glitch
●Sometimes after clicking the color option, it gets changed.
Review/Ratings
It has a rating of about 4.4 and many good reviews from users.
02Faceq
This application provides multiple facial features and an extensive trendy wardrobe. Even the tiniest characteristics on the face, such as beauty marks, facial hair, and brows, are essential. Hair accessories to make you own my little pony avatar. It looks as beautiful as when you apply your creativity to the maximum level.
Highlights
●Inclusive of many tabs for obvious face form, hairdo, and attire.
●Add more life to your avatars like text bubbles, hand gestures, etc.
●Multiple facial features
Limits
●Limited makeup options
●More dressing options expected
●Some slogans may be inappropriate
Ratings/Review
It has a rating of 3.1
03 SuperMe
This application is mainly for girls, and it offers 1000+ facial expressions and more materials. You can create and share animated videos of your avatars with the world and chat with people to make new friends. You can use this application to create my animated avatar.
Highlights
●There are 100 animations facilities where you can randomly apply by a simple handshake.
●A straightforward procedure to use.
●Multiple Facial expressions.
Limits
●You need to buy coins. It would be good if available for free.
●Primarily for girls
●The limitation of this application is that the language is still in its original language (Chinese).
Ratings/Review
This app has a rating of about 4
04Zmoji
Zmoji, a personal emoji creator, enables chatting with multiple versions of yours, and thus this way, you can make your own my little pony avatar. There are many unique features introduced to create a more appropriate.
Highlights
●It has a simple interface.
●It allows you to build a vivid cartoon avatar that matches your style quickly.
●It has Emoji Keyboard, which will enable you to send emojis directly from your keyboard in iMessage and third-party apps.
Limits
●The app also requires a subscription for some activities, which is disappointing.
●The subscription cost is high.
Ratings/Reviews
This app has a review of about 4.6
05Wondershare Wondershare Filmora Video Editor
To create my animated avatar, you can choose Wondershare Wondershare Filmora Video Editor . It is something magical that allows you to do anything with your photo. Of course, including changing to an avatar or a cartoon character. In this journal, you will see many different ways to make your own avatar for free, but Wondershare Filmora Video Editor offers to be all. It contains many templates, font styles, animation effects, wardrobes, and what less. Wondershare Filmora Video Editor is easier to use; with a few steps, you can create an avatar representing you more accurately than any other software could do.
It just goes with creating layers, liquefying, smoothening and additional features. And simply, you can share it to any social media directly from the software. Wondershare Wondershare Filmora Video Editor is mainly used to create my animated avatar.
Highlights
●Simple and easy interface.
●User friendly
●Multitude of features
Limits
●Advanced version need a subscription
Reviews
4.4 as per user reviews
For Win 7 or later (64-bit)
For macOS 10.12 or later
● Key Takeaways from This Episode →
● Understanding Adobe Creative Cloud Express
● Five different Apps used in creating my animated avatar
● Compared to all other online tools and programs, Wondershare Wondershare Filmora Video Editor is superior.
That Will Make Aesthetic Cartoon Drawing More Understandable
That Will Make Aesthetic Cartoon Drawing More Understandable
An easy yet powerful editor
Numerous effects to choose from
Detailed tutorials provided by the official channel
When you are trying to make an aesthetic drawings cartoon, the primary thing to focus on is the composition. Composition is the combination, arrangement, and organization of objects within the borders of drawing space. To have a great aesthetic cartoon drawing, you must focus on bringing the eyes of the viewer toward your center of interest within an aesthetically-pleasing composition. When we create illustrations, we are often concerned with putting in a lot of details that will overload the image and lose the meaning that we originally wanted it to convey.

We engage our audience and viewer more by composing a perfect aesthetic drawing. In addition, many rules define a good composition drawing, but these rules are mainly guidelines. Also pay attention to your personal preferences and instincts. In this guide, we’ll teach you how to make an excellent aesthetic cartoon painting more understandable.
In this article
01 [Canvas Aesthetic Painting Ideas](#Part 1)
02 [Blender Aesthetic Painting Ideas](#Part 2)
03 [How to Create Super-Detailed Aesthetic Cartoon Painting](#Part 3)
Part 1 Canvas Aesthetic Painting Ideas
There are times you do not need to be a famous painter or an art professional to create beautiful wall art. Canvas painting is an all-in-one application for all skill levels, from beginners to experts. It also provides you with different painting ideas ranging from beach scenes to abstract designs to create pieces that look stunning and professional.
We have compiled a list of canvas aesthetic painting ideas to help you begin your journey as an aesthetic cartoon painter. Look through the images to determine which ones match the style of painting you wish to add to your drawing and get inspiration to create your designs.
01Disney Canvas Art
These are aesthetic cartoon painting ideas relating to 2020 Disney Canvas Art. You can get ideas from this to begin your journey into the world of painting.

02Hippie Painting Canva Art
If you are also looking for other aesthetic cartoon painting ideas to choose from, you can select from this 2020 Cute Canvas Paintings “Hippie Painting” Canvas Art.

03Spongebob Painting
These painting ideas are a part of the Canvas Aesthetic Cartoon Painting ideas of 2020 called Spongebob Painting Disney Canvas Art.

04Babs Bunny Pa Et Mini Lerret
These are a painting about “Babs Bunny Pa Et Mini Lerret.” A 2020 Mini Canvas Art Hippie Painting Canvas idea that you can choose from

Part 2 Blender Aesthetic Painting Ideas
Blender is an accessible and open-source 3D creation suite that supports the entirety of the 3D pipeline modeling, rigging, animation, simulation, compositing rendering, motion tracking, video editing, and 2D animation pipeline. It is a fact that this is one of the best open-source software you can choose from to make your aesthetic cartoon drawing.
It is entirely free software, and various artists can use it to start digging in and playing with it. Here are some of the blender aesthetic cartoon painting ideas you can choose from:
01Princess Ira and Amina
This is a fictional aesthetic drawing cartoon of an African princess having gold gifted powers with her face painting inspired by Nigerian traditional face decorations. However, her crown is adorned with crosses, crystals, and chains which incorporate several elements from different cultural designs available from all over the world to portray unity.

02Survival Knife Weekly Drills 045
This was a design painting inspired based on BUCK KNIVES in pain texturing and focuses on making a practical game-ready asset.

03Radiance
This is a blender aesthetic cartoon painting idea of a graduation project made for the Concept Art specialized cursus at New3dge School.

04 The character looks dev
This blender cartoon painting’s inspiration came from Edward, the short film’s main character. It is a work in progress but a lovely painting that can inspire you.
Part 3 How to Create Super-Detailed Aesthetic Cartoon Painting
To create a super detailed aesthetic cartoon drawing, you do not need to be a trained artist, nor do you need a fancy cartoon picture maker. All you need to create a cartoon painting photo is a simple and Free picture from a cartoon editor to help you carry out the task more effectively.
However, you can also convert your cartoon paint into creative animation using Wondershare Filmora Video Editor . Filmora is a powerful all-in-one tool for editing that you can use to that can be used for free to animate your cartoon with its tons of effects, filters, and keyframing features that can help you carry this out effectively.
For Win 7 or later (64-bit)
For macOS 10.12 or later
Here is how to create a super detailed aesthetic cartoon painting:

Step 1: Open the Picsart editor on your desktop browser and click on the new project
Step 2: Next is to click on Upload to select the photo that you want to cartoon paint from the computer library of your hard drive
Step 2: Click on the toolbar, select the effect feature from the dropdown above your photo, and click on Magic to view all available one-click cartoon filters. However, almost all of the Magic effects on this editor will help you achieve an aesthetic cartoon photo effect.
Step 4: Click on Adjust and Blend above your photo workspace on the editor. This will help you manually adjust the effects (color burn, fade, saturation, brightness, etc.).
Step 5: Preview your result and once you are happy with the new cartoon photo painting, click on the Share button and download it from the top right corner of the editor to save it on your device.
● Ending Thoughts →
● This article explained creating and gave inspiration and ideas for the aesthetic cartoon painting you can choose from to make yours. In addition, the report also recommends Filmora as an influential editor if you intend to create an animation from your cartoon painting due to its tons of features.
● So, now you can start building your aesthetic drawings and cartoons!
When you are trying to make an aesthetic drawings cartoon, the primary thing to focus on is the composition. Composition is the combination, arrangement, and organization of objects within the borders of drawing space. To have a great aesthetic cartoon drawing, you must focus on bringing the eyes of the viewer toward your center of interest within an aesthetically-pleasing composition. When we create illustrations, we are often concerned with putting in a lot of details that will overload the image and lose the meaning that we originally wanted it to convey.
We engage our audience and viewer more by composing a perfect aesthetic drawing. In addition, many rules define a good composition drawing, but these rules are mainly guidelines. Also pay attention to your personal preferences and instincts. In this guide, we’ll teach you how to make an excellent aesthetic cartoon painting more understandable.
In this article
01 [Canvas Aesthetic Painting Ideas](#Part 1)
02 [Blender Aesthetic Painting Ideas](#Part 2)
03 [How to Create Super-Detailed Aesthetic Cartoon Painting](#Part 3)
Part 1 Canvas Aesthetic Painting Ideas
There are times you do not need to be a famous painter or an art professional to create beautiful wall art. Canvas painting is an all-in-one application for all skill levels, from beginners to experts. It also provides you with different painting ideas ranging from beach scenes to abstract designs to create pieces that look stunning and professional.
We have compiled a list of canvas aesthetic painting ideas to help you begin your journey as an aesthetic cartoon painter. Look through the images to determine which ones match the style of painting you wish to add to your drawing and get inspiration to create your designs.
01Disney Canvas Art
These are aesthetic cartoon painting ideas relating to 2020 Disney Canvas Art. You can get ideas from this to begin your journey into the world of painting.
02Hippie Painting Canva Art
If you are also looking for other aesthetic cartoon painting ideas to choose from, you can select from this 2020 Cute Canvas Paintings “Hippie Painting” Canvas Art.
03Spongebob Painting
These painting ideas are a part of the Canvas Aesthetic Cartoon Painting ideas of 2020 called Spongebob Painting Disney Canvas Art.
04Babs Bunny Pa Et Mini Lerret
These are a painting about “Babs Bunny Pa Et Mini Lerret.” A 2020 Mini Canvas Art Hippie Painting Canvas idea that you can choose from
Part 2 Blender Aesthetic Painting Ideas
Blender is an accessible and open-source 3D creation suite that supports the entirety of the 3D pipeline modeling, rigging, animation, simulation, compositing rendering, motion tracking, video editing, and 2D animation pipeline. It is a fact that this is one of the best open-source software you can choose from to make your aesthetic cartoon drawing.
It is entirely free software, and various artists can use it to start digging in and playing with it. Here are some of the blender aesthetic cartoon painting ideas you can choose from:
01Princess Ira and Amina
This is a fictional aesthetic drawing cartoon of an African princess having gold gifted powers with her face painting inspired by Nigerian traditional face decorations. However, her crown is adorned with crosses, crystals, and chains which incorporate several elements from different cultural designs available from all over the world to portray unity.
02Survival Knife Weekly Drills 045
This was a design painting inspired based on BUCK KNIVES in pain texturing and focuses on making a practical game-ready asset.
03Radiance
This is a blender aesthetic cartoon painting idea of a graduation project made for the Concept Art specialized cursus at New3dge School.
04 The character looks dev
This blender cartoon painting’s inspiration came from Edward, the short film’s main character. It is a work in progress but a lovely painting that can inspire you.
Part 3 How to Create Super-Detailed Aesthetic Cartoon Painting
To create a super detailed aesthetic cartoon drawing, you do not need to be a trained artist, nor do you need a fancy cartoon picture maker. All you need to create a cartoon painting photo is a simple and Free picture from a cartoon editor to help you carry out the task more effectively.
However, you can also convert your cartoon paint into creative animation using Wondershare Filmora Video Editor . Filmora is a powerful all-in-one tool for editing that you can use to that can be used for free to animate your cartoon with its tons of effects, filters, and keyframing features that can help you carry this out effectively.
For Win 7 or later (64-bit)
For macOS 10.12 or later
Here is how to create a super detailed aesthetic cartoon painting:
Step 1: Open the Picsart editor on your desktop browser and click on the new project
Step 2: Next is to click on Upload to select the photo that you want to cartoon paint from the computer library of your hard drive
Step 2: Click on the toolbar, select the effect feature from the dropdown above your photo, and click on Magic to view all available one-click cartoon filters. However, almost all of the Magic effects on this editor will help you achieve an aesthetic cartoon photo effect.
Step 4: Click on Adjust and Blend above your photo workspace on the editor. This will help you manually adjust the effects (color burn, fade, saturation, brightness, etc.).
Step 5: Preview your result and once you are happy with the new cartoon photo painting, click on the Share button and download it from the top right corner of the editor to save it on your device.
● Ending Thoughts →
● This article explained creating and gave inspiration and ideas for the aesthetic cartoon painting you can choose from to make yours. In addition, the report also recommends Filmora as an influential editor if you intend to create an animation from your cartoon painting due to its tons of features.
● So, now you can start building your aesthetic drawings and cartoons!
2D Character Animation: Everything You Should Know About It
2D Character Animation: Everything You Should Know About It
An easy yet powerful editor
Numerous effects to choose from
Detailed tutorials provided by the official channel
2D character animation is one of the significant kinds of animation popularly used for creating animated movies, marketing videos, cartoons, advertisements, educational content, corporate presentations, video games, etc.
With the popularity of video content, more and more businesses tend to use animation for promotion, as they magnify conversion rates by 20%. Some companies hire 2D character animation services; others try to make them online with software help.
In this article
01 [What is 2D Character Animation and What Does 2D Animation Do?](#Part 1)
02 [2D Character Animation Tips and Tricks](#Part 2)
03 [An Ultimate Guide to Create 2D Character Animation Online](#Part 3)
04 [5 Great 2D Character Animation Templates](#Part 4)
Part 1 What is 2D Character Animation and What Does 2D Animation Do?
2D animation is identified by having its characters and objects created in a 2D space. It means that they only have height and width to specify.
However, 2D animation is considered a traditional style, known from the 1800s. Initially, it was designed by merging the frames in which one drawing was followed by another and making them different; every second consists of 24 frames.
We all remember the classic Disney animations. Snow White and the Seven Dwarfs, The Little Mermaid, Bambi, etc. They are some of the highly famous 2D animation styles.
With the advancement of computer technologies, this process also got digitized through various 2D character animation software.
In this guide, we’ll talk about everything relatable to 2D character animation, and let’s proceed with the expert tips and tricks to create inspirational style within animation character 2D.
Part 2 2D Character Animation Tips and Tricks
01Look for a real-time reference
Using a real-world reference for 2D character animation can help you effectively animate faces. For example, when studios collaborate with voice-over artists, they often record their facial movements. It further helps 2D animators to ensure their expressions get captured convincingly.
If it seems impossible, you can consider using your face, so you have something to refer back to. You could also use a mirror and utter the words your character will speak. It will display the correct animated expressions.
02Observe real life
You need to use observation a lot more. One of the primary aspects of 2D character animation is bringing life to animate objections. Therefore, you must carefully consider how emotion can get portrayed and select each movement accordingly.
Take time watching how people in real-life environments talk and interact with each other, how they express emotions, how they move, etc. Please don’t spend much time doing this, as it is valuable to research.
03Simplicity is the key
2D character animation is never complex compared with 3D. Think carefully before creating a scene too complicated. You must not include too much information, which is hard to digest, and you may even find yourself compromising the scene’s realism. Try not to heavy the stage with too many pose changes or other elements, and keep it genuine.
04Draw animation again and again
Drawing animation consumes a lot of time. You can’t complete it within one day, so you better know deep down that one task only can be done after you have revamped it various times. For 2D character animation, you may need to draw objects on paper several times.
You can’t master the skill of animation character 2D quickly. Luckily, all pains will be relieved someday.
05Feedback is important
Feedback is an essential element of artistic development. It’s wise to actively seek out feedback from familiar figures who can help you enhance. Naturally, we may see work we have invested a great deal of time and effort indifferently to someone not so involved in the creative process. Feedback can equate to a valuable learning opportunity that will assist you produce the results hit the spot much more appropriately.
Part 3 An Ultimate Guide to Create 2D Character Animation Online
Let’s now look at making an illustrated 2D character animation move on a screen.
While there are nearly numerous options for 2D character animation tools and software, this tutorial will animate a character in Adobe After Effects.
Steps to create 2D character animation After Effects
01Step 1: Download and Install Duik
You need to install the Duik animation plugin for Adobe After Effects to simplify the whole process. You can animate and rig characters’ entire limbs with Duik using just the placement of their feet and hands.
While this isn’t an essential step, it can be valuable for beginners, as you’ll see in this tutorial. Luckily, Duik is available for free from Rainbox Laboratory.
02Step 2: Design Your Character
You need a moving character before you’re able to start animating. You can create this character in Adobe Illustrator and import it into After Effects.
Try creating a straightforward character with an aim on the character’s limbs.
In the example mentioned below, you can see that the body is a very rudimentary shape—a circle—with long legs that make it simple to consider the animation process.

Check the character’s joints. Making a round joint between the lower and upper parts of the legs, for instance, will help the character move more smoothly.

03Step 3: Make and Import Your Character Artwork
Now, you’ll need to make a few final adjustments before moving your character artwork. Break your character out into layers firstly. Every section of the character that will move independently needs a separate layer.
So, layers include his circular body, face, and the leg’s segments (i.e., lower leg, upper leg, and foot).

To import your character artwork, go to File, click the Import tab, and choose your character file. Ensure that you need to import it as a composition to ensure it includes the layers you just created.
04Step 4: Establish Initial Character Rigging
Now, the 2D character animation is almost over by the initial rigging.
Firstly, lower the opacity of all your layers to above 50% to see the critical joints within the character.
Next, you must ensure that the joints hinge in the ideal direction. It’s simple to do with the anchor point tool. For each character’s layer, place the anchor point at the center of gravity for each layer of the 2D character animation.
The anchor point would probably go between the eyes for the layer of the face (i.e., the nose, eyes, and mouth). For each legs’ section, hold the anchor point where the leg will hinge (e.g., the anchor point would be at the highest point for the leg’s upper portion, where it meets the body).

Then, use the parent tool to join the limbs’ sections. For instance, the parent of the foot would be the lower leg, and the upper portion is the parent of the lower leg.
It makes sure that the leg moves together as one unit with multiple hinge points.
Finally, use the Duik toolbar to create character controllers. Controllers control the rotation and position of critical elements within your character. For the ankles of the 2D character animation, you would select the controller that encompasses both the rotation and position.
05Step 5: Create Your Rig
Use the Duik toolbar to create a rig. Select each layer from the extremities inward from each limb, lasting with your controllers.
You would select the ankle for a leg, followed by the upper portion, the lower leg, and conclusively, the controller at the ankle. Then, select auto-rig within the Rigging area of the Duik toolbar.
The entire leg will move when you move that ankle controller. If your character contains them, repeat the process for the other leg, along with other limbs.
Before proceeding, test the limbs to make sure they hinge and move correctly. You need to adjust the opacity of the character back to 100% once you are satisfied with the movements.

06Step 6: Start Animating Your Character
You can begin animating after completing a rig. First, create keyframes—the ending and beginning points of the character’s movement. The character’s legs are at their most magnified are thus the endpoints for a walk cycle. Make sure that the beginning and ending of keyframes are identical to get an ideal loop.
Start adding in-between frames from there, like when one leg crosses over the other in the middle of a walking stride.
Moreover, you can add ‘easing” to the animation via 2D character animation After Effects’ Easy Ease tab, located under the Animation button, and Keyframe Assistant.
It will smoothen the transition between the keyframes. You will have a primary walking sequence at this instance.

Now, you can make further refinements to add detail and secondary movement, like a bobbing motion of the head. You can also modify elements like the keyframe velocity, further smoothing out the animation.
As you practice, you’ll get a better feel for your animation preferences and develop more advanced realistic 2D animation character design capabilities.
Part 4 5 Great 2D Character Animation Templates
1 – FrameStory Character Animation Toolkit
2 – Explainer Video Character Animation ToolKit
3 – 2D Character Animation After Effects Template
4 – Character Animation ToolKit
5 – Rigged Character Animation Mockup Template
Given above is a list of the best 2D character animation templates worth considering. Yet, if you are tired of using After Effects Templates, why not select Wondershare Filmora Template Mode?
It is a brand-new mode recently launched by Filmora to ramp up your story. It is a simplistic way to use compared with After Effects.
****Wondershare Filmora Video Editor Template Mode**
For Win 7 or later (64-bit)
For macOS 10.12 or later
Filmora Template Mode is a bold breakthrough that helps you create incredible videos in a minute. Forget about dragging n dropping the video clips into a timeline; Filmora template Mode provides you a new way of generating videos automatically by using various stylish video templates.
Steps to create a stunning animated video in 3 levels
01Step 1: Choose a template
Pick up a video template that best suits your needs.

02Step 2: Import Media
Import at least three video clips or images and let AI assist you in ramping the production process without hassle.

03Step 3: Export Project
Export media among multiple social media platforms.

● Key Takeaways from This Episode →
● Understanding 2D character animation tips and tricks
● A step by step guide to creating 2D character animation online
● Five best 2D character animation templates
● The best alternative of using the Template mode directly within the Wondershare Filmora
2D character animation is one of the significant kinds of animation popularly used for creating animated movies, marketing videos, cartoons, advertisements, educational content, corporate presentations, video games, etc.
With the popularity of video content, more and more businesses tend to use animation for promotion, as they magnify conversion rates by 20%. Some companies hire 2D character animation services; others try to make them online with software help.
In this article
01 [What is 2D Character Animation and What Does 2D Animation Do?](#Part 1)
02 [2D Character Animation Tips and Tricks](#Part 2)
03 [An Ultimate Guide to Create 2D Character Animation Online](#Part 3)
04 [5 Great 2D Character Animation Templates](#Part 4)
Part 1 What is 2D Character Animation and What Does 2D Animation Do?
2D animation is identified by having its characters and objects created in a 2D space. It means that they only have height and width to specify.
However, 2D animation is considered a traditional style, known from the 1800s. Initially, it was designed by merging the frames in which one drawing was followed by another and making them different; every second consists of 24 frames.
We all remember the classic Disney animations. Snow White and the Seven Dwarfs, The Little Mermaid, Bambi, etc. They are some of the highly famous 2D animation styles.
With the advancement of computer technologies, this process also got digitized through various 2D character animation software.
In this guide, we’ll talk about everything relatable to 2D character animation, and let’s proceed with the expert tips and tricks to create inspirational style within animation character 2D.
Part 2 2D Character Animation Tips and Tricks
01Look for a real-time reference
Using a real-world reference for 2D character animation can help you effectively animate faces. For example, when studios collaborate with voice-over artists, they often record their facial movements. It further helps 2D animators to ensure their expressions get captured convincingly.
If it seems impossible, you can consider using your face, so you have something to refer back to. You could also use a mirror and utter the words your character will speak. It will display the correct animated expressions.
02Observe real life
You need to use observation a lot more. One of the primary aspects of 2D character animation is bringing life to animate objections. Therefore, you must carefully consider how emotion can get portrayed and select each movement accordingly.
Take time watching how people in real-life environments talk and interact with each other, how they express emotions, how they move, etc. Please don’t spend much time doing this, as it is valuable to research.
03Simplicity is the key
2D character animation is never complex compared with 3D. Think carefully before creating a scene too complicated. You must not include too much information, which is hard to digest, and you may even find yourself compromising the scene’s realism. Try not to heavy the stage with too many pose changes or other elements, and keep it genuine.
04Draw animation again and again
Drawing animation consumes a lot of time. You can’t complete it within one day, so you better know deep down that one task only can be done after you have revamped it various times. For 2D character animation, you may need to draw objects on paper several times.
You can’t master the skill of animation character 2D quickly. Luckily, all pains will be relieved someday.
05Feedback is important
Feedback is an essential element of artistic development. It’s wise to actively seek out feedback from familiar figures who can help you enhance. Naturally, we may see work we have invested a great deal of time and effort indifferently to someone not so involved in the creative process. Feedback can equate to a valuable learning opportunity that will assist you produce the results hit the spot much more appropriately.
Part 3 An Ultimate Guide to Create 2D Character Animation Online
Let’s now look at making an illustrated 2D character animation move on a screen.
While there are nearly numerous options for 2D character animation tools and software, this tutorial will animate a character in Adobe After Effects.
Steps to create 2D character animation After Effects
01Step 1: Download and Install Duik
You need to install the Duik animation plugin for Adobe After Effects to simplify the whole process. You can animate and rig characters’ entire limbs with Duik using just the placement of their feet and hands.
While this isn’t an essential step, it can be valuable for beginners, as you’ll see in this tutorial. Luckily, Duik is available for free from Rainbox Laboratory.
02Step 2: Design Your Character
You need a moving character before you’re able to start animating. You can create this character in Adobe Illustrator and import it into After Effects.
Try creating a straightforward character with an aim on the character’s limbs.
In the example mentioned below, you can see that the body is a very rudimentary shape—a circle—with long legs that make it simple to consider the animation process.
Check the character’s joints. Making a round joint between the lower and upper parts of the legs, for instance, will help the character move more smoothly.
03Step 3: Make and Import Your Character Artwork
Now, you’ll need to make a few final adjustments before moving your character artwork. Break your character out into layers firstly. Every section of the character that will move independently needs a separate layer.
So, layers include his circular body, face, and the leg’s segments (i.e., lower leg, upper leg, and foot).
To import your character artwork, go to File, click the Import tab, and choose your character file. Ensure that you need to import it as a composition to ensure it includes the layers you just created.
04Step 4: Establish Initial Character Rigging
Now, the 2D character animation is almost over by the initial rigging.
Firstly, lower the opacity of all your layers to above 50% to see the critical joints within the character.
Next, you must ensure that the joints hinge in the ideal direction. It’s simple to do with the anchor point tool. For each character’s layer, place the anchor point at the center of gravity for each layer of the 2D character animation.
The anchor point would probably go between the eyes for the layer of the face (i.e., the nose, eyes, and mouth). For each legs’ section, hold the anchor point where the leg will hinge (e.g., the anchor point would be at the highest point for the leg’s upper portion, where it meets the body).
Then, use the parent tool to join the limbs’ sections. For instance, the parent of the foot would be the lower leg, and the upper portion is the parent of the lower leg.
It makes sure that the leg moves together as one unit with multiple hinge points.
Finally, use the Duik toolbar to create character controllers. Controllers control the rotation and position of critical elements within your character. For the ankles of the 2D character animation, you would select the controller that encompasses both the rotation and position.
05Step 5: Create Your Rig
Use the Duik toolbar to create a rig. Select each layer from the extremities inward from each limb, lasting with your controllers.
You would select the ankle for a leg, followed by the upper portion, the lower leg, and conclusively, the controller at the ankle. Then, select auto-rig within the Rigging area of the Duik toolbar.
The entire leg will move when you move that ankle controller. If your character contains them, repeat the process for the other leg, along with other limbs.
Before proceeding, test the limbs to make sure they hinge and move correctly. You need to adjust the opacity of the character back to 100% once you are satisfied with the movements.
06Step 6: Start Animating Your Character
You can begin animating after completing a rig. First, create keyframes—the ending and beginning points of the character’s movement. The character’s legs are at their most magnified are thus the endpoints for a walk cycle. Make sure that the beginning and ending of keyframes are identical to get an ideal loop.
Start adding in-between frames from there, like when one leg crosses over the other in the middle of a walking stride.
Moreover, you can add ‘easing” to the animation via 2D character animation After Effects’ Easy Ease tab, located under the Animation button, and Keyframe Assistant.
It will smoothen the transition between the keyframes. You will have a primary walking sequence at this instance.
Now, you can make further refinements to add detail and secondary movement, like a bobbing motion of the head. You can also modify elements like the keyframe velocity, further smoothing out the animation.
As you practice, you’ll get a better feel for your animation preferences and develop more advanced realistic 2D animation character design capabilities.
Part 4 5 Great 2D Character Animation Templates
1 – FrameStory Character Animation Toolkit
2 – Explainer Video Character Animation ToolKit
3 – 2D Character Animation After Effects Template
4 – Character Animation ToolKit
5 – Rigged Character Animation Mockup Template
Given above is a list of the best 2D character animation templates worth considering. Yet, if you are tired of using After Effects Templates, why not select Wondershare Filmora Template Mode?
It is a brand-new mode recently launched by Filmora to ramp up your story. It is a simplistic way to use compared with After Effects.
****Wondershare Filmora Video Editor Template Mode**
For Win 7 or later (64-bit)
For macOS 10.12 or later
Filmora Template Mode is a bold breakthrough that helps you create incredible videos in a minute. Forget about dragging n dropping the video clips into a timeline; Filmora template Mode provides you a new way of generating videos automatically by using various stylish video templates.
Steps to create a stunning animated video in 3 levels
01Step 1: Choose a template
Pick up a video template that best suits your needs.
02Step 2: Import Media
Import at least three video clips or images and let AI assist you in ramping the production process without hassle.
03Step 3: Export Project
Export media among multiple social media platforms.
● Key Takeaways from This Episode →
● Understanding 2D character animation tips and tricks
● A step by step guide to creating 2D character animation online
● Five best 2D character animation templates
● The best alternative of using the Template mode directly within the Wondershare Filmora
Also read:
- Updated 15 Best Video to GIF App on iPhone and Android for 2024
- Updated All About 3D Medical Animation And Its Uses for 2024
- 2024 Approved How to Make an Animation With 7 Steps
- Updated Best 15 Classics Animated Cartoon Movies
- Whats the Best 10 Photo Animator Templates That Bring Your Images to Life, In 2024
- New 2024 Approved Learn Easy Blender Rigging in Only 2 Minutes
- Updated No. 1 Maker to Animate Your Logo Online Free for 2024
- 2024 Approved Make Creative Animation Videos
- New How to Make Whiteboard Animation Videos
- How to Make GIF Stickers for WhatsApp 100 The Easy Way for 2024
- New In 2024, All About 3D Medical Animation And Its Uses
- In 2024, Looking for Love Animated GIFs? Here Are 5 Free Sources For You
- In 2024, Adobe Animate Text Effects Skills You Need to Know
- 2024 Approved Tutorials for Animating Picture Online Without Learning From Scratch
- New 2024 Approved How to Cartoonize Photo Photoshop in Easy Steps
- Updated In 2024, 8 Free GIF Animators to Make Your Own GIF
- New In 2024, 10 Amazing Whiteboard Animation Video Examples You Need to Bookmark
- 10 Most Memorable Japanese Cat Cartoons for 2024
- 2024 Approved What This Post Can Teach You About Clay Animation
- New Before You Learn 3D Animation Things You Should Know
- In 2024, How to Unlock Apple iPhone 14 Pro with IMEI Code?
- In 2024, How to Change/Fake Your Nubia Z50 Ultra Location on Viber | Dr.fone
- Can I use iTools gpx file to catch the rare Pokemon On Tecno Pova 5 Pro | Dr.fone
- How To Stream Anything From Xiaomi Redmi K70 Pro to Apple TV | Dr.fone
- In 2024, How to Fix Pokemon Go Route Not Working On Samsung Galaxy A14 5G? | Dr.fone
- Video File Repair - How to Fix Corrupted video files of Xiaomi Redmi K70 Pro on Windows?
- How to Bypass Google FRP Lock on Samsung Galaxy F04 Devices
- In 2024, Unova Stone Pokémon Go Evolution List and How Catch Them For Honor 70 Lite 5G | Dr.fone
- Can I use iTools gpx file to catch the rare Pokemon On Lava Storm 5G | Dr.fone
- In 2024, Hassle-Free Ways to Remove FRP Lock on Nokia G42 5G Phones with/without a PC
- In 2024, How to Transfer Data from Motorola Razr 40 to Any iOS Devices | Dr.fone
- Step-by-Step Tutorial How To Bypass Vivo Y56 5G FRP
- How to play MOV files on Defy 2 ?
- In 2024, The Magnificent Art of Pokemon Go Streaming On Apple iPhone 12? | Dr.fone
- Play Store Stuck on Downloading Of Vivo S18? 7 Ways to Resolve | Dr.fone
- In 2024, How To Remove iCloud From iPhone 7 Plus Smoothly
- In 2024, How To Remove Flashlight From Apple iPhone XS Max Lock Screen
- In 2024, Here are Some Pro Tips for Pokemon Go PvP Battles On Oppo A59 5G | Dr.fone
- How To Unlock SIM Cards Of Motorola Moto G84 5G Without PUK Codes
- How to Fix Unfortunately, Contacts Has Stopped Error on Vivo Y100 | Dr.fone
- Title: New 2024 Approved How to Make an Animated Travel Map Video?
- Author: Elon
- Created at : 2024-05-19 03:05:38
- Updated at : 2024-05-20 03:05:38
- Link: https://animation-videos.techidaily.com/new-2024-approved-how-to-make-an-animated-travel-map-video/
- License: This work is licensed under CC BY-NC-SA 4.0.
