
:max_bytes(150000):strip_icc():format(webp)/young-muslim-woman-using-phone-1137305438-75947aa7fb484506bf9da8c38fc68a03.jpg)
New 2024 Approved How to Stop Animation From Looping in Unity
How to Stop Animation From Looping in Unity
How to Stop Animation from Looping in Unity
An easy yet powerful editor
Numerous effects to choose from
Detailed tutorials provided by the official channel
Unity is an IDE interface all designed exclusively for game developers. However, you can do much more with Unity than game development. But, our main concern here is something else than this subject. You’re looking for easy tutorials on Unity stop animation!

And luckily, we’ve got you covered as we’ve briefly explained how to perform Unity stop animation from looping and the steps to make a smooth animation.
In this article
01 [What is Unity Used for?](#Part 1)
02 [How to Stop Animation Playing in Loop in Unity?](#Part 2)
03 [How to Smooth an Animation in Unity?](#Part 3)
Part 1 What is Unity Used for?
Unity is a software tool friendly to all the game developers out there. This tool is used by the large community of game developers to power and create their game development projects. And, the software is more of a professional means and not a simple pared-down ‘game builder .’Unity also offers one of the most significant inbuilt features like rendering, physics, and collision detection. Thus, one of the powerful aspects of Unity is that game developers need not go out of the box and create everything from scratch. Instead, they are available with the physics engine required to develop games quickly. Another robust feature of Unity is that it includes an excellent ‘Asset Store’ where developers can upload their creations and showcase them to the whole community. So, that’s Unity and its uses in a broader scope!
Before we take you through the next section, it’s important to mention that Unity is also known as cross-platform IDE, where IDE stands for ‘integrated development environment.’ So, it can be called more of an interface with access to all the tools and resources required to develop games.
Apart from the game development, Unity is known for other excellent usage purposes as:
● Simulations
● Animation
● Architectural Visualization
● Previsualization for Film
● Interactive Experiences
Among these features only, we’ll describe Unity stop animation from looping in detail.
Part 2 How to Stop Animation Playing in Loop in Unity?
As we said, we’ll describe to you the most accessible definition of how to stop Animation in Unity. Thus, there are simple steps that we’d like to define firsthand before explaining the whole procedure with an image-centric step-by-step guide.
So, those simple steps to stop motion animation in After Effects in the loop also go like below:
Step 1 Go to the Project tab and select Animation.
Step 2 Open the Inspector tab.
Step 3 Uncheck the checkbox Loop Time, and you’re good to go!
We’ll describe the same, i.e., Unity stop animation from looping through the step guide below.
In this guide, we’ll explain right from applying the Animation so that you’d understand better. So, let’s begin without any further ado!
01Step 1 Delete animation folder
We have already created an animation folder in the folder named as own Animation, so click that folder, click the animation folder, and then another folder along with as shown below. Hold the Shift key and click another folder. Then, right-click the Delete tab as depicted below.
Similarly, you can also delete the Animation if you wish.

02Step 2 Create an animation for the subject
Now, you may have different subjects. We’re creating Animation on Mobile Joystick for reference, as shown below.

Now, hit the Create tab on the Unity panel below. Then, proceed to save your Animation in the folder you’ve already created for the same.

03Step 3 Give positions to the animation
Firstly, hit the red-icon button used for recording, as shown below.

Give the position on the left side after you click the button. And, then, clicking almost near to 3you can give the position to the right-hand side as shown below.

Now, the animation has been set. You can see the animation from left to right if you click the Play button. So, here, you can see the results of infinite loop animation, which won’t stop.

You can follow two ways to stop this Animation in Unity from looping, and we’ll describe both methods below.
04Step 4 Stop animation Unity Way 1
Go to the animation folder where you’ve created the animation and click the New Animation icon as shown below.

Now, you have to uncheck the Loop Time tab on the top-right corner of the Unity panel.

05Step 5 Stop animation Unity Way 2
Alternatively, you can click the Animator tab on the top of the Unity panel and double-tap the New Animation button. Then, it will also delete or uncheck the loop time, as shown below.

These were all the steps to stop animation Unity.
Part 3 How to Smooth an Animation in Unity?
After done with Unity stop animation, it’s time to smooth your Unity animation. Again, we will describe it simply if you’re used to the Unity platform and then with a step guide with respective screenshots.
So, stay tuned until the end to reveal the easy steps of smoothing an animation in Unity.
Select the Dopesheet at the bottom of the animation window. Then, you need to switch to the ‘Curves’ view once you create your Animation in the Dopesheet. These animation curves help you accelerate and decelerate animations so that the movement and other things can stop and start smoothly.
So, let’s begin with the step guide tutorial on the same as follows:
For reference, take an example of a metronome object imported from Blender to Unity. Here, we’ve grouped all the pendulum objects under one rotation so that when we move the pendulum, it pivots to the correct point, as shown below.

01Add the animator
So, the first step begins with adding the Animator component to the parent object. You can do this by clicking the Add Component tab on the Unity panel’s left side, searching for Animator, and clicking the Animator.
You will also need a controller to control the animations. Go to your animation folder, right-click, and select Create> Animator Controller tab.

Let’s call or give it a name metronome animator as shown below.
Then, you need to drag this into your animator component. Again, you need to go to your animations folder, right-click, select Create> Animations tab.
Now, give this a name pendulum full swing.
02Open the animator tab
Now, open the animator tab, drag this pendulum swing animation to that panel, and double-tap the yellow-colored New Animation button.

03Create an animation
With the game object selected, the animated metronome pendulum, in this case, we’d like to animate the X component of the rotation. So, you need to click Add Property> Transform> Rotation tab and click the + sign on its right, as shown below.
Now, click the plus sign automatically to set two keyframes, one at the beginning and one at the end. Now, click on end select all, and then delete for now.

04Add keyframes to rotate the pendulum
With the first set of keyframes and the pendulum all way to the right, go halfway and change the rotation to the left on the left panel of Unity. Then, add another keyframe.

05Slow down the animation
As you can observe, the Animation of this pendulum is in a straight line and feels unnatural to the eyes. Thus, we’re required to smooth this Animation now! For this purpose, go to the Curves; you can see the pink properties of rotation as going from one side to another.

Now, you need to adjust these pink curves. Start by adding a key to one of its sides, as shown below. After that, it is all on you how slow or fasts you want these values to be.
Here, you’re all done smoothing the animation in Unity after learning the stop-animation Unity tutorial.
You can even stop motion animation on Photoshop with the above tutorial.
06Bonus Tip:
We want to introduce an excellent video editor software called Filmora Video Editor . It is from the house of Wondershare, a well-known software company worldwide.

Wondershare Filmora - Best Video Editor for Mac/Windows
5,481,435 people have downloaded it.
Build unique custom animations without breaking a sweat.
Focus on creating epic stories and leave the details to Filmora’s auto features.
Start a creative adventure with drag & drop effects and endless possibilities.
Filmora simplifies advanced features to save you time and effort.
Filmora cuts out repetition so you can move on to your next creative breakthrough.
With Filmora, you can easily add Animation and edit your videos to make them look world-class. The latest version and new updates are eye-candy and quick fix for beginner video editors.
So, please pay a visit to the Filmora website and check out its Mac and Windows version for free today.
● Key Takeaways from This Episode →
● Learning the concept and usage of Unity
● A tutorial on how to stop animation in Unity from looping
● A tutorial on how to smooth animation in Unity
● Introduction to Filmora, the top-most video editor software for beginners.
Unity is an IDE interface all designed exclusively for game developers. However, you can do much more with Unity than game development. But, our main concern here is something else than this subject. You’re looking for easy tutorials on Unity stop animation!
And luckily, we’ve got you covered as we’ve briefly explained how to perform Unity stop animation from looping and the steps to make a smooth animation.
In this article
01 [What is Unity Used for?](#Part 1)
02 [How to Stop Animation Playing in Loop in Unity?](#Part 2)
03 [How to Smooth an Animation in Unity?](#Part 3)
Part 1 What is Unity Used for?
Unity is a software tool friendly to all the game developers out there. This tool is used by the large community of game developers to power and create their game development projects. And, the software is more of a professional means and not a simple pared-down ‘game builder .’Unity also offers one of the most significant inbuilt features like rendering, physics, and collision detection. Thus, one of the powerful aspects of Unity is that game developers need not go out of the box and create everything from scratch. Instead, they are available with the physics engine required to develop games quickly. Another robust feature of Unity is that it includes an excellent ‘Asset Store’ where developers can upload their creations and showcase them to the whole community. So, that’s Unity and its uses in a broader scope!
Before we take you through the next section, it’s important to mention that Unity is also known as cross-platform IDE, where IDE stands for ‘integrated development environment.’ So, it can be called more of an interface with access to all the tools and resources required to develop games.
Apart from the game development, Unity is known for other excellent usage purposes as:
● Simulations
● Animation
● Architectural Visualization
● Previsualization for Film
● Interactive Experiences
Among these features only, we’ll describe Unity stop animation from looping in detail.
Part 2 How to Stop Animation Playing in Loop in Unity?
As we said, we’ll describe to you the most accessible definition of how to stop Animation in Unity. Thus, there are simple steps that we’d like to define firsthand before explaining the whole procedure with an image-centric step-by-step guide.
So, those simple steps to stop motion animation in After Effects in the loop also go like below:
Step 1 Go to the Project tab and select Animation.
Step 2 Open the Inspector tab.
Step 3 Uncheck the checkbox Loop Time, and you’re good to go!
We’ll describe the same, i.e., Unity stop animation from looping through the step guide below.
In this guide, we’ll explain right from applying the Animation so that you’d understand better. So, let’s begin without any further ado!
01Step 1 Delete animation folder
We have already created an animation folder in the folder named as own Animation, so click that folder, click the animation folder, and then another folder along with as shown below. Hold the Shift key and click another folder. Then, right-click the Delete tab as depicted below.
Similarly, you can also delete the Animation if you wish.
02Step 2 Create an animation for the subject
Now, you may have different subjects. We’re creating Animation on Mobile Joystick for reference, as shown below.
Now, hit the Create tab on the Unity panel below. Then, proceed to save your Animation in the folder you’ve already created for the same.
03Step 3 Give positions to the animation
Firstly, hit the red-icon button used for recording, as shown below.
Give the position on the left side after you click the button. And, then, clicking almost near to 3you can give the position to the right-hand side as shown below.
Now, the animation has been set. You can see the animation from left to right if you click the Play button. So, here, you can see the results of infinite loop animation, which won’t stop.
You can follow two ways to stop this Animation in Unity from looping, and we’ll describe both methods below.
04Step 4 Stop animation Unity Way 1
Go to the animation folder where you’ve created the animation and click the New Animation icon as shown below.
Now, you have to uncheck the Loop Time tab on the top-right corner of the Unity panel.
05Step 5 Stop animation Unity Way 2
Alternatively, you can click the Animator tab on the top of the Unity panel and double-tap the New Animation button. Then, it will also delete or uncheck the loop time, as shown below.
These were all the steps to stop animation Unity.
Part 3 How to Smooth an Animation in Unity?
After done with Unity stop animation, it’s time to smooth your Unity animation. Again, we will describe it simply if you’re used to the Unity platform and then with a step guide with respective screenshots.
So, stay tuned until the end to reveal the easy steps of smoothing an animation in Unity.
Select the Dopesheet at the bottom of the animation window. Then, you need to switch to the ‘Curves’ view once you create your Animation in the Dopesheet. These animation curves help you accelerate and decelerate animations so that the movement and other things can stop and start smoothly.
So, let’s begin with the step guide tutorial on the same as follows:
For reference, take an example of a metronome object imported from Blender to Unity. Here, we’ve grouped all the pendulum objects under one rotation so that when we move the pendulum, it pivots to the correct point, as shown below.
01Add the animator
So, the first step begins with adding the Animator component to the parent object. You can do this by clicking the Add Component tab on the Unity panel’s left side, searching for Animator, and clicking the Animator.
You will also need a controller to control the animations. Go to your animation folder, right-click, and select Create> Animator Controller tab.
Let’s call or give it a name metronome animator as shown below.
Then, you need to drag this into your animator component. Again, you need to go to your animations folder, right-click, select Create> Animations tab.
Now, give this a name pendulum full swing.
02Open the animator tab
Now, open the animator tab, drag this pendulum swing animation to that panel, and double-tap the yellow-colored New Animation button.
03Create an animation
With the game object selected, the animated metronome pendulum, in this case, we’d like to animate the X component of the rotation. So, you need to click Add Property> Transform> Rotation tab and click the + sign on its right, as shown below.
Now, click the plus sign automatically to set two keyframes, one at the beginning and one at the end. Now, click on end select all, and then delete for now.
04Add keyframes to rotate the pendulum
With the first set of keyframes and the pendulum all way to the right, go halfway and change the rotation to the left on the left panel of Unity. Then, add another keyframe.
05Slow down the animation
As you can observe, the Animation of this pendulum is in a straight line and feels unnatural to the eyes. Thus, we’re required to smooth this Animation now! For this purpose, go to the Curves; you can see the pink properties of rotation as going from one side to another.
Now, you need to adjust these pink curves. Start by adding a key to one of its sides, as shown below. After that, it is all on you how slow or fasts you want these values to be.
Here, you’re all done smoothing the animation in Unity after learning the stop-animation Unity tutorial.
You can even stop motion animation on Photoshop with the above tutorial.
06Bonus Tip:
We want to introduce an excellent video editor software called Filmora Video Editor . It is from the house of Wondershare, a well-known software company worldwide.
Wondershare Filmora - Best Video Editor for Mac/Windows
5,481,435 people have downloaded it.
Build unique custom animations without breaking a sweat.
Focus on creating epic stories and leave the details to Filmora’s auto features.
Start a creative adventure with drag & drop effects and endless possibilities.
Filmora simplifies advanced features to save you time and effort.
Filmora cuts out repetition so you can move on to your next creative breakthrough.
With Filmora, you can easily add Animation and edit your videos to make them look world-class. The latest version and new updates are eye-candy and quick fix for beginner video editors.
So, please pay a visit to the Filmora website and check out its Mac and Windows version for free today.
● Key Takeaways from This Episode →
● Learning the concept and usage of Unity
● A tutorial on how to stop animation in Unity from looping
● A tutorial on how to smooth animation in Unity
● Introduction to Filmora, the top-most video editor software for beginners.
Top 10 Popular Cartoons You Forgot Existed
Top 10 Popular Cartoons You Forgot Existed
An easy yet powerful editor
Numerous effects to choose from
Detailed tutorials provided by the official channel
There has been an advancement in the cartoon since the last publication made by “Paste” (a 5,800-word short story by Henry James). However, traditional cable networks have created exciting and new worlds and characters. Various streaming platforms like YouTube have allowed different creators to draw cartoon videos and publish them as they want. It has long been said that cartoons are specifically made for kids to enjoy on Saturday morning, but this is no longer the case as adults now enjoy watching cartoons in their free time.
Have you ever thought, “I want to draw myself as a cartoon“ and turn it into animation? Then you must get inspired. Cartoons now range from more complex characters. Many employ wittier humor and more profound stories to engage people of any age, giving them the ability to tell powerful, relatable, and hilarious stories within the realm of animation. As a result of the dramatic change in the cartoon world, we will be writing out top popular cartoons you may have forgotten that ever existed. This list will be on influence, relatability, and influence when they lived.
In this article
01 [Do You Remember the Very Popular Simpsons?](#Part 1)
02 [The 10 Best Cartoon Shows Since the Simpsons](#Part 2)
Part 1 Do You Remember the Very Popular Simpsons?
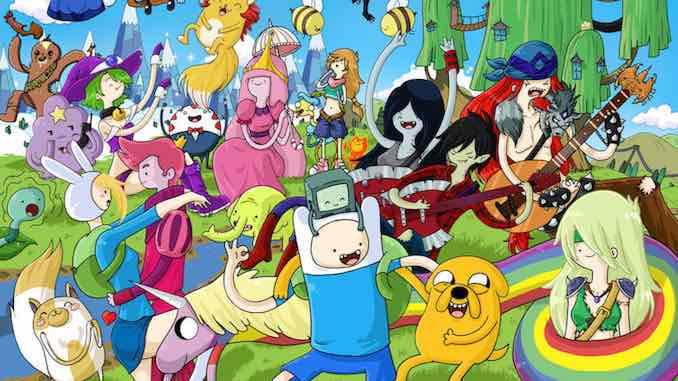
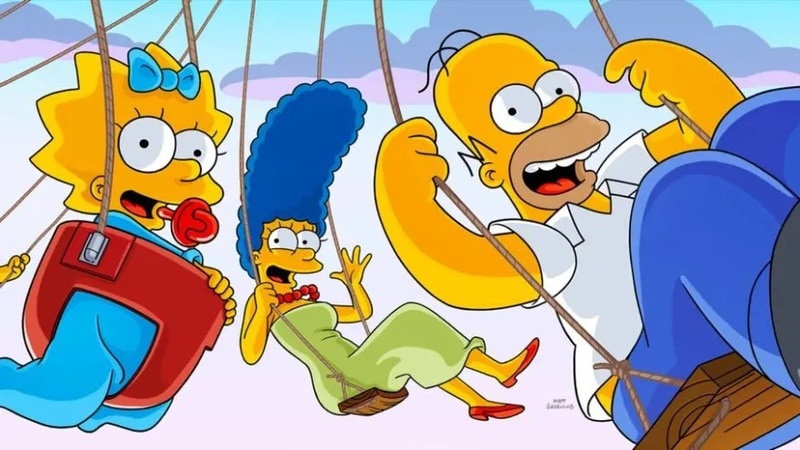
The Simpsons is an American animated cartoonist Matt Groening created for the Fox Broadcasting Company. The Simpsons began in 1987 as a short cartoon shot on The Tracey Ullman Show and received acclamation throughout its early seasons in the 1990s, which are generally considered a “golden age.”
The popular cartoon series is a satirical depiction of American life epitomized by the Simpson family, consisting of Bart, Homer, Lisa, Marge, and Maggie. In addition, the show is set to run on television, and the human condition and the fictional town of Springfield parody American culture and society.
However, the Simpsons is a combined production by 20th Television and Gracie Films. Also, on March 3, 2021, the series got renewed for seasons 33 and 34, with 22 episodes for each. Thus, increasing the number of episodes from 706 to 750. Furthermore, its thirty-third (33rd) season came on September 26, 2021.
Before now, the Simpsons was the longest-running American animated cartoon series, an American sitcom, and American scripted primetime television series awarded in terms of seasons and number of episodes.
Part 2 The 10 Best Cartoon Shows Since the Simpsons
You can decide to learn to draw your cartoons or draw yourself as a cartoon to create an animation for TV just like the Simpsons. However, if you are looking for the best tool to help you animate your cartoon much more manageable, we recommend using Wondershare Filmora Video Editor .
For Win 7 or later (64-bit)
For macOS 10.12 or later
Wondershare Filmora
Get started easily with Filmora’s powerful performance, intuitive interface, and countless effects!
Try It Free Try It Free Try It Free Learn More >

Filmora platform offers you tons of materials for learning to draw cartoons, and also it has a keyframing feature that allows you to animate your cartoon with ease.
However, here are the ten best cartoon shows that have existed since the Simpsons:
01Futurama
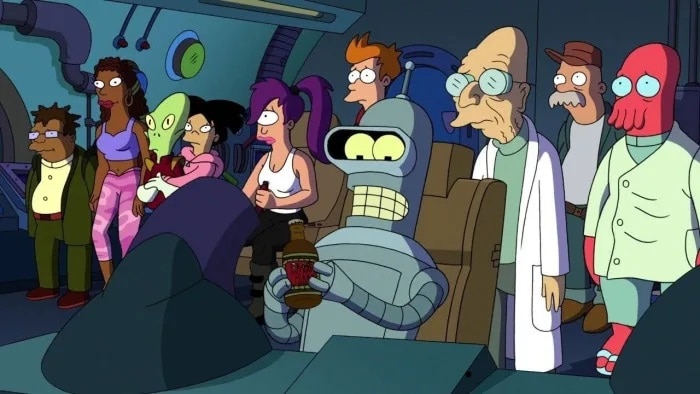
This popular cartoon series, first released on March 28, 1999, is a cartoon series about utopian or dystopian. The central concept of this series is that it dares to imagine a future that’s pretty similar to the present using a bunch of crazy technology and space travel. Aside from being pretty, it is also hilarious.
02The Critic
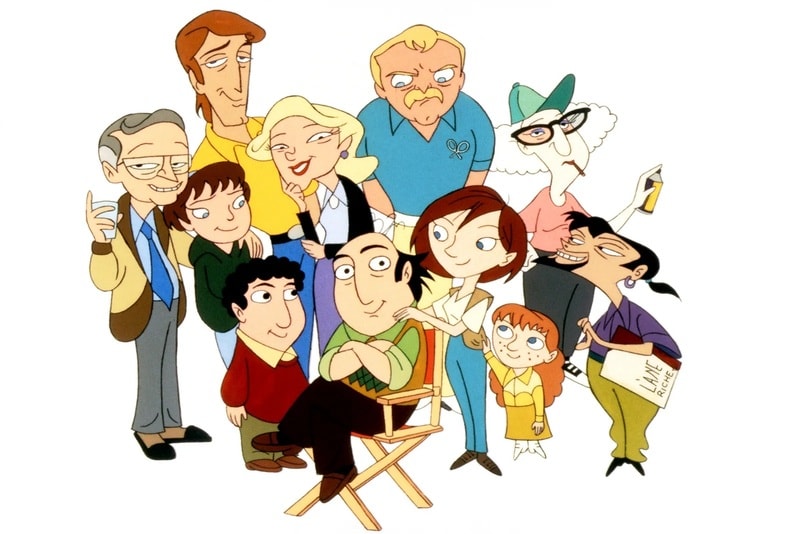
This cartoon series was first created in 1994 by the Simpson’s writers Al Jean and Mike Reiss. This cartoon has ramped up its predecessor’s non sequitur and sight-gag humor featuring Jon Lovitz’s Jay Sherman, an unfortunate portmanteau of Gene Siskel and Roger Ebert.
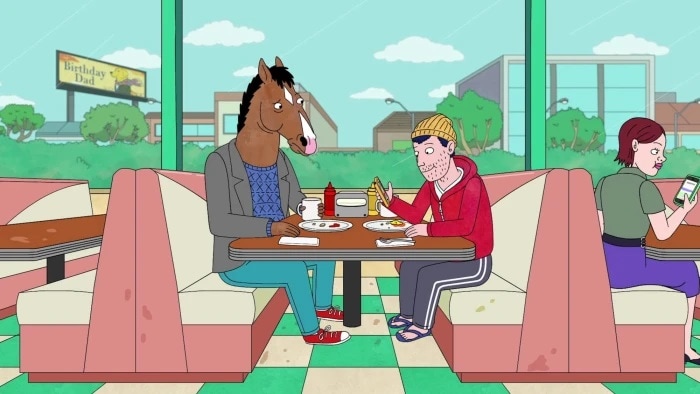
03Bojack Horseman
Bojack Horseman is a dumb cartoon character series first created on August 22, 2014. However, four (4) days later, the series was renewed for a second season, released on July 17, 2015. It is often a searing portrait of addiction, failure, depression, etc., as humans talk to a horse.
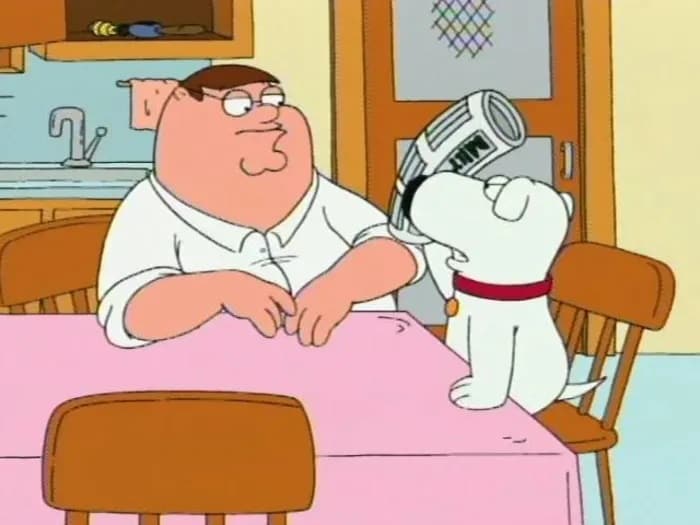
04Family Guy
Family Guy, the snoopy cartoon series, was first created on January 31, 1999, which goes for anything for a laugh style. However, you might not like the Griffin family or the other residents of Quahog, but you have to admit that the show stumbles on a great joke.
05South Park
South Park debuted with “Cartman Gets an Anal Probe, “ first created on August 13, 1997. Although it started with some cheap animations, it has become one of the iconic animated shows.

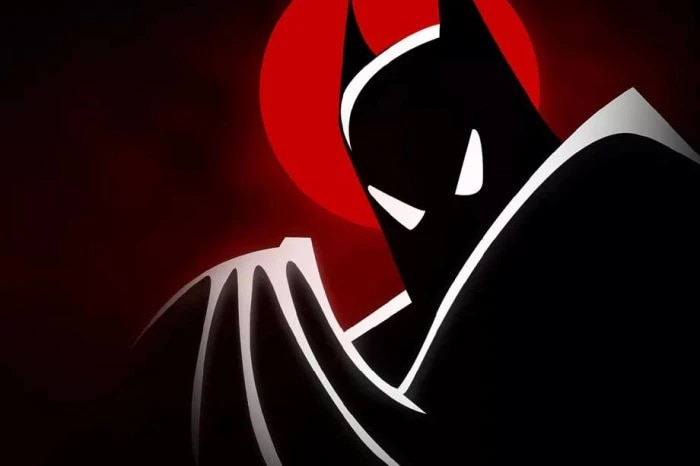
06Batman: The Animated Series
The Batman animated cartoon series, created on September 5, 1992, is a favorite for many people, although it is more comedy than an animated drama.
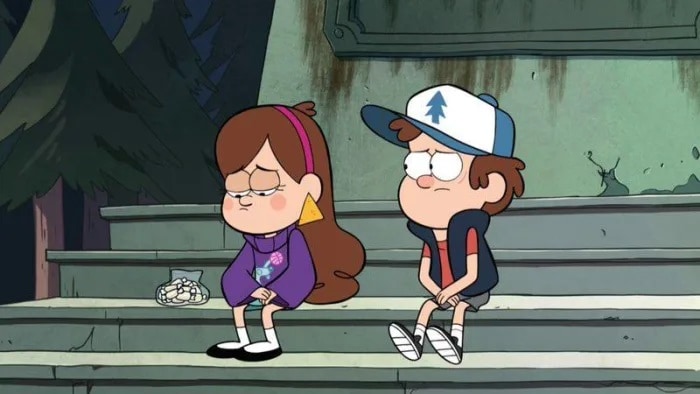
07Gravity Falls
This cartoon animated series was first created on June 15, 2012, and is a mystery story about a few kids with a supernatural bend.
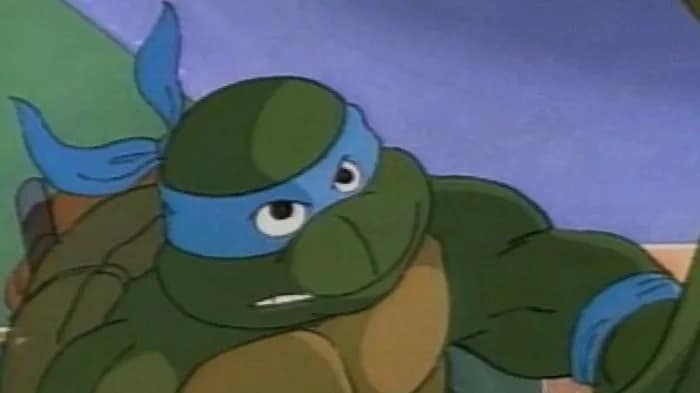
08Teenage Mutant Ninja Turtles
This popular cartoon animated series was first created in 1983 by cartoonists Kevin Eastman and Peter Laird. This cartoon series is the definitive version, brightly colored and fun and fluffy.
09Doug
This cartoon animated series was first created on March 26, 1999, by Jim Jinkins and produced by Jumbo Pictures. It was one of the first animated shows on Nickelodeon before moving to Disney pictures. However, this show is creative and down-to-earth at the same time.

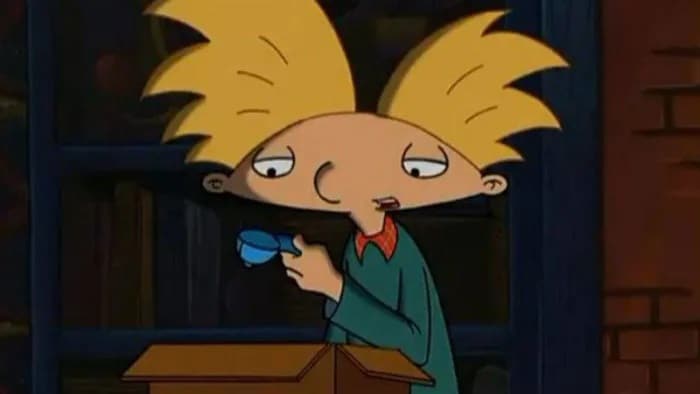
10Hey Arnold
This cartoon animated series came in on October 7, 1996. This show was the second after the first wave of the Nickelodeon show. It was the best of the bunch, and I liked the evolved version of “Doug.”
1
● Ending Thoughts →
● Aside from the list of popular cartoons mentioned in this article, you can also pick the snoopy cartoonswhen talking about comics that once existed.
● Addionally, you can also learn drawing cartoon videos and turn them into animation to publish in TV series.
● Finally, this article also emphasizes Fimora as the best editing tool you can choose from when you want to transform your cartoon drawing for class 6 into an animation.
There has been an advancement in the cartoon since the last publication made by “Paste” (a 5,800-word short story by Henry James). However, traditional cable networks have created exciting and new worlds and characters. Various streaming platforms like YouTube have allowed different creators to draw cartoon videos and publish them as they want. It has long been said that cartoons are specifically made for kids to enjoy on Saturday morning, but this is no longer the case as adults now enjoy watching cartoons in their free time.
Have you ever thought, “I want to draw myself as a cartoon“ and turn it into animation? Then you must get inspired. Cartoons now range from more complex characters. Many employ wittier humor and more profound stories to engage people of any age, giving them the ability to tell powerful, relatable, and hilarious stories within the realm of animation. As a result of the dramatic change in the cartoon world, we will be writing out top popular cartoons you may have forgotten that ever existed. This list will be on influence, relatability, and influence when they lived.
In this article
01 [Do You Remember the Very Popular Simpsons?](#Part 1)
02 [The 10 Best Cartoon Shows Since the Simpsons](#Part 2)
Part 1 Do You Remember the Very Popular Simpsons?
The Simpsons is an American animated cartoonist Matt Groening created for the Fox Broadcasting Company. The Simpsons began in 1987 as a short cartoon shot on The Tracey Ullman Show and received acclamation throughout its early seasons in the 1990s, which are generally considered a “golden age.”
The popular cartoon series is a satirical depiction of American life epitomized by the Simpson family, consisting of Bart, Homer, Lisa, Marge, and Maggie. In addition, the show is set to run on television, and the human condition and the fictional town of Springfield parody American culture and society.
However, the Simpsons is a combined production by 20th Television and Gracie Films. Also, on March 3, 2021, the series got renewed for seasons 33 and 34, with 22 episodes for each. Thus, increasing the number of episodes from 706 to 750. Furthermore, its thirty-third (33rd) season came on September 26, 2021.
Before now, the Simpsons was the longest-running American animated cartoon series, an American sitcom, and American scripted primetime television series awarded in terms of seasons and number of episodes.
Part 2 The 10 Best Cartoon Shows Since the Simpsons
You can decide to learn to draw your cartoons or draw yourself as a cartoon to create an animation for TV just like the Simpsons. However, if you are looking for the best tool to help you animate your cartoon much more manageable, we recommend using Wondershare Filmora Video Editor .
For Win 7 or later (64-bit)
For macOS 10.12 or later
Wondershare Filmora
Get started easily with Filmora’s powerful performance, intuitive interface, and countless effects!
Try It Free Try It Free Try It Free Learn More >
Filmora platform offers you tons of materials for learning to draw cartoons, and also it has a keyframing feature that allows you to animate your cartoon with ease.
However, here are the ten best cartoon shows that have existed since the Simpsons:
01Futurama
This popular cartoon series, first released on March 28, 1999, is a cartoon series about utopian or dystopian. The central concept of this series is that it dares to imagine a future that’s pretty similar to the present using a bunch of crazy technology and space travel. Aside from being pretty, it is also hilarious.
02The Critic
This cartoon series was first created in 1994 by the Simpson’s writers Al Jean and Mike Reiss. This cartoon has ramped up its predecessor’s non sequitur and sight-gag humor featuring Jon Lovitz’s Jay Sherman, an unfortunate portmanteau of Gene Siskel and Roger Ebert.
03Bojack Horseman
Bojack Horseman is a dumb cartoon character series first created on August 22, 2014. However, four (4) days later, the series was renewed for a second season, released on July 17, 2015. It is often a searing portrait of addiction, failure, depression, etc., as humans talk to a horse.
04Family Guy
Family Guy, the snoopy cartoon series, was first created on January 31, 1999, which goes for anything for a laugh style. However, you might not like the Griffin family or the other residents of Quahog, but you have to admit that the show stumbles on a great joke.
05South Park
South Park debuted with “Cartman Gets an Anal Probe, “ first created on August 13, 1997. Although it started with some cheap animations, it has become one of the iconic animated shows.
06Batman: The Animated Series
The Batman animated cartoon series, created on September 5, 1992, is a favorite for many people, although it is more comedy than an animated drama.
07Gravity Falls
This cartoon animated series was first created on June 15, 2012, and is a mystery story about a few kids with a supernatural bend.
08Teenage Mutant Ninja Turtles
This popular cartoon animated series was first created in 1983 by cartoonists Kevin Eastman and Peter Laird. This cartoon series is the definitive version, brightly colored and fun and fluffy.
09Doug
This cartoon animated series was first created on March 26, 1999, by Jim Jinkins and produced by Jumbo Pictures. It was one of the first animated shows on Nickelodeon before moving to Disney pictures. However, this show is creative and down-to-earth at the same time.
10Hey Arnold
This cartoon animated series came in on October 7, 1996. This show was the second after the first wave of the Nickelodeon show. It was the best of the bunch, and I liked the evolved version of “Doug.”
1
● Ending Thoughts →
● Aside from the list of popular cartoons mentioned in this article, you can also pick the snoopy cartoonswhen talking about comics that once existed.
● Addionally, you can also learn drawing cartoon videos and turn them into animation to publish in TV series.
● Finally, this article also emphasizes Fimora as the best editing tool you can choose from when you want to transform your cartoon drawing for class 6 into an animation.
How to Make GIF Stickers for WhatsApp 100% The Easy Way
How to Make GIF Stickers for WhatsApp 100% The Easy Way
An easy yet powerful editor
Numerous effects to choose from
Detailed tutorials provided by the official channel
Wish your dear friends and loved ones on their special days using some interesting WhatsApp stickers. There is an integrated library of these stickers in different categories on your Android as well as iPhone.

Still, if you want a more personalized one, you can create a customized sticker using videos on your phone or using third-party apps and tools. Learn about how to use the integrated stickers and create customized in the following parts of the topic.
In this article
01 [Using stickers from integrated library](#Part 1)
02 [Best tools to create animated GIF sticker – Wondershare Filmora](#Part 2)
03 [Using iPhone and Android videos to make GIF stickers](#Part 3)
Part 1 Using stickers from integrated library
WhatsApp on your Android and iPhone has a decent collection of stickers that can send to your contacts. You simply need to look for the sticker in the desired category and send it and the steps for adding GIFs to WhatsApp are listed below.
Step 1. Open the WhatsApp contact to which you wish to send the sticker. To open the animation library on your Android device, tap on the emoji icon and choose the GIF option. On an iPhone, the library opens by clicking on the sticker icon.
Step 2. Search and select the desired sticker from the available options.
Step 3. To finally share the selected one, click on the sticker and then on the Send button.

Part 2 Best tools to create animated GIF sticker – Wondershare Filmora
If you are in search of a tool that lets you create a professional-looking animated GIF easily Wondershare Filmora Video Editor is the best WhatsApp GIF maker tool. This software once downloaded on your Windows or Mac system, is all set to look after multiple video editing tasks including GIF creation.
Wondershare Filmora
Get started easily with Filmora’s powerful performance, intuitive interface, and countless effects!
Try It Free Try It Free Try It Free Learn More >
Your videos in MP4, MKV, MOV, and several other key formats can be converted to a GIF file using the program and multiple options for editing are available as well like crop, trim, add effects, add texts, and more.
The intuitive interface of the software makes it easy to use even by non-techy people.
Steps on how to make WhatsApp GIF sticker using Wondershare Filmora
**Step 1.**On your Windows or Mac, download, install, and launch the Wondershare software and then import the video files from which GIF has to be created.
Step 2. The added files have to be now dragged and dropped to the timeline.

Step 3. Editing tools for customization can be used.
**Step 4.**For further personalization by adding text, effects, and more the related functions can be used.

Step 5. Next, choose the GIF option as the target file format from the Local tab. Select the file name and the location. Clicking on the EXPORT button will start the processing.

Part 3 Using iPhone and Android videos to make GIF stickers
If you do not wish to use any third-party tools, basic stickers can also be created using the videos on your Android and iPhone. A video cannot be more than 6 seconds in length to be used as a GIF and thus longer videos need to be trimmed.
Steps on how to make a GIF stickers for WhatsApp
Step 1. Launch the WhatsApp contact to which you wish to send the GIF. Add the video from the device gallery by clicking on the camera button. A video using the camera can also be recorded.
Note: Ensure that video length is not more than 6 seconds. If it is more, use the slider at the top to trim the video.
Step 2. Next, you can add the text using the Caption option.
Step 3. Now to convert this video into a GIF click on the GIF button under the video and then tap on the Send button to share this animation with the contact.

● Key Takeaways from This Episode →
●WhatsApp has an integrated library of GIF stickers in a wide range of categories.
●For creating customized stickers, Wondershare Filmora works as the best software as it is simple, quick, and has multiple editing options.
●Using the videos from the gallery, GIF stickers can also be created on your Android and iPhone.
Wish your dear friends and loved ones on their special days using some interesting WhatsApp stickers. There is an integrated library of these stickers in different categories on your Android as well as iPhone.
Still, if you want a more personalized one, you can create a customized sticker using videos on your phone or using third-party apps and tools. Learn about how to use the integrated stickers and create customized in the following parts of the topic.
In this article
01 [Using stickers from integrated library](#Part 1)
02 [Best tools to create animated GIF sticker – Wondershare Filmora](#Part 2)
03 [Using iPhone and Android videos to make GIF stickers](#Part 3)
Part 1 Using stickers from integrated library
WhatsApp on your Android and iPhone has a decent collection of stickers that can send to your contacts. You simply need to look for the sticker in the desired category and send it and the steps for adding GIFs to WhatsApp are listed below.
Step 1. Open the WhatsApp contact to which you wish to send the sticker. To open the animation library on your Android device, tap on the emoji icon and choose the GIF option. On an iPhone, the library opens by clicking on the sticker icon.
Step 2. Search and select the desired sticker from the available options.
Step 3. To finally share the selected one, click on the sticker and then on the Send button.
Part 2 Best tools to create animated GIF sticker – Wondershare Filmora
If you are in search of a tool that lets you create a professional-looking animated GIF easily Wondershare Filmora Video Editor is the best WhatsApp GIF maker tool. This software once downloaded on your Windows or Mac system, is all set to look after multiple video editing tasks including GIF creation.
Wondershare Filmora
Get started easily with Filmora’s powerful performance, intuitive interface, and countless effects!
Try It Free Try It Free Try It Free Learn More >
Your videos in MP4, MKV, MOV, and several other key formats can be converted to a GIF file using the program and multiple options for editing are available as well like crop, trim, add effects, add texts, and more.
The intuitive interface of the software makes it easy to use even by non-techy people.
Steps on how to make WhatsApp GIF sticker using Wondershare Filmora
**Step 1.**On your Windows or Mac, download, install, and launch the Wondershare software and then import the video files from which GIF has to be created.
Step 2. The added files have to be now dragged and dropped to the timeline.
Step 3. Editing tools for customization can be used.
**Step 4.**For further personalization by adding text, effects, and more the related functions can be used.
Step 5. Next, choose the GIF option as the target file format from the Local tab. Select the file name and the location. Clicking on the EXPORT button will start the processing.
Part 3 Using iPhone and Android videos to make GIF stickers
If you do not wish to use any third-party tools, basic stickers can also be created using the videos on your Android and iPhone. A video cannot be more than 6 seconds in length to be used as a GIF and thus longer videos need to be trimmed.
Steps on how to make a GIF stickers for WhatsApp
Step 1. Launch the WhatsApp contact to which you wish to send the GIF. Add the video from the device gallery by clicking on the camera button. A video using the camera can also be recorded.
Note: Ensure that video length is not more than 6 seconds. If it is more, use the slider at the top to trim the video.
Step 2. Next, you can add the text using the Caption option.
Step 3. Now to convert this video into a GIF click on the GIF button under the video and then tap on the Send button to share this animation with the contact.
● Key Takeaways from This Episode →
●WhatsApp has an integrated library of GIF stickers in a wide range of categories.
●For creating customized stickers, Wondershare Filmora works as the best software as it is simple, quick, and has multiple editing options.
●Using the videos from the gallery, GIF stickers can also be created on your Android and iPhone.
Why These 10 Top Text Motion Templates Are Worth Your Attention
Why These 10+ Top Text Motion Templates Are Worth Your Attention
An easy yet powerful editor
Numerous effects to choose from
Detailed tutorials provided by the official channel
If you’re looking to add some ‘text in motion‘ to your video projects, then you’ve come to the right place! We’ve listed some of our favorite Text Motion After Effects and Text Motion Graphics Premiere Pro templates that you can use to get a head start in the realm of adding motion into text! (As a bonus, we’ve also included an overview on text motion and some of the best text motion graphics tutorials that you can refer to when trying out the templates we’ve recommended.)
In this article
01 [What’s Text Motion?](#Part 1)
02 [10 Best Text Motion After Effects](#Part 2)
03 [Tutorials for Making Great Text Motion](#Part 3)
Part 1 What’s Text Motion?
Alright, first of all, let’s answer the big question! Text Motion, what is it and why should you be adding it to your projects ASAP? Well, in regards to the former, the answer is simple: text motion graphics is literally text animation that you can add to your projects to give it an extra bit of life and make it more show-stealing!
In regards to the latter, the answer is in its description! After all, why wouldn’t you want your projects to be able to capture more attention?

Have a look at the screenshot above that we included of an example project on the video editor, Wondershare Filmora . As you can see, we inserted text in motion at the very start. And despite being a still screenshot of said text motion graphics, the preview is eye-catching even when paused!
This is the kind of project that you can do yourself with the right templates and the right video editor. We’ve got your back on the first in the list coming up. And, as for the second, we recommend that you try out Filmora! It is, as you can see, quite an expansive software. One that will allow you to truly make the most of the text motion graphics you’ll be able to create at the end of this article.
Part 2 10 Best Text Motion After Effects
Alright, now let’s move on to our promised Text Motion Graphics After Effects and Text Motion Graphics Premiere Pro templates. We’ve tried our best to pick a variety out for you so that you can have a good selection to choose from! You should also take the time to explore the different platforms where these templates are offered in case you end up needing a different look!
01Clean and Elegant Corporate Identity – Text Reveal (Mogrt)
The first on this list is the ‘Clean and Elegant Corporate Identity — Text Reveal’ by Mogrt. The title is quite explanatory in and of itself, but just in case you’re confused, it’s a template that was designed for professionals and brands to establish their corporate identity. The font is very modern in design, and it comes with several flare variations so that the reveal works out in the way that you want it to.
Other aspects, like the shadow blur, opacity, particle size (for the reveal), and text glossiness are also adjustable and can be changed at will based on your standards.
02Multipurpose Clean 3D Text to Title
The next text motion template is the ‘Multipurpose Clean 3D Text to Title’ also created by Mogrt. This one is text motion graphics that you can use for Premiere Pro and, with proper customization, and be used for just about anything that you want! It’s a very multi-purpose kind of graphic, one that you can maybe sneak in as an advert or for announcing celebrations or anniversaries!
As a final note, if you want to use this graphic as text motion for after effects , it is available for that as well!
03Simple Motion Text | Premiere Pro
This next template, the ‘Simple Motion Text’ graphic, is one that is available for both Premiere Pro and After Effects (though the link we’ve provided is for the Premiere Pro version!) As the name implies, the animation is quite simple, which may be exactly what you want, in any case. It certainly makes it very versatile (especially as you can change font style and color as you will). Making it the perfect template for a beginner that’s just starting out and doesn’t want anything too complicated.
0430 Glitch Text Presets For Premiere Pro | Mogrt
This next template, the ‘30 Glitch Text Presets’ by Mogrt is a Premiere Pro exclusive! It’s also quite fun in its particulars. As a template, it’s not as versatile as the one that we introduced previously, since the ‘glitch’ effect gives off quite the unique vibes, but that doesn’t make it any less potent at catching the eyes of your audience!
The best part, in this case, is that it comes with 30 pre-sets, all with fitting glitch sound effects (included in the pack) that you can use. Of course, there are other customization functions as well, including font style, color, transparency, and so on.
05Comic Bubbles MOGRT
Again, this next templated, called ‘Comic Bubbles’, kind of has its own unique vibe, making it inflexible in some ways but also more fun if that’s the kind of look that you’re looking for. Which, in this case, are literal ‘Comic’ text bubbles, like you would see in your old 90s comic (loud, pop-y, and with lots of bright colors!) The only difference from that to this is that these comic text bubbles move, allowing you to create ‘punchy’ text in between animated projects.
For your reference, there are 80 different comic bubbles included in the pack. All of which are easy to customize and will allow you to adjust colors, text, and transition effects (have a look at the video that we’ve linked if you want to see it in action!)
06Smoke To Text Reveal (Mogrt)
This next template, ‘Smoke to Text Reveal’ is another one that serves a very particular need. To help with visualization, the text motion graphics are at first obscured by smoke before it bubbles up into a crisp, modern text reveal! It’s perfect for those looking for underwater-themed text motion graphics. Or those who want to serve a hint of mystery with the smoke effect.
This is Text Motion Graphics - Premiere Pro. And the best part about it is that you can customize the text and the background at will — allowing you to truly make the template your own and make the most out of the smoke-to-reveal effect.
07Text Messages Toolkit
Want to appeal to the Gen Z audience? Then, the ‘text messages toolkit’ might be a fun text motion graphics for you to try. As you can perhaps surmise from the name, it’s a template that you can use in order to create ‘text message’ interactions. It’s customizable too! You can change the text box color, size, transparency, and just have a ball pimping it out of that’s what you want.
08Large Text Title Block
With the ‘large text title block’ template, you have the flexibility of the naturally more modern and minimalistic design, allowing you to use it for a wide variety of different projects. It works especially well for advertisements, if you’re wondering about potential uses, or as transition graphics between text to video!
09Blueprint Titles
Want something that’s a little quirkier? Or, perhaps, instructional? Then the ‘Blueprint Titles’ template is one that you can consider. As you can perhaps guess from the name, it allows you to create text motion graphics in a style that is similar to the kind of blueprints you usually see when working with design or architecture.
10Dynamic Minimalism
Sometimes, simple really is best! And, this next template, the ‘Dynamic Minimalism’ text motion after effects and text motion graphics premiere pro template is one that you might want in your arsenal just for the sake of your simpler projects! The kit comes with 30 different animations, as well as other customization functions that you can play around with to add a little personality to what are otherwise very minimalistic designs.
Part 3 Tutorials for Making Great Text Motion
For the last part of this article, we’ll be introducing some tutorials that you can refer to while trying out the templates that we recommended! We’ve pulled all of this from YouTube so that you can start learning immediately! And, of course, a variety has been chosen so that you can get your info from more than one source.
01Smooth Professional Text Animation in Premiere Pro - TUTORIAL
The first tutorial we have for you was created by Ignace Aleya on YouTube. This tutorial is a ‘Premiere Pro’ tutorial that focuses on helping beginners and intermediate users alike in understanding the ways of text motion graphics. He offers some pretty good pointers and tricks on keeping the quality of your work high. And the way that he shares his knowledge is pretty solid too! Allowing you to both watch and enjoy the video.
02Easy Title Motion Graphics
This next tutorial is about text motion graphics while working in Adobe After Effects. Like the previous tutorial, it will teach you the basics of using templates! It was posted by SonduckFilm, and the video covers five different “Easy Title Motion Graphics” as examples! Altogether, it’s a great choice if what you’re looking for is tips on making the most out of the templates we introduced on our list.
03Basic Logo Animations
Next, we have a tutorial from the YouTube content creator, Broken! This one is on the subject of both simple and complex logo animations that you can create when working on establishing a brand. It’s a great video for beginners and is quite informative on the subject of customization.
● Key Takeaways from This Episode →
● What is text motion and why do you need to start using it for your own projects ASAP? Well, text motion graphics are, basically, text animation! They’re eye-catching and informative at the same time, making them a great vessel for getting a message across to your audience.
● If you want to start creating text motion graphics yourself, we suggest starting with templates first! At least then, you’ll be able to make yourself comfortable while learning about the opportunities available to you.
● There are many different templates out there that you can try. Some are multi-purpose, some not. We’ve chosen a variety to introduce to you in of this article! Complete with a list of some tutorials in that you can refer to no matter what kind of project you’re working on.
If you’re looking to add some ‘text in motion‘ to your video projects, then you’ve come to the right place! We’ve listed some of our favorite Text Motion After Effects and Text Motion Graphics Premiere Pro templates that you can use to get a head start in the realm of adding motion into text! (As a bonus, we’ve also included an overview on text motion and some of the best text motion graphics tutorials that you can refer to when trying out the templates we’ve recommended.)
In this article
01 [What’s Text Motion?](#Part 1)
02 [10 Best Text Motion After Effects](#Part 2)
03 [Tutorials for Making Great Text Motion](#Part 3)
Part 1 What’s Text Motion?
Alright, first of all, let’s answer the big question! Text Motion, what is it and why should you be adding it to your projects ASAP? Well, in regards to the former, the answer is simple: text motion graphics is literally text animation that you can add to your projects to give it an extra bit of life and make it more show-stealing!
In regards to the latter, the answer is in its description! After all, why wouldn’t you want your projects to be able to capture more attention?
Have a look at the screenshot above that we included of an example project on the video editor, Wondershare Filmora . As you can see, we inserted text in motion at the very start. And despite being a still screenshot of said text motion graphics, the preview is eye-catching even when paused!
This is the kind of project that you can do yourself with the right templates and the right video editor. We’ve got your back on the first in the list coming up. And, as for the second, we recommend that you try out Filmora! It is, as you can see, quite an expansive software. One that will allow you to truly make the most of the text motion graphics you’ll be able to create at the end of this article.
Part 2 10 Best Text Motion After Effects
Alright, now let’s move on to our promised Text Motion Graphics After Effects and Text Motion Graphics Premiere Pro templates. We’ve tried our best to pick a variety out for you so that you can have a good selection to choose from! You should also take the time to explore the different platforms where these templates are offered in case you end up needing a different look!
01Clean and Elegant Corporate Identity – Text Reveal (Mogrt)
The first on this list is the ‘Clean and Elegant Corporate Identity — Text Reveal’ by Mogrt. The title is quite explanatory in and of itself, but just in case you’re confused, it’s a template that was designed for professionals and brands to establish their corporate identity. The font is very modern in design, and it comes with several flare variations so that the reveal works out in the way that you want it to.
Other aspects, like the shadow blur, opacity, particle size (for the reveal), and text glossiness are also adjustable and can be changed at will based on your standards.
02Multipurpose Clean 3D Text to Title
The next text motion template is the ‘Multipurpose Clean 3D Text to Title’ also created by Mogrt. This one is text motion graphics that you can use for Premiere Pro and, with proper customization, and be used for just about anything that you want! It’s a very multi-purpose kind of graphic, one that you can maybe sneak in as an advert or for announcing celebrations or anniversaries!
As a final note, if you want to use this graphic as text motion for after effects , it is available for that as well!
03Simple Motion Text | Premiere Pro
This next template, the ‘Simple Motion Text’ graphic, is one that is available for both Premiere Pro and After Effects (though the link we’ve provided is for the Premiere Pro version!) As the name implies, the animation is quite simple, which may be exactly what you want, in any case. It certainly makes it very versatile (especially as you can change font style and color as you will). Making it the perfect template for a beginner that’s just starting out and doesn’t want anything too complicated.
0430 Glitch Text Presets For Premiere Pro | Mogrt
This next template, the ‘30 Glitch Text Presets’ by Mogrt is a Premiere Pro exclusive! It’s also quite fun in its particulars. As a template, it’s not as versatile as the one that we introduced previously, since the ‘glitch’ effect gives off quite the unique vibes, but that doesn’t make it any less potent at catching the eyes of your audience!
The best part, in this case, is that it comes with 30 pre-sets, all with fitting glitch sound effects (included in the pack) that you can use. Of course, there are other customization functions as well, including font style, color, transparency, and so on.
05Comic Bubbles MOGRT
Again, this next templated, called ‘Comic Bubbles’, kind of has its own unique vibe, making it inflexible in some ways but also more fun if that’s the kind of look that you’re looking for. Which, in this case, are literal ‘Comic’ text bubbles, like you would see in your old 90s comic (loud, pop-y, and with lots of bright colors!) The only difference from that to this is that these comic text bubbles move, allowing you to create ‘punchy’ text in between animated projects.
For your reference, there are 80 different comic bubbles included in the pack. All of which are easy to customize and will allow you to adjust colors, text, and transition effects (have a look at the video that we’ve linked if you want to see it in action!)
06Smoke To Text Reveal (Mogrt)
This next template, ‘Smoke to Text Reveal’ is another one that serves a very particular need. To help with visualization, the text motion graphics are at first obscured by smoke before it bubbles up into a crisp, modern text reveal! It’s perfect for those looking for underwater-themed text motion graphics. Or those who want to serve a hint of mystery with the smoke effect.
This is Text Motion Graphics - Premiere Pro. And the best part about it is that you can customize the text and the background at will — allowing you to truly make the template your own and make the most out of the smoke-to-reveal effect.
07Text Messages Toolkit
Want to appeal to the Gen Z audience? Then, the ‘text messages toolkit’ might be a fun text motion graphics for you to try. As you can perhaps surmise from the name, it’s a template that you can use in order to create ‘text message’ interactions. It’s customizable too! You can change the text box color, size, transparency, and just have a ball pimping it out of that’s what you want.
08Large Text Title Block
With the ‘large text title block’ template, you have the flexibility of the naturally more modern and minimalistic design, allowing you to use it for a wide variety of different projects. It works especially well for advertisements, if you’re wondering about potential uses, or as transition graphics between text to video!
09Blueprint Titles
Want something that’s a little quirkier? Or, perhaps, instructional? Then the ‘Blueprint Titles’ template is one that you can consider. As you can perhaps guess from the name, it allows you to create text motion graphics in a style that is similar to the kind of blueprints you usually see when working with design or architecture.
10Dynamic Minimalism
Sometimes, simple really is best! And, this next template, the ‘Dynamic Minimalism’ text motion after effects and text motion graphics premiere pro template is one that you might want in your arsenal just for the sake of your simpler projects! The kit comes with 30 different animations, as well as other customization functions that you can play around with to add a little personality to what are otherwise very minimalistic designs.
Part 3 Tutorials for Making Great Text Motion
For the last part of this article, we’ll be introducing some tutorials that you can refer to while trying out the templates that we recommended! We’ve pulled all of this from YouTube so that you can start learning immediately! And, of course, a variety has been chosen so that you can get your info from more than one source.
01Smooth Professional Text Animation in Premiere Pro - TUTORIAL
The first tutorial we have for you was created by Ignace Aleya on YouTube. This tutorial is a ‘Premiere Pro’ tutorial that focuses on helping beginners and intermediate users alike in understanding the ways of text motion graphics. He offers some pretty good pointers and tricks on keeping the quality of your work high. And the way that he shares his knowledge is pretty solid too! Allowing you to both watch and enjoy the video.
02Easy Title Motion Graphics
This next tutorial is about text motion graphics while working in Adobe After Effects. Like the previous tutorial, it will teach you the basics of using templates! It was posted by SonduckFilm, and the video covers five different “Easy Title Motion Graphics” as examples! Altogether, it’s a great choice if what you’re looking for is tips on making the most out of the templates we introduced on our list.
03Basic Logo Animations
Next, we have a tutorial from the YouTube content creator, Broken! This one is on the subject of both simple and complex logo animations that you can create when working on establishing a brand. It’s a great video for beginners and is quite informative on the subject of customization.
● Key Takeaways from This Episode →
● What is text motion and why do you need to start using it for your own projects ASAP? Well, text motion graphics are, basically, text animation! They’re eye-catching and informative at the same time, making them a great vessel for getting a message across to your audience.
● If you want to start creating text motion graphics yourself, we suggest starting with templates first! At least then, you’ll be able to make yourself comfortable while learning about the opportunities available to you.
● There are many different templates out there that you can try. Some are multi-purpose, some not. We’ve chosen a variety to introduce to you in of this article! Complete with a list of some tutorials in that you can refer to no matter what kind of project you’re working on.
Most Popular Tips on Learning Animate Rigging
Most Popular Tips on Learning Animate Rigging
An easy yet powerful editor
Numerous effects to choose from
Detailed tutorials provided by the official channel
This was a question one of my friends asked me recently on the subject of animate rigging
To help them out (as well as other animation rigging beginners) I decided to compile some of the most popular tips on the subject in this article!
In this article
01 [The Only Guide You’ll Ever Need to Know About Rigging in Animation](#Part 1)
02 [How Do You Animate Rigging?](#Part 2)
Part 1 The Only Guide You’ll Ever Need to Know About Rigging in Animation
Before anything else, we’ve prepared a bit of an OVERVIEW on rigging in animation. This will cover most of the basic, need-to-know stuff to nudge you in the right direction and help the tips we’ve prepared to settle in more easily.
01What is Rigging in Animation
Rigging in animation is a technique used by animators to—quite literally—‘rig’ up a statistic digital character to act or move.
Even more simply, it’s a way of bringing literal life to your character models by introducing them to motion. The ‘rig’ in this case, is usually made as a sort of one-size-fits-all kind of tool, which you can use in order to create pre-made skeletal animations that replicate motions like walking, running, jumping, etc., and apply onto static characters. You can use animation software, like Maya in order to get this done!

02An Introduction to 2D Animation Rigging
2D animation is a more back-breaking kind of process. It’s what you see in a lot of older animations — where every frame needs to be drawn in order to allow for the illusion of motion in characters. This is how classics, like Mickey Mouse, are usually produced!
03An Introduction to 3D Animation Rigging
3D animation, as you can probably guess, is a more modern animation style. You see it in a lot of big blockbuster animated movies these days! Even Disney has since moved onto this style, whereas they were staunch supporters of 2D animation in previous decades. Now, a lot of their major productions, including titles such as “Tangled”, “Frozen”, and “Moana” are 3D animated.
In any case, this is more like what we described earlier — where skeletal ‘rigs’ are applied to static 3D character models to make them move.
04Key 3D Rigging Terms to Get You Moving
Finally, to make sure that you’re headed in the right direction, here’s a list of some of the more important 3D rigging terms that you’ll need to know:
Joints|Bones: This is pretty straightforward, but the Joints or the Bones, in this case, refers to the pieces of the skeletal rig that is used to create movement.
Driven Keys: Driven keys are there to help rigging artists make the movement appear more natural faster. It consists of two parts, the driver (which controls the animation) and the driven (the parts controlled by the driver).
Blend Shapes: This is an animation tool that riggers used mainly for facial animation (like lip-syncing). Basically, it allows them to blend or morph an existing shape to give it motion.
Inverse Kinematics: This is a method of animation that separates a part from the whole. Like how an animator can create motion in the wrist, for example, as a separate entity from the arm.
Forward Kinematics: Opposite of the previous style, this one is a method that follows a hierarchical progression.
Control Curves: This is a way of manipulating multiple joins in a rig in order to create one flowing movement.
Constraint: A way of limiting the positioning of a model or a joint.
Deformers: A way of enhancing rigs to produce a more organic model.
Skinning: This is the process of adding the 3D mesh to the joints.
Weight Planning: This is the process of planning how the weight of an object will affect its 3D mesh and the movement of its joints.
Facial Rigging: This is the process of setting up facial animation, similar to how you set up skeletal animation, but far more complex.
Part 2 How Do You Animate Rigging?
Now, onto actually talking about how you can start animate rigging. This section will guide you through the process in a way that should hopefully help you while in the process of learning about animation in general.
01How to Rig a Simple Character
This has been broken down into four distinct stages to make things as simple as possible! It won’t be discussing the tools you use, as there are plenty of tools you can use for animation, just the general process:
Step 1: Design Your Character

Before you even think about animation, you should start with designing your character (or characters.) This will give you a good basis on what kind of animation rigging you’ll need to work on for that character.
For example, for a humanoid character, a general skeletal rigging might be okay. However, for a creature or monster, their joints might be in different areas or they might even have additional joints regular human rigs don’t have!
So, start with a foundation that you can work from to make things easier on yourself.
Step 2: Start With Rigging Points!

When you have your character design ready, it’s time to start rigging joints! It’s best to start with the joints and leave the more finicky parts later. Basically, it’s always easier to start with the parts that can create big movements first!
Working on things layer by layer should help make things easier for you as well.
Step 3: Connect The Layers!
It’s time to put everything together to create smooth movement! Depending on what tool you’re using, this is usually just as easy as dragging things into place.
Step 4: Timing Your Animation

With the rig in place, the next thing you have to worry about is frame timing. Timing is important for ensuring that there is no break in character motions
02Beginners Tutorial on Shape Rigging
This one is a little more complicated, and should be improved more by trial and error, but here are a couple of tips that you can follow along with while exploring blend shapes in animation:
Master your sculpting tools first and foremost! The more familiar you are with the shapes that your tools can create, the better!
Symmetrical modeling is one way of making the process go a lot faster! Take advantage of this option to highlight components that you need to be affected in the same way and at the same time.
If symmetrical modeling is not working for you, independent modeling is a great way of making things appear more organic.

03How Auto Rig Mapping Works
Auto-rigging is the use of pre-made rigs in order to simplify the process. The tool automatically maps the areas where the characters and the rig are given the same symbol names and snaps them together to create joints for a motion to be applied.
04How Visual Rig Mapping Works
Visual mapping is a lot more complicated the auto-rig mapping, so it’s not something you want to jump into immediately. However, it is a must for animation riggers that work with unique character models. The process usually goes as follows:
Manually make connections starting with the joints.
Applying the skeleton to the rig to complete bones and connections.
Motion can then be added to the timeline.

05Finalizing Your Animated Rig
To finish us off, let’s talk about how you go about publishing your finished product! Of course, even after you have your complex rig completed, there are still other matters to think about in terms of making sure that the video is of quality!
Key Takeaways from This Episode
● Start off on the right footing by learning the basics of animation! These days, there are more options than ever, with the modern 3D animation rigging style now just as popular as the more classic 2D animation style.
● The best way to learn animation rigging is to practice! Structured guides can help you get to the point of almost mastery, but it’s not until you start playing with the tools of your craft that you can truly learn how to create beautiful animations!
● Some of the more complex functions of rigging require a lot of patience, so make sure that you always go into your projects with a level-head. And, just to be sure, invest in tools that will help rather than hinder your progress! There are many advanced software out there that can help you improve more easily.
This was a question one of my friends asked me recently on the subject of animate rigging
To help them out (as well as other animation rigging beginners) I decided to compile some of the most popular tips on the subject in this article!
In this article
01 [The Only Guide You’ll Ever Need to Know About Rigging in Animation](#Part 1)
02 [How Do You Animate Rigging?](#Part 2)
Part 1 The Only Guide You’ll Ever Need to Know About Rigging in Animation
Before anything else, we’ve prepared a bit of an OVERVIEW on rigging in animation. This will cover most of the basic, need-to-know stuff to nudge you in the right direction and help the tips we’ve prepared to settle in more easily.
01What is Rigging in Animation
Rigging in animation is a technique used by animators to—quite literally—‘rig’ up a statistic digital character to act or move.
Even more simply, it’s a way of bringing literal life to your character models by introducing them to motion. The ‘rig’ in this case, is usually made as a sort of one-size-fits-all kind of tool, which you can use in order to create pre-made skeletal animations that replicate motions like walking, running, jumping, etc., and apply onto static characters. You can use animation software, like Maya in order to get this done!
02An Introduction to 2D Animation Rigging
2D animation is a more back-breaking kind of process. It’s what you see in a lot of older animations — where every frame needs to be drawn in order to allow for the illusion of motion in characters. This is how classics, like Mickey Mouse, are usually produced!
03An Introduction to 3D Animation Rigging
3D animation, as you can probably guess, is a more modern animation style. You see it in a lot of big blockbuster animated movies these days! Even Disney has since moved onto this style, whereas they were staunch supporters of 2D animation in previous decades. Now, a lot of their major productions, including titles such as “Tangled”, “Frozen”, and “Moana” are 3D animated.
In any case, this is more like what we described earlier — where skeletal ‘rigs’ are applied to static 3D character models to make them move.
04Key 3D Rigging Terms to Get You Moving
Finally, to make sure that you’re headed in the right direction, here’s a list of some of the more important 3D rigging terms that you’ll need to know:
Joints|Bones: This is pretty straightforward, but the Joints or the Bones, in this case, refers to the pieces of the skeletal rig that is used to create movement.
Driven Keys: Driven keys are there to help rigging artists make the movement appear more natural faster. It consists of two parts, the driver (which controls the animation) and the driven (the parts controlled by the driver).
Blend Shapes: This is an animation tool that riggers used mainly for facial animation (like lip-syncing). Basically, it allows them to blend or morph an existing shape to give it motion.
Inverse Kinematics: This is a method of animation that separates a part from the whole. Like how an animator can create motion in the wrist, for example, as a separate entity from the arm.
Forward Kinematics: Opposite of the previous style, this one is a method that follows a hierarchical progression.
Control Curves: This is a way of manipulating multiple joins in a rig in order to create one flowing movement.
Constraint: A way of limiting the positioning of a model or a joint.
Deformers: A way of enhancing rigs to produce a more organic model.
Skinning: This is the process of adding the 3D mesh to the joints.
Weight Planning: This is the process of planning how the weight of an object will affect its 3D mesh and the movement of its joints.
Facial Rigging: This is the process of setting up facial animation, similar to how you set up skeletal animation, but far more complex.
Part 2 How Do You Animate Rigging?
Now, onto actually talking about how you can start animate rigging. This section will guide you through the process in a way that should hopefully help you while in the process of learning about animation in general.
01How to Rig a Simple Character
This has been broken down into four distinct stages to make things as simple as possible! It won’t be discussing the tools you use, as there are plenty of tools you can use for animation, just the general process:
Step 1: Design Your Character
Before you even think about animation, you should start with designing your character (or characters.) This will give you a good basis on what kind of animation rigging you’ll need to work on for that character.
For example, for a humanoid character, a general skeletal rigging might be okay. However, for a creature or monster, their joints might be in different areas or they might even have additional joints regular human rigs don’t have!
So, start with a foundation that you can work from to make things easier on yourself.
Step 2: Start With Rigging Points!
When you have your character design ready, it’s time to start rigging joints! It’s best to start with the joints and leave the more finicky parts later. Basically, it’s always easier to start with the parts that can create big movements first!
Working on things layer by layer should help make things easier for you as well.
Step 3: Connect The Layers!
It’s time to put everything together to create smooth movement! Depending on what tool you’re using, this is usually just as easy as dragging things into place.
Step 4: Timing Your Animation
With the rig in place, the next thing you have to worry about is frame timing. Timing is important for ensuring that there is no break in character motions
02Beginners Tutorial on Shape Rigging
This one is a little more complicated, and should be improved more by trial and error, but here are a couple of tips that you can follow along with while exploring blend shapes in animation:
Master your sculpting tools first and foremost! The more familiar you are with the shapes that your tools can create, the better!
Symmetrical modeling is one way of making the process go a lot faster! Take advantage of this option to highlight components that you need to be affected in the same way and at the same time.
If symmetrical modeling is not working for you, independent modeling is a great way of making things appear more organic.
03How Auto Rig Mapping Works
Auto-rigging is the use of pre-made rigs in order to simplify the process. The tool automatically maps the areas where the characters and the rig are given the same symbol names and snaps them together to create joints for a motion to be applied.
04How Visual Rig Mapping Works
Visual mapping is a lot more complicated the auto-rig mapping, so it’s not something you want to jump into immediately. However, it is a must for animation riggers that work with unique character models. The process usually goes as follows:
Manually make connections starting with the joints.
Applying the skeleton to the rig to complete bones and connections.
Motion can then be added to the timeline.
05Finalizing Your Animated Rig
To finish us off, let’s talk about how you go about publishing your finished product! Of course, even after you have your complex rig completed, there are still other matters to think about in terms of making sure that the video is of quality!
Key Takeaways from This Episode
● Start off on the right footing by learning the basics of animation! These days, there are more options than ever, with the modern 3D animation rigging style now just as popular as the more classic 2D animation style.
● The best way to learn animation rigging is to practice! Structured guides can help you get to the point of almost mastery, but it’s not until you start playing with the tools of your craft that you can truly learn how to create beautiful animations!
● Some of the more complex functions of rigging require a lot of patience, so make sure that you always go into your projects with a level-head. And, just to be sure, invest in tools that will help rather than hinder your progress! There are many advanced software out there that can help you improve more easily.
15 Best Pics Collage Apps : Top Picks
15 Best Pics Collage Apps in 2024: Top Picks
An easy yet powerful editor
Numerous effects to choose from
Detailed tutorials provided by the official channel
With a high-end camera in a mobile phone these days there is a huge collection of pictures from various events, trips, and of your near and dear ones. So why not be creative and make some interesting pics collage from these images? Surprise your friends, relatives, and other people on their special occasion by creating pics collage and for this, you would need the help of a good collage app.

With the myriad of options available, selecting a few can be a difficult task and to help you with this, we have shortlisted some of the popular ones in the write-up below.
Part 1 Top 11 Pics Collage apps for Android and iOS
Below we have shortlisted the best apps for the pics collage that will help you create a customized collage using multiple functions and tools.
01Pic Collage
This is one of the most widely used apps available for iOS and Android devices that helps you create interesting collages.
Key features
● Free app with basic features and allows to remove ads and get access to advanced features using the paid version
● Intuitive layout with multiple templates to create photo collage pics.
● Comes with an array of photo editing tools.
● Add images from your phone or also from social media accounts.

02Photo and Shape Collage Maker
This is a free Android-based app with a 3.6 rating.
Key features
● Create frame collage, shape collage, name collage, and others.
● Comes with predefined shapes for creating a collage.
● Allows editing the collage size, background, and other factors.
● Customized shape collage can be created your name, number, or face.
● Add stickers, text, and other elements.

03Diptic
This is a paid app for iOS devices that allows creating photos as well as video collages.
Key features:
● Comes with over 190 layouts to choose from
● Add multiple photos and videos in each layout.
● Option for customizing the layout.
● Use different filters for enhancing the images.
● Add captions, effects, and other interesting elements.
● Allows creating Diptics using photos and videos from the device, Facebook, Dropbox, and other sources.

04PhotoGrid
This is an Android and iOS based app for creating collages.
Key features
● Create collage using photos, and videos.
● Comes with a variety of templates for creating personalized collages.
● The built-in editor lets you customize the images.
● Background stickers, doodles, text, and other effects can be added.
● A free version supports basic features while the paid pro version removes ads and watermarks and offers advanced features.

05Ribbet
This app on Android and iOS is mainly a photo editing tool that also supports creating collages.
Key features
● Create a collage using different customizable templates.
● Edit images and change file parameters to suit requirements.
● Add special effects, frames, and text.
● Editing tools like clones, curves, and burning.

06Moldiv
Use this app on your Android and iOS devices to create collages and professionally edit images.
Key features
● Comes with a variety of free collage templates.
● A wide range of layouts is available that can be customized.
● Works as a pro image editing tool.
● Add stickers, filters, backgrounds, and other elements.
● Allows adding up to 9 photos in a frame.

07PicPlayPost
Just like its name, this is an interesting tool for creating collages on iOS and Android devices and supports other functions as well.
Key features
● Free app with IAP option.
● Allows creating an animated slideshow using images and videos.
● Option to choose aspect ratio depending on the platform you wish to use the collage.
● Add text watermark or a business logo using the app.
● A wide range of media file formats is supported.

08PiZap
This is a multitasking app for Android and iOS devices that support functions like creating a collage, meme, photo editing, and more.
Key features:
● Create photo collages, posters, and greeting cards, in a few simple steps.
● A wide range of templates is available including the ones for Twitter, YouTube, and other sites.
● Add text, memes, shapes, filters, and other elements.
● Free to use app with Pro version offering additional features and removing ads.

0910. Live Collage
Download this app on your Android and iOS devices for creating interesting collages.
Key features:
● A simple and clean interface makes collage-making easy and fast.
● Comes with a variety of templates including special ones for Facebook, and Instagram.
● Allows creating customized canvas size and 3D templates available as well.
● Add filters to enhance your images.

1011. Pic Stitch
The app on Android and iOS devices allows creating customized pic collages for all occasions.
Key features
● User-friendly interface to create a customized collage using images and videos.
● Comes with more than 200 templates.
● Multiple images editing options are supported.
● Share created collages to social media sites.
● Choose a customized aspect ratio and also add music.

1112. PicsArt
PicsArt collage is another widely used Android and iOS-based tool that can be used for multiple tasks including collage-making.
Key features
● Comes with multiple templates including the ones for social media as well as business requirements.
● Add up to 10 images on a grid.
● Comes with a free photo library to select images.
● Being a complete image editing tool it allows personalized images in different ways.

Additional Reading: Edit your videos professionally and create a video collage using Wondershare UniConverter
If you are looking for a video editing tool that can let your edit your videos like a professional Wondershare Filmora Video Editor is just the right choice. This Windows and Mac-based software support variety of basic, as well as advanced features, and this, makes the software for all users. With over 800 stunning effects, you can create a video masterpiece using your creativity. Media files in all key formats are supported and there are options to add texts, overlays, transitions, filters, as well as music files.
The split-screen feature of the software can be further used to play multiple videos in different frames making it look like a video collage.
Wondershare Filmora - Best Video Editor for Mac/Windows
5,481,435 people have downloaded it.
Build unique custom animations without breaking a sweat.
Focus on creating epic stories and leave the details to Filmora’s auto features.
Start a creative adventure with drag & drop effects and endless possibilities.
Filmora simplifies advanced features to save you time and effort.
Filmora cuts out repetition so you can move on to your next creative breakthrough.
● Key Takeaways from This Episode →
● Create stunning pic collages on your phone using apps.
● A wide range of apps for Android and iOS are available.
● Edit your videos professionally and create a video collage using Wondershare Filmora.
With a high-end camera in a mobile phone these days there is a huge collection of pictures from various events, trips, and of your near and dear ones. So why not be creative and make some interesting pics collage from these images? Surprise your friends, relatives, and other people on their special occasion by creating pics collage and for this, you would need the help of a good collage app.
With the myriad of options available, selecting a few can be a difficult task and to help you with this, we have shortlisted some of the popular ones in the write-up below.
Part 1 Top 11 Pics Collage apps for Android and iOS
Below we have shortlisted the best apps for the pics collage that will help you create a customized collage using multiple functions and tools.
01Pic Collage
This is one of the most widely used apps available for iOS and Android devices that helps you create interesting collages.
Key features
● Free app with basic features and allows to remove ads and get access to advanced features using the paid version
● Intuitive layout with multiple templates to create photo collage pics.
● Comes with an array of photo editing tools.
● Add images from your phone or also from social media accounts.
02Photo and Shape Collage Maker
This is a free Android-based app with a 3.6 rating.
Key features
● Create frame collage, shape collage, name collage, and others.
● Comes with predefined shapes for creating a collage.
● Allows editing the collage size, background, and other factors.
● Customized shape collage can be created your name, number, or face.
● Add stickers, text, and other elements.
03Diptic
This is a paid app for iOS devices that allows creating photos as well as video collages.
Key features:
● Comes with over 190 layouts to choose from
● Add multiple photos and videos in each layout.
● Option for customizing the layout.
● Use different filters for enhancing the images.
● Add captions, effects, and other interesting elements.
● Allows creating Diptics using photos and videos from the device, Facebook, Dropbox, and other sources.
04PhotoGrid
This is an Android and iOS based app for creating collages.
Key features
● Create collage using photos, and videos.
● Comes with a variety of templates for creating personalized collages.
● The built-in editor lets you customize the images.
● Background stickers, doodles, text, and other effects can be added.
● A free version supports basic features while the paid pro version removes ads and watermarks and offers advanced features.
05Ribbet
This app on Android and iOS is mainly a photo editing tool that also supports creating collages.
Key features
● Create a collage using different customizable templates.
● Edit images and change file parameters to suit requirements.
● Add special effects, frames, and text.
● Editing tools like clones, curves, and burning.
06Moldiv
Use this app on your Android and iOS devices to create collages and professionally edit images.
Key features
● Comes with a variety of free collage templates.
● A wide range of layouts is available that can be customized.
● Works as a pro image editing tool.
● Add stickers, filters, backgrounds, and other elements.
● Allows adding up to 9 photos in a frame.
07PicPlayPost
Just like its name, this is an interesting tool for creating collages on iOS and Android devices and supports other functions as well.
Key features
● Free app with IAP option.
● Allows creating an animated slideshow using images and videos.
● Option to choose aspect ratio depending on the platform you wish to use the collage.
● Add text watermark or a business logo using the app.
● A wide range of media file formats is supported.
08PiZap
This is a multitasking app for Android and iOS devices that support functions like creating a collage, meme, photo editing, and more.
Key features:
● Create photo collages, posters, and greeting cards, in a few simple steps.
● A wide range of templates is available including the ones for Twitter, YouTube, and other sites.
● Add text, memes, shapes, filters, and other elements.
● Free to use app with Pro version offering additional features and removing ads.
0910. Live Collage
Download this app on your Android and iOS devices for creating interesting collages.
Key features:
● A simple and clean interface makes collage-making easy and fast.
● Comes with a variety of templates including special ones for Facebook, and Instagram.
● Allows creating customized canvas size and 3D templates available as well.
● Add filters to enhance your images.
1011. Pic Stitch
The app on Android and iOS devices allows creating customized pic collages for all occasions.
Key features
● User-friendly interface to create a customized collage using images and videos.
● Comes with more than 200 templates.
● Multiple images editing options are supported.
● Share created collages to social media sites.
● Choose a customized aspect ratio and also add music.
1112. PicsArt
PicsArt collage is another widely used Android and iOS-based tool that can be used for multiple tasks including collage-making.
Key features
● Comes with multiple templates including the ones for social media as well as business requirements.
● Add up to 10 images on a grid.
● Comes with a free photo library to select images.
● Being a complete image editing tool it allows personalized images in different ways.
Additional Reading: Edit your videos professionally and create a video collage using Wondershare UniConverter
If you are looking for a video editing tool that can let your edit your videos like a professional Wondershare Filmora Video Editor is just the right choice. This Windows and Mac-based software support variety of basic, as well as advanced features, and this, makes the software for all users. With over 800 stunning effects, you can create a video masterpiece using your creativity. Media files in all key formats are supported and there are options to add texts, overlays, transitions, filters, as well as music files.
The split-screen feature of the software can be further used to play multiple videos in different frames making it look like a video collage.
Wondershare Filmora - Best Video Editor for Mac/Windows
5,481,435 people have downloaded it.
Build unique custom animations without breaking a sweat.
Focus on creating epic stories and leave the details to Filmora’s auto features.
Start a creative adventure with drag & drop effects and endless possibilities.
Filmora simplifies advanced features to save you time and effort.
Filmora cuts out repetition so you can move on to your next creative breakthrough.
● Key Takeaways from This Episode →
● Create stunning pic collages on your phone using apps.
● A wide range of apps for Android and iOS are available.
● Edit your videos professionally and create a video collage using Wondershare Filmora.
How I Animate Discord Profile Pictures (& You Can Too)
How I Animate Discord Profile Pictures (& You Can Too)
An easy yet powerful editor
Numerous effects to choose from
Detailed tutorials provided by the official channel
Some users are still unaware of the fact that they can change the discord profile photo. If you are looking forward to the same, then you are on the right page.
Here we will discuss the process helpful for animating Discord profile pictures in just a few simple steps. Let’s get started!
In this article
01 [Where Can I Get Animated Avatar for Discord?](#Part 1)
02 [How to Get an Animated Profile Picture on Discord](#Part 2)
03 [Some Other Useful Tips to Improve Your Image Animate](#Part 3)
Part 1 Where Can I Get an Animated Avatar for Discord?
In this section, we will discuss how you can animate a PFP and how to get an animated avatar for Discord.
How Do You Animate a PFP?
The steps you need to follow to animate a PFP are:
Step 1: Firstly, you need to decide on what character you want to have as PFP. It can be a cartoon character, a painting, an illustration etc.
Step 2: Now, choose an online tool and begin to edit your image. When you upload the image, make sure to crop it to square. Please note that you need to make your image circle. So now, look for the rounded corner option and give the image the desired shape.
Step 3: It’s time to be creative with the image now. You can remove background, erase or add text and even add a background that suits your avatar. The customization depends all on your requirement. This is it. Now, you need to know how you can get an animated avatar on Discord.
Part 2 How to Get an Animated Profile Picture on Discord
If you are confused about how you will be able to get an animated profile picture on Discord, don’t worry at all. The steps are as follows:
Step 1: To get an animated discord profile picture, you will need to have Nitro. Otherwise the profile picture won’t save as animated. Also, if you use PC for this, things will be better. Now, open the desktop version of Discord.
Step 2: Login to your account and go to User Settings by clicking the gear icon given next to your profile picture.
Step 3: In Settings, multiple options will be visible. You need to look for the “Discord Nitro” option. Clicking on this will lead you to Discord Nitro page.
Note: You need to click on “Subscribe” if you don’t have Discord Nitro.
Step 4: Choose the plan once you subscribe. Hit on “Select” after choosing it.
Step 5: Pay for it using the desired payment method. Enter your address and agree to the terms and conditions of Discord. After all the formalities are done, please click on “Sweet”. This will complete the subscription.
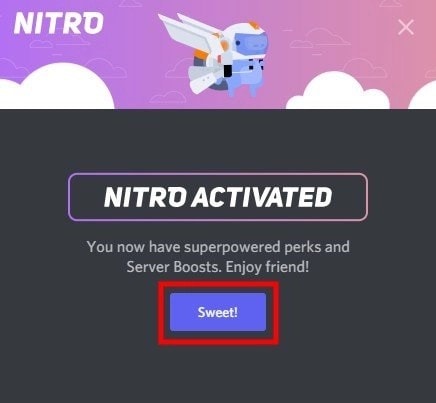
Step 6: Now, head to the GIF website like Tenor and choose the GIF that you like. Download it. You can right click on the GIF and click “Save Image as…” to get it.
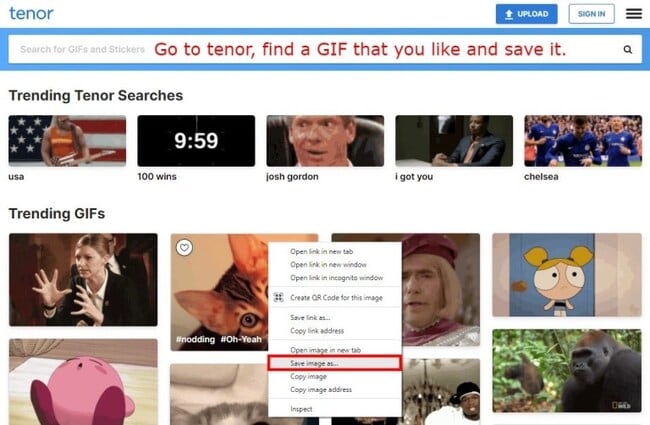
Step 7: After saving the GIF, go to the Settings of your Discord account. Hit on “User Profile” followed by “Change Avatar”.
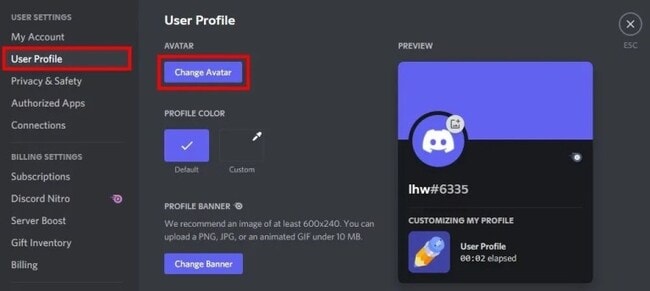
Step 8: The dialog box will open where you need to find the GIF you just saved. After finding the GIF, click on “Open”.
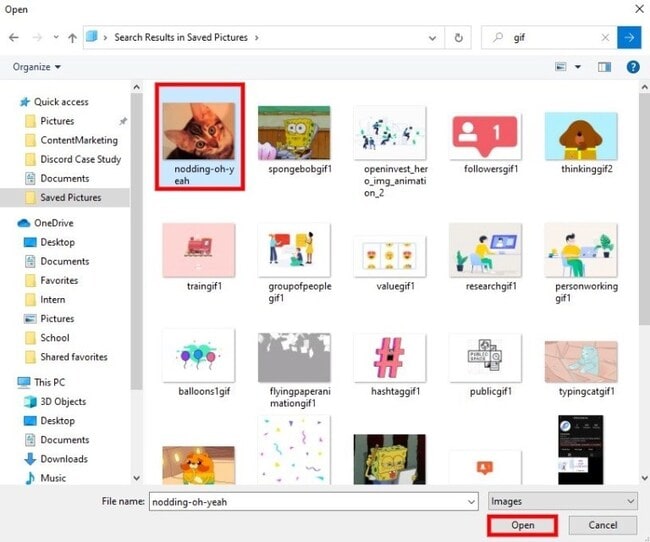
Note: You can take the animated avatar that you created yourself by using the steps in the previous part.
Step 9: Now, you will get to the Discord profile picture page. Here, you need to resize the GIF. Click on “Apply” when you are satisfied with the resizing or you can skip it too.
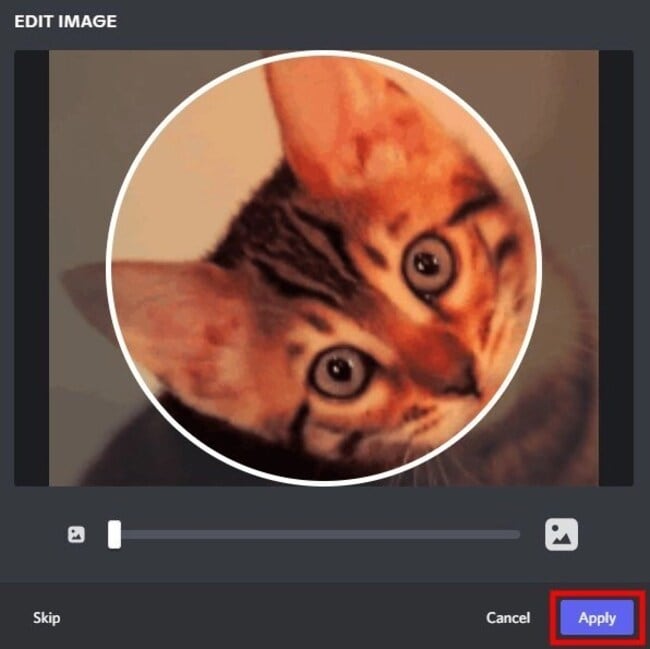
Step 10: Save the changes and you are good to go!
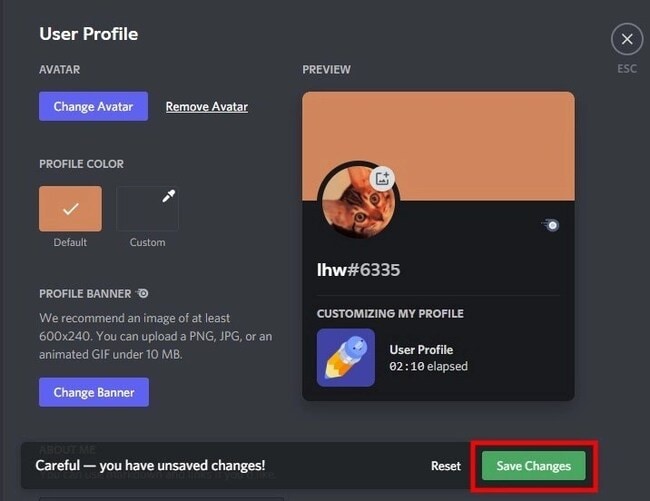
Part 3 Some Other Useful Tips to Improve Your Image Animate
If you’re wondering how to improve image animation, we’ve got some pointers for you. We all know that nitro is expensive and not everyone can get it for animating images. If you’re thinking the same thing, we’ve got the best tools for you right here.
Tools to consider for animating and improving the image:
01Adobe Spark
Adobe Spark is also among the best logo animation makers available and comes with the best features. It gives the final touch to the logo or video you have created. When you wish to animate your profile picture for Discord, the same can be done easily with it. The collection available on it is really very cool, and selecting from it can be an amazing experience. The templates are divided into categories along with the tabular ones so that you can choose them as per your requirements.
02Renderforest
Renderforest is also among the most loved software or applications loved by people around the world. It is helpful in creating logo animations too, for free. You can also choose from different templates available and customise them accordingly. Also, giving the animated effect to the logo is really very easy. If you wish to edit the logo, the same can be done easily. The major feature making it more appealing today is the transition effect, which is helpful in transforming a normal 2D logo into a 3D effect.

03Free Design logo
Free Design logo is an online application that always rules out the list. It features a 3D animation logo maker that is available for free. It has some logo samples and a catalogue available that are helpful for users to create excellent logos easily. Moreover, the templates available can be customised as per the need for stop. A user needs to download the application and, after it, they can have access to all the examples available for 3D logos.
04Tube arsenal
Tube Arsenal is also a famous application for users whenever they wish to animate a logo for their company. The interface appears to be similar to Renderforest, but the features are quite advanced. There is no technical knowledge required for using the same because it comes with an easy-to-use interface and templates that will be helpful in creating the logo of your choice.
Creative logo tips:

Some tips you can keep in mind while creating logo are as follows:
● Be specific to your brand. Be sure that you are not choosing a logo that may deviate customers from your brand perspective.
● Always choose colors in contrast because a single color logo does not seem to be appealing.
● Make sure to choose a template that is easy to understand. If the template seems to be difficult to understand, a user will not be able to get it.
● Create a logo with the minimum design because excessive design will make it tacky.
● Be sure not to add extra icons to the logo. This can be troublesome and make the logo unappealing.
● Go for white or a dark shade of background, because this will be helpful in making the text more visible.
Part 1 How to add an animated image/DP to WhatsApp?
Unfortunately, if you are looking forward to setting up an animated image on WhatsApp, it is not possible. The WhatsApp algorithm has been designed in such a manner that you can only use static images that is in JPG format. If the format is not the same, you can’t use it as the image over WhatsApp.
Key Takeaways from This Episode
● Nitro is helpful in setting up the animated image for discord.
● Filmora Pro is the best tool for editing images and animating them.
● WhatsApp doesn’t entertain setting up animated images over DP.
Some users are still unaware of the fact that they can change the discord profile photo. If you are looking forward to the same, then you are on the right page.
Here we will discuss the process helpful for animating Discord profile pictures in just a few simple steps. Let’s get started!
In this article
01 [Where Can I Get Animated Avatar for Discord?](#Part 1)
02 [How to Get an Animated Profile Picture on Discord](#Part 2)
03 [Some Other Useful Tips to Improve Your Image Animate](#Part 3)
Part 1 Where Can I Get an Animated Avatar for Discord?
In this section, we will discuss how you can animate a PFP and how to get an animated avatar for Discord.
How Do You Animate a PFP?
The steps you need to follow to animate a PFP are:
Step 1: Firstly, you need to decide on what character you want to have as PFP. It can be a cartoon character, a painting, an illustration etc.
Step 2: Now, choose an online tool and begin to edit your image. When you upload the image, make sure to crop it to square. Please note that you need to make your image circle. So now, look for the rounded corner option and give the image the desired shape.
Step 3: It’s time to be creative with the image now. You can remove background, erase or add text and even add a background that suits your avatar. The customization depends all on your requirement. This is it. Now, you need to know how you can get an animated avatar on Discord.
Part 2 How to Get an Animated Profile Picture on Discord
If you are confused about how you will be able to get an animated profile picture on Discord, don’t worry at all. The steps are as follows:
Step 1: To get an animated discord profile picture, you will need to have Nitro. Otherwise the profile picture won’t save as animated. Also, if you use PC for this, things will be better. Now, open the desktop version of Discord.
Step 2: Login to your account and go to User Settings by clicking the gear icon given next to your profile picture.
Step 3: In Settings, multiple options will be visible. You need to look for the “Discord Nitro” option. Clicking on this will lead you to Discord Nitro page.
Note: You need to click on “Subscribe” if you don’t have Discord Nitro.
Step 4: Choose the plan once you subscribe. Hit on “Select” after choosing it.
Step 5: Pay for it using the desired payment method. Enter your address and agree to the terms and conditions of Discord. After all the formalities are done, please click on “Sweet”. This will complete the subscription.
Step 6: Now, head to the GIF website like Tenor and choose the GIF that you like. Download it. You can right click on the GIF and click “Save Image as…” to get it.
Step 7: After saving the GIF, go to the Settings of your Discord account. Hit on “User Profile” followed by “Change Avatar”.
Step 8: The dialog box will open where you need to find the GIF you just saved. After finding the GIF, click on “Open”.
Note: You can take the animated avatar that you created yourself by using the steps in the previous part.
Step 9: Now, you will get to the Discord profile picture page. Here, you need to resize the GIF. Click on “Apply” when you are satisfied with the resizing or you can skip it too.
Step 10: Save the changes and you are good to go!
Part 3 Some Other Useful Tips to Improve Your Image Animate
If you’re wondering how to improve image animation, we’ve got some pointers for you. We all know that nitro is expensive and not everyone can get it for animating images. If you’re thinking the same thing, we’ve got the best tools for you right here.
Tools to consider for animating and improving the image:
01Adobe Spark
Adobe Spark is also among the best logo animation makers available and comes with the best features. It gives the final touch to the logo or video you have created. When you wish to animate your profile picture for Discord, the same can be done easily with it. The collection available on it is really very cool, and selecting from it can be an amazing experience. The templates are divided into categories along with the tabular ones so that you can choose them as per your requirements.
02Renderforest
Renderforest is also among the most loved software or applications loved by people around the world. It is helpful in creating logo animations too, for free. You can also choose from different templates available and customise them accordingly. Also, giving the animated effect to the logo is really very easy. If you wish to edit the logo, the same can be done easily. The major feature making it more appealing today is the transition effect, which is helpful in transforming a normal 2D logo into a 3D effect.
03Free Design logo
Free Design logo is an online application that always rules out the list. It features a 3D animation logo maker that is available for free. It has some logo samples and a catalogue available that are helpful for users to create excellent logos easily. Moreover, the templates available can be customised as per the need for stop. A user needs to download the application and, after it, they can have access to all the examples available for 3D logos.
04Tube arsenal
Tube Arsenal is also a famous application for users whenever they wish to animate a logo for their company. The interface appears to be similar to Renderforest, but the features are quite advanced. There is no technical knowledge required for using the same because it comes with an easy-to-use interface and templates that will be helpful in creating the logo of your choice.
Creative logo tips:
Some tips you can keep in mind while creating logo are as follows:
● Be specific to your brand. Be sure that you are not choosing a logo that may deviate customers from your brand perspective.
● Always choose colors in contrast because a single color logo does not seem to be appealing.
● Make sure to choose a template that is easy to understand. If the template seems to be difficult to understand, a user will not be able to get it.
● Create a logo with the minimum design because excessive design will make it tacky.
● Be sure not to add extra icons to the logo. This can be troublesome and make the logo unappealing.
● Go for white or a dark shade of background, because this will be helpful in making the text more visible.
Part 1 How to add an animated image/DP to WhatsApp?
Unfortunately, if you are looking forward to setting up an animated image on WhatsApp, it is not possible. The WhatsApp algorithm has been designed in such a manner that you can only use static images that is in JPG format. If the format is not the same, you can’t use it as the image over WhatsApp.
Key Takeaways from This Episode
● Nitro is helpful in setting up the animated image for discord.
● Filmora Pro is the best tool for editing images and animating them.
● WhatsApp doesn’t entertain setting up animated images over DP.
Also read:
- New Whiteboard Animation Services Top 15 Animation Companies to Pick
- Updated Best 10 Animated Templates in Canva
- 5 Foolproof Amazing Anime Text to Speech Tips for 2024
- All About 3D Medical Animation for 2024
- In 2024, Guide on How to Create GIF in WhatsApp iPhone
- New Top 10 Animated DP for WhatsApp for 2024
- New Want to Make a Meme GIF, In 2024
- New 2024 Approved How To Learn Cartoon Sketch Drawing
- Updated 10 Best Romance Anime Movies You Need to Watch for 2024
- 2024 Approved How to Create a Whiteboard Animation Video
- Christmas Is Coming! How to Find & Make Animated Christmas GIFs for 2024
- 2024 Approved How to Get Started in Stop Motion Claymation
- Updated 2024 Approved Top 8 Anime Name & Title Generators Online-Get Cool Anime Names
- New In 2024, What Is Motion Graphics
- New Best Canva 10 Animated Templates for 2024
- New Uncensored Top 10 + Free Streaming Sites for 2024
- Updated How To Animate Graphics in Canva for 2024
- New Top 8 Anime Name & Title Generators Online-Get Cool Anime Names
- Apple ID Locked for Security Reasons From iPhone 8 Plus? Find the Best Solution Here
- How to Rescue Lost Messages from Itel A05s
- In 2024, How to Change Netflix Location to Get More Country Version On Motorola Moto G Stylus (2023) | Dr.fone
- Stuck at Android System Recovery Of Vivo Y78+ ? Fix It Easily | Dr.fone
- In 2024, Unlocking Made Easy The Best 10 Apps for Unlocking Your Nokia C02 Device
- In 2024, Solved How To Transfer From Apple iPhone 15 Pro Max to iPhone 15 | Dr.fone
- Can Life360 Track Or See Text Messages? What Can You Do with Life360 On Apple iPhone X? | Dr.fone
- How To Restore Missing Call Logs from G22
- In 2024, Top IMEI Unlokers for Your Vivo V27 Pro Phone
- Recover your pictures after Oppo Reno 10 5G has been deleted.
- In 2024, 8 Ways to Transfer Photos from Nokia C12 to iPhone Easily | Dr.fone
- Proven Ways to Fix There Was A Problem Parsing the Package on Samsung Galaxy S23 FE | Dr.fone
- Repair damaged, unplayable video files of Vivo S17 Pro on Windows
- How to Track Oppo K11x by Phone Number | Dr.fone
- In 2024, Complete Fixes To Solve iPhone 8 Plus Randomly Asking for Apple ID Password
- How To Unlock A Found iPhone 14 Plus? | Dr.fone
- Title: New 2024 Approved How to Stop Animation From Looping in Unity
- Author: Elon
- Created at : 2024-05-19 03:05:40
- Updated at : 2024-05-20 03:05:40
- Link: https://animation-videos.techidaily.com/new-2024-approved-how-to-stop-animation-from-looping-in-unity/
- License: This work is licensed under CC BY-NC-SA 4.0.
