
:max_bytes(150000):strip_icc():format(webp)/GettyImages-1218764238-30613399ad1b4cffab4ab474184b9c88.jpg)
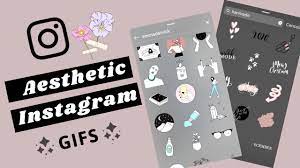
New 2024 Approved The Secret Sauce for Making GIF Instagram Story More Stunning
The Secret Sauce for Making GIF Instagram Story More Stunning
The Secret Sauce for Making GIF Instagram Story More Aesthetic
An easy yet powerful editor
Numerous effects to choose from
Detailed tutorials provided by the official channel
Adding own gift stickers to an Instagram story is in trend. An Instagram story can be made more creative with an Instagram gif story. Make a powerful impact with a gif on an Instagram story.
In this article
01 [How to Post Gifs to Instagram Story](#Part 1)
02 [8 Cute Instagram Stickers to Make Your Stories Aesthetic](#Part 2)
03 [How to Create Custom Gifs for Instagram Stories](#Part 3)
Part 1 How to Post Gifs to Instagram Story
Instagram stories are one of the best mediums to get connected to people at large. To be in trends and grab maximum people’s attention, it is very necessary to be updated with the new elements of Instagram stories. Gif Instagram story is a new way to increase the followers and be in trends. Adding these gifs in Instagram stories will improve your business by creating more engaging content for business promotion. Let’s see how this can be done?
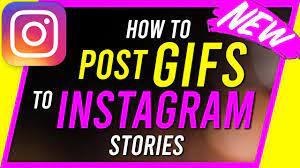
● Go to the Instagram app installed on your phone. While adding a sticker to a picture of videos in Instagram stories, a GIF option will appear.
● When you tap it, you can find several attractive gifs in the library powered by GIPHY.
● Tap add sticker button that appears on the top of the Instagram stories. Tap the ‘GIF’ icon; the library of trending gifs will appear.
● Look for the gif you need to add to your story. You also have a search option to find your favorite or trending gif.
● After selecting the desired gif, you can add it to your photo or video after resizing it as you desired.
● After finishing, tap on the ‘Your story’ icon.
So, this way, it is easy to create gif story instagram with just a few simple steps.
Part 2 Cute Instagram Stickers to Make Your Stories Aesthetic
Cute Instagram stickers are the best way to lift the creativity of your Instagram stories. Adding stickers are an amazing idea to add design to Instagram stories. Stickers make stories more creative and interesting. Some of the amazing stickers to beautify Instagram stories are:
01BOHO
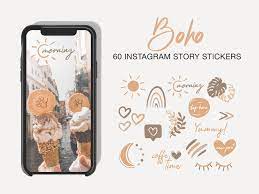
Boho stickers are good when you search for new stickers. They add fun to the story and give an amazing look for any lifestyle picture over an Instagram story. Boho white is also one type of sticker where are of them are white. Applying white boho to the picture background highlights the space and looks good. One has so many options from cute stars, hearts, lines, and flowers.
02FOOPKLO
For those who want words and saying gif on instagram story, there are some cute pink stickers available. These can be searched as FOOPKLO. Pink flowers, clusters, sayings, hearts, and some more cute stickers are there which can make Instagram stories lovelier.
03HALEYIVERS
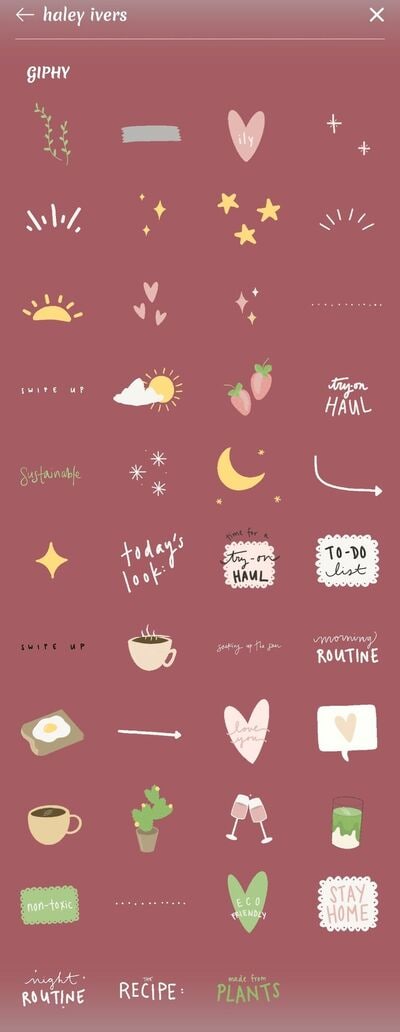
For those who are active Instagram users and update their stories every day, the old stickers may not entertain them. So, for those, there are HALEYIVERS stickers. Good morning, days, sunshine, coffee, stars, and hearts add a great style to the Instagram stories. So, next time you need some punch over Instagram stories add some HALEYIVERS stickers.
04OHLALALITA
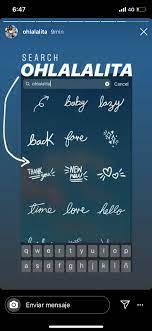
Instagram story gif is one of the great ways to even express your thoughts and moods in a summarized way. So, for those who wish to add a short story on Instagram, OHLALALITA has the best stickers. Loaded with so many cute words such as Tank you, Made with love, chill, glow, bye-bye, Wow, and many more, it makes any story in just simple words.
05SCARLETPIN
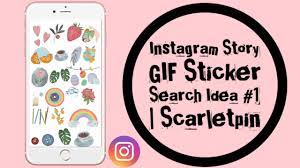
Instagram story gifs are a gift to those who are food lovers. Now with some new additions of gifs from GIPHY, they can post their food stories over their Instagram stories. The range of stickers that can help them is SCARLETPIN. These consist of some bright and colorful stickers of food. Red strawberries, tea, leaves, and oranges are great stuff to include in the morning Instagram stories.
06CURSIVE

Gif for Instagram story is also available in attractive writings. CURSIVE is the most attractive form of writing stories. Popular and cute sayings can be checked on CURSIVE and can be included in the stories. They can be searched and remembered easily. Cursive phrases can be added to the Instagram stories that look visually appealing to the viewers.
07EMOJIS
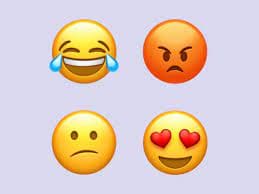
Emojis are the most lovable stickers available and can be part of any Instagram story. Typing on emojis can be done easily and they can be searched on the search bar. Perfect emojis gifs can be applied to an Instagram story that suits the situation. It can be moved or resized as per the requirement. These emojis gifs add a fun element to the Instagram stories.
08PAINT & BRUSH
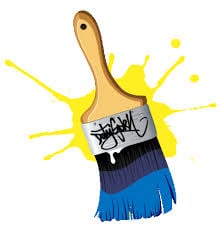
Instagram gif story can be made creative with paint and brush. Earlier the users can add text with plain background only. But, paint and brush have enhanced it. Now users can add paint behind the text to make it more engaging. They are simple yet very attractive when added to the stories.
Part 3 How to Create Custom Gifs for Instagram Stories
Funny and expressive Instagram stories of your own always win the hearts of followers. Custom-made gif for Instagram is a great tool for business owners as it brings volume to their business by increasing leads. Custom-made gifs over Instagram stories are eye-catching and thus people get interested in the business. This helps in creating a good brand image for the business.
So, some of the ways to create fascinating custom Gifs Instagram stories for self and business are:
01Pin Instagram stories
Visiting a place and letting people know where you are through Instagram stories is always loved by all. Now, this can be done attractively by using the Pin feature. One can pin on the pictures and videos over the Instagram stories to a particular place. This is the most interesting element to make an Instagram story catchy. It can be done easily by tapping and holding it till it shows a pin at the little bar. This was one can pin gif at the desired location. This gif can pop up at a certain location only. It can be applied to videos one has made of a certain location by moving the gif to a place where one desires.
02Using Gif to give life to any image
To make gif Instagram story aesthetic, adding some moves with sparkles will be the right option. An Instagram user can give life to a picture by including animated elements. Gif adds a fun and surprising element to any Instagram story. When movement in any picture is added through gif, it catches the attention of the viewers and they follow it. A business can make its content engaging with gifs and can achieve its goal.
03Gifs Instagram story to catch viewer’s attention
Gif can be used effectively to create attractive Instagram stories. These gifs are good for the business to highlight their important elements. Gifs like the link in bio, sound on, and swipe up are created for a call to action from the viewers. Adding arrows and signals through gif in the Instagram stories direct the people to spend some minutes on the stories and find something new.
04Highlighting text with gif effects
A customized Instagram story can be made by highlighting text through adding gifs. Sparkle, stars, and highlights gifs can be searched easily and can be applied to any Instagram story. By adding a gif, the text looks stunning and grabs the attention of the viewers. GIPHY has several text-based gifs which can take an ordinary text over the story at a great level. It can be searched by mentioning related keywords.
05Adding gifs to customize selfies
Selfies to Instagram stories are very common. But they can be made even better with some amazing gifs from GIPHY. One can add sunglasses, hats, jewelry, and other fun props to the selfies. Filters can be added by creating their own story through a gif.
06Filmora V11 – A GIF resource
Wondershare Filmora Video Editor (The Filmora Meme maker) : Some many apps and websites offer beautiful gifs to beautify Instagram stories. One of the places where Instagram users can find a wide collection of attractive gifs is Filmora V11. It is a user-friendly tool that has media editing features. It can be used to add sound, light effects, and beautiful gifs to Instagram stories.

Wondershare Filmora - Best Video Editor for Mac/Windows
5,481,435 people have downloaded it.
Build unique custom animations without breaking a sweat.
Focus on creating epic stories and leave the details to Filmora’s auto features.
Start a creative adventure with drag & drop effects and endless possibilities.
Filmora simplifies advanced features to save you time and effort.
Filmora cuts out repetition so you can move on to your next creative breakthrough.
For creating gifs, Filmora V11 can be used and it can be made in a few simple steps. Filmora V11 app is required to be installed on the system and media files can be imported there. Files can be dragged for creating gifs. Filters, stickers, and other effects can be added. They can be further customized as per the requirement of the users. After adding background effects, music, and sound, the gif can be previewed also. The media can be saved as GIFs and can be easily exported also. To customize gifs, the Filmora Meme maker can be used. Captions can be added to GIFs and can be customized by using templates available at Filmora.
So, next time you need to know how to add your own gif to Instagram story, go to Filmora V11. This is one of the great platforms to create some amazing custom gifs to add to Instagram stories. If you want to surprise your viewers with some interesting gifs, try Filmora V11.
● Key Takeaways from This Episode →
● Instagram stories are the most effective way to mark a great impression on the viewers. It is also one of the effective tools to lift any business. Best results can be obtained when attractive and interesting gifs are added to Instagram stories.
● Instagram stories gifs are becoming trendy and there are so many cute and amazing gif stickers available to create Instagram stories. Some of the widely used gifs and stickers are Boho, FOOPKLO, HALEYIVERS, OHLALALITA, and EMOJIS. Instagram users can explore these cute and funny stickers and add them to beautify their Instagram stories.
● Customized gif has spiced up the Instagram stories and amazed the people. This feature helps a business to influence people towards their work and attract more people. The content becomes more engaging and interesting through a customized gif.
Adding own gift stickers to an Instagram story is in trend. An Instagram story can be made more creative with an Instagram gif story. Make a powerful impact with a gif on an Instagram story.
In this article
01 [How to Post Gifs to Instagram Story](#Part 1)
02 [8 Cute Instagram Stickers to Make Your Stories Aesthetic](#Part 2)
03 [How to Create Custom Gifs for Instagram Stories](#Part 3)
Part 1 How to Post Gifs to Instagram Story
Instagram stories are one of the best mediums to get connected to people at large. To be in trends and grab maximum people’s attention, it is very necessary to be updated with the new elements of Instagram stories. Gif Instagram story is a new way to increase the followers and be in trends. Adding these gifs in Instagram stories will improve your business by creating more engaging content for business promotion. Let’s see how this can be done?
● Go to the Instagram app installed on your phone. While adding a sticker to a picture of videos in Instagram stories, a GIF option will appear.
● When you tap it, you can find several attractive gifs in the library powered by GIPHY.
● Tap add sticker button that appears on the top of the Instagram stories. Tap the ‘GIF’ icon; the library of trending gifs will appear.
● Look for the gif you need to add to your story. You also have a search option to find your favorite or trending gif.
● After selecting the desired gif, you can add it to your photo or video after resizing it as you desired.
● After finishing, tap on the ‘Your story’ icon.
So, this way, it is easy to create gif story instagram with just a few simple steps.
Part 2 Cute Instagram Stickers to Make Your Stories Aesthetic
Cute Instagram stickers are the best way to lift the creativity of your Instagram stories. Adding stickers are an amazing idea to add design to Instagram stories. Stickers make stories more creative and interesting. Some of the amazing stickers to beautify Instagram stories are:
01BOHO
Boho stickers are good when you search for new stickers. They add fun to the story and give an amazing look for any lifestyle picture over an Instagram story. Boho white is also one type of sticker where are of them are white. Applying white boho to the picture background highlights the space and looks good. One has so many options from cute stars, hearts, lines, and flowers.
02FOOPKLO
For those who want words and saying gif on instagram story, there are some cute pink stickers available. These can be searched as FOOPKLO. Pink flowers, clusters, sayings, hearts, and some more cute stickers are there which can make Instagram stories lovelier.
03HALEYIVERS
For those who are active Instagram users and update their stories every day, the old stickers may not entertain them. So, for those, there are HALEYIVERS stickers. Good morning, days, sunshine, coffee, stars, and hearts add a great style to the Instagram stories. So, next time you need some punch over Instagram stories add some HALEYIVERS stickers.
04OHLALALITA
Instagram story gif is one of the great ways to even express your thoughts and moods in a summarized way. So, for those who wish to add a short story on Instagram, OHLALALITA has the best stickers. Loaded with so many cute words such as Tank you, Made with love, chill, glow, bye-bye, Wow, and many more, it makes any story in just simple words.
05SCARLETPIN
Instagram story gifs are a gift to those who are food lovers. Now with some new additions of gifs from GIPHY, they can post their food stories over their Instagram stories. The range of stickers that can help them is SCARLETPIN. These consist of some bright and colorful stickers of food. Red strawberries, tea, leaves, and oranges are great stuff to include in the morning Instagram stories.
06CURSIVE
Gif for Instagram story is also available in attractive writings. CURSIVE is the most attractive form of writing stories. Popular and cute sayings can be checked on CURSIVE and can be included in the stories. They can be searched and remembered easily. Cursive phrases can be added to the Instagram stories that look visually appealing to the viewers.
07EMOJIS
Emojis are the most lovable stickers available and can be part of any Instagram story. Typing on emojis can be done easily and they can be searched on the search bar. Perfect emojis gifs can be applied to an Instagram story that suits the situation. It can be moved or resized as per the requirement. These emojis gifs add a fun element to the Instagram stories.
08PAINT & BRUSH
Instagram gif story can be made creative with paint and brush. Earlier the users can add text with plain background only. But, paint and brush have enhanced it. Now users can add paint behind the text to make it more engaging. They are simple yet very attractive when added to the stories.
Part 3 How to Create Custom Gifs for Instagram Stories
Funny and expressive Instagram stories of your own always win the hearts of followers. Custom-made gif for Instagram is a great tool for business owners as it brings volume to their business by increasing leads. Custom-made gifs over Instagram stories are eye-catching and thus people get interested in the business. This helps in creating a good brand image for the business.
So, some of the ways to create fascinating custom Gifs Instagram stories for self and business are:
01Pin Instagram stories
Visiting a place and letting people know where you are through Instagram stories is always loved by all. Now, this can be done attractively by using the Pin feature. One can pin on the pictures and videos over the Instagram stories to a particular place. This is the most interesting element to make an Instagram story catchy. It can be done easily by tapping and holding it till it shows a pin at the little bar. This was one can pin gif at the desired location. This gif can pop up at a certain location only. It can be applied to videos one has made of a certain location by moving the gif to a place where one desires.
02Using Gif to give life to any image
To make gif Instagram story aesthetic, adding some moves with sparkles will be the right option. An Instagram user can give life to a picture by including animated elements. Gif adds a fun and surprising element to any Instagram story. When movement in any picture is added through gif, it catches the attention of the viewers and they follow it. A business can make its content engaging with gifs and can achieve its goal.
03Gifs Instagram story to catch viewer’s attention
Gif can be used effectively to create attractive Instagram stories. These gifs are good for the business to highlight their important elements. Gifs like the link in bio, sound on, and swipe up are created for a call to action from the viewers. Adding arrows and signals through gif in the Instagram stories direct the people to spend some minutes on the stories and find something new.
04Highlighting text with gif effects
A customized Instagram story can be made by highlighting text through adding gifs. Sparkle, stars, and highlights gifs can be searched easily and can be applied to any Instagram story. By adding a gif, the text looks stunning and grabs the attention of the viewers. GIPHY has several text-based gifs which can take an ordinary text over the story at a great level. It can be searched by mentioning related keywords.
05Adding gifs to customize selfies
Selfies to Instagram stories are very common. But they can be made even better with some amazing gifs from GIPHY. One can add sunglasses, hats, jewelry, and other fun props to the selfies. Filters can be added by creating their own story through a gif.
06Filmora V11 – A GIF resource
Wondershare Filmora Video Editor (The Filmora Meme maker) : Some many apps and websites offer beautiful gifs to beautify Instagram stories. One of the places where Instagram users can find a wide collection of attractive gifs is Filmora V11. It is a user-friendly tool that has media editing features. It can be used to add sound, light effects, and beautiful gifs to Instagram stories.
Wondershare Filmora - Best Video Editor for Mac/Windows
5,481,435 people have downloaded it.
Build unique custom animations without breaking a sweat.
Focus on creating epic stories and leave the details to Filmora’s auto features.
Start a creative adventure with drag & drop effects and endless possibilities.
Filmora simplifies advanced features to save you time and effort.
Filmora cuts out repetition so you can move on to your next creative breakthrough.
For creating gifs, Filmora V11 can be used and it can be made in a few simple steps. Filmora V11 app is required to be installed on the system and media files can be imported there. Files can be dragged for creating gifs. Filters, stickers, and other effects can be added. They can be further customized as per the requirement of the users. After adding background effects, music, and sound, the gif can be previewed also. The media can be saved as GIFs and can be easily exported also. To customize gifs, the Filmora Meme maker can be used. Captions can be added to GIFs and can be customized by using templates available at Filmora.
So, next time you need to know how to add your own gif to Instagram story, go to Filmora V11. This is one of the great platforms to create some amazing custom gifs to add to Instagram stories. If you want to surprise your viewers with some interesting gifs, try Filmora V11.
● Key Takeaways from This Episode →
● Instagram stories are the most effective way to mark a great impression on the viewers. It is also one of the effective tools to lift any business. Best results can be obtained when attractive and interesting gifs are added to Instagram stories.
● Instagram stories gifs are becoming trendy and there are so many cute and amazing gif stickers available to create Instagram stories. Some of the widely used gifs and stickers are Boho, FOOPKLO, HALEYIVERS, OHLALALITA, and EMOJIS. Instagram users can explore these cute and funny stickers and add them to beautify their Instagram stories.
● Customized gif has spiced up the Instagram stories and amazed the people. This feature helps a business to influence people towards their work and attract more people. The content becomes more engaging and interesting through a customized gif.
The 10 Most Adorable Aesthetic Cartoon Characters
The 10 Most Adorable Aesthetic Cartoon Characters of All Time
An easy yet powerful editor
Numerous effects to choose from
Detailed tutorials provided by the official channel
Ever seen a cartoon, and you can’t just help staring! Primarily when they act your favorite scene, all you do is play it over and over.
Which cartoon character do you find most adorable? Talk about Moana, Frozen, or even Dory. How do you feel thinking about your favorite scene of them? Today, we will list our top 10 most adorable aesthetic cartoon characters. We promise you will love it, and we are sure many of them would resonate with you. Almost everyone gets drawn to the cutest cartoon characters’ aesthetic.
In this article
01 [Why is it so difficult to make aesthetic cartoon characters?](#Part 1)
02 [The most adorable 10 aesthetic cartoon character of all time.](#Part 2)
03 [How to apply aesthetic cartoon characters to video editing.](#Part 3)
Part 1 Why Is It So Difficult To Make Aesthetic Cartoon Characters?
It isn’t easy because it requires a lot of creativity, understanding of the character, focus, and patience to get all the details that make a character adorably aesthetic.
What makes a cartoon character aesthetic? It is not just about its looks. Yes, it starts with its eyes down to the shape of the head, face, and other bodily features, but beauty is relative.
It has to do with how much attachment the cartoon characters aesthetically can spur in their fans’ hearts due to their roles, attitude, and appearance.
Part 2 The 10 Most Adorable Aesthetic Cartoon Character
Here are our top picks of the most adorable aesthetic cartoon character in the following order to pick them quickly:
● Young dory
● Pua in Moana
● Olaf in Frozen
● Stitch in Lilo and Stitch
● Puss in boots
● Toothless in How to train your dragon
● Chip in beauty and the beast
● Moana in Moana
● Bonnie from Toy story
● Grogu from The Mandalorian
01Young Dory(Finding Dory 2026)
Who wouldn’t find young Dory adorable? Dory was voiced by the seven-year-old daughter of producer Lindsey Collins. Dory saw her short-term memory loss as a form of weakness. Her parents assured her that it was okay but warned her to stay away from the undertow. Before the 2016 classic, we first meet Dory in the 2003 Pixar’s classic ‘finding Nemo’ where Dory helps Marlin, a clownfish, reunites with his son, Nemo. In ‘Finding Dory, ‘ young Dory’s amnesiac was finally brought back thirteen years later. Dory is perseverant, has a trim physique, and yet she can do whatever she has set her mind to do.

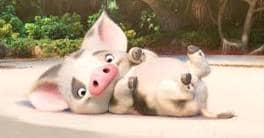
02Pua in Moana(2016)
Pua is a precious pig with puppy-like characteristics. He happens to be Moana’s best friend. Pua made his first appearance during the ‘Where you are’ performance alongside the village chief’s daughter. On Moana’s first attempt at setting sails to find Maui, their raft gets damaged, and Pua becomes scared of the sea and Moana’s oar. Later on, the makers removed the adorable pig to allow Moana to strive more independently. However, this indeed came with many critics from fans as Pua was just too sweet and cute. As much as Pua’s role in the film was small, he still made a lot of impressions.
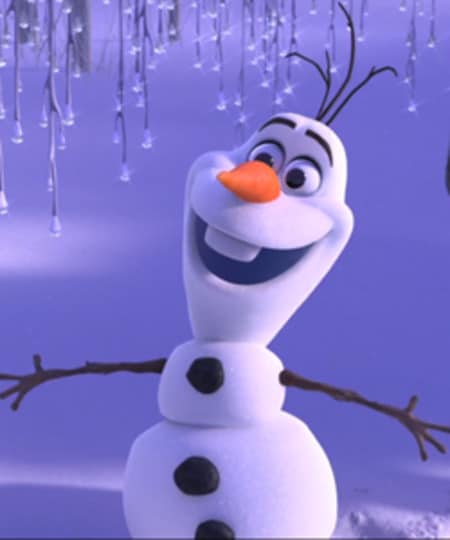
03Olaf in Frozen (2013)
Voiced by Josh Gad and created due to Elsa’s superpowers, Olaf wows us. The adorable little snowman desires warmth, and isn’t this just ironical. He expresses this in his song, ‘In summer,’ where he beautifully shows his love for the season. This snowman shows all the many characteristics his sweet self is made of. Talk about vibrant nature, bravery, humourous, and adorable optimism. Olaf signifies the Disney princesses’ innocence as they created Olaf when they were much younger. Olaf plays a vital role in helping Anna, Kristoff, and Sven on their adventure in finding Elsa. Olaf is just a sweet soul, and this list would not have been complete if we missed him!
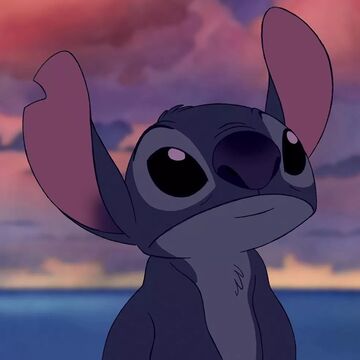
04Stitch in Lilo and Stitch (2002)
Stitch, a terrestrial, is also known as ‘Experiment 626’. Dr. JumbaJookiba genetically modified it. He initially creates him as destructive, and Stitch has a non-conventional form. He has two identities, a dog version as his true self with other arms, a retractable antenna, and three spines. Stitch accidentally meets Lilo in Kauia and is welcomed into the family. Even though Lilo’s classmates all see Stitch as unattractive and captain Gantu does not like him, Lilo makes away with societal beauty standards, and views Stitch as cute and fluffy.
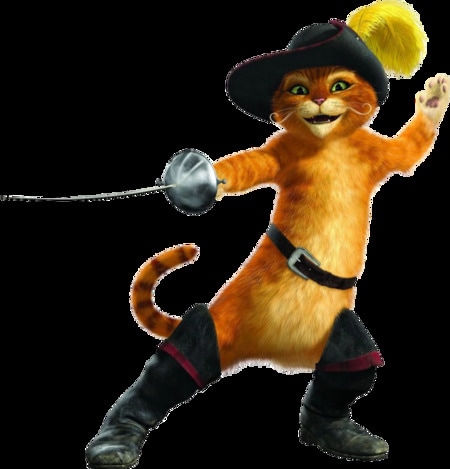
05Puss in Boots (Shrek Franchise 2001)
Puss, a smooth-talking cat with a Spanish accent, has an adorable face, and his comedic banter with Donkey in Shrek 2, coupled with his sweet face, one of the reasons for that film’s success. While developing Puss’s character, Antonio Bandera’s portrayal of ‘Zorro’ was used as the manor inspiration. Puss uses his big eyes and sweet cuteness as the perfect distraction for his trickery. Puss is just an absolute ball of sweetness and fluffy cuteness.
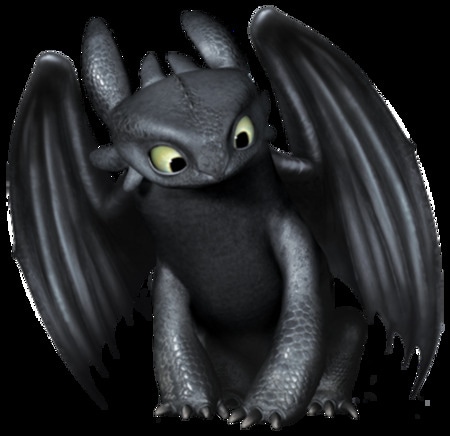
06Toothless in ‘How to train your dragon(2010-2019)
Toothless, a mighty dragon with a non-verbal humor sense, make its way into our hearts in the first “How to train your dragon.” Here, he ends up forming a bond with Hiccup, who took him down at first. As much as Toothless causes a heinous act, his big eyes, and a perfect and innocent smile make it hard to stay mad at him. After Toothless has an adorable family, he passes on his beautiful genetics.
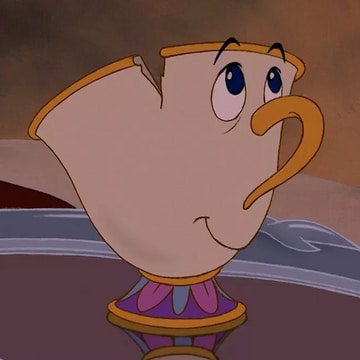
07Chip in beauty and the beast
Who knew teacups could look so alive and lovable and bring up emotions. Having seen ‘Beauty and the Beast,’ would you say that just the mere sight of a teacup didn’t cause a little tear well up in your eyes while remembering Chip. The adorable aesthetic cartoon character chip in the ‘Beauty and the Beast’ is a must mention.
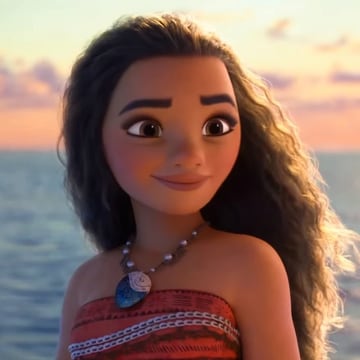
08Moana in Moana
Does Moana even need an explanation! The central character in the cartoon ‘Moana .’Brave, beautiful, determined, beautiful, kind, strong-willed. She was only a baby when she saved a baby sea turtle from a predatory bird. The ocean chose Moana to reunite a relic with the goddess ‘Tefiti .’ Moana’s independence received widespread acclaim as she got officially listed in 2019 as a Disney Princess, making her the twelfth on the list.
09Bonnie from Toy Story
Bonnie is a significant character in the cartoon **”**Toy Story. She is a cute-looking, shy, and the quiet character depicted as a 4-year old brunette girl. What is most notable is how Bonnie acts with her toys which she inherited from Andy. She usually withdraws when she is around adults and makes her first appearance in toy story 3, sitting on the front desk of Sunnyside Daycare with the monkey in her hand and trying to see what Mrs. Davis was donating. Bonnie has an active imagination when relating with her toys, who become her close friends. She is an adorable character and wows us all with her kind and friendly nature.
10 10. Grogu from The Mandalorian
Grogu is also popularly known as ‘The Child,’ a force-sensitive character who shows bravery and courage after surviving the Jedi siege. Grogu, alongside Djarin, went in search of the remaining Jedi. After his encounter with Skywalker, Grogu was forced to either accept his gift and return to Mandolarian or continue his Jedi training. Grogu chose to return to Mandolarian, where he reunited with Djari in a gang war.
Part 3 How To Apply Aesthetic Cartoon Characters To Video Editing
If you wish to add cartoon characters aesthetic to your videos, there are many video editing software that can do that for you.
Top of the list is Wondershare Filmora Video Editor . With this tool, you can make a smooth and natural animation add it to your video while editing. Filmora is a powerful video editing software that makes your video editing work seamless and perfect.
For Win 7 or later (64-bit)
For macOS 10.12 or later
You can also turn photos into cartoon style in one click.
Filmora’s keyframing features help you make the cartoon effects smooth and explicit.
Here are other video editing software that helps you add aesthetic cartoon characters to your video editing;
● Flipate
● Drawcartoon
● Animateit, etc.
You can choose from any one of them. But, for a wholesome application with all features that suit well with applying aesthetic cartoon characters to video editing, then Filmora is the name that flashes out.
● Ending Thoughts →
● Cartooncharacters are adorable in their uniqueness, from our charming Dory to Pua to Moana herself. The list goes on!
● However, the art of creating them is no small feat and requires detailed attention, patience, and a lot of creativity.
● To make your videos more fun and creative, you could add aesthetic cartoon characters using a tool like Filmora.
● Animators do a lot of work into creating adorable aesthetic cartoon characters, such that you have a hard time selecting the cutest of them all.
● Cartoon characters are the creative imaginations of 3d animators made for entertaining viewers.
● Do you think we missed out on any of your favorite cartoon characters? Please share with us in the comment section.
Ever seen a cartoon, and you can’t just help staring! Primarily when they act your favorite scene, all you do is play it over and over.
Which cartoon character do you find most adorable? Talk about Moana, Frozen, or even Dory. How do you feel thinking about your favorite scene of them? Today, we will list our top 10 most adorable aesthetic cartoon characters. We promise you will love it, and we are sure many of them would resonate with you. Almost everyone gets drawn to the cutest cartoon characters’ aesthetic.
In this article
01 [Why is it so difficult to make aesthetic cartoon characters?](#Part 1)
02 [The most adorable 10 aesthetic cartoon character of all time.](#Part 2)
03 [How to apply aesthetic cartoon characters to video editing.](#Part 3)
Part 1 Why Is It So Difficult To Make Aesthetic Cartoon Characters?
It isn’t easy because it requires a lot of creativity, understanding of the character, focus, and patience to get all the details that make a character adorably aesthetic.
What makes a cartoon character aesthetic? It is not just about its looks. Yes, it starts with its eyes down to the shape of the head, face, and other bodily features, but beauty is relative.
It has to do with how much attachment the cartoon characters aesthetically can spur in their fans’ hearts due to their roles, attitude, and appearance.
Part 2 The 10 Most Adorable Aesthetic Cartoon Character
Here are our top picks of the most adorable aesthetic cartoon character in the following order to pick them quickly:
● Young dory
● Pua in Moana
● Olaf in Frozen
● Stitch in Lilo and Stitch
● Puss in boots
● Toothless in How to train your dragon
● Chip in beauty and the beast
● Moana in Moana
● Bonnie from Toy story
● Grogu from The Mandalorian
01Young Dory(Finding Dory 2026)
Who wouldn’t find young Dory adorable? Dory was voiced by the seven-year-old daughter of producer Lindsey Collins. Dory saw her short-term memory loss as a form of weakness. Her parents assured her that it was okay but warned her to stay away from the undertow. Before the 2016 classic, we first meet Dory in the 2003 Pixar’s classic ‘finding Nemo’ where Dory helps Marlin, a clownfish, reunites with his son, Nemo. In ‘Finding Dory, ‘ young Dory’s amnesiac was finally brought back thirteen years later. Dory is perseverant, has a trim physique, and yet she can do whatever she has set her mind to do.
02Pua in Moana(2016)
Pua is a precious pig with puppy-like characteristics. He happens to be Moana’s best friend. Pua made his first appearance during the ‘Where you are’ performance alongside the village chief’s daughter. On Moana’s first attempt at setting sails to find Maui, their raft gets damaged, and Pua becomes scared of the sea and Moana’s oar. Later on, the makers removed the adorable pig to allow Moana to strive more independently. However, this indeed came with many critics from fans as Pua was just too sweet and cute. As much as Pua’s role in the film was small, he still made a lot of impressions.
03Olaf in Frozen (2013)
Voiced by Josh Gad and created due to Elsa’s superpowers, Olaf wows us. The adorable little snowman desires warmth, and isn’t this just ironical. He expresses this in his song, ‘In summer,’ where he beautifully shows his love for the season. This snowman shows all the many characteristics his sweet self is made of. Talk about vibrant nature, bravery, humourous, and adorable optimism. Olaf signifies the Disney princesses’ innocence as they created Olaf when they were much younger. Olaf plays a vital role in helping Anna, Kristoff, and Sven on their adventure in finding Elsa. Olaf is just a sweet soul, and this list would not have been complete if we missed him!
04Stitch in Lilo and Stitch (2002)
Stitch, a terrestrial, is also known as ‘Experiment 626’. Dr. JumbaJookiba genetically modified it. He initially creates him as destructive, and Stitch has a non-conventional form. He has two identities, a dog version as his true self with other arms, a retractable antenna, and three spines. Stitch accidentally meets Lilo in Kauia and is welcomed into the family. Even though Lilo’s classmates all see Stitch as unattractive and captain Gantu does not like him, Lilo makes away with societal beauty standards, and views Stitch as cute and fluffy.
05Puss in Boots (Shrek Franchise 2001)
Puss, a smooth-talking cat with a Spanish accent, has an adorable face, and his comedic banter with Donkey in Shrek 2, coupled with his sweet face, one of the reasons for that film’s success. While developing Puss’s character, Antonio Bandera’s portrayal of ‘Zorro’ was used as the manor inspiration. Puss uses his big eyes and sweet cuteness as the perfect distraction for his trickery. Puss is just an absolute ball of sweetness and fluffy cuteness.
06Toothless in ‘How to train your dragon(2010-2019)
Toothless, a mighty dragon with a non-verbal humor sense, make its way into our hearts in the first “How to train your dragon.” Here, he ends up forming a bond with Hiccup, who took him down at first. As much as Toothless causes a heinous act, his big eyes, and a perfect and innocent smile make it hard to stay mad at him. After Toothless has an adorable family, he passes on his beautiful genetics.
07Chip in beauty and the beast
Who knew teacups could look so alive and lovable and bring up emotions. Having seen ‘Beauty and the Beast,’ would you say that just the mere sight of a teacup didn’t cause a little tear well up in your eyes while remembering Chip. The adorable aesthetic cartoon character chip in the ‘Beauty and the Beast’ is a must mention.
08Moana in Moana
Does Moana even need an explanation! The central character in the cartoon ‘Moana .’Brave, beautiful, determined, beautiful, kind, strong-willed. She was only a baby when she saved a baby sea turtle from a predatory bird. The ocean chose Moana to reunite a relic with the goddess ‘Tefiti .’ Moana’s independence received widespread acclaim as she got officially listed in 2019 as a Disney Princess, making her the twelfth on the list.
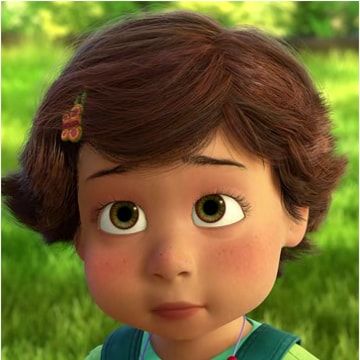
09Bonnie from Toy Story
Bonnie is a significant character in the cartoon **”**Toy Story. She is a cute-looking, shy, and the quiet character depicted as a 4-year old brunette girl. What is most notable is how Bonnie acts with her toys which she inherited from Andy. She usually withdraws when she is around adults and makes her first appearance in toy story 3, sitting on the front desk of Sunnyside Daycare with the monkey in her hand and trying to see what Mrs. Davis was donating. Bonnie has an active imagination when relating with her toys, who become her close friends. She is an adorable character and wows us all with her kind and friendly nature.
10 10. Grogu from The Mandalorian
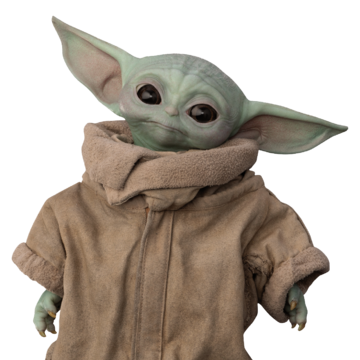
Grogu is also popularly known as ‘The Child,’ a force-sensitive character who shows bravery and courage after surviving the Jedi siege. Grogu, alongside Djarin, went in search of the remaining Jedi. After his encounter with Skywalker, Grogu was forced to either accept his gift and return to Mandolarian or continue his Jedi training. Grogu chose to return to Mandolarian, where he reunited with Djari in a gang war.
Part 3 How To Apply Aesthetic Cartoon Characters To Video Editing
If you wish to add cartoon characters aesthetic to your videos, there are many video editing software that can do that for you.
Top of the list is Wondershare Filmora Video Editor . With this tool, you can make a smooth and natural animation add it to your video while editing. Filmora is a powerful video editing software that makes your video editing work seamless and perfect.
For Win 7 or later (64-bit)
For macOS 10.12 or later
You can also turn photos into cartoon style in one click.
Filmora’s keyframing features help you make the cartoon effects smooth and explicit.
Here are other video editing software that helps you add aesthetic cartoon characters to your video editing;
● Flipate
● Drawcartoon
● Animateit, etc.
You can choose from any one of them. But, for a wholesome application with all features that suit well with applying aesthetic cartoon characters to video editing, then Filmora is the name that flashes out.
● Ending Thoughts →
● Cartooncharacters are adorable in their uniqueness, from our charming Dory to Pua to Moana herself. The list goes on!
● However, the art of creating them is no small feat and requires detailed attention, patience, and a lot of creativity.
● To make your videos more fun and creative, you could add aesthetic cartoon characters using a tool like Filmora.
● Animators do a lot of work into creating adorable aesthetic cartoon characters, such that you have a hard time selecting the cutest of them all.
● Cartoon characters are the creative imaginations of 3d animators made for entertaining viewers.
● Do you think we missed out on any of your favorite cartoon characters? Please share with us in the comment section.
Ever seen a cartoon, and you can’t just help staring! Primarily when they act your favorite scene, all you do is play it over and over.
Which cartoon character do you find most adorable? Talk about Moana, Frozen, or even Dory. How do you feel thinking about your favorite scene of them? Today, we will list our top 10 most adorable aesthetic cartoon characters. We promise you will love it, and we are sure many of them would resonate with you. Almost everyone gets drawn to the cutest cartoon characters’ aesthetic.
In this article
01 [Why is it so difficult to make aesthetic cartoon characters?](#Part 1)
02 [The most adorable 10 aesthetic cartoon character of all time.](#Part 2)
03 [How to apply aesthetic cartoon characters to video editing.](#Part 3)
Part 1 Why Is It So Difficult To Make Aesthetic Cartoon Characters?
It isn’t easy because it requires a lot of creativity, understanding of the character, focus, and patience to get all the details that make a character adorably aesthetic.
What makes a cartoon character aesthetic? It is not just about its looks. Yes, it starts with its eyes down to the shape of the head, face, and other bodily features, but beauty is relative.
It has to do with how much attachment the cartoon characters aesthetically can spur in their fans’ hearts due to their roles, attitude, and appearance.
Part 2 The 10 Most Adorable Aesthetic Cartoon Character
Here are our top picks of the most adorable aesthetic cartoon character in the following order to pick them quickly:
● Young dory
● Pua in Moana
● Olaf in Frozen
● Stitch in Lilo and Stitch
● Puss in boots
● Toothless in How to train your dragon
● Chip in beauty and the beast
● Moana in Moana
● Bonnie from Toy story
● Grogu from The Mandalorian
01Young Dory(Finding Dory 2026)
Who wouldn’t find young Dory adorable? Dory was voiced by the seven-year-old daughter of producer Lindsey Collins. Dory saw her short-term memory loss as a form of weakness. Her parents assured her that it was okay but warned her to stay away from the undertow. Before the 2016 classic, we first meet Dory in the 2003 Pixar’s classic ‘finding Nemo’ where Dory helps Marlin, a clownfish, reunites with his son, Nemo. In ‘Finding Dory, ‘ young Dory’s amnesiac was finally brought back thirteen years later. Dory is perseverant, has a trim physique, and yet she can do whatever she has set her mind to do.
02Pua in Moana(2016)
Pua is a precious pig with puppy-like characteristics. He happens to be Moana’s best friend. Pua made his first appearance during the ‘Where you are’ performance alongside the village chief’s daughter. On Moana’s first attempt at setting sails to find Maui, their raft gets damaged, and Pua becomes scared of the sea and Moana’s oar. Later on, the makers removed the adorable pig to allow Moana to strive more independently. However, this indeed came with many critics from fans as Pua was just too sweet and cute. As much as Pua’s role in the film was small, he still made a lot of impressions.
03Olaf in Frozen (2013)
Voiced by Josh Gad and created due to Elsa’s superpowers, Olaf wows us. The adorable little snowman desires warmth, and isn’t this just ironical. He expresses this in his song, ‘In summer,’ where he beautifully shows his love for the season. This snowman shows all the many characteristics his sweet self is made of. Talk about vibrant nature, bravery, humourous, and adorable optimism. Olaf signifies the Disney princesses’ innocence as they created Olaf when they were much younger. Olaf plays a vital role in helping Anna, Kristoff, and Sven on their adventure in finding Elsa. Olaf is just a sweet soul, and this list would not have been complete if we missed him!
04Stitch in Lilo and Stitch (2002)
Stitch, a terrestrial, is also known as ‘Experiment 626’. Dr. JumbaJookiba genetically modified it. He initially creates him as destructive, and Stitch has a non-conventional form. He has two identities, a dog version as his true self with other arms, a retractable antenna, and three spines. Stitch accidentally meets Lilo in Kauia and is welcomed into the family. Even though Lilo’s classmates all see Stitch as unattractive and captain Gantu does not like him, Lilo makes away with societal beauty standards, and views Stitch as cute and fluffy.
05Puss in Boots (Shrek Franchise 2001)
Puss, a smooth-talking cat with a Spanish accent, has an adorable face, and his comedic banter with Donkey in Shrek 2, coupled with his sweet face, one of the reasons for that film’s success. While developing Puss’s character, Antonio Bandera’s portrayal of ‘Zorro’ was used as the manor inspiration. Puss uses his big eyes and sweet cuteness as the perfect distraction for his trickery. Puss is just an absolute ball of sweetness and fluffy cuteness.
06Toothless in ‘How to train your dragon(2010-2019)
Toothless, a mighty dragon with a non-verbal humor sense, make its way into our hearts in the first “How to train your dragon.” Here, he ends up forming a bond with Hiccup, who took him down at first. As much as Toothless causes a heinous act, his big eyes, and a perfect and innocent smile make it hard to stay mad at him. After Toothless has an adorable family, he passes on his beautiful genetics.
07Chip in beauty and the beast
Who knew teacups could look so alive and lovable and bring up emotions. Having seen ‘Beauty and the Beast,’ would you say that just the mere sight of a teacup didn’t cause a little tear well up in your eyes while remembering Chip. The adorable aesthetic cartoon character chip in the ‘Beauty and the Beast’ is a must mention.
08Moana in Moana
Does Moana even need an explanation! The central character in the cartoon ‘Moana .’Brave, beautiful, determined, beautiful, kind, strong-willed. She was only a baby when she saved a baby sea turtle from a predatory bird. The ocean chose Moana to reunite a relic with the goddess ‘Tefiti .’ Moana’s independence received widespread acclaim as she got officially listed in 2019 as a Disney Princess, making her the twelfth on the list.
09Bonnie from Toy Story
Bonnie is a significant character in the cartoon **”**Toy Story. She is a cute-looking, shy, and the quiet character depicted as a 4-year old brunette girl. What is most notable is how Bonnie acts with her toys which she inherited from Andy. She usually withdraws when she is around adults and makes her first appearance in toy story 3, sitting on the front desk of Sunnyside Daycare with the monkey in her hand and trying to see what Mrs. Davis was donating. Bonnie has an active imagination when relating with her toys, who become her close friends. She is an adorable character and wows us all with her kind and friendly nature.
10 10. Grogu from The Mandalorian
Grogu is also popularly known as ‘The Child,’ a force-sensitive character who shows bravery and courage after surviving the Jedi siege. Grogu, alongside Djarin, went in search of the remaining Jedi. After his encounter with Skywalker, Grogu was forced to either accept his gift and return to Mandolarian or continue his Jedi training. Grogu chose to return to Mandolarian, where he reunited with Djari in a gang war.
Part 3 How To Apply Aesthetic Cartoon Characters To Video Editing
If you wish to add cartoon characters aesthetic to your videos, there are many video editing software that can do that for you.
Top of the list is Wondershare Filmora Video Editor . With this tool, you can make a smooth and natural animation add it to your video while editing. Filmora is a powerful video editing software that makes your video editing work seamless and perfect.
For Win 7 or later (64-bit)
For macOS 10.12 or later
You can also turn photos into cartoon style in one click.
Filmora’s keyframing features help you make the cartoon effects smooth and explicit.
Here are other video editing software that helps you add aesthetic cartoon characters to your video editing;
● Flipate
● Drawcartoon
● Animateit, etc.
You can choose from any one of them. But, for a wholesome application with all features that suit well with applying aesthetic cartoon characters to video editing, then Filmora is the name that flashes out.
● Ending Thoughts →
● Cartooncharacters are adorable in their uniqueness, from our charming Dory to Pua to Moana herself. The list goes on!
● However, the art of creating them is no small feat and requires detailed attention, patience, and a lot of creativity.
● To make your videos more fun and creative, you could add aesthetic cartoon characters using a tool like Filmora.
● Animators do a lot of work into creating adorable aesthetic cartoon characters, such that you have a hard time selecting the cutest of them all.
● Cartoon characters are the creative imaginations of 3d animators made for entertaining viewers.
● Do you think we missed out on any of your favorite cartoon characters? Please share with us in the comment section.
How to Make an Animated Travel Map Video?
How to Make an Animated Travel Map Video?

Benjamin Arango
Mar 27, 2024• Proven solutions
Animated travel map videos make it easy for the viewers to follow the routes from the source to destination locations right on the single screen. While the static maps would only allow the audience to see the markers from where the journey would start and is expected to end, the animated ones show the real-time movements and therefore look more interactive when viewed.
That said, here you will learn how to create an attractive and engaging animated travel map video using one of the easiest post-production applications, Wondershare Filmora, which is widely appreciated by amateurs and professionals throughout the globe. In another section, you will also learn about an alternative program that might be of some help in case you are more into online designing.
- Method 1: Make Animated Travel Map Videos with Location Video Maker - [Video Tutorial]
- Method 2: Make Interactive Animated Travel Map with Pictramap
- Method 3: Create Animated Travel Map Using Multidev
Method 1 Make Animated Travel Map Videos with Location Video Maker
The entire process of creating an animated travel map video in Wondershare’s Filmora is categorized into two parts, wherein the first part you will collect all the ingredients that are needed to get started, and in the second part you will actually make an animated map using the tools and features present in Filmora.
Watch a video tutorial to see how to make an animated map for a video:
For Win 7 or later (64-bit)
 Secure Download
For macOS 10.14 or later
Secure Download


Part 1: Prepare the Travel Map Materials
Following are the ingredients and the methods to collect them for animated travel map preparation:
Step 1: Get the Map
The first thing that you would need to prepare an animated map is an image of a realistic map. Thanks to Google and Microsoft, these things are now pretty easy to arrange. The process is given below:
- Launch your preferred web browser
- Type google.com in the address bar or the search box and hit Enter
- Scroll to zoom out so you can see the entire world map on one screen

- Type Snipping Tool in the Cortana search box present on the left side of the Taskbar
- Launch Snipping Tool, and use it to capture the screenshot of the map
Note: Snipping Tool is a built-in app in Windows 10 and is available for free. If you are using any other operating system, or have a different program to capture the screenshots, feel free to use it according to your convenience.
- Save the screenshot you captured as a JPG file on your PC
Step 2: Mark Out the Map Path
The next step in the process of preparing an animated travel map is to mark your route on it. To do so, you can use any of your preferred photo editing tools. However, to keep this illustration simple, Microsoft Paint is used here, and the method is given below:
- Right-click the screenshot you just captured
- Go to Open with on the context menu, and then click Paint from the submenu that appears
- Pick your preferred color from the pallet of the Paint interface. It is advisable to use an eye-catchy shade such as Red
- Use the Sphere shape tool to draw a circle over the source and destination locations on the map
- Use the Line tool to draw a line from the source point to the destination. Try giving the line a few turns to make it look realistic
- Go to File > Save As, and save the marked image with a different name
Note: Once this is done, you should have two image files of the map, i.e., one without the marks and one with it
Step 3: Download Some Travel Icons
Another important ingredient in an effective travel map animation is touring icons such as location marker image, a traveling medium symbol like a helicopter, airplane, car/bike (for short distances), etc. A couple of websites that offer royalty-free stock photos at absolutely no cost are listed below:
Note: Although the websites given above allow you to download and use their stock images and icons for free, you may need to give credits to the designers/creators of the symbols while using their objects. Therefore, you are suggested to check the Terms & Conditions and norms of usage of the elements before downloading and adding them to your projects.
Part 2: Make Animated Travel Map Videos with Filmora
After you have gathered all the necessary ingredients that are required to create a travel map animation, it is now time to get to work. The following instructions would guide you through the step-by-step process of preparing a decent and realistic animated travel map in Wondershare Filmora :
For Win 7 or later (64-bit)
Secure Download
For macOS 10.14 or later
Secure Download
Step 1: Import Ingredients to Filmora and Add Them to the Timeline
Launch the video editor on your computer, click anywhere inside the Media window at the upper-left area, and import all the images and icons that you collected earlier to program. Next, drag both the images of the map, i.e., with and without the marks to the Timeline, and ensure that they are of the same duration and are placed on the same track.

Note: Be sure to put the map without the marks first, and then the one with the marks. Also note that the images have the playback duration of 5 seconds in the Timeline by default, and this tenure can be reduced or increased by dragging the side handle of the media to the left or right respectively.
Step 2: Add Transition for Illusion of Route Appearance
Go to Transition from the standard toolbar at the top, locate the Erase Slide transition effect from the available presets, and place it in between the two image files that you earlier added to the Timeline. Next, click and drag either of the side handles of the transition to the end of the media clip. Notice how the other side of the effect is expanded in equal proportion.

Step 3: Preview and Export
Press the Spacebar on the keyboard to preview the video and see if the route appears as if it is being drawn on the map. Once the animation looks acceptable, click EXPORT from the top-center, go to the Local tab on the Export window, select MP4 from the formats list in the left, and click EXPORT from the bottom-right corner to export the current animation to MP4.
Step 4: Customize the Travel Map Media
Either start a new project and import the video of the map you exported in the previous step to the app and then to the Timeline, or remove the existing media from the Timeline in the same project, and add the exported video to it for convenience.

For Win 7 or later (64-bit)
Secure Download
For macOS 10.14 or later
Secure Download
Next, position the Skimmer (Playhead) a couple of frames before the one the route line appears and starts stretching from, and click the Split icon from the editing toolbar above the Timeline itself. Repeat this process for the other side of the media, i.e., position the Skimmer a couple of frames after the route line reaches the destination location, and click the Split icon again. Then remove the separated segments from both the sides by selecting them and pressing Delete on the keyboard, leaving only the portion where the animation is visible.

Optionally, right-click the media that is left behind in the Timeline, and go to Speed and Duration from the context menu. On the Custom Speed box, drag the Speed slider to the left to decrease the playback speed resulting in the increased duration of the media. Alternatively, you can manually enter a value in the Speed box to get precise tenure. Click OK when you are done.

Step 5: Add Animations to Travel Map
Right-click the media in the Timeline, and go to Add Animation from the context menu. Make sure that the Skimmer is on the first frame, and add several keyframes as explained below:
- Click Add to add the first keyframe

- Move a couple of frames further, and click Add one more time. Now, while you are on this second keyframe, use the Scale slider to zoom in to the map so the source location remains within focus.

- Next, move the Playhead further and add another keyframe a couple of frames before the route line hits the edge of the window.
- After this, move the Playhead again and position it where the route line reaches its destination location. Add another keyframe here as well, and move the map in the Preview window so the focus is now on the destination.
- Move the Playhead a few frames further, add another keyframe, and use the Scale slider to zoom a bit more into the map to make the entire animation look realistic. Click OK to save the changes.
Step 6: Add Icons and Titles, and Export the Project
Drag the image of the traveling medium to the Timeline, and place it on the frame the route line starts from. Make sure to place the image on the track above the map, and stretch it to the end so it remains visible throughout the animation. Next, use the method explained above to add keyframes to move the medium along with the route line from the source to the destination. Optionally, add the image of the location marker at the destination point, go to Transition, and add your preferred transition effect, preferably Dissolve, to the marker track in the Timeline so it looks as if it has appeared as the medium arrived the destination.
For Win 7 or later (64-bit)
Secure Download
For macOS 10.14 or later
Secure Download
Get back to the first frame in the Timeline, go to Titles on the standard toolbar, and add a title preset somewhere near the source location. Resize the text, change the format as needed, and add your preferred caption to it such as the start time, name, etc. Reduce the duration of the track so the title appears for a few frames, preferably before the map animation starts. Click OK when done. Repeat this process for the destination point as well.
Once everything is complete, click the Play button in the Preview window to review your work. If the video looks acceptable, click EXPORT from the top-center of the interface, and use the method explained earlier to export the animated travel map in your preferred format.
![]()
Method 2 How to Make Interactive Animated Travel Map with Pictramap
If you don’t want to install a dedicated animation software on your computer due to limited hardware resources or some other reason, there is an online solution called Pictramap to create a travel map animation using a web browser. The web app offers a lucrative interface that could be easily understood and worked with to produce an animated map for free.
The process to create an animated travel map with Pictramap is given below:
Step 1: Create a Project
Launch your favorite web browser, go to https://www.pictramap.com/ , click Create yours now, it’s free, and sign up to Pictramap using your preferred method. When you are on the Dashboard, enter a name in the field available under the My Projects section, and click Create to create a new project (the animated map).

Step 2: Define the Locations and Method of Commute
On the map, right-click the location you want to start your journey from, enter the name of the location or any other significant title, and click Add. Click the location marker, click the Travel Mode icon, and select your preferred mode of traveling. Repeat this process to mark the destination location as well.

Step 3: Preview the Animation
Click the View Animation button from the upper-right corner of the page to see the animated travel map.

Downsides of Using Pictramap to Create Animated Travel Map Video
Although Pictramap allows you to create a travel map animation with ease and extremely quickly, at the time of this writing, it offers no way of downloading the animation to your PC, and therefore it couldn’t be used in your projects.
If you are using Wondershare Filmora, you can use its built-in screen recording feature to record the animation that Pictramap plays, and then save the captured footage as MP4 or any other format on your computer. This video can then be imported to your projects for further uses.
![]()
A cross-platform for making videos anywhere for all creators

Why your video editing isn’t good enough? How about some creative inspo?
- 100 Million+ Users
- 150+ Countries and Regions
- 4 Million+ Social Media Followers
- 5 Million+ Stock Media for Use
* Secure Download

Method 3 How To Make Animated Travel Map Using Multidev
Multi.dev is still a new web-based application to build awesome animated maps, but it’s good! The application helps you create presentations about all your recent and previous trips. And the interface is also hassle-free.
So, follow this step-by-step guide to making animated maps with Multi.dev.
Step 1: Open Multi.dev
Visit Multi.dev from your internet browser.

Once the tool gets open, you will see a demo video. This example clip will have animated maps of different locations. So it is up to you whether to use the same example and edit the places you have been to or are planning to visit. Or, simply create a new animated map from scratch.
Step 2: Choose Your First Location
Take your mouse cursor on the left side of the application and type the first location in the search bar. As soon as you do it, you will see that the “travel arrow” will automatically begin from there. Likewise, type and select the next location through the search bar.
Once you type the location, you will see 8 travel modes, including airplane, bus, and train. You can select the same mode for all sites or a different mode for another place. Totally up to you!

Step 3: Select Map Themes
All your chosen places will be highlighted in the software’s minimalistic map.

Step 4: Download Map on Your Computer
If you’re happy with the animated map, click the “Create Video” button to save the animated map on your computer in a few minutes.


Contrarily, you can also share the animation by choosing the “Share Animation” option.
Conclusion
An animated travel map plays an important role to add a realistic touring effect to your motion picture projects. While you can use a web app like Pictramap to create such an animation online easily and for free, the limitations it comes along with might keep you from choosing this method.
Instead, you may want to get more inclined toward a dedicated post-production software like Wondershare Filmora that gives you full control over the process, and the freedom to choose your preferred format to export the animation to for independent usage.
For Win 7 or later (64-bit)
Secure Download
For macOS 10.14 or later
Secure Download
Benjamin Arango
Benjamin Arango is a writer and a lover of all things video.
Follow @Benjamin Arango
Benjamin Arango
Mar 27, 2024• Proven solutions
Animated travel map videos make it easy for the viewers to follow the routes from the source to destination locations right on the single screen. While the static maps would only allow the audience to see the markers from where the journey would start and is expected to end, the animated ones show the real-time movements and therefore look more interactive when viewed.
That said, here you will learn how to create an attractive and engaging animated travel map video using one of the easiest post-production applications, Wondershare Filmora, which is widely appreciated by amateurs and professionals throughout the globe. In another section, you will also learn about an alternative program that might be of some help in case you are more into online designing.
- Method 1: Make Animated Travel Map Videos with Location Video Maker - [Video Tutorial]
- Method 2: Make Interactive Animated Travel Map with Pictramap
- Method 3: Create Animated Travel Map Using Multidev
Method 1 Make Animated Travel Map Videos with Location Video Maker
The entire process of creating an animated travel map video in Wondershare’s Filmora is categorized into two parts, wherein the first part you will collect all the ingredients that are needed to get started, and in the second part you will actually make an animated map using the tools and features present in Filmora.
Watch a video tutorial to see how to make an animated map for a video:
For Win 7 or later (64-bit)
Secure Download
For macOS 10.14 or later
Secure Download
Part 1: Prepare the Travel Map Materials
Following are the ingredients and the methods to collect them for animated travel map preparation:
Step 1: Get the Map
The first thing that you would need to prepare an animated map is an image of a realistic map. Thanks to Google and Microsoft, these things are now pretty easy to arrange. The process is given below:
- Launch your preferred web browser
- Type google.com in the address bar or the search box and hit Enter
- Scroll to zoom out so you can see the entire world map on one screen
- Type Snipping Tool in the Cortana search box present on the left side of the Taskbar
- Launch Snipping Tool, and use it to capture the screenshot of the map
Note: Snipping Tool is a built-in app in Windows 10 and is available for free. If you are using any other operating system, or have a different program to capture the screenshots, feel free to use it according to your convenience.
- Save the screenshot you captured as a JPG file on your PC
Step 2: Mark Out the Map Path
The next step in the process of preparing an animated travel map is to mark your route on it. To do so, you can use any of your preferred photo editing tools. However, to keep this illustration simple, Microsoft Paint is used here, and the method is given below:
- Right-click the screenshot you just captured
- Go to Open with on the context menu, and then click Paint from the submenu that appears
- Pick your preferred color from the pallet of the Paint interface. It is advisable to use an eye-catchy shade such as Red
- Use the Sphere shape tool to draw a circle over the source and destination locations on the map
- Use the Line tool to draw a line from the source point to the destination. Try giving the line a few turns to make it look realistic
- Go to File > Save As, and save the marked image with a different name
Note: Once this is done, you should have two image files of the map, i.e., one without the marks and one with it
Step 3: Download Some Travel Icons
Another important ingredient in an effective travel map animation is touring icons such as location marker image, a traveling medium symbol like a helicopter, airplane, car/bike (for short distances), etc. A couple of websites that offer royalty-free stock photos at absolutely no cost are listed below:
Note: Although the websites given above allow you to download and use their stock images and icons for free, you may need to give credits to the designers/creators of the symbols while using their objects. Therefore, you are suggested to check the Terms & Conditions and norms of usage of the elements before downloading and adding them to your projects.
Part 2: Make Animated Travel Map Videos with Filmora
After you have gathered all the necessary ingredients that are required to create a travel map animation, it is now time to get to work. The following instructions would guide you through the step-by-step process of preparing a decent and realistic animated travel map in Wondershare Filmora :
For Win 7 or later (64-bit)
Secure Download
For macOS 10.14 or later
Secure Download
Step 1: Import Ingredients to Filmora and Add Them to the Timeline
Launch the video editor on your computer, click anywhere inside the Media window at the upper-left area, and import all the images and icons that you collected earlier to program. Next, drag both the images of the map, i.e., with and without the marks to the Timeline, and ensure that they are of the same duration and are placed on the same track.
Note: Be sure to put the map without the marks first, and then the one with the marks. Also note that the images have the playback duration of 5 seconds in the Timeline by default, and this tenure can be reduced or increased by dragging the side handle of the media to the left or right respectively.
Step 2: Add Transition for Illusion of Route Appearance
Go to Transition from the standard toolbar at the top, locate the Erase Slide transition effect from the available presets, and place it in between the two image files that you earlier added to the Timeline. Next, click and drag either of the side handles of the transition to the end of the media clip. Notice how the other side of the effect is expanded in equal proportion.
Step 3: Preview and Export
Press the Spacebar on the keyboard to preview the video and see if the route appears as if it is being drawn on the map. Once the animation looks acceptable, click EXPORT from the top-center, go to the Local tab on the Export window, select MP4 from the formats list in the left, and click EXPORT from the bottom-right corner to export the current animation to MP4.
Step 4: Customize the Travel Map Media
Either start a new project and import the video of the map you exported in the previous step to the app and then to the Timeline, or remove the existing media from the Timeline in the same project, and add the exported video to it for convenience.
For Win 7 or later (64-bit)
Secure Download
For macOS 10.14 or later
Secure Download
Next, position the Skimmer (Playhead) a couple of frames before the one the route line appears and starts stretching from, and click the Split icon from the editing toolbar above the Timeline itself. Repeat this process for the other side of the media, i.e., position the Skimmer a couple of frames after the route line reaches the destination location, and click the Split icon again. Then remove the separated segments from both the sides by selecting them and pressing Delete on the keyboard, leaving only the portion where the animation is visible.
Optionally, right-click the media that is left behind in the Timeline, and go to Speed and Duration from the context menu. On the Custom Speed box, drag the Speed slider to the left to decrease the playback speed resulting in the increased duration of the media. Alternatively, you can manually enter a value in the Speed box to get precise tenure. Click OK when you are done.
Step 5: Add Animations to Travel Map
Right-click the media in the Timeline, and go to Add Animation from the context menu. Make sure that the Skimmer is on the first frame, and add several keyframes as explained below:
- Click Add to add the first keyframe
- Move a couple of frames further, and click Add one more time. Now, while you are on this second keyframe, use the Scale slider to zoom in to the map so the source location remains within focus.
- Next, move the Playhead further and add another keyframe a couple of frames before the route line hits the edge of the window.
- After this, move the Playhead again and position it where the route line reaches its destination location. Add another keyframe here as well, and move the map in the Preview window so the focus is now on the destination.
- Move the Playhead a few frames further, add another keyframe, and use the Scale slider to zoom a bit more into the map to make the entire animation look realistic. Click OK to save the changes.
Step 6: Add Icons and Titles, and Export the Project
Drag the image of the traveling medium to the Timeline, and place it on the frame the route line starts from. Make sure to place the image on the track above the map, and stretch it to the end so it remains visible throughout the animation. Next, use the method explained above to add keyframes to move the medium along with the route line from the source to the destination. Optionally, add the image of the location marker at the destination point, go to Transition, and add your preferred transition effect, preferably Dissolve, to the marker track in the Timeline so it looks as if it has appeared as the medium arrived the destination.
For Win 7 or later (64-bit)
Secure Download
For macOS 10.14 or later
Secure Download
Get back to the first frame in the Timeline, go to Titles on the standard toolbar, and add a title preset somewhere near the source location. Resize the text, change the format as needed, and add your preferred caption to it such as the start time, name, etc. Reduce the duration of the track so the title appears for a few frames, preferably before the map animation starts. Click OK when done. Repeat this process for the destination point as well.
Once everything is complete, click the Play button in the Preview window to review your work. If the video looks acceptable, click EXPORT from the top-center of the interface, and use the method explained earlier to export the animated travel map in your preferred format.
![]()
Method 2 How to Make Interactive Animated Travel Map with Pictramap
If you don’t want to install a dedicated animation software on your computer due to limited hardware resources or some other reason, there is an online solution called Pictramap to create a travel map animation using a web browser. The web app offers a lucrative interface that could be easily understood and worked with to produce an animated map for free.
The process to create an animated travel map with Pictramap is given below:
Step 1: Create a Project
Launch your favorite web browser, go to https://www.pictramap.com/ , click Create yours now, it’s free, and sign up to Pictramap using your preferred method. When you are on the Dashboard, enter a name in the field available under the My Projects section, and click Create to create a new project (the animated map).
Step 2: Define the Locations and Method of Commute
On the map, right-click the location you want to start your journey from, enter the name of the location or any other significant title, and click Add. Click the location marker, click the Travel Mode icon, and select your preferred mode of traveling. Repeat this process to mark the destination location as well.
Step 3: Preview the Animation
Click the View Animation button from the upper-right corner of the page to see the animated travel map.
Downsides of Using Pictramap to Create Animated Travel Map Video
Although Pictramap allows you to create a travel map animation with ease and extremely quickly, at the time of this writing, it offers no way of downloading the animation to your PC, and therefore it couldn’t be used in your projects.
If you are using Wondershare Filmora, you can use its built-in screen recording feature to record the animation that Pictramap plays, and then save the captured footage as MP4 or any other format on your computer. This video can then be imported to your projects for further uses.
![]()
A cross-platform for making videos anywhere for all creators
Why your video editing isn’t good enough? How about some creative inspo?
- 100 Million+ Users
- 150+ Countries and Regions
- 4 Million+ Social Media Followers
- 5 Million+ Stock Media for Use
* Secure Download
Method 3 How To Make Animated Travel Map Using Multidev
Multi.dev is still a new web-based application to build awesome animated maps, but it’s good! The application helps you create presentations about all your recent and previous trips. And the interface is also hassle-free.
So, follow this step-by-step guide to making animated maps with Multi.dev.
Step 1: Open Multi.dev
Visit Multi.dev from your internet browser.
Once the tool gets open, you will see a demo video. This example clip will have animated maps of different locations. So it is up to you whether to use the same example and edit the places you have been to or are planning to visit. Or, simply create a new animated map from scratch.
Step 2: Choose Your First Location
Take your mouse cursor on the left side of the application and type the first location in the search bar. As soon as you do it, you will see that the “travel arrow” will automatically begin from there. Likewise, type and select the next location through the search bar.
Once you type the location, you will see 8 travel modes, including airplane, bus, and train. You can select the same mode for all sites or a different mode for another place. Totally up to you!
Step 3: Select Map Themes
All your chosen places will be highlighted in the software’s minimalistic map.
Step 4: Download Map on Your Computer
If you’re happy with the animated map, click the “Create Video” button to save the animated map on your computer in a few minutes.
Contrarily, you can also share the animation by choosing the “Share Animation” option.
Conclusion
An animated travel map plays an important role to add a realistic touring effect to your motion picture projects. While you can use a web app like Pictramap to create such an animation online easily and for free, the limitations it comes along with might keep you from choosing this method.
Instead, you may want to get more inclined toward a dedicated post-production software like Wondershare Filmora that gives you full control over the process, and the freedom to choose your preferred format to export the animation to for independent usage.
For Win 7 or later (64-bit)
Secure Download
For macOS 10.14 or later
Secure Download
Benjamin Arango
Benjamin Arango is a writer and a lover of all things video.
Follow @Benjamin Arango
Tutorial Guide to Animate Pictures in Canva
Versatile Video Editor - Wondershare Filmora
An easy yet powerful editor
Numerous effects to choose from
Detailed tutorials provided by the official channel
With the rapid rise of social media worldwide, animated posts (like GIFs) are becoming famous. They have become a replacement to other modes like JPEG and .Png
Famous designing tools like Canva introduced an animation feature in the light of its popularity. The feature allows you to step up your social media game and creates animated visuals in a blink! It is also efficient for both professional and amateur users.
Besides social media content, Canva is also useful to design birthday cards, event invites, inspirational quotes, and more! Let’s learn about how to animate pictures in Canva in detail.
In this article
01 What Canva Pictures Can Be Used For?
02 How to Animate Pictures in Canva?
03 Tips: Animate Pictures In Video
Part 1: What Canva Pictures Can Be Used For?
Be it for marketing campaigns or projects, Canva is the best tool for all designing work. It is a foolproof platform where you do not need prior designing experience. Canva is useful for

Social media/Instagram Posts: You can build your Instagram presence by creating posts through Canva. It has multiple templates and features to make alluring Instagram posts. It also has drag-and-drop free images to add customized designs to the template.
Facebook Covers: You can make Facebook covers on Canva by choosing a layout and adding other elements. You can include colors, fonts, and pictures on the cover. Canva has templates for all themes, moods, and styles!
Event Invites: Canva has hundreds of free layouts and libraries to create event invites. You can choose the appropriate template and incorporate party-oriented photos, icons, stickers, illustrations, and graphics. It also has a personalizing option to add personal pictures and artwork in the editor.
Inspirational Quotes: Canva allows you to curate inspirational quotes and dispense motivation in people. It has templates to modify the elements like font size, text size, borders, images, and more!
Collages: It helps create a collage where you can combine multiple pictures in one frame. Canva offers various grids with a capacity of 12 pictures and different sizes.
Part 2: How to Animate Pictures in Canva?
Canva helps you add instant animation in presentations, social media posts, and more. To know how to animate images in Canva, follow the below steps:

Step 1: Add Static Elements
Start by creating an image through static elements. To make the design attractive, you can add sample texts, illustrations, doodles, and other entities.
Try to stimulate your creativity and come up with a layout beforehand. If possible, sketch on paper and replicate the same.
Step 2: Animate Your Design
Take a final glance at the layout. Make sure it’s perfect. Once all the elements are placed as per your design, it’s time to animate them. For that:
- Click on the white background page
- Go to the “Toolbar” section
- Select the “Animate” button
Step 3: Select Page Animation Style
Canva offers six animation styles, where five are for free users, and one is for pro users. To access the five animation styles, follow these steps.
- Press the “Animate” Button
- Select “Page Animations”
- There you will find options like Block, Pan, Fade, Rise, and Tumble
- Select the style as per your design
Step 4: Preview and Download
After selecting a page animation style, it will preview the effect. If you find it good, move on to downloading the GIF. Here’s how to do so
- Go to the “Toolbar” option (present on your upper right hand)
- Choose GIF as the file type
- Check the page number and verify if it’s correct
- Press the “Done” button
Step 5: Final GIF
After clicking on the “Done” button, your GIF will be downloaded. You will be able to see a display for five seconds. If you want to edit the image after this, click on the time button (near the “Animate” button).
So, that was all about how to animate a photo in Canva.
Drawbacks of Canva
Despite efficient features and easy interface, there are certain areas where Canva lacks. This includes
- It does not have any local file storage.
- As too many people use Canva, your template may look the same as others.
- Some of its best features are not free to access.
- The mobile app version lacks certain elements and features.
Out of all these drawbacks, repetitions of templates are a big issue. That’s because everyone wants their posts to look unique and irreplaceable. However, common Canva templates may prevent that from happening.
Fortunately, there are ways to combat such issues. Let’s learn about them in the next section.
Tips: Animate Pictures In Video
You can also animate pictures in the video to make them more lively. For that, you can use Wondershare Filmora Pro Video Editor. It’s also efficient if you don’t know how to animate a picture in Canva:
Wondershare Filmora Video Editor
Filmora by Wondershare is a video editing software that helps you build custom animations easily. It has auto features to make epic stories and posts.
Wondershare Filmora
Get started easily with Filmora’s powerful performance, intuitive interface, and countless effects!
Try It Free Try It Free Try It Free Learn More about Filmora>

Its drag and drop effect makes designing simple and quick. Due to its outstanding attributes, options, and styles, Filmora has 77+ million happy users!
It’s a power-packed integration of functionality, performance, and more! In fact, it resolves the repeated template issue of Canva. The software has top-notch functions and innovative filters that add authenticity to the designs.
Till now, you learned about how to animate a picture on Canva. Now, let’s comprehend the right way to use Filmora for animating and adding images in the video.
Before using, make sure to update the software to its latest version. Follow separate methods for both Windows and Mac.
For Win
Step 1: Adding Image to Video Track
With Filmora, adding images to video is a matter of seconds! Start by:
- Identify the position where you want to add the image and place the Playhead there.
- Right-click on the picture from the media library. Click on the “Insert” option. Your image will be added. Select the “Append” option, if you want to add an image at the video end.

Note: How to Remove Black Bars around the Image?
- Go to “Settings” from the File section.
- Click on the “Editing” tab and select “Photo Placement.”
- Choose from the “Crop to Fit” or “Pan To Zoom” option. The black bars will be removed.
To add the image in between the video clip, split them. Now, add the image between the split parts.
Step 2: Add Images as Overlays
To add images as overlays, drag the image to a video track above the main track. The main track consists of your video.
Track 1 (or the track with a video clip) is the base of your video. If you add anything else, it will be displayed above this track as video track 2, 3, and so on. Overall, you can add 100 video tracks.
Step 3: Edit Your Image
If you know how to animate an image in Canva, editing images on Filmora is even easier. You can try the following methods:
Animate Your Images
- To add animation presets to the image, click on the image twice.
- Go to the “Animation Tab” and look for an animation preset.
- Drag the presets to the image for its effect

Make Image Color Adjustments
- Double-click on the image
- Go to the “Color” tab and then the “Color” section
- Customize the temperature, saturation, brightness, etc., as per your need.
- Press Ok.
Change Image Duration
You can increase the image duration to more than the default timing of 5 seconds. For that:
- Click on the image and select the “Duration” option.
- Go to the “Duration Setting” panel.
- Add the new duration timing.

Adjust Position, Rotate/Flip, and Opacity
- You can resize the image position through the circles and squares at the image edges.
- To flip or rotate the image, double-click on the picture. From the “Image Panel,” go to “Transform” and then click on “Rotate.” You can choose either “Horizontal Flip” or “Vertical Flip” to flip the images.
- Double-click on the image and click on the “Composting” option to add opacity. You can choose the blending mode or adjust the “Opacity” accordingly.

For Mac
Filmora for Mac comes with a drag and drop feature to add transitions, animated titles, and effects. You can start a new project from scratch by clicking on “New Project”. The entire process is the same as that for Windows users.
To apply animation in the images, use the motion effects option. For that,
- Click on the Image
- Go to Motion Tab
- Select a motion effect
- Double-click to apply the effect

Conclusion
So that’s how to animate photos in Canva. Hopefully, our steps will help you revamp your posts like a pro! If not Canva, you can use its alternative Filmora. It’s equally prominent, user-friendly, and feature-rich.
Versatile Video Editor - Wondershare Filmora
An easy yet powerful editor
Numerous effects to choose from
Detailed tutorials provided by the official channel
With the rapid rise of social media worldwide, animated posts (like GIFs) are becoming famous. They have become a replacement to other modes like JPEG and .Png
Famous designing tools like Canva introduced an animation feature in the light of its popularity. The feature allows you to step up your social media game and creates animated visuals in a blink! It is also efficient for both professional and amateur users.
Besides social media content, Canva is also useful to design birthday cards, event invites, inspirational quotes, and more! Let’s learn about how to animate pictures in Canva in detail.
In this article
01 What Canva Pictures Can Be Used For?
02 How to Animate Pictures in Canva?
03 Tips: Animate Pictures In Video
Part 1: What Canva Pictures Can Be Used For?
Be it for marketing campaigns or projects, Canva is the best tool for all designing work. It is a foolproof platform where you do not need prior designing experience. Canva is useful for
Social media/Instagram Posts: You can build your Instagram presence by creating posts through Canva. It has multiple templates and features to make alluring Instagram posts. It also has drag-and-drop free images to add customized designs to the template.
Facebook Covers: You can make Facebook covers on Canva by choosing a layout and adding other elements. You can include colors, fonts, and pictures on the cover. Canva has templates for all themes, moods, and styles!
Event Invites: Canva has hundreds of free layouts and libraries to create event invites. You can choose the appropriate template and incorporate party-oriented photos, icons, stickers, illustrations, and graphics. It also has a personalizing option to add personal pictures and artwork in the editor.
Inspirational Quotes: Canva allows you to curate inspirational quotes and dispense motivation in people. It has templates to modify the elements like font size, text size, borders, images, and more!
Collages: It helps create a collage where you can combine multiple pictures in one frame. Canva offers various grids with a capacity of 12 pictures and different sizes.
Part 2: How to Animate Pictures in Canva?
Canva helps you add instant animation in presentations, social media posts, and more. To know how to animate images in Canva, follow the below steps:
Step 1: Add Static Elements
Start by creating an image through static elements. To make the design attractive, you can add sample texts, illustrations, doodles, and other entities.
Try to stimulate your creativity and come up with a layout beforehand. If possible, sketch on paper and replicate the same.
Step 2: Animate Your Design
Take a final glance at the layout. Make sure it’s perfect. Once all the elements are placed as per your design, it’s time to animate them. For that:
- Click on the white background page
- Go to the “Toolbar” section
- Select the “Animate” button
Step 3: Select Page Animation Style
Canva offers six animation styles, where five are for free users, and one is for pro users. To access the five animation styles, follow these steps.
- Press the “Animate” Button
- Select “Page Animations”
- There you will find options like Block, Pan, Fade, Rise, and Tumble
- Select the style as per your design
Step 4: Preview and Download
After selecting a page animation style, it will preview the effect. If you find it good, move on to downloading the GIF. Here’s how to do so
- Go to the “Toolbar” option (present on your upper right hand)
- Choose GIF as the file type
- Check the page number and verify if it’s correct
- Press the “Done” button
Step 5: Final GIF
After clicking on the “Done” button, your GIF will be downloaded. You will be able to see a display for five seconds. If you want to edit the image after this, click on the time button (near the “Animate” button).
So, that was all about how to animate a photo in Canva.
Drawbacks of Canva
Despite efficient features and easy interface, there are certain areas where Canva lacks. This includes
- It does not have any local file storage.
- As too many people use Canva, your template may look the same as others.
- Some of its best features are not free to access.
- The mobile app version lacks certain elements and features.
Out of all these drawbacks, repetitions of templates are a big issue. That’s because everyone wants their posts to look unique and irreplaceable. However, common Canva templates may prevent that from happening.
Fortunately, there are ways to combat such issues. Let’s learn about them in the next section.
Tips: Animate Pictures In Video
You can also animate pictures in the video to make them more lively. For that, you can use Wondershare Filmora Pro Video Editor. It’s also efficient if you don’t know how to animate a picture in Canva:
Wondershare Filmora Video Editor
Filmora by Wondershare is a video editing software that helps you build custom animations easily. It has auto features to make epic stories and posts.
Wondershare Filmora
Get started easily with Filmora’s powerful performance, intuitive interface, and countless effects!
Try It Free Try It Free Try It Free Learn More about Filmora>
Its drag and drop effect makes designing simple and quick. Due to its outstanding attributes, options, and styles, Filmora has 77+ million happy users!
It’s a power-packed integration of functionality, performance, and more! In fact, it resolves the repeated template issue of Canva. The software has top-notch functions and innovative filters that add authenticity to the designs.
Till now, you learned about how to animate a picture on Canva. Now, let’s comprehend the right way to use Filmora for animating and adding images in the video.
Before using, make sure to update the software to its latest version. Follow separate methods for both Windows and Mac.
For Win
Step 1: Adding Image to Video Track
With Filmora, adding images to video is a matter of seconds! Start by:
- Identify the position where you want to add the image and place the Playhead there.
- Right-click on the picture from the media library. Click on the “Insert” option. Your image will be added. Select the “Append” option, if you want to add an image at the video end.
Note: How to Remove Black Bars around the Image?
- Go to “Settings” from the File section.
- Click on the “Editing” tab and select “Photo Placement.”
- Choose from the “Crop to Fit” or “Pan To Zoom” option. The black bars will be removed.
To add the image in between the video clip, split them. Now, add the image between the split parts.
Step 2: Add Images as Overlays
To add images as overlays, drag the image to a video track above the main track. The main track consists of your video.
Track 1 (or the track with a video clip) is the base of your video. If you add anything else, it will be displayed above this track as video track 2, 3, and so on. Overall, you can add 100 video tracks.
Step 3: Edit Your Image
If you know how to animate an image in Canva, editing images on Filmora is even easier. You can try the following methods:
Animate Your Images
- To add animation presets to the image, click on the image twice.
- Go to the “Animation Tab” and look for an animation preset.
- Drag the presets to the image for its effect
Make Image Color Adjustments
- Double-click on the image
- Go to the “Color” tab and then the “Color” section
- Customize the temperature, saturation, brightness, etc., as per your need.
- Press Ok.
Change Image Duration
You can increase the image duration to more than the default timing of 5 seconds. For that:
- Click on the image and select the “Duration” option.
- Go to the “Duration Setting” panel.
- Add the new duration timing.
Adjust Position, Rotate/Flip, and Opacity
- You can resize the image position through the circles and squares at the image edges.
- To flip or rotate the image, double-click on the picture. From the “Image Panel,” go to “Transform” and then click on “Rotate.” You can choose either “Horizontal Flip” or “Vertical Flip” to flip the images.
- Double-click on the image and click on the “Composting” option to add opacity. You can choose the blending mode or adjust the “Opacity” accordingly.
For Mac
Filmora for Mac comes with a drag and drop feature to add transitions, animated titles, and effects. You can start a new project from scratch by clicking on “New Project”. The entire process is the same as that for Windows users.
To apply animation in the images, use the motion effects option. For that,
- Click on the Image
- Go to Motion Tab
- Select a motion effect
- Double-click to apply the effect
Conclusion
So that’s how to animate photos in Canva. Hopefully, our steps will help you revamp your posts like a pro! If not Canva, you can use its alternative Filmora. It’s equally prominent, user-friendly, and feature-rich.
Versatile Video Editor - Wondershare Filmora
An easy yet powerful editor
Numerous effects to choose from
Detailed tutorials provided by the official channel
5 Different Animation Styles: A Simple but Complete Guide
5 Different Animation Styles: A Simple but Comprehensive Guide

Shanoon Cox
Mar 27, 2024• Proven solutions
To whatever generation or kind one could belong to, animation style videos attract people of all ages, and you will be one of them for sure. Rather than ordinary videos, animated ones provoke diverse impacts on the audience utilizing kinesthetic, illustration, and aural. But the reality or fact is, due to overexposure to social media sites and technological advancements, we have forgotten its importance. They are on the verge of existence at present. Are you an art lover who wishes to know more about animation styles? Want to know some of the software tools that can bring out the artist in you? Here is a complete guide that is all you need.
- Part 1: 5 Different Animation Styles
- Part 2: Create Your Animation Videos with Professional Video Editor
5 Different Animation Styles
Ready to enter into the world of animation along with us? We are all set to take you through a ride of different animation styles, their importance, and some of the videos that one should give a try!
1. 2D Animation
Let’s start with 2D as our fist animation style, which is the traditional or oldest form in practice for more than 100 years since 1908. 2D has widely been in usage to create animated short films, cartoon characters, games, marketing videos, and educational materials. In 2D animation, the characters or items, creatures, and backgrounds get crafted in a two-dimensional space. It produces a graphic of movement with the drawings played serially one after another.
Recommended Software: At present, various free animator tools like Creatoon, Blender, and Pencil 2D, whereas, for professionals, Encore, Flash, Toon Boom Harmony, and Adobe Photoshop can be handy!
The above 2D animation style video is a short film “Dark Dark Woods” directed by the students at “The Animation Workshop.” It is all about the young princess, Maria, drenched, and tired of living a royal life being filled with rules, duties, lessons, responsibilities, and customs. One night, she enters into an adventurous event where she finds herself in a mysterious monster-filled dark wood. Watch the film and find did she find out there!
2. 3D Animation
As the next version of 2D, in the animation industry, 3D revolutionized the market since its first appearance in 1972. Like 2D, 3D finds applications in varied platforms like a business, education, and entertainment. Still, the difference is they are unique and created in three-dimensional space using computer graphics and cinematography techniques as well. The pictures or characters look perfected with cutting-edge technology where toy story movie is an outstanding example.
Recommended Software: One can try some of the 3D modeling software packs like Maya, Houdini, Modo, ZBrush, and Lightwave 3D.
Do you know how it feels if you are trapped alone on a deserted island? “It’s a Cinch!” is a fantastic, funny 3D short film that is an adventurous movie made by the ESMA team at CGI. For sure, you will like this funny movie all about atrocities happening with a man and a pelican and enjoy it as much as I did!
3. Motion Graphics
Our next animation style is motion graphics of the animated graphic design, where text appears to be the main enhancing factor. It is a piece of animation or digital footage that illuminates a motion or notation incorporated with audio. It is a new way of communicating to the audience and in driving them deep into the story. You can categorize it under the visual effect technique, which involves the movement of graphic images or elements like logos or text, sound, music, and motion. Motion graphics are best to be found in action and finds a place in multimedia projects, advertising agencies, branding, television title making, and storytelling.
Recommended Software: Tools that are best for motion graphics is Mocha AE, After Effects, Illustrator, and Cinema 4D.
The world is a great place, but we always forget another beautiful hidden green world behind the fantastic buildings we reside in. Yes, “Beautiful World” is a motion graphic video by Blasterjaxx & DBSTF feat. Ryder presents how we humans have developed a great empire by destroying the other beautiful part of the world.
4. Stop Motion
Stop motion is one of the traditional animation styles that is the most popular filmmaking technique that uses hand-crafted or manipulated objects, mostly clay models. Puppets, silhouettes, and cut-outs can also be implemented as stop motion aids to produce animation. It is labor-intensive, a form of art, and has its flavor in animation, although 3D and visual effects have replaced it quite a long time before. But still, filmmakers like Tim Burton use stop motion in their films, making it to withstand the animation industry.
Recommended Software: You can make your stop motion video with software like Dragon frame, Stop Motion Pro Eclipse, and IKITMovie.
Although stop motion has gone before ages, there is still a fantastic introduction. Here is an award-winning short film, “Tokri (the basket),” which is a clumsy accident that leads a juvenile girl onto Mumbai’s streets with the trust of making things correct. Studio Eeksaurus, an Indian bastion animation company, has depicted a father and daughter’s tender emotive tale.
5. Paint-On-Glass Animation
Here is a Paint-on-Glass animation style that is a technique used for making animated films that gives a lot of fun. Artists paint short stories on glasses using oil paints and film them by recording it frame-by-frame. Russian animator Aleksandr Petrov is a famous artist well known for making award-winning paint-on-glass animation. Animators use different objects like brick dust, sand, pastels, and charcoal, to create outstanding drama in their films.
Recommended Software: You can also become a paint-on-glass animator now with tools like Pencil 2D, Blender, Krita, and GIMP.
Suppose you are wondering whether you could find any paint-on-glass animated movie on social media sites. In that case, there are numerous animated films, like “The Old Man and the Sea,” and “My Love,” produced by the experts of pictures of Aleksandr Petrov animation. Surprisingly, this bind-blowing introduction is a result of oil paints on a sheet of glass.
Conclusion
Do you aspire to become an animator and come up painting bright colors to videos? Choose animation styles that you most enjoy, find attractive today, and start working on it. Lastly, do not forget to give Filmora a chance to uplift your creation and give your animation style a life!
Shanoon Cox
Shanoon Cox is a writer and a lover of all things video.
Follow @Shanoon Cox
Shanoon Cox
Mar 27, 2024• Proven solutions
To whatever generation or kind one could belong to, animation style videos attract people of all ages, and you will be one of them for sure. Rather than ordinary videos, animated ones provoke diverse impacts on the audience utilizing kinesthetic, illustration, and aural. But the reality or fact is, due to overexposure to social media sites and technological advancements, we have forgotten its importance. They are on the verge of existence at present. Are you an art lover who wishes to know more about animation styles? Want to know some of the software tools that can bring out the artist in you? Here is a complete guide that is all you need.
- Part 1: 5 Different Animation Styles
- Part 2: Create Your Animation Videos with Professional Video Editor
5 Different Animation Styles
Ready to enter into the world of animation along with us? We are all set to take you through a ride of different animation styles, their importance, and some of the videos that one should give a try!
1. 2D Animation
Let’s start with 2D as our fist animation style, which is the traditional or oldest form in practice for more than 100 years since 1908. 2D has widely been in usage to create animated short films, cartoon characters, games, marketing videos, and educational materials. In 2D animation, the characters or items, creatures, and backgrounds get crafted in a two-dimensional space. It produces a graphic of movement with the drawings played serially one after another.
Recommended Software: At present, various free animator tools like Creatoon, Blender, and Pencil 2D, whereas, for professionals, Encore, Flash, Toon Boom Harmony, and Adobe Photoshop can be handy!
The above 2D animation style video is a short film “Dark Dark Woods” directed by the students at “The Animation Workshop.” It is all about the young princess, Maria, drenched, and tired of living a royal life being filled with rules, duties, lessons, responsibilities, and customs. One night, she enters into an adventurous event where she finds herself in a mysterious monster-filled dark wood. Watch the film and find did she find out there!
2. 3D Animation
As the next version of 2D, in the animation industry, 3D revolutionized the market since its first appearance in 1972. Like 2D, 3D finds applications in varied platforms like a business, education, and entertainment. Still, the difference is they are unique and created in three-dimensional space using computer graphics and cinematography techniques as well. The pictures or characters look perfected with cutting-edge technology where toy story movie is an outstanding example.
Recommended Software: One can try some of the 3D modeling software packs like Maya, Houdini, Modo, ZBrush, and Lightwave 3D.
Do you know how it feels if you are trapped alone on a deserted island? “It’s a Cinch!” is a fantastic, funny 3D short film that is an adventurous movie made by the ESMA team at CGI. For sure, you will like this funny movie all about atrocities happening with a man and a pelican and enjoy it as much as I did!
3. Motion Graphics
Our next animation style is motion graphics of the animated graphic design, where text appears to be the main enhancing factor. It is a piece of animation or digital footage that illuminates a motion or notation incorporated with audio. It is a new way of communicating to the audience and in driving them deep into the story. You can categorize it under the visual effect technique, which involves the movement of graphic images or elements like logos or text, sound, music, and motion. Motion graphics are best to be found in action and finds a place in multimedia projects, advertising agencies, branding, television title making, and storytelling.
Recommended Software: Tools that are best for motion graphics is Mocha AE, After Effects, Illustrator, and Cinema 4D.
The world is a great place, but we always forget another beautiful hidden green world behind the fantastic buildings we reside in. Yes, “Beautiful World” is a motion graphic video by Blasterjaxx & DBSTF feat. Ryder presents how we humans have developed a great empire by destroying the other beautiful part of the world.
4. Stop Motion
Stop motion is one of the traditional animation styles that is the most popular filmmaking technique that uses hand-crafted or manipulated objects, mostly clay models. Puppets, silhouettes, and cut-outs can also be implemented as stop motion aids to produce animation. It is labor-intensive, a form of art, and has its flavor in animation, although 3D and visual effects have replaced it quite a long time before. But still, filmmakers like Tim Burton use stop motion in their films, making it to withstand the animation industry.
Recommended Software: You can make your stop motion video with software like Dragon frame, Stop Motion Pro Eclipse, and IKITMovie.
Although stop motion has gone before ages, there is still a fantastic introduction. Here is an award-winning short film, “Tokri (the basket),” which is a clumsy accident that leads a juvenile girl onto Mumbai’s streets with the trust of making things correct. Studio Eeksaurus, an Indian bastion animation company, has depicted a father and daughter’s tender emotive tale.
5. Paint-On-Glass Animation
Here is a Paint-on-Glass animation style that is a technique used for making animated films that gives a lot of fun. Artists paint short stories on glasses using oil paints and film them by recording it frame-by-frame. Russian animator Aleksandr Petrov is a famous artist well known for making award-winning paint-on-glass animation. Animators use different objects like brick dust, sand, pastels, and charcoal, to create outstanding drama in their films.
Recommended Software: You can also become a paint-on-glass animator now with tools like Pencil 2D, Blender, Krita, and GIMP.
Suppose you are wondering whether you could find any paint-on-glass animated movie on social media sites. In that case, there are numerous animated films, like “The Old Man and the Sea,” and “My Love,” produced by the experts of pictures of Aleksandr Petrov animation. Surprisingly, this bind-blowing introduction is a result of oil paints on a sheet of glass.
Conclusion
Do you aspire to become an animator and come up painting bright colors to videos? Choose animation styles that you most enjoy, find attractive today, and start working on it. Lastly, do not forget to give Filmora a chance to uplift your creation and give your animation style a life!
Shanoon Cox
Shanoon Cox is a writer and a lover of all things video.
Follow @Shanoon Cox
10 Realistic Cartoon Characters You Would Run Away From if You Met in Real Life
10 Realistic Cartoon Characters You Would Run Away From if You Met in Real Life
An easy yet powerful editor
Numerous effects to choose from
Detailed tutorials provided by the official channel
Remember watching a cartoon reality show on the Cartoon Network? We all grew up watching cartoons. Cartoons are an unforgettable part of our childhood. But have you ever wondered what would your favorite cartoon characters look like in real life? Many cartoon characters like Popeye, Sponge Bob, Mickey Mouse, etc. look funny in their 2D images. Watching them do funny things and their funny expressions have always been fun.
But with the advancement in technology and the passage of time, we have some digital artists like Tatiana and Miguel Vasquez, who have recreated your famous cartoon characters into 3D. They have given them a realistic look that will scare you. These realistic cartoon faces will blow your mind.
In this article
01 [What’s a Realistic Cartoon?](#Part 1)
02 [10 Realistic Cartoon Characters You Would Run Away From If You Met In Real Life](#Part 2)
03 [How Do Cartoon Characters Reimagined As Realistic 3D Animation](#Part 3)
Part 1 What’s Realistic Cartoon?
Before moving towards the list of realistic cartoon characters, you must first know what a realistic cartoon is. As we all know, any animated drawing or illustration is a cartoon, it can either be non-realistic or semi-realistic. Earlier artists used to draw these cartoon characters on paper, but now technology has evolved.
With the introduction of different AI tools, many digital artists have recreated 3D versions of your favorite cartoon characters. These 3D versions of different cartoons are known as realistic cartoons. This can be done easily with help of AI technology and Digital Software.
Part 2 Realistic Cartoon Characters You Would Run Away From If You Met In Real Life
Have you ever thought how would your favorite cartoon character sponge bob looks like in real life? We will show you realistic versions of your favorite cartoon characters. Stay tuned for great fun waiting for you in this article!
01Sponge Bob (Sponge Bob Square Pants)
Sponge Bob Square Pants is an animated series full of fun and comedy. This show currently runs on Nickelodeon. Sponge Bob is a yellow-colored sea sponge and the main protagonist of the show. He is a cook at a restaurant named Krusty Krab. He often goes on adventures with his best friend Patrick Star. He mainly focuses on and aims at getting a boat-driving license from Mr. Puff’s boating school.
Have a look at the 3D recreation of this funny creature.
02Sid the Sloth (Ice Age)
Ice Age is one of the most popular animated series that revolves around the lives of a mammoth, tiger, sloth, and a scrat. A scrat is a combination of a squirrel and a rat. This series became so popular among the children that it was even nominated for an Oscar award.
It has a character called Sid. He is an abandoned sloth. His mother left him for some good to happen with him during the migration. His character in the entire series exhibits a friendly and carefree nature. Sometimes, he also acts as dumb and naïve.
Look at the funny recreation of this dumb-witted character. Does this recreation scare you?
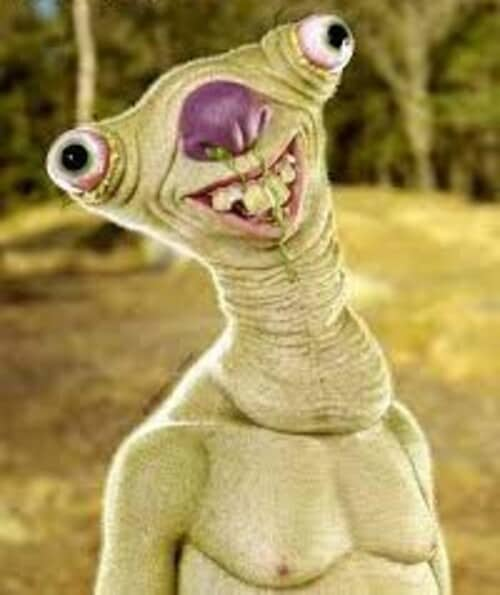
03Mr. Krabs (Sponge Bob Square Pants)
Sponge Bob Square Pants is one of the cartoons that have many different and funny-looking creatures. Mr. Krabs is one of those characters. He is a money-minded and miserly creature. He is the owner of the Krusty Krab fast food restaurant, where Sponge Bob works as a cook. He has a teenage daughter named Pearl and he can do anything to see her happy. He exhibits romantic feelings for Mrs. Puff.
Does this funny creature from the Sponge Bob series look funny in real life too?

04Patrick Star (Sponge Bob Square Pants)
Patrick Star is again a character from the cartoon show Sponge Bob Square Pants. He is the best friend of the main protagonist Sponge Bob, who lives 2 houses away from Sponge Bob’s house. He is a lazy, fat, and stupid pink-colored starfish. His character makes the show funnier and more interesting for kids.
How would you react when you will see this funny creature from Sponge Bob in real life? His 3D recreation seems a bit scary like a monster in real life.
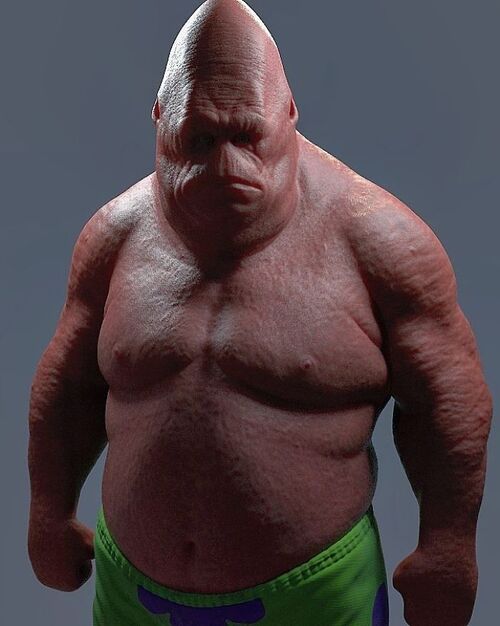
05Plankton (Sponge Bob Square Pants)
Plankton was once the best friend of Mr. Krabs but now they both share a rivalry bond. He is married to Karen and owns a fast food restaurant named Chum Bucket Restaurant in competition with Mr. Krabs’ Restaurant. He plays the antagonist character in the series. His restaurant doesn’t work as successfully as Krusty Krab Restaurant. In rivalry, he often comes up with different plans and tricks to outwit Mr. Krabs and steal the secret recipe of his famous Krabby Patty Burger, but never succeeds.
Have a look at the 3D recreation of this funny character from the series.
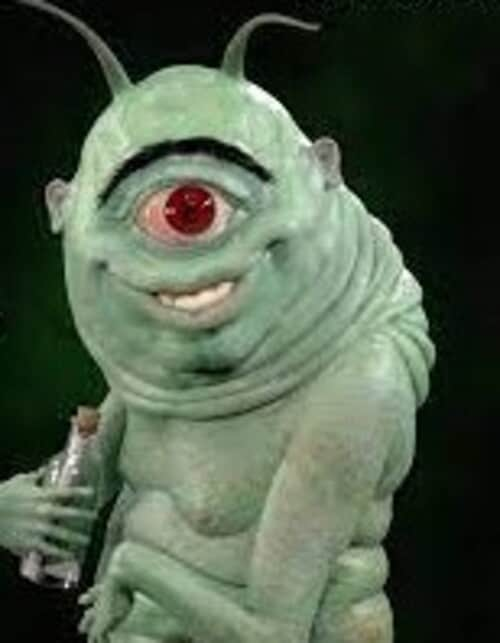
06Homer (The Simpsons)
The Simpsons is an animated series that revolves around the life of an American family. The Simpson family has five members named Homer, Marge, Bart, Lisa, and Maggie. Homer Simpson is the main character of this series. He lives in Springfield and is employed as a Safety Inspector at Springfield Nuclear Power Plant. He is married to Marge and is the father of three children – Bart, Lisa, and Maggie. The series depicts a strong bond of love and care for each other in the family.
Have a look at this realistic 3D recreation of Homer Simpson.
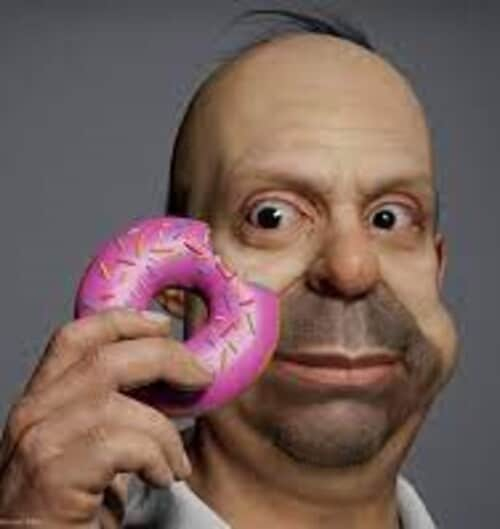
07Bugs Bunny (Looney Tunes)
Looney Tunes is entertaining people of all ages due to its great and funny characters. Bugs Bunny is one of our favorite characters from the animated cartoon show Looney Tunes. He is the main protagonist and the most popular character of the series. Kids love him the most because of his mischievous acts in the show. He looks too funny with a mouth filled with carrots and wearing funny costumes. This unique character has a great fan following all over the world.
The 3D recreation of this famous cartoon character is funny and scary at the same time.
08Sally (The Nightmare Before Christmas)
As the name suggests, The Nightmare Before Christmas is an American dark fantasy animated movie. This animated movie has received great financial success and appreciation for its wonderful characters and music.
Sally is a shy ragdoll created by a scientist Doctor Finkelstein. She secretly loves Jack – the main Protagonist of the movie. She tells him not to mix the preparation of Christmas with the Halloween party.
Look at her realistic 3D recreation by Tatiana, popularly known as TatiMoons.

09Stitch (Lilo and Stitch)
Lilo and Stitch is also an animated American movie. It is a science fiction and comedy movie that attracts the interest of people of all age groups. The story of this animated movie revolves around the two main characters named Lilo and Stitch. Lilo is a 7-year old orphan girl whose parents died in a car accident. She has a pet named Stitch.
The original name of Stitch is Experiment 626. He was illegally created by a scientist Jumba Jokiba through a genetic experiment. Lilo adopts him thinking that he is an innocent creature, she doesn’t know about his birth and origin.
Have a look at this realistic 3D recreation of Stitch’s character. Isn’t it scary?

10 Popeye (Popeye – The Sailor Man)
Popeye – The Sailor Man is another famous cartoon series. Popeye is the main protagonist of this series. He has a girlfriend named Olive Oyl. This series depicts the love triangle between Popeye, Olive, and Bluto. He is an uneducated sailor man who gets energy by eating spinach. He often comes up with non-realistic solutions to different problems and helps the police by investigating different cases. He has a versatile tobacco smoking pipe that sometimes acts as a whistle, and he even intakes the spinach through his pipe.
In the cartoon films, he looks funny, but this 3D recreation of his character is a bit scary.

Part 2 How Do Cartoon Characters Reimagined As Realistic 3D Animation
Nowadays, it has become easier to create and turn your imagination into a cartoon character with different online 3D animators. This makes storytelling easier and funny and it is a great way to engage children. Out of all the 3D animation tools, Filmora will assist you to create the best 3D version of your favorite cartoon character.
Filmora has various smart features that help you to turn any image into realistic 3D animation. You can create great animations using Wondershare Filmora Video Editor within a couple of hours. It offers you many different features that help in convenient customization.
● Ending Thoughts →
● Being a cartoon lover, we hope that you would have liked the 3D recreation of your favorite cartoons. Some of these 3D recreations are so scary that you would just run away from them in real life and some look like real monster cartoons.
● AI combined with digital software like Filmora makes it easier to create these 3D versions of famous cartoon characters.
● With Filmora, you don’t need to spend hours sketching cartoon characters on paper. You can easily create great and realistic animations digitally.
Remember watching a cartoon reality show on the Cartoon Network? We all grew up watching cartoons. Cartoons are an unforgettable part of our childhood. But have you ever wondered what would your favorite cartoon characters look like in real life? Many cartoon characters like Popeye, Sponge Bob, Mickey Mouse, etc. look funny in their 2D images. Watching them do funny things and their funny expressions have always been fun.
But with the advancement in technology and the passage of time, we have some digital artists like Tatiana and Miguel Vasquez, who have recreated your famous cartoon characters into 3D. They have given them a realistic look that will scare you. These realistic cartoon faces will blow your mind.
In this article
01 [What’s a Realistic Cartoon?](#Part 1)
02 [10 Realistic Cartoon Characters You Would Run Away From If You Met In Real Life](#Part 2)
03 [How Do Cartoon Characters Reimagined As Realistic 3D Animation](#Part 3)
Part 1 What’s Realistic Cartoon?
Before moving towards the list of realistic cartoon characters, you must first know what a realistic cartoon is. As we all know, any animated drawing or illustration is a cartoon, it can either be non-realistic or semi-realistic. Earlier artists used to draw these cartoon characters on paper, but now technology has evolved.
With the introduction of different AI tools, many digital artists have recreated 3D versions of your favorite cartoon characters. These 3D versions of different cartoons are known as realistic cartoons. This can be done easily with help of AI technology and Digital Software.
Part 2 Realistic Cartoon Characters You Would Run Away From If You Met In Real Life
Have you ever thought how would your favorite cartoon character sponge bob looks like in real life? We will show you realistic versions of your favorite cartoon characters. Stay tuned for great fun waiting for you in this article!
01Sponge Bob (Sponge Bob Square Pants)
Sponge Bob Square Pants is an animated series full of fun and comedy. This show currently runs on Nickelodeon. Sponge Bob is a yellow-colored sea sponge and the main protagonist of the show. He is a cook at a restaurant named Krusty Krab. He often goes on adventures with his best friend Patrick Star. He mainly focuses on and aims at getting a boat-driving license from Mr. Puff’s boating school.
Have a look at the 3D recreation of this funny creature.
02Sid the Sloth (Ice Age)
Ice Age is one of the most popular animated series that revolves around the lives of a mammoth, tiger, sloth, and a scrat. A scrat is a combination of a squirrel and a rat. This series became so popular among the children that it was even nominated for an Oscar award.
It has a character called Sid. He is an abandoned sloth. His mother left him for some good to happen with him during the migration. His character in the entire series exhibits a friendly and carefree nature. Sometimes, he also acts as dumb and naïve.
Look at the funny recreation of this dumb-witted character. Does this recreation scare you?
03Mr. Krabs (Sponge Bob Square Pants)
Sponge Bob Square Pants is one of the cartoons that have many different and funny-looking creatures. Mr. Krabs is one of those characters. He is a money-minded and miserly creature. He is the owner of the Krusty Krab fast food restaurant, where Sponge Bob works as a cook. He has a teenage daughter named Pearl and he can do anything to see her happy. He exhibits romantic feelings for Mrs. Puff.
Does this funny creature from the Sponge Bob series look funny in real life too?
04Patrick Star (Sponge Bob Square Pants)
Patrick Star is again a character from the cartoon show Sponge Bob Square Pants. He is the best friend of the main protagonist Sponge Bob, who lives 2 houses away from Sponge Bob’s house. He is a lazy, fat, and stupid pink-colored starfish. His character makes the show funnier and more interesting for kids.
How would you react when you will see this funny creature from Sponge Bob in real life? His 3D recreation seems a bit scary like a monster in real life.
05Plankton (Sponge Bob Square Pants)
Plankton was once the best friend of Mr. Krabs but now they both share a rivalry bond. He is married to Karen and owns a fast food restaurant named Chum Bucket Restaurant in competition with Mr. Krabs’ Restaurant. He plays the antagonist character in the series. His restaurant doesn’t work as successfully as Krusty Krab Restaurant. In rivalry, he often comes up with different plans and tricks to outwit Mr. Krabs and steal the secret recipe of his famous Krabby Patty Burger, but never succeeds.
Have a look at the 3D recreation of this funny character from the series.
06Homer (The Simpsons)
The Simpsons is an animated series that revolves around the life of an American family. The Simpson family has five members named Homer, Marge, Bart, Lisa, and Maggie. Homer Simpson is the main character of this series. He lives in Springfield and is employed as a Safety Inspector at Springfield Nuclear Power Plant. He is married to Marge and is the father of three children – Bart, Lisa, and Maggie. The series depicts a strong bond of love and care for each other in the family.
Have a look at this realistic 3D recreation of Homer Simpson.
07Bugs Bunny (Looney Tunes)
Looney Tunes is entertaining people of all ages due to its great and funny characters. Bugs Bunny is one of our favorite characters from the animated cartoon show Looney Tunes. He is the main protagonist and the most popular character of the series. Kids love him the most because of his mischievous acts in the show. He looks too funny with a mouth filled with carrots and wearing funny costumes. This unique character has a great fan following all over the world.
The 3D recreation of this famous cartoon character is funny and scary at the same time.
08Sally (The Nightmare Before Christmas)
As the name suggests, The Nightmare Before Christmas is an American dark fantasy animated movie. This animated movie has received great financial success and appreciation for its wonderful characters and music.
Sally is a shy ragdoll created by a scientist Doctor Finkelstein. She secretly loves Jack – the main Protagonist of the movie. She tells him not to mix the preparation of Christmas with the Halloween party.
Look at her realistic 3D recreation by Tatiana, popularly known as TatiMoons.
09Stitch (Lilo and Stitch)
Lilo and Stitch is also an animated American movie. It is a science fiction and comedy movie that attracts the interest of people of all age groups. The story of this animated movie revolves around the two main characters named Lilo and Stitch. Lilo is a 7-year old orphan girl whose parents died in a car accident. She has a pet named Stitch.
The original name of Stitch is Experiment 626. He was illegally created by a scientist Jumba Jokiba through a genetic experiment. Lilo adopts him thinking that he is an innocent creature, she doesn’t know about his birth and origin.
Have a look at this realistic 3D recreation of Stitch’s character. Isn’t it scary?
10 Popeye (Popeye – The Sailor Man)
Popeye – The Sailor Man is another famous cartoon series. Popeye is the main protagonist of this series. He has a girlfriend named Olive Oyl. This series depicts the love triangle between Popeye, Olive, and Bluto. He is an uneducated sailor man who gets energy by eating spinach. He often comes up with non-realistic solutions to different problems and helps the police by investigating different cases. He has a versatile tobacco smoking pipe that sometimes acts as a whistle, and he even intakes the spinach through his pipe.
In the cartoon films, he looks funny, but this 3D recreation of his character is a bit scary.
Part 2 How Do Cartoon Characters Reimagined As Realistic 3D Animation
Nowadays, it has become easier to create and turn your imagination into a cartoon character with different online 3D animators. This makes storytelling easier and funny and it is a great way to engage children. Out of all the 3D animation tools, Filmora will assist you to create the best 3D version of your favorite cartoon character.
Filmora has various smart features that help you to turn any image into realistic 3D animation. You can create great animations using Wondershare Filmora Video Editor within a couple of hours. It offers you many different features that help in convenient customization.
● Ending Thoughts →
● Being a cartoon lover, we hope that you would have liked the 3D recreation of your favorite cartoons. Some of these 3D recreations are so scary that you would just run away from them in real life and some look like real monster cartoons.
● AI combined with digital software like Filmora makes it easier to create these 3D versions of famous cartoon characters.
● With Filmora, you don’t need to spend hours sketching cartoon characters on paper. You can easily create great and realistic animations digitally.
Also read:
- New Can I Do Animated Logo Design Without Design Skills for 2024
- In 2024, Nurturing the Spirit Through the Top 10 Intellectual Anime Websites
- Updated 8 Top Motion Graphics Online Tools for Your Inspiration
- 2024 Approved How to Make Animated Videos for Business – an Ultimate Guide
- Updated In 2024, Tutorial on Making Unity 2D Animation
- Updated How to Cartoonize Photo Photoshop in Easy Steps for 2024
- New 5 Foolproof Amazing Anime Text to Speech Tips for 2024
- New In 2024, Whats Music Video GIF & How to Add Music to Your GIF Files
- 2024 Approved How to Make a Video a Live Photo 2023
- Updated 2024 Approved 12 Animated Slideshow PowerPoint Templates and Tools to Make Them
- New Tips for Animated Collage Maker
- Updated In 2024, You Can Turn a TikTok Into a GIF Now. Heres How
- New In 2024, Create or Find Good Morning/Night GIFs
- What Is Motion Graphics for 2024
- Updated All About 3D Medical Animation And Its Uses
- Updated In 2024, Methods to Make Photo Motion Effect Online?
- New 2024 Approved 6 Proven Ways to Dub Anime for Anime Voice Actor
- Updated Everything You Need to Know About Becoming a Motion Graphic Designer for 2024
- Updated 2024 Approved Create or Find Good Morning/Night GIFs
- Beginner Tutorial on Making Unity 2D Animation
- Tips for GIF to Animated PNG You Should Know for 2024
- Updated Best GIF Resizers to Reduce GIF Size for 2024
- Updated In 2024, Techniques on Making After Effects 2D Animation
- New In 2024, Learn How to Make Architecture Animation
- In 2024, A Beginners Guide for Learning 3D Animation
- In 2024, How to Create Free Photo Collage Frame in Minutes?
- In 2024, A Roster of 15 Top Disney Channel Cartoons
- CatchEmAll Celebrate National Pokémon Day with Virtual Location On Vivo Y100i | Dr.fone
- How to Repair corrupt MP4 and AVI files of Reno 11F 5G with Video Repair Utility on Mac?
- In 2024, Pattern Locks Are Unsafe Secure Your Samsung Galaxy A05s Phone Now with These Tips
- In 2024, How To Bypass Xiaomi 13T FRP In 3 Different Ways
- How Can You Cast Your Apple iPhone 12 to Windows PC With Ease? | Dr.fone
- 11 Ways to Fix it When My Nubia Red Magic 9 Pro Wont Charge | Dr.fone
- Best Methods for Realme 10T 5G Wont Turn On | Dr.fone
- Top 10 AirPlay Apps in Oppo Reno 11 Pro 5G for Streaming | Dr.fone
- Ways to stop parent tracking your Samsung Galaxy M54 5G | Dr.fone
- How To Restore Missing Messages Files from Poco C55
- In 2024, Top 11 Free Apps to Check IMEI on OnePlus Ace 3 Phones
- In 2024, How to Bypass Activation Lock on iPhone 6s or iPad?
- In 2024, How to Use Google Assistant on Your Lock Screen Of Itel P40+ Phone
- How to Transfer Data from Motorola Razr 40 to Other Android Devices? | Dr.fone
- How to Mirror Poco C65 to Mac? | Dr.fone
- How to Update iPhone 13 Pro to the Latest iOS Version? | Dr.fone
- How to recover deleted photos from Oppo A1x 5G.
- In 2024, iCloud Unlocker Download Unlock iCloud Lock for your Apple iPhone 6s Plus
- What are Location Permissions Life360 On Apple iPhone 15? | Dr.fone
- Thinking About Changing Your Netflix Region Without a VPN On Infinix Zero 5G 2023 Turbo? | Dr.fone
- 4 Most-Known Ways to Find Someone on Tinder For Realme C33 2023 by Name | Dr.fone
- Latest way to get Shiny Meltan Box in Pokémon Go Mystery Box On Nubia Red Magic 9 Pro+ | Dr.fone
- In 2024, How to Change Credit Card on Your Apple iPhone 13 Pro Apple ID and Apple Pay
- Fix OnePlus Ace 2 Pro Android System Webview Crash 2024 Issue | Dr.fone
- In 2024, 5 Quick Methods to Bypass Oppo Reno 11 Pro 5G FRP
- 7 Ways to Unlock a Locked HTC U23 Pro Phone
- What Is ChatGPT, In 2024
- Title: New 2024 Approved The Secret Sauce for Making GIF Instagram Story More Stunning
- Author: Elon
- Created at : 2024-05-19 03:05:33
- Updated at : 2024-05-20 03:05:33
- Link: https://animation-videos.techidaily.com/new-2024-approved-the-secret-sauce-for-making-gif-instagram-story-more-stunning/
- License: This work is licensed under CC BY-NC-SA 4.0.
