
:max_bytes(150000):strip_icc():format(webp)/samsungvoiceassistant-1c59910bc4614b2a8531fc5b7a754e7d.jpg)
New 2024 Approved The Top 20 Motion Graphics Companies & Studios
The Top 20 Motion Graphics Companies & Studios
The Best 20 Motion Graphics Companies & Studios
An easy yet powerful editor
Numerous effects to choose from
Detailed tutorials provided by the official channel
Generally, while watching the movies or the commercial ads you will see the great work of the motion graphic motion graphic companies but sometimes you don’t know who they are or how to connect with them. Here, we will share the best 20 motion graphics studio providing motion graphics services.
In this article
01 [Best 20 Motion Graphics Companies & Studios](#Part 1)
02 [Make Motion Graphics Videos without Hiring Motion Graphics Company](#Part 2)
Part 1 Best 20 Motion Graphics Companies & Studios
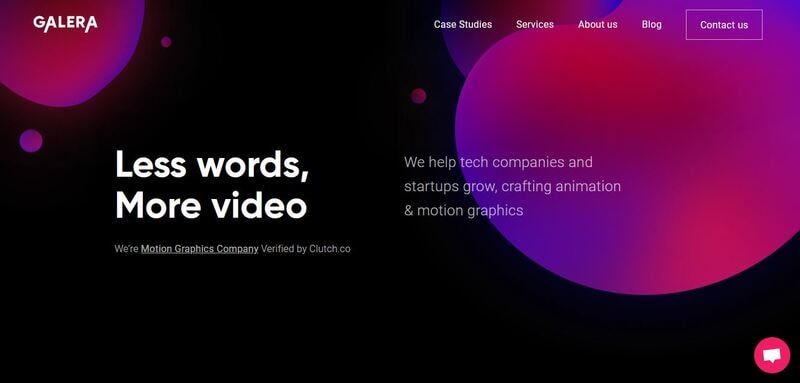
01Galera
Location: L’viv, Ukraine
Min. Project Size: $5,000+
Avg. Hourly Rate: $- $/ hr
Service Focus: Video Production
Animation Focus: 50%
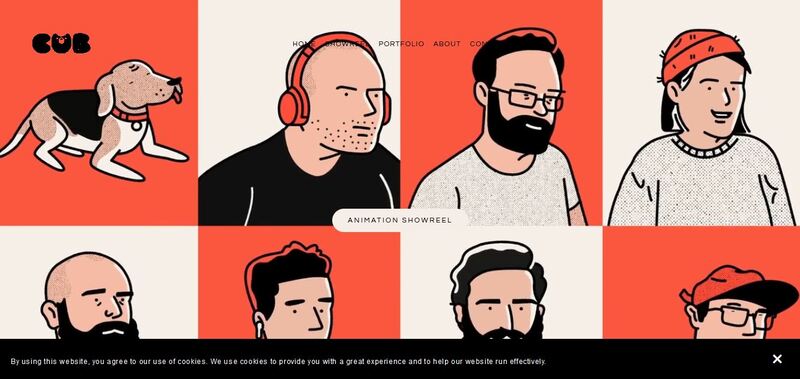
02Cub Studio
Location: London
Min. Project Size: Not Disclosed
Avg. Hourly Rate: Not Disclosed
Service Focus: Video Production
Animation Focus: 45%
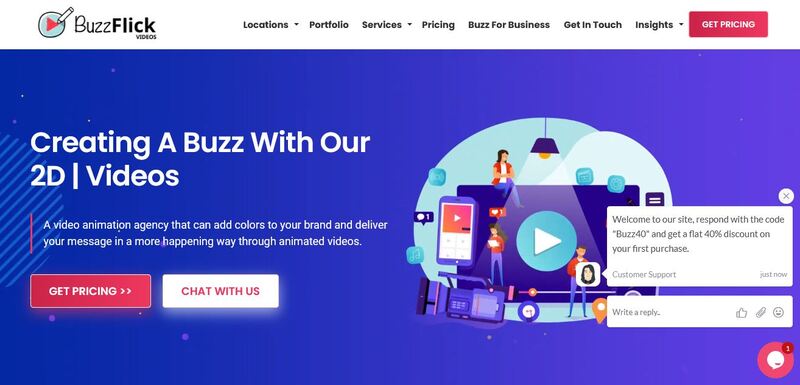
03BuzzFlick
Location: New York,
Min. Project Size: $1,000+
Avg. Hourly Rate: $- $/ hr
Service Focus: Video Production & Graphic Design
Animation Focus: 20%
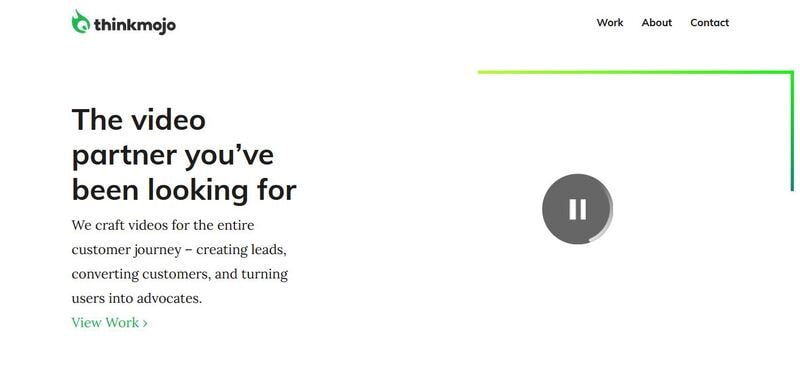
04Thinkmojo
Location: Campbell
Min. Project Size: Not Disclosed
Avg. Hourly Rate: Not Disclosed
Service Focus: Video Production
Animation Focus: 50%
05Covalent
Location: Pittsburgh, United States
Min. Project Size: $5,000+
Avg. Hourly Rate: $1- $1/ hr
Service Focus: Video Production, Digital Strategy & Broadcast Video
Animation Focus: 40%
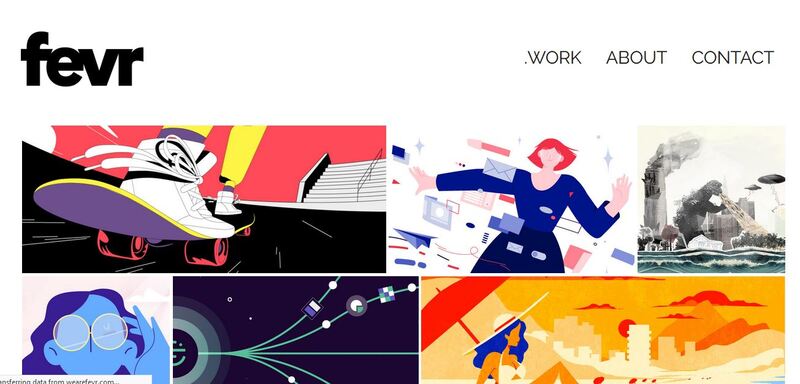
06FEVR
Location: Miami
Min. Project Size: $10,000+
Avg. Hourly Rate: $1- $1/ hr
Service Focus: Video Production
Animation Focus: 100%
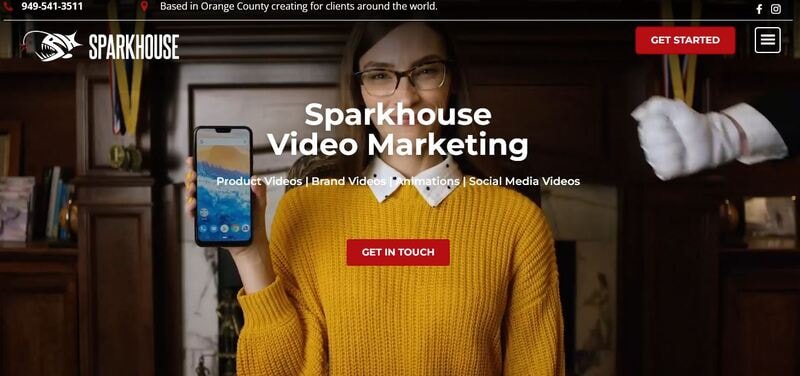
07Sparkhouse
Location: Irvine & Carlsbad
Min. Project Size: $10,000+
Avg. Hourly Rate: $1- $1/ hr
Service Focus: Video Production
Animation Focus: 50%
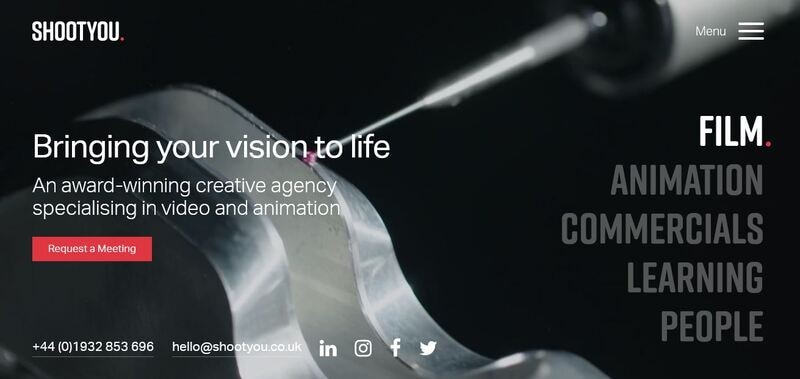
08Shoot You
Location: New York
Min. Project Size: $5,000+
Avg. Hourly Rate: $1- $1/ hr
Service Focus: Video Production, Advertising & Content Marketing
Animation Focus: 50%
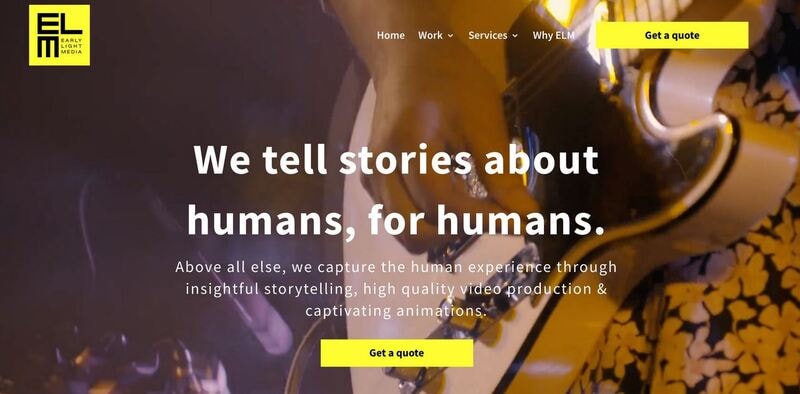
09Early Light Media
Location: Severna Park, United States
Min. Project Size: Undisclosed
Avg. Hourly Rate: $1- $1/ hr
Service Focus: Video Production
Animation Focus: 40%
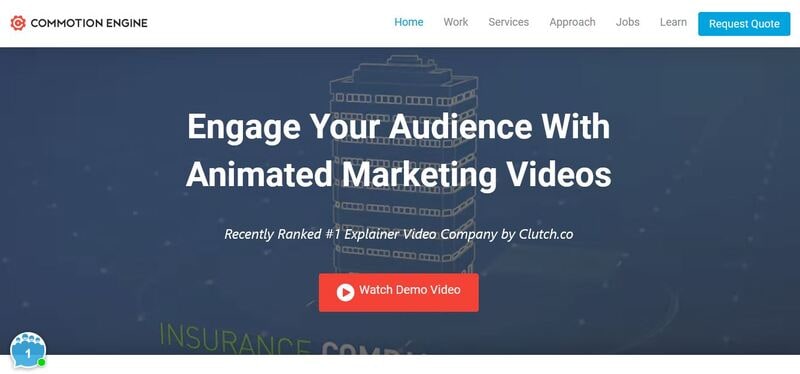
10Commotion Engine
Location: Chamblee, United States
Min. Project Size: $5,000+
Avg. Hourly Rate: $1- $1/ hr
Service Focus: Video Production & Graphic Design
Animation Focus: 35%
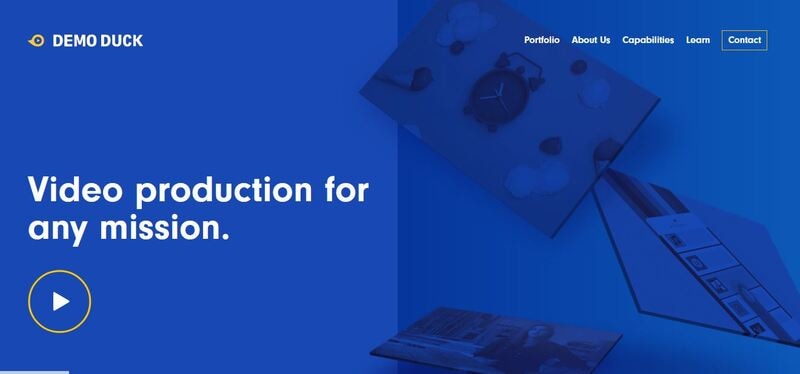
11Demo Duck
Location: Chicago. United States
Min. Project Size: $5,000+
Avg. Hourly Rate: $1- $1/ hr
Service Focus: Video Production
Animation Focus: 40%
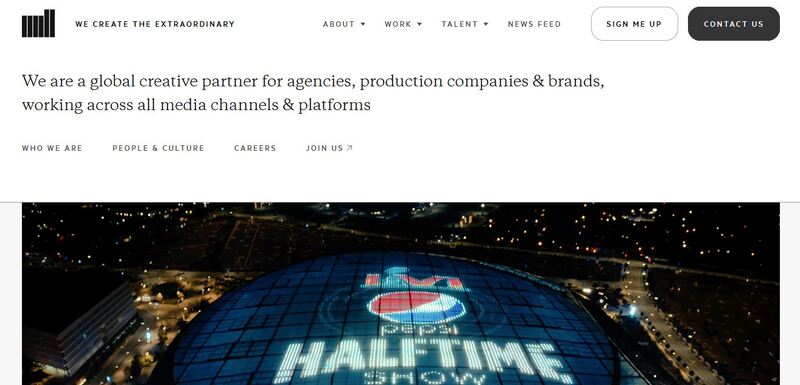
12The Mill
Location: London, United Kingdom
Min. Project Size: $10,000+
Avg. Hourly Rate: $1- $1/ hr
Service Focus: Graphic Design, Video Production
Animation Focus: 40%
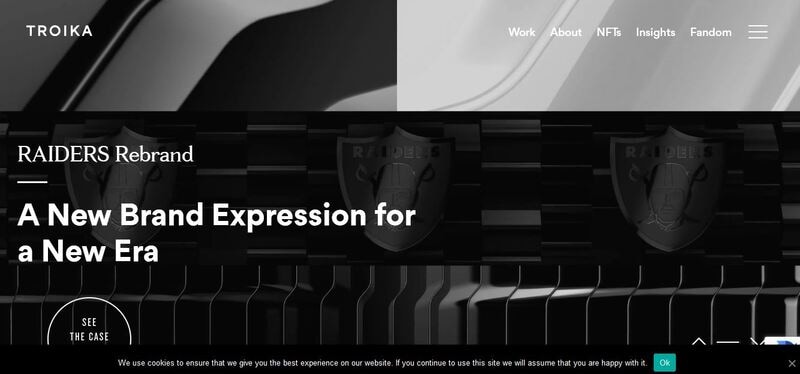
13Troika
Location: Los Angeles, United States
Min. Project Size: $5,000+
Avg. Hourly Rate: $1- $1/ hr
Service Focus: Advertising, Branding & Digital Strategy
Animation Focus: 60%
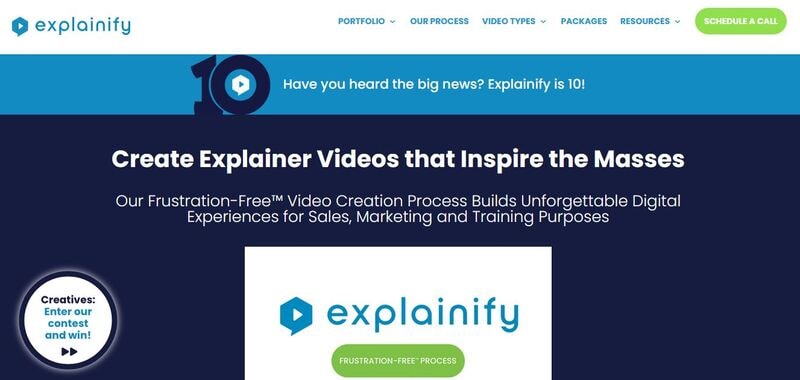
14Explainify
Location: Fayetteville, United States
Min. Project Size: $10,000+
Avg. Hourly Rate: $1- $1/ hr
Service Focus: Video Production & Broadcast Video
Animation Focus: 40%
15Rip Media Group
Location: Los Angeles, United States
Min. Project Size: $1,000+
Avg. Hourly Rate: $1- $1/ hr
Service Focus: Video Production, Content Marketing & Conversion Optimization
Animation Focus: 40%

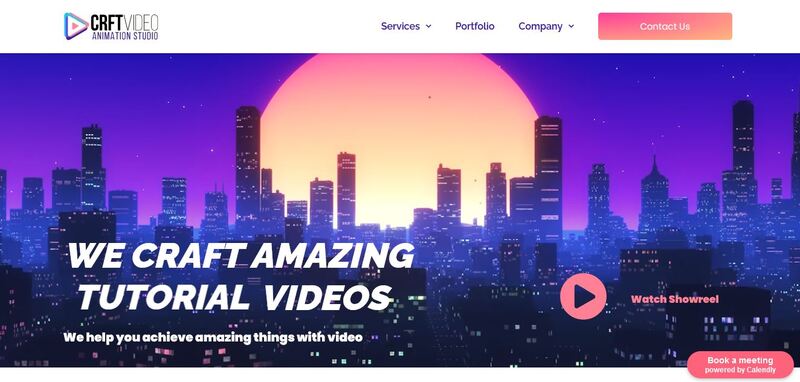
16CRFT
Location: New York
Min. Project Size: $1,000+
Avg. Hourly Rate: $- $/ hr
Service Focus: Video Production
Animation Focus: 51%
17Production M
Location: Studio City, United States
Min. Project Size: $10,000+
Avg. Hourly Rate: $30/ hr
Service Focus: Video Production
Animation Focus: 50%

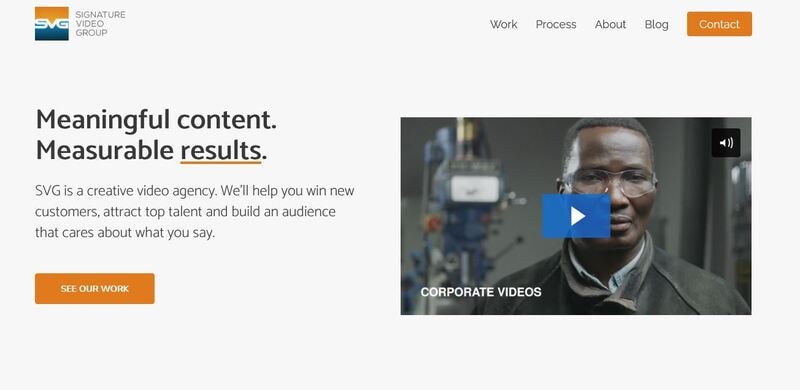
18Signature Video Group
Location: Toronto, Canada
Min. Project Size: $10,000+
Avg. Hourly Rate: Undisclosed
Service Focus: Video Production
Animation Focus: 50%
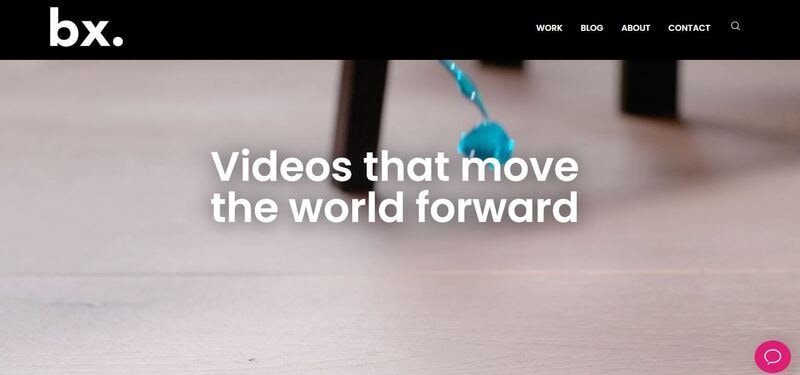
19BX Films
Location: Walnut Creek, CA
Min. Project Size: $25,000+
Avg. Hourly Rate: $1- $1/ hr
Service Focus: Video Production & Broadcast Video
Animation Focus: 50%
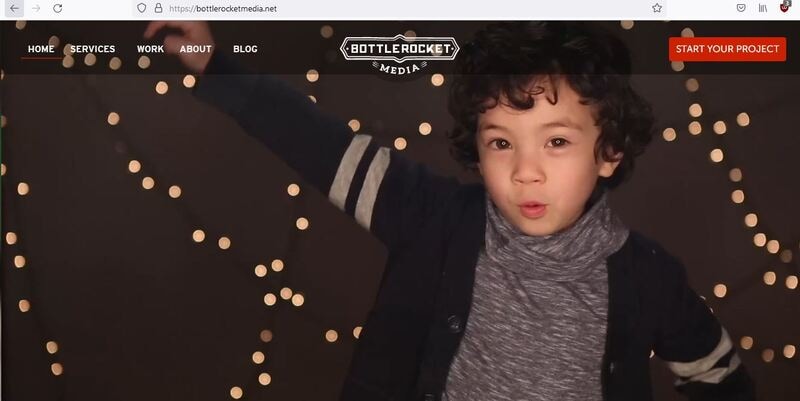
20Bottle Rocket Media
Location: Chicago, IL
Min. Project Size: $10,000+
Avg. Hourly Rate: $1- $1/ hr
Service Focus: Video Production & Broadcast Video
Animation Focus: 50%
Part 2 Make Motion Graphics Videos without Hiring Motion Graphics Company
● Wondershare Filmora Video Editor
Wondershare Filmora is powerful motion graphic video maker software which really helps you a lot if you don’t want to hire a motion graphics agency and want to make your videos by yourself. This video creator program comes with several features such as adding effects, audio, video, text, stickers and many other types of elements to the motion graphic videos.
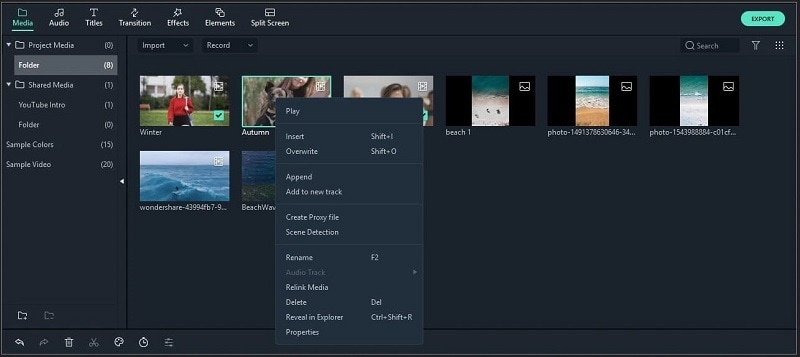
This program can save your lots of cost of hiring motion graphics studio for making your product or brand videos. The best part of the software is that it comes with a very easy to use interface which can be used by everyone to create videos even if you are a newbie or the non tech savvy person. It comes with the options to add motion tracking, key framing, color match, audio ducking, green screen, video split and video effects.

Wondershare Filmora - Best Video Editor for Mac/Windows
5,481,435 people have downloaded it.
Build unique custom animations without breaking a sweat.
Focus on creating epic stories and leave the details to Filmora’s auto features.
Start a creative adventure with drag & drop effects and endless possibilities.
Filmora simplifies advanced features to save you time and effort.
Filmora cuts out repetition so you can move on to your next creative breakthrough.
● Key Takeaways from This Episode →
● The list we have compiled in this article about the motion graphics services companies, are the companies who are providing very good services for the motion graphics videos.
● These best motion graphics studios can help you to create the best product videos according to your choice. But, the fact is that these companies charges lots of price for making videos.
Generally, while watching the movies or the commercial ads you will see the great work of the motion graphic motion graphic companies but sometimes you don’t know who they are or how to connect with them. Here, we will share the best 20 motion graphics studio providing motion graphics services.
In this article
01 [Best 20 Motion Graphics Companies & Studios](#Part 1)
02 [Make Motion Graphics Videos without Hiring Motion Graphics Company](#Part 2)
Part 1 Best 20 Motion Graphics Companies & Studios
01Galera
Location: L’viv, Ukraine
Min. Project Size: $5,000+
Avg. Hourly Rate: $- $/ hr
Service Focus: Video Production
Animation Focus: 50%
02Cub Studio
Location: London
Min. Project Size: Not Disclosed
Avg. Hourly Rate: Not Disclosed
Service Focus: Video Production
Animation Focus: 45%
03BuzzFlick
Location: New York,
Min. Project Size: $1,000+
Avg. Hourly Rate: $- $/ hr
Service Focus: Video Production & Graphic Design
Animation Focus: 20%
04Thinkmojo
Location: Campbell
Min. Project Size: Not Disclosed
Avg. Hourly Rate: Not Disclosed
Service Focus: Video Production
Animation Focus: 50%
05Covalent
Location: Pittsburgh, United States
Min. Project Size: $5,000+
Avg. Hourly Rate: $1- $1/ hr
Service Focus: Video Production, Digital Strategy & Broadcast Video
Animation Focus: 40%
06FEVR
Location: Miami
Min. Project Size: $10,000+
Avg. Hourly Rate: $1- $1/ hr
Service Focus: Video Production
Animation Focus: 100%
07Sparkhouse
Location: Irvine & Carlsbad
Min. Project Size: $10,000+
Avg. Hourly Rate: $1- $1/ hr
Service Focus: Video Production
Animation Focus: 50%
08Shoot You
Location: New York
Min. Project Size: $5,000+
Avg. Hourly Rate: $1- $1/ hr
Service Focus: Video Production, Advertising & Content Marketing
Animation Focus: 50%
09Early Light Media
Location: Severna Park, United States
Min. Project Size: Undisclosed
Avg. Hourly Rate: $1- $1/ hr
Service Focus: Video Production
Animation Focus: 40%
10Commotion Engine
Location: Chamblee, United States
Min. Project Size: $5,000+
Avg. Hourly Rate: $1- $1/ hr
Service Focus: Video Production & Graphic Design
Animation Focus: 35%
11Demo Duck
Location: Chicago. United States
Min. Project Size: $5,000+
Avg. Hourly Rate: $1- $1/ hr
Service Focus: Video Production
Animation Focus: 40%
12The Mill
Location: London, United Kingdom
Min. Project Size: $10,000+
Avg. Hourly Rate: $1- $1/ hr
Service Focus: Graphic Design, Video Production
Animation Focus: 40%
13Troika
Location: Los Angeles, United States
Min. Project Size: $5,000+
Avg. Hourly Rate: $1- $1/ hr
Service Focus: Advertising, Branding & Digital Strategy
Animation Focus: 60%
14Explainify
Location: Fayetteville, United States
Min. Project Size: $10,000+
Avg. Hourly Rate: $1- $1/ hr
Service Focus: Video Production & Broadcast Video
Animation Focus: 40%
15Rip Media Group
Location: Los Angeles, United States
Min. Project Size: $1,000+
Avg. Hourly Rate: $1- $1/ hr
Service Focus: Video Production, Content Marketing & Conversion Optimization
Animation Focus: 40%
16CRFT
Location: New York
Min. Project Size: $1,000+
Avg. Hourly Rate: $- $/ hr
Service Focus: Video Production
Animation Focus: 51%
17Production M
Location: Studio City, United States
Min. Project Size: $10,000+
Avg. Hourly Rate: $30/ hr
Service Focus: Video Production
Animation Focus: 50%
18Signature Video Group
Location: Toronto, Canada
Min. Project Size: $10,000+
Avg. Hourly Rate: Undisclosed
Service Focus: Video Production
Animation Focus: 50%
19BX Films
Location: Walnut Creek, CA
Min. Project Size: $25,000+
Avg. Hourly Rate: $1- $1/ hr
Service Focus: Video Production & Broadcast Video
Animation Focus: 50%
20Bottle Rocket Media
Location: Chicago, IL
Min. Project Size: $10,000+
Avg. Hourly Rate: $1- $1/ hr
Service Focus: Video Production & Broadcast Video
Animation Focus: 50%
Part 2 Make Motion Graphics Videos without Hiring Motion Graphics Company
● Wondershare Filmora Video Editor
Wondershare Filmora is powerful motion graphic video maker software which really helps you a lot if you don’t want to hire a motion graphics agency and want to make your videos by yourself. This video creator program comes with several features such as adding effects, audio, video, text, stickers and many other types of elements to the motion graphic videos.
This program can save your lots of cost of hiring motion graphics studio for making your product or brand videos. The best part of the software is that it comes with a very easy to use interface which can be used by everyone to create videos even if you are a newbie or the non tech savvy person. It comes with the options to add motion tracking, key framing, color match, audio ducking, green screen, video split and video effects.
Wondershare Filmora - Best Video Editor for Mac/Windows
5,481,435 people have downloaded it.
Build unique custom animations without breaking a sweat.
Focus on creating epic stories and leave the details to Filmora’s auto features.
Start a creative adventure with drag & drop effects and endless possibilities.
Filmora simplifies advanced features to save you time and effort.
Filmora cuts out repetition so you can move on to your next creative breakthrough.
● Key Takeaways from This Episode →
● The list we have compiled in this article about the motion graphics services companies, are the companies who are providing very good services for the motion graphics videos.
● These best motion graphics studios can help you to create the best product videos according to your choice. But, the fact is that these companies charges lots of price for making videos.
How to Cartoonize Photo Photoshop in Easy Steps
How to Cartoonize Photo Photoshop in Easy Steps
An easy yet powerful editor
Numerous effects to choose from
Detailed tutorials provided by the official channel
Cartoons, an already catchy entertainment source, can upgrade other media utilities on integration. Look through the easiest ways of creating cartoonize photo Photoshop stills!
In this article
01 [Types of Cartoon Effects in Photoshop](#Part 1)
02 [Easiest Ways to Cartoonize Photo in Photoshop](#Part 2)
03 [How to Use a Variety of Photoshop Special Effects to Create the Final Caricature Look](#Part 3)
Part 1 Types of Cartoon Effects in Photoshop
It is an absolute fun activity to explore your editing creativity in the realm of cartoonizing the otherwise ordinary still captures. Talking of the most convenient cartoon creator and editor applications, you can safely rely on the Photoshop Image Editor application to choose from a pool of cartoon editing effects for adding that spunky and funny element to your image files.
Presented in the following section, is a discussion of some of the most stunning and visibly amazing cartoon effects in the application’s Editor Library to cartoonize Photoshop images:
01Pop Art Photoshop Action
The effect is a predominantly preferred as a cartoon action Photoshop utility to caricaturize a normal image, along with customizing the same to change the colors and background of the original still capture for creating a brand new appearance with utmost ease. Apart from this, the aforesaid effect allows you to exclusively customize the globally acclaimed graphic masterpieces of Roy Lichtenstein. Working with the effect, you can edit a self-portrait or the favorite image of your pet to give the latter, a funny retro feel.

02Vintage Comic Creator
If the idea of sticking to just the creation of cartoon images is not enough to satisfy you, the Vintage Comic Creator effect allows you to expand your creativity level to work on cartoon based shape and text edits. You can use the effect to enhance an image logo or plain text with a comic book oriented text. A download of this cartoon effect template facilitates you with diversities of customizable layer styles, overlays and patterns.

03GTA Photoshop Action
This is a complete pleasure for the creative fan of Grand Theft Auto, the wicked chasing game series. Additional to creating a stark variety of edited cartoon stills, you are free to reinvent the aforesaid game’s most popular caricature edits, while using the GTA Photoshop Action editing filter. Launched by Indworks, the effect package consisting of 15 vibrant themes and 5 collage templates; promises a quick mimicry of your most cherished video and console games.

04Vector Paint Photoshop Action
The one is an amazing Photoshop effect for creating cartoon edits, which works through a merger of two different ingenious art themes or styles for transforming basic images into cartoonized stills.
The effect grants you the liberty to use varieties of art styles, such as, comic, photo retouching and energetic oil to obtain editing results comparable to that of any original photograph. The template is conveniently simple to use and assures you of quick results. All this, just at a nominal price of $6! Interesting, right?

05Ultra Realistic 3D Space Effect
Considering the fact of you being a space admirer, this one is the perfect image editor for you to add the vibrancy of stunning space elements and backgrounds within your cartoonized edits. The effect lets you play with the diverse range of customizable text and exciting caricature backgrounds. When downloading the template, you get a main setup file, a few editing examples and a web link to the free fonts present in the effect.

06Animated Zombie Grime Art Photoshop Action
Are you in love with the latest zombie grimes? If yes, then this action set is exclusive editor package for you. Working with the aforesaid image template, you can effortlessly add the perfect zombie theme to your cartoon edits, along with simultaneously creating a stunning animation, which you can use to enhance your video or GIF uploads on social media. Not forgetting the best part, you get a free access to this amazing utility.

Part 2 Easiest Ways to Cartoonize Photo in Photoshop
Having known about the amazing varieties of cartoonized editor templates in Photoshop, it is a natural instinct to feel motivated to create your own caricature images from normal capture stills. Addressing the concern of image transformation methods to turn a photo into a cartoon Photoshop, let us dive into some of the most affordable methods of creating cartoonized photos in the aforesaid editing application.
Talking of the most basic Photoshop tools for creating caricature images, you can start your editing spree with using the Graphic Tablet, Brush Tool, Layer Masks and a graphic pen to create amateur cartoonized edits from your still photographs, getting a full control on image tracing.
01Brush Tool
A few usage examples include working with a combination of the graphic tablet pen and the editor brushes to trace your image, using the brush in a masked or a fresh layer to avoid altering the actual image, and much more.
02Graphic Tablet
It is best to use the Photoshop Graphic Tablet for adhering to the concern of tracing cartoonized images. You can alternatively cater to the job with a trackpad, mouse, or even your hand. It is however, difficult to assure steady hand postures for image tracing, lest you are using a stylus pen.
03Pen Tool
Using the Pen Tool for cartoonizing your portrait, allows you to draw outlines along the desired figure within the image, along with its important elements, so that you can easily use these outlined paths to introduce different color blocks.
Similar to the Brush Tool, the Photoshop Pen utility grants you the freedom to vary the degree of detailing in your cartoon edit, from being highly expressive to only remaining around the shore. Working with the Pen Tool can, however be a bit tiring and time taking, with respect to the extent of detailing you wish to add to the caricature edits.
Additional to the aforementioned tools, you can also consider using the default image filters of the Photoshop application to get comparable results. This is an exclusively better option to choose, compared to the Pen Tool, when you are working without a Graphic Tablet. To get over the top realistic caricature renderings, you will need to supplement the use of Photoshop filters with the application’s editing channels and other adjustments.
Part 3 How to Use a Variety of Photoshop Special Effects to Create the Final Caricature Look
Considering the extensive discussion on the credibility of the Photoshop Image Editor application in the realm of creating stunning caricature images in high end resolution, let us proceed to learn about using the diversity of Photoshop’s special effects to get the last stage cartoonized appearance of ordinary still images.
User’s Guide to Create High End Cartoonized Look
The following tutorial is a stepwise explanation of the process to convert photo into cartoon Photoshop in the easiest possible way. Stick to the method for getting affordable results in a quick span.
Step 1: Download and Launch the Program
Visit the official website of Photoshop Image Editor for a free download of the software program in your system, followed by installing and launching the same in your device.
Step 2: Upload Your Image
On a successful launch of the editor program, you will be directed to the ‘Photoshop Editor’ window, where you are required to upload any desired still image from your device for creating a cartoonized edit. To do this, either simply add your image to the editor workspace using the ‘Drag and Drop’ method, or navigate to the ‘File’ tab in the top toolbar and click on ‘Open’ in the dropdown menu.
Step 3: Edge Enhancement
Once your image appears in the editor timeline, proceed to sharpen the edges of the face and body of the portrait. Start with navigating to and clicking on the ‘Filter’ option, followed by tapping on ‘Filter Gallery’ and selecting the ‘Artistic’ folder, where you need to choose the ‘Poster Edges’ option. Observe the effect of these setting on the portrait and make necessary changes.

Step 4: Background Setting
Ensure that the background and foreground of your image are set to white and black colors respectively. If not, proceed to adjust the same as required.

Step 5: Distorting the Edges
You now need to introduce some distortion in the edges of your portrait. Navigate to the ‘Filter’ option again, open the ‘Filter Gallery’ and choose ‘Torn Edges’ from the menu that drops down. Select the desired parameter values in accordance with your creative suitability.


Step 6: Using the Channels Panel
The next step is to select and copy your portrait using the ‘Ctrl + A’ and Ctrl + C commands respectively. Navigate to the ‘Channels’ panel at the right of the Photoshop workspace. At the panel’s bottom right, proceed with creating a new channel. It will be assigned the name ‘Alpha 1’ by Photoshop, which you are most welcome to change.


Step 7: Color Inversion
When you finish creating the channel, use the ‘Ctrl + V’ command to paste your portrait in the same. Proceed with inverting the image colors by navigating to the ‘Image’ option, followed by choosing the ‘Adjustment’ and ‘Invert’ options from the consecutive drop downs. Now, make a selection of the ‘White’ regions of your portrait by pressing the ‘Ctrl’ key and clicking on the ‘Alpha 1 Channel thumbnail.

Step 8: Layer Creation
Navigate to the ‘Layers’ panel at the right of the Photoshop workspace, and click on the ‘New Layer’ icon for creating a fresh layer. Fill the just created layer with black color, either by pressing ‘g’ from your system’s keyboard, or using the ‘Paint Bucket’ tool. Don’t forget to assign a suitable name to the layer.

Repeat the above process to create a separate layer and e fill the same with white color. The layer creation process is essential to separate the white and black colors of the actual image.

Step 10: Layer Dragging
In the ‘Layers’ panel, drag the ‘Black’ layer above the ‘White’ one.

Step 11: Creating Additional Layers
You are now required to create three more layers, with the same process as for the above two, for adding effects to the Skin, Clothes and Teeth/Eyes of the portrait. When you finish creation, assign suitable names to the layers, followed by dragging them below the ‘Black’ one within the ‘Layers’ panel.

Step 12: Color Selection and Application
Choose the respective colors for the clothes, skin and teeth/eyes of the cartoonized edit. To proceed with color application, navigate to the toolbar at the left of the Photoshop workspace and choose the ‘Brush Tool’. Finally, choose a particular layer and apply careful brush strokes to add color to the specific area of the portrait that you wish to edit. Follow the same process to add colors to the remaining layers to get the desired result in all areas of your cartoonized edit.

Step 13: Using the Gradient Tool
Navigate to the ‘Layers’ panel again and create a new ‘Gradient’ layer to further enhance your creation. You now need to select the ‘Gradient Tool’ from the toolbar at the left of the Photoshop workspace. The ‘Gradient Editor’ pops up with the continuously running ‘Gradient Bar’, as soon as you make the selection. Double click on the gradient boxes at both ends to select them, followed by making your color choices. Tap on ‘OK’ when you are satisfied with your work.

Step 14: Filling the Gradients
To proceed with gradient filling, press and hold the mouse button on the image at the bottom left and continue to drag the cursor to its top right corner. Leave the mouse and navigate to the ‘Layers’ panel for dragging and dropping the ‘Gradient’ layer above the ‘White’ layer.

You are now done with the process of creating a caricature edit from a normal still portrait. Your final image output will appear something like the following:

Cartoons, an already catchy entertainment source, can upgrade other media utilities on integration. Look through the easiest ways of creating cartoonize photo Photoshop stills!
In this article
01 [Types of Cartoon Effects in Photoshop](#Part 1)
02 [Easiest Ways to Cartoonize Photo in Photoshop](#Part 2)
03 [How to Use a Variety of Photoshop Special Effects to Create the Final Caricature Look](#Part 3)
Part 1 Types of Cartoon Effects in Photoshop
It is an absolute fun activity to explore your editing creativity in the realm of cartoonizing the otherwise ordinary still captures. Talking of the most convenient cartoon creator and editor applications, you can safely rely on the Photoshop Image Editor application to choose from a pool of cartoon editing effects for adding that spunky and funny element to your image files.
Presented in the following section, is a discussion of some of the most stunning and visibly amazing cartoon effects in the application’s Editor Library to cartoonize Photoshop images:
01Pop Art Photoshop Action
The effect is a predominantly preferred as a cartoon action Photoshop utility to caricaturize a normal image, along with customizing the same to change the colors and background of the original still capture for creating a brand new appearance with utmost ease. Apart from this, the aforesaid effect allows you to exclusively customize the globally acclaimed graphic masterpieces of Roy Lichtenstein. Working with the effect, you can edit a self-portrait or the favorite image of your pet to give the latter, a funny retro feel.
02Vintage Comic Creator
If the idea of sticking to just the creation of cartoon images is not enough to satisfy you, the Vintage Comic Creator effect allows you to expand your creativity level to work on cartoon based shape and text edits. You can use the effect to enhance an image logo or plain text with a comic book oriented text. A download of this cartoon effect template facilitates you with diversities of customizable layer styles, overlays and patterns.
03GTA Photoshop Action
This is a complete pleasure for the creative fan of Grand Theft Auto, the wicked chasing game series. Additional to creating a stark variety of edited cartoon stills, you are free to reinvent the aforesaid game’s most popular caricature edits, while using the GTA Photoshop Action editing filter. Launched by Indworks, the effect package consisting of 15 vibrant themes and 5 collage templates; promises a quick mimicry of your most cherished video and console games.
04Vector Paint Photoshop Action
The one is an amazing Photoshop effect for creating cartoon edits, which works through a merger of two different ingenious art themes or styles for transforming basic images into cartoonized stills.
The effect grants you the liberty to use varieties of art styles, such as, comic, photo retouching and energetic oil to obtain editing results comparable to that of any original photograph. The template is conveniently simple to use and assures you of quick results. All this, just at a nominal price of $6! Interesting, right?
05Ultra Realistic 3D Space Effect
Considering the fact of you being a space admirer, this one is the perfect image editor for you to add the vibrancy of stunning space elements and backgrounds within your cartoonized edits. The effect lets you play with the diverse range of customizable text and exciting caricature backgrounds. When downloading the template, you get a main setup file, a few editing examples and a web link to the free fonts present in the effect.
06Animated Zombie Grime Art Photoshop Action
Are you in love with the latest zombie grimes? If yes, then this action set is exclusive editor package for you. Working with the aforesaid image template, you can effortlessly add the perfect zombie theme to your cartoon edits, along with simultaneously creating a stunning animation, which you can use to enhance your video or GIF uploads on social media. Not forgetting the best part, you get a free access to this amazing utility.
Part 2 Easiest Ways to Cartoonize Photo in Photoshop
Having known about the amazing varieties of cartoonized editor templates in Photoshop, it is a natural instinct to feel motivated to create your own caricature images from normal capture stills. Addressing the concern of image transformation methods to turn a photo into a cartoon Photoshop, let us dive into some of the most affordable methods of creating cartoonized photos in the aforesaid editing application.
Talking of the most basic Photoshop tools for creating caricature images, you can start your editing spree with using the Graphic Tablet, Brush Tool, Layer Masks and a graphic pen to create amateur cartoonized edits from your still photographs, getting a full control on image tracing.
01Brush Tool
A few usage examples include working with a combination of the graphic tablet pen and the editor brushes to trace your image, using the brush in a masked or a fresh layer to avoid altering the actual image, and much more.
02Graphic Tablet
It is best to use the Photoshop Graphic Tablet for adhering to the concern of tracing cartoonized images. You can alternatively cater to the job with a trackpad, mouse, or even your hand. It is however, difficult to assure steady hand postures for image tracing, lest you are using a stylus pen.
03Pen Tool
Using the Pen Tool for cartoonizing your portrait, allows you to draw outlines along the desired figure within the image, along with its important elements, so that you can easily use these outlined paths to introduce different color blocks.
Similar to the Brush Tool, the Photoshop Pen utility grants you the freedom to vary the degree of detailing in your cartoon edit, from being highly expressive to only remaining around the shore. Working with the Pen Tool can, however be a bit tiring and time taking, with respect to the extent of detailing you wish to add to the caricature edits.
Additional to the aforementioned tools, you can also consider using the default image filters of the Photoshop application to get comparable results. This is an exclusively better option to choose, compared to the Pen Tool, when you are working without a Graphic Tablet. To get over the top realistic caricature renderings, you will need to supplement the use of Photoshop filters with the application’s editing channels and other adjustments.
Part 3 How to Use a Variety of Photoshop Special Effects to Create the Final Caricature Look
Considering the extensive discussion on the credibility of the Photoshop Image Editor application in the realm of creating stunning caricature images in high end resolution, let us proceed to learn about using the diversity of Photoshop’s special effects to get the last stage cartoonized appearance of ordinary still images.
User’s Guide to Create High End Cartoonized Look
The following tutorial is a stepwise explanation of the process to convert photo into cartoon Photoshop in the easiest possible way. Stick to the method for getting affordable results in a quick span.
Step 1: Download and Launch the Program
Visit the official website of Photoshop Image Editor for a free download of the software program in your system, followed by installing and launching the same in your device.
Step 2: Upload Your Image
On a successful launch of the editor program, you will be directed to the ‘Photoshop Editor’ window, where you are required to upload any desired still image from your device for creating a cartoonized edit. To do this, either simply add your image to the editor workspace using the ‘Drag and Drop’ method, or navigate to the ‘File’ tab in the top toolbar and click on ‘Open’ in the dropdown menu.
Step 3: Edge Enhancement
Once your image appears in the editor timeline, proceed to sharpen the edges of the face and body of the portrait. Start with navigating to and clicking on the ‘Filter’ option, followed by tapping on ‘Filter Gallery’ and selecting the ‘Artistic’ folder, where you need to choose the ‘Poster Edges’ option. Observe the effect of these setting on the portrait and make necessary changes.
Step 4: Background Setting
Ensure that the background and foreground of your image are set to white and black colors respectively. If not, proceed to adjust the same as required.
Step 5: Distorting the Edges
You now need to introduce some distortion in the edges of your portrait. Navigate to the ‘Filter’ option again, open the ‘Filter Gallery’ and choose ‘Torn Edges’ from the menu that drops down. Select the desired parameter values in accordance with your creative suitability.
Step 6: Using the Channels Panel
The next step is to select and copy your portrait using the ‘Ctrl + A’ and Ctrl + C commands respectively. Navigate to the ‘Channels’ panel at the right of the Photoshop workspace. At the panel’s bottom right, proceed with creating a new channel. It will be assigned the name ‘Alpha 1’ by Photoshop, which you are most welcome to change.
Step 7: Color Inversion
When you finish creating the channel, use the ‘Ctrl + V’ command to paste your portrait in the same. Proceed with inverting the image colors by navigating to the ‘Image’ option, followed by choosing the ‘Adjustment’ and ‘Invert’ options from the consecutive drop downs. Now, make a selection of the ‘White’ regions of your portrait by pressing the ‘Ctrl’ key and clicking on the ‘Alpha 1 Channel thumbnail.
Step 8: Layer Creation
Navigate to the ‘Layers’ panel at the right of the Photoshop workspace, and click on the ‘New Layer’ icon for creating a fresh layer. Fill the just created layer with black color, either by pressing ‘g’ from your system’s keyboard, or using the ‘Paint Bucket’ tool. Don’t forget to assign a suitable name to the layer.
Repeat the above process to create a separate layer and e fill the same with white color. The layer creation process is essential to separate the white and black colors of the actual image.
Step 10: Layer Dragging
In the ‘Layers’ panel, drag the ‘Black’ layer above the ‘White’ one.
Step 11: Creating Additional Layers
You are now required to create three more layers, with the same process as for the above two, for adding effects to the Skin, Clothes and Teeth/Eyes of the portrait. When you finish creation, assign suitable names to the layers, followed by dragging them below the ‘Black’ one within the ‘Layers’ panel.
Step 12: Color Selection and Application
Choose the respective colors for the clothes, skin and teeth/eyes of the cartoonized edit. To proceed with color application, navigate to the toolbar at the left of the Photoshop workspace and choose the ‘Brush Tool’. Finally, choose a particular layer and apply careful brush strokes to add color to the specific area of the portrait that you wish to edit. Follow the same process to add colors to the remaining layers to get the desired result in all areas of your cartoonized edit.
Step 13: Using the Gradient Tool
Navigate to the ‘Layers’ panel again and create a new ‘Gradient’ layer to further enhance your creation. You now need to select the ‘Gradient Tool’ from the toolbar at the left of the Photoshop workspace. The ‘Gradient Editor’ pops up with the continuously running ‘Gradient Bar’, as soon as you make the selection. Double click on the gradient boxes at both ends to select them, followed by making your color choices. Tap on ‘OK’ when you are satisfied with your work.
Step 14: Filling the Gradients
To proceed with gradient filling, press and hold the mouse button on the image at the bottom left and continue to drag the cursor to its top right corner. Leave the mouse and navigate to the ‘Layers’ panel for dragging and dropping the ‘Gradient’ layer above the ‘White’ layer.
You are now done with the process of creating a caricature edit from a normal still portrait. Your final image output will appear something like the following:
Best 12 2D Animation Studios All Should Check Out
Top 12 2D Animation Studios All Should Check Out
An easy yet powerful editor
Numerous effects to choose from
Detailed tutorials provided by the official channel
Now, when it comes to video marketing, the majority of businesses prefer choosing 2D animations. The reason being 2D animations have a lower production cost and they still offer complete liberty over creativity. However, it’s worth noting that editing a visually engaging 2D animation requires expertise.
That’s why it’s always an ideal solution to hire a dedicated 2D animation company. Such organizations have experienced video editors who specialize in 2D video editing and can craft the perfect 2D animation for your brand. In this article, we are going to walk you through a list of the top 12 2D animation studios you can hire to launch an enticing marketing video for your business.
In this article
01 [What is a 2D Animation Video and How Much Does a 2D Animation Video Cost?](#Part 1)
02 [How Much Time Does It Take to Create a 2D Animation Video?](#Part 2)
03 [What Are the Best Company for Creating 2D Animation Video?](#Part 3)
Part 1 What is a 2D Animation Video and How Much Does a 2D Animation Video Cost?
First things first; what is a 2D animation and why is it necessary to hire a 2D animation company? In layman’s terms, a 2D animation is a video where the movements are represented in two-dimensional space. The subjects in the video can either move forward or backward, but they can’t be allowed to move in a third dimension (depth).
Now, even though there are tools you can use to edit a 2D animation on your own, the process is time-consuming and requires certain expertise. And, since the primary objective of creating a 2D animation video is to engage potential customers, it’s always necessary to be super creative with the editing approach. This is the reason why the majority of brands hire professional 2D animation studios for the job.
The cost to create a 2D animation video can range anywhere between $1,000 to $10,000. It all depends on the length of the video, the production company you hire, and the quality you are looking for. But, it’s also worth noting that high pricing does not always mean superior quality as well. You’ll have to be extra cautious while picking through the best 2D animation studios.
Part 2 How Much Time Does It Take to Create a 2D Animation Video?
Due to their immense popularity in the marketing world, many business owners and marketers want to know how much time it takes to create a 2D animation video. Well, the answer is - it depends. If you have hired a team of professional editors or a dedicated 2D animation company, you’ll get your animated video within a week. However, if you try to follow the DIY approach and don’t know where to get started, it can even take up to 3-4 weeks for the video to complete.
Part 3 What Are the Best Company for Creating 2D Animation Video?
Now that you know the cost and time it takes to create a 2D animation video, let’s dive into the list of the most popular 2D animation studios you can hire for the next project. We have listed these companies on the basis of their customer reviews and pricing so that you can make the right decision easily.
01Explain Ninja
Minimum Project Size: $5,000
Team Size: 100-300
Location: Poland
Ratings: 4.5/5
Explain Ninja is a popular Poland-based 2D animation company that offers a wide variety of video production services to global clients. The company has already worked with big brands like Google, Bolt, and MyTaxi and is more than ready to create a 2D animation video for you as well.
The team can create different types of marketing videos including whitepaper animations, explainer videos, conventional 2D animations, etc. Basically, if you have the desired budget and are looking for a professional video production company, Explain Ninja is the right answer.
02**Wondershare Filmora Video Editor **
Minimum Project Size: $100 (Depends on the type of video you want to edit)
Team Size: The tool is an ideal choice for DIY editing
Ratings: 5/5
Technically not a 2D animation studio, Wondershare Filmora is a full-scale video editing tool designed to help editors create stunning videos. The tool offers a plethora of features that make it the best choice for people who want to create 2D animations on their own.
Filmroa has a built-in media library where you can find an array of 2D animation templates, video graphics, and transitions that could be integrated into a video within a few seconds. Not to mention, its timeline-based interface will make it a hassle-free job to create high-quality 2D animations that engage the viewers and help you promote your product more effectively.
For Win 7 or later (64-bit)
For macOS 10.12 or later
03Sparkhouse
Minimum Project Size: $10,000
Team Size: 10-50
Location: California
Ratings: 4/5
SparkHouse is another popular 2D animation studio that primarily specializes in corporate and commercial projects. The company is based in California, USA, and has worked with top brands like YouTube and Forever 2Sparkhouse offers a wide variety of video production services including 2D animations, explainer videos, and regular white paper animations.
Unique storytelling and custom transitions are two of the major USPs of Sparkhouse. The only downside of Sparkhouse is its expensive price tag. Due to its extensive popularity, Sparkhouse charges a hefty amount for its projects, which means it’s only ideal for large enterprises with a solid marketing budget.
04Studio Pigeon
Minimum Project Size: $5,000
Team Size: 50-500
Location: Poland
Ratings: 5/5
Studio Pigeon is also a popular Poland-based 2D animation company that provides full-scale video production services to a global clientele. Studio Pigeon’s portfolio includes some of the industry leaders including Microsoft, Ikea, and FOX Networks.
While Studio Pigeon specializes in all types of video production services, 2D explainer videos are their strong point. So, if you are looking to create a stunning explainer video for a newly launched product or service, you can get in touch with Studio Pigeon and let expert designers create a stunning video for you.
05BluBlu Studios
Minimum Project Size: $5,000
Team Size: 50-250
Location: Poland and USA
Ratings: 4.5/5
BluBlu Studios is one of the best 2D animation studios having two different branches in Poland and Chicago, USA. The company is well-renowned for its remarkable work across the industry. Since its inception in 2013, BluBlu Studios has worked with both small-scale businesses and fortune 500s. During this period, the company has also worked with many big brands including The New York Times, IKEA, and Twitter.
Basically, if you want to get a high-quality 2D animation for your product/services, BluBlu Studios is worth the consideration. Even if you own a startup or a small business, BluBlue Studios will allow you to get a stunning 2D animated video without burning a hole in your wallet.
06Epipheo
Minimum Project Size: $12,000
Team Size: 10-100
Location: Los Angeles
Ratings: 5/5
With Google considering it as their official marketing partner, Epipheo is undoubtedly one of the most reliable 2D animation studios you can hire to create a high-quality 2D animation for your marketing campaigns.
In addition to end-to-end video production services, Epipheo also offers other digital services including UI/UX design and marketing assistance. In short, Epiheo can handle the entire online marketing campaign for your brand. However, since the company has Google on its portfolio, the production charges are going to be comparatively higher than other available options.
07Snowy Peak
Minimum Project Size: $3,000
Team Size: 10 Employees
Location: Colorado, USA
Ratings: 3.5/5
Snowy Peak is a Colorado-based video production company that offers full-scale production services to help brands elevate their online presence and attract more customers.
As compared to other available options, Snowy Peak’s services are relatively affordable - so even if you have a limited marketing budget, you can hire them to get your 2D animation video. In addition to end-to-end video production services, Snowy Peak also specializes in direction assistance so that you can launch the most stunning marketing video for your brand.
08Animation Explainers
Minimum Project Size: $2,000
Team Size: 10 Employees
Location: Dublin, Ireland
Ratings: 4.5/5
Animation Explainers is a small-scale video production company that primarily works with startups and small-scale businesses. Based out of Dublin, Ireland, Animation Explainers is working with a vision to help businesses gain better online exposure through high-quality video production. Animation Explainers is an ideal video production studio for brands who want to launch a 2D animation video at a lower production cost.
09Darvideo Animation Studio
Minimum Project Size: $1,000+
Team Size: 50 Employees
Location: UKRAINE
Ratings: 4/5
Darvideo Animation Studio is one of the most affordable video production studios that offer an array of video production services such as explainer videos, 2D animations, 3D animated videos, and explainer videos.
The services start at as low as $1,000, which means you can launch a high-quality animation video without going over budget. Apart from 2D animation videos, Darvideo Animation Studio can also help you launch short-form videos to engage potential buyers across different platforms. Ideally, the company is a suitable choice for small-scale businesses and startups that have a limited marketing budget for 2D animated videos.
10The DVI Group
Minimum Project Size: $10,000+
Team Size: 50 Employees
Location: Atlanta
Ratings: 4.5/5
The DVI Group is a widely popular 2D animation company that has worked with different brands and helped them gain massive exposure in the digital landscape. The DVI team specializes in both 2D as well as 3D animation, which means brands can target different types of customers through dedicated videos. You can also hire the company to get short-form videos to engage customers across different social media platforms.
111Kasra Design
Minimum Project Size: $5,000+
Team Size: 50 Employees
Location: Malaysia
Ratings: 4.5/5
If you are looking for an experienced 2D animation studio, Kasra Design is the right answer. This Malaysia-based 2D animation company has delivered more than 600 2D and 3D animations to different organizations. Their services are relatively affordable, which means you can hire them even with a limited marketing budget.
121Demo Duck
Minimum Project Size: $2,000
Team Size: 100 Employees
Location: Chicago, United States
Rating: 4/5
Last, but certainly not least, Demo Duck is an ideal 2D animation company for businesses who want to step up their marketing game through creativity. The team has highly talented video editors who have years of experience working with a variety of brands from different parts of the world. Even though the company specializes in 2D animation videos, you can also hire them to get explainer videos, 3D animations, and conventional marketing videos.
Key Takeaways from This Episode
● 2D animations are one of the great ways to engage potential customers and drive better brand exposure
● The cost to create a 2D animation varies for each brand and mainly depends on the 2D animation company you hire
● There are dozens of 2D animation studios you can hire to launch a custom 2D animation or use a professional tool like Wondershare Pro to create a dedicated 2D animated video by yourself.
How to Make a Video a Live Photo 2023
How to Make a Video a Live Photo [2022]
An easy yet powerful editor
Numerous effects to choose from
Detailed tutorials provided by the official channel
Looking forward to turn your videos into live photos? Stay tuned to know how!
In this article
01 [How to Save Live Photos as a Video on iPhone/Ipad/Ipod](#Part 1)
02 [How to Turn a Video Into a Live Photo on iOS/Android](#Part 2)
Part 1 How to Save Live Photos as a Video on iPhone/Ipad/Ipod
Live photos are an amazing utility that allow you to save images as short moving snaps. Creating live photos is among the latest spunk of trendsetter stories, whether shared on social media platforms or created and saved just for fun, these definitely sound and look exciting, but that’s just one among the many things you can experiment on live photos.
Creating live photos takes you to a world of exciting features where you can explore your creativity in a number of ways, one of the easiest being turning live photos to videos. This comes handy when you need to share your live photos on platforms that do not have the compatibility to run live photos. If you are an iPhone user and wish to try your hands on experimenting with live photos, see through the following section of this article to learn how to turn live photo into video:
01Save as Video
Step 1: Launch the Photos App
In your iPhone, launch the ‘Photos’ app and navigate to ‘Albums’. All your live photos are present in the ‘Live Photos’ album.
Step 2: Format Selection
In latest versions (iOS 13v and above), you get a direct ‘Save as Video’ option in the ‘Photos’ application. Just click on that, and your live photo will be instantly saved in your iPhone gallery as a video. Here’s how you can use this feature:
● In the ‘Photos’ application, go to the ‘Live Photos’ album to select and open a desired live photo that you wish to convert to a video.
● Click on the ‘Share’ icon.

● Select ‘Save as Video’ from the drop down menu that displays sharing options.

Your created video will be saved in the ‘Photos’ application, next to the live photo you chose to turn into a video.
02iOS Shortcuts
This is a quicker way to save your live photos as videos in your iPhone. To use this feature, you first need to save the ‘Convert LivePhotos to Video’ shortcut in the ‘Shortcuts App’ gallery of your iPhone. You can do this by opening in your iOS internet browser.
Before using the above link, make sure to enable the ‘Allow Untrusted Shortcuts’ feature in your iPhone settings. You can do this as explained below:
● Reach to the ‘Settings’ application of your iPhone.
● Tap on ‘Shortcuts’ from the app’s welcome screen.
● Enable ‘Allow Untrusted Shortcuts’ with a toggle.

Having done that, here’s what you need to follow:
● Open the ‘Shortcuts’ application in your iOS device and tap the ‘Convert LivePhotos to Video’ shortcut.

● The ‘Live Photos’ album of your device opens up. Make a desired selection.

Your converted video gets automatically saved in the ‘Camera Roll’ folder of the ‘Photos’ application. Open the ‘Recents’ album to view your creation.
Part 2 How to Turn a Video Into a Live Photo on iOS/Android
Converting live photos to videos is fine, but going the other way round is all the more exciting and fun! You can even use these converted live photos as live screen wallpapers for your iOS and Android devices. If you are motivated to take up the excitement, look through the following methods to turn video into live photo:
01iOS Devices
Being an iOS user, you can choose among the following tools to convert video to live photo in your iPad, iPod or iPhone:
● Wondershare Filmora
Wondershare Filmora Video Editor is currently leading the software market among converter utilities that cater to various media conversion needs. This one is a free, smart, quick and convenient conversion tool that assures you of a hassle free video to live photo conversion in just a few clicks. What’s more interesting is, you don’t need to limit yourself with sticking to some particular video format, as Filmora conveniently supports almost all common ones.
Wondershare Filmora
Get started easily with Filmora’s powerful performance, intuitive interface, and countless effects!
Try It Free Try It Free Try It Free Learn More >

● IntoLive
This one is a third party application that allows you to convert videos into live photos, quickly and conveniently. This tool works well with devices having iOS 12.0 and later versions. All you have to do is follow the steps mentioned below:
Step 1:
Download the ‘IntoLive’ application from the Apple App Store.

Step 2:
Launch the same on your iOS device and grant the permission to access its ‘Photos’ Album.

Step 3:
In the ‘Videos’ section, choose the desired video that you wish to turn into a live photo.

Step 4:
An editor window will open up. Here, you can edit (cut, crop, trim, etc.) and add desired effects or filters to your selected video. Click on ‘Make’ at the top right when you finish the editing process.

Step 5:
If you have the paid version of the app, you can take up multiple repeats of your live photo; else you can use the free version with no repeats.

Step 6:
Once you are satisfied with the result, click on ‘Save Live Photo’. This will save your created live photo in your device’s gallery.

02VideoToLive
This is a free converter you can choose to turn video into live photo. This is a quite popular tool among iPhone users worldwide and is suitable for iOS versions 11.2 and later. You also have the liberty to share your created live photos on social media with this converter. Take the following steps to begin the conversion process:

Step 1:
Download the application from the Apple App Store and launch it on your iOS device.
Step 2:
Choose a video from your device gallery to convert it into a live photo.
Step 3:
In the video editor screen, crop the video to the preferred section that has to be converted into live photo. You can add video frames to your edited clip from the upper section of the editor screen.
Step 4:
Click on ‘Convert’ at the top right corner to initiate the conversion process.
03Android Devices
Live photos are undoubtedly known to add spark to your cherished moments, but the notch that puts these off with Android devices is that you can enjoy live photos on these devices only as live wallpapers.
Being an iPhone exclusive utility, Android devices lack the flexibility to capture live images. However, you can see them move on being set as live screen wallpapers. A handy alternative to this is converting a turn video into live photo and use it as live wallpaper. Here’s how you can take up the conversion process:
● TurnLive- Live Wallpaper
This one is a convenient, third party tool that lets you turn video into live photo in just a few quick steps. You can either use this application for free, or upgrade to the paid version to enjoy its premium features. To make amazing live photos from videos using this tool, you need to take up the steps given below:

Step 1: App Installation
To begin, visit the Google Playstore in your Android device and download the TurnLive- Live Wallpaper application. Next, you need install and launch the app in your device and accept its terms of service.
Step 2: Select a Video
Once you are done, click on the ‘Live Photo’ icon in the bottom of the app’s opening screen to reach the video selection page. Here, you need to choose ‘Video to Live Wallpaper’ option and grant the required app permissions to access your device’s camera and gallery. Select a desired video from the ones saved in your device and click ‘Done’ at the top right.
Step 3: Edit Your Video
You will now get directed to the app’s editor window, where you need to trim the selected video within a time frame of 1-5 seconds. To do this, select a cover frame within the clip and click ‘Next’. You can now use the video slider at the bottom to trim the clip. Adding suitable video effects and filters is also possible with this tool.
Step 4: It’s Almost Done!
When you finish editing, click ‘Next’ and choose the number of repeats for the created live photo. Wait for the conversion to finish and click on ‘My Wallpapers’ to view your creation.
Step 5: Download Your Live Photo!
Click ‘Download’ and tap ‘Clear’ in the app’s prompt message to remove your device’s current screen wallpaper. Next, allow the app to access your system settings. Once this finishes, tap ‘Clear’ again to download your creation. You will now get directed to a black screen tagged ‘DayTime LWP’. Click on ‘Set Wallpaper’ in this screen to make your live photo, the current wallpaper of your Android device.
● Video Live Wallpaper
This is another free app that you can use to your videos into amazing live photos in just 4 quick steps. All you need to do is explained in the following steps:
Step 1: download the Application
Download the Video Live Wallpaper application in your Android device from Google Playstore and proceed for its installation and launch.

Step 2: Select Your Video
In the app’s opening screen, click ‘Choose Video’ and grant app permissions to access your device’s media. Browse your video gallery to select a desired video that you wish to convert into a live photo.

Step 3: Edit Your Video
You will now get directed to the app’s editor screen. Here, you can explore your editing creativity to edit the selected video. Once you are happy, click the picture icon at the top right corner.

Step 4: Your Live Wallpaper is Ready!
To set the created live photo as your device screen wallpaper, select ‘Set as Wallpaper’ at the bottom right.

● Key Takeaways from This Episode →
● From cherishing moments to sharing them on social media, live photos can do it all.
● Being an iPhone exclusive utility, you need to create these from videos to enjoy them on other platforms and devices.
● Filmora is the best video to live photo converters, available as an easy, quick and convenient conversion tool.
Looking forward to turn your videos into live photos? Stay tuned to know how!
In this article
01 [How to Save Live Photos as a Video on iPhone/Ipad/Ipod](#Part 1)
02 [How to Turn a Video Into a Live Photo on iOS/Android](#Part 2)
Part 1 How to Save Live Photos as a Video on iPhone/Ipad/Ipod
Live photos are an amazing utility that allow you to save images as short moving snaps. Creating live photos is among the latest spunk of trendsetter stories, whether shared on social media platforms or created and saved just for fun, these definitely sound and look exciting, but that’s just one among the many things you can experiment on live photos.
Creating live photos takes you to a world of exciting features where you can explore your creativity in a number of ways, one of the easiest being turning live photos to videos. This comes handy when you need to share your live photos on platforms that do not have the compatibility to run live photos. If you are an iPhone user and wish to try your hands on experimenting with live photos, see through the following section of this article to learn how to turn live photo into video:
01Save as Video
Step 1: Launch the Photos App
In your iPhone, launch the ‘Photos’ app and navigate to ‘Albums’. All your live photos are present in the ‘Live Photos’ album.
Step 2: Format Selection
In latest versions (iOS 13v and above), you get a direct ‘Save as Video’ option in the ‘Photos’ application. Just click on that, and your live photo will be instantly saved in your iPhone gallery as a video. Here’s how you can use this feature:
● In the ‘Photos’ application, go to the ‘Live Photos’ album to select and open a desired live photo that you wish to convert to a video.
● Click on the ‘Share’ icon.
● Select ‘Save as Video’ from the drop down menu that displays sharing options.
Your created video will be saved in the ‘Photos’ application, next to the live photo you chose to turn into a video.
02iOS Shortcuts
This is a quicker way to save your live photos as videos in your iPhone. To use this feature, you first need to save the ‘Convert LivePhotos to Video’ shortcut in the ‘Shortcuts App’ gallery of your iPhone. You can do this by opening in your iOS internet browser.
Before using the above link, make sure to enable the ‘Allow Untrusted Shortcuts’ feature in your iPhone settings. You can do this as explained below:
● Reach to the ‘Settings’ application of your iPhone.
● Tap on ‘Shortcuts’ from the app’s welcome screen.
● Enable ‘Allow Untrusted Shortcuts’ with a toggle.
Having done that, here’s what you need to follow:
● Open the ‘Shortcuts’ application in your iOS device and tap the ‘Convert LivePhotos to Video’ shortcut.
● The ‘Live Photos’ album of your device opens up. Make a desired selection.
Your converted video gets automatically saved in the ‘Camera Roll’ folder of the ‘Photos’ application. Open the ‘Recents’ album to view your creation.
Part 2 How to Turn a Video Into a Live Photo on iOS/Android
Converting live photos to videos is fine, but going the other way round is all the more exciting and fun! You can even use these converted live photos as live screen wallpapers for your iOS and Android devices. If you are motivated to take up the excitement, look through the following methods to turn video into live photo:
01iOS Devices
Being an iOS user, you can choose among the following tools to convert video to live photo in your iPad, iPod or iPhone:
● Wondershare Filmora
Wondershare Filmora Video Editor is currently leading the software market among converter utilities that cater to various media conversion needs. This one is a free, smart, quick and convenient conversion tool that assures you of a hassle free video to live photo conversion in just a few clicks. What’s more interesting is, you don’t need to limit yourself with sticking to some particular video format, as Filmora conveniently supports almost all common ones.
Wondershare Filmora
Get started easily with Filmora’s powerful performance, intuitive interface, and countless effects!
Try It Free Try It Free Try It Free Learn More >
● IntoLive
This one is a third party application that allows you to convert videos into live photos, quickly and conveniently. This tool works well with devices having iOS 12.0 and later versions. All you have to do is follow the steps mentioned below:
Step 1:
Download the ‘IntoLive’ application from the Apple App Store.
Step 2:
Launch the same on your iOS device and grant the permission to access its ‘Photos’ Album.
Step 3:
In the ‘Videos’ section, choose the desired video that you wish to turn into a live photo.
Step 4:
An editor window will open up. Here, you can edit (cut, crop, trim, etc.) and add desired effects or filters to your selected video. Click on ‘Make’ at the top right when you finish the editing process.
Step 5:
If you have the paid version of the app, you can take up multiple repeats of your live photo; else you can use the free version with no repeats.
Step 6:
Once you are satisfied with the result, click on ‘Save Live Photo’. This will save your created live photo in your device’s gallery.
02VideoToLive
This is a free converter you can choose to turn video into live photo. This is a quite popular tool among iPhone users worldwide and is suitable for iOS versions 11.2 and later. You also have the liberty to share your created live photos on social media with this converter. Take the following steps to begin the conversion process:
Step 1:
Download the application from the Apple App Store and launch it on your iOS device.
Step 2:
Choose a video from your device gallery to convert it into a live photo.
Step 3:
In the video editor screen, crop the video to the preferred section that has to be converted into live photo. You can add video frames to your edited clip from the upper section of the editor screen.
Step 4:
Click on ‘Convert’ at the top right corner to initiate the conversion process.
03Android Devices
Live photos are undoubtedly known to add spark to your cherished moments, but the notch that puts these off with Android devices is that you can enjoy live photos on these devices only as live wallpapers.
Being an iPhone exclusive utility, Android devices lack the flexibility to capture live images. However, you can see them move on being set as live screen wallpapers. A handy alternative to this is converting a turn video into live photo and use it as live wallpaper. Here’s how you can take up the conversion process:
● TurnLive- Live Wallpaper
This one is a convenient, third party tool that lets you turn video into live photo in just a few quick steps. You can either use this application for free, or upgrade to the paid version to enjoy its premium features. To make amazing live photos from videos using this tool, you need to take up the steps given below:
Step 1: App Installation
To begin, visit the Google Playstore in your Android device and download the TurnLive- Live Wallpaper application. Next, you need install and launch the app in your device and accept its terms of service.
Step 2: Select a Video
Once you are done, click on the ‘Live Photo’ icon in the bottom of the app’s opening screen to reach the video selection page. Here, you need to choose ‘Video to Live Wallpaper’ option and grant the required app permissions to access your device’s camera and gallery. Select a desired video from the ones saved in your device and click ‘Done’ at the top right.
Step 3: Edit Your Video
You will now get directed to the app’s editor window, where you need to trim the selected video within a time frame of 1-5 seconds. To do this, select a cover frame within the clip and click ‘Next’. You can now use the video slider at the bottom to trim the clip. Adding suitable video effects and filters is also possible with this tool.
Step 4: It’s Almost Done!
When you finish editing, click ‘Next’ and choose the number of repeats for the created live photo. Wait for the conversion to finish and click on ‘My Wallpapers’ to view your creation.
Step 5: Download Your Live Photo!
Click ‘Download’ and tap ‘Clear’ in the app’s prompt message to remove your device’s current screen wallpaper. Next, allow the app to access your system settings. Once this finishes, tap ‘Clear’ again to download your creation. You will now get directed to a black screen tagged ‘DayTime LWP’. Click on ‘Set Wallpaper’ in this screen to make your live photo, the current wallpaper of your Android device.
● Video Live Wallpaper
This is another free app that you can use to your videos into amazing live photos in just 4 quick steps. All you need to do is explained in the following steps:
Step 1: download the Application
Download the Video Live Wallpaper application in your Android device from Google Playstore and proceed for its installation and launch.
Step 2: Select Your Video
In the app’s opening screen, click ‘Choose Video’ and grant app permissions to access your device’s media. Browse your video gallery to select a desired video that you wish to convert into a live photo.
Step 3: Edit Your Video
You will now get directed to the app’s editor screen. Here, you can explore your editing creativity to edit the selected video. Once you are happy, click the picture icon at the top right corner.
Step 4: Your Live Wallpaper is Ready!
To set the created live photo as your device screen wallpaper, select ‘Set as Wallpaper’ at the bottom right.
● Key Takeaways from This Episode →
● From cherishing moments to sharing them on social media, live photos can do it all.
● Being an iPhone exclusive utility, you need to create these from videos to enjoy them on other platforms and devices.
● Filmora is the best video to live photo converters, available as an easy, quick and convenient conversion tool.
Animate Pictures in Canva
Versatile Video Editor - Wondershare Filmora
An easy yet powerful editor
Numerous effects to choose from
Detailed tutorials provided by the official channel
With the rapid rise of social media worldwide, animated posts (like GIFs) are becoming famous. They have become a replacement to other modes like JPEG and .Png
Famous designing tools like Canva introduced an animation feature in the light of its popularity. The feature allows you to step up your social media game and creates animated visuals in a blink! It is also efficient for both professional and amateur users.
Besides social media content, Canva is also useful to design birthday cards, event invites, inspirational quotes, and more! Let’s learn about how to animate pictures in Canva in detail.
In this article
01 What Canva Pictures Can Be Used For?
02 How to Animate Pictures in Canva?
03 Tips: Animate Pictures In Video
Part 1: What Canva Pictures Can Be Used For?
Be it for marketing campaigns or projects, Canva is the best tool for all designing work. It is a foolproof platform where you do not need prior designing experience. Canva is useful for

Social media/Instagram Posts: You can build your Instagram presence by creating posts through Canva. It has multiple templates and features to make alluring Instagram posts. It also has drag-and-drop free images to add customized designs to the template.
Facebook Covers: You can make Facebook covers on Canva by choosing a layout and adding other elements. You can include colors, fonts, and pictures on the cover. Canva has templates for all themes, moods, and styles!
Event Invites: Canva has hundreds of free layouts and libraries to create event invites. You can choose the appropriate template and incorporate party-oriented photos, icons, stickers, illustrations, and graphics. It also has a personalizing option to add personal pictures and artwork in the editor.
Inspirational Quotes: Canva allows you to curate inspirational quotes and dispense motivation in people. It has templates to modify the elements like font size, text size, borders, images, and more!
Collages: It helps create a collage where you can combine multiple pictures in one frame. Canva offers various grids with a capacity of 12 pictures and different sizes.
Part 2: How to Animate Pictures in Canva?
Canva helps you add instant animation in presentations, social media posts, and more. To know how to animate images in Canva, follow the below steps:

Step 1: Add Static Elements
Start by creating an image through static elements. To make the design attractive, you can add sample texts, illustrations, doodles, and other entities.
Try to stimulate your creativity and come up with a layout beforehand. If possible, sketch on paper and replicate the same.
Step 2: Animate Your Design
Take a final glance at the layout. Make sure it’s perfect. Once all the elements are placed as per your design, it’s time to animate them. For that:
- Click on the white background page
- Go to the “Toolbar” section
- Select the “Animate” button
Step 3: Select Page Animation Style
Canva offers six animation styles, where five are for free users, and one is for pro users. To access the five animation styles, follow these steps.
- Press the “Animate” Button
- Select “Page Animations”
- There you will find options like Block, Pan, Fade, Rise, and Tumble
- Select the style as per your design
Step 4: Preview and Download
After selecting a page animation style, it will preview the effect. If you find it good, move on to downloading the GIF. Here’s how to do so
- Go to the “Toolbar” option (present on your upper right hand)
- Choose GIF as the file type
- Check the page number and verify if it’s correct
- Press the “Done” button
Step 5: Final GIF
After clicking on the “Done” button, your GIF will be downloaded. You will be able to see a display for five seconds. If you want to edit the image after this, click on the time button (near the “Animate” button).
So, that was all about how to animate a photo in Canva.
Drawbacks of Canva
Despite efficient features and easy interface, there are certain areas where Canva lacks. This includes
- It does not have any local file storage.
- As too many people use Canva, your template may look the same as others.
- Some of its best features are not free to access.
- The mobile app version lacks certain elements and features.
Out of all these drawbacks, repetitions of templates are a big issue. That’s because everyone wants their posts to look unique and irreplaceable. However, common Canva templates may prevent that from happening.
Fortunately, there are ways to combat such issues. Let’s learn about them in the next section.
Tips: Animate Pictures In Video
You can also animate pictures in the video to make them more lively. For that, you can use Wondershare Filmora Pro Video Editor. It’s also efficient if you don’t know how to animate a picture in Canva:
Wondershare Filmora Video Editor
Filmora by Wondershare is a video editing software that helps you build custom animations easily. It has auto features to make epic stories and posts.
Wondershare Filmora
Get started easily with Filmora’s powerful performance, intuitive interface, and countless effects!
Try It Free Try It Free Try It Free Learn More about Filmora>
Its drag and drop effect makes designing simple and quick. Due to its outstanding attributes, options, and styles, Filmora has 77+ million happy users!
It’s a power-packed integration of functionality, performance, and more! In fact, it resolves the repeated template issue of Canva. The software has top-notch functions and innovative filters that add authenticity to the designs.
Till now, you learned about how to animate a picture on Canva. Now, let’s comprehend the right way to use Filmora for animating and adding images in the video.
Before using, make sure to update the software to its latest version. Follow separate methods for both Windows and Mac.
For Win
Step 1: Adding Image to Video Track
With Filmora, adding images to video is a matter of seconds! Start by:
- Identify the position where you want to add the image and place the Playhead there.
- Right-click on the picture from the media library. Click on the “Insert” option. Your image will be added. Select the “Append” option, if you want to add an image at the video end.

Note: How to Remove Black Bars around the Image?
- Go to “Settings” from the File section.
- Click on the “Editing” tab and select “Photo Placement.”
- Choose from the “Crop to Fit” or “Pan To Zoom” option. The black bars will be removed.
To add the image in between the video clip, split them. Now, add the image between the split parts.
Step 2: Add Images as Overlays
To add images as overlays, drag the image to a video track above the main track. The main track consists of your video.
Track 1 (or the track with a video clip) is the base of your video. If you add anything else, it will be displayed above this track as video track 2, 3, and so on. Overall, you can add 100 video tracks.
Step 3: Edit Your Image
If you know how to animate an image in Canva, editing images on Filmora is even easier. You can try the following methods:
Animate Your Images
- To add animation presets to the image, click on the image twice.
- Go to the “Animation Tab” and look for an animation preset.
- Drag the presets to the image for its effect

Make Image Color Adjustments
- Double-click on the image
- Go to the “Color” tab and then the “Color” section
- Customize the temperature, saturation, brightness, etc., as per your need.
- Press Ok.
Change Image Duration
You can increase the image duration to more than the default timing of 5 seconds. For that:
- Click on the image and select the “Duration” option.
- Go to the “Duration Setting” panel.
- Add the new duration timing.

Adjust Position, Rotate/Flip, and Opacity
- You can resize the image position through the circles and squares at the image edges.
- To flip or rotate the image, double-click on the picture. From the “Image Panel,” go to “Transform” and then click on “Rotate.” You can choose either “Horizontal Flip” or “Vertical Flip” to flip the images.
- Double-click on the image and click on the “Composting” option to add opacity. You can choose the blending mode or adjust the “Opacity” accordingly.

For Mac
Filmora for Mac comes with a drag and drop feature to add transitions, animated titles, and effects. You can start a new project from scratch by clicking on “New Project”. The entire process is the same as that for Windows users.
To apply animation in the images, use the motion effects option. For that,
- Click on the Image
- Go to Motion Tab
- Select a motion effect
- Double-click to apply the effect

Conclusion
So that’s how to animate photos in Canva. Hopefully, our steps will help you revamp your posts like a pro! If not Canva, you can use its alternative Filmora. It’s equally prominent, user-friendly, and feature-rich.
Versatile Video Editor - Wondershare Filmora
An easy yet powerful editor
Numerous effects to choose from
Detailed tutorials provided by the official channel
With the rapid rise of social media worldwide, animated posts (like GIFs) are becoming famous. They have become a replacement to other modes like JPEG and .Png
Famous designing tools like Canva introduced an animation feature in the light of its popularity. The feature allows you to step up your social media game and creates animated visuals in a blink! It is also efficient for both professional and amateur users.
Besides social media content, Canva is also useful to design birthday cards, event invites, inspirational quotes, and more! Let’s learn about how to animate pictures in Canva in detail.
In this article
01 What Canva Pictures Can Be Used For?
02 How to Animate Pictures in Canva?
03 Tips: Animate Pictures In Video
Part 1: What Canva Pictures Can Be Used For?
Be it for marketing campaigns or projects, Canva is the best tool for all designing work. It is a foolproof platform where you do not need prior designing experience. Canva is useful for
Social media/Instagram Posts: You can build your Instagram presence by creating posts through Canva. It has multiple templates and features to make alluring Instagram posts. It also has drag-and-drop free images to add customized designs to the template.
Facebook Covers: You can make Facebook covers on Canva by choosing a layout and adding other elements. You can include colors, fonts, and pictures on the cover. Canva has templates for all themes, moods, and styles!
Event Invites: Canva has hundreds of free layouts and libraries to create event invites. You can choose the appropriate template and incorporate party-oriented photos, icons, stickers, illustrations, and graphics. It also has a personalizing option to add personal pictures and artwork in the editor.
Inspirational Quotes: Canva allows you to curate inspirational quotes and dispense motivation in people. It has templates to modify the elements like font size, text size, borders, images, and more!
Collages: It helps create a collage where you can combine multiple pictures in one frame. Canva offers various grids with a capacity of 12 pictures and different sizes.
Part 2: How to Animate Pictures in Canva?
Canva helps you add instant animation in presentations, social media posts, and more. To know how to animate images in Canva, follow the below steps:
Step 1: Add Static Elements
Start by creating an image through static elements. To make the design attractive, you can add sample texts, illustrations, doodles, and other entities.
Try to stimulate your creativity and come up with a layout beforehand. If possible, sketch on paper and replicate the same.
Step 2: Animate Your Design
Take a final glance at the layout. Make sure it’s perfect. Once all the elements are placed as per your design, it’s time to animate them. For that:
- Click on the white background page
- Go to the “Toolbar” section
- Select the “Animate” button
Step 3: Select Page Animation Style
Canva offers six animation styles, where five are for free users, and one is for pro users. To access the five animation styles, follow these steps.
- Press the “Animate” Button
- Select “Page Animations”
- There you will find options like Block, Pan, Fade, Rise, and Tumble
- Select the style as per your design
Step 4: Preview and Download
After selecting a page animation style, it will preview the effect. If you find it good, move on to downloading the GIF. Here’s how to do so
- Go to the “Toolbar” option (present on your upper right hand)
- Choose GIF as the file type
- Check the page number and verify if it’s correct
- Press the “Done” button
Step 5: Final GIF
After clicking on the “Done” button, your GIF will be downloaded. You will be able to see a display for five seconds. If you want to edit the image after this, click on the time button (near the “Animate” button).
So, that was all about how to animate a photo in Canva.
Drawbacks of Canva
Despite efficient features and easy interface, there are certain areas where Canva lacks. This includes
- It does not have any local file storage.
- As too many people use Canva, your template may look the same as others.
- Some of its best features are not free to access.
- The mobile app version lacks certain elements and features.
Out of all these drawbacks, repetitions of templates are a big issue. That’s because everyone wants their posts to look unique and irreplaceable. However, common Canva templates may prevent that from happening.
Fortunately, there are ways to combat such issues. Let’s learn about them in the next section.
Tips: Animate Pictures In Video
You can also animate pictures in the video to make them more lively. For that, you can use Wondershare Filmora Pro Video Editor. It’s also efficient if you don’t know how to animate a picture in Canva:
Wondershare Filmora Video Editor
Filmora by Wondershare is a video editing software that helps you build custom animations easily. It has auto features to make epic stories and posts.
Wondershare Filmora
Get started easily with Filmora’s powerful performance, intuitive interface, and countless effects!
Try It Free Try It Free Try It Free Learn More about Filmora>
Its drag and drop effect makes designing simple and quick. Due to its outstanding attributes, options, and styles, Filmora has 77+ million happy users!
It’s a power-packed integration of functionality, performance, and more! In fact, it resolves the repeated template issue of Canva. The software has top-notch functions and innovative filters that add authenticity to the designs.
Till now, you learned about how to animate a picture on Canva. Now, let’s comprehend the right way to use Filmora for animating and adding images in the video.
Before using, make sure to update the software to its latest version. Follow separate methods for both Windows and Mac.
For Win
Step 1: Adding Image to Video Track
With Filmora, adding images to video is a matter of seconds! Start by:
- Identify the position where you want to add the image and place the Playhead there.
- Right-click on the picture from the media library. Click on the “Insert” option. Your image will be added. Select the “Append” option, if you want to add an image at the video end.
Note: How to Remove Black Bars around the Image?
- Go to “Settings” from the File section.
- Click on the “Editing” tab and select “Photo Placement.”
- Choose from the “Crop to Fit” or “Pan To Zoom” option. The black bars will be removed.
To add the image in between the video clip, split them. Now, add the image between the split parts.
Step 2: Add Images as Overlays
To add images as overlays, drag the image to a video track above the main track. The main track consists of your video.
Track 1 (or the track with a video clip) is the base of your video. If you add anything else, it will be displayed above this track as video track 2, 3, and so on. Overall, you can add 100 video tracks.
Step 3: Edit Your Image
If you know how to animate an image in Canva, editing images on Filmora is even easier. You can try the following methods:
Animate Your Images
- To add animation presets to the image, click on the image twice.
- Go to the “Animation Tab” and look for an animation preset.
- Drag the presets to the image for its effect
Make Image Color Adjustments
- Double-click on the image
- Go to the “Color” tab and then the “Color” section
- Customize the temperature, saturation, brightness, etc., as per your need.
- Press Ok.
Change Image Duration
You can increase the image duration to more than the default timing of 5 seconds. For that:
- Click on the image and select the “Duration” option.
- Go to the “Duration Setting” panel.
- Add the new duration timing.
Adjust Position, Rotate/Flip, and Opacity
- You can resize the image position through the circles and squares at the image edges.
- To flip or rotate the image, double-click on the picture. From the “Image Panel,” go to “Transform” and then click on “Rotate.” You can choose either “Horizontal Flip” or “Vertical Flip” to flip the images.
- Double-click on the image and click on the “Composting” option to add opacity. You can choose the blending mode or adjust the “Opacity” accordingly.
For Mac
Filmora for Mac comes with a drag and drop feature to add transitions, animated titles, and effects. You can start a new project from scratch by clicking on “New Project”. The entire process is the same as that for Windows users.
To apply animation in the images, use the motion effects option. For that,
- Click on the Image
- Go to Motion Tab
- Select a motion effect
- Double-click to apply the effect
Conclusion
So that’s how to animate photos in Canva. Hopefully, our steps will help you revamp your posts like a pro! If not Canva, you can use its alternative Filmora. It’s equally prominent, user-friendly, and feature-rich.
Versatile Video Editor - Wondershare Filmora
An easy yet powerful editor
Numerous effects to choose from
Detailed tutorials provided by the official channel
Top 10 Online Animated Logo Makers Everyone Should Know
Top 10 Free Online Animated Logo Makers Everyone Should Know
An easy yet powerful editor
Numerous effects to choose from
Detailed tutorials provided by the official channel
And as we all know objects in motion are much more attractive than static visuals, logo animation is the latest trend that is gaining popularity at a fast pace.
![]()
If you too want to create some interesting 3D logo motion and other types of animated logos but are confused about how to start, we are here to help you.
In this article
01 [What are Animated Logos and their benefits](#Part 1)
02 [Top 10 online tools for creating animated logos ](#Part 2)
03 [The Best Alternative to Online Animated Logo Makers](#Part 3)
Part 1 What Are Animated Logos and Their Benefits
A logo can be termed as the first face of your brand or a business which gives it a visual identity. A logo works as the foundation of the brand that helps in its growth as well as reputation. The trend has shifted from basic static logos to animated ones which include interesting motion graphics. These logos are catchy and capable of getting the instant attention of the people.
![]()
There are several benefits associated with using logo animation and some of the key ones are enlisted below.
● Create brand awareness A well-designed animated logo can create brand awareness by grabbing the interest of the potential clients and also creating a strong connection with them.
● Goes well with the brand story Animated logos gives you the freedom to use images, sounds, and motion graphics to have a connect with the audience. Thus, using animations logos that match your brand story can be created efficiently.
● Add professionalism and create a modern look Moving ahead with the times is the best thing with its business or promotion. So, a good animated logo will not only add a professional touch to your brand or a business but will also give a modern touch.
Part 2 Top 10 Online Tools for Creating Animated Logos
If you are low on budget or do not want to risk initially with the paid animated logos, free online tools work best. These programs work from your browser, need no software download, and are simple to use. Some of these tools can also be used to create logo to 3D animation. To cut down on your research work, we have shortlisted some of the widely used online animated logo makers as below.
01 Renderforest
When it comes to branding and animations online, this is the top-rated tool in its category. The tool allows creating impressive animated logos in just a few minutes. Pre-set styles are available that can be used according to the brand type.
Key Features:
● Allows creating animated logos using the AI of the tool.
● Intuitive and user-friendly interface.
● Comes with pre-set styles and readymade templates to choose from like minimal, abstract, organic, and more.
● Fonts and icons can be customized.
● High-definition export.
![]()
02 Viddyoze
This is another popular cloud-based tool that helps create interesting animated logos in a few simple clicks. The created animations can be further customized by making changes in the color scheme and other parameters.
Key Features:
● Simple to use online tool for creating 3D animations.
● Offers live-action animation.
● Characters and logos can be mixed and combined in a video.
● Comes with multiple templates and movie filters.
![]()
03 Adobe Spark
Adobe needs no introduction when it comes to editing and animations. Adobe Spark is a feature-packed online tool that helps you perform multiple functions including animated logo creation. Several templates in different categories are available to match your brand or business.
Key Features:
● Cloud-based tool for creating creative animated logos.
● Designs and templates are available in multiple categories.
● Customizable icons, colors, texts, fonts, and others.
● Support a wide range of additional features.
![]()
04 Design Free Logo
This is a free online 3D animated logo maker that comes with several pre-designed samples and templates for creating a perfect animated logo for your company. Simple to use, the tool is apt even for beginners in designing.
Key Features:
● This is 3D animation logo online free tool.
● Comes with a wide range of templates in an array of categories like the abstract, alphabet, floral, food, 3D, and more.
● Logos can be created based on the industry type.
● Simple and user-friendly interface.
![]()
05 PixTeller
Using this browser-based tool, motion to your logo elements can be added to create an impressive animated logo. A wide range of logo shapes, templates, and designs are available and option for customization is also there.
Key Features:
● Create animated logos frame by frame for better editing and customization.
● Comes with more than 100,000 shapes for the logos and over 130 fonts for creating a logo of your choice.
● Multiple customizable templates and designs in different categories are available.
● Support multiple filters like shadow, warp, blur, spacing, height, pixelate, and more.
● Created animated logos can be downloaded in MP4 or GIF format.
![]()
06 Offeo
This online animation tool is apt for creating hi-tech animated logos and the simple interface makes it perfect even for beginners. The tool is known for the perfect blend of creativity and handcraft.
Key Features:
● Create animated logos for websites as well as other platforms easily and quickly.
● Multiple library functions and customizable options are available.
● Allows adjusting the speed of the animation.
● Comes with multiple templates and graphics to choose from.
● Option to choose the ready-made elements or add the local ones.
![]()
07 Animaker
This free online tool just requires free sign-up after which it is all set to help you create rich animated logos. You can choose from the wide range of supported built-in templates as well as characters to match your requirements.
Key Features:
● This free SaaS video animation online tool helps create impressive animated logos, cartoons, and others.
● Comes with multiple templates, designs, characters, icons, charts, maps, and bags to choose from.
● Icons, colors, and other parameters can be customized using this 3D animation logo online free tool**.**
● Allows viewing the logo in different styles using the board style.
● Comes with sound effects and an option for voice recording and text to speech.
● Easy drag and drop interface make functioning quick.
● Software is supported in 50 languages worldwide.
● Created animations can be uploaded to social media sites.
![]()
08 Quince Media
For creating different types of animated media including animated logos this is a decent tool to use. Being an online program, it works from your browser and is free to use. Images in PNG and vector format can be added to the tool for creating the choice of animation.
Key Features:
● Create animated logos and other animated media using this simple and quick online tool.
● Comes with multiple designs and templates.
● 3D animated logos can be created for social media, films, broadcasts, and other platforms.
● Simple and fast to use.
![]()
09 MotionDen
This is a simple and easy online tool that can help you create animated logos in a hassle-free manner. You can even create other animated projects like slideshows, intros, and others using the program.
Key Features:
● A simple online tool with a user-friendly interface for creating logos.
● Comes with multiple templates in different categories like serenity, dark smoke, fire red, and more.
● Support to a wide range of devices including desktop, smartphone, and tablets.
● Allows creating 3D logos.
● Templates can be customized as per the requirements.
![]()
10 Tube Arsenal
This online tool is mainly used for creating YouTube video intros but it supports other functions as well including animated logo creation. The 3D editor of the program will let you add animations as needed. The extensive collection of templates lets you choose the design that best matches your requirements.
Key Features:
● Create animated logos using the 3D editor of the tool.
● Comes with an array of templates to choose from.
● Allows customizing color, text, images, and other parameters.
● This 3D animation logo online free support unlimited quick previews.
● Simple and user-friendly interface.
![]()
Key Takeaways from This Episode
● Logos are an integral part of brands and businesses that helps create brand awareness among potential clients.
● Animated logos are the present-day trend where motion graphics are added to the logos. These logo animation are interesting and can reach a broader audience and leave more impact.
● Several online tools for creating animated logos for free are available. Check out the features of these tools and choose the most suitable one.
● Wondershare Filmoa works as the best online alternative that helps in creating rich animated logos with an option for customization.
10 Scary Anime Girls That Will Make You Creepy
10 Scary Anime Girls That Will Make You Creepy

Shanoon Cox
Mar 27, 2024• Proven solutions
Animes have been one of the widely enjoyed forms of entertainment by people all over the world for decades. There are certain animes that attract people due to their scariness and the characters in them.
Even though girls are usually displayed as cute and pinkish and lovely, some animes display them as creepy. And believe me, these creepy anime girls have a huge fan base and are capable of giving the audience a chill over the spine while watching them.
The creepiness of the anime girls adds to the horror of animes and people enjoy watching them. So let’s find out more about these scary anime girls and why their scary character is loved by the fans.
10 Scary Anime Girls in the Scary Animes
There are a lot of animes with different genres. But some of the animes have some characters that stand out due to their weirdness and creepiness. Let’s talk about 10 such scary anime girls that still give the audience creeps:
- 1. Ai Enma (Hell Girl)
- 2. Shion Sonozaki (Higurashi: When They Cry)
- 3. Sachiko Shinozaki (Corpse Party)
- 4. Shiro (Deadman Wonderland)
- 5. Megumi Shimizu (Shiki)
- 6. Esdeath (Akame Ga Kill!)
- 7. Himiko Toga (My Hero Academia)
- 8. Hana Midorikawa (Prison School)
- 9. Isabella (The Promised Neverland)
- 10. Lucy (Elfen Lied)
1. Ai Enma (Hell Girl)
Ai Enma is one of the cute-looking characters in Hell Girl, but do not be deceived by her looks. She was a girl who was buried alive when she was seven, by her own villagers. Enma crawled out of the ground and burned the entire village, killing every single person living there as an act of vengeance.
Later as a punishment for her horrific doings, she was cast out and sentenced to live out her afterlife as Hell Girl. Still, in her childhood, Ai was assigned the job of dragging dead souls to hell, whether they deserved it or not. The coldness in her eyes and the way she does things without a shiver is what makes her creepy.
2. Shion Sonozaki (Higurashi: When They Cry)
Shion Sonozaki from Higurashi: When They Cry is a dark character who is not exactly what she seems outside. The town she lives in is cursed and she is trying to break that dark cycle that offers only death and tragedy.
There is too much to the story, and saying more about it may reveal the suspense. The story is filled with horror and adventure, and the character of Shion absorbs some of the darkness of the town, which gives a scary impact on the audience.
3. Sachiko Shinozaki (Corpse Party)
Sachiko from Corpse Party is a friendly-looking but scary character who loves to rip out the tongues of some of her fellow characters. She tortures students in Heavenly Host Elementry School which is a living hell in the anime.
Sachiko unleashes a lot of horror in the series and she plays the part of an elementary school ghost breaking all the expectations of the audience. Torturing her fellow mates and cutting their tongues out before death is something that makes Sachiko a perfect scary anime girl.
4. Shiro (Deadman Wonderland)
Shiro, the creepy-looking girl from Deadman Wonderland is another character to be scared of. She was adopted for the only purpose of being used as a human experiment in her childhood. The experiments instilled a very scary character in her which gives a horror nature to the anime in total.
The experiments on here were very painful and multiple personalities called “The Wretched Egg” were developed by her to cope up with torture. The creepy nature and the use of her special skills to murder some characters in the anime and frame her adopted brother for it is very dark and scary.
5. Megumi Shimizu (Shiki)
Megumi Shimizu of Shiki is a young girl and the first of all to be killed by the Kirishiki family. She was the first person who died who was not Yamairi and also the first to rise as Shiki.
After becoming a Shiki Megumi became very malicious and attacked the villagers. She enjoyed attacking them and that is very creepy. She also was ready to kill Tohru Mutou and Kaori’s father due to some small reasons. Her character without a drop of sympathy or care for the people around her is very scary and makes her very unpredictable.
6. Esdeath (Akame Ga Kill!)
Esdeath in Akame Ga Kill who is also known as the ice queen of the empire is a very manipulative character and a sadist. She follows the motto, the strong survive and the weak die, and justifies killing innocents and torturing enemies because of it.
Esdeath once made a prince who lost to strip naked before her and lick her boots, before killing his which is a different level of dark. She keeps her sadistic character in check to be in power which is very scary and dangerous for someone with power. She unleashing her cruelty on defenseless people is another thing that makes her a perfect scary anime girl.

7. Himiko Toga (My Hero Academia)
Himiko is a cute-looking girl that possesses the ability to shapeshift to anything she wants. The creepy part is, in order to shapeshift she has to ingest another person’s blood.
Though Himiko appears to be a typical funny school girl, she can turn into a murderous beast in the blink of an eye. Her twister view of relationships and her trying to befriend people while trying to kill them at the same time all give us creepy chills while watching the anime.
8. Hana Midorikawa (Prison School)
Though Hana Midorikawa looks very cute and innocent she is as creepy as any girl can get. The story evolves in an underground prison school which is an explainable aspect that made Hana the sadist she is.
At first, Hana might seem to be a cute girl who does not belong at the place she currently is, but going deeper the opinion of the audience changes extremely. Hana happens to be a violent sociopath with a lot of dangerous thoughts and a urination fetish, and that is just the beginning of her creepiness.
9. Isabella (The Promised Neverland)
Isabella who is also known as Mama is one of the main characters in the Promised Land. Being a caretaker to children, though she appears to be loving and affectionate to her children, that’s not the real case.
Isabella has a twisted character and shows detachment to her tragedies. This character shows antagonism, betrayal, and a twisted nature enough for the fans to feel creepy about her.
10. Lucy (Elfen Lied)
Lucy in Elfen Lied is a character that sometimes gets sympathy and other times creeps the audience out. She has difficulty drawing a line between good and evil. She can be seen as being sadistically tormented and ruthlessly tormenting about the cruelty around her.
Her surroundings and the people are responsible for how she is and that is why despite being creepy she is loved by a lot of people.
Final thoughts
Though most animes are fun to watch, horror animes are also enjoyed by a lot of people. The main aspect of these horror animes is the scary characters that make the audience wonder.
We have listed the top 10 scary anime girls of different animes that are equally liked and hated by the audience all over the world. The way they act, their cruelty, sadism all define their scary character. These scary anime girls have created such a huge impact that a fan might forget the anime name but never the name of the scary anime girl who gives him/her chills all over the body.
Shanoon Cox
Shanoon Cox is a writer and a lover of all things video.
Follow @Shanoon Cox
Shanoon Cox
Mar 27, 2024• Proven solutions
Animes have been one of the widely enjoyed forms of entertainment by people all over the world for decades. There are certain animes that attract people due to their scariness and the characters in them.
Even though girls are usually displayed as cute and pinkish and lovely, some animes display them as creepy. And believe me, these creepy anime girls have a huge fan base and are capable of giving the audience a chill over the spine while watching them.
The creepiness of the anime girls adds to the horror of animes and people enjoy watching them. So let’s find out more about these scary anime girls and why their scary character is loved by the fans.
10 Scary Anime Girls in the Scary Animes
There are a lot of animes with different genres. But some of the animes have some characters that stand out due to their weirdness and creepiness. Let’s talk about 10 such scary anime girls that still give the audience creeps:
- 1. Ai Enma (Hell Girl)
- 2. Shion Sonozaki (Higurashi: When They Cry)
- 3. Sachiko Shinozaki (Corpse Party)
- 4. Shiro (Deadman Wonderland)
- 5. Megumi Shimizu (Shiki)
- 6. Esdeath (Akame Ga Kill!)
- 7. Himiko Toga (My Hero Academia)
- 8. Hana Midorikawa (Prison School)
- 9. Isabella (The Promised Neverland)
- 10. Lucy (Elfen Lied)
1. Ai Enma (Hell Girl)
Ai Enma is one of the cute-looking characters in Hell Girl, but do not be deceived by her looks. She was a girl who was buried alive when she was seven, by her own villagers. Enma crawled out of the ground and burned the entire village, killing every single person living there as an act of vengeance.
Later as a punishment for her horrific doings, she was cast out and sentenced to live out her afterlife as Hell Girl. Still, in her childhood, Ai was assigned the job of dragging dead souls to hell, whether they deserved it or not. The coldness in her eyes and the way she does things without a shiver is what makes her creepy.
2. Shion Sonozaki (Higurashi: When They Cry)
Shion Sonozaki from Higurashi: When They Cry is a dark character who is not exactly what she seems outside. The town she lives in is cursed and she is trying to break that dark cycle that offers only death and tragedy.
There is too much to the story, and saying more about it may reveal the suspense. The story is filled with horror and adventure, and the character of Shion absorbs some of the darkness of the town, which gives a scary impact on the audience.
3. Sachiko Shinozaki (Corpse Party)
Sachiko from Corpse Party is a friendly-looking but scary character who loves to rip out the tongues of some of her fellow characters. She tortures students in Heavenly Host Elementry School which is a living hell in the anime.
Sachiko unleashes a lot of horror in the series and she plays the part of an elementary school ghost breaking all the expectations of the audience. Torturing her fellow mates and cutting their tongues out before death is something that makes Sachiko a perfect scary anime girl.
4. Shiro (Deadman Wonderland)
Shiro, the creepy-looking girl from Deadman Wonderland is another character to be scared of. She was adopted for the only purpose of being used as a human experiment in her childhood. The experiments instilled a very scary character in her which gives a horror nature to the anime in total.
The experiments on here were very painful and multiple personalities called “The Wretched Egg” were developed by her to cope up with torture. The creepy nature and the use of her special skills to murder some characters in the anime and frame her adopted brother for it is very dark and scary.
5. Megumi Shimizu (Shiki)
Megumi Shimizu of Shiki is a young girl and the first of all to be killed by the Kirishiki family. She was the first person who died who was not Yamairi and also the first to rise as Shiki.
After becoming a Shiki Megumi became very malicious and attacked the villagers. She enjoyed attacking them and that is very creepy. She also was ready to kill Tohru Mutou and Kaori’s father due to some small reasons. Her character without a drop of sympathy or care for the people around her is very scary and makes her very unpredictable.
6. Esdeath (Akame Ga Kill!)
Esdeath in Akame Ga Kill who is also known as the ice queen of the empire is a very manipulative character and a sadist. She follows the motto, the strong survive and the weak die, and justifies killing innocents and torturing enemies because of it.
Esdeath once made a prince who lost to strip naked before her and lick her boots, before killing his which is a different level of dark. She keeps her sadistic character in check to be in power which is very scary and dangerous for someone with power. She unleashing her cruelty on defenseless people is another thing that makes her a perfect scary anime girl.
7. Himiko Toga (My Hero Academia)
Himiko is a cute-looking girl that possesses the ability to shapeshift to anything she wants. The creepy part is, in order to shapeshift she has to ingest another person’s blood.
Though Himiko appears to be a typical funny school girl, she can turn into a murderous beast in the blink of an eye. Her twister view of relationships and her trying to befriend people while trying to kill them at the same time all give us creepy chills while watching the anime.
8. Hana Midorikawa (Prison School)
Though Hana Midorikawa looks very cute and innocent she is as creepy as any girl can get. The story evolves in an underground prison school which is an explainable aspect that made Hana the sadist she is.
At first, Hana might seem to be a cute girl who does not belong at the place she currently is, but going deeper the opinion of the audience changes extremely. Hana happens to be a violent sociopath with a lot of dangerous thoughts and a urination fetish, and that is just the beginning of her creepiness.
9. Isabella (The Promised Neverland)
Isabella who is also known as Mama is one of the main characters in the Promised Land. Being a caretaker to children, though she appears to be loving and affectionate to her children, that’s not the real case.
Isabella has a twisted character and shows detachment to her tragedies. This character shows antagonism, betrayal, and a twisted nature enough for the fans to feel creepy about her.
10. Lucy (Elfen Lied)
Lucy in Elfen Lied is a character that sometimes gets sympathy and other times creeps the audience out. She has difficulty drawing a line between good and evil. She can be seen as being sadistically tormented and ruthlessly tormenting about the cruelty around her.
Her surroundings and the people are responsible for how she is and that is why despite being creepy she is loved by a lot of people.
Final thoughts
Though most animes are fun to watch, horror animes are also enjoyed by a lot of people. The main aspect of these horror animes is the scary characters that make the audience wonder.
We have listed the top 10 scary anime girls of different animes that are equally liked and hated by the audience all over the world. The way they act, their cruelty, sadism all define their scary character. These scary anime girls have created such a huge impact that a fan might forget the anime name but never the name of the scary anime girl who gives him/her chills all over the body.
Shanoon Cox
Shanoon Cox is a writer and a lover of all things video.
Follow @Shanoon Cox
Also read:
- New How to Make 3D Cartoon of Yourself for 2024
- In 2024, How To Make Pinterest Slideshow in Simple Ways
- Updated 10 Amazing Whiteboard Animation Video Examples You Need to Bookmark for 2024
- New 2024 Approved How to Stop Animation From Looping in Unity
- Updated Top Claymation Shows That Make Your Memories Unforgettable
- How to Make 3D Cartoon of Yourself for 2024
- Tutorials for Animating Picture Online Without Learning From Scratch for 2024
- Updated 2024 Approved Best Practices on Online 3D Avatar Creator
- Updated What Wikipedia Cant Tell You About the 10 Batman Cartoons
- Updated In 2024, Learn 3D Logo Animation and Templates
- Updated In 2024, 10 Top Memorable Japanese Cat Cartoons
- Updated In 2024, Easy Shortcut to Convert Videos to Gifs on iPhone
- Simple Guide to Create New and Exciting Blackboard Animation for 2024
- Top 10 Online Animated Logo Makers Everyone Should Know for 2024
- Updated 2024 Approved Ideas That Will Help You Out in Learning How to Send WhatsApp Animated Gifs
- New 2024 Approved How to Learn Cartoon Characters Sketch Quickly
- In 2024, 10 Great Apps to Turn Funny Animated Images Into Comics
- In 2024, Learn 3D Logo Animation and Templates
- Top 7 Animated GIF Text Makers
- 2024 Approved Top 12 2D Animation Studios All Should Check Out
- All About 3D Medical Animation And Its Uses
- Little Known Techniques of Motion Graphics in Premiere Pro for 2024
- New 2024 Approved Samples of Cartoon Character Face to Inspire You
- 2024 Approved How to Animate Image on Scroll and Text on Scroll?
- Updated How to Make Animation Characters with the Best Character Creators
- In 2024, In-Depth Study of Cartoon Painting Starts From Learning to Draw It
- In 2024, Bypass iCloud Activation Lock with IMEI Code From iPhone 6s
- How to share/fake gps on Uber for Vivo S17e | Dr.fone
- In 2024, Full Guide to Fix iToolab AnyGO Not Working On Asus ROG Phone 7 | Dr.fone
- How to Fix Infinix Smart 8 HD Find My Friends No Location Found? | Dr.fone
- In 2024, Hacks to do pokemon go trainer battles For Apple iPhone SE (2022) | Dr.fone
- In 2024, What Is a SIM Network Unlock PIN? Get Your Nokia G22 Phone Network-Ready
- Disabling iPhone 13 Pro Parental Restrictions With/Without Password | Dr.fone
- How to Transfer Text Messages from Realme Narzo N53 to New Phone | Dr.fone
- Why Is My Honor X50i+ Offline? Troubleshooting Guide | Dr.fone
- In 2024, Top 10 Password Cracking Tools For Nokia G22
- Pokemon Go Error 12 Failed to Detect Location On Motorola Moto G73 5G? | Dr.fone
- Life360 Circle Everything You Need to Know On Samsung Galaxy M34 | Dr.fone
- Does Moto G Stylus 5G (2023) support AVCHD video?
- Complete Guide For iPhone 13 Pro Max Lock Screen
- In 2024, How to Unlock Apple iPhone 11 Pro Passcode without iTunes without Knowing Passcode?
- How to Transfer Music from Vivo T2x 5G to iPod | Dr.fone
- In 2024, How to Use Google Assistant on Your Lock Screen Of Oppo F25 Pro 5G Phone
- In 2024, Ultimate guide to get the meltan box pokemon go For Honor 90 | Dr.fone
- In 2024, 5 Ways to Track Samsung Galaxy S23 Ultra without App | Dr.fone
- 8 Workable Fixes to the SIM not provisioned MM#2 Error on Tecno Camon 20 Premier 5G | Dr.fone
- In 2024, How to Use Google Assistant on Your Lock Screen Of Realme C55 Phone
- In 2024, How to Reset your Vivo Y27s Lock Screen Password
- Title: New 2024 Approved The Top 20 Motion Graphics Companies & Studios
- Author: Elon
- Created at : 2024-05-19 03:05:44
- Updated at : 2024-05-20 03:05:44
- Link: https://animation-videos.techidaily.com/new-2024-approved-the-top-20-motion-graphics-companies-and-studios/
- License: This work is licensed under CC BY-NC-SA 4.0.
