
New 5 Best Adobe Animate Courses & Classes | Beginners Complete Tutorial for 2024
5 Best Adobe Animate Courses & Classes | Beginners Complete Tutorial
5 Best Adobe Animate Courses & Classes | Beginners Complete Tutorial
An easy yet powerful editor
Numerous effects to choose from
Detailed tutorials provided by official channel
Professional animation is hence one of the fields that has a bright future. Willing to learn more about animation?

Don’t worry! We’ve got you covered, follow this article and find out more about the best 5 Adobe animate courses.
In this article
01 [What is Adobe Animate CC?](#Part 1)
02 [Top 8 FULL ADOBE ANIMATE COURSES | Beginners Complete Tutorial](#Part 2)
03 [How to Quickly Learn the Skills of Adobe Animate Course](#Part 3)
Part 1 What is Adobe Animate CC?
1. Who should take Adobe Animate course?
Learning is never bound. Anyone willing to learn can put in effort and time. As long as you wish to learn, and have an interest in it you can take it up. Those of you who wish to make a career in animation are highly recommended to take up this course. The Adobe animate course can help you kickstart your career as a professional animator.
2. Are there prerequisites to Adobe Animate course?
Animation is one such field that does not require a lot of prerequisites. In fact, even a beginner who has absolutely no idea about animation can take up the adobe animate course.
Part 2 Top 5 FULL ADOBE ANIMATE COURSES | Beginners Complete Tutorial
1. Adobe animate CC 2018- HTML5 Banner Ads
Adobe animate CC 2018- HTML5 Banner Ads is one of the most comprehensive courses on adobe animate. It teaches you several relevant skills associated with animation and marketing (one of the primary applications of animation).

Skills you will learn:
● Basics of HTML5 banner ads using adobe animate
● Understanding the importance of Adobe animate CC in web advertisements
● Through this course, you’d become an expert at publishing ad networks
● The course will help you explore tools and techniques related to banner advertising
Udemy: Udemy Duration: About 5 hours
Pros
The course is beginner-friendly; it helps you advance your career in animation from scratch.
The course covers even complex concepts.
You receive a course completion certificate
Cons
The course is paid and you need to pay a nominal fee in order to access the lecture videos.
The course is monotonous i.e. there is no live teaching.
2. 2D animation for beginners with adobe animate, Walt Wonderwolk
If you’re looking for a well-designed course that covers almost all the necessary concepts, then this course is just the right one for you. Through this course, you can learn all about Adobe animate. All the primary concepts are explained in detail in this course.

Skills you will learn:
● All the primary concepts of computer-generated animations using Adobe animate.
● You will learn important concepts such as eases, symbols, vector drawings, tweens, and key frames.
● You will also learn how to add sound to your animation
● You will gain hands-on knowledge about drawing, composition, and animation of characters.
Udemy: skillshare
Pros
The course is great for beginners to start learning about Adobe animate
The course covers fundamental concepts of animation
Cons
You need a skillshare membership in order to access the lecture videos.
You need to pay in order to get a skillshare membership
You do not get a course completion certificate
3. Rigging and animating in Adobe animate
Looking for a quick crash course about Adobe animate? Well, this course is perfect for you. As the name suggests, in this course you shall learn all about rigging and animating 2d characters.

Skills you will learn:
● rigging and animating adobe animate
● Through this course, you will know how to efficiently animate any character
● Discover the utilization of vectors and images for rigging
● You will get a clear understanding of important concepts such as layer parenting, motion tweening, and symbols.
Udemy: Udemy Duration: around 4 hours
Pros
You will learn the major concepts of animation.
You will learn about rigging in detail, one of the core concepts of animation.
The course is available on Udemy, one of the most accessible platforms.
Cons
The course is not free, you need to pay a nominal amount to access the course.
It is not a renowned course.
The course is not Beginner friendly, it needs you to have some understanding of animation.
4. Learning Adobe Animate CC: Animation, LinkedIn learning
LinkedIn’s new platform, LinkedIn learning has several professional courses. Learning Adobe animate CC is one of the courses available on LinkedIn learning. It teaches you all about digital transformations. By the end of this course, you will be able to create a handy bit of animation.

Skills you will learn:
● Fundamentals of digital animation on Adobe animate CC
● Understanding and implementation of concepts such as keyframes, symbols, tweening, and drawing tools.
● Understand about the creation of natural effects and shape tweens.
● Adding music and sound effects to your animation.
Udemy: LinkedIn learning Duration: Around 3 hours
Pros
The course duration is considerably shorter.
All the primary concepts of animation are given importance in this course.
You get additional quizzes and study material along with the lecture videos
Cons
You need to have an active LinkedIn learning membership.
You need to pay for the LinkedIn learning membership.
The course is fast-paced, you need to grasp the concepts quickly.
5. Animate a walk cycle frame by frame in Adobe animate
This hands-on course is perfect for those who prefer experimenting as they watch the lecture videos. The course teaches you how to animate 2D and 3D characters smoothly. As you near the end of this course, you will have a clear understanding of how animation works and how to animate a hand-drawn character from scratch.

Skills you will learn:
● You will learn how to animate a hand-drawn character from scratch.
● You shall learn how to set up a working canvas and design a character.
● You will learn about the essential features of designing such as color fills, overlapping actions, shadows, and cleanup strokes.
Udemy: skillshare
Pros
The course focuses on the design aspect of animated characters.
The course gives you a hands-on experience with animation tools.
The course helps you learn how to create creative hand drawn characters.
Cons
You need an active skillshare membership to access the lecture videos
Skillshare membership is a paid one.
There are courses from more popular counterparts such as Udemy.
Part 3 How to Quickly Learn the Skills of Adobe Animate Course
Now that you’ve decided to get your hands dirty by dwelling into animation, you must give Wondershare Filmora Pro a try. What’s Wondershare Filmora ?
It’s essentially a one-stop shop for all your video editing needs. From video editing to rigging Wwondershare Filmora Pro has got it all. Using this platform, even a beginner can create exquisite animated videos.
The platform offers you several tools that are easy to use.
Even a neophyte could easily create beautiful animations by using Wondershare Filmora Pro. Using Wondershare Filmora Pro, you can not only animate characters but also define their motion, add sound effects, and edit videos. Filmora Pro offers you animation tools that are easier to operate and resultantly help you make amazing animated videos.
Wondershare Filmora
Get started easily with Filmora’s powerful performance, intuitive interface, and countless effects!
Try It Free Try It Free Try It Free Learn More >

Key Takeaways from This Episode
● As we see, today we’ve taken a look at a few of the best Adobe animate courses.
● Each of the courses can help you learn the basics of animation.
● Animation is indeed one of the budding fields, and with these fruitful courses, you can learn all about animation and possibly begin your journey as a freelancer or a professional in animation.
● Through these courses, you can create animated advertisement videos with ease. Wondershare Filmora Pro however can make your job easier by offering you amazing tools for generating animated videos!<
● Well, on this note we shall take leave! Wishing you good luck on your journey as an animator!
Professional animation is hence one of the fields that has a bright future. Willing to learn more about animation?
Don’t worry! We’ve got you covered, follow this article and find out more about the best 5 Adobe animate courses.
In this article
01 [What is Adobe Animate CC?](#Part 1)
02 [Top 8 FULL ADOBE ANIMATE COURSES | Beginners Complete Tutorial](#Part 2)
03 [How to Quickly Learn the Skills of Adobe Animate Course](#Part 3)
Part 1 What is Adobe Animate CC?
1. Who should take Adobe Animate course?
Learning is never bound. Anyone willing to learn can put in effort and time. As long as you wish to learn, and have an interest in it you can take it up. Those of you who wish to make a career in animation are highly recommended to take up this course. The Adobe animate course can help you kickstart your career as a professional animator.
2. Are there prerequisites to Adobe Animate course?
Animation is one such field that does not require a lot of prerequisites. In fact, even a beginner who has absolutely no idea about animation can take up the adobe animate course.
Part 2 Top 5 FULL ADOBE ANIMATE COURSES | Beginners Complete Tutorial
1. Adobe animate CC 2018- HTML5 Banner Ads
Adobe animate CC 2018- HTML5 Banner Ads is one of the most comprehensive courses on adobe animate. It teaches you several relevant skills associated with animation and marketing (one of the primary applications of animation).
Skills you will learn:
● Basics of HTML5 banner ads using adobe animate
● Understanding the importance of Adobe animate CC in web advertisements
● Through this course, you’d become an expert at publishing ad networks
● The course will help you explore tools and techniques related to banner advertising
Udemy: Udemy Duration: About 5 hours
Pros
The course is beginner-friendly; it helps you advance your career in animation from scratch.
The course covers even complex concepts.
You receive a course completion certificate
Cons
The course is paid and you need to pay a nominal fee in order to access the lecture videos.
The course is monotonous i.e. there is no live teaching.
2. 2D animation for beginners with adobe animate, Walt Wonderwolk
If you’re looking for a well-designed course that covers almost all the necessary concepts, then this course is just the right one for you. Through this course, you can learn all about Adobe animate. All the primary concepts are explained in detail in this course.
Skills you will learn:
● All the primary concepts of computer-generated animations using Adobe animate.
● You will learn important concepts such as eases, symbols, vector drawings, tweens, and key frames.
● You will also learn how to add sound to your animation
● You will gain hands-on knowledge about drawing, composition, and animation of characters.
Udemy: skillshare
Pros
The course is great for beginners to start learning about Adobe animate
The course covers fundamental concepts of animation
Cons
You need a skillshare membership in order to access the lecture videos.
You need to pay in order to get a skillshare membership
You do not get a course completion certificate
3. Rigging and animating in Adobe animate
Looking for a quick crash course about Adobe animate? Well, this course is perfect for you. As the name suggests, in this course you shall learn all about rigging and animating 2d characters.
Skills you will learn:
● rigging and animating adobe animate
● Through this course, you will know how to efficiently animate any character
● Discover the utilization of vectors and images for rigging
● You will get a clear understanding of important concepts such as layer parenting, motion tweening, and symbols.
Udemy: Udemy Duration: around 4 hours
Pros
You will learn the major concepts of animation.
You will learn about rigging in detail, one of the core concepts of animation.
The course is available on Udemy, one of the most accessible platforms.
Cons
The course is not free, you need to pay a nominal amount to access the course.
It is not a renowned course.
The course is not Beginner friendly, it needs you to have some understanding of animation.
4. Learning Adobe Animate CC: Animation, LinkedIn learning
LinkedIn’s new platform, LinkedIn learning has several professional courses. Learning Adobe animate CC is one of the courses available on LinkedIn learning. It teaches you all about digital transformations. By the end of this course, you will be able to create a handy bit of animation.
Skills you will learn:
● Fundamentals of digital animation on Adobe animate CC
● Understanding and implementation of concepts such as keyframes, symbols, tweening, and drawing tools.
● Understand about the creation of natural effects and shape tweens.
● Adding music and sound effects to your animation.
Udemy: LinkedIn learning Duration: Around 3 hours
Pros
The course duration is considerably shorter.
All the primary concepts of animation are given importance in this course.
You get additional quizzes and study material along with the lecture videos
Cons
You need to have an active LinkedIn learning membership.
You need to pay for the LinkedIn learning membership.
The course is fast-paced, you need to grasp the concepts quickly.
5. Animate a walk cycle frame by frame in Adobe animate
This hands-on course is perfect for those who prefer experimenting as they watch the lecture videos. The course teaches you how to animate 2D and 3D characters smoothly. As you near the end of this course, you will have a clear understanding of how animation works and how to animate a hand-drawn character from scratch.
Skills you will learn:
● You will learn how to animate a hand-drawn character from scratch.
● You shall learn how to set up a working canvas and design a character.
● You will learn about the essential features of designing such as color fills, overlapping actions, shadows, and cleanup strokes.
Udemy: skillshare
Pros
The course focuses on the design aspect of animated characters.
The course gives you a hands-on experience with animation tools.
The course helps you learn how to create creative hand drawn characters.
Cons
You need an active skillshare membership to access the lecture videos
Skillshare membership is a paid one.
There are courses from more popular counterparts such as Udemy.
Part 3 How to Quickly Learn the Skills of Adobe Animate Course
Now that you’ve decided to get your hands dirty by dwelling into animation, you must give Wondershare Filmora Pro a try. What’s Wondershare Filmora ?
It’s essentially a one-stop shop for all your video editing needs. From video editing to rigging Wwondershare Filmora Pro has got it all. Using this platform, even a beginner can create exquisite animated videos.
The platform offers you several tools that are easy to use.
Even a neophyte could easily create beautiful animations by using Wondershare Filmora Pro. Using Wondershare Filmora Pro, you can not only animate characters but also define their motion, add sound effects, and edit videos. Filmora Pro offers you animation tools that are easier to operate and resultantly help you make amazing animated videos.
Wondershare Filmora
Get started easily with Filmora’s powerful performance, intuitive interface, and countless effects!
Try It Free Try It Free Try It Free Learn More >
Key Takeaways from This Episode
● As we see, today we’ve taken a look at a few of the best Adobe animate courses.
● Each of the courses can help you learn the basics of animation.
● Animation is indeed one of the budding fields, and with these fruitful courses, you can learn all about animation and possibly begin your journey as a freelancer or a professional in animation.
● Through these courses, you can create animated advertisement videos with ease. Wondershare Filmora Pro however can make your job easier by offering you amazing tools for generating animated videos!<
● Well, on this note we shall take leave! Wishing you good luck on your journey as an animator!
How to Draw A Skeleton Cartoon – A Step by Step Guide
How to Draw Skeleton Cartoon – A Step by Step Guide
An easy yet powerful editor
Numerous effects to choose from
Detailed tutorials provided by the official channel
We often see skeleton cartoons on t-shirts and phone cases. There is a famous skeleton cartoon show. Most of the shows are pretty popular, and the skeleton cartoon in the shows became quite trendy in the fashion industry. The trend of a skeleton cartoon character is very much relevant nowadays. One might think about how this skeleton cartoon is drawn.
Sometimes it is hand drawn or digitally drawn. Here is a step-by-step guide for you if you wonder how to draw a skeleton cartoon. This guide will effortlessly help you draw the most quirky and trendy skeleton cartoon.
In this article
01 [This Is What 5 Skeletons of Famous Cartoon Characters Would Look Like](#Part 1)
02 [How to Draw Cartoon Skeletons With Step by Step](#Part 2)
Part 1 This Is What 5 Skeletons of Famous Cartoon Characters Would Look Like
From our very childhood, we have come across numerous cartoons shows. But have we ever wondered how the skeleton of these cartoon characters would look? No worries if you have not given a thought to this. This article can give you a small tour of the world where you will be able to see skeletons of a few famous cartoon characters that we have known since our childhood. The skeletons of famous cartoon characters are:
01Charlie
Charlie Brown, known as Charlie, is the main character in the comic strip Peanuts. This is a widely recognized American cartoon. Many people can relate to Charlie. Charlie is shy, nervous, and lacks confidence. These characteristics make him relatable to a chunk of common people. Charlie is referred to as the “Loveable Loser.”Charlie is an overwhelmingly short and stout character physically. Have you ever imagined how Charlie’s skeleton version would look? Here is how the skeleton cartoon of Charlie would look.

02Fred Flintstone
I have known very few people who do not know about Fred Flintstone. Fred Flinstone is the protagonist of the famous American sitcom show Yabba-Dabba-Dinosaurs and the entire franchise. The Flinstone is another show that features Fred with his family. Of course, the show’s main attraction is the Flinstone family and the way this show is set. This show is set in a way that romanticizes a family living in a cave. Coming to talk about skeletons, have you ever thought that what if a skeleton cartoon show version of The Flintstone were made. How would this short, fat man with almost a square look as a skeleton? We can look up here how the skeleton version of Fred Flintstone looks:

03Bubbles
The Bubble is one of the main characters of the popular TV cartoon show Powerpuff girls. The other protagonists are Blossom and Buttercup, her sisters. The Bubble is named Bubble because she is the bubbliest and most fun-loving among the three sisters. Bubble is a sweet little girl with a round face and big round eyes and short limbs. These characteristics in this character make it look cuter. But to think, how would we imagine Bubble in a skeleton version. This is how Bubble would look like a skeleton.

04Dexter
Dexter is the protagonist in the show Dexter’s Laboratory. Dexter is one of the most outstanding kid scientists who have made great inventions in his secret laboratory. It would be more appropriate to call Dexter an anti-heroic protagonist. He works in his secret laboratory for various projects like stopping bullying worldwide. Dexter is a short young boy with curly hair. Dexter is mostly seen wearing a white lab coat and semi-circle goggles, like someone who is always working in a lab. Imagining Dexter as a skeleton can be hilarious. But this is how Dexter would look like a skeleton cartoon.

05Pikachu
Pikachu is one of the characters or one of the Pokémons in the famous animated Japanese series Pokémon. Pikachu is a small yellow furry Pokémon. It seems very sweet to the audience and the general public, but it acquires a dangerous skill to give out an electric shock. This small yellow furry creature has featured in many films with the protagonist of the famous show Pokémon Ash Ketchum. This cartoon character has a presence in the fashion industry. It has been used to fashion dresses, bags, and many more. How would it be if we sat to think of a skeleton version of this furry creature? This may not a pleasant experience for everyone. The perfect way to demonstrate pikachu as a skeleton version would be:

Part 2 How to Draw Cartoon Skeletons With Step by Step
Have you ever tried drawing a skeleton cartoon character? You can use a skeleton cartoon to add a quirky effect to your project. You can draw an animated skeleton on your favorite t-shirt and change the vibe of the t-shirt. There are many methods to draw skeleton cartoon. Here we focus mainly on one way to draw cartoon skeleton. The method might seem difficult at the beginning, but the whole process becomes easier and smooth once you start following the steps. The steps are:
Step 1: To start with the drawing of the skeleton, let’s start with the head or the skull. The head should be round, and the jaw area needs to be at some angle or angular and have smaller lines than the long rounded lines on the upper part of the skull.
Step 2: The mouth of the skull must be open, and then we need to concentrate on other features of the face like the teeth, nose, and cheekbone.

Step 3: After the head is complete, we focus on the neck and the chest area. To draw the neck, divide the neck into small sections to show the division in the neck portion, as shown in the picture.
Step 4: To start with the rib cage, we need to draw the spine. The spine can be drawn as a long thick line and should be a continuity of the neck, so the neck and the spine should be drawn in the same way and same line. It is to be drawn at the body’s center, just below the head. You can refer to the example as shown below.
Step 5: After you have drawn the spine, to draw the rib, draw circles around the spine as if the curved lines demonstrating the rib are revolving around the spine.

Step 6: After the head and the chest region is complete. Focus on the hand. You can rest the arms any way you want. Since you are a beginner, this example shows the easiest ways to rest the hands when you are drawing a cartoon skeleton.
Step 7: The left arm will rest on the hips, and the right arm needs to be shown in a way so that it looks that the skeleton body is leaning on some object.
Step 8: Since the arms have divisions, the bones must be drawn the same way shown in the example with the same divisions on the arms.
Step 9: Keep in mind that both the arms must have equal bone divisions; otherwise, the drawing may look weird.
Step 10: Now you need to draw the hand. The hand is made of small bones. To draw the hand, divide it into small sections consisting of very small bones.

Step 11: After the hands are complete, the upper part of the body is complete. Now we need to focus on the lower part of the body.
Step 12: To start with the lower part of the body, we start with the hip portion.
Step 13: Show the hips with curved lines, and draw a round-like shape inside the curve to show the holes in the hips.
Step 14: After the hip is complete, start with the upper half of the legs. Draw a long bone from the hip to demonstrate the upper part of the leg.

Step 15: Now we need to concentrate on the other half of the leg. You can position the legs any way you want. Here in the example, the left leg will be crossed over the right leg.
Step 16: After the lower half of the legs is complete, the standing posture of the skeleton is set.
Step 17: Now we need to add the feet at the end of the leg. The feet are made of tiny pieces of bones; to draw the feet, divide them into small sections, as shown in the example.
Step 18: Draw the feet in a similar way to how you have drawn the hands.

Step 19: You can color your skeleton drawing or give your shading style after your skeleton drawing is done.
You can make quirky skeleton cartoon animations and compile them to a video, adding music effects. You might think you need different apps for the video and the audio editing part. That might be the case for other apps. Here is Wondershare Filmora Video Editor ; you can edit your video, make slideshows, and edit the background sound score. Just imagine of not changing windows while editing your exciting project can be so comfortable!
For Win 7 or later (64-bit)
For macOS 10.12 or later
● Ending Thoughts →
● It might be astonishing for you to see the skeleton versions of your favorite cartoon characters from your childhood.
● It gives a quirky effect to our minds but, at the same time, leaves us wondering about the skeleton drawing cartoon.
● Now you know the methodof drawing a cartoon skeleton. You can make your version of a skeleton cartoon; you can create your style and interpretation. You can create a skeleton dog cartoon.
● You can use the method to make animations or even paint on your t-shirt or wall paintings to add a little quirkiness.
● The cartoon skeleton gives a cool vibe. You can use your animation as your wallpaper. Keep quirking!
We often see skeleton cartoons on t-shirts and phone cases. There is a famous skeleton cartoon show. Most of the shows are pretty popular, and the skeleton cartoon in the shows became quite trendy in the fashion industry. The trend of a skeleton cartoon character is very much relevant nowadays. One might think about how this skeleton cartoon is drawn.
Sometimes it is hand drawn or digitally drawn. Here is a step-by-step guide for you if you wonder how to draw a skeleton cartoon. This guide will effortlessly help you draw the most quirky and trendy skeleton cartoon.
In this article
01 [This Is What 5 Skeletons of Famous Cartoon Characters Would Look Like](#Part 1)
02 [How to Draw Cartoon Skeletons With Step by Step](#Part 2)
Part 1 This Is What 5 Skeletons of Famous Cartoon Characters Would Look Like
From our very childhood, we have come across numerous cartoons shows. But have we ever wondered how the skeleton of these cartoon characters would look? No worries if you have not given a thought to this. This article can give you a small tour of the world where you will be able to see skeletons of a few famous cartoon characters that we have known since our childhood. The skeletons of famous cartoon characters are:
01Charlie
Charlie Brown, known as Charlie, is the main character in the comic strip Peanuts. This is a widely recognized American cartoon. Many people can relate to Charlie. Charlie is shy, nervous, and lacks confidence. These characteristics make him relatable to a chunk of common people. Charlie is referred to as the “Loveable Loser.”Charlie is an overwhelmingly short and stout character physically. Have you ever imagined how Charlie’s skeleton version would look? Here is how the skeleton cartoon of Charlie would look.
02Fred Flintstone
I have known very few people who do not know about Fred Flintstone. Fred Flinstone is the protagonist of the famous American sitcom show Yabba-Dabba-Dinosaurs and the entire franchise. The Flinstone is another show that features Fred with his family. Of course, the show’s main attraction is the Flinstone family and the way this show is set. This show is set in a way that romanticizes a family living in a cave. Coming to talk about skeletons, have you ever thought that what if a skeleton cartoon show version of The Flintstone were made. How would this short, fat man with almost a square look as a skeleton? We can look up here how the skeleton version of Fred Flintstone looks:
03Bubbles
The Bubble is one of the main characters of the popular TV cartoon show Powerpuff girls. The other protagonists are Blossom and Buttercup, her sisters. The Bubble is named Bubble because she is the bubbliest and most fun-loving among the three sisters. Bubble is a sweet little girl with a round face and big round eyes and short limbs. These characteristics in this character make it look cuter. But to think, how would we imagine Bubble in a skeleton version. This is how Bubble would look like a skeleton.
04Dexter
Dexter is the protagonist in the show Dexter’s Laboratory. Dexter is one of the most outstanding kid scientists who have made great inventions in his secret laboratory. It would be more appropriate to call Dexter an anti-heroic protagonist. He works in his secret laboratory for various projects like stopping bullying worldwide. Dexter is a short young boy with curly hair. Dexter is mostly seen wearing a white lab coat and semi-circle goggles, like someone who is always working in a lab. Imagining Dexter as a skeleton can be hilarious. But this is how Dexter would look like a skeleton cartoon.
05Pikachu
Pikachu is one of the characters or one of the Pokémons in the famous animated Japanese series Pokémon. Pikachu is a small yellow furry Pokémon. It seems very sweet to the audience and the general public, but it acquires a dangerous skill to give out an electric shock. This small yellow furry creature has featured in many films with the protagonist of the famous show Pokémon Ash Ketchum. This cartoon character has a presence in the fashion industry. It has been used to fashion dresses, bags, and many more. How would it be if we sat to think of a skeleton version of this furry creature? This may not a pleasant experience for everyone. The perfect way to demonstrate pikachu as a skeleton version would be:
Part 2 How to Draw Cartoon Skeletons With Step by Step
Have you ever tried drawing a skeleton cartoon character? You can use a skeleton cartoon to add a quirky effect to your project. You can draw an animated skeleton on your favorite t-shirt and change the vibe of the t-shirt. There are many methods to draw skeleton cartoon. Here we focus mainly on one way to draw cartoon skeleton. The method might seem difficult at the beginning, but the whole process becomes easier and smooth once you start following the steps. The steps are:
Step 1: To start with the drawing of the skeleton, let’s start with the head or the skull. The head should be round, and the jaw area needs to be at some angle or angular and have smaller lines than the long rounded lines on the upper part of the skull.
Step 2: The mouth of the skull must be open, and then we need to concentrate on other features of the face like the teeth, nose, and cheekbone.
Step 3: After the head is complete, we focus on the neck and the chest area. To draw the neck, divide the neck into small sections to show the division in the neck portion, as shown in the picture.
Step 4: To start with the rib cage, we need to draw the spine. The spine can be drawn as a long thick line and should be a continuity of the neck, so the neck and the spine should be drawn in the same way and same line. It is to be drawn at the body’s center, just below the head. You can refer to the example as shown below.
Step 5: After you have drawn the spine, to draw the rib, draw circles around the spine as if the curved lines demonstrating the rib are revolving around the spine.
Step 6: After the head and the chest region is complete. Focus on the hand. You can rest the arms any way you want. Since you are a beginner, this example shows the easiest ways to rest the hands when you are drawing a cartoon skeleton.
Step 7: The left arm will rest on the hips, and the right arm needs to be shown in a way so that it looks that the skeleton body is leaning on some object.
Step 8: Since the arms have divisions, the bones must be drawn the same way shown in the example with the same divisions on the arms.
Step 9: Keep in mind that both the arms must have equal bone divisions; otherwise, the drawing may look weird.
Step 10: Now you need to draw the hand. The hand is made of small bones. To draw the hand, divide it into small sections consisting of very small bones.
Step 11: After the hands are complete, the upper part of the body is complete. Now we need to focus on the lower part of the body.
Step 12: To start with the lower part of the body, we start with the hip portion.
Step 13: Show the hips with curved lines, and draw a round-like shape inside the curve to show the holes in the hips.
Step 14: After the hip is complete, start with the upper half of the legs. Draw a long bone from the hip to demonstrate the upper part of the leg.
Step 15: Now we need to concentrate on the other half of the leg. You can position the legs any way you want. Here in the example, the left leg will be crossed over the right leg.
Step 16: After the lower half of the legs is complete, the standing posture of the skeleton is set.
Step 17: Now we need to add the feet at the end of the leg. The feet are made of tiny pieces of bones; to draw the feet, divide them into small sections, as shown in the example.
Step 18: Draw the feet in a similar way to how you have drawn the hands.
Step 19: You can color your skeleton drawing or give your shading style after your skeleton drawing is done.
You can make quirky skeleton cartoon animations and compile them to a video, adding music effects. You might think you need different apps for the video and the audio editing part. That might be the case for other apps. Here is Wondershare Filmora Video Editor ; you can edit your video, make slideshows, and edit the background sound score. Just imagine of not changing windows while editing your exciting project can be so comfortable!
For Win 7 or later (64-bit)
For macOS 10.12 or later
● Ending Thoughts →
● It might be astonishing for you to see the skeleton versions of your favorite cartoon characters from your childhood.
● It gives a quirky effect to our minds but, at the same time, leaves us wondering about the skeleton drawing cartoon.
● Now you know the methodof drawing a cartoon skeleton. You can make your version of a skeleton cartoon; you can create your style and interpretation. You can create a skeleton dog cartoon.
● You can use the method to make animations or even paint on your t-shirt or wall paintings to add a little quirkiness.
● The cartoon skeleton gives a cool vibe. You can use your animation as your wallpaper. Keep quirking!
What’s Your No. 1 Maker to Animate Your Logo Online Free
What’s Your No. 1 Maker to Animate Your Logo Online Free
An easy yet powerful editor
Numerous effects to choose from
Detailed tutorials provided by the official channel
A logo can be referred to as the heart of a brand or business. A logo presents the characteristics of a business or a product.
With the help of various applications and tools available online animated graphics can be created. And when we use the same, you can easily animate your logo online.
In this article
01 [Can an Animated Logo Help to Grow Brand?](#Part 1)
02 [What Kind of Animated Logo Maker Can Grab Attention at the Soonest?](#Part 2)
Part 1 Can an Animated Logo Help to Grow Brand?
01Where to Use Animated Logo?
The target of an animated logo is to draw attention to views in all the available digital spaces. The purpose is different for different cases. The following will give an idea of where you can use your animated logo:
● Company website
Websites are considered as a CV for an organization. So it is very important and necessary to see that the website is working effectively. An animated logo will help in improving the brand image website along with it will also boost Search Engine Optimization (SEO). Visitors or consumers are visiting the website or the page will get to see the animated logo whenever they visit the site and thus spend more time on the website. This will also bring an impact on the rank of the websites in regards to the search results.
![]()
● Promo Videos
Promo video acts as marketing tools for companies. Brands and companies make profits and earn revenue through Promo videos. So while promoting a brand’s promo video, you can include an animated logo with it. This combination of promo video and animated logo will certainly accomplish various marketing goals. You can animate your logo online for free if you don’t have one yet.
![]()
● Social Networks
Social networking platforms nowadays are considered to be one of the important platforms for various product promotions. Usually, people spend a lot of time online making communications through social networks such as Twitter, Instagram, Pinterest, and Facebook. We have already learned that video content can be used as a marketing tool. These videos with the animated logo are easy to share as well as access. Also, you can convert your animated logo into a GIF which can be used for a social posting. Thus they get shared all across the social networking platform.
![]()
● Presentations
Companies often hold various presentations from time to time. It can be a presentation at a business meeting or brand promotion or demonstration. While giving these presentations, you can always include your animated logo with the presentation. By doing this, you will also end up adding an element of creativity and originality to your presentation.
![]()
023 Reasons Why Animated Logos Help to Grow Brand
![]()
We all know why a logo is important for branding a product and the business. The logo symbolizes the brand and the product. It also helps the consumers to identify a specific brand. A logo is considered to be the face of the brand or the business. We have also learned the importance of an animated logo.
Tips:
● Animated Logos helps in Increasing Brand Awareness
● Animated Logos tells an engaging story about your brand
● Animated Logos captures the Viewers Attention
Part 2 What Kind of Animated Logo Maker Can Grab Attention at the Soonest?
011.5 Amazing Templates for Jaw-Dropping Logos
● Octopus
![]()
● LUX
![]()
● Giant Owl
![]()
● 500px
![]()
● Zoom
![]()
02These 8 Makers Make Animating Logos Easier Than Ever
When you consider animating your logo online, there are various logo makers in the industry, and you might question yourself that ‘How can I animate my logo online?’ Here is the list of the eight best logo makers who can help you to animate your logo online are:
● Renderforest
5 key features are:
● Amazing logo fonts
● Wide variety of logo styles
● Amazing layout designs
● Logos can be created on the cloud with built-in tools
● Logo can be edited anytime without any hassle
Rating: Renderforest rating is 10 out of 10
Review: I found Renderforest to be very fast and effective in making an animated logo. The amazing logo fonts are available with the vast logo style library. It made the work much easier and smoother. I found Renderforest to be the apt logo maker for my work. If I had assigned some logo artist to do the same, the cost would have been much higher.
![]()
● OFFEO’s Logo
5 key features are:
● Compatible and affordable with all existing programs
● Availability of a huge library
● Animation speed can be customized
● Availability of various color palettes for every single template
● No limitations regarding the length of animation one wish to create
Rating: OFFEO’s Logo rating is 4.7 out of 5
Review: I was looking for a good animation maker for my vlogging site when I came across OFFEO’s Logo. The best part of this maker is that it is very easy to use. And I have made a professional animated logo just with a click of a button. Now I don’t need a pro for any further animated videos.
![]()
● Animaker
5 key features are:
● One can customize the logo
● Availability of awesome sound effects
● Logos can be sketched with the Tetris style and others
● Exclusive library of logo styles
● Largest animation library
Rating: The rating is 4 out of 5
Review: I had a marvelous experience with Animaker. It has been a bag full of positive surprises. Animaker made it possible to create some unique content in a very short time and with very little operational costs.
![]()
● Viddyoze
5 key features are:
● Availability of live-action animation
● Multi rendering processing
● Availability of hundreds of unique templates
● Ready-made logo designs are available
● Logos and characters can be mixed to make one single video
Rating: The rating is 4.2 out of 5
Review: My experience with Viddyoze is amazing. I have made some amazing videos and logos by Viddyoze for my own personal use, as well as helping my friend with his business. I will always use Viddyoze for creating animated logos.
![]()
● Reallusion
5 key features are:
● Creative control features are present
● Modified interface control
● Material generation assistant help available
● Drag and drop for creating 2D motion effect
● Hundreds of ready-made logo designs are available
Rating: The rating is 3.5 out of 5
Review: I was amazed at the character animation and the rendering features available. It is a very user-friendly logo maker with straightforward features available in comparison to other 3D animation software.
![]()
● PixTeller
5 key features are:
● More than 100,000 logo shapes are available
● Unique Text Properties helps to create exclusive text for logos
● Logos created can be downloaded as GIF or MP4 format
● One can create frame by frame tailored logo animations
● Availability of a huge number of logo templates
Rating: The rating is 4.6 out of 5
Review: The best thing about PixTeller are its edit and create images in a simple and placid way. With PixTeller my job has been a smooth one, whereas previously, creating an animated logo with other makers was a headache.
![]()
● Quince MEDIA
5 key features are:
● Availability of Architectural 3D animation
● 2D animators can use this for commercial use
● Presence of 3D illustration and character
● Availability of Promo video motion graphics
● One can create characters with unbeatable graphics
Rating: The rating is 4.4 out of 5
Review: After using Quince MEDIA, I was just left awestruck. I was able to create some exquisite 3D animated logos with the available 3D illustration and characters. Also, I was able to create some unique graphics for my company’s animated logo.
![]()
● Biteable
5 key features are:
● Availability of a large color scheme
● One can share logos directly to Facebook, Instagram, YouTube, and others
● Drag and drop feature available
● Features are built for enterprise uses
● Fast interaction lets animated logos created in a few minutes
Rating: The rating is 4.4 out of 5
Review: After using Biteable, I was able to create videos and animated logos of high quality with a professional outlook. Earlier I used to spend days creating small videos, but now it can be done in an hour or so. Adding my own music is now easier.
![]()
Key Takeaways from This Episode
● At the end of this article, you have understood the importance of having an animated logo instead of a static image logo.
● Also, you got the view as to how an animated logo helps you in the growth of your brand and business.
● And finally, you got an idea that what are the various types of animated logos that grab the viewer’s attention the most.
● So, animate your logo online for your brand and make a mark in your business.
In-Depth Study of Cartoon Painting Starts
In-depth Study of Cartoon Painting Starts from Learning to Draw It
An easy yet powerful editor
Numerous effects to choose from
Detailed tutorials provided by the official channel
Cartoon painting is slowly becoming popular due to its many benefits, especially easy cartoon canvas painting. For instance, it is pretty eye-grabbing, especially if your audience is children.

Thanks to the animation aspect, it has become relatively cheap to do advertisements with cartoons instead of real people.
In this article
01 [What Are Good Cartoons to Draw?](#Part 1)
02 [How Do You Draw a Cartoon Character for Beginners?](#Part 2)
03 [Is There Anything else You Can Do to Draw Cartoons More Quickly?](#Part 3)
Part 1 What Are Good Cartoons to Draw?
As far as good cartoons are concerned, expect about 5 popular types. These cartoons to draw include:
01 Illustrative Cartoons
They are the most suitable cartoons to draw when portraying particular ideas directly and simply.
The cartoons are primarily used in advertisements, teaching aids, and explaining stories. They also have text that explains them further.
It explains why they are common in school books, making them perfect for explaining content or subject.

02 Animated Cartoons
It is important to note that these cartoons are drawn using computers despite looking as if they are hand-drawn. One thing that makes them stand out is that they seem to be in action and movement.
As much as that’s how they seem from the viewer’s perspective, that’s far from the truth. They are just drawn in series, and since the first one will differ from the second one, there is that illusion of movement created.

03 Comic Strips or Panels
In most cases, these are regular features characterized by established or known characters and usually displayed in newspapers.
Just like the animated cartoons, they are showcased in series to tell or illustrate a story. The series of panels have words said by the various characters.
The words are usually in balloons, and a single comic strip may cover a single or double page of a newspaper.

04 Gag Cartoons
As the name gag suggests, these cartoons revolve around jokes. These single-paneled cartoons often make fun of human beings.
Through overstatements, humor resonates from what is drawn. They can either serve as entertainment or point out, if not make fun of, people, especially their mistakes and faults. Besides the cartoon, expect a caption that’s often a single sentence.

05 Editorial or Political Cartoons
These cartoons are also made for the newspapers. Expect them to be a single drawing on an editorial page. It sheds more light on a particular newspaper’s editorial comment.
As much as some have captions, that’s not always the case. Just like the gag cartoons, they ridicule people, but the editorial ones focus on celebrities.

Part 2 How Do You Draw a Cartoon Character for Beginners?
Even cartoon painting experts were once beginners. So, feel encouraged because you stand a chance also to become an expert in the long run. All you need to do is take the first step. Fortunately, we are here to hold your hand as you do so. So. Without further ado, let’s get started.
01 Cartoon Painting of a Young Character
These are the steps you need to follow when doing so:
Step 1Start with the face
The face is significant, especially when it comes to cartoon painting. It has complex as well as simple parts. For example, the face itself is pretty basic since you will need to begin with a circle.
After that, draw a horizontal and vertical line and ensure that they intersect in the middle.

Step 2Draw the eyes by drawing
Draw the eyes by drawing an oval and ensuring that the top side is slightly tilting to the side.
Do the same thing on the other side since the norm is a pair of eyes. The gap between the two should also be sensible.

Step 3Draw eyebrows
On the upper side of the eye, ensure that the lines are slightly thick. The eyebrows also need to be placed above the eyes, slightly above the thick line representing the eyelashes.

Step 4Draw jaw
After that, start shaping the jaw. Keep in mind that it plays a huge role in determining whether the character will look thin or fat. Additionally, how you draw the jaw determines whether the character will be old or young and how old or young the person will look.

Step 5Draw nose
Design the nose and ensure that you don’t put many details. The good thing about the nose is that a tip is enough to serve the purpose. Another common approach when drawing the nose is doing so as if you are viewing it from the side.

Step 6Draw mouth
Next, draw the mouth and consider the age of your character as you do so. If it is a child, despite the gender, stick to simplicity. You should also avoid drawing the lips. Preferably, go for the good, expressive trace since it never disappoints.

Step 7Draw ears
Proceed to the ears and in relation to whether the character is facing the camera or not. If your character is looking at the camera, you should see the front side view. Therefore, it won’t make sense to display the internal cavities in this case.

Step 8Draw haircut
Proceed to the ears and in relation to whether the character is facing the camera or not. If your character is looking at the camera, you should see the front side view. Therefore, it won’t make sense to display the internal cavities in this case.
As scary as it may look, you need not be an expert to make the haircut look perfect. Additionally, there is no constant way of drawing the haircut, and you are at liberty to practice as much creativity as possible.
Nevertheless, please don’t take it lightly since it can be quite descriptive. For instance, the hair is used to tell the personality of a character. Practice makes perfect, and you better keep doing it until you get it right. Ensure that what you draw shows the age and character of the cartoons to draw as perfectly as possible.
So far, our focus has been on a young character. However, that’s not always the case explaining why we will look at a cartoon painting of an old character.

02 Cartoon Paintings of an Old Character
If you want your character to look old, this is the way to go:
Step 1Old character draw a face
The face is no different from that of a young character. Start with the eyes and add their pupils, eyebrows and don’t forget to add wrinkles.
Since the character is old compared to the previous one, ensure that the eyebrows are thick. They should occupy more space of the forehead.

Step 2Old character make the chin
Make the chin longer too.

Step 3Old character draw the nose
Ensure that the nose design looks wider and larger since the character is old. To achieve that, make the nose look close to the eyes

Step 4Old character exaggerates mustache
Skip the mouth bit and instead go for a big, exaggerated mustache. That’s one common characteristic of an old character, especially male.

Step 5Draw hair
When it comes to hair, bald and side hair will play the trick perfectly. The nose is no different from that of a young character.

03 Cartoon Painting of a Female Character
So far, our focus has been on a male character. So, what do you do if you want to create a female one instead? These are some of the steps to follow as you do so.
The procedure is not that different. However, consider that women’s facial structures are more delicate than those of their male counterparts. Some of the things that stand out include long hair, a small nose, a thin chin, thin eyebrows, and large, expressive eyelashes. Large pupils will also do, especially if you are good at drawing.

Key Takeaways from This Episode
● There are five major types of cartoons to draw, animation, editorial, gag, illustrative and comic strips.
● Cartoon painting is not that hard, especially if you have a guide on how to go about it.
● If that turns out to be difficult, you can always go for the Filmora pro.
Cartoon painting is slowly becoming popular due to its many benefits, especially easy cartoon canvas painting. For instance, it is pretty eye-grabbing, especially if your audience is children.
Thanks to the animation aspect, it has become relatively cheap to do advertisements with cartoons instead of real people.
In this article
01 [What Are Good Cartoons to Draw?](#Part 1)
02 [How Do You Draw a Cartoon Character for Beginners?](#Part 2)
03 [Is There Anything else You Can Do to Draw Cartoons More Quickly?](#Part 3)
Part 1 What Are Good Cartoons to Draw?
As far as good cartoons are concerned, expect about 5 popular types. These cartoons to draw include:
01 Illustrative Cartoons
They are the most suitable cartoons to draw when portraying particular ideas directly and simply.
The cartoons are primarily used in advertisements, teaching aids, and explaining stories. They also have text that explains them further.
It explains why they are common in school books, making them perfect for explaining content or subject.
02 Animated Cartoons
It is important to note that these cartoons are drawn using computers despite looking as if they are hand-drawn. One thing that makes them stand out is that they seem to be in action and movement.
As much as that’s how they seem from the viewer’s perspective, that’s far from the truth. They are just drawn in series, and since the first one will differ from the second one, there is that illusion of movement created.
03 Comic Strips or Panels
In most cases, these are regular features characterized by established or known characters and usually displayed in newspapers.
Just like the animated cartoons, they are showcased in series to tell or illustrate a story. The series of panels have words said by the various characters.
The words are usually in balloons, and a single comic strip may cover a single or double page of a newspaper.
04 Gag Cartoons
As the name gag suggests, these cartoons revolve around jokes. These single-paneled cartoons often make fun of human beings.
Through overstatements, humor resonates from what is drawn. They can either serve as entertainment or point out, if not make fun of, people, especially their mistakes and faults. Besides the cartoon, expect a caption that’s often a single sentence.
05 Editorial or Political Cartoons
These cartoons are also made for the newspapers. Expect them to be a single drawing on an editorial page. It sheds more light on a particular newspaper’s editorial comment.
As much as some have captions, that’s not always the case. Just like the gag cartoons, they ridicule people, but the editorial ones focus on celebrities.
Part 2 How Do You Draw a Cartoon Character for Beginners?
Even cartoon painting experts were once beginners. So, feel encouraged because you stand a chance also to become an expert in the long run. All you need to do is take the first step. Fortunately, we are here to hold your hand as you do so. So. Without further ado, let’s get started.
01 Cartoon Painting of a Young Character
These are the steps you need to follow when doing so:
Step 1Start with the face
The face is significant, especially when it comes to cartoon painting. It has complex as well as simple parts. For example, the face itself is pretty basic since you will need to begin with a circle.
After that, draw a horizontal and vertical line and ensure that they intersect in the middle.
Step 2Draw the eyes by drawing
Draw the eyes by drawing an oval and ensuring that the top side is slightly tilting to the side.
Do the same thing on the other side since the norm is a pair of eyes. The gap between the two should also be sensible.
Step 3Draw eyebrows
On the upper side of the eye, ensure that the lines are slightly thick. The eyebrows also need to be placed above the eyes, slightly above the thick line representing the eyelashes.
Step 4Draw jaw
After that, start shaping the jaw. Keep in mind that it plays a huge role in determining whether the character will look thin or fat. Additionally, how you draw the jaw determines whether the character will be old or young and how old or young the person will look.
Step 5Draw nose
Design the nose and ensure that you don’t put many details. The good thing about the nose is that a tip is enough to serve the purpose. Another common approach when drawing the nose is doing so as if you are viewing it from the side.
Step 6Draw mouth
Next, draw the mouth and consider the age of your character as you do so. If it is a child, despite the gender, stick to simplicity. You should also avoid drawing the lips. Preferably, go for the good, expressive trace since it never disappoints.
Step 7Draw ears
Proceed to the ears and in relation to whether the character is facing the camera or not. If your character is looking at the camera, you should see the front side view. Therefore, it won’t make sense to display the internal cavities in this case.
Step 8Draw haircut
Proceed to the ears and in relation to whether the character is facing the camera or not. If your character is looking at the camera, you should see the front side view. Therefore, it won’t make sense to display the internal cavities in this case.
As scary as it may look, you need not be an expert to make the haircut look perfect. Additionally, there is no constant way of drawing the haircut, and you are at liberty to practice as much creativity as possible.
Nevertheless, please don’t take it lightly since it can be quite descriptive. For instance, the hair is used to tell the personality of a character. Practice makes perfect, and you better keep doing it until you get it right. Ensure that what you draw shows the age and character of the cartoons to draw as perfectly as possible.
So far, our focus has been on a young character. However, that’s not always the case explaining why we will look at a cartoon painting of an old character.
02 Cartoon Paintings of an Old Character
If you want your character to look old, this is the way to go:
Step 1Old character draw a face
The face is no different from that of a young character. Start with the eyes and add their pupils, eyebrows and don’t forget to add wrinkles.
Since the character is old compared to the previous one, ensure that the eyebrows are thick. They should occupy more space of the forehead.
Step 2Old character make the chin
Make the chin longer too.
Step 3Old character draw the nose
Ensure that the nose design looks wider and larger since the character is old. To achieve that, make the nose look close to the eyes
Step 4Old character exaggerates mustache
Skip the mouth bit and instead go for a big, exaggerated mustache. That’s one common characteristic of an old character, especially male.
Step 5Draw hair
When it comes to hair, bald and side hair will play the trick perfectly. The nose is no different from that of a young character.
03 Cartoon Painting of a Female Character
So far, our focus has been on a male character. So, what do you do if you want to create a female one instead? These are some of the steps to follow as you do so.
The procedure is not that different. However, consider that women’s facial structures are more delicate than those of their male counterparts. Some of the things that stand out include long hair, a small nose, a thin chin, thin eyebrows, and large, expressive eyelashes. Large pupils will also do, especially if you are good at drawing.
Key Takeaways from This Episode
● There are five major types of cartoons to draw, animation, editorial, gag, illustrative and comic strips.
● Cartoon painting is not that hard, especially if you have a guide on how to go about it.
● If that turns out to be difficult, you can always go for the Filmora pro.
How to Make My Photo 3D Cartoon Online
How to Make My Photo 3D Cartoon Online
An easy yet powerful editor
Numerous effects to choose from
Detailed tutorials provided by the official channel
Animated pictures are picking up the pace on the list of the top trends since they are able to convey so much in a fraction of a second which normal pictures or videos are incapable of.
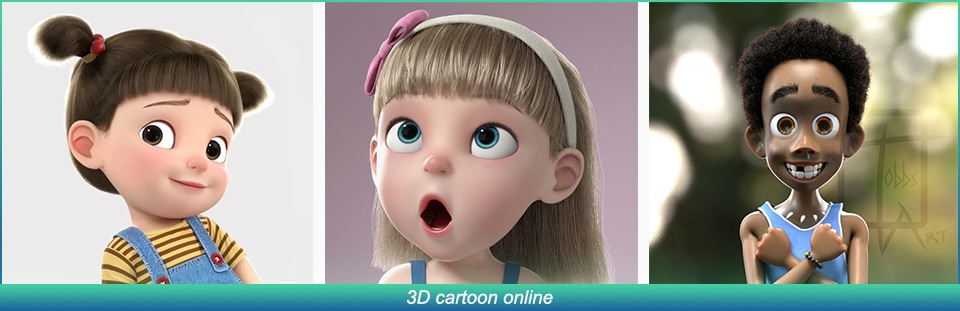
From creating vlogs to making your photos into a 3D cartoon online, everything is possible with the right software or app.
In this article
01 [3 Secrets to Creating an (amazing) Animated Video](#Part 1)
02 [Best 10 3D Photo Maker and Photo Animator Apps](#Part 2)
03 [How to Make Your Own Photo into Cartoon?](#Part 3)
Part 1 3 Secrets to Creating an (amazing) Animated Video
Animation is the perfect tool to boost any campaign. It is a medium of brand communication that has the potential to reach out to a wide variety of audiences. Most recently, photo animations like GIFs, cartooned pictures and motion graphic posters are becoming widely popular.

Marketers and content creators can take full advantage of online apps to develop amazing animated videos that would instantly grasp the viewer’s attention. Here are three secrets you should know about creating an amazing animated video:
Storytelling:
● It is easier to tell a story with moving pictures.
● They add a different level of visual charisma to the storytelling process.
● With the help of a few interesting and easy-to-use apps, you can create stunning cinematic images and establish your own unique style of storytelling.

Persuasive Call to Action:
● A call-to-action is a standard way of telling people what you want them to do such as making a purchase, downloading an e-book or registering for a subscription.
● It helps your audience if you guide them step-by-step with the help of images.
● Try out a combination of both written and animated graphics to boost your content’s persuasion.
● It is easier to convince people when they have the information laid out in front of their eyes.

Simplify the Complex:
● It helps if you imagine your audience like children who need a picture book to learn their lessons.
● It is easier to retain information when they are visually stimulating.
● Designing animated graphics is pretty easy when you understand the purpose behind it.
● Scrutinize your work to check if it is causing any hindrance in keeping up with the information.

Animating images can be a fun and engaging process. It only involves understanding the mindset of your target audience. This process need not be complicated. You can start out by converting your photos into 3D animations using a 3D animated photo maker.
Part 2 Best 10 3D Photo Maker and Photo Animator Apps 800
No. 1 LucidPix

Lucidpix permits you to explore your creative side in fun ways. An app that captures depth-enhanced pictures! Anyone with a smart device (mobile or tablet) can start creating 3D photos using lucidpix.
YouTube Product Demo Video ↓ ↓ ↓
| Name of maker | Size | Rating | Operating System |
|---|---|---|---|
| Lucid Inc. | 39 to 154 MB | 3.6/5 on playstore. | Android and iOS. |
Pros
Free download
User-friendly UI
Easily converts a regular photo into 3D
Cons
Contains Ads
Always offers & insists users to buy app
App is still under development
No. 2 Wigglegram

Wigglegram creates a single 3D image after combining multiple photographs. It turns all the captured photos into one single animated photo to make it look like a 3D image.
YouTube Product Demo Video ↓ ↓ ↓
| Name of maker | Size | Rating | Operating System |
|---|---|---|---|
| n4no | 8.7MB | 3.0/5 on Playstore | Android & iOS |
Pros
Direct social media share option.
Helps create reaction Gifs.
Super easy and fast 3D photo-making experience.
Cons
It doesn’t have good ratings.
App contains Ads.
App size is below 10MB.
No. 3 MotionLeap

Earlier branded as Pixaloop, Motionleap is a great option to animate still images. It also has cool features like animated rains, snow, butterfly & diamond.
YouTube Product Demo Video ↓ ↓ ↓
| Name of maker | Size | Rating | Operating System |
|---|---|---|---|
| Lightricks Ltd | 84 to 197 MB | 4.2/5 Playstore | iOS and Android |
Pros
Easy to use & accurate.
Elements opacity can be controlled.
Neat & clean effects, elements and overlays.
Cons
Better source photos are required.
Animation takes more time in comparison to other apps.
No. 4 Movepic

This super cool app offers effects that let you add glitches, flowing water and even a live sky to your images by just selecting the area you wish to apply the effects and is not that heavy to download.
YouTube Product Demo Video ↓ ↓ ↓
| Name of maker | Size | Rating | Operating System |
|---|---|---|---|
| ryzenrise | 48.16 MB | 4.3/5 on Playstore | Android and iOS (alternative) |
Pros
Is it a secure app to use?
Great for applying photo motion.
Regularly updated for bug fixes.
Cons
Regularly updated for bug fixes.
Lacks certain editing features
No. 5 Adobe Spark

Adobe Spark is a free-to-use photo animation software and has Adobe trust with it. It offers hundreds of fonts and templates for any type of photo though you would bear a watermark for the free version.
YouTube Product Demo Video ↓ ↓ ↓
| Name of maker | Size | Rating | Operating System |
|---|---|---|---|
| Adobe | 2.5 MB | 4.5/5 on Playstore | Android and iOS |
Pros
Hundreds of exclusive templates.
Intuitive interface best suited for beginners.
Easy to view dashboard.
Cons
Limited features in the free version.
Glitches in design.
No. 6 PopPic 6

PopPic 6 is a 3D camera with which you can directly click and apply a 3D filter effect to your flat images in order to make them pop.
YouTube Product Demo Video ↓ ↓ ↓
| Name of maker | Size | Rating | Operating System |
|---|---|---|---|
| PopPic 3D LLC | 36.9 MB | 4.7/5 on Applestore | iOS |
Pros
Ready to click 3D camera.
Dozens of filters.
Stylish and simple app design.
Cons
Limited functionality.
Low performance.
No. 7 ImgPlay

ImgPlay is kind of a cross between the features of Werble and Motionleap. There are hundreds of ready-to-use animations for your photos.
YouTube Product Demo Video ↓ ↓ ↓
| Name of maker | Size | Rating | Operating System |
|---|---|---|---|
| ImgBase Inc | 139 MB | 3.9/5 on Applestore | Android and iOS |
Pros
The convenient app to create easy GIFs.
Click, save and share feature.
Live photo features.
Cons
Limited editing options.
Not for professional graphics.
No. 8 GIPHY

Giphy is like a search engine for GIFs but also has an app version that lets you create amazing GIF animations that are ready for upload.
YouTube Product Demo Video ↓ ↓ ↓
| Name of maker | Size | Rating | Operating System |
|---|---|---|---|
| GIPHY | 100 MB | 4.8/5 on Playstore. | Android and iOS. |
Pros
Great for simple animations.
Create GIFs for promotions.
A vast range of options.
Cons
Limited color options.
Only suitable for GIF animations.
No. 9 Photo Bender

Photo Bender is more specifically designed for Android users. It is an app that enables you to warp your images against an animated effect. There are slight editing features also available in the app like bending and stretching an image.
YouTube Product Demo Video ↓ ↓ ↓
| Name of maker | Size | Rating | Operating System |
|---|---|---|---|
| Smart Photo Editor | 3.5 MB | 3.5/5 on Playstore | Android |
Pros
Export GIF, JPEG and PNG files.
Use simple editing features like coloring, stretching, and brushing.
Completely free to use.
Cons
Limited only to Android.
No. 10 Vimage 3D

An award-winning app for creating awe-inspiring animated images. Programmed to automatically detect what edits your images need. Does involve paying a premium.
YouTube Product Demo Video ↓ ↓ ↓
| Name of maker | Size | Rating | Operating System |
|---|---|---|---|
| Vimage | 21MB | 5.0/5 on Playstore | Android and iOS |
Pros
A large variety of filters, sounds and animated effects.
Max 2560p resolution.
Intuitive app interface.
Cons
Best features are limited to the premium version.
The free version comes with a non-removable watermark.
Part 3 How to Make Your Own Photo into Cartoon?
Prior to the digital age, creating a cartoon would require an entire team of professional animators such as in the house of Disney. A Cartoon animation meant sketching each frame by hand while maintaining continuity.
Now with the help of smart video effects, you can literally turn any image into a cartoon. These cartoonish animations can be both engaging and entertaining with some help from Wondershare Filmora .
Though we have enlisted 10 exceptional apps for ‘cartooning’ your images, Filmora gives you the flexibility which other apps don’t. You can create awesome animated videos online using Filmora while saving a ton of time.
You can use Filmora on both Mac and PC. Turn selfies, stock pictures, and snapshots into inspiring cartoon visuals using dozens of amazing filters and features on Filmora Pro.
Some of the exclusive features of Filmora Pro;
Audio Features →
● Noise Reduction.
● Audio Sync.
● Transition Audio.
● Compressor.
Animation Features →
● Motion Tracking.
● Ease In/Ease Out.
● Pan & Zoom
Movie Editing →
● Add Titles and Texts.
● Cinematic Lighting.
● Masking.
● Distortion and Wrapping.
Colouring Features →
● Colour Wheels
● Colour Correction
● Scopes.
By now you should know that Filmora Pro has a ton of customizable features that you can experiment with but this can be a bit confusing for beginners.
Key Takeaways from This Episode
● You can now turn your images into amazing animated cartoons using a wide range of 3d animated image-makers available online.
● Creating an exceptional animated video is a matter of storytelling, visual engagement and simplifying complex information.
● Use Filmora Pro to get your hands on professional editing software which is jam-packed with a bunch of exclusive features.
Animated pictures are picking up the pace on the list of the top trends since they are able to convey so much in a fraction of a second which normal pictures or videos are incapable of.
From creating vlogs to making your photos into a 3D cartoon online, everything is possible with the right software or app.
In this article
01 [3 Secrets to Creating an (amazing) Animated Video](#Part 1)
02 [Best 10 3D Photo Maker and Photo Animator Apps](#Part 2)
03 [How to Make Your Own Photo into Cartoon?](#Part 3)
Part 1 3 Secrets to Creating an (amazing) Animated Video
Animation is the perfect tool to boost any campaign. It is a medium of brand communication that has the potential to reach out to a wide variety of audiences. Most recently, photo animations like GIFs, cartooned pictures and motion graphic posters are becoming widely popular.
Marketers and content creators can take full advantage of online apps to develop amazing animated videos that would instantly grasp the viewer’s attention. Here are three secrets you should know about creating an amazing animated video:
Storytelling:
● It is easier to tell a story with moving pictures.
● They add a different level of visual charisma to the storytelling process.
● With the help of a few interesting and easy-to-use apps, you can create stunning cinematic images and establish your own unique style of storytelling.
Persuasive Call to Action:
● A call-to-action is a standard way of telling people what you want them to do such as making a purchase, downloading an e-book or registering for a subscription.
● It helps your audience if you guide them step-by-step with the help of images.
● Try out a combination of both written and animated graphics to boost your content’s persuasion.
● It is easier to convince people when they have the information laid out in front of their eyes.
Simplify the Complex:
● It helps if you imagine your audience like children who need a picture book to learn their lessons.
● It is easier to retain information when they are visually stimulating.
● Designing animated graphics is pretty easy when you understand the purpose behind it.
● Scrutinize your work to check if it is causing any hindrance in keeping up with the information.
Animating images can be a fun and engaging process. It only involves understanding the mindset of your target audience. This process need not be complicated. You can start out by converting your photos into 3D animations using a 3D animated photo maker.
Part 2 Best 10 3D Photo Maker and Photo Animator Apps 800
No. 1 LucidPix
Lucidpix permits you to explore your creative side in fun ways. An app that captures depth-enhanced pictures! Anyone with a smart device (mobile or tablet) can start creating 3D photos using lucidpix.
YouTube Product Demo Video ↓ ↓ ↓
| Name of maker | Size | Rating | Operating System |
|---|---|---|---|
| Lucid Inc. | 39 to 154 MB | 3.6/5 on playstore. | Android and iOS. |
Pros
Free download
User-friendly UI
Easily converts a regular photo into 3D
Cons
Contains Ads
Always offers & insists users to buy app
App is still under development
No. 2 Wigglegram
Wigglegram creates a single 3D image after combining multiple photographs. It turns all the captured photos into one single animated photo to make it look like a 3D image.
YouTube Product Demo Video ↓ ↓ ↓
| Name of maker | Size | Rating | Operating System |
|---|---|---|---|
| n4no | 8.7MB | 3.0/5 on Playstore | Android & iOS |
Pros
Direct social media share option.
Helps create reaction Gifs.
Super easy and fast 3D photo-making experience.
Cons
It doesn’t have good ratings.
App contains Ads.
App size is below 10MB.
No. 3 MotionLeap
Earlier branded as Pixaloop, Motionleap is a great option to animate still images. It also has cool features like animated rains, snow, butterfly & diamond.
YouTube Product Demo Video ↓ ↓ ↓
| Name of maker | Size | Rating | Operating System |
|---|---|---|---|
| Lightricks Ltd | 84 to 197 MB | 4.2/5 Playstore | iOS and Android |
Pros
Easy to use & accurate.
Elements opacity can be controlled.
Neat & clean effects, elements and overlays.
Cons
Better source photos are required.
Animation takes more time in comparison to other apps.
No. 4 Movepic
This super cool app offers effects that let you add glitches, flowing water and even a live sky to your images by just selecting the area you wish to apply the effects and is not that heavy to download.
YouTube Product Demo Video ↓ ↓ ↓
| Name of maker | Size | Rating | Operating System |
|---|---|---|---|
| ryzenrise | 48.16 MB | 4.3/5 on Playstore | Android and iOS (alternative) |
Pros
Is it a secure app to use?
Great for applying photo motion.
Regularly updated for bug fixes.
Cons
Regularly updated for bug fixes.
Lacks certain editing features
No. 5 Adobe Spark
Adobe Spark is a free-to-use photo animation software and has Adobe trust with it. It offers hundreds of fonts and templates for any type of photo though you would bear a watermark for the free version.
YouTube Product Demo Video ↓ ↓ ↓
| Name of maker | Size | Rating | Operating System |
|---|---|---|---|
| Adobe | 2.5 MB | 4.5/5 on Playstore | Android and iOS |
Pros
Hundreds of exclusive templates.
Intuitive interface best suited for beginners.
Easy to view dashboard.
Cons
Limited features in the free version.
Glitches in design.
No. 6 PopPic 6
PopPic 6 is a 3D camera with which you can directly click and apply a 3D filter effect to your flat images in order to make them pop.
YouTube Product Demo Video ↓ ↓ ↓
| Name of maker | Size | Rating | Operating System |
|---|---|---|---|
| PopPic 3D LLC | 36.9 MB | 4.7/5 on Applestore | iOS |
Pros
Ready to click 3D camera.
Dozens of filters.
Stylish and simple app design.
Cons
Limited functionality.
Low performance.
No. 7 ImgPlay
ImgPlay is kind of a cross between the features of Werble and Motionleap. There are hundreds of ready-to-use animations for your photos.
YouTube Product Demo Video ↓ ↓ ↓
| Name of maker | Size | Rating | Operating System |
|---|---|---|---|
| ImgBase Inc | 139 MB | 3.9/5 on Applestore | Android and iOS |
Pros
The convenient app to create easy GIFs.
Click, save and share feature.
Live photo features.
Cons
Limited editing options.
Not for professional graphics.
No. 8 GIPHY
Giphy is like a search engine for GIFs but also has an app version that lets you create amazing GIF animations that are ready for upload.
YouTube Product Demo Video ↓ ↓ ↓
| Name of maker | Size | Rating | Operating System |
|---|---|---|---|
| GIPHY | 100 MB | 4.8/5 on Playstore. | Android and iOS. |
Pros
Great for simple animations.
Create GIFs for promotions.
A vast range of options.
Cons
Limited color options.
Only suitable for GIF animations.
No. 9 Photo Bender
Photo Bender is more specifically designed for Android users. It is an app that enables you to warp your images against an animated effect. There are slight editing features also available in the app like bending and stretching an image.
YouTube Product Demo Video ↓ ↓ ↓
| Name of maker | Size | Rating | Operating System |
|---|---|---|---|
| Smart Photo Editor | 3.5 MB | 3.5/5 on Playstore | Android |
Pros
Export GIF, JPEG and PNG files.
Use simple editing features like coloring, stretching, and brushing.
Completely free to use.
Cons
Limited only to Android.
No. 10 Vimage 3D
An award-winning app for creating awe-inspiring animated images. Programmed to automatically detect what edits your images need. Does involve paying a premium.
YouTube Product Demo Video ↓ ↓ ↓
| Name of maker | Size | Rating | Operating System |
|---|---|---|---|
| Vimage | 21MB | 5.0/5 on Playstore | Android and iOS |
Pros
A large variety of filters, sounds and animated effects.
Max 2560p resolution.
Intuitive app interface.
Cons
Best features are limited to the premium version.
The free version comes with a non-removable watermark.
Part 3 How to Make Your Own Photo into Cartoon?
Prior to the digital age, creating a cartoon would require an entire team of professional animators such as in the house of Disney. A Cartoon animation meant sketching each frame by hand while maintaining continuity.
Now with the help of smart video effects, you can literally turn any image into a cartoon. These cartoonish animations can be both engaging and entertaining with some help from Wondershare Filmora .
Though we have enlisted 10 exceptional apps for ‘cartooning’ your images, Filmora gives you the flexibility which other apps don’t. You can create awesome animated videos online using Filmora while saving a ton of time.
You can use Filmora on both Mac and PC. Turn selfies, stock pictures, and snapshots into inspiring cartoon visuals using dozens of amazing filters and features on Filmora Pro.
Some of the exclusive features of Filmora Pro;
Audio Features →
● Noise Reduction.
● Audio Sync.
● Transition Audio.
● Compressor.
Animation Features →
● Motion Tracking.
● Ease In/Ease Out.
● Pan & Zoom
Movie Editing →
● Add Titles and Texts.
● Cinematic Lighting.
● Masking.
● Distortion and Wrapping.
Colouring Features →
● Colour Wheels
● Colour Correction
● Scopes.
By now you should know that Filmora Pro has a ton of customizable features that you can experiment with but this can be a bit confusing for beginners.
Key Takeaways from This Episode
● You can now turn your images into amazing animated cartoons using a wide range of 3d animated image-makers available online.
● Creating an exceptional animated video is a matter of storytelling, visual engagement and simplifying complex information.
● Use Filmora Pro to get your hands on professional editing software which is jam-packed with a bunch of exclusive features.
Ways to Create an Adobe Collage
How to Create an Adobe Collage?
An easy yet powerful editor
Numerous effects to choose from
Detailed tutorials provided by the official channel
All of you might know that an adobe collage was created first of all by Ewelina Karpowiak in the working field of Adobe Photoshop. Here these professionals have the need to mix different shapes and types of textures.
They can also create illustrations that appear well like 3D looking pictures.
In this article
01 [What Are Collage Portrait?](#Part 1)
02 [How to Create a Photo Collage in Adobe Spark?](#Part 2)
03 [Where to Find More Photo Collage Resources](#Part 3)
Part 1 What Are Collage Portrait?
A collage portrait is the perfect technique with which you can easily make a picture by gathering other pieces of photos. Here you have to use the most perfect graphical pieces. In this way you can make a composite photo with the help of this technology. When you make use of an adobe spark collage then you will get more benefit with this kind of technique in the long way. In brief you can conclude that a collage portrait is a nice and good way to make a photo with as many portrait pictures. Here you can also make and create a good looking family pictures with such kind of pieces of photos. You can also give publicity to these kinds of photos in the long way.
Part 2 How to Create a Photo Collage in Adobe Spark?
When you take help of spark adobe collage then you can know how to create a photo collage in Adobe Spark. Just see the steps below with which you can genuine success in this task and motive:-
● You will need to choose and select your favorite collage photos.
● Just open the chosen photos in Photoshop.
● Just make a new file for your collage Photoshop.
● Add or upload images at the same time.
● Make proper arrangements of your chosen photos.
● Create proper spaces and merge all the graphic layers with one another.
Part 3 Where to Find More Photo Collage Resources
With the help of a collage adobe spark you can get help to get more photo collage resources. Just collect accessories like magazine photos, fancy papers and photographs. You can make all these kinds steps when you feel interested in creating collages. In this way you can gather these things to commence the process of adobe collage and its essential resources.
Wondershare Filmora
Get started easily with Filmora’s powerful performance, intuitive interface, and countless effects!
Try It Free Try It Free Try It Free Learn More >
Wondershare Filmora Video Editor ‘s stock media is now being very much high in the market of Adobe and photography. It is a very much non-stop stock media with media that is made with stock images. When you choose stock images then your photos will not get banned and spammed when you upload on the internet.
01The attraction of Filmora stock images and photos
When you chooseFilmora V11’s stock media then you can also easily add special video effects so that your Photoshop work will appear glittering in the long way. When you combine the technology of Adobe Collage with the above mentioned stock images related to Filmora then you will not have to pay any kind of royalty fee in the long way.
Here you can also customize the video effects with the greatest ease. Just choose the option of stock footage so that nobody will charge you of stealing photos from other websites on the internet. When you make videos related to the technique of collage adobe then you will see that you can give special video effects and music lyrics to enhance the attraction of such kind of these videos. You can even easily download all such useful resources from Filmora as well as software like Adobe. Just have completed access to such video making software like Adobe and merge it well with the stock images concerned with Filmora. Today most creators of collage adobe can make marvelous videos with applying these attractive video and pictorial effects.
Image Name- how-to-create-an-adobe-collage5
Alt tag- Filmora stock images and photos
01The final summary
● When you talk more about any adobe collage then you will see that it was created first of all by Ewelina Karpowiak. She was working as a Adobe Photoshop developer. You can see as well as realize that you can create a collage adobe by mixing as many pieces of portraits into a single picture in the long way. These pictures will appear well like good 3D looking pictures. You can give good publicity to these pictures in many ways.
● You can get the best support from a spark adobe collage when you need to make a good photo collage from the technique of Adobe Spark. When you do this then you will have to choose the best photos for your collage. You will need to open those photos that you will see in Photoshop. You might even upload and add the needed images at the same time duration. Even you have to make a new file for the sake of your collage Photoshop. You might even add and upload images at the same duration of time. You have to make proper arrangements for the photos that you have selected. You will also need to make proper spaces for sake of arranging your selected images.
● When you make active use of collage adobe spark then you will find more resources of photo collage. Here you can get accessories like fancy papers and magazine photos as well as good looking photographs. When you are in a mood to create more good appearing collages then you can have all these resources. You might even see that Filmora V11’s stock media has attained a very high popularity in the market of photos. When you use these techniques then you will get free stock photos that you can use and add anywhere. After you make your mind to make an adobe collage then you can also make very much attractive media. When you are in a mood to do Filmora stock photography then you can use stock images to make images as well as attractive videos. Here you can also make use of special video effects and good hearing music tunes. You can easily download these effective resources from Filmora stock photos. Their software is such with which you can make excellent videos and even here collage adobe will help you well in the long run. Just make these attractive videos with marvelous pictorial and image related effects.
01Some more things to know
● Today even adobe collage is being used in making and creating love portrait photography. Here you can take a fresh start when you want to create a nice picture or photo with the pieces of colorful portraits. Here you can also make dynamic photos with combined pieces of portraits. This task can be done quickly in a very simple way. Thus this kind of technology can be used to make good looking and colored posters, images of social media and covers of commercial and personal magazines. Here you might also see that adobe Photoshop is also being utilized to make such portraits that are made with collage technology. Here you can also make attractive designs. You have to also test and judge the effects of color effects. Just also take the help of incorporating textures to make a professional looking poster and collage adobe.
● You can also use an adobe spark collage to make anarchic newspapers. Here you have to use the cutting style to make the collage portraits with the best editorial design. Here you can get more beneficial results by mixing colorful images and media technology with one another. As far as fashion concerning portraits is concerned you can get the benefits of having an edgy twist with them. You can also make changes and blending of these images with some elements like patterns that look like bionomical images.
● The spark adobe collage is very much essential as here you can make or create as many colorful images with this unique technology. With it you can also make a brand new portrait by combining the pieces of a colorful picture. Just combine as many images to create a brand new print. This could be the best example to make a high quality designed picture. All the collage portraits require an image that works on the technique of anchoring. Never forget that such an image needs high resolution pixels that can be mapped at anytime.
● Key Takeaways from This Episode →
● Finally we want to say that the technology of adobe collage is the best way to make good looking colorful pictures with the pieces of portraits.
● Here you will see that when you are in need of making high quality colorful images then you can make use of stock images that are available free on the web or internet.
● When you make use of these photos then no one will charge you of stealing the photo images of others on the web.
How To Create Pinterest Slideshow in Simple Ways
How to Make Pinterest Slideshow in Simple Ways
An easy yet powerful editor
Numerous effects to choose from
Detailed tutorials provided by the official channel
Slideshows are a collection of images arranged together that an audience can quickly swipe through to view the content. Pinterest is known for its one-pin to one post feature. You cannot post more than one image or video in a pin.
Thus, business people could start sharing all of the images or products, services, or articles mostly because it can be stressful to do that. But with the Pinterest slideshow, you can now upload all the images you want to at once in one pin. Moreso, even have people view the pins simultaneously just by swiping through.
In this article
01 [How to display Pinterest’s latest pins in a slideshow? ](#Part 1)
02 [How to upload multiple photos to Pinterest?](#Part 2)
03 [How to display Pinterest’s latest pins in a slideshow? ](#Part 3)
Part 1 How to Display Pinterest Latest Pins in A Slideshow
Using Pinterest’s latest pins in a slideshow is another way to display the latest pins from any Pinterest user or blogger’s blog. Each image is linked to its pin page on Pinterest instead of the board or profile page if you use the Pinterest profile or board widget.
To install this widget, you need the user or board’s RSS feed URL, then use it as the input for a blogger slide show gadget.
Here are the tricky steps to follow for the Pinterest slide show;
Step 1: Constructing Pinterest RSS feed URL
The Pinterest RSS feed URL of a user is different from aboard.
● It would be the user’s profile URL + feed/RSS for a user. To get your Profile URL, click on your username in the top right corner of your screen, and you will see a URL in your web browser’s URL. That is your profile URL.
● For the board URL, you will get that after clicking on the board from the homepage. The URL would appear on your browser’s URL bar.

Step 2: Reformatting the feed for the slideshow gadget:
The RSS feed from step one is not very compatible with the blogger slideshow gadget. It accepts RSS feed in Media RSS format, but you can convert with Yahoo pipe. Simply plug in your feed URL in the Yahoo pipe URL.
You have to replace the value of the feed URL with the feed URL you got in step one and the pin count with the number of pins displayed on the slide show.
With this, you have successfully converted your feed URL to the media version of the Pinterest feed.
Step 3: Add the slideshow widget
Take the following step to add the slideshow widget.
Go to Dashboard > Layout and click on ‘Add A Gadget.’
Now Add, A Gadget window, scroll down and select Slideshow.

Under Source, select Other.

Put in the converted Pinterest RSS feed URL from step 2 into the Feed URL text box.
Click Save and view your blog.
Part 2 How to Upload Multiple Photos to Pinterest
If you want to display multiple photos of your product or share your brand story with pictures, then this is a feature you will grab. Pinterest allows you to display various products at a time. But first, you must also have a business account to do this.
When you upload multiple photos on Pinterest, they are known as carousel pins. This feature is a great advertising tool and will help you during the Pinterest slideshow.
This is because people would see your carousel on their home feed just like any other pin you have posted. They may also tap on the carousel and swipe through the different photos on the carousel. When the pinner saves it, they have kept the entire image.
Here is a step-by-step method to upload multiple photos to Pinterest.
Step 1: Log into your Pinterest
First, log into your Pinterest business account to access the feature. If you do not have a business account, it is elementary to do so. There is no need for you to enter any billing information if you are wondering about that. It is a straightforward process. Just open your account, click on the drop-down menu near your profile picture, see ‘convert to business,’ then upgrade your account, and you are good to go.
You should also ensure that the photos you want to upload are on your computer. If you have originally planned to use it to explain an article visually, then make sure the particular image that represents that article is correctly saved on your computer. The images should be 1:1 or 2:3 in ratio, and the format either ‘png’ or ‘jpeg.’
Add your pictures and upload. If you want to reorder your pin, you can replace or remove images within the carousel.

Step 2: Add Title
Add a title, description, and website of the carousel pin. Your title will be a snippet of what the blog post or article will be about or the recipe’s title. Your description should be the same as your Pinterest text, and you can also choose to let it appear only on your first image on your carousel pin.
Step 3: Select a Board
The last step is to select a board relevant to your carousel pin. Thus, you have your carousel pin and images. However, you cannot view this immediately as in a standard pin or video pin. But you can go back to your board to view your pin when it is ready.
Part 3 How to Make Pinterest Slideshow In 5 Simple Ways
Slideshows are a beautiful way to enhance your Pinterest account and generate more leads on your Profile. If you’ve been wondering if and how you can make slideshows on Pinterest, here’s a guaranteed step you can follow. But then Pinterest slideshows are instead referred to as a showcase.
However, to access this feature, you must first own a business account on Pinterest.
Here are five (5) simple ways you can make Slideshow on Pinterest:
Step 1: Go to your Pinterest Profile
Click settings next to your profile photo in the top right corner.

Step 2: Select Profile
When the Settings window appears, select Profile.

Step 3: Click Edit
Next to Featured Boards, click Edit.

Step 4: Select Boards
After clicking Edit for your Featured Boards, you’ll reach a screen where you may edit the boards you want to highlight. Select which boards you’d like to feature by clicking on each drop-down menu.
Opening a new Pinterest page is a good idea. Scroll down to Boards with the most Pin impressions under Analytics>Profile. These are the boards that I highlighted.

Step 5: Save
When you’ve decided which boards to include in your Featured, click Save.
● Bonus – Wondershare Filmora
With this feature, you can also tweak your Pinterest slides and make them look professional and befitting to your audience using Wondershare Filmora Video Editor .
For Win 7 or later (64-bit)
For macOS 10.12 or later
Wondershare Filmora is an online video editing software with several unique features, including split-screen, freeze-frame, loop images, and videos to help you create top-notch visual content for your brand. With features like the Chroma key, you can easily create special effects in your Pinterest slideshow background.
You can also use color match and video effects to enhance the quality of the slide.
● Ending Thoughts →
● Making a Pinterest slideshow can be confusing if you do not have the correct information. But if you do, it’ll be a great way to spice up your social media content and create more leads for your business.
● Pinterest is a social media platform that keeps growing and adding more features by the day. It is also increasing the number of users per day. Try out the simple steps stated on how to make a slideshow on Pinterest. Finally, by incorporating Filmora in your levelling up plans, you will be able to bring your brand in front of your target customer and present it nicely.
Slideshows are a collection of images arranged together that an audience can quickly swipe through to view the content. Pinterest is known for its one-pin to one post feature. You cannot post more than one image or video in a pin.
Thus, business people could start sharing all of the images or products, services, or articles mostly because it can be stressful to do that. But with the Pinterest slideshow, you can now upload all the images you want to at once in one pin. Moreso, even have people view the pins simultaneously just by swiping through.
In this article
01 [How to display Pinterest’s latest pins in a slideshow? ](#Part 1)
02 [How to upload multiple photos to Pinterest?](#Part 2)
03 [How to display Pinterest’s latest pins in a slideshow? ](#Part 3)
Part 1 How to Display Pinterest Latest Pins in A Slideshow
Using Pinterest’s latest pins in a slideshow is another way to display the latest pins from any Pinterest user or blogger’s blog. Each image is linked to its pin page on Pinterest instead of the board or profile page if you use the Pinterest profile or board widget.
To install this widget, you need the user or board’s RSS feed URL, then use it as the input for a blogger slide show gadget.
Here are the tricky steps to follow for the Pinterest slide show;
Step 1: Constructing Pinterest RSS feed URL
The Pinterest RSS feed URL of a user is different from aboard.
● It would be the user’s profile URL + feed/RSS for a user. To get your Profile URL, click on your username in the top right corner of your screen, and you will see a URL in your web browser’s URL. That is your profile URL.
● For the board URL, you will get that after clicking on the board from the homepage. The URL would appear on your browser’s URL bar.
Step 2: Reformatting the feed for the slideshow gadget:
The RSS feed from step one is not very compatible with the blogger slideshow gadget. It accepts RSS feed in Media RSS format, but you can convert with Yahoo pipe. Simply plug in your feed URL in the Yahoo pipe URL.
You have to replace the value of the feed URL with the feed URL you got in step one and the pin count with the number of pins displayed on the slide show.
With this, you have successfully converted your feed URL to the media version of the Pinterest feed.
Step 3: Add the slideshow widget
Take the following step to add the slideshow widget.
Go to Dashboard > Layout and click on ‘Add A Gadget.’
Now Add, A Gadget window, scroll down and select Slideshow.
Under Source, select Other.
Put in the converted Pinterest RSS feed URL from step 2 into the Feed URL text box.
Click Save and view your blog.
Part 2 How to Upload Multiple Photos to Pinterest
If you want to display multiple photos of your product or share your brand story with pictures, then this is a feature you will grab. Pinterest allows you to display various products at a time. But first, you must also have a business account to do this.
When you upload multiple photos on Pinterest, they are known as carousel pins. This feature is a great advertising tool and will help you during the Pinterest slideshow.
This is because people would see your carousel on their home feed just like any other pin you have posted. They may also tap on the carousel and swipe through the different photos on the carousel. When the pinner saves it, they have kept the entire image.
Here is a step-by-step method to upload multiple photos to Pinterest.
Step 1: Log into your Pinterest
First, log into your Pinterest business account to access the feature. If you do not have a business account, it is elementary to do so. There is no need for you to enter any billing information if you are wondering about that. It is a straightforward process. Just open your account, click on the drop-down menu near your profile picture, see ‘convert to business,’ then upgrade your account, and you are good to go.
You should also ensure that the photos you want to upload are on your computer. If you have originally planned to use it to explain an article visually, then make sure the particular image that represents that article is correctly saved on your computer. The images should be 1:1 or 2:3 in ratio, and the format either ‘png’ or ‘jpeg.’
Add your pictures and upload. If you want to reorder your pin, you can replace or remove images within the carousel.
Step 2: Add Title
Add a title, description, and website of the carousel pin. Your title will be a snippet of what the blog post or article will be about or the recipe’s title. Your description should be the same as your Pinterest text, and you can also choose to let it appear only on your first image on your carousel pin.
Step 3: Select a Board
The last step is to select a board relevant to your carousel pin. Thus, you have your carousel pin and images. However, you cannot view this immediately as in a standard pin or video pin. But you can go back to your board to view your pin when it is ready.
Part 3 How to Make Pinterest Slideshow In 5 Simple Ways
Slideshows are a beautiful way to enhance your Pinterest account and generate more leads on your Profile. If you’ve been wondering if and how you can make slideshows on Pinterest, here’s a guaranteed step you can follow. But then Pinterest slideshows are instead referred to as a showcase.
However, to access this feature, you must first own a business account on Pinterest.
Here are five (5) simple ways you can make Slideshow on Pinterest:
Step 1: Go to your Pinterest Profile
Click settings next to your profile photo in the top right corner.
Step 2: Select Profile
When the Settings window appears, select Profile.
Step 3: Click Edit
Next to Featured Boards, click Edit.
Step 4: Select Boards
After clicking Edit for your Featured Boards, you’ll reach a screen where you may edit the boards you want to highlight. Select which boards you’d like to feature by clicking on each drop-down menu.
Opening a new Pinterest page is a good idea. Scroll down to Boards with the most Pin impressions under Analytics>Profile. These are the boards that I highlighted.
Step 5: Save
When you’ve decided which boards to include in your Featured, click Save.
● Bonus – Wondershare Filmora
With this feature, you can also tweak your Pinterest slides and make them look professional and befitting to your audience using Wondershare Filmora Video Editor .
For Win 7 or later (64-bit)
For macOS 10.12 or later
Wondershare Filmora is an online video editing software with several unique features, including split-screen, freeze-frame, loop images, and videos to help you create top-notch visual content for your brand. With features like the Chroma key, you can easily create special effects in your Pinterest slideshow background.
You can also use color match and video effects to enhance the quality of the slide.
● Ending Thoughts →
● Making a Pinterest slideshow can be confusing if you do not have the correct information. But if you do, it’ll be a great way to spice up your social media content and create more leads for your business.
● Pinterest is a social media platform that keeps growing and adding more features by the day. It is also increasing the number of users per day. Try out the simple steps stated on how to make a slideshow on Pinterest. Finally, by incorporating Filmora in your levelling up plans, you will be able to bring your brand in front of your target customer and present it nicely.
Also read:
- Updated 12 Animation Video Maker That Can Triple Conversion Rates
- Updated FREE Best Anime Streaming Sites to Download Anime
- New How to Make Photo 3D Cartoon Online for 2024
- New In 2024, Samples of Cartoon Character Face to Inspire You
- How to Make Creative Animation Videos
- New What Is the Best Collage Photo Grid Maker - Experts Choice for 2024
- New In 2024, 15 Horror Animes That Will Trigger a Heart Attack
- New Animate Your Photo Online with These Awesome Tools for 2024
- 2024 Approved 12+ Stunning Instagram GIF Stickers
- Updated Methods to Make Photo Motion Effect Online?
- New 2024 Approved 10 Cartoon Photo Converters
- Top 10 Websites to Download Anime Subtitles for Free for 2024
- In 2024, Creative Ways to Make iPhone Text GIF
- New How to Make Slideshow in LinkedIn for 2024
- New How You Can Turn Yourself Into Anime Character Using Anime Filter for 2024
- New 2024 Approved Tutorial on Making Unity 2D Animation
- In 2024, How to Draw Cartoons Step by Step with This Guide
- Updated How to Make GIF Stickers for WhatsApp 100 The Simple Way for 2024
- 2024 Approved How to Turn Yourself Into WhatsApp Cartoon
- Updated Best 15 Instant Classics Animated Cartoon Movies
- New In 2024, 10 Realistic Cartoon Characters You Would Run Away From if You Met in Real Life
- New How I Animate Discord Profile Pictures for 2024
- How to Make Well Done Animated GIF By Yourself?
- In 2024, Can I Still Do Animated Logo Design Without Design Skills?
- New In 2024, Dead Simple Guide to Create New and Exciting Blackboard Animation
- New In 2024, The Definitive Guide to Whiteboard Animation
- Updated In 2024, How to Make an Animation With 7 Steps
- New In 2024, How to Reduce GIF Size and Best GIF Resizers
- New 2024 Approved Top 15 2D Animation Software Free That Worth to Try
- Updated In 2024, Ways on How to Liven Up Your Animate Website on Scroll
- 2024 Approved 10 Scary Anime Girls That Will Make You Creepy
- Best GIF Maker Software for Windows and Mac
- 10 Best Photoshop Cartoon Effects For Creatives
- New The 15 Most Efficient Photo to Cartoon Apps for Android
- Updated 2024 Approved Top Practices on Online 3D Avatar Creator
- Updated 2024 Approved Techniques for Making After Effects 2D Animation
- In 2024, Ways to Make Sure You Get the Most up to Date Cartoon Character Design Tips
- Updated 2024 Approved How To Learn Cartoon Sketch Drawing— Pencil Sketch for Beginners
- New In 2024, Best 10 Animated Photo Collage Apps
- Updated A Beginners Guide for Learning 3D Animation for 2024
- New How to Create an Adobe Collage, In 2024
- 2024 Approved Popular Female & Male Disney Cartoon Characters To Empower You
- Updated 2024 Approved Christmas Is Coming! How to Find & Make Animated Christmas GIFs?
- New 2024 Approved The Best 8 Places for High-Quality Royalty Free Gifs (Paid and Free)
- Updated In 2024, How To Make Pinterest Slideshow in Simple Ways
- 15 Types of Cartoon Drawing Styles Examples for 2024
- Updated Ideas of Learning How to Send WhatsApp Animated Gifs
- New 2024 Approved 5 Photoshop Alternatives to Animate Your Logo
- Best 8 Tools Tell You How to Make Slideshows for Instagram
- How to Reset a Xiaomi Redmi Note 12 Pro+ 5G Phone That Is Locked | Dr.fone
- Proven Ways to Fix There Was A Problem Parsing the Package on Oppo A78 5G | Dr.fone
- In 2024, Things You Should Know When Unlocking Total Wireless Of Apple iPhone SE
- In 2024, Why does the pokemon go battle league not available On Motorola Razr 40 | Dr.fone
- In 2024, About Xiaomi Redmi Note 13 Pro+ 5G FRP Bypass
- Best Ways on How to Unlock/Bypass/Swipe/Remove Vivo Y02T Fingerprint Lock
- In 2024, The Ultimate Guide How to Bypass Swipe Screen to Unlock on Xiaomi Redmi Note 13 Pro+ 5G Device
- Spoofing Life360 How to Do it on OnePlus Ace 2V? | Dr.fone
- Cellular Network Not Available for Voice Calls On Oppo A18 | Dr.fone
- How to Cast Vivo S17 Screen to PC Using WiFi | Dr.fone
- In 2024, How to Fix when Apple Account Locked On Apple iPhone 8 Plus?
- Top Apps and Online Tools To Track Nubia Red Magic 9 Pro+ Phone With/Without IMEI Number
- In 2024, 5 Ways To Teach You To Transfer Files from Realme Narzo 60x 5G to Other Android Devices Easily | Dr.fone
- In 2024, How to Bypass Android Lock Screen Using Emergency Call On Vivo X Fold 2?
- Proven Ways in How To Hide Location on Life360 For Nokia C12 Plus | Dr.fone
- 3 Easy Solutions to Hard Reset Samsung Galaxy F14 5G | Dr.fone
- How to recover deleted photos from Android Gallery after format on Xiaomi 13T
- How to Change Apple iPhone 15 Location on Skout | Dr.fone
- Different Methods for Resetting Tecno Camon 20 Phones with Screen Locked and Not | Dr.fone
- Issues playing MKV video on Xiaomi Redmi A2
- How to Fix It Nokia C300 Wont Turn On | Dr.fone
- In 2024, The Complete Guide to Motorola Razr 40 FRP Bypass Everything You Need to Know
- Does Xiaomi 14 Ultra Have Find My Friends? | Dr.fone
- In 2024, Is Fake GPS Location Spoofer a Good Choice On Nokia C02? | Dr.fone
- In 2024, Top 5 Oppo Bypass FRP Tools for PC That Actually Work
- 3 Easy Ways to Factory Reset a Locked iPhone SE (2022) Without iTunes
- Restore Missing App Icon on Infinix Hot 40 Step-by-Step Solutions | Dr.fone
- Here are Some Pro Tips for Pokemon Go PvP Battles On Oppo Reno 10 Pro+ 5G | Dr.fone
- In 2024, How to Unlock Nubia Red Magic 8S Pro+ Phone without Any Data Loss
- In 2024, For People Wanting to Mock GPS on Tecno Camon 20 Devices | Dr.fone
- How to Unlock Poco X6 Pro Phone without Google Account?
- Pova 5 Messages Recovery - Recover Deleted Messages from Pova 5
- In 2024, How to Change Poco C55 Location on Skout | Dr.fone
- Is GSM Flasher ADB Legit? Full Review To Bypass Your Oppo A79 5G Phone FRP Lock
- How to Track Realme GT Neo 5 SE by Phone Number | Dr.fone
- In 2024, How To Use Allshare Cast To Turn On Screen Mirroring On Infinix Note 30 Pro | Dr.fone
- Unlocking the Power of Smart Lock A Beginners Guide for Vivo T2 Pro 5G Users
- Full Guide to Fix iToolab AnyGO Not Working On Vivo Y28 5G | Dr.fone
- How To Teleport Your GPS Location On Google Pixel 7a? | Dr.fone
- How Do I Stop Someone From Tracking My Honor Play 7T? | Dr.fone
- In 2024, Does Airplane Mode Turn off GPS Location On Apple iPhone 13 mini? | Dr.fone
- In 2024, iPogo will be the new iSpoofer On Vivo V27e? | Dr.fone
- Title: New 5 Best Adobe Animate Courses & Classes | Beginners Complete Tutorial for 2024
- Author: Elon
- Created at : 2024-05-19 03:05:15
- Updated at : 2024-05-20 03:05:15
- Link: https://animation-videos.techidaily.com/new-5-best-adobe-animate-courses-and-classes-beginners-complete-tutorial-for-2024/
- License: This work is licensed under CC BY-NC-SA 4.0.
