
:max_bytes(150000):strip_icc():format(webp)/football-referee-signaling-touchdown-in-stadium-599944339-5a84cb9e875db900367df025.jpg)
New Animated Collage Maker Tips for 2024
Animated Collage Maker Tips
Versatile Video Editor - Wondershare Filmora
An easy yet powerful editor
Numerous effects to choose from
Detailed tutorials provided by the official channel
Using collections of pictures, you can create a collage and animate it to excite the audience. The animated collage maker eases this task and aids in creating the collage as a pro editor. Manually, you would have seen many images pasted on a single sheet conveying a meaningful message overall. A similar scenario happens when you do them digitally. You can build a collage with the help of a wide range of images. Mostly these are used to excite the viewers during special occasions like parties, anniversaries.

For the official purpose, the animated collage occupies the business webpages to enlighten the website visitors about the products and services. The animated collage has dual purposes that meet your personal and professional needs. In this article, you will learn about the animated collage making tools in detail and the best way in creating them efficiently. Choose the best program that satisfies your needs with more customizing properties. Scroll down to discover the best applications to build a collage that serves your needs precisely.
In this article
01 What is an animated collage maker?
02 Best 4 animated collage maker tools
Part 1: What is an animated collage maker?
The animated collage maker is a sophisticated program that imports the desired images into the working space and animate them using the in-built options. Before applying the animations to the collage, you can edit the images and bring the best out of your captures. The animated collage will convey a meaningful message to the audience. Here, you can add texts, pictures to express your emotions in the animation. If you closely watch the digital market, you will come across a wide range of applications serving this animation as per your requirements.

Every tool is unique and comprised of intellectual animation effects to include in your files to acquire the desired outcomes. You can also try collage making with the captured videos too. Any media files are sufficient to create a collage to attract the audience. Check for the compatibility of file formats when you choose any tool to perform this activity.
Part 2: Best 4 animated collage maker tools
In this section, you will learn about the unique tools that assist in making a collage using the media files and inserting your favorite animations to enhance interaction with the viewers. Every application is unique and they provide different elements to serve your design needs. Both the professionals and newbie users can try the below-discussed tools without any hesitation. They offer a simple environment and you can work on your images confidently to build interactive files for your needs.
The below discussion gives you valuable insights on the tools and the efficient way to employ them while creating a meaningful collage for your requirements. Surf them carefully and try the app that inspires you a lot.
2.1 Photos.google.com
The Google platform serves you with the making of collages using the captured media files. Step into this environment to create a collage for your needs hassle-free. First, go to photos.google.com and log in to your Google account. Then, click Utilities and press ‘Create new -> Animation or Collage’. Add the images from its storage space and tap the ‘Create’ button. It is a simple method and you can create a collage in no time. Without downloading any application, you can build an animated collage for your requirements. You can use any number of images during the making of the collage process.

There are options to include videos too. You can choose the perfect files as per your desires. It is a built-in application provided by Google to build their collage by including the stored images or videos in this virtual space.
**2.2 Canva
The Canva is an incredible program that offers excellent editing options on the media files. You can either make a video or image collage using this platform. While making the collage, you can add texts to convey a thousand meanings to the audience. Use the animated collage files to narrate stories based on your theme. Canva is widely used by professionals and you can use it to create a collage for official and personal use. The fabulous template collections give you a wow feeling when you step into the working space. The sophisticated environment and the controls are explicitly visible for quick reach.

To create a collage using Canva, launch the application and choose the base template for this process from its libraries. Then, navigate the folders and select the media files to upload them into this design interface. Next, customize it by adding stickers, changing the colors, inserting texts to add flavors to the existing content. Edit the videos with basic customizing options like trim, crop, and rotate. Finally, tap the create a video collage button to build an animated collage file in MP4 format. Download it and use them on any platform flawlessly.
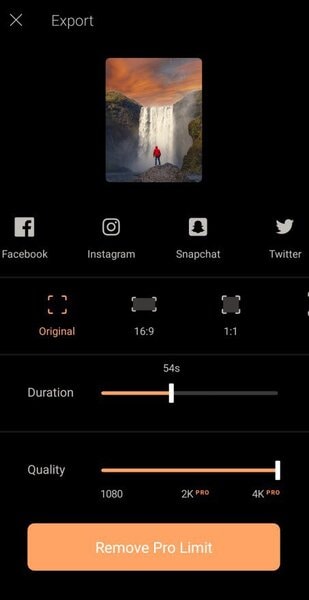
**2.3 Filmora
The Filmora is a sophisticated tool that creates miracles with the media files. You can use this application as an editor in modifying the details precisely to enhance its appearance. Using the image and video files you can create a wide range of GIFs and other animated images in no time. This platform offers excellent editing options to grab the attention of the audience. It serves as a reliable program for professionals to make the best out of the captured images.

Wondershare Filmora - Best Video Editor for Mac/Windows
5,481,435 people have downloaded it.
Unleash your imagination while customizing the media files
It has a simple interface and aids you in personalizing the pictures limitlessly.
The built-in templates and toolbox excite you when performing miraculous changes to your images and videos.
Export and import the files effortlessly despite file sizes and locations.
The availability of the tutorials guides even a newbie to use all its functionalities precisely.
You can use the customizing elements to animate the GIFs and include texts and overlays as per your needs. It is an excellent application that performs beyond your expectations.
**2.4 Kizoa
It is an online **animated collage maker that serves you with dozens of templates. You can either create a collage from scratch or use the in-built templates to make your work easy. Step into its website and log in to build your favorite collage using the collection of media files. Choose the templates and upload the images or videos. You can add some effects to enhance its movements and finally click the create button to complete the process. Make an instant share to desired media platform using the export option. It is a fabulous online tool that offers you a comfortable space to bring wonders to your images. Create an interactive and animated collage to entertain the audience to the core. Use this program without any hesitation because the automated wizard will guide you to proceed forward with the respective pop-up messages.

These are the ideal and productive animated collage maker tools that excel in the digital space. They are reliable and you can opt for them even without any second thought. The online and offline programs aid in making the best out of the captured media files. Choose the one that meets your needs and proceed with the making of the animated collage to entertain your guests during special occasions.
**Conclusion
Thus, this article had given you enlightening insights about the best - animated collage makers at the online platform. The above-discussed applications are highly performable and they serve your needs without any excuses. Use the Filmora app to perform multitasking on your media files and add extra detail to your animated images or videos with the help of the in-built elements. Stay connected with this article to discover new horizons about the collage maker tools.
Using collections of pictures, you can create a collage and animate it to excite the audience. The animated collage maker eases this task and aids in creating the collage as a pro editor. Manually, you would have seen many images pasted on a single sheet conveying a meaningful message overall. A similar scenario happens when you do them digitally. You can build a collage with the help of a wide range of images. Mostly these are used to excite the viewers during special occasions like parties, anniversaries.
For the official purpose, the animated collage occupies the business webpages to enlighten the website visitors about the products and services. The animated collage has dual purposes that meet your personal and professional needs. In this article, you will learn about the animated collage making tools in detail and the best way in creating them efficiently. Choose the best program that satisfies your needs with more customizing properties. Scroll down to discover the best applications to build a collage that serves your needs precisely.
In this article
01 What is an animated collage maker?
02 Best 4 animated collage maker tools
Part 1: What is an animated collage maker?
The animated collage maker is a sophisticated program that imports the desired images into the working space and animate them using the in-built options. Before applying the animations to the collage, you can edit the images and bring the best out of your captures. The animated collage will convey a meaningful message to the audience. Here, you can add texts, pictures to express your emotions in the animation. If you closely watch the digital market, you will come across a wide range of applications serving this animation as per your requirements.
Every tool is unique and comprised of intellectual animation effects to include in your files to acquire the desired outcomes. You can also try collage making with the captured videos too. Any media files are sufficient to create a collage to attract the audience. Check for the compatibility of file formats when you choose any tool to perform this activity.
Part 2: Best 4 animated collage maker tools
In this section, you will learn about the unique tools that assist in making a collage using the media files and inserting your favorite animations to enhance interaction with the viewers. Every application is unique and they provide different elements to serve your design needs. Both the professionals and newbie users can try the below-discussed tools without any hesitation. They offer a simple environment and you can work on your images confidently to build interactive files for your needs.
The below discussion gives you valuable insights on the tools and the efficient way to employ them while creating a meaningful collage for your requirements. Surf them carefully and try the app that inspires you a lot.
2.1 Photos.google.com
The Google platform serves you with the making of collages using the captured media files. Step into this environment to create a collage for your needs hassle-free. First, go to photos.google.com and log in to your Google account. Then, click Utilities and press ‘Create new -> Animation or Collage’. Add the images from its storage space and tap the ‘Create’ button. It is a simple method and you can create a collage in no time. Without downloading any application, you can build an animated collage for your requirements. You can use any number of images during the making of the collage process.
There are options to include videos too. You can choose the perfect files as per your desires. It is a built-in application provided by Google to build their collage by including the stored images or videos in this virtual space.
**2.2 Canva
The Canva is an incredible program that offers excellent editing options on the media files. You can either make a video or image collage using this platform. While making the collage, you can add texts to convey a thousand meanings to the audience. Use the animated collage files to narrate stories based on your theme. Canva is widely used by professionals and you can use it to create a collage for official and personal use. The fabulous template collections give you a wow feeling when you step into the working space. The sophisticated environment and the controls are explicitly visible for quick reach.
To create a collage using Canva, launch the application and choose the base template for this process from its libraries. Then, navigate the folders and select the media files to upload them into this design interface. Next, customize it by adding stickers, changing the colors, inserting texts to add flavors to the existing content. Edit the videos with basic customizing options like trim, crop, and rotate. Finally, tap the create a video collage button to build an animated collage file in MP4 format. Download it and use them on any platform flawlessly.
**2.3 Filmora
The Filmora is a sophisticated tool that creates miracles with the media files. You can use this application as an editor in modifying the details precisely to enhance its appearance. Using the image and video files you can create a wide range of GIFs and other animated images in no time. This platform offers excellent editing options to grab the attention of the audience. It serves as a reliable program for professionals to make the best out of the captured images.
Wondershare Filmora - Best Video Editor for Mac/Windows
5,481,435 people have downloaded it.
Unleash your imagination while customizing the media files
It has a simple interface and aids you in personalizing the pictures limitlessly.
The built-in templates and toolbox excite you when performing miraculous changes to your images and videos.
Export and import the files effortlessly despite file sizes and locations.
The availability of the tutorials guides even a newbie to use all its functionalities precisely.
You can use the customizing elements to animate the GIFs and include texts and overlays as per your needs. It is an excellent application that performs beyond your expectations.
**2.4 Kizoa
It is an online **animated collage maker that serves you with dozens of templates. You can either create a collage from scratch or use the in-built templates to make your work easy. Step into its website and log in to build your favorite collage using the collection of media files. Choose the templates and upload the images or videos. You can add some effects to enhance its movements and finally click the create button to complete the process. Make an instant share to desired media platform using the export option. It is a fabulous online tool that offers you a comfortable space to bring wonders to your images. Create an interactive and animated collage to entertain the audience to the core. Use this program without any hesitation because the automated wizard will guide you to proceed forward with the respective pop-up messages.
These are the ideal and productive animated collage maker tools that excel in the digital space. They are reliable and you can opt for them even without any second thought. The online and offline programs aid in making the best out of the captured media files. Choose the one that meets your needs and proceed with the making of the animated collage to entertain your guests during special occasions.
**Conclusion
Thus, this article had given you enlightening insights about the best - animated collage makers at the online platform. The above-discussed applications are highly performable and they serve your needs without any excuses. Use the Filmora app to perform multitasking on your media files and add extra detail to your animated images or videos with the help of the in-built elements. Stay connected with this article to discover new horizons about the collage maker tools.
Tutorials to Make Animated Images – Even if You’re Just Starting Out
Tutorials to Make Animated Images – Even if You’re Just Starting out
An easy yet powerful editor
Numerous effects to choose from
Detailed tutorials provided by the official channel
Not to mention, if you animate pictures, you’ll be able to stand apart in the crowd and maximize your brand exposure. By creating animated happy birthday images, you’ll be able to bring life to the still images.
In this guide, we’ll walk you through different ways to make animated images. Read this guide and you’ll be able to animate your images without any hassle.
In this article
01 [What are Animated Pictures?](#Part 1)
02 [Is It Possible to Animate Pictures On Your Own?](#Part 2)
03 [5 Best Tools to Make Animated Pictures](#Part 3)
Part 1 What are Animated Pictures?
For readers who aren’t familiar with animated images, here’s what you need to know. An animated image (also referred to as GIF) is designed by adding motion to a still image. Remember all the funny cat memes you see on Instagram? Well, they are a great example of animated images.
However, it’s important to understand that the applications of animated images aren’t only limited to social media and marketing. You can even animate your family photos and add life to those 20-year old pictures you’ve been saving forever. Not to mention, you can also create animated images of your favorite superhero movie. Love the Justice League starcast? Simply pick your favorite superhero and you’ll get stunning Justice League animated images.
Part 2 Is It Possible to Animate Pictures On Your Own?
When it comes to animating images, the majority of users want to know if it’s at all possible to create animated images by themselves. Even though animating an image is a tedious task, it’s safe to say that you can do it without any external help.
Of course, if you choose a tool like Adobe Photoshop to do the job, you’ll be out of luck because of the steep learning curve. But, there are hundreds of other alternatives you can use to animate pictures. There are ready-to-use 3D photo animators online that’ll allow you to animate any image within a few seconds. These tools are equipped with pre-installed animation templates that you can apply to any image and bring life to them.
Part 3 4 Best Tools to Make Animated Pictures
So, now that you know the key benefits of animated pictures, let’s take a look at the seven best tools you can use to create stunning animated images. To ensure we provide you with a diverse list of photo animators, we have included both platform-dependent and cross-platform solutions to the list.
01Motion Leap
Motion Leap is a free 3D motion graphics generator that works on the Android platform. The tool offers an easy-to-use interface that editors can utilize to turn their still images into dedicated videos that play in loop. One of the major advantages of using Motion Leap for animating images is that it doesn’t leave a watermark on your pictures, even if you are using the free version of the tool. In fact, the free version offers all the necessary tools you’ll need to create animated pictures.
Since Motion Leap works on mobile, you don’t have to fire up your laptop every time you want to create an animated picture. Simply launch the app on your smartphone and you’ll be able to animate pictures right away. As of now, the only downside of Motion Leap is that it doesn’t save the output in GIF format, unless you have purchased the premium version.
Key Features:
● Add motion graphics by simply dragging objects on your screen
● Freeze specific areas within the image and apply dedicated filters
● Built-in editing panel to adjust different elements such as exposure, contrast, highlights, etc.
● Motion Leap is affordable
02Animate Me
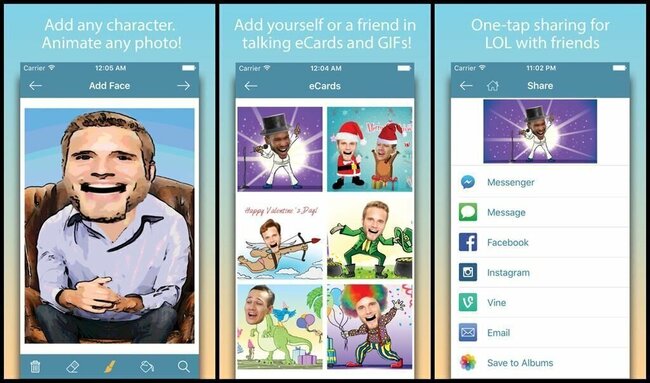
Animate Me is an exclusive iOS 3D photo animator that you can install on your iDevices and animate different types of images instantly. Though the app isn’t targeted towards professional marketers, it’s a fun tool if you want to animate your family photos or create happy birthday animated images. The app is available for free, which means you can create fun animated pictures without paying a single penny.
In addition to animating pictures, you can also use Animate Me to animate videos and create visually appealing eCards. In case you don’t know, e-Cards are used to communicate with others in a fun manner. With dozens of built-in e-card templates, you’ll be able to create high-quality e-cards right away. These templates support complete customization - so you can also use your face to customize the e-card.
Key Features of Animate Me:
● Hundreds of ready-to-use e-card templates
● Add sound effects to the characters used in an e-card
● Animate images and videos right on your smartphone
03Gyazo
Gyazo is a desktop-based screen capture tool that’s primarily designed to capture full or a specific portion of the screen. The tool is available for Windows, macOS, and Linux, which means you can use it across all desktop platforms without any hassle.
Apart from capturing screens, you can also use Gyazo to turn screen captures into dedicated GIFs with a single click. It’s worth noting that you won’t get any advanced editing options like other tools mentioned in the list, but Gyazo is still a reliable tool for users who want to animate screenshots.
Key Features:
● Capture screens and turn them into GIFs
● Animate pictures for free
● Available for Windows, macOS, and Linux
04GIFmaker.me
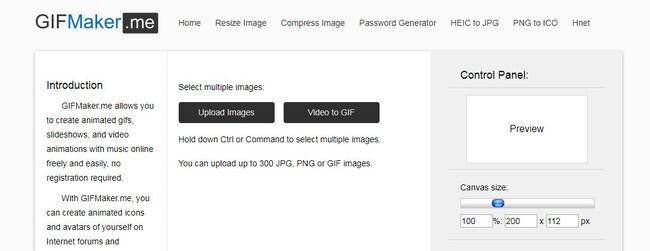
GIFMaker.me is an online 3D photo animator that’s primarily designed to turn regular images into GIFs. Being an online tool, you have the liberty to access GIFmaker.me across different platforms, be it mobile or desktop. The online editor offers an easy-to-use interface and provides an array of built-in features that you can use to create stunning GIFs.
All you have to do is decide the motion by dragging the subjects across the screen and the tool will automatically replicate it in a loop. Apart from creating GIFs from still images, you can also use GIFmaker to add animations to your videos. The tool has several ready-to-use animation templates that you can apply to your videos with the simple drag-&-drop functionality.
Key Features:
● Merge multiple images to create a custom GIF
● Reduce the size or reverse the motion of a particular GIF
● No sign-in required. You can start creating animated images directly with GIFmaker.me
Key Takeaways from This Episode
● Animated pictures can be used in different situations, be it for marketing purposes or simply for fun
● With dedicated tools, you can animate pictures all by yourself - without any professional assistance
● Wondershare Filmora Pro is an ideal video editing tool that provides a plethora of animation templates that you can apply to both videos and images.
Not to mention, if you animate pictures, you’ll be able to stand apart in the crowd and maximize your brand exposure. By creating animated happy birthday images, you’ll be able to bring life to the still images.
In this guide, we’ll walk you through different ways to make animated images. Read this guide and you’ll be able to animate your images without any hassle.
In this article
01 [What are Animated Pictures?](#Part 1)
02 [Is It Possible to Animate Pictures On Your Own?](#Part 2)
03 [5 Best Tools to Make Animated Pictures](#Part 3)
Part 1 What are Animated Pictures?
For readers who aren’t familiar with animated images, here’s what you need to know. An animated image (also referred to as GIF) is designed by adding motion to a still image. Remember all the funny cat memes you see on Instagram? Well, they are a great example of animated images.
However, it’s important to understand that the applications of animated images aren’t only limited to social media and marketing. You can even animate your family photos and add life to those 20-year old pictures you’ve been saving forever. Not to mention, you can also create animated images of your favorite superhero movie. Love the Justice League starcast? Simply pick your favorite superhero and you’ll get stunning Justice League animated images.
Part 2 Is It Possible to Animate Pictures On Your Own?
When it comes to animating images, the majority of users want to know if it’s at all possible to create animated images by themselves. Even though animating an image is a tedious task, it’s safe to say that you can do it without any external help.
Of course, if you choose a tool like Adobe Photoshop to do the job, you’ll be out of luck because of the steep learning curve. But, there are hundreds of other alternatives you can use to animate pictures. There are ready-to-use 3D photo animators online that’ll allow you to animate any image within a few seconds. These tools are equipped with pre-installed animation templates that you can apply to any image and bring life to them.
Part 3 4 Best Tools to Make Animated Pictures
So, now that you know the key benefits of animated pictures, let’s take a look at the seven best tools you can use to create stunning animated images. To ensure we provide you with a diverse list of photo animators, we have included both platform-dependent and cross-platform solutions to the list.
01Motion Leap
Motion Leap is a free 3D motion graphics generator that works on the Android platform. The tool offers an easy-to-use interface that editors can utilize to turn their still images into dedicated videos that play in loop. One of the major advantages of using Motion Leap for animating images is that it doesn’t leave a watermark on your pictures, even if you are using the free version of the tool. In fact, the free version offers all the necessary tools you’ll need to create animated pictures.
Since Motion Leap works on mobile, you don’t have to fire up your laptop every time you want to create an animated picture. Simply launch the app on your smartphone and you’ll be able to animate pictures right away. As of now, the only downside of Motion Leap is that it doesn’t save the output in GIF format, unless you have purchased the premium version.
Key Features:
● Add motion graphics by simply dragging objects on your screen
● Freeze specific areas within the image and apply dedicated filters
● Built-in editing panel to adjust different elements such as exposure, contrast, highlights, etc.
● Motion Leap is affordable
02Animate Me
Animate Me is an exclusive iOS 3D photo animator that you can install on your iDevices and animate different types of images instantly. Though the app isn’t targeted towards professional marketers, it’s a fun tool if you want to animate your family photos or create happy birthday animated images. The app is available for free, which means you can create fun animated pictures without paying a single penny.
In addition to animating pictures, you can also use Animate Me to animate videos and create visually appealing eCards. In case you don’t know, e-Cards are used to communicate with others in a fun manner. With dozens of built-in e-card templates, you’ll be able to create high-quality e-cards right away. These templates support complete customization - so you can also use your face to customize the e-card.
Key Features of Animate Me:
● Hundreds of ready-to-use e-card templates
● Add sound effects to the characters used in an e-card
● Animate images and videos right on your smartphone
03Gyazo
Gyazo is a desktop-based screen capture tool that’s primarily designed to capture full or a specific portion of the screen. The tool is available for Windows, macOS, and Linux, which means you can use it across all desktop platforms without any hassle.
Apart from capturing screens, you can also use Gyazo to turn screen captures into dedicated GIFs with a single click. It’s worth noting that you won’t get any advanced editing options like other tools mentioned in the list, but Gyazo is still a reliable tool for users who want to animate screenshots.
Key Features:
● Capture screens and turn them into GIFs
● Animate pictures for free
● Available for Windows, macOS, and Linux
04GIFmaker.me
GIFMaker.me is an online 3D photo animator that’s primarily designed to turn regular images into GIFs. Being an online tool, you have the liberty to access GIFmaker.me across different platforms, be it mobile or desktop. The online editor offers an easy-to-use interface and provides an array of built-in features that you can use to create stunning GIFs.
All you have to do is decide the motion by dragging the subjects across the screen and the tool will automatically replicate it in a loop. Apart from creating GIFs from still images, you can also use GIFmaker to add animations to your videos. The tool has several ready-to-use animation templates that you can apply to your videos with the simple drag-&-drop functionality.
Key Features:
● Merge multiple images to create a custom GIF
● Reduce the size or reverse the motion of a particular GIF
● No sign-in required. You can start creating animated images directly with GIFmaker.me
Key Takeaways from This Episode
● Animated pictures can be used in different situations, be it for marketing purposes or simply for fun
● With dedicated tools, you can animate pictures all by yourself - without any professional assistance
● Wondershare Filmora Pro is an ideal video editing tool that provides a plethora of animation templates that you can apply to both videos and images.
15 Types of Cartoon Drawing Styles Examples
15 Types of Cartoon Drawing Styles with Examples
An easy yet powerful editor
Numerous effects to choose from
Detailed tutorials provided by the official channel
The perfect, if not the best, place to begin cartoon drawing style as an artist is drawings or sketches since you don’t need a lot of drawing equipment to start this type of drawing. What you chiefly need is just your pen and paper to begin.
So, let’s move ahead as this content will show you different cartoon drawing styles, and in no time, you’ll master the art.
In this article
01 [15 Types of Cartoon You May Use for Your Next Marketing Project](#Part 1)
02 [How To Draw Myself In Five Different Cartoon Styles](#Part 2)
Part 1 Types of Cartoon You May Use for Your Next Marketing Project
As I’ve mentioned before, there are various types and styles of cartoon drawings. Below are a few cartoon drawing styles you may want to use for your next project.
01Modern Cartoon Style
This style is currently the most common art style displayed on TV channels like Cartoon Network.
Note that this cartoon-style drawing’s main features are the thick outlines, geometric shapes, and bright colors.
One of the significant reasons this drawing style is this way is that using simple shapes without much detail makes the overall animation process much faster and saves resources for the studios. Nonetheless, it is a beautiful and captivating cartoon drawing style!
This drawing style is used by many modern cartoons. Here are a few examples:
● The Powerpuff Girls
● Dexter’s Laboratory
● Codename: Kids Next Door
● Gravity Falls
02Realistic Cartoon Style
This cartoon drawing style is more quirky since, generally, cartoon drawing is more likely to simplify shapes. The realistic cartoon-style drawing adds more details and keeps figures much more in line with reality. This drawing style is typical among artists who vectorize people’s photographs.
You can also, to some extent, include Caricatures in this category. Caricatures are generally very realistic besides the whole enlargement and shrinking of specific body parts!
Few examples of realistic cartoon drawing styles:
● Ugly Americans
● General Caricataures
● Archer
03Modern Anime
This style tends to be more complex, primarily seen in drawings where the characters seem to be in motion, like in comic books. Modern-day drawings of this style have a lot of shadows and highlights in their character and environment, giving them a relatively new level of complexity.
Here are a few examples of modern animes that follow this Japanese cartoon drawing style.
● My Hero Academia
● Sword Art Online
● Attack on Titan
● Fullmetal Alchemist Brotherhood
04Classic Manga
The old Japanese manga characters tend to possess human-like attributes (proportions) in terms of the body. The difference is the big eyes they have the most time.
Generally, this cartoon drawing style focuses more on feminine bodies, possessing angular chins and thin bodies. Some drawing styles tend to make some parts of the body overtly long compared to the rest of the body; for instance, the legs are mostly longer than other parts.
A few examples of classic manga possessing this cartoon style drawing are:
● Oh My Goddess
● Urusei Yatsura
● Sailor Moon
● Hellsing
05Chibi Drawing Style
The Chibi Cartoon Drawing Style mainly focuses on making the characters into a tiny version of themselves as if being compressed or compacted into a small container.
Examples of where this drawing style is used:
● Lucky Star
● Bottle Fairy
● Himouto! Umaru-chan
06The Simpsons Cartoon Drawing Style
This cartoon-style drawing is widely famous. Though this style has undergone some evolution throughout the years, the main features remained constant! That is to say, the yellow bodies and big and white sphere-like eyes remained.
07Classic Disney
This drawing style was a staple for years, though this drawing style has had an evolutionary cartoon drawing style over the years.
08Mid 20th Century Disney
Disney upped their game during the mid 20th century and started working more with live actors, drawing from references, and filming shots before drawing the cartoons.
Some remarkable examples of this cartoon drawing style are
● Alice in Wonderland
● Cinderella
● Beauty and the Beast
09Modern Disney Drawing Style
This cartoon-style drawing is an immediate improvement of the mid-20th 20th drawing style. This cartoon style is brighter, more detailed, and more complex generally.
Although Disney has stopped creating 2D cartoon drawings, there are still some examples of this more refined art style:
● The Princess and the Frog
● Lilo and Stitch
10Old Cartoon Drawing Style
This drawing style is mostly in black and white format, with very high contrast body parts. The features of this style are having short bodies and long limbs. Sometimes, this type of drawing is referred to as Noodle drawing because the character’s body moves as if there are no bones in their body.
Some examples of this cartoon drawing style include:
● Mickey Mouse
● Betty Boop
11South Park
South Park cartoon drawing style is aptly geometric and has little depth. Shadows or highlights in this cartoon-style are rare. The colors are pretty solid and clean.
12Chrono Trigger/ Dragon Ball (Akira Toriyama)
Akira Toriyama’s cartoon drawing style characterizes having big and almost rectangular eyes and a lot of geometric shapes and definitions in the muscles.
13Crayon Shin-Chan
This cartoon-style drawing is effortless. An exciting aspect of this style is that it doesn’t mind pushing the limits of the character.
The lines generally are thin, and the eyes are prominent in black and white colors.
14Betty Boop
Betty Boop’s cartoon drawing style possesses contrasting black and white colors. Fragile lines with the characters contain a very high amount of black shapes.
15Adventure Time
Adventure Time’s art is incredibly geometric, and its characters are nearly boneless, making it a more current example of a cartoon drawing style.
More fluid animation is possible as a result of this. The art is also quite brilliant, with vibrant hues that leap off the screen.
Aside from that, the characters’ eyes are usually tiny (with a few exceptions), and the lines are skinny.
Part 2 How to draw myself in five different cartoon styles
There are loads of cartoon characters to choose from when trying to draw me. To sketch yourself as a cartoon, first, you have to determine what cartoon drawing style to appear in. This will give you hints on how to go about the drawing.
● The traditional drawing method is a pencil and paper.
● Online Avatar builders
● Adobe character animator
● Outsource to designers or illustrators
● Hire a studio or a freelancer
● Wondershare Filmora Video Editor

Wondershare Filmora - Best Video Editor for Mac/Windows
5,481,435 people have downloaded it.
Build unique custom animations without breaking a sweat.
Focus on creating epic stories and leave the details to Filmora’s auto features.
Start a creative adventure with drag & drop effects and endless possibilities.
Filmora simplifies advanced features to save you time and effort.
Filmora cuts out repetition so you can move on to your next creative breakthrough.
The Filmora software is an easy-to-use editing app with many beautiful features that can make your animation or cartoon-style drawing more vibrant.
● Split-screen makes it easier to tell a story or draw with multiple screens.
● Preset templates are superb for turning your drawings into creative videos.
● Motion graphics
● Keyframing
● Screen recorder and other unique features.
● Ending Thoughts →
● We’ve looked at the various cartoon drawing styles.
● How to draw self in cartoon style.
● The Filmora software to upbeat your sketches at the professional level.
● hus, go check out any cartoon-style drawings and see which one you like best. Make sure to study the reference drawing and practice more to perfect the artist in you.
The perfect, if not the best, place to begin cartoon drawing style as an artist is drawings or sketches since you don’t need a lot of drawing equipment to start this type of drawing. What you chiefly need is just your pen and paper to begin.
So, let’s move ahead as this content will show you different cartoon drawing styles, and in no time, you’ll master the art.
In this article
01 [15 Types of Cartoon You May Use for Your Next Marketing Project](#Part 1)
02 [How To Draw Myself In Five Different Cartoon Styles](#Part 2)
Part 1 Types of Cartoon You May Use for Your Next Marketing Project
As I’ve mentioned before, there are various types and styles of cartoon drawings. Below are a few cartoon drawing styles you may want to use for your next project.
01Modern Cartoon Style
This style is currently the most common art style displayed on TV channels like Cartoon Network.
Note that this cartoon-style drawing’s main features are the thick outlines, geometric shapes, and bright colors.
One of the significant reasons this drawing style is this way is that using simple shapes without much detail makes the overall animation process much faster and saves resources for the studios. Nonetheless, it is a beautiful and captivating cartoon drawing style!
This drawing style is used by many modern cartoons. Here are a few examples:
● The Powerpuff Girls
● Dexter’s Laboratory
● Codename: Kids Next Door
● Gravity Falls
02Realistic Cartoon Style
This cartoon drawing style is more quirky since, generally, cartoon drawing is more likely to simplify shapes. The realistic cartoon-style drawing adds more details and keeps figures much more in line with reality. This drawing style is typical among artists who vectorize people’s photographs.
You can also, to some extent, include Caricatures in this category. Caricatures are generally very realistic besides the whole enlargement and shrinking of specific body parts!
Few examples of realistic cartoon drawing styles:
● Ugly Americans
● General Caricataures
● Archer
03Modern Anime
This style tends to be more complex, primarily seen in drawings where the characters seem to be in motion, like in comic books. Modern-day drawings of this style have a lot of shadows and highlights in their character and environment, giving them a relatively new level of complexity.
Here are a few examples of modern animes that follow this Japanese cartoon drawing style.
● My Hero Academia
● Sword Art Online
● Attack on Titan
● Fullmetal Alchemist Brotherhood
04Classic Manga
The old Japanese manga characters tend to possess human-like attributes (proportions) in terms of the body. The difference is the big eyes they have the most time.
Generally, this cartoon drawing style focuses more on feminine bodies, possessing angular chins and thin bodies. Some drawing styles tend to make some parts of the body overtly long compared to the rest of the body; for instance, the legs are mostly longer than other parts.
A few examples of classic manga possessing this cartoon style drawing are:
● Oh My Goddess
● Urusei Yatsura
● Sailor Moon
● Hellsing
05Chibi Drawing Style
The Chibi Cartoon Drawing Style mainly focuses on making the characters into a tiny version of themselves as if being compressed or compacted into a small container.
Examples of where this drawing style is used:
● Lucky Star
● Bottle Fairy
● Himouto! Umaru-chan
06The Simpsons Cartoon Drawing Style
This cartoon-style drawing is widely famous. Though this style has undergone some evolution throughout the years, the main features remained constant! That is to say, the yellow bodies and big and white sphere-like eyes remained.
07Classic Disney
This drawing style was a staple for years, though this drawing style has had an evolutionary cartoon drawing style over the years.
08Mid 20th Century Disney
Disney upped their game during the mid 20th century and started working more with live actors, drawing from references, and filming shots before drawing the cartoons.
Some remarkable examples of this cartoon drawing style are
● Alice in Wonderland
● Cinderella
● Beauty and the Beast
09Modern Disney Drawing Style
This cartoon-style drawing is an immediate improvement of the mid-20th 20th drawing style. This cartoon style is brighter, more detailed, and more complex generally.
Although Disney has stopped creating 2D cartoon drawings, there are still some examples of this more refined art style:
● The Princess and the Frog
● Lilo and Stitch
10Old Cartoon Drawing Style
This drawing style is mostly in black and white format, with very high contrast body parts. The features of this style are having short bodies and long limbs. Sometimes, this type of drawing is referred to as Noodle drawing because the character’s body moves as if there are no bones in their body.
Some examples of this cartoon drawing style include:
● Mickey Mouse
● Betty Boop
11South Park
South Park cartoon drawing style is aptly geometric and has little depth. Shadows or highlights in this cartoon-style are rare. The colors are pretty solid and clean.
12Chrono Trigger/ Dragon Ball (Akira Toriyama)
Akira Toriyama’s cartoon drawing style characterizes having big and almost rectangular eyes and a lot of geometric shapes and definitions in the muscles.
13Crayon Shin-Chan
This cartoon-style drawing is effortless. An exciting aspect of this style is that it doesn’t mind pushing the limits of the character.
The lines generally are thin, and the eyes are prominent in black and white colors.
14Betty Boop
Betty Boop’s cartoon drawing style possesses contrasting black and white colors. Fragile lines with the characters contain a very high amount of black shapes.
15Adventure Time
Adventure Time’s art is incredibly geometric, and its characters are nearly boneless, making it a more current example of a cartoon drawing style.
More fluid animation is possible as a result of this. The art is also quite brilliant, with vibrant hues that leap off the screen.
Aside from that, the characters’ eyes are usually tiny (with a few exceptions), and the lines are skinny.
Part 2 How to draw myself in five different cartoon styles
There are loads of cartoon characters to choose from when trying to draw me. To sketch yourself as a cartoon, first, you have to determine what cartoon drawing style to appear in. This will give you hints on how to go about the drawing.
● The traditional drawing method is a pencil and paper.
● Online Avatar builders
● Adobe character animator
● Outsource to designers or illustrators
● Hire a studio or a freelancer
● Wondershare Filmora Video Editor
Wondershare Filmora - Best Video Editor for Mac/Windows
5,481,435 people have downloaded it.
Build unique custom animations without breaking a sweat.
Focus on creating epic stories and leave the details to Filmora’s auto features.
Start a creative adventure with drag & drop effects and endless possibilities.
Filmora simplifies advanced features to save you time and effort.
Filmora cuts out repetition so you can move on to your next creative breakthrough.
The Filmora software is an easy-to-use editing app with many beautiful features that can make your animation or cartoon-style drawing more vibrant.
● Split-screen makes it easier to tell a story or draw with multiple screens.
● Preset templates are superb for turning your drawings into creative videos.
● Motion graphics
● Keyframing
● Screen recorder and other unique features.
● Ending Thoughts →
● We’ve looked at the various cartoon drawing styles.
● How to draw self in cartoon style.
● The Filmora software to upbeat your sketches at the professional level.
● hus, go check out any cartoon-style drawings and see which one you like best. Make sure to study the reference drawing and practice more to perfect the artist in you.
The Complete Guide to Whiteboard Animation
The Definitive Guide to Whiteboard Animation
An easy yet powerful editor
Numerous effects to choose from
Detailed tutorials provided by the official channel
We think about moving videos with actors and actresses when we talk about motion. But, when we speak about doodle videos or drawn videos, we feel about whiteboard animation.
This article covers all the necessary information about whiteboard animation, Filmora whiteboard animation, whiteboard animation cost, etc. Under whiteboard animation, sketches adjust in a manner that results in continual animation reflection.
In this article
01 [What is Whiteboard Animation?](#Part 1)
02 [How Can Whiteboard Animation Be Used?](#Part 2)
03 [What is Whiteboard Animation Cost?](#Part 3)
04 [Some Whiteboard Animation Tools That Worth Using](#Part 4)
Part 1 What is Whiteboard Animation?

Whiteboard animation is a style that shows static watcher images getting drawn on the white screen. The graphics are at the core of a narration that walks the audience through the story by the draws. These animations are modest to understand, but they make us involved all of an impulsive.
Whiteboard animation could be a video in the middle of narration that walks the viewer through a story by viewing the illustrator’s hand drawing it onto a white background. Established in 2007, whiteboard animation may be a new and exciting way of communicating to the viewer in a very personal way.
It applies effects like time-lapse and stop-motion to bring stories to life. Its uses include internal and external television and internet advertisements, software and product demonstrations, whiteboard animation lectures and educational videos for all ages, and various artistic possibilities like untrue storytelling.
Whiteboard animation videos are traditionally made by simply recording the artist live as they draw the content for the video while at the same time reciting the story. An efficient technique in these visually-oriented times, but a tricky balancing act for even the most effective illustrators and speakers.
Part 2 How Can Whiteboard Animation Be Used?
While working with whiteboard animation for pc or going with whiteboard animation hand drawing in digital mode, it is important to understand how can whiteboard animation be used for? Let’s try to figure out that in the following points:
01Represent complex ideas in a simple way
A whiteboard video can offer assistance if the item or framework you need to portray is complex or exceedingly specialized. Individuals frequently get bored amid clarifications, and the more point by point those clarifications are, the harder it is to focus.
Whether you’re pushing an item on a press page or sharing a new trade prepare with your team, employing a high-quality whiteboard movement video to induce your point-over will keep up tall intrigued for as long as the video is playing. This can be because whiteboard liveliness is fast-moving, outwardly point by point, and frequently colorful, making them simple and fun to watch—for as long as it takes to clarify the thought.
02You can cover a part of your thoughts all at once
For reasons comparative to those displayed over, a whiteboard video is perfect on the off chance that you would like to cover an expansive sum of data within the introduction. With ideas unfolding visually as the storyteller portrays what’s going on, you’ll be able to get absent with counting a part of diverse thoughts within the same video without losing the watcher intrigued.
03You need to get other business attention
Did you know that whiteboard activity recordings are fair as compelling for Bshowcasing? The industrial-yet-casual look-and-feel of whiteboard activity loans itself astoundingly generously to a corporate environment.
Whiteboard movement administrations can donate you a noteworthy edge over competing companies once you approach other businesses along with your offer.
04You should maintain a strategic distance from awful performing artists at all costs
With whiteboard liveliness, you don’t ought to enlist on-screen characters to play in your video. This cruel noteworthy took a toll on reserve funds. Still, it can moreover spare you genuine embarrassment—good, persuading performing artists can be troublesome to find, and awful ones will have your group of onlookers wincing through the complete introduction. Movement ousts this issue inside and out.
05You plan to use social media marketing
If you need to utilize YouTube or social media advertisements for your promotion, whiteboard liveliness recordings alone will do the job. Individuals like them, so you’ve got a great chance of getting sees and clicks—and sales.
(Fun truth: Did you know there are 3billion looks conducted on YouTube alone each month? If you need your share of that activity, utilizing whiteboard activity recordings may be your best wager.)
06You want to create a story
On the off-chance that you need your video to tell a portion of your brand’s story, no one will do that way better than whiteboard movement administrations. Disney demonstrated that liveliness was an incredibly viable way to tell stories nearly a hundred years ago. Why not take after that convention?
07You want to use humor
When you need to consolidate humor into your video introduction, whiteboard activity is one of the most excellent ways to induce giggles. Novice performing artists can be unbalanced and irritating when they attempt to be clever on camera, but in whiteboard animation’s laid-back visual fashion, it can communicate humor immaculately.
08You need to reuse ancient sound substance
If you want to repurpose other sorts of the substance you’ve got lying around—say, a podcast scene or a discourse you gave—you can combine preexisting audio with whiteboard liveliness. This will assist you to capitalize on the substance you’ve as of now made, and it’ll undoubtedly breathe new life into it.
Part 3 What is Whiteboard Animation Cost?
Should you contract an artisan or fair do-it-yourself for whiteboard activity? Let’s have a conversation around sweat equity.
You can set up a video camera yourself and utilize video altering computer program to make a Whiteboard Liveliness. However, it’ll likely require a couple of weeks of your time, and your comes about will be far from a professional studio’s quality. Expect ineffectively drawn pictures and composed words that are unreadable.
Whiteboard activity program can be fetched as small as $50plus saves a couple of weeks of your time. These cheap programs utilize an inactive picture of a hand and clip craftsmanship. But the ultimate item isn’t unique, and its esteem is an excellent Control Point introduction.
Another choice is Adobe Eventual outcomes, an industry-standard activity program. It’s what they utilize to create National Commercials. It costs $16in any case, and learning the computer program requires a bachelor’s degree.
Part 4 Some Whiteboard Animation Tools That Worth Using
Whiteboard animation software or whiteboard animation app permits you to form whiteboard animation videos. Animation software offers a visual, drag-and-drop interface to simplify the designing process for creators.
Wondering what whiteboard animations are? They’re explainer videos where a hand sketches on a whiteboard. Before, this was manual, where a lecturer writes on a whiteboard. But because of whiteboard animation software, you don’t have to have a whiteboard or compose aboard again.
Whiteboard animation tool has built-in hand styles and virtual whiteboards that automatically process animation formation.
Wondershare Filmora Video Editor and Camtasia are some of the best videos altering computer programs with cool features compared to other competing video varying Software.
Wondershare Filmora
Get started easily with Filmora’s powerful performance, intuitive interface, and countless effects!
Try It Free Try It Free Try It Free Learn More >
Here are a few steps to follow for making whiteboard animation videos in Filmora and Camtasia:
01Write a Script
Much like a standard video or a brief skit, there must be a script if a whiteboard animation video succeeds. It is excellent to have compelling images and information, but without a logical story, they’re nothing.
It is not a blog, storyboard, or a collection of bullet points. You hope for a proper script, which says everything about the video. Why? Because then you’ll know precisely what images should be added further in specific segments, what the narrator must show, and what transitions are necessary.
02Start with the Storyboard
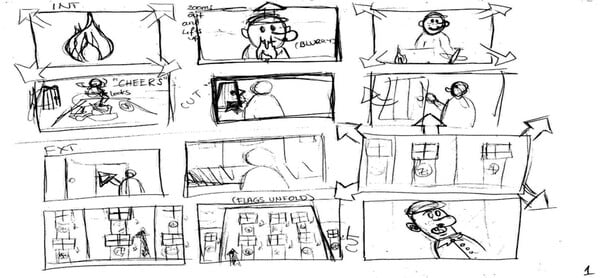
Now you have got a script, and you’ve got a clear idea of how you want your video to return across. It’s time to start out building the storyboard. With a storyboard, you may be able to sort out your thoughts far better. You’ll see how each frame comes onto the screen, and a unit of ammunition ties into the opposite.
When you create your storyboard, you may have a simple idea about how your final product will look. If there is some alteration you’re not proud of, this can be the instant where you’ll make changes.
03Create Images
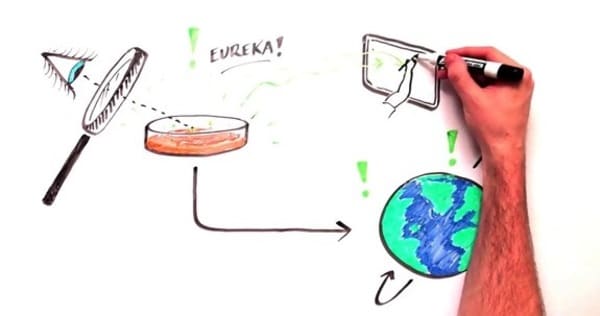
You may find this part very easy if you’re a precise person. It’s all about crafting fun and unique images that will help deliver the data you want to bring across. Attempt to create striking photos which will excite your audience. The simpler, more distinctive, and attractive you’ll be able to make those images, the higher your end product.
04Animate Those Images
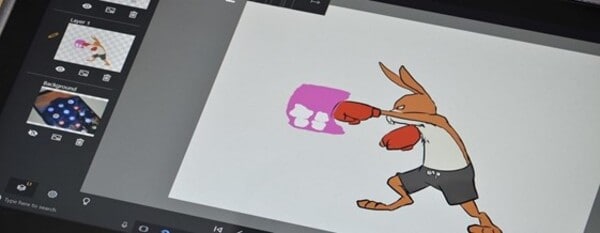
With your images drawn and in situ on the storyboard, it’s time to animate them. When animating your whiteboard animation video, confine in mind that every frame will likely show for no. quite seconds. This forces you to form every single movement count – with only some seconds per frame available, and quick movements are often preferable to extended scenes of stillness.
05Record and Sync the Audio
The audio is arguably one of the main essential parts of a whiteboard animation video. So, before recording the audio for any part of your project, practice reading through your script several times until you recognize it by memory and cannot struggle when speaking into the microphone during the particular recording process.
The final step involves getting your audio. Every animated video must have narration because it helps to elucidate what’s happening within the images that folks are seeing. Record your audio, and ensure it’s perfectly in sync with your content.
So, whether you are going with hand whiteboard animation and then modifying and animated with Filmora or the Camtasia whiteboard animation, both result in good whiteboard animation. Whereas, if looking for comprehensive video editing tools, the obvious choice will be Filmora.
● Key Takeaways from This Episode →
● In short, the article gives you the basic understanding of:
● What is meant by Whiteboard Animation?
● Different examples of whiteboard animation videos to explain the techniques
● Steps to apply whiteboard animation with Filmora
● Further, the article has explained Whiteboard Animation with different examples to clarify how it looks, and some websites may help you lead more about Whiteboard Animation videos. The most important question answered above is how to make videos ideally at Filmora. I hope your queries are explicit after reading this post.
We think about moving videos with actors and actresses when we talk about motion. But, when we speak about doodle videos or drawn videos, we feel about whiteboard animation.
This article covers all the necessary information about whiteboard animation, Filmora whiteboard animation, whiteboard animation cost, etc. Under whiteboard animation, sketches adjust in a manner that results in continual animation reflection.
In this article
01 [What is Whiteboard Animation?](#Part 1)
02 [How Can Whiteboard Animation Be Used?](#Part 2)
03 [What is Whiteboard Animation Cost?](#Part 3)
04 [Some Whiteboard Animation Tools That Worth Using](#Part 4)
Part 1 What is Whiteboard Animation?
Whiteboard animation is a style that shows static watcher images getting drawn on the white screen. The graphics are at the core of a narration that walks the audience through the story by the draws. These animations are modest to understand, but they make us involved all of an impulsive.
Whiteboard animation could be a video in the middle of narration that walks the viewer through a story by viewing the illustrator’s hand drawing it onto a white background. Established in 2007, whiteboard animation may be a new and exciting way of communicating to the viewer in a very personal way.
It applies effects like time-lapse and stop-motion to bring stories to life. Its uses include internal and external television and internet advertisements, software and product demonstrations, whiteboard animation lectures and educational videos for all ages, and various artistic possibilities like untrue storytelling.
Whiteboard animation videos are traditionally made by simply recording the artist live as they draw the content for the video while at the same time reciting the story. An efficient technique in these visually-oriented times, but a tricky balancing act for even the most effective illustrators and speakers.
Part 2 How Can Whiteboard Animation Be Used?
While working with whiteboard animation for pc or going with whiteboard animation hand drawing in digital mode, it is important to understand how can whiteboard animation be used for? Let’s try to figure out that in the following points:
01Represent complex ideas in a simple way
A whiteboard video can offer assistance if the item or framework you need to portray is complex or exceedingly specialized. Individuals frequently get bored amid clarifications, and the more point by point those clarifications are, the harder it is to focus.
Whether you’re pushing an item on a press page or sharing a new trade prepare with your team, employing a high-quality whiteboard movement video to induce your point-over will keep up tall intrigued for as long as the video is playing. This can be because whiteboard liveliness is fast-moving, outwardly point by point, and frequently colorful, making them simple and fun to watch—for as long as it takes to clarify the thought.
02You can cover a part of your thoughts all at once
For reasons comparative to those displayed over, a whiteboard video is perfect on the off chance that you would like to cover an expansive sum of data within the introduction. With ideas unfolding visually as the storyteller portrays what’s going on, you’ll be able to get absent with counting a part of diverse thoughts within the same video without losing the watcher intrigued.
03You need to get other business attention
Did you know that whiteboard activity recordings are fair as compelling for Bshowcasing? The industrial-yet-casual look-and-feel of whiteboard activity loans itself astoundingly generously to a corporate environment.
Whiteboard movement administrations can donate you a noteworthy edge over competing companies once you approach other businesses along with your offer.
04You should maintain a strategic distance from awful performing artists at all costs
With whiteboard liveliness, you don’t ought to enlist on-screen characters to play in your video. This cruel noteworthy took a toll on reserve funds. Still, it can moreover spare you genuine embarrassment—good, persuading performing artists can be troublesome to find, and awful ones will have your group of onlookers wincing through the complete introduction. Movement ousts this issue inside and out.
05You plan to use social media marketing
If you need to utilize YouTube or social media advertisements for your promotion, whiteboard liveliness recordings alone will do the job. Individuals like them, so you’ve got a great chance of getting sees and clicks—and sales.
(Fun truth: Did you know there are 3billion looks conducted on YouTube alone each month? If you need your share of that activity, utilizing whiteboard activity recordings may be your best wager.)
06You want to create a story
On the off-chance that you need your video to tell a portion of your brand’s story, no one will do that way better than whiteboard movement administrations. Disney demonstrated that liveliness was an incredibly viable way to tell stories nearly a hundred years ago. Why not take after that convention?
07You want to use humor
When you need to consolidate humor into your video introduction, whiteboard activity is one of the most excellent ways to induce giggles. Novice performing artists can be unbalanced and irritating when they attempt to be clever on camera, but in whiteboard animation’s laid-back visual fashion, it can communicate humor immaculately.
08You need to reuse ancient sound substance
If you want to repurpose other sorts of the substance you’ve got lying around—say, a podcast scene or a discourse you gave—you can combine preexisting audio with whiteboard liveliness. This will assist you to capitalize on the substance you’ve as of now made, and it’ll undoubtedly breathe new life into it.
Part 3 What is Whiteboard Animation Cost?
Should you contract an artisan or fair do-it-yourself for whiteboard activity? Let’s have a conversation around sweat equity.
You can set up a video camera yourself and utilize video altering computer program to make a Whiteboard Liveliness. However, it’ll likely require a couple of weeks of your time, and your comes about will be far from a professional studio’s quality. Expect ineffectively drawn pictures and composed words that are unreadable.
Whiteboard activity program can be fetched as small as $50plus saves a couple of weeks of your time. These cheap programs utilize an inactive picture of a hand and clip craftsmanship. But the ultimate item isn’t unique, and its esteem is an excellent Control Point introduction.
Another choice is Adobe Eventual outcomes, an industry-standard activity program. It’s what they utilize to create National Commercials. It costs $16in any case, and learning the computer program requires a bachelor’s degree.
Part 4 Some Whiteboard Animation Tools That Worth Using
Whiteboard animation software or whiteboard animation app permits you to form whiteboard animation videos. Animation software offers a visual, drag-and-drop interface to simplify the designing process for creators.
Wondering what whiteboard animations are? They’re explainer videos where a hand sketches on a whiteboard. Before, this was manual, where a lecturer writes on a whiteboard. But because of whiteboard animation software, you don’t have to have a whiteboard or compose aboard again.
Whiteboard animation tool has built-in hand styles and virtual whiteboards that automatically process animation formation.
Wondershare Filmora Video Editor and Camtasia are some of the best videos altering computer programs with cool features compared to other competing video varying Software.
Wondershare Filmora
Get started easily with Filmora’s powerful performance, intuitive interface, and countless effects!
Try It Free Try It Free Try It Free Learn More >
Here are a few steps to follow for making whiteboard animation videos in Filmora and Camtasia:
01Write a Script
Much like a standard video or a brief skit, there must be a script if a whiteboard animation video succeeds. It is excellent to have compelling images and information, but without a logical story, they’re nothing.
It is not a blog, storyboard, or a collection of bullet points. You hope for a proper script, which says everything about the video. Why? Because then you’ll know precisely what images should be added further in specific segments, what the narrator must show, and what transitions are necessary.
02Start with the Storyboard
Now you have got a script, and you’ve got a clear idea of how you want your video to return across. It’s time to start out building the storyboard. With a storyboard, you may be able to sort out your thoughts far better. You’ll see how each frame comes onto the screen, and a unit of ammunition ties into the opposite.
When you create your storyboard, you may have a simple idea about how your final product will look. If there is some alteration you’re not proud of, this can be the instant where you’ll make changes.
03Create Images
You may find this part very easy if you’re a precise person. It’s all about crafting fun and unique images that will help deliver the data you want to bring across. Attempt to create striking photos which will excite your audience. The simpler, more distinctive, and attractive you’ll be able to make those images, the higher your end product.
04Animate Those Images
With your images drawn and in situ on the storyboard, it’s time to animate them. When animating your whiteboard animation video, confine in mind that every frame will likely show for no. quite seconds. This forces you to form every single movement count – with only some seconds per frame available, and quick movements are often preferable to extended scenes of stillness.
05Record and Sync the Audio
The audio is arguably one of the main essential parts of a whiteboard animation video. So, before recording the audio for any part of your project, practice reading through your script several times until you recognize it by memory and cannot struggle when speaking into the microphone during the particular recording process.
The final step involves getting your audio. Every animated video must have narration because it helps to elucidate what’s happening within the images that folks are seeing. Record your audio, and ensure it’s perfectly in sync with your content.
So, whether you are going with hand whiteboard animation and then modifying and animated with Filmora or the Camtasia whiteboard animation, both result in good whiteboard animation. Whereas, if looking for comprehensive video editing tools, the obvious choice will be Filmora.
● Key Takeaways from This Episode →
● In short, the article gives you the basic understanding of:
● What is meant by Whiteboard Animation?
● Different examples of whiteboard animation videos to explain the techniques
● Steps to apply whiteboard animation with Filmora
● Further, the article has explained Whiteboard Animation with different examples to clarify how it looks, and some websites may help you lead more about Whiteboard Animation videos. The most important question answered above is how to make videos ideally at Filmora. I hope your queries are explicit after reading this post.
How to Cartoonize Photo Photoshop in Easy Steps
How to Cartoonize Photo Photoshop in Easy Steps
An easy yet powerful editor
Numerous effects to choose from
Detailed tutorials provided by the official channel
Cartoons, an already catchy entertainment source, can upgrade other media utilities on integration. Look through the easiest ways of creating cartoonize photo Photoshop stills!
In this article
01 [Types of Cartoon Effects in Photoshop](#Part 1)
02 [Easiest Ways to Cartoonize Photo in Photoshop](#Part 2)
03 [How to Use a Variety of Photoshop Special Effects to Create the Final Caricature Look](#Part 3)
Part 1 Types of Cartoon Effects in Photoshop
It is an absolute fun activity to explore your editing creativity in the realm of cartoonizing the otherwise ordinary still captures. Talking of the most convenient cartoon creator and editor applications, you can safely rely on the Photoshop Image Editor application to choose from a pool of cartoon editing effects for adding that spunky and funny element to your image files.
Presented in the following section, is a discussion of some of the most stunning and visibly amazing cartoon effects in the application’s Editor Library to cartoonize Photoshop images:
01Pop Art Photoshop Action
The effect is a predominantly preferred as a cartoon action Photoshop utility to caricaturize a normal image, along with customizing the same to change the colors and background of the original still capture for creating a brand new appearance with utmost ease. Apart from this, the aforesaid effect allows you to exclusively customize the globally acclaimed graphic masterpieces of Roy Lichtenstein. Working with the effect, you can edit a self-portrait or the favorite image of your pet to give the latter, a funny retro feel.

02Vintage Comic Creator
If the idea of sticking to just the creation of cartoon images is not enough to satisfy you, the Vintage Comic Creator effect allows you to expand your creativity level to work on cartoon based shape and text edits. You can use the effect to enhance an image logo or plain text with a comic book oriented text. A download of this cartoon effect template facilitates you with diversities of customizable layer styles, overlays and patterns.

03GTA Photoshop Action
This is a complete pleasure for the creative fan of Grand Theft Auto, the wicked chasing game series. Additional to creating a stark variety of edited cartoon stills, you are free to reinvent the aforesaid game’s most popular caricature edits, while using the GTA Photoshop Action editing filter. Launched by Indworks, the effect package consisting of 15 vibrant themes and 5 collage templates; promises a quick mimicry of your most cherished video and console games.

04Vector Paint Photoshop Action
The one is an amazing Photoshop effect for creating cartoon edits, which works through a merger of two different ingenious art themes or styles for transforming basic images into cartoonized stills.
The effect grants you the liberty to use varieties of art styles, such as, comic, photo retouching and energetic oil to obtain editing results comparable to that of any original photograph. The template is conveniently simple to use and assures you of quick results. All this, just at a nominal price of $6! Interesting, right?

05Ultra Realistic 3D Space Effect
Considering the fact of you being a space admirer, this one is the perfect image editor for you to add the vibrancy of stunning space elements and backgrounds within your cartoonized edits. The effect lets you play with the diverse range of customizable text and exciting caricature backgrounds. When downloading the template, you get a main setup file, a few editing examples and a web link to the free fonts present in the effect.

06Animated Zombie Grime Art Photoshop Action
Are you in love with the latest zombie grimes? If yes, then this action set is exclusive editor package for you. Working with the aforesaid image template, you can effortlessly add the perfect zombie theme to your cartoon edits, along with simultaneously creating a stunning animation, which you can use to enhance your video or GIF uploads on social media. Not forgetting the best part, you get a free access to this amazing utility.

Part 2 Easiest Ways to Cartoonize Photo in Photoshop
Having known about the amazing varieties of cartoonized editor templates in Photoshop, it is a natural instinct to feel motivated to create your own caricature images from normal capture stills. Addressing the concern of image transformation methods to turn a photo into a cartoon Photoshop, let us dive into some of the most affordable methods of creating cartoonized photos in the aforesaid editing application.
Talking of the most basic Photoshop tools for creating caricature images, you can start your editing spree with using the Graphic Tablet, Brush Tool, Layer Masks and a graphic pen to create amateur cartoonized edits from your still photographs, getting a full control on image tracing.
01Brush Tool
A few usage examples include working with a combination of the graphic tablet pen and the editor brushes to trace your image, using the brush in a masked or a fresh layer to avoid altering the actual image, and much more.
02Graphic Tablet
It is best to use the Photoshop Graphic Tablet for adhering to the concern of tracing cartoonized images. You can alternatively cater to the job with a trackpad, mouse, or even your hand. It is however, difficult to assure steady hand postures for image tracing, lest you are using a stylus pen.
03Pen Tool
Using the Pen Tool for cartoonizing your portrait, allows you to draw outlines along the desired figure within the image, along with its important elements, so that you can easily use these outlined paths to introduce different color blocks.
Similar to the Brush Tool, the Photoshop Pen utility grants you the freedom to vary the degree of detailing in your cartoon edit, from being highly expressive to only remaining around the shore. Working with the Pen Tool can, however be a bit tiring and time taking, with respect to the extent of detailing you wish to add to the caricature edits.
Additional to the aforementioned tools, you can also consider using the default image filters of the Photoshop application to get comparable results. This is an exclusively better option to choose, compared to the Pen Tool, when you are working without a Graphic Tablet. To get over the top realistic caricature renderings, you will need to supplement the use of Photoshop filters with the application’s editing channels and other adjustments.
Part 3 How to Use a Variety of Photoshop Special Effects to Create the Final Caricature Look
Considering the extensive discussion on the credibility of the Photoshop Image Editor application in the realm of creating stunning caricature images in high end resolution, let us proceed to learn about using the diversity of Photoshop’s special effects to get the last stage cartoonized appearance of ordinary still images.
User’s Guide to Create High End Cartoonized Look
The following tutorial is a stepwise explanation of the process to convert photo into cartoon Photoshop in the easiest possible way. Stick to the method for getting affordable results in a quick span.
Step 1: Download and Launch the Program
Visit the official website of Photoshop Image Editor for a free download of the software program in your system, followed by installing and launching the same in your device.
Step 2: Upload Your Image
On a successful launch of the editor program, you will be directed to the ‘Photoshop Editor’ window, where you are required to upload any desired still image from your device for creating a cartoonized edit. To do this, either simply add your image to the editor workspace using the ‘Drag and Drop’ method, or navigate to the ‘File’ tab in the top toolbar and click on ‘Open’ in the dropdown menu.
Step 3: Edge Enhancement
Once your image appears in the editor timeline, proceed to sharpen the edges of the face and body of the portrait. Start with navigating to and clicking on the ‘Filter’ option, followed by tapping on ‘Filter Gallery’ and selecting the ‘Artistic’ folder, where you need to choose the ‘Poster Edges’ option. Observe the effect of these setting on the portrait and make necessary changes.

Step 4: Background Setting
Ensure that the background and foreground of your image are set to white and black colors respectively. If not, proceed to adjust the same as required.

Step 5: Distorting the Edges
You now need to introduce some distortion in the edges of your portrait. Navigate to the ‘Filter’ option again, open the ‘Filter Gallery’ and choose ‘Torn Edges’ from the menu that drops down. Select the desired parameter values in accordance with your creative suitability.


Step 6: Using the Channels Panel
The next step is to select and copy your portrait using the ‘Ctrl + A’ and Ctrl + C commands respectively. Navigate to the ‘Channels’ panel at the right of the Photoshop workspace. At the panel’s bottom right, proceed with creating a new channel. It will be assigned the name ‘Alpha 1’ by Photoshop, which you are most welcome to change.


Step 7: Color Inversion
When you finish creating the channel, use the ‘Ctrl + V’ command to paste your portrait in the same. Proceed with inverting the image colors by navigating to the ‘Image’ option, followed by choosing the ‘Adjustment’ and ‘Invert’ options from the consecutive drop downs. Now, make a selection of the ‘White’ regions of your portrait by pressing the ‘Ctrl’ key and clicking on the ‘Alpha 1 Channel thumbnail.

Step 8: Layer Creation
Navigate to the ‘Layers’ panel at the right of the Photoshop workspace, and click on the ‘New Layer’ icon for creating a fresh layer. Fill the just created layer with black color, either by pressing ‘g’ from your system’s keyboard, or using the ‘Paint Bucket’ tool. Don’t forget to assign a suitable name to the layer.

Repeat the above process to create a separate layer and e fill the same with white color. The layer creation process is essential to separate the white and black colors of the actual image.

Step 10: Layer Dragging
In the ‘Layers’ panel, drag the ‘Black’ layer above the ‘White’ one.

Step 11: Creating Additional Layers
You are now required to create three more layers, with the same process as for the above two, for adding effects to the Skin, Clothes and Teeth/Eyes of the portrait. When you finish creation, assign suitable names to the layers, followed by dragging them below the ‘Black’ one within the ‘Layers’ panel.

Step 12: Color Selection and Application
Choose the respective colors for the clothes, skin and teeth/eyes of the cartoonized edit. To proceed with color application, navigate to the toolbar at the left of the Photoshop workspace and choose the ‘Brush Tool’. Finally, choose a particular layer and apply careful brush strokes to add color to the specific area of the portrait that you wish to edit. Follow the same process to add colors to the remaining layers to get the desired result in all areas of your cartoonized edit.

Step 13: Using the Gradient Tool
Navigate to the ‘Layers’ panel again and create a new ‘Gradient’ layer to further enhance your creation. You now need to select the ‘Gradient Tool’ from the toolbar at the left of the Photoshop workspace. The ‘Gradient Editor’ pops up with the continuously running ‘Gradient Bar’, as soon as you make the selection. Double click on the gradient boxes at both ends to select them, followed by making your color choices. Tap on ‘OK’ when you are satisfied with your work.

Step 14: Filling the Gradients
To proceed with gradient filling, press and hold the mouse button on the image at the bottom left and continue to drag the cursor to its top right corner. Leave the mouse and navigate to the ‘Layers’ panel for dragging and dropping the ‘Gradient’ layer above the ‘White’ layer.

You are now done with the process of creating a caricature edit from a normal still portrait. Your final image output will appear something like the following:

Cartoons, an already catchy entertainment source, can upgrade other media utilities on integration. Look through the easiest ways of creating cartoonize photo Photoshop stills!
In this article
01 [Types of Cartoon Effects in Photoshop](#Part 1)
02 [Easiest Ways to Cartoonize Photo in Photoshop](#Part 2)
03 [How to Use a Variety of Photoshop Special Effects to Create the Final Caricature Look](#Part 3)
Part 1 Types of Cartoon Effects in Photoshop
It is an absolute fun activity to explore your editing creativity in the realm of cartoonizing the otherwise ordinary still captures. Talking of the most convenient cartoon creator and editor applications, you can safely rely on the Photoshop Image Editor application to choose from a pool of cartoon editing effects for adding that spunky and funny element to your image files.
Presented in the following section, is a discussion of some of the most stunning and visibly amazing cartoon effects in the application’s Editor Library to cartoonize Photoshop images:
01Pop Art Photoshop Action
The effect is a predominantly preferred as a cartoon action Photoshop utility to caricaturize a normal image, along with customizing the same to change the colors and background of the original still capture for creating a brand new appearance with utmost ease. Apart from this, the aforesaid effect allows you to exclusively customize the globally acclaimed graphic masterpieces of Roy Lichtenstein. Working with the effect, you can edit a self-portrait or the favorite image of your pet to give the latter, a funny retro feel.
02Vintage Comic Creator
If the idea of sticking to just the creation of cartoon images is not enough to satisfy you, the Vintage Comic Creator effect allows you to expand your creativity level to work on cartoon based shape and text edits. You can use the effect to enhance an image logo or plain text with a comic book oriented text. A download of this cartoon effect template facilitates you with diversities of customizable layer styles, overlays and patterns.
03GTA Photoshop Action
This is a complete pleasure for the creative fan of Grand Theft Auto, the wicked chasing game series. Additional to creating a stark variety of edited cartoon stills, you are free to reinvent the aforesaid game’s most popular caricature edits, while using the GTA Photoshop Action editing filter. Launched by Indworks, the effect package consisting of 15 vibrant themes and 5 collage templates; promises a quick mimicry of your most cherished video and console games.
04Vector Paint Photoshop Action
The one is an amazing Photoshop effect for creating cartoon edits, which works through a merger of two different ingenious art themes or styles for transforming basic images into cartoonized stills.
The effect grants you the liberty to use varieties of art styles, such as, comic, photo retouching and energetic oil to obtain editing results comparable to that of any original photograph. The template is conveniently simple to use and assures you of quick results. All this, just at a nominal price of $6! Interesting, right?
05Ultra Realistic 3D Space Effect
Considering the fact of you being a space admirer, this one is the perfect image editor for you to add the vibrancy of stunning space elements and backgrounds within your cartoonized edits. The effect lets you play with the diverse range of customizable text and exciting caricature backgrounds. When downloading the template, you get a main setup file, a few editing examples and a web link to the free fonts present in the effect.
06Animated Zombie Grime Art Photoshop Action
Are you in love with the latest zombie grimes? If yes, then this action set is exclusive editor package for you. Working with the aforesaid image template, you can effortlessly add the perfect zombie theme to your cartoon edits, along with simultaneously creating a stunning animation, which you can use to enhance your video or GIF uploads on social media. Not forgetting the best part, you get a free access to this amazing utility.
Part 2 Easiest Ways to Cartoonize Photo in Photoshop
Having known about the amazing varieties of cartoonized editor templates in Photoshop, it is a natural instinct to feel motivated to create your own caricature images from normal capture stills. Addressing the concern of image transformation methods to turn a photo into a cartoon Photoshop, let us dive into some of the most affordable methods of creating cartoonized photos in the aforesaid editing application.
Talking of the most basic Photoshop tools for creating caricature images, you can start your editing spree with using the Graphic Tablet, Brush Tool, Layer Masks and a graphic pen to create amateur cartoonized edits from your still photographs, getting a full control on image tracing.
01Brush Tool
A few usage examples include working with a combination of the graphic tablet pen and the editor brushes to trace your image, using the brush in a masked or a fresh layer to avoid altering the actual image, and much more.
02Graphic Tablet
It is best to use the Photoshop Graphic Tablet for adhering to the concern of tracing cartoonized images. You can alternatively cater to the job with a trackpad, mouse, or even your hand. It is however, difficult to assure steady hand postures for image tracing, lest you are using a stylus pen.
03Pen Tool
Using the Pen Tool for cartoonizing your portrait, allows you to draw outlines along the desired figure within the image, along with its important elements, so that you can easily use these outlined paths to introduce different color blocks.
Similar to the Brush Tool, the Photoshop Pen utility grants you the freedom to vary the degree of detailing in your cartoon edit, from being highly expressive to only remaining around the shore. Working with the Pen Tool can, however be a bit tiring and time taking, with respect to the extent of detailing you wish to add to the caricature edits.
Additional to the aforementioned tools, you can also consider using the default image filters of the Photoshop application to get comparable results. This is an exclusively better option to choose, compared to the Pen Tool, when you are working without a Graphic Tablet. To get over the top realistic caricature renderings, you will need to supplement the use of Photoshop filters with the application’s editing channels and other adjustments.
Part 3 How to Use a Variety of Photoshop Special Effects to Create the Final Caricature Look
Considering the extensive discussion on the credibility of the Photoshop Image Editor application in the realm of creating stunning caricature images in high end resolution, let us proceed to learn about using the diversity of Photoshop’s special effects to get the last stage cartoonized appearance of ordinary still images.
User’s Guide to Create High End Cartoonized Look
The following tutorial is a stepwise explanation of the process to convert photo into cartoon Photoshop in the easiest possible way. Stick to the method for getting affordable results in a quick span.
Step 1: Download and Launch the Program
Visit the official website of Photoshop Image Editor for a free download of the software program in your system, followed by installing and launching the same in your device.
Step 2: Upload Your Image
On a successful launch of the editor program, you will be directed to the ‘Photoshop Editor’ window, where you are required to upload any desired still image from your device for creating a cartoonized edit. To do this, either simply add your image to the editor workspace using the ‘Drag and Drop’ method, or navigate to the ‘File’ tab in the top toolbar and click on ‘Open’ in the dropdown menu.
Step 3: Edge Enhancement
Once your image appears in the editor timeline, proceed to sharpen the edges of the face and body of the portrait. Start with navigating to and clicking on the ‘Filter’ option, followed by tapping on ‘Filter Gallery’ and selecting the ‘Artistic’ folder, where you need to choose the ‘Poster Edges’ option. Observe the effect of these setting on the portrait and make necessary changes.
Step 4: Background Setting
Ensure that the background and foreground of your image are set to white and black colors respectively. If not, proceed to adjust the same as required.
Step 5: Distorting the Edges
You now need to introduce some distortion in the edges of your portrait. Navigate to the ‘Filter’ option again, open the ‘Filter Gallery’ and choose ‘Torn Edges’ from the menu that drops down. Select the desired parameter values in accordance with your creative suitability.
Step 6: Using the Channels Panel
The next step is to select and copy your portrait using the ‘Ctrl + A’ and Ctrl + C commands respectively. Navigate to the ‘Channels’ panel at the right of the Photoshop workspace. At the panel’s bottom right, proceed with creating a new channel. It will be assigned the name ‘Alpha 1’ by Photoshop, which you are most welcome to change.
Step 7: Color Inversion
When you finish creating the channel, use the ‘Ctrl + V’ command to paste your portrait in the same. Proceed with inverting the image colors by navigating to the ‘Image’ option, followed by choosing the ‘Adjustment’ and ‘Invert’ options from the consecutive drop downs. Now, make a selection of the ‘White’ regions of your portrait by pressing the ‘Ctrl’ key and clicking on the ‘Alpha 1 Channel thumbnail.
Step 8: Layer Creation
Navigate to the ‘Layers’ panel at the right of the Photoshop workspace, and click on the ‘New Layer’ icon for creating a fresh layer. Fill the just created layer with black color, either by pressing ‘g’ from your system’s keyboard, or using the ‘Paint Bucket’ tool. Don’t forget to assign a suitable name to the layer.
Repeat the above process to create a separate layer and e fill the same with white color. The layer creation process is essential to separate the white and black colors of the actual image.
Step 10: Layer Dragging
In the ‘Layers’ panel, drag the ‘Black’ layer above the ‘White’ one.
Step 11: Creating Additional Layers
You are now required to create three more layers, with the same process as for the above two, for adding effects to the Skin, Clothes and Teeth/Eyes of the portrait. When you finish creation, assign suitable names to the layers, followed by dragging them below the ‘Black’ one within the ‘Layers’ panel.
Step 12: Color Selection and Application
Choose the respective colors for the clothes, skin and teeth/eyes of the cartoonized edit. To proceed with color application, navigate to the toolbar at the left of the Photoshop workspace and choose the ‘Brush Tool’. Finally, choose a particular layer and apply careful brush strokes to add color to the specific area of the portrait that you wish to edit. Follow the same process to add colors to the remaining layers to get the desired result in all areas of your cartoonized edit.
Step 13: Using the Gradient Tool
Navigate to the ‘Layers’ panel again and create a new ‘Gradient’ layer to further enhance your creation. You now need to select the ‘Gradient Tool’ from the toolbar at the left of the Photoshop workspace. The ‘Gradient Editor’ pops up with the continuously running ‘Gradient Bar’, as soon as you make the selection. Double click on the gradient boxes at both ends to select them, followed by making your color choices. Tap on ‘OK’ when you are satisfied with your work.
Step 14: Filling the Gradients
To proceed with gradient filling, press and hold the mouse button on the image at the bottom left and continue to drag the cursor to its top right corner. Leave the mouse and navigate to the ‘Layers’ panel for dragging and dropping the ‘Gradient’ layer above the ‘White’ layer.
You are now done with the process of creating a caricature edit from a normal still portrait. Your final image output will appear something like the following:
Top 8 Anime Name Generators Online-Get Cool Anime Names
Top 8 Anime Name Generators Online-Get Cool Anime Names

Shanoon Cox
Mar 27, 2024• Proven solutions
An anime name generator is a cool and fun tool that is used by anime lovers all over the world. This tool helps to create attractive anime names for you depending on your interests in anime or your character traits.
Anime names are used for a variety of purposes by anime lovers. Most of them want a cool anime-related name for their YouTube channel, game profile, twitch profile, etc. and with a large number of users on these platforms, it is difficult to get a unique name.
Also, a name becomes a symbol that represents quality, appearance, shortcomings, personality, etc.
The anime name generators will generate unique anime-related names for the users to choose from. A cool anime name always will attract more audiences to whatever content they are displaying.
Top 8 Anime Name Generators Online
A cool anime name will always attract the attention of people no matter what platform you are on. But not all people are creative enough to create such a name of their own. That is where an anime name generator comes for help.
Let’s have a look at the top 8 anime name generators available online that can be used to create unique anime names.
1. Fantasy Name Generator
The Fantasy Name Generator is a free application that can provide up to 10 anime and manga character names. The names on this site are divided into 3 categories, namely real names, fake names, and nicknames or unique names. All the names provided are Japanese.
A list of 10 names will be listed on the website when you open it. You can easily choose between male and female character anime names. If you are not satisfied with the displayed list, simply click on the Male names of Females names tab and 10 new random names will be displayed.
2. Cool Generator
The Cool Generator is another simple anime name generator that can be used to create anime names, clan names, team names, etc. All the anime names generated by this tool are unique and represent different characteristics.
A list of 24 anime names will be displayed when you open the cool generator. You can choose any one of the names from it. If you are not satisfied with the names displayed, you can go for another set of 24 names by tapping on the Generate New tab displayed above.
3. Thestoryshack.com
Thestoryshack.com is an awesome anime name generator that can provide you with countless anime names for your story, gaming adventure, or any other project. 6 unique names will be displayed on the page and you can go for more by clicking on the refresh tab.
This anime name-generating tool helps to choose between female and male character names very easily. They have also sorted the names into different categories elf names like elf names, dragon names, demon names, dwarf names, medieval names, Viking names, etc. for the convenience of the users.
4. Masterpiece Generator
Masterpiece Generator is another free online tool that helps you to create epic anime names. This tool allows you to create names with a maximum of 5 components, and hence you can choose between short and sweet or long and swanky names.
This application takes into account a variety of factors like gender, character title, flavor, character type, birth year, nationality, etc. to create a list of names. Once you have givens your suggestion, a list of names will be displayed on the page after clicking on the Write me some character names tab towards the bottom.
5. Reedsy
Reedsy is another tool that can generate cool Japanese anime character names for you. All the names are computer-generated and have something to do with their traditions.
A list of five Japanese names will be displayed once you open the page. The meanings of these names will also be mentioned for those who wish to choose names with specific meanings. You can choose the names between random, male, and female options. Clicking on the Generate names tab will always display a new set of names with the meanings.
6. Rumandmonkey.com
Rumandmonkey.com is a fun anime title generator that you can use to create appealing anime names. A small drawback is the number of ads that keep covering your display when you open the tool.
This anime name generator has classified the character names based on a different generation. You can choose between the greatest generation, baby boomer, generation x, millennials, and generation alpha categories. A variety of other questions will be asked on your likes and dislikes and an anime name will be displayed depending on the answers you have given. This tool only displays 1 name at a time and might require a little patience.
7. Quizony
Quizony is a great anime name generator for anime fans out there. The anime names generated by this tool represent the personality and character of the individual.
A series of questions will be asked by this tool to have an idea of likes and dislikes. A small drawback is that about 29 questions must be answered before they provide you with anime names. Once all the questions are answered the tool will choose a unique name for you. This tool has a brilliant way of choosing names but is not a suitable option if you want more than one anime name.
8. Fun Generator
As the name indicates Fun Generator is a very good application for all the fun-seeking anime lovers out there. This tool allows you to choose between a variety of Japanese anime names for your character.
A list of 5 different anime character names will be displayed when you open the site. You can either choose any one of them or go for another set by clicking on the tabs below. They also have options to choose from random, male or female character names.
Conclusion
Anime names are used by many anime lovers all over the world as their user name, profile name, etc. most people tend to keep this name for a lifetime. But not everyone can create an anime name that defines them and which is already not taken.
This problem is solved by anime name generators that are freely available online nowadays. These anime name generators help to create unique anime names that are appealing and tailored to the character traits of the individual.
We have listed the best online anime title generators available above. Choose an attractive anime name for yourself and have fun.
Shanoon Cox
Shanoon Cox is a writer and a lover of all things video.
Follow @Shanoon Cox
Shanoon Cox
Mar 27, 2024• Proven solutions
An anime name generator is a cool and fun tool that is used by anime lovers all over the world. This tool helps to create attractive anime names for you depending on your interests in anime or your character traits.
Anime names are used for a variety of purposes by anime lovers. Most of them want a cool anime-related name for their YouTube channel, game profile, twitch profile, etc. and with a large number of users on these platforms, it is difficult to get a unique name.
Also, a name becomes a symbol that represents quality, appearance, shortcomings, personality, etc.
The anime name generators will generate unique anime-related names for the users to choose from. A cool anime name always will attract more audiences to whatever content they are displaying.
Top 8 Anime Name Generators Online
A cool anime name will always attract the attention of people no matter what platform you are on. But not all people are creative enough to create such a name of their own. That is where an anime name generator comes for help.
Let’s have a look at the top 8 anime name generators available online that can be used to create unique anime names.
1. Fantasy Name Generator
The Fantasy Name Generator is a free application that can provide up to 10 anime and manga character names. The names on this site are divided into 3 categories, namely real names, fake names, and nicknames or unique names. All the names provided are Japanese.
A list of 10 names will be listed on the website when you open it. You can easily choose between male and female character anime names. If you are not satisfied with the displayed list, simply click on the Male names of Females names tab and 10 new random names will be displayed.
2. Cool Generator
The Cool Generator is another simple anime name generator that can be used to create anime names, clan names, team names, etc. All the anime names generated by this tool are unique and represent different characteristics.
A list of 24 anime names will be displayed when you open the cool generator. You can choose any one of the names from it. If you are not satisfied with the names displayed, you can go for another set of 24 names by tapping on the Generate New tab displayed above.
3. Thestoryshack.com
Thestoryshack.com is an awesome anime name generator that can provide you with countless anime names for your story, gaming adventure, or any other project. 6 unique names will be displayed on the page and you can go for more by clicking on the refresh tab.
This anime name-generating tool helps to choose between female and male character names very easily. They have also sorted the names into different categories elf names like elf names, dragon names, demon names, dwarf names, medieval names, Viking names, etc. for the convenience of the users.
4. Masterpiece Generator
Masterpiece Generator is another free online tool that helps you to create epic anime names. This tool allows you to create names with a maximum of 5 components, and hence you can choose between short and sweet or long and swanky names.
This application takes into account a variety of factors like gender, character title, flavor, character type, birth year, nationality, etc. to create a list of names. Once you have givens your suggestion, a list of names will be displayed on the page after clicking on the Write me some character names tab towards the bottom.
5. Reedsy
Reedsy is another tool that can generate cool Japanese anime character names for you. All the names are computer-generated and have something to do with their traditions.
A list of five Japanese names will be displayed once you open the page. The meanings of these names will also be mentioned for those who wish to choose names with specific meanings. You can choose the names between random, male, and female options. Clicking on the Generate names tab will always display a new set of names with the meanings.
6. Rumandmonkey.com
Rumandmonkey.com is a fun anime title generator that you can use to create appealing anime names. A small drawback is the number of ads that keep covering your display when you open the tool.
This anime name generator has classified the character names based on a different generation. You can choose between the greatest generation, baby boomer, generation x, millennials, and generation alpha categories. A variety of other questions will be asked on your likes and dislikes and an anime name will be displayed depending on the answers you have given. This tool only displays 1 name at a time and might require a little patience.
7. Quizony
Quizony is a great anime name generator for anime fans out there. The anime names generated by this tool represent the personality and character of the individual.
A series of questions will be asked by this tool to have an idea of likes and dislikes. A small drawback is that about 29 questions must be answered before they provide you with anime names. Once all the questions are answered the tool will choose a unique name for you. This tool has a brilliant way of choosing names but is not a suitable option if you want more than one anime name.
8. Fun Generator
As the name indicates Fun Generator is a very good application for all the fun-seeking anime lovers out there. This tool allows you to choose between a variety of Japanese anime names for your character.
A list of 5 different anime character names will be displayed when you open the site. You can either choose any one of them or go for another set by clicking on the tabs below. They also have options to choose from random, male or female character names.
Conclusion
Anime names are used by many anime lovers all over the world as their user name, profile name, etc. most people tend to keep this name for a lifetime. But not everyone can create an anime name that defines them and which is already not taken.
This problem is solved by anime name generators that are freely available online nowadays. These anime name generators help to create unique anime names that are appealing and tailored to the character traits of the individual.
We have listed the best online anime title generators available above. Choose an attractive anime name for yourself and have fun.
Shanoon Cox
Shanoon Cox is a writer and a lover of all things video.
Follow @Shanoon Cox
Top 3 Ways to Create Gif with Great 3D Gif Maker
Top 3 Ways to Create Gif Images with Great 3D Gif Maker
An easy yet powerful editor
Numerous effects to choose from
Detailed tutorials provided by the official channel
If what you’re searching for is a 3D GIF Maker, then we’ve got your back. Below, we’ve not only listed the three best ways to create 3D animated GIFs, but we’ve also included a brief tutorial that you can reference when creating your very own GIF images.
In this article
01 [Best 3 Ways to Create 3D Animated GIFs](#Part 1)
02 [Create 3D animated GIFs online with Filmora](#Part 2)
Part 1 Best 3 Ways to Create 3D Animated GIFs
First off, as promised, we have a brief list of some 3D GIF Maker tools that you can try. We’ve made sure to pick a unique set of 3D GIF Maker tools and 3D GIF Generator tools in order to give you a variety to choose from. It won’t be the most comprehensive list, but it should help you on your way to understanding how these 3D GIF makers usually work and how you can use them in order to create GIF images that you can share with your friends, family, and colleagues.
01 Wondershare Filmora Video Editor
The first 3D GIF Maker on our list is Filmora. It’s probably not the first one that you’d naturally think of as a 3D GIF Maker, seeing as it was developed to be more than that. But, it doesn’t discount the fact that it can be used in order to create and edit your own GIFs.
Wondershare Filmora is available for both Windows and Mac users. It allows you to create a GIF with images or video easily and even gives you the tools needed to edit and perfect it before you export it for use (a process that we’ll be showing off in more detail in the tutorial section below if you’re interested in learning more.)
For Win 7 or later (64-bit)
For macOS 10.12 or later
022. Adobe Photoshop
Adobe Photoshop, much like Filmora, is probably not, first and foremost, considered a mere 3D GIF Maker. However, it doesn’t erase its 3D GIF Creator functions. This tool, if used correctly, can make just about anything you want.
The process of using it, of course, is a little fussier than other alternatives (you’ll probably want to look up a more detailed explanation on the subject), but the fussiness does also mean that you can control every detail of your project and get it to look exactly how you want it to look.
03EaseUS Video Editor
Similar to Filmora, EaseUS Video Editor is an advanced video editing tool that you can use as a 3D GIF Creator quite easily. It comes built-in with templates, filters, design elements, transition effects, music, and so much more — allowing you to freely design your GIF images so that they can be ready for publishing right off the bat.
The beauty of it, of course, is that, much like with all the other options that we introduced today, you can use the program for more than just 3D GIF creation after the fact — opening yourself up for different and more complex projects in the future (be they image, audio, or video-related.)
Part 2 Create 3D Animated Gifs Online With Wondershare Filmora Video Editor
Now, as promised, we’ve also included a tutorial that you can follow along with to create your own 3D Animated GIFs with the tool, Wondershare Filmora Video Editor . With this tool, we’ll be showing you the basic way to do it (by using a premade video that you can edit and then convert into GIF format). But, feel free to explore the tool and use it as you wish (i.e., as a 3D spinning GIF creator, 3D rotating text GIF maker, 3D cube GIF maker, and so on.)
01Step 1: Launch Filmora Video Editor
First things first, launch the 3D GIF maker that you intend to use. In our case, that is Filmora (a screenshot has been provided below for your edification and reference. We’ll be using Filmora as our example.)
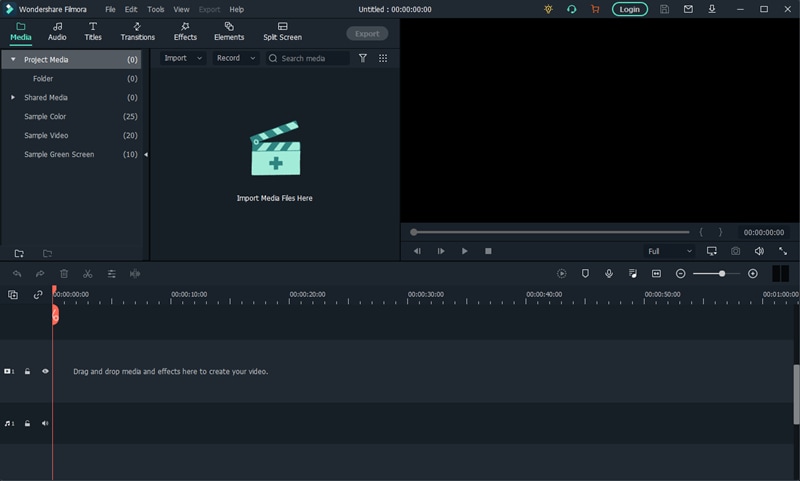
02Step 2: Upload File(s)
Next, upload the file or files that you want to turn into a GIF.
As mentioned in the introduction, we’ll be using a pre-made video, but you can use whatever you wish (i.e., images). In order to upload, we clicked the File tab (pointed out in the image below) and selected Import Media > Import Media File. However, you can also drag and drop your file(s) on the designated area of the UI..
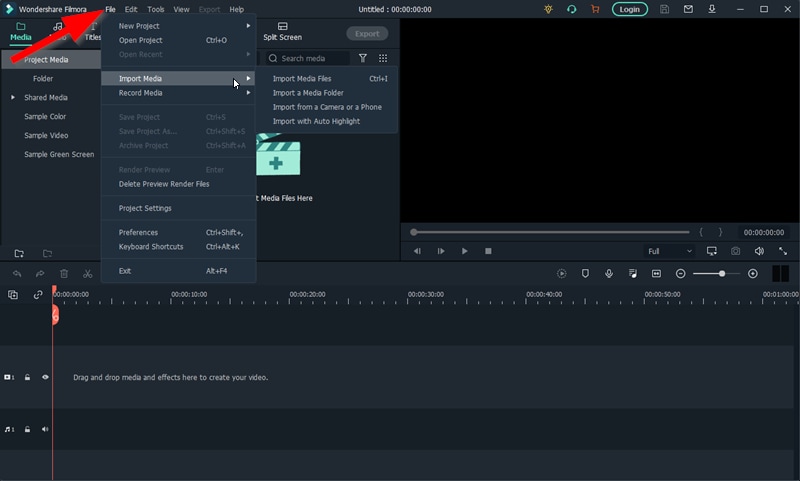
03Step 3: Drag Uploaded Media to Timeline
To create a GIF withFilmora , you’ll need to first create a video. Don’t worry, this is simple. Just drag and drop the media that you want to use onto the timeline.
Note: Any uploaded media will be in the media folder (marked [1] in the image below). Drag media from there onto the timeline (marked [2] in the image below) in order to create a video.
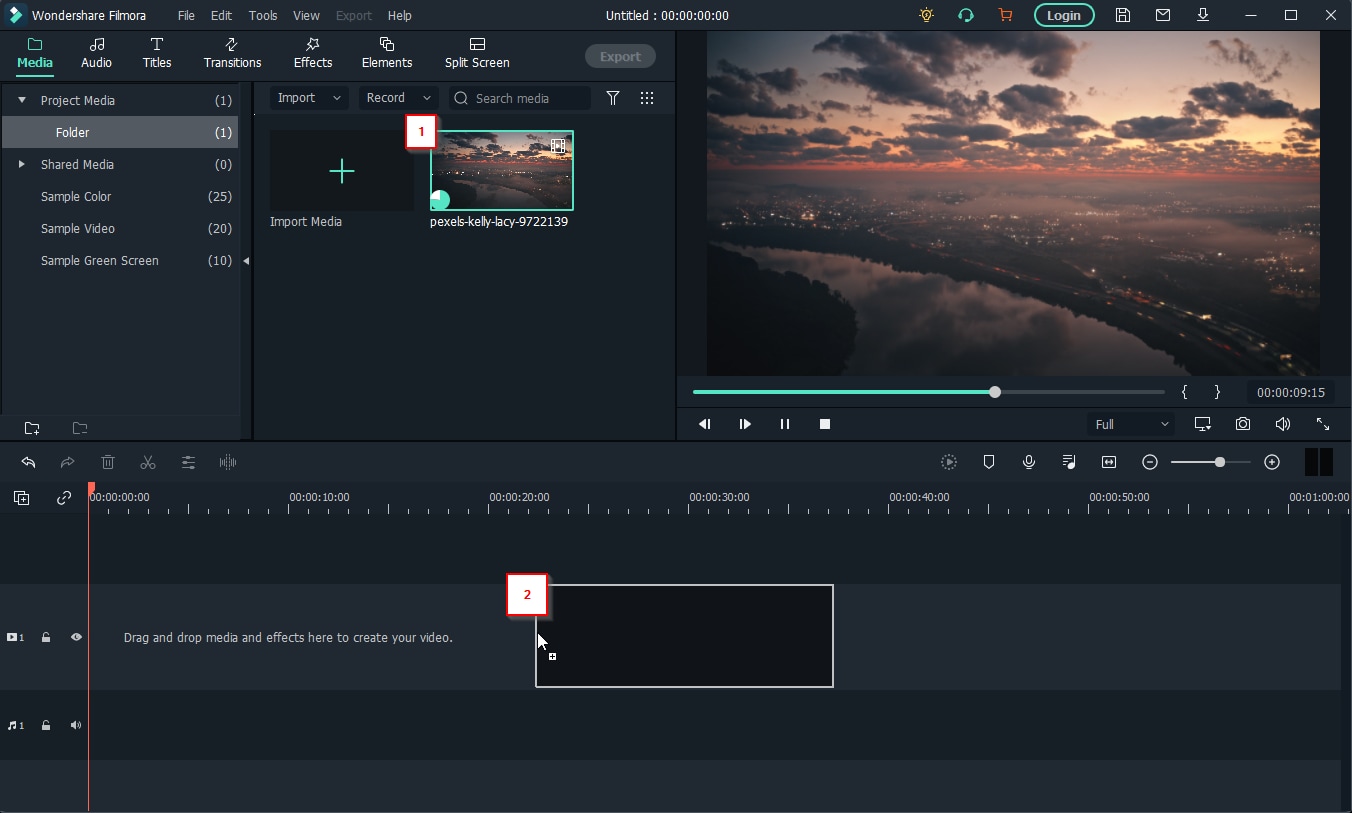
04Step 4: (Optional) Edit Video
If you want, take this opportunity to work on your video some more before converting it into a GIF. Filmora is set up to help you with this. Providing all the following features:
●Trim or Cut features to trim down the video.
●Add Text or audio to video.
●Use templates, filters, or other elements to design videos.
●Add transitions for better video flow.
And then some. In our case, we used the ‘Trim’ feature to cut down our video for a cleaner look.
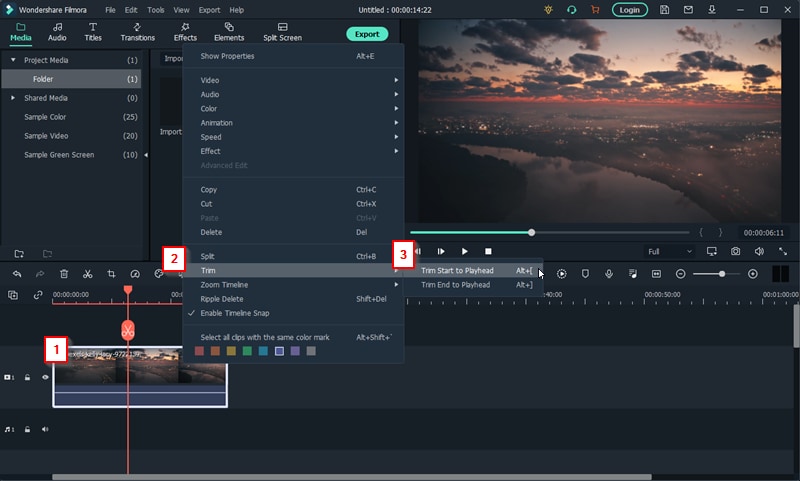
05Step 5: Create Video > GIF
Once you’re done editing your video, you can now convert it to a GIF.
This is easy enough to do. Just click the ‘Export’ tab and select the ‘Create Video’ option. That will allow you to choose to convert your finished video into a GIF file that you can share with your friends.
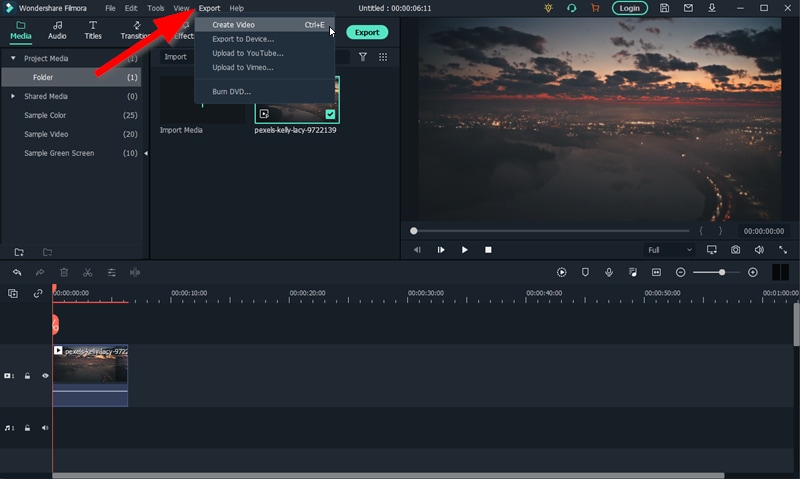
● Key Takeaways from This Episode →
● GIFs are a great way of sharing fun moments with friends and family. And, these days, it’s easier than ever to create them.
● There are 3D GIF Makers available everywhere online. Each one is a little different, of course. But capable of allowing you to create GIFs with images and videos that you can eventually share.
● One such example is the 3D GIF Maker, Filmora. It was the first one that we introduced on our list of the best 3D GIf Makers.
● We also included a tutorial on how you can use Filmora as a 3D GIF Generator for your reference. You can try out the program today if you like. Wondershare offers a FREE trial that you can use in order to explore the many functions of the software before you commit to buying out the perpetual license or signing up for one of their subscription packages.
If what you’re searching for is a 3D GIF Maker, then we’ve got your back. Below, we’ve not only listed the three best ways to create 3D animated GIFs, but we’ve also included a brief tutorial that you can reference when creating your very own GIF images.
In this article
01 [Best 3 Ways to Create 3D Animated GIFs](#Part 1)
02 [Create 3D animated GIFs online with Filmora](#Part 2)
Part 1 Best 3 Ways to Create 3D Animated GIFs
First off, as promised, we have a brief list of some 3D GIF Maker tools that you can try. We’ve made sure to pick a unique set of 3D GIF Maker tools and 3D GIF Generator tools in order to give you a variety to choose from. It won’t be the most comprehensive list, but it should help you on your way to understanding how these 3D GIF makers usually work and how you can use them in order to create GIF images that you can share with your friends, family, and colleagues.
01 Wondershare Filmora Video Editor
The first 3D GIF Maker on our list is Filmora. It’s probably not the first one that you’d naturally think of as a 3D GIF Maker, seeing as it was developed to be more than that. But, it doesn’t discount the fact that it can be used in order to create and edit your own GIFs.
Wondershare Filmora is available for both Windows and Mac users. It allows you to create a GIF with images or video easily and even gives you the tools needed to edit and perfect it before you export it for use (a process that we’ll be showing off in more detail in the tutorial section below if you’re interested in learning more.)
For Win 7 or later (64-bit)
For macOS 10.12 or later
022. Adobe Photoshop
Adobe Photoshop, much like Filmora, is probably not, first and foremost, considered a mere 3D GIF Maker. However, it doesn’t erase its 3D GIF Creator functions. This tool, if used correctly, can make just about anything you want.
The process of using it, of course, is a little fussier than other alternatives (you’ll probably want to look up a more detailed explanation on the subject), but the fussiness does also mean that you can control every detail of your project and get it to look exactly how you want it to look.
03EaseUS Video Editor
Similar to Filmora, EaseUS Video Editor is an advanced video editing tool that you can use as a 3D GIF Creator quite easily. It comes built-in with templates, filters, design elements, transition effects, music, and so much more — allowing you to freely design your GIF images so that they can be ready for publishing right off the bat.
The beauty of it, of course, is that, much like with all the other options that we introduced today, you can use the program for more than just 3D GIF creation after the fact — opening yourself up for different and more complex projects in the future (be they image, audio, or video-related.)
Part 2 Create 3D Animated Gifs Online With Wondershare Filmora Video Editor
Now, as promised, we’ve also included a tutorial that you can follow along with to create your own 3D Animated GIFs with the tool, Wondershare Filmora Video Editor . With this tool, we’ll be showing you the basic way to do it (by using a premade video that you can edit and then convert into GIF format). But, feel free to explore the tool and use it as you wish (i.e., as a 3D spinning GIF creator, 3D rotating text GIF maker, 3D cube GIF maker, and so on.)
01Step 1: Launch Filmora Video Editor
First things first, launch the 3D GIF maker that you intend to use. In our case, that is Filmora (a screenshot has been provided below for your edification and reference. We’ll be using Filmora as our example.)
02Step 2: Upload File(s)
Next, upload the file or files that you want to turn into a GIF.
As mentioned in the introduction, we’ll be using a pre-made video, but you can use whatever you wish (i.e., images). In order to upload, we clicked the File tab (pointed out in the image below) and selected Import Media > Import Media File. However, you can also drag and drop your file(s) on the designated area of the UI..
03Step 3: Drag Uploaded Media to Timeline
To create a GIF withFilmora , you’ll need to first create a video. Don’t worry, this is simple. Just drag and drop the media that you want to use onto the timeline.
Note: Any uploaded media will be in the media folder (marked [1] in the image below). Drag media from there onto the timeline (marked [2] in the image below) in order to create a video.
04Step 4: (Optional) Edit Video
If you want, take this opportunity to work on your video some more before converting it into a GIF. Filmora is set up to help you with this. Providing all the following features:
●Trim or Cut features to trim down the video.
●Add Text or audio to video.
●Use templates, filters, or other elements to design videos.
●Add transitions for better video flow.
And then some. In our case, we used the ‘Trim’ feature to cut down our video for a cleaner look.
05Step 5: Create Video > GIF
Once you’re done editing your video, you can now convert it to a GIF.
This is easy enough to do. Just click the ‘Export’ tab and select the ‘Create Video’ option. That will allow you to choose to convert your finished video into a GIF file that you can share with your friends.
● Key Takeaways from This Episode →
● GIFs are a great way of sharing fun moments with friends and family. And, these days, it’s easier than ever to create them.
● There are 3D GIF Makers available everywhere online. Each one is a little different, of course. But capable of allowing you to create GIFs with images and videos that you can eventually share.
● One such example is the 3D GIF Maker, Filmora. It was the first one that we introduced on our list of the best 3D GIf Makers.
● We also included a tutorial on how you can use Filmora as a 3D GIF Generator for your reference. You can try out the program today if you like. Wondershare offers a FREE trial that you can use in order to explore the many functions of the software before you commit to buying out the perpetual license or signing up for one of their subscription packages.
Also read:
- 2024 Approved Top 8 Anime Name & Title Generators Online-Get Cool Anime Names
- Updated How to Make an Animation With 7 Steps for 2024
- Learn What Are Differences Between 2D And 3D Animation
- Updated 10 Great Moving Animation PowerPoint Techniques for 2024
- How To Turn Yourself Into Anime Character for 2024
- New 2024 Approved Best 10 Apps to Enhance Your Instagram Story Slideshow
- 12 Best Stop Motion Studios Worth Recommending for 2024
- New In 2024, How to Make Your Characters Interactive in Unity Animation Rigging
- Updated Ways on How to Liven Up Your Animate Website on Scroll
- Updated 2024 Approved 10 Must Watch Netflix Cartoon Series For You
- 2024 Approved Handy Tip From Adobe Animate Rigging Tutorial for All Learners
- New 12 Captivating Websites with Triggered Animate on Scroll Examples
- New In 2024, 10 Awesome Moving Animation PowerPoint Techniques
- Updated Is It That Easy to Make My Own Animated Character, In 2024
- Updated In 2024, How to Make GIF Stickers for WhatsApp 100 The Simple Way
- Updated 12 Websites with Triggered Animate on Scroll Examples
- Updated Beginners Guide for Learning 3D Animation for 2024
- 2024 Approved 5 Photoshop Alternatives to Animate Your Logo
- 2024 Approved Epic Formula to Animate Photos From These 10 Animate Pictures App
- Updated 5 Websites with Animated Logos That Catch Your Eyes for 2024
- Updated In 2024, 10 Best Convert Video Between GIF Software High Quality
- 2024 Approved The Secret Sauce for Making GIF Instagram Story More Aesthetic
- New Types of Cartoon Styles You May Use for The Next Marketing Project for 2024
- 10 Trendy Free Logo Animation Templates for 2024
- New Tutorials to Make Animated Images – Even if Youre Just Starting Out
- Updated In 2024, 10 Great Apps to Turn Funny Animated Images Into Comics
- New In 2024, How to Animate Image on Scroll and Text on Scroll?
- Updated 15 Best Video to GIF App on iPhone and Android for 2024
- New In 2024, Why These 10 Top Text Motion Templates Are Worth Your Attention
- In 2024, Rootjunky APK To Bypass Google FRP Lock For Xiaomi Redmi A2
- How to Resolve Nokia XR21 Screen Not Working | Dr.fone
- In 2024, Why Apple Account Disabled On your iPhone 11 Pro Max? How to Fix
- What You Need To Know To Improve Your Samsung Galaxy A24 Hard Reset | Dr.fone
- Different Methods for Resetting Infinix Zero 5G 2023 Turbo Phones with Screen Locked and Not | Dr.fone
- Updated What Is AI Background Generator, In 2024
- In 2024, How To Remove Passcode From iPhone 12 Pro? Complete Guide
- In 2024, A Step-by-Step Guide on Using ADB and Fastboot to Remove FRP Lock on your Samsung Galaxy M54 5G
- updated In 2024, A Comprehensive Guide to Video and Subtitle Translation with Veed.io
- In 2024, A Guide ZTE Nubia Flip 5G Wireless and Wired Screen Mirroring | Dr.fone
- In 2024, How Can We Bypass Vivo X Flip FRP?
- In 2024, How to Get and Use Pokemon Go Promo Codes On Honor X7b | Dr.fone
- All Things You Need to Know about Wipe Data/Factory Reset For Honor X8b | Dr.fone
- In 2024, How To Change Country on App Store for Apple iPhone 6 Plus With 7 Methods | Dr.fone
- Failed to play MKV movies on Samsung Galaxy A05
- Title: New Animated Collage Maker Tips for 2024
- Author: Elon
- Created at : 2024-05-19 03:05:21
- Updated at : 2024-05-20 03:05:21
- Link: https://animation-videos.techidaily.com/new-animated-collage-maker-tips-for-2024/
- License: This work is licensed under CC BY-NC-SA 4.0.
