
:max_bytes(150000):strip_icc():format(webp)/5-things-to-consider-before-buying-a-gaming-laptop-5235493-145a8c941b9f46e99d9a90bdee387893.jpg)
New Before You Learn 3D Animation Some Things You Should Know
Before You Learn 3D Animation: Some Things You Should Know
Before You Learn 3D Animation: Some Things You Should Know
An easy yet powerful editor
Numerous effects to choose from
Detailed tutorials provided by the official channel
Before you delve into the profession of creating 3d cartoon filters, you need to understand or decide if creating animated characters is something you would like to do. It’s not going to be smooth as you will get frustrated at some point, you will get confused, and it will be challenging, but in the end, it is rewarding because it is an expression of your mind coming to life. You are the one to breathe life into your characters who represent your imaginations. You will also have to infuse a great deal of your creativity to create beautiful and exciting characters for others to enjoy. Meanwhile, let’s first understand what 3d animations mean.
Becoming a 3d animator is not a feat you can achieve in a short time. It is not days, weeks, months, or even years. Like any other profession, a professional 3d animator must have put in a great deal of work, mixed with a lot of passion and love for what he is doing. To become successful as a 3d animator, you must love what you are doing or be ready to put in the work.
This article will expose what you should learn to create beautiful 3d animation cartoons, including what to expect as a 3d animator.
In this article
01 [What are 3d animation and the process of 3d animation?](#Part 1)
02 [Differences between 2d animation and 3d animation](#Part 2)
03 [A roaster of 8 best 3d animation software.](#Part 3)
04 [Top 3 3d animation making mistakes to avoid](#Part 4)
Part 1 What Is 3D Animation And The Process of 3D Animation?
animation is a term that describes the art of creating 3-dimensional images and placing them in a digital environment. It is a process that uses motion to bring objects, characters, etc., to life.
It is also known as computer-generated imagery, and it is currently the most common animation type for feature films.
Various software and programs are designed specifically for 3d animations and allow the animators to bring the objects to life.
The process of 3d animation happens in three(3) stages;
● Modeling
● Layout and animation
● Rendering
Modeling in 3d animation involves generating the objects or characters either by using a modeling tool or using a real thing. The real object is scanned directly into the computer, where other processes follow. You have total control over your character and how you want them to appear by modeling. You decide the weight, specifications, feel, etc. However, scanning objects save a lot of time. You must add texture before modeling your character or reviewing it before moving to the following layout and animation.
Layout and animation stage: A layout is determined when the generated objects move to this stage. It involves creating a set/scene where the objects can position. Layout first happens before animation does. After adding the objects and characters, they get animated using animation variables. After this, you use motion capture or keyframing to give life to the models in the scenes.
Rendering: Rendering is using software or programs. It is not something to do using just your computer. These tools can generate the scenes into the finished image according to the client’s requirements or set goals.
Creating cartoon background images or any other form of animations is a process that requires a lot of planning and work, which sums up a lot of time. To learn 3d animation, you must be ready to give in ample time as it is a profession that requires some time to handle.
The process listed above also shows the creativity requirement required to succeed in the 3d animation industry. To think that you must create the scenes, which is the layout stage, means you have to be creative in your imagination. If you then decide to model your character from scratch using modeling tools. That also requires another job of thinking and extracting a lot of your creative juices.
Part 2 What is the difference between 2d animation and 3d animation?
Anyone can decide to learn animation with no plan in mind or understanding of what the profession involves. animation is different from 2d animation, and if you want to learn animation, you need to understand the distinction between these two.
animation can have a lot of creative possibilities, whereas 3d animation has a lot of natural abilities. The visual style of both types of animation is explicitly different.
3d animation is a more intensive technical process than the various stages mentioned earlier. It would most likely involve different specialists to handle them to get a more professional output. However, 2d animation consists of drawing the characters frame by frame.
animated cartoons are in The Simpsons, Pinocchio, the Lion king, etc.

animations are like the ones Dreamworks, Pixar, produce. They include the avengers, the bad guys, etc.


Part 3 A Roaster Of 8 Best 3D Animation Software

Several 3D animation software exists in the market, both free and paid. If you are a animation creator or love animation for fun, you can use the free software to make your videos, cartoon photos, 3d cartoon faces, etc.
With many animation software available in the market, you can only fully trust a few.
Here’s a roaster of 8 best 3D animation software you could use to create the cartoon monsters you’ve always been curious about;
● Filmora
● Blender
● Maya
● Wings 3d
● Adobe Animate
● Cinema 4d
● K-3D
● Milcamo
Filmora Video animation tool: This is a highly recommended 3D animation tool with many features and pros. It has a wide range of keyframes, about six of which make your cartoon background images smooth and natural.
| Software | Features | OS | Pro |
|---|---|---|---|
| Wondershare Filmora Video Editor | It has an auto-color correction It has smooth keyframes | Windows, Mac | You can apply light flare effects You can apply an audio mixer |
| Blender | It has textured brushes and masking for 3d painting. It has add-ons and customised tools with high python scripting. | Windows, Linux, Mac computers | It has Virtual reality rendering, Strong camera restoration. It had both manual and automatic tracking. |
| Maya | Free trial of 30 days. Can create complex technical effects | Windows, Max | Good Control and perfect accuracy. Can collect motion capture data. |
| Wings 3d | Auto UV mapping system It has support for light and material effects. | Windows, Linux, and Mac OS | Advanced 3d and 2d modeling tools. It is free to use |
| Adobe animate | Virtual camera functionality gives a realistic view. Adoptive animation effects, zooming, panning etc. | Windows, Mac | Effective audio syncing technology. Customizable font, styling etc. |
| Cinema 4d | Concepts develop without time modeling Large library of preset scenes. | Windows, Mac | Customised with a huge asset range It is a faster tool than Maya Dissect complete scene and is faster than Maya. |
| K-3D | It has property adjustment capabilities with handy strong features. I5 is made up of basic tools for animation, curves, patches. | Mac OS X, Linux, FreeBSD, windows platforms | It is very flexible for either complex or basic workflows. It has a wide selection of plugins. |
| Mixamo | Streamlined user experience It has a faster search function that is accurate | Windows, Mac | It has fast character and animation browsing. Download multiple animations at a go |
For Win 7 or later (64-bit)
For macOS 10.12 or later
Part 4 Top Three (3) 3d Animation Making Mistakes To Avoid

As we initially mentioned, 3d animation requires an intensive technical process. It is a skill that you need to hone over the years by paying attention to detail, being highly creative, and daring to succeed.
Here are 3 mistakes you must avoid during the animation process;
● Forgetting the ‘why’ factor
● Over-animating a scene
● Not giving your viewers time to take it in
Forgetting the why: In a animation cartoon, every move, walking step, and smile is essential. Every character represented in your cartoon background is there for a specific reason.
You would be making a mistake that will affect the result if you lose focus on this reason. Your viewers won’t find your cartoon believable if the moves and acting don’t add up.
Your characters don’t just move because they want to move. Something must have spurred the motion or reaction. It could be for what happened to them, what they heard, or saw another character did in the scene. Do not neglect the why of the act.
While animating, focus on why and keep revisiting until all your characters and objects are knitted closely together.
Over-animating a scene: This is another mistake animators should avoid. If you animate your characters, everything may be a mess if you animate the background and foreground. Simplicity is how to get this thing, keep it simple and focused.
Do not have much going on in each scene but only where you need the attention of your viewers. Animators that do this end up confusing their viewers with no direction.
You can use camera effects such as depth of field to make your audience focus on the point you are trying to make in the particular scene.
Not giving your viewers time to take it in: This is another 3d animation making a mistake you should be careful of. Not giving your viewers time to process the happenings on the scene before the next.
This can be avoided by timing and measuring cuts such that any animation at the start of a new scene is timed to enable the viewers to take it in. You can ask for third-party criticism on your work to find out how your animation is received and see pointers to mistakes such as this. The third party could be your colleague or friend.
Note: You can easily avoid any error or mistake or modify your 3D animation with the help of the Wondershare Filmora video editor. That will provide a solid base for featuring 3D animation.
● Ending Thoughts →
● 3D animation refers to using motion to breathe life into inanimate objects, and they can create animated videos and animation cartoons.
● 3D animation is highly technical, unlike 2d animation
● You can avoid the above 3d mistakes if you remain objective and open, and ready to accept constructive criticism.
● Becoming an animator is a fun thing to do, and it allows you to be free to express your creativity while entertaining other people entirely.
● Before you start learning 3d animation and create cartoon photos, ensure that you have read through all that we have explained here to have good information about what you are going into.
Before you delve into the profession of creating 3d cartoon filters, you need to understand or decide if creating animated characters is something you would like to do. It’s not going to be smooth as you will get frustrated at some point, you will get confused, and it will be challenging, but in the end, it is rewarding because it is an expression of your mind coming to life. You are the one to breathe life into your characters who represent your imaginations. You will also have to infuse a great deal of your creativity to create beautiful and exciting characters for others to enjoy. Meanwhile, let’s first understand what 3d animations mean.
Becoming a 3d animator is not a feat you can achieve in a short time. It is not days, weeks, months, or even years. Like any other profession, a professional 3d animator must have put in a great deal of work, mixed with a lot of passion and love for what he is doing. To become successful as a 3d animator, you must love what you are doing or be ready to put in the work.
This article will expose what you should learn to create beautiful 3d animation cartoons, including what to expect as a 3d animator.
In this article
01 [What are 3d animation and the process of 3d animation?](#Part 1)
02 [Differences between 2d animation and 3d animation](#Part 2)
03 [A roaster of 8 best 3d animation software.](#Part 3)
04 [Top 3 3d animation making mistakes to avoid](#Part 4)
Part 1 What Is 3D Animation And The Process of 3D Animation?
animation is a term that describes the art of creating 3-dimensional images and placing them in a digital environment. It is a process that uses motion to bring objects, characters, etc., to life.
It is also known as computer-generated imagery, and it is currently the most common animation type for feature films.
Various software and programs are designed specifically for 3d animations and allow the animators to bring the objects to life.
The process of 3d animation happens in three(3) stages;
● Modeling
● Layout and animation
● Rendering
Modeling in 3d animation involves generating the objects or characters either by using a modeling tool or using a real thing. The real object is scanned directly into the computer, where other processes follow. You have total control over your character and how you want them to appear by modeling. You decide the weight, specifications, feel, etc. However, scanning objects save a lot of time. You must add texture before modeling your character or reviewing it before moving to the following layout and animation.
Layout and animation stage: A layout is determined when the generated objects move to this stage. It involves creating a set/scene where the objects can position. Layout first happens before animation does. After adding the objects and characters, they get animated using animation variables. After this, you use motion capture or keyframing to give life to the models in the scenes.
Rendering: Rendering is using software or programs. It is not something to do using just your computer. These tools can generate the scenes into the finished image according to the client’s requirements or set goals.
Creating cartoon background images or any other form of animations is a process that requires a lot of planning and work, which sums up a lot of time. To learn 3d animation, you must be ready to give in ample time as it is a profession that requires some time to handle.
The process listed above also shows the creativity requirement required to succeed in the 3d animation industry. To think that you must create the scenes, which is the layout stage, means you have to be creative in your imagination. If you then decide to model your character from scratch using modeling tools. That also requires another job of thinking and extracting a lot of your creative juices.
Part 2 What is the difference between 2d animation and 3d animation?
Anyone can decide to learn animation with no plan in mind or understanding of what the profession involves. animation is different from 2d animation, and if you want to learn animation, you need to understand the distinction between these two.
animation can have a lot of creative possibilities, whereas 3d animation has a lot of natural abilities. The visual style of both types of animation is explicitly different.
3d animation is a more intensive technical process than the various stages mentioned earlier. It would most likely involve different specialists to handle them to get a more professional output. However, 2d animation consists of drawing the characters frame by frame.
animated cartoons are in The Simpsons, Pinocchio, the Lion king, etc.
animations are like the ones Dreamworks, Pixar, produce. They include the avengers, the bad guys, etc.
Part 3 A Roaster Of 8 Best 3D Animation Software
Several 3D animation software exists in the market, both free and paid. If you are a animation creator or love animation for fun, you can use the free software to make your videos, cartoon photos, 3d cartoon faces, etc.
With many animation software available in the market, you can only fully trust a few.
Here’s a roaster of 8 best 3D animation software you could use to create the cartoon monsters you’ve always been curious about;
● Filmora
● Blender
● Maya
● Wings 3d
● Adobe Animate
● Cinema 4d
● K-3D
● Milcamo
Filmora Video animation tool: This is a highly recommended 3D animation tool with many features and pros. It has a wide range of keyframes, about six of which make your cartoon background images smooth and natural.
| Software | Features | OS | Pro |
|---|---|---|---|
| Wondershare Filmora Video Editor | It has an auto-color correction It has smooth keyframes | Windows, Mac | You can apply light flare effects You can apply an audio mixer |
| Blender | It has textured brushes and masking for 3d painting. It has add-ons and customised tools with high python scripting. | Windows, Linux, Mac computers | It has Virtual reality rendering, Strong camera restoration. It had both manual and automatic tracking. |
| Maya | Free trial of 30 days. Can create complex technical effects | Windows, Max | Good Control and perfect accuracy. Can collect motion capture data. |
| Wings 3d | Auto UV mapping system It has support for light and material effects. | Windows, Linux, and Mac OS | Advanced 3d and 2d modeling tools. It is free to use |
| Adobe animate | Virtual camera functionality gives a realistic view. Adoptive animation effects, zooming, panning etc. | Windows, Mac | Effective audio syncing technology. Customizable font, styling etc. |
| Cinema 4d | Concepts develop without time modeling Large library of preset scenes. | Windows, Mac | Customised with a huge asset range It is a faster tool than Maya Dissect complete scene and is faster than Maya. |
| K-3D | It has property adjustment capabilities with handy strong features. I5 is made up of basic tools for animation, curves, patches. | Mac OS X, Linux, FreeBSD, windows platforms | It is very flexible for either complex or basic workflows. It has a wide selection of plugins. |
| Mixamo | Streamlined user experience It has a faster search function that is accurate | Windows, Mac | It has fast character and animation browsing. Download multiple animations at a go |
For Win 7 or later (64-bit)
For macOS 10.12 or later
Part 4 Top Three (3) 3d Animation Making Mistakes To Avoid
As we initially mentioned, 3d animation requires an intensive technical process. It is a skill that you need to hone over the years by paying attention to detail, being highly creative, and daring to succeed.
Here are 3 mistakes you must avoid during the animation process;
● Forgetting the ‘why’ factor
● Over-animating a scene
● Not giving your viewers time to take it in
Forgetting the why: In a animation cartoon, every move, walking step, and smile is essential. Every character represented in your cartoon background is there for a specific reason.
You would be making a mistake that will affect the result if you lose focus on this reason. Your viewers won’t find your cartoon believable if the moves and acting don’t add up.
Your characters don’t just move because they want to move. Something must have spurred the motion or reaction. It could be for what happened to them, what they heard, or saw another character did in the scene. Do not neglect the why of the act.
While animating, focus on why and keep revisiting until all your characters and objects are knitted closely together.
Over-animating a scene: This is another mistake animators should avoid. If you animate your characters, everything may be a mess if you animate the background and foreground. Simplicity is how to get this thing, keep it simple and focused.
Do not have much going on in each scene but only where you need the attention of your viewers. Animators that do this end up confusing their viewers with no direction.
You can use camera effects such as depth of field to make your audience focus on the point you are trying to make in the particular scene.
Not giving your viewers time to take it in: This is another 3d animation making a mistake you should be careful of. Not giving your viewers time to process the happenings on the scene before the next.
This can be avoided by timing and measuring cuts such that any animation at the start of a new scene is timed to enable the viewers to take it in. You can ask for third-party criticism on your work to find out how your animation is received and see pointers to mistakes such as this. The third party could be your colleague or friend.
Note: You can easily avoid any error or mistake or modify your 3D animation with the help of the Wondershare Filmora video editor. That will provide a solid base for featuring 3D animation.
● Ending Thoughts →
● 3D animation refers to using motion to breathe life into inanimate objects, and they can create animated videos and animation cartoons.
● 3D animation is highly technical, unlike 2d animation
● You can avoid the above 3d mistakes if you remain objective and open, and ready to accept constructive criticism.
● Becoming an animator is a fun thing to do, and it allows you to be free to express your creativity while entertaining other people entirely.
● Before you start learning 3d animation and create cartoon photos, ensure that you have read through all that we have explained here to have good information about what you are going into.
How to Make an Animated Travel Map Video?
How to Make an Animated Travel Map Video?

Benjamin Arango
Mar 27, 2024• Proven solutions
Animated travel map videos make it easy for the viewers to follow the routes from the source to destination locations right on the single screen. While the static maps would only allow the audience to see the markers from where the journey would start and is expected to end, the animated ones show the real-time movements and therefore look more interactive when viewed.
That said, here you will learn how to create an attractive and engaging animated travel map video using one of the easiest post-production applications, Wondershare Filmora, which is widely appreciated by amateurs and professionals throughout the globe. In another section, you will also learn about an alternative program that might be of some help in case you are more into online designing.
- Method 1: Make Animated Travel Map Videos with Location Video Maker - [Video Tutorial]
- Method 2: Make Interactive Animated Travel Map with Pictramap
- Method 3: Create Animated Travel Map Using Multidev
Method 1 Make Animated Travel Map Videos with Location Video Maker
The entire process of creating an animated travel map video in Wondershare’s Filmora is categorized into two parts, wherein the first part you will collect all the ingredients that are needed to get started, and in the second part you will actually make an animated map using the tools and features present in Filmora.
Watch a video tutorial to see how to make an animated map for a video:
For Win 7 or later (64-bit)
 Secure Download
For macOS 10.14 or later
Secure Download


Part 1: Prepare the Travel Map Materials
Following are the ingredients and the methods to collect them for animated travel map preparation:
Step 1: Get the Map
The first thing that you would need to prepare an animated map is an image of a realistic map. Thanks to Google and Microsoft, these things are now pretty easy to arrange. The process is given below:
- Launch your preferred web browser
- Type google.com in the address bar or the search box and hit Enter
- Scroll to zoom out so you can see the entire world map on one screen

- Type Snipping Tool in the Cortana search box present on the left side of the Taskbar
- Launch Snipping Tool, and use it to capture the screenshot of the map
Note: Snipping Tool is a built-in app in Windows 10 and is available for free. If you are using any other operating system, or have a different program to capture the screenshots, feel free to use it according to your convenience.
- Save the screenshot you captured as a JPG file on your PC
Step 2: Mark Out the Map Path
The next step in the process of preparing an animated travel map is to mark your route on it. To do so, you can use any of your preferred photo editing tools. However, to keep this illustration simple, Microsoft Paint is used here, and the method is given below:
- Right-click the screenshot you just captured
- Go to Open with on the context menu, and then click Paint from the submenu that appears
- Pick your preferred color from the pallet of the Paint interface. It is advisable to use an eye-catchy shade such as Red
- Use the Sphere shape tool to draw a circle over the source and destination locations on the map
- Use the Line tool to draw a line from the source point to the destination. Try giving the line a few turns to make it look realistic
- Go to File > Save As, and save the marked image with a different name
Note: Once this is done, you should have two image files of the map, i.e., one without the marks and one with it
Step 3: Download Some Travel Icons
Another important ingredient in an effective travel map animation is touring icons such as location marker image, a traveling medium symbol like a helicopter, airplane, car/bike (for short distances), etc. A couple of websites that offer royalty-free stock photos at absolutely no cost are listed below:
Note: Although the websites given above allow you to download and use their stock images and icons for free, you may need to give credits to the designers/creators of the symbols while using their objects. Therefore, you are suggested to check the Terms & Conditions and norms of usage of the elements before downloading and adding them to your projects.
Part 2: Make Animated Travel Map Videos with Filmora
After you have gathered all the necessary ingredients that are required to create a travel map animation, it is now time to get to work. The following instructions would guide you through the step-by-step process of preparing a decent and realistic animated travel map in Wondershare Filmora :
For Win 7 or later (64-bit)
Secure Download
For macOS 10.14 or later
Secure Download
Step 1: Import Ingredients to Filmora and Add Them to the Timeline
Launch the video editor on your computer, click anywhere inside the Media window at the upper-left area, and import all the images and icons that you collected earlier to program. Next, drag both the images of the map, i.e., with and without the marks to the Timeline, and ensure that they are of the same duration and are placed on the same track.

Note: Be sure to put the map without the marks first, and then the one with the marks. Also note that the images have the playback duration of 5 seconds in the Timeline by default, and this tenure can be reduced or increased by dragging the side handle of the media to the left or right respectively.
Step 2: Add Transition for Illusion of Route Appearance
Go to Transition from the standard toolbar at the top, locate the Erase Slide transition effect from the available presets, and place it in between the two image files that you earlier added to the Timeline. Next, click and drag either of the side handles of the transition to the end of the media clip. Notice how the other side of the effect is expanded in equal proportion.

Step 3: Preview and Export
Press the Spacebar on the keyboard to preview the video and see if the route appears as if it is being drawn on the map. Once the animation looks acceptable, click EXPORT from the top-center, go to the Local tab on the Export window, select MP4 from the formats list in the left, and click EXPORT from the bottom-right corner to export the current animation to MP4.
Step 4: Customize the Travel Map Media
Either start a new project and import the video of the map you exported in the previous step to the app and then to the Timeline, or remove the existing media from the Timeline in the same project, and add the exported video to it for convenience.

For Win 7 or later (64-bit)
Secure Download
For macOS 10.14 or later
Secure Download
Next, position the Skimmer (Playhead) a couple of frames before the one the route line appears and starts stretching from, and click the Split icon from the editing toolbar above the Timeline itself. Repeat this process for the other side of the media, i.e., position the Skimmer a couple of frames after the route line reaches the destination location, and click the Split icon again. Then remove the separated segments from both the sides by selecting them and pressing Delete on the keyboard, leaving only the portion where the animation is visible.

Optionally, right-click the media that is left behind in the Timeline, and go to Speed and Duration from the context menu. On the Custom Speed box, drag the Speed slider to the left to decrease the playback speed resulting in the increased duration of the media. Alternatively, you can manually enter a value in the Speed box to get precise tenure. Click OK when you are done.

Step 5: Add Animations to Travel Map
Right-click the media in the Timeline, and go to Add Animation from the context menu. Make sure that the Skimmer is on the first frame, and add several keyframes as explained below:
- Click Add to add the first keyframe

- Move a couple of frames further, and click Add one more time. Now, while you are on this second keyframe, use the Scale slider to zoom in to the map so the source location remains within focus.

- Next, move the Playhead further and add another keyframe a couple of frames before the route line hits the edge of the window.
- After this, move the Playhead again and position it where the route line reaches its destination location. Add another keyframe here as well, and move the map in the Preview window so the focus is now on the destination.
- Move the Playhead a few frames further, add another keyframe, and use the Scale slider to zoom a bit more into the map to make the entire animation look realistic. Click OK to save the changes.
Step 6: Add Icons and Titles, and Export the Project
Drag the image of the traveling medium to the Timeline, and place it on the frame the route line starts from. Make sure to place the image on the track above the map, and stretch it to the end so it remains visible throughout the animation. Next, use the method explained above to add keyframes to move the medium along with the route line from the source to the destination. Optionally, add the image of the location marker at the destination point, go to Transition, and add your preferred transition effect, preferably Dissolve, to the marker track in the Timeline so it looks as if it has appeared as the medium arrived the destination.
For Win 7 or later (64-bit)
Secure Download
For macOS 10.14 or later
Secure Download
Get back to the first frame in the Timeline, go to Titles on the standard toolbar, and add a title preset somewhere near the source location. Resize the text, change the format as needed, and add your preferred caption to it such as the start time, name, etc. Reduce the duration of the track so the title appears for a few frames, preferably before the map animation starts. Click OK when done. Repeat this process for the destination point as well.
Once everything is complete, click the Play button in the Preview window to review your work. If the video looks acceptable, click EXPORT from the top-center of the interface, and use the method explained earlier to export the animated travel map in your preferred format.
![]()
Method 2 How to Make Interactive Animated Travel Map with Pictramap
If you don’t want to install a dedicated animation software on your computer due to limited hardware resources or some other reason, there is an online solution called Pictramap to create a travel map animation using a web browser. The web app offers a lucrative interface that could be easily understood and worked with to produce an animated map for free.
The process to create an animated travel map with Pictramap is given below:
Step 1: Create a Project
Launch your favorite web browser, go to https://www.pictramap.com/ , click Create yours now, it’s free, and sign up to Pictramap using your preferred method. When you are on the Dashboard, enter a name in the field available under the My Projects section, and click Create to create a new project (the animated map).

Step 2: Define the Locations and Method of Commute
On the map, right-click the location you want to start your journey from, enter the name of the location or any other significant title, and click Add. Click the location marker, click the Travel Mode icon, and select your preferred mode of traveling. Repeat this process to mark the destination location as well.

Step 3: Preview the Animation
Click the View Animation button from the upper-right corner of the page to see the animated travel map.

Downsides of Using Pictramap to Create Animated Travel Map Video
Although Pictramap allows you to create a travel map animation with ease and extremely quickly, at the time of this writing, it offers no way of downloading the animation to your PC, and therefore it couldn’t be used in your projects.
If you are using Wondershare Filmora, you can use its built-in screen recording feature to record the animation that Pictramap plays, and then save the captured footage as MP4 or any other format on your computer. This video can then be imported to your projects for further uses.
![]()
A cross-platform for making videos anywhere for all creators

Why your video editing isn’t good enough? How about some creative inspo?
- 100 Million+ Users
- 150+ Countries and Regions
- 4 Million+ Social Media Followers
- 5 Million+ Stock Media for Use
* Secure Download

Method 3 How To Make Animated Travel Map Using Multidev
Multi.dev is still a new web-based application to build awesome animated maps, but it’s good! The application helps you create presentations about all your recent and previous trips. And the interface is also hassle-free.
So, follow this step-by-step guide to making animated maps with Multi.dev.
Step 1: Open Multi.dev
Visit Multi.dev from your internet browser.

Once the tool gets open, you will see a demo video. This example clip will have animated maps of different locations. So it is up to you whether to use the same example and edit the places you have been to or are planning to visit. Or, simply create a new animated map from scratch.
Step 2: Choose Your First Location
Take your mouse cursor on the left side of the application and type the first location in the search bar. As soon as you do it, you will see that the “travel arrow” will automatically begin from there. Likewise, type and select the next location through the search bar.
Once you type the location, you will see 8 travel modes, including airplane, bus, and train. You can select the same mode for all sites or a different mode for another place. Totally up to you!

Step 3: Select Map Themes
All your chosen places will be highlighted in the software’s minimalistic map.

Step 4: Download Map on Your Computer
If you’re happy with the animated map, click the “Create Video” button to save the animated map on your computer in a few minutes.


Contrarily, you can also share the animation by choosing the “Share Animation” option.
Conclusion
An animated travel map plays an important role to add a realistic touring effect to your motion picture projects. While you can use a web app like Pictramap to create such an animation online easily and for free, the limitations it comes along with might keep you from choosing this method.
Instead, you may want to get more inclined toward a dedicated post-production software like Wondershare Filmora that gives you full control over the process, and the freedom to choose your preferred format to export the animation to for independent usage.
For Win 7 or later (64-bit)
Secure Download
For macOS 10.14 or later
Secure Download
Benjamin Arango
Benjamin Arango is a writer and a lover of all things video.
Follow @Benjamin Arango
Benjamin Arango
Mar 27, 2024• Proven solutions
Animated travel map videos make it easy for the viewers to follow the routes from the source to destination locations right on the single screen. While the static maps would only allow the audience to see the markers from where the journey would start and is expected to end, the animated ones show the real-time movements and therefore look more interactive when viewed.
That said, here you will learn how to create an attractive and engaging animated travel map video using one of the easiest post-production applications, Wondershare Filmora, which is widely appreciated by amateurs and professionals throughout the globe. In another section, you will also learn about an alternative program that might be of some help in case you are more into online designing.
- Method 1: Make Animated Travel Map Videos with Location Video Maker - [Video Tutorial]
- Method 2: Make Interactive Animated Travel Map with Pictramap
- Method 3: Create Animated Travel Map Using Multidev
Method 1 Make Animated Travel Map Videos with Location Video Maker
The entire process of creating an animated travel map video in Wondershare’s Filmora is categorized into two parts, wherein the first part you will collect all the ingredients that are needed to get started, and in the second part you will actually make an animated map using the tools and features present in Filmora.
Watch a video tutorial to see how to make an animated map for a video:
For Win 7 or later (64-bit)
Secure Download
For macOS 10.14 or later
Secure Download
Part 1: Prepare the Travel Map Materials
Following are the ingredients and the methods to collect them for animated travel map preparation:
Step 1: Get the Map
The first thing that you would need to prepare an animated map is an image of a realistic map. Thanks to Google and Microsoft, these things are now pretty easy to arrange. The process is given below:
- Launch your preferred web browser
- Type google.com in the address bar or the search box and hit Enter
- Scroll to zoom out so you can see the entire world map on one screen
- Type Snipping Tool in the Cortana search box present on the left side of the Taskbar
- Launch Snipping Tool, and use it to capture the screenshot of the map
Note: Snipping Tool is a built-in app in Windows 10 and is available for free. If you are using any other operating system, or have a different program to capture the screenshots, feel free to use it according to your convenience.
- Save the screenshot you captured as a JPG file on your PC
Step 2: Mark Out the Map Path
The next step in the process of preparing an animated travel map is to mark your route on it. To do so, you can use any of your preferred photo editing tools. However, to keep this illustration simple, Microsoft Paint is used here, and the method is given below:
- Right-click the screenshot you just captured
- Go to Open with on the context menu, and then click Paint from the submenu that appears
- Pick your preferred color from the pallet of the Paint interface. It is advisable to use an eye-catchy shade such as Red
- Use the Sphere shape tool to draw a circle over the source and destination locations on the map
- Use the Line tool to draw a line from the source point to the destination. Try giving the line a few turns to make it look realistic
- Go to File > Save As, and save the marked image with a different name
Note: Once this is done, you should have two image files of the map, i.e., one without the marks and one with it
Step 3: Download Some Travel Icons
Another important ingredient in an effective travel map animation is touring icons such as location marker image, a traveling medium symbol like a helicopter, airplane, car/bike (for short distances), etc. A couple of websites that offer royalty-free stock photos at absolutely no cost are listed below:
Note: Although the websites given above allow you to download and use their stock images and icons for free, you may need to give credits to the designers/creators of the symbols while using their objects. Therefore, you are suggested to check the Terms & Conditions and norms of usage of the elements before downloading and adding them to your projects.
Part 2: Make Animated Travel Map Videos with Filmora
After you have gathered all the necessary ingredients that are required to create a travel map animation, it is now time to get to work. The following instructions would guide you through the step-by-step process of preparing a decent and realistic animated travel map in Wondershare Filmora :
For Win 7 or later (64-bit)
Secure Download
For macOS 10.14 or later
Secure Download
Step 1: Import Ingredients to Filmora and Add Them to the Timeline
Launch the video editor on your computer, click anywhere inside the Media window at the upper-left area, and import all the images and icons that you collected earlier to program. Next, drag both the images of the map, i.e., with and without the marks to the Timeline, and ensure that they are of the same duration and are placed on the same track.
Note: Be sure to put the map without the marks first, and then the one with the marks. Also note that the images have the playback duration of 5 seconds in the Timeline by default, and this tenure can be reduced or increased by dragging the side handle of the media to the left or right respectively.
Step 2: Add Transition for Illusion of Route Appearance
Go to Transition from the standard toolbar at the top, locate the Erase Slide transition effect from the available presets, and place it in between the two image files that you earlier added to the Timeline. Next, click and drag either of the side handles of the transition to the end of the media clip. Notice how the other side of the effect is expanded in equal proportion.
Step 3: Preview and Export
Press the Spacebar on the keyboard to preview the video and see if the route appears as if it is being drawn on the map. Once the animation looks acceptable, click EXPORT from the top-center, go to the Local tab on the Export window, select MP4 from the formats list in the left, and click EXPORT from the bottom-right corner to export the current animation to MP4.
Step 4: Customize the Travel Map Media
Either start a new project and import the video of the map you exported in the previous step to the app and then to the Timeline, or remove the existing media from the Timeline in the same project, and add the exported video to it for convenience.
For Win 7 or later (64-bit)
Secure Download
For macOS 10.14 or later
Secure Download
Next, position the Skimmer (Playhead) a couple of frames before the one the route line appears and starts stretching from, and click the Split icon from the editing toolbar above the Timeline itself. Repeat this process for the other side of the media, i.e., position the Skimmer a couple of frames after the route line reaches the destination location, and click the Split icon again. Then remove the separated segments from both the sides by selecting them and pressing Delete on the keyboard, leaving only the portion where the animation is visible.
Optionally, right-click the media that is left behind in the Timeline, and go to Speed and Duration from the context menu. On the Custom Speed box, drag the Speed slider to the left to decrease the playback speed resulting in the increased duration of the media. Alternatively, you can manually enter a value in the Speed box to get precise tenure. Click OK when you are done.
Step 5: Add Animations to Travel Map
Right-click the media in the Timeline, and go to Add Animation from the context menu. Make sure that the Skimmer is on the first frame, and add several keyframes as explained below:
- Click Add to add the first keyframe
- Move a couple of frames further, and click Add one more time. Now, while you are on this second keyframe, use the Scale slider to zoom in to the map so the source location remains within focus.
- Next, move the Playhead further and add another keyframe a couple of frames before the route line hits the edge of the window.
- After this, move the Playhead again and position it where the route line reaches its destination location. Add another keyframe here as well, and move the map in the Preview window so the focus is now on the destination.
- Move the Playhead a few frames further, add another keyframe, and use the Scale slider to zoom a bit more into the map to make the entire animation look realistic. Click OK to save the changes.
Step 6: Add Icons and Titles, and Export the Project
Drag the image of the traveling medium to the Timeline, and place it on the frame the route line starts from. Make sure to place the image on the track above the map, and stretch it to the end so it remains visible throughout the animation. Next, use the method explained above to add keyframes to move the medium along with the route line from the source to the destination. Optionally, add the image of the location marker at the destination point, go to Transition, and add your preferred transition effect, preferably Dissolve, to the marker track in the Timeline so it looks as if it has appeared as the medium arrived the destination.
For Win 7 or later (64-bit)
Secure Download
For macOS 10.14 or later
Secure Download
Get back to the first frame in the Timeline, go to Titles on the standard toolbar, and add a title preset somewhere near the source location. Resize the text, change the format as needed, and add your preferred caption to it such as the start time, name, etc. Reduce the duration of the track so the title appears for a few frames, preferably before the map animation starts. Click OK when done. Repeat this process for the destination point as well.
Once everything is complete, click the Play button in the Preview window to review your work. If the video looks acceptable, click EXPORT from the top-center of the interface, and use the method explained earlier to export the animated travel map in your preferred format.
![]()
Method 2 How to Make Interactive Animated Travel Map with Pictramap
If you don’t want to install a dedicated animation software on your computer due to limited hardware resources or some other reason, there is an online solution called Pictramap to create a travel map animation using a web browser. The web app offers a lucrative interface that could be easily understood and worked with to produce an animated map for free.
The process to create an animated travel map with Pictramap is given below:
Step 1: Create a Project
Launch your favorite web browser, go to https://www.pictramap.com/ , click Create yours now, it’s free, and sign up to Pictramap using your preferred method. When you are on the Dashboard, enter a name in the field available under the My Projects section, and click Create to create a new project (the animated map).
Step 2: Define the Locations and Method of Commute
On the map, right-click the location you want to start your journey from, enter the name of the location or any other significant title, and click Add. Click the location marker, click the Travel Mode icon, and select your preferred mode of traveling. Repeat this process to mark the destination location as well.
Step 3: Preview the Animation
Click the View Animation button from the upper-right corner of the page to see the animated travel map.
Downsides of Using Pictramap to Create Animated Travel Map Video
Although Pictramap allows you to create a travel map animation with ease and extremely quickly, at the time of this writing, it offers no way of downloading the animation to your PC, and therefore it couldn’t be used in your projects.
If you are using Wondershare Filmora, you can use its built-in screen recording feature to record the animation that Pictramap plays, and then save the captured footage as MP4 or any other format on your computer. This video can then be imported to your projects for further uses.
![]()
A cross-platform for making videos anywhere for all creators
Why your video editing isn’t good enough? How about some creative inspo?
- 100 Million+ Users
- 150+ Countries and Regions
- 4 Million+ Social Media Followers
- 5 Million+ Stock Media for Use
* Secure Download
Method 3 How To Make Animated Travel Map Using Multidev
Multi.dev is still a new web-based application to build awesome animated maps, but it’s good! The application helps you create presentations about all your recent and previous trips. And the interface is also hassle-free.
So, follow this step-by-step guide to making animated maps with Multi.dev.
Step 1: Open Multi.dev
Visit Multi.dev from your internet browser.
Once the tool gets open, you will see a demo video. This example clip will have animated maps of different locations. So it is up to you whether to use the same example and edit the places you have been to or are planning to visit. Or, simply create a new animated map from scratch.
Step 2: Choose Your First Location
Take your mouse cursor on the left side of the application and type the first location in the search bar. As soon as you do it, you will see that the “travel arrow” will automatically begin from there. Likewise, type and select the next location through the search bar.
Once you type the location, you will see 8 travel modes, including airplane, bus, and train. You can select the same mode for all sites or a different mode for another place. Totally up to you!
Step 3: Select Map Themes
All your chosen places will be highlighted in the software’s minimalistic map.
Step 4: Download Map on Your Computer
If you’re happy with the animated map, click the “Create Video” button to save the animated map on your computer in a few minutes.
Contrarily, you can also share the animation by choosing the “Share Animation” option.
Conclusion
An animated travel map plays an important role to add a realistic touring effect to your motion picture projects. While you can use a web app like Pictramap to create such an animation online easily and for free, the limitations it comes along with might keep you from choosing this method.
Instead, you may want to get more inclined toward a dedicated post-production software like Wondershare Filmora that gives you full control over the process, and the freedom to choose your preferred format to export the animation to for independent usage.
For Win 7 or later (64-bit)
Secure Download
For macOS 10.14 or later
Secure Download
Benjamin Arango
Benjamin Arango is a writer and a lover of all things video.
Follow @Benjamin Arango
The 15 Most Efficient Photo to Cartoon Apps for Android
The 15 Most Efficient Photo to Cartoon Apps for Android
An easy yet powerful editor
Numerous effects to choose from
Detailed tutorials provided by the official channel
It’s usually better to start with a free cartoon app for Android, whether you want to make a cartoon avatar of yourself or add humorous cartoons and live artistic effects to your photos.
In today’s digital age, your smartphone can serve as a portable cartoon picture editor, allowing you to apply cool and artistic effects to new or current photos. Finding an excellent cartoon-making app for Android is difficult because there are so many unique possibilities.
To assist you, we’ve compiled a list of the top cartoon picture apps for Android and iPhone that can help you turn your photo into a cartoon in seconds. Let’s get started without further ado.
In this article
01 [10 Apps to Kickstart Your Need to Photo to Cartoon](#Part 1)
02 [Top 5 iOS Apps to Turn Photo into Cartoon](#Part 2)
Part 1 Apps to Kickstart Your Need to Photo to Cartoon
In this part, you will have a chance to familiarize yourself with the best cartoon apps for Android, along with all the relevant information that matches your need.
01Cartoon Photo Editor
This free image to cartoon app has been a favorite for many years, making it an obvious choice for the top slot.
This cartoon pic software could be the ideal choice for you to add fantastic artistic and cartoon effects to your new or current photos.
Features:
• Add fantastic cartoon effects to your phone’s gallery photos.
• With a single tap of your finger, save images or take an image instantly.
• The autofocus feature (click anywhere on the screen)
• Several eye-catching effects, including a cartoon, oil painting, thermal vision, drawing, and more.
Compatibility:- Android 4.4 or above
Rating: 4.2
Price:- Free
02Camart – Cartoon Photo
This one is extensively used photos to cartoon picture apps for Android users.
Cartoon Photo is the ideal program for instantly applying the most spectacular cartoon effects to your images!
With an intelligent cartoon camera, you can effortlessly turn your most fabulous selfies and recorded films into live paints.
Features:
• Use your phone’s camera to take photos, selfies, and movies, then apply real-time artistic effects.
• There are many fantastic artistic filters to pick from (cartoon, pencil, comics, sketch, oil painting, watercolor, and many more).
• Use autofocus, pinch to zoom, and more by tapping on the screen.
• Email or post photos to popular social networking sites to share with your friends.
Compatibility:- Android 4.4 or above
Price:- Free
Rating: 3.9
03Cartoon Pictures – Cartoon Photo Editor
Cartoon Pictures - Cartoon Photo Editor makes as the best Android photos to cartoon apps for adding cartoon effects, oil paintings, and canvas artwork.
It has a wide range of cartoon animation effects, pencil sketch effects, smooth art filters, and painting effects that will transform your regular photos into beautiful works of art.
Features:
• A cartoon picture conversion program with a beautiful look.
• Hundreds of incredible cartoon photo effects
• A powerful selfie camera that allows you to edit photos in real-time.
• Post your sketch styles and artwork to social media sites like Facebook, Instagram, Pinterest, and Twitter.
Compatibility:- Android 5.0 or later
Price:- Free
Rating: 4.4
04Cartoon Photo – Pictures Cartoon Drawing
It combines all distinctive cartoon effects and art filters into one software, allowing you to instantly transform your photographs into grey cartoons, smooth pencil sketches and drawings, oil paintings, and pixel art.
Although the Google Play market is overflowing with cartoon-type editing apps, this is the best cartoon-making app for Android. You can now be your cartoonist.
Features:
• Create cartoon drawings from any new or old photos.
• Selfie camera with powerful cartoon snaps, creative photo combining, and cartoon filters
• A plethora of contemporary artistic filters to pick from (cartoon yourself, a cartoon photo maker, photo to caricature, and many more)
Compatibility:- Android 4.1 or above
Price:- Free
Rating: 2.6
05Cartoon Photo Editor – Pencil Sketch Art
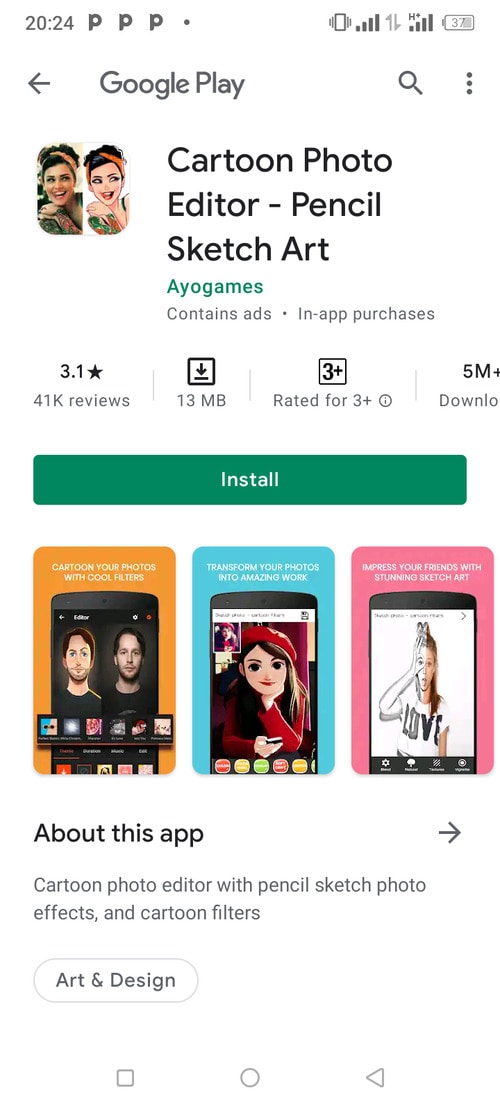
If you need a way to turn your favorite photos into cartoon drawings, this cartoon camera is the way to go.
This most excellent comedy picture software attempts to provide a plethora of fantastic cartoon graphics filters to help your photos stand out.
Features:
• Create cartoons and oil paintings from any photo
• Use the ‘Cartoon yourself’ function to turn your images into masterpieces.
• Photo editor for cartoons/photo creator for cartoons
Compatibility:- Requires 4.1 or more Android
Price:- Free
Rating: 3.1
06Art Camera – Cartoon, Pencil Sketch Art Effect Photo
Do you enjoy sketching? This greatest photo to cartoon app from Model X is a must-have for everyone who wants to add pencil sketches and fantastic artistic and cartoon effects to existing photos.
It also serves as a useful photo organizer, allowing you to organize and manage your photos using date and time tags. With the help of our top-rated convert photo to cartoon app, you can now be the center of attention.
Features:
• A vast range of picture effects and filters inspired by oil paintings and cartoons
• A plethora of photo editing and adjusting options, such as contrast, brightness, and saturation
• UHD camera, HD selfie, auto-focus, HDR, and silent capture mode, among other features.
Compatibility:- Android 4.2+
Price:- Free
Rating: 4.5
07Tooncam – Cartoon, Pencil Sketch Pic
Do you want to make cartoons out of your most extraordinary selfies? If that’s the case, the finest cartoon picture editor app for Android is all you’ll need. What could be better than Tooncam?
With this picture-to cartoon app at your disposal, you can quickly turn your images into spectacular cartoons.
Features:
• With a few clicks of your finger, make fantastic web-based comics.
• Transforms your regular photos into adorable cartoon selfies
• More than 15 different cartoon effects
Compatibility:- Android 4.4+ and iOS
Price:- Free
Rating: 4.0
08Prisma Art Effect Photo Editor
Prisma was the most popular cartoon animation app on the market only a few years ago. Even though this app isn’t as famous as it once was, it still has some absorbing art filters that can make your shot look like some of history’s greatest artists created it.
The best part is that new filters come every day, so you’ll never run out of cartoon photo ideas. Furthermore, the software has various special photo effects and the ability to save your works in both SD and HD resolution.
Features:
● Every day, you get new cartoon effects.
● You will get more than 300 filters.
● Cartooning is the only option.
● Easily cartoon the photo.
Price: Free, though in-app purchases
Compatibility: Android
Ratings: 4.6
09Cartoon Yourself
Even if you can’t record videos or shoot images with the Cartoon Yourself app for Android, it’s still a good option to quickly turn a photo into a cartoon. Select a picture with the ‘Add a Photo’ button, then hit the ‘Apply Effect’ button to begin browsing the app’s extensive library of stickers and cartoon effects.
After the photo has been cartoonized, you can save it to your phone or share it on social media with your friends. The Cartoon Yourself app also provides basic photo editing features, such as cropping, mirroring, and rotating images.
Features:
● For novices, a primary and easy-to-use photo-to-cartoon app
● It has some excellent and lovely cartoon effects.
● Limited Free filters and effects
Price: Free, but with in-app purchases.
Compatibility: Android
Rating: 3.1
10Painnt – Art & Cartoon Filters
Painnt is easily one of the greatest cartoons yourself apps on the market, with over a thousand filters and effects. Because this picture editor allows you to change the transparency, saturation, and brightness of all your images, you can manipulate them in almost any way you desire. Painnt is also a creative community where you can find and meet others who share your art interests.
However, the accessible version of the program limits the size of the photos you may export, and you must subscribe to one of the subscription plans to process pictures in HD. The cost of a yearly subscription is only $9.99.
Features:
• Version is updated regularly to include more filters.
• Change the parameters of the cartoon filters to make them your own.
• Advanced AI technology.
Price: Free(in-app purchases)
Compatibility: Android
Rating: 3.8
Part 2 Top 5 iOS Apps to Turn Photo into Cartoon
Here, we have some of the best iOS applications that will assist you in turning photos into cartoons quickly.
01Cartoon Yourself Video Effects
Even if you aren’t a fan of the best cartoon video maker app download for iOS, this incredible photo-to cartoon app will convert you into one.
It features a user-friendly screen and an extensive range of amusing picture effects to help you build a cartoon avatar of yourself.
Features:
• Convert any snapshot of a person into an animated animation.
• Use a variety of authentic facial expressions (squint eyes, flirty wink, sad face, nice smile, etc.)
• Use dozens of humorous photo effects to turn your face into an alien, hideous, bulb-headed person, and more.
02Cartoon Camera Free
Apart from the Cartoon and Pencil Sketch effects, this little program doesn’t offer anything else. You may either use photos from your phone or take new ones and turn them into fantastic cartoons. The images you modify with the Cartoon Camera Free app can be saved to your camera roll or shared on social media.
However, because the process of turning your photos into cartoons is fully automated, you won’t have much control over how the final version of your cartoon photo will appear.
Features
● You can quickly draw a caricature of yourself on your phone.
● This fantastic photo-to cartoon tool will provide you with a realistic cartoon effect in real-time.
● It is updated regularly. Thus, you won’t use the most recent effects.
03Photo To Cartoon Yourself Edit
Photo To Cartoon Yourself is a popular cartoon photo programs, allowing you to create avatars or a cartoon of yourself quickly.
Capture a photo from your phone’s gallery or take a fresh one with the camera and turn it into a fantastic cartoon straight away for free. It is the most powerful program on this list for converting a photo into a cartoon AVATAR with the least amount of work and time. Furthermore, it includes many fascinating elements that will give your shot a realistic cartoon ethos.
Features:
● Choose images from your photo library.
● Turn your images into cartoons and send them via email.
● No picture shrinking or stretching; create cartoon images in high definition in seconds.
● Free to access
04Clip2Comic & Caricature Maker
Clip2Comic & Caricature Maker comes with a friendly interface that works wonders while converting a photo into caricatures, sketches, or cartoons.
Clip2Comic also allows you to make your cartoon videos in a matter of seconds using its real-time preview camera.
Features:
• Choose an image or video clip from your photo album to use.
• A wide range of free cartoon, drawing, caricature, and poster effects are available.
• Customization tools allow you to tweak your image’s outlines and blacks.
• Use several color filters to put your cartoon faces in the appropriate mood.
05MomentCam Cartoons & Stickers
MomentCam allows you to create your bitmoji based on your preferences. MomentCam is one of the most popular photo-to-cartoon apps on the market right now, with over 300 million downloads.
It allows you to create personalized emoticons and funny cartoons to convey your emotions in the most amusing way imaginable. Thousands of realistic effects and filters are available to give your shot an authentic cartoon feel. You can make a better version of yourself with MomentCam.
MomentCam may be at the bottom of the list of the best cartoon camera applications for iPhone and iPad, but it is well worth a look.
Features:
● Turn yourself into witty cartoons and glistening emoticons.
● Add text bubbles to some jokes and phrases to make your cartoons more entertaining
● Alter your caricatures’ facial expressions.
● You can get great prizes by sharing your amusing creations with millions of people all around the world.
****Wondershare Filmora Video Editor - Best Application**
With the rise in popularity of cartoonizing photo apps for Android, we’d like to introduce you to a fantastic app that will assist you in creating cartoon animation. Following its incredible characteristics in no time. Wondershare Filmora Animation software is a new Wondershare product that includes several downloadable animated characters and elements.
Most significantly, this software offers a user-friendly interface, an intelligent editing workflow, is lightweight, has a quick video rendering speed, and much more.
● Ending Thoughts →
● Now that you’ve found the best cartoon video maker app for Android, choose the one that’s right for you. Whether on Android or iOS devices, these animation movie creators will turn the world upside down in just a few clicks, so give it a try today!
● You can also try out a fantastic app, Filmora. It is a perfect cartoon-making app for Android and iOS. Change your photo to cartoon in a few clicks.
It’s usually better to start with a free cartoon app for Android, whether you want to make a cartoon avatar of yourself or add humorous cartoons and live artistic effects to your photos.
In today’s digital age, your smartphone can serve as a portable cartoon picture editor, allowing you to apply cool and artistic effects to new or current photos. Finding an excellent cartoon-making app for Android is difficult because there are so many unique possibilities.
To assist you, we’ve compiled a list of the top cartoon picture apps for Android and iPhone that can help you turn your photo into a cartoon in seconds. Let’s get started without further ado.
In this article
01 [10 Apps to Kickstart Your Need to Photo to Cartoon](#Part 1)
02 [Top 5 iOS Apps to Turn Photo into Cartoon](#Part 2)
Part 1 Apps to Kickstart Your Need to Photo to Cartoon
In this part, you will have a chance to familiarize yourself with the best cartoon apps for Android, along with all the relevant information that matches your need.
01Cartoon Photo Editor
This free image to cartoon app has been a favorite for many years, making it an obvious choice for the top slot.
This cartoon pic software could be the ideal choice for you to add fantastic artistic and cartoon effects to your new or current photos.
Features:
• Add fantastic cartoon effects to your phone’s gallery photos.
• With a single tap of your finger, save images or take an image instantly.
• The autofocus feature (click anywhere on the screen)
• Several eye-catching effects, including a cartoon, oil painting, thermal vision, drawing, and more.
Compatibility:- Android 4.4 or above
Rating: 4.2
Price:- Free
02Camart – Cartoon Photo
This one is extensively used photos to cartoon picture apps for Android users.
Cartoon Photo is the ideal program for instantly applying the most spectacular cartoon effects to your images!
With an intelligent cartoon camera, you can effortlessly turn your most fabulous selfies and recorded films into live paints.
Features:
• Use your phone’s camera to take photos, selfies, and movies, then apply real-time artistic effects.
• There are many fantastic artistic filters to pick from (cartoon, pencil, comics, sketch, oil painting, watercolor, and many more).
• Use autofocus, pinch to zoom, and more by tapping on the screen.
• Email or post photos to popular social networking sites to share with your friends.
Compatibility:- Android 4.4 or above
Price:- Free
Rating: 3.9
03Cartoon Pictures – Cartoon Photo Editor
Cartoon Pictures - Cartoon Photo Editor makes as the best Android photos to cartoon apps for adding cartoon effects, oil paintings, and canvas artwork.
It has a wide range of cartoon animation effects, pencil sketch effects, smooth art filters, and painting effects that will transform your regular photos into beautiful works of art.
Features:
• A cartoon picture conversion program with a beautiful look.
• Hundreds of incredible cartoon photo effects
• A powerful selfie camera that allows you to edit photos in real-time.
• Post your sketch styles and artwork to social media sites like Facebook, Instagram, Pinterest, and Twitter.
Compatibility:- Android 5.0 or later
Price:- Free
Rating: 4.4
04Cartoon Photo – Pictures Cartoon Drawing
It combines all distinctive cartoon effects and art filters into one software, allowing you to instantly transform your photographs into grey cartoons, smooth pencil sketches and drawings, oil paintings, and pixel art.
Although the Google Play market is overflowing with cartoon-type editing apps, this is the best cartoon-making app for Android. You can now be your cartoonist.
Features:
• Create cartoon drawings from any new or old photos.
• Selfie camera with powerful cartoon snaps, creative photo combining, and cartoon filters
• A plethora of contemporary artistic filters to pick from (cartoon yourself, a cartoon photo maker, photo to caricature, and many more)
Compatibility:- Android 4.1 or above
Price:- Free
Rating: 2.6
05Cartoon Photo Editor – Pencil Sketch Art
If you need a way to turn your favorite photos into cartoon drawings, this cartoon camera is the way to go.
This most excellent comedy picture software attempts to provide a plethora of fantastic cartoon graphics filters to help your photos stand out.
Features:
• Create cartoons and oil paintings from any photo
• Use the ‘Cartoon yourself’ function to turn your images into masterpieces.
• Photo editor for cartoons/photo creator for cartoons
Compatibility:- Requires 4.1 or more Android
Price:- Free
Rating: 3.1
06Art Camera – Cartoon, Pencil Sketch Art Effect Photo
Do you enjoy sketching? This greatest photo to cartoon app from Model X is a must-have for everyone who wants to add pencil sketches and fantastic artistic and cartoon effects to existing photos.
It also serves as a useful photo organizer, allowing you to organize and manage your photos using date and time tags. With the help of our top-rated convert photo to cartoon app, you can now be the center of attention.
Features:
• A vast range of picture effects and filters inspired by oil paintings and cartoons
• A plethora of photo editing and adjusting options, such as contrast, brightness, and saturation
• UHD camera, HD selfie, auto-focus, HDR, and silent capture mode, among other features.
Compatibility:- Android 4.2+
Price:- Free
Rating: 4.5
07Tooncam – Cartoon, Pencil Sketch Pic
Do you want to make cartoons out of your most extraordinary selfies? If that’s the case, the finest cartoon picture editor app for Android is all you’ll need. What could be better than Tooncam?
With this picture-to cartoon app at your disposal, you can quickly turn your images into spectacular cartoons.
Features:
• With a few clicks of your finger, make fantastic web-based comics.
• Transforms your regular photos into adorable cartoon selfies
• More than 15 different cartoon effects
Compatibility:- Android 4.4+ and iOS
Price:- Free
Rating: 4.0
08Prisma Art Effect Photo Editor
Prisma was the most popular cartoon animation app on the market only a few years ago. Even though this app isn’t as famous as it once was, it still has some absorbing art filters that can make your shot look like some of history’s greatest artists created it.
The best part is that new filters come every day, so you’ll never run out of cartoon photo ideas. Furthermore, the software has various special photo effects and the ability to save your works in both SD and HD resolution.
Features:
● Every day, you get new cartoon effects.
● You will get more than 300 filters.
● Cartooning is the only option.
● Easily cartoon the photo.
Price: Free, though in-app purchases
Compatibility: Android
Ratings: 4.6
09Cartoon Yourself
Even if you can’t record videos or shoot images with the Cartoon Yourself app for Android, it’s still a good option to quickly turn a photo into a cartoon. Select a picture with the ‘Add a Photo’ button, then hit the ‘Apply Effect’ button to begin browsing the app’s extensive library of stickers and cartoon effects.
After the photo has been cartoonized, you can save it to your phone or share it on social media with your friends. The Cartoon Yourself app also provides basic photo editing features, such as cropping, mirroring, and rotating images.
Features:
● For novices, a primary and easy-to-use photo-to-cartoon app
● It has some excellent and lovely cartoon effects.
● Limited Free filters and effects
Price: Free, but with in-app purchases.
Compatibility: Android
Rating: 3.1
10Painnt – Art & Cartoon Filters
Painnt is easily one of the greatest cartoons yourself apps on the market, with over a thousand filters and effects. Because this picture editor allows you to change the transparency, saturation, and brightness of all your images, you can manipulate them in almost any way you desire. Painnt is also a creative community where you can find and meet others who share your art interests.
However, the accessible version of the program limits the size of the photos you may export, and you must subscribe to one of the subscription plans to process pictures in HD. The cost of a yearly subscription is only $9.99.
Features:
• Version is updated regularly to include more filters.
• Change the parameters of the cartoon filters to make them your own.
• Advanced AI technology.
Price: Free(in-app purchases)
Compatibility: Android
Rating: 3.8
Part 2 Top 5 iOS Apps to Turn Photo into Cartoon
Here, we have some of the best iOS applications that will assist you in turning photos into cartoons quickly.
01Cartoon Yourself Video Effects
Even if you aren’t a fan of the best cartoon video maker app download for iOS, this incredible photo-to cartoon app will convert you into one.
It features a user-friendly screen and an extensive range of amusing picture effects to help you build a cartoon avatar of yourself.
Features:
• Convert any snapshot of a person into an animated animation.
• Use a variety of authentic facial expressions (squint eyes, flirty wink, sad face, nice smile, etc.)
• Use dozens of humorous photo effects to turn your face into an alien, hideous, bulb-headed person, and more.
02Cartoon Camera Free
Apart from the Cartoon and Pencil Sketch effects, this little program doesn’t offer anything else. You may either use photos from your phone or take new ones and turn them into fantastic cartoons. The images you modify with the Cartoon Camera Free app can be saved to your camera roll or shared on social media.
However, because the process of turning your photos into cartoons is fully automated, you won’t have much control over how the final version of your cartoon photo will appear.
Features
● You can quickly draw a caricature of yourself on your phone.
● This fantastic photo-to cartoon tool will provide you with a realistic cartoon effect in real-time.
● It is updated regularly. Thus, you won’t use the most recent effects.
03Photo To Cartoon Yourself Edit
Photo To Cartoon Yourself is a popular cartoon photo programs, allowing you to create avatars or a cartoon of yourself quickly.
Capture a photo from your phone’s gallery or take a fresh one with the camera and turn it into a fantastic cartoon straight away for free. It is the most powerful program on this list for converting a photo into a cartoon AVATAR with the least amount of work and time. Furthermore, it includes many fascinating elements that will give your shot a realistic cartoon ethos.
Features:
● Choose images from your photo library.
● Turn your images into cartoons and send them via email.
● No picture shrinking or stretching; create cartoon images in high definition in seconds.
● Free to access
04Clip2Comic & Caricature Maker
Clip2Comic & Caricature Maker comes with a friendly interface that works wonders while converting a photo into caricatures, sketches, or cartoons.
Clip2Comic also allows you to make your cartoon videos in a matter of seconds using its real-time preview camera.
Features:
• Choose an image or video clip from your photo album to use.
• A wide range of free cartoon, drawing, caricature, and poster effects are available.
• Customization tools allow you to tweak your image’s outlines and blacks.
• Use several color filters to put your cartoon faces in the appropriate mood.
05MomentCam Cartoons & Stickers
MomentCam allows you to create your bitmoji based on your preferences. MomentCam is one of the most popular photo-to-cartoon apps on the market right now, with over 300 million downloads.
It allows you to create personalized emoticons and funny cartoons to convey your emotions in the most amusing way imaginable. Thousands of realistic effects and filters are available to give your shot an authentic cartoon feel. You can make a better version of yourself with MomentCam.
MomentCam may be at the bottom of the list of the best cartoon camera applications for iPhone and iPad, but it is well worth a look.
Features:
● Turn yourself into witty cartoons and glistening emoticons.
● Add text bubbles to some jokes and phrases to make your cartoons more entertaining
● Alter your caricatures’ facial expressions.
● You can get great prizes by sharing your amusing creations with millions of people all around the world.
****Wondershare Filmora Video Editor - Best Application**
With the rise in popularity of cartoonizing photo apps for Android, we’d like to introduce you to a fantastic app that will assist you in creating cartoon animation. Following its incredible characteristics in no time. Wondershare Filmora Animation software is a new Wondershare product that includes several downloadable animated characters and elements.
Most significantly, this software offers a user-friendly interface, an intelligent editing workflow, is lightweight, has a quick video rendering speed, and much more.
● Ending Thoughts →
● Now that you’ve found the best cartoon video maker app for Android, choose the one that’s right for you. Whether on Android or iOS devices, these animation movie creators will turn the world upside down in just a few clicks, so give it a try today!
● You can also try out a fantastic app, Filmora. It is a perfect cartoon-making app for Android and iOS. Change your photo to cartoon in a few clicks.
5 Websites with Animated Logos That Catch Your Eyes
5 Websites with Animated Logos That Can Catch Your Eyes
An easy yet powerful editor
Numerous effects to choose from
Detailed tutorials provided by the official channel
Animated logos could be difficult to make for someone who has no experience with animation. That is why we are here to tell you how you can make an attractive animated logo.
Learn more about websites with animated logos through this article.
In this article
01 [Why You Should Use Logo Animation](#Part 1)
02 [5 Awesome Ways to Use Logo Animation](#Part 2)
03 [6 of the Best Animated Logos](#Part 3)
04 [8 Websites with Premium Animated Logo Templates](#Part 4)
Part 1 Why You Should Use Logo Animation
Those who make it big are known to brave the storm. The ones who follow the crowd just turn out to be ordinary. However, those who innovate, rise to a higher level. Here is why you should go for a website with animated logo!
01They grab viewers attraction
The human mind chooses to believe in the supremacy of what appeals to them visually. It is highly important to grab the user’s attention in order to make a mark. Animated logos help your website to visually appeal to the viewer and grab his/her attention. Potential customers will tend to remember the logo of your website and this would directly impact the conversion rates of your website.

02Increase in brand awareness
Brand awareness is key to a website’s success. As we saw earlier, people often tend to remember brands by their logo and not name. An attractive animated logo will help you create a strong brand awareness among potential customers and help your brand gain popularity.
03Animated logos can convey more
A brand logo is supposed to be the identity of a brand. The logo should be capable enough of explaining your website’s understanding about the field. For instance, if your company is in the cyber security domain, the logo should be good enough to justify your company’s expertise. Animated logos help you establish trust by conveying more through the medium of a logo.
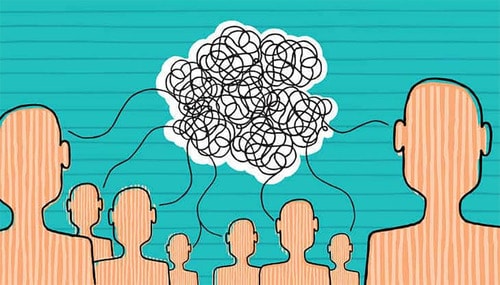
Part 2 4 Awesome Ways to Use Logo Animation
01They can serve as introductions to marketing videos
Video marketing is one of the most commonly used marketing techniques. Research suggested that about 99 percent of brands use video marketing in order to enhance their brand image. Starting of your video with an animated logo will not just look catchy but also make the video all the more professional.
02They can make great outros
Just like animated videos can serve as amazing introductory bits of the video, they can also be the perfect outros to videos. If you haven’t added your animated logo in the introduction of the video then they can be added at the end. This will lead to your viewers remembering your brand for a longer time.
03Look very attractive at trade shows
Trade shows are opportunities where websites and company owners can interact with investors and potential customers face to face. It’s an excellent opportunity to make your mark on the big stage. Logos of companies may be projected on the big screen in such events. At such events when you have just a few seconds to make a mark, you need your logo to grab the viewer’s attention. Hence, animated logos could be very useful.
04They could be a great addition to your company’s email signature
Emails are regarded as the 3rd largest information sources in the B2B industry. It is one of the largest means of communication and marketing. Email signatures have been around for years; however the traditional email signatures have now gone out of fashion. Contemporary email signatures include animated logos to leave a bigger impact on the receiver. Using animated logos, you can add grace to your email signatures and escape the ordinary.
Part 3 6 of the Best Animated Logos
01Mastercard
Mastercard is one of the first companies to use animated logos. The logo is simply fantastic due to the meaning it conveys without any complex animation. The animated logo involves the traditional venn diagram logo of mastercard morphing into several objects. These objects include everything from food to groceries to luxurious products. It basically includes the various kinds of commodities people buy using mastercards.
02Burger king
Another popular brand that uses animated logos is the american fast food giant, burger king. The logo is not highly flashy like we see in mastercard. However, the animated logo does obviously look more attention seeking than the conventional static logo. The logo shows the stacking of the different elements of the logo one by one over each other. This resembles the process of making a burger.
03Fedex
Another logo that would classify as a flashy animated logo is the fedex logo. Initially, fedex had experimented with several logos before sticking to the arrow logo which continues even today. The animated logo involves an arrow making the letter “Fedex” with its trajectory and then finally settling in between letters X and E. The logistics giant delivers couriers from one corner of the world to another, and the arrow symbolizes exactly that!
04Flickr
Flickr is a popular stock image and video hosting platform. Anyone can use the stock images and videos in their content. The logo starts with a blue and pink dot initially. These dots later expand in a whirlpool like motion. The logo starts off with the static logo before it expands. The idea is to show that the online stock image portal goes beyond limits and has every picture and video you’d need
05Bundle
Bundle is a popular app that offers its users rewards upon shopping from selected stores. These stores have an alliance with bundle and upon shopping from them, users seek reward points on the bundle app. The animated logo starts of with a pink screen which later converges to become a large “B” wrapped with a gifting ribbon. Although, the logo is pretty simple it does an amazing job at explaining the brand’s MSP and attracts customers.
06Google
The logo of google has evolved over the years. Google is almost synonymous to attractive logos and it comes up with attractive new logos every now and then. One of the newest logos, an animated one, is by far one of the most attractive animated logos. It aims to depict the numerous things users can search using “Google voice search”.
Part 4 5 Websites with Premium Animated Logo Templates
01RenderForest
There are several applications you can use for animating your next logo for your website. RenderForest is one such software that lets you explore multiple animated logo templates. The tool has an array of templates you can choose from. Each of the templates is unique in its own way and has its own charm. Additionally, the software also has a functionality using which you can animate your static logo using templates.
Developed and managed by Adobe, the editing application is a popular one. The software allows you to use several pre-made templates while animating. The animations that you can find on adobe spark are
02Adobe Spark
Adobe spark seamless and designed perfectly. Using adobe spark, you can give your animated logo a touch of class and perfection. Although the software is paid, it is worth every penny due to the numerous animation templates and video editing tools available.
03Design free logo
Another amazing tool for animation, design free logo is a complete animation tool that offers several animation templates. Additionally, the free software also lets users animate in 3 dimensions. The software is best suited for novice animators who have limited experience with animation. The software is very simple to use unlike its sophisticated counterparts.
04Logo maker plus
If you are looking for an android application that helps you create seamless animated logos, well logo maker plus is just the perfect application for you. The app has more than a 100 templates for animating your logo, hence making it the perfect app for those who want to perform basic animation. Additionally, the app also has multiple visual effects which would enable you to make catchy logos
05Animaker
The final software on this list of amazing softwares is animaker. The software works well to animate logos, presentations, and marketing videos. The software has more than 50 effects. Moreover, using this software you can add filters, effects and sound effects. The software also lets users upload the videos to facebook and youtube directly!
Final Thoughts
● Today, we took a look at a few of the best animated logos which you could idealize.
● Nowadays, even big brands are adopting animated logos.
● They help establish a brand image and take your brand to a higher level.
● We also saw a few softwares that could help you make an animated logo. Wish to make an animated logo? Head to any one of the websites and make your website with animated logos!
Animated logos could be difficult to make for someone who has no experience with animation. That is why we are here to tell you how you can make an attractive animated logo.
Learn more about websites with animated logos through this article.
In this article
01 [Why You Should Use Logo Animation](#Part 1)
02 [5 Awesome Ways to Use Logo Animation](#Part 2)
03 [6 of the Best Animated Logos](#Part 3)
04 [8 Websites with Premium Animated Logo Templates](#Part 4)
Part 1 Why You Should Use Logo Animation
Those who make it big are known to brave the storm. The ones who follow the crowd just turn out to be ordinary. However, those who innovate, rise to a higher level. Here is why you should go for a website with animated logo!
01They grab viewers attraction
The human mind chooses to believe in the supremacy of what appeals to them visually. It is highly important to grab the user’s attention in order to make a mark. Animated logos help your website to visually appeal to the viewer and grab his/her attention. Potential customers will tend to remember the logo of your website and this would directly impact the conversion rates of your website.
02Increase in brand awareness
Brand awareness is key to a website’s success. As we saw earlier, people often tend to remember brands by their logo and not name. An attractive animated logo will help you create a strong brand awareness among potential customers and help your brand gain popularity.
03Animated logos can convey more
A brand logo is supposed to be the identity of a brand. The logo should be capable enough of explaining your website’s understanding about the field. For instance, if your company is in the cyber security domain, the logo should be good enough to justify your company’s expertise. Animated logos help you establish trust by conveying more through the medium of a logo.
Part 2 4 Awesome Ways to Use Logo Animation
01They can serve as introductions to marketing videos
Video marketing is one of the most commonly used marketing techniques. Research suggested that about 99 percent of brands use video marketing in order to enhance their brand image. Starting of your video with an animated logo will not just look catchy but also make the video all the more professional.
02They can make great outros
Just like animated videos can serve as amazing introductory bits of the video, they can also be the perfect outros to videos. If you haven’t added your animated logo in the introduction of the video then they can be added at the end. This will lead to your viewers remembering your brand for a longer time.
03Look very attractive at trade shows
Trade shows are opportunities where websites and company owners can interact with investors and potential customers face to face. It’s an excellent opportunity to make your mark on the big stage. Logos of companies may be projected on the big screen in such events. At such events when you have just a few seconds to make a mark, you need your logo to grab the viewer’s attention. Hence, animated logos could be very useful.
04They could be a great addition to your company’s email signature
Emails are regarded as the 3rd largest information sources in the B2B industry. It is one of the largest means of communication and marketing. Email signatures have been around for years; however the traditional email signatures have now gone out of fashion. Contemporary email signatures include animated logos to leave a bigger impact on the receiver. Using animated logos, you can add grace to your email signatures and escape the ordinary.
Part 3 6 of the Best Animated Logos
01Mastercard
Mastercard is one of the first companies to use animated logos. The logo is simply fantastic due to the meaning it conveys without any complex animation. The animated logo involves the traditional venn diagram logo of mastercard morphing into several objects. These objects include everything from food to groceries to luxurious products. It basically includes the various kinds of commodities people buy using mastercards.
02Burger king
Another popular brand that uses animated logos is the american fast food giant, burger king. The logo is not highly flashy like we see in mastercard. However, the animated logo does obviously look more attention seeking than the conventional static logo. The logo shows the stacking of the different elements of the logo one by one over each other. This resembles the process of making a burger.
03Fedex
Another logo that would classify as a flashy animated logo is the fedex logo. Initially, fedex had experimented with several logos before sticking to the arrow logo which continues even today. The animated logo involves an arrow making the letter “Fedex” with its trajectory and then finally settling in between letters X and E. The logistics giant delivers couriers from one corner of the world to another, and the arrow symbolizes exactly that!
04Flickr
Flickr is a popular stock image and video hosting platform. Anyone can use the stock images and videos in their content. The logo starts with a blue and pink dot initially. These dots later expand in a whirlpool like motion. The logo starts off with the static logo before it expands. The idea is to show that the online stock image portal goes beyond limits and has every picture and video you’d need
05Bundle
Bundle is a popular app that offers its users rewards upon shopping from selected stores. These stores have an alliance with bundle and upon shopping from them, users seek reward points on the bundle app. The animated logo starts of with a pink screen which later converges to become a large “B” wrapped with a gifting ribbon. Although, the logo is pretty simple it does an amazing job at explaining the brand’s MSP and attracts customers.
06Google
The logo of google has evolved over the years. Google is almost synonymous to attractive logos and it comes up with attractive new logos every now and then. One of the newest logos, an animated one, is by far one of the most attractive animated logos. It aims to depict the numerous things users can search using “Google voice search”.
Part 4 5 Websites with Premium Animated Logo Templates
01RenderForest
There are several applications you can use for animating your next logo for your website. RenderForest is one such software that lets you explore multiple animated logo templates. The tool has an array of templates you can choose from. Each of the templates is unique in its own way and has its own charm. Additionally, the software also has a functionality using which you can animate your static logo using templates.
Developed and managed by Adobe, the editing application is a popular one. The software allows you to use several pre-made templates while animating. The animations that you can find on adobe spark are
02Adobe Spark
Adobe spark seamless and designed perfectly. Using adobe spark, you can give your animated logo a touch of class and perfection. Although the software is paid, it is worth every penny due to the numerous animation templates and video editing tools available.
03Design free logo
Another amazing tool for animation, design free logo is a complete animation tool that offers several animation templates. Additionally, the free software also lets users animate in 3 dimensions. The software is best suited for novice animators who have limited experience with animation. The software is very simple to use unlike its sophisticated counterparts.
04Logo maker plus
If you are looking for an android application that helps you create seamless animated logos, well logo maker plus is just the perfect application for you. The app has more than a 100 templates for animating your logo, hence making it the perfect app for those who want to perform basic animation. Additionally, the app also has multiple visual effects which would enable you to make catchy logos
05Animaker
The final software on this list of amazing softwares is animaker. The software works well to animate logos, presentations, and marketing videos. The software has more than 50 effects. Moreover, using this software you can add filters, effects and sound effects. The software also lets users upload the videos to facebook and youtube directly!
Final Thoughts
● Today, we took a look at a few of the best animated logos which you could idealize.
● Nowadays, even big brands are adopting animated logos.
● They help establish a brand image and take your brand to a higher level.
● We also saw a few softwares that could help you make an animated logo. Wish to make an animated logo? Head to any one of the websites and make your website with animated logos!
Best 10 Video to GIF Converters: Top Picks
Best 10 Video to GIF Converters: Top Picks
An easy yet powerful editor
Numerous effects to choose from
Detailed tutorials provided by the official channel
Having trouble converting your videos to GIF? Browse the top 10 converters to sort this out!
In this article
01 [Why GIFs are Widely Used and Popular?](#Part 1)
02 [Top 10 Ways to Turn Video into GIF](#Part 2)
Part 1 Why GIFs are Widely Used and Popular?
If you take a poll on the watch preference of GIF versus videos, most of votes you get would be in favor of watching GIFs. There are obvious reasons to the fact that anyone would prefer watching a GIF over a video, irrespective of its length. Some major ones that make it quite annoying to watch videos include the following:
● To begin with, you need to turn the video on and off, depending on your choice of watching a video or surfing through stories and feeds, failing which you get to hear additional sounds through your feed from the already running video. You further need to stop the music or go for a volume control in case you are not interested to watch the video.
● Most of the videos you run turn up to be irrelevant or uninteresting through the middle, but you don’t have a choice to make bit adjustments. If however possible, the method is not quite convenient. You may need to visit a different site in case you run a video that is not integrated with webpage of your searched content, wait for the portal’s interface to load or watch an advertisement.
● GIFs, on the other hand, do not require pausing or turning off, and run automatically. You also don’t need to mute any sounds. These ensure to-the-point message delivery and don’t divert your attention from the primary content you visit the webpage for.
Owing to the above, most of us are now much interested to convert videos to GIFs for an exact, impactful and to the point content creation and sharing. See through the next sections of this article to learn about the best video to GIF conversion tools and software.
Part 1 Top 10 Ways to Turn Video into GIF
Considering the credibility of GIFs, you may often require to convert your long videos into short and content specific GIFs. Given below are the 10 best methods to cater to the need of video to GIF conversion:
01Filmora
Wondershare Filmora Video Editor is one among the most popular and easy methods to convert videos to GIFs. It is compatible with almost all common video formats and is loaded with a plethora of exciting effects and editing tools. Take the following steps to create GIFs from videos using this application:
Wondershare Filmora
Get started easily with Filmora’s powerful performance, intuitive interface, and countless effects!
Try It Free Try It Free Try It Free Learn More >


Step 1: Import Your Video
Launch Filmora and import your desired video in the app’s welcome window. To do this, click on ‘New Project’ followed by ‘Import’ option from the drop down menu to add your video to the Filmora.

Step 2: Timeline Dragging
Add your video to the app’s timeline using the ‘Drag and Drop’ method. You can also extract video frames by taking screenshots and merge these images into your GIF from the media library.

Step 3: Explore Your Editing Skills
You can now edit the imported video in the timeline using a range of interesting effects. Crop, trim, split or make speed adjustments to give your video a catchy look.

Step 4: Include Messages
Try adding texts and supplementary elements to deliver impactful messages through your creation.

Step 5: It’s Time to Share!
Click ‘Export’ to save your GIF to your device. You are now ready to post your work in your social communities to get the most deserved attention of your peers!

02YouTube to GIF
This one is a simple and user-friendly video to GIF converter. You can convert videos to GIFs from your PC or other online platforms with this converter. The converter allows you to play with a variety of editing effects to make your creation more interesting. All you need to do is the following:
● In the video URL bar, type ‘gif’ after ‘www.’ and you will be redirected to converter’s working window. Set the GIF time interval or apply specific effects using the tools from the panel in the left of the working window.


● To set the video time frame, highlight it in the video timeline. Set the desired interval using the ‘Start Time’ and ‘End Time’ options.

● To add a new visual effect, select it from the menu. Below the video timeline, a row of parameters will get displayed. Set the effect parameters to make desired changes.
● Click ‘Create GIF’. In the ‘Settings’ menu, you can rename and add tags to your creation and even make it private.

● That’s it! You can download your GIF now. You may get a converter purchase offer for enabling advanced features. While most users prefer sticking to the free version, it is up to you whether to decline or accept the purchase offer.
● The ‘Download’ feature is exclusive to registered users. However, if you don’t prefer creating an account, just open the GIF download link in a separate tab’s ‘Direct Link’ row. Alternatively, you can replace ‘gif’ with ‘conv’ in the video URL bar and choose ‘Convert to GIF’. However, this process may take some extra minutes.

03Giphy GIF Maker
This is an editing tool that you can use to convert video to GIF online. This one is a reliable converter tool with a user-cohesive interface. It is a simple video editor that is available to you for free. All you need to do is mentioned below:
Step 1: Load your Video
Go to the official app website and paste your desired video link in the search bar. Your video gets uploaded to the app’s editor screen. Specify the time frame and check out your GIF’s preview.

Step 2: Let’s Go Editing!
Select ‘Continue to Decorate’ to edit your GIF with texts, effects, frames and filters. You can even go for a straight upload if your video doesn’t require customization.

Step 3: Time to Share!
Select ‘Continue to Upload’ and add required tags. Tap ‘Upload to Giphy’ to make a social media post or add it to the app’s website through a specific share code.
04Wondershare TunesGo
This is an effective video to GIF creator tool, loaded with extensive features. You can use this application to convert videos, live photos and multiple snaps into interesting GIFs. TunesGo gives you the freedom to edit your work in your own style with a variety of effects. Here’s what you need to do:

Step 1: Launch TunesGo
Download, install and launch the app into your PC. You may be asked for a device connection setup, but you can skip that in case GIF creation is your only requirement.

Step 2: Upload your Video
In the app’s welcome screen, navigate to ‘Toolbox’ at the top. From the drop down interface, choose ‘GIF Maker’. In the new window that pops-up next, click on ‘Add’ to upload the desired video to the app from your PC.

Step 3: Let’s Create!
Set the required time frame for your GIF in the app’s timeline and tap the ‘Create GIF’ button to start the conversion process. On completion, your work gets automatically saved in the ‘Pictures’ folder in your PC. You can also customize your target location.

05Vimeo
Vimeo is also a quick, 3-stepvideo to GIF converter. However, you need to have a Vimeo account to take up the conversion process. This is an easy and hassle free GIF creator, that adheres to your creation needs within minutes. Here’s what you need to do:
Step 1: Upload Your Video
Log in to your Vimeo account. In the opening window, select ’Upload’ from the toolbar at the top. ‘Drag and Drop’ or click ‘Choose Files’ to upload the desired video from your device.

Step 2: Create Your GIF
After you are done uploading the video, select ‘Create a GIF’ from the sidebar at the left. You will be directed to the GIF Editor window. Select a loop section from the video and set a time frame of maximum 6 seconds in the video timeline. Now click ‘Create GIF’.


Step 3: Export Your Creation
Your GIF is ready to download and share. You can also embed your GIF by generating embed codes for specific platforms.
06 Adobe Photoshop
This one is one f the most popular editing applications you can use to make GIF out of video. It’s simple and user-friendly interface does not require you to possess a Photoshop mastery for the conversion purpose. Here’s what you need to follow:
Step 1: Search Your Video
Find a video of your choice from a desired platform. In case you want a YouTube video, add ‘ss’ prior to the video’s service name in YouTube’s URL bar.
STEP 2: Edit Your Video
Use any preferable video splitters and editors to crop, trim and add interesting effects to your video and set a maximum time frame of 3 seconds.
Step 3: Create GIF
Open your edited video in Adobe Photoshop and tap ‘File Import-Video frames into layers’.

Step 4: Adjust Settings
Make required setting adjustments and click on ‘File-Save for Web’. Try adjusting image resolution and color range if your file size exceeds 10 MB.

Step 5: Save Your Work
In the ’Files’ tab at the top, select ‘Save’ and choose the ‘.gif’ extension in the ‘File Type’ dialog box to save your creation to your PC.
07Convertio
This converter provides a simple, 3-step process to create GIF from video. Either use it as a browser extension or download it from Google Chrome Webstore. Take the following steps to convert videos to GIF online.
● Upload your desired video to the service timeline. You can either choose files directly or ‘Drag and Drop’ them from your device.
● Select ‘Convert’ to make GIF from your uploaded video.
● Tap ‘Download’ to save your creation.

You can use this service to make different format conversions. However, this converter does not allow you to edit or add effects your GIF.
08MakeAGif
You can use this tool as a GIF video maker online to create, exchange and share GIFs on different platforms. Additionally, you also get the flexibility to use already saved images in your device to add them to your GIF. The app’s basic version allows you to create GIFs without watermarks. To add watermarks, you will need an account on the app. To convert videos to GIFs using this tool, you should take the following steps:
Step 1: Upload Your Video
In the app’s welcome screen, click on ‘Video to GIF’ and upload a desired video in the editor timeline. Add effects and make speed and time frame adjustments. When satisfied, tap ‘Continue to Publishing’.

Step 2: Add Names and Tags
In the publishing window, give a suitable name and add required tags to your edited video to make it easily identifiable. When you are done, click on ‘Create a GIF’ from the bottom right.

Step 3: Ready to Share!
You can now share your created GIF across social media platforms.

09Adobe Premiere
Similar to Adobe Photoshop, Adobe Premiere too is quite a preferred application for creating GIFs from videos. This is a simple, quick and free application that converts your videos to GIFs in a span of few minutes. Here’s what you need to do to go about the process:

Step 1: Edit your Video
Add a video of your choice in the Adobe Premiere timeline and play with your editing creativity to add desired effects and filters to it. Make sure to set requisite time frames to your edit.

Step 2: Prepare an Export
Click into the app’s video timeline, and prepare a file export using the following path:
File> Export> Media

Step 3: Settings Adjustments
In the Media Export window, navigate to the ‘Format’ tab. From the drop down menu, choose ‘Animated GIF’. Here, you can add your gif file, select its target destination and adjust the required settings.

Step 4: Export Your Work
Click ‘Export’ to share your creation on social media or click on ‘Queue’ to send your GIF to a specific media encoder.

1010. Movavi Video Converter
This is one of the latest video converter software you can rely on to make GIF from video files. This software allows you to create top quality animated GIFs and is compatible with a variety of video formats. Using this converter, you can create amazing GIFs in 5 quick steps: here’s what you need to follow:
Step 1: Download and Install the Software
To begin, download the converter software from its official site and adhere to the user instructions to install the same in your system.
Step 2: Upload Your Video
In the software’s opening window, click on ‘Add Media’ followed by ‘Add Video’ and select a desired video from your system to upload on the Movavi video timeline.

Step 3: Trim Your Video
Select ‘Edit’ from the right of your video file. In the editing window, specify the initial cut of the video by displacing the marker to the desired point. Click on ‘Scissors’ to add multiple cut points to your video. You can even drag the cut points around the editor timeline. Choose the unvented sections and click ‘Trash Can’. When the result satisfies you, click ‘Done’.

Step 4: Choose a Conversion Format
Navigate to the ‘Images’ tab and select ‘GIF’ and set an adequate size for the GIF. Here, you can adjust quality, frame size and rate and resize method using the ‘Cogwheel’ tool.

Step 5: Let’s Get Converting!
Tap ‘Convert’ and wait for the conversion to finish. You will be automatically directed to the folder where your converted files get saved.

● Key Takeaways from This Episode →
● GIFs are short, to the point and convenient to access, providing exact and impactful message delivery.
● The software market is flooded with a variety of editing tools to convert your dull videos to catchy GIFs.
● Filmora is a quick and smart editing tool that envisages your GIF creating experience with a range of exciting features.
Having trouble converting your videos to GIF? Browse the top 10 converters to sort this out!
In this article
01 [Why GIFs are Widely Used and Popular?](#Part 1)
02 [Top 10 Ways to Turn Video into GIF](#Part 2)
Part 1 Why GIFs are Widely Used and Popular?
If you take a poll on the watch preference of GIF versus videos, most of votes you get would be in favor of watching GIFs. There are obvious reasons to the fact that anyone would prefer watching a GIF over a video, irrespective of its length. Some major ones that make it quite annoying to watch videos include the following:
● To begin with, you need to turn the video on and off, depending on your choice of watching a video or surfing through stories and feeds, failing which you get to hear additional sounds through your feed from the already running video. You further need to stop the music or go for a volume control in case you are not interested to watch the video.
● Most of the videos you run turn up to be irrelevant or uninteresting through the middle, but you don’t have a choice to make bit adjustments. If however possible, the method is not quite convenient. You may need to visit a different site in case you run a video that is not integrated with webpage of your searched content, wait for the portal’s interface to load or watch an advertisement.
● GIFs, on the other hand, do not require pausing or turning off, and run automatically. You also don’t need to mute any sounds. These ensure to-the-point message delivery and don’t divert your attention from the primary content you visit the webpage for.
Owing to the above, most of us are now much interested to convert videos to GIFs for an exact, impactful and to the point content creation and sharing. See through the next sections of this article to learn about the best video to GIF conversion tools and software.
Part 1 Top 10 Ways to Turn Video into GIF
Considering the credibility of GIFs, you may often require to convert your long videos into short and content specific GIFs. Given below are the 10 best methods to cater to the need of video to GIF conversion:
01Filmora
Wondershare Filmora Video Editor is one among the most popular and easy methods to convert videos to GIFs. It is compatible with almost all common video formats and is loaded with a plethora of exciting effects and editing tools. Take the following steps to create GIFs from videos using this application:
Wondershare Filmora
Get started easily with Filmora’s powerful performance, intuitive interface, and countless effects!
Try It Free Try It Free Try It Free Learn More >
Step 1: Import Your Video
Launch Filmora and import your desired video in the app’s welcome window. To do this, click on ‘New Project’ followed by ‘Import’ option from the drop down menu to add your video to the Filmora.
Step 2: Timeline Dragging
Add your video to the app’s timeline using the ‘Drag and Drop’ method. You can also extract video frames by taking screenshots and merge these images into your GIF from the media library.
Step 3: Explore Your Editing Skills
You can now edit the imported video in the timeline using a range of interesting effects. Crop, trim, split or make speed adjustments to give your video a catchy look.
Step 4: Include Messages
Try adding texts and supplementary elements to deliver impactful messages through your creation.
Step 5: It’s Time to Share!
Click ‘Export’ to save your GIF to your device. You are now ready to post your work in your social communities to get the most deserved attention of your peers!
02YouTube to GIF
This one is a simple and user-friendly video to GIF converter. You can convert videos to GIFs from your PC or other online platforms with this converter. The converter allows you to play with a variety of editing effects to make your creation more interesting. All you need to do is the following:
● In the video URL bar, type ‘gif’ after ‘www.’ and you will be redirected to converter’s working window. Set the GIF time interval or apply specific effects using the tools from the panel in the left of the working window.
● To set the video time frame, highlight it in the video timeline. Set the desired interval using the ‘Start Time’ and ‘End Time’ options.
● To add a new visual effect, select it from the menu. Below the video timeline, a row of parameters will get displayed. Set the effect parameters to make desired changes.
● Click ‘Create GIF’. In the ‘Settings’ menu, you can rename and add tags to your creation and even make it private.
● That’s it! You can download your GIF now. You may get a converter purchase offer for enabling advanced features. While most users prefer sticking to the free version, it is up to you whether to decline or accept the purchase offer.
● The ‘Download’ feature is exclusive to registered users. However, if you don’t prefer creating an account, just open the GIF download link in a separate tab’s ‘Direct Link’ row. Alternatively, you can replace ‘gif’ with ‘conv’ in the video URL bar and choose ‘Convert to GIF’. However, this process may take some extra minutes.
03Giphy GIF Maker
This is an editing tool that you can use to convert video to GIF online. This one is a reliable converter tool with a user-cohesive interface. It is a simple video editor that is available to you for free. All you need to do is mentioned below:
Step 1: Load your Video
Go to the official app website and paste your desired video link in the search bar. Your video gets uploaded to the app’s editor screen. Specify the time frame and check out your GIF’s preview.
Step 2: Let’s Go Editing!
Select ‘Continue to Decorate’ to edit your GIF with texts, effects, frames and filters. You can even go for a straight upload if your video doesn’t require customization.
Step 3: Time to Share!
Select ‘Continue to Upload’ and add required tags. Tap ‘Upload to Giphy’ to make a social media post or add it to the app’s website through a specific share code.
04Wondershare TunesGo
This is an effective video to GIF creator tool, loaded with extensive features. You can use this application to convert videos, live photos and multiple snaps into interesting GIFs. TunesGo gives you the freedom to edit your work in your own style with a variety of effects. Here’s what you need to do:
Step 1: Launch TunesGo
Download, install and launch the app into your PC. You may be asked for a device connection setup, but you can skip that in case GIF creation is your only requirement.
Step 2: Upload your Video
In the app’s welcome screen, navigate to ‘Toolbox’ at the top. From the drop down interface, choose ‘GIF Maker’. In the new window that pops-up next, click on ‘Add’ to upload the desired video to the app from your PC.
Step 3: Let’s Create!
Set the required time frame for your GIF in the app’s timeline and tap the ‘Create GIF’ button to start the conversion process. On completion, your work gets automatically saved in the ‘Pictures’ folder in your PC. You can also customize your target location.
05Vimeo
Vimeo is also a quick, 3-stepvideo to GIF converter. However, you need to have a Vimeo account to take up the conversion process. This is an easy and hassle free GIF creator, that adheres to your creation needs within minutes. Here’s what you need to do:
Step 1: Upload Your Video
Log in to your Vimeo account. In the opening window, select ’Upload’ from the toolbar at the top. ‘Drag and Drop’ or click ‘Choose Files’ to upload the desired video from your device.
Step 2: Create Your GIF
After you are done uploading the video, select ‘Create a GIF’ from the sidebar at the left. You will be directed to the GIF Editor window. Select a loop section from the video and set a time frame of maximum 6 seconds in the video timeline. Now click ‘Create GIF’.
Step 3: Export Your Creation
Your GIF is ready to download and share. You can also embed your GIF by generating embed codes for specific platforms.
06 Adobe Photoshop
This one is one f the most popular editing applications you can use to make GIF out of video. It’s simple and user-friendly interface does not require you to possess a Photoshop mastery for the conversion purpose. Here’s what you need to follow:
Step 1: Search Your Video
Find a video of your choice from a desired platform. In case you want a YouTube video, add ‘ss’ prior to the video’s service name in YouTube’s URL bar.
STEP 2: Edit Your Video
Use any preferable video splitters and editors to crop, trim and add interesting effects to your video and set a maximum time frame of 3 seconds.
Step 3: Create GIF
Open your edited video in Adobe Photoshop and tap ‘File Import-Video frames into layers’.
Step 4: Adjust Settings
Make required setting adjustments and click on ‘File-Save for Web’. Try adjusting image resolution and color range if your file size exceeds 10 MB.
Step 5: Save Your Work
In the ’Files’ tab at the top, select ‘Save’ and choose the ‘.gif’ extension in the ‘File Type’ dialog box to save your creation to your PC.
07Convertio
This converter provides a simple, 3-step process to create GIF from video. Either use it as a browser extension or download it from Google Chrome Webstore. Take the following steps to convert videos to GIF online.
● Upload your desired video to the service timeline. You can either choose files directly or ‘Drag and Drop’ them from your device.
● Select ‘Convert’ to make GIF from your uploaded video.
● Tap ‘Download’ to save your creation.
You can use this service to make different format conversions. However, this converter does not allow you to edit or add effects your GIF.
08MakeAGif
You can use this tool as a GIF video maker online to create, exchange and share GIFs on different platforms. Additionally, you also get the flexibility to use already saved images in your device to add them to your GIF. The app’s basic version allows you to create GIFs without watermarks. To add watermarks, you will need an account on the app. To convert videos to GIFs using this tool, you should take the following steps:
Step 1: Upload Your Video
In the app’s welcome screen, click on ‘Video to GIF’ and upload a desired video in the editor timeline. Add effects and make speed and time frame adjustments. When satisfied, tap ‘Continue to Publishing’.
Step 2: Add Names and Tags
In the publishing window, give a suitable name and add required tags to your edited video to make it easily identifiable. When you are done, click on ‘Create a GIF’ from the bottom right.
Step 3: Ready to Share!
You can now share your created GIF across social media platforms.
09Adobe Premiere
Similar to Adobe Photoshop, Adobe Premiere too is quite a preferred application for creating GIFs from videos. This is a simple, quick and free application that converts your videos to GIFs in a span of few minutes. Here’s what you need to do to go about the process:
Step 1: Edit your Video
Add a video of your choice in the Adobe Premiere timeline and play with your editing creativity to add desired effects and filters to it. Make sure to set requisite time frames to your edit.
Step 2: Prepare an Export
Click into the app’s video timeline, and prepare a file export using the following path:
File> Export> Media
Step 3: Settings Adjustments
In the Media Export window, navigate to the ‘Format’ tab. From the drop down menu, choose ‘Animated GIF’. Here, you can add your gif file, select its target destination and adjust the required settings.
Step 4: Export Your Work
Click ‘Export’ to share your creation on social media or click on ‘Queue’ to send your GIF to a specific media encoder.
1010. Movavi Video Converter
This is one of the latest video converter software you can rely on to make GIF from video files. This software allows you to create top quality animated GIFs and is compatible with a variety of video formats. Using this converter, you can create amazing GIFs in 5 quick steps: here’s what you need to follow:
Step 1: Download and Install the Software
To begin, download the converter software from its official site and adhere to the user instructions to install the same in your system.
Step 2: Upload Your Video
In the software’s opening window, click on ‘Add Media’ followed by ‘Add Video’ and select a desired video from your system to upload on the Movavi video timeline.
Step 3: Trim Your Video
Select ‘Edit’ from the right of your video file. In the editing window, specify the initial cut of the video by displacing the marker to the desired point. Click on ‘Scissors’ to add multiple cut points to your video. You can even drag the cut points around the editor timeline. Choose the unvented sections and click ‘Trash Can’. When the result satisfies you, click ‘Done’.
Step 4: Choose a Conversion Format
Navigate to the ‘Images’ tab and select ‘GIF’ and set an adequate size for the GIF. Here, you can adjust quality, frame size and rate and resize method using the ‘Cogwheel’ tool.
Step 5: Let’s Get Converting!
Tap ‘Convert’ and wait for the conversion to finish. You will be automatically directed to the folder where your converted files get saved.
● Key Takeaways from This Episode →
● GIFs are short, to the point and convenient to access, providing exact and impactful message delivery.
● The software market is flooded with a variety of editing tools to convert your dull videos to catchy GIFs.
● Filmora is a quick and smart editing tool that envisages your GIF creating experience with a range of exciting features.
5 Techniques You Never Heard of for Converting MP4 to GIF in Photoshop
5 Techniques You Never heard of for Converting MP4 to GIF in Photoshop
An easy yet powerful editor
Numerous effects to choose from
Detailed tutorials provided by the official channel
When someone mentions a GIF, what comes to your mind? Some people can picture what it means but wouldn’t describe that match. So, before we discuss how to convert mp4 to gif in Photoshop, it would be wise to define it briefly. First of all, GIF stands for Graphics Interchange Format. Its file format is a compressed image, and it is most suitable for animation. We all know that an animated GIF comprises a series of many still images. However, since these images play sequentially, it may appear as if they are in motion. It is that movement illusion that makes the animation effect come about.
When someone mentions a GIF, what comes to your mind? Some people can picture what it means but wouldn’t describe that match. So, before we discuss how to convert mp4 to gif in Photoshop, it would be wise to define it briefly. First of all, GIF stands for Graphics Interchange Format. Its file format is a compressed image, and it is most suitable for animation. We all know that an animated GIF comprises a series of many still images. However, since these images play sequentially, it may appear as if they are in motion. It is that movement illusion that makes the animation effect come about.
In this article
01 [How to Convert Video to GIF in Photoshop - Easy Way](#Part 1)
02 [How to Create Animated GIFs from Video without Photoshop](#Part 2)
Part 1 How to Convert Video to GIF in Photoshop - Easy Way
If you want to convert video to GIF in Photoshop, here is a discussion of the easy way to go about it.
Step 1: Ensure that the Dimensions are Right
When you start to convert mp4 to GIF using Photoshop, it is important to highlight some things that need to be done before anything else. Ensure that you set the resolution and dimensions right. Failure to do saw will see the size of your video determine that of your GIF. Beneath such occurrences, you may find yourself having a GIF that’s too large, and its quality leaves a lot to be desired.
The dimensions you choose will depend on what you are working on at any one particular time. For instance, a 720 x 300 layout is recommended for a banner ad GIF. If there is something that one can’t stress enough is the importance of ensuring that you use pixels. As for the resolution, keep in mind that a low resolution translates to a small file size. In this case, you are at privilege to choose between two units, pixels and inches.
Additionally, set the color mode. Since GIFs are meant for screens, ensure that you select the RGB color mode. Finally, click on Create, which opens a new document, and start following these steps to convert Mp4 to GIF Photoshop.
Step 2: Import the Video you want to convert from MP4 to GIF Photoshop
Remember that we already opened Photoshop by pressing Create. Now, the next thing would be to navigate to File followed by Import before selecting the Video Frames to Layers option.

Step 3: Set Up the Following Settings Accordingly
After choosing the video file, choose Open, and a dialogue box with several options and a preview of the video appears.

The radio buttons give you two options to choose from. The “From Beginning to End” is the ideal choice if you want the whole video to be converted to GIF. However, if you want to focus on a section of the video, select “Selected Range Only.” On the other hand, the checkbox allows you to limit the video to 2 frames. Simply tick it, and Photoshop will automatically ensure that only two frames of the video are left.
Last but not least, check the “Make Frame Animation” checkbox. Once all these settings are set as recommended and depending on preference, Photoshop will export your video as several frames. In the event that the program crashes, all is not lost. You can fix it by reducing the video’s quality and then try importing it.
Step 4: Edit the GIF
Photoshop also gives you several options to help you edit your frames to perfection. In most cases, these settings are ideal for manipulating the quality of your GIF. Interestingly, it is possible to preview how the GIF will look before committing to any change. So expect two panes, right and left. The left one allows you to see the preview, whereas its right counterpart helps you edit.

Alternatively, select one of the preset choices. If you do so, there is no requirement The bottom line is that the tool makes to make any changes. That doesn’t mean you can’t choose a Preset option and then edit it to your preferences. Expect the quality of the GIF to decrease and the size to be relatively small. Right below the Preset, don’t forget to confirm that the selected option is GIF.
Step 5: Save the GIF
Once satisfied by the GIF created, save these frames as animated GIFs. Go to File, then Export, followed by Save for Web (Legacy).

That’s how to convert Mp4 to GIF in simple steps.
Part 2 How to Create Animated GIFs from Video without Photoshop
Alternatively, you can opt to convert Mp4 to GIF using Wondershare Filmora Video Editor . It is yet another tool suitable for creating animated GIFs using videos and photos. It allows the user to customize GIF images using overlays, text, animation, and elements. When it is over, you are at liberty to export it to your computer or any other common portable storage device. The bottommost line is that the tool makes it easy to use whenever necessary. The icing on the cake is the fact that you don’t have to sign up or pay a premium. In case you are wondering, it is also easy to use. All you got to do is to follow these steps.

Wondershare Filmora - Best Video Editor for Mac/Windows
5,481,435 people have downloaded it.
Build unique custom animations without breaking a sweat.
Focus on creating epic stories and leave the details to Filmora’s auto features.
Start a creative adventure with drag & drop effects and endless possibilities.
Filmora simplifies advanced features to save you time and effort.
Filmora cuts out repetition so you can move on to your next creative breakthrough.
Step 1: Import the Videos
Ensure that the videos you import are editable lest that will be a waste of time. Its design makes it compatible with a wide range of formats, including wmv, mkv, mp4, wav, mpeg, avi, jpg, and png. Since it is among the compatible formats, don’t hesitate to use Filmora to convert GIF to mp4 and vice versa instead of Photoshop.
Step 2: Drag the videos to Filmora timeline
Keep in mind that Filmora has a long list of tools you can use to edit your videos. However, you can also use them on a video that’s on its timeline. To drop them there, all you have to do is drag them to the timeline.

Step 3: Edit the File
The list of ways of editing your videos is long. Some of your options are split, crop, combine, slow down, and speed up the GIFs, to mention a few. So, pick the options that fit your situation the best. Ensure that the end product is as good as possible by using these features to the best level.
Step 4: Add Various Text Effects
In most cases, images and videos aren’t enough. You may want to add text to enhance what you want to achieve with the GIF. To do so, you can always introduce text, and trust me, it never disappoints. In addition to text, you can also add sound at this stage. Again, it is something that does GIFs the justice they deserve.

Step 5: Save and Export the GIF
When all is stated and done, you will have to save and export the GIFs so that you can use them accordingly. For instance, you can share them with friends via social media. Ensure that the extension you use is the GIF.
● Key Takeaways from This Episode →
● Based on the above discussion, it is possible to convert mp4 to GIF. As a matter of fact, it is quite easy, and you don’t need to be an expert to get it done.
●Rest assured that the video will become a GIF with a few clicks. Then, you can go ahead and use it as you may wish.
●On one side, you can use Photoshop. It is a tool designed to perform such tasks.
●If you choose it, use the above guide and follow each of the steps. It is quite detailed to the extent that you won’t get stuck along the way.
●On the other hand, you can also use Wondershare Filmora. It is yet another application that converts MP4 to GIF excellently.
When someone mentions a GIF, what comes to your mind? Some people can picture what it means but wouldn’t describe that match. So, before we discuss how to convert mp4 to gif in Photoshop, it would be wise to define it briefly. First of all, GIF stands for Graphics Interchange Format. Its file format is a compressed image, and it is most suitable for animation. We all know that an animated GIF comprises a series of many still images. However, since these images play sequentially, it may appear as if they are in motion. It is that movement illusion that makes the animation effect come about.
When someone mentions a GIF, what comes to your mind? Some people can picture what it means but wouldn’t describe that match. So, before we discuss how to convert mp4 to gif in Photoshop, it would be wise to define it briefly. First of all, GIF stands for Graphics Interchange Format. Its file format is a compressed image, and it is most suitable for animation. We all know that an animated GIF comprises a series of many still images. However, since these images play sequentially, it may appear as if they are in motion. It is that movement illusion that makes the animation effect come about.
In this article
01 [How to Convert Video to GIF in Photoshop - Easy Way](#Part 1)
02 [How to Create Animated GIFs from Video without Photoshop](#Part 2)
Part 1 How to Convert Video to GIF in Photoshop - Easy Way
If you want to convert video to GIF in Photoshop, here is a discussion of the easy way to go about it.
Step 1: Ensure that the Dimensions are Right
When you start to convert mp4 to GIF using Photoshop, it is important to highlight some things that need to be done before anything else. Ensure that you set the resolution and dimensions right. Failure to do saw will see the size of your video determine that of your GIF. Beneath such occurrences, you may find yourself having a GIF that’s too large, and its quality leaves a lot to be desired.
The dimensions you choose will depend on what you are working on at any one particular time. For instance, a 720 x 300 layout is recommended for a banner ad GIF. If there is something that one can’t stress enough is the importance of ensuring that you use pixels. As for the resolution, keep in mind that a low resolution translates to a small file size. In this case, you are at privilege to choose between two units, pixels and inches.
Additionally, set the color mode. Since GIFs are meant for screens, ensure that you select the RGB color mode. Finally, click on Create, which opens a new document, and start following these steps to convert Mp4 to GIF Photoshop.
Step 2: Import the Video you want to convert from MP4 to GIF Photoshop
Remember that we already opened Photoshop by pressing Create. Now, the next thing would be to navigate to File followed by Import before selecting the Video Frames to Layers option.
Step 3: Set Up the Following Settings Accordingly
After choosing the video file, choose Open, and a dialogue box with several options and a preview of the video appears.
The radio buttons give you two options to choose from. The “From Beginning to End” is the ideal choice if you want the whole video to be converted to GIF. However, if you want to focus on a section of the video, select “Selected Range Only.” On the other hand, the checkbox allows you to limit the video to 2 frames. Simply tick it, and Photoshop will automatically ensure that only two frames of the video are left.
Last but not least, check the “Make Frame Animation” checkbox. Once all these settings are set as recommended and depending on preference, Photoshop will export your video as several frames. In the event that the program crashes, all is not lost. You can fix it by reducing the video’s quality and then try importing it.
Step 4: Edit the GIF
Photoshop also gives you several options to help you edit your frames to perfection. In most cases, these settings are ideal for manipulating the quality of your GIF. Interestingly, it is possible to preview how the GIF will look before committing to any change. So expect two panes, right and left. The left one allows you to see the preview, whereas its right counterpart helps you edit.
Alternatively, select one of the preset choices. If you do so, there is no requirement The bottom line is that the tool makes to make any changes. That doesn’t mean you can’t choose a Preset option and then edit it to your preferences. Expect the quality of the GIF to decrease and the size to be relatively small. Right below the Preset, don’t forget to confirm that the selected option is GIF.
Step 5: Save the GIF
Once satisfied by the GIF created, save these frames as animated GIFs. Go to File, then Export, followed by Save for Web (Legacy).
That’s how to convert Mp4 to GIF in simple steps.
Part 2 How to Create Animated GIFs from Video without Photoshop
Alternatively, you can opt to convert Mp4 to GIF using Wondershare Filmora Video Editor . It is yet another tool suitable for creating animated GIFs using videos and photos. It allows the user to customize GIF images using overlays, text, animation, and elements. When it is over, you are at liberty to export it to your computer or any other common portable storage device. The bottommost line is that the tool makes it easy to use whenever necessary. The icing on the cake is the fact that you don’t have to sign up or pay a premium. In case you are wondering, it is also easy to use. All you got to do is to follow these steps.
Wondershare Filmora - Best Video Editor for Mac/Windows
5,481,435 people have downloaded it.
Build unique custom animations without breaking a sweat.
Focus on creating epic stories and leave the details to Filmora’s auto features.
Start a creative adventure with drag & drop effects and endless possibilities.
Filmora simplifies advanced features to save you time and effort.
Filmora cuts out repetition so you can move on to your next creative breakthrough.
Step 1: Import the Videos
Ensure that the videos you import are editable lest that will be a waste of time. Its design makes it compatible with a wide range of formats, including wmv, mkv, mp4, wav, mpeg, avi, jpg, and png. Since it is among the compatible formats, don’t hesitate to use Filmora to convert GIF to mp4 and vice versa instead of Photoshop.
Step 2: Drag the videos to Filmora timeline
Keep in mind that Filmora has a long list of tools you can use to edit your videos. However, you can also use them on a video that’s on its timeline. To drop them there, all you have to do is drag them to the timeline.
Step 3: Edit the File
The list of ways of editing your videos is long. Some of your options are split, crop, combine, slow down, and speed up the GIFs, to mention a few. So, pick the options that fit your situation the best. Ensure that the end product is as good as possible by using these features to the best level.
Step 4: Add Various Text Effects
In most cases, images and videos aren’t enough. You may want to add text to enhance what you want to achieve with the GIF. To do so, you can always introduce text, and trust me, it never disappoints. In addition to text, you can also add sound at this stage. Again, it is something that does GIFs the justice they deserve.
Step 5: Save and Export the GIF
When all is stated and done, you will have to save and export the GIFs so that you can use them accordingly. For instance, you can share them with friends via social media. Ensure that the extension you use is the GIF.
● Key Takeaways from This Episode →
● Based on the above discussion, it is possible to convert mp4 to GIF. As a matter of fact, it is quite easy, and you don’t need to be an expert to get it done.
●Rest assured that the video will become a GIF with a few clicks. Then, you can go ahead and use it as you may wish.
●On one side, you can use Photoshop. It is a tool designed to perform such tasks.
●If you choose it, use the above guide and follow each of the steps. It is quite detailed to the extent that you won’t get stuck along the way.
●On the other hand, you can also use Wondershare Filmora. It is yet another application that converts MP4 to GIF excellently.
Animate Pictures in Canva
Versatile Video Editor - Wondershare Filmora
An easy yet powerful editor
Numerous effects to choose from
Detailed tutorials provided by the official channel
With the rapid rise of social media worldwide, animated posts (like GIFs) are becoming famous. They have become a replacement to other modes like JPEG and .Png
Famous designing tools like Canva introduced an animation feature in the light of its popularity. The feature allows you to step up your social media game and creates animated visuals in a blink! It is also efficient for both professional and amateur users.
Besides social media content, Canva is also useful to design birthday cards, event invites, inspirational quotes, and more! Let’s learn about how to animate pictures in Canva in detail.
In this article
01 What Canva Pictures Can Be Used For?
02 How to Animate Pictures in Canva?
03 Tips: Animate Pictures In Video
Part 1: What Canva Pictures Can Be Used For?
Be it for marketing campaigns or projects, Canva is the best tool for all designing work. It is a foolproof platform where you do not need prior designing experience. Canva is useful for

Social media/Instagram Posts: You can build your Instagram presence by creating posts through Canva. It has multiple templates and features to make alluring Instagram posts. It also has drag-and-drop free images to add customized designs to the template.
Facebook Covers: You can make Facebook covers on Canva by choosing a layout and adding other elements. You can include colors, fonts, and pictures on the cover. Canva has templates for all themes, moods, and styles!
Event Invites: Canva has hundreds of free layouts and libraries to create event invites. You can choose the appropriate template and incorporate party-oriented photos, icons, stickers, illustrations, and graphics. It also has a personalizing option to add personal pictures and artwork in the editor.
Inspirational Quotes: Canva allows you to curate inspirational quotes and dispense motivation in people. It has templates to modify the elements like font size, text size, borders, images, and more!
Collages: It helps create a collage where you can combine multiple pictures in one frame. Canva offers various grids with a capacity of 12 pictures and different sizes.
Part 2: How to Animate Pictures in Canva?
Canva helps you add instant animation in presentations, social media posts, and more. To know how to animate images in Canva, follow the below steps:

Step 1: Add Static Elements
Start by creating an image through static elements. To make the design attractive, you can add sample texts, illustrations, doodles, and other entities.
Try to stimulate your creativity and come up with a layout beforehand. If possible, sketch on paper and replicate the same.
Step 2: Animate Your Design
Take a final glance at the layout. Make sure it’s perfect. Once all the elements are placed as per your design, it’s time to animate them. For that:
- Click on the white background page
- Go to the “Toolbar” section
- Select the “Animate” button
Step 3: Select Page Animation Style
Canva offers six animation styles, where five are for free users, and one is for pro users. To access the five animation styles, follow these steps.
- Press the “Animate” Button
- Select “Page Animations”
- There you will find options like Block, Pan, Fade, Rise, and Tumble
- Select the style as per your design
Step 4: Preview and Download
After selecting a page animation style, it will preview the effect. If you find it good, move on to downloading the GIF. Here’s how to do so
- Go to the “Toolbar” option (present on your upper right hand)
- Choose GIF as the file type
- Check the page number and verify if it’s correct
- Press the “Done” button
Step 5: Final GIF
After clicking on the “Done” button, your GIF will be downloaded. You will be able to see a display for five seconds. If you want to edit the image after this, click on the time button (near the “Animate” button).
So, that was all about how to animate a photo in Canva.
Drawbacks of Canva
Despite efficient features and easy interface, there are certain areas where Canva lacks. This includes
- It does not have any local file storage.
- As too many people use Canva, your template may look the same as others.
- Some of its best features are not free to access.
- The mobile app version lacks certain elements and features.
Out of all these drawbacks, repetitions of templates are a big issue. That’s because everyone wants their posts to look unique and irreplaceable. However, common Canva templates may prevent that from happening.
Fortunately, there are ways to combat such issues. Let’s learn about them in the next section.
Tips: Animate Pictures In Video
You can also animate pictures in the video to make them more lively. For that, you can use Wondershare Filmora Pro Video Editor. It’s also efficient if you don’t know how to animate a picture in Canva:
Wondershare Filmora Video Editor
Filmora by Wondershare is a video editing software that helps you build custom animations easily. It has auto features to make epic stories and posts.
Wondershare Filmora
Get started easily with Filmora’s powerful performance, intuitive interface, and countless effects!
Try It Free Try It Free Try It Free Learn More about Filmora>
Its drag and drop effect makes designing simple and quick. Due to its outstanding attributes, options, and styles, Filmora has 77+ million happy users!
It’s a power-packed integration of functionality, performance, and more! In fact, it resolves the repeated template issue of Canva. The software has top-notch functions and innovative filters that add authenticity to the designs.
Till now, you learned about how to animate a picture on Canva. Now, let’s comprehend the right way to use Filmora for animating and adding images in the video.
Before using, make sure to update the software to its latest version. Follow separate methods for both Windows and Mac.
For Win
Step 1: Adding Image to Video Track
With Filmora, adding images to video is a matter of seconds! Start by:
- Identify the position where you want to add the image and place the Playhead there.
- Right-click on the picture from the media library. Click on the “Insert” option. Your image will be added. Select the “Append” option, if you want to add an image at the video end.

Note: How to Remove Black Bars around the Image?
- Go to “Settings” from the File section.
- Click on the “Editing” tab and select “Photo Placement.”
- Choose from the “Crop to Fit” or “Pan To Zoom” option. The black bars will be removed.
To add the image in between the video clip, split them. Now, add the image between the split parts.
Step 2: Add Images as Overlays
To add images as overlays, drag the image to a video track above the main track. The main track consists of your video.
Track 1 (or the track with a video clip) is the base of your video. If you add anything else, it will be displayed above this track as video track 2, 3, and so on. Overall, you can add 100 video tracks.
Step 3: Edit Your Image
If you know how to animate an image in Canva, editing images on Filmora is even easier. You can try the following methods:
Animate Your Images
- To add animation presets to the image, click on the image twice.
- Go to the “Animation Tab” and look for an animation preset.
- Drag the presets to the image for its effect

Make Image Color Adjustments
- Double-click on the image
- Go to the “Color” tab and then the “Color” section
- Customize the temperature, saturation, brightness, etc., as per your need.
- Press Ok.
Change Image Duration
You can increase the image duration to more than the default timing of 5 seconds. For that:
- Click on the image and select the “Duration” option.
- Go to the “Duration Setting” panel.
- Add the new duration timing.

Adjust Position, Rotate/Flip, and Opacity
- You can resize the image position through the circles and squares at the image edges.
- To flip or rotate the image, double-click on the picture. From the “Image Panel,” go to “Transform” and then click on “Rotate.” You can choose either “Horizontal Flip” or “Vertical Flip” to flip the images.
- Double-click on the image and click on the “Composting” option to add opacity. You can choose the blending mode or adjust the “Opacity” accordingly.

For Mac
Filmora for Mac comes with a drag and drop feature to add transitions, animated titles, and effects. You can start a new project from scratch by clicking on “New Project”. The entire process is the same as that for Windows users.
To apply animation in the images, use the motion effects option. For that,
- Click on the Image
- Go to Motion Tab
- Select a motion effect
- Double-click to apply the effect

Conclusion
So that’s how to animate photos in Canva. Hopefully, our steps will help you revamp your posts like a pro! If not Canva, you can use its alternative Filmora. It’s equally prominent, user-friendly, and feature-rich.
Versatile Video Editor - Wondershare Filmora
An easy yet powerful editor
Numerous effects to choose from
Detailed tutorials provided by the official channel
With the rapid rise of social media worldwide, animated posts (like GIFs) are becoming famous. They have become a replacement to other modes like JPEG and .Png
Famous designing tools like Canva introduced an animation feature in the light of its popularity. The feature allows you to step up your social media game and creates animated visuals in a blink! It is also efficient for both professional and amateur users.
Besides social media content, Canva is also useful to design birthday cards, event invites, inspirational quotes, and more! Let’s learn about how to animate pictures in Canva in detail.
In this article
01 What Canva Pictures Can Be Used For?
02 How to Animate Pictures in Canva?
03 Tips: Animate Pictures In Video
Part 1: What Canva Pictures Can Be Used For?
Be it for marketing campaigns or projects, Canva is the best tool for all designing work. It is a foolproof platform where you do not need prior designing experience. Canva is useful for
Social media/Instagram Posts: You can build your Instagram presence by creating posts through Canva. It has multiple templates and features to make alluring Instagram posts. It also has drag-and-drop free images to add customized designs to the template.
Facebook Covers: You can make Facebook covers on Canva by choosing a layout and adding other elements. You can include colors, fonts, and pictures on the cover. Canva has templates for all themes, moods, and styles!
Event Invites: Canva has hundreds of free layouts and libraries to create event invites. You can choose the appropriate template and incorporate party-oriented photos, icons, stickers, illustrations, and graphics. It also has a personalizing option to add personal pictures and artwork in the editor.
Inspirational Quotes: Canva allows you to curate inspirational quotes and dispense motivation in people. It has templates to modify the elements like font size, text size, borders, images, and more!
Collages: It helps create a collage where you can combine multiple pictures in one frame. Canva offers various grids with a capacity of 12 pictures and different sizes.
Part 2: How to Animate Pictures in Canva?
Canva helps you add instant animation in presentations, social media posts, and more. To know how to animate images in Canva, follow the below steps:
Step 1: Add Static Elements
Start by creating an image through static elements. To make the design attractive, you can add sample texts, illustrations, doodles, and other entities.
Try to stimulate your creativity and come up with a layout beforehand. If possible, sketch on paper and replicate the same.
Step 2: Animate Your Design
Take a final glance at the layout. Make sure it’s perfect. Once all the elements are placed as per your design, it’s time to animate them. For that:
- Click on the white background page
- Go to the “Toolbar” section
- Select the “Animate” button
Step 3: Select Page Animation Style
Canva offers six animation styles, where five are for free users, and one is for pro users. To access the five animation styles, follow these steps.
- Press the “Animate” Button
- Select “Page Animations”
- There you will find options like Block, Pan, Fade, Rise, and Tumble
- Select the style as per your design
Step 4: Preview and Download
After selecting a page animation style, it will preview the effect. If you find it good, move on to downloading the GIF. Here’s how to do so
- Go to the “Toolbar” option (present on your upper right hand)
- Choose GIF as the file type
- Check the page number and verify if it’s correct
- Press the “Done” button
Step 5: Final GIF
After clicking on the “Done” button, your GIF will be downloaded. You will be able to see a display for five seconds. If you want to edit the image after this, click on the time button (near the “Animate” button).
So, that was all about how to animate a photo in Canva.
Drawbacks of Canva
Despite efficient features and easy interface, there are certain areas where Canva lacks. This includes
- It does not have any local file storage.
- As too many people use Canva, your template may look the same as others.
- Some of its best features are not free to access.
- The mobile app version lacks certain elements and features.
Out of all these drawbacks, repetitions of templates are a big issue. That’s because everyone wants their posts to look unique and irreplaceable. However, common Canva templates may prevent that from happening.
Fortunately, there are ways to combat such issues. Let’s learn about them in the next section.
Tips: Animate Pictures In Video
You can also animate pictures in the video to make them more lively. For that, you can use Wondershare Filmora Pro Video Editor. It’s also efficient if you don’t know how to animate a picture in Canva:
Wondershare Filmora Video Editor
Filmora by Wondershare is a video editing software that helps you build custom animations easily. It has auto features to make epic stories and posts.
Wondershare Filmora
Get started easily with Filmora’s powerful performance, intuitive interface, and countless effects!
Try It Free Try It Free Try It Free Learn More about Filmora>
Its drag and drop effect makes designing simple and quick. Due to its outstanding attributes, options, and styles, Filmora has 77+ million happy users!
It’s a power-packed integration of functionality, performance, and more! In fact, it resolves the repeated template issue of Canva. The software has top-notch functions and innovative filters that add authenticity to the designs.
Till now, you learned about how to animate a picture on Canva. Now, let’s comprehend the right way to use Filmora for animating and adding images in the video.
Before using, make sure to update the software to its latest version. Follow separate methods for both Windows and Mac.
For Win
Step 1: Adding Image to Video Track
With Filmora, adding images to video is a matter of seconds! Start by:
- Identify the position where you want to add the image and place the Playhead there.
- Right-click on the picture from the media library. Click on the “Insert” option. Your image will be added. Select the “Append” option, if you want to add an image at the video end.
Note: How to Remove Black Bars around the Image?
- Go to “Settings” from the File section.
- Click on the “Editing” tab and select “Photo Placement.”
- Choose from the “Crop to Fit” or “Pan To Zoom” option. The black bars will be removed.
To add the image in between the video clip, split them. Now, add the image between the split parts.
Step 2: Add Images as Overlays
To add images as overlays, drag the image to a video track above the main track. The main track consists of your video.
Track 1 (or the track with a video clip) is the base of your video. If you add anything else, it will be displayed above this track as video track 2, 3, and so on. Overall, you can add 100 video tracks.
Step 3: Edit Your Image
If you know how to animate an image in Canva, editing images on Filmora is even easier. You can try the following methods:
Animate Your Images
- To add animation presets to the image, click on the image twice.
- Go to the “Animation Tab” and look for an animation preset.
- Drag the presets to the image for its effect
Make Image Color Adjustments
- Double-click on the image
- Go to the “Color” tab and then the “Color” section
- Customize the temperature, saturation, brightness, etc., as per your need.
- Press Ok.
Change Image Duration
You can increase the image duration to more than the default timing of 5 seconds. For that:
- Click on the image and select the “Duration” option.
- Go to the “Duration Setting” panel.
- Add the new duration timing.
Adjust Position, Rotate/Flip, and Opacity
- You can resize the image position through the circles and squares at the image edges.
- To flip or rotate the image, double-click on the picture. From the “Image Panel,” go to “Transform” and then click on “Rotate.” You can choose either “Horizontal Flip” or “Vertical Flip” to flip the images.
- Double-click on the image and click on the “Composting” option to add opacity. You can choose the blending mode or adjust the “Opacity” accordingly.
For Mac
Filmora for Mac comes with a drag and drop feature to add transitions, animated titles, and effects. You can start a new project from scratch by clicking on “New Project”. The entire process is the same as that for Windows users.
To apply animation in the images, use the motion effects option. For that,
- Click on the Image
- Go to Motion Tab
- Select a motion effect
- Double-click to apply the effect
Conclusion
So that’s how to animate photos in Canva. Hopefully, our steps will help you revamp your posts like a pro! If not Canva, you can use its alternative Filmora. It’s equally prominent, user-friendly, and feature-rich.
Versatile Video Editor - Wondershare Filmora
An easy yet powerful editor
Numerous effects to choose from
Detailed tutorials provided by the official channel
Also read:
- Updated 2024 Approved 10 Amazing Cartoon Music Examples You Need to Bookmark
- The Secret Sauce for Making GIF Instagram Story More Stunning
- Updated 2024 Approved Amazing Techniques of Motion Graphics in Premiere Pro
- New 2024 Approved 12 Aesthetic GIF Instagram for Marketers
- 2024 Approved 15 Animated Characters We All Had A Crush On
- Updated 2024 Approved 10 Realistic Cartoon Characters You Would Run Away From if You Met in Real Life
- Updated Christmas Is Coming! How to Find & Make Animated Christmas GIFs, In 2024
- 2024 Approved Best 12 Evil Cartoon Characters of All Time
- New In 2024, 10 Great MP4 to GIF Converters to Get Perfect-Made GIF
- 2024 Approved Top 10 Best Photo to Animation Converters
- Updated In 2024, What Wikipedia Cant Tell You About the 10 Batman Cartoons
- 2024 Approved 10 Must-Use MP4 to GIF Converters to Get Perfect-Made GIF
- Updated How to Stop Animation From Looping in Unity
- 2024 Approved Tips on How to Learn Graphics Animation
- Updated How to Make Architecture Animation
- Updated In 2024, Secret Source to Make a Great Stop Motion Puppet
- Updated In 2024, In-Depth Study of Cartoon Painting Starts From Learning to Draw It
- Popular Tips on Learning Animate Rigging for 2024
- Updated Best GIF Maker Software for Windows and Mac
- Learn How to Make Architecture Animation
- New How to Combine Multiple GIFs Into One with GIF Combiner
- Updated 12 Aesthetic GIF Instagram for Marketers for 2024
- Updated Types of Cartoon Styles You May Use for The Next Marketing Project
- How to Make a 3D Cartoon of Yourself
- In 2024, How to Remove Activation Lock From the Apple iPhone 12 Pro Max Without Previous Owner?
- How to use iSpoofer on Tecno Spark 10 5G? | Dr.fone
- How to share/fake gps on Uber for Xiaomi Redmi Note 13 Pro+ 5G | Dr.fone
- Can you play MP4 on Galaxy Z Fold 5?
- In 2024, Best Anti Tracker Software For Apple iPhone 7 | Dr.fone
- iPogo will be the new iSpoofer On Samsung Galaxy S23 Tactical Edition? | Dr.fone
- In 2024, How to Intercept Text Messages on Samsung Galaxy F54 5G | Dr.fone
- Hard Resetting an Infinix Note 30 Pro Device Made Easy | Dr.fone
- In 2024, Getting the Pokemon Go GPS Signal Not Found 11 Error in Oppo A18 | Dr.fone
- Why Is My Poco M6 Pro 4G Offline? Troubleshooting Guide | Dr.fone
- Top 6 Apps/Services to Trace Any Motorola Razr 40 Ultra Location By Mobile Number | Dr.fone
- How to retrieve erased videos from Google Pixel 8 Pro
- Top 4 Android System Repair Software for Asus ROG Phone 8 Bricked Devices | Dr.fone
- Unlock Apple ID without Phone Number From iPhone 12 Pro
- In 2024, 4 Ways to Transfer Music from Vivo S17 to iPhone | Dr.fone
- In 2024, How To Do Lava Yuva 3 Screen Sharing | Dr.fone
- Three Ways to Sim Unlock Vivo Y100 5G
- Read This Guide to Find a Reliable Alternative to Fake GPS On OnePlus Nord N30 SE | Dr.fone
- Title: New Before You Learn 3D Animation Some Things You Should Know
- Author: Elon
- Created at : 2024-05-19 03:04:40
- Updated at : 2024-05-20 03:04:40
- Link: https://animation-videos.techidaily.com/new-before-you-learn-3d-animation-some-things-you-should-know/
- License: This work is licensed under CC BY-NC-SA 4.0.
