
:max_bytes(150000):strip_icc():format(webp)/TwitterVideoDownload-5b605aaac9e77c002c3a42f3.jpg)
New Best 10 Apps to Enhance Your Instagram Story Slideshow for 2024
Best 10 Apps to Enhance Your Instagram Story Slideshow
Best 10 Apps to Enhance Your Instagram Story Slideshow
An easy yet powerful editor
Numerous effects to choose from
Detailed tutorials provided by the official channel
Instagram reels and stories have turned into convenient ways of exploring your video creation skills with fun. Read further to know about the top 10 apps to create amazing Insta story slideshows!
In this article
01 [What’s Instagram Story Slideshow](#Part 1)
02 [How to Use Instagram Slideshow?](#Part 2)
03 [Top 10 Apps for Making Instagram Story Slideshow (iOS & Android)](#Part 3)
04 [Tips for Enhancing Your Insta Story Slideshow](#Part 4)
Part 1 What’s Instagram Story Slideshow
With the growing influence of social media on the global life and work culture in today’s times, each and every event on such platforms becomes the new trend of the current IT impacted society. Speaking in the light of the newest developments, Instagram story slideshows have become the latest talk of the diverse range of social media communities across the web.
Since its entry into the communication galore, the Instagram application has emerged as an absolute favourite of social media freaks, thanks to its already captivating features. Moving ahead with its customary user appealing efforts, the latter has recently introduced the slideshow feature to upgrade and improvise its content stories and reels.
Working with the same, you can now integrate your otherwise simple and elementary Instagram stories into awesome slideshows. This visibly means that your conventional stories and reels on the app are now going to get that missing spark with a plethora of customizable motion graphic features. An Instagram story slideshow can work to earn you a huge number of followers, thus uplifting your social creativity quotient and entertainment appeal.
These creative 15 second snippets are appreciably the most amazing trends to increase your audience backup as a market organization, business enterprise, an influencer or as a rising star, all because of an excellent content presentation strategy and catchy outlook. Try hands at using this high end graphic presentation utility to attract the most awaited jaw dropping appreciation of your social media posts.
Part 2 How to Use Instagram Slideshow
Now that you are aware about the excitement and social buzz that your Instagram story slideshows can create with an immediate effect, the aforesaid reason is sufficient enough to motivate you towards diving deeper into the interesting ways of working with the feature to your maximum advantage. Adhering to the concern, let us proceed with learning about the most appealing trends to use an Instagram slideshow in the following section:
● Stepwise Tutorials and Visual Guides
The utility of Instagram slideshows to merge multiple images and videos together has blocked the interruption of additional feeds amid the content presentation, thus giving you the liberty to post a set of related videos and stills in one go, which can be of great help when you encounter a need to share tutorial videos, recipe follow ups and alike content that essentially requires a sequential presentation.
The Instagram stories slideshow can be useful to DIY creators who wish to demonstrate or guide their followers to create stunning examples of self-designed masterpieces. Posting step wise guides with clear cut instructions to work upon or use something, like that of a new product, can also be catered with an Instagram slideshow story.
● Product Advertising and Sale
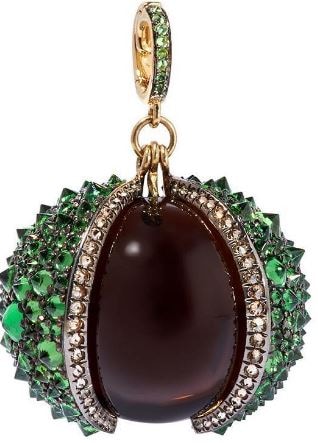
If you are looking for impressive and cost effective solutions to launch your products among potential customers, consider taking the help of Instagram slideshows. The feature is known to deliver excellent results in the brand promotion of some particular products, such as jewelry and apparel design.
Jewelers, furniture retailers and textile designers can work with the slideshow to upload a series of images and videos for a clear and vivid demonstration of the product. Considering the fact that such commodities may greatly differ in their visual and actual appearance, the products can be shown through a variety of angles to facilitate viewers with the most comprehensive and an almost exact presentation of the different aspects that a product claims to have.
Part 3 Top 10 Apps for Making Instagram Story Slideshow (iOS & Android)
By now, you must have had a comprehensive understanding of the significance of Instagram story slideshows in uplifting different aspects of your content delivery, along with effectively addressing your diverse and large scale information sharing needs. Moving ahead with our discussion, let us browse through some of the best software solutions to create the most appealing Instagram story slideshows in the following section:
01SlideLab
Starting with the list the first application to look forward on creating over the top Instagram story slideshows with utmost ease. The software package is loaded with an extensive range of editing effects and filters, audio-visual transitions and supplementary design elements, that promise you of a high resolution, professional quality slideshow output.
Working with the software, you get the flexibility to conveniently customize the sequence in which the images would appear in the slideshow, with allowing a maximum screen display time of 3 seconds to each image. The created slideshows can be easily shared on various media handles and platforms, including Instagram, Facebook and YouTube.
While you can undertake a free trial of the tool, a paid subscription of the same costing $ 4.99 is required for accessing the complete range of features associated with the program. The software is however, exclusively compatible with iOS supported devices.
02VivaVideo
This one is an excellent video editor and graphic designer tool, which you can use to create and share amazing slideshows to complement your Instagram stories and feeds. Working with the aforesaid software program, you don’t need to worry about the concerns of device compatibility, as the program works well with your favorite MacOs and Windows supported systems and devices.
Talking of the specific features that the software promises to offer, you can use its built in camera to capture high resolution videos and supplement them with over 60 high end customization utilities, like sound effects and transitions, along with dubbing the video. The basic version of the tool is available for free usage and allows you to choose between the Pro and Quick modes, respectively for a high flexibility and an escalated automated response.
The free version is however, known to leave watermarks on the created videos, is stuffed with frequently appearing ads and permits a 5-minute presentation time. You can escape these hustles anytime by subscribing to the paid version of VivaVideo for $ 2.99.

03InShot
The InShot image and video editor program is another potential candidate to be employed as an Instagram story slideshow creator. The software’s effect library is packed with a heap of conveniently usable design elements and features to create the most beautiful Instagram slideshows. The app can be put to use for efficiently designing Instagram stories to address personal and professional concerns.
Some over the top features of the tool include, the flexibility to crop, trim, cut and merge video files, and uplift them with a range of effects, filters, transitions and backgrounds. The exclusive audio flexibility of the software allows you to add upbeat sound and music, while enabling a choice of fading music in and out.
The software additionally permits to adjust the speed control of your videos, making them run in a slow or fast motion as per the content requirement. There are also a variety of graphic elements, like, texts, emojis, stickers, etc., which you can add to your images and videos to make them more pronounced.

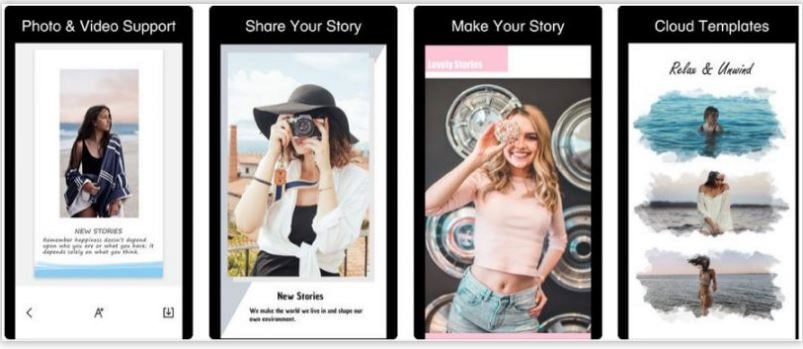
04StoryArt
Enjoying the highest user ratings on a number of leading software review platforms, the StoryArt software package lands among the most popular and preferred applications to work with creating slideshows for Instagram stories. The most appealing features of the software program include, an extensive range of more than 200 premade slideshow templates which can be directly edited to create amazing Instagram feeds and stories.
Other attractive features of the slideshow creator tool include, a plethora of design effects with varying diversities of fonts, colors, filters and around 20 elusive background themes, that are updated weekly with new additions. The program comes with a clean and responsive interface, is free to use and conforms with Windows and MacOs devices.
05Unfold
Unfold is quite a reliable software tool for creating elegant Instagram story slideshows from a storehouse of preset design templates, while adding a series of inline video and image editing effects to the same. The tool’s slideshow creator package comes with a mix of free and premium features, and does not require the account creation formality to begin working.
Major attractions of the program consist of 25 free and more than 60 premium slideshow design templates, 5 different font styles and upgraded text customizations, high resolution slideshow output and a direct share facility. You can prefer to download the software application from the various iOS and Android app stores, and work with the same on your preferred laptops, desktops and smartphones, without worrying about device compatibility.

06Canva
Canva is conveniently counted among the best Instagram slideshow maker tools and has the possibly the vastest inventory of over 60, 000 beautiful premade slideshow templates to create the mot captivating Instagram stories. Working with the tool, you are granted the liberty to select from a hoard of around 1 million stock images to set the most perfect background for the slideshow being created.
Additional features of the software comprise of high end image customization effects, fonts, transitions, texts and filters, with a never ending variety of frames, textures, icons, badges and stickers. If this is not enough, you get to access a diverse library of high end design elements, like, photo vignette, design grids, image enhancer and photo blur, to compliment your Instagram slideshow stories with the most cherished visual effects.
Talking of the platform cohesiveness, you can work with the tool through its desktop download as well as a free installation from any of the Android or Apple app stores.

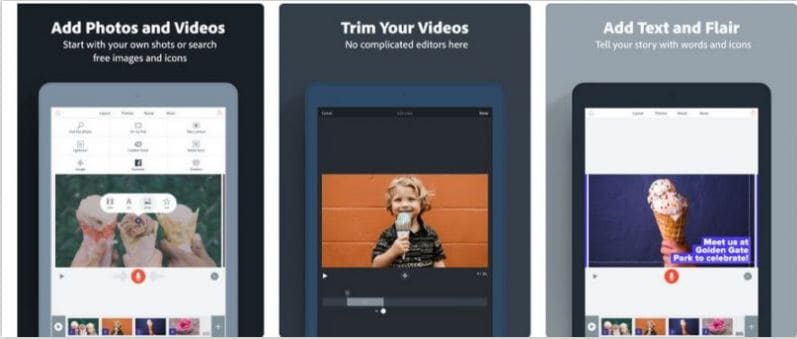
07Adobe Spark
This one is a family of graphic design software and tools that conveniently boasts of its extensive credibility towards facilitating the creation of high resolution and engaging image and video slideshows to uplift the conventional feeds and stories of Instagram. Post the creation process, you can add a diversity of audio-visual effects, like, animations, sounds, fonts, text layouts, cutouts and design elements to further enhance your graphic artwork.
The application greets you with the most pleasing and easy to use workspace, which would never require you to be a graphic design expert to start working on the slideshows. If you are into creating video centered Instagram story slideshows, you can choose to work with animated videos and prefer to select the media from your device gallery as well as the software’s huge in-house video collection. The tool’s template library is a further amusement, with a countless number of story and message centered themes.
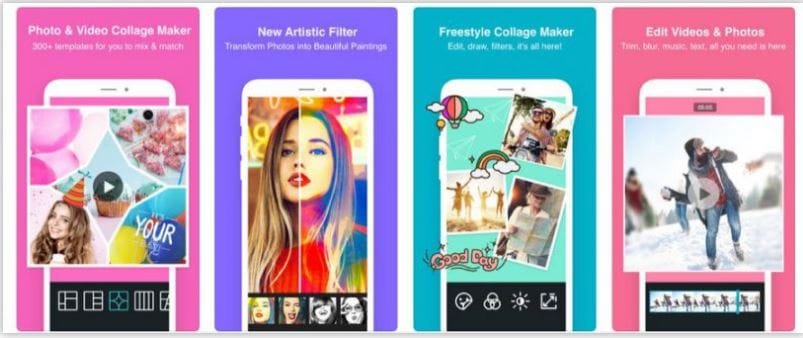
08PhotoGrid
If you are explicitly keen on creating video and photo collages for a jaw dropping Instagram story, consider working with the aforesaid application without a second thought. What’s more exciting is that the software comes with a huge set of over 300 pre made design templates to exclusively craft beautiful slideshows for Instagram stories on any iOS and Android device.
Talking of the app’s set of editing features, apart from being packed with multiple text fonts, over 60 image filters and 90 slideshow backgrounds, the most striking characteristic of the tool is, it permits you to clip an object from an image and remove the latter’s background. Other utilities of the software comprise of a real-time selfie camera, that clicks and automatically beautifies the captured image, beauty enhancing features that can apply and remove makeup from profile shots and selfies.
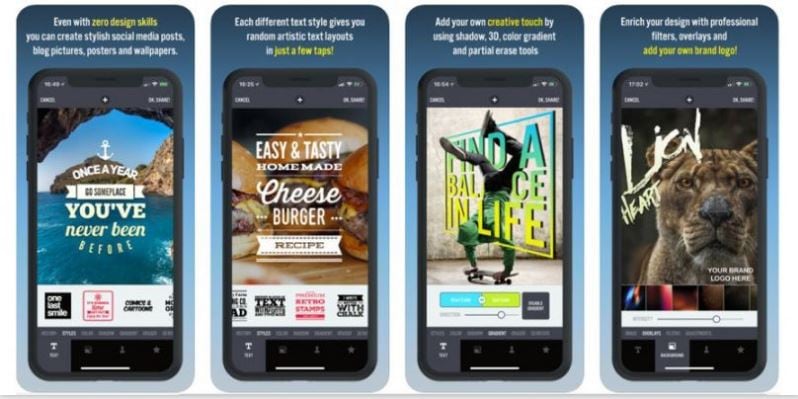
09Typorama
The next entry in the list is the Typorama software tool, which you can use to create text based slideshows for your Instagram stories. The software’s fonts library is full of elusive typographic designs to choose the best one that suits your content style and arrangement within the slideshow. When opting to work with this feature of the software, you will only need to select a suitable background and begin typing. That’s it!
Extending the text styling credibility of the tool a bit more, you can select from over 50 different typographic layouts and more than 100 typeface and font choices, a huge collection of story based quotes and a diversity of shadows, distortion effects and gradients to improvise your text. The program additionally consists of over 1000 stock templates, image filters, overlays and correction tools to enhance your slideshow background.
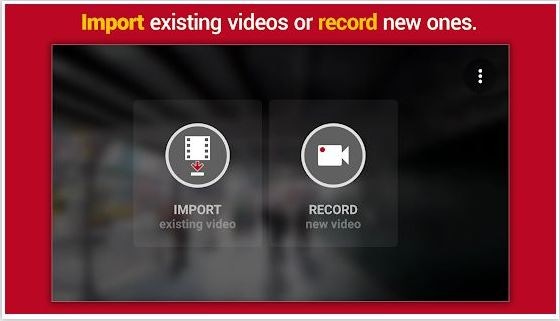
10Microsoft Hyperlapse
This one is an advanced slideshow creator program that allows you to design Instagram stories slideshow in time lapse. You can work with the tool to modify the slideshow speed up to 32 times ahead of the normal and create time lapse stories for a maximum of 20 minutes directly on your smartphone.
The app specializes in creating high end video slideshows for Instagram stories and feeds, while showing a great compatibility with high resolution videos. The working interface is super easy to understand and use, without requiring any over the top technical expertise. Feel free to use the app on any iOS or Android supported smartphone.
Part 4 Tips for Enhancing Your Insta Story Slideshow
By far, you have come a long way reading through the credibility, usage and tools to create Instagram story slideshow free of cost as well as though paid subscriptions. In the following section of this article, let us keep our focus on learning about some of the most amazing tips and tricks to upgrade your Insta story slideshow to the next level:
● A Compact Photo Album
Do you land among those social media freaks how want to share just every moment of your day with your peers, or are you confused on selecting the best photos and videos of a cherished event, vacation or bringing home a new utility and end up posting a heap of media on your social media handles?
If your answer is a guilty ‘Yes’, you can try on giving up the habit now by creating an Instagram story photo slideshow to share mini album of your most loved images from the event or vacation. You can use the feature to create a collection of amazing videos as well and share it too with your friends on social media without the guilt of becoming a feed-hog.
Want a practical experience of using Instagram slideshows? See through the following tutorial to understand the exact creation process:
Step 1: Choose the First Image
Begin with selecting the first image for your slideshow, just as you would ideally do for a normal, single image Instagram feed and long press the same.
Step 2: Confirming the Selection
Navigate to the bottom right corner of your selected image to locate a button similar to a photo slideshow. Tap the button to see a ‘1’ inscribed in a blue circle appear on your chosen image.
Step 3: Make Further Selections
You can now proceed to select other images or videos for the slideshow, in a similar fashion as the first one. You are allowed to include a maximum of 10 media files within the slideshow.
Step 4: Customize Your Creation
Tap the ‘Next’ button when you have finished making the required selections. The editor interface will now open to let you customize the selected images with a series of effects and filters, both one at a time, as well as the entire set altogether. You can also work with modifying the order of appearance of the photos and videos if required.
Step 5: The Final Touches
Once you are done with the editing process, continue to follow the remaining steps, as you would do to create a normal Instagram post. You can include captions, locations and tag your peers on the platform.
Step 6: Time to Share!
Your Instagram slideshow is ready to be posted. Upload it either to your feed or story to receive a hoard of likes and comments!
● Animated Text Overlays
If your Instagram story slideshows are missing out on the visual spunk, try complimenting their images and videos with animated transitions and text overlays. Short and quick animations are the best ways to enhance a slideshow story with an eye catching effect. Applying a variety of text overlays would help to keep the audience curious about the next visual delight.
● Prefer a Vertical Aspect Ratio
While the landscape mode tends to ward off certain portions of the visual media from a slideshow being played across multiple sized screens, using the portrait mode with a vertical aspect ratio suits best to almost every screen size. Taking care of this fact will ensure that your audience does not get distracted with the semi visible contents of the slideshow story.
● Choose Your Editing Effects Wisely
Regardless of the slideshow creation tool you prefer, there are a diversity of effects, templates, design elements and filters to uplift your craft with the perfect look. However, you should be cautious enough while making your choice so that the balance of colors, fonts and themes is affordably maintained, lest you would end up with a messy and loud Instagram story slideshow, that would not gather much appeal.
● Creating Instagram Story Slideshows with Wondershare Filmora
Wondershare Filmora Video Editor is the undisputed leader in creating awesome slideshows for Instagram stories, packed with a diverse number of graphic design tools. Beginning to discuss about the reserve of features that the software promises to offer, the app’s template library is a trunk of the most expressive and elegant slideshow backgrounds, themes and images.
For Win 7 or later (64-bit)
For macOS 10.12 or later
Moving further, the app has recently added the 1:1 aspect ratio to its image and video resolution alternatives to exclusively adhere to the slideshow design concern, allowing the perfect display of your craft across a variety of screen dimensions. Filmora, an advanced version of the basic Filmora editor program is known to most effectively cater to the concern of creating Instagram story slideshows.
Working with this slideshow creator program, you can explore your editing skills to your heart’s content and supplement the images and videos of your slideshow with the most expanded range of audio-visual effects, seamless animated transitions, text overlays, thematic backgrounds and creative image filters. The app comes to you absolutely free of cost and welcomes you with a pleasing and clean interface, and is compatible with all of your Mac, iOS and Windows supported devices and Android smartphones.
● Ending Thoughts →
● Instagram story slideshows are the newest trends of professional and commercial information sharing and personalized fun and entertainment.
● When looking through alternatives to create Instagram slideshow online or through an application software, there is a heap of creator tools.
● Pick the Wondershare Filmora slideshow creator program to design the most sparked up slideshows for your Instagram stories.
Instagram reels and stories have turned into convenient ways of exploring your video creation skills with fun. Read further to know about the top 10 apps to create amazing Insta story slideshows!
In this article
01 [What’s Instagram Story Slideshow](#Part 1)
02 [How to Use Instagram Slideshow?](#Part 2)
03 [Top 10 Apps for Making Instagram Story Slideshow (iOS & Android)](#Part 3)
04 [Tips for Enhancing Your Insta Story Slideshow](#Part 4)
Part 1 What’s Instagram Story Slideshow
With the growing influence of social media on the global life and work culture in today’s times, each and every event on such platforms becomes the new trend of the current IT impacted society. Speaking in the light of the newest developments, Instagram story slideshows have become the latest talk of the diverse range of social media communities across the web.
Since its entry into the communication galore, the Instagram application has emerged as an absolute favourite of social media freaks, thanks to its already captivating features. Moving ahead with its customary user appealing efforts, the latter has recently introduced the slideshow feature to upgrade and improvise its content stories and reels.
Working with the same, you can now integrate your otherwise simple and elementary Instagram stories into awesome slideshows. This visibly means that your conventional stories and reels on the app are now going to get that missing spark with a plethora of customizable motion graphic features. An Instagram story slideshow can work to earn you a huge number of followers, thus uplifting your social creativity quotient and entertainment appeal.
These creative 15 second snippets are appreciably the most amazing trends to increase your audience backup as a market organization, business enterprise, an influencer or as a rising star, all because of an excellent content presentation strategy and catchy outlook. Try hands at using this high end graphic presentation utility to attract the most awaited jaw dropping appreciation of your social media posts.
Part 2 How to Use Instagram Slideshow
Now that you are aware about the excitement and social buzz that your Instagram story slideshows can create with an immediate effect, the aforesaid reason is sufficient enough to motivate you towards diving deeper into the interesting ways of working with the feature to your maximum advantage. Adhering to the concern, let us proceed with learning about the most appealing trends to use an Instagram slideshow in the following section:
● Stepwise Tutorials and Visual Guides
The utility of Instagram slideshows to merge multiple images and videos together has blocked the interruption of additional feeds amid the content presentation, thus giving you the liberty to post a set of related videos and stills in one go, which can be of great help when you encounter a need to share tutorial videos, recipe follow ups and alike content that essentially requires a sequential presentation.
The Instagram stories slideshow can be useful to DIY creators who wish to demonstrate or guide their followers to create stunning examples of self-designed masterpieces. Posting step wise guides with clear cut instructions to work upon or use something, like that of a new product, can also be catered with an Instagram slideshow story.
● Product Advertising and Sale
If you are looking for impressive and cost effective solutions to launch your products among potential customers, consider taking the help of Instagram slideshows. The feature is known to deliver excellent results in the brand promotion of some particular products, such as jewelry and apparel design.
Jewelers, furniture retailers and textile designers can work with the slideshow to upload a series of images and videos for a clear and vivid demonstration of the product. Considering the fact that such commodities may greatly differ in their visual and actual appearance, the products can be shown through a variety of angles to facilitate viewers with the most comprehensive and an almost exact presentation of the different aspects that a product claims to have.
Part 3 Top 10 Apps for Making Instagram Story Slideshow (iOS & Android)
By now, you must have had a comprehensive understanding of the significance of Instagram story slideshows in uplifting different aspects of your content delivery, along with effectively addressing your diverse and large scale information sharing needs. Moving ahead with our discussion, let us browse through some of the best software solutions to create the most appealing Instagram story slideshows in the following section:
01SlideLab
Starting with the list the first application to look forward on creating over the top Instagram story slideshows with utmost ease. The software package is loaded with an extensive range of editing effects and filters, audio-visual transitions and supplementary design elements, that promise you of a high resolution, professional quality slideshow output.
Working with the software, you get the flexibility to conveniently customize the sequence in which the images would appear in the slideshow, with allowing a maximum screen display time of 3 seconds to each image. The created slideshows can be easily shared on various media handles and platforms, including Instagram, Facebook and YouTube.
While you can undertake a free trial of the tool, a paid subscription of the same costing $ 4.99 is required for accessing the complete range of features associated with the program. The software is however, exclusively compatible with iOS supported devices.
02VivaVideo
This one is an excellent video editor and graphic designer tool, which you can use to create and share amazing slideshows to complement your Instagram stories and feeds. Working with the aforesaid software program, you don’t need to worry about the concerns of device compatibility, as the program works well with your favorite MacOs and Windows supported systems and devices.
Talking of the specific features that the software promises to offer, you can use its built in camera to capture high resolution videos and supplement them with over 60 high end customization utilities, like sound effects and transitions, along with dubbing the video. The basic version of the tool is available for free usage and allows you to choose between the Pro and Quick modes, respectively for a high flexibility and an escalated automated response.
The free version is however, known to leave watermarks on the created videos, is stuffed with frequently appearing ads and permits a 5-minute presentation time. You can escape these hustles anytime by subscribing to the paid version of VivaVideo for $ 2.99.
03InShot
The InShot image and video editor program is another potential candidate to be employed as an Instagram story slideshow creator. The software’s effect library is packed with a heap of conveniently usable design elements and features to create the most beautiful Instagram slideshows. The app can be put to use for efficiently designing Instagram stories to address personal and professional concerns.
Some over the top features of the tool include, the flexibility to crop, trim, cut and merge video files, and uplift them with a range of effects, filters, transitions and backgrounds. The exclusive audio flexibility of the software allows you to add upbeat sound and music, while enabling a choice of fading music in and out.
The software additionally permits to adjust the speed control of your videos, making them run in a slow or fast motion as per the content requirement. There are also a variety of graphic elements, like, texts, emojis, stickers, etc., which you can add to your images and videos to make them more pronounced.
04StoryArt
Enjoying the highest user ratings on a number of leading software review platforms, the StoryArt software package lands among the most popular and preferred applications to work with creating slideshows for Instagram stories. The most appealing features of the software program include, an extensive range of more than 200 premade slideshow templates which can be directly edited to create amazing Instagram feeds and stories.
Other attractive features of the slideshow creator tool include, a plethora of design effects with varying diversities of fonts, colors, filters and around 20 elusive background themes, that are updated weekly with new additions. The program comes with a clean and responsive interface, is free to use and conforms with Windows and MacOs devices.
05Unfold
Unfold is quite a reliable software tool for creating elegant Instagram story slideshows from a storehouse of preset design templates, while adding a series of inline video and image editing effects to the same. The tool’s slideshow creator package comes with a mix of free and premium features, and does not require the account creation formality to begin working.
Major attractions of the program consist of 25 free and more than 60 premium slideshow design templates, 5 different font styles and upgraded text customizations, high resolution slideshow output and a direct share facility. You can prefer to download the software application from the various iOS and Android app stores, and work with the same on your preferred laptops, desktops and smartphones, without worrying about device compatibility.
06Canva
Canva is conveniently counted among the best Instagram slideshow maker tools and has the possibly the vastest inventory of over 60, 000 beautiful premade slideshow templates to create the mot captivating Instagram stories. Working with the tool, you are granted the liberty to select from a hoard of around 1 million stock images to set the most perfect background for the slideshow being created.
Additional features of the software comprise of high end image customization effects, fonts, transitions, texts and filters, with a never ending variety of frames, textures, icons, badges and stickers. If this is not enough, you get to access a diverse library of high end design elements, like, photo vignette, design grids, image enhancer and photo blur, to compliment your Instagram slideshow stories with the most cherished visual effects.
Talking of the platform cohesiveness, you can work with the tool through its desktop download as well as a free installation from any of the Android or Apple app stores.
07Adobe Spark
This one is a family of graphic design software and tools that conveniently boasts of its extensive credibility towards facilitating the creation of high resolution and engaging image and video slideshows to uplift the conventional feeds and stories of Instagram. Post the creation process, you can add a diversity of audio-visual effects, like, animations, sounds, fonts, text layouts, cutouts and design elements to further enhance your graphic artwork.
The application greets you with the most pleasing and easy to use workspace, which would never require you to be a graphic design expert to start working on the slideshows. If you are into creating video centered Instagram story slideshows, you can choose to work with animated videos and prefer to select the media from your device gallery as well as the software’s huge in-house video collection. The tool’s template library is a further amusement, with a countless number of story and message centered themes.
08PhotoGrid
If you are explicitly keen on creating video and photo collages for a jaw dropping Instagram story, consider working with the aforesaid application without a second thought. What’s more exciting is that the software comes with a huge set of over 300 pre made design templates to exclusively craft beautiful slideshows for Instagram stories on any iOS and Android device.
Talking of the app’s set of editing features, apart from being packed with multiple text fonts, over 60 image filters and 90 slideshow backgrounds, the most striking characteristic of the tool is, it permits you to clip an object from an image and remove the latter’s background. Other utilities of the software comprise of a real-time selfie camera, that clicks and automatically beautifies the captured image, beauty enhancing features that can apply and remove makeup from profile shots and selfies.
09Typorama
The next entry in the list is the Typorama software tool, which you can use to create text based slideshows for your Instagram stories. The software’s fonts library is full of elusive typographic designs to choose the best one that suits your content style and arrangement within the slideshow. When opting to work with this feature of the software, you will only need to select a suitable background and begin typing. That’s it!
Extending the text styling credibility of the tool a bit more, you can select from over 50 different typographic layouts and more than 100 typeface and font choices, a huge collection of story based quotes and a diversity of shadows, distortion effects and gradients to improvise your text. The program additionally consists of over 1000 stock templates, image filters, overlays and correction tools to enhance your slideshow background.
10Microsoft Hyperlapse
This one is an advanced slideshow creator program that allows you to design Instagram stories slideshow in time lapse. You can work with the tool to modify the slideshow speed up to 32 times ahead of the normal and create time lapse stories for a maximum of 20 minutes directly on your smartphone.
The app specializes in creating high end video slideshows for Instagram stories and feeds, while showing a great compatibility with high resolution videos. The working interface is super easy to understand and use, without requiring any over the top technical expertise. Feel free to use the app on any iOS or Android supported smartphone.
Part 4 Tips for Enhancing Your Insta Story Slideshow
By far, you have come a long way reading through the credibility, usage and tools to create Instagram story slideshow free of cost as well as though paid subscriptions. In the following section of this article, let us keep our focus on learning about some of the most amazing tips and tricks to upgrade your Insta story slideshow to the next level:
● A Compact Photo Album
Do you land among those social media freaks how want to share just every moment of your day with your peers, or are you confused on selecting the best photos and videos of a cherished event, vacation or bringing home a new utility and end up posting a heap of media on your social media handles?
If your answer is a guilty ‘Yes’, you can try on giving up the habit now by creating an Instagram story photo slideshow to share mini album of your most loved images from the event or vacation. You can use the feature to create a collection of amazing videos as well and share it too with your friends on social media without the guilt of becoming a feed-hog.
Want a practical experience of using Instagram slideshows? See through the following tutorial to understand the exact creation process:
Step 1: Choose the First Image
Begin with selecting the first image for your slideshow, just as you would ideally do for a normal, single image Instagram feed and long press the same.
Step 2: Confirming the Selection
Navigate to the bottom right corner of your selected image to locate a button similar to a photo slideshow. Tap the button to see a ‘1’ inscribed in a blue circle appear on your chosen image.
Step 3: Make Further Selections
You can now proceed to select other images or videos for the slideshow, in a similar fashion as the first one. You are allowed to include a maximum of 10 media files within the slideshow.
Step 4: Customize Your Creation
Tap the ‘Next’ button when you have finished making the required selections. The editor interface will now open to let you customize the selected images with a series of effects and filters, both one at a time, as well as the entire set altogether. You can also work with modifying the order of appearance of the photos and videos if required.
Step 5: The Final Touches
Once you are done with the editing process, continue to follow the remaining steps, as you would do to create a normal Instagram post. You can include captions, locations and tag your peers on the platform.
Step 6: Time to Share!
Your Instagram slideshow is ready to be posted. Upload it either to your feed or story to receive a hoard of likes and comments!
● Animated Text Overlays
If your Instagram story slideshows are missing out on the visual spunk, try complimenting their images and videos with animated transitions and text overlays. Short and quick animations are the best ways to enhance a slideshow story with an eye catching effect. Applying a variety of text overlays would help to keep the audience curious about the next visual delight.
● Prefer a Vertical Aspect Ratio
While the landscape mode tends to ward off certain portions of the visual media from a slideshow being played across multiple sized screens, using the portrait mode with a vertical aspect ratio suits best to almost every screen size. Taking care of this fact will ensure that your audience does not get distracted with the semi visible contents of the slideshow story.
● Choose Your Editing Effects Wisely
Regardless of the slideshow creation tool you prefer, there are a diversity of effects, templates, design elements and filters to uplift your craft with the perfect look. However, you should be cautious enough while making your choice so that the balance of colors, fonts and themes is affordably maintained, lest you would end up with a messy and loud Instagram story slideshow, that would not gather much appeal.
● Creating Instagram Story Slideshows with Wondershare Filmora
Wondershare Filmora Video Editor is the undisputed leader in creating awesome slideshows for Instagram stories, packed with a diverse number of graphic design tools. Beginning to discuss about the reserve of features that the software promises to offer, the app’s template library is a trunk of the most expressive and elegant slideshow backgrounds, themes and images.
For Win 7 or later (64-bit)
For macOS 10.12 or later
Moving further, the app has recently added the 1:1 aspect ratio to its image and video resolution alternatives to exclusively adhere to the slideshow design concern, allowing the perfect display of your craft across a variety of screen dimensions. Filmora, an advanced version of the basic Filmora editor program is known to most effectively cater to the concern of creating Instagram story slideshows.
Working with this slideshow creator program, you can explore your editing skills to your heart’s content and supplement the images and videos of your slideshow with the most expanded range of audio-visual effects, seamless animated transitions, text overlays, thematic backgrounds and creative image filters. The app comes to you absolutely free of cost and welcomes you with a pleasing and clean interface, and is compatible with all of your Mac, iOS and Windows supported devices and Android smartphones.
● Ending Thoughts →
● Instagram story slideshows are the newest trends of professional and commercial information sharing and personalized fun and entertainment.
● When looking through alternatives to create Instagram slideshow online or through an application software, there is a heap of creator tools.
● Pick the Wondershare Filmora slideshow creator program to design the most sparked up slideshows for your Instagram stories.
Tutorial on Making Unity 2D Animation
Beginner Tutorial on Making Unity 2D Animation
An easy yet powerful editor
Numerous effects to choose from
Detailed tutorials provided by the official channel
Now, ideally, Unity is considered to be a suitable tool for 3D games that have too many animated elements. But, this doesn’t mean that you cannot design 2D animations with Unity.
In this guide, we are going to show you how to get started with 2D animations in Unity and incorporate them into your games to enhance the overall gameplay.
In this article
01 [Can Unity Be Used for 2D Animation?](#Part 1)
02 [How Do You Make a 2D Animation in Unity?](#Part 2)
Part 1 Can Unity Be Used for 2D Animation?
First, things first; can Unity be used for 2D animations. The answer is Yes! Being a full-scale gaming engine, developers/designers can use Unity to create stunning Unity 2D animations for their games. The tool has dedicated 2D animation packages that contain all the elements you’ll need to create high-quality 2D animations for your games.
Keep in mind that for each object, you’ll have to create a separate 2D sprite sheet and use it to configure the 2D animation. However, there are other 2D animation packages that you can install, using sprite sheets is the most common method to get the job done. The latest versions of Unity also offer a dedicated Stripe library where you can add multiple Stripe Sheets and it becomes relatively easier to manage them.
With the Sprite library, 2D animations with Unity becomes a hassle-free job. Designers can even manage dozens of 2D animations without any hassle. The Sprite editor will also let you control the overall movement of different moving objects in your animation and make it look more sleek. In general, if you are planning to create 2D animations for your videos or even a dedicated mobile game, Unity can be a suitable software for the job.
Part 2 How Do You Make a 2D Animation in Unity?
To create a 2D animation with Unity, the first step would be to create a dedicated Sprite sheet. Now, you can use a wide variety of third-party programs to create the desired Sprite sheet. In general, it depends on the project requirements and the personal preferences of the designer himself. However, whichever tool you use to create the Stripe sheets, make sure that the final image is a transparent PNG file as it’ll make your job much easier while animating objects in Unity.
After you have successfully designed the stripe (a transparent image file) in an external application, the next step would be to import it to Unity. When you import the Stripe file, make sure to create a separate Sprite folder so that you can easily manage all these files in one place. Also, a dedicated Stripe folder will allow you to keep a check on each Stripe file in a hassle-free manner.

While importing 2D animations into Unity, you can also configure its settings to ensure that it matches the overall game design. Ideally, we recommend keeping the Pixels Per Unit to the same size as all your visual components. This will allow you to maintain the desired consistency throughout the project and make it visually enticing.
Now, before proceeding any further, make sure to switch to the “Stripe Editor” window. With the “Stripe Editor”, you’ll be able to control the overall settings of each animation individually and control the movement to make it look crisper. In the Stripe window, you can also adjust the slice settings and save your work to avoid any potential data loss.
At this point, you can move towards creating the 2D animation with Unity. To do this, you’ll have to bring both the Animation and the Animator tabs to UnityParts editing panel. You can make them visible by tapping the “Windows” option on your screen.

That’s it; a timeline-based editing panel will appear on your screen. From here onwards, you can get started with animating the object. Each animation will depend on your specific game requirements. So, feel free to unleash your creativity and use different elements of Unity to bring your 2D animations to life.
Part 3 Part 3 Creating 2D Animations for Your Videos - An Effective Solution for Video Editors
Now, when it comes to creating 2D animations for videos, you may not want to use a tool like Unity to get the job done. Why? Because Unity is more suitable for animating objects for games. Not to mention, Unity has a steep learning curve and if you are not an experienced Unity developer, you may fail to create a 2D animation properly.
So, if you only need a 2D animation for videos, we have a better alternative for the job. Instead of Unity, you can use Wondershare Filmora Video Editor for the job. It’s a full-scale video editing software that’s specifically designed to edit high-quality videos. Whether you are a YouTube or simply edit videos for your clients, using Wondershare Filmora will help you showcase your creativity more effectively.

Filmora has a built-in media library that offers a plethora of ready-to-use animation templates as well as video effects. You can import these animations into your video with a single click and enhance the overall quality of the video to drive better engagement. These animations are also customizable, which means you can tweak their appearance to match the overall theme of your video itself. The media player also offers audio effects that’ll make your videos more dramatic.
And, finally, you’ll also find a wide variety of advanced editing options such as keyframing, motion detection, and green screen editing. All these features will allow you to uplift the production quality of your videos and engage potential viewers more effectively.
For Win 7 or later (64-bit)
For macOS 10.12 or later
A few key features of Filmora that make it the most reliable video editing software include:
● Thousands of ready-to-use animation templates and video effects
● Easy-to-use timeline-based editing panel
● Dedicated audio editor to control the sound quality
● Cross-platform compatibility
So, if you are also planning to launch a high-scale video for YouTube or any other platform by adding
Key Takeaways from This Episode
● Creating 2D animations with Unity is possible, however, you must be an expert game developer with extensive experience in Unity game development
● To create Unity 2D animations, you’ll have to use Sprite Sheets and then import them into Unity to turn them into animation.
● Now, if you are a regular video editor and only want to create 2D animations for videos, you can also use full-scale software such as Wondershare Filmora Pro.
Now, ideally, Unity is considered to be a suitable tool for 3D games that have too many animated elements. But, this doesn’t mean that you cannot design 2D animations with Unity.
In this guide, we are going to show you how to get started with 2D animations in Unity and incorporate them into your games to enhance the overall gameplay.
In this article
01 [Can Unity Be Used for 2D Animation?](#Part 1)
02 [How Do You Make a 2D Animation in Unity?](#Part 2)
Part 1 Can Unity Be Used for 2D Animation?
First, things first; can Unity be used for 2D animations. The answer is Yes! Being a full-scale gaming engine, developers/designers can use Unity to create stunning Unity 2D animations for their games. The tool has dedicated 2D animation packages that contain all the elements you’ll need to create high-quality 2D animations for your games.
Keep in mind that for each object, you’ll have to create a separate 2D sprite sheet and use it to configure the 2D animation. However, there are other 2D animation packages that you can install, using sprite sheets is the most common method to get the job done. The latest versions of Unity also offer a dedicated Stripe library where you can add multiple Stripe Sheets and it becomes relatively easier to manage them.
With the Sprite library, 2D animations with Unity becomes a hassle-free job. Designers can even manage dozens of 2D animations without any hassle. The Sprite editor will also let you control the overall movement of different moving objects in your animation and make it look more sleek. In general, if you are planning to create 2D animations for your videos or even a dedicated mobile game, Unity can be a suitable software for the job.
Part 2 How Do You Make a 2D Animation in Unity?
To create a 2D animation with Unity, the first step would be to create a dedicated Sprite sheet. Now, you can use a wide variety of third-party programs to create the desired Sprite sheet. In general, it depends on the project requirements and the personal preferences of the designer himself. However, whichever tool you use to create the Stripe sheets, make sure that the final image is a transparent PNG file as it’ll make your job much easier while animating objects in Unity.
After you have successfully designed the stripe (a transparent image file) in an external application, the next step would be to import it to Unity. When you import the Stripe file, make sure to create a separate Sprite folder so that you can easily manage all these files in one place. Also, a dedicated Stripe folder will allow you to keep a check on each Stripe file in a hassle-free manner.
While importing 2D animations into Unity, you can also configure its settings to ensure that it matches the overall game design. Ideally, we recommend keeping the Pixels Per Unit to the same size as all your visual components. This will allow you to maintain the desired consistency throughout the project and make it visually enticing.
Now, before proceeding any further, make sure to switch to the “Stripe Editor” window. With the “Stripe Editor”, you’ll be able to control the overall settings of each animation individually and control the movement to make it look crisper. In the Stripe window, you can also adjust the slice settings and save your work to avoid any potential data loss.
At this point, you can move towards creating the 2D animation with Unity. To do this, you’ll have to bring both the Animation and the Animator tabs to UnityParts editing panel. You can make them visible by tapping the “Windows” option on your screen.
That’s it; a timeline-based editing panel will appear on your screen. From here onwards, you can get started with animating the object. Each animation will depend on your specific game requirements. So, feel free to unleash your creativity and use different elements of Unity to bring your 2D animations to life.
Part 3 Part 3 Creating 2D Animations for Your Videos - An Effective Solution for Video Editors
Now, when it comes to creating 2D animations for videos, you may not want to use a tool like Unity to get the job done. Why? Because Unity is more suitable for animating objects for games. Not to mention, Unity has a steep learning curve and if you are not an experienced Unity developer, you may fail to create a 2D animation properly.
So, if you only need a 2D animation for videos, we have a better alternative for the job. Instead of Unity, you can use Wondershare Filmora Video Editor for the job. It’s a full-scale video editing software that’s specifically designed to edit high-quality videos. Whether you are a YouTube or simply edit videos for your clients, using Wondershare Filmora will help you showcase your creativity more effectively.
Filmora has a built-in media library that offers a plethora of ready-to-use animation templates as well as video effects. You can import these animations into your video with a single click and enhance the overall quality of the video to drive better engagement. These animations are also customizable, which means you can tweak their appearance to match the overall theme of your video itself. The media player also offers audio effects that’ll make your videos more dramatic.
And, finally, you’ll also find a wide variety of advanced editing options such as keyframing, motion detection, and green screen editing. All these features will allow you to uplift the production quality of your videos and engage potential viewers more effectively.
For Win 7 or later (64-bit)
For macOS 10.12 or later
A few key features of Filmora that make it the most reliable video editing software include:
● Thousands of ready-to-use animation templates and video effects
● Easy-to-use timeline-based editing panel
● Dedicated audio editor to control the sound quality
● Cross-platform compatibility
So, if you are also planning to launch a high-scale video for YouTube or any other platform by adding
Key Takeaways from This Episode
● Creating 2D animations with Unity is possible, however, you must be an expert game developer with extensive experience in Unity game development
● To create Unity 2D animations, you’ll have to use Sprite Sheets and then import them into Unity to turn them into animation.
● Now, if you are a regular video editor and only want to create 2D animations for videos, you can also use full-scale software such as Wondershare Filmora Pro.
How to Turn Yourself Into WhatsApp Cartoon
How to Turn Yourself Into a WhatsApp Cartoon
An easy yet powerful editor
Numerous effects to choose from
Detailed tutorials provided by the official channel
Let me ask you a question - how much fun would it be if you could create your own animated stickers and send them to your friends and family members on Whatsapp? I mean, it would make the entire conversation more fun and also add a personal element to the entire chat. Right? Well, to tell you the truth, it is possible to create Whatsapp cartoons and stickers, and the best part is you don’t need any technical expertise to get the job done.
Of course, for a long time, Whatsapp didn’t allow its users to use third-party animated stickers within the messenger. But, recently the messaging platform introduced a custom “stickers pack” feature that now allows people to upload their own stickers and create a dedicated sticker app.
You can also rely on several third-party sticker designer applications to get the job done. So, if you have been looking for a way to use your own face as an animated sticker in Whatsapp, continue reading. In this guide, we’ll walk you through different ways to create and upload a custom cartoon sticker in Whatsapp and make your Whatsapp chats more fun.
In this article
01 [How to Create Your Own Custom Animated Whatsapp Stickers](#Part 1)
02 [How to Create Custom Animated Whatsapp Stickers on Android and iPhone](#Part 2)
Part 1 How to Create Your Own Custom Animated Whatsapp Stickers
Now, before we go any further, I would like to point out that Whatsapp doesn’t allow users to directly create a custom cartoon sticker. There’s no AR feature that’ll turn your face into a cartoon character. So, to use a cartoon Whatsapp profile picture, you’ll have to rely on a third-party tool to get the job done. Based on which platform you use to access Whatsapp, you can choose a wide variety of Whatsapp animated sticker creators and use them to design custom cartoon stickers to make traditional Whatsapp conversations more fun.
One of the easiest ways to create custom stickers for Whatsapp is to use Wondershare Wondershare Filmora Video Editor . Filmora is a full-scale video editing software that’s specifically designed to help editors unleash their creativity and create stunning movies for different platforms.
For Win 7 or later (64-bit)
For macOS 10.12 or later
Filmora is among the most popular video editing tools that many creators use to edit high-quality YouTube vlogs and other types of videos for other platforms. However, Wondershare Filmora is not just a video editing tool. You can also use it to create custom cartoon animations and export them in the desired format within a few seconds. Filmora has a timeline-based interface that makes it relatively easier for editors to streamline the entire editing process while ensuring that none of the shots go missing.

Filmora also has a built-in media store - known as FilmStocks - where you can find hundreds of video effects, animations, animated characters, etc. FilmStocks also offers access to copyright-free music, allowing creators to use high-quality music in their videos without worrying about unexpected copyright strikes.
So, if you are looking for an all-in-one tool to create Whatsapp cartoon stickers, install Wondershare Filmora on your computer and start turning your face into an animated sticker.
Part 1 How to Create Custom Animated Whatsapp Stickers on Android and iPhone
One of the tools that can help you do the job is “Toon Me”. As the name implies, Toon Me is an online platform that’s designed to help users turn their faces into respective cartoon stickers. It’s designed by the developers at Photo Labs - an online platform that makes photo editing a hassle-free task. Since the tool is designed by expert developers, you can expect to get the best results in the end. And, the best part is creating custom cartoon characters using Toon Me is a relatively easy process.

All you have to do is download Toon Me on your phone and use the camera to create a Whatsapp cartoon sticker for yourself. The app is available on both Google Play Store and Apple’s App Store. It means regardless of the smartphone you’re using, Toon Me will allow you to design a Whatsapp cartoon sticker without any hassle.
Like Toon Me, there are dozens of other applications you can install on your smartphone to create personalized animated stickers. One such example is Sticker Maker. Sticker Maker is an Android application that’ll allow you to capture your face and turn it into an animated sticker. It’s compatible across different Android versions and runs smoothly on all Android models. So, if you own an Android device, here’s the step-by-step process to use Sticker Maker to turn your face into an animated sticker.
Step 1 - Start by installing Sticker Maker on your smartphone and launch the application to get started.
Step 2 - On its home screen, click the “Create a New Sticker Pack” option.
Step 3 - Give the sticker pack a name and then, press enter to proceed further.
Step 4 - At this point, you can either select one of the existing pictures from your Gallery or open the camera to click a fresh selfie. Either way, upload the picture and let the app convert it into a corresponding sticker.
Step 5 - You can upload 8-10 pictures at once and create the entire sticker pack instantly. And, once you have successfully created the sticker pack, simply click the “Add to Whatsapp” button.

That’s it; the selected sticker pack will get added to your Whatsapp’s sticker collection and you’ll be able to use them right away. That’s how quick and easy it is to create custom Whatsapp cartoons using different tools on your smartphone.
● Ending Thoughts →
● Using personalized Whatsapp cartoon stickers is a great way to make Whatsapp conversations fun.
● Wondershare Filmora is a feature-packed video editing software that’s designed to help creators create stunning videos and Whatsapp stickers. Its timeline-based interface and built-in media store will allow you to create stunning Whatsapp stickers without any hassle
● You can also download dedicated sticker maker applications on your iPhone or Android devices and use them directly to create visually appealing animated stickers for Whatsapp.
Let me ask you a question - how much fun would it be if you could create your own animated stickers and send them to your friends and family members on Whatsapp? I mean, it would make the entire conversation more fun and also add a personal element to the entire chat. Right? Well, to tell you the truth, it is possible to create Whatsapp cartoons and stickers, and the best part is you don’t need any technical expertise to get the job done.
Of course, for a long time, Whatsapp didn’t allow its users to use third-party animated stickers within the messenger. But, recently the messaging platform introduced a custom “stickers pack” feature that now allows people to upload their own stickers and create a dedicated sticker app.
You can also rely on several third-party sticker designer applications to get the job done. So, if you have been looking for a way to use your own face as an animated sticker in Whatsapp, continue reading. In this guide, we’ll walk you through different ways to create and upload a custom cartoon sticker in Whatsapp and make your Whatsapp chats more fun.
In this article
01 [How to Create Your Own Custom Animated Whatsapp Stickers](#Part 1)
02 [How to Create Custom Animated Whatsapp Stickers on Android and iPhone](#Part 2)
Part 1 How to Create Your Own Custom Animated Whatsapp Stickers
Now, before we go any further, I would like to point out that Whatsapp doesn’t allow users to directly create a custom cartoon sticker. There’s no AR feature that’ll turn your face into a cartoon character. So, to use a cartoon Whatsapp profile picture, you’ll have to rely on a third-party tool to get the job done. Based on which platform you use to access Whatsapp, you can choose a wide variety of Whatsapp animated sticker creators and use them to design custom cartoon stickers to make traditional Whatsapp conversations more fun.
One of the easiest ways to create custom stickers for Whatsapp is to use Wondershare Wondershare Filmora Video Editor . Filmora is a full-scale video editing software that’s specifically designed to help editors unleash their creativity and create stunning movies for different platforms.
For Win 7 or later (64-bit)
For macOS 10.12 or later
Filmora is among the most popular video editing tools that many creators use to edit high-quality YouTube vlogs and other types of videos for other platforms. However, Wondershare Filmora is not just a video editing tool. You can also use it to create custom cartoon animations and export them in the desired format within a few seconds. Filmora has a timeline-based interface that makes it relatively easier for editors to streamline the entire editing process while ensuring that none of the shots go missing.
Filmora also has a built-in media store - known as FilmStocks - where you can find hundreds of video effects, animations, animated characters, etc. FilmStocks also offers access to copyright-free music, allowing creators to use high-quality music in their videos without worrying about unexpected copyright strikes.
So, if you are looking for an all-in-one tool to create Whatsapp cartoon stickers, install Wondershare Filmora on your computer and start turning your face into an animated sticker.
Part 1 How to Create Custom Animated Whatsapp Stickers on Android and iPhone
One of the tools that can help you do the job is “Toon Me”. As the name implies, Toon Me is an online platform that’s designed to help users turn their faces into respective cartoon stickers. It’s designed by the developers at Photo Labs - an online platform that makes photo editing a hassle-free task. Since the tool is designed by expert developers, you can expect to get the best results in the end. And, the best part is creating custom cartoon characters using Toon Me is a relatively easy process.
All you have to do is download Toon Me on your phone and use the camera to create a Whatsapp cartoon sticker for yourself. The app is available on both Google Play Store and Apple’s App Store. It means regardless of the smartphone you’re using, Toon Me will allow you to design a Whatsapp cartoon sticker without any hassle.
Like Toon Me, there are dozens of other applications you can install on your smartphone to create personalized animated stickers. One such example is Sticker Maker. Sticker Maker is an Android application that’ll allow you to capture your face and turn it into an animated sticker. It’s compatible across different Android versions and runs smoothly on all Android models. So, if you own an Android device, here’s the step-by-step process to use Sticker Maker to turn your face into an animated sticker.
Step 1 - Start by installing Sticker Maker on your smartphone and launch the application to get started.
Step 2 - On its home screen, click the “Create a New Sticker Pack” option.
Step 3 - Give the sticker pack a name and then, press enter to proceed further.
Step 4 - At this point, you can either select one of the existing pictures from your Gallery or open the camera to click a fresh selfie. Either way, upload the picture and let the app convert it into a corresponding sticker.
Step 5 - You can upload 8-10 pictures at once and create the entire sticker pack instantly. And, once you have successfully created the sticker pack, simply click the “Add to Whatsapp” button.
That’s it; the selected sticker pack will get added to your Whatsapp’s sticker collection and you’ll be able to use them right away. That’s how quick and easy it is to create custom Whatsapp cartoons using different tools on your smartphone.
● Ending Thoughts →
● Using personalized Whatsapp cartoon stickers is a great way to make Whatsapp conversations fun.
● Wondershare Filmora is a feature-packed video editing software that’s designed to help creators create stunning videos and Whatsapp stickers. Its timeline-based interface and built-in media store will allow you to create stunning Whatsapp stickers without any hassle
● You can also download dedicated sticker maker applications on your iPhone or Android devices and use them directly to create visually appealing animated stickers for Whatsapp.
Apps to Animate Still Pictures
Apps to Animate Still Pictures Which Could Make Your Pictures Become Internet Sensation
An easy yet powerful editor
Numerous effects to choose from
Detailed tutorials provided by the official channel
Now, it is a question of what to do with all those still photos lying in your phone. You can be pretty certain that you won’t be retiring from clicking images anytime soon. A tip to help make posting images more interesting would be using apps to animate your photos.
You can also find an app that animates your face specifically, which is great for instagram content and has a greater chance of getting reactions or comments. So without further to do let’s get animating.
In this article
01 [Review of General Methods: Can You Animate Still Pictures?](#Part 1)
02 [10 Best apps to animate still photos on Android & iOS](#Part 2)
03 [Additional Extension: 5 Apps to Animate Old Photos](#Part 3)
Part 1 Review of General Methods: Can You Animate Still Pictures?
It’s pretty obvious that you can! These days you can do whatever you want online so animating still pictures should be a piece of cake if you know-how.
A video is basically an entire collage of moving pictures. So if you can cut out pictures from a video why not turn still pictures into animations.
There are a number of ways you can use to animate still images →
● Videos are multiple pictures that move at a frame rate. Make short copies of a video by cutting out the essential moments and playing them in a loop.
● Add and play video animation elements over a picture. With the right software, this task is as easy as copy-pasting over another image.
● Apply an animated 3D image with a transparent background over another image. Remember, the bigger the element the closer it is. So size is directly translated as distance.
● You can use multiple filters and effects on an image with an animated portrait app. Find out what app you can use further on in this article.
● Turn an image into a GIF. No matter its small size and cartoonish style, GIF animation has a very wide appeal as online content.
Part 2 10 Best apps to animate still photos on Android & iOS
01GIPHY
Giphy is the largest internet catalog for GIF files, clips & stickers. No matter if it is a scene from a movie or an animation you have watched somewhere, using this application you can easily find, save & share or simply create something new.
Price: Free
Pros
● Quickly turns still photos into an animation.
● Easily share your work through all social media channels.
Cons
● Search tags are varied; you may need to search using unlikely words to get desired results.
Applicable System: Android
02GIPHY
One of the best ways to turn your photos & videos into GIFs is using ImgPlay. It has a clearer interface making it easy to use. Imgplay comes with paid- premium and non-paid version making it suitable for personal & professional application.
Price: Pro $4.99.
Pros
● It is not packed with unnecessary features.
Cons
● ImgPlay slaps a watermark on all its non-premium versions.
Applicable System: Android & iOS.
03Loopsie
The best Part is that Loopsie provides spectacular cinematographic effects to your animated stills. Stabilization algorithm efficiently removes shaking effects & blurs.
Price: Free.
Pros
● User friendly UI
● Easy to share on social media platforms.
Cons
● Paid version is a bit pricey.
Applicable System: Only on iOS.
04StoryZ
Looking for ways to create animated visuals form still images? This is where your quest ends. An advanced editing platform that offers overlays, movement & color filters. Banner Ads & watermarks can be removed by paying a small subscription fee.
Price: Free version available. Premium costs INR 789 a year.
Pros
● Double exposure effect combines video overlay & static imagery.
Cons
● Contains Ad & watermark.
Applicable System: Android.
05Animate Me
Animate Me offers you a package of postcards & greeting snapshots that you can animate according to your need. The paid subscription will get you updated sounds & effects every now & then.
Price: Free.
Pros
● Easy to use & beginners friendly.
Cons
● Editing features & tools are limited.
Applicable System: Windows**.**
06Movepic
Create animated stills, GIFs, live-wallpapers all with Movepic. It allows you to animate simply anything by drawing a path. You can also adjust the speed of animation manually.
Price: Free.
Pros
● Animate in a light motion.
● Easy to use.
Cons
● Free version leaves a watermark on images.
Applicable System: Android & iOS.
07Pixaloop
Pixaloop is a fun app packed with significant animation & editing features. 100% free to use software delivers live animated images in a few clicks. User friendly interface edits images using powerful & precise animation tools.
Price- Free.
Pros
● Offers all the necessary features & core tools.
● Provides accuracy & flexibility to the users.
Cons
● The animation process is a bit time consuming.
Applicable System: Android & iOS.
08Zoetropic
Zoetropic has a combination of 3D tools and Camera FX to animate your images. User friendly interface allows you to mask the still areas if you wish to keep it still.
Price: $199 (Pro)
Pros
● Easily customize motion areas.
● Apply overlays & audios.
Cons
● App price is higher than similar available apps.
Applicable System: Android & iOS.
9Motionleap
It is one of the most top reviewed apps on Playstore related to animating still photos. It has several features like programming directional cues, freeze portions of your photo or even apply filters.
Price: Free version. Pro version; $3.50/month, $18/year and $55 lifetime.
Pros
● Its free version does not apply watermark.
● Intuitive Interface.
Cons
● Best features are locked in Pro version.
Applicable System: Android & iOS.
Part 3 Additional Extension: 5 Apps to Animate Old Photos
It can be unanimously agreed upon that people have been storing photos for decades as a means of preserving memories. We don’t get much opportunity to meet familiar faces too often so why not just try and animate still images of relatives. Now we already know how we can start animating images on apps but restoring original images maybe a tad more complicated than that. This time a bit of the animation is dependent on the physical state of the picture so be sure it’s in mint condition.
These photos can be restored or manipulated digitally with the help of smart AI. We have listed down some of the apps to animate old photos and reconstruct faces;
01Photos Revive
You can add colour to old worn out photos and make them look more realistic in terms of tonal colorization using artificial intelligence. The app also asks you recollect any details of the photo that you might remember in terms of the image.
Applicable OS: iOS only.

02Remini
After going through several improvements and upgrades, you can use the app Remini to confidently restore low resolution images that are either pixelated, blurred or damaged into High Definition images. This app has already been used by users to process a hundred million photos.
Applicable OS: Android 1.7.2 or higher, & iOS 9.3 or higher.

03Colorize
Another app that uses AI to add colorization to your old images. It is a popular animate your family photo app which has amazing other tools and filters to try out.
Applicable OS: Android and iOS.

04Deep Nostalgia
Using this app which has been innovated by the geology platform MyHeritage uses ai to add gestures to still images to evoke nostalgia in the users.
Applicable OS: Online.

04Google Photoscan
Google scanner is a futuristic app for restoring photos of the past. The app uses a smart scanning technology that provides several scans of the same photo automatically.
Applicable OS: Android or iOS.

Key Takeaways from This Episode
● Animating photos are a new way of reimagining still images into moving live content. There are many methods and approaches you can choose to animate your images.
● Some of them being video animations, transparent background elements, Filters and effects and of course GIFs.
● There are dozens of apps with built in smart artificial intelligence to help restore old photos or make short animations out of them. Some of them are applicable for desktops while others available both on Android and iOS.
Now, it is a question of what to do with all those still photos lying in your phone. You can be pretty certain that you won’t be retiring from clicking images anytime soon. A tip to help make posting images more interesting would be using apps to animate your photos.
You can also find an app that animates your face specifically, which is great for instagram content and has a greater chance of getting reactions or comments. So without further to do let’s get animating.
In this article
01 [Review of General Methods: Can You Animate Still Pictures?](#Part 1)
02 [10 Best apps to animate still photos on Android & iOS](#Part 2)
03 [Additional Extension: 5 Apps to Animate Old Photos](#Part 3)
Part 1 Review of General Methods: Can You Animate Still Pictures?
It’s pretty obvious that you can! These days you can do whatever you want online so animating still pictures should be a piece of cake if you know-how.
A video is basically an entire collage of moving pictures. So if you can cut out pictures from a video why not turn still pictures into animations.
There are a number of ways you can use to animate still images →
● Videos are multiple pictures that move at a frame rate. Make short copies of a video by cutting out the essential moments and playing them in a loop.
● Add and play video animation elements over a picture. With the right software, this task is as easy as copy-pasting over another image.
● Apply an animated 3D image with a transparent background over another image. Remember, the bigger the element the closer it is. So size is directly translated as distance.
● You can use multiple filters and effects on an image with an animated portrait app. Find out what app you can use further on in this article.
● Turn an image into a GIF. No matter its small size and cartoonish style, GIF animation has a very wide appeal as online content.
Part 2 10 Best apps to animate still photos on Android & iOS
01GIPHY
Giphy is the largest internet catalog for GIF files, clips & stickers. No matter if it is a scene from a movie or an animation you have watched somewhere, using this application you can easily find, save & share or simply create something new.
Price: Free
Pros
● Quickly turns still photos into an animation.
● Easily share your work through all social media channels.
Cons
● Search tags are varied; you may need to search using unlikely words to get desired results.
Applicable System: Android
02GIPHY
One of the best ways to turn your photos & videos into GIFs is using ImgPlay. It has a clearer interface making it easy to use. Imgplay comes with paid- premium and non-paid version making it suitable for personal & professional application.
Price: Pro $4.99.
Pros
● It is not packed with unnecessary features.
Cons
● ImgPlay slaps a watermark on all its non-premium versions.
Applicable System: Android & iOS.
03Loopsie
The best Part is that Loopsie provides spectacular cinematographic effects to your animated stills. Stabilization algorithm efficiently removes shaking effects & blurs.
Price: Free.
Pros
● User friendly UI
● Easy to share on social media platforms.
Cons
● Paid version is a bit pricey.
Applicable System: Only on iOS.
04StoryZ
Looking for ways to create animated visuals form still images? This is where your quest ends. An advanced editing platform that offers overlays, movement & color filters. Banner Ads & watermarks can be removed by paying a small subscription fee.
Price: Free version available. Premium costs INR 789 a year.
Pros
● Double exposure effect combines video overlay & static imagery.
Cons
● Contains Ad & watermark.
Applicable System: Android.
05Animate Me
Animate Me offers you a package of postcards & greeting snapshots that you can animate according to your need. The paid subscription will get you updated sounds & effects every now & then.
Price: Free.
Pros
● Easy to use & beginners friendly.
Cons
● Editing features & tools are limited.
Applicable System: Windows**.**
06Movepic
Create animated stills, GIFs, live-wallpapers all with Movepic. It allows you to animate simply anything by drawing a path. You can also adjust the speed of animation manually.
Price: Free.
Pros
● Animate in a light motion.
● Easy to use.
Cons
● Free version leaves a watermark on images.
Applicable System: Android & iOS.
07Pixaloop
Pixaloop is a fun app packed with significant animation & editing features. 100% free to use software delivers live animated images in a few clicks. User friendly interface edits images using powerful & precise animation tools.
Price- Free.
Pros
● Offers all the necessary features & core tools.
● Provides accuracy & flexibility to the users.
Cons
● The animation process is a bit time consuming.
Applicable System: Android & iOS.
08Zoetropic
Zoetropic has a combination of 3D tools and Camera FX to animate your images. User friendly interface allows you to mask the still areas if you wish to keep it still.
Price: $199 (Pro)
Pros
● Easily customize motion areas.
● Apply overlays & audios.
Cons
● App price is higher than similar available apps.
Applicable System: Android & iOS.
9Motionleap
It is one of the most top reviewed apps on Playstore related to animating still photos. It has several features like programming directional cues, freeze portions of your photo or even apply filters.
Price: Free version. Pro version; $3.50/month, $18/year and $55 lifetime.
Pros
● Its free version does not apply watermark.
● Intuitive Interface.
Cons
● Best features are locked in Pro version.
Applicable System: Android & iOS.
Part 3 Additional Extension: 5 Apps to Animate Old Photos
It can be unanimously agreed upon that people have been storing photos for decades as a means of preserving memories. We don’t get much opportunity to meet familiar faces too often so why not just try and animate still images of relatives. Now we already know how we can start animating images on apps but restoring original images maybe a tad more complicated than that. This time a bit of the animation is dependent on the physical state of the picture so be sure it’s in mint condition.
These photos can be restored or manipulated digitally with the help of smart AI. We have listed down some of the apps to animate old photos and reconstruct faces;
01Photos Revive
You can add colour to old worn out photos and make them look more realistic in terms of tonal colorization using artificial intelligence. The app also asks you recollect any details of the photo that you might remember in terms of the image.
Applicable OS: iOS only.
02Remini
After going through several improvements and upgrades, you can use the app Remini to confidently restore low resolution images that are either pixelated, blurred or damaged into High Definition images. This app has already been used by users to process a hundred million photos.
Applicable OS: Android 1.7.2 or higher, & iOS 9.3 or higher.
03Colorize
Another app that uses AI to add colorization to your old images. It is a popular animate your family photo app which has amazing other tools and filters to try out.
Applicable OS: Android and iOS.
04Deep Nostalgia
Using this app which has been innovated by the geology platform MyHeritage uses ai to add gestures to still images to evoke nostalgia in the users.
Applicable OS: Online.
04Google Photoscan
Google scanner is a futuristic app for restoring photos of the past. The app uses a smart scanning technology that provides several scans of the same photo automatically.
Applicable OS: Android or iOS.
Key Takeaways from This Episode
● Animating photos are a new way of reimagining still images into moving live content. There are many methods and approaches you can choose to animate your images.
● Some of them being video animations, transparent background elements, Filters and effects and of course GIFs.
● There are dozens of apps with built in smart artificial intelligence to help restore old photos or make short animations out of them. Some of them are applicable for desktops while others available both on Android and iOS.
How to Create Animated Video on Canva?
Canva is a simple way—without any graphic design experience—to make professional graphics for social media, newsletters, presentations, business cards, gift certificates, brochures, and more. Flexible design templates offer the ideal layout for your target destination, letting you aim over the design, not the file formatting or the size.
So, can you make an animated video on Canva?
Yes, because Canva lives on the cloud, you can access your graphics from anywhere you can get online while using Canva on the cloud. Learn how you can play, get up, and run with Canva in this short, fun tutorial guide. We’ll discuss adding and editing images, using inbuilt design templates, and working with typography to build your next project with Canva.
In the subsequent sections, we shall learn more about Canva animated videos and how to create one easily on your PC.
In this article
01 [Create an animated video with a Canva template](#Part 1)
02 [Create Canva animated video with your video](#Part 2)
Part 1 Create an animated video with a Canva template
In this section, we’ll explore how to make animated video on Canva, which applies to both the free and pro account of Canva. However, the steps given below got created from Canva’s free account. We suppose that you’ve already created an account on Canva and logged into the platform. So, further steps will proceed as follows:
Go to the Video tab given in the top front panel of Canva and choose any template of your desire. Let’s say we’ve selected the very first template, 1920 × 1080 pixels. There are lots of options provided by Canva from where you can choose your favorites. You can also create a template with a custom size.

After you enter the editing panel, you have the choice of different templates on the left-hand panel. You can search for a template of your choice among them and can create other pages, as shown below. To preview the templates, you can click the Play button with mentioned time duration on the top right corner of the editing screen.

Now, it’s time to add creativity and explore more editing elements within the Canva. You can modify the entire template given and add something of your own.

Now, you can explore various editing Elements given on the left-hand panel, as shown below. There are multiple options available here as well.

You can add some text within the Canva template, and you can search from the left-hand panel. Given above are various options by which you can bold, italicize, and underline the text.

Now, let’s add some music to the video. So, go to the Audio tab and select any one of the options among them. There are different choices for you to explore here as well.

After you’re done, you can hit the Preview Play button on the top and see your project, as shown below.
It’s all done, and you can proceed with the next section.
Part 2 Create Canva animated video with your video
We’ll discuss how to create an animated video by uploading our video in Canva without using any template in this section. After logging in to the Canva account credentials, select the Video tab and choose the different templates offered.
We’ve selected a blank template for the purpose as follows.

Now, you need to head directly towards the Uploads tab and upload your video created over here.

By now, you have most probably got over with uploading your media. Click the uploaded video, and it will automatically enter within the editing panel of Canva, as shown below.

You’re all done now, and it’s all finished! Even though template usage is quite simple, it’s pretty straightforward when you don’t use any ready-made template. However, you can still beautify this simple video with different elements like text, music, etc.
Animation style videos influence people of all ages to whatever generation, or the kind you belong to will be one of them for sure.
Animated ones provoke diverse impacts instead of ordinary videos on the audience utilizing illustration, kinesthetic, etc. But the fact is, due to technological advancements and overexposure to social media sites, we have forgotten its significance.
Want to know some other most accessible software tools that can bring out the artist in you? Here is an alternative that is all you need.
Are you surprised to find that you can go with various animation styles to boost your business or bring out your talents? But are you confused about how to revamp your story and effectively film it? Why should you worry when the best animation maker and Canva’s alternative Wondershare Filmora is here exclusively for you to create fantastic animation videos that could stand out of the box?
Conclusion
Do you aspire to paint with bright colors to videos or want to become an animator? Then, choose animation styles that you most enjoy, find attractive today, start working on them, or create Canva animated videos as the tutorial indicates above. Lastly, don’t forget to give Filmora a chance to upscale your creation and give your animation style a life!
02 [Create Canva animated video with your video](#Part 2)
Part 1 Create an animated video with a Canva template
In this section, we’ll explore how to make animated video on Canva, which applies to both the free and pro account of Canva. However, the steps given below got created from Canva’s free account. We suppose that you’ve already created an account on Canva and logged into the platform. So, further steps will proceed as follows:
Go to the Video tab given in the top front panel of Canva and choose any template of your desire. Let’s say we’ve selected the very first template, 1920 × 1080 pixels. There are lots of options provided by Canva from where you can choose your favorites. You can also create a template with a custom size.
After you enter the editing panel, you have the choice of different templates on the left-hand panel. You can search for a template of your choice among them and can create other pages, as shown below. To preview the templates, you can click the Play button with mentioned time duration on the top right corner of the editing screen.
Now, it’s time to add creativity and explore more editing elements within the Canva. You can modify the entire template given and add something of your own.
Now, you can explore various editing Elements given on the left-hand panel, as shown below. There are multiple options available here as well.
You can add some text within the Canva template, and you can search from the left-hand panel. Given above are various options by which you can bold, italicize, and underline the text.
Now, let’s add some music to the video. So, go to the Audio tab and select any one of the options among them. There are different choices for you to explore here as well.
After you’re done, you can hit the Preview Play button on the top and see your project, as shown below.
It’s all done, and you can proceed with the next section.
Part 2 Create Canva animated video with your video
We’ll discuss how to create an animated video by uploading our video in Canva without using any template in this section. After logging in to the Canva account credentials, select the Video tab and choose the different templates offered.
We’ve selected a blank template for the purpose as follows.
Now, you need to head directly towards the Uploads tab and upload your video created over here.
By now, you have most probably got over with uploading your media. Click the uploaded video, and it will automatically enter within the editing panel of Canva, as shown below.
You’re all done now, and it’s all finished! Even though template usage is quite simple, it’s pretty straightforward when you don’t use any ready-made template. However, you can still beautify this simple video with different elements like text, music, etc.
Animation style videos influence people of all ages to whatever generation, or the kind you belong to will be one of them for sure.
Animated ones provoke diverse impacts instead of ordinary videos on the audience utilizing illustration, kinesthetic, etc. But the fact is, due to technological advancements and overexposure to social media sites, we have forgotten its significance.
Want to know some other most accessible software tools that can bring out the artist in you? Here is an alternative that is all you need.
Are you surprised to find that you can go with various animation styles to boost your business or bring out your talents? But are you confused about how to revamp your story and effectively film it? Why should you worry when the best animation maker and Canva’s alternative Wondershare Filmora is here exclusively for you to create fantastic animation videos that could stand out of the box?
Conclusion
Do you aspire to paint with bright colors to videos or want to become an animator? Then, choose animation styles that you most enjoy, find attractive today, start working on them, or create Canva animated videos as the tutorial indicates above. Lastly, don’t forget to give Filmora a chance to upscale your creation and give your animation style a life!
10 Great Apps for Turning Funny Animated Images Into Comics
10 Great Apps for Turning Funny Animated Images into Comics
An easy yet powerful editor
Numerous effects to choose from
Detailed tutorials provided by the official channel
There are several apps available that can let you create interesting funny animated images, cartoons, and comics by adding speech bubbles, animations, and other effects.
In this article
01 [Top apps to turn pictures into cartoons](#Part 1)
02 [Best Alternative to Cartoon Apps- Wondershare Filmorapro](#Part 2)
03 [Key Takeaways](#Part 3)
Part 1 Top apps to turn pictures into cartoons
To add some fun elements to your regular images and make them even more interesting you can convert them into cartoons and comics. The task of conversion can seem to be difficult and tricky but with the availability of several apps and programs, you can achieve the desired results in just a few clicks.
With multiple options available, you are bound to get confused while selecting an app. Helping you with the same, we have shortlisted the top 10 apps in the category as below.
01 Prisma Photo Editor
Available for download on Android and iOS devices this is an excellent photo editing app that comes with over 300 art filters and animations. You can quickly convert your images into funny and interesting cartoons using the app in no time. Additionally, several image parameters like sharpness, exposure, brightness, and others can also be adjusted as needed.
02 Photo Lab Picture Editor
This is free to use app on the Google Play Store with the IAP option. With a 4.6 high rating, the app is simple to use and offers more than 900 funny and stylish effects that can be added to your images. You can choose from photo montages, animations, filters, and other effects that match your requirements. You can even add photo frames to make your image look impressive. Create professional-looking cartoons in no time using this wonderful app.
03 MomentCam Cartoons & Stickers
This free app on Google Play Store with a 4 rating is just perfect for creating interesting cartoons and emoticons using images. The process is simple and quick where you just need to add the image and create its personalized avatar. Interesting background can also be added to further enhance the cartoon. The app also gives you the option to share the created cartoon on social media sites.

04 ToonMe
Create cartoons using your selfies and other images on your phone in just a few clicks using this high-rated app on Google Play Store. The AI of the app allows the creation of interesting full-body cartoons as well as vector portrait templates. Multiple layouts and designs are also available to choose from. The interface is simple and the app is also available for download Apple Play Store.

05 Pixlr- Free Photo Editor
This is a widely used image editing app that is simple and free to use. A wide range of image editing features and filters are available with the app including cartoon filters that will let you unleash your creativity and design impressive cartoons and other images. Also available for iOS devices the app also facilitates sharing the created images over social media and emails. Additional features include auto-fix, double exposure, adjusting image tone, and others.
06 Painnt- Pro Art Filters
This feature-packed app on Google Store lets you create professional-looking art pieces from the images using filters and animations. With more than 1000 filters in several categories including cartoons, classical, abstract, and others you can have a creation of your choice. App uses AI and also has an option for preview and fine-tuning. You can even share your creations with the app community and over social networking sites.
07 Clip2Comic & Caricature Maker
This is among the best app for iPhone users that allows creating funny and interesting cartoons, caricatures, and other artwork using images. Several other editing tools and filters are also available that support customizing high-quality and high-resolution images. Additionally, the app also supports editing the videos and converting them into animated clippings. The deformation filter further makes your creation look funny and interesting.
08 Deep Art Effects
This free app for Android and iOS devices comes with more than 100 effects and filters of different types including cartoon-based. Using the AI of the app, you can create impressive artwork in HD resolution. The app supports fast image processing and also supports sharing the artwork with the community. A paid premium version of the app is also available that has no ads, watermark, allows creating own filters, and has additional features.
09 Cartoon Photo Editor
This free app for iOS devices will let you turn your images into cartoons like a pro. The app comes with more than 15 cartoon filters to choose from and you can even choose the art style as a retro cartoon, Minecraft, and others. The images from the device can be added to the app or you can even capture one using the camera. The created cartoons can also be shared over social media sites using the app. The pro-paid version offers additional features and functions.
10 Comica- Comics and cartoon maker
As the name suggests, this is a comics and cartoon creating an app on Google Play Store. This lightweight app is free to use and comes with legit-looking effects and allows adding speech balloons. You can even create your memes using the app and take your creativity to a new level.

Key Takeaways from This Episode
● Check out the images on your smartphone or system that can be used for creating interesting cartoons.
● Analyze multiple apps and programs that can let you add cartoon and comic effects to your selected images.
● Finalize the tool that offers the best features, is simple to use, and can quickly convert your images to funny animated images and cartoons with added functionalities.
There are several apps available that can let you create interesting funny animated images, cartoons, and comics by adding speech bubbles, animations, and other effects.
In this article
01 [Top apps to turn pictures into cartoons](#Part 1)
02 [Best Alternative to Cartoon Apps- Wondershare Filmorapro](#Part 2)
03 [Key Takeaways](#Part 3)
Part 1 Top apps to turn pictures into cartoons
To add some fun elements to your regular images and make them even more interesting you can convert them into cartoons and comics. The task of conversion can seem to be difficult and tricky but with the availability of several apps and programs, you can achieve the desired results in just a few clicks.
With multiple options available, you are bound to get confused while selecting an app. Helping you with the same, we have shortlisted the top 10 apps in the category as below.
01 Prisma Photo Editor
Available for download on Android and iOS devices this is an excellent photo editing app that comes with over 300 art filters and animations. You can quickly convert your images into funny and interesting cartoons using the app in no time. Additionally, several image parameters like sharpness, exposure, brightness, and others can also be adjusted as needed.
02 Photo Lab Picture Editor
This is free to use app on the Google Play Store with the IAP option. With a 4.6 high rating, the app is simple to use and offers more than 900 funny and stylish effects that can be added to your images. You can choose from photo montages, animations, filters, and other effects that match your requirements. You can even add photo frames to make your image look impressive. Create professional-looking cartoons in no time using this wonderful app.
03 MomentCam Cartoons & Stickers
This free app on Google Play Store with a 4 rating is just perfect for creating interesting cartoons and emoticons using images. The process is simple and quick where you just need to add the image and create its personalized avatar. Interesting background can also be added to further enhance the cartoon. The app also gives you the option to share the created cartoon on social media sites.
04 ToonMe
Create cartoons using your selfies and other images on your phone in just a few clicks using this high-rated app on Google Play Store. The AI of the app allows the creation of interesting full-body cartoons as well as vector portrait templates. Multiple layouts and designs are also available to choose from. The interface is simple and the app is also available for download Apple Play Store.
05 Pixlr- Free Photo Editor
This is a widely used image editing app that is simple and free to use. A wide range of image editing features and filters are available with the app including cartoon filters that will let you unleash your creativity and design impressive cartoons and other images. Also available for iOS devices the app also facilitates sharing the created images over social media and emails. Additional features include auto-fix, double exposure, adjusting image tone, and others.
06 Painnt- Pro Art Filters
This feature-packed app on Google Store lets you create professional-looking art pieces from the images using filters and animations. With more than 1000 filters in several categories including cartoons, classical, abstract, and others you can have a creation of your choice. App uses AI and also has an option for preview and fine-tuning. You can even share your creations with the app community and over social networking sites.
07 Clip2Comic & Caricature Maker
This is among the best app for iPhone users that allows creating funny and interesting cartoons, caricatures, and other artwork using images. Several other editing tools and filters are also available that support customizing high-quality and high-resolution images. Additionally, the app also supports editing the videos and converting them into animated clippings. The deformation filter further makes your creation look funny and interesting.
08 Deep Art Effects
This free app for Android and iOS devices comes with more than 100 effects and filters of different types including cartoon-based. Using the AI of the app, you can create impressive artwork in HD resolution. The app supports fast image processing and also supports sharing the artwork with the community. A paid premium version of the app is also available that has no ads, watermark, allows creating own filters, and has additional features.
09 Cartoon Photo Editor
This free app for iOS devices will let you turn your images into cartoons like a pro. The app comes with more than 15 cartoon filters to choose from and you can even choose the art style as a retro cartoon, Minecraft, and others. The images from the device can be added to the app or you can even capture one using the camera. The created cartoons can also be shared over social media sites using the app. The pro-paid version offers additional features and functions.
10 Comica- Comics and cartoon maker
As the name suggests, this is a comics and cartoon creating an app on Google Play Store. This lightweight app is free to use and comes with legit-looking effects and allows adding speech balloons. You can even create your memes using the app and take your creativity to a new level.
Key Takeaways from This Episode
● Check out the images on your smartphone or system that can be used for creating interesting cartoons.
● Analyze multiple apps and programs that can let you add cartoon and comic effects to your selected images.
● Finalize the tool that offers the best features, is simple to use, and can quickly convert your images to funny animated images and cartoons with added functionalities.
2D Character Animation: Everything You Should Know About It
2D Character Animation: Everything You Should Know About It
An easy yet powerful editor
Numerous effects to choose from
Detailed tutorials provided by the official channel
2D character animation is one of the significant kinds of animation popularly used for creating animated movies, marketing videos, cartoons, advertisements, educational content, corporate presentations, video games, etc.
With the popularity of video content, more and more businesses tend to use animation for promotion, as they magnify conversion rates by 20%. Some companies hire 2D character animation services; others try to make them online with software help.
In this article
01 [What is 2D Character Animation and What Does 2D Animation Do?](#Part 1)
02 [2D Character Animation Tips and Tricks](#Part 2)
03 [An Ultimate Guide to Create 2D Character Animation Online](#Part 3)
04 [5 Great 2D Character Animation Templates](#Part 4)
Part 1 What is 2D Character Animation and What Does 2D Animation Do?
2D animation is identified by having its characters and objects created in a 2D space. It means that they only have height and width to specify.
However, 2D animation is considered a traditional style, known from the 1800s. Initially, it was designed by merging the frames in which one drawing was followed by another and making them different; every second consists of 24 frames.
We all remember the classic Disney animations. Snow White and the Seven Dwarfs, The Little Mermaid, Bambi, etc. They are some of the highly famous 2D animation styles.
With the advancement of computer technologies, this process also got digitized through various 2D character animation software.
In this guide, we’ll talk about everything relatable to 2D character animation, and let’s proceed with the expert tips and tricks to create inspirational style within animation character 2D.
Part 2 2D Character Animation Tips and Tricks
01Look for a real-time reference
Using a real-world reference for 2D character animation can help you effectively animate faces. For example, when studios collaborate with voice-over artists, they often record their facial movements. It further helps 2D animators to ensure their expressions get captured convincingly.
If it seems impossible, you can consider using your face, so you have something to refer back to. You could also use a mirror and utter the words your character will speak. It will display the correct animated expressions.
02Observe real life
You need to use observation a lot more. One of the primary aspects of 2D character animation is bringing life to animate objections. Therefore, you must carefully consider how emotion can get portrayed and select each movement accordingly.
Take time watching how people in real-life environments talk and interact with each other, how they express emotions, how they move, etc. Please don’t spend much time doing this, as it is valuable to research.
03Simplicity is the key
2D character animation is never complex compared with 3D. Think carefully before creating a scene too complicated. You must not include too much information, which is hard to digest, and you may even find yourself compromising the scene’s realism. Try not to heavy the stage with too many pose changes or other elements, and keep it genuine.
04Draw animation again and again
Drawing animation consumes a lot of time. You can’t complete it within one day, so you better know deep down that one task only can be done after you have revamped it various times. For 2D character animation, you may need to draw objects on paper several times.
You can’t master the skill of animation character 2D quickly. Luckily, all pains will be relieved someday.
05Feedback is important
Feedback is an essential element of artistic development. It’s wise to actively seek out feedback from familiar figures who can help you enhance. Naturally, we may see work we have invested a great deal of time and effort indifferently to someone not so involved in the creative process. Feedback can equate to a valuable learning opportunity that will assist you produce the results hit the spot much more appropriately.
Part 3 An Ultimate Guide to Create 2D Character Animation Online
Let’s now look at making an illustrated 2D character animation move on a screen.
While there are nearly numerous options for 2D character animation tools and software, this tutorial will animate a character in Adobe After Effects.
Steps to create 2D character animation After Effects
01Step 1: Download and Install Duik
You need to install the Duik animation plugin for Adobe After Effects to simplify the whole process. You can animate and rig characters’ entire limbs with Duik using just the placement of their feet and hands.
While this isn’t an essential step, it can be valuable for beginners, as you’ll see in this tutorial. Luckily, Duik is available for free from Rainbox Laboratory.
02Step 2: Design Your Character
You need a moving character before you’re able to start animating. You can create this character in Adobe Illustrator and import it into After Effects.
Try creating a straightforward character with an aim on the character’s limbs.
In the example mentioned below, you can see that the body is a very rudimentary shape—a circle—with long legs that make it simple to consider the animation process.

Check the character’s joints. Making a round joint between the lower and upper parts of the legs, for instance, will help the character move more smoothly.

03Step 3: Make and Import Your Character Artwork
Now, you’ll need to make a few final adjustments before moving your character artwork. Break your character out into layers firstly. Every section of the character that will move independently needs a separate layer.
So, layers include his circular body, face, and the leg’s segments (i.e., lower leg, upper leg, and foot).

To import your character artwork, go to File, click the Import tab, and choose your character file. Ensure that you need to import it as a composition to ensure it includes the layers you just created.
04Step 4: Establish Initial Character Rigging
Now, the 2D character animation is almost over by the initial rigging.
Firstly, lower the opacity of all your layers to above 50% to see the critical joints within the character.
Next, you must ensure that the joints hinge in the ideal direction. It’s simple to do with the anchor point tool. For each character’s layer, place the anchor point at the center of gravity for each layer of the 2D character animation.
The anchor point would probably go between the eyes for the layer of the face (i.e., the nose, eyes, and mouth). For each legs’ section, hold the anchor point where the leg will hinge (e.g., the anchor point would be at the highest point for the leg’s upper portion, where it meets the body).

Then, use the parent tool to join the limbs’ sections. For instance, the parent of the foot would be the lower leg, and the upper portion is the parent of the lower leg.
It makes sure that the leg moves together as one unit with multiple hinge points.
Finally, use the Duik toolbar to create character controllers. Controllers control the rotation and position of critical elements within your character. For the ankles of the 2D character animation, you would select the controller that encompasses both the rotation and position.
05Step 5: Create Your Rig
Use the Duik toolbar to create a rig. Select each layer from the extremities inward from each limb, lasting with your controllers.
You would select the ankle for a leg, followed by the upper portion, the lower leg, and conclusively, the controller at the ankle. Then, select auto-rig within the Rigging area of the Duik toolbar.
The entire leg will move when you move that ankle controller. If your character contains them, repeat the process for the other leg, along with other limbs.
Before proceeding, test the limbs to make sure they hinge and move correctly. You need to adjust the opacity of the character back to 100% once you are satisfied with the movements.

06Step 6: Start Animating Your Character
You can begin animating after completing a rig. First, create keyframes—the ending and beginning points of the character’s movement. The character’s legs are at their most magnified are thus the endpoints for a walk cycle. Make sure that the beginning and ending of keyframes are identical to get an ideal loop.
Start adding in-between frames from there, like when one leg crosses over the other in the middle of a walking stride.
Moreover, you can add ‘easing” to the animation via 2D character animation After Effects’ Easy Ease tab, located under the Animation button, and Keyframe Assistant.
It will smoothen the transition between the keyframes. You will have a primary walking sequence at this instance.

Now, you can make further refinements to add detail and secondary movement, like a bobbing motion of the head. You can also modify elements like the keyframe velocity, further smoothing out the animation.
As you practice, you’ll get a better feel for your animation preferences and develop more advanced realistic 2D animation character design capabilities.
Part 4 5 Great 2D Character Animation Templates
1 – FrameStory Character Animation Toolkit
2 – Explainer Video Character Animation ToolKit
3 – 2D Character Animation After Effects Template
4 – Character Animation ToolKit
5 – Rigged Character Animation Mockup Template
Given above is a list of the best 2D character animation templates worth considering. Yet, if you are tired of using After Effects Templates, why not select Wondershare Filmora Template Mode?
It is a brand-new mode recently launched by Filmora to ramp up your story. It is a simplistic way to use compared with After Effects.
****Wondershare Filmora Video Editor Template Mode**
For Win 7 or later (64-bit)
For macOS 10.12 or later
Filmora Template Mode is a bold breakthrough that helps you create incredible videos in a minute. Forget about dragging n dropping the video clips into a timeline; Filmora template Mode provides you a new way of generating videos automatically by using various stylish video templates.
Steps to create a stunning animated video in 3 levels
01Step 1: Choose a template
Pick up a video template that best suits your needs.

02Step 2: Import Media
Import at least three video clips or images and let AI assist you in ramping the production process without hassle.

03Step 3: Export Project
Export media among multiple social media platforms.

● Key Takeaways from This Episode →
● Understanding 2D character animation tips and tricks
● A step by step guide to creating 2D character animation online
● Five best 2D character animation templates
● The best alternative of using the Template mode directly within the Wondershare Filmora
2D character animation is one of the significant kinds of animation popularly used for creating animated movies, marketing videos, cartoons, advertisements, educational content, corporate presentations, video games, etc.
With the popularity of video content, more and more businesses tend to use animation for promotion, as they magnify conversion rates by 20%. Some companies hire 2D character animation services; others try to make them online with software help.
In this article
01 [What is 2D Character Animation and What Does 2D Animation Do?](#Part 1)
02 [2D Character Animation Tips and Tricks](#Part 2)
03 [An Ultimate Guide to Create 2D Character Animation Online](#Part 3)
04 [5 Great 2D Character Animation Templates](#Part 4)
Part 1 What is 2D Character Animation and What Does 2D Animation Do?
2D animation is identified by having its characters and objects created in a 2D space. It means that they only have height and width to specify.
However, 2D animation is considered a traditional style, known from the 1800s. Initially, it was designed by merging the frames in which one drawing was followed by another and making them different; every second consists of 24 frames.
We all remember the classic Disney animations. Snow White and the Seven Dwarfs, The Little Mermaid, Bambi, etc. They are some of the highly famous 2D animation styles.
With the advancement of computer technologies, this process also got digitized through various 2D character animation software.
In this guide, we’ll talk about everything relatable to 2D character animation, and let’s proceed with the expert tips and tricks to create inspirational style within animation character 2D.
Part 2 2D Character Animation Tips and Tricks
01Look for a real-time reference
Using a real-world reference for 2D character animation can help you effectively animate faces. For example, when studios collaborate with voice-over artists, they often record their facial movements. It further helps 2D animators to ensure their expressions get captured convincingly.
If it seems impossible, you can consider using your face, so you have something to refer back to. You could also use a mirror and utter the words your character will speak. It will display the correct animated expressions.
02Observe real life
You need to use observation a lot more. One of the primary aspects of 2D character animation is bringing life to animate objections. Therefore, you must carefully consider how emotion can get portrayed and select each movement accordingly.
Take time watching how people in real-life environments talk and interact with each other, how they express emotions, how they move, etc. Please don’t spend much time doing this, as it is valuable to research.
03Simplicity is the key
2D character animation is never complex compared with 3D. Think carefully before creating a scene too complicated. You must not include too much information, which is hard to digest, and you may even find yourself compromising the scene’s realism. Try not to heavy the stage with too many pose changes or other elements, and keep it genuine.
04Draw animation again and again
Drawing animation consumes a lot of time. You can’t complete it within one day, so you better know deep down that one task only can be done after you have revamped it various times. For 2D character animation, you may need to draw objects on paper several times.
You can’t master the skill of animation character 2D quickly. Luckily, all pains will be relieved someday.
05Feedback is important
Feedback is an essential element of artistic development. It’s wise to actively seek out feedback from familiar figures who can help you enhance. Naturally, we may see work we have invested a great deal of time and effort indifferently to someone not so involved in the creative process. Feedback can equate to a valuable learning opportunity that will assist you produce the results hit the spot much more appropriately.
Part 3 An Ultimate Guide to Create 2D Character Animation Online
Let’s now look at making an illustrated 2D character animation move on a screen.
While there are nearly numerous options for 2D character animation tools and software, this tutorial will animate a character in Adobe After Effects.
Steps to create 2D character animation After Effects
01Step 1: Download and Install Duik
You need to install the Duik animation plugin for Adobe After Effects to simplify the whole process. You can animate and rig characters’ entire limbs with Duik using just the placement of their feet and hands.
While this isn’t an essential step, it can be valuable for beginners, as you’ll see in this tutorial. Luckily, Duik is available for free from Rainbox Laboratory.
02Step 2: Design Your Character
You need a moving character before you’re able to start animating. You can create this character in Adobe Illustrator and import it into After Effects.
Try creating a straightforward character with an aim on the character’s limbs.
In the example mentioned below, you can see that the body is a very rudimentary shape—a circle—with long legs that make it simple to consider the animation process.
Check the character’s joints. Making a round joint between the lower and upper parts of the legs, for instance, will help the character move more smoothly.
03Step 3: Make and Import Your Character Artwork
Now, you’ll need to make a few final adjustments before moving your character artwork. Break your character out into layers firstly. Every section of the character that will move independently needs a separate layer.
So, layers include his circular body, face, and the leg’s segments (i.e., lower leg, upper leg, and foot).
To import your character artwork, go to File, click the Import tab, and choose your character file. Ensure that you need to import it as a composition to ensure it includes the layers you just created.
04Step 4: Establish Initial Character Rigging
Now, the 2D character animation is almost over by the initial rigging.
Firstly, lower the opacity of all your layers to above 50% to see the critical joints within the character.
Next, you must ensure that the joints hinge in the ideal direction. It’s simple to do with the anchor point tool. For each character’s layer, place the anchor point at the center of gravity for each layer of the 2D character animation.
The anchor point would probably go between the eyes for the layer of the face (i.e., the nose, eyes, and mouth). For each legs’ section, hold the anchor point where the leg will hinge (e.g., the anchor point would be at the highest point for the leg’s upper portion, where it meets the body).
Then, use the parent tool to join the limbs’ sections. For instance, the parent of the foot would be the lower leg, and the upper portion is the parent of the lower leg.
It makes sure that the leg moves together as one unit with multiple hinge points.
Finally, use the Duik toolbar to create character controllers. Controllers control the rotation and position of critical elements within your character. For the ankles of the 2D character animation, you would select the controller that encompasses both the rotation and position.
05Step 5: Create Your Rig
Use the Duik toolbar to create a rig. Select each layer from the extremities inward from each limb, lasting with your controllers.
You would select the ankle for a leg, followed by the upper portion, the lower leg, and conclusively, the controller at the ankle. Then, select auto-rig within the Rigging area of the Duik toolbar.
The entire leg will move when you move that ankle controller. If your character contains them, repeat the process for the other leg, along with other limbs.
Before proceeding, test the limbs to make sure they hinge and move correctly. You need to adjust the opacity of the character back to 100% once you are satisfied with the movements.
06Step 6: Start Animating Your Character
You can begin animating after completing a rig. First, create keyframes—the ending and beginning points of the character’s movement. The character’s legs are at their most magnified are thus the endpoints for a walk cycle. Make sure that the beginning and ending of keyframes are identical to get an ideal loop.
Start adding in-between frames from there, like when one leg crosses over the other in the middle of a walking stride.
Moreover, you can add ‘easing” to the animation via 2D character animation After Effects’ Easy Ease tab, located under the Animation button, and Keyframe Assistant.
It will smoothen the transition between the keyframes. You will have a primary walking sequence at this instance.
Now, you can make further refinements to add detail and secondary movement, like a bobbing motion of the head. You can also modify elements like the keyframe velocity, further smoothing out the animation.
As you practice, you’ll get a better feel for your animation preferences and develop more advanced realistic 2D animation character design capabilities.
Part 4 5 Great 2D Character Animation Templates
1 – FrameStory Character Animation Toolkit
2 – Explainer Video Character Animation ToolKit
3 – 2D Character Animation After Effects Template
4 – Character Animation ToolKit
5 – Rigged Character Animation Mockup Template
Given above is a list of the best 2D character animation templates worth considering. Yet, if you are tired of using After Effects Templates, why not select Wondershare Filmora Template Mode?
It is a brand-new mode recently launched by Filmora to ramp up your story. It is a simplistic way to use compared with After Effects.
****Wondershare Filmora Video Editor Template Mode**
For Win 7 or later (64-bit)
For macOS 10.12 or later
Filmora Template Mode is a bold breakthrough that helps you create incredible videos in a minute. Forget about dragging n dropping the video clips into a timeline; Filmora template Mode provides you a new way of generating videos automatically by using various stylish video templates.
Steps to create a stunning animated video in 3 levels
01Step 1: Choose a template
Pick up a video template that best suits your needs.
02Step 2: Import Media
Import at least three video clips or images and let AI assist you in ramping the production process without hassle.
03Step 3: Export Project
Export media among multiple social media platforms.
● Key Takeaways from This Episode →
● Understanding 2D character animation tips and tricks
● A step by step guide to creating 2D character animation online
● Five best 2D character animation templates
● The best alternative of using the Template mode directly within the Wondershare Filmora
Also read:
- New In 2024, Animated Business Logos and Tools to Create
- Updated In 2024, Best 15 Classics Animated Cartoon Movies
- Updated 2024 Approved Handy Tips From Adobe Animate Rigging Tutorial for All Learners
- In 2024, Want to Make a Meme GIF? Heres How to Do
- Updated Learn How to Make Your Characters Interactive in Unity Animation Rigging
- Updated Easy Cartoon Characters Drawing Tutorials for You Who Are Learning to Draw for 2024
- Updated 2024 Approved How to Create Picsart Cartoon
- How to Make a Video a Live Photo 2023 for 2024
- 2024 Approved 15 Best Stop Motion Animation Kits to Fuel Creativity
- Updated Top 10 Best and Fast Ways to Turn Image Into Gif for 2024
- How to Make a GIF in Photoshop for 2024
- New In 2024, Have You Seen the Facebook Cartoon App Everyones Using Recently
- New 5 Must Try Ways to Add and Send GIF in Text Message on Android
- What This Post Can Teach You About Clay Animation
- Updated 2024 Approved 12 Animation Video Maker That Can Triple Conversion Rates
- Updated 2024 Approved 10 Most Memorable Japanese Cat Cartoons
- In 2024, Top 12 Video to GIF Converters High Quality to Check Out
- New In 2024, Top 7 Best Free GIF Apps for Android
- Updated In 2024, Handy Tips From Adobe Animate Rigging Tutorial for All Learners
- New In 2024, The Best 10 Sketch Animation Video Makers
- New 2024 Approved The Only Guide Youll Need to Learn About GIF Video Downloader
- New In 2024, How to Analyze an Editorial Cartoon
- Updated Learn Simple Blender Rigging in Only 2 Minutes for 2024
- Updated 5 Ways You Never Heard of for Converting MP4 to GIF in Photoshop
- Amazing Techniques of Motion Graphics in Premiere Pro
- In 2024, The 10 Most Adorable Aesthetic Cartoon Characters
- New 2024 Approved How to Learn Cartoon Characters Sketch Quickly
- New How to Combine Multiple GIFs Into One with GIF Combiner for 2024
- New In 2024, 5 Free Animated Gif Sources You Must Check
- New Top 10 Popular Cartoons You Forgot Existed for 2024
- New In 2024, Ways on How to Get Started in Stop Motion Claymation
- New 2024 Approved Best 10 Animated DP for WhatsApp
- Updated How to Make Your Characters Interactive in Unity Animation Rigging
- New In 2024, Tips on How to Learn Graphics Animation
- Updated 2024 Approved 20 Free After Effects Logo Reveal Templates You Will Want to Know
- 2024 Approved 12 Animation Video Maker That Can Triple Conversion Rates
- 2024 Approved How You Can Turn Yourself Into Anime Character Using Anime Filter
- New 2024 Approved 5 Best Adobe Animate Courses & Classes
- Updated In 2024, Top 7 Best Animated Lyric Video Software for FREE
- New 2024 Approved Apps to Animate Still Pictures Which Could Make Your Pictures Become Internet Sensation
- Best Practices on Online 3D Avatar Creator for 2024
- Full Guide on Mirroring Your Infinix GT 10 Pro to Your PC/Mac | Dr.fone
- How to Mirror Apple iPhone 7 Plus to Roku? | Dr.fone
- In 2024, Guide to Mirror Your Infinix Hot 40i to Other Android devices | Dr.fone
- Hassle-Free Ways to Remove FRP Lock from Samsung Galaxy S24+ Phones with/without a PC
- In 2024, How to Change Location on TikTok to See More Content On your Motorola Edge 40 | Dr.fone
- How To Fix OEM Unlock Missing on Samsung Galaxy A05s?
- Planning to Use a Pokemon Go Joystick on Vivo X Fold 2? | Dr.fone
- How to Remove Forgotten PIN Of Your Samsung Galaxy A15 4G
- 5 Easy Ways to Change Location on YouTube TV On Itel S23 | Dr.fone
- Prank Your Friends! Easy Ways to Fake and Share Google Maps Location On Vivo V27 | Dr.fone
- In 2024, About Nokia C12 Plus FRP Bypass
- In 2024, Reasons why Pokémon GPS does not Work On Poco X5 Pro? | Dr.fone
- Best Apple iPhone 13 Pro & iPad Screen Mirroring App | Dr.fone
- Title: New Best 10 Apps to Enhance Your Instagram Story Slideshow for 2024
- Author: Elon
- Created at : 2024-05-19 03:05:25
- Updated at : 2024-05-20 03:05:25
- Link: https://animation-videos.techidaily.com/new-best-10-apps-to-enhance-your-instagram-story-slideshow-for-2024/
- License: This work is licensed under CC BY-NC-SA 4.0.
