

New Best 10 Old Cartoons From Cartoon Network That You Miss
Best 10 Old Cartoons From Cartoon Network That You Miss
Top 10 Old Cartoons From Cartoon Network That You Miss
An easy yet powerful editor
Numerous effects to choose from
Detailed tutorials provided by the official channel
Right from our childhood days, we were drawn to the interesting late 80s cartoons shown on the old cartoon network. Watching them used to be quite fun and the best time pass after studying. At that time, the most popular and favorite were Disney cartoons.
Cartoon network was used to advertise mostly as a kids channel but it succeeded to please everyone by airing not only cartoons but also some good shows for teenagers and adults as well. It had introduced a lot of classics that defined childhood. But, now all we can do is watch the old episodes and wish we were young again.
We will refresh your memories of your childhood days with some of the most popular old Disney cartoons that you should not miss watching even today.
01**Dumbo
Rating: 7.3
Stars: 4
Do you remember Dumbo, that cute elephant baby with big ears? It was one of the shortest featured films by Disney. This animated old Disney shows cartoon had made an emotional connection with the kids as well as adults.
First, he gets separated from his mother after she tried to protect her baby from the kids who came to see him in the circus. Now, Dumbo was lonely but the Timothy, the mice never left his side. He helps Dumbo in achieving his highest potential. Later did Dumbo realizes that his ears give him the strength to fly, for which others ridiculed him all the time.
In the end, the movie gave the lesson of never giving up on our dreams and being as brave as possible to face this cruel world’s reality.
Votes: 128,942
02**Bambi
Rating: 7.3
Stars: 3.5
Bambi is a lively and engaging retelling of Disney’s characters and their adventures. It is the tale of a young deer that has yet to learn how to live in the great woods. The story revolves around his journey from his childhood days to adulthood. He learns about the forest and its inhabitants from his mother.
However, her demise changes Bambi’s life completely and this moment was the most heartbreaking part of the entire story. He grows spending time with Thumper and Flower and becomes wiser to the stag. These animated old cartoons from the cartoon network will keep your eyes glued to the screen. The movie was appreciated with many awards and achievements.
Votes: 139,750
03**Pinocchio
Rating: 7.5
Stars: 4.5
A classic tale of adventure, Pinocchio is a puppet whose nose grows when he lies. He was crafted by recognized by the carpenter Gepetoo and life was added by a fairy. This live-action Disney adaptation of the book by Carlo Collodi was a smash hit in Italy and was distributed by Disney to the old cartoon network website and other channels.
Each part of this animated cartoon won the heart of the audience including the whale climax, the theme song “when you wish upon a star”, and so on. The most iconic moment in this classic was Pinocchio saving Gepetto from the whale. Despite him being a disobedient character, it left many lessons to unfold for the kids.
Votes: 141,146
04**Snow White & the Seven Dwarves
Rating: 7.6
Stars: 3
Snow White & the Seven brought a revolution to the animated cinematic world. It was a beautiful fairy tale of a girl whose charm captured everyone’s heart in the kingdom including the dwarves. But, her wicked stepmother when asked her magic mirror who is fairest of all? It said about Snow White and this made her feel jealous.
She planned to kill her with a poisonous apple. However, Snow White survived as a kiss from her true love could save her. It was a classic Disney masterpiece loved by millions of fans around the world. Today also, this beloved title will make for a perfect addition to every family movie collection.
Votes: 194,392
05**The Jungle Book
Rating: 7.6
Stars: 4
Who can forget the epic character Mowgli, Bagheera, and Baloo in the jungle book? For several years, its series aired on the old cartoon network. His battle with the Shere Khan and quest to know about himself while spending time with his wolf siblings, all kept enchanting audiences. This is among the most loved old Disney channel cartoons of that time.
Even today, no one can refuse to watch it. It was also the last film produced by the Walt Disney house. Its movie has received several awards like the Peta innovation in Film Award, Academy Award, BAFTA Awards, and so on.
Votes: 177,666
06**Alice in Wonderland
Rating: 7.4
Stars: 3.5
Alice in Wonderland focuses on the story of a girl who fell asleep and dreams of falling into a white rabbit hole. She ends up landing in an animated world of fantastical creatures. As she follows the White Rabbit, she grows in size until she is finally small enough to enter a garden full of talking flowers and oversized insects.
After meeting the Mad Hatter, the Cheshire Cat, and other strange characters, Alice embarks on a series of adventures that take her to a tea party with the Mad Hatter, a tea party with the March Hare, and then a trial at the hands of the Queen of Hearts. She encounters many strange creatures on her journey. Her adventures go terrible at first but as she meets and spends time with them, things started going well.
Votes: 138,126
07**Cinderella
Rating: 7.3
Stars: 3
Cinderella is a classic tale filled with adventure, romance, and magic. When a young woman’s father unexpectedly passes away, her loving stepmother and step sisters neglect her.
But Cinderella finds comfort in her animal friends, like the mice Gus and Jaq who help her clean and cook, the lovable bird Juno, and especially the kind-hearted Fairy Godmother who helps make Cinderella’s dreams come true at a royal ball. Her fortune wasn’t in her favor but her luck turned out good eventually after meeting her Godmother who reunited her with a Prince.
The story of Cinderella makes us believe in the magic existing in the Universe. Somewhere, you have a silent well-wisher to chance your life.
Votes: 138,126
08**The Little Mermaid
Rating: 7.6
Stars: 3.5
The Little Mermaid is a wildly popular Disney animated film and a wonderful modern fairy tale. Ariel, the daughter of King Triton, has years to be in the world outside of the sea. She fell in love with the handsome Prince, Ariel soon finds out that they cannot be together because he is a human and she is a mermaid. So she makes a deal with Ursula, an evil sorceress to turn her into a human for three days on land.
She meets Flounder the fish, Sebastian the crab, and a host of other sea creatures. At times it’s just too much to handle but eventually, Ariel discovers her strength and that dreams do come true when you believe in yourself!
This cartoon won two academy awards for the “Under the sea” song. It was also the start of the Disney Renaissance period.
Votes: 254,253
09**The Lion King
Rating: 8.5
Stars: 4.5
The Lion King, a beloved animated movie of all time, bursts onto the cartoon channels in a visually spectacular way that touched hearts and captivated minds. You will experience the joy, excitement, and anticipation of Simba’s adventure-filled journey that is filled with humor, affection, and heart-racing excitement. He was about to succeed his father but uncle Scar killed him and made Simba responsible for his death. Some of the old cartoon channels kept showing this show for a long time.
Votes: 1,017,146
10**Tangled
Rating: 7.8
Stars: 3.5
Disney snatches you up and tugs at your heart with this tale about a little lost princess living in a secluded tower. She had long blonde hair and was finding a way to see the world that she knew nothing about it. You’ll get to know Rapunzel as you’ve never seen her before in this exciting one of the old Disney cartoons. This animated cartoon shows her struggle of living away from her parents and escaping the tower with the help of an intruder Flynn Rider.
Votes: 437,453
● Ending Thoughts →
● For a while, you can live your childhood again by watching Old Disney cartoons.
● Theyare immemorial and watching them even today leaves us connected.
● Thanks to the old cartoon network website keeping the legacy of cartoons going still today.
● But yeah, those classics aren’t aired anymore on cartoon networks so you can watch them through YouTube.
Top 4 Websites to Get Anime Footage for Free
Top 4 Websites to Get Anime Footage for Free

Shanoon Cox
Mar 27, 2024• Proven solutions
If you are an anime fan, then you may already know that recently the anime music videos and anime montages have been going viral across different social media platforms. People are creating their own montages and sharing them on platforms like TikTok and Facebook. You may be inspired to create your own anime footage after watching those videos.
If you are an anime lover and want to create your own anime music videos or TikTok montage then you can easily do it by using a video editor like Wondershare Filmora . All you need to do is, record your footage, select a clip from anime video, and connect your footage with anime clip. There is no really big deal to it; the most difficult part of it is how to find a website where you can download anime videos to use for making anime footage.
![]()
A cross-platform for making videos anywhere for all creators

Why your video editing isn’t good enough? How about some creative inspo?
- 100 Million+ Users
- 150+ Countries and Regions
- 4 Million+ Social Media Followers
- 5 Million+ Stock Media for Use
* Secure Download

Part 1 Top 4 Websites to Get Anime Footage for Free
If you are struggling to download anime videos and you want a solution to your problem, then you just landed on the right page. In this article, we will share the top four websites from where you can download anime footage for free and use them to create your montages. So, let’s discuss in detail those websites.
** 01 Anime-Raws
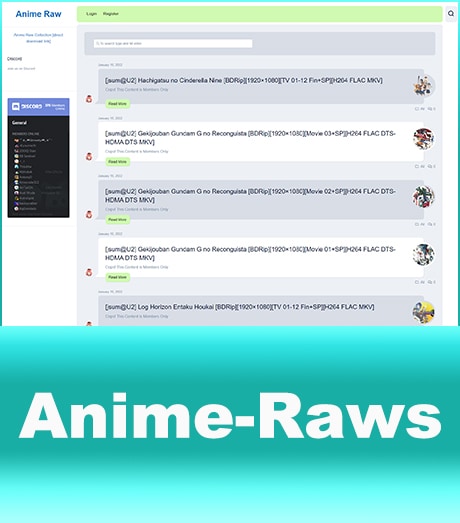
Because of technical reason, You need to register before you download raw anime from here now. If you don’t want to bother to do that, try out the latter choices. Anime Raws is a website that you can use to directly download raw anime videos. It is one of the top websites to download anime music videos and anime gifs. When you open the website through its link, you will see a lot of options in the top menu. You can click on the master list from the top navigation, and it will take you to a page where you will find a huge list of anime tv series.
You will see that there are thousands of raw anime series which you can easily download. All you have to do is to search for your favorite anime and click on it. It will take you to a cloud link where all episodes will be already uploaded. From there, you can easily download your desired episodes by doing just a few simple clicks.
** 02 Compsquad.carrd.co
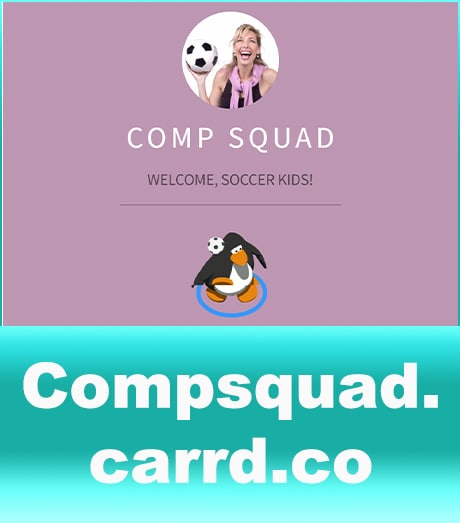
Comp Squad is the second-best website that you can use to download anime clips. Comp Squad’s full name is Compilation Squad, and as the name suggests, this website contains compilations from various anime series. When you open the website from its URL, you will see two options on the homepage (Comp List and Tellynom).
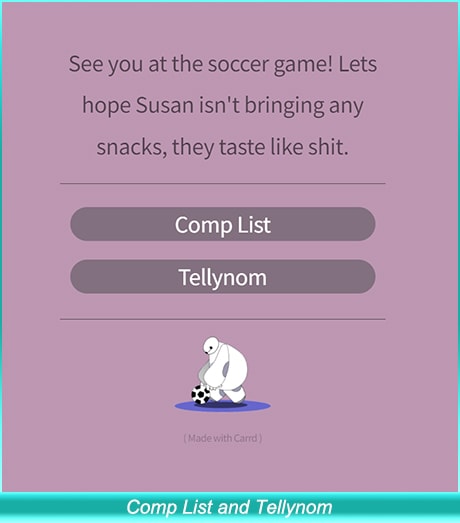
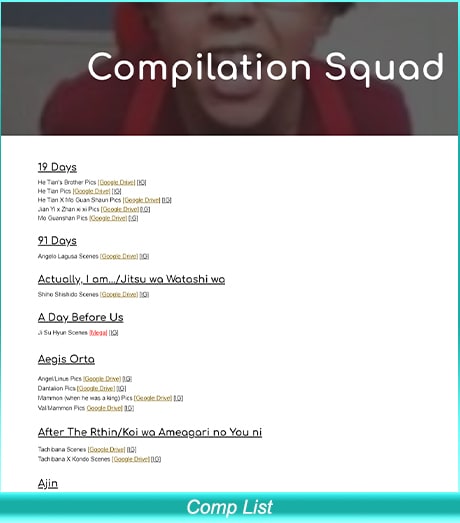
If you want to download and get clips of a certain anime, then you have to click on the Comp List. It will take you to a page where you will see different anime series listed. You will see multiple compilations from a single anime, so things will become a lot easier for you. Just search the name of your desired anime, and you will see a google drive or mega link in front of the compilation. You can simply download your desired clips from those cloud links.
If you cannot find your desired anime in the list, you can click on the Tellynom button from the homepage, and it will take you to a new page where you can request your desired anime from the contributors.
** 03 Gogoanime.VC
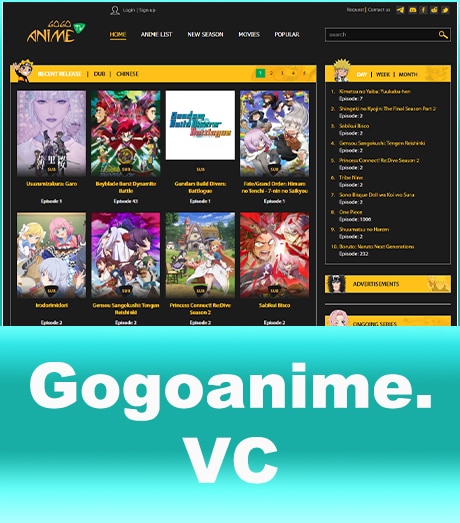
Gogo Anime is the third popular website from where you can easily download anime seasons and anime movies. To download your favorite anime seasons, just click on the anime list from the top navigation of the website, and it will take you to a page where you will find different anime sessions alphabetically sorted.

Search for your favorite anime in the list and click on it. It will take you to a page where you will find all episodes. Click on your desired episode, and you will see a download button. You can easily download your favorite episodes in just a few simple clicks.
** 04
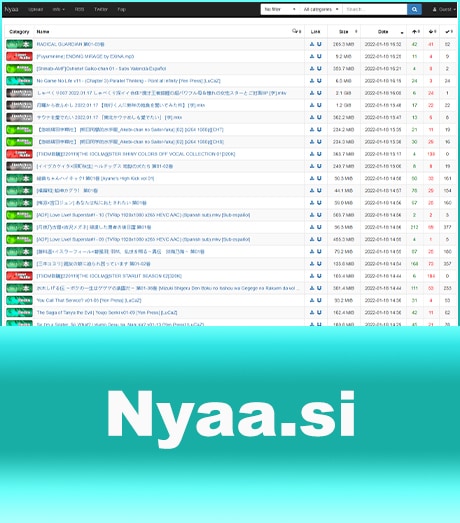
Nyaa is an easy-to-use site for downloading anime. Just open the website, and you will see the most recently listed anime in listicle form, as shown in the picture above. You will find a torrent download link and a magnetic link next to every anime name. It only requires a single click to download any video from this website. Moreover, you can also search for your desired anime in the search bar and download it easily.
Part 2 How to Use Filmora for Cutting the Desired Clip From a Full Video
The next step in making your anime montage is to cut the desired part of a few seconds from your anime video. We recommend you use Wondershare Filmora to edit videos for this purpose. You can easily use the built-in screen recorder of Filmora to get the desired part from a full video. You can do it in a few simple steps.
Run Filmora on your computer, and if it is not installed, then you can download and install it from their official website.
Now go to file, click on record media, and then click on the record PC screen.
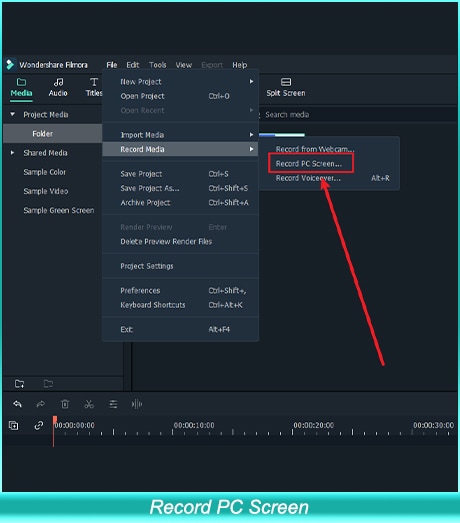
A new window will open where you will see different recording options.
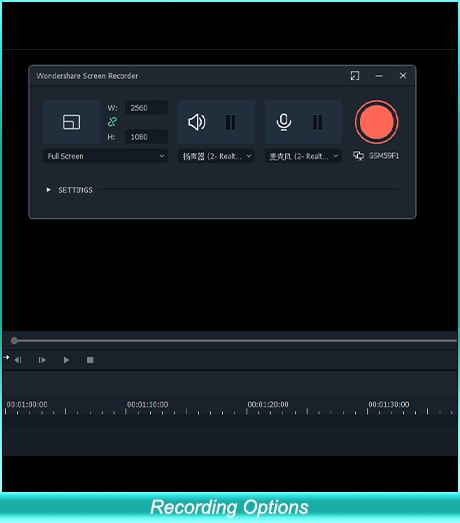
Now play the anime video using any media player on your computer and go to the desired part of the video that you want to record, and click on start recording.
When your desired scene has been recorded, you may stop the recording whenever you like.
Once you stop the recording, the file will be automatically imported to Filmora, and now you can use it for creating your anime montage.


Shanoon Cox
Shanoon Cox is a writer and a lover of all things video.
Follow @Shanoon Cox
Shanoon Cox
Mar 27, 2024• Proven solutions
If you are an anime fan, then you may already know that recently the anime music videos and anime montages have been going viral across different social media platforms. People are creating their own montages and sharing them on platforms like TikTok and Facebook. You may be inspired to create your own anime footage after watching those videos.
If you are an anime lover and want to create your own anime music videos or TikTok montage then you can easily do it by using a video editor like Wondershare Filmora . All you need to do is, record your footage, select a clip from anime video, and connect your footage with anime clip. There is no really big deal to it; the most difficult part of it is how to find a website where you can download anime videos to use for making anime footage.
![]()
A cross-platform for making videos anywhere for all creators
Why your video editing isn’t good enough? How about some creative inspo?
- 100 Million+ Users
- 150+ Countries and Regions
- 4 Million+ Social Media Followers
- 5 Million+ Stock Media for Use
* Secure Download
Part 1 Top 4 Websites to Get Anime Footage for Free
If you are struggling to download anime videos and you want a solution to your problem, then you just landed on the right page. In this article, we will share the top four websites from where you can download anime footage for free and use them to create your montages. So, let’s discuss in detail those websites.
** 01 Anime-Raws
Because of technical reason, You need to register before you download raw anime from here now. If you don’t want to bother to do that, try out the latter choices. Anime Raws is a website that you can use to directly download raw anime videos. It is one of the top websites to download anime music videos and anime gifs. When you open the website through its link, you will see a lot of options in the top menu. You can click on the master list from the top navigation, and it will take you to a page where you will find a huge list of anime tv series.
You will see that there are thousands of raw anime series which you can easily download. All you have to do is to search for your favorite anime and click on it. It will take you to a cloud link where all episodes will be already uploaded. From there, you can easily download your desired episodes by doing just a few simple clicks.
** 02 Compsquad.carrd.co
Comp Squad is the second-best website that you can use to download anime clips. Comp Squad’s full name is Compilation Squad, and as the name suggests, this website contains compilations from various anime series. When you open the website from its URL, you will see two options on the homepage (Comp List and Tellynom).
If you want to download and get clips of a certain anime, then you have to click on the Comp List. It will take you to a page where you will see different anime series listed. You will see multiple compilations from a single anime, so things will become a lot easier for you. Just search the name of your desired anime, and you will see a google drive or mega link in front of the compilation. You can simply download your desired clips from those cloud links.
If you cannot find your desired anime in the list, you can click on the Tellynom button from the homepage, and it will take you to a new page where you can request your desired anime from the contributors.
** 03 Gogoanime.VC
Gogo Anime is the third popular website from where you can easily download anime seasons and anime movies. To download your favorite anime seasons, just click on the anime list from the top navigation of the website, and it will take you to a page where you will find different anime sessions alphabetically sorted.
Search for your favorite anime in the list and click on it. It will take you to a page where you will find all episodes. Click on your desired episode, and you will see a download button. You can easily download your favorite episodes in just a few simple clicks.
** 04
Nyaa is an easy-to-use site for downloading anime. Just open the website, and you will see the most recently listed anime in listicle form, as shown in the picture above. You will find a torrent download link and a magnetic link next to every anime name. It only requires a single click to download any video from this website. Moreover, you can also search for your desired anime in the search bar and download it easily.
Part 2 How to Use Filmora for Cutting the Desired Clip From a Full Video
The next step in making your anime montage is to cut the desired part of a few seconds from your anime video. We recommend you use Wondershare Filmora to edit videos for this purpose. You can easily use the built-in screen recorder of Filmora to get the desired part from a full video. You can do it in a few simple steps.
Run Filmora on your computer, and if it is not installed, then you can download and install it from their official website.
Now go to file, click on record media, and then click on the record PC screen.
A new window will open where you will see different recording options.
Now play the anime video using any media player on your computer and go to the desired part of the video that you want to record, and click on start recording.
When your desired scene has been recorded, you may stop the recording whenever you like.
Once you stop the recording, the file will be automatically imported to Filmora, and now you can use it for creating your anime montage.
Shanoon Cox
Shanoon Cox is a writer and a lover of all things video.
Follow @Shanoon Cox
How to Create a Whiteboard Video Step by Step [2023 Updated]
How to Create a Whiteboard Video Step by Step
Shanoon Cox
Mar 27, 2024• Proven solutions
Drawings will always have a special place in storytelling. Whether you are demonstrating a new concept to a child, highlighting the features of a product to your bosses, or showcasing the intricacies of a marketing campaign, drawings make it easier for the audience to understand what is being said.
That is why it is so important to learn how to create whiteboard animation. When you learn how to create a whiteboard video with animate pictures app , you are in a unique position when it comes to selling your story, and convincing others of what you already know.
- Part1: What is Whiteboard Animation Video?
- Part2: How to Create Whiteboard Animation Videos?
- Part3: Useful Tips for Creating Whiteboard Animation
Part 1:What is Whiteboard Animation Video?
To understand the whiteboard animation video, we must go back to the beginning. Think about how professors illustrate different topics and equations using a whiteboard. They will write down the important words or formulas and then expand on that information through their lecture.
Whiteboard animation is taking those words, phrases and images to another level. Whiteboard animation is a series of events or videos that are created using 2D animation software . These videos can be showcased in any type of setting. You can upload them onto a social media site, show them as part of a presentation, or add them to a crowdfunding or product funding page.
When someone watches a whiteboard animation video, they see the series of images and graphics in sequential order, and there is usually a narration accompanying those images. These videos can be short, anywhere from 30 to 90 seconds. The idea is to deliver information in a clear, coherent and concise way.
To create whiteboard animation, the goal is to take complex concepts and information, and make it easy to understand. Now we can go into some detail about how to create a whiteboard video.
Part 2:How to Create Whiteboard Animation Videos?
Step 1: Write a Script
Much like a normal video or a short skit, there must be a script if a whiteboard animation video is to succeed. Having interesting images and information is great, but they are nothing without a coherent story.
It is not a blog post, storyboard or a set of bullet points. What you need is a proper script, which says everything in regards to the video. Why? Because then you will know precisely what images should be added in certain sections, what the narrator must say, and what transitions are necessary.

Step 2: Start with the Storyboard
Now you have a script. You have a clear idea of how you want your video to come across. It is time to start creating the storyboard. With a storyboard, you will be able to organize your thoughts much better. You can see how each frame comes onto the screen, and how one shot ties into the other.
When you create your storyboard, you will have a good idea about how your final product will look. If there are some transitions you are not happy with, this is the moment where you can make changes.

Step 3: Create Images
If you are a creative person, you will find this part very easy. It is all about creating fun and unique images that will help convey the information that you want to get across. Try to create memorable images that will excite your audience. The simpler, more distinctive and interesting you can make those images, the better your end result.

Step 4: Animate Those Images
Now you have your images, and it is time to find some coherence between those images and your script. You will have to time the animation for your images as you do not want things lingering on the screen for too long, or being seen for a brief second. It may be a good idea for you to speak out the narration as you are animating the images and timing their animation. It will help you with the timing.

Step 5: Record and Sync the Audio
The final step involves getting your audio. Every animated video must have narration as it helps to explain what is happening in the images that people are seeing. Record your audio, and ensure it is perfectly in sync with your content.

Part 3:Useful Tips for Creating Whiteboard Animation
Evoke Empathy
The goal of a whiteboard animation video is not just to explain information in a cold and impersonal way. You are hoping to make a connection with your audience. You want them to care about what you are showcasing. By evoking empathy, you will create the connection that you desire.
By adding emotional references, such as funny, lighthearted, cute or emotional moments, you will find your videos are getting a much better reception from the audience. People can relate to content better when it makes them feel things - especially if those feelings are positive.
Personalize the Images
Showing interesting images is a good start. But if you can personalize these images with graphics and color, your storyboard will look even better. Remember that your goal is to get people to stand up and take notice of the content that you are creating.
Conclusion
Now that we have gone over the entire process of creating a whiteboard animation video, we hope that you are ready to get started on your project. And if you are wondering how you will edit your video, we recommend Filmora . You can use it to make animation video by adding keyframes, so the animation will be smooth and natural. You just need to build a white plane to easily start making animation. Besides, color correction and audio mixer will raise up your explainer video to a new level. Download it to have a try (Free)!
Shanoon Cox
Shanoon Cox is a writer and a lover of all things video.
Follow @Shanoon Cox
Shanoon Cox
Mar 27, 2024• Proven solutions
Drawings will always have a special place in storytelling. Whether you are demonstrating a new concept to a child, highlighting the features of a product to your bosses, or showcasing the intricacies of a marketing campaign, drawings make it easier for the audience to understand what is being said.
That is why it is so important to learn how to create whiteboard animation. When you learn how to create a whiteboard video with animate pictures app , you are in a unique position when it comes to selling your story, and convincing others of what you already know.
- Part1: What is Whiteboard Animation Video?
- Part2: How to Create Whiteboard Animation Videos?
- Part3: Useful Tips for Creating Whiteboard Animation
Part 1:What is Whiteboard Animation Video?
To understand the whiteboard animation video, we must go back to the beginning. Think about how professors illustrate different topics and equations using a whiteboard. They will write down the important words or formulas and then expand on that information through their lecture.
Whiteboard animation is taking those words, phrases and images to another level. Whiteboard animation is a series of events or videos that are created using 2D animation software . These videos can be showcased in any type of setting. You can upload them onto a social media site, show them as part of a presentation, or add them to a crowdfunding or product funding page.
When someone watches a whiteboard animation video, they see the series of images and graphics in sequential order, and there is usually a narration accompanying those images. These videos can be short, anywhere from 30 to 90 seconds. The idea is to deliver information in a clear, coherent and concise way.
To create whiteboard animation, the goal is to take complex concepts and information, and make it easy to understand. Now we can go into some detail about how to create a whiteboard video.
Part 2:How to Create Whiteboard Animation Videos?
Step 1: Write a Script
Much like a normal video or a short skit, there must be a script if a whiteboard animation video is to succeed. Having interesting images and information is great, but they are nothing without a coherent story.
It is not a blog post, storyboard or a set of bullet points. What you need is a proper script, which says everything in regards to the video. Why? Because then you will know precisely what images should be added in certain sections, what the narrator must say, and what transitions are necessary.
Step 2: Start with the Storyboard
Now you have a script. You have a clear idea of how you want your video to come across. It is time to start creating the storyboard. With a storyboard, you will be able to organize your thoughts much better. You can see how each frame comes onto the screen, and how one shot ties into the other.
When you create your storyboard, you will have a good idea about how your final product will look. If there are some transitions you are not happy with, this is the moment where you can make changes.
Step 3: Create Images
If you are a creative person, you will find this part very easy. It is all about creating fun and unique images that will help convey the information that you want to get across. Try to create memorable images that will excite your audience. The simpler, more distinctive and interesting you can make those images, the better your end result.
Step 4: Animate Those Images
Now you have your images, and it is time to find some coherence between those images and your script. You will have to time the animation for your images as you do not want things lingering on the screen for too long, or being seen for a brief second. It may be a good idea for you to speak out the narration as you are animating the images and timing their animation. It will help you with the timing.
Step 5: Record and Sync the Audio
The final step involves getting your audio. Every animated video must have narration as it helps to explain what is happening in the images that people are seeing. Record your audio, and ensure it is perfectly in sync with your content.
Part 3:Useful Tips for Creating Whiteboard Animation
Evoke Empathy
The goal of a whiteboard animation video is not just to explain information in a cold and impersonal way. You are hoping to make a connection with your audience. You want them to care about what you are showcasing. By evoking empathy, you will create the connection that you desire.
By adding emotional references, such as funny, lighthearted, cute or emotional moments, you will find your videos are getting a much better reception from the audience. People can relate to content better when it makes them feel things - especially if those feelings are positive.
Personalize the Images
Showing interesting images is a good start. But if you can personalize these images with graphics and color, your storyboard will look even better. Remember that your goal is to get people to stand up and take notice of the content that you are creating.
Conclusion
Now that we have gone over the entire process of creating a whiteboard animation video, we hope that you are ready to get started on your project. And if you are wondering how you will edit your video, we recommend Filmora . You can use it to make animation video by adding keyframes, so the animation will be smooth and natural. You just need to build a white plane to easily start making animation. Besides, color correction and audio mixer will raise up your explainer video to a new level. Download it to have a try (Free)!
Shanoon Cox
Shanoon Cox is a writer and a lover of all things video.
Follow @Shanoon Cox
26 Cool Anime Girl Names and Their Meanings
26 Cool Anime Girl Names and Their Meanings
Shanoon Cox
Mar 27, 2024• Proven solutions
The dedication in anime goes even beyond the lively visuals and complex plotlines. You will find powerful and spunk anime girl characters leading the show. Not to mention the unique anime girl name that is often linked to the characters’ roles in the plot, values, or personality. These interesting names with deep meanings have been a focus of attention for many anime fans.
From adorable and cool-sounding names to sweet names with spiritual meaning, there are all kinds of anime girl names. Let’s look at some fun cases where a character’s name is just as necessary as any other information to disclose their nature and purpose.
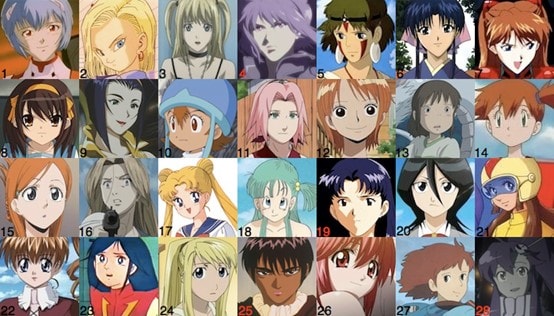
26 Cool Anime Girl Names and Their Meanings
Here we sorted out 26 cool anime girl names for you. They are listed in alphabetical order:
1. Asuka: tomorrow, smell, perfume
Asuka is a Japanese anime girl name which means tomorrow; smell, perfume, collectively its smell of tomorrow. While perfume gets mentioned as the gods’ poetry, the appeal of its magical language remains mysterious and fragile. Perfume, smell together with tomorrow gives all the positive feelings which a character portrays in the series.
2. Bashira: joyful and a predictor of good news
Bashira is a Japanese anime name that means joyful and a predictor of good news. Being an anime girl character, this name adds a translation of her appearance and the purposes of her character in the series. We agree that anime is not for everyone since their deeply planned names always help people get the unclear meanings and hidden purposes of characters.
3. Chika: scatter, flower
Chika is a popular feminine Japanese anime name. It can be written with the kanji characters (chi), meaning thousand, wisdom, intellect, or scatter combined with (ka), meaning “flower.” This name gives us the concept of a strong girl, who can be both; strong girls with delicacy.
4. Dai: great
Its origin is Japan; Dai is a female-given name that is pronounced dah-ee. Dai means “great; to shine,” and it is of Japanese and Welsh origin. Greatness has always been everyone’s preference; anime girl characters have also been portrayed as goddesses many times.
5. Erza Scarlet: the gift of God
According to the name and its meaning, Erza played a very restricted role, and following the rules is all she wanted. Erza means the gift of God; this term is often termed as enhanced wisdom, knowledge, and faith.
6. Fujiko: wisteria
Fujiko means Wisteria which is a name of a flower that perfectly portrays the feminity of a girl and strength.
7. Gizmodo – black clover
Gizmodo is a dark Japanese name that means black clover. The anime girl characters are powerful idols who can deal with all kinds of negativity with their dark sides.
8. Haruko: spring-born
Haruko means the spring-born, which can be pretty colorful. With this vibrant personality, anime girl characters never fail to spread positivity among their fans.
9. Isamu: brave, courageous
Anime characters always show bravery, and being courageous is their constant middle name. Isamu is a Japanese name that is perfectly picked for girl characters whose series revolves around bravery.
10. Junko: pure, genuine child
Junko a Japanese name chosen for an anime girl who is pure and genuine. A child who can serve their fans with purity and kindness.
11. Kamiko: little goddess
Kamiko, the Japanese-oriented name for a girl character, elaborates that a little goddess can be a lot. Their kind little hearts can be an example for their fans.
12. Lina: palm tree
Lina, the palm tree, played support for others like the palm tree, huge and helpful. This Japanese name, with its meaning, is enough strength for viewers.
13. Masami: become beautiful
Masami is a Japanese girl term that represents “to become beautiful.” Anime girl characters always successfully show how they pull them back despite all of the chaos around them.
14. Natsuki: vegetables, Greens, Moon
This female Japanese name has a lot wider meaning than its character, but somehow it was dreamily selected. Natsuki, which means vegetables, green, and moon, every word has its beauty. Their bright explanations can also brighten anyone’s perspective.
15. Ohana: God’s grace gift
The name Ohana is an Armenian origin as an anime girl’s name. Ohana means God’s grace gift. God’s grace is accessible today and tomorrow to those who have damaged hearts but are beautifully pulled back.
16. Puyumi: purity
The name means “purity.” More accurately represents the lotus flower’s nature that grows on mud, but the lotus bud grows high through mud and blooms continuously. Anime girl’s names are wisely chosen according to their characters.
17. Qualia: Angel
Qualia originated from Japan speaks for itself; the angel means anime fans can experience their life turning into a good point.
18. Reiko: Beautiful; lovely child
Reiko, the Japanese name picked for the anime girl character, portrays a lovely-hearted child and a savior of humanity. These characters can tremendously leave a big impact on their fans’ lives.
19. Sakura: Cherry blossom
A flower of several trees is cherry blossom, also known as Sakura and Sakura, an anime girl character in Japanese.
20. Tomiko: Happiness child
It’s a Japanese-oriented anime girl name that means happiness child. Through this anime character, fans can have more than an open doorway to enjoy this greatness;
21. Umeko: Plum
The Umeko means the Plum is again a Japanese name means the Plum, which implies something desirable. These girl anime characters are a true example for fans who can spread positivity.
22. Veronica: victory
Veronica is an old Greek-originated name, which means victory. Anime girls are powerful girls who can make sure of the victory after every conflict regardless of gender.
23. Wakana: Harmony, Music, Complete
The name Wakana is mainly a Japanese female name that means harmony, which gives the concept of completeness. Anime girl characters are the whole pack of providing harmony and peace.
24. Xoey: life
Zoe is a word that comes from the Greek language, which means life. This life can give an ability to learn and to assist others and make the fans’ life stress-free.
25. Yuriko: Lily flower
Yuriko is a Japanese girl name that means Lily, which gives the feeling of Gentleness. Anime girls can be strong yet the most delicate characters.
26. Zuiho: Expertise, Perfect, Serious
This anime girl name can give you inspiration for being an expert and perfect. This Japanese-originated name can be the ideal impression of strictness.
What a Cool Anime Name Can Make a Difference?
An anime name says a lot about the character and its personality. While creating anime names, animators aim to spot a light on the individuality of the character with connections to their past.
Anime names are full of style, strong sense, and unique sounds. These names are always cool; whether for girls or boys, they’re used in adventurous, creative, and romantic anime series. All in all, anime girl names can be a true inspiration for anyone, regardless of gender
So, which anime girl name sounds perfect for your kid?
Shanoon Cox
Shanoon Cox is a writer and a lover of all things video.
Follow @Shanoon Cox
Shanoon Cox
Mar 27, 2024• Proven solutions
The dedication in anime goes even beyond the lively visuals and complex plotlines. You will find powerful and spunk anime girl characters leading the show. Not to mention the unique anime girl name that is often linked to the characters’ roles in the plot, values, or personality. These interesting names with deep meanings have been a focus of attention for many anime fans.
From adorable and cool-sounding names to sweet names with spiritual meaning, there are all kinds of anime girl names. Let’s look at some fun cases where a character’s name is just as necessary as any other information to disclose their nature and purpose.
26 Cool Anime Girl Names and Their Meanings
Here we sorted out 26 cool anime girl names for you. They are listed in alphabetical order:
1. Asuka: tomorrow, smell, perfume
Asuka is a Japanese anime girl name which means tomorrow; smell, perfume, collectively its smell of tomorrow. While perfume gets mentioned as the gods’ poetry, the appeal of its magical language remains mysterious and fragile. Perfume, smell together with tomorrow gives all the positive feelings which a character portrays in the series.
2. Bashira: joyful and a predictor of good news
Bashira is a Japanese anime name that means joyful and a predictor of good news. Being an anime girl character, this name adds a translation of her appearance and the purposes of her character in the series. We agree that anime is not for everyone since their deeply planned names always help people get the unclear meanings and hidden purposes of characters.
3. Chika: scatter, flower
Chika is a popular feminine Japanese anime name. It can be written with the kanji characters (chi), meaning thousand, wisdom, intellect, or scatter combined with (ka), meaning “flower.” This name gives us the concept of a strong girl, who can be both; strong girls with delicacy.
4. Dai: great
Its origin is Japan; Dai is a female-given name that is pronounced dah-ee. Dai means “great; to shine,” and it is of Japanese and Welsh origin. Greatness has always been everyone’s preference; anime girl characters have also been portrayed as goddesses many times.
5. Erza Scarlet: the gift of God
According to the name and its meaning, Erza played a very restricted role, and following the rules is all she wanted. Erza means the gift of God; this term is often termed as enhanced wisdom, knowledge, and faith.
6. Fujiko: wisteria
Fujiko means Wisteria which is a name of a flower that perfectly portrays the feminity of a girl and strength.
7. Gizmodo – black clover
Gizmodo is a dark Japanese name that means black clover. The anime girl characters are powerful idols who can deal with all kinds of negativity with their dark sides.
8. Haruko: spring-born
Haruko means the spring-born, which can be pretty colorful. With this vibrant personality, anime girl characters never fail to spread positivity among their fans.
9. Isamu: brave, courageous
Anime characters always show bravery, and being courageous is their constant middle name. Isamu is a Japanese name that is perfectly picked for girl characters whose series revolves around bravery.
10. Junko: pure, genuine child
Junko a Japanese name chosen for an anime girl who is pure and genuine. A child who can serve their fans with purity and kindness.
11. Kamiko: little goddess
Kamiko, the Japanese-oriented name for a girl character, elaborates that a little goddess can be a lot. Their kind little hearts can be an example for their fans.
12. Lina: palm tree
Lina, the palm tree, played support for others like the palm tree, huge and helpful. This Japanese name, with its meaning, is enough strength for viewers.
13. Masami: become beautiful
Masami is a Japanese girl term that represents “to become beautiful.” Anime girl characters always successfully show how they pull them back despite all of the chaos around them.
14. Natsuki: vegetables, Greens, Moon
This female Japanese name has a lot wider meaning than its character, but somehow it was dreamily selected. Natsuki, which means vegetables, green, and moon, every word has its beauty. Their bright explanations can also brighten anyone’s perspective.
15. Ohana: God’s grace gift
The name Ohana is an Armenian origin as an anime girl’s name. Ohana means God’s grace gift. God’s grace is accessible today and tomorrow to those who have damaged hearts but are beautifully pulled back.
16. Puyumi: purity
The name means “purity.” More accurately represents the lotus flower’s nature that grows on mud, but the lotus bud grows high through mud and blooms continuously. Anime girl’s names are wisely chosen according to their characters.
17. Qualia: Angel
Qualia originated from Japan speaks for itself; the angel means anime fans can experience their life turning into a good point.
18. Reiko: Beautiful; lovely child
Reiko, the Japanese name picked for the anime girl character, portrays a lovely-hearted child and a savior of humanity. These characters can tremendously leave a big impact on their fans’ lives.
19. Sakura: Cherry blossom
A flower of several trees is cherry blossom, also known as Sakura and Sakura, an anime girl character in Japanese.
20. Tomiko: Happiness child
It’s a Japanese-oriented anime girl name that means happiness child. Through this anime character, fans can have more than an open doorway to enjoy this greatness;
21. Umeko: Plum
The Umeko means the Plum is again a Japanese name means the Plum, which implies something desirable. These girl anime characters are a true example for fans who can spread positivity.
22. Veronica: victory
Veronica is an old Greek-originated name, which means victory. Anime girls are powerful girls who can make sure of the victory after every conflict regardless of gender.
23. Wakana: Harmony, Music, Complete
The name Wakana is mainly a Japanese female name that means harmony, which gives the concept of completeness. Anime girl characters are the whole pack of providing harmony and peace.
24. Xoey: life
Zoe is a word that comes from the Greek language, which means life. This life can give an ability to learn and to assist others and make the fans’ life stress-free.
25. Yuriko: Lily flower
Yuriko is a Japanese girl name that means Lily, which gives the feeling of Gentleness. Anime girls can be strong yet the most delicate characters.
26. Zuiho: Expertise, Perfect, Serious
This anime girl name can give you inspiration for being an expert and perfect. This Japanese-originated name can be the ideal impression of strictness.
What a Cool Anime Name Can Make a Difference?
An anime name says a lot about the character and its personality. While creating anime names, animators aim to spot a light on the individuality of the character with connections to their past.
Anime names are full of style, strong sense, and unique sounds. These names are always cool; whether for girls or boys, they’re used in adventurous, creative, and romantic anime series. All in all, anime girl names can be a true inspiration for anyone, regardless of gender
So, which anime girl name sounds perfect for your kid?
Shanoon Cox
Shanoon Cox is a writer and a lover of all things video.
Follow @Shanoon Cox
How to Make a Video a Live Photo
How to Make a Video a Live Photo [2022]
An easy yet powerful editor
Numerous effects to choose from
Detailed tutorials provided by the official channel
Looking forward to turn your videos into live photos? Stay tuned to know how!
In this article
01 [How to Save Live Photos as a Video on iPhone/Ipad/Ipod](#Part 1)
02 [How to Turn a Video Into a Live Photo on iOS/Android](#Part 2)
Part 1 How to Save Live Photos as a Video on iPhone/Ipad/Ipod
Live photos are an amazing utility that allow you to save images as short moving snaps. Creating live photos is among the latest spunk of trendsetter stories, whether shared on social media platforms or created and saved just for fun, these definitely sound and look exciting, but that’s just one among the many things you can experiment on live photos.
Creating live photos takes you to a world of exciting features where you can explore your creativity in a number of ways, one of the easiest being turning live photos to videos. This comes handy when you need to share your live photos on platforms that do not have the compatibility to run live photos. If you are an iPhone user and wish to try your hands on experimenting with live photos, see through the following section of this article to learn how to turn live photo into video:
01Save as Video
Step 1: Launch the Photos App
In your iPhone, launch the ‘Photos’ app and navigate to ‘Albums’. All your live photos are present in the ‘Live Photos’ album.
Step 2: Format Selection
In latest versions (iOS 13v and above), you get a direct ‘Save as Video’ option in the ‘Photos’ application. Just click on that, and your live photo will be instantly saved in your iPhone gallery as a video. Here’s how you can use this feature:
● In the ‘Photos’ application, go to the ‘Live Photos’ album to select and open a desired live photo that you wish to convert to a video.
● Click on the ‘Share’ icon.

● Select ‘Save as Video’ from the drop down menu that displays sharing options.

Your created video will be saved in the ‘Photos’ application, next to the live photo you chose to turn into a video.
02iOS Shortcuts
This is a quicker way to save your live photos as videos in your iPhone. To use this feature, you first need to save the ‘Convert LivePhotos to Video’ shortcut in the ‘Shortcuts App’ gallery of your iPhone. You can do this by opening in your iOS internet browser.
Before using the above link, make sure to enable the ‘Allow Untrusted Shortcuts’ feature in your iPhone settings. You can do this as explained below:
● Reach to the ‘Settings’ application of your iPhone.
● Tap on ‘Shortcuts’ from the app’s welcome screen.
● Enable ‘Allow Untrusted Shortcuts’ with a toggle.

Having done that, here’s what you need to follow:
● Open the ‘Shortcuts’ application in your iOS device and tap the ‘Convert LivePhotos to Video’ shortcut.

● The ‘Live Photos’ album of your device opens up. Make a desired selection.

Your converted video gets automatically saved in the ‘Camera Roll’ folder of the ‘Photos’ application. Open the ‘Recents’ album to view your creation.
Part 2 How to Turn a Video Into a Live Photo on iOS/Android
Converting live photos to videos is fine, but going the other way round is all the more exciting and fun! You can even use these converted live photos as live screen wallpapers for your iOS and Android devices. If you are motivated to take up the excitement, look through the following methods to turn video into live photo:
01iOS Devices
Being an iOS user, you can choose among the following tools to convert video to live photo in your iPad, iPod or iPhone:
● Wondershare Filmora
Wondershare Filmora Video Editor is currently leading the software market among converter utilities that cater to various media conversion needs. This one is a free, smart, quick and convenient conversion tool that assures you of a hassle free video to live photo conversion in just a few clicks. What’s more interesting is, you don’t need to limit yourself with sticking to some particular video format, as Filmora conveniently supports almost all common ones.
Wondershare Filmora
Get started easily with Filmora’s powerful performance, intuitive interface, and countless effects Try It Free Try It Free Learn More >

● IntoLive
This one is a third party application that allows you to convert videos into live photos, quickly and conveniently. This tool works well with devices having iOS 12.0 and later versions. All you have to do is follow the steps mentioned below:
Step 1:
Download the ‘IntoLive’ application from the Apple App Store.

Step 2:
Launch the same on your iOS device and grant the permission to access its ‘Photos’ Album.

Step 3:
In the ‘Videos’ section, choose the desired video that you wish to turn into a live photo.

Step 4:
An editor window will open up. Here, you can edit (cut, crop, trim, etc.) and add desired effects or filters to your selected video. Click on ‘Make’ at the top right when you finish the editing process.

Step 5:
If you have the paid version of the app, you can take up multiple repeats of your live photo; else you can use the free version with no repeats.

Step 6:
Once you are satisfied with the result, click on ‘Save Live Photo’. This will save your created live photo in your device’s gallery.

02VideoToLive
This is a free converter you can choose to turn video into live photo. This is a quite popular tool among iPhone users worldwide and is suitable for iOS versions 11.2 and later. You also have the liberty to share your created live photos on social media with this converter. Take the following steps to begin the conversion process:

Step 1:
Download the application from the Apple App Store and launch it on your iOS device.
Step 2:
Choose a video from your device gallery to convert it into a live photo.
Step 3:
In the video editor screen, crop the video to the preferred section that has to be converted into live photo. You can add video frames to your edited clip from the upper section of the editor screen.
Step 4:
Click on ‘Convert’ at the top right corner to initiate the conversion process.
03Android Devices
Live photos are undoubtedly known to add spark to your cherished moments, but the notch that puts these off with Android devices is that you can enjoy live photos on these devices only as live wallpapers.
Being an iPhone exclusive utility, Android devices lack the flexibility to capture live images. However, you can see them move on being set as live screen wallpapers. A handy alternative to this is converting a turn video into live photo and use it as live wallpaper. Here’s how you can take up the conversion process:
● TurnLive- Live Wallpaper
This one is a convenient, third party tool that lets you turn video into live photo in just a few quick steps. You can either use this application for free, or upgrade to the paid version to enjoy its premium features. To make amazing live photos from videos using this tool, you need to take up the steps given below:

Step 1: App Installation
To begin, visit the Google Playstore in your Android device and download the TurnLive- Live Wallpaper application. Next, you need install and launch the app in your device and accept its terms of service.
Step 2: Select a Video
Once you are done, click on the ‘Live Photo’ icon in the bottom of the app’s opening screen to reach the video selection page. Here, you need to choose ‘Video to Live Wallpaper’ option and grant the required app permissions to access your device’s camera and gallery. Select a desired video from the ones saved in your device and click ‘Done’ at the top right.
Step 3: Edit Your Video
You will now get directed to the app’s editor window, where you need to trim the selected video within a time frame of 1-5 seconds. To do this, select a cover frame within the clip and click ‘Next’. You can now use the video slider at the bottom to trim the clip. Adding suitable video effects and filters is also possible with this tool.
Step 4: It’s Almost Done!
When you finish editing, click ‘Next’ and choose the number of repeats for the created live photo. Wait for the conversion to finish and click on ‘My Wallpapers’ to view your creation.
Step 5: Download Your Live Photo!
Click ‘Download’ and tap ‘Clear’ in the app’s prompt message to remove your device’s current screen wallpaper. Next, allow the app to access your system settings. Once this finishes, tap ‘Clear’ again to download your creation. You will now get directed to a black screen tagged ‘DayTime LWP’. Click on ‘Set Wallpaper’ in this screen to make your live photo, the current wallpaper of your Android device.
● Video Live Wallpaper
This is another free app that you can use to your videos into amazing live photos in just 4 quick steps. All you need to do is explained in the following steps:
Step 1: download the Application
Download the Video Live Wallpaper application in your Android device from Google Playstore and proceed for its installation and launch.

Step 2: Select Your Video
In the app’s opening screen, click ‘Choose Video’ and grant app permissions to access your device’s media. Browse your video gallery to select a desired video that you wish to convert into a live photo.

Step 3: Edit Your Video
You will now get directed to the app’s editor screen. Here, you can explore your editing creativity to edit the selected video. Once you are happy, click the picture icon at the top right corner.

Step 4: Your Live Wallpaper is Ready!
To set the created live photo as your device screen wallpaper, select ‘Set as Wallpaper’ at the bottom right.

● Key Takeaways from This Episode →
● From cherishing moments to sharing them on social media, live photos can do it all.
● Being an iPhone exclusive utility, you need to create these from videos to enjoy them on other platforms and devices.
● Filmora is the best video to live photo converters, available as an easy, quick and convenient conversion tool.
Looking forward to turn your videos into live photos? Stay tuned to know how!
In this article
01 [How to Save Live Photos as a Video on iPhone/Ipad/Ipod](#Part 1)
02 [How to Turn a Video Into a Live Photo on iOS/Android](#Part 2)
Part 1 How to Save Live Photos as a Video on iPhone/Ipad/Ipod
Live photos are an amazing utility that allow you to save images as short moving snaps. Creating live photos is among the latest spunk of trendsetter stories, whether shared on social media platforms or created and saved just for fun, these definitely sound and look exciting, but that’s just one among the many things you can experiment on live photos.
Creating live photos takes you to a world of exciting features where you can explore your creativity in a number of ways, one of the easiest being turning live photos to videos. This comes handy when you need to share your live photos on platforms that do not have the compatibility to run live photos. If you are an iPhone user and wish to try your hands on experimenting with live photos, see through the following section of this article to learn how to turn live photo into video:
01Save as Video
Step 1: Launch the Photos App
In your iPhone, launch the ‘Photos’ app and navigate to ‘Albums’. All your live photos are present in the ‘Live Photos’ album.
Step 2: Format Selection
In latest versions (iOS 13v and above), you get a direct ‘Save as Video’ option in the ‘Photos’ application. Just click on that, and your live photo will be instantly saved in your iPhone gallery as a video. Here’s how you can use this feature:
● In the ‘Photos’ application, go to the ‘Live Photos’ album to select and open a desired live photo that you wish to convert to a video.
● Click on the ‘Share’ icon.
● Select ‘Save as Video’ from the drop down menu that displays sharing options.
Your created video will be saved in the ‘Photos’ application, next to the live photo you chose to turn into a video.
02iOS Shortcuts
This is a quicker way to save your live photos as videos in your iPhone. To use this feature, you first need to save the ‘Convert LivePhotos to Video’ shortcut in the ‘Shortcuts App’ gallery of your iPhone. You can do this by opening in your iOS internet browser.
Before using the above link, make sure to enable the ‘Allow Untrusted Shortcuts’ feature in your iPhone settings. You can do this as explained below:
● Reach to the ‘Settings’ application of your iPhone.
● Tap on ‘Shortcuts’ from the app’s welcome screen.
● Enable ‘Allow Untrusted Shortcuts’ with a toggle.
Having done that, here’s what you need to follow:
● Open the ‘Shortcuts’ application in your iOS device and tap the ‘Convert LivePhotos to Video’ shortcut.
● The ‘Live Photos’ album of your device opens up. Make a desired selection.
Your converted video gets automatically saved in the ‘Camera Roll’ folder of the ‘Photos’ application. Open the ‘Recents’ album to view your creation.
Part 2 How to Turn a Video Into a Live Photo on iOS/Android
Converting live photos to videos is fine, but going the other way round is all the more exciting and fun! You can even use these converted live photos as live screen wallpapers for your iOS and Android devices. If you are motivated to take up the excitement, look through the following methods to turn video into live photo:
01iOS Devices
Being an iOS user, you can choose among the following tools to convert video to live photo in your iPad, iPod or iPhone:
● Wondershare Filmora
Wondershare Filmora Video Editor is currently leading the software market among converter utilities that cater to various media conversion needs. This one is a free, smart, quick and convenient conversion tool that assures you of a hassle free video to live photo conversion in just a few clicks. What’s more interesting is, you don’t need to limit yourself with sticking to some particular video format, as Filmora conveniently supports almost all common ones.
Wondershare Filmora
Get started easily with Filmora’s powerful performance, intuitive interface, and countless effects Try It Free Try It Free Learn More >
● IntoLive
This one is a third party application that allows you to convert videos into live photos, quickly and conveniently. This tool works well with devices having iOS 12.0 and later versions. All you have to do is follow the steps mentioned below:
Step 1:
Download the ‘IntoLive’ application from the Apple App Store.
Step 2:
Launch the same on your iOS device and grant the permission to access its ‘Photos’ Album.
Step 3:
In the ‘Videos’ section, choose the desired video that you wish to turn into a live photo.
Step 4:
An editor window will open up. Here, you can edit (cut, crop, trim, etc.) and add desired effects or filters to your selected video. Click on ‘Make’ at the top right when you finish the editing process.
Step 5:
If you have the paid version of the app, you can take up multiple repeats of your live photo; else you can use the free version with no repeats.
Step 6:
Once you are satisfied with the result, click on ‘Save Live Photo’. This will save your created live photo in your device’s gallery.
02VideoToLive
This is a free converter you can choose to turn video into live photo. This is a quite popular tool among iPhone users worldwide and is suitable for iOS versions 11.2 and later. You also have the liberty to share your created live photos on social media with this converter. Take the following steps to begin the conversion process:
Step 1:
Download the application from the Apple App Store and launch it on your iOS device.
Step 2:
Choose a video from your device gallery to convert it into a live photo.
Step 3:
In the video editor screen, crop the video to the preferred section that has to be converted into live photo. You can add video frames to your edited clip from the upper section of the editor screen.
Step 4:
Click on ‘Convert’ at the top right corner to initiate the conversion process.
03Android Devices
Live photos are undoubtedly known to add spark to your cherished moments, but the notch that puts these off with Android devices is that you can enjoy live photos on these devices only as live wallpapers.
Being an iPhone exclusive utility, Android devices lack the flexibility to capture live images. However, you can see them move on being set as live screen wallpapers. A handy alternative to this is converting a turn video into live photo and use it as live wallpaper. Here’s how you can take up the conversion process:
● TurnLive- Live Wallpaper
This one is a convenient, third party tool that lets you turn video into live photo in just a few quick steps. You can either use this application for free, or upgrade to the paid version to enjoy its premium features. To make amazing live photos from videos using this tool, you need to take up the steps given below:
Step 1: App Installation
To begin, visit the Google Playstore in your Android device and download the TurnLive- Live Wallpaper application. Next, you need install and launch the app in your device and accept its terms of service.
Step 2: Select a Video
Once you are done, click on the ‘Live Photo’ icon in the bottom of the app’s opening screen to reach the video selection page. Here, you need to choose ‘Video to Live Wallpaper’ option and grant the required app permissions to access your device’s camera and gallery. Select a desired video from the ones saved in your device and click ‘Done’ at the top right.
Step 3: Edit Your Video
You will now get directed to the app’s editor window, where you need to trim the selected video within a time frame of 1-5 seconds. To do this, select a cover frame within the clip and click ‘Next’. You can now use the video slider at the bottom to trim the clip. Adding suitable video effects and filters is also possible with this tool.
Step 4: It’s Almost Done!
When you finish editing, click ‘Next’ and choose the number of repeats for the created live photo. Wait for the conversion to finish and click on ‘My Wallpapers’ to view your creation.
Step 5: Download Your Live Photo!
Click ‘Download’ and tap ‘Clear’ in the app’s prompt message to remove your device’s current screen wallpaper. Next, allow the app to access your system settings. Once this finishes, tap ‘Clear’ again to download your creation. You will now get directed to a black screen tagged ‘DayTime LWP’. Click on ‘Set Wallpaper’ in this screen to make your live photo, the current wallpaper of your Android device.
● Video Live Wallpaper
This is another free app that you can use to your videos into amazing live photos in just 4 quick steps. All you need to do is explained in the following steps:
Step 1: download the Application
Download the Video Live Wallpaper application in your Android device from Google Playstore and proceed for its installation and launch.
Step 2: Select Your Video
In the app’s opening screen, click ‘Choose Video’ and grant app permissions to access your device’s media. Browse your video gallery to select a desired video that you wish to convert into a live photo.
Step 3: Edit Your Video
You will now get directed to the app’s editor screen. Here, you can explore your editing creativity to edit the selected video. Once you are happy, click the picture icon at the top right corner.
Step 4: Your Live Wallpaper is Ready!
To set the created live photo as your device screen wallpaper, select ‘Set as Wallpaper’ at the bottom right.
● Key Takeaways from This Episode →
● From cherishing moments to sharing them on social media, live photos can do it all.
● Being an iPhone exclusive utility, you need to create these from videos to enjoy them on other platforms and devices.
● Filmora is the best video to live photo converters, available as an easy, quick and convenient conversion tool.
How to Insert a GIF Into Powerpoint
How to Insert a GIF into Powerpoint
Shanoon Cox
Mar 27, 2024• Proven solutions
Microsoft Powerpoint has been on the Internet for quite some time now. People who use this application make a common mistake of using too many slides with huge amounts of text and that is a major turnoff for the audience. Huge text is seen as a disaster. You should be able to convey an interesting story to your attentive audience without explaining every single detail on your slides for your presentation. Using a GIF to explain complicate things or just set it as a background can be much interesting.
You may also like: Top 26 Best Free GIF Makers Online >>
Why we need to insert GIF into the Powerpoint
- It allows us to instantly grab the audience’s short attention span.
- It allows the presentation to answer a lot of preconceived notion from the audience with less words.
- It is a good guide to bring up a pressing issue.
Tips when adding gif to your Powerpoint presentation
- Keep it easy to follow along.
- Make use of humor
- Combine GIF images with your text together.
Part 1: Make GIFs by yourself
There are many animated gif images on the internet, you can also make one by yourself. Wondershare Filmora is a powerful editing tools that allow you to convert video into GIF images, no matter what kind of video formats you got, including MKV, FLV, WMV, MP4, etc. You can also add advanced elements, animations, text, overlays to personlize your GIFs.
However, if you want to make a GIF online, Filmora meme maker is your ultimate solution. It helps you make image, GIF and video memes directly without watermark. It is totally FREE to use and no sign up. You can change text size, color and position to create caption when you are editing. You can also put text inside or outside in GIF. Just with a few clicks, your GIF is done . Try it nowDownload Mac Version ](https://tools.techidaily.com/wondershare/filmora/download/ )
Part 2: How to Insert a GIF into Powerpoint
There are three main methods on using Microsoft Powerpoint to your advantage when you are trying to insert a GIF image into your presentation.
Method 1: Powerpoint Picture Insert Utility
Select the Insert tab located at the top of the Powerpoint application.
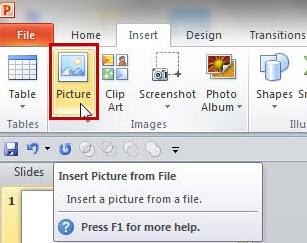
The next step is to select the Picture icon located in the Images ribbon area located also at the top of the computer window. Look for the image that you desire to add to the Powerpoint slide, then make sure to double click on the file to successfully insert your image.
You also have the option to move the GIF image on the page by clicking and dragging the image to the location that you want to place the picture.
Method 2: Copy and Paste
A helpful step is to first locate your desired GIF image, using Control + C to copy it first. Then, paste your image on the Powerpoint slide by pressing Control + V.
You can also highlight the file name, and then use the drag and drop feature to put your image directly into the Powerpoint slide of your choice.
Method 3: Embedding GIF’s from the web
The final method is to embed GIF images on the Internet into a Powerpoint slide. You can achieve this function by using the Insert Ribbon’s Pictures icon.
Select Pictures, then write in the image URL directly in the File input box. Then, select Insert. The Powerpoint application will download the GIF image that you selected into the current Powerpoint slide for your presentation. The GIF image is still available for you to access anytime if you are not connected to the Internet. It is due to being embedded.
Here we recommend the method 1 and 2, the method 3 will take a little time while Powerpoint downloading the GIF picture.
Customize the GIFs in Powerpoint
There are some important ways to customize your GIF images in the Powerpoint application.
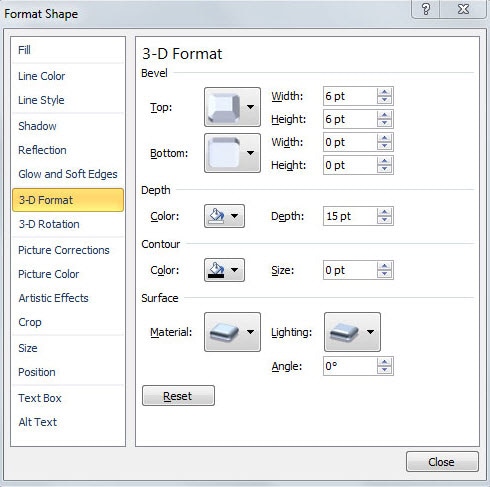
If you desire on changing the physical size of your GIF file or changing the appearance of the image, you can right click on your desired image and select Format Pictures. It will open up a brand new Format Picture window that will have a good variety of image editing menus at your fingertips at the left side of the computer window.
There is a feature where you can change the brightness and contrast on your images by selecting the Picture Corrections icon. Experiment and have fun.
Shanoon Cox
Shanoon Cox is a writer and a lover of all things video.
Follow @Shanoon Cox
Shanoon Cox
Mar 27, 2024• Proven solutions
Microsoft Powerpoint has been on the Internet for quite some time now. People who use this application make a common mistake of using too many slides with huge amounts of text and that is a major turnoff for the audience. Huge text is seen as a disaster. You should be able to convey an interesting story to your attentive audience without explaining every single detail on your slides for your presentation. Using a GIF to explain complicate things or just set it as a background can be much interesting.
You may also like: Top 26 Best Free GIF Makers Online >>
Why we need to insert GIF into the Powerpoint
- It allows us to instantly grab the audience’s short attention span.
- It allows the presentation to answer a lot of preconceived notion from the audience with less words.
- It is a good guide to bring up a pressing issue.
Tips when adding gif to your Powerpoint presentation
- Keep it easy to follow along.
- Make use of humor
- Combine GIF images with your text together.
Part 1: Make GIFs by yourself
There are many animated gif images on the internet, you can also make one by yourself. Wondershare Filmora is a powerful editing tools that allow you to convert video into GIF images, no matter what kind of video formats you got, including MKV, FLV, WMV, MP4, etc. You can also add advanced elements, animations, text, overlays to personlize your GIFs.
However, if you want to make a GIF online, Filmora meme maker is your ultimate solution. It helps you make image, GIF and video memes directly without watermark. It is totally FREE to use and no sign up. You can change text size, color and position to create caption when you are editing. You can also put text inside or outside in GIF. Just with a few clicks, your GIF is done . Try it nowDownload Mac Version ](https://tools.techidaily.com/wondershare/filmora/download/ )
Part 2: How to Insert a GIF into Powerpoint
There are three main methods on using Microsoft Powerpoint to your advantage when you are trying to insert a GIF image into your presentation.
Method 1: Powerpoint Picture Insert Utility
Select the Insert tab located at the top of the Powerpoint application.
The next step is to select the Picture icon located in the Images ribbon area located also at the top of the computer window. Look for the image that you desire to add to the Powerpoint slide, then make sure to double click on the file to successfully insert your image.
You also have the option to move the GIF image on the page by clicking and dragging the image to the location that you want to place the picture.
Method 2: Copy and Paste
A helpful step is to first locate your desired GIF image, using Control + C to copy it first. Then, paste your image on the Powerpoint slide by pressing Control + V.
You can also highlight the file name, and then use the drag and drop feature to put your image directly into the Powerpoint slide of your choice.
Method 3: Embedding GIF’s from the web
The final method is to embed GIF images on the Internet into a Powerpoint slide. You can achieve this function by using the Insert Ribbon’s Pictures icon.
Select Pictures, then write in the image URL directly in the File input box. Then, select Insert. The Powerpoint application will download the GIF image that you selected into the current Powerpoint slide for your presentation. The GIF image is still available for you to access anytime if you are not connected to the Internet. It is due to being embedded.
Here we recommend the method 1 and 2, the method 3 will take a little time while Powerpoint downloading the GIF picture.
Customize the GIFs in Powerpoint
There are some important ways to customize your GIF images in the Powerpoint application.
If you desire on changing the physical size of your GIF file or changing the appearance of the image, you can right click on your desired image and select Format Pictures. It will open up a brand new Format Picture window that will have a good variety of image editing menus at your fingertips at the left side of the computer window.
There is a feature where you can change the brightness and contrast on your images by selecting the Picture Corrections icon. Experiment and have fun.
Shanoon Cox
Shanoon Cox is a writer and a lover of all things video.
Follow @Shanoon Cox
Learn Pencil2D Animation Tutorial Overview
Animation is one of the trendiest technologies. The basics of animation were formulated in the 2000s from the moving page trick. The first few animators learned that animation is nothing but continuous switching of frames from one to another. One animated still is switched to another and then another in a quick sequence such that it makes a sequential moving frame. Today, animation has come a long way from where it started and today it is used for several commercials, tutorials, and even educational lecture videos. Pencil2D animation is an amazing animation tool that can be used by even neophytes. Want to learn more about 2d pencil animation and its super cool features? Well, you’re at the perfect place. Today we’ll be telling you more about pencil 2d animation and giving you a small overview of its usage.
In this article
01 [What is Pencil2D and How to Install?](#Part 1)
02 [Overview of the Application Interface](#Part 2)
03 [How to Create Animations with Pencil2D?](#Part 3)
Part 1 What is Pencil2D and How to Install?
2d pencil animation is popular open-source animation software. The software is pretty cool for those who are newly starting off with animation. The open-source software is available on all major operating systems including Windows, Mac OS, and Unix. Using this amazing software, we can make amazing cartoon characters using traditional cartoon-making techniques such as tracing drawing, skinning. Using this software, you can save animations in the native animation formats or extract the animation to PNG, JPG, or other formats. Wish to explore more about pencil 2d animation software? Follow the steps listed below in order to download the pencil2d animation software.
● Firstly, you need to ensure that your device has ample space on it.
● Next, you need to head to the official website of pencil2d.
● Further, you need to select your operating system. You can find different versions of the software, namely windows 7/8/10, windows XP/ Vista, Mac OS, and Linux
● Once downloaded, you need to start the installation setup. Note that this may take a while to download.
● Once downloaded, you can start familiarizing yourself with the software.
Part 2 Overview of the Application Interface
1. The brush tool
The brush tool must have reminded you of paint software in windows. The brush tool is a popular and highly utilitarian basic tool in Pencil2D animation software. You can either access it via the user interface or quickly access it by using the B key on your keyboard. As the name suggests, the brush tool is literally just a brush that allows you to draw and paint any sort of drawings of different shades, colors, and thickness. If you wish to change the color, you can find a color palette on the left side of the interface.

2. The eraser tool
You’ve a brush tool; it’s almost common sense that there’d be an eraser. The eraser tool has an eraser as its icon. If you wish to use the eraser, click on the eraser tool or simply click the E button on your keyboard. Once you’ve selected the tool, you need to simply hover over the parts you wish to erase.

3. Bucket tool
The bucket tool is another useful tool that you can find in the left tool pane of pencil 2d animation. The tool icon looks like a bucket and it is used to fill an entire area with a particular color. You can choose the color you’d like to fill from the color pallet available on the left side. Alternatively, you can also access the bucket tool by pressing the “K” key on your keyboard.

4. Custom colors
A cool feature that you can find on pencil 2d animation software is the custom color one. You can merge and mix colors according to your choice and create your own color. To do so, you need to click on the small color box that you’ll find at the top right of your screen. By doing so, a huge color wheel will appear on your screen. Now you can either enter values of the R, G, and B if you wish to merge different colors and make a new one or select a particular color from the huge color wheel that appears in front of you. These colors vary in gradient, shade, and a lot of different factors.

5. The Undo button
The Undo button is a highly useful functionality for the lazy ones who do not wish to erase the mistake they made. By undoing, the previous step gets reverted and you can start over again. The traditional undo shortcut, Ctrl+Z does work in the pencil 2d animation. Alternatively, you can also use the undo feature via the user interface. You can do so by heading over to the edit option in the topmost bar. The first option in the drop-down menu would be undo.

Part 3 How to Create Animations with Pencil2D?
Creating animations in pencil 2d is slightly sophisticated and certainly needs minimal practice. Follow the steps listed below in order to learn how to animate through pencil 2d to make your first animation.
1. Ensure that you’ve turned on your bitmap on the first frame
Animation works through quick switching of frame which makes it appear as though the object is in motion. By turning on the bitmap, pencil 2d animation ensures that you’ve no blank frames at the start of your animation.

2. Draw your animated character
Since you’re trying to animate, you need to have an animated character or object. Hence, the first step to making your first animation is by drawing the object or character that you wish to animate. Try to make the character as realistic as possible. To start with, maybe you can try animating just a stick figure; this is because animating a complex character is rather difficult for beginners.

3.The three circular buttons
Once you’re satisfied with the character you draw, you need to spot the 3 circular buttons which are arranged in the “+”,”-“,”+” order. By pressing the first “+” button, you can add an empty slide. If you click on the “-“ button, it will delete the most recent slide and if you click on the next “+” button, it will duplicate the current slide.

4.Repeat until you get an animation
Now that you know how to deal with multiple frames, you can continue creating frames and making the animated characters move by tweaking with the drawing in every frame. For instance, if you wish to show that the animated character is running, in one of the frames the left leg should be forward and in the next one, the right leg should be forward. Keep repeating this process of tweaking with frames until you’ve your desired animated video.

Now that we’ve seen the process of animation via Pencil2D, you must have realized that it’s pretty orthodox and complicated. Moreover, you cannot carry out rigging and other newer animation techniques. Hence, we introduce you to Wondershare Filmora Video Editor , your all in one animation making platform. Here you can animate without any hassle. Wondershare Filmora makes your job easier with multiple animation features, you needn’t even draw your animated character. You can simply import a custom-made character and rig the character. Further, you need not deal with multiple frames and personally pay attention to each frame. All in all, Filmora makes your job simple and your animations much more seamless.
For Win 7 or later (64-bit)
For macOS 10.12 or later
Key Takeaways from This Episode
● Animation is actively being used for multiple purposes.
● Today we took a look at one of the orthodox yet popular animation tools, Pencil2D.
● The Pencil2D animation tool offers you multiple functionalities and allows you to make animations.
● Next, we also took a look at Wondershare Filmora Pro, your one-stop shop for all animation needs. You can find multiple animation features here and it’s all so simple.
● What are you waiting for? Your next animation is just one click away.
02 [Overview of the Application Interface](#Part 2)
03 [How to Create Animations with Pencil2D?](#Part 3)
Part 1 What is Pencil2D and How to Install?
2d pencil animation is popular open-source animation software. The software is pretty cool for those who are newly starting off with animation. The open-source software is available on all major operating systems including Windows, Mac OS, and Unix. Using this amazing software, we can make amazing cartoon characters using traditional cartoon-making techniques such as tracing drawing, skinning. Using this software, you can save animations in the native animation formats or extract the animation to PNG, JPG, or other formats. Wish to explore more about pencil 2d animation software? Follow the steps listed below in order to download the pencil2d animation software.
● Firstly, you need to ensure that your device has ample space on it.
● Next, you need to head to the official website of pencil2d.
● Further, you need to select your operating system. You can find different versions of the software, namely windows 7/8/10, windows XP/ Vista, Mac OS, and Linux
● Once downloaded, you need to start the installation setup. Note that this may take a while to download.
● Once downloaded, you can start familiarizing yourself with the software.
Part 2 Overview of the Application Interface
1. The brush tool
The brush tool must have reminded you of paint software in windows. The brush tool is a popular and highly utilitarian basic tool in Pencil2D animation software. You can either access it via the user interface or quickly access it by using the B key on your keyboard. As the name suggests, the brush tool is literally just a brush that allows you to draw and paint any sort of drawings of different shades, colors, and thickness. If you wish to change the color, you can find a color palette on the left side of the interface.
2. The eraser tool
You’ve a brush tool; it’s almost common sense that there’d be an eraser. The eraser tool has an eraser as its icon. If you wish to use the eraser, click on the eraser tool or simply click the E button on your keyboard. Once you’ve selected the tool, you need to simply hover over the parts you wish to erase.
3. Bucket tool
The bucket tool is another useful tool that you can find in the left tool pane of pencil 2d animation. The tool icon looks like a bucket and it is used to fill an entire area with a particular color. You can choose the color you’d like to fill from the color pallet available on the left side. Alternatively, you can also access the bucket tool by pressing the “K” key on your keyboard.
4. Custom colors
A cool feature that you can find on pencil 2d animation software is the custom color one. You can merge and mix colors according to your choice and create your own color. To do so, you need to click on the small color box that you’ll find at the top right of your screen. By doing so, a huge color wheel will appear on your screen. Now you can either enter values of the R, G, and B if you wish to merge different colors and make a new one or select a particular color from the huge color wheel that appears in front of you. These colors vary in gradient, shade, and a lot of different factors.
5. The Undo button
The Undo button is a highly useful functionality for the lazy ones who do not wish to erase the mistake they made. By undoing, the previous step gets reverted and you can start over again. The traditional undo shortcut, Ctrl+Z does work in the pencil 2d animation. Alternatively, you can also use the undo feature via the user interface. You can do so by heading over to the edit option in the topmost bar. The first option in the drop-down menu would be undo.
Part 3 How to Create Animations with Pencil2D?
Creating animations in pencil 2d is slightly sophisticated and certainly needs minimal practice. Follow the steps listed below in order to learn how to animate through pencil 2d to make your first animation.
1. Ensure that you’ve turned on your bitmap on the first frame
Animation works through quick switching of frame which makes it appear as though the object is in motion. By turning on the bitmap, pencil 2d animation ensures that you’ve no blank frames at the start of your animation.
2. Draw your animated character
Since you’re trying to animate, you need to have an animated character or object. Hence, the first step to making your first animation is by drawing the object or character that you wish to animate. Try to make the character as realistic as possible. To start with, maybe you can try animating just a stick figure; this is because animating a complex character is rather difficult for beginners.
3.The three circular buttons
Once you’re satisfied with the character you draw, you need to spot the 3 circular buttons which are arranged in the “+”,”-“,”+” order. By pressing the first “+” button, you can add an empty slide. If you click on the “-“ button, it will delete the most recent slide and if you click on the next “+” button, it will duplicate the current slide.
4.Repeat until you get an animation
Now that you know how to deal with multiple frames, you can continue creating frames and making the animated characters move by tweaking with the drawing in every frame. For instance, if you wish to show that the animated character is running, in one of the frames the left leg should be forward and in the next one, the right leg should be forward. Keep repeating this process of tweaking with frames until you’ve your desired animated video.
Now that we’ve seen the process of animation via Pencil2D, you must have realized that it’s pretty orthodox and complicated. Moreover, you cannot carry out rigging and other newer animation techniques. Hence, we introduce you to Wondershare Filmora Video Editor , your all in one animation making platform. Here you can animate without any hassle. Wondershare Filmora makes your job easier with multiple animation features, you needn’t even draw your animated character. You can simply import a custom-made character and rig the character. Further, you need not deal with multiple frames and personally pay attention to each frame. All in all, Filmora makes your job simple and your animations much more seamless.
For Win 7 or later (64-bit)
For macOS 10.12 or later
Key Takeaways from This Episode
● Animation is actively being used for multiple purposes.
● Today we took a look at one of the orthodox yet popular animation tools, Pencil2D.
● The Pencil2D animation tool offers you multiple functionalities and allows you to make animations.
● Next, we also took a look at Wondershare Filmora Pro, your one-stop shop for all animation needs. You can find multiple animation features here and it’s all so simple.
● What are you waiting for? Your next animation is just one click away.
Also read:
- New 2024 Approved 10 Caricature Makers to Turn Photo to Caricature Effects
- Updated Everything You Need to Know About Becoming a Motion Graphic Designer
- Updated In 2024, How to Animate - Adobe Animate Tutorial for All
- Updated Best GIF Resizers to Reduce GIF Size for 2024
- 15 Best Video to GIF App on iPhone and Android for 2024
- New Best 15 Horror Animes That Will Trigger a Heart Attack for 2024
- New 2024 Approved 10 Amazing Wallpaper Collage Ideas and Photos
- Updated Top Practices on Online 3D Avatar Creator
- In 2024, Adobe Animate Riggings Tutorial for You
- How to Create Photo Collage Frame for Free in Minutes?
- 2024 Approved Learn How to Do Funny Cartoon Drawings
- Finding Some Different Ways to Animated Cartoon of Yourself for 2024
- Updated In 2024, Some Must-Know Useful Lego Animation Ideas for You
- How to Make Photo 3D Cartoon Online
- New What Is the Meaning of Motion Graphics for 2024
- The Coolest Anime Characters Ever| List of Top Favorites for 2024
- In 2024, The 15 Most Efficient Photo to Cartoon Software for Android
- New The Only Guide to Make 2D Rigging Clear to You for 2024
- New How to Make a 3D Cartoon of Yourself
- New 2024 Approved In-Depth Study of Cartoon Painting Starts From Learning to Draw It
- Updated In 2024, Handy Tips From Adobe Animate Rigging Tutorial for All Learners
- 2024 Approved How to Draw Cartoons Step by Step with This Guide
- Updated 5 Websites with Animated Logos That Catch Your Eyes for 2024
- Learn How to Draw Cartoons Step by Step with This Guide for 2024
- Top 8 Anime Name Generators Online-Get Cool Anime Names
- 12 Websites with Triggered Animate on Scroll Examples
- Updated In 2024, Simple Shortcut to Convert Videos to Gifs on iPhone
- New 2024 Approved The Coolest Anime Characters Ever| List of Top Favorites
- Updated The Best 10 Sketch Animation Video Makers for 2024
- In 2024, How To Create Animated Clipart in PowerPoint
- New In 2024, 8 Best Motion Graphics Online Tools for Your Inspiration
- Updated How to Create a Whiteboard Video Step by Step 2023 Updated for 2024
- How to Find Some Different Ways to Animated Cartoon of Yourself
- New Complete Guide to Send Gif WhatsApp on Android
- Updated Top 15 Male Anime Characters By Voting
- Updated 15 Types of Cartoon Drawing Styles with Examples
- Updated 2024 Approved Have You Seen the Facebook Cartoon App Everyones Using Recently
- New In 2024, How to Create a Whiteboard Video Step by Step
- In 2024, Does Life360 Notify When You Log Out On Apple iPhone 8? | Dr.fone
- In 2024, Top 15 Augmented Reality Games Like Pokémon GO To Play On Poco M6 Pro 5G | Dr.fone
- 8 Solutions to Solve YouTube App Crashing on Infinix Hot 30i | Dr.fone
- In 2024, Bypass iCloud Activation Lock with IMEI Code On iPhone X
- Updated 2024 Approved Best 5 AI Movie Script Generators
- In 2024, How To Change Your Apple ID on Apple iPhone XS With or Without Password
- Getting the Pokemon Go GPS Signal Not Found 11 Error in Xiaomi 13T Pro | Dr.fone
- In 2024, 9 Best Phone Monitoring Apps for Vivo Y78+ | Dr.fone
- In 2024, Forgotten The Voicemail Password Of Realme C53? Try These Fixes
- Full Guide to Catch 100 IV Pokémon Using a Map On Honor 90 Lite | Dr.fone
- In 2024, How to Unlock Apple iPhone 6 Plus with/without SIM Card
- Pokémon Go Cooldown Chart On Vivo S17 | Dr.fone
- In 2024, 9 Best Free Android Monitoring Apps to Monitor Phone Remotely For your Tecno Phantom V Flip | Dr.fone
- 8 Ultimate Fixes for Google Play Your Realme Narzo 60x 5G Isnt Compatible | Dr.fone
- Remove the Lock Screen Fingerprint Of Your Realme C33 2023
- In 2024, 6 Methods to Mirror Apple iPhone XS Max to your Windows PC | Dr.fone
- In 2024, Pattern Locks Are Unsafe Secure Your Vivo V27e Phone Now with These Tips
- How to Delete iCloud Account with or without Password from your Apple iPhone X/Windows/Mac
- A Detailed VPNa Fake GPS Location Free Review On Samsung Galaxy A05 | Dr.fone
- How to Remove Apple ID from iPhone 7 without Password?
- How To Update or Downgrade iPhone XS Without iTunes? | Dr.fone
- How To Fix Auto Lock Greyed Out on iPhone SE | Dr.fone
- How to unlock Vivo X100
- Top 15 Augmented Reality Games Like Pokémon GO To Play On Oppo Find X7 | Dr.fone
- A How-To Guide on Bypassing iPhone 7 iCloud Activation Lock
- How To Remove Passcode From Apple iPhone 14 Plus? Complete Guide | Dr.fone
- Ultimate Guide to Catch the Regional-Located Pokemon For Motorola Moto G73 5G | Dr.fone
- Will the iPogo Get You Banned and How to Solve It On Honor 90 Pro | Dr.fone
- Ultimate Guide to Free PPTP VPN For Beginners On Tecno Pova 6 Pro 5G | Dr.fone
- Two Ways to Track My Boyfriends Vivo V29e without Him Knowing | Dr.fone
- Ultimate guide to get the meltan box pokemon go For Vivo Y100i | Dr.fone
- In 2024, CatchEmAll Celebrate National Pokémon Day with Virtual Location On Apple iPhone 12 Pro | Dr.fone
- In 2024, 10 Free Location Spoofers to Fake GPS Location on your Poco F5 5G | Dr.fone
- Title: New Best 10 Old Cartoons From Cartoon Network That You Miss
- Author: Elon
- Created at : 2024-06-23 02:09:36
- Updated at : 2024-06-24 02:09:36
- Link: https://animation-videos.techidaily.com/new-best-10-old-cartoons-from-cartoon-network-that-you-miss/
- License: This work is licensed under CC BY-NC-SA 4.0.
