
:max_bytes(150000):strip_icc():format(webp)/sb10069770n-003-56a104403df78cafdaa7dd48-ba41d70c51114343aaa38409d9cdfc3f.jpg)
New DP Animation Maker Tutorial for Finding The Best Animated Profile Picture Maker for 2024
DP Animation Maker Tutorial for Finding The Best Animated Profile Picture Maker
DP Animation Maker Tutorial for Finding The Best Animated Profile Picture Maker
An easy yet powerful editor
Numerous effects to choose from
Detailed tutorials provided by the official channel
Social media is getting more and more competitive, and it’s crucial to make a good first impression. Animated profile pictures grab the user’s attention and give the added boost that helps you become different in a good way.
This article will show you the ten top animated profile picture makers using which you can create awesome profile pictures with ease.
In this article
01 [What does “PFP” mean?](#Part 1)
02 [The 10 Best Animated Profile Picture Makers for Making awesome profile pictures](#Part 2)
03 [What Happens if You Make Animated Video Instead of Pictures?](#Part 3)
Part 1 What does “PFP” mean?
PFP stands for “Picture For Profile” or, more commonly, “Profile Picture.” It is the first thing people see when they visit your profile on a social networking website. The profile owners typically upload their own images on Facebook, Twitter, Instagram, WhatsApp, and others at different times during the year or when anything significant happens.
Adding a photo gives your followers a chance to put a face to the name and an idea of what you look like. This allows them to better relate to you and creates a strong foundation for conversations and any other type of interactions.
Part 2 The 10 Best Animated Profile Picture Makers for Making awesome profile pictures
Animated profile pictures add fun and steal the show when you add them to your social accounts. What’s more, it can be much easier to create a WhatsApp animated profile picture when you’re using the right tool. Here in this post, we present you with the ten best animated profile picture makers for your reference and use.
01Canva
Canva lets you make an animated profile picture as simple as “drag and drop” without any creativity. Canva’s unique WYSIWYG animation technique makes it very straightforward to create your own avatar - making awesome animated gifs has never been simpler.
The UI is simple enough that even the smallest of details are well thought out. The captions are editable, so you easily customize the words appearing in each awesome gif.
Canva, one of the best animated profile picture makers, is a great alternative for those who prefer to work and create using the browser and without downloading and installing any software. You can also access Canva directly from any mobile device or tablet, making it convenient for you to share creative greetings and social media posts with your friends and loved ones.

●Pros:
● A near-unlimited number of stunning pre-built templates for a wide range of usage
● Beautiful and easy-to-use application interface
● The tool gets frequent bug fixes and updates with the latest features and even more templates
Cons:
● The free plan comes with a pretty meager cloud storage capacity
● No vector design is possible
● Lack of the ability to connect more than one Facebook login for those who handle personal and business pages separately
02Placeit
Are you looking for an easy way to make a simple but effective WhatsApp animated profile picture? Go to Placeit.net, and be creative with its wide range of customizable attractive pre-built templates.
Templates are hand-drawn and professionally designed. With thousands of animated templates, you can create a profile picture in a jiffy. Placeit lets you post fun and exciting photos that attract attention and grow your fanbase in no time.
Make your profile picture come to life with this one-of-a-kind animated profile picture maker! Using its proprietary image editor, you will be able to spread smiles, laughter, surprise, and much more right in seconds.

Pros:
● The overall UI is fairly streamlined – making an animated profile picture should take more than just a few clicks
● From color schemes to changing text fonts – everything is customizable
● Templates are ultra-high-quality
Cons:
● A bit expensive monthly plan
● Pay-per-item cost is definitely not affordable
● No option to add your own custom font
03PicMonkey
PicMonkey is a powerful yet simple online photo editor that lets you showcase your creativity and brand through animated profile pictures, cover photos, advertisements of all kinds, and more. In addition to its easy-to-learn features, PicMonkey offers endless possibilities for amateurs and professionals alike!
To be a meaningful part of the social media world, creating your own profile picture is not only fun but also a smart way to show your individuality. And with PicMonkey’s image editor, crafting the perfect profile picture doesn’t have to be complicated. With over 15 million users, PicMonkey is a leading photo editing software that has been helping individuals create drool-worthy designs in minutes.

Pros:
● The interface is user-friendly, and the tool offers an easy-to-learn feature set
● With a plethora of customizable in-built templates, you can generate some fresh animated profile pictures every time you try the app
● The developer keeps the tool updated with new resources and features always
Cons:
● You cannot work on more than one template simultaneously
● Lacks a proper and detailed user guide with useful tips
● Without paying for the Pro version, you can’t access some super-handy basic features
04Powerpuff Yourself
Are you looking for an easy way to make your own avatar? Powerpuff Yourself is a user-friendly tool that produces realistic anime avatars based on your photos. The features that you can expect are –
● Anime avatars, each with six different skin tones.
● Female or male avatars,
● Unique background based on your answers to the questions, and
● About 70 different hairstyles.
Make your very own anime avatar with this cute animated profile picture generator by simply selecting mouth, eyes, glasses, hair, and dress for your preferred character. After choosing the scene for the background, answer some questions about yourself and press the button to create your avatar!

Pros:
● Choose from a variety of combinations of face, eyes, hairstyles, clothes, and accessories
● Share your fresh customized avatar with just a single click
● Available in all major languages
Cons:
● No option to upload your own custom design
● The generated avatar can’t be white-labeled as the end result gets saved with the CN logo
● While the background can be animated, you are not allowed to animate the main character
05Pixlr
Change the way you see yourself on social networks With Pixlr. It is a free online profile picture maker, tablet, and mobile photo editor with all the amazing editing features one can expect only from professional tools like Photoshop. Ever wonder how your photos would look in black-and-white or what that flower in your hand looks like as a cartoon? Go to pixlr.com, log in with Facebook to create your free account, and you will be surprised by what you can do with its host of powerful self-edit features.
Complete your online persona with the help of Pixlr, now available on browser, Android, and iOS! Use the Pixlr app to take a picture and then, with a few taps or mouse clicks, enhance and decorate it. Add funny text, use special effects filters, crop and rotate, remove red-eye - it’s all there in one app! Make an impact with your profile picture and be recognized as an expert in your field.

Pros:
● Offers a simple yet powerful browser-based graphics editing experience
● A great collection of multipurpose templates designed to keep the modern social platforms in mind
● Plenty of super useful features are available in the free version
Cons:
● Some annoying glitches in the middle of editing while shifting from one tab to another
● A fair number of options work slowly due to bugs that need to be ironed out
● The doodle tool offers no “brush” feature
06Animate Me
Animate Me is a new application for iPhone that assists you with creating animated images. It has an easy-to-use interface to make animations with photos so that you can design your own animated image in a jiffy without any hassle.
The tool has two modes to create images. One of the modes is Edit mode, where you can edit your work immediately after you finish drawing. And another is Camera mode, which allows you to make a hand-drawn animation out of videos already shot. This dp animation maker tutorial can be easy for you to understand.
Touch, draw and share your animation - with Animate Me, there is no longer any need for professional graphics tools. Create animation from your photos, GIF files, or live camera action with just a touch, and share it with family and friends by email, message or post it to your Facebook wall.

Pros:
● Straightforward user interface
● Add images from your device or Facebook album or choose one from the app’s pre-built collection
● Add exciting cool features and cute sounds to your images
Cons:
● The free version of the tool has a limited number of options
● Frequent updates come with new bugs
● Some users complained of “bad words” even in the kid’s voice
07Picstun
Do you want to make awesome animated videos with your photos easily? Picstun is the best photo animator app in the Android market which can add powerful video effects to a picture free and instantaneously. It produces beautiful cartoon effects for your photos and video, allowing you to tell animated video stories in gorgeous styles instead of sharing static pictures.
You can learn this simple yet professional photo animator easily. Users of PicStun are able to create an animated video with a variety of over 3,000 pictures in various topics and animation effects.
The best thing about this application is that you can use your gallery images, too, on which the animation will be superimposed. There are many other nifty features in this next-generation picture animation maker tool. For instance, adding text, effects, music, and more right onto your pictures is possible directly from the application interface.

Pros:
● A wide range of animation effects are available
● Allows you to preview the result before you finally save it and share the same with the world
● One-click social network sharing
Cons:
● The application often crashes when trying to import multiple images into it
● A limited number of effects beg for an update with fresh animation possibilities
● Lacks proper instructions for the new users
08Loopsie
Loopsie allows you to create picture animation using your own photos. Add emojis, text, drawings, and speech bubbles to your photos in a matter of seconds to create amazing GIF images that can be used for messages or for sharing.
Are you tired of boring photos? This animated profile picture maker lets you animate your images! Just add one of the characters to your photo and give them an animated life. Loopsie supports video creation too! Add video clips and photos, pick a theme for your video, and Loopsie will do the work for you. Now, you can also hashtag on Facebook or Twitter to show off your design like the pros!

Pros:
● An easy-to-use interface offers a short learning curve
● The resolutions of end-results are readily social media compatible
● Can share on all major social networking sites directly within the app
Cons:
● While it allows the user to import their own videos, they get ranked randomly inside the app
● A new user can find it a little difficult to use the software without enough instruction set
● Recent updates added too many gimmicky filters without actually improving the experience much
09PFPmaker
PFPmaker is the original animated profile picture maker that allows adding eye-catching animations to your profile images on major social platforms like Instagram, Facebook, Twitter, and more. With PFPMaker, creating personalized animated gifs of yourself is a piece of cake. Simply decide what you want in your animation, upload some images (or take from the in-built collection inside the app), and PFPMaker will make it happen.
Increase your brand awareness, get more likes and shares, and drive more traffic to your website - all by making custom animated profile pictures using PFPmaker. Now you can create a professional identity in a matter of seconds and acquire new followers, fans, or customers!

Pros:
● Generates strikingly gorgeous animated profile images in seconds
● Its AI-powered background removal tool works awesomely well
● Loads of customization option makes this a cool nifty tool
Cons:
● No native Android or iOS app is available; everything is browser-based
● Competitors offer more animation possibilities
● While users can request a specific feature, it gets implemented rarely
10Animated GIF Maker
Animated GIF Maker is an online tool to create animated gif pictures from the user’s photos and images. The tool can convert image files up to 6MB in size, with a maximum of 5 frames. However, files greater than 3MB in size will not be displayed on the result page
Make a photo animation! Upload your own images, and Animated Gif Maker will merge them into a cool animated GIF. You can use this tool to create an animated profile picture for your social page or just have fun making short videos with your friends’ photos. Adjust the file format, resize the image and add text to your new animated picture – whatever way you want to customize the result is possible by this little tool!

Pros:
● Allows a user to upload more than one file at the same time
● Images can be converted into multiple formats easily
● Cropping and resizing the uploaded pictures is a breeze
Cons:
● File upload size restricted to 6 MB
● No native smartphone app
● The browser-based interface offers limited functionalities
Key Takeaways from This Episode
● Keeping your Facebook, Twitter, and other social profile photos fresh is vital if you want to make a good impression.
● Or perhaps you just want to have an image that is up to date and relevant. But have you ever tried to use an animated profile picture maker?
● If not, this is the right time you choose from one of our preferred tools from this article and surprise your friends with your new whatsapp animated profile picture today.
Social media is getting more and more competitive, and it’s crucial to make a good first impression. Animated profile pictures grab the user’s attention and give the added boost that helps you become different in a good way.
This article will show you the ten top animated profile picture makers using which you can create awesome profile pictures with ease.
In this article
01 [What does “PFP” mean?](#Part 1)
02 [The 10 Best Animated Profile Picture Makers for Making awesome profile pictures](#Part 2)
03 [What Happens if You Make Animated Video Instead of Pictures?](#Part 3)
Part 1 What does “PFP” mean?
PFP stands for “Picture For Profile” or, more commonly, “Profile Picture.” It is the first thing people see when they visit your profile on a social networking website. The profile owners typically upload their own images on Facebook, Twitter, Instagram, WhatsApp, and others at different times during the year or when anything significant happens.
Adding a photo gives your followers a chance to put a face to the name and an idea of what you look like. This allows them to better relate to you and creates a strong foundation for conversations and any other type of interactions.
Part 2 The 10 Best Animated Profile Picture Makers for Making awesome profile pictures
Animated profile pictures add fun and steal the show when you add them to your social accounts. What’s more, it can be much easier to create a WhatsApp animated profile picture when you’re using the right tool. Here in this post, we present you with the ten best animated profile picture makers for your reference and use.
01Canva
Canva lets you make an animated profile picture as simple as “drag and drop” without any creativity. Canva’s unique WYSIWYG animation technique makes it very straightforward to create your own avatar - making awesome animated gifs has never been simpler.
The UI is simple enough that even the smallest of details are well thought out. The captions are editable, so you easily customize the words appearing in each awesome gif.
Canva, one of the best animated profile picture makers, is a great alternative for those who prefer to work and create using the browser and without downloading and installing any software. You can also access Canva directly from any mobile device or tablet, making it convenient for you to share creative greetings and social media posts with your friends and loved ones.
●Pros:
● A near-unlimited number of stunning pre-built templates for a wide range of usage
● Beautiful and easy-to-use application interface
● The tool gets frequent bug fixes and updates with the latest features and even more templates
Cons:
● The free plan comes with a pretty meager cloud storage capacity
● No vector design is possible
● Lack of the ability to connect more than one Facebook login for those who handle personal and business pages separately
02Placeit
Are you looking for an easy way to make a simple but effective WhatsApp animated profile picture? Go to Placeit.net, and be creative with its wide range of customizable attractive pre-built templates.
Templates are hand-drawn and professionally designed. With thousands of animated templates, you can create a profile picture in a jiffy. Placeit lets you post fun and exciting photos that attract attention and grow your fanbase in no time.
Make your profile picture come to life with this one-of-a-kind animated profile picture maker! Using its proprietary image editor, you will be able to spread smiles, laughter, surprise, and much more right in seconds.
Pros:
● The overall UI is fairly streamlined – making an animated profile picture should take more than just a few clicks
● From color schemes to changing text fonts – everything is customizable
● Templates are ultra-high-quality
Cons:
● A bit expensive monthly plan
● Pay-per-item cost is definitely not affordable
● No option to add your own custom font
03PicMonkey
PicMonkey is a powerful yet simple online photo editor that lets you showcase your creativity and brand through animated profile pictures, cover photos, advertisements of all kinds, and more. In addition to its easy-to-learn features, PicMonkey offers endless possibilities for amateurs and professionals alike!
To be a meaningful part of the social media world, creating your own profile picture is not only fun but also a smart way to show your individuality. And with PicMonkey’s image editor, crafting the perfect profile picture doesn’t have to be complicated. With over 15 million users, PicMonkey is a leading photo editing software that has been helping individuals create drool-worthy designs in minutes.
Pros:
● The interface is user-friendly, and the tool offers an easy-to-learn feature set
● With a plethora of customizable in-built templates, you can generate some fresh animated profile pictures every time you try the app
● The developer keeps the tool updated with new resources and features always
Cons:
● You cannot work on more than one template simultaneously
● Lacks a proper and detailed user guide with useful tips
● Without paying for the Pro version, you can’t access some super-handy basic features
04Powerpuff Yourself
Are you looking for an easy way to make your own avatar? Powerpuff Yourself is a user-friendly tool that produces realistic anime avatars based on your photos. The features that you can expect are –
● Anime avatars, each with six different skin tones.
● Female or male avatars,
● Unique background based on your answers to the questions, and
● About 70 different hairstyles.
Make your very own anime avatar with this cute animated profile picture generator by simply selecting mouth, eyes, glasses, hair, and dress for your preferred character. After choosing the scene for the background, answer some questions about yourself and press the button to create your avatar!
Pros:
● Choose from a variety of combinations of face, eyes, hairstyles, clothes, and accessories
● Share your fresh customized avatar with just a single click
● Available in all major languages
Cons:
● No option to upload your own custom design
● The generated avatar can’t be white-labeled as the end result gets saved with the CN logo
● While the background can be animated, you are not allowed to animate the main character
05Pixlr
Change the way you see yourself on social networks With Pixlr. It is a free online profile picture maker, tablet, and mobile photo editor with all the amazing editing features one can expect only from professional tools like Photoshop. Ever wonder how your photos would look in black-and-white or what that flower in your hand looks like as a cartoon? Go to pixlr.com, log in with Facebook to create your free account, and you will be surprised by what you can do with its host of powerful self-edit features.
Complete your online persona with the help of Pixlr, now available on browser, Android, and iOS! Use the Pixlr app to take a picture and then, with a few taps or mouse clicks, enhance and decorate it. Add funny text, use special effects filters, crop and rotate, remove red-eye - it’s all there in one app! Make an impact with your profile picture and be recognized as an expert in your field.
Pros:
● Offers a simple yet powerful browser-based graphics editing experience
● A great collection of multipurpose templates designed to keep the modern social platforms in mind
● Plenty of super useful features are available in the free version
Cons:
● Some annoying glitches in the middle of editing while shifting from one tab to another
● A fair number of options work slowly due to bugs that need to be ironed out
● The doodle tool offers no “brush” feature
06Animate Me
Animate Me is a new application for iPhone that assists you with creating animated images. It has an easy-to-use interface to make animations with photos so that you can design your own animated image in a jiffy without any hassle.
The tool has two modes to create images. One of the modes is Edit mode, where you can edit your work immediately after you finish drawing. And another is Camera mode, which allows you to make a hand-drawn animation out of videos already shot. This dp animation maker tutorial can be easy for you to understand.
Touch, draw and share your animation - with Animate Me, there is no longer any need for professional graphics tools. Create animation from your photos, GIF files, or live camera action with just a touch, and share it with family and friends by email, message or post it to your Facebook wall.
Pros:
● Straightforward user interface
● Add images from your device or Facebook album or choose one from the app’s pre-built collection
● Add exciting cool features and cute sounds to your images
Cons:
● The free version of the tool has a limited number of options
● Frequent updates come with new bugs
● Some users complained of “bad words” even in the kid’s voice
07Picstun
Do you want to make awesome animated videos with your photos easily? Picstun is the best photo animator app in the Android market which can add powerful video effects to a picture free and instantaneously. It produces beautiful cartoon effects for your photos and video, allowing you to tell animated video stories in gorgeous styles instead of sharing static pictures.
You can learn this simple yet professional photo animator easily. Users of PicStun are able to create an animated video with a variety of over 3,000 pictures in various topics and animation effects.
The best thing about this application is that you can use your gallery images, too, on which the animation will be superimposed. There are many other nifty features in this next-generation picture animation maker tool. For instance, adding text, effects, music, and more right onto your pictures is possible directly from the application interface.
Pros:
● A wide range of animation effects are available
● Allows you to preview the result before you finally save it and share the same with the world
● One-click social network sharing
Cons:
● The application often crashes when trying to import multiple images into it
● A limited number of effects beg for an update with fresh animation possibilities
● Lacks proper instructions for the new users
08Loopsie
Loopsie allows you to create picture animation using your own photos. Add emojis, text, drawings, and speech bubbles to your photos in a matter of seconds to create amazing GIF images that can be used for messages or for sharing.
Are you tired of boring photos? This animated profile picture maker lets you animate your images! Just add one of the characters to your photo and give them an animated life. Loopsie supports video creation too! Add video clips and photos, pick a theme for your video, and Loopsie will do the work for you. Now, you can also hashtag on Facebook or Twitter to show off your design like the pros!
Pros:
● An easy-to-use interface offers a short learning curve
● The resolutions of end-results are readily social media compatible
● Can share on all major social networking sites directly within the app
Cons:
● While it allows the user to import their own videos, they get ranked randomly inside the app
● A new user can find it a little difficult to use the software without enough instruction set
● Recent updates added too many gimmicky filters without actually improving the experience much
09PFPmaker
PFPmaker is the original animated profile picture maker that allows adding eye-catching animations to your profile images on major social platforms like Instagram, Facebook, Twitter, and more. With PFPMaker, creating personalized animated gifs of yourself is a piece of cake. Simply decide what you want in your animation, upload some images (or take from the in-built collection inside the app), and PFPMaker will make it happen.
Increase your brand awareness, get more likes and shares, and drive more traffic to your website - all by making custom animated profile pictures using PFPmaker. Now you can create a professional identity in a matter of seconds and acquire new followers, fans, or customers!
Pros:
● Generates strikingly gorgeous animated profile images in seconds
● Its AI-powered background removal tool works awesomely well
● Loads of customization option makes this a cool nifty tool
Cons:
● No native Android or iOS app is available; everything is browser-based
● Competitors offer more animation possibilities
● While users can request a specific feature, it gets implemented rarely
10Animated GIF Maker
Animated GIF Maker is an online tool to create animated gif pictures from the user’s photos and images. The tool can convert image files up to 6MB in size, with a maximum of 5 frames. However, files greater than 3MB in size will not be displayed on the result page
Make a photo animation! Upload your own images, and Animated Gif Maker will merge them into a cool animated GIF. You can use this tool to create an animated profile picture for your social page or just have fun making short videos with your friends’ photos. Adjust the file format, resize the image and add text to your new animated picture – whatever way you want to customize the result is possible by this little tool!
Pros:
● Allows a user to upload more than one file at the same time
● Images can be converted into multiple formats easily
● Cropping and resizing the uploaded pictures is a breeze
Cons:
● File upload size restricted to 6 MB
● No native smartphone app
● The browser-based interface offers limited functionalities
Key Takeaways from This Episode
● Keeping your Facebook, Twitter, and other social profile photos fresh is vital if you want to make a good impression.
● Or perhaps you just want to have an image that is up to date and relevant. But have you ever tried to use an animated profile picture maker?
● If not, this is the right time you choose from one of our preferred tools from this article and surprise your friends with your new whatsapp animated profile picture today.
Easy Shortcut to Convert Videos to Gifs on iPhone
Simple Shortcut to Convert Videos to Gifs on iPhone
An easy yet powerful editor
Numerous effects to choose from
Detailed tutorials provided by the official channel
To create iPhone video to GIF there are several third-party apps available. You can even choose the online sites for the task, but the editing and other options will be limited. The GIFs on your iPhone can be created using videos as well as Live photos.

One of the best ways to create a GIF is using the Shortcuts app that comes pre-installed on devices running on iOS 13 and later versions of the OS. The app has shortcuts to accomplish several tasks on your iPhone including GIF creation. Learn about using Shortcuts and other tools for creating a GIF on iPhone.
In this article
01 [How to make GIF from Video on iPhone using Shortcut App](#Part 1)
02 [How to save Live Photos as GIF on iPhone](#Part 2)
03 [How to save Live Photos as GIF on iPhone](#Part 3)
04 [How to save videos as live photos on your iPhone?](#Part 4)
05 [Best tool for creating GIFs and video editing on your Windows and Mac- Wondershare Filmora](#Part 5)
Part 1 How to make GIF from Video on iPhone using Shortcut App
One of the easiest ways to convert video GIF iPhone is by using the Shortcuts app. If you have deleted the app, you can reinstall it from the app store. Once the app is installed, you would next need to allow the untrusted shortcuts and for this go to Settings > Shortcuts> toggle Add Untrusted Shortcuts to add the shortcuts created by the user. The further steps for converting video to GIF iPhone are as follows.
Step 1. On your iPhone, download the Video to GIF shortcut. You can download it using iCloud or RoutineHub. Find the shortcut and click on Get Shortcut will let you check the action of the shortcut.
Move down and click on the red Add Untrusted Shortcut button that will add the shortcut for the library.

Step 2. Go to the My Shortcuts tab and click on the Video to GIF section. If you are using it for the first time, you need to grant permission to use the videos and photos. Click on the OK button and continue.

Step 3. Next, browse and add the video from which you wish to create the GIF. Since GIF animations are short, it is always recommended to use short videos.
Step 4. Video processing will start and during this, the Video to GIF shortcut will be greyed out.

Step 5. Once done, the preview of the GIF will appear on the screen. Finally, you can save the GIF to your Photos app on iPhone or can also share it through email, AirDrop, iMessage, and other third-party services as needed.

Part 2 How to save Live Photos as GIF on iPhone
Live Photo is an interesting feature of the iPhone where an image is captured in an animated form for a couple of seconds. These Live Photos can be easily converted to GIFs using the steps below.
Step 1. On your iPhone Photo app, open the Live Photo that you want to save as GIF.
Step 2. Darg the selected photo upwards and will see multiple effects options along with other image details.
Step 3 To save the selected image as GIF, choose Loop or Bounce animation. Once done, share the image on mail and other services listed or save it to the device.

Part 3 How to save Live Photo as video on iPhone
You can also convert your live photos to videos and then use them for making GIFs and for other uses. The steps for iPhone live photo to video are as follows.
Step 1. On your iPhone, open the Photos app and choose the Live Photo that you want to convert.
Step 2. Next, click on the share button at the bottom of the screen and multiple options will be seen.
Step 3. Scroll down and choose Save as Video option and with this, the live photo will be saved as a Video.
Additionally, you can also convert the LivePhotos to videos using the shortcut app.

Part 4 How to save videos as live photos on your iPhone?
If you need to convert your videos to live photos on iPhone, there are several third-party tools available and one of the widely used is IntoLive. Using this app, videos, as well as GIFs, can be converted into live photos.
Steps on how to turn a video into a live photo iPhone
Step 1. Download, install and launch the IntoLive app from the app store.
Step 2. Next, browse and add the desired video.
Step 3. If needed, the added video can be customized using several supported features.
Step 4. Next, click on the Make option at the top-right corner and then choose the repeats you want for a Live Photo.
Step 5. Finally, click on the Live Photo and your Live Photo will be saved to the device.

Part 5 Best tool for creating GIFs and video editing on your Windows and Mac- Wondershare Filmora
Above we have listed several ways to create GIFs on your iPhone and also to convert videos to LivePhotos and vice-versa. Installing different tools for different tasks is a hassle and also a time-consuming task. So, if you are looking for an all-in-one tool that allows you to create GIFs, and professionally edit your media files, Wondershare Filmora Video Editor is the best tool to consider. Available for quick download on your Windows and Mac system, this feature-packed software has an intuitive and user-friendly interface.
Wondershare Filmora
Get started easily with Filmora’s powerful performance, intuitive interface, and countless effects!
Try It Free Try It Free Try It Free Learn More >

Media files in all key formats are supported by the tool and there are multiple options for editing and video creation like splitting, rotating, cutting, adding effects, sounds, text, and other elements. In a few simple steps, your customized GIF and other professional-looking media files will be ready.
Steps to create GIF using Wondershare Filmora
Step 1. Launch the installed software on your system and add the video or images from the system.
Step 2. The added media files next need to be dragged and dropped to the timeline at the bottom of the interface.
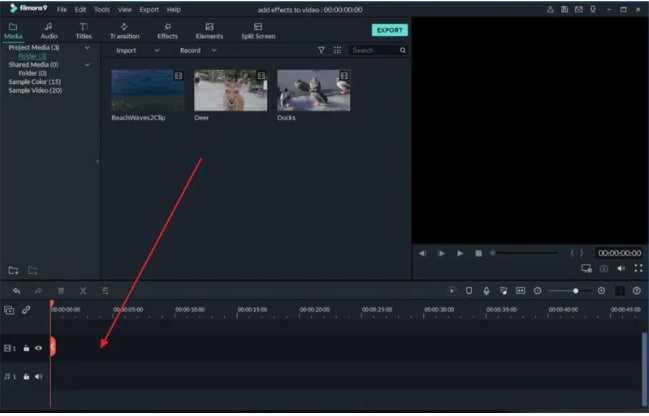
Step 3. After the files are moved, you can customize them using several editing tools like rotate, crop, cut, and more.
Step 4. Next, add text, effects, sound, and other elements as needed.

Step 5. Finally choose to export the file and then from the Local tab, select the GIF option. Choose a file name and location and then finally click on the EXPORT button.

● Key Takeaways from This Episode →
●There are several ways to turn video into GIF iPhone.
●Using shortcuts is one of the most straightforward methods for creating GIFs using videos.
●You can also convert videos to LivePhoto and vice versa on your iPhone using third-party apps.
●Wondershare Filmora is an excellent software to make GIFs and professionally edit media files.
To create iPhone video to GIF there are several third-party apps available. You can even choose the online sites for the task, but the editing and other options will be limited. The GIFs on your iPhone can be created using videos as well as Live photos.
One of the best ways to create a GIF is using the Shortcuts app that comes pre-installed on devices running on iOS 13 and later versions of the OS. The app has shortcuts to accomplish several tasks on your iPhone including GIF creation. Learn about using Shortcuts and other tools for creating a GIF on iPhone.
In this article
01 [How to make GIF from Video on iPhone using Shortcut App](#Part 1)
02 [How to save Live Photos as GIF on iPhone](#Part 2)
03 [How to save Live Photos as GIF on iPhone](#Part 3)
04 [How to save videos as live photos on your iPhone?](#Part 4)
05 [Best tool for creating GIFs and video editing on your Windows and Mac- Wondershare Filmora](#Part 5)
Part 1 How to make GIF from Video on iPhone using Shortcut App
One of the easiest ways to convert video GIF iPhone is by using the Shortcuts app. If you have deleted the app, you can reinstall it from the app store. Once the app is installed, you would next need to allow the untrusted shortcuts and for this go to Settings > Shortcuts> toggle Add Untrusted Shortcuts to add the shortcuts created by the user. The further steps for converting video to GIF iPhone are as follows.
Step 1. On your iPhone, download the Video to GIF shortcut. You can download it using iCloud or RoutineHub. Find the shortcut and click on Get Shortcut will let you check the action of the shortcut.
Move down and click on the red Add Untrusted Shortcut button that will add the shortcut for the library.
Step 2. Go to the My Shortcuts tab and click on the Video to GIF section. If you are using it for the first time, you need to grant permission to use the videos and photos. Click on the OK button and continue.
Step 3. Next, browse and add the video from which you wish to create the GIF. Since GIF animations are short, it is always recommended to use short videos.
Step 4. Video processing will start and during this, the Video to GIF shortcut will be greyed out.
Step 5. Once done, the preview of the GIF will appear on the screen. Finally, you can save the GIF to your Photos app on iPhone or can also share it through email, AirDrop, iMessage, and other third-party services as needed.
Part 2 How to save Live Photos as GIF on iPhone
Live Photo is an interesting feature of the iPhone where an image is captured in an animated form for a couple of seconds. These Live Photos can be easily converted to GIFs using the steps below.
Step 1. On your iPhone Photo app, open the Live Photo that you want to save as GIF.
Step 2. Darg the selected photo upwards and will see multiple effects options along with other image details.
Step 3 To save the selected image as GIF, choose Loop or Bounce animation. Once done, share the image on mail and other services listed or save it to the device.
Part 3 How to save Live Photo as video on iPhone
You can also convert your live photos to videos and then use them for making GIFs and for other uses. The steps for iPhone live photo to video are as follows.
Step 1. On your iPhone, open the Photos app and choose the Live Photo that you want to convert.
Step 2. Next, click on the share button at the bottom of the screen and multiple options will be seen.
Step 3. Scroll down and choose Save as Video option and with this, the live photo will be saved as a Video.
Additionally, you can also convert the LivePhotos to videos using the shortcut app.
Part 4 How to save videos as live photos on your iPhone?
If you need to convert your videos to live photos on iPhone, there are several third-party tools available and one of the widely used is IntoLive. Using this app, videos, as well as GIFs, can be converted into live photos.
Steps on how to turn a video into a live photo iPhone
Step 1. Download, install and launch the IntoLive app from the app store.
Step 2. Next, browse and add the desired video.
Step 3. If needed, the added video can be customized using several supported features.
Step 4. Next, click on the Make option at the top-right corner and then choose the repeats you want for a Live Photo.
Step 5. Finally, click on the Live Photo and your Live Photo will be saved to the device.
Part 5 Best tool for creating GIFs and video editing on your Windows and Mac- Wondershare Filmora
Above we have listed several ways to create GIFs on your iPhone and also to convert videos to LivePhotos and vice-versa. Installing different tools for different tasks is a hassle and also a time-consuming task. So, if you are looking for an all-in-one tool that allows you to create GIFs, and professionally edit your media files, Wondershare Filmora Video Editor is the best tool to consider. Available for quick download on your Windows and Mac system, this feature-packed software has an intuitive and user-friendly interface.
Wondershare Filmora
Get started easily with Filmora’s powerful performance, intuitive interface, and countless effects!
Try It Free Try It Free Try It Free Learn More >
Media files in all key formats are supported by the tool and there are multiple options for editing and video creation like splitting, rotating, cutting, adding effects, sounds, text, and other elements. In a few simple steps, your customized GIF and other professional-looking media files will be ready.
Steps to create GIF using Wondershare Filmora
Step 1. Launch the installed software on your system and add the video or images from the system.
Step 2. The added media files next need to be dragged and dropped to the timeline at the bottom of the interface.
Step 3. After the files are moved, you can customize them using several editing tools like rotate, crop, cut, and more.
Step 4. Next, add text, effects, sound, and other elements as needed.
Step 5. Finally choose to export the file and then from the Local tab, select the GIF option. Choose a file name and location and then finally click on the EXPORT button.
● Key Takeaways from This Episode →
●There are several ways to turn video into GIF iPhone.
●Using shortcuts is one of the most straightforward methods for creating GIFs using videos.
●You can also convert videos to LivePhoto and vice versa on your iPhone using third-party apps.
●Wondershare Filmora is an excellent software to make GIFs and professionally edit media files.
Easy Cartoon Characters Drawing Tutorials for You Who Are Learning to Draw
Easy Cartoon Characters Drawing Tutorials for You Who Are Learning to Draw
An easy yet powerful editor
Numerous effects to choose from
Detailed tutorials provided by the official channel
Learning the art of cartoon characters drawing? We can help! Cartoon characters drawing is no rocket science, ABCD: Anybody Can Draw!

We are as excited as you as we bring to you a few of the best drawing tutorials!
In this article
01 [Double Your Results with Learning Cartoon Drawing Styles First](#Part 1)
02 [Best 6 Cartoon Characters Anyone Can Draw (with Free Video Tutorials)](#Part 2)
03 [Easy Cartoon Characters to Draw Step by Step](#Part 3)
Part 1 Double Your Results with Learning Cartoon Drawing Styles First
01 Cartoon Character Sketches
Sketching is one of the most popular art forms. Sketching can be done for real-life people or celebrities or we can also make sketches of imaginary characters and cartoons. Sketching is generally made of pencil and does not involve the usage of colors.

02 Cartoon Characters Drawing with Color
Cartoon characters can be made with color to make them more attractive. This is another popular form of art that cartoonists follow. You can explore several methods of coloring and try making your cartoon colorful.

03 Disney Cartoon Characters Drawing
Disney cartoon character drawing is probably one of the simplest. This is because they have a predefined size and are mostly symmetric. Disney cartoon characters generally use common geometric shapes such as circles, ovals, and squares. Hence making it a beginner-friendly choice!

Part 2 Best 6 Cartoon Characters Anyone Can Draw (with Free Video Tutorials)
01 Roger the alien
Roger the alien is one of the simplest cartoon characters to draw. This children’s classic cartoon character always intrigues children due to its bizarre shape. It fixes the image of an outer space characters in a child’s mind(If they exist).
What makes it easy to draw?
● The oval-shaped head is easy to draw since it is not very detailed.
● The character does not have any hair, hair is one of the more difficult parts to draw.
● The body features aren’t very prominent, hence making the character easy to draw.
Challenges you may encounter
● If you are a first-timer, then you may find it challenging to draw fingers and the toes.
● Getting the weird alien head shape might be a little difficult and may take you a few attempts.
● Making the two eyes exactly similar to each other may be challenging for a few of you.
02 Wakko Warner
What makes it easy to draw?
● The character generally has geometrical shapes and hence you can use shape tracers to draw a few parts.
● The appealing appearance of the character makes it interesting to draw.
● The eyes are not very difficult to recreate.
Challenges you may encounter
● The eyes are not very difficult to recreate.
● The shape of the mouth and the tongue that is sticking out is slightly complex.
● Perfecting the shape of the hair is a little challenging.
03 Cosmo
What makes it easy to draw?
● We recommend you to try this character out mainly because of its uniqueness.
● The eyes are not very complicated to draw.
● The body resembles a stick image and is hence simple to draw.
Challenges you may encounter
● The shape of the crown needs to be perfect, especially because of the tilt the crown has.
● The fingers are challenging to draw.
● The hair has a distinct shape, this shape needs to come out perfectly.
04 Courage the cowardly dog
What makes it easy to draw?
● Firstly, it’s one of the most favorite cartoons, hence it will ensure to keep you interested in the drawing.
● The hands and legs resemble stick figures and are simple to draw.
● The body structure is simple.
Challenges you may encounter
● Drawing a cartoon animal instead of a human being might be intriguing for beginners.
● The large eyes, which is one of the characteristic features needs to be perfect.
● The design of the ears is the trickiest part and could be difficult to draw.
05 Tom And Jerry
When we think of cartoons, the first few names that probably come to our mind are tom and jerry. This duo of a grumpy cat and a mysterious mouse has left an everlasting impact on the world of cartoons. The duo is famous throughout the world and is loved throughout age groups
Why do we recommend you to try your hands on this?
● This is a classic cartoon that almost everyone loves.
● There are several resources on the internet to help you draw the cartoon characters.
● The characters need not be perfect, even a close resemblance to them would be sufficient for the viewers to identify them due to their fame.
Challenges you may encounter
● You need to be careful with the proportion of sizes of tom and jerry.
● The structures of tom and jerry are not very simple to draw.
● Perfecting the grumpy expression on tom’s face and a frightened expression on jerry’s face is challenging.
05 Catdog
Catdog is another very interesting character. Who’d have imagined a cat and a dog morphed in a single body? Well, imagination has no end to it as they say! Catdog is a yellow cat and dog in a single body, it looks cute and at the same time intriguing.
Why do we recommend you try your hands on this?
● The cartoon character is mainly composed of geometrical shapes.
● The character is vividly colorful.
● The bright yellow color is super attractive and hence makes drawing catdog very fun.
Challenges you may encounter
● The character is illusional, you might have difficulty while deciding how to even look at it.
● The cat and dog faces are not very different from each other and have minute differences while drawing you need to be careful about having a distinct difference between the two faces.
Now that we’ve taken our baby steps towards understanding the art of drawing cartoons.
Key Takeaways from This Episode
● That’s a lot of knowledge for today, isn’t it? Today we’ve seen the basics of drawing cartoon characters.
● We also got our hands dirty by exploring a few easy cartoon characters that you could draw.
● Further, we saw the basic steps that you would need to take in order to draw the face of any cartoon character! All in all, we learned everything we needed to know to draw our first cartoon! What are you waiting for? Go try out drawing your first cartoon today!
Learning the art of cartoon characters drawing? We can help! Cartoon characters drawing is no rocket science, ABCD: Anybody Can Draw!
We are as excited as you as we bring to you a few of the best drawing tutorials!
In this article
01 [Double Your Results with Learning Cartoon Drawing Styles First](#Part 1)
02 [Best 6 Cartoon Characters Anyone Can Draw (with Free Video Tutorials)](#Part 2)
03 [Easy Cartoon Characters to Draw Step by Step](#Part 3)
Part 1 Double Your Results with Learning Cartoon Drawing Styles First
01 Cartoon Character Sketches
Sketching is one of the most popular art forms. Sketching can be done for real-life people or celebrities or we can also make sketches of imaginary characters and cartoons. Sketching is generally made of pencil and does not involve the usage of colors.
02 Cartoon Characters Drawing with Color
Cartoon characters can be made with color to make them more attractive. This is another popular form of art that cartoonists follow. You can explore several methods of coloring and try making your cartoon colorful.
03 Disney Cartoon Characters Drawing
Disney cartoon character drawing is probably one of the simplest. This is because they have a predefined size and are mostly symmetric. Disney cartoon characters generally use common geometric shapes such as circles, ovals, and squares. Hence making it a beginner-friendly choice!
Part 2 Best 6 Cartoon Characters Anyone Can Draw (with Free Video Tutorials)
01 Roger the alien
Roger the alien is one of the simplest cartoon characters to draw. This children’s classic cartoon character always intrigues children due to its bizarre shape. It fixes the image of an outer space characters in a child’s mind(If they exist).
What makes it easy to draw?
● The oval-shaped head is easy to draw since it is not very detailed.
● The character does not have any hair, hair is one of the more difficult parts to draw.
● The body features aren’t very prominent, hence making the character easy to draw.
Challenges you may encounter
● If you are a first-timer, then you may find it challenging to draw fingers and the toes.
● Getting the weird alien head shape might be a little difficult and may take you a few attempts.
● Making the two eyes exactly similar to each other may be challenging for a few of you.
02 Wakko Warner
What makes it easy to draw?
● The character generally has geometrical shapes and hence you can use shape tracers to draw a few parts.
● The appealing appearance of the character makes it interesting to draw.
● The eyes are not very difficult to recreate.
Challenges you may encounter
● The eyes are not very difficult to recreate.
● The shape of the mouth and the tongue that is sticking out is slightly complex.
● Perfecting the shape of the hair is a little challenging.
03 Cosmo
What makes it easy to draw?
● We recommend you to try this character out mainly because of its uniqueness.
● The eyes are not very complicated to draw.
● The body resembles a stick image and is hence simple to draw.
Challenges you may encounter
● The shape of the crown needs to be perfect, especially because of the tilt the crown has.
● The fingers are challenging to draw.
● The hair has a distinct shape, this shape needs to come out perfectly.
04 Courage the cowardly dog
What makes it easy to draw?
● Firstly, it’s one of the most favorite cartoons, hence it will ensure to keep you interested in the drawing.
● The hands and legs resemble stick figures and are simple to draw.
● The body structure is simple.
Challenges you may encounter
● Drawing a cartoon animal instead of a human being might be intriguing for beginners.
● The large eyes, which is one of the characteristic features needs to be perfect.
● The design of the ears is the trickiest part and could be difficult to draw.
05 Tom And Jerry
When we think of cartoons, the first few names that probably come to our mind are tom and jerry. This duo of a grumpy cat and a mysterious mouse has left an everlasting impact on the world of cartoons. The duo is famous throughout the world and is loved throughout age groups
Why do we recommend you to try your hands on this?
● This is a classic cartoon that almost everyone loves.
● There are several resources on the internet to help you draw the cartoon characters.
● The characters need not be perfect, even a close resemblance to them would be sufficient for the viewers to identify them due to their fame.
Challenges you may encounter
● You need to be careful with the proportion of sizes of tom and jerry.
● The structures of tom and jerry are not very simple to draw.
● Perfecting the grumpy expression on tom’s face and a frightened expression on jerry’s face is challenging.
05 Catdog
Catdog is another very interesting character. Who’d have imagined a cat and a dog morphed in a single body? Well, imagination has no end to it as they say! Catdog is a yellow cat and dog in a single body, it looks cute and at the same time intriguing.
Why do we recommend you try your hands on this?
● The cartoon character is mainly composed of geometrical shapes.
● The character is vividly colorful.
● The bright yellow color is super attractive and hence makes drawing catdog very fun.
Challenges you may encounter
● The character is illusional, you might have difficulty while deciding how to even look at it.
● The cat and dog faces are not very different from each other and have minute differences while drawing you need to be careful about having a distinct difference between the two faces.
Now that we’ve taken our baby steps towards understanding the art of drawing cartoons.
Key Takeaways from This Episode
● That’s a lot of knowledge for today, isn’t it? Today we’ve seen the basics of drawing cartoon characters.
● We also got our hands dirty by exploring a few easy cartoon characters that you could draw.
● Further, we saw the basic steps that you would need to take in order to draw the face of any cartoon character! All in all, we learned everything we needed to know to draw our first cartoon! What are you waiting for? Go try out drawing your first cartoon today!
Epic Formula to Animate Photos From These 10 Animate Pictures App
Epic Formula to Animate Photos from These 10 Animate Pictures App
An easy yet powerful editor
Numerous effects to choose from
Detailed tutorials provided by the official channel
With the availability of modern technology, still photos can be seamlessly transformed into live animated photos. Adding motion and movement along with filter effects to still photos is pretty easy with an animated pictures app.
For Win 7 or later (64-bit)
For macOS 10.12 or later
In this article, we have listed 10 of the best animated picture apps available in 2021. You will find all essential details and features of these 10 apps which will help you choose the best option when choosing an app for animating a picture. Let us take a look at these 10 apps!
In this article
01 [10 Animate Pictures Apps](#Part 1)
02 [The contrast of These 10 Animate Pictures Apps](#Part 2)
Part 1 10 Animate Pictures Apps
01 MotionLeap

MotionLeap
● Price
Free, with premium version available.
● OS
Android and iOS
● Key features
You can freeze parts of an image.
Variety of filters can be applied.
Although MotionLeap is free to use there’s a Pro and subscription version with a greater variety of features in it. The best part about this animated pictures app is that it does not put any watermark over the final image.
The app can animate still photos and convert them into short, loop videos. This is done by the programming of the directional cues into the image which is executed by dragging actions of the thumb across your mobile screen.
Although, on MotionLeap, without the pro version, the photo will be saved in video format.
02 GIPHY

GIPHY
● Price
Free
● OS
Android and iOS
● Key features
Simple, easy to use UI
A variety of built-in animation tools
Sticker maker on iOS (for iPhone X and later models)
We might already be acquainted with GIPHY as the most popular search engine for GIFs. Although, what’s unknown is that GIPHY has a mobile app both for Android and iOS which can be used to create GIFs and animate photos.
The app’s key advantage is its highly intuitive and very easy to use interface that makes it really easy to animate photos with the GIPHY app. Above all, it is completely free to use and along with animating pictures, you can also add captions to your animated photos or even capture short videos.
03 Movepic

Movepic
● Price
Free, with premium version available.
● OS
Android and iOS
● Key features
Easy to use.
A range of built in overlays and filters.
Movepic is another excellent app for animating pictures. As an animated pictures app, it is quite similar to MotionLeap owing to the fact that it animates still photos.
A downside of the Movepic free version is that it puts a watermark on the image and you cannot remove it without upgrading to the premium version or VIP account. The app saves the final images as a movie file and not as a GIF.
04 ImgPlay

ImgPlay
● Price
Free, with premium version available.
● OS
Android and iOS
● Key features
Easy to use.
Lay out still photographs side-by-side and use burst photos or videos.
ImgPlay is another very popular and effective animated pictures app. The app makes use of a range of ready-to-use animated photos for the web.
ImgPlay also comes with a range of advanced and easy-to-understand controls. This app, in spite of all its perks, puts a watermark on the image—which, once again, cannot be removed unless you buy the premium version of the app.
05 StoryZ

StoryZ
● Price
Free, with premium version available.
● OS
Android and iOS
● Key features
Programmed movement paths, overlays and color filters.
Saves images automatically as GIFs.
StoryZ is one of the best apps on this list and anyone who has used the app would agree with that. The app can seamlessly animate still photos.
A great thing about this app is that StoryZ enables users to remove the watermark from the image by simply watching a quick ad before saving the file.
06 VIMAGE 3D

VIMAGE 3D
● Price
Free, with premium version available.
● OS
Android and iOS
● Key features
AI enabled.
A range of filters and special effects.
Add sounds to your animated images and videos.
This one is an award winning app for animating pictures and the app won a Google Play award in 2018. The app is simply exceptional in terms of user experience as well as features.
Like most of these apps, you do need to pay to remove the watermark, get access to the full effects library, and the ability to export your images in up to 2560p resolution.
07 Photo Bender

Photo Bender
● Price
Free
● OS
Android
● Key features
A variety of editing tools and features including brushes.
Enables users to export images as MP4s, GIFs, JPEGs, and PNGs.
Photo Bender is an animated pictures app that is specific to the Android platform. The app is popular for its convenience of use and it enables users to digitally warp images and animate photos.
There are a variety of things that can be done to an image with the help of this app. From colouring an image, to bending it, stretching it, and a lot more, you can do it all. You also get a range of brushes to use on the image.
08 Zoetropic

Zoetropic
● Price
Free, with premium version available.
● OS
Android and iOS
● Key features
The app is really fast and efficient.
Simple UI.
Zoetropic helps you animate images in minutes,even if you are using the app for the first time. The app does not come with a lot of features but its simplicity, effectiveness and ease of use makes it a great option for animated pictures app.
09 Lumyer

Lumyer
● Price
Free, with premium version available.
● OS
Android and iOS
● Key features
Seasonal and occasional animation effects.
Easy to use.
This app is another great platform to edit pictures and animate them. It enables you to add a variety of effects to pictures and easily animate them.
From subtle weather effects to sparkle, seasonal animations and a lot more, the app offers a lot of options.
Part 2: The contrast of These 10 Animate Pictures Apps
| Name of The Animated Picture App | Advantages | Disadvantages |
|---|---|---|
| MotionLeap | No watermark+Variety of filters; | File saved in video format without pro version |
| GIPHY | Free to use+Simple UI | Not suitable for advanced editing |
| Movepic | Built-in overlays and filters | Saves final image as video file without pro version Watermark |
| ImgPlay | Easy to use and understand+Ready to go animated photos for the web | Watermark on image |
| StoryZ | Remove watermark by watching an ad+Variety of animation techniques | Boring interface |
| VIMAGE 3D | Neat UI+Endless features+AI enabled | Need to buy premium version to access majority of features |
| Photo Bender | A range of tasks can be executed | Not a very attractive UI |
| Zoetropic | Simple, effective and easy to use | Limited effects on free version |
| Lumyer | Fast and easy to use+Lot of features | Can be expensive due to several in-app purchases |
| Filmora | Easy to Use+fordable+ons of features+Seamless UI+rofessional video editing tools | Not available on mobile |
Key Takeaways from This Episode
● That brings us to the end of the article. Anyone looking for an animated pictures app to animate their images have found 10 of the best apps available in the market right now.
● With the list of these 10 apps, anyone can find the most suitable platform for their own purposes of animating an image.
● Last but not the least, if it comes to an all inclusive platform for video editing and animating pictures, Filmora Pro is definitely the winner on this list! So check out your options and make the best choice!
With the availability of modern technology, still photos can be seamlessly transformed into live animated photos. Adding motion and movement along with filter effects to still photos is pretty easy with an animated pictures app.
For Win 7 or later (64-bit)
For macOS 10.12 or later
In this article, we have listed 10 of the best animated picture apps available in 2021. You will find all essential details and features of these 10 apps which will help you choose the best option when choosing an app for animating a picture. Let us take a look at these 10 apps!
In this article
01 [10 Animate Pictures Apps](#Part 1)
02 [The contrast of These 10 Animate Pictures Apps](#Part 2)
Part 1 10 Animate Pictures Apps
01 MotionLeap
MotionLeap
● Price
Free, with premium version available.
● OS
Android and iOS
● Key features
You can freeze parts of an image.
Variety of filters can be applied.
Although MotionLeap is free to use there’s a Pro and subscription version with a greater variety of features in it. The best part about this animated pictures app is that it does not put any watermark over the final image.
The app can animate still photos and convert them into short, loop videos. This is done by the programming of the directional cues into the image which is executed by dragging actions of the thumb across your mobile screen.
Although, on MotionLeap, without the pro version, the photo will be saved in video format.
02 GIPHY
GIPHY
● Price
Free
● OS
Android and iOS
● Key features
Simple, easy to use UI
A variety of built-in animation tools
Sticker maker on iOS (for iPhone X and later models)
We might already be acquainted with GIPHY as the most popular search engine for GIFs. Although, what’s unknown is that GIPHY has a mobile app both for Android and iOS which can be used to create GIFs and animate photos.
The app’s key advantage is its highly intuitive and very easy to use interface that makes it really easy to animate photos with the GIPHY app. Above all, it is completely free to use and along with animating pictures, you can also add captions to your animated photos or even capture short videos.
03 Movepic
Movepic
● Price
Free, with premium version available.
● OS
Android and iOS
● Key features
Easy to use.
A range of built in overlays and filters.
Movepic is another excellent app for animating pictures. As an animated pictures app, it is quite similar to MotionLeap owing to the fact that it animates still photos.
A downside of the Movepic free version is that it puts a watermark on the image and you cannot remove it without upgrading to the premium version or VIP account. The app saves the final images as a movie file and not as a GIF.
04 ImgPlay
ImgPlay
● Price
Free, with premium version available.
● OS
Android and iOS
● Key features
Easy to use.
Lay out still photographs side-by-side and use burst photos or videos.
ImgPlay is another very popular and effective animated pictures app. The app makes use of a range of ready-to-use animated photos for the web.
ImgPlay also comes with a range of advanced and easy-to-understand controls. This app, in spite of all its perks, puts a watermark on the image—which, once again, cannot be removed unless you buy the premium version of the app.
05 StoryZ
StoryZ
● Price
Free, with premium version available.
● OS
Android and iOS
● Key features
Programmed movement paths, overlays and color filters.
Saves images automatically as GIFs.
StoryZ is one of the best apps on this list and anyone who has used the app would agree with that. The app can seamlessly animate still photos.
A great thing about this app is that StoryZ enables users to remove the watermark from the image by simply watching a quick ad before saving the file.
06 VIMAGE 3D
VIMAGE 3D
● Price
Free, with premium version available.
● OS
Android and iOS
● Key features
AI enabled.
A range of filters and special effects.
Add sounds to your animated images and videos.
This one is an award winning app for animating pictures and the app won a Google Play award in 2018. The app is simply exceptional in terms of user experience as well as features.
Like most of these apps, you do need to pay to remove the watermark, get access to the full effects library, and the ability to export your images in up to 2560p resolution.
07 Photo Bender
Photo Bender
● Price
Free
● OS
Android
● Key features
A variety of editing tools and features including brushes.
Enables users to export images as MP4s, GIFs, JPEGs, and PNGs.
Photo Bender is an animated pictures app that is specific to the Android platform. The app is popular for its convenience of use and it enables users to digitally warp images and animate photos.
There are a variety of things that can be done to an image with the help of this app. From colouring an image, to bending it, stretching it, and a lot more, you can do it all. You also get a range of brushes to use on the image.
08 Zoetropic
Zoetropic
● Price
Free, with premium version available.
● OS
Android and iOS
● Key features
The app is really fast and efficient.
Simple UI.
Zoetropic helps you animate images in minutes,even if you are using the app for the first time. The app does not come with a lot of features but its simplicity, effectiveness and ease of use makes it a great option for animated pictures app.
09 Lumyer
Lumyer
● Price
Free, with premium version available.
● OS
Android and iOS
● Key features
Seasonal and occasional animation effects.
Easy to use.
This app is another great platform to edit pictures and animate them. It enables you to add a variety of effects to pictures and easily animate them.
From subtle weather effects to sparkle, seasonal animations and a lot more, the app offers a lot of options.
Part 2: The contrast of These 10 Animate Pictures Apps
| Name of The Animated Picture App | Advantages | Disadvantages |
|---|---|---|
| MotionLeap | No watermark+Variety of filters; | File saved in video format without pro version |
| GIPHY | Free to use+Simple UI | Not suitable for advanced editing |
| Movepic | Built-in overlays and filters | Saves final image as video file without pro version Watermark |
| ImgPlay | Easy to use and understand+Ready to go animated photos for the web | Watermark on image |
| StoryZ | Remove watermark by watching an ad+Variety of animation techniques | Boring interface |
| VIMAGE 3D | Neat UI+Endless features+AI enabled | Need to buy premium version to access majority of features |
| Photo Bender | A range of tasks can be executed | Not a very attractive UI |
| Zoetropic | Simple, effective and easy to use | Limited effects on free version |
| Lumyer | Fast and easy to use+Lot of features | Can be expensive due to several in-app purchases |
| Filmora | Easy to Use+fordable+ons of features+Seamless UI+rofessional video editing tools | Not available on mobile |
Key Takeaways from This Episode
● That brings us to the end of the article. Anyone looking for an animated pictures app to animate their images have found 10 of the best apps available in the market right now.
● With the list of these 10 apps, anyone can find the most suitable platform for their own purposes of animating an image.
● Last but not the least, if it comes to an all inclusive platform for video editing and animating pictures, Filmora Pro is definitely the winner on this list! So check out your options and make the best choice!
A Beginners Guide for Learning 3D Animation
A Beginners Guide for Learning 3D Animation
An easy yet powerful editor
Numerous effects to choose from
Detailed tutorials provided by the official channel
“I am still finding it difficult to go into animation even after covering some basic concepts of animation, hardware, software, books, and courses. Is there a way I can learn 3D animation and graphic design courses quickly and easily?”
This guide will show you what professional 3D animators go through and share how you can start your animation career. Sit back and enjoy this all-encompassing and educating guide to learn 3D Animation for beginners!
In this article
01 [Should You Study 3D Animation?](#Part 1)
02 [Top 5 Programs for 3D Animation](#Part 2)
03 [The Best 10 Online Courses to Learn 3D Animation for Beginners](#Part 3)
04 [Recommended 3D Animation Learning Books and Resources](#Part 4)
Part 1 Should You Study 3D Animation?
3D animation is a graphic design technique that uses motions to bring props, characters, objects, etc., to life. For a long time, 3D animation has created TV shows, films, and games, but now it is widely used to create materials for businesses that help them advertise their services and products. The most common usage of 3D animation is creating three-dimensional moving objects and placing them in a digital environment. There is software used to generate these objects specifically for 3D animation with 3D animation courses online for free to learn how to use such software. This software helps 3D animators to create the illusion of movement needed to bring these objects to life.
As the popularity of 3D animation begins to grow, its usage also increases. 3D animation can be useful for the following:
● Many businesses use 3D animation for presentation and more examples and graphics.
● 3D animation is used in real estate as many apartment complexes use it to create interior and exterior renders for their properties. 3D animation allows renters or buyers to view the property without visiting it.
● 3D animation can also be valuable in the medical industry to create exciting graphics for presentation.
You can divide the process of 3D animation into three primary phases:
● Modeling: The modeling stage is how characters or objects get created. This stage can include scanning natural objects into a computer or using a modeling tool. Both methods are helpful and outstanding. When you scan real-world objects into your computer, it saves a lot of time; creating a model entirely by yourself using a tool will give you control over the entire look. Irrespective of the methods used, textures must be added to the character or objects before moving to the next stage.
● Animation and layout: At this stage, the created models are animated and positioned into a particular scene, first determining a layout by creating a set and adding objects into it. The characters and things must be animated by assigning animation variables, and then models within the scene can be given life through motion capture and keyframing.
● Rendering: This stage is where the scene generates into the finished image by using a specific software as the process of rendering cannot be handled by a typical computer
For learning 3D animation, practice, to make yourself perfect for getting your 3D animation as smooth and precise as you would like it to take some time. If your set goal is to create 3D characters, you first need to know how to recreate people in a digital form. According to the 3D animation forum, it takes at least eight months to learn how to animate if only you spend about three to four hours every day. It takes firm dedication to learn 3D animation and graphic design courses.
Part 2 Top 5 Programs for 3D Animation
Aside from the three basic phases involved in 3D animation, there are other individual steps that and needed in 3D animation and 3D animation graphic design courses which include:
● Step 1: creating the story and conceptualizing
● Step 2: making the 3D models
● Step 3: rigging, texturing, and animation
● Step 4: setting up the cameras and lightning
● Step 5: rendering
● Step 6: applying special effects and compositing
● Step 7: editing, music, and Foley
● Step 8: the final output
The best part of 3D animation is finding free animation programs without watermarks that are very useful for creating content on Windows and Mac. These best 3D animation courses include:
01Filmora
For Win 7 or later (64-bit)
For macOS 10.12 or later
Wondershare Filmora Video Editor is a straightforward and powerful animation software to create 3D animated text, shapes, elements, or transitions you want for your videos with its 800+ stunning effects. This software comes with a keyframing, green screen, video stabilization, color tuning, split and zoom, amongst others, that help you create precise and smooth animation effects. Filmora program works perfectly on your Windows and Mac computer.
02Blender
Blender is an open-source, powerful 3D animation software for professional users. This animation software does not easily make an image and mission since it focuses on 3D. It takes your animation projects to a whole new level as this program works perfectly on your Mac computer.
03DAZ Studio
DAZ Studio is a potent and completely free tool for 3D animation creation that lets you create short videos whether you are using this for pleasure or business. This 3D animation creator is complicated to use, and 3D effects are at the core focus of this software. This software is highly compatible with Windows 64 bit, and you can build a model, render, and pose animation within the skin texture level.
04Terragen

Terragen is a completely free 3D animation program for Windows tablets and computers. It allows you to create a photo-realistic CG environment and 3D animation that you want. The featured image gallery on this software homepage will give you a profound idea of the outcome when you use the program.
05Anim8or
Anim8or Easy free 3D animation program supports 3D modeler and Truetype fonts to meet your advanced needs. This program is difficult for beginners but allows you to create a unique work according to your needs.
Part 3 The Best 10 Online Courses to Learn 3D Animation for Beginners
There are online 3D animation courses for beginners to learn from and these courses include:
01Introduction to Voxel Art for Character Design by Zach Soares
Price: $12.99
Certificate: Available upon completion of the course
02Psychedelic Animation with Photoshop and After Effects by Klarens Malluta
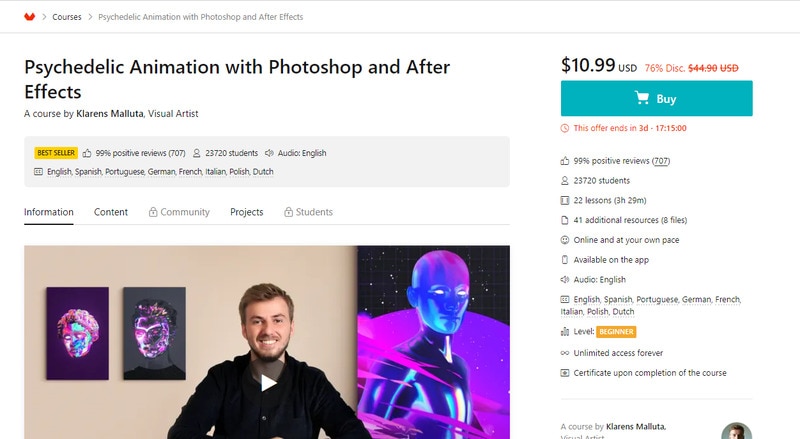
Price: $10.99
Certificate: Available upon completion of the course
032D and 3D Animation with After Effects and Cinema 4D by Andrea Gendusa
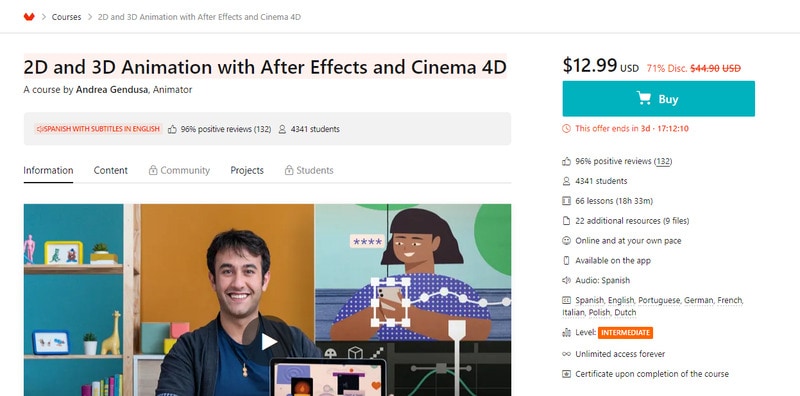
Price: $12.99
Certificate: Available upon completion of the course
04Blender for Beginners by Carlos Sifuentes Haro
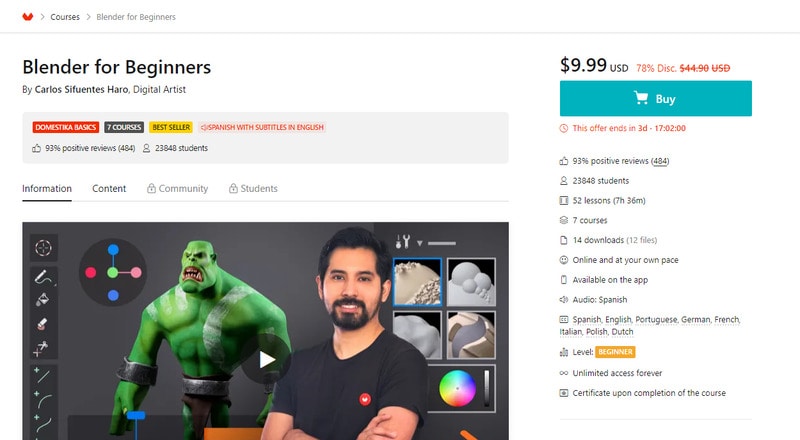
Price: $9.99
Certificate: Available upon completion of the course
05Adobe After Effects for Beginners by Manuel Neto
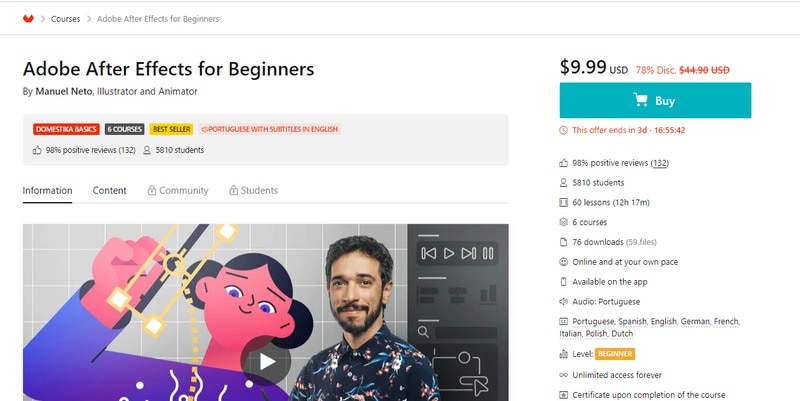
Price: $9.99
Certificate: Available upon completion of the course
06Animation for Typographic Compositions by Holke 79
Price: $12.99
Certificate: Available upon completion of the course
07Adobe After Effects for Character Animation By Facundo López
Price: $9.99
Certificate: Available upon completion of the course
08Animation Techniques with 3D Effects in After Effects by Moncho Massé
Price: $10.99
Certificate: Available upon completion of the course
093D Typography: Playing with Color and Volume by Thomas Burden
Price: $12.99
Certificate: Available upon completion of the course
103D Animation for Non Animators with Cinema 4D by Zigor Samaniego

Price: $11.99
Certificate: Certificate upon completion of the course
Part 4 Part 4 Recommended 3D Animation Learning Books and Resources
Learn 3D animation with the best 3D animation courses, learning books, and resources. Books and Resources for learning 3D animation include but are not limited to:
● 3D Animation Essentials by Andy Beane
3D Animation Essentials by Andy Beane is a comprehensive book on the fundamentals and principles of 3D animation for films and video games.
● 3D Art Essential by Ami Chopine
3D Art Essential by Ami Chopine is all about the hows and whys of 3D animation and teachers why certain techniques and styles work for a particular project.
● Key Takeaways from This Episode →
● Understanding 3D Animation
● Top 5 Programs used for learning 3D Animation
● The Best 10 Online 3D Animation Courses for Beginners
● 3D Animation Graphic Design Courses, Learning Books and Resources
“I am still finding it difficult to go into animation even after covering some basic concepts of animation, hardware, software, books, and courses. Is there a way I can learn 3D animation and graphic design courses quickly and easily?”
This guide will show you what professional 3D animators go through and share how you can start your animation career. Sit back and enjoy this all-encompassing and educating guide to learn 3D Animation for beginners!
In this article
01 [Should You Study 3D Animation?](#Part 1)
02 [Top 5 Programs for 3D Animation](#Part 2)
03 [The Best 10 Online Courses to Learn 3D Animation for Beginners](#Part 3)
04 [Recommended 3D Animation Learning Books and Resources](#Part 4)
Part 1 Should You Study 3D Animation?
3D animation is a graphic design technique that uses motions to bring props, characters, objects, etc., to life. For a long time, 3D animation has created TV shows, films, and games, but now it is widely used to create materials for businesses that help them advertise their services and products. The most common usage of 3D animation is creating three-dimensional moving objects and placing them in a digital environment. There is software used to generate these objects specifically for 3D animation with 3D animation courses online for free to learn how to use such software. This software helps 3D animators to create the illusion of movement needed to bring these objects to life.
As the popularity of 3D animation begins to grow, its usage also increases. 3D animation can be useful for the following:
● Many businesses use 3D animation for presentation and more examples and graphics.
● 3D animation is used in real estate as many apartment complexes use it to create interior and exterior renders for their properties. 3D animation allows renters or buyers to view the property without visiting it.
● 3D animation can also be valuable in the medical industry to create exciting graphics for presentation.
You can divide the process of 3D animation into three primary phases:
● Modeling: The modeling stage is how characters or objects get created. This stage can include scanning natural objects into a computer or using a modeling tool. Both methods are helpful and outstanding. When you scan real-world objects into your computer, it saves a lot of time; creating a model entirely by yourself using a tool will give you control over the entire look. Irrespective of the methods used, textures must be added to the character or objects before moving to the next stage.
● Animation and layout: At this stage, the created models are animated and positioned into a particular scene, first determining a layout by creating a set and adding objects into it. The characters and things must be animated by assigning animation variables, and then models within the scene can be given life through motion capture and keyframing.
● Rendering: This stage is where the scene generates into the finished image by using a specific software as the process of rendering cannot be handled by a typical computer
For learning 3D animation, practice, to make yourself perfect for getting your 3D animation as smooth and precise as you would like it to take some time. If your set goal is to create 3D characters, you first need to know how to recreate people in a digital form. According to the 3D animation forum, it takes at least eight months to learn how to animate if only you spend about three to four hours every day. It takes firm dedication to learn 3D animation and graphic design courses.
Part 2 Top 5 Programs for 3D Animation
Aside from the three basic phases involved in 3D animation, there are other individual steps that and needed in 3D animation and 3D animation graphic design courses which include:
● Step 1: creating the story and conceptualizing
● Step 2: making the 3D models
● Step 3: rigging, texturing, and animation
● Step 4: setting up the cameras and lightning
● Step 5: rendering
● Step 6: applying special effects and compositing
● Step 7: editing, music, and Foley
● Step 8: the final output
The best part of 3D animation is finding free animation programs without watermarks that are very useful for creating content on Windows and Mac. These best 3D animation courses include:
01Filmora
For Win 7 or later (64-bit)
For macOS 10.12 or later
Wondershare Filmora Video Editor is a straightforward and powerful animation software to create 3D animated text, shapes, elements, or transitions you want for your videos with its 800+ stunning effects. This software comes with a keyframing, green screen, video stabilization, color tuning, split and zoom, amongst others, that help you create precise and smooth animation effects. Filmora program works perfectly on your Windows and Mac computer.
02Blender
Blender is an open-source, powerful 3D animation software for professional users. This animation software does not easily make an image and mission since it focuses on 3D. It takes your animation projects to a whole new level as this program works perfectly on your Mac computer.
03DAZ Studio
DAZ Studio is a potent and completely free tool for 3D animation creation that lets you create short videos whether you are using this for pleasure or business. This 3D animation creator is complicated to use, and 3D effects are at the core focus of this software. This software is highly compatible with Windows 64 bit, and you can build a model, render, and pose animation within the skin texture level.
04Terragen
Terragen is a completely free 3D animation program for Windows tablets and computers. It allows you to create a photo-realistic CG environment and 3D animation that you want. The featured image gallery on this software homepage will give you a profound idea of the outcome when you use the program.
05Anim8or
Anim8or Easy free 3D animation program supports 3D modeler and Truetype fonts to meet your advanced needs. This program is difficult for beginners but allows you to create a unique work according to your needs.
Part 3 The Best 10 Online Courses to Learn 3D Animation for Beginners
There are online 3D animation courses for beginners to learn from and these courses include:
01Introduction to Voxel Art for Character Design by Zach Soares
Price: $12.99
Certificate: Available upon completion of the course
02Psychedelic Animation with Photoshop and After Effects by Klarens Malluta
Price: $10.99
Certificate: Available upon completion of the course
032D and 3D Animation with After Effects and Cinema 4D by Andrea Gendusa
Price: $12.99
Certificate: Available upon completion of the course
04Blender for Beginners by Carlos Sifuentes Haro
Price: $9.99
Certificate: Available upon completion of the course
05Adobe After Effects for Beginners by Manuel Neto
Price: $9.99
Certificate: Available upon completion of the course
06Animation for Typographic Compositions by Holke 79
Price: $12.99
Certificate: Available upon completion of the course
07Adobe After Effects for Character Animation By Facundo López
Price: $9.99
Certificate: Available upon completion of the course
08Animation Techniques with 3D Effects in After Effects by Moncho Massé
Price: $10.99
Certificate: Available upon completion of the course
093D Typography: Playing with Color and Volume by Thomas Burden
Price: $12.99
Certificate: Available upon completion of the course
103D Animation for Non Animators with Cinema 4D by Zigor Samaniego
Price: $11.99
Certificate: Certificate upon completion of the course
Part 4 Part 4 Recommended 3D Animation Learning Books and Resources
Learn 3D animation with the best 3D animation courses, learning books, and resources. Books and Resources for learning 3D animation include but are not limited to:
● 3D Animation Essentials by Andy Beane
3D Animation Essentials by Andy Beane is a comprehensive book on the fundamentals and principles of 3D animation for films and video games.
● 3D Art Essential by Ami Chopine
3D Art Essential by Ami Chopine is all about the hows and whys of 3D animation and teachers why certain techniques and styles work for a particular project.
● Key Takeaways from This Episode →
● Understanding 3D Animation
● Top 5 Programs used for learning 3D Animation
● The Best 10 Online 3D Animation Courses for Beginners
● 3D Animation Graphic Design Courses, Learning Books and Resources
15 Best Stop Motion Animation Kits to Fuel Creativity (2024 Guide)
15 Best Stop Motion Animation Kits to Fuel Creativity (2024 Guide)
An easy yet powerful editor
Numerous effects to choose from
Detailed tutorials provided by the official channel
Stop motion animation is becoming more famous by the year, and it’s not even a surprising thing. Creating animated films takes objects, either soft clay items or dolls with joints, and manipulates them.
If you wish to make this type of animation, then you want to find the best Stop Motion Animation Kits that you can find. Some options out there are even free. This article will share the eight best options for stop motion animation software, separating them by whether they are for Macs or PC.
In this article
01 [15 Best Stop Motion Animation Kits](#Part 1)
02 [How to Pick the Best Animation Kits for Kids?](#Part 2)
Part 1 15 Best Stop Motion Animation Kits
After introducing you to the concept of Stop Motion Animation Kits, we’ve gathered a list of the top Stop Motion Animation Kits that best suits the kids as follows:
01Hue Animation Studio
The Hue Animation Studio kit is unique because it can be helpful with any clay or toys you may have. The equipment is ideal for animations featuring anything from Playmobil toys, Lego, or even clay animations.
Features
● The kit includes the guidebook,
● It includes a HUE HD USB camera with a microphone.
● The kit Consists of a license of Stop Motion Animation software.
● There’s a mini stage with a green screen and background.
● The system requirements are Windows or Mac OS 10.5+.
Pros
● Less learning curve
● With an HD camera
● Easy to create time-lapse videos and special effects
Cons
● Old-fashioned interface
● Not ideal for beginners
● Requires a license to buy
02LEGO Make Your Own Movie Activity Kit
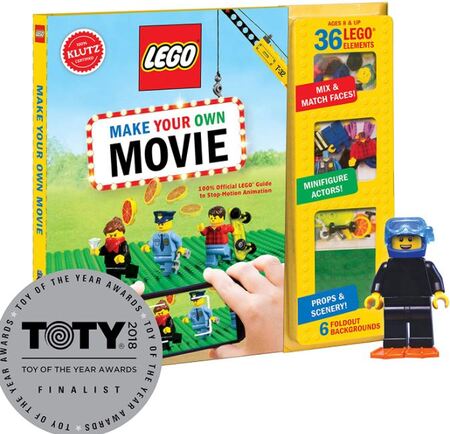
LEGO is one of the top players in the animation industry, and its Stop Motion Animation kit is phenomenal to the mark. The kit offers a complete guide to making your stop motion animations and includes several props and other goodies, as described in the Features below.
Features
● Includes an 8pages book to use while animating.
● It contains official LEGO props and Minifigures.
● You get punch-out animation frames.
● It involves foldout paper backgrounds.
● Best applicable to kids above eight years.
Pros
● Good for beginners
● Great accessories
● Informative book
Cons
● Only basics in the book
● Not all the accessories are there
● No app available
03I Can Animate It Studio
I Can Animate It Studio is another Stop Motion Animation kit by Kudlian. However, the kit looks a little offbeat since it doesn’t come with a guide. However, Kudlian offers instructions and guidelines online to simplify the tasks.
Features
● This animation kit includes a separate webcam for shooting.
● It has an onion skin feature for getting the best results at animation.
● Involves an element to edit with a green screen.
● It also helps create stop-frame animation by creating drawings.
● Compatible with both Windows and Mac OS.
Pros
● Available as App
● Interactive user interface
● Easy to create cute videos
Cons
● Difficult to use the animator pack
● Slow processing
● May need to pay for premium Features
04ZuAnimation Kit

Zuis among the best stop motion animation kits developed by HUE’s initial software. And, it’s the kit that is already usual with kids. So, it generally means that it will involve less learning curve comparatively. And, it has some tiny Features which may leave all other toys in the category.
Features
● A lifetime software with two perpetual licenses.
● Includes a green screen for keying background.
● It Consists of an animation handbook to offer you fantastic tips and advice.
● It contains a webcam with a metal base.
● You get a modeling clay to design characters and a mini set to hold them.
Pros
● Good pack of sound effects, artwork, and more
● Interactive interface
● With animation handbook
Cons
● Some defects with cameras, so check them earlier
● Lack of video signals
● Limited animation Features
05Stop Motion Explosion Animation Kit
The Stop Motion Explosion complete HD stop motion animation is another rival in the industry for the big competitors playing out. The kit also contains an inbuilt microphone to record your audio. And, there’s a precious 29pages book included to provide you a lot. Let’s see more of its Features below.
Features
● It comes with an HD camera and flexible stand with a microphone and manual zoom control.
● It contains a CD with animation software.
● The kit involves a quick start guide.
● It includes lots of free tutorials.
● It Consists of a 29pages book with in-depth information.
Pros
● Interactive user interface
● Contains guided information book
● Lots of free tutorials
Cons
● Lack of fast processing
● Need to use the app alongside book
● High learning curve
06EyeThink BusyBody Animation Toy
As the name also signifies, the kit is pretty different from other stop motion animation kits. It’s one of the coolest of its kind also occupied with the attention of Victorian children in the days gone by. The kit doesn’t include any camera. Instead, it works on the principle of ‘persistence of vision.’ Please scroll below to reveal more of its Features.
Features
● You will get a central snipping base with mirrors.
● It contains bendable figures for easy posing.
● It includes a complete hands-on stop motion animation kit without any complications.
● Includes instructions to give you detailed images on how to pose figures.
● Works on the principle of ‘persistence of vision’ without any camera.
Pros
● Easy to use with good accessibility
● Scalable to younger kids
● Works without a camera
Cons
● More of subjective task
● Maybe hard to understand
● A very different concept of animation
07OgoBild Animate It
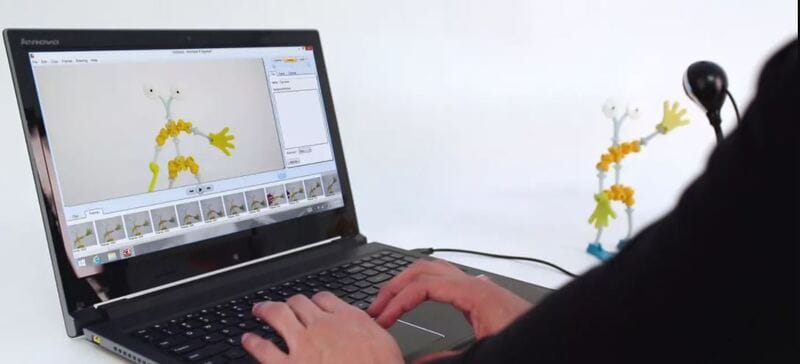
Brought to you from Gromet and Wallace’s creators, this is a super simple Stop Motion Animation kit. It includes hundreds of Construction pieces to begin with. Also, you will get a webcam and stop motion animation software ideally geared towards kids aged 8-years old.
Features
● Compatible with the Windows operating system.
● It contains a camera with an articulated stand to capture from better angles.
● It includes an easy upload to YouTube feature for social sharing.
Pros
● Good for social sharing
● Better accessories
● Ideal for beginners
Cons
● A pretty confusing interface
● Only compatible with Windows
● Slow processing software
08Dragonframe 5
Again, this stop-animation kit isn’t that fancy, but it can compete with all the rivals out there. It only contains Software, though, with a list of functions including Cinematography, Animation, vector-based drawings, and much more.
Features
● It includes Animation and Cinematography tools.
● It contains a frame-based timeline editor.
● Dragonframe 5 includes a lip-sync system for the best audio recording.
● It includes Motion Control and Vector-based drawing tools.
● This kit Consists of a configurable X-sheet.
Pros
● Lots of functions
● Not just a toy
● Friendly and effective to deal with.
Cons
● Too hard for the young kids
● Expensive
● Confusing interface
09VidBox Stop Motion Studio
VidBox Stop Motion Studio has similar software to Dragonframe but it is more suitable for younger kids. Well, you can readily go for this kit if you already have a camera. It also contains the option to upload creations to Facebook and YouTube directly.
Features
● It can create output in different formats, including WMV, MPEG HD resolution, etc.
● It contains an adjustable frame rate to control the video’s speed.
● The Chroma binding effect creates the best setting for the background.
● It includes DSLR camera support.
● It contains Image Editor, String Removal, and Overlay Frames tool to add special effects.
Pros
● It gives detailed instructions
● Too basic Features
● Difficult to handle toys
Cons
● Too much info is intimidating
● Slow process
● Some issues with the Chroma effect
10Animation Studio by Helen Piercy – A Book
As the name suggests, this stop motion studio book isby Helen Piercy, an animator with lots of experience in the field. You will also get all the required Features, such as editing the green screen and more. In addition, tutorials regarding and techniques on puppets are also in the kit.
Features
● You get a mini stage set.
● It involves a press-out puppet monster with movable parts.
● It contains storyboard samples and sheets.
● The book contains an engaging animation handbook.
● It Consists of a variety of press-out props.
Pros
● A highly informative book
● Contains easy to understand animation scenes
● Various and techniques
Cons
● Hard to understand info
● Only a book
● It cannot get you through real practical
11- Minecraft Stop Motion Animation Studio
Though it seems usual to many kids out, there are valid reasons behind that. First, it is different from other Stop Motion Animation kits as it is available in an app rather than any software. Thus, you can use it on a tablet or phone and edit whatever you shoot.
Features
● It includes a variety of props.
● It contains six different backgrounds.
● This kit involves one movie stage.
● It Consists of a device holder.
● Minecraft contains 1additional accessories.
Pros
● No need of a powerful PC
● Lots of accessories
● With different backgrounds
Cons
● The app contains compatibility issues
● Less number of props in quantity
● Lack of software integration
12- Zing StikBot Zanimation Studio Pro
This stop animation kit is a reasonably priced and excellent little package. With this kit, however, you will need your camera. You can manipulate this kit into different poses as the figures have small suction cups on the feet and hands.
Features
● It includes two posable StikBot figures.
● Works on an animation app to record frames.
● It contains a Blue screen or reversible green screen stage.
● It Consists of a tripod stand for a tablet or smartphone camera.
Pros
Simple software
Lots of functions
Included software
Cons
● Lack of app availability
● Not compatible with Linux systems
● Only for Windows and Mac
13- Honestech Stop Motion Studio 4.0
It’s a great entry-level stop motion animation kit that includes a blue or green screen. It also contains accessible Features for background editing, sound effects, background music, etc. Given below are more of its parts.
● A super simple editing interface is appealing to beginner kids.
● String Removal feature for more delicacy and effects.
● Chroma Key and Audio Recording.
● YouTube/Facebook upload feature.
● DSLR camera support.
Pros
● The great Chroma keying feature
● Simple user interface
● Lots of other Features
Cons
● Not for advanced kids
● A bit slow software
● Certain issues with camera integration
14- Crayola Color Alive Easy Animation Studio
It’s another basic Stop Motion Animation kit to easily create custom animated videos by kids. It also includes easy drawing coloring book characters. And, there are tracking markers to make the job easier for kids.
Features
● Design and color characters pose and capture.
● It includes a stand and mannequin.
● It contains a 30-page booklet with the required information.
● It is compatible with Android and iOS.
● Crayola contains 1twistable color pencils with the device’s stand.
Pros
● Ideal for beginners
● Detailed info book
● Great accessories
Cons
● Slow processing UI
● Inefficient tracking markers
● The app may run certain compatibility issues
15- Claytoon Clay Project Studio
Young kids can easily use this Clay Studio and create impressive figures for their stop motion animation. It has bright colored clays, which are non-hardening and thus suitable for animation projects. And, there’s a good choice in colors with valuable instructions, index cards, and accessories.
Features
● Non-hardening clay material
● Brilliant color range to create amazing characters
● Intermixable clays
● Simple to follow instruction cards
● 5 modeling tools and clay knife
Pros
● Hard clay
● Perfect colors
● Professional for adult usage
Cons
● Maybe be crumbled clays
● Oily material
● It may not contain all the desired colors
Part 2 How to pick the best animation kits for kids?
Below are the factors you need to Consider before buying Stop Motion Animation kits. So, let’s dive into each element in detail.
01Recommended Age
Producing something creative with a Stop Motion Animation kit will be a lengthy process that will involve patience and some informational content to use the Kits properly. So while selecting the best Animation Kit, keep in mind the Recommended Age that the company has specified. If the product is for the young generation, the younger ones might have difficulty using the product.
02Different forms of Kits
You may check a few of them with different Features for the best stop animation kits. However, the significant difference between them is whether they come as complete kits or not. If you buy a complete kit, you will have a camera and other elements with the product.
The only thing you will require other than the entire animation kit would be a computer for software purposes. Moreover, you can also select Kits that do not come with a camera individually.
For this, you must use a smartphone to record the video. Conclusively, the kits present on the market are zoetrope-type kits. However, they are not available with electronics. So you won’t be able to create full films with this one.
03Extra Features
As extra Features, you get Props and full-on sets included with some of the kits. These allow you to create the scenes that you are looking for. You can also transform the orientation of some of the props, which gives you extra functionality.
04Apps
When you’re in the hustle to create a Stop Motion Animation, you need a few things. One of them is the smartphone or a camera. At the same time, the other one will be the App on your phone that will help you merge everything the way you wish it to be.
Some of the companies out there will create their apps, and it will assist you with different integration procedures, but if the kit you select is not available with a dedicated app. There are a lot of good apps on the market right now that you can go for. These 3rd party apps are unique and will get your job done too.
05 Software
You will either need an App or Proper Software for the putting-together part. This Software will need hardware such as either a laptop or a PC. Before deciding on an animation kit, make sure you know the system requirements if the kit is only supported through software.
06Bonus: Create an easy stop motion video via Wondershare Filmora Video Editor
In old times, making stop motion videos was a very hectic task, and sometimes it could take several days to make such videos. With the advancement of technology and editing software like Filmora, it has become effortless. All you need is a camera and video editing software to create your stop motion animations.
For Win 7 or later (64-bit)
For macOS 10.12 or later
Let’s dig deep into the stop motion animations and learn how to create these videos on your own.
07Steps For Making Stop-Motion Video
If you want to create your stop motion animation, follow this step-by-guide.
● Capture The Shots
Move an object and capture its movement frame by frame. Suppose we are making a stop motion video of bottle spin. Place your camera in a steady place, and bring your object in the frame. Move your object slightly and take a shot. Keep doing this until you have at least 12,23or photos of the object’s movement. We took the bottle spin only as an example. You can create your ideas here.
● Download And Start Filmora X
If you haven’t downloaded the Filmora in your system, download it from their official website. If it is already on your PC, then run the program.
● Choose The Suitable Frame Rate In Project Settings.
Begin a new project by hitting the File and selecting the full-wide resolution.
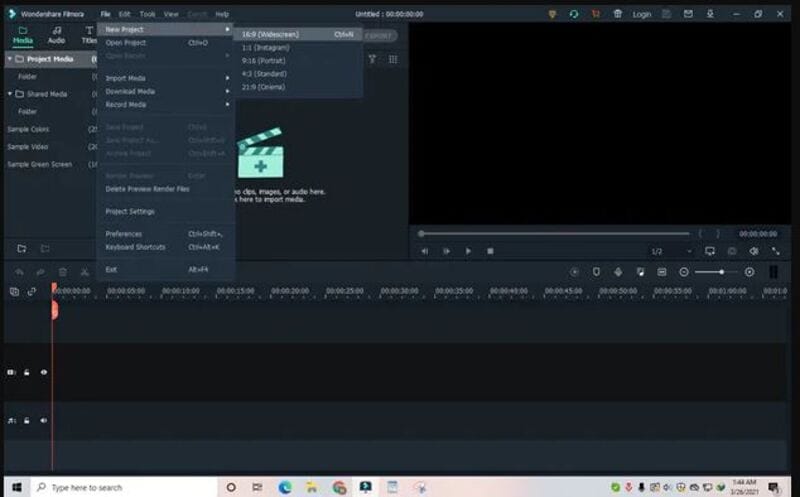
Once you select the resolution, click on the File and go to project settings.
Now select the frame rate you captured the video, i.e., 236etc. If you didn’t Consider the frame rate when taking shots, you could select 24.

● Import The Media Files
Once you have done with the settings above, import the captured images using the import option from the file menu.
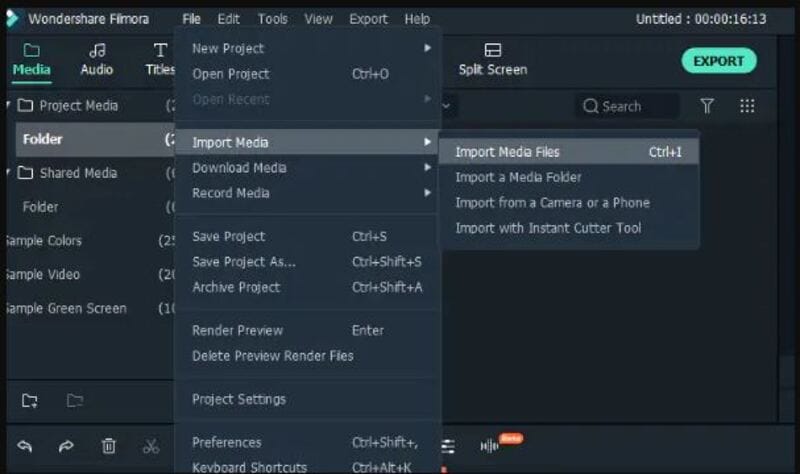
● Adjust the Preferences
Go to File and click select preferences from the menu or press the shortcut key Ctrl+Shift+,
A window will appear on your screen. Click on editing and adjust the photo duration anywhere between 0.2 - 0.5 seconds.
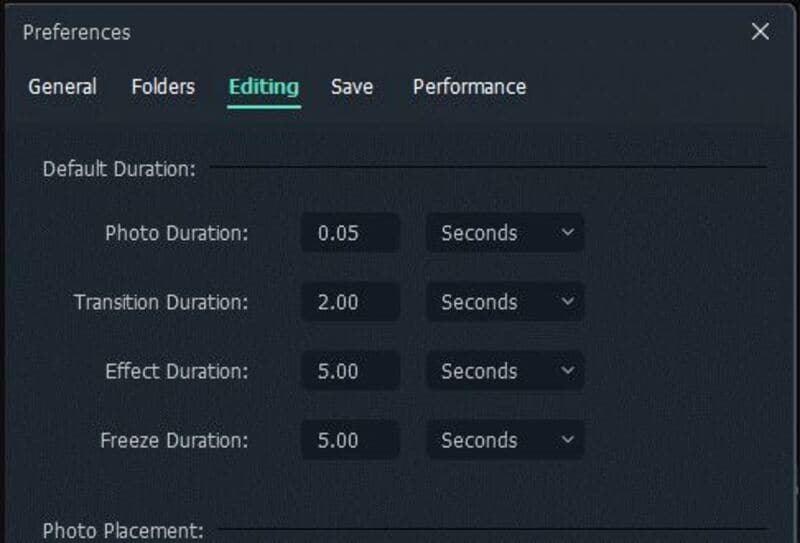
● Create and Export.
Once you complete all the settings mentioned above, import all images timeline-track, and click on play, you will notice that your stop motion animation has been created.
Now click on the export button, select the desired video format, export the video, and share it with your friends.
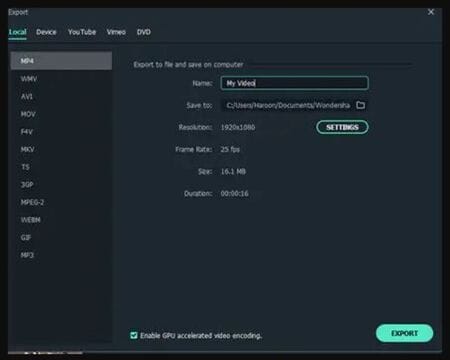
Ok, this is very easy. It’s just time-Consuming if you want to make a big enough project. Here is the result.
Filmora is one of the most straightforward software you can use to create your stop motion animation videos. This magic can be easily created by following the steps mentioned above, even if you have no video editing experience.
● Key Takeaways from This Episode →
● Stop-motion animation kits are a form of art, and with all of the access we have to such technology via our computers, it is a big deal to get started with it. Most of them include Stop Motion animation starter kits as well. That’s why you want to be sure that you look at everything in depth and see what you like. Then, determine which kits will be best for your purposes and see why it makes such a big difference for you and everything you want to accomplish in the long run.
Stop motion animation is becoming more famous by the year, and it’s not even a surprising thing. Creating animated films takes objects, either soft clay items or dolls with joints, and manipulates them.
If you wish to make this type of animation, then you want to find the best Stop Motion Animation Kits that you can find. Some options out there are even free. This article will share the eight best options for stop motion animation software, separating them by whether they are for Macs or PC.
In this article
01 [15 Best Stop Motion Animation Kits](#Part 1)
02 [How to Pick the Best Animation Kits for Kids?](#Part 2)
Part 1 15 Best Stop Motion Animation Kits
After introducing you to the concept of Stop Motion Animation Kits, we’ve gathered a list of the top Stop Motion Animation Kits that best suits the kids as follows:
01Hue Animation Studio
The Hue Animation Studio kit is unique because it can be helpful with any clay or toys you may have. The equipment is ideal for animations featuring anything from Playmobil toys, Lego, or even clay animations.
Features
● The kit includes the guidebook,
● It includes a HUE HD USB camera with a microphone.
● The kit Consists of a license of Stop Motion Animation software.
● There’s a mini stage with a green screen and background.
● The system requirements are Windows or Mac OS 10.5+.
Pros
● Less learning curve
● With an HD camera
● Easy to create time-lapse videos and special effects
Cons
● Old-fashioned interface
● Not ideal for beginners
● Requires a license to buy
02LEGO Make Your Own Movie Activity Kit
LEGO is one of the top players in the animation industry, and its Stop Motion Animation kit is phenomenal to the mark. The kit offers a complete guide to making your stop motion animations and includes several props and other goodies, as described in the Features below.
Features
● Includes an 8pages book to use while animating.
● It contains official LEGO props and Minifigures.
● You get punch-out animation frames.
● It involves foldout paper backgrounds.
● Best applicable to kids above eight years.
Pros
● Good for beginners
● Great accessories
● Informative book
Cons
● Only basics in the book
● Not all the accessories are there
● No app available
03I Can Animate It Studio
I Can Animate It Studio is another Stop Motion Animation kit by Kudlian. However, the kit looks a little offbeat since it doesn’t come with a guide. However, Kudlian offers instructions and guidelines online to simplify the tasks.
Features
● This animation kit includes a separate webcam for shooting.
● It has an onion skin feature for getting the best results at animation.
● Involves an element to edit with a green screen.
● It also helps create stop-frame animation by creating drawings.
● Compatible with both Windows and Mac OS.
Pros
● Available as App
● Interactive user interface
● Easy to create cute videos
Cons
● Difficult to use the animator pack
● Slow processing
● May need to pay for premium Features
04ZuAnimation Kit
Zuis among the best stop motion animation kits developed by HUE’s initial software. And, it’s the kit that is already usual with kids. So, it generally means that it will involve less learning curve comparatively. And, it has some tiny Features which may leave all other toys in the category.
Features
● A lifetime software with two perpetual licenses.
● Includes a green screen for keying background.
● It Consists of an animation handbook to offer you fantastic tips and advice.
● It contains a webcam with a metal base.
● You get a modeling clay to design characters and a mini set to hold them.
Pros
● Good pack of sound effects, artwork, and more
● Interactive interface
● With animation handbook
Cons
● Some defects with cameras, so check them earlier
● Lack of video signals
● Limited animation Features
05Stop Motion Explosion Animation Kit
The Stop Motion Explosion complete HD stop motion animation is another rival in the industry for the big competitors playing out. The kit also contains an inbuilt microphone to record your audio. And, there’s a precious 29pages book included to provide you a lot. Let’s see more of its Features below.
Features
● It comes with an HD camera and flexible stand with a microphone and manual zoom control.
● It contains a CD with animation software.
● The kit involves a quick start guide.
● It includes lots of free tutorials.
● It Consists of a 29pages book with in-depth information.
Pros
● Interactive user interface
● Contains guided information book
● Lots of free tutorials
Cons
● Lack of fast processing
● Need to use the app alongside book
● High learning curve
06EyeThink BusyBody Animation Toy
As the name also signifies, the kit is pretty different from other stop motion animation kits. It’s one of the coolest of its kind also occupied with the attention of Victorian children in the days gone by. The kit doesn’t include any camera. Instead, it works on the principle of ‘persistence of vision.’ Please scroll below to reveal more of its Features.
Features
● You will get a central snipping base with mirrors.
● It contains bendable figures for easy posing.
● It includes a complete hands-on stop motion animation kit without any complications.
● Includes instructions to give you detailed images on how to pose figures.
● Works on the principle of ‘persistence of vision’ without any camera.
Pros
● Easy to use with good accessibility
● Scalable to younger kids
● Works without a camera
Cons
● More of subjective task
● Maybe hard to understand
● A very different concept of animation
07OgoBild Animate It
Brought to you from Gromet and Wallace’s creators, this is a super simple Stop Motion Animation kit. It includes hundreds of Construction pieces to begin with. Also, you will get a webcam and stop motion animation software ideally geared towards kids aged 8-years old.
Features
● Compatible with the Windows operating system.
● It contains a camera with an articulated stand to capture from better angles.
● It includes an easy upload to YouTube feature for social sharing.
Pros
● Good for social sharing
● Better accessories
● Ideal for beginners
Cons
● A pretty confusing interface
● Only compatible with Windows
● Slow processing software
08Dragonframe 5
Again, this stop-animation kit isn’t that fancy, but it can compete with all the rivals out there. It only contains Software, though, with a list of functions including Cinematography, Animation, vector-based drawings, and much more.
Features
● It includes Animation and Cinematography tools.
● It contains a frame-based timeline editor.
● Dragonframe 5 includes a lip-sync system for the best audio recording.
● It includes Motion Control and Vector-based drawing tools.
● This kit Consists of a configurable X-sheet.
Pros
● Lots of functions
● Not just a toy
● Friendly and effective to deal with.
Cons
● Too hard for the young kids
● Expensive
● Confusing interface
09VidBox Stop Motion Studio
VidBox Stop Motion Studio has similar software to Dragonframe but it is more suitable for younger kids. Well, you can readily go for this kit if you already have a camera. It also contains the option to upload creations to Facebook and YouTube directly.
Features
● It can create output in different formats, including WMV, MPEG HD resolution, etc.
● It contains an adjustable frame rate to control the video’s speed.
● The Chroma binding effect creates the best setting for the background.
● It includes DSLR camera support.
● It contains Image Editor, String Removal, and Overlay Frames tool to add special effects.
Pros
● It gives detailed instructions
● Too basic Features
● Difficult to handle toys
Cons
● Too much info is intimidating
● Slow process
● Some issues with the Chroma effect
10Animation Studio by Helen Piercy – A Book
As the name suggests, this stop motion studio book isby Helen Piercy, an animator with lots of experience in the field. You will also get all the required Features, such as editing the green screen and more. In addition, tutorials regarding and techniques on puppets are also in the kit.
Features
● You get a mini stage set.
● It involves a press-out puppet monster with movable parts.
● It contains storyboard samples and sheets.
● The book contains an engaging animation handbook.
● It Consists of a variety of press-out props.
Pros
● A highly informative book
● Contains easy to understand animation scenes
● Various and techniques
Cons
● Hard to understand info
● Only a book
● It cannot get you through real practical
11- Minecraft Stop Motion Animation Studio
Though it seems usual to many kids out, there are valid reasons behind that. First, it is different from other Stop Motion Animation kits as it is available in an app rather than any software. Thus, you can use it on a tablet or phone and edit whatever you shoot.
Features
● It includes a variety of props.
● It contains six different backgrounds.
● This kit involves one movie stage.
● It Consists of a device holder.
● Minecraft contains 1additional accessories.
Pros
● No need of a powerful PC
● Lots of accessories
● With different backgrounds
Cons
● The app contains compatibility issues
● Less number of props in quantity
● Lack of software integration
12- Zing StikBot Zanimation Studio Pro
This stop animation kit is a reasonably priced and excellent little package. With this kit, however, you will need your camera. You can manipulate this kit into different poses as the figures have small suction cups on the feet and hands.
Features
● It includes two posable StikBot figures.
● Works on an animation app to record frames.
● It contains a Blue screen or reversible green screen stage.
● It Consists of a tripod stand for a tablet or smartphone camera.
Pros
Simple software
Lots of functions
Included software
Cons
● Lack of app availability
● Not compatible with Linux systems
● Only for Windows and Mac
13- Honestech Stop Motion Studio 4.0
It’s a great entry-level stop motion animation kit that includes a blue or green screen. It also contains accessible Features for background editing, sound effects, background music, etc. Given below are more of its parts.
● A super simple editing interface is appealing to beginner kids.
● String Removal feature for more delicacy and effects.
● Chroma Key and Audio Recording.
● YouTube/Facebook upload feature.
● DSLR camera support.
Pros
● The great Chroma keying feature
● Simple user interface
● Lots of other Features
Cons
● Not for advanced kids
● A bit slow software
● Certain issues with camera integration
14- Crayola Color Alive Easy Animation Studio
It’s another basic Stop Motion Animation kit to easily create custom animated videos by kids. It also includes easy drawing coloring book characters. And, there are tracking markers to make the job easier for kids.
Features
● Design and color characters pose and capture.
● It includes a stand and mannequin.
● It contains a 30-page booklet with the required information.
● It is compatible with Android and iOS.
● Crayola contains 1twistable color pencils with the device’s stand.
Pros
● Ideal for beginners
● Detailed info book
● Great accessories
Cons
● Slow processing UI
● Inefficient tracking markers
● The app may run certain compatibility issues
15- Claytoon Clay Project Studio
Young kids can easily use this Clay Studio and create impressive figures for their stop motion animation. It has bright colored clays, which are non-hardening and thus suitable for animation projects. And, there’s a good choice in colors with valuable instructions, index cards, and accessories.
Features
● Non-hardening clay material
● Brilliant color range to create amazing characters
● Intermixable clays
● Simple to follow instruction cards
● 5 modeling tools and clay knife
Pros
● Hard clay
● Perfect colors
● Professional for adult usage
Cons
● Maybe be crumbled clays
● Oily material
● It may not contain all the desired colors
Part 2 How to pick the best animation kits for kids?
Below are the factors you need to Consider before buying Stop Motion Animation kits. So, let’s dive into each element in detail.
01Recommended Age
Producing something creative with a Stop Motion Animation kit will be a lengthy process that will involve patience and some informational content to use the Kits properly. So while selecting the best Animation Kit, keep in mind the Recommended Age that the company has specified. If the product is for the young generation, the younger ones might have difficulty using the product.
02Different forms of Kits
You may check a few of them with different Features for the best stop animation kits. However, the significant difference between them is whether they come as complete kits or not. If you buy a complete kit, you will have a camera and other elements with the product.
The only thing you will require other than the entire animation kit would be a computer for software purposes. Moreover, you can also select Kits that do not come with a camera individually.
For this, you must use a smartphone to record the video. Conclusively, the kits present on the market are zoetrope-type kits. However, they are not available with electronics. So you won’t be able to create full films with this one.
03Extra Features
As extra Features, you get Props and full-on sets included with some of the kits. These allow you to create the scenes that you are looking for. You can also transform the orientation of some of the props, which gives you extra functionality.
04Apps
When you’re in the hustle to create a Stop Motion Animation, you need a few things. One of them is the smartphone or a camera. At the same time, the other one will be the App on your phone that will help you merge everything the way you wish it to be.
Some of the companies out there will create their apps, and it will assist you with different integration procedures, but if the kit you select is not available with a dedicated app. There are a lot of good apps on the market right now that you can go for. These 3rd party apps are unique and will get your job done too.
05 Software
You will either need an App or Proper Software for the putting-together part. This Software will need hardware such as either a laptop or a PC. Before deciding on an animation kit, make sure you know the system requirements if the kit is only supported through software.
06Bonus: Create an easy stop motion video via Wondershare Filmora Video Editor
In old times, making stop motion videos was a very hectic task, and sometimes it could take several days to make such videos. With the advancement of technology and editing software like Filmora, it has become effortless. All you need is a camera and video editing software to create your stop motion animations.
For Win 7 or later (64-bit)
For macOS 10.12 or later
Let’s dig deep into the stop motion animations and learn how to create these videos on your own.
07Steps For Making Stop-Motion Video
If you want to create your stop motion animation, follow this step-by-guide.
● Capture The Shots
Move an object and capture its movement frame by frame. Suppose we are making a stop motion video of bottle spin. Place your camera in a steady place, and bring your object in the frame. Move your object slightly and take a shot. Keep doing this until you have at least 12,23or photos of the object’s movement. We took the bottle spin only as an example. You can create your ideas here.
● Download And Start Filmora X
If you haven’t downloaded the Filmora in your system, download it from their official website. If it is already on your PC, then run the program.
● Choose The Suitable Frame Rate In Project Settings.
Begin a new project by hitting the File and selecting the full-wide resolution.
Once you select the resolution, click on the File and go to project settings.
Now select the frame rate you captured the video, i.e., 236etc. If you didn’t Consider the frame rate when taking shots, you could select 24.
● Import The Media Files
Once you have done with the settings above, import the captured images using the import option from the file menu.
● Adjust the Preferences
Go to File and click select preferences from the menu or press the shortcut key Ctrl+Shift+,
A window will appear on your screen. Click on editing and adjust the photo duration anywhere between 0.2 - 0.5 seconds.
● Create and Export.
Once you complete all the settings mentioned above, import all images timeline-track, and click on play, you will notice that your stop motion animation has been created.
Now click on the export button, select the desired video format, export the video, and share it with your friends.
Ok, this is very easy. It’s just time-Consuming if you want to make a big enough project. Here is the result.
Filmora is one of the most straightforward software you can use to create your stop motion animation videos. This magic can be easily created by following the steps mentioned above, even if you have no video editing experience.
● Key Takeaways from This Episode →
● Stop-motion animation kits are a form of art, and with all of the access we have to such technology via our computers, it is a big deal to get started with it. Most of them include Stop Motion animation starter kits as well. That’s why you want to be sure that you look at everything in depth and see what you like. Then, determine which kits will be best for your purposes and see why it makes such a big difference for you and everything you want to accomplish in the long run.
Tips That Show Anybody How to Get Awesome Background for Slideshow in PowerPoint
Tips That Show Anybody How to Get Awesome Background for Slideshow in Powerpoint
An easy yet powerful editor
Numerous effects to choose from
Detailed tutorials provided by the official channel
Amazing slideshow background are an absolute attention grabber in the realm of creative PowerPoint presentations. If you wish to upgrade yours with the same, be here to learn how!
In this article
01 [How to Add Video Background in PowerPoint?](#Part 1)
02 [How to Create Moving Backgrounds in Microsoft PowerPoint?](#Part 2)
03 [Some Tips for You to Get Awesome PowerPoint Backgrounds & Templates](#Part 3)
Part 1 How to Add Video Background in PowerPoint?
When the talk is about engaging means to deliver a precise information, PowerPoint slideshows are an absolute stunner. While these are already a captivating utility to present your thing, the output and audience engagement is at par with the inclusion of attractive design elements in the presentation. As is evident, there are enormous diversities of supplementary elements to complement your presentation, let us centre our discussion to the application of video background for slideshow in PowerPoint.
User’s Guide to Add Video Background in a PowerPoint Slideshow
The following section presents a detailed explanation of the steps to supplement your PowerPoint presentations with classic video backgrounds in just a few quick steps:
Step 1: Launch Your Presentation
Start with opening the desired PowerPoint presentation to which you want to add the video background, in any of your preferred devices.
Step 2: Add a Video to Your Slide
Browse through your presentation slides to locate the one you want to add the video background to. When you have made your choice, navigate to the PowerPoint toolbar at the top and hit the ‘Insert’ tab and choose the ‘Video’ option.
You will now be presented with 2 choices, either uploading a video from your device or insert one from the web by pasting its YouTube URL into the slide. If you are uploading a video from your device, proceed with selecting the desired video and tap ‘Insert’.

Step 3: Move and Resize Your Video
After uploading your video to the slide, you need to make suitable adjustments in its size and alignment to synchronize the same with the contents of the slide. To do this, drag the top left corner of the video to that of the slide to set the top alignment ratio. In the same way, move the bottom right corner of the video to be in sync with that of the slide. You will see the video occupying the entire slide at the end of the adjustment process.

Step 4: Set the Video Background
You will now need to set the video as the background of your slide, so that the latter’s contents are displayed over the video. You can do this by right clicking on the video and choosing the ‘Send to Back’ option from the dropdown that follows. This will cause the contents of your slide to get displayed over the video.

Step 5: Playback Edit and Customization Choices
Before proceeding towards making changes in the video playback and formatting, prefer taking a quick preview of your work till here. Once you are satisfied, navigate to the PowerPoint Toolbar at the top, hit the ‘Video Tools’ tab, followed by clicking on the ‘Playback’ tab.
It is recommended to introduce the following changes in your video for the most affordable slideshow output:
● Loop Your Video
Creating a video loop will facilitate you with an automatic replay of your video without the need to restart it every time with a click. You can loop your video by navigating to the ‘Video Options’ section and choose ‘Loop Until Stopped’ by clicking within the checkbox next to it. The background video will now continue to play until you switch to a different slide.
● Automatically Start Your Video
To avoid clicking on the slide amid your presentation for the video loop to begin, adjust the latter’s settings for an automatic start. Navigate to the ‘Start’ dropdown menu and select ‘Automatically’.
● Trim Your Video
You can work with some basic video editing tools in PowerPoint, like trimming and cropping your background video to a desired length. If you wish to ward off certain portions of your video, reach to and click o the ‘Trim Video’ button. Following this, drag the slider of the video to select the desired portions of the clip and exclude the rest.
You can further work with some more editing effects to create the perfect video backgrounds for your presentation slides in line with your specific preferences.

Step 6: Annotate Your Video Background
When you are done with the video editing process, take a preview of the same to ensure that everything is set in the proper order and at the proper place. Lastly, if you wish to add suitable text annotations to your video, you can do this with the ‘ClassPoint’ tool to write over the video background. All you need to do is select a preferred pen colour and start writing on your slide screen. You can further, save the annotations for a work record.

Part 2 How to Create Moving Backgrounds in Microsoft PowerPoint?
Moving PowerPoint slideshow background is another aspect of graphic creativity at its best, which can be used in a number of ways to grab considerable viewer attention. When choosing to add moving backgrounds to your presentation, the latter can aid in improving the style of content presentation, making your audience curious about how and what happens next.
Having learnt about the utility and creation process of video backgrounds in the PowerPoint presentation tool, let us extend our discussion to the method of creating a moving slide show background in the same in the following section:
User’s Guide to Create Moving Backgrounds for PowerPoint Presentations
Discussed below is an explanatory procedure for designing moving backgrounds with an awesome appearance for slideshow presentations in Microsoft PowerPoint:
Step 1: Open Your Presentation
To begin with, launch the PowerPoint tool in your preferred device and open the presentation on which you will be working to add the moving background. After the presentation gets loaded, navigate through the same and select the desired slide to proceed with the aforesaid task.
Step 2: Choose a Video Location
To add your desired video to the slide, navigate to the PowerPoint ribbon at the top and click on the ‘Insert’ tab. Select ‘Video’ from the list of options that appears, followed by choosing one of the ‘Online Video’ or ‘Video on My PC’ options from the video selection prompt. It is further recommended to select a video in the MP4 format, as the latter gives best results of moving and video backgrounds.
Step 3: Insert Your Video
Choose the second option in the selection prompt to upload a video from your device. You will now be asked to browse through your device and locate the desired video in the ‘Insert Video’ dialog box that appears. Select your video and tap the ‘Insert’ button to add your video.
To upload videos from an online source, choose the ‘Online Video’ option in the selection prompt and proceed to search the video from PowerPoint or paste its embed code to recover the video. The chosen video will begin to download and can be added to the PowerPoint presentation after the download process comes to an end.

Step 4: Playback Editing and Video Customization
Before proceeding further, consider paying your video once by clicking on the ‘Start’ button. You can also add different effects, trim and crop or add a bookmark to your video by navigating to and clicking on the ‘Video Tools’ tab, followed by selecting the ‘Format’ option. To work with the start and playback options for the video, click on ‘Playback’ in the dropdown menu of the ‘Video Tools’ tab.

Part 3 Some Tips for You to Get Awesome PowerPoint Backgrounds & Templates
Now that you have developed a comprehensive understanding of the utility of adding video and moving background for slideshow presentation, let us look through some easy tips and tricks to conveniently access the top rated and the most popular PowerPoint slideshow templates and backgrounds in the following section:
01Cool Slide Backgrounds
Slideshow presentations in PowerPoint are supplemented with a visual spark through amazing and vibrant backgrounds that are a sign of excellent graphic creativity. When working with a PowerPoint presentation of your own, do take the liberty to use some cool slide backgrounds to your creative advantage.
When the talk is about complementing your presentation with a cohesive and upbeat background, you can either select the most suitable one from a heap of pre made slideshow templates available both in the PowerPoint slideshow creator tool as well as across the web. However, if you wish to take the excitement to another level, try hands at creating an awesome and cool backgrounds for PowerPoint slides of your own!
Talking about some really cool tips and tricks to design a slideshow presentation background in PowerPoint, start with including some specific shapes and color overlays to the background capture, experiment with a polygon background, work on enhancing the background image with classic and artistic effects and apply a mix of colors, textures and patterns to give a classy look to your slideshow backgrounds.

02Professional Slideshow Backgrounds
If you are aiming at creating a PowerPoint slideshow presentation with a business centered design approach, you will need to cut down on some extra elements that you would ideally choose to include in a personal purpose based slideshow. Paying attention to the fact that business and corporate centered presentations should be simple, subtle and to the point, it would be an intelligent step to avoid adding too many expressive elements in the background.
Whether you are creating a professional slideshow background of your own or working with a pre designed template, take care to include a complementary play of a light background theme with a maximum of 2 balancing shades.
Avoid too much vibrancy and abstain from applying over the top effects and quick transitions, lest your presentation may look a bit too crowed. If your slides have lot of written content, prefer using a white color background text in a professional font style.
If you have decided on picking a pre made template, you can browse through a diversity of suggestions across the web, while keeping the aforesaid constraints in mind. Consider taking a look at the figure given below to have a more comprehensive understating of the prerequisites of selecting a professional sideshow background template:

03Happy Birthday Slide Backgrounds
Birthday parties are the most appealing synonyms of fun and entertainment. If you are into the profession of organizing events that renders smiling and happy faces, slideshow presentations could be of great help to you in discussing about services, types of social gentries and event targets with your clients.
When looking through different options to select the perfect birthday template, either for a professional event, or just to go down the memory lane of your most cherished moments, take caution to search for a vibrant alternative with colorful images, different background designs and party oriented cool themes, wide aspect ratio with high screen resolution for a mass display and conveniently editable graphics.
If you are creating a happy birthday slide background of your own, there are variety of realms to explore your graphic design creativity, owing to the fact that the subject of creation is highly expressive and multi-dimensional. While you are free to extend your creativity to the next level, do pay attention to the above constraints for a more elusive and outstanding creation output, while maintaining the fun and entertainment quotient intact.

04Wedding Slide Backgrounds
Considering the fact that wedding events are pronounced means of fun, leisure, enjoyment and beautiful memories, anything that aims to be a part of the celebrations, should be equally ecstatic and engaging. Infusing festive occasions with technology, slideshow based wedding invitations and moment captures are the top rated modern trends of celebrating this significant life event.
If you are keen on designing the perfect slideshow presentation for wedding invitations, photo albums and thank you cards, prefer to choose a wedding slide background template with aesthetic layout and flowing element inclusions, like that of floral borders and scented candles. Look though the elements of a subtle thematic setup with soothing color combinations, preferably in complementary pastel shades, like pink and white.
Talking of template customizability, the latter should have placeholders to include names of the bride and groom, the wedding date and venue, and of course the wedding photographs. The beautiful slide background template should have enough design space to include the most elusive play of text colors and fonts to suit specific preferences of creating special memories of a cherished event.

05Slideshow Backgrounds and Templates in Filmora
When looking for the most convenient lead to an extensive variety of beautiful slideshow templates and background, the template library of Wondershare Filmora Video Editor slideshow creator program can be your most affordable destination. The aforesaid software library is known to possess the best and most perfect template choices to suit the creation constraints of almost every slideshow presentation style and objective you can possibly think of.
For Win 7 or later (64-bit)
For macOS 10.12 or later
The elusive templates are further supplemented with a plethora of design flexibilities and customization features that are all set to deliver you the most appreciable creation output. Stressing a bit on the template customization choices of the software, you can work with the tool to uplift your slideshow backgrounds with artistic image effects and overlays, annotate them with beautiful text formations in a variety of colors, fonts and sizes and lots more.
Moving a bit deeper into the creative aspect, you can upgrade the visual style of your presentations with the most perfect and seamless image and video transitions and text animations. The bottom line is, working with the aforesaid slideshow creator program, you are entitled to get jaw dropping applaud from your audience, while making a confident and a content delivery through your slideshow presentation.

● Ending Thoughts →
● Using an expressive and complementing background in your slideshow presentation uplifts its visual credibility in captivating your audience.
● Browsing through the web, you get to access a vast range of amazing slideshow backgrounds and templates to make your presentation, a visual masterpiece.
● When looking for the most distributed storehouse of slideshow backgrounds and templates, the Wondershare Filmora library is your ultimate solution.
Amazing slideshow background are an absolute attention grabber in the realm of creative PowerPoint presentations. If you wish to upgrade yours with the same, be here to learn how!
In this article
01 [How to Add Video Background in PowerPoint?](#Part 1)
02 [How to Create Moving Backgrounds in Microsoft PowerPoint?](#Part 2)
03 [Some Tips for You to Get Awesome PowerPoint Backgrounds & Templates](#Part 3)
Part 1 How to Add Video Background in PowerPoint?
When the talk is about engaging means to deliver a precise information, PowerPoint slideshows are an absolute stunner. While these are already a captivating utility to present your thing, the output and audience engagement is at par with the inclusion of attractive design elements in the presentation. As is evident, there are enormous diversities of supplementary elements to complement your presentation, let us centre our discussion to the application of video background for slideshow in PowerPoint.
User’s Guide to Add Video Background in a PowerPoint Slideshow
The following section presents a detailed explanation of the steps to supplement your PowerPoint presentations with classic video backgrounds in just a few quick steps:
Step 1: Launch Your Presentation
Start with opening the desired PowerPoint presentation to which you want to add the video background, in any of your preferred devices.
Step 2: Add a Video to Your Slide
Browse through your presentation slides to locate the one you want to add the video background to. When you have made your choice, navigate to the PowerPoint toolbar at the top and hit the ‘Insert’ tab and choose the ‘Video’ option.
You will now be presented with 2 choices, either uploading a video from your device or insert one from the web by pasting its YouTube URL into the slide. If you are uploading a video from your device, proceed with selecting the desired video and tap ‘Insert’.
Step 3: Move and Resize Your Video
After uploading your video to the slide, you need to make suitable adjustments in its size and alignment to synchronize the same with the contents of the slide. To do this, drag the top left corner of the video to that of the slide to set the top alignment ratio. In the same way, move the bottom right corner of the video to be in sync with that of the slide. You will see the video occupying the entire slide at the end of the adjustment process.
Step 4: Set the Video Background
You will now need to set the video as the background of your slide, so that the latter’s contents are displayed over the video. You can do this by right clicking on the video and choosing the ‘Send to Back’ option from the dropdown that follows. This will cause the contents of your slide to get displayed over the video.
Step 5: Playback Edit and Customization Choices
Before proceeding towards making changes in the video playback and formatting, prefer taking a quick preview of your work till here. Once you are satisfied, navigate to the PowerPoint Toolbar at the top, hit the ‘Video Tools’ tab, followed by clicking on the ‘Playback’ tab.
It is recommended to introduce the following changes in your video for the most affordable slideshow output:
● Loop Your Video
Creating a video loop will facilitate you with an automatic replay of your video without the need to restart it every time with a click. You can loop your video by navigating to the ‘Video Options’ section and choose ‘Loop Until Stopped’ by clicking within the checkbox next to it. The background video will now continue to play until you switch to a different slide.
● Automatically Start Your Video
To avoid clicking on the slide amid your presentation for the video loop to begin, adjust the latter’s settings for an automatic start. Navigate to the ‘Start’ dropdown menu and select ‘Automatically’.
● Trim Your Video
You can work with some basic video editing tools in PowerPoint, like trimming and cropping your background video to a desired length. If you wish to ward off certain portions of your video, reach to and click o the ‘Trim Video’ button. Following this, drag the slider of the video to select the desired portions of the clip and exclude the rest.
You can further work with some more editing effects to create the perfect video backgrounds for your presentation slides in line with your specific preferences.
Step 6: Annotate Your Video Background
When you are done with the video editing process, take a preview of the same to ensure that everything is set in the proper order and at the proper place. Lastly, if you wish to add suitable text annotations to your video, you can do this with the ‘ClassPoint’ tool to write over the video background. All you need to do is select a preferred pen colour and start writing on your slide screen. You can further, save the annotations for a work record.
Part 2 How to Create Moving Backgrounds in Microsoft PowerPoint?
Moving PowerPoint slideshow background is another aspect of graphic creativity at its best, which can be used in a number of ways to grab considerable viewer attention. When choosing to add moving backgrounds to your presentation, the latter can aid in improving the style of content presentation, making your audience curious about how and what happens next.
Having learnt about the utility and creation process of video backgrounds in the PowerPoint presentation tool, let us extend our discussion to the method of creating a moving slide show background in the same in the following section:
User’s Guide to Create Moving Backgrounds for PowerPoint Presentations
Discussed below is an explanatory procedure for designing moving backgrounds with an awesome appearance for slideshow presentations in Microsoft PowerPoint:
Step 1: Open Your Presentation
To begin with, launch the PowerPoint tool in your preferred device and open the presentation on which you will be working to add the moving background. After the presentation gets loaded, navigate through the same and select the desired slide to proceed with the aforesaid task.
Step 2: Choose a Video Location
To add your desired video to the slide, navigate to the PowerPoint ribbon at the top and click on the ‘Insert’ tab. Select ‘Video’ from the list of options that appears, followed by choosing one of the ‘Online Video’ or ‘Video on My PC’ options from the video selection prompt. It is further recommended to select a video in the MP4 format, as the latter gives best results of moving and video backgrounds.
Step 3: Insert Your Video
Choose the second option in the selection prompt to upload a video from your device. You will now be asked to browse through your device and locate the desired video in the ‘Insert Video’ dialog box that appears. Select your video and tap the ‘Insert’ button to add your video.
To upload videos from an online source, choose the ‘Online Video’ option in the selection prompt and proceed to search the video from PowerPoint or paste its embed code to recover the video. The chosen video will begin to download and can be added to the PowerPoint presentation after the download process comes to an end.
Step 4: Playback Editing and Video Customization
Before proceeding further, consider paying your video once by clicking on the ‘Start’ button. You can also add different effects, trim and crop or add a bookmark to your video by navigating to and clicking on the ‘Video Tools’ tab, followed by selecting the ‘Format’ option. To work with the start and playback options for the video, click on ‘Playback’ in the dropdown menu of the ‘Video Tools’ tab.
Part 3 Some Tips for You to Get Awesome PowerPoint Backgrounds & Templates
Now that you have developed a comprehensive understanding of the utility of adding video and moving background for slideshow presentation, let us look through some easy tips and tricks to conveniently access the top rated and the most popular PowerPoint slideshow templates and backgrounds in the following section:
01Cool Slide Backgrounds
Slideshow presentations in PowerPoint are supplemented with a visual spark through amazing and vibrant backgrounds that are a sign of excellent graphic creativity. When working with a PowerPoint presentation of your own, do take the liberty to use some cool slide backgrounds to your creative advantage.
When the talk is about complementing your presentation with a cohesive and upbeat background, you can either select the most suitable one from a heap of pre made slideshow templates available both in the PowerPoint slideshow creator tool as well as across the web. However, if you wish to take the excitement to another level, try hands at creating an awesome and cool backgrounds for PowerPoint slides of your own!
Talking about some really cool tips and tricks to design a slideshow presentation background in PowerPoint, start with including some specific shapes and color overlays to the background capture, experiment with a polygon background, work on enhancing the background image with classic and artistic effects and apply a mix of colors, textures and patterns to give a classy look to your slideshow backgrounds.
02Professional Slideshow Backgrounds
If you are aiming at creating a PowerPoint slideshow presentation with a business centered design approach, you will need to cut down on some extra elements that you would ideally choose to include in a personal purpose based slideshow. Paying attention to the fact that business and corporate centered presentations should be simple, subtle and to the point, it would be an intelligent step to avoid adding too many expressive elements in the background.
Whether you are creating a professional slideshow background of your own or working with a pre designed template, take care to include a complementary play of a light background theme with a maximum of 2 balancing shades.
Avoid too much vibrancy and abstain from applying over the top effects and quick transitions, lest your presentation may look a bit too crowed. If your slides have lot of written content, prefer using a white color background text in a professional font style.
If you have decided on picking a pre made template, you can browse through a diversity of suggestions across the web, while keeping the aforesaid constraints in mind. Consider taking a look at the figure given below to have a more comprehensive understating of the prerequisites of selecting a professional sideshow background template:
03Happy Birthday Slide Backgrounds
Birthday parties are the most appealing synonyms of fun and entertainment. If you are into the profession of organizing events that renders smiling and happy faces, slideshow presentations could be of great help to you in discussing about services, types of social gentries and event targets with your clients.
When looking through different options to select the perfect birthday template, either for a professional event, or just to go down the memory lane of your most cherished moments, take caution to search for a vibrant alternative with colorful images, different background designs and party oriented cool themes, wide aspect ratio with high screen resolution for a mass display and conveniently editable graphics.
If you are creating a happy birthday slide background of your own, there are variety of realms to explore your graphic design creativity, owing to the fact that the subject of creation is highly expressive and multi-dimensional. While you are free to extend your creativity to the next level, do pay attention to the above constraints for a more elusive and outstanding creation output, while maintaining the fun and entertainment quotient intact.
04Wedding Slide Backgrounds
Considering the fact that wedding events are pronounced means of fun, leisure, enjoyment and beautiful memories, anything that aims to be a part of the celebrations, should be equally ecstatic and engaging. Infusing festive occasions with technology, slideshow based wedding invitations and moment captures are the top rated modern trends of celebrating this significant life event.
If you are keen on designing the perfect slideshow presentation for wedding invitations, photo albums and thank you cards, prefer to choose a wedding slide background template with aesthetic layout and flowing element inclusions, like that of floral borders and scented candles. Look though the elements of a subtle thematic setup with soothing color combinations, preferably in complementary pastel shades, like pink and white.
Talking of template customizability, the latter should have placeholders to include names of the bride and groom, the wedding date and venue, and of course the wedding photographs. The beautiful slide background template should have enough design space to include the most elusive play of text colors and fonts to suit specific preferences of creating special memories of a cherished event.
05Slideshow Backgrounds and Templates in Filmora
When looking for the most convenient lead to an extensive variety of beautiful slideshow templates and background, the template library of Wondershare Filmora Video Editor slideshow creator program can be your most affordable destination. The aforesaid software library is known to possess the best and most perfect template choices to suit the creation constraints of almost every slideshow presentation style and objective you can possibly think of.
For Win 7 or later (64-bit)
For macOS 10.12 or later
The elusive templates are further supplemented with a plethora of design flexibilities and customization features that are all set to deliver you the most appreciable creation output. Stressing a bit on the template customization choices of the software, you can work with the tool to uplift your slideshow backgrounds with artistic image effects and overlays, annotate them with beautiful text formations in a variety of colors, fonts and sizes and lots more.
Moving a bit deeper into the creative aspect, you can upgrade the visual style of your presentations with the most perfect and seamless image and video transitions and text animations. The bottom line is, working with the aforesaid slideshow creator program, you are entitled to get jaw dropping applaud from your audience, while making a confident and a content delivery through your slideshow presentation.
● Ending Thoughts →
● Using an expressive and complementing background in your slideshow presentation uplifts its visual credibility in captivating your audience.
● Browsing through the web, you get to access a vast range of amazing slideshow backgrounds and templates to make your presentation, a visual masterpiece.
● When looking for the most distributed storehouse of slideshow backgrounds and templates, the Wondershare Filmora library is your ultimate solution.
Also read:
- In 2024,
- Updated How to Animate Image on Scroll and Text on Scroll for 2024
- In 2024, Step-by-Step Guide to Send Gif WhatsApp on Android
- New In 2024, The Only Guide Youll Need to Learn About GIF Video Downloader
- New Create or Find Good Morning/Night GIFs for 2024
- In 2024, The 10 Most Adorable Aesthetic Cartoon Characters of All Time
- Animated Business Logos and Tools to Create for 2024
- Step-by-Step Guide to Send Gif WhatsApp on Android
- New Why These 10 Top Text Motion Templates Are Worth Your Attention for 2024
- In 2024, How to Make Slideshow in LinkedIn
- New Have You Seen the Facebook Cartoon App Everyones Using Recently for 2024
- New Pencil2D Animation Tutorial Overview
- New 2024 Approved Are You Ready to Animate Game Character From Scratch?
- New How to Make Photo Motion Effect Online for 2024
- In 2024, Techniques for Creating Animated Logo That Few People Know About
- New How to Make Creative Animation Videos
- Ready to Animate Game Character From Scratch, In 2024
- New How to Combine Two/More GIFs Into One GIF Mergers Offered
- Updated In 2024, 10 Cartoon Character Makers to Create Animated Characters
- Updated 2024 Approved A Roster of 15 Top Disney Channel Cartoons
- Updated In 2024, Complete Guide to Send Gif WhatsApp on Android
- 2024 Approved 15 Best Collage Makers to Create Aesthetic Collages
- In 2024, How to Mirror Your Tecno Pova 5 Screen to PC with Chromecast | Dr.fone
- In 2024, How to use iSpoofer on Vivo Y55s 5G (2023)? | Dr.fone
- In 2024, What Is a SIM Network Unlock PIN? Get Your Samsung Galaxy A14 5G Phone Network-Ready
- In 2024, How to Reset a Locked Poco C55 Phone
- How to Bypass Google FRP Lock on Honor 90 Lite Devices
- In 2024, Easy Guide to Motorola Razr 40 FRP Bypass With Best Methods
- Planning to Use a Pokemon Go Joystick on Samsung Galaxy S21 FE 5G (2023)? | Dr.fone
- updated 2024 Approved 5 Best Apps for Voice Translation From English to Bangla
- The Most Useful Tips for Pokemon Go Ultra League On Lava Yuva 2 | Dr.fone
- How To Leave a Life360 Group On Nokia XR21 Without Anyone Knowing? | Dr.fone
- Title: New DP Animation Maker Tutorial for Finding The Best Animated Profile Picture Maker for 2024
- Author: Elon
- Created at : 2024-05-19 03:05:31
- Updated at : 2024-05-20 03:05:31
- Link: https://animation-videos.techidaily.com/new-dp-animation-maker-tutorial-for-finding-the-best-animated-profile-picture-maker-for-2024/
- License: This work is licensed under CC BY-NC-SA 4.0.
