
:max_bytes(150000):strip_icc():format(webp)/ScreenShot2018-12-08at3.04.00PM-5c0c23f6c9e77c00018eae4e.png)
New Guide on Creating GIF in WhatsApp iPhone
Guide on Creating GIF in WhatsApp iPhone
2024 Guide on How to Create GIF in WhatsApp iPhone
An easy yet powerful editor
Numerous effects to choose from
Detailed tutorials provided by the official channel
Standing for Graphics Interchange Format, GIF is short animated images that you can see all over social media sites and other online platforms. These interesting animations can also be shared during your conversations on WhatsApp.

So, if you too are looking for ways to create as well as send GIFs on WhatsApp iPhone, you are on the right page. Keep reading to know all the possible ways to send WhatsApp GIFs on iPhone.
In this article
01 [How to send WhatsApp GIF from the integrated library on iPhone](#Part 1)
02 [How to send Live Photos as WhatsApp GIF on iPhone](#Part 2)
03 [How to create WhatsApp GIF using videos on iPhone](#Part 3)
04 [How to create excellent GIF effortlessly using Wondershare Filmora- All in One video editing software](#Part 4)
Part 1 How to send WhatsApp GIF from the integrated library on iPhone
If you have the latest version of WhatsApp installed on your phone, you can easily and quickly send the GIF from the integrated library having a collection of GIFs in several categories. The steps to send GIF in WhatsApp iPhone are as below.
Step 1. On your iPhone, launch WhatsApp and open the contact or a group to which you wish to send the GIF.
Step 2. Click on the Stickers icon at the typing section and then choose the GIF option at the bottom.
Step 3. Multiple GIFs in different categories will appear. You can further search for the desired GIF using a keyword at the search icon at the bottom-left corner. The list of the Recents and the Favorites can also be searched using their respective icons.
Note: To save any particular GIF in the favorites list, tap and hold the GIF and then click on Add To Favorites option.
StepTap on the selected GIF and then click on the Send icon at the bottom-right corner. Your WhatsApp GIF iPhone will be sent.

Part 2 How to send Live Photos as WhatsApp GIF on iPhone
Live Photos on your iPhone can also be sent as GIFs in WhatsApp conversations and the steps for the same are as below.
Note: The feature is available for users having iPhone 6 or later versions.
Step 1.Open the WhatsApp contact on your iPhone to whom you wish to send the GIF. Click on the + icon and then choose the option of Photo & Video Library.
Step 2. Search for the Live photo in your gallery and then press it. When the image pops out, slide upwards and then click on the Select as GIF option.
Step 3. Tap on the Send icon to share the selected Live photo as GIF.

Part 3 How to create WhatsApp GIF using videos on iPhone
In addition to the integrated library, you can also convert the videos on your iPhone to GIF and share them on WhatsApp. To be used as GIF, the length of the videos cannot be more than 6 seconds. Thus, for a larger video, you need to trim it to be under 6 seconds. Steps to get the task done are as follows.
Step 1.Launch WhatsApp on your iPhone and select the contact to which you want to share the GIF. Next, click on + sign and then choose Photo & Video Library option.
Step 2.Select the desired video from your phone gallery.
Step 3.After the video is added, an editing screen will open. Here you can trim the video to make it under 6 seconds using the slider at the top. Further changes can be made like adding a sticker, text, or making a freehand drawing.
Step 4.After all customizations are done, click on the GIF button.
Step 5.Finally, tap on the Send icon at the bottom-right corner to send the edited video as GIF.

Part 4 How to create excellent GIF effortlessly using Wondershare Filmora- All in One video editing software
WhatsApp in your iPhone has a built-in option to create GIFs using the videos on the device. Though the process is simple, the option for editing and customizations are limited. So, if you want to create GIFs using videos online and with advanced editing tools, we suggest using Wondershare Filmora Video Editor .
This all-in-one video editing software will let you edit and customize your files in several ways and in a few simple steps, your desired GIF will be ready.
Wondershare Filmora
Get started easily with Filmora’s powerful performance, intuitive interface, and countless effects!
Try It Free Try It Free Try It Free Learn More >

Key features of the software
● Add media files in all ley formats like MP4, MOV, MKV, PNG, and others to create GIFs.
● Simple and quick steps for creating the desired animation.
● Allows to customize the GIF using functions like slow-down, crop, rotate, and many more.
● Allows adding text, voice, and other elements.
● Option to share the created GIF to Vimeo, and YouTube directly.
● Software support to all latest Windows and Mac systems.
Steps to create WhatsApp GIF using Wondershare Filmora.
Step 1.Open the installed software on your system and import the desired images and videos from your system.
Step 2.Drag and drop the added videos and images to the timeline.

Step 3.Edit the file using features like crop, rotate, split, and others.
Step 4.Add text and other elements as needed.

Step 5.At the Local tab, save the customized media as GIF. Select the file name and the destination and then finally, click on the EXPORT button to start processing.
● Key Takeaways from This Episode →
●Gifs for WhatsApp iPhone can be added from the integrated library.
●Live Photos, as well as videos, can also be used to create and share them as GIF.
●For creating interesting and funny GIF in a hassle-free manner, Wondershare Filmora works as the best software.
Standing for Graphics Interchange Format, GIF is short animated images that you can see all over social media sites and other online platforms. These interesting animations can also be shared during your conversations on WhatsApp.
So, if you too are looking for ways to create as well as send GIFs on WhatsApp iPhone, you are on the right page. Keep reading to know all the possible ways to send WhatsApp GIFs on iPhone.
In this article
01 [How to send WhatsApp GIF from the integrated library on iPhone](#Part 1)
02 [How to send Live Photos as WhatsApp GIF on iPhone](#Part 2)
03 [How to create WhatsApp GIF using videos on iPhone](#Part 3)
04 [How to create excellent GIF effortlessly using Wondershare Filmora- All in One video editing software](#Part 4)
Part 1 How to send WhatsApp GIF from the integrated library on iPhone
If you have the latest version of WhatsApp installed on your phone, you can easily and quickly send the GIF from the integrated library having a collection of GIFs in several categories. The steps to send GIF in WhatsApp iPhone are as below.
Step 1. On your iPhone, launch WhatsApp and open the contact or a group to which you wish to send the GIF.
Step 2. Click on the Stickers icon at the typing section and then choose the GIF option at the bottom.
Step 3. Multiple GIFs in different categories will appear. You can further search for the desired GIF using a keyword at the search icon at the bottom-left corner. The list of the Recents and the Favorites can also be searched using their respective icons.
Note: To save any particular GIF in the favorites list, tap and hold the GIF and then click on Add To Favorites option.
StepTap on the selected GIF and then click on the Send icon at the bottom-right corner. Your WhatsApp GIF iPhone will be sent.
Part 2 How to send Live Photos as WhatsApp GIF on iPhone
Live Photos on your iPhone can also be sent as GIFs in WhatsApp conversations and the steps for the same are as below.
Note: The feature is available for users having iPhone 6 or later versions.
Step 1.Open the WhatsApp contact on your iPhone to whom you wish to send the GIF. Click on the + icon and then choose the option of Photo & Video Library.
Step 2. Search for the Live photo in your gallery and then press it. When the image pops out, slide upwards and then click on the Select as GIF option.
Step 3. Tap on the Send icon to share the selected Live photo as GIF.
Part 3 How to create WhatsApp GIF using videos on iPhone
In addition to the integrated library, you can also convert the videos on your iPhone to GIF and share them on WhatsApp. To be used as GIF, the length of the videos cannot be more than 6 seconds. Thus, for a larger video, you need to trim it to be under 6 seconds. Steps to get the task done are as follows.
Step 1.Launch WhatsApp on your iPhone and select the contact to which you want to share the GIF. Next, click on + sign and then choose Photo & Video Library option.
Step 2.Select the desired video from your phone gallery.
Step 3.After the video is added, an editing screen will open. Here you can trim the video to make it under 6 seconds using the slider at the top. Further changes can be made like adding a sticker, text, or making a freehand drawing.
Step 4.After all customizations are done, click on the GIF button.
Step 5.Finally, tap on the Send icon at the bottom-right corner to send the edited video as GIF.
Part 4 How to create excellent GIF effortlessly using Wondershare Filmora- All in One video editing software
WhatsApp in your iPhone has a built-in option to create GIFs using the videos on the device. Though the process is simple, the option for editing and customizations are limited. So, if you want to create GIFs using videos online and with advanced editing tools, we suggest using Wondershare Filmora Video Editor .
This all-in-one video editing software will let you edit and customize your files in several ways and in a few simple steps, your desired GIF will be ready.
Wondershare Filmora
Get started easily with Filmora’s powerful performance, intuitive interface, and countless effects!
Try It Free Try It Free Try It Free Learn More >
Key features of the software
● Add media files in all ley formats like MP4, MOV, MKV, PNG, and others to create GIFs.
● Simple and quick steps for creating the desired animation.
● Allows to customize the GIF using functions like slow-down, crop, rotate, and many more.
● Allows adding text, voice, and other elements.
● Option to share the created GIF to Vimeo, and YouTube directly.
● Software support to all latest Windows and Mac systems.
Steps to create WhatsApp GIF using Wondershare Filmora.
Step 1.Open the installed software on your system and import the desired images and videos from your system.
Step 2.Drag and drop the added videos and images to the timeline.
Step 3.Edit the file using features like crop, rotate, split, and others.
Step 4.Add text and other elements as needed.
Step 5.At the Local tab, save the customized media as GIF. Select the file name and the destination and then finally, click on the EXPORT button to start processing.
● Key Takeaways from This Episode →
●Gifs for WhatsApp iPhone can be added from the integrated library.
●Live Photos, as well as videos, can also be used to create and share them as GIF.
●For creating interesting and funny GIF in a hassle-free manner, Wondershare Filmora works as the best software.
12 Dubbed Anime Websites to Watch for Free
12 Dubbed Anime Websites to Watch for Free

Shanoon Cox
Mar 27, 2024• Proven solutions
Anime enthusiasts worldwide appreciate the convenience of watching dubbed anime, and numerous websites cater to this preference. Here’s a curated list of 12 top-notch free dubbed anime websites worth bookmarking:
1. Wcostream (<www.wcostream.tv>)
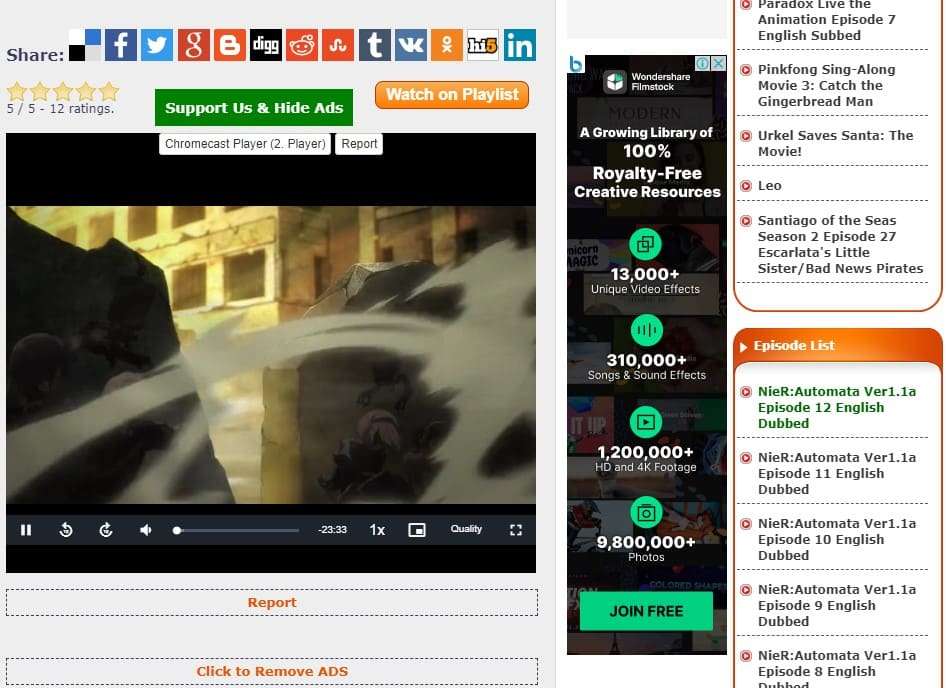
Wcostream is a comprehensive anime streaming platform offering a vast collection of dubbed anime series and movies. Its extensive library encompasses popular titles like Naruto, One Piece, Bleach, Attack on Titan, My Hero Academia, and many more. With over 1.1 million monthly visitors, Wcostream stands out for its user-friendly interface, regular updates, and seamless navigation.
Features: Cannot adjust clarity, no ads
Recommendation: Wcostream is a great option for those who want to watch dubbed anime without any ads. However, it’s important to note that the video quality cannot be adjusted.
2. Crunchyroll (<www.crunchyroll.com>)
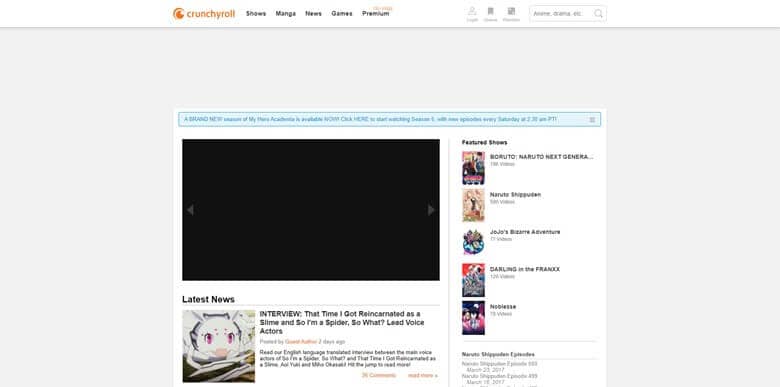
Crunchyroll is a global anime powerhouse renowned for its extensive collection of dubbed anime, Asian dramas, and manga. It features a vast library of popular titles, including Attack on Titan, Naruto, and Yuri on Ice. Crunchyroll’s premium version offers an ad-free viewing experience and additional perks.
Features: Has ads, can switch resolution between 240/360p/480p
Recommendation: Crunchyroll is a popular option for dubbed anime, but it’s important to note that there are ads and the video quality is limited to 480p. However, Crunchyroll does offer a premium subscription that includes ad-free viewing and higher video quality.
3. KissAnime (kissanime.com.ru)
KissAnime is a renowned anime streaming platform offering both subbed and dubbed versions of a diverse range of anime series and movies. It supports offline viewing, provides advanced filtering options, and doesn’t require account creation. KissAnime’s extensive library and convenient features make it a popular choice.
Features: There are ads, but some resources may be invalid and the definition cannot be adjusted. Japanese comic resources are limited.
Recommendation: KissAnime used to be a popular option for dubbed anime, but it has been experiencing some issues lately. Some resources may be invalid and the definition cannot be adjusted. Additionally, the Japanese comic resources are limited.
4. Anime-Planet (<www.anime-planet.com/anime/watch-online/dubbed> )
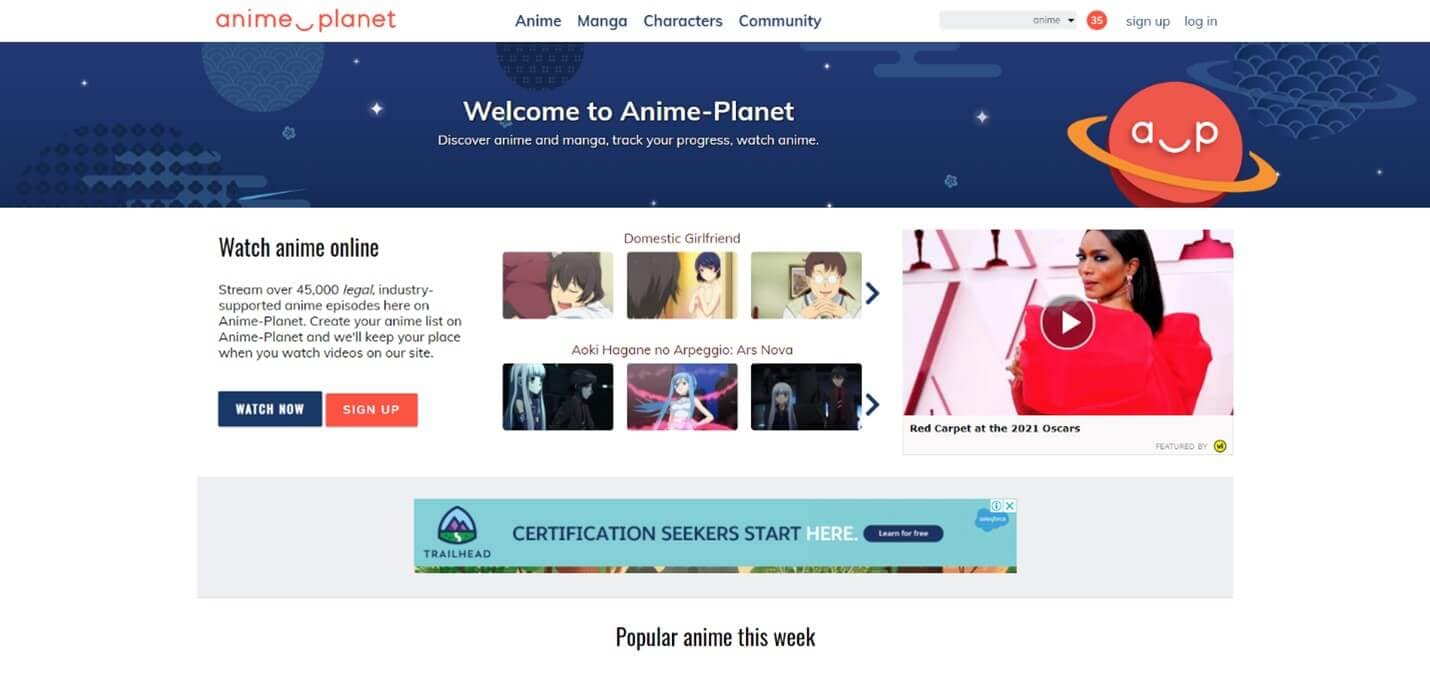
Anime-Planet caters to anime fans seeking a comprehensive anime experience. It offers a vast collection of dubbed anime, along with features for creating personal anime lists, tracking progress, and engaging with fellow anime enthusiasts. The website’s user-friendly interface and extensive library make it a popular choice.
Features: No ads, can switch the definition between 240/360p/480p
Recommendation: Anime-Planet is a good option for those who are looking for a website with no ads and a focus on community features. However, it’s important to note that the video quality is limited to 480p.
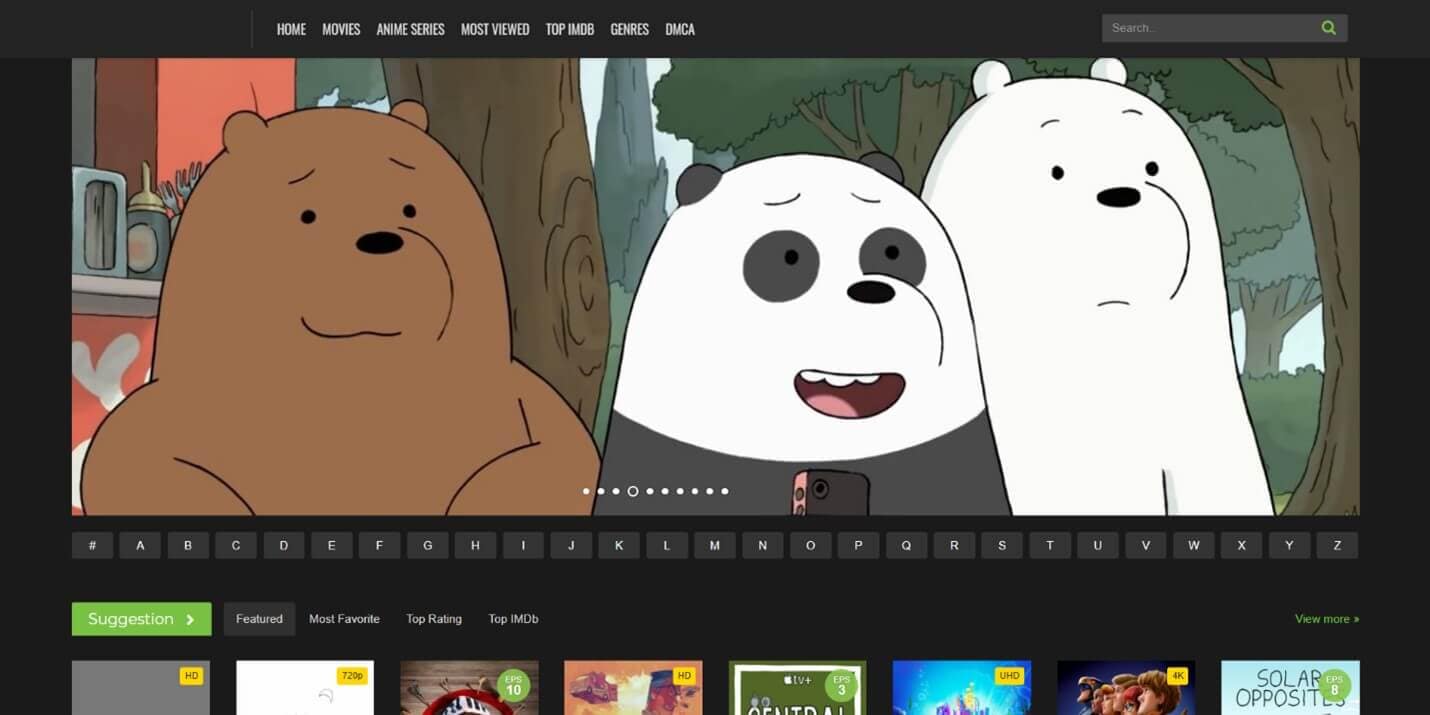
5. 123anime (123animehub.cc)
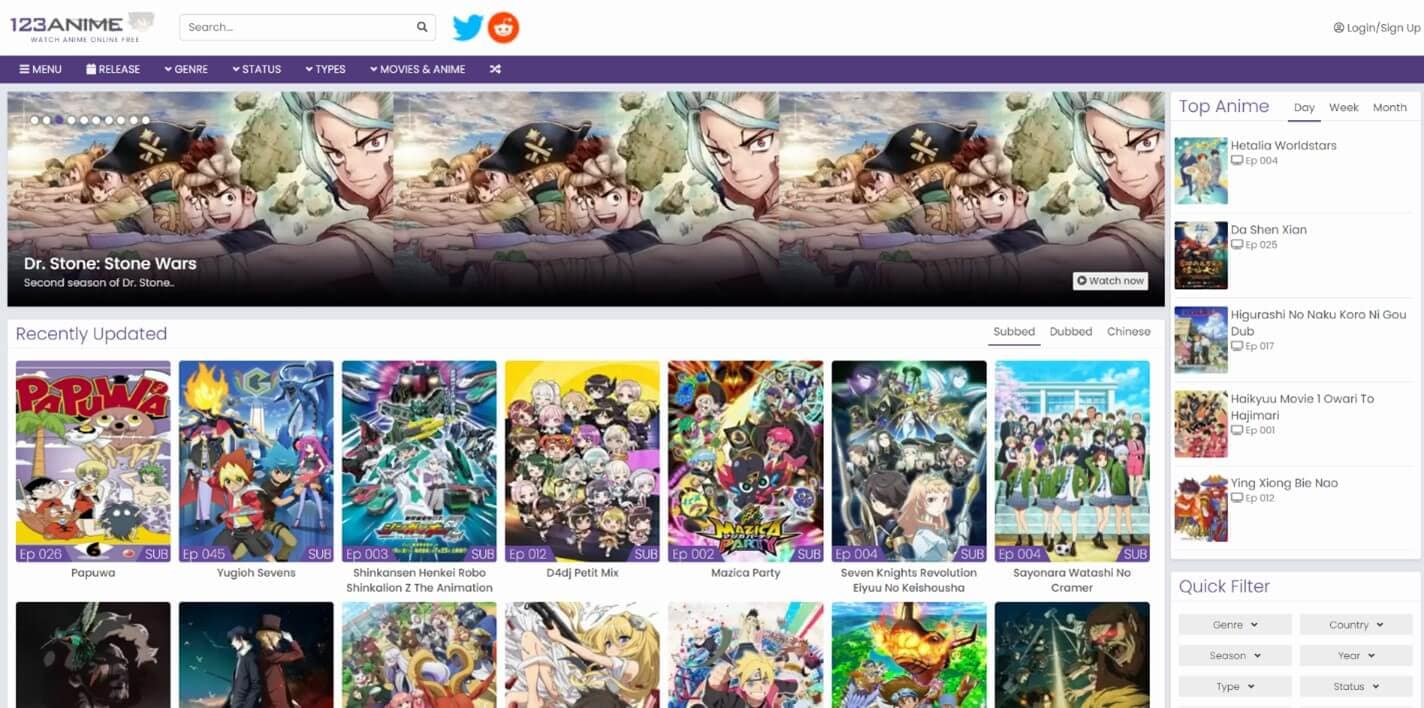
123anime is a popular platform renowned for its extensive collection of dubbed Japanese anime series, movies, and TV shows. Its user-friendly interface and extensive library make it a popular choice among anime enthusiasts.
Features: No ads, free to download, you can switch the resolution between 360p/480p/720p/1080p, you can set the playback speed, you can set fast forward or rewind.
Recommendation: 123anime is a good option for those who are looking for a website with no ads, the ability to download episodes for offline viewing, multiple playback speed options, and the ability to fast forward or rewind.
6. 9Anime (9animetv.to)
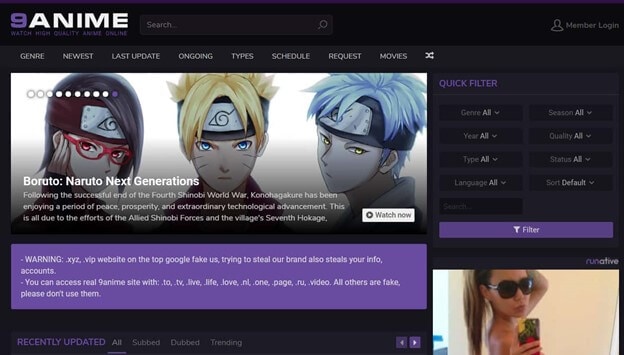
9Anime stands out for its exceptional collection of dubbed anime, most of which can be streamed in high-quality 1080p resolution. It offers a vast library of dubbed anime, movies, and other top-quality shows. The website’s regular updates and user-friendly interface enhance its appeal.
Features: There are no ads, you can turn on the automatic generation of English subtitles, you can switch the definition between 360p/720p/800p, and you can adjust the playback speed.
Recommendation: 9Anime is a great option for those who are looking for a website with no ads, automatic English subtitles, and the ability to adjust the playback speed. However, it’s important to note that the video quality is limited to 800p.
7. Dubbedanime (dubbedanime.biz)
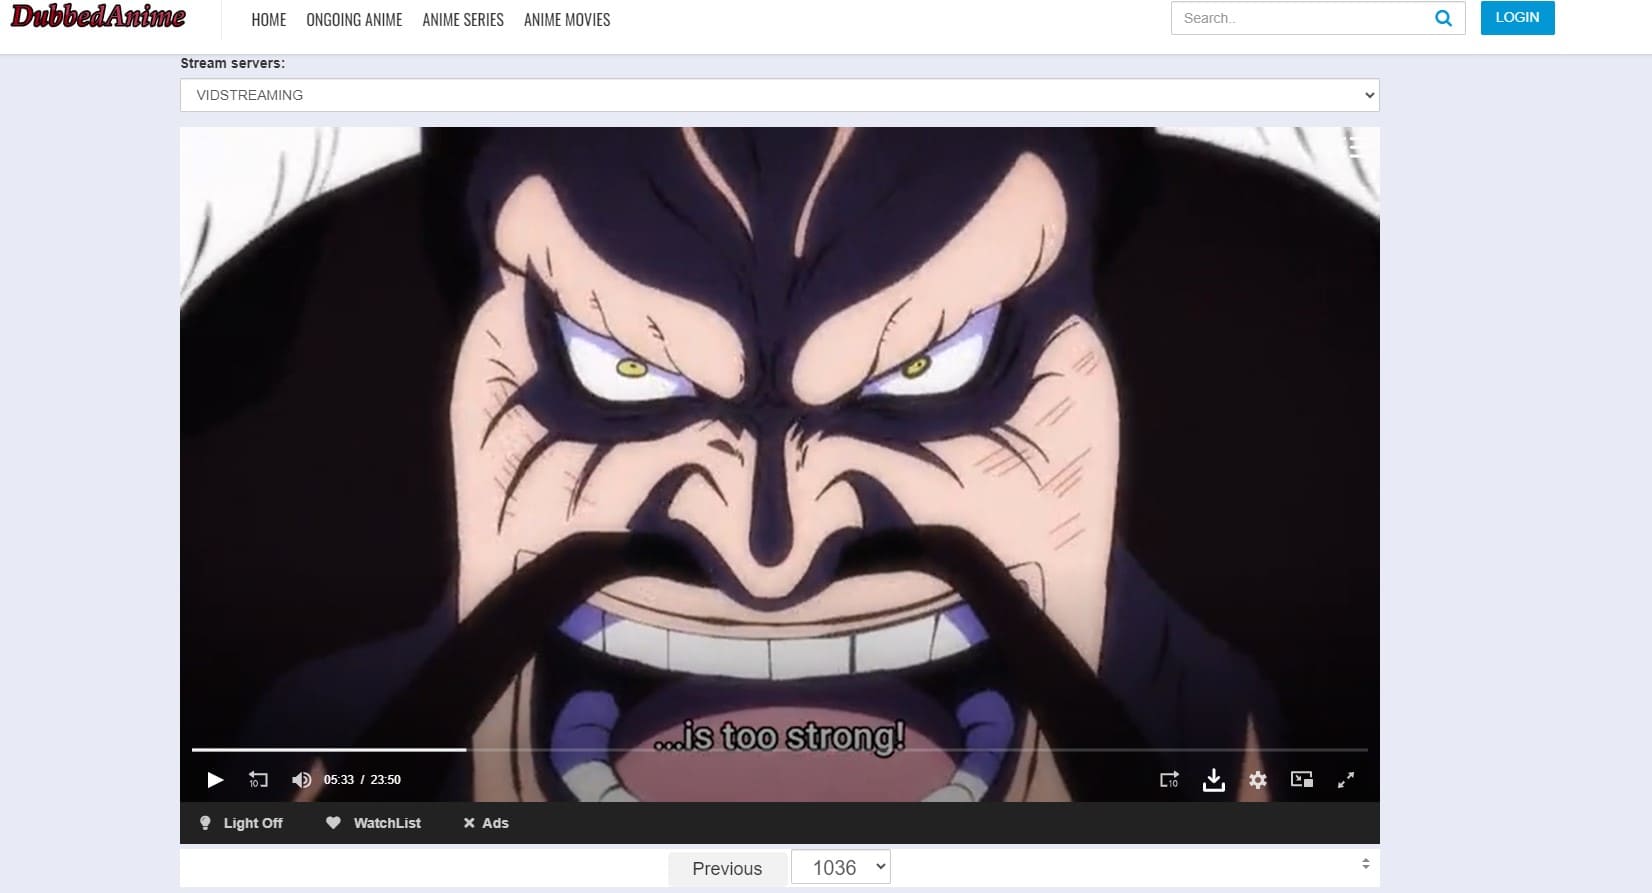
Dubbedanime is a dedicated haven for dubbed anime enthusiasts. Its collection includes a wide range of genres, from action and adventure to romance and comedy. The website’s simple interface and quick loading times make it a popular choice among anime lovers.
Features: There are ads, you can download it for free, you can switch the resolution between 360p/480p/720p/1080p
Recommendation: Dubbedanime is a good option for those who are looking for a website with a large library of dubbed anime and the ability to download episodes for offline viewing. However, it’s important to note that there are ads.
8. Animepahe (animepahe.ac/animepahe.com)

Animepahe provides a rich selection of dubbed anime, including popular titles like Naruto, One Piece, and Bleach. Its user-friendly interface and extensive library make it a convenient destination for anime enthusiasts.
Features: Some resources may be invalid or private and the resolution cannot be adjusted but the resolution is very high and there are no ads.
Recommendation: Animepahe is a good option for those who are looking for a website with no ads and very high video quality. However, it’s important to note that some resources may be invalid.
9. Streammovieshd (<www.streammovieshd.co>)

Streammovieshd offers a diverse collection of dubbed anime, catering to various genres and preferences. Its user-friendly interface and extensive library make it a popular choice among anime fans.
Features: No ads, can switch between SD and HD definition, can be set to generate English/French/German/Dutch/Italian/Arabic.
Recommendation: Streammovieshd is a good option for those who are looking for a website with no ads, multiple subtitle options, and the ability to switch between SD and HD definitions.
10. AnimeHeaven (animeheaven.me)
AnimeHeaven is a dedicated platform for dubbed anime, offering a vast library of titles spanning various genres. Its user-friendly interface and extensive collection make it a convenient destination for anime enthusiasts.
Features: Free to download, no ads, and you can set the playback speed
Recommendation: AnimeHeaven is a good option for those who are looking for a website with no ads, the ability to download episodes for offline viewing, and the ability to set the playback speed.
11. AnimeSuge (animesuge.to)

AnimeSuge provides a comprehensive selection of dubbed anime, including popular titles like Attack on Titan, My Hero Academia, and Fairy Tail. Its user-friendly interface and extensive library make it a convenient destination for anime fans.
Features: No ads, you can switch the definition between 360p/720p/1080p, you can set the playback speed, you can set fast forward or rewind.
Recommendation: AnimeSuge is a great option for those who are looking for a website with no ads, multiple playback speed options, and the ability to fast-forward or rewind.
12. Tubi (tubitv.com)
Tubi is a free video streaming service offering a diverse selection of dubbed anime, including popular titles like Death Note, Naruto, and Dragon Ball. Its user-friendly interface and extensive library make it a convenient destination for anime fans.
Features: There are ads, you can switch the resolution between 360p and 480p, and you can set fast forward or rewind.
Recommendation: Tubi is a good option for those who are looking for a website with a large library of dubbed anime, multiple playback speed options, and the ability to fast-forward or rewind.
Some sites might need a VPN to visit if you cannot enter. These 12 free dubbed anime websites provide a wealth of entertainment options for anime enthusiasts, catering to diverse preferences and ensuring a seamless viewing experience.
Shanoon Cox
Shanoon Cox is a writer and a lover of all things video.
Follow @Shanoon Cox
Shanoon Cox
Mar 27, 2024• Proven solutions
Anime enthusiasts worldwide appreciate the convenience of watching dubbed anime, and numerous websites cater to this preference. Here’s a curated list of 12 top-notch free dubbed anime websites worth bookmarking:
1. Wcostream (<www.wcostream.tv>)
Wcostream is a comprehensive anime streaming platform offering a vast collection of dubbed anime series and movies. Its extensive library encompasses popular titles like Naruto, One Piece, Bleach, Attack on Titan, My Hero Academia, and many more. With over 1.1 million monthly visitors, Wcostream stands out for its user-friendly interface, regular updates, and seamless navigation.
Features: Cannot adjust clarity, no ads
Recommendation: Wcostream is a great option for those who want to watch dubbed anime without any ads. However, it’s important to note that the video quality cannot be adjusted.
2. Crunchyroll (<www.crunchyroll.com>)
Crunchyroll is a global anime powerhouse renowned for its extensive collection of dubbed anime, Asian dramas, and manga. It features a vast library of popular titles, including Attack on Titan, Naruto, and Yuri on Ice. Crunchyroll’s premium version offers an ad-free viewing experience and additional perks.
Features: Has ads, can switch resolution between 240/360p/480p
Recommendation: Crunchyroll is a popular option for dubbed anime, but it’s important to note that there are ads and the video quality is limited to 480p. However, Crunchyroll does offer a premium subscription that includes ad-free viewing and higher video quality.
3. KissAnime (kissanime.com.ru)
KissAnime is a renowned anime streaming platform offering both subbed and dubbed versions of a diverse range of anime series and movies. It supports offline viewing, provides advanced filtering options, and doesn’t require account creation. KissAnime’s extensive library and convenient features make it a popular choice.
Features: There are ads, but some resources may be invalid and the definition cannot be adjusted. Japanese comic resources are limited.
Recommendation: KissAnime used to be a popular option for dubbed anime, but it has been experiencing some issues lately. Some resources may be invalid and the definition cannot be adjusted. Additionally, the Japanese comic resources are limited.
4. Anime-Planet (<www.anime-planet.com/anime/watch-online/dubbed> )
Anime-Planet caters to anime fans seeking a comprehensive anime experience. It offers a vast collection of dubbed anime, along with features for creating personal anime lists, tracking progress, and engaging with fellow anime enthusiasts. The website’s user-friendly interface and extensive library make it a popular choice.
Features: No ads, can switch the definition between 240/360p/480p
Recommendation: Anime-Planet is a good option for those who are looking for a website with no ads and a focus on community features. However, it’s important to note that the video quality is limited to 480p.
5. 123anime (123animehub.cc)
123anime is a popular platform renowned for its extensive collection of dubbed Japanese anime series, movies, and TV shows. Its user-friendly interface and extensive library make it a popular choice among anime enthusiasts.
Features: No ads, free to download, you can switch the resolution between 360p/480p/720p/1080p, you can set the playback speed, you can set fast forward or rewind.
Recommendation: 123anime is a good option for those who are looking for a website with no ads, the ability to download episodes for offline viewing, multiple playback speed options, and the ability to fast forward or rewind.
6. 9Anime (9animetv.to)
9Anime stands out for its exceptional collection of dubbed anime, most of which can be streamed in high-quality 1080p resolution. It offers a vast library of dubbed anime, movies, and other top-quality shows. The website’s regular updates and user-friendly interface enhance its appeal.
Features: There are no ads, you can turn on the automatic generation of English subtitles, you can switch the definition between 360p/720p/800p, and you can adjust the playback speed.
Recommendation: 9Anime is a great option for those who are looking for a website with no ads, automatic English subtitles, and the ability to adjust the playback speed. However, it’s important to note that the video quality is limited to 800p.
7. Dubbedanime (dubbedanime.biz)
Dubbedanime is a dedicated haven for dubbed anime enthusiasts. Its collection includes a wide range of genres, from action and adventure to romance and comedy. The website’s simple interface and quick loading times make it a popular choice among anime lovers.
Features: There are ads, you can download it for free, you can switch the resolution between 360p/480p/720p/1080p
Recommendation: Dubbedanime is a good option for those who are looking for a website with a large library of dubbed anime and the ability to download episodes for offline viewing. However, it’s important to note that there are ads.
8. Animepahe (animepahe.ac/animepahe.com)
Animepahe provides a rich selection of dubbed anime, including popular titles like Naruto, One Piece, and Bleach. Its user-friendly interface and extensive library make it a convenient destination for anime enthusiasts.
Features: Some resources may be invalid or private and the resolution cannot be adjusted but the resolution is very high and there are no ads.
Recommendation: Animepahe is a good option for those who are looking for a website with no ads and very high video quality. However, it’s important to note that some resources may be invalid.
9. Streammovieshd (<www.streammovieshd.co>)
Streammovieshd offers a diverse collection of dubbed anime, catering to various genres and preferences. Its user-friendly interface and extensive library make it a popular choice among anime fans.
Features: No ads, can switch between SD and HD definition, can be set to generate English/French/German/Dutch/Italian/Arabic.
Recommendation: Streammovieshd is a good option for those who are looking for a website with no ads, multiple subtitle options, and the ability to switch between SD and HD definitions.
10. AnimeHeaven (animeheaven.me)
AnimeHeaven is a dedicated platform for dubbed anime, offering a vast library of titles spanning various genres. Its user-friendly interface and extensive collection make it a convenient destination for anime enthusiasts.
Features: Free to download, no ads, and you can set the playback speed
Recommendation: AnimeHeaven is a good option for those who are looking for a website with no ads, the ability to download episodes for offline viewing, and the ability to set the playback speed.
11. AnimeSuge (animesuge.to)
AnimeSuge provides a comprehensive selection of dubbed anime, including popular titles like Attack on Titan, My Hero Academia, and Fairy Tail. Its user-friendly interface and extensive library make it a convenient destination for anime fans.
Features: No ads, you can switch the definition between 360p/720p/1080p, you can set the playback speed, you can set fast forward or rewind.
Recommendation: AnimeSuge is a great option for those who are looking for a website with no ads, multiple playback speed options, and the ability to fast-forward or rewind.
12. Tubi (tubitv.com)
Tubi is a free video streaming service offering a diverse selection of dubbed anime, including popular titles like Death Note, Naruto, and Dragon Ball. Its user-friendly interface and extensive library make it a convenient destination for anime fans.
Features: There are ads, you can switch the resolution between 360p and 480p, and you can set fast forward or rewind.
Recommendation: Tubi is a good option for those who are looking for a website with a large library of dubbed anime, multiple playback speed options, and the ability to fast-forward or rewind.
Some sites might need a VPN to visit if you cannot enter. These 12 free dubbed anime websites provide a wealth of entertainment options for anime enthusiasts, catering to diverse preferences and ensuring a seamless viewing experience.
Shanoon Cox
Shanoon Cox is a writer and a lover of all things video.
Follow @Shanoon Cox
How to Create Picsart Cartoon in Simple Ways
How to Create Picsart Cartoon
An easy yet powerful editor
Numerous effects to choose from
Detailed tutorials provided by the official channel
Cartoonized images are a convenient source of fun and media entertainment in present times. Try hands at creating your own caricature masterpieces with Picsart!
In this article
01 [How To Edit Cartoon Picture in Picsart](#Part 1)
02 [How To Make A Cartoon On Your Phone](#Part 2)
03 [How to Cartoon Yourself on Picsart](#Part 3)
Part 1 How to Edit Cartoon Picture in Picsart
Cartoonized pictures as you must be aware of, are comic transformations of real-time images and are widely used on social media to add a funny angle to the diversity of conversation going on, or even just as a source of plentiful amusement.
If you often feel motivated to experiment with the art and are looking for a perfect solution, see through the following section for a detailed and stepwise guide to create and edit a Picsart cartoon with utmost ease and within a quick time span:
User’s Guide to Edit Cartoon Pictures in Picsart
Step 1: Download the Picsart Application
Visit the official Picsart website to download the desktop version of the app in your Windows or MacOs supported PC.
Step 2: Make a Selection
Launch the app in your system to reach the Picsart welcome screen. Navigate to the bottom and tap the ‘+’ symbol. You are now required to choose a desired image to create the cartoon edit. You can either browse through your system gallery or search a specific one from the Picsart photo library in the ‘Search Bar’ at the top of the app screen.

Step 3: Let’s Get Editing!
When you have made your choice, navigate to the toolbar at the bottom of the app screen and click on the ‘Effects’ tab. Make a side scroll to choose a specific effect category, like that of ‘Artistic’ or ‘Magic’ to open a library of effects in the selected category.
As an example, selecting the ‘Cartoonizer’ option in the ‘Artistic’ effects category can add an immediate caricature feel to your selected real-time image. You can further include manual adjustments to get the perfect cartoon look by pressing and holding the ‘Cartoonizer’ option. There are a whole variety of magical effects, such as, Neo Pop, Soul, Badlands, Animation and Paw in the ‘Magic’ effects category, that are just perfect in giving your edit a fantasizing look with a Picsart cartoon background.
If you are looking for a quicker editing process, prefer adding cartoonized elements, like ‘Picsart Stickers’ to your image instead of going for a complete caricature edit. To do this, open the ‘Picsart Photo Editor’, navigates to the ‘Sticker’ symbol and click on it, followed by searching ‘Cartoon Sticker’. You can alternatively search a specific keyword with the ‘Cartoon’ descriptor, if you are clear on what you want to add.
You can further, resize your selected sticker with a ‘Two Finger Pinch’ or use the ‘Eraser’ tool to ward off any unwanted portions from the same. You are free to take as many repetitions of the process as you wish, till you get the perfect result for saving to your device and sharing on your social media handles.

Step 4: Time to Save and Share!
When you are satisfied with your work, navigate to the right hand corner and tap ‘Apply’ to finalize your changes, followed by clicking on the ‘Next’ button at the top right corner of the app screen to save and export your creation.
Part 2 How to Make a Cartoon on Your Phone
After a detailed analysis of the cartoon editing procedure in your desktops, let us see thro ugh the method of creating cartoonized images on your MacOs and Android smartphones on the following section:
Stepwise Procedure for Creating Cartoonized Images on Phone
Step 1: Download the Application
When going to use the Picsart editor application on your smartphone, you will first require a download of the same in your concerned device. You can do this by visiting the ‘Google PlayStore’ for an Android device or the ‘Apple App Store’ for MacOs smartphones.
Step 2: Choose a Real-time Image
After a successful launch of the ‘Picsart Editor’ application in your smartphone, reach to and click on the ‘+’ icon at the bottom of the app’s working interface. This needs to be followed by selecting any specific real-time image, either from your smartphone gallery or the Picsart photo library using the top ‘Search Bar’ of the interface, for creating a cartoonized edit.

Step 3: Editing Begins!
Once you are done with selecting the image, proceed to add effects to your selection by clicking the ‘Effects’ tab in the bottom toolbar, succeeded by picking a desired effect type through a right scroll. Tap on any category, such as, Magic, Artistic, etc, to open the effect library of the same.
For instance, you can click on the ‘Cartoonizer’ option within Artistic’ effects to supplement your uploaded real-time image with an instant cartoonized effect. You are also granted the liberty to make manual changes to set the caricature image effects as per your preferences, which you can do with a ‘Press and Hold’ of the ‘Cartoonizer’ tab. If you have a diversion towards complementing your cartoonized images with magical effects, choose from Animation, Neo Pop, Paw, Badlands, Paw, and other amazing options in the ‘Magic’ category.

Step 4: Save and Export
When you have completed the editing process and the changes satisfy you, go to the ‘Apply’ tab at the right side of the editor screen to see the changes appear in your edit. You can now navigate to the upper right corner of the app screen and click on ‘Next’ to save your work locally to your device, along with exporting the same across different media platforms.
Part 3 How to Cartoon Yourself on Picsart
Having learnt about the interesting ways to edit cartoon pictures and create cartoons on your smartphone, you might like to try hands on creating a cartoon portrait of yourself in the Picsart editor for a variety of reasons, like that of creating cartoon profile pics of yourself. Let us have a look of the procedure for the same using the Picsart Online Image Editor tool in the following section:
User’s Guide to Create a Cartoon Portrait With Picsart Online Photo Editor
Step 1: Launch the Application
In any of your favorite internet browsers, search for and open ‘Picsart Desktop Editor’. In the app’s working interface, tap ‘Upload’ or ‘New Project’ to choose an image from your device or the free to use Picsart image library respectively, for proceeding with the cartoonized transformations.

Step 2: Edit Your Selection
Tap on the ‘Effects’ tab from the editing toolbar at the top of your image and select a desired effect category to access the diversity of cartoonifying filters. It is recommended to select the ‘Magic’ category for the most splendid cartoon effects, such as, Paw, Badland, Animation, Soul and Neo Pop among many others.

You can even make manual adjustments in the brightness, color, saturation, burn and fade, etc., of the image by clicking on the ‘Adjust’ and ‘Blend’ options at the top of the image workspace.

Step 3: Download and Share Your Work
When you are done editing, navigate to and click on the ‘Share’ option at the upper right corner of the editor screen to download your cartoonized image.

****Wondershare Filmora Video Editor Cartoon Image Creator**
For Win 7 or later (64-bit)
For macOS 10.12 or later
Picsart is certainly a dependable solution to create caricature images, but if you are keen on looking for an alternative application to cater to the need, Introduced to the software market by Wondershare, the Filmora Cartoon Image Creator can be a convenient rescue. The app promises you of a high quality cartoonized edit with a plethora of editing effects to suit your most specific editing preferences.
● Ending Thoughts →
● Creating cartoonized edits from real time images is a fun and entertaining activity along with being the latest media trend.
● The Picsart editor application allows making caricature images from actual stills through desktop, smartphone and online compatible image editing program.
● Talking of suitable Picsart alternatives, you can rely on the Filmora Cartoon Image Creator application for high quality cartoonized image creation.
Cartoonized images are a convenient source of fun and media entertainment in present times. Try hands at creating your own caricature masterpieces with Picsart!
In this article
01 [How To Edit Cartoon Picture in Picsart](#Part 1)
02 [How To Make A Cartoon On Your Phone](#Part 2)
03 [How to Cartoon Yourself on Picsart](#Part 3)
Part 1 How to Edit Cartoon Picture in Picsart
Cartoonized pictures as you must be aware of, are comic transformations of real-time images and are widely used on social media to add a funny angle to the diversity of conversation going on, or even just as a source of plentiful amusement.
If you often feel motivated to experiment with the art and are looking for a perfect solution, see through the following section for a detailed and stepwise guide to create and edit a Picsart cartoon with utmost ease and within a quick time span:
User’s Guide to Edit Cartoon Pictures in Picsart
Step 1: Download the Picsart Application
Visit the official Picsart website to download the desktop version of the app in your Windows or MacOs supported PC.
Step 2: Make a Selection
Launch the app in your system to reach the Picsart welcome screen. Navigate to the bottom and tap the ‘+’ symbol. You are now required to choose a desired image to create the cartoon edit. You can either browse through your system gallery or search a specific one from the Picsart photo library in the ‘Search Bar’ at the top of the app screen.
Step 3: Let’s Get Editing!
When you have made your choice, navigate to the toolbar at the bottom of the app screen and click on the ‘Effects’ tab. Make a side scroll to choose a specific effect category, like that of ‘Artistic’ or ‘Magic’ to open a library of effects in the selected category.
As an example, selecting the ‘Cartoonizer’ option in the ‘Artistic’ effects category can add an immediate caricature feel to your selected real-time image. You can further include manual adjustments to get the perfect cartoon look by pressing and holding the ‘Cartoonizer’ option. There are a whole variety of magical effects, such as, Neo Pop, Soul, Badlands, Animation and Paw in the ‘Magic’ effects category, that are just perfect in giving your edit a fantasizing look with a Picsart cartoon background.
If you are looking for a quicker editing process, prefer adding cartoonized elements, like ‘Picsart Stickers’ to your image instead of going for a complete caricature edit. To do this, open the ‘Picsart Photo Editor’, navigates to the ‘Sticker’ symbol and click on it, followed by searching ‘Cartoon Sticker’. You can alternatively search a specific keyword with the ‘Cartoon’ descriptor, if you are clear on what you want to add.
You can further, resize your selected sticker with a ‘Two Finger Pinch’ or use the ‘Eraser’ tool to ward off any unwanted portions from the same. You are free to take as many repetitions of the process as you wish, till you get the perfect result for saving to your device and sharing on your social media handles.
Step 4: Time to Save and Share!
When you are satisfied with your work, navigate to the right hand corner and tap ‘Apply’ to finalize your changes, followed by clicking on the ‘Next’ button at the top right corner of the app screen to save and export your creation.
Part 2 How to Make a Cartoon on Your Phone
After a detailed analysis of the cartoon editing procedure in your desktops, let us see thro ugh the method of creating cartoonized images on your MacOs and Android smartphones on the following section:
Stepwise Procedure for Creating Cartoonized Images on Phone
Step 1: Download the Application
When going to use the Picsart editor application on your smartphone, you will first require a download of the same in your concerned device. You can do this by visiting the ‘Google PlayStore’ for an Android device or the ‘Apple App Store’ for MacOs smartphones.
Step 2: Choose a Real-time Image
After a successful launch of the ‘Picsart Editor’ application in your smartphone, reach to and click on the ‘+’ icon at the bottom of the app’s working interface. This needs to be followed by selecting any specific real-time image, either from your smartphone gallery or the Picsart photo library using the top ‘Search Bar’ of the interface, for creating a cartoonized edit.
Step 3: Editing Begins!
Once you are done with selecting the image, proceed to add effects to your selection by clicking the ‘Effects’ tab in the bottom toolbar, succeeded by picking a desired effect type through a right scroll. Tap on any category, such as, Magic, Artistic, etc, to open the effect library of the same.
For instance, you can click on the ‘Cartoonizer’ option within Artistic’ effects to supplement your uploaded real-time image with an instant cartoonized effect. You are also granted the liberty to make manual changes to set the caricature image effects as per your preferences, which you can do with a ‘Press and Hold’ of the ‘Cartoonizer’ tab. If you have a diversion towards complementing your cartoonized images with magical effects, choose from Animation, Neo Pop, Paw, Badlands, Paw, and other amazing options in the ‘Magic’ category.
Step 4: Save and Export
When you have completed the editing process and the changes satisfy you, go to the ‘Apply’ tab at the right side of the editor screen to see the changes appear in your edit. You can now navigate to the upper right corner of the app screen and click on ‘Next’ to save your work locally to your device, along with exporting the same across different media platforms.
Part 3 How to Cartoon Yourself on Picsart
Having learnt about the interesting ways to edit cartoon pictures and create cartoons on your smartphone, you might like to try hands on creating a cartoon portrait of yourself in the Picsart editor for a variety of reasons, like that of creating cartoon profile pics of yourself. Let us have a look of the procedure for the same using the Picsart Online Image Editor tool in the following section:
User’s Guide to Create a Cartoon Portrait With Picsart Online Photo Editor
Step 1: Launch the Application
In any of your favorite internet browsers, search for and open ‘Picsart Desktop Editor’. In the app’s working interface, tap ‘Upload’ or ‘New Project’ to choose an image from your device or the free to use Picsart image library respectively, for proceeding with the cartoonized transformations.
Step 2: Edit Your Selection
Tap on the ‘Effects’ tab from the editing toolbar at the top of your image and select a desired effect category to access the diversity of cartoonifying filters. It is recommended to select the ‘Magic’ category for the most splendid cartoon effects, such as, Paw, Badland, Animation, Soul and Neo Pop among many others.
You can even make manual adjustments in the brightness, color, saturation, burn and fade, etc., of the image by clicking on the ‘Adjust’ and ‘Blend’ options at the top of the image workspace.
Step 3: Download and Share Your Work
When you are done editing, navigate to and click on the ‘Share’ option at the upper right corner of the editor screen to download your cartoonized image.
****Wondershare Filmora Video Editor Cartoon Image Creator**
For Win 7 or later (64-bit)
For macOS 10.12 or later
Picsart is certainly a dependable solution to create caricature images, but if you are keen on looking for an alternative application to cater to the need, Introduced to the software market by Wondershare, the Filmora Cartoon Image Creator can be a convenient rescue. The app promises you of a high quality cartoonized edit with a plethora of editing effects to suit your most specific editing preferences.
● Ending Thoughts →
● Creating cartoonized edits from real time images is a fun and entertaining activity along with being the latest media trend.
● The Picsart editor application allows making caricature images from actual stills through desktop, smartphone and online compatible image editing program.
● Talking of suitable Picsart alternatives, you can rely on the Filmora Cartoon Image Creator application for high quality cartoonized image creation.
Learn Disney Cartoon Drawing to See More Disney Magic Moments
Learn Disney Cartoon Drawing to See More Disney Magic Moments
An easy yet powerful editor
Numerous effects to choose from
Detailed tutorials provided by the official channel
How to Draw a Disney Caricature

Disney-Inspired Ipad Drawing Class for Beginners
In this article
01 [How to Draw a Disney Caricature](#Part 1)
02 [Disney-Inspired Ipad Drawing Class for Beginners](#Part 2)
Part 1 How to Draw a Disney Caricature
Below is the step-by-step guide to making a Disney cartoon drawing with colors from the comfort of your home:
01How to Draw Mickey

Unarguably, Mickey Mouse is one of the most famous anime characters globally. This character was created in 1928 and is a famous Disney cartoon drawing by animators. Here are straightforward steps to help you draw a Mickey Mouse:
Step 1: Sketch the general but carefully observed features of Mickey Mouse, including the position of ears, body shape (reverse C shape), body proportions including eyes, limbs, and arms, length of arms, button on his pants, and angle on the hands.
Step 2: Take your pencil and paper, and using gentle and weak strokes, make a simple sketch of the head, neck, belly, and limbs.

Step 3: Draw contours of the mouth, ears, and nose.

Step 4: Specify the face features like a smiling opened mouth, tip of the nose, and eyes.

Step 5: Draw the hands carefully, observing the length of both arms and their proportion to the size of the character’s head.

Step 6: Sketch the outline contours of the shoes, the legs, and the pants.

Step 7: Sketch the final outline contour of the body, then erase excess lines where necessary. Add the two buttons on Mickey mouse pants.

Step 8: Draw his nose’s tail, tongue, and ellipse.

Step 9: First, use a 2B or 4B or any soft black color pencil to color the black parts.

Step 10: Depending on your preference, you can color with water, acrylic paints, or pastels.

02How to Draw Captain America
Follow these simple steps to make a Disney cartoon drawing of Captain America:
Step 1: Draw the head and chest
Draw the outlines of his masked face using smooth lines. Draw a curved line across his face to divide his face from his mask. Draw a large letter A and add tiny wings beside it on his forehead. Draw his mouth, eyes, and nose. Use curved lines to indicate his shoulder and chest, then draw a star on his chest.

Step 2: Draw his arm and waist
Draw a curved line on the shoulder to represent the bicep, then draw his gloved arm curled to form a fist. Draw curved lines beneath the chest to represent his muscular weight, then draw the pouches on his belt and use more curved lines to draw his waist.

Step 3: Draw his legs
Here, we shall portray Captain America in action. Use curved lines to show his extended right leg with boots. The left leg should appear more petite.

Step 4: Draw his shield
Against his right arm, carefully draw a flattened circular shape. You can achieve this by drawing concentric circles with a large star in the middle. Draw his arm poking out from behind his shield.

Step 5: Include the final details
Add some vertical lines across his waist and some details on his boots.

Step 6: Colour Captain America
Using colors of the American flag, color your drawing with red, white, and blue colors.

03How to Draw Stitch
Stitch is a bulletproof and fireproof alien from the Lilo and Stitch animations. Here’s how you can draw Stitch:
Step 1: Draw a circle that would form Stitch’s head

Step 2: Using a long curved line, draw an irregular peanut shape beneath the head to represent its body.

Step 3: To form its light underbelly, enclose a small shape parallel to the outline of Stitch’s body using a long curved line. On the chest region, draw a series of small “V” shapes to indicate the presence of fur.

Step 4: Draw Stitch’s arm using curved lines for the upper arm and another pair for the lower arm. Draw his bent hands and fingers using short lines. At the tip of its fingers, draw small pointed triangles to represent its claws.

Step 5: Erase the guidelines from Stitch’s arm

Step 6: Draw Stitch’s outstretched arm using a pair of curved lines and small “C” shaped lines to represent the fingers. Use short lines to connect the fingers. Draw small “V” shapes at the tip of the fingers for the triangular claws.

Step 7: Use a pair of curved lines to sketch each leg, then enclose the toes using C-shaped lines

Step 8: Sketch the ears using long curved lines to indicate the base and folds. Sketch the fur on top of Stitch’s head using a series of curved lines.

Step 9: Draw a big circle for the nose and use curved lines to indicate the nostrils. For the eyes, draw irregular rounded shapes, one within the other. Sketch too long curved lines to show the mouth and small blonde triangles for the teeth. Above the eyes and nose, draw curved lines.

Step 10: Use different shades of blue to colour Stitch.

Part 2 Disney-Inspired Ipad Drawing Class for Beginner
Here is a list of classes for beginners interested in drawing Disney characters.
01Dive into the world of Animation with a Disney-Inspired Ipad Drawing Course

This Disney-inspired lesson focuses on real-life scenarios that are beautiful and adorable. Create your everyday settings by sketching backgrounds and outfitting figures.
It will assist you in developing a straightforward approach to drawing cartoon characters through experimentation and time. Follow along and sketch characters, then make your new character.
02Drawing Faces: A Beginner‘s Guide

Ira Marcks, a graphic novelist, will teach you everything you need to know about drawing faces. Are you completely new when it comes to drawing? No worries; follow along with Ira’s bite-sized lectures, and you’ll be ready to delve into a class project by the end of the course.
Do you prefer to set your speed and work at it? If yes, then extend your learning beyond the classroom, download Ira’s Drawing Faces Book.
03Disney Inspired Drawings: Faces and Expressions

Learners will look at sketching a cartoon image of themselves or people they know while exploring the specific traits of Disney-style characters in this one-time live drawing lesson.
Learners will collaborate with the teacher while working on their art projects. This is a technique class, so the focus will be on the process and working towards a finished goal. Nevertheless, a piece may get completed outside of class.
This program is for students who have a basic understanding of drawing and proportion, are open to artistic growth, and are comfortable appearing on camera and sharing their work in a small group setting. All to help each other, and the classroom environment will support all students.
04Free Art Lessons By The Parks’ Imagineers
This lesson will teach how to create your theme park, design virtual landscapes, and even sketch unique costumes!
You’ll also learn how to draw characters from Frozen 2 like Anna and Elsa and classics like Mickey Mouse, Daisy Duck, Pluto, and others.
Your class experience can be enjoyable when using an easy-to-use tool like Wondershare Filmora.
Wondershare Filmora Video Editor is a robust and easy-to-use video editor for users of all skill levels, from beginner to advanced. Its advanced tools, adjustable keyframing, smoothing effects, and motion blur will considerably assist you in creating a high-quality animation video. Furthermore, the auto color correction and audio mixing will elevate your 2D animation film to new heights. Filmora is the best solution if you want more productivity, control, and customization options for your Disney cartoon drawings and animation.
For Win 7 or later (64-bit)
For macOS 10.12 or later
● Ending Thoughts →
● How to make a Disney cartoon drawing
● A step-by-step guide to drawing your favorite Disney cartoon drawing with colors
● How to use Filmora to create animations
● Different Disney-inspired beginner classes for iPad users.
How to Draw a Disney Caricature
Disney-Inspired Ipad Drawing Class for Beginners
In this article
01 [How to Draw a Disney Caricature](#Part 1)
02 [Disney-Inspired Ipad Drawing Class for Beginners](#Part 2)
Part 1 How to Draw a Disney Caricature
Below is the step-by-step guide to making a Disney cartoon drawing with colors from the comfort of your home:
01How to Draw Mickey
Unarguably, Mickey Mouse is one of the most famous anime characters globally. This character was created in 1928 and is a famous Disney cartoon drawing by animators. Here are straightforward steps to help you draw a Mickey Mouse:
Step 1: Sketch the general but carefully observed features of Mickey Mouse, including the position of ears, body shape (reverse C shape), body proportions including eyes, limbs, and arms, length of arms, button on his pants, and angle on the hands.
Step 2: Take your pencil and paper, and using gentle and weak strokes, make a simple sketch of the head, neck, belly, and limbs.
Step 3: Draw contours of the mouth, ears, and nose.
Step 4: Specify the face features like a smiling opened mouth, tip of the nose, and eyes.
Step 5: Draw the hands carefully, observing the length of both arms and their proportion to the size of the character’s head.
Step 6: Sketch the outline contours of the shoes, the legs, and the pants.
Step 7: Sketch the final outline contour of the body, then erase excess lines where necessary. Add the two buttons on Mickey mouse pants.
Step 8: Draw his nose’s tail, tongue, and ellipse.
Step 9: First, use a 2B or 4B or any soft black color pencil to color the black parts.
Step 10: Depending on your preference, you can color with water, acrylic paints, or pastels.
02How to Draw Captain America
Follow these simple steps to make a Disney cartoon drawing of Captain America:
Step 1: Draw the head and chest
Draw the outlines of his masked face using smooth lines. Draw a curved line across his face to divide his face from his mask. Draw a large letter A and add tiny wings beside it on his forehead. Draw his mouth, eyes, and nose. Use curved lines to indicate his shoulder and chest, then draw a star on his chest.
Step 2: Draw his arm and waist
Draw a curved line on the shoulder to represent the bicep, then draw his gloved arm curled to form a fist. Draw curved lines beneath the chest to represent his muscular weight, then draw the pouches on his belt and use more curved lines to draw his waist.
Step 3: Draw his legs
Here, we shall portray Captain America in action. Use curved lines to show his extended right leg with boots. The left leg should appear more petite.
Step 4: Draw his shield
Against his right arm, carefully draw a flattened circular shape. You can achieve this by drawing concentric circles with a large star in the middle. Draw his arm poking out from behind his shield.
Step 5: Include the final details
Add some vertical lines across his waist and some details on his boots.
Step 6: Colour Captain America
Using colors of the American flag, color your drawing with red, white, and blue colors.
03How to Draw Stitch
Stitch is a bulletproof and fireproof alien from the Lilo and Stitch animations. Here’s how you can draw Stitch:
Step 1: Draw a circle that would form Stitch’s head
Step 2: Using a long curved line, draw an irregular peanut shape beneath the head to represent its body.
Step 3: To form its light underbelly, enclose a small shape parallel to the outline of Stitch’s body using a long curved line. On the chest region, draw a series of small “V” shapes to indicate the presence of fur.
Step 4: Draw Stitch’s arm using curved lines for the upper arm and another pair for the lower arm. Draw his bent hands and fingers using short lines. At the tip of its fingers, draw small pointed triangles to represent its claws.
Step 5: Erase the guidelines from Stitch’s arm
Step 6: Draw Stitch’s outstretched arm using a pair of curved lines and small “C” shaped lines to represent the fingers. Use short lines to connect the fingers. Draw small “V” shapes at the tip of the fingers for the triangular claws.
Step 7: Use a pair of curved lines to sketch each leg, then enclose the toes using C-shaped lines
Step 8: Sketch the ears using long curved lines to indicate the base and folds. Sketch the fur on top of Stitch’s head using a series of curved lines.
Step 9: Draw a big circle for the nose and use curved lines to indicate the nostrils. For the eyes, draw irregular rounded shapes, one within the other. Sketch too long curved lines to show the mouth and small blonde triangles for the teeth. Above the eyes and nose, draw curved lines.
Step 10: Use different shades of blue to colour Stitch.
Part 2 Disney-Inspired Ipad Drawing Class for Beginner
Here is a list of classes for beginners interested in drawing Disney characters.
01Dive into the world of Animation with a Disney-Inspired Ipad Drawing Course
This Disney-inspired lesson focuses on real-life scenarios that are beautiful and adorable. Create your everyday settings by sketching backgrounds and outfitting figures.
It will assist you in developing a straightforward approach to drawing cartoon characters through experimentation and time. Follow along and sketch characters, then make your new character.
02Drawing Faces: A Beginner‘s Guide
Ira Marcks, a graphic novelist, will teach you everything you need to know about drawing faces. Are you completely new when it comes to drawing? No worries; follow along with Ira’s bite-sized lectures, and you’ll be ready to delve into a class project by the end of the course.
Do you prefer to set your speed and work at it? If yes, then extend your learning beyond the classroom, download Ira’s Drawing Faces Book.
03Disney Inspired Drawings: Faces and Expressions
Learners will look at sketching a cartoon image of themselves or people they know while exploring the specific traits of Disney-style characters in this one-time live drawing lesson.
Learners will collaborate with the teacher while working on their art projects. This is a technique class, so the focus will be on the process and working towards a finished goal. Nevertheless, a piece may get completed outside of class.
This program is for students who have a basic understanding of drawing and proportion, are open to artistic growth, and are comfortable appearing on camera and sharing their work in a small group setting. All to help each other, and the classroom environment will support all students.
04Free Art Lessons By The Parks’ Imagineers
This lesson will teach how to create your theme park, design virtual landscapes, and even sketch unique costumes!
You’ll also learn how to draw characters from Frozen 2 like Anna and Elsa and classics like Mickey Mouse, Daisy Duck, Pluto, and others.
Your class experience can be enjoyable when using an easy-to-use tool like Wondershare Filmora.
Wondershare Filmora Video Editor is a robust and easy-to-use video editor for users of all skill levels, from beginner to advanced. Its advanced tools, adjustable keyframing, smoothing effects, and motion blur will considerably assist you in creating a high-quality animation video. Furthermore, the auto color correction and audio mixing will elevate your 2D animation film to new heights. Filmora is the best solution if you want more productivity, control, and customization options for your Disney cartoon drawings and animation.
For Win 7 or later (64-bit)
For macOS 10.12 or later
● Ending Thoughts →
● How to make a Disney cartoon drawing
● A step-by-step guide to drawing your favorite Disney cartoon drawing with colors
● How to use Filmora to create animations
● Different Disney-inspired beginner classes for iPad users.
5 Best Adobe Animate Courses & Classes | Beginners Complete Tutorial
5 Best Adobe Animate Courses & Classes | Beginners Complete Tutorial
An easy yet powerful editor
Numerous effects to choose from
Detailed tutorials provided by official channel
Professional animation is hence one of the fields that has a bright future. Willing to learn more about animation?

Don’t worry! We’ve got you covered, follow this article and find out more about the best 5 Adobe animate courses.
In this article
01 [What is Adobe Animate CC?](#Part 1)
02 [Top 8 FULL ADOBE ANIMATE COURSES | Beginners Complete Tutorial](#Part 2)
03 [How to Quickly Learn the Skills of Adobe Animate Course](#Part 3)
Part 1 What is Adobe Animate CC?
1. Who should take Adobe Animate course?
Learning is never bound. Anyone willing to learn can put in effort and time. As long as you wish to learn, and have an interest in it you can take it up. Those of you who wish to make a career in animation are highly recommended to take up this course. The Adobe animate course can help you kickstart your career as a professional animator.
2. Are there prerequisites to Adobe Animate course?
Animation is one such field that does not require a lot of prerequisites. In fact, even a beginner who has absolutely no idea about animation can take up the adobe animate course.
Part 2 Top 5 FULL ADOBE ANIMATE COURSES | Beginners Complete Tutorial
1. Adobe animate CC 2018- HTML5 Banner Ads
Adobe animate CC 2018- HTML5 Banner Ads is one of the most comprehensive courses on adobe animate. It teaches you several relevant skills associated with animation and marketing (one of the primary applications of animation).

Skills you will learn:
● Basics of HTML5 banner ads using adobe animate
● Understanding the importance of Adobe animate CC in web advertisements
● Through this course, you’d become an expert at publishing ad networks
● The course will help you explore tools and techniques related to banner advertising
Udemy: Udemy Duration: About 5 hours
Pros
The course is beginner-friendly; it helps you advance your career in animation from scratch.
The course covers even complex concepts.
You receive a course completion certificate
Cons
The course is paid and you need to pay a nominal fee in order to access the lecture videos.
The course is monotonous i.e. there is no live teaching.
2. 2D animation for beginners with adobe animate, Walt Wonderwolk
If you’re looking for a well-designed course that covers almost all the necessary concepts, then this course is just the right one for you. Through this course, you can learn all about Adobe animate. All the primary concepts are explained in detail in this course.

Skills you will learn:
● All the primary concepts of computer-generated animations using Adobe animate.
● You will learn important concepts such as eases, symbols, vector drawings, tweens, and key frames.
● You will also learn how to add sound to your animation
● You will gain hands-on knowledge about drawing, composition, and animation of characters.
Udemy: skillshare
Pros
The course is great for beginners to start learning about Adobe animate
The course covers fundamental concepts of animation
Cons
You need a skillshare membership in order to access the lecture videos.
You need to pay in order to get a skillshare membership
You do not get a course completion certificate
3. Rigging and animating in Adobe animate
Looking for a quick crash course about Adobe animate? Well, this course is perfect for you. As the name suggests, in this course you shall learn all about rigging and animating 2d characters.

Skills you will learn:
● rigging and animating adobe animate
● Through this course, you will know how to efficiently animate any character
● Discover the utilization of vectors and images for rigging
● You will get a clear understanding of important concepts such as layer parenting, motion tweening, and symbols.
Udemy: Udemy Duration: around 4 hours
Pros
You will learn the major concepts of animation.
You will learn about rigging in detail, one of the core concepts of animation.
The course is available on Udemy, one of the most accessible platforms.
Cons
The course is not free, you need to pay a nominal amount to access the course.
It is not a renowned course.
The course is not Beginner friendly, it needs you to have some understanding of animation.
4. Learning Adobe Animate CC: Animation, LinkedIn learning
LinkedIn’s new platform, LinkedIn learning has several professional courses. Learning Adobe animate CC is one of the courses available on LinkedIn learning. It teaches you all about digital transformations. By the end of this course, you will be able to create a handy bit of animation.

Skills you will learn:
● Fundamentals of digital animation on Adobe animate CC
● Understanding and implementation of concepts such as keyframes, symbols, tweening, and drawing tools.
● Understand about the creation of natural effects and shape tweens.
● Adding music and sound effects to your animation.
Udemy: LinkedIn learning Duration: Around 3 hours
Pros
The course duration is considerably shorter.
All the primary concepts of animation are given importance in this course.
You get additional quizzes and study material along with the lecture videos
Cons
You need to have an active LinkedIn learning membership.
You need to pay for the LinkedIn learning membership.
The course is fast-paced, you need to grasp the concepts quickly.
5. Animate a walk cycle frame by frame in Adobe animate
This hands-on course is perfect for those who prefer experimenting as they watch the lecture videos. The course teaches you how to animate 2D and 3D characters smoothly. As you near the end of this course, you will have a clear understanding of how animation works and how to animate a hand-drawn character from scratch.

Skills you will learn:
● You will learn how to animate a hand-drawn character from scratch.
● You shall learn how to set up a working canvas and design a character.
● You will learn about the essential features of designing such as color fills, overlapping actions, shadows, and cleanup strokes.
Udemy: skillshare
Pros
The course focuses on the design aspect of animated characters.
The course gives you a hands-on experience with animation tools.
The course helps you learn how to create creative hand drawn characters.
Cons
You need an active skillshare membership to access the lecture videos
Skillshare membership is a paid one.
There are courses from more popular counterparts such as Udemy.
Part 3 How to Quickly Learn the Skills of Adobe Animate Course
Now that you’ve decided to get your hands dirty by dwelling into animation, you must give Wondershare Filmora Pro a try. What’s Wondershare Filmora ?
It’s essentially a one-stop shop for all your video editing needs. From video editing to rigging Wwondershare Filmora Pro has got it all. Using this platform, even a beginner can create exquisite animated videos.
The platform offers you several tools that are easy to use.
Even a neophyte could easily create beautiful animations by using Wondershare Filmora Pro. Using Wondershare Filmora Pro, you can not only animate characters but also define their motion, add sound effects, and edit videos. Filmora Pro offers you animation tools that are easier to operate and resultantly help you make amazing animated videos.
Wondershare Filmora
Get started easily with Filmora’s powerful performance, intuitive interface, and countless effects!
Try It Free Try It Free Try It Free Learn More >
Key Takeaways from This Episode
● As we see, today we’ve taken a look at a few of the best Adobe animate courses.
● Each of the courses can help you learn the basics of animation.
● Animation is indeed one of the budding fields, and with these fruitful courses, you can learn all about animation and possibly begin your journey as a freelancer or a professional in animation.
● Through these courses, you can create animated advertisement videos with ease. Wondershare Filmora Pro however can make your job easier by offering you amazing tools for generating animated videos!<
● Well, on this note we shall take leave! Wishing you good luck on your journey as an animator!
Professional animation is hence one of the fields that has a bright future. Willing to learn more about animation?
Don’t worry! We’ve got you covered, follow this article and find out more about the best 5 Adobe animate courses.
In this article
01 [What is Adobe Animate CC?](#Part 1)
02 [Top 8 FULL ADOBE ANIMATE COURSES | Beginners Complete Tutorial](#Part 2)
03 [How to Quickly Learn the Skills of Adobe Animate Course](#Part 3)
Part 1 What is Adobe Animate CC?
1. Who should take Adobe Animate course?
Learning is never bound. Anyone willing to learn can put in effort and time. As long as you wish to learn, and have an interest in it you can take it up. Those of you who wish to make a career in animation are highly recommended to take up this course. The Adobe animate course can help you kickstart your career as a professional animator.
2. Are there prerequisites to Adobe Animate course?
Animation is one such field that does not require a lot of prerequisites. In fact, even a beginner who has absolutely no idea about animation can take up the adobe animate course.
Part 2 Top 5 FULL ADOBE ANIMATE COURSES | Beginners Complete Tutorial
1. Adobe animate CC 2018- HTML5 Banner Ads
Adobe animate CC 2018- HTML5 Banner Ads is one of the most comprehensive courses on adobe animate. It teaches you several relevant skills associated with animation and marketing (one of the primary applications of animation).
Skills you will learn:
● Basics of HTML5 banner ads using adobe animate
● Understanding the importance of Adobe animate CC in web advertisements
● Through this course, you’d become an expert at publishing ad networks
● The course will help you explore tools and techniques related to banner advertising
Udemy: Udemy Duration: About 5 hours
Pros
The course is beginner-friendly; it helps you advance your career in animation from scratch.
The course covers even complex concepts.
You receive a course completion certificate
Cons
The course is paid and you need to pay a nominal fee in order to access the lecture videos.
The course is monotonous i.e. there is no live teaching.
2. 2D animation for beginners with adobe animate, Walt Wonderwolk
If you’re looking for a well-designed course that covers almost all the necessary concepts, then this course is just the right one for you. Through this course, you can learn all about Adobe animate. All the primary concepts are explained in detail in this course.
Skills you will learn:
● All the primary concepts of computer-generated animations using Adobe animate.
● You will learn important concepts such as eases, symbols, vector drawings, tweens, and key frames.
● You will also learn how to add sound to your animation
● You will gain hands-on knowledge about drawing, composition, and animation of characters.
Udemy: skillshare
Pros
The course is great for beginners to start learning about Adobe animate
The course covers fundamental concepts of animation
Cons
You need a skillshare membership in order to access the lecture videos.
You need to pay in order to get a skillshare membership
You do not get a course completion certificate
3. Rigging and animating in Adobe animate
Looking for a quick crash course about Adobe animate? Well, this course is perfect for you. As the name suggests, in this course you shall learn all about rigging and animating 2d characters.
Skills you will learn:
● rigging and animating adobe animate
● Through this course, you will know how to efficiently animate any character
● Discover the utilization of vectors and images for rigging
● You will get a clear understanding of important concepts such as layer parenting, motion tweening, and symbols.
Udemy: Udemy Duration: around 4 hours
Pros
You will learn the major concepts of animation.
You will learn about rigging in detail, one of the core concepts of animation.
The course is available on Udemy, one of the most accessible platforms.
Cons
The course is not free, you need to pay a nominal amount to access the course.
It is not a renowned course.
The course is not Beginner friendly, it needs you to have some understanding of animation.
4. Learning Adobe Animate CC: Animation, LinkedIn learning
LinkedIn’s new platform, LinkedIn learning has several professional courses. Learning Adobe animate CC is one of the courses available on LinkedIn learning. It teaches you all about digital transformations. By the end of this course, you will be able to create a handy bit of animation.
Skills you will learn:
● Fundamentals of digital animation on Adobe animate CC
● Understanding and implementation of concepts such as keyframes, symbols, tweening, and drawing tools.
● Understand about the creation of natural effects and shape tweens.
● Adding music and sound effects to your animation.
Udemy: LinkedIn learning Duration: Around 3 hours
Pros
The course duration is considerably shorter.
All the primary concepts of animation are given importance in this course.
You get additional quizzes and study material along with the lecture videos
Cons
You need to have an active LinkedIn learning membership.
You need to pay for the LinkedIn learning membership.
The course is fast-paced, you need to grasp the concepts quickly.
5. Animate a walk cycle frame by frame in Adobe animate
This hands-on course is perfect for those who prefer experimenting as they watch the lecture videos. The course teaches you how to animate 2D and 3D characters smoothly. As you near the end of this course, you will have a clear understanding of how animation works and how to animate a hand-drawn character from scratch.
Skills you will learn:
● You will learn how to animate a hand-drawn character from scratch.
● You shall learn how to set up a working canvas and design a character.
● You will learn about the essential features of designing such as color fills, overlapping actions, shadows, and cleanup strokes.
Udemy: skillshare
Pros
The course focuses on the design aspect of animated characters.
The course gives you a hands-on experience with animation tools.
The course helps you learn how to create creative hand drawn characters.
Cons
You need an active skillshare membership to access the lecture videos
Skillshare membership is a paid one.
There are courses from more popular counterparts such as Udemy.
Part 3 How to Quickly Learn the Skills of Adobe Animate Course
Now that you’ve decided to get your hands dirty by dwelling into animation, you must give Wondershare Filmora Pro a try. What’s Wondershare Filmora ?
It’s essentially a one-stop shop for all your video editing needs. From video editing to rigging Wwondershare Filmora Pro has got it all. Using this platform, even a beginner can create exquisite animated videos.
The platform offers you several tools that are easy to use.
Even a neophyte could easily create beautiful animations by using Wondershare Filmora Pro. Using Wondershare Filmora Pro, you can not only animate characters but also define their motion, add sound effects, and edit videos. Filmora Pro offers you animation tools that are easier to operate and resultantly help you make amazing animated videos.
Wondershare Filmora
Get started easily with Filmora’s powerful performance, intuitive interface, and countless effects!
Try It Free Try It Free Try It Free Learn More >
Key Takeaways from This Episode
● As we see, today we’ve taken a look at a few of the best Adobe animate courses.
● Each of the courses can help you learn the basics of animation.
● Animation is indeed one of the budding fields, and with these fruitful courses, you can learn all about animation and possibly begin your journey as a freelancer or a professional in animation.
● Through these courses, you can create animated advertisement videos with ease. Wondershare Filmora Pro however can make your job easier by offering you amazing tools for generating animated videos!<
● Well, on this note we shall take leave! Wishing you good luck on your journey as an animator!
The Only Guide You’ll Need to Learn About GIF Video Downloader
The Only Guide You’ll Ever Need to Learn About GIF Video Downloader
An easy yet powerful editor
Numerous effects to choose from
Detailed tutorials provided by the official channel
Want to escape the tiff of tedious video download processes? Stay tuned for best solutions
In this article
01 [Benefits of Using Video Downloader Online](#Part 1)
02 [How to Download Videos From Giphy?](#Part 2)
03 [How to Download Giphy Videos for Mobile/Computer?](#Part 3)
04 [Best 5 Tools for Converting Giphy to Mp4](#Part 4)
Part 1 Benefits of Using Video Downloader Online
Today’s information technology centered era has found a web solution for almost any and everything that can be possibly thought of. From informative articles to explanatory videos, you can find useful and need specific content in a diversity of ways. While reading does not sound a convenient cup of tea to most of us, videos are something more preferable.
When looking through descriptive solutions that could affordably serve your purpose, explanatory videos are the handiest choices owing to the ‘see and learn’ flexibility they provide viewers with. However, what attract more concern is, how to save these videos to your device. After all, you would never want to lose a useful video and most of us, of course have data pricing and usage limitations.
Online video downloader tools are certainly the most widely preferred and trusted solutions to the aforesaid concerns, and why not, they claim a range of choice benefits. Some of the obvious benefits of using these tools are listed below:
01Hassle Free Video Streaming
A seamless stream is something all of us would wish to be guaranteed of, before even thinking to watch a video. Whether looking through informative content or just as an entertainment choice, videos with frequent buffering intervals are always disapproving. One of the major reasons you should prefer an online video download is to escape the ‘and…that’s buffering again’ notch.
02Information Sharing
Living within a bunch of social media platforms and utilities, content sharing has become more of a habit than a requisite need. Any and everything ranging from useful to entertaining, unusual to funny; is shared across social media platforms every seconds.
Well, that’s absolutely fine, but what if you wish to share large video files through Instant Messaging tools and mails? Link sharing is not always convenient, owing to device version differences. To be on the safe side, it is quite better to download videos online and share them with your peers without having to worry about length and device compatibility.
03Cut Down on e-Learning Utilities
Imagine a scenario where you are into watching an explicitly useful video and the internet shuts down or you run out of data? This can be both annoying and critical at times. Why take the risk when you have dependable solutions? Just go for a quick video download using any of your preferred online tools and enjoy an uninterrupted streaming
04YouTube is not the End
Online video downloading tools provide you with the flexibility of surfing through a pool of content sites and support a range of video formats. Consequently, there is a visibly unlimited content access and download liberty that these tools assure you of. As a matter of fact, YouTube is definitely not the only video platform you are left with.
05Say ‘NO’ to Installation Procedures
Installing apps is something most of us tend to preferably avoid. While the running out of your device’s storage space is an evident concern, exposure to malware and spam content is an added risk to your smartphone or PC. Besides this, installation procedures may often be wary and time consuming. Taking the help of inbuilt download feature these online tools have is an affordable pick through.
06Convenient Usage
Not everyone around you is familiar with the know-how of technical utilities. Keeping that in mind, these online video download tools are developed to serve users within a range of technical backgrounds. Even if you don’t know anything about downloads, all you need to do is just copy a video link and paste it in the downloader’s URL bar and that’s actually it. You can see the video in your device gallery within a minimal time span.
Part 2 How to Download Videos From Giphy?
Giphy is a popular and preferred application you can choose to share video contents with social media communities across various platforms. The site has introduced a GIF Video downloader tool to facilitate quick and easy video downloads among its users. This tool allows you a high quality video download in mp4 format.
The tool is compatible with almost all common web browsers and confines the video download process to a single copy-paste step. You can even download live Giphy videos here, but you are required to wait for the video streaming to finish. To download videos to your heart’s content using this tool, here’s what you need to do:
Step 1: Copy a Video Link
Visit the official website of Giphy and type a matching keyword in the search box to look for a desired video. You can also refer to the site’s suggestion list that appears when you enter a particular keyword. When you have made your choice, just copy the video URL.
Step 2: Time to Paste
Paste the copied link in the Giphy search bar and click on ‘Download’ to receive a download link for your selected video. Click on the provided link to initiate the downloading process.
Part 3 How to Download Giphy Videos for Mobile/Computer?
Most of us have specific device preferences to get that perfect and comfortable video streaming experience. While some of us get glued to smartphones, others may find PCs more convenient. If device compatibility keeps you from watching your favorite videos, see through the following steps to download GIF videos on any of your preferred devices:
01Mobile Downloads
Downloading Giphy videos was never easier You just need to do the following to get your favorite one in your smartphone:
Step 1:
Visit the official Giphy website and search a video of your choice.
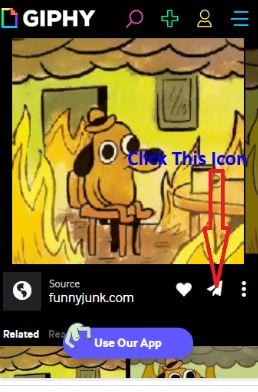
Step2:
Once found, copy the video URL and paste the same in the Giphy search bar.
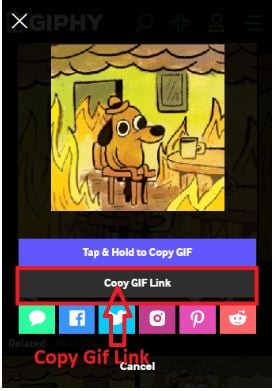
Step 3:
Click ‘Download’ and that’s it
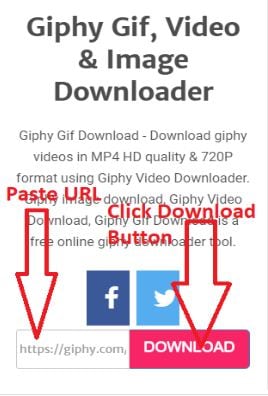
02PC Downloads
If you are among those who would rather prefer a wide screen video stream, you can choose download Giphy videos into your PC. After all, it’s nothing more than a few quick steps All you have to do is explained below:
Step 1: Video Selection
In your suitable browser, visit the official Giphy website. Select a video category from the top and select a video you wish to download.
Step 2: Save Your Video
Right click on your previously selected video and choose ‘Save Image As’ fr4om the drop down menu. The ‘Save Image’ box opens up.
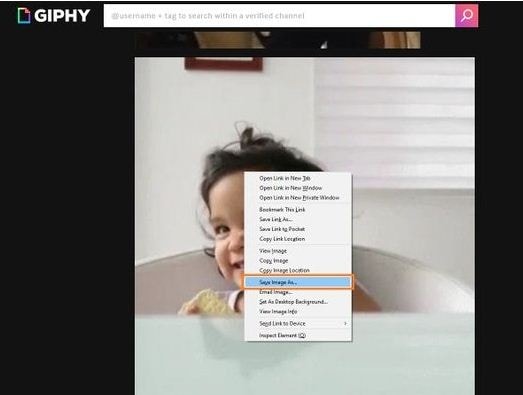
Step 3: Name Your Video
Using the ‘Save Image’ box, navigate to a suitable destination in your PC where you want to save your video. In the ‘File Name’ dialog box, give a name to the video file without changing the file extension. When you are done, click on ‘Save’. This will download and save your video in the selected target folder.
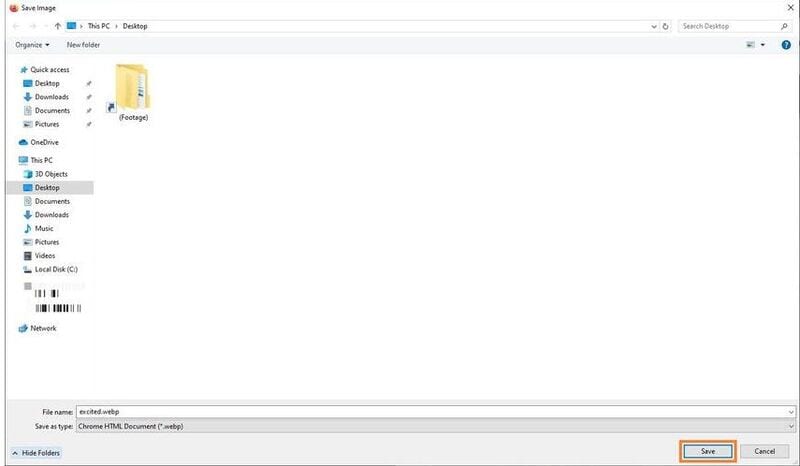
Part 4 Best 5 Tools for Converting Giphy to Mp4
While the short and specific GIFs on the Giphy website are quite interesting and impactful, you may sometimes encounter the need to go for a change of video format (for IM and mail sharing purposes). Having learnt about benefits of online video download, you would certainly want to browse through the best tools for converting Giphy videos to mp4.
Listed below are some of the most quick and convenient tools you can choose to convert Giphy video to mp4:
01**Wondershare Filmora Video Editor **
This is exceptionally excellent video converter software that has the potential to cater to all your conversion needs in a single go. Loaded with exciting features and available to users for free, this tool supports and ensures a hassle free inter conversion of almost all known video file formats. This is a single package solution to all your video editing and conversion requirements.
Wondershare Filmora
Get started easily with Filmora’s powerful performance, intuitive interface, and countless effects!
Try It Free Try It Free Try It Free Learn More >
Key Features:
Some of the most prominent features of this software include the following:
● The most appealing feature about this tool is that you don’t require an internet facility to use it.
● Highly stable and crash protected software, even on heavy loading (around 10 files at a time).
● Has the most convenient interface, suitable for users with varieties of technical aptitude.
● Comes with an inbuilt audio library that allows you to add relatable music to your video, once you are done with the conversion process.
● You can enhance your downloaded video with a range of amazing effects and texts in the tool’s editor window.
02Online-Convert
This is quite a handy tool to convert Giphy videos to mp4. It comes with an inbuilt video editor that gives you the liberty to cut, crop, trim and rotate your videos to exclusively extract the ‘most perfect’ parts and even decorate them with amazing frames. This one is also a free video converter tool.
Key Features
Listed below are some of the most viable features of this conversion tool:
● You can directly export the mp4 files to Cloud utilities.
● This tool supports almost all video formats.
● Has preloaded fundamental video editing features
03Convert GIF to Mp4
This one is a free online Giphy to mp4 converter tool, having a bit tricky interface, but has amazing editing features. You can cut, crop and trim videos, add music and adjust frame rates and even add subtitles to your videos with this tool. It however does not support external media sharing of the converted mp4 files.
Key Features:
Major attractions of this online tool comprise the following:
● This tool is loaded with hundreds of sound and video editing utilities.
● It comes with SubRip Subtitle (SRT) files that you can use to add interesting subtitles and make your videos more impactful.
● You can directly export the downloaded videos to your Google and IOS Dropbox.
04GIF-2-Mp4
This conversion tool has possibly has the most convenient user interface. Like most online tools, this too offers you a free GIF to video conversion service. However, you will have to compromise on the editing flexibility and data limit while using this tool, as it lacks any editing features and converts files within 50 MB. You can only adjust the resolution and quality of the converted mp4 files.
Key Features:
You can still prefer this conversion tool on account of the following features:
● This tool is simple and is developed with a view to assure user cohesiveness.
● You don’t need to go through wary software settings or wait for long durations for the conversion process to finish.
● Using this tool, you can share video files through email.
05CloudConvert
This is another excellent online tool to convert Giphy videos to mp4. It enables a quick file conversion and you are granted the liberty to make adjustments in video quality, file size and resolution. The tool’s handy interface converts GIF video to mp4 files in a matter of several seconds. However, it has a limitation of allowing utmost 25 conversions in 24 hours.
Key Features:
Using this tool for video conversion gives you access to the following features:
● This is a quick and free converter tool.
● You are not forced to watch unnecessary advertisements on the tool’s site.
● You can go for a parallel conversion of multiple files.
● You can make changes in the default video and sound settings.
● Key Takeaways from This Episode →
● Online video downloader tools are an advantageous means of hassle free video streaming.
● User credibility has flooded the online market with a range of video converter tools.
● Filmora is among the most preferred, quick and convenient GIF to mp4 converters available online.
Want to escape the tiff of tedious video download processes? Stay tuned for best solutions
In this article
01 [Benefits of Using Video Downloader Online](#Part 1)
02 [How to Download Videos From Giphy?](#Part 2)
03 [How to Download Giphy Videos for Mobile/Computer?](#Part 3)
04 [Best 5 Tools for Converting Giphy to Mp4](#Part 4)
Part 1 Benefits of Using Video Downloader Online
Today’s information technology centered era has found a web solution for almost any and everything that can be possibly thought of. From informative articles to explanatory videos, you can find useful and need specific content in a diversity of ways. While reading does not sound a convenient cup of tea to most of us, videos are something more preferable.
When looking through descriptive solutions that could affordably serve your purpose, explanatory videos are the handiest choices owing to the ‘see and learn’ flexibility they provide viewers with. However, what attract more concern is, how to save these videos to your device. After all, you would never want to lose a useful video and most of us, of course have data pricing and usage limitations.
Online video downloader tools are certainly the most widely preferred and trusted solutions to the aforesaid concerns, and why not, they claim a range of choice benefits. Some of the obvious benefits of using these tools are listed below:
01Hassle Free Video Streaming
A seamless stream is something all of us would wish to be guaranteed of, before even thinking to watch a video. Whether looking through informative content or just as an entertainment choice, videos with frequent buffering intervals are always disapproving. One of the major reasons you should prefer an online video download is to escape the ‘and…that’s buffering again’ notch.
02Information Sharing
Living within a bunch of social media platforms and utilities, content sharing has become more of a habit than a requisite need. Any and everything ranging from useful to entertaining, unusual to funny; is shared across social media platforms every seconds.
Well, that’s absolutely fine, but what if you wish to share large video files through Instant Messaging tools and mails? Link sharing is not always convenient, owing to device version differences. To be on the safe side, it is quite better to download videos online and share them with your peers without having to worry about length and device compatibility.
03Cut Down on e-Learning Utilities
Imagine a scenario where you are into watching an explicitly useful video and the internet shuts down or you run out of data? This can be both annoying and critical at times. Why take the risk when you have dependable solutions? Just go for a quick video download using any of your preferred online tools and enjoy an uninterrupted streaming
04YouTube is not the End
Online video downloading tools provide you with the flexibility of surfing through a pool of content sites and support a range of video formats. Consequently, there is a visibly unlimited content access and download liberty that these tools assure you of. As a matter of fact, YouTube is definitely not the only video platform you are left with.
05Say ‘NO’ to Installation Procedures
Installing apps is something most of us tend to preferably avoid. While the running out of your device’s storage space is an evident concern, exposure to malware and spam content is an added risk to your smartphone or PC. Besides this, installation procedures may often be wary and time consuming. Taking the help of inbuilt download feature these online tools have is an affordable pick through.
06Convenient Usage
Not everyone around you is familiar with the know-how of technical utilities. Keeping that in mind, these online video download tools are developed to serve users within a range of technical backgrounds. Even if you don’t know anything about downloads, all you need to do is just copy a video link and paste it in the downloader’s URL bar and that’s actually it. You can see the video in your device gallery within a minimal time span.
Part 2 How to Download Videos From Giphy?
Giphy is a popular and preferred application you can choose to share video contents with social media communities across various platforms. The site has introduced a GIF Video downloader tool to facilitate quick and easy video downloads among its users. This tool allows you a high quality video download in mp4 format.
The tool is compatible with almost all common web browsers and confines the video download process to a single copy-paste step. You can even download live Giphy videos here, but you are required to wait for the video streaming to finish. To download videos to your heart’s content using this tool, here’s what you need to do:
Step 1: Copy a Video Link
Visit the official website of Giphy and type a matching keyword in the search box to look for a desired video. You can also refer to the site’s suggestion list that appears when you enter a particular keyword. When you have made your choice, just copy the video URL.
Step 2: Time to Paste
Paste the copied link in the Giphy search bar and click on ‘Download’ to receive a download link for your selected video. Click on the provided link to initiate the downloading process.
Part 3 How to Download Giphy Videos for Mobile/Computer?
Most of us have specific device preferences to get that perfect and comfortable video streaming experience. While some of us get glued to smartphones, others may find PCs more convenient. If device compatibility keeps you from watching your favorite videos, see through the following steps to download GIF videos on any of your preferred devices:
01Mobile Downloads
Downloading Giphy videos was never easier You just need to do the following to get your favorite one in your smartphone:
Step 1:
Visit the official Giphy website and search a video of your choice.
Step2:
Once found, copy the video URL and paste the same in the Giphy search bar.
Step 3:
Click ‘Download’ and that’s it
02PC Downloads
If you are among those who would rather prefer a wide screen video stream, you can choose download Giphy videos into your PC. After all, it’s nothing more than a few quick steps All you have to do is explained below:
Step 1: Video Selection
In your suitable browser, visit the official Giphy website. Select a video category from the top and select a video you wish to download.
Step 2: Save Your Video
Right click on your previously selected video and choose ‘Save Image As’ fr4om the drop down menu. The ‘Save Image’ box opens up.
Step 3: Name Your Video
Using the ‘Save Image’ box, navigate to a suitable destination in your PC where you want to save your video. In the ‘File Name’ dialog box, give a name to the video file without changing the file extension. When you are done, click on ‘Save’. This will download and save your video in the selected target folder.
Part 4 Best 5 Tools for Converting Giphy to Mp4
While the short and specific GIFs on the Giphy website are quite interesting and impactful, you may sometimes encounter the need to go for a change of video format (for IM and mail sharing purposes). Having learnt about benefits of online video download, you would certainly want to browse through the best tools for converting Giphy videos to mp4.
Listed below are some of the most quick and convenient tools you can choose to convert Giphy video to mp4:
01**Wondershare Filmora Video Editor **
This is exceptionally excellent video converter software that has the potential to cater to all your conversion needs in a single go. Loaded with exciting features and available to users for free, this tool supports and ensures a hassle free inter conversion of almost all known video file formats. This is a single package solution to all your video editing and conversion requirements.
Wondershare Filmora
Get started easily with Filmora’s powerful performance, intuitive interface, and countless effects!
Try It Free Try It Free Try It Free Learn More >
Key Features:
Some of the most prominent features of this software include the following:
● The most appealing feature about this tool is that you don’t require an internet facility to use it.
● Highly stable and crash protected software, even on heavy loading (around 10 files at a time).
● Has the most convenient interface, suitable for users with varieties of technical aptitude.
● Comes with an inbuilt audio library that allows you to add relatable music to your video, once you are done with the conversion process.
● You can enhance your downloaded video with a range of amazing effects and texts in the tool’s editor window.
02Online-Convert
This is quite a handy tool to convert Giphy videos to mp4. It comes with an inbuilt video editor that gives you the liberty to cut, crop, trim and rotate your videos to exclusively extract the ‘most perfect’ parts and even decorate them with amazing frames. This one is also a free video converter tool.
Key Features
Listed below are some of the most viable features of this conversion tool:
● You can directly export the mp4 files to Cloud utilities.
● This tool supports almost all video formats.
● Has preloaded fundamental video editing features
03Convert GIF to Mp4
This one is a free online Giphy to mp4 converter tool, having a bit tricky interface, but has amazing editing features. You can cut, crop and trim videos, add music and adjust frame rates and even add subtitles to your videos with this tool. It however does not support external media sharing of the converted mp4 files.
Key Features:
Major attractions of this online tool comprise the following:
● This tool is loaded with hundreds of sound and video editing utilities.
● It comes with SubRip Subtitle (SRT) files that you can use to add interesting subtitles and make your videos more impactful.
● You can directly export the downloaded videos to your Google and IOS Dropbox.
04GIF-2-Mp4
This conversion tool has possibly has the most convenient user interface. Like most online tools, this too offers you a free GIF to video conversion service. However, you will have to compromise on the editing flexibility and data limit while using this tool, as it lacks any editing features and converts files within 50 MB. You can only adjust the resolution and quality of the converted mp4 files.
Key Features:
You can still prefer this conversion tool on account of the following features:
● This tool is simple and is developed with a view to assure user cohesiveness.
● You don’t need to go through wary software settings or wait for long durations for the conversion process to finish.
● Using this tool, you can share video files through email.
05CloudConvert
This is another excellent online tool to convert Giphy videos to mp4. It enables a quick file conversion and you are granted the liberty to make adjustments in video quality, file size and resolution. The tool’s handy interface converts GIF video to mp4 files in a matter of several seconds. However, it has a limitation of allowing utmost 25 conversions in 24 hours.
Key Features:
Using this tool for video conversion gives you access to the following features:
● This is a quick and free converter tool.
● You are not forced to watch unnecessary advertisements on the tool’s site.
● You can go for a parallel conversion of multiple files.
● You can make changes in the default video and sound settings.
● Key Takeaways from This Episode →
● Online video downloader tools are an advantageous means of hassle free video streaming.
● User credibility has flooded the online market with a range of video converter tools.
● Filmora is among the most preferred, quick and convenient GIF to mp4 converters available online.
What Wikipedia Won’t Tell You Specifically About Character Rigging
What Wikipedia Won’t Tell You Specifically About Character Rigging
An easy yet powerful editor
Numerous effects to choose from
Detailed tutorials provided by the official channel
The function of character rigging can easily be compared to that of bones, muscles and joints. They act as skeletons to virtual animations. You can also imagine them as strings used on dolls. These digitalized bones function inter-connectedly in a 3D animation.
In this article
01 [Intro to Character Rigging](#Part 1)
02 [8 Tips for Character Rigging](#Part 2)
03 [10 Best Character Rigging Services to Buy Online](#Part 3)
04 [How to Make 3d Character Rig? Are There Any Plugins or Easy](#Part 4)
Part 1 Intro to Character Rigging
As you already know by now that the process of rigging a character can be quite a tedious task. It involves a lot of creative thinking, precision and a keen eye to notice all the small details.
Once you have a model character to work on, riggers set off to creating a skeleton to match the character. These skele-animations can be used to move the entire model as if tugging on strings (not literally).
The movement of the chain of skeletons or rigs is interdependent. Which means if you pull on any one bone, it moves all the other bones in the same sequence. Similar to how bones move within the human body.
Riggers use programs and tools to create a series of bone like structures that can deformed and animated freely according to the preference of the animators.
Movements like positioning, curving and rotation can be recorded and then played back in the animation.
This requires the rigger to constantly coordinate between modelers, animators till the end of the project. This entire process can take weeks or even months.
Amazingly enough, its 20and there are online tools and tutorials you can use to easily learn complex animations like they make in large scale movies and games.
Part 2 8 Tips for Character Rigging
01The Right Rig for the Job
Rigging is a skill all animators gets good at overtime. The more you practice the more familiar you are with the tools you are using. It will also help you understand that not all rigs are meant for the same set of movements.
You need to be able to discern what rig is it that you need and discard what you don’t. If the rig is being used in a game, then the focus will be more on the experience while for movies its attention.
02Deformers for Facial Rigging
Constructing a realistic facial rig can be quite a task but is indeed satisfying once finished. Human facial features require a great degree of flexibility which is why using a variety of deformers for different parts of the face. They are better suited for creating joints over the face and can be done more quickly.
03IK and FK
Though you can use one without the other, it is best to use both of them in an animation. You can’t work without both arms can you? Applying both Inverse and Forward Kinematics in your rig design can help it make more stylistic.
04Learn Python and Maya API: Learn Python and Maya API
If you wish to take your rigging skills to the next level then learning Maya API and Python are great millstones. This way, you can create high quality and sophisticated rigs with high intense flexibility on Maya. Also, Python allows you to write new scripts for PlugIns.
05Delegate to an Animator
After rigging for several hours it is easy to feel like you are only seeing from one perspective. Get in touch with an animator earlier on in the project can help you get feedback to stay consistent in the rigging process.
06Learn Web Technologies: Learn Web Technologies
To be a good animator or rigging specialist involves a lot of learning. Animation technology is constantly changing therefore it is highly recommended to stay up to date with the latest web technologies. Learning HTML, Java Script and CSS is becoming vital to being a part of the gaming world.
07Use Scalable Tools
Not all the characters or objects you rig are going to be of the same size. Selecting the right rigging software is crucial for you to be able to scale your animations. You won’t need to use everything, just the tools that serve your purpose.
08Use a Clean Interface
If you have ever heard of the phrase ‘clean workplace – cleaner work’ then you should know how an untidy interface can affect your workflow. This won’t necessarily change the results but can surely better your experience.
Part 3 Best Character Rigging Services to Buy Online
Don’t feel confused about where to begin. The first step to get into rigging is to master a software, any software, here are of the best ones you can choose from;
01Maya
Offers the best animation features on the market.

02Blender
Vast variety of tools for sculpting, rigging or VFX.

03Modo
Has a more simplified approach towards modelling and rigging.

043ds Max
Leverages high flexibility and ease of use to riggers.
05Sculptris
Excellentfor beginners who need a gateway software to start art.

06ZBrush
Lets you work on your sculpting skills with digital clay.

07Cheetah 3D
Developed by Macintosh to be an easy to learn modelling software.

08Rhinoceros 3D
Harbours a mathematical approach to modelling and modular design.

09Fusion 360
Offers a wide range of simulation tools.

10Cinema 4D
Recognized by professionals for well-equipped arsenal of digital rendering.

Part 4 How to Make Character Rig? Are There Any Plugins or Easy
How to Make Character Rig? Are There Any Plugins or Easy
When we imagine animation, most of the time we are baffled by the end product? But what really goes on behind the mesmerizing colors and whimsical characters.
The basic is of course building rigs to support the entire movement of the character and confine it to actual physical laws that makes it almost a mimic of reality. The entire process of rigging rather simplifies the path to achieve that goal.
In Cinema, character rigging has multiple layers that goes into creating the entire skeleton animation. Setting up a character rig can take anywhere between a few hours or a few days. It probably takes mainstream movies ten times that time.
Let us break down the process of making a rig so that it is simpler to understand.
The process;
Weight Painting: An integral part of the entire rigging process. Although, weight painting can be rendered automatically by the software that you are using, but that can end up making the animation look less realistic. You can instead fine tune the weight of each bone in the rig. You can also copy similar looking bones and apply them to different mesh and repurpose them to function differently.
Placing Bones: After designing a bone structure of character, you can copy the same and use it for similar characters. This is why in games and animation, you notice characters with similar features and traits.
Inverse Kinematics: Not all bones are meant to move in a forward direction. This is why inverses Kinematics are applied to certain bones like the legs, shoulders or even a dragon’s tail. Setting up the IK of your rig would keep specific bones pointed in the right direction so as to make the animation look more natural.
Applying Constraints: The physical realm is built with restrictions. There are things you can do or can’t do according to the natural order of things so as to make your character movement more naturalistic.
Simulation Skeletons: Now comes the part where the magic happens. After fully completing a skeletal animation you can now simulate the motion over the mesh and record the result of the simulation through a series of frames.
Create an animated movie: You can play back the simulation in an animation software such as Blender and then create your own animated movie with Filmora with its easy drag and drop interface. Movies are a collage of frames, so you need to animate according to the fps you want for your video.
Facial Rigs: Facial expressions are more complex than whole body movements. It requires the attention dedicated to a project of its own. Here is where you can play with deforming shapes together to replicate facial muscle movement.
● Key Takeaways from This Episode →
● Rigging has become science in its own right but that does not mean you can’t be artistic with it.
● What you should remember that creating skeletal animation is all about movement and applying physical restrictions to it.
● Start simple and practice until you master the most complex features of any of the top rigging software services raging in the market.
The function of character rigging can easily be compared to that of bones, muscles and joints. They act as skeletons to virtual animations. You can also imagine them as strings used on dolls. These digitalized bones function inter-connectedly in a 3D animation.
In this article
01 [Intro to Character Rigging](#Part 1)
02 [8 Tips for Character Rigging](#Part 2)
03 [10 Best Character Rigging Services to Buy Online](#Part 3)
04 [How to Make 3d Character Rig? Are There Any Plugins or Easy](#Part 4)
Part 1 Intro to Character Rigging
As you already know by now that the process of rigging a character can be quite a tedious task. It involves a lot of creative thinking, precision and a keen eye to notice all the small details.
Once you have a model character to work on, riggers set off to creating a skeleton to match the character. These skele-animations can be used to move the entire model as if tugging on strings (not literally).
The movement of the chain of skeletons or rigs is interdependent. Which means if you pull on any one bone, it moves all the other bones in the same sequence. Similar to how bones move within the human body.
Riggers use programs and tools to create a series of bone like structures that can deformed and animated freely according to the preference of the animators.
Movements like positioning, curving and rotation can be recorded and then played back in the animation.
This requires the rigger to constantly coordinate between modelers, animators till the end of the project. This entire process can take weeks or even months.
Amazingly enough, its 20and there are online tools and tutorials you can use to easily learn complex animations like they make in large scale movies and games.
Part 2 8 Tips for Character Rigging
01The Right Rig for the Job
Rigging is a skill all animators gets good at overtime. The more you practice the more familiar you are with the tools you are using. It will also help you understand that not all rigs are meant for the same set of movements.
You need to be able to discern what rig is it that you need and discard what you don’t. If the rig is being used in a game, then the focus will be more on the experience while for movies its attention.
02Deformers for Facial Rigging
Constructing a realistic facial rig can be quite a task but is indeed satisfying once finished. Human facial features require a great degree of flexibility which is why using a variety of deformers for different parts of the face. They are better suited for creating joints over the face and can be done more quickly.
03IK and FK
Though you can use one without the other, it is best to use both of them in an animation. You can’t work without both arms can you? Applying both Inverse and Forward Kinematics in your rig design can help it make more stylistic.
04Learn Python and Maya API: Learn Python and Maya API
If you wish to take your rigging skills to the next level then learning Maya API and Python are great millstones. This way, you can create high quality and sophisticated rigs with high intense flexibility on Maya. Also, Python allows you to write new scripts for PlugIns.
05Delegate to an Animator
After rigging for several hours it is easy to feel like you are only seeing from one perspective. Get in touch with an animator earlier on in the project can help you get feedback to stay consistent in the rigging process.
06Learn Web Technologies: Learn Web Technologies
To be a good animator or rigging specialist involves a lot of learning. Animation technology is constantly changing therefore it is highly recommended to stay up to date with the latest web technologies. Learning HTML, Java Script and CSS is becoming vital to being a part of the gaming world.
07Use Scalable Tools
Not all the characters or objects you rig are going to be of the same size. Selecting the right rigging software is crucial for you to be able to scale your animations. You won’t need to use everything, just the tools that serve your purpose.
08Use a Clean Interface
If you have ever heard of the phrase ‘clean workplace – cleaner work’ then you should know how an untidy interface can affect your workflow. This won’t necessarily change the results but can surely better your experience.
Part 3 Best Character Rigging Services to Buy Online
Don’t feel confused about where to begin. The first step to get into rigging is to master a software, any software, here are of the best ones you can choose from;
01Maya
Offers the best animation features on the market.
02Blender
Vast variety of tools for sculpting, rigging or VFX.
03Modo
Has a more simplified approach towards modelling and rigging.
043ds Max
Leverages high flexibility and ease of use to riggers.
05Sculptris
Excellentfor beginners who need a gateway software to start art.
06ZBrush
Lets you work on your sculpting skills with digital clay.
07Cheetah 3D
Developed by Macintosh to be an easy to learn modelling software.
08Rhinoceros 3D
Harbours a mathematical approach to modelling and modular design.
09Fusion 360
Offers a wide range of simulation tools.
10Cinema 4D
Recognized by professionals for well-equipped arsenal of digital rendering.
Part 4 How to Make Character Rig? Are There Any Plugins or Easy
How to Make Character Rig? Are There Any Plugins or Easy
When we imagine animation, most of the time we are baffled by the end product? But what really goes on behind the mesmerizing colors and whimsical characters.
The basic is of course building rigs to support the entire movement of the character and confine it to actual physical laws that makes it almost a mimic of reality. The entire process of rigging rather simplifies the path to achieve that goal.
In Cinema, character rigging has multiple layers that goes into creating the entire skeleton animation. Setting up a character rig can take anywhere between a few hours or a few days. It probably takes mainstream movies ten times that time.
Let us break down the process of making a rig so that it is simpler to understand.
The process;
Weight Painting: An integral part of the entire rigging process. Although, weight painting can be rendered automatically by the software that you are using, but that can end up making the animation look less realistic. You can instead fine tune the weight of each bone in the rig. You can also copy similar looking bones and apply them to different mesh and repurpose them to function differently.
Placing Bones: After designing a bone structure of character, you can copy the same and use it for similar characters. This is why in games and animation, you notice characters with similar features and traits.
Inverse Kinematics: Not all bones are meant to move in a forward direction. This is why inverses Kinematics are applied to certain bones like the legs, shoulders or even a dragon’s tail. Setting up the IK of your rig would keep specific bones pointed in the right direction so as to make the animation look more natural.
Applying Constraints: The physical realm is built with restrictions. There are things you can do or can’t do according to the natural order of things so as to make your character movement more naturalistic.
Simulation Skeletons: Now comes the part where the magic happens. After fully completing a skeletal animation you can now simulate the motion over the mesh and record the result of the simulation through a series of frames.
Create an animated movie: You can play back the simulation in an animation software such as Blender and then create your own animated movie with Filmora with its easy drag and drop interface. Movies are a collage of frames, so you need to animate according to the fps you want for your video.
Facial Rigs: Facial expressions are more complex than whole body movements. It requires the attention dedicated to a project of its own. Here is where you can play with deforming shapes together to replicate facial muscle movement.
● Key Takeaways from This Episode →
● Rigging has become science in its own right but that does not mean you can’t be artistic with it.
● What you should remember that creating skeletal animation is all about movement and applying physical restrictions to it.
● Start simple and practice until you master the most complex features of any of the top rigging software services raging in the market.
Also read:
- New 2024 Approved Fuel Creativity with 10 Awesome Collection of 2D Animation Examples
- 2024 Approved Create Animated Video on Canva
- Updated In 2024, The Ultimate Cheatsheet to 15 Adobe Animate Alternatives
- 2024 Approved Top 8 Anime Name & Title Generators Online-Get Cool Anime Names
- All About 3D Medical Animation for 2024
- New That Will Make Aesthetic Cartoon Drawing More Understandable
- Updated In 2024, The Best 8 Places for High-Quality Royalty Free Gifs
- Updated 2024 Approved How to Combine Two/More GIFs Into One GIF Mergers Offered
- Updated 2024 Approved How to Draw A Skeleton Cartoon – A Step by Step Guide
- New In 2024, 10 Best Tools to Make Pic Collage for Windows
- In 2024, Learn Easy Blender Rigging in Only 2 Minutes
- Best GIF to Video Converters
- How to Create a Whiteboard Video Step by Step 2023 Updated
- New Most Effective Ways to Set WhatsApp Status for 2024
- In 2024, Interesting Fundamentals and Ultimate Guide to Animated Characters Drawings
- 2024 Approved Best 10 Animated DP for WhatsApp
- Methods to Make Photo Motion Effect Online, In 2024
- Updated 2024 Approved Whiteboard Animation Services Top 15 Animation Companies to Pick
- 15 Forgotten Cartoon Characters of All Time
- Updated 2024 Approved 18 Best Tools and Services to Create Animated Videos for Your Business
- New 2024 Approved 10 Most Memorable Japanese Cat Cartoons
- New The Only Guide Youll Ever Need to Learn About GIF Video Downloader
- New Secret Source to Make a Stop Motion Puppet for 2024
- Updated In 2024, Top 10 Websites to Download Anime Subtitles for Free
- Updated 10 Cartoon Canvas Painting Ideas for Total Beginners for 2024
- 2024 Approved How to Create Benime Whiteboard Animation on Android
- Updated 2024 Approved Best GIF Maker Software for Windows and Mac
- Updated 2024 Approved Handy Tips From Adobe Animate Rigging Tutorial for All Learners
- Updated In 2024, Want to Make a Meme GIF? Heres How to Do
- New Tips to Create Animated Social Media Posts in Canva for 2024
- Finding Some Different Ways to Animated Cartoon of Yourself
- In 2024, Ways on How to Liven Up Your Animate Website on Scroll
- How to Obtain and Create Animated GIF Icons Like a Pro, In 2024
- Updated Create or Find Good Morning/Night GIFs
- New In 2024, The Definitive Guide to Whiteboard Animation
- New 2024 Approved 10 Cartoon Photo Converters You Couldnt Do Without
- Updated In 2024, Learn How to Do Funny Cartoon Drawings
- New Best 10 Photo Animator Templates
- In 2024, Thousands Already Found 15 Best Sites to Watch Cartoons Online Free And So Can You
- In 2024, Learn Disney Cartoon Drawing to See More Disney Magic Moments
- New In 2024, The Best 10 Sketch Animation Video Makers
- Adobe Animate Riggings Tutorial for You for 2024
- New How to Make Photo Motion Effect Online for 2024
- New Top 8 Anime Name & Title Generators Online-Get Cool Anime Names
- How to Fix Life360 Shows Wrong Location On Motorola Defy 2? | Dr.fone
- How to Change Your Poco M6 5G Location on life360 Without Anyone Knowing? | Dr.fone
- How To Upgrade or Downgrade Apple iPhone 15 Without iTunes? | Dr.fone
- In 2024, All You Need To Know About Mega Greninja For Apple iPhone 7 | Dr.fone
- In 2024, 8 Ways to Transfer Photos from Samsung Galaxy Z Flip 5 to iPhone Easily | Dr.fone
- How Do You Remove Restricted Mode on Apple iPhone 13 Pro | Dr.fone
- In 2024, 10 Fake GPS Location Apps on Android Of your Poco X6 Pro | Dr.fone
- Realme Music Recovery - Recover Deleted Music from Realme
- Fix Unfortunately Settings Has Stopped on Nokia C110 Quickly | Dr.fone
- How To Transfer Data From iPhone 15 Plus To Other iPhone 12 Pro devices? | Dr.fone
- In 2024, How To Stream Anything From Oppo Reno 10 5G to Apple TV | Dr.fone
- Can I recover my data if my iPhone 6s Plus screen turns black? | Stellar
- How to unlock a disable iPhone 14 Plus without itunes
- How To Bypass the Required Apple Store Verification For iPhone 13 Pro | Dr.fone
- In 2024, Is Fake GPS Location Spoofer a Good Choice On Realme V30? | Dr.fone
- In 2024, A Working Guide For Pachirisu Pokemon Go Map On Oppo Reno 11F 5G | Dr.fone
- In 2024, The Best Android SIM Unlock Code Generators Unlock Your Vivo T2 5G Phone Hassle-Free
- In 2024, Unlocking an iCloud Locked iPad and iPhone 11 Pro
- Cellular Network Not Available for Voice Calls On Tecno Spark 10C | Dr.fone
- Did Your iPhone 15 Pro Passcode Change Itself? Unlock It Now | Dr.fone
- Complete Tutorial to Use GPS Joystick to Fake GPS Location On Infinix Smart 7 HD | Dr.fone
- Forgot iPhone 13 Pro Max Backup Password? Heres What to Do | Dr.fone
- Video Fixer Software for all Corrupt Videos of Nokia C12 Pro
- 4 Most-Known Ways to Find Someone on Tinder For Tecno Spark 20 by Name | Dr.fone
- Two Ways to Track My Boyfriends Nokia C32 without Him Knowing | Dr.fone
- Simple ways to get recent calls back from Motorola Moto G Stylus (2023)
- In 2024, How to Change Credit Card from Your Apple iPhone 13 Pro Max Apple ID and Apple Pay
- 7 Solutions to Fix Chrome Crashes or Wont Open on Honor V Purse | Dr.fone
- new In 2024, A Comprehensive Guide for Free Video Translator Downloading
- Title: New Guide on Creating GIF in WhatsApp iPhone
- Author: Elon
- Created at : 2024-05-19 03:04:50
- Updated at : 2024-05-20 03:04:50
- Link: https://animation-videos.techidaily.com/new-guide-on-creating-gif-in-whatsapp-iphone/
- License: This work is licensed under CC BY-NC-SA 4.0.
