
:max_bytes(150000):strip_icc():format(webp)/TwitterVideoDownload-5b605aaac9e77c002c3a42f3.jpg)
New Handy Tips From Adobe Animate Rigging Tutorial for All Learners for 2024
Handy Tips From Adobe Animate Rigging Tutorial for All Learners
Handy Tips from Adobe Animate Rigging Tutorial for All Learners
An easy yet powerful editor
Numerous effects to choose from
Detailed tutorials provided by the official channel
Rigging is a technology that is not known to everyone. However, an animation freak must know the technology in depth.

If you are an animator, you must be wondering how to implement rigging. Follow this tutorial and get a complete insight on the adobe animate rigging tutorial.
In this article
01 [Do You Understand How Auto Rig Mapping Works?](#Part 1)
02 [How Do I Use Rig Mapping in Adobe Animate?](#Part 2)
03 [Where to Rig and Animate More Characters?](#Part 3)
Part 1 Do You Understand How Auto Rig Mapping Works?
The primary goal of animation is to animate or construct human-like characters that tend to mimic the structure of a human body or animal body. The closer is the resemblance of the motion, the better is the animation. However, mimicking a human-like motion with precision is rather difficult. This is because humans have a sophisticated structure, and the mimicry of a complex motion like that performed by human beings through animation is indeed difficult.
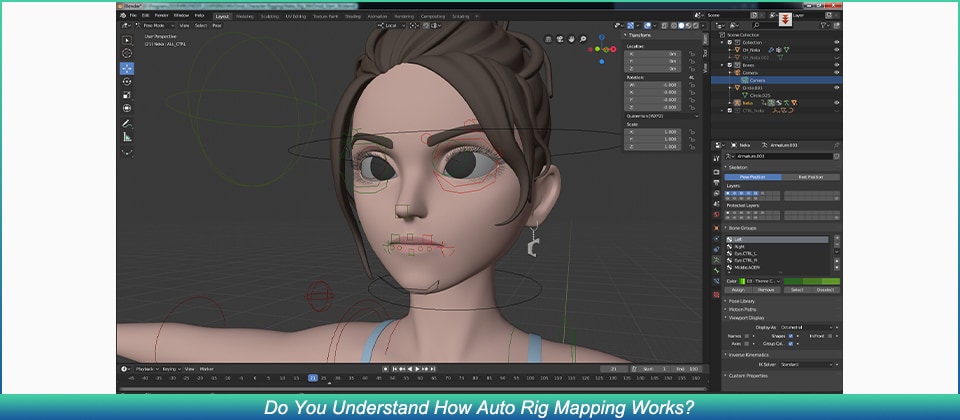
For countering this, animators decided to use rigging. Rigging is essentially a technology wherein the skeletal structure of the animated character must be designed prior to the final character. The primary components of the skeletal structure, i.e. the skull, the jaw, the limbs (arm and leg) are modeled to finally form a whole skeleton.
The structure is fine tuned and the skeleton is given rotatory motion, and prismatic motion wherever needed. Each part of the animated character is enabled to move and mimic complex motion.
Part 2 How Do I Use Rig Mapping in Adobe Animate?
1. How Do You Rig a 2d Character in an Animation?
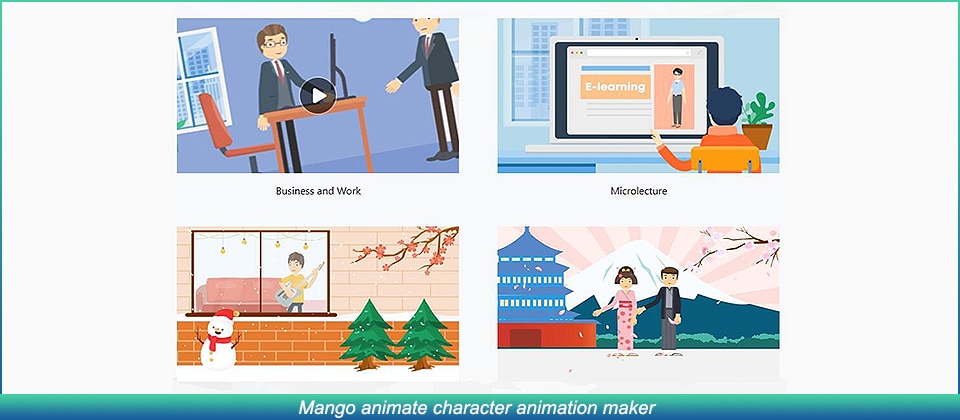
❶ Mango animate character animation maker
Mango animate character animation maker is an amazing software that can perform the task of animation in a very simple manner. We can rightfully comment that the software does make the job of animators rather simple. The rigging animation software automatically generates an energetic skeletal figure of the static character image. Using this skeleton, the software helps you to animate the character.
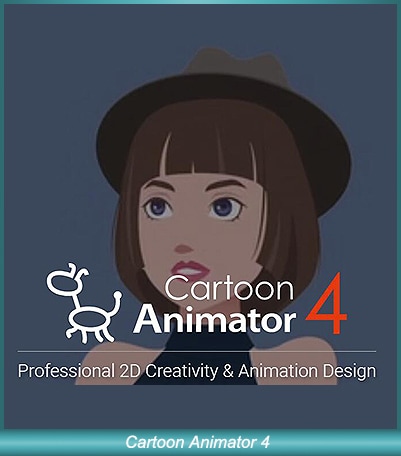
❷ Cartoon Animator 4
The software is one that suffices to almost every level of animator, be it a novice, intermediate, or an expert. The animation maker has super cool features and could make you animate characters very easily. The rigging tool can again convert a static image of the character you intend to animate into its skeletal structure.
❸ Blender
Now any professional animator reading this will obviously know about blender. It is indeed one of the most popular tools available to perform any kind of animation. Moreover, most professional courses teach the basics of animation using blender.

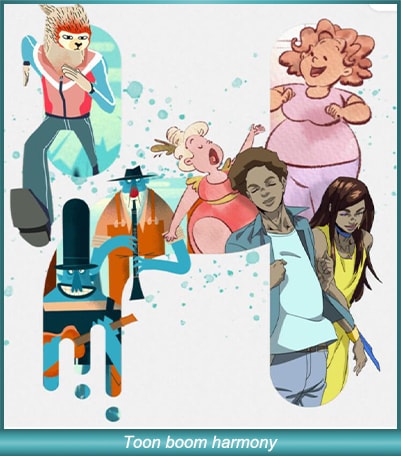
❹ Toon boom harmony
Toon boom harmony is another software that offers pretty decent rigging features. The software is pretty popular among novice animators who just wish to animate 2d characters. The advanced tool offers animation, rigging, and drawing features.
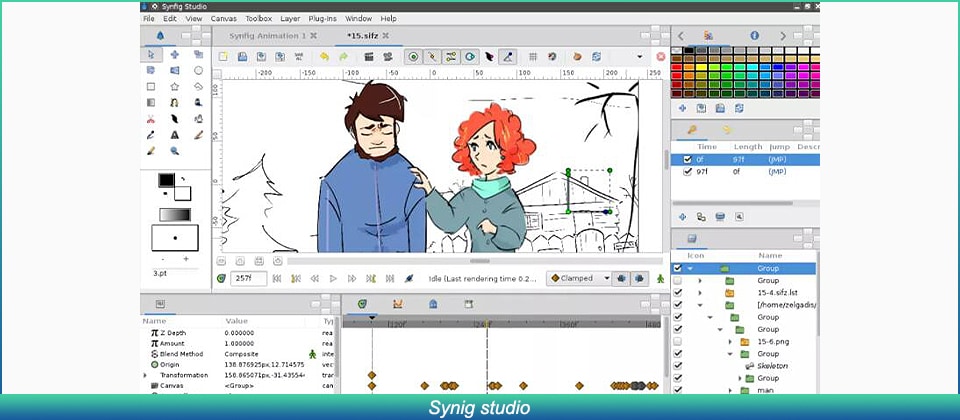
❺ Synig studio
Synig studio is another popular software among the animation community. The software is meant for animators of all levels, ranging from beginners to professionals, anybody can use this tool to animate. The software uses complex technologies in order to ensure that the character is animated seamlessly.
2. How Do You Animate a Custom Rig?
If you want to try animating custom rigs, it is indeed very simple, if you use beginner-friendly software, all you need to do is input the static image of your character. Select the motion template that you’d like to apply to your character. You’re good to go! However, you can’t animate custom motions using beginner-friendly software, you can only choose from the available templates.
Part 3 Where to Rig and Animate More Characters?
Comfort and convenience are what we always prioritize. Wondershare Filmora offers you exactly the same. With Wondershare Filmora Pro, you can easily animate and make desirable structures. The several features that Filmora Pro offers include:
Audio Features →
● Audio transition
● Audio compression
● Noise reduction
Video Features →
● Animation
● Motion tracking
● Video editing
The features listed above are just a few of the many features Wondershare Filmora Pro offers. If you’re looking to try out animation, then we highly recommend you to give it a go. It’s a one-stop shop for your animation needs.
Key Takeaways from This Episode
● As we reach the end of the article, we can say that it was indeed a fruitful read as we understood about several different tools to perform animations and rigging.
● The tools we looked at today make life easier for animators and video editors, using these tools, animations can be performed in minutes.
● We hope that the adobe animated rigging tutorial helped you understand the challenges of animation and how to counter them! We’d like to recommend Wondershare Filmora Pro to you, a comprehensive feature-rich tool that provides you with several different features. Think video editing? Think Filmora Pro!
Rigging is a technology that is not known to everyone. However, an animation freak must know the technology in depth.
If you are an animator, you must be wondering how to implement rigging. Follow this tutorial and get a complete insight on the adobe animate rigging tutorial.
In this article
01 [Do You Understand How Auto Rig Mapping Works?](#Part 1)
02 [How Do I Use Rig Mapping in Adobe Animate?](#Part 2)
03 [Where to Rig and Animate More Characters?](#Part 3)
Part 1 Do You Understand How Auto Rig Mapping Works?
The primary goal of animation is to animate or construct human-like characters that tend to mimic the structure of a human body or animal body. The closer is the resemblance of the motion, the better is the animation. However, mimicking a human-like motion with precision is rather difficult. This is because humans have a sophisticated structure, and the mimicry of a complex motion like that performed by human beings through animation is indeed difficult.
For countering this, animators decided to use rigging. Rigging is essentially a technology wherein the skeletal structure of the animated character must be designed prior to the final character. The primary components of the skeletal structure, i.e. the skull, the jaw, the limbs (arm and leg) are modeled to finally form a whole skeleton.
The structure is fine tuned and the skeleton is given rotatory motion, and prismatic motion wherever needed. Each part of the animated character is enabled to move and mimic complex motion.
Part 2 How Do I Use Rig Mapping in Adobe Animate?
1. How Do You Rig a 2d Character in an Animation?
❶ Mango animate character animation maker
Mango animate character animation maker is an amazing software that can perform the task of animation in a very simple manner. We can rightfully comment that the software does make the job of animators rather simple. The rigging animation software automatically generates an energetic skeletal figure of the static character image. Using this skeleton, the software helps you to animate the character.
❷ Cartoon Animator 4
The software is one that suffices to almost every level of animator, be it a novice, intermediate, or an expert. The animation maker has super cool features and could make you animate characters very easily. The rigging tool can again convert a static image of the character you intend to animate into its skeletal structure.
❸ Blender
Now any professional animator reading this will obviously know about blender. It is indeed one of the most popular tools available to perform any kind of animation. Moreover, most professional courses teach the basics of animation using blender.
❹ Toon boom harmony
Toon boom harmony is another software that offers pretty decent rigging features. The software is pretty popular among novice animators who just wish to animate 2d characters. The advanced tool offers animation, rigging, and drawing features.
❺ Synig studio
Synig studio is another popular software among the animation community. The software is meant for animators of all levels, ranging from beginners to professionals, anybody can use this tool to animate. The software uses complex technologies in order to ensure that the character is animated seamlessly.
2. How Do You Animate a Custom Rig?
If you want to try animating custom rigs, it is indeed very simple, if you use beginner-friendly software, all you need to do is input the static image of your character. Select the motion template that you’d like to apply to your character. You’re good to go! However, you can’t animate custom motions using beginner-friendly software, you can only choose from the available templates.
Part 3 Where to Rig and Animate More Characters?
Comfort and convenience are what we always prioritize. Wondershare Filmora offers you exactly the same. With Wondershare Filmora Pro, you can easily animate and make desirable structures. The several features that Filmora Pro offers include:
Audio Features →
● Audio transition
● Audio compression
● Noise reduction
Video Features →
● Animation
● Motion tracking
● Video editing
The features listed above are just a few of the many features Wondershare Filmora Pro offers. If you’re looking to try out animation, then we highly recommend you to give it a go. It’s a one-stop shop for your animation needs.
Key Takeaways from This Episode
● As we reach the end of the article, we can say that it was indeed a fruitful read as we understood about several different tools to perform animations and rigging.
● The tools we looked at today make life easier for animators and video editors, using these tools, animations can be performed in minutes.
● We hope that the adobe animated rigging tutorial helped you understand the challenges of animation and how to counter them! We’d like to recommend Wondershare Filmora Pro to you, a comprehensive feature-rich tool that provides you with several different features. Think video editing? Think Filmora Pro!
15 Best Collage Makers to Create Aesthetic Collages
15 Best Collage Makers to Create Aesthetic Collages
An easy yet powerful editor
Numerous effects to choose from
Detailed tutorials provided by the official channel
It is rightly said that a picture is worth a thousand words and what if there are multiple pictures? It becomes a story!! Creating collages have been popular among people for a long and with high-end cameras, mobile phones, and excellent tools the task has become even easier and quicker.

So, if you too are willing to create an aesthetic collage for yourself or loved ones, there is no dearth of collage-making tools. So, to prevent you from the hassles of selecting one such tool, we have shortlisted the popular ones.
In this article
01 [Need for a collage-making tool?](#Part 1)
02 [Top 15 collage makers to create aesthetic collages](#Part 2)
03 [Best software to create video collages and edit videos professionally – Wondershare Filmora](#Part 3)
Part 1 Need for a collage-making tool?
Though aesthetic collage wallpaper making may sound simple, it is an artwork to create an impressive-looking collage. Adjusting the images in the right format, cropping their sizes, setting a background, setting colors, adding text are some of the many factors that go into the making of a visually appealing collage. So now, all these considerations can be taken care of by a good collage-making tool. All you need to do is pick up your choice of images, select a template and let the tool do its work.
In no time, a collage of your choice will be ready.
Part 2 Top 15 collage makers to create aesthetic collages
There is a wide range of online, desktop, and app-based collage-making tools available that can be selected based on your requirements. Check out the most popular ones as below.
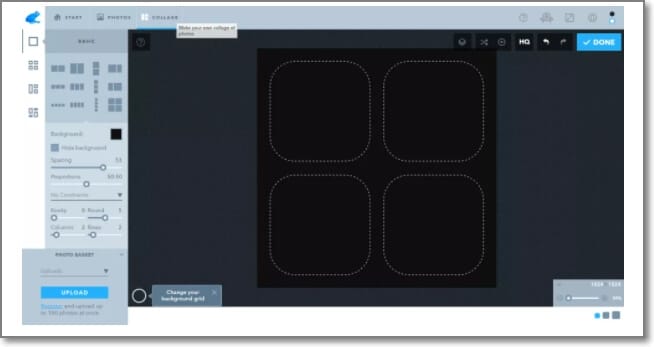
01Free Collage Maker Online
This is a free-to-use online tool that can be used for creating impressive aesthetic wallpaper collage quickly. The tool gives you the option to either choose your own layout or use one of the readymade templates. Multiple editing options are supported like adjust9ing exposure, contrast, shadows, white balance, and more. You can even turn, rotate, and distort the images. Using this online tool, you can even add the text and also customize it. A wide range of formats is supported by a tool like RAW, JPEG, PSD, PNG, and others.
022. Canva
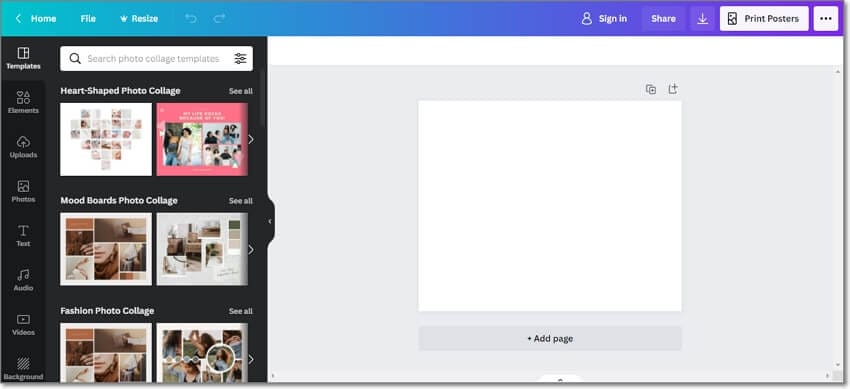
This is a widely used online tool that supports multiple functions including image collage creation and image editing. The tool allows adding images in all popular formats for creating a collage using several templates. The position of the photos, font of the text, shades, and other parameters can be adjusted as required. The tool also has a huge collection of images in different categories that can also be used for making aesthetic photo collage. Created collages can be saved in JPEG, PDF, and PNG format.
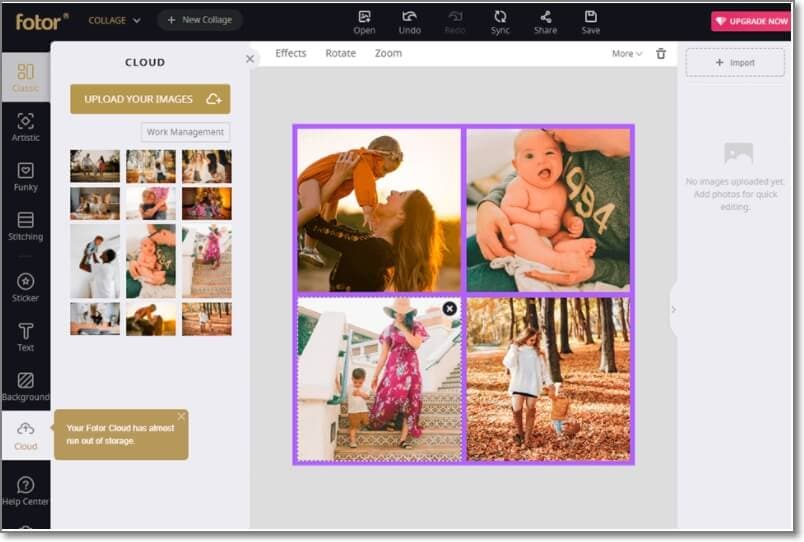
03Fotor
Creating high-quality trendy photo collages is easy and quick using this online tool that supports all popular image formats. There are several grids and template options available for you to create the desired collage. Stickers and text can be added to the created collage to add some fun elements. Several adjustments can be made like frame width, rounded corners, background color, aspect ratio, adding filters, effects, and more. With multiple features, the interface becomes quite confusing.
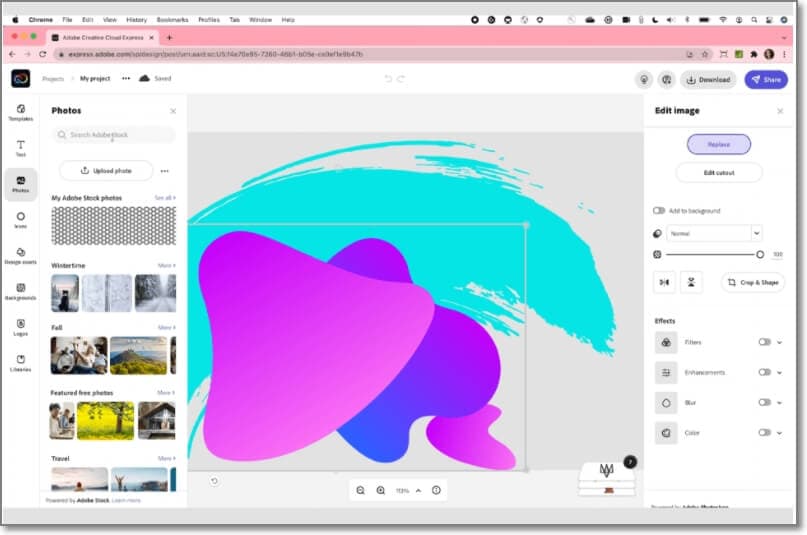
04Adobe Creative Cloud Express
Adobe is one of the most widely used tools when it comes to images and videos and creating a picture collage is one of the supported features. Using the online version of this tool, collages can be created quickly and only a free sign-up is needed. In addition to your images, you can even choose from the wide collection of royalty-free pictures. Theme-based templates are available to match your requirements and for customization, all basic editing features are supported. You can even add texts, filters, and effects to your collages.
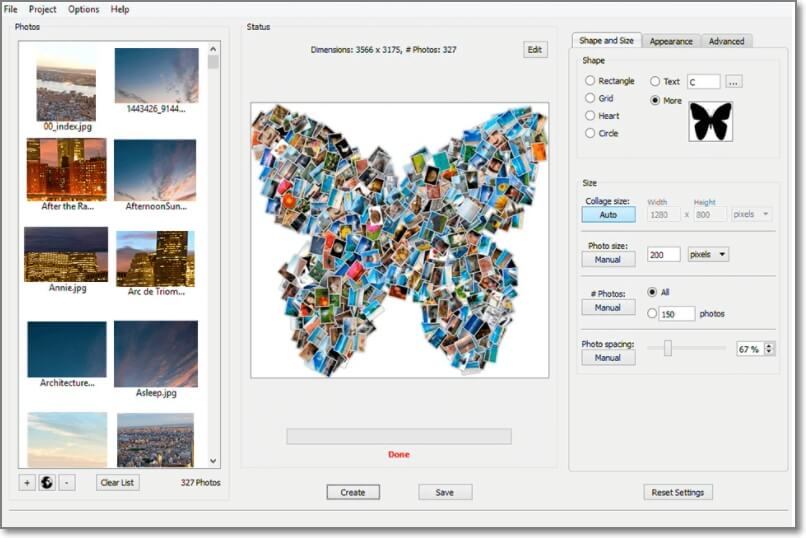
05Shape Collage
This automatic collage maker lets you create the desired collage in just a few simple steps. The interface is simple and all the basic editing functions for customization are supported. You can change the background, frame, the distance between the images, and several other factors. The tool is available to be used as desktop software, an online program, and also as an app that can be downloaded on a phone.
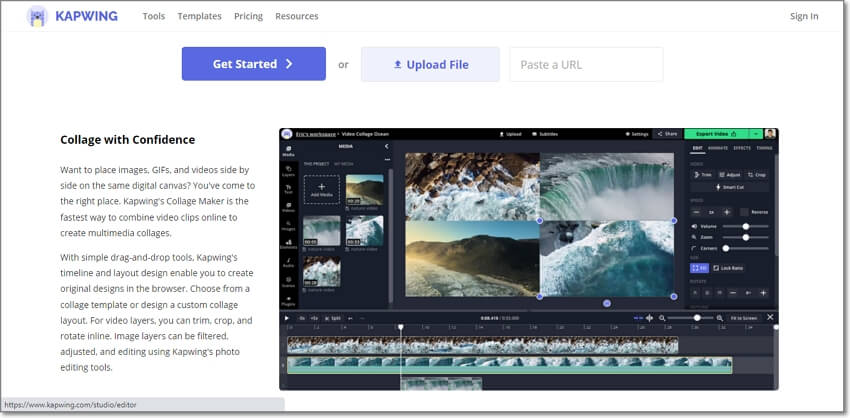
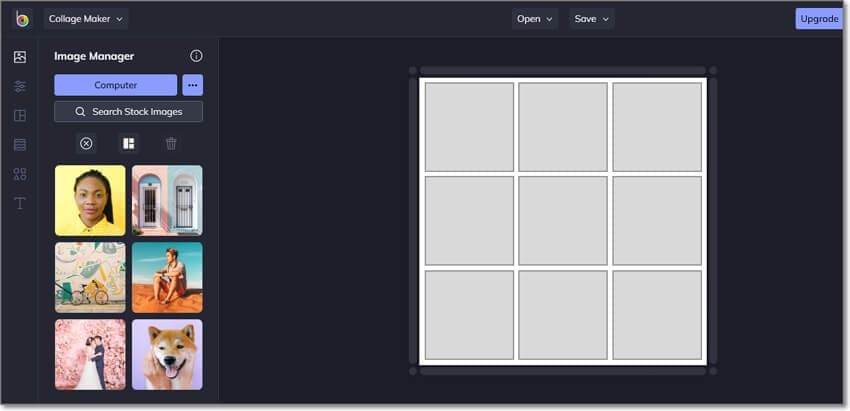
06Kapwing Collage Maker
Using this free online tool, collages can be made using images, videos, GIFs, as well as music files. The tool allows you to choose either a blank canvas or choose from multiple templates available at the site. The drag and drop features are supported and there are multiple editing options as well. The free version has a watermark on the created collages which can be removed after creating a free account. The created collage can be saved to the system or its URL can be obtained.
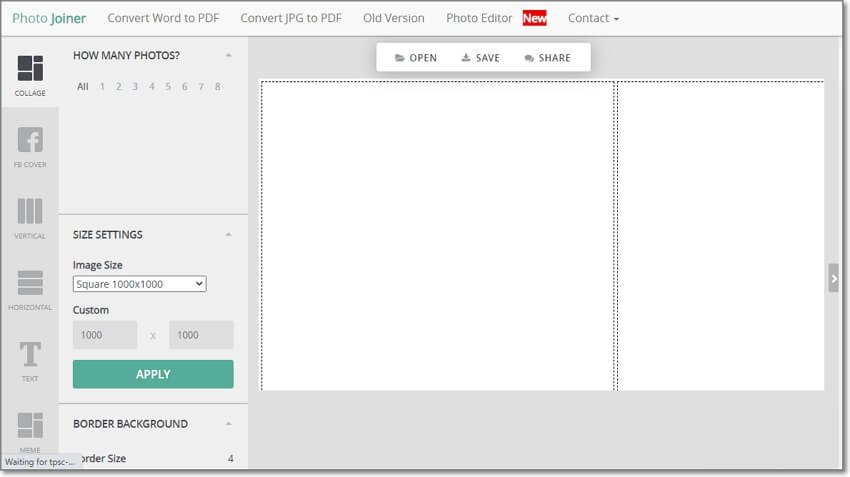
07Photo Joiner
As the name suggests, this is a photo joining tool that works from your browser and allows creating a picture collage. The interface is user-friendly and the work process is smooth where you just need to add the images, choose the layout, add text, and make required settings to create your choice of a template. The tool allows changing the image size, as well as the background. Using the tool, you can also create an FB cover in a simple step.
08Ribbet
This is a widely used photo editing tool that performs an array of additional features as well including collage making. The tool is available in a free as well as a premium paid version. The interface is smart and comes packed in with all basic collage-making functions. Decent templates are available to choose from with the option to adjust the size, edit exposure, lighting, and other parameters.
09BeFunky
Creating aesthetic, funky, and all types of different collages is quick and easy using this online tool. A variety of customizable layout options are available at the site to match your requirements. The images can be enhanced by changing the background color, pattern, adding fonts, effects, filters, and more. The free version of the tool supports basic functions while for more advanced options you need to purchase the premium plan. The tool is also available as an app for Android and iOS devices.
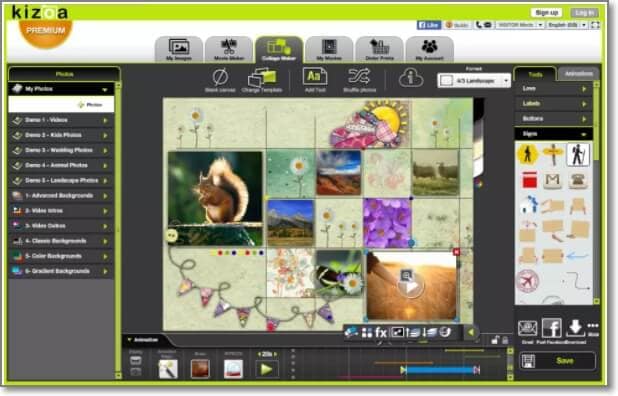
10Kizoa
This is a free online slideshow maker that allows creating a slideshow in different aspect ratios which is suitable for all types of platforms and screen sizes. An array of static and animated templates is available and you can even add multiple effects, text, and other elements to customize the collage as desired. There is also a paid version of the tool with added features and functions.
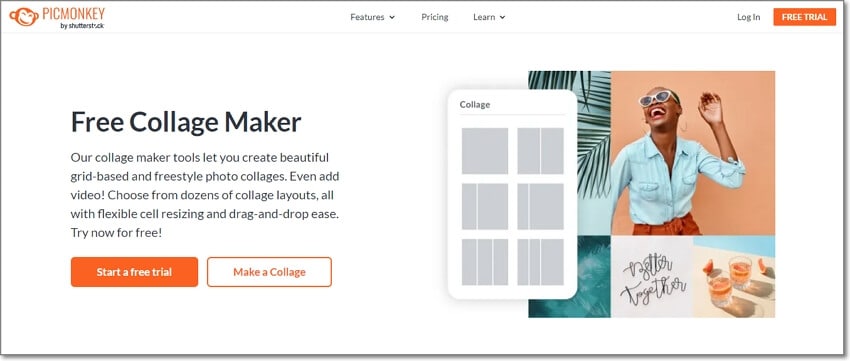
11PicMonkey
This is another popular name when it comes to collage-making tools. The tool allows creating freestyle as well as grid-based collages and in addition to the images, you can even add videos. Hundreds of collage layouts are available that can be further customized as needed. The function of auto-cell resizing adjusts all the images to the grids perfectly. Apart from your media files, you can even choose from the free stock of images and videos available at the site.
12piZap
Just like its interesting name, this online tool allows you to create interesting collages. The interface is intuitive and there are multiple templates to choose from. Further, the templates can be customized using an editing tool, adding filters, texts, effects, and other elements. The Facebook banner template is one of the interesting and useful features. For ad-free experience and additional functions, the pro-paid version can be selected.
13FotoJet
Using this browser-based tool you can create collages, posters, photo cards, YouTube banners, fun images, Facebook covers, and others. The templates in different categories are available to match your themes and create interesting collages. You can even choose to create a classic collage to keep it simple. Upgrading the tool to the paid version offers additional resources and features.

14Picsart Collage Maker
This is another simple to use free online collage-making tool that can create aesthetic and other types of collages. The interface of the tool is clean which makes the working smooth and quick and the images can be added from your system as well as from your social media accounts. Multiple effects, filters, clip-art, and other elements can be added to make the collage look impressive.
15Photovisi
Using this free online collage-making tool, you will have access to templates in different categories like abstract, magic, love, nature, and many categories more. You can even create Facebook covers, E-cards, and YouTube channel banners using the program. An array of built-in effects is available to customize the file and the tool also offers collaboration options. The created collage can be saved locally or can also be shared through an email.
Part 3 Best software to create video collages and edit videos professionally – Wondershare Filmora
Above we have listed the best tools for creating image collages and a few of them also has a feature to add videos. If you are want to create a video collage and looking for a tool that can edit your videos professionally, Wondershare Filmora is the best tool to consider. The animated split screen effect of the software allows you to view your videos on a split-screen thus making it look like a collage.
For all types of video editing requirements, this is an excellent tool available for download on Windows and Mac systems.
For Win 7 or later (64-bit)
For macOS 10.12 or later
● Key Takeaways from This Episode →
● To create aesthetics and other types of collages, a wide range of collage-maker tools are available.
● Choose from desktop tools, online programs, or apps as needed.
● To edit videos and create decent video collages, Wondershare Filmora is an excellent tool.
It is rightly said that a picture is worth a thousand words and what if there are multiple pictures? It becomes a story!! Creating collages have been popular among people for a long and with high-end cameras, mobile phones, and excellent tools the task has become even easier and quicker.
So, if you too are willing to create an aesthetic collage for yourself or loved ones, there is no dearth of collage-making tools. So, to prevent you from the hassles of selecting one such tool, we have shortlisted the popular ones.
In this article
01 [Need for a collage-making tool?](#Part 1)
02 [Top 15 collage makers to create aesthetic collages](#Part 2)
03 [Best software to create video collages and edit videos professionally – Wondershare Filmora](#Part 3)
Part 1 Need for a collage-making tool?
Though aesthetic collage wallpaper making may sound simple, it is an artwork to create an impressive-looking collage. Adjusting the images in the right format, cropping their sizes, setting a background, setting colors, adding text are some of the many factors that go into the making of a visually appealing collage. So now, all these considerations can be taken care of by a good collage-making tool. All you need to do is pick up your choice of images, select a template and let the tool do its work.
In no time, a collage of your choice will be ready.
Part 2 Top 15 collage makers to create aesthetic collages
There is a wide range of online, desktop, and app-based collage-making tools available that can be selected based on your requirements. Check out the most popular ones as below.
01Free Collage Maker Online
This is a free-to-use online tool that can be used for creating impressive aesthetic wallpaper collage quickly. The tool gives you the option to either choose your own layout or use one of the readymade templates. Multiple editing options are supported like adjust9ing exposure, contrast, shadows, white balance, and more. You can even turn, rotate, and distort the images. Using this online tool, you can even add the text and also customize it. A wide range of formats is supported by a tool like RAW, JPEG, PSD, PNG, and others.
022. Canva
This is a widely used online tool that supports multiple functions including image collage creation and image editing. The tool allows adding images in all popular formats for creating a collage using several templates. The position of the photos, font of the text, shades, and other parameters can be adjusted as required. The tool also has a huge collection of images in different categories that can also be used for making aesthetic photo collage. Created collages can be saved in JPEG, PDF, and PNG format.
03Fotor
Creating high-quality trendy photo collages is easy and quick using this online tool that supports all popular image formats. There are several grids and template options available for you to create the desired collage. Stickers and text can be added to the created collage to add some fun elements. Several adjustments can be made like frame width, rounded corners, background color, aspect ratio, adding filters, effects, and more. With multiple features, the interface becomes quite confusing.
04Adobe Creative Cloud Express
Adobe is one of the most widely used tools when it comes to images and videos and creating a picture collage is one of the supported features. Using the online version of this tool, collages can be created quickly and only a free sign-up is needed. In addition to your images, you can even choose from the wide collection of royalty-free pictures. Theme-based templates are available to match your requirements and for customization, all basic editing features are supported. You can even add texts, filters, and effects to your collages.
05Shape Collage
This automatic collage maker lets you create the desired collage in just a few simple steps. The interface is simple and all the basic editing functions for customization are supported. You can change the background, frame, the distance between the images, and several other factors. The tool is available to be used as desktop software, an online program, and also as an app that can be downloaded on a phone.
06Kapwing Collage Maker
Using this free online tool, collages can be made using images, videos, GIFs, as well as music files. The tool allows you to choose either a blank canvas or choose from multiple templates available at the site. The drag and drop features are supported and there are multiple editing options as well. The free version has a watermark on the created collages which can be removed after creating a free account. The created collage can be saved to the system or its URL can be obtained.
07Photo Joiner
As the name suggests, this is a photo joining tool that works from your browser and allows creating a picture collage. The interface is user-friendly and the work process is smooth where you just need to add the images, choose the layout, add text, and make required settings to create your choice of a template. The tool allows changing the image size, as well as the background. Using the tool, you can also create an FB cover in a simple step.
08Ribbet
This is a widely used photo editing tool that performs an array of additional features as well including collage making. The tool is available in a free as well as a premium paid version. The interface is smart and comes packed in with all basic collage-making functions. Decent templates are available to choose from with the option to adjust the size, edit exposure, lighting, and other parameters.
09BeFunky
Creating aesthetic, funky, and all types of different collages is quick and easy using this online tool. A variety of customizable layout options are available at the site to match your requirements. The images can be enhanced by changing the background color, pattern, adding fonts, effects, filters, and more. The free version of the tool supports basic functions while for more advanced options you need to purchase the premium plan. The tool is also available as an app for Android and iOS devices.
10Kizoa
This is a free online slideshow maker that allows creating a slideshow in different aspect ratios which is suitable for all types of platforms and screen sizes. An array of static and animated templates is available and you can even add multiple effects, text, and other elements to customize the collage as desired. There is also a paid version of the tool with added features and functions.
11PicMonkey
This is another popular name when it comes to collage-making tools. The tool allows creating freestyle as well as grid-based collages and in addition to the images, you can even add videos. Hundreds of collage layouts are available that can be further customized as needed. The function of auto-cell resizing adjusts all the images to the grids perfectly. Apart from your media files, you can even choose from the free stock of images and videos available at the site.
12piZap
Just like its interesting name, this online tool allows you to create interesting collages. The interface is intuitive and there are multiple templates to choose from. Further, the templates can be customized using an editing tool, adding filters, texts, effects, and other elements. The Facebook banner template is one of the interesting and useful features. For ad-free experience and additional functions, the pro-paid version can be selected.
13FotoJet
Using this browser-based tool you can create collages, posters, photo cards, YouTube banners, fun images, Facebook covers, and others. The templates in different categories are available to match your themes and create interesting collages. You can even choose to create a classic collage to keep it simple. Upgrading the tool to the paid version offers additional resources and features.
14Picsart Collage Maker
This is another simple to use free online collage-making tool that can create aesthetic and other types of collages. The interface of the tool is clean which makes the working smooth and quick and the images can be added from your system as well as from your social media accounts. Multiple effects, filters, clip-art, and other elements can be added to make the collage look impressive.
15Photovisi
Using this free online collage-making tool, you will have access to templates in different categories like abstract, magic, love, nature, and many categories more. You can even create Facebook covers, E-cards, and YouTube channel banners using the program. An array of built-in effects is available to customize the file and the tool also offers collaboration options. The created collage can be saved locally or can also be shared through an email.
Part 3 Best software to create video collages and edit videos professionally – Wondershare Filmora
Above we have listed the best tools for creating image collages and a few of them also has a feature to add videos. If you are want to create a video collage and looking for a tool that can edit your videos professionally, Wondershare Filmora is the best tool to consider. The animated split screen effect of the software allows you to view your videos on a split-screen thus making it look like a collage.
For all types of video editing requirements, this is an excellent tool available for download on Windows and Mac systems.
For Win 7 or later (64-bit)
For macOS 10.12 or later
● Key Takeaways from This Episode →
● To create aesthetics and other types of collages, a wide range of collage-maker tools are available.
● Choose from desktop tools, online programs, or apps as needed.
● To edit videos and create decent video collages, Wondershare Filmora is an excellent tool.
It is rightly said that a picture is worth a thousand words and what if there are multiple pictures? It becomes a story!! Creating collages have been popular among people for a long and with high-end cameras, mobile phones, and excellent tools the task has become even easier and quicker.
So, if you too are willing to create an aesthetic collage for yourself or loved ones, there is no dearth of collage-making tools. So, to prevent you from the hassles of selecting one such tool, we have shortlisted the popular ones.
In this article
01 [Need for a collage-making tool?](#Part 1)
02 [Top 15 collage makers to create aesthetic collages](#Part 2)
03 [Best software to create video collages and edit videos professionally – Wondershare Filmora](#Part 3)
Part 1 Need for a collage-making tool?
Though aesthetic collage wallpaper making may sound simple, it is an artwork to create an impressive-looking collage. Adjusting the images in the right format, cropping their sizes, setting a background, setting colors, adding text are some of the many factors that go into the making of a visually appealing collage. So now, all these considerations can be taken care of by a good collage-making tool. All you need to do is pick up your choice of images, select a template and let the tool do its work.
In no time, a collage of your choice will be ready.
Part 2 Top 15 collage makers to create aesthetic collages
There is a wide range of online, desktop, and app-based collage-making tools available that can be selected based on your requirements. Check out the most popular ones as below.
01Free Collage Maker Online
This is a free-to-use online tool that can be used for creating impressive aesthetic wallpaper collage quickly. The tool gives you the option to either choose your own layout or use one of the readymade templates. Multiple editing options are supported like adjust9ing exposure, contrast, shadows, white balance, and more. You can even turn, rotate, and distort the images. Using this online tool, you can even add the text and also customize it. A wide range of formats is supported by a tool like RAW, JPEG, PSD, PNG, and others.
022. Canva
This is a widely used online tool that supports multiple functions including image collage creation and image editing. The tool allows adding images in all popular formats for creating a collage using several templates. The position of the photos, font of the text, shades, and other parameters can be adjusted as required. The tool also has a huge collection of images in different categories that can also be used for making aesthetic photo collage. Created collages can be saved in JPEG, PDF, and PNG format.
03Fotor
Creating high-quality trendy photo collages is easy and quick using this online tool that supports all popular image formats. There are several grids and template options available for you to create the desired collage. Stickers and text can be added to the created collage to add some fun elements. Several adjustments can be made like frame width, rounded corners, background color, aspect ratio, adding filters, effects, and more. With multiple features, the interface becomes quite confusing.
04Adobe Creative Cloud Express
Adobe is one of the most widely used tools when it comes to images and videos and creating a picture collage is one of the supported features. Using the online version of this tool, collages can be created quickly and only a free sign-up is needed. In addition to your images, you can even choose from the wide collection of royalty-free pictures. Theme-based templates are available to match your requirements and for customization, all basic editing features are supported. You can even add texts, filters, and effects to your collages.
05Shape Collage
This automatic collage maker lets you create the desired collage in just a few simple steps. The interface is simple and all the basic editing functions for customization are supported. You can change the background, frame, the distance between the images, and several other factors. The tool is available to be used as desktop software, an online program, and also as an app that can be downloaded on a phone.
06Kapwing Collage Maker
Using this free online tool, collages can be made using images, videos, GIFs, as well as music files. The tool allows you to choose either a blank canvas or choose from multiple templates available at the site. The drag and drop features are supported and there are multiple editing options as well. The free version has a watermark on the created collages which can be removed after creating a free account. The created collage can be saved to the system or its URL can be obtained.
07Photo Joiner
As the name suggests, this is a photo joining tool that works from your browser and allows creating a picture collage. The interface is user-friendly and the work process is smooth where you just need to add the images, choose the layout, add text, and make required settings to create your choice of a template. The tool allows changing the image size, as well as the background. Using the tool, you can also create an FB cover in a simple step.
08Ribbet
This is a widely used photo editing tool that performs an array of additional features as well including collage making. The tool is available in a free as well as a premium paid version. The interface is smart and comes packed in with all basic collage-making functions. Decent templates are available to choose from with the option to adjust the size, edit exposure, lighting, and other parameters.
09BeFunky
Creating aesthetic, funky, and all types of different collages is quick and easy using this online tool. A variety of customizable layout options are available at the site to match your requirements. The images can be enhanced by changing the background color, pattern, adding fonts, effects, filters, and more. The free version of the tool supports basic functions while for more advanced options you need to purchase the premium plan. The tool is also available as an app for Android and iOS devices.
10Kizoa
This is a free online slideshow maker that allows creating a slideshow in different aspect ratios which is suitable for all types of platforms and screen sizes. An array of static and animated templates is available and you can even add multiple effects, text, and other elements to customize the collage as desired. There is also a paid version of the tool with added features and functions.
11PicMonkey
This is another popular name when it comes to collage-making tools. The tool allows creating freestyle as well as grid-based collages and in addition to the images, you can even add videos. Hundreds of collage layouts are available that can be further customized as needed. The function of auto-cell resizing adjusts all the images to the grids perfectly. Apart from your media files, you can even choose from the free stock of images and videos available at the site.
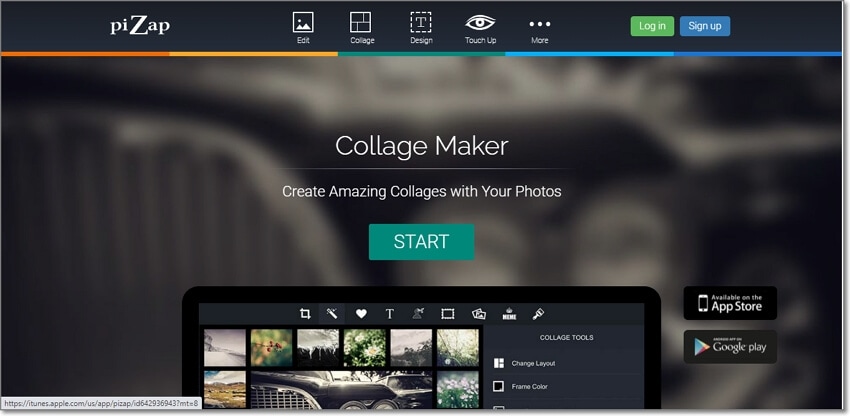
12piZap
Just like its interesting name, this online tool allows you to create interesting collages. The interface is intuitive and there are multiple templates to choose from. Further, the templates can be customized using an editing tool, adding filters, texts, effects, and other elements. The Facebook banner template is one of the interesting and useful features. For ad-free experience and additional functions, the pro-paid version can be selected.
13FotoJet
Using this browser-based tool you can create collages, posters, photo cards, YouTube banners, fun images, Facebook covers, and others. The templates in different categories are available to match your themes and create interesting collages. You can even choose to create a classic collage to keep it simple. Upgrading the tool to the paid version offers additional resources and features.
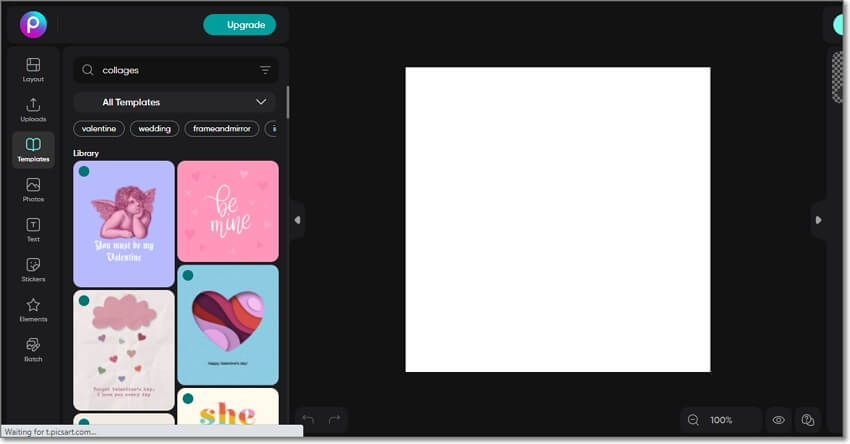
14Picsart Collage Maker
This is another simple to use free online collage-making tool that can create aesthetic and other types of collages. The interface of the tool is clean which makes the working smooth and quick and the images can be added from your system as well as from your social media accounts. Multiple effects, filters, clip-art, and other elements can be added to make the collage look impressive.
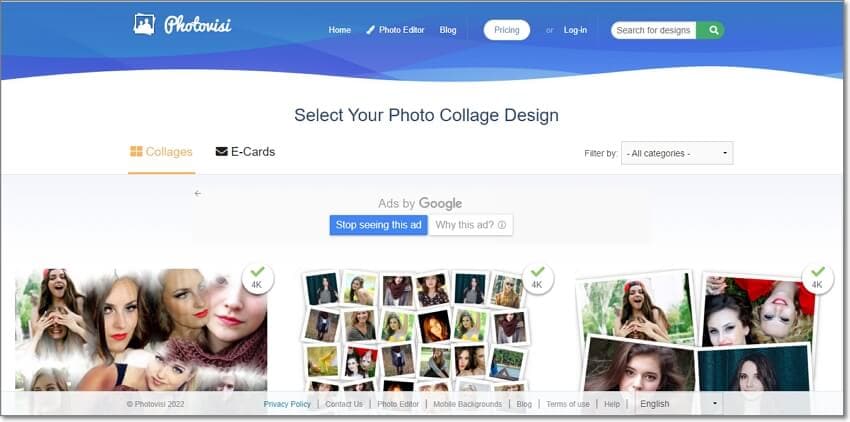
15Photovisi
Using this free online collage-making tool, you will have access to templates in different categories like abstract, magic, love, nature, and many categories more. You can even create Facebook covers, E-cards, and YouTube channel banners using the program. An array of built-in effects is available to customize the file and the tool also offers collaboration options. The created collage can be saved locally or can also be shared through an email.
Part 3 Best software to create video collages and edit videos professionally – Wondershare Filmora
Above we have listed the best tools for creating image collages and a few of them also has a feature to add videos. If you are want to create a video collage and looking for a tool that can edit your videos professionally, Wondershare Filmora is the best tool to consider. The animated split screen effect of the software allows you to view your videos on a split-screen thus making it look like a collage.
For all types of video editing requirements, this is an excellent tool available for download on Windows and Mac systems.
For Win 7 or later (64-bit)
For macOS 10.12 or later
● Key Takeaways from This Episode →
● To create aesthetics and other types of collages, a wide range of collage-maker tools are available.
● Choose from desktop tools, online programs, or apps as needed.
● To edit videos and create decent video collages, Wondershare Filmora is an excellent tool.
It is rightly said that a picture is worth a thousand words and what if there are multiple pictures? It becomes a story!! Creating collages have been popular among people for a long and with high-end cameras, mobile phones, and excellent tools the task has become even easier and quicker.
So, if you too are willing to create an aesthetic collage for yourself or loved ones, there is no dearth of collage-making tools. So, to prevent you from the hassles of selecting one such tool, we have shortlisted the popular ones.
In this article
01 [Need for a collage-making tool?](#Part 1)
02 [Top 15 collage makers to create aesthetic collages](#Part 2)
03 [Best software to create video collages and edit videos professionally – Wondershare Filmora](#Part 3)
Part 1 Need for a collage-making tool?
Though aesthetic collage wallpaper making may sound simple, it is an artwork to create an impressive-looking collage. Adjusting the images in the right format, cropping their sizes, setting a background, setting colors, adding text are some of the many factors that go into the making of a visually appealing collage. So now, all these considerations can be taken care of by a good collage-making tool. All you need to do is pick up your choice of images, select a template and let the tool do its work.
In no time, a collage of your choice will be ready.
Part 2 Top 15 collage makers to create aesthetic collages
There is a wide range of online, desktop, and app-based collage-making tools available that can be selected based on your requirements. Check out the most popular ones as below.
01Free Collage Maker Online
This is a free-to-use online tool that can be used for creating impressive aesthetic wallpaper collage quickly. The tool gives you the option to either choose your own layout or use one of the readymade templates. Multiple editing options are supported like adjust9ing exposure, contrast, shadows, white balance, and more. You can even turn, rotate, and distort the images. Using this online tool, you can even add the text and also customize it. A wide range of formats is supported by a tool like RAW, JPEG, PSD, PNG, and others.
022. Canva
This is a widely used online tool that supports multiple functions including image collage creation and image editing. The tool allows adding images in all popular formats for creating a collage using several templates. The position of the photos, font of the text, shades, and other parameters can be adjusted as required. The tool also has a huge collection of images in different categories that can also be used for making aesthetic photo collage. Created collages can be saved in JPEG, PDF, and PNG format.
03Fotor
Creating high-quality trendy photo collages is easy and quick using this online tool that supports all popular image formats. There are several grids and template options available for you to create the desired collage. Stickers and text can be added to the created collage to add some fun elements. Several adjustments can be made like frame width, rounded corners, background color, aspect ratio, adding filters, effects, and more. With multiple features, the interface becomes quite confusing.
04Adobe Creative Cloud Express
Adobe is one of the most widely used tools when it comes to images and videos and creating a picture collage is one of the supported features. Using the online version of this tool, collages can be created quickly and only a free sign-up is needed. In addition to your images, you can even choose from the wide collection of royalty-free pictures. Theme-based templates are available to match your requirements and for customization, all basic editing features are supported. You can even add texts, filters, and effects to your collages.
05Shape Collage
This automatic collage maker lets you create the desired collage in just a few simple steps. The interface is simple and all the basic editing functions for customization are supported. You can change the background, frame, the distance between the images, and several other factors. The tool is available to be used as desktop software, an online program, and also as an app that can be downloaded on a phone.
06Kapwing Collage Maker
Using this free online tool, collages can be made using images, videos, GIFs, as well as music files. The tool allows you to choose either a blank canvas or choose from multiple templates available at the site. The drag and drop features are supported and there are multiple editing options as well. The free version has a watermark on the created collages which can be removed after creating a free account. The created collage can be saved to the system or its URL can be obtained.
07Photo Joiner
As the name suggests, this is a photo joining tool that works from your browser and allows creating a picture collage. The interface is user-friendly and the work process is smooth where you just need to add the images, choose the layout, add text, and make required settings to create your choice of a template. The tool allows changing the image size, as well as the background. Using the tool, you can also create an FB cover in a simple step.
08Ribbet
This is a widely used photo editing tool that performs an array of additional features as well including collage making. The tool is available in a free as well as a premium paid version. The interface is smart and comes packed in with all basic collage-making functions. Decent templates are available to choose from with the option to adjust the size, edit exposure, lighting, and other parameters.
09BeFunky
Creating aesthetic, funky, and all types of different collages is quick and easy using this online tool. A variety of customizable layout options are available at the site to match your requirements. The images can be enhanced by changing the background color, pattern, adding fonts, effects, filters, and more. The free version of the tool supports basic functions while for more advanced options you need to purchase the premium plan. The tool is also available as an app for Android and iOS devices.
10Kizoa
This is a free online slideshow maker that allows creating a slideshow in different aspect ratios which is suitable for all types of platforms and screen sizes. An array of static and animated templates is available and you can even add multiple effects, text, and other elements to customize the collage as desired. There is also a paid version of the tool with added features and functions.
11PicMonkey
This is another popular name when it comes to collage-making tools. The tool allows creating freestyle as well as grid-based collages and in addition to the images, you can even add videos. Hundreds of collage layouts are available that can be further customized as needed. The function of auto-cell resizing adjusts all the images to the grids perfectly. Apart from your media files, you can even choose from the free stock of images and videos available at the site.
12piZap
Just like its interesting name, this online tool allows you to create interesting collages. The interface is intuitive and there are multiple templates to choose from. Further, the templates can be customized using an editing tool, adding filters, texts, effects, and other elements. The Facebook banner template is one of the interesting and useful features. For ad-free experience and additional functions, the pro-paid version can be selected.
13FotoJet
Using this browser-based tool you can create collages, posters, photo cards, YouTube banners, fun images, Facebook covers, and others. The templates in different categories are available to match your themes and create interesting collages. You can even choose to create a classic collage to keep it simple. Upgrading the tool to the paid version offers additional resources and features.
14Picsart Collage Maker
This is another simple to use free online collage-making tool that can create aesthetic and other types of collages. The interface of the tool is clean which makes the working smooth and quick and the images can be added from your system as well as from your social media accounts. Multiple effects, filters, clip-art, and other elements can be added to make the collage look impressive.
15Photovisi
Using this free online collage-making tool, you will have access to templates in different categories like abstract, magic, love, nature, and many categories more. You can even create Facebook covers, E-cards, and YouTube channel banners using the program. An array of built-in effects is available to customize the file and the tool also offers collaboration options. The created collage can be saved locally or can also be shared through an email.
Part 3 Best software to create video collages and edit videos professionally – Wondershare Filmora
Above we have listed the best tools for creating image collages and a few of them also has a feature to add videos. If you are want to create a video collage and looking for a tool that can edit your videos professionally, Wondershare Filmora is the best tool to consider. The animated split screen effect of the software allows you to view your videos on a split-screen thus making it look like a collage.
For all types of video editing requirements, this is an excellent tool available for download on Windows and Mac systems.
For Win 7 or later (64-bit)
For macOS 10.12 or later
● Key Takeaways from This Episode →
● To create aesthetics and other types of collages, a wide range of collage-maker tools are available.
● Choose from desktop tools, online programs, or apps as needed.
● To edit videos and create decent video collages, Wondershare Filmora is an excellent tool.
Guide on Creating GIF in WhatsApp iPhone
2024 Guide on How to Create GIF in WhatsApp iPhone
An easy yet powerful editor
Numerous effects to choose from
Detailed tutorials provided by the official channel
Standing for Graphics Interchange Format, GIF is short animated images that you can see all over social media sites and other online platforms. These interesting animations can also be shared during your conversations on WhatsApp.

So, if you too are looking for ways to create as well as send GIFs on WhatsApp iPhone, you are on the right page. Keep reading to know all the possible ways to send WhatsApp GIFs on iPhone.
In this article
01 [How to send WhatsApp GIF from the integrated library on iPhone](#Part 1)
02 [How to send Live Photos as WhatsApp GIF on iPhone](#Part 2)
03 [How to create WhatsApp GIF using videos on iPhone](#Part 3)
04 [How to create excellent GIF effortlessly using Wondershare Filmora- All in One video editing software](#Part 4)
Part 1 How to send WhatsApp GIF from the integrated library on iPhone
If you have the latest version of WhatsApp installed on your phone, you can easily and quickly send the GIF from the integrated library having a collection of GIFs in several categories. The steps to send GIF in WhatsApp iPhone are as below.
Step 1. On your iPhone, launch WhatsApp and open the contact or a group to which you wish to send the GIF.
Step 2. Click on the Stickers icon at the typing section and then choose the GIF option at the bottom.
Step 3. Multiple GIFs in different categories will appear. You can further search for the desired GIF using a keyword at the search icon at the bottom-left corner. The list of the Recents and the Favorites can also be searched using their respective icons.
Note: To save any particular GIF in the favorites list, tap and hold the GIF and then click on Add To Favorites option.
StepTap on the selected GIF and then click on the Send icon at the bottom-right corner. Your WhatsApp GIF iPhone will be sent.

Part 2 How to send Live Photos as WhatsApp GIF on iPhone
Live Photos on your iPhone can also be sent as GIFs in WhatsApp conversations and the steps for the same are as below.
Note: The feature is available for users having iPhone 6 or later versions.
Step 1.Open the WhatsApp contact on your iPhone to whom you wish to send the GIF. Click on the + icon and then choose the option of Photo & Video Library.
Step 2. Search for the Live photo in your gallery and then press it. When the image pops out, slide upwards and then click on the Select as GIF option.
Step 3. Tap on the Send icon to share the selected Live photo as GIF.

Part 3 How to create WhatsApp GIF using videos on iPhone
In addition to the integrated library, you can also convert the videos on your iPhone to GIF and share them on WhatsApp. To be used as GIF, the length of the videos cannot be more than 6 seconds. Thus, for a larger video, you need to trim it to be under 6 seconds. Steps to get the task done are as follows.
Step 1.Launch WhatsApp on your iPhone and select the contact to which you want to share the GIF. Next, click on + sign and then choose Photo & Video Library option.
Step 2.Select the desired video from your phone gallery.
Step 3.After the video is added, an editing screen will open. Here you can trim the video to make it under 6 seconds using the slider at the top. Further changes can be made like adding a sticker, text, or making a freehand drawing.
Step 4.After all customizations are done, click on the GIF button.
Step 5.Finally, tap on the Send icon at the bottom-right corner to send the edited video as GIF.

Part 4 How to create excellent GIF effortlessly using Wondershare Filmora- All in One video editing software
WhatsApp in your iPhone has a built-in option to create GIFs using the videos on the device. Though the process is simple, the option for editing and customizations are limited. So, if you want to create GIFs using videos online and with advanced editing tools, we suggest using Wondershare Filmora Video Editor .
This all-in-one video editing software will let you edit and customize your files in several ways and in a few simple steps, your desired GIF will be ready.
Wondershare Filmora
Get started easily with Filmora’s powerful performance, intuitive interface, and countless effects!
Try It Free Try It Free Try It Free Learn More >

Key features of the software
● Add media files in all ley formats like MP4, MOV, MKV, PNG, and others to create GIFs.
● Simple and quick steps for creating the desired animation.
● Allows to customize the GIF using functions like slow-down, crop, rotate, and many more.
● Allows adding text, voice, and other elements.
● Option to share the created GIF to Vimeo, and YouTube directly.
● Software support to all latest Windows and Mac systems.
Steps to create WhatsApp GIF using Wondershare Filmora.
Step 1.Open the installed software on your system and import the desired images and videos from your system.
Step 2.Drag and drop the added videos and images to the timeline.

Step 3.Edit the file using features like crop, rotate, split, and others.
Step 4.Add text and other elements as needed.

Step 5.At the Local tab, save the customized media as GIF. Select the file name and the destination and then finally, click on the EXPORT button to start processing.
● Key Takeaways from This Episode →
●Gifs for WhatsApp iPhone can be added from the integrated library.
●Live Photos, as well as videos, can also be used to create and share them as GIF.
●For creating interesting and funny GIF in a hassle-free manner, Wondershare Filmora works as the best software.
Standing for Graphics Interchange Format, GIF is short animated images that you can see all over social media sites and other online platforms. These interesting animations can also be shared during your conversations on WhatsApp.
So, if you too are looking for ways to create as well as send GIFs on WhatsApp iPhone, you are on the right page. Keep reading to know all the possible ways to send WhatsApp GIFs on iPhone.
In this article
01 [How to send WhatsApp GIF from the integrated library on iPhone](#Part 1)
02 [How to send Live Photos as WhatsApp GIF on iPhone](#Part 2)
03 [How to create WhatsApp GIF using videos on iPhone](#Part 3)
04 [How to create excellent GIF effortlessly using Wondershare Filmora- All in One video editing software](#Part 4)
Part 1 How to send WhatsApp GIF from the integrated library on iPhone
If you have the latest version of WhatsApp installed on your phone, you can easily and quickly send the GIF from the integrated library having a collection of GIFs in several categories. The steps to send GIF in WhatsApp iPhone are as below.
Step 1. On your iPhone, launch WhatsApp and open the contact or a group to which you wish to send the GIF.
Step 2. Click on the Stickers icon at the typing section and then choose the GIF option at the bottom.
Step 3. Multiple GIFs in different categories will appear. You can further search for the desired GIF using a keyword at the search icon at the bottom-left corner. The list of the Recents and the Favorites can also be searched using their respective icons.
Note: To save any particular GIF in the favorites list, tap and hold the GIF and then click on Add To Favorites option.
StepTap on the selected GIF and then click on the Send icon at the bottom-right corner. Your WhatsApp GIF iPhone will be sent.
Part 2 How to send Live Photos as WhatsApp GIF on iPhone
Live Photos on your iPhone can also be sent as GIFs in WhatsApp conversations and the steps for the same are as below.
Note: The feature is available for users having iPhone 6 or later versions.
Step 1.Open the WhatsApp contact on your iPhone to whom you wish to send the GIF. Click on the + icon and then choose the option of Photo & Video Library.
Step 2. Search for the Live photo in your gallery and then press it. When the image pops out, slide upwards and then click on the Select as GIF option.
Step 3. Tap on the Send icon to share the selected Live photo as GIF.
Part 3 How to create WhatsApp GIF using videos on iPhone
In addition to the integrated library, you can also convert the videos on your iPhone to GIF and share them on WhatsApp. To be used as GIF, the length of the videos cannot be more than 6 seconds. Thus, for a larger video, you need to trim it to be under 6 seconds. Steps to get the task done are as follows.
Step 1.Launch WhatsApp on your iPhone and select the contact to which you want to share the GIF. Next, click on + sign and then choose Photo & Video Library option.
Step 2.Select the desired video from your phone gallery.
Step 3.After the video is added, an editing screen will open. Here you can trim the video to make it under 6 seconds using the slider at the top. Further changes can be made like adding a sticker, text, or making a freehand drawing.
Step 4.After all customizations are done, click on the GIF button.
Step 5.Finally, tap on the Send icon at the bottom-right corner to send the edited video as GIF.
Part 4 How to create excellent GIF effortlessly using Wondershare Filmora- All in One video editing software
WhatsApp in your iPhone has a built-in option to create GIFs using the videos on the device. Though the process is simple, the option for editing and customizations are limited. So, if you want to create GIFs using videos online and with advanced editing tools, we suggest using Wondershare Filmora Video Editor .
This all-in-one video editing software will let you edit and customize your files in several ways and in a few simple steps, your desired GIF will be ready.
Wondershare Filmora
Get started easily with Filmora’s powerful performance, intuitive interface, and countless effects!
Try It Free Try It Free Try It Free Learn More >
Key features of the software
● Add media files in all ley formats like MP4, MOV, MKV, PNG, and others to create GIFs.
● Simple and quick steps for creating the desired animation.
● Allows to customize the GIF using functions like slow-down, crop, rotate, and many more.
● Allows adding text, voice, and other elements.
● Option to share the created GIF to Vimeo, and YouTube directly.
● Software support to all latest Windows and Mac systems.
Steps to create WhatsApp GIF using Wondershare Filmora.
Step 1.Open the installed software on your system and import the desired images and videos from your system.
Step 2.Drag and drop the added videos and images to the timeline.
Step 3.Edit the file using features like crop, rotate, split, and others.
Step 4.Add text and other elements as needed.
Step 5.At the Local tab, save the customized media as GIF. Select the file name and the destination and then finally, click on the EXPORT button to start processing.
● Key Takeaways from This Episode →
●Gifs for WhatsApp iPhone can be added from the integrated library.
●Live Photos, as well as videos, can also be used to create and share them as GIF.
●For creating interesting and funny GIF in a hassle-free manner, Wondershare Filmora works as the best software.
What Is A GIF
What Is A GIF

Shanoon Cox
Mar 27, 2024• Proven solutions
GIF stands for Graphic Interchange Format and this animated graphic image can be usually found on web pages. They appear like a twirling icon or a banner or just have few letters that go larger like a magic. Note that animated GIF file is actually specified as a GIF89a and this single file use to contain so many images inside a particular folder. The fact is that this group of images use to follow an endless loop on screen and it creates a feel like document never ends and frames keep on arriving on screen. In few cases, it may follow one or two looped sequences and then animation stops automatically. These animated GIF files are commonly used on social media platform as well as for web ad banners.

What is a GIF?
As we already discussed, GIF stands for Graphic Interchange Format. It is a useful file extension for an animated raster file and is second most popular image file format throughout the world. You might be aware that JPEG is on first ranking at World Wide Web.
In technical terms, GIF makes sue of LZW compression algorithm whose owner is Unisys. Note that, Unisys follows particular licensing statements so users need to have license before using GIF images. But in regular practices, most of the web developers or file downloader’s keep on ignoring this licensing term and they are using it freely. Hence GIF’s have proposed a patent free kind of replacement via PNG.
If you want to make GIF online, Filmora meme maker is your ultimate solution. It helps you make image, GIF and video memes directly without watermark. It is totally FREE to use and no sign up. You can change text size, color and position to create caption when you are editing. You can also put text inside or outside in GIF. Try it now!
Application of GIF
You may easily find numerous GIF files on social media. These day’s people are using them commonly to entertain audience on their pages or channels. They are also being used for active conversations in comments or replies. Many people are utilizing GIFs just to convey unique reactions on internet at different channels. They are commonly used for illustrations and one of the most prominent applications is in the business world for marketing needs. It can help to explain your business products with entertainment and increased user engagement. The artistic world of GIFs can easily boost your customers online.
Many big brands these days are using GIF files to add a breathtaking moment to internet for their targeted audience and these small sized files are definitely do miracles. Actually popularity of GIF’s and their ability to deliver content interactively has revolutionized the world. That is why GIFs these days use to define Lexicon of internet and Oxford dictionary has recently decided to add this GIF to their list of words. In the world of art, GIF images have received great attention and most of art galleries or popular institutions are making use of GIFs to showcase incredible art work of their talented graphic artists.
How to make a GIF?
Now you might be interested to create your own GIF. Actually market is loaded with so many tools to do so. You can make use of Adobe Photoshop too or some other popular software are KickmyGraphics, Photoscape, Microsoft GIF Animator etc. If we talk about online tools then gifmaker.me, Ezgif.com and Giphy are the common options. It is also much easier to find GIF creator applications for smartphones, the list of some popular applications include: Gif Studio, Gif Me Camera air GIFBOOM for Android users whereas iPhone users can download GIFX, Daycap, MyFace When, Giffer etc.
It is possible to develop gifs from collection of still images or even from moving videos and this task is much easier that anyone can perform. In order to execute this task with ease, we would like to recommend Wondershare Filmora for you. The reason behind this recommendation is the simple and most interactive interface of this software tool. Using Filmora, you can easily combine number of stills into GIFs or turn small videos into GIFs. The more interesting thing is that Filmora also allows easy customization of Gifs as users can add overlays, elements and text etc to their GIFs using Filmora platform.


How to make GIFs with Wondershare Filmora
Here are few simple to execute steps to accomplish this task:
1. Import media files
The very first task for users is to import some editable video file or collection of photos to timeline of Wondershare Filmora. This software tool extends support to more than 150 media file formats so you can easily upload any of your image ranging somewhere between png, jpg, avi, mpeg, wav, mkv, mp4 or wmv etc.
2. Drag to timeline
Users can simply drag their video/image file and drop it on Filmora timeline. Once your file reaches there then it can be edited using wide range of tools.

3. Edit media files
There are unlimited editing options with so many interesting features of Filmora. Users can easily pick anything like slow down, speed up, combine, rotate, split, crop etc. to develop eye catching video as per available content.
4. Add text effect to GIF files
It is right time to update text based information to your GIFs. Few small messages always appear good in GIFs.

5. Save and export
Once you are done with all these steps then simply save your file with GIF extension and it is now ready to get uploaded on social media platforms.

Check this video tutorial to know more details:
Download Mac Version ](https://tools.techidaily.com/wondershare/filmora/download/ )
Shanoon Cox
Shanoon Cox is a writer and a lover of all things video.
Follow @Shanoon Cox
Shanoon Cox
Mar 27, 2024• Proven solutions
GIF stands for Graphic Interchange Format and this animated graphic image can be usually found on web pages. They appear like a twirling icon or a banner or just have few letters that go larger like a magic. Note that animated GIF file is actually specified as a GIF89a and this single file use to contain so many images inside a particular folder. The fact is that this group of images use to follow an endless loop on screen and it creates a feel like document never ends and frames keep on arriving on screen. In few cases, it may follow one or two looped sequences and then animation stops automatically. These animated GIF files are commonly used on social media platform as well as for web ad banners.
What is a GIF?
As we already discussed, GIF stands for Graphic Interchange Format. It is a useful file extension for an animated raster file and is second most popular image file format throughout the world. You might be aware that JPEG is on first ranking at World Wide Web.
In technical terms, GIF makes sue of LZW compression algorithm whose owner is Unisys. Note that, Unisys follows particular licensing statements so users need to have license before using GIF images. But in regular practices, most of the web developers or file downloader’s keep on ignoring this licensing term and they are using it freely. Hence GIF’s have proposed a patent free kind of replacement via PNG.
If you want to make GIF online, Filmora meme maker is your ultimate solution. It helps you make image, GIF and video memes directly without watermark. It is totally FREE to use and no sign up. You can change text size, color and position to create caption when you are editing. You can also put text inside or outside in GIF. Try it now!
Application of GIF
You may easily find numerous GIF files on social media. These day’s people are using them commonly to entertain audience on their pages or channels. They are also being used for active conversations in comments or replies. Many people are utilizing GIFs just to convey unique reactions on internet at different channels. They are commonly used for illustrations and one of the most prominent applications is in the business world for marketing needs. It can help to explain your business products with entertainment and increased user engagement. The artistic world of GIFs can easily boost your customers online.
Many big brands these days are using GIF files to add a breathtaking moment to internet for their targeted audience and these small sized files are definitely do miracles. Actually popularity of GIF’s and their ability to deliver content interactively has revolutionized the world. That is why GIFs these days use to define Lexicon of internet and Oxford dictionary has recently decided to add this GIF to their list of words. In the world of art, GIF images have received great attention and most of art galleries or popular institutions are making use of GIFs to showcase incredible art work of their talented graphic artists.
How to make a GIF?
Now you might be interested to create your own GIF. Actually market is loaded with so many tools to do so. You can make use of Adobe Photoshop too or some other popular software are KickmyGraphics, Photoscape, Microsoft GIF Animator etc. If we talk about online tools then gifmaker.me, Ezgif.com and Giphy are the common options. It is also much easier to find GIF creator applications for smartphones, the list of some popular applications include: Gif Studio, Gif Me Camera air GIFBOOM for Android users whereas iPhone users can download GIFX, Daycap, MyFace When, Giffer etc.
It is possible to develop gifs from collection of still images or even from moving videos and this task is much easier that anyone can perform. In order to execute this task with ease, we would like to recommend Wondershare Filmora for you. The reason behind this recommendation is the simple and most interactive interface of this software tool. Using Filmora, you can easily combine number of stills into GIFs or turn small videos into GIFs. The more interesting thing is that Filmora also allows easy customization of Gifs as users can add overlays, elements and text etc to their GIFs using Filmora platform.
How to make GIFs with Wondershare Filmora
Here are few simple to execute steps to accomplish this task:
1. Import media files
The very first task for users is to import some editable video file or collection of photos to timeline of Wondershare Filmora. This software tool extends support to more than 150 media file formats so you can easily upload any of your image ranging somewhere between png, jpg, avi, mpeg, wav, mkv, mp4 or wmv etc.
2. Drag to timeline
Users can simply drag their video/image file and drop it on Filmora timeline. Once your file reaches there then it can be edited using wide range of tools.
3. Edit media files
There are unlimited editing options with so many interesting features of Filmora. Users can easily pick anything like slow down, speed up, combine, rotate, split, crop etc. to develop eye catching video as per available content.
4. Add text effect to GIF files
It is right time to update text based information to your GIFs. Few small messages always appear good in GIFs.
5. Save and export
Once you are done with all these steps then simply save your file with GIF extension and it is now ready to get uploaded on social media platforms.
Check this video tutorial to know more details:
Download Mac Version ](https://tools.techidaily.com/wondershare/filmora/download/ )
Shanoon Cox
Shanoon Cox is a writer and a lover of all things video.
Follow @Shanoon Cox
Animate Pictures in Canva
Versatile Video Editor - Wondershare Filmora
An easy yet powerful editor
Numerous effects to choose from
Detailed tutorials provided by the official channel
With the rapid rise of social media worldwide, animated posts (like GIFs) are becoming famous. They have become a replacement to other modes like JPEG and .Png
Famous designing tools like Canva introduced an animation feature in the light of its popularity. The feature allows you to step up your social media game and creates animated visuals in a blink! It is also efficient for both professional and amateur users.
Besides social media content, Canva is also useful to design birthday cards, event invites, inspirational quotes, and more! Let’s learn about how to animate pictures in Canva in detail.
In this article
01 What Canva Pictures Can Be Used For?
02 How to Animate Pictures in Canva?
03 Tips: Animate Pictures In Video
Part 1: What Canva Pictures Can Be Used For?
Be it for marketing campaigns or projects, Canva is the best tool for all designing work. It is a foolproof platform where you do not need prior designing experience. Canva is useful for

Social media/Instagram Posts: You can build your Instagram presence by creating posts through Canva. It has multiple templates and features to make alluring Instagram posts. It also has drag-and-drop free images to add customized designs to the template.
Facebook Covers: You can make Facebook covers on Canva by choosing a layout and adding other elements. You can include colors, fonts, and pictures on the cover. Canva has templates for all themes, moods, and styles!
Event Invites: Canva has hundreds of free layouts and libraries to create event invites. You can choose the appropriate template and incorporate party-oriented photos, icons, stickers, illustrations, and graphics. It also has a personalizing option to add personal pictures and artwork in the editor.
Inspirational Quotes: Canva allows you to curate inspirational quotes and dispense motivation in people. It has templates to modify the elements like font size, text size, borders, images, and more!
Collages: It helps create a collage where you can combine multiple pictures in one frame. Canva offers various grids with a capacity of 12 pictures and different sizes.
Part 2: How to Animate Pictures in Canva?
Canva helps you add instant animation in presentations, social media posts, and more. To know how to animate images in Canva, follow the below steps:

Step 1: Add Static Elements
Start by creating an image through static elements. To make the design attractive, you can add sample texts, illustrations, doodles, and other entities.
Try to stimulate your creativity and come up with a layout beforehand. If possible, sketch on paper and replicate the same.
Step 2: Animate Your Design
Take a final glance at the layout. Make sure it’s perfect. Once all the elements are placed as per your design, it’s time to animate them. For that:
- Click on the white background page
- Go to the “Toolbar” section
- Select the “Animate” button
Step 3: Select Page Animation Style
Canva offers six animation styles, where five are for free users, and one is for pro users. To access the five animation styles, follow these steps.
- Press the “Animate” Button
- Select “Page Animations”
- There you will find options like Block, Pan, Fade, Rise, and Tumble
- Select the style as per your design
Step 4: Preview and Download
After selecting a page animation style, it will preview the effect. If you find it good, move on to downloading the GIF. Here’s how to do so
- Go to the “Toolbar” option (present on your upper right hand)
- Choose GIF as the file type
- Check the page number and verify if it’s correct
- Press the “Done” button
Step 5: Final GIF
After clicking on the “Done” button, your GIF will be downloaded. You will be able to see a display for five seconds. If you want to edit the image after this, click on the time button (near the “Animate” button).
So, that was all about how to animate a photo in Canva.
Drawbacks of Canva
Despite efficient features and easy interface, there are certain areas where Canva lacks. This includes
- It does not have any local file storage.
- As too many people use Canva, your template may look the same as others.
- Some of its best features are not free to access.
- The mobile app version lacks certain elements and features.
Out of all these drawbacks, repetitions of templates are a big issue. That’s because everyone wants their posts to look unique and irreplaceable. However, common Canva templates may prevent that from happening.
Fortunately, there are ways to combat such issues. Let’s learn about them in the next section.
Tips: Animate Pictures In Video
You can also animate pictures in the video to make them more lively. For that, you can use Wondershare Filmora Pro Video Editor. It’s also efficient if you don’t know how to animate a picture in Canva:
Wondershare Filmora Video Editor
Filmora by Wondershare is a video editing software that helps you build custom animations easily. It has auto features to make epic stories and posts.
Wondershare Filmora
Get started easily with Filmora’s powerful performance, intuitive interface, and countless effects!
Try It Free Try It Free Try It Free Learn More about Filmora>
Its drag and drop effect makes designing simple and quick. Due to its outstanding attributes, options, and styles, Filmora has 77+ million happy users!
It’s a power-packed integration of functionality, performance, and more! In fact, it resolves the repeated template issue of Canva. The software has top-notch functions and innovative filters that add authenticity to the designs.
Till now, you learned about how to animate a picture on Canva. Now, let’s comprehend the right way to use Filmora for animating and adding images in the video.
Before using, make sure to update the software to its latest version. Follow separate methods for both Windows and Mac.
For Win
Step 1: Adding Image to Video Track
With Filmora, adding images to video is a matter of seconds! Start by:
- Identify the position where you want to add the image and place the Playhead there.
- Right-click on the picture from the media library. Click on the “Insert” option. Your image will be added. Select the “Append” option, if you want to add an image at the video end.

Note: How to Remove Black Bars around the Image?
- Go to “Settings” from the File section.
- Click on the “Editing” tab and select “Photo Placement.”
- Choose from the “Crop to Fit” or “Pan To Zoom” option. The black bars will be removed.
To add the image in between the video clip, split them. Now, add the image between the split parts.
Step 2: Add Images as Overlays
To add images as overlays, drag the image to a video track above the main track. The main track consists of your video.
Track 1 (or the track with a video clip) is the base of your video. If you add anything else, it will be displayed above this track as video track 2, 3, and so on. Overall, you can add 100 video tracks.
Step 3: Edit Your Image
If you know how to animate an image in Canva, editing images on Filmora is even easier. You can try the following methods:
Animate Your Images
- To add animation presets to the image, click on the image twice.
- Go to the “Animation Tab” and look for an animation preset.
- Drag the presets to the image for its effect

Make Image Color Adjustments
- Double-click on the image
- Go to the “Color” tab and then the “Color” section
- Customize the temperature, saturation, brightness, etc., as per your need.
- Press Ok.
Change Image Duration
You can increase the image duration to more than the default timing of 5 seconds. For that:
- Click on the image and select the “Duration” option.
- Go to the “Duration Setting” panel.
- Add the new duration timing.

Adjust Position, Rotate/Flip, and Opacity
- You can resize the image position through the circles and squares at the image edges.
- To flip or rotate the image, double-click on the picture. From the “Image Panel,” go to “Transform” and then click on “Rotate.” You can choose either “Horizontal Flip” or “Vertical Flip” to flip the images.
- Double-click on the image and click on the “Composting” option to add opacity. You can choose the blending mode or adjust the “Opacity” accordingly.

For Mac
Filmora for Mac comes with a drag and drop feature to add transitions, animated titles, and effects. You can start a new project from scratch by clicking on “New Project”. The entire process is the same as that for Windows users.
To apply animation in the images, use the motion effects option. For that,
- Click on the Image
- Go to Motion Tab
- Select a motion effect
- Double-click to apply the effect

Conclusion
So that’s how to animate photos in Canva. Hopefully, our steps will help you revamp your posts like a pro! If not Canva, you can use its alternative Filmora. It’s equally prominent, user-friendly, and feature-rich.
Versatile Video Editor - Wondershare Filmora
An easy yet powerful editor
Numerous effects to choose from
Detailed tutorials provided by the official channel
With the rapid rise of social media worldwide, animated posts (like GIFs) are becoming famous. They have become a replacement to other modes like JPEG and .Png
Famous designing tools like Canva introduced an animation feature in the light of its popularity. The feature allows you to step up your social media game and creates animated visuals in a blink! It is also efficient for both professional and amateur users.
Besides social media content, Canva is also useful to design birthday cards, event invites, inspirational quotes, and more! Let’s learn about how to animate pictures in Canva in detail.
In this article
01 What Canva Pictures Can Be Used For?
02 How to Animate Pictures in Canva?
03 Tips: Animate Pictures In Video
Part 1: What Canva Pictures Can Be Used For?
Be it for marketing campaigns or projects, Canva is the best tool for all designing work. It is a foolproof platform where you do not need prior designing experience. Canva is useful for
Social media/Instagram Posts: You can build your Instagram presence by creating posts through Canva. It has multiple templates and features to make alluring Instagram posts. It also has drag-and-drop free images to add customized designs to the template.
Facebook Covers: You can make Facebook covers on Canva by choosing a layout and adding other elements. You can include colors, fonts, and pictures on the cover. Canva has templates for all themes, moods, and styles!
Event Invites: Canva has hundreds of free layouts and libraries to create event invites. You can choose the appropriate template and incorporate party-oriented photos, icons, stickers, illustrations, and graphics. It also has a personalizing option to add personal pictures and artwork in the editor.
Inspirational Quotes: Canva allows you to curate inspirational quotes and dispense motivation in people. It has templates to modify the elements like font size, text size, borders, images, and more!
Collages: It helps create a collage where you can combine multiple pictures in one frame. Canva offers various grids with a capacity of 12 pictures and different sizes.
Part 2: How to Animate Pictures in Canva?
Canva helps you add instant animation in presentations, social media posts, and more. To know how to animate images in Canva, follow the below steps:
Step 1: Add Static Elements
Start by creating an image through static elements. To make the design attractive, you can add sample texts, illustrations, doodles, and other entities.
Try to stimulate your creativity and come up with a layout beforehand. If possible, sketch on paper and replicate the same.
Step 2: Animate Your Design
Take a final glance at the layout. Make sure it’s perfect. Once all the elements are placed as per your design, it’s time to animate them. For that:
- Click on the white background page
- Go to the “Toolbar” section
- Select the “Animate” button
Step 3: Select Page Animation Style
Canva offers six animation styles, where five are for free users, and one is for pro users. To access the five animation styles, follow these steps.
- Press the “Animate” Button
- Select “Page Animations”
- There you will find options like Block, Pan, Fade, Rise, and Tumble
- Select the style as per your design
Step 4: Preview and Download
After selecting a page animation style, it will preview the effect. If you find it good, move on to downloading the GIF. Here’s how to do so
- Go to the “Toolbar” option (present on your upper right hand)
- Choose GIF as the file type
- Check the page number and verify if it’s correct
- Press the “Done” button
Step 5: Final GIF
After clicking on the “Done” button, your GIF will be downloaded. You will be able to see a display for five seconds. If you want to edit the image after this, click on the time button (near the “Animate” button).
So, that was all about how to animate a photo in Canva.
Drawbacks of Canva
Despite efficient features and easy interface, there are certain areas where Canva lacks. This includes
- It does not have any local file storage.
- As too many people use Canva, your template may look the same as others.
- Some of its best features are not free to access.
- The mobile app version lacks certain elements and features.
Out of all these drawbacks, repetitions of templates are a big issue. That’s because everyone wants their posts to look unique and irreplaceable. However, common Canva templates may prevent that from happening.
Fortunately, there are ways to combat such issues. Let’s learn about them in the next section.
Tips: Animate Pictures In Video
You can also animate pictures in the video to make them more lively. For that, you can use Wondershare Filmora Pro Video Editor. It’s also efficient if you don’t know how to animate a picture in Canva:
Wondershare Filmora Video Editor
Filmora by Wondershare is a video editing software that helps you build custom animations easily. It has auto features to make epic stories and posts.
Wondershare Filmora
Get started easily with Filmora’s powerful performance, intuitive interface, and countless effects!
Try It Free Try It Free Try It Free Learn More about Filmora>
Its drag and drop effect makes designing simple and quick. Due to its outstanding attributes, options, and styles, Filmora has 77+ million happy users!
It’s a power-packed integration of functionality, performance, and more! In fact, it resolves the repeated template issue of Canva. The software has top-notch functions and innovative filters that add authenticity to the designs.
Till now, you learned about how to animate a picture on Canva. Now, let’s comprehend the right way to use Filmora for animating and adding images in the video.
Before using, make sure to update the software to its latest version. Follow separate methods for both Windows and Mac.
For Win
Step 1: Adding Image to Video Track
With Filmora, adding images to video is a matter of seconds! Start by:
- Identify the position where you want to add the image and place the Playhead there.
- Right-click on the picture from the media library. Click on the “Insert” option. Your image will be added. Select the “Append” option, if you want to add an image at the video end.
Note: How to Remove Black Bars around the Image?
- Go to “Settings” from the File section.
- Click on the “Editing” tab and select “Photo Placement.”
- Choose from the “Crop to Fit” or “Pan To Zoom” option. The black bars will be removed.
To add the image in between the video clip, split them. Now, add the image between the split parts.
Step 2: Add Images as Overlays
To add images as overlays, drag the image to a video track above the main track. The main track consists of your video.
Track 1 (or the track with a video clip) is the base of your video. If you add anything else, it will be displayed above this track as video track 2, 3, and so on. Overall, you can add 100 video tracks.
Step 3: Edit Your Image
If you know how to animate an image in Canva, editing images on Filmora is even easier. You can try the following methods:
Animate Your Images
- To add animation presets to the image, click on the image twice.
- Go to the “Animation Tab” and look for an animation preset.
- Drag the presets to the image for its effect
Make Image Color Adjustments
- Double-click on the image
- Go to the “Color” tab and then the “Color” section
- Customize the temperature, saturation, brightness, etc., as per your need.
- Press Ok.
Change Image Duration
You can increase the image duration to more than the default timing of 5 seconds. For that:
- Click on the image and select the “Duration” option.
- Go to the “Duration Setting” panel.
- Add the new duration timing.
Adjust Position, Rotate/Flip, and Opacity
- You can resize the image position through the circles and squares at the image edges.
- To flip or rotate the image, double-click on the picture. From the “Image Panel,” go to “Transform” and then click on “Rotate.” You can choose either “Horizontal Flip” or “Vertical Flip” to flip the images.
- Double-click on the image and click on the “Composting” option to add opacity. You can choose the blending mode or adjust the “Opacity” accordingly.
For Mac
Filmora for Mac comes with a drag and drop feature to add transitions, animated titles, and effects. You can start a new project from scratch by clicking on “New Project”. The entire process is the same as that for Windows users.
To apply animation in the images, use the motion effects option. For that,
- Click on the Image
- Go to Motion Tab
- Select a motion effect
- Double-click to apply the effect
Conclusion
So that’s how to animate photos in Canva. Hopefully, our steps will help you revamp your posts like a pro! If not Canva, you can use its alternative Filmora. It’s equally prominent, user-friendly, and feature-rich.
Versatile Video Editor - Wondershare Filmora
An easy yet powerful editor
Numerous effects to choose from
Detailed tutorials provided by the official channel
Best Claymation Shows That Make Your Memories Unforgettable
Best Claymation Shows That Make Your Memories Unforgettable
An easy yet powerful editor
Numerous effects to choose from
Detailed tutorials provided by the official channel
There are plenty of things that the 90s have given us. And when we revisit them now, it gives us an inimitable feeling of nostalgia which we would like to store forever with us. And one of the things that can bring back tons of cherished memories from the 90s is the claymation tv shows.
The claymation shows were called the clay animation shows. The reason for such a name was because the characters in the shows were made from malleable or deformable materials, especially out of clay. They have been one of the most revolutionary and entertaining components of that time.
These shows were one of the forms among the numerous forms of stop-motion animations. We will cover what these shows were about, their cast, and where you can watch them today. And in the following discussion, we will be discussing the ten best 90s claymation shows to bring back wonderful nostalgic memories.

Here is the list of the top claymation tv shows and all the information, including the sites and apps you can watch even today!
01Plasmo
Plasmo was an Australian science fiction TV series about a two and a half-year-old space orphan. The show first premiered in 199starring Abbe Holmes, Phillip Houghton and Pia Morley. You can watch this show on YouTube.

02Plonsters
The Plonsters was a show that premiered in 19which showed the characters Plif, Plops and Plummy, babble and morph, and their wonderful adventures. The show starred Ralph Thiekötter, and you can watch this show on Netflix and Tubi.
04Rex the Runt
Rex the Runt was a comedy show that premiered in 199The show was about the adventures of intrepid Rex and his plasticine companions. It starred about nine celebrities. Steve Box, Elisabeth Hadley, Andrew Jeffers, and Kevin Wrench were among them. You can watch this show even today on Amazon Prime.

05Mio Mao
Mia Mao first premiered in 197starring Derek Griffiths as cast. The show was about two plasticine kittens, Mia and Mao, exploring and finding different objects and animals who hide in their garden. You can watch this show on Amazon Prime.
06Celebrity Death
The Celebrity Deathmatch featured numerous celebrities who were shown as clay-animated characters. Their characters would have quite an intense fight in a boxing ring, and the match would be pretty different from the ordinary boxing matches.
Most of the boxing matches ended with the death of the celebrities, which was the reason for the show to get its name “Celebrity Deathmatch”. It was one of the most favourite and popular 9claymation shows on MTV, an absolute treat and entertainment to watch.
The show premiered on January 2199and it continued to air till the year 2007., with its final episode on March 3200Its cast included a series of celebrities, including Maurice Schlafer, Lean Maxwell, Mills Lane, David Wills, Steve Austin, Masasa Moyo and several other celebrities.
You can readily watch this show today on Amazon Instant Video, iTunes, Paramount+ or Amazon Prime Video.
07The Gumby Show
The Gumby Show was yet another popular tv show of the 9that premiered first on March 1195It featured a green-titular character, a humanoid that was a creation and the model of Art Clokey.
This character has been the reason behind two tv series, another feature-length movie and several other media. The ones to star in this tv show are Dal McKennon and Dick Beals. The show is about Gumby experiencing different adventures through various times and environments in history. The show also features his constant companion, a titular, red coloured talking pony named Pokey.
You can watch the show on Netflix and Amazon Prime.
08Pat & Mat
Pat & Mat was an entertaining and fun-to-watch television show of the 90s. The show first premiered in 19and starred David Nykl and Peter Alton, who played the role of Pat and Mat, respectively.
The show was about two neighbours, Pat and Mat, who faced self-created problems. And then, they solved these problems through any possible and impossible remedy.
You can watch this show now on Zee5 and Mx Player for free.
09Pingu
Pingu was a television show about a clumsy yet sweet penguin who lived with his family in the polar ice cap of Antarctica. Pingu, along with his seal friend Robby and sister, Punga, go on different adventures.
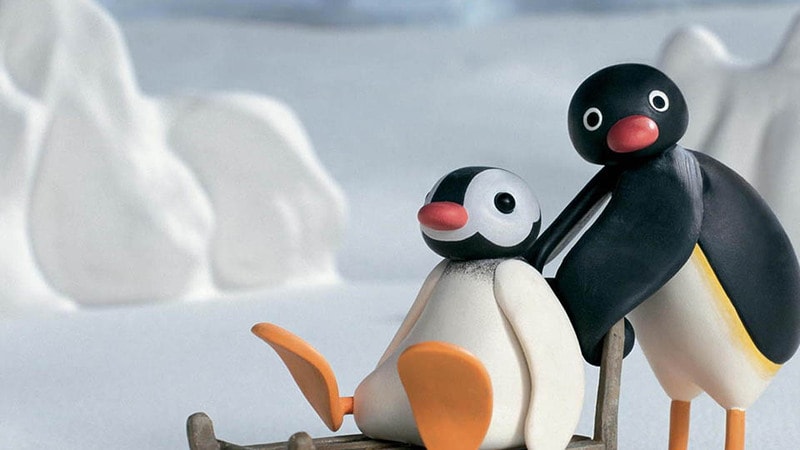
This show first premiered on May 2198with Carlo Bonomi, David Sant and Marcello Magni starring in it. You can watch the episodes of this unforgettable and entertaining tv show on ITV Hub and Amazon Prime.
10The Red and the Blue
The Red and the Blue was an Italian television series for children that first premiered in 197The show was about two antagonist clay shape-shifting characters who detected against an undifferentiated background, white.
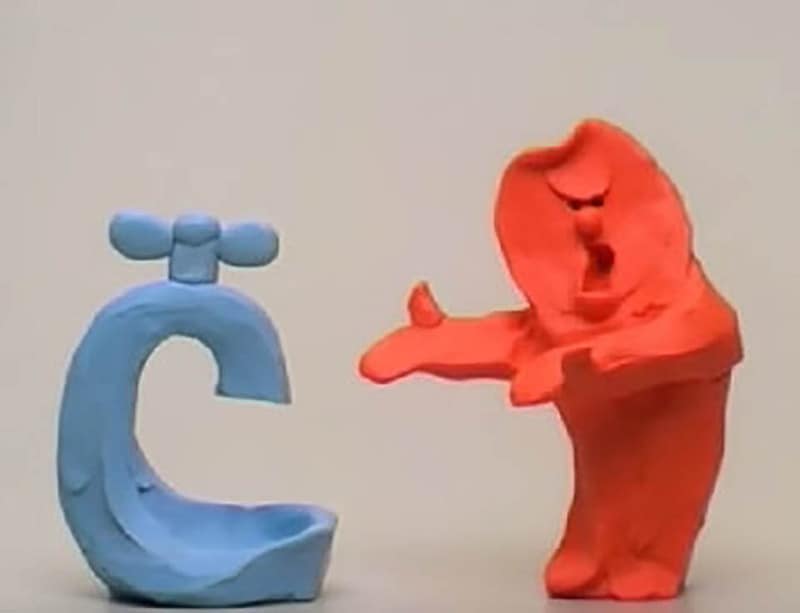
The cast of this tv show included Carlo Bonomi, and you can see this show today on YouTube.
11The PJs
The PJs was a popular and loved tv show that premiered on 10th January 199About twenty celebrities were starring in this show, and naming a few among them were Eddie Murphy, Ja’Net DuBois, Loretta Devine, Shawn Michael Howard, Snoop Dog and many more.
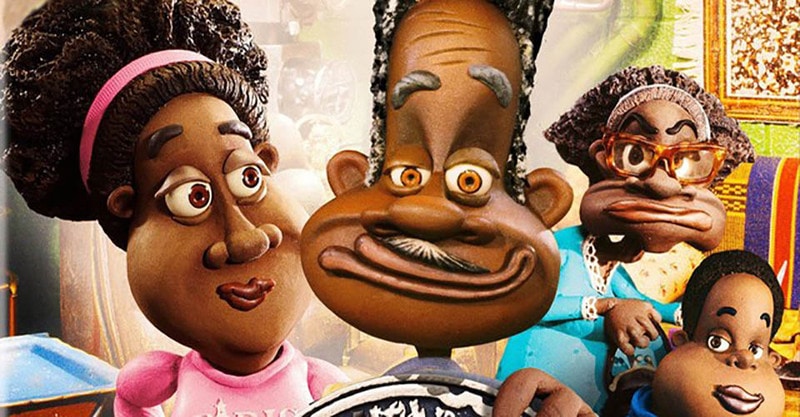
The show was about Thurgood Stubbs, the superintendent of Lawrence Hilton-Jacobs housing project and lived with his wife, Muriel. This comedy show satirically featured the difficulties one faces in a big-city housing project, which the protagonist Thurgood Stubbs and his friends faced.
You can watch this show on Peacock Tv.
● Bonus:
Now, without video editing, these fantastic shows of the 9could not have been created. But To your surprise, you too can create such incredible videos effortlessly. And that can be possible through an efficient and effective video editing tool.
You can find innumerable video editing tools available in this present world, but you must choose the best. So, let us introduce you to the best video editing tool, with which you can showcase all your editing skills and creativity-Wondershare Filmora Video Editor !
We call this tool the best video editing tool because its numerous features make it the most proficient video editing tool. Let us now look into its numerous effective features below.
● Professional editing tools
Filmora is the video editing tool that incorporates all the professional editing features to make your videos of the best and the professional quality. The elements envelop every aspect of the finest quality video editing works, which brings out the best of skills and creativity in you.
● Easy to use
Although Filmora has every professional editing tool, you will face no difficulty figuring out how the tools work. Even if you are a beginner, you can effortlessly use this editing tool to not only initiate your video editing journey but also enrich your skills.
● Free trial
You need not buy the proceed features on your first try. You can readily avail of the free trial of Filmora and its paid features. And as you try and find the features pleasing, you can proceed to purchase the aid features.
● Personalize and edit your videos
You can avail of the various features such as rotating, cropping, trimming and splitting the videos to edit. Also, there are other features where you can change the speed of the videos. Therefore, the features you get in these tools are of the most proficient quality.
● Over 8effects
The Filmora editing tool offers you more than 8editing effects that will never make you feel lacking any features and effects you need. And this helps you in making the best videos most effortlessly.
● Get the tool on any devices
Filmora believes that editing skills should be made discoverable anywhere and everywhere. Thus, you can download or use this tool on any device that you use. So, you need not have any specific device to avail of this incredible video editing tool, and you can make and edit videos on any device you want.
● Key Takeaways from This Episode →
● These are the best ten claymation tv shows and series that you can watch even today to bring back all the memories and revisit your early days of the 90s. So, to wrap up our discussion, we would conclude by retracing the aspects and factors that we covered in our discussion. We had enveloped the following topics effectively.
● We discussed the claymation picture through a little interdiction.
● Then, we discussed the ten best claymation TV shows popular in the 90s. We discussed their stories, their casts, their premieres and also the sites and apps where you can watch them even today.
● Lastly, we introduced you to the best editing tool, Filmora, that will help you edit any video of your choice and explore your video editing skills with the finest professional features and infinite effects.
There are plenty of things that the 90s have given us. And when we revisit them now, it gives us an inimitable feeling of nostalgia which we would like to store forever with us. And one of the things that can bring back tons of cherished memories from the 90s is the claymation tv shows.
The claymation shows were called the clay animation shows. The reason for such a name was because the characters in the shows were made from malleable or deformable materials, especially out of clay. They have been one of the most revolutionary and entertaining components of that time.
These shows were one of the forms among the numerous forms of stop-motion animations. We will cover what these shows were about, their cast, and where you can watch them today. And in the following discussion, we will be discussing the ten best 90s claymation shows to bring back wonderful nostalgic memories.
Here is the list of the top claymation tv shows and all the information, including the sites and apps you can watch even today!
01Plasmo
Plasmo was an Australian science fiction TV series about a two and a half-year-old space orphan. The show first premiered in 199starring Abbe Holmes, Phillip Houghton and Pia Morley. You can watch this show on YouTube.
02Plonsters
The Plonsters was a show that premiered in 19which showed the characters Plif, Plops and Plummy, babble and morph, and their wonderful adventures. The show starred Ralph Thiekötter, and you can watch this show on Netflix and Tubi.
04Rex the Runt
Rex the Runt was a comedy show that premiered in 199The show was about the adventures of intrepid Rex and his plasticine companions. It starred about nine celebrities. Steve Box, Elisabeth Hadley, Andrew Jeffers, and Kevin Wrench were among them. You can watch this show even today on Amazon Prime.
05Mio Mao
Mia Mao first premiered in 197starring Derek Griffiths as cast. The show was about two plasticine kittens, Mia and Mao, exploring and finding different objects and animals who hide in their garden. You can watch this show on Amazon Prime.
06Celebrity Death
The Celebrity Deathmatch featured numerous celebrities who were shown as clay-animated characters. Their characters would have quite an intense fight in a boxing ring, and the match would be pretty different from the ordinary boxing matches.
Most of the boxing matches ended with the death of the celebrities, which was the reason for the show to get its name “Celebrity Deathmatch”. It was one of the most favourite and popular 9claymation shows on MTV, an absolute treat and entertainment to watch.
The show premiered on January 2199and it continued to air till the year 2007., with its final episode on March 3200Its cast included a series of celebrities, including Maurice Schlafer, Lean Maxwell, Mills Lane, David Wills, Steve Austin, Masasa Moyo and several other celebrities.
You can readily watch this show today on Amazon Instant Video, iTunes, Paramount+ or Amazon Prime Video.
07The Gumby Show
The Gumby Show was yet another popular tv show of the 9that premiered first on March 1195It featured a green-titular character, a humanoid that was a creation and the model of Art Clokey.
This character has been the reason behind two tv series, another feature-length movie and several other media. The ones to star in this tv show are Dal McKennon and Dick Beals. The show is about Gumby experiencing different adventures through various times and environments in history. The show also features his constant companion, a titular, red coloured talking pony named Pokey.
You can watch the show on Netflix and Amazon Prime.
08Pat & Mat
Pat & Mat was an entertaining and fun-to-watch television show of the 90s. The show first premiered in 19and starred David Nykl and Peter Alton, who played the role of Pat and Mat, respectively.
The show was about two neighbours, Pat and Mat, who faced self-created problems. And then, they solved these problems through any possible and impossible remedy.
You can watch this show now on Zee5 and Mx Player for free.
09Pingu
Pingu was a television show about a clumsy yet sweet penguin who lived with his family in the polar ice cap of Antarctica. Pingu, along with his seal friend Robby and sister, Punga, go on different adventures.
This show first premiered on May 2198with Carlo Bonomi, David Sant and Marcello Magni starring in it. You can watch the episodes of this unforgettable and entertaining tv show on ITV Hub and Amazon Prime.
10The Red and the Blue
The Red and the Blue was an Italian television series for children that first premiered in 197The show was about two antagonist clay shape-shifting characters who detected against an undifferentiated background, white.
The cast of this tv show included Carlo Bonomi, and you can see this show today on YouTube.
11The PJs
The PJs was a popular and loved tv show that premiered on 10th January 199About twenty celebrities were starring in this show, and naming a few among them were Eddie Murphy, Ja’Net DuBois, Loretta Devine, Shawn Michael Howard, Snoop Dog and many more.
The show was about Thurgood Stubbs, the superintendent of Lawrence Hilton-Jacobs housing project and lived with his wife, Muriel. This comedy show satirically featured the difficulties one faces in a big-city housing project, which the protagonist Thurgood Stubbs and his friends faced.
You can watch this show on Peacock Tv.
● Bonus:
Now, without video editing, these fantastic shows of the 9could not have been created. But To your surprise, you too can create such incredible videos effortlessly. And that can be possible through an efficient and effective video editing tool.
You can find innumerable video editing tools available in this present world, but you must choose the best. So, let us introduce you to the best video editing tool, with which you can showcase all your editing skills and creativity-Wondershare Filmora Video Editor !
We call this tool the best video editing tool because its numerous features make it the most proficient video editing tool. Let us now look into its numerous effective features below.
● Professional editing tools
Filmora is the video editing tool that incorporates all the professional editing features to make your videos of the best and the professional quality. The elements envelop every aspect of the finest quality video editing works, which brings out the best of skills and creativity in you.
● Easy to use
Although Filmora has every professional editing tool, you will face no difficulty figuring out how the tools work. Even if you are a beginner, you can effortlessly use this editing tool to not only initiate your video editing journey but also enrich your skills.
● Free trial
You need not buy the proceed features on your first try. You can readily avail of the free trial of Filmora and its paid features. And as you try and find the features pleasing, you can proceed to purchase the aid features.
● Personalize and edit your videos
You can avail of the various features such as rotating, cropping, trimming and splitting the videos to edit. Also, there are other features where you can change the speed of the videos. Therefore, the features you get in these tools are of the most proficient quality.
● Over 8effects
The Filmora editing tool offers you more than 8editing effects that will never make you feel lacking any features and effects you need. And this helps you in making the best videos most effortlessly.
● Get the tool on any devices
Filmora believes that editing skills should be made discoverable anywhere and everywhere. Thus, you can download or use this tool on any device that you use. So, you need not have any specific device to avail of this incredible video editing tool, and you can make and edit videos on any device you want.
● Key Takeaways from This Episode →
● These are the best ten claymation tv shows and series that you can watch even today to bring back all the memories and revisit your early days of the 90s. So, to wrap up our discussion, we would conclude by retracing the aspects and factors that we covered in our discussion. We had enveloped the following topics effectively.
● We discussed the claymation picture through a little interdiction.
● Then, we discussed the ten best claymation TV shows popular in the 90s. We discussed their stories, their casts, their premieres and also the sites and apps where you can watch them even today.
● Lastly, we introduced you to the best editing tool, Filmora, that will help you edit any video of your choice and explore your video editing skills with the finest professional features and infinite effects.
How You Can Turn Yourself Into Anime Character Using Anime Filter
How You Can Turn Yourself into Anime Character Using Anime Filter
An easy yet powerful editor
Numerous effects to choose from
Detailed tutorials provided by the official channel
Everyone is looking for the Anime Filter that allows you to turn yourself into an animated character. All in an effort to join in on the TikTok trend that’s been awakening the inner anime enthusiast in everyone.

In this post, we’ll be sharing with you all that we know about this elusive anime filter (along with some bonuses along the way)
In this article
01 [Let’s Figure out What’s Anime Filter First](#Part 1)
02 [More Tutorials on Anime Filter That You Should Not Miss](#Part 2)
Part 1 Let’s Figure out What’s Anime Filter First
01What is the Anime Filter on TikTok?
Okay, first off What even is this anime filter everyone is talking about and how can you use it to turn yourself into an animated character? We’ve attached a helpful YouTube Video below from @Kapwing who has a more comprehensive explanation for you.
But, as for the basics? It works just like most filters in that it can be used in both video and picture mode (allowing you to also make your own animated profile picture if you’d like). All you have to do is turn it on, and it’ll turn you into the most fitting anime character of your style immediately
02How to Get the TikTok Anime Filter?
Now to finally get down to business How exactly can you get the anime filter for your TikTok? Well, here’s the trick Despite having earned its popularity on TikTok, the Anime Style filter actually comes from Snapchat So, if you do want to animate yourself like you’ve seen all the other popular TikTok-ers do, you’ll need to record the video (or take the picture) on the Snapchat App first and then upload it to TikTok.
03A step-by-step breakdown of this process has been provided below (pictures included)
Step 1Download the Snapchat App
Alright, to start off with, you’ll need to download the Snapchat app on your smartphone (it’s available for both Android and iOS devices)

Step 2Open Snapchat App on your mobile device
Once you have the Snapchat app downloaded and installed on your device, open it

Step 3Search for the Anime Style Filter on Snapchat
Once you have the Snapchat app open, click on the search bar at the top of the interface, type ‘anime style’, and search
You might find that there are multiple versions of the filter (like as is shown in the image below), but the one that you need to select is the one titled Anime Style and created by Snapchat (it should appear first, as it does in the example)

Step 4Turn Yourself into an Animated Character
Finally You should be moved to the video recorder or the profile picture taker, where you can see yourself animated once and for all

Step 5Upload your anime filter-ed video to TikTok
Now, in order to get your Anime-fied self on TikTok, all you need to do is upload your video creation (either on your mobile device or your computer) We’ve provided a URL for you below that will take you directly to the TikTok upload page.

Part 2 More Tutorials on Anime Filter That You Should Not Miss
The Anime Style filter that we introduced in the previous section isn’t the only ‘animated’ filter available, of course It’s the one that caught the attention of a lot of people, thanks, in large part, to the participation of a couple of some of the bigger TikTok-ers on the platform. However, you can always expand your selection a bit by checking out some of the other interesting anime filters in the market:
0112 Anime Filters to Turn Yourself into an Anime Character
Anime Filter #1: Anime Style Realistic

In order to fix some of the more glaring issues with the regular Anime Style filter, Snapchat created a second filter, called Anime Style Realistic This one has a distinctively less anime style when it comes to looks. But it does allow for more skin colors, better hair integration, and accessories
Pros
FREE Snapchat lens that you can use at any time.
Works with most skin tones.
Better hair/accessory integration.
Cons
The style is more realistic than anime.
It is not available anywhere else; you’ll need to be on Snapchat to use it.
Not great at capturing motion.
This is a fun filter to use for those looking to spice up their timeline with something a little different (OR for those having a bad day and would like the almost-anonymity the filter can provide).
Anime Filter #2: Cartoon Style

Next, we have another Snapchat original lens called Cartoon Style This filter is more reminiscent of the older animated cartoon styles (think Pocahontas, Lilo & Stitch, etc.), but it doesn’t make it any less fun
Pros
FREE Snapchat lens.
Works with all skin tones.
Works with accessories.
Cons
More of a cartoon animated style than anime.
Not available anywhere else, you can only use it with Snapchat.
Not great at capturing motion.
Again, just like the Anime Filter, this is good for slapping on just to have fun or to sneakily erase a couple of blemishes
Anime Filter #3: Anime Filter

Now, although we mentioned that TikTok doesn’t have any anime-style filters, the Chinese version of it (surprisingly) does You can see it being used in the image above, rendering the user into an animated (albeit not classically Japanese animated) character.
Pros
Free Chinese TikTok filter.
Great at capturing motion.
Chinese animated drawing style.
Cons
Only available for the foreign version of the TikTok app.
Not the best with skin tones.
It doesn’t use the classic Japanese-animation style.
This has seen a popularity boost recently, with many TikTok users using it to show a ‘before’ and ‘after’ (like the image shown above), of their dance being animated.
Filter URL: https://www.douyin.com/
Anime Filter #4: Anime Eyes

This next filter is the first unofficial anime filter on this list. It was created by one of the users of Snapchat and can be found there if you want to use it This one doesn’t animate the whole face of the user, but it does apply a sticker of various ‘anime eyes’ that you can use as a semi-animated profile picture maker (free)
Pros
FREE Snapchat filter
Anime-eyes sticker to cover the eyes
Useful as an animated profile picture maker
Cons
Only available on the Snapchat app
Does not capture motion
Does not animate the entire face
This really is best used for profile pictures only You’ve probably seen it around as such, although some users also find it useful for hiding tired eyes
Anime Filter #5: Wondershare Filmora

If you’re looking to step up your game ‘editing-wise’ and give your pictures and videos an even more anime feel, then you can also consider the anime filters that the video editing tool, Wondershare Filmora Video Editor , offers. (You can also skip the pre-made filters altogether and create your own animated video with stickers and other effects.)
Pros
Variety of anime filters for videos
Comes with advanced video editing tools
Creates high-quality videos
Cons
Premium Software
No face animation
This particular option is for those looking for something a step above what everyone else is doing. All while allowing a more flexible experience
For Win 7 or later (64-bit)
For macOS 10.12 or later
Anime Filter #6: MHA Anime Filter (Instagram)

Continuing on from our trend of ‘out-there’ options, there’s also the MHA filter from Instagram This one has been especially popular with the anime fanbase as it offers plenty of opportunities for hilarious, pointed responses
Pros
FREE with Instagram
Anime-themed sticker
Trending on TikTok
Cons
Not a face animator filter
Not a profile picture animator
Limited anime options
It’s definitely not what you might have initially been looking for. But its popularity on TikTok is undeniable
Anime Filter #7: Anime Filter

Our second recommended anime-themed filter is the basic Anime Filter on Instagram This one flicks through dozens of some of the most popular animes to find out which one suits you best And, just like the previous, is currently trending on Tiktok
Pros
FREE with Instagram
Anime-themed sticker filter
Trending on TikTok
Cons
Sticker, not face animator
Available only on Instagram
Limited options
Anime Filter #8: Cartoon

This next animation filter pick of ours brings us back to Snapchat It’s called the Cartoon lens. And, just like our initial picks, it will change your pictures to that of a cartoon This one is closer to the cartoon-style popular around the 2000s (think Frozen & Tangled)
Pros
Available on Snapchat
Animated profile picture maker (free)
Works for various skin types
Cons
Not the best at motion capturing
Only available on Snapchat
Doesn’t use classic Japanese style
It’s not quite the anime filter that you’re probably looking for, but it does still work if all you want is a way of cartoon-ifying yourself to spice up your timeline It’ll clear up any blemishes too
Anime Filter #9: Comics Style

Again, we’re moving towards a different kind of animation style with this next filter from Snapchat, but the Comics Style filter does have its own promises of fun as well Especially for those who are long-time fans of American comics (or, even, your average modern-day Avengers fan)
Pros
FREE on Snapchat
Video face animator
Works with a variety of skin tones
Cons
Awkward with some face shapes
Does not work with all face accessories
Available only on Snapchat
Anime Filter #10: Cartoon 3D Style

Now, this might get confusing, but for our last picks, we actually have a set of filters all called Cartoon 3D Style But trust us They’re all different This first version is one you would probably relate more to the DreamWorks motion picture, Ratatouille
Pros
FREE profile picture animator on Snapchat
Compatible with a variety of face shapes
Compatible with a variety of skin tones
Cons
Set features (i.e., pointed nose)
Non-anime drawing style
Not compatible with some facial accessories
Anime Filter #11: Cartoon 3D Style

For our next Cartoon 3D Style lens from Snapchat, we have a face animator that can help you turn into something very close to another dreamwork’s motion picture (think the Despicable me or the Minions)
Pros
Cartoon style animator that is FREE to use
Great for motion capturing
Compatible with a variety of skin colors
Cons
Available only on Snapchat
Not compatible with certain face accessories
Limited face warping effect
Anime Filter #12: Cartoon 3D Style

And finally, for the last of our recommended anime filters, we have the Cartoon 3D Style lens from Snapchat that makes you look like your favorite Disney character (In this case, the obvious inspiration comes from Disney’s Frozen or Tangled)
Pros
Disney face animator that is FREE on Snapchat
Compatible with all skin tones
Trending on TikTok
Cons
It can only be used on Snapchat
Not great at capturing motion
02Steps to Download the Anime Filter App and Turn Yourself into an Anime Character
Now, if those filters weren’t enough for you, we’ve also included this next tutorial on how you can find apps on your mobile device that will allow you to get the same effect without having to use Snapchat, TikTok, or Instagram
Step 1Go to the App Store
The first step, of course, is to go to the app store on your mobile device.

Step 2Search for Anime Filter App
Next, search ‘Anime Filter’ on your phone’s app store.

Step 3Select Anime Filter App
There are multiple types of anime filter apps available in the market. Pick the one that you think will work best for you.

Step 4Install Anime Filter App
Finally, once you’ve found the anime filter app for you, install it.

Step 5Open Anime Filter App
The app that we used for our example, Anime Camera, offers several different animation styles However, this app does come with a subscription fee, so keep that in mind.

03Anime Filter Has a Sadly Unsurprising Problem
You might have noticed this while we were introducing all the different types of anime-style filters available, but the popular Anime Filter has its shortcomings. Which includes:
PROBLEM 1: Dark Skin Tones
The anime filter’s inability to capture darker skin tones accurately is one of the biggest issues users have with the filter.
PROBLEM 2: Hair Style
Hairstyle options are also very limited. And, as for black hairstyles? Well, the options are pretty much non-existent.
PROBLEM 3: Face Accessories
Do you wear glasses? How about piercings? Well, this won’t translate for you either, unfortunately
Key Takeaways from This Episode
● The Anime Filter is a hot, trending topic in platforms like Tiktok, Instagram, and Snapchat It’s also a fun way of engaging with the anime community
● There are other, similar face-animation filters available (The Cartoon 3D Styles, especially, were quite popular for a time)
● Unsurprisingly, the anime filter does have its problems… And it left a big chunk of the TikTok community pretty flabbergasted — and disappointed. But that didn’t stop them from joining in the fun to provide some empowering commentary
Everyone is looking for the Anime Filter that allows you to turn yourself into an animated character. All in an effort to join in on the TikTok trend that’s been awakening the inner anime enthusiast in everyone.
In this post, we’ll be sharing with you all that we know about this elusive anime filter (along with some bonuses along the way)
In this article
01 [Let’s Figure out What’s Anime Filter First](#Part 1)
02 [More Tutorials on Anime Filter That You Should Not Miss](#Part 2)
Part 1 Let’s Figure out What’s Anime Filter First
01What is the Anime Filter on TikTok?
Okay, first off What even is this anime filter everyone is talking about and how can you use it to turn yourself into an animated character? We’ve attached a helpful YouTube Video below from @Kapwing who has a more comprehensive explanation for you.
But, as for the basics? It works just like most filters in that it can be used in both video and picture mode (allowing you to also make your own animated profile picture if you’d like). All you have to do is turn it on, and it’ll turn you into the most fitting anime character of your style immediately
02How to Get the TikTok Anime Filter?
Now to finally get down to business How exactly can you get the anime filter for your TikTok? Well, here’s the trick Despite having earned its popularity on TikTok, the Anime Style filter actually comes from Snapchat So, if you do want to animate yourself like you’ve seen all the other popular TikTok-ers do, you’ll need to record the video (or take the picture) on the Snapchat App first and then upload it to TikTok.
03A step-by-step breakdown of this process has been provided below (pictures included)
Step 1Download the Snapchat App
Alright, to start off with, you’ll need to download the Snapchat app on your smartphone (it’s available for both Android and iOS devices)
Step 2Open Snapchat App on your mobile device
Once you have the Snapchat app downloaded and installed on your device, open it
Step 3Search for the Anime Style Filter on Snapchat
Once you have the Snapchat app open, click on the search bar at the top of the interface, type ‘anime style’, and search
You might find that there are multiple versions of the filter (like as is shown in the image below), but the one that you need to select is the one titled Anime Style and created by Snapchat (it should appear first, as it does in the example)
Step 4Turn Yourself into an Animated Character
Finally You should be moved to the video recorder or the profile picture taker, where you can see yourself animated once and for all
Step 5Upload your anime filter-ed video to TikTok
Now, in order to get your Anime-fied self on TikTok, all you need to do is upload your video creation (either on your mobile device or your computer) We’ve provided a URL for you below that will take you directly to the TikTok upload page.
Part 2 More Tutorials on Anime Filter That You Should Not Miss
The Anime Style filter that we introduced in the previous section isn’t the only ‘animated’ filter available, of course It’s the one that caught the attention of a lot of people, thanks, in large part, to the participation of a couple of some of the bigger TikTok-ers on the platform. However, you can always expand your selection a bit by checking out some of the other interesting anime filters in the market:
0112 Anime Filters to Turn Yourself into an Anime Character
Anime Filter #1: Anime Style Realistic
In order to fix some of the more glaring issues with the regular Anime Style filter, Snapchat created a second filter, called Anime Style Realistic This one has a distinctively less anime style when it comes to looks. But it does allow for more skin colors, better hair integration, and accessories
Pros
FREE Snapchat lens that you can use at any time.
Works with most skin tones.
Better hair/accessory integration.
Cons
The style is more realistic than anime.
It is not available anywhere else; you’ll need to be on Snapchat to use it.
Not great at capturing motion.
This is a fun filter to use for those looking to spice up their timeline with something a little different (OR for those having a bad day and would like the almost-anonymity the filter can provide).
Anime Filter #2: Cartoon Style
Next, we have another Snapchat original lens called Cartoon Style This filter is more reminiscent of the older animated cartoon styles (think Pocahontas, Lilo & Stitch, etc.), but it doesn’t make it any less fun
Pros
FREE Snapchat lens.
Works with all skin tones.
Works with accessories.
Cons
More of a cartoon animated style than anime.
Not available anywhere else, you can only use it with Snapchat.
Not great at capturing motion.
Again, just like the Anime Filter, this is good for slapping on just to have fun or to sneakily erase a couple of blemishes
Anime Filter #3: Anime Filter
Now, although we mentioned that TikTok doesn’t have any anime-style filters, the Chinese version of it (surprisingly) does You can see it being used in the image above, rendering the user into an animated (albeit not classically Japanese animated) character.
Pros
Free Chinese TikTok filter.
Great at capturing motion.
Chinese animated drawing style.
Cons
Only available for the foreign version of the TikTok app.
Not the best with skin tones.
It doesn’t use the classic Japanese-animation style.
This has seen a popularity boost recently, with many TikTok users using it to show a ‘before’ and ‘after’ (like the image shown above), of their dance being animated.
Filter URL: https://www.douyin.com/
Anime Filter #4: Anime Eyes
This next filter is the first unofficial anime filter on this list. It was created by one of the users of Snapchat and can be found there if you want to use it This one doesn’t animate the whole face of the user, but it does apply a sticker of various ‘anime eyes’ that you can use as a semi-animated profile picture maker (free)
Pros
FREE Snapchat filter
Anime-eyes sticker to cover the eyes
Useful as an animated profile picture maker
Cons
Only available on the Snapchat app
Does not capture motion
Does not animate the entire face
This really is best used for profile pictures only You’ve probably seen it around as such, although some users also find it useful for hiding tired eyes
Anime Filter #5: Wondershare Filmora
If you’re looking to step up your game ‘editing-wise’ and give your pictures and videos an even more anime feel, then you can also consider the anime filters that the video editing tool, Wondershare Filmora Video Editor , offers. (You can also skip the pre-made filters altogether and create your own animated video with stickers and other effects.)
Pros
Variety of anime filters for videos
Comes with advanced video editing tools
Creates high-quality videos
Cons
Premium Software
No face animation
This particular option is for those looking for something a step above what everyone else is doing. All while allowing a more flexible experience
For Win 7 or later (64-bit)
For macOS 10.12 or later
Anime Filter #6: MHA Anime Filter (Instagram)
Continuing on from our trend of ‘out-there’ options, there’s also the MHA filter from Instagram This one has been especially popular with the anime fanbase as it offers plenty of opportunities for hilarious, pointed responses
Pros
FREE with Instagram
Anime-themed sticker
Trending on TikTok
Cons
Not a face animator filter
Not a profile picture animator
Limited anime options
It’s definitely not what you might have initially been looking for. But its popularity on TikTok is undeniable
Anime Filter #7: Anime Filter
Our second recommended anime-themed filter is the basic Anime Filter on Instagram This one flicks through dozens of some of the most popular animes to find out which one suits you best And, just like the previous, is currently trending on Tiktok
Pros
FREE with Instagram
Anime-themed sticker filter
Trending on TikTok
Cons
Sticker, not face animator
Available only on Instagram
Limited options
Anime Filter #8: Cartoon
This next animation filter pick of ours brings us back to Snapchat It’s called the Cartoon lens. And, just like our initial picks, it will change your pictures to that of a cartoon This one is closer to the cartoon-style popular around the 2000s (think Frozen & Tangled)
Pros
Available on Snapchat
Animated profile picture maker (free)
Works for various skin types
Cons
Not the best at motion capturing
Only available on Snapchat
Doesn’t use classic Japanese style
It’s not quite the anime filter that you’re probably looking for, but it does still work if all you want is a way of cartoon-ifying yourself to spice up your timeline It’ll clear up any blemishes too
Anime Filter #9: Comics Style
Again, we’re moving towards a different kind of animation style with this next filter from Snapchat, but the Comics Style filter does have its own promises of fun as well Especially for those who are long-time fans of American comics (or, even, your average modern-day Avengers fan)
Pros
FREE on Snapchat
Video face animator
Works with a variety of skin tones
Cons
Awkward with some face shapes
Does not work with all face accessories
Available only on Snapchat
Anime Filter #10: Cartoon 3D Style
Now, this might get confusing, but for our last picks, we actually have a set of filters all called Cartoon 3D Style But trust us They’re all different This first version is one you would probably relate more to the DreamWorks motion picture, Ratatouille
Pros
FREE profile picture animator on Snapchat
Compatible with a variety of face shapes
Compatible with a variety of skin tones
Cons
Set features (i.e., pointed nose)
Non-anime drawing style
Not compatible with some facial accessories
Anime Filter #11: Cartoon 3D Style
For our next Cartoon 3D Style lens from Snapchat, we have a face animator that can help you turn into something very close to another dreamwork’s motion picture (think the Despicable me or the Minions)
Pros
Cartoon style animator that is FREE to use
Great for motion capturing
Compatible with a variety of skin colors
Cons
Available only on Snapchat
Not compatible with certain face accessories
Limited face warping effect
Anime Filter #12: Cartoon 3D Style
And finally, for the last of our recommended anime filters, we have the Cartoon 3D Style lens from Snapchat that makes you look like your favorite Disney character (In this case, the obvious inspiration comes from Disney’s Frozen or Tangled)
Pros
Disney face animator that is FREE on Snapchat
Compatible with all skin tones
Trending on TikTok
Cons
It can only be used on Snapchat
Not great at capturing motion
02Steps to Download the Anime Filter App and Turn Yourself into an Anime Character
Now, if those filters weren’t enough for you, we’ve also included this next tutorial on how you can find apps on your mobile device that will allow you to get the same effect without having to use Snapchat, TikTok, or Instagram
Step 1Go to the App Store
The first step, of course, is to go to the app store on your mobile device.
Step 2Search for Anime Filter App
Next, search ‘Anime Filter’ on your phone’s app store.
Step 3Select Anime Filter App
There are multiple types of anime filter apps available in the market. Pick the one that you think will work best for you.
Step 4Install Anime Filter App
Finally, once you’ve found the anime filter app for you, install it.
Step 5Open Anime Filter App
The app that we used for our example, Anime Camera, offers several different animation styles However, this app does come with a subscription fee, so keep that in mind.
03Anime Filter Has a Sadly Unsurprising Problem
You might have noticed this while we were introducing all the different types of anime-style filters available, but the popular Anime Filter has its shortcomings. Which includes:
PROBLEM 1: Dark Skin Tones
The anime filter’s inability to capture darker skin tones accurately is one of the biggest issues users have with the filter.
PROBLEM 2: Hair Style
Hairstyle options are also very limited. And, as for black hairstyles? Well, the options are pretty much non-existent.
PROBLEM 3: Face Accessories
Do you wear glasses? How about piercings? Well, this won’t translate for you either, unfortunately
Key Takeaways from This Episode
● The Anime Filter is a hot, trending topic in platforms like Tiktok, Instagram, and Snapchat It’s also a fun way of engaging with the anime community
● There are other, similar face-animation filters available (The Cartoon 3D Styles, especially, were quite popular for a time)
● Unsurprisingly, the anime filter does have its problems… And it left a big chunk of the TikTok community pretty flabbergasted — and disappointed. But that didn’t stop them from joining in the fun to provide some empowering commentary
Also read:
- New 2024 Approved Top 7 Best Free GIF Apps for Android
- New 10 Best Free GIF Apps for iPhone and iPad for 2024
- Updated In 2024, Top 12 Illusion Gifs Top Picks
- Updated In 2024, 10 Great MP4 to GIF Converters to Get Perfect-Made GIF
- Updated How to Turn Yourself Into a WhatsApp Cartoon
- 10 Trendy Free Logo Animation Templates
- New 2024 Approved Best 10 Photo Animator Templates
- New 10 Caricature Makers to Turn Your Photo to Caricature Effects
- New In 2024, Ways to Create an Adobe Collage
- 2024 Approved How to Become a Motion Graphic Designer
- How to Make Well Done Animated GIF By Yourself, In 2024
- 2024 Approved Best 15 Anime Shows That Are Great to Binge Watch
- New Handy Tip From Adobe Animate Rigging Tutorial for All Learners
- How to Make GIF Stickers for WhatsApp 100 The Simple Way
- In 2024, Top 7 Best Animated Lyric Video Software for FREE
- Updated 2024 Approved Adobe Animate Riggings PROPER Tutorial for You
- Updated 2024 Approved Best 15 Horror Animes That Will Trigger a Heart Attack
- New In 2024, Adobe Auto Rigger Is AWESOME
- 2024 Approved 5 Foolproof Amazing Anime Text to Speech Tips for Makers
- Updated 10 Options for Your Need on Animation Makers for 2024
- How to identify some outdated hardware drivers with Windows Device Manager in Windows 11 & 10 & 7
- Top 10 Samsung Galaxy M14 5G Android SIM Unlock APK
- The Complete Guide to Itel P40+ FRP Bypass Everything You Need to Know
- How to Unlock Realme 11 Pro+ Bootloader Easily
- How to Recover Deleted iPhone 13 mini Camera Roll Photos and Photo Stream Pictures? | Stellar
- How Tecno Spark 10 Pro Mirror Screen to PC? | Dr.fone
- Play MOV movies on Samsung Galaxy F34 5G, is it possible?
- 3 Ways for Android Pokemon Go Spoofing On Nokia 105 Classic | Dr.fone
- How to Bypass FRP from Motorola Moto G Stylus 5G (2023)?
- Full Guide to Fix iToolab AnyGO Not Working On Honor Magic 6 | Dr.fone
- In 2024, Resolve Your Apple iPhone 7 Keeps Asking for Outlook Password | Dr.fone
- In 2024, How Do You Remove Restricted Mode on iPhone 7 Plus | Dr.fone
- How To Bypass Honor 80 Pro Straight Screen Edition FRP In 3 Different Ways
- All You Need To Know About Mega Greninja For Xiaomi Redmi Note 12R | Dr.fone
- Best Pokemons for PVP Matches in Pokemon Go For Tecno Camon 20 Pro 5G | Dr.fone
- Ways to stop parent tracking your Apple iPhone SE | Dr.fone
- In 2024, The Magnificent Art of Pokemon Go Streaming On Oppo Reno 8T? | Dr.fone
- How to Change GPS Location on Nokia C110 Easily & Safely | Dr.fone
- Things You Should Know When Unlocking Total Wireless Of Apple iPhone 13 Pro
- Title: New Handy Tips From Adobe Animate Rigging Tutorial for All Learners for 2024
- Author: Elon
- Created at : 2024-05-19 03:05:34
- Updated at : 2024-05-20 03:05:34
- Link: https://animation-videos.techidaily.com/new-handy-tips-from-adobe-animate-rigging-tutorial-for-all-learners-for-2024/
- License: This work is licensed under CC BY-NC-SA 4.0.
