
:max_bytes(150000):strip_icc():format(webp)/TheOscarsStatue-33f6c30d7ffd4694a4dd1d1113de57f5.jpg)
New How to Create a Whiteboard Video Step by Step for 2024
How to Create a Whiteboard Video Step by Step
How to Create a Whiteboard Video Step by Step

Shanoon Cox
Mar 27, 2024• Proven solutions
Drawings will always have a special place in storytelling. Whether you are demonstrating a new concept to a child, highlighting the features of a product to your bosses, or showcasing the intricacies of a marketing campaign, drawings make it easier for the audience to understand what is being said.
That is why it is so important to learn how to create whiteboard animation. When you learn how to create a whiteboard video with animate pictures app , you are in a unique position when it comes to selling your story, and convincing others of what you already know.
- Part1: What is Whiteboard Animation Video?
- Part2: How to Create Whiteboard Animation Videos?
- Part3: Useful Tips for Creating Whiteboard Animation
Part 1:What is Whiteboard Animation Video?
To understand the whiteboard animation video, we must go back to the beginning. Think about how professors illustrate different topics and equations using a whiteboard. They will write down the important words or formulas and then expand on that information through their lecture.
Whiteboard animation is taking those words, phrases and images to another level. Whiteboard animation is a series of events or videos that are created using 2D animation software . These videos can be showcased in any type of setting. You can upload them onto a social media site, show them as part of a presentation, or add them to a crowdfunding or product funding page.
When someone watches a whiteboard animation video, they see the series of images and graphics in sequential order, and there is usually a narration accompanying those images. These videos can be short, anywhere from 30 to 90 seconds. The idea is to deliver information in a clear, coherent and concise way.
To create whiteboard animation, the goal is to take complex concepts and information, and make it easy to understand. Now we can go into some detail about how to create a whiteboard video.
Part 2:How to Create Whiteboard Animation Videos?
Step 1: Write a Script
Much like a normal video or a short skit, there must be a script if a whiteboard animation video is to succeed. Having interesting images and information is great, but they are nothing without a coherent story.
It is not a blog post, storyboard or a set of bullet points. What you need is a proper script, which says everything in regards to the video. Why? Because then you will know precisely what images should be added in certain sections, what the narrator must say, and what transitions are necessary.

Step 2: Start with the Storyboard
Now you have a script. You have a clear idea of how you want your video to come across. It is time to start creating the storyboard. With a storyboard, you will be able to organize your thoughts much better. You can see how each frame comes onto the screen, and how one shot ties into the other.
When you create your storyboard, you will have a good idea about how your final product will look. If there are some transitions you are not happy with, this is the moment where you can make changes.

Step 3: Create Images
If you are a creative person, you will find this part very easy. It is all about creating fun and unique images that will help convey the information that you want to get across. Try to create memorable images that will excite your audience. The simpler, more distinctive and interesting you can make those images, the better your end result.

Step 4: Animate Those Images
Now you have your images, and it is time to find some coherence between those images and your script. You will have to time the animation for your images as you do not want things lingering on the screen for too long, or being seen for a brief second. It may be a good idea for you to speak out the narration as you are animating the images and timing their animation. It will help you with the timing.

Step 5: Record and Sync the Audio
The final step involves getting your audio. Every animated video must have narration as it helps to explain what is happening in the images that people are seeing. Record your audio, and ensure it is perfectly in sync with your content.

Part 3:Useful Tips for Creating Whiteboard Animation
Evoke Empathy
The goal of a whiteboard animation video is not just to explain information in a cold and impersonal way. You are hoping to make a connection with your audience. You want them to care about what you are showcasing. By evoking empathy, you will create the connection that you desire.
By adding emotional references, such as funny, lighthearted, cute or emotional moments, you will find your videos are getting a much better reception from the audience. People can relate to content better when it makes them feel things - especially if those feelings are positive.
Personalize the Images
Showing interesting images is a good start. But if you can personalize these images with graphics and color, your storyboard will look even better. Remember that your goal is to get people to stand up and take notice of the content that you are creating.
Conclusion
Now that we have gone over the entire process of creating a whiteboard animation video, we hope that you are ready to get started on your project. And if you are wondering how you will edit your video, we recommend Filmora . You can use it to make animation video by adding keyframes, so the animation will be smooth and natural. You just need to build a white plane to easily start making animation. Besides, color correction and audio mixer will raise up your explainer video to a new level. Download it to have a try (Free)!
Shanoon Cox
Shanoon Cox is a writer and a lover of all things video.
Follow @Shanoon Cox
Shanoon Cox
Mar 27, 2024• Proven solutions
Drawings will always have a special place in storytelling. Whether you are demonstrating a new concept to a child, highlighting the features of a product to your bosses, or showcasing the intricacies of a marketing campaign, drawings make it easier for the audience to understand what is being said.
That is why it is so important to learn how to create whiteboard animation. When you learn how to create a whiteboard video with animate pictures app , you are in a unique position when it comes to selling your story, and convincing others of what you already know.
- Part1: What is Whiteboard Animation Video?
- Part2: How to Create Whiteboard Animation Videos?
- Part3: Useful Tips for Creating Whiteboard Animation
Part 1:What is Whiteboard Animation Video?
To understand the whiteboard animation video, we must go back to the beginning. Think about how professors illustrate different topics and equations using a whiteboard. They will write down the important words or formulas and then expand on that information through their lecture.
Whiteboard animation is taking those words, phrases and images to another level. Whiteboard animation is a series of events or videos that are created using 2D animation software . These videos can be showcased in any type of setting. You can upload them onto a social media site, show them as part of a presentation, or add them to a crowdfunding or product funding page.
When someone watches a whiteboard animation video, they see the series of images and graphics in sequential order, and there is usually a narration accompanying those images. These videos can be short, anywhere from 30 to 90 seconds. The idea is to deliver information in a clear, coherent and concise way.
To create whiteboard animation, the goal is to take complex concepts and information, and make it easy to understand. Now we can go into some detail about how to create a whiteboard video.
Part 2:How to Create Whiteboard Animation Videos?
Step 1: Write a Script
Much like a normal video or a short skit, there must be a script if a whiteboard animation video is to succeed. Having interesting images and information is great, but they are nothing without a coherent story.
It is not a blog post, storyboard or a set of bullet points. What you need is a proper script, which says everything in regards to the video. Why? Because then you will know precisely what images should be added in certain sections, what the narrator must say, and what transitions are necessary.
Step 2: Start with the Storyboard
Now you have a script. You have a clear idea of how you want your video to come across. It is time to start creating the storyboard. With a storyboard, you will be able to organize your thoughts much better. You can see how each frame comes onto the screen, and how one shot ties into the other.
When you create your storyboard, you will have a good idea about how your final product will look. If there are some transitions you are not happy with, this is the moment where you can make changes.
Step 3: Create Images
If you are a creative person, you will find this part very easy. It is all about creating fun and unique images that will help convey the information that you want to get across. Try to create memorable images that will excite your audience. The simpler, more distinctive and interesting you can make those images, the better your end result.
Step 4: Animate Those Images
Now you have your images, and it is time to find some coherence between those images and your script. You will have to time the animation for your images as you do not want things lingering on the screen for too long, or being seen for a brief second. It may be a good idea for you to speak out the narration as you are animating the images and timing their animation. It will help you with the timing.
Step 5: Record and Sync the Audio
The final step involves getting your audio. Every animated video must have narration as it helps to explain what is happening in the images that people are seeing. Record your audio, and ensure it is perfectly in sync with your content.
Part 3:Useful Tips for Creating Whiteboard Animation
Evoke Empathy
The goal of a whiteboard animation video is not just to explain information in a cold and impersonal way. You are hoping to make a connection with your audience. You want them to care about what you are showcasing. By evoking empathy, you will create the connection that you desire.
By adding emotional references, such as funny, lighthearted, cute or emotional moments, you will find your videos are getting a much better reception from the audience. People can relate to content better when it makes them feel things - especially if those feelings are positive.
Personalize the Images
Showing interesting images is a good start. But if you can personalize these images with graphics and color, your storyboard will look even better. Remember that your goal is to get people to stand up and take notice of the content that you are creating.
Conclusion
Now that we have gone over the entire process of creating a whiteboard animation video, we hope that you are ready to get started on your project. And if you are wondering how you will edit your video, we recommend Filmora . You can use it to make animation video by adding keyframes, so the animation will be smooth and natural. You just need to build a white plane to easily start making animation. Besides, color correction and audio mixer will raise up your explainer video to a new level. Download it to have a try (Free)!
Shanoon Cox
Shanoon Cox is a writer and a lover of all things video.
Follow @Shanoon Cox
Uncensored Top 10 + Free Streaming Sites
Top 10 Banned Anime Around the World and Why
Shanoon Cox
Mar 27, 2024• Proven solutions
There is hardly a genre that anime hasn’t conquered. While anime is super entertaining and fun to watch, it can get quite crazy and questionable. Yes, anime is animated but the content is mature. From violence to incest and other controversial issues, anime can be offensive sometimes. Due to this, some countries have banned anime shows for its viewers – especially for younger audiences.
Want to find out what anime shows they are and why they are banned? Well, you are in the right spot. Today, we will talk about the top 10 banned anime shows and why they are banned. So, let’s find out!
![]()
A cross-platform for making videos anywhere for all creators

Why your video editing isn’t good enough? How about some creative inspo?
- 100 Million+ Users
- 150+ Countries and Regions
- 4 Million+ Social Media Followers
- 5 Million+ Stock Media for Use
* Secure Download

Part 1: Top 10 Banned Anime List
Here is a list of the 10 banned animes you should know about and why they are banned:
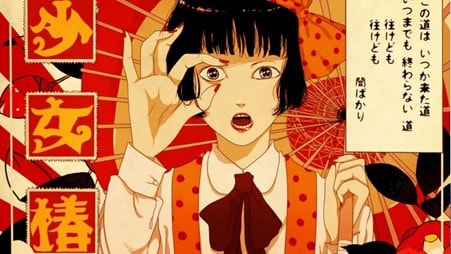
1. Shoujo Tsubaki (Banned Everywhere)
It has a very dark, depressing, and intense storyline and it is considered one of the most controversial anime movies ever. This is a 1992 anime film about a young girl whose mother dies. The girl meets a man who tells her he will help her if she ever needs anything. So, after her mother’s death, she goes to find the man and ends up at a circus where she gets abused and raped. Thus, Shoujo Tsubaki is about child sexual abuse with unbearable gore scenes. The horrific and disturbing visuals of this anime have left many viewers traumatized – so much so that the tapes of this film were also destroyed. Therefore, Shoujo Tsubaki is banned almost everywhere, including Japan itself.
2. Osomatsu-San (Banned in Japan)
Osomatsu-San is banned in Japan due to copyright issues. The series’ first episode had parodies of famous anime shows including Attack on Titan, Naruto, Sailor Moon, Dragon Ball Z, and more. Thus, due to copyright, the show’s first episode was removed from airing. It is still not available on mainstream anime websites. You can find the DVD version of the show, but even those do not have the first episode.

3. Excel Saga (Banned in Japan)
Excel Saga is based on a popular manga of the same name. It is about a secret ideological organization whose purpose is world domination. The entire Excel Saga is available to watch except for its last episode, called “Going Too Far” – very fitting indeed. It is even banned in its home country, Japan. The reason why this episode got banned is that it’s too long, violent, pornographic, and offensive. Fun fact: The Director of the show, Shinichi Watanabe, purposely got the last episode banned to make it daring and unforgettable. The last episode of Excel Saga is only available on DVD.

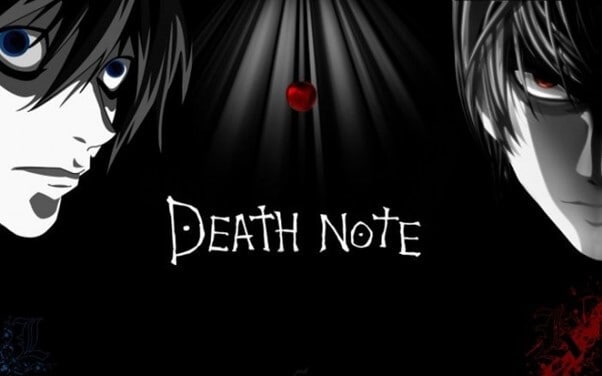
4. Death Note (Banned in China)
Death note is one of the most famous anime shows ever and while it’s gruesome, bloody and horrific, it is easily available on mainstream platforms, including Netflix. However, there is still a country that did not appreciate the dark premise of this show. Death Note is banned in China due to its theme. The show is about death, justice, murder and violence so it is considered as a corrupting influence on kids.
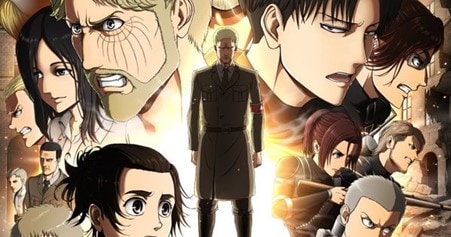
5. Attack on Titan (Banned in China)
Another cult-favorite anime on the lists is Attack on Titan. Due to its bloody, disgusting and disturbing visuals, it has been banned in China. While millions of viewers love this anime, China thinks this show portrays a lot of excessive violence which is very unhealthy for the younger audience. With that being said, if you are 18 and above, do not miss out on Attack on Titan. It is truly one of the best anime out there!
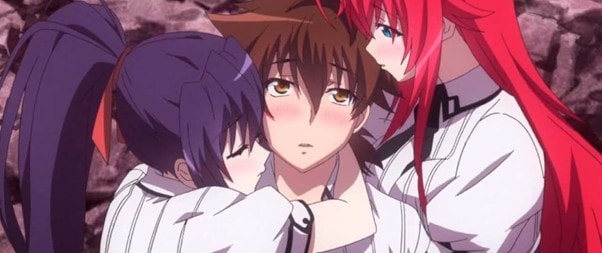
6. High School DxD (Banned in New Zealand)
With very high viewer ratings, it’s a bit of shock to see this show on the list. High School DxD follows the story of Issei Hyodo, a perverted high school kid who is killed on his very first date. But he gets reincarnated by Rias Gremory as a demon. Now, how come a show about angles and demons gets banned? Well, the premise of the show focuses on corrupt high school kids with a perverted mindset. This show is very sexual and shows a lot of nudity in certain scenes. This is why New Zealand has banned High School DxD for its sexual, harem themes based around high school kids.
7. Puni Puny Poemy (Banned in New Zealand)
Puni Puny Poemy sounds super cute and childish but don’t let the name fool you. Puni Puny Poemy is a spin-off inspired by Excel Saga – no wonder is it banned. This anime has a lot of sexual content surrounding very young characters. The nudity, explicit sexual scenes and harem inspired content is what makes this show so questionable. Thus, it is banned in New Zealand for being overly vulgar and sexual for young viewers. The show does not have a high viewership such as popular titles like Death Note or Attack on Titan, so many countries ignored it.
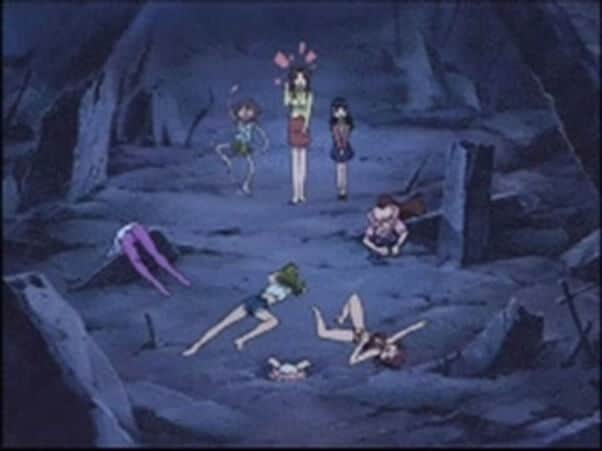
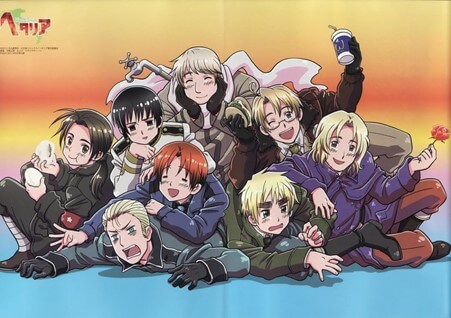
8. Hetalia: Axis Powers (Banned in South Korea)
Every character in this show represents a country and the role they played in World War II. Even though it is a comedy anime, it offended a few countries. South Korea actually banned the show on the grounds of “offensive stereotypes” and was called a “national crime” by the country. Hetalia: Axis Powers continued to air, the character and all the references to South Korea were completely removed due to backlash. The censored version of this anime is still available in some parts of the country.
9. Pokémon (Banned in Saudi Arabia)
Pokemon banned? Pokemon is perhaps THE most famous and innocent anime ever. It’s kid friendly and super clean. So, why is a show about Satoshi and his pocket monster banned? The religious authorities of Saudi Arabia declared that Pokemon promotes gambling and Jewish sentiments. Since then, there have been many conspiracy theories revolving around the show claiming it to be a Zionist conspiracy. Thus, it is banned in Saudi Arabia. Crazy right?
10. Kite (Banned in Norway)
Kite follows the story of a girl who uses bullets to kill people and make them explode. Now, you must be thinking that the violent nature of the show got it banned in Norway. Nope! not the case. Kite is banned in Norway due to a very graphic sexual assault scene on a minor. Norway has very strict laws against child pornography, thus the entire anime got banned. Similarly, the United States also censored and removed certain parts of the movie but it is not banned there.
Part 2: Where to Watch Anime Online for Free
If you live in any of the countries mentioned in the list above and want to watch the anime banned by your country, we have got you covered. Here are top 5 websites where you can watch anime online for free:
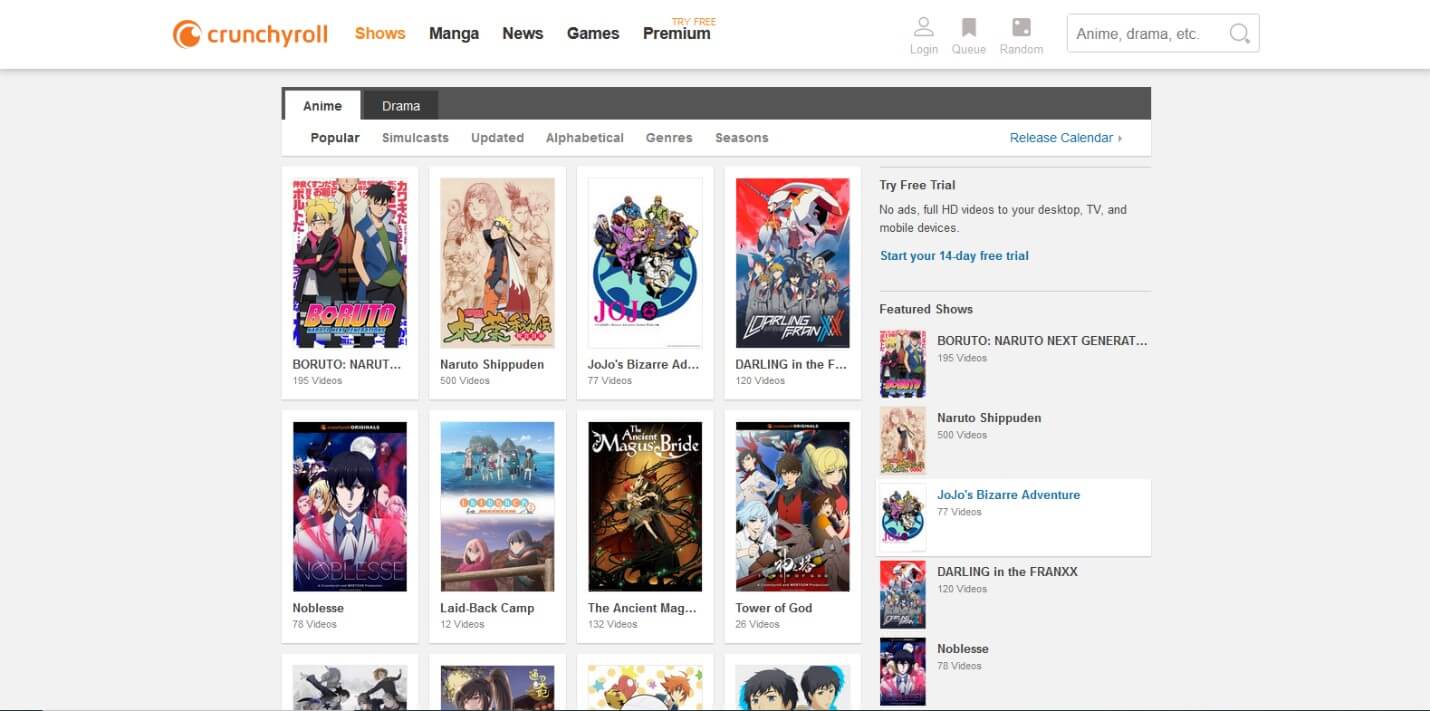
1. Crunchyroll
Crunchyroll has a wide range of anime shows and movies. This streaming service is available in different countries including the USA, UK, Canada, Australia and some Asian countries. From old anime shows to all the latest ones, you will find everything here. It allows you to watch and share anime on social media. It is also available in different languages with subtitles and dubbing. Crunchyroll also offers a premium version for an ad-free experience. The premium version also has a popular manga.
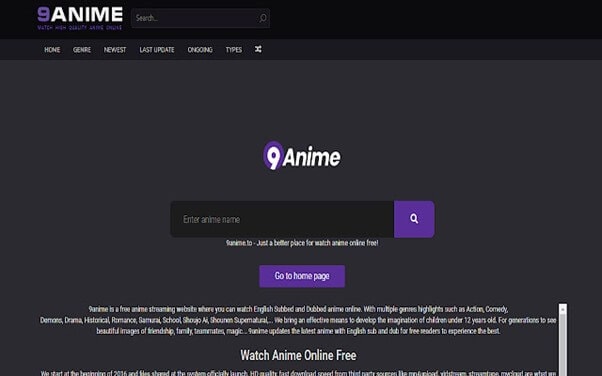
2. 9anime
9anime is a dedicated website for anime. It allows you to watch different types of animated content. From action, drama, and thriller to comedy, you can watch any anime show here. This website gives you access to all the popular anime shows, movies, and OVA (Original Video Animation). It is available across multiple countries including Canada, United States, United Kingdom, Australia, Netherlands, and some Asian countries. If it is not available in your country of origin, you can also access this website on a VPN.
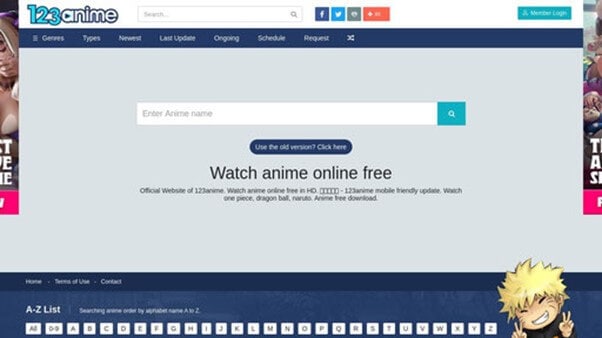
3. 123anime
This is a great alternative to 9anime. This website is a free platform to watch anime online for free in HD quality. It is also mobile-friendly and loads video without buffering. You can watch all the famous anime shows and movies on 123anime such as Pokemon, One Piece, Death Note, Dragon Ball Z, Naruto, and more. It also allows you to download anime for free.
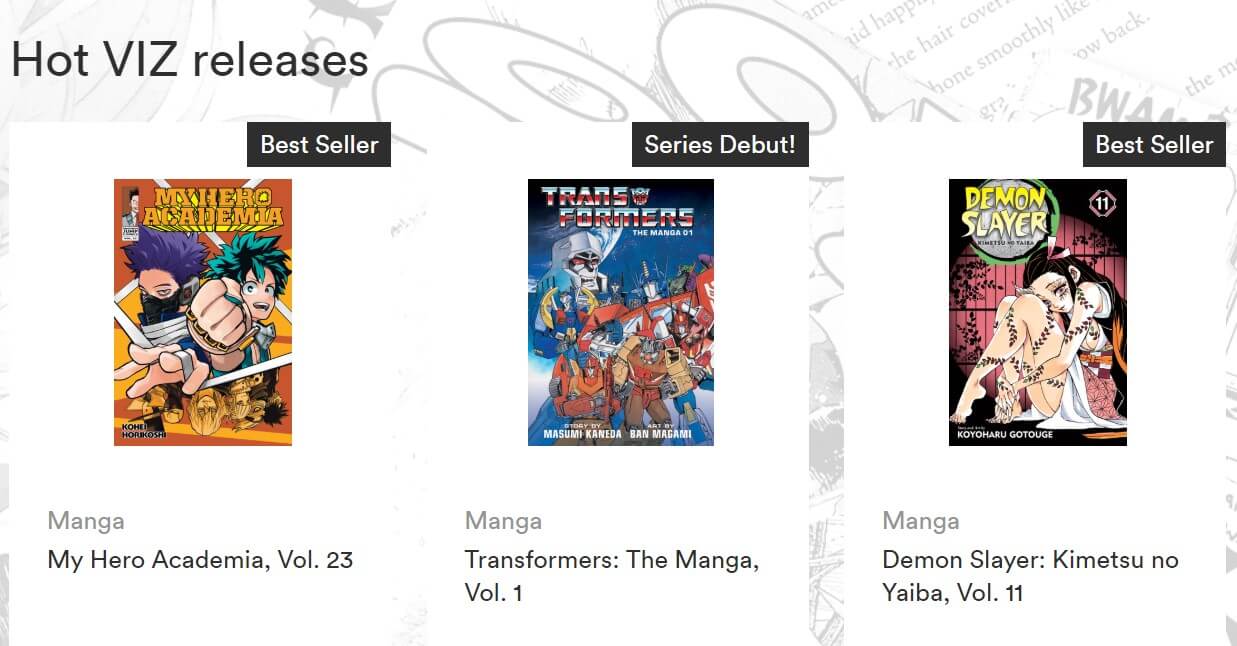
4. VIZ
VIZ is one of the most popular choices for manga and anime. From publishing, to animation and to entertainment licensing, VIZ handles it all. It offers all popular manga as well as all the latest anime series. From classic cult favorites to latest hits, VIZ has the best collection of anime shows and movies. You can save your favorite show on the website and create your own library to binge watch anime shows. All the shows also come with English subtitles.
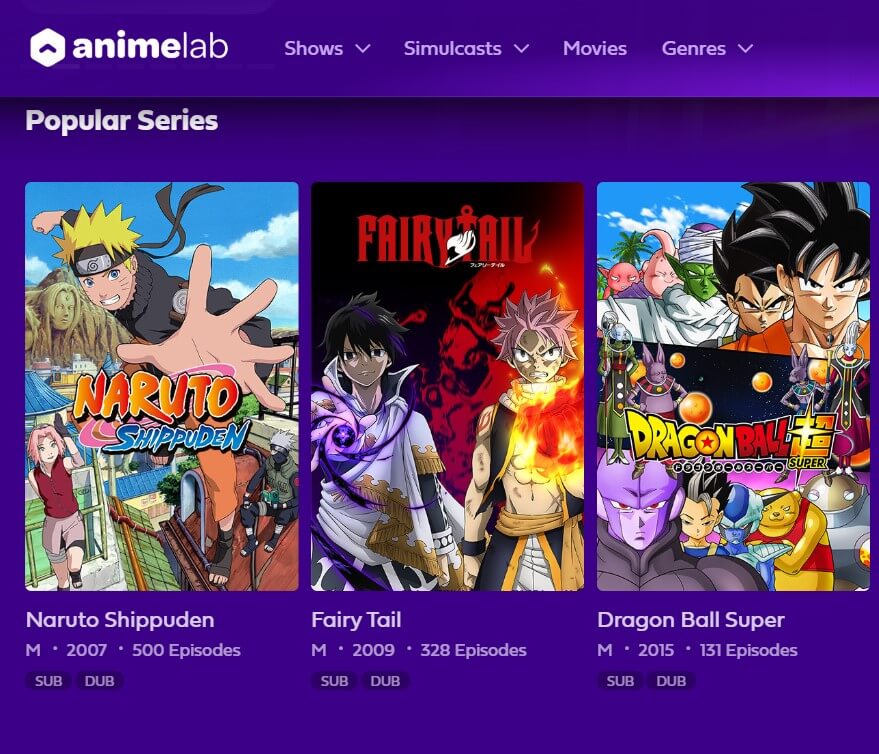
5. Animelab
AnimeLab is a website that offers a huge collection of all the popular anime. Plus, all the videos here are dubbed and subtitled. It also allows you to watch all the latest shows and releases as soon as they are aired. From action, thriller, adventure and horror to drama and comedy, you can watch all types of anime here. It is also compatible with all android and iPhone devices. AnimeLab is available in only two countries currently i.e., New Zealand and Australia. You can use VPN to watch in any other country.
While anime has entertained fans over the years, there are some anime shows that are very disturbing and offensive. They can toy with the psychology of the viewer and are often too inappropriate to handle. Such anime can be violent, sexual or gruesome. This is why some anime are banned in certain countries due to local laws, censorship, and copyright issues. In this article, we listed down top 10 banned anime shows and why they are banned. If you want to watch anime, especially banned anime, do check out the websites mentioned above. You will find all the anime shows you are looking for!
Shanoon Cox
Shanoon Cox is a writer and a lover of all things video.
Follow @Shanoon Cox
Shanoon Cox
Mar 27, 2024• Proven solutions
There is hardly a genre that anime hasn’t conquered. While anime is super entertaining and fun to watch, it can get quite crazy and questionable. Yes, anime is animated but the content is mature. From violence to incest and other controversial issues, anime can be offensive sometimes. Due to this, some countries have banned anime shows for its viewers – especially for younger audiences.
Want to find out what anime shows they are and why they are banned? Well, you are in the right spot. Today, we will talk about the top 10 banned anime shows and why they are banned. So, let’s find out!
![]()
A cross-platform for making videos anywhere for all creators
Why your video editing isn’t good enough? How about some creative inspo?
- 100 Million+ Users
- 150+ Countries and Regions
- 4 Million+ Social Media Followers
- 5 Million+ Stock Media for Use
* Secure Download
Part 1: Top 10 Banned Anime List
Here is a list of the 10 banned animes you should know about and why they are banned:
1. Shoujo Tsubaki (Banned Everywhere)
It has a very dark, depressing, and intense storyline and it is considered one of the most controversial anime movies ever. This is a 1992 anime film about a young girl whose mother dies. The girl meets a man who tells her he will help her if she ever needs anything. So, after her mother’s death, she goes to find the man and ends up at a circus where she gets abused and raped. Thus, Shoujo Tsubaki is about child sexual abuse with unbearable gore scenes. The horrific and disturbing visuals of this anime have left many viewers traumatized – so much so that the tapes of this film were also destroyed. Therefore, Shoujo Tsubaki is banned almost everywhere, including Japan itself.
2. Osomatsu-San (Banned in Japan)
Osomatsu-San is banned in Japan due to copyright issues. The series’ first episode had parodies of famous anime shows including Attack on Titan, Naruto, Sailor Moon, Dragon Ball Z, and more. Thus, due to copyright, the show’s first episode was removed from airing. It is still not available on mainstream anime websites. You can find the DVD version of the show, but even those do not have the first episode.
3. Excel Saga (Banned in Japan)
Excel Saga is based on a popular manga of the same name. It is about a secret ideological organization whose purpose is world domination. The entire Excel Saga is available to watch except for its last episode, called “Going Too Far” – very fitting indeed. It is even banned in its home country, Japan. The reason why this episode got banned is that it’s too long, violent, pornographic, and offensive. Fun fact: The Director of the show, Shinichi Watanabe, purposely got the last episode banned to make it daring and unforgettable. The last episode of Excel Saga is only available on DVD.
4. Death Note (Banned in China)
Death note is one of the most famous anime shows ever and while it’s gruesome, bloody and horrific, it is easily available on mainstream platforms, including Netflix. However, there is still a country that did not appreciate the dark premise of this show. Death Note is banned in China due to its theme. The show is about death, justice, murder and violence so it is considered as a corrupting influence on kids.
5. Attack on Titan (Banned in China)
Another cult-favorite anime on the lists is Attack on Titan. Due to its bloody, disgusting and disturbing visuals, it has been banned in China. While millions of viewers love this anime, China thinks this show portrays a lot of excessive violence which is very unhealthy for the younger audience. With that being said, if you are 18 and above, do not miss out on Attack on Titan. It is truly one of the best anime out there!
6. High School DxD (Banned in New Zealand)
With very high viewer ratings, it’s a bit of shock to see this show on the list. High School DxD follows the story of Issei Hyodo, a perverted high school kid who is killed on his very first date. But he gets reincarnated by Rias Gremory as a demon. Now, how come a show about angles and demons gets banned? Well, the premise of the show focuses on corrupt high school kids with a perverted mindset. This show is very sexual and shows a lot of nudity in certain scenes. This is why New Zealand has banned High School DxD for its sexual, harem themes based around high school kids.
7. Puni Puny Poemy (Banned in New Zealand)
Puni Puny Poemy sounds super cute and childish but don’t let the name fool you. Puni Puny Poemy is a spin-off inspired by Excel Saga – no wonder is it banned. This anime has a lot of sexual content surrounding very young characters. The nudity, explicit sexual scenes and harem inspired content is what makes this show so questionable. Thus, it is banned in New Zealand for being overly vulgar and sexual for young viewers. The show does not have a high viewership such as popular titles like Death Note or Attack on Titan, so many countries ignored it.
8. Hetalia: Axis Powers (Banned in South Korea)
Every character in this show represents a country and the role they played in World War II. Even though it is a comedy anime, it offended a few countries. South Korea actually banned the show on the grounds of “offensive stereotypes” and was called a “national crime” by the country. Hetalia: Axis Powers continued to air, the character and all the references to South Korea were completely removed due to backlash. The censored version of this anime is still available in some parts of the country.
9. Pokémon (Banned in Saudi Arabia)
Pokemon banned? Pokemon is perhaps THE most famous and innocent anime ever. It’s kid friendly and super clean. So, why is a show about Satoshi and his pocket monster banned? The religious authorities of Saudi Arabia declared that Pokemon promotes gambling and Jewish sentiments. Since then, there have been many conspiracy theories revolving around the show claiming it to be a Zionist conspiracy. Thus, it is banned in Saudi Arabia. Crazy right?
10. Kite (Banned in Norway)
Kite follows the story of a girl who uses bullets to kill people and make them explode. Now, you must be thinking that the violent nature of the show got it banned in Norway. Nope! not the case. Kite is banned in Norway due to a very graphic sexual assault scene on a minor. Norway has very strict laws against child pornography, thus the entire anime got banned. Similarly, the United States also censored and removed certain parts of the movie but it is not banned there.
Part 2: Where to Watch Anime Online for Free
If you live in any of the countries mentioned in the list above and want to watch the anime banned by your country, we have got you covered. Here are top 5 websites where you can watch anime online for free:
1. Crunchyroll
Crunchyroll has a wide range of anime shows and movies. This streaming service is available in different countries including the USA, UK, Canada, Australia and some Asian countries. From old anime shows to all the latest ones, you will find everything here. It allows you to watch and share anime on social media. It is also available in different languages with subtitles and dubbing. Crunchyroll also offers a premium version for an ad-free experience. The premium version also has a popular manga.
2. 9anime
9anime is a dedicated website for anime. It allows you to watch different types of animated content. From action, drama, and thriller to comedy, you can watch any anime show here. This website gives you access to all the popular anime shows, movies, and OVA (Original Video Animation). It is available across multiple countries including Canada, United States, United Kingdom, Australia, Netherlands, and some Asian countries. If it is not available in your country of origin, you can also access this website on a VPN.
3. 123anime
This is a great alternative to 9anime. This website is a free platform to watch anime online for free in HD quality. It is also mobile-friendly and loads video without buffering. You can watch all the famous anime shows and movies on 123anime such as Pokemon, One Piece, Death Note, Dragon Ball Z, Naruto, and more. It also allows you to download anime for free.
4. VIZ
VIZ is one of the most popular choices for manga and anime. From publishing, to animation and to entertainment licensing, VIZ handles it all. It offers all popular manga as well as all the latest anime series. From classic cult favorites to latest hits, VIZ has the best collection of anime shows and movies. You can save your favorite show on the website and create your own library to binge watch anime shows. All the shows also come with English subtitles.
5. Animelab
AnimeLab is a website that offers a huge collection of all the popular anime. Plus, all the videos here are dubbed and subtitled. It also allows you to watch all the latest shows and releases as soon as they are aired. From action, thriller, adventure and horror to drama and comedy, you can watch all types of anime here. It is also compatible with all android and iPhone devices. AnimeLab is available in only two countries currently i.e., New Zealand and Australia. You can use VPN to watch in any other country.
While anime has entertained fans over the years, there are some anime shows that are very disturbing and offensive. They can toy with the psychology of the viewer and are often too inappropriate to handle. Such anime can be violent, sexual or gruesome. This is why some anime are banned in certain countries due to local laws, censorship, and copyright issues. In this article, we listed down top 10 banned anime shows and why they are banned. If you want to watch anime, especially banned anime, do check out the websites mentioned above. You will find all the anime shows you are looking for!
Shanoon Cox
Shanoon Cox is a writer and a lover of all things video.
Follow @Shanoon Cox
Types of Cartoon Styles You May Use for The Next Marketing Project
Types of Cartoon Styles You May Use for Your Next Marketing Project
An easy yet powerful editor
Numerous effects to choose from
Detailed tutorials provided by the official channel
The whole concept of animation originated mainly from Japan. The cartoons that are shown on TV have different cartoon art styles. These cartoon art styles have their history of origin. These numerous cartoon styles play a significant role in the whole animation industry. If you find which cartoon illustration styles to use for your next project, this is the perfect place for your answer.
You can use any cartoon art style in your upcoming marketing project and make it a success. This article focuses on different cartoon art styles and how you can develop your anime cartoon style. You can use these methods to draw cartoon styles of yourself.
In this article
01 [10 Types of Cartoon Styles With Examples](#Part 1)
02 [Drawing Myself in 5 Different Cartoon Styles](#Part 2)
03 [How You Can Develop a Cartoon Style for Animation](#Part 3)
Part 1 Types of Cartoon Styles With Examples
There are numerous kinds of cartoon styles. Different animators use different cartoon styles. You can even develop your anime cartoon style. The different types of Animation are:
012D Animation
animations are trendy cartoon styles. This style of animation needs no introduction. This type of anime cartoon style was produced by Walt Disney. The most exciting features of the images were that they had only two dimensions: height and width.
Even though several people suggested that 2D art styles cartoon were invented during the early twentieth century. Back then, it was not much popular; Walt Disney made these cartoon styles famous. Example:

02Traditional Animation
As the name suggests, traditional Animation is an old cartoon art style. These cartoon styles were first seen in the year 1877. Emil Reynaud discovered a new tool for demonstrating objects that are moving. In this type of Animation, all the images are drawn manually on paper with a pencil. This method of making cartoon styles is time-consuming. However, later computer applications and programs were developed, making this task much easier and more efficient. Example:

03Animation
animation cartoon styles came into existence with graphics and visual software development. The first 3D dimensional image was created in the year 1972. However, an attempt to make 3D Animation was made in 1961. Nowadays, 3D Animation is a widely used animation style. It is used in the entertainment industry and medical imaging to adequately explain the body and organisms. Example:

04Flipbook Animation
In flipbook animation, each frame is drawn on each notebook page. After drawing all the frames is complete, turn the pages quickly. When the pages are turned quickly, it seems to be a moving video because of the different frames drawn on each page. Example:

05Clay Animation
This animation method turns out to be very funny after it is completed. This method of Animation is quite tricky. In this animation method, the characters are made out of clay at first, and then the movements are recorded in a camera. These movements are then made smooth and compiled like a video with different scenes using the software. The main audience for this kind of Animation is children. Example:

06Typography Animation
Typography animation is also called kinetic typography. This style of Animation is text animation. This method was originated in the year 1899. Back then, this Animation was not much popular. This style of typography animation gained popularity after 60 years it first originated. Typography animation is considered a good method for e-learning while training employees. Example:

07Stop-Motion Animation
Stop-Motion animation is an age-old animation technique. The attempt to use this type of Animation was made 150 years ago. The specialty of this type of Animation is that the animator takes pictures of different frames by moving the objects in different positions and clicking the picture of each frame. These pictures are compiled to create a continuous video. This method of Animation is straightforward to go. Example:

08Sand Animation
Sand Animation was invented in the year 1969. This type of Animation involves sand and a luminous surface on which the Animation is done. This method is used in cartoon anime styles or different shows. In this type of Animation, the sand is used to create 2D images. This type of Animation is used for storytelling in reality shows. Example:

09Motion Graphics
Motion design was invented in the year 1960. It is one of the most popular cartoon art styles used nowadays. This type of Animation creates promotional videos, game screensavers, commercial advertising videos, etc. It is one of the universal animation techniques used globally for various purposes. Example:

10Mechanical Animation
Mechanical Animation is mainly used in producing technical equipment. The most fantastic thing about this animation method is that you can make changes to a product that has not yet been developed. This kind of Animation is used with 3D Animation to show the working of machines in and out. It is done together with 3D Animation to clearly visualize the machine.

Part 2 Drawing Myself in 5 Different Cartoon Styles
You can draw yourself using these 5 different cartoon styles:
01You can use 3D filters on Snapchat to draw a Pixar-like picture of yourself
The steps are:
Step 1: Install and run the “Snapchat” app on your phone.
Step2: Open the app and turn on the camera.
Step 3: There is a smiling face symbol on the right side of the camera button, tap on that.
Step 4: Click on the explore menu and select the “Cartoon 3D Style” option.
Step 5: Capture your video
Step 6: Then your cartoon character-like video is ready.
02You can also use Instagram to create a Disney-like character of yourself
The steps are:
Step 1: Open your Instagram account.
Step 2: Click on the ‘+’ icon. Select the “Story” option.
Step 3: Different effects appear on the screen.
Step 4: Scroll the effects and find an icon of a magnifying glass.
Step 5: Click on that icon and type cartoon on the search bar.
Step 6: After your search is finished, different cartoon filters will appear on your screen.
Step 7: Tap on any one of the effects. The effect opens.
Step 8: Tap on the bookmark icon to save the cartoon effect.
Step 9: Now you can go back to the effects options to use the cartoon effect.
Your Disney-like cartoon picture is ready!
03You can use Google meet
Step 1: When you open the Google meet app, there are filters to use while on a call.
Step 2: Choose one of the filters that have a cartoon effect.
Step 3: When you join any meeting, you will appear like a cartoon character from TV.
04You can use B612
Step 1: Install and open the app on your phone.
Step 2: After you open the app, a circle button appears at the bottom of your screen in the middle.
Step 3: Tap on the circle.
Step 4: Numerous filters will appear.
Step 5: Choose one cartoon-like filter from the options of effect in the menu.
Step 6: After selecting one effect, make a video of yourself using an effect.
Step 7: Your cartoon video is ready on your screen.
05You can use Wondershare Filmora Video Editor
For Win 7 or later (64-bit)
For macOS 10.12 or later
Step 1: Capture a video of yourself using your phone’s camera.
Step 2: Install and open the Filmora app on your phone.
Step 3: After you open the app, you will be given the option to choose a video.
Step 4: Choose the video of yourself.
Step 5: After choosing your video, there is an option “click edit” tap on that.
Step 6: A menu appears; select the “effects” option from the menu.
Step 7: Different effects will appear on your screen.
Step 8: Select the cartoon effect you want to use in your video.
Step 9: After you have selected the effect, it will take some time to process.
Step 10: Your cartoon-like video is ready.
How You Can Develop a Cartoon Style for Animation
Anyone can develop new cartoon styles by following these simple procedures or habits. The procedures are:
● You can take references from real-life objects.
Most of the Animation we see here has been taken from real-life references, be it a cat, car, house, etc. So, to develop the cartoon styles, you can take references from real-life objects. You can also search for a particular characteristic in things you won’t use as your reference. If you want to draw a cat, you can use a living cat as your reference.
● You can copy and try to make Animation like your favorite animator.
If you use this method, this will help you improve your skill. No animation is 100% real, no matter what kind of Animation it is or who is creating it. However, you cannot keep on making animations like your favorite animator because you will not be able to find your anime art styles and skills.
● You can create an animated character of your own.
After taking your reference from real-life objects and knowing about the animation styles and the basic principles of Animation, you can create your animated character. If you create your character, keeping all the skills and techniques in mind, you can develop outstanding animation styles.
● To develop your cartoon style, you need to practice drawing regularly.
To get s grasp this whole process of Animation, you need to draw and practice different cartoon art styles. You can draw anything you like, or you don’t like on paper or on a drawing tablet. You can also color sketchbooks to improve your skills in Animation.
You can use Filmora to make cartoon videos and, at the same time, make cartoon videos of normally captured videos. These cartoon videos can be compiled into one video. You can use this video to edit different types of videos. Filmora has a user-friendly interface that can help you create your cartoon video effortlessly.
● Ending Thoughts →
● I hope you have understood the different types of anime cartoon styles by now.
● These methods can help you make the best for your next marketing project.
● These methods are easy, efficient, and efficient. All the aforementioned methods were discovered in the late nineteenth and early twentieth century.
● With the advancement of technology, the process has become more accessible. However, you can use any cartoon-style art.
The whole concept of animation originated mainly from Japan. The cartoons that are shown on TV have different cartoon art styles. These cartoon art styles have their history of origin. These numerous cartoon styles play a significant role in the whole animation industry. If you find which cartoon illustration styles to use for your next project, this is the perfect place for your answer.
You can use any cartoon art style in your upcoming marketing project and make it a success. This article focuses on different cartoon art styles and how you can develop your anime cartoon style. You can use these methods to draw cartoon styles of yourself.
In this article
01 [10 Types of Cartoon Styles With Examples](#Part 1)
02 [Drawing Myself in 5 Different Cartoon Styles](#Part 2)
03 [How You Can Develop a Cartoon Style for Animation](#Part 3)
Part 1 Types of Cartoon Styles With Examples
There are numerous kinds of cartoon styles. Different animators use different cartoon styles. You can even develop your anime cartoon style. The different types of Animation are:
012D Animation
animations are trendy cartoon styles. This style of animation needs no introduction. This type of anime cartoon style was produced by Walt Disney. The most exciting features of the images were that they had only two dimensions: height and width.
Even though several people suggested that 2D art styles cartoon were invented during the early twentieth century. Back then, it was not much popular; Walt Disney made these cartoon styles famous. Example:
02Traditional Animation
As the name suggests, traditional Animation is an old cartoon art style. These cartoon styles were first seen in the year 1877. Emil Reynaud discovered a new tool for demonstrating objects that are moving. In this type of Animation, all the images are drawn manually on paper with a pencil. This method of making cartoon styles is time-consuming. However, later computer applications and programs were developed, making this task much easier and more efficient. Example:
03Animation
animation cartoon styles came into existence with graphics and visual software development. The first 3D dimensional image was created in the year 1972. However, an attempt to make 3D Animation was made in 1961. Nowadays, 3D Animation is a widely used animation style. It is used in the entertainment industry and medical imaging to adequately explain the body and organisms. Example:
04Flipbook Animation
In flipbook animation, each frame is drawn on each notebook page. After drawing all the frames is complete, turn the pages quickly. When the pages are turned quickly, it seems to be a moving video because of the different frames drawn on each page. Example:
05Clay Animation
This animation method turns out to be very funny after it is completed. This method of Animation is quite tricky. In this animation method, the characters are made out of clay at first, and then the movements are recorded in a camera. These movements are then made smooth and compiled like a video with different scenes using the software. The main audience for this kind of Animation is children. Example:
06Typography Animation
Typography animation is also called kinetic typography. This style of Animation is text animation. This method was originated in the year 1899. Back then, this Animation was not much popular. This style of typography animation gained popularity after 60 years it first originated. Typography animation is considered a good method for e-learning while training employees. Example:
07Stop-Motion Animation
Stop-Motion animation is an age-old animation technique. The attempt to use this type of Animation was made 150 years ago. The specialty of this type of Animation is that the animator takes pictures of different frames by moving the objects in different positions and clicking the picture of each frame. These pictures are compiled to create a continuous video. This method of Animation is straightforward to go. Example:
08Sand Animation
Sand Animation was invented in the year 1969. This type of Animation involves sand and a luminous surface on which the Animation is done. This method is used in cartoon anime styles or different shows. In this type of Animation, the sand is used to create 2D images. This type of Animation is used for storytelling in reality shows. Example:
09Motion Graphics
Motion design was invented in the year 1960. It is one of the most popular cartoon art styles used nowadays. This type of Animation creates promotional videos, game screensavers, commercial advertising videos, etc. It is one of the universal animation techniques used globally for various purposes. Example:
10Mechanical Animation
Mechanical Animation is mainly used in producing technical equipment. The most fantastic thing about this animation method is that you can make changes to a product that has not yet been developed. This kind of Animation is used with 3D Animation to show the working of machines in and out. It is done together with 3D Animation to clearly visualize the machine.
Part 2 Drawing Myself in 5 Different Cartoon Styles
You can draw yourself using these 5 different cartoon styles:
01You can use 3D filters on Snapchat to draw a Pixar-like picture of yourself
The steps are:
Step 1: Install and run the “Snapchat” app on your phone.
Step2: Open the app and turn on the camera.
Step 3: There is a smiling face symbol on the right side of the camera button, tap on that.
Step 4: Click on the explore menu and select the “Cartoon 3D Style” option.
Step 5: Capture your video
Step 6: Then your cartoon character-like video is ready.
02You can also use Instagram to create a Disney-like character of yourself
The steps are:
Step 1: Open your Instagram account.
Step 2: Click on the ‘+’ icon. Select the “Story” option.
Step 3: Different effects appear on the screen.
Step 4: Scroll the effects and find an icon of a magnifying glass.
Step 5: Click on that icon and type cartoon on the search bar.
Step 6: After your search is finished, different cartoon filters will appear on your screen.
Step 7: Tap on any one of the effects. The effect opens.
Step 8: Tap on the bookmark icon to save the cartoon effect.
Step 9: Now you can go back to the effects options to use the cartoon effect.
Your Disney-like cartoon picture is ready!
03You can use Google meet
Step 1: When you open the Google meet app, there are filters to use while on a call.
Step 2: Choose one of the filters that have a cartoon effect.
Step 3: When you join any meeting, you will appear like a cartoon character from TV.
04You can use B612
Step 1: Install and open the app on your phone.
Step 2: After you open the app, a circle button appears at the bottom of your screen in the middle.
Step 3: Tap on the circle.
Step 4: Numerous filters will appear.
Step 5: Choose one cartoon-like filter from the options of effect in the menu.
Step 6: After selecting one effect, make a video of yourself using an effect.
Step 7: Your cartoon video is ready on your screen.
05You can use Wondershare Filmora Video Editor
For Win 7 or later (64-bit)
For macOS 10.12 or later
Step 1: Capture a video of yourself using your phone’s camera.
Step 2: Install and open the Filmora app on your phone.
Step 3: After you open the app, you will be given the option to choose a video.
Step 4: Choose the video of yourself.
Step 5: After choosing your video, there is an option “click edit” tap on that.
Step 6: A menu appears; select the “effects” option from the menu.
Step 7: Different effects will appear on your screen.
Step 8: Select the cartoon effect you want to use in your video.
Step 9: After you have selected the effect, it will take some time to process.
Step 10: Your cartoon-like video is ready.
How You Can Develop a Cartoon Style for Animation
Anyone can develop new cartoon styles by following these simple procedures or habits. The procedures are:
● You can take references from real-life objects.
Most of the Animation we see here has been taken from real-life references, be it a cat, car, house, etc. So, to develop the cartoon styles, you can take references from real-life objects. You can also search for a particular characteristic in things you won’t use as your reference. If you want to draw a cat, you can use a living cat as your reference.
● You can copy and try to make Animation like your favorite animator.
If you use this method, this will help you improve your skill. No animation is 100% real, no matter what kind of Animation it is or who is creating it. However, you cannot keep on making animations like your favorite animator because you will not be able to find your anime art styles and skills.
● You can create an animated character of your own.
After taking your reference from real-life objects and knowing about the animation styles and the basic principles of Animation, you can create your animated character. If you create your character, keeping all the skills and techniques in mind, you can develop outstanding animation styles.
● To develop your cartoon style, you need to practice drawing regularly.
To get s grasp this whole process of Animation, you need to draw and practice different cartoon art styles. You can draw anything you like, or you don’t like on paper or on a drawing tablet. You can also color sketchbooks to improve your skills in Animation.
You can use Filmora to make cartoon videos and, at the same time, make cartoon videos of normally captured videos. These cartoon videos can be compiled into one video. You can use this video to edit different types of videos. Filmora has a user-friendly interface that can help you create your cartoon video effortlessly.
● Ending Thoughts →
● I hope you have understood the different types of anime cartoon styles by now.
● These methods can help you make the best for your next marketing project.
● These methods are easy, efficient, and efficient. All the aforementioned methods were discovered in the late nineteenth and early twentieth century.
● With the advancement of technology, the process has become more accessible. However, you can use any cartoon-style art.
Tips on How to Get Awesome Background for Slideshow in PowerPoint
Tips That Show Anybody How to Get Awesome Background for Slideshow in Powerpoint
An easy yet powerful editor
Numerous effects to choose from
Detailed tutorials provided by the official channel
Amazing slideshow background are an absolute attention grabber in the realm of creative PowerPoint presentations. If you wish to upgrade yours with the same, be here to learn how!
In this article
01 [How to Add Video Background in PowerPoint?](#Part 1)
02 [How to Create Moving Backgrounds in Microsoft PowerPoint?](#Part 2)
03 [Some Tips for You to Get Awesome PowerPoint Backgrounds & Templates](#Part 3)
Part 1 How to Add Video Background in PowerPoint?
When the talk is about engaging means to deliver a precise information, PowerPoint slideshows are an absolute stunner. While these are already a captivating utility to present your thing, the output and audience engagement is at par with the inclusion of attractive design elements in the presentation. As is evident, there are enormous diversities of supplementary elements to complement your presentation, let us centre our discussion to the application of video background for slideshow in PowerPoint.
User’s Guide to Add Video Background in a PowerPoint Slideshow
The following section presents a detailed explanation of the steps to supplement your PowerPoint presentations with classic video backgrounds in just a few quick steps:
Step 1: Launch Your Presentation
Start with opening the desired PowerPoint presentation to which you want to add the video background, in any of your preferred devices.
Step 2: Add a Video to Your Slide
Browse through your presentation slides to locate the one you want to add the video background to. When you have made your choice, navigate to the PowerPoint toolbar at the top and hit the ‘Insert’ tab and choose the ‘Video’ option.
You will now be presented with 2 choices, either uploading a video from your device or insert one from the web by pasting its YouTube URL into the slide. If you are uploading a video from your device, proceed with selecting the desired video and tap ‘Insert’.

Step 3: Move and Resize Your Video
After uploading your video to the slide, you need to make suitable adjustments in its size and alignment to synchronize the same with the contents of the slide. To do this, drag the top left corner of the video to that of the slide to set the top alignment ratio. In the same way, move the bottom right corner of the video to be in sync with that of the slide. You will see the video occupying the entire slide at the end of the adjustment process.

Step 4: Set the Video Background
You will now need to set the video as the background of your slide, so that the latter’s contents are displayed over the video. You can do this by right clicking on the video and choosing the ‘Send to Back’ option from the dropdown that follows. This will cause the contents of your slide to get displayed over the video.

Step 5: Playback Edit and Customization Choices
Before proceeding towards making changes in the video playback and formatting, prefer taking a quick preview of your work till here. Once you are satisfied, navigate to the PowerPoint Toolbar at the top, hit the ‘Video Tools’ tab, followed by clicking on the ‘Playback’ tab.
It is recommended to introduce the following changes in your video for the most affordable slideshow output:
● Loop Your Video
Creating a video loop will facilitate you with an automatic replay of your video without the need to restart it every time with a click. You can loop your video by navigating to the ‘Video Options’ section and choose ‘Loop Until Stopped’ by clicking within the checkbox next to it. The background video will now continue to play until you switch to a different slide.
● Automatically Start Your Video
To avoid clicking on the slide amid your presentation for the video loop to begin, adjust the latter’s settings for an automatic start. Navigate to the ‘Start’ dropdown menu and select ‘Automatically’.
● Trim Your Video
You can work with some basic video editing tools in PowerPoint, like trimming and cropping your background video to a desired length. If you wish to ward off certain portions of your video, reach to and click o the ‘Trim Video’ button. Following this, drag the slider of the video to select the desired portions of the clip and exclude the rest.
You can further work with some more editing effects to create the perfect video backgrounds for your presentation slides in line with your specific preferences.

Step 6: Annotate Your Video Background
When you are done with the video editing process, take a preview of the same to ensure that everything is set in the proper order and at the proper place. Lastly, if you wish to add suitable text annotations to your video, you can do this with the ‘ClassPoint’ tool to write over the video background. All you need to do is select a preferred pen colour and start writing on your slide screen. You can further, save the annotations for a work record.

Part 2 How to Create Moving Backgrounds in Microsoft PowerPoint?
Moving PowerPoint slideshow background is another aspect of graphic creativity at its best, which can be used in a number of ways to grab considerable viewer attention. When choosing to add moving backgrounds to your presentation, the latter can aid in improving the style of content presentation, making your audience curious about how and what happens next.
Having learnt about the utility and creation process of video backgrounds in the PowerPoint presentation tool, let us extend our discussion to the method of creating a moving slide show background in the same in the following section:
User’s Guide to Create Moving Backgrounds for PowerPoint Presentations
Discussed below is an explanatory procedure for designing moving backgrounds with an awesome appearance for slideshow presentations in Microsoft PowerPoint:
Step 1: Open Your Presentation
To begin with, launch the PowerPoint tool in your preferred device and open the presentation on which you will be working to add the moving background. After the presentation gets loaded, navigate through the same and select the desired slide to proceed with the aforesaid task.
Step 2: Choose a Video Location
To add your desired video to the slide, navigate to the PowerPoint ribbon at the top and click on the ‘Insert’ tab. Select ‘Video’ from the list of options that appears, followed by choosing one of the ‘Online Video’ or ‘Video on My PC’ options from the video selection prompt. It is further recommended to select a video in the MP4 format, as the latter gives best results of moving and video backgrounds.
Step 3: Insert Your Video
Choose the second option in the selection prompt to upload a video from your device. You will now be asked to browse through your device and locate the desired video in the ‘Insert Video’ dialog box that appears. Select your video and tap the ‘Insert’ button to add your video.
To upload videos from an online source, choose the ‘Online Video’ option in the selection prompt and proceed to search the video from PowerPoint or paste its embed code to recover the video. The chosen video will begin to download and can be added to the PowerPoint presentation after the download process comes to an end.

Step 4: Playback Editing and Video Customization
Before proceeding further, consider paying your video once by clicking on the ‘Start’ button. You can also add different effects, trim and crop or add a bookmark to your video by navigating to and clicking on the ‘Video Tools’ tab, followed by selecting the ‘Format’ option. To work with the start and playback options for the video, click on ‘Playback’ in the dropdown menu of the ‘Video Tools’ tab.

Part 3 Some Tips for You to Get Awesome PowerPoint Backgrounds & Templates
Now that you have developed a comprehensive understanding of the utility of adding video and moving background for slideshow presentation, let us look through some easy tips and tricks to conveniently access the top rated and the most popular PowerPoint slideshow templates and backgrounds in the following section:
01Cool Slide Backgrounds
Slideshow presentations in PowerPoint are supplemented with a visual spark through amazing and vibrant backgrounds that are a sign of excellent graphic creativity. When working with a PowerPoint presentation of your own, do take the liberty to use some cool slide backgrounds to your creative advantage.
When the talk is about complementing your presentation with a cohesive and upbeat background, you can either select the most suitable one from a heap of pre made slideshow templates available both in the PowerPoint slideshow creator tool as well as across the web. However, if you wish to take the excitement to another level, try hands at creating an awesome and cool backgrounds for PowerPoint slides of your own!
Talking about some really cool tips and tricks to design a slideshow presentation background in PowerPoint, start with including some specific shapes and color overlays to the background capture, experiment with a polygon background, work on enhancing the background image with classic and artistic effects and apply a mix of colors, textures and patterns to give a classy look to your slideshow backgrounds.

02Professional Slideshow Backgrounds
If you are aiming at creating a PowerPoint slideshow presentation with a business centered design approach, you will need to cut down on some extra elements that you would ideally choose to include in a personal purpose based slideshow. Paying attention to the fact that business and corporate centered presentations should be simple, subtle and to the point, it would be an intelligent step to avoid adding too many expressive elements in the background.
Whether you are creating a professional slideshow background of your own or working with a pre designed template, take care to include a complementary play of a light background theme with a maximum of 2 balancing shades.
Avoid too much vibrancy and abstain from applying over the top effects and quick transitions, lest your presentation may look a bit too crowed. If your slides have lot of written content, prefer using a white color background text in a professional font style.
If you have decided on picking a pre made template, you can browse through a diversity of suggestions across the web, while keeping the aforesaid constraints in mind. Consider taking a look at the figure given below to have a more comprehensive understating of the prerequisites of selecting a professional sideshow background template:

03Happy Birthday Slide Backgrounds
Birthday parties are the most appealing synonyms of fun and entertainment. If you are into the profession of organizing events that renders smiling and happy faces, slideshow presentations could be of great help to you in discussing about services, types of social gentries and event targets with your clients.
When looking through different options to select the perfect birthday template, either for a professional event, or just to go down the memory lane of your most cherished moments, take caution to search for a vibrant alternative with colorful images, different background designs and party oriented cool themes, wide aspect ratio with high screen resolution for a mass display and conveniently editable graphics.
If you are creating a happy birthday slide background of your own, there are variety of realms to explore your graphic design creativity, owing to the fact that the subject of creation is highly expressive and multi-dimensional. While you are free to extend your creativity to the next level, do pay attention to the above constraints for a more elusive and outstanding creation output, while maintaining the fun and entertainment quotient intact.

04Wedding Slide Backgrounds
Considering the fact that wedding events are pronounced means of fun, leisure, enjoyment and beautiful memories, anything that aims to be a part of the celebrations, should be equally ecstatic and engaging. Infusing festive occasions with technology, slideshow based wedding invitations and moment captures are the top rated modern trends of celebrating this significant life event.
If you are keen on designing the perfect slideshow presentation for wedding invitations, photo albums and thank you cards, prefer to choose a wedding slide background template with aesthetic layout and flowing element inclusions, like that of floral borders and scented candles. Look though the elements of a subtle thematic setup with soothing color combinations, preferably in complementary pastel shades, like pink and white.
Talking of template customizability, the latter should have placeholders to include names of the bride and groom, the wedding date and venue, and of course the wedding photographs. The beautiful slide background template should have enough design space to include the most elusive play of text colors and fonts to suit specific preferences of creating special memories of a cherished event.

05Slideshow Backgrounds and Templates in Filmora
When looking for the most convenient lead to an extensive variety of beautiful slideshow templates and background, the template library of Wondershare Filmora Video Editor slideshow creator program can be your most affordable destination. The aforesaid software library is known to possess the best and most perfect template choices to suit the creation constraints of almost every slideshow presentation style and objective you can possibly think of.
For Win 7 or later (64-bit)
For macOS 10.12 or later
The elusive templates are further supplemented with a plethora of design flexibilities and customization features that are all set to deliver you the most appreciable creation output. Stressing a bit on the template customization choices of the software, you can work with the tool to uplift your slideshow backgrounds with artistic image effects and overlays, annotate them with beautiful text formations in a variety of colors, fonts and sizes and lots more.
Moving a bit deeper into the creative aspect, you can upgrade the visual style of your presentations with the most perfect and seamless image and video transitions and text animations. The bottom line is, working with the aforesaid slideshow creator program, you are entitled to get jaw dropping applaud from your audience, while making a confident and a content delivery through your slideshow presentation.

● Ending Thoughts →
● Using an expressive and complementing background in your slideshow presentation uplifts its visual credibility in captivating your audience.
● Browsing through the web, you get to access a vast range of amazing slideshow backgrounds and templates to make your presentation, a visual masterpiece.
● When looking for the most distributed storehouse of slideshow backgrounds and templates, the Wondershare Filmora library is your ultimate solution.
Amazing slideshow background are an absolute attention grabber in the realm of creative PowerPoint presentations. If you wish to upgrade yours with the same, be here to learn how!
In this article
01 [How to Add Video Background in PowerPoint?](#Part 1)
02 [How to Create Moving Backgrounds in Microsoft PowerPoint?](#Part 2)
03 [Some Tips for You to Get Awesome PowerPoint Backgrounds & Templates](#Part 3)
Part 1 How to Add Video Background in PowerPoint?
When the talk is about engaging means to deliver a precise information, PowerPoint slideshows are an absolute stunner. While these are already a captivating utility to present your thing, the output and audience engagement is at par with the inclusion of attractive design elements in the presentation. As is evident, there are enormous diversities of supplementary elements to complement your presentation, let us centre our discussion to the application of video background for slideshow in PowerPoint.
User’s Guide to Add Video Background in a PowerPoint Slideshow
The following section presents a detailed explanation of the steps to supplement your PowerPoint presentations with classic video backgrounds in just a few quick steps:
Step 1: Launch Your Presentation
Start with opening the desired PowerPoint presentation to which you want to add the video background, in any of your preferred devices.
Step 2: Add a Video to Your Slide
Browse through your presentation slides to locate the one you want to add the video background to. When you have made your choice, navigate to the PowerPoint toolbar at the top and hit the ‘Insert’ tab and choose the ‘Video’ option.
You will now be presented with 2 choices, either uploading a video from your device or insert one from the web by pasting its YouTube URL into the slide. If you are uploading a video from your device, proceed with selecting the desired video and tap ‘Insert’.
Step 3: Move and Resize Your Video
After uploading your video to the slide, you need to make suitable adjustments in its size and alignment to synchronize the same with the contents of the slide. To do this, drag the top left corner of the video to that of the slide to set the top alignment ratio. In the same way, move the bottom right corner of the video to be in sync with that of the slide. You will see the video occupying the entire slide at the end of the adjustment process.
Step 4: Set the Video Background
You will now need to set the video as the background of your slide, so that the latter’s contents are displayed over the video. You can do this by right clicking on the video and choosing the ‘Send to Back’ option from the dropdown that follows. This will cause the contents of your slide to get displayed over the video.
Step 5: Playback Edit and Customization Choices
Before proceeding towards making changes in the video playback and formatting, prefer taking a quick preview of your work till here. Once you are satisfied, navigate to the PowerPoint Toolbar at the top, hit the ‘Video Tools’ tab, followed by clicking on the ‘Playback’ tab.
It is recommended to introduce the following changes in your video for the most affordable slideshow output:
● Loop Your Video
Creating a video loop will facilitate you with an automatic replay of your video without the need to restart it every time with a click. You can loop your video by navigating to the ‘Video Options’ section and choose ‘Loop Until Stopped’ by clicking within the checkbox next to it. The background video will now continue to play until you switch to a different slide.
● Automatically Start Your Video
To avoid clicking on the slide amid your presentation for the video loop to begin, adjust the latter’s settings for an automatic start. Navigate to the ‘Start’ dropdown menu and select ‘Automatically’.
● Trim Your Video
You can work with some basic video editing tools in PowerPoint, like trimming and cropping your background video to a desired length. If you wish to ward off certain portions of your video, reach to and click o the ‘Trim Video’ button. Following this, drag the slider of the video to select the desired portions of the clip and exclude the rest.
You can further work with some more editing effects to create the perfect video backgrounds for your presentation slides in line with your specific preferences.
Step 6: Annotate Your Video Background
When you are done with the video editing process, take a preview of the same to ensure that everything is set in the proper order and at the proper place. Lastly, if you wish to add suitable text annotations to your video, you can do this with the ‘ClassPoint’ tool to write over the video background. All you need to do is select a preferred pen colour and start writing on your slide screen. You can further, save the annotations for a work record.
Part 2 How to Create Moving Backgrounds in Microsoft PowerPoint?
Moving PowerPoint slideshow background is another aspect of graphic creativity at its best, which can be used in a number of ways to grab considerable viewer attention. When choosing to add moving backgrounds to your presentation, the latter can aid in improving the style of content presentation, making your audience curious about how and what happens next.
Having learnt about the utility and creation process of video backgrounds in the PowerPoint presentation tool, let us extend our discussion to the method of creating a moving slide show background in the same in the following section:
User’s Guide to Create Moving Backgrounds for PowerPoint Presentations
Discussed below is an explanatory procedure for designing moving backgrounds with an awesome appearance for slideshow presentations in Microsoft PowerPoint:
Step 1: Open Your Presentation
To begin with, launch the PowerPoint tool in your preferred device and open the presentation on which you will be working to add the moving background. After the presentation gets loaded, navigate through the same and select the desired slide to proceed with the aforesaid task.
Step 2: Choose a Video Location
To add your desired video to the slide, navigate to the PowerPoint ribbon at the top and click on the ‘Insert’ tab. Select ‘Video’ from the list of options that appears, followed by choosing one of the ‘Online Video’ or ‘Video on My PC’ options from the video selection prompt. It is further recommended to select a video in the MP4 format, as the latter gives best results of moving and video backgrounds.
Step 3: Insert Your Video
Choose the second option in the selection prompt to upload a video from your device. You will now be asked to browse through your device and locate the desired video in the ‘Insert Video’ dialog box that appears. Select your video and tap the ‘Insert’ button to add your video.
To upload videos from an online source, choose the ‘Online Video’ option in the selection prompt and proceed to search the video from PowerPoint or paste its embed code to recover the video. The chosen video will begin to download and can be added to the PowerPoint presentation after the download process comes to an end.
Step 4: Playback Editing and Video Customization
Before proceeding further, consider paying your video once by clicking on the ‘Start’ button. You can also add different effects, trim and crop or add a bookmark to your video by navigating to and clicking on the ‘Video Tools’ tab, followed by selecting the ‘Format’ option. To work with the start and playback options for the video, click on ‘Playback’ in the dropdown menu of the ‘Video Tools’ tab.
Part 3 Some Tips for You to Get Awesome PowerPoint Backgrounds & Templates
Now that you have developed a comprehensive understanding of the utility of adding video and moving background for slideshow presentation, let us look through some easy tips and tricks to conveniently access the top rated and the most popular PowerPoint slideshow templates and backgrounds in the following section:
01Cool Slide Backgrounds
Slideshow presentations in PowerPoint are supplemented with a visual spark through amazing and vibrant backgrounds that are a sign of excellent graphic creativity. When working with a PowerPoint presentation of your own, do take the liberty to use some cool slide backgrounds to your creative advantage.
When the talk is about complementing your presentation with a cohesive and upbeat background, you can either select the most suitable one from a heap of pre made slideshow templates available both in the PowerPoint slideshow creator tool as well as across the web. However, if you wish to take the excitement to another level, try hands at creating an awesome and cool backgrounds for PowerPoint slides of your own!
Talking about some really cool tips and tricks to design a slideshow presentation background in PowerPoint, start with including some specific shapes and color overlays to the background capture, experiment with a polygon background, work on enhancing the background image with classic and artistic effects and apply a mix of colors, textures and patterns to give a classy look to your slideshow backgrounds.
02Professional Slideshow Backgrounds
If you are aiming at creating a PowerPoint slideshow presentation with a business centered design approach, you will need to cut down on some extra elements that you would ideally choose to include in a personal purpose based slideshow. Paying attention to the fact that business and corporate centered presentations should be simple, subtle and to the point, it would be an intelligent step to avoid adding too many expressive elements in the background.
Whether you are creating a professional slideshow background of your own or working with a pre designed template, take care to include a complementary play of a light background theme with a maximum of 2 balancing shades.
Avoid too much vibrancy and abstain from applying over the top effects and quick transitions, lest your presentation may look a bit too crowed. If your slides have lot of written content, prefer using a white color background text in a professional font style.
If you have decided on picking a pre made template, you can browse through a diversity of suggestions across the web, while keeping the aforesaid constraints in mind. Consider taking a look at the figure given below to have a more comprehensive understating of the prerequisites of selecting a professional sideshow background template:
03Happy Birthday Slide Backgrounds
Birthday parties are the most appealing synonyms of fun and entertainment. If you are into the profession of organizing events that renders smiling and happy faces, slideshow presentations could be of great help to you in discussing about services, types of social gentries and event targets with your clients.
When looking through different options to select the perfect birthday template, either for a professional event, or just to go down the memory lane of your most cherished moments, take caution to search for a vibrant alternative with colorful images, different background designs and party oriented cool themes, wide aspect ratio with high screen resolution for a mass display and conveniently editable graphics.
If you are creating a happy birthday slide background of your own, there are variety of realms to explore your graphic design creativity, owing to the fact that the subject of creation is highly expressive and multi-dimensional. While you are free to extend your creativity to the next level, do pay attention to the above constraints for a more elusive and outstanding creation output, while maintaining the fun and entertainment quotient intact.
04Wedding Slide Backgrounds
Considering the fact that wedding events are pronounced means of fun, leisure, enjoyment and beautiful memories, anything that aims to be a part of the celebrations, should be equally ecstatic and engaging. Infusing festive occasions with technology, slideshow based wedding invitations and moment captures are the top rated modern trends of celebrating this significant life event.
If you are keen on designing the perfect slideshow presentation for wedding invitations, photo albums and thank you cards, prefer to choose a wedding slide background template with aesthetic layout and flowing element inclusions, like that of floral borders and scented candles. Look though the elements of a subtle thematic setup with soothing color combinations, preferably in complementary pastel shades, like pink and white.
Talking of template customizability, the latter should have placeholders to include names of the bride and groom, the wedding date and venue, and of course the wedding photographs. The beautiful slide background template should have enough design space to include the most elusive play of text colors and fonts to suit specific preferences of creating special memories of a cherished event.
05Slideshow Backgrounds and Templates in Filmora
When looking for the most convenient lead to an extensive variety of beautiful slideshow templates and background, the template library of Wondershare Filmora Video Editor slideshow creator program can be your most affordable destination. The aforesaid software library is known to possess the best and most perfect template choices to suit the creation constraints of almost every slideshow presentation style and objective you can possibly think of.
For Win 7 or later (64-bit)
For macOS 10.12 or later
The elusive templates are further supplemented with a plethora of design flexibilities and customization features that are all set to deliver you the most appreciable creation output. Stressing a bit on the template customization choices of the software, you can work with the tool to uplift your slideshow backgrounds with artistic image effects and overlays, annotate them with beautiful text formations in a variety of colors, fonts and sizes and lots more.
Moving a bit deeper into the creative aspect, you can upgrade the visual style of your presentations with the most perfect and seamless image and video transitions and text animations. The bottom line is, working with the aforesaid slideshow creator program, you are entitled to get jaw dropping applaud from your audience, while making a confident and a content delivery through your slideshow presentation.
● Ending Thoughts →
● Using an expressive and complementing background in your slideshow presentation uplifts its visual credibility in captivating your audience.
● Browsing through the web, you get to access a vast range of amazing slideshow backgrounds and templates to make your presentation, a visual masterpiece.
● When looking for the most distributed storehouse of slideshow backgrounds and templates, the Wondershare Filmora library is your ultimate solution.
The 15 Most Efficient Photo to Cartoon Apps for Android
The 15 Most Efficient Photo to Cartoon Apps for Android
An easy yet powerful editor
Numerous effects to choose from
Detailed tutorials provided by the official channel
It’s usually better to start with a free cartoon app for Android, whether you want to make a cartoon avatar of yourself or add humorous cartoons and live artistic effects to your photos.
In today’s digital age, your smartphone can serve as a portable cartoon picture editor, allowing you to apply cool and artistic effects to new or current photos. Finding an excellent cartoon-making app for Android is difficult because there are so many unique possibilities.
To assist you, we’ve compiled a list of the top cartoon picture apps for Android and iPhone that can help you turn your photo into a cartoon in seconds. Let’s get started without further ado.
In this article
01 [10 Apps to Kickstart Your Need to Photo to Cartoon](#Part 1)
02 [Top 5 iOS Apps to Turn Photo into Cartoon](#Part 2)
Part 1 Apps to Kickstart Your Need to Photo to Cartoon
In this part, you will have a chance to familiarize yourself with the best cartoon apps for Android, along with all the relevant information that matches your need.
01Cartoon Photo Editor
This free image to cartoon app has been a favorite for many years, making it an obvious choice for the top slot.
This cartoon pic software could be the ideal choice for you to add fantastic artistic and cartoon effects to your new or current photos.
Features:
• Add fantastic cartoon effects to your phone’s gallery photos.
• With a single tap of your finger, save images or take an image instantly.
• The autofocus feature (click anywhere on the screen)
• Several eye-catching effects, including a cartoon, oil painting, thermal vision, drawing, and more.
Compatibility:- Android 4.4 or above
Rating: 4.2
Price:- Free
02Camart – Cartoon Photo
This one is extensively used photos to cartoon picture apps for Android users.
Cartoon Photo is the ideal program for instantly applying the most spectacular cartoon effects to your images!
With an intelligent cartoon camera, you can effortlessly turn your most fabulous selfies and recorded films into live paints.
Features:
• Use your phone’s camera to take photos, selfies, and movies, then apply real-time artistic effects.
• There are many fantastic artistic filters to pick from (cartoon, pencil, comics, sketch, oil painting, watercolor, and many more).
• Use autofocus, pinch to zoom, and more by tapping on the screen.
• Email or post photos to popular social networking sites to share with your friends.
Compatibility:- Android 4.4 or above
Price:- Free
Rating: 3.9
03Cartoon Pictures – Cartoon Photo Editor
Cartoon Pictures - Cartoon Photo Editor makes as the best Android photos to cartoon apps for adding cartoon effects, oil paintings, and canvas artwork.
It has a wide range of cartoon animation effects, pencil sketch effects, smooth art filters, and painting effects that will transform your regular photos into beautiful works of art.
Features:
• A cartoon picture conversion program with a beautiful look.
• Hundreds of incredible cartoon photo effects
• A powerful selfie camera that allows you to edit photos in real-time.
• Post your sketch styles and artwork to social media sites like Facebook, Instagram, Pinterest, and Twitter.
Compatibility:- Android 5.0 or later
Price:- Free
Rating: 4.4
04Cartoon Photo – Pictures Cartoon Drawing
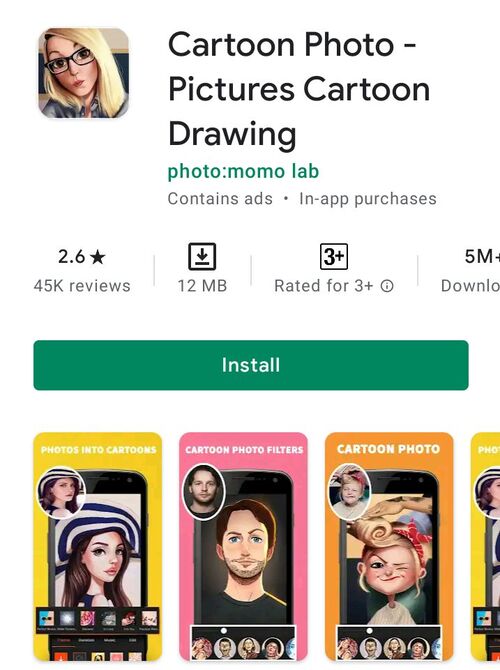
It combines all distinctive cartoon effects and art filters into one software, allowing you to instantly transform your photographs into grey cartoons, smooth pencil sketches and drawings, oil paintings, and pixel art.
Although the Google Play market is overflowing with cartoon-type editing apps, this is the best cartoon-making app for Android. You can now be your cartoonist.
Features:
• Create cartoon drawings from any new or old photos.
• Selfie camera with powerful cartoon snaps, creative photo combining, and cartoon filters
• A plethora of contemporary artistic filters to pick from (cartoon yourself, a cartoon photo maker, photo to caricature, and many more)
Compatibility:- Android 4.1 or above
Price:- Free
Rating: 2.6
05Cartoon Photo Editor – Pencil Sketch Art
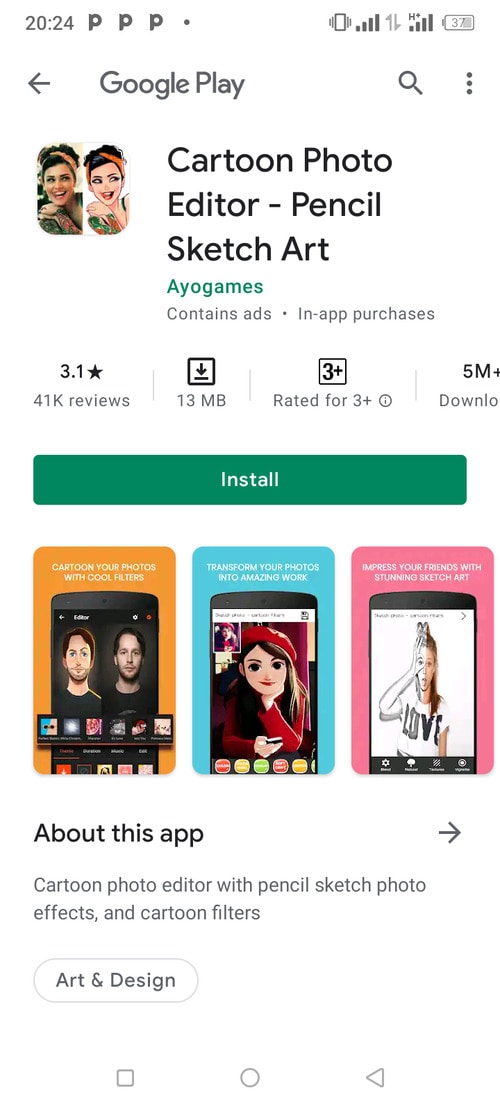
If you need a way to turn your favorite photos into cartoon drawings, this cartoon camera is the way to go.
This most excellent comedy picture software attempts to provide a plethora of fantastic cartoon graphics filters to help your photos stand out.
Features:
• Create cartoons and oil paintings from any photo
• Use the ‘Cartoon yourself’ function to turn your images into masterpieces.
• Photo editor for cartoons/photo creator for cartoons
Compatibility:- Requires 4.1 or more Android
Price:- Free
Rating: 3.1
06Art Camera – Cartoon, Pencil Sketch Art Effect Photo
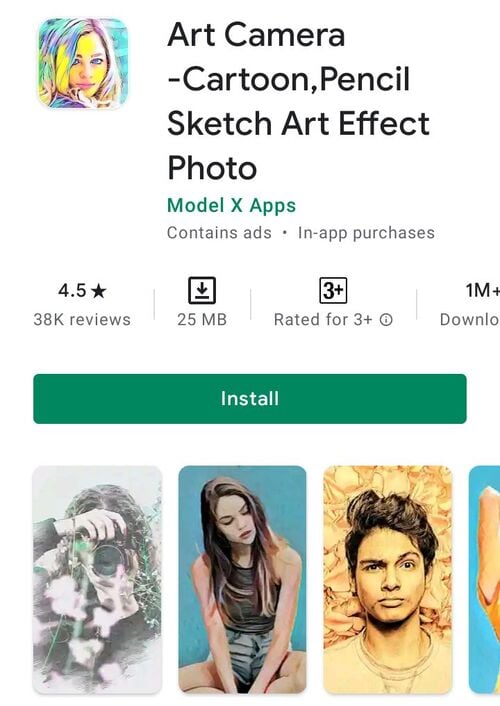
Do you enjoy sketching? This greatest photo to cartoon app from Model X is a must-have for everyone who wants to add pencil sketches and fantastic artistic and cartoon effects to existing photos.
It also serves as a useful photo organizer, allowing you to organize and manage your photos using date and time tags. With the help of our top-rated convert photo to cartoon app, you can now be the center of attention.
Features:
• A vast range of picture effects and filters inspired by oil paintings and cartoons
• A plethora of photo editing and adjusting options, such as contrast, brightness, and saturation
• UHD camera, HD selfie, auto-focus, HDR, and silent capture mode, among other features.
Compatibility:- Android 4.2+
Price:- Free
Rating: 4.5
07Tooncam – Cartoon, Pencil Sketch Pic
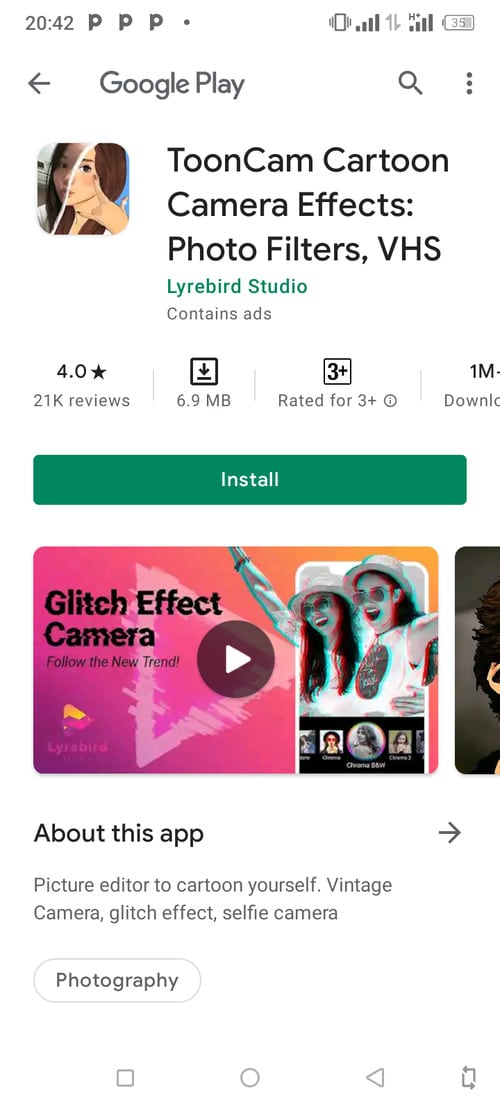
Do you want to make cartoons out of your most extraordinary selfies? If that’s the case, the finest cartoon picture editor app for Android is all you’ll need. What could be better than Tooncam?
With this picture-to cartoon app at your disposal, you can quickly turn your images into spectacular cartoons.
Features:
• With a few clicks of your finger, make fantastic web-based comics.
• Transforms your regular photos into adorable cartoon selfies
• More than 15 different cartoon effects
Compatibility:- Android 4.4+ and iOS
Price:- Free
Rating: 4.0
08Prisma Art Effect Photo Editor
Prisma was the most popular cartoon animation app on the market only a few years ago. Even though this app isn’t as famous as it once was, it still has some absorbing art filters that can make your shot look like some of history’s greatest artists created it.
The best part is that new filters come every day, so you’ll never run out of cartoon photo ideas. Furthermore, the software has various special photo effects and the ability to save your works in both SD and HD resolution.
Features:
● Every day, you get new cartoon effects.
● You will get more than 300 filters.
● Cartooning is the only option.
● Easily cartoon the photo.
Price: Free, though in-app purchases
Compatibility: Android
Ratings: 4.6
09Cartoon Yourself
Even if you can’t record videos or shoot images with the Cartoon Yourself app for Android, it’s still a good option to quickly turn a photo into a cartoon. Select a picture with the ‘Add a Photo’ button, then hit the ‘Apply Effect’ button to begin browsing the app’s extensive library of stickers and cartoon effects.
After the photo has been cartoonized, you can save it to your phone or share it on social media with your friends. The Cartoon Yourself app also provides basic photo editing features, such as cropping, mirroring, and rotating images.
Features:
● For novices, a primary and easy-to-use photo-to-cartoon app
● It has some excellent and lovely cartoon effects.
● Limited Free filters and effects
Price: Free, but with in-app purchases.
Compatibility: Android
Rating: 3.1
10Painnt – Art & Cartoon Filters
Painnt is easily one of the greatest cartoons yourself apps on the market, with over a thousand filters and effects. Because this picture editor allows you to change the transparency, saturation, and brightness of all your images, you can manipulate them in almost any way you desire. Painnt is also a creative community where you can find and meet others who share your art interests.
However, the accessible version of the program limits the size of the photos you may export, and you must subscribe to one of the subscription plans to process pictures in HD. The cost of a yearly subscription is only $9.99.
Features:
• Version is updated regularly to include more filters.
• Change the parameters of the cartoon filters to make them your own.
• Advanced AI technology.
Price: Free(in-app purchases)
Compatibility: Android
Rating: 3.8
Part 2 Top 5 iOS Apps to Turn Photo into Cartoon
Here, we have some of the best iOS applications that will assist you in turning photos into cartoons quickly.
01Cartoon Yourself Video Effects
Even if you aren’t a fan of the best cartoon video maker app download for iOS, this incredible photo-to cartoon app will convert you into one.
It features a user-friendly screen and an extensive range of amusing picture effects to help you build a cartoon avatar of yourself.
Features:
• Convert any snapshot of a person into an animated animation.
• Use a variety of authentic facial expressions (squint eyes, flirty wink, sad face, nice smile, etc.)
• Use dozens of humorous photo effects to turn your face into an alien, hideous, bulb-headed person, and more.
02Cartoon Camera Free
Apart from the Cartoon and Pencil Sketch effects, this little program doesn’t offer anything else. You may either use photos from your phone or take new ones and turn them into fantastic cartoons. The images you modify with the Cartoon Camera Free app can be saved to your camera roll or shared on social media.
However, because the process of turning your photos into cartoons is fully automated, you won’t have much control over how the final version of your cartoon photo will appear.
Features
● You can quickly draw a caricature of yourself on your phone.
● This fantastic photo-to cartoon tool will provide you with a realistic cartoon effect in real-time.
● It is updated regularly. Thus, you won’t use the most recent effects.
03Photo To Cartoon Yourself Edit
Photo To Cartoon Yourself is a popular cartoon photo programs, allowing you to create avatars or a cartoon of yourself quickly.
Capture a photo from your phone’s gallery or take a fresh one with the camera and turn it into a fantastic cartoon straight away for free. It is the most powerful program on this list for converting a photo into a cartoon AVATAR with the least amount of work and time. Furthermore, it includes many fascinating elements that will give your shot a realistic cartoon ethos.
Features:
● Choose images from your photo library.
● Turn your images into cartoons and send them via email.
● No picture shrinking or stretching; create cartoon images in high definition in seconds.
● Free to access
04Clip2Comic & Caricature Maker
Clip2Comic & Caricature Maker comes with a friendly interface that works wonders while converting a photo into caricatures, sketches, or cartoons.
Clip2Comic also allows you to make your cartoon videos in a matter of seconds using its real-time preview camera.
Features:
• Choose an image or video clip from your photo album to use.
• A wide range of free cartoon, drawing, caricature, and poster effects are available.
• Customization tools allow you to tweak your image’s outlines and blacks.
• Use several color filters to put your cartoon faces in the appropriate mood.
05MomentCam Cartoons & Stickers
MomentCam allows you to create your bitmoji based on your preferences. MomentCam is one of the most popular photo-to-cartoon apps on the market right now, with over 300 million downloads.
It allows you to create personalized emoticons and funny cartoons to convey your emotions in the most amusing way imaginable. Thousands of realistic effects and filters are available to give your shot an authentic cartoon feel. You can make a better version of yourself with MomentCam.
MomentCam may be at the bottom of the list of the best cartoon camera applications for iPhone and iPad, but it is well worth a look.
Features:
● Turn yourself into witty cartoons and glistening emoticons.
● Add text bubbles to some jokes and phrases to make your cartoons more entertaining
● Alter your caricatures’ facial expressions.
● You can get great prizes by sharing your amusing creations with millions of people all around the world.
****Wondershare Filmora Video Editor - Best Application**
With the rise in popularity of cartoonizing photo apps for Android, we’d like to introduce you to a fantastic app that will assist you in creating cartoon animation. Following its incredible characteristics in no time. Wondershare Filmora Animation software is a new Wondershare product that includes several downloadable animated characters and elements.
Most significantly, this software offers a user-friendly interface, an intelligent editing workflow, is lightweight, has a quick video rendering speed, and much more.
● Ending Thoughts →
● Now that you’ve found the best cartoon video maker app for Android, choose the one that’s right for you. Whether on Android or iOS devices, these animation movie creators will turn the world upside down in just a few clicks, so give it a try today!
● You can also try out a fantastic app, Filmora. It is a perfect cartoon-making app for Android and iOS. Change your photo to cartoon in a few clicks.
It’s usually better to start with a free cartoon app for Android, whether you want to make a cartoon avatar of yourself or add humorous cartoons and live artistic effects to your photos.
In today’s digital age, your smartphone can serve as a portable cartoon picture editor, allowing you to apply cool and artistic effects to new or current photos. Finding an excellent cartoon-making app for Android is difficult because there are so many unique possibilities.
To assist you, we’ve compiled a list of the top cartoon picture apps for Android and iPhone that can help you turn your photo into a cartoon in seconds. Let’s get started without further ado.
In this article
01 [10 Apps to Kickstart Your Need to Photo to Cartoon](#Part 1)
02 [Top 5 iOS Apps to Turn Photo into Cartoon](#Part 2)
Part 1 Apps to Kickstart Your Need to Photo to Cartoon
In this part, you will have a chance to familiarize yourself with the best cartoon apps for Android, along with all the relevant information that matches your need.
01Cartoon Photo Editor
This free image to cartoon app has been a favorite for many years, making it an obvious choice for the top slot.
This cartoon pic software could be the ideal choice for you to add fantastic artistic and cartoon effects to your new or current photos.
Features:
• Add fantastic cartoon effects to your phone’s gallery photos.
• With a single tap of your finger, save images or take an image instantly.
• The autofocus feature (click anywhere on the screen)
• Several eye-catching effects, including a cartoon, oil painting, thermal vision, drawing, and more.
Compatibility:- Android 4.4 or above
Rating: 4.2
Price:- Free
02Camart – Cartoon Photo
This one is extensively used photos to cartoon picture apps for Android users.
Cartoon Photo is the ideal program for instantly applying the most spectacular cartoon effects to your images!
With an intelligent cartoon camera, you can effortlessly turn your most fabulous selfies and recorded films into live paints.
Features:
• Use your phone’s camera to take photos, selfies, and movies, then apply real-time artistic effects.
• There are many fantastic artistic filters to pick from (cartoon, pencil, comics, sketch, oil painting, watercolor, and many more).
• Use autofocus, pinch to zoom, and more by tapping on the screen.
• Email or post photos to popular social networking sites to share with your friends.
Compatibility:- Android 4.4 or above
Price:- Free
Rating: 3.9
03Cartoon Pictures – Cartoon Photo Editor
Cartoon Pictures - Cartoon Photo Editor makes as the best Android photos to cartoon apps for adding cartoon effects, oil paintings, and canvas artwork.
It has a wide range of cartoon animation effects, pencil sketch effects, smooth art filters, and painting effects that will transform your regular photos into beautiful works of art.
Features:
• A cartoon picture conversion program with a beautiful look.
• Hundreds of incredible cartoon photo effects
• A powerful selfie camera that allows you to edit photos in real-time.
• Post your sketch styles and artwork to social media sites like Facebook, Instagram, Pinterest, and Twitter.
Compatibility:- Android 5.0 or later
Price:- Free
Rating: 4.4
04Cartoon Photo – Pictures Cartoon Drawing
It combines all distinctive cartoon effects and art filters into one software, allowing you to instantly transform your photographs into grey cartoons, smooth pencil sketches and drawings, oil paintings, and pixel art.
Although the Google Play market is overflowing with cartoon-type editing apps, this is the best cartoon-making app for Android. You can now be your cartoonist.
Features:
• Create cartoon drawings from any new or old photos.
• Selfie camera with powerful cartoon snaps, creative photo combining, and cartoon filters
• A plethora of contemporary artistic filters to pick from (cartoon yourself, a cartoon photo maker, photo to caricature, and many more)
Compatibility:- Android 4.1 or above
Price:- Free
Rating: 2.6
05Cartoon Photo Editor – Pencil Sketch Art
If you need a way to turn your favorite photos into cartoon drawings, this cartoon camera is the way to go.
This most excellent comedy picture software attempts to provide a plethora of fantastic cartoon graphics filters to help your photos stand out.
Features:
• Create cartoons and oil paintings from any photo
• Use the ‘Cartoon yourself’ function to turn your images into masterpieces.
• Photo editor for cartoons/photo creator for cartoons
Compatibility:- Requires 4.1 or more Android
Price:- Free
Rating: 3.1
06Art Camera – Cartoon, Pencil Sketch Art Effect Photo
Do you enjoy sketching? This greatest photo to cartoon app from Model X is a must-have for everyone who wants to add pencil sketches and fantastic artistic and cartoon effects to existing photos.
It also serves as a useful photo organizer, allowing you to organize and manage your photos using date and time tags. With the help of our top-rated convert photo to cartoon app, you can now be the center of attention.
Features:
• A vast range of picture effects and filters inspired by oil paintings and cartoons
• A plethora of photo editing and adjusting options, such as contrast, brightness, and saturation
• UHD camera, HD selfie, auto-focus, HDR, and silent capture mode, among other features.
Compatibility:- Android 4.2+
Price:- Free
Rating: 4.5
07Tooncam – Cartoon, Pencil Sketch Pic
Do you want to make cartoons out of your most extraordinary selfies? If that’s the case, the finest cartoon picture editor app for Android is all you’ll need. What could be better than Tooncam?
With this picture-to cartoon app at your disposal, you can quickly turn your images into spectacular cartoons.
Features:
• With a few clicks of your finger, make fantastic web-based comics.
• Transforms your regular photos into adorable cartoon selfies
• More than 15 different cartoon effects
Compatibility:- Android 4.4+ and iOS
Price:- Free
Rating: 4.0
08Prisma Art Effect Photo Editor
Prisma was the most popular cartoon animation app on the market only a few years ago. Even though this app isn’t as famous as it once was, it still has some absorbing art filters that can make your shot look like some of history’s greatest artists created it.
The best part is that new filters come every day, so you’ll never run out of cartoon photo ideas. Furthermore, the software has various special photo effects and the ability to save your works in both SD and HD resolution.
Features:
● Every day, you get new cartoon effects.
● You will get more than 300 filters.
● Cartooning is the only option.
● Easily cartoon the photo.
Price: Free, though in-app purchases
Compatibility: Android
Ratings: 4.6
09Cartoon Yourself
Even if you can’t record videos or shoot images with the Cartoon Yourself app for Android, it’s still a good option to quickly turn a photo into a cartoon. Select a picture with the ‘Add a Photo’ button, then hit the ‘Apply Effect’ button to begin browsing the app’s extensive library of stickers and cartoon effects.
After the photo has been cartoonized, you can save it to your phone or share it on social media with your friends. The Cartoon Yourself app also provides basic photo editing features, such as cropping, mirroring, and rotating images.
Features:
● For novices, a primary and easy-to-use photo-to-cartoon app
● It has some excellent and lovely cartoon effects.
● Limited Free filters and effects
Price: Free, but with in-app purchases.
Compatibility: Android
Rating: 3.1
10Painnt – Art & Cartoon Filters
Painnt is easily one of the greatest cartoons yourself apps on the market, with over a thousand filters and effects. Because this picture editor allows you to change the transparency, saturation, and brightness of all your images, you can manipulate them in almost any way you desire. Painnt is also a creative community where you can find and meet others who share your art interests.
However, the accessible version of the program limits the size of the photos you may export, and you must subscribe to one of the subscription plans to process pictures in HD. The cost of a yearly subscription is only $9.99.
Features:
• Version is updated regularly to include more filters.
• Change the parameters of the cartoon filters to make them your own.
• Advanced AI technology.
Price: Free(in-app purchases)
Compatibility: Android
Rating: 3.8
Part 2 Top 5 iOS Apps to Turn Photo into Cartoon
Here, we have some of the best iOS applications that will assist you in turning photos into cartoons quickly.
01Cartoon Yourself Video Effects
Even if you aren’t a fan of the best cartoon video maker app download for iOS, this incredible photo-to cartoon app will convert you into one.
It features a user-friendly screen and an extensive range of amusing picture effects to help you build a cartoon avatar of yourself.
Features:
• Convert any snapshot of a person into an animated animation.
• Use a variety of authentic facial expressions (squint eyes, flirty wink, sad face, nice smile, etc.)
• Use dozens of humorous photo effects to turn your face into an alien, hideous, bulb-headed person, and more.
02Cartoon Camera Free
Apart from the Cartoon and Pencil Sketch effects, this little program doesn’t offer anything else. You may either use photos from your phone or take new ones and turn them into fantastic cartoons. The images you modify with the Cartoon Camera Free app can be saved to your camera roll or shared on social media.
However, because the process of turning your photos into cartoons is fully automated, you won’t have much control over how the final version of your cartoon photo will appear.
Features
● You can quickly draw a caricature of yourself on your phone.
● This fantastic photo-to cartoon tool will provide you with a realistic cartoon effect in real-time.
● It is updated regularly. Thus, you won’t use the most recent effects.
03Photo To Cartoon Yourself Edit
Photo To Cartoon Yourself is a popular cartoon photo programs, allowing you to create avatars or a cartoon of yourself quickly.
Capture a photo from your phone’s gallery or take a fresh one with the camera and turn it into a fantastic cartoon straight away for free. It is the most powerful program on this list for converting a photo into a cartoon AVATAR with the least amount of work and time. Furthermore, it includes many fascinating elements that will give your shot a realistic cartoon ethos.
Features:
● Choose images from your photo library.
● Turn your images into cartoons and send them via email.
● No picture shrinking or stretching; create cartoon images in high definition in seconds.
● Free to access
04Clip2Comic & Caricature Maker
Clip2Comic & Caricature Maker comes with a friendly interface that works wonders while converting a photo into caricatures, sketches, or cartoons.
Clip2Comic also allows you to make your cartoon videos in a matter of seconds using its real-time preview camera.
Features:
• Choose an image or video clip from your photo album to use.
• A wide range of free cartoon, drawing, caricature, and poster effects are available.
• Customization tools allow you to tweak your image’s outlines and blacks.
• Use several color filters to put your cartoon faces in the appropriate mood.
05MomentCam Cartoons & Stickers
MomentCam allows you to create your bitmoji based on your preferences. MomentCam is one of the most popular photo-to-cartoon apps on the market right now, with over 300 million downloads.
It allows you to create personalized emoticons and funny cartoons to convey your emotions in the most amusing way imaginable. Thousands of realistic effects and filters are available to give your shot an authentic cartoon feel. You can make a better version of yourself with MomentCam.
MomentCam may be at the bottom of the list of the best cartoon camera applications for iPhone and iPad, but it is well worth a look.
Features:
● Turn yourself into witty cartoons and glistening emoticons.
● Add text bubbles to some jokes and phrases to make your cartoons more entertaining
● Alter your caricatures’ facial expressions.
● You can get great prizes by sharing your amusing creations with millions of people all around the world.
****Wondershare Filmora Video Editor - Best Application**
With the rise in popularity of cartoonizing photo apps for Android, we’d like to introduce you to a fantastic app that will assist you in creating cartoon animation. Following its incredible characteristics in no time. Wondershare Filmora Animation software is a new Wondershare product that includes several downloadable animated characters and elements.
Most significantly, this software offers a user-friendly interface, an intelligent editing workflow, is lightweight, has a quick video rendering speed, and much more.
● Ending Thoughts →
● Now that you’ve found the best cartoon video maker app for Android, choose the one that’s right for you. Whether on Android or iOS devices, these animation movie creators will turn the world upside down in just a few clicks, so give it a try today!
● You can also try out a fantastic app, Filmora. It is a perfect cartoon-making app for Android and iOS. Change your photo to cartoon in a few clicks.
FREE Top 10 Best Convert Video Between GIF and Software [High Quality, 2024]
FREE Top 10 Best Convert Video Between GIF and Software [High Quality, 2024]
Shanoon Cox
Mar 27, 2024• Proven solutions


GIF images are gaining popularity among users as they are able to convey a great amount of information. So when you are not able to accommodate heavy videos in your projects but want to deliver more accurate visual information, then GIF are useful solutions.
Converting a video clip to GIF is the easiest way to make GIFs. If you still feel the GIF file is too large, cutting GIF is also a great option.
After 28 hours of research and comparison, we rounded up the top 10 software to convert video between GIFs to help you make GIFs with ease. They are gif video makers that can be used online, on Windows and Mac.
10 Best Software for Converting Video to GIF
1. Wondershare Filmora
Using an interactive platform of Wondershare Filmora, you can easily develop a classic GIF image as an output. All popular video file formats like MKV, WMV, AVI and MP4, etc. are OK. The best part is that Filmora never poses any restriction about file size during conversion hence users can process HD videos to get GIF images.
It’s a very impressive editing tool with a wide set of attractive features that can make your image highly customized. Feel free to choose advanced elements, animations, text, overlays, etc for the development of original GIFs.
Besides, Filmora allows you to extract still images from video with the same resolution. You can then combine and edit the extracted PNG images to make an interesting GIF.

Click Snapshot icon to extract image from video in Filmora
Moreover, if you want to make a GIF online, the Filmora meme maker is your ultimate solution. It helps you make images, GIFs and video memes directly without watermark. You can change text size, color, and position to create a caption when you are editing. You can also put text inside or outside in GIF.
It is totally FREE to use and no signup. Try it now!
Check this video to learn how to convert video to GIF step by step.
Download Mac Version ](https://tools.techidaily.com/wondershare/filmora/download/ )
2. Any GIF Animator
The simple and powerful design of Any GIF converter app can immediately turn your favorite videos into interactive GIFs. It supports a wide range of file formats like WEBM, ASF, MPG, FLV, and AVI, etc. The best part is that this tool also allows users to get their media files imported from optical storage devices like DVD etc or even webcam recorded screens can also be processed. It is possible to specify frame rate start and end time markers with ease and for customization, users can access advanced text overlays, loops, and resolution effects.
Features:
- Intuitive easy to use interface lets you access it without even checking any user manual. It is simple and completely hassle-free.
- You may perfect your GIF animation with the help of an animation wizard. It is an easy and quick way of customizing and adding effects to your GIF animation.
- You get a built-in image editor that includes a comprehensive set of tools for editing.
- There are several graphics formats that you may use to convert video to gif on Any GIF Animator. It includes PNG, JPEG, TIFF, BMP, GIF, ICO, PSD, PCX, RLE, PIC, DIB, AVI, PCD, WMF, and several others.
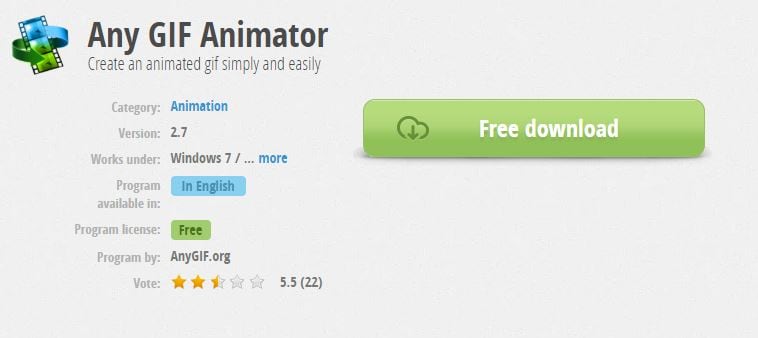
3. Free Video to GIF Converter
This lightweight and user-friendly application can easily fulfill your video to GIF conversion needs with its straightforward conversion process. Users simply need to upload their video file to the software timeline and then update settings for its start time, end time, resolution, frame rate, and size etc. Once all details are specified then simply hit the convert button and within a few seconds, your GIF will be with you. Users can also preview their files at the time of the conversion process so that desired changes can be updated on time.
Features:
- A very simple tool that can be easily used by anyone.
- It allows you to convert long video to gif.
- The interface has just steps, extract, and create a video to gifs.
- The file types supported are AVI, GIF, mp4, MPEG, and WAV.
- You can change the height and width of the individual frame.
- You can select the playback speed.
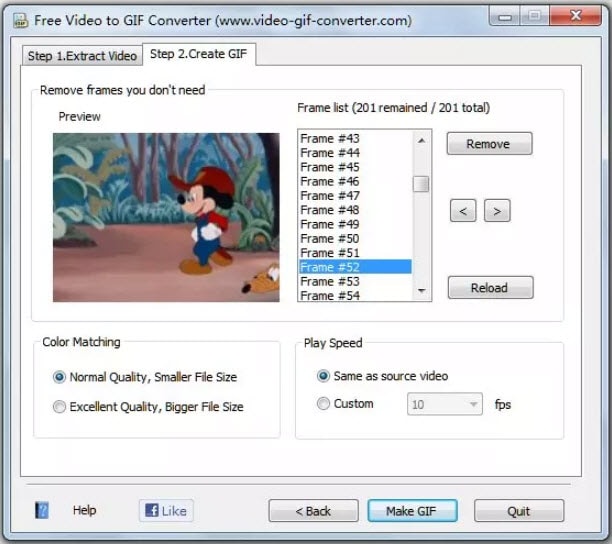
4. Cute Video to GIF Converter
This tool is designed to assist users with fast and efficient GIF conversion processes using various animation effects. It allows users to share collections of GIFS over other networks so that audience can avail the best content with ease update. Users can also extract moments from their favorite TV shows and then develop eye-catching GIFs with small file size and lesser loading times.
Features:
- It has an intuitive GUI consisting of a single-window that shows every segment of the app in one frame with making it fussy.
- Supports several video file types along with several audio file types as well. The video file types include MP4, AVI, MPEG, RMVB, WMV, VOB, SWF, and M2TS and the audio track formats are MP3, AC3, and WMA.
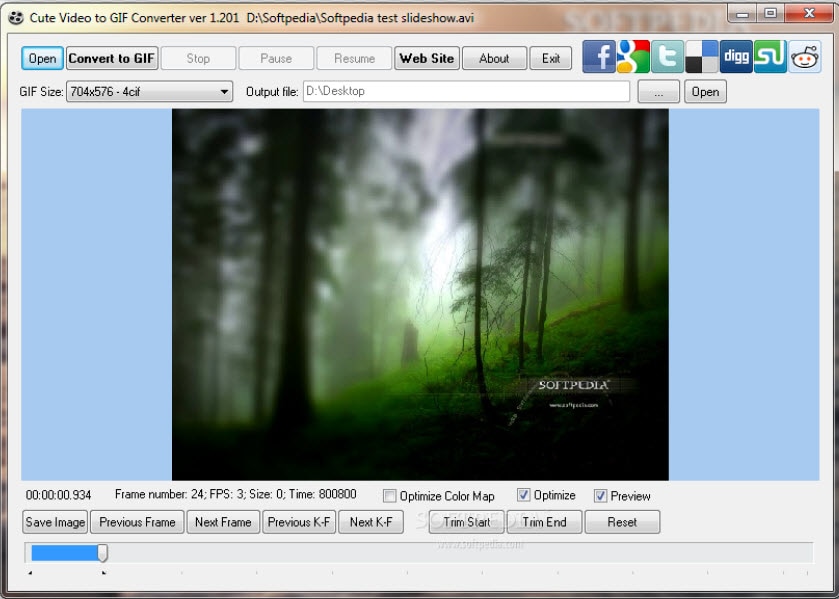
5. KickMyGraphics
Here is a lightweight yet powerful GIF converter program that can record, create or edit GIF images to produce high quality customized results. Users can easily update various animated clips to this platform with popular file formats like PNG, BMP, JPG, regular GIF and animated GIF etc. Its advanced editor allows easy customization with rotate, trim, stretch, loopback, scale and many more options. Users can easily adjust settings for the output file format, size and quality.
Features:
- It is a small, in-built freeware program to convert video to gif.
- You can import several video MPG, AVI, MP4, ASF, and other video types as well. You can import manifold animated Gif, Jpg, Bmp and Png files.
- Direct recording of animated GIF images.
- Allows various editing options like the loop, stretch, pan, reverse, and much more.

6. Movie to GIF
Converting video clips to GIF becomes very simple with Movie to GIF converter tool because its user-friendly interface and fast editing tools make everything possible with ease. It allows users to define color depth, frame rate, speed and size of videos manually and once all settings are done them GIFs can be created within seconds. This tool supports almost all popular media file formats for GIF processing like VOB, MOV, WMV, MP4, AVI etc.
Features:
- Very simple video to GIF converter.
- User-friendly interface.
- Play video clips in GIF files.
- Set more frames per second so the output GIF appears as the original video.
- The breadth and height of the GIF are adjustable.

7. Instagriffer
Using Instagriffer, users can collect memorable stills from the screen within seconds and then process them interactively to develop GIFs. No matter whether you want to grab moments from your favorite YouTube video, lovable Vine start or something interesting from Netflix, Instagriffer can assist you to import any of your desired moment for designing GIFs. This instant professional image editor tool possesses a wide range of loops, filters and text abilities. It is available free of cost and you need not worry about viruses, spyware or annoying ads on this platform.
Features:
- You can capture the best GIF-worthy moments instantly from your screen.
- Add text, filters, loops, and more.
- Convert video to gif completely free of charge.
- Easy addition of highly customizable text and custom logos
- With Instagriffer there will be no watermarks to your gif
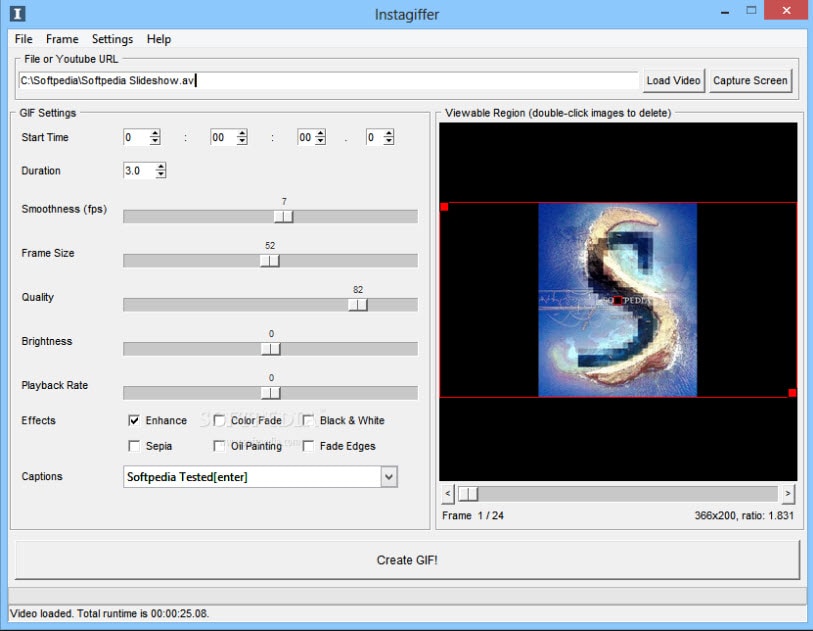
8. Ezgif
There are two useful options for GIF conversions on Ezgif, the first one is to upload an already existing video file to a software timeline for generating GIF as an output. The second option is to paste the video URL on a specified field in software and then process this video link. It can convert large-sized videos into GIFs within very less time. Never forget to use impressive editing tools of Ezgif to get outstanding and professional-looking GIF outputs.
Features:
- Convert transparent video (with alpha channel) to transparent GIF.
- Use resize the crop tool to crop out only part of the video or change your gif’s dimension.
- Select frame rates as per your requirement.
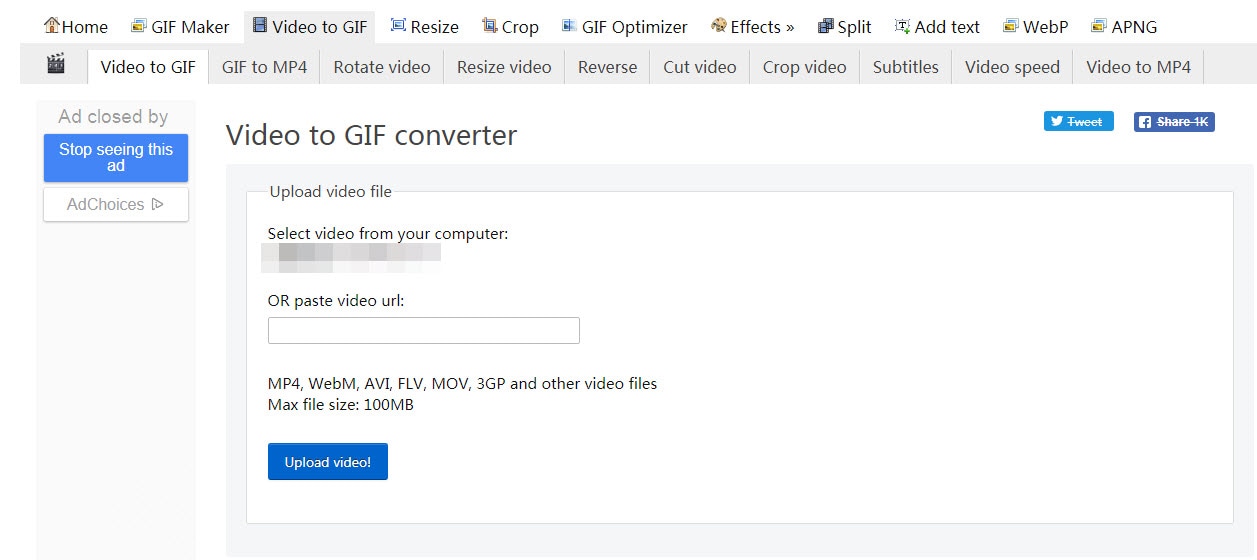
9. Giphy
Giphy is well known as the biggest GIF supportive platform that is being accessed by millions of users every day. This tool is designed to assists in easy conversions and fast sharing needs for developed GIF images. Users need to copy their desired video URL into a specified field on the software window and then hit the create button. It also follows drag and drop tools for getting videos internally from folders inside the computer. Users can also add sound clips for their GIFs and make it more eye-catching with additional tags and descriptions.
Features:
- Extremely easy and fast gif creation
- Create animated gifs from YouTube videos and images
- Convert video to GIF completely free

10. Zazmar
If you need a tool that can process heavy media files faster to develop light-weighted GIFS then Zamar is the best option for you. It supports more than 1200 media file formats so that users can process any of their desired video or image with ease and their interactive platform makes every editing task much easier with user-friendly editing tools.
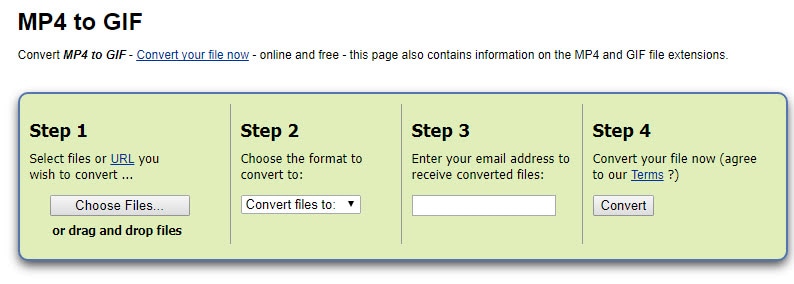
Features:
- Fast and easy video to gif conversion.
- Easy drag and drop option for uploading multiple files.
- A high-speed download of the converted files.
Conclusion
Here, I am sure you’ve known which one is the best video to GIF converter software for your needs.
Comparison Table of the Best Video to GIF Converters
Note: You can click the product name to get into the detailed info of each video to GIF converters listed above.
| Program Name | Supported format | System available |
|---|---|---|
| Wondershare Filmora | AVI, DV, DIF, NUT, NSV, FLV, MKV, MP4, M4V, PSP, 3GP, MOV, MPG, MPEG, VOB, DAT, EVO, TS, TP, TRP, M2TS, WMV, ASF, DVR-MS | Win & Mac |
| Any GIF Animator | MP4, MOV, AVI, and more | Win |
| Free Video to GIF Converter | MKV, MP4, MOV, WMV, AVI, FLV, and MOB | Win |
| Cute Video to GIF Converter | AVI, MPG, FLV, MP4, 3GP, VOB, WMV | win |
| KickMyGraphics | AVI, MPG, WMV, MP4, ASF | win |
| Movie to GIF | AVI, MPG, WMV, MP4, MKV, MOV, VOB etc. | win |
| Instagriffer | mkv, flv, avi, mp4 | Win & Mac |
| Ezgif | MP4/AVI/WEBM/FLV/MOV and other video files | Online |
| Giphy | MP4/AVI/WEBM/FLV/MOV and other video files | Online |
| Zamzar | MP4 | Online |
However, Filmora is one of the best powerful software that can help you create GIFs with straightforward UI interface, and easy-to-use GIF tools. If you want to know the specific steps, please check the video below.
Download Mac Version ](https://tools.techidaily.com/wondershare/filmora/download/ )
Frequently Asked Questions About Converting Video to GIFs
1. How To Crop A GIF To A Circle?
Whether or not you can crop a GIF into a circle, depends on the cropping tools the app you are using offers. Some GIF makers allow you to choose the shape to which you are going to crop a GIF, while others don’t provide this option.
Using Filmora’s mask features is probably one of the easiest ways to crop a GIF to a circle, as you simply have to apply the mask to the footage and specify which parts of the GIF’s frames are going to be removed. What’s more, you can choose the shape of the mask in Filmora which enables you to crop GIFs into a variety of different shapes.
2. How To Turn A Video Into A GIF?
All you need to do in order to turn a video into a GIF is to change the file’s format. Most videos are saved as MP4, AVI, or MOV files, and nearly all video editors and GIF makers allow you to convert a video file into a GIF.
So, you simply have to choose GIF as the format in which you want to export a video file you imported into a video editing software or an online GIF maker and wait for the rendering process to be completed.
Shanoon Cox
Shanoon Cox is a writer and a lover of all things video.
Follow @Shanoon Cox
Shanoon Cox
Mar 27, 2024• Proven solutions
GIF images are gaining popularity among users as they are able to convey a great amount of information. So when you are not able to accommodate heavy videos in your projects but want to deliver more accurate visual information, then GIF are useful solutions.
Converting a video clip to GIF is the easiest way to make GIFs. If you still feel the GIF file is too large, cutting GIF is also a great option.
After 28 hours of research and comparison, we rounded up the top 10 software to convert video between GIFs to help you make GIFs with ease. They are gif video makers that can be used online, on Windows and Mac.
10 Best Software for Converting Video to GIF
1. Wondershare Filmora
Using an interactive platform of Wondershare Filmora, you can easily develop a classic GIF image as an output. All popular video file formats like MKV, WMV, AVI and MP4, etc. are OK. The best part is that Filmora never poses any restriction about file size during conversion hence users can process HD videos to get GIF images.
It’s a very impressive editing tool with a wide set of attractive features that can make your image highly customized. Feel free to choose advanced elements, animations, text, overlays, etc for the development of original GIFs.
Besides, Filmora allows you to extract still images from video with the same resolution. You can then combine and edit the extracted PNG images to make an interesting GIF.
Click Snapshot icon to extract image from video in Filmora
Moreover, if you want to make a GIF online, the Filmora meme maker is your ultimate solution. It helps you make images, GIFs and video memes directly without watermark. You can change text size, color, and position to create a caption when you are editing. You can also put text inside or outside in GIF.
It is totally FREE to use and no signup. Try it now!
Check this video to learn how to convert video to GIF step by step.
Download Mac Version ](https://tools.techidaily.com/wondershare/filmora/download/ )
2. Any GIF Animator
The simple and powerful design of Any GIF converter app can immediately turn your favorite videos into interactive GIFs. It supports a wide range of file formats like WEBM, ASF, MPG, FLV, and AVI, etc. The best part is that this tool also allows users to get their media files imported from optical storage devices like DVD etc or even webcam recorded screens can also be processed. It is possible to specify frame rate start and end time markers with ease and for customization, users can access advanced text overlays, loops, and resolution effects.
Features:
- Intuitive easy to use interface lets you access it without even checking any user manual. It is simple and completely hassle-free.
- You may perfect your GIF animation with the help of an animation wizard. It is an easy and quick way of customizing and adding effects to your GIF animation.
- You get a built-in image editor that includes a comprehensive set of tools for editing.
- There are several graphics formats that you may use to convert video to gif on Any GIF Animator. It includes PNG, JPEG, TIFF, BMP, GIF, ICO, PSD, PCX, RLE, PIC, DIB, AVI, PCD, WMF, and several others.
3. Free Video to GIF Converter
This lightweight and user-friendly application can easily fulfill your video to GIF conversion needs with its straightforward conversion process. Users simply need to upload their video file to the software timeline and then update settings for its start time, end time, resolution, frame rate, and size etc. Once all details are specified then simply hit the convert button and within a few seconds, your GIF will be with you. Users can also preview their files at the time of the conversion process so that desired changes can be updated on time.
Features:
- A very simple tool that can be easily used by anyone.
- It allows you to convert long video to gif.
- The interface has just steps, extract, and create a video to gifs.
- The file types supported are AVI, GIF, mp4, MPEG, and WAV.
- You can change the height and width of the individual frame.
- You can select the playback speed.
4. Cute Video to GIF Converter
This tool is designed to assist users with fast and efficient GIF conversion processes using various animation effects. It allows users to share collections of GIFS over other networks so that audience can avail the best content with ease update. Users can also extract moments from their favorite TV shows and then develop eye-catching GIFs with small file size and lesser loading times.
Features:
- It has an intuitive GUI consisting of a single-window that shows every segment of the app in one frame with making it fussy.
- Supports several video file types along with several audio file types as well. The video file types include MP4, AVI, MPEG, RMVB, WMV, VOB, SWF, and M2TS and the audio track formats are MP3, AC3, and WMA.
5. KickMyGraphics
Here is a lightweight yet powerful GIF converter program that can record, create or edit GIF images to produce high quality customized results. Users can easily update various animated clips to this platform with popular file formats like PNG, BMP, JPG, regular GIF and animated GIF etc. Its advanced editor allows easy customization with rotate, trim, stretch, loopback, scale and many more options. Users can easily adjust settings for the output file format, size and quality.
Features:
- It is a small, in-built freeware program to convert video to gif.
- You can import several video MPG, AVI, MP4, ASF, and other video types as well. You can import manifold animated Gif, Jpg, Bmp and Png files.
- Direct recording of animated GIF images.
- Allows various editing options like the loop, stretch, pan, reverse, and much more.
6. Movie to GIF
Converting video clips to GIF becomes very simple with Movie to GIF converter tool because its user-friendly interface and fast editing tools make everything possible with ease. It allows users to define color depth, frame rate, speed and size of videos manually and once all settings are done them GIFs can be created within seconds. This tool supports almost all popular media file formats for GIF processing like VOB, MOV, WMV, MP4, AVI etc.
Features:
- Very simple video to GIF converter.
- User-friendly interface.
- Play video clips in GIF files.
- Set more frames per second so the output GIF appears as the original video.
- The breadth and height of the GIF are adjustable.
7. Instagriffer
Using Instagriffer, users can collect memorable stills from the screen within seconds and then process them interactively to develop GIFs. No matter whether you want to grab moments from your favorite YouTube video, lovable Vine start or something interesting from Netflix, Instagriffer can assist you to import any of your desired moment for designing GIFs. This instant professional image editor tool possesses a wide range of loops, filters and text abilities. It is available free of cost and you need not worry about viruses, spyware or annoying ads on this platform.
Features:
- You can capture the best GIF-worthy moments instantly from your screen.
- Add text, filters, loops, and more.
- Convert video to gif completely free of charge.
- Easy addition of highly customizable text and custom logos
- With Instagriffer there will be no watermarks to your gif
8. Ezgif
There are two useful options for GIF conversions on Ezgif, the first one is to upload an already existing video file to a software timeline for generating GIF as an output. The second option is to paste the video URL on a specified field in software and then process this video link. It can convert large-sized videos into GIFs within very less time. Never forget to use impressive editing tools of Ezgif to get outstanding and professional-looking GIF outputs.
Features:
- Convert transparent video (with alpha channel) to transparent GIF.
- Use resize the crop tool to crop out only part of the video or change your gif’s dimension.
- Select frame rates as per your requirement.
9. Giphy
Giphy is well known as the biggest GIF supportive platform that is being accessed by millions of users every day. This tool is designed to assists in easy conversions and fast sharing needs for developed GIF images. Users need to copy their desired video URL into a specified field on the software window and then hit the create button. It also follows drag and drop tools for getting videos internally from folders inside the computer. Users can also add sound clips for their GIFs and make it more eye-catching with additional tags and descriptions.
Features:
- Extremely easy and fast gif creation
- Create animated gifs from YouTube videos and images
- Convert video to GIF completely free
10. Zazmar
If you need a tool that can process heavy media files faster to develop light-weighted GIFS then Zamar is the best option for you. It supports more than 1200 media file formats so that users can process any of their desired video or image with ease and their interactive platform makes every editing task much easier with user-friendly editing tools.
Features:
- Fast and easy video to gif conversion.
- Easy drag and drop option for uploading multiple files.
- A high-speed download of the converted files.
Conclusion
Here, I am sure you’ve known which one is the best video to GIF converter software for your needs.
Comparison Table of the Best Video to GIF Converters
Note: You can click the product name to get into the detailed info of each video to GIF converters listed above.
| Program Name | Supported format | System available |
|---|---|---|
| Wondershare Filmora | AVI, DV, DIF, NUT, NSV, FLV, MKV, MP4, M4V, PSP, 3GP, MOV, MPG, MPEG, VOB, DAT, EVO, TS, TP, TRP, M2TS, WMV, ASF, DVR-MS | Win & Mac |
| Any GIF Animator | MP4, MOV, AVI, and more | Win |
| Free Video to GIF Converter | MKV, MP4, MOV, WMV, AVI, FLV, and MOB | Win |
| Cute Video to GIF Converter | AVI, MPG, FLV, MP4, 3GP, VOB, WMV | win |
| KickMyGraphics | AVI, MPG, WMV, MP4, ASF | win |
| Movie to GIF | AVI, MPG, WMV, MP4, MKV, MOV, VOB etc. | win |
| Instagriffer | mkv, flv, avi, mp4 | Win & Mac |
| Ezgif | MP4/AVI/WEBM/FLV/MOV and other video files | Online |
| Giphy | MP4/AVI/WEBM/FLV/MOV and other video files | Online |
| Zamzar | MP4 | Online |
However, Filmora is one of the best powerful software that can help you create GIFs with straightforward UI interface, and easy-to-use GIF tools. If you want to know the specific steps, please check the video below.
Download Mac Version ](https://tools.techidaily.com/wondershare/filmora/download/ )
Frequently Asked Questions About Converting Video to GIFs
1. How To Crop A GIF To A Circle?
Whether or not you can crop a GIF into a circle, depends on the cropping tools the app you are using offers. Some GIF makers allow you to choose the shape to which you are going to crop a GIF, while others don’t provide this option.
Using Filmora’s mask features is probably one of the easiest ways to crop a GIF to a circle, as you simply have to apply the mask to the footage and specify which parts of the GIF’s frames are going to be removed. What’s more, you can choose the shape of the mask in Filmora which enables you to crop GIFs into a variety of different shapes.
2. How To Turn A Video Into A GIF?
All you need to do in order to turn a video into a GIF is to change the file’s format. Most videos are saved as MP4, AVI, or MOV files, and nearly all video editors and GIF makers allow you to convert a video file into a GIF.
So, you simply have to choose GIF as the format in which you want to export a video file you imported into a video editing software or an online GIF maker and wait for the rendering process to be completed.
Shanoon Cox
Shanoon Cox is a writer and a lover of all things video.
Follow @Shanoon Cox
Learn Disney Cartoon Drawing to See Disney Magic Moments
Learn Disney Cartoon Drawing to See More Disney Magic Moments
An easy yet powerful editor
Numerous effects to choose from
Detailed tutorials provided by the official channel
How to Draw a Disney Caricature

Disney-Inspired Ipad Drawing Class for Beginners
In this article
01 [How to Draw a Disney Caricature](#Part 1)
02 [Disney-Inspired Ipad Drawing Class for Beginners](#Part 2)
Part 1 How to Draw a Disney Caricature
Below is the step-by-step guide to making a Disney cartoon drawing with colors from the comfort of your home:
01How to Draw Mickey

Unarguably, Mickey Mouse is one of the most famous anime characters globally. This character was created in 1928 and is a famous Disney cartoon drawing by animators. Here are straightforward steps to help you draw a Mickey Mouse:
Step 1: Sketch the general but carefully observed features of Mickey Mouse, including the position of ears, body shape (reverse C shape), body proportions including eyes, limbs, and arms, length of arms, button on his pants, and angle on the hands.
Step 2: Take your pencil and paper, and using gentle and weak strokes, make a simple sketch of the head, neck, belly, and limbs.

Step 3: Draw contours of the mouth, ears, and nose.

Step 4: Specify the face features like a smiling opened mouth, tip of the nose, and eyes.

Step 5: Draw the hands carefully, observing the length of both arms and their proportion to the size of the character’s head.

Step 6: Sketch the outline contours of the shoes, the legs, and the pants.

Step 7: Sketch the final outline contour of the body, then erase excess lines where necessary. Add the two buttons on Mickey mouse pants.

Step 8: Draw his nose’s tail, tongue, and ellipse.

Step 9: First, use a 2B or 4B or any soft black color pencil to color the black parts.

Step 10: Depending on your preference, you can color with water, acrylic paints, or pastels.

02How to Draw Captain America
Follow these simple steps to make a Disney cartoon drawing of Captain America:
Step 1: Draw the head and chest
Draw the outlines of his masked face using smooth lines. Draw a curved line across his face to divide his face from his mask. Draw a large letter A and add tiny wings beside it on his forehead. Draw his mouth, eyes, and nose. Use curved lines to indicate his shoulder and chest, then draw a star on his chest.

Step 2: Draw his arm and waist
Draw a curved line on the shoulder to represent the bicep, then draw his gloved arm curled to form a fist. Draw curved lines beneath the chest to represent his muscular weight, then draw the pouches on his belt and use more curved lines to draw his waist.

Step 3: Draw his legs
Here, we shall portray Captain America in action. Use curved lines to show his extended right leg with boots. The left leg should appear more petite.

Step 4: Draw his shield
Against his right arm, carefully draw a flattened circular shape. You can achieve this by drawing concentric circles with a large star in the middle. Draw his arm poking out from behind his shield.

Step 5: Include the final details
Add some vertical lines across his waist and some details on his boots.

Step 6: Colour Captain America
Using colors of the American flag, color your drawing with red, white, and blue colors.

03How to Draw Stitch
Stitch is a bulletproof and fireproof alien from the Lilo and Stitch animations. Here’s how you can draw Stitch:
Step 1: Draw a circle that would form Stitch’s head

Step 2: Using a long curved line, draw an irregular peanut shape beneath the head to represent its body.

Step 3: To form its light underbelly, enclose a small shape parallel to the outline of Stitch’s body using a long curved line. On the chest region, draw a series of small “V” shapes to indicate the presence of fur.

Step 4: Draw Stitch’s arm using curved lines for the upper arm and another pair for the lower arm. Draw his bent hands and fingers using short lines. At the tip of its fingers, draw small pointed triangles to represent its claws.

Step 5: Erase the guidelines from Stitch’s arm

Step 6: Draw Stitch’s outstretched arm using a pair of curved lines and small “C” shaped lines to represent the fingers. Use short lines to connect the fingers. Draw small “V” shapes at the tip of the fingers for the triangular claws.

Step 7: Use a pair of curved lines to sketch each leg, then enclose the toes using C-shaped lines

Step 8: Sketch the ears using long curved lines to indicate the base and folds. Sketch the fur on top of Stitch’s head using a series of curved lines.

Step 9: Draw a big circle for the nose and use curved lines to indicate the nostrils. For the eyes, draw irregular rounded shapes, one within the other. Sketch too long curved lines to show the mouth and small blonde triangles for the teeth. Above the eyes and nose, draw curved lines.

Step 10: Use different shades of blue to colour Stitch.

Part 2 Disney-Inspired Ipad Drawing Class for Beginner
Here is a list of classes for beginners interested in drawing Disney characters.
01Dive into the world of Animation with a Disney-Inspired Ipad Drawing Course

This Disney-inspired lesson focuses on real-life scenarios that are beautiful and adorable. Create your everyday settings by sketching backgrounds and outfitting figures.
It will assist you in developing a straightforward approach to drawing cartoon characters through experimentation and time. Follow along and sketch characters, then make your new character.
02Drawing Faces: A Beginner‘s Guide

Ira Marcks, a graphic novelist, will teach you everything you need to know about drawing faces. Are you completely new when it comes to drawing? No worries; follow along with Ira’s bite-sized lectures, and you’ll be ready to delve into a class project by the end of the course.
Do you prefer to set your speed and work at it? If yes, then extend your learning beyond the classroom, download Ira’s Drawing Faces Book.
03Disney Inspired Drawings: Faces and Expressions

Learners will look at sketching a cartoon image of themselves or people they know while exploring the specific traits of Disney-style characters in this one-time live drawing lesson.
Learners will collaborate with the teacher while working on their art projects. This is a technique class, so the focus will be on the process and working towards a finished goal. Nevertheless, a piece may get completed outside of class.
This program is for students who have a basic understanding of drawing and proportion, are open to artistic growth, and are comfortable appearing on camera and sharing their work in a small group setting. All to help each other, and the classroom environment will support all students.
04Free Art Lessons By The Parks’ Imagineers
This lesson will teach how to create your theme park, design virtual landscapes, and even sketch unique costumes!
You’ll also learn how to draw characters from Frozen 2 like Anna and Elsa and classics like Mickey Mouse, Daisy Duck, Pluto, and others.
Your class experience can be enjoyable when using an easy-to-use tool like Wondershare Filmora.
Wondershare Filmora Video Editor is a robust and easy-to-use video editor for users of all skill levels, from beginner to advanced. Its advanced tools, adjustable keyframing, smoothing effects, and motion blur will considerably assist you in creating a high-quality animation video. Furthermore, the auto color correction and audio mixing will elevate your 2D animation film to new heights. Filmora is the best solution if you want more productivity, control, and customization options for your Disney cartoon drawings and animation.
For Win 7 or later (64-bit)
For macOS 10.12 or later
● Ending Thoughts →
● How to make a Disney cartoon drawing
● A step-by-step guide to drawing your favorite Disney cartoon drawing with colors
● How to use Filmora to create animations
● Different Disney-inspired beginner classes for iPad users.
How to Draw a Disney Caricature
Disney-Inspired Ipad Drawing Class for Beginners
In this article
01 [How to Draw a Disney Caricature](#Part 1)
02 [Disney-Inspired Ipad Drawing Class for Beginners](#Part 2)
Part 1 How to Draw a Disney Caricature
Below is the step-by-step guide to making a Disney cartoon drawing with colors from the comfort of your home:
01How to Draw Mickey
Unarguably, Mickey Mouse is one of the most famous anime characters globally. This character was created in 1928 and is a famous Disney cartoon drawing by animators. Here are straightforward steps to help you draw a Mickey Mouse:
Step 1: Sketch the general but carefully observed features of Mickey Mouse, including the position of ears, body shape (reverse C shape), body proportions including eyes, limbs, and arms, length of arms, button on his pants, and angle on the hands.
Step 2: Take your pencil and paper, and using gentle and weak strokes, make a simple sketch of the head, neck, belly, and limbs.
Step 3: Draw contours of the mouth, ears, and nose.
Step 4: Specify the face features like a smiling opened mouth, tip of the nose, and eyes.
Step 5: Draw the hands carefully, observing the length of both arms and their proportion to the size of the character’s head.
Step 6: Sketch the outline contours of the shoes, the legs, and the pants.
Step 7: Sketch the final outline contour of the body, then erase excess lines where necessary. Add the two buttons on Mickey mouse pants.
Step 8: Draw his nose’s tail, tongue, and ellipse.
Step 9: First, use a 2B or 4B or any soft black color pencil to color the black parts.
Step 10: Depending on your preference, you can color with water, acrylic paints, or pastels.
02How to Draw Captain America
Follow these simple steps to make a Disney cartoon drawing of Captain America:
Step 1: Draw the head and chest
Draw the outlines of his masked face using smooth lines. Draw a curved line across his face to divide his face from his mask. Draw a large letter A and add tiny wings beside it on his forehead. Draw his mouth, eyes, and nose. Use curved lines to indicate his shoulder and chest, then draw a star on his chest.
Step 2: Draw his arm and waist
Draw a curved line on the shoulder to represent the bicep, then draw his gloved arm curled to form a fist. Draw curved lines beneath the chest to represent his muscular weight, then draw the pouches on his belt and use more curved lines to draw his waist.
Step 3: Draw his legs
Here, we shall portray Captain America in action. Use curved lines to show his extended right leg with boots. The left leg should appear more petite.
Step 4: Draw his shield
Against his right arm, carefully draw a flattened circular shape. You can achieve this by drawing concentric circles with a large star in the middle. Draw his arm poking out from behind his shield.
Step 5: Include the final details
Add some vertical lines across his waist and some details on his boots.
Step 6: Colour Captain America
Using colors of the American flag, color your drawing with red, white, and blue colors.
03How to Draw Stitch
Stitch is a bulletproof and fireproof alien from the Lilo and Stitch animations. Here’s how you can draw Stitch:
Step 1: Draw a circle that would form Stitch’s head
Step 2: Using a long curved line, draw an irregular peanut shape beneath the head to represent its body.
Step 3: To form its light underbelly, enclose a small shape parallel to the outline of Stitch’s body using a long curved line. On the chest region, draw a series of small “V” shapes to indicate the presence of fur.
Step 4: Draw Stitch’s arm using curved lines for the upper arm and another pair for the lower arm. Draw his bent hands and fingers using short lines. At the tip of its fingers, draw small pointed triangles to represent its claws.
Step 5: Erase the guidelines from Stitch’s arm
Step 6: Draw Stitch’s outstretched arm using a pair of curved lines and small “C” shaped lines to represent the fingers. Use short lines to connect the fingers. Draw small “V” shapes at the tip of the fingers for the triangular claws.
Step 7: Use a pair of curved lines to sketch each leg, then enclose the toes using C-shaped lines
Step 8: Sketch the ears using long curved lines to indicate the base and folds. Sketch the fur on top of Stitch’s head using a series of curved lines.
Step 9: Draw a big circle for the nose and use curved lines to indicate the nostrils. For the eyes, draw irregular rounded shapes, one within the other. Sketch too long curved lines to show the mouth and small blonde triangles for the teeth. Above the eyes and nose, draw curved lines.
Step 10: Use different shades of blue to colour Stitch.
Part 2 Disney-Inspired Ipad Drawing Class for Beginner
Here is a list of classes for beginners interested in drawing Disney characters.
01Dive into the world of Animation with a Disney-Inspired Ipad Drawing Course
This Disney-inspired lesson focuses on real-life scenarios that are beautiful and adorable. Create your everyday settings by sketching backgrounds and outfitting figures.
It will assist you in developing a straightforward approach to drawing cartoon characters through experimentation and time. Follow along and sketch characters, then make your new character.
02Drawing Faces: A Beginner‘s Guide
Ira Marcks, a graphic novelist, will teach you everything you need to know about drawing faces. Are you completely new when it comes to drawing? No worries; follow along with Ira’s bite-sized lectures, and you’ll be ready to delve into a class project by the end of the course.
Do you prefer to set your speed and work at it? If yes, then extend your learning beyond the classroom, download Ira’s Drawing Faces Book.
03Disney Inspired Drawings: Faces and Expressions
Learners will look at sketching a cartoon image of themselves or people they know while exploring the specific traits of Disney-style characters in this one-time live drawing lesson.
Learners will collaborate with the teacher while working on their art projects. This is a technique class, so the focus will be on the process and working towards a finished goal. Nevertheless, a piece may get completed outside of class.
This program is for students who have a basic understanding of drawing and proportion, are open to artistic growth, and are comfortable appearing on camera and sharing their work in a small group setting. All to help each other, and the classroom environment will support all students.
04Free Art Lessons By The Parks’ Imagineers
This lesson will teach how to create your theme park, design virtual landscapes, and even sketch unique costumes!
You’ll also learn how to draw characters from Frozen 2 like Anna and Elsa and classics like Mickey Mouse, Daisy Duck, Pluto, and others.
Your class experience can be enjoyable when using an easy-to-use tool like Wondershare Filmora.
Wondershare Filmora Video Editor is a robust and easy-to-use video editor for users of all skill levels, from beginner to advanced. Its advanced tools, adjustable keyframing, smoothing effects, and motion blur will considerably assist you in creating a high-quality animation video. Furthermore, the auto color correction and audio mixing will elevate your 2D animation film to new heights. Filmora is the best solution if you want more productivity, control, and customization options for your Disney cartoon drawings and animation.
For Win 7 or later (64-bit)
For macOS 10.12 or later
● Ending Thoughts →
● How to make a Disney cartoon drawing
● A step-by-step guide to drawing your favorite Disney cartoon drawing with colors
● How to use Filmora to create animations
● Different Disney-inspired beginner classes for iPad users.
Also read:
- New Thousands Already Found 15 Best Sites to Watch Cartoons Online Free And So Can You for 2024
- New In 2024, 5 Recommended Websites for Text GIF Maker
- Updated In 2024, The Only Guide Youll Ever Need to Learn About GIF Video Downloader
- Updated In 2024, 18 Best Tools and Services to Create Animated Videos for Business 2023
- Updated In 2024, Secret Source to Make a Stop Motion Puppet
- Updated In 2024, Amazing Techniques of Motion Graphics in Premiere Pro
- Updated 2024 Approved 15 Best Collage Makers to Create Aesthetic Collages
- 2024 Approved How to Create Benime Whiteboard Animation on Android
- New 2024 Approved The Only Guide Youll Need to Learn About GIF Video Downloader
- New In 2024, A Roster of 15 Top Disney Channel Cartoons
- New What Is the Meaning of Motion Graphics
- New 2024 Approved How to Draw Cartoons Step by Step with This Guide
- Before You Learn Facebook Slideshow 5 Things You Should Know How-TOS
- Updated 20 Free After Effects Logo Reveal Templates You Will Want to Know for 2024
- Updated Top 3 Ways to Create Gif Images with Great 3D Gif Maker
- New In 2024, 5 Websites with Animated Logos That Can Catch Your Eyes
- 2024 Approved 4 Smart Solutions to Create or Find Good Morning/Night GIFs
- Updated No. 1 Maker to Animate Your Logo Online Free for 2024
- In 2024, 10 Amazing Wallpaper Collage Ideas and Photos
- How to Become a Motion Graphic Designer for 2024
- Super Easy Ways To Deal with Motorola G54 5G Unresponsive Screen | Dr.fone
- In 2024, Change Location on Yik Yak For your Poco X5 Pro to Enjoy More Fun | Dr.fone
- How to Stop Life360 from Tracking You On Realme C33 2023? | Dr.fone
- In 2024, How Do I SIM Unlock My Apple iPhone 12 mini?
- In 2024, Complete Tutorial to Use VPNa to Fake GPS Location On Tecno Camon 30 Pro 5G | Dr.fone
- How to Transfer Data from Motorola Moto G34 5G to Any iOS Devices | Dr.fone
- Ultimate Guide on Xiaomi Redmi 13C FRP Bypass
- 3 Ways to Fake GPS Without Root On Xiaomi Redmi A2+ | Dr.fone
- In 2024, Fake the Location to Get Around the MLB Blackouts on Poco C65 | Dr.fone
- In 2024, How to Transfer Data from Itel A70 to Any iOS Devices | Dr.fone
- In 2024, 2 Ways to Transfer Text Messages from Xiaomi 13T to iPhone 15/14/13/12/11/X/8/ | Dr.fone
- How to Unlock SIM Card on Apple iPhone 6s Plus online without jailbreak
- In 2024, Does iTools virtual location not work On Apple iPhone 6s/iPad? | Dr.fone
- How to recover deleted photos on Realme C67 4G
- Factory Reset Apple iPhone 13 | Dr.fone
- Title: New How to Create a Whiteboard Video Step by Step for 2024
- Author: Elon
- Created at : 2024-05-19 03:05:19
- Updated at : 2024-05-20 03:05:19
- Link: https://animation-videos.techidaily.com/new-how-to-create-a-whiteboard-video-step-by-step-for-2024/
- License: This work is licensed under CC BY-NC-SA 4.0.
