

New How to Liven Up Your Animate Website on Scroll
How to Liven Up Your Animate Website on Scroll
How to Liven Up Your Animate Website on Scroll
An easy yet powerful editor
Numerous effects to choose from
Detailed tutorials provided by the official channel
“I am looking for the information about animate website on a scroll and how to use the parallax scrolling on the website. Can I get some reference websites and a video editor for editing the parallax videos?”

The animate website on scroll is a new and latest feature offered by the developers in the new websites. Here, in this article, we are going to discuss the animate scroll websites.
In this article
01 [The Benefits of Scroll Animation That Few People Know](#Part 1)
02 [Top 5 Scroll-to-Animate Effects in Online Animation](#Part 2)
03 [10 Websites With Inspiring Scrolling Animation](#Part 3)
Part 1 The Benefits of Scroll Animation That Few People Know
01 What is Scroll Animation?
Scroll animation is a feature offered by the website developers on the website where you will see the elements when you move the cursor on the website or when you scroll the webpage of the website.

Previously this concept was not much popular because sometimes website visitors can get confused with this feature but as per a few kinds of research, it is observed that this feature is more user friendly than the common websites. This technique also helps people to make the content more visible at the time of scrolling the website.
02 Why Should You Use On-Scroll Animation Effects?
There are many positive aspects of using the On-Scroll animation effects for your websites. When you use this animation on your website then you will see a wow factor on your website and your visitors will be happy while browsing.
#1: Visitors Never Lost while Navigating
In the on scroll animation effects when the visitors scroll your website then they will never feel lost and they can easily understand that where they started and ended up.
#2: Animate website on Scroll can attract the Visitor Attention to Call to Action
If you use the animate website on a scroll then your website visitors can get direct attention to the call to action buttons available on your webpage. It can easily attract the attention of visitors to any specific place where you want. On scroll, the animation is just like pointing at anyone with a finger. The working of this technique is that when a user starts browsing and scrolling on your website then it starts loading the next steps.
#3: It keeps Visitors Engaged
With the animate website on scroll whenever a visitor scrolls down to the webpages then they will find the interesting content in every scroll. It gives a very good view to the user than the static website content. Users show interest in reading the whole page.
#4: Scrolling Decrease the Page Loading Time
In the scroll animation users slowly scroll the website to find the content which helps you to decrease the loading time of a webpage. Scrolling always loads the elements one by one when they need.
Part 2 Top 5 Scroll-to-Animate Effects in Online Animation
01 Scroll Through Image to Change Text Parallax Effect
In the Scroll through Image effect, you will see the content of the webpage after scrolling through the image on the website and developed by codemyui.

02 Hero Book Cover Slide to Intro – Mobile Friendly
In this animation effect when you move the cursor on the image then the image will turn upside and you will be able to see the content written on the webpage.

03 Marquee Page Border Effect On Scroll using GSAP
Marquee page border effect as the name of this scroll effect tells about it that in this effect you will simply see the moving border when you scroll from all 4 sides. It gives a great look to your videos.

04 Scrollable Agency Portfolio Grid Design
Scrollable Agency Portfolio Grid Design effect is specially designed for the agencies. It gives a very creative look to the web pages. You can simply scroll the web pages from the right to the left side and then finally select the content using the call to action buttons.

05 Change Text Color and Side across Image on Scroll
This scrolling effect allows you to give a text-changing effect on your web pages. When a visitor scroll on your website pages then they will see the changes in the colors of the text which gives a superb view to your viewers.

Part 3 10 Websites with Inspiring Scrolling Animation
01 Jessandruss
Jessandruss is a wedding website developed using scrolling animation. On this website mainly the wedding story of Jess & Russ is presented by the website developers. This is an awesome design of the parallax scrolling where you can see their relationship story.

02 Fire Watch Game
Fire Watch Game website is one of the best examples of the Parallax scrolling website. On this website, developers have used around 6 layers which can be moved and show the sense of depth. On this website, parallax scrolling is not used on the whole site so you can only find it on the top of the homepage. This helps the website to make it user-friendly for the visitors and they can easily read it without any issue of the constant parallax scrolling.

03 Diesel Bad Guide
Diesel Bad guide is a one-page website that was designed for the launch of Diesel’s bad Fragrance. When visitors visit the website then they will see an image with the call to action button with the name “Bad Guide”. When you move the cursor on the call to action button you will hear a sound and after clicking you will be redirected to the product page where you can buy the fragrances. You can view the direction on the website to use it. You can use your mouse to drag the products from up to down and down to upside. This is completely developed using parallax scrolling.

04 ToyFight
ToyFight is the most popular and award-winning website where you can find thousands of cool features. This website is designed with the use of parallax scrolling and 3D technology. When you move the cursor on this website then the toys move a little bit in the background which is the effect of parallax scrolling. All pages of this website are designed using parallax scrolling.

05 New York Times: Snowfall
Snowfall is a webpage designed on the New York Times website shows that how the parallax scrolling is used to show a story related to the snowfall. On this webpage, they used parallax scrolling on the images and videos which show the tunnel creek avalanche. This story is very old and published in 2012 but still, this is the best example of parallax scrolling usage.

06 Dog studio
Dog studio is an awesome website developed using the parallax scrolling effect. In the background, you will see a 3D animated dog that continuously moves when you scroll on the website. It also changes the color of the dog when you hover the mouse on the titles of the website. The do position also changes as you scroll down the website.

07 Delassus Group
Delassus Group’s website is the most popular example of horizontal scrolling. Mostly all websites work in vertical scrolling while using parallax scrolling but in the case of the Delassus group website, you will see the website display its products horizontally in a very attractive way.
08 Louie Sellers
Recapafteruse website is a portfolio website which is designed by Louie Seller and they always use a very clever parallax scrolling effect to keep interesting the webpage for their visitors. Recapafteruse is their business name. On the website when you first start scrolling then the pen will uncap and when you finish scrolling and reach the end of the page then the pen will be closed again. It reflects his business name “RecapAfterUse”. This effect is used on every webpage of the website.

09 The story of The Goonies
Goonies website is another example of parallax scrolling. On this website when you visit the first page you will see the image with the water and mountains and after starting the scrolling you will start seeing the images of kids and after that credits page and finally the gallery page. This is a one-page website and parallax scrolling is used on the whole webpage.

10 Wondershare Filmora
Wondershare Filmora is advanced video editing software that helps you to edit the videos for your parallax scrolling websites. It offers you several advanced video editing options with the easiest-to-use interface. The software is available for windows as well as Mac users to edit the videos. With the help of Wondershare Filmora, you can easily edit the videos with cool features such as motion tracking, color matching, audio ducking, split-screen, using premade templates, controlling the video speed, etc. The Wondershare Filmora offers you basic to advanced level options for editing your videos for parallax scrolling with the easy-to-use interface so you can use it even you are a newbie in video editing without any issue.
Key Takeaways from This Episode
● This is all about the parallax scrolling website and its examples.
● There are many different high-tech blog sites are available that use different types of parallax scrolling animation designs to keep their users engaged.
● These look very attractive and you get the chance to get more viewers for your website.
● If you are looking for making the best animation video to use with your parallax scrolling website then we would like to suggest the Wondershare Filmora software as it can help you to create the best videos for your parallax scrolling website.
“I am looking for the information about animate website on a scroll and how to use the parallax scrolling on the website. Can I get some reference websites and a video editor for editing the parallax videos?”
The animate website on scroll is a new and latest feature offered by the developers in the new websites. Here, in this article, we are going to discuss the animate scroll websites.
In this article
01 [The Benefits of Scroll Animation That Few People Know](#Part 1)
02 [Top 5 Scroll-to-Animate Effects in Online Animation](#Part 2)
03 [10 Websites With Inspiring Scrolling Animation](#Part 3)
Part 1 The Benefits of Scroll Animation That Few People Know
01 What is Scroll Animation?
Scroll animation is a feature offered by the website developers on the website where you will see the elements when you move the cursor on the website or when you scroll the webpage of the website.
Previously this concept was not much popular because sometimes website visitors can get confused with this feature but as per a few kinds of research, it is observed that this feature is more user friendly than the common websites. This technique also helps people to make the content more visible at the time of scrolling the website.
02 Why Should You Use On-Scroll Animation Effects?
There are many positive aspects of using the On-Scroll animation effects for your websites. When you use this animation on your website then you will see a wow factor on your website and your visitors will be happy while browsing.
#1: Visitors Never Lost while Navigating
In the on scroll animation effects when the visitors scroll your website then they will never feel lost and they can easily understand that where they started and ended up.
#2: Animate website on Scroll can attract the Visitor Attention to Call to Action
If you use the animate website on a scroll then your website visitors can get direct attention to the call to action buttons available on your webpage. It can easily attract the attention of visitors to any specific place where you want. On scroll, the animation is just like pointing at anyone with a finger. The working of this technique is that when a user starts browsing and scrolling on your website then it starts loading the next steps.
#3: It keeps Visitors Engaged
With the animate website on scroll whenever a visitor scrolls down to the webpages then they will find the interesting content in every scroll. It gives a very good view to the user than the static website content. Users show interest in reading the whole page.
#4: Scrolling Decrease the Page Loading Time
In the scroll animation users slowly scroll the website to find the content which helps you to decrease the loading time of a webpage. Scrolling always loads the elements one by one when they need.
Part 2 Top 5 Scroll-to-Animate Effects in Online Animation
01 Scroll Through Image to Change Text Parallax Effect
In the Scroll through Image effect, you will see the content of the webpage after scrolling through the image on the website and developed by codemyui.
02 Hero Book Cover Slide to Intro – Mobile Friendly
In this animation effect when you move the cursor on the image then the image will turn upside and you will be able to see the content written on the webpage.
03 Marquee Page Border Effect On Scroll using GSAP
Marquee page border effect as the name of this scroll effect tells about it that in this effect you will simply see the moving border when you scroll from all 4 sides. It gives a great look to your videos.
04 Scrollable Agency Portfolio Grid Design
Scrollable Agency Portfolio Grid Design effect is specially designed for the agencies. It gives a very creative look to the web pages. You can simply scroll the web pages from the right to the left side and then finally select the content using the call to action buttons.
05 Change Text Color and Side across Image on Scroll
This scrolling effect allows you to give a text-changing effect on your web pages. When a visitor scroll on your website pages then they will see the changes in the colors of the text which gives a superb view to your viewers.
Part 3 10 Websites with Inspiring Scrolling Animation
01 Jessandruss
Jessandruss is a wedding website developed using scrolling animation. On this website mainly the wedding story of Jess & Russ is presented by the website developers. This is an awesome design of the parallax scrolling where you can see their relationship story.
02 Fire Watch Game
Fire Watch Game website is one of the best examples of the Parallax scrolling website. On this website, developers have used around 6 layers which can be moved and show the sense of depth. On this website, parallax scrolling is not used on the whole site so you can only find it on the top of the homepage. This helps the website to make it user-friendly for the visitors and they can easily read it without any issue of the constant parallax scrolling.
03 Diesel Bad Guide
Diesel Bad guide is a one-page website that was designed for the launch of Diesel’s bad Fragrance. When visitors visit the website then they will see an image with the call to action button with the name “Bad Guide”. When you move the cursor on the call to action button you will hear a sound and after clicking you will be redirected to the product page where you can buy the fragrances. You can view the direction on the website to use it. You can use your mouse to drag the products from up to down and down to upside. This is completely developed using parallax scrolling.
04 ToyFight
ToyFight is the most popular and award-winning website where you can find thousands of cool features. This website is designed with the use of parallax scrolling and 3D technology. When you move the cursor on this website then the toys move a little bit in the background which is the effect of parallax scrolling. All pages of this website are designed using parallax scrolling.
05 New York Times: Snowfall
Snowfall is a webpage designed on the New York Times website shows that how the parallax scrolling is used to show a story related to the snowfall. On this webpage, they used parallax scrolling on the images and videos which show the tunnel creek avalanche. This story is very old and published in 2012 but still, this is the best example of parallax scrolling usage.
06 Dog studio
Dog studio is an awesome website developed using the parallax scrolling effect. In the background, you will see a 3D animated dog that continuously moves when you scroll on the website. It also changes the color of the dog when you hover the mouse on the titles of the website. The do position also changes as you scroll down the website.
07 Delassus Group
Delassus Group’s website is the most popular example of horizontal scrolling. Mostly all websites work in vertical scrolling while using parallax scrolling but in the case of the Delassus group website, you will see the website display its products horizontally in a very attractive way.
08 Louie Sellers
Recapafteruse website is a portfolio website which is designed by Louie Seller and they always use a very clever parallax scrolling effect to keep interesting the webpage for their visitors. Recapafteruse is their business name. On the website when you first start scrolling then the pen will uncap and when you finish scrolling and reach the end of the page then the pen will be closed again. It reflects his business name “RecapAfterUse”. This effect is used on every webpage of the website.
09 The story of The Goonies
Goonies website is another example of parallax scrolling. On this website when you visit the first page you will see the image with the water and mountains and after starting the scrolling you will start seeing the images of kids and after that credits page and finally the gallery page. This is a one-page website and parallax scrolling is used on the whole webpage.
10 Wondershare Filmora
Wondershare Filmora is advanced video editing software that helps you to edit the videos for your parallax scrolling websites. It offers you several advanced video editing options with the easiest-to-use interface. The software is available for windows as well as Mac users to edit the videos. With the help of Wondershare Filmora, you can easily edit the videos with cool features such as motion tracking, color matching, audio ducking, split-screen, using premade templates, controlling the video speed, etc. The Wondershare Filmora offers you basic to advanced level options for editing your videos for parallax scrolling with the easy-to-use interface so you can use it even you are a newbie in video editing without any issue.
Key Takeaways from This Episode
● This is all about the parallax scrolling website and its examples.
● There are many different high-tech blog sites are available that use different types of parallax scrolling animation designs to keep their users engaged.
● These look very attractive and you get the chance to get more viewers for your website.
● If you are looking for making the best animation video to use with your parallax scrolling website then we would like to suggest the Wondershare Filmora software as it can help you to create the best videos for your parallax scrolling website.
Handy Tip From Adobe Animate Rigging Tutorial for All Learners
Handy Tips from Adobe Animate Rigging Tutorial for All Learners
An easy yet powerful editor
Numerous effects to choose from
Detailed tutorials provided by the official channel
Rigging is a technology that is not known to everyone. However, an animation freak must know the technology in depth.

If you are an animator, you must be wondering how to implement rigging. Follow this tutorial and get a complete insight on the adobe animate rigging tutorial.
In this article
01 [Do You Understand How Auto Rig Mapping Works?](#Part 1)
02 [How Do I Use Rig Mapping in Adobe Animate?](#Part 2)
03 [Where to Rig and Animate More Characters?](#Part 3)
Part 1 Do You Understand How Auto Rig Mapping Works?
The primary goal of animation is to animate or construct human-like characters that tend to mimic the structure of a human body or animal body. The closer is the resemblance of the motion, the better is the animation. However, mimicking a human-like motion with precision is rather difficult. This is because humans have a sophisticated structure, and the mimicry of a complex motion like that performed by human beings through animation is indeed difficult.
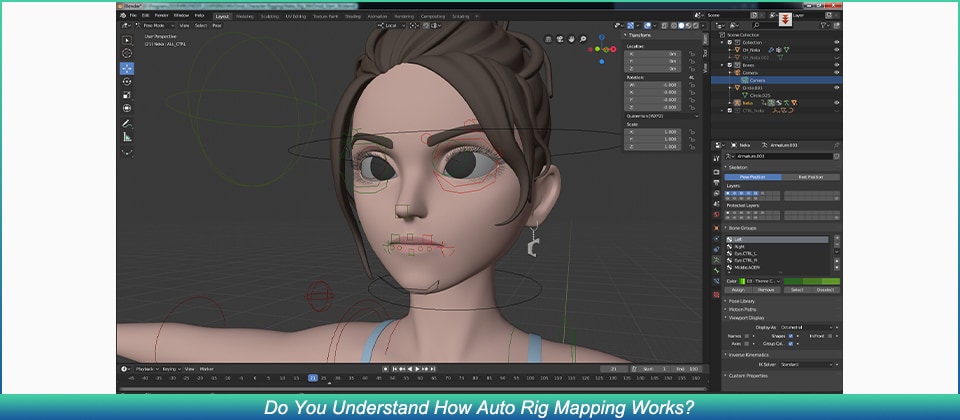
For countering this, animators decided to use rigging. Rigging is essentially a technology wherein the skeletal structure of the animated character must be designed prior to the final character. The primary components of the skeletal structure, i.e. the skull, the jaw, the limbs (arm and leg) are modeled to finally form a whole skeleton.
The structure is fine tuned and the skeleton is given rotatory motion, and prismatic motion wherever needed. Each part of the animated character is enabled to move and mimic complex motion.
Part 2 How Do I Use Rig Mapping in Adobe Animate?
1. How Do You Rig a 2d Character in an Animation?
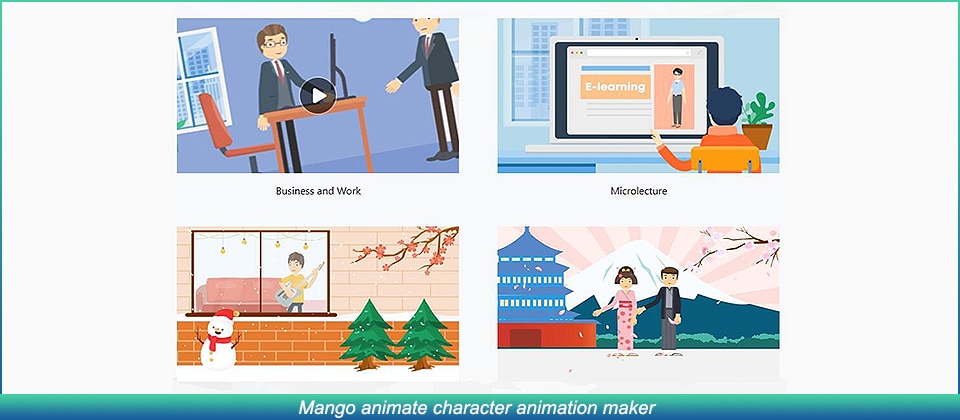
❶ Mango animate character animation maker
Mango animate character animation maker is an amazing software that can perform the task of animation in a very simple manner. We can rightfully comment that the software does make the job of animators rather simple. The rigging animation software automatically generates an energetic skeletal figure of the static character image. Using this skeleton, the software helps you to animate the character.
❷ Cartoon Animator 4
The software is one that suffices to almost every level of animator, be it a novice, intermediate, or an expert. The animation maker has super cool features and could make you animate characters very easily. The rigging tool can again convert a static image of the character you intend to animate into its skeletal structure.
❸ Blender
Now any professional animator reading this will obviously know about blender. It is indeed one of the most popular tools available to perform any kind of animation. Moreover, most professional courses teach the basics of animation using blender.

❹ Toon boom harmony
Toon boom harmony is another software that offers pretty decent rigging features. The software is pretty popular among novice animators who just wish to animate 2d characters. The advanced tool offers animation, rigging, and drawing features.
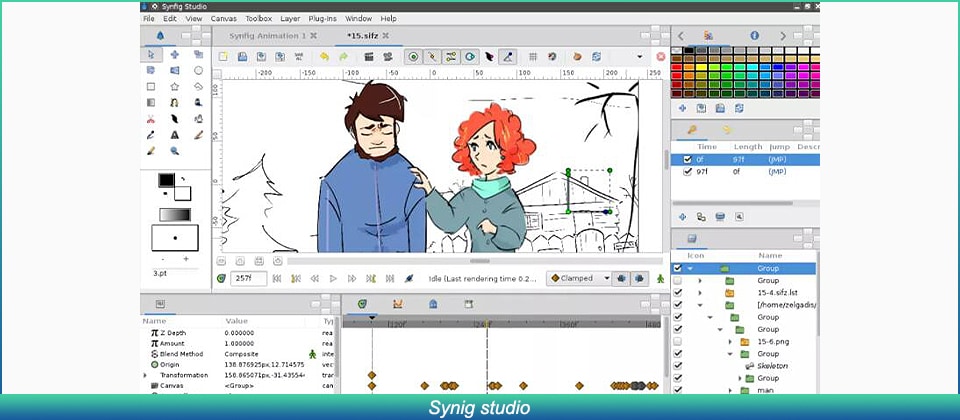
❺ Synig studio
Synig studio is another popular software among the animation community. The software is meant for animators of all levels, ranging from beginners to professionals, anybody can use this tool to animate. The software uses complex technologies in order to ensure that the character is animated seamlessly.
2. How Do You Animate a Custom Rig?
If you want to try animating custom rigs, it is indeed very simple, if you use beginner-friendly software, all you need to do is input the static image of your character. Select the motion template that you’d like to apply to your character. You’re good to go! However, you can’t animate custom motions using beginner-friendly software, you can only choose from the available templates.
Part 3 Where to Rig and Animate More Characters?
Comfort and convenience are what we always prioritize. Wondershare Filmora offers you exactly the same. With Wondershare Filmora Pro, you can easily animate and make desirable structures. The several features that Filmora Pro offers include:
Audio Features →
● Audio transition
● Audio compression
● Noise reduction
Video Features →
● Animation
● Motion tracking
● Video editing
The features listed above are just a few of the many features Wondershare Filmora Pro offers. If you’re looking to try out animation, then we highly recommend you to give it a go. It’s a one-stop shop for your animation needs.
Key Takeaways from This Episode
● As we reach the end of the article, we can say that it was indeed a fruitful read as we understood about several different tools to perform animations and rigging.
● The tools we looked at today make life easier for animators and video editors, using these tools, animations can be performed in minutes.
● We hope that the adobe animated rigging tutorial helped you understand the challenges of animation and how to counter them! We’d like to recommend Wondershare Filmora Pro to you, a comprehensive feature-rich tool that provides you with several different features. Think video editing? Think Filmora Pro Try It Free
Rigging is a technology that is not known to everyone. However, an animation freak must know the technology in depth.
If you are an animator, you must be wondering how to implement rigging. Follow this tutorial and get a complete insight on the adobe animate rigging tutorial.
In this article
01 [Do You Understand How Auto Rig Mapping Works?](#Part 1)
02 [How Do I Use Rig Mapping in Adobe Animate?](#Part 2)
03 [Where to Rig and Animate More Characters?](#Part 3)
Part 1 Do You Understand How Auto Rig Mapping Works?
The primary goal of animation is to animate or construct human-like characters that tend to mimic the structure of a human body or animal body. The closer is the resemblance of the motion, the better is the animation. However, mimicking a human-like motion with precision is rather difficult. This is because humans have a sophisticated structure, and the mimicry of a complex motion like that performed by human beings through animation is indeed difficult.
For countering this, animators decided to use rigging. Rigging is essentially a technology wherein the skeletal structure of the animated character must be designed prior to the final character. The primary components of the skeletal structure, i.e. the skull, the jaw, the limbs (arm and leg) are modeled to finally form a whole skeleton.
The structure is fine tuned and the skeleton is given rotatory motion, and prismatic motion wherever needed. Each part of the animated character is enabled to move and mimic complex motion.
Part 2 How Do I Use Rig Mapping in Adobe Animate?
1. How Do You Rig a 2d Character in an Animation?
❶ Mango animate character animation maker
Mango animate character animation maker is an amazing software that can perform the task of animation in a very simple manner. We can rightfully comment that the software does make the job of animators rather simple. The rigging animation software automatically generates an energetic skeletal figure of the static character image. Using this skeleton, the software helps you to animate the character.
❷ Cartoon Animator 4
The software is one that suffices to almost every level of animator, be it a novice, intermediate, or an expert. The animation maker has super cool features and could make you animate characters very easily. The rigging tool can again convert a static image of the character you intend to animate into its skeletal structure.
❸ Blender
Now any professional animator reading this will obviously know about blender. It is indeed one of the most popular tools available to perform any kind of animation. Moreover, most professional courses teach the basics of animation using blender.
❹ Toon boom harmony
Toon boom harmony is another software that offers pretty decent rigging features. The software is pretty popular among novice animators who just wish to animate 2d characters. The advanced tool offers animation, rigging, and drawing features.
❺ Synig studio
Synig studio is another popular software among the animation community. The software is meant for animators of all levels, ranging from beginners to professionals, anybody can use this tool to animate. The software uses complex technologies in order to ensure that the character is animated seamlessly.
2. How Do You Animate a Custom Rig?
If you want to try animating custom rigs, it is indeed very simple, if you use beginner-friendly software, all you need to do is input the static image of your character. Select the motion template that you’d like to apply to your character. You’re good to go! However, you can’t animate custom motions using beginner-friendly software, you can only choose from the available templates.
Part 3 Where to Rig and Animate More Characters?
Comfort and convenience are what we always prioritize. Wondershare Filmora offers you exactly the same. With Wondershare Filmora Pro, you can easily animate and make desirable structures. The several features that Filmora Pro offers include:
Audio Features →
● Audio transition
● Audio compression
● Noise reduction
Video Features →
● Animation
● Motion tracking
● Video editing
The features listed above are just a few of the many features Wondershare Filmora Pro offers. If you’re looking to try out animation, then we highly recommend you to give it a go. It’s a one-stop shop for your animation needs.
Key Takeaways from This Episode
● As we reach the end of the article, we can say that it was indeed a fruitful read as we understood about several different tools to perform animations and rigging.
● The tools we looked at today make life easier for animators and video editors, using these tools, animations can be performed in minutes.
● We hope that the adobe animated rigging tutorial helped you understand the challenges of animation and how to counter them! We’d like to recommend Wondershare Filmora Pro to you, a comprehensive feature-rich tool that provides you with several different features. Think video editing? Think Filmora Pro!
Adobe Auto Rigger Is AWESOME
Adobe Auto Rigger is AWESOME
An easy yet powerful editor
Numerous effects to choose from
Detailed tutorials provided by the official channel
The Adobe Auto rigger is definitely something to look into if you want to quickly and easily prep 3D Animated Characters (without having to learn all the difficult ins and outs of Adobe 3D Rigging.) It’s a perfect tool for beginners.
Especially those that aren’t really looking to create big animated projects, just small animated characters or objects that they can use for their websites, video content, video game development, etc.
In this article
01 [What’s Adobe Auto Rigger?](#Part 1)
02 [How Do You Auto Rig a Character in Adobe?](#Part 2)
03 [Other AWESOME Auto Rigger Tools](#Part 3)
Part 1 What’s Adobe Auto Rigger?
Alright, so what is the Adobe Auto Rigger and how does it differ from Adobe Animate Advanced Rigging or Adobe After Effects Rigging? Is there any difference at all??? The simple answer? Yes, there is a definite difference.
It’s all thanks to the third-party tool, Mixamo, which will allow you to upload characters for auto rigging (basically bypassing the kind of work that is usually required for manually rigging and animating in Adobe Animate and After Effects.) We’ll talk more about this in the tutorial below. For now, all you need to know is that it takes care of setting up a character for you with only a few simple steps.
Thus, enabling you to quickly move forward in your projects if you wish. Whether you’re intending to create a quick little animation for your website, or jumping into a video editing software like Wondershare Filmora Video Editor (which is great professional software with everything you need to start creating high-quality content that you can share with your audience.)

Part 2 How Do You Auto Rig a Character in Adobe?
Now onto our promised tutorial. Here, we make use of the Adobe Auto Rigger, Mixamo, in order to demonstrate how you can bypass Adobe Rigging by making use of Mixamo’s auto-rigging functions or their pre-existing character models for creating your projects.
01Upload Your Own Character
To start, you’ll need to visit ‘Maximo.com’ and sign in with your Adobe ID (email and password required.)
You can also sign-up for free if you’d like. That option is available for those who may want to explore the available options first.
Once you’re logged in, go to the ‘Editor’ panel and prepare to upload a custom character for automatic rigging. This is assuming that you have a character design already prepared, of course. If not, then don’t worry. The next should help.

02(Optional) Browse for Downloadable Characters
The best part of Mixamo is that it has a rich library full of pre-rigged characters that you can use should you wish to. These can be found under the ‘Characters’ tab (shown in the image below.)
So, if you don’t have a character model prepared just yet or have no intention of diving too deeply into character design just in general, you don’t have to worry. You can just download one of the pre-rigged characters here and use them for your project.

03Rig a Custom Character
If you’ve decided to go forward with a custom character, after all, upload it to the Adobe Auto Rigger (shown in the image below.)
This is a very straightforward tool that you can use to place the most important markers on your figure (chin, wrists, elbows, knees, and groin). Once you’ve confirmed the placement of all these points, you can continue and come out of it with your Model auto-rigged and work-ready.

04Download Rigged Character and Begin Animation
It may take several minutes for the Adobe Auto Rigger to completely finish auto-rigging your project, so have a bit of patience. You’ll be taken back to the main interface when complete, and you’ll be able to download your now rigged model for use.
Part 3 Other AWESOME Auto Rigger Tools
Now, just in case you’re interested in other methods of automatically rigging outside of what we demonstrated above for rigging in Adobe Animate and After Effects… We’ve included some other add-ons and tools that you can use with other popular Animation software. They’re all a little bit different, so make sure to pay attention to the details provided (and watch the video attached too. As it should show you just what exactly each of these auto-rigging tools is capable of doing for you.)
01InstantRig - Auto Rigger
The first Auto Rigger on this list is ‘Instant Rig.’ This is a rigging tool for the Animation software called 3ds Max. More specifically, it’s a ‘modular rigging’ tool. That makes it very versatile, allowing you to determine the features of the character that you are working with based on their attributes (no matter how many fingers, toes, tails, ears, etc. they need.) The tool is particularly popular with game developers, as it is a quick and easy way of rigging game characters — whether they be humanoid or beastly in form. (A free version of the tool is available, but a full license will require a one-time fee of around $35.)
02Auto-Rig Pro
Next, we have the auto-rigging addon for the free, open-source Animation Software, Blender. This add-on can be used very similarly to the Adobe Animate Puppet Rig tools — and is free to use besides. The add-on has a ‘smart feature’ that is capable of automatically rigging up joints and bones of humanoid forms in an instant and can also be used for rigging up non-humanoid characters — albeit, it would have to be manual.
03Perseus Auto Rig - Maya
Next up, we have Perseus Auto Rig. This one works with Maya (which is a very popular professional software used by a lot of animation studios in the industry) and actually comes in three versions. There’s the Perseus ‘Biped Rigging’ license for humanoid characters, the Perseus ‘Facial Rigging’ license for rigging facial features, and the Perseus ‘Quadruped Rigging’ license for non-humanoid creatures.
04Auto Character Setup
Next is the auto-character set-up tool for MODO. This is a tool designed for rigging up bi-pedal characters — so mostly humanoid forms. But it does offer some flexibility as to the form that bipedal character takes. So, you can adjust it as needed if there’s something incongruous with your design and the auto-rigger itself.
05IKMAX
For our last tool for auto-rigging, we have IKMAX. This works for 3ds Max and Maya (both of which we’ve mentioned before. It’s very easy to use and adjust as needed — with sliders that you can fiddle around with the work through any problem areas if need be.
● Key Takeaways from This Episode →
● If you’re interested in introducing animations into your content but you don’t have the time or the patience to get too involved with Adobe Rigging (which is a complex subject to talk about even for some professional animators), the auto-rigging solutions are definitely something to consider.
● The Adobe Auto Rigger, Mixamo, is an especially exciting tool to try out. Not only is it incredibly easy to use, but it comes with pre-made character designs that you can play around with to start your experimentations into animation early.
● If Adobe is not your software of choice, don’t worry. There are other auto-rigging tools that you can try out if need be. We introduced at least five that you can use with some of the more popular alternative animation software in a list for you to look through.
The Adobe Auto rigger is definitely something to look into if you want to quickly and easily prep 3D Animated Characters (without having to learn all the difficult ins and outs of Adobe 3D Rigging.) It’s a perfect tool for beginners.
Especially those that aren’t really looking to create big animated projects, just small animated characters or objects that they can use for their websites, video content, video game development, etc.
In this article
01 [What’s Adobe Auto Rigger?](#Part 1)
02 [How Do You Auto Rig a Character in Adobe?](#Part 2)
03 [Other AWESOME Auto Rigger Tools](#Part 3)
Part 1 What’s Adobe Auto Rigger?
Alright, so what is the Adobe Auto Rigger and how does it differ from Adobe Animate Advanced Rigging or Adobe After Effects Rigging? Is there any difference at all??? The simple answer? Yes, there is a definite difference.
It’s all thanks to the third-party tool, Mixamo, which will allow you to upload characters for auto rigging (basically bypassing the kind of work that is usually required for manually rigging and animating in Adobe Animate and After Effects.) We’ll talk more about this in the tutorial below. For now, all you need to know is that it takes care of setting up a character for you with only a few simple steps.
Thus, enabling you to quickly move forward in your projects if you wish. Whether you’re intending to create a quick little animation for your website, or jumping into a video editing software like Wondershare Filmora Video Editor (which is great professional software with everything you need to start creating high-quality content that you can share with your audience.)
Part 2 How Do You Auto Rig a Character in Adobe?
Now onto our promised tutorial. Here, we make use of the Adobe Auto Rigger, Mixamo, in order to demonstrate how you can bypass Adobe Rigging by making use of Mixamo’s auto-rigging functions or their pre-existing character models for creating your projects.
01Upload Your Own Character
To start, you’ll need to visit ‘Maximo.com’ and sign in with your Adobe ID (email and password required.)
You can also sign-up for free if you’d like. That option is available for those who may want to explore the available options first.
Once you’re logged in, go to the ‘Editor’ panel and prepare to upload a custom character for automatic rigging. This is assuming that you have a character design already prepared, of course. If not, then don’t worry. The next should help.
02(Optional) Browse for Downloadable Characters
The best part of Mixamo is that it has a rich library full of pre-rigged characters that you can use should you wish to. These can be found under the ‘Characters’ tab (shown in the image below.)
So, if you don’t have a character model prepared just yet or have no intention of diving too deeply into character design just in general, you don’t have to worry. You can just download one of the pre-rigged characters here and use them for your project.
03Rig a Custom Character
If you’ve decided to go forward with a custom character, after all, upload it to the Adobe Auto Rigger (shown in the image below.)
This is a very straightforward tool that you can use to place the most important markers on your figure (chin, wrists, elbows, knees, and groin). Once you’ve confirmed the placement of all these points, you can continue and come out of it with your Model auto-rigged and work-ready.
04Download Rigged Character and Begin Animation
It may take several minutes for the Adobe Auto Rigger to completely finish auto-rigging your project, so have a bit of patience. You’ll be taken back to the main interface when complete, and you’ll be able to download your now rigged model for use.
Part 3 Other AWESOME Auto Rigger Tools
Now, just in case you’re interested in other methods of automatically rigging outside of what we demonstrated above for rigging in Adobe Animate and After Effects… We’ve included some other add-ons and tools that you can use with other popular Animation software. They’re all a little bit different, so make sure to pay attention to the details provided (and watch the video attached too. As it should show you just what exactly each of these auto-rigging tools is capable of doing for you.)
01InstantRig - Auto Rigger
The first Auto Rigger on this list is ‘Instant Rig.’ This is a rigging tool for the Animation software called 3ds Max. More specifically, it’s a ‘modular rigging’ tool. That makes it very versatile, allowing you to determine the features of the character that you are working with based on their attributes (no matter how many fingers, toes, tails, ears, etc. they need.) The tool is particularly popular with game developers, as it is a quick and easy way of rigging game characters — whether they be humanoid or beastly in form. (A free version of the tool is available, but a full license will require a one-time fee of around $35.)
02Auto-Rig Pro
Next, we have the auto-rigging addon for the free, open-source Animation Software, Blender. This add-on can be used very similarly to the Adobe Animate Puppet Rig tools — and is free to use besides. The add-on has a ‘smart feature’ that is capable of automatically rigging up joints and bones of humanoid forms in an instant and can also be used for rigging up non-humanoid characters — albeit, it would have to be manual.
03Perseus Auto Rig - Maya
Next up, we have Perseus Auto Rig. This one works with Maya (which is a very popular professional software used by a lot of animation studios in the industry) and actually comes in three versions. There’s the Perseus ‘Biped Rigging’ license for humanoid characters, the Perseus ‘Facial Rigging’ license for rigging facial features, and the Perseus ‘Quadruped Rigging’ license for non-humanoid creatures.
04Auto Character Setup
Next is the auto-character set-up tool for MODO. This is a tool designed for rigging up bi-pedal characters — so mostly humanoid forms. But it does offer some flexibility as to the form that bipedal character takes. So, you can adjust it as needed if there’s something incongruous with your design and the auto-rigger itself.
05IKMAX
For our last tool for auto-rigging, we have IKMAX. This works for 3ds Max and Maya (both of which we’ve mentioned before. It’s very easy to use and adjust as needed — with sliders that you can fiddle around with the work through any problem areas if need be.
● Key Takeaways from This Episode →
● If you’re interested in introducing animations into your content but you don’t have the time or the patience to get too involved with Adobe Rigging (which is a complex subject to talk about even for some professional animators), the auto-rigging solutions are definitely something to consider.
● The Adobe Auto Rigger, Mixamo, is an especially exciting tool to try out. Not only is it incredibly easy to use, but it comes with pre-made character designs that you can play around with to start your experimentations into animation early.
● If Adobe is not your software of choice, don’t worry. There are other auto-rigging tools that you can try out if need be. We introduced at least five that you can use with some of the more popular alternative animation software in a list for you to look through.
The Only Guide to Make 2D Rigging Clear to You
The Only Guide You’ll Ever Need to Learn That Make 2D Rigging Clear to You
An easy yet powerful editor
Numerous effects to choose from
Detailed tutorials provided by the official channel
If you’re looking to get a head start in 2D Rigging or 2D Animation in general, then this guide should get you to where you need to go.
We’ll be introducing 2D Rigging in a comprehensive way — perfect for beginners who aren’t familiar with the subject and want something more solid as their foundation.
In this article
01 [All You Need to Know About 2D Rigging](#Part 1)
02 [What is the Difference and Connection Between 2D and 3D](#Part 2)
03 [What Are the Best 2D Rigging Animation Tools?](#Part 3)
Part 1 All You Need to Know About Rigging
For this first part, we’re going to talk about Rigging in a general way. Think of it as an introduction to the subject. One that should, hopefully, set you off on the right foot. It should also help clarify things that you might need to know as we delve into deeper and more advanced subjects in the next sections of this article.
01What is the Meaning of Rigging in Animation?
Alright, so what does rigging 2D characters actually do? What meaning, or effect, does it have? These questions can be quickly answered with this: Rigging (whether it’s or 3D) is the practice of attaching ‘bones’ to a character model. Bones that, in the future, you can use to create motion.
If you’re an artist, then you’re probably familiar with the concept of creating an initial sketch that you put the final drawing on top of — done with the sole purpose of creating a structure that will allow you to move forward more easily in your art.
That’s exactly what you do when Rigging. You’re building a structure that will allow you to easily create animated characters that you can move at will in the future.
02Why Use Animation?
Alright, so what’s the difference between creating a Face Rig and a Face Rig? Is there any? To answer this, the simple answer is, yes. There is quite the difference.
A lot of animators prefer to practice Animation over Animation because it is more traditional and requires less complicated software (not that it doesn’t come with complications of its own.) Specifically, animation requires quite a lengthy character creation and rigging process.
You should consider the subject more based on what project you’re working on. Things that you might want to keep in mind include your project timeline, project budget, character rig usability in the future, length of the project, and so on.
(There’s also a more in-depth breakdown of this in of this guide.)
03What is Animation Rigging Software?
Now, for the last section of this Rigging overview, let’s talk about Rigging Animation Software. You should be able to guess what it’s meant for, but how you can use it is a little different, especially with the many different varieties of Rigging Animation Software available.
We’ll be introducing some in the third part of this guide — so you can learn more about the differences there. For now, all you need to know is that it usually comes with advanced rigging and character deformer tools that you can use to easily (and efficiently) animate your characters.
Part 2 What is the Difference and Connection Between and 3D
As promised, this next section will be devoted to clarifying the differences and similarities between Animation and Animation. As we mentioned previously, most animators prefer Animation. But, more often than not, they switch between both forms in order to create something suitable for their current project.
01How and Animations Are Created
First, let’s talk about the process involved. In the end, this can be described simply as: it starts off the same, but then becomes significantly more and more dissimilar the further you go along. More specifically, whether you’re working on a or Animation, you usually start with working through your vision for the project.
That means exploring ideas and creating hand-illustrated storyboards (which will serve as the foundation for the project as a whole). Then, the next steps involve media gathering (i.e., character creation, sound clips, voice-overs, sound effects, etc.) So that everything would be ready for the project.
This is when the difference starts. Animation involves hand-drawing characters in different poses and angles (with the standard being frames for a second) and can be completed with basic rigging (i.e., face rig for moving mouths or eyes). It’s normal in Animation as well for characters to remain static for several frames. While, with 3D, it is the exact opposite — the characters must be in constant motion so as to remain realistic (which can be done with extensive rigging.)
02Time Investments for Creating and Animations
Next, let’s talk about time investments. This can be a bit tricky to differentiate. Animations, as mentioned, are generally easier to create because it requires less rigging (but more drawings for certain scenes and angles makes it take more time). Meanwhile, Animation usually involves a front-heavy timeline — since you’re looking at intensive character creation and rigging. Once all this is set up though? The rest of the process is much faster than Animation.
You’ll also have to consider the work that you have to put in after your animations have been created. For example, the work you’ll need to put into finalizing your project with a video editor like Wondershare Filmora Video Editor (which would work great with animations especially, as it will allow you to actively add into the timeline as you go.)
For Win 7 or later (64-bit)
For macOS 10.12 or later
Part 3 What Are the Best Rigging Animation Tools?
For this final section of the guide, we’re finally moving on to our introduction to Rigging Animation Software. As mentioned, we’ve picked quite the variety to make sure that you have a good idea of how each will work. (A sample video has also been attached to make sure that you know what kind of projects can be created with these Rigging tools. Take the opportunity to explore those, too. If only for further edification.)
01Reallusion – Cartoon Animator 4
The first of the Rigging Animation Software on this list is Reallusion’s Cartoon Animator 4 (previously known as CrazyTalk Animator). This software was originally developed in order to allow everyone (from beginners to professionals) to create advanced animations with very little effort. To that end, it comes with a lot of motion templates and Auto Rig functions (i.e., audio lip-syncing) that the user can use to seriously cut down on the work required.
02Harmony ToonBoom
Harmony ToonBoom is well-known in the Rigging Animation Software industry. It’s the software that is used by many professionals. According to the Toon Boom Harmony website, this software was even used to create popular television shows like Rick and Morty, Bob’s Burgers, The Simpsons, and Futurama. It’s considerably more difficult to use for beginners, but it comes with many advanced functions that allow its users to create truly complex and beautiful Animations.
03Synfig Studio
The best thing about Synfig Studio (right from the onset), is that it is FREE. There are two versions of this tool — one that is ‘stable’ and the other in ‘development.’ The developmental version offers more advanced functions, of course, but for most beginners, the ‘stable’ version would serve just as well.
04Adobe Animate
Adobe Animate is software that belongs in Adobe’s long line of professional-level products. It’s a part of the classic ‘Adobe Suite.’ As a professional software, however, keep in mind that it might be more difficult to get used to at first (there’s a steep, learning curve right off the bat). But, if used correctly, it can be used to create quite impressive and eye-catching interactive animations (i.e., game content or website elements.)
05Animaker
Animaker is quite popular for beginners. It offers templates, so you can start off with an easy project if that’s what you’d like. But it also offers a lot of custom-creation tools that can be used for creating complex and professional Animations — although perhaps not at the level as the ones you might see from other alternatives (this software is most suitable for simple animations.)
06Moho Pro
Moho Pro (previously known as Anime Studio Pro) is a popular Animation program that fans of anime really love. This is one of the best software to use if you’re more interested in traditional animation (which involves a lot of free-hand drawing). Although, despite that fact, it has many advanced rigging functions as well (so you can create a mix of traditional and modern animation if you wish.)
07Pencil 2D
Pencil 2D, much like Synfig Studio, is FREE, cross-platform software. It’s quite old, but it’s matured over the years to include more and more functions (you might already be personally aware of it, in fact. It had its time to shine in the early 2010s.) The important thing to remember though is the fact that this is definitely more of a ‘traditional animation’ software. It does offer some basic rigging, but it’s best used by those who would prefer to practice the art of frame-by-frame animation.
08OpenToonz
OpenToonz is another free Rigging Animation Software (although it should be noted that there is a premium version, called Toonz, that is quite well known.) The best part about it is that it is a combination of software. One that you can use both for traditional animation and Animation. It’s also pretty easy to use, making it a good option for those just starting out.
● Key Takeaways from This Episode →
● 2D Rigging is the practice of creating ‘structure’ or ‘bones’ from which you can move characters or models. In these are usually ‘pins’ placed in bendable areas (i.e., the elbow, for bending the arm.)
● There are many differences between Animation and Animation. What you end up choosing should be decided by your project.
● Remember though, that Animations usually take longer to create even though Animations require more complex riggings.
● If you’re serious about getting into Rigging, make sure to consider the Rigging Animation Software that you choose to use very carefully. Each one has its own pros and cons.
Top 12 Illusion Gifs: Top Picks
Best 12 Illusion Gifs: Top Picks
An easy yet powerful editor
Numerous effects to choose from
Detailed tutorials provided by the official channel
Do you know that these are reaching heights and people are very happy in sharing them? If you are unaware of it, don’t worry and keep reading. Thorugh today’s post, we will discuss illusion GIF in detail yo make it easy for you to make up your mind and try your hands on it.
In this article
01 [What Is GIF Illustration?](#Part 1)
02 [Best 12 Illusion Gifs](#Part 2)
Part 1 What Is GIF Illustration?
GIFs are a form of digital media that is used to show animations and other types of visuals. It is a type of file format that can be created with different editing software. These are usually used for short videos or images on the internet and social media.
Furthermore, GIFs are an excellent way to create visual content for social media posts or as an animated overlay on a video.
These are now used as everything from advertisements to commentary from all walks of life. The users of GIFs seem to be endless! They can be used in many different ways, such as to add visual interest, provide context or even humor, and so on. It is totally on the user how they are considering it to make the things more relevant to the context for which they have created or shared the GIF.
Part 2 Best 12 Illusion Gifs
This curated list will help you to know the best Illusion GIF that is still ruling out the market. This includes:-
01Van Gogh Stare GIF
The Van Gogh Stare, also known as the “dazzle camouflage,” is an optical illusion created by artist Vincent van Gogh. It was likely intended to represent the eye’s instability and movement. The image has been used in a variety of ways, including on social media sites like Tumblr. In general, this GIF illusion is a demonstration of the Van Gogh Stare.
02This brain-busting rotation
We are all used to seeing the world around us in two dimensions. But what if we could see it in three dimensions? Well, now you can! This GIF shows a rotating 3D object that appears to be made of cubes. The illusion is created by the fact that the camera rotates around the object, but you can’t see it from every angle.
03This loop tea GIF
This GIF illusion is a perfect example of how our brain works. When we see something that doesn’t make sense, we try to make sense of it by filling in the gaps with what we believe it should look like. The GIF illusion consists of two frames. The first frame shows a woman drinking tea from a cup, and the second frame shows her drinking from an empty cup. When our brain tries to fill in the gaps, it assumes that the woman drank all of the tea and sees her as drinking from an empty cup even though she is actually drinking from a full one.
04No smkoing! Well, you should never
The GIF illusion consists of two images: one of a cloud and another of cauliflower. The animation starts with the cloud and then switches to the cauliflower. But if you take a closer look, you’ll notice that there’s actually no smoke in the first image, just the cauliflower. And it’s not really a head either - it’s just an ordinary cauliflower from behind.
The reason why this illusion works is that our brains are wired to see patterns and shapes in things that aren’t always there - for example, when we see faces in random objects or shapes in clouds. This GIF takes advantage of that by showing two images where these are
05The never-ending corridor
The GIF illusion is a rather simple illusion that takes advantage of the way our brains perceive motion. Our brains are programmed to see a moving object as a single object in order to make sense of the world around us. This means that when we see an object moving, we perceive it as one solid thing instead of many separate objects.
This GIF illusion is a perfect example of how the human brain works. The brain can’t process that the two images are different, and instead, it sees them as a single image.
06Now, this, the eye-pleaser
The illusion works on the principle of depth perception and how our eyes are not able to accurately process all of the information that they receive from our surroundings. The black lines on the white background make it seem like there are two rows of lines, but there’s only one row that appears to be moving back and forth.
07Commercial At design GIF
The GIF illusion is a simple design that tricks the brain into thinking that it is 3D. The design consists of two circles, one inside the other, with three arrows pointing inwards. The outside circle has a white background and the inside circle has a black background. When you look at this design from different angles, you will see that the arrows point outwards and not inwards as they should be doing.
08Wait what? Is this truly a reflection?
This illusion works because our brain recognizes that the mirror image is not what’s really happening and flips the image in our head to make it right-side up.
It’s also possible that we are tricked by the fact that we know mirrors flip images, so when we see an upside-down image in front of us, we automatically assume it’s just inverted.
09This haunting tableau (Not exactly a GIF but worth sharing)
The GIF illusion is a type of optical illusion that can be explained by the Gestalt Principles. The Gestalt Principles are guidelines for how we perceive and organize visual information. This optical illusion is created by overlapping two similar images on top of each other in the same place but with different colors. Our brain perceives this as a single image, and our eyes try to make sense of it by looking for visual cues in the image. When we focus on one image, it looks like a triangle with a red line going through it. But when we focus on the other image, it looks like an arrow pointing up that has been cut in half with a red line through it.
10This safety hazard
This GIF illusion is a safety hazard because it tricks the brain into thinking that the person in front of them is standing still. When you stare at this GIF for too long, the person will appear to be moving backward. This illusion can cause accidents if you believe that a person is still when they are actually approaching you.
11Welcome to the 3d World
It’s an illusion created by the use of perspective. The camera is positioned in such a way that it appears that the three-dimensional cube is only two-dimensional.
The camera is positioned in such a way that it appears that the three-dimensional cube is only two-dimensional.
12I will keep this table forever
The GIF illusion is an optical illusion that makes the table in the background appear to be bigger than it actually is. The table in front of the window appears to be smaller and closer to the viewer. There are two factors that make this illusion happen. One of them is perspective, which makes objects appear larger as they get closer and smaller as they get farther away. The other factor is size constancy, which makes objects look about the same size regardless of how far away they are from you.
Part 3 How Do You Make a GIF Illustration?
If you are someone who is curious to make a GIF illustration but have no clue how to make it, then the online portals are catering to all your needs. Right now, there are multiple tools available that will help you to create the illustration seamlessly. Among all of them, we suggest you try your hands on Filmora.
Wondershare Filmora Video Editor is one of the best tools available to make the gift illustration as you want. You just need to upload the content, and then you are all set to edit it at your convenience. The best part is the interface of the tool is very simple to understand, which simply means there will be no need for you to belong to any technical background to use this tool.

Wondershare Filmora - Best Video Editor for Mac/Windows
5,481,435 people have downloaded it.
Build unique custom animations without breaking a sweat.
Focus on creating epic stories and leave the details to Filmora’s auto features.
Start a creative adventure with drag & drop effects and endless possibilities.
Filmora simplifies advanced features to save you time and effort.
Filmora cuts out repetition so you can move on to your next creative breakthrough.
Along with creating the GIF files, it also help you to do the editing as you wanted. For example, if you are looking forward to reading on any text to the GIF file, you can also do it seamlessly. The interface will help you to understand how you can do it so that there will be no problem in creating the content as you want.
● Key Takeaways from This Episode →
● Filmora is the best tool to create illusion GIF.
●Illusion GIF are in use for advertisement.
●Creating illusion GIF is just a matter of few steps.
Do you know that these are reaching heights and people are very happy in sharing them? If you are unaware of it, don’t worry and keep reading. Thorugh today’s post, we will discuss illusion GIF in detail yo make it easy for you to make up your mind and try your hands on it.
In this article
01 [What Is GIF Illustration?](#Part 1)
02 [Best 12 Illusion Gifs](#Part 2)
Part 1 What Is GIF Illustration?
GIFs are a form of digital media that is used to show animations and other types of visuals. It is a type of file format that can be created with different editing software. These are usually used for short videos or images on the internet and social media.
Furthermore, GIFs are an excellent way to create visual content for social media posts or as an animated overlay on a video.
These are now used as everything from advertisements to commentary from all walks of life. The users of GIFs seem to be endless! They can be used in many different ways, such as to add visual interest, provide context or even humor, and so on. It is totally on the user how they are considering it to make the things more relevant to the context for which they have created or shared the GIF.
Part 2 Best 12 Illusion Gifs
This curated list will help you to know the best Illusion GIF that is still ruling out the market. This includes:-
01Van Gogh Stare GIF
The Van Gogh Stare, also known as the “dazzle camouflage,” is an optical illusion created by artist Vincent van Gogh. It was likely intended to represent the eye’s instability and movement. The image has been used in a variety of ways, including on social media sites like Tumblr. In general, this GIF illusion is a demonstration of the Van Gogh Stare.
02This brain-busting rotation
We are all used to seeing the world around us in two dimensions. But what if we could see it in three dimensions? Well, now you can! This GIF shows a rotating 3D object that appears to be made of cubes. The illusion is created by the fact that the camera rotates around the object, but you can’t see it from every angle.
03This loop tea GIF
This GIF illusion is a perfect example of how our brain works. When we see something that doesn’t make sense, we try to make sense of it by filling in the gaps with what we believe it should look like. The GIF illusion consists of two frames. The first frame shows a woman drinking tea from a cup, and the second frame shows her drinking from an empty cup. When our brain tries to fill in the gaps, it assumes that the woman drank all of the tea and sees her as drinking from an empty cup even though she is actually drinking from a full one.
04No smkoing! Well, you should never
The GIF illusion consists of two images: one of a cloud and another of cauliflower. The animation starts with the cloud and then switches to the cauliflower. But if you take a closer look, you’ll notice that there’s actually no smoke in the first image, just the cauliflower. And it’s not really a head either - it’s just an ordinary cauliflower from behind.
The reason why this illusion works is that our brains are wired to see patterns and shapes in things that aren’t always there - for example, when we see faces in random objects or shapes in clouds. This GIF takes advantage of that by showing two images where these are
05The never-ending corridor
The GIF illusion is a rather simple illusion that takes advantage of the way our brains perceive motion. Our brains are programmed to see a moving object as a single object in order to make sense of the world around us. This means that when we see an object moving, we perceive it as one solid thing instead of many separate objects.
This GIF illusion is a perfect example of how the human brain works. The brain can’t process that the two images are different, and instead, it sees them as a single image.
06Now, this, the eye-pleaser
The illusion works on the principle of depth perception and how our eyes are not able to accurately process all of the information that they receive from our surroundings. The black lines on the white background make it seem like there are two rows of lines, but there’s only one row that appears to be moving back and forth.
07Commercial At design GIF
The GIF illusion is a simple design that tricks the brain into thinking that it is 3D. The design consists of two circles, one inside the other, with three arrows pointing inwards. The outside circle has a white background and the inside circle has a black background. When you look at this design from different angles, you will see that the arrows point outwards and not inwards as they should be doing.
08Wait what? Is this truly a reflection?
This illusion works because our brain recognizes that the mirror image is not what’s really happening and flips the image in our head to make it right-side up.
It’s also possible that we are tricked by the fact that we know mirrors flip images, so when we see an upside-down image in front of us, we automatically assume it’s just inverted.
09This haunting tableau (Not exactly a GIF but worth sharing)
The GIF illusion is a type of optical illusion that can be explained by the Gestalt Principles. The Gestalt Principles are guidelines for how we perceive and organize visual information. This optical illusion is created by overlapping two similar images on top of each other in the same place but with different colors. Our brain perceives this as a single image, and our eyes try to make sense of it by looking for visual cues in the image. When we focus on one image, it looks like a triangle with a red line going through it. But when we focus on the other image, it looks like an arrow pointing up that has been cut in half with a red line through it.
10This safety hazard
This GIF illusion is a safety hazard because it tricks the brain into thinking that the person in front of them is standing still. When you stare at this GIF for too long, the person will appear to be moving backward. This illusion can cause accidents if you believe that a person is still when they are actually approaching you.
11Welcome to the 3d World
It’s an illusion created by the use of perspective. The camera is positioned in such a way that it appears that the three-dimensional cube is only two-dimensional.
The camera is positioned in such a way that it appears that the three-dimensional cube is only two-dimensional.
12I will keep this table forever
The GIF illusion is an optical illusion that makes the table in the background appear to be bigger than it actually is. The table in front of the window appears to be smaller and closer to the viewer. There are two factors that make this illusion happen. One of them is perspective, which makes objects appear larger as they get closer and smaller as they get farther away. The other factor is size constancy, which makes objects look about the same size regardless of how far away they are from you.
Part 3 How Do You Make a GIF Illustration?
If you are someone who is curious to make a GIF illustration but have no clue how to make it, then the online portals are catering to all your needs. Right now, there are multiple tools available that will help you to create the illustration seamlessly. Among all of them, we suggest you try your hands on Filmora.
Wondershare Filmora Video Editor is one of the best tools available to make the gift illustration as you want. You just need to upload the content, and then you are all set to edit it at your convenience. The best part is the interface of the tool is very simple to understand, which simply means there will be no need for you to belong to any technical background to use this tool.
Wondershare Filmora - Best Video Editor for Mac/Windows
5,481,435 people have downloaded it.
Build unique custom animations without breaking a sweat.
Focus on creating epic stories and leave the details to Filmora’s auto features.
Start a creative adventure with drag & drop effects and endless possibilities.
Filmora simplifies advanced features to save you time and effort.
Filmora cuts out repetition so you can move on to your next creative breakthrough.
Along with creating the GIF files, it also help you to do the editing as you wanted. For example, if you are looking forward to reading on any text to the GIF file, you can also do it seamlessly. The interface will help you to understand how you can do it so that there will be no problem in creating the content as you want.
● Key Takeaways from This Episode →
● Filmora is the best tool to create illusion GIF.
●Illusion GIF are in use for advertisement.
●Creating illusion GIF is just a matter of few steps.
15 Best Pics Collage Apps : Top Picks
15 Best Pics Collage Apps in 2024: Top Picks
An easy yet powerful editor
Numerous effects to choose from
Detailed tutorials provided by the official channel
With a high-end camera in a mobile phone these days there is a huge collection of pictures from various events, trips, and of your near and dear ones. So why not be creative and make some interesting pics collage from these images? Surprise your friends, relatives, and other people on their special occasion by creating pics collage and for this, you would need the help of a good collage app.

With the myriad of options available, selecting a few can be a difficult task and to help you with this, we have shortlisted some of the popular ones in the write-up below.
Part 1 Top 11 Pics Collage apps for Android and iOS
Below we have shortlisted the best apps for the pics collage that will help you create a customized collage using multiple functions and tools.
01Pic Collage
This is one of the most widely used apps available for iOS and Android devices that helps you create interesting collages.
Key features
● Free app with basic features and allows to remove ads and get access to advanced features using the paid version
● Intuitive layout with multiple templates to create photo collage pics.
● Comes with an array of photo editing tools.
● Add images from your phone or also from social media accounts.

02Photo and Shape Collage Maker
This is a free Android-based app with a 3.6 rating.
Key features
● Create frame collage, shape collage, name collage, and others.
● Comes with predefined shapes for creating a collage.
● Allows editing the collage size, background, and other factors.
● Customized shape collage can be created your name, number, or face.
● Add stickers, text, and other elements.

03Diptic
This is a paid app for iOS devices that allows creating photos as well as video collages.
Key features:
● Comes with over 190 layouts to choose from
● Add multiple photos and videos in each layout.
● Option for customizing the layout.
● Use different filters for enhancing the images.
● Add captions, effects, and other interesting elements.
● Allows creating Diptics using photos and videos from the device, Facebook, Dropbox, and other sources.

04PhotoGrid
This is an Android and iOS based app for creating collages.
Key features
● Create collage using photos, and videos.
● Comes with a variety of templates for creating personalized collages.
● The built-in editor lets you customize the images.
● Background stickers, doodles, text, and other effects can be added.
● A free version supports basic features while the paid pro version removes ads and watermarks and offers advanced features.

05Ribbet
This app on Android and iOS is mainly a photo editing tool that also supports creating collages.
Key features
● Create a collage using different customizable templates.
● Edit images and change file parameters to suit requirements.
● Add special effects, frames, and text.
● Editing tools like clones, curves, and burning.

06Moldiv
Use this app on your Android and iOS devices to create collages and professionally edit images.
Key features
● Comes with a variety of free collage templates.
● A wide range of layouts is available that can be customized.
● Works as a pro image editing tool.
● Add stickers, filters, backgrounds, and other elements.
● Allows adding up to 9 photos in a frame.

07PicPlayPost
Just like its name, this is an interesting tool for creating collages on iOS and Android devices and supports other functions as well.
Key features
● Free app with IAP option.
● Allows creating an animated slideshow using images and videos.
● Option to choose aspect ratio depending on the platform you wish to use the collage.
● Add text watermark or a business logo using the app.
● A wide range of media file formats is supported.

08PiZap
This is a multitasking app for Android and iOS devices that support functions like creating a collage, meme, photo editing, and more.
Key features:
● Create photo collages, posters, and greeting cards, in a few simple steps.
● A wide range of templates is available including the ones for Twitter, YouTube, and other sites.
● Add text, memes, shapes, filters, and other elements.
● Free to use app with Pro version offering additional features and removing ads.

0910. Live Collage
Download this app on your Android and iOS devices for creating interesting collages.
Key features:
● A simple and clean interface makes collage-making easy and fast.
● Comes with a variety of templates including special ones for Facebook, and Instagram.
● Allows creating customized canvas size and 3D templates available as well.
● Add filters to enhance your images.

1011. Pic Stitch
The app on Android and iOS devices allows creating customized pic collages for all occasions.
Key features
● User-friendly interface to create a customized collage using images and videos.
● Comes with more than 200 templates.
● Multiple images editing options are supported.
● Share created collages to social media sites.
● Choose a customized aspect ratio and also add music.

1112. PicsArt
PicsArt collage is another widely used Android and iOS-based tool that can be used for multiple tasks including collage-making.
Key features
● Comes with multiple templates including the ones for social media as well as business requirements.
● Add up to 10 images on a grid.
● Comes with a free photo library to select images.
● Being a complete image editing tool it allows personalized images in different ways.

Additional Reading: Edit your videos professionally and create a video collage using Wondershare UniConverter
If you are looking for a video editing tool that can let your edit your videos like a professional Wondershare Filmora Video Editor is just the right choice. This Windows and Mac-based software support variety of basic, as well as advanced features, and this, makes the software for all users. With over 800 stunning effects, you can create a video masterpiece using your creativity. Media files in all key formats are supported and there are options to add texts, overlays, transitions, filters, as well as music files.
The split-screen feature of the software can be further used to play multiple videos in different frames making it look like a video collage.
Wondershare Filmora - Best Video Editor for Mac/Windows
5,481,435 people have downloaded it.
Build unique custom animations without breaking a sweat.
Focus on creating epic stories and leave the details to Filmora’s auto features.
Start a creative adventure with drag & drop effects and endless possibilities.
Filmora simplifies advanced features to save you time and effort.
Filmora cuts out repetition so you can move on to your next creative breakthrough.
● Key Takeaways from This Episode →
● Create stunning pic collages on your phone using apps.
● A wide range of apps for Android and iOS are available.
● Edit your videos professionally and create a video collage using Wondershare Filmora.
With a high-end camera in a mobile phone these days there is a huge collection of pictures from various events, trips, and of your near and dear ones. So why not be creative and make some interesting pics collage from these images? Surprise your friends, relatives, and other people on their special occasion by creating pics collage and for this, you would need the help of a good collage app.
With the myriad of options available, selecting a few can be a difficult task and to help you with this, we have shortlisted some of the popular ones in the write-up below.
Part 1 Top 11 Pics Collage apps for Android and iOS
Below we have shortlisted the best apps for the pics collage that will help you create a customized collage using multiple functions and tools.
01Pic Collage
This is one of the most widely used apps available for iOS and Android devices that helps you create interesting collages.
Key features
● Free app with basic features and allows to remove ads and get access to advanced features using the paid version
● Intuitive layout with multiple templates to create photo collage pics.
● Comes with an array of photo editing tools.
● Add images from your phone or also from social media accounts.
02Photo and Shape Collage Maker
This is a free Android-based app with a 3.6 rating.
Key features
● Create frame collage, shape collage, name collage, and others.
● Comes with predefined shapes for creating a collage.
● Allows editing the collage size, background, and other factors.
● Customized shape collage can be created your name, number, or face.
● Add stickers, text, and other elements.
03Diptic
This is a paid app for iOS devices that allows creating photos as well as video collages.
Key features:
● Comes with over 190 layouts to choose from
● Add multiple photos and videos in each layout.
● Option for customizing the layout.
● Use different filters for enhancing the images.
● Add captions, effects, and other interesting elements.
● Allows creating Diptics using photos and videos from the device, Facebook, Dropbox, and other sources.
04PhotoGrid
This is an Android and iOS based app for creating collages.
Key features
● Create collage using photos, and videos.
● Comes with a variety of templates for creating personalized collages.
● The built-in editor lets you customize the images.
● Background stickers, doodles, text, and other effects can be added.
● A free version supports basic features while the paid pro version removes ads and watermarks and offers advanced features.
05Ribbet
This app on Android and iOS is mainly a photo editing tool that also supports creating collages.
Key features
● Create a collage using different customizable templates.
● Edit images and change file parameters to suit requirements.
● Add special effects, frames, and text.
● Editing tools like clones, curves, and burning.
06Moldiv
Use this app on your Android and iOS devices to create collages and professionally edit images.
Key features
● Comes with a variety of free collage templates.
● A wide range of layouts is available that can be customized.
● Works as a pro image editing tool.
● Add stickers, filters, backgrounds, and other elements.
● Allows adding up to 9 photos in a frame.
07PicPlayPost
Just like its name, this is an interesting tool for creating collages on iOS and Android devices and supports other functions as well.
Key features
● Free app with IAP option.
● Allows creating an animated slideshow using images and videos.
● Option to choose aspect ratio depending on the platform you wish to use the collage.
● Add text watermark or a business logo using the app.
● A wide range of media file formats is supported.
08PiZap
This is a multitasking app for Android and iOS devices that support functions like creating a collage, meme, photo editing, and more.
Key features:
● Create photo collages, posters, and greeting cards, in a few simple steps.
● A wide range of templates is available including the ones for Twitter, YouTube, and other sites.
● Add text, memes, shapes, filters, and other elements.
● Free to use app with Pro version offering additional features and removing ads.
0910. Live Collage
Download this app on your Android and iOS devices for creating interesting collages.
Key features:
● A simple and clean interface makes collage-making easy and fast.
● Comes with a variety of templates including special ones for Facebook, and Instagram.
● Allows creating customized canvas size and 3D templates available as well.
● Add filters to enhance your images.
1011. Pic Stitch
The app on Android and iOS devices allows creating customized pic collages for all occasions.
Key features
● User-friendly interface to create a customized collage using images and videos.
● Comes with more than 200 templates.
● Multiple images editing options are supported.
● Share created collages to social media sites.
● Choose a customized aspect ratio and also add music.
1112. PicsArt
PicsArt collage is another widely used Android and iOS-based tool that can be used for multiple tasks including collage-making.
Key features
● Comes with multiple templates including the ones for social media as well as business requirements.
● Add up to 10 images on a grid.
● Comes with a free photo library to select images.
● Being a complete image editing tool it allows personalized images in different ways.
Additional Reading: Edit your videos professionally and create a video collage using Wondershare UniConverter
If you are looking for a video editing tool that can let your edit your videos like a professional Wondershare Filmora Video Editor is just the right choice. This Windows and Mac-based software support variety of basic, as well as advanced features, and this, makes the software for all users. With over 800 stunning effects, you can create a video masterpiece using your creativity. Media files in all key formats are supported and there are options to add texts, overlays, transitions, filters, as well as music files.
The split-screen feature of the software can be further used to play multiple videos in different frames making it look like a video collage.
Wondershare Filmora - Best Video Editor for Mac/Windows
5,481,435 people have downloaded it.
Build unique custom animations without breaking a sweat.
Focus on creating epic stories and leave the details to Filmora’s auto features.
Start a creative adventure with drag & drop effects and endless possibilities.
Filmora simplifies advanced features to save you time and effort.
Filmora cuts out repetition so you can move on to your next creative breakthrough.
● Key Takeaways from This Episode →
● Create stunning pic collages on your phone using apps.
● A wide range of apps for Android and iOS are available.
● Edit your videos professionally and create a video collage using Wondershare Filmora.
What Is the Best Collage Photo Grid Maker - Experts Choice
What is the Best Collage Photo Grid Maker - Experts Choice
An easy yet powerful editor
Numerous effects to choose from
Detailed tutorials provided by the official channel
Whether it is an Instagram collage grid, other social media sites, an online platform, a greeting card, or even a wall of your room, collages are everywhere. It is a great way to assemble multiple pictures into a single frame. Depending on your purpose, theme, and other factors, there are several different styles of collages that can be created like photo grid, shaped collage, polaroid collage, and more. One of the most classic and traditional styles is a photo grid collage. Taking the help of a dedicated collage-making app or a tool can help you create an amazing and eye-catchy collage in no time. Keep reading to learn more about collage photo grid and the best tools to create them.

In this article
01 [What is a photo grid?](#Part 1)
02 [Need for using special tools and apps to create a photo grid collage](#Part 2)
03 [Top 5 tools to create photo grid](#Part 3)
04 [Use stock images to enhance your photo grid](#Part 4)
Part 1 What is a photo grid?
When a special grid frame having a specific number of rows and columns is used for arranging photos, the created collage is known as a photo grid collage. These multiple added images will make them look like a single picture in a frame. A photo grid is one of the most classic styles of creating a collage that is also the most widely used one. You can never go wrong with a collage while arranging the pictures in a photo grid.
Part 2 Need for using special tools and apps to create a photo grid collage
Though creating a photo grid may look like a simple process which it is also, there are a lot of elements that go into creating an impressive and attractive collage. Adding the images of the correct size and orientation, adjusting the borders, customizing the frames, adding filters, adding text, are some of the many factors that help in creating a wonderful collage, and for this good collage-making tool or an app is required.
These special photo grid collage maker tools have built-in templates, designs, and support other features that help you create an interesting photo grid of your choice. Moreover, some of these programs also come with high-quality stock images that can be used in the grid to further enhance their overall looks.
Part 3 Top 5 tools to create photo grid
We have selected the top 5 grid collage maker tools that can be used to create a customized photo grid.
01Fotor
This is one of the best tools available for creating a photo grid using one of the several templates available. It is the Classic Collage style of this app that will let you create a customized grid where you can add the desired number of images and then edit the background, borders, and other elements. You can even add text, stickers, effects, and other interesting filters. Fotor is a free online tool that can be used from your browser and you just need to free sign-up using your Google, Facebook, or Apple account.

02FotoJet
This is another free-to-use browser-based tool that can be used for creating a photo grid. The interface of the tool is simple and there are multiple grid options to choose from depending on the number of images to be added. The spacing between the grids as well as the roundness of the margins can also be adjusted as desired. The tool also gives you the option to choose the added image file resolution. Text, clipart, and background to the collage can also be added and there is also a library of images that can be used. The created collage can be saved or can also be shared directly to Twitter, Pinterest, and Tumblr.

03Adobe Spark
This is one of the top collages making tools that can be used to design the desired collage in different styles including photo grid. Unlike other Adobe tools, the collage-making program is simple and quick to use and does not require advanced technical know-how. You simply need to create a free account for Adobe Creative Cloud and the collage-making features can be easily used. There are pre-set designs and templates available to match your theme and requirements. You can further make customization to other collage elements as needed.

04Photo Collage
This free-to-use online tool requires no software download or installation and allows creating a grid quickly and easily. The interface of the tool is user-friendly where you just need to browse and add the images or can simply drag and drop them as well. You can choose from multiple template options available and can also add text, effects, and stickers to the collage. Multiple image editing options are also supported like zoom, flip, transparency, and more.

05Canva
Free and simple to use, this is one of the most widely used collage-making tools that is available as a browser-based program as well as Android and iOS app. Several photo-grid templates in different styles are available at the site that lets you create the desired collage in no time. You can customize the selected templates by adding filters, texts, effects, and more elements available. A paid version of the tool with advanced features is also available.

Part 4 Use stock images to enhance your photo grid
Adding high-quality and interesting images to your photo grid will level up its overall look and make it eye-catchy. If you are running short of such interesting and bright images, no need to worry as several sites have a good collection of images that can be used. One such program that we recommend here to check the stock images is Wondershare Filmora. Though Filmora is an advanced Windows and Mac-based video editing software, there are multiple additional features supported one of them is a collection of images in an array of categories.
Depending on the theme of your photo grid, you can select the desired images and other media from Wondershare Filmora Video Editor . Additionally, the split-screen feature of the software will let you add and play multiple videos in a single frame that makes it look like a video collage.
Wondershare Filmora - Best Video Editor for Mac/Windows
5,481,435 people have downloaded it.
Build unique custom animations without breaking a sweat.
Focus on creating epic stories and leave the details to Filmora’s auto features.
Start a creative adventure with drag & drop effects and endless possibilities.
Filmora simplifies advanced features to save you time and effort.
Filmora cuts out repetition so you can move on to your next creative breakthrough.
● Key Takeaways from This Episode →
● A photo grid is a classic and traditional style of creating a collage.
● There are several online tools, software, and mobile apps available for creating interesting photo grids.
● Wondershare Filmora is a great site to get stock of images in different categories and for all types of video editing requirements.
Whether it is an Instagram collage grid, other social media sites, an online platform, a greeting card, or even a wall of your room, collages are everywhere. It is a great way to assemble multiple pictures into a single frame. Depending on your purpose, theme, and other factors, there are several different styles of collages that can be created like photo grid, shaped collage, polaroid collage, and more. One of the most classic and traditional styles is a photo grid collage. Taking the help of a dedicated collage-making app or a tool can help you create an amazing and eye-catchy collage in no time. Keep reading to learn more about collage photo grid and the best tools to create them.
In this article
01 [What is a photo grid?](#Part 1)
02 [Need for using special tools and apps to create a photo grid collage](#Part 2)
03 [Top 5 tools to create photo grid](#Part 3)
04 [Use stock images to enhance your photo grid](#Part 4)
Part 1 What is a photo grid?
When a special grid frame having a specific number of rows and columns is used for arranging photos, the created collage is known as a photo grid collage. These multiple added images will make them look like a single picture in a frame. A photo grid is one of the most classic styles of creating a collage that is also the most widely used one. You can never go wrong with a collage while arranging the pictures in a photo grid.
Part 2 Need for using special tools and apps to create a photo grid collage
Though creating a photo grid may look like a simple process which it is also, there are a lot of elements that go into creating an impressive and attractive collage. Adding the images of the correct size and orientation, adjusting the borders, customizing the frames, adding filters, adding text, are some of the many factors that help in creating a wonderful collage, and for this good collage-making tool or an app is required.
These special photo grid collage maker tools have built-in templates, designs, and support other features that help you create an interesting photo grid of your choice. Moreover, some of these programs also come with high-quality stock images that can be used in the grid to further enhance their overall looks.
Part 3 Top 5 tools to create photo grid
We have selected the top 5 grid collage maker tools that can be used to create a customized photo grid.
01Fotor
This is one of the best tools available for creating a photo grid using one of the several templates available. It is the Classic Collage style of this app that will let you create a customized grid where you can add the desired number of images and then edit the background, borders, and other elements. You can even add text, stickers, effects, and other interesting filters. Fotor is a free online tool that can be used from your browser and you just need to free sign-up using your Google, Facebook, or Apple account.
02FotoJet
This is another free-to-use browser-based tool that can be used for creating a photo grid. The interface of the tool is simple and there are multiple grid options to choose from depending on the number of images to be added. The spacing between the grids as well as the roundness of the margins can also be adjusted as desired. The tool also gives you the option to choose the added image file resolution. Text, clipart, and background to the collage can also be added and there is also a library of images that can be used. The created collage can be saved or can also be shared directly to Twitter, Pinterest, and Tumblr.
03Adobe Spark
This is one of the top collages making tools that can be used to design the desired collage in different styles including photo grid. Unlike other Adobe tools, the collage-making program is simple and quick to use and does not require advanced technical know-how. You simply need to create a free account for Adobe Creative Cloud and the collage-making features can be easily used. There are pre-set designs and templates available to match your theme and requirements. You can further make customization to other collage elements as needed.
04Photo Collage
This free-to-use online tool requires no software download or installation and allows creating a grid quickly and easily. The interface of the tool is user-friendly where you just need to browse and add the images or can simply drag and drop them as well. You can choose from multiple template options available and can also add text, effects, and stickers to the collage. Multiple image editing options are also supported like zoom, flip, transparency, and more.
05Canva
Free and simple to use, this is one of the most widely used collage-making tools that is available as a browser-based program as well as Android and iOS app. Several photo-grid templates in different styles are available at the site that lets you create the desired collage in no time. You can customize the selected templates by adding filters, texts, effects, and more elements available. A paid version of the tool with advanced features is also available.
Part 4 Use stock images to enhance your photo grid
Adding high-quality and interesting images to your photo grid will level up its overall look and make it eye-catchy. If you are running short of such interesting and bright images, no need to worry as several sites have a good collection of images that can be used. One such program that we recommend here to check the stock images is Wondershare Filmora. Though Filmora is an advanced Windows and Mac-based video editing software, there are multiple additional features supported one of them is a collection of images in an array of categories.
Depending on the theme of your photo grid, you can select the desired images and other media from Wondershare Filmora Video Editor . Additionally, the split-screen feature of the software will let you add and play multiple videos in a single frame that makes it look like a video collage.
Wondershare Filmora - Best Video Editor for Mac/Windows
5,481,435 people have downloaded it.
Build unique custom animations without breaking a sweat.
Focus on creating epic stories and leave the details to Filmora’s auto features.
Start a creative adventure with drag & drop effects and endless possibilities.
Filmora simplifies advanced features to save you time and effort.
Filmora cuts out repetition so you can move on to your next creative breakthrough.
● Key Takeaways from This Episode →
● A photo grid is a classic and traditional style of creating a collage.
● There are several online tools, software, and mobile apps available for creating interesting photo grids.
● Wondershare Filmora is a great site to get stock of images in different categories and for all types of video editing requirements.
Also read:
- New In 2024, How to Analyze an Editorial Cartoon Easily
- Christmas Is Coming! How to Find & Make Animated Christmas GIFs?
- In 2024, 10 Trendy Free Logo Animation Templates
- Top 10 Apps to Enhance Your Instagram Story Slideshow for 2024
- New 2024 Approved 12+ Stunning Instagram GIF Stickers and How to Make & Find
- Learn How to Create Adobe 3D Animation for 2024
- New Ways to Make Sure You Get the Most up to Date Cartoon Character Design Tips
- New In 2024, How to Make an Animation With 7 Steps
- Updated 2024 Approved 18 Best Tools and Services to Create Animated Videos for Business 2023
- Updated How to Create an Animated Sticky Navbar for 2024
- 18 Best Tools and Services to Create Animated Videos for Business 2023
- Epic Formula to Animate Photos From These 10 Animate Pictures App
- New 2024 Approved How to Combine Two/More GIFs Into One GIF Mergers Offered
- Updated 2024 Approved 5 Best Adobe Animate Courses & Classes
- 10 Caricature Makers to Turn Your Photo to Caricature Effects
- How to Become a Motion Graphic Designer for 2024
- Updated Learn What Are Differences Between 2D And 3D Animation
- In 2024, Ideas of Learning How to Send WhatsApp Animated Gifs
- Updated 2024 Approved The Best 8 Places for High-Quality Royalty Free Gifs
- 2024 Approved Techniques on How to Make After Effects 2D Animation
- Updated 2024 Approved 5 Free Animated Gif Sources You Must Check
- 2024 Approved How to Send and Add Snapchat GIFs 100 in Easy Way
- New Top 4 Websites to Get Anime Footage for Free for 2024
- Updated 12 Top Stop Motion Studios Worth Recommending for 2024
- New In 2024, Techniques for Making After Effects 2D Animation
- Updated In 2024, Tips on How to Get Awesome Background for Slideshow in PowerPoint
- Updated 4 Things You Should Know About Pinterest GIF
- New Learn Disney Cartoon Drawing to See More Disney Magic Moments
- In 2024, How to Send and Add Snapchat GIFs 100 The Easy Way
- How to Create Your Avatar Free
- 2024 Approved Samples of Cartoon Character Face
- Updated Incredible Ways to Find Suitable Animated Graphic Maker for 2024
- New In 2024, How to Make a Video a Live Photo
- Updated 2024 Approved Ways to Make Sure You Get the Most up to Date Cartoon Character Design Tips
- Updated In 2024, Best 15 Female Anime Characters-Who Is Your Favorite?
- Something About Types of Motion Graphics
- New In 2024, Beginners Guide for Learning 3D Animation
- Top 10 Best Photo to Animation Converters That Give You an Advantage for 2024
- Updated Everything You Need to Know About Becoming a Motion Graphic Designer
- New All About 3D Medical Animation And Its Uses
- Methods to Change GPS Location On Apple iPhone 14 | Dr.fone
- Turn Off Screen Lock - Infinix Hot 40
- Top 15 Augmented Reality Games Like Pokémon GO To Play On Vivo V29 | Dr.fone
- In 2024, Lock Your Realme GT 5 Pro Phone in Style The Top 5 Gesture Lock Screen Apps
- Updated 2024 Approved 6 Best Voice Changers
- 3 Easy Methods to Unlock iCloud Locked Apple iPhone 13 Pro/iPad/iPod
- In 2024, How to Turn Off Google Location to Stop Tracking You on Apple iPhone 8 Plus | Dr.fone
- Easy Guide to Honor 80 Pro Straight Screen Edition FRP Bypass With Best Methods
- All Must-Knows to Use Fake GPS GO Location Spoofer On HTC U23 Pro | Dr.fone
- Undelete lost music from Find N3 Flip
- Vivo Y78+ Bootloop Problem, How to Fix it Without Data Loss | Dr.fone
- In 2024, Top 10 Best Spy Watches For your Motorola Moto G 5G (2023) | Dr.fone
- How do you play HEVC/H.265 files on Motorola G24 Power?
- How to Screen Share Mac to Apple iPhone 15? | Dr.fone
- How To Restore Missing Messages Files from Infinix Hot 40 Pro
- Unlock Your Samsung Galaxy M54 5G Phone with Ease The 3 Best Lock Screen Removal Tools
- 3 Ways to Unlock iPhone 6 Plus without Passcode or Face ID
- Android Safe Mode - How to Turn off Safe Mode on Itel A60s? | Dr.fone
- In 2024, Process of Screen Sharing Samsung Galaxy A24 to PC- Detailed Steps | Dr.fone
- Different Methods To Unlock Your iPhone 15 Pro
- How Honor X50 GT Mirror Screen to PC? | Dr.fone
- In 2024, How to Intercept Text Messages on Vivo Y100t | Dr.fone
- How to Stop My Spouse from Spying on My Xiaomi Redmi A2 | Dr.fone
- In 2024, List of Pokémon Go Joysticks On Honor 70 Lite 5G | Dr.fone
- Guide on How To Remove Apple ID From iPhone 6 Plus
- How to Fix My Motorola Edge 40 Neo Location Is Wrong | Dr.fone
- Can I use iTools gpx file to catch the rare Pokemon On Realme GT 5 (240W) | Dr.fone
- Title: New How to Liven Up Your Animate Website on Scroll
- Author: Elon
- Created at : 2024-06-23 02:09:43
- Updated at : 2024-06-24 02:09:43
- Link: https://animation-videos.techidaily.com/new-how-to-liven-up-your-animate-website-on-scroll/
- License: This work is licensed under CC BY-NC-SA 4.0.
