
:max_bytes(150000):strip_icc():format(webp)/AIrendering_CROPPED_Guillaume_GettyImages-1418477818-d0a9c5ce09584a1099f21a5f1f690a88.jpg)
New How to Make a Photoshop Collage in Simple Steps for 2024
How to Make a Photoshop Collage in Simple Steps
How to Make a Photoshop Collage in EASY Steps
An easy yet powerful editor
Numerous effects to choose from
Detailed tutorials provided by the official channel
Photographs are a way of capturing and stopping the time in a small frame. They hold millions of memories that we want to cherish forever in our lives. And sometimes, we want to make a cluster of all the happy memories by making a collage of the photos.

Also, what can be a better gift to someone than presenting them a collection of all the cherishable memories you have with them in photographs? And that can be made possible through various photoshop collage ideas.
In this article
01 [Does Photoshop Have Collage Templates?](#Part 1)
02 [How to Make Your Own Collage with Photoshop Templates](#Part 2)
03 [How to Custom a Photoshop Collage in 9 Simple Steps](#Part 3)
Part 1 Does Photoshop Have Collage Templates?
There is numerous photo collage template in photoshop, and you even access and use some of them for free. Additionally, you can also create your template in Photoshop and use them in making your collage. If you want to make your template in Photoshop, here is how.
Step 1: Make a new layer and fill it up with your choice of colour.
Step 2: Resize and duplicate the layer to create the pattern you want for your collage.
Step 3: Integrate a “Clipping Mask.”
Step 4: For every image, create new clipping masks.
Step 5: Your collage template is ready so, export it to use!
Part 2 How to Make Your Own Collage with Photoshop Templates
Now that we know that you can access numerous incredible photoshop templates for free, you might want to create a collage for yourself in Photoshop. So, this is how you can use the photoshop collage template to make your collage with Photoshop Templates.
First, you need to select the images you want to create a collage with. Then you will have to import them. You can either “select and import” them one at a time or even batch import all of them together. Then, you can readily choose the template you want to use, or you can also create one for yourself.
Then you can resize or edit the images in the way you want and place them in the desired order. After you are done arranging and creating the collage perfectly, save the file in JPEG format and then export it to access it whenever you want!
Part 3 How to Custom a Photoshop Collage in 9 Simple Steps
If you do not know the answer to the question: how to make a collage in photoshop, there is absolutely nothing to worry about. Because the answer to this question is simple and includes not more than nine steps.
So now, we will be discussing the nine simple steps that will help you make a custom photo collage in photoshop. Here is the list of steps that will help you in doing so.
● Step 1: Selecting your favorite photos
The first step to making a collage in photoshop is to select all the photos you would like your collage to have. Now, it will be best for you to choose your photos wisely. We understand that each photograph is equally sweet and cherishable. But, when you select the images for your collage in a thoughtful manner, the collage turns out much better than expected.
You can use different collage ideas for photoshop, such as following a particular storyline, where you collage the photos so that it recreates the memory or the moments in sequence. Another way to select your photos is by sticking to a particular theme, and it can be vintage or on one specific color or the like. It will help your collage turn out in the best and the most thoughtful way.
● Step 2: Opening the photos you have selected, in collage maker photoshop
Now that you have selected which images you would want your collage to have, the next step will require you to open those images in the collage maker Photoshop. For this, you will have to select the option “File”. There, you will find the option “Open”. Then you will open the images you have chosen in Photoshop.
Also, you can simply press the “ctrl” and the “O” keys on your keyboard and it will automatically help you open the images you have selected for the photo collage on photoshop.

Another way to open the pages you have selected for your collage is through the “Drag and Drop” function. It is more effortless to choose the images and open them in Photoshop. After you have opened the photos in Photoshop, it will open in a different tab and look like in the following picture.

● Step 3: Make a new file for your collage on photoshop
The third step requires you to make a new file for your photo collage in photoshop. For this, you need to select or click on the “File” option on Photoshop. Then, click on the “New” option. It will help you make a new file for your collage. You can also select the “ctrl” and “N” together.
As you click on the “New” option, you will be given options to choose from. Choose the one that matches your preference.
When you are working on photoshop to make a collage, the images will need a collage background because it is on this background that the photos will assemble. If you have made a collage before on photoshop, you can use the old collage photoshop template. Otherwise, you need to create a new document for the collage.

● Step 4: Add the selected images one-by-one
Adding the images can be done in many ways. One way to do so is by opening the photo and clicking on it. Another way of doing so is to use the “Marquee Tool” of Photoshop.

Another way of doing so is by pressing the “ctrl” and “A” keys on your keyboard together. You will find the matching ants border around the image when you do this.

Then, go to the “Edit” option and choose “Copy” there. Or, you can also select the “ctrl” and “C” keys on your keywords together. Then go to your new document and select the option of “Paste” from the “Edit” option, or you can also press the “ctrl” and “V” keys together to do so.
The photo will be added in its own layer on the new document.

● Step 5: Arrange the images
Now, arrange the images in the way you want. If you have chosen to tell a story through your collage creator in photoshop, then arrange the photos accordingly. You can do so with the help of the “Move” tool or simply tap V. You can also use the “Free Transform” tool to edit and transform the images in the way you want. You can resize, rotate and edit the photos in many other ways through the “Free Transform” tool.
Step 6: Integrate image space
To create a collage in photoshop in a better and more spaced-out manner, you need to add some spacing between the images you have in your collage. There are two ways to add spacing between the pictures; one way is by creating a thin, white border around each image.
And the second method is by accessing and using the “Layers” feature in Photoshop.

● Step 7: Merge all the Layers
This step is necessary when you have used the “Layer” feature to create the spacing among the images present in your collage. You will be able to do so from the “Layer” option. So, go to the “Layer” option and select the “Merge Invisible” option present there.

● Step 8: cropping the final picture
Before the final step, it is important that you crop the final picture. And to do so, you can opt for the “Crop tool”. You will be able to access it easily, or you can also simply tap C to use the “Crop tool.”

● Step 9: Save the final collage and export
After you have done all the necessary changes and are satisfied with the final collage, then, save the file. To do so, go to the “File” option and select the “Save as” option.

Then choose the file type to be “JPEG”. Type the name you would want the collage to be saved as. This completes the process of saving the file. Then choose the image quality you would want the collage to be exported in.

● Key Takeaways from This Episode →
● In this discussion, we have covered the following topics.
● We discussed whether Photoshop has collage templates.
● Then we proceeded with discussing how we can create a collage in photoshop using the templates in it.
● Lastly, we wrapped up our discussion with the nine-step tutorial about customizing a collage in Photoshop.
Photographs are a way of capturing and stopping the time in a small frame. They hold millions of memories that we want to cherish forever in our lives. And sometimes, we want to make a cluster of all the happy memories by making a collage of the photos.
Also, what can be a better gift to someone than presenting them a collection of all the cherishable memories you have with them in photographs? And that can be made possible through various photoshop collage ideas.
In this article
01 [Does Photoshop Have Collage Templates?](#Part 1)
02 [How to Make Your Own Collage with Photoshop Templates](#Part 2)
03 [How to Custom a Photoshop Collage in 9 Simple Steps](#Part 3)
Part 1 Does Photoshop Have Collage Templates?
There is numerous photo collage template in photoshop, and you even access and use some of them for free. Additionally, you can also create your template in Photoshop and use them in making your collage. If you want to make your template in Photoshop, here is how.
Step 1: Make a new layer and fill it up with your choice of colour.
Step 2: Resize and duplicate the layer to create the pattern you want for your collage.
Step 3: Integrate a “Clipping Mask.”
Step 4: For every image, create new clipping masks.
Step 5: Your collage template is ready so, export it to use!
Part 2 How to Make Your Own Collage with Photoshop Templates
Now that we know that you can access numerous incredible photoshop templates for free, you might want to create a collage for yourself in Photoshop. So, this is how you can use the photoshop collage template to make your collage with Photoshop Templates.
First, you need to select the images you want to create a collage with. Then you will have to import them. You can either “select and import” them one at a time or even batch import all of them together. Then, you can readily choose the template you want to use, or you can also create one for yourself.
Then you can resize or edit the images in the way you want and place them in the desired order. After you are done arranging and creating the collage perfectly, save the file in JPEG format and then export it to access it whenever you want!
Part 3 How to Custom a Photoshop Collage in 9 Simple Steps
If you do not know the answer to the question: how to make a collage in photoshop, there is absolutely nothing to worry about. Because the answer to this question is simple and includes not more than nine steps.
So now, we will be discussing the nine simple steps that will help you make a custom photo collage in photoshop. Here is the list of steps that will help you in doing so.
● Step 1: Selecting your favorite photos
The first step to making a collage in photoshop is to select all the photos you would like your collage to have. Now, it will be best for you to choose your photos wisely. We understand that each photograph is equally sweet and cherishable. But, when you select the images for your collage in a thoughtful manner, the collage turns out much better than expected.
You can use different collage ideas for photoshop, such as following a particular storyline, where you collage the photos so that it recreates the memory or the moments in sequence. Another way to select your photos is by sticking to a particular theme, and it can be vintage or on one specific color or the like. It will help your collage turn out in the best and the most thoughtful way.
● Step 2: Opening the photos you have selected, in collage maker photoshop
Now that you have selected which images you would want your collage to have, the next step will require you to open those images in the collage maker Photoshop. For this, you will have to select the option “File”. There, you will find the option “Open”. Then you will open the images you have chosen in Photoshop.
Also, you can simply press the “ctrl” and the “O” keys on your keyboard and it will automatically help you open the images you have selected for the photo collage on photoshop.
Another way to open the pages you have selected for your collage is through the “Drag and Drop” function. It is more effortless to choose the images and open them in Photoshop. After you have opened the photos in Photoshop, it will open in a different tab and look like in the following picture.
● Step 3: Make a new file for your collage on photoshop
The third step requires you to make a new file for your photo collage in photoshop. For this, you need to select or click on the “File” option on Photoshop. Then, click on the “New” option. It will help you make a new file for your collage. You can also select the “ctrl” and “N” together.
As you click on the “New” option, you will be given options to choose from. Choose the one that matches your preference.
When you are working on photoshop to make a collage, the images will need a collage background because it is on this background that the photos will assemble. If you have made a collage before on photoshop, you can use the old collage photoshop template. Otherwise, you need to create a new document for the collage.
● Step 4: Add the selected images one-by-one
Adding the images can be done in many ways. One way to do so is by opening the photo and clicking on it. Another way of doing so is to use the “Marquee Tool” of Photoshop.
Another way of doing so is by pressing the “ctrl” and “A” keys on your keyboard together. You will find the matching ants border around the image when you do this.
Then, go to the “Edit” option and choose “Copy” there. Or, you can also select the “ctrl” and “C” keys on your keywords together. Then go to your new document and select the option of “Paste” from the “Edit” option, or you can also press the “ctrl” and “V” keys together to do so.
The photo will be added in its own layer on the new document.
● Step 5: Arrange the images
Now, arrange the images in the way you want. If you have chosen to tell a story through your collage creator in photoshop, then arrange the photos accordingly. You can do so with the help of the “Move” tool or simply tap V. You can also use the “Free Transform” tool to edit and transform the images in the way you want. You can resize, rotate and edit the photos in many other ways through the “Free Transform” tool.
Step 6: Integrate image space
To create a collage in photoshop in a better and more spaced-out manner, you need to add some spacing between the images you have in your collage. There are two ways to add spacing between the pictures; one way is by creating a thin, white border around each image.
And the second method is by accessing and using the “Layers” feature in Photoshop.
● Step 7: Merge all the Layers
This step is necessary when you have used the “Layer” feature to create the spacing among the images present in your collage. You will be able to do so from the “Layer” option. So, go to the “Layer” option and select the “Merge Invisible” option present there.
● Step 8: cropping the final picture
Before the final step, it is important that you crop the final picture. And to do so, you can opt for the “Crop tool”. You will be able to access it easily, or you can also simply tap C to use the “Crop tool.”
● Step 9: Save the final collage and export
After you have done all the necessary changes and are satisfied with the final collage, then, save the file. To do so, go to the “File” option and select the “Save as” option.
Then choose the file type to be “JPEG”. Type the name you would want the collage to be saved as. This completes the process of saving the file. Then choose the image quality you would want the collage to be exported in.
● Key Takeaways from This Episode →
● In this discussion, we have covered the following topics.
● We discussed whether Photoshop has collage templates.
● Then we proceeded with discussing how we can create a collage in photoshop using the templates in it.
● Lastly, we wrapped up our discussion with the nine-step tutorial about customizing a collage in Photoshop.
Amazing Ways to Find Suitable Animated Graphic Maker
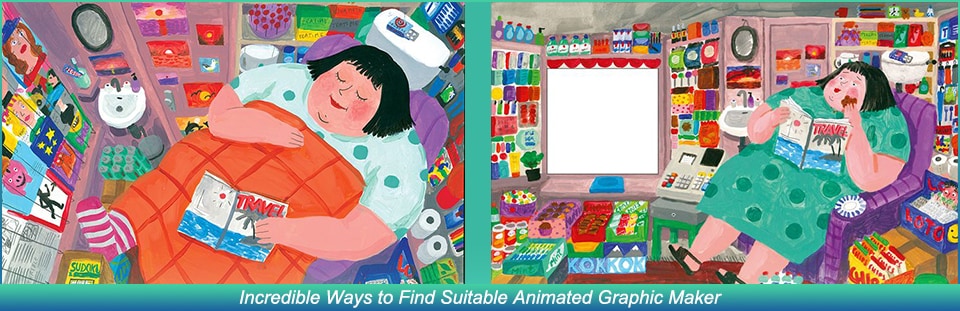
Incredible Ways to Find Suitable Animated Graphic Maker
An easy yet powerful editor
Numerous effects to choose from
Detailed tutorials provided by the official channel
Are you an enthusiast of animations, too? Do you, too, want to create something fun and exciting and show your skills through animation?
It is a hundred percent possible, with the animated graphic maker software available in the present times. Let us know more about this fantastic world of animation and the suitable animated graphic maker that will make your animation dreams and skills more enhanced and proficient in no time!
In this article
01 [Facts About Animated Graphics You Need to Know](#Part 1)
02 [Why You Should Use Animated Graphics in Your Marketing](#Part 2)
03 [Why You Should Use Animated Graphics in Your Marketing](#Part 3)
Part 1 Facts About Animated Graphics You Need to Know
There are specific facts that are important for you to know if you want to work with animations and use graphic animated tools. The facts are as follows.
01 Can Vector Graphics Be Animated?
Precisely, yes. Vector graphics can readily be animated, and that, too, is better than pixels. Animation or movement in animations occurs due to either of the two components- pixels and vectors. One can readily be animated in vector graphics. There are software tools available that can assist in the animation of vector graphics ideally. Thus, with the help of various software, creating animated vector graphics is now effortless and fun!

02 How Do I Animate a Still Image Online?
The process to animate static images online is no big deal at all. You just have to be familiar with the various software that is available for this work. Along with being familiar with the software, you also have to know how each of them works. If you know how the animation tools in the software you are going to use, it becomes an effortless and easy task to animate still images online.
You can animate static images online with the help of some renowned software or app like - Wondershare Filmora, Plotagraph, StoryZ, GIFMaker.me, PixaMotion, Movepic, Photo Motion, and 3Dthis. Each of these software ideally provides you with all the tools and functions that you can choose for animating still images online.
Wondershare Filmora
Power Up Your Story with Filmora. Professional video editing is made easy.
03 How Do You Make Animated Vector Graphics?
There are specific steps involved that help you in creating animated graphics. And the steps are as follows.
Steps for creating animated graphics:
● Isolating the vector
This step involves the selection of the vector image that you want to animate.
● Making duplicates of the vector image
You need to duplicate the vector image that you have chosen to animate. The duplication will help you reflect the movement in the image.
● Making changes in the frames
Proceed to make minor changes in each of the frames to reflect movement in the images.
● Wash it, rinse it and continue the cycle
Make a duplication of the artboard. Then, perform the changes the same as done previously. And repeat this cycle.
● Copy the large artboard
Copy the large artboard to the software you are using for animation. And then utilize the available tools of animation in the software for animating vector graphics.

Part 2 Why You Should Use Animated Graphics in Your Marketing?
In a very precise way, we can answer as animated graphics propagate and amplify awareness of the brands that integrate their utility. However, this is a general way of answering the important question. There are several reasons that make it necessary and beneficial for you to integrate animated graphics for websites for marketing your brand name. And they are as follows.
01 Eye-catching
One of the most important reasons for your marketing to include animated graphics is that they catch the attention of the audience more than any other method of marketing. They are interesting and fun, and that is the feature that attracts the attention of the audience. They get to see your brand in a more exciting and exciting way. Consequently, marketing your brand becomes ideally effective.

02 Easily informative
The motive for marketing is to inform the audience and other people about different information about your brand or company. Often, conveying information about your brands, services, and products becomes uninteresting for the audience. To make it more appealing, animated graphics can do the perfect job. They are fascinating to watch and deliver all the required information in a new and novel way. This does not bore the audience. Instead, if the animations are unique and exciting, people can actually be interested in watching them at will.
03 Customize it based on your needs
Graphic animations can be created based on the requirements of your marketing. And it is not just about the needs; it can be based on the audience genre you have. For example, if your products or services are meant for the kids, the animation will be made according to those factors that appeal to the kids. If your brand is for senior citizens, the animations will be different. Most importantly, if your brand shifts its audience genre, animations can also be created in the genre that you are choosing to serve at present. Thus, the customization ability of graphics animation offers flexibility in marketing.

03 A most efficient method of marketing
Graphic animation delivers the required promotional information in no time and in the most attractive way possible. Thus, there can be no other method of marketing as efficient and quick as graphics animation.
Part 3How to Create Animated Graphics That Stand out?
Well, the aspect of animation has attained the attention of thousands of enthusiasts all around the globe. And so, you will find numerous people making animations. And for this reason, there is numerous animation software available too on the internet. But, what can you do to design your animation to stand out? There are a few software for graphic animation that are better than the rest. And one of them is Wondershare Filmora. It is one of the top software. And it will readily and effortlessly help you integrate your animation skills and make your animations unique among the crowd.
What are the key features of this software?
● Professional quality animation tools
Do you believe that you possess immense animation skills? Then, no other software can be as motivational for you as Filmora Pro because its tools and features help you create professional-quality animation. You can readily create animated graphics for youtube from this software.
● Option for import and export
There is no occurrence of graphics hardware acceleration while you export a file from Filmora Pro.
● Easy user interface
The tools present in this software for animation are of professional quality. You can make animations that will look highly proficient. But, that does not make this software a difficult-to-use tool.
Filmora Features →
● Limitless video tracks
● Availability in Windows and well Mac
● Auto color correction
Filmora Features →
● Audio Noise Reduction
● Motion Graphics animation support
● Automatic Audio Sync
Key Takeaways from This Episode
● This was all about the different aspects of choosing a suitable animated graphic maker.
● You can readily opt for one of the several free animated graphics maker software available.
● But, if you want to avail yourself of the best, Filmora is the best go-to software for animated graphic making and exploring your animation skills.


Are you an enthusiast of animations, too? Do you, too, want to create something fun and exciting and show your skills through animation?
It is a hundred percent possible, with the animated graphic maker software available in the present times. Let us know more about this fantastic world of animation and the suitable animated graphic maker that will make your animation dreams and skills more enhanced and proficient in no time!
In this article
01 [Facts About Animated Graphics You Need to Know](#Part 1)
02 [Why You Should Use Animated Graphics in Your Marketing](#Part 2)
03 [Why You Should Use Animated Graphics in Your Marketing](#Part 3)
Part 1 Facts About Animated Graphics You Need to Know
There are specific facts that are important for you to know if you want to work with animations and use graphic animated tools. The facts are as follows.
01 Can Vector Graphics Be Animated?
Precisely, yes. Vector graphics can readily be animated, and that, too, is better than pixels. Animation or movement in animations occurs due to either of the two components- pixels and vectors. One can readily be animated in vector graphics. There are software tools available that can assist in the animation of vector graphics ideally. Thus, with the help of various software, creating animated vector graphics is now effortless and fun!
02 How Do I Animate a Still Image Online?
The process to animate static images online is no big deal at all. You just have to be familiar with the various software that is available for this work. Along with being familiar with the software, you also have to know how each of them works. If you know how the animation tools in the software you are going to use, it becomes an effortless and easy task to animate still images online.
You can animate static images online with the help of some renowned software or app like - Wondershare Filmora, Plotagraph, StoryZ, GIFMaker.me, PixaMotion, Movepic, Photo Motion, and 3Dthis. Each of these software ideally provides you with all the tools and functions that you can choose for animating still images online.
Wondershare Filmora
Power Up Your Story with Filmora. Professional video editing is made easy.
03 How Do You Make Animated Vector Graphics?
There are specific steps involved that help you in creating animated graphics. And the steps are as follows.
Steps for creating animated graphics:
● Isolating the vector
This step involves the selection of the vector image that you want to animate.
● Making duplicates of the vector image
You need to duplicate the vector image that you have chosen to animate. The duplication will help you reflect the movement in the image.
● Making changes in the frames
Proceed to make minor changes in each of the frames to reflect movement in the images.
● Wash it, rinse it and continue the cycle
Make a duplication of the artboard. Then, perform the changes the same as done previously. And repeat this cycle.
● Copy the large artboard
Copy the large artboard to the software you are using for animation. And then utilize the available tools of animation in the software for animating vector graphics.
Part 2 Why You Should Use Animated Graphics in Your Marketing?
In a very precise way, we can answer as animated graphics propagate and amplify awareness of the brands that integrate their utility. However, this is a general way of answering the important question. There are several reasons that make it necessary and beneficial for you to integrate animated graphics for websites for marketing your brand name. And they are as follows.
01 Eye-catching
One of the most important reasons for your marketing to include animated graphics is that they catch the attention of the audience more than any other method of marketing. They are interesting and fun, and that is the feature that attracts the attention of the audience. They get to see your brand in a more exciting and exciting way. Consequently, marketing your brand becomes ideally effective.
02 Easily informative
The motive for marketing is to inform the audience and other people about different information about your brand or company. Often, conveying information about your brands, services, and products becomes uninteresting for the audience. To make it more appealing, animated graphics can do the perfect job. They are fascinating to watch and deliver all the required information in a new and novel way. This does not bore the audience. Instead, if the animations are unique and exciting, people can actually be interested in watching them at will.
03 Customize it based on your needs
Graphic animations can be created based on the requirements of your marketing. And it is not just about the needs; it can be based on the audience genre you have. For example, if your products or services are meant for the kids, the animation will be made according to those factors that appeal to the kids. If your brand is for senior citizens, the animations will be different. Most importantly, if your brand shifts its audience genre, animations can also be created in the genre that you are choosing to serve at present. Thus, the customization ability of graphics animation offers flexibility in marketing.
03 A most efficient method of marketing
Graphic animation delivers the required promotional information in no time and in the most attractive way possible. Thus, there can be no other method of marketing as efficient and quick as graphics animation.
Part 3How to Create Animated Graphics That Stand out?
Well, the aspect of animation has attained the attention of thousands of enthusiasts all around the globe. And so, you will find numerous people making animations. And for this reason, there is numerous animation software available too on the internet. But, what can you do to design your animation to stand out? There are a few software for graphic animation that are better than the rest. And one of them is Wondershare Filmora. It is one of the top software. And it will readily and effortlessly help you integrate your animation skills and make your animations unique among the crowd.
What are the key features of this software?
● Professional quality animation tools
Do you believe that you possess immense animation skills? Then, no other software can be as motivational for you as Filmora Pro because its tools and features help you create professional-quality animation. You can readily create animated graphics for youtube from this software.
● Option for import and export
There is no occurrence of graphics hardware acceleration while you export a file from Filmora Pro.
● Easy user interface
The tools present in this software for animation are of professional quality. You can make animations that will look highly proficient. But, that does not make this software a difficult-to-use tool.
Filmora Features →
● Limitless video tracks
● Availability in Windows and well Mac
● Auto color correction
Filmora Features →
● Audio Noise Reduction
● Motion Graphics animation support
● Automatic Audio Sync
Key Takeaways from This Episode
● This was all about the different aspects of choosing a suitable animated graphic maker.
● You can readily opt for one of the several free animated graphics maker software available.
● But, if you want to avail yourself of the best, Filmora is the best go-to software for animated graphic making and exploring your animation skills.
What Wikipedia Won’t Tell You About Character Rigging
What Wikipedia Won’t Tell You Specifically About Character Rigging
An easy yet powerful editor
Numerous effects to choose from
Detailed tutorials provided by the official channel
The function of character rigging can easily be compared to that of bones, muscles and joints. They act as skeletons to virtual animations. You can also imagine them as strings used on dolls. These digitalized bones function inter-connectedly in a 3D animation.
In this article
01 [Intro to Character Rigging](#Part 1)
02 [8 Tips for Character Rigging](#Part 2)
03 [10 Best Character Rigging Services to Buy Online](#Part 3)
04 [How to Make 3d Character Rig? Are There Any Plugins or Easy](#Part 4)
Part 1 Intro to Character Rigging
As you already know by now that the process of rigging a character can be quite a tedious task. It involves a lot of creative thinking, precision and a keen eye to notice all the small details.
Once you have a model character to work on, riggers set off to creating a skeleton to match the character. These skele-animations can be used to move the entire model as if tugging on strings (not literally).
The movement of the chain of skeletons or rigs is interdependent. Which means if you pull on any one bone, it moves all the other bones in the same sequence. Similar to how bones move within the human body.
Riggers use programs and tools to create a series of bone like structures that can deformed and animated freely according to the preference of the animators.
Movements like positioning, curving and rotation can be recorded and then played back in the animation.
This requires the rigger to constantly coordinate between modelers, animators till the end of the project. This entire process can take weeks or even months.
Amazingly enough, its 20and there are online tools and tutorials you can use to easily learn complex animations like they make in large scale movies and games.
Part 2 8 Tips for Character Rigging
01The Right Rig for the Job
Rigging is a skill all animators gets good at overtime. The more you practice the more familiar you are with the tools you are using. It will also help you understand that not all rigs are meant for the same set of movements.
You need to be able to discern what rig is it that you need and discard what you don’t. If the rig is being used in a game, then the focus will be more on the experience while for movies its attention.
02Deformers for Facial Rigging
Constructing a realistic facial rig can be quite a task but is indeed satisfying once finished. Human facial features require a great degree of flexibility which is why using a variety of deformers for different parts of the face. They are better suited for creating joints over the face and can be done more quickly.
03IK and FK
Though you can use one without the other, it is best to use both of them in an animation. You can’t work without both arms can you? Applying both Inverse and Forward Kinematics in your rig design can help it make more stylistic.
04Learn Python and Maya API: Learn Python and Maya API
If you wish to take your rigging skills to the next level then learning Maya API and Python are great millstones. This way, you can create high quality and sophisticated rigs with high intense flexibility on Maya. Also, Python allows you to write new scripts for PlugIns.
05Delegate to an Animator
After rigging for several hours it is easy to feel like you are only seeing from one perspective. Get in touch with an animator earlier on in the project can help you get feedback to stay consistent in the rigging process.
06Learn Web Technologies: Learn Web Technologies
To be a good animator or rigging specialist involves a lot of learning. Animation technology is constantly changing therefore it is highly recommended to stay up to date with the latest web technologies. Learning HTML, Java Script and CSS is becoming vital to being a part of the gaming world.
07Use Scalable Tools
Not all the characters or objects you rig are going to be of the same size. Selecting the right rigging software is crucial for you to be able to scale your animations. You won’t need to use everything, just the tools that serve your purpose.
08Use a Clean Interface
If you have ever heard of the phrase ‘clean workplace – cleaner work’ then you should know how an untidy interface can affect your workflow. This won’t necessarily change the results but can surely better your experience.
Part 3 Best Character Rigging Services to Buy Online
Don’t feel confused about where to begin. The first step to get into rigging is to master a software, any software, here are of the best ones you can choose from;
01Maya
Offers the best animation features on the market.

02Blender
Vast variety of tools for sculpting, rigging or VFX.

03Modo
Has a more simplified approach towards modelling and rigging.

043ds Max
Leverages high flexibility and ease of use to riggers.
05Sculptris
Excellentfor beginners who need a gateway software to start art.

06ZBrush
Lets you work on your sculpting skills with digital clay.

07Cheetah 3D
Developed by Macintosh to be an easy to learn modelling software.

08Rhinoceros 3D
Harbours a mathematical approach to modelling and modular design.

09Fusion 360
Offers a wide range of simulation tools.

10Cinema 4D
Recognized by professionals for well-equipped arsenal of digital rendering.

Part 4 How to Make Character Rig? Are There Any Plugins or Easy
How to Make Character Rig? Are There Any Plugins or Easy
When we imagine animation, most of the time we are baffled by the end product? But what really goes on behind the mesmerizing colors and whimsical characters.
The basic is of course building rigs to support the entire movement of the character and confine it to actual physical laws that makes it almost a mimic of reality. The entire process of rigging rather simplifies the path to achieve that goal.
In Cinema, character rigging has multiple layers that goes into creating the entire skeleton animation. Setting up a character rig can take anywhere between a few hours or a few days. It probably takes mainstream movies ten times that time.
Let us break down the process of making a rig so that it is simpler to understand.
The process;
Weight Painting: An integral part of the entire rigging process. Although, weight painting can be rendered automatically by the software that you are using, but that can end up making the animation look less realistic. You can instead fine tune the weight of each bone in the rig. You can also copy similar looking bones and apply them to different mesh and repurpose them to function differently.
Placing Bones: After designing a bone structure of character, you can copy the same and use it for similar characters. This is why in games and animation, you notice characters with similar features and traits.
Inverse Kinematics: Not all bones are meant to move in a forward direction. This is why inverses Kinematics are applied to certain bones like the legs, shoulders or even a dragon’s tail. Setting up the IK of your rig would keep specific bones pointed in the right direction so as to make the animation look more natural.
Applying Constraints: The physical realm is built with restrictions. There are things you can do or can’t do according to the natural order of things so as to make your character movement more naturalistic.
Simulation Skeletons: Now comes the part where the magic happens. After fully completing a skeletal animation you can now simulate the motion over the mesh and record the result of the simulation through a series of frames.
Create an animated movie: You can play back the simulation in an animation software such as Blender and then create your own animated movie with Filmora with its easy drag and drop interface. Movies are a collage of frames, so you need to animate according to the fps you want for your video.
Facial Rigs: Facial expressions are more complex than whole body movements. It requires the attention dedicated to a project of its own. Here is where you can play with deforming shapes together to replicate facial muscle movement.
● Key Takeaways from This Episode →
● Rigging has become science in its own right but that does not mean you can’t be artistic with it.
● What you should remember that creating skeletal animation is all about movement and applying physical restrictions to it.
● Start simple and practice until you master the most complex features of any of the top rigging software services raging in the market.
The function of character rigging can easily be compared to that of bones, muscles and joints. They act as skeletons to virtual animations. You can also imagine them as strings used on dolls. These digitalized bones function inter-connectedly in a 3D animation.
In this article
01 [Intro to Character Rigging](#Part 1)
02 [8 Tips for Character Rigging](#Part 2)
03 [10 Best Character Rigging Services to Buy Online](#Part 3)
04 [How to Make 3d Character Rig? Are There Any Plugins or Easy](#Part 4)
Part 1 Intro to Character Rigging
As you already know by now that the process of rigging a character can be quite a tedious task. It involves a lot of creative thinking, precision and a keen eye to notice all the small details.
Once you have a model character to work on, riggers set off to creating a skeleton to match the character. These skele-animations can be used to move the entire model as if tugging on strings (not literally).
The movement of the chain of skeletons or rigs is interdependent. Which means if you pull on any one bone, it moves all the other bones in the same sequence. Similar to how bones move within the human body.
Riggers use programs and tools to create a series of bone like structures that can deformed and animated freely according to the preference of the animators.
Movements like positioning, curving and rotation can be recorded and then played back in the animation.
This requires the rigger to constantly coordinate between modelers, animators till the end of the project. This entire process can take weeks or even months.
Amazingly enough, its 20and there are online tools and tutorials you can use to easily learn complex animations like they make in large scale movies and games.
Part 2 8 Tips for Character Rigging
01The Right Rig for the Job
Rigging is a skill all animators gets good at overtime. The more you practice the more familiar you are with the tools you are using. It will also help you understand that not all rigs are meant for the same set of movements.
You need to be able to discern what rig is it that you need and discard what you don’t. If the rig is being used in a game, then the focus will be more on the experience while for movies its attention.
02Deformers for Facial Rigging
Constructing a realistic facial rig can be quite a task but is indeed satisfying once finished. Human facial features require a great degree of flexibility which is why using a variety of deformers for different parts of the face. They are better suited for creating joints over the face and can be done more quickly.
03IK and FK
Though you can use one without the other, it is best to use both of them in an animation. You can’t work without both arms can you? Applying both Inverse and Forward Kinematics in your rig design can help it make more stylistic.
04Learn Python and Maya API: Learn Python and Maya API
If you wish to take your rigging skills to the next level then learning Maya API and Python are great millstones. This way, you can create high quality and sophisticated rigs with high intense flexibility on Maya. Also, Python allows you to write new scripts for PlugIns.
05Delegate to an Animator
After rigging for several hours it is easy to feel like you are only seeing from one perspective. Get in touch with an animator earlier on in the project can help you get feedback to stay consistent in the rigging process.
06Learn Web Technologies: Learn Web Technologies
To be a good animator or rigging specialist involves a lot of learning. Animation technology is constantly changing therefore it is highly recommended to stay up to date with the latest web technologies. Learning HTML, Java Script and CSS is becoming vital to being a part of the gaming world.
07Use Scalable Tools
Not all the characters or objects you rig are going to be of the same size. Selecting the right rigging software is crucial for you to be able to scale your animations. You won’t need to use everything, just the tools that serve your purpose.
08Use a Clean Interface
If you have ever heard of the phrase ‘clean workplace – cleaner work’ then you should know how an untidy interface can affect your workflow. This won’t necessarily change the results but can surely better your experience.
Part 3 Best Character Rigging Services to Buy Online
Don’t feel confused about where to begin. The first step to get into rigging is to master a software, any software, here are of the best ones you can choose from;
01Maya
Offers the best animation features on the market.
02Blender
Vast variety of tools for sculpting, rigging or VFX.
03Modo
Has a more simplified approach towards modelling and rigging.
043ds Max
Leverages high flexibility and ease of use to riggers.
05Sculptris
Excellentfor beginners who need a gateway software to start art.
06ZBrush
Lets you work on your sculpting skills with digital clay.
07Cheetah 3D
Developed by Macintosh to be an easy to learn modelling software.
08Rhinoceros 3D
Harbours a mathematical approach to modelling and modular design.
09Fusion 360
Offers a wide range of simulation tools.
10Cinema 4D
Recognized by professionals for well-equipped arsenal of digital rendering.
Part 4 How to Make Character Rig? Are There Any Plugins or Easy
How to Make Character Rig? Are There Any Plugins or Easy
When we imagine animation, most of the time we are baffled by the end product? But what really goes on behind the mesmerizing colors and whimsical characters.
The basic is of course building rigs to support the entire movement of the character and confine it to actual physical laws that makes it almost a mimic of reality. The entire process of rigging rather simplifies the path to achieve that goal.
In Cinema, character rigging has multiple layers that goes into creating the entire skeleton animation. Setting up a character rig can take anywhere between a few hours or a few days. It probably takes mainstream movies ten times that time.
Let us break down the process of making a rig so that it is simpler to understand.
The process;
Weight Painting: An integral part of the entire rigging process. Although, weight painting can be rendered automatically by the software that you are using, but that can end up making the animation look less realistic. You can instead fine tune the weight of each bone in the rig. You can also copy similar looking bones and apply them to different mesh and repurpose them to function differently.
Placing Bones: After designing a bone structure of character, you can copy the same and use it for similar characters. This is why in games and animation, you notice characters with similar features and traits.
Inverse Kinematics: Not all bones are meant to move in a forward direction. This is why inverses Kinematics are applied to certain bones like the legs, shoulders or even a dragon’s tail. Setting up the IK of your rig would keep specific bones pointed in the right direction so as to make the animation look more natural.
Applying Constraints: The physical realm is built with restrictions. There are things you can do or can’t do according to the natural order of things so as to make your character movement more naturalistic.
Simulation Skeletons: Now comes the part where the magic happens. After fully completing a skeletal animation you can now simulate the motion over the mesh and record the result of the simulation through a series of frames.
Create an animated movie: You can play back the simulation in an animation software such as Blender and then create your own animated movie with Filmora with its easy drag and drop interface. Movies are a collage of frames, so you need to animate according to the fps you want for your video.
Facial Rigs: Facial expressions are more complex than whole body movements. It requires the attention dedicated to a project of its own. Here is where you can play with deforming shapes together to replicate facial muscle movement.
● Key Takeaways from This Episode →
● Rigging has become science in its own right but that does not mean you can’t be artistic with it.
● What you should remember that creating skeletal animation is all about movement and applying physical restrictions to it.
● Start simple and practice until you master the most complex features of any of the top rigging software services raging in the market.
How to Create Picsart Cartoon in Simple Ways
How to Create Picsart Cartoon
An easy yet powerful editor
Numerous effects to choose from
Detailed tutorials provided by the official channel
Cartoonized images are a convenient source of fun and media entertainment in present times. Try hands at creating your own caricature masterpieces with Picsart!
In this article
01 [How To Edit Cartoon Picture in Picsart](#Part 1)
02 [How To Make A Cartoon On Your Phone](#Part 2)
03 [How to Cartoon Yourself on Picsart](#Part 3)
Part 1 How to Edit Cartoon Picture in Picsart
Cartoonized pictures as you must be aware of, are comic transformations of real-time images and are widely used on social media to add a funny angle to the diversity of conversation going on, or even just as a source of plentiful amusement.
If you often feel motivated to experiment with the art and are looking for a perfect solution, see through the following section for a detailed and stepwise guide to create and edit a Picsart cartoon with utmost ease and within a quick time span:
User’s Guide to Edit Cartoon Pictures in Picsart
Step 1: Download the Picsart Application
Visit the official Picsart website to download the desktop version of the app in your Windows or MacOs supported PC.
Step 2: Make a Selection
Launch the app in your system to reach the Picsart welcome screen. Navigate to the bottom and tap the ‘+’ symbol. You are now required to choose a desired image to create the cartoon edit. You can either browse through your system gallery or search a specific one from the Picsart photo library in the ‘Search Bar’ at the top of the app screen.

Step 3: Let’s Get Editing!
When you have made your choice, navigate to the toolbar at the bottom of the app screen and click on the ‘Effects’ tab. Make a side scroll to choose a specific effect category, like that of ‘Artistic’ or ‘Magic’ to open a library of effects in the selected category.
As an example, selecting the ‘Cartoonizer’ option in the ‘Artistic’ effects category can add an immediate caricature feel to your selected real-time image. You can further include manual adjustments to get the perfect cartoon look by pressing and holding the ‘Cartoonizer’ option. There are a whole variety of magical effects, such as, Neo Pop, Soul, Badlands, Animation and Paw in the ‘Magic’ effects category, that are just perfect in giving your edit a fantasizing look with a Picsart cartoon background.
If you are looking for a quicker editing process, prefer adding cartoonized elements, like ‘Picsart Stickers’ to your image instead of going for a complete caricature edit. To do this, open the ‘Picsart Photo Editor’, navigates to the ‘Sticker’ symbol and click on it, followed by searching ‘Cartoon Sticker’. You can alternatively search a specific keyword with the ‘Cartoon’ descriptor, if you are clear on what you want to add.
You can further, resize your selected sticker with a ‘Two Finger Pinch’ or use the ‘Eraser’ tool to ward off any unwanted portions from the same. You are free to take as many repetitions of the process as you wish, till you get the perfect result for saving to your device and sharing on your social media handles.

Step 4: Time to Save and Share!
When you are satisfied with your work, navigate to the right hand corner and tap ‘Apply’ to finalize your changes, followed by clicking on the ‘Next’ button at the top right corner of the app screen to save and export your creation.
Part 2 How to Make a Cartoon on Your Phone
After a detailed analysis of the cartoon editing procedure in your desktops, let us see thro ugh the method of creating cartoonized images on your MacOs and Android smartphones on the following section:
Stepwise Procedure for Creating Cartoonized Images on Phone
Step 1: Download the Application
When going to use the Picsart editor application on your smartphone, you will first require a download of the same in your concerned device. You can do this by visiting the ‘Google PlayStore’ for an Android device or the ‘Apple App Store’ for MacOs smartphones.
Step 2: Choose a Real-time Image
After a successful launch of the ‘Picsart Editor’ application in your smartphone, reach to and click on the ‘+’ icon at the bottom of the app’s working interface. This needs to be followed by selecting any specific real-time image, either from your smartphone gallery or the Picsart photo library using the top ‘Search Bar’ of the interface, for creating a cartoonized edit.

Step 3: Editing Begins!
Once you are done with selecting the image, proceed to add effects to your selection by clicking the ‘Effects’ tab in the bottom toolbar, succeeded by picking a desired effect type through a right scroll. Tap on any category, such as, Magic, Artistic, etc, to open the effect library of the same.
For instance, you can click on the ‘Cartoonizer’ option within Artistic’ effects to supplement your uploaded real-time image with an instant cartoonized effect. You are also granted the liberty to make manual changes to set the caricature image effects as per your preferences, which you can do with a ‘Press and Hold’ of the ‘Cartoonizer’ tab. If you have a diversion towards complementing your cartoonized images with magical effects, choose from Animation, Neo Pop, Paw, Badlands, Paw, and other amazing options in the ‘Magic’ category.

Step 4: Save and Export
When you have completed the editing process and the changes satisfy you, go to the ‘Apply’ tab at the right side of the editor screen to see the changes appear in your edit. You can now navigate to the upper right corner of the app screen and click on ‘Next’ to save your work locally to your device, along with exporting the same across different media platforms.
Part 3 How to Cartoon Yourself on Picsart
Having learnt about the interesting ways to edit cartoon pictures and create cartoons on your smartphone, you might like to try hands on creating a cartoon portrait of yourself in the Picsart editor for a variety of reasons, like that of creating cartoon profile pics of yourself. Let us have a look of the procedure for the same using the Picsart Online Image Editor tool in the following section:
User’s Guide to Create a Cartoon Portrait With Picsart Online Photo Editor
Step 1: Launch the Application
In any of your favorite internet browsers, search for and open ‘Picsart Desktop Editor’. In the app’s working interface, tap ‘Upload’ or ‘New Project’ to choose an image from your device or the free to use Picsart image library respectively, for proceeding with the cartoonized transformations.

Step 2: Edit Your Selection
Tap on the ‘Effects’ tab from the editing toolbar at the top of your image and select a desired effect category to access the diversity of cartoonifying filters. It is recommended to select the ‘Magic’ category for the most splendid cartoon effects, such as, Paw, Badland, Animation, Soul and Neo Pop among many others.

You can even make manual adjustments in the brightness, color, saturation, burn and fade, etc., of the image by clicking on the ‘Adjust’ and ‘Blend’ options at the top of the image workspace.

Step 3: Download and Share Your Work
When you are done editing, navigate to and click on the ‘Share’ option at the upper right corner of the editor screen to download your cartoonized image.

****Wondershare Filmora Video Editor Cartoon Image Creator**
For Win 7 or later (64-bit)
For macOS 10.12 or later
Picsart is certainly a dependable solution to create caricature images, but if you are keen on looking for an alternative application to cater to the need, Introduced to the software market by Wondershare, the Filmora Cartoon Image Creator can be a convenient rescue. The app promises you of a high quality cartoonized edit with a plethora of editing effects to suit your most specific editing preferences.
● Ending Thoughts →
● Creating cartoonized edits from real time images is a fun and entertaining activity along with being the latest media trend.
● The Picsart editor application allows making caricature images from actual stills through desktop, smartphone and online compatible image editing program.
● Talking of suitable Picsart alternatives, you can rely on the Filmora Cartoon Image Creator application for high quality cartoonized image creation.
Cartoonized images are a convenient source of fun and media entertainment in present times. Try hands at creating your own caricature masterpieces with Picsart!
In this article
01 [How To Edit Cartoon Picture in Picsart](#Part 1)
02 [How To Make A Cartoon On Your Phone](#Part 2)
03 [How to Cartoon Yourself on Picsart](#Part 3)
Part 1 How to Edit Cartoon Picture in Picsart
Cartoonized pictures as you must be aware of, are comic transformations of real-time images and are widely used on social media to add a funny angle to the diversity of conversation going on, or even just as a source of plentiful amusement.
If you often feel motivated to experiment with the art and are looking for a perfect solution, see through the following section for a detailed and stepwise guide to create and edit a Picsart cartoon with utmost ease and within a quick time span:
User’s Guide to Edit Cartoon Pictures in Picsart
Step 1: Download the Picsart Application
Visit the official Picsart website to download the desktop version of the app in your Windows or MacOs supported PC.
Step 2: Make a Selection
Launch the app in your system to reach the Picsart welcome screen. Navigate to the bottom and tap the ‘+’ symbol. You are now required to choose a desired image to create the cartoon edit. You can either browse through your system gallery or search a specific one from the Picsart photo library in the ‘Search Bar’ at the top of the app screen.
Step 3: Let’s Get Editing!
When you have made your choice, navigate to the toolbar at the bottom of the app screen and click on the ‘Effects’ tab. Make a side scroll to choose a specific effect category, like that of ‘Artistic’ or ‘Magic’ to open a library of effects in the selected category.
As an example, selecting the ‘Cartoonizer’ option in the ‘Artistic’ effects category can add an immediate caricature feel to your selected real-time image. You can further include manual adjustments to get the perfect cartoon look by pressing and holding the ‘Cartoonizer’ option. There are a whole variety of magical effects, such as, Neo Pop, Soul, Badlands, Animation and Paw in the ‘Magic’ effects category, that are just perfect in giving your edit a fantasizing look with a Picsart cartoon background.
If you are looking for a quicker editing process, prefer adding cartoonized elements, like ‘Picsart Stickers’ to your image instead of going for a complete caricature edit. To do this, open the ‘Picsart Photo Editor’, navigates to the ‘Sticker’ symbol and click on it, followed by searching ‘Cartoon Sticker’. You can alternatively search a specific keyword with the ‘Cartoon’ descriptor, if you are clear on what you want to add.
You can further, resize your selected sticker with a ‘Two Finger Pinch’ or use the ‘Eraser’ tool to ward off any unwanted portions from the same. You are free to take as many repetitions of the process as you wish, till you get the perfect result for saving to your device and sharing on your social media handles.
Step 4: Time to Save and Share!
When you are satisfied with your work, navigate to the right hand corner and tap ‘Apply’ to finalize your changes, followed by clicking on the ‘Next’ button at the top right corner of the app screen to save and export your creation.
Part 2 How to Make a Cartoon on Your Phone
After a detailed analysis of the cartoon editing procedure in your desktops, let us see thro ugh the method of creating cartoonized images on your MacOs and Android smartphones on the following section:
Stepwise Procedure for Creating Cartoonized Images on Phone
Step 1: Download the Application
When going to use the Picsart editor application on your smartphone, you will first require a download of the same in your concerned device. You can do this by visiting the ‘Google PlayStore’ for an Android device or the ‘Apple App Store’ for MacOs smartphones.
Step 2: Choose a Real-time Image
After a successful launch of the ‘Picsart Editor’ application in your smartphone, reach to and click on the ‘+’ icon at the bottom of the app’s working interface. This needs to be followed by selecting any specific real-time image, either from your smartphone gallery or the Picsart photo library using the top ‘Search Bar’ of the interface, for creating a cartoonized edit.
Step 3: Editing Begins!
Once you are done with selecting the image, proceed to add effects to your selection by clicking the ‘Effects’ tab in the bottom toolbar, succeeded by picking a desired effect type through a right scroll. Tap on any category, such as, Magic, Artistic, etc, to open the effect library of the same.
For instance, you can click on the ‘Cartoonizer’ option within Artistic’ effects to supplement your uploaded real-time image with an instant cartoonized effect. You are also granted the liberty to make manual changes to set the caricature image effects as per your preferences, which you can do with a ‘Press and Hold’ of the ‘Cartoonizer’ tab. If you have a diversion towards complementing your cartoonized images with magical effects, choose from Animation, Neo Pop, Paw, Badlands, Paw, and other amazing options in the ‘Magic’ category.
Step 4: Save and Export
When you have completed the editing process and the changes satisfy you, go to the ‘Apply’ tab at the right side of the editor screen to see the changes appear in your edit. You can now navigate to the upper right corner of the app screen and click on ‘Next’ to save your work locally to your device, along with exporting the same across different media platforms.
Part 3 How to Cartoon Yourself on Picsart
Having learnt about the interesting ways to edit cartoon pictures and create cartoons on your smartphone, you might like to try hands on creating a cartoon portrait of yourself in the Picsart editor for a variety of reasons, like that of creating cartoon profile pics of yourself. Let us have a look of the procedure for the same using the Picsart Online Image Editor tool in the following section:
User’s Guide to Create a Cartoon Portrait With Picsart Online Photo Editor
Step 1: Launch the Application
In any of your favorite internet browsers, search for and open ‘Picsart Desktop Editor’. In the app’s working interface, tap ‘Upload’ or ‘New Project’ to choose an image from your device or the free to use Picsart image library respectively, for proceeding with the cartoonized transformations.
Step 2: Edit Your Selection
Tap on the ‘Effects’ tab from the editing toolbar at the top of your image and select a desired effect category to access the diversity of cartoonifying filters. It is recommended to select the ‘Magic’ category for the most splendid cartoon effects, such as, Paw, Badland, Animation, Soul and Neo Pop among many others.
You can even make manual adjustments in the brightness, color, saturation, burn and fade, etc., of the image by clicking on the ‘Adjust’ and ‘Blend’ options at the top of the image workspace.
Step 3: Download and Share Your Work
When you are done editing, navigate to and click on the ‘Share’ option at the upper right corner of the editor screen to download your cartoonized image.
****Wondershare Filmora Video Editor Cartoon Image Creator**
For Win 7 or later (64-bit)
For macOS 10.12 or later
Picsart is certainly a dependable solution to create caricature images, but if you are keen on looking for an alternative application to cater to the need, Introduced to the software market by Wondershare, the Filmora Cartoon Image Creator can be a convenient rescue. The app promises you of a high quality cartoonized edit with a plethora of editing effects to suit your most specific editing preferences.
● Ending Thoughts →
● Creating cartoonized edits from real time images is a fun and entertaining activity along with being the latest media trend.
● The Picsart editor application allows making caricature images from actual stills through desktop, smartphone and online compatible image editing program.
● Talking of suitable Picsart alternatives, you can rely on the Filmora Cartoon Image Creator application for high quality cartoonized image creation.
How to Make an Animated Travel Map Video?
How to Make an Animated Travel Map Video?

Benjamin Arango
Mar 27, 2024• Proven solutions
Animated travel map videos make it easy for the viewers to follow the routes from the source to destination locations right on the single screen. While the static maps would only allow the audience to see the markers from where the journey would start and is expected to end, the animated ones show the real-time movements and therefore look more interactive when viewed.
That said, here you will learn how to create an attractive and engaging animated travel map video using one of the easiest post-production applications, Wondershare Filmora, which is widely appreciated by amateurs and professionals throughout the globe. In another section, you will also learn about an alternative program that might be of some help in case you are more into online designing.
- Method 1: Make Animated Travel Map Videos with Location Video Maker - [Video Tutorial]
- Method 2: Make Interactive Animated Travel Map with Pictramap
- Method 3: Create Animated Travel Map Using Multidev
Method 1 Make Animated Travel Map Videos with Location Video Maker
The entire process of creating an animated travel map video in Wondershare’s Filmora is categorized into two parts, wherein the first part you will collect all the ingredients that are needed to get started, and in the second part you will actually make an animated map using the tools and features present in Filmora.
Watch a video tutorial to see how to make an animated map for a video:
For Win 7 or later (64-bit)
 Secure Download
For macOS 10.14 or later
Secure Download


Part 1: Prepare the Travel Map Materials
Following are the ingredients and the methods to collect them for animated travel map preparation:
Step 1: Get the Map
The first thing that you would need to prepare an animated map is an image of a realistic map. Thanks to Google and Microsoft, these things are now pretty easy to arrange. The process is given below:
- Launch your preferred web browser
- Type google.com in the address bar or the search box and hit Enter
- Scroll to zoom out so you can see the entire world map on one screen

- Type Snipping Tool in the Cortana search box present on the left side of the Taskbar
- Launch Snipping Tool, and use it to capture the screenshot of the map
Note: Snipping Tool is a built-in app in Windows 10 and is available for free. If you are using any other operating system, or have a different program to capture the screenshots, feel free to use it according to your convenience.
- Save the screenshot you captured as a JPG file on your PC
Step 2: Mark Out the Map Path
The next step in the process of preparing an animated travel map is to mark your route on it. To do so, you can use any of your preferred photo editing tools. However, to keep this illustration simple, Microsoft Paint is used here, and the method is given below:
- Right-click the screenshot you just captured
- Go to Open with on the context menu, and then click Paint from the submenu that appears
- Pick your preferred color from the pallet of the Paint interface. It is advisable to use an eye-catchy shade such as Red
- Use the Sphere shape tool to draw a circle over the source and destination locations on the map
- Use the Line tool to draw a line from the source point to the destination. Try giving the line a few turns to make it look realistic
- Go to File > Save As, and save the marked image with a different name
Note: Once this is done, you should have two image files of the map, i.e., one without the marks and one with it
Step 3: Download Some Travel Icons
Another important ingredient in an effective travel map animation is touring icons such as location marker image, a traveling medium symbol like a helicopter, airplane, car/bike (for short distances), etc. A couple of websites that offer royalty-free stock photos at absolutely no cost are listed below:
Note: Although the websites given above allow you to download and use their stock images and icons for free, you may need to give credits to the designers/creators of the symbols while using their objects. Therefore, you are suggested to check the Terms & Conditions and norms of usage of the elements before downloading and adding them to your projects.
Part 2: Make Animated Travel Map Videos with Filmora
After you have gathered all the necessary ingredients that are required to create a travel map animation, it is now time to get to work. The following instructions would guide you through the step-by-step process of preparing a decent and realistic animated travel map in Wondershare Filmora :
For Win 7 or later (64-bit)
Secure Download
For macOS 10.14 or later
Secure Download
Step 1: Import Ingredients to Filmora and Add Them to the Timeline
Launch the video editor on your computer, click anywhere inside the Media window at the upper-left area, and import all the images and icons that you collected earlier to program. Next, drag both the images of the map, i.e., with and without the marks to the Timeline, and ensure that they are of the same duration and are placed on the same track.

Note: Be sure to put the map without the marks first, and then the one with the marks. Also note that the images have the playback duration of 5 seconds in the Timeline by default, and this tenure can be reduced or increased by dragging the side handle of the media to the left or right respectively.
Step 2: Add Transition for Illusion of Route Appearance
Go to Transition from the standard toolbar at the top, locate the Erase Slide transition effect from the available presets, and place it in between the two image files that you earlier added to the Timeline. Next, click and drag either of the side handles of the transition to the end of the media clip. Notice how the other side of the effect is expanded in equal proportion.

Step 3: Preview and Export
Press the Spacebar on the keyboard to preview the video and see if the route appears as if it is being drawn on the map. Once the animation looks acceptable, click EXPORT from the top-center, go to the Local tab on the Export window, select MP4 from the formats list in the left, and click EXPORT from the bottom-right corner to export the current animation to MP4.
Step 4: Customize the Travel Map Media
Either start a new project and import the video of the map you exported in the previous step to the app and then to the Timeline, or remove the existing media from the Timeline in the same project, and add the exported video to it for convenience.

For Win 7 or later (64-bit)
Secure Download
For macOS 10.14 or later
Secure Download
Next, position the Skimmer (Playhead) a couple of frames before the one the route line appears and starts stretching from, and click the Split icon from the editing toolbar above the Timeline itself. Repeat this process for the other side of the media, i.e., position the Skimmer a couple of frames after the route line reaches the destination location, and click the Split icon again. Then remove the separated segments from both the sides by selecting them and pressing Delete on the keyboard, leaving only the portion where the animation is visible.

Optionally, right-click the media that is left behind in the Timeline, and go to Speed and Duration from the context menu. On the Custom Speed box, drag the Speed slider to the left to decrease the playback speed resulting in the increased duration of the media. Alternatively, you can manually enter a value in the Speed box to get precise tenure. Click OK when you are done.

Step 5: Add Animations to Travel Map
Right-click the media in the Timeline, and go to Add Animation from the context menu. Make sure that the Skimmer is on the first frame, and add several keyframes as explained below:
- Click Add to add the first keyframe

- Move a couple of frames further, and click Add one more time. Now, while you are on this second keyframe, use the Scale slider to zoom in to the map so the source location remains within focus.

- Next, move the Playhead further and add another keyframe a couple of frames before the route line hits the edge of the window.
- After this, move the Playhead again and position it where the route line reaches its destination location. Add another keyframe here as well, and move the map in the Preview window so the focus is now on the destination.
- Move the Playhead a few frames further, add another keyframe, and use the Scale slider to zoom a bit more into the map to make the entire animation look realistic. Click OK to save the changes.
Step 6: Add Icons and Titles, and Export the Project
Drag the image of the traveling medium to the Timeline, and place it on the frame the route line starts from. Make sure to place the image on the track above the map, and stretch it to the end so it remains visible throughout the animation. Next, use the method explained above to add keyframes to move the medium along with the route line from the source to the destination. Optionally, add the image of the location marker at the destination point, go to Transition, and add your preferred transition effect, preferably Dissolve, to the marker track in the Timeline so it looks as if it has appeared as the medium arrived the destination.
For Win 7 or later (64-bit)
Secure Download
For macOS 10.14 or later
Secure Download
Get back to the first frame in the Timeline, go to Titles on the standard toolbar, and add a title preset somewhere near the source location. Resize the text, change the format as needed, and add your preferred caption to it such as the start time, name, etc. Reduce the duration of the track so the title appears for a few frames, preferably before the map animation starts. Click OK when done. Repeat this process for the destination point as well.
Once everything is complete, click the Play button in the Preview window to review your work. If the video looks acceptable, click EXPORT from the top-center of the interface, and use the method explained earlier to export the animated travel map in your preferred format.
![]()
Method 2 How to Make Interactive Animated Travel Map with Pictramap
If you don’t want to install a dedicated animation software on your computer due to limited hardware resources or some other reason, there is an online solution called Pictramap to create a travel map animation using a web browser. The web app offers a lucrative interface that could be easily understood and worked with to produce an animated map for free.
The process to create an animated travel map with Pictramap is given below:
Step 1: Create a Project
Launch your favorite web browser, go to https://www.pictramap.com/ , click Create yours now, it’s free, and sign up to Pictramap using your preferred method. When you are on the Dashboard, enter a name in the field available under the My Projects section, and click Create to create a new project (the animated map).

Step 2: Define the Locations and Method of Commute
On the map, right-click the location you want to start your journey from, enter the name of the location or any other significant title, and click Add. Click the location marker, click the Travel Mode icon, and select your preferred mode of traveling. Repeat this process to mark the destination location as well.

Step 3: Preview the Animation
Click the View Animation button from the upper-right corner of the page to see the animated travel map.

Downsides of Using Pictramap to Create Animated Travel Map Video
Although Pictramap allows you to create a travel map animation with ease and extremely quickly, at the time of this writing, it offers no way of downloading the animation to your PC, and therefore it couldn’t be used in your projects.
If you are using Wondershare Filmora, you can use its built-in screen recording feature to record the animation that Pictramap plays, and then save the captured footage as MP4 or any other format on your computer. This video can then be imported to your projects for further uses.
![]()
A cross-platform for making videos anywhere for all creators

Why your video editing isn’t good enough? How about some creative inspo?
- 100 Million+ Users
- 150+ Countries and Regions
- 4 Million+ Social Media Followers
- 5 Million+ Stock Media for Use
* Secure Download

Method 3 How To Make Animated Travel Map Using Multidev
Multi.dev is still a new web-based application to build awesome animated maps, but it’s good! The application helps you create presentations about all your recent and previous trips. And the interface is also hassle-free.
So, follow this step-by-step guide to making animated maps with Multi.dev.
Step 1: Open Multi.dev
Visit Multi.dev from your internet browser.

Once the tool gets open, you will see a demo video. This example clip will have animated maps of different locations. So it is up to you whether to use the same example and edit the places you have been to or are planning to visit. Or, simply create a new animated map from scratch.
Step 2: Choose Your First Location
Take your mouse cursor on the left side of the application and type the first location in the search bar. As soon as you do it, you will see that the “travel arrow” will automatically begin from there. Likewise, type and select the next location through the search bar.
Once you type the location, you will see 8 travel modes, including airplane, bus, and train. You can select the same mode for all sites or a different mode for another place. Totally up to you!

Step 3: Select Map Themes
All your chosen places will be highlighted in the software’s minimalistic map.

Step 4: Download Map on Your Computer
If you’re happy with the animated map, click the “Create Video” button to save the animated map on your computer in a few minutes.


Contrarily, you can also share the animation by choosing the “Share Animation” option.
Conclusion
An animated travel map plays an important role to add a realistic touring effect to your motion picture projects. While you can use a web app like Pictramap to create such an animation online easily and for free, the limitations it comes along with might keep you from choosing this method.
Instead, you may want to get more inclined toward a dedicated post-production software like Wondershare Filmora that gives you full control over the process, and the freedom to choose your preferred format to export the animation to for independent usage.
For Win 7 or later (64-bit)
Secure Download
For macOS 10.14 or later
Secure Download
Benjamin Arango
Benjamin Arango is a writer and a lover of all things video.
Follow @Benjamin Arango
Benjamin Arango
Mar 27, 2024• Proven solutions
Animated travel map videos make it easy for the viewers to follow the routes from the source to destination locations right on the single screen. While the static maps would only allow the audience to see the markers from where the journey would start and is expected to end, the animated ones show the real-time movements and therefore look more interactive when viewed.
That said, here you will learn how to create an attractive and engaging animated travel map video using one of the easiest post-production applications, Wondershare Filmora, which is widely appreciated by amateurs and professionals throughout the globe. In another section, you will also learn about an alternative program that might be of some help in case you are more into online designing.
- Method 1: Make Animated Travel Map Videos with Location Video Maker - [Video Tutorial]
- Method 2: Make Interactive Animated Travel Map with Pictramap
- Method 3: Create Animated Travel Map Using Multidev
Method 1 Make Animated Travel Map Videos with Location Video Maker
The entire process of creating an animated travel map video in Wondershare’s Filmora is categorized into two parts, wherein the first part you will collect all the ingredients that are needed to get started, and in the second part you will actually make an animated map using the tools and features present in Filmora.
Watch a video tutorial to see how to make an animated map for a video:
For Win 7 or later (64-bit)
Secure Download
For macOS 10.14 or later
Secure Download
Part 1: Prepare the Travel Map Materials
Following are the ingredients and the methods to collect them for animated travel map preparation:
Step 1: Get the Map
The first thing that you would need to prepare an animated map is an image of a realistic map. Thanks to Google and Microsoft, these things are now pretty easy to arrange. The process is given below:
- Launch your preferred web browser
- Type google.com in the address bar or the search box and hit Enter
- Scroll to zoom out so you can see the entire world map on one screen
- Type Snipping Tool in the Cortana search box present on the left side of the Taskbar
- Launch Snipping Tool, and use it to capture the screenshot of the map
Note: Snipping Tool is a built-in app in Windows 10 and is available for free. If you are using any other operating system, or have a different program to capture the screenshots, feel free to use it according to your convenience.
- Save the screenshot you captured as a JPG file on your PC
Step 2: Mark Out the Map Path
The next step in the process of preparing an animated travel map is to mark your route on it. To do so, you can use any of your preferred photo editing tools. However, to keep this illustration simple, Microsoft Paint is used here, and the method is given below:
- Right-click the screenshot you just captured
- Go to Open with on the context menu, and then click Paint from the submenu that appears
- Pick your preferred color from the pallet of the Paint interface. It is advisable to use an eye-catchy shade such as Red
- Use the Sphere shape tool to draw a circle over the source and destination locations on the map
- Use the Line tool to draw a line from the source point to the destination. Try giving the line a few turns to make it look realistic
- Go to File > Save As, and save the marked image with a different name
Note: Once this is done, you should have two image files of the map, i.e., one without the marks and one with it
Step 3: Download Some Travel Icons
Another important ingredient in an effective travel map animation is touring icons such as location marker image, a traveling medium symbol like a helicopter, airplane, car/bike (for short distances), etc. A couple of websites that offer royalty-free stock photos at absolutely no cost are listed below:
Note: Although the websites given above allow you to download and use their stock images and icons for free, you may need to give credits to the designers/creators of the symbols while using their objects. Therefore, you are suggested to check the Terms & Conditions and norms of usage of the elements before downloading and adding them to your projects.
Part 2: Make Animated Travel Map Videos with Filmora
After you have gathered all the necessary ingredients that are required to create a travel map animation, it is now time to get to work. The following instructions would guide you through the step-by-step process of preparing a decent and realistic animated travel map in Wondershare Filmora :
For Win 7 or later (64-bit)
Secure Download
For macOS 10.14 or later
Secure Download
Step 1: Import Ingredients to Filmora and Add Them to the Timeline
Launch the video editor on your computer, click anywhere inside the Media window at the upper-left area, and import all the images and icons that you collected earlier to program. Next, drag both the images of the map, i.e., with and without the marks to the Timeline, and ensure that they are of the same duration and are placed on the same track.
Note: Be sure to put the map without the marks first, and then the one with the marks. Also note that the images have the playback duration of 5 seconds in the Timeline by default, and this tenure can be reduced or increased by dragging the side handle of the media to the left or right respectively.
Step 2: Add Transition for Illusion of Route Appearance
Go to Transition from the standard toolbar at the top, locate the Erase Slide transition effect from the available presets, and place it in between the two image files that you earlier added to the Timeline. Next, click and drag either of the side handles of the transition to the end of the media clip. Notice how the other side of the effect is expanded in equal proportion.
Step 3: Preview and Export
Press the Spacebar on the keyboard to preview the video and see if the route appears as if it is being drawn on the map. Once the animation looks acceptable, click EXPORT from the top-center, go to the Local tab on the Export window, select MP4 from the formats list in the left, and click EXPORT from the bottom-right corner to export the current animation to MP4.
Step 4: Customize the Travel Map Media
Either start a new project and import the video of the map you exported in the previous step to the app and then to the Timeline, or remove the existing media from the Timeline in the same project, and add the exported video to it for convenience.
For Win 7 or later (64-bit)
Secure Download
For macOS 10.14 or later
Secure Download
Next, position the Skimmer (Playhead) a couple of frames before the one the route line appears and starts stretching from, and click the Split icon from the editing toolbar above the Timeline itself. Repeat this process for the other side of the media, i.e., position the Skimmer a couple of frames after the route line reaches the destination location, and click the Split icon again. Then remove the separated segments from both the sides by selecting them and pressing Delete on the keyboard, leaving only the portion where the animation is visible.
Optionally, right-click the media that is left behind in the Timeline, and go to Speed and Duration from the context menu. On the Custom Speed box, drag the Speed slider to the left to decrease the playback speed resulting in the increased duration of the media. Alternatively, you can manually enter a value in the Speed box to get precise tenure. Click OK when you are done.
Step 5: Add Animations to Travel Map
Right-click the media in the Timeline, and go to Add Animation from the context menu. Make sure that the Skimmer is on the first frame, and add several keyframes as explained below:
- Click Add to add the first keyframe
- Move a couple of frames further, and click Add one more time. Now, while you are on this second keyframe, use the Scale slider to zoom in to the map so the source location remains within focus.
- Next, move the Playhead further and add another keyframe a couple of frames before the route line hits the edge of the window.
- After this, move the Playhead again and position it where the route line reaches its destination location. Add another keyframe here as well, and move the map in the Preview window so the focus is now on the destination.
- Move the Playhead a few frames further, add another keyframe, and use the Scale slider to zoom a bit more into the map to make the entire animation look realistic. Click OK to save the changes.
Step 6: Add Icons and Titles, and Export the Project
Drag the image of the traveling medium to the Timeline, and place it on the frame the route line starts from. Make sure to place the image on the track above the map, and stretch it to the end so it remains visible throughout the animation. Next, use the method explained above to add keyframes to move the medium along with the route line from the source to the destination. Optionally, add the image of the location marker at the destination point, go to Transition, and add your preferred transition effect, preferably Dissolve, to the marker track in the Timeline so it looks as if it has appeared as the medium arrived the destination.
For Win 7 or later (64-bit)
Secure Download
For macOS 10.14 or later
Secure Download
Get back to the first frame in the Timeline, go to Titles on the standard toolbar, and add a title preset somewhere near the source location. Resize the text, change the format as needed, and add your preferred caption to it such as the start time, name, etc. Reduce the duration of the track so the title appears for a few frames, preferably before the map animation starts. Click OK when done. Repeat this process for the destination point as well.
Once everything is complete, click the Play button in the Preview window to review your work. If the video looks acceptable, click EXPORT from the top-center of the interface, and use the method explained earlier to export the animated travel map in your preferred format.
![]()
Method 2 How to Make Interactive Animated Travel Map with Pictramap
If you don’t want to install a dedicated animation software on your computer due to limited hardware resources or some other reason, there is an online solution called Pictramap to create a travel map animation using a web browser. The web app offers a lucrative interface that could be easily understood and worked with to produce an animated map for free.
The process to create an animated travel map with Pictramap is given below:
Step 1: Create a Project
Launch your favorite web browser, go to https://www.pictramap.com/ , click Create yours now, it’s free, and sign up to Pictramap using your preferred method. When you are on the Dashboard, enter a name in the field available under the My Projects section, and click Create to create a new project (the animated map).
Step 2: Define the Locations and Method of Commute
On the map, right-click the location you want to start your journey from, enter the name of the location or any other significant title, and click Add. Click the location marker, click the Travel Mode icon, and select your preferred mode of traveling. Repeat this process to mark the destination location as well.
Step 3: Preview the Animation
Click the View Animation button from the upper-right corner of the page to see the animated travel map.
Downsides of Using Pictramap to Create Animated Travel Map Video
Although Pictramap allows you to create a travel map animation with ease and extremely quickly, at the time of this writing, it offers no way of downloading the animation to your PC, and therefore it couldn’t be used in your projects.
If you are using Wondershare Filmora, you can use its built-in screen recording feature to record the animation that Pictramap plays, and then save the captured footage as MP4 or any other format on your computer. This video can then be imported to your projects for further uses.
![]()
A cross-platform for making videos anywhere for all creators
Why your video editing isn’t good enough? How about some creative inspo?
- 100 Million+ Users
- 150+ Countries and Regions
- 4 Million+ Social Media Followers
- 5 Million+ Stock Media for Use
* Secure Download
Method 3 How To Make Animated Travel Map Using Multidev
Multi.dev is still a new web-based application to build awesome animated maps, but it’s good! The application helps you create presentations about all your recent and previous trips. And the interface is also hassle-free.
So, follow this step-by-step guide to making animated maps with Multi.dev.
Step 1: Open Multi.dev
Visit Multi.dev from your internet browser.
Once the tool gets open, you will see a demo video. This example clip will have animated maps of different locations. So it is up to you whether to use the same example and edit the places you have been to or are planning to visit. Or, simply create a new animated map from scratch.
Step 2: Choose Your First Location
Take your mouse cursor on the left side of the application and type the first location in the search bar. As soon as you do it, you will see that the “travel arrow” will automatically begin from there. Likewise, type and select the next location through the search bar.
Once you type the location, you will see 8 travel modes, including airplane, bus, and train. You can select the same mode for all sites or a different mode for another place. Totally up to you!
Step 3: Select Map Themes
All your chosen places will be highlighted in the software’s minimalistic map.
Step 4: Download Map on Your Computer
If you’re happy with the animated map, click the “Create Video” button to save the animated map on your computer in a few minutes.
Contrarily, you can also share the animation by choosing the “Share Animation” option.
Conclusion
An animated travel map plays an important role to add a realistic touring effect to your motion picture projects. While you can use a web app like Pictramap to create such an animation online easily and for free, the limitations it comes along with might keep you from choosing this method.
Instead, you may want to get more inclined toward a dedicated post-production software like Wondershare Filmora that gives you full control over the process, and the freedom to choose your preferred format to export the animation to for independent usage.
For Win 7 or later (64-bit)
Secure Download
For macOS 10.14 or later
Secure Download
Benjamin Arango
Benjamin Arango is a writer and a lover of all things video.
Follow @Benjamin Arango
Tips for Canva Animated Elements
Versatile Video Editor - Wondershare Filmora
An easy yet powerful editor
Numerous effects to choose from
Detailed tutorials provided by the official channel
Thanks to the progress of graphic design, users are no longer simply satisfied with everyday designs, no matter how complex the design itself. They want innovation, they want a fresh and mesmerizing new idea. This becomes increasingly harder to achieve and helps push the boundaries of what designers want.
This is where motion can come into play. Movement in graphic design has emerged as a recent design trend. This is where users benefit from valuable tips for Canva animated elements.
Without further ado, let’s dive into everything you need to know to design animated elements in Canva.
In this article
01 [What is Canva?](#Part 1)
02 [Animate An Element In Canva ](#Part 2)
03 [Make Elements Move In Canva](#Part 3)
04 [How About Making Animated Elements On Video](#Part 4)
Part 1 What is Canva?
Canva has become a buzzword in the designing and animation world. It’s a graphic design platform that allows users to create graphic designs for social media, for presentations, documents, cards for any memorable occasion. It was founded by Melanie Perkins, an Australian technology entrepreneur.
Canva has become a buzzword in the designing and animation world. It’s a graphic design platform that allows users to create graphic designs for social media, for presentations, documents, cards for any memorable occasion. It was founded by Melanie Perkins, an Australian technology entrepreneur.
It allows users to work individually or across teams. With real-time live changes made available, Canva is pushing the boundary of what is possible and making it more accessible. With the introduction of animated elements in Canva, the possibilities for design horizons have expanded significantly.
Part 2 Animate An Element In Canva
There are one of two ways to go about creating an animation. You can work off an existing template or create a custom template. If you’re wondering how to animate individual elements in Canva then this guide is for you.
The first step to animation is building your custom static design. For that you need to go to Canva and select “Create a Design” option. Once you do, select the type of content you’re attempting to create- from Instagram posts to a presentation or an A4 document.
Think of the text font you’re going to use.

Then you should look into adding elements that suit your text on the design.

You can upload photographs into your creation with the upload button. This also extends to uploading audio that you want to use on video clips.

Once you’re done with these steps, you should have a customized static design that you can use. Let’s now look at how to animate individual elements in Canva. These elements are the text, the image, audio, and video.
2.1 Image
To add an image to Canva, you need to upload it in the ‘Upload’ tab on Canva. Once you do, the image can then be selected for display on your presentation.
For images, you can also choose to frame them within the “elements” tab. There are two kinds of elements. One which allows photographs to be embedded in them and ones which don’t. You can choose any element as a frame for your embedded image.
The next thing is to choose the “Animate” button. This will open up different options for animation features. The animate button allows a preview of what each animation does in real-time.

The ones with the crown are premium features exclusive to Canva Pro, the paid subscription.
2.2 Text
Add in the text you want to see to the image. The text can be in any style that you choose. Canva offers a variety of fonts that you can use to customize the color, size, and duration of the display.

2.3 Video
If you’re ready to take your content creation skills to the next level, this section is for you. You have the option of adding videos to Canva as well. Just load the video you have on hand to the Canva “Uploads” section. Introduce the video clip to the design.
Another way to embed the video is by using an element and embedding your video within it.
With video, you also have options like cropping, adjusting the playback. With playback, you can choose “Autoplay Video” and “Loop Video.” These are basic options for how the video can be played. The crop function allows you to trim the video to any point in time.
On top of this, you can use the animate button, which can create options for how the video is introduced to the backdrop.

If you want to remove the animation, you need to go to the “Animate” button and select the ‘None’ option to delete the animation from the design.
You can opt to animate either just the elements or you can animate the slide on the whole with “Page Animations.”
Part 3 Make Elements Move In Canva
How To Arrange The Order Of An Animation?
The brilliant thing about Canva is that you can decide the order you want to create your animation. The component elements of a Canva backdrop are the text, audio, images, video. These form the basis for the animated elements in Canva.
You can work on whichever component feels more accessible to you. Canva also allows users to make videos for title sequences and end-cards for video sharing platforms.
How to Change The Duration Of Animated Graphic In Canva
Once you’ve added a video element to your presentation, you’ll notice that the timer disappears from the production. This is because the presentation only lasts the duration of the video.
If you go to the next slide of the presentation, you can often notice a timer available. It has a default duration of five seconds. If you click on the clock symbol, a menu with “Timing” will appear with a slider. You can adjust the timing from 0.1 seconds up to a maximum of 30 seconds.
Part 4 How About Making Animated Elements On Video
If you’ve decided Canva is not the tool for you, you can choose any video editing software to make your animation.
Wondershare Filmora is the tool that can help you level up your content creation. It allows users to increase precision and provides professional video editing options.
AI Portrait – The best feature of Wondershare Filmora for gameplay editing
The AI Portrait is a new add-on in Wondershare Filmora. It can easily remove video backgrounds without using a green screen or chroma key, allowing you to add borders, glitch effects, pixelated, noise, or segmentation video effects.

Conclusion
Now that you understand how to build an animation and the software required, you should differentiate between average and extraordinary editing tools.
Filmora and Canva are the best editing tools in this case. Like you can animate individual elements Canva, you can do the same in the other tool also. It may be used to produce animation videos by introducing keyframes, resulting in a seamless and realistic animation. Aside from that, using color correction and an audio processor can help take your animations to the next tier.
Download it today to make your videos better.
Thanks to the progress of graphic design, users are no longer simply satisfied with everyday designs, no matter how complex the design itself. They want innovation, they want a fresh and mesmerizing new idea. This becomes increasingly harder to achieve and helps push the boundaries of what designers want.
This is where motion can come into play. Movement in graphic design has emerged as a recent design trend. This is where users benefit from valuable tips for Canva animated elements.
Without further ado, let’s dive into everything you need to know to design animated elements in Canva.
In this article
01 [What is Canva?](#Part 1)
02 [Animate An Element In Canva ](#Part 2)
03 [Make Elements Move In Canva](#Part 3)
04 [How About Making Animated Elements On Video](#Part 4)
Part 1 What is Canva?
Canva has become a buzzword in the designing and animation world. It’s a graphic design platform that allows users to create graphic designs for social media, for presentations, documents, cards for any memorable occasion. It was founded by Melanie Perkins, an Australian technology entrepreneur.
Canva has become a buzzword in the designing and animation world. It’s a graphic design platform that allows users to create graphic designs for social media, for presentations, documents, cards for any memorable occasion. It was founded by Melanie Perkins, an Australian technology entrepreneur.
It allows users to work individually or across teams. With real-time live changes made available, Canva is pushing the boundary of what is possible and making it more accessible. With the introduction of animated elements in Canva, the possibilities for design horizons have expanded significantly.
Part 2 Animate An Element In Canva
There are one of two ways to go about creating an animation. You can work off an existing template or create a custom template. If you’re wondering how to animate individual elements in Canva then this guide is for you.
The first step to animation is building your custom static design. For that you need to go to Canva and select “Create a Design” option. Once you do, select the type of content you’re attempting to create- from Instagram posts to a presentation or an A4 document.
Think of the text font you’re going to use.
Then you should look into adding elements that suit your text on the design.
You can upload photographs into your creation with the upload button. This also extends to uploading audio that you want to use on video clips.
Once you’re done with these steps, you should have a customized static design that you can use. Let’s now look at how to animate individual elements in Canva. These elements are the text, the image, audio, and video.
2.1 Image
To add an image to Canva, you need to upload it in the ‘Upload’ tab on Canva. Once you do, the image can then be selected for display on your presentation.
For images, you can also choose to frame them within the “elements” tab. There are two kinds of elements. One which allows photographs to be embedded in them and ones which don’t. You can choose any element as a frame for your embedded image.
The next thing is to choose the “Animate” button. This will open up different options for animation features. The animate button allows a preview of what each animation does in real-time.
The ones with the crown are premium features exclusive to Canva Pro, the paid subscription.
2.2 Text
Add in the text you want to see to the image. The text can be in any style that you choose. Canva offers a variety of fonts that you can use to customize the color, size, and duration of the display.
2.3 Video
If you’re ready to take your content creation skills to the next level, this section is for you. You have the option of adding videos to Canva as well. Just load the video you have on hand to the Canva “Uploads” section. Introduce the video clip to the design.
Another way to embed the video is by using an element and embedding your video within it.
With video, you also have options like cropping, adjusting the playback. With playback, you can choose “Autoplay Video” and “Loop Video.” These are basic options for how the video can be played. The crop function allows you to trim the video to any point in time.
On top of this, you can use the animate button, which can create options for how the video is introduced to the backdrop.
If you want to remove the animation, you need to go to the “Animate” button and select the ‘None’ option to delete the animation from the design.
You can opt to animate either just the elements or you can animate the slide on the whole with “Page Animations.”
Part 3 Make Elements Move In Canva
How To Arrange The Order Of An Animation?
The brilliant thing about Canva is that you can decide the order you want to create your animation. The component elements of a Canva backdrop are the text, audio, images, video. These form the basis for the animated elements in Canva.
You can work on whichever component feels more accessible to you. Canva also allows users to make videos for title sequences and end-cards for video sharing platforms.
How to Change The Duration Of Animated Graphic In Canva
Once you’ve added a video element to your presentation, you’ll notice that the timer disappears from the production. This is because the presentation only lasts the duration of the video.
If you go to the next slide of the presentation, you can often notice a timer available. It has a default duration of five seconds. If you click on the clock symbol, a menu with “Timing” will appear with a slider. You can adjust the timing from 0.1 seconds up to a maximum of 30 seconds.
Part 4 How About Making Animated Elements On Video
If you’ve decided Canva is not the tool for you, you can choose any video editing software to make your animation.
Wondershare Filmora is the tool that can help you level up your content creation. It allows users to increase precision and provides professional video editing options.
AI Portrait – The best feature of Wondershare Filmora for gameplay editing
The AI Portrait is a new add-on in Wondershare Filmora. It can easily remove video backgrounds without using a green screen or chroma key, allowing you to add borders, glitch effects, pixelated, noise, or segmentation video effects.
Conclusion
Now that you understand how to build an animation and the software required, you should differentiate between average and extraordinary editing tools.
Filmora and Canva are the best editing tools in this case. Like you can animate individual elements Canva, you can do the same in the other tool also. It may be used to produce animation videos by introducing keyframes, resulting in a seamless and realistic animation. Aside from that, using color correction and an audio processor can help take your animations to the next tier.
Download it today to make your videos better.
Also read:
- Updated 2024 Approved How to Find Some Different Ways to Animated Cartoon of Yourself
- New 10 Top Tools to Make Pic Collage for Windows
- Whats Rigging Animation and Why It Matters for 2024
- New 2024 Approved Whats Music Video GIF & How to Add Music to Your GIF Files
- Updated In 2024, Top 15 2D Animation Software Free That Worth to Try
- New What Wikipedia Wont Tell You About Character Rigging
- Updated In 2024, Simple Shortcut to Convert Videos to Gifs on iPhone
- New 4 Smart Solutions to Create or Find Good Morning/Night GIFs for 2024
- In 2024, Methods to Make Photo Motion Effect Online?
- 10 Must-Use MP4 to GIF Converters to Get Perfect-Made GIF for 2024
- Apps to Animate Still Pictures
- 2024 Approved Ways You Can Master to Make Claymation Videos
- Updated 18 Best Tools and Services to Create Animated Videos for Business 2023
- Best 10 3D Text Animation Templates
- Updated 2024 Approved Ideas That Will Help You Out in Learning How to Send WhatsApp Animated Gifs
- New In 2024, What Is Still Motion Animation and How Does It Work?
- In 2024, Ways to Create an Adobe Collage
- The Complete Guide to Whiteboard Animation
- Ways You Can Master to Find 10 Best Free Animated Text Generator
- Updated Handy Tip From Adobe Animate Rigging Tutorial for All Learners
- Updated 10 Must Watch Netflix Cartoon Series For You for 2024
- New In 2024, Guide on Creating GIF in WhatsApp iPhone
- New Best 8 Tools Tell You How to Make Slideshows for Instagram for 2024
- New In 2024, A Roster of 15 Top Disney Channel Cartoons
- New 2024 Approved That Will Make Aesthetic Cartoon Drawing More Understandable
- Updated In 2024, 5 Photoshop Alternatives to Animate Logo
- Updated 2024 Approved How to Make My Photo 3D Cartoon Online
- Updated 2024 Approved How to Make 3D Cartoon of Yourself
- Updated Best 10 Video to GIF Converters Top Picks
- How to Find & Make Animated Christmas GIFs for 2024
- New How to Insert a GIF Into Powerpoint
- New The Top Free 12 GIF Meme Maker at a Glance for 2024
- 2024 Approved 8 Best Motion Graphics Online Tools for Your Inspiration
- Creative Ways to Create iPhone Text GIF
- New 2024 Approved 12 Aesthetic GIF Instagram for Marketers
- Updated In 2024, Ultimate Guide to Animated Characters Drawings
- What are Location Permissions Life360 On Infinix Note 30? | Dr.fone
- 6 Solutions to Fix Error 505 in Google Play Store on Honor Magic 6 Pro | Dr.fone
- How To Unbrick a Dead Nubia Red Magic 9 Pro | Dr.fone
- How To Leave a Life360 Group On Realme C33 2023 Without Anyone Knowing? | Dr.fone
- In 2024, Hacks to do pokemon go trainer battles For Honor X50 | Dr.fone
- Fake Android Location without Rooting For Your Oppo A1x 5G | Dr.fone
- It's Easy to Share Your Winning Forex Trades With Friends and Family on Local Trade Copier™ Together
- How To Unlock A Found Apple iPhone 13?
- In 2024, Simple and Effective Ways to Change Your Country on YouTube App Of your Tecno Pova 6 Pro 5G | Dr.fone
- How To Unlock Stolen iPhone X In Different Conditionsin | Dr.fone
- In 2024, How to Hide/Fake Snapchat Location on Your Motorola Moto G04 | Dr.fone
- 3 Ways to Unlock iPhone 12 without Passcode or Face ID | Dr.fone
- How to Unlock Apple iPhone 7 Plus with a Mask On | Dr.fone
- Which Pokémon can Evolve with a Moon Stone For Vivo S17 Pro? | Dr.fone
- Ultimate Guide to Free PPTP VPN For Beginners On Realme C55 | Dr.fone
- A Detailed VPNa Fake GPS Location Free Review On Tecno Phantom V Fold | Dr.fone
- How to Change Your Oppo Reno 11F 5G Location on life360 Without Anyone Knowing? | Dr.fone
- Here Are Some Reliable Ways to Get Pokemon Go Friend Codes For Samsung Galaxy S23 | Dr.fone
- In 2024, A Guide Poco X5 Wireless and Wired Screen Mirroring | Dr.fone
- New 2024 Approved The Ultimate Guide to Online Video Marketing
- How to Soft Reset Vivo S17t phone? | Dr.fone
- In 2024, Recommended Best Applications for Mirroring Your Tecno Camon 20 Pro 5G Screen | Dr.fone
- In 2024, 3 Facts You Need to Know about Screen Mirroring Poco M6 Pro 4G | Dr.fone
- In 2024, How to Bypass Android Lock Screen Using Emergency Call On Nubia Z50S Pro?
- How to Rescue Lost Contacts from Samsung Galaxy Z Fold 5?
- How to Realme Narzo 60 Pro 5G Get Deleted Pictures Back with Ease and Safety?
- How to Reset a Locked Realme C55 Phone
- In 2024, Downloading SamFw FRP Tool 3.0 for Samsung Galaxy A14 4G
- Different Methods for Resetting Samsung Galaxy Z Fold 5 Phones with Screen Locked and Not | Dr.fone
- Complete Guide to Hard Reset Your Oppo Reno 8T 5G | Dr.fone
- Title: New How to Make a Photoshop Collage in Simple Steps for 2024
- Author: Elon
- Created at : 2024-05-19 03:05:46
- Updated at : 2024-05-20 03:05:46
- Link: https://animation-videos.techidaily.com/new-how-to-make-a-photoshop-collage-in-simple-steps-for-2024/
- License: This work is licensed under CC BY-NC-SA 4.0.
