
:max_bytes(150000):strip_icc():format(webp)/tropical-beach-wallpaper-beach-backgrounds-587fbb765f9b584db3241860.jpg)
New How to Make Animation Characters with the Best Character Creators for 2024
How to Make Animation Characters with the Best Character Creators
How-to Guide: Make Animation Characters with the Best Animated Character Creators
An easy yet powerful editor
Numerous effects to choose from
Detailed tutorials provided by the official channel
Are you a marketer and don’t know where to start? You can start with character animation?
This article will engage you with many software to create your own animated character. Plus, some easy ways too for those novices in this field with simple apps to create your own animated character.
In this article
01 [How to Choose the Right Character Animation Maker?](#Part 1)
02 [Top 8 Software to make Character Animation. ](#Part 2)
03 [3 Easy Ways to Make Your Own Cartoon Character (For Beginners/Non-Illustrators)](#Part 3)
Part 1 How to Choose the Right Character Animation Maker?
If you are concerned about which character animation maker to choose, be aware of the analysis and alternatives you need to know. After knowing the needs of the animation as going to be mentioned below, your chances of selecting the software correctly will increase.
At first, you need to know what are you creating, what kind of animation software you want to produce? What are the objectives of videos marketing or movies? By answering these questions, you can choose the correct software.
You need to decide the features you require in the software. You may not require all the advanced features. If you are doing a simple animated video, you require only simple features but enough to complete your project.
There is a separate type of software for 2D and 3D, and you need to choose your requirement to complete the project
Now that you have known all the features you need to consider before choosing software choose it wisely and enjoy creating character animation. We’ll go over a considerable number of animation software in this journal, and you can choose one of them.
Part 2 Top 8 software to Create Character Animation
Due to the difficulty in selecting character animation software, we have sorted out some of the most beneficial and user-friendly options.
01 Animaker
The best part of this software is its versatility and flexibility. Animaker is valuable software for every kind of business animation, and it involves multiple features. It is a feature-rich free animated character creator.
●You may create six different styles using Animaker: 2D, 2.5D, typography, infographic, whiteboard, and handcrafts.
●100 charts, 1000 icons, and 3000 maps are in the animated infographic.
●You can use advanced animation features like a record, multi-move, curve, transition effects, camera in and out, and enter/exit effects.
●Animaker supports audio features like text to speech, sound effects, voice recording, and creating custom sounds.
●Also, it comes along with pre-designed transition effects and supports HD videos.
This is free software for simple basic features, but in the case of professional uses, the price ranges from $12 - $99 based on the features required.
02Stop Motion Studio
If you are a beginner, this software would be helpful. After creating high-quality 2K stop motion animations videos, you can mix them with 2D drawings. The disadvantage does not have any free features.
●It runs on different operating systems like iOS, macOS, Android, and Windows.
●It has DSLR camera support.
●There is a green screen option to change the background of the video or animation.
●Other handy tools like paint tools, magic erasers, and sound effects.
●This is an effortless editing app.
The price of the Stop Motion Studio varies based on the operating system. For Windows, it is $1.99; for iOS and Android, the price is $4.99; and for Mac, the cost is $9.99.
03Vyond
With Vyond, you can create an array of handy and professional animated character creator videos. Users from pro to beginners can easily access this software for creating an explainer video and whiteboard animations using this feature-rich software.
●It offers a wide range of entering/exit effects for static images.
●Convenient drag and drop features for beginners to access quickly.
●One of the unique features here is automatic lip-syncing.
●There is a built-in library that you can customize.
●Vyond supports team collaboration and camera tools like camera angles and pan zooms.
Vyond offers a free trial of 14 days to check the features and friendliness. You can get the active features for a month or a year by paying $49 and $999 based on the specs you require.
04Wideo
This is an excellent online tool designed for beginners to develop animated videos. Here, you can create an animated character and use that in animated videos, presentations, and promotions with the animated character creator, the best tool for beginners.
●‘Wideo’ provides HD support for the users.
●You may use an extensive library of templates to make videos for various reasons.
●Add music and soundtracks to your videos.
●Publish the final animated videos directly to YouTube.
●The length of your videos and the amount of storage space depend on your plan.
The licensing plan of Wideo varies based on the expertise and features required. It ranges from $19 to $79 per month. Also, it has a free trial of 7 days.
05Blender
Blender is open-source software used to create animated characters online to create video games, models, renderings, etc. Blender has a rich animation feature, helping everyone to make all levels of animation.
●Blender is compatible with Mac OS X, Windows, and Linux.
●Advanced modeling, sculpting, and UV tools are included.
●Provided with rigging as well as animation in advanced mode.
●Enjoy other features like sculpt brush strokes, onion skinning, layers, and colors for the stroke and fill.
●It creates a very smooth animation video.
This is free animated character creator software. Thus, you need not pay to access any tools or features in Blender. It will be more beneficial for personal use without any investment.
06’Mango Animate’ Character Maker
‘Mango Animate’ Character Maker is the most excellent beginner character animating software available.
●It includes several action skeletons templates that make it simple to turn several PNG/PSD photos into realistic 2D animated creatures.
●Mango Animate CM comes with an extensive library of predefined motions, allowing users to animate their chosen character quickly and effortlessly.
●It may also personalize animated characters by changing their clothing or skin tone.
●Add facial expressions to tell fantastic stories.
●It can be operated by beginners also easily.
The ‘Mango Animate’ Character Maker price ranges from $ 4.08 to $16.58 per month based on the level of animation you are going to make (starter, pro, and enterprise).
01iClone
How about a character animation software whose name links to well-known companies like Ford and Microsoft?
●iClone is precisely that software with completely customizable 3D characters.
●And a wide range of lip-sync options.
●It’s a favorite among animators looking for a program that includes facial animation, motion key editing, and soft fabric physics simulation.
●Furthermore, thanks to its enhanced shadowing and lighting effects.
●Creating a realistic environment for characters has never been easier.
The price of iClone software is $398 for the character animation essential bundle and $199 for the standard package.
08Auto Desk Maya
Professional animation designers will find Autodesk Maya to be the ideal toolkit.
●It is a medium for channeling your technical and artistic abilities into fascinating 3D animations.
●Since it is a comprehensive program, it covers rendering, simulation, and modeling simultaneously.
●Clump modifier, MASH nodes, UV editor, and After Effects Live Link is significant characteristics worth highlighting in their innovative features.
●You can easily shape 3D objects and scenes with institutive modeling tools.
●It creates realistic effects from explosions to cloth simulation.
Auto Desk Maya is a costly software with a price of $215 per month and $4845 for three years.
Part 3 3 Easy Ways to Create Your Own Cartoon Character (For Beginners/Non-Illustrators)
Using the right yet easy tool is the right approach for those pretty new in creating their cartoon character. So, here we shall reveal about such easy ways to make your cartoon character.
01Online Avatar Builders
To create animated characters online, an avatar with avatar builders is a fun approach to a unique look for yourself. Because these tools are frequently online, you won’t need to install any software. In most circumstances, you won’t need to register to utilize the service. Online avatar generators have several advantages, including that they are either free or inexpensive to use. One significant disadvantage is that they can only acquire a hazy resemblance to you.
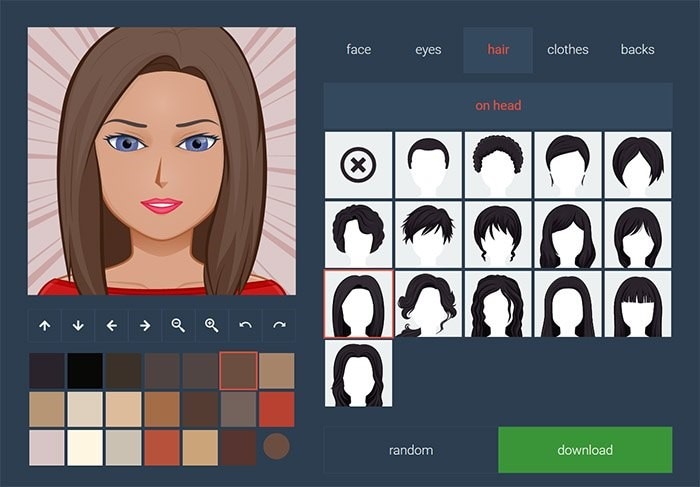
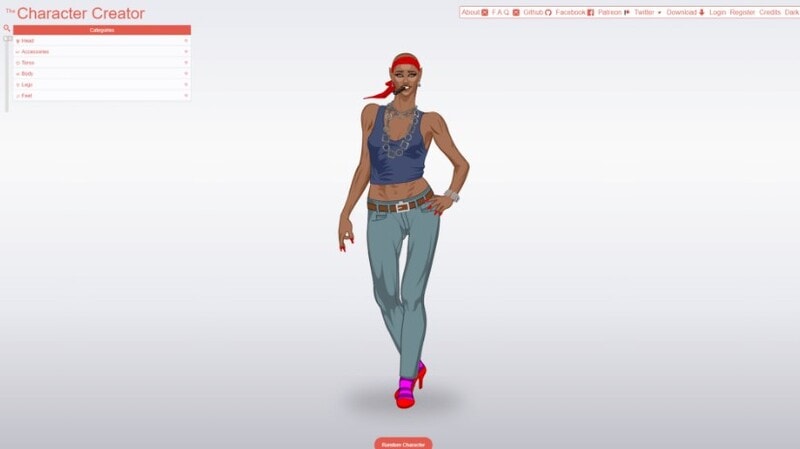
01Character Creator
With this online tool, create your own animated character, a custom female or male vector character. Aside from facial customization, you get access to a vast wardrobe of clothing, shoes, and body accessories. The character creator is ideal for generating a muscular, alternative “video game type” identity.
03Wondershare Wondershare Filmora Video Editor
Wondershare Wondershare Filmora Video Editor is an excellent option if you want simple but strong video editing tools. The keyframing tools will assist you in creating smooth and precise cartoon effects. With one click, you can quickly turn a photo into a comic. Additionally, you can choose from a variety of header templates and transitions. This is a free animated character creator.
For Win 7 or later (64-bit)
For macOS 10.12 or later
This YouTube tutorial will help you learn about keyframes and different templates. In comparison to the other ten ways listed above, we recommend Wondershare Filmora Video Editor .
● Key Takeaways from This Episode →
● Understanding how to choose the right character animator
● Eight software to create your own character animation
● Some of the simple ways to create cartoon characters.
Are you a marketer and don’t know where to start? You can start with character animation?
This article will engage you with many software to create your own animated character. Plus, some easy ways too for those novices in this field with simple apps to create your own animated character.
In this article
01 [How to Choose the Right Character Animation Maker?](#Part 1)
02 [Top 8 Software to make Character Animation. ](#Part 2)
03 [3 Easy Ways to Make Your Own Cartoon Character (For Beginners/Non-Illustrators)](#Part 3)
Part 1 How to Choose the Right Character Animation Maker?
If you are concerned about which character animation maker to choose, be aware of the analysis and alternatives you need to know. After knowing the needs of the animation as going to be mentioned below, your chances of selecting the software correctly will increase.
At first, you need to know what are you creating, what kind of animation software you want to produce? What are the objectives of videos marketing or movies? By answering these questions, you can choose the correct software.
You need to decide the features you require in the software. You may not require all the advanced features. If you are doing a simple animated video, you require only simple features but enough to complete your project.
There is a separate type of software for 2D and 3D, and you need to choose your requirement to complete the project
Now that you have known all the features you need to consider before choosing software choose it wisely and enjoy creating character animation. We’ll go over a considerable number of animation software in this journal, and you can choose one of them.
Part 2 Top 8 software to Create Character Animation
Due to the difficulty in selecting character animation software, we have sorted out some of the most beneficial and user-friendly options.
01 Animaker
The best part of this software is its versatility and flexibility. Animaker is valuable software for every kind of business animation, and it involves multiple features. It is a feature-rich free animated character creator.
●You may create six different styles using Animaker: 2D, 2.5D, typography, infographic, whiteboard, and handcrafts.
●100 charts, 1000 icons, and 3000 maps are in the animated infographic.
●You can use advanced animation features like a record, multi-move, curve, transition effects, camera in and out, and enter/exit effects.
●Animaker supports audio features like text to speech, sound effects, voice recording, and creating custom sounds.
●Also, it comes along with pre-designed transition effects and supports HD videos.
This is free software for simple basic features, but in the case of professional uses, the price ranges from $12 - $99 based on the features required.
02Stop Motion Studio
If you are a beginner, this software would be helpful. After creating high-quality 2K stop motion animations videos, you can mix them with 2D drawings. The disadvantage does not have any free features.
●It runs on different operating systems like iOS, macOS, Android, and Windows.
●It has DSLR camera support.
●There is a green screen option to change the background of the video or animation.
●Other handy tools like paint tools, magic erasers, and sound effects.
●This is an effortless editing app.
The price of the Stop Motion Studio varies based on the operating system. For Windows, it is $1.99; for iOS and Android, the price is $4.99; and for Mac, the cost is $9.99.
03Vyond
With Vyond, you can create an array of handy and professional animated character creator videos. Users from pro to beginners can easily access this software for creating an explainer video and whiteboard animations using this feature-rich software.
●It offers a wide range of entering/exit effects for static images.
●Convenient drag and drop features for beginners to access quickly.
●One of the unique features here is automatic lip-syncing.
●There is a built-in library that you can customize.
●Vyond supports team collaboration and camera tools like camera angles and pan zooms.
Vyond offers a free trial of 14 days to check the features and friendliness. You can get the active features for a month or a year by paying $49 and $999 based on the specs you require.
04Wideo
This is an excellent online tool designed for beginners to develop animated videos. Here, you can create an animated character and use that in animated videos, presentations, and promotions with the animated character creator, the best tool for beginners.
●‘Wideo’ provides HD support for the users.
●You may use an extensive library of templates to make videos for various reasons.
●Add music and soundtracks to your videos.
●Publish the final animated videos directly to YouTube.
●The length of your videos and the amount of storage space depend on your plan.
The licensing plan of Wideo varies based on the expertise and features required. It ranges from $19 to $79 per month. Also, it has a free trial of 7 days.
05Blender
Blender is open-source software used to create animated characters online to create video games, models, renderings, etc. Blender has a rich animation feature, helping everyone to make all levels of animation.
●Blender is compatible with Mac OS X, Windows, and Linux.
●Advanced modeling, sculpting, and UV tools are included.
●Provided with rigging as well as animation in advanced mode.
●Enjoy other features like sculpt brush strokes, onion skinning, layers, and colors for the stroke and fill.
●It creates a very smooth animation video.
This is free animated character creator software. Thus, you need not pay to access any tools or features in Blender. It will be more beneficial for personal use without any investment.
06’Mango Animate’ Character Maker
‘Mango Animate’ Character Maker is the most excellent beginner character animating software available.
●It includes several action skeletons templates that make it simple to turn several PNG/PSD photos into realistic 2D animated creatures.
●Mango Animate CM comes with an extensive library of predefined motions, allowing users to animate their chosen character quickly and effortlessly.
●It may also personalize animated characters by changing their clothing or skin tone.
●Add facial expressions to tell fantastic stories.
●It can be operated by beginners also easily.
The ‘Mango Animate’ Character Maker price ranges from $ 4.08 to $16.58 per month based on the level of animation you are going to make (starter, pro, and enterprise).
01iClone
How about a character animation software whose name links to well-known companies like Ford and Microsoft?
●iClone is precisely that software with completely customizable 3D characters.
●And a wide range of lip-sync options.
●It’s a favorite among animators looking for a program that includes facial animation, motion key editing, and soft fabric physics simulation.
●Furthermore, thanks to its enhanced shadowing and lighting effects.
●Creating a realistic environment for characters has never been easier.
The price of iClone software is $398 for the character animation essential bundle and $199 for the standard package.
08Auto Desk Maya
Professional animation designers will find Autodesk Maya to be the ideal toolkit.
●It is a medium for channeling your technical and artistic abilities into fascinating 3D animations.
●Since it is a comprehensive program, it covers rendering, simulation, and modeling simultaneously.
●Clump modifier, MASH nodes, UV editor, and After Effects Live Link is significant characteristics worth highlighting in their innovative features.
●You can easily shape 3D objects and scenes with institutive modeling tools.
●It creates realistic effects from explosions to cloth simulation.
Auto Desk Maya is a costly software with a price of $215 per month and $4845 for three years.
Part 3 3 Easy Ways to Create Your Own Cartoon Character (For Beginners/Non-Illustrators)
Using the right yet easy tool is the right approach for those pretty new in creating their cartoon character. So, here we shall reveal about such easy ways to make your cartoon character.
01Online Avatar Builders
To create animated characters online, an avatar with avatar builders is a fun approach to a unique look for yourself. Because these tools are frequently online, you won’t need to install any software. In most circumstances, you won’t need to register to utilize the service. Online avatar generators have several advantages, including that they are either free or inexpensive to use. One significant disadvantage is that they can only acquire a hazy resemblance to you.
01Character Creator
With this online tool, create your own animated character, a custom female or male vector character. Aside from facial customization, you get access to a vast wardrobe of clothing, shoes, and body accessories. The character creator is ideal for generating a muscular, alternative “video game type” identity.
03Wondershare Wondershare Filmora Video Editor
Wondershare Wondershare Filmora Video Editor is an excellent option if you want simple but strong video editing tools. The keyframing tools will assist you in creating smooth and precise cartoon effects. With one click, you can quickly turn a photo into a comic. Additionally, you can choose from a variety of header templates and transitions. This is a free animated character creator.
For Win 7 or later (64-bit)
For macOS 10.12 or later
This YouTube tutorial will help you learn about keyframes and different templates. In comparison to the other ten ways listed above, we recommend Wondershare Filmora Video Editor .
● Key Takeaways from This Episode →
● Understanding how to choose the right character animator
● Eight software to create your own character animation
● Some of the simple ways to create cartoon characters.
10 Great Apps to Turn Funny Animated Images Into Comics
10 Great Apps for Turning Funny Animated Images into Comics
An easy yet powerful editor
Numerous effects to choose from
Detailed tutorials provided by the official channel
There are several apps available that can let you create interesting funny animated images, cartoons, and comics by adding speech bubbles, animations, and other effects.

In this article
01 [Top apps to turn pictures into cartoons](#Part 1)
02 [Best Alternative to Cartoon Apps- Wondershare Filmorapro](#Part 2)
03 [Key Takeaways](#Part 3)
Part 1 Top apps to turn pictures into cartoons
To add some fun elements to your regular images and make them even more interesting you can convert them into cartoons and comics. The task of conversion can seem to be difficult and tricky but with the availability of several apps and programs, you can achieve the desired results in just a few clicks.
With multiple options available, you are bound to get confused while selecting an app. Helping you with the same, we have shortlisted the top 10 apps in the category as below.
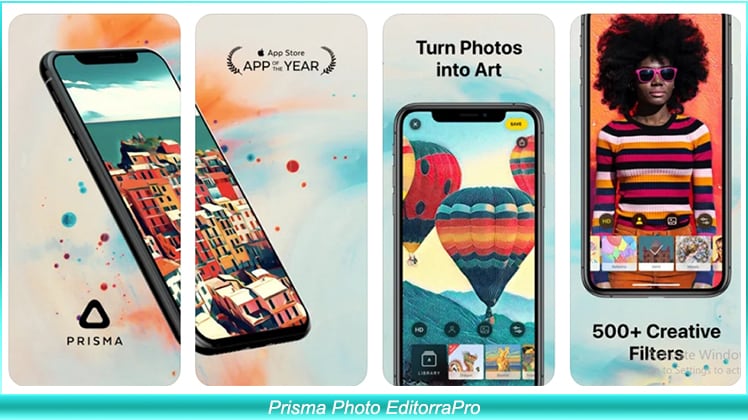
01 Prisma Photo Editor
Available for download on Android and iOS devices this is an excellent photo editing app that comes with over 300 art filters and animations. You can quickly convert your images into funny and interesting cartoons using the app in no time. Additionally, several image parameters like sharpness, exposure, brightness, and others can also be adjusted as needed.
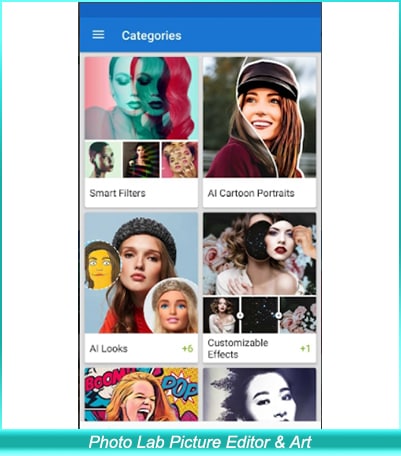
02 Photo Lab Picture Editor
This is free to use app on the Google Play Store with the IAP option. With a 4.6 high rating, the app is simple to use and offers more than 900 funny and stylish effects that can be added to your images. You can choose from photo montages, animations, filters, and other effects that match your requirements. You can even add photo frames to make your image look impressive. Create professional-looking cartoons in no time using this wonderful app.
03 MomentCam Cartoons & Stickers
This free app on Google Play Store with a 4 rating is just perfect for creating interesting cartoons and emoticons using images. The process is simple and quick where you just need to add the image and create its personalized avatar. Interesting background can also be added to further enhance the cartoon. The app also gives you the option to share the created cartoon on social media sites.

04 ToonMe
Create cartoons using your selfies and other images on your phone in just a few clicks using this high-rated app on Google Play Store. The AI of the app allows the creation of interesting full-body cartoons as well as vector portrait templates. Multiple layouts and designs are also available to choose from. The interface is simple and the app is also available for download Apple Play Store.

05 Pixlr- Free Photo Editor
This is a widely used image editing app that is simple and free to use. A wide range of image editing features and filters are available with the app including cartoon filters that will let you unleash your creativity and design impressive cartoons and other images. Also available for iOS devices the app also facilitates sharing the created images over social media and emails. Additional features include auto-fix, double exposure, adjusting image tone, and others.
06 Painnt- Pro Art Filters
This feature-packed app on Google Store lets you create professional-looking art pieces from the images using filters and animations. With more than 1000 filters in several categories including cartoons, classical, abstract, and others you can have a creation of your choice. App uses AI and also has an option for preview and fine-tuning. You can even share your creations with the app community and over social networking sites.
07 Clip2Comic & Caricature Maker
This is among the best app for iPhone users that allows creating funny and interesting cartoons, caricatures, and other artwork using images. Several other editing tools and filters are also available that support customizing high-quality and high-resolution images. Additionally, the app also supports editing the videos and converting them into animated clippings. The deformation filter further makes your creation look funny and interesting.
08 Deep Art Effects
This free app for Android and iOS devices comes with more than 100 effects and filters of different types including cartoon-based. Using the AI of the app, you can create impressive artwork in HD resolution. The app supports fast image processing and also supports sharing the artwork with the community. A paid premium version of the app is also available that has no ads, watermark, allows creating own filters, and has additional features.
09 Cartoon Photo Editor
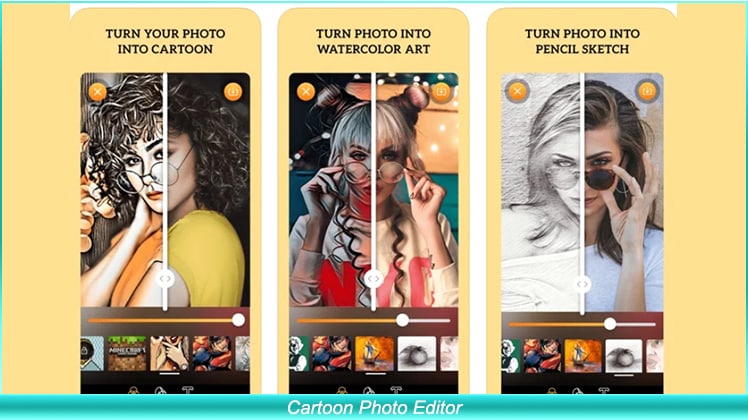
This free app for iOS devices will let you turn your images into cartoons like a pro. The app comes with more than 15 cartoon filters to choose from and you can even choose the art style as a retro cartoon, Minecraft, and others. The images from the device can be added to the app or you can even capture one using the camera. The created cartoons can also be shared over social media sites using the app. The pro-paid version offers additional features and functions.
10 Comica- Comics and cartoon maker
As the name suggests, this is a comics and cartoon creating an app on Google Play Store. This lightweight app is free to use and comes with legit-looking effects and allows adding speech balloons. You can even create your memes using the app and take your creativity to a new level.

Key Takeaways from This Episode
● Check out the images on your smartphone or system that can be used for creating interesting cartoons.
● Analyze multiple apps and programs that can let you add cartoon and comic effects to your selected images.
● Finalize the tool that offers the best features, is simple to use, and can quickly convert your images to funny animated images and cartoons with added functionalities.
There are several apps available that can let you create interesting funny animated images, cartoons, and comics by adding speech bubbles, animations, and other effects.
In this article
01 [Top apps to turn pictures into cartoons](#Part 1)
02 [Best Alternative to Cartoon Apps- Wondershare Filmorapro](#Part 2)
03 [Key Takeaways](#Part 3)
Part 1 Top apps to turn pictures into cartoons
To add some fun elements to your regular images and make them even more interesting you can convert them into cartoons and comics. The task of conversion can seem to be difficult and tricky but with the availability of several apps and programs, you can achieve the desired results in just a few clicks.
With multiple options available, you are bound to get confused while selecting an app. Helping you with the same, we have shortlisted the top 10 apps in the category as below.
01 Prisma Photo Editor
Available for download on Android and iOS devices this is an excellent photo editing app that comes with over 300 art filters and animations. You can quickly convert your images into funny and interesting cartoons using the app in no time. Additionally, several image parameters like sharpness, exposure, brightness, and others can also be adjusted as needed.
02 Photo Lab Picture Editor
This is free to use app on the Google Play Store with the IAP option. With a 4.6 high rating, the app is simple to use and offers more than 900 funny and stylish effects that can be added to your images. You can choose from photo montages, animations, filters, and other effects that match your requirements. You can even add photo frames to make your image look impressive. Create professional-looking cartoons in no time using this wonderful app.
03 MomentCam Cartoons & Stickers
This free app on Google Play Store with a 4 rating is just perfect for creating interesting cartoons and emoticons using images. The process is simple and quick where you just need to add the image and create its personalized avatar. Interesting background can also be added to further enhance the cartoon. The app also gives you the option to share the created cartoon on social media sites.
04 ToonMe
Create cartoons using your selfies and other images on your phone in just a few clicks using this high-rated app on Google Play Store. The AI of the app allows the creation of interesting full-body cartoons as well as vector portrait templates. Multiple layouts and designs are also available to choose from. The interface is simple and the app is also available for download Apple Play Store.
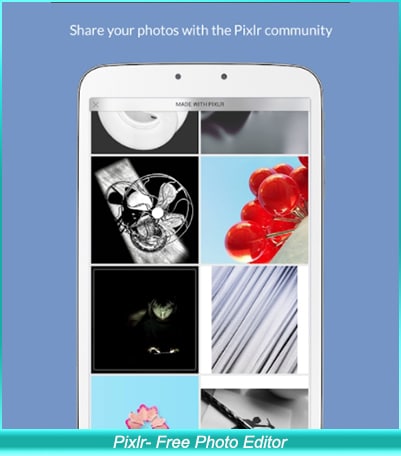
05 Pixlr- Free Photo Editor
This is a widely used image editing app that is simple and free to use. A wide range of image editing features and filters are available with the app including cartoon filters that will let you unleash your creativity and design impressive cartoons and other images. Also available for iOS devices the app also facilitates sharing the created images over social media and emails. Additional features include auto-fix, double exposure, adjusting image tone, and others.
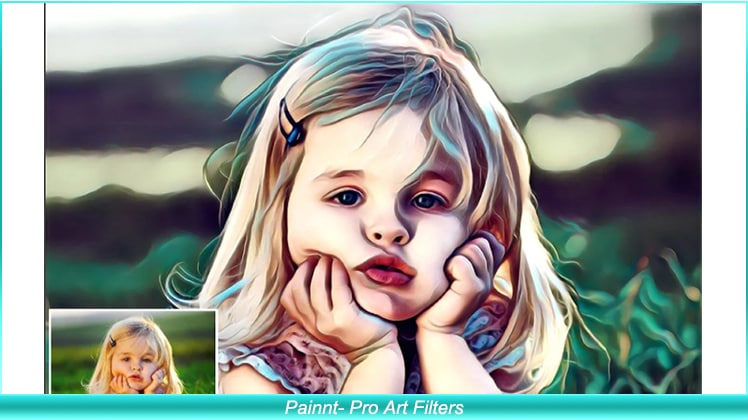
06 Painnt- Pro Art Filters
This feature-packed app on Google Store lets you create professional-looking art pieces from the images using filters and animations. With more than 1000 filters in several categories including cartoons, classical, abstract, and others you can have a creation of your choice. App uses AI and also has an option for preview and fine-tuning. You can even share your creations with the app community and over social networking sites.
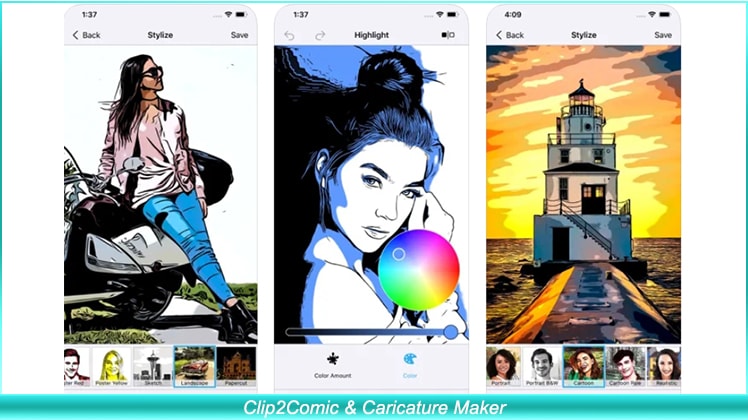
07 Clip2Comic & Caricature Maker
This is among the best app for iPhone users that allows creating funny and interesting cartoons, caricatures, and other artwork using images. Several other editing tools and filters are also available that support customizing high-quality and high-resolution images. Additionally, the app also supports editing the videos and converting them into animated clippings. The deformation filter further makes your creation look funny and interesting.
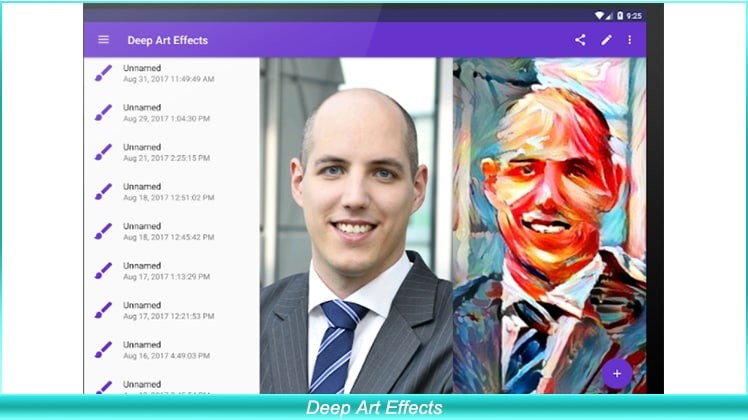
08 Deep Art Effects
This free app for Android and iOS devices comes with more than 100 effects and filters of different types including cartoon-based. Using the AI of the app, you can create impressive artwork in HD resolution. The app supports fast image processing and also supports sharing the artwork with the community. A paid premium version of the app is also available that has no ads, watermark, allows creating own filters, and has additional features.
09 Cartoon Photo Editor
This free app for iOS devices will let you turn your images into cartoons like a pro. The app comes with more than 15 cartoon filters to choose from and you can even choose the art style as a retro cartoon, Minecraft, and others. The images from the device can be added to the app or you can even capture one using the camera. The created cartoons can also be shared over social media sites using the app. The pro-paid version offers additional features and functions.
10 Comica- Comics and cartoon maker
As the name suggests, this is a comics and cartoon creating an app on Google Play Store. This lightweight app is free to use and comes with legit-looking effects and allows adding speech balloons. You can even create your memes using the app and take your creativity to a new level.
Key Takeaways from This Episode
● Check out the images on your smartphone or system that can be used for creating interesting cartoons.
● Analyze multiple apps and programs that can let you add cartoon and comic effects to your selected images.
● Finalize the tool that offers the best features, is simple to use, and can quickly convert your images to funny animated images and cartoons with added functionalities.
There are several apps available that can let you create interesting funny animated images, cartoons, and comics by adding speech bubbles, animations, and other effects.
In this article
01 [Top apps to turn pictures into cartoons](#Part 1)
02 [Best Alternative to Cartoon Apps- Wondershare Filmorapro](#Part 2)
03 [Key Takeaways](#Part 3)
Part 1 Top apps to turn pictures into cartoons
To add some fun elements to your regular images and make them even more interesting you can convert them into cartoons and comics. The task of conversion can seem to be difficult and tricky but with the availability of several apps and programs, you can achieve the desired results in just a few clicks.
With multiple options available, you are bound to get confused while selecting an app. Helping you with the same, we have shortlisted the top 10 apps in the category as below.
01 Prisma Photo Editor
Available for download on Android and iOS devices this is an excellent photo editing app that comes with over 300 art filters and animations. You can quickly convert your images into funny and interesting cartoons using the app in no time. Additionally, several image parameters like sharpness, exposure, brightness, and others can also be adjusted as needed.
02 Photo Lab Picture Editor
This is free to use app on the Google Play Store with the IAP option. With a 4.6 high rating, the app is simple to use and offers more than 900 funny and stylish effects that can be added to your images. You can choose from photo montages, animations, filters, and other effects that match your requirements. You can even add photo frames to make your image look impressive. Create professional-looking cartoons in no time using this wonderful app.
03 MomentCam Cartoons & Stickers
This free app on Google Play Store with a 4 rating is just perfect for creating interesting cartoons and emoticons using images. The process is simple and quick where you just need to add the image and create its personalized avatar. Interesting background can also be added to further enhance the cartoon. The app also gives you the option to share the created cartoon on social media sites.
04 ToonMe
Create cartoons using your selfies and other images on your phone in just a few clicks using this high-rated app on Google Play Store. The AI of the app allows the creation of interesting full-body cartoons as well as vector portrait templates. Multiple layouts and designs are also available to choose from. The interface is simple and the app is also available for download Apple Play Store.
05 Pixlr- Free Photo Editor
This is a widely used image editing app that is simple and free to use. A wide range of image editing features and filters are available with the app including cartoon filters that will let you unleash your creativity and design impressive cartoons and other images. Also available for iOS devices the app also facilitates sharing the created images over social media and emails. Additional features include auto-fix, double exposure, adjusting image tone, and others.
06 Painnt- Pro Art Filters
This feature-packed app on Google Store lets you create professional-looking art pieces from the images using filters and animations. With more than 1000 filters in several categories including cartoons, classical, abstract, and others you can have a creation of your choice. App uses AI and also has an option for preview and fine-tuning. You can even share your creations with the app community and over social networking sites.
07 Clip2Comic & Caricature Maker
This is among the best app for iPhone users that allows creating funny and interesting cartoons, caricatures, and other artwork using images. Several other editing tools and filters are also available that support customizing high-quality and high-resolution images. Additionally, the app also supports editing the videos and converting them into animated clippings. The deformation filter further makes your creation look funny and interesting.
08 Deep Art Effects
This free app for Android and iOS devices comes with more than 100 effects and filters of different types including cartoon-based. Using the AI of the app, you can create impressive artwork in HD resolution. The app supports fast image processing and also supports sharing the artwork with the community. A paid premium version of the app is also available that has no ads, watermark, allows creating own filters, and has additional features.
09 Cartoon Photo Editor
This free app for iOS devices will let you turn your images into cartoons like a pro. The app comes with more than 15 cartoon filters to choose from and you can even choose the art style as a retro cartoon, Minecraft, and others. The images from the device can be added to the app or you can even capture one using the camera. The created cartoons can also be shared over social media sites using the app. The pro-paid version offers additional features and functions.
10 Comica- Comics and cartoon maker
As the name suggests, this is a comics and cartoon creating an app on Google Play Store. This lightweight app is free to use and comes with legit-looking effects and allows adding speech balloons. You can even create your memes using the app and take your creativity to a new level.
Key Takeaways from This Episode
● Check out the images on your smartphone or system that can be used for creating interesting cartoons.
● Analyze multiple apps and programs that can let you add cartoon and comic effects to your selected images.
● Finalize the tool that offers the best features, is simple to use, and can quickly convert your images to funny animated images and cartoons with added functionalities.
Best 10 Video to GIF Converters: Top Picks
Best 10 Video to GIF Converters: Top Picks
An easy yet powerful editor
Numerous effects to choose from
Detailed tutorials provided by the official channel
Having trouble converting your videos to GIF? Browse the top 10 converters to sort this out!
In this article
01 [Why GIFs are Widely Used and Popular?](#Part 1)
02 [Top 10 Ways to Turn Video into GIF](#Part 2)
Part 1 Why GIFs are Widely Used and Popular?
If you take a poll on the watch preference of GIF versus videos, most of votes you get would be in favor of watching GIFs. There are obvious reasons to the fact that anyone would prefer watching a GIF over a video, irrespective of its length. Some major ones that make it quite annoying to watch videos include the following:
● To begin with, you need to turn the video on and off, depending on your choice of watching a video or surfing through stories and feeds, failing which you get to hear additional sounds through your feed from the already running video. You further need to stop the music or go for a volume control in case you are not interested to watch the video.
● Most of the videos you run turn up to be irrelevant or uninteresting through the middle, but you don’t have a choice to make bit adjustments. If however possible, the method is not quite convenient. You may need to visit a different site in case you run a video that is not integrated with webpage of your searched content, wait for the portal’s interface to load or watch an advertisement.
● GIFs, on the other hand, do not require pausing or turning off, and run automatically. You also don’t need to mute any sounds. These ensure to-the-point message delivery and don’t divert your attention from the primary content you visit the webpage for.
Owing to the above, most of us are now much interested to convert videos to GIFs for an exact, impactful and to the point content creation and sharing. See through the next sections of this article to learn about the best video to GIF conversion tools and software.
Part 1 Top 10 Ways to Turn Video into GIF
Considering the credibility of GIFs, you may often require to convert your long videos into short and content specific GIFs. Given below are the 10 best methods to cater to the need of video to GIF conversion:
01Filmora
Wondershare Filmora Video Editor is one among the most popular and easy methods to convert videos to GIFs. It is compatible with almost all common video formats and is loaded with a plethora of exciting effects and editing tools. Take the following steps to create GIFs from videos using this application:
Wondershare Filmora
Get started easily with Filmora’s powerful performance, intuitive interface, and countless effects!
Try It Free Try It Free Try It Free Learn More >


Step 1: Import Your Video
Launch Filmora and import your desired video in the app’s welcome window. To do this, click on ‘New Project’ followed by ‘Import’ option from the drop down menu to add your video to the Filmora.

Step 2: Timeline Dragging
Add your video to the app’s timeline using the ‘Drag and Drop’ method. You can also extract video frames by taking screenshots and merge these images into your GIF from the media library.

Step 3: Explore Your Editing Skills
You can now edit the imported video in the timeline using a range of interesting effects. Crop, trim, split or make speed adjustments to give your video a catchy look.

Step 4: Include Messages
Try adding texts and supplementary elements to deliver impactful messages through your creation.

Step 5: It’s Time to Share!
Click ‘Export’ to save your GIF to your device. You are now ready to post your work in your social communities to get the most deserved attention of your peers!

02YouTube to GIF
This one is a simple and user-friendly video to GIF converter. You can convert videos to GIFs from your PC or other online platforms with this converter. The converter allows you to play with a variety of editing effects to make your creation more interesting. All you need to do is the following:
● In the video URL bar, type ‘gif’ after ‘www.’ and you will be redirected to converter’s working window. Set the GIF time interval or apply specific effects using the tools from the panel in the left of the working window.


● To set the video time frame, highlight it in the video timeline. Set the desired interval using the ‘Start Time’ and ‘End Time’ options.

● To add a new visual effect, select it from the menu. Below the video timeline, a row of parameters will get displayed. Set the effect parameters to make desired changes.
● Click ‘Create GIF’. In the ‘Settings’ menu, you can rename and add tags to your creation and even make it private.

● That’s it! You can download your GIF now. You may get a converter purchase offer for enabling advanced features. While most users prefer sticking to the free version, it is up to you whether to decline or accept the purchase offer.
● The ‘Download’ feature is exclusive to registered users. However, if you don’t prefer creating an account, just open the GIF download link in a separate tab’s ‘Direct Link’ row. Alternatively, you can replace ‘gif’ with ‘conv’ in the video URL bar and choose ‘Convert to GIF’. However, this process may take some extra minutes.

03Giphy GIF Maker
This is an editing tool that you can use to convert video to GIF online. This one is a reliable converter tool with a user-cohesive interface. It is a simple video editor that is available to you for free. All you need to do is mentioned below:
Step 1: Load your Video
Go to the official app website and paste your desired video link in the search bar. Your video gets uploaded to the app’s editor screen. Specify the time frame and check out your GIF’s preview.

Step 2: Let’s Go Editing!
Select ‘Continue to Decorate’ to edit your GIF with texts, effects, frames and filters. You can even go for a straight upload if your video doesn’t require customization.

Step 3: Time to Share!
Select ‘Continue to Upload’ and add required tags. Tap ‘Upload to Giphy’ to make a social media post or add it to the app’s website through a specific share code.
04Wondershare TunesGo
This is an effective video to GIF creator tool, loaded with extensive features. You can use this application to convert videos, live photos and multiple snaps into interesting GIFs. TunesGo gives you the freedom to edit your work in your own style with a variety of effects. Here’s what you need to do:

Step 1: Launch TunesGo
Download, install and launch the app into your PC. You may be asked for a device connection setup, but you can skip that in case GIF creation is your only requirement.

Step 2: Upload your Video
In the app’s welcome screen, navigate to ‘Toolbox’ at the top. From the drop down interface, choose ‘GIF Maker’. In the new window that pops-up next, click on ‘Add’ to upload the desired video to the app from your PC.

Step 3: Let’s Create!
Set the required time frame for your GIF in the app’s timeline and tap the ‘Create GIF’ button to start the conversion process. On completion, your work gets automatically saved in the ‘Pictures’ folder in your PC. You can also customize your target location.

05Vimeo
Vimeo is also a quick, 3-stepvideo to GIF converter. However, you need to have a Vimeo account to take up the conversion process. This is an easy and hassle free GIF creator, that adheres to your creation needs within minutes. Here’s what you need to do:
Step 1: Upload Your Video
Log in to your Vimeo account. In the opening window, select ’Upload’ from the toolbar at the top. ‘Drag and Drop’ or click ‘Choose Files’ to upload the desired video from your device.

Step 2: Create Your GIF
After you are done uploading the video, select ‘Create a GIF’ from the sidebar at the left. You will be directed to the GIF Editor window. Select a loop section from the video and set a time frame of maximum 6 seconds in the video timeline. Now click ‘Create GIF’.


Step 3: Export Your Creation
Your GIF is ready to download and share. You can also embed your GIF by generating embed codes for specific platforms.
06 Adobe Photoshop
This one is one f the most popular editing applications you can use to make GIF out of video. It’s simple and user-friendly interface does not require you to possess a Photoshop mastery for the conversion purpose. Here’s what you need to follow:
Step 1: Search Your Video
Find a video of your choice from a desired platform. In case you want a YouTube video, add ‘ss’ prior to the video’s service name in YouTube’s URL bar.
STEP 2: Edit Your Video
Use any preferable video splitters and editors to crop, trim and add interesting effects to your video and set a maximum time frame of 3 seconds.
Step 3: Create GIF
Open your edited video in Adobe Photoshop and tap ‘File Import-Video frames into layers’.

Step 4: Adjust Settings
Make required setting adjustments and click on ‘File-Save for Web’. Try adjusting image resolution and color range if your file size exceeds 10 MB.

Step 5: Save Your Work
In the ’Files’ tab at the top, select ‘Save’ and choose the ‘.gif’ extension in the ‘File Type’ dialog box to save your creation to your PC.
07Convertio
This converter provides a simple, 3-step process to create GIF from video. Either use it as a browser extension or download it from Google Chrome Webstore. Take the following steps to convert videos to GIF online.
● Upload your desired video to the service timeline. You can either choose files directly or ‘Drag and Drop’ them from your device.
● Select ‘Convert’ to make GIF from your uploaded video.
● Tap ‘Download’ to save your creation.

You can use this service to make different format conversions. However, this converter does not allow you to edit or add effects your GIF.
08MakeAGif
You can use this tool as a GIF video maker online to create, exchange and share GIFs on different platforms. Additionally, you also get the flexibility to use already saved images in your device to add them to your GIF. The app’s basic version allows you to create GIFs without watermarks. To add watermarks, you will need an account on the app. To convert videos to GIFs using this tool, you should take the following steps:
Step 1: Upload Your Video
In the app’s welcome screen, click on ‘Video to GIF’ and upload a desired video in the editor timeline. Add effects and make speed and time frame adjustments. When satisfied, tap ‘Continue to Publishing’.

Step 2: Add Names and Tags
In the publishing window, give a suitable name and add required tags to your edited video to make it easily identifiable. When you are done, click on ‘Create a GIF’ from the bottom right.

Step 3: Ready to Share!
You can now share your created GIF across social media platforms.

09Adobe Premiere
Similar to Adobe Photoshop, Adobe Premiere too is quite a preferred application for creating GIFs from videos. This is a simple, quick and free application that converts your videos to GIFs in a span of few minutes. Here’s what you need to do to go about the process:

Step 1: Edit your Video
Add a video of your choice in the Adobe Premiere timeline and play with your editing creativity to add desired effects and filters to it. Make sure to set requisite time frames to your edit.

Step 2: Prepare an Export
Click into the app’s video timeline, and prepare a file export using the following path:
File> Export> Media

Step 3: Settings Adjustments
In the Media Export window, navigate to the ‘Format’ tab. From the drop down menu, choose ‘Animated GIF’. Here, you can add your gif file, select its target destination and adjust the required settings.

Step 4: Export Your Work
Click ‘Export’ to share your creation on social media or click on ‘Queue’ to send your GIF to a specific media encoder.

1010. Movavi Video Converter
This is one of the latest video converter software you can rely on to make GIF from video files. This software allows you to create top quality animated GIFs and is compatible with a variety of video formats. Using this converter, you can create amazing GIFs in 5 quick steps: here’s what you need to follow:
Step 1: Download and Install the Software
To begin, download the converter software from its official site and adhere to the user instructions to install the same in your system.
Step 2: Upload Your Video
In the software’s opening window, click on ‘Add Media’ followed by ‘Add Video’ and select a desired video from your system to upload on the Movavi video timeline.

Step 3: Trim Your Video
Select ‘Edit’ from the right of your video file. In the editing window, specify the initial cut of the video by displacing the marker to the desired point. Click on ‘Scissors’ to add multiple cut points to your video. You can even drag the cut points around the editor timeline. Choose the unvented sections and click ‘Trash Can’. When the result satisfies you, click ‘Done’.

Step 4: Choose a Conversion Format
Navigate to the ‘Images’ tab and select ‘GIF’ and set an adequate size for the GIF. Here, you can adjust quality, frame size and rate and resize method using the ‘Cogwheel’ tool.

Step 5: Let’s Get Converting!
Tap ‘Convert’ and wait for the conversion to finish. You will be automatically directed to the folder where your converted files get saved.

● Key Takeaways from This Episode →
● GIFs are short, to the point and convenient to access, providing exact and impactful message delivery.
● The software market is flooded with a variety of editing tools to convert your dull videos to catchy GIFs.
● Filmora is a quick and smart editing tool that envisages your GIF creating experience with a range of exciting features.
Having trouble converting your videos to GIF? Browse the top 10 converters to sort this out!
In this article
01 [Why GIFs are Widely Used and Popular?](#Part 1)
02 [Top 10 Ways to Turn Video into GIF](#Part 2)
Part 1 Why GIFs are Widely Used and Popular?
If you take a poll on the watch preference of GIF versus videos, most of votes you get would be in favor of watching GIFs. There are obvious reasons to the fact that anyone would prefer watching a GIF over a video, irrespective of its length. Some major ones that make it quite annoying to watch videos include the following:
● To begin with, you need to turn the video on and off, depending on your choice of watching a video or surfing through stories and feeds, failing which you get to hear additional sounds through your feed from the already running video. You further need to stop the music or go for a volume control in case you are not interested to watch the video.
● Most of the videos you run turn up to be irrelevant or uninteresting through the middle, but you don’t have a choice to make bit adjustments. If however possible, the method is not quite convenient. You may need to visit a different site in case you run a video that is not integrated with webpage of your searched content, wait for the portal’s interface to load or watch an advertisement.
● GIFs, on the other hand, do not require pausing or turning off, and run automatically. You also don’t need to mute any sounds. These ensure to-the-point message delivery and don’t divert your attention from the primary content you visit the webpage for.
Owing to the above, most of us are now much interested to convert videos to GIFs for an exact, impactful and to the point content creation and sharing. See through the next sections of this article to learn about the best video to GIF conversion tools and software.
Part 1 Top 10 Ways to Turn Video into GIF
Considering the credibility of GIFs, you may often require to convert your long videos into short and content specific GIFs. Given below are the 10 best methods to cater to the need of video to GIF conversion:
01Filmora
Wondershare Filmora Video Editor is one among the most popular and easy methods to convert videos to GIFs. It is compatible with almost all common video formats and is loaded with a plethora of exciting effects and editing tools. Take the following steps to create GIFs from videos using this application:
Wondershare Filmora
Get started easily with Filmora’s powerful performance, intuitive interface, and countless effects!
Try It Free Try It Free Try It Free Learn More >
Step 1: Import Your Video
Launch Filmora and import your desired video in the app’s welcome window. To do this, click on ‘New Project’ followed by ‘Import’ option from the drop down menu to add your video to the Filmora.
Step 2: Timeline Dragging
Add your video to the app’s timeline using the ‘Drag and Drop’ method. You can also extract video frames by taking screenshots and merge these images into your GIF from the media library.
Step 3: Explore Your Editing Skills
You can now edit the imported video in the timeline using a range of interesting effects. Crop, trim, split or make speed adjustments to give your video a catchy look.
Step 4: Include Messages
Try adding texts and supplementary elements to deliver impactful messages through your creation.
Step 5: It’s Time to Share!
Click ‘Export’ to save your GIF to your device. You are now ready to post your work in your social communities to get the most deserved attention of your peers!
02YouTube to GIF
This one is a simple and user-friendly video to GIF converter. You can convert videos to GIFs from your PC or other online platforms with this converter. The converter allows you to play with a variety of editing effects to make your creation more interesting. All you need to do is the following:
● In the video URL bar, type ‘gif’ after ‘www.’ and you will be redirected to converter’s working window. Set the GIF time interval or apply specific effects using the tools from the panel in the left of the working window.
● To set the video time frame, highlight it in the video timeline. Set the desired interval using the ‘Start Time’ and ‘End Time’ options.
● To add a new visual effect, select it from the menu. Below the video timeline, a row of parameters will get displayed. Set the effect parameters to make desired changes.
● Click ‘Create GIF’. In the ‘Settings’ menu, you can rename and add tags to your creation and even make it private.
● That’s it! You can download your GIF now. You may get a converter purchase offer for enabling advanced features. While most users prefer sticking to the free version, it is up to you whether to decline or accept the purchase offer.
● The ‘Download’ feature is exclusive to registered users. However, if you don’t prefer creating an account, just open the GIF download link in a separate tab’s ‘Direct Link’ row. Alternatively, you can replace ‘gif’ with ‘conv’ in the video URL bar and choose ‘Convert to GIF’. However, this process may take some extra minutes.
03Giphy GIF Maker
This is an editing tool that you can use to convert video to GIF online. This one is a reliable converter tool with a user-cohesive interface. It is a simple video editor that is available to you for free. All you need to do is mentioned below:
Step 1: Load your Video
Go to the official app website and paste your desired video link in the search bar. Your video gets uploaded to the app’s editor screen. Specify the time frame and check out your GIF’s preview.
Step 2: Let’s Go Editing!
Select ‘Continue to Decorate’ to edit your GIF with texts, effects, frames and filters. You can even go for a straight upload if your video doesn’t require customization.
Step 3: Time to Share!
Select ‘Continue to Upload’ and add required tags. Tap ‘Upload to Giphy’ to make a social media post or add it to the app’s website through a specific share code.
04Wondershare TunesGo
This is an effective video to GIF creator tool, loaded with extensive features. You can use this application to convert videos, live photos and multiple snaps into interesting GIFs. TunesGo gives you the freedom to edit your work in your own style with a variety of effects. Here’s what you need to do:
Step 1: Launch TunesGo
Download, install and launch the app into your PC. You may be asked for a device connection setup, but you can skip that in case GIF creation is your only requirement.
Step 2: Upload your Video
In the app’s welcome screen, navigate to ‘Toolbox’ at the top. From the drop down interface, choose ‘GIF Maker’. In the new window that pops-up next, click on ‘Add’ to upload the desired video to the app from your PC.
Step 3: Let’s Create!
Set the required time frame for your GIF in the app’s timeline and tap the ‘Create GIF’ button to start the conversion process. On completion, your work gets automatically saved in the ‘Pictures’ folder in your PC. You can also customize your target location.
05Vimeo
Vimeo is also a quick, 3-stepvideo to GIF converter. However, you need to have a Vimeo account to take up the conversion process. This is an easy and hassle free GIF creator, that adheres to your creation needs within minutes. Here’s what you need to do:
Step 1: Upload Your Video
Log in to your Vimeo account. In the opening window, select ’Upload’ from the toolbar at the top. ‘Drag and Drop’ or click ‘Choose Files’ to upload the desired video from your device.
Step 2: Create Your GIF
After you are done uploading the video, select ‘Create a GIF’ from the sidebar at the left. You will be directed to the GIF Editor window. Select a loop section from the video and set a time frame of maximum 6 seconds in the video timeline. Now click ‘Create GIF’.
Step 3: Export Your Creation
Your GIF is ready to download and share. You can also embed your GIF by generating embed codes for specific platforms.
06 Adobe Photoshop
This one is one f the most popular editing applications you can use to make GIF out of video. It’s simple and user-friendly interface does not require you to possess a Photoshop mastery for the conversion purpose. Here’s what you need to follow:
Step 1: Search Your Video
Find a video of your choice from a desired platform. In case you want a YouTube video, add ‘ss’ prior to the video’s service name in YouTube’s URL bar.
STEP 2: Edit Your Video
Use any preferable video splitters and editors to crop, trim and add interesting effects to your video and set a maximum time frame of 3 seconds.
Step 3: Create GIF
Open your edited video in Adobe Photoshop and tap ‘File Import-Video frames into layers’.
Step 4: Adjust Settings
Make required setting adjustments and click on ‘File-Save for Web’. Try adjusting image resolution and color range if your file size exceeds 10 MB.
Step 5: Save Your Work
In the ’Files’ tab at the top, select ‘Save’ and choose the ‘.gif’ extension in the ‘File Type’ dialog box to save your creation to your PC.
07Convertio
This converter provides a simple, 3-step process to create GIF from video. Either use it as a browser extension or download it from Google Chrome Webstore. Take the following steps to convert videos to GIF online.
● Upload your desired video to the service timeline. You can either choose files directly or ‘Drag and Drop’ them from your device.
● Select ‘Convert’ to make GIF from your uploaded video.
● Tap ‘Download’ to save your creation.
You can use this service to make different format conversions. However, this converter does not allow you to edit or add effects your GIF.
08MakeAGif
You can use this tool as a GIF video maker online to create, exchange and share GIFs on different platforms. Additionally, you also get the flexibility to use already saved images in your device to add them to your GIF. The app’s basic version allows you to create GIFs without watermarks. To add watermarks, you will need an account on the app. To convert videos to GIFs using this tool, you should take the following steps:
Step 1: Upload Your Video
In the app’s welcome screen, click on ‘Video to GIF’ and upload a desired video in the editor timeline. Add effects and make speed and time frame adjustments. When satisfied, tap ‘Continue to Publishing’.
Step 2: Add Names and Tags
In the publishing window, give a suitable name and add required tags to your edited video to make it easily identifiable. When you are done, click on ‘Create a GIF’ from the bottom right.
Step 3: Ready to Share!
You can now share your created GIF across social media platforms.
09Adobe Premiere
Similar to Adobe Photoshop, Adobe Premiere too is quite a preferred application for creating GIFs from videos. This is a simple, quick and free application that converts your videos to GIFs in a span of few minutes. Here’s what you need to do to go about the process:
Step 1: Edit your Video
Add a video of your choice in the Adobe Premiere timeline and play with your editing creativity to add desired effects and filters to it. Make sure to set requisite time frames to your edit.
Step 2: Prepare an Export
Click into the app’s video timeline, and prepare a file export using the following path:
File> Export> Media
Step 3: Settings Adjustments
In the Media Export window, navigate to the ‘Format’ tab. From the drop down menu, choose ‘Animated GIF’. Here, you can add your gif file, select its target destination and adjust the required settings.
Step 4: Export Your Work
Click ‘Export’ to share your creation on social media or click on ‘Queue’ to send your GIF to a specific media encoder.
1010. Movavi Video Converter
This is one of the latest video converter software you can rely on to make GIF from video files. This software allows you to create top quality animated GIFs and is compatible with a variety of video formats. Using this converter, you can create amazing GIFs in 5 quick steps: here’s what you need to follow:
Step 1: Download and Install the Software
To begin, download the converter software from its official site and adhere to the user instructions to install the same in your system.
Step 2: Upload Your Video
In the software’s opening window, click on ‘Add Media’ followed by ‘Add Video’ and select a desired video from your system to upload on the Movavi video timeline.
Step 3: Trim Your Video
Select ‘Edit’ from the right of your video file. In the editing window, specify the initial cut of the video by displacing the marker to the desired point. Click on ‘Scissors’ to add multiple cut points to your video. You can even drag the cut points around the editor timeline. Choose the unvented sections and click ‘Trash Can’. When the result satisfies you, click ‘Done’.
Step 4: Choose a Conversion Format
Navigate to the ‘Images’ tab and select ‘GIF’ and set an adequate size for the GIF. Here, you can adjust quality, frame size and rate and resize method using the ‘Cogwheel’ tool.
Step 5: Let’s Get Converting!
Tap ‘Convert’ and wait for the conversion to finish. You will be automatically directed to the folder where your converted files get saved.
● Key Takeaways from This Episode →
● GIFs are short, to the point and convenient to access, providing exact and impactful message delivery.
● The software market is flooded with a variety of editing tools to convert your dull videos to catchy GIFs.
● Filmora is a quick and smart editing tool that envisages your GIF creating experience with a range of exciting features.
Little Known Techniques of Motion Graphics in Premiere Pro
Little Known Techniques of Motion Graphics in Premiere Pro
An easy yet powerful editor
Numerous effects to choose from
Detailed tutorials provided by the official channel
Video editing has recently gained momentum in content design, and with Motion Graphics Premiere Pro editing templates, it has all the fun in the house.
In this article
01 [5 Editing Motion Graphics Techniques in Adobe Premiere Pro](#Part 1)
02 [10 Free Motion Graphics Templates for Premiere Pro](#Part 2)
03 [How to Use Motion Graphics Templates in Premiere Pro](#Part 3)
Part 1 5 Editing Motion Graphics Techniques in Adobe Premiere Pro
A variety of editing techniques of motion graphics for Premiere Pro are ready to give a classy touch to your videos. Let’s brush up through the best you can have.
01Cropping Clips
Cropping your videos allows you to fit them into your required size frames. To remove any unwanted portions of your edits, crop them in adobe Premiere Pro with your desired aspect ratio to give that ‘just perfect’ look to your edits.
Start from importing and adding your footage to your project panel, followed by creating a fresh composition. Now, choose ‘Crop’ from the Effects panel to add it to your clip, either by double-clicking or dragging and dropping.
02Trimming Clips
If you want to adjust the ‘In and Out’ play back sequence of your edited clips, you can go for trimming them. You can trim your clips in the Source and Program monitors, or even in the Premiere Pro timeline. You can choose from the standard cut, jump cut, B-roll cut etc, to suit your editing needs and styles.
All you need to do is open the clip, mark the In and Out points, adjust their sequence with previous or next edits in your cue and that’s it. You can also use keyboard shortcuts for this purpose. However, you need to preset these shortcuts before you begin editing your clips.
03Adding Text
You can try adding simple and formatted texts to enhance your video outlook. This comes handy when you are aiming to deliver specific messages to your audience. You can add normal write-ups, callout quotations and customize your text in a number of exciting styles. Just go to the Type tool, format your text in the Text Box and you’re done!
04Audio Level Adjustment
Want to add spark to your clips with a synchronized audio visual effect? After you finish trimming and cropping, consider opting for an in-line audio adjustment. This will definitely enhance your video and take your craft to the next level.
All you need to do is select an audio clip, click on ‘Audio Gain’ in the drop down menu, set desired Decibel count in the Audio Gain Box and select ‘OK’.
05Exporting Videos
Once you are done with your video craft, you should certainly look forward to making it available for social exposure. To do this, select appropriate sequence constraints in the Export window, choose the export platform, format and Codec, make fine tuning and bit rate adjustments and finish export either in Premiere Pro or Media Encoder. You may also save these settings for your next exports.
Part 2 Free Motion Graphics Templates for Premiere Pro
Let’s have a look into your best choices of free motion graphic templates for Premiere Pro:
0114 Premiere Pro Lumetri Looks
Want to enhance your video creativity with that amazing Hollywood feel? You can undoubtedly opt for the Premiere Lumetri Looks template that gives you the liberty to provide a Hollywood oriented color scheme to your videos, just like those incredible color patterns one would see in Dr. Strangelove, The Martian and many more famous Hollywood flicks.

0215 Animated Lower Thirds
This template comes handy when you need to add lower thirds to your videos, either to introduce different content varieties or to objectify your video components. You can use this template with ease in your personal as well as commercial videos to give them that explicit professional touch.

03Horror Trailer Titles
If horror videos turn you on, use this template in video creations to customize them with that intense and scary feel! This template helps you add scary title slates that are just enough to add a terrifying quotient to your videos. From personal to professional, this template can add intensity to any video type.
04Instagram Stories Premiere Pro Template
This template is a definite catch for those Instagram lovers who constantly experiment to post engaging stories on the platform. If you want your IG stories to grab the talk, go for this animation template to customize photos and text so that they get the buzz among your followers.

05Dust Overlays
Comprising of studio-like effects, this template allows you to enhance your films with high quality dynamic animation in appealing texture variations. Use this template to create videos with those attractive misty backgrounds with cohesive variations in lighting with adjustable power effects.
06Travel Stories Premiere Pro Template
If you are into travel blogging and trying to add spunk to your stories and videos, this template is there to help you out with its catchy text animations and flowy transitions. Available in an upgraded configuration, this template is everything you need to make your travel blogs hover the trending charts.

07Digital Slideshow
Go for this template to add spark to your graphic presentations. Designed primarily for professional usage, it is equally effective in personal projects also. Developed by Evanto Elements, the company offers unlimited access on subscription.

08Free Quotes Premiere Pro Template
If you want to add animated quotes to your video creations, this template is a must try for you. Providing 6 quoting options and a ‘click to change’ text and color interface with convenient customizability keeps it among the top choices for hastle free motion editing.

09Cinematic Title Style Library
If you are bored with those conventional Premiere Pro titles but don’t want to invest time in creating styles of your own, you can use the modernized title styles from this library to enhance your creations with that intense cinematic feel. You can use them comfortably for personal and commercial purposes.

10Space Background Elements
This set of background templates is designed to provide realistic settings to video creators who work on science fiction and space oriented themes. Loaded with different real-time effects, this template provides the ultimate feel of a space travel in 4K.

Part 2 Alternatives to Premiere Pro: Filmora
If not Premiere Pro, you can go for Filmora as a dependable alternative. It’s an exquisite set of amazing and top-notch tools for creating g and editing videos. Wondershare introduced Filmora as an effective, easy-to-use editing software that’s equally caters to the editing pace of beginners as well as experts. You can use Filmora with Windows and macOS.
Packed with a range of appealing customization choices, Filmora comes to you in four principal versions:
● Wondershare Filmora Video Editor
Suitable for beginners, this is the basic and the simplest version having inbuilt editing templates. It’s desktop compatible software.
For Win 7 or later (64-bit)
For macOS 10.12 or later
● Filmora
Android and iOS compatibility in this version of Filmora brought video editing from PCs and laptops into smartphones.

● FilmoraScrn
This version allows you to record your editing screen if you’re a working on Windows.

Part 4 How to Use Motion Graphics Templates in Premiere Pro
After getting familiar with Premiere Pro editing and templates, let’s get into using these adobe premiere motion graphics templates for an exemplary video creating experience. Take up the following steps to get started.
● Go to Premiere Pro Essential Graphics Panel
In the Premiere Pro startup page, select ‘Window’ from the toolbar and select ‘Essential Graphics’ from the drop down menu.
● Add Motion Graphics Templates to Library
Click the ‘Import’ button present at the bottom in the right side of the Essential Graphics Panel. Go to and choose your downloaded motion graphics template file and select ‘Open’. Your file is added to the Essential Graphics Library.
● Drag-Drop the MOGRT to Timeline
‘Drag’ your motion graphics template from the library and ‘Drop’ it on your Timeline.
● Customize Your Template
Go to the ‘Edit’ option in the Essential Graphics Panel to look for customization choices available for your selected motion graphics adobe template.
● Key Takeaways from This Episode →
● Adobe Premiere Pro is an amazing video creation and editing tool that ensures to give a professional class to your edits. Be it personal creativity or professional expertise, this software is all set to give you a wholesome editing experience you will never forget.
● Loaded with an extensive variety of editing templates, available for free and on subscription, adobe premiere pro is a one stop access to all your editing concerns. Its customizable effects will certainly make your creations stand out in the league.
● Video editing is a high in demand craft of excellence. With advancements in software developments, the creative market offers you a pool of over the top editing software that is ready to give that classy spunk to your videos. So just your own from the pool and go on a spree of creating trend setting videos that never miss out on grabbing the attention of everyone around!
Video editing has recently gained momentum in content design, and with Motion Graphics Premiere Pro editing templates, it has all the fun in the house.
In this article
01 [5 Editing Motion Graphics Techniques in Adobe Premiere Pro](#Part 1)
02 [10 Free Motion Graphics Templates for Premiere Pro](#Part 2)
03 [How to Use Motion Graphics Templates in Premiere Pro](#Part 3)
Part 1 5 Editing Motion Graphics Techniques in Adobe Premiere Pro
A variety of editing techniques of motion graphics for Premiere Pro are ready to give a classy touch to your videos. Let’s brush up through the best you can have.
01Cropping Clips
Cropping your videos allows you to fit them into your required size frames. To remove any unwanted portions of your edits, crop them in adobe Premiere Pro with your desired aspect ratio to give that ‘just perfect’ look to your edits.
Start from importing and adding your footage to your project panel, followed by creating a fresh composition. Now, choose ‘Crop’ from the Effects panel to add it to your clip, either by double-clicking or dragging and dropping.
02Trimming Clips
If you want to adjust the ‘In and Out’ play back sequence of your edited clips, you can go for trimming them. You can trim your clips in the Source and Program monitors, or even in the Premiere Pro timeline. You can choose from the standard cut, jump cut, B-roll cut etc, to suit your editing needs and styles.
All you need to do is open the clip, mark the In and Out points, adjust their sequence with previous or next edits in your cue and that’s it. You can also use keyboard shortcuts for this purpose. However, you need to preset these shortcuts before you begin editing your clips.
03Adding Text
You can try adding simple and formatted texts to enhance your video outlook. This comes handy when you are aiming to deliver specific messages to your audience. You can add normal write-ups, callout quotations and customize your text in a number of exciting styles. Just go to the Type tool, format your text in the Text Box and you’re done!
04Audio Level Adjustment
Want to add spark to your clips with a synchronized audio visual effect? After you finish trimming and cropping, consider opting for an in-line audio adjustment. This will definitely enhance your video and take your craft to the next level.
All you need to do is select an audio clip, click on ‘Audio Gain’ in the drop down menu, set desired Decibel count in the Audio Gain Box and select ‘OK’.
05Exporting Videos
Once you are done with your video craft, you should certainly look forward to making it available for social exposure. To do this, select appropriate sequence constraints in the Export window, choose the export platform, format and Codec, make fine tuning and bit rate adjustments and finish export either in Premiere Pro or Media Encoder. You may also save these settings for your next exports.
Part 2 Free Motion Graphics Templates for Premiere Pro
Let’s have a look into your best choices of free motion graphic templates for Premiere Pro:
0114 Premiere Pro Lumetri Looks
Want to enhance your video creativity with that amazing Hollywood feel? You can undoubtedly opt for the Premiere Lumetri Looks template that gives you the liberty to provide a Hollywood oriented color scheme to your videos, just like those incredible color patterns one would see in Dr. Strangelove, The Martian and many more famous Hollywood flicks.
0215 Animated Lower Thirds
This template comes handy when you need to add lower thirds to your videos, either to introduce different content varieties or to objectify your video components. You can use this template with ease in your personal as well as commercial videos to give them that explicit professional touch.
03Horror Trailer Titles
If horror videos turn you on, use this template in video creations to customize them with that intense and scary feel! This template helps you add scary title slates that are just enough to add a terrifying quotient to your videos. From personal to professional, this template can add intensity to any video type.
04Instagram Stories Premiere Pro Template
This template is a definite catch for those Instagram lovers who constantly experiment to post engaging stories on the platform. If you want your IG stories to grab the talk, go for this animation template to customize photos and text so that they get the buzz among your followers.
05Dust Overlays
Comprising of studio-like effects, this template allows you to enhance your films with high quality dynamic animation in appealing texture variations. Use this template to create videos with those attractive misty backgrounds with cohesive variations in lighting with adjustable power effects.
06Travel Stories Premiere Pro Template
If you are into travel blogging and trying to add spunk to your stories and videos, this template is there to help you out with its catchy text animations and flowy transitions. Available in an upgraded configuration, this template is everything you need to make your travel blogs hover the trending charts.
07Digital Slideshow
Go for this template to add spark to your graphic presentations. Designed primarily for professional usage, it is equally effective in personal projects also. Developed by Evanto Elements, the company offers unlimited access on subscription.
08Free Quotes Premiere Pro Template
If you want to add animated quotes to your video creations, this template is a must try for you. Providing 6 quoting options and a ‘click to change’ text and color interface with convenient customizability keeps it among the top choices for hastle free motion editing.
09Cinematic Title Style Library
If you are bored with those conventional Premiere Pro titles but don’t want to invest time in creating styles of your own, you can use the modernized title styles from this library to enhance your creations with that intense cinematic feel. You can use them comfortably for personal and commercial purposes.
10Space Background Elements
This set of background templates is designed to provide realistic settings to video creators who work on science fiction and space oriented themes. Loaded with different real-time effects, this template provides the ultimate feel of a space travel in 4K.
Part 2 Alternatives to Premiere Pro: Filmora
If not Premiere Pro, you can go for Filmora as a dependable alternative. It’s an exquisite set of amazing and top-notch tools for creating g and editing videos. Wondershare introduced Filmora as an effective, easy-to-use editing software that’s equally caters to the editing pace of beginners as well as experts. You can use Filmora with Windows and macOS.
Packed with a range of appealing customization choices, Filmora comes to you in four principal versions:
● Wondershare Filmora Video Editor
Suitable for beginners, this is the basic and the simplest version having inbuilt editing templates. It’s desktop compatible software.
For Win 7 or later (64-bit)
For macOS 10.12 or later
● Filmora
Android and iOS compatibility in this version of Filmora brought video editing from PCs and laptops into smartphones.
● FilmoraScrn
This version allows you to record your editing screen if you’re a working on Windows.
Part 4 How to Use Motion Graphics Templates in Premiere Pro
After getting familiar with Premiere Pro editing and templates, let’s get into using these adobe premiere motion graphics templates for an exemplary video creating experience. Take up the following steps to get started.
● Go to Premiere Pro Essential Graphics Panel
In the Premiere Pro startup page, select ‘Window’ from the toolbar and select ‘Essential Graphics’ from the drop down menu.
● Add Motion Graphics Templates to Library
Click the ‘Import’ button present at the bottom in the right side of the Essential Graphics Panel. Go to and choose your downloaded motion graphics template file and select ‘Open’. Your file is added to the Essential Graphics Library.
● Drag-Drop the MOGRT to Timeline
‘Drag’ your motion graphics template from the library and ‘Drop’ it on your Timeline.
● Customize Your Template
Go to the ‘Edit’ option in the Essential Graphics Panel to look for customization choices available for your selected motion graphics adobe template.
● Key Takeaways from This Episode →
● Adobe Premiere Pro is an amazing video creation and editing tool that ensures to give a professional class to your edits. Be it personal creativity or professional expertise, this software is all set to give you a wholesome editing experience you will never forget.
● Loaded with an extensive variety of editing templates, available for free and on subscription, adobe premiere pro is a one stop access to all your editing concerns. Its customizable effects will certainly make your creations stand out in the league.
● Video editing is a high in demand craft of excellence. With advancements in software developments, the creative market offers you a pool of over the top editing software that is ready to give that classy spunk to your videos. So just your own from the pool and go on a spree of creating trend setting videos that never miss out on grabbing the attention of everyone around!
How to Animate - Adobe Animate Tutorial for All
How to Animate - Adobe Animate Tutorial for All
An easy yet powerful editor
Numerous effects to choose from
Detailed tutorials provided by the official channel
Now, since the tool has too many elements to understand, it’s always a good strategy to start your journey with a dedicated Adobe Animate CC tutorial.
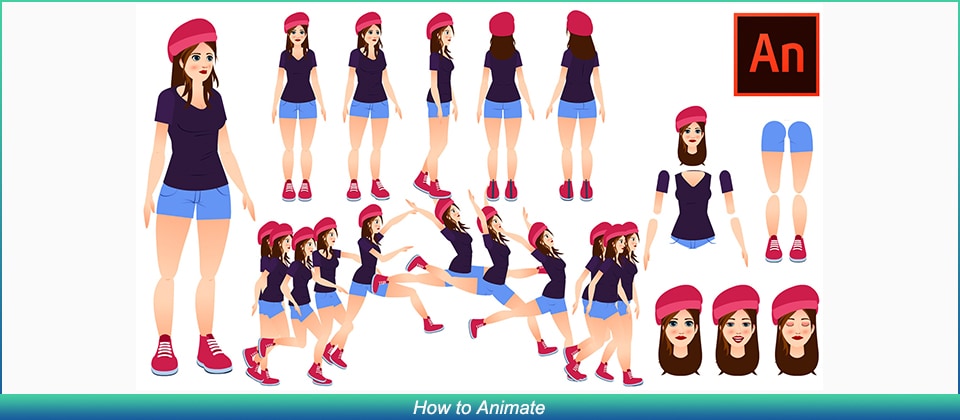
In today’s guide, we are going to introduce a few of these tutorials so that you can easily start creating animations in Adobe Animate CC, even if you have zero prior experience with the software.
In this article
01 [Adobe Animate CC tutorial](#Part 1)
02 [How Do You Animate in Adobe Animation?](#Part 2)
03 [Other Rare Tutorials for Self-learning to Learn How to Animate](#Part 3)
Part 1 Is Adobe Animate Good for Beginners?
When people start their careers as graphic designers, they always struggle to pick the right tool to accompany them during their journey. Since there are too many options to choose from, beginners always end up comparing a tool with other available options. They even weigh the pros and cons of each animation software individually to make the best decision. The same is the case with Adobe Animate. Many beginners want to know if Adobe Animate is the right animation software to get started as a professional graphic designer.
Since the Adobe community continues to grow rapidly, you’ll also be able to find a variety of Adobe Animate tutorials quite easily.
So, as far as beginner-friendliness is concerned, Adobe Animate is a complete winner that anyone can use to create stunning animations, designs, and templates right on their PCs.
Part 2 How Do You Animate in Adobe Animation?
1. Introduction to Adobe Animate
For complete beginners, there’s nothing better than a one-stop tutorial that provides a detailed insight into the basics of Adobe Animate and helps them get familiar with different elements of the software.
Well, this 2 hours 30 minutes long YouTube Adobe Animate tutorial by TipTut is what you need to start your journey with the software. The tutorial involves everything, starting from the simple setup to creating your first animation. You can either download this tutorial on your system or watch it online to understand the basic workflow of Adobe Animate.
Key Features:
● Learn how to set up a project in Adobe Animate.
● Adjusting the elements (such as frame rate) of your first animation.
● Completing your first animation using colors, gestures, and simple movement.
2. Creating HTML Banner Ads
Apart from regular 2D animations, some designers also use Adobe Animate to create dedicated banner ads for their marketing campaigns using HTML 5. This will be a pretty useful Adobe Animate tutorial PDF for anyone who wants to join a marketing firm or plan exclusive marketing campaigns for his own products/services.
Key Features:
● Learn how to build HTML banner ads from scratch.
● Get familiar with the overall process of publishing a banner ad on platforms like Google AdWords.
● Understand how to keep the file size of a banner down to keep it optimized.
3. Animate CC Game Development
As we mentioned earlier, some people also use Adobe Animate to design games. If you want to follow the same career, this Adobe Animate CC tutorial is for you.
All the games developed in Adobe Animate are designed in HTML 5 and are usually web-based. By the end of this tutorial, you would have built a fully-functional game in Adobe Animate.
Key Features:
● Creating the game world.
● Understanding CreateJS Overview in Adobe Animate CC.
● Building in-game assets and configuring their unique features.
4. 2D Animation for Beginners
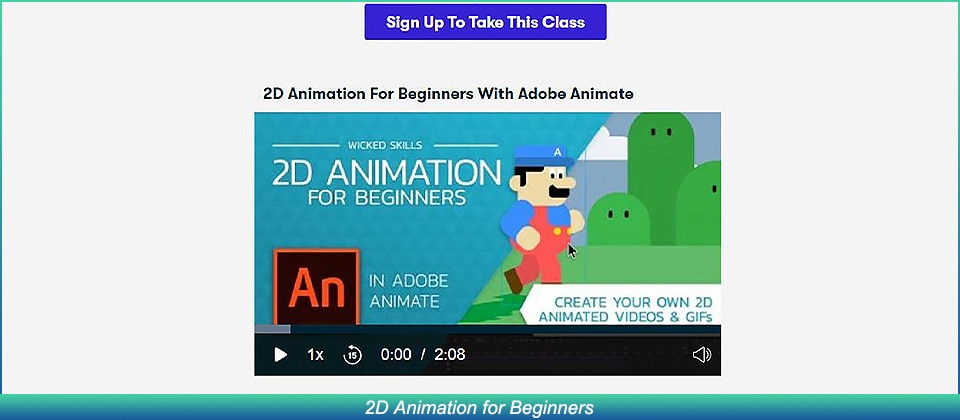
This is another useful Adobe Animate tutorial for all the beginners out there. Compiled by Walt Wonderwolk, the tutorial is separated into 12 parts in which he has explained different features of Adobe Animate in detail.
Key Features:
● Designing graphic vectors in Adobe Animate.
● Each feature is explained with a respective example.
● Learn how to add sounds to your animations to make them visually appealing.
5. Adobe Animate for Social Media
Being a feature-packed animation software, you can also use Adobe Animate to create content for your social media profiles. To do this, however, you must be familiar with all the necessary features of the tool. This 1.5 hours long tutorial will help you get familiar with features such as the tweening system that’ll help you turn regular social media posts into stunning animations.
Key Features:
● Designing simple assets and designs for social media.
● Exporting GIFs and Animated Videos.
● Customizing stills and motion graphics in Adobe Animate.
Key Takeaways from This Episode
● Adobe Animate boasts different applications, ranging from simple 2D animations to game designing
● Since Adobe Animation is an extensive software, it’ll always be a wise decision to get started with Adobe Animate tutorials.
● After you have compiled designs/animations in Adobe Animate, Wondershare Filmora Pro will help you enhance its overall quality.
Now, since the tool has too many elements to understand, it’s always a good strategy to start your journey with a dedicated Adobe Animate CC tutorial.
In today’s guide, we are going to introduce a few of these tutorials so that you can easily start creating animations in Adobe Animate CC, even if you have zero prior experience with the software.
In this article
01 [Adobe Animate CC tutorial](#Part 1)
02 [How Do You Animate in Adobe Animation?](#Part 2)
03 [Other Rare Tutorials for Self-learning to Learn How to Animate](#Part 3)
Part 1 Is Adobe Animate Good for Beginners?
When people start their careers as graphic designers, they always struggle to pick the right tool to accompany them during their journey. Since there are too many options to choose from, beginners always end up comparing a tool with other available options. They even weigh the pros and cons of each animation software individually to make the best decision. The same is the case with Adobe Animate. Many beginners want to know if Adobe Animate is the right animation software to get started as a professional graphic designer.
Since the Adobe community continues to grow rapidly, you’ll also be able to find a variety of Adobe Animate tutorials quite easily.
So, as far as beginner-friendliness is concerned, Adobe Animate is a complete winner that anyone can use to create stunning animations, designs, and templates right on their PCs.
Part 2 How Do You Animate in Adobe Animation?
1. Introduction to Adobe Animate
For complete beginners, there’s nothing better than a one-stop tutorial that provides a detailed insight into the basics of Adobe Animate and helps them get familiar with different elements of the software.
Well, this 2 hours 30 minutes long YouTube Adobe Animate tutorial by TipTut is what you need to start your journey with the software. The tutorial involves everything, starting from the simple setup to creating your first animation. You can either download this tutorial on your system or watch it online to understand the basic workflow of Adobe Animate.
Key Features:
● Learn how to set up a project in Adobe Animate.
● Adjusting the elements (such as frame rate) of your first animation.
● Completing your first animation using colors, gestures, and simple movement.
2. Creating HTML Banner Ads
Apart from regular 2D animations, some designers also use Adobe Animate to create dedicated banner ads for their marketing campaigns using HTML 5. This will be a pretty useful Adobe Animate tutorial PDF for anyone who wants to join a marketing firm or plan exclusive marketing campaigns for his own products/services.
Key Features:
● Learn how to build HTML banner ads from scratch.
● Get familiar with the overall process of publishing a banner ad on platforms like Google AdWords.
● Understand how to keep the file size of a banner down to keep it optimized.
3. Animate CC Game Development
As we mentioned earlier, some people also use Adobe Animate to design games. If you want to follow the same career, this Adobe Animate CC tutorial is for you.
All the games developed in Adobe Animate are designed in HTML 5 and are usually web-based. By the end of this tutorial, you would have built a fully-functional game in Adobe Animate.
Key Features:
● Creating the game world.
● Understanding CreateJS Overview in Adobe Animate CC.
● Building in-game assets and configuring their unique features.
4. 2D Animation for Beginners
This is another useful Adobe Animate tutorial for all the beginners out there. Compiled by Walt Wonderwolk, the tutorial is separated into 12 parts in which he has explained different features of Adobe Animate in detail.
Key Features:
● Designing graphic vectors in Adobe Animate.
● Each feature is explained with a respective example.
● Learn how to add sounds to your animations to make them visually appealing.
5. Adobe Animate for Social Media
Being a feature-packed animation software, you can also use Adobe Animate to create content for your social media profiles. To do this, however, you must be familiar with all the necessary features of the tool. This 1.5 hours long tutorial will help you get familiar with features such as the tweening system that’ll help you turn regular social media posts into stunning animations.
Key Features:
● Designing simple assets and designs for social media.
● Exporting GIFs and Animated Videos.
● Customizing stills and motion graphics in Adobe Animate.
Key Takeaways from This Episode
● Adobe Animate boasts different applications, ranging from simple 2D animations to game designing
● Since Adobe Animation is an extensive software, it’ll always be a wise decision to get started with Adobe Animate tutorials.
● After you have compiled designs/animations in Adobe Animate, Wondershare Filmora Pro will help you enhance its overall quality.
Amazing Ideas About Creating Personalised WhatsApp GIF Sticker
Stunning Ideas About Creating Personalised WhatsApp GIF Sticker
An easy yet powerful editor
Numerous effects to choose from
Detailed tutorials provided by the official channel
WhatsApp has become the most popularly and widely used medium for text conversation and with the reach of the platform increasing every day, new features are added from time to time to keep the users hooked. In the same line, WhatsApp now allows creating customized animated GIF stickers to be used in the chats.
Animated stickers will let you express your feeling and thoughts through animations which will surely make the conversation more interesting. These stickers can be created on your Android as well as iPhone. The article below will help you to know the detailed process to create GIF sticker WhatsApp and also how these stickers can be used in your videos to make the videos more entertaining.
In this article
01 [How to Create Custom Animated WhatsApp Stickers on Android and iPhone](#Part 1)
02 [How to Use Custom Stickers in Filmora?](#Part 2)
Part 1 How to Create Custom Animated WhatsApp Stickers on Android and iPhone
Animated third-party stickers cannot be added directly to WhatsApp and thus you can create a customized one. To create these GIF stickers for WhatsApp, you would need the help of third-party apps.
For Android devices, one such popular app is the Sticker Maker app. For iPhone, we suggest using Sticker Maker Studio app.
Once these apps are installed on your device, GIF stickers can be made in no time.
Steps to make sticker GIF WhatsApp on Android phone
Step 1. Download, install and open the Sticker maker app on your Android device.
Step 2. Tap on the “Create a new sticker pack” option on your app.
Step 3. Give the desired name to your sticker pack and click on the Create button.
Step 4. To add the animated stickers, click on the created sticker pack.
Step 5. Next, click on the first box, and then from the menu choose the Select file option.

Step 6. Next, choose the video from your phone from which you wish to create a sticker. You can even add a GIF file. After the media file is added, the app will compress it and will turn it into an animated sticker automatically.
Step 7. Now, you need to add 3 animated stickers to the other boxes of the sticker app (as mentioned in step 5).
Note: Multiple stickers can be added using the same process.
Step 8. Click on the “Add to WhatsApp” button after a minimum of 3 stickers are added to the pack.
Step 9. Now, your stickers are ready. Open the WhatsApp chat and launch the sticker panel where you can see your created GIF stickers. Choose the sticker you want, add it to your chat, and send it.

Steps to make WhatsApp Sticker GIF on iPhone
Step 1. On your iPhone, download, install and launch the Sticker Maker Studio app from the app store.
Step 2. Choose the sticker pack and also the name of the author at the respective boxes and then click on the Create button.
Step 3. Next, click on the new sticker pack that is created.

Step 4. Multiple boxes will now appear from which you need to choose the first one and then
select the Files option.
Step 5. Choose the desired Video from your device from which sticker has to be created. You can also create GIF to WhatsApp sticker. Other stickers to the pack can be added similarly. The app will automatically convert the added file to a sticker.
Step 6. After the stickers are added (at least 3), click on the Add to WhatsApp button at the generated Tray icon.

Note: If you see your tray icon to be blank, click on it else there will be issues adding the stickers to the WhatsApp chat later. A tray icon can be selected from the images.
Step 7. Next, you will be asked if you wish to open WhatsApp, click on Okay.
Step 8. Now, to add the animated GIF stickers to WhatsApp, you need to click on the Save button and your stickers are ready to be used in the chat.

Part 2 How to Use Custom Stickers in Wondershare Filmora Video Editor ?
For Win 7 or later (64-bit)
For macOS 10.12 or later
Why use your customized GIF stickers only in WhatsApp chats when they can be used in Videos as well? Yes, using Wondershare Filmora software you can use your customized animated stickers in your videos as well to make them more eye-catchy and interesting. Additionally, you can also add the effects to your videos using the software.
Wondershare Filmora is a feature-packed that allows creating stunning and professional-looking videos using its wide range of functions like motion tracking, adding effects, color matching, noise enhancement, keyframe animations, adding captions, and much more.
The user-friendly interface makes the tool apt even for beginners.
Steps to add GIF animations to videos using Wondershare Filmora
Step 1. On your Windows or Mac system, launch the software and choose Media > Import> Import Media Files on the main interface.

Step 2. Next, choose and add the created animated sticker to the software interface. Alternatively, you can also select the sticker from Elements. Drag and drop the added sticker to the video.

Step 3. To adjust the parameters like the size and the rotation of the sticker, you need to double-click on the sticker at the timeline. Additionally, color adjustments can also be made and if needed, you can also add 3D motion.

Step 4. To change the size and the location of the sticker, you need to drag it accordingly in
the viewer panel.
Step 5. Next, at the Local tab, choose the video format, resolution, and desktop folder. Finally, click on the Export button to start processing.
Note: The created video can also be saved to DVD or can be uploaded to YouTube and Vimeo directly using the software.

● Key Takeaways from This Episode →
●The latest GIF sticker feature of WhatsApp allows adding interesting animations to your chats.
●To create customized GIF stickers on Android and iPhone, third-party apps have to be used.
●The customized stickers can also be added to your videos using Wondershare Filmora.
WhatsApp has become the most popularly and widely used medium for text conversation and with the reach of the platform increasing every day, new features are added from time to time to keep the users hooked. In the same line, WhatsApp now allows creating customized animated GIF stickers to be used in the chats.
Animated stickers will let you express your feeling and thoughts through animations which will surely make the conversation more interesting. These stickers can be created on your Android as well as iPhone. The article below will help you to know the detailed process to create GIF sticker WhatsApp and also how these stickers can be used in your videos to make the videos more entertaining.
In this article
01 [How to Create Custom Animated WhatsApp Stickers on Android and iPhone](#Part 1)
02 [How to Use Custom Stickers in Filmora?](#Part 2)
Part 1 How to Create Custom Animated WhatsApp Stickers on Android and iPhone
Animated third-party stickers cannot be added directly to WhatsApp and thus you can create a customized one. To create these GIF stickers for WhatsApp, you would need the help of third-party apps.
For Android devices, one such popular app is the Sticker Maker app. For iPhone, we suggest using Sticker Maker Studio app.
Once these apps are installed on your device, GIF stickers can be made in no time.
Steps to make sticker GIF WhatsApp on Android phone
Step 1. Download, install and open the Sticker maker app on your Android device.
Step 2. Tap on the “Create a new sticker pack” option on your app.
Step 3. Give the desired name to your sticker pack and click on the Create button.
Step 4. To add the animated stickers, click on the created sticker pack.
Step 5. Next, click on the first box, and then from the menu choose the Select file option.
Step 6. Next, choose the video from your phone from which you wish to create a sticker. You can even add a GIF file. After the media file is added, the app will compress it and will turn it into an animated sticker automatically.
Step 7. Now, you need to add 3 animated stickers to the other boxes of the sticker app (as mentioned in step 5).
Note: Multiple stickers can be added using the same process.
Step 8. Click on the “Add to WhatsApp” button after a minimum of 3 stickers are added to the pack.
Step 9. Now, your stickers are ready. Open the WhatsApp chat and launch the sticker panel where you can see your created GIF stickers. Choose the sticker you want, add it to your chat, and send it.
Steps to make WhatsApp Sticker GIF on iPhone
Step 1. On your iPhone, download, install and launch the Sticker Maker Studio app from the app store.
Step 2. Choose the sticker pack and also the name of the author at the respective boxes and then click on the Create button.
Step 3. Next, click on the new sticker pack that is created.
Step 4. Multiple boxes will now appear from which you need to choose the first one and then
select the Files option.
Step 5. Choose the desired Video from your device from which sticker has to be created. You can also create GIF to WhatsApp sticker. Other stickers to the pack can be added similarly. The app will automatically convert the added file to a sticker.
Step 6. After the stickers are added (at least 3), click on the Add to WhatsApp button at the generated Tray icon.
Note: If you see your tray icon to be blank, click on it else there will be issues adding the stickers to the WhatsApp chat later. A tray icon can be selected from the images.
Step 7. Next, you will be asked if you wish to open WhatsApp, click on Okay.
Step 8. Now, to add the animated GIF stickers to WhatsApp, you need to click on the Save button and your stickers are ready to be used in the chat.
Part 2 How to Use Custom Stickers in Wondershare Filmora Video Editor ?
For Win 7 or later (64-bit)
For macOS 10.12 or later
Why use your customized GIF stickers only in WhatsApp chats when they can be used in Videos as well? Yes, using Wondershare Filmora software you can use your customized animated stickers in your videos as well to make them more eye-catchy and interesting. Additionally, you can also add the effects to your videos using the software.
Wondershare Filmora is a feature-packed that allows creating stunning and professional-looking videos using its wide range of functions like motion tracking, adding effects, color matching, noise enhancement, keyframe animations, adding captions, and much more.
The user-friendly interface makes the tool apt even for beginners.
Steps to add GIF animations to videos using Wondershare Filmora
Step 1. On your Windows or Mac system, launch the software and choose Media > Import> Import Media Files on the main interface.
Step 2. Next, choose and add the created animated sticker to the software interface. Alternatively, you can also select the sticker from Elements. Drag and drop the added sticker to the video.
Step 3. To adjust the parameters like the size and the rotation of the sticker, you need to double-click on the sticker at the timeline. Additionally, color adjustments can also be made and if needed, you can also add 3D motion.
Step 4. To change the size and the location of the sticker, you need to drag it accordingly in
the viewer panel.
Step 5. Next, at the Local tab, choose the video format, resolution, and desktop folder. Finally, click on the Export button to start processing.
Note: The created video can also be saved to DVD or can be uploaded to YouTube and Vimeo directly using the software.
● Key Takeaways from This Episode →
●The latest GIF sticker feature of WhatsApp allows adding interesting animations to your chats.
●To create customized GIF stickers on Android and iPhone, third-party apps have to be used.
●The customized stickers can also be added to your videos using Wondershare Filmora.
Secret Source to Make a Stop Motion Puppet
Secret Source to Make a Stop Motion Puppetd
An easy yet powerful editor
Numerous effects to choose from
Detailed tutorials provided by the official channel
The significant difference between a stop-motion puppet and other types is that they have an armature inside. An armature is the puppet’s skeleton, a must to hold its position without sleeping for each captured frame. The stop motion puppet makeover should be precise to prevent it from breaking down or falling quickly. In addition, buying a stop-motion puppet armature might be pretty expensive, so making them by yourself is much more fun and cheaper.

To prevent any mishap during your stop-motion puppet making, your pupils should be as durable and lightweight as possible, and they must be designed based on what you will be doing and what kind of movement will be required of them. In essence, your story’s overall purpose for creating the animation will be the ultimate factor in how your character is built and designed.
In this article
01 [8 Popular Stop Motion Puppet Examples](#Part 1)
02 [How to Make a Stop Motion Puppet](#Part 2)
Part 1 8 Popular Stop Motion Puppet Examples
While wandering all through the web world, you will encounter many famous stop motion puppets. Some of them are very popular stop-motion puppets for sale, and this section of the article is about to explore eight (of them and what they stand for:
01Rudolph the Red-Nosed Reindeer

Rudolph, the Red-Nosed Reindeer, is a pleasant Christmas stop motion animated TV special in 19produced by video craft international limited. These figures starred in the perennially beloved stop motion animation Christmas special.
02Nestor the Long-Eared Christmas Donkey

The Long-Eared Christmas Donkey, Nestor is a Christmas stop motion animated TV special in 19produced by Rankin-Bass productions. The story is back in the Roman Empire days when miniature donkeys were born with very long years and kept getting into trouble. When the owner decides to throw him out of the stable, his mother sacrifices her life to save him from a blizzard.
03Santa Claus is Comin’ to Town

This is a stop-motion animation TV special in 19made by Rankin-bass productions. The story tells all about Santa Claus when he was a baby and growing up with the Kringles. The story is told and sang by a special delivery Kluger voiced by Fred Astaire.
04Negative Space
This one is one of the world’s wide appreciated and Oscar-nominated stop motion puppet animations that reflect the son and father relationship in an interactive way. It is a must to watch animation effects.

05Fantastic Mr. Fox

Fantastic Mr. Fox is a 20puppet animation movie that talks about an urban fox that cannot resist returning to his farm and must help his community survive the farmer’s retaliation.
06Coraline

Coraline is a 20Pope x animation TV series that talks about an adventurous 11-year-old girl that finds another strange world that is an idealized version of her frustrating home.
07The Nightmare before Christmas

The nightmare before Christmas is a puppet animation TV series that talks about Jack Skellington, the king of Halloween Town, and discovers Christmas town but his attempts to bring Christmas to his home result in confusion.
07Corpse bride

Corpse Bride is a puppet animated family TV series in 20talks about a shy groom practicing his wedding vow in the inadvertent presence of a deceased young woman as she rises from the grave, assuming that he has married her.
Part 2 How to Make a Stop Motion Puppet
Do you have a story, and you need some puppets to take the place of your actors, and you want to double in stop motion animation. The fact is there are different ways to create your Stop Motion Puppet, and as per your storyboard requirement, you can go with other methods. Such as, you can either use tools to build your puppet armature, otherwise can make some puppets from clothes and threads to give it a structure, else can use clay to assign a static puppet structure. It’s all your choice, so all in all what you need is:
● A Storyboard
● Puppet armature tools
● Camera setup
● Editing Software (in our case, we are going to use Wondershare Filmora Video Editor )
In this tutorial, we will be teaching you how to make stop-motion puppets in a way that is relatively cost-effective to produce durable means whose construction requires little or no time or extra equipment:

Wondershare Filmora - Best Video Editor for Mac/Windows
5,481,435 people have downloaded it.
Build unique custom animations without breaking a sweat.
Focus on creating epic stories and leave the details to Filmora’s auto features.
Start a creative adventure with drag & drop effects and endless possibilities.
Filmora simplifies advanced features to save you time and effort.
Filmora cuts out repetition so you can move on to your next creative breakthrough.
Materials:
● Ball head screws (M2.5)
● Small screws (M3)
● Ball head screws (2xand brass pipes whose diameter is less than ball head screws
● Brass plate (strips 2mm thick)
Tools:
● M3 thread tap
● M2.5 thread tap
● Screwdriver
● Pliers
● Drill press
● Drills of 2.5 mm, 2 mm, 3 mm
● Power sander
● Loctite
● File
● Bandsaw
Step
● Use the brass to mark the length of the bone
● Cut the tube according to the length
● Sandpaper or file it Square
● On both sides of the tube, use the tap to cause the tread
● Use the screws in the brass tube to screw the ball head

Step 2:
● On each sides of the brass strip, drill 2.5 mm holes
● Then, between holes of the holes you drill, drill 2.5 mm holes
● Between the other 2.5 mm holes, drill 3mm holes

Step 3:
● On the 2.5 mm holes on the sides, use the 3mm drill to create some cup
● With the 3 mm tap, cut the thread in the 2 mm holes in the middle

Step 4:
● Without damaging the holes, file the end of the strip with all the holes as close to the first 3
● From the strip, cut the parts with the first three holes
● Also, as close to the most used flyer to file the other side.
Note: Make sure you are careful while filing as this will get very hot

**Step 5:**Join all the parts together and make sure that the cup on the outer holes of the two plates is two words each other and tighten the bolts to hold the bones

Step 6: Join to strip of bras together and form a torso. Then cut the torso and form the feet

Step 7: When your puppet is the way you want it, lock teeth styles by fixing the ball head screw in place

Animation Editing:
Also, you can make a stop motion video on Filmora by considering the following factors:
● Camera Steadiness is a must for every shot you plan for Stop Motion Video. Shaking a camera is not good. Else, your video won’t be smooth.
● Ensure capture the shot under consistent light and prevent light exposure from changing on the object; otherwise, there will be inconsistency in the video.
● To make it easier, play the film in advance, as the more friends your video, the smoother the video will be.
Here are steps to make a stop motion video on Filmora:
Step 1 Place the camera steady and bring your object in the frame. Lightly move your things and capture the movement frame by frame.

Step 2 Download and start, or if you have already installed, run the Filmora program and choose a suitable frame rate in the project settings. After selecting the resolution, click on the file and go to the project setting.

Step 3 Now import the media file using the import option from the file menu and import the captured images.

Step 4 Adjust the menu’s preference or press the shortcut key Ctrl+Shift+, and a window will appear on your screen. Select the editing panel and change the photo duration between 0.2 to 0.5 seconds.

Step 5 Once done with all the settings and satisfied with the results, click on export and select your desired video format. Your video will be exported and saved in your library so you can share it with friends.

● Key Takeaways from This Episode →
● Get to know about what is stop motion puppets.
● Different examples of how dinosaur stop motion puppet or other puppet animation form works.
● The process to create your stop motion puppet and how Filmora will assist you in it.
The significant difference between a stop-motion puppet and other types is that they have an armature inside. An armature is the puppet’s skeleton, a must to hold its position without sleeping for each captured frame. The stop motion puppet makeover should be precise to prevent it from breaking down or falling quickly. In addition, buying a stop-motion puppet armature might be pretty expensive, so making them by yourself is much more fun and cheaper.
To prevent any mishap during your stop-motion puppet making, your pupils should be as durable and lightweight as possible, and they must be designed based on what you will be doing and what kind of movement will be required of them. In essence, your story’s overall purpose for creating the animation will be the ultimate factor in how your character is built and designed.
In this article
01 [8 Popular Stop Motion Puppet Examples](#Part 1)
02 [How to Make a Stop Motion Puppet](#Part 2)
Part 1 8 Popular Stop Motion Puppet Examples
While wandering all through the web world, you will encounter many famous stop motion puppets. Some of them are very popular stop-motion puppets for sale, and this section of the article is about to explore eight (of them and what they stand for:
01Rudolph the Red-Nosed Reindeer
Rudolph, the Red-Nosed Reindeer, is a pleasant Christmas stop motion animated TV special in 19produced by video craft international limited. These figures starred in the perennially beloved stop motion animation Christmas special.
02Nestor the Long-Eared Christmas Donkey
The Long-Eared Christmas Donkey, Nestor is a Christmas stop motion animated TV special in 19produced by Rankin-Bass productions. The story is back in the Roman Empire days when miniature donkeys were born with very long years and kept getting into trouble. When the owner decides to throw him out of the stable, his mother sacrifices her life to save him from a blizzard.
03Santa Claus is Comin’ to Town
This is a stop-motion animation TV special in 19made by Rankin-bass productions. The story tells all about Santa Claus when he was a baby and growing up with the Kringles. The story is told and sang by a special delivery Kluger voiced by Fred Astaire.
04Negative Space
This one is one of the world’s wide appreciated and Oscar-nominated stop motion puppet animations that reflect the son and father relationship in an interactive way. It is a must to watch animation effects.
05Fantastic Mr. Fox
Fantastic Mr. Fox is a 20puppet animation movie that talks about an urban fox that cannot resist returning to his farm and must help his community survive the farmer’s retaliation.
06Coraline
Coraline is a 20Pope x animation TV series that talks about an adventurous 11-year-old girl that finds another strange world that is an idealized version of her frustrating home.
07The Nightmare before Christmas
The nightmare before Christmas is a puppet animation TV series that talks about Jack Skellington, the king of Halloween Town, and discovers Christmas town but his attempts to bring Christmas to his home result in confusion.
07Corpse bride
Corpse Bride is a puppet animated family TV series in 20talks about a shy groom practicing his wedding vow in the inadvertent presence of a deceased young woman as she rises from the grave, assuming that he has married her.
Part 2 How to Make a Stop Motion Puppet
Do you have a story, and you need some puppets to take the place of your actors, and you want to double in stop motion animation. The fact is there are different ways to create your Stop Motion Puppet, and as per your storyboard requirement, you can go with other methods. Such as, you can either use tools to build your puppet armature, otherwise can make some puppets from clothes and threads to give it a structure, else can use clay to assign a static puppet structure. It’s all your choice, so all in all what you need is:
● A Storyboard
● Puppet armature tools
● Camera setup
● Editing Software (in our case, we are going to use Wondershare Filmora Video Editor )
In this tutorial, we will be teaching you how to make stop-motion puppets in a way that is relatively cost-effective to produce durable means whose construction requires little or no time or extra equipment:
Wondershare Filmora - Best Video Editor for Mac/Windows
5,481,435 people have downloaded it.
Build unique custom animations without breaking a sweat.
Focus on creating epic stories and leave the details to Filmora’s auto features.
Start a creative adventure with drag & drop effects and endless possibilities.
Filmora simplifies advanced features to save you time and effort.
Filmora cuts out repetition so you can move on to your next creative breakthrough.
Materials:
● Ball head screws (M2.5)
● Small screws (M3)
● Ball head screws (2xand brass pipes whose diameter is less than ball head screws
● Brass plate (strips 2mm thick)
Tools:
● M3 thread tap
● M2.5 thread tap
● Screwdriver
● Pliers
● Drill press
● Drills of 2.5 mm, 2 mm, 3 mm
● Power sander
● Loctite
● File
● Bandsaw
Step
● Use the brass to mark the length of the bone
● Cut the tube according to the length
● Sandpaper or file it Square
● On both sides of the tube, use the tap to cause the tread
● Use the screws in the brass tube to screw the ball head
Step 2:
● On each sides of the brass strip, drill 2.5 mm holes
● Then, between holes of the holes you drill, drill 2.5 mm holes
● Between the other 2.5 mm holes, drill 3mm holes
Step 3:
● On the 2.5 mm holes on the sides, use the 3mm drill to create some cup
● With the 3 mm tap, cut the thread in the 2 mm holes in the middle
Step 4:
● Without damaging the holes, file the end of the strip with all the holes as close to the first 3
● From the strip, cut the parts with the first three holes
● Also, as close to the most used flyer to file the other side.
Note: Make sure you are careful while filing as this will get very hot
**Step 5:**Join all the parts together and make sure that the cup on the outer holes of the two plates is two words each other and tighten the bolts to hold the bones
Step 6: Join to strip of bras together and form a torso. Then cut the torso and form the feet
Step 7: When your puppet is the way you want it, lock teeth styles by fixing the ball head screw in place
Animation Editing:
Also, you can make a stop motion video on Filmora by considering the following factors:
● Camera Steadiness is a must for every shot you plan for Stop Motion Video. Shaking a camera is not good. Else, your video won’t be smooth.
● Ensure capture the shot under consistent light and prevent light exposure from changing on the object; otherwise, there will be inconsistency in the video.
● To make it easier, play the film in advance, as the more friends your video, the smoother the video will be.
Here are steps to make a stop motion video on Filmora:
Step 1 Place the camera steady and bring your object in the frame. Lightly move your things and capture the movement frame by frame.
Step 2 Download and start, or if you have already installed, run the Filmora program and choose a suitable frame rate in the project settings. After selecting the resolution, click on the file and go to the project setting.
Step 3 Now import the media file using the import option from the file menu and import the captured images.
Step 4 Adjust the menu’s preference or press the shortcut key Ctrl+Shift+, and a window will appear on your screen. Select the editing panel and change the photo duration between 0.2 to 0.5 seconds.
Step 5 Once done with all the settings and satisfied with the results, click on export and select your desired video format. Your video will be exported and saved in your library so you can share it with friends.
● Key Takeaways from This Episode →
● Get to know about what is stop motion puppets.
● Different examples of how dinosaur stop motion puppet or other puppet animation form works.
● The process to create your stop motion puppet and how Filmora will assist you in it.
Also read:
- Updated 2024 Approved Simple Guide to Create New and Exciting Blackboard Animation
- New In 2024, 10 Caricature Makers to Turn Your Photo to Caricature Effects
- 2024 Approved Best 15 Female Anime Characters-Who Is Your Favorite?
- New Great Ways to Make Claymation Videos for 2024
- New 2024 Approved 20 Free After Effects Logo Reveal Templates You Will Want to Know
- In 2024, 12 Aesthetic GIF Instagram for Marketers
- Updated In 2024, Make Creative Animation Videos
- New 8 Best Motion Graphics Online Tools for Your Inspiration for 2024
- New 2024 Approved How to Create Benime Whiteboard Animation in Android
- New How To Learn Cartoon Sketch Drawing— Pencil Sketch for Beginners for 2024
- In 2024, Samples of Cartoon Character Face
- New In 2024, Creative Ways to Create iPhone Text GIF
- Updated Top 10 Banned Anime Around the World and Why
- 2024 Approved 10 Cartoon Photo Converters
- Updated 5 Best Adobe Animate Courses & Classes for 2024
- Best 10 Photo Animator Templates for 2024
- Updated 2024 Approved 10 Must Watch Netflix Cartoon Series For You
- Updated Best Websites to Download Animated GIFs for Free-Free GIF Download
- New In 2024, Top 12 Evil Cartoon Characters of All Time
- New What Are Differences Between 2D And 3D Animation
- Updated In 2024, Animate Pictures in Canva
- Updated 2024 Approved How to Create an Adobe Collage?
- New How to Become a Motion Graphic Designer for 2024
- New 8 Best Motion Graphics Online Tools for Your Inspiration
- New 2024 Approved How to Make Photo 3D Cartoon Online
- 2024 Approved 12 Best Stop Motion Studios Worth Recommending
- Updated 2024 Approved Everything You Need to Know About Becoming a Motion Graphic Designer
- Updated Best 15 Female Anime Characters-Who Is Your Favorite for 2024
- Updated The Secret Sauce for Making GIF Instagram Story More Aesthetic for 2024
- Updated In 2024, Adobe Animate Riggings PROPER Tutorial for You
- 2024 Approved Best 10 Old Cartoons From Cartoon Network That You Miss
- Updated How to Animate Image on Scroll and Text on Scroll, In 2024
- In 2024, 5 Different Animation Styles A Simple but Complete Guide
- New Tutorial on Making Unity 2D Animation
- New In 2024, Top 7 Animated GIF Text Makers
- Updated 2024 Approved Animated Business Logos and Tools to Create
- In 2024, Make Well Done Animated GIF
- Updated Learn Simple Blender Rigging in Only 2 Minutes
- In 2024, Detailed guide of ispoofer for pogo installation On Nokia C32 | Dr.fone
- Simple ways to get lost videos back from Motorola Edge 40 Neo
- How to Get and Use Pokemon Go Promo Codes On Honor Magic 5 Pro | Dr.fone
- How To Transfer Data From Apple iPhone 15 To Other iPhone 14 Pro Max devices? | Dr.fone
- The 6 Best SIM Unlock Services That Actually Work On Your OnePlus Ace 2V Device
- In 2024, How to Transfer Contacts from Nokia C12 to Other Android Devices Devices? | Dr.fone
- How do i sign a .svd file electronically
- In 2024, How To Check if Your Samsung Galaxy S24+ Is Unlocked
- How to recover deleted photos on OnePlus
- In 2024, What Legendaries Are In Pokemon Platinum On Vivo V29e? | Dr.fone
- Why does the pokemon go battle league not available On Vivo V30 Lite 5G | Dr.fone
- How to Spy on Text Messages from Computer & HTC U23 Pro | Dr.fone
- 10 Easy-to-Use FRP Bypass Tools for Unlocking Google Accounts On Itel P55+
- 7 Ways to Unlock a Locked Tecno Camon 20 Pro 5G Phone
- 5 Quick Methods to Bypass Realme C53 FRP
- How to Get and Use Pokemon Go Promo Codes On Nokia C32 | Dr.fone
- In 2024, How To Check if Your Samsung Galaxy XCover 7 Is Unlocked
- Title: New How to Make Animation Characters with the Best Character Creators for 2024
- Author: Elon
- Created at : 2024-05-19 03:05:21
- Updated at : 2024-05-20 03:05:21
- Link: https://animation-videos.techidaily.com/new-how-to-make-animation-characters-with-the-best-character-creators-for-2024/
- License: This work is licensed under CC BY-NC-SA 4.0.
