

New How to Make Your Own GIF on WhatsApp in Simple Ways
How to Make Your Own GIF on WhatsApp in Simple Ways
How to Make Your Own GIF on WhatsApp in Simple Ways
An easy yet powerful editor
Numerous effects to choose from
Detailed tutorials provided by the official channel
The feature of adding a GIF to your conversations on WhatsApp has been rolled out for a long and these animations add liveliness to your chats. On your iPhone as well as Android devices, there is an integrated library of these GIFs in several categories that can be used.
Additionally, you can even make your own GIF using the videos on your WhatsApp in a few simple steps. Learn all about these GIFs and how to make your own GIF on WhatsApp.
In this article
01 [How to send GIF from the integrated library on WhatsApp](#Part 1)
02 [How to create WhatsApp GIF using Videos on Android and iPhone](#Part 2)
03 [How to create an excellent GIF using Wondershare Filmora](#Part 3)
Part 1 How to send GIF from the integrated library on WhatsApp
Your iPhone, as well as Android devices, has a library of GIFs that can be used to search for the desired animations. The steps for sharing these GIFs are as follows.
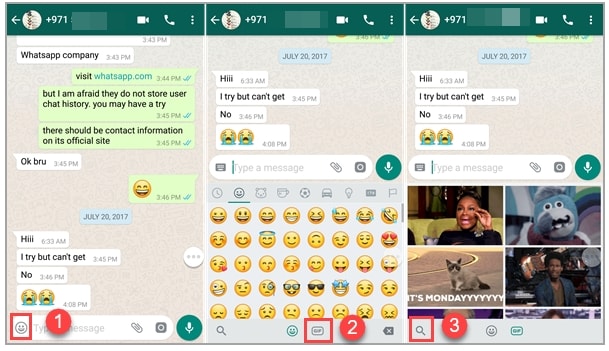
Step 1. Launch WhatsApp on your smartphone and open the chat to which you wish to send the GIF. On your Android phone, click on the smiley emoji and then select GIF options from the bottom of the screen and the library of the animations will open.
On your iPhone, to open the library of GIF, click on the sticker icon.
Step 2. You can choose from available GIF and even search for the desired one using the keyword at the search icon.
Step 3. Tap on the selected GIF and then click on the Send button that will share the animation to the chat.
Part 2 How to create WhatsApp GIF using Videos on Android and iPhone
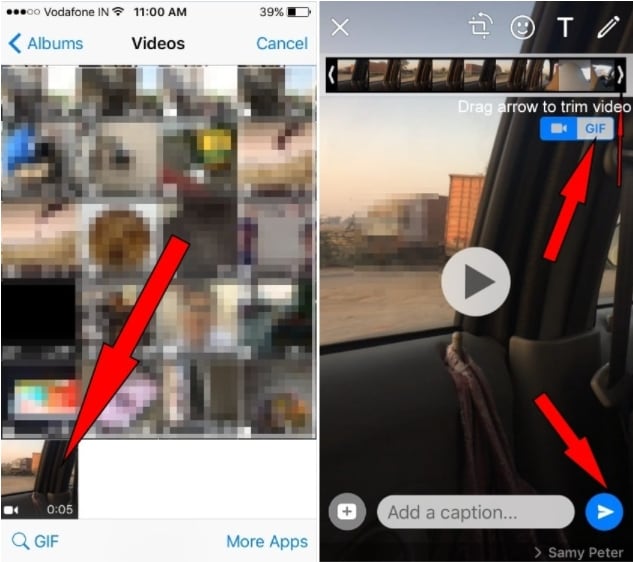
In addition to the library, WhatsApp also allows creating GIF animations using the videos on the device. (For iPhone users, even Live Photos can be used). For a video to be used as GIF, it cannot be more than 6 seconds. So, the longer videos need to be trimmed to under 6 seconds.
Steps to create custom GIF WhatsApp using videos
Step 1. Open the WhatsApp chat on your phone where you want to send the GIF. Click on the camera icon and then select the video from your device’s gallery. Alternatively, you can also record a live video to create a GIF.
Step 2. After the video is added, trim it down under 6 seconds using the slider at the top. You can add text to the video using the Caption option.
Step 3. Next, click on the GIF button that will convert the added video into GIF. Finally, click on the Send button at the bottom-right corner.
Part 3 How to create an excellent GIF using Wondershare Filmora
Though iPhone and Android, both allow creating a GIF from videos on your device, the option for customizations is limited. So, if you want to create your own GIF using images and videos, Wondershare Filmora will work as the best software. This versatile tool supports all key media formats like JPG, PNG, MP4, MKV, MOV, and others for creating GIF animations.
The overall process is fast as well as simple where you just need to add the media files, edit them and choose to save them as GIFs. Using Wondershare Filmora Video Editor , multiple customizations can be done, like rotating, trimming, adding texts, adding sounds, speed-up, adding elements, and more.
Wondershare Filmora
Get started easily with Filmora’s powerful performance, intuitive interface, and countless effects!
Try It Free Try It Free Try It Free Learn More >

Steps to create GIF using Wondershare Filmora
StepLaunch the Wondershare software on your system and add the local media files from which you wish to create a GIF.
Step 1. Next, drag and drop the files to the timeline of the software.
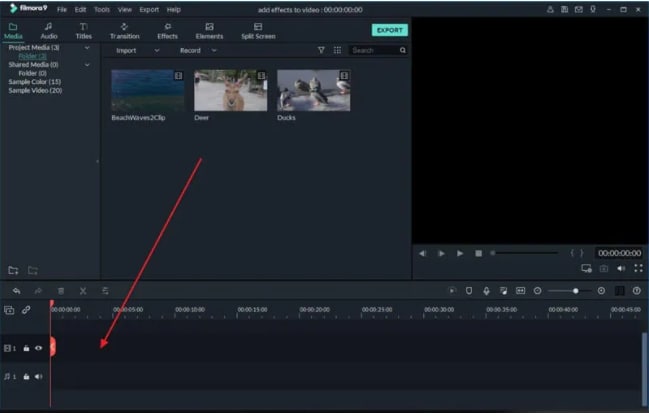
Step 2. Using the editing tools, you can customize the added files.
Step 3. Add texts, and effects as needed using the functions at the software.
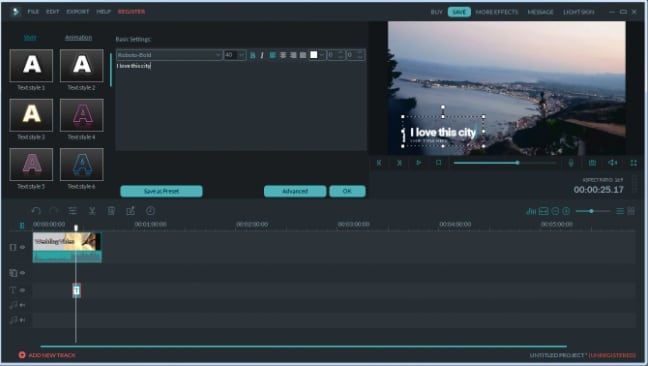
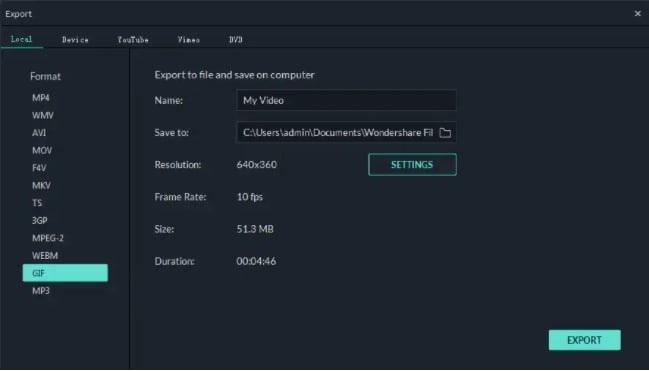
Step 4. Next, at the Local tab choose the GIF option, select the desired file name and the system location to save the file. Finally, click on the EXPORT button to start the file processing.
● Key Takeaways from This Episode →
●GIF animations can be added from the integrated library at Android and iPhone devices.
●Using the local videos on the phone, GIF can also be created.
●For creating an excellent and professional-looking GIF, Wondershare Filmora works as one of the best tools that is simple and quick to use.
The feature of adding a GIF to your conversations on WhatsApp has been rolled out for a long and these animations add liveliness to your chats. On your iPhone as well as Android devices, there is an integrated library of these GIFs in several categories that can be used.
Additionally, you can even make your own GIF using the videos on your WhatsApp in a few simple steps. Learn all about these GIFs and how to make your own GIF on WhatsApp.
In this article
01 [How to send GIF from the integrated library on WhatsApp](#Part 1)
02 [How to create WhatsApp GIF using Videos on Android and iPhone](#Part 2)
03 [How to create an excellent GIF using Wondershare Filmora](#Part 3)
Part 1 How to send GIF from the integrated library on WhatsApp
Your iPhone, as well as Android devices, has a library of GIFs that can be used to search for the desired animations. The steps for sharing these GIFs are as follows.
Step 1. Launch WhatsApp on your smartphone and open the chat to which you wish to send the GIF. On your Android phone, click on the smiley emoji and then select GIF options from the bottom of the screen and the library of the animations will open.
On your iPhone, to open the library of GIF, click on the sticker icon.
Step 2. You can choose from available GIF and even search for the desired one using the keyword at the search icon.
Step 3. Tap on the selected GIF and then click on the Send button that will share the animation to the chat.
Part 2 How to create WhatsApp GIF using Videos on Android and iPhone
In addition to the library, WhatsApp also allows creating GIF animations using the videos on the device. (For iPhone users, even Live Photos can be used). For a video to be used as GIF, it cannot be more than 6 seconds. So, the longer videos need to be trimmed to under 6 seconds.
Steps to create custom GIF WhatsApp using videos
Step 1. Open the WhatsApp chat on your phone where you want to send the GIF. Click on the camera icon and then select the video from your device’s gallery. Alternatively, you can also record a live video to create a GIF.
Step 2. After the video is added, trim it down under 6 seconds using the slider at the top. You can add text to the video using the Caption option.
Step 3. Next, click on the GIF button that will convert the added video into GIF. Finally, click on the Send button at the bottom-right corner.
Part 3 How to create an excellent GIF using Wondershare Filmora
Though iPhone and Android, both allow creating a GIF from videos on your device, the option for customizations is limited. So, if you want to create your own GIF using images and videos, Wondershare Filmora will work as the best software. This versatile tool supports all key media formats like JPG, PNG, MP4, MKV, MOV, and others for creating GIF animations.
The overall process is fast as well as simple where you just need to add the media files, edit them and choose to save them as GIFs. Using Wondershare Filmora Video Editor , multiple customizations can be done, like rotating, trimming, adding texts, adding sounds, speed-up, adding elements, and more.
Wondershare Filmora
Get started easily with Filmora’s powerful performance, intuitive interface, and countless effects!
Try It Free Try It Free Try It Free Learn More >
Steps to create GIF using Wondershare Filmora
StepLaunch the Wondershare software on your system and add the local media files from which you wish to create a GIF.
Step 1. Next, drag and drop the files to the timeline of the software.
Step 2. Using the editing tools, you can customize the added files.
Step 3. Add texts, and effects as needed using the functions at the software.
Step 4. Next, at the Local tab choose the GIF option, select the desired file name and the system location to save the file. Finally, click on the EXPORT button to start the file processing.
● Key Takeaways from This Episode →
●GIF animations can be added from the integrated library at Android and iPhone devices.
●Using the local videos on the phone, GIF can also be created.
●For creating an excellent and professional-looking GIF, Wondershare Filmora works as one of the best tools that is simple and quick to use.
Want to Make a Meme GIF?
Want to Make a Meme GIF? Here’s How to Do
An easy yet powerful editor
Numerous effects to choose from
Detailed tutorials provided by the official channel
You might know that mememe gif, are very much popular in the market of graphics developing on the internet. This kind of meme culture has got well developed in our life style so that you might have not imagined before. Even this topic was not too much exclusive on the web. Thus we have begun to employ memes in our daily life style. This was the one that started as a humorous topic and now during these days it became to be much talked in the form of freedom of speech.
Take for example the cat in grumpy form, a sandwich eating kid or a successful kid all these are the best tips for making a gif meme. Even today they are being used at a very wide scale. Finally you can see that memes of gifs have become a very valuable part of our lives. When you make use of such kind of technology then you will get benefit in the tasks related to media and the internet.
In this article
01 [Can Gifs Be Memes?](#Part 1)
02 [8 Must-Visit GIF Websites to Get Stunning Memes](#Part 2)
03 [How to Make a Meme GIF](#Part 3)
04 [Tips for Inspiring Meme Gifs Ideas](#Part 4)
Part 1 Can Gifs Be Memes?

01What’s Memes?
You will see that memes is a good element of any kind of system or culture. This kind of system could be passed from one person to the other one. This task can be also done well by non genetic methods. You can say when you make meme gif, then you have to use any kind of video, photo, image and piece of any paper showing some written text. This text can be used well by persons who use internet in a very extensive way. Memes generally has a humorous nature so most internet users will have a fine experience while using it.
02What Does Meme and GIF Stand For?
When we talk of meme then you will see that it stands for Multimedia & Electronic Music Experiments. This is a way with which you can develop many customizable electronic instruments in the long way. You will see that Meme was first of all developed by Richard Dawkins in the year 1976. He did it with replicating as well as transmission of meme. When we talk about gif then we will see that stands for Graphics Interchange Format. It was first of all made in the year 1987. With this kind of system you can decrease the size of animated pictures and images.
Part 2 Must-Visit GIF Websites to Get Stunning Memes
01GIPHY
Key Features-
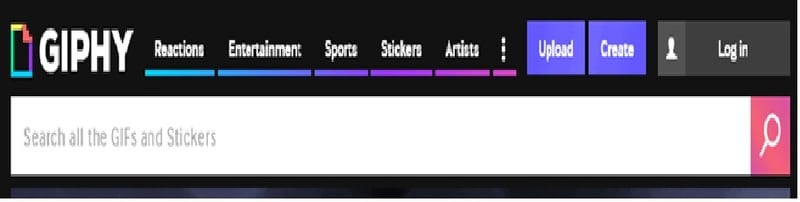
When you make a gif meme then you will see that this website was first of all created by Jack Cooke and Alex Chung. They did it in the form of a GIF and even a sticker keyboard that was having unique characteristics**.** Here you have to simply plug inside a keyboard and click on the button of the search bar. In this way you can create many samples of gif and upload them from the sites of social media like Facebook and Instagram.
02 Tenor
Key Features-
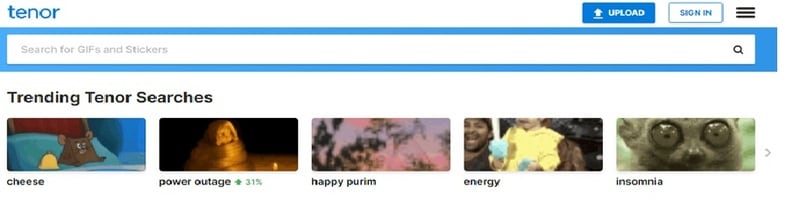
The interface of Tenor is very much good looking and straight forward. With it you can type the keyword concerned with the homepage to your GIF to search it with the help of hit bar. With Tenor you can also make genius ideas related to making a meme gif. When you visit the site of Tenor then you will see that it does not have any scarcity of content when you want to upload graphics interface format with it on your website.
03 GIFER
Key Features-
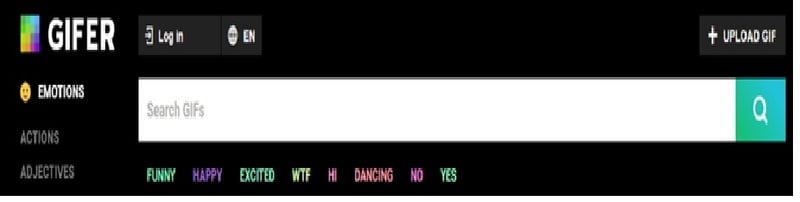
When you ignore the meme gif site of GIFER then you will see that your list will be incomplete without it. This is one of the best resources for getting and making gif memes on the pin point. When you want to type anything or want to get some information about any subject then click on any of the emotion icons. You may also click on the search bar.
04 Gfycat
Key Features-
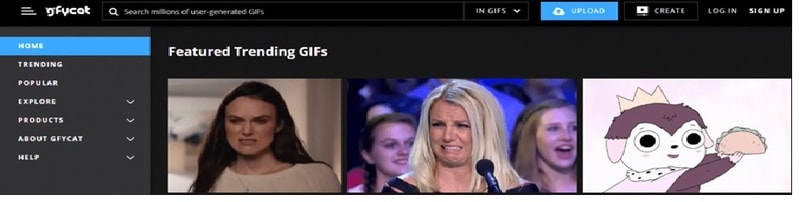
The site of Gfycat is the best when you want to so like the activities of making memes. This is the best way to make a gif meme so that you will get good results in the task of making graphic interface samples. Like all the websites of GIF this site will also enable you to seek search content. Just type specific keywords or you might simply click on the left side panel.
05Imgflip
Key Features-
When you want to make a meme gif then just land on the site of Imgflip. This could be a great option. When we compare it with other kind of GIF sites then we will see that they have a simple layout. You can click on the search icon that is at the top and get information about any of your target keywords.
06Reaction GIFs

Key Features-
Here when you land on the site of Reaction GIFs. You can type your favorite keyword like make a meme gif on the right side of this search engine and hit on the search icon. You can also easily upload any kind of content even yet this procedure might take a bit more time. This kind of website is visible in a streamlined way. Here you can even make the entries related to FAQs.
07Imgur
Key Features-
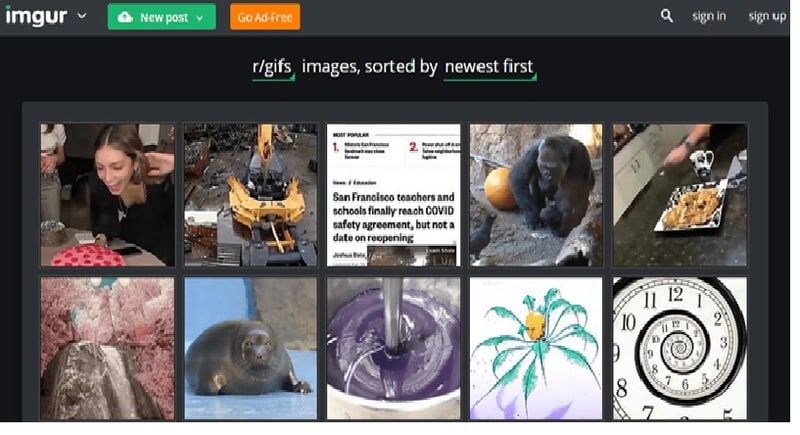
When you talk of Imgur then you will see that you can make and create static images with this kind of site. This is a genuine site with which you can make a meme gif. You can make any kind of theme related to internet graphics when you choose this site.
Part 3 How to Make a Meme GIF
01How to Make a Meme GIF on Ios &Want to make an Android Gift?
When you want to make a Meme GIF on Los then you can make use of Meme maker. Here you can get started well. Just take one such page and upload a GIF on it. You may even click on the text that is seen on the top left to make addition of the needed captions. Here you can add your needed images or audio options. When you want to make an android gif then just make the following steps:-
● Just open the gallery of your desired app and press the images that depict your needed photos.
● Tape the icon that shows the 3 vertical dots.
● Choose the create option and select the GIF option.
● You can create the GIF image and review it in a better way.
02How to Make a Meme GIF on Window? Here’s How to & Mac?
When you make a meme gif on Window then you have to see and take some steps:-
● Just land on the IMGFlip website.
● You have to click on the icon of GIF icon.
● Just import an image and video to make it converted to GIF.
● You may add a text to the GIF.
● You may also customize the speed and count the times that you have played it.
● Finally you may save it in animated form.
Part 4 Tips for Inspiring Meme Gifs Ideas
When you want to add and follow tips for inspiring more ideas for making meme gif then you can see that such ideas are even being used at TV shows and movies. You can even make attractive images with them. You can easily loop these images to create the best animated clips. After you make a meme gif then you will see that even you can use a pop reference in the long way. When you do the combination of meme and gif then you can also make humorous clips that are called as meme gif. Even you can make use of the content that is concerned with Wondershare Filmora Video Editor VII so that your graphics will appear well in the long way.

Wondershare Filmora - Best Video Editor for Mac/Windows
5,481,435 people have downloaded it.
Build unique custom animations without breaking a sweat.
Focus on creating epic stories and leave the details to Filmora’s auto features.
Start a creative adventure with drag & drop effects and endless possibilities.
Filmora simplifies advanced features to save you time and effort.
Filmora cuts out repetition so you can move on to your next creative breakthrough.
Brief summary
● When you make meme gif then you will see that with this technology you can create a fine system on the internet frame as far as meme is concerned with Filmora VII. On the other hand gif stands for graphic interface formats.
● You can visit more websites for gif and meme creation on the internet and here you will get many unique websites for gif creation. You can also take help from graphics experts who will give you the best output concerned with gif and making a meme in the long way.
● You can get more tips on the web when you want to make gif samples on the platform of android and Mac. Here you will have to take and follow certain steps and with it you will reach your goal to make the best graphical interface even on all kinds of smart phones etc. Here you will also get support to make a meme gif. Taking care about what you need for meme gif
● Key Takeaways from This Episode →
● When we talk about the final conclusion of this article then we will see that meme gif will be a nice way to develop advanced methods of media and graphics interchange format. Here you will see that this could be a free method with which you can make a perfect meme.
● You can also use GIPHY on the technology platform of iPad, iPhone and Android. You can also make the task of downloading of GIPHY on your phone that might be of any model. You can make memes gif for your app store in your phone. You can do this task easily on your search bar. Most of these apps are available in black color.
You might know that mememe gif, are very much popular in the market of graphics developing on the internet. This kind of meme culture has got well developed in our life style so that you might have not imagined before. Even this topic was not too much exclusive on the web. Thus we have begun to employ memes in our daily life style. This was the one that started as a humorous topic and now during these days it became to be much talked in the form of freedom of speech.
Take for example the cat in grumpy form, a sandwich eating kid or a successful kid all these are the best tips for making a gif meme. Even today they are being used at a very wide scale. Finally you can see that memes of gifs have become a very valuable part of our lives. When you make use of such kind of technology then you will get benefit in the tasks related to media and the internet.
In this article
01 [Can Gifs Be Memes?](#Part 1)
02 [8 Must-Visit GIF Websites to Get Stunning Memes](#Part 2)
03 [How to Make a Meme GIF](#Part 3)
04 [Tips for Inspiring Meme Gifs Ideas](#Part 4)
Part 1 Can Gifs Be Memes?
01What’s Memes?
You will see that memes is a good element of any kind of system or culture. This kind of system could be passed from one person to the other one. This task can be also done well by non genetic methods. You can say when you make meme gif, then you have to use any kind of video, photo, image and piece of any paper showing some written text. This text can be used well by persons who use internet in a very extensive way. Memes generally has a humorous nature so most internet users will have a fine experience while using it.
02What Does Meme and GIF Stand For?
When we talk of meme then you will see that it stands for Multimedia & Electronic Music Experiments. This is a way with which you can develop many customizable electronic instruments in the long way. You will see that Meme was first of all developed by Richard Dawkins in the year 1976. He did it with replicating as well as transmission of meme. When we talk about gif then we will see that stands for Graphics Interchange Format. It was first of all made in the year 1987. With this kind of system you can decrease the size of animated pictures and images.
Part 2 Must-Visit GIF Websites to Get Stunning Memes
01GIPHY
Key Features-
When you make a gif meme then you will see that this website was first of all created by Jack Cooke and Alex Chung. They did it in the form of a GIF and even a sticker keyboard that was having unique characteristics**.** Here you have to simply plug inside a keyboard and click on the button of the search bar. In this way you can create many samples of gif and upload them from the sites of social media like Facebook and Instagram.
02 Tenor
Key Features-
The interface of Tenor is very much good looking and straight forward. With it you can type the keyword concerned with the homepage to your GIF to search it with the help of hit bar. With Tenor you can also make genius ideas related to making a meme gif. When you visit the site of Tenor then you will see that it does not have any scarcity of content when you want to upload graphics interface format with it on your website.
03 GIFER
Key Features-
When you ignore the meme gif site of GIFER then you will see that your list will be incomplete without it. This is one of the best resources for getting and making gif memes on the pin point. When you want to type anything or want to get some information about any subject then click on any of the emotion icons. You may also click on the search bar.
04 Gfycat
Key Features-
The site of Gfycat is the best when you want to so like the activities of making memes. This is the best way to make a gif meme so that you will get good results in the task of making graphic interface samples. Like all the websites of GIF this site will also enable you to seek search content. Just type specific keywords or you might simply click on the left side panel.
05Imgflip
Key Features-
When you want to make a meme gif then just land on the site of Imgflip. This could be a great option. When we compare it with other kind of GIF sites then we will see that they have a simple layout. You can click on the search icon that is at the top and get information about any of your target keywords.
06Reaction GIFs
Key Features-
Here when you land on the site of Reaction GIFs. You can type your favorite keyword like make a meme gif on the right side of this search engine and hit on the search icon. You can also easily upload any kind of content even yet this procedure might take a bit more time. This kind of website is visible in a streamlined way. Here you can even make the entries related to FAQs.
07Imgur
Key Features-
When you talk of Imgur then you will see that you can make and create static images with this kind of site. This is a genuine site with which you can make a meme gif. You can make any kind of theme related to internet graphics when you choose this site.
Part 3 How to Make a Meme GIF
01How to Make a Meme GIF on Ios &Want to make an Android Gift?
When you want to make a Meme GIF on Los then you can make use of Meme maker. Here you can get started well. Just take one such page and upload a GIF on it. You may even click on the text that is seen on the top left to make addition of the needed captions. Here you can add your needed images or audio options. When you want to make an android gif then just make the following steps:-
● Just open the gallery of your desired app and press the images that depict your needed photos.
● Tape the icon that shows the 3 vertical dots.
● Choose the create option and select the GIF option.
● You can create the GIF image and review it in a better way.
02How to Make a Meme GIF on Window? Here’s How to & Mac?
When you make a meme gif on Window then you have to see and take some steps:-
● Just land on the IMGFlip website.
● You have to click on the icon of GIF icon.
● Just import an image and video to make it converted to GIF.
● You may add a text to the GIF.
● You may also customize the speed and count the times that you have played it.
● Finally you may save it in animated form.
Part 4 Tips for Inspiring Meme Gifs Ideas
When you want to add and follow tips for inspiring more ideas for making meme gif then you can see that such ideas are even being used at TV shows and movies. You can even make attractive images with them. You can easily loop these images to create the best animated clips. After you make a meme gif then you will see that even you can use a pop reference in the long way. When you do the combination of meme and gif then you can also make humorous clips that are called as meme gif. Even you can make use of the content that is concerned with Wondershare Filmora Video Editor VII so that your graphics will appear well in the long way.
Wondershare Filmora - Best Video Editor for Mac/Windows
5,481,435 people have downloaded it.
Build unique custom animations without breaking a sweat.
Focus on creating epic stories and leave the details to Filmora’s auto features.
Start a creative adventure with drag & drop effects and endless possibilities.
Filmora simplifies advanced features to save you time and effort.
Filmora cuts out repetition so you can move on to your next creative breakthrough.
Brief summary
● When you make meme gif then you will see that with this technology you can create a fine system on the internet frame as far as meme is concerned with Filmora VII. On the other hand gif stands for graphic interface formats.
● You can visit more websites for gif and meme creation on the internet and here you will get many unique websites for gif creation. You can also take help from graphics experts who will give you the best output concerned with gif and making a meme in the long way.
● You can get more tips on the web when you want to make gif samples on the platform of android and Mac. Here you will have to take and follow certain steps and with it you will reach your goal to make the best graphical interface even on all kinds of smart phones etc. Here you will also get support to make a meme gif. Taking care about what you need for meme gif
● Key Takeaways from This Episode →
● When we talk about the final conclusion of this article then we will see that meme gif will be a nice way to develop advanced methods of media and graphics interchange format. Here you will see that this could be a free method with which you can make a perfect meme.
● You can also use GIPHY on the technology platform of iPad, iPhone and Android. You can also make the task of downloading of GIPHY on your phone that might be of any model. You can make memes gif for your app store in your phone. You can do this task easily on your search bar. Most of these apps are available in black color.
How to Create a Whiteboard Video Step by Step [2023 Updated]
How to Create a Whiteboard Video Step by Step

Shanoon Cox
Mar 27, 2024• Proven solutions
Drawings will always have a special place in storytelling. Whether you are demonstrating a new concept to a child, highlighting the features of a product to your bosses, or showcasing the intricacies of a marketing campaign, drawings make it easier for the audience to understand what is being said.
That is why it is so important to learn how to create whiteboard animation. When you learn how to create a whiteboard video with animate pictures app , you are in a unique position when it comes to selling your story, and convincing others of what you already know.
- Part1: What is Whiteboard Animation Video?
- Part2: How to Create Whiteboard Animation Videos?
- Part3: Useful Tips for Creating Whiteboard Animation
Part 1:What is Whiteboard Animation Video?
To understand the whiteboard animation video, we must go back to the beginning. Think about how professors illustrate different topics and equations using a whiteboard. They will write down the important words or formulas and then expand on that information through their lecture.
Whiteboard animation is taking those words, phrases and images to another level. Whiteboard animation is a series of events or videos that are created using 2D animation software . These videos can be showcased in any type of setting. You can upload them onto a social media site, show them as part of a presentation, or add them to a crowdfunding or product funding page.
When someone watches a whiteboard animation video, they see the series of images and graphics in sequential order, and there is usually a narration accompanying those images. These videos can be short, anywhere from 30 to 90 seconds. The idea is to deliver information in a clear, coherent and concise way.
To create whiteboard animation, the goal is to take complex concepts and information, and make it easy to understand. Now we can go into some detail about how to create a whiteboard video.
Part 2:How to Create Whiteboard Animation Videos?
Step 1: Write a Script
Much like a normal video or a short skit, there must be a script if a whiteboard animation video is to succeed. Having interesting images and information is great, but they are nothing without a coherent story.
It is not a blog post, storyboard or a set of bullet points. What you need is a proper script, which says everything in regards to the video. Why? Because then you will know precisely what images should be added in certain sections, what the narrator must say, and what transitions are necessary.

Step 2: Start with the Storyboard
Now you have a script. You have a clear idea of how you want your video to come across. It is time to start creating the storyboard. With a storyboard, you will be able to organize your thoughts much better. You can see how each frame comes onto the screen, and how one shot ties into the other.
When you create your storyboard, you will have a good idea about how your final product will look. If there are some transitions you are not happy with, this is the moment where you can make changes.

Step 3: Create Images
If you are a creative person, you will find this part very easy. It is all about creating fun and unique images that will help convey the information that you want to get across. Try to create memorable images that will excite your audience. The simpler, more distinctive and interesting you can make those images, the better your end result.

Step 4: Animate Those Images
Now you have your images, and it is time to find some coherence between those images and your script. You will have to time the animation for your images as you do not want things lingering on the screen for too long, or being seen for a brief second. It may be a good idea for you to speak out the narration as you are animating the images and timing their animation. It will help you with the timing.

Step 5: Record and Sync the Audio
The final step involves getting your audio. Every animated video must have narration as it helps to explain what is happening in the images that people are seeing. Record your audio, and ensure it is perfectly in sync with your content.

Part 3:Useful Tips for Creating Whiteboard Animation
Evoke Empathy
The goal of a whiteboard animation video is not just to explain information in a cold and impersonal way. You are hoping to make a connection with your audience. You want them to care about what you are showcasing. By evoking empathy, you will create the connection that you desire.
By adding emotional references, such as funny, lighthearted, cute or emotional moments, you will find your videos are getting a much better reception from the audience. People can relate to content better when it makes them feel things - especially if those feelings are positive.
Personalize the Images
Showing interesting images is a good start. But if you can personalize these images with graphics and color, your storyboard will look even better. Remember that your goal is to get people to stand up and take notice of the content that you are creating.
Conclusion
Now that we have gone over the entire process of creating a whiteboard animation video, we hope that you are ready to get started on your project. And if you are wondering how you will edit your video, we recommend Filmora . You can use it to make animation video by adding keyframes, so the animation will be smooth and natural. You just need to build a white plane to easily start making animation. Besides, color correction and audio mixer will raise up your explainer video to a new level. Download it to have a try (Free)!
Shanoon Cox
Shanoon Cox is a writer and a lover of all things video.
Follow @Shanoon Cox
Shanoon Cox
Mar 27, 2024• Proven solutions
Drawings will always have a special place in storytelling. Whether you are demonstrating a new concept to a child, highlighting the features of a product to your bosses, or showcasing the intricacies of a marketing campaign, drawings make it easier for the audience to understand what is being said.
That is why it is so important to learn how to create whiteboard animation. When you learn how to create a whiteboard video with animate pictures app , you are in a unique position when it comes to selling your story, and convincing others of what you already know.
- Part1: What is Whiteboard Animation Video?
- Part2: How to Create Whiteboard Animation Videos?
- Part3: Useful Tips for Creating Whiteboard Animation
Part 1:What is Whiteboard Animation Video?
To understand the whiteboard animation video, we must go back to the beginning. Think about how professors illustrate different topics and equations using a whiteboard. They will write down the important words or formulas and then expand on that information through their lecture.
Whiteboard animation is taking those words, phrases and images to another level. Whiteboard animation is a series of events or videos that are created using 2D animation software . These videos can be showcased in any type of setting. You can upload them onto a social media site, show them as part of a presentation, or add them to a crowdfunding or product funding page.
When someone watches a whiteboard animation video, they see the series of images and graphics in sequential order, and there is usually a narration accompanying those images. These videos can be short, anywhere from 30 to 90 seconds. The idea is to deliver information in a clear, coherent and concise way.
To create whiteboard animation, the goal is to take complex concepts and information, and make it easy to understand. Now we can go into some detail about how to create a whiteboard video.
Part 2:How to Create Whiteboard Animation Videos?
Step 1: Write a Script
Much like a normal video or a short skit, there must be a script if a whiteboard animation video is to succeed. Having interesting images and information is great, but they are nothing without a coherent story.
It is not a blog post, storyboard or a set of bullet points. What you need is a proper script, which says everything in regards to the video. Why? Because then you will know precisely what images should be added in certain sections, what the narrator must say, and what transitions are necessary.
Step 2: Start with the Storyboard
Now you have a script. You have a clear idea of how you want your video to come across. It is time to start creating the storyboard. With a storyboard, you will be able to organize your thoughts much better. You can see how each frame comes onto the screen, and how one shot ties into the other.
When you create your storyboard, you will have a good idea about how your final product will look. If there are some transitions you are not happy with, this is the moment where you can make changes.
Step 3: Create Images
If you are a creative person, you will find this part very easy. It is all about creating fun and unique images that will help convey the information that you want to get across. Try to create memorable images that will excite your audience. The simpler, more distinctive and interesting you can make those images, the better your end result.
Step 4: Animate Those Images
Now you have your images, and it is time to find some coherence between those images and your script. You will have to time the animation for your images as you do not want things lingering on the screen for too long, or being seen for a brief second. It may be a good idea for you to speak out the narration as you are animating the images and timing their animation. It will help you with the timing.
Step 5: Record and Sync the Audio
The final step involves getting your audio. Every animated video must have narration as it helps to explain what is happening in the images that people are seeing. Record your audio, and ensure it is perfectly in sync with your content.
Part 3:Useful Tips for Creating Whiteboard Animation
Evoke Empathy
The goal of a whiteboard animation video is not just to explain information in a cold and impersonal way. You are hoping to make a connection with your audience. You want them to care about what you are showcasing. By evoking empathy, you will create the connection that you desire.
By adding emotional references, such as funny, lighthearted, cute or emotional moments, you will find your videos are getting a much better reception from the audience. People can relate to content better when it makes them feel things - especially if those feelings are positive.
Personalize the Images
Showing interesting images is a good start. But if you can personalize these images with graphics and color, your storyboard will look even better. Remember that your goal is to get people to stand up and take notice of the content that you are creating.
Conclusion
Now that we have gone over the entire process of creating a whiteboard animation video, we hope that you are ready to get started on your project. And if you are wondering how you will edit your video, we recommend Filmora . You can use it to make animation video by adding keyframes, so the animation will be smooth and natural. You just need to build a white plane to easily start making animation. Besides, color correction and audio mixer will raise up your explainer video to a new level. Download it to have a try (Free)!
Shanoon Cox
Shanoon Cox is a writer and a lover of all things video.
Follow @Shanoon Cox
Tips on How to Get Awesome Background for Slideshow in PowerPoint
Tips That Show Anybody How to Get Awesome Background for Slideshow in Powerpoint
An easy yet powerful editor
Numerous effects to choose from
Detailed tutorials provided by the official channel
Amazing slideshow background are an absolute attention grabber in the realm of creative PowerPoint presentations. If you wish to upgrade yours with the same, be here to learn how!
In this article
01 [How to Add Video Background in PowerPoint?](#Part 1)
02 [How to Create Moving Backgrounds in Microsoft PowerPoint?](#Part 2)
03 [Some Tips for You to Get Awesome PowerPoint Backgrounds & Templates](#Part 3)
Part 1 How to Add Video Background in PowerPoint?
When the talk is about engaging means to deliver a precise information, PowerPoint slideshows are an absolute stunner. While these are already a captivating utility to present your thing, the output and audience engagement is at par with the inclusion of attractive design elements in the presentation. As is evident, there are enormous diversities of supplementary elements to complement your presentation, let us centre our discussion to the application of video background for slideshow in PowerPoint.
User’s Guide to Add Video Background in a PowerPoint Slideshow
The following section presents a detailed explanation of the steps to supplement your PowerPoint presentations with classic video backgrounds in just a few quick steps:
Step 1: Launch Your Presentation
Start with opening the desired PowerPoint presentation to which you want to add the video background, in any of your preferred devices.
Step 2: Add a Video to Your Slide
Browse through your presentation slides to locate the one you want to add the video background to. When you have made your choice, navigate to the PowerPoint toolbar at the top and hit the ‘Insert’ tab and choose the ‘Video’ option.
You will now be presented with 2 choices, either uploading a video from your device or insert one from the web by pasting its YouTube URL into the slide. If you are uploading a video from your device, proceed with selecting the desired video and tap ‘Insert’.

Step 3: Move and Resize Your Video
After uploading your video to the slide, you need to make suitable adjustments in its size and alignment to synchronize the same with the contents of the slide. To do this, drag the top left corner of the video to that of the slide to set the top alignment ratio. In the same way, move the bottom right corner of the video to be in sync with that of the slide. You will see the video occupying the entire slide at the end of the adjustment process.

Step 4: Set the Video Background
You will now need to set the video as the background of your slide, so that the latter’s contents are displayed over the video. You can do this by right clicking on the video and choosing the ‘Send to Back’ option from the dropdown that follows. This will cause the contents of your slide to get displayed over the video.

Step 5: Playback Edit and Customization Choices
Before proceeding towards making changes in the video playback and formatting, prefer taking a quick preview of your work till here. Once you are satisfied, navigate to the PowerPoint Toolbar at the top, hit the ‘Video Tools’ tab, followed by clicking on the ‘Playback’ tab.
It is recommended to introduce the following changes in your video for the most affordable slideshow output:
● Loop Your Video
Creating a video loop will facilitate you with an automatic replay of your video without the need to restart it every time with a click. You can loop your video by navigating to the ‘Video Options’ section and choose ‘Loop Until Stopped’ by clicking within the checkbox next to it. The background video will now continue to play until you switch to a different slide.
● Automatically Start Your Video
To avoid clicking on the slide amid your presentation for the video loop to begin, adjust the latter’s settings for an automatic start. Navigate to the ‘Start’ dropdown menu and select ‘Automatically’.
● Trim Your Video
You can work with some basic video editing tools in PowerPoint, like trimming and cropping your background video to a desired length. If you wish to ward off certain portions of your video, reach to and click o the ‘Trim Video’ button. Following this, drag the slider of the video to select the desired portions of the clip and exclude the rest.
You can further work with some more editing effects to create the perfect video backgrounds for your presentation slides in line with your specific preferences.

Step 6: Annotate Your Video Background
When you are done with the video editing process, take a preview of the same to ensure that everything is set in the proper order and at the proper place. Lastly, if you wish to add suitable text annotations to your video, you can do this with the ‘ClassPoint’ tool to write over the video background. All you need to do is select a preferred pen colour and start writing on your slide screen. You can further, save the annotations for a work record.

Part 2 How to Create Moving Backgrounds in Microsoft PowerPoint?
Moving PowerPoint slideshow background is another aspect of graphic creativity at its best, which can be used in a number of ways to grab considerable viewer attention. When choosing to add moving backgrounds to your presentation, the latter can aid in improving the style of content presentation, making your audience curious about how and what happens next.
Having learnt about the utility and creation process of video backgrounds in the PowerPoint presentation tool, let us extend our discussion to the method of creating a moving slide show background in the same in the following section:
User’s Guide to Create Moving Backgrounds for PowerPoint Presentations
Discussed below is an explanatory procedure for designing moving backgrounds with an awesome appearance for slideshow presentations in Microsoft PowerPoint:
Step 1: Open Your Presentation
To begin with, launch the PowerPoint tool in your preferred device and open the presentation on which you will be working to add the moving background. After the presentation gets loaded, navigate through the same and select the desired slide to proceed with the aforesaid task.
Step 2: Choose a Video Location
To add your desired video to the slide, navigate to the PowerPoint ribbon at the top and click on the ‘Insert’ tab. Select ‘Video’ from the list of options that appears, followed by choosing one of the ‘Online Video’ or ‘Video on My PC’ options from the video selection prompt. It is further recommended to select a video in the MP4 format, as the latter gives best results of moving and video backgrounds.
Step 3: Insert Your Video
Choose the second option in the selection prompt to upload a video from your device. You will now be asked to browse through your device and locate the desired video in the ‘Insert Video’ dialog box that appears. Select your video and tap the ‘Insert’ button to add your video.
To upload videos from an online source, choose the ‘Online Video’ option in the selection prompt and proceed to search the video from PowerPoint or paste its embed code to recover the video. The chosen video will begin to download and can be added to the PowerPoint presentation after the download process comes to an end.

Step 4: Playback Editing and Video Customization
Before proceeding further, consider paying your video once by clicking on the ‘Start’ button. You can also add different effects, trim and crop or add a bookmark to your video by navigating to and clicking on the ‘Video Tools’ tab, followed by selecting the ‘Format’ option. To work with the start and playback options for the video, click on ‘Playback’ in the dropdown menu of the ‘Video Tools’ tab.

Part 3 Some Tips for You to Get Awesome PowerPoint Backgrounds & Templates
Now that you have developed a comprehensive understanding of the utility of adding video and moving background for slideshow presentation, let us look through some easy tips and tricks to conveniently access the top rated and the most popular PowerPoint slideshow templates and backgrounds in the following section:
01Cool Slide Backgrounds
Slideshow presentations in PowerPoint are supplemented with a visual spark through amazing and vibrant backgrounds that are a sign of excellent graphic creativity. When working with a PowerPoint presentation of your own, do take the liberty to use some cool slide backgrounds to your creative advantage.
When the talk is about complementing your presentation with a cohesive and upbeat background, you can either select the most suitable one from a heap of pre made slideshow templates available both in the PowerPoint slideshow creator tool as well as across the web. However, if you wish to take the excitement to another level, try hands at creating an awesome and cool backgrounds for PowerPoint slides of your own!
Talking about some really cool tips and tricks to design a slideshow presentation background in PowerPoint, start with including some specific shapes and color overlays to the background capture, experiment with a polygon background, work on enhancing the background image with classic and artistic effects and apply a mix of colors, textures and patterns to give a classy look to your slideshow backgrounds.

02Professional Slideshow Backgrounds
If you are aiming at creating a PowerPoint slideshow presentation with a business centered design approach, you will need to cut down on some extra elements that you would ideally choose to include in a personal purpose based slideshow. Paying attention to the fact that business and corporate centered presentations should be simple, subtle and to the point, it would be an intelligent step to avoid adding too many expressive elements in the background.
Whether you are creating a professional slideshow background of your own or working with a pre designed template, take care to include a complementary play of a light background theme with a maximum of 2 balancing shades.
Avoid too much vibrancy and abstain from applying over the top effects and quick transitions, lest your presentation may look a bit too crowed. If your slides have lot of written content, prefer using a white color background text in a professional font style.
If you have decided on picking a pre made template, you can browse through a diversity of suggestions across the web, while keeping the aforesaid constraints in mind. Consider taking a look at the figure given below to have a more comprehensive understating of the prerequisites of selecting a professional sideshow background template:

03Happy Birthday Slide Backgrounds
Birthday parties are the most appealing synonyms of fun and entertainment. If you are into the profession of organizing events that renders smiling and happy faces, slideshow presentations could be of great help to you in discussing about services, types of social gentries and event targets with your clients.
When looking through different options to select the perfect birthday template, either for a professional event, or just to go down the memory lane of your most cherished moments, take caution to search for a vibrant alternative with colorful images, different background designs and party oriented cool themes, wide aspect ratio with high screen resolution for a mass display and conveniently editable graphics.
If you are creating a happy birthday slide background of your own, there are variety of realms to explore your graphic design creativity, owing to the fact that the subject of creation is highly expressive and multi-dimensional. While you are free to extend your creativity to the next level, do pay attention to the above constraints for a more elusive and outstanding creation output, while maintaining the fun and entertainment quotient intact.

04Wedding Slide Backgrounds
Considering the fact that wedding events are pronounced means of fun, leisure, enjoyment and beautiful memories, anything that aims to be a part of the celebrations, should be equally ecstatic and engaging. Infusing festive occasions with technology, slideshow based wedding invitations and moment captures are the top rated modern trends of celebrating this significant life event.
If you are keen on designing the perfect slideshow presentation for wedding invitations, photo albums and thank you cards, prefer to choose a wedding slide background template with aesthetic layout and flowing element inclusions, like that of floral borders and scented candles. Look though the elements of a subtle thematic setup with soothing color combinations, preferably in complementary pastel shades, like pink and white.
Talking of template customizability, the latter should have placeholders to include names of the bride and groom, the wedding date and venue, and of course the wedding photographs. The beautiful slide background template should have enough design space to include the most elusive play of text colors and fonts to suit specific preferences of creating special memories of a cherished event.

05Slideshow Backgrounds and Templates in Filmora
When looking for the most convenient lead to an extensive variety of beautiful slideshow templates and background, the template library of Wondershare Filmora Video Editor slideshow creator program can be your most affordable destination. The aforesaid software library is known to possess the best and most perfect template choices to suit the creation constraints of almost every slideshow presentation style and objective you can possibly think of.
For Win 7 or later (64-bit)
For macOS 10.12 or later
The elusive templates are further supplemented with a plethora of design flexibilities and customization features that are all set to deliver you the most appreciable creation output. Stressing a bit on the template customization choices of the software, you can work with the tool to uplift your slideshow backgrounds with artistic image effects and overlays, annotate them with beautiful text formations in a variety of colors, fonts and sizes and lots more.
Moving a bit deeper into the creative aspect, you can upgrade the visual style of your presentations with the most perfect and seamless image and video transitions and text animations. The bottom line is, working with the aforesaid slideshow creator program, you are entitled to get jaw dropping applaud from your audience, while making a confident and a content delivery through your slideshow presentation.

● Ending Thoughts →
● Using an expressive and complementing background in your slideshow presentation uplifts its visual credibility in captivating your audience.
● Browsing through the web, you get to access a vast range of amazing slideshow backgrounds and templates to make your presentation, a visual masterpiece.
● When looking for the most distributed storehouse of slideshow backgrounds and templates, the Wondershare Filmora library is your ultimate solution.
Amazing slideshow background are an absolute attention grabber in the realm of creative PowerPoint presentations. If you wish to upgrade yours with the same, be here to learn how!
In this article
01 [How to Add Video Background in PowerPoint?](#Part 1)
02 [How to Create Moving Backgrounds in Microsoft PowerPoint?](#Part 2)
03 [Some Tips for You to Get Awesome PowerPoint Backgrounds & Templates](#Part 3)
Part 1 How to Add Video Background in PowerPoint?
When the talk is about engaging means to deliver a precise information, PowerPoint slideshows are an absolute stunner. While these are already a captivating utility to present your thing, the output and audience engagement is at par with the inclusion of attractive design elements in the presentation. As is evident, there are enormous diversities of supplementary elements to complement your presentation, let us centre our discussion to the application of video background for slideshow in PowerPoint.
User’s Guide to Add Video Background in a PowerPoint Slideshow
The following section presents a detailed explanation of the steps to supplement your PowerPoint presentations with classic video backgrounds in just a few quick steps:
Step 1: Launch Your Presentation
Start with opening the desired PowerPoint presentation to which you want to add the video background, in any of your preferred devices.
Step 2: Add a Video to Your Slide
Browse through your presentation slides to locate the one you want to add the video background to. When you have made your choice, navigate to the PowerPoint toolbar at the top and hit the ‘Insert’ tab and choose the ‘Video’ option.
You will now be presented with 2 choices, either uploading a video from your device or insert one from the web by pasting its YouTube URL into the slide. If you are uploading a video from your device, proceed with selecting the desired video and tap ‘Insert’.
Step 3: Move and Resize Your Video
After uploading your video to the slide, you need to make suitable adjustments in its size and alignment to synchronize the same with the contents of the slide. To do this, drag the top left corner of the video to that of the slide to set the top alignment ratio. In the same way, move the bottom right corner of the video to be in sync with that of the slide. You will see the video occupying the entire slide at the end of the adjustment process.
Step 4: Set the Video Background
You will now need to set the video as the background of your slide, so that the latter’s contents are displayed over the video. You can do this by right clicking on the video and choosing the ‘Send to Back’ option from the dropdown that follows. This will cause the contents of your slide to get displayed over the video.
Step 5: Playback Edit and Customization Choices
Before proceeding towards making changes in the video playback and formatting, prefer taking a quick preview of your work till here. Once you are satisfied, navigate to the PowerPoint Toolbar at the top, hit the ‘Video Tools’ tab, followed by clicking on the ‘Playback’ tab.
It is recommended to introduce the following changes in your video for the most affordable slideshow output:
● Loop Your Video
Creating a video loop will facilitate you with an automatic replay of your video without the need to restart it every time with a click. You can loop your video by navigating to the ‘Video Options’ section and choose ‘Loop Until Stopped’ by clicking within the checkbox next to it. The background video will now continue to play until you switch to a different slide.
● Automatically Start Your Video
To avoid clicking on the slide amid your presentation for the video loop to begin, adjust the latter’s settings for an automatic start. Navigate to the ‘Start’ dropdown menu and select ‘Automatically’.
● Trim Your Video
You can work with some basic video editing tools in PowerPoint, like trimming and cropping your background video to a desired length. If you wish to ward off certain portions of your video, reach to and click o the ‘Trim Video’ button. Following this, drag the slider of the video to select the desired portions of the clip and exclude the rest.
You can further work with some more editing effects to create the perfect video backgrounds for your presentation slides in line with your specific preferences.
Step 6: Annotate Your Video Background
When you are done with the video editing process, take a preview of the same to ensure that everything is set in the proper order and at the proper place. Lastly, if you wish to add suitable text annotations to your video, you can do this with the ‘ClassPoint’ tool to write over the video background. All you need to do is select a preferred pen colour and start writing on your slide screen. You can further, save the annotations for a work record.
Part 2 How to Create Moving Backgrounds in Microsoft PowerPoint?
Moving PowerPoint slideshow background is another aspect of graphic creativity at its best, which can be used in a number of ways to grab considerable viewer attention. When choosing to add moving backgrounds to your presentation, the latter can aid in improving the style of content presentation, making your audience curious about how and what happens next.
Having learnt about the utility and creation process of video backgrounds in the PowerPoint presentation tool, let us extend our discussion to the method of creating a moving slide show background in the same in the following section:
User’s Guide to Create Moving Backgrounds for PowerPoint Presentations
Discussed below is an explanatory procedure for designing moving backgrounds with an awesome appearance for slideshow presentations in Microsoft PowerPoint:
Step 1: Open Your Presentation
To begin with, launch the PowerPoint tool in your preferred device and open the presentation on which you will be working to add the moving background. After the presentation gets loaded, navigate through the same and select the desired slide to proceed with the aforesaid task.
Step 2: Choose a Video Location
To add your desired video to the slide, navigate to the PowerPoint ribbon at the top and click on the ‘Insert’ tab. Select ‘Video’ from the list of options that appears, followed by choosing one of the ‘Online Video’ or ‘Video on My PC’ options from the video selection prompt. It is further recommended to select a video in the MP4 format, as the latter gives best results of moving and video backgrounds.
Step 3: Insert Your Video
Choose the second option in the selection prompt to upload a video from your device. You will now be asked to browse through your device and locate the desired video in the ‘Insert Video’ dialog box that appears. Select your video and tap the ‘Insert’ button to add your video.
To upload videos from an online source, choose the ‘Online Video’ option in the selection prompt and proceed to search the video from PowerPoint or paste its embed code to recover the video. The chosen video will begin to download and can be added to the PowerPoint presentation after the download process comes to an end.
Step 4: Playback Editing and Video Customization
Before proceeding further, consider paying your video once by clicking on the ‘Start’ button. You can also add different effects, trim and crop or add a bookmark to your video by navigating to and clicking on the ‘Video Tools’ tab, followed by selecting the ‘Format’ option. To work with the start and playback options for the video, click on ‘Playback’ in the dropdown menu of the ‘Video Tools’ tab.
Part 3 Some Tips for You to Get Awesome PowerPoint Backgrounds & Templates
Now that you have developed a comprehensive understanding of the utility of adding video and moving background for slideshow presentation, let us look through some easy tips and tricks to conveniently access the top rated and the most popular PowerPoint slideshow templates and backgrounds in the following section:
01Cool Slide Backgrounds
Slideshow presentations in PowerPoint are supplemented with a visual spark through amazing and vibrant backgrounds that are a sign of excellent graphic creativity. When working with a PowerPoint presentation of your own, do take the liberty to use some cool slide backgrounds to your creative advantage.
When the talk is about complementing your presentation with a cohesive and upbeat background, you can either select the most suitable one from a heap of pre made slideshow templates available both in the PowerPoint slideshow creator tool as well as across the web. However, if you wish to take the excitement to another level, try hands at creating an awesome and cool backgrounds for PowerPoint slides of your own!
Talking about some really cool tips and tricks to design a slideshow presentation background in PowerPoint, start with including some specific shapes and color overlays to the background capture, experiment with a polygon background, work on enhancing the background image with classic and artistic effects and apply a mix of colors, textures and patterns to give a classy look to your slideshow backgrounds.
02Professional Slideshow Backgrounds
If you are aiming at creating a PowerPoint slideshow presentation with a business centered design approach, you will need to cut down on some extra elements that you would ideally choose to include in a personal purpose based slideshow. Paying attention to the fact that business and corporate centered presentations should be simple, subtle and to the point, it would be an intelligent step to avoid adding too many expressive elements in the background.
Whether you are creating a professional slideshow background of your own or working with a pre designed template, take care to include a complementary play of a light background theme with a maximum of 2 balancing shades.
Avoid too much vibrancy and abstain from applying over the top effects and quick transitions, lest your presentation may look a bit too crowed. If your slides have lot of written content, prefer using a white color background text in a professional font style.
If you have decided on picking a pre made template, you can browse through a diversity of suggestions across the web, while keeping the aforesaid constraints in mind. Consider taking a look at the figure given below to have a more comprehensive understating of the prerequisites of selecting a professional sideshow background template:
03Happy Birthday Slide Backgrounds
Birthday parties are the most appealing synonyms of fun and entertainment. If you are into the profession of organizing events that renders smiling and happy faces, slideshow presentations could be of great help to you in discussing about services, types of social gentries and event targets with your clients.
When looking through different options to select the perfect birthday template, either for a professional event, or just to go down the memory lane of your most cherished moments, take caution to search for a vibrant alternative with colorful images, different background designs and party oriented cool themes, wide aspect ratio with high screen resolution for a mass display and conveniently editable graphics.
If you are creating a happy birthday slide background of your own, there are variety of realms to explore your graphic design creativity, owing to the fact that the subject of creation is highly expressive and multi-dimensional. While you are free to extend your creativity to the next level, do pay attention to the above constraints for a more elusive and outstanding creation output, while maintaining the fun and entertainment quotient intact.
04Wedding Slide Backgrounds
Considering the fact that wedding events are pronounced means of fun, leisure, enjoyment and beautiful memories, anything that aims to be a part of the celebrations, should be equally ecstatic and engaging. Infusing festive occasions with technology, slideshow based wedding invitations and moment captures are the top rated modern trends of celebrating this significant life event.
If you are keen on designing the perfect slideshow presentation for wedding invitations, photo albums and thank you cards, prefer to choose a wedding slide background template with aesthetic layout and flowing element inclusions, like that of floral borders and scented candles. Look though the elements of a subtle thematic setup with soothing color combinations, preferably in complementary pastel shades, like pink and white.
Talking of template customizability, the latter should have placeholders to include names of the bride and groom, the wedding date and venue, and of course the wedding photographs. The beautiful slide background template should have enough design space to include the most elusive play of text colors and fonts to suit specific preferences of creating special memories of a cherished event.
05Slideshow Backgrounds and Templates in Filmora
When looking for the most convenient lead to an extensive variety of beautiful slideshow templates and background, the template library of Wondershare Filmora Video Editor slideshow creator program can be your most affordable destination. The aforesaid software library is known to possess the best and most perfect template choices to suit the creation constraints of almost every slideshow presentation style and objective you can possibly think of.
For Win 7 or later (64-bit)
For macOS 10.12 or later
The elusive templates are further supplemented with a plethora of design flexibilities and customization features that are all set to deliver you the most appreciable creation output. Stressing a bit on the template customization choices of the software, you can work with the tool to uplift your slideshow backgrounds with artistic image effects and overlays, annotate them with beautiful text formations in a variety of colors, fonts and sizes and lots more.
Moving a bit deeper into the creative aspect, you can upgrade the visual style of your presentations with the most perfect and seamless image and video transitions and text animations. The bottom line is, working with the aforesaid slideshow creator program, you are entitled to get jaw dropping applaud from your audience, while making a confident and a content delivery through your slideshow presentation.
● Ending Thoughts →
● Using an expressive and complementing background in your slideshow presentation uplifts its visual credibility in captivating your audience.
● Browsing through the web, you get to access a vast range of amazing slideshow backgrounds and templates to make your presentation, a visual masterpiece.
● When looking for the most distributed storehouse of slideshow backgrounds and templates, the Wondershare Filmora library is your ultimate solution.
12 Best Stop Motion Studios Worth Recommending
12 Best Stop Motion Studios Worth Recommending
An easy yet powerful editor
Numerous effects to choose from
Detailed tutorials provided by the official channel
Since people are getting more aware of innovative and creative ideas, the tools like stop motion studio are also emerging. This tool or software, or you can call an app, is mainly concerned with animation and is recognized to create very magical outputs.
This guide will teach what to consider about the Stop Motion Studio, how it works, and a deep look at animation movies to realize the magic of such tools on a broader scale. So, let’s start the article on stop motion studio Pro without any further ado.
In this article
01 [What is Stop Motion Studio and How Does It Work?](#Part 1)
02 [How to Use Stop Motion Studio on PC?](#Part 2)
03 [A Roster of 12 Best Stop-Motion Companies](#Part 3)
04 [How To Make A Stop Motion Video Super Easily?](#Part 4)
Part 1 What is Stop Motion Studio and How Does It Work?
Like the name, stop motion studio creates compelling stop-action movies. It is a terrific app with a whole set of unique features used mainly to turn images and audio into videos in an exciting way that is a fun process for everyone. The app is for Android and iOS. The app is a breeze to use with the camera since it’s operable through smartphones.
However, the students are highly reputed and engaged with this app. They are known to create educational videos over the platform, useful for presentations, etc. Yet, the benefits can also apply to teachers, and in fact, everyone out there.
Now, it’s time to look at the working procedure of stop motion studio pro. To begin with, you have to download the app over your operating system primarily. You can start the project right away after the installation. It’s optional to Sign Up on the app, but you will need it in the future to unlock certain features. The app consists of a simple user interface with a big plus icon that will directly take you to the capture and editing panel. After clicking the picture, a video will be available, which you can play or edit via features such as adding audio, adding effects, cutting sections, and more.
Once you finish the project, you can export and share stop motion studio on Android and other devices.
Part 2 How to Use Stop Motion Studio on PC?
Now, let’s look at the guide on using stop motion studio pro on a PC that generally uses stop motion studio on Windows or stop motion studio on Mac.
We can use stop motion studio online on both the Windows and Mac operating systems but given below is a guide of using the tool on Mac OS.
1. Set up your equipment
To get started, connect your DSLR camera with the PC.
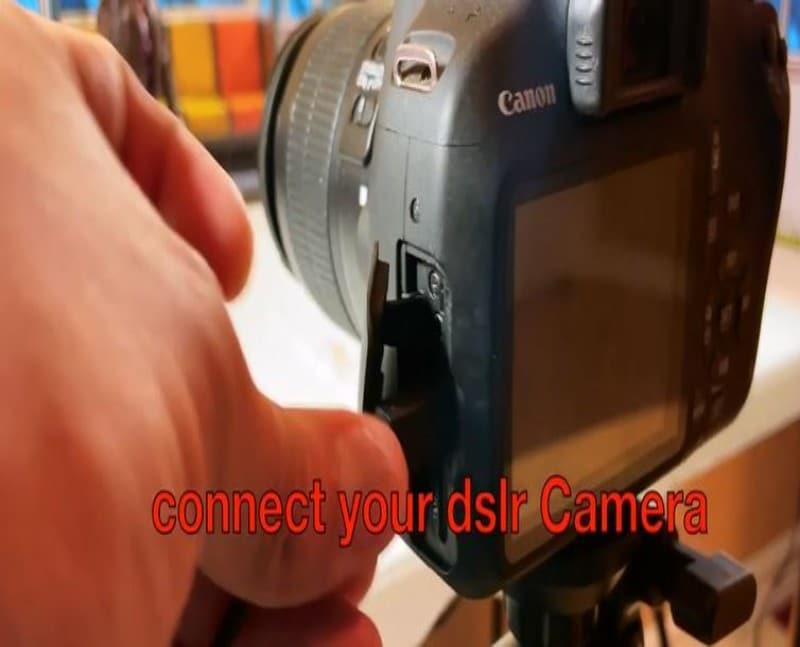
2. Open Stop Motion software
Now, download, and launch the Stop Motion Studio for Mac. Open the software and name your project after double-clicking the New Movie tab.
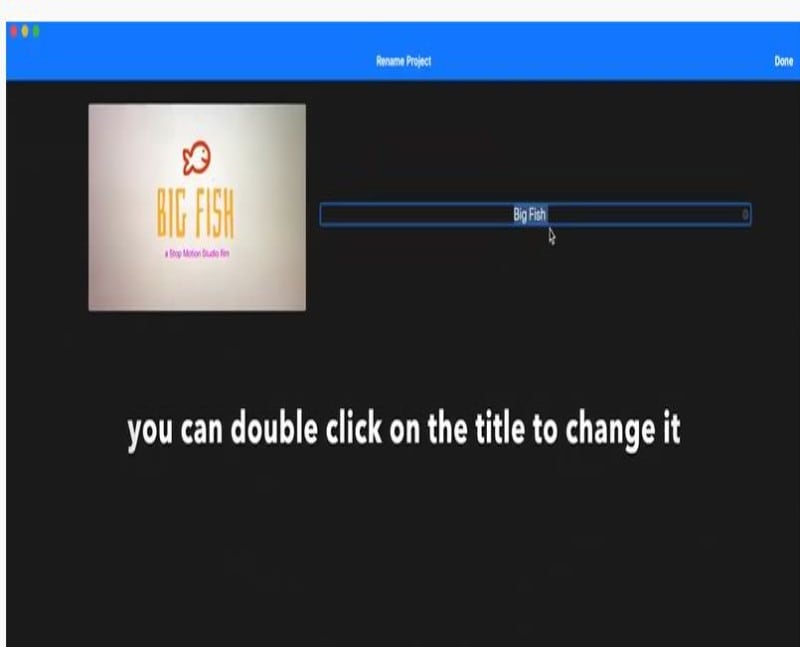
Here, you can organize your projects by name, date, or duration.
3. Connect the camera to your software
To connect the DSLR camera to the software, click the lines icon and check for the name of your camera, which should display here.
After you click your camera option, the camera will get connected.
4. Proceed with the basic settings.
As shown below, our setting will take this dot three steps back.
5. Capture images
The big red button will capture the shots, and there’s an option along its side to time the shots.
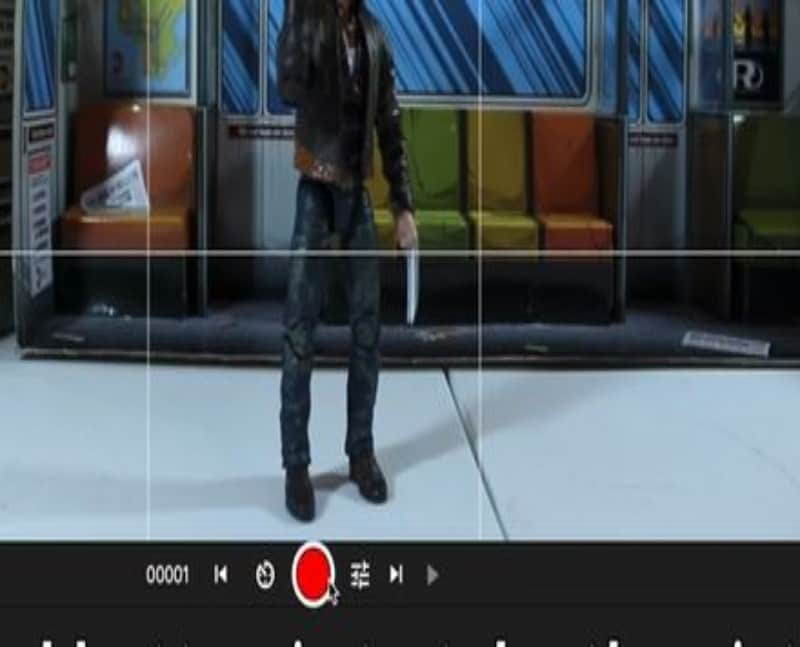
Here, you can also explore settings to proceed with. For example, you can change the texture, ISO, shutter speed, aperture, green screen, blue screen, etc. You can also rotate or flip the images from here. And, there are lots for the list goes on.
6. Start shooting.
It would help if you pressed Enter key on your PC to start shooting the images. Then, after clicking pictures, you can click the + icon and get features as follows.
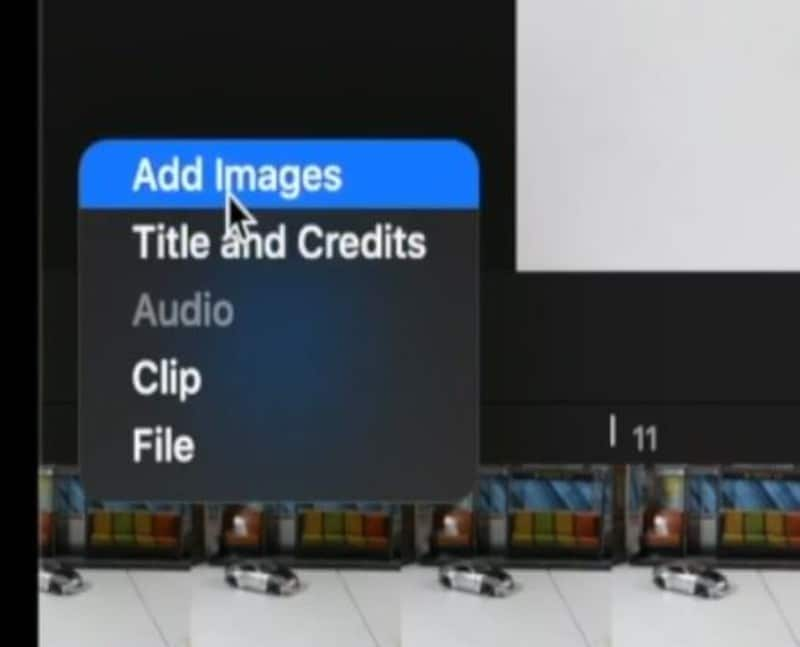
You can record your audio and change the frame rate of images as per your requirements.
7. Export project
Finally, hit the Export icon on the top-right corner to export the project and get the following features.
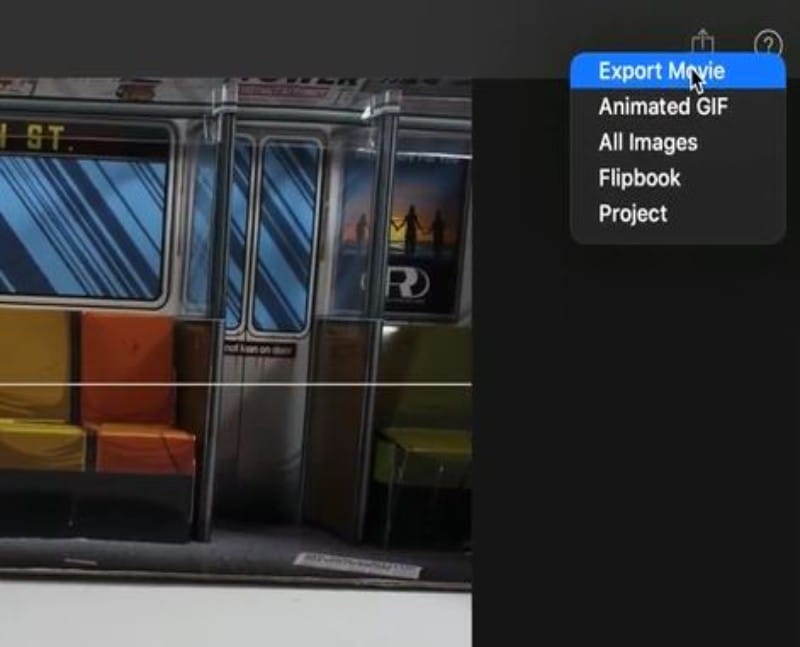
So, wasn’t it an easy stop motion studio on PC?
Part 3 A Roster of Best Stop-Motion Studio Movies
Since the start of the first half of the 20th century, the animation industry has grown drastically. Understanding market needs, a highly aware knowledge base, and consistent innovative ideas allow such movies to grow exponentially. And, it’s our luck to have such companies in our era that are a great source of entertainment in this chaotic generation.
This section will look at the top 12 stop-motion animation studio movies by the recognized stop motion animation companies with their critical specs, including the ideal vital specs. So, let’s begin with the magic below.
01A Town Called Panic (2009)

Rotten Tomatoes Score: 81%
Critics Consensus: A Town called Panic is an endlessly creative, raucous, animated romp with an adult and quirky sense of humor.
Starring: Jeanne Balibar, Stephane Aubier, Nicolas Buyer, Veronique Dumont
Directed by: Vincent Patar, Stephane Aubier
Synopsis: The film revolves around Indian (Bruce Ellison) and Cowboy (Stephane Aubier), where they plan to create a barbeque pit for their friend’s birthday, Horse (Vincent Patar). The accidental purchase delivery of million bricks than the intended deconstructs their house—also, the attempts to rebuild drop when their walls get continually stolen. The trio then travels to the Earth’s center with a determination to track down the thieves. They also discovered the culprits, who are a group of mad scientists.
022 - Consuming Spirits (2012)
Rotten Tomatoes Score: 89%
Critics Consensus: Not available yet.
Starring: Nancy Andrews, Chris Harris, Robert Levy, Chris Sullivan
Directed by: Chris Sullivan
Synopsis: Three residents (Chris Sullivan, Nancy Andrews, Robert Levy) of a small town live interconnected, sad lives.
03The Boxtrolls (2014)
Rotten Tomatoes Score: 81%
Critics Consensus: The Boxtrolls is a visual splendor and enough offbeat wit, yet it’s far from Laika’s best offerings. It still provides a healthy dose of all-age entertainment.
Starring: Elle Fanning, Ben Kingsley, Toni Collete, Isaac Hempstead-Wright
Directed by: Anthony Stacchi, Graham Annable
Synopsis: The movie leads to saving the Box trolley from extermination. It began with the Eggs (Isaac Hempstead-Wright), an orphan living under the community of mischievous and quirky creatures. These creatures have inhabited a cavern below the city of Cheesebridge. Eggs decided to go above the ground when villainous Archibald Snatcher (Ben Kingsley) made a plan to get rid of these pretty harmless beings. When Eggs went above the ground, he met and befriended feisty Winnifred (Elle Fanning). Together, they made a daring plan to save the Boxtrolls.
04The Year Without a Santa Claus (2006)
Rotten Tomatoes Score: 90%
Critics Consensus: No worries and fear. Mrs. Claus spreads all her cheers in the movie, presenting a holiday classic full of unforgettable characters and songs that are true to the Christmas spirit.
Starring: Chris Jattan, Ethan Suplee, Eddie Griffin, John Goodman
Directed by: Ron Underwood
Synopsis: Here, two elves try to save Christmas after John Goodman, a disgruntled Saint Nick, decided to take the year off.
05Fantastic Planet (1930)
Rotten Tomatoes Score: 91%
Critics Consensus: The movie is an animated epic that transforms into a surreal, fantastic, lovely, and graceful.
Starring: Mark Gruner, Marvin Miller, Hal Smith, Barry Bostwick
Directed by: Rene Laloux
Synopsis: The animated tale displays a relationship between small human-like Oms and their large creatures, blue-skinned oppressors, the Draags, also the rulers of planet Ygam. All thanks to the young female Draag, when an Om boy gets educated, the hierarchy of Draags keeping the Oms as illiterate pets have also shifted. This weakens the Draags control over Oms rebellion. So will they now co-exist or destroy each other?
06The Burton’s Corpse Bride (2005)
Rotten Tomatoes Score: 84%
Critics Consensus: The Burton’s Corpse Bride is a visually imaginative, bitter-sweet, whimsical macabre movie expected from Tim Burton.
Starring: Helena Bonham Carter, Johny Depp, Tracey Ullman, Emily Watson
Directed by: Tim Burton, Mike Johnson
Synopsis: A marriage was arranged for Victor and Victoria by their families. Victor is pretty nervous though they both like each other. Victor went to practice the lines to utter to Victoria in the forest where his intended arm of Victoria as a tree’s branch led him to the land of the dead. The land belongs to Emily, a dead creature, and now she wants to marry Victor. Victor must get rid of her and go to Victoria before marrying a villainous Barkis Bittern.
07The Pirates. Band of Misfits (2012)
Rotten Tomatoes Score: 86%
Critics Consensus: The Pirates showcases some skillfully animated fares with modern cinema’s smartness. However, the movie may not appropriately scale the customary delights of Aardman.
Starring: Martin Freeman, Imelda Staunton, David Tennant, Hugh Grant.
Directed by: Peter Lord
Synopsis: An enthusiastic pirate captain sails the high seas accompanied by his ragtag crew and dreams of becoming the year’s pirate by beating his rivals. The journey takes him through the exotic shores of Blood Island to the foggy streets of Victorian London. They also battle with a clever queen along the way and join forces with a scientist named Charles Darwin.
08James And The Giant Peach (1996)

Rotten Tomatoes Score: 91%
Critics Consensus: The dynamic and arresting visuals, light as air story, and offbeat details make this stop motion studio movie solid family entertainment.
Starring: Joanna Lumley, Paul Terry, Miriam Margolyes, Pete Postlethwaite
Directed by: Henry Selick
Synopsis: This children’s tale featuring live-action and stop motion animation takes through the adventures of James, an orphaned young British boy. He is forced to live with cruel aunts where he finds a way to hide his existence when he discovers a giant peach. He rolls it into the sea and sails for New York accompanied by friendly insects.
09Missing Link (2019)
Rotten Tomatoes Score: 88%
Critics Consensus: It’s a beautifully animated triumph for Laika with plenty of heart, lots of humor, and even a little food thought.
Starring: Zach Galifianakis, Zoe Saldana, Hugh Jackman, David Walliams
Directed by: Chris Butler
Synopsis: Mr. Link, an 8-feet furry creature after being tired of living a solitary life in the Pacific Northwest, recruits a fearless explorer to guide him on a journey of the fabled valley of Shangri-La. The trio encounters their share of peril as they travel to far extremities of the world and adventurer Adelina Fortnight. They learn the family that one always expects in their companionship through all this.
10Mary and Max (2009)
Rotten Tomatoes Score: 95%
Critics Consensus: Mary and Max is a startlingly inventive and lovingly crafted animation whose technical craft equals emotional resonance.
Starring: Philip Seymour Hoffman, Eric Bana, Barry Humphries, Toni Collette
Directed by: Adam Elliot
Synopsis: A Jewish man and a lonely Australian girl developed an unlikely friendship in New York through letters.
11The Little Prince (2015)
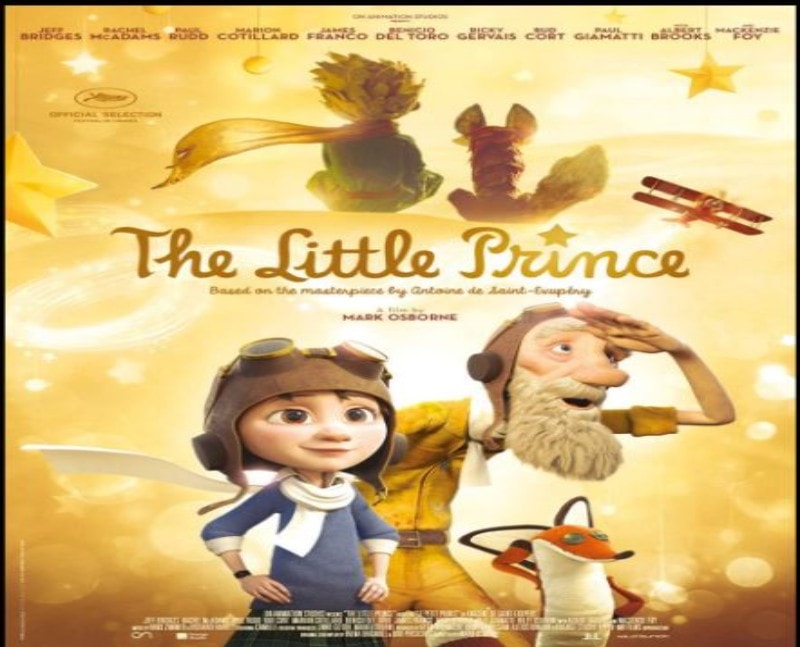
Rotten Tomatoes Score: 93%
Critics Consensus: Again, a faithful and beautiful made stop animation studio movie that sticks to the spirit of its classic source material. It is a family-friendly treat that throws thrilling visuals with a satisfying story.
Starring: Rachel McAdams, James Franco, Marion Cottilard, Jeff Bridges
Directed by: Mark Osborne
Synopsis: The Aviator introduces a girl to a world where she learns that human connections matter the most and where she rediscovered her childhood as well. It’s only with the heart that one can see rightly and can be seen as essential what is invisible to the eyes otherwise.
12Alice (1989)
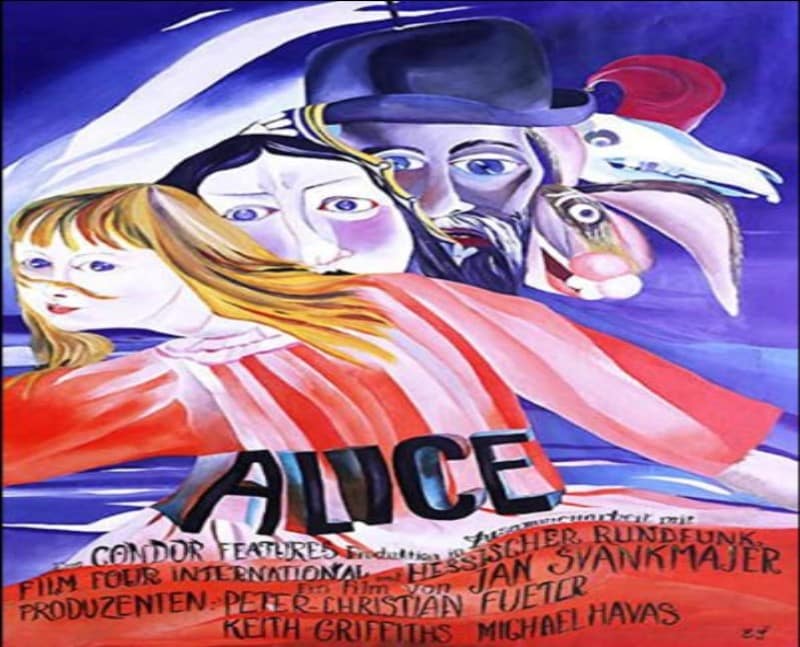
Rotten Tomatoes Score: 95%
Critics Consensus: No consensus yet.
Starring: Kristyna Kohoutova
Directed by: Jan Svankmajeru
Synopsis: In a classic children’s book by Lewis Carroll, Alice follows her stuffed rabbit via a portal inside her dresser to be whisked away to Wonderland. While the Mad Hatter, White Rabbit, and Cheshire Cat are still present, the bizarre characters and familiar magical world have undergone an unsettling transformation.
Here, we end our discussion on the best picks by stop motion animation companies. Of course, you can always refer to such fantastic pieces to take inspiration from.
Part 4 How To Make A Stop Motion Video Super Easily?
Once done with the production stage, it is time to transition to post-production. Here, your stop motion animation will get its final posture. You need to place all the images you wish to include in the video’s final cut into a folder and arrange them the same way as they should appear in the video. Even though Wondershare Filmora Video Editor provides powerful video editing tools that enable you to improve the colors in the footage you are syncing with, it is best to edit your photos via dedicated photo editing software.
For Win 7 or later (64-bit)
For macOS 10.12 or later
Afterward, you should go and launch Filmora, do a new project and add the folder to Filmora’s Media tab. Moreover, you should also import all audio files you would like to use in your project before doing any actual editing. When finished, head over to the File tab, and choose the Preferences option.
Once the option pops up on the screen, hit the Edit tab to set the max duration of a image in a video you’re making.
The value you insert into the Photo Duration box is based upon the number of frames your video contains. Filmora doesn’t let you minimize a project’s frame rate below 23.97fps. Thus, if you want your animation to have frames per second, you need to set the value of the Photo Duration to 00:00:04.
You can then add your media assets to the timeline, hit the Play button to preview the results, and export the video from Filmora if you like the results.
Image Name: stop-motion-studio-14
Image Alt: stop motion video Wondershare Filmora
● Key Takeaways from This Episode →
● The concept and working on stop motion studio pro
● Top Stop Motion Animation Movies
● How to create a stop-animation studio via Wondershare Filmora
Since people are getting more aware of innovative and creative ideas, the tools like stop motion studio are also emerging. This tool or software, or you can call an app, is mainly concerned with animation and is recognized to create very magical outputs.
This guide will teach what to consider about the Stop Motion Studio, how it works, and a deep look at animation movies to realize the magic of such tools on a broader scale. So, let’s start the article on stop motion studio Pro without any further ado.
In this article
01 [What is Stop Motion Studio and How Does It Work?](#Part 1)
02 [How to Use Stop Motion Studio on PC?](#Part 2)
03 [A Roster of 12 Best Stop-Motion Companies](#Part 3)
04 [How To Make A Stop Motion Video Super Easily?](#Part 4)
Part 1 What is Stop Motion Studio and How Does It Work?
Like the name, stop motion studio creates compelling stop-action movies. It is a terrific app with a whole set of unique features used mainly to turn images and audio into videos in an exciting way that is a fun process for everyone. The app is for Android and iOS. The app is a breeze to use with the camera since it’s operable through smartphones.
However, the students are highly reputed and engaged with this app. They are known to create educational videos over the platform, useful for presentations, etc. Yet, the benefits can also apply to teachers, and in fact, everyone out there.
Now, it’s time to look at the working procedure of stop motion studio pro. To begin with, you have to download the app over your operating system primarily. You can start the project right away after the installation. It’s optional to Sign Up on the app, but you will need it in the future to unlock certain features. The app consists of a simple user interface with a big plus icon that will directly take you to the capture and editing panel. After clicking the picture, a video will be available, which you can play or edit via features such as adding audio, adding effects, cutting sections, and more.
Once you finish the project, you can export and share stop motion studio on Android and other devices.
Part 2 How to Use Stop Motion Studio on PC?
Now, let’s look at the guide on using stop motion studio pro on a PC that generally uses stop motion studio on Windows or stop motion studio on Mac.
We can use stop motion studio online on both the Windows and Mac operating systems but given below is a guide of using the tool on Mac OS.
1. Set up your equipment
To get started, connect your DSLR camera with the PC.
2. Open Stop Motion software
Now, download, and launch the Stop Motion Studio for Mac. Open the software and name your project after double-clicking the New Movie tab.
Here, you can organize your projects by name, date, or duration.
3. Connect the camera to your software
To connect the DSLR camera to the software, click the lines icon and check for the name of your camera, which should display here.
After you click your camera option, the camera will get connected.
4. Proceed with the basic settings.
As shown below, our setting will take this dot three steps back.
5. Capture images
The big red button will capture the shots, and there’s an option along its side to time the shots.
Here, you can also explore settings to proceed with. For example, you can change the texture, ISO, shutter speed, aperture, green screen, blue screen, etc. You can also rotate or flip the images from here. And, there are lots for the list goes on.
6. Start shooting.
It would help if you pressed Enter key on your PC to start shooting the images. Then, after clicking pictures, you can click the + icon and get features as follows.
You can record your audio and change the frame rate of images as per your requirements.
7. Export project
Finally, hit the Export icon on the top-right corner to export the project and get the following features.
So, wasn’t it an easy stop motion studio on PC?
Part 3 A Roster of Best Stop-Motion Studio Movies
Since the start of the first half of the 20th century, the animation industry has grown drastically. Understanding market needs, a highly aware knowledge base, and consistent innovative ideas allow such movies to grow exponentially. And, it’s our luck to have such companies in our era that are a great source of entertainment in this chaotic generation.
This section will look at the top 12 stop-motion animation studio movies by the recognized stop motion animation companies with their critical specs, including the ideal vital specs. So, let’s begin with the magic below.
01A Town Called Panic (2009)
Rotten Tomatoes Score: 81%
Critics Consensus: A Town called Panic is an endlessly creative, raucous, animated romp with an adult and quirky sense of humor.
Starring: Jeanne Balibar, Stephane Aubier, Nicolas Buyer, Veronique Dumont
Directed by: Vincent Patar, Stephane Aubier
Synopsis: The film revolves around Indian (Bruce Ellison) and Cowboy (Stephane Aubier), where they plan to create a barbeque pit for their friend’s birthday, Horse (Vincent Patar). The accidental purchase delivery of million bricks than the intended deconstructs their house—also, the attempts to rebuild drop when their walls get continually stolen. The trio then travels to the Earth’s center with a determination to track down the thieves. They also discovered the culprits, who are a group of mad scientists.
022 - Consuming Spirits (2012)
Rotten Tomatoes Score: 89%
Critics Consensus: Not available yet.
Starring: Nancy Andrews, Chris Harris, Robert Levy, Chris Sullivan
Directed by: Chris Sullivan
Synopsis: Three residents (Chris Sullivan, Nancy Andrews, Robert Levy) of a small town live interconnected, sad lives.
03The Boxtrolls (2014)
Rotten Tomatoes Score: 81%
Critics Consensus: The Boxtrolls is a visual splendor and enough offbeat wit, yet it’s far from Laika’s best offerings. It still provides a healthy dose of all-age entertainment.
Starring: Elle Fanning, Ben Kingsley, Toni Collete, Isaac Hempstead-Wright
Directed by: Anthony Stacchi, Graham Annable
Synopsis: The movie leads to saving the Box trolley from extermination. It began with the Eggs (Isaac Hempstead-Wright), an orphan living under the community of mischievous and quirky creatures. These creatures have inhabited a cavern below the city of Cheesebridge. Eggs decided to go above the ground when villainous Archibald Snatcher (Ben Kingsley) made a plan to get rid of these pretty harmless beings. When Eggs went above the ground, he met and befriended feisty Winnifred (Elle Fanning). Together, they made a daring plan to save the Boxtrolls.
04The Year Without a Santa Claus (2006)
Rotten Tomatoes Score: 90%
Critics Consensus: No worries and fear. Mrs. Claus spreads all her cheers in the movie, presenting a holiday classic full of unforgettable characters and songs that are true to the Christmas spirit.
Starring: Chris Jattan, Ethan Suplee, Eddie Griffin, John Goodman
Directed by: Ron Underwood
Synopsis: Here, two elves try to save Christmas after John Goodman, a disgruntled Saint Nick, decided to take the year off.
05Fantastic Planet (1930)
Rotten Tomatoes Score: 91%
Critics Consensus: The movie is an animated epic that transforms into a surreal, fantastic, lovely, and graceful.
Starring: Mark Gruner, Marvin Miller, Hal Smith, Barry Bostwick
Directed by: Rene Laloux
Synopsis: The animated tale displays a relationship between small human-like Oms and their large creatures, blue-skinned oppressors, the Draags, also the rulers of planet Ygam. All thanks to the young female Draag, when an Om boy gets educated, the hierarchy of Draags keeping the Oms as illiterate pets have also shifted. This weakens the Draags control over Oms rebellion. So will they now co-exist or destroy each other?
06The Burton’s Corpse Bride (2005)
Rotten Tomatoes Score: 84%
Critics Consensus: The Burton’s Corpse Bride is a visually imaginative, bitter-sweet, whimsical macabre movie expected from Tim Burton.
Starring: Helena Bonham Carter, Johny Depp, Tracey Ullman, Emily Watson
Directed by: Tim Burton, Mike Johnson
Synopsis: A marriage was arranged for Victor and Victoria by their families. Victor is pretty nervous though they both like each other. Victor went to practice the lines to utter to Victoria in the forest where his intended arm of Victoria as a tree’s branch led him to the land of the dead. The land belongs to Emily, a dead creature, and now she wants to marry Victor. Victor must get rid of her and go to Victoria before marrying a villainous Barkis Bittern.
07The Pirates. Band of Misfits (2012)
Rotten Tomatoes Score: 86%
Critics Consensus: The Pirates showcases some skillfully animated fares with modern cinema’s smartness. However, the movie may not appropriately scale the customary delights of Aardman.
Starring: Martin Freeman, Imelda Staunton, David Tennant, Hugh Grant.
Directed by: Peter Lord
Synopsis: An enthusiastic pirate captain sails the high seas accompanied by his ragtag crew and dreams of becoming the year’s pirate by beating his rivals. The journey takes him through the exotic shores of Blood Island to the foggy streets of Victorian London. They also battle with a clever queen along the way and join forces with a scientist named Charles Darwin.
08James And The Giant Peach (1996)
Rotten Tomatoes Score: 91%
Critics Consensus: The dynamic and arresting visuals, light as air story, and offbeat details make this stop motion studio movie solid family entertainment.
Starring: Joanna Lumley, Paul Terry, Miriam Margolyes, Pete Postlethwaite
Directed by: Henry Selick
Synopsis: This children’s tale featuring live-action and stop motion animation takes through the adventures of James, an orphaned young British boy. He is forced to live with cruel aunts where he finds a way to hide his existence when he discovers a giant peach. He rolls it into the sea and sails for New York accompanied by friendly insects.
09Missing Link (2019)
Rotten Tomatoes Score: 88%
Critics Consensus: It’s a beautifully animated triumph for Laika with plenty of heart, lots of humor, and even a little food thought.
Starring: Zach Galifianakis, Zoe Saldana, Hugh Jackman, David Walliams
Directed by: Chris Butler
Synopsis: Mr. Link, an 8-feet furry creature after being tired of living a solitary life in the Pacific Northwest, recruits a fearless explorer to guide him on a journey of the fabled valley of Shangri-La. The trio encounters their share of peril as they travel to far extremities of the world and adventurer Adelina Fortnight. They learn the family that one always expects in their companionship through all this.
10Mary and Max (2009)
Rotten Tomatoes Score: 95%
Critics Consensus: Mary and Max is a startlingly inventive and lovingly crafted animation whose technical craft equals emotional resonance.
Starring: Philip Seymour Hoffman, Eric Bana, Barry Humphries, Toni Collette
Directed by: Adam Elliot
Synopsis: A Jewish man and a lonely Australian girl developed an unlikely friendship in New York through letters.
11The Little Prince (2015)
Rotten Tomatoes Score: 93%
Critics Consensus: Again, a faithful and beautiful made stop animation studio movie that sticks to the spirit of its classic source material. It is a family-friendly treat that throws thrilling visuals with a satisfying story.
Starring: Rachel McAdams, James Franco, Marion Cottilard, Jeff Bridges
Directed by: Mark Osborne
Synopsis: The Aviator introduces a girl to a world where she learns that human connections matter the most and where she rediscovered her childhood as well. It’s only with the heart that one can see rightly and can be seen as essential what is invisible to the eyes otherwise.
12Alice (1989)
Rotten Tomatoes Score: 95%
Critics Consensus: No consensus yet.
Starring: Kristyna Kohoutova
Directed by: Jan Svankmajeru
Synopsis: In a classic children’s book by Lewis Carroll, Alice follows her stuffed rabbit via a portal inside her dresser to be whisked away to Wonderland. While the Mad Hatter, White Rabbit, and Cheshire Cat are still present, the bizarre characters and familiar magical world have undergone an unsettling transformation.
Here, we end our discussion on the best picks by stop motion animation companies. Of course, you can always refer to such fantastic pieces to take inspiration from.
Part 4 How To Make A Stop Motion Video Super Easily?
Once done with the production stage, it is time to transition to post-production. Here, your stop motion animation will get its final posture. You need to place all the images you wish to include in the video’s final cut into a folder and arrange them the same way as they should appear in the video. Even though Wondershare Filmora Video Editor provides powerful video editing tools that enable you to improve the colors in the footage you are syncing with, it is best to edit your photos via dedicated photo editing software.
For Win 7 or later (64-bit)
For macOS 10.12 or later
Afterward, you should go and launch Filmora, do a new project and add the folder to Filmora’s Media tab. Moreover, you should also import all audio files you would like to use in your project before doing any actual editing. When finished, head over to the File tab, and choose the Preferences option.
Once the option pops up on the screen, hit the Edit tab to set the max duration of a image in a video you’re making.
The value you insert into the Photo Duration box is based upon the number of frames your video contains. Filmora doesn’t let you minimize a project’s frame rate below 23.97fps. Thus, if you want your animation to have frames per second, you need to set the value of the Photo Duration to 00:00:04.
You can then add your media assets to the timeline, hit the Play button to preview the results, and export the video from Filmora if you like the results.
Image Name: stop-motion-studio-14
Image Alt: stop motion video Wondershare Filmora
● Key Takeaways from This Episode →
● The concept and working on stop motion studio pro
● Top Stop Motion Animation Movies
● How to create a stop-animation studio via Wondershare Filmora
The Complete Guide to Whiteboard Animation
The Definitive Guide to Whiteboard Animation
An easy yet powerful editor
Numerous effects to choose from
Detailed tutorials provided by the official channel
We think about moving videos with actors and actresses when we talk about motion. But, when we speak about doodle videos or drawn videos, we feel about whiteboard animation.
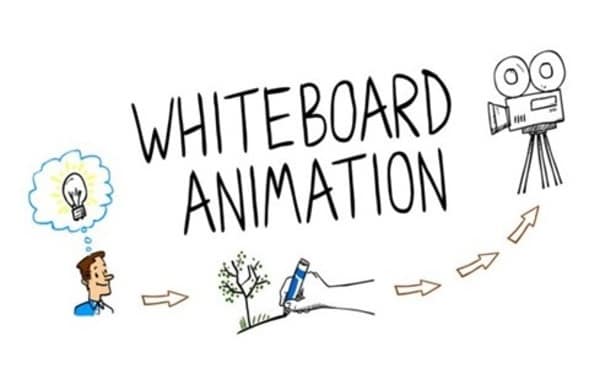
This article covers all the necessary information about whiteboard animation, Filmora whiteboard animation, whiteboard animation cost, etc. Under whiteboard animation, sketches adjust in a manner that results in continual animation reflection.
In this article
01 [What is Whiteboard Animation?](#Part 1)
02 [How Can Whiteboard Animation Be Used?](#Part 2)
03 [What is Whiteboard Animation Cost?](#Part 3)
04 [Some Whiteboard Animation Tools That Worth Using](#Part 4)
Part 1 What is Whiteboard Animation?

Whiteboard animation is a style that shows static watcher images getting drawn on the white screen. The graphics are at the core of a narration that walks the audience through the story by the draws. These animations are modest to understand, but they make us involved all of an impulsive.
Whiteboard animation could be a video in the middle of narration that walks the viewer through a story by viewing the illustrator’s hand drawing it onto a white background. Established in 2007, whiteboard animation may be a new and exciting way of communicating to the viewer in a very personal way.
It applies effects like time-lapse and stop-motion to bring stories to life. Its uses include internal and external television and internet advertisements, software and product demonstrations, whiteboard animation lectures and educational videos for all ages, and various artistic possibilities like untrue storytelling.
Whiteboard animation videos are traditionally made by simply recording the artist live as they draw the content for the video while at the same time reciting the story. An efficient technique in these visually-oriented times, but a tricky balancing act for even the most effective illustrators and speakers.
Part 2 How Can Whiteboard Animation Be Used?

While working with whiteboard animation for pc or going with whiteboard animation hand drawing in digital mode, it is important to understand how can whiteboard animation be used for? Let’s try to figure out that in the following points:
01Represent complex ideas in a simple way
A whiteboard video can offer assistance if the item or framework you need to portray is complex or exceedingly specialized. Individuals frequently get bored amid clarifications, and the more point by point those clarifications are, the harder it is to focus.
Whether you’re pushing an item on a press page or sharing a new trade prepare with your team, employing a high-quality whiteboard movement video to induce your point-over will keep up tall intrigued for as long as the video is playing. This can be because whiteboard liveliness is fast-moving, outwardly point by point, and frequently colorful, making them simple and fun to watch—for as long as it takes to clarify the thought.
02You can cover a part of your thoughts all at once
For reasons comparative to those displayed over, a whiteboard video is perfect on the off chance that you would like to cover an expansive sum of data within the introduction. With ideas unfolding visually as the storyteller portrays what’s going on, you’ll be able to get absent with counting a part of diverse thoughts within the same video without losing the watcher intrigued.
03You need to get other business attention
Did you know that whiteboard activity recordings are fair as compelling for Bshowcasing? The industrial-yet-casual look-and-feel of whiteboard activity loans itself astoundingly generously to a corporate environment.
Whiteboard movement administrations can donate you a noteworthy edge over competing companies once you approach other businesses along with your offer.
04You should maintain a strategic distance from awful performing artists at all costs
With whiteboard liveliness, you don’t ought to enlist on-screen characters to play in your video. This cruel noteworthy took a toll on reserve funds. Still, it can moreover spare you genuine embarrassment—good, persuading performing artists can be troublesome to find, and awful ones will have your group of onlookers wincing through the complete introduction. Movement ousts this issue inside and out.
05You plan to use social media marketing
If you need to utilize YouTube or social media advertisements for your promotion, whiteboard liveliness recordings alone will do the job. Individuals like them, so you’ve got a great chance of getting sees and clicks—and sales.
(Fun truth: Did you know there are 3billion looks conducted on YouTube alone each month? If you need your share of that activity, utilizing whiteboard activity recordings may be your best wager.)
06You want to create a story
On the off-chance that you need your video to tell a portion of your brand’s story, no one will do that way better than whiteboard movement administrations. Disney demonstrated that liveliness was an incredibly viable way to tell stories nearly a hundred years ago. Why not take after that convention?
07You want to use humor
When you need to consolidate humor into your video introduction, whiteboard activity is one of the most excellent ways to induce giggles. Novice performing artists can be unbalanced and irritating when they attempt to be clever on camera, but in whiteboard animation’s laid-back visual fashion, it can communicate humor immaculately.
08You need to reuse ancient sound substance
If you want to repurpose other sorts of the substance you’ve got lying around—say, a podcast scene or a discourse you gave—you can combine preexisting audio with whiteboard liveliness. This will assist you to capitalize on the substance you’ve as of now made, and it’ll undoubtedly breathe new life into it.
Part 3 What is Whiteboard Animation Cost?
Should you contract an artisan or fair do-it-yourself for whiteboard activity? Let’s have a conversation around sweat equity.
You can set up a video camera yourself and utilize video altering computer program to make a Whiteboard Liveliness. However, it’ll likely require a couple of weeks of your time, and your comes about will be far from a professional studio’s quality. Expect ineffectively drawn pictures and composed words that are unreadable.
Whiteboard activity program can be fetched as small as $50plus saves a couple of weeks of your time. These cheap programs utilize an inactive picture of a hand and clip craftsmanship. But the ultimate item isn’t unique, and its esteem is an excellent Control Point introduction.
Another choice is Adobe Eventual outcomes, an industry-standard activity program. It’s what they utilize to create National Commercials. It costs $16in any case, and learning the computer program requires a bachelor’s degree.
Part 4 Some Whiteboard Animation Tools That Worth Using
Whiteboard animation software or whiteboard animation app permits you to form whiteboard animation videos. Animation software offers a visual, drag-and-drop interface to simplify the designing process for creators.
Wondering what whiteboard animations are? They’re explainer videos where a hand sketches on a whiteboard. Before, this was manual, where a lecturer writes on a whiteboard. But because of whiteboard animation software, you don’t have to have a whiteboard or compose aboard again.
Whiteboard animation tool has built-in hand styles and virtual whiteboards that automatically process animation formation.
Wondershare Filmora Video Editor and Camtasia are some of the best videos altering computer programs with cool features compared to other competing video varying Software.
Wondershare Filmora
Get started easily with Filmora’s powerful performance, intuitive interface, and countless effects!
Try It Free Try It Free Try It Free Learn More >
Here are a few steps to follow for making whiteboard animation videos in Filmora and Camtasia:
01Write a Script

Much like a standard video or a brief skit, there must be a script if a whiteboard animation video succeeds. It is excellent to have compelling images and information, but without a logical story, they’re nothing.
It is not a blog, storyboard, or a collection of bullet points. You hope for a proper script, which says everything about the video. Why? Because then you’ll know precisely what images should be added further in specific segments, what the narrator must show, and what transitions are necessary.
02Start with the Storyboard
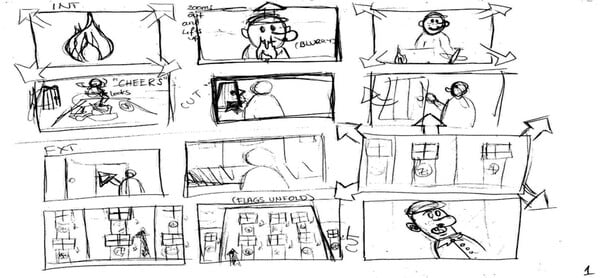
Now you have got a script, and you’ve got a clear idea of how you want your video to return across. It’s time to start out building the storyboard. With a storyboard, you may be able to sort out your thoughts far better. You’ll see how each frame comes onto the screen, and a unit of ammunition ties into the opposite.
When you create your storyboard, you may have a simple idea about how your final product will look. If there is some alteration you’re not proud of, this can be the instant where you’ll make changes.
03Create Images
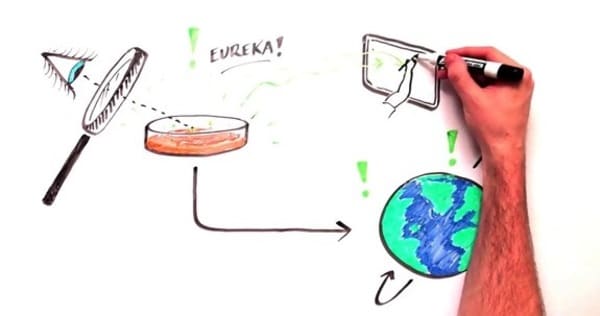
You may find this part very easy if you’re a precise person. It’s all about crafting fun and unique images that will help deliver the data you want to bring across. Attempt to create striking photos which will excite your audience. The simpler, more distinctive, and attractive you’ll be able to make those images, the higher your end product.
04Animate Those Images
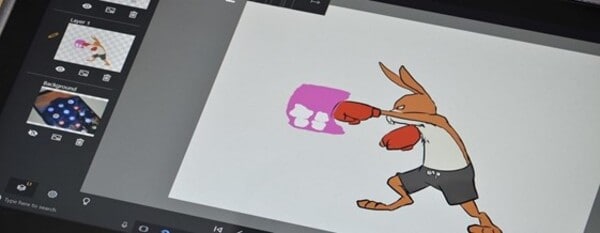
With your images drawn and in situ on the storyboard, it’s time to animate them. When animating your whiteboard animation video, confine in mind that every frame will likely show for no. quite seconds. This forces you to form every single movement count – with only some seconds per frame available, and quick movements are often preferable to extended scenes of stillness.
05Record and Sync the Audio
The audio is arguably one of the main essential parts of a whiteboard animation video. So, before recording the audio for any part of your project, practice reading through your script several times until you recognize it by memory and cannot struggle when speaking into the microphone during the particular recording process.
The final step involves getting your audio. Every animated video must have narration because it helps to elucidate what’s happening within the images that folks are seeing. Record your audio, and ensure it’s perfectly in sync with your content.
So, whether you are going with hand whiteboard animation and then modifying and animated with Filmora or the Camtasia whiteboard animation, both result in good whiteboard animation. Whereas, if looking for comprehensive video editing tools, the obvious choice will be Filmora.
● Key Takeaways from This Episode →
● In short, the article gives you the basic understanding of:
● What is meant by Whiteboard Animation?
● Different examples of whiteboard animation videos to explain the techniques
● Steps to apply whiteboard animation with Filmora
● Further, the article has explained Whiteboard Animation with different examples to clarify how it looks, and some websites may help you lead more about Whiteboard Animation videos. The most important question answered above is how to make videos ideally at Filmora. I hope your queries are explicit after reading this post.
We think about moving videos with actors and actresses when we talk about motion. But, when we speak about doodle videos or drawn videos, we feel about whiteboard animation.
This article covers all the necessary information about whiteboard animation, Filmora whiteboard animation, whiteboard animation cost, etc. Under whiteboard animation, sketches adjust in a manner that results in continual animation reflection.
In this article
01 [What is Whiteboard Animation?](#Part 1)
02 [How Can Whiteboard Animation Be Used?](#Part 2)
03 [What is Whiteboard Animation Cost?](#Part 3)
04 [Some Whiteboard Animation Tools That Worth Using](#Part 4)
Part 1 What is Whiteboard Animation?
Whiteboard animation is a style that shows static watcher images getting drawn on the white screen. The graphics are at the core of a narration that walks the audience through the story by the draws. These animations are modest to understand, but they make us involved all of an impulsive.
Whiteboard animation could be a video in the middle of narration that walks the viewer through a story by viewing the illustrator’s hand drawing it onto a white background. Established in 2007, whiteboard animation may be a new and exciting way of communicating to the viewer in a very personal way.
It applies effects like time-lapse and stop-motion to bring stories to life. Its uses include internal and external television and internet advertisements, software and product demonstrations, whiteboard animation lectures and educational videos for all ages, and various artistic possibilities like untrue storytelling.
Whiteboard animation videos are traditionally made by simply recording the artist live as they draw the content for the video while at the same time reciting the story. An efficient technique in these visually-oriented times, but a tricky balancing act for even the most effective illustrators and speakers.
Part 2 How Can Whiteboard Animation Be Used?
While working with whiteboard animation for pc or going with whiteboard animation hand drawing in digital mode, it is important to understand how can whiteboard animation be used for? Let’s try to figure out that in the following points:
01Represent complex ideas in a simple way
A whiteboard video can offer assistance if the item or framework you need to portray is complex or exceedingly specialized. Individuals frequently get bored amid clarifications, and the more point by point those clarifications are, the harder it is to focus.
Whether you’re pushing an item on a press page or sharing a new trade prepare with your team, employing a high-quality whiteboard movement video to induce your point-over will keep up tall intrigued for as long as the video is playing. This can be because whiteboard liveliness is fast-moving, outwardly point by point, and frequently colorful, making them simple and fun to watch—for as long as it takes to clarify the thought.
02You can cover a part of your thoughts all at once
For reasons comparative to those displayed over, a whiteboard video is perfect on the off chance that you would like to cover an expansive sum of data within the introduction. With ideas unfolding visually as the storyteller portrays what’s going on, you’ll be able to get absent with counting a part of diverse thoughts within the same video without losing the watcher intrigued.
03You need to get other business attention
Did you know that whiteboard activity recordings are fair as compelling for Bshowcasing? The industrial-yet-casual look-and-feel of whiteboard activity loans itself astoundingly generously to a corporate environment.
Whiteboard movement administrations can donate you a noteworthy edge over competing companies once you approach other businesses along with your offer.
04You should maintain a strategic distance from awful performing artists at all costs
With whiteboard liveliness, you don’t ought to enlist on-screen characters to play in your video. This cruel noteworthy took a toll on reserve funds. Still, it can moreover spare you genuine embarrassment—good, persuading performing artists can be troublesome to find, and awful ones will have your group of onlookers wincing through the complete introduction. Movement ousts this issue inside and out.
05You plan to use social media marketing
If you need to utilize YouTube or social media advertisements for your promotion, whiteboard liveliness recordings alone will do the job. Individuals like them, so you’ve got a great chance of getting sees and clicks—and sales.
(Fun truth: Did you know there are 3billion looks conducted on YouTube alone each month? If you need your share of that activity, utilizing whiteboard activity recordings may be your best wager.)
06You want to create a story
On the off-chance that you need your video to tell a portion of your brand’s story, no one will do that way better than whiteboard movement administrations. Disney demonstrated that liveliness was an incredibly viable way to tell stories nearly a hundred years ago. Why not take after that convention?
07You want to use humor
When you need to consolidate humor into your video introduction, whiteboard activity is one of the most excellent ways to induce giggles. Novice performing artists can be unbalanced and irritating when they attempt to be clever on camera, but in whiteboard animation’s laid-back visual fashion, it can communicate humor immaculately.
08You need to reuse ancient sound substance
If you want to repurpose other sorts of the substance you’ve got lying around—say, a podcast scene or a discourse you gave—you can combine preexisting audio with whiteboard liveliness. This will assist you to capitalize on the substance you’ve as of now made, and it’ll undoubtedly breathe new life into it.
Part 3 What is Whiteboard Animation Cost?
Should you contract an artisan or fair do-it-yourself for whiteboard activity? Let’s have a conversation around sweat equity.
You can set up a video camera yourself and utilize video altering computer program to make a Whiteboard Liveliness. However, it’ll likely require a couple of weeks of your time, and your comes about will be far from a professional studio’s quality. Expect ineffectively drawn pictures and composed words that are unreadable.
Whiteboard activity program can be fetched as small as $50plus saves a couple of weeks of your time. These cheap programs utilize an inactive picture of a hand and clip craftsmanship. But the ultimate item isn’t unique, and its esteem is an excellent Control Point introduction.
Another choice is Adobe Eventual outcomes, an industry-standard activity program. It’s what they utilize to create National Commercials. It costs $16in any case, and learning the computer program requires a bachelor’s degree.
Part 4 Some Whiteboard Animation Tools That Worth Using
Whiteboard animation software or whiteboard animation app permits you to form whiteboard animation videos. Animation software offers a visual, drag-and-drop interface to simplify the designing process for creators.
Wondering what whiteboard animations are? They’re explainer videos where a hand sketches on a whiteboard. Before, this was manual, where a lecturer writes on a whiteboard. But because of whiteboard animation software, you don’t have to have a whiteboard or compose aboard again.
Whiteboard animation tool has built-in hand styles and virtual whiteboards that automatically process animation formation.
Wondershare Filmora Video Editor and Camtasia are some of the best videos altering computer programs with cool features compared to other competing video varying Software.
Wondershare Filmora
Get started easily with Filmora’s powerful performance, intuitive interface, and countless effects!
Try It Free Try It Free Try It Free Learn More >
Here are a few steps to follow for making whiteboard animation videos in Filmora and Camtasia:
01Write a Script
Much like a standard video or a brief skit, there must be a script if a whiteboard animation video succeeds. It is excellent to have compelling images and information, but without a logical story, they’re nothing.
It is not a blog, storyboard, or a collection of bullet points. You hope for a proper script, which says everything about the video. Why? Because then you’ll know precisely what images should be added further in specific segments, what the narrator must show, and what transitions are necessary.
02Start with the Storyboard
Now you have got a script, and you’ve got a clear idea of how you want your video to return across. It’s time to start out building the storyboard. With a storyboard, you may be able to sort out your thoughts far better. You’ll see how each frame comes onto the screen, and a unit of ammunition ties into the opposite.
When you create your storyboard, you may have a simple idea about how your final product will look. If there is some alteration you’re not proud of, this can be the instant where you’ll make changes.
03Create Images
You may find this part very easy if you’re a precise person. It’s all about crafting fun and unique images that will help deliver the data you want to bring across. Attempt to create striking photos which will excite your audience. The simpler, more distinctive, and attractive you’ll be able to make those images, the higher your end product.
04Animate Those Images
With your images drawn and in situ on the storyboard, it’s time to animate them. When animating your whiteboard animation video, confine in mind that every frame will likely show for no. quite seconds. This forces you to form every single movement count – with only some seconds per frame available, and quick movements are often preferable to extended scenes of stillness.
05Record and Sync the Audio
The audio is arguably one of the main essential parts of a whiteboard animation video. So, before recording the audio for any part of your project, practice reading through your script several times until you recognize it by memory and cannot struggle when speaking into the microphone during the particular recording process.
The final step involves getting your audio. Every animated video must have narration because it helps to elucidate what’s happening within the images that folks are seeing. Record your audio, and ensure it’s perfectly in sync with your content.
So, whether you are going with hand whiteboard animation and then modifying and animated with Filmora or the Camtasia whiteboard animation, both result in good whiteboard animation. Whereas, if looking for comprehensive video editing tools, the obvious choice will be Filmora.
● Key Takeaways from This Episode →
● In short, the article gives you the basic understanding of:
● What is meant by Whiteboard Animation?
● Different examples of whiteboard animation videos to explain the techniques
● Steps to apply whiteboard animation with Filmora
● Further, the article has explained Whiteboard Animation with different examples to clarify how it looks, and some websites may help you lead more about Whiteboard Animation videos. The most important question answered above is how to make videos ideally at Filmora. I hope your queries are explicit after reading this post.
Top 3 Ways to Create Gif Images with Great 3D Gif Maker
Top 3 Ways to Create Gif Images with Great 3D Gif Maker
An easy yet powerful editor
Numerous effects to choose from
Detailed tutorials provided by the official channel
If what you’re searching for is a 3D GIF Maker, then we’ve got your back. Below, we’ve not only listed the three best ways to create 3D animated GIFs, but we’ve also included a brief tutorial that you can reference when creating your very own GIF images.
In this article
01 [Best 3 Ways to Create 3D Animated GIFs](#Part 1)
02 [Create 3D animated GIFs online with Filmora](#Part 2)
Part 1 Best 3 Ways to Create 3D Animated GIFs
First off, as promised, we have a brief list of some 3D GIF Maker tools that you can try. We’ve made sure to pick a unique set of 3D GIF Maker tools and 3D GIF Generator tools in order to give you a variety to choose from. It won’t be the most comprehensive list, but it should help you on your way to understanding how these 3D GIF makers usually work and how you can use them in order to create GIF images that you can share with your friends, family, and colleagues.
01 Wondershare Filmora Video Editor
The first 3D GIF Maker on our list is Filmora. It’s probably not the first one that you’d naturally think of as a 3D GIF Maker, seeing as it was developed to be more than that. But, it doesn’t discount the fact that it can be used in order to create and edit your own GIFs.
Wondershare Filmora is available for both Windows and Mac users. It allows you to create a GIF with images or video easily and even gives you the tools needed to edit and perfect it before you export it for use (a process that we’ll be showing off in more detail in the tutorial section below if you’re interested in learning more.)
For Win 7 or later (64-bit)
For macOS 10.12 or later
022. Adobe Photoshop
Adobe Photoshop, much like Filmora, is probably not, first and foremost, considered a mere 3D GIF Maker. However, it doesn’t erase its 3D GIF Creator functions. This tool, if used correctly, can make just about anything you want.
The process of using it, of course, is a little fussier than other alternatives (you’ll probably want to look up a more detailed explanation on the subject), but the fussiness does also mean that you can control every detail of your project and get it to look exactly how you want it to look.
03EaseUS Video Editor
Similar to Filmora, EaseUS Video Editor is an advanced video editing tool that you can use as a 3D GIF Creator quite easily. It comes built-in with templates, filters, design elements, transition effects, music, and so much more — allowing you to freely design your GIF images so that they can be ready for publishing right off the bat.
The beauty of it, of course, is that, much like with all the other options that we introduced today, you can use the program for more than just 3D GIF creation after the fact — opening yourself up for different and more complex projects in the future (be they image, audio, or video-related.)
Part 2 Create 3D Animated Gifs Online With Wondershare Filmora Video Editor
Now, as promised, we’ve also included a tutorial that you can follow along with to create your own 3D Animated GIFs with the tool, Wondershare Filmora Video Editor . With this tool, we’ll be showing you the basic way to do it (by using a premade video that you can edit and then convert into GIF format). But, feel free to explore the tool and use it as you wish (i.e., as a 3D spinning GIF creator, 3D rotating text GIF maker, 3D cube GIF maker, and so on.)
01Step 1: Launch Filmora Video Editor
First things first, launch the 3D GIF maker that you intend to use. In our case, that is Filmora (a screenshot has been provided below for your edification and reference. We’ll be using Filmora as our example.)
02Step 2: Upload File(s)
Next, upload the file or files that you want to turn into a GIF.
As mentioned in the introduction, we’ll be using a pre-made video, but you can use whatever you wish (i.e., images). In order to upload, we clicked the File tab (pointed out in the image below) and selected Import Media > Import Media File. However, you can also drag and drop your file(s) on the designated area of the UI..
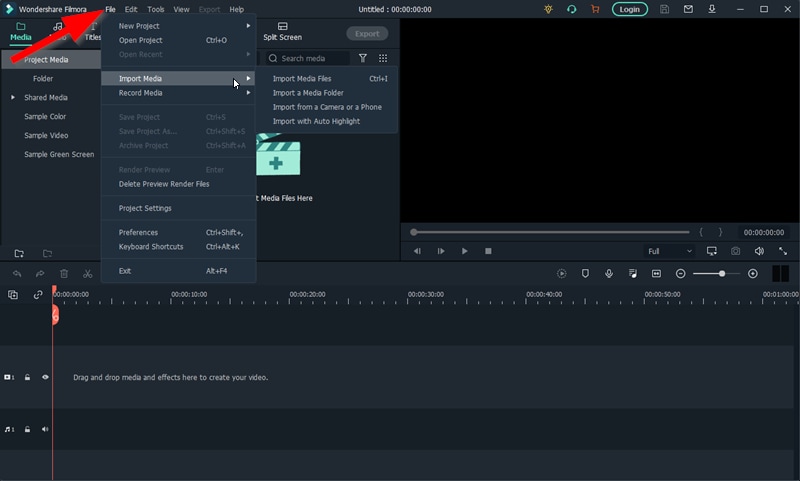
03Step 3: Drag Uploaded Media to Timeline
To create a GIF withFilmora , you’ll need to first create a video. Don’t worry, this is simple. Just drag and drop the media that you want to use onto the timeline.
Note: Any uploaded media will be in the media folder (marked [1] in the image below). Drag media from there onto the timeline (marked [2] in the image below) in order to create a video.
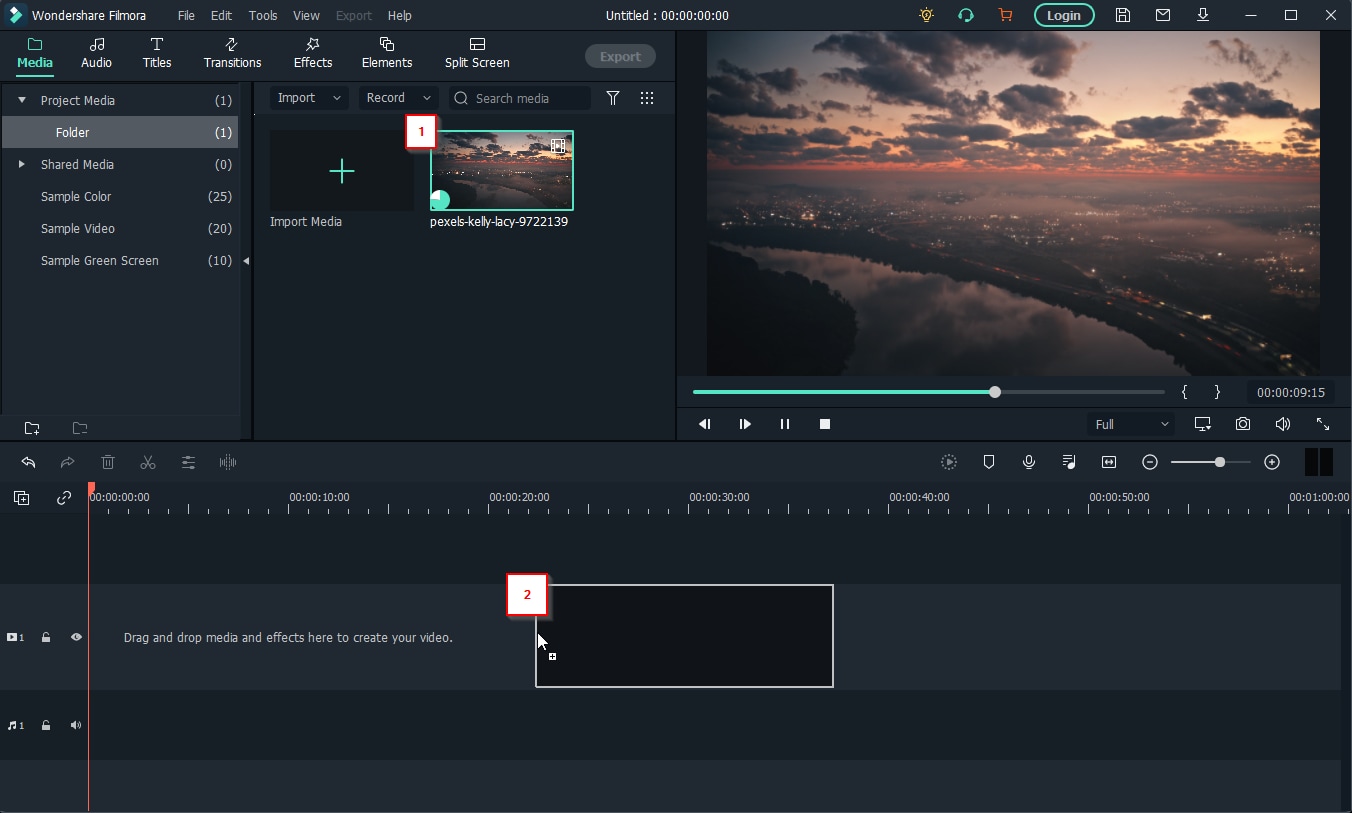
04Step 4: (Optional) Edit Video
If you want, take this opportunity to work on your video some more before converting it into a GIF. Filmora is set up to help you with this. Providing all the following features:
●Trim or Cut features to trim down the video.
●Add Text or audio to video.
●Use templates, filters, or other elements to design videos.
●Add transitions for better video flow.
And then some. In our case, we used the ‘Trim’ feature to cut down our video for a cleaner look.
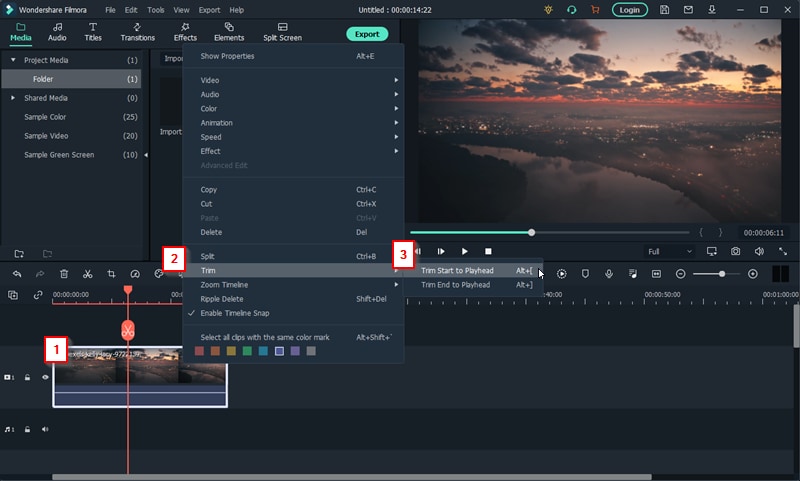
05Step 5: Create Video > GIF
Once you’re done editing your video, you can now convert it to a GIF.
This is easy enough to do. Just click the ‘Export’ tab and select the ‘Create Video’ option. That will allow you to choose to convert your finished video into a GIF file that you can share with your friends.
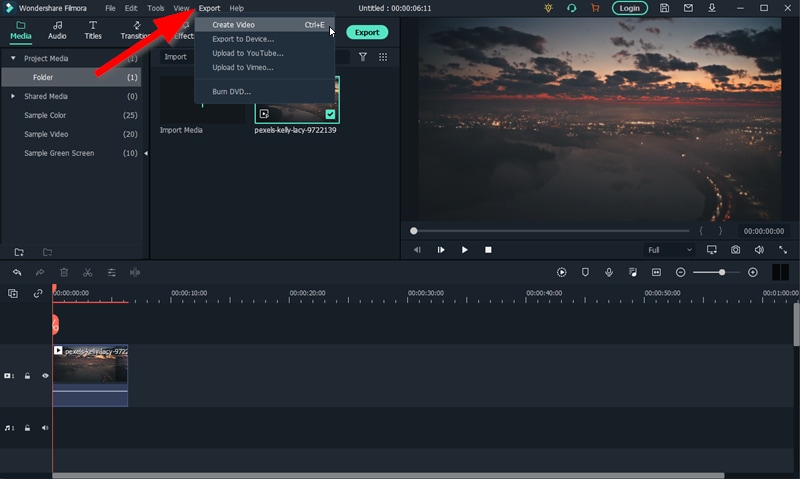
● Key Takeaways from This Episode →
● GIFs are a great way of sharing fun moments with friends and family. And, these days, it’s easier than ever to create them.
● There are 3D GIF Makers available everywhere online. Each one is a little different, of course. But capable of allowing you to create GIFs with images and videos that you can eventually share.
● One such example is the 3D GIF Maker, Filmora. It was the first one that we introduced on our list of the best 3D GIf Makers.
● We also included a tutorial on how you can use Filmora as a 3D GIF Generator for your reference. You can try out the program today if you like. Wondershare offers a FREE trial that you can use in order to explore the many functions of the software before you commit to buying out the perpetual license or signing up for one of their subscription packages.
If what you’re searching for is a 3D GIF Maker, then we’ve got your back. Below, we’ve not only listed the three best ways to create 3D animated GIFs, but we’ve also included a brief tutorial that you can reference when creating your very own GIF images.
In this article
01 [Best 3 Ways to Create 3D Animated GIFs](#Part 1)
02 [Create 3D animated GIFs online with Filmora](#Part 2)
Part 1 Best 3 Ways to Create 3D Animated GIFs
First off, as promised, we have a brief list of some 3D GIF Maker tools that you can try. We’ve made sure to pick a unique set of 3D GIF Maker tools and 3D GIF Generator tools in order to give you a variety to choose from. It won’t be the most comprehensive list, but it should help you on your way to understanding how these 3D GIF makers usually work and how you can use them in order to create GIF images that you can share with your friends, family, and colleagues.
01 Wondershare Filmora Video Editor
The first 3D GIF Maker on our list is Filmora. It’s probably not the first one that you’d naturally think of as a 3D GIF Maker, seeing as it was developed to be more than that. But, it doesn’t discount the fact that it can be used in order to create and edit your own GIFs.
Wondershare Filmora is available for both Windows and Mac users. It allows you to create a GIF with images or video easily and even gives you the tools needed to edit and perfect it before you export it for use (a process that we’ll be showing off in more detail in the tutorial section below if you’re interested in learning more.)
For Win 7 or later (64-bit)
For macOS 10.12 or later
022. Adobe Photoshop
Adobe Photoshop, much like Filmora, is probably not, first and foremost, considered a mere 3D GIF Maker. However, it doesn’t erase its 3D GIF Creator functions. This tool, if used correctly, can make just about anything you want.
The process of using it, of course, is a little fussier than other alternatives (you’ll probably want to look up a more detailed explanation on the subject), but the fussiness does also mean that you can control every detail of your project and get it to look exactly how you want it to look.
03EaseUS Video Editor
Similar to Filmora, EaseUS Video Editor is an advanced video editing tool that you can use as a 3D GIF Creator quite easily. It comes built-in with templates, filters, design elements, transition effects, music, and so much more — allowing you to freely design your GIF images so that they can be ready for publishing right off the bat.
The beauty of it, of course, is that, much like with all the other options that we introduced today, you can use the program for more than just 3D GIF creation after the fact — opening yourself up for different and more complex projects in the future (be they image, audio, or video-related.)
Part 2 Create 3D Animated Gifs Online With Wondershare Filmora Video Editor
Now, as promised, we’ve also included a tutorial that you can follow along with to create your own 3D Animated GIFs with the tool, Wondershare Filmora Video Editor . With this tool, we’ll be showing you the basic way to do it (by using a premade video that you can edit and then convert into GIF format). But, feel free to explore the tool and use it as you wish (i.e., as a 3D spinning GIF creator, 3D rotating text GIF maker, 3D cube GIF maker, and so on.)
01Step 1: Launch Filmora Video Editor
First things first, launch the 3D GIF maker that you intend to use. In our case, that is Filmora (a screenshot has been provided below for your edification and reference. We’ll be using Filmora as our example.)
02Step 2: Upload File(s)
Next, upload the file or files that you want to turn into a GIF.
As mentioned in the introduction, we’ll be using a pre-made video, but you can use whatever you wish (i.e., images). In order to upload, we clicked the File tab (pointed out in the image below) and selected Import Media > Import Media File. However, you can also drag and drop your file(s) on the designated area of the UI..
03Step 3: Drag Uploaded Media to Timeline
To create a GIF withFilmora , you’ll need to first create a video. Don’t worry, this is simple. Just drag and drop the media that you want to use onto the timeline.
Note: Any uploaded media will be in the media folder (marked [1] in the image below). Drag media from there onto the timeline (marked [2] in the image below) in order to create a video.
04Step 4: (Optional) Edit Video
If you want, take this opportunity to work on your video some more before converting it into a GIF. Filmora is set up to help you with this. Providing all the following features:
●Trim or Cut features to trim down the video.
●Add Text or audio to video.
●Use templates, filters, or other elements to design videos.
●Add transitions for better video flow.
And then some. In our case, we used the ‘Trim’ feature to cut down our video for a cleaner look.
05Step 5: Create Video > GIF
Once you’re done editing your video, you can now convert it to a GIF.
This is easy enough to do. Just click the ‘Export’ tab and select the ‘Create Video’ option. That will allow you to choose to convert your finished video into a GIF file that you can share with your friends.
● Key Takeaways from This Episode →
● GIFs are a great way of sharing fun moments with friends and family. And, these days, it’s easier than ever to create them.
● There are 3D GIF Makers available everywhere online. Each one is a little different, of course. But capable of allowing you to create GIFs with images and videos that you can eventually share.
● One such example is the 3D GIF Maker, Filmora. It was the first one that we introduced on our list of the best 3D GIf Makers.
● We also included a tutorial on how you can use Filmora as a 3D GIF Generator for your reference. You can try out the program today if you like. Wondershare offers a FREE trial that you can use in order to explore the many functions of the software before you commit to buying out the perpetual license or signing up for one of their subscription packages.
Also read:
- 2024 Approved How-To Guide Make Animation Characters with the Best Animated Character Creators
- Updated 15 Best Stop Motion Animation Kits to Fuel Creativity
- Top 7 Best Free GIF Apps for Android for 2024
- Updated In 2024, How to Cartoonize Photo Photoshop in Easy Steps
- Updated How to Convert Video to GIF Fast & Easy for 2024
- Updated Are You Ready to Animate Game Character From Scratch for 2024
- New 2024 Approved All About 3D Medical Animation And Its Uses
- In 2024, Ways to Master to Find 10 Best Free Animated Text Generator
- 12 Best Stop Motion Studios Worth Recommending
- In 2024, Ready to Animate Game Character From Scratch?
- 2024 Approved Little Known Techniques of Motion Graphics in Premiere Pro
- New Top Tips for Effortless Unity 3D Animation for 2024
- Updated In 2024, How to Animate - Adobe Animate Tutorial for All
- Updated Ways to Create Animated Clipart in PowerPoint
- New Top 7 Best Animated Lyric Video Software for FREE for 2024
- Updated Some Must-Know Useful Lego Animation Ideas
- Updated 2024 Approved How to Create Your Own Avatar Free
- Top 10 Animated Photo Collage Apps You Should Know for 2024
- How to Get Started in Stop Motion Claymation
- In 2024, All About Types of Motion Graphics
- New In 2024, Best Practices on Online 3D Avatar Creator
- Updated In 2024, All About 3D Medical Animation And Its Uses
- New 2024 Approved 10 Caricature Makers to Turn Your Photo to Caricature Effects
- 2024 Approved 15 Top Pics Collage Apps
- In 2024, How to Turn Yourself Into WhatsApp Cartoon
- In 2024, Easy Guide How To Bypass Oppo F25 Pro 5G FRP Android 10/11/12/13
- How to Unlock Verizon Apple iPhone 6s
- In 2024, 6 Proven Ways to Unlock Vivo Y100 5G Phone When You Forget the Password
- In 2024, 5 Easy Ways to Copy Contacts from Honor X7b to iPhone 14 and 15 | Dr.fone
- How to Mirror PC Screen to Oppo Find N3 Flip Phones? | Dr.fone
- Complete Tutorial to Use VPNa to Fake GPS Location On Itel A70 | Dr.fone
- In 2024, Unlock Your Device iCloud DNS Bypass Explained and Tested, Plus Easy Alternatives On iPhone 6s
- Catch or Beat Sleeping Snorlax on Pokemon Go For Poco X6 | Dr.fone
- How to Unlock ZTE Blade A73 5G Phone Password Without Factory Reset?
- The Best 8 VPN Hardware Devices Reviewed On Oppo A2 | Dr.fone
- Overview of the Best Lava Agni 2 5G Screen Mirroring App | Dr.fone
- In 2024, How to Unlock T-Mobile Apple iPhone 6 Plus online without SIM Card?
- 5 Solutions For Oppo F23 5G Unlock Without Password
- How To Use Special Features - Virtual Location On Vivo V30 Pro? | Dr.fone
- Top Apps and Online Tools To Track Vivo S18e Phone With/Without IMEI Number
- In 2024, Top 4 Ways to Trace Motorola Moto E13 Location | Dr.fone
- In 2024, Pokemon Go No GPS Signal? Heres Every Possible Solution On Tecno Spark 10 Pro | Dr.fone
- Unlock Your Device iCloud DNS Bypass Explained and Tested, Plus Easy Alternatives On Apple iPhone 15 Pro Max
- In 2024, How to Unlock SIM Card on Oppo Find X6 Pro online without jailbreak
- In 2024, How to Reset your Motorola Moto G04 Lock Screen Password
- Title: New How to Make Your Own GIF on WhatsApp in Simple Ways
- Author: Elon
- Created at : 2024-06-15 11:22:51
- Updated at : 2024-06-16 11:22:51
- Link: https://animation-videos.techidaily.com/new-how-to-make-your-own-gif-on-whatsapp-in-simple-ways/
- License: This work is licensed under CC BY-NC-SA 4.0.
