

New In 2024, Amazing Ways to Find Suitable Animated Graphic Maker
Amazing Ways to Find Suitable Animated Graphic Maker
Incredible Ways to Find Suitable Animated Graphic Maker
An easy yet powerful editor
Numerous effects to choose from
Detailed tutorials provided by the official channel
Are you an enthusiast of animations, too? Do you, too, want to create something fun and exciting and show your skills through animation?
It is a hundred percent possible, with the animated graphic maker software available in the present times. Let us know more about this fantastic world of animation and the suitable animated graphic maker that will make your animation dreams and skills more enhanced and proficient in no time!
In this article
01 [Facts About Animated Graphics You Need to Know](#Part 1)
02 [Why You Should Use Animated Graphics in Your Marketing](#Part 2)
03 [Why You Should Use Animated Graphics in Your Marketing](#Part 3)
Part 1 Facts About Animated Graphics You Need to Know
There are specific facts that are important for you to know if you want to work with animations and use graphic animated tools. The facts are as follows.
01 Can Vector Graphics Be Animated?
Precisely, yes. Vector graphics can readily be animated, and that, too, is better than pixels. Animation or movement in animations occurs due to either of the two components- pixels and vectors. One can readily be animated in vector graphics. There are software tools available that can assist in the animation of vector graphics ideally. Thus, with the help of various software, creating animated vector graphics is now effortless and fun!

02 How Do I Animate a Still Image Online?
The process to animate static images online is no big deal at all. You just have to be familiar with the various software that is available for this work. Along with being familiar with the software, you also have to know how each of them works. If you know how the animation tools in the software you are going to use, it becomes an effortless and easy task to animate still images online.
You can animate static images online with the help of some renowned software or app like - Wondershare Filmora, Plotagraph, StoryZ, GIFMaker.me, PixaMotion, Movepic, Photo Motion, and 3Dthis. Each of these software ideally provides you with all the tools and functions that you can choose for animating still images online.
Wondershare Filmora
Power Up Your Story with Filmora. Professional video editing is made easy.
03 How Do You Make Animated Vector Graphics?
There are specific steps involved that help you in creating animated graphics. And the steps are as follows.
Steps for creating animated graphics:
● Isolating the vector
This step involves the selection of the vector image that you want to animate.
● Making duplicates of the vector image
You need to duplicate the vector image that you have chosen to animate. The duplication will help you reflect the movement in the image.
● Making changes in the frames
Proceed to make minor changes in each of the frames to reflect movement in the images.
● Wash it, rinse it and continue the cycle
Make a duplication of the artboard. Then, perform the changes the same as done previously. And repeat this cycle.
● Copy the large artboard
Copy the large artboard to the software you are using for animation. And then utilize the available tools of animation in the software for animating vector graphics.

Part 2 Why You Should Use Animated Graphics in Your Marketing?
In a very precise way, we can answer as animated graphics propagate and amplify awareness of the brands that integrate their utility. However, this is a general way of answering the important question. There are several reasons that make it necessary and beneficial for you to integrate animated graphics for websites for marketing your brand name. And they are as follows.
01 Eye-catching
One of the most important reasons for your marketing to include animated graphics is that they catch the attention of the audience more than any other method of marketing. They are interesting and fun, and that is the feature that attracts the attention of the audience. They get to see your brand in a more exciting and exciting way. Consequently, marketing your brand becomes ideally effective.

02 Easily informative
The motive for marketing is to inform the audience and other people about different information about your brand or company. Often, conveying information about your brands, services, and products becomes uninteresting for the audience. To make it more appealing, animated graphics can do the perfect job. They are fascinating to watch and deliver all the required information in a new and novel way. This does not bore the audience. Instead, if the animations are unique and exciting, people can actually be interested in watching them at will.
03 Customize it based on your needs
Graphic animations can be created based on the requirements of your marketing. And it is not just about the needs; it can be based on the audience genre you have. For example, if your products or services are meant for the kids, the animation will be made according to those factors that appeal to the kids. If your brand is for senior citizens, the animations will be different. Most importantly, if your brand shifts its audience genre, animations can also be created in the genre that you are choosing to serve at present. Thus, the customization ability of graphics animation offers flexibility in marketing.

03 A most efficient method of marketing
Graphic animation delivers the required promotional information in no time and in the most attractive way possible. Thus, there can be no other method of marketing as efficient and quick as graphics animation.
Part 3How to Create Animated Graphics That Stand out?
Well, the aspect of animation has attained the attention of thousands of enthusiasts all around the globe. And so, you will find numerous people making animations. And for this reason, there is numerous animation software available too on the internet. But, what can you do to design your animation to stand out? There are a few software for graphic animation that are better than the rest. And one of them is Wondershare Filmora. It is one of the top software. And it will readily and effortlessly help you integrate your animation skills and make your animations unique among the crowd.
What are the key features of this software?
● Professional quality animation tools
Do you believe that you possess immense animation skills? Then, no other software can be as motivational for you as Filmora Pro because its tools and features help you create professional-quality animation. You can readily create animated graphics for youtube from this software.
● Option for import and export
There is no occurrence of graphics hardware acceleration while you export a file from Filmora Pro.
● Easy user interface
The tools present in this software for animation are of professional quality. You can make animations that will look highly proficient. But, that does not make this software a difficult-to-use tool.
Filmora Features →
● Limitless video tracks
● Availability in Windows and well Mac
● Auto color correction
Filmora Features →
● Audio Noise Reduction
● Motion Graphics animation support
● Automatic Audio Sync
Key Takeaways from This Episode
● This was all about the different aspects of choosing a suitable animated graphic maker.
● You can readily opt for one of the several free animated graphics maker software available.
● But, if you want to avail yourself of the best, Filmora is the best go-to software for animated graphic making and exploring your animation skills.


Are you an enthusiast of animations, too? Do you, too, want to create something fun and exciting and show your skills through animation?
It is a hundred percent possible, with the animated graphic maker software available in the present times. Let us know more about this fantastic world of animation and the suitable animated graphic maker that will make your animation dreams and skills more enhanced and proficient in no time!
In this article
01 [Facts About Animated Graphics You Need to Know](#Part 1)
02 [Why You Should Use Animated Graphics in Your Marketing](#Part 2)
03 [Why You Should Use Animated Graphics in Your Marketing](#Part 3)
Part 1 Facts About Animated Graphics You Need to Know
There are specific facts that are important for you to know if you want to work with animations and use graphic animated tools. The facts are as follows.
01 Can Vector Graphics Be Animated?
Precisely, yes. Vector graphics can readily be animated, and that, too, is better than pixels. Animation or movement in animations occurs due to either of the two components- pixels and vectors. One can readily be animated in vector graphics. There are software tools available that can assist in the animation of vector graphics ideally. Thus, with the help of various software, creating animated vector graphics is now effortless and fun!
02 How Do I Animate a Still Image Online?
The process to animate static images online is no big deal at all. You just have to be familiar with the various software that is available for this work. Along with being familiar with the software, you also have to know how each of them works. If you know how the animation tools in the software you are going to use, it becomes an effortless and easy task to animate still images online.
You can animate static images online with the help of some renowned software or app like - Wondershare Filmora, Plotagraph, StoryZ, GIFMaker.me, PixaMotion, Movepic, Photo Motion, and 3Dthis. Each of these software ideally provides you with all the tools and functions that you can choose for animating still images online.
Wondershare Filmora
Power Up Your Story with Filmora. Professional video editing is made easy.
03 How Do You Make Animated Vector Graphics?
There are specific steps involved that help you in creating animated graphics. And the steps are as follows.
Steps for creating animated graphics:
● Isolating the vector
This step involves the selection of the vector image that you want to animate.
● Making duplicates of the vector image
You need to duplicate the vector image that you have chosen to animate. The duplication will help you reflect the movement in the image.
● Making changes in the frames
Proceed to make minor changes in each of the frames to reflect movement in the images.
● Wash it, rinse it and continue the cycle
Make a duplication of the artboard. Then, perform the changes the same as done previously. And repeat this cycle.
● Copy the large artboard
Copy the large artboard to the software you are using for animation. And then utilize the available tools of animation in the software for animating vector graphics.
Part 2 Why You Should Use Animated Graphics in Your Marketing?
In a very precise way, we can answer as animated graphics propagate and amplify awareness of the brands that integrate their utility. However, this is a general way of answering the important question. There are several reasons that make it necessary and beneficial for you to integrate animated graphics for websites for marketing your brand name. And they are as follows.
01 Eye-catching
One of the most important reasons for your marketing to include animated graphics is that they catch the attention of the audience more than any other method of marketing. They are interesting and fun, and that is the feature that attracts the attention of the audience. They get to see your brand in a more exciting and exciting way. Consequently, marketing your brand becomes ideally effective.
02 Easily informative
The motive for marketing is to inform the audience and other people about different information about your brand or company. Often, conveying information about your brands, services, and products becomes uninteresting for the audience. To make it more appealing, animated graphics can do the perfect job. They are fascinating to watch and deliver all the required information in a new and novel way. This does not bore the audience. Instead, if the animations are unique and exciting, people can actually be interested in watching them at will.
03 Customize it based on your needs
Graphic animations can be created based on the requirements of your marketing. And it is not just about the needs; it can be based on the audience genre you have. For example, if your products or services are meant for the kids, the animation will be made according to those factors that appeal to the kids. If your brand is for senior citizens, the animations will be different. Most importantly, if your brand shifts its audience genre, animations can also be created in the genre that you are choosing to serve at present. Thus, the customization ability of graphics animation offers flexibility in marketing.
03 A most efficient method of marketing
Graphic animation delivers the required promotional information in no time and in the most attractive way possible. Thus, there can be no other method of marketing as efficient and quick as graphics animation.
Part 3How to Create Animated Graphics That Stand out?
Well, the aspect of animation has attained the attention of thousands of enthusiasts all around the globe. And so, you will find numerous people making animations. And for this reason, there is numerous animation software available too on the internet. But, what can you do to design your animation to stand out? There are a few software for graphic animation that are better than the rest. And one of them is Wondershare Filmora. It is one of the top software. And it will readily and effortlessly help you integrate your animation skills and make your animations unique among the crowd.
What are the key features of this software?
● Professional quality animation tools
Do you believe that you possess immense animation skills? Then, no other software can be as motivational for you as Filmora Pro because its tools and features help you create professional-quality animation. You can readily create animated graphics for youtube from this software.
● Option for import and export
There is no occurrence of graphics hardware acceleration while you export a file from Filmora Pro.
● Easy user interface
The tools present in this software for animation are of professional quality. You can make animations that will look highly proficient. But, that does not make this software a difficult-to-use tool.
Filmora Features →
● Limitless video tracks
● Availability in Windows and well Mac
● Auto color correction
Filmora Features →
● Audio Noise Reduction
● Motion Graphics animation support
● Automatic Audio Sync
Key Takeaways from This Episode
● This was all about the different aspects of choosing a suitable animated graphic maker.
● You can readily opt for one of the several free animated graphics maker software available.
● But, if you want to avail yourself of the best, Filmora is the best go-to software for animated graphic making and exploring your animation skills.
8 Best Motion Graphics Online Tools for Your Inspiration
8 Best Motion Graphics Online Tools for Your Inspiration
An easy yet powerful editor
Numerous effects to choose from
Detailed tutorials provided by the official channel
Are you looking for the correct answers about what is motion graphics or how to create motion graphics? If yes, then you are at the right place.
Here we will discuss about few best motion graphics online websites and how to create motion graphics video.
In this article
01 [The Power of Motion Graphics](#Part 1)
02 [Motion Graphics Online Courses You Should Learn](#Part 2)
03 [How to Make Motion Graphics in 5 Steps Easily?](#Part 3)
04 [How to Make a Studio-quality Motion Graphics Video](#Part 4)
Part 1 The Power of Motion Graphics
Motion graphics is actually a term which is generally used to describe the mix up of the animation and the graphic designs. People usage the motion graphics in the emotions videos and market their products as well. Motion graphics with the video on the landing page of your website increases the conversion rate by 8as compared to the other methods. Motion graphic videos of your products can simply display the idea of your business within few seconds to the target audience. The biggest reason of using the motion graphics now a day is that motions graphics can quickly the critical or complex business things in few seconds with the fast, simple and compelling way.
Part 2 Motion Graphics Online Courses You Should Learn
If you are newbie to the motion graphics then there are thousands of courses available over the internet which can help you to learn what motion graphic is and how to create your own motion graphic videos of your product and services. Here we are going to list a few courses.
01Creative Coding: Making Visuals with JavaScript
This is the first course which is mainly designed to learn to make the beautiful visuals using the JavaScript. This course is designed by Bruno Imbrizi. In this course you can also explore the coding fundamentals very easily. You can learn the things you need to setup before the programming concepts such as loops, arrays, variables and functions.

02Psychedelic Animation with Photoshop and After Effects
This motion graphics online course is designed by the Klarens Malluta which helps you to understand the aspect of Photoshop to create the beautiful motion graphic videos. Here, you can easily learn about creating colorful psychedelic animation for your motion graphics. With this course you can easily turn the simple photos in the retro futuristic artwork and connect the emotions of the target audience.

03Introduction to Design and Modeling with Blender
This motion graphics video course is presented by the Luis Arizaga which defines the making of characters and the designs in your videos. This course mainly focuses on the blender software which helps you to create powerful animate videos using the render, light, model and the other objects. This course also tells you that how to use the camera lights and create the materials for your motion graphic videos.

04Express Animation for Social Media with After Effects
This course is provided by the Yimbo Escárrega over the internet. With the help of this course you can learn about making your motion graphic online projects quickly in the record time to save your time. While learning this course you can create the beautiful animations quickly and easily with the graphics as well as the video content.

05#Creation of Animated Short Films in for Social Media
The creation of animated short films in for the social media course is presented by the Buda.tv which mainly helps you to learn creating the animated short films for your projects. This helps you to learn the concept from the starting to the end so you can easily understand the basic concepts as well as up to the execution of your video. This course starts with the meeting with Martin and Dalmiro who are the founders of the Buda.TV. Slowly they will start teaching you short films and finally you will be able to export the project with the specification provided by the Martin and Dalmiro.

Part 3 How to Make Motion Graphics in 5 Steps Easily?
Creating motion graphic videos requires you to have lots of designing skills without using any software. In the software’s generally there are premade templates available for mostly all kinds of categories. You can use them and directly apply with your videos with just few changes. If you are still unsure about how to start then you can follow the below steps in this part.
01Things to Prepare before Starting
● First of all you need to start with a creative story. This will help your animator and writer to understand their job easily. Make sure to include all information in the story.
● Make sure to hire a good promotion team in the starting itself because it will help you to get the view of your videos as much as you want.
Now, if you ready then please follow the below steps.
02Steps of Making Motion Graphics
Step 1 Write your Script with a Story
If you want to create good motion graphics video then the story is the first requirement for your motion graphic video. Make sure to choose a short story which defines and clear the motive of video. Mostly stories will be from the seconds to 3 minutes.
Step 2 Prepare for Storyboard for Visualize the Content
Now, you need to prepare the story with the help of your team members of the production and design team. This is the step where the final product will take place. In this step if you have any confusion then you must discuss it with the team because this is very important part of your motion graphic video.
Step 3 Turn your Creative Storyboard in the Design:
At this stage you can now turn your storyboard idea in the design. Here you have to choose the graphic designs of your video, style and color combination for your video. The best thing is that you can choose simple design because it gives a great impact on the video you are creating for your brand.
Once you are ready with the sketches of the storyboard you can easily translate the storyboard in the design what you want. Make sure to keep the things perfect because at this stage every effort will be for the final design.
Step 4 Create the Final Motion Graphic Video Design:
This stage is where you will start animating your designs to make to actual motion graphic video. Here, you need to take care about lots of things such as the style of animation in video, timing, music and the sound effects.
Part 4 How to Make a Studio-quality Motion Graphics Video
Wondershare Filmora Video Editor
Wondershare Filmora is motion graphics maker software which enables you to create best and perfect motion graphics videos within few seconds with the help of premade templates offered in the software. This program comes with the beautiful interface which is very easy to understand for all users and everyone can videos without any effort even if you are newbie to the animation industry. The program comes with several unique features such as motion tracking, key framing, color matching, audio ducking, green screen, split screen, video effects, audio effects and many more other features.

Wondershare Filmora - Best Video Editor for Mac/Windows
5,481,435 people have downloaded it.
Build unique custom animations without breaking a sweat.
Focus on creating epic stories and leave the details to Filmora’s auto features.
Start a creative adventure with drag & drop effects and endless possibilities.
Filmora simplifies advanced features to save you time and effort.
Filmora cuts out repetition so you can move on to your next creative breakthrough.
● Key Takeaways from This Episode →
● Generally, creating motion graphics videos for your products or services requires lots of efforts when you are going to create them first time. It takes lots of time and research for making the motion graphic videos.
● If you want to save your time and create the award winning motion graphic videos then we would like you to try the Wondershare Filmora because it quickly create best and perfect videos for your product or services promotions.
Are you looking for the correct answers about what is motion graphics or how to create motion graphics? If yes, then you are at the right place.
Here we will discuss about few best motion graphics online websites and how to create motion graphics video.
In this article
01 [The Power of Motion Graphics](#Part 1)
02 [Motion Graphics Online Courses You Should Learn](#Part 2)
03 [How to Make Motion Graphics in 5 Steps Easily?](#Part 3)
04 [How to Make a Studio-quality Motion Graphics Video](#Part 4)
Part 1 The Power of Motion Graphics
Motion graphics is actually a term which is generally used to describe the mix up of the animation and the graphic designs. People usage the motion graphics in the emotions videos and market their products as well. Motion graphics with the video on the landing page of your website increases the conversion rate by 8as compared to the other methods. Motion graphic videos of your products can simply display the idea of your business within few seconds to the target audience. The biggest reason of using the motion graphics now a day is that motions graphics can quickly the critical or complex business things in few seconds with the fast, simple and compelling way.
Part 2 Motion Graphics Online Courses You Should Learn
If you are newbie to the motion graphics then there are thousands of courses available over the internet which can help you to learn what motion graphic is and how to create your own motion graphic videos of your product and services. Here we are going to list a few courses.
01Creative Coding: Making Visuals with JavaScript
This is the first course which is mainly designed to learn to make the beautiful visuals using the JavaScript. This course is designed by Bruno Imbrizi. In this course you can also explore the coding fundamentals very easily. You can learn the things you need to setup before the programming concepts such as loops, arrays, variables and functions.
02Psychedelic Animation with Photoshop and After Effects
This motion graphics online course is designed by the Klarens Malluta which helps you to understand the aspect of Photoshop to create the beautiful motion graphic videos. Here, you can easily learn about creating colorful psychedelic animation for your motion graphics. With this course you can easily turn the simple photos in the retro futuristic artwork and connect the emotions of the target audience.
03Introduction to Design and Modeling with Blender
This motion graphics video course is presented by the Luis Arizaga which defines the making of characters and the designs in your videos. This course mainly focuses on the blender software which helps you to create powerful animate videos using the render, light, model and the other objects. This course also tells you that how to use the camera lights and create the materials for your motion graphic videos.
04Express Animation for Social Media with After Effects
This course is provided by the Yimbo Escárrega over the internet. With the help of this course you can learn about making your motion graphic online projects quickly in the record time to save your time. While learning this course you can create the beautiful animations quickly and easily with the graphics as well as the video content.
05#Creation of Animated Short Films in for Social Media
The creation of animated short films in for the social media course is presented by the Buda.tv which mainly helps you to learn creating the animated short films for your projects. This helps you to learn the concept from the starting to the end so you can easily understand the basic concepts as well as up to the execution of your video. This course starts with the meeting with Martin and Dalmiro who are the founders of the Buda.TV. Slowly they will start teaching you short films and finally you will be able to export the project with the specification provided by the Martin and Dalmiro.
Part 3 How to Make Motion Graphics in 5 Steps Easily?
Creating motion graphic videos requires you to have lots of designing skills without using any software. In the software’s generally there are premade templates available for mostly all kinds of categories. You can use them and directly apply with your videos with just few changes. If you are still unsure about how to start then you can follow the below steps in this part.
01Things to Prepare before Starting
● First of all you need to start with a creative story. This will help your animator and writer to understand their job easily. Make sure to include all information in the story.
● Make sure to hire a good promotion team in the starting itself because it will help you to get the view of your videos as much as you want.
Now, if you ready then please follow the below steps.
02Steps of Making Motion Graphics
Step 1 Write your Script with a Story
If you want to create good motion graphics video then the story is the first requirement for your motion graphic video. Make sure to choose a short story which defines and clear the motive of video. Mostly stories will be from the seconds to 3 minutes.
Step 2 Prepare for Storyboard for Visualize the Content
Now, you need to prepare the story with the help of your team members of the production and design team. This is the step where the final product will take place. In this step if you have any confusion then you must discuss it with the team because this is very important part of your motion graphic video.
Step 3 Turn your Creative Storyboard in the Design:
At this stage you can now turn your storyboard idea in the design. Here you have to choose the graphic designs of your video, style and color combination for your video. The best thing is that you can choose simple design because it gives a great impact on the video you are creating for your brand.
Once you are ready with the sketches of the storyboard you can easily translate the storyboard in the design what you want. Make sure to keep the things perfect because at this stage every effort will be for the final design.
Step 4 Create the Final Motion Graphic Video Design:
This stage is where you will start animating your designs to make to actual motion graphic video. Here, you need to take care about lots of things such as the style of animation in video, timing, music and the sound effects.
Part 4 How to Make a Studio-quality Motion Graphics Video
Wondershare Filmora Video Editor
Wondershare Filmora is motion graphics maker software which enables you to create best and perfect motion graphics videos within few seconds with the help of premade templates offered in the software. This program comes with the beautiful interface which is very easy to understand for all users and everyone can videos without any effort even if you are newbie to the animation industry. The program comes with several unique features such as motion tracking, key framing, color matching, audio ducking, green screen, split screen, video effects, audio effects and many more other features.
Wondershare Filmora - Best Video Editor for Mac/Windows
5,481,435 people have downloaded it.
Build unique custom animations without breaking a sweat.
Focus on creating epic stories and leave the details to Filmora’s auto features.
Start a creative adventure with drag & drop effects and endless possibilities.
Filmora simplifies advanced features to save you time and effort.
Filmora cuts out repetition so you can move on to your next creative breakthrough.
● Key Takeaways from This Episode →
● Generally, creating motion graphics videos for your products or services requires lots of efforts when you are going to create them first time. It takes lots of time and research for making the motion graphic videos.
● If you want to save your time and create the award winning motion graphic videos then we would like you to try the Wondershare Filmora because it quickly create best and perfect videos for your product or services promotions.
Tutorial Guide to Animate Pictures in Canva
Versatile Video Editor - Wondershare Filmora
An easy yet powerful editor
Numerous effects to choose from
Detailed tutorials provided by the official channel
With the rapid rise of social media worldwide, animated posts (like GIFs) are becoming famous. They have become a replacement to other modes like JPEG and .Png
Famous designing tools like Canva introduced an animation feature in the light of its popularity. The feature allows you to step up your social media game and creates animated visuals in a blink! It is also efficient for both professional and amateur users.
Besides social media content, Canva is also useful to design birthday cards, event invites, inspirational quotes, and more! Let’s learn about how to animate pictures in Canva in detail.
In this article
01 What Canva Pictures Can Be Used For?
02 How to Animate Pictures in Canva?
03 Tips: Animate Pictures In Video
Part 1: What Canva Pictures Can Be Used For?
Be it for marketing campaigns or projects, Canva is the best tool for all designing work. It is a foolproof platform where you do not need prior designing experience. Canva is useful for

Social media/Instagram Posts: You can build your Instagram presence by creating posts through Canva. It has multiple templates and features to make alluring Instagram posts. It also has drag-and-drop free images to add customized designs to the template.
Facebook Covers: You can make Facebook covers on Canva by choosing a layout and adding other elements. You can include colors, fonts, and pictures on the cover. Canva has templates for all themes, moods, and styles!
Event Invites: Canva has hundreds of free layouts and libraries to create event invites. You can choose the appropriate template and incorporate party-oriented photos, icons, stickers, illustrations, and graphics. It also has a personalizing option to add personal pictures and artwork in the editor.
Inspirational Quotes: Canva allows you to curate inspirational quotes and dispense motivation in people. It has templates to modify the elements like font size, text size, borders, images, and more!
Collages: It helps create a collage where you can combine multiple pictures in one frame. Canva offers various grids with a capacity of 12 pictures and different sizes.
Part 2: How to Animate Pictures in Canva?
Canva helps you add instant animation in presentations, social media posts, and more. To know how to animate images in Canva, follow the below steps:

Step 1: Add Static Elements
Start by creating an image through static elements. To make the design attractive, you can add sample texts, illustrations, doodles, and other entities.
Try to stimulate your creativity and come up with a layout beforehand. If possible, sketch on paper and replicate the same.
Step 2: Animate Your Design
Take a final glance at the layout. Make sure it’s perfect. Once all the elements are placed as per your design, it’s time to animate them. For that:
- Click on the white background page
- Go to the “Toolbar” section
- Select the “Animate” button
Step 3: Select Page Animation Style
Canva offers six animation styles, where five are for free users, and one is for pro users. To access the five animation styles, follow these steps.
- Press the “Animate” Button
- Select “Page Animations”
- There you will find options like Block, Pan, Fade, Rise, and Tumble
- Select the style as per your design
Step 4: Preview and Download
After selecting a page animation style, it will preview the effect. If you find it good, move on to downloading the GIF. Here’s how to do so
- Go to the “Toolbar” option (present on your upper right hand)
- Choose GIF as the file type
- Check the page number and verify if it’s correct
- Press the “Done” button
Step 5: Final GIF
After clicking on the “Done” button, your GIF will be downloaded. You will be able to see a display for five seconds. If you want to edit the image after this, click on the time button (near the “Animate” button).
So, that was all about how to animate a photo in Canva.
Drawbacks of Canva
Despite efficient features and easy interface, there are certain areas where Canva lacks. This includes
- It does not have any local file storage.
- As too many people use Canva, your template may look the same as others.
- Some of its best features are not free to access.
- The mobile app version lacks certain elements and features.
Out of all these drawbacks, repetitions of templates are a big issue. That’s because everyone wants their posts to look unique and irreplaceable. However, common Canva templates may prevent that from happening.
Fortunately, there are ways to combat such issues. Let’s learn about them in the next section.
Tips: Animate Pictures In Video
You can also animate pictures in the video to make them more lively. For that, you can use Wondershare Filmora Pro Video Editor. It’s also efficient if you don’t know how to animate a picture in Canva:
Wondershare Filmora Video Editor
Filmora by Wondershare is a video editing software that helps you build custom animations easily. It has auto features to make epic stories and posts.
Wondershare Filmora
Get started easily with Filmora’s powerful performance, intuitive interface, and countless effects Try It Free Try It Free Learn More about Filmora>

Its drag and drop effect makes designing simple and quick. Due to its outstanding attributes, options, and styles, Filmora has 77+ million happy users!
It’s a power-packed integration of functionality, performance, and more! In fact, it resolves the repeated template issue of Canva. The software has top-notch functions and innovative filters that add authenticity to the designs.
Till now, you learned about how to animate a picture on Canva. Now, let’s comprehend the right way to use Filmora for animating and adding images in the video.
Before using, make sure to update the software to its latest version. Follow separate methods for both Windows and Mac.
For Win
Step 1: Adding Image to Video Track
With Filmora, adding images to video is a matter of seconds! Start by:
- Identify the position where you want to add the image and place the Playhead there.
- Right-click on the picture from the media library. Click on the “Insert” option. Your image will be added. Select the “Append” option, if you want to add an image at the video end.

Note: How to Remove Black Bars around the Image?
- Go to “Settings” from the File section.
- Click on the “Editing” tab and select “Photo Placement.”
- Choose from the “Crop to Fit” or “Pan To Zoom” option. The black bars will be removed.
To add the image in between the video clip, split them. Now, add the image between the split parts.
Step 2: Add Images as Overlays
To add images as overlays, drag the image to a video track above the main track. The main track consists of your video.
Track 1 (or the track with a video clip) is the base of your video. If you add anything else, it will be displayed above this track as video track 2, 3, and so on. Overall, you can add 100 video tracks.
Step 3: Edit Your Image
If you know how to animate an image in Canva, editing images on Filmora is even easier. You can try the following methods:
Animate Your Images
- To add animation presets to the image, click on the image twice.
- Go to the “Animation Tab” and look for an animation preset.
- Drag the presets to the image for its effect

Make Image Color Adjustments
- Double-click on the image
- Go to the “Color” tab and then the “Color” section
- Customize the temperature, saturation, brightness, etc., as per your need.
- Press Ok.
Change Image Duration
You can increase the image duration to more than the default timing of 5 seconds. For that:
- Click on the image and select the “Duration” option.
- Go to the “Duration Setting” panel.
- Add the new duration timing.

Adjust Position, Rotate/Flip, and Opacity
- You can resize the image position through the circles and squares at the image edges.
- To flip or rotate the image, double-click on the picture. From the “Image Panel,” go to “Transform” and then click on “Rotate.” You can choose either “Horizontal Flip” or “Vertical Flip” to flip the images.
- Double-click on the image and click on the “Composting” option to add opacity. You can choose the blending mode or adjust the “Opacity” accordingly.

For Mac
Filmora for Mac comes with a drag and drop feature to add transitions, animated titles, and effects. You can start a new project from scratch by clicking on “New Project”. The entire process is the same as that for Windows users.
To apply animation in the images, use the motion effects option. For that,
- Click on the Image
- Go to Motion Tab
- Select a motion effect
- Double-click to apply the effect

Conclusion
So that’s how to animate photos in Canva. Hopefully, our steps will help you revamp your posts like a pro! If not Canva, you can use its alternative Filmora. It’s equally prominent, user-friendly, and feature-rich.
Versatile Video Editor - Wondershare Filmora
An easy yet powerful editor
Numerous effects to choose from
Detailed tutorials provided by the official channel
With the rapid rise of social media worldwide, animated posts (like GIFs) are becoming famous. They have become a replacement to other modes like JPEG and .Png
Famous designing tools like Canva introduced an animation feature in the light of its popularity. The feature allows you to step up your social media game and creates animated visuals in a blink! It is also efficient for both professional and amateur users.
Besides social media content, Canva is also useful to design birthday cards, event invites, inspirational quotes, and more! Let’s learn about how to animate pictures in Canva in detail.
In this article
01 What Canva Pictures Can Be Used For?
02 How to Animate Pictures in Canva?
03 Tips: Animate Pictures In Video
Part 1: What Canva Pictures Can Be Used For?
Be it for marketing campaigns or projects, Canva is the best tool for all designing work. It is a foolproof platform where you do not need prior designing experience. Canva is useful for
Social media/Instagram Posts: You can build your Instagram presence by creating posts through Canva. It has multiple templates and features to make alluring Instagram posts. It also has drag-and-drop free images to add customized designs to the template.
Facebook Covers: You can make Facebook covers on Canva by choosing a layout and adding other elements. You can include colors, fonts, and pictures on the cover. Canva has templates for all themes, moods, and styles!
Event Invites: Canva has hundreds of free layouts and libraries to create event invites. You can choose the appropriate template and incorporate party-oriented photos, icons, stickers, illustrations, and graphics. It also has a personalizing option to add personal pictures and artwork in the editor.
Inspirational Quotes: Canva allows you to curate inspirational quotes and dispense motivation in people. It has templates to modify the elements like font size, text size, borders, images, and more!
Collages: It helps create a collage where you can combine multiple pictures in one frame. Canva offers various grids with a capacity of 12 pictures and different sizes.
Part 2: How to Animate Pictures in Canva?
Canva helps you add instant animation in presentations, social media posts, and more. To know how to animate images in Canva, follow the below steps:
Step 1: Add Static Elements
Start by creating an image through static elements. To make the design attractive, you can add sample texts, illustrations, doodles, and other entities.
Try to stimulate your creativity and come up with a layout beforehand. If possible, sketch on paper and replicate the same.
Step 2: Animate Your Design
Take a final glance at the layout. Make sure it’s perfect. Once all the elements are placed as per your design, it’s time to animate them. For that:
- Click on the white background page
- Go to the “Toolbar” section
- Select the “Animate” button
Step 3: Select Page Animation Style
Canva offers six animation styles, where five are for free users, and one is for pro users. To access the five animation styles, follow these steps.
- Press the “Animate” Button
- Select “Page Animations”
- There you will find options like Block, Pan, Fade, Rise, and Tumble
- Select the style as per your design
Step 4: Preview and Download
After selecting a page animation style, it will preview the effect. If you find it good, move on to downloading the GIF. Here’s how to do so
- Go to the “Toolbar” option (present on your upper right hand)
- Choose GIF as the file type
- Check the page number and verify if it’s correct
- Press the “Done” button
Step 5: Final GIF
After clicking on the “Done” button, your GIF will be downloaded. You will be able to see a display for five seconds. If you want to edit the image after this, click on the time button (near the “Animate” button).
So, that was all about how to animate a photo in Canva.
Drawbacks of Canva
Despite efficient features and easy interface, there are certain areas where Canva lacks. This includes
- It does not have any local file storage.
- As too many people use Canva, your template may look the same as others.
- Some of its best features are not free to access.
- The mobile app version lacks certain elements and features.
Out of all these drawbacks, repetitions of templates are a big issue. That’s because everyone wants their posts to look unique and irreplaceable. However, common Canva templates may prevent that from happening.
Fortunately, there are ways to combat such issues. Let’s learn about them in the next section.
Tips: Animate Pictures In Video
You can also animate pictures in the video to make them more lively. For that, you can use Wondershare Filmora Pro Video Editor. It’s also efficient if you don’t know how to animate a picture in Canva:
Wondershare Filmora Video Editor
Filmora by Wondershare is a video editing software that helps you build custom animations easily. It has auto features to make epic stories and posts.
Wondershare Filmora
Get started easily with Filmora’s powerful performance, intuitive interface, and countless effects Try It Free Try It Free Learn More about Filmora>
Its drag and drop effect makes designing simple and quick. Due to its outstanding attributes, options, and styles, Filmora has 77+ million happy users!
It’s a power-packed integration of functionality, performance, and more! In fact, it resolves the repeated template issue of Canva. The software has top-notch functions and innovative filters that add authenticity to the designs.
Till now, you learned about how to animate a picture on Canva. Now, let’s comprehend the right way to use Filmora for animating and adding images in the video.
Before using, make sure to update the software to its latest version. Follow separate methods for both Windows and Mac.
For Win
Step 1: Adding Image to Video Track
With Filmora, adding images to video is a matter of seconds! Start by:
- Identify the position where you want to add the image and place the Playhead there.
- Right-click on the picture from the media library. Click on the “Insert” option. Your image will be added. Select the “Append” option, if you want to add an image at the video end.
Note: How to Remove Black Bars around the Image?
- Go to “Settings” from the File section.
- Click on the “Editing” tab and select “Photo Placement.”
- Choose from the “Crop to Fit” or “Pan To Zoom” option. The black bars will be removed.
To add the image in between the video clip, split them. Now, add the image between the split parts.
Step 2: Add Images as Overlays
To add images as overlays, drag the image to a video track above the main track. The main track consists of your video.
Track 1 (or the track with a video clip) is the base of your video. If you add anything else, it will be displayed above this track as video track 2, 3, and so on. Overall, you can add 100 video tracks.
Step 3: Edit Your Image
If you know how to animate an image in Canva, editing images on Filmora is even easier. You can try the following methods:
Animate Your Images
- To add animation presets to the image, click on the image twice.
- Go to the “Animation Tab” and look for an animation preset.
- Drag the presets to the image for its effect
Make Image Color Adjustments
- Double-click on the image
- Go to the “Color” tab and then the “Color” section
- Customize the temperature, saturation, brightness, etc., as per your need.
- Press Ok.
Change Image Duration
You can increase the image duration to more than the default timing of 5 seconds. For that:
- Click on the image and select the “Duration” option.
- Go to the “Duration Setting” panel.
- Add the new duration timing.
Adjust Position, Rotate/Flip, and Opacity
- You can resize the image position through the circles and squares at the image edges.
- To flip or rotate the image, double-click on the picture. From the “Image Panel,” go to “Transform” and then click on “Rotate.” You can choose either “Horizontal Flip” or “Vertical Flip” to flip the images.
- Double-click on the image and click on the “Composting” option to add opacity. You can choose the blending mode or adjust the “Opacity” accordingly.
For Mac
Filmora for Mac comes with a drag and drop feature to add transitions, animated titles, and effects. You can start a new project from scratch by clicking on “New Project”. The entire process is the same as that for Windows users.
To apply animation in the images, use the motion effects option. For that,
- Click on the Image
- Go to Motion Tab
- Select a motion effect
- Double-click to apply the effect
Conclusion
So that’s how to animate photos in Canva. Hopefully, our steps will help you revamp your posts like a pro! If not Canva, you can use its alternative Filmora. It’s equally prominent, user-friendly, and feature-rich.
Versatile Video Editor - Wondershare Filmora
An easy yet powerful editor
Numerous effects to choose from
Detailed tutorials provided by the official channel
You Can Turn a TikTok Into a GIF Now
You Can Turn a TikTok Into a GIF Now. Here’s How
An easy yet powerful editor
Numerous effects to choose from
Detailed tutorials provided by the official channel
Want to add sharing flexibility to TikTok videos? Convert them into GIFs!
In this article
01 [What is GIF TikTok?](#Part 1)
02 [How to Make a GIF From a TikTok Video](#Part 2)
Part 1 What Is TikTok GIF?
In today’s IT enhanced lifestyle, having a profound reach on social media is the new name of popularity. Everyone out there is profusely keen on creating and sharing a plethora of content varieties; memes, videos, animations and what not, across social communities. However, TikTok videos lag behind in this race; often lack the ‘Share’ flexibility.
To match up, there are solutions to convert TikTok video into GIFs. A TikTok GIF is a short, impactful and to the point clip that’s here to share fun and exciting content in the most interesting ways. If you have a bunch of TikTok videos to share with your peers, but missing out on an effective sharing solution, you can conveniently look forward to convert those videos into catchy and interesting GIFs that will definitely hold the attention of your viewers.
Feel motivated? See through the rest of this article to know some quick and easy TikTok to GIF conversion tools and software!
Part 2 How to Make a GIF From a TikTok Video
When looking through solutions to create GIF TikTok videos, you will find a pool of methods and tools available on the internet. All you need to do is select the best one for yourself and get started with converting TikTok Videos into GIFs. Given below are some of the best solutions adhering to the aforesaid concern:
01Filmora
Wondershare Filmora Video Editor is one of the best application software to create a TikTok GIF. This is a simple and smart converter application that caters to your concern in just a few minutes. What’s best is that this app is absolutely free to use and is compatible with your PC, smartphone and a variety of other devices. Here’s how you can use Filmora to convert your TikTok videos into GIFs:

Step 1: Import Your Video
Start with importing a desired TikTok video file to the Filmora timeline. You can also ‘Drag and Drop’ the video file to the editor timeline. Using this application, you have the flexibility to import your clip in almost any video format.

Step 2: Edit Your Clip
Suited to your content preferences, you can edit and enhance your clips with a variety of effects, like, cut, trim, rotate, split, etc., and make appropriate speed adjustments. You can even include text messages to make your GIF more impactful.

Wondershare Filmora
Get started easily with Filmora’s powerful performance, intuitive interface, and countless effects Try It Free Try It Free Learn More >
Step 3: Let’s Save and Share!
When you are happy, save your work using the .gif file extension. That’s it! You are ready to share your creation with your social media peers.

02TikTok’s Inbuilt GIF Converter
TikTok allows you to directly convert its videos into GIFs. You can use the TikTok application in your smartphone to take up the conversion process. All you need to do is follow the steps given below:
Step 1: Select Your TikTok Video
To get started, open the TikTok application in your smartphone and select the video you want to convert into GIF.
Step 2: Share the Video
Click the ‘Share’ icon at the right of the video screen.

Step 3: Format Selection
Scroll down to the bottom of the screen and choose the ‘Share as GIF’ option. This will automatically convert your TikTok video into GIF in a few seconds.

Step 4: Save and Export
Click on the ‘Save Image’ option to save the GIF in your phone’s gallery. You can also export your creation to different social media platforms.
03Wondershare UniConverter
This one is a handy toolbox loaded with a variety of features that allow you to play with your video creativity. Using this tool, you can quickly create GIF for TikTok and also fix the size and duration of the same. This software supports almost all video formats and comes with an inbuilt editor that you can use to add effects and make your GIFs all the more interesting. This is compatible with your Windows or MacOS PC.
Take the following steps to create GIFs from TikTok videos using this software:

Step 1: Download and Launch the Application
Download the Wondershare UniConverter application to your PC from the software’s official website.
Step 2: Open GIF Maker
In the app’s welcome screen, navigate to the ‘Toolbox’ tab and select ‘GIF Maker’ from the panel that gets displayed.
Step 3: Upload Your TikTok Video
In the next pop-up window, select ‘Video to GIF’ and click on the (+) icon in the centre. You can also click on ‘Add Files’ in the top left and choose a saved TikTok video from your PC to upload.

Step 4: Trim Your Video
Trim the uploaded video to the desired portion from where you wish to create the GIF and set adequate time frames for the same. You can even drag the video thumbnail slider to trim the video.

Step 5: Let’s Get Creating!
Set the final size and frame rate from the ‘Output Size’ and ‘Frame Rate’ tabs respectively. To save your creation, browse and choose the desired system folder by clicking on the ‘Save to:’ tab. Lastly, select ‘Create GIF’ to start the conversion process.

04Kapwing GIF Maker
There may be instances where you cannot save or share TikTok videos. To cut the rush in such cases, you can use Kapwing’s GIF Maker to convert videos from TikTok to GIF online. This one is a free video editing tool that works with almost all internet enabled smartphones and supports almost all common video formats. Here’s what you need to do for making GIFs from TikTok videos using this tool:
Step 1: Copy a Video Link
Search your desired TikTok video and click on the ‘Share’ icon. In the drop down menu, select ‘Copy Link’ to save the video link in your device memory. Once this happens, you will get a confirmation message that says, ‘Copied’.

Step 2: Open GIF Maker
Open the GIF Maker tool in your browser and paste the saved TikTok video link in the editor’s URL bar. This will automatically redirect you to the Kapwing Studio, where you have the liberty to trim, crop or split your video clip to the desired time frame. It is better to set a play span of 3-5 seconds.
You can trim the clip by dragging its ends or introduce cuts at specific points using the split button above the editor timeline. To make volume adjustments, select the video layer and click on ‘Edit Video’ and move the adjuster circle to the left or right to decrease, increase and mute the video volume.


Step 3: Download and Share Your Creation
To save your work, tap ‘Export Video’ at the top and select ‘Export as GIF’ from the drop down menu. Wait for the conversion process to finish and click ‘Download’. This will save the GIF to your device.
You will find a watermark at the corner of your clip. Click ‘Sign In to Remove the Watermark’ to remove it. A workspace for the present and later projects will be created, where you can save you work for a couple of days with Kapwing’s free version. To export your work to social media, click ‘Share’. You can even host your creation on websites. Just copy the video link and select ‘Embed’.

05TT Downloader
This one is another online tool you can use to create GIFs from TikTok videos. This is a quick converter tool that transforms TikTok videos to GIFs in 5 easy steps within minutes. It is a browser tool and does not require a software download. All you need to do is explained in the following steps:

Step 1:
Visit the official site of the tool.
Step 2:
Select ‘TikTok to GIF’ to get redirected to the TikTok to GIF Converter home page.
Step 3:
Copy and paste the desired TikTok video link in the converter’s URL bar. To proceed further, click on ‘Get Video’.

Step 4:
Trim your clip within a time frame of 1-10 seconds.
Step 5:
Click ‘Done’ to initiate the conversion process. Once it finishes, you can download the converted GIF to your device.
06MiniTool MovieMaker
You can prefer this tool to convert TikTok videos in your PC into GIFs. This tool gives you the liberty to trim, cut, reverse and rotate GIFs and even add text and filters to them. Here’s how you can use this tool to transform TikTok videos into interesting GIFs:
Step 1:
Download and install this GIF maker tool in your PC. Launch the same when you are done with the installation process.
Step 2:
In the converter window, import and add your desired TikTok clip into the converter timeline.

Step 3:
You are now free to edit and add text to your video.
Step 4:
Once you finish, tap ‘Export’ and choose your output format as GIF.
Step 5:
Hit ‘Export’ to let the conversion process begin.
● Key Takeaways from This Episode →
● TikTok videos often lack the save and share features, which is an obvious necessity of today’s social outlook.
● Varieties of online tools and software are available for converting TikTok videos to GIFs to increase the sharing flexibility.
● Filmora is a quick and intelligent choice to take up the conversion process within a catch of few clicks.
Want to add sharing flexibility to TikTok videos? Convert them into GIFs!
In this article
01 [What is GIF TikTok?](#Part 1)
02 [How to Make a GIF From a TikTok Video](#Part 2)
Part 1 What Is TikTok GIF?
In today’s IT enhanced lifestyle, having a profound reach on social media is the new name of popularity. Everyone out there is profusely keen on creating and sharing a plethora of content varieties; memes, videos, animations and what not, across social communities. However, TikTok videos lag behind in this race; often lack the ‘Share’ flexibility.
To match up, there are solutions to convert TikTok video into GIFs. A TikTok GIF is a short, impactful and to the point clip that’s here to share fun and exciting content in the most interesting ways. If you have a bunch of TikTok videos to share with your peers, but missing out on an effective sharing solution, you can conveniently look forward to convert those videos into catchy and interesting GIFs that will definitely hold the attention of your viewers.
Feel motivated? See through the rest of this article to know some quick and easy TikTok to GIF conversion tools and software!
Part 2 How to Make a GIF From a TikTok Video
When looking through solutions to create GIF TikTok videos, you will find a pool of methods and tools available on the internet. All you need to do is select the best one for yourself and get started with converting TikTok Videos into GIFs. Given below are some of the best solutions adhering to the aforesaid concern:
01Filmora
Wondershare Filmora Video Editor is one of the best application software to create a TikTok GIF. This is a simple and smart converter application that caters to your concern in just a few minutes. What’s best is that this app is absolutely free to use and is compatible with your PC, smartphone and a variety of other devices. Here’s how you can use Filmora to convert your TikTok videos into GIFs:
Step 1: Import Your Video
Start with importing a desired TikTok video file to the Filmora timeline. You can also ‘Drag and Drop’ the video file to the editor timeline. Using this application, you have the flexibility to import your clip in almost any video format.
Step 2: Edit Your Clip
Suited to your content preferences, you can edit and enhance your clips with a variety of effects, like, cut, trim, rotate, split, etc., and make appropriate speed adjustments. You can even include text messages to make your GIF more impactful.
Wondershare Filmora
Get started easily with Filmora’s powerful performance, intuitive interface, and countless effects Try It Free Try It Free Learn More >
Step 3: Let’s Save and Share!
When you are happy, save your work using the .gif file extension. That’s it! You are ready to share your creation with your social media peers.
02TikTok’s Inbuilt GIF Converter
TikTok allows you to directly convert its videos into GIFs. You can use the TikTok application in your smartphone to take up the conversion process. All you need to do is follow the steps given below:
Step 1: Select Your TikTok Video
To get started, open the TikTok application in your smartphone and select the video you want to convert into GIF.
Step 2: Share the Video
Click the ‘Share’ icon at the right of the video screen.
Step 3: Format Selection
Scroll down to the bottom of the screen and choose the ‘Share as GIF’ option. This will automatically convert your TikTok video into GIF in a few seconds.
Step 4: Save and Export
Click on the ‘Save Image’ option to save the GIF in your phone’s gallery. You can also export your creation to different social media platforms.
03Wondershare UniConverter
This one is a handy toolbox loaded with a variety of features that allow you to play with your video creativity. Using this tool, you can quickly create GIF for TikTok and also fix the size and duration of the same. This software supports almost all video formats and comes with an inbuilt editor that you can use to add effects and make your GIFs all the more interesting. This is compatible with your Windows or MacOS PC.
Take the following steps to create GIFs from TikTok videos using this software:
Step 1: Download and Launch the Application
Download the Wondershare UniConverter application to your PC from the software’s official website.
Step 2: Open GIF Maker
In the app’s welcome screen, navigate to the ‘Toolbox’ tab and select ‘GIF Maker’ from the panel that gets displayed.
Step 3: Upload Your TikTok Video
In the next pop-up window, select ‘Video to GIF’ and click on the (+) icon in the centre. You can also click on ‘Add Files’ in the top left and choose a saved TikTok video from your PC to upload.
Step 4: Trim Your Video
Trim the uploaded video to the desired portion from where you wish to create the GIF and set adequate time frames for the same. You can even drag the video thumbnail slider to trim the video.
Step 5: Let’s Get Creating!
Set the final size and frame rate from the ‘Output Size’ and ‘Frame Rate’ tabs respectively. To save your creation, browse and choose the desired system folder by clicking on the ‘Save to:’ tab. Lastly, select ‘Create GIF’ to start the conversion process.
04Kapwing GIF Maker
There may be instances where you cannot save or share TikTok videos. To cut the rush in such cases, you can use Kapwing’s GIF Maker to convert videos from TikTok to GIF online. This one is a free video editing tool that works with almost all internet enabled smartphones and supports almost all common video formats. Here’s what you need to do for making GIFs from TikTok videos using this tool:
Step 1: Copy a Video Link
Search your desired TikTok video and click on the ‘Share’ icon. In the drop down menu, select ‘Copy Link’ to save the video link in your device memory. Once this happens, you will get a confirmation message that says, ‘Copied’.
Step 2: Open GIF Maker
Open the GIF Maker tool in your browser and paste the saved TikTok video link in the editor’s URL bar. This will automatically redirect you to the Kapwing Studio, where you have the liberty to trim, crop or split your video clip to the desired time frame. It is better to set a play span of 3-5 seconds.
You can trim the clip by dragging its ends or introduce cuts at specific points using the split button above the editor timeline. To make volume adjustments, select the video layer and click on ‘Edit Video’ and move the adjuster circle to the left or right to decrease, increase and mute the video volume.
Step 3: Download and Share Your Creation
To save your work, tap ‘Export Video’ at the top and select ‘Export as GIF’ from the drop down menu. Wait for the conversion process to finish and click ‘Download’. This will save the GIF to your device.
You will find a watermark at the corner of your clip. Click ‘Sign In to Remove the Watermark’ to remove it. A workspace for the present and later projects will be created, where you can save you work for a couple of days with Kapwing’s free version. To export your work to social media, click ‘Share’. You can even host your creation on websites. Just copy the video link and select ‘Embed’.
05TT Downloader
This one is another online tool you can use to create GIFs from TikTok videos. This is a quick converter tool that transforms TikTok videos to GIFs in 5 easy steps within minutes. It is a browser tool and does not require a software download. All you need to do is explained in the following steps:
Step 1:
Visit the official site of the tool.
Step 2:
Select ‘TikTok to GIF’ to get redirected to the TikTok to GIF Converter home page.
Step 3:
Copy and paste the desired TikTok video link in the converter’s URL bar. To proceed further, click on ‘Get Video’.
Step 4:
Trim your clip within a time frame of 1-10 seconds.
Step 5:
Click ‘Done’ to initiate the conversion process. Once it finishes, you can download the converted GIF to your device.
06MiniTool MovieMaker
You can prefer this tool to convert TikTok videos in your PC into GIFs. This tool gives you the liberty to trim, cut, reverse and rotate GIFs and even add text and filters to them. Here’s how you can use this tool to transform TikTok videos into interesting GIFs:
Step 1:
Download and install this GIF maker tool in your PC. Launch the same when you are done with the installation process.
Step 2:
In the converter window, import and add your desired TikTok clip into the converter timeline.
Step 3:
You are now free to edit and add text to your video.
Step 4:
Once you finish, tap ‘Export’ and choose your output format as GIF.
Step 5:
Hit ‘Export’ to let the conversion process begin.
● Key Takeaways from This Episode →
● TikTok videos often lack the save and share features, which is an obvious necessity of today’s social outlook.
● Varieties of online tools and software are available for converting TikTok videos to GIFs to increase the sharing flexibility.
● Filmora is a quick and intelligent choice to take up the conversion process within a catch of few clicks.
The Secret Sauce for Making GIF Instagram Story More Aesthetic
The Secret Sauce for Making GIF Instagram Story More Aesthetic
An easy yet powerful editor
Numerous effects to choose from
Detailed tutorials provided by the official channel
Adding own gift stickers to an Instagram story is in trend. An Instagram story can be made more creative with an Instagram gif story. Make a powerful impact with a gif on an Instagram story.
In this article
01 [How to Post Gifs to Instagram Story](#Part 1)
02 [8 Cute Instagram Stickers to Make Your Stories Aesthetic](#Part 2)
03 [How to Create Custom Gifs for Instagram Stories](#Part 3)
Part 1 How to Post Gifs to Instagram Story
Instagram stories are one of the best mediums to get connected to people at large. To be in trends and grab maximum people’s attention, it is very necessary to be updated with the new elements of Instagram stories. Gif Instagram story is a new way to increase the followers and be in trends. Adding these gifs in Instagram stories will improve your business by creating more engaging content for business promotion. Let’s see how this can be done?
● Go to the Instagram app installed on your phone. While adding a sticker to a picture of videos in Instagram stories, a GIF option will appear.
● When you tap it, you can find several attractive gifs in the library powered by GIPHY.
● Tap add sticker button that appears on the top of the Instagram stories. Tap the ‘GIF’ icon; the library of trending gifs will appear.
● Look for the gif you need to add to your story. You also have a search option to find your favorite or trending gif.
● After selecting the desired gif, you can add it to your photo or video after resizing it as you desired.
● After finishing, tap on the ‘Your story’ icon.
So, this way, it is easy to create gif story instagram with just a few simple steps.
Part 2 Cute Instagram Stickers to Make Your Stories Aesthetic
Cute Instagram stickers are the best way to lift the creativity of your Instagram stories. Adding stickers are an amazing idea to add design to Instagram stories. Stickers make stories more creative and interesting. Some of the amazing stickers to beautify Instagram stories are:
01BOHO
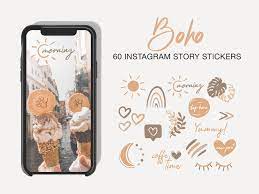
Boho stickers are good when you search for new stickers. They add fun to the story and give an amazing look for any lifestyle picture over an Instagram story. Boho white is also one type of sticker where are of them are white. Applying white boho to the picture background highlights the space and looks good. One has so many options from cute stars, hearts, lines, and flowers.
02FOOPKLO
For those who want words and saying gif on instagram story, there are some cute pink stickers available. These can be searched as FOOPKLO. Pink flowers, clusters, sayings, hearts, and some more cute stickers are there which can make Instagram stories lovelier.
03HALEYIVERS
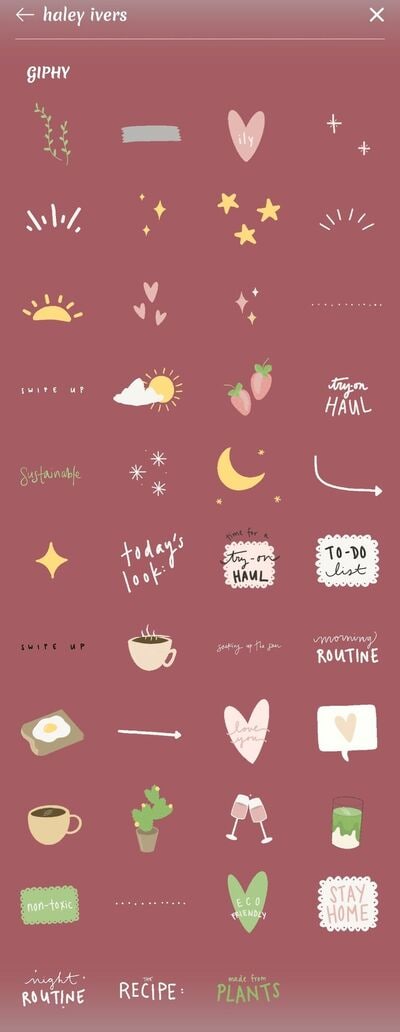
For those who are active Instagram users and update their stories every day, the old stickers may not entertain them. So, for those, there are HALEYIVERS stickers. Good morning, days, sunshine, coffee, stars, and hearts add a great style to the Instagram stories. So, next time you need some punch over Instagram stories add some HALEYIVERS stickers.
04OHLALALITA
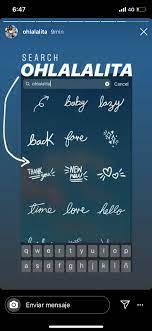
Instagram story gif is one of the great ways to even express your thoughts and moods in a summarized way. So, for those who wish to add a short story on Instagram, OHLALALITA has the best stickers. Loaded with so many cute words such as Tank you, Made with love, chill, glow, bye-bye, Wow, and many more, it makes any story in just simple words.
05SCARLETPIN
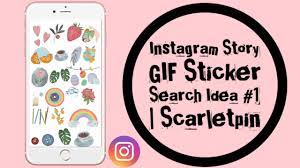
Instagram story gifs are a gift to those who are food lovers. Now with some new additions of gifs from GIPHY, they can post their food stories over their Instagram stories. The range of stickers that can help them is SCARLETPIN. These consist of some bright and colorful stickers of food. Red strawberries, tea, leaves, and oranges are great stuff to include in the morning Instagram stories.
06CURSIVE

Gif for Instagram story is also available in attractive writings. CURSIVE is the most attractive form of writing stories. Popular and cute sayings can be checked on CURSIVE and can be included in the stories. They can be searched and remembered easily. Cursive phrases can be added to the Instagram stories that look visually appealing to the viewers.
07EMOJIS
Emojis are the most lovable stickers available and can be part of any Instagram story. Typing on emojis can be done easily and they can be searched on the search bar. Perfect emojis gifs can be applied to an Instagram story that suits the situation. It can be moved or resized as per the requirement. These emojis gifs add a fun element to the Instagram stories.
08PAINT & BRUSH
Instagram gif story can be made creative with paint and brush. Earlier the users can add text with plain background only. But, paint and brush have enhanced it. Now users can add paint behind the text to make it more engaging. They are simple yet very attractive when added to the stories.
Part 3 How to Create Custom Gifs for Instagram Stories
Funny and expressive Instagram stories of your own always win the hearts of followers. Custom-made gif for Instagram is a great tool for business owners as it brings volume to their business by increasing leads. Custom-made gifs over Instagram stories are eye-catching and thus people get interested in the business. This helps in creating a good brand image for the business.
So, some of the ways to create fascinating custom Gifs Instagram stories for self and business are:
01Pin Instagram stories
Visiting a place and letting people know where you are through Instagram stories is always loved by all. Now, this can be done attractively by using the Pin feature. One can pin on the pictures and videos over the Instagram stories to a particular place. This is the most interesting element to make an Instagram story catchy. It can be done easily by tapping and holding it till it shows a pin at the little bar. This was one can pin gif at the desired location. This gif can pop up at a certain location only. It can be applied to videos one has made of a certain location by moving the gif to a place where one desires.
02Using Gif to give life to any image
To make gif Instagram story aesthetic, adding some moves with sparkles will be the right option. An Instagram user can give life to a picture by including animated elements. Gif adds a fun and surprising element to any Instagram story. When movement in any picture is added through gif, it catches the attention of the viewers and they follow it. A business can make its content engaging with gifs and can achieve its goal.
03Gifs Instagram story to catch viewer’s attention
Gif can be used effectively to create attractive Instagram stories. These gifs are good for the business to highlight their important elements. Gifs like the link in bio, sound on, and swipe up are created for a call to action from the viewers. Adding arrows and signals through gif in the Instagram stories direct the people to spend some minutes on the stories and find something new.
04Highlighting text with gif effects
A customized Instagram story can be made by highlighting text through adding gifs. Sparkle, stars, and highlights gifs can be searched easily and can be applied to any Instagram story. By adding a gif, the text looks stunning and grabs the attention of the viewers. GIPHY has several text-based gifs which can take an ordinary text over the story at a great level. It can be searched by mentioning related keywords.
05Adding gifs to customize selfies
Selfies to Instagram stories are very common. But they can be made even better with some amazing gifs from GIPHY. One can add sunglasses, hats, jewelry, and other fun props to the selfies. Filters can be added by creating their own story through a gif.
06Filmora V11 – A GIF resource
Wondershare Filmora Video Editor (The Filmora Meme maker) : Some many apps and websites offer beautiful gifs to beautify Instagram stories. One of the places where Instagram users can find a wide collection of attractive gifs is Filmora V11. It is a user-friendly tool that has media editing features. It can be used to add sound, light effects, and beautiful gifs to Instagram stories.
Wondershare Filmora - Best Video Editor for Mac/Windows
5,481,435 people have downloaded it.
Build unique custom animations without breaking a sweat.
Focus on creating epic stories and leave the details to Filmora’s auto features.
Start a creative adventure with drag & drop effects and endless possibilities.
Filmora simplifies advanced features to save you time and effort.
Filmora cuts out repetition so you can move on to your next creative breakthrough.
For creating gifs, Filmora V11 can be used and it can be made in a few simple steps. Filmora V11 app is required to be installed on the system and media files can be imported there. Files can be dragged for creating gifs. Filters, stickers, and other effects can be added. They can be further customized as per the requirement of the users. After adding background effects, music, and sound, the gif can be previewed also. The media can be saved as GIFs and can be easily exported also. To customize gifs, the Filmora Meme maker can be used. Captions can be added to GIFs and can be customized by using templates available at Filmora.
So, next time you need to know how to add your own gif to Instagram story, go to Filmora V11. This is one of the great platforms to create some amazing custom gifs to add to Instagram stories. If you want to surprise your viewers with some interesting gifs, try Filmora V11.
● Key Takeaways from This Episode →
● Instagram stories are the most effective way to mark a great impression on the viewers. It is also one of the effective tools to lift any business. Best results can be obtained when attractive and interesting gifs are added to Instagram stories.
● Instagram stories gifs are becoming trendy and there are so many cute and amazing gif stickers available to create Instagram stories. Some of the widely used gifs and stickers are Boho, FOOPKLO, HALEYIVERS, OHLALALITA, and EMOJIS. Instagram users can explore these cute and funny stickers and add them to beautify their Instagram stories.
● Customized gif has spiced up the Instagram stories and amazed the people. This feature helps a business to influence people towards their work and attract more people. The content becomes more engaging and interesting through a customized gif.
Adding own gift stickers to an Instagram story is in trend. An Instagram story can be made more creative with an Instagram gif story. Make a powerful impact with a gif on an Instagram story.
In this article
01 [How to Post Gifs to Instagram Story](#Part 1)
02 [8 Cute Instagram Stickers to Make Your Stories Aesthetic](#Part 2)
03 [How to Create Custom Gifs for Instagram Stories](#Part 3)
Part 1 How to Post Gifs to Instagram Story
Instagram stories are one of the best mediums to get connected to people at large. To be in trends and grab maximum people’s attention, it is very necessary to be updated with the new elements of Instagram stories. Gif Instagram story is a new way to increase the followers and be in trends. Adding these gifs in Instagram stories will improve your business by creating more engaging content for business promotion. Let’s see how this can be done?
● Go to the Instagram app installed on your phone. While adding a sticker to a picture of videos in Instagram stories, a GIF option will appear.
● When you tap it, you can find several attractive gifs in the library powered by GIPHY.
● Tap add sticker button that appears on the top of the Instagram stories. Tap the ‘GIF’ icon; the library of trending gifs will appear.
● Look for the gif you need to add to your story. You also have a search option to find your favorite or trending gif.
● After selecting the desired gif, you can add it to your photo or video after resizing it as you desired.
● After finishing, tap on the ‘Your story’ icon.
So, this way, it is easy to create gif story instagram with just a few simple steps.
Part 2 Cute Instagram Stickers to Make Your Stories Aesthetic
Cute Instagram stickers are the best way to lift the creativity of your Instagram stories. Adding stickers are an amazing idea to add design to Instagram stories. Stickers make stories more creative and interesting. Some of the amazing stickers to beautify Instagram stories are:
01BOHO
Boho stickers are good when you search for new stickers. They add fun to the story and give an amazing look for any lifestyle picture over an Instagram story. Boho white is also one type of sticker where are of them are white. Applying white boho to the picture background highlights the space and looks good. One has so many options from cute stars, hearts, lines, and flowers.
02FOOPKLO
For those who want words and saying gif on instagram story, there are some cute pink stickers available. These can be searched as FOOPKLO. Pink flowers, clusters, sayings, hearts, and some more cute stickers are there which can make Instagram stories lovelier.
03HALEYIVERS
For those who are active Instagram users and update their stories every day, the old stickers may not entertain them. So, for those, there are HALEYIVERS stickers. Good morning, days, sunshine, coffee, stars, and hearts add a great style to the Instagram stories. So, next time you need some punch over Instagram stories add some HALEYIVERS stickers.
04OHLALALITA
Instagram story gif is one of the great ways to even express your thoughts and moods in a summarized way. So, for those who wish to add a short story on Instagram, OHLALALITA has the best stickers. Loaded with so many cute words such as Tank you, Made with love, chill, glow, bye-bye, Wow, and many more, it makes any story in just simple words.
05SCARLETPIN
Instagram story gifs are a gift to those who are food lovers. Now with some new additions of gifs from GIPHY, they can post their food stories over their Instagram stories. The range of stickers that can help them is SCARLETPIN. These consist of some bright and colorful stickers of food. Red strawberries, tea, leaves, and oranges are great stuff to include in the morning Instagram stories.
06CURSIVE
Gif for Instagram story is also available in attractive writings. CURSIVE is the most attractive form of writing stories. Popular and cute sayings can be checked on CURSIVE and can be included in the stories. They can be searched and remembered easily. Cursive phrases can be added to the Instagram stories that look visually appealing to the viewers.
07EMOJIS
Emojis are the most lovable stickers available and can be part of any Instagram story. Typing on emojis can be done easily and they can be searched on the search bar. Perfect emojis gifs can be applied to an Instagram story that suits the situation. It can be moved or resized as per the requirement. These emojis gifs add a fun element to the Instagram stories.
08PAINT & BRUSH
Instagram gif story can be made creative with paint and brush. Earlier the users can add text with plain background only. But, paint and brush have enhanced it. Now users can add paint behind the text to make it more engaging. They are simple yet very attractive when added to the stories.
Part 3 How to Create Custom Gifs for Instagram Stories
Funny and expressive Instagram stories of your own always win the hearts of followers. Custom-made gif for Instagram is a great tool for business owners as it brings volume to their business by increasing leads. Custom-made gifs over Instagram stories are eye-catching and thus people get interested in the business. This helps in creating a good brand image for the business.
So, some of the ways to create fascinating custom Gifs Instagram stories for self and business are:
01Pin Instagram stories
Visiting a place and letting people know where you are through Instagram stories is always loved by all. Now, this can be done attractively by using the Pin feature. One can pin on the pictures and videos over the Instagram stories to a particular place. This is the most interesting element to make an Instagram story catchy. It can be done easily by tapping and holding it till it shows a pin at the little bar. This was one can pin gif at the desired location. This gif can pop up at a certain location only. It can be applied to videos one has made of a certain location by moving the gif to a place where one desires.
02Using Gif to give life to any image
To make gif Instagram story aesthetic, adding some moves with sparkles will be the right option. An Instagram user can give life to a picture by including animated elements. Gif adds a fun and surprising element to any Instagram story. When movement in any picture is added through gif, it catches the attention of the viewers and they follow it. A business can make its content engaging with gifs and can achieve its goal.
03Gifs Instagram story to catch viewer’s attention
Gif can be used effectively to create attractive Instagram stories. These gifs are good for the business to highlight their important elements. Gifs like the link in bio, sound on, and swipe up are created for a call to action from the viewers. Adding arrows and signals through gif in the Instagram stories direct the people to spend some minutes on the stories and find something new.
04Highlighting text with gif effects
A customized Instagram story can be made by highlighting text through adding gifs. Sparkle, stars, and highlights gifs can be searched easily and can be applied to any Instagram story. By adding a gif, the text looks stunning and grabs the attention of the viewers. GIPHY has several text-based gifs which can take an ordinary text over the story at a great level. It can be searched by mentioning related keywords.
05Adding gifs to customize selfies
Selfies to Instagram stories are very common. But they can be made even better with some amazing gifs from GIPHY. One can add sunglasses, hats, jewelry, and other fun props to the selfies. Filters can be added by creating their own story through a gif.
06Filmora V11 – A GIF resource
Wondershare Filmora Video Editor (The Filmora Meme maker) : Some many apps and websites offer beautiful gifs to beautify Instagram stories. One of the places where Instagram users can find a wide collection of attractive gifs is Filmora V11. It is a user-friendly tool that has media editing features. It can be used to add sound, light effects, and beautiful gifs to Instagram stories.
Wondershare Filmora - Best Video Editor for Mac/Windows
5,481,435 people have downloaded it.
Build unique custom animations without breaking a sweat.
Focus on creating epic stories and leave the details to Filmora’s auto features.
Start a creative adventure with drag & drop effects and endless possibilities.
Filmora simplifies advanced features to save you time and effort.
Filmora cuts out repetition so you can move on to your next creative breakthrough.
For creating gifs, Filmora V11 can be used and it can be made in a few simple steps. Filmora V11 app is required to be installed on the system and media files can be imported there. Files can be dragged for creating gifs. Filters, stickers, and other effects can be added. They can be further customized as per the requirement of the users. After adding background effects, music, and sound, the gif can be previewed also. The media can be saved as GIFs and can be easily exported also. To customize gifs, the Filmora Meme maker can be used. Captions can be added to GIFs and can be customized by using templates available at Filmora.
So, next time you need to know how to add your own gif to Instagram story, go to Filmora V11. This is one of the great platforms to create some amazing custom gifs to add to Instagram stories. If you want to surprise your viewers with some interesting gifs, try Filmora V11.
● Key Takeaways from This Episode →
● Instagram stories are the most effective way to mark a great impression on the viewers. It is also one of the effective tools to lift any business. Best results can be obtained when attractive and interesting gifs are added to Instagram stories.
● Instagram stories gifs are becoming trendy and there are so many cute and amazing gif stickers available to create Instagram stories. Some of the widely used gifs and stickers are Boho, FOOPKLO, HALEYIVERS, OHLALALITA, and EMOJIS. Instagram users can explore these cute and funny stickers and add them to beautify their Instagram stories.
● Customized gif has spiced up the Instagram stories and amazed the people. This feature helps a business to influence people towards their work and attract more people. The content becomes more engaging and interesting through a customized gif.
How to Draw Cartoons Step by Step with This Guide
Learn How to Draw Cartoons Step by Step with This Guide
An easy yet powerful editor
Numerous effects to choose from
Detailed tutorials provided by the official channel
Cartoon character drawing is usually a vital aspect of any child’s life who loves to watch cartoon series and can sometimes be someone’s favorite thing in the world.

A cartoon character is a series of single drawings that tell a joke or story. Although cartoons are mostly drawn, they can sometimes be animated. Kids like comics which makes them an essential part of every child’s life. Cartoons are not only used for entertainment purposes but also help kids and young children learn more about the world around them. For example, children learn about love, loss, friendship, and other essential life issues about life by watching cartoons.
However, cartoons are not only limited to children but are also for adults. In addition, cartoons created for an adult audience go deeper into real-life problems and explore darker themes. They aim to create content that matches the maturity and age of the audience. Watching cartoons is fun. But what if you could make them? This article will provide you with a guide on producing cool cartoon drawings that will match different audiences, both older and younger.
In this article
01 [How to Draw Cartoon Characters Step by Step](#Part 1)
02 [Cartoon Easy Drawing with Colour Step by Step](#Part 2)
03 [Cartoon Easy Sketch Drawing Step by Step](#Part 3)
Part 1 How to Draw Cartoon Characters Step by Step
Note that in the world we live in, Professionals were once students, and experts were once beginners. This means that everyone has a starting point, and they all have one thing in common: “learning.” Whether you are aspiring to become an English teacher, an astrophysicist, an artist, or a physician’s assistant, you must first learn the ins and outs of the field.
Those aspiring to become animators and cartoonists must first learn the basics of cartoon character drawing and practice some easy, simple cartoon drawing before cranking out the Mickey-Mouses of the entertainment world. However, we will cover the basic principles of easy cartoon drawing for beginners step by step to get your learning process started. Here is how to draw a Micky-Mouse perfectly:

Step 1:
● Use a pencil to begin your drawing.
● First, create a circle for the head and a curved line on the left side.
● Draw a horizontal line at the center.
Step 2: Next, draw an oval shape for the mouth and a “U” shape added to the bottom, and then you can add another parallel “U” shape and connect it with the oval.
Step 3: Draw the eye using two upside-down “U” shapes, and then you add his large ear on the right and a small one at the top of the head.
Step 4: You can draw a bean shape and another smaller one inside for the body.
Step 5: Add oval shapes for his feet to draw his legs and draw his tail on the right side just above the leg.
Step 6: Draw two elongated shapes for his arms, a small oval for the hand and a basic shape of his fingers.
Step 7: Draw the cheese and add a few small circles inside.
Step 8: Also include the facial features by drawing the inside of the nose, eyebrows, eyes, and whiskers.
Step 9:
● Draw his fingers and hair between his ears.
● Trace your pencil lines with a sharpie.
● Erase the pencil afterward.
Step 10: Finally, you can color your drawing and upload it to your website.
Part 1 Cartoon Easy Drawing with Colour Step by Step
Applying color to a drawing is very important to beautify your drawing and make it look stunning and attractive. Here is how to cartoon easy drawing a flower using a colored pencil:
Step 1: Using a color photocopy of a reference photo, crop and rearrange elements of the poppy composition. With light pressure and HB pencil, draw a composition onto a four-ply, 100% cotton museum board frequently found among framing supplies.
Step 2: With very light pressure, apply the first colored pencil layer and add more emphasis where the values will be deeper. While doing this, note that the pencil application will still appear granular, and the texture of the museum board is still visible.

Step 3: Create the veins in the leaves and the fuzzy texture of the stem and pod, and also, as the individual strands of stamens, put down a sheet of translucent drafting paper. Use heavy tracing paper with a very sharp 7H graphite pencil and apply heavy pressure in drawing the lines for stamens, fuzz, and veins on the drafting paper and impress them into the surface of the museum board. Then, with a contrasting layer of darker color, these features dramatically show up on the stem, leaves, center of the flower, pod, and center of the flower. Then add deeper values of rose in the shadowed areas of the flower petals.

Step 4: To make them appear less granular and intensify the colors, start by blending with a clear, alcohol-based blending marker. The solvent, wax, or vegetable oil then dissolves the binder in the colored pencil layer and fluidly releases the pigment. This will also help to “fill in” the dots of the tooth of the paper and make the color appear denser.

Step 5: Continue to intensify the color by using a non-pigmented blending pencil over a previous layer and repeat a layer or two of color, much like a “color sandwich.” Repeat this “ burnishing “ process for subsequent layerings of color, like a double-decker or triple-decker sandwich.
Also, make sure the rich, dark negative space is carried out the same way, layering colors and burnishing, then repeating the colors for deep, rich saturation.
Render the deep, smeary flecks of pollen by heavily applying “freckles” of burgundy, then slightly smudge them with the tip of a blending marker. Lastly, scratch a few of the tiny wisps of fuzz on the pod and stem carefully into the board via a sharp X-acto knife for a striking contrast of light against the deep background.

Part 2 Cartoon Easy Sketch Drawing Step by Step
This is the initial stage of the drawing process. It requires you to create an outline of the concept you want to draw before adding color. However, it is also referred to as a technique in shading. For example, if you’re going to sketch a cherry fruit, there are a few things to note here.
Try not to look at the cherry as a whole but look at its shapes and name them. This way, you are looking at the parts to the whole and not the entire piece.

Step 1: Draw two overlapping circles and draw two curved lines from each of the circles.
Step 2: Make a small rectangle at the top to join the two stems and draw a second set of curved lines.
Step 3: Draw thick lines inside the rectangle for the bumps and darken the lines and use your finger to smudge them a bit for the shaded effect.
Step 4: Draw a curved line from the stem on the right to the circle’s edge to create the bump.
Step 5: Holding your pencil at an angle, make light strokes going across the front of both cherries. Take note of the places where there is no light. This is where the light source is hitting the cherry the most.
Step 6: To darken, a shade over those places again, keep layering the shading technique until you get the effect you see on the cherries.
Step 7: Use the same technique to shade under the cherries, but use your finger to smudge it to smoother the shadow.
●Bonus:
You can add color, effect, or animate to your cartoon character drawing by using Wondershare Filmora Video Editor , the best editor on the internet. Filmora is a free software program with the same creating abilities and imaging editing similar to Adobe Illustrator. It is open software that runs on various programs, such as Windows, Mac, and Linux. Please get to know more about this exclusive tool from Wondershare on their official website.
For Win 7 or later (64-bit)
For macOS 10.12 or later
● Ending Thoughts →
● A step-by-step guide on drawing easy cartoons for painting and how to sketch your drawing correctly.
● Cartoon character drawings in easy and quick steps.
● Easy cartoon drawing for beginners.
● Lastly, to add color to your drawing, use Filmora software.
● So, use the tips and tricks to make your presentation’s best cartoon characters come alive and be a pro with Filmora.
Cartoon character drawing is usually a vital aspect of any child’s life who loves to watch cartoon series and can sometimes be someone’s favorite thing in the world.
A cartoon character is a series of single drawings that tell a joke or story. Although cartoons are mostly drawn, they can sometimes be animated. Kids like comics which makes them an essential part of every child’s life. Cartoons are not only used for entertainment purposes but also help kids and young children learn more about the world around them. For example, children learn about love, loss, friendship, and other essential life issues about life by watching cartoons.
However, cartoons are not only limited to children but are also for adults. In addition, cartoons created for an adult audience go deeper into real-life problems and explore darker themes. They aim to create content that matches the maturity and age of the audience. Watching cartoons is fun. But what if you could make them? This article will provide you with a guide on producing cool cartoon drawings that will match different audiences, both older and younger.
In this article
01 [How to Draw Cartoon Characters Step by Step](#Part 1)
02 [Cartoon Easy Drawing with Colour Step by Step](#Part 2)
03 [Cartoon Easy Sketch Drawing Step by Step](#Part 3)
Part 1 How to Draw Cartoon Characters Step by Step
Note that in the world we live in, Professionals were once students, and experts were once beginners. This means that everyone has a starting point, and they all have one thing in common: “learning.” Whether you are aspiring to become an English teacher, an astrophysicist, an artist, or a physician’s assistant, you must first learn the ins and outs of the field.
Those aspiring to become animators and cartoonists must first learn the basics of cartoon character drawing and practice some easy, simple cartoon drawing before cranking out the Mickey-Mouses of the entertainment world. However, we will cover the basic principles of easy cartoon drawing for beginners step by step to get your learning process started. Here is how to draw a Micky-Mouse perfectly:
Step 1:
● Use a pencil to begin your drawing.
● First, create a circle for the head and a curved line on the left side.
● Draw a horizontal line at the center.
Step 2: Next, draw an oval shape for the mouth and a “U” shape added to the bottom, and then you can add another parallel “U” shape and connect it with the oval.
Step 3: Draw the eye using two upside-down “U” shapes, and then you add his large ear on the right and a small one at the top of the head.
Step 4: You can draw a bean shape and another smaller one inside for the body.
Step 5: Add oval shapes for his feet to draw his legs and draw his tail on the right side just above the leg.
Step 6: Draw two elongated shapes for his arms, a small oval for the hand and a basic shape of his fingers.
Step 7: Draw the cheese and add a few small circles inside.
Step 8: Also include the facial features by drawing the inside of the nose, eyebrows, eyes, and whiskers.
Step 9:
● Draw his fingers and hair between his ears.
● Trace your pencil lines with a sharpie.
● Erase the pencil afterward.
Step 10: Finally, you can color your drawing and upload it to your website.
Part 1 Cartoon Easy Drawing with Colour Step by Step
Applying color to a drawing is very important to beautify your drawing and make it look stunning and attractive. Here is how to cartoon easy drawing a flower using a colored pencil:
Step 1: Using a color photocopy of a reference photo, crop and rearrange elements of the poppy composition. With light pressure and HB pencil, draw a composition onto a four-ply, 100% cotton museum board frequently found among framing supplies.
Step 2: With very light pressure, apply the first colored pencil layer and add more emphasis where the values will be deeper. While doing this, note that the pencil application will still appear granular, and the texture of the museum board is still visible.
Step 3: Create the veins in the leaves and the fuzzy texture of the stem and pod, and also, as the individual strands of stamens, put down a sheet of translucent drafting paper. Use heavy tracing paper with a very sharp 7H graphite pencil and apply heavy pressure in drawing the lines for stamens, fuzz, and veins on the drafting paper and impress them into the surface of the museum board. Then, with a contrasting layer of darker color, these features dramatically show up on the stem, leaves, center of the flower, pod, and center of the flower. Then add deeper values of rose in the shadowed areas of the flower petals.
Step 4: To make them appear less granular and intensify the colors, start by blending with a clear, alcohol-based blending marker. The solvent, wax, or vegetable oil then dissolves the binder in the colored pencil layer and fluidly releases the pigment. This will also help to “fill in” the dots of the tooth of the paper and make the color appear denser.
Step 5: Continue to intensify the color by using a non-pigmented blending pencil over a previous layer and repeat a layer or two of color, much like a “color sandwich.” Repeat this “ burnishing “ process for subsequent layerings of color, like a double-decker or triple-decker sandwich.
Also, make sure the rich, dark negative space is carried out the same way, layering colors and burnishing, then repeating the colors for deep, rich saturation.
Render the deep, smeary flecks of pollen by heavily applying “freckles” of burgundy, then slightly smudge them with the tip of a blending marker. Lastly, scratch a few of the tiny wisps of fuzz on the pod and stem carefully into the board via a sharp X-acto knife for a striking contrast of light against the deep background.
Part 2 Cartoon Easy Sketch Drawing Step by Step
This is the initial stage of the drawing process. It requires you to create an outline of the concept you want to draw before adding color. However, it is also referred to as a technique in shading. For example, if you’re going to sketch a cherry fruit, there are a few things to note here.
Try not to look at the cherry as a whole but look at its shapes and name them. This way, you are looking at the parts to the whole and not the entire piece.
Step 1: Draw two overlapping circles and draw two curved lines from each of the circles.
Step 2: Make a small rectangle at the top to join the two stems and draw a second set of curved lines.
Step 3: Draw thick lines inside the rectangle for the bumps and darken the lines and use your finger to smudge them a bit for the shaded effect.
Step 4: Draw a curved line from the stem on the right to the circle’s edge to create the bump.
Step 5: Holding your pencil at an angle, make light strokes going across the front of both cherries. Take note of the places where there is no light. This is where the light source is hitting the cherry the most.
Step 6: To darken, a shade over those places again, keep layering the shading technique until you get the effect you see on the cherries.
Step 7: Use the same technique to shade under the cherries, but use your finger to smudge it to smoother the shadow.
●Bonus:
You can add color, effect, or animate to your cartoon character drawing by using Wondershare Filmora Video Editor , the best editor on the internet. Filmora is a free software program with the same creating abilities and imaging editing similar to Adobe Illustrator. It is open software that runs on various programs, such as Windows, Mac, and Linux. Please get to know more about this exclusive tool from Wondershare on their official website.
For Win 7 or later (64-bit)
For macOS 10.12 or later
● Ending Thoughts →
● A step-by-step guide on drawing easy cartoons for painting and how to sketch your drawing correctly.
● Cartoon character drawings in easy and quick steps.
● Easy cartoon drawing for beginners.
● Lastly, to add color to your drawing, use Filmora software.
● So, use the tips and tricks to make your presentation’s best cartoon characters come alive and be a pro with Filmora.
Also read:
- New 2024 Approved How to Cartoonize Photo Photoshop in Simple Steps
- 2024 Approved Best 12 Video to GIF Converters High Quality to Check Out
- New In 2024, Ways You Can Master to Find 10 Best Free Animated Text Generator
- 15 Best Stop Motion Animation Kits to Fuel Creativity
- 2024 Approved What This Post Can Teach You About Clay Animation
- In 2024, 6 Unexpected Ways Gif Animation Maker Can Affect Your Marketing
- 2024 Approved Top 10 Best Photo to Animation Converters That Give You an Advantage
- Updated How to Find 3D Animation Studio
- New Ultimate Guide to Animated Characters Drawings
- In 2024, What Wikipedia Wont Tell You About Character Rigging
- Updated Know All About Animated Business Logos and the Best Tools to Create One
- Updated How To Remove The Endless Loop From Animated GIF
- Updated 2024 Approved How to Make Animated Videos for Business Simple Guide
- 10 Best Romance Anime Movies You Need to Watch for 2024
- Updated Best 10 Animated Photo Collage Apps
- New How to Create Benime Whiteboard Animation in Android for 2024
- New 12+ Stunning Instagram GIF Stickers and How to Make & Find
- New 2024 Approved Some Must-Know Useful Lego Animation Ideas for You
- Updated Ways to Create Animated Clipart in PowerPoint
- Updated What Is Motion Graphics for 2024
- New Top 7 Animated GIF Text Makers
- In 2024, Best 15 Greatest Claymation Movies of All Time
- Easy Shortcut to Convert Videos to Gifs on iPhone
- New 2024 Approved How to Draw A Skeleton Cartoon – A Step by Step Guide
- 15 Best Stop Motion Animation Kits to Fuel Creativity (2024 Guide)
- New In 2024, Top 10 Sketch Animation Video Makers
- New 2024 Approved Easy Cartoon Characters Drawing Tutorials for You Who Are Learning to Draw
- The Art of Comics - Learn How to Do Funny Cartoon Drawings for 2024
- Apps to Animate Still Pictures Which Could Make Your Pictures Become Internet Sensation for 2024
- Updated Whats the Best 10 Photo Animator Templates That Bring Your Images to Life?
- New 2024 Approved How to Animate - Adobe Animate Tutorias
- Updated Secrets to Make 2D Game Animation
- Updated In 2024, Top 15 Male Anime Characters By Voting
- Updated In 2024, 10 Popular Cartoon Characters That You Wont Want to Miss
- Updated In 2024, Top 15 2D Animation Software Free That Worth to Try
- Updated 5 Websites with Animated Logos That Catch Your Eyes
- Updated Tips That Show Anybody How to Get Awesome Background for Slideshow in PowerPoint
- New Before You Learn 3D Animation Things You Should Know
- New OBS Animated Lower Thirds Alternatives for 2024
- 2024 Approved Tips for Animated Collage Maker
- New 2024 Approved Ways You Can Master to Make Claymation Videos
- 8 Blender 3D Animation Tutorials
- Updated 12+ Stunning Instagram GIF Stickers and How to Make & Find for 2024
- New In 2024, The 15 Most Efficient Photo to Cartoon Apps for Android
- Updated Fuel Creativity with 10 Awesome Collection of 2D Animation Examples
- Updated In 2024, Top 10 Free Online Animated Logo Makers Everyone Should Know
- New In 2024, Best AI Rap Voice Generators You Should Try
- In 2024, How to Bypass FRP on Motorola Moto G73 5G?
- 5 Solutions For Infinix Note 30 VIP Unlock Without Password
- How To Recover Lost Data from iPhone 13 Pro? | Dr.fone
- 5 Ways to Reset Lava Blaze 2 Without Volume Buttons | Dr.fone
- How to recover deleted contacts from Infinix Hot 40 Pro.
- Unova Stone Pokémon Go Evolution List and How Catch Them For Realme 11 5G | Dr.fone
- Pokemon Go Error 12 Failed to Detect Location On Poco M6 Pro 4G? | Dr.fone
- In 2024, How to Migrate Android Data From Infinix Hot 40 Pro to New Android Phone? | Dr.fone
- How to Lock Apps on Oppo Reno 11F 5G to Protect Your Individual Information
- In 2024, How to Mirror Apple iPhone X to Roku? | Dr.fone
- Authentication Error Occurred on Oppo K11 5G? Here Are 10 Proven Fixes | Dr.fone
- How to Unlock Disabled iPhone 14 Plus/iPad Without Computer
- 7 Solutions to Fix Error Code 963 on Google Play Of Itel A60s | Dr.fone
- How To Restore Missing Messages Files from Xiaomi Redmi 13C
- How to Transfer from Apple iPhone 7 Plus to Samsung Galaxy S20? | Dr.fone
- Full Guide to Unlock Your Nokia C02
- How to Bypass Google FRP Lock on Asus ROG Phone 8 Devices
- How to Fix Pokemon Go Route Not Working On Honor 90 GT? | Dr.fone
- In 2024, How to Unlock Infinix Note 30 Pro Phone Pattern Lock without Factory Reset
- Top Apps and Online Tools To Track Realme Narzo 60x 5G Phone With/Without IMEI Number
- 6 Fixes to Unfortunately WhatsApp has stopped Error Popups On Asus ROG Phone 8 | Dr.fone
- Coqui Voice Cloning The Ultimate Solution to Streamline Audio Content
- How to Easily Hard reset my Tecno Spark 10 Pro | Dr.fone
- How To Unbrick a Dead Gionee F3 Pro | Dr.fone
- Title: New In 2024, Amazing Ways to Find Suitable Animated Graphic Maker
- Author: Elon
- Created at : 2024-06-23 02:10:08
- Updated at : 2024-06-24 02:10:08
- Link: https://animation-videos.techidaily.com/new-in-2024-amazing-ways-to-find-suitable-animated-graphic-maker/
- License: This work is licensed under CC BY-NC-SA 4.0.
