
:max_bytes(150000):strip_icc():format(webp)/apps-like-tiktok-the-best-alternatives-in-2020-9f3611f635da4198956585133eaf01cb.jpg)
New In 2024, Apps to Animate Still Pictures
Apps to Animate Still Pictures
Apps to Animate Still Pictures Which Could Make Your Pictures Become Internet Sensation
An easy yet powerful editor
Numerous effects to choose from
Detailed tutorials provided by the official channel
Now, it is a question of what to do with all those still photos lying in your phone. You can be pretty certain that you won’t be retiring from clicking images anytime soon. A tip to help make posting images more interesting would be using apps to animate your photos.
You can also find an app that animates your face specifically, which is great for instagram content and has a greater chance of getting reactions or comments. So without further to do let’s get animating.
In this article
01 [Review of General Methods: Can You Animate Still Pictures?](#Part 1)
02 [10 Best apps to animate still photos on Android & iOS](#Part 2)
03 [Additional Extension: 5 Apps to Animate Old Photos](#Part 3)
Part 1 Review of General Methods: Can You Animate Still Pictures?
It’s pretty obvious that you can! These days you can do whatever you want online so animating still pictures should be a piece of cake if you know-how.
A video is basically an entire collage of moving pictures. So if you can cut out pictures from a video why not turn still pictures into animations.
There are a number of ways you can use to animate still images →
● Videos are multiple pictures that move at a frame rate. Make short copies of a video by cutting out the essential moments and playing them in a loop.
● Add and play video animation elements over a picture. With the right software, this task is as easy as copy-pasting over another image.
● Apply an animated 3D image with a transparent background over another image. Remember, the bigger the element the closer it is. So size is directly translated as distance.
● You can use multiple filters and effects on an image with an animated portrait app. Find out what app you can use further on in this article.
● Turn an image into a GIF. No matter its small size and cartoonish style, GIF animation has a very wide appeal as online content.
Part 2 10 Best apps to animate still photos on Android & iOS
01GIPHY
Giphy is the largest internet catalog for GIF files, clips & stickers. No matter if it is a scene from a movie or an animation you have watched somewhere, using this application you can easily find, save & share or simply create something new.
Price: Free
Pros
● Quickly turns still photos into an animation.
● Easily share your work through all social media channels.
Cons
● Search tags are varied; you may need to search using unlikely words to get desired results.
Applicable System: Android
02GIPHY
One of the best ways to turn your photos & videos into GIFs is using ImgPlay. It has a clearer interface making it easy to use. Imgplay comes with paid- premium and non-paid version making it suitable for personal & professional application.
Price: Pro $4.99.
Pros
● It is not packed with unnecessary features.
Cons
● ImgPlay slaps a watermark on all its non-premium versions.
Applicable System: Android & iOS.
03Loopsie
The best Part is that Loopsie provides spectacular cinematographic effects to your animated stills. Stabilization algorithm efficiently removes shaking effects & blurs.
Price: Free.
Pros
● User friendly UI
● Easy to share on social media platforms.
Cons
● Paid version is a bit pricey.
Applicable System: Only on iOS.
04StoryZ
Looking for ways to create animated visuals form still images? This is where your quest ends. An advanced editing platform that offers overlays, movement & color filters. Banner Ads & watermarks can be removed by paying a small subscription fee.
Price: Free version available. Premium costs INR 789 a year.
Pros
● Double exposure effect combines video overlay & static imagery.
Cons
● Contains Ad & watermark.
Applicable System: Android.
05Animate Me
Animate Me offers you a package of postcards & greeting snapshots that you can animate according to your need. The paid subscription will get you updated sounds & effects every now & then.
Price: Free.
Pros
● Easy to use & beginners friendly.
Cons
● Editing features & tools are limited.
Applicable System: Windows**.**
06Movepic
Create animated stills, GIFs, live-wallpapers all with Movepic. It allows you to animate simply anything by drawing a path. You can also adjust the speed of animation manually.
Price: Free.
Pros
● Animate in a light motion.
● Easy to use.
Cons
● Free version leaves a watermark on images.
Applicable System: Android & iOS.
07Pixaloop
Pixaloop is a fun app packed with significant animation & editing features. 100% free to use software delivers live animated images in a few clicks. User friendly interface edits images using powerful & precise animation tools.
Price- Free.
Pros
● Offers all the necessary features & core tools.
● Provides accuracy & flexibility to the users.
Cons
● The animation process is a bit time consuming.
Applicable System: Android & iOS.
08Zoetropic
Zoetropic has a combination of 3D tools and Camera FX to animate your images. User friendly interface allows you to mask the still areas if you wish to keep it still.
Price: $199 (Pro)
Pros
● Easily customize motion areas.
● Apply overlays & audios.
Cons
● App price is higher than similar available apps.
Applicable System: Android & iOS.
9Motionleap
It is one of the most top reviewed apps on Playstore related to animating still photos. It has several features like programming directional cues, freeze portions of your photo or even apply filters.
Price: Free version. Pro version; $3.50/month, $18/year and $55 lifetime.
Pros
● Its free version does not apply watermark.
● Intuitive Interface.
Cons
● Best features are locked in Pro version.
Applicable System: Android & iOS.
Part 3 Additional Extension: 5 Apps to Animate Old Photos
It can be unanimously agreed upon that people have been storing photos for decades as a means of preserving memories. We don’t get much opportunity to meet familiar faces too often so why not just try and animate still images of relatives. Now we already know how we can start animating images on apps but restoring original images maybe a tad more complicated than that. This time a bit of the animation is dependent on the physical state of the picture so be sure it’s in mint condition.
These photos can be restored or manipulated digitally with the help of smart AI. We have listed down some of the apps to animate old photos and reconstruct faces;
01Photos Revive
You can add colour to old worn out photos and make them look more realistic in terms of tonal colorization using artificial intelligence. The app also asks you recollect any details of the photo that you might remember in terms of the image.
Applicable OS: iOS only.

02Remini
After going through several improvements and upgrades, you can use the app Remini to confidently restore low resolution images that are either pixelated, blurred or damaged into High Definition images. This app has already been used by users to process a hundred million photos.
Applicable OS: Android 1.7.2 or higher, & iOS 9.3 or higher.

03Colorize
Another app that uses AI to add colorization to your old images. It is a popular animate your family photo app which has amazing other tools and filters to try out.
Applicable OS: Android and iOS.

04Deep Nostalgia
Using this app which has been innovated by the geology platform MyHeritage uses ai to add gestures to still images to evoke nostalgia in the users.
Applicable OS: Online.

04Google Photoscan
Google scanner is a futuristic app for restoring photos of the past. The app uses a smart scanning technology that provides several scans of the same photo automatically.
Applicable OS: Android or iOS.

Key Takeaways from This Episode
● Animating photos are a new way of reimagining still images into moving live content. There are many methods and approaches you can choose to animate your images.
● Some of them being video animations, transparent background elements, Filters and effects and of course GIFs.
● There are dozens of apps with built in smart artificial intelligence to help restore old photos or make short animations out of them. Some of them are applicable for desktops while others available both on Android and iOS.
Now, it is a question of what to do with all those still photos lying in your phone. You can be pretty certain that you won’t be retiring from clicking images anytime soon. A tip to help make posting images more interesting would be using apps to animate your photos.
You can also find an app that animates your face specifically, which is great for instagram content and has a greater chance of getting reactions or comments. So without further to do let’s get animating.
In this article
01 [Review of General Methods: Can You Animate Still Pictures?](#Part 1)
02 [10 Best apps to animate still photos on Android & iOS](#Part 2)
03 [Additional Extension: 5 Apps to Animate Old Photos](#Part 3)
Part 1 Review of General Methods: Can You Animate Still Pictures?
It’s pretty obvious that you can! These days you can do whatever you want online so animating still pictures should be a piece of cake if you know-how.
A video is basically an entire collage of moving pictures. So if you can cut out pictures from a video why not turn still pictures into animations.
There are a number of ways you can use to animate still images →
● Videos are multiple pictures that move at a frame rate. Make short copies of a video by cutting out the essential moments and playing them in a loop.
● Add and play video animation elements over a picture. With the right software, this task is as easy as copy-pasting over another image.
● Apply an animated 3D image with a transparent background over another image. Remember, the bigger the element the closer it is. So size is directly translated as distance.
● You can use multiple filters and effects on an image with an animated portrait app. Find out what app you can use further on in this article.
● Turn an image into a GIF. No matter its small size and cartoonish style, GIF animation has a very wide appeal as online content.
Part 2 10 Best apps to animate still photos on Android & iOS
01GIPHY
Giphy is the largest internet catalog for GIF files, clips & stickers. No matter if it is a scene from a movie or an animation you have watched somewhere, using this application you can easily find, save & share or simply create something new.
Price: Free
Pros
● Quickly turns still photos into an animation.
● Easily share your work through all social media channels.
Cons
● Search tags are varied; you may need to search using unlikely words to get desired results.
Applicable System: Android
02GIPHY
One of the best ways to turn your photos & videos into GIFs is using ImgPlay. It has a clearer interface making it easy to use. Imgplay comes with paid- premium and non-paid version making it suitable for personal & professional application.
Price: Pro $4.99.
Pros
● It is not packed with unnecessary features.
Cons
● ImgPlay slaps a watermark on all its non-premium versions.
Applicable System: Android & iOS.
03Loopsie
The best Part is that Loopsie provides spectacular cinematographic effects to your animated stills. Stabilization algorithm efficiently removes shaking effects & blurs.
Price: Free.
Pros
● User friendly UI
● Easy to share on social media platforms.
Cons
● Paid version is a bit pricey.
Applicable System: Only on iOS.
04StoryZ
Looking for ways to create animated visuals form still images? This is where your quest ends. An advanced editing platform that offers overlays, movement & color filters. Banner Ads & watermarks can be removed by paying a small subscription fee.
Price: Free version available. Premium costs INR 789 a year.
Pros
● Double exposure effect combines video overlay & static imagery.
Cons
● Contains Ad & watermark.
Applicable System: Android.
05Animate Me
Animate Me offers you a package of postcards & greeting snapshots that you can animate according to your need. The paid subscription will get you updated sounds & effects every now & then.
Price: Free.
Pros
● Easy to use & beginners friendly.
Cons
● Editing features & tools are limited.
Applicable System: Windows**.**
06Movepic
Create animated stills, GIFs, live-wallpapers all with Movepic. It allows you to animate simply anything by drawing a path. You can also adjust the speed of animation manually.
Price: Free.
Pros
● Animate in a light motion.
● Easy to use.
Cons
● Free version leaves a watermark on images.
Applicable System: Android & iOS.
07Pixaloop
Pixaloop is a fun app packed with significant animation & editing features. 100% free to use software delivers live animated images in a few clicks. User friendly interface edits images using powerful & precise animation tools.
Price- Free.
Pros
● Offers all the necessary features & core tools.
● Provides accuracy & flexibility to the users.
Cons
● The animation process is a bit time consuming.
Applicable System: Android & iOS.
08Zoetropic
Zoetropic has a combination of 3D tools and Camera FX to animate your images. User friendly interface allows you to mask the still areas if you wish to keep it still.
Price: $199 (Pro)
Pros
● Easily customize motion areas.
● Apply overlays & audios.
Cons
● App price is higher than similar available apps.
Applicable System: Android & iOS.
9Motionleap
It is one of the most top reviewed apps on Playstore related to animating still photos. It has several features like programming directional cues, freeze portions of your photo or even apply filters.
Price: Free version. Pro version; $3.50/month, $18/year and $55 lifetime.
Pros
● Its free version does not apply watermark.
● Intuitive Interface.
Cons
● Best features are locked in Pro version.
Applicable System: Android & iOS.
Part 3 Additional Extension: 5 Apps to Animate Old Photos
It can be unanimously agreed upon that people have been storing photos for decades as a means of preserving memories. We don’t get much opportunity to meet familiar faces too often so why not just try and animate still images of relatives. Now we already know how we can start animating images on apps but restoring original images maybe a tad more complicated than that. This time a bit of the animation is dependent on the physical state of the picture so be sure it’s in mint condition.
These photos can be restored or manipulated digitally with the help of smart AI. We have listed down some of the apps to animate old photos and reconstruct faces;
01Photos Revive
You can add colour to old worn out photos and make them look more realistic in terms of tonal colorization using artificial intelligence. The app also asks you recollect any details of the photo that you might remember in terms of the image.
Applicable OS: iOS only.
02Remini
After going through several improvements and upgrades, you can use the app Remini to confidently restore low resolution images that are either pixelated, blurred or damaged into High Definition images. This app has already been used by users to process a hundred million photos.
Applicable OS: Android 1.7.2 or higher, & iOS 9.3 or higher.
03Colorize
Another app that uses AI to add colorization to your old images. It is a popular animate your family photo app which has amazing other tools and filters to try out.
Applicable OS: Android and iOS.
04Deep Nostalgia
Using this app which has been innovated by the geology platform MyHeritage uses ai to add gestures to still images to evoke nostalgia in the users.
Applicable OS: Online.
04Google Photoscan
Google scanner is a futuristic app for restoring photos of the past. The app uses a smart scanning technology that provides several scans of the same photo automatically.
Applicable OS: Android or iOS.
Key Takeaways from This Episode
● Animating photos are a new way of reimagining still images into moving live content. There are many methods and approaches you can choose to animate your images.
● Some of them being video animations, transparent background elements, Filters and effects and of course GIFs.
● There are dozens of apps with built in smart artificial intelligence to help restore old photos or make short animations out of them. Some of them are applicable for desktops while others available both on Android and iOS.
Learn How to Do Funny Cartoon Drawings
The Art of Comics - Learn How to Do Funny Cartoon Drawings
An easy yet powerful editor
Numerous effects to choose from
Detailed tutorials provided by the official channel
Whether you want to use a simple short video or an accessible online lesson, you will find everything that you need to learn how to create comic cartoon drawing on this website. This website article contains all the tutorials you need, ranging from your favorite wild animals, places, objects, farm animals, characters, vehicles, and food.

Do not forget that practicing is the key to success, so don’t hesitate to try several drawing lessons to help you improve your abilities. Start today to learn how to draw funny cartoons online at your own pace and comfort with this step-by-step tutorial.
In this article
01 [How to Draw Funny Cartoon Faces](#Part 1)
02 [How to Draw Your Own Cartoon Character](#Part 2)
Part 1 How to Draw Funny Cartoon Faces
Drawing funny faces in cartoons is very easy compared to other drawing styles or drawing complete parts of the comic. All that is need is practice and experiment with different combinations of shapes. This article will guide on how to draw funny cartoon faces of various types using six other steps:
Step 1: To begin, you need to first draw the face outline by drawing the following;
● Any Perfect type of round shape like a circle.
● Any pear shapes
● An upside-down triangle
● A quadrilateral like a trapezium, a square, or any of your choice

Step 2: To draw the nose in the middle of the face, draw somewhere any of the following;
● A round shape that is bulgy
● A U-shape
● A V-shape
● A small dash.

Step 3: Next is that you draw two round shapes for the eyes, and each of them should have a smaller round or dot (for the pupil), which is above the nose. This eye can be in the shape of any of the following;
● Two large circles
● An ovals
● A curvy “M,” like the one you can see in the “McDonalds” logo.

Step 4: You can draw the mouth just below the nose and draw any of the shapes from the list given below. In addition, to make the mouth funnier, you should then add teeth by either drawing a small square sticking out inside the mouth from the upper side, at the roof of the mouth, or a straight horizontal line which is across the mouth and several vertical lines used to form a grid having two rows and many columns.
● A U-shaped curve that is large
● A triangle like a right-angled one which is most preferred
● A circle or an oval shape
● A rectangle shapes
● A straight line shapes

Step 5: You can add any other “extra fittings” such as the ears (in cartoons, ears generally considered to be ‘extra’), wrinkles, collar, hat, hair, etc.

Step 6: Finally, your cartoon face drawing is ready! You can also add different colors to the picture with different funky shades to make it attractive.

Part 2 How to Draw Your Own Cartoon Character
Are you bored? Why not take up a pencil and draw your cartoon comic drawing character? Note that drawing will be a relief from boredom, and it also helps your creativity fly very high.
However, you can easily add some colors and designs or even animate your cartoon character using this free software known as Filmora. Wondershare Filmora Video Editor is the best software to make you cartoon your picture or animate your cartoon characters with tons of filters and effects and its keyframing feature, which allows this with ease.
For Win 7 or later (64-bit)
For macOS 10.12 or later
Read this article on how to draw the perfect cartoon character yourself:
Step 1: The first is to have an idea of what you want to draw, i.e., the picture you want to draw. You can pick any character to draw from your favorite website or WeeWorld.com.
● First, you draw the face but make sure you don’t add a nose but do a black outline.
● Next, you can draw the other features but make sure you don’t use colored pencils. Only use your main writing utensil.
● Then, remember to use your imagination to add the clothes and hairstyle.
● Finally, you can delete any unwanted lines and color with artist utensils, such as crayons, paintbrushes, colored pencils, etc. Also, remember that you can add some detail to your character to make it pop out and be beautiful.

Step 2: Now you have officially made your cartoon, how does it feel?

Step 3: Next, you want to go back and draw again, but this time, not an imitation.

Step 4: Pick up a new piece of paper to be used to draw another character. But this time, you need to change the features. You can decide to make the eyes bigger, neon skin, and maybe crazy hair. You can try clothes that you would love to wear, or ones you wish you could get. Also, try to change the size around to make the features look different and add a nose, and then you can finally color your creation.

Step 5: Now, you can compare the two drawings to notice the difference. You will realize that one is an imitation while the other is all you! Now, you can grab a new piece of notebook paper.

Step 6: Next is that you begin to jot down different ideas. For example, you may want to draw a cute little puppy or a cute baby. Sometimes you can decide that your cartoon could be about a talking apple or something different.

Step 7: Grab another piece of paper and draw any other character you can imagine. You can try using a Sharpie marker for the outline by carefully tracing the pencil. Then you can erase any stray marks on the piece of paper. Next, you can also use any writing utensils like markers, crayons, colored pencils, pastels, or even paint, as it also works well.

Step 8: You can grab your notebook sheet again and then jot down any idea of a comic series. Also, make a plot or funny lines that you could use or any other characters.

Step 9: Next, you fold the blank sheet of paper and make it into about four lines. And then you can draw your main character by just using a pencil first.

Step 10: You can then draw the other characters and all the basic outlines in the drawing.

Step 11: Next is that you can draw the furniture and background, such as trees or anything else, to beautify your drawing.

Step 12: You can go back and add details and outline with Sharpie or black marker and delete any stray marks. You can also color if wanted.

Step 13: Next is for you to add dialogue and actively work with your character drawing.

Step 14: Finally, and there you have it. Congratulation! You now have your perfect, awesome, beautiful, and YOUR cartoon.

● Ending Thoughts →
● This article explained all you need to know about learning how to do funny cartoon drawings very quickly. You can also use these methods to create funny cat cartoon drawings or any other drawing you want for cat lovers.
● However, you can decide to animate your graphic using the best software to carry it out quickly, i.e., Filmora.
Whether you want to use a simple short video or an accessible online lesson, you will find everything that you need to learn how to create comic cartoon drawing on this website. This website article contains all the tutorials you need, ranging from your favorite wild animals, places, objects, farm animals, characters, vehicles, and food.
Do not forget that practicing is the key to success, so don’t hesitate to try several drawing lessons to help you improve your abilities. Start today to learn how to draw funny cartoons online at your own pace and comfort with this step-by-step tutorial.
In this article
01 [How to Draw Funny Cartoon Faces](#Part 1)
02 [How to Draw Your Own Cartoon Character](#Part 2)
Part 1 How to Draw Funny Cartoon Faces
Drawing funny faces in cartoons is very easy compared to other drawing styles or drawing complete parts of the comic. All that is need is practice and experiment with different combinations of shapes. This article will guide on how to draw funny cartoon faces of various types using six other steps:
Step 1: To begin, you need to first draw the face outline by drawing the following;
● Any Perfect type of round shape like a circle.
● Any pear shapes
● An upside-down triangle
● A quadrilateral like a trapezium, a square, or any of your choice
Step 2: To draw the nose in the middle of the face, draw somewhere any of the following;
● A round shape that is bulgy
● A U-shape
● A V-shape
● A small dash.
Step 3: Next is that you draw two round shapes for the eyes, and each of them should have a smaller round or dot (for the pupil), which is above the nose. This eye can be in the shape of any of the following;
● Two large circles
● An ovals
● A curvy “M,” like the one you can see in the “McDonalds” logo.
Step 4: You can draw the mouth just below the nose and draw any of the shapes from the list given below. In addition, to make the mouth funnier, you should then add teeth by either drawing a small square sticking out inside the mouth from the upper side, at the roof of the mouth, or a straight horizontal line which is across the mouth and several vertical lines used to form a grid having two rows and many columns.
● A U-shaped curve that is large
● A triangle like a right-angled one which is most preferred
● A circle or an oval shape
● A rectangle shapes
● A straight line shapes
Step 5: You can add any other “extra fittings” such as the ears (in cartoons, ears generally considered to be ‘extra’), wrinkles, collar, hat, hair, etc.
Step 6: Finally, your cartoon face drawing is ready! You can also add different colors to the picture with different funky shades to make it attractive.
Part 2 How to Draw Your Own Cartoon Character
Are you bored? Why not take up a pencil and draw your cartoon comic drawing character? Note that drawing will be a relief from boredom, and it also helps your creativity fly very high.
However, you can easily add some colors and designs or even animate your cartoon character using this free software known as Filmora. Wondershare Filmora Video Editor is the best software to make you cartoon your picture or animate your cartoon characters with tons of filters and effects and its keyframing feature, which allows this with ease.
For Win 7 or later (64-bit)
For macOS 10.12 or later
Read this article on how to draw the perfect cartoon character yourself:
Step 1: The first is to have an idea of what you want to draw, i.e., the picture you want to draw. You can pick any character to draw from your favorite website or WeeWorld.com.
● First, you draw the face but make sure you don’t add a nose but do a black outline.
● Next, you can draw the other features but make sure you don’t use colored pencils. Only use your main writing utensil.
● Then, remember to use your imagination to add the clothes and hairstyle.
● Finally, you can delete any unwanted lines and color with artist utensils, such as crayons, paintbrushes, colored pencils, etc. Also, remember that you can add some detail to your character to make it pop out and be beautiful.
Step 2: Now you have officially made your cartoon, how does it feel?
Step 3: Next, you want to go back and draw again, but this time, not an imitation.
Step 4: Pick up a new piece of paper to be used to draw another character. But this time, you need to change the features. You can decide to make the eyes bigger, neon skin, and maybe crazy hair. You can try clothes that you would love to wear, or ones you wish you could get. Also, try to change the size around to make the features look different and add a nose, and then you can finally color your creation.
Step 5: Now, you can compare the two drawings to notice the difference. You will realize that one is an imitation while the other is all you! Now, you can grab a new piece of notebook paper.
Step 6: Next is that you begin to jot down different ideas. For example, you may want to draw a cute little puppy or a cute baby. Sometimes you can decide that your cartoon could be about a talking apple or something different.
Step 7: Grab another piece of paper and draw any other character you can imagine. You can try using a Sharpie marker for the outline by carefully tracing the pencil. Then you can erase any stray marks on the piece of paper. Next, you can also use any writing utensils like markers, crayons, colored pencils, pastels, or even paint, as it also works well.
Step 8: You can grab your notebook sheet again and then jot down any idea of a comic series. Also, make a plot or funny lines that you could use or any other characters.
Step 9: Next, you fold the blank sheet of paper and make it into about four lines. And then you can draw your main character by just using a pencil first.
Step 10: You can then draw the other characters and all the basic outlines in the drawing.
Step 11: Next is that you can draw the furniture and background, such as trees or anything else, to beautify your drawing.
Step 12: You can go back and add details and outline with Sharpie or black marker and delete any stray marks. You can also color if wanted.
Step 13: Next is for you to add dialogue and actively work with your character drawing.
Step 14: Finally, and there you have it. Congratulation! You now have your perfect, awesome, beautiful, and YOUR cartoon.
● Ending Thoughts →
● This article explained all you need to know about learning how to do funny cartoon drawings very quickly. You can also use these methods to create funny cat cartoon drawings or any other drawing you want for cat lovers.
● However, you can decide to animate your graphic using the best software to carry it out quickly, i.e., Filmora.
Best 12 Illusion Gifs: Top Picks
Best 12 Illusion Gifs: Top Picks
An easy yet powerful editor
Numerous effects to choose from
Detailed tutorials provided by the official channel
Do you know that these are reaching heights and people are very happy in sharing them? If you are unaware of it, don’t worry and keep reading. Thorugh today’s post, we will discuss illusion GIF in detail yo make it easy for you to make up your mind and try your hands on it.
In this article
01 [What Is GIF Illustration?](#Part 1)
02 [Best 12 Illusion Gifs](#Part 2)
Part 1 What Is GIF Illustration?
GIFs are a form of digital media that is used to show animations and other types of visuals. It is a type of file format that can be created with different editing software. These are usually used for short videos or images on the internet and social media.
Furthermore, GIFs are an excellent way to create visual content for social media posts or as an animated overlay on a video.
These are now used as everything from advertisements to commentary from all walks of life. The users of GIFs seem to be endless! They can be used in many different ways, such as to add visual interest, provide context or even humor, and so on. It is totally on the user how they are considering it to make the things more relevant to the context for which they have created or shared the GIF.
Part 2 Best 12 Illusion Gifs
This curated list will help you to know the best Illusion GIF that is still ruling out the market. This includes:-
01Van Gogh Stare GIF
The Van Gogh Stare, also known as the “dazzle camouflage,” is an optical illusion created by artist Vincent van Gogh. It was likely intended to represent the eye’s instability and movement. The image has been used in a variety of ways, including on social media sites like Tumblr. In general, this GIF illusion is a demonstration of the Van Gogh Stare.
02This brain-busting rotation
We are all used to seeing the world around us in two dimensions. But what if we could see it in three dimensions? Well, now you can! This GIF shows a rotating 3D object that appears to be made of cubes. The illusion is created by the fact that the camera rotates around the object, but you can’t see it from every angle.
03This loop tea GIF
This GIF illusion is a perfect example of how our brain works. When we see something that doesn’t make sense, we try to make sense of it by filling in the gaps with what we believe it should look like. The GIF illusion consists of two frames. The first frame shows a woman drinking tea from a cup, and the second frame shows her drinking from an empty cup. When our brain tries to fill in the gaps, it assumes that the woman drank all of the tea and sees her as drinking from an empty cup even though she is actually drinking from a full one.
04No smkoing! Well, you should never
The GIF illusion consists of two images: one of a cloud and another of cauliflower. The animation starts with the cloud and then switches to the cauliflower. But if you take a closer look, you’ll notice that there’s actually no smoke in the first image, just the cauliflower. And it’s not really a head either - it’s just an ordinary cauliflower from behind.
The reason why this illusion works is that our brains are wired to see patterns and shapes in things that aren’t always there - for example, when we see faces in random objects or shapes in clouds. This GIF takes advantage of that by showing two images where these are
05The never-ending corridor
The GIF illusion is a rather simple illusion that takes advantage of the way our brains perceive motion. Our brains are programmed to see a moving object as a single object in order to make sense of the world around us. This means that when we see an object moving, we perceive it as one solid thing instead of many separate objects.
This GIF illusion is a perfect example of how the human brain works. The brain can’t process that the two images are different, and instead, it sees them as a single image.
06Now, this, the eye-pleaser
The illusion works on the principle of depth perception and how our eyes are not able to accurately process all of the information that they receive from our surroundings. The black lines on the white background make it seem like there are two rows of lines, but there’s only one row that appears to be moving back and forth.
07Commercial At design GIF
The GIF illusion is a simple design that tricks the brain into thinking that it is 3D. The design consists of two circles, one inside the other, with three arrows pointing inwards. The outside circle has a white background and the inside circle has a black background. When you look at this design from different angles, you will see that the arrows point outwards and not inwards as they should be doing.
08Wait what? Is this truly a reflection?
This illusion works because our brain recognizes that the mirror image is not what’s really happening and flips the image in our head to make it right-side up.
It’s also possible that we are tricked by the fact that we know mirrors flip images, so when we see an upside-down image in front of us, we automatically assume it’s just inverted.
09This haunting tableau (Not exactly a GIF but worth sharing)
The GIF illusion is a type of optical illusion that can be explained by the Gestalt Principles. The Gestalt Principles are guidelines for how we perceive and organize visual information. This optical illusion is created by overlapping two similar images on top of each other in the same place but with different colors. Our brain perceives this as a single image, and our eyes try to make sense of it by looking for visual cues in the image. When we focus on one image, it looks like a triangle with a red line going through it. But when we focus on the other image, it looks like an arrow pointing up that has been cut in half with a red line through it.
10This safety hazard
This GIF illusion is a safety hazard because it tricks the brain into thinking that the person in front of them is standing still. When you stare at this GIF for too long, the person will appear to be moving backward. This illusion can cause accidents if you believe that a person is still when they are actually approaching you.
11Welcome to the 3d World
It’s an illusion created by the use of perspective. The camera is positioned in such a way that it appears that the three-dimensional cube is only two-dimensional.
The camera is positioned in such a way that it appears that the three-dimensional cube is only two-dimensional.
12I will keep this table forever
The GIF illusion is an optical illusion that makes the table in the background appear to be bigger than it actually is. The table in front of the window appears to be smaller and closer to the viewer. There are two factors that make this illusion happen. One of them is perspective, which makes objects appear larger as they get closer and smaller as they get farther away. The other factor is size constancy, which makes objects look about the same size regardless of how far away they are from you.
Part 3 How Do You Make a GIF Illustration?
If you are someone who is curious to make a GIF illustration but have no clue how to make it, then the online portals are catering to all your needs. Right now, there are multiple tools available that will help you to create the illustration seamlessly. Among all of them, we suggest you try your hands on Filmora.
Wondershare Filmora Video Editor is one of the best tools available to make the gift illustration as you want. You just need to upload the content, and then you are all set to edit it at your convenience. The best part is the interface of the tool is very simple to understand, which simply means there will be no need for you to belong to any technical background to use this tool.

Wondershare Filmora - Best Video Editor for Mac/Windows
5,481,435 people have downloaded it.
Build unique custom animations without breaking a sweat.
Focus on creating epic stories and leave the details to Filmora’s auto features.
Start a creative adventure with drag & drop effects and endless possibilities.
Filmora simplifies advanced features to save you time and effort.
Filmora cuts out repetition so you can move on to your next creative breakthrough.
Along with creating the GIF files, it also help you to do the editing as you wanted. For example, if you are looking forward to reading on any text to the GIF file, you can also do it seamlessly. The interface will help you to understand how you can do it so that there will be no problem in creating the content as you want.
● Key Takeaways from This Episode →
● Filmora is the best tool to create illusion GIF.
●Illusion GIF are in use for advertisement.
●Creating illusion GIF is just a matter of few steps.
Do you know that these are reaching heights and people are very happy in sharing them? If you are unaware of it, don’t worry and keep reading. Thorugh today’s post, we will discuss illusion GIF in detail yo make it easy for you to make up your mind and try your hands on it.
In this article
01 [What Is GIF Illustration?](#Part 1)
02 [Best 12 Illusion Gifs](#Part 2)
Part 1 What Is GIF Illustration?
GIFs are a form of digital media that is used to show animations and other types of visuals. It is a type of file format that can be created with different editing software. These are usually used for short videos or images on the internet and social media.
Furthermore, GIFs are an excellent way to create visual content for social media posts or as an animated overlay on a video.
These are now used as everything from advertisements to commentary from all walks of life. The users of GIFs seem to be endless! They can be used in many different ways, such as to add visual interest, provide context or even humor, and so on. It is totally on the user how they are considering it to make the things more relevant to the context for which they have created or shared the GIF.
Part 2 Best 12 Illusion Gifs
This curated list will help you to know the best Illusion GIF that is still ruling out the market. This includes:-
01Van Gogh Stare GIF
The Van Gogh Stare, also known as the “dazzle camouflage,” is an optical illusion created by artist Vincent van Gogh. It was likely intended to represent the eye’s instability and movement. The image has been used in a variety of ways, including on social media sites like Tumblr. In general, this GIF illusion is a demonstration of the Van Gogh Stare.
02This brain-busting rotation
We are all used to seeing the world around us in two dimensions. But what if we could see it in three dimensions? Well, now you can! This GIF shows a rotating 3D object that appears to be made of cubes. The illusion is created by the fact that the camera rotates around the object, but you can’t see it from every angle.
03This loop tea GIF
This GIF illusion is a perfect example of how our brain works. When we see something that doesn’t make sense, we try to make sense of it by filling in the gaps with what we believe it should look like. The GIF illusion consists of two frames. The first frame shows a woman drinking tea from a cup, and the second frame shows her drinking from an empty cup. When our brain tries to fill in the gaps, it assumes that the woman drank all of the tea and sees her as drinking from an empty cup even though she is actually drinking from a full one.
04No smkoing! Well, you should never
The GIF illusion consists of two images: one of a cloud and another of cauliflower. The animation starts with the cloud and then switches to the cauliflower. But if you take a closer look, you’ll notice that there’s actually no smoke in the first image, just the cauliflower. And it’s not really a head either - it’s just an ordinary cauliflower from behind.
The reason why this illusion works is that our brains are wired to see patterns and shapes in things that aren’t always there - for example, when we see faces in random objects or shapes in clouds. This GIF takes advantage of that by showing two images where these are
05The never-ending corridor
The GIF illusion is a rather simple illusion that takes advantage of the way our brains perceive motion. Our brains are programmed to see a moving object as a single object in order to make sense of the world around us. This means that when we see an object moving, we perceive it as one solid thing instead of many separate objects.
This GIF illusion is a perfect example of how the human brain works. The brain can’t process that the two images are different, and instead, it sees them as a single image.
06Now, this, the eye-pleaser
The illusion works on the principle of depth perception and how our eyes are not able to accurately process all of the information that they receive from our surroundings. The black lines on the white background make it seem like there are two rows of lines, but there’s only one row that appears to be moving back and forth.
07Commercial At design GIF
The GIF illusion is a simple design that tricks the brain into thinking that it is 3D. The design consists of two circles, one inside the other, with three arrows pointing inwards. The outside circle has a white background and the inside circle has a black background. When you look at this design from different angles, you will see that the arrows point outwards and not inwards as they should be doing.
08Wait what? Is this truly a reflection?
This illusion works because our brain recognizes that the mirror image is not what’s really happening and flips the image in our head to make it right-side up.
It’s also possible that we are tricked by the fact that we know mirrors flip images, so when we see an upside-down image in front of us, we automatically assume it’s just inverted.
09This haunting tableau (Not exactly a GIF but worth sharing)
The GIF illusion is a type of optical illusion that can be explained by the Gestalt Principles. The Gestalt Principles are guidelines for how we perceive and organize visual information. This optical illusion is created by overlapping two similar images on top of each other in the same place but with different colors. Our brain perceives this as a single image, and our eyes try to make sense of it by looking for visual cues in the image. When we focus on one image, it looks like a triangle with a red line going through it. But when we focus on the other image, it looks like an arrow pointing up that has been cut in half with a red line through it.
10This safety hazard
This GIF illusion is a safety hazard because it tricks the brain into thinking that the person in front of them is standing still. When you stare at this GIF for too long, the person will appear to be moving backward. This illusion can cause accidents if you believe that a person is still when they are actually approaching you.
11Welcome to the 3d World
It’s an illusion created by the use of perspective. The camera is positioned in such a way that it appears that the three-dimensional cube is only two-dimensional.
The camera is positioned in such a way that it appears that the three-dimensional cube is only two-dimensional.
12I will keep this table forever
The GIF illusion is an optical illusion that makes the table in the background appear to be bigger than it actually is. The table in front of the window appears to be smaller and closer to the viewer. There are two factors that make this illusion happen. One of them is perspective, which makes objects appear larger as they get closer and smaller as they get farther away. The other factor is size constancy, which makes objects look about the same size regardless of how far away they are from you.
Part 3 How Do You Make a GIF Illustration?
If you are someone who is curious to make a GIF illustration but have no clue how to make it, then the online portals are catering to all your needs. Right now, there are multiple tools available that will help you to create the illustration seamlessly. Among all of them, we suggest you try your hands on Filmora.
Wondershare Filmora Video Editor is one of the best tools available to make the gift illustration as you want. You just need to upload the content, and then you are all set to edit it at your convenience. The best part is the interface of the tool is very simple to understand, which simply means there will be no need for you to belong to any technical background to use this tool.
Wondershare Filmora - Best Video Editor for Mac/Windows
5,481,435 people have downloaded it.
Build unique custom animations without breaking a sweat.
Focus on creating epic stories and leave the details to Filmora’s auto features.
Start a creative adventure with drag & drop effects and endless possibilities.
Filmora simplifies advanced features to save you time and effort.
Filmora cuts out repetition so you can move on to your next creative breakthrough.
Along with creating the GIF files, it also help you to do the editing as you wanted. For example, if you are looking forward to reading on any text to the GIF file, you can also do it seamlessly. The interface will help you to understand how you can do it so that there will be no problem in creating the content as you want.
● Key Takeaways from This Episode →
● Filmora is the best tool to create illusion GIF.
●Illusion GIF are in use for advertisement.
●Creating illusion GIF is just a matter of few steps.
How To Learn Cartoon Sketch Drawing
How To Learn Cartoon Sketch Drawing— Pencil Sketch for Beginners
An easy yet powerful editor
Numerous effects to choose from
Detailed tutorials provided by the official channel
If you are learning how to draw, particularly cartoon sketches drawing, you must start at a beginner’s level. No skill is difficult if you just put your mind to it. You can learn the basics of the beginning, what you must do, and a learning curve, but if you have passion for it or love what you are doing, you will give it time to practice.
It all boils down to practicing it. Knowing how to draw beautiful sketch cartoons drawing is not a complex thing to do if you start at the beginner’s level.
So, for all who are reading this article, we will show sketch drawings of cartoons, i.e., how to draw step by step in an understandable manner.
In this article
01 [Collection of 8 Hottest Cartoon Drawings](#Part 1)
02 [How to Draw Cartoon Step by Step Easy Pencil Drawing](#Part 2)
Part 1 Collection of 8 Hottest Cartoon Drawings
Here’s a collection of 8 hottest cartoon love drawing pencil sketches for you.
01Motlu Patlu
This is a sketch of the Motu Patlu cartoon drawing. The artist used some simple forms such as a pear shape while developing the body in making this sketch. The pear shape helps in developing the bodies of cartoon characters.

02Basketball Sketch Drawing
The cartoon basketball drawing is one of our top picks wherein the artist took his time to get every detail in the scene. The image alone tells the story.

03Tom and Jerry Sketch drawing
If you were a lover of the famous cartoon Tom and Jerry, you should know this. Here’s a sketch cartoon drawing of Tom and Jerry.

04Cat Sketch
Isn’t this beautiful sketch cartoon drawing of a cat just it? The way the artist details it and gets the perfect fit made it part of our collection.

05Cute Cartoon love sketch
We couldn’t have finished this list without adding this beautiful sketch cartoon drawing.

06Homer
This cartoon sketch drawing of Homer in the Simpsons is just it. Looking at the body build, you can easily trace the outline of the pear-shaped form.

07Cute Cartoon Drawing
This drawing cartoon sketch caught our attention, and we are sure you would love it. With the round head and pear-shaped belly, you will agree that you can start your learning journey with the steps listed in this article.

08Cartoon love drawing
This sketch cartoon drawing portrays the love between a girl and a boy. It is one attractive sketch that shows details of expressions on the faces.

Part 2 How to Draw Cartoon Step by Step Easy Pencil Drawing
An essential factor you must bear in mind is that you must not let go of your creativity when learning how to draw.
You have to be free with yourself and try to create cartoon sketch drawings of characters that you love.
The more it’s about something you love, the better you get at it.
Here’s a step-by-step process of an easy pencil drawing or sketch cartoon drawing.
● Step 1: Draw a circle
Draw a circle and a “noodle” shape, as shown in the illustration. The head is a circle, and the body is a pear form.
The lower half of the pear is fatter than the top. Take note of how the upper half slightly overlaps the head circle.

● Step 2: Draw a pair of eyes.
As shown in the image, add the perspective guidelines around the head. These recommendations will assist you in correctly positioning your rabbit’s eyes and nose.
Above the horizontal guideline, draw the eyes. Where the parameters cross is where the nose is put.

● Step 3: Draw the cheek and Wings
Make the cheekbones. As shown in the illustration, add the ears and arms. It’s OK if the ear shapes differ somewhat from those displayed.
Notice how the arm contour curve organically emerges from behind the shoulders when you sketch the arms. Make it this way if you can.

● Step 4: Draw the legs
Draw the legs and tail of the animal. The arm and leg curves may appear to be challenging. As a result, be gentle with your pencil. Don’t yank on the pencil too hard!
Your cartoon rabbit’s shape is now plainly evident.

● Step 5: Draw the mouth
Let’s focus on the face for a moment. Draw an iris ellipse and an inner line in the ear inside the eyes. Include the nose. Draw the mouth and the teeth.

● Step 6: Outline the contours
Because rabbits eat carrots, this one eats them in excess. Outline the carrot’s outlines. On the legs, draw the brows and the fingers.
As you may have observed, I messed up the teeth in the previous image. Therefore I deleted the thick black pencil lines that were superfluous.
Erase and Shade (Step 8)

● Step 7: Outline the Character
Now, outline the contours of the entire character with a softer pencil. You can pick up B4 or B6 (if you don’t have either, try HB). Please leave a little bright dot on the nose while darkening it.

● Step 8: Erase and Shade
Remove everything that isn’t required. See? That is how your bunny should seem.
I also advocate using a pencil-type eraser in addition to regular or kneaded erasers. Shade the entire rabbit’s body if you’re using a graphite pencil. The inside of the ear, the belly, the paws, and the tail can all be white or brighter.

●Bonus Software for Beautiful Sketch Cartoon Drawing:
Wondershare Filmora Video Editor is a superb video editing software developed by Wondershare. It is a simple entry-level version with preset video templates and effects. With the numerous powerful features in Filmora, we can add amazing effects to our cartoon sketches to make them look better.
For Win 7 or later (64-bit)
For macOS 10.12 or later
Here’s how to use Filmora for cartoon sketch drawing enhancements.
Chroma key (Green screen): This feature can change the background of your sketched cartoon drawing photo by adding special effects to make it look nice.
Color Match: Color match is a feature in Filmora used to apply color correction settings in a video. You can use this feature to enhance your sketches.
Mask and blend: Filmora mask and blend feature has resourceful modes and is easy to use. You can use them for your pencil sketched cartoon drawing.
● Ending Thoughts →
● Making beautiful sketch cartoon drawings is not rocket science. It is a result of consistent practice.
● In this article, we have given you key points and strategies you can use to start practicing cartoon sketch drawing. However, do begin from our idea, i.e., a circle for the head and a pear for developing the body.
● Thus, your journey to learning how to draw cartoons step by step quickly with a pencil is already a walkover.
If you are learning how to draw, particularly cartoon sketches drawing, you must start at a beginner’s level. No skill is difficult if you just put your mind to it. You can learn the basics of the beginning, what you must do, and a learning curve, but if you have passion for it or love what you are doing, you will give it time to practice.
It all boils down to practicing it. Knowing how to draw beautiful sketch cartoons drawing is not a complex thing to do if you start at the beginner’s level.
So, for all who are reading this article, we will show sketch drawings of cartoons, i.e., how to draw step by step in an understandable manner.
In this article
01 [Collection of 8 Hottest Cartoon Drawings](#Part 1)
02 [How to Draw Cartoon Step by Step Easy Pencil Drawing](#Part 2)
Part 1 Collection of 8 Hottest Cartoon Drawings
Here’s a collection of 8 hottest cartoon love drawing pencil sketches for you.
01Motlu Patlu
This is a sketch of the Motu Patlu cartoon drawing. The artist used some simple forms such as a pear shape while developing the body in making this sketch. The pear shape helps in developing the bodies of cartoon characters.
02Basketball Sketch Drawing
The cartoon basketball drawing is one of our top picks wherein the artist took his time to get every detail in the scene. The image alone tells the story.
03Tom and Jerry Sketch drawing
If you were a lover of the famous cartoon Tom and Jerry, you should know this. Here’s a sketch cartoon drawing of Tom and Jerry.
04Cat Sketch
Isn’t this beautiful sketch cartoon drawing of a cat just it? The way the artist details it and gets the perfect fit made it part of our collection.
05Cute Cartoon love sketch
We couldn’t have finished this list without adding this beautiful sketch cartoon drawing.
06Homer
This cartoon sketch drawing of Homer in the Simpsons is just it. Looking at the body build, you can easily trace the outline of the pear-shaped form.
07Cute Cartoon Drawing
This drawing cartoon sketch caught our attention, and we are sure you would love it. With the round head and pear-shaped belly, you will agree that you can start your learning journey with the steps listed in this article.
08Cartoon love drawing
This sketch cartoon drawing portrays the love between a girl and a boy. It is one attractive sketch that shows details of expressions on the faces.
Part 2 How to Draw Cartoon Step by Step Easy Pencil Drawing
An essential factor you must bear in mind is that you must not let go of your creativity when learning how to draw.
You have to be free with yourself and try to create cartoon sketch drawings of characters that you love.
The more it’s about something you love, the better you get at it.
Here’s a step-by-step process of an easy pencil drawing or sketch cartoon drawing.
● Step 1: Draw a circle
Draw a circle and a “noodle” shape, as shown in the illustration. The head is a circle, and the body is a pear form.
The lower half of the pear is fatter than the top. Take note of how the upper half slightly overlaps the head circle.
● Step 2: Draw a pair of eyes.
As shown in the image, add the perspective guidelines around the head. These recommendations will assist you in correctly positioning your rabbit’s eyes and nose.
Above the horizontal guideline, draw the eyes. Where the parameters cross is where the nose is put.
● Step 3: Draw the cheek and Wings
Make the cheekbones. As shown in the illustration, add the ears and arms. It’s OK if the ear shapes differ somewhat from those displayed.
Notice how the arm contour curve organically emerges from behind the shoulders when you sketch the arms. Make it this way if you can.
● Step 4: Draw the legs
Draw the legs and tail of the animal. The arm and leg curves may appear to be challenging. As a result, be gentle with your pencil. Don’t yank on the pencil too hard!
Your cartoon rabbit’s shape is now plainly evident.
● Step 5: Draw the mouth
Let’s focus on the face for a moment. Draw an iris ellipse and an inner line in the ear inside the eyes. Include the nose. Draw the mouth and the teeth.
● Step 6: Outline the contours
Because rabbits eat carrots, this one eats them in excess. Outline the carrot’s outlines. On the legs, draw the brows and the fingers.
As you may have observed, I messed up the teeth in the previous image. Therefore I deleted the thick black pencil lines that were superfluous.
Erase and Shade (Step 8)
● Step 7: Outline the Character
Now, outline the contours of the entire character with a softer pencil. You can pick up B4 or B6 (if you don’t have either, try HB). Please leave a little bright dot on the nose while darkening it.
● Step 8: Erase and Shade
Remove everything that isn’t required. See? That is how your bunny should seem.
I also advocate using a pencil-type eraser in addition to regular or kneaded erasers. Shade the entire rabbit’s body if you’re using a graphite pencil. The inside of the ear, the belly, the paws, and the tail can all be white or brighter.
●Bonus Software for Beautiful Sketch Cartoon Drawing:
Wondershare Filmora Video Editor is a superb video editing software developed by Wondershare. It is a simple entry-level version with preset video templates and effects. With the numerous powerful features in Filmora, we can add amazing effects to our cartoon sketches to make them look better.
For Win 7 or later (64-bit)
For macOS 10.12 or later
Here’s how to use Filmora for cartoon sketch drawing enhancements.
Chroma key (Green screen): This feature can change the background of your sketched cartoon drawing photo by adding special effects to make it look nice.
Color Match: Color match is a feature in Filmora used to apply color correction settings in a video. You can use this feature to enhance your sketches.
Mask and blend: Filmora mask and blend feature has resourceful modes and is easy to use. You can use them for your pencil sketched cartoon drawing.
● Ending Thoughts →
● Making beautiful sketch cartoon drawings is not rocket science. It is a result of consistent practice.
● In this article, we have given you key points and strategies you can use to start practicing cartoon sketch drawing. However, do begin from our idea, i.e., a circle for the head and a pear for developing the body.
● Thus, your journey to learning how to draw cartoons step by step quickly with a pencil is already a walkover.
15 Best Apps to Turn Photos Into Cartoons and Sketches
The 15 Best Apps to Turn Photos into Cartoons and Sketches
An easy yet powerful editor
Numerous effects to choose from
Detailed tutorials provided by the official channel
Our mobile phones give a plethora of capabilities for making them seem creative and one-of-a-kind. One method is to convert ordinary pictures into cartoons or sketches.
And if you want to test an app that can convert any picture into a cartoon, this post is for you.
In this article
01 [The 10 best apps to turn photos into cartoons ](#Part 1)
02 [The 5 best apps to turn photos into sketches](#Part 2)
Part 1 The 10 Best Apps to Turn Photos into Cartoons
We all love clicking pictures and exploring what more effects could be added to the click. Converting your images into cartoons is one such effect that most digital art lovers out there would love to unleash their creativity. If you would like to learn more about Filmora video animation , you can watch this tutorial:
For Win 7 or later (64-bit)
For macOS 10.12 or later
Below is the list of top 10 apps that one can use to convert photos to cartoons.
01Cartoon Pictures
Compatibility: Android
Rating: 4.1/5
Key Features: Free of cost with diverse options for cartoon filters.
Verdict:
For people looking to convert photos into cartoons, the Cartoon Pictures app is the one-stop for all. With its compatibility currently offered to both android and iOS, Cartoon Pictures offers a wide range of options. A person can modify their pictures using filters and effects on their image converted to cartoon.
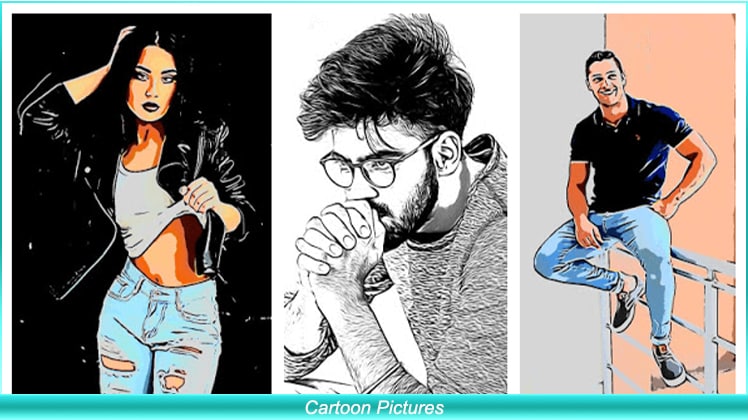
Cartoon pictures are on the top of our list due to the positive review. Overall, the app optimises memory consumption, i.e. 13MB with Cartoon Me’s gallery of filters, drawings, art pieces, editions, cartoons, oil paintings, artistic pictures, effects, and photos.
02Snapchat
Compatibility: Android/iOS
Rating: Android: 4.2/5, iOS: 3.6/5
Key Features: Popular app allowing you to not only use filters but connect with people from all over the world.
Verdict:
Although the app is famous worldwide as a photo-sharing app, Snapchat can be used for much more than that. Snapchat has launched a new effect that allows users to convert their photographs into Disney characters. It changes your look into “a modern-day prince(ess).”
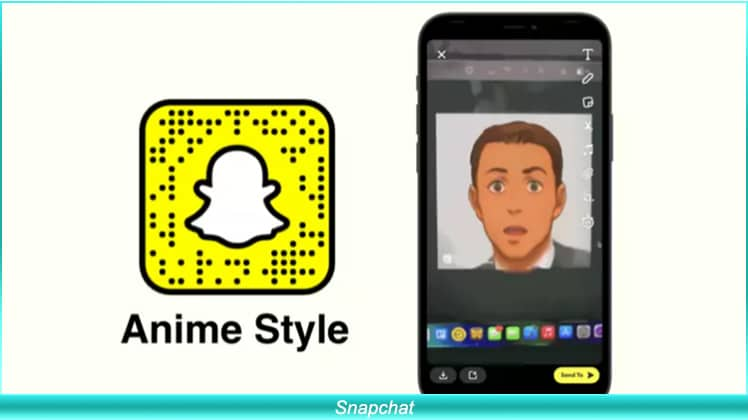
According to the firm, numerous Snapchatters across the world have been using this filter to click a cartoon portrait and has been watched over 1.7 billion times. Snapchat has several other filters that help you convert your real-life photo into a cartoon. Snapchat is free for all, with several positive reviews from across the globe.
03ToonMe
Compatibility: Android/iOS
Rating: Android 4.2/5, iOS: 4.6/5
Key Features: Easy to use UI with several options to cartoonify image
Verdict:
ToonMe is the most simple to use; this app is on our list with an easy UI to use. Compared to all the other photo to cartoon apps, toonme best suits the people who are looking to convert their images readily. You may use your phone or existing photographs to make a cartoon using free built-in editing features.
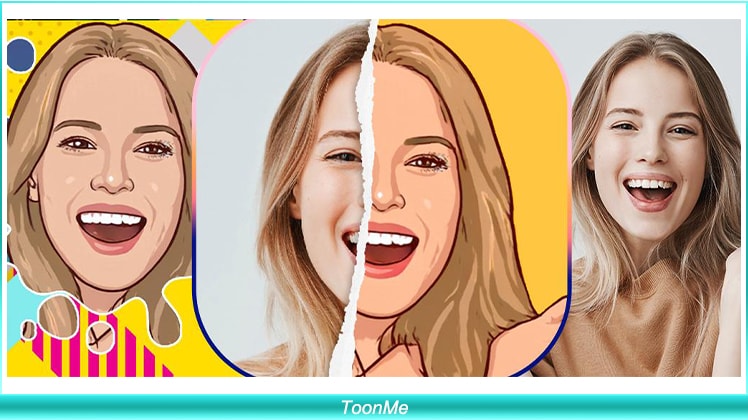
The software is only 16 MB in size and is free to download from both the Google play store and the Apple app store. You may download it right now and start transforming yourself into cartoons.
04Wondershare Filmora
Compatibility: Win/Mac
Rating: Win: 4.5/5, Mac: 4.6/5
Key Features: Several options for video and photo editing in HD+.
Verdict:
Wondershare Filmora Video Editor is a well renowned and well-recognised name for those in the video-editing industry. It is well known for its wide range of tools and implementations that can be made on one image using Filmora. It has a user-friendly interface and an easy-to-use photo to cartoon converter tool.
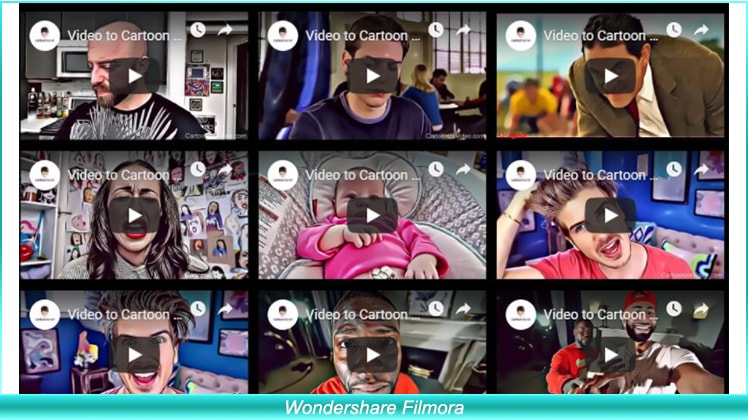
Although there is wide use of Filmora in this section, we would be talking about its ability to convert images into cartoons. The app is available for both Win and Mac, which is entirely justifiable for the feature it offers.
Wondershare Filmora - Best Video Editor for Mac/Windows
5,481,435 people have downloaded it.
Build unique custom animations without breaking a sweat.
Focus on creating epic stories and leave the details to Filmora’s auto features.
Start a creative adventure with drag & drop effects and endless possibilities.
Filmora simplifies advanced features to save you time and effort.
Filmora cuts out repetition so you can move on to your next creative breakthrough.
05Comics and Cartoon Maker
Compatibility: Android
Rating: 4.0/5
Key Features: Readily converts images to animate photos with a comic effect.
Verdict:
Are you a comic fan looking to convert your photos into animated images? Comic Cartoon Maker is the right app for you. With several options to convert your image into a cartoon. Comic Cartoon Maker is available for both Android and iOS and occupies 20MB of space in both.
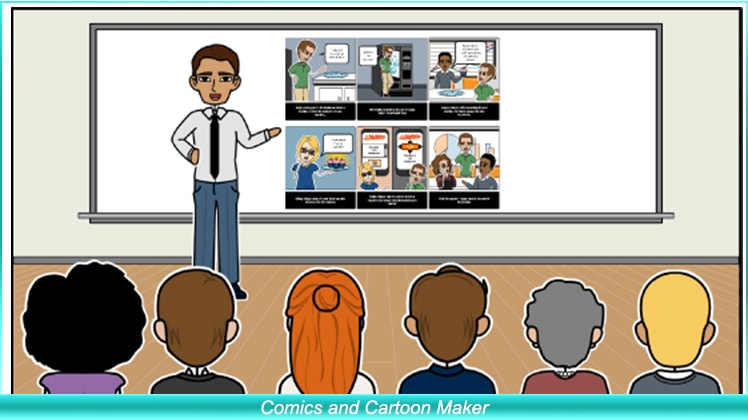
You may choose a photo from your collection or snap a fresh one with the app. After you’ve selected your filter, you may add speaking balloons to create a more believable “comic effect.” This is the simplest approach to “cartoon yourself” that you will discover on the internet.
06Avatoon
Compatibility: Android/iOS
Rating: Android: 4.5/5, iOS: 4.6/5
Key Features: Facial recognition, snapshots, stickers, avatars, and animated profile picture style options.
Verdict:
If you want to transform yourself into animated pictures, this is the programme you use. Anyone can transform themselves into animated characters with a simple click, which may then be made into stickers. These Stickers may be shared among your acquaintances via the WhatsApp app as well as other major social networking sites such as Instagram, Facebook, and many others.
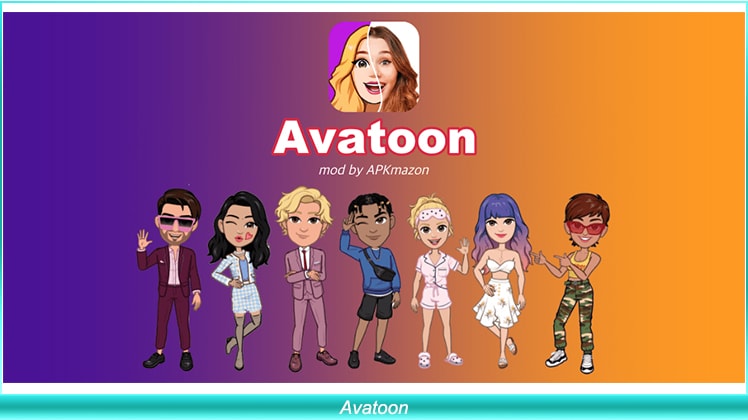
The software is 53 MB in size and is downloadable on both the Play Store and the App Store. The app has been reviewed positively due to the diverse usability of its features.
07Reface
Compatibility: Android/iOS
Rating: Android: 4.2/ 5, iOS: 4.7/5
Key Features: Swap your face with celebrities and animated cartoons.
Verdict:
It’s a famous cartoon picture maker, a face-swapping app available on both the Play Store and App stores. You may change your appearance to that of celebrities featuring animated Disney characters. The software is a lot of fun and very simple to use.
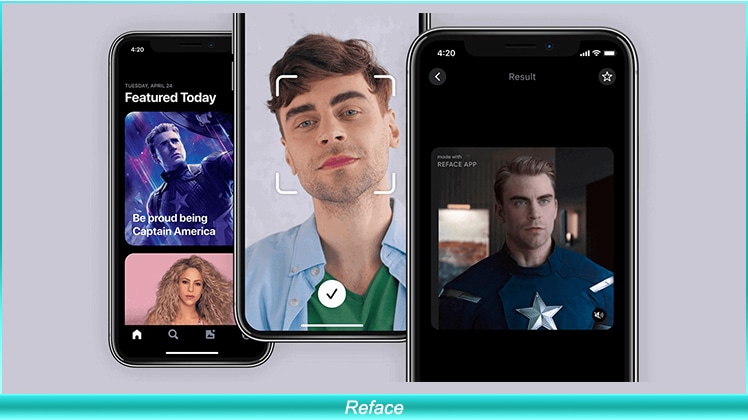
The app is available in both paid and free editions. Although you will be limited to setting and swapping space per day using the free versions, The app consumes a total of 14MB and comes with unique features such as GIF, stickers, meme maker, etc.
08Prisma Photo Editor
Compatibility: Android/iOS
Rating: Android: 4.4/5, iOS: 4.6/5
Key Features: Most optimised AI which converts pictures into cartoons and much more
Verdict:
Prisma picture designer is an older and well-known photo editing tool for both Android and iOS users. It is a picture editing software with the ability to create cartoon pictures in a short amount of time. This programme is a multifunctional photo editor that allows you to edit images and make yourself into a cartoon effortlessly**.**
It features a variety of picture filter choices as well as a unique feed. You can simply change a photograph into a magnificent piece of artwork in the style of Munk, Picasso, or any other design you like, which has led to such good reviews by users. Although the app consumes 68MB it is yet most compatible and easy to convert pictures to cartoons.
09Sketch Drawing Photo Editor
Compatibility: Android
Rating: 4.3/5
Key Features: Create animated pics, drawings and sketches with this free animated photo maker
Verdict:
Pencil Photo Sketch is a professional photo programme that can transform your images into stunning hand-drawn pencil drawings or comic cartoon-like illustrations. Choose an image from your album or take a photo with your smartphone to create a pencil sketch or drawing effect.

The app UI is straightforward to use; all you have to do is import a picture or choose a snapshot from your collection and transform it into a magnificent pencil drawing. The software is around 19 MB in size and therefore is downloadable on both the play store and the app store.
10Moments Cartoon Caricature
Compatibility: Android
Rating: 3.2/5
Key Features: Helps you turn your photo into an animated caricature cartoon.
Verdict:
You’ll be able to enter selfie challenges or merely appreciate the great caricature tools that will allow you to convert a regular event into a funny photo. The app’s photo editor has a plethora of tools for transforming photos into cartoons in whatever way you desire.
You’ll also have the option of exploring with monochrome caricatures. All of the options available in the Moments Cartoon Caricature software are intended to assist you in creating great social media photographs.
Part 2 The 5 Best Apps to Turn Photos into Sketches
Now that we are done editing the cartoons, next on our list is sketches. Several digital artists look forward to creating a sketch-like effect to their photos. Below is the list of five apps that would help users turn their photos into sketches.
01PicsArt
Compatibility: Android, iOS
Rating: Android: 4.2/5, iOS:4.6/5
Key Features: Several filters, effects and modifications that one can do to their clicks
Verdict: Looking to transform your pictures into an artwork or sketch? Don’t worry PicsArt has got you covered. The app is compatible with Android and iOS and takes around 75MB on your device.
The app can be used to convert images to sketches and much more, making the app multipurpose. The user friendly UI and magnificent quality of filters have given them a reputed stand in their field.
02GoArt
Compatibility: Android,iOS
Rating: Android: 4.3/5, iOS:3.7/5
Key Features: Turns photos into HD paintings that can be printed and framed.
Verdict: GoArt was created to print the images you make as a key focus. This provides some incredible benefits as well as a few possible drawbacks for your photography requirements. The programme transforms the snapshot into an artistic composition by utilising AI technology.
Even though it produces a clear and high-quality image, it might take a couple of minutes to process, as opposed to other fast solutions.
03PhotoLab
Compatibility: Android,iOS
Rating: Android: 4.0/5, iOS:4.3/5
Key Features: Photo filters, sketchbook effect, collages and montage for quick touch-ups.
Verdict: PhotoLab is the software for you if you enjoy playing with hilarious, innovative, and attractive effects. The AI-powered technology is incredibly simple to use and will instantly do modifications such as trimming for you.
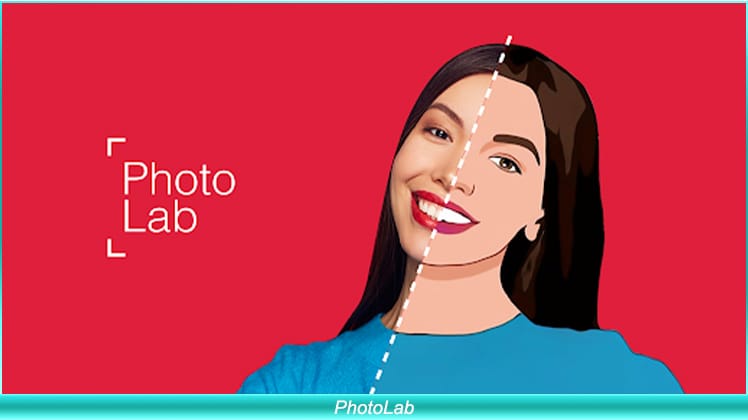
You may quickly publish your picture to social media or share it on a platform developed particularly for publishing digital art from the app.
04Instatoon
Compatibility: iOS
Rating: 4.4/5
Key Features: Helps iOS users convert their images into real-life portraits.
Verdict:
Instatoon has a large fan base since it provides a high-quality product that genuinely does what you ask for! This programme has fewer picture editing options because it focuses solely on producing art from your photographs.
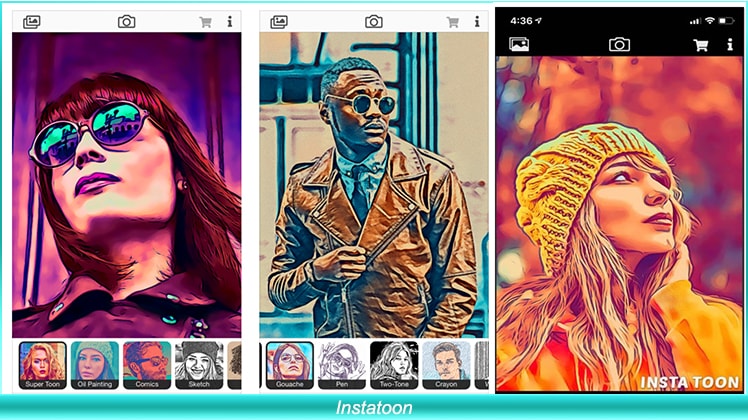
Scroll through the list of possible filters until you discover the ideal match. Numerous filter choices are available, such as black and white sketch designs, oil paintings, and cartoons.
05BeCasso
Compatibility: iOS
Rating: 4.6/5
Key Features: Artificial intelligence, neural networks, and aesthetic picture filters form a potent mix.
Verdict:
BeCasso is packed with excellent creative filters inspired by your favourite painters, such as Vincent Van Gogh and Pablo Picasso.
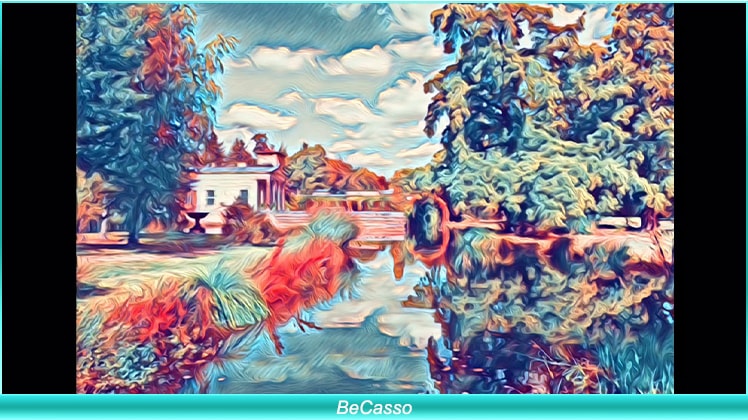
After importing your chosen photo, scroll through a big variety of different artistic styles and choose the filters you want. You would like to edit your images prior sharing them because most of the photo editing capabilities in this programme are only available when you pay for a membership.
Key Takeaways from This Episode
● Using various software, making sketches and cartoons can be tedious and time-consuming for digital enthusiasts. This brings us to a more leisurely resort to propose an effortless and hassle-free way to convert their images into cartoons and sketches.
● So far, we have learned about the various ways we can use animated pic maker and software to animate pictures and form sketch-like effects using apps made for android and iOS.
● With every app having its diversified use and application, users can download the one that suits them the best, reading through the given content to help them save time and plan better.
Our mobile phones give a plethora of capabilities for making them seem creative and one-of-a-kind. One method is to convert ordinary pictures into cartoons or sketches.
And if you want to test an app that can convert any picture into a cartoon, this post is for you.
In this article
01 [The 10 best apps to turn photos into cartoons ](#Part 1)
02 [The 5 best apps to turn photos into sketches](#Part 2)
Part 1 The 10 Best Apps to Turn Photos into Cartoons
We all love clicking pictures and exploring what more effects could be added to the click. Converting your images into cartoons is one such effect that most digital art lovers out there would love to unleash their creativity. If you would like to learn more about Filmora video animation , you can watch this tutorial:
For Win 7 or later (64-bit)
For macOS 10.12 or later
Below is the list of top 10 apps that one can use to convert photos to cartoons.
01Cartoon Pictures
Compatibility: Android
Rating: 4.1/5
Key Features: Free of cost with diverse options for cartoon filters.
Verdict:
For people looking to convert photos into cartoons, the Cartoon Pictures app is the one-stop for all. With its compatibility currently offered to both android and iOS, Cartoon Pictures offers a wide range of options. A person can modify their pictures using filters and effects on their image converted to cartoon.
Cartoon pictures are on the top of our list due to the positive review. Overall, the app optimises memory consumption, i.e. 13MB with Cartoon Me’s gallery of filters, drawings, art pieces, editions, cartoons, oil paintings, artistic pictures, effects, and photos.
02Snapchat
Compatibility: Android/iOS
Rating: Android: 4.2/5, iOS: 3.6/5
Key Features: Popular app allowing you to not only use filters but connect with people from all over the world.
Verdict:
Although the app is famous worldwide as a photo-sharing app, Snapchat can be used for much more than that. Snapchat has launched a new effect that allows users to convert their photographs into Disney characters. It changes your look into “a modern-day prince(ess).”
According to the firm, numerous Snapchatters across the world have been using this filter to click a cartoon portrait and has been watched over 1.7 billion times. Snapchat has several other filters that help you convert your real-life photo into a cartoon. Snapchat is free for all, with several positive reviews from across the globe.
03ToonMe
Compatibility: Android/iOS
Rating: Android 4.2/5, iOS: 4.6/5
Key Features: Easy to use UI with several options to cartoonify image
Verdict:
ToonMe is the most simple to use; this app is on our list with an easy UI to use. Compared to all the other photo to cartoon apps, toonme best suits the people who are looking to convert their images readily. You may use your phone or existing photographs to make a cartoon using free built-in editing features.
The software is only 16 MB in size and is free to download from both the Google play store and the Apple app store. You may download it right now and start transforming yourself into cartoons.
04Wondershare Filmora
Compatibility: Win/Mac
Rating: Win: 4.5/5, Mac: 4.6/5
Key Features: Several options for video and photo editing in HD+.
Verdict:
Wondershare Filmora Video Editor is a well renowned and well-recognised name for those in the video-editing industry. It is well known for its wide range of tools and implementations that can be made on one image using Filmora. It has a user-friendly interface and an easy-to-use photo to cartoon converter tool.
Although there is wide use of Filmora in this section, we would be talking about its ability to convert images into cartoons. The app is available for both Win and Mac, which is entirely justifiable for the feature it offers.
Wondershare Filmora - Best Video Editor for Mac/Windows
5,481,435 people have downloaded it.
Build unique custom animations without breaking a sweat.
Focus on creating epic stories and leave the details to Filmora’s auto features.
Start a creative adventure with drag & drop effects and endless possibilities.
Filmora simplifies advanced features to save you time and effort.
Filmora cuts out repetition so you can move on to your next creative breakthrough.
05Comics and Cartoon Maker
Compatibility: Android
Rating: 4.0/5
Key Features: Readily converts images to animate photos with a comic effect.
Verdict:
Are you a comic fan looking to convert your photos into animated images? Comic Cartoon Maker is the right app for you. With several options to convert your image into a cartoon. Comic Cartoon Maker is available for both Android and iOS and occupies 20MB of space in both.
You may choose a photo from your collection or snap a fresh one with the app. After you’ve selected your filter, you may add speaking balloons to create a more believable “comic effect.” This is the simplest approach to “cartoon yourself” that you will discover on the internet.
06Avatoon
Compatibility: Android/iOS
Rating: Android: 4.5/5, iOS: 4.6/5
Key Features: Facial recognition, snapshots, stickers, avatars, and animated profile picture style options.
Verdict:
If you want to transform yourself into animated pictures, this is the programme you use. Anyone can transform themselves into animated characters with a simple click, which may then be made into stickers. These Stickers may be shared among your acquaintances via the WhatsApp app as well as other major social networking sites such as Instagram, Facebook, and many others.
The software is 53 MB in size and is downloadable on both the Play Store and the App Store. The app has been reviewed positively due to the diverse usability of its features.
07Reface
Compatibility: Android/iOS
Rating: Android: 4.2/ 5, iOS: 4.7/5
Key Features: Swap your face with celebrities and animated cartoons.
Verdict:
It’s a famous cartoon picture maker, a face-swapping app available on both the Play Store and App stores. You may change your appearance to that of celebrities featuring animated Disney characters. The software is a lot of fun and very simple to use.
The app is available in both paid and free editions. Although you will be limited to setting and swapping space per day using the free versions, The app consumes a total of 14MB and comes with unique features such as GIF, stickers, meme maker, etc.
08Prisma Photo Editor
Compatibility: Android/iOS
Rating: Android: 4.4/5, iOS: 4.6/5
Key Features: Most optimised AI which converts pictures into cartoons and much more
Verdict:
Prisma picture designer is an older and well-known photo editing tool for both Android and iOS users. It is a picture editing software with the ability to create cartoon pictures in a short amount of time. This programme is a multifunctional photo editor that allows you to edit images and make yourself into a cartoon effortlessly**.**
It features a variety of picture filter choices as well as a unique feed. You can simply change a photograph into a magnificent piece of artwork in the style of Munk, Picasso, or any other design you like, which has led to such good reviews by users. Although the app consumes 68MB it is yet most compatible and easy to convert pictures to cartoons.
09Sketch Drawing Photo Editor
Compatibility: Android
Rating: 4.3/5
Key Features: Create animated pics, drawings and sketches with this free animated photo maker
Verdict:
Pencil Photo Sketch is a professional photo programme that can transform your images into stunning hand-drawn pencil drawings or comic cartoon-like illustrations. Choose an image from your album or take a photo with your smartphone to create a pencil sketch or drawing effect.
The app UI is straightforward to use; all you have to do is import a picture or choose a snapshot from your collection and transform it into a magnificent pencil drawing. The software is around 19 MB in size and therefore is downloadable on both the play store and the app store.
10Moments Cartoon Caricature
Compatibility: Android
Rating: 3.2/5
Key Features: Helps you turn your photo into an animated caricature cartoon.
Verdict:
You’ll be able to enter selfie challenges or merely appreciate the great caricature tools that will allow you to convert a regular event into a funny photo. The app’s photo editor has a plethora of tools for transforming photos into cartoons in whatever way you desire.
You’ll also have the option of exploring with monochrome caricatures. All of the options available in the Moments Cartoon Caricature software are intended to assist you in creating great social media photographs.
Part 2 The 5 Best Apps to Turn Photos into Sketches
Now that we are done editing the cartoons, next on our list is sketches. Several digital artists look forward to creating a sketch-like effect to their photos. Below is the list of five apps that would help users turn their photos into sketches.
01PicsArt
Compatibility: Android, iOS
Rating: Android: 4.2/5, iOS:4.6/5
Key Features: Several filters, effects and modifications that one can do to their clicks
Verdict: Looking to transform your pictures into an artwork or sketch? Don’t worry PicsArt has got you covered. The app is compatible with Android and iOS and takes around 75MB on your device.
The app can be used to convert images to sketches and much more, making the app multipurpose. The user friendly UI and magnificent quality of filters have given them a reputed stand in their field.
02GoArt
Compatibility: Android,iOS
Rating: Android: 4.3/5, iOS:3.7/5
Key Features: Turns photos into HD paintings that can be printed and framed.
Verdict: GoArt was created to print the images you make as a key focus. This provides some incredible benefits as well as a few possible drawbacks for your photography requirements. The programme transforms the snapshot into an artistic composition by utilising AI technology.
Even though it produces a clear and high-quality image, it might take a couple of minutes to process, as opposed to other fast solutions.
03PhotoLab
Compatibility: Android,iOS
Rating: Android: 4.0/5, iOS:4.3/5
Key Features: Photo filters, sketchbook effect, collages and montage for quick touch-ups.
Verdict: PhotoLab is the software for you if you enjoy playing with hilarious, innovative, and attractive effects. The AI-powered technology is incredibly simple to use and will instantly do modifications such as trimming for you.
You may quickly publish your picture to social media or share it on a platform developed particularly for publishing digital art from the app.
04Instatoon
Compatibility: iOS
Rating: 4.4/5
Key Features: Helps iOS users convert their images into real-life portraits.
Verdict:
Instatoon has a large fan base since it provides a high-quality product that genuinely does what you ask for! This programme has fewer picture editing options because it focuses solely on producing art from your photographs.
Scroll through the list of possible filters until you discover the ideal match. Numerous filter choices are available, such as black and white sketch designs, oil paintings, and cartoons.
05BeCasso
Compatibility: iOS
Rating: 4.6/5
Key Features: Artificial intelligence, neural networks, and aesthetic picture filters form a potent mix.
Verdict:
BeCasso is packed with excellent creative filters inspired by your favourite painters, such as Vincent Van Gogh and Pablo Picasso.
After importing your chosen photo, scroll through a big variety of different artistic styles and choose the filters you want. You would like to edit your images prior sharing them because most of the photo editing capabilities in this programme are only available when you pay for a membership.
Key Takeaways from This Episode
● Using various software, making sketches and cartoons can be tedious and time-consuming for digital enthusiasts. This brings us to a more leisurely resort to propose an effortless and hassle-free way to convert their images into cartoons and sketches.
● So far, we have learned about the various ways we can use animated pic maker and software to animate pictures and form sketch-like effects using apps made for android and iOS.
● With every app having its diversified use and application, users can download the one that suits them the best, reading through the given content to help them save time and plan better.
Most Effective Tactics to Set WhatsApp Status
Most Effective Tactics to Set WhatsApp Status
An easy yet powerful editor
Numerous effects to choose from
Detailed tutorials provided by the official channel
People generally use images to be uploaded as their WhatsApp status and unknown to many, videos as well as GIFs can also be added as status.
This status remains on your profile for 24 hours and can be viewed only by people who are on your contact list. So, if you too looking for ways to add WhatsApp status GIF, keep reading.
In this article
01 [How to set an animated GIF as WhatsApp status from the phone gallery?](#Part 1)
02 [How to set an animated GIF as WhatsApp status using an app?](#Part 2)
03 [Setting WhatsApp GIF status using device internal camera](#Part 3)
04 [How to create an interesting GIF in a hassle-free manner using Wondershare Filmora](#Part 4)
Part 1 How to set an animated GIF as WhatsApp status from the phone gallery?
If the GIF that you wish to use as the WhatsApp status is present on your phone, you can add it directly from the phone gallery. The steps to get this task done are enlisted below.
Step 1. Launch WhatsApp on your phone and then click on the Status tab.
Step 2. Tap on the My status tab to add a new status. The camera app on the phone will open and you need to launch the phone gallery now.
Step 3. Choose the desired GIF from the gallery, click on it and then tap on the Send button to set it as your status.
The selected GIF will be set as your WhatsApp status.
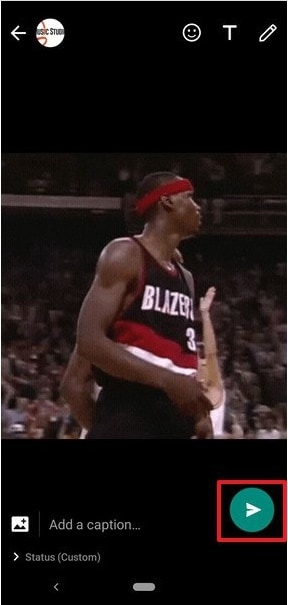
Part 2 How to set an animated GIF as WhatsApp status using an app?
Another way to add an animated GIF WhatsApp status is by using an app and for this, we recommend Giphy as the best tool. The steps to use the app for setting an animated status are as follows.
Step 1. Download, install and open the Giphy app on your phone.
Step 2. The main interface of the app will show multiple GIF options. You can also search your choice of animation based on categories or by using the search box.
Step 3. Next, click on the desired GIF to open it and see it in a larger frame.
Step 4. Under the selected GIF, click on the icon resembling a paper plane, and sharing options will appear.
Step 5. Choose the WhatsApp icon from the options available and then at the next menu, click on the My status option.
Step 6. Next, tap on the green arrow at the bottom-right corner to set GIF as WhatsApp status.
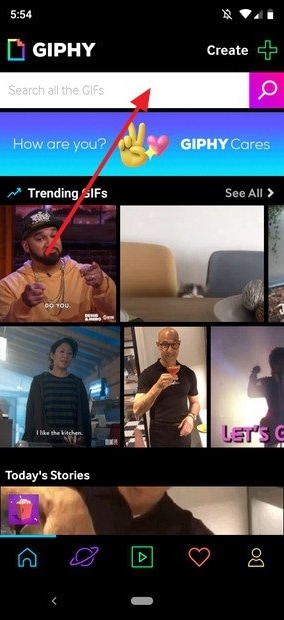
Part 3 Setting WhatsApp GIF status using device internal camera
Another way to add an animated GIF as WhatsApp status is using the internal camera of the device. The steps for the same are as follows.
Step 1. On your phone, launch WhatsApp and at the Status tab, click on the My Status option.
Step 2. The camera of the phone will get activated and now to start the video recording, you need to tap and hold the button that is used for taking the images.
Step 3. Record the video for which you wish to make an animation (video cannot be longer than 5 seconds).
Step 4. After the recording is done, you can adjust the duration using the slider and then choose to play the recorded video as GIF. Click on the Send button to share the video as WhatsApp Status.

Part 4 How to create an interesting GIF in a hassle-free manner using Wondershare Filmora Video Editor
If you wish to set your WhatsApp status as interesting GIF videos, you would need to download such animations online. Another way is to get customized GIF files and this professional tool will be required. If you too want to create your own customized animation in a hassle-free manner, we suggest using Wondershare Filmora. Not only WhatsApp status, but you can also use software for creating GIF animations for web pages, social media sites, ad banners, and other uses.
Wondershare Filmora
Get started easily with Filmora’s powerful performance, intuitive interface, and countless effects!
Try It Free Try It Free Try It Free Learn More >

Using Wondershare Filmora, artistic animations can be quickly created using an image as well as videos. The process is simple and does not require any advanced technical know-how. To create the desired GIF video, there are multiple options for customizations available like adding text, overlays, elements, and more.
Key features of the software
● Create GIF animations using videos and still images.
● Support all key video and image formats like FLV, MKV, MP4, and more.
● Allows customizing the animations by adding text, overlays, elements, and others.
● Quick and hassle-free tool for creating an interesting GIF.
● Windows and Mac support.
Steps to create GIF for WhatsApp status using Wondershare Filmora
Step 1. Launch Wondershare Filmora and add video or images from which you wish to create an animated GIF.
Step 2. Drag and drop the added media file to the timeline of the software.
Step 3. Next, edit and customize the added files using features like combine, crop, split, speed-up, slow, and more.
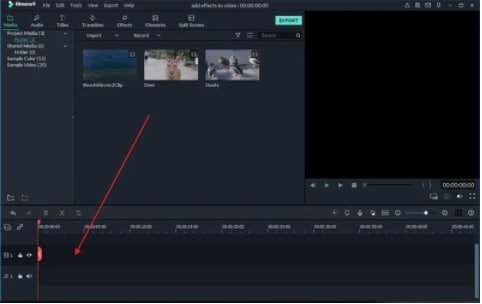
Step 4. You can also add text or elements like sound and others to the added files.
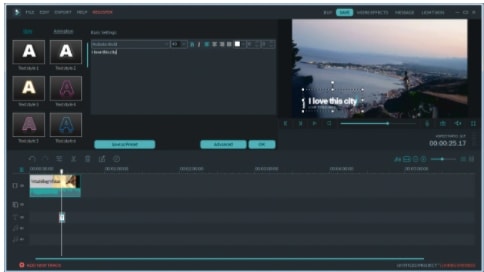
Step 5. Next, when all settings are done, choose GIF at the Local tab to save the media file as GIF. Choose the desired file name and the system location to save the file. Finally, click on the Export button.
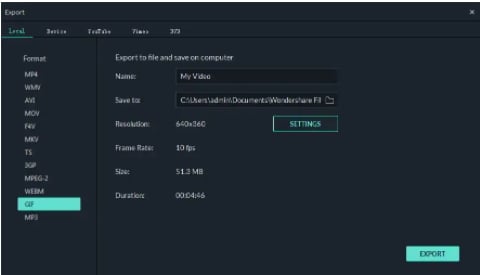
The created GIF animation will save to your selected folder and can be used as WhatsApp status, on social media sites, or for any other use as needed.
● Key Takeaways from This Episode →
●GIF animations can now be used as WhatsApp status.
●There are multiple ways to set GIF animations as WhatsApp status.
People generally use images to be uploaded as their WhatsApp status and unknown to many, videos as well as GIFs can also be added as status.
This status remains on your profile for 24 hours and can be viewed only by people who are on your contact list. So, if you too looking for ways to add WhatsApp status GIF, keep reading.
In this article
01 [How to set an animated GIF as WhatsApp status from the phone gallery?](#Part 1)
02 [How to set an animated GIF as WhatsApp status using an app?](#Part 2)
03 [Setting WhatsApp GIF status using device internal camera](#Part 3)
04 [How to create an interesting GIF in a hassle-free manner using Wondershare Filmora](#Part 4)
Part 1 How to set an animated GIF as WhatsApp status from the phone gallery?
If the GIF that you wish to use as the WhatsApp status is present on your phone, you can add it directly from the phone gallery. The steps to get this task done are enlisted below.
Step 1. Launch WhatsApp on your phone and then click on the Status tab.
Step 2. Tap on the My status tab to add a new status. The camera app on the phone will open and you need to launch the phone gallery now.
Step 3. Choose the desired GIF from the gallery, click on it and then tap on the Send button to set it as your status.
The selected GIF will be set as your WhatsApp status.
Part 2 How to set an animated GIF as WhatsApp status using an app?
Another way to add an animated GIF WhatsApp status is by using an app and for this, we recommend Giphy as the best tool. The steps to use the app for setting an animated status are as follows.
Step 1. Download, install and open the Giphy app on your phone.
Step 2. The main interface of the app will show multiple GIF options. You can also search your choice of animation based on categories or by using the search box.
Step 3. Next, click on the desired GIF to open it and see it in a larger frame.
Step 4. Under the selected GIF, click on the icon resembling a paper plane, and sharing options will appear.
Step 5. Choose the WhatsApp icon from the options available and then at the next menu, click on the My status option.
Step 6. Next, tap on the green arrow at the bottom-right corner to set GIF as WhatsApp status.
Part 3 Setting WhatsApp GIF status using device internal camera
Another way to add an animated GIF as WhatsApp status is using the internal camera of the device. The steps for the same are as follows.
Step 1. On your phone, launch WhatsApp and at the Status tab, click on the My Status option.
Step 2. The camera of the phone will get activated and now to start the video recording, you need to tap and hold the button that is used for taking the images.
Step 3. Record the video for which you wish to make an animation (video cannot be longer than 5 seconds).
Step 4. After the recording is done, you can adjust the duration using the slider and then choose to play the recorded video as GIF. Click on the Send button to share the video as WhatsApp Status.
Part 4 How to create an interesting GIF in a hassle-free manner using Wondershare Filmora Video Editor
If you wish to set your WhatsApp status as interesting GIF videos, you would need to download such animations online. Another way is to get customized GIF files and this professional tool will be required. If you too want to create your own customized animation in a hassle-free manner, we suggest using Wondershare Filmora. Not only WhatsApp status, but you can also use software for creating GIF animations for web pages, social media sites, ad banners, and other uses.
Wondershare Filmora
Get started easily with Filmora’s powerful performance, intuitive interface, and countless effects!
Try It Free Try It Free Try It Free Learn More >
Using Wondershare Filmora, artistic animations can be quickly created using an image as well as videos. The process is simple and does not require any advanced technical know-how. To create the desired GIF video, there are multiple options for customizations available like adding text, overlays, elements, and more.
Key features of the software
● Create GIF animations using videos and still images.
● Support all key video and image formats like FLV, MKV, MP4, and more.
● Allows customizing the animations by adding text, overlays, elements, and others.
● Quick and hassle-free tool for creating an interesting GIF.
● Windows and Mac support.
Steps to create GIF for WhatsApp status using Wondershare Filmora
Step 1. Launch Wondershare Filmora and add video or images from which you wish to create an animated GIF.
Step 2. Drag and drop the added media file to the timeline of the software.
Step 3. Next, edit and customize the added files using features like combine, crop, split, speed-up, slow, and more.
Step 4. You can also add text or elements like sound and others to the added files.
Step 5. Next, when all settings are done, choose GIF at the Local tab to save the media file as GIF. Choose the desired file name and the system location to save the file. Finally, click on the Export button.
The created GIF animation will save to your selected folder and can be used as WhatsApp status, on social media sites, or for any other use as needed.
● Key Takeaways from This Episode →
●GIF animations can now be used as WhatsApp status.
●There are multiple ways to set GIF animations as WhatsApp status.
Guide on How to Create GIF in WhatsApp iPhone
2024 Guide on How to Create GIF in WhatsApp iPhone
An easy yet powerful editor
Numerous effects to choose from
Detailed tutorials provided by the official channel
Standing for Graphics Interchange Format, GIF is short animated images that you can see all over social media sites and other online platforms. These interesting animations can also be shared during your conversations on WhatsApp.

So, if you too are looking for ways to create as well as send GIFs on WhatsApp iPhone, you are on the right page. Keep reading to know all the possible ways to send WhatsApp GIFs on iPhone.
In this article
01 [How to send WhatsApp GIF from the integrated library on iPhone](#Part 1)
02 [How to send Live Photos as WhatsApp GIF on iPhone](#Part 2)
03 [How to create WhatsApp GIF using videos on iPhone](#Part 3)
04 [How to create excellent GIF effortlessly using Wondershare Filmora- All in One video editing software](#Part 4)
Part 1 How to send WhatsApp GIF from the integrated library on iPhone
If you have the latest version of WhatsApp installed on your phone, you can easily and quickly send the GIF from the integrated library having a collection of GIFs in several categories. The steps to send GIF in WhatsApp iPhone are as below.
Step 1. On your iPhone, launch WhatsApp and open the contact or a group to which you wish to send the GIF.
Step 2. Click on the Stickers icon at the typing section and then choose the GIF option at the bottom.
Step 3. Multiple GIFs in different categories will appear. You can further search for the desired GIF using a keyword at the search icon at the bottom-left corner. The list of the Recents and the Favorites can also be searched using their respective icons.
Note: To save any particular GIF in the favorites list, tap and hold the GIF and then click on Add To Favorites option.
StepTap on the selected GIF and then click on the Send icon at the bottom-right corner. Your WhatsApp GIF iPhone will be sent.

Part 2 How to send Live Photos as WhatsApp GIF on iPhone
Live Photos on your iPhone can also be sent as GIFs in WhatsApp conversations and the steps for the same are as below.
Note: The feature is available for users having iPhone 6 or later versions.
Step 1.Open the WhatsApp contact on your iPhone to whom you wish to send the GIF. Click on the + icon and then choose the option of Photo & Video Library.
Step 2. Search for the Live photo in your gallery and then press it. When the image pops out, slide upwards and then click on the Select as GIF option.
Step 3. Tap on the Send icon to share the selected Live photo as GIF.

Part 3 How to create WhatsApp GIF using videos on iPhone
In addition to the integrated library, you can also convert the videos on your iPhone to GIF and share them on WhatsApp. To be used as GIF, the length of the videos cannot be more than 6 seconds. Thus, for a larger video, you need to trim it to be under 6 seconds. Steps to get the task done are as follows.
Step 1.Launch WhatsApp on your iPhone and select the contact to which you want to share the GIF. Next, click on + sign and then choose Photo & Video Library option.
Step 2.Select the desired video from your phone gallery.
Step 3.After the video is added, an editing screen will open. Here you can trim the video to make it under 6 seconds using the slider at the top. Further changes can be made like adding a sticker, text, or making a freehand drawing.
Step 4.After all customizations are done, click on the GIF button.
Step 5.Finally, tap on the Send icon at the bottom-right corner to send the edited video as GIF.

Part 4 How to create excellent GIF effortlessly using Wondershare Filmora- All in One video editing software
WhatsApp in your iPhone has a built-in option to create GIFs using the videos on the device. Though the process is simple, the option for editing and customizations are limited. So, if you want to create GIFs using videos online and with advanced editing tools, we suggest using Wondershare Filmora Video Editor .
This all-in-one video editing software will let you edit and customize your files in several ways and in a few simple steps, your desired GIF will be ready.
Wondershare Filmora
Get started easily with Filmora’s powerful performance, intuitive interface, and countless effects!
Try It Free Try It Free Try It Free Learn More >
Key features of the software
● Add media files in all ley formats like MP4, MOV, MKV, PNG, and others to create GIFs.
● Simple and quick steps for creating the desired animation.
● Allows to customize the GIF using functions like slow-down, crop, rotate, and many more.
● Allows adding text, voice, and other elements.
● Option to share the created GIF to Vimeo, and YouTube directly.
● Software support to all latest Windows and Mac systems.
Steps to create WhatsApp GIF using Wondershare Filmora.
Step 1.Open the installed software on your system and import the desired images and videos from your system.
Step 2.Drag and drop the added videos and images to the timeline.

Step 3.Edit the file using features like crop, rotate, split, and others.
Step 4.Add text and other elements as needed.

Step 5.At the Local tab, save the customized media as GIF. Select the file name and the destination and then finally, click on the EXPORT button to start processing.
● Key Takeaways from This Episode →
●Gifs for WhatsApp iPhone can be added from the integrated library.
●Live Photos, as well as videos, can also be used to create and share them as GIF.
●For creating interesting and funny GIF in a hassle-free manner, Wondershare Filmora works as the best software.
Standing for Graphics Interchange Format, GIF is short animated images that you can see all over social media sites and other online platforms. These interesting animations can also be shared during your conversations on WhatsApp.
So, if you too are looking for ways to create as well as send GIFs on WhatsApp iPhone, you are on the right page. Keep reading to know all the possible ways to send WhatsApp GIFs on iPhone.
In this article
01 [How to send WhatsApp GIF from the integrated library on iPhone](#Part 1)
02 [How to send Live Photos as WhatsApp GIF on iPhone](#Part 2)
03 [How to create WhatsApp GIF using videos on iPhone](#Part 3)
04 [How to create excellent GIF effortlessly using Wondershare Filmora- All in One video editing software](#Part 4)
Part 1 How to send WhatsApp GIF from the integrated library on iPhone
If you have the latest version of WhatsApp installed on your phone, you can easily and quickly send the GIF from the integrated library having a collection of GIFs in several categories. The steps to send GIF in WhatsApp iPhone are as below.
Step 1. On your iPhone, launch WhatsApp and open the contact or a group to which you wish to send the GIF.
Step 2. Click on the Stickers icon at the typing section and then choose the GIF option at the bottom.
Step 3. Multiple GIFs in different categories will appear. You can further search for the desired GIF using a keyword at the search icon at the bottom-left corner. The list of the Recents and the Favorites can also be searched using their respective icons.
Note: To save any particular GIF in the favorites list, tap and hold the GIF and then click on Add To Favorites option.
StepTap on the selected GIF and then click on the Send icon at the bottom-right corner. Your WhatsApp GIF iPhone will be sent.
Part 2 How to send Live Photos as WhatsApp GIF on iPhone
Live Photos on your iPhone can also be sent as GIFs in WhatsApp conversations and the steps for the same are as below.
Note: The feature is available for users having iPhone 6 or later versions.
Step 1.Open the WhatsApp contact on your iPhone to whom you wish to send the GIF. Click on the + icon and then choose the option of Photo & Video Library.
Step 2. Search for the Live photo in your gallery and then press it. When the image pops out, slide upwards and then click on the Select as GIF option.
Step 3. Tap on the Send icon to share the selected Live photo as GIF.
Part 3 How to create WhatsApp GIF using videos on iPhone
In addition to the integrated library, you can also convert the videos on your iPhone to GIF and share them on WhatsApp. To be used as GIF, the length of the videos cannot be more than 6 seconds. Thus, for a larger video, you need to trim it to be under 6 seconds. Steps to get the task done are as follows.
Step 1.Launch WhatsApp on your iPhone and select the contact to which you want to share the GIF. Next, click on + sign and then choose Photo & Video Library option.
Step 2.Select the desired video from your phone gallery.
Step 3.After the video is added, an editing screen will open. Here you can trim the video to make it under 6 seconds using the slider at the top. Further changes can be made like adding a sticker, text, or making a freehand drawing.
Step 4.After all customizations are done, click on the GIF button.
Step 5.Finally, tap on the Send icon at the bottom-right corner to send the edited video as GIF.
Part 4 How to create excellent GIF effortlessly using Wondershare Filmora- All in One video editing software
WhatsApp in your iPhone has a built-in option to create GIFs using the videos on the device. Though the process is simple, the option for editing and customizations are limited. So, if you want to create GIFs using videos online and with advanced editing tools, we suggest using Wondershare Filmora Video Editor .
This all-in-one video editing software will let you edit and customize your files in several ways and in a few simple steps, your desired GIF will be ready.
Wondershare Filmora
Get started easily with Filmora’s powerful performance, intuitive interface, and countless effects!
Try It Free Try It Free Try It Free Learn More >
Key features of the software
● Add media files in all ley formats like MP4, MOV, MKV, PNG, and others to create GIFs.
● Simple and quick steps for creating the desired animation.
● Allows to customize the GIF using functions like slow-down, crop, rotate, and many more.
● Allows adding text, voice, and other elements.
● Option to share the created GIF to Vimeo, and YouTube directly.
● Software support to all latest Windows and Mac systems.
Steps to create WhatsApp GIF using Wondershare Filmora.
Step 1.Open the installed software on your system and import the desired images and videos from your system.
Step 2.Drag and drop the added videos and images to the timeline.
Step 3.Edit the file using features like crop, rotate, split, and others.
Step 4.Add text and other elements as needed.
Step 5.At the Local tab, save the customized media as GIF. Select the file name and the destination and then finally, click on the EXPORT button to start processing.
● Key Takeaways from This Episode →
●Gifs for WhatsApp iPhone can be added from the integrated library.
●Live Photos, as well as videos, can also be used to create and share them as GIF.
●For creating interesting and funny GIF in a hassle-free manner, Wondershare Filmora works as the best software.
Also read:
- Updated 2024 Approved Best Tips for Effortless Unity 3D Animation
- The Only Guide Youll Ever Need to Learn About GIF Video Downloader
- How to Combine Two/More GIFs Into One GIF Mergers Offered
- New 2024 Approved 10 Scary Anime Girls That Will Make You Creepy
- Updated 2024 Approved How to Create Your Own Avatar Free
- New 6 Types of Animation You May Like for 2024
- New 2024 Approved Something About Types of Motion Graphics
- Updated 2024 Approved Complete Guide to Send Gif WhatsApp on Android
- Updated How to Liven Up Your Animate Website on Scroll for 2024
- 2024 Approved Epic Formula to Animate Photos From These 10 Animate Pictures App
- The 15 Best Apps to Turn Photos Into Cartoons and Sketches for 2024
- Updated In 2024, No. 1 Maker to Animate Your Logo Online Free
- 2024 Approved 12 Animation Video Maker That Can Triple Your Conversion Rates
- Updated In 2024, Know All About Animated Business Logos and the Best Tools to Create One
- 2024 Approved How to Create YouTube Intro Animation Like a Pro
- New Adobe Animate Text Effects Skills You Need to Know
- New 2024 Approved Tips on How to Get Awesome Background for Slideshow in PowerPoint
- New 10 Classical Animated Cartoon Types With Examples for 2024
- Uncensored Top 10 + Free Streaming Sites
- 8 Best Motion Graphics Online Tools for Your Inspiration for 2024
- In 2024, 20 Free After Effects Logo Reveal Templates You Will Want to Know
- Updated 2024 Approved The Only Guide Youll Ever Need to Learn About GIF Video Downloader
- Updated In 2024, Ways on How to Get Started in Stop Motion Claymation
- New In 2024, 10 Great MP4 to GIF Converters to Get Perfect-Made GIF
- New In 2024, 10 Best Romance Anime Movies You Need to Watch
- New 21 Top Free Anime Websites to Watch Anime Online-Anime for 2024
- New 2024 Approved The Art of Comics - Learn How to Do Funny Cartoon Drawings
- In 2024, How to Make Well Done Animated GIF By Yourself?
- Updated In 2024, Top 10 Online Animated Logo Makers Everyone Should Know
- New 2024 Approved Top 10 Animated DP for WhatsApp
- New 2024 Approved Learn How to Draw Cartoons Step by Step with This Guide
- New 2024 Approved Dead Simple Guide to Create New and Exciting Blackboard Animation
- New Is Blender 2D Animation As Awesome As 3D for 2024
- 2024 Approved Learn Disney Cartoon Drawing to See More Disney Magic Moments
- Updated How to Create Benime Whiteboard Animation in Android
- Updated Learn About Lip-Syncing in Animation for 2024
- New 2024 Approved How to Make an Animated Travel Map Video?
- New The Best Free 12 GIF Meme Maker at a Glance for 2024
- How to Create Benime Whiteboard Animation in Android
- 2024 Approved The 10 Most Adorable Aesthetic Cartoon Characters of All Time
- New In 2024, How to Create a Whiteboard Video Step by Step 2023 Updated
- New 2024 Approved 15 Forgotten Cartoon Characters of All Time You Used to Love
- Updated 18 Best Tools and Services to Create Animated Videos for Business 2023 for 2024
- Updated How to Find & Make Animated Christmas GIFs, In 2024
- New In 2024, No. 1 Maker to Animate Your Logo Online Free
- Updated 2024 Approved Best 15 Classics Animated Cartoon Movies
- 5 Different Animation Styles A Simple but Complete Guide for 2024
- Pattern Locks Are Unsafe Secure Your Realme C53 Phone Now with These Tips
- Updated User Choice Top Free Streaming Sites for Sports for 2024
- In 2024, Overview of the Best Nokia C110 Screen Mirroring App | Dr.fone
- Bypass Activation Lock From Apple iPhone 14 - 4 Easy Ways
- In 2024, How Can Oppo Find N3 FlipMirror Share to PC? | Dr.fone
- How to share/fake gps on Uber for Infinix Note 30 Pro | Dr.fone
- In 2024, Learn How To Lock Stolen Your iPhone XS Max Properly | Dr.fone
- How to Bypass iCloud Lock on iPhone 8
- In 2024, How to Screen Mirroring HTC U23 Pro? | Dr.fone
- How to Stop Google Chrome from Tracking Your Location On Nokia C12 Pro? | Dr.fone
- Pokemon Go No GPS Signal? Heres Every Possible Solution On Nubia Z50 Ultra | Dr.fone
- How to Change Google Play Location On Xiaomi Redmi K70E | Dr.fone
- How Can I Use a Fake GPS Without Mock Location On Apple iPhone 7? | Dr.fone
- Title: New In 2024, Apps to Animate Still Pictures
- Author: Elon
- Created at : 2024-05-19 03:05:20
- Updated at : 2024-05-20 03:05:20
- Link: https://animation-videos.techidaily.com/new-in-2024-apps-to-animate-still-pictures/
- License: This work is licensed under CC BY-NC-SA 4.0.
