
:max_bytes(150000):strip_icc():format(webp)/how-to-see-who-viewed-your-tiktok-5271090-e2cb663541b8484a8a2e80ffbdd98db3.jpg)
New In 2024, Before You Learn Facebook Slideshow 5 Things You Should Know
Before You Learn Facebook Slideshow: 5 Things You Should Know
Before You Learn Facebook Slideshow Things You Should Know [How-TOS]
An easy yet powerful editor
Numerous effects to choose from
Detailed tutorials provided by the official channel
If you are looking for interesting solutions to create the most amazing slideshow on Facebook, rest assured, you are at the right place to get every help!
In this article
01 [Where Did the Facebook Slideshow Tool Go?](#Part 1)
02 [How to Create a Slideshow on Facebook?](#Part 2)
03 [Top 5 Facebook Slideshow Alternatives](#Part 3)
Part 1 Where Did the Facebook Slideshow Tool Go?
While almost everyone around you must be fascinated about the stunning and appealing slideshows that the Facebook community used to offer its users with, it is evidently sad to realize that the utility has become a story of the past. The creators of the tool have by now, took multiple rounds on removing, retrieving and again removing the utility from the official Facebook website as well as the smartphone application.
It is however relaxing to know that the Facebook developer team has worked efficiently to produce alternatives to the application’s slideshow tool after the latter’s permanent disappearance from the user account pages and app profiles. You can now work with the Facebook Ads Manager or Facebook Creator Studio to sort out the concern of creating slideshow on Facebook.
Part 2 How to Create a Slideshow on Facebook?
Facebook slideshows are incredibly awesome trends of making a concise, expressive and to the point delivery of diverse content varieties. Piping up your information through and extensive assortment of sound, text and motion, these short snippets are no less than a seamless video streaming of the same information.
If you are about to launch a new product for your business enterprise, consider working with the utility to create an elusive Facebook slideshow ad for a quick demonstration of your brand among different social media communities, turning the fun of slideshow creation into a smart and responsive product promotion strategy, without having to bother your wallet for the same.
If you are concerned about the quality of the final output, it is not a cause of worry, since the Facebook slideshow creator tool promises you of an appreciable slideshow result, that takes a quick loading time, is comparable to a high resolution video and works well with all your favourite devices.
Having talked enough on the usage credibility, let us now proceed to adhere to the concern of creating a slideshow on Facebook with a diversity of media files in the following section:
01Facebook Slideshows from Videos
Step 1: Launch the Tool
Start with opening the Facebook app in your device to launch the ‘Facebook Ads Manager’ utility and tap ‘Create’ in the latter’s welcome interface.

Step 2: Select Your Video
Browse through your device’s gallery to choose a desired video for slideshow creation. When you have made your choice, set a 16:9 aspect ratio for the same to avoid square cropping.

Step 3: Upload Your Video
Proceed with uploading your video to the Facebook tool by clicking on the ‘Add Video’ button and watch it getting split into still images frames, from where you can view a seamless slideshow display of the same.

Step 4: Select Multiple Frames
you can now select a series of image frames and arrange them in the correct sequence of appearance by clicking on each one of them to be included within the creator timeline.
Step 5: Add Captions Your Stills
Tap on the small ‘Pencil’ icon within the images to customize them with suitable captions. You can further add style to these image names by making appropriate selections of font, position color of every frame caption. Once you have finished naming all the frames, click on ‘Save’ to apply your changes.
Step 6: Preview Your Creation
When you are satisfied with your work, consider watching a preview of the same to be assured of the perfect placement of everything. To do this, navigate to the ‘Preview Pane’ at the top right corner of the program interface, and tapping the ‘Preview’ button.
02Facebook Slideshows from Images
Step 1: Launch the Tool
To begin with, open the Facebook app in any of your preferred devices and proceed to launch the ‘Facebook Ads Manager’ tool, followed by clicking on the ‘Create Slideshow’ button at the bottom of the tool’s welcome screen.

Step 2: Upload Your Images
As you complete Step 1, a ‘Video Creation Kit’ will appear, where you will need to click within the ‘Create Slideshow’ checkbox, followed by tapping on the ‘Continue’ button at the bottom right corner of the window.

Step 3: Upload Your Images
Clicking on the ‘Continue’ button will take you to the ‘Settings Box’ where you need to tap on the ‘Add Photos’ option. An image selection box will now pop up, allowing you to select and upload a maximum of 10 images from your Facebook account, stock and page galleries or your device collections. Prefer keeping all the photos within the same aspect ratio to escape the extra task of cropping the images.
When you have finished making your selections, navigate to the bottom right corner of the window and hit the ‘Confirm’ button. This will make your selections shows up all together in the ‘Settings Box’, in the sequential order of their appearance in the slideshow. If you want to introduce some changes, delete and re-upload the images.

Step 4: Customize Your Images with Captions
To add suitable captions to the slideshow images, tap the ‘Pencil’ icon within them. You are also allowed to customize the stills with transitions, effects, etc., and make adjustments to the screen time of each image frame.

Part 3 Top 5 Facebook Slideshow Alternatives
Having heard about the disappointment from the exit of the Facebook slideshow creator tool, it becomes naturally important to seek through the affordable alternatives of the same to set straight the issue of how to do a slideshow on Facebook. Working towards the solutions, let us learn about the top 5 most preferred Facebook slideshow alternatives in the following section:
03PowerDirector
One of the most suitable candidates of Facebook slideshow alternatives, PowerDirector easily lands among the highly preferred tools for creating stunning slideshows. Compatible with the MacOs and Windows operating systems, the software lets you create high end, top quality slideshow presentations with a classic and professional outlook.
Talking of the creator program’s most appealing features, this one is an upgraded slideshow creator suite that is capable enough to address your most diverse design requirements, like those of high resolution video effects, Hollywood inspired movies and personal content sharing. The software package is loaded with tons of elusive video effects, themed templates and transition effects to facilitate a compelling creation.
Working with PowerDirector’s exclusive slideshow program, you get the liberty to escape the notch of storyboard and timeline editing and start the creation process in the launch window of the program itself. The extremely user cohesive interface of the software guides you through each creation step via streamlined plug-ins, making the design process quick and super easy even for newbies.

04SmartSHOW 3D
When thinking of how to make a slideshow on facebook, this one is another top rated Facebook slideshow alternatives, that comes with an extensive toolkit to create amazing presentations from video clips and images, while complementing them with a plethora of effects and transitions. Some of the key features of the program include multiple slide layering, animating selected layers and fine tune the transitions with keyframe adjustments.
You can additionally uplift the slides with image masks, shapes, 3D animated texts and other forms of graphic arts. An additively appealing feature of the slideshow creator program is the ability to mix descriptive images with your favorite music to develop stunning masterpieces of entertaining slideshows, which you can conveniently share and enjoy with family and friends on a diversity of social media platforms.
Using the tool, you can work with applying motion graphic effects to still photos without having to be an over the top tech savvy user. The editor library of the tool is loaded with some of the most awesome transition effects, like, wipes, 3D motions, gradients and fade-ins, along with the facility of adding titles, voice comments and captions to the slides of your presentation. The tool is however, exclusively a Windows compatible utility.

05PhotoStage Slideshow Software
Next in the list of alternatives to the Facebook slideshow maker tool is the aforesaid software program, that allows you to create professional quality slideshows with as many videos and images as you can possibly think of and supplement them with a variety of texts, music, voiceovers and effects. You can further work on customizing the slideshow images with making suitable adjustments in color, brightness and saturation parameters.
The software comes with a Quick Create utility, which you can use to instantly create high resolution slideshows and spark them up with zooms, pans and fades, while getting a preview of the same in real-time. You can even proceed to burn your creation into a disk, make an online upload, or simply save it to your device.
Talking of the cost constraints of this amazing slideshow creator tool, you get to work with the software for a commercial use, free of cost for a definite time period and with a restricted number of features. However, you can always consider on buying the paid version of the program to avail an access to the latter’s entire range of features and utilities. The tool works well with all Windows and Mac supported devices.

06Kizoa
Moving ahead in the list you have the Kizoa slideshow maker for Facebook, which is a dependable alternative to the conventional Facebook slideshow creator. Choosing this tool to design your slideshow presentation, you are entitled to the amazing feature of displaying your presentation on almost any screen, including smartphones, television, computers and tablets with getting to choose from 7 types of aspect ratios. The tool is designed to have a Windows and MacOs compatibility.
The application further lets you add the most specific parts of your images within the presentation slides with its smart cropping tool, while keeping an account of the file formats and screen space requirements of the images with utmost convenience. You are also allowed to choose from a storehouse of preset templates to add your desired photos and video clips in the slideshow and entice them with GIFs, effects and texts.
When you are done with the creation process, just attempt to download and save the slideshow in any preferred file format, such as, AVI, GIF, MP4, MOV, MPEG2, etc., or even burn it to a DVD. You are now free to share your slideshow on various online media sharing platforms. Using the free version of Kizoa, you are permitted to create slideshows with a duration of 60 seconds, which can be upgraded to a limitless length with a paid subscription.

07SlideLab
If you are a newbie to the field of creating slideshows, and wondering about how to create a slideshow on Facebook 2021, this one is affordably the most perfect tool you can rely on. Packed with an extensive range of effects, music, transitions and filters, SlideLab is the smartest software choice to create slideshow presentations for family entertainment and personal use.
The tool consists of an in built sharing utility that allows you to design and share slideshows on social media platforms, like YouTube, Facebook and Instagram with a single click. Working on your slideshow within the program, you can escape the cringe of cropping the images, as they are automatically adjusted to the square fit alignment of the app’s working window. You can quickly rearrange the placement of the images in the slideshow as per your preferences.
As far as the sharing credibility of the presentation is concerned, the software grants you the liberty to export your creation in PPTX and PDF file formats, and view them later in Keynote and PowerPoint.
The app shows a convenient workflow with Windows and MacOs devices and limits the image play duration to 3 seconds, along with a permitting a restricted number of transitions and effects in its free version, which you can access by availing a paid subscription of the program.

08Creating Facebook Slideshows With Wondershare Filmora
When browsing through feasible alternatives on how to make a facebook slideshow, the IT market is indeed flooded with a hoard of creation utilities. If you have just begun trying hands at slideshow creation, consider using the Wondershare Filmora Video Editor slideshow maker application for addressing your slideshow design concerns. The extensive, feature rich library of the app lets you create attractive presentation masterpieces with a wide range of special effects, transitions, texts, titles and music tracks.
For Win 7 or later (64-bit)
For macOS 10.12 or later
Working with the Filmora slideshow creator, you can trim, crop or cut the video clips and images of your presentation to give them the best look. The tool comes with a unique Filmora Template Mode to create business oriented Facebook slideshows, is compatible to any windows and Mac supported device and lets you easily make a slideshow on Facebook.
● Ending Thoughts →
● Creating Facebook slideshows can be useful in addressing a variety of personal and professional data sharing needs.
● Browsing through design alternatives, you will land across a pool of software choices to create stunning slideshows for Facebook.
● When deciding on the best Facebook slideshow creator tool, Wondershare Filmora can be your smartest pick.
If you are looking for interesting solutions to create the most amazing slideshow on Facebook, rest assured, you are at the right place to get every help!
In this article
01 [Where Did the Facebook Slideshow Tool Go?](#Part 1)
02 [How to Create a Slideshow on Facebook?](#Part 2)
03 [Top 5 Facebook Slideshow Alternatives](#Part 3)
Part 1 Where Did the Facebook Slideshow Tool Go?
While almost everyone around you must be fascinated about the stunning and appealing slideshows that the Facebook community used to offer its users with, it is evidently sad to realize that the utility has become a story of the past. The creators of the tool have by now, took multiple rounds on removing, retrieving and again removing the utility from the official Facebook website as well as the smartphone application.
It is however relaxing to know that the Facebook developer team has worked efficiently to produce alternatives to the application’s slideshow tool after the latter’s permanent disappearance from the user account pages and app profiles. You can now work with the Facebook Ads Manager or Facebook Creator Studio to sort out the concern of creating slideshow on Facebook.
Part 2 How to Create a Slideshow on Facebook?
Facebook slideshows are incredibly awesome trends of making a concise, expressive and to the point delivery of diverse content varieties. Piping up your information through and extensive assortment of sound, text and motion, these short snippets are no less than a seamless video streaming of the same information.
If you are about to launch a new product for your business enterprise, consider working with the utility to create an elusive Facebook slideshow ad for a quick demonstration of your brand among different social media communities, turning the fun of slideshow creation into a smart and responsive product promotion strategy, without having to bother your wallet for the same.
If you are concerned about the quality of the final output, it is not a cause of worry, since the Facebook slideshow creator tool promises you of an appreciable slideshow result, that takes a quick loading time, is comparable to a high resolution video and works well with all your favourite devices.
Having talked enough on the usage credibility, let us now proceed to adhere to the concern of creating a slideshow on Facebook with a diversity of media files in the following section:
01Facebook Slideshows from Videos
Step 1: Launch the Tool
Start with opening the Facebook app in your device to launch the ‘Facebook Ads Manager’ utility and tap ‘Create’ in the latter’s welcome interface.
Step 2: Select Your Video
Browse through your device’s gallery to choose a desired video for slideshow creation. When you have made your choice, set a 16:9 aspect ratio for the same to avoid square cropping.
Step 3: Upload Your Video
Proceed with uploading your video to the Facebook tool by clicking on the ‘Add Video’ button and watch it getting split into still images frames, from where you can view a seamless slideshow display of the same.
Step 4: Select Multiple Frames
you can now select a series of image frames and arrange them in the correct sequence of appearance by clicking on each one of them to be included within the creator timeline.
Step 5: Add Captions Your Stills
Tap on the small ‘Pencil’ icon within the images to customize them with suitable captions. You can further add style to these image names by making appropriate selections of font, position color of every frame caption. Once you have finished naming all the frames, click on ‘Save’ to apply your changes.
Step 6: Preview Your Creation
When you are satisfied with your work, consider watching a preview of the same to be assured of the perfect placement of everything. To do this, navigate to the ‘Preview Pane’ at the top right corner of the program interface, and tapping the ‘Preview’ button.
02Facebook Slideshows from Images
Step 1: Launch the Tool
To begin with, open the Facebook app in any of your preferred devices and proceed to launch the ‘Facebook Ads Manager’ tool, followed by clicking on the ‘Create Slideshow’ button at the bottom of the tool’s welcome screen.
Step 2: Upload Your Images
As you complete Step 1, a ‘Video Creation Kit’ will appear, where you will need to click within the ‘Create Slideshow’ checkbox, followed by tapping on the ‘Continue’ button at the bottom right corner of the window.
Step 3: Upload Your Images
Clicking on the ‘Continue’ button will take you to the ‘Settings Box’ where you need to tap on the ‘Add Photos’ option. An image selection box will now pop up, allowing you to select and upload a maximum of 10 images from your Facebook account, stock and page galleries or your device collections. Prefer keeping all the photos within the same aspect ratio to escape the extra task of cropping the images.
When you have finished making your selections, navigate to the bottom right corner of the window and hit the ‘Confirm’ button. This will make your selections shows up all together in the ‘Settings Box’, in the sequential order of their appearance in the slideshow. If you want to introduce some changes, delete and re-upload the images.
Step 4: Customize Your Images with Captions
To add suitable captions to the slideshow images, tap the ‘Pencil’ icon within them. You are also allowed to customize the stills with transitions, effects, etc., and make adjustments to the screen time of each image frame.
Part 3 Top 5 Facebook Slideshow Alternatives
Having heard about the disappointment from the exit of the Facebook slideshow creator tool, it becomes naturally important to seek through the affordable alternatives of the same to set straight the issue of how to do a slideshow on Facebook. Working towards the solutions, let us learn about the top 5 most preferred Facebook slideshow alternatives in the following section:
03PowerDirector
One of the most suitable candidates of Facebook slideshow alternatives, PowerDirector easily lands among the highly preferred tools for creating stunning slideshows. Compatible with the MacOs and Windows operating systems, the software lets you create high end, top quality slideshow presentations with a classic and professional outlook.
Talking of the creator program’s most appealing features, this one is an upgraded slideshow creator suite that is capable enough to address your most diverse design requirements, like those of high resolution video effects, Hollywood inspired movies and personal content sharing. The software package is loaded with tons of elusive video effects, themed templates and transition effects to facilitate a compelling creation.
Working with PowerDirector’s exclusive slideshow program, you get the liberty to escape the notch of storyboard and timeline editing and start the creation process in the launch window of the program itself. The extremely user cohesive interface of the software guides you through each creation step via streamlined plug-ins, making the design process quick and super easy even for newbies.
04SmartSHOW 3D
When thinking of how to make a slideshow on facebook, this one is another top rated Facebook slideshow alternatives, that comes with an extensive toolkit to create amazing presentations from video clips and images, while complementing them with a plethora of effects and transitions. Some of the key features of the program include multiple slide layering, animating selected layers and fine tune the transitions with keyframe adjustments.
You can additionally uplift the slides with image masks, shapes, 3D animated texts and other forms of graphic arts. An additively appealing feature of the slideshow creator program is the ability to mix descriptive images with your favorite music to develop stunning masterpieces of entertaining slideshows, which you can conveniently share and enjoy with family and friends on a diversity of social media platforms.
Using the tool, you can work with applying motion graphic effects to still photos without having to be an over the top tech savvy user. The editor library of the tool is loaded with some of the most awesome transition effects, like, wipes, 3D motions, gradients and fade-ins, along with the facility of adding titles, voice comments and captions to the slides of your presentation. The tool is however, exclusively a Windows compatible utility.
05PhotoStage Slideshow Software
Next in the list of alternatives to the Facebook slideshow maker tool is the aforesaid software program, that allows you to create professional quality slideshows with as many videos and images as you can possibly think of and supplement them with a variety of texts, music, voiceovers and effects. You can further work on customizing the slideshow images with making suitable adjustments in color, brightness and saturation parameters.
The software comes with a Quick Create utility, which you can use to instantly create high resolution slideshows and spark them up with zooms, pans and fades, while getting a preview of the same in real-time. You can even proceed to burn your creation into a disk, make an online upload, or simply save it to your device.
Talking of the cost constraints of this amazing slideshow creator tool, you get to work with the software for a commercial use, free of cost for a definite time period and with a restricted number of features. However, you can always consider on buying the paid version of the program to avail an access to the latter’s entire range of features and utilities. The tool works well with all Windows and Mac supported devices.
06Kizoa
Moving ahead in the list you have the Kizoa slideshow maker for Facebook, which is a dependable alternative to the conventional Facebook slideshow creator. Choosing this tool to design your slideshow presentation, you are entitled to the amazing feature of displaying your presentation on almost any screen, including smartphones, television, computers and tablets with getting to choose from 7 types of aspect ratios. The tool is designed to have a Windows and MacOs compatibility.
The application further lets you add the most specific parts of your images within the presentation slides with its smart cropping tool, while keeping an account of the file formats and screen space requirements of the images with utmost convenience. You are also allowed to choose from a storehouse of preset templates to add your desired photos and video clips in the slideshow and entice them with GIFs, effects and texts.
When you are done with the creation process, just attempt to download and save the slideshow in any preferred file format, such as, AVI, GIF, MP4, MOV, MPEG2, etc., or even burn it to a DVD. You are now free to share your slideshow on various online media sharing platforms. Using the free version of Kizoa, you are permitted to create slideshows with a duration of 60 seconds, which can be upgraded to a limitless length with a paid subscription.
07SlideLab
If you are a newbie to the field of creating slideshows, and wondering about how to create a slideshow on Facebook 2021, this one is affordably the most perfect tool you can rely on. Packed with an extensive range of effects, music, transitions and filters, SlideLab is the smartest software choice to create slideshow presentations for family entertainment and personal use.
The tool consists of an in built sharing utility that allows you to design and share slideshows on social media platforms, like YouTube, Facebook and Instagram with a single click. Working on your slideshow within the program, you can escape the cringe of cropping the images, as they are automatically adjusted to the square fit alignment of the app’s working window. You can quickly rearrange the placement of the images in the slideshow as per your preferences.
As far as the sharing credibility of the presentation is concerned, the software grants you the liberty to export your creation in PPTX and PDF file formats, and view them later in Keynote and PowerPoint.
The app shows a convenient workflow with Windows and MacOs devices and limits the image play duration to 3 seconds, along with a permitting a restricted number of transitions and effects in its free version, which you can access by availing a paid subscription of the program.
08Creating Facebook Slideshows With Wondershare Filmora
When browsing through feasible alternatives on how to make a facebook slideshow, the IT market is indeed flooded with a hoard of creation utilities. If you have just begun trying hands at slideshow creation, consider using the Wondershare Filmora Video Editor slideshow maker application for addressing your slideshow design concerns. The extensive, feature rich library of the app lets you create attractive presentation masterpieces with a wide range of special effects, transitions, texts, titles and music tracks.
For Win 7 or later (64-bit)
For macOS 10.12 or later
Working with the Filmora slideshow creator, you can trim, crop or cut the video clips and images of your presentation to give them the best look. The tool comes with a unique Filmora Template Mode to create business oriented Facebook slideshows, is compatible to any windows and Mac supported device and lets you easily make a slideshow on Facebook.
● Ending Thoughts →
● Creating Facebook slideshows can be useful in addressing a variety of personal and professional data sharing needs.
● Browsing through design alternatives, you will land across a pool of software choices to create stunning slideshows for Facebook.
● When deciding on the best Facebook slideshow creator tool, Wondershare Filmora can be your smartest pick.
Tips on How to Learn Graphics Animation
Tips for Learning Graphics Animation
An easy yet powerful editor
Numerous effects to choose from
Detailed tutorials provided by the official channel
In the recent few years, videos have become the primary tool for marketers to attract their target customers. Unlike banners and pamphlets, videos are relatively more engaging and make it easier for marketers to establish a connection with the viewers. Now, each brand has different preferences when it comes to choosing the right video marketing strategy.
While some brands opt for conventional video advertisements, others get a bit creative and introduce graphics animation to their videos to make them more captivating. Of course, if you want to maximize the user’s attention and retain more customers, you would prefer the latter. Animated videos are more engaging and also sets the brand apart from the rest of the crowd.
In this article
01 [Why Study Graphic Design and Animation?](#Part 1)
02 [What’s the Difference Between Motion Graphics and Animation?](#Part 2)
03 [5 Graphic Design Techniques for Motion Graphics](#Part 3)
04 [How to Create Animated Graphics That Stand Out](#Part 4)
Part 1 Why Study Graphic Design and Animation?
So, why should you care about graphic design and animation? The answer is pretty simple - because these two concepts can help you step up your brand’s marketing game and attract maximum leads. By incorporating graphics and animations into your videos, you’ll be able to make them highly engaging.
However, user engagement isn’t the only reason why graphics and animations should be a part of your marketing strategy. They can also be used to simplify complex topics and explain them in an interactive manner. Let’s say you want to explain the overall working of a particular product. Instead of creating a boring tutorial, you can design explainer white paper animations to explain each step in detail and help viewers understand the overall dynamics of the product more conveniently.
Similarly, the applications of animated videos are endless. From product promotion to everyday marketing, they can help businesses in different scenarios and maximize the results.
Part 2 What’s the Difference Between Motion Graphics and Animation?
Now, whenever we talk about graphic animation videos, people often get confused between motion graphics and simple animations. While both these terms are in correlation, there are certain factors that separate motion graphics from animations. In layman terms, all motion graphics are animations, but not all animations are motion graphics. To give you a better clarity, we have explained both motion graphics and animations in detail.
01Motion Graphics
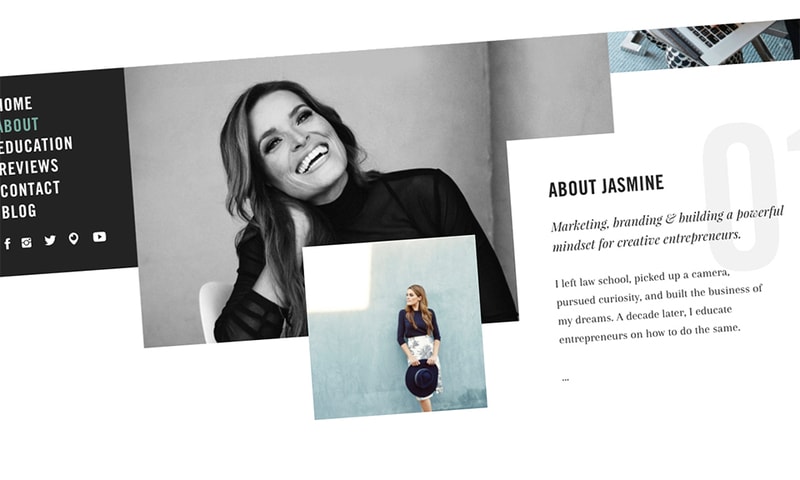
Motion Graphics are one of the sub-categories of animations that are primarily created to add motion to still images. The flashing logos you see on different websites are the perfect example of motion graphics. The primary objective of motion graphics is to make designs more appealing. A traditional website logo may not grab the visitor’s attention, but if it has a slight movement, it’ll most likely draw the eyeballs, even if someone is visiting the website for the first time. In general, designers apply motion graphics to objects and texts to enhance their visual appearance.
Moreover, motion graphics can also make it easier to educate people on a certain topic. For instance, a still image may not clarify the overall USPs of your brand. However, by designing a dedicated motion graphics, you’ll be able to explain everything and connect with the potential customers more effectively. Some designers also use motion graphics to simply uplift the overall visual appearance of their designs.
Whatever the reason, using motion graphics in 20can make you reach your marketing objectives more conveniently.
02Animations
Animation, on the other hand, is a general broader Umbrella term that’s used to define a wide variety of visual representations. As we mentioned earlier, motion graphics are also a part of graphics animations. However, animations aren’t just limited to moving text/objects. According to the official definition, an animation can be explained as a video in which motion is introduced to make static objects move in the landscape.
The general idea of an animation is to convey a storyline in an interactive manner while keeping the customers engaged. Animations are usually divided into two categories, i.e., animations and animations. White paper animations are a great example of animations as the entire movement is in a two-dimensional landscape. In animations, on the other hand, the movement is not restricted to two dimensions only. Cartoons and animated series are the perfect example of animations as the objects are allowed to move in a three dimensional landscape.
Part 3 5 Graphic Design Techniques for Motion Graphics
So, now that you know how motion graphics differ from the regular animations, let’s understand the tactics to design motion graphics as a beginner. Of course, if you are planning to step into the world of animated videos, you are less likely to start with graphic animation videos. A better starting point would be something as simple as a motion graphics animation. Here are 5 tactics that’ll guide you the right way while creating a motion graphics animation for the first time.
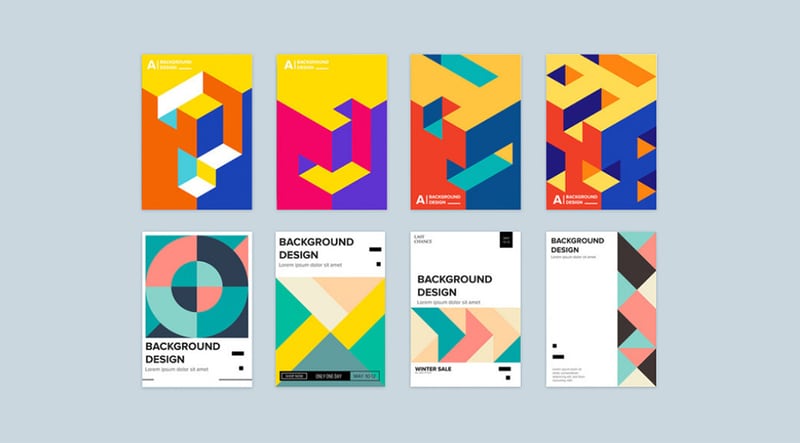
01Start With a Template
Now, when it comes to designing a motion graphics animation, you can either start on a blank canvas or choose one of the ready-to-use templates to speed up the entire designing process. As an absolute beginner, it would be better to choose the latter as it’ll require less designing from your part.
Working on a blank canvas is quite a challenging task, especially when you don’t have years of experience as a designer. But, with a ready made template, you can start with the editing process right away. There are a plethora of editing platforms like Canva, PicArt, and Visme where you’ll find motion graphics templates. These templates are fully customizable, which means you can manipulate their design to meet your specific brand requirements.
02Be Subtle With Personal Branding
Now, even if you are choosing a built-in template, it would be crucial to customize its color scheme so that it matches the overall theme of your brand. Let’s say you are using red and white colors on your website. So, while designing the motion graphics, make sure to change its existing color scheme with red and white so that it can go with your website in a hassle-free manner.
In addition to the color scheme, you can also use other visual elements that represent your brand in the digital landscape. However, do not overdo the personal branding as it may also backfire and affect the quality of your motion graphics animation.
03Do Not Add Unnecessary Elements
It’s also worth noting that any unnecessary element in your motion graphics design will only make it cluttered and damage the overall user experience. Before you publish the motion graphics on any online portal, make sure to analyze it from users’ point-of-view. In case you find any invaluable elements, go ahead and remove them from the design.
04Design Multiple Variations
It’s not necessary that the first motion graphic you design will be worth publishing on your website. That’s why it’s always necessary to design multiple variations so that you can upload the most appealing design on your website. Some designers also A/B test their motion graphics design to choose the best design among all the variations. In any case, having multiple variations will only help you maintain the high market standards.
05Use GIF Format
Finally, once your motion graphics animation is ready, go ahead and save it in GIF format. With GIF format, you’ll be able to upload the picture across all platforms and ensure that the object movement inside the motion graphics doesn’t get affected at all.
Part 5 How to Create Animated Graphics That Stand out
At this point, you already know that designing a graphics animation requires a professional editing tool. While there are different options to choose from, we recommend using Wondershare Wondershare Filmora Video Editor . It’s a professional video editing tool that comes with a built-in media library where you’ll find hundreds of ready-to-use animation templates.
These templates are one-click away from being integrated into your videos, which means you’ll be able to design graphic animation videos in no time. The tool offers a timeline based editing panel that speeds up the entire editing process and makes your workflow much smoother. All the animation templates in Filmora are completely customizable. So, as an editor, you’ll be able to edit the template and customize it to match the overall storyline of your video.
Filmora is an ideal editing software for editors who want to add motion graphics and animations directly to their videos. Instead of switching to a different editing tool, Filmora will allow you to integrate the animations directly to your video and enjoy an uninterrupted workflow.
Some of the key features that make Filmora the perfect editing tool for motion graphics animation include:
● Built-in media library containing several animation templates
● Advanced editing features such as keyframing and motion graphics design
● Timeline-based user interface for quick editing
● Cross-platform compatibility
\
● Key Takeaways from This Episode →
● Graphic animations and motion graphics have become the new go-to tool for marketers to promote their product/services
● A simple motion graphics can help you maximize the retention rate of your marketing campaigns due to their higher customer engagement
● If you want to add graphics animation to videos, install Wondershare Wondershare Filmora Video Editor on your system. With its ready-to-use animation templates, you’ll be able to create high-quality and visually stunning graphic animations in no time
In the recent few years, videos have become the primary tool for marketers to attract their target customers. Unlike banners and pamphlets, videos are relatively more engaging and make it easier for marketers to establish a connection with the viewers. Now, each brand has different preferences when it comes to choosing the right video marketing strategy.
While some brands opt for conventional video advertisements, others get a bit creative and introduce graphics animation to their videos to make them more captivating. Of course, if you want to maximize the user’s attention and retain more customers, you would prefer the latter. Animated videos are more engaging and also sets the brand apart from the rest of the crowd.
In this article
01 [Why Study Graphic Design and Animation?](#Part 1)
02 [What’s the Difference Between Motion Graphics and Animation?](#Part 2)
03 [5 Graphic Design Techniques for Motion Graphics](#Part 3)
04 [How to Create Animated Graphics That Stand Out](#Part 4)
Part 1 Why Study Graphic Design and Animation?
So, why should you care about graphic design and animation? The answer is pretty simple - because these two concepts can help you step up your brand’s marketing game and attract maximum leads. By incorporating graphics and animations into your videos, you’ll be able to make them highly engaging.
However, user engagement isn’t the only reason why graphics and animations should be a part of your marketing strategy. They can also be used to simplify complex topics and explain them in an interactive manner. Let’s say you want to explain the overall working of a particular product. Instead of creating a boring tutorial, you can design explainer white paper animations to explain each step in detail and help viewers understand the overall dynamics of the product more conveniently.
Similarly, the applications of animated videos are endless. From product promotion to everyday marketing, they can help businesses in different scenarios and maximize the results.
Part 2 What’s the Difference Between Motion Graphics and Animation?
Now, whenever we talk about graphic animation videos, people often get confused between motion graphics and simple animations. While both these terms are in correlation, there are certain factors that separate motion graphics from animations. In layman terms, all motion graphics are animations, but not all animations are motion graphics. To give you a better clarity, we have explained both motion graphics and animations in detail.
01Motion Graphics
Motion Graphics are one of the sub-categories of animations that are primarily created to add motion to still images. The flashing logos you see on different websites are the perfect example of motion graphics. The primary objective of motion graphics is to make designs more appealing. A traditional website logo may not grab the visitor’s attention, but if it has a slight movement, it’ll most likely draw the eyeballs, even if someone is visiting the website for the first time. In general, designers apply motion graphics to objects and texts to enhance their visual appearance.
Moreover, motion graphics can also make it easier to educate people on a certain topic. For instance, a still image may not clarify the overall USPs of your brand. However, by designing a dedicated motion graphics, you’ll be able to explain everything and connect with the potential customers more effectively. Some designers also use motion graphics to simply uplift the overall visual appearance of their designs.
Whatever the reason, using motion graphics in 20can make you reach your marketing objectives more conveniently.
02Animations
Animation, on the other hand, is a general broader Umbrella term that’s used to define a wide variety of visual representations. As we mentioned earlier, motion graphics are also a part of graphics animations. However, animations aren’t just limited to moving text/objects. According to the official definition, an animation can be explained as a video in which motion is introduced to make static objects move in the landscape.
The general idea of an animation is to convey a storyline in an interactive manner while keeping the customers engaged. Animations are usually divided into two categories, i.e., animations and animations. White paper animations are a great example of animations as the entire movement is in a two-dimensional landscape. In animations, on the other hand, the movement is not restricted to two dimensions only. Cartoons and animated series are the perfect example of animations as the objects are allowed to move in a three dimensional landscape.
Part 3 5 Graphic Design Techniques for Motion Graphics
So, now that you know how motion graphics differ from the regular animations, let’s understand the tactics to design motion graphics as a beginner. Of course, if you are planning to step into the world of animated videos, you are less likely to start with graphic animation videos. A better starting point would be something as simple as a motion graphics animation. Here are 5 tactics that’ll guide you the right way while creating a motion graphics animation for the first time.
01Start With a Template
Now, when it comes to designing a motion graphics animation, you can either start on a blank canvas or choose one of the ready-to-use templates to speed up the entire designing process. As an absolute beginner, it would be better to choose the latter as it’ll require less designing from your part.
Working on a blank canvas is quite a challenging task, especially when you don’t have years of experience as a designer. But, with a ready made template, you can start with the editing process right away. There are a plethora of editing platforms like Canva, PicArt, and Visme where you’ll find motion graphics templates. These templates are fully customizable, which means you can manipulate their design to meet your specific brand requirements.
02Be Subtle With Personal Branding
Now, even if you are choosing a built-in template, it would be crucial to customize its color scheme so that it matches the overall theme of your brand. Let’s say you are using red and white colors on your website. So, while designing the motion graphics, make sure to change its existing color scheme with red and white so that it can go with your website in a hassle-free manner.
In addition to the color scheme, you can also use other visual elements that represent your brand in the digital landscape. However, do not overdo the personal branding as it may also backfire and affect the quality of your motion graphics animation.
03Do Not Add Unnecessary Elements
It’s also worth noting that any unnecessary element in your motion graphics design will only make it cluttered and damage the overall user experience. Before you publish the motion graphics on any online portal, make sure to analyze it from users’ point-of-view. In case you find any invaluable elements, go ahead and remove them from the design.
04Design Multiple Variations
It’s not necessary that the first motion graphic you design will be worth publishing on your website. That’s why it’s always necessary to design multiple variations so that you can upload the most appealing design on your website. Some designers also A/B test their motion graphics design to choose the best design among all the variations. In any case, having multiple variations will only help you maintain the high market standards.
05Use GIF Format
Finally, once your motion graphics animation is ready, go ahead and save it in GIF format. With GIF format, you’ll be able to upload the picture across all platforms and ensure that the object movement inside the motion graphics doesn’t get affected at all.
Part 5 How to Create Animated Graphics That Stand out
At this point, you already know that designing a graphics animation requires a professional editing tool. While there are different options to choose from, we recommend using Wondershare Wondershare Filmora Video Editor . It’s a professional video editing tool that comes with a built-in media library where you’ll find hundreds of ready-to-use animation templates.
These templates are one-click away from being integrated into your videos, which means you’ll be able to design graphic animation videos in no time. The tool offers a timeline based editing panel that speeds up the entire editing process and makes your workflow much smoother. All the animation templates in Filmora are completely customizable. So, as an editor, you’ll be able to edit the template and customize it to match the overall storyline of your video.
Filmora is an ideal editing software for editors who want to add motion graphics and animations directly to their videos. Instead of switching to a different editing tool, Filmora will allow you to integrate the animations directly to your video and enjoy an uninterrupted workflow.
Some of the key features that make Filmora the perfect editing tool for motion graphics animation include:
● Built-in media library containing several animation templates
● Advanced editing features such as keyframing and motion graphics design
● Timeline-based user interface for quick editing
● Cross-platform compatibility
\
● Key Takeaways from This Episode →
● Graphic animations and motion graphics have become the new go-to tool for marketers to promote their product/services
● A simple motion graphics can help you maximize the retention rate of your marketing campaigns due to their higher customer engagement
● If you want to add graphics animation to videos, install Wondershare Wondershare Filmora Video Editor on your system. With its ready-to-use animation templates, you’ll be able to create high-quality and visually stunning graphic animations in no time
Best 12 Evil Cartoon Characters of All Time
Top 12 Evil Cartoon Characters of All Time
An easy yet powerful editor
Numerous effects to choose from
Detailed tutorials provided by the official channel
The time when Incredible 2 hits thetheatres, family of Super-starshad to face off against the new villain ‘The Screen Slaver’, he was a villain who make use of hypnotism to get the people do what he want to. Perhaps, only the time will tell us if any upcoming bad-guy will be brutal enough to gets added in the list of great cartoon animated villains throughout the history.Your favourite cartoon superhero would not be a super hero without a villain to battle. So, it’s the villain who set the stage or fire and plot in a motion.Many cartoon evil cartoon characters from the past shown us their presence with genuinely memorable moments and crimes that were both exciting & exhilarating to watch on the screen.
Presenting you the list of fifteen most incredible villains of all time when it comes to cartoon characters.
01Cruella De Vil, From 101 Dalmatians
Name of the cartoon character: Cruella De Vil
Your next villain on the list alone includes the words like Devil, Cruel, Evil, but you don’t need to spell each one of them in order to prove how wicked and cruel this female character is. A person don’t need to be a pet lover to know about the obsession of scalping puppies for the fur in terms of sick & twisted, however for the evil cartoon character ‘Cruella De Vil’, it is not just the horrible hobby but also a whole way of life. Aside from having penchant for the puppy murders, she loves to sit in home alone. Cartoon Cruella devilis the central antagonist of the animated series one hundred and one Dalmatians. Her death’s head-face, schizoid black &white head of hairsas well as her cheekbones which looks similar to a holding position of double-pointed arrows inside her mouth are enough to kill you. Her satanic, go-for-broke craving to grab those spotted puppies are always ready to bring Goosebumps. Cruella Deville cartooncharacter is one of the scariest and fantastic characters of that era.
02Hades, Disney’s Hercules
Name of the cartoon character: Hades
James Woods’ anachronistic Hollywood style “sweetie baby” patter and fast-talking, probably is not that far-off exactly from what you would like to hear in real life for TinselTown. In one of the episode of spin-off TV series by Disney: Hercules featured Jafar’s ghost in Strangers on the Train-style of plot to switch the enemies, Aladdin for the Hercules. Hades cannot believe in his guest’s melodramatic-histrionics & then indulges in few more wisecracks at the Jafar’s expense.
03Tasmanian Devil
Name of the cartoon character: Taz
Tasmanian devil or Tazharbours a very special craving for the rabbits and talking about its cruel acts, he always love to crave for his favourite food ‘Bunny the rabbit’. He is a strong murderous-beast with jaws as brutal as a steel trap. With his ravenous appetite he is capable of eating tigers, buffaloes, lions, elephants, donkeys, giraffes, rhinoceroses,octopuses, moose and of course Rabbits. In the animated character “Ducking the Devil”, a warning is show which describe TASMANIAN DEVIL as the most powerful, evil-tempered, vicious brute who is hungry for food every single time. He comes among the list of Tassie devil cartoonfor his killing abilities.
04Gru, Despicable Me
Name of the cartoon character: Gru
Gru is the central character of the movie franchise ‘Despicable Me’ and he is both villain & hero at once. He never seems to put any of his loved ones in danger physically but his villainy comes more in terms of mega-pranks. Thanks to his latent cuddliness and goofball horde of Minions won’s the heart of millions.
05Jafar From Aladdin
Name of the cartoon character: Jafar
Jafar always managed to put himself one step away from other townspeople who are searching for Aladdin . He is Sultan’s evil advisor, and having lots of negative qualities that goes beyond his questionable facial-hair. In the entire episodes of Disney’s classic Aladdin, Jafar always attempts to overthrow sultan, and forces Princess Jasmine to marry him and even plans to kill Aladdin.
06Ren Hoek, The Ren and Stimpy Show
Name of the cartoon character: Ren Hoek
He is the evil cartoon character who tortures & kills animals, but why? Well, there is no reason behind it, he just love to murder poor animals & one of the episodes of ‘The Ren and Stimpy Show’ he nearly whacks somebody’s eyeballs out. With his psychotic characteristics he is still among the list of dangerously wicked villains of all time. He is theEvil dog cartoonfor all the puppies.
07Scar, The Lion King
Name of the cartoon character: Scar
He is the central most antagonist of the Disney’s 1994 most anticipated and most interesting animated feature movie, The Lion King. He is the 2ndson of Uru & Ahadi, who were in past, the King and the Queen of this Pride Lands. He is also a younger brother of Mufasa,&uncle of Simba.
He is yet another glib feline from the Disney’s villain and ready to show his evilness with famous song “Be Prepared”. With Jeremy Irons’ outstanding delivery & sarcastic personality is all you need to watch as Scar always imagines himself asa fuehrer in another famous song ‘Triumph of the Will-style’.
Scar look at the things with his sinister approach and even one step further by convincing his nephew Simba for his father’s death after murdering her younger brother to gain access to the throw of king.
With his gang of hyenas, he take over his new-kingdom & ruled the same with his wicked leadership skills which is as horrible as Scar’s morals. He is always ready to show you his sinful supervillain approach who destroys everything in and around you.
08Sher-Khan, The Jungle book
Name of the cartoon character: Sher-Khan
With George Sanders’s sophisticated, urbane voice the role of Sher-khan was one of the most brilliant performances anevil cat cartoon can ever have. It was the kind of performance that can’t be replicated. SherKhan’s above-it-all voice delivery is just an incredible as well as an interesting alternative to voiceless predator who usually threatening hero in this Disney film.
09Mojo Jojo, Powerpuff Girls
Name of the cartoon character: Mojo Jojo
He was the one with tough cookie, a booming voice &different diabolical schemes as compared to what he knew in terms of what next to do. The bad monkey of animated cartoon characters always in a hurry to ruin the lives of Powerpuff Girls for different occasions, & eventually succeeded in doing so in various episodes of ‘Powerpuff Girls’. A successful villain is always memorable, but one who is hyper-intelligent sometimes wins few more brownie points.
10The Joker, From Batman Animated Series
Name of the cartoon character: The Joker
He is the most anticipated TV villain that you can’t forget to add in the list, he is the villain of the villains. The Joker from the Batman animated series and comic books is the most iconic villains of all times. Every single iteration of this ‘Clown Prince of Crime’delivers a new reason to love him. You can’t end the list of evil cartoon characters from 90’s without including MR. J. He has an intent of turning the ‘Gotham City ’ into his petrifying playground. It takes immense pleasure to watch him in each & every single moment while torturing with his killing performance to others. He love to create chaos at each place where he goes.
11Maleficent, Sleeping Beauty
Name of the cartoon character: Maleficent
With her icy elegant looks and great entrance with a blaze of eldritch flame makes her a supreme contender of the most evil cartoon face. She has an impeccable fashion-sense also with spiky black &purple robes and not to forget her headpiece shaped-like set of elegantly curved-horns.
She is the self-described “mistress’ of all devils.With being a nasty babe, she is sarcastically evil with her taunts and tortures of shooting lightning-bolts at her own cartoonish-minions. She is the bad-ass and always manages to sneak-peak a naughty word into the Disney toon at the time of turning into one of the coolest-looking cartoon-dragons ever.
12The Evil Queen, Snow White
Name of the cartoon character: The Evil Queen
The evil queen’s performance in Snow white is way more than even the 21st century’s standards and she is still the scariest devil cartoon character. There is always a pair of ‘excellent’ shots in the Snow white movie that never fails to impress anyone. The elegant evil queen downs the area that will transform the queen into the withered hag with both foreground &background elements framing the queen, suddenly slides intothe opposite directions & at the end dissolve into the blur when the room starts to spin around her-this is something powerful multiplane-effect. She always manages to tell you about her evil acts with breath-taking moments of visually appealing storytelling.
The Final Words
● When we mix up golden ages of animation & villainy, we will get amazing galleries of animated baddies, this list also have those baddies with mix of emotions & love for them.
● The Devils described demonstrating us about the level of creativity.
● You can refurbish your classic moments with those characters from this list with successfully greatest villains.
Also keep this suggestion of learning about the ways to simply turn yourself into one of your favourite Evil anime character through the use of filters and little understanding of anime.
Relive your classic moments of evil anime characters with FilmoraVideo Editor App
Remembering your coolest Anime Characters? Wondershare Filmora Video Editor can let you achieve this by turning yourself into evil character in just few steps.
For Win 7 or later (64-bit)
For macOS 10.12 or later
Also, you can apply:
● Record your anime
● Enhancement to your video contents through multiple effects
● Make use of sound effects to give yourself an devil look and feel.
● Customize the anime or cartoon videos
● Apply different styles of video effects
Tips for Canva Animated Elements
Versatile Video Editor - Wondershare Filmora
An easy yet powerful editor
Numerous effects to choose from
Detailed tutorials provided by the official channel
Thanks to the progress of graphic design, users are no longer simply satisfied with everyday designs, no matter how complex the design itself. They want innovation, they want a fresh and mesmerizing new idea. This becomes increasingly harder to achieve and helps push the boundaries of what designers want.
This is where motion can come into play. Movement in graphic design has emerged as a recent design trend. This is where users benefit from valuable tips for Canva animated elements.
Without further ado, let’s dive into everything you need to know to design animated elements in Canva.
In this article
01 [What is Canva?](#Part 1)
02 [Animate An Element In Canva ](#Part 2)
03 [Make Elements Move In Canva](#Part 3)
04 [How About Making Animated Elements On Video](#Part 4)
Part 1 What is Canva?
Canva has become a buzzword in the designing and animation world. It’s a graphic design platform that allows users to create graphic designs for social media, for presentations, documents, cards for any memorable occasion. It was founded by Melanie Perkins, an Australian technology entrepreneur.
Canva has become a buzzword in the designing and animation world. It’s a graphic design platform that allows users to create graphic designs for social media, for presentations, documents, cards for any memorable occasion. It was founded by Melanie Perkins, an Australian technology entrepreneur.
It allows users to work individually or across teams. With real-time live changes made available, Canva is pushing the boundary of what is possible and making it more accessible. With the introduction of animated elements in Canva, the possibilities for design horizons have expanded significantly.
Part 2 Animate An Element In Canva
There are one of two ways to go about creating an animation. You can work off an existing template or create a custom template. If you’re wondering how to animate individual elements in Canva then this guide is for you.
The first step to animation is building your custom static design. For that you need to go to Canva and select “Create a Design” option. Once you do, select the type of content you’re attempting to create- from Instagram posts to a presentation or an A4 document.
Think of the text font you’re going to use.

Then you should look into adding elements that suit your text on the design.

You can upload photographs into your creation with the upload button. This also extends to uploading audio that you want to use on video clips.

Once you’re done with these steps, you should have a customized static design that you can use. Let’s now look at how to animate individual elements in Canva. These elements are the text, the image, audio, and video.
2.1 Image
To add an image to Canva, you need to upload it in the ‘Upload’ tab on Canva. Once you do, the image can then be selected for display on your presentation.
For images, you can also choose to frame them within the “elements” tab. There are two kinds of elements. One which allows photographs to be embedded in them and ones which don’t. You can choose any element as a frame for your embedded image.
The next thing is to choose the “Animate” button. This will open up different options for animation features. The animate button allows a preview of what each animation does in real-time.

The ones with the crown are premium features exclusive to Canva Pro, the paid subscription.
2.2 Text
Add in the text you want to see to the image. The text can be in any style that you choose. Canva offers a variety of fonts that you can use to customize the color, size, and duration of the display.

2.3 Video
If you’re ready to take your content creation skills to the next level, this section is for you. You have the option of adding videos to Canva as well. Just load the video you have on hand to the Canva “Uploads” section. Introduce the video clip to the design.
Another way to embed the video is by using an element and embedding your video within it.
With video, you also have options like cropping, adjusting the playback. With playback, you can choose “Autoplay Video” and “Loop Video.” These are basic options for how the video can be played. The crop function allows you to trim the video to any point in time.
On top of this, you can use the animate button, which can create options for how the video is introduced to the backdrop.

If you want to remove the animation, you need to go to the “Animate” button and select the ‘None’ option to delete the animation from the design.
You can opt to animate either just the elements or you can animate the slide on the whole with “Page Animations.”
Part 3 Make Elements Move In Canva
How To Arrange The Order Of An Animation?
The brilliant thing about Canva is that you can decide the order you want to create your animation. The component elements of a Canva backdrop are the text, audio, images, video. These form the basis for the animated elements in Canva.
You can work on whichever component feels more accessible to you. Canva also allows users to make videos for title sequences and end-cards for video sharing platforms.
How to Change The Duration Of Animated Graphic In Canva
Once you’ve added a video element to your presentation, you’ll notice that the timer disappears from the production. This is because the presentation only lasts the duration of the video.
If you go to the next slide of the presentation, you can often notice a timer available. It has a default duration of five seconds. If you click on the clock symbol, a menu with “Timing” will appear with a slider. You can adjust the timing from 0.1 seconds up to a maximum of 30 seconds.
Part 4 How About Making Animated Elements On Video
If you’ve decided Canva is not the tool for you, you can choose any video editing software to make your animation.
Wondershare Filmora is the tool that can help you level up your content creation. It allows users to increase precision and provides professional video editing options.
AI Portrait – The best feature of Wondershare Filmora for gameplay editing
The AI Portrait is a new add-on in Wondershare Filmora. It can easily remove video backgrounds without using a green screen or chroma key, allowing you to add borders, glitch effects, pixelated, noise, or segmentation video effects.

Conclusion
Now that you understand how to build an animation and the software required, you should differentiate between average and extraordinary editing tools.
Filmora and Canva are the best editing tools in this case. Like you can animate individual elements Canva, you can do the same in the other tool also. It may be used to produce animation videos by introducing keyframes, resulting in a seamless and realistic animation. Aside from that, using color correction and an audio processor can help take your animations to the next tier.
Download it today to make your videos better.
Thanks to the progress of graphic design, users are no longer simply satisfied with everyday designs, no matter how complex the design itself. They want innovation, they want a fresh and mesmerizing new idea. This becomes increasingly harder to achieve and helps push the boundaries of what designers want.
This is where motion can come into play. Movement in graphic design has emerged as a recent design trend. This is where users benefit from valuable tips for Canva animated elements.
Without further ado, let’s dive into everything you need to know to design animated elements in Canva.
In this article
01 [What is Canva?](#Part 1)
02 [Animate An Element In Canva ](#Part 2)
03 [Make Elements Move In Canva](#Part 3)
04 [How About Making Animated Elements On Video](#Part 4)
Part 1 What is Canva?
Canva has become a buzzword in the designing and animation world. It’s a graphic design platform that allows users to create graphic designs for social media, for presentations, documents, cards for any memorable occasion. It was founded by Melanie Perkins, an Australian technology entrepreneur.
Canva has become a buzzword in the designing and animation world. It’s a graphic design platform that allows users to create graphic designs for social media, for presentations, documents, cards for any memorable occasion. It was founded by Melanie Perkins, an Australian technology entrepreneur.
It allows users to work individually or across teams. With real-time live changes made available, Canva is pushing the boundary of what is possible and making it more accessible. With the introduction of animated elements in Canva, the possibilities for design horizons have expanded significantly.
Part 2 Animate An Element In Canva
There are one of two ways to go about creating an animation. You can work off an existing template or create a custom template. If you’re wondering how to animate individual elements in Canva then this guide is for you.
The first step to animation is building your custom static design. For that you need to go to Canva and select “Create a Design” option. Once you do, select the type of content you’re attempting to create- from Instagram posts to a presentation or an A4 document.
Think of the text font you’re going to use.
Then you should look into adding elements that suit your text on the design.
You can upload photographs into your creation with the upload button. This also extends to uploading audio that you want to use on video clips.
Once you’re done with these steps, you should have a customized static design that you can use. Let’s now look at how to animate individual elements in Canva. These elements are the text, the image, audio, and video.
2.1 Image
To add an image to Canva, you need to upload it in the ‘Upload’ tab on Canva. Once you do, the image can then be selected for display on your presentation.
For images, you can also choose to frame them within the “elements” tab. There are two kinds of elements. One which allows photographs to be embedded in them and ones which don’t. You can choose any element as a frame for your embedded image.
The next thing is to choose the “Animate” button. This will open up different options for animation features. The animate button allows a preview of what each animation does in real-time.
The ones with the crown are premium features exclusive to Canva Pro, the paid subscription.
2.2 Text
Add in the text you want to see to the image. The text can be in any style that you choose. Canva offers a variety of fonts that you can use to customize the color, size, and duration of the display.
2.3 Video
If you’re ready to take your content creation skills to the next level, this section is for you. You have the option of adding videos to Canva as well. Just load the video you have on hand to the Canva “Uploads” section. Introduce the video clip to the design.
Another way to embed the video is by using an element and embedding your video within it.
With video, you also have options like cropping, adjusting the playback. With playback, you can choose “Autoplay Video” and “Loop Video.” These are basic options for how the video can be played. The crop function allows you to trim the video to any point in time.
On top of this, you can use the animate button, which can create options for how the video is introduced to the backdrop.
If you want to remove the animation, you need to go to the “Animate” button and select the ‘None’ option to delete the animation from the design.
You can opt to animate either just the elements or you can animate the slide on the whole with “Page Animations.”
Part 3 Make Elements Move In Canva
How To Arrange The Order Of An Animation?
The brilliant thing about Canva is that you can decide the order you want to create your animation. The component elements of a Canva backdrop are the text, audio, images, video. These form the basis for the animated elements in Canva.
You can work on whichever component feels more accessible to you. Canva also allows users to make videos for title sequences and end-cards for video sharing platforms.
How to Change The Duration Of Animated Graphic In Canva
Once you’ve added a video element to your presentation, you’ll notice that the timer disappears from the production. This is because the presentation only lasts the duration of the video.
If you go to the next slide of the presentation, you can often notice a timer available. It has a default duration of five seconds. If you click on the clock symbol, a menu with “Timing” will appear with a slider. You can adjust the timing from 0.1 seconds up to a maximum of 30 seconds.
Part 4 How About Making Animated Elements On Video
If you’ve decided Canva is not the tool for you, you can choose any video editing software to make your animation.
Wondershare Filmora is the tool that can help you level up your content creation. It allows users to increase precision and provides professional video editing options.
AI Portrait – The best feature of Wondershare Filmora for gameplay editing
The AI Portrait is a new add-on in Wondershare Filmora. It can easily remove video backgrounds without using a green screen or chroma key, allowing you to add borders, glitch effects, pixelated, noise, or segmentation video effects.
Conclusion
Now that you understand how to build an animation and the software required, you should differentiate between average and extraordinary editing tools.
Filmora and Canva are the best editing tools in this case. Like you can animate individual elements Canva, you can do the same in the other tool also. It may be used to produce animation videos by introducing keyframes, resulting in a seamless and realistic animation. Aside from that, using color correction and an audio processor can help take your animations to the next tier.
Download it today to make your videos better.
What Wikipedia Won’t Tell You Specifically About Character Rigging
What Wikipedia Won’t Tell You Specifically About Character Rigging
An easy yet powerful editor
Numerous effects to choose from
Detailed tutorials provided by the official channel
The function of character rigging can easily be compared to that of bones, muscles and joints. They act as skeletons to virtual animations. You can also imagine them as strings used on dolls. These digitalized bones function inter-connectedly in a 3D animation.
In this article
01 [Intro to Character Rigging](#Part 1)
02 [8 Tips for Character Rigging](#Part 2)
03 [10 Best Character Rigging Services to Buy Online](#Part 3)
04 [How to Make 3d Character Rig? Are There Any Plugins or Easy](#Part 4)
Part 1 Intro to Character Rigging
As you already know by now that the process of rigging a character can be quite a tedious task. It involves a lot of creative thinking, precision and a keen eye to notice all the small details.
Once you have a model character to work on, riggers set off to creating a skeleton to match the character. These skele-animations can be used to move the entire model as if tugging on strings (not literally).
The movement of the chain of skeletons or rigs is interdependent. Which means if you pull on any one bone, it moves all the other bones in the same sequence. Similar to how bones move within the human body.
Riggers use programs and tools to create a series of bone like structures that can deformed and animated freely according to the preference of the animators.
Movements like positioning, curving and rotation can be recorded and then played back in the animation.
This requires the rigger to constantly coordinate between modelers, animators till the end of the project. This entire process can take weeks or even months.
Amazingly enough, its 20and there are online tools and tutorials you can use to easily learn complex animations like they make in large scale movies and games.
Part 2 8 Tips for Character Rigging
01The Right Rig for the Job
Rigging is a skill all animators gets good at overtime. The more you practice the more familiar you are with the tools you are using. It will also help you understand that not all rigs are meant for the same set of movements.
You need to be able to discern what rig is it that you need and discard what you don’t. If the rig is being used in a game, then the focus will be more on the experience while for movies its attention.
02Deformers for Facial Rigging
Constructing a realistic facial rig can be quite a task but is indeed satisfying once finished. Human facial features require a great degree of flexibility which is why using a variety of deformers for different parts of the face. They are better suited for creating joints over the face and can be done more quickly.
03IK and FK
Though you can use one without the other, it is best to use both of them in an animation. You can’t work without both arms can you? Applying both Inverse and Forward Kinematics in your rig design can help it make more stylistic.
04Learn Python and Maya API: Learn Python and Maya API
If you wish to take your rigging skills to the next level then learning Maya API and Python are great millstones. This way, you can create high quality and sophisticated rigs with high intense flexibility on Maya. Also, Python allows you to write new scripts for PlugIns.
05Delegate to an Animator
After rigging for several hours it is easy to feel like you are only seeing from one perspective. Get in touch with an animator earlier on in the project can help you get feedback to stay consistent in the rigging process.
06Learn Web Technologies: Learn Web Technologies
To be a good animator or rigging specialist involves a lot of learning. Animation technology is constantly changing therefore it is highly recommended to stay up to date with the latest web technologies. Learning HTML, Java Script and CSS is becoming vital to being a part of the gaming world.
07Use Scalable Tools
Not all the characters or objects you rig are going to be of the same size. Selecting the right rigging software is crucial for you to be able to scale your animations. You won’t need to use everything, just the tools that serve your purpose.
08Use a Clean Interface
If you have ever heard of the phrase ‘clean workplace – cleaner work’ then you should know how an untidy interface can affect your workflow. This won’t necessarily change the results but can surely better your experience.
Part 3 Best Character Rigging Services to Buy Online
Don’t feel confused about where to begin. The first step to get into rigging is to master a software, any software, here are of the best ones you can choose from;
01Maya
Offers the best animation features on the market.

02Blender
Vast variety of tools for sculpting, rigging or VFX.

03Modo
Has a more simplified approach towards modelling and rigging.

043ds Max
Leverages high flexibility and ease of use to riggers.
05Sculptris
Excellentfor beginners who need a gateway software to start art.

06ZBrush
Lets you work on your sculpting skills with digital clay.

07Cheetah 3D
Developed by Macintosh to be an easy to learn modelling software.

08Rhinoceros 3D
Harbours a mathematical approach to modelling and modular design.

09Fusion 360
Offers a wide range of simulation tools.

10Cinema 4D
Recognized by professionals for well-equipped arsenal of digital rendering.

Part 4 How to Make Character Rig? Are There Any Plugins or Easy
How to Make Character Rig? Are There Any Plugins or Easy
When we imagine animation, most of the time we are baffled by the end product? But what really goes on behind the mesmerizing colors and whimsical characters.
The basic is of course building rigs to support the entire movement of the character and confine it to actual physical laws that makes it almost a mimic of reality. The entire process of rigging rather simplifies the path to achieve that goal.
In Cinema, character rigging has multiple layers that goes into creating the entire skeleton animation. Setting up a character rig can take anywhere between a few hours or a few days. It probably takes mainstream movies ten times that time.
Let us break down the process of making a rig so that it is simpler to understand.
The process;
Weight Painting: An integral part of the entire rigging process. Although, weight painting can be rendered automatically by the software that you are using, but that can end up making the animation look less realistic. You can instead fine tune the weight of each bone in the rig. You can also copy similar looking bones and apply them to different mesh and repurpose them to function differently.
Placing Bones: After designing a bone structure of character, you can copy the same and use it for similar characters. This is why in games and animation, you notice characters with similar features and traits.
Inverse Kinematics: Not all bones are meant to move in a forward direction. This is why inverses Kinematics are applied to certain bones like the legs, shoulders or even a dragon’s tail. Setting up the IK of your rig would keep specific bones pointed in the right direction so as to make the animation look more natural.
Applying Constraints: The physical realm is built with restrictions. There are things you can do or can’t do according to the natural order of things so as to make your character movement more naturalistic.
Simulation Skeletons: Now comes the part where the magic happens. After fully completing a skeletal animation you can now simulate the motion over the mesh and record the result of the simulation through a series of frames.
Create an animated movie: You can play back the simulation in an animation software such as Blender and then create your own animated movie with Filmora with its easy drag and drop interface. Movies are a collage of frames, so you need to animate according to the fps you want for your video.
Facial Rigs: Facial expressions are more complex than whole body movements. It requires the attention dedicated to a project of its own. Here is where you can play with deforming shapes together to replicate facial muscle movement.
● Key Takeaways from This Episode →
● Rigging has become science in its own right but that does not mean you can’t be artistic with it.
● What you should remember that creating skeletal animation is all about movement and applying physical restrictions to it.
● Start simple and practice until you master the most complex features of any of the top rigging software services raging in the market.
The function of character rigging can easily be compared to that of bones, muscles and joints. They act as skeletons to virtual animations. You can also imagine them as strings used on dolls. These digitalized bones function inter-connectedly in a 3D animation.
In this article
01 [Intro to Character Rigging](#Part 1)
02 [8 Tips for Character Rigging](#Part 2)
03 [10 Best Character Rigging Services to Buy Online](#Part 3)
04 [How to Make 3d Character Rig? Are There Any Plugins or Easy](#Part 4)
Part 1 Intro to Character Rigging
As you already know by now that the process of rigging a character can be quite a tedious task. It involves a lot of creative thinking, precision and a keen eye to notice all the small details.
Once you have a model character to work on, riggers set off to creating a skeleton to match the character. These skele-animations can be used to move the entire model as if tugging on strings (not literally).
The movement of the chain of skeletons or rigs is interdependent. Which means if you pull on any one bone, it moves all the other bones in the same sequence. Similar to how bones move within the human body.
Riggers use programs and tools to create a series of bone like structures that can deformed and animated freely according to the preference of the animators.
Movements like positioning, curving and rotation can be recorded and then played back in the animation.
This requires the rigger to constantly coordinate between modelers, animators till the end of the project. This entire process can take weeks or even months.
Amazingly enough, its 20and there are online tools and tutorials you can use to easily learn complex animations like they make in large scale movies and games.
Part 2 8 Tips for Character Rigging
01The Right Rig for the Job
Rigging is a skill all animators gets good at overtime. The more you practice the more familiar you are with the tools you are using. It will also help you understand that not all rigs are meant for the same set of movements.
You need to be able to discern what rig is it that you need and discard what you don’t. If the rig is being used in a game, then the focus will be more on the experience while for movies its attention.
02Deformers for Facial Rigging
Constructing a realistic facial rig can be quite a task but is indeed satisfying once finished. Human facial features require a great degree of flexibility which is why using a variety of deformers for different parts of the face. They are better suited for creating joints over the face and can be done more quickly.
03IK and FK
Though you can use one without the other, it is best to use both of them in an animation. You can’t work without both arms can you? Applying both Inverse and Forward Kinematics in your rig design can help it make more stylistic.
04Learn Python and Maya API: Learn Python and Maya API
If you wish to take your rigging skills to the next level then learning Maya API and Python are great millstones. This way, you can create high quality and sophisticated rigs with high intense flexibility on Maya. Also, Python allows you to write new scripts for PlugIns.
05Delegate to an Animator
After rigging for several hours it is easy to feel like you are only seeing from one perspective. Get in touch with an animator earlier on in the project can help you get feedback to stay consistent in the rigging process.
06Learn Web Technologies: Learn Web Technologies
To be a good animator or rigging specialist involves a lot of learning. Animation technology is constantly changing therefore it is highly recommended to stay up to date with the latest web technologies. Learning HTML, Java Script and CSS is becoming vital to being a part of the gaming world.
07Use Scalable Tools
Not all the characters or objects you rig are going to be of the same size. Selecting the right rigging software is crucial for you to be able to scale your animations. You won’t need to use everything, just the tools that serve your purpose.
08Use a Clean Interface
If you have ever heard of the phrase ‘clean workplace – cleaner work’ then you should know how an untidy interface can affect your workflow. This won’t necessarily change the results but can surely better your experience.
Part 3 Best Character Rigging Services to Buy Online
Don’t feel confused about where to begin. The first step to get into rigging is to master a software, any software, here are of the best ones you can choose from;
01Maya
Offers the best animation features on the market.
02Blender
Vast variety of tools for sculpting, rigging or VFX.
03Modo
Has a more simplified approach towards modelling and rigging.
043ds Max
Leverages high flexibility and ease of use to riggers.
05Sculptris
Excellentfor beginners who need a gateway software to start art.
06ZBrush
Lets you work on your sculpting skills with digital clay.
07Cheetah 3D
Developed by Macintosh to be an easy to learn modelling software.
08Rhinoceros 3D
Harbours a mathematical approach to modelling and modular design.
09Fusion 360
Offers a wide range of simulation tools.
10Cinema 4D
Recognized by professionals for well-equipped arsenal of digital rendering.
Part 4 How to Make Character Rig? Are There Any Plugins or Easy
How to Make Character Rig? Are There Any Plugins or Easy
When we imagine animation, most of the time we are baffled by the end product? But what really goes on behind the mesmerizing colors and whimsical characters.
The basic is of course building rigs to support the entire movement of the character and confine it to actual physical laws that makes it almost a mimic of reality. The entire process of rigging rather simplifies the path to achieve that goal.
In Cinema, character rigging has multiple layers that goes into creating the entire skeleton animation. Setting up a character rig can take anywhere between a few hours or a few days. It probably takes mainstream movies ten times that time.
Let us break down the process of making a rig so that it is simpler to understand.
The process;
Weight Painting: An integral part of the entire rigging process. Although, weight painting can be rendered automatically by the software that you are using, but that can end up making the animation look less realistic. You can instead fine tune the weight of each bone in the rig. You can also copy similar looking bones and apply them to different mesh and repurpose them to function differently.
Placing Bones: After designing a bone structure of character, you can copy the same and use it for similar characters. This is why in games and animation, you notice characters with similar features and traits.
Inverse Kinematics: Not all bones are meant to move in a forward direction. This is why inverses Kinematics are applied to certain bones like the legs, shoulders or even a dragon’s tail. Setting up the IK of your rig would keep specific bones pointed in the right direction so as to make the animation look more natural.
Applying Constraints: The physical realm is built with restrictions. There are things you can do or can’t do according to the natural order of things so as to make your character movement more naturalistic.
Simulation Skeletons: Now comes the part where the magic happens. After fully completing a skeletal animation you can now simulate the motion over the mesh and record the result of the simulation through a series of frames.
Create an animated movie: You can play back the simulation in an animation software such as Blender and then create your own animated movie with Filmora with its easy drag and drop interface. Movies are a collage of frames, so you need to animate according to the fps you want for your video.
Facial Rigs: Facial expressions are more complex than whole body movements. It requires the attention dedicated to a project of its own. Here is where you can play with deforming shapes together to replicate facial muscle movement.
● Key Takeaways from This Episode →
● Rigging has become science in its own right but that does not mean you can’t be artistic with it.
● What you should remember that creating skeletal animation is all about movement and applying physical restrictions to it.
● Start simple and practice until you master the most complex features of any of the top rigging software services raging in the market.
Before You Learn 3D Animation: Things You Should Know
Before You Learn 3D Animation: Some Things You Should Know
An easy yet powerful editor
Numerous effects to choose from
Detailed tutorials provided by the official channel
Before you delve into the profession of creating 3d cartoon filters, you need to understand or decide if creating animated characters is something you would like to do. It’s not going to be smooth as you will get frustrated at some point, you will get confused, and it will be challenging, but in the end, it is rewarding because it is an expression of your mind coming to life. You are the one to breathe life into your characters who represent your imaginations. You will also have to infuse a great deal of your creativity to create beautiful and exciting characters for others to enjoy. Meanwhile, let’s first understand what 3d animations mean.
Becoming a 3d animator is not a feat you can achieve in a short time. It is not days, weeks, months, or even years. Like any other profession, a professional 3d animator must have put in a great deal of work, mixed with a lot of passion and love for what he is doing. To become successful as a 3d animator, you must love what you are doing or be ready to put in the work.
This article will expose what you should learn to create beautiful 3d animation cartoons, including what to expect as a 3d animator.
In this article
01 [What are 3d animation and the process of 3d animation?](#Part 1)
02 [Differences between 2d animation and 3d animation](#Part 2)
03 [A roaster of 8 best 3d animation software.](#Part 3)
04 [Top 3 3d animation making mistakes to avoid](#Part 4)
Part 1 What Is 3D Animation And The Process of 3D Animation?
animation is a term that describes the art of creating 3-dimensional images and placing them in a digital environment. It is a process that uses motion to bring objects, characters, etc., to life.
It is also known as computer-generated imagery, and it is currently the most common animation type for feature films.
Various software and programs are designed specifically for 3d animations and allow the animators to bring the objects to life.
The process of 3d animation happens in three(3) stages;
● Modeling
● Layout and animation
● Rendering
Modeling in 3d animation involves generating the objects or characters either by using a modeling tool or using a real thing. The real object is scanned directly into the computer, where other processes follow. You have total control over your character and how you want them to appear by modeling. You decide the weight, specifications, feel, etc. However, scanning objects save a lot of time. You must add texture before modeling your character or reviewing it before moving to the following layout and animation.
Layout and animation stage: A layout is determined when the generated objects move to this stage. It involves creating a set/scene where the objects can position. Layout first happens before animation does. After adding the objects and characters, they get animated using animation variables. After this, you use motion capture or keyframing to give life to the models in the scenes.
Rendering: Rendering is using software or programs. It is not something to do using just your computer. These tools can generate the scenes into the finished image according to the client’s requirements or set goals.
Creating cartoon background images or any other form of animations is a process that requires a lot of planning and work, which sums up a lot of time. To learn 3d animation, you must be ready to give in ample time as it is a profession that requires some time to handle.
The process listed above also shows the creativity requirement required to succeed in the 3d animation industry. To think that you must create the scenes, which is the layout stage, means you have to be creative in your imagination. If you then decide to model your character from scratch using modeling tools. That also requires another job of thinking and extracting a lot of your creative juices.
Part 2 What is the difference between 2d animation and 3d animation?
Anyone can decide to learn animation with no plan in mind or understanding of what the profession involves. animation is different from 2d animation, and if you want to learn animation, you need to understand the distinction between these two.
animation can have a lot of creative possibilities, whereas 3d animation has a lot of natural abilities. The visual style of both types of animation is explicitly different.
3d animation is a more intensive technical process than the various stages mentioned earlier. It would most likely involve different specialists to handle them to get a more professional output. However, 2d animation consists of drawing the characters frame by frame.
animated cartoons are in The Simpsons, Pinocchio, the Lion king, etc.

animations are like the ones Dreamworks, Pixar, produce. They include the avengers, the bad guys, etc.


Part 3 A Roaster Of 8 Best 3D Animation Software

Several 3D animation software exists in the market, both free and paid. If you are a animation creator or love animation for fun, you can use the free software to make your videos, cartoon photos, 3d cartoon faces, etc.
With many animation software available in the market, you can only fully trust a few.
Here’s a roaster of 8 best 3D animation software you could use to create the cartoon monsters you’ve always been curious about;
● Filmora
● Blender
● Maya
● Wings 3d
● Adobe Animate
● Cinema 4d
● K-3D
● Milcamo
Filmora Video animation tool: This is a highly recommended 3D animation tool with many features and pros. It has a wide range of keyframes, about six of which make your cartoon background images smooth and natural.
| Software | Features | OS | Pro |
|---|---|---|---|
| Wondershare Filmora Video Editor | It has an auto-color correction It has smooth keyframes | Windows, Mac | You can apply light flare effects You can apply an audio mixer |
| Blender | It has textured brushes and masking for 3d painting. It has add-ons and customised tools with high python scripting. | Windows, Linux, Mac computers | It has Virtual reality rendering, Strong camera restoration. It had both manual and automatic tracking. |
| Maya | Free trial of 30 days. Can create complex technical effects | Windows, Max | Good Control and perfect accuracy. Can collect motion capture data. |
| Wings 3d | Auto UV mapping system It has support for light and material effects. | Windows, Linux, and Mac OS | Advanced 3d and 2d modeling tools. It is free to use |
| Adobe animate | Virtual camera functionality gives a realistic view. Adoptive animation effects, zooming, panning etc. | Windows, Mac | Effective audio syncing technology. Customizable font, styling etc. |
| Cinema 4d | Concepts develop without time modeling Large library of preset scenes. | Windows, Mac | Customised with a huge asset range It is a faster tool than Maya Dissect complete scene and is faster than Maya. |
| K-3D | It has property adjustment capabilities with handy strong features. I5 is made up of basic tools for animation, curves, patches. | Mac OS X, Linux, FreeBSD, windows platforms | It is very flexible for either complex or basic workflows. It has a wide selection of plugins. |
| Mixamo | Streamlined user experience It has a faster search function that is accurate | Windows, Mac | It has fast character and animation browsing. Download multiple animations at a go |
For Win 7 or later (64-bit)
For macOS 10.12 or later
Part 4 Top Three (3) 3d Animation Making Mistakes To Avoid

As we initially mentioned, 3d animation requires an intensive technical process. It is a skill that you need to hone over the years by paying attention to detail, being highly creative, and daring to succeed.
Here are 3 mistakes you must avoid during the animation process;
● Forgetting the ‘why’ factor
● Over-animating a scene
● Not giving your viewers time to take it in
Forgetting the why: In a animation cartoon, every move, walking step, and smile is essential. Every character represented in your cartoon background is there for a specific reason.
You would be making a mistake that will affect the result if you lose focus on this reason. Your viewers won’t find your cartoon believable if the moves and acting don’t add up.
Your characters don’t just move because they want to move. Something must have spurred the motion or reaction. It could be for what happened to them, what they heard, or saw another character did in the scene. Do not neglect the why of the act.
While animating, focus on why and keep revisiting until all your characters and objects are knitted closely together.
Over-animating a scene: This is another mistake animators should avoid. If you animate your characters, everything may be a mess if you animate the background and foreground. Simplicity is how to get this thing, keep it simple and focused.
Do not have much going on in each scene but only where you need the attention of your viewers. Animators that do this end up confusing their viewers with no direction.
You can use camera effects such as depth of field to make your audience focus on the point you are trying to make in the particular scene.
Not giving your viewers time to take it in: This is another 3d animation making a mistake you should be careful of. Not giving your viewers time to process the happenings on the scene before the next.
This can be avoided by timing and measuring cuts such that any animation at the start of a new scene is timed to enable the viewers to take it in. You can ask for third-party criticism on your work to find out how your animation is received and see pointers to mistakes such as this. The third party could be your colleague or friend.
Note: You can easily avoid any error or mistake or modify your 3D animation with the help of the Wondershare Filmora video editor. That will provide a solid base for featuring 3D animation.
● Ending Thoughts →
● 3D animation refers to using motion to breathe life into inanimate objects, and they can create animated videos and animation cartoons.
● 3D animation is highly technical, unlike 2d animation
● You can avoid the above 3d mistakes if you remain objective and open, and ready to accept constructive criticism.
● Becoming an animator is a fun thing to do, and it allows you to be free to express your creativity while entertaining other people entirely.
● Before you start learning 3d animation and create cartoon photos, ensure that you have read through all that we have explained here to have good information about what you are going into.
Before you delve into the profession of creating 3d cartoon filters, you need to understand or decide if creating animated characters is something you would like to do. It’s not going to be smooth as you will get frustrated at some point, you will get confused, and it will be challenging, but in the end, it is rewarding because it is an expression of your mind coming to life. You are the one to breathe life into your characters who represent your imaginations. You will also have to infuse a great deal of your creativity to create beautiful and exciting characters for others to enjoy. Meanwhile, let’s first understand what 3d animations mean.
Becoming a 3d animator is not a feat you can achieve in a short time. It is not days, weeks, months, or even years. Like any other profession, a professional 3d animator must have put in a great deal of work, mixed with a lot of passion and love for what he is doing. To become successful as a 3d animator, you must love what you are doing or be ready to put in the work.
This article will expose what you should learn to create beautiful 3d animation cartoons, including what to expect as a 3d animator.
In this article
01 [What are 3d animation and the process of 3d animation?](#Part 1)
02 [Differences between 2d animation and 3d animation](#Part 2)
03 [A roaster of 8 best 3d animation software.](#Part 3)
04 [Top 3 3d animation making mistakes to avoid](#Part 4)
Part 1 What Is 3D Animation And The Process of 3D Animation?
animation is a term that describes the art of creating 3-dimensional images and placing them in a digital environment. It is a process that uses motion to bring objects, characters, etc., to life.
It is also known as computer-generated imagery, and it is currently the most common animation type for feature films.
Various software and programs are designed specifically for 3d animations and allow the animators to bring the objects to life.
The process of 3d animation happens in three(3) stages;
● Modeling
● Layout and animation
● Rendering
Modeling in 3d animation involves generating the objects or characters either by using a modeling tool or using a real thing. The real object is scanned directly into the computer, where other processes follow. You have total control over your character and how you want them to appear by modeling. You decide the weight, specifications, feel, etc. However, scanning objects save a lot of time. You must add texture before modeling your character or reviewing it before moving to the following layout and animation.
Layout and animation stage: A layout is determined when the generated objects move to this stage. It involves creating a set/scene where the objects can position. Layout first happens before animation does. After adding the objects and characters, they get animated using animation variables. After this, you use motion capture or keyframing to give life to the models in the scenes.
Rendering: Rendering is using software or programs. It is not something to do using just your computer. These tools can generate the scenes into the finished image according to the client’s requirements or set goals.
Creating cartoon background images or any other form of animations is a process that requires a lot of planning and work, which sums up a lot of time. To learn 3d animation, you must be ready to give in ample time as it is a profession that requires some time to handle.
The process listed above also shows the creativity requirement required to succeed in the 3d animation industry. To think that you must create the scenes, which is the layout stage, means you have to be creative in your imagination. If you then decide to model your character from scratch using modeling tools. That also requires another job of thinking and extracting a lot of your creative juices.
Part 2 What is the difference between 2d animation and 3d animation?
Anyone can decide to learn animation with no plan in mind or understanding of what the profession involves. animation is different from 2d animation, and if you want to learn animation, you need to understand the distinction between these two.
animation can have a lot of creative possibilities, whereas 3d animation has a lot of natural abilities. The visual style of both types of animation is explicitly different.
3d animation is a more intensive technical process than the various stages mentioned earlier. It would most likely involve different specialists to handle them to get a more professional output. However, 2d animation consists of drawing the characters frame by frame.
animated cartoons are in The Simpsons, Pinocchio, the Lion king, etc.
animations are like the ones Dreamworks, Pixar, produce. They include the avengers, the bad guys, etc.
Part 3 A Roaster Of 8 Best 3D Animation Software
Several 3D animation software exists in the market, both free and paid. If you are a animation creator or love animation for fun, you can use the free software to make your videos, cartoon photos, 3d cartoon faces, etc.
With many animation software available in the market, you can only fully trust a few.
Here’s a roaster of 8 best 3D animation software you could use to create the cartoon monsters you’ve always been curious about;
● Filmora
● Blender
● Maya
● Wings 3d
● Adobe Animate
● Cinema 4d
● K-3D
● Milcamo
Filmora Video animation tool: This is a highly recommended 3D animation tool with many features and pros. It has a wide range of keyframes, about six of which make your cartoon background images smooth and natural.
| Software | Features | OS | Pro |
|---|---|---|---|
| Wondershare Filmora Video Editor | It has an auto-color correction It has smooth keyframes | Windows, Mac | You can apply light flare effects You can apply an audio mixer |
| Blender | It has textured brushes and masking for 3d painting. It has add-ons and customised tools with high python scripting. | Windows, Linux, Mac computers | It has Virtual reality rendering, Strong camera restoration. It had both manual and automatic tracking. |
| Maya | Free trial of 30 days. Can create complex technical effects | Windows, Max | Good Control and perfect accuracy. Can collect motion capture data. |
| Wings 3d | Auto UV mapping system It has support for light and material effects. | Windows, Linux, and Mac OS | Advanced 3d and 2d modeling tools. It is free to use |
| Adobe animate | Virtual camera functionality gives a realistic view. Adoptive animation effects, zooming, panning etc. | Windows, Mac | Effective audio syncing technology. Customizable font, styling etc. |
| Cinema 4d | Concepts develop without time modeling Large library of preset scenes. | Windows, Mac | Customised with a huge asset range It is a faster tool than Maya Dissect complete scene and is faster than Maya. |
| K-3D | It has property adjustment capabilities with handy strong features. I5 is made up of basic tools for animation, curves, patches. | Mac OS X, Linux, FreeBSD, windows platforms | It is very flexible for either complex or basic workflows. It has a wide selection of plugins. |
| Mixamo | Streamlined user experience It has a faster search function that is accurate | Windows, Mac | It has fast character and animation browsing. Download multiple animations at a go |
For Win 7 or later (64-bit)
For macOS 10.12 or later
Part 4 Top Three (3) 3d Animation Making Mistakes To Avoid
As we initially mentioned, 3d animation requires an intensive technical process. It is a skill that you need to hone over the years by paying attention to detail, being highly creative, and daring to succeed.
Here are 3 mistakes you must avoid during the animation process;
● Forgetting the ‘why’ factor
● Over-animating a scene
● Not giving your viewers time to take it in
Forgetting the why: In a animation cartoon, every move, walking step, and smile is essential. Every character represented in your cartoon background is there for a specific reason.
You would be making a mistake that will affect the result if you lose focus on this reason. Your viewers won’t find your cartoon believable if the moves and acting don’t add up.
Your characters don’t just move because they want to move. Something must have spurred the motion or reaction. It could be for what happened to them, what they heard, or saw another character did in the scene. Do not neglect the why of the act.
While animating, focus on why and keep revisiting until all your characters and objects are knitted closely together.
Over-animating a scene: This is another mistake animators should avoid. If you animate your characters, everything may be a mess if you animate the background and foreground. Simplicity is how to get this thing, keep it simple and focused.
Do not have much going on in each scene but only where you need the attention of your viewers. Animators that do this end up confusing their viewers with no direction.
You can use camera effects such as depth of field to make your audience focus on the point you are trying to make in the particular scene.
Not giving your viewers time to take it in: This is another 3d animation making a mistake you should be careful of. Not giving your viewers time to process the happenings on the scene before the next.
This can be avoided by timing and measuring cuts such that any animation at the start of a new scene is timed to enable the viewers to take it in. You can ask for third-party criticism on your work to find out how your animation is received and see pointers to mistakes such as this. The third party could be your colleague or friend.
Note: You can easily avoid any error or mistake or modify your 3D animation with the help of the Wondershare Filmora video editor. That will provide a solid base for featuring 3D animation.
● Ending Thoughts →
● 3D animation refers to using motion to breathe life into inanimate objects, and they can create animated videos and animation cartoons.
● 3D animation is highly technical, unlike 2d animation
● You can avoid the above 3d mistakes if you remain objective and open, and ready to accept constructive criticism.
● Becoming an animator is a fun thing to do, and it allows you to be free to express your creativity while entertaining other people entirely.
● Before you start learning 3d animation and create cartoon photos, ensure that you have read through all that we have explained here to have good information about what you are going into.
Complete Guide to Send Gif WhatsApp on Android
Step-by-step Guide to Send Gif WhatsApp on Android
An easy yet powerful editor
Numerous effects to choose from
Detailed tutorials provided by the official channel
While chatting with your friends and dear ones on WhatsApp, you can not only send videos and images but also some GIFs. The GIF files will convey your mood and feelings using short animations.
On your Android device, these files can be either selected from the collection available at WhatsApp or can be imported from Giphy. Additionally, you can also create your own customized WhatsApp GIFs Android using images or videos.
In this article
01 [How to send WhatsApp GIF on Android](#Part 1)
02 [How to create a custom GIF on WhatsApp Android](#Part 2)
03 [Create professional-looking GIF using Wondershare Filmora](#Part 3)
Part 1 How to send WhatsApp GIF on Android
To send GIFs to your contacts in WhatsApp it is important to ensure that you have the latest version of the messaging app installed on your phone. There is an integrated library of GIFs on your Android phone from where you can search like tom and jerry gif stickers for WhatsApp, peach and Goma gif for WhatsApp, and more.
Step 1.Launch WhatsApp on your Android device and open any conversation to which you wish to send a GIF.
Step 2.Click on the Emoji icon at the bottom left corner of the chat window.
Step 3.At the bottom middle of the screen, click on the GIF button and the list of options available at the integrated library will appear on the screen. You can even search for the desired GIF by entering the keyword at the search icon.
Step 4.Next, tap on the selected GIF to preview it. You can also add a message using Add a caption… button
Step 5.Finally, click on the green Send button (white paper plane icon) at the bottom-right corner. The GIF will be sent to your conversation.
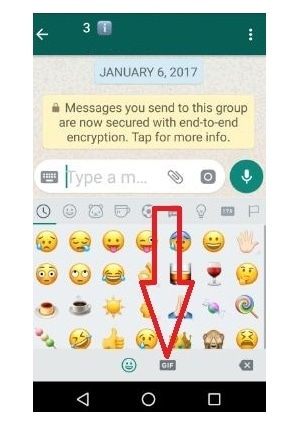
Part 2 How to create a custom GIF on WhatsApp Android
WhatsApp allows you to create a customized GIF using images and videos on your Android phone. The steps for the same are as follows
Step 1.Open the WhatsApp chat to whom you wish to send the customized GIF.
Step 2.At the bottom of the screen, click the camera icon. Either choose to record a desired video or import from the phone gallery to create a GIF.
Step 3.Once the video is added, trim it using the slider at the top. (To create a GIF, the video cannot be more than 5 seconds). You can even add a text message using Add a caption. option at the bottom of the screen.
Step 4.Next, click on the GIF button under the slider and then click on the send button at the bottom-right corner.
GIF created using the video will be sent to your contact.
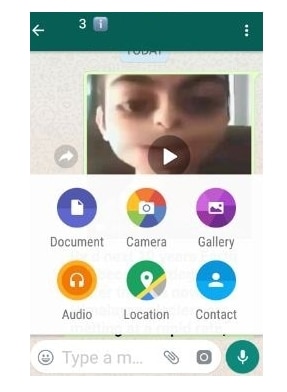
Part 3 Create professional-looking GIF using Wondershare Filmora Video Editor
Though WhatsApp allows creating GIFs using videos and images, the options for customizations are not there. So, to facilitate you creating professional-looking GIFs in no time, we suggest using Wondershare Filmora. Images and videos can be added to this versatile Windows and Mac-based tool for creating artistic animations. There are multiple options for customizing the file like adding elements, sound, text, and more.
Wondershare Filmora
Get started easily with Filmora’s powerful performance, intuitive interface, and countless effects!
Try It Free Try It Free Try It Free Learn More >

You can also speed up, slow down, rotate, crop, and perform other editing tasks. The software allows adding media files in all widely used formats like MO4, MOV, MKV, and more. The software has a user-friendly interface that makes it apt for users even without any prior experience in creating animations.
Steps to create a customized GIF WhstaApp Android using Wondershare Filmora
Step 1.Download, install and open the Wondershare Filmora software on your system. Browse and import the videos and images from your system from which you wish to create a GIF.
Step 2.After the files are added, drag and drop them to the timeline of the software at the bottom.
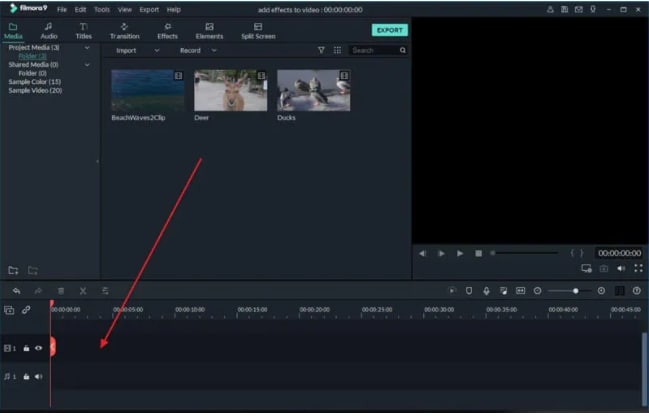
Step 3.Next comes the editing. Using multiple editing functions of the software you can rotate, crop, speed up, slow down, and perform a wide range of tasks as needed.
Step 4.You can even add the text messages to your animations and also choose the font and other parameters of the text.

Step 5.Once all the selections and editing are done, choose GIF at the Local tab to save your created media file as GIF. Finally, click on the EXPORT button to start processing and saving the file as GIF.
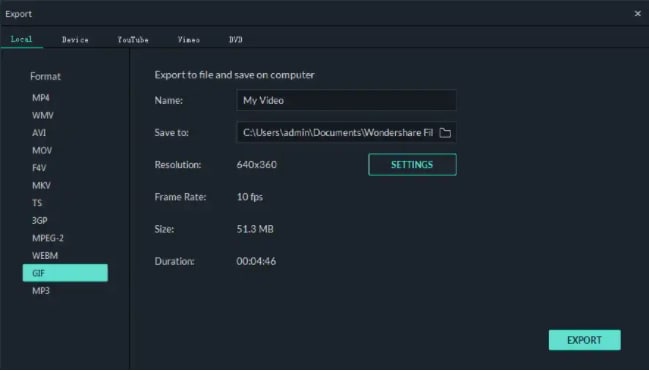
The created GIF can now be used for WhatsApp chat, social media sites, and other online sites.
● Key Takeaways from This Episode →
●GIF animations can be added to WhatsApp chats on your Android phone using an integrated library or GIPHY.
●WhatsApp also allows creating GIFs using videos and images on your device or by recording one.
●To create a professional and appealing GIF, Wondershare Filmora is the best tool. The software can also be used for several other video editing tasks.
While chatting with your friends and dear ones on WhatsApp, you can not only send videos and images but also some GIFs. The GIF files will convey your mood and feelings using short animations.
On your Android device, these files can be either selected from the collection available at WhatsApp or can be imported from Giphy. Additionally, you can also create your own customized WhatsApp GIFs Android using images or videos.
In this article
01 [How to send WhatsApp GIF on Android](#Part 1)
02 [How to create a custom GIF on WhatsApp Android](#Part 2)
03 [Create professional-looking GIF using Wondershare Filmora](#Part 3)
Part 1 How to send WhatsApp GIF on Android
To send GIFs to your contacts in WhatsApp it is important to ensure that you have the latest version of the messaging app installed on your phone. There is an integrated library of GIFs on your Android phone from where you can search like tom and jerry gif stickers for WhatsApp, peach and Goma gif for WhatsApp, and more.
Step 1.Launch WhatsApp on your Android device and open any conversation to which you wish to send a GIF.
Step 2.Click on the Emoji icon at the bottom left corner of the chat window.
Step 3.At the bottom middle of the screen, click on the GIF button and the list of options available at the integrated library will appear on the screen. You can even search for the desired GIF by entering the keyword at the search icon.
Step 4.Next, tap on the selected GIF to preview it. You can also add a message using Add a caption… button
Step 5.Finally, click on the green Send button (white paper plane icon) at the bottom-right corner. The GIF will be sent to your conversation.
Part 2 How to create a custom GIF on WhatsApp Android
WhatsApp allows you to create a customized GIF using images and videos on your Android phone. The steps for the same are as follows
Step 1.Open the WhatsApp chat to whom you wish to send the customized GIF.
Step 2.At the bottom of the screen, click the camera icon. Either choose to record a desired video or import from the phone gallery to create a GIF.
Step 3.Once the video is added, trim it using the slider at the top. (To create a GIF, the video cannot be more than 5 seconds). You can even add a text message using Add a caption. option at the bottom of the screen.
Step 4.Next, click on the GIF button under the slider and then click on the send button at the bottom-right corner.
GIF created using the video will be sent to your contact.
Part 3 Create professional-looking GIF using Wondershare Filmora Video Editor
Though WhatsApp allows creating GIFs using videos and images, the options for customizations are not there. So, to facilitate you creating professional-looking GIFs in no time, we suggest using Wondershare Filmora. Images and videos can be added to this versatile Windows and Mac-based tool for creating artistic animations. There are multiple options for customizing the file like adding elements, sound, text, and more.
Wondershare Filmora
Get started easily with Filmora’s powerful performance, intuitive interface, and countless effects!
Try It Free Try It Free Try It Free Learn More >
You can also speed up, slow down, rotate, crop, and perform other editing tasks. The software allows adding media files in all widely used formats like MO4, MOV, MKV, and more. The software has a user-friendly interface that makes it apt for users even without any prior experience in creating animations.
Steps to create a customized GIF WhstaApp Android using Wondershare Filmora
Step 1.Download, install and open the Wondershare Filmora software on your system. Browse and import the videos and images from your system from which you wish to create a GIF.
Step 2.After the files are added, drag and drop them to the timeline of the software at the bottom.
Step 3.Next comes the editing. Using multiple editing functions of the software you can rotate, crop, speed up, slow down, and perform a wide range of tasks as needed.
Step 4.You can even add the text messages to your animations and also choose the font and other parameters of the text.
Step 5.Once all the selections and editing are done, choose GIF at the Local tab to save your created media file as GIF. Finally, click on the EXPORT button to start processing and saving the file as GIF.
The created GIF can now be used for WhatsApp chat, social media sites, and other online sites.
● Key Takeaways from This Episode →
●GIF animations can be added to WhatsApp chats on your Android phone using an integrated library or GIPHY.
●WhatsApp also allows creating GIFs using videos and images on your device or by recording one.
●To create a professional and appealing GIF, Wondershare Filmora is the best tool. The software can also be used for several other video editing tasks.
Also read:
- Updated Why These 10+ Top Text Motion Templates Are Worth Your Attention for 2024
- New How to Make Well Done Animated GIF By Yourself for 2024
- New In 2024, Samples of Cartoon Character Face to Inspire You
- New 5 Must Try Ways to Add GIF in Text Message on Android for 2024
- New In 2024, 10 Realistic Cartoon Characters You Would Run Away From if You Met in Real Life
- Updated 2024 Approved 10 Cartoon Photo Converters You Couldnt Do Without
- In 2024, 10 Cartoon Photo Converters
- New The Top Free 12 GIF Meme Maker at a Glance
- New Adobe Animate Text Effects Skills That You Need to Know for 2024
- New How to Animate Image on Scroll and Text on Scroll?
- Learn How to Make Your Characters Interactive in Unity Animation Rigging for 2024
- New How to Find Some Different Ways to Animated Cartoon of Yourself
- Updated How to Draw A Skeleton Cartoon – A Step by Step Guide for 2024
- The Top Free 12 GIF Meme Maker at a Glance
- Updated Ways to Make Sure You Get the Most up to Date Cartoon Character Design Tips for 2024
- Updated The Secret Sauce for Making GIF Instagram Story More Aesthetic for 2024
- Updated 2024 Approved Why These 10+ Top Text Motion Templates Are Worth Your Attention
- New Simple Guide to Create New and Exciting Blackboard Animation for 2024
- Updated 10 Cartoon Canvas Painting Ideas for Total Beginners
- Updated The Top 20 Motion Graphics Companies & Studios
- Updated In 2024, How to Get Started in Stop Motion Claymation
- 2024 Approved Learn 3D Logo Animation and Templates
- Updated Know All About Animated Business Logos and the Best Tools to Create One
- New 15 Best Video to GIF App on iPhone and Android for 2024
- Updated 2024 Approved Tutorials for Animating Picture Online Without Learning From Scratch
- New 2024 Approved Top 10 Popular Cartoons You Forgot Existed
- Updated Learn 3D Logo Animation and Templates for 2024
- New How to Get Started in Stop Motion Claymation for 2024
- 5 Photoshop Alternatives to Animate Logo
- 10 Cartoon Character Makers to Create Animated Characters
- 2024 Approved How to Make Creative Animation Videos
- In 2024, Apps to Animate Still Pictures Which Could Make Your Pictures Become Internet Sensation
- New Learn How to Make Architecture Animation
- A Beginners Guide for Learning 3D Animation
- Updated 2024 Approved How to Reduce GIF Size and Best GIF Resizers
- 2024 Approved 5 Photoshop Alternatives to Animate Your Logo
- Updated Why These 10 Top Text Motion Templates Are Worth Your Attention
- New How to Make Architecture Animation for 2024
- Updated 12 Animation Video Maker That Can Triple Your Conversion Rates
- Updated Best Canva 10 Animated Templates
- Dead Simple Guide to Create New and Exciting Blackboard Animation for 2024
- How to Reset Gmail Password on Realme Narzo N53 Devices
- In 2024, How Can We Bypass Oppo Reno 11 5G FRP?
- How to play an MP4 on Moto G14?
- In 2024, Apple iPhone SE Mirror to PC? Top Apps You Must Know | Dr.fone
- In 2024, 5 Ways To Teach You To Transfer Files from Vivo S17e to Other Android Devices Easily | Dr.fone
- The Ultimate Guide to Bypassing iCloud Activation Lock from iPhone 15 Pro Max
- In 2024, Unlock Your Disabled iPhone 12 mini Without iTunes in 5 Ways | Dr.fone
- 2024 Approved Netflix Subtitle Translation Methods Comprehensive Guide
- How to Lock Apps on Vivo V29 to Protect Your Individual Information
- How to Change your Poco C51 Location on Twitter | Dr.fone
- Edit and Send Fake Location on Telegram For your Nubia Z50 Ultra in 3 Ways | Dr.fone
- Title: New In 2024, Before You Learn Facebook Slideshow 5 Things You Should Know
- Author: Elon
- Created at : 2024-05-19 03:05:48
- Updated at : 2024-05-20 03:05:48
- Link: https://animation-videos.techidaily.com/new-in-2024-before-you-learn-facebook-slideshow-5-things-you-should-know/
- License: This work is licensed under CC BY-NC-SA 4.0.
