

New In 2024, How to Make an Animation With 7 Steps
How to Make an Animation With 7 Steps
How to Make an Animation With 7 Steps

Shanoon Cox
Mar 27, 2024• Proven solutions
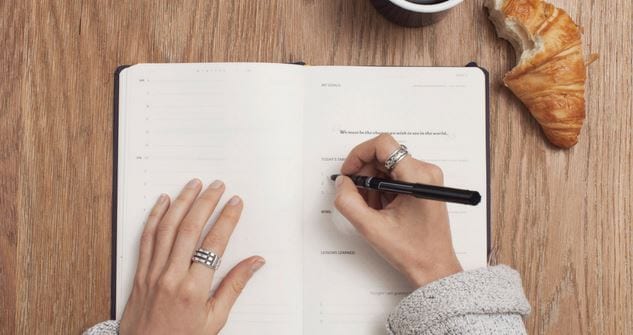
Did you see a cool flash animation on YouTube and wished if you could use it for your site as well? Does the very thought of making such professional animation that can cost you a bomb, pulls you back from your thoughts? Just forget all your worries because now you can do it yourself and it is a matter of just some time.
With the development of technology, almost anyone can learn how to create animation even with free animation software and create animated clipart in powerpoint if they follow the right instructions. So, in this article, let’s learn how to make an animation in just 7 easy steps on your computer.


Part 1: Preparation
1. Script is the Essence
If you wish to understand the nuances of how to make an animation, the first step you should know is scripting.
Playing with the words in your mind and weaving them on paper makes a big difference. So, penning a story helps you to recognize the loopholes, the pace, and the character development in your story.
The script gives a person an idea of where your story is based, how does it look or at which time of the day are you talking about, who is talking to whom, and most importantly, the dialogues, what are your story characters say to one another. The script is the essence of creating animation and without it, you cannot resume the process of animation.
2. Storyboarding
What is storyboarding? It is a sequence of images or pre-visualization of movie shots to understand how exactly the story will unveil, the feel, the look, the camera angles, everything is described like a flowchart.
Storyboarding can be of various types. It may be colorful, it may just an outline, or black and white or something with complete detail. A storyboard must give a complete and close image of what the movie would look like.
The images must be captioned, the movement of the camera must be shown with arrows, and the object and characters must be differentiated from the background with colors.

3. Voiceover
If you want to make your animation more vivid and interesting, remember to add voiceover. Would you like to see an animated movie without a voice? It is a vital part of any movie recording.
When you ask how to make an animation, you also need to know how to record a voiceover. The animation is influenced by voice performance for focus and timing of a scene. The animated scene and the voiceover must be in sync perfectly in order to retain the attention of the viewers.
In the earlier days, a recording studio used to be rented and a sound engineer and voiceover artist was hired for it. But, today the auditions for VO are done online and the best one with professional recording tools is hired.
![]()
Part 2:Production
4. Animation
Once the preparation stages are over with script, storyboard, and voiceover in place, the animation part can be started. The length of the VO and the story are the deciding factors for the time required for animation. So, pick up a 2D animation software to animate your characters. The process includes importing images, adding it to the timelines.

5. Audio Mix
In this step, it is important to select and assemble the recorded sounds and start preparing the final mix of the sound in order to ensure proper lip sync and other sound effects needed for the final animation film.
Any heavy unwanted sounds are removed and significant spot sounds are added while mixing the pre-determined soundtrack.

Part 3: Edit and Export
6. Final Editing
Often the scenes for the animation film are randomly shot. There are a number of scenes that are shot just as a back up so that later while editing it can be checked and the best shot from many can be picked to include in the movie. All such things are finally checked in the final editing. It is the process of rearranging the clips so that the end product is flawless. Other editing task includes the addition of effects in the clips or text used in titling, etc.
7. Export
Exporting the animated movie is the last step in creating an animation. How to make an animation is no more a big reason for headache. If you want, you may also share it directly on the social media platforms with your friends and viewers.
Conclusion
Now, as you know how to make an animation and the steps involved in it, you must also be aware of one of the best software for editing.
Here we recommend using Filmora . You can use it to make animation video by adding keyframes, so the animation will be smooth and natural. You just need to build a white plane to easily start making animation. Besides, color correction and audio mixer will raise up your animation video to a new level. Download it to have a try (Free)!
Shanoon Cox
Shanoon Cox is a writer and a lover of all things video.
Follow @Shanoon Cox
Shanoon Cox
Mar 27, 2024• Proven solutions
Did you see a cool flash animation on YouTube and wished if you could use it for your site as well? Does the very thought of making such professional animation that can cost you a bomb, pulls you back from your thoughts? Just forget all your worries because now you can do it yourself and it is a matter of just some time.
With the development of technology, almost anyone can learn how to create animation even with free animation software and create animated clipart in powerpoint if they follow the right instructions. So, in this article, let’s learn how to make an animation in just 7 easy steps on your computer.
Part 1: Preparation
1. Script is the Essence
If you wish to understand the nuances of how to make an animation, the first step you should know is scripting.
Playing with the words in your mind and weaving them on paper makes a big difference. So, penning a story helps you to recognize the loopholes, the pace, and the character development in your story.
The script gives a person an idea of where your story is based, how does it look or at which time of the day are you talking about, who is talking to whom, and most importantly, the dialogues, what are your story characters say to one another. The script is the essence of creating animation and without it, you cannot resume the process of animation.
2. Storyboarding
What is storyboarding? It is a sequence of images or pre-visualization of movie shots to understand how exactly the story will unveil, the feel, the look, the camera angles, everything is described like a flowchart.
Storyboarding can be of various types. It may be colorful, it may just an outline, or black and white or something with complete detail. A storyboard must give a complete and close image of what the movie would look like.
The images must be captioned, the movement of the camera must be shown with arrows, and the object and characters must be differentiated from the background with colors.
3. Voiceover
If you want to make your animation more vivid and interesting, remember to add voiceover. Would you like to see an animated movie without a voice? It is a vital part of any movie recording.
When you ask how to make an animation, you also need to know how to record a voiceover. The animation is influenced by voice performance for focus and timing of a scene. The animated scene and the voiceover must be in sync perfectly in order to retain the attention of the viewers.
In the earlier days, a recording studio used to be rented and a sound engineer and voiceover artist was hired for it. But, today the auditions for VO are done online and the best one with professional recording tools is hired.
![]()
Part 2:Production
4. Animation
Once the preparation stages are over with script, storyboard, and voiceover in place, the animation part can be started. The length of the VO and the story are the deciding factors for the time required for animation. So, pick up a 2D animation software to animate your characters. The process includes importing images, adding it to the timelines.
5. Audio Mix
In this step, it is important to select and assemble the recorded sounds and start preparing the final mix of the sound in order to ensure proper lip sync and other sound effects needed for the final animation film.
Any heavy unwanted sounds are removed and significant spot sounds are added while mixing the pre-determined soundtrack.
Part 3: Edit and Export
6. Final Editing
Often the scenes for the animation film are randomly shot. There are a number of scenes that are shot just as a back up so that later while editing it can be checked and the best shot from many can be picked to include in the movie. All such things are finally checked in the final editing. It is the process of rearranging the clips so that the end product is flawless. Other editing task includes the addition of effects in the clips or text used in titling, etc.
7. Export
Exporting the animated movie is the last step in creating an animation. How to make an animation is no more a big reason for headache. If you want, you may also share it directly on the social media platforms with your friends and viewers.
Conclusion
Now, as you know how to make an animation and the steps involved in it, you must also be aware of one of the best software for editing.
Here we recommend using Filmora . You can use it to make animation video by adding keyframes, so the animation will be smooth and natural. You just need to build a white plane to easily start making animation. Besides, color correction and audio mixer will raise up your animation video to a new level. Download it to have a try (Free)!
Shanoon Cox
Shanoon Cox is a writer and a lover of all things video.
Follow @Shanoon Cox
5 Techniques You Never Heard of for Converting MP4 to GIF in Photoshop
5 Techniques You Never heard of for Converting MP4 to GIF in Photoshop
An easy yet powerful editor
Numerous effects to choose from
Detailed tutorials provided by the official channel
When someone mentions a GIF, what comes to your mind? Some people can picture what it means but wouldn’t describe that match. So, before we discuss how to convert mp4 to gif in Photoshop, it would be wise to define it briefly. First of all, GIF stands for Graphics Interchange Format. Its file format is a compressed image, and it is most suitable for animation. We all know that an animated GIF comprises a series of many still images. However, since these images play sequentially, it may appear as if they are in motion. It is that movement illusion that makes the animation effect come about.
When someone mentions a GIF, what comes to your mind? Some people can picture what it means but wouldn’t describe that match. So, before we discuss how to convert mp4 to gif in Photoshop, it would be wise to define it briefly. First of all, GIF stands for Graphics Interchange Format. Its file format is a compressed image, and it is most suitable for animation. We all know that an animated GIF comprises a series of many still images. However, since these images play sequentially, it may appear as if they are in motion. It is that movement illusion that makes the animation effect come about.
In this article
01 [How to Convert Video to GIF in Photoshop - Easy Way](#Part 1)
02 [How to Create Animated GIFs from Video without Photoshop](#Part 2)
Part 1 How to Convert Video to GIF in Photoshop - Easy Way
If you want to convert video to GIF in Photoshop, here is a discussion of the easy way to go about it.
Step 1: Ensure that the Dimensions are Right
When you start to convert mp4 to GIF using Photoshop, it is important to highlight some things that need to be done before anything else. Ensure that you set the resolution and dimensions right. Failure to do saw will see the size of your video determine that of your GIF. Beneath such occurrences, you may find yourself having a GIF that’s too large, and its quality leaves a lot to be desired.
The dimensions you choose will depend on what you are working on at any one particular time. For instance, a 720 x 300 layout is recommended for a banner ad GIF. If there is something that one can’t stress enough is the importance of ensuring that you use pixels. As for the resolution, keep in mind that a low resolution translates to a small file size. In this case, you are at privilege to choose between two units, pixels and inches.
Additionally, set the color mode. Since GIFs are meant for screens, ensure that you select the RGB color mode. Finally, click on Create, which opens a new document, and start following these steps to convert Mp4 to GIF Photoshop.
Step 2: Import the Video you want to convert from MP4 to GIF Photoshop
Remember that we already opened Photoshop by pressing Create. Now, the next thing would be to navigate to File followed by Import before selecting the Video Frames to Layers option.

Step 3: Set Up the Following Settings Accordingly
After choosing the video file, choose Open, and a dialogue box with several options and a preview of the video appears.

The radio buttons give you two options to choose from. The “From Beginning to End” is the ideal choice if you want the whole video to be converted to GIF. However, if you want to focus on a section of the video, select “Selected Range Only.” On the other hand, the checkbox allows you to limit the video to 2 frames. Simply tick it, and Photoshop will automatically ensure that only two frames of the video are left.
Last but not least, check the “Make Frame Animation” checkbox. Once all these settings are set as recommended and depending on preference, Photoshop will export your video as several frames. In the event that the program crashes, all is not lost. You can fix it by reducing the video’s quality and then try importing it.
Step 4: Edit the GIF
Photoshop also gives you several options to help you edit your frames to perfection. In most cases, these settings are ideal for manipulating the quality of your GIF. Interestingly, it is possible to preview how the GIF will look before committing to any change. So expect two panes, right and left. The left one allows you to see the preview, whereas its right counterpart helps you edit.

Alternatively, select one of the preset choices. If you do so, there is no requirement The bottom line is that the tool makes to make any changes. That doesn’t mean you can’t choose a Preset option and then edit it to your preferences. Expect the quality of the GIF to decrease and the size to be relatively small. Right below the Preset, don’t forget to confirm that the selected option is GIF.
Step 5: Save the GIF
Once satisfied by the GIF created, save these frames as animated GIFs. Go to File, then Export, followed by Save for Web (Legacy).

That’s how to convert Mp4 to GIF in simple steps.
Part 2 How to Create Animated GIFs from Video without Photoshop
Alternatively, you can opt to convert Mp4 to GIF using Wondershare Filmora Video Editor . It is yet another tool suitable for creating animated GIFs using videos and photos. It allows the user to customize GIF images using overlays, text, animation, and elements. When it is over, you are at liberty to export it to your computer or any other common portable storage device. The bottommost line is that the tool makes it easy to use whenever necessary. The icing on the cake is the fact that you don’t have to sign up or pay a premium. In case you are wondering, it is also easy to use. All you got to do is to follow these steps.

Wondershare Filmora - Best Video Editor for Mac/Windows
5,481,435 people have downloaded it.
Build unique custom animations without breaking a sweat.
Focus on creating epic stories and leave the details to Filmora’s auto features.
Start a creative adventure with drag & drop effects and endless possibilities.
Filmora simplifies advanced features to save you time and effort.
Filmora cuts out repetition so you can move on to your next creative breakthrough.
Step 1: Import the Videos
Ensure that the videos you import are editable lest that will be a waste of time. Its design makes it compatible with a wide range of formats, including wmv, mkv, mp4, wav, mpeg, avi, jpg, and png. Since it is among the compatible formats, don’t hesitate to use Filmora to convert GIF to mp4 and vice versa instead of Photoshop.
Step 2: Drag the videos to Filmora timeline
Keep in mind that Filmora has a long list of tools you can use to edit your videos. However, you can also use them on a video that’s on its timeline. To drop them there, all you have to do is drag them to the timeline.

Step 3: Edit the File
The list of ways of editing your videos is long. Some of your options are split, crop, combine, slow down, and speed up the GIFs, to mention a few. So, pick the options that fit your situation the best. Ensure that the end product is as good as possible by using these features to the best level.
Step 4: Add Various Text Effects
In most cases, images and videos aren’t enough. You may want to add text to enhance what you want to achieve with the GIF. To do so, you can always introduce text, and trust me, it never disappoints. In addition to text, you can also add sound at this stage. Again, it is something that does GIFs the justice they deserve.

Step 5: Save and Export the GIF
When all is stated and done, you will have to save and export the GIFs so that you can use them accordingly. For instance, you can share them with friends via social media. Ensure that the extension you use is the GIF.
● Key Takeaways from This Episode →
● Based on the above discussion, it is possible to convert mp4 to GIF. As a matter of fact, it is quite easy, and you don’t need to be an expert to get it done.
●Rest assured that the video will become a GIF with a few clicks. Then, you can go ahead and use it as you may wish.
●On one side, you can use Photoshop. It is a tool designed to perform such tasks.
●If you choose it, use the above guide and follow each of the steps. It is quite detailed to the extent that you won’t get stuck along the way.
●On the other hand, you can also use Wondershare Filmora. It is yet another application that converts MP4 to GIF excellently.
When someone mentions a GIF, what comes to your mind? Some people can picture what it means but wouldn’t describe that match. So, before we discuss how to convert mp4 to gif in Photoshop, it would be wise to define it briefly. First of all, GIF stands for Graphics Interchange Format. Its file format is a compressed image, and it is most suitable for animation. We all know that an animated GIF comprises a series of many still images. However, since these images play sequentially, it may appear as if they are in motion. It is that movement illusion that makes the animation effect come about.
When someone mentions a GIF, what comes to your mind? Some people can picture what it means but wouldn’t describe that match. So, before we discuss how to convert mp4 to gif in Photoshop, it would be wise to define it briefly. First of all, GIF stands for Graphics Interchange Format. Its file format is a compressed image, and it is most suitable for animation. We all know that an animated GIF comprises a series of many still images. However, since these images play sequentially, it may appear as if they are in motion. It is that movement illusion that makes the animation effect come about.
In this article
01 [How to Convert Video to GIF in Photoshop - Easy Way](#Part 1)
02 [How to Create Animated GIFs from Video without Photoshop](#Part 2)
Part 1 How to Convert Video to GIF in Photoshop - Easy Way
If you want to convert video to GIF in Photoshop, here is a discussion of the easy way to go about it.
Step 1: Ensure that the Dimensions are Right
When you start to convert mp4 to GIF using Photoshop, it is important to highlight some things that need to be done before anything else. Ensure that you set the resolution and dimensions right. Failure to do saw will see the size of your video determine that of your GIF. Beneath such occurrences, you may find yourself having a GIF that’s too large, and its quality leaves a lot to be desired.
The dimensions you choose will depend on what you are working on at any one particular time. For instance, a 720 x 300 layout is recommended for a banner ad GIF. If there is something that one can’t stress enough is the importance of ensuring that you use pixels. As for the resolution, keep in mind that a low resolution translates to a small file size. In this case, you are at privilege to choose between two units, pixels and inches.
Additionally, set the color mode. Since GIFs are meant for screens, ensure that you select the RGB color mode. Finally, click on Create, which opens a new document, and start following these steps to convert Mp4 to GIF Photoshop.
Step 2: Import the Video you want to convert from MP4 to GIF Photoshop
Remember that we already opened Photoshop by pressing Create. Now, the next thing would be to navigate to File followed by Import before selecting the Video Frames to Layers option.
Step 3: Set Up the Following Settings Accordingly
After choosing the video file, choose Open, and a dialogue box with several options and a preview of the video appears.
The radio buttons give you two options to choose from. The “From Beginning to End” is the ideal choice if you want the whole video to be converted to GIF. However, if you want to focus on a section of the video, select “Selected Range Only.” On the other hand, the checkbox allows you to limit the video to 2 frames. Simply tick it, and Photoshop will automatically ensure that only two frames of the video are left.
Last but not least, check the “Make Frame Animation” checkbox. Once all these settings are set as recommended and depending on preference, Photoshop will export your video as several frames. In the event that the program crashes, all is not lost. You can fix it by reducing the video’s quality and then try importing it.
Step 4: Edit the GIF
Photoshop also gives you several options to help you edit your frames to perfection. In most cases, these settings are ideal for manipulating the quality of your GIF. Interestingly, it is possible to preview how the GIF will look before committing to any change. So expect two panes, right and left. The left one allows you to see the preview, whereas its right counterpart helps you edit.
Alternatively, select one of the preset choices. If you do so, there is no requirement The bottom line is that the tool makes to make any changes. That doesn’t mean you can’t choose a Preset option and then edit it to your preferences. Expect the quality of the GIF to decrease and the size to be relatively small. Right below the Preset, don’t forget to confirm that the selected option is GIF.
Step 5: Save the GIF
Once satisfied by the GIF created, save these frames as animated GIFs. Go to File, then Export, followed by Save for Web (Legacy).
That’s how to convert Mp4 to GIF in simple steps.
Part 2 How to Create Animated GIFs from Video without Photoshop
Alternatively, you can opt to convert Mp4 to GIF using Wondershare Filmora Video Editor . It is yet another tool suitable for creating animated GIFs using videos and photos. It allows the user to customize GIF images using overlays, text, animation, and elements. When it is over, you are at liberty to export it to your computer or any other common portable storage device. The bottommost line is that the tool makes it easy to use whenever necessary. The icing on the cake is the fact that you don’t have to sign up or pay a premium. In case you are wondering, it is also easy to use. All you got to do is to follow these steps.
Wondershare Filmora - Best Video Editor for Mac/Windows
5,481,435 people have downloaded it.
Build unique custom animations without breaking a sweat.
Focus on creating epic stories and leave the details to Filmora’s auto features.
Start a creative adventure with drag & drop effects and endless possibilities.
Filmora simplifies advanced features to save you time and effort.
Filmora cuts out repetition so you can move on to your next creative breakthrough.
Step 1: Import the Videos
Ensure that the videos you import are editable lest that will be a waste of time. Its design makes it compatible with a wide range of formats, including wmv, mkv, mp4, wav, mpeg, avi, jpg, and png. Since it is among the compatible formats, don’t hesitate to use Filmora to convert GIF to mp4 and vice versa instead of Photoshop.
Step 2: Drag the videos to Filmora timeline
Keep in mind that Filmora has a long list of tools you can use to edit your videos. However, you can also use them on a video that’s on its timeline. To drop them there, all you have to do is drag them to the timeline.
Step 3: Edit the File
The list of ways of editing your videos is long. Some of your options are split, crop, combine, slow down, and speed up the GIFs, to mention a few. So, pick the options that fit your situation the best. Ensure that the end product is as good as possible by using these features to the best level.
Step 4: Add Various Text Effects
In most cases, images and videos aren’t enough. You may want to add text to enhance what you want to achieve with the GIF. To do so, you can always introduce text, and trust me, it never disappoints. In addition to text, you can also add sound at this stage. Again, it is something that does GIFs the justice they deserve.
Step 5: Save and Export the GIF
When all is stated and done, you will have to save and export the GIFs so that you can use them accordingly. For instance, you can share them with friends via social media. Ensure that the extension you use is the GIF.
● Key Takeaways from This Episode →
● Based on the above discussion, it is possible to convert mp4 to GIF. As a matter of fact, it is quite easy, and you don’t need to be an expert to get it done.
●Rest assured that the video will become a GIF with a few clicks. Then, you can go ahead and use it as you may wish.
●On one side, you can use Photoshop. It is a tool designed to perform such tasks.
●If you choose it, use the above guide and follow each of the steps. It is quite detailed to the extent that you won’t get stuck along the way.
●On the other hand, you can also use Wondershare Filmora. It is yet another application that converts MP4 to GIF excellently.
Learn Disney Cartoon Drawing to See More Disney Magic Moments
Learn Disney Cartoon Drawing to See More Disney Magic Moments
An easy yet powerful editor
Numerous effects to choose from
Detailed tutorials provided by the official channel
How to Draw a Disney Caricature

Disney-Inspired Ipad Drawing Class for Beginners
In this article
01 [How to Draw a Disney Caricature](#Part 1)
02 [Disney-Inspired Ipad Drawing Class for Beginners](#Part 2)
Part 1 How to Draw a Disney Caricature
Below is the step-by-step guide to making a Disney cartoon drawing with colors from the comfort of your home:
01How to Draw Mickey

Unarguably, Mickey Mouse is one of the most famous anime characters globally. This character was created in 1928 and is a famous Disney cartoon drawing by animators. Here are straightforward steps to help you draw a Mickey Mouse:
Step 1: Sketch the general but carefully observed features of Mickey Mouse, including the position of ears, body shape (reverse C shape), body proportions including eyes, limbs, and arms, length of arms, button on his pants, and angle on the hands.
Step 2: Take your pencil and paper, and using gentle and weak strokes, make a simple sketch of the head, neck, belly, and limbs.

Step 3: Draw contours of the mouth, ears, and nose.

Step 4: Specify the face features like a smiling opened mouth, tip of the nose, and eyes.

Step 5: Draw the hands carefully, observing the length of both arms and their proportion to the size of the character’s head.

Step 6: Sketch the outline contours of the shoes, the legs, and the pants.

Step 7: Sketch the final outline contour of the body, then erase excess lines where necessary. Add the two buttons on Mickey mouse pants.

Step 8: Draw his nose’s tail, tongue, and ellipse.

Step 9: First, use a 2B or 4B or any soft black color pencil to color the black parts.

Step 10: Depending on your preference, you can color with water, acrylic paints, or pastels.

02How to Draw Captain America
Follow these simple steps to make a Disney cartoon drawing of Captain America:
Step 1: Draw the head and chest
Draw the outlines of his masked face using smooth lines. Draw a curved line across his face to divide his face from his mask. Draw a large letter A and add tiny wings beside it on his forehead. Draw his mouth, eyes, and nose. Use curved lines to indicate his shoulder and chest, then draw a star on his chest.

Step 2: Draw his arm and waist
Draw a curved line on the shoulder to represent the bicep, then draw his gloved arm curled to form a fist. Draw curved lines beneath the chest to represent his muscular weight, then draw the pouches on his belt and use more curved lines to draw his waist.

Step 3: Draw his legs
Here, we shall portray Captain America in action. Use curved lines to show his extended right leg with boots. The left leg should appear more petite.

Step 4: Draw his shield
Against his right arm, carefully draw a flattened circular shape. You can achieve this by drawing concentric circles with a large star in the middle. Draw his arm poking out from behind his shield.

Step 5: Include the final details
Add some vertical lines across his waist and some details on his boots.

Step 6: Colour Captain America
Using colors of the American flag, color your drawing with red, white, and blue colors.

03How to Draw Stitch
Stitch is a bulletproof and fireproof alien from the Lilo and Stitch animations. Here’s how you can draw Stitch:
Step 1: Draw a circle that would form Stitch’s head

Step 2: Using a long curved line, draw an irregular peanut shape beneath the head to represent its body.

Step 3: To form its light underbelly, enclose a small shape parallel to the outline of Stitch’s body using a long curved line. On the chest region, draw a series of small “V” shapes to indicate the presence of fur.

Step 4: Draw Stitch’s arm using curved lines for the upper arm and another pair for the lower arm. Draw his bent hands and fingers using short lines. At the tip of its fingers, draw small pointed triangles to represent its claws.

Step 5: Erase the guidelines from Stitch’s arm

Step 6: Draw Stitch’s outstretched arm using a pair of curved lines and small “C” shaped lines to represent the fingers. Use short lines to connect the fingers. Draw small “V” shapes at the tip of the fingers for the triangular claws.

Step 7: Use a pair of curved lines to sketch each leg, then enclose the toes using C-shaped lines

Step 8: Sketch the ears using long curved lines to indicate the base and folds. Sketch the fur on top of Stitch’s head using a series of curved lines.

Step 9: Draw a big circle for the nose and use curved lines to indicate the nostrils. For the eyes, draw irregular rounded shapes, one within the other. Sketch too long curved lines to show the mouth and small blonde triangles for the teeth. Above the eyes and nose, draw curved lines.

Step 10: Use different shades of blue to colour Stitch.

Part 2 Disney-Inspired Ipad Drawing Class for Beginner
Here is a list of classes for beginners interested in drawing Disney characters.
01Dive into the world of Animation with a Disney-Inspired Ipad Drawing Course

This Disney-inspired lesson focuses on real-life scenarios that are beautiful and adorable. Create your everyday settings by sketching backgrounds and outfitting figures.
It will assist you in developing a straightforward approach to drawing cartoon characters through experimentation and time. Follow along and sketch characters, then make your new character.
02Drawing Faces: A Beginner‘s Guide

Ira Marcks, a graphic novelist, will teach you everything you need to know about drawing faces. Are you completely new when it comes to drawing? No worries; follow along with Ira’s bite-sized lectures, and you’ll be ready to delve into a class project by the end of the course.
Do you prefer to set your speed and work at it? If yes, then extend your learning beyond the classroom, download Ira’s Drawing Faces Book.
03Disney Inspired Drawings: Faces and Expressions

Learners will look at sketching a cartoon image of themselves or people they know while exploring the specific traits of Disney-style characters in this one-time live drawing lesson.
Learners will collaborate with the teacher while working on their art projects. This is a technique class, so the focus will be on the process and working towards a finished goal. Nevertheless, a piece may get completed outside of class.
This program is for students who have a basic understanding of drawing and proportion, are open to artistic growth, and are comfortable appearing on camera and sharing their work in a small group setting. All to help each other, and the classroom environment will support all students.
04Free Art Lessons By The Parks’ Imagineers
This lesson will teach how to create your theme park, design virtual landscapes, and even sketch unique costumes!
You’ll also learn how to draw characters from Frozen 2 like Anna and Elsa and classics like Mickey Mouse, Daisy Duck, Pluto, and others.
Your class experience can be enjoyable when using an easy-to-use tool like Wondershare Filmora.
Wondershare Filmora Video Editor is a robust and easy-to-use video editor for users of all skill levels, from beginner to advanced. Its advanced tools, adjustable keyframing, smoothing effects, and motion blur will considerably assist you in creating a high-quality animation video. Furthermore, the auto color correction and audio mixing will elevate your 2D animation film to new heights. Filmora is the best solution if you want more productivity, control, and customization options for your Disney cartoon drawings and animation.
For Win 7 or later (64-bit)
For macOS 10.12 or later
● Ending Thoughts →
● How to make a Disney cartoon drawing
● A step-by-step guide to drawing your favorite Disney cartoon drawing with colors
● How to use Filmora to create animations
● Different Disney-inspired beginner classes for iPad users.
How to Draw a Disney Caricature
Disney-Inspired Ipad Drawing Class for Beginners
In this article
01 [How to Draw a Disney Caricature](#Part 1)
02 [Disney-Inspired Ipad Drawing Class for Beginners](#Part 2)
Part 1 How to Draw a Disney Caricature
Below is the step-by-step guide to making a Disney cartoon drawing with colors from the comfort of your home:
01How to Draw Mickey
Unarguably, Mickey Mouse is one of the most famous anime characters globally. This character was created in 1928 and is a famous Disney cartoon drawing by animators. Here are straightforward steps to help you draw a Mickey Mouse:
Step 1: Sketch the general but carefully observed features of Mickey Mouse, including the position of ears, body shape (reverse C shape), body proportions including eyes, limbs, and arms, length of arms, button on his pants, and angle on the hands.
Step 2: Take your pencil and paper, and using gentle and weak strokes, make a simple sketch of the head, neck, belly, and limbs.
Step 3: Draw contours of the mouth, ears, and nose.
Step 4: Specify the face features like a smiling opened mouth, tip of the nose, and eyes.
Step 5: Draw the hands carefully, observing the length of both arms and their proportion to the size of the character’s head.
Step 6: Sketch the outline contours of the shoes, the legs, and the pants.
Step 7: Sketch the final outline contour of the body, then erase excess lines where necessary. Add the two buttons on Mickey mouse pants.
Step 8: Draw his nose’s tail, tongue, and ellipse.
Step 9: First, use a 2B or 4B or any soft black color pencil to color the black parts.
Step 10: Depending on your preference, you can color with water, acrylic paints, or pastels.
02How to Draw Captain America
Follow these simple steps to make a Disney cartoon drawing of Captain America:
Step 1: Draw the head and chest
Draw the outlines of his masked face using smooth lines. Draw a curved line across his face to divide his face from his mask. Draw a large letter A and add tiny wings beside it on his forehead. Draw his mouth, eyes, and nose. Use curved lines to indicate his shoulder and chest, then draw a star on his chest.
Step 2: Draw his arm and waist
Draw a curved line on the shoulder to represent the bicep, then draw his gloved arm curled to form a fist. Draw curved lines beneath the chest to represent his muscular weight, then draw the pouches on his belt and use more curved lines to draw his waist.
Step 3: Draw his legs
Here, we shall portray Captain America in action. Use curved lines to show his extended right leg with boots. The left leg should appear more petite.
Step 4: Draw his shield
Against his right arm, carefully draw a flattened circular shape. You can achieve this by drawing concentric circles with a large star in the middle. Draw his arm poking out from behind his shield.
Step 5: Include the final details
Add some vertical lines across his waist and some details on his boots.
Step 6: Colour Captain America
Using colors of the American flag, color your drawing with red, white, and blue colors.
03How to Draw Stitch
Stitch is a bulletproof and fireproof alien from the Lilo and Stitch animations. Here’s how you can draw Stitch:
Step 1: Draw a circle that would form Stitch’s head
Step 2: Using a long curved line, draw an irregular peanut shape beneath the head to represent its body.
Step 3: To form its light underbelly, enclose a small shape parallel to the outline of Stitch’s body using a long curved line. On the chest region, draw a series of small “V” shapes to indicate the presence of fur.
Step 4: Draw Stitch’s arm using curved lines for the upper arm and another pair for the lower arm. Draw his bent hands and fingers using short lines. At the tip of its fingers, draw small pointed triangles to represent its claws.
Step 5: Erase the guidelines from Stitch’s arm
Step 6: Draw Stitch’s outstretched arm using a pair of curved lines and small “C” shaped lines to represent the fingers. Use short lines to connect the fingers. Draw small “V” shapes at the tip of the fingers for the triangular claws.
Step 7: Use a pair of curved lines to sketch each leg, then enclose the toes using C-shaped lines
Step 8: Sketch the ears using long curved lines to indicate the base and folds. Sketch the fur on top of Stitch’s head using a series of curved lines.
Step 9: Draw a big circle for the nose and use curved lines to indicate the nostrils. For the eyes, draw irregular rounded shapes, one within the other. Sketch too long curved lines to show the mouth and small blonde triangles for the teeth. Above the eyes and nose, draw curved lines.
Step 10: Use different shades of blue to colour Stitch.
Part 2 Disney-Inspired Ipad Drawing Class for Beginner
Here is a list of classes for beginners interested in drawing Disney characters.
01Dive into the world of Animation with a Disney-Inspired Ipad Drawing Course
This Disney-inspired lesson focuses on real-life scenarios that are beautiful and adorable. Create your everyday settings by sketching backgrounds and outfitting figures.
It will assist you in developing a straightforward approach to drawing cartoon characters through experimentation and time. Follow along and sketch characters, then make your new character.
02Drawing Faces: A Beginner‘s Guide
Ira Marcks, a graphic novelist, will teach you everything you need to know about drawing faces. Are you completely new when it comes to drawing? No worries; follow along with Ira’s bite-sized lectures, and you’ll be ready to delve into a class project by the end of the course.
Do you prefer to set your speed and work at it? If yes, then extend your learning beyond the classroom, download Ira’s Drawing Faces Book.
03Disney Inspired Drawings: Faces and Expressions
Learners will look at sketching a cartoon image of themselves or people they know while exploring the specific traits of Disney-style characters in this one-time live drawing lesson.
Learners will collaborate with the teacher while working on their art projects. This is a technique class, so the focus will be on the process and working towards a finished goal. Nevertheless, a piece may get completed outside of class.
This program is for students who have a basic understanding of drawing and proportion, are open to artistic growth, and are comfortable appearing on camera and sharing their work in a small group setting. All to help each other, and the classroom environment will support all students.
04Free Art Lessons By The Parks’ Imagineers
This lesson will teach how to create your theme park, design virtual landscapes, and even sketch unique costumes!
You’ll also learn how to draw characters from Frozen 2 like Anna and Elsa and classics like Mickey Mouse, Daisy Duck, Pluto, and others.
Your class experience can be enjoyable when using an easy-to-use tool like Wondershare Filmora.
Wondershare Filmora Video Editor is a robust and easy-to-use video editor for users of all skill levels, from beginner to advanced. Its advanced tools, adjustable keyframing, smoothing effects, and motion blur will considerably assist you in creating a high-quality animation video. Furthermore, the auto color correction and audio mixing will elevate your 2D animation film to new heights. Filmora is the best solution if you want more productivity, control, and customization options for your Disney cartoon drawings and animation.
For Win 7 or later (64-bit)
For macOS 10.12 or later
● Ending Thoughts →
● How to make a Disney cartoon drawing
● A step-by-step guide to drawing your favorite Disney cartoon drawing with colors
● How to use Filmora to create animations
● Different Disney-inspired beginner classes for iPad users.
The 15 Most Efficient Photo to Cartoon Software for Android
The 15 Most Efficient Photo to Cartoon Apps for Android
An easy yet powerful editor
Numerous effects to choose from
Detailed tutorials provided by the official channel
It’s usually better to start with a free cartoon app for Android, whether you want to make a cartoon avatar of yourself or add humorous cartoons and live artistic effects to your photos.
In today’s digital age, your smartphone can serve as a portable cartoon picture editor, allowing you to apply cool and artistic effects to new or current photos. Finding an excellent cartoon-making app for Android is difficult because there are so many unique possibilities.
To assist you, we’ve compiled a list of the top cartoon picture apps for Android and iPhone that can help you turn your photo into a cartoon in seconds. Let’s get started without further ado.
In this article
01 [10 Apps to Kickstart Your Need to Photo to Cartoon](#Part 1)
02 [Top 5 iOS Apps to Turn Photo into Cartoon](#Part 2)
Part 1 Apps to Kickstart Your Need to Photo to Cartoon
In this part, you will have a chance to familiarize yourself with the best cartoon apps for Android, along with all the relevant information that matches your need.
01Cartoon Photo Editor
This free image to cartoon app has been a favorite for many years, making it an obvious choice for the top slot.
This cartoon pic software could be the ideal choice for you to add fantastic artistic and cartoon effects to your new or current photos.
Features:
• Add fantastic cartoon effects to your phone’s gallery photos.
• With a single tap of your finger, save images or take an image instantly.
• The autofocus feature (click anywhere on the screen)
• Several eye-catching effects, including a cartoon, oil painting, thermal vision, drawing, and more.
Compatibility:- Android 4.4 or above
Rating: 4.2
Price:- Free
02Camart – Cartoon Photo
This one is extensively used photos to cartoon picture apps for Android users.
Cartoon Photo is the ideal program for instantly applying the most spectacular cartoon effects to your images!
With an intelligent cartoon camera, you can effortlessly turn your most fabulous selfies and recorded films into live paints.
Features:
• Use your phone’s camera to take photos, selfies, and movies, then apply real-time artistic effects.
• There are many fantastic artistic filters to pick from (cartoon, pencil, comics, sketch, oil painting, watercolor, and many more).
• Use autofocus, pinch to zoom, and more by tapping on the screen.
• Email or post photos to popular social networking sites to share with your friends.
Compatibility:- Android 4.4 or above
Price:- Free
Rating: 3.9
03Cartoon Pictures – Cartoon Photo Editor
Cartoon Pictures - Cartoon Photo Editor makes as the best Android photos to cartoon apps for adding cartoon effects, oil paintings, and canvas artwork.
It has a wide range of cartoon animation effects, pencil sketch effects, smooth art filters, and painting effects that will transform your regular photos into beautiful works of art.
Features:
• A cartoon picture conversion program with a beautiful look.
• Hundreds of incredible cartoon photo effects
• A powerful selfie camera that allows you to edit photos in real-time.
• Post your sketch styles and artwork to social media sites like Facebook, Instagram, Pinterest, and Twitter.
Compatibility:- Android 5.0 or later
Price:- Free
Rating: 4.4
04Cartoon Photo – Pictures Cartoon Drawing
It combines all distinctive cartoon effects and art filters into one software, allowing you to instantly transform your photographs into grey cartoons, smooth pencil sketches and drawings, oil paintings, and pixel art.
Although the Google Play market is overflowing with cartoon-type editing apps, this is the best cartoon-making app for Android. You can now be your cartoonist.
Features:
• Create cartoon drawings from any new or old photos.
• Selfie camera with powerful cartoon snaps, creative photo combining, and cartoon filters
• A plethora of contemporary artistic filters to pick from (cartoon yourself, a cartoon photo maker, photo to caricature, and many more)
Compatibility:- Android 4.1 or above
Price:- Free
Rating: 2.6
05Cartoon Photo Editor – Pencil Sketch Art
If you need a way to turn your favorite photos into cartoon drawings, this cartoon camera is the way to go.
This most excellent comedy picture software attempts to provide a plethora of fantastic cartoon graphics filters to help your photos stand out.
Features:
• Create cartoons and oil paintings from any photo
• Use the ‘Cartoon yourself’ function to turn your images into masterpieces.
• Photo editor for cartoons/photo creator for cartoons
Compatibility:- Requires 4.1 or more Android
Price:- Free
Rating: 3.1
06Art Camera – Cartoon, Pencil Sketch Art Effect Photo
Do you enjoy sketching? This greatest photo to cartoon app from Model X is a must-have for everyone who wants to add pencil sketches and fantastic artistic and cartoon effects to existing photos.
It also serves as a useful photo organizer, allowing you to organize and manage your photos using date and time tags. With the help of our top-rated convert photo to cartoon app, you can now be the center of attention.
Features:
• A vast range of picture effects and filters inspired by oil paintings and cartoons
• A plethora of photo editing and adjusting options, such as contrast, brightness, and saturation
• UHD camera, HD selfie, auto-focus, HDR, and silent capture mode, among other features.
Compatibility:- Android 4.2+
Price:- Free
Rating: 4.5
07Tooncam – Cartoon, Pencil Sketch Pic
Do you want to make cartoons out of your most extraordinary selfies? If that’s the case, the finest cartoon picture editor app for Android is all you’ll need. What could be better than Tooncam?
With this picture-to cartoon app at your disposal, you can quickly turn your images into spectacular cartoons.
Features:
• With a few clicks of your finger, make fantastic web-based comics.
• Transforms your regular photos into adorable cartoon selfies
• More than 15 different cartoon effects
Compatibility:- Android 4.4+ and iOS
Price:- Free
Rating: 4.0
08Prisma Art Effect Photo Editor
Prisma was the most popular cartoon animation app on the market only a few years ago. Even though this app isn’t as famous as it once was, it still has some absorbing art filters that can make your shot look like some of history’s greatest artists created it.
The best part is that new filters come every day, so you’ll never run out of cartoon photo ideas. Furthermore, the software has various special photo effects and the ability to save your works in both SD and HD resolution.
Features:
● Every day, you get new cartoon effects.
● You will get more than 300 filters.
● Cartooning is the only option.
● Easily cartoon the photo.
Price: Free, though in-app purchases
Compatibility: Android
Ratings: 4.6
09Cartoon Yourself
Even if you can’t record videos or shoot images with the Cartoon Yourself app for Android, it’s still a good option to quickly turn a photo into a cartoon. Select a picture with the ‘Add a Photo’ button, then hit the ‘Apply Effect’ button to begin browsing the app’s extensive library of stickers and cartoon effects.
After the photo has been cartoonized, you can save it to your phone or share it on social media with your friends. The Cartoon Yourself app also provides basic photo editing features, such as cropping, mirroring, and rotating images.
Features:
● For novices, a primary and easy-to-use photo-to-cartoon app
● It has some excellent and lovely cartoon effects.
● Limited Free filters and effects
Price: Free, but with in-app purchases.
Compatibility: Android
Rating: 3.1
10Painnt – Art & Cartoon Filters
Painnt is easily one of the greatest cartoons yourself apps on the market, with over a thousand filters and effects. Because this picture editor allows you to change the transparency, saturation, and brightness of all your images, you can manipulate them in almost any way you desire. Painnt is also a creative community where you can find and meet others who share your art interests.
However, the accessible version of the program limits the size of the photos you may export, and you must subscribe to one of the subscription plans to process pictures in HD. The cost of a yearly subscription is only $9.99.
Features:
• Version is updated regularly to include more filters.
• Change the parameters of the cartoon filters to make them your own.
• Advanced AI technology.
Price: Free(in-app purchases)
Compatibility: Android
Rating: 3.8
Part 2 Top 5 iOS Apps to Turn Photo into Cartoon
Here, we have some of the best iOS applications that will assist you in turning photos into cartoons quickly.
01Cartoon Yourself Video Effects
Even if you aren’t a fan of the best cartoon video maker app download for iOS, this incredible photo-to cartoon app will convert you into one.
It features a user-friendly screen and an extensive range of amusing picture effects to help you build a cartoon avatar of yourself.
Features:
• Convert any snapshot of a person into an animated animation.
• Use a variety of authentic facial expressions (squint eyes, flirty wink, sad face, nice smile, etc.)
• Use dozens of humorous photo effects to turn your face into an alien, hideous, bulb-headed person, and more.
02Cartoon Camera Free
Apart from the Cartoon and Pencil Sketch effects, this little program doesn’t offer anything else. You may either use photos from your phone or take new ones and turn them into fantastic cartoons. The images you modify with the Cartoon Camera Free app can be saved to your camera roll or shared on social media.
However, because the process of turning your photos into cartoons is fully automated, you won’t have much control over how the final version of your cartoon photo will appear.
Features
● You can quickly draw a caricature of yourself on your phone.
● This fantastic photo-to cartoon tool will provide you with a realistic cartoon effect in real-time.
● It is updated regularly. Thus, you won’t use the most recent effects.
03Photo To Cartoon Yourself Edit
Photo To Cartoon Yourself is a popular cartoon photo programs, allowing you to create avatars or a cartoon of yourself quickly.
Capture a photo from your phone’s gallery or take a fresh one with the camera and turn it into a fantastic cartoon straight away for free. It is the most powerful program on this list for converting a photo into a cartoon AVATAR with the least amount of work and time. Furthermore, it includes many fascinating elements that will give your shot a realistic cartoon ethos.
Features:
● Choose images from your photo library.
● Turn your images into cartoons and send them via email.
● No picture shrinking or stretching; create cartoon images in high definition in seconds.
● Free to access
04Clip2Comic & Caricature Maker
Clip2Comic & Caricature Maker comes with a friendly interface that works wonders while converting a photo into caricatures, sketches, or cartoons.
Clip2Comic also allows you to make your cartoon videos in a matter of seconds using its real-time preview camera.
Features:
• Choose an image or video clip from your photo album to use.
• A wide range of free cartoon, drawing, caricature, and poster effects are available.
• Customization tools allow you to tweak your image’s outlines and blacks.
• Use several color filters to put your cartoon faces in the appropriate mood.
05MomentCam Cartoons & Stickers
MomentCam allows you to create your bitmoji based on your preferences. MomentCam is one of the most popular photo-to-cartoon apps on the market right now, with over 300 million downloads.
It allows you to create personalized emoticons and funny cartoons to convey your emotions in the most amusing way imaginable. Thousands of realistic effects and filters are available to give your shot an authentic cartoon feel. You can make a better version of yourself with MomentCam.
MomentCam may be at the bottom of the list of the best cartoon camera applications for iPhone and iPad, but it is well worth a look.
Features:
● Turn yourself into witty cartoons and glistening emoticons.
● Add text bubbles to some jokes and phrases to make your cartoons more entertaining
● Alter your caricatures’ facial expressions.
● You can get great prizes by sharing your amusing creations with millions of people all around the world.
****Wondershare Filmora Video Editor - Best Application**
With the rise in popularity of cartoonizing photo apps for Android, we’d like to introduce you to a fantastic app that will assist you in creating cartoon animation. Following its incredible characteristics in no time. Wondershare Filmora Animation software is a new Wondershare product that includes several downloadable animated characters and elements.
Most significantly, this software offers a user-friendly interface, an intelligent editing workflow, is lightweight, has a quick video rendering speed, and much more.
● Ending Thoughts →
● Now that you’ve found the best cartoon video maker app for Android, choose the one that’s right for you. Whether on Android or iOS devices, these animation movie creators will turn the world upside down in just a few clicks, so give it a try today!
● You can also try out a fantastic app, Filmora. It is a perfect cartoon-making app for Android and iOS. Change your photo to cartoon in a few clicks.
Formula to Animate Photos From 10 Animate Pictures App
Epic Formula to Animate Photos from These 10 Animate Pictures App
An easy yet powerful editor
Numerous effects to choose from
Detailed tutorials provided by the official channel
With the availability of modern technology, still photos can be seamlessly transformed into live animated photos. Adding motion and movement along with filter effects to still photos is pretty easy with an animated pictures app.
For Win 7 or later (64-bit)
For macOS 10.12 or later
In this article, we have listed 10 of the best animated picture apps available in 2021. You will find all essential details and features of these 10 apps which will help you choose the best option when choosing an app for animating a picture. Let us take a look at these 10 apps!
In this article
01 [10 Animate Pictures Apps](#Part 1)
02 [The contrast of These 10 Animate Pictures Apps](#Part 2)
Part 1 10 Animate Pictures Apps
01 MotionLeap

MotionLeap
● Price
Free, with premium version available.
● OS
Android and iOS
● Key features
You can freeze parts of an image.
Variety of filters can be applied.
Although MotionLeap is free to use there’s a Pro and subscription version with a greater variety of features in it. The best part about this animated pictures app is that it does not put any watermark over the final image.
The app can animate still photos and convert them into short, loop videos. This is done by the programming of the directional cues into the image which is executed by dragging actions of the thumb across your mobile screen.
Although, on MotionLeap, without the pro version, the photo will be saved in video format.
02 GIPHY

GIPHY
● Price
Free
● OS
Android and iOS
● Key features
Simple, easy to use UI
A variety of built-in animation tools
Sticker maker on iOS (for iPhone X and later models)
We might already be acquainted with GIPHY as the most popular search engine for GIFs. Although, what’s unknown is that GIPHY has a mobile app both for Android and iOS which can be used to create GIFs and animate photos.
The app’s key advantage is its highly intuitive and very easy to use interface that makes it really easy to animate photos with the GIPHY app. Above all, it is completely free to use and along with animating pictures, you can also add captions to your animated photos or even capture short videos.
03 Movepic

Movepic
● Price
Free, with premium version available.
● OS
Android and iOS
● Key features
Easy to use.
A range of built in overlays and filters.
Movepic is another excellent app for animating pictures. As an animated pictures app, it is quite similar to MotionLeap owing to the fact that it animates still photos.
A downside of the Movepic free version is that it puts a watermark on the image and you cannot remove it without upgrading to the premium version or VIP account. The app saves the final images as a movie file and not as a GIF.
04 ImgPlay

ImgPlay
● Price
Free, with premium version available.
● OS
Android and iOS
● Key features
Easy to use.
Lay out still photographs side-by-side and use burst photos or videos.
ImgPlay is another very popular and effective animated pictures app. The app makes use of a range of ready-to-use animated photos for the web.
ImgPlay also comes with a range of advanced and easy-to-understand controls. This app, in spite of all its perks, puts a watermark on the image—which, once again, cannot be removed unless you buy the premium version of the app.
05 StoryZ

StoryZ
● Price
Free, with premium version available.
● OS
Android and iOS
● Key features
Programmed movement paths, overlays and color filters.
Saves images automatically as GIFs.
StoryZ is one of the best apps on this list and anyone who has used the app would agree with that. The app can seamlessly animate still photos.
A great thing about this app is that StoryZ enables users to remove the watermark from the image by simply watching a quick ad before saving the file.
06 VIMAGE 3D

VIMAGE 3D
● Price
Free, with premium version available.
● OS
Android and iOS
● Key features
AI enabled.
A range of filters and special effects.
Add sounds to your animated images and videos.
This one is an award winning app for animating pictures and the app won a Google Play award in 2018. The app is simply exceptional in terms of user experience as well as features.
Like most of these apps, you do need to pay to remove the watermark, get access to the full effects library, and the ability to export your images in up to 2560p resolution.
07 Photo Bender

Photo Bender
● Price
Free
● OS
Android
● Key features
A variety of editing tools and features including brushes.
Enables users to export images as MP4s, GIFs, JPEGs, and PNGs.
Photo Bender is an animated pictures app that is specific to the Android platform. The app is popular for its convenience of use and it enables users to digitally warp images and animate photos.
There are a variety of things that can be done to an image with the help of this app. From colouring an image, to bending it, stretching it, and a lot more, you can do it all. You also get a range of brushes to use on the image.
08 Zoetropic

Zoetropic
● Price
Free, with premium version available.
● OS
Android and iOS
● Key features
The app is really fast and efficient.
Simple UI.
Zoetropic helps you animate images in minutes,even if you are using the app for the first time. The app does not come with a lot of features but its simplicity, effectiveness and ease of use makes it a great option for animated pictures app.
09 Lumyer

Lumyer
● Price
Free, with premium version available.
● OS
Android and iOS
● Key features
Seasonal and occasional animation effects.
Easy to use.
This app is another great platform to edit pictures and animate them. It enables you to add a variety of effects to pictures and easily animate them.
From subtle weather effects to sparkle, seasonal animations and a lot more, the app offers a lot of options.
Part 2: The contrast of These 10 Animate Pictures Apps
| Name of The Animated Picture App | Advantages | Disadvantages |
|---|---|---|
| MotionLeap | No watermark+Variety of filters; | File saved in video format without pro version |
| GIPHY | Free to use+Simple UI | Not suitable for advanced editing |
| Movepic | Built-in overlays and filters | Saves final image as video file without pro version Watermark |
| ImgPlay | Easy to use and understand+Ready to go animated photos for the web | Watermark on image |
| StoryZ | Remove watermark by watching an ad+Variety of animation techniques | Boring interface |
| VIMAGE 3D | Neat UI+Endless features+AI enabled | Need to buy premium version to access majority of features |
| Photo Bender | A range of tasks can be executed | Not a very attractive UI |
| Zoetropic | Simple, effective and easy to use | Limited effects on free version |
| Lumyer | Fast and easy to use+Lot of features | Can be expensive due to several in-app purchases |
| Filmora | Easy to Use+fordable+ons of features+Seamless UI+rofessional video editing tools | Not available on mobile |
Key Takeaways from This Episode
● That brings us to the end of the article. Anyone looking for an animated pictures app to animate their images have found 10 of the best apps available in the market right now.
● With the list of these 10 apps, anyone can find the most suitable platform for their own purposes of animating an image.
● Last but not the least, if it comes to an all inclusive platform for video editing and animating pictures, Filmora Pro is definitely the winner on this list! So check out your options and make the best choice!
With the availability of modern technology, still photos can be seamlessly transformed into live animated photos. Adding motion and movement along with filter effects to still photos is pretty easy with an animated pictures app.
For Win 7 or later (64-bit)
For macOS 10.12 or later
In this article, we have listed 10 of the best animated picture apps available in 2021. You will find all essential details and features of these 10 apps which will help you choose the best option when choosing an app for animating a picture. Let us take a look at these 10 apps!
In this article
01 [10 Animate Pictures Apps](#Part 1)
02 [The contrast of These 10 Animate Pictures Apps](#Part 2)
Part 1 10 Animate Pictures Apps
01 MotionLeap
MotionLeap
● Price
Free, with premium version available.
● OS
Android and iOS
● Key features
You can freeze parts of an image.
Variety of filters can be applied.
Although MotionLeap is free to use there’s a Pro and subscription version with a greater variety of features in it. The best part about this animated pictures app is that it does not put any watermark over the final image.
The app can animate still photos and convert them into short, loop videos. This is done by the programming of the directional cues into the image which is executed by dragging actions of the thumb across your mobile screen.
Although, on MotionLeap, without the pro version, the photo will be saved in video format.
02 GIPHY
GIPHY
● Price
Free
● OS
Android and iOS
● Key features
Simple, easy to use UI
A variety of built-in animation tools
Sticker maker on iOS (for iPhone X and later models)
We might already be acquainted with GIPHY as the most popular search engine for GIFs. Although, what’s unknown is that GIPHY has a mobile app both for Android and iOS which can be used to create GIFs and animate photos.
The app’s key advantage is its highly intuitive and very easy to use interface that makes it really easy to animate photos with the GIPHY app. Above all, it is completely free to use and along with animating pictures, you can also add captions to your animated photos or even capture short videos.
03 Movepic
Movepic
● Price
Free, with premium version available.
● OS
Android and iOS
● Key features
Easy to use.
A range of built in overlays and filters.
Movepic is another excellent app for animating pictures. As an animated pictures app, it is quite similar to MotionLeap owing to the fact that it animates still photos.
A downside of the Movepic free version is that it puts a watermark on the image and you cannot remove it without upgrading to the premium version or VIP account. The app saves the final images as a movie file and not as a GIF.
04 ImgPlay
ImgPlay
● Price
Free, with premium version available.
● OS
Android and iOS
● Key features
Easy to use.
Lay out still photographs side-by-side and use burst photos or videos.
ImgPlay is another very popular and effective animated pictures app. The app makes use of a range of ready-to-use animated photos for the web.
ImgPlay also comes with a range of advanced and easy-to-understand controls. This app, in spite of all its perks, puts a watermark on the image—which, once again, cannot be removed unless you buy the premium version of the app.
05 StoryZ
StoryZ
● Price
Free, with premium version available.
● OS
Android and iOS
● Key features
Programmed movement paths, overlays and color filters.
Saves images automatically as GIFs.
StoryZ is one of the best apps on this list and anyone who has used the app would agree with that. The app can seamlessly animate still photos.
A great thing about this app is that StoryZ enables users to remove the watermark from the image by simply watching a quick ad before saving the file.
06 VIMAGE 3D
VIMAGE 3D
● Price
Free, with premium version available.
● OS
Android and iOS
● Key features
AI enabled.
A range of filters and special effects.
Add sounds to your animated images and videos.
This one is an award winning app for animating pictures and the app won a Google Play award in 2018. The app is simply exceptional in terms of user experience as well as features.
Like most of these apps, you do need to pay to remove the watermark, get access to the full effects library, and the ability to export your images in up to 2560p resolution.
07 Photo Bender
Photo Bender
● Price
Free
● OS
Android
● Key features
A variety of editing tools and features including brushes.
Enables users to export images as MP4s, GIFs, JPEGs, and PNGs.
Photo Bender is an animated pictures app that is specific to the Android platform. The app is popular for its convenience of use and it enables users to digitally warp images and animate photos.
There are a variety of things that can be done to an image with the help of this app. From colouring an image, to bending it, stretching it, and a lot more, you can do it all. You also get a range of brushes to use on the image.
08 Zoetropic
Zoetropic
● Price
Free, with premium version available.
● OS
Android and iOS
● Key features
The app is really fast and efficient.
Simple UI.
Zoetropic helps you animate images in minutes,even if you are using the app for the first time. The app does not come with a lot of features but its simplicity, effectiveness and ease of use makes it a great option for animated pictures app.
09 Lumyer
Lumyer
● Price
Free, with premium version available.
● OS
Android and iOS
● Key features
Seasonal and occasional animation effects.
Easy to use.
This app is another great platform to edit pictures and animate them. It enables you to add a variety of effects to pictures and easily animate them.
From subtle weather effects to sparkle, seasonal animations and a lot more, the app offers a lot of options.
Part 2: The contrast of These 10 Animate Pictures Apps
| Name of The Animated Picture App | Advantages | Disadvantages |
|---|---|---|
| MotionLeap | No watermark+Variety of filters; | File saved in video format without pro version |
| GIPHY | Free to use+Simple UI | Not suitable for advanced editing |
| Movepic | Built-in overlays and filters | Saves final image as video file without pro version Watermark |
| ImgPlay | Easy to use and understand+Ready to go animated photos for the web | Watermark on image |
| StoryZ | Remove watermark by watching an ad+Variety of animation techniques | Boring interface |
| VIMAGE 3D | Neat UI+Endless features+AI enabled | Need to buy premium version to access majority of features |
| Photo Bender | A range of tasks can be executed | Not a very attractive UI |
| Zoetropic | Simple, effective and easy to use | Limited effects on free version |
| Lumyer | Fast and easy to use+Lot of features | Can be expensive due to several in-app purchases |
| Filmora | Easy to Use+fordable+ons of features+Seamless UI+rofessional video editing tools | Not available on mobile |
Key Takeaways from This Episode
● That brings us to the end of the article. Anyone looking for an animated pictures app to animate their images have found 10 of the best apps available in the market right now.
● With the list of these 10 apps, anyone can find the most suitable platform for their own purposes of animating an image.
● Last but not the least, if it comes to an all inclusive platform for video editing and animating pictures, Filmora Pro is definitely the winner on this list! So check out your options and make the best choice!
10 2D/3D Animation Tips & Tricks for You
10 2D/3D Animation Tips & Tricks to Bring New Ideas to You
Shanoon Cox
Mar 27, 2024• Proven solutions
Animation is a skill that you need years to practice. However, the learning process can be boosted if you master some animation tips. If you’re looking for great 2D/3D animation tips and tricks, this is what we will offer here.
There are some overlaps between 2D and 3D animation tips like practicing and object pose, but in essence, animation tips can be learned commonly.
These animation tips will help you make your 2D and 3D animations as bold and creative as possible, while reduce your workload and enable you to get your work out into the world quicker with excellent animation software . Let’s take a look at the top 10 2D/3D animation tips and tricks right now.
- Part 1: 2D Animation Tips for Beginners
- Part 2: 3D Animation Tips for Beginners
- Part 3: Frequently Asked Questions about Animation Tips
You may also like: Top 10 Anime Websites to Watch Anime Free
Part 1: 2D Animation Tips for Beginners
1. Find a reference in the real world
This first 2D animation tip is to find a reference. Using a real-world reference can help you animate faces effectively. When studios work with voice-over artists , they often record their facial movements so 2D animators can work with them and ensure their expressions are captured convincingly.
If this isn’t possible, consider using your face, so you have something to refer back to. You could use a mirror and speak the words your character will be saying into it. This can help you get the animated expressions just right.

2. Observe real life
The second animation tip is about observation. One of the key aspects of 2D animation is bringing life to animate objections. You need to think hard about how emotion can be portrayed and choose each movement carefully.
Spend time watching how people in real-life environments talk and interact with each one another, how they move, and how they express emotion. People-watching can be worth its weight in gold when it comes to preparing animations for 2D. Don’t be afraid to spend a great deal of time doing this, as it can be counted as valuable research.

3. Simplicity is the key
2D animation is never complicated compared with 3D. Think carefully before making a scene too complex. If there is too much information to digest, the overall effect can be one of confusion, and you may even find yourself compromising the realism of the scene. Try not to litter the scene with too many pose changes or other elements, and keep it authentic.

4. Draw animation again and again
Drawing animation takes a lot of time. It can’t be finished within one day, so you better know deep down that one piece of work only can be done after you have revised it many times. For 2D animation, it means you need to draw objects on paper many times.
In other words, the animation is a skill that needs practice and time. You can’t master it quickly. Luckily, all pains will be rewarded someday.

5. Feedback is crucial
Feedback is an essential part of artistic development . It’s wise to actively seek out commentary from knowledgeable figures who can help you improve. Naturally, we may see work we have invested a great deal of time and effort indifferently to someone not so involved in the creative process. Feedback can equate to a valuable learning opportunity that will help you make the result hit the spot much more convincingly.

Part 2: 3D Animation Tips for Beginners
Speaking of 3D animation, we think it is not easy to start at first. In this case, you need more tips and tricks.
6. Carefully use keyframing
3D Animation is all about poses. Remember, this animation tip is crucial. Individual frames come together to create movement and tell a story. The keyframes in 3D animation videos are the first and last movements in any sequence. You need to create strong first and last poses for your movements before deciding what happens between them. You must make these poses as memorable and powerful as you can.

7. Evaluate constructive criticism
It’s vital to pay attention to constructive criticism rather than simply choosing to ignore it. Most examples of constructive criticism aren’t about offending you, and friendly advice can play a pivotal role in helping you get the results that you are looking for.
This 3D animation tip can take years to reach the level you want to when it comes to the animation industry. Even if you don’t receive a great deal of or even any positive feedback, the people offering their comments may simply be trying to help you so you can improve. You may find that the criticism is being made purely because of personal preference on the part of the commentator.

8. Take the rhythm in animation
For 3D stop motion animation video, rhythm is an element to do storytelling. The best 3D animations have a strong sense of rhythm and a natural movement flow. Many inexperienced animators have found themselves animating too fast or slow. Don’t worry if you have this problem in the early days, as chances are you’ll start to get it right with time. Timing and spacing between your frames create movement in your animation. With time, you will get a better idea of how many frames you need to move the object from point A to B.

9. Basic model
You may see your system working too hard when you use a high-res model , and this can dramatically slow down the animation process. When you playback the animation in real-time, you may not see every frame. If you are working on the motion of a character, use a simple proxy 3D model to prevent this problem. You can then work more effectively with movement and return the more complex model to the process later.

10. Use ‘shark fin’
This is a advanced 3D animation tip for you. A curve known as the ‘shark fin’ is often used for facial animation processes. This can help you represent rapid facial movements, including those involving the lips and eyebrows. Faces can move very quickly, so it’s wise to make expressions occur within just one or two frames, or three if the spacing demands it.

Part 3: Frequently Asked Questions about Animation Tips
Below are four FAQs about 2D and 3D animation tips that people have asked many times. Hope they are helpful.
1. Are there any animation tricks to use?
We must say muting dialogue is one trick you should know. If your audio is on, you need to listen to it again and again. Thus, audio can disturb your creating process. After you finished the animation, you can turn audio on to revise the animation.
Besides, when you do animation, another trick is you can pause the post before the character goes into the next pose. It is a commonly used trick used by professionals, so you might think it is useful.
2. Is animation hard to learn?
Many beginners are wondering is it difficult to learn animation. The answer is NO if you are about to learn 2D animation. Many tutorials and lessons are easy to find in the market. However, if you start on 3D animation, it will be much harder than you thought. In this case, we recommend you learning 2D animation first.
3. Can I learn animation on my own?
You can learn animation on your own, but that’s not the best way. We recommend you learning animation by attending a training class , especially if you are a starter. You can build a solid animation knowledge base fast compared with learning on your own.
4. How can I get better at animation?
The best answer to get better is to imitate and practice. This tip is the most useful, practical, but difficult to complete one. If you can practice like half a year, you will get much better at animation.
Conclusion
By taking the above animation tips, you can create engaging, inspiring, and unforgettable animations that will captivate your audience. Why not get started following these animation tips right now?
Shanoon Cox
Shanoon Cox is a writer and a lover of all things video.
Follow @Shanoon Cox
Shanoon Cox
Mar 27, 2024• Proven solutions
Animation is a skill that you need years to practice. However, the learning process can be boosted if you master some animation tips. If you’re looking for great 2D/3D animation tips and tricks, this is what we will offer here.
There are some overlaps between 2D and 3D animation tips like practicing and object pose, but in essence, animation tips can be learned commonly.
These animation tips will help you make your 2D and 3D animations as bold and creative as possible, while reduce your workload and enable you to get your work out into the world quicker with excellent animation software . Let’s take a look at the top 10 2D/3D animation tips and tricks right now.
- Part 1: 2D Animation Tips for Beginners
- Part 2: 3D Animation Tips for Beginners
- Part 3: Frequently Asked Questions about Animation Tips
You may also like: Top 10 Anime Websites to Watch Anime Free
Part 1: 2D Animation Tips for Beginners
1. Find a reference in the real world
This first 2D animation tip is to find a reference. Using a real-world reference can help you animate faces effectively. When studios work with voice-over artists , they often record their facial movements so 2D animators can work with them and ensure their expressions are captured convincingly.
If this isn’t possible, consider using your face, so you have something to refer back to. You could use a mirror and speak the words your character will be saying into it. This can help you get the animated expressions just right.
2. Observe real life
The second animation tip is about observation. One of the key aspects of 2D animation is bringing life to animate objections. You need to think hard about how emotion can be portrayed and choose each movement carefully.
Spend time watching how people in real-life environments talk and interact with each one another, how they move, and how they express emotion. People-watching can be worth its weight in gold when it comes to preparing animations for 2D. Don’t be afraid to spend a great deal of time doing this, as it can be counted as valuable research.
3. Simplicity is the key
2D animation is never complicated compared with 3D. Think carefully before making a scene too complex. If there is too much information to digest, the overall effect can be one of confusion, and you may even find yourself compromising the realism of the scene. Try not to litter the scene with too many pose changes or other elements, and keep it authentic.
4. Draw animation again and again
Drawing animation takes a lot of time. It can’t be finished within one day, so you better know deep down that one piece of work only can be done after you have revised it many times. For 2D animation, it means you need to draw objects on paper many times.
In other words, the animation is a skill that needs practice and time. You can’t master it quickly. Luckily, all pains will be rewarded someday.
5. Feedback is crucial
Feedback is an essential part of artistic development . It’s wise to actively seek out commentary from knowledgeable figures who can help you improve. Naturally, we may see work we have invested a great deal of time and effort indifferently to someone not so involved in the creative process. Feedback can equate to a valuable learning opportunity that will help you make the result hit the spot much more convincingly.
Part 2: 3D Animation Tips for Beginners
Speaking of 3D animation, we think it is not easy to start at first. In this case, you need more tips and tricks.
6. Carefully use keyframing
3D Animation is all about poses. Remember, this animation tip is crucial. Individual frames come together to create movement and tell a story. The keyframes in 3D animation videos are the first and last movements in any sequence. You need to create strong first and last poses for your movements before deciding what happens between them. You must make these poses as memorable and powerful as you can.
7. Evaluate constructive criticism
It’s vital to pay attention to constructive criticism rather than simply choosing to ignore it. Most examples of constructive criticism aren’t about offending you, and friendly advice can play a pivotal role in helping you get the results that you are looking for.
This 3D animation tip can take years to reach the level you want to when it comes to the animation industry. Even if you don’t receive a great deal of or even any positive feedback, the people offering their comments may simply be trying to help you so you can improve. You may find that the criticism is being made purely because of personal preference on the part of the commentator.
8. Take the rhythm in animation
For 3D stop motion animation video, rhythm is an element to do storytelling. The best 3D animations have a strong sense of rhythm and a natural movement flow. Many inexperienced animators have found themselves animating too fast or slow. Don’t worry if you have this problem in the early days, as chances are you’ll start to get it right with time. Timing and spacing between your frames create movement in your animation. With time, you will get a better idea of how many frames you need to move the object from point A to B.
9. Basic model
You may see your system working too hard when you use a high-res model , and this can dramatically slow down the animation process. When you playback the animation in real-time, you may not see every frame. If you are working on the motion of a character, use a simple proxy 3D model to prevent this problem. You can then work more effectively with movement and return the more complex model to the process later.
10. Use ‘shark fin’
This is a advanced 3D animation tip for you. A curve known as the ‘shark fin’ is often used for facial animation processes. This can help you represent rapid facial movements, including those involving the lips and eyebrows. Faces can move very quickly, so it’s wise to make expressions occur within just one or two frames, or three if the spacing demands it.
Part 3: Frequently Asked Questions about Animation Tips
Below are four FAQs about 2D and 3D animation tips that people have asked many times. Hope they are helpful.
1. Are there any animation tricks to use?
We must say muting dialogue is one trick you should know. If your audio is on, you need to listen to it again and again. Thus, audio can disturb your creating process. After you finished the animation, you can turn audio on to revise the animation.
Besides, when you do animation, another trick is you can pause the post before the character goes into the next pose. It is a commonly used trick used by professionals, so you might think it is useful.
2. Is animation hard to learn?
Many beginners are wondering is it difficult to learn animation. The answer is NO if you are about to learn 2D animation. Many tutorials and lessons are easy to find in the market. However, if you start on 3D animation, it will be much harder than you thought. In this case, we recommend you learning 2D animation first.
3. Can I learn animation on my own?
You can learn animation on your own, but that’s not the best way. We recommend you learning animation by attending a training class , especially if you are a starter. You can build a solid animation knowledge base fast compared with learning on your own.
4. How can I get better at animation?
The best answer to get better is to imitate and practice. This tip is the most useful, practical, but difficult to complete one. If you can practice like half a year, you will get much better at animation.
Conclusion
By taking the above animation tips, you can create engaging, inspiring, and unforgettable animations that will captivate your audience. Why not get started following these animation tips right now?
Shanoon Cox
Shanoon Cox is a writer and a lover of all things video.
Follow @Shanoon Cox
10 Realistic Cartoon Characters You Will Run Away From if You Met in R
10 Realistic Cartoon Characters You Would Run Away From if You Met in Real Life
An easy yet powerful editor
Numerous effects to choose from
Detailed tutorials provided by the official channel
Remember watching a cartoon reality show on the Cartoon Network? We all grew up watching cartoons. Cartoons are an unforgettable part of our childhood. But have you ever wondered what would your favorite cartoon characters look like in real life? Many cartoon characters like Popeye, Sponge Bob, Mickey Mouse, etc. look funny in their 2D images. Watching them do funny things and their funny expressions have always been fun.
But with the advancement in technology and the passage of time, we have some digital artists like Tatiana and Miguel Vasquez, who have recreated your famous cartoon characters into 3D. They have given them a realistic look that will scare you. These realistic cartoon faces will blow your mind.
In this article
01 [What’s a Realistic Cartoon?](#Part 1)
02 [10 Realistic Cartoon Characters You Would Run Away From If You Met In Real Life](#Part 2)
03 [How Do Cartoon Characters Reimagined As Realistic 3D Animation](#Part 3)
Part 1 What’s Realistic Cartoon?
Before moving towards the list of realistic cartoon characters, you must first know what a realistic cartoon is. As we all know, any animated drawing or illustration is a cartoon, it can either be non-realistic or semi-realistic. Earlier artists used to draw these cartoon characters on paper, but now technology has evolved.
With the introduction of different AI tools, many digital artists have recreated 3D versions of your favorite cartoon characters. These 3D versions of different cartoons are known as realistic cartoons. This can be done easily with help of AI technology and Digital Software.
Part 2 Realistic Cartoon Characters You Would Run Away From If You Met In Real Life
Have you ever thought how would your favorite cartoon character sponge bob looks like in real life? We will show you realistic versions of your favorite cartoon characters. Stay tuned for great fun waiting for you in this article!
01Sponge Bob (Sponge Bob Square Pants)
Sponge Bob Square Pants is an animated series full of fun and comedy. This show currently runs on Nickelodeon. Sponge Bob is a yellow-colored sea sponge and the main protagonist of the show. He is a cook at a restaurant named Krusty Krab. He often goes on adventures with his best friend Patrick Star. He mainly focuses on and aims at getting a boat-driving license from Mr. Puff’s boating school.
Have a look at the 3D recreation of this funny creature.
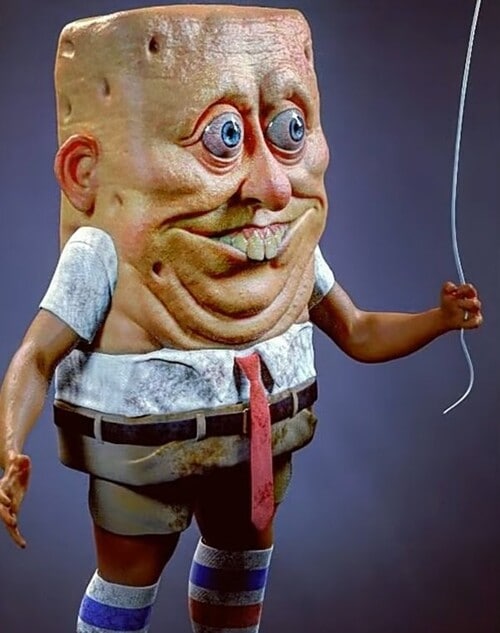
02Sid the Sloth (Ice Age)
Ice Age is one of the most popular animated series that revolves around the lives of a mammoth, tiger, sloth, and a scrat. A scrat is a combination of a squirrel and a rat. This series became so popular among the children that it was even nominated for an Oscar award.
It has a character called Sid. He is an abandoned sloth. His mother left him for some good to happen with him during the migration. His character in the entire series exhibits a friendly and carefree nature. Sometimes, he also acts as dumb and naïve.
Look at the funny recreation of this dumb-witted character. Does this recreation scare you?
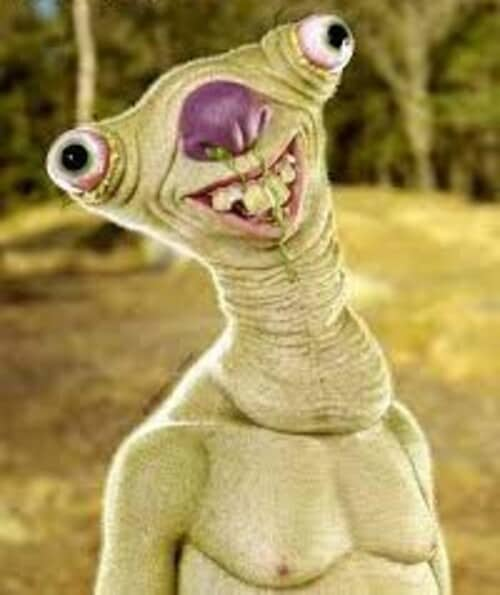
03Mr. Krabs (Sponge Bob Square Pants)
Sponge Bob Square Pants is one of the cartoons that have many different and funny-looking creatures. Mr. Krabs is one of those characters. He is a money-minded and miserly creature. He is the owner of the Krusty Krab fast food restaurant, where Sponge Bob works as a cook. He has a teenage daughter named Pearl and he can do anything to see her happy. He exhibits romantic feelings for Mrs. Puff.
Does this funny creature from the Sponge Bob series look funny in real life too?

04Patrick Star (Sponge Bob Square Pants)
Patrick Star is again a character from the cartoon show Sponge Bob Square Pants. He is the best friend of the main protagonist Sponge Bob, who lives 2 houses away from Sponge Bob’s house. He is a lazy, fat, and stupid pink-colored starfish. His character makes the show funnier and more interesting for kids.
How would you react when you will see this funny creature from Sponge Bob in real life? His 3D recreation seems a bit scary like a monster in real life.
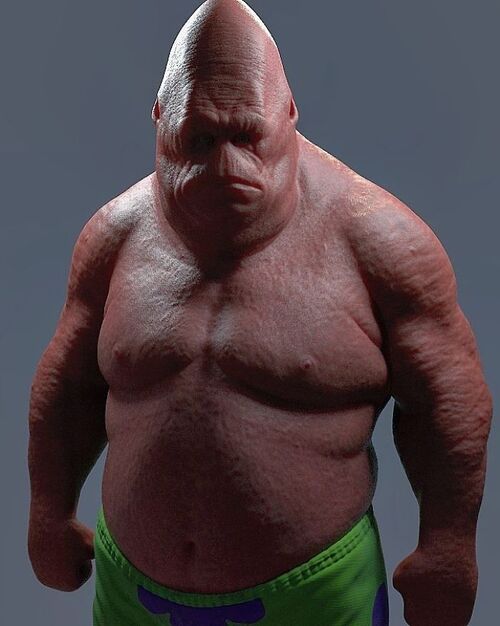
05Plankton (Sponge Bob Square Pants)
Plankton was once the best friend of Mr. Krabs but now they both share a rivalry bond. He is married to Karen and owns a fast food restaurant named Chum Bucket Restaurant in competition with Mr. Krabs’ Restaurant. He plays the antagonist character in the series. His restaurant doesn’t work as successfully as Krusty Krab Restaurant. In rivalry, he often comes up with different plans and tricks to outwit Mr. Krabs and steal the secret recipe of his famous Krabby Patty Burger, but never succeeds.
Have a look at the 3D recreation of this funny character from the series.
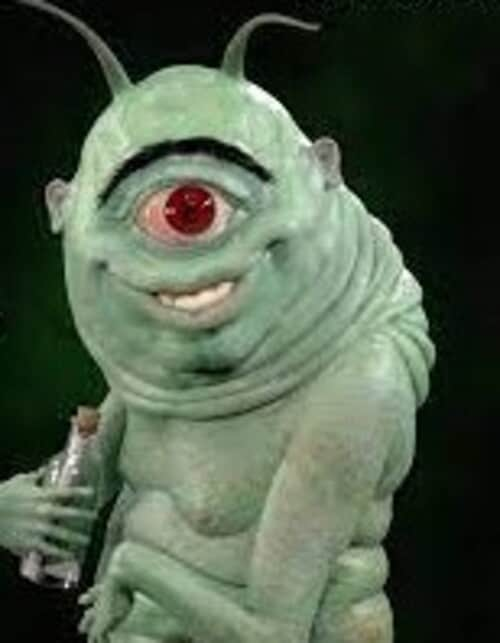
06Homer (The Simpsons)
The Simpsons is an animated series that revolves around the life of an American family. The Simpson family has five members named Homer, Marge, Bart, Lisa, and Maggie. Homer Simpson is the main character of this series. He lives in Springfield and is employed as a Safety Inspector at Springfield Nuclear Power Plant. He is married to Marge and is the father of three children – Bart, Lisa, and Maggie. The series depicts a strong bond of love and care for each other in the family.
Have a look at this realistic 3D recreation of Homer Simpson.
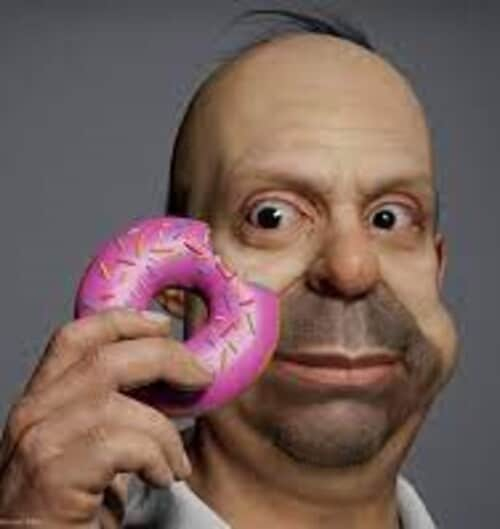
07Bugs Bunny (Looney Tunes)
Looney Tunes is entertaining people of all ages due to its great and funny characters. Bugs Bunny is one of our favorite characters from the animated cartoon show Looney Tunes. He is the main protagonist and the most popular character of the series. Kids love him the most because of his mischievous acts in the show. He looks too funny with a mouth filled with carrots and wearing funny costumes. This unique character has a great fan following all over the world.
The 3D recreation of this famous cartoon character is funny and scary at the same time.
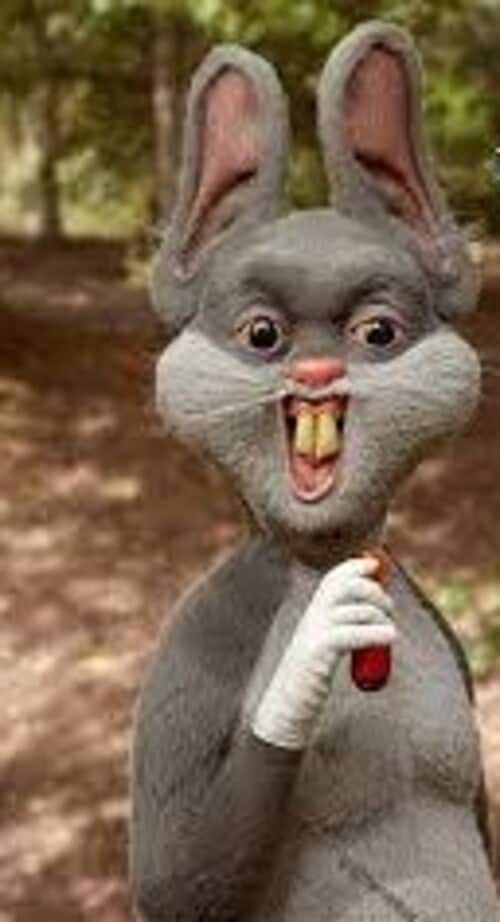
08Sally (The Nightmare Before Christmas)
As the name suggests, The Nightmare Before Christmas is an American dark fantasy animated movie. This animated movie has received great financial success and appreciation for its wonderful characters and music.
Sally is a shy ragdoll created by a scientist Doctor Finkelstein. She secretly loves Jack – the main Protagonist of the movie. She tells him not to mix the preparation of Christmas with the Halloween party.
Look at her realistic 3D recreation by Tatiana, popularly known as TatiMoons.

09Stitch (Lilo and Stitch)
Lilo and Stitch is also an animated American movie. It is a science fiction and comedy movie that attracts the interest of people of all age groups. The story of this animated movie revolves around the two main characters named Lilo and Stitch. Lilo is a 7-year old orphan girl whose parents died in a car accident. She has a pet named Stitch.
The original name of Stitch is Experiment 626. He was illegally created by a scientist Jumba Jokiba through a genetic experiment. Lilo adopts him thinking that he is an innocent creature, she doesn’t know about his birth and origin.
Have a look at this realistic 3D recreation of Stitch’s character. Isn’t it scary?

10 Popeye (Popeye – The Sailor Man)
Popeye – The Sailor Man is another famous cartoon series. Popeye is the main protagonist of this series. He has a girlfriend named Olive Oyl. This series depicts the love triangle between Popeye, Olive, and Bluto. He is an uneducated sailor man who gets energy by eating spinach. He often comes up with non-realistic solutions to different problems and helps the police by investigating different cases. He has a versatile tobacco smoking pipe that sometimes acts as a whistle, and he even intakes the spinach through his pipe.
In the cartoon films, he looks funny, but this 3D recreation of his character is a bit scary.

Part 2 How Do Cartoon Characters Reimagined As Realistic 3D Animation
Nowadays, it has become easier to create and turn your imagination into a cartoon character with different online 3D animators. This makes storytelling easier and funny and it is a great way to engage children. Out of all the 3D animation tools, Filmora will assist you to create the best 3D version of your favorite cartoon character.
Filmora has various smart features that help you to turn any image into realistic 3D animation. You can create great animations using Wondershare Filmora Video Editor within a couple of hours. It offers you many different features that help in convenient customization.
● Ending Thoughts →
● Being a cartoon lover, we hope that you would have liked the 3D recreation of your favorite cartoons. Some of these 3D recreations are so scary that you would just run away from them in real life and some look like real monster cartoons.
● AI combined with digital software like Filmora makes it easier to create these 3D versions of famous cartoon characters.
● With Filmora, you don’t need to spend hours sketching cartoon characters on paper. You can easily create great and realistic animations digitally.
Remember watching a cartoon reality show on the Cartoon Network? We all grew up watching cartoons. Cartoons are an unforgettable part of our childhood. But have you ever wondered what would your favorite cartoon characters look like in real life? Many cartoon characters like Popeye, Sponge Bob, Mickey Mouse, etc. look funny in their 2D images. Watching them do funny things and their funny expressions have always been fun.
But with the advancement in technology and the passage of time, we have some digital artists like Tatiana and Miguel Vasquez, who have recreated your famous cartoon characters into 3D. They have given them a realistic look that will scare you. These realistic cartoon faces will blow your mind.
In this article
01 [What’s a Realistic Cartoon?](#Part 1)
02 [10 Realistic Cartoon Characters You Would Run Away From If You Met In Real Life](#Part 2)
03 [How Do Cartoon Characters Reimagined As Realistic 3D Animation](#Part 3)
Part 1 What’s Realistic Cartoon?
Before moving towards the list of realistic cartoon characters, you must first know what a realistic cartoon is. As we all know, any animated drawing or illustration is a cartoon, it can either be non-realistic or semi-realistic. Earlier artists used to draw these cartoon characters on paper, but now technology has evolved.
With the introduction of different AI tools, many digital artists have recreated 3D versions of your favorite cartoon characters. These 3D versions of different cartoons are known as realistic cartoons. This can be done easily with help of AI technology and Digital Software.
Part 2 Realistic Cartoon Characters You Would Run Away From If You Met In Real Life
Have you ever thought how would your favorite cartoon character sponge bob looks like in real life? We will show you realistic versions of your favorite cartoon characters. Stay tuned for great fun waiting for you in this article!
01Sponge Bob (Sponge Bob Square Pants)
Sponge Bob Square Pants is an animated series full of fun and comedy. This show currently runs on Nickelodeon. Sponge Bob is a yellow-colored sea sponge and the main protagonist of the show. He is a cook at a restaurant named Krusty Krab. He often goes on adventures with his best friend Patrick Star. He mainly focuses on and aims at getting a boat-driving license from Mr. Puff’s boating school.
Have a look at the 3D recreation of this funny creature.
02Sid the Sloth (Ice Age)
Ice Age is one of the most popular animated series that revolves around the lives of a mammoth, tiger, sloth, and a scrat. A scrat is a combination of a squirrel and a rat. This series became so popular among the children that it was even nominated for an Oscar award.
It has a character called Sid. He is an abandoned sloth. His mother left him for some good to happen with him during the migration. His character in the entire series exhibits a friendly and carefree nature. Sometimes, he also acts as dumb and naïve.
Look at the funny recreation of this dumb-witted character. Does this recreation scare you?
03Mr. Krabs (Sponge Bob Square Pants)
Sponge Bob Square Pants is one of the cartoons that have many different and funny-looking creatures. Mr. Krabs is one of those characters. He is a money-minded and miserly creature. He is the owner of the Krusty Krab fast food restaurant, where Sponge Bob works as a cook. He has a teenage daughter named Pearl and he can do anything to see her happy. He exhibits romantic feelings for Mrs. Puff.
Does this funny creature from the Sponge Bob series look funny in real life too?
04Patrick Star (Sponge Bob Square Pants)
Patrick Star is again a character from the cartoon show Sponge Bob Square Pants. He is the best friend of the main protagonist Sponge Bob, who lives 2 houses away from Sponge Bob’s house. He is a lazy, fat, and stupid pink-colored starfish. His character makes the show funnier and more interesting for kids.
How would you react when you will see this funny creature from Sponge Bob in real life? His 3D recreation seems a bit scary like a monster in real life.
05Plankton (Sponge Bob Square Pants)
Plankton was once the best friend of Mr. Krabs but now they both share a rivalry bond. He is married to Karen and owns a fast food restaurant named Chum Bucket Restaurant in competition with Mr. Krabs’ Restaurant. He plays the antagonist character in the series. His restaurant doesn’t work as successfully as Krusty Krab Restaurant. In rivalry, he often comes up with different plans and tricks to outwit Mr. Krabs and steal the secret recipe of his famous Krabby Patty Burger, but never succeeds.
Have a look at the 3D recreation of this funny character from the series.
06Homer (The Simpsons)
The Simpsons is an animated series that revolves around the life of an American family. The Simpson family has five members named Homer, Marge, Bart, Lisa, and Maggie. Homer Simpson is the main character of this series. He lives in Springfield and is employed as a Safety Inspector at Springfield Nuclear Power Plant. He is married to Marge and is the father of three children – Bart, Lisa, and Maggie. The series depicts a strong bond of love and care for each other in the family.
Have a look at this realistic 3D recreation of Homer Simpson.
07Bugs Bunny (Looney Tunes)
Looney Tunes is entertaining people of all ages due to its great and funny characters. Bugs Bunny is one of our favorite characters from the animated cartoon show Looney Tunes. He is the main protagonist and the most popular character of the series. Kids love him the most because of his mischievous acts in the show. He looks too funny with a mouth filled with carrots and wearing funny costumes. This unique character has a great fan following all over the world.
The 3D recreation of this famous cartoon character is funny and scary at the same time.
08Sally (The Nightmare Before Christmas)
As the name suggests, The Nightmare Before Christmas is an American dark fantasy animated movie. This animated movie has received great financial success and appreciation for its wonderful characters and music.
Sally is a shy ragdoll created by a scientist Doctor Finkelstein. She secretly loves Jack – the main Protagonist of the movie. She tells him not to mix the preparation of Christmas with the Halloween party.
Look at her realistic 3D recreation by Tatiana, popularly known as TatiMoons.
09Stitch (Lilo and Stitch)
Lilo and Stitch is also an animated American movie. It is a science fiction and comedy movie that attracts the interest of people of all age groups. The story of this animated movie revolves around the two main characters named Lilo and Stitch. Lilo is a 7-year old orphan girl whose parents died in a car accident. She has a pet named Stitch.
The original name of Stitch is Experiment 626. He was illegally created by a scientist Jumba Jokiba through a genetic experiment. Lilo adopts him thinking that he is an innocent creature, she doesn’t know about his birth and origin.
Have a look at this realistic 3D recreation of Stitch’s character. Isn’t it scary?
10 Popeye (Popeye – The Sailor Man)
Popeye – The Sailor Man is another famous cartoon series. Popeye is the main protagonist of this series. He has a girlfriend named Olive Oyl. This series depicts the love triangle between Popeye, Olive, and Bluto. He is an uneducated sailor man who gets energy by eating spinach. He often comes up with non-realistic solutions to different problems and helps the police by investigating different cases. He has a versatile tobacco smoking pipe that sometimes acts as a whistle, and he even intakes the spinach through his pipe.
In the cartoon films, he looks funny, but this 3D recreation of his character is a bit scary.
Part 2 How Do Cartoon Characters Reimagined As Realistic 3D Animation
Nowadays, it has become easier to create and turn your imagination into a cartoon character with different online 3D animators. This makes storytelling easier and funny and it is a great way to engage children. Out of all the 3D animation tools, Filmora will assist you to create the best 3D version of your favorite cartoon character.
Filmora has various smart features that help you to turn any image into realistic 3D animation. You can create great animations using Wondershare Filmora Video Editor within a couple of hours. It offers you many different features that help in convenient customization.
● Ending Thoughts →
● Being a cartoon lover, we hope that you would have liked the 3D recreation of your favorite cartoons. Some of these 3D recreations are so scary that you would just run away from them in real life and some look like real monster cartoons.
● AI combined with digital software like Filmora makes it easier to create these 3D versions of famous cartoon characters.
● With Filmora, you don’t need to spend hours sketching cartoon characters on paper. You can easily create great and realistic animations digitally.
Also read:
- New In 2024, How To Animate Graphics in Canva
- In 2024, Best Websites to Download Animated GIFs for Free
- Updated Best Practices on Online 3D Avatar Creator
- New In 2024, Before You Learn 3D Animation Things You Should Know
- Top 7 Animated GIF Text Makers for 2024
- Updated Are You Ready to Animate Game Character From Scratch, In 2024
- New Samples of Cartoon Character Face for 2024
- Updated Can I Still Do Animated Logo Design Without Design Skills for 2024
- Updated 2024 Approved How to Convert Animated GIF From Video
- Best 10 Video to GIF Converters Top Picks for 2024
- New 15 Iconic Cartoon Characters of All Time
- New 10 Cartoon Photo Converters You Couldnt Do Without
- New What Wikipedia Wont Tell You About Character Rigging for 2024
- Top 15 Male Anime Characters By Voting for 2024
- Updated 2024 Approved The 15 Most Efficient Photo to Cartoon Apps for Android
- New In 2024, 15 Forgotten Cartoon Characters of All Time
- Updated 2024 Approved Can I Do Animated Logo Design Without Design Skills?
- Updated 2024 Approved 4 Things You Need to Know About Pinterest GIF
- New 21 Top Free Anime Websites to Watch Anime Online-Anime
- 5 Best Adobe Animate Courses & Classes | Beginners Complete Tutorial for 2024
- Fuel Your Creativity with 10 Awesome Collection of 2D Animation Examples
- Updated Learn How to Make Architecture Animation
- 10 Scary Anime Girls That Will Make You Creepy
- Are You Head Over Heels With 3D Animation Design?
- In 2024, Popular Female & Male Disney Cartoon Characters To Empower You
- New Tutorials to Make Animated Images – Even if Youre Just Starting Out for 2024
- New
- New How to Combine Multiple GIFs Into One with GIF Combiner for 2024
- Updated Top 10 Free Online Animated Logo Makers Everyone Should Know for 2024
- In 2024, Top 8 Tools Tell You How to Make Slideshows for Instagram
- Updated Handy Tip From Adobe Animate Rigging Tutorial for All Learners
- Updated How to Make GIF Stickers for WhatsApp 100 The Easy Way for 2024
- Updated In 2024, Nurturing the Spirit Through the Top 10 Intellectual Anime Websites
- New 2024 Approved How to Create A GIF with Sound?
- New In 2024, 10 Popular Cartoon Characters That You Wont Want to Miss
- 2024 Approved 15 Types of Cartoon Drawing Styles Examples
- Easy Shortcut to Convert Videos to Gifs on iPhone
- Updated Top 10 AI-Talking Avatars Revolutionizing Communication
- In 2024, Hassle-Free Ways to Remove FRP Lock on Samsung Galaxy M14 5Gwith/without a PC
- In 2024, How to Show Wi-Fi Password on Nubia Z50S Pro
- Top 7 Skype Hacker to Hack Any Skype Account On your Realme C67 5G | Dr.fone
- In 2024, The Best iSpoofer Alternative to Try On Realme 11 Pro | Dr.fone
- How to Fix iPad or Apple iPhone 6 Stuck On Activation Lock?
- Top-Notch Solutions for Disabled Apple ID On Apple iPhone 12 Making It Possible
- A Detailed Guide on Faking Your Location in Mozilla Firefox On Honor V Purse | Dr.fone
- Best software to Fix and Repair Corrupt MP4,MOV,AVI video files of Smart 8
- How to Unlock Apple iPhone 6s, Apples New iPhone | Dr.fone
- How to Hard Reset Motorola Moto G34 5G Without Password | Dr.fone
- In 2024, How To Stream Anything From Honor X50i to Apple TV | Dr.fone
- What To Do if Your Realme 11 Pro Auto Does Not Work | Dr.fone
- In 2024, Fake the Location to Get Around the MLB Blackouts on OnePlus Nord CE 3 Lite 5G | Dr.fone
- Complete guide for recovering call logs on ZTE Nubia Z60 Ultra
- In 2024, 3 Effective Ways to Bypass Activation Lock from iPhone X
- Remove the Lock Screen Fingerprint Of Your Samsung Galaxy A05s
- In 2024, How to Change Lock Screen Wallpaper on Vivo G2
- How to Downgrade iPhone 12 Pro without Losing Any Content? | Dr.fone
- All Things You Need to Know about Wipe Data/Factory Reset For Poco M6 Pro 5G | Dr.fone
- 4 Ways to Unlock Apple iPhone XR to Use USB Accessories Without Passcode
- In 2024, A Perfect Guide To Remove or Disable Google Smart Lock On Samsung Galaxy A23 5G
- In 2024, Ways to trade pokemon go from far away On Oppo Reno 10 Pro 5G? | Dr.fone
- Looking For A Location Changer On Tecno Spark 20 Pro? Look No Further | Dr.fone
- Restore Missing App Icon on Honor Magic 5 Step-by-Step Solutions | Dr.fone
- 5 Ways to Track Vivo V27 Pro without App | Dr.fone
- Easy steps to recover deleted pictures from Nubia Red Magic 8S Pro+.
- 7 Fixes for Unfortunately, Phone Has Stopped on Vivo Y78+ | Dr.fone
- In 2024, Change Location on Yik Yak For your Apple iPhone 7 Plus to Enjoy More Fun | Dr.fone
- In 2024, 9 Mind-Blowing Tricks to Hatch Eggs in Pokemon Go Without Walking On Honor V Purse | Dr.fone
- In 2024, A Step-by-Step Guide on Using ADB and Fastboot to Remove FRP Lock on your Vivo V29e
- A Working Guide For Pachirisu Pokemon Go Map On Infinix Note 30 VIP | Dr.fone
- Title: New In 2024, How to Make an Animation With 7 Steps
- Author: Elon
- Created at : 2024-06-30 12:27:30
- Updated at : 2024-07-01 12:27:30
- Link: https://animation-videos.techidaily.com/new-in-2024-how-to-make-an-animation-with-7-steps/
- License: This work is licensed under CC BY-NC-SA 4.0.
