
:max_bytes(150000):strip_icc():format(webp)/GettyImages-185223738-56a691fd5f9b58b7d0e3a1d9.jpg)
New In 2024, How to Reduce GIF Size and Best GIF Resizers
Best GIF Resizers to Reduce GIF Size
How to Reduce GIF Size and Best GIF Resizers

Shanoon Cox
Mar 27, 2024• Proven solutions
With the increasing popularity of Smartphones, people these days are experiencing all new things with lots of excitement. And GIFs are always the most interesting content for them. When we talk about limited band width and fast loading time solutions then GIFs are the first options in front of our eyes. These files use to have small size so they can be transferred and downloaded with ease and at faster rate. If you are interested to know about various resizing concepts related to GIFs then the article below can be helpful for you.
How to reduce GIF size?
There are so many things that contribute in managing overall size of GIFs. The list includes the colour count inside, dimensions of images that you have used for development of GIFs and number of frames included inside one GIF folder. In case if it is an animated GIF then size may increase accordingly. Somehow, if you become able to optimize your Gifs then it is much easier to share them over internet.
Photoshop is a great tool to edit your image, including gif images. Here we are going to show you how to make your GIF smaller in Photoshop.
1. Crop away any extra space around the image:
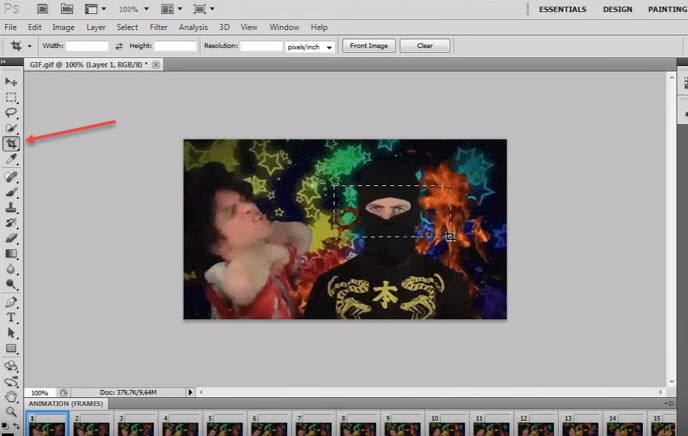
Image source: youtube.com
The very first task for users is to bring your GIF video file onto Photoshop timeline. Sometimes, it is not essential to update whole series of your GIF animation to the library, the GIF can be simply trimmed at timeline panel. One needs to turn on loop option and then be active enough to allocate the right place to trim your video.
2. Reduce dimensions of Output:

Image source: google.com
Those who are working on Photoshop CC 2017 version will be able to develop GIFs by simply executing Explore As option from menu. To do this, they need to move to files and then from drop down menu select Export as. Soon a menu will open where you need to choose your output file format as GIF and adjust weight and height parameter to reduce physical dimensions of your image.
In case if you are using Adobe Photoshop Elements 14 then on its interface, users need to move to File and then hit Save for Web option. It will help to open a Save for Web type dialogue box immediately, on this new window you can apply desired changes to physical dimensions of your content, reduce color information and apply dithering etc.
3. Adjust number of colors in image:
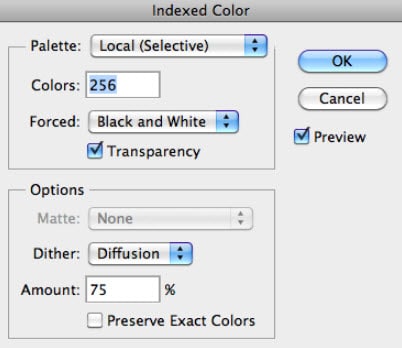
Image source: google.com
One of the most useful tricks for marketers is to optimize size of their GIF images by adjusting total number of colours to it. It can be done using color table tool that assists in easy selection and de-selection. This table use to contain about 256 unique colours and all of them use to contain 8 bit wide information. The best recommendation for good quality and small seize GIFs is to limit colours up to 64 only or keep then less than this. But sometimes your original videos may ask you for increment in color information.
Tips:
During GIF size reduction process, you will have to go through color number selections in the series of 256, 128, 64, 32, 16, 8, 4, 2, 1 etc. Use the smaller side of scale to get best results during optimization process.
- Users can also reduce number of frames in their GIFs.
- Never forget to avoid dithering as it may help to improve appearance of images.
- It is essential work with loss less compression algorithms otherwise huge loss in information will be carried out.
- Interlacing is not good option for your GIFs as it causes significant increase in overall file size.
Best GIF resizers
Those who are searching for some alternatives to Photoshop for creation of GIF images can move towards the list below:
2. FileOptimizer:
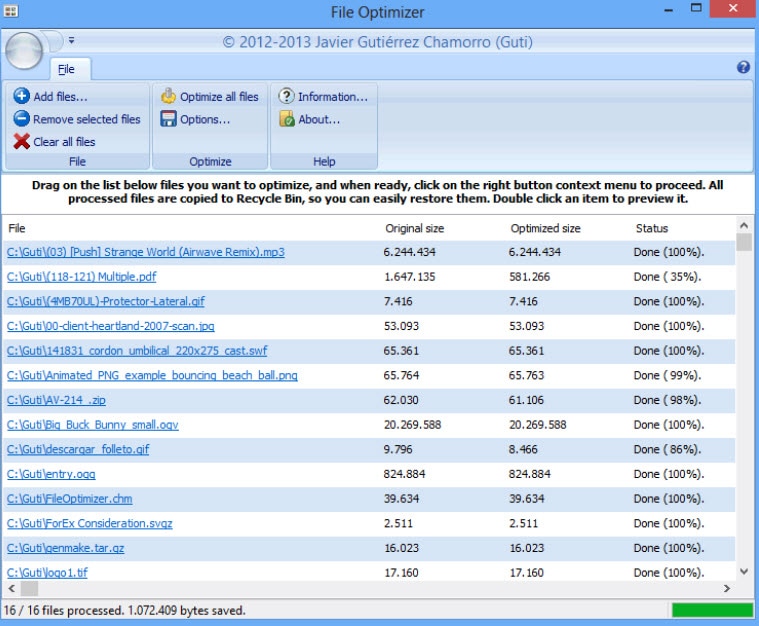
This is an advanced optimization tool for GIF sets as it can shrink output file using its multiple recompressing procedures. It can help to compress audio, video as well as other documents with popular file sizes like JPG, GMP, PNG and TIFF etc.
3. FileMinimizer Pictures:
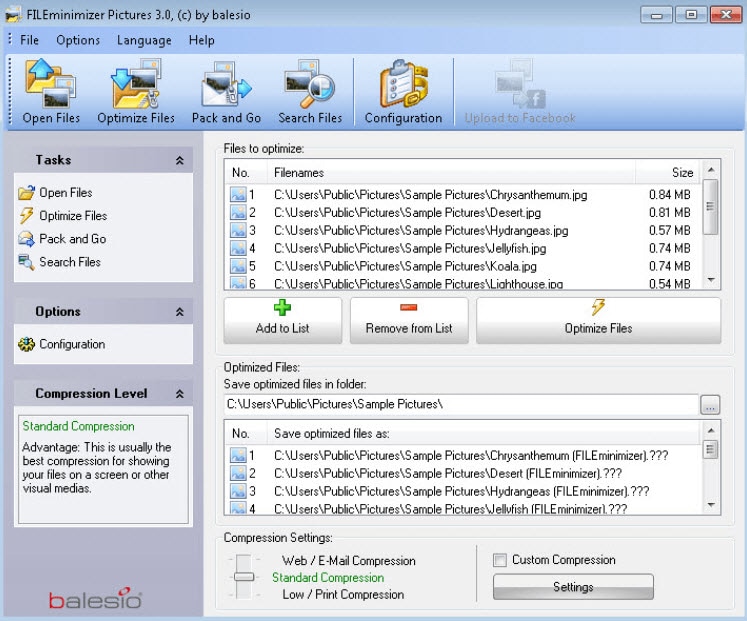
It can compress GIF images up to 98% with its classic optimization techniques. It generally follows 4 compression levels but sometimes may go through several levels to generate smaller GIFs but even without losing quality. It works only on Windows platform.
4. RIOT:
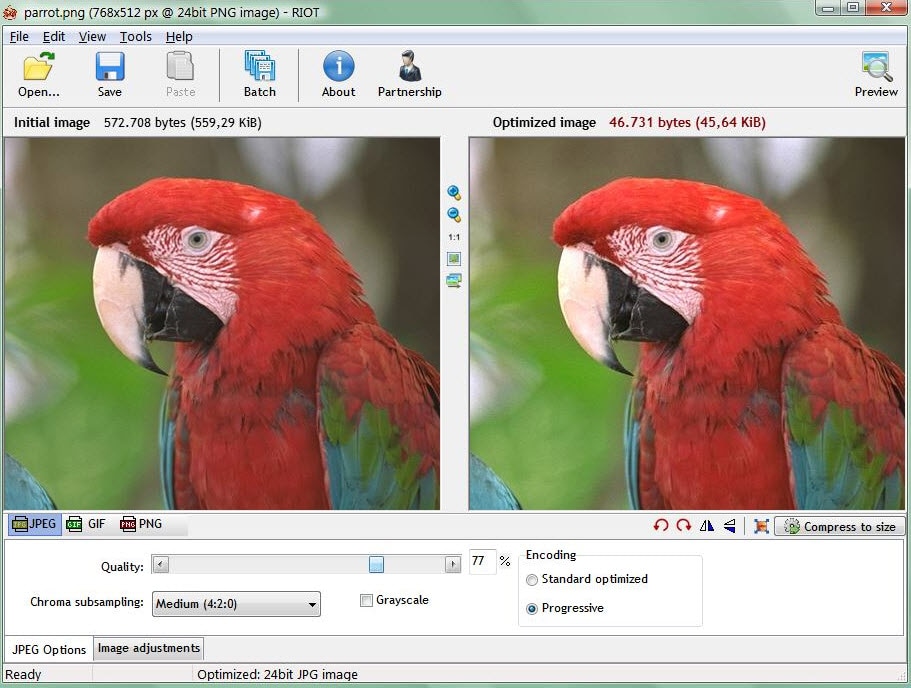
Here RIOT stands for Radical Image Optimization Tool that can adjust so many feature parameters for GIFs along with file size compressions. This optimizer makes use of matadeta settings, color information etc to reduce overall file size.
5. GifftingTool:
BY simply optimizing repetitive colours and pixels from GIF frames, this tool can easily provides loss less optimization solution. It can be used to adjust image cropping, reversing, merging, looping and filtering needs.
6. GIF Optimizer:
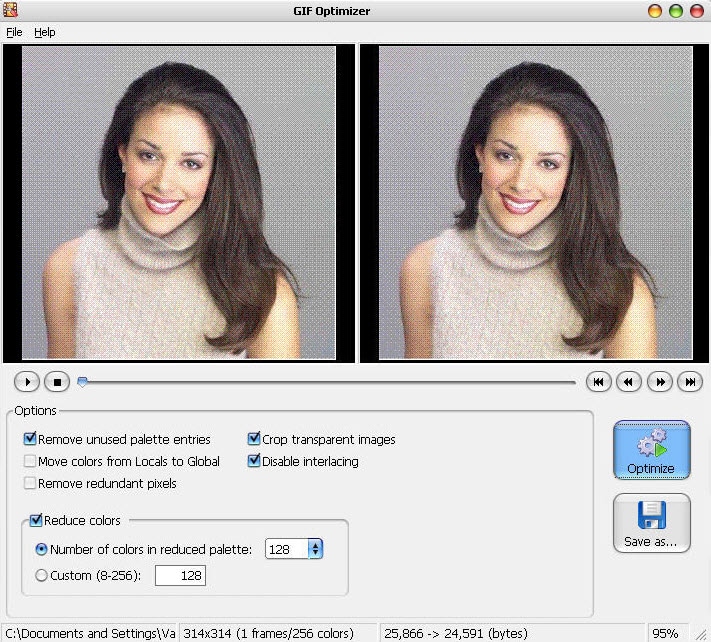
This is specially designed one click type GIF optimizer that can provide compression up to 90%. It also assists to reduce the total load time for GIF with reduction in file size.
7. Ezgif.com – Online:

This online GIF image editor can shrink your image by simply reducing its colour information. Users can easily minimize file size for about 30% using this tool that has features like crop, resize etc.
8. Conpressor.io – Online:
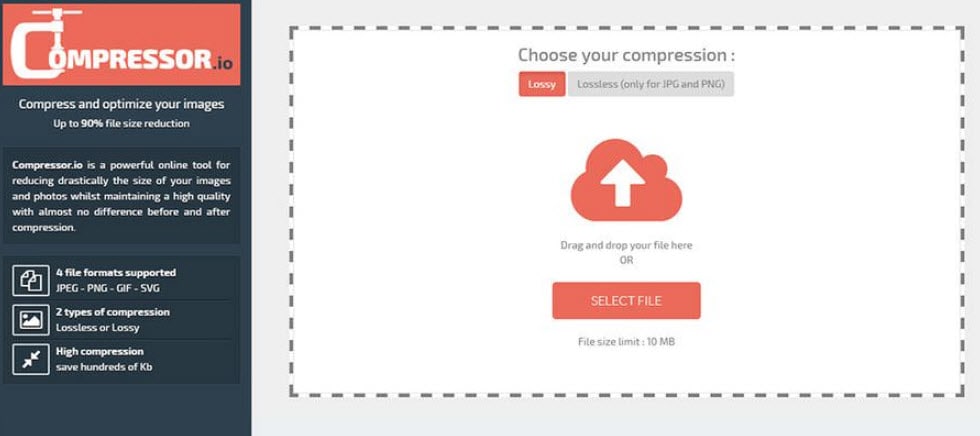
This online web app can assist users to compress their image to smallest size segment even without decaying overall quality. You can easily process SVG, PNG, GIF and JPG file formats over here.
9. Picasion.com – Online:

It helps to reduce overall weight of GIFs so that they can be easily uploaded over internet.
10. GIF Reducer:
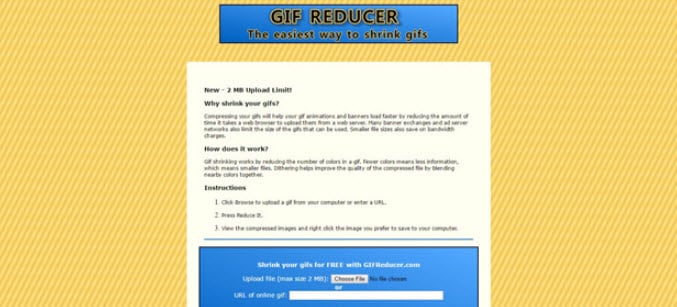
Reducer can easily shrink GIF file so that it web loading times can be increased instantly.
11. Resizeimage.net:
Use this tool to get impressive results for your GIF optimization and it can process almost all file formats to make things easily workable for users.
Conclusion
If you want to make a GIF online, Filmora meme maker is your ultimate solution. It helps you make image, GIF and video memes directly without watermark. It is totally FREE to use and no sign up. You can change text size, color and position to create caption when you are editing. You can also put text inside or outside in GIF. Just with a few clicks, your GIF is done . Try it now!
Shanoon Cox
Shanoon Cox is a writer and a lover of all things video.
Follow @Shanoon Cox
Shanoon Cox
Mar 27, 2024• Proven solutions
With the increasing popularity of Smartphones, people these days are experiencing all new things with lots of excitement. And GIFs are always the most interesting content for them. When we talk about limited band width and fast loading time solutions then GIFs are the first options in front of our eyes. These files use to have small size so they can be transferred and downloaded with ease and at faster rate. If you are interested to know about various resizing concepts related to GIFs then the article below can be helpful for you.
How to reduce GIF size?
There are so many things that contribute in managing overall size of GIFs. The list includes the colour count inside, dimensions of images that you have used for development of GIFs and number of frames included inside one GIF folder. In case if it is an animated GIF then size may increase accordingly. Somehow, if you become able to optimize your Gifs then it is much easier to share them over internet.
Photoshop is a great tool to edit your image, including gif images. Here we are going to show you how to make your GIF smaller in Photoshop.
1. Crop away any extra space around the image:
Image source: youtube.com
The very first task for users is to bring your GIF video file onto Photoshop timeline. Sometimes, it is not essential to update whole series of your GIF animation to the library, the GIF can be simply trimmed at timeline panel. One needs to turn on loop option and then be active enough to allocate the right place to trim your video.
2. Reduce dimensions of Output:
Image source: google.com
Those who are working on Photoshop CC 2017 version will be able to develop GIFs by simply executing Explore As option from menu. To do this, they need to move to files and then from drop down menu select Export as. Soon a menu will open where you need to choose your output file format as GIF and adjust weight and height parameter to reduce physical dimensions of your image.
In case if you are using Adobe Photoshop Elements 14 then on its interface, users need to move to File and then hit Save for Web option. It will help to open a Save for Web type dialogue box immediately, on this new window you can apply desired changes to physical dimensions of your content, reduce color information and apply dithering etc.
3. Adjust number of colors in image:
Image source: google.com
One of the most useful tricks for marketers is to optimize size of their GIF images by adjusting total number of colours to it. It can be done using color table tool that assists in easy selection and de-selection. This table use to contain about 256 unique colours and all of them use to contain 8 bit wide information. The best recommendation for good quality and small seize GIFs is to limit colours up to 64 only or keep then less than this. But sometimes your original videos may ask you for increment in color information.
Tips:
During GIF size reduction process, you will have to go through color number selections in the series of 256, 128, 64, 32, 16, 8, 4, 2, 1 etc. Use the smaller side of scale to get best results during optimization process.
- Users can also reduce number of frames in their GIFs.
- Never forget to avoid dithering as it may help to improve appearance of images.
- It is essential work with loss less compression algorithms otherwise huge loss in information will be carried out.
- Interlacing is not good option for your GIFs as it causes significant increase in overall file size.
Best GIF resizers
Those who are searching for some alternatives to Photoshop for creation of GIF images can move towards the list below:
2. FileOptimizer:
This is an advanced optimization tool for GIF sets as it can shrink output file using its multiple recompressing procedures. It can help to compress audio, video as well as other documents with popular file sizes like JPG, GMP, PNG and TIFF etc.
3. FileMinimizer Pictures:
It can compress GIF images up to 98% with its classic optimization techniques. It generally follows 4 compression levels but sometimes may go through several levels to generate smaller GIFs but even without losing quality. It works only on Windows platform.
4. RIOT:
Here RIOT stands for Radical Image Optimization Tool that can adjust so many feature parameters for GIFs along with file size compressions. This optimizer makes use of matadeta settings, color information etc to reduce overall file size.
5. GifftingTool:
BY simply optimizing repetitive colours and pixels from GIF frames, this tool can easily provides loss less optimization solution. It can be used to adjust image cropping, reversing, merging, looping and filtering needs.
6. GIF Optimizer:
This is specially designed one click type GIF optimizer that can provide compression up to 90%. It also assists to reduce the total load time for GIF with reduction in file size.
7. Ezgif.com – Online:
This online GIF image editor can shrink your image by simply reducing its colour information. Users can easily minimize file size for about 30% using this tool that has features like crop, resize etc.
8. Conpressor.io – Online:
This online web app can assist users to compress their image to smallest size segment even without decaying overall quality. You can easily process SVG, PNG, GIF and JPG file formats over here.
9. Picasion.com – Online:
It helps to reduce overall weight of GIFs so that they can be easily uploaded over internet.
10. GIF Reducer:
Reducer can easily shrink GIF file so that it web loading times can be increased instantly.
11. Resizeimage.net:
Use this tool to get impressive results for your GIF optimization and it can process almost all file formats to make things easily workable for users.
Conclusion
If you want to make a GIF online, Filmora meme maker is your ultimate solution. It helps you make image, GIF and video memes directly without watermark. It is totally FREE to use and no sign up. You can change text size, color and position to create caption when you are editing. You can also put text inside or outside in GIF. Just with a few clicks, your GIF is done . Try it now!
Shanoon Cox
Shanoon Cox is a writer and a lover of all things video.
Follow @Shanoon Cox
Tutorial Guide to Animate Pictures in Canva
Versatile Video Editor - Wondershare Filmora
An easy yet powerful editor
Numerous effects to choose from
Detailed tutorials provided by the official channel
With the rapid rise of social media worldwide, animated posts (like GIFs) are becoming famous. They have become a replacement to other modes like JPEG and .Png
Famous designing tools like Canva introduced an animation feature in the light of its popularity. The feature allows you to step up your social media game and creates animated visuals in a blink! It is also efficient for both professional and amateur users.
Besides social media content, Canva is also useful to design birthday cards, event invites, inspirational quotes, and more! Let’s learn about how to animate pictures in Canva in detail.
In this article
01 What Canva Pictures Can Be Used For?
02 How to Animate Pictures in Canva?
03 Tips: Animate Pictures In Video
Part 1: What Canva Pictures Can Be Used For?
Be it for marketing campaigns or projects, Canva is the best tool for all designing work. It is a foolproof platform where you do not need prior designing experience. Canva is useful for

Social media/Instagram Posts: You can build your Instagram presence by creating posts through Canva. It has multiple templates and features to make alluring Instagram posts. It also has drag-and-drop free images to add customized designs to the template.
Facebook Covers: You can make Facebook covers on Canva by choosing a layout and adding other elements. You can include colors, fonts, and pictures on the cover. Canva has templates for all themes, moods, and styles!
Event Invites: Canva has hundreds of free layouts and libraries to create event invites. You can choose the appropriate template and incorporate party-oriented photos, icons, stickers, illustrations, and graphics. It also has a personalizing option to add personal pictures and artwork in the editor.
Inspirational Quotes: Canva allows you to curate inspirational quotes and dispense motivation in people. It has templates to modify the elements like font size, text size, borders, images, and more!
Collages: It helps create a collage where you can combine multiple pictures in one frame. Canva offers various grids with a capacity of 12 pictures and different sizes.
Part 2: How to Animate Pictures in Canva?
Canva helps you add instant animation in presentations, social media posts, and more. To know how to animate images in Canva, follow the below steps:

Step 1: Add Static Elements
Start by creating an image through static elements. To make the design attractive, you can add sample texts, illustrations, doodles, and other entities.
Try to stimulate your creativity and come up with a layout beforehand. If possible, sketch on paper and replicate the same.
Step 2: Animate Your Design
Take a final glance at the layout. Make sure it’s perfect. Once all the elements are placed as per your design, it’s time to animate them. For that:
- Click on the white background page
- Go to the “Toolbar” section
- Select the “Animate” button
Step 3: Select Page Animation Style
Canva offers six animation styles, where five are for free users, and one is for pro users. To access the five animation styles, follow these steps.
- Press the “Animate” Button
- Select “Page Animations”
- There you will find options like Block, Pan, Fade, Rise, and Tumble
- Select the style as per your design
Step 4: Preview and Download
After selecting a page animation style, it will preview the effect. If you find it good, move on to downloading the GIF. Here’s how to do so
- Go to the “Toolbar” option (present on your upper right hand)
- Choose GIF as the file type
- Check the page number and verify if it’s correct
- Press the “Done” button
Step 5: Final GIF
After clicking on the “Done” button, your GIF will be downloaded. You will be able to see a display for five seconds. If you want to edit the image after this, click on the time button (near the “Animate” button).
So, that was all about how to animate a photo in Canva.
Drawbacks of Canva
Despite efficient features and easy interface, there are certain areas where Canva lacks. This includes
- It does not have any local file storage.
- As too many people use Canva, your template may look the same as others.
- Some of its best features are not free to access.
- The mobile app version lacks certain elements and features.
Out of all these drawbacks, repetitions of templates are a big issue. That’s because everyone wants their posts to look unique and irreplaceable. However, common Canva templates may prevent that from happening.
Fortunately, there are ways to combat such issues. Let’s learn about them in the next section.
Tips: Animate Pictures In Video
You can also animate pictures in the video to make them more lively. For that, you can use Wondershare Filmora Pro Video Editor. It’s also efficient if you don’t know how to animate a picture in Canva:
Wondershare Filmora Video Editor
Filmora by Wondershare is a video editing software that helps you build custom animations easily. It has auto features to make epic stories and posts.
Wondershare Filmora
Get started easily with Filmora’s powerful performance, intuitive interface, and countless effects!
Try It Free Try It Free Try It Free Learn More about Filmora>

Its drag and drop effect makes designing simple and quick. Due to its outstanding attributes, options, and styles, Filmora has 77+ million happy users!
It’s a power-packed integration of functionality, performance, and more! In fact, it resolves the repeated template issue of Canva. The software has top-notch functions and innovative filters that add authenticity to the designs.
Till now, you learned about how to animate a picture on Canva. Now, let’s comprehend the right way to use Filmora for animating and adding images in the video.
Before using, make sure to update the software to its latest version. Follow separate methods for both Windows and Mac.
For Win
Step 1: Adding Image to Video Track
With Filmora, adding images to video is a matter of seconds! Start by:
- Identify the position where you want to add the image and place the Playhead there.
- Right-click on the picture from the media library. Click on the “Insert” option. Your image will be added. Select the “Append” option, if you want to add an image at the video end.

Note: How to Remove Black Bars around the Image?
- Go to “Settings” from the File section.
- Click on the “Editing” tab and select “Photo Placement.”
- Choose from the “Crop to Fit” or “Pan To Zoom” option. The black bars will be removed.
To add the image in between the video clip, split them. Now, add the image between the split parts.
Step 2: Add Images as Overlays
To add images as overlays, drag the image to a video track above the main track. The main track consists of your video.
Track 1 (or the track with a video clip) is the base of your video. If you add anything else, it will be displayed above this track as video track 2, 3, and so on. Overall, you can add 100 video tracks.
Step 3: Edit Your Image
If you know how to animate an image in Canva, editing images on Filmora is even easier. You can try the following methods:
Animate Your Images
- To add animation presets to the image, click on the image twice.
- Go to the “Animation Tab” and look for an animation preset.
- Drag the presets to the image for its effect

Make Image Color Adjustments
- Double-click on the image
- Go to the “Color” tab and then the “Color” section
- Customize the temperature, saturation, brightness, etc., as per your need.
- Press Ok.
Change Image Duration
You can increase the image duration to more than the default timing of 5 seconds. For that:
- Click on the image and select the “Duration” option.
- Go to the “Duration Setting” panel.
- Add the new duration timing.

Adjust Position, Rotate/Flip, and Opacity
- You can resize the image position through the circles and squares at the image edges.
- To flip or rotate the image, double-click on the picture. From the “Image Panel,” go to “Transform” and then click on “Rotate.” You can choose either “Horizontal Flip” or “Vertical Flip” to flip the images.
- Double-click on the image and click on the “Composting” option to add opacity. You can choose the blending mode or adjust the “Opacity” accordingly.

For Mac
Filmora for Mac comes with a drag and drop feature to add transitions, animated titles, and effects. You can start a new project from scratch by clicking on “New Project”. The entire process is the same as that for Windows users.
To apply animation in the images, use the motion effects option. For that,
- Click on the Image
- Go to Motion Tab
- Select a motion effect
- Double-click to apply the effect

Conclusion
So that’s how to animate photos in Canva. Hopefully, our steps will help you revamp your posts like a pro! If not Canva, you can use its alternative Filmora. It’s equally prominent, user-friendly, and feature-rich.
Versatile Video Editor - Wondershare Filmora
An easy yet powerful editor
Numerous effects to choose from
Detailed tutorials provided by the official channel
With the rapid rise of social media worldwide, animated posts (like GIFs) are becoming famous. They have become a replacement to other modes like JPEG and .Png
Famous designing tools like Canva introduced an animation feature in the light of its popularity. The feature allows you to step up your social media game and creates animated visuals in a blink! It is also efficient for both professional and amateur users.
Besides social media content, Canva is also useful to design birthday cards, event invites, inspirational quotes, and more! Let’s learn about how to animate pictures in Canva in detail.
In this article
01 What Canva Pictures Can Be Used For?
02 How to Animate Pictures in Canva?
03 Tips: Animate Pictures In Video
Part 1: What Canva Pictures Can Be Used For?
Be it for marketing campaigns or projects, Canva is the best tool for all designing work. It is a foolproof platform where you do not need prior designing experience. Canva is useful for
Social media/Instagram Posts: You can build your Instagram presence by creating posts through Canva. It has multiple templates and features to make alluring Instagram posts. It also has drag-and-drop free images to add customized designs to the template.
Facebook Covers: You can make Facebook covers on Canva by choosing a layout and adding other elements. You can include colors, fonts, and pictures on the cover. Canva has templates for all themes, moods, and styles!
Event Invites: Canva has hundreds of free layouts and libraries to create event invites. You can choose the appropriate template and incorporate party-oriented photos, icons, stickers, illustrations, and graphics. It also has a personalizing option to add personal pictures and artwork in the editor.
Inspirational Quotes: Canva allows you to curate inspirational quotes and dispense motivation in people. It has templates to modify the elements like font size, text size, borders, images, and more!
Collages: It helps create a collage where you can combine multiple pictures in one frame. Canva offers various grids with a capacity of 12 pictures and different sizes.
Part 2: How to Animate Pictures in Canva?
Canva helps you add instant animation in presentations, social media posts, and more. To know how to animate images in Canva, follow the below steps:
Step 1: Add Static Elements
Start by creating an image through static elements. To make the design attractive, you can add sample texts, illustrations, doodles, and other entities.
Try to stimulate your creativity and come up with a layout beforehand. If possible, sketch on paper and replicate the same.
Step 2: Animate Your Design
Take a final glance at the layout. Make sure it’s perfect. Once all the elements are placed as per your design, it’s time to animate them. For that:
- Click on the white background page
- Go to the “Toolbar” section
- Select the “Animate” button
Step 3: Select Page Animation Style
Canva offers six animation styles, where five are for free users, and one is for pro users. To access the five animation styles, follow these steps.
- Press the “Animate” Button
- Select “Page Animations”
- There you will find options like Block, Pan, Fade, Rise, and Tumble
- Select the style as per your design
Step 4: Preview and Download
After selecting a page animation style, it will preview the effect. If you find it good, move on to downloading the GIF. Here’s how to do so
- Go to the “Toolbar” option (present on your upper right hand)
- Choose GIF as the file type
- Check the page number and verify if it’s correct
- Press the “Done” button
Step 5: Final GIF
After clicking on the “Done” button, your GIF will be downloaded. You will be able to see a display for five seconds. If you want to edit the image after this, click on the time button (near the “Animate” button).
So, that was all about how to animate a photo in Canva.
Drawbacks of Canva
Despite efficient features and easy interface, there are certain areas where Canva lacks. This includes
- It does not have any local file storage.
- As too many people use Canva, your template may look the same as others.
- Some of its best features are not free to access.
- The mobile app version lacks certain elements and features.
Out of all these drawbacks, repetitions of templates are a big issue. That’s because everyone wants their posts to look unique and irreplaceable. However, common Canva templates may prevent that from happening.
Fortunately, there are ways to combat such issues. Let’s learn about them in the next section.
Tips: Animate Pictures In Video
You can also animate pictures in the video to make them more lively. For that, you can use Wondershare Filmora Pro Video Editor. It’s also efficient if you don’t know how to animate a picture in Canva:
Wondershare Filmora Video Editor
Filmora by Wondershare is a video editing software that helps you build custom animations easily. It has auto features to make epic stories and posts.
Wondershare Filmora
Get started easily with Filmora’s powerful performance, intuitive interface, and countless effects!
Try It Free Try It Free Try It Free Learn More about Filmora>
Its drag and drop effect makes designing simple and quick. Due to its outstanding attributes, options, and styles, Filmora has 77+ million happy users!
It’s a power-packed integration of functionality, performance, and more! In fact, it resolves the repeated template issue of Canva. The software has top-notch functions and innovative filters that add authenticity to the designs.
Till now, you learned about how to animate a picture on Canva. Now, let’s comprehend the right way to use Filmora for animating and adding images in the video.
Before using, make sure to update the software to its latest version. Follow separate methods for both Windows and Mac.
For Win
Step 1: Adding Image to Video Track
With Filmora, adding images to video is a matter of seconds! Start by:
- Identify the position where you want to add the image and place the Playhead there.
- Right-click on the picture from the media library. Click on the “Insert” option. Your image will be added. Select the “Append” option, if you want to add an image at the video end.
Note: How to Remove Black Bars around the Image?
- Go to “Settings” from the File section.
- Click on the “Editing” tab and select “Photo Placement.”
- Choose from the “Crop to Fit” or “Pan To Zoom” option. The black bars will be removed.
To add the image in between the video clip, split them. Now, add the image between the split parts.
Step 2: Add Images as Overlays
To add images as overlays, drag the image to a video track above the main track. The main track consists of your video.
Track 1 (or the track with a video clip) is the base of your video. If you add anything else, it will be displayed above this track as video track 2, 3, and so on. Overall, you can add 100 video tracks.
Step 3: Edit Your Image
If you know how to animate an image in Canva, editing images on Filmora is even easier. You can try the following methods:
Animate Your Images
- To add animation presets to the image, click on the image twice.
- Go to the “Animation Tab” and look for an animation preset.
- Drag the presets to the image for its effect
Make Image Color Adjustments
- Double-click on the image
- Go to the “Color” tab and then the “Color” section
- Customize the temperature, saturation, brightness, etc., as per your need.
- Press Ok.
Change Image Duration
You can increase the image duration to more than the default timing of 5 seconds. For that:
- Click on the image and select the “Duration” option.
- Go to the “Duration Setting” panel.
- Add the new duration timing.
Adjust Position, Rotate/Flip, and Opacity
- You can resize the image position through the circles and squares at the image edges.
- To flip or rotate the image, double-click on the picture. From the “Image Panel,” go to “Transform” and then click on “Rotate.” You can choose either “Horizontal Flip” or “Vertical Flip” to flip the images.
- Double-click on the image and click on the “Composting” option to add opacity. You can choose the blending mode or adjust the “Opacity” accordingly.
For Mac
Filmora for Mac comes with a drag and drop feature to add transitions, animated titles, and effects. You can start a new project from scratch by clicking on “New Project”. The entire process is the same as that for Windows users.
To apply animation in the images, use the motion effects option. For that,
- Click on the Image
- Go to Motion Tab
- Select a motion effect
- Double-click to apply the effect
Conclusion
So that’s how to animate photos in Canva. Hopefully, our steps will help you revamp your posts like a pro! If not Canva, you can use its alternative Filmora. It’s equally prominent, user-friendly, and feature-rich.
Versatile Video Editor - Wondershare Filmora
An easy yet powerful editor
Numerous effects to choose from
Detailed tutorials provided by the official channel
A Beginner’s Guide to Tell You What 3D Animation Is
A Beginner’s Guide to Explain What 3D Animation Is
An easy yet powerful editor
Numerous effects to choose from
Detailed tutorials provided by the official channel
With present-day technology, 3D animation has reached all spheres be it entertainment, advertising, architecture, education, and much more. With the increasing use of 3D animation, there is a rise in the tools and programs used for creating such animations.
So, to help you get all the details about 3D animation, 3D modelling and animation process, best tools, tips, and tricks, keep reading the following parts.
In this article
01 [What Does 3D Animation Mean?](#Part 1)
02 [What is the Process of 3D Animation?](#Part 2)
03 [Types of 3D Animations](#Part 3)
04 [Top 5 3D Animation Software](#Part 4)
05 [Top Animation Tips and Tricks](#Part 5)
Part 1 What does 3D animation mean?
In simplest terms, animation is a process of manipulating the images so that they appear to be moving, and when this manipulation is done in three-dimensional space, it is called 3D animation. The objects and the models used for 3D animation can be rotated or moved like the real ones. Some tools can be used to scan real-life objects which can be then used as blueprints for creating animation 3D models.
The characters and the objects in 3D animations have to be moved to make them as realistic as possible. No matter, how interesting or perfect character you may create, if it does not move in an even manner, the overall effect will be ruined. The latest techniques and tools these days are capable of creating lifelike scenes.

Part 2 What is the process of 3D Animation?
Creating a 3D animation is a complex process involving several phases. Below listed are the main 3 phases for creating an animation.
01Modeling
The main thing for any 3D animation is its objects, models, or characters and this phase involves creating these objects. Since the objects are based on 3D computer models, the process is termed 3D modeling. A model by a computer appears like a mesh of geometric shapes including curves, points, lines, and more. These shapes do not look anywhere like real objects and only after when the textures and colors are added to them, they appear like real things.
02Layout and animation
The next step is layout and animation where characters are placed in the scenes and the animation of their movements is done using 3D animation tools. Initially, keyframes are created which are the start and the end pose of any animation, and then later other details like the effects, lighting, camerawork, and more are added to get the desired animation that appears on the screen.
03Rendering
The final step in the 3D creation process is rendering where the created animation is finalized as well as exported. To make sure that the final animation plays seamlessly and looks absolutely perfect, it is essential to check all the minute details.
After the production of 3D animation is done, next comes the post-production which is the phase where effects, music, and voiceovers are added and combined to make the entire animation look complete.

Part 3 Types of 3D animations
Now when we know what is a 3D animation and its process, we also need to know that different types of 3D animations are there. Some of the key ones are as below.
● 3D videos and movies
● 3D Virtual Reality
● Interactive 3D
● Digital 3D
● Clay Motion also termed Stop motion animation
● Pixilation
● Cell-shaded animation
● Paint-on-glass
● Pinscreen
Part 4 Top 5 3D Animation software
When it comes to 3D animation tools, the choices can be overwhelming and the list of promises claimed by the tools can be large. He, you need to shortlist the tools that best match your requirements as well as your skill sets. Below we have narrowed down the top 5 software of the category.
01Autodesk Maya
This is a top-rated animation, modeling, simulation, and rendering tool. Using this versatile tool, complex characters and animated videos can be created with all the needed effects.
Key features:
● Versatile 3D animation tool with support to a wide range of features.
● Available for download on Windows, Mac, and Linux systems.
● Allows creating complex characters, adding realistic effects, custom graphics, and more.
● Arnold’s feature of the tool allows switching between CPU and GPU.
● Animation features like fast-playback, time editing, graph editing, ghost editing, multiple modeling options, and others are supported.

02Blender
This is free and open-source software that can be used for creating 3D animations, motion graphics, computer games, and more. Since the tool has been in use for a long time, several artists keep adding to the tool.
Key features
● Free and open-source animation tool.
● Support to multiple platforms including Windows, Mac, and Linux.
● OpenGL interface which makes the functioning smooth.
● Comprehensive and robust set of tools for creating versatile animations. Some of these include automatic skilling, unwrapping texturing, envelope, skeleton, B-spline interpolated bones, sound synchronization, and more.
● Support input from motion-capture tools.

03Houdini
Used by reputed VFX companies like Pixar, Sony, Disney, and others, this is an excellent software that can be used for creating 3D animations, games, and others. With multi-platform support, it is a paid tool that also comes with a free learning edition.
Key features
● Feature-packed animation tool used by industry pioneers.
● Use node-based workflow for creating animations.
● Create biped and quadruped 3D objects using rigging tools.
● Comes with multiple plans to choose from as per budget and requirements.
● Offers a high level of flexibility and creativity.

04Cinema 4D
This professional animation creation software is known for its features and stability. With the availability of multiple tutorials and guides, learning the tool and its functions is easy.
Key features of the software
● Known to be an excellent tool for motion graphics, illustrations, and visualizations.
● Easy learning curve owing to the availability of tutorials, guides, and training materials. Access to free membership of Cineversity which is a training site.
● Comes with a 14-day free trial version along with a free education version for the teachers and students.
● Functions of the software are tested by QA and Beta testers that offer high stability.
● Support features like automatic keyframing, tag and expressions, effectors, and more.

05**Wondershare Filmora Video Editor **
If you are looking for software that is simple and easy to use but supports all advanced features this is one of the best choices. Available for Windows and Mac the tool also works as an excellent video editing tool.
Key features
● This easy 3D animation tool Allows creating sharp and lively animations using features like keyframing, motion-tracking, and others.
● Allows to add the preset motions or even customize your own animations.
● The speed, as well as the duration of the animation, can be changed using the ease-in and ease-out options.
● Make your videos lively with features like warp, distorting, masking, lights & flares, text& titles, and more.
● High-quality presets are available with features like auto-correction, color wheels, scopes, and more.
● Audio features supported like automatic audio sync, audio compression, audio transitions, and noise correction.
For Win 7 or later (64-bit)
For macOS 10.12 or later
Part 5 Top Animation Tips And Tricks
Though 3D animation requires a lot of technical know-how of the process, there are several tips and tricks that can make your task quicker, easier, and smoother. We have gathered a few such tips below.
01Make realistic objects by observing real life
The more you will observe real-life the more you will be able to imitate it into your animations for giving life to your objects, models, and characters. Having some knowledge about real-life, gravity, and similar topics will help you work on your animations more interactively.
02Evolve with latest techniques and technology
The tools, programs, and technology are progressing every day and to make the best use of the same, you need to evolve with the technology. To use the features and functions of the software you need to keep learning and growing.
03Go with the basic first
While working with the animations, it is very easy to get carried away with the process and get into the trap of looking for details. This will eventually move you away from your main track and will lead to a waste of time and effort. Thus, it is always advisable to go with the basics first and then move towards the detailing.
04Learn about the human emotions
Facial expressions are an important element of any 3D animation that brings life to characters. A good animation will portray good and complex emotions and thus it is important to study these emotions in detail so that they can be incorporated into your objects, models, and characters.

● Key Takeaways from This Episode →
● Animations created in 3-dimensional space are termed 3D animations.
● 3D animations involve pre-production, post-production, and several steps.
● For the smooth creation of 3D animations, several tips and tricks can be considered.
● A wide range of tools for creating 3D animations are available and one of the best tools in the category is Wondershare Filmora Video Editor that is effective and easy to use.
With present-day technology, 3D animation has reached all spheres be it entertainment, advertising, architecture, education, and much more. With the increasing use of 3D animation, there is a rise in the tools and programs used for creating such animations.
So, to help you get all the details about 3D animation, 3D modelling and animation process, best tools, tips, and tricks, keep reading the following parts.
In this article
01 [What Does 3D Animation Mean?](#Part 1)
02 [What is the Process of 3D Animation?](#Part 2)
03 [Types of 3D Animations](#Part 3)
04 [Top 5 3D Animation Software](#Part 4)
05 [Top Animation Tips and Tricks](#Part 5)
Part 1 What does 3D animation mean?
In simplest terms, animation is a process of manipulating the images so that they appear to be moving, and when this manipulation is done in three-dimensional space, it is called 3D animation. The objects and the models used for 3D animation can be rotated or moved like the real ones. Some tools can be used to scan real-life objects which can be then used as blueprints for creating animation 3D models.
The characters and the objects in 3D animations have to be moved to make them as realistic as possible. No matter, how interesting or perfect character you may create, if it does not move in an even manner, the overall effect will be ruined. The latest techniques and tools these days are capable of creating lifelike scenes.
Part 2 What is the process of 3D Animation?
Creating a 3D animation is a complex process involving several phases. Below listed are the main 3 phases for creating an animation.
01Modeling
The main thing for any 3D animation is its objects, models, or characters and this phase involves creating these objects. Since the objects are based on 3D computer models, the process is termed 3D modeling. A model by a computer appears like a mesh of geometric shapes including curves, points, lines, and more. These shapes do not look anywhere like real objects and only after when the textures and colors are added to them, they appear like real things.
02Layout and animation
The next step is layout and animation where characters are placed in the scenes and the animation of their movements is done using 3D animation tools. Initially, keyframes are created which are the start and the end pose of any animation, and then later other details like the effects, lighting, camerawork, and more are added to get the desired animation that appears on the screen.
03Rendering
The final step in the 3D creation process is rendering where the created animation is finalized as well as exported. To make sure that the final animation plays seamlessly and looks absolutely perfect, it is essential to check all the minute details.
After the production of 3D animation is done, next comes the post-production which is the phase where effects, music, and voiceovers are added and combined to make the entire animation look complete.
Part 3 Types of 3D animations
Now when we know what is a 3D animation and its process, we also need to know that different types of 3D animations are there. Some of the key ones are as below.
● 3D videos and movies
● 3D Virtual Reality
● Interactive 3D
● Digital 3D
● Clay Motion also termed Stop motion animation
● Pixilation
● Cell-shaded animation
● Paint-on-glass
● Pinscreen
Part 4 Top 5 3D Animation software
When it comes to 3D animation tools, the choices can be overwhelming and the list of promises claimed by the tools can be large. He, you need to shortlist the tools that best match your requirements as well as your skill sets. Below we have narrowed down the top 5 software of the category.
01Autodesk Maya
This is a top-rated animation, modeling, simulation, and rendering tool. Using this versatile tool, complex characters and animated videos can be created with all the needed effects.
Key features:
● Versatile 3D animation tool with support to a wide range of features.
● Available for download on Windows, Mac, and Linux systems.
● Allows creating complex characters, adding realistic effects, custom graphics, and more.
● Arnold’s feature of the tool allows switching between CPU and GPU.
● Animation features like fast-playback, time editing, graph editing, ghost editing, multiple modeling options, and others are supported.
02Blender
This is free and open-source software that can be used for creating 3D animations, motion graphics, computer games, and more. Since the tool has been in use for a long time, several artists keep adding to the tool.
Key features
● Free and open-source animation tool.
● Support to multiple platforms including Windows, Mac, and Linux.
● OpenGL interface which makes the functioning smooth.
● Comprehensive and robust set of tools for creating versatile animations. Some of these include automatic skilling, unwrapping texturing, envelope, skeleton, B-spline interpolated bones, sound synchronization, and more.
● Support input from motion-capture tools.
03Houdini
Used by reputed VFX companies like Pixar, Sony, Disney, and others, this is an excellent software that can be used for creating 3D animations, games, and others. With multi-platform support, it is a paid tool that also comes with a free learning edition.
Key features
● Feature-packed animation tool used by industry pioneers.
● Use node-based workflow for creating animations.
● Create biped and quadruped 3D objects using rigging tools.
● Comes with multiple plans to choose from as per budget and requirements.
● Offers a high level of flexibility and creativity.
04Cinema 4D
This professional animation creation software is known for its features and stability. With the availability of multiple tutorials and guides, learning the tool and its functions is easy.
Key features of the software
● Known to be an excellent tool for motion graphics, illustrations, and visualizations.
● Easy learning curve owing to the availability of tutorials, guides, and training materials. Access to free membership of Cineversity which is a training site.
● Comes with a 14-day free trial version along with a free education version for the teachers and students.
● Functions of the software are tested by QA and Beta testers that offer high stability.
● Support features like automatic keyframing, tag and expressions, effectors, and more.
05**Wondershare Filmora Video Editor **
If you are looking for software that is simple and easy to use but supports all advanced features this is one of the best choices. Available for Windows and Mac the tool also works as an excellent video editing tool.
Key features
● This easy 3D animation tool Allows creating sharp and lively animations using features like keyframing, motion-tracking, and others.
● Allows to add the preset motions or even customize your own animations.
● The speed, as well as the duration of the animation, can be changed using the ease-in and ease-out options.
● Make your videos lively with features like warp, distorting, masking, lights & flares, text& titles, and more.
● High-quality presets are available with features like auto-correction, color wheels, scopes, and more.
● Audio features supported like automatic audio sync, audio compression, audio transitions, and noise correction.
For Win 7 or later (64-bit)
For macOS 10.12 or later
Part 5 Top Animation Tips And Tricks
Though 3D animation requires a lot of technical know-how of the process, there are several tips and tricks that can make your task quicker, easier, and smoother. We have gathered a few such tips below.
01Make realistic objects by observing real life
The more you will observe real-life the more you will be able to imitate it into your animations for giving life to your objects, models, and characters. Having some knowledge about real-life, gravity, and similar topics will help you work on your animations more interactively.
02Evolve with latest techniques and technology
The tools, programs, and technology are progressing every day and to make the best use of the same, you need to evolve with the technology. To use the features and functions of the software you need to keep learning and growing.
03Go with the basic first
While working with the animations, it is very easy to get carried away with the process and get into the trap of looking for details. This will eventually move you away from your main track and will lead to a waste of time and effort. Thus, it is always advisable to go with the basics first and then move towards the detailing.
04Learn about the human emotions
Facial expressions are an important element of any 3D animation that brings life to characters. A good animation will portray good and complex emotions and thus it is important to study these emotions in detail so that they can be incorporated into your objects, models, and characters.
● Key Takeaways from This Episode →
● Animations created in 3-dimensional space are termed 3D animations.
● 3D animations involve pre-production, post-production, and several steps.
● For the smooth creation of 3D animations, several tips and tricks can be considered.
● A wide range of tools for creating 3D animations are available and one of the best tools in the category is Wondershare Filmora Video Editor that is effective and easy to use.
15 Best Pics Collage Apps : Top Picks
15 Best Pics Collage Apps in 2024: Top Picks
An easy yet powerful editor
Numerous effects to choose from
Detailed tutorials provided by the official channel
With a high-end camera in a mobile phone these days there is a huge collection of pictures from various events, trips, and of your near and dear ones. So why not be creative and make some interesting pics collage from these images? Surprise your friends, relatives, and other people on their special occasion by creating pics collage and for this, you would need the help of a good collage app.

With the myriad of options available, selecting a few can be a difficult task and to help you with this, we have shortlisted some of the popular ones in the write-up below.
Part 1 Top 11 Pics Collage apps for Android and iOS
Below we have shortlisted the best apps for the pics collage that will help you create a customized collage using multiple functions and tools.
01Pic Collage
This is one of the most widely used apps available for iOS and Android devices that helps you create interesting collages.
Key features
● Free app with basic features and allows to remove ads and get access to advanced features using the paid version
● Intuitive layout with multiple templates to create photo collage pics.
● Comes with an array of photo editing tools.
● Add images from your phone or also from social media accounts.

02Photo and Shape Collage Maker
This is a free Android-based app with a 3.6 rating.
Key features
● Create frame collage, shape collage, name collage, and others.
● Comes with predefined shapes for creating a collage.
● Allows editing the collage size, background, and other factors.
● Customized shape collage can be created your name, number, or face.
● Add stickers, text, and other elements.

03Diptic
This is a paid app for iOS devices that allows creating photos as well as video collages.
Key features:
● Comes with over 190 layouts to choose from
● Add multiple photos and videos in each layout.
● Option for customizing the layout.
● Use different filters for enhancing the images.
● Add captions, effects, and other interesting elements.
● Allows creating Diptics using photos and videos from the device, Facebook, Dropbox, and other sources.

04PhotoGrid
This is an Android and iOS based app for creating collages.
Key features
● Create collage using photos, and videos.
● Comes with a variety of templates for creating personalized collages.
● The built-in editor lets you customize the images.
● Background stickers, doodles, text, and other effects can be added.
● A free version supports basic features while the paid pro version removes ads and watermarks and offers advanced features.

05Ribbet
This app on Android and iOS is mainly a photo editing tool that also supports creating collages.
Key features
● Create a collage using different customizable templates.
● Edit images and change file parameters to suit requirements.
● Add special effects, frames, and text.
● Editing tools like clones, curves, and burning.

06Moldiv
Use this app on your Android and iOS devices to create collages and professionally edit images.
Key features
● Comes with a variety of free collage templates.
● A wide range of layouts is available that can be customized.
● Works as a pro image editing tool.
● Add stickers, filters, backgrounds, and other elements.
● Allows adding up to 9 photos in a frame.

07PicPlayPost
Just like its name, this is an interesting tool for creating collages on iOS and Android devices and supports other functions as well.
Key features
● Free app with IAP option.
● Allows creating an animated slideshow using images and videos.
● Option to choose aspect ratio depending on the platform you wish to use the collage.
● Add text watermark or a business logo using the app.
● A wide range of media file formats is supported.

08PiZap
This is a multitasking app for Android and iOS devices that support functions like creating a collage, meme, photo editing, and more.
Key features:
● Create photo collages, posters, and greeting cards, in a few simple steps.
● A wide range of templates is available including the ones for Twitter, YouTube, and other sites.
● Add text, memes, shapes, filters, and other elements.
● Free to use app with Pro version offering additional features and removing ads.

0910. Live Collage
Download this app on your Android and iOS devices for creating interesting collages.
Key features:
● A simple and clean interface makes collage-making easy and fast.
● Comes with a variety of templates including special ones for Facebook, and Instagram.
● Allows creating customized canvas size and 3D templates available as well.
● Add filters to enhance your images.

1011. Pic Stitch
The app on Android and iOS devices allows creating customized pic collages for all occasions.
Key features
● User-friendly interface to create a customized collage using images and videos.
● Comes with more than 200 templates.
● Multiple images editing options are supported.
● Share created collages to social media sites.
● Choose a customized aspect ratio and also add music.

1112. PicsArt
PicsArt collage is another widely used Android and iOS-based tool that can be used for multiple tasks including collage-making.
Key features
● Comes with multiple templates including the ones for social media as well as business requirements.
● Add up to 10 images on a grid.
● Comes with a free photo library to select images.
● Being a complete image editing tool it allows personalized images in different ways.

Additional Reading: Edit your videos professionally and create a video collage using Wondershare UniConverter
If you are looking for a video editing tool that can let your edit your videos like a professional Wondershare Filmora Video Editor is just the right choice. This Windows and Mac-based software support variety of basic, as well as advanced features, and this, makes the software for all users. With over 800 stunning effects, you can create a video masterpiece using your creativity. Media files in all key formats are supported and there are options to add texts, overlays, transitions, filters, as well as music files.
The split-screen feature of the software can be further used to play multiple videos in different frames making it look like a video collage.

Wondershare Filmora - Best Video Editor for Mac/Windows
5,481,435 people have downloaded it.
Build unique custom animations without breaking a sweat.
Focus on creating epic stories and leave the details to Filmora’s auto features.
Start a creative adventure with drag & drop effects and endless possibilities.
Filmora simplifies advanced features to save you time and effort.
Filmora cuts out repetition so you can move on to your next creative breakthrough.
● Key Takeaways from This Episode →
● Create stunning pic collages on your phone using apps.
● A wide range of apps for Android and iOS are available.
● Edit your videos professionally and create a video collage using Wondershare Filmora.
With a high-end camera in a mobile phone these days there is a huge collection of pictures from various events, trips, and of your near and dear ones. So why not be creative and make some interesting pics collage from these images? Surprise your friends, relatives, and other people on their special occasion by creating pics collage and for this, you would need the help of a good collage app.
With the myriad of options available, selecting a few can be a difficult task and to help you with this, we have shortlisted some of the popular ones in the write-up below.
Part 1 Top 11 Pics Collage apps for Android and iOS
Below we have shortlisted the best apps for the pics collage that will help you create a customized collage using multiple functions and tools.
01Pic Collage
This is one of the most widely used apps available for iOS and Android devices that helps you create interesting collages.
Key features
● Free app with basic features and allows to remove ads and get access to advanced features using the paid version
● Intuitive layout with multiple templates to create photo collage pics.
● Comes with an array of photo editing tools.
● Add images from your phone or also from social media accounts.
02Photo and Shape Collage Maker
This is a free Android-based app with a 3.6 rating.
Key features
● Create frame collage, shape collage, name collage, and others.
● Comes with predefined shapes for creating a collage.
● Allows editing the collage size, background, and other factors.
● Customized shape collage can be created your name, number, or face.
● Add stickers, text, and other elements.
03Diptic
This is a paid app for iOS devices that allows creating photos as well as video collages.
Key features:
● Comes with over 190 layouts to choose from
● Add multiple photos and videos in each layout.
● Option for customizing the layout.
● Use different filters for enhancing the images.
● Add captions, effects, and other interesting elements.
● Allows creating Diptics using photos and videos from the device, Facebook, Dropbox, and other sources.
04PhotoGrid
This is an Android and iOS based app for creating collages.
Key features
● Create collage using photos, and videos.
● Comes with a variety of templates for creating personalized collages.
● The built-in editor lets you customize the images.
● Background stickers, doodles, text, and other effects can be added.
● A free version supports basic features while the paid pro version removes ads and watermarks and offers advanced features.
05Ribbet
This app on Android and iOS is mainly a photo editing tool that also supports creating collages.
Key features
● Create a collage using different customizable templates.
● Edit images and change file parameters to suit requirements.
● Add special effects, frames, and text.
● Editing tools like clones, curves, and burning.
06Moldiv
Use this app on your Android and iOS devices to create collages and professionally edit images.
Key features
● Comes with a variety of free collage templates.
● A wide range of layouts is available that can be customized.
● Works as a pro image editing tool.
● Add stickers, filters, backgrounds, and other elements.
● Allows adding up to 9 photos in a frame.
07PicPlayPost
Just like its name, this is an interesting tool for creating collages on iOS and Android devices and supports other functions as well.
Key features
● Free app with IAP option.
● Allows creating an animated slideshow using images and videos.
● Option to choose aspect ratio depending on the platform you wish to use the collage.
● Add text watermark or a business logo using the app.
● A wide range of media file formats is supported.
08PiZap
This is a multitasking app for Android and iOS devices that support functions like creating a collage, meme, photo editing, and more.
Key features:
● Create photo collages, posters, and greeting cards, in a few simple steps.
● A wide range of templates is available including the ones for Twitter, YouTube, and other sites.
● Add text, memes, shapes, filters, and other elements.
● Free to use app with Pro version offering additional features and removing ads.
0910. Live Collage
Download this app on your Android and iOS devices for creating interesting collages.
Key features:
● A simple and clean interface makes collage-making easy and fast.
● Comes with a variety of templates including special ones for Facebook, and Instagram.
● Allows creating customized canvas size and 3D templates available as well.
● Add filters to enhance your images.
1011. Pic Stitch
The app on Android and iOS devices allows creating customized pic collages for all occasions.
Key features
● User-friendly interface to create a customized collage using images and videos.
● Comes with more than 200 templates.
● Multiple images editing options are supported.
● Share created collages to social media sites.
● Choose a customized aspect ratio and also add music.
1112. PicsArt
PicsArt collage is another widely used Android and iOS-based tool that can be used for multiple tasks including collage-making.
Key features
● Comes with multiple templates including the ones for social media as well as business requirements.
● Add up to 10 images on a grid.
● Comes with a free photo library to select images.
● Being a complete image editing tool it allows personalized images in different ways.
Additional Reading: Edit your videos professionally and create a video collage using Wondershare UniConverter
If you are looking for a video editing tool that can let your edit your videos like a professional Wondershare Filmora Video Editor is just the right choice. This Windows and Mac-based software support variety of basic, as well as advanced features, and this, makes the software for all users. With over 800 stunning effects, you can create a video masterpiece using your creativity. Media files in all key formats are supported and there are options to add texts, overlays, transitions, filters, as well as music files.
The split-screen feature of the software can be further used to play multiple videos in different frames making it look like a video collage.
Wondershare Filmora - Best Video Editor for Mac/Windows
5,481,435 people have downloaded it.
Build unique custom animations without breaking a sweat.
Focus on creating epic stories and leave the details to Filmora’s auto features.
Start a creative adventure with drag & drop effects and endless possibilities.
Filmora simplifies advanced features to save you time and effort.
Filmora cuts out repetition so you can move on to your next creative breakthrough.
● Key Takeaways from This Episode →
● Create stunning pic collages on your phone using apps.
● A wide range of apps for Android and iOS are available.
● Edit your videos professionally and create a video collage using Wondershare Filmora.
Simple Shortcut to Convert Videos to Gifs on iPhone
Simple Shortcut to Convert Videos to Gifs on iPhone
An easy yet powerful editor
Numerous effects to choose from
Detailed tutorials provided by the official channel
To create iPhone video to GIF there are several third-party apps available. You can even choose the online sites for the task, but the editing and other options will be limited. The GIFs on your iPhone can be created using videos as well as Live photos.

One of the best ways to create a GIF is using the Shortcuts app that comes pre-installed on devices running on iOS 13 and later versions of the OS. The app has shortcuts to accomplish several tasks on your iPhone including GIF creation. Learn about using Shortcuts and other tools for creating a GIF on iPhone.
In this article
01 [How to make GIF from Video on iPhone using Shortcut App](#Part 1)
02 [How to save Live Photos as GIF on iPhone](#Part 2)
03 [How to save Live Photos as GIF on iPhone](#Part 3)
04 [How to save videos as live photos on your iPhone?](#Part 4)
05 [Best tool for creating GIFs and video editing on your Windows and Mac- Wondershare Filmora](#Part 5)
Part 1 How to make GIF from Video on iPhone using Shortcut App
One of the easiest ways to convert video GIF iPhone is by using the Shortcuts app. If you have deleted the app, you can reinstall it from the app store. Once the app is installed, you would next need to allow the untrusted shortcuts and for this go to Settings > Shortcuts> toggle Add Untrusted Shortcuts to add the shortcuts created by the user. The further steps for converting video to GIF iPhone are as follows.
Step 1. On your iPhone, download the Video to GIF shortcut. You can download it using iCloud or RoutineHub. Find the shortcut and click on Get Shortcut will let you check the action of the shortcut.
Move down and click on the red Add Untrusted Shortcut button that will add the shortcut for the library.

Step 2. Go to the My Shortcuts tab and click on the Video to GIF section. If you are using it for the first time, you need to grant permission to use the videos and photos. Click on the OK button and continue.

Step 3. Next, browse and add the video from which you wish to create the GIF. Since GIF animations are short, it is always recommended to use short videos.
Step 4. Video processing will start and during this, the Video to GIF shortcut will be greyed out.

Step 5. Once done, the preview of the GIF will appear on the screen. Finally, you can save the GIF to your Photos app on iPhone or can also share it through email, AirDrop, iMessage, and other third-party services as needed.

Part 2 How to save Live Photos as GIF on iPhone
Live Photo is an interesting feature of the iPhone where an image is captured in an animated form for a couple of seconds. These Live Photos can be easily converted to GIFs using the steps below.
Step 1. On your iPhone Photo app, open the Live Photo that you want to save as GIF.
Step 2. Darg the selected photo upwards and will see multiple effects options along with other image details.
Step 3 To save the selected image as GIF, choose Loop or Bounce animation. Once done, share the image on mail and other services listed or save it to the device.

Part 3 How to save Live Photo as video on iPhone
You can also convert your live photos to videos and then use them for making GIFs and for other uses. The steps for iPhone live photo to video are as follows.
Step 1. On your iPhone, open the Photos app and choose the Live Photo that you want to convert.
Step 2. Next, click on the share button at the bottom of the screen and multiple options will be seen.
Step 3. Scroll down and choose Save as Video option and with this, the live photo will be saved as a Video.
Additionally, you can also convert the LivePhotos to videos using the shortcut app.

Part 4 How to save videos as live photos on your iPhone?
If you need to convert your videos to live photos on iPhone, there are several third-party tools available and one of the widely used is IntoLive. Using this app, videos, as well as GIFs, can be converted into live photos.
Steps on how to turn a video into a live photo iPhone
Step 1. Download, install and launch the IntoLive app from the app store.
Step 2. Next, browse and add the desired video.
Step 3. If needed, the added video can be customized using several supported features.
Step 4. Next, click on the Make option at the top-right corner and then choose the repeats you want for a Live Photo.
Step 5. Finally, click on the Live Photo and your Live Photo will be saved to the device.

Part 5 Best tool for creating GIFs and video editing on your Windows and Mac- Wondershare Filmora
Above we have listed several ways to create GIFs on your iPhone and also to convert videos to LivePhotos and vice-versa. Installing different tools for different tasks is a hassle and also a time-consuming task. So, if you are looking for an all-in-one tool that allows you to create GIFs, and professionally edit your media files, Wondershare Filmora Video Editor is the best tool to consider. Available for quick download on your Windows and Mac system, this feature-packed software has an intuitive and user-friendly interface.
Wondershare Filmora
Get started easily with Filmora’s powerful performance, intuitive interface, and countless effects!
Try It Free Try It Free Try It Free Learn More >
Media files in all key formats are supported by the tool and there are multiple options for editing and video creation like splitting, rotating, cutting, adding effects, sounds, text, and other elements. In a few simple steps, your customized GIF and other professional-looking media files will be ready.
Steps to create GIF using Wondershare Filmora
Step 1. Launch the installed software on your system and add the video or images from the system.
Step 2. The added media files next need to be dragged and dropped to the timeline at the bottom of the interface.
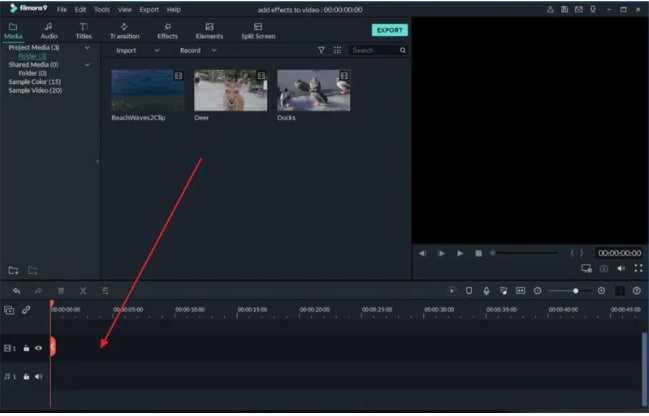
Step 3. After the files are moved, you can customize them using several editing tools like rotate, crop, cut, and more.
Step 4. Next, add text, effects, sound, and other elements as needed.

Step 5. Finally choose to export the file and then from the Local tab, select the GIF option. Choose a file name and location and then finally click on the EXPORT button.

● Key Takeaways from This Episode →
●There are several ways to turn video into GIF iPhone.
●Using shortcuts is one of the most straightforward methods for creating GIFs using videos.
●You can also convert videos to LivePhoto and vice versa on your iPhone using third-party apps.
●Wondershare Filmora is an excellent software to make GIFs and professionally edit media files.
To create iPhone video to GIF there are several third-party apps available. You can even choose the online sites for the task, but the editing and other options will be limited. The GIFs on your iPhone can be created using videos as well as Live photos.
One of the best ways to create a GIF is using the Shortcuts app that comes pre-installed on devices running on iOS 13 and later versions of the OS. The app has shortcuts to accomplish several tasks on your iPhone including GIF creation. Learn about using Shortcuts and other tools for creating a GIF on iPhone.
In this article
01 [How to make GIF from Video on iPhone using Shortcut App](#Part 1)
02 [How to save Live Photos as GIF on iPhone](#Part 2)
03 [How to save Live Photos as GIF on iPhone](#Part 3)
04 [How to save videos as live photos on your iPhone?](#Part 4)
05 [Best tool for creating GIFs and video editing on your Windows and Mac- Wondershare Filmora](#Part 5)
Part 1 How to make GIF from Video on iPhone using Shortcut App
One of the easiest ways to convert video GIF iPhone is by using the Shortcuts app. If you have deleted the app, you can reinstall it from the app store. Once the app is installed, you would next need to allow the untrusted shortcuts and for this go to Settings > Shortcuts> toggle Add Untrusted Shortcuts to add the shortcuts created by the user. The further steps for converting video to GIF iPhone are as follows.
Step 1. On your iPhone, download the Video to GIF shortcut. You can download it using iCloud or RoutineHub. Find the shortcut and click on Get Shortcut will let you check the action of the shortcut.
Move down and click on the red Add Untrusted Shortcut button that will add the shortcut for the library.
Step 2. Go to the My Shortcuts tab and click on the Video to GIF section. If you are using it for the first time, you need to grant permission to use the videos and photos. Click on the OK button and continue.
Step 3. Next, browse and add the video from which you wish to create the GIF. Since GIF animations are short, it is always recommended to use short videos.
Step 4. Video processing will start and during this, the Video to GIF shortcut will be greyed out.
Step 5. Once done, the preview of the GIF will appear on the screen. Finally, you can save the GIF to your Photos app on iPhone or can also share it through email, AirDrop, iMessage, and other third-party services as needed.
Part 2 How to save Live Photos as GIF on iPhone
Live Photo is an interesting feature of the iPhone where an image is captured in an animated form for a couple of seconds. These Live Photos can be easily converted to GIFs using the steps below.
Step 1. On your iPhone Photo app, open the Live Photo that you want to save as GIF.
Step 2. Darg the selected photo upwards and will see multiple effects options along with other image details.
Step 3 To save the selected image as GIF, choose Loop or Bounce animation. Once done, share the image on mail and other services listed or save it to the device.
Part 3 How to save Live Photo as video on iPhone
You can also convert your live photos to videos and then use them for making GIFs and for other uses. The steps for iPhone live photo to video are as follows.
Step 1. On your iPhone, open the Photos app and choose the Live Photo that you want to convert.
Step 2. Next, click on the share button at the bottom of the screen and multiple options will be seen.
Step 3. Scroll down and choose Save as Video option and with this, the live photo will be saved as a Video.
Additionally, you can also convert the LivePhotos to videos using the shortcut app.
Part 4 How to save videos as live photos on your iPhone?
If you need to convert your videos to live photos on iPhone, there are several third-party tools available and one of the widely used is IntoLive. Using this app, videos, as well as GIFs, can be converted into live photos.
Steps on how to turn a video into a live photo iPhone
Step 1. Download, install and launch the IntoLive app from the app store.
Step 2. Next, browse and add the desired video.
Step 3. If needed, the added video can be customized using several supported features.
Step 4. Next, click on the Make option at the top-right corner and then choose the repeats you want for a Live Photo.
Step 5. Finally, click on the Live Photo and your Live Photo will be saved to the device.
Part 5 Best tool for creating GIFs and video editing on your Windows and Mac- Wondershare Filmora
Above we have listed several ways to create GIFs on your iPhone and also to convert videos to LivePhotos and vice-versa. Installing different tools for different tasks is a hassle and also a time-consuming task. So, if you are looking for an all-in-one tool that allows you to create GIFs, and professionally edit your media files, Wondershare Filmora Video Editor is the best tool to consider. Available for quick download on your Windows and Mac system, this feature-packed software has an intuitive and user-friendly interface.
Wondershare Filmora
Get started easily with Filmora’s powerful performance, intuitive interface, and countless effects!
Try It Free Try It Free Try It Free Learn More >
Media files in all key formats are supported by the tool and there are multiple options for editing and video creation like splitting, rotating, cutting, adding effects, sounds, text, and other elements. In a few simple steps, your customized GIF and other professional-looking media files will be ready.
Steps to create GIF using Wondershare Filmora
Step 1. Launch the installed software on your system and add the video or images from the system.
Step 2. The added media files next need to be dragged and dropped to the timeline at the bottom of the interface.
Step 3. After the files are moved, you can customize them using several editing tools like rotate, crop, cut, and more.
Step 4. Next, add text, effects, sound, and other elements as needed.
Step 5. Finally choose to export the file and then from the Local tab, select the GIF option. Choose a file name and location and then finally click on the EXPORT button.
● Key Takeaways from This Episode →
●There are several ways to turn video into GIF iPhone.
●Using shortcuts is one of the most straightforward methods for creating GIFs using videos.
●You can also convert videos to LivePhoto and vice versa on your iPhone using third-party apps.
●Wondershare Filmora is an excellent software to make GIFs and professionally edit media files.
Great Ways to Make Claymation Videos
Ways You Can Master to Make Claymation Videos
An easy yet powerful editor
Numerous effects to choose from
Detailed tutorials provided by the official channel
Claymation videos appear to be more appealing as compared to other graphical or pictorial videos we create. However, some people still believe that making such a video is not their forte and that they cannot achieve mastery in the field.
So, if you have the same question and want to learn how to make a claymation video quickly and easily, stay tuned with us. In this article, we are covering all the relevant details to help you create the best claymation video possible and the outcome will be as expected. Let’s get started!
In this article
01 [What is Claymation and How It Works](#Part 1)
02 [History of Claymation Movies](#Part 2)
03 [6 Best Claymation Videos of All Time](#Part 3)
04 [How to Make Claymation Videos](#Part 4)
Part 1 What is Claymation and How It Works
With the name Claymation, you might be thinking that there is a use of clay in creating such videos. Well, you are right. These videos are representations of stop-motion animation, which is created with the help of plasticine clay.
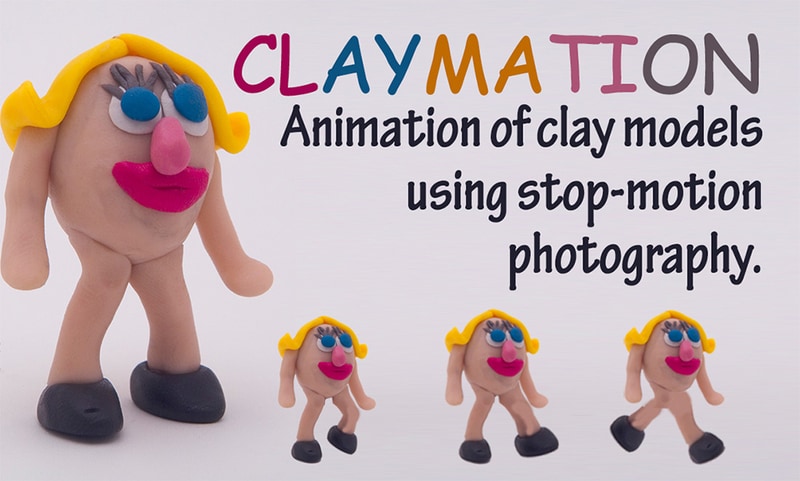
The use of platicsine is not only restricted to the animated characters, but these are also considered for creating the ultimate surroundings. The videos are recorded in such a manner that synchronization must be established with background and character, and viewers will be able to enjoy the same. After creating the videos, they are played in quick succession to get the right appearance of the movement.
Part 2 History of Claymation Movies
01The Beginning of Claymation Movies
Well, you will be surprised to know that the Claymation videos came into existence after the introduction of plasticine. It was founded in 189and since then, clamaytion videos have been able to find their way to silver screens. In earlier times, people used to dip their toes into color and then try to create artwork. But with innovation, the process has been changed and the oldest known extant clay animation film is Long Live the Bull (1926) by Joseph Sunn. The main procedure for creating this film is Claymation.

In the 190as well, there were some productions going on considering the claymation work, and some turned out to be successful, while some had no existence after that. For example, “Animated Putty” (1911), a historic feature by Walter R. Booth, dates back. So, yes, one can consider that this has existed for a very long time.
025 Famous Claymation Examples Over the Years
If we start exploring through some of the best examples of the past, you will be surprised to know that there are some claymation videos that still hit the top of the list of best movies around. These are as follows:
● The Nightmare Before Christmas
● The Life Aquatic with Steve Zissou
● Coraline
● The PJs
And there are some more that excel at utilizing claymation and teaching users how to make a claymation video. Some movies belong to the comedy genre, and some are related to fiction only through having a combination of friendship and others.
03A Look into the Art of Claymation for Film and Video Projects
Claymation has been around for a long time, and it’s becoming more popular. Small projects and big budget features alike are finding new and innovative ways to combine traditional models with other digital filmmaking methodologies like character animation, green screens, etc.
You can see that the team behind Missing Link went to great lengths to create an incredible looking production. They used both practical rigging systems and green screens as props. They used live-action footage and computer animation for more complex water and action sequences. All of them make it more appealing to the audience.
There are a lot of different ways you might want to get into claymation. Hand-drawn stop animation has seen an increase in popularity lately, with people looking for new ways to explore it. Drawing frames by hand is a really satisfying experience, not only because you have the chance to explore your interests and have some fun with them, but also because it pushes you creatively to explore new limits.
So yes, it is right to conclude that there is a great scope for claymation video production and one must be aware of claymation animators to try their hands on it.
Part 3 6 Best Claymation Videos of All Time
People have the curiosity to know the best claymation videos all the time. Well, according to us, the videos you can consider are as follows:
01The Boxtrolls
The Boxtrolls turned out to be one of the best Claymation movies produced to date.The response that was received was not overwhelming, but it came up with a unique setting of clay models and the animation given to this movie was perfect. Also, it received the chance to be premiered during the Venice Film Festival 2014.
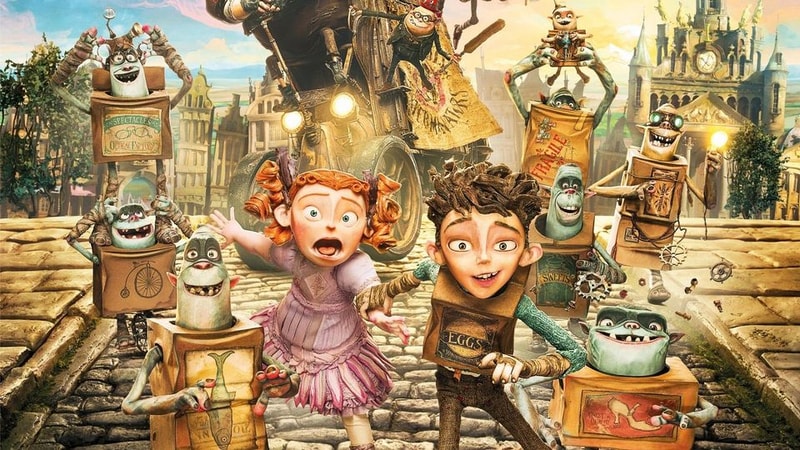
02Paranorman
Paranorman is among those claymation movies which cannot be the result of the dark effort put in by the producers. This movie focuses on children. It has different characters integrated, and the printed faces for each character have been utilized. This movie set good records, and children were very happy after seeing it on screen.
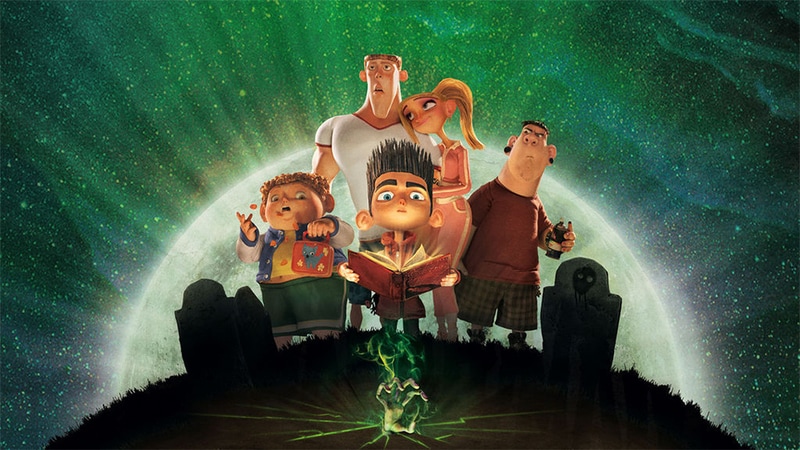
03Chicken run
Chicken Run was not the well-known Claymation video of the time, which was intended to be original cinematic peace. There was collaboration between Dreamworks and others to get this exceptional movie available on screen. The storey was so heart-touching, it’s no wonder it received a good response. Due to the availability of technology at that time, this movie was not able to set good records, but after it, most people are aware of the same.
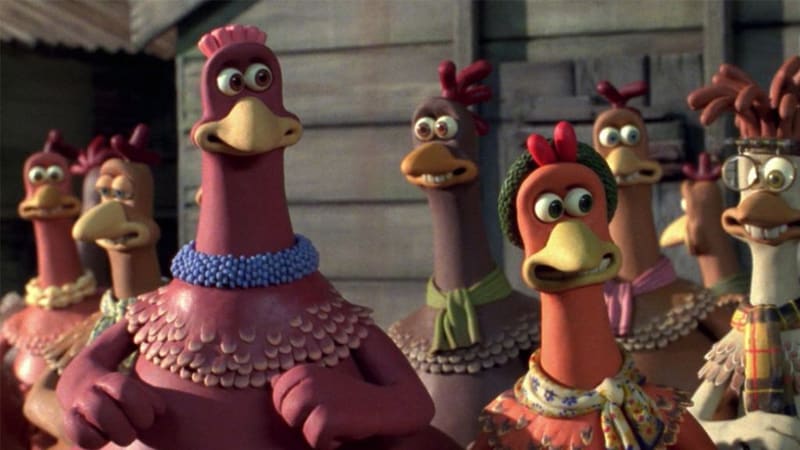
04Consuming Spirits
Consuming spirits come into consideration in 201and it is a story about three residents of a small rust belt town. They are somewhere, living an interconnected life, and things are not fine with them. Also, they are confused about how to fix things for a better lifestyle.

05A town called panic
A town called Panic came into existence in 200and it is an animated movie about a cowboy and an Indian. They are planning to construct a barbecue pit for the birthday but are facing a lot of difficulties in doing so. But somehow they managed to do so. The concept of this movie is quite different as compared to other Claymation movies.
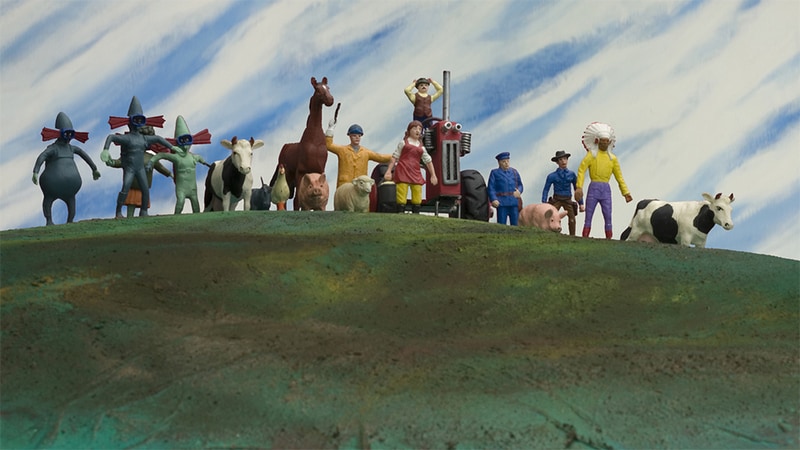
06The Year without a Santa Claus
The Year without a Santa Claus came into existence in 200This movie is focused on the spot where Santa Claus has taken off for the year and others are trying to save Christmas after this announcement. There is a lot more integrated in this movie to watch.
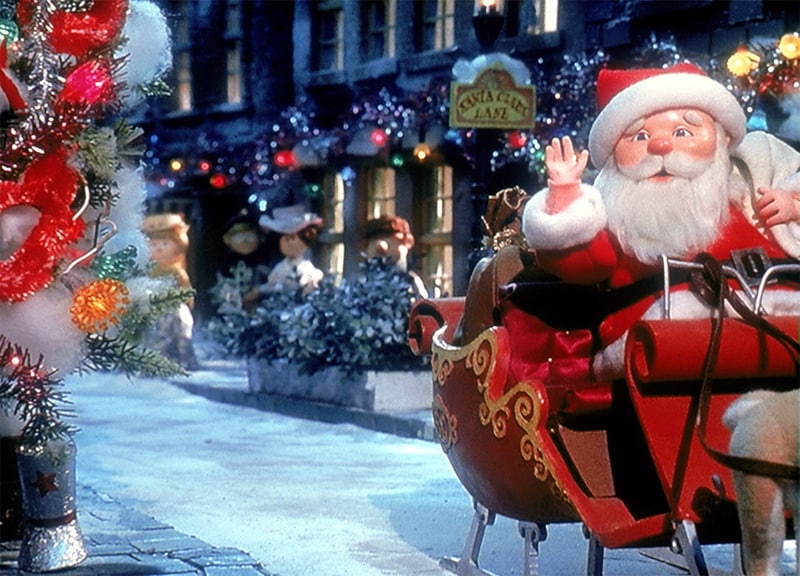
Part 4 How to Make Claymation Videos
If you are looking forward to trying your hands on claymation videos, do it now as this is very simple. For this, you only require a claymation animator like Wondershare Filmora Video Editor for the same. But before choosing it out, be sure to know the steps that will help you make the video easily.
Wondershare Filmora
Get started easily with Filmora’s powerful performance, intuitive interface, and countless effects!
Try It Free Try It Free Try It Free Learn More >
The steps you need to follow are:
Step 1 Make yourself available to the Claymation Animator (you can use Filmora for this task) and sign up for it.
Step 2 Now, to start the project, you need to lockout the photos that are under consideration for creating the project.
Step 3 Arrange all the photos in a sequential order or say whatever you want, and do the editing, considering the speed and other effects.
Step 4 After setting up the effects, review the same for finalization.
Step 5 After finalizing the effects, save the same.
These are the simple steps to follow if you want to create Claymation videos.
Well, as we have discussed Filmora, this is one of the best tools available to help you create claymation videos easily. This tool has an easy-to-use and navigate interface and will assist you in achieving your desired results.
Also, you will be happy to know that an abundance of features have been added to it, making it one of the most considerable tools to have. So, yes, if you are looking for how to create claymation videos, try it now and be ready to get the expected outcome.
● Key Takeaways from This Episode →
● Claymation videos are getting more digitalized.
● Filmora is one of the best claymation animators to use.
● Claymation videos can be edited easily and customised by the user easily.
Claymation videos appear to be more appealing as compared to other graphical or pictorial videos we create. However, some people still believe that making such a video is not their forte and that they cannot achieve mastery in the field.
So, if you have the same question and want to learn how to make a claymation video quickly and easily, stay tuned with us. In this article, we are covering all the relevant details to help you create the best claymation video possible and the outcome will be as expected. Let’s get started!
In this article
01 [What is Claymation and How It Works](#Part 1)
02 [History of Claymation Movies](#Part 2)
03 [6 Best Claymation Videos of All Time](#Part 3)
04 [How to Make Claymation Videos](#Part 4)
Part 1 What is Claymation and How It Works
With the name Claymation, you might be thinking that there is a use of clay in creating such videos. Well, you are right. These videos are representations of stop-motion animation, which is created with the help of plasticine clay.
The use of platicsine is not only restricted to the animated characters, but these are also considered for creating the ultimate surroundings. The videos are recorded in such a manner that synchronization must be established with background and character, and viewers will be able to enjoy the same. After creating the videos, they are played in quick succession to get the right appearance of the movement.
Part 2 History of Claymation Movies
01The Beginning of Claymation Movies
Well, you will be surprised to know that the Claymation videos came into existence after the introduction of plasticine. It was founded in 189and since then, clamaytion videos have been able to find their way to silver screens. In earlier times, people used to dip their toes into color and then try to create artwork. But with innovation, the process has been changed and the oldest known extant clay animation film is Long Live the Bull (1926) by Joseph Sunn. The main procedure for creating this film is Claymation.
In the 190as well, there were some productions going on considering the claymation work, and some turned out to be successful, while some had no existence after that. For example, “Animated Putty” (1911), a historic feature by Walter R. Booth, dates back. So, yes, one can consider that this has existed for a very long time.
025 Famous Claymation Examples Over the Years
If we start exploring through some of the best examples of the past, you will be surprised to know that there are some claymation videos that still hit the top of the list of best movies around. These are as follows:
● The Nightmare Before Christmas
● The Life Aquatic with Steve Zissou
● Coraline
● The PJs
And there are some more that excel at utilizing claymation and teaching users how to make a claymation video. Some movies belong to the comedy genre, and some are related to fiction only through having a combination of friendship and others.
03A Look into the Art of Claymation for Film and Video Projects
Claymation has been around for a long time, and it’s becoming more popular. Small projects and big budget features alike are finding new and innovative ways to combine traditional models with other digital filmmaking methodologies like character animation, green screens, etc.
You can see that the team behind Missing Link went to great lengths to create an incredible looking production. They used both practical rigging systems and green screens as props. They used live-action footage and computer animation for more complex water and action sequences. All of them make it more appealing to the audience.
There are a lot of different ways you might want to get into claymation. Hand-drawn stop animation has seen an increase in popularity lately, with people looking for new ways to explore it. Drawing frames by hand is a really satisfying experience, not only because you have the chance to explore your interests and have some fun with them, but also because it pushes you creatively to explore new limits.
So yes, it is right to conclude that there is a great scope for claymation video production and one must be aware of claymation animators to try their hands on it.
Part 3 6 Best Claymation Videos of All Time
People have the curiosity to know the best claymation videos all the time. Well, according to us, the videos you can consider are as follows:
01The Boxtrolls
The Boxtrolls turned out to be one of the best Claymation movies produced to date.The response that was received was not overwhelming, but it came up with a unique setting of clay models and the animation given to this movie was perfect. Also, it received the chance to be premiered during the Venice Film Festival 2014.
02Paranorman
Paranorman is among those claymation movies which cannot be the result of the dark effort put in by the producers. This movie focuses on children. It has different characters integrated, and the printed faces for each character have been utilized. This movie set good records, and children were very happy after seeing it on screen.
03Chicken run
Chicken Run was not the well-known Claymation video of the time, which was intended to be original cinematic peace. There was collaboration between Dreamworks and others to get this exceptional movie available on screen. The storey was so heart-touching, it’s no wonder it received a good response. Due to the availability of technology at that time, this movie was not able to set good records, but after it, most people are aware of the same.
04Consuming Spirits
Consuming spirits come into consideration in 201and it is a story about three residents of a small rust belt town. They are somewhere, living an interconnected life, and things are not fine with them. Also, they are confused about how to fix things for a better lifestyle.
05A town called panic
A town called Panic came into existence in 200and it is an animated movie about a cowboy and an Indian. They are planning to construct a barbecue pit for the birthday but are facing a lot of difficulties in doing so. But somehow they managed to do so. The concept of this movie is quite different as compared to other Claymation movies.
06The Year without a Santa Claus
The Year without a Santa Claus came into existence in 200This movie is focused on the spot where Santa Claus has taken off for the year and others are trying to save Christmas after this announcement. There is a lot more integrated in this movie to watch.
Part 4 How to Make Claymation Videos
If you are looking forward to trying your hands on claymation videos, do it now as this is very simple. For this, you only require a claymation animator like Wondershare Filmora Video Editor for the same. But before choosing it out, be sure to know the steps that will help you make the video easily.
Wondershare Filmora
Get started easily with Filmora’s powerful performance, intuitive interface, and countless effects!
Try It Free Try It Free Try It Free Learn More >
The steps you need to follow are:
Step 1 Make yourself available to the Claymation Animator (you can use Filmora for this task) and sign up for it.
Step 2 Now, to start the project, you need to lockout the photos that are under consideration for creating the project.
Step 3 Arrange all the photos in a sequential order or say whatever you want, and do the editing, considering the speed and other effects.
Step 4 After setting up the effects, review the same for finalization.
Step 5 After finalizing the effects, save the same.
These are the simple steps to follow if you want to create Claymation videos.
Well, as we have discussed Filmora, this is one of the best tools available to help you create claymation videos easily. This tool has an easy-to-use and navigate interface and will assist you in achieving your desired results.
Also, you will be happy to know that an abundance of features have been added to it, making it one of the most considerable tools to have. So, yes, if you are looking for how to create claymation videos, try it now and be ready to get the expected outcome.
● Key Takeaways from This Episode →
● Claymation videos are getting more digitalized.
● Filmora is one of the best claymation animators to use.
● Claymation videos can be edited easily and customised by the user easily.
How to Create Benime Whiteboard Animation on Android
How to Create Benime Whiteboard Animation in Android
An easy yet powerful editor
Numerous effects to choose from
Detailed tutorials provided by the official channel
Millions of people on social media would want to post the working system, information, and business policies on a topic. For this reason, such people need an easy way to make a good quality influential video in a short time. Although many applications can help you create animated videos.
In this article, we will be talking about whiteboard animation and, more specifically, about Benime whiteboard animation mod APK.
In this article
01 [What’s Benime Used for?](#Part 1)
02 [How to Create Benime Whiteboard Animation in Android](#Part 2)
Part 1 What’s Benime Used for?
Benime is the first doodle video creation application on Android devices that allows users to create professional and realistic doodle videos within minutes. It can add music and voice-over to audio, create presentations and marketing videos, and create a whiteboard animation using built-in assets.
One of the practical uses of Benime whiteboard animation is that it makes it very easy for anybody to create a professional whiteboard animation without any experience or knowledge in animation. With this application, you can use the built-in templates or decide to start from scratch using your drawings or images, then record yourself talking over the top of your work. It is one of the most active Android applications to explain ideas through a captivating animated video that can eventually increase your followers quickly.
It is used not just to explain information in an impersonal codon way but also to connect with your audience. By allowing your audience to show concern about what you are trying to showcase and evoking empathy.
It helps you get the audience to pay attention to the content you are creating by providing you with personalized graphics, colors, and images.
Benime is a great application that can help create an animated video using built-in assets. The application is flexible, user-friendly, and accessible via Benime whiteboard animation APK download. To download the Android application and make your desired video, you can also visit the Google play store to proceed with downloading the application as it contains advertisements and offers in-app purchases.
So, in short, we can say that Benime is valuable for,
● Whiteboard animation creation
● Inbuilt assets for video making
● Editing video with either voice, music, text, color
● Motion Slide animation
● Board background
● Supports online rendering of videos
● Instant preview functioning
● Sharing video in MP4 format
Part 2 How to Create Benime Whiteboard Animation in Android
We will also be giving you tips on all you need to know about creating a whiteboard animation:
● Write a script, whether it is a short script or a regular video. The whiteboard animation video might not succeed with exciting information and images and no coherent story. Since it is not a set of bullet points, storyboards, or blog stories, having a proper script is everything you need.
● Next is to start your storyboard to help you organize your thoughts much better. By creating a storyboard, you have a good idea of how the final product will look like and the transition of the story.
● Create memorable photos that will excite your audience. Perhaps if you are a creative person, this part will be much easier as all you need is to create a unique and fun image that will help pass the information that she wants to get across.
● Animates the created images and finds clearance between your script and the photos.
● Record the audio, which is the final step to ensure a perfectly synchronized audio and content.
Benime Whiteboard Animation application offers tons of features that can be used to enhance whiteboard animation creation. More so, here is a step-by-guide on how to use the Benime application more effectively and efficiently in creating a whiteboard animation:
01Software Download
First, download and install the Benime application on your phone and then open it.
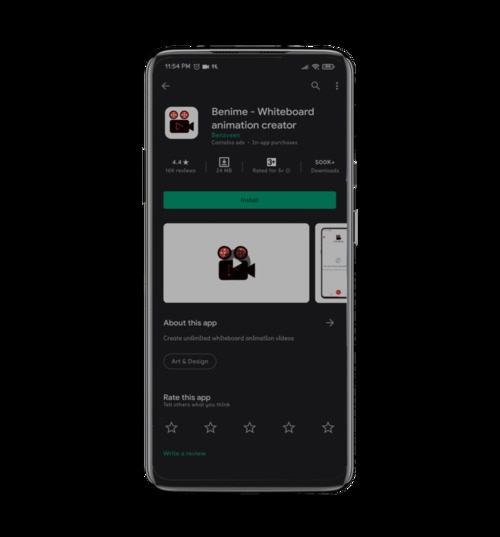
02Create New Video
Click on the + sign to make a new video. Enter the video title, choose the desired video quality, and click Create a Movie.
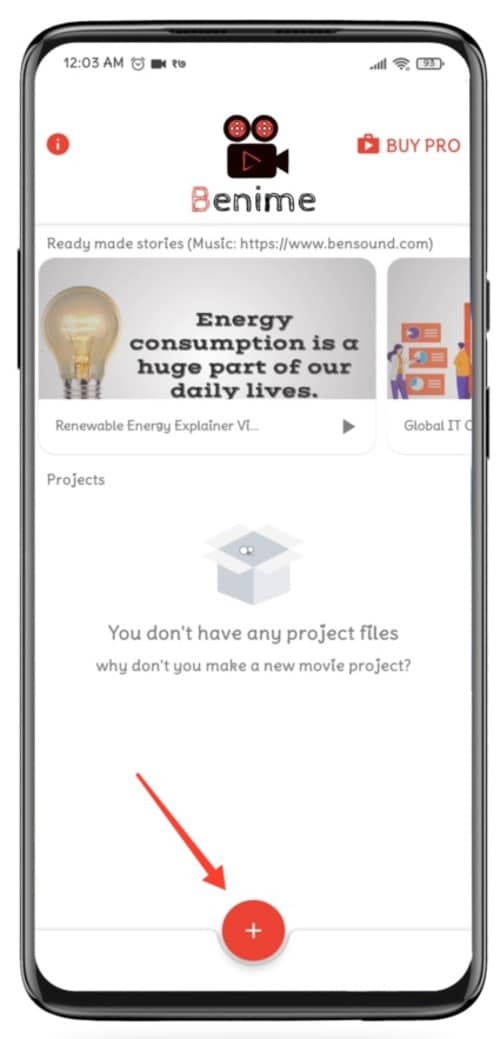
03Enter Text
A blank slide will be visible, where you will make changes, tap the Text option to enter the text.
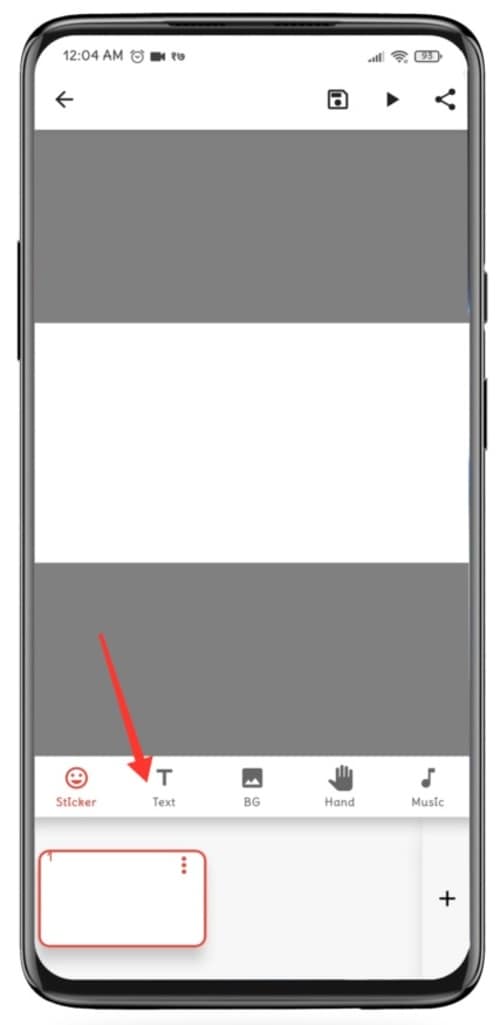
04Edit Text
After entering your desired text, click on the Insert option. The text size can be changeable by swiping to the left or right on the size line. More so, you can edit the color of the text by clicking on the color option. You can also change and use the application by clicking on the hand option. Background color change can go with the BG option.
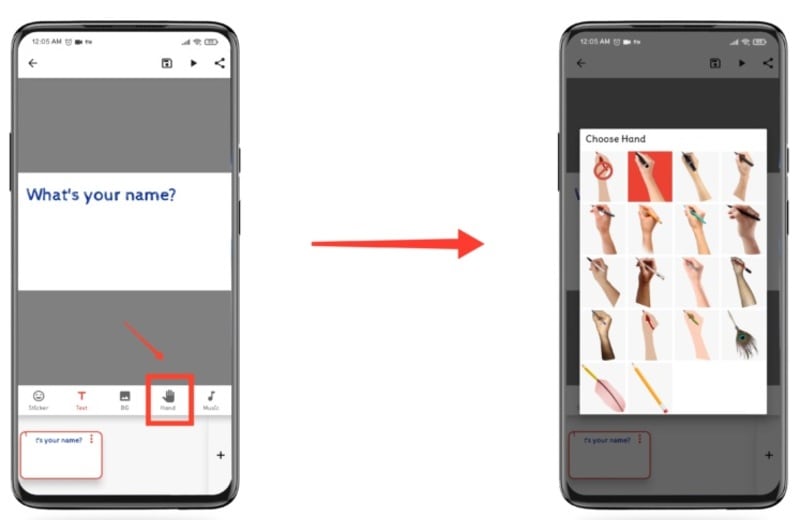
If you want to insert some characters, drawings, pictures, etc. Click on the sticker option at the bottom left and then slide to the right at the top to choose the icon or image that you want to insert.
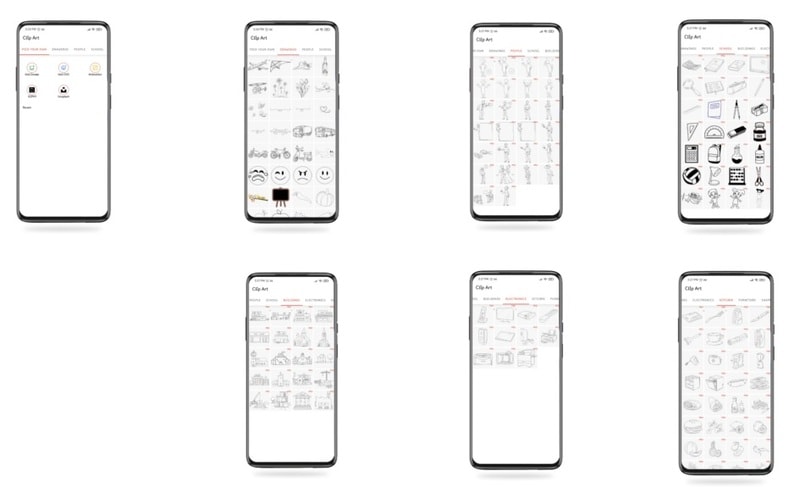
05Add Audio
After you are ok with the text and image, you can now add your voice over or music by clicking on any of the two options: voice over and music track.
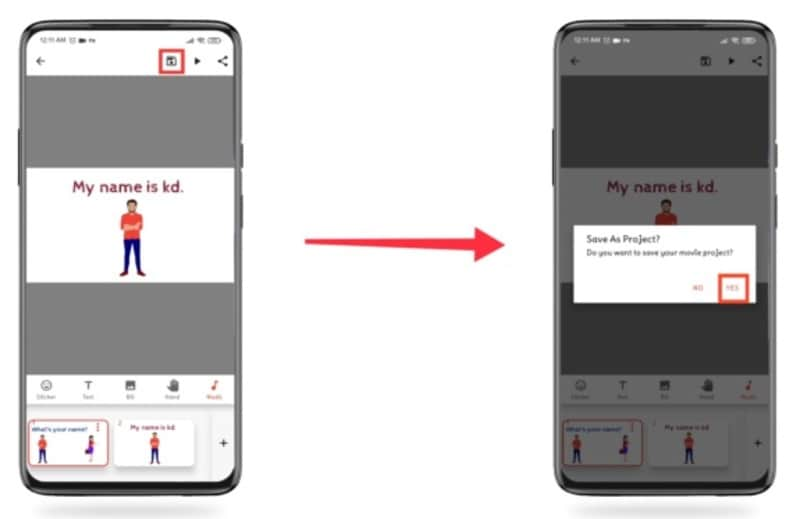
05Create and Share your Video
Lastly, click on the Save icon and then click on Yes. Then insert the name of the video and click on Make movie. Instantly the video will enter the rendering mode, and after this process, you will get the option of playing and sharing the film. Select the one you wish.
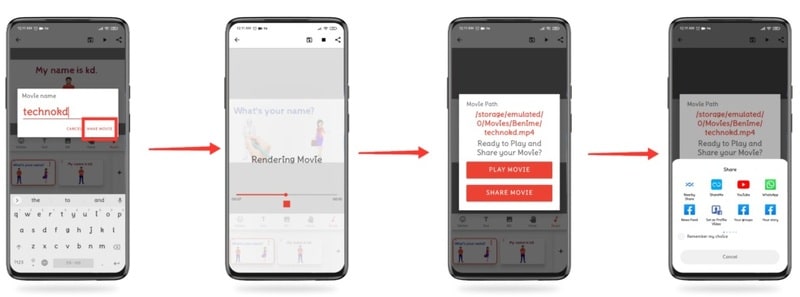
Benime Whiteboard animation can also be on PC via varieties of software. However, the Filmora software has proven to be one of the best because of its features. While working or creating a storyboard, the most aptly used software is Filmora. That will make it easy to create whiteboard animation with lots and lots of editing options in terms of transparency, 2D/animation, smooth keyframing, and a lot more.
Part 3 PC Tools Useful For Whiteboard Animation
01Renderforest Whiteboard Animation
Renderforest whiteboard animation: This is a free whiteboard animation tool that creates exciting and unique animation stories, a cloud-based program that does not need a powerful machine. It weeds hundreds of ready-made scenes to enhance your whiteboard animation stories
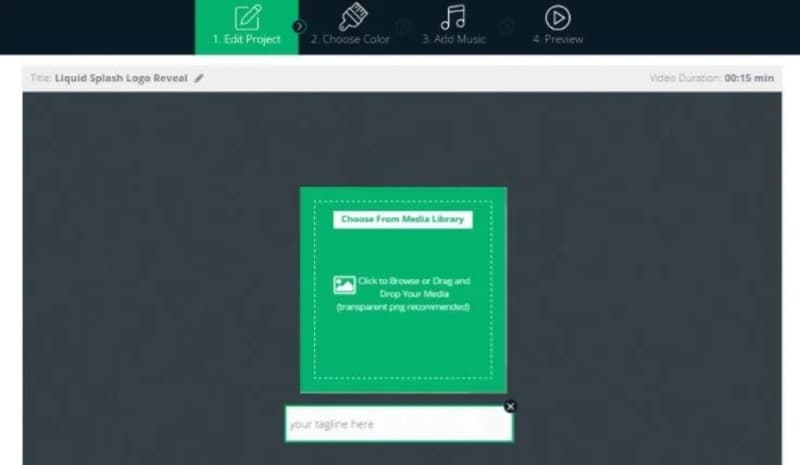
02Powtoon Whiteboard Animation
This can make a whiteboard animation very quickly for free, with an object to touch up video and free royalty music to make your whiteboard animation perfect.
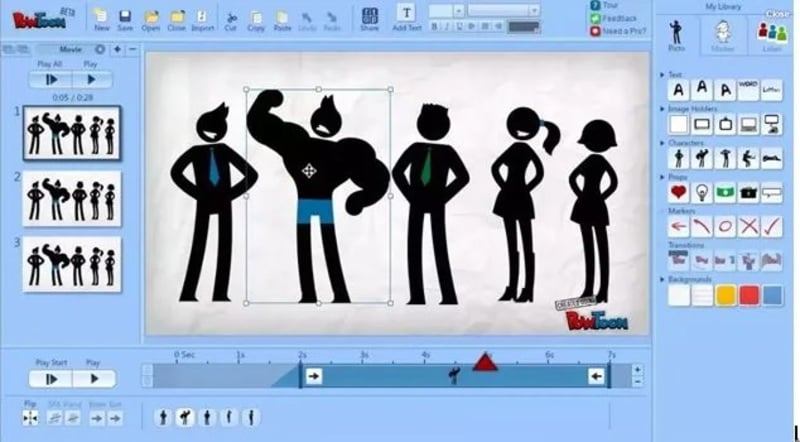
03Fiverr Whiteboard Animation
If looking for different whiteboard and animation explainers, Fiverr whiteboard animation will be the right choice. That will assist you in how to keep or engage your audience with proper explanation.
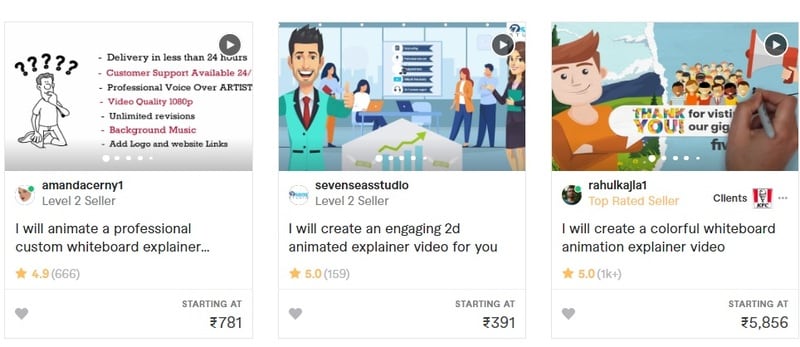
04Whiteboard Animation Videoscribe
Being in the education domain is a noble cause, and you can enhance the delivery of quality education through Whiteboard Animation Videoscribe. That will give you the freedom to modify your content with animation drawing. However, it is a subscription-based service.
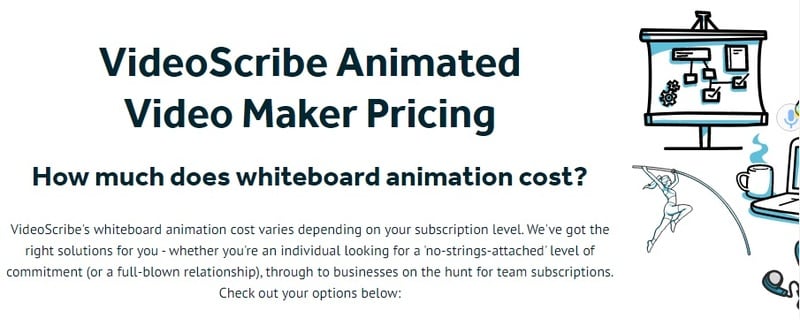
05Vyond Whiteboard Animation
Vyond whiteboard animation provides you with in-house whiteboard animated video production solutions for educational, professional, or training purposes.
06Animaker Whiteboard Animation
This is another free whiteboard animation software used to make videos quickly with various functions. It includes a free-to-use option and a full video length that is enough. It supports a few props, characters, infographic icons, animated maps, charts, etc.
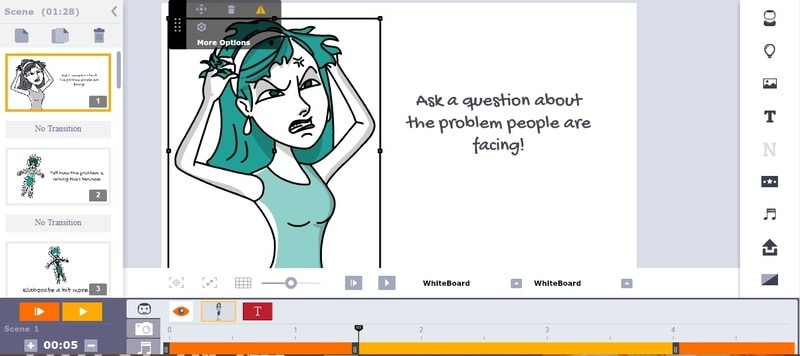
07Rawshorts Whiteboard Animation
This simple, easy-to-use whiteboard animation comes with an explainer video with a drag-and-drop interface. You can either start from nothing or choose between the animated whiteboard templates. Rendering and sharing the animated video in this software is super easy and comes with a Facebook, YouTube, and other social media platform integration. Anyone can use whether you are a beginner or professional, creating videos to show your client, training videos, and marketing videos that help demonstrate a strategy.
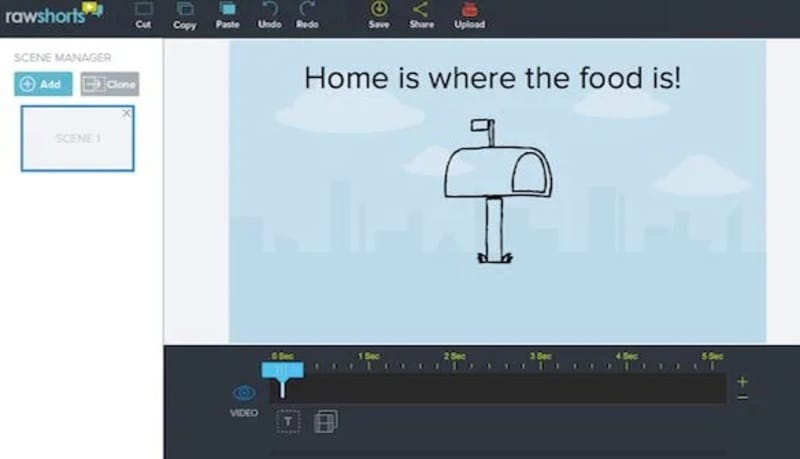
08Videojeeves Whiteboard Animation
This software has many whiteboard animation options, whether you are open to sharing something with your friends or creating a whiteboard animation for work. It helps to make your job easier and faster.
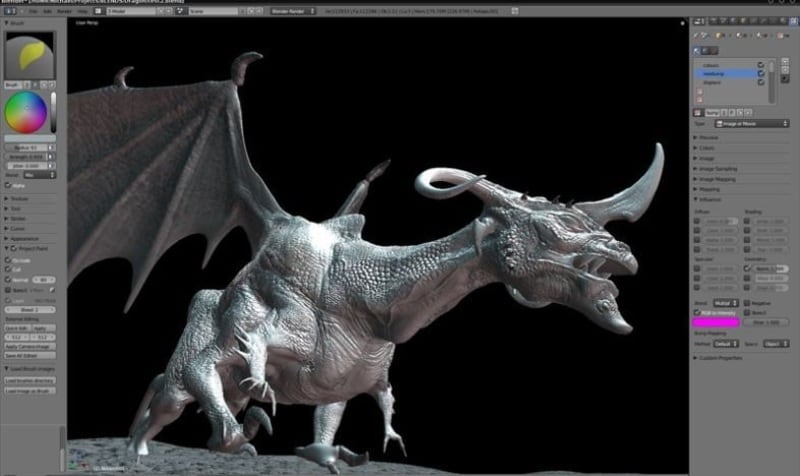
09Truscribe Whiteboard Animation
This premier software offers customers a dedicated plan when they are whiteboard animation videos can be created. With this software, the process can start when customers request a quote on their website, giving them more reliable information about the pricing and strategy.
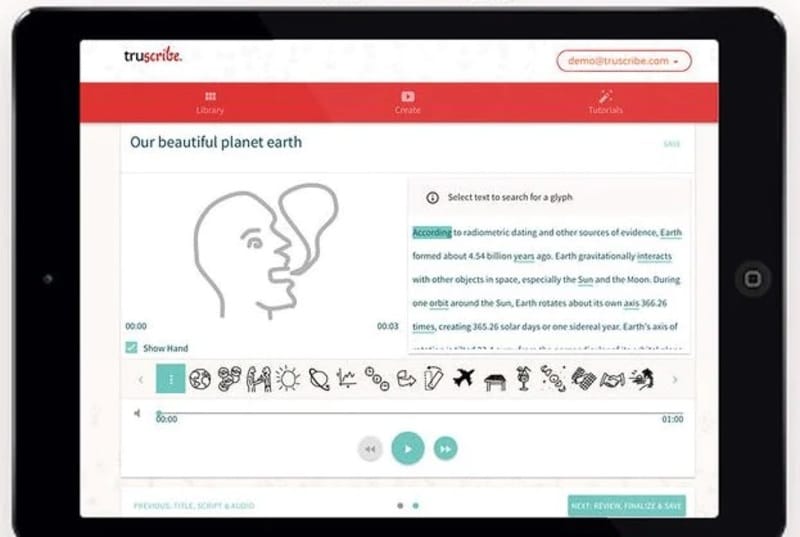
● Key Takeaways from This Episode →
● Basic functionality of Benime Whiteboard Animation software.
● How to create whiteboard animation with Benime.
● Whiteboard animation on PC with Filmora and some other relevant software.
Millions of people on social media would want to post the working system, information, and business policies on a topic. For this reason, such people need an easy way to make a good quality influential video in a short time. Although many applications can help you create animated videos.
In this article, we will be talking about whiteboard animation and, more specifically, about Benime whiteboard animation mod APK.
In this article
01 [What’s Benime Used for?](#Part 1)
02 [How to Create Benime Whiteboard Animation in Android](#Part 2)
Part 1 What’s Benime Used for?
Benime is the first doodle video creation application on Android devices that allows users to create professional and realistic doodle videos within minutes. It can add music and voice-over to audio, create presentations and marketing videos, and create a whiteboard animation using built-in assets.
One of the practical uses of Benime whiteboard animation is that it makes it very easy for anybody to create a professional whiteboard animation without any experience or knowledge in animation. With this application, you can use the built-in templates or decide to start from scratch using your drawings or images, then record yourself talking over the top of your work. It is one of the most active Android applications to explain ideas through a captivating animated video that can eventually increase your followers quickly.
It is used not just to explain information in an impersonal codon way but also to connect with your audience. By allowing your audience to show concern about what you are trying to showcase and evoking empathy.
It helps you get the audience to pay attention to the content you are creating by providing you with personalized graphics, colors, and images.
Benime is a great application that can help create an animated video using built-in assets. The application is flexible, user-friendly, and accessible via Benime whiteboard animation APK download. To download the Android application and make your desired video, you can also visit the Google play store to proceed with downloading the application as it contains advertisements and offers in-app purchases.
So, in short, we can say that Benime is valuable for,
● Whiteboard animation creation
● Inbuilt assets for video making
● Editing video with either voice, music, text, color
● Motion Slide animation
● Board background
● Supports online rendering of videos
● Instant preview functioning
● Sharing video in MP4 format
Part 2 How to Create Benime Whiteboard Animation in Android
We will also be giving you tips on all you need to know about creating a whiteboard animation:
● Write a script, whether it is a short script or a regular video. The whiteboard animation video might not succeed with exciting information and images and no coherent story. Since it is not a set of bullet points, storyboards, or blog stories, having a proper script is everything you need.
● Next is to start your storyboard to help you organize your thoughts much better. By creating a storyboard, you have a good idea of how the final product will look like and the transition of the story.
● Create memorable photos that will excite your audience. Perhaps if you are a creative person, this part will be much easier as all you need is to create a unique and fun image that will help pass the information that she wants to get across.
● Animates the created images and finds clearance between your script and the photos.
● Record the audio, which is the final step to ensure a perfectly synchronized audio and content.
Benime Whiteboard Animation application offers tons of features that can be used to enhance whiteboard animation creation. More so, here is a step-by-guide on how to use the Benime application more effectively and efficiently in creating a whiteboard animation:
01Software Download
First, download and install the Benime application on your phone and then open it.
02Create New Video
Click on the + sign to make a new video. Enter the video title, choose the desired video quality, and click Create a Movie.
03Enter Text
A blank slide will be visible, where you will make changes, tap the Text option to enter the text.
04Edit Text
After entering your desired text, click on the Insert option. The text size can be changeable by swiping to the left or right on the size line. More so, you can edit the color of the text by clicking on the color option. You can also change and use the application by clicking on the hand option. Background color change can go with the BG option.
If you want to insert some characters, drawings, pictures, etc. Click on the sticker option at the bottom left and then slide to the right at the top to choose the icon or image that you want to insert.
05Add Audio
After you are ok with the text and image, you can now add your voice over or music by clicking on any of the two options: voice over and music track.
05Create and Share your Video
Lastly, click on the Save icon and then click on Yes. Then insert the name of the video and click on Make movie. Instantly the video will enter the rendering mode, and after this process, you will get the option of playing and sharing the film. Select the one you wish.
Benime Whiteboard animation can also be on PC via varieties of software. However, the Filmora software has proven to be one of the best because of its features. While working or creating a storyboard, the most aptly used software is Filmora. That will make it easy to create whiteboard animation with lots and lots of editing options in terms of transparency, 2D/animation, smooth keyframing, and a lot more.
Part 3 PC Tools Useful For Whiteboard Animation
01Renderforest Whiteboard Animation
Renderforest whiteboard animation: This is a free whiteboard animation tool that creates exciting and unique animation stories, a cloud-based program that does not need a powerful machine. It weeds hundreds of ready-made scenes to enhance your whiteboard animation stories
02Powtoon Whiteboard Animation
This can make a whiteboard animation very quickly for free, with an object to touch up video and free royalty music to make your whiteboard animation perfect.
03Fiverr Whiteboard Animation
If looking for different whiteboard and animation explainers, Fiverr whiteboard animation will be the right choice. That will assist you in how to keep or engage your audience with proper explanation.
04Whiteboard Animation Videoscribe
Being in the education domain is a noble cause, and you can enhance the delivery of quality education through Whiteboard Animation Videoscribe. That will give you the freedom to modify your content with animation drawing. However, it is a subscription-based service.
05Vyond Whiteboard Animation
Vyond whiteboard animation provides you with in-house whiteboard animated video production solutions for educational, professional, or training purposes.
06Animaker Whiteboard Animation
This is another free whiteboard animation software used to make videos quickly with various functions. It includes a free-to-use option and a full video length that is enough. It supports a few props, characters, infographic icons, animated maps, charts, etc.
07Rawshorts Whiteboard Animation
This simple, easy-to-use whiteboard animation comes with an explainer video with a drag-and-drop interface. You can either start from nothing or choose between the animated whiteboard templates. Rendering and sharing the animated video in this software is super easy and comes with a Facebook, YouTube, and other social media platform integration. Anyone can use whether you are a beginner or professional, creating videos to show your client, training videos, and marketing videos that help demonstrate a strategy.
08Videojeeves Whiteboard Animation
This software has many whiteboard animation options, whether you are open to sharing something with your friends or creating a whiteboard animation for work. It helps to make your job easier and faster.
09Truscribe Whiteboard Animation
This premier software offers customers a dedicated plan when they are whiteboard animation videos can be created. With this software, the process can start when customers request a quote on their website, giving them more reliable information about the pricing and strategy.
● Key Takeaways from This Episode →
● Basic functionality of Benime Whiteboard Animation software.
● How to create whiteboard animation with Benime.
● Whiteboard animation on PC with Filmora and some other relevant software.
Also read:
- Updated In 2024, 10 Best Photoshop Cartoon Effects For Creatives
- A Beginners Guide to Explain What 3D Animation Is
- New 10 Top Memorable Japanese Cat Cartoons for 2024
- Updated How to Make Photo Motion Effect Online, In 2024
- New The Complete Guide to Whiteboard Animation for 2024
- Updated Best Canva 10 Animated Templates for 2024
- Best 10 Video to GIF Converters Top Picks for 2024
- Updated How to Make an Animated Travel Map Video?
- What Is A GIF
- Updated In 2024, Ways You Can Master to Make Claymation Videos
- Updated 2024 Approved Learn Disney Cartoon Drawing to See Disney Magic Moments
- New In 2024, Tutorial on Making Unity 2D Animation
- Updated How to Make a GIF in Photoshop
- New 2024 Approved Incredible Ways to Find Suitable Animated Graphic Maker
- 2024 Approved What Is Still Motion Animation and How Does It Work?
- How to Liven Up Your Animate Website on Scroll
- Updated 2024 Approved The Best 8 Places for High-Quality Royalty Free Gifs
- Updated How to Find & Make Animated Christmas GIFs for 2024
- Updated In 2024, Simple Guide to Create New and Exciting Blackboard Animation
- 2024 Approved Step-by-Step Guide to Send Gif WhatsApp on Android
- New 10 Must-Use MP4 to GIF Converters to Get Perfect-Made GIF
- New 2024 Approved Is It That Easy to Make My Animated Character
- In 2024, Adobe Animate Text Effects Skills You Need to Know
- New 2024 Approved Top 15 Male Anime Characters By Voting
- In 2024, 10 Trendy & Stylish Free Logo Animation Templates
- 2024 Approved 15 Best Stop Motion Animation Kits to Fuel Creativity
- New Complete Guide to Send Gif WhatsApp on Android for 2024
- New In 2024, Top 3 Ways to Create Gif Images with Great 3D Gif Maker
- Updated Tutorials to Make Animated Images for 2024
- In 2024, How to Make GIF Stickers for WhatsApp 100 The Simple Way
- Updated 2024 Approved Finding The Best Animated Profile Picture Maker
- How to Cartoonize Photo Photoshop in Simple Steps for 2024
- Updated 2024 Approved How to Create a Whiteboard Video Step by Step
- Updated 2024 Approved 10 Most Memorable Japanese Cat Cartoons
- Updated Can I Do Animated Logo Design Without Design Skills for 2024
- Updated 2024 Approved 10 Cartoon Canvas Painting Ideas for Total Beginners
- Updated Little Known Techniques of Motion Graphics in Premiere Pro for 2024
- 2024 Approved 15 Types of Cartoon Drawing Styles Examples
- New 2024 Approved What Is Motion Graphics
- New Great Guide for Beginners on 2D Animation Making for 2024
- 6 Solutions to Fix Error 505 in Google Play Store on OnePlus 11 5G | Dr.fone
- 4 Ways to Transfer Music from Vivo S17 to iPhone | Dr.fone
- In 2024, A Perfect Guide To Remove or Disable Google Smart Lock On Motorola Moto G34 5G
- Updated In 2024, What Is an AI Video Editor?
- 3 Effective Methods to Fake GPS location on Android For your Motorola Moto G73 5G | Dr.fone
- Which Pokémon can Evolve with a Moon Stone For Apple iPhone 15? | Dr.fone
- How to Restore Deleted Nokia C210 Pictures An Easy Method Explained.
- In 2024, 5 Ways To Teach You To Transfer Files from Nokia C12 to Other Android Devices Easily | Dr.fone
- How Can Honor Magic 6 ProMirror Share to PC? | Dr.fone
- Guide on How To Change Your Apple ID Email Address On Apple iPhone 12 mini | Dr.fone
- Full Guide How To Fix Connection Is Not Private on Vivo Y200e 5G | Dr.fone
- Why Your WhatsApp Live Location is Not Updating and How to Fix on your Realme GT 5 | Dr.fone
- In 2024, How Can You Transfer Files From Vivo Y100A To iPhone 15/14/13? | Dr.fone
- Bypass iPhone 13 activation lock with a professional tool
- How To Unlock Stolen Apple iPhone SE (2022) In Different Conditionsin | Dr.fone
- How to Unlock iPhone XS Max with a Mask On
- In 2024, Easiest Guide How to Clone Realme GT Neo 5 SE Phone? | Dr.fone
- How to Detect and Stop mSpy from Spying on Your Apple iPhone 11 Pro | Dr.fone
- Life360 Learn How Everything Works On Vivo T2 Pro 5G | Dr.fone
- OnePlus Open Not Connecting to Wi-Fi? 12 Quick Ways to Fix | Dr.fone
- Best 10 Free and Best Text-to-Speech Generators for 2024
- In 2024, How To Unlock SIM Cards Of Oppo Reno 11 5G Without PUK Codes
- 3 Solutions to Hard Reset Sony Xperia 5 V Phone Using PC | Dr.fone
- In 2024, How to Transfer Contacts from OnePlus Nord N30 5G to Other Android Devices Using Bluetooth? | Dr.fone
- Latest Guide How To Bypass Nokia C12 FRP Without Computer
- Looking For A Location Changer On Realme GT 5? Look No Further | Dr.fone
- In 2024, The Magnificent Art of Pokemon Go Streaming On Itel P55T? | Dr.fone
- Best Methods for ZTE Nubia Z60 Ultra Wont Turn On | Dr.fone
- In 2024, How to fix iCloud lock on your Apple iPhone 15 Pro Max and iPad
- In 2024, Remove Device Supervision From your iPhone 6 Plus
- In 2024, Dose Life360 Notify Me When Someone Checks My Location On Honor Magic 5 Lite? | Dr.fone
- Ultimate Guide from Oppo A2 FRP Bypass
- How To Fix Unresponsive Phone Touchscreen Of Honor X50 GT | Dr.fone
- How to Restore Deleted Vivo V30 Contacts An Easy Method Explained.
- Google Play Services Wont Update? 12 Fixes are Here on Huawei Nova Y91 | Dr.fone
- The Best Android Unlock Software For Oppo A78 5G Device Top 5 Picks to Remove Android Locks
- Why Does My Realme V30T Keep Turning Off By Itself? 6 Fixes Are Here | Dr.fone
- Title: New In 2024, How to Reduce GIF Size and Best GIF Resizers
- Author: Elon
- Created at : 2024-05-19 03:05:40
- Updated at : 2024-05-20 03:05:40
- Link: https://animation-videos.techidaily.com/new-in-2024-how-to-reduce-gif-size-and-best-gif-resizers/
- License: This work is licensed under CC BY-NC-SA 4.0.
