

New In 2024, How to Send and Add Snapchat GIFs 100 The Easy Way
How to Send and Add Snapchat GIFs 100% The Easy Way
How to Send and Add Snapchat GIFs 100% The Easy Way
An easy yet powerful editor
Numerous effects to choose from
Detailed tutorials provided by the official channel
GIFs make texting so much more fun. You can express many emotions and include entertaining animations to give your messages a human touch. Users may share and receive GIFs on most social networking networks, and Snapchat is no exception. We’ll show you how to send GIFs on Snapchat, whether you’re an Android or iOS user, in this article.
This covers instructions on how to get GIFs in Snapchat and how to transmit GIFs in chat rooms and on Snapchat Stories updates. Let’s get started.
In this article
01 [How to Send GIFs on Snapchat](#Part 1)
02 [How to Get GIFs on Snapchat Snaps and Messages?](#Part 2)
Part 1 How to Send GIFs on Snapchat
Here is a simple step guide on how to send Snapchat GIF:
Step 1: Take a photo
Start your Snapchat app as usual and snap a photo or video.

Step 2: Tap the Sticker icon
From the row on the right side of the screen, tap the Sticker icon.
To add a GIF to your photo or video, scroll down and select one. You can also use the search option to locate more particular GIFs by entering a term or phrase.

Step 3: Drag GIF
Drag the GIF you added to the screen’s desired location.
Pinch your screen to change the GIF’s size as needed.
Step 4: Save and Share
You can then share your Snap with other social networking platforms by sending it to your Stories, friends/contacts, or just saving it to your gallery.

Part 2 How to Get GIFs on Snapchat Snaps and Messages?
Getting a GIF on Snapchat can be tasking, but here is a simple guide to achieving that.
Step 1: Make use of a Gboard.
Enter the chat of the friend or person to whom you want to send the GIF and maximize or open the keyboard using the text bar.

Step 2: Select the GIF you want.
Choose a GIF from the collection or catalog that you’d want to utilize and submit it.

You can use the same snap to apply many stickers. Drag and drop it on the trashcan icon to get rid of it.
Here’s how to get Gboard on your Android device if it didn’t come with it:
• Download the Gboard from the Play Store or whichever playstore you want.
• Go to Settings> System> Languages and Input> Virtual Keyboard and select it.
• Double-check that Gboard is selected as your primary keyboard.
After that, grant any permissions it requires so that you can use it right away in Snapchat.
Now that it’s as simple as it gets, let’s send comparable GIFs utilizing iOS devices.
For iPhone/iPad:
For iPhone users, you must first download and install the giphy app on your phone. Once you have successfully set the giphy app as your default keyboard, you can send Snapchat GIFs chat by following the steps below:
Step 1: Press the Globe icon
Continuously press and hold the globe icon to the left of the space bar to reveal the available keyboard, then choose a specific or favorite GIF from the giphy list.

Step 2: Find GIF
Find the GIF you wish to send and tap it to copy it.

Step 3: Paste GIF
Return to the conversation, paste the GIF into the text box, and press the send button.

For those who don’t know how to use the Giphy app on their iPhones or iPads, read the following instructions:
• Go to the Settings menu and pick the General icon.
•To see your keyboard options, go to the keyboard setting and tap it.
• To see the accessible keyboard, tap on the part labelled keyboard.
• Select Add a New Keyboard.
• The Giphy keyboard will undoubtedly be among the third-party keyboards.
• Once you’ve included or added the keyboard, it’ll appear in the “active keyboard” section.
• Select the Allow Full Access option.
Have you heard of Filmora before? I’m afraid not, Wondershare Filmora Video Editor is a video editing program that allows you to edit videos in various ways.
It’s exciting and amusing to make your animated GIF from any video or photo. Due to their large size, video scenes might be challenging to manage, but GIFs are perfect for profile posts and sharing with friends as simple jokes.
However, if you wish to create a GIF online, Filmora’s online meme maker is the ideal choice. You may use it to make a watermark-free photo, GIF, and video memes. It is free to use, and there is no need to register. You can change the text size, color, and position when you’re altering a caption. You can also add text to the inside or outside in a GIF.
Wondershare Filmora
Get started easily with Filmora’s powerful performance, intuitive interface, and countless effects!
Try It Free Try It Free Try It Free Learn More >

GIFs may be created from a collection of static photographs or even moving movies, and the process is effortless enough for anyone to do. We recommend Wondershare Filmora for you to complete this task quickly and easily. The rationale for this suggestion is the software tool’s user-friendly and engaging interface. You can soon mix a lot of stills into GIFs or convert small videos into GIFs with Filmora. What’s more, the Filmora platform enables easy modification of GIFs, with users able to add overlays, components, and text to their GIFs.
● Key Takeaways from This Episode →
● You must have gotten one or two tips on how to send and add Snapchat GIFs, all that is for you is to grab your phone, be it an Android or iOS, and make your chat, conversations, photos, and videos more interesting by making use of GIFs on Snapchat.
● iPhone users must ensure that the Giphy app is installed to achieve this.It is also important to note that you can create your exciting GIFs using Wondershare Filmora, and this can help you easily create an awesome GIF in no time. Get to it!!
GIFs make texting so much more fun. You can express many emotions and include entertaining animations to give your messages a human touch. Users may share and receive GIFs on most social networking networks, and Snapchat is no exception. We’ll show you how to send GIFs on Snapchat, whether you’re an Android or iOS user, in this article.
This covers instructions on how to get GIFs in Snapchat and how to transmit GIFs in chat rooms and on Snapchat Stories updates. Let’s get started.
In this article
01 [How to Send GIFs on Snapchat](#Part 1)
02 [How to Get GIFs on Snapchat Snaps and Messages?](#Part 2)
Part 1 How to Send GIFs on Snapchat
Here is a simple step guide on how to send Snapchat GIF:
Step 1: Take a photo
Start your Snapchat app as usual and snap a photo or video.
Step 2: Tap the Sticker icon
From the row on the right side of the screen, tap the Sticker icon.
To add a GIF to your photo or video, scroll down and select one. You can also use the search option to locate more particular GIFs by entering a term or phrase.
Step 3: Drag GIF
Drag the GIF you added to the screen’s desired location.
Pinch your screen to change the GIF’s size as needed.
Step 4: Save and Share
You can then share your Snap with other social networking platforms by sending it to your Stories, friends/contacts, or just saving it to your gallery.
Part 2 How to Get GIFs on Snapchat Snaps and Messages?
Getting a GIF on Snapchat can be tasking, but here is a simple guide to achieving that.
Step 1: Make use of a Gboard.
Enter the chat of the friend or person to whom you want to send the GIF and maximize or open the keyboard using the text bar.
Step 2: Select the GIF you want.
Choose a GIF from the collection or catalog that you’d want to utilize and submit it.
You can use the same snap to apply many stickers. Drag and drop it on the trashcan icon to get rid of it.
Here’s how to get Gboard on your Android device if it didn’t come with it:
• Download the Gboard from the Play Store or whichever playstore you want.
• Go to Settings> System> Languages and Input> Virtual Keyboard and select it.
• Double-check that Gboard is selected as your primary keyboard.
After that, grant any permissions it requires so that you can use it right away in Snapchat.
Now that it’s as simple as it gets, let’s send comparable GIFs utilizing iOS devices.
For iPhone/iPad:
For iPhone users, you must first download and install the giphy app on your phone. Once you have successfully set the giphy app as your default keyboard, you can send Snapchat GIFs chat by following the steps below:
Step 1: Press the Globe icon
Continuously press and hold the globe icon to the left of the space bar to reveal the available keyboard, then choose a specific or favorite GIF from the giphy list.
Step 2: Find GIF
Find the GIF you wish to send and tap it to copy it.
Step 3: Paste GIF
Return to the conversation, paste the GIF into the text box, and press the send button.
For those who don’t know how to use the Giphy app on their iPhones or iPads, read the following instructions:
• Go to the Settings menu and pick the General icon.
•To see your keyboard options, go to the keyboard setting and tap it.
• To see the accessible keyboard, tap on the part labelled keyboard.
• Select Add a New Keyboard.
• The Giphy keyboard will undoubtedly be among the third-party keyboards.
• Once you’ve included or added the keyboard, it’ll appear in the “active keyboard” section.
• Select the Allow Full Access option.
Have you heard of Filmora before? I’m afraid not, Wondershare Filmora Video Editor is a video editing program that allows you to edit videos in various ways.
It’s exciting and amusing to make your animated GIF from any video or photo. Due to their large size, video scenes might be challenging to manage, but GIFs are perfect for profile posts and sharing with friends as simple jokes.
However, if you wish to create a GIF online, Filmora’s online meme maker is the ideal choice. You may use it to make a watermark-free photo, GIF, and video memes. It is free to use, and there is no need to register. You can change the text size, color, and position when you’re altering a caption. You can also add text to the inside or outside in a GIF.
Wondershare Filmora
Get started easily with Filmora’s powerful performance, intuitive interface, and countless effects!
Try It Free Try It Free Try It Free Learn More >
GIFs may be created from a collection of static photographs or even moving movies, and the process is effortless enough for anyone to do. We recommend Wondershare Filmora for you to complete this task quickly and easily. The rationale for this suggestion is the software tool’s user-friendly and engaging interface. You can soon mix a lot of stills into GIFs or convert small videos into GIFs with Filmora. What’s more, the Filmora platform enables easy modification of GIFs, with users able to add overlays, components, and text to their GIFs.
● Key Takeaways from This Episode →
● You must have gotten one or two tips on how to send and add Snapchat GIFs, all that is for you is to grab your phone, be it an Android or iOS, and make your chat, conversations, photos, and videos more interesting by making use of GIFs on Snapchat.
● iPhone users must ensure that the Giphy app is installed to achieve this.It is also important to note that you can create your exciting GIFs using Wondershare Filmora, and this can help you easily create an awesome GIF in no time. Get to it!!
Animated Collage Maker Tips
Versatile Video Editor - Wondershare Filmora
An easy yet powerful editor
Numerous effects to choose from
Detailed tutorials provided by the official channel
Using collections of pictures, you can create a collage and animate it to excite the audience. The animated collage maker eases this task and aids in creating the collage as a pro editor. Manually, you would have seen many images pasted on a single sheet conveying a meaningful message overall. A similar scenario happens when you do them digitally. You can build a collage with the help of a wide range of images. Mostly these are used to excite the viewers during special occasions like parties, anniversaries.

For the official purpose, the animated collage occupies the business webpages to enlighten the website visitors about the products and services. The animated collage has dual purposes that meet your personal and professional needs. In this article, you will learn about the animated collage making tools in detail and the best way in creating them efficiently. Choose the best program that satisfies your needs with more customizing properties. Scroll down to discover the best applications to build a collage that serves your needs precisely.
In this article
01 What is an animated collage maker?
02 Best 4 animated collage maker tools
Part 1: What is an animated collage maker?
The animated collage maker is a sophisticated program that imports the desired images into the working space and animate them using the in-built options. Before applying the animations to the collage, you can edit the images and bring the best out of your captures. The animated collage will convey a meaningful message to the audience. Here, you can add texts, pictures to express your emotions in the animation. If you closely watch the digital market, you will come across a wide range of applications serving this animation as per your requirements.

Every tool is unique and comprised of intellectual animation effects to include in your files to acquire the desired outcomes. You can also try collage making with the captured videos too. Any media files are sufficient to create a collage to attract the audience. Check for the compatibility of file formats when you choose any tool to perform this activity.
Part 2: Best 4 animated collage maker tools
In this section, you will learn about the unique tools that assist in making a collage using the media files and inserting your favorite animations to enhance interaction with the viewers. Every application is unique and they provide different elements to serve your design needs. Both the professionals and newbie users can try the below-discussed tools without any hesitation. They offer a simple environment and you can work on your images confidently to build interactive files for your needs.
The below discussion gives you valuable insights on the tools and the efficient way to employ them while creating a meaningful collage for your requirements. Surf them carefully and try the app that inspires you a lot.
2.1 Photos.google.com
The Google platform serves you with the making of collages using the captured media files. Step into this environment to create a collage for your needs hassle-free. First, go to photos.google.com and log in to your Google account. Then, click Utilities and press ‘Create new -> Animation or Collage’. Add the images from its storage space and tap the ‘Create’ button. It is a simple method and you can create a collage in no time. Without downloading any application, you can build an animated collage for your requirements. You can use any number of images during the making of the collage process.

There are options to include videos too. You can choose the perfect files as per your desires. It is a built-in application provided by Google to build their collage by including the stored images or videos in this virtual space.
**2.2 Canva
The Canva is an incredible program that offers excellent editing options on the media files. You can either make a video or image collage using this platform. While making the collage, you can add texts to convey a thousand meanings to the audience. Use the animated collage files to narrate stories based on your theme. Canva is widely used by professionals and you can use it to create a collage for official and personal use. The fabulous template collections give you a wow feeling when you step into the working space. The sophisticated environment and the controls are explicitly visible for quick reach.

To create a collage using Canva, launch the application and choose the base template for this process from its libraries. Then, navigate the folders and select the media files to upload them into this design interface. Next, customize it by adding stickers, changing the colors, inserting texts to add flavors to the existing content. Edit the videos with basic customizing options like trim, crop, and rotate. Finally, tap the create a video collage button to build an animated collage file in MP4 format. Download it and use them on any platform flawlessly.
**2.3 Filmora
The Filmora is a sophisticated tool that creates miracles with the media files. You can use this application as an editor in modifying the details precisely to enhance its appearance. Using the image and video files you can create a wide range of GIFs and other animated images in no time. This platform offers excellent editing options to grab the attention of the audience. It serves as a reliable program for professionals to make the best out of the captured images.
Wondershare Filmora - Best Video Editor for Mac/Windows
5,481,435 people have downloaded it.
Unleash your imagination while customizing the media files
It has a simple interface and aids you in personalizing the pictures limitlessly.
The built-in templates and toolbox excite you when performing miraculous changes to your images and videos.
Export and import the files effortlessly despite file sizes and locations.
The availability of the tutorials guides even a newbie to use all its functionalities precisely.
You can use the customizing elements to animate the GIFs and include texts and overlays as per your needs. It is an excellent application that performs beyond your expectations.
**2.4 Kizoa
It is an online **animated collage maker that serves you with dozens of templates. You can either create a collage from scratch or use the in-built templates to make your work easy. Step into its website and log in to build your favorite collage using the collection of media files. Choose the templates and upload the images or videos. You can add some effects to enhance its movements and finally click the create button to complete the process. Make an instant share to desired media platform using the export option. It is a fabulous online tool that offers you a comfortable space to bring wonders to your images. Create an interactive and animated collage to entertain the audience to the core. Use this program without any hesitation because the automated wizard will guide you to proceed forward with the respective pop-up messages.

These are the ideal and productive animated collage maker tools that excel in the digital space. They are reliable and you can opt for them even without any second thought. The online and offline programs aid in making the best out of the captured media files. Choose the one that meets your needs and proceed with the making of the animated collage to entertain your guests during special occasions.
**Conclusion
Thus, this article had given you enlightening insights about the best - animated collage makers at the online platform. The above-discussed applications are highly performable and they serve your needs without any excuses. Use the Filmora app to perform multitasking on your media files and add extra detail to your animated images or videos with the help of the in-built elements. Stay connected with this article to discover new horizons about the collage maker tools.
Using collections of pictures, you can create a collage and animate it to excite the audience. The animated collage maker eases this task and aids in creating the collage as a pro editor. Manually, you would have seen many images pasted on a single sheet conveying a meaningful message overall. A similar scenario happens when you do them digitally. You can build a collage with the help of a wide range of images. Mostly these are used to excite the viewers during special occasions like parties, anniversaries.
For the official purpose, the animated collage occupies the business webpages to enlighten the website visitors about the products and services. The animated collage has dual purposes that meet your personal and professional needs. In this article, you will learn about the animated collage making tools in detail and the best way in creating them efficiently. Choose the best program that satisfies your needs with more customizing properties. Scroll down to discover the best applications to build a collage that serves your needs precisely.
In this article
01 What is an animated collage maker?
02 Best 4 animated collage maker tools
Part 1: What is an animated collage maker?
The animated collage maker is a sophisticated program that imports the desired images into the working space and animate them using the in-built options. Before applying the animations to the collage, you can edit the images and bring the best out of your captures. The animated collage will convey a meaningful message to the audience. Here, you can add texts, pictures to express your emotions in the animation. If you closely watch the digital market, you will come across a wide range of applications serving this animation as per your requirements.
Every tool is unique and comprised of intellectual animation effects to include in your files to acquire the desired outcomes. You can also try collage making with the captured videos too. Any media files are sufficient to create a collage to attract the audience. Check for the compatibility of file formats when you choose any tool to perform this activity.
Part 2: Best 4 animated collage maker tools
In this section, you will learn about the unique tools that assist in making a collage using the media files and inserting your favorite animations to enhance interaction with the viewers. Every application is unique and they provide different elements to serve your design needs. Both the professionals and newbie users can try the below-discussed tools without any hesitation. They offer a simple environment and you can work on your images confidently to build interactive files for your needs.
The below discussion gives you valuable insights on the tools and the efficient way to employ them while creating a meaningful collage for your requirements. Surf them carefully and try the app that inspires you a lot.
2.1 Photos.google.com
The Google platform serves you with the making of collages using the captured media files. Step into this environment to create a collage for your needs hassle-free. First, go to photos.google.com and log in to your Google account. Then, click Utilities and press ‘Create new -> Animation or Collage’. Add the images from its storage space and tap the ‘Create’ button. It is a simple method and you can create a collage in no time. Without downloading any application, you can build an animated collage for your requirements. You can use any number of images during the making of the collage process.
There are options to include videos too. You can choose the perfect files as per your desires. It is a built-in application provided by Google to build their collage by including the stored images or videos in this virtual space.
**2.2 Canva
The Canva is an incredible program that offers excellent editing options on the media files. You can either make a video or image collage using this platform. While making the collage, you can add texts to convey a thousand meanings to the audience. Use the animated collage files to narrate stories based on your theme. Canva is widely used by professionals and you can use it to create a collage for official and personal use. The fabulous template collections give you a wow feeling when you step into the working space. The sophisticated environment and the controls are explicitly visible for quick reach.
To create a collage using Canva, launch the application and choose the base template for this process from its libraries. Then, navigate the folders and select the media files to upload them into this design interface. Next, customize it by adding stickers, changing the colors, inserting texts to add flavors to the existing content. Edit the videos with basic customizing options like trim, crop, and rotate. Finally, tap the create a video collage button to build an animated collage file in MP4 format. Download it and use them on any platform flawlessly.
**2.3 Filmora
The Filmora is a sophisticated tool that creates miracles with the media files. You can use this application as an editor in modifying the details precisely to enhance its appearance. Using the image and video files you can create a wide range of GIFs and other animated images in no time. This platform offers excellent editing options to grab the attention of the audience. It serves as a reliable program for professionals to make the best out of the captured images.
Wondershare Filmora - Best Video Editor for Mac/Windows
5,481,435 people have downloaded it.
Unleash your imagination while customizing the media files
It has a simple interface and aids you in personalizing the pictures limitlessly.
The built-in templates and toolbox excite you when performing miraculous changes to your images and videos.
Export and import the files effortlessly despite file sizes and locations.
The availability of the tutorials guides even a newbie to use all its functionalities precisely.
You can use the customizing elements to animate the GIFs and include texts and overlays as per your needs. It is an excellent application that performs beyond your expectations.
**2.4 Kizoa
It is an online **animated collage maker that serves you with dozens of templates. You can either create a collage from scratch or use the in-built templates to make your work easy. Step into its website and log in to build your favorite collage using the collection of media files. Choose the templates and upload the images or videos. You can add some effects to enhance its movements and finally click the create button to complete the process. Make an instant share to desired media platform using the export option. It is a fabulous online tool that offers you a comfortable space to bring wonders to your images. Create an interactive and animated collage to entertain the audience to the core. Use this program without any hesitation because the automated wizard will guide you to proceed forward with the respective pop-up messages.
These are the ideal and productive animated collage maker tools that excel in the digital space. They are reliable and you can opt for them even without any second thought. The online and offline programs aid in making the best out of the captured media files. Choose the one that meets your needs and proceed with the making of the animated collage to entertain your guests during special occasions.
**Conclusion
Thus, this article had given you enlightening insights about the best - animated collage makers at the online platform. The above-discussed applications are highly performable and they serve your needs without any excuses. Use the Filmora app to perform multitasking on your media files and add extra detail to your animated images or videos with the help of the in-built elements. Stay connected with this article to discover new horizons about the collage maker tools.
The 10 Most Adorable Aesthetic Cartoon Characters
The 10 Most Adorable Aesthetic Cartoon Characters of All Time
An easy yet powerful editor
Numerous effects to choose from
Detailed tutorials provided by the official channel
Ever seen a cartoon, and you can’t just help staring! Primarily when they act your favorite scene, all you do is play it over and over.
Which cartoon character do you find most adorable? Talk about Moana, Frozen, or even Dory. How do you feel thinking about your favorite scene of them? Today, we will list our top 10 most adorable aesthetic cartoon characters. We promise you will love it, and we are sure many of them would resonate with you. Almost everyone gets drawn to the cutest cartoon characters’ aesthetic.
In this article
01 [Why is it so difficult to make aesthetic cartoon characters?](#Part 1)
02 [The most adorable 10 aesthetic cartoon character of all time.](#Part 2)
03 [How to apply aesthetic cartoon characters to video editing.](#Part 3)
Part 1 Why Is It So Difficult To Make Aesthetic Cartoon Characters?
It isn’t easy because it requires a lot of creativity, understanding of the character, focus, and patience to get all the details that make a character adorably aesthetic.
What makes a cartoon character aesthetic? It is not just about its looks. Yes, it starts with its eyes down to the shape of the head, face, and other bodily features, but beauty is relative.
It has to do with how much attachment the cartoon characters aesthetically can spur in their fans’ hearts due to their roles, attitude, and appearance.
Part 2 The 10 Most Adorable Aesthetic Cartoon Character
Here are our top picks of the most adorable aesthetic cartoon character in the following order to pick them quickly:
● Young dory
● Pua in Moana
● Olaf in Frozen
● Stitch in Lilo and Stitch
● Puss in boots
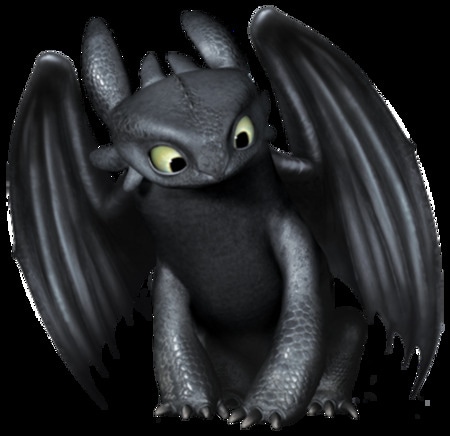
● Toothless in How to train your dragon
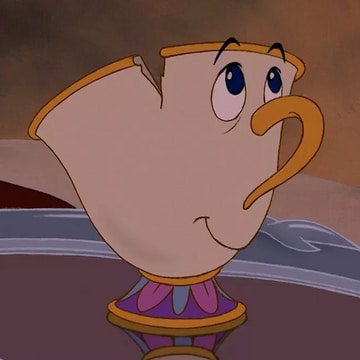
● Chip in beauty and the beast
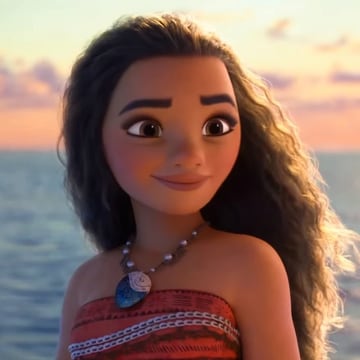
● Moana in Moana
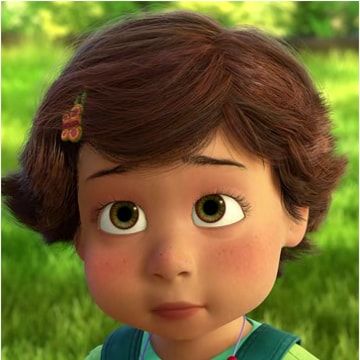
● Bonnie from Toy story
● Grogu from The Mandalorian
01Young Dory(Finding Dory 2026)
Who wouldn’t find young Dory adorable? Dory was voiced by the seven-year-old daughter of producer Lindsey Collins. Dory saw her short-term memory loss as a form of weakness. Her parents assured her that it was okay but warned her to stay away from the undertow. Before the 2016 classic, we first meet Dory in the 2003 Pixar’s classic ‘finding Nemo’ where Dory helps Marlin, a clownfish, reunites with his son, Nemo. In ‘Finding Dory, ‘ young Dory’s amnesiac was finally brought back thirteen years later. Dory is perseverant, has a trim physique, and yet she can do whatever she has set her mind to do.

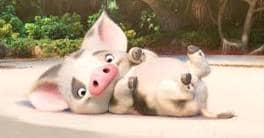
02Pua in Moana(2016)
Pua is a precious pig with puppy-like characteristics. He happens to be Moana’s best friend. Pua made his first appearance during the ‘Where you are’ performance alongside the village chief’s daughter. On Moana’s first attempt at setting sails to find Maui, their raft gets damaged, and Pua becomes scared of the sea and Moana’s oar. Later on, the makers removed the adorable pig to allow Moana to strive more independently. However, this indeed came with many critics from fans as Pua was just too sweet and cute. As much as Pua’s role in the film was small, he still made a lot of impressions.
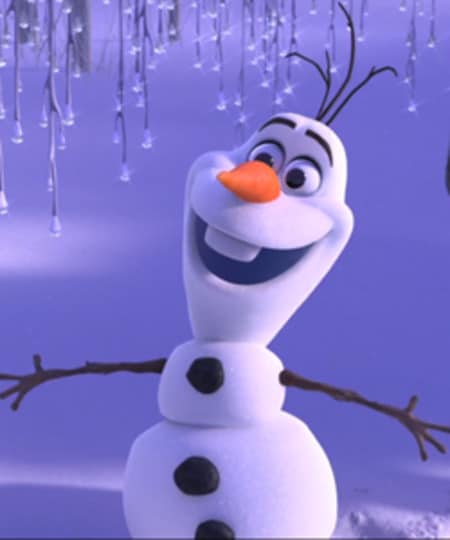
03Olaf in Frozen (2013)
Voiced by Josh Gad and created due to Elsa’s superpowers, Olaf wows us. The adorable little snowman desires warmth, and isn’t this just ironical. He expresses this in his song, ‘In summer,’ where he beautifully shows his love for the season. This snowman shows all the many characteristics his sweet self is made of. Talk about vibrant nature, bravery, humourous, and adorable optimism. Olaf signifies the Disney princesses’ innocence as they created Olaf when they were much younger. Olaf plays a vital role in helping Anna, Kristoff, and Sven on their adventure in finding Elsa. Olaf is just a sweet soul, and this list would not have been complete if we missed him!
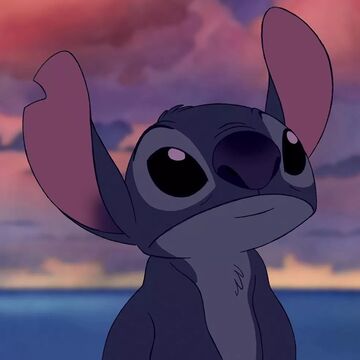
04Stitch in Lilo and Stitch (2002)
Stitch, a terrestrial, is also known as ‘Experiment 626’. Dr. JumbaJookiba genetically modified it. He initially creates him as destructive, and Stitch has a non-conventional form. He has two identities, a dog version as his true self with other arms, a retractable antenna, and three spines. Stitch accidentally meets Lilo in Kauia and is welcomed into the family. Even though Lilo’s classmates all see Stitch as unattractive and captain Gantu does not like him, Lilo makes away with societal beauty standards, and views Stitch as cute and fluffy.
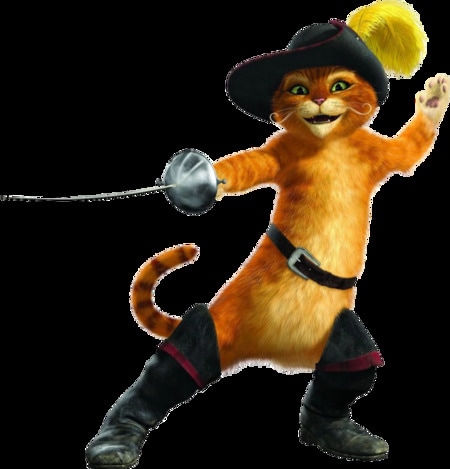
05Puss in Boots (Shrek Franchise 2001)
Puss, a smooth-talking cat with a Spanish accent, has an adorable face, and his comedic banter with Donkey in Shrek 2, coupled with his sweet face, one of the reasons for that film’s success. While developing Puss’s character, Antonio Bandera’s portrayal of ‘Zorro’ was used as the manor inspiration. Puss uses his big eyes and sweet cuteness as the perfect distraction for his trickery. Puss is just an absolute ball of sweetness and fluffy cuteness.
06Toothless in ‘How to train your dragon(2010-2019)
Toothless, a mighty dragon with a non-verbal humor sense, make its way into our hearts in the first “How to train your dragon.” Here, he ends up forming a bond with Hiccup, who took him down at first. As much as Toothless causes a heinous act, his big eyes, and a perfect and innocent smile make it hard to stay mad at him. After Toothless has an adorable family, he passes on his beautiful genetics.
07Chip in beauty and the beast
Who knew teacups could look so alive and lovable and bring up emotions. Having seen ‘Beauty and the Beast,’ would you say that just the mere sight of a teacup didn’t cause a little tear well up in your eyes while remembering Chip. The adorable aesthetic cartoon character chip in the ‘Beauty and the Beast’ is a must mention.
08Moana in Moana
Does Moana even need an explanation! The central character in the cartoon ‘Moana .’Brave, beautiful, determined, beautiful, kind, strong-willed. She was only a baby when she saved a baby sea turtle from a predatory bird. The ocean chose Moana to reunite a relic with the goddess ‘Tefiti .’ Moana’s independence received widespread acclaim as she got officially listed in 2019 as a Disney Princess, making her the twelfth on the list.
09Bonnie from Toy Story
Bonnie is a significant character in the cartoon **”**Toy Story. She is a cute-looking, shy, and the quiet character depicted as a 4-year old brunette girl. What is most notable is how Bonnie acts with her toys which she inherited from Andy. She usually withdraws when she is around adults and makes her first appearance in toy story 3, sitting on the front desk of Sunnyside Daycare with the monkey in her hand and trying to see what Mrs. Davis was donating. Bonnie has an active imagination when relating with her toys, who become her close friends. She is an adorable character and wows us all with her kind and friendly nature.
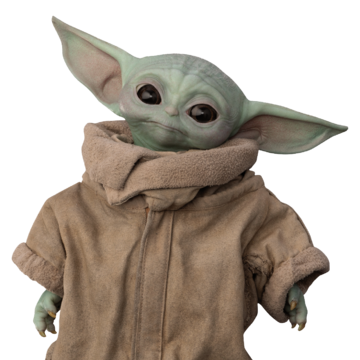
10 10. Grogu from The Mandalorian
Grogu is also popularly known as ‘The Child,’ a force-sensitive character who shows bravery and courage after surviving the Jedi siege. Grogu, alongside Djarin, went in search of the remaining Jedi. After his encounter with Skywalker, Grogu was forced to either accept his gift and return to Mandolarian or continue his Jedi training. Grogu chose to return to Mandolarian, where he reunited with Djari in a gang war.
Part 3 How To Apply Aesthetic Cartoon Characters To Video Editing
If you wish to add cartoon characters aesthetic to your videos, there are many video editing software that can do that for you.
Top of the list is Wondershare Filmora Video Editor . With this tool, you can make a smooth and natural animation add it to your video while editing. Filmora is a powerful video editing software that makes your video editing work seamless and perfect.
For Win 7 or later (64-bit)
For macOS 10.12 or later
You can also turn photos into cartoon style in one click.
Filmora’s keyframing features help you make the cartoon effects smooth and explicit.
Here are other video editing software that helps you add aesthetic cartoon characters to your video editing;
● Flipate
● Drawcartoon
● Animateit, etc.
You can choose from any one of them. But, for a wholesome application with all features that suit well with applying aesthetic cartoon characters to video editing, then Filmora is the name that flashes out.
● Ending Thoughts →
● Cartooncharacters are adorable in their uniqueness, from our charming Dory to Pua to Moana herself. The list goes on!
● However, the art of creating them is no small feat and requires detailed attention, patience, and a lot of creativity.
● To make your videos more fun and creative, you could add aesthetic cartoon characters using a tool like Filmora.
● Animators do a lot of work into creating adorable aesthetic cartoon characters, such that you have a hard time selecting the cutest of them all.
● Cartoon characters are the creative imaginations of 3d animators made for entertaining viewers.
● Do you think we missed out on any of your favorite cartoon characters? Please share with us in the comment section.
Ever seen a cartoon, and you can’t just help staring! Primarily when they act your favorite scene, all you do is play it over and over.
Which cartoon character do you find most adorable? Talk about Moana, Frozen, or even Dory. How do you feel thinking about your favorite scene of them? Today, we will list our top 10 most adorable aesthetic cartoon characters. We promise you will love it, and we are sure many of them would resonate with you. Almost everyone gets drawn to the cutest cartoon characters’ aesthetic.
In this article
01 [Why is it so difficult to make aesthetic cartoon characters?](#Part 1)
02 [The most adorable 10 aesthetic cartoon character of all time.](#Part 2)
03 [How to apply aesthetic cartoon characters to video editing.](#Part 3)
Part 1 Why Is It So Difficult To Make Aesthetic Cartoon Characters?
It isn’t easy because it requires a lot of creativity, understanding of the character, focus, and patience to get all the details that make a character adorably aesthetic.
What makes a cartoon character aesthetic? It is not just about its looks. Yes, it starts with its eyes down to the shape of the head, face, and other bodily features, but beauty is relative.
It has to do with how much attachment the cartoon characters aesthetically can spur in their fans’ hearts due to their roles, attitude, and appearance.
Part 2 The 10 Most Adorable Aesthetic Cartoon Character
Here are our top picks of the most adorable aesthetic cartoon character in the following order to pick them quickly:
● Young dory
● Pua in Moana
● Olaf in Frozen
● Stitch in Lilo and Stitch
● Puss in boots
● Toothless in How to train your dragon
● Chip in beauty and the beast
● Moana in Moana
● Bonnie from Toy story
● Grogu from The Mandalorian
01Young Dory(Finding Dory 2026)
Who wouldn’t find young Dory adorable? Dory was voiced by the seven-year-old daughter of producer Lindsey Collins. Dory saw her short-term memory loss as a form of weakness. Her parents assured her that it was okay but warned her to stay away from the undertow. Before the 2016 classic, we first meet Dory in the 2003 Pixar’s classic ‘finding Nemo’ where Dory helps Marlin, a clownfish, reunites with his son, Nemo. In ‘Finding Dory, ‘ young Dory’s amnesiac was finally brought back thirteen years later. Dory is perseverant, has a trim physique, and yet she can do whatever she has set her mind to do.
02Pua in Moana(2016)
Pua is a precious pig with puppy-like characteristics. He happens to be Moana’s best friend. Pua made his first appearance during the ‘Where you are’ performance alongside the village chief’s daughter. On Moana’s first attempt at setting sails to find Maui, their raft gets damaged, and Pua becomes scared of the sea and Moana’s oar. Later on, the makers removed the adorable pig to allow Moana to strive more independently. However, this indeed came with many critics from fans as Pua was just too sweet and cute. As much as Pua’s role in the film was small, he still made a lot of impressions.
03Olaf in Frozen (2013)
Voiced by Josh Gad and created due to Elsa’s superpowers, Olaf wows us. The adorable little snowman desires warmth, and isn’t this just ironical. He expresses this in his song, ‘In summer,’ where he beautifully shows his love for the season. This snowman shows all the many characteristics his sweet self is made of. Talk about vibrant nature, bravery, humourous, and adorable optimism. Olaf signifies the Disney princesses’ innocence as they created Olaf when they were much younger. Olaf plays a vital role in helping Anna, Kristoff, and Sven on their adventure in finding Elsa. Olaf is just a sweet soul, and this list would not have been complete if we missed him!
04Stitch in Lilo and Stitch (2002)
Stitch, a terrestrial, is also known as ‘Experiment 626’. Dr. JumbaJookiba genetically modified it. He initially creates him as destructive, and Stitch has a non-conventional form. He has two identities, a dog version as his true self with other arms, a retractable antenna, and three spines. Stitch accidentally meets Lilo in Kauia and is welcomed into the family. Even though Lilo’s classmates all see Stitch as unattractive and captain Gantu does not like him, Lilo makes away with societal beauty standards, and views Stitch as cute and fluffy.
05Puss in Boots (Shrek Franchise 2001)
Puss, a smooth-talking cat with a Spanish accent, has an adorable face, and his comedic banter with Donkey in Shrek 2, coupled with his sweet face, one of the reasons for that film’s success. While developing Puss’s character, Antonio Bandera’s portrayal of ‘Zorro’ was used as the manor inspiration. Puss uses his big eyes and sweet cuteness as the perfect distraction for his trickery. Puss is just an absolute ball of sweetness and fluffy cuteness.
06Toothless in ‘How to train your dragon(2010-2019)
Toothless, a mighty dragon with a non-verbal humor sense, make its way into our hearts in the first “How to train your dragon.” Here, he ends up forming a bond with Hiccup, who took him down at first. As much as Toothless causes a heinous act, his big eyes, and a perfect and innocent smile make it hard to stay mad at him. After Toothless has an adorable family, he passes on his beautiful genetics.
07Chip in beauty and the beast
Who knew teacups could look so alive and lovable and bring up emotions. Having seen ‘Beauty and the Beast,’ would you say that just the mere sight of a teacup didn’t cause a little tear well up in your eyes while remembering Chip. The adorable aesthetic cartoon character chip in the ‘Beauty and the Beast’ is a must mention.
08Moana in Moana
Does Moana even need an explanation! The central character in the cartoon ‘Moana .’Brave, beautiful, determined, beautiful, kind, strong-willed. She was only a baby when she saved a baby sea turtle from a predatory bird. The ocean chose Moana to reunite a relic with the goddess ‘Tefiti .’ Moana’s independence received widespread acclaim as she got officially listed in 2019 as a Disney Princess, making her the twelfth on the list.
09Bonnie from Toy Story
Bonnie is a significant character in the cartoon **”**Toy Story. She is a cute-looking, shy, and the quiet character depicted as a 4-year old brunette girl. What is most notable is how Bonnie acts with her toys which she inherited from Andy. She usually withdraws when she is around adults and makes her first appearance in toy story 3, sitting on the front desk of Sunnyside Daycare with the monkey in her hand and trying to see what Mrs. Davis was donating. Bonnie has an active imagination when relating with her toys, who become her close friends. She is an adorable character and wows us all with her kind and friendly nature.
10 10. Grogu from The Mandalorian
Grogu is also popularly known as ‘The Child,’ a force-sensitive character who shows bravery and courage after surviving the Jedi siege. Grogu, alongside Djarin, went in search of the remaining Jedi. After his encounter with Skywalker, Grogu was forced to either accept his gift and return to Mandolarian or continue his Jedi training. Grogu chose to return to Mandolarian, where he reunited with Djari in a gang war.
Part 3 How To Apply Aesthetic Cartoon Characters To Video Editing
If you wish to add cartoon characters aesthetic to your videos, there are many video editing software that can do that for you.
Top of the list is Wondershare Filmora Video Editor . With this tool, you can make a smooth and natural animation add it to your video while editing. Filmora is a powerful video editing software that makes your video editing work seamless and perfect.
For Win 7 or later (64-bit)
For macOS 10.12 or later
You can also turn photos into cartoon style in one click.
Filmora’s keyframing features help you make the cartoon effects smooth and explicit.
Here are other video editing software that helps you add aesthetic cartoon characters to your video editing;
● Flipate
● Drawcartoon
● Animateit, etc.
You can choose from any one of them. But, for a wholesome application with all features that suit well with applying aesthetic cartoon characters to video editing, then Filmora is the name that flashes out.
● Ending Thoughts →
● Cartooncharacters are adorable in their uniqueness, from our charming Dory to Pua to Moana herself. The list goes on!
● However, the art of creating them is no small feat and requires detailed attention, patience, and a lot of creativity.
● To make your videos more fun and creative, you could add aesthetic cartoon characters using a tool like Filmora.
● Animators do a lot of work into creating adorable aesthetic cartoon characters, such that you have a hard time selecting the cutest of them all.
● Cartoon characters are the creative imaginations of 3d animators made for entertaining viewers.
● Do you think we missed out on any of your favorite cartoon characters? Please share with us in the comment section.
Learn All About 3D Logo Animation and Templates
Learn All About 3D Logo Animation and Templates
An easy yet powerful editor
Numerous effects to choose from
Detailed tutorials provided by the official channel
If you too are keen to have an animated logo for your brand, product, or business several readymade templates can be used.
![]()
There are types of 3D logo animation tools available that can be used for customizing these templates or creating a logo from scratch as per your requirements.
In this article
01 [Benefits of Using 3d Logo Animation?](#Part 1)
02 [Where to Use Animated Logos?](#Part 2)
03 [Tips to make animated logos effective](#Part 3)
04 [Top 3D-logo Animation Template Sites](#Part 4)
05 [Top Software for Creating 3D Animated Logos](#Part 5)
Part 1 Benefits of using 3D logo animation?
Animated logos offers multiple benefits to a business or a brand. Some of the major ones are gathered for you as below.
01Increase brand awareness
Animations add life to your logos and thus can help in raising brand awareness and creating an instant connection with the clients and audience. The chances of remembering an animated logo are high and this in turn will get the attention and engagement of the audience.
02Better storytelling
The combination of images, sound, and motion in a 3D logo helps in creating an emotional connection with the audience. An animated logo supports the brand story more efficiently than a static logo and can further help to create a detailed explanation of the story.
03Adds a modern and professional look
An animated logo will add a professional and modern look to your business, product, brand, company, site, and others. An animated logo will make the audience feel that you are innovative and go with the latest trends that in turn add to the professionalism.
04Look unique and stand out from the crowd
With similar-looking designs and logos, animation can make your brand and business look apart from the others and thus get the attention of prospective clients and customers.
05Creates a pleasant first impression
It is the first impression that can make or break the image of a brand or a product. So, to ensure that the first impression of your brand or business is excellent, animated logos works to a great extent.
![]()
Part 2 Where to use Animated Logos?
Though animated logos can be used for an array of business types and platforms, there are a few certain ones where they are most effective. Check these as below.
● Social Media
● Paid Ads
● Branded Videos
● Email signatures
● Websites
● Brands and business
● Products and e-commerce
Part 3 Tips to make animated logos effective
Animated logos are created to get the attention of the audience and thus create brand awareness and for this, several factors can be considered.
● Firstly, analyze the goals of the company before creating an animated logo. It is important to know what will be the brand personality that you wish to portray through the logo.
● The logos should be created based on the preferences of the users and thus making research of the same before finalizing the animation is important.
● Animated logos should be short and interesting. Long ones are boring and will also result in the loss of interest.
● It is interesting to include a surprise element in your logo by creating them in a manner so that they are unpredictable.
● Use professional software to create impressive software that will not only make the task easier but will also save time.
![]()
Part 4 Top 3D-logo animation template sites
There are several sites where you can check readymade animated logo templates that will make your animation creating task quick and easy. These templates have a readymade design for the animated logo and these designs can be further customized to create a logo of your choice. Most of the sites with templates also have a built-in editor that can be used for editing the templates. If not, you can download the template and can then edit them using professional editing software like Wondershare Filmora Video Editor .
Some of the sites where you can check 3D logo animation free download and paid download of the templates in different categories.
● Storyblocks
● FlexClip
● MotionArray
● AfterEffects and more.
You can check out the various templates available at one of these sites and choose the one that best matches your company or product’s personality and fit your requirements.
Part 5 Top software for creating 3D Animated Logos
If you want a customized logo to be created as per your needs or want to edit the templates, there are several animations creating software available. Below we have shortlisted some of the major ones.
01**Wondershare Filmora Video Editor **
This Windows and Mac-based software is an excellent tool for all types of video editing and creating requirements. Using the tool, you can create a 3D animated logo or can even edit the templates to meet your requirements. A simple interface makes the software apt for all users and the process is also fast.
Key features:
● Create the desired animation using keyframing.
● Use motion-blur to enhance the animation.
● Edit the animation and other videos using multiple editing effects.
● Allows adding interesting effects like transitions, filters, and more.
● Enhanced audio using features like background noise removal, audio equalizer, keyframe audio editing, and more.
● Support fast rendering and fast import and export of the files.
● Windows and Mac support.
For Win 7 or later (64-bit)
For macOS 10.12 or later
02Viddyoze
This is another popular and user-friendly software that can be used for creating 3D animated logos and other animations. The tool comes packed with multiple features and templates that allow creating the desired animation in no time.
Key features
● A user-friendly tool with an intuitive interface.
● Comes with multiple templates to choose from.
● The template can be customized by changing several parameters like text, colors, and more.
● Comes with multiple editing tools and has multi-font support.
● The custom-created audio track for live templates.
● Support multi-ratio templates to make them compatible with different platforms and sites.
![]()
03Renderforest
This is an online 3D animated logo maker that comes with multiple templates and tools. Simple to use, the tool needs no software download or installation.
Key features
● This 3D logo animation online free tool is simple to use and does not require any software download.
● Comes with multiple templates and animation designs like fire logo, shattering logo, splash logo, and more.
● 3D effects of the tool can be used for creating 3D animated logos.
![]()
04Adobe After Effects
Adobe is a reputed software for all types of video editing requirements and its long list of functions also includes 3D animated logo making. Though the learning curve of the software is steep, once you get the hang of it, you can easily create professional animations and edit files.
Key features
● Create high-quality animations including 3D logos.
● Allows adding keyframes for animations and add exciting effects.
● Support features like the 3D ground plane, 3D draught preview, extended viewport, 3D transform gizmos, and more.
● Comes with a wide range of readymade templates for creating logos.
● 3D logo animation after effects tool allows media replacement in motion graphic templates.
![]()
05Animaker
This is another widely used online tool that allows creating of decent 3D animated logos. The interface is simple and there is no requirement for any software download.
Key features
● Simple and user-friendly interface with support to drop and drag.
● Comes with over 20 readymade templates for creating animated logos.
● Audio files and music to the animations can also be added.
● Support to more than 50 languages which makes it accessible across the world.
● Created animations can also be uploaded to YouTube and Facebook.
![]()
● Key Takeaways from This Episode →
● 3D animated logos work magic for your business and brand by creating awareness, catching the attention of the audience, and also keeping them engaged.
● Animated logos are used by different types of businesses and industries and for different platforms.
● There are several sites where readymade templates for creating 3D animated logos are available. These templates can be customized as needed.
● An array of 3D animated logo-making software is available and one of the best on the list is Wondershare Filmora Video Editor that is effective and also user-friendly.
How to Draw Cartoons Step by Step with This Guide
Learn How to Draw Cartoons Step by Step with This Guide
An easy yet powerful editor
Numerous effects to choose from
Detailed tutorials provided by the official channel
Cartoon character drawing is usually a vital aspect of any child’s life who loves to watch cartoon series and can sometimes be someone’s favorite thing in the world.

A cartoon character is a series of single drawings that tell a joke or story. Although cartoons are mostly drawn, they can sometimes be animated. Kids like comics which makes them an essential part of every child’s life. Cartoons are not only used for entertainment purposes but also help kids and young children learn more about the world around them. For example, children learn about love, loss, friendship, and other essential life issues about life by watching cartoons.
However, cartoons are not only limited to children but are also for adults. In addition, cartoons created for an adult audience go deeper into real-life problems and explore darker themes. They aim to create content that matches the maturity and age of the audience. Watching cartoons is fun. But what if you could make them? This article will provide you with a guide on producing cool cartoon drawings that will match different audiences, both older and younger.
In this article
01 [How to Draw Cartoon Characters Step by Step](#Part 1)
02 [Cartoon Easy Drawing with Colour Step by Step](#Part 2)
03 [Cartoon Easy Sketch Drawing Step by Step](#Part 3)
Part 1 How to Draw Cartoon Characters Step by Step
Note that in the world we live in, Professionals were once students, and experts were once beginners. This means that everyone has a starting point, and they all have one thing in common: “learning.” Whether you are aspiring to become an English teacher, an astrophysicist, an artist, or a physician’s assistant, you must first learn the ins and outs of the field.
Those aspiring to become animators and cartoonists must first learn the basics of cartoon character drawing and practice some easy, simple cartoon drawing before cranking out the Mickey-Mouses of the entertainment world. However, we will cover the basic principles of easy cartoon drawing for beginners step by step to get your learning process started. Here is how to draw a Micky-Mouse perfectly:

Step 1:
● Use a pencil to begin your drawing.
● First, create a circle for the head and a curved line on the left side.
● Draw a horizontal line at the center.
Step 2: Next, draw an oval shape for the mouth and a “U” shape added to the bottom, and then you can add another parallel “U” shape and connect it with the oval.
Step 3: Draw the eye using two upside-down “U” shapes, and then you add his large ear on the right and a small one at the top of the head.
Step 4: You can draw a bean shape and another smaller one inside for the body.
Step 5: Add oval shapes for his feet to draw his legs and draw his tail on the right side just above the leg.
Step 6: Draw two elongated shapes for his arms, a small oval for the hand and a basic shape of his fingers.
Step 7: Draw the cheese and add a few small circles inside.
Step 8: Also include the facial features by drawing the inside of the nose, eyebrows, eyes, and whiskers.
Step 9:
● Draw his fingers and hair between his ears.
● Trace your pencil lines with a sharpie.
● Erase the pencil afterward.
Step 10: Finally, you can color your drawing and upload it to your website.
Part 1 Cartoon Easy Drawing with Colour Step by Step
Applying color to a drawing is very important to beautify your drawing and make it look stunning and attractive. Here is how to cartoon easy drawing a flower using a colored pencil:
Step 1: Using a color photocopy of a reference photo, crop and rearrange elements of the poppy composition. With light pressure and HB pencil, draw a composition onto a four-ply, 100% cotton museum board frequently found among framing supplies.
Step 2: With very light pressure, apply the first colored pencil layer and add more emphasis where the values will be deeper. While doing this, note that the pencil application will still appear granular, and the texture of the museum board is still visible.

Step 3: Create the veins in the leaves and the fuzzy texture of the stem and pod, and also, as the individual strands of stamens, put down a sheet of translucent drafting paper. Use heavy tracing paper with a very sharp 7H graphite pencil and apply heavy pressure in drawing the lines for stamens, fuzz, and veins on the drafting paper and impress them into the surface of the museum board. Then, with a contrasting layer of darker color, these features dramatically show up on the stem, leaves, center of the flower, pod, and center of the flower. Then add deeper values of rose in the shadowed areas of the flower petals.

Step 4: To make them appear less granular and intensify the colors, start by blending with a clear, alcohol-based blending marker. The solvent, wax, or vegetable oil then dissolves the binder in the colored pencil layer and fluidly releases the pigment. This will also help to “fill in” the dots of the tooth of the paper and make the color appear denser.

Step 5: Continue to intensify the color by using a non-pigmented blending pencil over a previous layer and repeat a layer or two of color, much like a “color sandwich.” Repeat this “ burnishing “ process for subsequent layerings of color, like a double-decker or triple-decker sandwich.
Also, make sure the rich, dark negative space is carried out the same way, layering colors and burnishing, then repeating the colors for deep, rich saturation.
Render the deep, smeary flecks of pollen by heavily applying “freckles” of burgundy, then slightly smudge them with the tip of a blending marker. Lastly, scratch a few of the tiny wisps of fuzz on the pod and stem carefully into the board via a sharp X-acto knife for a striking contrast of light against the deep background.

Part 2 Cartoon Easy Sketch Drawing Step by Step
This is the initial stage of the drawing process. It requires you to create an outline of the concept you want to draw before adding color. However, it is also referred to as a technique in shading. For example, if you’re going to sketch a cherry fruit, there are a few things to note here.
Try not to look at the cherry as a whole but look at its shapes and name them. This way, you are looking at the parts to the whole and not the entire piece.

Step 1: Draw two overlapping circles and draw two curved lines from each of the circles.
Step 2: Make a small rectangle at the top to join the two stems and draw a second set of curved lines.
Step 3: Draw thick lines inside the rectangle for the bumps and darken the lines and use your finger to smudge them a bit for the shaded effect.
Step 4: Draw a curved line from the stem on the right to the circle’s edge to create the bump.
Step 5: Holding your pencil at an angle, make light strokes going across the front of both cherries. Take note of the places where there is no light. This is where the light source is hitting the cherry the most.
Step 6: To darken, a shade over those places again, keep layering the shading technique until you get the effect you see on the cherries.
Step 7: Use the same technique to shade under the cherries, but use your finger to smudge it to smoother the shadow.
●Bonus:
You can add color, effect, or animate to your cartoon character drawing by using Wondershare Filmora Video Editor , the best editor on the internet. Filmora is a free software program with the same creating abilities and imaging editing similar to Adobe Illustrator. It is open software that runs on various programs, such as Windows, Mac, and Linux. Please get to know more about this exclusive tool from Wondershare on their official website.
For Win 7 or later (64-bit)
For macOS 10.12 or later
● Ending Thoughts →
● A step-by-step guide on drawing easy cartoons for painting and how to sketch your drawing correctly.
● Cartoon character drawings in easy and quick steps.
● Easy cartoon drawing for beginners.
● Lastly, to add color to your drawing, use Filmora software.
● So, use the tips and tricks to make your presentation’s best cartoon characters come alive and be a pro with Filmora.
Cartoon character drawing is usually a vital aspect of any child’s life who loves to watch cartoon series and can sometimes be someone’s favorite thing in the world.
A cartoon character is a series of single drawings that tell a joke or story. Although cartoons are mostly drawn, they can sometimes be animated. Kids like comics which makes them an essential part of every child’s life. Cartoons are not only used for entertainment purposes but also help kids and young children learn more about the world around them. For example, children learn about love, loss, friendship, and other essential life issues about life by watching cartoons.
However, cartoons are not only limited to children but are also for adults. In addition, cartoons created for an adult audience go deeper into real-life problems and explore darker themes. They aim to create content that matches the maturity and age of the audience. Watching cartoons is fun. But what if you could make them? This article will provide you with a guide on producing cool cartoon drawings that will match different audiences, both older and younger.
In this article
01 [How to Draw Cartoon Characters Step by Step](#Part 1)
02 [Cartoon Easy Drawing with Colour Step by Step](#Part 2)
03 [Cartoon Easy Sketch Drawing Step by Step](#Part 3)
Part 1 How to Draw Cartoon Characters Step by Step
Note that in the world we live in, Professionals were once students, and experts were once beginners. This means that everyone has a starting point, and they all have one thing in common: “learning.” Whether you are aspiring to become an English teacher, an astrophysicist, an artist, or a physician’s assistant, you must first learn the ins and outs of the field.
Those aspiring to become animators and cartoonists must first learn the basics of cartoon character drawing and practice some easy, simple cartoon drawing before cranking out the Mickey-Mouses of the entertainment world. However, we will cover the basic principles of easy cartoon drawing for beginners step by step to get your learning process started. Here is how to draw a Micky-Mouse perfectly:
Step 1:
● Use a pencil to begin your drawing.
● First, create a circle for the head and a curved line on the left side.
● Draw a horizontal line at the center.
Step 2: Next, draw an oval shape for the mouth and a “U” shape added to the bottom, and then you can add another parallel “U” shape and connect it with the oval.
Step 3: Draw the eye using two upside-down “U” shapes, and then you add his large ear on the right and a small one at the top of the head.
Step 4: You can draw a bean shape and another smaller one inside for the body.
Step 5: Add oval shapes for his feet to draw his legs and draw his tail on the right side just above the leg.
Step 6: Draw two elongated shapes for his arms, a small oval for the hand and a basic shape of his fingers.
Step 7: Draw the cheese and add a few small circles inside.
Step 8: Also include the facial features by drawing the inside of the nose, eyebrows, eyes, and whiskers.
Step 9:
● Draw his fingers and hair between his ears.
● Trace your pencil lines with a sharpie.
● Erase the pencil afterward.
Step 10: Finally, you can color your drawing and upload it to your website.
Part 1 Cartoon Easy Drawing with Colour Step by Step
Applying color to a drawing is very important to beautify your drawing and make it look stunning and attractive. Here is how to cartoon easy drawing a flower using a colored pencil:
Step 1: Using a color photocopy of a reference photo, crop and rearrange elements of the poppy composition. With light pressure and HB pencil, draw a composition onto a four-ply, 100% cotton museum board frequently found among framing supplies.
Step 2: With very light pressure, apply the first colored pencil layer and add more emphasis where the values will be deeper. While doing this, note that the pencil application will still appear granular, and the texture of the museum board is still visible.
Step 3: Create the veins in the leaves and the fuzzy texture of the stem and pod, and also, as the individual strands of stamens, put down a sheet of translucent drafting paper. Use heavy tracing paper with a very sharp 7H graphite pencil and apply heavy pressure in drawing the lines for stamens, fuzz, and veins on the drafting paper and impress them into the surface of the museum board. Then, with a contrasting layer of darker color, these features dramatically show up on the stem, leaves, center of the flower, pod, and center of the flower. Then add deeper values of rose in the shadowed areas of the flower petals.
Step 4: To make them appear less granular and intensify the colors, start by blending with a clear, alcohol-based blending marker. The solvent, wax, or vegetable oil then dissolves the binder in the colored pencil layer and fluidly releases the pigment. This will also help to “fill in” the dots of the tooth of the paper and make the color appear denser.
Step 5: Continue to intensify the color by using a non-pigmented blending pencil over a previous layer and repeat a layer or two of color, much like a “color sandwich.” Repeat this “ burnishing “ process for subsequent layerings of color, like a double-decker or triple-decker sandwich.
Also, make sure the rich, dark negative space is carried out the same way, layering colors and burnishing, then repeating the colors for deep, rich saturation.
Render the deep, smeary flecks of pollen by heavily applying “freckles” of burgundy, then slightly smudge them with the tip of a blending marker. Lastly, scratch a few of the tiny wisps of fuzz on the pod and stem carefully into the board via a sharp X-acto knife for a striking contrast of light against the deep background.
Part 2 Cartoon Easy Sketch Drawing Step by Step
This is the initial stage of the drawing process. It requires you to create an outline of the concept you want to draw before adding color. However, it is also referred to as a technique in shading. For example, if you’re going to sketch a cherry fruit, there are a few things to note here.
Try not to look at the cherry as a whole but look at its shapes and name them. This way, you are looking at the parts to the whole and not the entire piece.
Step 1: Draw two overlapping circles and draw two curved lines from each of the circles.
Step 2: Make a small rectangle at the top to join the two stems and draw a second set of curved lines.
Step 3: Draw thick lines inside the rectangle for the bumps and darken the lines and use your finger to smudge them a bit for the shaded effect.
Step 4: Draw a curved line from the stem on the right to the circle’s edge to create the bump.
Step 5: Holding your pencil at an angle, make light strokes going across the front of both cherries. Take note of the places where there is no light. This is where the light source is hitting the cherry the most.
Step 6: To darken, a shade over those places again, keep layering the shading technique until you get the effect you see on the cherries.
Step 7: Use the same technique to shade under the cherries, but use your finger to smudge it to smoother the shadow.
●Bonus:
You can add color, effect, or animate to your cartoon character drawing by using Wondershare Filmora Video Editor , the best editor on the internet. Filmora is a free software program with the same creating abilities and imaging editing similar to Adobe Illustrator. It is open software that runs on various programs, such as Windows, Mac, and Linux. Please get to know more about this exclusive tool from Wondershare on their official website.
For Win 7 or later (64-bit)
For macOS 10.12 or later
● Ending Thoughts →
● A step-by-step guide on drawing easy cartoons for painting and how to sketch your drawing correctly.
● Cartoon character drawings in easy and quick steps.
● Easy cartoon drawing for beginners.
● Lastly, to add color to your drawing, use Filmora software.
● So, use the tips and tricks to make your presentation’s best cartoon characters come alive and be a pro with Filmora.
How to Combine Multiple GIFs Into One with GIF Combiner
How to Combine Multiple GIFs into One with GIF Combiner

Shanoon Cox
Mar 27, 2024• Proven solutions
Are you looking for a software tool to create animated GIFs? Go online, you will easily find so many with impressive editing abilities. There are so many interesting things that you can do with a collection of GIFs. Many professionals these days are trying new tricks to make classic small duration animated movies with interactive GIF creator tools .
The article below will provide you step by step guidance about how to merge or combine animated GIFs together.
We are going to discuss two methods where one GIF combiner can assist you to play GIFs side by side, whereas the other will tell you about playing another GIF in continuation after first. In the end, we will also let you know the three best GIF combiners you can use.
Keep reading.
If you are not able to use Photoshop due to its complicated interface and Ezgif is not a suitable tool for your device, then the best recommendation for your animated GIF creation needs is Wondershare Filmora .
This tool is designed with a user-friendly interface and it can easily assist you in the development of high-quality gifs. There are so many customization options associated with each design like color correction, speed adjustments, and overlays, etc.
Filmora offers compatibility over Windows as well as Mac devices so you can easily access it anywhere. Further, it can process more than 150 file formats so you need not worry about your selection. Simply download Wondershare Filmora for your desktop and get started with impressive GIF editing.
Download it now to have a try!
See how to make a cool GIF from a video with Wondershare Filmora.
 Download Mac Version ](https://tools.techidaily.com/wondershare/filmora/download/ )
Part 1: How to Combine/Merge Animated GIFs Into One
Method 1: Merge GIFs into one with Photoshop
Adobe Photoshop is one of the top-rated photo editing software tools and nowadays it is popularly being used for GIF combining. Using Photoshop, you can easily play multiple GIF images side by side on the screen. Here are a few simple to follow steps to accomplish this task:
Step 1: Import GIFs to combine
First of all, users need to launch Adobe Photoshop on their device and then import both GIF images to individual tabs. This task can be easily done using Drag and Drop tools. Resize both tabs so that you can view both images at a time on screen.
Step 2: Save GIF with name
Go to the Window menu and ensure that the Timeline option is marked in the drop-down menu.

Now open one empty file with height same as that of already imported GIF files. Save this file with any suitable name, for example Z.

Note: If you need a transparent view of your imported GIF images then go to Layer and select New and finally hit Layer option. You can now hide its bottom layer.
Step 3: Copy frames

Now move to the tab of the first GIF file and then to the timeline toolbar. On the top right corner of your screen, you will find the menu icon. Here you need to select and copy all frames.
Step 4: Paste your copy
It is time to move to GIF Z file, move to its timeline toolbar, and then select the menu icon from the top right corner of your screen. Paste your recently copied selection over here. Never forget to choose Paste Over selection option from Pop up Dialogue Box.
Step 5: Copy and paste
Simply repeat the process explained in Step 3 and 4 for the 2nd GIF image. After execution of these steps, your GIF Z file will be containing all layers of your imported GIF files but as you have pasted them one over another so it is important to separate their elements now.
Step 6: To make separation
To do this separation, go to GIF Z tab and then select layers of second GIF file and simply move them below the first GIF layer files. Users can now have a preview of both GIFs in the timeline window.

Step 7: Change image settings
After finalizing the best preview for your edited files, you can hit the file menu option and then save your project for device or web option. It will immediately open a dialogue box where users can easily specify their image quality and loop count details. Never forget to have one more preview before saving the final results.

Step 8: Save your project
As now you are done with all the editing tasks so it is time to hit the “Save” option and then provide your destination address to the modified file. Your animated GIF file is now ready to get uploaded on the internet.
Check this video to learn more on how to combine gifs with Photoshop
Method 2: Combine GIFs and Play one After Another
Many youngsters love to create impressive stories by just combining a few GIF images one after another in sequence. If you are also one of them then you should follow these steps discussed in the second method.
We are recommending Ezgif.com to complete this task with the easy to follow steps as discussed below:
You may also like: Top 26 Best Free GIF Makers Online >>
Step 1: Upload GIFs files
First of all, you need to upload your desired GIF files to the Ezgif.com platform. For fast selection of multiple files simply follow Ctrl key-based selection.
This tool also allows users to create a mixture of animated GIF files with simple still images even if they are of different file formats. The conversion process will be carried out automatically by this tool.
Step 2: Adjust frame
As soon as these files will get uploaded, you will find all frames on the editor window. Here you can easily adjust frame delays as well as their order. Note that, GIFs are often ordered in alphabetic order so while reorganizing your files, never forget to rename them accurately. Now hit the “Animate It” button and it will immediately prepare a small preview window on the screen.

Step 3: Optimize your GIFs
Ezgif.com provides a wide range of optimization options to users after this preview. You can easily adjust features as per your requirement by setting desired values for text, speed, effects, rotate, resize and crop, etc. If you do not want to make such changes then you can directly hit the save button. This software tool will take a few seconds to process your project and then a new GIF image with all defined frames will be generated. It will be containing all source images with your preferred ordered sequence. You can easily find it at your destination folder and use it further for entertainment.
Part 2: 3 Best GIF Combiners You Can Make GIFs
1. Filmora Meme Maker - Online GIF Combiner
If you want to combine GIFs online, the Filmora meme maker is your ultimate solution.
It helps you make images, GIFs and video memes directly without watermark. It is totally FREE to use and no signup. You can change text size, color and position to create caption when you are editing. You can also put text inside or outside in GIF.
Just with a few clicks, your GIF is done . Try Now!

2. GIPHY
GIPHY is a GIF combiner where you can find various GIF files to combine. All of the GIFs are funny and interesting to use for people who love to combine GIFs. There are some examples in this site, so you can have the inspiration to combine GIFs if you don’t know where to start. You also can find different styles: reaction, sports, artists and more.

3. PIXEL
If you don’t want to use Photoshop to combine GIFs, here we recommend using PIXEL. You can use it to make GIFs easily online. You can add more than one GIF at one time. Besides, this GIF combiner can also change the GIF size to fit your needs. After the editing is made, you need to click create animation to export GIFs. You should know that GIF size is 32×32 for PIXEL, and 64×64 for SUPER PIXEL.
![]()
Frequently Asked Questions About Combing GIFs
1. Can I Combine A Few Gifs?
Yes, you can. Any photo or video editing software that supports GIF file format allows you to combine one or more GIFs. For instance, Adobe Photoshop users can combine several GIF files and play them simultaneously next to each other, but this task can be overwhelming if you are not familiar with this photo editing software.
An online GIF combiner like Ezgif enables you to combine multiple GIFs from your web browser for free, which makes it a great option for anyone who doesn’t have access to a professional photo or video editing software.
2. How To Merge Several Animated GIFs?
Playing two or more GIFs one after another in a single file is easy, as you just have to arrange them in a way you want them to appear in the final version of the GIF on the editor’s timeline and then export your project as a GIF file.
What’s more, you will be able to remove the frames of the GIFs you don’t want to include in the output file or apply different filters and effects. However, the options you are going to have at your disposal depending on the GIF maker or video editing software you are using to merge several animated GIFs into a single file.
Shanoon Cox
Shanoon Cox is a writer and a lover of all things video.
Follow @Shanoon Cox
Shanoon Cox
Mar 27, 2024• Proven solutions
Are you looking for a software tool to create animated GIFs? Go online, you will easily find so many with impressive editing abilities. There are so many interesting things that you can do with a collection of GIFs. Many professionals these days are trying new tricks to make classic small duration animated movies with interactive GIF creator tools .
The article below will provide you step by step guidance about how to merge or combine animated GIFs together.
We are going to discuss two methods where one GIF combiner can assist you to play GIFs side by side, whereas the other will tell you about playing another GIF in continuation after first. In the end, we will also let you know the three best GIF combiners you can use.
Keep reading.
If you are not able to use Photoshop due to its complicated interface and Ezgif is not a suitable tool for your device, then the best recommendation for your animated GIF creation needs is Wondershare Filmora .
This tool is designed with a user-friendly interface and it can easily assist you in the development of high-quality gifs. There are so many customization options associated with each design like color correction, speed adjustments, and overlays, etc.
Filmora offers compatibility over Windows as well as Mac devices so you can easily access it anywhere. Further, it can process more than 150 file formats so you need not worry about your selection. Simply download Wondershare Filmora for your desktop and get started with impressive GIF editing.
Download it now to have a try!
See how to make a cool GIF from a video with Wondershare Filmora.
Download Mac Version ](https://tools.techidaily.com/wondershare/filmora/download/ )
Part 1: How to Combine/Merge Animated GIFs Into One
Method 1: Merge GIFs into one with Photoshop
Adobe Photoshop is one of the top-rated photo editing software tools and nowadays it is popularly being used for GIF combining. Using Photoshop, you can easily play multiple GIF images side by side on the screen. Here are a few simple to follow steps to accomplish this task:
Step 1: Import GIFs to combine
First of all, users need to launch Adobe Photoshop on their device and then import both GIF images to individual tabs. This task can be easily done using Drag and Drop tools. Resize both tabs so that you can view both images at a time on screen.
Step 2: Save GIF with name
Go to the Window menu and ensure that the Timeline option is marked in the drop-down menu.
Now open one empty file with height same as that of already imported GIF files. Save this file with any suitable name, for example Z.
Note: If you need a transparent view of your imported GIF images then go to Layer and select New and finally hit Layer option. You can now hide its bottom layer.
Step 3: Copy frames
Now move to the tab of the first GIF file and then to the timeline toolbar. On the top right corner of your screen, you will find the menu icon. Here you need to select and copy all frames.
Step 4: Paste your copy
It is time to move to GIF Z file, move to its timeline toolbar, and then select the menu icon from the top right corner of your screen. Paste your recently copied selection over here. Never forget to choose Paste Over selection option from Pop up Dialogue Box.
Step 5: Copy and paste
Simply repeat the process explained in Step 3 and 4 for the 2nd GIF image. After execution of these steps, your GIF Z file will be containing all layers of your imported GIF files but as you have pasted them one over another so it is important to separate their elements now.
Step 6: To make separation
To do this separation, go to GIF Z tab and then select layers of second GIF file and simply move them below the first GIF layer files. Users can now have a preview of both GIFs in the timeline window.
Step 7: Change image settings
After finalizing the best preview for your edited files, you can hit the file menu option and then save your project for device or web option. It will immediately open a dialogue box where users can easily specify their image quality and loop count details. Never forget to have one more preview before saving the final results.
Step 8: Save your project
As now you are done with all the editing tasks so it is time to hit the “Save” option and then provide your destination address to the modified file. Your animated GIF file is now ready to get uploaded on the internet.
Check this video to learn more on how to combine gifs with Photoshop
Method 2: Combine GIFs and Play one After Another
Many youngsters love to create impressive stories by just combining a few GIF images one after another in sequence. If you are also one of them then you should follow these steps discussed in the second method.
We are recommending Ezgif.com to complete this task with the easy to follow steps as discussed below:
You may also like: Top 26 Best Free GIF Makers Online >>
Step 1: Upload GIFs files
First of all, you need to upload your desired GIF files to the Ezgif.com platform. For fast selection of multiple files simply follow Ctrl key-based selection.
This tool also allows users to create a mixture of animated GIF files with simple still images even if they are of different file formats. The conversion process will be carried out automatically by this tool.
Step 2: Adjust frame
As soon as these files will get uploaded, you will find all frames on the editor window. Here you can easily adjust frame delays as well as their order. Note that, GIFs are often ordered in alphabetic order so while reorganizing your files, never forget to rename them accurately. Now hit the “Animate It” button and it will immediately prepare a small preview window on the screen.
Step 3: Optimize your GIFs
Ezgif.com provides a wide range of optimization options to users after this preview. You can easily adjust features as per your requirement by setting desired values for text, speed, effects, rotate, resize and crop, etc. If you do not want to make such changes then you can directly hit the save button. This software tool will take a few seconds to process your project and then a new GIF image with all defined frames will be generated. It will be containing all source images with your preferred ordered sequence. You can easily find it at your destination folder and use it further for entertainment.
Part 2: 3 Best GIF Combiners You Can Make GIFs
1. Filmora Meme Maker - Online GIF Combiner
If you want to combine GIFs online, the Filmora meme maker is your ultimate solution.
It helps you make images, GIFs and video memes directly without watermark. It is totally FREE to use and no signup. You can change text size, color and position to create caption when you are editing. You can also put text inside or outside in GIF.
Just with a few clicks, your GIF is done . Try Now!
2. GIPHY
GIPHY is a GIF combiner where you can find various GIF files to combine. All of the GIFs are funny and interesting to use for people who love to combine GIFs. There are some examples in this site, so you can have the inspiration to combine GIFs if you don’t know where to start. You also can find different styles: reaction, sports, artists and more.
3. PIXEL
If you don’t want to use Photoshop to combine GIFs, here we recommend using PIXEL. You can use it to make GIFs easily online. You can add more than one GIF at one time. Besides, this GIF combiner can also change the GIF size to fit your needs. After the editing is made, you need to click create animation to export GIFs. You should know that GIF size is 32×32 for PIXEL, and 64×64 for SUPER PIXEL.
![]()
Frequently Asked Questions About Combing GIFs
1. Can I Combine A Few Gifs?
Yes, you can. Any photo or video editing software that supports GIF file format allows you to combine one or more GIFs. For instance, Adobe Photoshop users can combine several GIF files and play them simultaneously next to each other, but this task can be overwhelming if you are not familiar with this photo editing software.
An online GIF combiner like Ezgif enables you to combine multiple GIFs from your web browser for free, which makes it a great option for anyone who doesn’t have access to a professional photo or video editing software.
2. How To Merge Several Animated GIFs?
Playing two or more GIFs one after another in a single file is easy, as you just have to arrange them in a way you want them to appear in the final version of the GIF on the editor’s timeline and then export your project as a GIF file.
What’s more, you will be able to remove the frames of the GIFs you don’t want to include in the output file or apply different filters and effects. However, the options you are going to have at your disposal depending on the GIF maker or video editing software you are using to merge several animated GIFs into a single file.
Shanoon Cox
Shanoon Cox is a writer and a lover of all things video.
Follow @Shanoon Cox
Also read:
- Updated 2024 Approved Create or Find Good Morning/Night GIFs
- The Complete Guide to Whiteboard Animation for 2024
- Everything You Need to Know About Becoming a Motion Graphic Designer for 2024
- New 2024 Approved Best 15 Horror Animes That Will Trigger a Heart Attack
- Updated Ultimate Guide to Animated Characters Drawings
- Top 12 Video to GIF Converters High Quality to Check Out for 2024
- 2024 Approved 10 Amazing Cartoon Music Examples You Need to Bookmark
- The Most Efficient Techniques for You to Make 3D Animation Character for 2024
- Updated How to Make GIF Stickers for WhatsApp 100 The Simple Way
- Updated In 2024, Why These 10 Top Text Motion Templates Are Worth Your Attention
- 2024 Approved Top 3 Ways to Create Gif with Great 3D Gif Maker
- 2024 Approved Fuel Your Creativity with 10 Awesome Collection of 2D Animation Examples
- 2024 Approved Best 12 Evil Cartoon Characters of All Time
- New 2024 Approved Top 10 Banned Anime Around the World and Why
- New In 2024, Learn About Lip-Syncing in Animation
- New A Beginners Guide to Tell You What 3D Animation Is for 2024
- Updated In 2024, 10 Great MP4 to GIF Converters to Get Perfect-Made GIF
- New 2024 Approved 4 Things You Need to Know About Pinterest GIF
- Best 10 Apps to Enhance Your Instagram Story Slideshow for 2024
- In 2024, Best GIF to Video Converters
- How to Create a YouTube Intro Animation Like a Pro
- Updated 2024 Approved 10 of the Best Disney Animated Shows
- New In 2024, Ways on How to Get Started in Stop Motion Claymation
- New In 2024, OBS Animated Lower Thirds Alternatives
- 2024 Approved 18 Best Tools and Services to Create Animated Videos for Business 2023
- Updated In 2024, 4 Smart Solutions to Create or Find Good Morning/Night GIFs
- New Top Tips for Effortless Unity 3D Animation
- How to Make Your Characters Interactive in Unity Animation Rigging
- How To Get Out of Recovery or DFU Mode on Apple iPhone 12 Pro Max? | Dr.fone
- 3uTools Virtual Location Not Working On Infinix Smart 7 HD? Fix Now | Dr.fone
- In 2024, Fixing Foneazy MockGo Not Working On Realme 11X 5G | Dr.fone
- Can I recover permanently deleted photos from Realme GT Neo 5
- In 2024, Detailed guide of ispoofer for pogo installation On Sony Xperia 10 V | Dr.fone
- In 2024, Complete Tutorial to Use VPNa to Fake GPS Location On Asus ROG Phone 7 | Dr.fone
- In 2024, How to Fake Snapchat Location without Jailbreak On OnePlus Open | Dr.fone
- How to Fake GPS on Android without Mock Location For your Tecno Phantom V Flip | Dr.fone
- In 2024, 3 Ways to Track Apple iPhone 12 without Them Knowing | Dr.fone
- In 2024, How To Bypass iCloud Activation Lock On iPod and Apple iPhone 14 Pro Max The Right Way
- How To Fix Unresponsive Touch Screen on Vivo Y36i | Dr.fone
- What are Location Permissions Life360 On Xiaomi Redmi Note 12T Pro? | Dr.fone
- Wondering the Best Alternative to Hola On Samsung Galaxy F54 5G? Here Is the Answer | Dr.fone
- Pokemon Go Error 12 Failed to Detect Location On Motorola Edge 2023? | Dr.fone
- Title: New In 2024, How to Send and Add Snapchat GIFs 100 The Easy Way
- Author: Elon
- Created at : 2024-06-08 05:07:49
- Updated at : 2024-06-09 05:07:49
- Link: https://animation-videos.techidaily.com/new-in-2024-how-to-send-and-add-snapchat-gifs-100-the-easy-way/
- License: This work is licensed under CC BY-NC-SA 4.0.
