

New In 2024, Is It That Easy to Make My Own Animated Character?
Is It That Easy to Make My Own Animated Character?
Is It That Easy to Make My Own Animated Character?
An easy yet powerful editor
Numerous effects to choose from
Detailed tutorials provided by the official channel
Using animated characters and avatars is a fun way to present your profile. Character animation is a unique ability that entails bringing animated characters to life. It creates an illusion of thoughts, emotions, and personality.
Everyone has a question, how to make my own animated character. This tutorial will help create an animated character of yourself.
In this article
01 [Can I Create My Own GIF?](#Part 1)
02 [How Can I Make My Picture a Cartoon Character?](#Part 2)
Part 1 Can I Create My Own GIF?
Despite being 30 years old, GIFs are still famously used by many in chats and many ways in phones, computers, etc. There are many online websites and software to create GIFs. Animated visuals make a brand’s communication with its customers more charismatic and engaging. With the correct visual stimuli, a GIF’s usefulness can be increased even more. Finding GIFs to publish is simple, but creating your own is more complicated. You can make a GIF on your mobile or computer without needing Photoshop in various ways.
We use paper and pencils or software to do character animations. A thoroughly analyzed concept, a great deal of discussion, study, and critical decisions go into producing an animated cartoon or GIF character, ensuring that the ideas come to life in the greatest possible way.
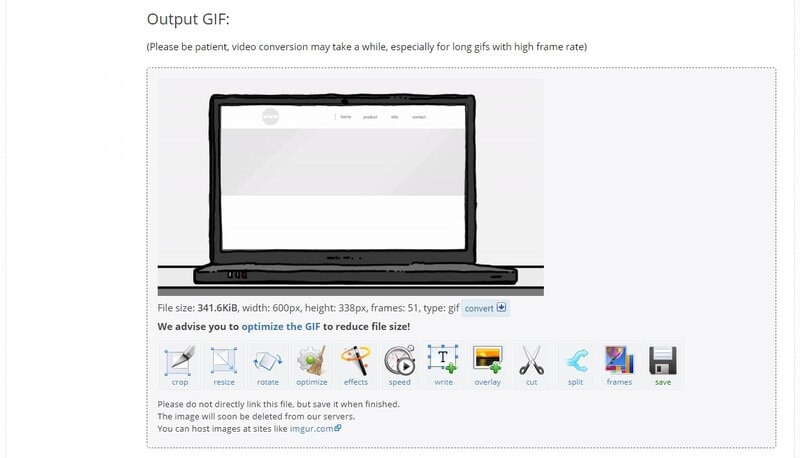
To understand how you can create your GIF, let’s discuss converting a video or multiple photos to GIF online. With the help of ezgif.com, which works on both mobile and computer.
01Converting Images to GIF
● Step 1: To convert Images to GIFs, click on “GIF maker” on the home page
● Step 2: You can select on the image or multiple images to convert it into GIF
● Step 3: Click on “Upload and made as GIF”
● Step 4: Later, you can make necessary changes like changing the order, time for each image, resizing the image, setting loop count, and many additional effects. Now, click on create GIF.
● Step 5: Finally, the GIF you created will be previewable in a box at the corner.
02Converting Videos to GIF
● Step 1: First, you need to choose the ‘video to gif’ option.
● Step 2: Choose the video that must be converted to GIF and click on “Upload.”
● Step 3: You can make desired changes like splitting, cutting, cropping the video. Enter the start and end times of the video.
● Step 4: After you’ve finished with all of the effects, click “Make GIF.” A preview of the GIF will appear below, depending on the size of the video.
Part 2 How Can I Make My Picture a Cartoon Character
01What App Turns You into a Disney Character
Let us learn how to design your own animated character in this part.
● Voila AI Artist
Moho supports both Windows and macOS. Moho is a motion graphics program that includes tools for working with 2D vector animation and other animation effects. Moho assists you to create graphics on a tablet and use the built-in graphics editor to construct storyboards and control objects in layers. The software includes various graphic elements and characters, realistic physics, and Unity integration.
Moho has a rating of 5 on Amazon.
Through this YouTube tutorial, you will design your own animated character.
02What app is Best for Animation
● Moho
Moho supports both Windows and macOS. Moho is a motion graphics program that includes tools for working with 2D vector animation and other animation effects. Moho allows you to create graphics on a tablet and use the built-in graphics editor to construct storyboards and control objects in layers. The software includes a variety of graphic elements and characters, as well as realistic physics and Unity integration. Moho has a rating of 5 on Amazon.
● OpenTooz
OpenTooz supports both Windows and macOS. Being a professional animation cartoon-making applications suite, it produced Futurama and Sponge Bob. OpenToonz has a lot of drawing tools, effects and also a skeletal character animation feature. It also allows you to transfer photos from tracing, make a sketch, and has a large set of drawing tools and effects.
This app has a rating of 8.2 out of 10.
● Cinema 4D
Cinema 4D supports both Windows and macOS. Cinema 4D is a professional solution for producing 3D models, dynamic graphics, and realistic renderings with an elementary interface that even a beginner can comprehend. Basic capabilities, procedural and polygonal modeling, are supported, and a variety of package modules for various uses, such as scene visualization, object dynamics simulation, character animation, and more.
This app has a rating of 8 out of 10.
03Which app is the Best for Animation Free
● Adobe Animate
Both Windows and macOS are compatible with Adobe Animate. This is a powerful web design program and Adobe’s best iPad animation app, allowing even novices to create professional-looking vector graphics and animations. It’s just as simple to process a finished image as it is to create one from scratch with Animate. Good overlay, 3D models, and interfaces are all supported by the app. The content can be helpful on websites, online movies, and games once exported.
● Pencil2D
Pencil2D supports both Windows and macOS. This open-source animation software for mobile apps is a lightweight tool for working with simple 2D visuals. Allows you to sketch pixel and animate characters on the fly without putting your creativity at risk. You can add effects and filters by efficiently processing vector and raster graphics. It also includes valuable hints and examples to assist aspiring artists in getting started. It’s fun to experiment with free iPad animation applications and computer animation apps.
● Synfig Studio
Synfig Studio supports Windows and macOS. Synfig is a simple, easy open-source 2D animation editor that lets you make animations, add filters, shading and morphing effects, and more. Skeletal animation is supported, allowing you to build cartoon figures, which is lovely. The finished product can be rendered later or on a different computer entirely.
All these applications will be helpful to create an animated character of yourself.
● Wondershare Filmora Video Editor
We propose Wondershare Filmora, in this case, create animation videos by adding keyframes, resulting in a smooth and natural animation. Wondershare Filmora has various animation effects that cover a wide range of animated transitions with multiple versions. You can change the revealed length, conceal length, gradient size, and direction or position to get different outcomes.
To get started with animation, all you need is a white plane. Aside from that, color correction and an audio mixer will take your animation video to the next level. Download it for free to give it a try! Below is a tutorial on how to make animation using Filmora.
For Win 7 or later (64-bit)
For macOS 10.12 or later
● Key Takeaways from This Episode →
● Discussed an app that converts images or videos into GIFs
● Best apps for animations
● The proposal of the best software for animation, which is Wondershare Filmora Video Editor .
Using animated characters and avatars is a fun way to present your profile. Character animation is a unique ability that entails bringing animated characters to life. It creates an illusion of thoughts, emotions, and personality.
Everyone has a question, how to make my own animated character. This tutorial will help create an animated character of yourself.
In this article
01 [Can I Create My Own GIF?](#Part 1)
02 [How Can I Make My Picture a Cartoon Character?](#Part 2)
Part 1 Can I Create My Own GIF?
Despite being 30 years old, GIFs are still famously used by many in chats and many ways in phones, computers, etc. There are many online websites and software to create GIFs. Animated visuals make a brand’s communication with its customers more charismatic and engaging. With the correct visual stimuli, a GIF’s usefulness can be increased even more. Finding GIFs to publish is simple, but creating your own is more complicated. You can make a GIF on your mobile or computer without needing Photoshop in various ways.
We use paper and pencils or software to do character animations. A thoroughly analyzed concept, a great deal of discussion, study, and critical decisions go into producing an animated cartoon or GIF character, ensuring that the ideas come to life in the greatest possible way.
To understand how you can create your GIF, let’s discuss converting a video or multiple photos to GIF online. With the help of ezgif.com, which works on both mobile and computer.
01Converting Images to GIF
● Step 1: To convert Images to GIFs, click on “GIF maker” on the home page
● Step 2: You can select on the image or multiple images to convert it into GIF
● Step 3: Click on “Upload and made as GIF”
● Step 4: Later, you can make necessary changes like changing the order, time for each image, resizing the image, setting loop count, and many additional effects. Now, click on create GIF.
● Step 5: Finally, the GIF you created will be previewable in a box at the corner.
02Converting Videos to GIF
● Step 1: First, you need to choose the ‘video to gif’ option.
● Step 2: Choose the video that must be converted to GIF and click on “Upload.”
● Step 3: You can make desired changes like splitting, cutting, cropping the video. Enter the start and end times of the video.
● Step 4: After you’ve finished with all of the effects, click “Make GIF.” A preview of the GIF will appear below, depending on the size of the video.
Part 2 How Can I Make My Picture a Cartoon Character
01What App Turns You into a Disney Character
Let us learn how to design your own animated character in this part.
● Voila AI Artist
Moho supports both Windows and macOS. Moho is a motion graphics program that includes tools for working with 2D vector animation and other animation effects. Moho assists you to create graphics on a tablet and use the built-in graphics editor to construct storyboards and control objects in layers. The software includes various graphic elements and characters, realistic physics, and Unity integration.
Moho has a rating of 5 on Amazon.
Through this YouTube tutorial, you will design your own animated character.
02What app is Best for Animation
● Moho
Moho supports both Windows and macOS. Moho is a motion graphics program that includes tools for working with 2D vector animation and other animation effects. Moho allows you to create graphics on a tablet and use the built-in graphics editor to construct storyboards and control objects in layers. The software includes a variety of graphic elements and characters, as well as realistic physics and Unity integration. Moho has a rating of 5 on Amazon.
● OpenTooz
OpenTooz supports both Windows and macOS. Being a professional animation cartoon-making applications suite, it produced Futurama and Sponge Bob. OpenToonz has a lot of drawing tools, effects and also a skeletal character animation feature. It also allows you to transfer photos from tracing, make a sketch, and has a large set of drawing tools and effects.
This app has a rating of 8.2 out of 10.
● Cinema 4D
Cinema 4D supports both Windows and macOS. Cinema 4D is a professional solution for producing 3D models, dynamic graphics, and realistic renderings with an elementary interface that even a beginner can comprehend. Basic capabilities, procedural and polygonal modeling, are supported, and a variety of package modules for various uses, such as scene visualization, object dynamics simulation, character animation, and more.
This app has a rating of 8 out of 10.
03Which app is the Best for Animation Free
● Adobe Animate
Both Windows and macOS are compatible with Adobe Animate. This is a powerful web design program and Adobe’s best iPad animation app, allowing even novices to create professional-looking vector graphics and animations. It’s just as simple to process a finished image as it is to create one from scratch with Animate. Good overlay, 3D models, and interfaces are all supported by the app. The content can be helpful on websites, online movies, and games once exported.
● Pencil2D
Pencil2D supports both Windows and macOS. This open-source animation software for mobile apps is a lightweight tool for working with simple 2D visuals. Allows you to sketch pixel and animate characters on the fly without putting your creativity at risk. You can add effects and filters by efficiently processing vector and raster graphics. It also includes valuable hints and examples to assist aspiring artists in getting started. It’s fun to experiment with free iPad animation applications and computer animation apps.
● Synfig Studio
Synfig Studio supports Windows and macOS. Synfig is a simple, easy open-source 2D animation editor that lets you make animations, add filters, shading and morphing effects, and more. Skeletal animation is supported, allowing you to build cartoon figures, which is lovely. The finished product can be rendered later or on a different computer entirely.
All these applications will be helpful to create an animated character of yourself.
● Wondershare Filmora Video Editor
We propose Wondershare Filmora, in this case, create animation videos by adding keyframes, resulting in a smooth and natural animation. Wondershare Filmora has various animation effects that cover a wide range of animated transitions with multiple versions. You can change the revealed length, conceal length, gradient size, and direction or position to get different outcomes.
To get started with animation, all you need is a white plane. Aside from that, color correction and an audio mixer will take your animation video to the next level. Download it for free to give it a try! Below is a tutorial on how to make animation using Filmora.
For Win 7 or later (64-bit)
For macOS 10.12 or later
● Key Takeaways from This Episode →
● Discussed an app that converts images or videos into GIFs
● Best apps for animations
● The proposal of the best software for animation, which is Wondershare Filmora Video Editor .
The 10 Most Adorable Aesthetic Cartoon Characters of All Time
The 10 Most Adorable Aesthetic Cartoon Characters of All Time
An easy yet powerful editor
Numerous effects to choose from
Detailed tutorials provided by the official channel
Ever seen a cartoon, and you can’t just help staring! Primarily when they act your favorite scene, all you do is play it over and over.
Which cartoon character do you find most adorable? Talk about Moana, Frozen, or even Dory. How do you feel thinking about your favorite scene of them? Today, we will list our top 10 most adorable aesthetic cartoon characters. We promise you will love it, and we are sure many of them would resonate with you. Almost everyone gets drawn to the cutest cartoon characters’ aesthetic.
In this article
01 [Why is it so difficult to make aesthetic cartoon characters?](#Part 1)
02 [The most adorable 10 aesthetic cartoon character of all time.](#Part 2)
03 [How to apply aesthetic cartoon characters to video editing.](#Part 3)
Part 1 Why Is It So Difficult To Make Aesthetic Cartoon Characters?
It isn’t easy because it requires a lot of creativity, understanding of the character, focus, and patience to get all the details that make a character adorably aesthetic.
What makes a cartoon character aesthetic? It is not just about its looks. Yes, it starts with its eyes down to the shape of the head, face, and other bodily features, but beauty is relative.
It has to do with how much attachment the cartoon characters aesthetically can spur in their fans’ hearts due to their roles, attitude, and appearance.
Part 2 The 10 Most Adorable Aesthetic Cartoon Character
Here are our top picks of the most adorable aesthetic cartoon character in the following order to pick them quickly:
● Young dory
● Pua in Moana
● Olaf in Frozen
● Stitch in Lilo and Stitch
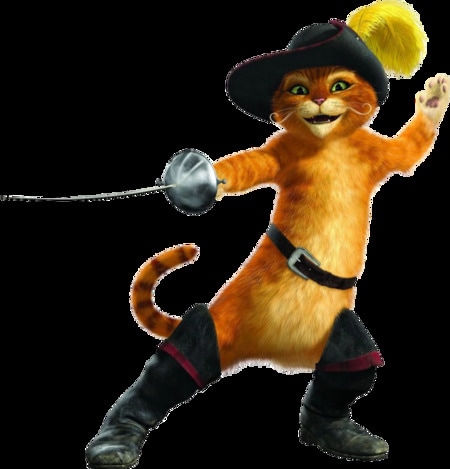
● Puss in boots
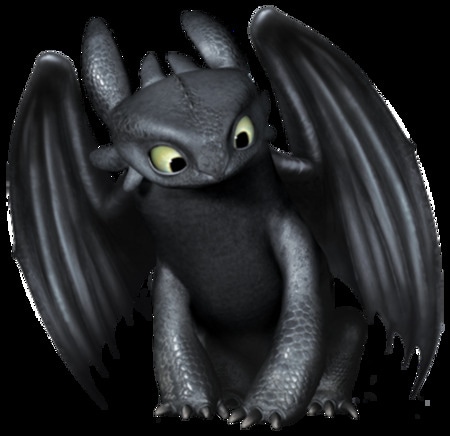
● Toothless in How to train your dragon
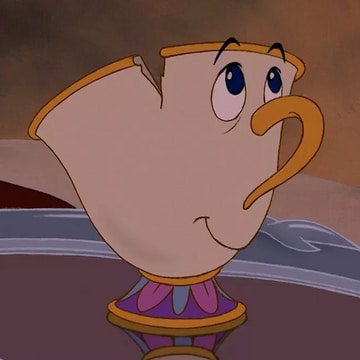
● Chip in beauty and the beast
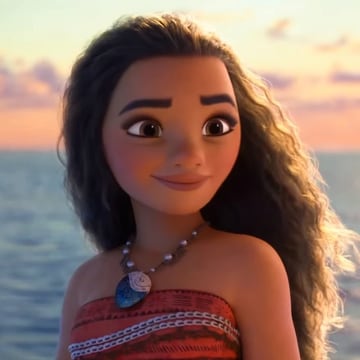
● Moana in Moana
● Bonnie from Toy story
● Grogu from The Mandalorian
01Young Dory(Finding Dory 2026)
Who wouldn’t find young Dory adorable? Dory was voiced by the seven-year-old daughter of producer Lindsey Collins. Dory saw her short-term memory loss as a form of weakness. Her parents assured her that it was okay but warned her to stay away from the undertow. Before the 2016 classic, we first meet Dory in the 2003 Pixar’s classic ‘finding Nemo’ where Dory helps Marlin, a clownfish, reunites with his son, Nemo. In ‘Finding Dory, ‘ young Dory’s amnesiac was finally brought back thirteen years later. Dory is perseverant, has a trim physique, and yet she can do whatever she has set her mind to do.

02Pua in Moana(2016)
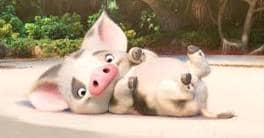
Pua is a precious pig with puppy-like characteristics. He happens to be Moana’s best friend. Pua made his first appearance during the ‘Where you are’ performance alongside the village chief’s daughter. On Moana’s first attempt at setting sails to find Maui, their raft gets damaged, and Pua becomes scared of the sea and Moana’s oar. Later on, the makers removed the adorable pig to allow Moana to strive more independently. However, this indeed came with many critics from fans as Pua was just too sweet and cute. As much as Pua’s role in the film was small, he still made a lot of impressions.
03Olaf in Frozen (2013)
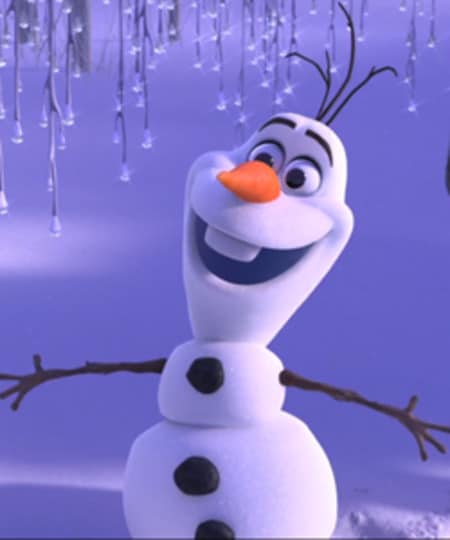
Voiced by Josh Gad and created due to Elsa’s superpowers, Olaf wows us. The adorable little snowman desires warmth, and isn’t this just ironical. He expresses this in his song, ‘In summer,’ where he beautifully shows his love for the season. This snowman shows all the many characteristics his sweet self is made of. Talk about vibrant nature, bravery, humourous, and adorable optimism. Olaf signifies the Disney princesses’ innocence as they created Olaf when they were much younger. Olaf plays a vital role in helping Anna, Kristoff, and Sven on their adventure in finding Elsa. Olaf is just a sweet soul, and this list would not have been complete if we missed him!
04Stitch in Lilo and Stitch (2002)
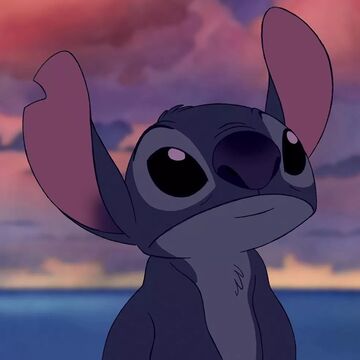
Stitch, a terrestrial, is also known as ‘Experiment 626’. Dr. JumbaJookiba genetically modified it. He initially creates him as destructive, and Stitch has a non-conventional form. He has two identities, a dog version as his true self with other arms, a retractable antenna, and three spines. Stitch accidentally meets Lilo in Kauia and is welcomed into the family. Even though Lilo’s classmates all see Stitch as unattractive and captain Gantu does not like him, Lilo makes away with societal beauty standards, and views Stitch as cute and fluffy.
05Puss in Boots (Shrek Franchise 2001)
Puss, a smooth-talking cat with a Spanish accent, has an adorable face, and his comedic banter with Donkey in Shrek 2, coupled with his sweet face, one of the reasons for that film’s success. While developing Puss’s character, Antonio Bandera’s portrayal of ‘Zorro’ was used as the manor inspiration. Puss uses his big eyes and sweet cuteness as the perfect distraction for his trickery. Puss is just an absolute ball of sweetness and fluffy cuteness.
06Toothless in ‘How to train your dragon(2010-2019)
Toothless, a mighty dragon with a non-verbal humor sense, make its way into our hearts in the first “How to train your dragon.” Here, he ends up forming a bond with Hiccup, who took him down at first. As much as Toothless causes a heinous act, his big eyes, and a perfect and innocent smile make it hard to stay mad at him. After Toothless has an adorable family, he passes on his beautiful genetics.
07Chip in beauty and the beast
Who knew teacups could look so alive and lovable and bring up emotions. Having seen ‘Beauty and the Beast,’ would you say that just the mere sight of a teacup didn’t cause a little tear well up in your eyes while remembering Chip. The adorable aesthetic cartoon character chip in the ‘Beauty and the Beast’ is a must mention.
08Moana in Moana
Does Moana even need an explanation! The central character in the cartoon ‘Moana .’Brave, beautiful, determined, beautiful, kind, strong-willed. She was only a baby when she saved a baby sea turtle from a predatory bird. The ocean chose Moana to reunite a relic with the goddess ‘Tefiti .’ Moana’s independence received widespread acclaim as she got officially listed in 2019 as a Disney Princess, making her the twelfth on the list.
09Bonnie from Toy Story
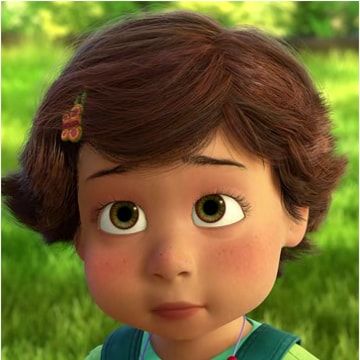
Bonnie is a significant character in the cartoon **”**Toy Story. She is a cute-looking, shy, and the quiet character depicted as a 4-year old brunette girl. What is most notable is how Bonnie acts with her toys which she inherited from Andy. She usually withdraws when she is around adults and makes her first appearance in toy story 3, sitting on the front desk of Sunnyside Daycare with the monkey in her hand and trying to see what Mrs. Davis was donating. Bonnie has an active imagination when relating with her toys, who become her close friends. She is an adorable character and wows us all with her kind and friendly nature.
10 10. Grogu from The Mandalorian
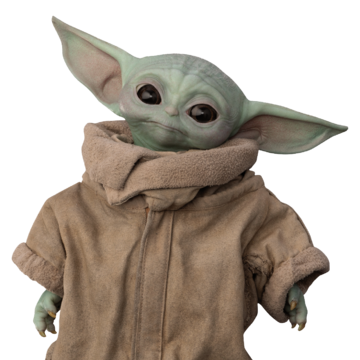
Grogu is also popularly known as ‘The Child,’ a force-sensitive character who shows bravery and courage after surviving the Jedi siege. Grogu, alongside Djarin, went in search of the remaining Jedi. After his encounter with Skywalker, Grogu was forced to either accept his gift and return to Mandolarian or continue his Jedi training. Grogu chose to return to Mandolarian, where he reunited with Djari in a gang war.
Part 3 How To Apply Aesthetic Cartoon Characters To Video Editing
If you wish to add cartoon characters aesthetic to your videos, there are many video editing software that can do that for you.
Top of the list is Wondershare Filmora Video Editor . With this tool, you can make a smooth and natural animation add it to your video while editing. Filmora is a powerful video editing software that makes your video editing work seamless and perfect.
For Win 7 or later (64-bit)
For macOS 10.12 or later
You can also turn photos into cartoon style in one click.
Filmora’s keyframing features help you make the cartoon effects smooth and explicit.
Here are other video editing software that helps you add aesthetic cartoon characters to your video editing;
● Flipate
● Drawcartoon
● Animateit, etc.
You can choose from any one of them. But, for a wholesome application with all features that suit well with applying aesthetic cartoon characters to video editing, then Filmora is the name that flashes out.
● Ending Thoughts →
● Cartooncharacters are adorable in their uniqueness, from our charming Dory to Pua to Moana herself. The list goes on!
● However, the art of creating them is no small feat and requires detailed attention, patience, and a lot of creativity.
● To make your videos more fun and creative, you could add aesthetic cartoon characters using a tool like Filmora.
● Animators do a lot of work into creating adorable aesthetic cartoon characters, such that you have a hard time selecting the cutest of them all.
● Cartoon characters are the creative imaginations of 3d animators made for entertaining viewers.
● Do you think we missed out on any of your favorite cartoon characters? Please share with us in the comment section.
Ever seen a cartoon, and you can’t just help staring! Primarily when they act your favorite scene, all you do is play it over and over.
Which cartoon character do you find most adorable? Talk about Moana, Frozen, or even Dory. How do you feel thinking about your favorite scene of them? Today, we will list our top 10 most adorable aesthetic cartoon characters. We promise you will love it, and we are sure many of them would resonate with you. Almost everyone gets drawn to the cutest cartoon characters’ aesthetic.
In this article
01 [Why is it so difficult to make aesthetic cartoon characters?](#Part 1)
02 [The most adorable 10 aesthetic cartoon character of all time.](#Part 2)
03 [How to apply aesthetic cartoon characters to video editing.](#Part 3)
Part 1 Why Is It So Difficult To Make Aesthetic Cartoon Characters?
It isn’t easy because it requires a lot of creativity, understanding of the character, focus, and patience to get all the details that make a character adorably aesthetic.
What makes a cartoon character aesthetic? It is not just about its looks. Yes, it starts with its eyes down to the shape of the head, face, and other bodily features, but beauty is relative.
It has to do with how much attachment the cartoon characters aesthetically can spur in their fans’ hearts due to their roles, attitude, and appearance.
Part 2 The 10 Most Adorable Aesthetic Cartoon Character
Here are our top picks of the most adorable aesthetic cartoon character in the following order to pick them quickly:
● Young dory
● Pua in Moana
● Olaf in Frozen
● Stitch in Lilo and Stitch
● Puss in boots
● Toothless in How to train your dragon
● Chip in beauty and the beast
● Moana in Moana
● Bonnie from Toy story
● Grogu from The Mandalorian
01Young Dory(Finding Dory 2026)
Who wouldn’t find young Dory adorable? Dory was voiced by the seven-year-old daughter of producer Lindsey Collins. Dory saw her short-term memory loss as a form of weakness. Her parents assured her that it was okay but warned her to stay away from the undertow. Before the 2016 classic, we first meet Dory in the 2003 Pixar’s classic ‘finding Nemo’ where Dory helps Marlin, a clownfish, reunites with his son, Nemo. In ‘Finding Dory, ‘ young Dory’s amnesiac was finally brought back thirteen years later. Dory is perseverant, has a trim physique, and yet she can do whatever she has set her mind to do.
02Pua in Moana(2016)
Pua is a precious pig with puppy-like characteristics. He happens to be Moana’s best friend. Pua made his first appearance during the ‘Where you are’ performance alongside the village chief’s daughter. On Moana’s first attempt at setting sails to find Maui, their raft gets damaged, and Pua becomes scared of the sea and Moana’s oar. Later on, the makers removed the adorable pig to allow Moana to strive more independently. However, this indeed came with many critics from fans as Pua was just too sweet and cute. As much as Pua’s role in the film was small, he still made a lot of impressions.
03Olaf in Frozen (2013)
Voiced by Josh Gad and created due to Elsa’s superpowers, Olaf wows us. The adorable little snowman desires warmth, and isn’t this just ironical. He expresses this in his song, ‘In summer,’ where he beautifully shows his love for the season. This snowman shows all the many characteristics his sweet self is made of. Talk about vibrant nature, bravery, humourous, and adorable optimism. Olaf signifies the Disney princesses’ innocence as they created Olaf when they were much younger. Olaf plays a vital role in helping Anna, Kristoff, and Sven on their adventure in finding Elsa. Olaf is just a sweet soul, and this list would not have been complete if we missed him!
04Stitch in Lilo and Stitch (2002)
Stitch, a terrestrial, is also known as ‘Experiment 626’. Dr. JumbaJookiba genetically modified it. He initially creates him as destructive, and Stitch has a non-conventional form. He has two identities, a dog version as his true self with other arms, a retractable antenna, and three spines. Stitch accidentally meets Lilo in Kauia and is welcomed into the family. Even though Lilo’s classmates all see Stitch as unattractive and captain Gantu does not like him, Lilo makes away with societal beauty standards, and views Stitch as cute and fluffy.
05Puss in Boots (Shrek Franchise 2001)
Puss, a smooth-talking cat with a Spanish accent, has an adorable face, and his comedic banter with Donkey in Shrek 2, coupled with his sweet face, one of the reasons for that film’s success. While developing Puss’s character, Antonio Bandera’s portrayal of ‘Zorro’ was used as the manor inspiration. Puss uses his big eyes and sweet cuteness as the perfect distraction for his trickery. Puss is just an absolute ball of sweetness and fluffy cuteness.
06Toothless in ‘How to train your dragon(2010-2019)
Toothless, a mighty dragon with a non-verbal humor sense, make its way into our hearts in the first “How to train your dragon.” Here, he ends up forming a bond with Hiccup, who took him down at first. As much as Toothless causes a heinous act, his big eyes, and a perfect and innocent smile make it hard to stay mad at him. After Toothless has an adorable family, he passes on his beautiful genetics.
07Chip in beauty and the beast
Who knew teacups could look so alive and lovable and bring up emotions. Having seen ‘Beauty and the Beast,’ would you say that just the mere sight of a teacup didn’t cause a little tear well up in your eyes while remembering Chip. The adorable aesthetic cartoon character chip in the ‘Beauty and the Beast’ is a must mention.
08Moana in Moana
Does Moana even need an explanation! The central character in the cartoon ‘Moana .’Brave, beautiful, determined, beautiful, kind, strong-willed. She was only a baby when she saved a baby sea turtle from a predatory bird. The ocean chose Moana to reunite a relic with the goddess ‘Tefiti .’ Moana’s independence received widespread acclaim as she got officially listed in 2019 as a Disney Princess, making her the twelfth on the list.
09Bonnie from Toy Story
Bonnie is a significant character in the cartoon **”**Toy Story. She is a cute-looking, shy, and the quiet character depicted as a 4-year old brunette girl. What is most notable is how Bonnie acts with her toys which she inherited from Andy. She usually withdraws when she is around adults and makes her first appearance in toy story 3, sitting on the front desk of Sunnyside Daycare with the monkey in her hand and trying to see what Mrs. Davis was donating. Bonnie has an active imagination when relating with her toys, who become her close friends. She is an adorable character and wows us all with her kind and friendly nature.
10 10. Grogu from The Mandalorian
Grogu is also popularly known as ‘The Child,’ a force-sensitive character who shows bravery and courage after surviving the Jedi siege. Grogu, alongside Djarin, went in search of the remaining Jedi. After his encounter with Skywalker, Grogu was forced to either accept his gift and return to Mandolarian or continue his Jedi training. Grogu chose to return to Mandolarian, where he reunited with Djari in a gang war.
Part 3 How To Apply Aesthetic Cartoon Characters To Video Editing
If you wish to add cartoon characters aesthetic to your videos, there are many video editing software that can do that for you.
Top of the list is Wondershare Filmora Video Editor . With this tool, you can make a smooth and natural animation add it to your video while editing. Filmora is a powerful video editing software that makes your video editing work seamless and perfect.
For Win 7 or later (64-bit)
For macOS 10.12 or later
You can also turn photos into cartoon style in one click.
Filmora’s keyframing features help you make the cartoon effects smooth and explicit.
Here are other video editing software that helps you add aesthetic cartoon characters to your video editing;
● Flipate
● Drawcartoon
● Animateit, etc.
You can choose from any one of them. But, for a wholesome application with all features that suit well with applying aesthetic cartoon characters to video editing, then Filmora is the name that flashes out.
● Ending Thoughts →
● Cartooncharacters are adorable in their uniqueness, from our charming Dory to Pua to Moana herself. The list goes on!
● However, the art of creating them is no small feat and requires detailed attention, patience, and a lot of creativity.
● To make your videos more fun and creative, you could add aesthetic cartoon characters using a tool like Filmora.
● Animators do a lot of work into creating adorable aesthetic cartoon characters, such that you have a hard time selecting the cutest of them all.
● Cartoon characters are the creative imaginations of 3d animators made for entertaining viewers.
● Do you think we missed out on any of your favorite cartoon characters? Please share with us in the comment section.
10 Photoshop Cartoon Effects For Creatives
10 Photoshop Cartoon Effects For Creatives
An easy yet powerful editor
Numerous effects to choose from
Detailed tutorials provided by the official channel
Whether cartoon lover or not, photo cartoon effects is admired by everyone nowadays. People want to use Photoshop cartoon effects.
Using Photoshop applications lets, you know that editing and applying effects are often time-consuming. Adjusting the color, resizing the image, applying effects is lengthy, requires focus, and sometimes may be boring. Thus, we have some Photoshop cartoon effects that will save your time and provide you with desired results.
In this article
01 [11 Best Photoshop Cartoon Effects](#Part 1)
02 [How To Create A Photo To Cartoon Effect In A Photoshop](#Part 2)
Part 1 Best Photoshop Cartoon Effects
If you prefer to download the cartoon effect app or want to edit the photo online without editing, here’s is a list of some of the best Photoshop or Premiere Pro cartoon effects:
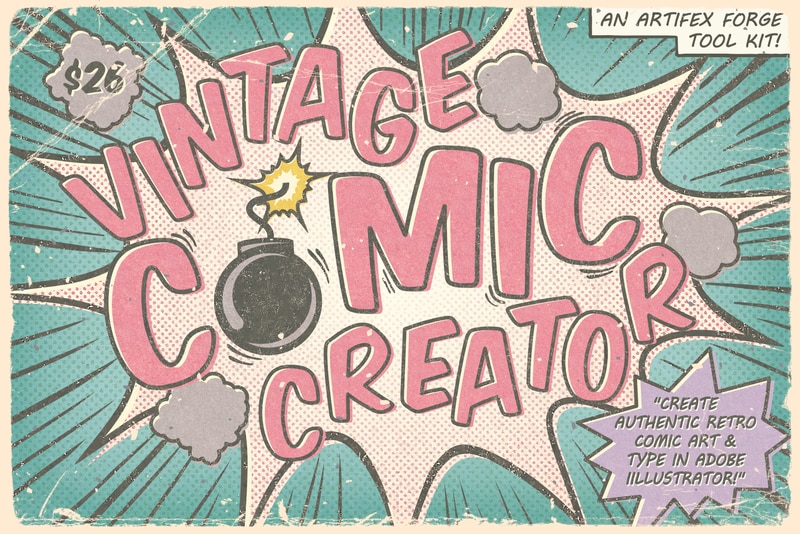
01Vintage Comic Creator
Vintage Comic Creator allows users to add After Effects in cartoon effects in photographs and texts. This can be the best choice if you want to add some shape effects, color, and change texture.
Along with cartoon edit text, an individual can also download overlays, pattern styles, and layer styles to make it comic book text. All the downloaded versions of templates are popular and editable as per the user’s requirement.
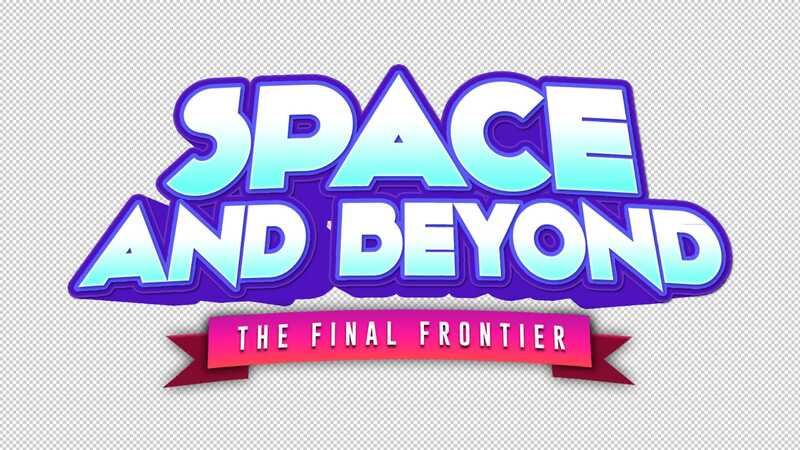
02Ultra Realistic 3D Space effect
Are you a space lover and looking for space inspires cartoon edits? Here’s a Solution. Ultra Realistic 3D Space cartoon effect allows the users to create editable fun cartoon text and Space themes.
Since it provides a variety of themes and ideas doesn’t limit the user when it comes to editing.
It provides you with a file with an example to make it easy to apply the cartoon effect online according to your wish.
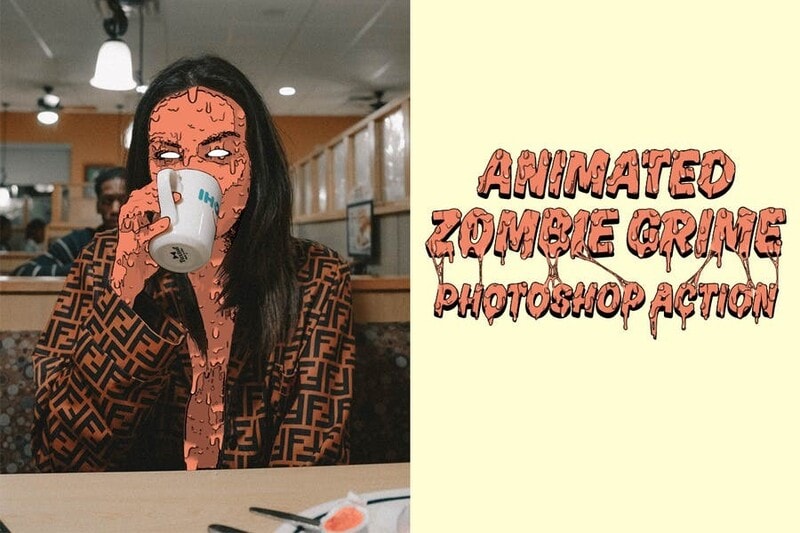
03Animated Zombie Grime Art Photoshop action
To the fans of all the zombie movies, here’s something you should try out!
Animated Zombie Grime Art provides features in which users can edit their photographs with zombie cartoon effects and experience how they will look like a zombie with zero effort. It also provides the option to create and save GIFs or videos. One can easily use them on their social media accounts.
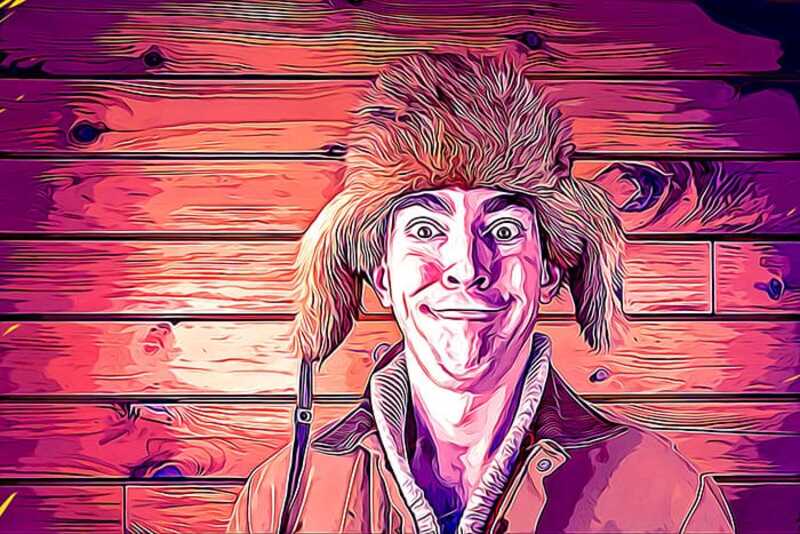
04Cartoon art Photoshop action
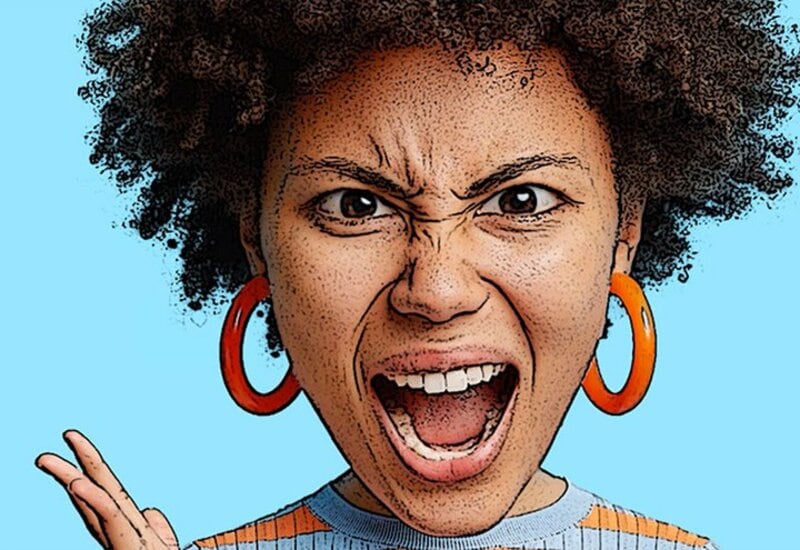
A quick and easy online cartoon effect helps individuals edit their photographs into paintings or cartoon characters. With only a few simple actions, users can easily edit their pictures. It provides editing in paintings, cartoons, oil pastels, oil paintings, etc.
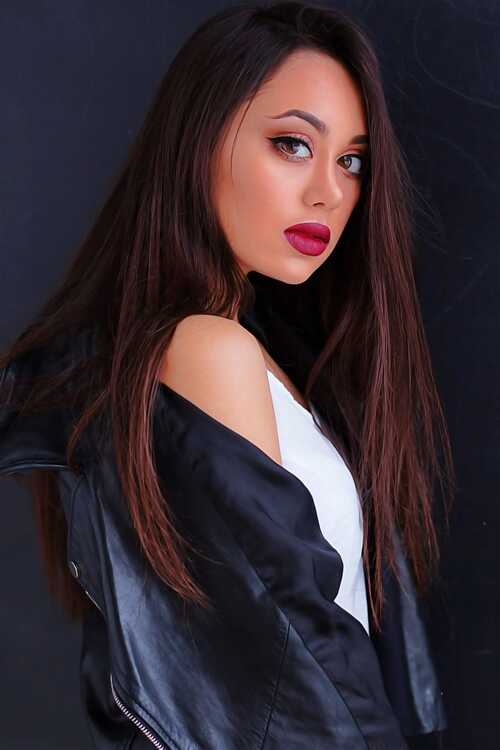
05Soft Photoshop cartoon effects
Soft Photoshop cartoon effects help the users edit the photos into cartoon effects and allow them to add smooth effects to them. With just one click, you can add different colors to your image can adjust the brightness, contrast, highlight, texture, etc. It includes layers and smart filters, thus providing various editing options.
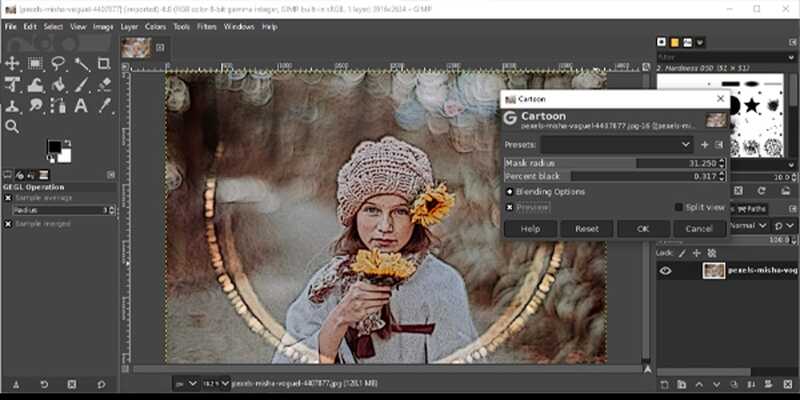
06Gimp cartoon effect
It is one of the fastest methods to edit your photographs into cartoon effects. Within a single click, you can cartoonify your pictures. With the help of the Gimp cartoon effect, the user can readjust brightness, contrast, light, etc. You can try soft burn, burn and overlay and can invert colors. It provides different filters with special effects that users can use free of cost.
07Pop art Photoshop action
Pop art Photoshop action easily converts any photograph into a retro cartoon photo effect. It transforms the picture into a cartoon customized painting within one click. Users can enjoy the features of adjusting colors and can change the background according to their wishes.

08Cell shader Photoshop action
If you want to convert photos into cartoon effects and at the same time want to apply cell shading, then here’s a magic photo cartoon effect. Cartooning your picture along with cell shading can be time-consuming sometimes. Cell shader Photoshop allows the user to shade the image with a single click. You can try it on any picture.
093D cartoon text effect
This cartoon effect app helped change the text or the style of the text by adding specific animations or filters. It includes different forms and types in which users can edit the text and make it look fantastic. This 3D animation you can use in your document in animation or simple editing.
10Filmora cartoon effects
With Wondershare Filmora Video Editor , users can take a new picture or add a photo from their phone’s gallery. Once the image is ready for editing, you should tap on the Apply Cartoon Effect button. It contains 12 different cartoon photo effect styles; thus, users can choose any style they want to insert in their picture. You can also add motion to images, videos, and unlimited editing features with the latest updates.
For Win 7 or later (64-bit)
For macOS 10.12 or later
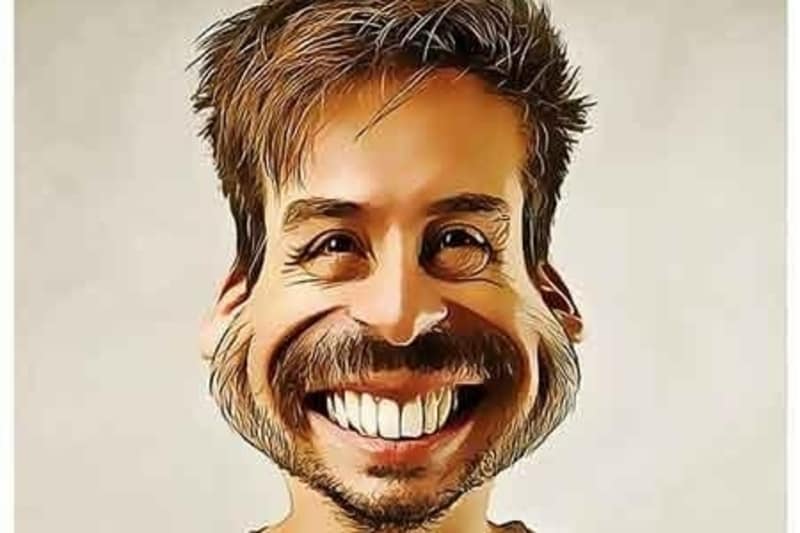
11 Caricature maker Photoshop action
You can turn your photographs into caricatures and make them look awesome. With the help of this After Effects, cartoon animation converts a simple picture into a fun carriage with just one click. You can adjust colors, size, and shape and add more features.
Part 2 How To Create A Photo To Cartoon Effect In A Photoshop
Below is a guide that will help you know more about Photoshop’s cartoon effect.
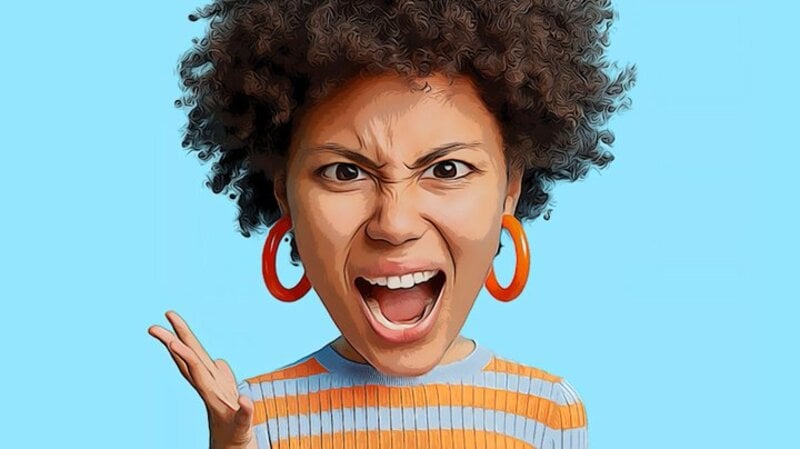
● Step 1: Select Image
Now, choose an image you want to cartoonize.
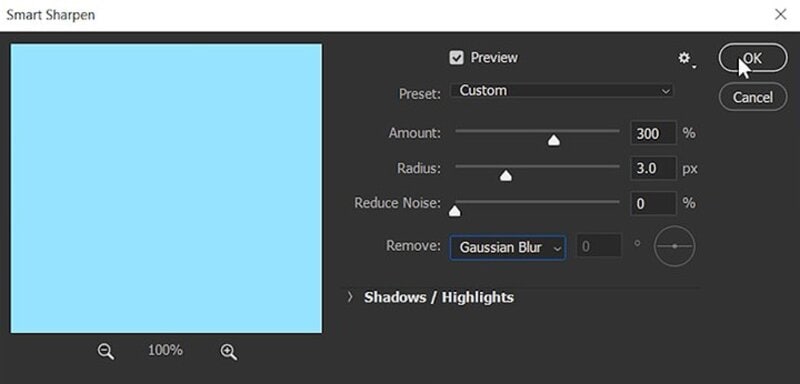
● Step 2: Apply Filter-Sharpen
Go to Filter to sharpen the image. Select the Gaussian Blur from the Remove drop-down list
Press OK.
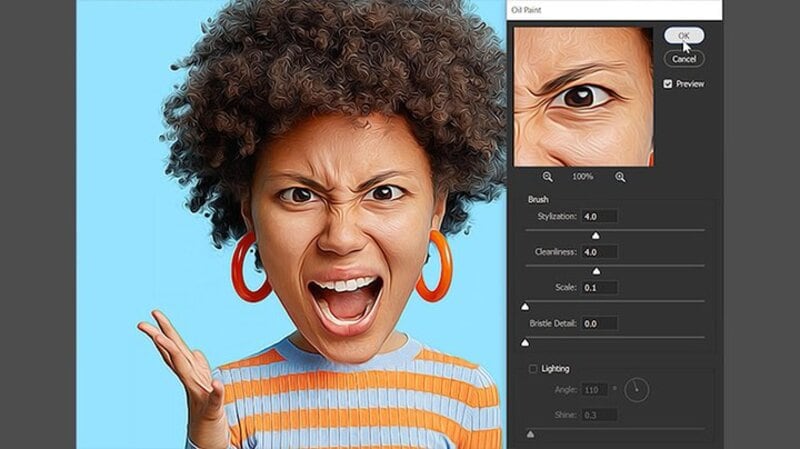
● Step 3: Apply Filter-Stylize
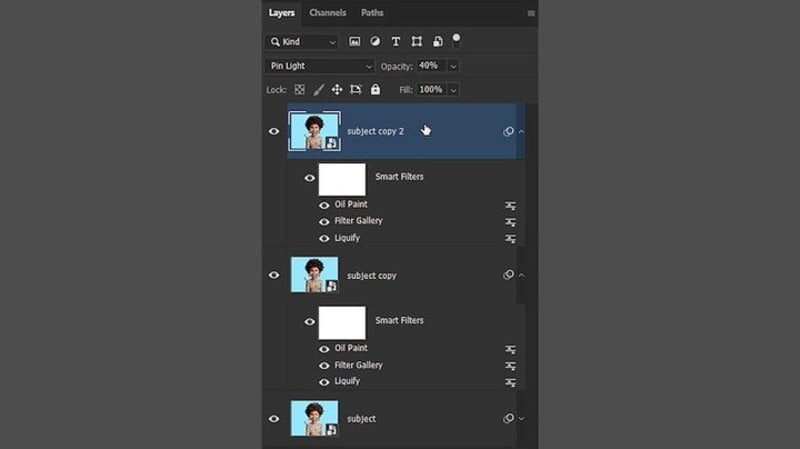
Go to Filter, then apply stylization and Oil paint.
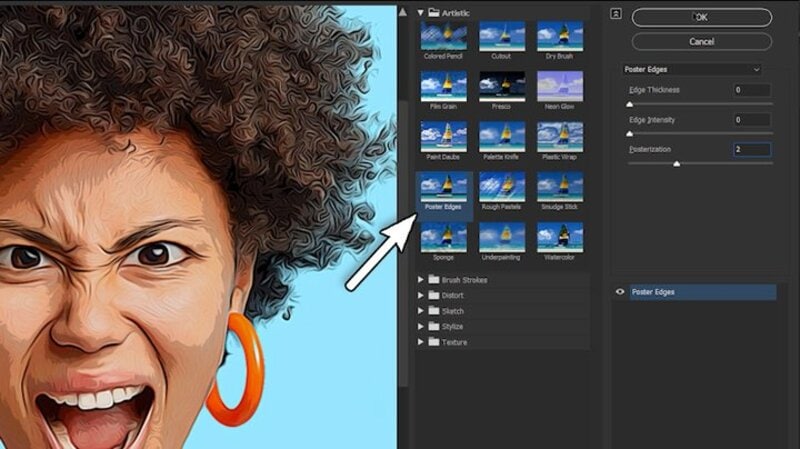
● Step 4: Choose Poster Edges
Choose from the list of effects on the filter gallery, click on Poster Edges and click OK.
● Step 5: Blur
It will start to resemble a cartoon, but there’s still more to do, so use the Filter > Blur Menu to add a Surface Blur. Set the Threshold to 15 pixels and the Radius to 12 pixels. This effect gives the skin a considerably smoother and cleaner appearance. Select OK.
● Step 6: Unsharp Mask
You can add some sharpness and increase particular highlights by going to Filter > Sharpen > Unsharp Mask.
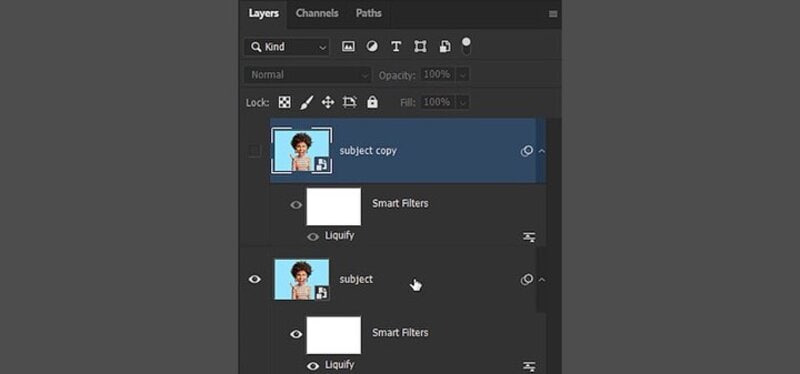
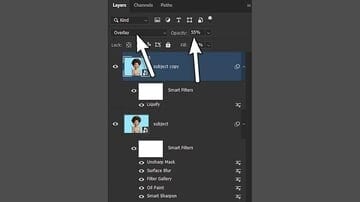
Unhide the second Smart Object layer and change its blending mode to Overlay. Then, reduce the layer’s Opacity to 55 percent.
Now, it will start to resemble a cartoon, but there’s still more to do, so use the Filter > Blur Menu to add a Surface Blur. Set the Threshold to 12 pixels and the Radius to 12 pixels.
● Step 7: Apply the Oil paint filter again
Return to Filter > Filter Gallery and select Poster Edges once more. These will draw attention to certain aspects of the portrait.
Choose the Oil Paint Filter from Filter > Stylize. Select OK.
● Step 8: Double-click on Filter Gallery
Click OK after double-clicking the Filter Gallery Smart Filter already on this layer.
Carry on with the same steps for the Oil Paint Filter.
Select OK.
● Step 9: Choose the Raw filter option
Let’s take this photo cartoon effect to the next level with a simple method! To make a Stamp Visible Layer, choose the very top layer and press Control-Shift-Alt-E. When you wish to merge all the layers in a document onto a new layer, this shortcut comes in handy.
Lastly, convert the new layer to a Smart Object by right-clicking on it.
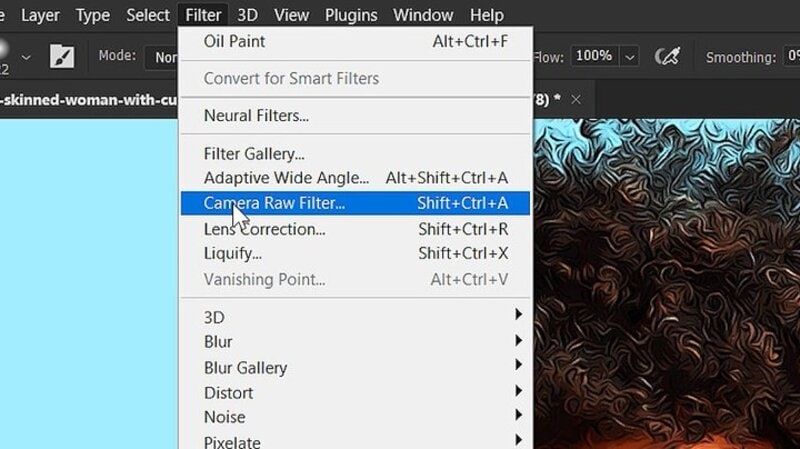
Select the Camera Raw Filter option from the Filter menu.
● Ending Thoughts →
● After visiting this article, I’m sure you have plenty of options for cartoon effects according to your choice. In this technological world, it’s hard to find the Photoshop cartoon effect of your desire, which helps save time.
● The above is one of the best After Effects cartoon animations you can use as a cartoon lover. Besides, you can also try out our recommended Filmora – the editor in vogue for its world-class editing features to help enhance your data.
Whether cartoon lover or not, photo cartoon effects is admired by everyone nowadays. People want to use Photoshop cartoon effects.
Using Photoshop applications lets, you know that editing and applying effects are often time-consuming. Adjusting the color, resizing the image, applying effects is lengthy, requires focus, and sometimes may be boring. Thus, we have some Photoshop cartoon effects that will save your time and provide you with desired results.
In this article
01 [11 Best Photoshop Cartoon Effects](#Part 1)
02 [How To Create A Photo To Cartoon Effect In A Photoshop](#Part 2)
Part 1 Best Photoshop Cartoon Effects
If you prefer to download the cartoon effect app or want to edit the photo online without editing, here’s is a list of some of the best Photoshop or Premiere Pro cartoon effects:
01Vintage Comic Creator
Vintage Comic Creator allows users to add After Effects in cartoon effects in photographs and texts. This can be the best choice if you want to add some shape effects, color, and change texture.
Along with cartoon edit text, an individual can also download overlays, pattern styles, and layer styles to make it comic book text. All the downloaded versions of templates are popular and editable as per the user’s requirement.
02Ultra Realistic 3D Space effect
Are you a space lover and looking for space inspires cartoon edits? Here’s a Solution. Ultra Realistic 3D Space cartoon effect allows the users to create editable fun cartoon text and Space themes.
Since it provides a variety of themes and ideas doesn’t limit the user when it comes to editing.
It provides you with a file with an example to make it easy to apply the cartoon effect online according to your wish.
03Animated Zombie Grime Art Photoshop action
To the fans of all the zombie movies, here’s something you should try out!
Animated Zombie Grime Art provides features in which users can edit their photographs with zombie cartoon effects and experience how they will look like a zombie with zero effort. It also provides the option to create and save GIFs or videos. One can easily use them on their social media accounts.
04Cartoon art Photoshop action
A quick and easy online cartoon effect helps individuals edit their photographs into paintings or cartoon characters. With only a few simple actions, users can easily edit their pictures. It provides editing in paintings, cartoons, oil pastels, oil paintings, etc.
05Soft Photoshop cartoon effects
Soft Photoshop cartoon effects help the users edit the photos into cartoon effects and allow them to add smooth effects to them. With just one click, you can add different colors to your image can adjust the brightness, contrast, highlight, texture, etc. It includes layers and smart filters, thus providing various editing options.
06Gimp cartoon effect
It is one of the fastest methods to edit your photographs into cartoon effects. Within a single click, you can cartoonify your pictures. With the help of the Gimp cartoon effect, the user can readjust brightness, contrast, light, etc. You can try soft burn, burn and overlay and can invert colors. It provides different filters with special effects that users can use free of cost.
07Pop art Photoshop action
Pop art Photoshop action easily converts any photograph into a retro cartoon photo effect. It transforms the picture into a cartoon customized painting within one click. Users can enjoy the features of adjusting colors and can change the background according to their wishes.
08Cell shader Photoshop action
If you want to convert photos into cartoon effects and at the same time want to apply cell shading, then here’s a magic photo cartoon effect. Cartooning your picture along with cell shading can be time-consuming sometimes. Cell shader Photoshop allows the user to shade the image with a single click. You can try it on any picture.
093D cartoon text effect
This cartoon effect app helped change the text or the style of the text by adding specific animations or filters. It includes different forms and types in which users can edit the text and make it look fantastic. This 3D animation you can use in your document in animation or simple editing.
10Filmora cartoon effects
With Wondershare Filmora Video Editor , users can take a new picture or add a photo from their phone’s gallery. Once the image is ready for editing, you should tap on the Apply Cartoon Effect button. It contains 12 different cartoon photo effect styles; thus, users can choose any style they want to insert in their picture. You can also add motion to images, videos, and unlimited editing features with the latest updates.
For Win 7 or later (64-bit)
For macOS 10.12 or later
11 Caricature maker Photoshop action
You can turn your photographs into caricatures and make them look awesome. With the help of this After Effects, cartoon animation converts a simple picture into a fun carriage with just one click. You can adjust colors, size, and shape and add more features.
Part 2 How To Create A Photo To Cartoon Effect In A Photoshop
Below is a guide that will help you know more about Photoshop’s cartoon effect.
● Step 1: Select Image
Now, choose an image you want to cartoonize.
● Step 2: Apply Filter-Sharpen
Go to Filter to sharpen the image. Select the Gaussian Blur from the Remove drop-down list
Press OK.
● Step 3: Apply Filter-Stylize
Go to Filter, then apply stylization and Oil paint.
● Step 4: Choose Poster Edges
Choose from the list of effects on the filter gallery, click on Poster Edges and click OK.
● Step 5: Blur
It will start to resemble a cartoon, but there’s still more to do, so use the Filter > Blur Menu to add a Surface Blur. Set the Threshold to 15 pixels and the Radius to 12 pixels. This effect gives the skin a considerably smoother and cleaner appearance. Select OK.
● Step 6: Unsharp Mask
You can add some sharpness and increase particular highlights by going to Filter > Sharpen > Unsharp Mask.
Unhide the second Smart Object layer and change its blending mode to Overlay. Then, reduce the layer’s Opacity to 55 percent.
Now, it will start to resemble a cartoon, but there’s still more to do, so use the Filter > Blur Menu to add a Surface Blur. Set the Threshold to 12 pixels and the Radius to 12 pixels.
● Step 7: Apply the Oil paint filter again
Return to Filter > Filter Gallery and select Poster Edges once more. These will draw attention to certain aspects of the portrait.
Choose the Oil Paint Filter from Filter > Stylize. Select OK.
● Step 8: Double-click on Filter Gallery
Click OK after double-clicking the Filter Gallery Smart Filter already on this layer.
Carry on with the same steps for the Oil Paint Filter.
Select OK.
● Step 9: Choose the Raw filter option
Let’s take this photo cartoon effect to the next level with a simple method! To make a Stamp Visible Layer, choose the very top layer and press Control-Shift-Alt-E. When you wish to merge all the layers in a document onto a new layer, this shortcut comes in handy.
Lastly, convert the new layer to a Smart Object by right-clicking on it.
Select the Camera Raw Filter option from the Filter menu.
● Ending Thoughts →
● After visiting this article, I’m sure you have plenty of options for cartoon effects according to your choice. In this technological world, it’s hard to find the Photoshop cartoon effect of your desire, which helps save time.
● The above is one of the best After Effects cartoon animations you can use as a cartoon lover. Besides, you can also try out our recommended Filmora – the editor in vogue for its world-class editing features to help enhance your data.
https://images.wondershare.com/filmora/article-images/filmora9-website
2D Character Animation: Everything You Should Know About It
An easy yet powerful editor
Numerous effects to choose from
Detailed tutorials provided by the official channel
2D character animation is one of the significant kinds of animation popularly used for creating animated movies, marketing videos, cartoons, advertisements, educational content, corporate presentations, video games, etc.
With the popularity of video content, more and more businesses tend to use animation for promotion, as they magnify conversion rates by 20%. Some companies hire 2D character animation services; others try to make them online with software help.
In this article
01 [What is 2D Character Animation and What Does 2D Animation Do?](#Part 1)
02 [2D Character Animation Tips and Tricks](#Part 2)
03 [An Ultimate Guide to Create 2D Character Animation Online](#Part 3)
04 [5 Great 2D Character Animation Templates](#Part 4)
Part 1 What is 2D Character Animation and What Does 2D Animation Do?
2D animation is identified by having its characters and objects created in a 2D space. It means that they only have height and width to specify.
However, 2D animation is considered a traditional style, known from the 1800s. Initially, it was designed by merging the frames in which one drawing was followed by another and making them different; every second consists of 24 frames.
We all remember the classic Disney animations. Snow White and the Seven Dwarfs, The Little Mermaid, Bambi, etc. They are some of the highly famous 2D animation styles.
With the advancement of computer technologies, this process also got digitized through various 2D character animation software.
In this guide, we’ll talk about everything relatable to 2D character animation, and let’s proceed with the expert tips and tricks to create inspirational style within animation character 2D.
Part 2 2D Character Animation Tips and Tricks
01Look for a real-time reference
Using a real-world reference for 2D character animation can help you effectively animate faces. For example, when studios collaborate with voice-over artists, they often record their facial movements. It further helps 2D animators to ensure their expressions get captured convincingly.
If it seems impossible, you can consider using your face, so you have something to refer back to. You could also use a mirror and utter the words your character will speak. It will display the correct animated expressions.
02Observe real life
You need to use observation a lot more. One of the primary aspects of 2D character animation is bringing life to animate objections. Therefore, you must carefully consider how emotion can get portrayed and select each movement accordingly.
Take time watching how people in real-life environments talk and interact with each other, how they express emotions, how they move, etc. Please don’t spend much time doing this, as it is valuable to research.
03Simplicity is the key
2D character animation is never complex compared with 3D. Think carefully before creating a scene too complicated. You must not include too much information, which is hard to digest, and you may even find yourself compromising the scene’s realism. Try not to heavy the stage with too many pose changes or other elements, and keep it genuine.
04Draw animation again and again
Drawing animation consumes a lot of time. You can’t complete it within one day, so you better know deep down that one task only can be done after you have revamped it various times. For 2D character animation, you may need to draw objects on paper several times.
You can’t master the skill of animation character 2D quickly. Luckily, all pains will be relieved someday.
05Feedback is important
Feedback is an essential element of artistic development. It’s wise to actively seek out feedback from familiar figures who can help you enhance. Naturally, we may see work we have invested a great deal of time and effort indifferently to someone not so involved in the creative process. Feedback can equate to a valuable learning opportunity that will assist you produce the results hit the spot much more appropriately.
Part 3 An Ultimate Guide to Create 2D Character Animation Online
Let’s now look at making an illustrated 2D character animation move on a screen.
While there are nearly numerous options for 2D character animation tools and software, this tutorial will animate a character in Adobe After Effects.
Steps to create 2D character animation After Effects
01Step 1: Download and Install Duik
You need to install the Duik animation plugin for Adobe After Effects to simplify the whole process. You can animate and rig characters’ entire limbs with Duik using just the placement of their feet and hands.
While this isn’t an essential step, it can be valuable for beginners, as you’ll see in this tutorial. Luckily, Duik is available for free from Rainbox Laboratory.
02Step 2: Design Your Character
You need a moving character before you’re able to start animating. You can create this character in Adobe Illustrator and import it into After Effects.
Try creating a straightforward character with an aim on the character’s limbs.
In the example mentioned below, you can see that the body is a very rudimentary shape—a circle—with long legs that make it simple to consider the animation process.

Check the character’s joints. Making a round joint between the lower and upper parts of the legs, for instance, will help the character move more smoothly.

03Step 3: Make and Import Your Character Artwork
Now, you’ll need to make a few final adjustments before moving your character artwork. Break your character out into layers firstly. Every section of the character that will move independently needs a separate layer.
So, layers include his circular body, face, and the leg’s segments (i.e., lower leg, upper leg, and foot).

To import your character artwork, go to File, click the Import tab, and choose your character file. Ensure that you need to import it as a composition to ensure it includes the layers you just created.
04Step 4: Establish Initial Character Rigging
Now, the 2D character animation is almost over by the initial rigging.
Firstly, lower the opacity of all your layers to above 50% to see the critical joints within the character.
Next, you must ensure that the joints hinge in the ideal direction. It’s simple to do with the anchor point tool. For each character’s layer, place the anchor point at the center of gravity for each layer of the 2D character animation.
The anchor point would probably go between the eyes for the layer of the face (i.e., the nose, eyes, and mouth). For each legs’ section, hold the anchor point where the leg will hinge (e.g., the anchor point would be at the highest point for the leg’s upper portion, where it meets the body).

Then, use the parent tool to join the limbs’ sections. For instance, the parent of the foot would be the lower leg, and the upper portion is the parent of the lower leg.
It makes sure that the leg moves together as one unit with multiple hinge points.
Finally, use the Duik toolbar to create character controllers. Controllers control the rotation and position of critical elements within your character. For the ankles of the 2D character animation, you would select the controller that encompasses both the rotation and position.
05Step 5: Create Your Rig
Use the Duik toolbar to create a rig. Select each layer from the extremities inward from each limb, lasting with your controllers.
You would select the ankle for a leg, followed by the upper portion, the lower leg, and conclusively, the controller at the ankle. Then, select auto-rig within the Rigging area of the Duik toolbar.
The entire leg will move when you move that ankle controller. If your character contains them, repeat the process for the other leg, along with other limbs.
Before proceeding, test the limbs to make sure they hinge and move correctly. You need to adjust the opacity of the character back to 100% once you are satisfied with the movements.

06Step 6: Start Animating Your Character
You can begin animating after completing a rig. First, create keyframes—the ending and beginning points of the character’s movement. The character’s legs are at their most magnified are thus the endpoints for a walk cycle. Make sure that the beginning and ending of keyframes are identical to get an ideal loop.
Start adding in-between frames from there, like when one leg crosses over the other in the middle of a walking stride.
Moreover, you can add ‘easing” to the animation via 2D character animation After Effects’ Easy Ease tab, located under the Animation button, and Keyframe Assistant.
It will smoothen the transition between the keyframes. You will have a primary walking sequence at this instance.

Now, you can make further refinements to add detail and secondary movement, like a bobbing motion of the head. You can also modify elements like the keyframe velocity, further smoothing out the animation.
As you practice, you’ll get a better feel for your animation preferences and develop more advanced realistic 2D animation character design capabilities.
Part 4 5 Great 2D Character Animation Templates
1 – FrameStory Character Animation Toolkit
2 – Explainer Video Character Animation ToolKit
3 – 2D Character Animation After Effects Template
4 – Character Animation ToolKit
5 – Rigged Character Animation Mockup Template
Given above is a list of the best 2D character animation templates worth considering. Yet, if you are tired of using After Effects Templates, why not select Wondershare Filmora Template Mode?
It is a brand-new mode recently launched by Filmora to ramp up your story. It is a simplistic way to use compared with After Effects.
****Wondershare Filmora Video Editor Template Mode**
For Win 7 or later (64-bit)
For macOS 10.12 or later
Filmora Template Mode is a bold breakthrough that helps you create incredible videos in a minute. Forget about dragging n dropping the video clips into a timeline; Filmora template Mode provides you a new way of generating videos automatically by using various stylish video templates.
Steps to create a stunning animated video in 3 levels
01Step 1: Choose a template
Pick up a video template that best suits your needs.

02Step 2: Import Media
Import at least three video clips or images and let AI assist you in ramping the production process without hassle.

03Step 3: Export Project
Export media among multiple social media platforms.

● Key Takeaways from This Episode →
● Understanding 2D character animation tips and tricks
● A step by step guide to creating 2D character animation online
● Five best 2D character animation templates
● The best alternative of using the Template mode directly within the Wondershare Filmora
2D character animation is one of the significant kinds of animation popularly used for creating animated movies, marketing videos, cartoons, advertisements, educational content, corporate presentations, video games, etc.
With the popularity of video content, more and more businesses tend to use animation for promotion, as they magnify conversion rates by 20%. Some companies hire 2D character animation services; others try to make them online with software help.
In this article
01 [What is 2D Character Animation and What Does 2D Animation Do?](#Part 1)
02 [2D Character Animation Tips and Tricks](#Part 2)
03 [An Ultimate Guide to Create 2D Character Animation Online](#Part 3)
04 [5 Great 2D Character Animation Templates](#Part 4)
Part 1 What is 2D Character Animation and What Does 2D Animation Do?
2D animation is identified by having its characters and objects created in a 2D space. It means that they only have height and width to specify.
However, 2D animation is considered a traditional style, known from the 1800s. Initially, it was designed by merging the frames in which one drawing was followed by another and making them different; every second consists of 24 frames.
We all remember the classic Disney animations. Snow White and the Seven Dwarfs, The Little Mermaid, Bambi, etc. They are some of the highly famous 2D animation styles.
With the advancement of computer technologies, this process also got digitized through various 2D character animation software.
In this guide, we’ll talk about everything relatable to 2D character animation, and let’s proceed with the expert tips and tricks to create inspirational style within animation character 2D.
Part 2 2D Character Animation Tips and Tricks
01Look for a real-time reference
Using a real-world reference for 2D character animation can help you effectively animate faces. For example, when studios collaborate with voice-over artists, they often record their facial movements. It further helps 2D animators to ensure their expressions get captured convincingly.
If it seems impossible, you can consider using your face, so you have something to refer back to. You could also use a mirror and utter the words your character will speak. It will display the correct animated expressions.
02Observe real life
You need to use observation a lot more. One of the primary aspects of 2D character animation is bringing life to animate objections. Therefore, you must carefully consider how emotion can get portrayed and select each movement accordingly.
Take time watching how people in real-life environments talk and interact with each other, how they express emotions, how they move, etc. Please don’t spend much time doing this, as it is valuable to research.
03Simplicity is the key
2D character animation is never complex compared with 3D. Think carefully before creating a scene too complicated. You must not include too much information, which is hard to digest, and you may even find yourself compromising the scene’s realism. Try not to heavy the stage with too many pose changes or other elements, and keep it genuine.
04Draw animation again and again
Drawing animation consumes a lot of time. You can’t complete it within one day, so you better know deep down that one task only can be done after you have revamped it various times. For 2D character animation, you may need to draw objects on paper several times.
You can’t master the skill of animation character 2D quickly. Luckily, all pains will be relieved someday.
05Feedback is important
Feedback is an essential element of artistic development. It’s wise to actively seek out feedback from familiar figures who can help you enhance. Naturally, we may see work we have invested a great deal of time and effort indifferently to someone not so involved in the creative process. Feedback can equate to a valuable learning opportunity that will assist you produce the results hit the spot much more appropriately.
Part 3 An Ultimate Guide to Create 2D Character Animation Online
Let’s now look at making an illustrated 2D character animation move on a screen.
While there are nearly numerous options for 2D character animation tools and software, this tutorial will animate a character in Adobe After Effects.
Steps to create 2D character animation After Effects
01Step 1: Download and Install Duik
You need to install the Duik animation plugin for Adobe After Effects to simplify the whole process. You can animate and rig characters’ entire limbs with Duik using just the placement of their feet and hands.
While this isn’t an essential step, it can be valuable for beginners, as you’ll see in this tutorial. Luckily, Duik is available for free from Rainbox Laboratory.
02Step 2: Design Your Character
You need a moving character before you’re able to start animating. You can create this character in Adobe Illustrator and import it into After Effects.
Try creating a straightforward character with an aim on the character’s limbs.
In the example mentioned below, you can see that the body is a very rudimentary shape—a circle—with long legs that make it simple to consider the animation process.
Check the character’s joints. Making a round joint between the lower and upper parts of the legs, for instance, will help the character move more smoothly.
03Step 3: Make and Import Your Character Artwork
Now, you’ll need to make a few final adjustments before moving your character artwork. Break your character out into layers firstly. Every section of the character that will move independently needs a separate layer.
So, layers include his circular body, face, and the leg’s segments (i.e., lower leg, upper leg, and foot).
To import your character artwork, go to File, click the Import tab, and choose your character file. Ensure that you need to import it as a composition to ensure it includes the layers you just created.
04Step 4: Establish Initial Character Rigging
Now, the 2D character animation is almost over by the initial rigging.
Firstly, lower the opacity of all your layers to above 50% to see the critical joints within the character.
Next, you must ensure that the joints hinge in the ideal direction. It’s simple to do with the anchor point tool. For each character’s layer, place the anchor point at the center of gravity for each layer of the 2D character animation.
The anchor point would probably go between the eyes for the layer of the face (i.e., the nose, eyes, and mouth). For each legs’ section, hold the anchor point where the leg will hinge (e.g., the anchor point would be at the highest point for the leg’s upper portion, where it meets the body).
Then, use the parent tool to join the limbs’ sections. For instance, the parent of the foot would be the lower leg, and the upper portion is the parent of the lower leg.
It makes sure that the leg moves together as one unit with multiple hinge points.
Finally, use the Duik toolbar to create character controllers. Controllers control the rotation and position of critical elements within your character. For the ankles of the 2D character animation, you would select the controller that encompasses both the rotation and position.
05Step 5: Create Your Rig
Use the Duik toolbar to create a rig. Select each layer from the extremities inward from each limb, lasting with your controllers.
You would select the ankle for a leg, followed by the upper portion, the lower leg, and conclusively, the controller at the ankle. Then, select auto-rig within the Rigging area of the Duik toolbar.
The entire leg will move when you move that ankle controller. If your character contains them, repeat the process for the other leg, along with other limbs.
Before proceeding, test the limbs to make sure they hinge and move correctly. You need to adjust the opacity of the character back to 100% once you are satisfied with the movements.
06Step 6: Start Animating Your Character
You can begin animating after completing a rig. First, create keyframes—the ending and beginning points of the character’s movement. The character’s legs are at their most magnified are thus the endpoints for a walk cycle. Make sure that the beginning and ending of keyframes are identical to get an ideal loop.
Start adding in-between frames from there, like when one leg crosses over the other in the middle of a walking stride.
Moreover, you can add ‘easing” to the animation via 2D character animation After Effects’ Easy Ease tab, located under the Animation button, and Keyframe Assistant.
It will smoothen the transition between the keyframes. You will have a primary walking sequence at this instance.
Now, you can make further refinements to add detail and secondary movement, like a bobbing motion of the head. You can also modify elements like the keyframe velocity, further smoothing out the animation.
As you practice, you’ll get a better feel for your animation preferences and develop more advanced realistic 2D animation character design capabilities.
Part 4 5 Great 2D Character Animation Templates
1 – FrameStory Character Animation Toolkit
2 – Explainer Video Character Animation ToolKit
3 – 2D Character Animation After Effects Template
4 – Character Animation ToolKit
5 – Rigged Character Animation Mockup Template
Given above is a list of the best 2D character animation templates worth considering. Yet, if you are tired of using After Effects Templates, why not select Wondershare Filmora Template Mode?
It is a brand-new mode recently launched by Filmora to ramp up your story. It is a simplistic way to use compared with After Effects.
****Wondershare Filmora Video Editor Template Mode**
For Win 7 or later (64-bit)
For macOS 10.12 or later
Filmora Template Mode is a bold breakthrough that helps you create incredible videos in a minute. Forget about dragging n dropping the video clips into a timeline; Filmora template Mode provides you a new way of generating videos automatically by using various stylish video templates.
Steps to create a stunning animated video in 3 levels
01Step 1: Choose a template
Pick up a video template that best suits your needs.
02Step 2: Import Media
Import at least three video clips or images and let AI assist you in ramping the production process without hassle.
03Step 3: Export Project
Export media among multiple social media platforms.
● Key Takeaways from This Episode →
● Understanding 2D character animation tips and tricks
● A step by step guide to creating 2D character animation online
● Five best 2D character animation templates
● The best alternative of using the Template mode directly within the Wondershare Filmora
Guide on How to Create GIF in WhatsApp iPhone
2024 Guide on How to Create GIF in WhatsApp iPhone
An easy yet powerful editor
Numerous effects to choose from
Detailed tutorials provided by the official channel
Standing for Graphics Interchange Format, GIF is short animated images that you can see all over social media sites and other online platforms. These interesting animations can also be shared during your conversations on WhatsApp.

So, if you too are looking for ways to create as well as send GIFs on WhatsApp iPhone, you are on the right page. Keep reading to know all the possible ways to send WhatsApp GIFs on iPhone.
In this article
01 [How to send WhatsApp GIF from the integrated library on iPhone](#Part 1)
02 [How to send Live Photos as WhatsApp GIF on iPhone](#Part 2)
03 [How to create WhatsApp GIF using videos on iPhone](#Part 3)
04 [How to create excellent GIF effortlessly using Wondershare Filmora- All in One video editing software](#Part 4)
Part 1 How to send WhatsApp GIF from the integrated library on iPhone
If you have the latest version of WhatsApp installed on your phone, you can easily and quickly send the GIF from the integrated library having a collection of GIFs in several categories. The steps to send GIF in WhatsApp iPhone are as below.
Step 1. On your iPhone, launch WhatsApp and open the contact or a group to which you wish to send the GIF.
Step 2. Click on the Stickers icon at the typing section and then choose the GIF option at the bottom.
Step 3. Multiple GIFs in different categories will appear. You can further search for the desired GIF using a keyword at the search icon at the bottom-left corner. The list of the Recents and the Favorites can also be searched using their respective icons.
Note: To save any particular GIF in the favorites list, tap and hold the GIF and then click on Add To Favorites option.
StepTap on the selected GIF and then click on the Send icon at the bottom-right corner. Your WhatsApp GIF iPhone will be sent.

Part 2 How to send Live Photos as WhatsApp GIF on iPhone
Live Photos on your iPhone can also be sent as GIFs in WhatsApp conversations and the steps for the same are as below.
Note: The feature is available for users having iPhone 6 or later versions.
Step 1.Open the WhatsApp contact on your iPhone to whom you wish to send the GIF. Click on the + icon and then choose the option of Photo & Video Library.
Step 2. Search for the Live photo in your gallery and then press it. When the image pops out, slide upwards and then click on the Select as GIF option.
Step 3. Tap on the Send icon to share the selected Live photo as GIF.

Part 3 How to create WhatsApp GIF using videos on iPhone
In addition to the integrated library, you can also convert the videos on your iPhone to GIF and share them on WhatsApp. To be used as GIF, the length of the videos cannot be more than 6 seconds. Thus, for a larger video, you need to trim it to be under 6 seconds. Steps to get the task done are as follows.
Step 1.Launch WhatsApp on your iPhone and select the contact to which you want to share the GIF. Next, click on + sign and then choose Photo & Video Library option.
Step 2.Select the desired video from your phone gallery.
Step 3.After the video is added, an editing screen will open. Here you can trim the video to make it under 6 seconds using the slider at the top. Further changes can be made like adding a sticker, text, or making a freehand drawing.
Step 4.After all customizations are done, click on the GIF button.
Step 5.Finally, tap on the Send icon at the bottom-right corner to send the edited video as GIF.

Part 4 How to create excellent GIF effortlessly using Wondershare Filmora- All in One video editing software
WhatsApp in your iPhone has a built-in option to create GIFs using the videos on the device. Though the process is simple, the option for editing and customizations are limited. So, if you want to create GIFs using videos online and with advanced editing tools, we suggest using Wondershare Filmora Video Editor .
This all-in-one video editing software will let you edit and customize your files in several ways and in a few simple steps, your desired GIF will be ready.
Wondershare Filmora
Get started easily with Filmora’s powerful performance, intuitive interface, and countless effects!
Try It Free Try It Free Try It Free Learn More >

Key features of the software
● Add media files in all ley formats like MP4, MOV, MKV, PNG, and others to create GIFs.
● Simple and quick steps for creating the desired animation.
● Allows to customize the GIF using functions like slow-down, crop, rotate, and many more.
● Allows adding text, voice, and other elements.
● Option to share the created GIF to Vimeo, and YouTube directly.
● Software support to all latest Windows and Mac systems.
Steps to create WhatsApp GIF using Wondershare Filmora.
Step 1.Open the installed software on your system and import the desired images and videos from your system.
Step 2.Drag and drop the added videos and images to the timeline.

Step 3.Edit the file using features like crop, rotate, split, and others.
Step 4.Add text and other elements as needed.

Step 5.At the Local tab, save the customized media as GIF. Select the file name and the destination and then finally, click on the EXPORT button to start processing.
● Key Takeaways from This Episode →
●Gifs for WhatsApp iPhone can be added from the integrated library.
●Live Photos, as well as videos, can also be used to create and share them as GIF.
●For creating interesting and funny GIF in a hassle-free manner, Wondershare Filmora works as the best software.
Standing for Graphics Interchange Format, GIF is short animated images that you can see all over social media sites and other online platforms. These interesting animations can also be shared during your conversations on WhatsApp.
So, if you too are looking for ways to create as well as send GIFs on WhatsApp iPhone, you are on the right page. Keep reading to know all the possible ways to send WhatsApp GIFs on iPhone.
In this article
01 [How to send WhatsApp GIF from the integrated library on iPhone](#Part 1)
02 [How to send Live Photos as WhatsApp GIF on iPhone](#Part 2)
03 [How to create WhatsApp GIF using videos on iPhone](#Part 3)
04 [How to create excellent GIF effortlessly using Wondershare Filmora- All in One video editing software](#Part 4)
Part 1 How to send WhatsApp GIF from the integrated library on iPhone
If you have the latest version of WhatsApp installed on your phone, you can easily and quickly send the GIF from the integrated library having a collection of GIFs in several categories. The steps to send GIF in WhatsApp iPhone are as below.
Step 1. On your iPhone, launch WhatsApp and open the contact or a group to which you wish to send the GIF.
Step 2. Click on the Stickers icon at the typing section and then choose the GIF option at the bottom.
Step 3. Multiple GIFs in different categories will appear. You can further search for the desired GIF using a keyword at the search icon at the bottom-left corner. The list of the Recents and the Favorites can also be searched using their respective icons.
Note: To save any particular GIF in the favorites list, tap and hold the GIF and then click on Add To Favorites option.
StepTap on the selected GIF and then click on the Send icon at the bottom-right corner. Your WhatsApp GIF iPhone will be sent.
Part 2 How to send Live Photos as WhatsApp GIF on iPhone
Live Photos on your iPhone can also be sent as GIFs in WhatsApp conversations and the steps for the same are as below.
Note: The feature is available for users having iPhone 6 or later versions.
Step 1.Open the WhatsApp contact on your iPhone to whom you wish to send the GIF. Click on the + icon and then choose the option of Photo & Video Library.
Step 2. Search for the Live photo in your gallery and then press it. When the image pops out, slide upwards and then click on the Select as GIF option.
Step 3. Tap on the Send icon to share the selected Live photo as GIF.
Part 3 How to create WhatsApp GIF using videos on iPhone
In addition to the integrated library, you can also convert the videos on your iPhone to GIF and share them on WhatsApp. To be used as GIF, the length of the videos cannot be more than 6 seconds. Thus, for a larger video, you need to trim it to be under 6 seconds. Steps to get the task done are as follows.
Step 1.Launch WhatsApp on your iPhone and select the contact to which you want to share the GIF. Next, click on + sign and then choose Photo & Video Library option.
Step 2.Select the desired video from your phone gallery.
Step 3.After the video is added, an editing screen will open. Here you can trim the video to make it under 6 seconds using the slider at the top. Further changes can be made like adding a sticker, text, or making a freehand drawing.
Step 4.After all customizations are done, click on the GIF button.
Step 5.Finally, tap on the Send icon at the bottom-right corner to send the edited video as GIF.
Part 4 How to create excellent GIF effortlessly using Wondershare Filmora- All in One video editing software
WhatsApp in your iPhone has a built-in option to create GIFs using the videos on the device. Though the process is simple, the option for editing and customizations are limited. So, if you want to create GIFs using videos online and with advanced editing tools, we suggest using Wondershare Filmora Video Editor .
This all-in-one video editing software will let you edit and customize your files in several ways and in a few simple steps, your desired GIF will be ready.
Wondershare Filmora
Get started easily with Filmora’s powerful performance, intuitive interface, and countless effects!
Try It Free Try It Free Try It Free Learn More >
Key features of the software
● Add media files in all ley formats like MP4, MOV, MKV, PNG, and others to create GIFs.
● Simple and quick steps for creating the desired animation.
● Allows to customize the GIF using functions like slow-down, crop, rotate, and many more.
● Allows adding text, voice, and other elements.
● Option to share the created GIF to Vimeo, and YouTube directly.
● Software support to all latest Windows and Mac systems.
Steps to create WhatsApp GIF using Wondershare Filmora.
Step 1.Open the installed software on your system and import the desired images and videos from your system.
Step 2.Drag and drop the added videos and images to the timeline.
Step 3.Edit the file using features like crop, rotate, split, and others.
Step 4.Add text and other elements as needed.
Step 5.At the Local tab, save the customized media as GIF. Select the file name and the destination and then finally, click on the EXPORT button to start processing.
● Key Takeaways from This Episode →
●Gifs for WhatsApp iPhone can be added from the integrated library.
●Live Photos, as well as videos, can also be used to create and share them as GIF.
●For creating interesting and funny GIF in a hassle-free manner, Wondershare Filmora works as the best software.
Most Effective Ways to Set WhatsApp Status
Most Effective Tactics to Set WhatsApp Status
An easy yet powerful editor
Numerous effects to choose from
Detailed tutorials provided by the official channel
People generally use images to be uploaded as their WhatsApp status and unknown to many, videos as well as GIFs can also be added as status.
This status remains on your profile for 24 hours and can be viewed only by people who are on your contact list. So, if you too looking for ways to add WhatsApp status GIF, keep reading.
In this article
01 [How to set an animated GIF as WhatsApp status from the phone gallery?](#Part 1)
02 [How to set an animated GIF as WhatsApp status using an app?](#Part 2)
03 [Setting WhatsApp GIF status using device internal camera](#Part 3)
04 [How to create an interesting GIF in a hassle-free manner using Wondershare Filmora](#Part 4)
Part 1 How to set an animated GIF as WhatsApp status from the phone gallery?
If the GIF that you wish to use as the WhatsApp status is present on your phone, you can add it directly from the phone gallery. The steps to get this task done are enlisted below.
Step 1. Launch WhatsApp on your phone and then click on the Status tab.
Step 2. Tap on the My status tab to add a new status. The camera app on the phone will open and you need to launch the phone gallery now.
Step 3. Choose the desired GIF from the gallery, click on it and then tap on the Send button to set it as your status.
The selected GIF will be set as your WhatsApp status.
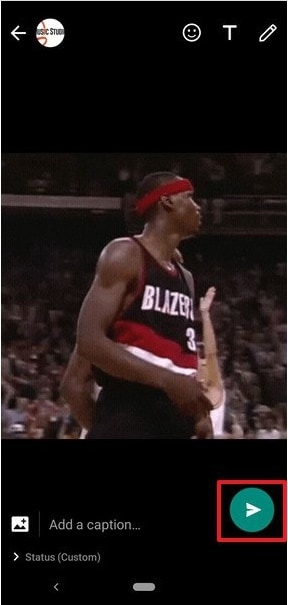
Part 2 How to set an animated GIF as WhatsApp status using an app?
Another way to add an animated GIF WhatsApp status is by using an app and for this, we recommend Giphy as the best tool. The steps to use the app for setting an animated status are as follows.
Step 1. Download, install and open the Giphy app on your phone.
Step 2. The main interface of the app will show multiple GIF options. You can also search your choice of animation based on categories or by using the search box.
Step 3. Next, click on the desired GIF to open it and see it in a larger frame.
Step 4. Under the selected GIF, click on the icon resembling a paper plane, and sharing options will appear.
Step 5. Choose the WhatsApp icon from the options available and then at the next menu, click on the My status option.
Step 6. Next, tap on the green arrow at the bottom-right corner to set GIF as WhatsApp status.
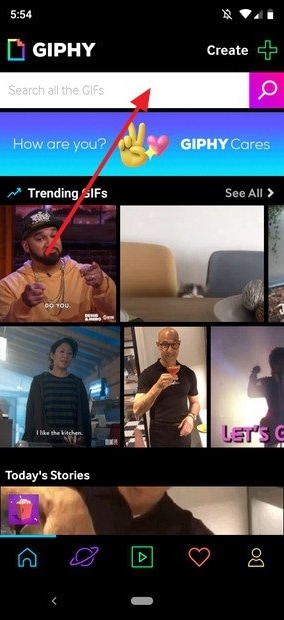
Part 3 Setting WhatsApp GIF status using device internal camera
Another way to add an animated GIF as WhatsApp status is using the internal camera of the device. The steps for the same are as follows.
Step 1. On your phone, launch WhatsApp and at the Status tab, click on the My Status option.
Step 2. The camera of the phone will get activated and now to start the video recording, you need to tap and hold the button that is used for taking the images.
Step 3. Record the video for which you wish to make an animation (video cannot be longer than 5 seconds).
Step 4. After the recording is done, you can adjust the duration using the slider and then choose to play the recorded video as GIF. Click on the Send button to share the video as WhatsApp Status.

Part 4 How to create an interesting GIF in a hassle-free manner using Wondershare Filmora Video Editor
If you wish to set your WhatsApp status as interesting GIF videos, you would need to download such animations online. Another way is to get customized GIF files and this professional tool will be required. If you too want to create your own customized animation in a hassle-free manner, we suggest using Wondershare Filmora. Not only WhatsApp status, but you can also use software for creating GIF animations for web pages, social media sites, ad banners, and other uses.
Wondershare Filmora
Get started easily with Filmora’s powerful performance, intuitive interface, and countless effects!
Try It Free Try It Free Try It Free Learn More >
Using Wondershare Filmora, artistic animations can be quickly created using an image as well as videos. The process is simple and does not require any advanced technical know-how. To create the desired GIF video, there are multiple options for customizations available like adding text, overlays, elements, and more.
Key features of the software
● Create GIF animations using videos and still images.
● Support all key video and image formats like FLV, MKV, MP4, and more.
● Allows customizing the animations by adding text, overlays, elements, and others.
● Quick and hassle-free tool for creating an interesting GIF.
● Windows and Mac support.
Steps to create GIF for WhatsApp status using Wondershare Filmora
Step 1. Launch Wondershare Filmora and add video or images from which you wish to create an animated GIF.
Step 2. Drag and drop the added media file to the timeline of the software.
Step 3. Next, edit and customize the added files using features like combine, crop, split, speed-up, slow, and more.
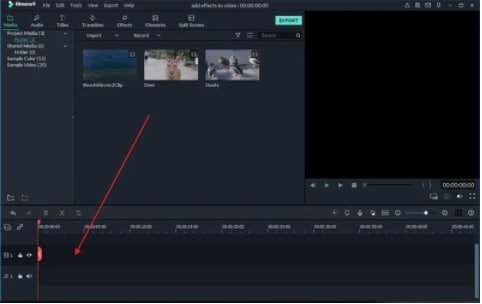
Step 4. You can also add text or elements like sound and others to the added files.
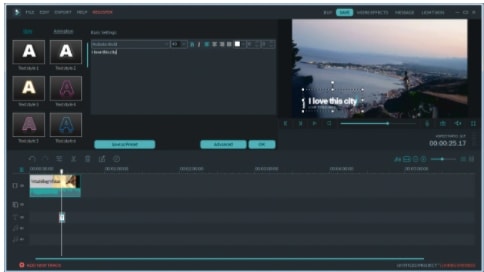
Step 5. Next, when all settings are done, choose GIF at the Local tab to save the media file as GIF. Choose the desired file name and the system location to save the file. Finally, click on the Export button.
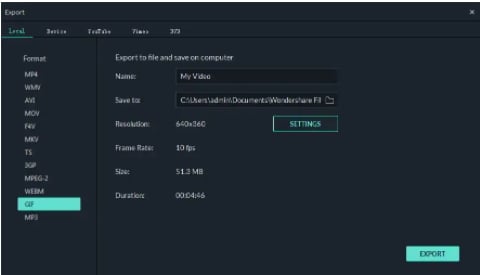
The created GIF animation will save to your selected folder and can be used as WhatsApp status, on social media sites, or for any other use as needed.
● Key Takeaways from This Episode →
●GIF animations can now be used as WhatsApp status.
●There are multiple ways to set GIF animations as WhatsApp status.
People generally use images to be uploaded as their WhatsApp status and unknown to many, videos as well as GIFs can also be added as status.
This status remains on your profile for 24 hours and can be viewed only by people who are on your contact list. So, if you too looking for ways to add WhatsApp status GIF, keep reading.
In this article
01 [How to set an animated GIF as WhatsApp status from the phone gallery?](#Part 1)
02 [How to set an animated GIF as WhatsApp status using an app?](#Part 2)
03 [Setting WhatsApp GIF status using device internal camera](#Part 3)
04 [How to create an interesting GIF in a hassle-free manner using Wondershare Filmora](#Part 4)
Part 1 How to set an animated GIF as WhatsApp status from the phone gallery?
If the GIF that you wish to use as the WhatsApp status is present on your phone, you can add it directly from the phone gallery. The steps to get this task done are enlisted below.
Step 1. Launch WhatsApp on your phone and then click on the Status tab.
Step 2. Tap on the My status tab to add a new status. The camera app on the phone will open and you need to launch the phone gallery now.
Step 3. Choose the desired GIF from the gallery, click on it and then tap on the Send button to set it as your status.
The selected GIF will be set as your WhatsApp status.
Part 2 How to set an animated GIF as WhatsApp status using an app?
Another way to add an animated GIF WhatsApp status is by using an app and for this, we recommend Giphy as the best tool. The steps to use the app for setting an animated status are as follows.
Step 1. Download, install and open the Giphy app on your phone.
Step 2. The main interface of the app will show multiple GIF options. You can also search your choice of animation based on categories or by using the search box.
Step 3. Next, click on the desired GIF to open it and see it in a larger frame.
Step 4. Under the selected GIF, click on the icon resembling a paper plane, and sharing options will appear.
Step 5. Choose the WhatsApp icon from the options available and then at the next menu, click on the My status option.
Step 6. Next, tap on the green arrow at the bottom-right corner to set GIF as WhatsApp status.
Part 3 Setting WhatsApp GIF status using device internal camera
Another way to add an animated GIF as WhatsApp status is using the internal camera of the device. The steps for the same are as follows.
Step 1. On your phone, launch WhatsApp and at the Status tab, click on the My Status option.
Step 2. The camera of the phone will get activated and now to start the video recording, you need to tap and hold the button that is used for taking the images.
Step 3. Record the video for which you wish to make an animation (video cannot be longer than 5 seconds).
Step 4. After the recording is done, you can adjust the duration using the slider and then choose to play the recorded video as GIF. Click on the Send button to share the video as WhatsApp Status.
Part 4 How to create an interesting GIF in a hassle-free manner using Wondershare Filmora Video Editor
If you wish to set your WhatsApp status as interesting GIF videos, you would need to download such animations online. Another way is to get customized GIF files and this professional tool will be required. If you too want to create your own customized animation in a hassle-free manner, we suggest using Wondershare Filmora. Not only WhatsApp status, but you can also use software for creating GIF animations for web pages, social media sites, ad banners, and other uses.
Wondershare Filmora
Get started easily with Filmora’s powerful performance, intuitive interface, and countless effects!
Try It Free Try It Free Try It Free Learn More >
Using Wondershare Filmora, artistic animations can be quickly created using an image as well as videos. The process is simple and does not require any advanced technical know-how. To create the desired GIF video, there are multiple options for customizations available like adding text, overlays, elements, and more.
Key features of the software
● Create GIF animations using videos and still images.
● Support all key video and image formats like FLV, MKV, MP4, and more.
● Allows customizing the animations by adding text, overlays, elements, and others.
● Quick and hassle-free tool for creating an interesting GIF.
● Windows and Mac support.
Steps to create GIF for WhatsApp status using Wondershare Filmora
Step 1. Launch Wondershare Filmora and add video or images from which you wish to create an animated GIF.
Step 2. Drag and drop the added media file to the timeline of the software.
Step 3. Next, edit and customize the added files using features like combine, crop, split, speed-up, slow, and more.
Step 4. You can also add text or elements like sound and others to the added files.
Step 5. Next, when all settings are done, choose GIF at the Local tab to save the media file as GIF. Choose the desired file name and the system location to save the file. Finally, click on the Export button.
The created GIF animation will save to your selected folder and can be used as WhatsApp status, on social media sites, or for any other use as needed.
● Key Takeaways from This Episode →
●GIF animations can now be used as WhatsApp status.
●There are multiple ways to set GIF animations as WhatsApp status.
Useful Tips for Canva Animated Elements
Versatile Video Editor - Wondershare Filmora
An easy yet powerful editor
Numerous effects to choose from
Detailed tutorials provided by the official channel
Thanks to the progress of graphic design, users are no longer simply satisfied with everyday designs, no matter how complex the design itself. They want innovation, they want a fresh and mesmerizing new idea. This becomes increasingly harder to achieve and helps push the boundaries of what designers want.
This is where motion can come into play. Movement in graphic design has emerged as a recent design trend. This is where users benefit from valuable tips for Canva animated elements.
Without further ado, let’s dive into everything you need to know to design animated elements in Canva.
In this article
01 [What is Canva?](#Part 1)
02 [Animate An Element In Canva ](#Part 2)
03 [Make Elements Move In Canva](#Part 3)
04 [How About Making Animated Elements On Video](#Part 4)
Part 1 What is Canva?
Canva has become a buzzword in the designing and animation world. It’s a graphic design platform that allows users to create graphic designs for social media, for presentations, documents, cards for any memorable occasion. It was founded by Melanie Perkins, an Australian technology entrepreneur.
Canva has become a buzzword in the designing and animation world. It’s a graphic design platform that allows users to create graphic designs for social media, for presentations, documents, cards for any memorable occasion. It was founded by Melanie Perkins, an Australian technology entrepreneur.
It allows users to work individually or across teams. With real-time live changes made available, Canva is pushing the boundary of what is possible and making it more accessible. With the introduction of animated elements in Canva, the possibilities for design horizons have expanded significantly.
Part 2 Animate An Element In Canva
There are one of two ways to go about creating an animation. You can work off an existing template or create a custom template. If you’re wondering how to animate individual elements in Canva then this guide is for you.
The first step to animation is building your custom static design. For that you need to go to Canva and select “Create a Design” option. Once you do, select the type of content you’re attempting to create- from Instagram posts to a presentation or an A4 document.
Think of the text font you’re going to use.

Then you should look into adding elements that suit your text on the design.

You can upload photographs into your creation with the upload button. This also extends to uploading audio that you want to use on video clips.

Once you’re done with these steps, you should have a customized static design that you can use. Let’s now look at how to animate individual elements in Canva. These elements are the text, the image, audio, and video.
2.1 Image
To add an image to Canva, you need to upload it in the ‘Upload’ tab on Canva. Once you do, the image can then be selected for display on your presentation.
For images, you can also choose to frame them within the “elements” tab. There are two kinds of elements. One which allows photographs to be embedded in them and ones which don’t. You can choose any element as a frame for your embedded image.
The next thing is to choose the “Animate” button. This will open up different options for animation features. The animate button allows a preview of what each animation does in real-time.

The ones with the crown are premium features exclusive to Canva Pro, the paid subscription.
2.2 Text
Add in the text you want to see to the image. The text can be in any style that you choose. Canva offers a variety of fonts that you can use to customize the color, size, and duration of the display.

2.3 Video
If you’re ready to take your content creation skills to the next level, this section is for you. You have the option of adding videos to Canva as well. Just load the video you have on hand to the Canva “Uploads” section. Introduce the video clip to the design.
Another way to embed the video is by using an element and embedding your video within it.
With video, you also have options like cropping, adjusting the playback. With playback, you can choose “Autoplay Video” and “Loop Video.” These are basic options for how the video can be played. The crop function allows you to trim the video to any point in time.
On top of this, you can use the animate button, which can create options for how the video is introduced to the backdrop.

If you want to remove the animation, you need to go to the “Animate” button and select the ‘None’ option to delete the animation from the design.
You can opt to animate either just the elements or you can animate the slide on the whole with “Page Animations.”
Part 3 Make Elements Move In Canva
How To Arrange The Order Of An Animation?
The brilliant thing about Canva is that you can decide the order you want to create your animation. The component elements of a Canva backdrop are the text, audio, images, video. These form the basis for the animated elements in Canva.
You can work on whichever component feels more accessible to you. Canva also allows users to make videos for title sequences and end-cards for video sharing platforms.
How to Change The Duration Of Animated Graphic In Canva
Once you’ve added a video element to your presentation, you’ll notice that the timer disappears from the production. This is because the presentation only lasts the duration of the video.
If you go to the next slide of the presentation, you can often notice a timer available. It has a default duration of five seconds. If you click on the clock symbol, a menu with “Timing” will appear with a slider. You can adjust the timing from 0.1 seconds up to a maximum of 30 seconds.
Part 4 How About Making Animated Elements On Video
If you’ve decided Canva is not the tool for you, you can choose any video editing software to make your animation.
Wondershare Filmora is the tool that can help you level up your content creation. It allows users to increase precision and provides professional video editing options.
AI Portrait – The best feature of Wondershare Filmora for gameplay editing
The AI Portrait is a new add-on in Wondershare Filmora. It can easily remove video backgrounds without using a green screen or chroma key, allowing you to add borders, glitch effects, pixelated, noise, or segmentation video effects.

Conclusion
Now that you understand how to build an animation and the software required, you should differentiate between average and extraordinary editing tools.
Filmora and Canva are the best editing tools in this case. Like you can animate individual elements Canva, you can do the same in the other tool also. It may be used to produce animation videos by introducing keyframes, resulting in a seamless and realistic animation. Aside from that, using color correction and an audio processor can help take your animations to the next tier.
Download it today to make your videos better.
Thanks to the progress of graphic design, users are no longer simply satisfied with everyday designs, no matter how complex the design itself. They want innovation, they want a fresh and mesmerizing new idea. This becomes increasingly harder to achieve and helps push the boundaries of what designers want.
This is where motion can come into play. Movement in graphic design has emerged as a recent design trend. This is where users benefit from valuable tips for Canva animated elements.
Without further ado, let’s dive into everything you need to know to design animated elements in Canva.
In this article
01 [What is Canva?](#Part 1)
02 [Animate An Element In Canva ](#Part 2)
03 [Make Elements Move In Canva](#Part 3)
04 [How About Making Animated Elements On Video](#Part 4)
Part 1 What is Canva?
Canva has become a buzzword in the designing and animation world. It’s a graphic design platform that allows users to create graphic designs for social media, for presentations, documents, cards for any memorable occasion. It was founded by Melanie Perkins, an Australian technology entrepreneur.
Canva has become a buzzword in the designing and animation world. It’s a graphic design platform that allows users to create graphic designs for social media, for presentations, documents, cards for any memorable occasion. It was founded by Melanie Perkins, an Australian technology entrepreneur.
It allows users to work individually or across teams. With real-time live changes made available, Canva is pushing the boundary of what is possible and making it more accessible. With the introduction of animated elements in Canva, the possibilities for design horizons have expanded significantly.
Part 2 Animate An Element In Canva
There are one of two ways to go about creating an animation. You can work off an existing template or create a custom template. If you’re wondering how to animate individual elements in Canva then this guide is for you.
The first step to animation is building your custom static design. For that you need to go to Canva and select “Create a Design” option. Once you do, select the type of content you’re attempting to create- from Instagram posts to a presentation or an A4 document.
Think of the text font you’re going to use.
Then you should look into adding elements that suit your text on the design.
You can upload photographs into your creation with the upload button. This also extends to uploading audio that you want to use on video clips.
Once you’re done with these steps, you should have a customized static design that you can use. Let’s now look at how to animate individual elements in Canva. These elements are the text, the image, audio, and video.
2.1 Image
To add an image to Canva, you need to upload it in the ‘Upload’ tab on Canva. Once you do, the image can then be selected for display on your presentation.
For images, you can also choose to frame them within the “elements” tab. There are two kinds of elements. One which allows photographs to be embedded in them and ones which don’t. You can choose any element as a frame for your embedded image.
The next thing is to choose the “Animate” button. This will open up different options for animation features. The animate button allows a preview of what each animation does in real-time.
The ones with the crown are premium features exclusive to Canva Pro, the paid subscription.
2.2 Text
Add in the text you want to see to the image. The text can be in any style that you choose. Canva offers a variety of fonts that you can use to customize the color, size, and duration of the display.
2.3 Video
If you’re ready to take your content creation skills to the next level, this section is for you. You have the option of adding videos to Canva as well. Just load the video you have on hand to the Canva “Uploads” section. Introduce the video clip to the design.
Another way to embed the video is by using an element and embedding your video within it.
With video, you also have options like cropping, adjusting the playback. With playback, you can choose “Autoplay Video” and “Loop Video.” These are basic options for how the video can be played. The crop function allows you to trim the video to any point in time.
On top of this, you can use the animate button, which can create options for how the video is introduced to the backdrop.
If you want to remove the animation, you need to go to the “Animate” button and select the ‘None’ option to delete the animation from the design.
You can opt to animate either just the elements or you can animate the slide on the whole with “Page Animations.”
Part 3 Make Elements Move In Canva
How To Arrange The Order Of An Animation?
The brilliant thing about Canva is that you can decide the order you want to create your animation. The component elements of a Canva backdrop are the text, audio, images, video. These form the basis for the animated elements in Canva.
You can work on whichever component feels more accessible to you. Canva also allows users to make videos for title sequences and end-cards for video sharing platforms.
How to Change The Duration Of Animated Graphic In Canva
Once you’ve added a video element to your presentation, you’ll notice that the timer disappears from the production. This is because the presentation only lasts the duration of the video.
If you go to the next slide of the presentation, you can often notice a timer available. It has a default duration of five seconds. If you click on the clock symbol, a menu with “Timing” will appear with a slider. You can adjust the timing from 0.1 seconds up to a maximum of 30 seconds.
Part 4 How About Making Animated Elements On Video
If you’ve decided Canva is not the tool for you, you can choose any video editing software to make your animation.
Wondershare Filmora is the tool that can help you level up your content creation. It allows users to increase precision and provides professional video editing options.
AI Portrait – The best feature of Wondershare Filmora for gameplay editing
The AI Portrait is a new add-on in Wondershare Filmora. It can easily remove video backgrounds without using a green screen or chroma key, allowing you to add borders, glitch effects, pixelated, noise, or segmentation video effects.
Conclusion
Now that you understand how to build an animation and the software required, you should differentiate between average and extraordinary editing tools.
Filmora and Canva are the best editing tools in this case. Like you can animate individual elements Canva, you can do the same in the other tool also. It may be used to produce animation videos by introducing keyframes, resulting in a seamless and realistic animation. Aside from that, using color correction and an audio processor can help take your animations to the next tier.
Download it today to make your videos better.
Also read:
- New 2024 Approved Creative Ways to Create iPhone Text GIF
- Nurturing the Spirit Through the Top 10 Intellectual Anime Websites
- New In 2024, Top 10 Online Animated Logo Makers Everyone Should Know
- Updated 2024 Approved How to Send and Add Snapchat GIFs 100 in Easy Way
- 2024 Approved Top 10 Cartoon Canvas Painting Ideas for Total Beginners
- New How to Create A GIF with Sound, In 2024
- New Handy Tips From Adobe Animate Rigging Tutorial for All Learners
- In 2024, What Is Still Motion Animation and How Does It Work?
- Updated 15 Best Sites to Watch Cartoons Online Free And So Can You
- Best 12 2D Animation Studios All Should Check Out for 2024
- In 2024, How-To Guide Make Animation Characters with the Best Animated Character Creators
- Updated The Most Efficient Techniques for You to Make 3D Animation Character
- Updated Adobe Animate Riggings PROPER Tutorial for You
- Updated In 2024, Ways to Stop Animation From Looping in Unity
- Updated 2024 Approved 10 Best Animation Makers for Kids to Have Fun
- How to Draw Skeleton Cartoon – A Step by Step Guide for 2024
- Updated In 2024, Tutorials for Animating Picture Online Without Learning From Scratch
- Updated Ways to Create an Adobe Collage for 2024
- 2024 Approved Adobe Animate Text Effects Skills You Need to Know
- New 10 Must Watch Netflix Cartoon Series For You for 2024
- New 2024 Approved Top 10 Old Cartoons From Cartoon Network That You Miss
- Updated In 2024, Types of Cartoon Styles You May Use for Your Next Marketing Project
- How to Create Your Own Avatar Free
- New 2024 Approved Secret Source to Make a Stop Motion Puppet
- Updated That Will Make Aesthetic Cartoon Drawing More Understandable
- Updated 20 Best Anime Movies You Cannot Miss 2024 Update
- New Are You Head Over Heels With 3D Animation Design?
- In 2024, How to Change Lock Screen Wallpaper on Samsung Galaxy XCover 7
- In 2024, Trouble with iPhone SE (2022) Swipe-Up? Try These 11 Solutions | Dr.fone
- How to Electronically Sign a .xlsx Using DigiSigner
- In 2024, Fake the Location to Get Around the MLB Blackouts on Apple iPhone 12 mini | Dr.fone
- Fixing Persistent Pandora Crashes on Motorola Edge 40 Neo | Dr.fone
- In 2024, Tips and Tricks for Apple ID Locked Issue On iPhone 12 mini
- How To Deal With the Xiaomi Civi 3 Disney 100th Anniversary Edition Screen Black But Still Works? | Dr.fone
- In 2024, 8 Ways to Transfer Photos from Motorola Edge 2023 to iPhone Easily | Dr.fone
- How to Repair corrupt MP4 and MOV files of Oppo F23 5G using Video Repair Utility on Mac?
- Best Oppo Find N3 Flip Pattern Lock Removal Tools Remove Android Pattern Lock Without Losing Data
- How To Use Allshare Cast To Turn On Screen Mirroring On OnePlus 11 5G | Dr.fone
- In 2024, Top 7 Online Auto Subtitle Translators for Content Creators
- How To Fix Unresponsive Touch Screen on Vivo V27 Pro | Dr.fone
- App Wont Open on Your Itel P55T? Here Are All Fixes | Dr.fone
- In 2024, How To Bypass Xiaomi Redmi Note 13 Pro+ 5G FRP In 3 Different Ways
- How To Reset the Security Questions of Your Apple ID On Your Apple iPhone XS
- In 2024, Detailed Review of doctorSIM Unlock Service For iPhone 7
- In 2024, 5 Easy Ways to Copy Contacts from Realme GT Neo 5 to iPhone 14 and 15 | Dr.fone
- In 2024, 10 Fake GPS Location Apps on Android Of your Realme GT 5 (240W) | Dr.fone
- The way to recover deleted pictures on Infinix Zero 5G 2023 Turbo without backup.
- In 2024, 9 Best Free Android Monitoring Apps to Monitor Phone Remotely For your Vivo X100 Pro | Dr.fone
- How to View GPX Files Online and Offline Solutions Of Apple iPhone 14 Plus | Dr.fone
- New Best 5 Quandale Dingle Voice Generators
- How to Restore iPhone without Backup | Stellar
- Network Locked SIM Card Inserted On Your Nokia G22 Phone? Unlock It Now
- How To Unlock iPhone 11 Official Method to Unlock Your iPhone 11
- Title: New In 2024, Is It That Easy to Make My Own Animated Character?
- Author: Elon
- Created at : 2024-06-08 05:07:47
- Updated at : 2024-06-09 05:07:47
- Link: https://animation-videos.techidaily.com/new-in-2024-is-it-that-easy-to-make-my-own-animated-character/
- License: This work is licensed under CC BY-NC-SA 4.0.
