
:max_bytes(150000):strip_icc():format(webp)/GettyImages-184415451-9f59b82b64ac421cad0f28540a515b5f.jpg)
New In 2024, Secrets to Make 2D Game Animation
Secrets to Make 2D Game Animation
Secrets to Make 2D Game Animation
An easy yet powerful editor
Numerous effects to choose from
Detailed tutorials provided by the official channel
In this dominated era by 2D game animation, when even the latest versions of Super Mario Bros and Street Fighter. are created of polygonized characters, quality sprite-based 2D games are rare.
In this article
01 [2D Game Animation Courses and Tutorials](#Part 1)
02 [5 Best Game Animation Services to Buy Online](#Part 2)
03 [Best 5 Game Animation Tools for Development As of 2022](#Part 3)
04 [3 Tips for Making Great Animations for 2D Games](#Part 4)
05 [How to Make 2D Animation for Games](#Part 5)
Part 1 2D Game Animation Courses and Tutorials
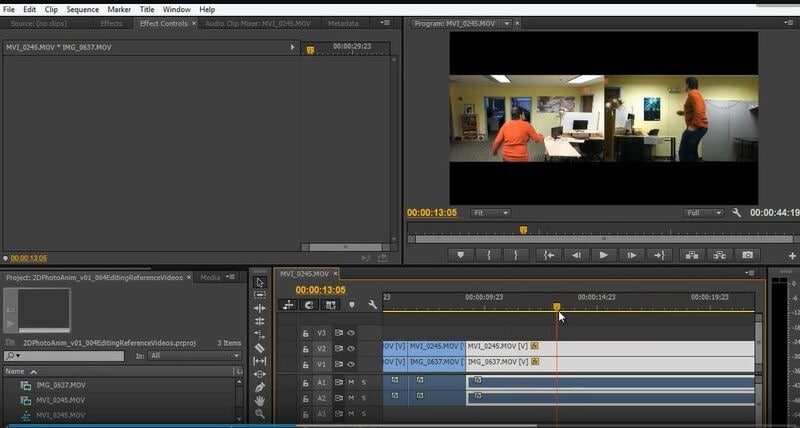
01Animating a 2D Character within Live-Action Video in Photoshop and Premiere
This tutorial greatly defines the process of creating traditional 2D animation in Photoshop implacable over live-action video. We’ll discuss the live-action planning shots with animation in mind, continuity of video editing, and making references for video animation. You will also know how to create the critical poses via rough animation to finish the entire movement and make final line images.
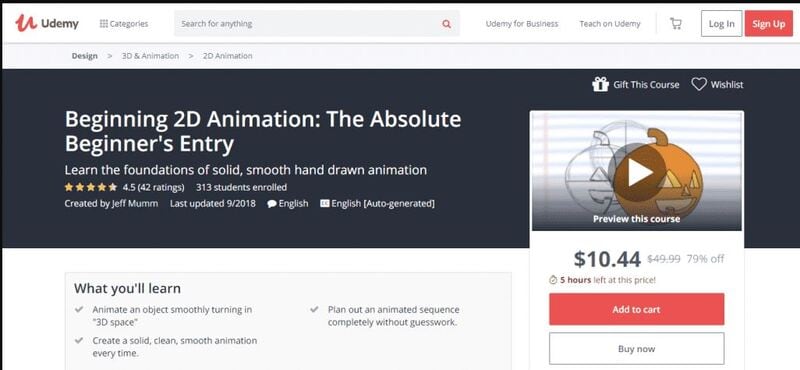
02Beginning 2D Animation: The Absolute Beginner’s Entry with Jeff Mumm
This course lays a solid foundation for absolute beginners entering the exciting world of 2D game animation. Here, we describe the detailed steps to create unique and great-looking animations.
You will also learn ‘easing,’ one of the twelve animation principles, and ultimately plan an animated sequence.
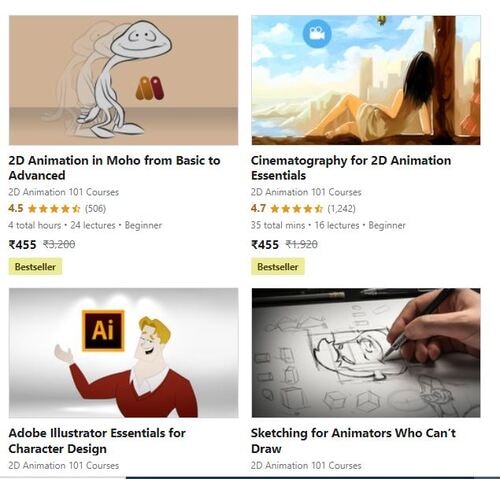
032D Animation in Moho from Basic to Advanced
This course focuses on applying the principles of animation to create an organic walk cycle for the character. This tutorial or course will also teach you how to rig and prepare your animated characters and do 2D game animation.
You will also learn how to trace characters in Moho and use different drawing tools.
Also, you will learn how to create an organic walk cycle by applying advanced animation principles.

042D Animation 101 Courses
This is one of the free online and the ultimate 2D game character design and animation courses that offer free online certificates. Autumn Leave Films has ten years of experience in the film industry and a great collection of short films – nearly 30 2D Animation 101 Courses.
2D Animation 101 provides eight courses, plus free and proprietary 2D game character animation software. In addition, their “Free Step-by-Step Plan” is specifically compelling to beginners in the 2D Animation arena.
It includes daily 10-minute lessons, online 2D game character animation tutorials, suggestions, and tips on using the required software.
05Skillshare -2D Animation for Beginners with Adobe Animate
This is one of the free online 2D animation courses that offer free online animation courses with certificates. You can learn 2D animation online by following Walt’s course. This course is designed for beginners and demonstrates how to create animated characters by providing students with an understanding of the fundamental principles and vivid examples. This tutorial covers various topics, including vector art basics in Animate, nested animations, adding audio to animations, and more.
This short course or tutorial is ideal for animation for personal rather than professional reasons.

Part 2 5 Best Game Animation Services to Buy Online
Rather than using and learning the best 2D animation software for game development, we’d like to describe a list of the top 5 freelancing platforms to rely upon for the best game animation services.
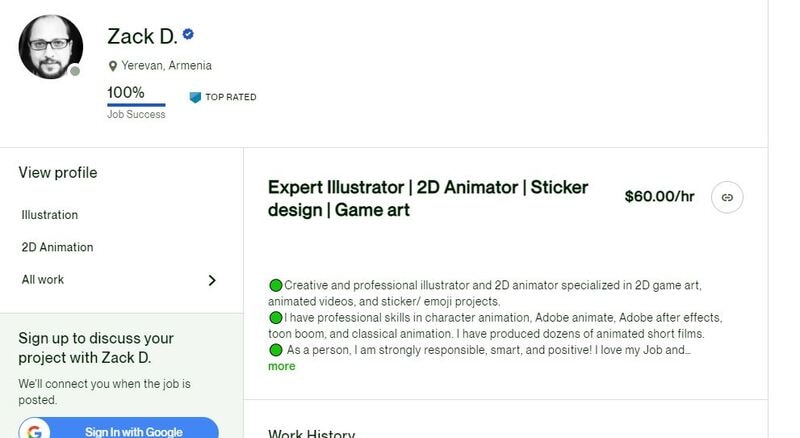
01Upwork
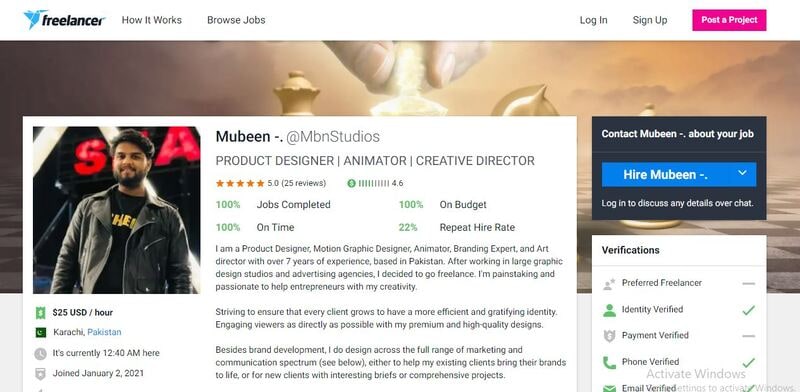
02Freelancer
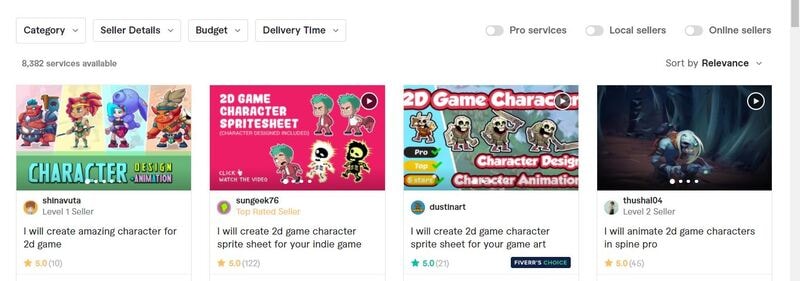
03Fiverr
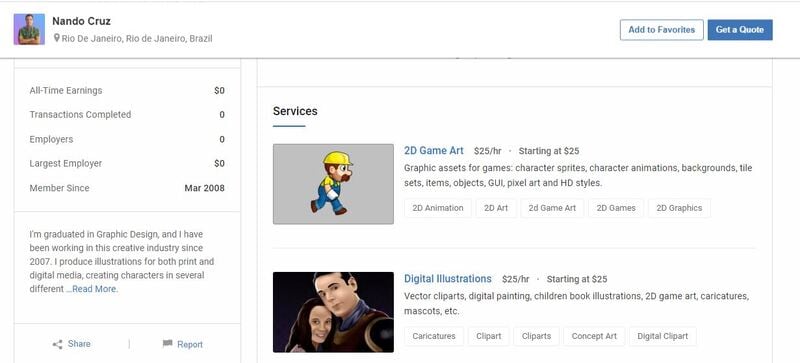
04Guru
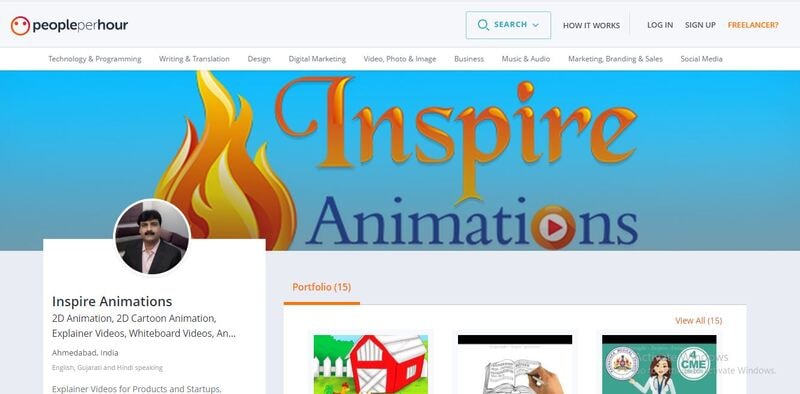
05PeoplePerHour
Part 3 Best 5 Game Animation Tools for Development As of 2022
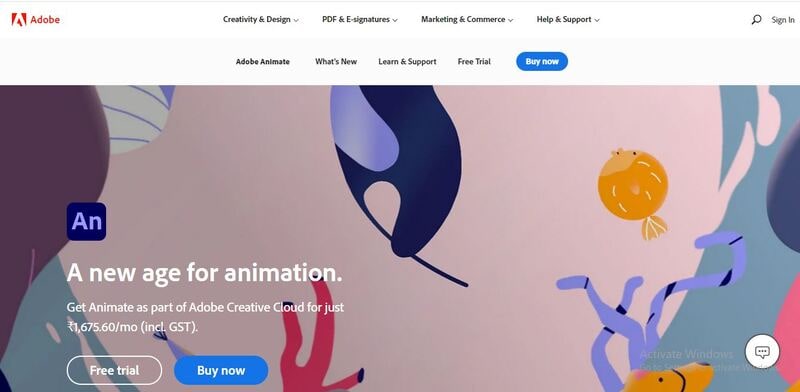
01Adobe Animate
It is a program from Adobe’s Creative Cloud. It offers the ability to make many varieties of animated features, games, or other Flash multimedia. The program was called Adobe Flash Professional for more than ten years; that name was retired in 2015.
The main features of Animate are as follows:
● Integration with your Adobe cloud library of assets
● Easy cross-platform use with other Adobe products
● Creates animated movies, cartoons, or clips
● Creates Flash games or interactive Flash utilities
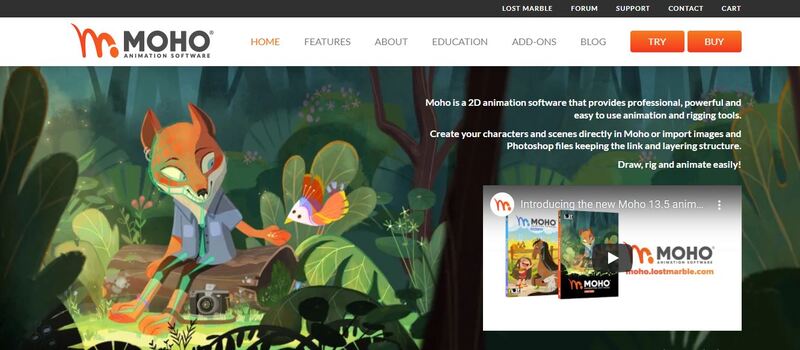
02Moho
It’s a comprehensive and best 2D game animation software where your animations are basically on the level of some of your favorite creations. It’s projected toward animators looking to hone their craft.
You could create some fantastic stuff if you’re up to the task (and the price). Moreover, they’re constantly adding updates.
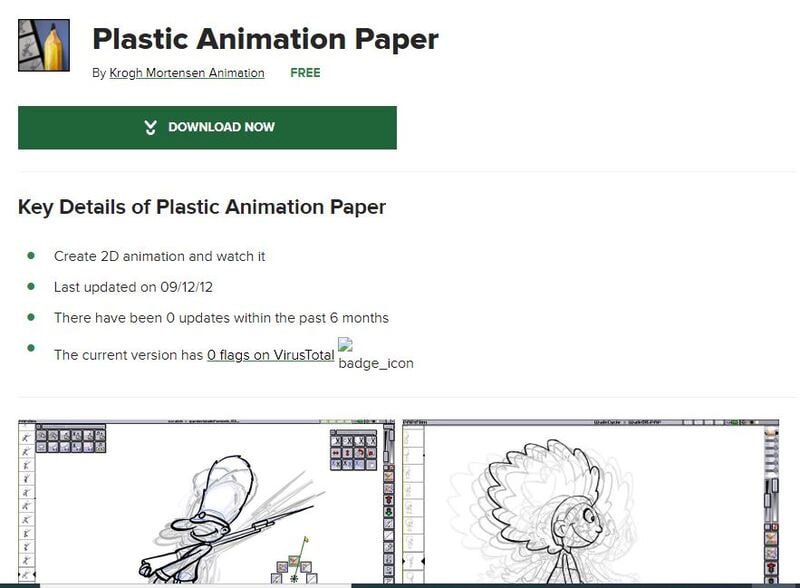
03Plastic Animation Paper
Plastic Animation Paper is another best 2D game character animation software that deals heavily with the concept of pencil drawing.
The program is designed for the most straightforward use and involves clear resolution. You can do whatever you wish with your drawings and elevate yourself to the next level.
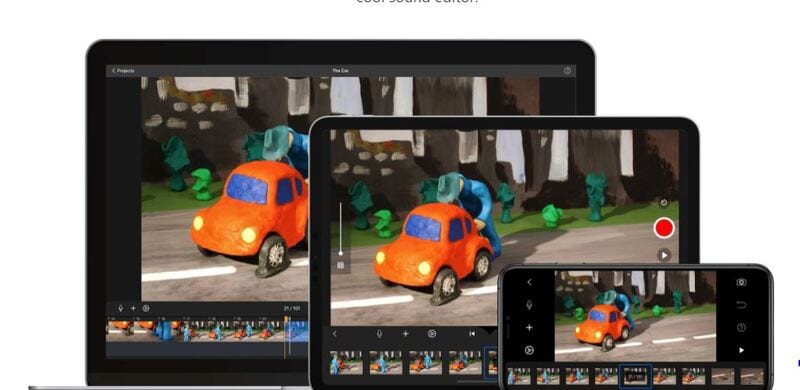
04Stop Motion Studio
‘Want to create movies like Wallace and those groovy Lego shorts on YouTube? Stop Motion Studio allows you to create terrific stop action movies with a bucket of specialized features.’
05Animaker
Learning how to make 2D animation for games with Animaker is also good to set up a storyboard and animate the characters or props in that scene. It’s used by companies like Verizon, Google, Pepsi, etc.
It’s appropriate for ad placement on websites and simplistic for beginners. They make it easy and super-fast to get lost for hours animating.
Part 4 3 Tips for Making Great Animations for 2D Games
Now that you have some initial idea of 2D game animation let’s jump to the top 3 tips that will help you create the best and unique 2D game character animation designs with ease.
It will be beneficial while knowing how to make 2D animation for games.
01Focus on the story and start with simple movements
You need to focus on the storyline so that outcome will come accordingly. Focus on every detail while sketching, and don’t miss out on simple movements. Take paper and pencil and start drawing simple exercises like the movement of a bouncing ball etc.
02Use keyframes properly
You need to carefully use keyframes’ start and endpoints to have robust storytelling and movements. To adequately describe the first and last, you need to consider effectively using the keyframes.
03Enliven your characters
You need to give life to your characters so that audience can best relate to the story. Also, pay good attention to facial expressions, sound, tickling movements, etc.
Although these may look like the most straightforward tips ever, these are the most practical 2D game animation strategies that can do wonders if used effectively.
Part 5 How to Make 2D Animation for Games
Making 2D game character animation isn’t a straightforward process and thus needs detailed knowledge that we will describe below.
Let’s use Unity as the best 2D animation software for games without further ado!
Essential awareness of the Unity Editor (how to navigate and open tabs) is required to work with the Unity Animation window.
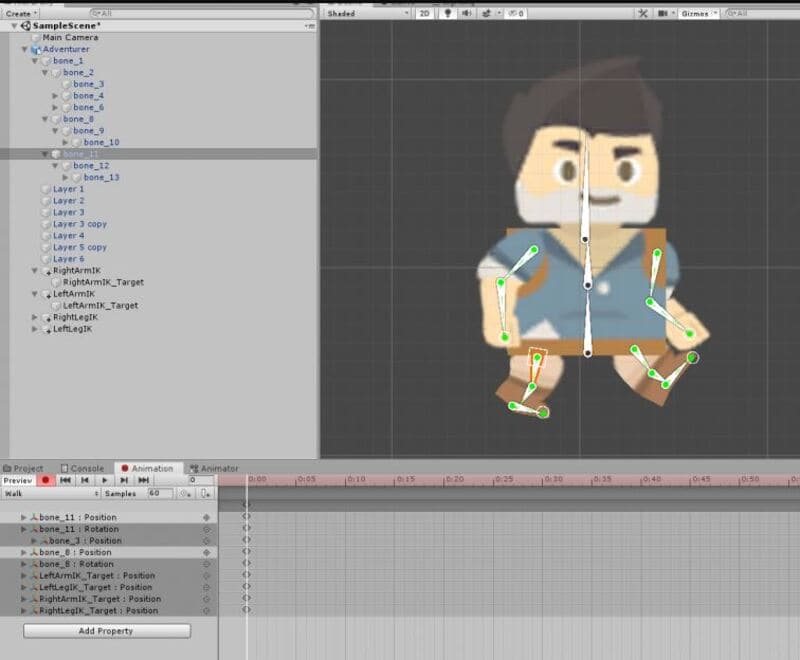
01Step 1: Start the Animation tab
Choose the Adventurer character and launch the Animation tab.
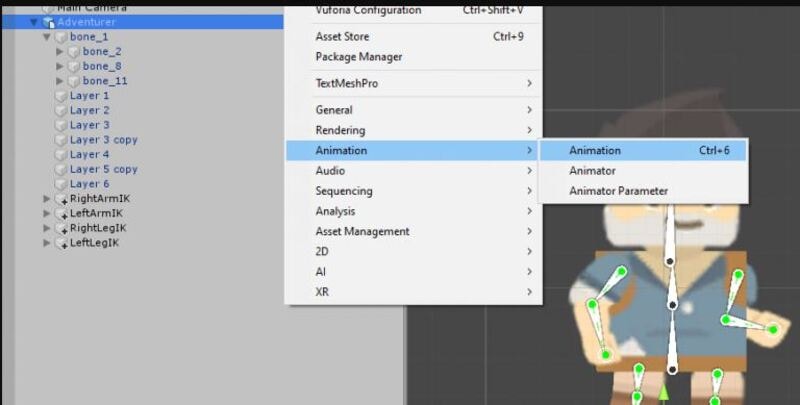
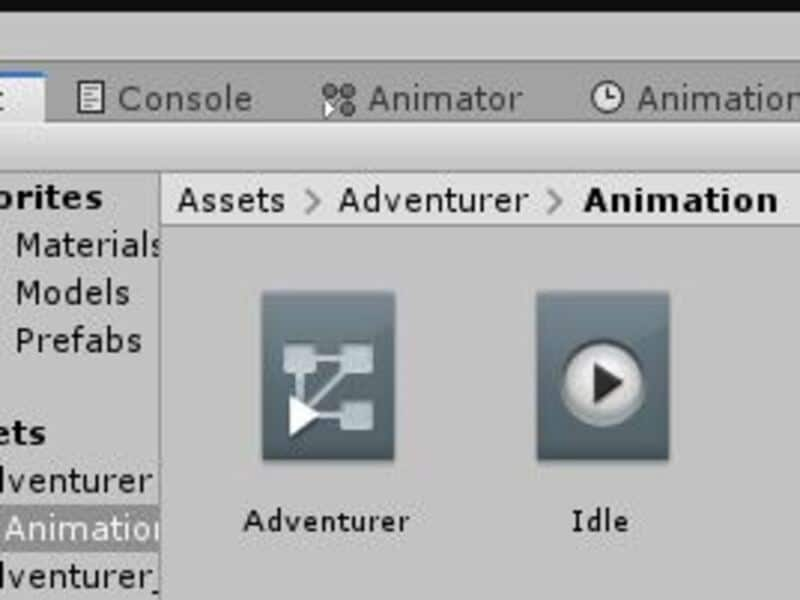
Dock this next to your project tab and console tab. Head towards the project tab and name with the Adventurer folder. Make a new folder known as “Animation.”
With the Animation tab, create a new animation known as “Idle” placed in our Animation folder.
It also creates an Animator Controller in that same folder.
Now, let’s start animating this character!
02Step 2: Proceed with the Idle Animation
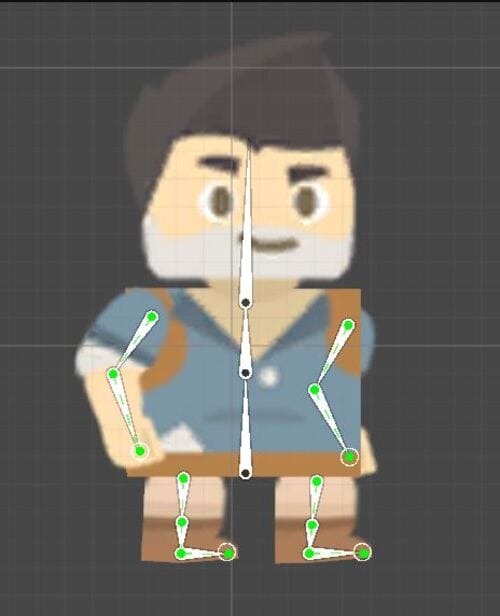
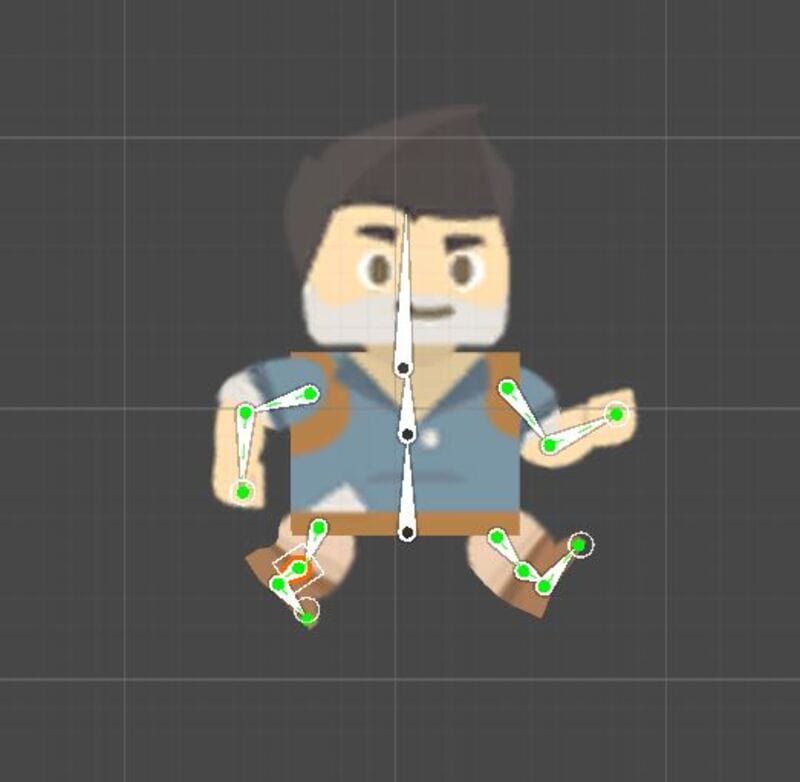
IKs contribute a lot to the efficiency and speed of animating when it comes to idle animation. We must animate a subtle movement very similar to a breathing motion. Tap the red record button and move the character to this position:
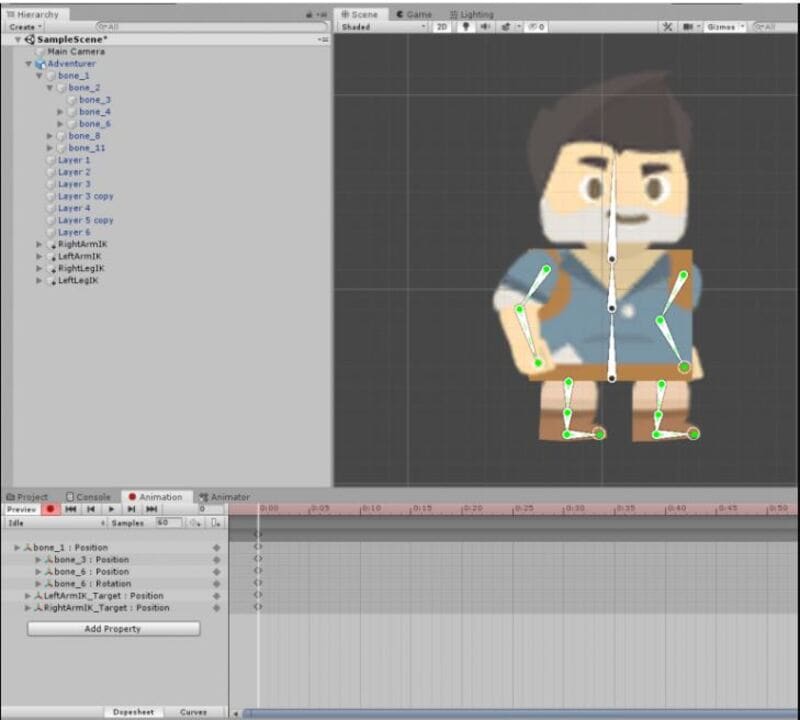
Now go about fifty frames ahead and barely move the top torso bone straight down.
Drag the arm IKs to the side to contain less bend in them and display a sort of “swinging” motion. Here is the pose that I chose:
A subtle tweak is there. It makes the idle animation look strange if we create large movements. Then, choose the first group of keyframes and tap the Ctrl-C (Command-C on a Mac).
Then, paste these frame-centric keyframes on number 1:50.
So, the nice looping animation is over now! It looks genuine, but we need to add some head motion to improve the illusion.
Just rotate the head back ever so slightly. But, as you can see, it makes a huge difference. Alright! Congratulations! We now have an idle animation!
03Step 3: Start walk animation
Create a new animation clip called ‘Walk.”
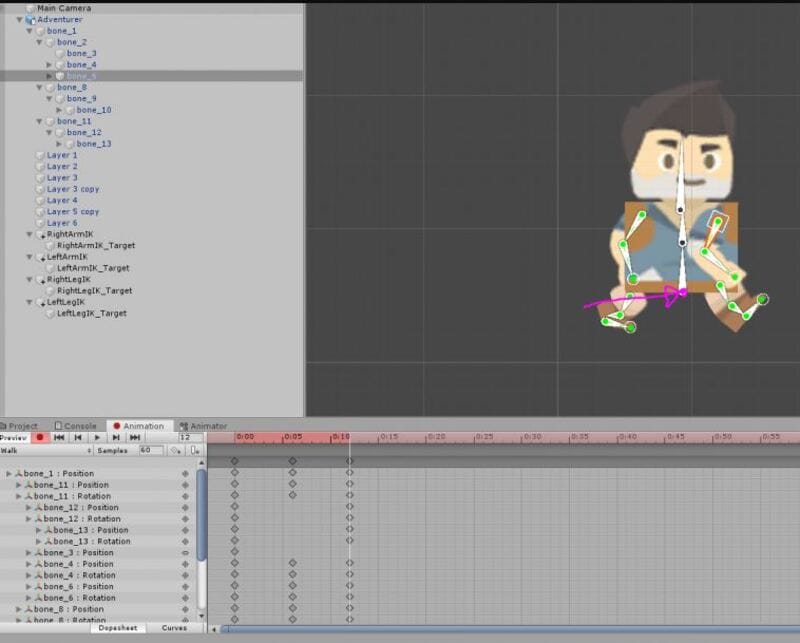
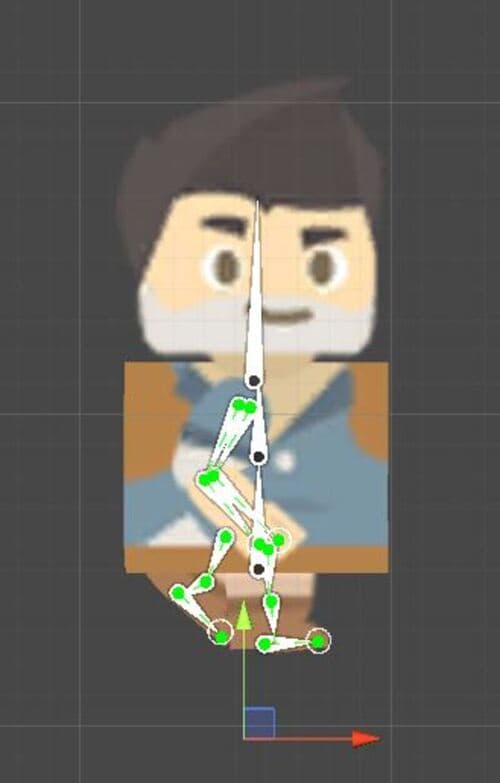
This animation is a bit more technical. Here, we need to know a few essential things about walk locomotion. The walk animation’s primary function is that the character is always touching the ground. Therefore, we should never have a pose where our character is airborne. Also, I use the word “pose” intentionally. When we animate in 2D, an action comprises certain key poses. In the scenario of the walk animation, we have one posture like this:
Here we have the right foot (relative to the character) touching the ground as you wander.
Then, about six frames ahead, we have a “passing pose.”
It contains a slight movement downwards. It further adds a realistic bobbing motion.
We must animate the character moving forward by moving the entire character game object. Don’t move the surface by any other means except by dragging the character as the whole object.
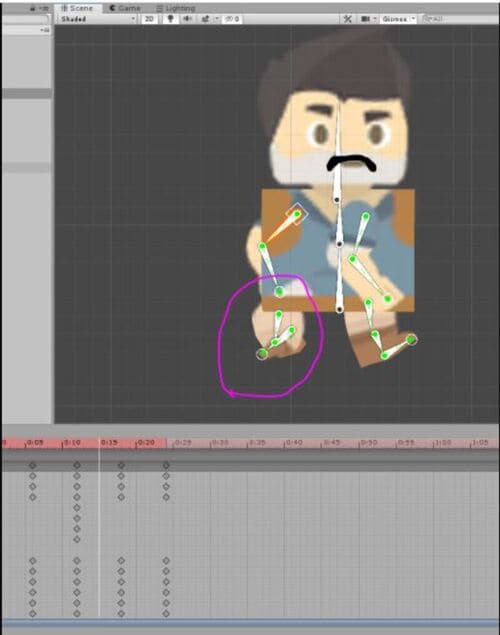
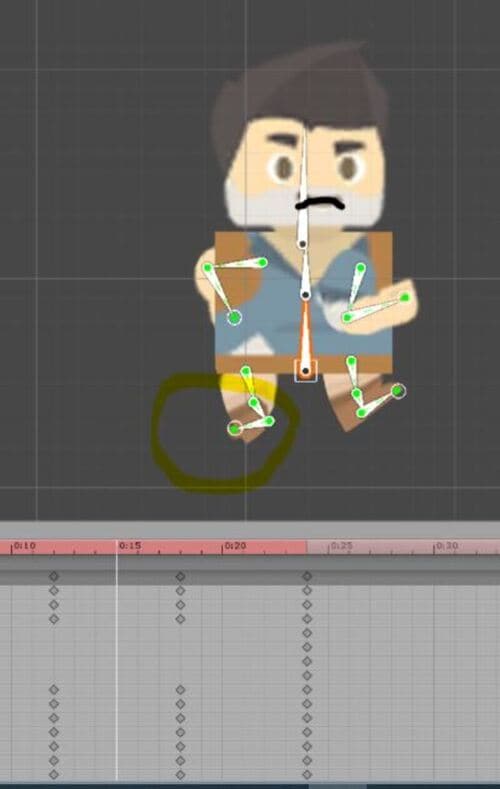
Then, the “dynamic pose” with the left foot touching the ground this time.
This happens at frame twelve, and we are still forwarding the character.
Now, we just require a final passing pose.
And then we recreate the same pose!
Now, copy the first keyframe and paste it. Reposition the character on the X-axis to match the forward motion. Now, go back to your animation and tweak any limbs bending in the wrong direction.
We are done!
04Step 4: Run animation
For the Run animation, create one pose with the airborne character. The distance covered is also more significant than the walk animation. Besides, the run animation has a similar general structure, but we add one extra pose to improve the illusion ultimately.
Create a new animation folder or clip called “Run.”
Tap the record tab and move the limbs to this pose:
The armature, we found, was very fiddly, so be patient while trying to create this pose. This first dynamic pose means that we need to have the whole character move slightly up on the y-axis. Then, after forwarding the six frames, we drag the character in different positions and down while limbs reposition to make the first passing pose.
Go through these two keyframes to check if you have an experimental animation. Reposition the feet to avoid foot sliding.
Then, the second dynamic pose happens six frames forward:
Now, we have another passing posture at frame number 18:
And conclusively, we have our final dynamic pose and make it look like the first pose. An excellent place to begin is to copy the first frame and paste it at the end. Drag the character forward on the X-axis into the ideal place. Now move the limbs into roughly the exact position as the beginning pose.
05Step 5: Go back to animation and check
Now, you can go back through the animation and consider checking two things. Firstly, correct any unnaturally bent limbs.
06Step 6: Create a contact pose
Secondly, we are required to add a unique pose to this run cycle called a “Contact Pose,” where we can visibly see the character make contact with the ground. This pose occurs a few frames after the dynamic pose and a few before the passing pose. It is simply the forward leg making early contact with the ground.

We need one of these before every passing pose. Also, while we’re here, let’s add a little more toe movement after passing each passing pose to make it look like the character got pushed off the ground.
So, this is the procedure to use the best 2D animation software for game development via Unity, and you can similarly continue to make jump animations, root motion, and more.
This tutorial mainly focused on animating a 2D character and dove deeper into the actual structure of an animation. Knowing these things will allow you to animate 2D characters and 3D characters as the principles are the same for each medium.
Easiest Solution for 2D Game Character Animation
Animating 2D games with Filmora Pro is a perfect choice. You get to try out its excellent 2D and 3D animation functions that are highly affordable and simple to use for both Android and iOS devices. You can consider using keyframe animations and letting them look realistic.
You can also get your fingers on a vast range of video editing tools with Wondershare Filmora Video Editor , such as color correction and grading, motion tracking, keying, simulations, and more. It allows you to make incredible animated videos and cinematic reels.
How to animate games with Wondershare Filmora
More advancement means more and kinds of games are fading out to obscurity. You can now animate 2D games underrated and add a bit of your touch to them via software like Filmora Pro and others like it.
For example, Filmora Pro features a dozen different transition effects like Centre Wipe, Evaporate, or Linear Wipe.
For Win 7 or later (64-bit)
For macOS 10.12 or later
You can also apply 3D rendering techniques to your games’ light and shadow effects.
● Key Takeaways from This Episode →
● A guide to the ultimate 2d game character design & animation course
● A guide to 5 best game animation services
● Learning five best 2D game character animation tools
● Tips for making excellent 2D game animations
● A step by ultimate step guide to making 2D game animation character in Unity
● Exploring the easiest solution for 2D game animation
In this dominated era by 2D game animation, when even the latest versions of Super Mario Bros and Street Fighter. are created of polygonized characters, quality sprite-based 2D games are rare.
In this article
01 [2D Game Animation Courses and Tutorials](#Part 1)
02 [5 Best Game Animation Services to Buy Online](#Part 2)
03 [Best 5 Game Animation Tools for Development As of 2022](#Part 3)
04 [3 Tips for Making Great Animations for 2D Games](#Part 4)
05 [How to Make 2D Animation for Games](#Part 5)
Part 1 2D Game Animation Courses and Tutorials
01Animating a 2D Character within Live-Action Video in Photoshop and Premiere
This tutorial greatly defines the process of creating traditional 2D animation in Photoshop implacable over live-action video. We’ll discuss the live-action planning shots with animation in mind, continuity of video editing, and making references for video animation. You will also know how to create the critical poses via rough animation to finish the entire movement and make final line images.
02Beginning 2D Animation: The Absolute Beginner’s Entry with Jeff Mumm
This course lays a solid foundation for absolute beginners entering the exciting world of 2D game animation. Here, we describe the detailed steps to create unique and great-looking animations.
You will also learn ‘easing,’ one of the twelve animation principles, and ultimately plan an animated sequence.
032D Animation in Moho from Basic to Advanced
This course focuses on applying the principles of animation to create an organic walk cycle for the character. This tutorial or course will also teach you how to rig and prepare your animated characters and do 2D game animation.
You will also learn how to trace characters in Moho and use different drawing tools.
Also, you will learn how to create an organic walk cycle by applying advanced animation principles.
042D Animation 101 Courses
This is one of the free online and the ultimate 2D game character design and animation courses that offer free online certificates. Autumn Leave Films has ten years of experience in the film industry and a great collection of short films – nearly 30 2D Animation 101 Courses.
2D Animation 101 provides eight courses, plus free and proprietary 2D game character animation software. In addition, their “Free Step-by-Step Plan” is specifically compelling to beginners in the 2D Animation arena.
It includes daily 10-minute lessons, online 2D game character animation tutorials, suggestions, and tips on using the required software.
05Skillshare -2D Animation for Beginners with Adobe Animate
This is one of the free online 2D animation courses that offer free online animation courses with certificates. You can learn 2D animation online by following Walt’s course. This course is designed for beginners and demonstrates how to create animated characters by providing students with an understanding of the fundamental principles and vivid examples. This tutorial covers various topics, including vector art basics in Animate, nested animations, adding audio to animations, and more.
This short course or tutorial is ideal for animation for personal rather than professional reasons.
Part 2 5 Best Game Animation Services to Buy Online
Rather than using and learning the best 2D animation software for game development, we’d like to describe a list of the top 5 freelancing platforms to rely upon for the best game animation services.
01Upwork
02Freelancer
03Fiverr
04Guru
05PeoplePerHour
Part 3 Best 5 Game Animation Tools for Development As of 2022
01Adobe Animate
It is a program from Adobe’s Creative Cloud. It offers the ability to make many varieties of animated features, games, or other Flash multimedia. The program was called Adobe Flash Professional for more than ten years; that name was retired in 2015.
The main features of Animate are as follows:
● Integration with your Adobe cloud library of assets
● Easy cross-platform use with other Adobe products
● Creates animated movies, cartoons, or clips
● Creates Flash games or interactive Flash utilities
02Moho
It’s a comprehensive and best 2D game animation software where your animations are basically on the level of some of your favorite creations. It’s projected toward animators looking to hone their craft.
You could create some fantastic stuff if you’re up to the task (and the price). Moreover, they’re constantly adding updates.
03Plastic Animation Paper
Plastic Animation Paper is another best 2D game character animation software that deals heavily with the concept of pencil drawing.
The program is designed for the most straightforward use and involves clear resolution. You can do whatever you wish with your drawings and elevate yourself to the next level.
04Stop Motion Studio
‘Want to create movies like Wallace and those groovy Lego shorts on YouTube? Stop Motion Studio allows you to create terrific stop action movies with a bucket of specialized features.’
05Animaker
Learning how to make 2D animation for games with Animaker is also good to set up a storyboard and animate the characters or props in that scene. It’s used by companies like Verizon, Google, Pepsi, etc.
It’s appropriate for ad placement on websites and simplistic for beginners. They make it easy and super-fast to get lost for hours animating.
Part 4 3 Tips for Making Great Animations for 2D Games
Now that you have some initial idea of 2D game animation let’s jump to the top 3 tips that will help you create the best and unique 2D game character animation designs with ease.
It will be beneficial while knowing how to make 2D animation for games.
01Focus on the story and start with simple movements
You need to focus on the storyline so that outcome will come accordingly. Focus on every detail while sketching, and don’t miss out on simple movements. Take paper and pencil and start drawing simple exercises like the movement of a bouncing ball etc.
02Use keyframes properly
You need to carefully use keyframes’ start and endpoints to have robust storytelling and movements. To adequately describe the first and last, you need to consider effectively using the keyframes.
03Enliven your characters
You need to give life to your characters so that audience can best relate to the story. Also, pay good attention to facial expressions, sound, tickling movements, etc.
Although these may look like the most straightforward tips ever, these are the most practical 2D game animation strategies that can do wonders if used effectively.
Part 5 How to Make 2D Animation for Games
Making 2D game character animation isn’t a straightforward process and thus needs detailed knowledge that we will describe below.
Let’s use Unity as the best 2D animation software for games without further ado!
Essential awareness of the Unity Editor (how to navigate and open tabs) is required to work with the Unity Animation window.
01Step 1: Start the Animation tab
Choose the Adventurer character and launch the Animation tab.
Dock this next to your project tab and console tab. Head towards the project tab and name with the Adventurer folder. Make a new folder known as “Animation.”
With the Animation tab, create a new animation known as “Idle” placed in our Animation folder.
It also creates an Animator Controller in that same folder.
Now, let’s start animating this character!
02Step 2: Proceed with the Idle Animation
IKs contribute a lot to the efficiency and speed of animating when it comes to idle animation. We must animate a subtle movement very similar to a breathing motion. Tap the red record button and move the character to this position:
Now go about fifty frames ahead and barely move the top torso bone straight down.
Drag the arm IKs to the side to contain less bend in them and display a sort of “swinging” motion. Here is the pose that I chose:
A subtle tweak is there. It makes the idle animation look strange if we create large movements. Then, choose the first group of keyframes and tap the Ctrl-C (Command-C on a Mac).
Then, paste these frame-centric keyframes on number 1:50.
So, the nice looping animation is over now! It looks genuine, but we need to add some head motion to improve the illusion.
Just rotate the head back ever so slightly. But, as you can see, it makes a huge difference. Alright! Congratulations! We now have an idle animation!
03Step 3: Start walk animation
Create a new animation clip called ‘Walk.”
This animation is a bit more technical. Here, we need to know a few essential things about walk locomotion. The walk animation’s primary function is that the character is always touching the ground. Therefore, we should never have a pose where our character is airborne. Also, I use the word “pose” intentionally. When we animate in 2D, an action comprises certain key poses. In the scenario of the walk animation, we have one posture like this:
Here we have the right foot (relative to the character) touching the ground as you wander.
Then, about six frames ahead, we have a “passing pose.”
It contains a slight movement downwards. It further adds a realistic bobbing motion.
We must animate the character moving forward by moving the entire character game object. Don’t move the surface by any other means except by dragging the character as the whole object.
Then, the “dynamic pose” with the left foot touching the ground this time.
This happens at frame twelve, and we are still forwarding the character.
Now, we just require a final passing pose.
And then we recreate the same pose!
Now, copy the first keyframe and paste it. Reposition the character on the X-axis to match the forward motion. Now, go back to your animation and tweak any limbs bending in the wrong direction.
We are done!
04Step 4: Run animation
For the Run animation, create one pose with the airborne character. The distance covered is also more significant than the walk animation. Besides, the run animation has a similar general structure, but we add one extra pose to improve the illusion ultimately.
Create a new animation folder or clip called “Run.”
Tap the record tab and move the limbs to this pose:
The armature, we found, was very fiddly, so be patient while trying to create this pose. This first dynamic pose means that we need to have the whole character move slightly up on the y-axis. Then, after forwarding the six frames, we drag the character in different positions and down while limbs reposition to make the first passing pose.
Go through these two keyframes to check if you have an experimental animation. Reposition the feet to avoid foot sliding.
Then, the second dynamic pose happens six frames forward:
Now, we have another passing posture at frame number 18:
And conclusively, we have our final dynamic pose and make it look like the first pose. An excellent place to begin is to copy the first frame and paste it at the end. Drag the character forward on the X-axis into the ideal place. Now move the limbs into roughly the exact position as the beginning pose.
05Step 5: Go back to animation and check
Now, you can go back through the animation and consider checking two things. Firstly, correct any unnaturally bent limbs.
06Step 6: Create a contact pose
Secondly, we are required to add a unique pose to this run cycle called a “Contact Pose,” where we can visibly see the character make contact with the ground. This pose occurs a few frames after the dynamic pose and a few before the passing pose. It is simply the forward leg making early contact with the ground.
We need one of these before every passing pose. Also, while we’re here, let’s add a little more toe movement after passing each passing pose to make it look like the character got pushed off the ground.
So, this is the procedure to use the best 2D animation software for game development via Unity, and you can similarly continue to make jump animations, root motion, and more.
This tutorial mainly focused on animating a 2D character and dove deeper into the actual structure of an animation. Knowing these things will allow you to animate 2D characters and 3D characters as the principles are the same for each medium.
Easiest Solution for 2D Game Character Animation
Animating 2D games with Filmora Pro is a perfect choice. You get to try out its excellent 2D and 3D animation functions that are highly affordable and simple to use for both Android and iOS devices. You can consider using keyframe animations and letting them look realistic.
You can also get your fingers on a vast range of video editing tools with Wondershare Filmora Video Editor , such as color correction and grading, motion tracking, keying, simulations, and more. It allows you to make incredible animated videos and cinematic reels.
How to animate games with Wondershare Filmora
More advancement means more and kinds of games are fading out to obscurity. You can now animate 2D games underrated and add a bit of your touch to them via software like Filmora Pro and others like it.
For example, Filmora Pro features a dozen different transition effects like Centre Wipe, Evaporate, or Linear Wipe.
For Win 7 or later (64-bit)
For macOS 10.12 or later
You can also apply 3D rendering techniques to your games’ light and shadow effects.
● Key Takeaways from This Episode →
● A guide to the ultimate 2d game character design & animation course
● A guide to 5 best game animation services
● Learning five best 2D game character animation tools
● Tips for making excellent 2D game animations
● A step by ultimate step guide to making 2D game animation character in Unity
● Exploring the easiest solution for 2D game animation
Learn What Are Differences Between 2D And 3D Animation
What Are Differences Between 2D And 3D Animation
An easy yet powerful editor
Numerous effects to choose from
Detailed tutorials provided by the official channel
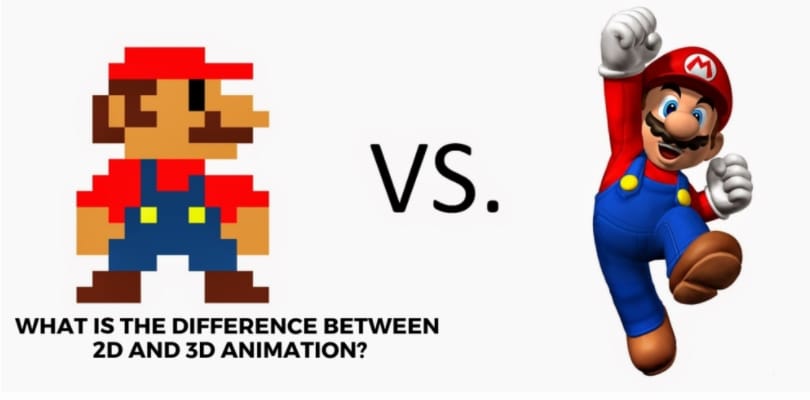
Creating an animation requires multiple processes and tasks to get that final result that we enjoy on the screen. Irrespective of the type of animations like stop-motion, sketch, computer, and others, all of them majorly falls under two main categories- 2D animation and 3D animation. The popular cartoons like Mickey Mouse, Tom & Jerry, and others that became an integral part of all childhood were 2D animations and with technological advancement and 3D animation in use, they are more like aged-veterans.
Toy Story was the first 3D animation movie and after that, there is no stopping. Though 3D animations are more interesting and engaging, they are fields where 2D animations work better. This article will help you to learn in detail about 2D 3D animation, their differences, uses, and other aspects.
In this article
01 [Definition of 2D Animation 3D Animation?](#Part 1)
02 [Key Differences Between 2D Animations and 3D Animations](#Part 2)
03 [Selecting Between 2D Animation and 3D Animation?](#Part 3)
04 [Merging 2D Animation and 3D Animation](#Part 4)
Part 1 Part Definition Of 2D And 3D Animation
012D Animation
The traditional method of animation is termed 2D animation and it has been in use for a long time. A 2D animated video has multiple images in different positions which when moved quickly one after the other simulates a movement. The flipping of the images creates an illusion of movement. Earlier 2D animations were created using hands but now there is advanced computer software that can create these animations in just a few simple clicks. The term 2D means 2 dimensional which means that an image for the animation can be moved in two-dimensional space that is X-axis and Y-axis.
023D Animation
In simplest terms, a 3D animation is an animation that is created in three-dimensional space which makes the characters and objects appear realistic and lively. Thus, a 3D animation has height, width as well as depth. These animations are more complex and the process of creating them is totally different from that of 2D animations. Though 3D animations are used in different industries and platforms these days, majorly they can be found for creating movies, games, and cartoons.
Part 2 Part Key Differences Between 2d Animations and 3d Animations
The major difference between a 2D animation and 3D animation lies in the final appearance. While a 2D animation appears like a flat animation which can be an image or a photograph at a fast movement while a 3D animation looks like real objects that can be seen from all angles and have their front, back, top, as well as the bottom.
The table below will differentiate both these animations on various parameters.
| Features/Type of Animation | 2D Animation | 3D Animation |
|---|---|---|
| Full-Form | Two-dimensional | Three-dimensional |
| Meaning | These animations with 2-dimensional objects appear to be moving when the images are moved at a fast speed. | The objects and characters in these animations look more realistic as their appear in 3-dimensional space. |
| Supported Aspects and axis | Length and height (X-axis and Y-axis) | Length, height, and width (X-axis, Y-axis and Z-axis) |
| Appearance | Appear as flat | Appear lively and realistic |
| Basic elements | It’s all about frames | The animation is all about movements |
| Axis | Images appear at X-axis, and Y axis | Objects appear at X-axis, Y-axis, and Z-axis. |
| Use and target audience | Used for social media sites, demos, animated whiteboard videos, and similar others. | Used for movies, cartoons, video games. |
| Use of software | Hand-drawn images or computer-generated images can be used. | Complex software is needed. |
| Cost | Cheaper than 3D animations | Expensive |
| Examples | Snow White, The Jungle Book, Mickey Mouse, Tom & Jerry, and more. | The Toy Story, Transformers, Incredibles, and more. |
Part 3 Selecting Between 2D Animation and 3D Animation?
Confused between 2D animation and 3D animation? Several factors can be considered to select between the two types of animations. Major ones are enlisted below.
● Target audience: For general explanation and use, 2D animations are a good choice as they are interesting, engaging, and also pocket-friendly. If the target audience is professional people that need in-depth and important information about something, 3D animations are a better choice.
● Availability of software: There are different software used for different types of animations. The availability of the software can also be a deciding factor for selecting between a 2D animation or 3D animation.
● Budget: This is another important factor to be considered. Since 3D animation requires more complex tools and procedures, creating them is expensive. So, depending on how much you are willing to spend, you can choose between the two.
Part 4 Part Merging 2D Animation and 3D Animation
Why choose one, when both can be used? Yes, to get the best of both worlds, 2D animations can be used along with 3D animations depending on the type of the project. Both the styles can be adjusted as per the requirements and for this, good professional software is needed.
We here suggest Wondershare Filmora Video Editor as the best tool as it not only comes equipped with all the latest features but the entire process is also quick and hassle-free. Majorly working as an excellent video editing software, the program supports multiple functions supporting animated videos. Using this Windows and Mac-based tool yon create dynamic animated videos and also edit them and customize them to suit your requirements.
For Win 7 or later (64-bit)
For macOS 10.12 or later
Key features of the software
● Create interesting and engaging animated and other videos using more than 100 media layers, composting tools, and dynamic effects.
● Apply motion elements, filters, and transitions for dynamic videos.
● Audio functions like background noise removal, audio equalizer, keyframe audio editing, and others are supported.
● Fast import, export, and rendering.
● Option to preview the files in high resolution.
● Features like fisheye correction, speed control, stabilization, advanced color correction, 3D LUTs, and others are supported.
● Additional supported functions include import from social media sites, portrait support, camera shake, audio-mixing, screen recording, auto-crop, and others.
● Windows and Mac support.
● Key Takeaways from This Episode →
● 2D and 3D animation are the two major types of animations created for different uses.
● A 2D animation appears in two-dimensional space while a 3D animation appears in a three-dimensional space and looks livelier and more realistic.
● Both 2D and 3D animations can be merged using professional software like Wondershare Filmora Video Editor that supports a wide range of other functions as well.
5 Must Try Ways to Add and Send GIF in Text Message on Android
5 Must Try Ways to Add and Send GIF in Text Message on Android
An easy yet powerful editor
Numerous effects to choose from
Detailed tutorials provided by the official channel
A much easier and more extraordinary way of expressing yourself is texting with GIFs, and thus, GIFs for texting on Android are so famous now. GIFs, an abbreviation for Graphics Interchange Format, are brief animated images primarily used in a fun way to pass a message during texting and chatting. You do not necessarily have to say a word; a GIF does that for you!

Having GIFs is one thing; it is another to know how to use them effectively during conversations. Almost all operating system keyboards come with their style of sending GIFs to people. Also, you can download GIFs from the internet and go ahead to attach them directly to a text message. There are also third-party applications like GIPHY and GIF Keyboard to get GIFs for texting on Android. GIPHY is undoubtedly the best GIF app for Android texting. With Gboard, the built-in Google keyboard found in most Android devices; you can effortlessly search for GIFs for texting on Android.
In this article
01 [Can You Text a GIF?](#Part 1)
02 [Best 5 Ways to Add and Send GIFs in Text Message on Android](#Part 2)
Part 1 Can You Text a GIF?
The simple answer is yes! It is possible to message a GIF. GIFs for Android text messaging are becoming the new normal, and this is not surprising as they are easy to add to texts and make texting livelier.
To use a GIF for texting on Android, open any messaging app of your choice found on your Android device; it could be WhatsApp or the default message app installed on the Android device. The keyboard would most likely offer you a variety of GIF options. If not, click on the smiley icon at the bottom of the keyboard to reveal other GIFs grouped in categories. Simply clicking on any of your choices would select it, and all you must do is hit the send icon.
Google’s texting app, Google Messages, comes with sending GIFs. To use a GIF in text messages on Android, open the messaging app and start a fresh conversation or open an existing one, then select the square icon with GIF written in the middle. Select your preferred GIF, then click Send. You can also add a brief description or caption before sending the GIF across.
Apart from the built-in apps on Android devices that allow you to send GIFs, there are unique apps like GIPHY (compatible with Android and iOS devices) with an extensive array of GIFs that can fit into different contexts greetings, culture, animals, reactions, etc. You can also employ social media trackers that help you discover popular and trending GIFs. If the available GIFs do not express your intention, you can go ahead to perform a search to find other GIFs. That way, there’s no limitation to the messages you want to pass through GIFs for texting on Android devices.
Part 2 Best 5 Ways to Add and Send GIF in Text Message on Android
There are different ways of using GIFs for Android texting. Apart from using the GIFs available in the built-in keyboard of messaging apps, downloading, and installing an instant messaging app or GIF keyboard is one of the best and easiest ways to access many GIF libraries.
This section would suggest to you the best GIF apps for Android texting and other ways you can explore to send GIFs and make your texting less wordy, more visual, and more expressive:
01Attaching GIF to a text message
This method of using GIFs for Android texting is straightforward. All you need is a messaging app, then follow these steps:
Step 1: On your Android phone’s app list, open Messages, the app represented as a white speech bubble.

Step 2: At the bottom right corner of the app, tap the blue circular button with a white plus sign. This will open a page to select the receiver’s contact.

Step 3: Select the recipient’s number by tapping on it from the contact list or type the number or name of the person directly into the “To” field at the top of the screen.

Step 4: Tap the circular button with the plus sign in the middle on the left side of the message field. Depending on the app, it may be a paper clip icon.

Step 5: Tap the images icon to select an image from your phone media library.

Step 6: Click Gallery to select a previously downloaded GIF.

Step 7: Select the GIF you want to send. This would insert the GIF into a small preview image on the text message. The GIF would play in the preview window.

Step 8: Click the paper icon at the right corner of the text field to send the animated GIF image.

02Gboard
Gboard is a Google keyboard. This is another easy way of adding GIFs for Android text messaging. If you do not have Gboard, download it from Play Store and install it on your Android phone. Follow these to add GIFs to your text messages:
Step 1: Download, install and set up Gboard on your Android phone.

Step 2: Open your text messaging app to write a new text message. If you have previously sent a message to the recipient, click on the ongoing conversation or open a new chat and select the recipient’s contact.
Step 3: Tap the text message field to compose your text message. If your default keyboard is Gboard, then Gboard will be automatically opened.

Step 4: At the bottom of the keyboard, just to the left of the space bar, tap the smiley face icon.

Step 5: Click the GIF button located at the bottom row of the keyboard.

Step 6: Browse through the different categories tab below the GIF to select a GIF or enter a keyword to look for a GIF.

Step 7: Click on the GIF you want to add to the text message you’re typing automatically.

Step 8: Click the Send button, usually represented as a paper airplane icon at the bottom right of the messaging app.

03GIPHY
This is one of the most popular platforms that supports GIFs for texting on Android. It has the largest library of GIFs, making it a perfect search engine for them. GIPHY allows you to personalize your GIFs while finding the latest and trending GIFs. It also allows you to explore visual aspects, including sports highlights, TV shows, movies, etc. Installing this application gives you access to various GIFs that you can directly share with friends on social media or send them to messaging apps like WhatsApp, Facebook Messenger, etc. With GIPHY, you can save and share gifs while also using the animated stickers available on the app.

04SwiftKey Keyboard
This keyboard app comes with many features, including sending GIFs. This keyboard app lends your writing style and adapts to it, making it a highly productive app for typing. Its emoji keyboard allows you to effortlessly search and send fun stickers, emojis, and GIFs while texting. It also has a multilingual feature.

05GIF Keyboard
This keyboard makes it easy for you to directly and conveniently send GIFs from your keyboard. With a library of millions of GIFs, you need to type in a keyword to get the right GIF at any point in time. Send emojis, videos, and animated GIFs with just a single click using GIF Keyboard. You can browse for GIFs by category, save your favorites GIFs, and share them using different messaging apps.

● Key Takeaways from This Episode →
● How to use GIFs for Android texting.
●the Best GIF apps for Android texting.
● Different reliable ways of using GIFs to spice up your texting on Android devices.
●Using GIFs for Android text messaging is the way to go in this modern age. This is because people relate more to visual representations than mere write-ups. Now, you know that it is possible to text GIFs and send them is simple using the extensively discussed methods in this article.
A much easier and more extraordinary way of expressing yourself is texting with GIFs, and thus, GIFs for texting on Android are so famous now. GIFs, an abbreviation for Graphics Interchange Format, are brief animated images primarily used in a fun way to pass a message during texting and chatting. You do not necessarily have to say a word; a GIF does that for you!
Having GIFs is one thing; it is another to know how to use them effectively during conversations. Almost all operating system keyboards come with their style of sending GIFs to people. Also, you can download GIFs from the internet and go ahead to attach them directly to a text message. There are also third-party applications like GIPHY and GIF Keyboard to get GIFs for texting on Android. GIPHY is undoubtedly the best GIF app for Android texting. With Gboard, the built-in Google keyboard found in most Android devices; you can effortlessly search for GIFs for texting on Android.
In this article
01 [Can You Text a GIF?](#Part 1)
02 [Best 5 Ways to Add and Send GIFs in Text Message on Android](#Part 2)
Part 1 Can You Text a GIF?
The simple answer is yes! It is possible to message a GIF. GIFs for Android text messaging are becoming the new normal, and this is not surprising as they are easy to add to texts and make texting livelier.
To use a GIF for texting on Android, open any messaging app of your choice found on your Android device; it could be WhatsApp or the default message app installed on the Android device. The keyboard would most likely offer you a variety of GIF options. If not, click on the smiley icon at the bottom of the keyboard to reveal other GIFs grouped in categories. Simply clicking on any of your choices would select it, and all you must do is hit the send icon.
Google’s texting app, Google Messages, comes with sending GIFs. To use a GIF in text messages on Android, open the messaging app and start a fresh conversation or open an existing one, then select the square icon with GIF written in the middle. Select your preferred GIF, then click Send. You can also add a brief description or caption before sending the GIF across.
Apart from the built-in apps on Android devices that allow you to send GIFs, there are unique apps like GIPHY (compatible with Android and iOS devices) with an extensive array of GIFs that can fit into different contexts greetings, culture, animals, reactions, etc. You can also employ social media trackers that help you discover popular and trending GIFs. If the available GIFs do not express your intention, you can go ahead to perform a search to find other GIFs. That way, there’s no limitation to the messages you want to pass through GIFs for texting on Android devices.
Part 2 Best 5 Ways to Add and Send GIF in Text Message on Android
There are different ways of using GIFs for Android texting. Apart from using the GIFs available in the built-in keyboard of messaging apps, downloading, and installing an instant messaging app or GIF keyboard is one of the best and easiest ways to access many GIF libraries.
This section would suggest to you the best GIF apps for Android texting and other ways you can explore to send GIFs and make your texting less wordy, more visual, and more expressive:
01Attaching GIF to a text message
This method of using GIFs for Android texting is straightforward. All you need is a messaging app, then follow these steps:
Step 1: On your Android phone’s app list, open Messages, the app represented as a white speech bubble.
Step 2: At the bottom right corner of the app, tap the blue circular button with a white plus sign. This will open a page to select the receiver’s contact.
Step 3: Select the recipient’s number by tapping on it from the contact list or type the number or name of the person directly into the “To” field at the top of the screen.
Step 4: Tap the circular button with the plus sign in the middle on the left side of the message field. Depending on the app, it may be a paper clip icon.
Step 5: Tap the images icon to select an image from your phone media library.
Step 6: Click Gallery to select a previously downloaded GIF.
Step 7: Select the GIF you want to send. This would insert the GIF into a small preview image on the text message. The GIF would play in the preview window.
Step 8: Click the paper icon at the right corner of the text field to send the animated GIF image.
02Gboard
Gboard is a Google keyboard. This is another easy way of adding GIFs for Android text messaging. If you do not have Gboard, download it from Play Store and install it on your Android phone. Follow these to add GIFs to your text messages:
Step 1: Download, install and set up Gboard on your Android phone.
Step 2: Open your text messaging app to write a new text message. If you have previously sent a message to the recipient, click on the ongoing conversation or open a new chat and select the recipient’s contact.
Step 3: Tap the text message field to compose your text message. If your default keyboard is Gboard, then Gboard will be automatically opened.
Step 4: At the bottom of the keyboard, just to the left of the space bar, tap the smiley face icon.
Step 5: Click the GIF button located at the bottom row of the keyboard.
Step 6: Browse through the different categories tab below the GIF to select a GIF or enter a keyword to look for a GIF.
Step 7: Click on the GIF you want to add to the text message you’re typing automatically.
Step 8: Click the Send button, usually represented as a paper airplane icon at the bottom right of the messaging app.
03GIPHY
This is one of the most popular platforms that supports GIFs for texting on Android. It has the largest library of GIFs, making it a perfect search engine for them. GIPHY allows you to personalize your GIFs while finding the latest and trending GIFs. It also allows you to explore visual aspects, including sports highlights, TV shows, movies, etc. Installing this application gives you access to various GIFs that you can directly share with friends on social media or send them to messaging apps like WhatsApp, Facebook Messenger, etc. With GIPHY, you can save and share gifs while also using the animated stickers available on the app.
04SwiftKey Keyboard
This keyboard app comes with many features, including sending GIFs. This keyboard app lends your writing style and adapts to it, making it a highly productive app for typing. Its emoji keyboard allows you to effortlessly search and send fun stickers, emojis, and GIFs while texting. It also has a multilingual feature.
05GIF Keyboard
This keyboard makes it easy for you to directly and conveniently send GIFs from your keyboard. With a library of millions of GIFs, you need to type in a keyword to get the right GIF at any point in time. Send emojis, videos, and animated GIFs with just a single click using GIF Keyboard. You can browse for GIFs by category, save your favorites GIFs, and share them using different messaging apps.
● Key Takeaways from This Episode →
● How to use GIFs for Android texting.
●the Best GIF apps for Android texting.
● Different reliable ways of using GIFs to spice up your texting on Android devices.
●Using GIFs for Android text messaging is the way to go in this modern age. This is because people relate more to visual representations than mere write-ups. Now, you know that it is possible to text GIFs and send them is simple using the extensively discussed methods in this article.
Create Animated Social Media Posts in Canva
Versatile Video Editor - Wondershare Filmora
An easy yet powerful editor
Numerous effects to choose from
Detailed tutorials provided by the official channel
Eye-catching social media posts are an excellent, attention-grabbing way to make your ideal clients stop scrolling. Today, we’ll describe how to create animated social media posts through Canva posts entirely free and without any design experience required on Canva.
Level up your next social media campaign by adding beautifully designed graphics! You can choose from our library of professionally designed Canva layouts for Facebook, Pinterest, Twitter, Instagram, and more.
Without any further ado, let’s get into the process as follows!
In this article
01 [Which social media animated posts can be created on Canva?](#Part 1)
02 [What Canva can help with animated social media posts?](#Part 2)
03 [Steps to create animated social media pictures in Canva](#Part 3)
04 [Steps to create animated social media videos in Canva](#Part 4)
Part 1 Which social media animated posts can be created on Canva?
With the latest Canva Pro feature, you can go for Canva Animator!
Yes, you can easily create animated social media posts via Canva, like Facebook stories or animated Instagram stories. And, you can also create ads for any other social media platform using its Custom Design feature.
It consists of ready-made templates for Facebook, Twitter, Instagram, and more.
To explore the entire animated social media templates, visit the Canva official website, log in, and type in the vibrant social media to see different options below.

All of the templates that will come upon Canva are fully customizable as per your requirements. If you prefer, you can also select a blank animated story template, which is probably the first among these options.
Part 2 What Canva can help with animated social media posts?
As already discussed, Canva consists of thousands of templates to choose from among the category of animated social media posts. Moreover, there are lots of free as well as paid templates.
Another thing that Canva can help you with these templates is complete customization. You can easily customize the entire template ranging from its colors selection to images to elements etc. And, you can even remove aspects if you don’t like anything among the template designs.
Understand the pros of Canva to get our point better as follows:
Canva provides a range of features due to which has gained popularity among millions of people. The benefits of using Canva are −
1. Free Design Platform
Canva is free to use platform for everyone. You can use it for creating attention-grabbing designs for marketing campaigns, social media, or projects.
There are certain features in Canva that are useful for professionals. You can get Canva Pro to access those features with a premium library of stock photos, shapes, fonts, and templates.
You can also go for in-app purchases if you are not looking to purchase the Pro version.
2. No skills or experience required
To use Canva, you don’t need any prior experience as a graphic designer. You can swap between images and fonts to create a professional design with many layouts and tools available.
3. Ease of use with multiple templates and fonts
Canva has a library of different backgrounds, images, templates, fonts, stickers to ensure that you get outstanding outcomes. You can create an engaging design in just a few clicks with these tools. The only thing you need is creativity.

4. Endless options
Canva has every digital design option covered, from Pinterest and Facebook posts to Resume, e−book

5. User−friendly interface
The Canva’s layout is pretty simple to use.
On the design page of Canva, there are the grids for templates, photos, stickers, and background on the left-hand side. Above the design are the color palettes, font tabs, and other formatting tools. You can use these tools with the drag and drop editor in your design in a few clicks.

6. Create a team
You can make your Canva team so that they can have access to the designs. You can determine the kind of access your team members or employees have through the shareable links to make edits.

Part 3 Steps to create animated social media pictures in Canva
Unleash your creativity by animating your design pages, elements, and text.
Make or open an existing design.
- Hit to choose the page, element, or text box that you wish to animate.
- Once you hit the Animate tab above the editor on the toolbar, you will see the displayed options on the side panel.
- Please hover your mouse over it to preview an option. Then, you’ll see your design animate.
- Click on it to apply.
- For pages: To control the animation timing, click to select the page, and then click on the stopwatch icon above the editor.
- Download your design in GIF or video format.
You can also directly share them on social media or schedule them for later.
Part 4 Steps to create animated social media videos in Canva
1. Select your template
Sign in to Canva, then choose and make your social media story template. There are two vastly different ways to explore this: You can either select “Create a design” at the top or go for a particular template to get the ideal dimensions.
2. Animate your video
Here’s where the fun begins! Now that you are ready to start editing your selected template, you can add animated and unique elements to your story in three various ways.
- Add a video
You’re ready to add in your video once you’ve chosen your template! Upload or select any video you might want to use and drag it into a placeholder on your story chosen template. If needed, adjust the size and positioning until it fits.
- Animated design elements
Another option to animate your social media posts videos is through the Elements feature in Canva by choosing the “Stickers” tab.
You can either enter your requirement in the search bar or scroll through Canva’s huge graphics and enter “animated {insert the word you’re searching for, i.e., lines, arrows}. Then, you can drag and drop them right into your design.
There are specific search terms for your reference: Animated Sparkle, Animated Arrow, Animated Word, and Animated Line.
- Use the Animate button.
There’s an “Animate” button you’ll see at the top when you’re in your design. Hit on the page you wish to animate, and the Animate tab will pop up on the top left.
Use these three features to create an animated video individually or all together – they’ll be sure to up-level your stories in a fun and unique way.
3. Preview and Download
You can preview your animated stories once you finish the action by hitting the “Play” tab at the top of your screen.
There you have your Canva animated social media creation!
For quick reference, be sure to download my Animated Canva Elements document, all my favorite animated elements. Head to the video to grab them!
As you know how to create an animation and the steps needed, you must also be aware of one of the best editing software available.
Here we recommend using Filmora. You can use it to create compelling animation videos than the animated social media on Canva posts so that the animation will come out smooth and natural by adding keyframes. You are just required to frame a white plane to begin creating animation. Despite this, its audio mixer and color correction editing elements will increase your animation video to a new level. Download it to have a try (Free)!
Wondershare Filmora
Get started easily with Filmora’s powerful performance, intuitive interface, and countless effects!
Try It Free Try It Free Try It Free Learn More >

AI Portrait – The best feature of Wondershare Filmora for gameplay editing
The AI Portrait is a new add-on in Wondershare Filmora. It can easily remove video backgrounds without using a green screen or chroma key, allowing you to add borders, glitch effects, pixelated, noise, or segmentation video effects.

Conclusion
And that, my friends, is how you can create your unique animated graphics quickly and easily. So, now it’s your turn! With our above tutorial, you can now permit yourself to make and craft your first and exclusive Canva animated GIFs for social media!
Besides, do not forget to try out the Wondershare FilmorPro for any video editing that you may need for your animated social media videos via Canva.
I can’t wait to hear all about it. See you next time.
Eye-catching social media posts are an excellent, attention-grabbing way to make your ideal clients stop scrolling. Today, we’ll describe how to create animated social media posts through Canva posts entirely free and without any design experience required on Canva.
Level up your next social media campaign by adding beautifully designed graphics! You can choose from our library of professionally designed Canva layouts for Facebook, Pinterest, Twitter, Instagram, and more.
Without any further ado, let’s get into the process as follows!
In this article
01 [Which social media animated posts can be created on Canva?](#Part 1)
02 [What Canva can help with animated social media posts?](#Part 2)
03 [Steps to create animated social media pictures in Canva](#Part 3)
04 [Steps to create animated social media videos in Canva](#Part 4)
Part 1 Which social media animated posts can be created on Canva?
With the latest Canva Pro feature, you can go for Canva Animator!
Yes, you can easily create animated social media posts via Canva, like Facebook stories or animated Instagram stories. And, you can also create ads for any other social media platform using its Custom Design feature.
It consists of ready-made templates for Facebook, Twitter, Instagram, and more.
To explore the entire animated social media templates, visit the Canva official website, log in, and type in the vibrant social media to see different options below.
All of the templates that will come upon Canva are fully customizable as per your requirements. If you prefer, you can also select a blank animated story template, which is probably the first among these options.
Part 2 What Canva can help with animated social media posts?
As already discussed, Canva consists of thousands of templates to choose from among the category of animated social media posts. Moreover, there are lots of free as well as paid templates.
Another thing that Canva can help you with these templates is complete customization. You can easily customize the entire template ranging from its colors selection to images to elements etc. And, you can even remove aspects if you don’t like anything among the template designs.
Understand the pros of Canva to get our point better as follows:
Canva provides a range of features due to which has gained popularity among millions of people. The benefits of using Canva are −
1. Free Design Platform
Canva is free to use platform for everyone. You can use it for creating attention-grabbing designs for marketing campaigns, social media, or projects.
There are certain features in Canva that are useful for professionals. You can get Canva Pro to access those features with a premium library of stock photos, shapes, fonts, and templates.
You can also go for in-app purchases if you are not looking to purchase the Pro version.
2. No skills or experience required
To use Canva, you don’t need any prior experience as a graphic designer. You can swap between images and fonts to create a professional design with many layouts and tools available.
3. Ease of use with multiple templates and fonts
Canva has a library of different backgrounds, images, templates, fonts, stickers to ensure that you get outstanding outcomes. You can create an engaging design in just a few clicks with these tools. The only thing you need is creativity.
4. Endless options
Canva has every digital design option covered, from Pinterest and Facebook posts to Resume, e−book
5. User−friendly interface
The Canva’s layout is pretty simple to use.
On the design page of Canva, there are the grids for templates, photos, stickers, and background on the left-hand side. Above the design are the color palettes, font tabs, and other formatting tools. You can use these tools with the drag and drop editor in your design in a few clicks.
6. Create a team
You can make your Canva team so that they can have access to the designs. You can determine the kind of access your team members or employees have through the shareable links to make edits.
Part 3 Steps to create animated social media pictures in Canva
Unleash your creativity by animating your design pages, elements, and text.
Make or open an existing design.
- Hit to choose the page, element, or text box that you wish to animate.
- Once you hit the Animate tab above the editor on the toolbar, you will see the displayed options on the side panel.
- Please hover your mouse over it to preview an option. Then, you’ll see your design animate.
- Click on it to apply.
- For pages: To control the animation timing, click to select the page, and then click on the stopwatch icon above the editor.
- Download your design in GIF or video format.
You can also directly share them on social media or schedule them for later.
Part 4 Steps to create animated social media videos in Canva
1. Select your template
Sign in to Canva, then choose and make your social media story template. There are two vastly different ways to explore this: You can either select “Create a design” at the top or go for a particular template to get the ideal dimensions.
2. Animate your video
Here’s where the fun begins! Now that you are ready to start editing your selected template, you can add animated and unique elements to your story in three various ways.
- Add a video
You’re ready to add in your video once you’ve chosen your template! Upload or select any video you might want to use and drag it into a placeholder on your story chosen template. If needed, adjust the size and positioning until it fits.
- Animated design elements
Another option to animate your social media posts videos is through the Elements feature in Canva by choosing the “Stickers” tab.
You can either enter your requirement in the search bar or scroll through Canva’s huge graphics and enter “animated {insert the word you’re searching for, i.e., lines, arrows}. Then, you can drag and drop them right into your design.
There are specific search terms for your reference: Animated Sparkle, Animated Arrow, Animated Word, and Animated Line.
- Use the Animate button.
There’s an “Animate” button you’ll see at the top when you’re in your design. Hit on the page you wish to animate, and the Animate tab will pop up on the top left.
Use these three features to create an animated video individually or all together – they’ll be sure to up-level your stories in a fun and unique way.
3. Preview and Download
You can preview your animated stories once you finish the action by hitting the “Play” tab at the top of your screen.
There you have your Canva animated social media creation!
For quick reference, be sure to download my Animated Canva Elements document, all my favorite animated elements. Head to the video to grab them!
As you know how to create an animation and the steps needed, you must also be aware of one of the best editing software available.
Here we recommend using Filmora. You can use it to create compelling animation videos than the animated social media on Canva posts so that the animation will come out smooth and natural by adding keyframes. You are just required to frame a white plane to begin creating animation. Despite this, its audio mixer and color correction editing elements will increase your animation video to a new level. Download it to have a try (Free)!
Wondershare Filmora
Get started easily with Filmora’s powerful performance, intuitive interface, and countless effects!
Try It Free Try It Free Try It Free Learn More >
AI Portrait – The best feature of Wondershare Filmora for gameplay editing
The AI Portrait is a new add-on in Wondershare Filmora. It can easily remove video backgrounds without using a green screen or chroma key, allowing you to add borders, glitch effects, pixelated, noise, or segmentation video effects.
Conclusion
And that, my friends, is how you can create your unique animated graphics quickly and easily. So, now it’s your turn! With our above tutorial, you can now permit yourself to make and craft your first and exclusive Canva animated GIFs for social media!
Besides, do not forget to try out the Wondershare FilmorPro for any video editing that you may need for your animated social media videos via Canva.
I can’t wait to hear all about it. See you next time.
How to Stop Animation From Looping in Unity
How to Stop Animation from Looping in Unity
An easy yet powerful editor
Numerous effects to choose from
Detailed tutorials provided by the official channel
Unity is an IDE interface all designed exclusively for game developers. However, you can do much more with Unity than game development. But, our main concern here is something else than this subject. You’re looking for easy tutorials on Unity stop animation!

And luckily, we’ve got you covered as we’ve briefly explained how to perform Unity stop animation from looping and the steps to make a smooth animation.
In this article
01 [What is Unity Used for?](#Part 1)
02 [How to Stop Animation Playing in Loop in Unity?](#Part 2)
03 [How to Smooth an Animation in Unity?](#Part 3)
Part 1 What is Unity Used for?
Unity is a software tool friendly to all the game developers out there. This tool is used by the large community of game developers to power and create their game development projects. And, the software is more of a professional means and not a simple pared-down ‘game builder .’Unity also offers one of the most significant inbuilt features like rendering, physics, and collision detection. Thus, one of the powerful aspects of Unity is that game developers need not go out of the box and create everything from scratch. Instead, they are available with the physics engine required to develop games quickly. Another robust feature of Unity is that it includes an excellent ‘Asset Store’ where developers can upload their creations and showcase them to the whole community. So, that’s Unity and its uses in a broader scope!
Before we take you through the next section, it’s important to mention that Unity is also known as cross-platform IDE, where IDE stands for ‘integrated development environment.’ So, it can be called more of an interface with access to all the tools and resources required to develop games.
Apart from the game development, Unity is known for other excellent usage purposes as:
● Simulations
● Animation
● Architectural Visualization
● Previsualization for Film
● Interactive Experiences
Among these features only, we’ll describe Unity stop animation from looping in detail.
Part 2 How to Stop Animation Playing in Loop in Unity?
As we said, we’ll describe to you the most accessible definition of how to stop Animation in Unity. Thus, there are simple steps that we’d like to define firsthand before explaining the whole procedure with an image-centric step-by-step guide.
So, those simple steps to stop motion animation in After Effects in the loop also go like below:
Step 1 Go to the Project tab and select Animation.
Step 2 Open the Inspector tab.
Step 3 Uncheck the checkbox Loop Time, and you’re good to go!
We’ll describe the same, i.e., Unity stop animation from looping through the step guide below.
In this guide, we’ll explain right from applying the Animation so that you’d understand better. So, let’s begin without any further ado!
01Step 1 Delete animation folder
We have already created an animation folder in the folder named as own Animation, so click that folder, click the animation folder, and then another folder along with as shown below. Hold the Shift key and click another folder. Then, right-click the Delete tab as depicted below.
Similarly, you can also delete the Animation if you wish.

02Step 2 Create an animation for the subject
Now, you may have different subjects. We’re creating Animation on Mobile Joystick for reference, as shown below.

Now, hit the Create tab on the Unity panel below. Then, proceed to save your Animation in the folder you’ve already created for the same.

03Step 3 Give positions to the animation
Firstly, hit the red-icon button used for recording, as shown below.

Give the position on the left side after you click the button. And, then, clicking almost near to 3you can give the position to the right-hand side as shown below.

Now, the animation has been set. You can see the animation from left to right if you click the Play button. So, here, you can see the results of infinite loop animation, which won’t stop.

You can follow two ways to stop this Animation in Unity from looping, and we’ll describe both methods below.
04Step 4 Stop animation Unity Way 1
Go to the animation folder where you’ve created the animation and click the New Animation icon as shown below.

Now, you have to uncheck the Loop Time tab on the top-right corner of the Unity panel.

05Step 5 Stop animation Unity Way 2
Alternatively, you can click the Animator tab on the top of the Unity panel and double-tap the New Animation button. Then, it will also delete or uncheck the loop time, as shown below.

These were all the steps to stop animation Unity.
Part 3 How to Smooth an Animation in Unity?
After done with Unity stop animation, it’s time to smooth your Unity animation. Again, we will describe it simply if you’re used to the Unity platform and then with a step guide with respective screenshots.
So, stay tuned until the end to reveal the easy steps of smoothing an animation in Unity.
Select the Dopesheet at the bottom of the animation window. Then, you need to switch to the ‘Curves’ view once you create your Animation in the Dopesheet. These animation curves help you accelerate and decelerate animations so that the movement and other things can stop and start smoothly.
So, let’s begin with the step guide tutorial on the same as follows:
For reference, take an example of a metronome object imported from Blender to Unity. Here, we’ve grouped all the pendulum objects under one rotation so that when we move the pendulum, it pivots to the correct point, as shown below.

01Add the animator
So, the first step begins with adding the Animator component to the parent object. You can do this by clicking the Add Component tab on the Unity panel’s left side, searching for Animator, and clicking the Animator.
You will also need a controller to control the animations. Go to your animation folder, right-click, and select Create> Animator Controller tab.

Let’s call or give it a name metronome animator as shown below.
Then, you need to drag this into your animator component. Again, you need to go to your animations folder, right-click, select Create> Animations tab.
Now, give this a name pendulum full swing.
02Open the animator tab
Now, open the animator tab, drag this pendulum swing animation to that panel, and double-tap the yellow-colored New Animation button.

03Create an animation
With the game object selected, the animated metronome pendulum, in this case, we’d like to animate the X component of the rotation. So, you need to click Add Property> Transform> Rotation tab and click the + sign on its right, as shown below.
Now, click the plus sign automatically to set two keyframes, one at the beginning and one at the end. Now, click on end select all, and then delete for now.

04Add keyframes to rotate the pendulum
With the first set of keyframes and the pendulum all way to the right, go halfway and change the rotation to the left on the left panel of Unity. Then, add another keyframe.

05Slow down the animation
As you can observe, the Animation of this pendulum is in a straight line and feels unnatural to the eyes. Thus, we’re required to smooth this Animation now! For this purpose, go to the Curves; you can see the pink properties of rotation as going from one side to another.

Now, you need to adjust these pink curves. Start by adding a key to one of its sides, as shown below. After that, it is all on you how slow or fasts you want these values to be.
Here, you’re all done smoothing the animation in Unity after learning the stop-animation Unity tutorial.
You can even stop motion animation on Photoshop with the above tutorial.
06Bonus Tip:
We want to introduce an excellent video editor software called Filmora Video Editor . It is from the house of Wondershare, a well-known software company worldwide.

Wondershare Filmora - Best Video Editor for Mac/Windows
5,481,435 people have downloaded it.
Build unique custom animations without breaking a sweat.
Focus on creating epic stories and leave the details to Filmora’s auto features.
Start a creative adventure with drag & drop effects and endless possibilities.
Filmora simplifies advanced features to save you time and effort.
Filmora cuts out repetition so you can move on to your next creative breakthrough.
With Filmora, you can easily add Animation and edit your videos to make them look world-class. The latest version and new updates are eye-candy and quick fix for beginner video editors.
So, please pay a visit to the Filmora website and check out its Mac and Windows version for free today.
● Key Takeaways from This Episode →
● Learning the concept and usage of Unity
● A tutorial on how to stop animation in Unity from looping
● A tutorial on how to smooth animation in Unity
● Introduction to Filmora, the top-most video editor software for beginners.
Unity is an IDE interface all designed exclusively for game developers. However, you can do much more with Unity than game development. But, our main concern here is something else than this subject. You’re looking for easy tutorials on Unity stop animation!
And luckily, we’ve got you covered as we’ve briefly explained how to perform Unity stop animation from looping and the steps to make a smooth animation.
In this article
01 [What is Unity Used for?](#Part 1)
02 [How to Stop Animation Playing in Loop in Unity?](#Part 2)
03 [How to Smooth an Animation in Unity?](#Part 3)
Part 1 What is Unity Used for?
Unity is a software tool friendly to all the game developers out there. This tool is used by the large community of game developers to power and create their game development projects. And, the software is more of a professional means and not a simple pared-down ‘game builder .’Unity also offers one of the most significant inbuilt features like rendering, physics, and collision detection. Thus, one of the powerful aspects of Unity is that game developers need not go out of the box and create everything from scratch. Instead, they are available with the physics engine required to develop games quickly. Another robust feature of Unity is that it includes an excellent ‘Asset Store’ where developers can upload their creations and showcase them to the whole community. So, that’s Unity and its uses in a broader scope!
Before we take you through the next section, it’s important to mention that Unity is also known as cross-platform IDE, where IDE stands for ‘integrated development environment.’ So, it can be called more of an interface with access to all the tools and resources required to develop games.
Apart from the game development, Unity is known for other excellent usage purposes as:
● Simulations
● Animation
● Architectural Visualization
● Previsualization for Film
● Interactive Experiences
Among these features only, we’ll describe Unity stop animation from looping in detail.
Part 2 How to Stop Animation Playing in Loop in Unity?
As we said, we’ll describe to you the most accessible definition of how to stop Animation in Unity. Thus, there are simple steps that we’d like to define firsthand before explaining the whole procedure with an image-centric step-by-step guide.
So, those simple steps to stop motion animation in After Effects in the loop also go like below:
Step 1 Go to the Project tab and select Animation.
Step 2 Open the Inspector tab.
Step 3 Uncheck the checkbox Loop Time, and you’re good to go!
We’ll describe the same, i.e., Unity stop animation from looping through the step guide below.
In this guide, we’ll explain right from applying the Animation so that you’d understand better. So, let’s begin without any further ado!
01Step 1 Delete animation folder
We have already created an animation folder in the folder named as own Animation, so click that folder, click the animation folder, and then another folder along with as shown below. Hold the Shift key and click another folder. Then, right-click the Delete tab as depicted below.
Similarly, you can also delete the Animation if you wish.
02Step 2 Create an animation for the subject
Now, you may have different subjects. We’re creating Animation on Mobile Joystick for reference, as shown below.
Now, hit the Create tab on the Unity panel below. Then, proceed to save your Animation in the folder you’ve already created for the same.
03Step 3 Give positions to the animation
Firstly, hit the red-icon button used for recording, as shown below.
Give the position on the left side after you click the button. And, then, clicking almost near to 3you can give the position to the right-hand side as shown below.
Now, the animation has been set. You can see the animation from left to right if you click the Play button. So, here, you can see the results of infinite loop animation, which won’t stop.
You can follow two ways to stop this Animation in Unity from looping, and we’ll describe both methods below.
04Step 4 Stop animation Unity Way 1
Go to the animation folder where you’ve created the animation and click the New Animation icon as shown below.
Now, you have to uncheck the Loop Time tab on the top-right corner of the Unity panel.
05Step 5 Stop animation Unity Way 2
Alternatively, you can click the Animator tab on the top of the Unity panel and double-tap the New Animation button. Then, it will also delete or uncheck the loop time, as shown below.
These were all the steps to stop animation Unity.
Part 3 How to Smooth an Animation in Unity?
After done with Unity stop animation, it’s time to smooth your Unity animation. Again, we will describe it simply if you’re used to the Unity platform and then with a step guide with respective screenshots.
So, stay tuned until the end to reveal the easy steps of smoothing an animation in Unity.
Select the Dopesheet at the bottom of the animation window. Then, you need to switch to the ‘Curves’ view once you create your Animation in the Dopesheet. These animation curves help you accelerate and decelerate animations so that the movement and other things can stop and start smoothly.
So, let’s begin with the step guide tutorial on the same as follows:
For reference, take an example of a metronome object imported from Blender to Unity. Here, we’ve grouped all the pendulum objects under one rotation so that when we move the pendulum, it pivots to the correct point, as shown below.
01Add the animator
So, the first step begins with adding the Animator component to the parent object. You can do this by clicking the Add Component tab on the Unity panel’s left side, searching for Animator, and clicking the Animator.
You will also need a controller to control the animations. Go to your animation folder, right-click, and select Create> Animator Controller tab.
Let’s call or give it a name metronome animator as shown below.
Then, you need to drag this into your animator component. Again, you need to go to your animations folder, right-click, select Create> Animations tab.
Now, give this a name pendulum full swing.
02Open the animator tab
Now, open the animator tab, drag this pendulum swing animation to that panel, and double-tap the yellow-colored New Animation button.
03Create an animation
With the game object selected, the animated metronome pendulum, in this case, we’d like to animate the X component of the rotation. So, you need to click Add Property> Transform> Rotation tab and click the + sign on its right, as shown below.
Now, click the plus sign automatically to set two keyframes, one at the beginning and one at the end. Now, click on end select all, and then delete for now.
04Add keyframes to rotate the pendulum
With the first set of keyframes and the pendulum all way to the right, go halfway and change the rotation to the left on the left panel of Unity. Then, add another keyframe.
05Slow down the animation
As you can observe, the Animation of this pendulum is in a straight line and feels unnatural to the eyes. Thus, we’re required to smooth this Animation now! For this purpose, go to the Curves; you can see the pink properties of rotation as going from one side to another.
Now, you need to adjust these pink curves. Start by adding a key to one of its sides, as shown below. After that, it is all on you how slow or fasts you want these values to be.
Here, you’re all done smoothing the animation in Unity after learning the stop-animation Unity tutorial.
You can even stop motion animation on Photoshop with the above tutorial.
06Bonus Tip:
We want to introduce an excellent video editor software called Filmora Video Editor . It is from the house of Wondershare, a well-known software company worldwide.
Wondershare Filmora - Best Video Editor for Mac/Windows
5,481,435 people have downloaded it.
Build unique custom animations without breaking a sweat.
Focus on creating epic stories and leave the details to Filmora’s auto features.
Start a creative adventure with drag & drop effects and endless possibilities.
Filmora simplifies advanced features to save you time and effort.
Filmora cuts out repetition so you can move on to your next creative breakthrough.
With Filmora, you can easily add Animation and edit your videos to make them look world-class. The latest version and new updates are eye-candy and quick fix for beginner video editors.
So, please pay a visit to the Filmora website and check out its Mac and Windows version for free today.
● Key Takeaways from This Episode →
● Learning the concept and usage of Unity
● A tutorial on how to stop animation in Unity from looping
● A tutorial on how to smooth animation in Unity
● Introduction to Filmora, the top-most video editor software for beginners.
15 Forgotten Cartoon Characters of All Time You Used to Love
15 Forgotten Cartoon Characters of All Time You Used to Love
An easy yet powerful editor
Numerous effects to choose from
Detailed tutorials provided by the official channel
Whether you are from your 70’s, 80’s or 90’s, thanks to video streaming services like Amazon, Netflix, YouTube and various others, you are now getting a golden chance to watch your favourite cartoons at your comfort.
Watching Cartoons were always one of the favourite activities that everything loves to experience without any age restriction. For different centuries cartoon industry has been treated as the perfect medium for the entertainment. With lots of cartoons flooding your TV sets from the last few decades everybody have seen different varieties of characters that have won the hearts of millions.
In this article
01 [Five 70s cartoon characters](#Part 1)
02 [Five 80s cartoon characters](#Part 2)
03 [Five 90s cartoon characters](#Part 3)
Part 1 Six 70s cartoon characters
All the cartoon characters mentioned below were very popular during the 70s &are still having good marks in our hearts today. 70s were known for interesting cartoon series.
01Bagpuss
Premiered: 1974
Actors: Oliver Postgate
YouTube video
Summary
Saggy cloth-cat from this show was featured in around 13 episodes. At that time ‘stop-motion’ technique for animation was utilized by the creators for this television series.
02Fat Albert
Name of the character: Fat Albert
Name of Show: Fat Albert and Cosby Kids
Premiered: 1974
Actors: Weird Harold, Rudy, Mush-mouth, Dumb Donald, Bucky, Bill & of course-Fat Albert.
YouTube video
Summary: Still childhood experiences of Bill-Cosby have had amazing influence on making of this amazing TV series.
03Fred Flintstones
Name of the character: Fred Flintstones
Name of Show: Flintstones
Premiered: 1960-1966
Actors: John Goodman.
YouTube video
YouTube video
Summary
Flintstones returned to TV-screens with characters as well as cultural-references thrown into stone- age narrative that ultimately captivated the audience right before time of ‘The Simpsons’. This show set the premise at the time of stone-age but carefully and delicately crafted plot characteristic of modern day. The Flintstones fascinated audience with casual manner of how the characters faced-life, thus making lasting connection with audience who were craving for celluloid freshness. Fred Flintstone was one of the most amazing 70s cartoon characters.
04The Herbs
Name of the character: The Herbs
**Name of Show:**The Herbs!
Premiered: 1968
Actors:Gordon Rollings .
YouTube video
Summary
Multiple different characters were featured in this 3D animated series with a leading role by same character name. Other important characters were ‘Parsley the Lion’, Sir-Basil, Tarragon-the-Dragon, Lady Rosemary, Sage the Owl, Dill the Dog, Bay Leaf & Signor Solidago.
05Godzooky
Name of the character: Godzooky
**Name of Show:**Godzilla.
Premiered: 1978
Actors: Jeff David as Captain Carl Majors
YouTube video
Summary
Created by Hanna-Barbera-Productions this television series Godzooky.Don-Messick gave his voice for this amazing character. After some popularity of 60s cartoon characters, this was the only one that was extremely famous for his villain attitude.
06Casper
Name of the character: Casper
Name of Show: ‘Casper and the Angels’
Premiered: 1979-1980
Actors: Casper: Julie McWhirter, Nerdley: Hall Smith
YouTube video
Summary
Magic of 70s cartoon cartoons still prevails and Casper is the most amazing example. The ‘Casper’ character was a ghost that was presented in television series as a friendly person. It was like a ghost-child who always tries to befriend the people rather than scaring them off.
Part 2 Five 80s cartoon characters
01Jem
Name of the character: Jem
Name of Show: ‘Jem’
Premiered: 1985
Actors: Britta Phillips as Jerrica Benton
YouTube video
Summary
“Showtime synergy!” beginning with this attractive storylines, this was slightly more adult as compared to the average 80s cartoon characters. This was pretty cool cartoon and sometimes inspires El to easily come-up with her own style of fun alter-ego that Jem could use in order to escape stresses of being world’s savior.
02Penny
Name of the character: Penny
Name of Show: ‘’Inspector Gadget’
Premiered: 1983
Actors: Mona Marshall, Holly Berger
YouTube video
Summary
Penny in this series was the brain behind her uncle’s all crazy escapades. El makes use of her brain in order to provide help for Hopper fling enemies whenever his brawn was not enough to get things done. Both characters tasked with the outsmarting similar power of enemies Dr. Claw in the Inspector Gadget and runs M.A.D. a criminal organization and other ones were Evil Russians beneath mall in the Stranger Things. It was always good to watch this fancy, amazing character from 90s, 80s female cartoon characters.
03Garfield
Name of the character: Garfield
Name of Show: ‘Garfield and Friends’
Premiered: 1988-1995
Actors: Bill Murray as Garfield
YouTube video:
Summary
Followed by Lazy cat Garfield, this show contains excitable dog-Odie, imaginative pig-Orson, & their animal-friends with lots of small-scale adventures around their hometown like playing pranks, throwing birthday-parties, and watching movies together. Garfield was a lazy-cat that only desire to lie around the habits of watching-TV & eating Lasagna, however his friends as well as his owner-Jon always drags him into fun loving adventures of their own.
04Michaelangelo
Name of the character: MichaelLangelo
Name of Show: ‘Teenage Mutant Ninja Turtles’
Premiered: 1987-1996
Actors: Noel Fisher, Greg Cipes, Robbie Rist
YouTube video:
Summary
Michelangelo or nicknamed Mike/Mikey, is the fictional superhero & a leading character from the four main characters of favorite 80’s show Teenage Mutant Ninja Turtles. Michaelangelo, Raphael, Donatello and Leonardo are popular mutant-turtles all have grown-up as youngsters with their mentor Splinter at underground. They fight villains like Foot Clan, Shredder, &intelligent brain inside the jar named Krang. Because of so many fun-villains inside this series were presented, that show was so much popular and beloved by everyone. This TV-series aired for around 10 seasons.
05Firestar
Name of the character: FireStar
Name of Show: Spider-Man & his Amazing Friends
Premiered: 1981
Actors: Kathy Garver, Laura Bailey
YouTube video
Summary
Firestar got the ability to battle wide range of super-villains together with the Spider-Man & Iceman in this animated show Spider-Man & His Amazing Friends. She had never ever appeared in the comic book form earlier Spider-Man & his Amazing-Friends hit but you might see her in modern, live-action Marvel Cinematic-Universe very soon.
Use Wondershare Filmora Video Editor for Cartoon animations, Styles and Editing
cartoon主题视频
For Win 7 or later (64-bit)
For macOS 10.12 or later
Still thinking about your favorite cartoon characters from 80’s or 90’s? Then Filmora can help you to create nostalgic moments again with your hand crafts. You can make video animations, sketch and draw an art of your loved ones from the list of extremely popular cartoon characters. FIlmora is the best choice drawing some amazing cartoons in just few steps.
Even you can Cartoonize any of your video with your favorite animations of cartoons through cartoon effects.
It is the best Smartphone and PC platform based software to make cartoons.
Later on you can share your creations with other platforms over the web.
Even if you want to customize or edit any cartoon, you can do this with its powerful editing features.
Part 3 Five 90s cartoon characters
Most of us are from ‘90s but at the same time, during our children, we didn’t had a lot of options rather than just watch whatever put on the television. At that time cartoons were super-cool with popular music & contains originality. One of the most interesting things was the presence of sense-of-commonality among the people especially children. Cartoons materialized during ‘90s still continue to charm us and cartoon characters were the most among all. Let dig deep-down into our memory lane today & check out the amazing cartoon characters from Golden Period of animation.
01Dexter
Name of the character: Dexter
Name of Show: Dexter’s Laboratory
Premiered: 1995-2003
Actors: Dexter: Christine Cavanaugh, Dee-Dee: Kat Cressida
YouTube video:
Summary
Dexter was the original & the ultimate genius during 90s. Dexter’s intelligence as well as knack for the new inventions made him not only popular but also the smartest one’s among the cartoon characters from 90s cartoon network characters. He was credited with creation of plethora of extraordinary devices & known for someone who keeps on experimenting with various ideas on his mindful head. Dexter shares cute love-hate relationship with an annoying sister of his own Dee-Dee.
02Buster Bunny
Name of the character: Buster Bunny
Name of Show: Tiny Toon Adventures
Premiered: 1995-2003
Actors: Charlie Adler and John Kassir
YouTube video:
Summary
In the list of cartoon network characters 90swe name we have is Buster bunny. Somewhat similar to ‘Looney Tunes’ cartoon-series, the Tiny Toon Adventures’s USP was Buster Bunny and does the same so adventurously. With its young & enthusiastic personality of male rabbit was the commander of all sorts for Tiny Toons. He was capable of dealing with his own-set of issues together with other complicated School curriculum.
03Mojo Jojo
Name of the character: Mojo Jojo!
Name of Show: The Powerpuff Girls
Premiered: 1998-2005
Actors: Cathy Cavadini, Tom Kenny, Tara Strong, EG Daily.
YouTube video:
Summary
The Powerpuff-Girls was one of the most amazing and the most recognizable cartoons characters of all times. Mojo Jojo character also featured in this popular animated-television series with its evil mysteries and actions. This character was at prime time during 90’s and Mojo jojo always threatens Powerpuff Girls with his skills and expertise in gadgets, strategies etc. but somehow powerpuff-girls always managed to beat Mojo-Jojo.
04Courage
Name of the character: Courage
Name of Show: Courage The Cowardly Dog
Premiered: 1996
Actors: Marty Grabstein
YouTube video
Courage character may be easily scared &often found nervous, but he was someone who cares for his owner Muriel & Eustace and would go to any level to protect them. It was the most encouraging and commendable projections of canine on-screen. He was loyal & loving with his emotions to be selfless by risking his life for his owners. Before the arrival of2000 cartoon characters, this was favorite entertainment package for all age group.
05Johnny Bravo
Name of the character: Johnny Bravo
Name of Show: Johnny Bravo
Premiered: 1997–2004
Actors: Jeff Bennett, Brenda Vaccaro& Mae Whitman
YouTube video:
Summary
Who don’t know about ‘Johnny Bravo’? This was one of the most famous and extremely popular character of cartoon network 90s cartoon characters. During 90s this gain so much popularity and showcased with a bang. The animated character Johnny bravo was all famous and was the leading figure. The iconic and comic character Johnny was the central attraction of this television series. He was confident and good-looking as humanly as possible. You often see him wearing sunglasses with black shirt & blue jeans. He was somewhere a positive-individual with no bad-qualities whatsoever that makes him goofy &truly a blue narcissist. No matter how tough were the circumstances, if Johnny cares for or likes a girl, he can go beyond the ordinary level to assure that that particular girl like him at the end.
● Ending Thoughts →
● Different characters from all eras 70’s, 80’s and 90’s were true examples of perfect personality for the children.
● You can cherish all the moments by living again you period as a kid with all those characters
● No matter what the situation or circumstances demands cartoon characters always the best to ensure great level of entertainment without any age restrictions.
Also read:
- In 2024, 10 Great MP4 to GIF Converters to Get Perfect-Made GIF
- 2024 Approved Samples of Cartoon Character Face to Inspire You
- Updated How to Make a Video a Live Photo
- Updated 12 Aesthetic GIF Instagram for Marketers and Creatives
- Updated How to Insert a GIF Into Powerpoint for 2024
- 2024 Approved 10 Scary Anime Girls That Will Make You Creepy
- 2024 Approved How to Create a Whiteboard Video Step by Step
- Top 20+ Best Free GIF Makers Online to Quickly Edit GIF for 2024
- New 2024 Approved The 15 Most Efficient Photo to Cartoon Apps for Android
- Updated In 2024, Top Practices on Online 3D Avatar Creator
- Updated In 2024, 8 Best Motion Graphics Online Tools for Your Inspiration
- New 12 Animation Video Maker That Can Triple Conversion Rates for 2024
- Updated In 2024, How to Analyze an Editorial Cartoon
- New In 2024, Best Tips for Effortless Unity 3D Animation
- 2024 Approved Whats Rigging Animation
- In 2024, Top 10 3D Text Animation Templates
- Updated In 2024, Adobe Animate Text Effects Skills That You Need to Know
- New In 2024, Tutorials for Animating Picture Online Without Learning From Scratch
- New 10 Great MP4 to GIF Converters to Get Perfect-Made GIF
- What Is Still Motion Animation for 2024
- 2024 Approved The Secret Sauce for Making GIF Instagram Story More Stunning
- New 5 Best Adobe Animate Courses & Classes for 2024
- Updated How to Convert Video to GIF Fast & Easy for 2024
- Updated The Complete Guide to Whiteboard Animation for 2024
- New In 2024, The Only Guide Youll Need to Learn About GIF Video Downloader
- New 2024 Approved 12 Captivating Websites with Triggered Animate on Scroll Examples
- New 2024 Approved Whats Your No. 1 Maker to Animate Your Logo Online Free
- Know All About Animated Business Logos and the Best Tools to Create One for 2024
- Updated In 2024, Can I Do Animated Logo Design Without Design Skills?
- New 2024 Approved How to Create Free Photo Collage Frame in Minutes?
- New In 2024, How to Make a Photoshop Collage in EASY Steps
- In 2024, How to Cartoonize Photo Photoshop in Easy Steps
- New Top Claymation Shows That Make Your Memories Unforgettable for 2024
- 2024 Approved How to Analyze an Editorial Cartoon
- Tips on How to Get Awesome Background for Slideshow in PowerPoint for 2024
- Updated In 2024, 12 Best Stop Motion Studios Worth Recommending
- How To Translate Videos in Tamil for a Wider Reach for 2024
- What Does Enter PUK Code Mean And Why Did The Sim Get PUK Blocked On Nokia C32 Device
- How to Delete iCloud Account with or without Password from your Apple iPhone 14 Pro/Windows/Mac
- How To Transfer Data From Apple iPhone 15 Pro Max To Other iPhone 15 Pro devices? | Dr.fone
- How to Easily Hard reset my Realme Narzo 60 Pro 5G | Dr.fone
- In 2024, Easy Ways to Manage Your Honor 100 Location Settings | Dr.fone
- In 2024, How to Unlock Nokia C12 Phone without Google Account?
- In 2024, Ways to trade pokemon go from far away On Honor X50i+? | Dr.fone
- Top 10 AI Subtitle Translators for Content Creators for 2024
- Will the iPogo Get You Banned and How to Solve It On Poco X6 | Dr.fone
- Title: New In 2024, Secrets to Make 2D Game Animation
- Author: Elon
- Created at : 2024-05-19 03:05:13
- Updated at : 2024-05-20 03:05:13
- Link: https://animation-videos.techidaily.com/new-in-2024-secrets-to-make-2d-game-animation/
- License: This work is licensed under CC BY-NC-SA 4.0.
