
:max_bytes(150000):strip_icc():format(webp)/dormroomentfeatured-5b5e9dd3c9e77c004f28632e.jpg)
New In 2024, Whats Rigging Animation
What’s Rigging Animation
What’s Rigging Animation and Why It Matters
An easy yet powerful editor
Numerous effects to choose from
Detailed tutorials provided by the official channel
Today there is a lot pre-made skeletons you can use and reuse as many times as you want, making only a few minor adjustments to the base design. If your creativity is sparking like firecrackers, then a rig can make it look more defined and/or realistic.
Not convinced? Let’s talk more about Rigging Animation.
In this article
01 [What is Rigging Animation](#Part 1)
02 [The Ultimate Collection for Free Maya Rigs [2022]](#Part 2)
Part 1 What is Rigging Animation
01Why Your Animators Need to Know How to Rig
Walk into any professional animation studio toady, you would notice unfamiliar skeleton figures in at least one of the screens.
This is called skeleton animation and is a major technique used in creating animated models that give us that 36vibe of the character in movies. It helps animators in controlling its movement just like a puppet. Hidden call back to the Matrix.
What you see in most movies or games, are characters and models who supported by a network of digital mechanical skeletons all rigged to move in a certain way.
02How Does Rigging Work?
The process of rigging is usually the second step in a long line of other methods applied after creating a model.
There is a series of interdependent bones that need to be constructed which is representation of the skeletal structure which is the basic goal in rigging animation.
With the right digital animation software you can reposition, repurpose and scale these bones in more ways than one.
The next step would involve recording the different movements of these bones on a timeline. This part of the process is called keyframing in animation.
These simple steps are actually more intricate than they actually are. Each movement acts as trigger to another set of movements like how the shoulder bone is connected to the forearm of our body.
This movement of the model becomes even more realistic once its weight scale has been determined. Painting weight can be considered to be the most unnerving challenge in the entire process.
Which is where Inverse Kinematics can help in making things 5easier by just reversing forward kinematic movements.
All of these aspects of rigging makes it possible to help animation mimic real life movements.
03How is Rigging Used?
Rigging is a technique which has only started gaining more prominence in recent times due to how crucial it is to the gaming and animation movie industry.
Not only is it used on characters but all mechanical objects in animations can also be rigged. With the help of a computerized program physicality is added to the bone structure and is recorded through a series of frames. These recording are then played back.
There are other applications to the and modelling process which goes beyond the entertainment industry such as giving virtual medical demonstrations or modeling a product.
This entire process can get much more repetitive and complex when it comes to rigging something as dynamic as the human face.
04Intro to Rigging Software
You might already be aware by now that there are some major animation software on the market that can provide you with just about every tool you need to make jaw dropping rigger animations.
Software like Blender, Cinema 4D, Maya and Houdini employs fantastic Skeletal Animation and digital motion capturing techniques. They open the doors to more realistic animations that can be used to create far more interactive and personalized digital worlds.
Maya and 3Ds Max is used to do real time animation rigging and is considered by most to be the industry standard by most animators.
Blender on the other hand is a free to use software. Though not quite as strong as Maya, it is an open source software which is equipped with everything you need to rig and animate models.
You can import completed animated files onto game engines and all types of other applications. The most common format for importing animated files is .fbx.
Part 2 The Ultimate Collection for Free Maya Rigs [2022]
01How’s Maya Rigs?
To tell the truth, every year you have spent on learning animation would come into great use in making your imagination come to life. Maya is probably the one software which gives you credit for just knowing it.
Maya has several levels of features you need to practice before you can call yourself a Maya master.
The best way to get your hands practiced on animating on Maya is by becoming well versed with all the stats and proportions while working with rigs. You would surely need to get your hands on high quality rig packages that makes the learning experience even more worth it.
With time, you would get better at understanding of the specifics of building a structure you would be showing in the final result. However getting stuck with the wrong type of rig can end up making your animating experience counterintuitive.
Here is a list of Maya Rigs you can start on right away;
02Best Free Maya Rigs of 2022
● Basic Rigs

Understanding the Basic Functionality of inanimate objects is a clear place to start in animation rigging. It helps you get a strong grasp over animation principals like bouncing a ball, before moving on to more challenging rigging packages.
● Ultimate Rigs
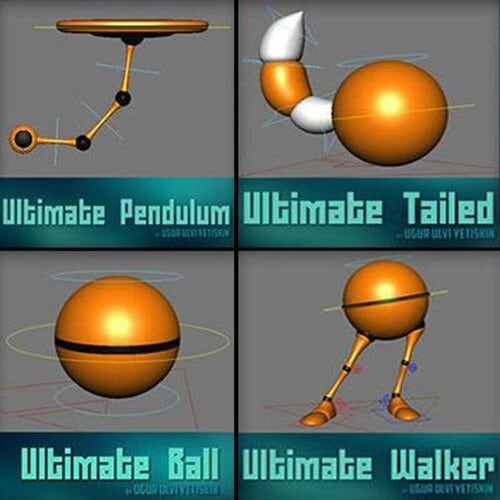
As you keep trying out different basic rigging functionalities, you eventually would need an ultimate rigging pack which is a complete set of all basic rigs. It is a great option to download and have this as a backup.
● Flour Sack
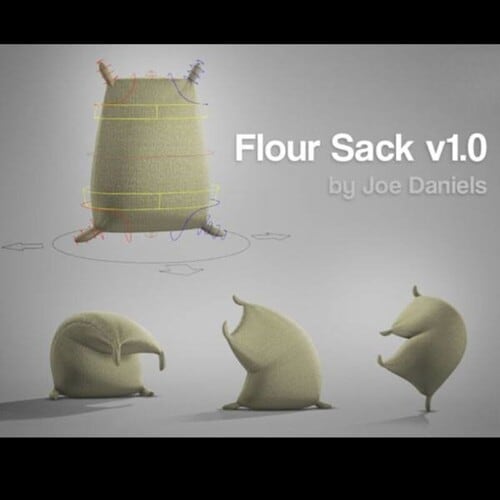
The Flour Sack free Rig is old school trainer pack. It simplifies your understanding character emotions by applying posing and adding weight to an object with a whimsical undefined structure.
● Wall E

If you are easily familiar with this character then you should remember how beautifully Wall-E was able express himself. It certainly is a step up on your journey to improving motion capture techniques. Try making your own Dreamworks style animation with Filmora from Wondershare where you can pair your animations with a few amazing film editing tools.
● JuiceBox
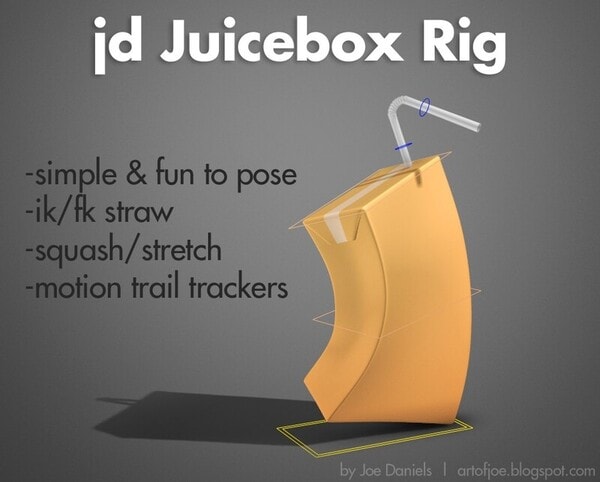
Another favored animation teaching prop is the Juice Box. It follows similar principals like the Flour Sack but the straw adds a different dimension to it. This is where an animator can try out more ways to get creative without a simple straw getting in their way.
● The Walking Egg
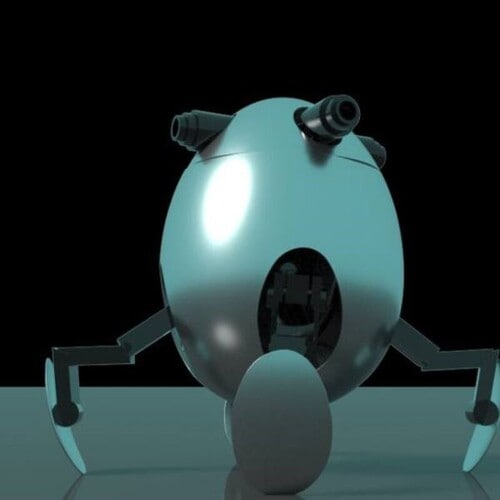
An egg shaped mechanical quadruped robot who has the ability to contract its legs into its body. Its legs are probably its best feature since it is lockable at then joints. A fun part of this robot is that its screen eyes can turn into guns.
● Cartoon Chameleon
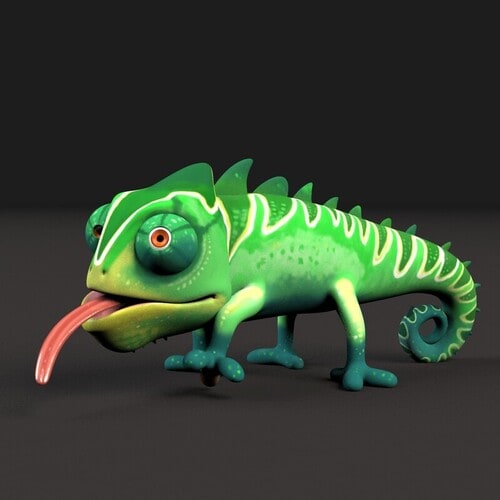
This chameleon has all basic body and facial functions needed by a quadruped. It is a funny whimsical character similar to ‘Pasacal’ from the movie “Tangled” which you can play with. Its tongue is a special feature although you may need to work on its control.
● Judy Hopps
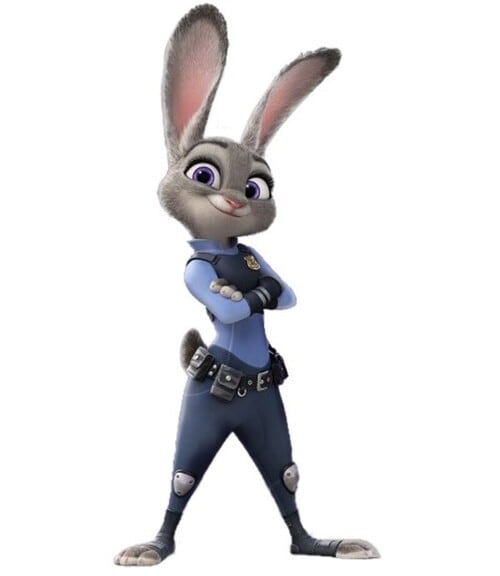
Time to master the art of animating emotions and Judy with her amazing big round eyes can easily be adjusted with the help of floating controllers. The dynamic features of this rig has micro facial controls which you practice with.
● Roboter 2.0.1
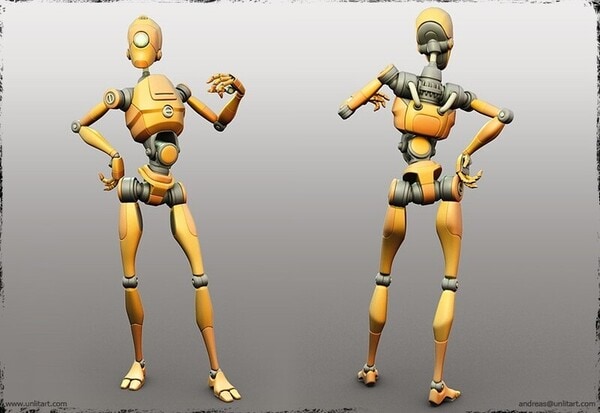
Interested in Robots? Try playing with this humanoid figure but be warned that it might not feel as easy to replicate natural human body motion. It might take some practice but you can try taking on the initial steps by practicing on a robot rig. At least you can excuse any minor imperfections.
● Bony and Beefy
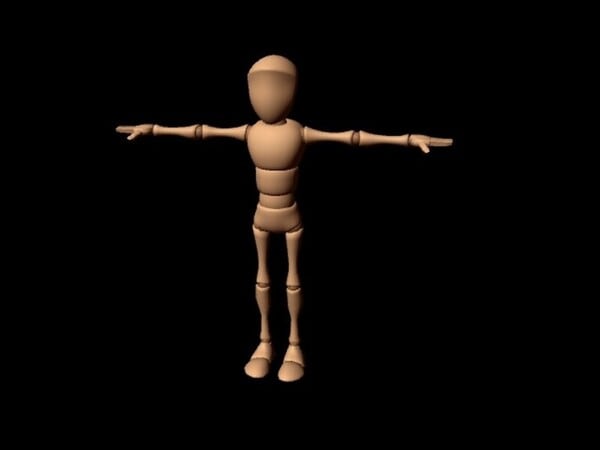
The next challenge would be to master this incredibly advanced rig. There are various different body specifications which you will need to be familiar with. This rig gives you a fair advantage by already toggling all visibility controls.
● Key Takeaways from This Episode →
● Rigging is a fantastic way to learn the foundations of animations and how it all ties into the final result. It involves creating skeletal animations of bones that share parental relationship with each other; one bone moves an entire set. You can record these movements and then play them over timeline.
● You can practice rigging with both simple and advanced animations. Complex rigging structures like facial features may require separate project of its own. There are various rigging software like Blender and Maya which provides you with everything you need to carry out a successful rigging process.
● Get started with rigging animation by practicing on free Maya Rigs. Find out which rig suits you best according to your skills level.
Today there is a lot pre-made skeletons you can use and reuse as many times as you want, making only a few minor adjustments to the base design. If your creativity is sparking like firecrackers, then a rig can make it look more defined and/or realistic.
Not convinced? Let’s talk more about Rigging Animation.
In this article
01 [What is Rigging Animation](#Part 1)
02 [The Ultimate Collection for Free Maya Rigs [2022]](#Part 2)
Part 1 What is Rigging Animation
01Why Your Animators Need to Know How to Rig
Walk into any professional animation studio toady, you would notice unfamiliar skeleton figures in at least one of the screens.
This is called skeleton animation and is a major technique used in creating animated models that give us that 36vibe of the character in movies. It helps animators in controlling its movement just like a puppet. Hidden call back to the Matrix.
What you see in most movies or games, are characters and models who supported by a network of digital mechanical skeletons all rigged to move in a certain way.
02How Does Rigging Work?
The process of rigging is usually the second step in a long line of other methods applied after creating a model.
There is a series of interdependent bones that need to be constructed which is representation of the skeletal structure which is the basic goal in rigging animation.
With the right digital animation software you can reposition, repurpose and scale these bones in more ways than one.
The next step would involve recording the different movements of these bones on a timeline. This part of the process is called keyframing in animation.
These simple steps are actually more intricate than they actually are. Each movement acts as trigger to another set of movements like how the shoulder bone is connected to the forearm of our body.
This movement of the model becomes even more realistic once its weight scale has been determined. Painting weight can be considered to be the most unnerving challenge in the entire process.
Which is where Inverse Kinematics can help in making things 5easier by just reversing forward kinematic movements.
All of these aspects of rigging makes it possible to help animation mimic real life movements.
03How is Rigging Used?
Rigging is a technique which has only started gaining more prominence in recent times due to how crucial it is to the gaming and animation movie industry.
Not only is it used on characters but all mechanical objects in animations can also be rigged. With the help of a computerized program physicality is added to the bone structure and is recorded through a series of frames. These recording are then played back.
There are other applications to the and modelling process which goes beyond the entertainment industry such as giving virtual medical demonstrations or modeling a product.
This entire process can get much more repetitive and complex when it comes to rigging something as dynamic as the human face.
04Intro to Rigging Software
You might already be aware by now that there are some major animation software on the market that can provide you with just about every tool you need to make jaw dropping rigger animations.
Software like Blender, Cinema 4D, Maya and Houdini employs fantastic Skeletal Animation and digital motion capturing techniques. They open the doors to more realistic animations that can be used to create far more interactive and personalized digital worlds.
Maya and 3Ds Max is used to do real time animation rigging and is considered by most to be the industry standard by most animators.
Blender on the other hand is a free to use software. Though not quite as strong as Maya, it is an open source software which is equipped with everything you need to rig and animate models.
You can import completed animated files onto game engines and all types of other applications. The most common format for importing animated files is .fbx.
Part 2 The Ultimate Collection for Free Maya Rigs [2022]
01How’s Maya Rigs?
To tell the truth, every year you have spent on learning animation would come into great use in making your imagination come to life. Maya is probably the one software which gives you credit for just knowing it.
Maya has several levels of features you need to practice before you can call yourself a Maya master.
The best way to get your hands practiced on animating on Maya is by becoming well versed with all the stats and proportions while working with rigs. You would surely need to get your hands on high quality rig packages that makes the learning experience even more worth it.
With time, you would get better at understanding of the specifics of building a structure you would be showing in the final result. However getting stuck with the wrong type of rig can end up making your animating experience counterintuitive.
Here is a list of Maya Rigs you can start on right away;
02Best Free Maya Rigs of 2022
● Basic Rigs
Understanding the Basic Functionality of inanimate objects is a clear place to start in animation rigging. It helps you get a strong grasp over animation principals like bouncing a ball, before moving on to more challenging rigging packages.
● Ultimate Rigs
As you keep trying out different basic rigging functionalities, you eventually would need an ultimate rigging pack which is a complete set of all basic rigs. It is a great option to download and have this as a backup.
● Flour Sack
The Flour Sack free Rig is old school trainer pack. It simplifies your understanding character emotions by applying posing and adding weight to an object with a whimsical undefined structure.
● Wall E
If you are easily familiar with this character then you should remember how beautifully Wall-E was able express himself. It certainly is a step up on your journey to improving motion capture techniques. Try making your own Dreamworks style animation with Filmora from Wondershare where you can pair your animations with a few amazing film editing tools.
● JuiceBox
Another favored animation teaching prop is the Juice Box. It follows similar principals like the Flour Sack but the straw adds a different dimension to it. This is where an animator can try out more ways to get creative without a simple straw getting in their way.
● The Walking Egg
An egg shaped mechanical quadruped robot who has the ability to contract its legs into its body. Its legs are probably its best feature since it is lockable at then joints. A fun part of this robot is that its screen eyes can turn into guns.
● Cartoon Chameleon
This chameleon has all basic body and facial functions needed by a quadruped. It is a funny whimsical character similar to ‘Pasacal’ from the movie “Tangled” which you can play with. Its tongue is a special feature although you may need to work on its control.
● Judy Hopps
Time to master the art of animating emotions and Judy with her amazing big round eyes can easily be adjusted with the help of floating controllers. The dynamic features of this rig has micro facial controls which you practice with.
● Roboter 2.0.1
Interested in Robots? Try playing with this humanoid figure but be warned that it might not feel as easy to replicate natural human body motion. It might take some practice but you can try taking on the initial steps by practicing on a robot rig. At least you can excuse any minor imperfections.
● Bony and Beefy
The next challenge would be to master this incredibly advanced rig. There are various different body specifications which you will need to be familiar with. This rig gives you a fair advantage by already toggling all visibility controls.
● Key Takeaways from This Episode →
● Rigging is a fantastic way to learn the foundations of animations and how it all ties into the final result. It involves creating skeletal animations of bones that share parental relationship with each other; one bone moves an entire set. You can record these movements and then play them over timeline.
● You can practice rigging with both simple and advanced animations. Complex rigging structures like facial features may require separate project of its own. There are various rigging software like Blender and Maya which provides you with everything you need to carry out a successful rigging process.
● Get started with rigging animation by practicing on free Maya Rigs. Find out which rig suits you best according to your skills level.
How to Create Picsart Cartoon in Simple Ways
How to Create Picsart Cartoon
An easy yet powerful editor
Numerous effects to choose from
Detailed tutorials provided by the official channel
Cartoonized images are a convenient source of fun and media entertainment in present times. Try hands at creating your own caricature masterpieces with Picsart!
In this article
01 [How To Edit Cartoon Picture in Picsart](#Part 1)
02 [How To Make A Cartoon On Your Phone](#Part 2)
03 [How to Cartoon Yourself on Picsart](#Part 3)
Part 1 How to Edit Cartoon Picture in Picsart
Cartoonized pictures as you must be aware of, are comic transformations of real-time images and are widely used on social media to add a funny angle to the diversity of conversation going on, or even just as a source of plentiful amusement.
If you often feel motivated to experiment with the art and are looking for a perfect solution, see through the following section for a detailed and stepwise guide to create and edit a Picsart cartoon with utmost ease and within a quick time span:
User’s Guide to Edit Cartoon Pictures in Picsart
Step 1: Download the Picsart Application
Visit the official Picsart website to download the desktop version of the app in your Windows or MacOs supported PC.
Step 2: Make a Selection
Launch the app in your system to reach the Picsart welcome screen. Navigate to the bottom and tap the ‘+’ symbol. You are now required to choose a desired image to create the cartoon edit. You can either browse through your system gallery or search a specific one from the Picsart photo library in the ‘Search Bar’ at the top of the app screen.

Step 3: Let’s Get Editing!
When you have made your choice, navigate to the toolbar at the bottom of the app screen and click on the ‘Effects’ tab. Make a side scroll to choose a specific effect category, like that of ‘Artistic’ or ‘Magic’ to open a library of effects in the selected category.
As an example, selecting the ‘Cartoonizer’ option in the ‘Artistic’ effects category can add an immediate caricature feel to your selected real-time image. You can further include manual adjustments to get the perfect cartoon look by pressing and holding the ‘Cartoonizer’ option. There are a whole variety of magical effects, such as, Neo Pop, Soul, Badlands, Animation and Paw in the ‘Magic’ effects category, that are just perfect in giving your edit a fantasizing look with a Picsart cartoon background.
If you are looking for a quicker editing process, prefer adding cartoonized elements, like ‘Picsart Stickers’ to your image instead of going for a complete caricature edit. To do this, open the ‘Picsart Photo Editor’, navigates to the ‘Sticker’ symbol and click on it, followed by searching ‘Cartoon Sticker’. You can alternatively search a specific keyword with the ‘Cartoon’ descriptor, if you are clear on what you want to add.
You can further, resize your selected sticker with a ‘Two Finger Pinch’ or use the ‘Eraser’ tool to ward off any unwanted portions from the same. You are free to take as many repetitions of the process as you wish, till you get the perfect result for saving to your device and sharing on your social media handles.

Step 4: Time to Save and Share!
When you are satisfied with your work, navigate to the right hand corner and tap ‘Apply’ to finalize your changes, followed by clicking on the ‘Next’ button at the top right corner of the app screen to save and export your creation.
Part 2 How to Make a Cartoon on Your Phone
After a detailed analysis of the cartoon editing procedure in your desktops, let us see thro ugh the method of creating cartoonized images on your MacOs and Android smartphones on the following section:
Stepwise Procedure for Creating Cartoonized Images on Phone
Step 1: Download the Application
When going to use the Picsart editor application on your smartphone, you will first require a download of the same in your concerned device. You can do this by visiting the ‘Google PlayStore’ for an Android device or the ‘Apple App Store’ for MacOs smartphones.
Step 2: Choose a Real-time Image
After a successful launch of the ‘Picsart Editor’ application in your smartphone, reach to and click on the ‘+’ icon at the bottom of the app’s working interface. This needs to be followed by selecting any specific real-time image, either from your smartphone gallery or the Picsart photo library using the top ‘Search Bar’ of the interface, for creating a cartoonized edit.

Step 3: Editing Begins!
Once you are done with selecting the image, proceed to add effects to your selection by clicking the ‘Effects’ tab in the bottom toolbar, succeeded by picking a desired effect type through a right scroll. Tap on any category, such as, Magic, Artistic, etc, to open the effect library of the same.
For instance, you can click on the ‘Cartoonizer’ option within Artistic’ effects to supplement your uploaded real-time image with an instant cartoonized effect. You are also granted the liberty to make manual changes to set the caricature image effects as per your preferences, which you can do with a ‘Press and Hold’ of the ‘Cartoonizer’ tab. If you have a diversion towards complementing your cartoonized images with magical effects, choose from Animation, Neo Pop, Paw, Badlands, Paw, and other amazing options in the ‘Magic’ category.

Step 4: Save and Export
When you have completed the editing process and the changes satisfy you, go to the ‘Apply’ tab at the right side of the editor screen to see the changes appear in your edit. You can now navigate to the upper right corner of the app screen and click on ‘Next’ to save your work locally to your device, along with exporting the same across different media platforms.
Part 3 How to Cartoon Yourself on Picsart
Having learnt about the interesting ways to edit cartoon pictures and create cartoons on your smartphone, you might like to try hands on creating a cartoon portrait of yourself in the Picsart editor for a variety of reasons, like that of creating cartoon profile pics of yourself. Let us have a look of the procedure for the same using the Picsart Online Image Editor tool in the following section:
User’s Guide to Create a Cartoon Portrait With Picsart Online Photo Editor
Step 1: Launch the Application
In any of your favorite internet browsers, search for and open ‘Picsart Desktop Editor’. In the app’s working interface, tap ‘Upload’ or ‘New Project’ to choose an image from your device or the free to use Picsart image library respectively, for proceeding with the cartoonized transformations.

Step 2: Edit Your Selection
Tap on the ‘Effects’ tab from the editing toolbar at the top of your image and select a desired effect category to access the diversity of cartoonifying filters. It is recommended to select the ‘Magic’ category for the most splendid cartoon effects, such as, Paw, Badland, Animation, Soul and Neo Pop among many others.

You can even make manual adjustments in the brightness, color, saturation, burn and fade, etc., of the image by clicking on the ‘Adjust’ and ‘Blend’ options at the top of the image workspace.

Step 3: Download and Share Your Work
When you are done editing, navigate to and click on the ‘Share’ option at the upper right corner of the editor screen to download your cartoonized image.

****Wondershare Filmora Video Editor Cartoon Image Creator**
For Win 7 or later (64-bit)
For macOS 10.12 or later
Picsart is certainly a dependable solution to create caricature images, but if you are keen on looking for an alternative application to cater to the need, Introduced to the software market by Wondershare, the Filmora Cartoon Image Creator can be a convenient rescue. The app promises you of a high quality cartoonized edit with a plethora of editing effects to suit your most specific editing preferences.
● Ending Thoughts →
● Creating cartoonized edits from real time images is a fun and entertaining activity along with being the latest media trend.
● The Picsart editor application allows making caricature images from actual stills through desktop, smartphone and online compatible image editing program.
● Talking of suitable Picsart alternatives, you can rely on the Filmora Cartoon Image Creator application for high quality cartoonized image creation.
Cartoonized images are a convenient source of fun and media entertainment in present times. Try hands at creating your own caricature masterpieces with Picsart!
In this article
01 [How To Edit Cartoon Picture in Picsart](#Part 1)
02 [How To Make A Cartoon On Your Phone](#Part 2)
03 [How to Cartoon Yourself on Picsart](#Part 3)
Part 1 How to Edit Cartoon Picture in Picsart
Cartoonized pictures as you must be aware of, are comic transformations of real-time images and are widely used on social media to add a funny angle to the diversity of conversation going on, or even just as a source of plentiful amusement.
If you often feel motivated to experiment with the art and are looking for a perfect solution, see through the following section for a detailed and stepwise guide to create and edit a Picsart cartoon with utmost ease and within a quick time span:
User’s Guide to Edit Cartoon Pictures in Picsart
Step 1: Download the Picsart Application
Visit the official Picsart website to download the desktop version of the app in your Windows or MacOs supported PC.
Step 2: Make a Selection
Launch the app in your system to reach the Picsart welcome screen. Navigate to the bottom and tap the ‘+’ symbol. You are now required to choose a desired image to create the cartoon edit. You can either browse through your system gallery or search a specific one from the Picsart photo library in the ‘Search Bar’ at the top of the app screen.
Step 3: Let’s Get Editing!
When you have made your choice, navigate to the toolbar at the bottom of the app screen and click on the ‘Effects’ tab. Make a side scroll to choose a specific effect category, like that of ‘Artistic’ or ‘Magic’ to open a library of effects in the selected category.
As an example, selecting the ‘Cartoonizer’ option in the ‘Artistic’ effects category can add an immediate caricature feel to your selected real-time image. You can further include manual adjustments to get the perfect cartoon look by pressing and holding the ‘Cartoonizer’ option. There are a whole variety of magical effects, such as, Neo Pop, Soul, Badlands, Animation and Paw in the ‘Magic’ effects category, that are just perfect in giving your edit a fantasizing look with a Picsart cartoon background.
If you are looking for a quicker editing process, prefer adding cartoonized elements, like ‘Picsart Stickers’ to your image instead of going for a complete caricature edit. To do this, open the ‘Picsart Photo Editor’, navigates to the ‘Sticker’ symbol and click on it, followed by searching ‘Cartoon Sticker’. You can alternatively search a specific keyword with the ‘Cartoon’ descriptor, if you are clear on what you want to add.
You can further, resize your selected sticker with a ‘Two Finger Pinch’ or use the ‘Eraser’ tool to ward off any unwanted portions from the same. You are free to take as many repetitions of the process as you wish, till you get the perfect result for saving to your device and sharing on your social media handles.
Step 4: Time to Save and Share!
When you are satisfied with your work, navigate to the right hand corner and tap ‘Apply’ to finalize your changes, followed by clicking on the ‘Next’ button at the top right corner of the app screen to save and export your creation.
Part 2 How to Make a Cartoon on Your Phone
After a detailed analysis of the cartoon editing procedure in your desktops, let us see thro ugh the method of creating cartoonized images on your MacOs and Android smartphones on the following section:
Stepwise Procedure for Creating Cartoonized Images on Phone
Step 1: Download the Application
When going to use the Picsart editor application on your smartphone, you will first require a download of the same in your concerned device. You can do this by visiting the ‘Google PlayStore’ for an Android device or the ‘Apple App Store’ for MacOs smartphones.
Step 2: Choose a Real-time Image
After a successful launch of the ‘Picsart Editor’ application in your smartphone, reach to and click on the ‘+’ icon at the bottom of the app’s working interface. This needs to be followed by selecting any specific real-time image, either from your smartphone gallery or the Picsart photo library using the top ‘Search Bar’ of the interface, for creating a cartoonized edit.
Step 3: Editing Begins!
Once you are done with selecting the image, proceed to add effects to your selection by clicking the ‘Effects’ tab in the bottom toolbar, succeeded by picking a desired effect type through a right scroll. Tap on any category, such as, Magic, Artistic, etc, to open the effect library of the same.
For instance, you can click on the ‘Cartoonizer’ option within Artistic’ effects to supplement your uploaded real-time image with an instant cartoonized effect. You are also granted the liberty to make manual changes to set the caricature image effects as per your preferences, which you can do with a ‘Press and Hold’ of the ‘Cartoonizer’ tab. If you have a diversion towards complementing your cartoonized images with magical effects, choose from Animation, Neo Pop, Paw, Badlands, Paw, and other amazing options in the ‘Magic’ category.
Step 4: Save and Export
When you have completed the editing process and the changes satisfy you, go to the ‘Apply’ tab at the right side of the editor screen to see the changes appear in your edit. You can now navigate to the upper right corner of the app screen and click on ‘Next’ to save your work locally to your device, along with exporting the same across different media platforms.
Part 3 How to Cartoon Yourself on Picsart
Having learnt about the interesting ways to edit cartoon pictures and create cartoons on your smartphone, you might like to try hands on creating a cartoon portrait of yourself in the Picsart editor for a variety of reasons, like that of creating cartoon profile pics of yourself. Let us have a look of the procedure for the same using the Picsart Online Image Editor tool in the following section:
User’s Guide to Create a Cartoon Portrait With Picsart Online Photo Editor
Step 1: Launch the Application
In any of your favorite internet browsers, search for and open ‘Picsart Desktop Editor’. In the app’s working interface, tap ‘Upload’ or ‘New Project’ to choose an image from your device or the free to use Picsart image library respectively, for proceeding with the cartoonized transformations.
Step 2: Edit Your Selection
Tap on the ‘Effects’ tab from the editing toolbar at the top of your image and select a desired effect category to access the diversity of cartoonifying filters. It is recommended to select the ‘Magic’ category for the most splendid cartoon effects, such as, Paw, Badland, Animation, Soul and Neo Pop among many others.
You can even make manual adjustments in the brightness, color, saturation, burn and fade, etc., of the image by clicking on the ‘Adjust’ and ‘Blend’ options at the top of the image workspace.
Step 3: Download and Share Your Work
When you are done editing, navigate to and click on the ‘Share’ option at the upper right corner of the editor screen to download your cartoonized image.
****Wondershare Filmora Video Editor Cartoon Image Creator**
For Win 7 or later (64-bit)
For macOS 10.12 or later
Picsart is certainly a dependable solution to create caricature images, but if you are keen on looking for an alternative application to cater to the need, Introduced to the software market by Wondershare, the Filmora Cartoon Image Creator can be a convenient rescue. The app promises you of a high quality cartoonized edit with a plethora of editing effects to suit your most specific editing preferences.
● Ending Thoughts →
● Creating cartoonized edits from real time images is a fun and entertaining activity along with being the latest media trend.
● The Picsart editor application allows making caricature images from actual stills through desktop, smartphone and online compatible image editing program.
● Talking of suitable Picsart alternatives, you can rely on the Filmora Cartoon Image Creator application for high quality cartoonized image creation.
That Will Make Aesthetic Cartoon Drawing More Understandable
That Will Make Aesthetic Cartoon Drawing More Understandable
An easy yet powerful editor
Numerous effects to choose from
Detailed tutorials provided by the official channel
When you are trying to make an aesthetic drawings cartoon, the primary thing to focus on is the composition. Composition is the combination, arrangement, and organization of objects within the borders of drawing space. To have a great aesthetic cartoon drawing, you must focus on bringing the eyes of the viewer toward your center of interest within an aesthetically-pleasing composition. When we create illustrations, we are often concerned with putting in a lot of details that will overload the image and lose the meaning that we originally wanted it to convey.

We engage our audience and viewer more by composing a perfect aesthetic drawing. In addition, many rules define a good composition drawing, but these rules are mainly guidelines. Also pay attention to your personal preferences and instincts. In this guide, we’ll teach you how to make an excellent aesthetic cartoon painting more understandable.
In this article
01 [Canvas Aesthetic Painting Ideas](#Part 1)
02 [Blender Aesthetic Painting Ideas](#Part 2)
03 [How to Create Super-Detailed Aesthetic Cartoon Painting](#Part 3)
Part 1 Canvas Aesthetic Painting Ideas
There are times you do not need to be a famous painter or an art professional to create beautiful wall art. Canvas painting is an all-in-one application for all skill levels, from beginners to experts. It also provides you with different painting ideas ranging from beach scenes to abstract designs to create pieces that look stunning and professional.
We have compiled a list of canvas aesthetic painting ideas to help you begin your journey as an aesthetic cartoon painter. Look through the images to determine which ones match the style of painting you wish to add to your drawing and get inspiration to create your designs.
01Disney Canvas Art
These are aesthetic cartoon painting ideas relating to 2020 Disney Canvas Art. You can get ideas from this to begin your journey into the world of painting.

02Hippie Painting Canva Art
If you are also looking for other aesthetic cartoon painting ideas to choose from, you can select from this 2020 Cute Canvas Paintings “Hippie Painting” Canvas Art.

03Spongebob Painting
These painting ideas are a part of the Canvas Aesthetic Cartoon Painting ideas of 2020 called Spongebob Painting Disney Canvas Art.

04Babs Bunny Pa Et Mini Lerret
These are a painting about “Babs Bunny Pa Et Mini Lerret.” A 2020 Mini Canvas Art Hippie Painting Canvas idea that you can choose from

Part 2 Blender Aesthetic Painting Ideas
Blender is an accessible and open-source 3D creation suite that supports the entirety of the 3D pipeline modeling, rigging, animation, simulation, compositing rendering, motion tracking, video editing, and 2D animation pipeline. It is a fact that this is one of the best open-source software you can choose from to make your aesthetic cartoon drawing.
It is entirely free software, and various artists can use it to start digging in and playing with it. Here are some of the blender aesthetic cartoon painting ideas you can choose from:
01Princess Ira and Amina
This is a fictional aesthetic drawing cartoon of an African princess having gold gifted powers with her face painting inspired by Nigerian traditional face decorations. However, her crown is adorned with crosses, crystals, and chains which incorporate several elements from different cultural designs available from all over the world to portray unity.

02Survival Knife Weekly Drills 045
This was a design painting inspired based on BUCK KNIVES in pain texturing and focuses on making a practical game-ready asset.

03Radiance
This is a blender aesthetic cartoon painting idea of a graduation project made for the Concept Art specialized cursus at New3dge School.

04 The character looks dev
This blender cartoon painting’s inspiration came from Edward, the short film’s main character. It is a work in progress but a lovely painting that can inspire you.
Part 3 How to Create Super-Detailed Aesthetic Cartoon Painting
To create a super detailed aesthetic cartoon drawing, you do not need to be a trained artist, nor do you need a fancy cartoon picture maker. All you need to create a cartoon painting photo is a simple and Free picture from a cartoon editor to help you carry out the task more effectively.
However, you can also convert your cartoon paint into creative animation using Wondershare Filmora Video Editor . Filmora is a powerful all-in-one tool for editing that you can use to that can be used for free to animate your cartoon with its tons of effects, filters, and keyframing features that can help you carry this out effectively.
For Win 7 or later (64-bit)
For macOS 10.12 or later
Here is how to create a super detailed aesthetic cartoon painting:

Step 1: Open the Picsart editor on your desktop browser and click on the new project
Step 2: Next is to click on Upload to select the photo that you want to cartoon paint from the computer library of your hard drive
Step 2: Click on the toolbar, select the effect feature from the dropdown above your photo, and click on Magic to view all available one-click cartoon filters. However, almost all of the Magic effects on this editor will help you achieve an aesthetic cartoon photo effect.
Step 4: Click on Adjust and Blend above your photo workspace on the editor. This will help you manually adjust the effects (color burn, fade, saturation, brightness, etc.).
Step 5: Preview your result and once you are happy with the new cartoon photo painting, click on the Share button and download it from the top right corner of the editor to save it on your device.
● Ending Thoughts →
● This article explained creating and gave inspiration and ideas for the aesthetic cartoon painting you can choose from to make yours. In addition, the report also recommends Filmora as an influential editor if you intend to create an animation from your cartoon painting due to its tons of features.
● So, now you can start building your aesthetic drawings and cartoons!
When you are trying to make an aesthetic drawings cartoon, the primary thing to focus on is the composition. Composition is the combination, arrangement, and organization of objects within the borders of drawing space. To have a great aesthetic cartoon drawing, you must focus on bringing the eyes of the viewer toward your center of interest within an aesthetically-pleasing composition. When we create illustrations, we are often concerned with putting in a lot of details that will overload the image and lose the meaning that we originally wanted it to convey.
We engage our audience and viewer more by composing a perfect aesthetic drawing. In addition, many rules define a good composition drawing, but these rules are mainly guidelines. Also pay attention to your personal preferences and instincts. In this guide, we’ll teach you how to make an excellent aesthetic cartoon painting more understandable.
In this article
01 [Canvas Aesthetic Painting Ideas](#Part 1)
02 [Blender Aesthetic Painting Ideas](#Part 2)
03 [How to Create Super-Detailed Aesthetic Cartoon Painting](#Part 3)
Part 1 Canvas Aesthetic Painting Ideas
There are times you do not need to be a famous painter or an art professional to create beautiful wall art. Canvas painting is an all-in-one application for all skill levels, from beginners to experts. It also provides you with different painting ideas ranging from beach scenes to abstract designs to create pieces that look stunning and professional.
We have compiled a list of canvas aesthetic painting ideas to help you begin your journey as an aesthetic cartoon painter. Look through the images to determine which ones match the style of painting you wish to add to your drawing and get inspiration to create your designs.
01Disney Canvas Art
These are aesthetic cartoon painting ideas relating to 2020 Disney Canvas Art. You can get ideas from this to begin your journey into the world of painting.
02Hippie Painting Canva Art
If you are also looking for other aesthetic cartoon painting ideas to choose from, you can select from this 2020 Cute Canvas Paintings “Hippie Painting” Canvas Art.
03Spongebob Painting
These painting ideas are a part of the Canvas Aesthetic Cartoon Painting ideas of 2020 called Spongebob Painting Disney Canvas Art.
04Babs Bunny Pa Et Mini Lerret
These are a painting about “Babs Bunny Pa Et Mini Lerret.” A 2020 Mini Canvas Art Hippie Painting Canvas idea that you can choose from
Part 2 Blender Aesthetic Painting Ideas
Blender is an accessible and open-source 3D creation suite that supports the entirety of the 3D pipeline modeling, rigging, animation, simulation, compositing rendering, motion tracking, video editing, and 2D animation pipeline. It is a fact that this is one of the best open-source software you can choose from to make your aesthetic cartoon drawing.
It is entirely free software, and various artists can use it to start digging in and playing with it. Here are some of the blender aesthetic cartoon painting ideas you can choose from:
01Princess Ira and Amina
This is a fictional aesthetic drawing cartoon of an African princess having gold gifted powers with her face painting inspired by Nigerian traditional face decorations. However, her crown is adorned with crosses, crystals, and chains which incorporate several elements from different cultural designs available from all over the world to portray unity.
02Survival Knife Weekly Drills 045
This was a design painting inspired based on BUCK KNIVES in pain texturing and focuses on making a practical game-ready asset.
03Radiance
This is a blender aesthetic cartoon painting idea of a graduation project made for the Concept Art specialized cursus at New3dge School.
04 The character looks dev
This blender cartoon painting’s inspiration came from Edward, the short film’s main character. It is a work in progress but a lovely painting that can inspire you.
Part 3 How to Create Super-Detailed Aesthetic Cartoon Painting
To create a super detailed aesthetic cartoon drawing, you do not need to be a trained artist, nor do you need a fancy cartoon picture maker. All you need to create a cartoon painting photo is a simple and Free picture from a cartoon editor to help you carry out the task more effectively.
However, you can also convert your cartoon paint into creative animation using Wondershare Filmora Video Editor . Filmora is a powerful all-in-one tool for editing that you can use to that can be used for free to animate your cartoon with its tons of effects, filters, and keyframing features that can help you carry this out effectively.
For Win 7 or later (64-bit)
For macOS 10.12 or later
Here is how to create a super detailed aesthetic cartoon painting:
Step 1: Open the Picsart editor on your desktop browser and click on the new project
Step 2: Next is to click on Upload to select the photo that you want to cartoon paint from the computer library of your hard drive
Step 2: Click on the toolbar, select the effect feature from the dropdown above your photo, and click on Magic to view all available one-click cartoon filters. However, almost all of the Magic effects on this editor will help you achieve an aesthetic cartoon photo effect.
Step 4: Click on Adjust and Blend above your photo workspace on the editor. This will help you manually adjust the effects (color burn, fade, saturation, brightness, etc.).
Step 5: Preview your result and once you are happy with the new cartoon photo painting, click on the Share button and download it from the top right corner of the editor to save it on your device.
● Ending Thoughts →
● This article explained creating and gave inspiration and ideas for the aesthetic cartoon painting you can choose from to make yours. In addition, the report also recommends Filmora as an influential editor if you intend to create an animation from your cartoon painting due to its tons of features.
● So, now you can start building your aesthetic drawings and cartoons!
Before You Learn Facebook Slideshow: 5 Things You Should Know [How-TOS]
Before You Learn Facebook Slideshow Things You Should Know [How-TOS]
An easy yet powerful editor
Numerous effects to choose from
Detailed tutorials provided by the official channel
If you are looking for interesting solutions to create the most amazing slideshow on Facebook, rest assured, you are at the right place to get every help!
In this article
01 [Where Did the Facebook Slideshow Tool Go?](#Part 1)
02 [How to Create a Slideshow on Facebook?](#Part 2)
03 [Top 5 Facebook Slideshow Alternatives](#Part 3)
Part 1 Where Did the Facebook Slideshow Tool Go?
While almost everyone around you must be fascinated about the stunning and appealing slideshows that the Facebook community used to offer its users with, it is evidently sad to realize that the utility has become a story of the past. The creators of the tool have by now, took multiple rounds on removing, retrieving and again removing the utility from the official Facebook website as well as the smartphone application.
It is however relaxing to know that the Facebook developer team has worked efficiently to produce alternatives to the application’s slideshow tool after the latter’s permanent disappearance from the user account pages and app profiles. You can now work with the Facebook Ads Manager or Facebook Creator Studio to sort out the concern of creating slideshow on Facebook.
Part 2 How to Create a Slideshow on Facebook?
Facebook slideshows are incredibly awesome trends of making a concise, expressive and to the point delivery of diverse content varieties. Piping up your information through and extensive assortment of sound, text and motion, these short snippets are no less than a seamless video streaming of the same information.
If you are about to launch a new product for your business enterprise, consider working with the utility to create an elusive Facebook slideshow ad for a quick demonstration of your brand among different social media communities, turning the fun of slideshow creation into a smart and responsive product promotion strategy, without having to bother your wallet for the same.
If you are concerned about the quality of the final output, it is not a cause of worry, since the Facebook slideshow creator tool promises you of an appreciable slideshow result, that takes a quick loading time, is comparable to a high resolution video and works well with all your favourite devices.
Having talked enough on the usage credibility, let us now proceed to adhere to the concern of creating a slideshow on Facebook with a diversity of media files in the following section:
01Facebook Slideshows from Videos
Step 1: Launch the Tool
Start with opening the Facebook app in your device to launch the ‘Facebook Ads Manager’ utility and tap ‘Create’ in the latter’s welcome interface.

Step 2: Select Your Video
Browse through your device’s gallery to choose a desired video for slideshow creation. When you have made your choice, set a 16:9 aspect ratio for the same to avoid square cropping.

Step 3: Upload Your Video
Proceed with uploading your video to the Facebook tool by clicking on the ‘Add Video’ button and watch it getting split into still images frames, from where you can view a seamless slideshow display of the same.

Step 4: Select Multiple Frames
you can now select a series of image frames and arrange them in the correct sequence of appearance by clicking on each one of them to be included within the creator timeline.
Step 5: Add Captions Your Stills
Tap on the small ‘Pencil’ icon within the images to customize them with suitable captions. You can further add style to these image names by making appropriate selections of font, position color of every frame caption. Once you have finished naming all the frames, click on ‘Save’ to apply your changes.
Step 6: Preview Your Creation
When you are satisfied with your work, consider watching a preview of the same to be assured of the perfect placement of everything. To do this, navigate to the ‘Preview Pane’ at the top right corner of the program interface, and tapping the ‘Preview’ button.
02Facebook Slideshows from Images
Step 1: Launch the Tool
To begin with, open the Facebook app in any of your preferred devices and proceed to launch the ‘Facebook Ads Manager’ tool, followed by clicking on the ‘Create Slideshow’ button at the bottom of the tool’s welcome screen.

Step 2: Upload Your Images
As you complete Step 1, a ‘Video Creation Kit’ will appear, where you will need to click within the ‘Create Slideshow’ checkbox, followed by tapping on the ‘Continue’ button at the bottom right corner of the window.

Step 3: Upload Your Images
Clicking on the ‘Continue’ button will take you to the ‘Settings Box’ where you need to tap on the ‘Add Photos’ option. An image selection box will now pop up, allowing you to select and upload a maximum of 10 images from your Facebook account, stock and page galleries or your device collections. Prefer keeping all the photos within the same aspect ratio to escape the extra task of cropping the images.
When you have finished making your selections, navigate to the bottom right corner of the window and hit the ‘Confirm’ button. This will make your selections shows up all together in the ‘Settings Box’, in the sequential order of their appearance in the slideshow. If you want to introduce some changes, delete and re-upload the images.

Step 4: Customize Your Images with Captions
To add suitable captions to the slideshow images, tap the ‘Pencil’ icon within them. You are also allowed to customize the stills with transitions, effects, etc., and make adjustments to the screen time of each image frame.

Part 3 Top 5 Facebook Slideshow Alternatives
Having heard about the disappointment from the exit of the Facebook slideshow creator tool, it becomes naturally important to seek through the affordable alternatives of the same to set straight the issue of how to do a slideshow on Facebook. Working towards the solutions, let us learn about the top 5 most preferred Facebook slideshow alternatives in the following section:
03PowerDirector
One of the most suitable candidates of Facebook slideshow alternatives, PowerDirector easily lands among the highly preferred tools for creating stunning slideshows. Compatible with the MacOs and Windows operating systems, the software lets you create high end, top quality slideshow presentations with a classic and professional outlook.
Talking of the creator program’s most appealing features, this one is an upgraded slideshow creator suite that is capable enough to address your most diverse design requirements, like those of high resolution video effects, Hollywood inspired movies and personal content sharing. The software package is loaded with tons of elusive video effects, themed templates and transition effects to facilitate a compelling creation.
Working with PowerDirector’s exclusive slideshow program, you get the liberty to escape the notch of storyboard and timeline editing and start the creation process in the launch window of the program itself. The extremely user cohesive interface of the software guides you through each creation step via streamlined plug-ins, making the design process quick and super easy even for newbies.

04SmartSHOW 3D
When thinking of how to make a slideshow on facebook, this one is another top rated Facebook slideshow alternatives, that comes with an extensive toolkit to create amazing presentations from video clips and images, while complementing them with a plethora of effects and transitions. Some of the key features of the program include multiple slide layering, animating selected layers and fine tune the transitions with keyframe adjustments.
You can additionally uplift the slides with image masks, shapes, 3D animated texts and other forms of graphic arts. An additively appealing feature of the slideshow creator program is the ability to mix descriptive images with your favorite music to develop stunning masterpieces of entertaining slideshows, which you can conveniently share and enjoy with family and friends on a diversity of social media platforms.
Using the tool, you can work with applying motion graphic effects to still photos without having to be an over the top tech savvy user. The editor library of the tool is loaded with some of the most awesome transition effects, like, wipes, 3D motions, gradients and fade-ins, along with the facility of adding titles, voice comments and captions to the slides of your presentation. The tool is however, exclusively a Windows compatible utility.

05PhotoStage Slideshow Software
Next in the list of alternatives to the Facebook slideshow maker tool is the aforesaid software program, that allows you to create professional quality slideshows with as many videos and images as you can possibly think of and supplement them with a variety of texts, music, voiceovers and effects. You can further work on customizing the slideshow images with making suitable adjustments in color, brightness and saturation parameters.
The software comes with a Quick Create utility, which you can use to instantly create high resolution slideshows and spark them up with zooms, pans and fades, while getting a preview of the same in real-time. You can even proceed to burn your creation into a disk, make an online upload, or simply save it to your device.
Talking of the cost constraints of this amazing slideshow creator tool, you get to work with the software for a commercial use, free of cost for a definite time period and with a restricted number of features. However, you can always consider on buying the paid version of the program to avail an access to the latter’s entire range of features and utilities. The tool works well with all Windows and Mac supported devices.

06Kizoa
Moving ahead in the list you have the Kizoa slideshow maker for Facebook, which is a dependable alternative to the conventional Facebook slideshow creator. Choosing this tool to design your slideshow presentation, you are entitled to the amazing feature of displaying your presentation on almost any screen, including smartphones, television, computers and tablets with getting to choose from 7 types of aspect ratios. The tool is designed to have a Windows and MacOs compatibility.
The application further lets you add the most specific parts of your images within the presentation slides with its smart cropping tool, while keeping an account of the file formats and screen space requirements of the images with utmost convenience. You are also allowed to choose from a storehouse of preset templates to add your desired photos and video clips in the slideshow and entice them with GIFs, effects and texts.
When you are done with the creation process, just attempt to download and save the slideshow in any preferred file format, such as, AVI, GIF, MP4, MOV, MPEG2, etc., or even burn it to a DVD. You are now free to share your slideshow on various online media sharing platforms. Using the free version of Kizoa, you are permitted to create slideshows with a duration of 60 seconds, which can be upgraded to a limitless length with a paid subscription.

07SlideLab
If you are a newbie to the field of creating slideshows, and wondering about how to create a slideshow on Facebook 2021, this one is affordably the most perfect tool you can rely on. Packed with an extensive range of effects, music, transitions and filters, SlideLab is the smartest software choice to create slideshow presentations for family entertainment and personal use.
The tool consists of an in built sharing utility that allows you to design and share slideshows on social media platforms, like YouTube, Facebook and Instagram with a single click. Working on your slideshow within the program, you can escape the cringe of cropping the images, as they are automatically adjusted to the square fit alignment of the app’s working window. You can quickly rearrange the placement of the images in the slideshow as per your preferences.
As far as the sharing credibility of the presentation is concerned, the software grants you the liberty to export your creation in PPTX and PDF file formats, and view them later in Keynote and PowerPoint.
The app shows a convenient workflow with Windows and MacOs devices and limits the image play duration to 3 seconds, along with a permitting a restricted number of transitions and effects in its free version, which you can access by availing a paid subscription of the program.

08Creating Facebook Slideshows With Wondershare Filmora
When browsing through feasible alternatives on how to make a facebook slideshow, the IT market is indeed flooded with a hoard of creation utilities. If you have just begun trying hands at slideshow creation, consider using the Wondershare Filmora Video Editor slideshow maker application for addressing your slideshow design concerns. The extensive, feature rich library of the app lets you create attractive presentation masterpieces with a wide range of special effects, transitions, texts, titles and music tracks.
For Win 7 or later (64-bit)
For macOS 10.12 or later
Working with the Filmora slideshow creator, you can trim, crop or cut the video clips and images of your presentation to give them the best look. The tool comes with a unique Filmora Template Mode to create business oriented Facebook slideshows, is compatible to any windows and Mac supported device and lets you easily make a slideshow on Facebook.
● Ending Thoughts →
● Creating Facebook slideshows can be useful in addressing a variety of personal and professional data sharing needs.
● Browsing through design alternatives, you will land across a pool of software choices to create stunning slideshows for Facebook.
● When deciding on the best Facebook slideshow creator tool, Wondershare Filmora can be your smartest pick.
If you are looking for interesting solutions to create the most amazing slideshow on Facebook, rest assured, you are at the right place to get every help!
In this article
01 [Where Did the Facebook Slideshow Tool Go?](#Part 1)
02 [How to Create a Slideshow on Facebook?](#Part 2)
03 [Top 5 Facebook Slideshow Alternatives](#Part 3)
Part 1 Where Did the Facebook Slideshow Tool Go?
While almost everyone around you must be fascinated about the stunning and appealing slideshows that the Facebook community used to offer its users with, it is evidently sad to realize that the utility has become a story of the past. The creators of the tool have by now, took multiple rounds on removing, retrieving and again removing the utility from the official Facebook website as well as the smartphone application.
It is however relaxing to know that the Facebook developer team has worked efficiently to produce alternatives to the application’s slideshow tool after the latter’s permanent disappearance from the user account pages and app profiles. You can now work with the Facebook Ads Manager or Facebook Creator Studio to sort out the concern of creating slideshow on Facebook.
Part 2 How to Create a Slideshow on Facebook?
Facebook slideshows are incredibly awesome trends of making a concise, expressive and to the point delivery of diverse content varieties. Piping up your information through and extensive assortment of sound, text and motion, these short snippets are no less than a seamless video streaming of the same information.
If you are about to launch a new product for your business enterprise, consider working with the utility to create an elusive Facebook slideshow ad for a quick demonstration of your brand among different social media communities, turning the fun of slideshow creation into a smart and responsive product promotion strategy, without having to bother your wallet for the same.
If you are concerned about the quality of the final output, it is not a cause of worry, since the Facebook slideshow creator tool promises you of an appreciable slideshow result, that takes a quick loading time, is comparable to a high resolution video and works well with all your favourite devices.
Having talked enough on the usage credibility, let us now proceed to adhere to the concern of creating a slideshow on Facebook with a diversity of media files in the following section:
01Facebook Slideshows from Videos
Step 1: Launch the Tool
Start with opening the Facebook app in your device to launch the ‘Facebook Ads Manager’ utility and tap ‘Create’ in the latter’s welcome interface.
Step 2: Select Your Video
Browse through your device’s gallery to choose a desired video for slideshow creation. When you have made your choice, set a 16:9 aspect ratio for the same to avoid square cropping.
Step 3: Upload Your Video
Proceed with uploading your video to the Facebook tool by clicking on the ‘Add Video’ button and watch it getting split into still images frames, from where you can view a seamless slideshow display of the same.
Step 4: Select Multiple Frames
you can now select a series of image frames and arrange them in the correct sequence of appearance by clicking on each one of them to be included within the creator timeline.
Step 5: Add Captions Your Stills
Tap on the small ‘Pencil’ icon within the images to customize them with suitable captions. You can further add style to these image names by making appropriate selections of font, position color of every frame caption. Once you have finished naming all the frames, click on ‘Save’ to apply your changes.
Step 6: Preview Your Creation
When you are satisfied with your work, consider watching a preview of the same to be assured of the perfect placement of everything. To do this, navigate to the ‘Preview Pane’ at the top right corner of the program interface, and tapping the ‘Preview’ button.
02Facebook Slideshows from Images
Step 1: Launch the Tool
To begin with, open the Facebook app in any of your preferred devices and proceed to launch the ‘Facebook Ads Manager’ tool, followed by clicking on the ‘Create Slideshow’ button at the bottom of the tool’s welcome screen.
Step 2: Upload Your Images
As you complete Step 1, a ‘Video Creation Kit’ will appear, where you will need to click within the ‘Create Slideshow’ checkbox, followed by tapping on the ‘Continue’ button at the bottom right corner of the window.
Step 3: Upload Your Images
Clicking on the ‘Continue’ button will take you to the ‘Settings Box’ where you need to tap on the ‘Add Photos’ option. An image selection box will now pop up, allowing you to select and upload a maximum of 10 images from your Facebook account, stock and page galleries or your device collections. Prefer keeping all the photos within the same aspect ratio to escape the extra task of cropping the images.
When you have finished making your selections, navigate to the bottom right corner of the window and hit the ‘Confirm’ button. This will make your selections shows up all together in the ‘Settings Box’, in the sequential order of their appearance in the slideshow. If you want to introduce some changes, delete and re-upload the images.
Step 4: Customize Your Images with Captions
To add suitable captions to the slideshow images, tap the ‘Pencil’ icon within them. You are also allowed to customize the stills with transitions, effects, etc., and make adjustments to the screen time of each image frame.
Part 3 Top 5 Facebook Slideshow Alternatives
Having heard about the disappointment from the exit of the Facebook slideshow creator tool, it becomes naturally important to seek through the affordable alternatives of the same to set straight the issue of how to do a slideshow on Facebook. Working towards the solutions, let us learn about the top 5 most preferred Facebook slideshow alternatives in the following section:
03PowerDirector
One of the most suitable candidates of Facebook slideshow alternatives, PowerDirector easily lands among the highly preferred tools for creating stunning slideshows. Compatible with the MacOs and Windows operating systems, the software lets you create high end, top quality slideshow presentations with a classic and professional outlook.
Talking of the creator program’s most appealing features, this one is an upgraded slideshow creator suite that is capable enough to address your most diverse design requirements, like those of high resolution video effects, Hollywood inspired movies and personal content sharing. The software package is loaded with tons of elusive video effects, themed templates and transition effects to facilitate a compelling creation.
Working with PowerDirector’s exclusive slideshow program, you get the liberty to escape the notch of storyboard and timeline editing and start the creation process in the launch window of the program itself. The extremely user cohesive interface of the software guides you through each creation step via streamlined plug-ins, making the design process quick and super easy even for newbies.
04SmartSHOW 3D
When thinking of how to make a slideshow on facebook, this one is another top rated Facebook slideshow alternatives, that comes with an extensive toolkit to create amazing presentations from video clips and images, while complementing them with a plethora of effects and transitions. Some of the key features of the program include multiple slide layering, animating selected layers and fine tune the transitions with keyframe adjustments.
You can additionally uplift the slides with image masks, shapes, 3D animated texts and other forms of graphic arts. An additively appealing feature of the slideshow creator program is the ability to mix descriptive images with your favorite music to develop stunning masterpieces of entertaining slideshows, which you can conveniently share and enjoy with family and friends on a diversity of social media platforms.
Using the tool, you can work with applying motion graphic effects to still photos without having to be an over the top tech savvy user. The editor library of the tool is loaded with some of the most awesome transition effects, like, wipes, 3D motions, gradients and fade-ins, along with the facility of adding titles, voice comments and captions to the slides of your presentation. The tool is however, exclusively a Windows compatible utility.
05PhotoStage Slideshow Software
Next in the list of alternatives to the Facebook slideshow maker tool is the aforesaid software program, that allows you to create professional quality slideshows with as many videos and images as you can possibly think of and supplement them with a variety of texts, music, voiceovers and effects. You can further work on customizing the slideshow images with making suitable adjustments in color, brightness and saturation parameters.
The software comes with a Quick Create utility, which you can use to instantly create high resolution slideshows and spark them up with zooms, pans and fades, while getting a preview of the same in real-time. You can even proceed to burn your creation into a disk, make an online upload, or simply save it to your device.
Talking of the cost constraints of this amazing slideshow creator tool, you get to work with the software for a commercial use, free of cost for a definite time period and with a restricted number of features. However, you can always consider on buying the paid version of the program to avail an access to the latter’s entire range of features and utilities. The tool works well with all Windows and Mac supported devices.
06Kizoa
Moving ahead in the list you have the Kizoa slideshow maker for Facebook, which is a dependable alternative to the conventional Facebook slideshow creator. Choosing this tool to design your slideshow presentation, you are entitled to the amazing feature of displaying your presentation on almost any screen, including smartphones, television, computers and tablets with getting to choose from 7 types of aspect ratios. The tool is designed to have a Windows and MacOs compatibility.
The application further lets you add the most specific parts of your images within the presentation slides with its smart cropping tool, while keeping an account of the file formats and screen space requirements of the images with utmost convenience. You are also allowed to choose from a storehouse of preset templates to add your desired photos and video clips in the slideshow and entice them with GIFs, effects and texts.
When you are done with the creation process, just attempt to download and save the slideshow in any preferred file format, such as, AVI, GIF, MP4, MOV, MPEG2, etc., or even burn it to a DVD. You are now free to share your slideshow on various online media sharing platforms. Using the free version of Kizoa, you are permitted to create slideshows with a duration of 60 seconds, which can be upgraded to a limitless length with a paid subscription.
07SlideLab
If you are a newbie to the field of creating slideshows, and wondering about how to create a slideshow on Facebook 2021, this one is affordably the most perfect tool you can rely on. Packed with an extensive range of effects, music, transitions and filters, SlideLab is the smartest software choice to create slideshow presentations for family entertainment and personal use.
The tool consists of an in built sharing utility that allows you to design and share slideshows on social media platforms, like YouTube, Facebook and Instagram with a single click. Working on your slideshow within the program, you can escape the cringe of cropping the images, as they are automatically adjusted to the square fit alignment of the app’s working window. You can quickly rearrange the placement of the images in the slideshow as per your preferences.
As far as the sharing credibility of the presentation is concerned, the software grants you the liberty to export your creation in PPTX and PDF file formats, and view them later in Keynote and PowerPoint.
The app shows a convenient workflow with Windows and MacOs devices and limits the image play duration to 3 seconds, along with a permitting a restricted number of transitions and effects in its free version, which you can access by availing a paid subscription of the program.
08Creating Facebook Slideshows With Wondershare Filmora
When browsing through feasible alternatives on how to make a facebook slideshow, the IT market is indeed flooded with a hoard of creation utilities. If you have just begun trying hands at slideshow creation, consider using the Wondershare Filmora Video Editor slideshow maker application for addressing your slideshow design concerns. The extensive, feature rich library of the app lets you create attractive presentation masterpieces with a wide range of special effects, transitions, texts, titles and music tracks.
For Win 7 or later (64-bit)
For macOS 10.12 or later
Working with the Filmora slideshow creator, you can trim, crop or cut the video clips and images of your presentation to give them the best look. The tool comes with a unique Filmora Template Mode to create business oriented Facebook slideshows, is compatible to any windows and Mac supported device and lets you easily make a slideshow on Facebook.
● Ending Thoughts →
● Creating Facebook slideshows can be useful in addressing a variety of personal and professional data sharing needs.
● Browsing through design alternatives, you will land across a pool of software choices to create stunning slideshows for Facebook.
● When deciding on the best Facebook slideshow creator tool, Wondershare Filmora can be your smartest pick.
Best 10 Popular Cartoons You Forgot Existed
Top 10 Popular Cartoons You Forgot Existed
An easy yet powerful editor
Numerous effects to choose from
Detailed tutorials provided by the official channel
There has been an advancement in the cartoon since the last publication made by “Paste” (a 5,800-word short story by Henry James). However, traditional cable networks have created exciting and new worlds and characters. Various streaming platforms like YouTube have allowed different creators to draw cartoon videos and publish them as they want. It has long been said that cartoons are specifically made for kids to enjoy on Saturday morning, but this is no longer the case as adults now enjoy watching cartoons in their free time.
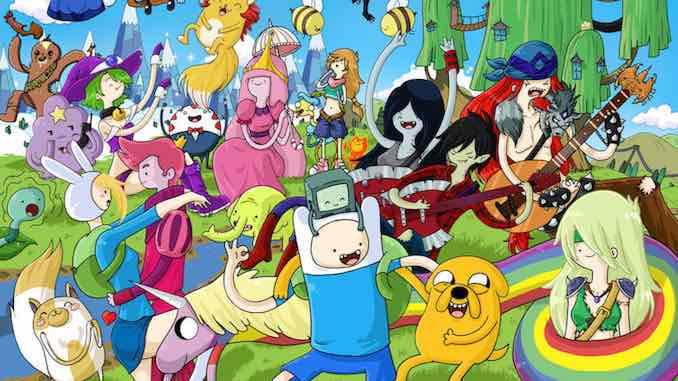
Have you ever thought, “I want to draw myself as a cartoon“ and turn it into animation? Then you must get inspired. Cartoons now range from more complex characters. Many employ wittier humor and more profound stories to engage people of any age, giving them the ability to tell powerful, relatable, and hilarious stories within the realm of animation. As a result of the dramatic change in the cartoon world, we will be writing out top popular cartoons you may have forgotten that ever existed. This list will be on influence, relatability, and influence when they lived.
In this article
01 [Do You Remember the Very Popular Simpsons?](#Part 1)
02 [The 10 Best Cartoon Shows Since the Simpsons](#Part 2)
Part 1 Do You Remember the Very Popular Simpsons?
The Simpsons is an American animated cartoonist Matt Groening created for the Fox Broadcasting Company. The Simpsons began in 1987 as a short cartoon shot on The Tracey Ullman Show and received acclamation throughout its early seasons in the 1990s, which are generally considered a “golden age.”
The popular cartoon series is a satirical depiction of American life epitomized by the Simpson family, consisting of Bart, Homer, Lisa, Marge, and Maggie. In addition, the show is set to run on television, and the human condition and the fictional town of Springfield parody American culture and society.
However, the Simpsons is a combined production by 20th Television and Gracie Films. Also, on March 3, 2021, the series got renewed for seasons 33 and 34, with 22 episodes for each. Thus, increasing the number of episodes from 706 to 750. Furthermore, its thirty-third (33rd) season came on September 26, 2021.
Before now, the Simpsons was the longest-running American animated cartoon series, an American sitcom, and American scripted primetime television series awarded in terms of seasons and number of episodes.
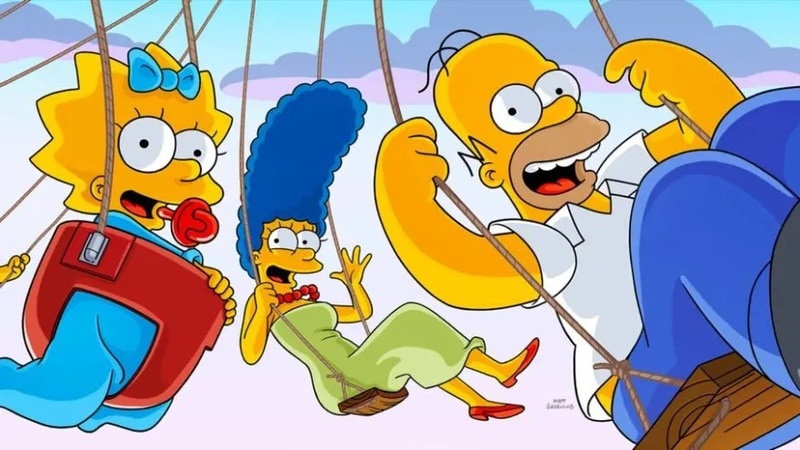
Part 2 The 10 Best Cartoon Shows Since the Simpsons
You can decide to learn to draw your cartoons or draw yourself as a cartoon to create an animation for TV just like the Simpsons. However, if you are looking for the best tool to help you animate your cartoon much more manageable, we recommend using Wondershare Filmora Video Editor .
For Win 7 or later (64-bit)
For macOS 10.12 or later
Wondershare Filmora
Get started easily with Filmora’s powerful performance, intuitive interface, and countless effects!
Try It Free Try It Free Try It Free Learn More >

Filmora platform offers you tons of materials for learning to draw cartoons, and also it has a keyframing feature that allows you to animate your cartoon with ease.
However, here are the ten best cartoon shows that have existed since the Simpsons:
01Futurama
This popular cartoon series, first released on March 28, 1999, is a cartoon series about utopian or dystopian. The central concept of this series is that it dares to imagine a future that’s pretty similar to the present using a bunch of crazy technology and space travel. Aside from being pretty, it is also hilarious.
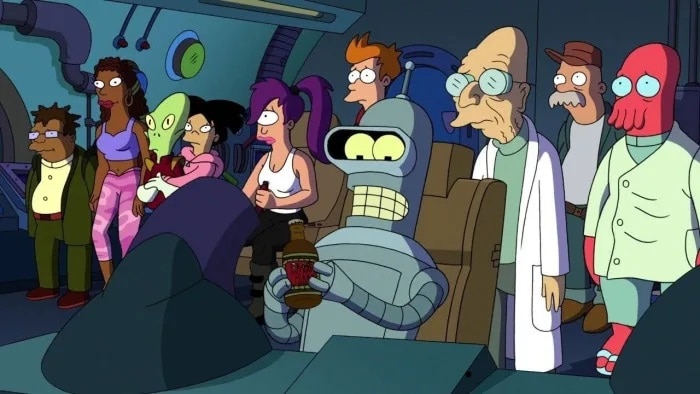
02The Critic
This cartoon series was first created in 1994 by the Simpson’s writers Al Jean and Mike Reiss. This cartoon has ramped up its predecessor’s non sequitur and sight-gag humor featuring Jon Lovitz’s Jay Sherman, an unfortunate portmanteau of Gene Siskel and Roger Ebert.
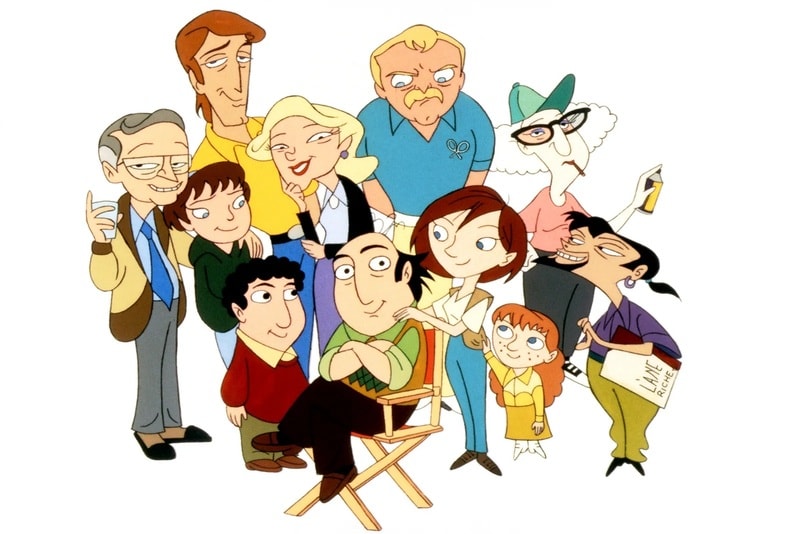
03Bojack Horseman
Bojack Horseman is a dumb cartoon character series first created on August 22, 2014. However, four (4) days later, the series was renewed for a second season, released on July 17, 2015. It is often a searing portrait of addiction, failure, depression, etc., as humans talk to a horse.
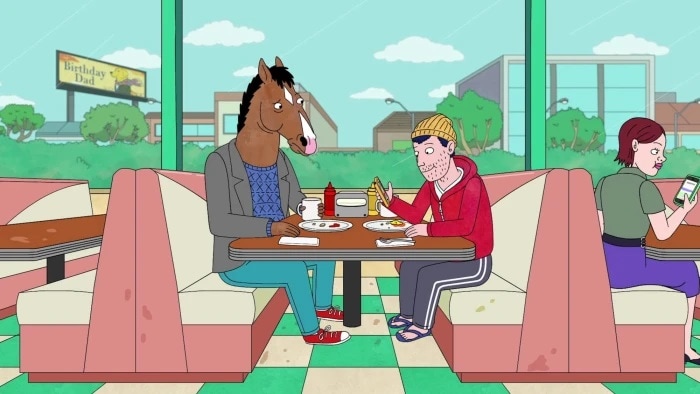
04Family Guy
Family Guy, the snoopy cartoon series, was first created on January 31, 1999, which goes for anything for a laugh style. However, you might not like the Griffin family or the other residents of Quahog, but you have to admit that the show stumbles on a great joke.
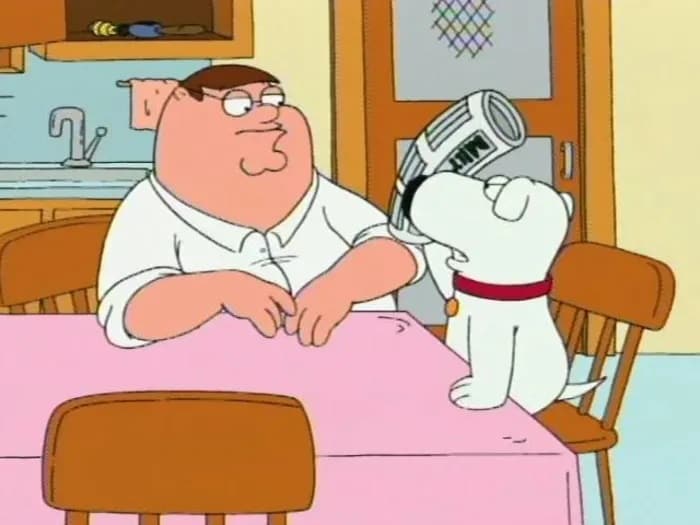
05South Park
South Park debuted with “Cartman Gets an Anal Probe, “ first created on August 13, 1997. Although it started with some cheap animations, it has become one of the iconic animated shows.

06Batman: The Animated Series
The Batman animated cartoon series, created on September 5, 1992, is a favorite for many people, although it is more comedy than an animated drama.
07Gravity Falls
This cartoon animated series was first created on June 15, 2012, and is a mystery story about a few kids with a supernatural bend.
08Teenage Mutant Ninja Turtles
This popular cartoon animated series was first created in 1983 by cartoonists Kevin Eastman and Peter Laird. This cartoon series is the definitive version, brightly colored and fun and fluffy.
09Doug
This cartoon animated series was first created on March 26, 1999, by Jim Jinkins and produced by Jumbo Pictures. It was one of the first animated shows on Nickelodeon before moving to Disney pictures. However, this show is creative and down-to-earth at the same time.

10Hey Arnold
This cartoon animated series came in on October 7, 1996. This show was the second after the first wave of the Nickelodeon show. It was the best of the bunch, and I liked the evolved version of “Doug.”
1
● Ending Thoughts →
● Aside from the list of popular cartoons mentioned in this article, you can also pick the snoopy cartoonswhen talking about comics that once existed.
● Addionally, you can also learn drawing cartoon videos and turn them into animation to publish in TV series.
● Finally, this article also emphasizes Fimora as the best editing tool you can choose from when you want to transform your cartoon drawing for class 6 into an animation.
There has been an advancement in the cartoon since the last publication made by “Paste” (a 5,800-word short story by Henry James). However, traditional cable networks have created exciting and new worlds and characters. Various streaming platforms like YouTube have allowed different creators to draw cartoon videos and publish them as they want. It has long been said that cartoons are specifically made for kids to enjoy on Saturday morning, but this is no longer the case as adults now enjoy watching cartoons in their free time.
Have you ever thought, “I want to draw myself as a cartoon“ and turn it into animation? Then you must get inspired. Cartoons now range from more complex characters. Many employ wittier humor and more profound stories to engage people of any age, giving them the ability to tell powerful, relatable, and hilarious stories within the realm of animation. As a result of the dramatic change in the cartoon world, we will be writing out top popular cartoons you may have forgotten that ever existed. This list will be on influence, relatability, and influence when they lived.
In this article
01 [Do You Remember the Very Popular Simpsons?](#Part 1)
02 [The 10 Best Cartoon Shows Since the Simpsons](#Part 2)
Part 1 Do You Remember the Very Popular Simpsons?
The Simpsons is an American animated cartoonist Matt Groening created for the Fox Broadcasting Company. The Simpsons began in 1987 as a short cartoon shot on The Tracey Ullman Show and received acclamation throughout its early seasons in the 1990s, which are generally considered a “golden age.”
The popular cartoon series is a satirical depiction of American life epitomized by the Simpson family, consisting of Bart, Homer, Lisa, Marge, and Maggie. In addition, the show is set to run on television, and the human condition and the fictional town of Springfield parody American culture and society.
However, the Simpsons is a combined production by 20th Television and Gracie Films. Also, on March 3, 2021, the series got renewed for seasons 33 and 34, with 22 episodes for each. Thus, increasing the number of episodes from 706 to 750. Furthermore, its thirty-third (33rd) season came on September 26, 2021.
Before now, the Simpsons was the longest-running American animated cartoon series, an American sitcom, and American scripted primetime television series awarded in terms of seasons and number of episodes.
Part 2 The 10 Best Cartoon Shows Since the Simpsons
You can decide to learn to draw your cartoons or draw yourself as a cartoon to create an animation for TV just like the Simpsons. However, if you are looking for the best tool to help you animate your cartoon much more manageable, we recommend using Wondershare Filmora Video Editor .
For Win 7 or later (64-bit)
For macOS 10.12 or later
Wondershare Filmora
Get started easily with Filmora’s powerful performance, intuitive interface, and countless effects!
Try It Free Try It Free Try It Free Learn More >
Filmora platform offers you tons of materials for learning to draw cartoons, and also it has a keyframing feature that allows you to animate your cartoon with ease.
However, here are the ten best cartoon shows that have existed since the Simpsons:
01Futurama
This popular cartoon series, first released on March 28, 1999, is a cartoon series about utopian or dystopian. The central concept of this series is that it dares to imagine a future that’s pretty similar to the present using a bunch of crazy technology and space travel. Aside from being pretty, it is also hilarious.
02The Critic
This cartoon series was first created in 1994 by the Simpson’s writers Al Jean and Mike Reiss. This cartoon has ramped up its predecessor’s non sequitur and sight-gag humor featuring Jon Lovitz’s Jay Sherman, an unfortunate portmanteau of Gene Siskel and Roger Ebert.
03Bojack Horseman
Bojack Horseman is a dumb cartoon character series first created on August 22, 2014. However, four (4) days later, the series was renewed for a second season, released on July 17, 2015. It is often a searing portrait of addiction, failure, depression, etc., as humans talk to a horse.
04Family Guy
Family Guy, the snoopy cartoon series, was first created on January 31, 1999, which goes for anything for a laugh style. However, you might not like the Griffin family or the other residents of Quahog, but you have to admit that the show stumbles on a great joke.
05South Park
South Park debuted with “Cartman Gets an Anal Probe, “ first created on August 13, 1997. Although it started with some cheap animations, it has become one of the iconic animated shows.
06Batman: The Animated Series
The Batman animated cartoon series, created on September 5, 1992, is a favorite for many people, although it is more comedy than an animated drama.
07Gravity Falls
This cartoon animated series was first created on June 15, 2012, and is a mystery story about a few kids with a supernatural bend.
08Teenage Mutant Ninja Turtles
This popular cartoon animated series was first created in 1983 by cartoonists Kevin Eastman and Peter Laird. This cartoon series is the definitive version, brightly colored and fun and fluffy.
09Doug
This cartoon animated series was first created on March 26, 1999, by Jim Jinkins and produced by Jumbo Pictures. It was one of the first animated shows on Nickelodeon before moving to Disney pictures. However, this show is creative and down-to-earth at the same time.
10Hey Arnold
This cartoon animated series came in on October 7, 1996. This show was the second after the first wave of the Nickelodeon show. It was the best of the bunch, and I liked the evolved version of “Doug.”
1
● Ending Thoughts →
● Aside from the list of popular cartoons mentioned in this article, you can also pick the snoopy cartoonswhen talking about comics that once existed.
● Addionally, you can also learn drawing cartoon videos and turn them into animation to publish in TV series.
● Finally, this article also emphasizes Fimora as the best editing tool you can choose from when you want to transform your cartoon drawing for class 6 into an animation.
Tips for GIF to Animated PNG
Versatile Video Editor - Wondershare Filmora
An easy yet powerful editor
Numerous effects to choose from
Detailed tutorials provided by the official channel
The advent of many instant chats had led to the demand for GIFs and animated PNGs. Users access these files to express their emotions amidst the chat environment. There are unique ways to convert GIFs to animated PNGs precisely. In the digital space, there are surplus applications are available to perform this conversion process without compromising with the quality factors.
In this article, a detailed discussion on the GIFs and the animated PNGs are available for better understanding. It is the process of working with images and implementing some actions with the pictures that makes it appear interesting. Most GIFs and animated PNGs are used for fun and it helps to excite your friends amidst serious chats. It serves as the source of conveying thoughts with fun-filled visuals. Before choosing between the GIFs and APNGs, analyze which file format offers you surplus advantages for optimal handling. Here, in the below discussion you will study the features of this file format and the precise methods to switch between these two files efficiently.
In this article
01 [What is GIF & What is animated PNG](#Part 1)
02 [GIF vs animated PNG, which is better?](#Part 2)
03 [Can PNG be animated like GIF?](#Part 3)
04 [How to Convert GIF to animated PNG?](#Part 4)
Part 1 What is GIF & What is animated PNG
The GIFs are animated images and the picture moves in a sequence in a cycle. The movement repeats without stopping. This type of picture is popular on the webpages and the built-in templates are available in the digital space for quick downloads. The single-frame GIFs take more time to download and displays exciting moves that trigger laughter with audiences. GIF takes the abbreviation of Graphics Interchange Format. It came into existence in the year 1980s and is widely used globally. GIFs are animated images in a basic format. It adopts the safe LZW algorithm that tracks the colors optimally.
The superior form of the motion picture is animated PNGs. It stands for Portable Network Graphics. This format supports indexed color, grayscale, and true color images. Additionally, the animated PNGs has advantages like alpha channels, cross-platform gamma corrections and two-dimensional interlacing. APNG came into existence in the year 1995 and is compatible with a few web browsers.
Part 2 GIF vs animated PNG, which is better?
When compared to GIFs and APNG, APNG seems to be technically strong with a wide range of supporting features. The quality of the file of APNG is good as it displays 24-bit images and 8- bit transparency. The APNG images can be compressed to the smallest value thereby encouraging the ease of transfer between devices. APNG has access to many color combinations whereas GIFs can use up to 256 colors. The new web browser versions are compatible with APNGs and the older browsers play the GIFs precisely. To view the APNG files in the older browsers you require external plugins or extensions. The higher quality APNGs are mostly used by professionals when compared to GIFs. The portability in moving the animated images is simple with APNGs. The GIF files have a poor compression rate and it is difficult to transfer at the digital space.
Part 3 Can PNG be animated like GIF?
You can animate the PNG files like GIF using reliable tools in the online space. There are unique programs to establish this process. It works on every detail on the PNG files and adds transition effects to the images to implement the movements. If you take closer looks at the digital space, you will acquire sophisticated programs to add transitions to the static pictures. While animating the PNG files, you must include frames, durations, and transition effects to the PNG images to include the animations. Based on the settings, the animated PNG file functions. Every move of the images is assigned by the attributes set by the users with the help of powerful applications in the digital space. You can also find online tools to assist in this operation. The static PNG files get desired moves by animating like GIF files. The APNG has superior quality when compared to GIF files. As discussed above many professionals opt for APNG files than GIFs.

Part 4 How to Convert GIF to animated PNG?
In this section, you will learn how to convert GIF to animated PNG using online tools. Use the recommended online platform to carry out the quality conversions to acquire desired outcomes.
1. EZGIF
It is an exclusive online space that brings quality animations to GIF files acquiring the properties of APNG. By converting the GIFs to APNG, you can enhance various features like easy storage, best compression, quality elements in the file. When you step into this website, you can perform a wide range of conversion processes between animated and static image files. Choose the right tabs on the menu to trigger the desired changes to the uploaded files.
Choose GIF to APNG tab at the top menu to begin this conversion process. The GIF files will receive all the good functionalities of APNG after this conversion process. You can download the animated PNGs to any platform after a successful conversion.
Follow the below steps to proceed with GIF to animated PNGs using the EZGIF online tool.
Step 1
Go to the website and upload the GIF file by tapping the ‘Choose File’ button. The maximum file size is 50MB that ensures a flawless upload process. Here, you can either choose a file from a local drive or paste the URL from an online source into this webpage flawlessly. Then, click the Upload button to trigger this GIF to the APNG conversion process.
Step 2
Format the output and click the convert button to download the animated PNG files.
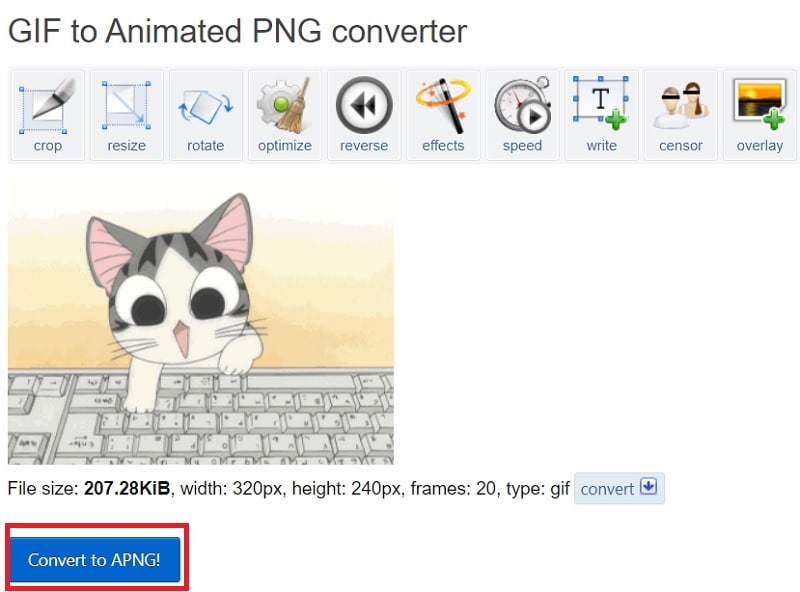
It is a simple and yet effective one that helps to convert the GIFs to animated PNGs in no time. You can also use the edit tools to make changes to the GIF files before the conversion process. The converted files are available for downloads at your local system drive. Access them when required and upload them to the desired platform to make fun with your friends and family members.
2. Free convert
In this section, you will be learning how to use the Free convert webpage to carry out the GIF to the animated PNG conversion process. It is a user-friendly interface where the controls are explicit to make the perfect click appropriately. This website provides a secure platform to carry out the conversion process optimally. The uploaded files are deleted automatically after 2 hours. You can expect a quality conversion process to take place on this website.
The stepwise process to convert GIF to animated PNG using the Freeconvert website.
Step 1
Upload the Gif files by tapping the ‘Choose GIF files’ button. This platform supports GIF file sizes up to 1GB.

Step 2
Hit the Convert to APNG button to trigger the conversion process and download the APNG file to desired storage space precisely.

Surf the above steps to carry out a precise conversion process between GIF and animated PNG. After this format conversion process, you can enjoy all the benefits of APNG overcoming the constraints with the GIF files.
These are the two efficient ways of converting the GIF files to APNG format using online web pages. You can choose any one of the websites to carry out the desired APNG conversion process optimally.
Wondershare Filmora
Get started easily with Filmora’s powerful performance, intuitive interface, and countless effects!
Try It Free Try It Free Try It Free Learn More >
AI Portrait – The best feature of Wondershare Filmora for gameplay editing
The AI Portrait is a new add-on in Wondershare Filmora. It can easily remove video backgrounds without using a green screen or chroma key, allowing you to add borders, glitch effects, pixelated, noise, or segmentation video effects.

Conclusion
Thus, this article had given valuable insights on the conversion of GIF to animated PNG files. The enlightening discussion about the GIFs and APNGs assists you to choose the best one from these two options. You must be clear about the differences between these formats and select the ones that meet your needs appropriately. Connect with the above-discussed web pages to carry out the conversion effortlessly with a few clicks. Stay connected with this article to discover the new horizons of animated clippings that excite you during online communications.
The advent of many instant chats had led to the demand for GIFs and animated PNGs. Users access these files to express their emotions amidst the chat environment. There are unique ways to convert GIFs to animated PNGs precisely. In the digital space, there are surplus applications are available to perform this conversion process without compromising with the quality factors.
In this article, a detailed discussion on the GIFs and the animated PNGs are available for better understanding. It is the process of working with images and implementing some actions with the pictures that makes it appear interesting. Most GIFs and animated PNGs are used for fun and it helps to excite your friends amidst serious chats. It serves as the source of conveying thoughts with fun-filled visuals. Before choosing between the GIFs and APNGs, analyze which file format offers you surplus advantages for optimal handling. Here, in the below discussion you will study the features of this file format and the precise methods to switch between these two files efficiently.
In this article
01 [What is GIF & What is animated PNG](#Part 1)
02 [GIF vs animated PNG, which is better?](#Part 2)
03 [Can PNG be animated like GIF?](#Part 3)
04 [How to Convert GIF to animated PNG?](#Part 4)
Part 1 What is GIF & What is animated PNG
The GIFs are animated images and the picture moves in a sequence in a cycle. The movement repeats without stopping. This type of picture is popular on the webpages and the built-in templates are available in the digital space for quick downloads. The single-frame GIFs take more time to download and displays exciting moves that trigger laughter with audiences. GIF takes the abbreviation of Graphics Interchange Format. It came into existence in the year 1980s and is widely used globally. GIFs are animated images in a basic format. It adopts the safe LZW algorithm that tracks the colors optimally.
The superior form of the motion picture is animated PNGs. It stands for Portable Network Graphics. This format supports indexed color, grayscale, and true color images. Additionally, the animated PNGs has advantages like alpha channels, cross-platform gamma corrections and two-dimensional interlacing. APNG came into existence in the year 1995 and is compatible with a few web browsers.
Part 2 GIF vs animated PNG, which is better?
When compared to GIFs and APNG, APNG seems to be technically strong with a wide range of supporting features. The quality of the file of APNG is good as it displays 24-bit images and 8- bit transparency. The APNG images can be compressed to the smallest value thereby encouraging the ease of transfer between devices. APNG has access to many color combinations whereas GIFs can use up to 256 colors. The new web browser versions are compatible with APNGs and the older browsers play the GIFs precisely. To view the APNG files in the older browsers you require external plugins or extensions. The higher quality APNGs are mostly used by professionals when compared to GIFs. The portability in moving the animated images is simple with APNGs. The GIF files have a poor compression rate and it is difficult to transfer at the digital space.
Part 3 Can PNG be animated like GIF?
You can animate the PNG files like GIF using reliable tools in the online space. There are unique programs to establish this process. It works on every detail on the PNG files and adds transition effects to the images to implement the movements. If you take closer looks at the digital space, you will acquire sophisticated programs to add transitions to the static pictures. While animating the PNG files, you must include frames, durations, and transition effects to the PNG images to include the animations. Based on the settings, the animated PNG file functions. Every move of the images is assigned by the attributes set by the users with the help of powerful applications in the digital space. You can also find online tools to assist in this operation. The static PNG files get desired moves by animating like GIF files. The APNG has superior quality when compared to GIF files. As discussed above many professionals opt for APNG files than GIFs.
Part 4 How to Convert GIF to animated PNG?
In this section, you will learn how to convert GIF to animated PNG using online tools. Use the recommended online platform to carry out the quality conversions to acquire desired outcomes.
1. EZGIF
It is an exclusive online space that brings quality animations to GIF files acquiring the properties of APNG. By converting the GIFs to APNG, you can enhance various features like easy storage, best compression, quality elements in the file. When you step into this website, you can perform a wide range of conversion processes between animated and static image files. Choose the right tabs on the menu to trigger the desired changes to the uploaded files.
Choose GIF to APNG tab at the top menu to begin this conversion process. The GIF files will receive all the good functionalities of APNG after this conversion process. You can download the animated PNGs to any platform after a successful conversion.
Follow the below steps to proceed with GIF to animated PNGs using the EZGIF online tool.
Step 1
Go to the website and upload the GIF file by tapping the ‘Choose File’ button. The maximum file size is 50MB that ensures a flawless upload process. Here, you can either choose a file from a local drive or paste the URL from an online source into this webpage flawlessly. Then, click the Upload button to trigger this GIF to the APNG conversion process.
Step 2
Format the output and click the convert button to download the animated PNG files.
It is a simple and yet effective one that helps to convert the GIFs to animated PNGs in no time. You can also use the edit tools to make changes to the GIF files before the conversion process. The converted files are available for downloads at your local system drive. Access them when required and upload them to the desired platform to make fun with your friends and family members.
2. Free convert
In this section, you will be learning how to use the Free convert webpage to carry out the GIF to the animated PNG conversion process. It is a user-friendly interface where the controls are explicit to make the perfect click appropriately. This website provides a secure platform to carry out the conversion process optimally. The uploaded files are deleted automatically after 2 hours. You can expect a quality conversion process to take place on this website.
The stepwise process to convert GIF to animated PNG using the Freeconvert website.
Step 1
Upload the Gif files by tapping the ‘Choose GIF files’ button. This platform supports GIF file sizes up to 1GB.
Step 2
Hit the Convert to APNG button to trigger the conversion process and download the APNG file to desired storage space precisely.
Surf the above steps to carry out a precise conversion process between GIF and animated PNG. After this format conversion process, you can enjoy all the benefits of APNG overcoming the constraints with the GIF files.
These are the two efficient ways of converting the GIF files to APNG format using online web pages. You can choose any one of the websites to carry out the desired APNG conversion process optimally.
Wondershare Filmora
Get started easily with Filmora’s powerful performance, intuitive interface, and countless effects!
Try It Free Try It Free Try It Free Learn More >
AI Portrait – The best feature of Wondershare Filmora for gameplay editing
The AI Portrait is a new add-on in Wondershare Filmora. It can easily remove video backgrounds without using a green screen or chroma key, allowing you to add borders, glitch effects, pixelated, noise, or segmentation video effects.
Conclusion
Thus, this article had given valuable insights on the conversion of GIF to animated PNG files. The enlightening discussion about the GIFs and APNGs assists you to choose the best one from these two options. You must be clear about the differences between these formats and select the ones that meet your needs appropriately. Connect with the above-discussed web pages to carry out the conversion effortlessly with a few clicks. Stay connected with this article to discover the new horizons of animated clippings that excite you during online communications.
Also read:
- Updated How To Turn Yourself Into Anime Character
- Updated Tips on How to Get Awesome Background for Slideshow in PowerPoint
- Updated 2024 Approved Amazing Techniques of Motion Graphics in Premiere Pro
- New 2024 Approved Animate Photo Online with These Awesome Tools
- Updated In 2024, Amazing Ideas About Creating Personalised WhatsApp GIF Sticker
- Updated The 15 Most Efficient Photo to Cartoon Software for Android for 2024
- New How to Make Photo 3D Cartoon Online
- Updated 2024 Approved Best Claymation Shows That Make Your Memories Unforgettable
- New How to Make a GIF in Photoshop
- Techniques for Making After Effects 2D Animation
- New How to Make an Animated Travel Map Video, In 2024
- Updated 15 Types of Cartoon Drawing Styles Examples for 2024
- Updated In 2024, DP Animation Maker Tutorial for Finding The Best Animated Profile Picture Maker
- Updated In 2024, Ways to Master to Find 10 Best Free Animated Text Generator
- Updated How To Learn Cartoon Sketch Drawing— Pencil Sketch for Beginners for 2024
- In 2024, 10 2D/3D Animation Tips & Tricks to Bring New Ideas to You
- Updated 2024 Approved Ways to Master to Find 10 Best Free Animated Text Generator
- New In 2024, 6 Unexpected Ways Gif Animation Maker That Affect Your Marketing
- New 15 Best Video to GIF App on iPhone and Android for 2024
- Updated 2024 Approved Learn Simple Blender Rigging in Only 2 Minutes
- Updated In 2024, How to Make Your Own GIF on WhatsApp in Simple Ways
- New Whats Your No. 1 Maker to Animate Your Logo Online Free
- New 2024 Approved Create or Find Good Morning/Night GIFs
- In 2024, Techniques for Creating Animated Logo That Few People Know About
- New 10 Trendy & Stylish Free Logo Animation Templates
- New 2024 Approved 26 Cool Anime Girl Names and Their Meanings
- In 2024, How to Make Animated Videos for Business Simple Guide
- Updated What Is Motion Graphics
- Samsung ADB Format Tool for PC vs. Other Unlocking Tools Which One is the Best?
- In 2024, How to Bypass Apple iPhone 13 Passcode Easily Video Inside
- How To Track IMEI Number Of Poco M6 Pro 4G Through Google Earth?
- How to Fix My Nubia Red Magic 9 Pro+ Location Is Wrong | Dr.fone
- Can I Bypass a Forgotten Phone Password Of Vivo S17e?
- How To Pause Life360 Location Sharing For Lava Yuva 3 | Dr.fone
- In 2024, How to Change Location on TikTok to See More Content On your Oppo A56s 5G | Dr.fone
- Repair Office 2013 Files (Word, Excel and PowerPoint)on Windows | Stellar
- Quick Fixes for Why Is My Vivo X90S Black and White | Dr.fone
- In 2024, How PGSharp Save You from Ban While Spoofing Pokemon Go On Vivo Y100A? | Dr.fone
- Title: New In 2024, Whats Rigging Animation
- Author: Elon
- Created at : 2024-05-19 03:05:47
- Updated at : 2024-05-20 03:05:47
- Link: https://animation-videos.techidaily.com/new-in-2024-whats-rigging-animation/
- License: This work is licensed under CC BY-NC-SA 4.0.
