
:max_bytes(150000):strip_icc():format(webp)/laptop-569944733df78cafda90169f.jpg)
New In 2024, Why These 10+ Top Text Motion Templates Are Worth Your Attention
Why These 10 Top Text Motion Templates Are Worth Your Attention
Why These 10+ Top Text Motion Templates Are Worth Your Attention
An easy yet powerful editor
Numerous effects to choose from
Detailed tutorials provided by the official channel
If you’re looking to add some ‘text in motion‘ to your video projects, then you’ve come to the right place! We’ve listed some of our favorite Text Motion After Effects and Text Motion Graphics Premiere Pro templates that you can use to get a head start in the realm of adding motion into text! (As a bonus, we’ve also included an overview on text motion and some of the best text motion graphics tutorials that you can refer to when trying out the templates we’ve recommended.)
In this article
01 [What’s Text Motion?](#Part 1)
02 [10 Best Text Motion After Effects](#Part 2)
03 [Tutorials for Making Great Text Motion](#Part 3)
Part 1 What’s Text Motion?
Alright, first of all, let’s answer the big question! Text Motion, what is it and why should you be adding it to your projects ASAP? Well, in regards to the former, the answer is simple: text motion graphics is literally text animation that you can add to your projects to give it an extra bit of life and make it more show-stealing!
In regards to the latter, the answer is in its description! After all, why wouldn’t you want your projects to be able to capture more attention?

Have a look at the screenshot above that we included of an example project on the video editor, Wondershare Filmora . As you can see, we inserted text in motion at the very start. And despite being a still screenshot of said text motion graphics, the preview is eye-catching even when paused!
This is the kind of project that you can do yourself with the right templates and the right video editor. We’ve got your back on the first in the list coming up. And, as for the second, we recommend that you try out Filmora! It is, as you can see, quite an expansive software. One that will allow you to truly make the most of the text motion graphics you’ll be able to create at the end of this article.
Part 2 10 Best Text Motion After Effects
Alright, now let’s move on to our promised Text Motion Graphics After Effects and Text Motion Graphics Premiere Pro templates. We’ve tried our best to pick a variety out for you so that you can have a good selection to choose from! You should also take the time to explore the different platforms where these templates are offered in case you end up needing a different look!
01Clean and Elegant Corporate Identity – Text Reveal (Mogrt)
The first on this list is the ‘Clean and Elegant Corporate Identity — Text Reveal’ by Mogrt. The title is quite explanatory in and of itself, but just in case you’re confused, it’s a template that was designed for professionals and brands to establish their corporate identity. The font is very modern in design, and it comes with several flare variations so that the reveal works out in the way that you want it to.
Other aspects, like the shadow blur, opacity, particle size (for the reveal), and text glossiness are also adjustable and can be changed at will based on your standards.
02Multipurpose Clean 3D Text to Title
The next text motion template is the ‘Multipurpose Clean 3D Text to Title’ also created by Mogrt. This one is text motion graphics that you can use for Premiere Pro and, with proper customization, and be used for just about anything that you want! It’s a very multi-purpose kind of graphic, one that you can maybe sneak in as an advert or for announcing celebrations or anniversaries!
As a final note, if you want to use this graphic as text motion for after effects , it is available for that as well!
03Simple Motion Text | Premiere Pro
This next template, the ‘Simple Motion Text’ graphic, is one that is available for both Premiere Pro and After Effects (though the link we’ve provided is for the Premiere Pro version!) As the name implies, the animation is quite simple, which may be exactly what you want, in any case. It certainly makes it very versatile (especially as you can change font style and color as you will). Making it the perfect template for a beginner that’s just starting out and doesn’t want anything too complicated.
0430 Glitch Text Presets For Premiere Pro | Mogrt
This next template, the ‘30 Glitch Text Presets’ by Mogrt is a Premiere Pro exclusive! It’s also quite fun in its particulars. As a template, it’s not as versatile as the one that we introduced previously, since the ‘glitch’ effect gives off quite the unique vibes, but that doesn’t make it any less potent at catching the eyes of your audience!
The best part, in this case, is that it comes with 30 pre-sets, all with fitting glitch sound effects (included in the pack) that you can use. Of course, there are other customization functions as well, including font style, color, transparency, and so on.
05Comic Bubbles MOGRT
Again, this next templated, called ‘Comic Bubbles’, kind of has its own unique vibe, making it inflexible in some ways but also more fun if that’s the kind of look that you’re looking for. Which, in this case, are literal ‘Comic’ text bubbles, like you would see in your old 90s comic (loud, pop-y, and with lots of bright colors!) The only difference from that to this is that these comic text bubbles move, allowing you to create ‘punchy’ text in between animated projects.
For your reference, there are 80 different comic bubbles included in the pack. All of which are easy to customize and will allow you to adjust colors, text, and transition effects (have a look at the video that we’ve linked if you want to see it in action!)
06Smoke To Text Reveal (Mogrt)
This next template, ‘Smoke to Text Reveal’ is another one that serves a very particular need. To help with visualization, the text motion graphics are at first obscured by smoke before it bubbles up into a crisp, modern text reveal! It’s perfect for those looking for underwater-themed text motion graphics. Or those who want to serve a hint of mystery with the smoke effect.
This is Text Motion Graphics - Premiere Pro. And the best part about it is that you can customize the text and the background at will — allowing you to truly make the template your own and make the most out of the smoke-to-reveal effect.
07Text Messages Toolkit
Want to appeal to the Gen Z audience? Then, the ‘text messages toolkit’ might be a fun text motion graphics for you to try. As you can perhaps surmise from the name, it’s a template that you can use in order to create ‘text message’ interactions. It’s customizable too! You can change the text box color, size, transparency, and just have a ball pimping it out of that’s what you want.
08Large Text Title Block
With the ‘large text title block’ template, you have the flexibility of the naturally more modern and minimalistic design, allowing you to use it for a wide variety of different projects. It works especially well for advertisements, if you’re wondering about potential uses, or as transition graphics between text to video!
09Blueprint Titles
Want something that’s a little quirkier? Or, perhaps, instructional? Then the ‘Blueprint Titles’ template is one that you can consider. As you can perhaps guess from the name, it allows you to create text motion graphics in a style that is similar to the kind of blueprints you usually see when working with design or architecture.
10Dynamic Minimalism
Sometimes, simple really is best! And, this next template, the ‘Dynamic Minimalism’ text motion after effects and text motion graphics premiere pro template is one that you might want in your arsenal just for the sake of your simpler projects! The kit comes with 30 different animations, as well as other customization functions that you can play around with to add a little personality to what are otherwise very minimalistic designs.
Part 3 Tutorials for Making Great Text Motion
For the last part of this article, we’ll be introducing some tutorials that you can refer to while trying out the templates that we recommended! We’ve pulled all of this from YouTube so that you can start learning immediately! And, of course, a variety has been chosen so that you can get your info from more than one source.
01Smooth Professional Text Animation in Premiere Pro - TUTORIAL
The first tutorial we have for you was created by Ignace Aleya on YouTube. This tutorial is a ‘Premiere Pro’ tutorial that focuses on helping beginners and intermediate users alike in understanding the ways of text motion graphics. He offers some pretty good pointers and tricks on keeping the quality of your work high. And the way that he shares his knowledge is pretty solid too! Allowing you to both watch and enjoy the video.
02Easy Title Motion Graphics
This next tutorial is about text motion graphics while working in Adobe After Effects. Like the previous tutorial, it will teach you the basics of using templates! It was posted by SonduckFilm, and the video covers five different “Easy Title Motion Graphics” as examples! Altogether, it’s a great choice if what you’re looking for is tips on making the most out of the templates we introduced on our list.
03Basic Logo Animations
Next, we have a tutorial from the YouTube content creator, Broken! This one is on the subject of both simple and complex logo animations that you can create when working on establishing a brand. It’s a great video for beginners and is quite informative on the subject of customization.
● Key Takeaways from This Episode →
● What is text motion and why do you need to start using it for your own projects ASAP? Well, text motion graphics are, basically, text animation! They’re eye-catching and informative at the same time, making them a great vessel for getting a message across to your audience.
● If you want to start creating text motion graphics yourself, we suggest starting with templates first! At least then, you’ll be able to make yourself comfortable while learning about the opportunities available to you.
● There are many different templates out there that you can try. Some are multi-purpose, some not. We’ve chosen a variety to introduce to you in of this article! Complete with a list of some tutorials in that you can refer to no matter what kind of project you’re working on.
If you’re looking to add some ‘text in motion‘ to your video projects, then you’ve come to the right place! We’ve listed some of our favorite Text Motion After Effects and Text Motion Graphics Premiere Pro templates that you can use to get a head start in the realm of adding motion into text! (As a bonus, we’ve also included an overview on text motion and some of the best text motion graphics tutorials that you can refer to when trying out the templates we’ve recommended.)
In this article
01 [What’s Text Motion?](#Part 1)
02 [10 Best Text Motion After Effects](#Part 2)
03 [Tutorials for Making Great Text Motion](#Part 3)
Part 1 What’s Text Motion?
Alright, first of all, let’s answer the big question! Text Motion, what is it and why should you be adding it to your projects ASAP? Well, in regards to the former, the answer is simple: text motion graphics is literally text animation that you can add to your projects to give it an extra bit of life and make it more show-stealing!
In regards to the latter, the answer is in its description! After all, why wouldn’t you want your projects to be able to capture more attention?
Have a look at the screenshot above that we included of an example project on the video editor, Wondershare Filmora . As you can see, we inserted text in motion at the very start. And despite being a still screenshot of said text motion graphics, the preview is eye-catching even when paused!
This is the kind of project that you can do yourself with the right templates and the right video editor. We’ve got your back on the first in the list coming up. And, as for the second, we recommend that you try out Filmora! It is, as you can see, quite an expansive software. One that will allow you to truly make the most of the text motion graphics you’ll be able to create at the end of this article.
Part 2 10 Best Text Motion After Effects
Alright, now let’s move on to our promised Text Motion Graphics After Effects and Text Motion Graphics Premiere Pro templates. We’ve tried our best to pick a variety out for you so that you can have a good selection to choose from! You should also take the time to explore the different platforms where these templates are offered in case you end up needing a different look!
01Clean and Elegant Corporate Identity – Text Reveal (Mogrt)
The first on this list is the ‘Clean and Elegant Corporate Identity — Text Reveal’ by Mogrt. The title is quite explanatory in and of itself, but just in case you’re confused, it’s a template that was designed for professionals and brands to establish their corporate identity. The font is very modern in design, and it comes with several flare variations so that the reveal works out in the way that you want it to.
Other aspects, like the shadow blur, opacity, particle size (for the reveal), and text glossiness are also adjustable and can be changed at will based on your standards.
02Multipurpose Clean 3D Text to Title
The next text motion template is the ‘Multipurpose Clean 3D Text to Title’ also created by Mogrt. This one is text motion graphics that you can use for Premiere Pro and, with proper customization, and be used for just about anything that you want! It’s a very multi-purpose kind of graphic, one that you can maybe sneak in as an advert or for announcing celebrations or anniversaries!
As a final note, if you want to use this graphic as text motion for after effects , it is available for that as well!
03Simple Motion Text | Premiere Pro
This next template, the ‘Simple Motion Text’ graphic, is one that is available for both Premiere Pro and After Effects (though the link we’ve provided is for the Premiere Pro version!) As the name implies, the animation is quite simple, which may be exactly what you want, in any case. It certainly makes it very versatile (especially as you can change font style and color as you will). Making it the perfect template for a beginner that’s just starting out and doesn’t want anything too complicated.
0430 Glitch Text Presets For Premiere Pro | Mogrt
This next template, the ‘30 Glitch Text Presets’ by Mogrt is a Premiere Pro exclusive! It’s also quite fun in its particulars. As a template, it’s not as versatile as the one that we introduced previously, since the ‘glitch’ effect gives off quite the unique vibes, but that doesn’t make it any less potent at catching the eyes of your audience!
The best part, in this case, is that it comes with 30 pre-sets, all with fitting glitch sound effects (included in the pack) that you can use. Of course, there are other customization functions as well, including font style, color, transparency, and so on.
05Comic Bubbles MOGRT
Again, this next templated, called ‘Comic Bubbles’, kind of has its own unique vibe, making it inflexible in some ways but also more fun if that’s the kind of look that you’re looking for. Which, in this case, are literal ‘Comic’ text bubbles, like you would see in your old 90s comic (loud, pop-y, and with lots of bright colors!) The only difference from that to this is that these comic text bubbles move, allowing you to create ‘punchy’ text in between animated projects.
For your reference, there are 80 different comic bubbles included in the pack. All of which are easy to customize and will allow you to adjust colors, text, and transition effects (have a look at the video that we’ve linked if you want to see it in action!)
06Smoke To Text Reveal (Mogrt)
This next template, ‘Smoke to Text Reveal’ is another one that serves a very particular need. To help with visualization, the text motion graphics are at first obscured by smoke before it bubbles up into a crisp, modern text reveal! It’s perfect for those looking for underwater-themed text motion graphics. Or those who want to serve a hint of mystery with the smoke effect.
This is Text Motion Graphics - Premiere Pro. And the best part about it is that you can customize the text and the background at will — allowing you to truly make the template your own and make the most out of the smoke-to-reveal effect.
07Text Messages Toolkit
Want to appeal to the Gen Z audience? Then, the ‘text messages toolkit’ might be a fun text motion graphics for you to try. As you can perhaps surmise from the name, it’s a template that you can use in order to create ‘text message’ interactions. It’s customizable too! You can change the text box color, size, transparency, and just have a ball pimping it out of that’s what you want.
08Large Text Title Block
With the ‘large text title block’ template, you have the flexibility of the naturally more modern and minimalistic design, allowing you to use it for a wide variety of different projects. It works especially well for advertisements, if you’re wondering about potential uses, or as transition graphics between text to video!
09Blueprint Titles
Want something that’s a little quirkier? Or, perhaps, instructional? Then the ‘Blueprint Titles’ template is one that you can consider. As you can perhaps guess from the name, it allows you to create text motion graphics in a style that is similar to the kind of blueprints you usually see when working with design or architecture.
10Dynamic Minimalism
Sometimes, simple really is best! And, this next template, the ‘Dynamic Minimalism’ text motion after effects and text motion graphics premiere pro template is one that you might want in your arsenal just for the sake of your simpler projects! The kit comes with 30 different animations, as well as other customization functions that you can play around with to add a little personality to what are otherwise very minimalistic designs.
Part 3 Tutorials for Making Great Text Motion
For the last part of this article, we’ll be introducing some tutorials that you can refer to while trying out the templates that we recommended! We’ve pulled all of this from YouTube so that you can start learning immediately! And, of course, a variety has been chosen so that you can get your info from more than one source.
01Smooth Professional Text Animation in Premiere Pro - TUTORIAL
The first tutorial we have for you was created by Ignace Aleya on YouTube. This tutorial is a ‘Premiere Pro’ tutorial that focuses on helping beginners and intermediate users alike in understanding the ways of text motion graphics. He offers some pretty good pointers and tricks on keeping the quality of your work high. And the way that he shares his knowledge is pretty solid too! Allowing you to both watch and enjoy the video.
02Easy Title Motion Graphics
This next tutorial is about text motion graphics while working in Adobe After Effects. Like the previous tutorial, it will teach you the basics of using templates! It was posted by SonduckFilm, and the video covers five different “Easy Title Motion Graphics” as examples! Altogether, it’s a great choice if what you’re looking for is tips on making the most out of the templates we introduced on our list.
03Basic Logo Animations
Next, we have a tutorial from the YouTube content creator, Broken! This one is on the subject of both simple and complex logo animations that you can create when working on establishing a brand. It’s a great video for beginners and is quite informative on the subject of customization.
● Key Takeaways from This Episode →
● What is text motion and why do you need to start using it for your own projects ASAP? Well, text motion graphics are, basically, text animation! They’re eye-catching and informative at the same time, making them a great vessel for getting a message across to your audience.
● If you want to start creating text motion graphics yourself, we suggest starting with templates first! At least then, you’ll be able to make yourself comfortable while learning about the opportunities available to you.
● There are many different templates out there that you can try. Some are multi-purpose, some not. We’ve chosen a variety to introduce to you in of this article! Complete with a list of some tutorials in that you can refer to no matter what kind of project you’re working on.
Top 8 Anime Name Generators Online-Get Cool Anime Names
Top 8 Anime Name Generators Online-Get Cool Anime Names

Shanoon Cox
Mar 27, 2024• Proven solutions
An anime name generator is a cool and fun tool that is used by anime lovers all over the world. This tool helps to create attractive anime names for you depending on your interests in anime or your character traits.
Anime names are used for a variety of purposes by anime lovers. Most of them want a cool anime-related name for their YouTube channel, game profile, twitch profile, etc. and with a large number of users on these platforms, it is difficult to get a unique name.
Also, a name becomes a symbol that represents quality, appearance, shortcomings, personality, etc.
The anime name generators will generate unique anime-related names for the users to choose from. A cool anime name always will attract more audiences to whatever content they are displaying.
Top 8 Anime Name Generators Online
A cool anime name will always attract the attention of people no matter what platform you are on. But not all people are creative enough to create such a name of their own. That is where an anime name generator comes for help.
Let’s have a look at the top 8 anime name generators available online that can be used to create unique anime names.
1. Fantasy Name Generator
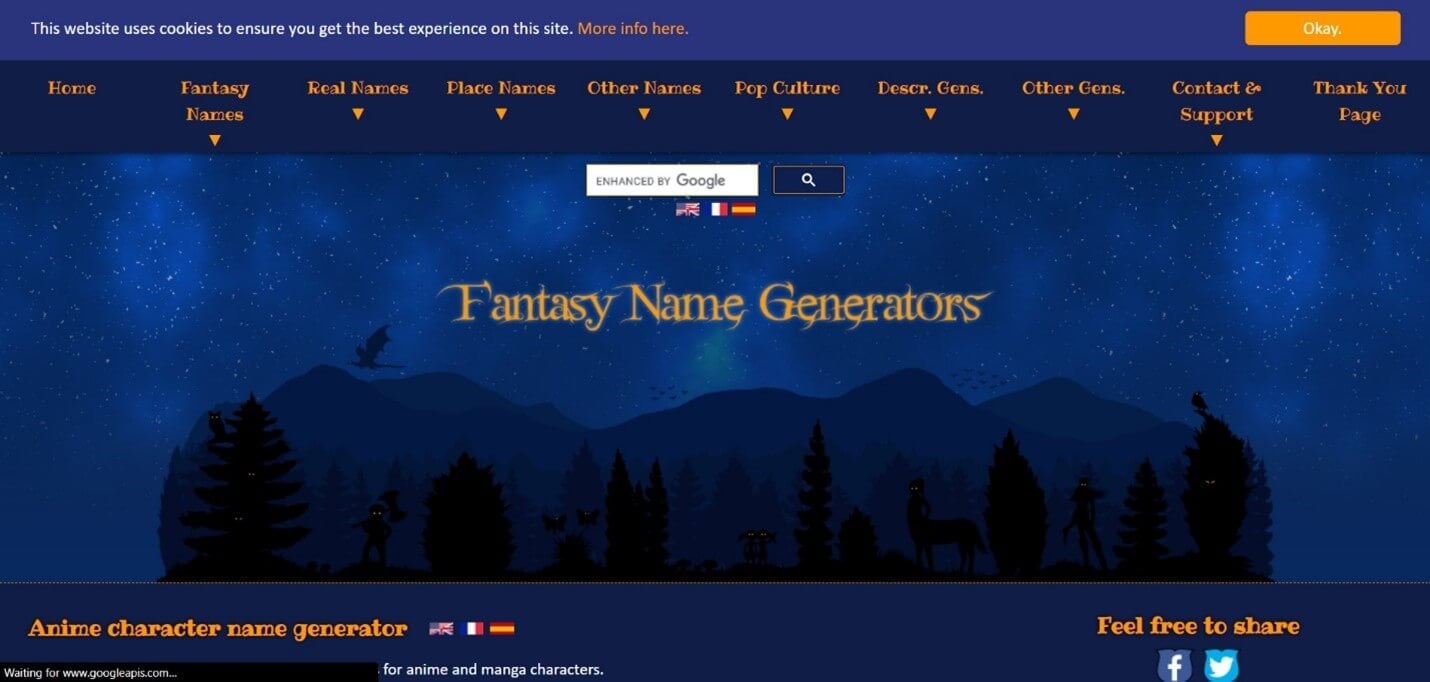
The Fantasy Name Generator is a free application that can provide up to 10 anime and manga character names. The names on this site are divided into 3 categories, namely real names, fake names, and nicknames or unique names. All the names provided are Japanese.
A list of 10 names will be listed on the website when you open it. You can easily choose between male and female character anime names. If you are not satisfied with the displayed list, simply click on the Male names of Females names tab and 10 new random names will be displayed.
2. Cool Generator
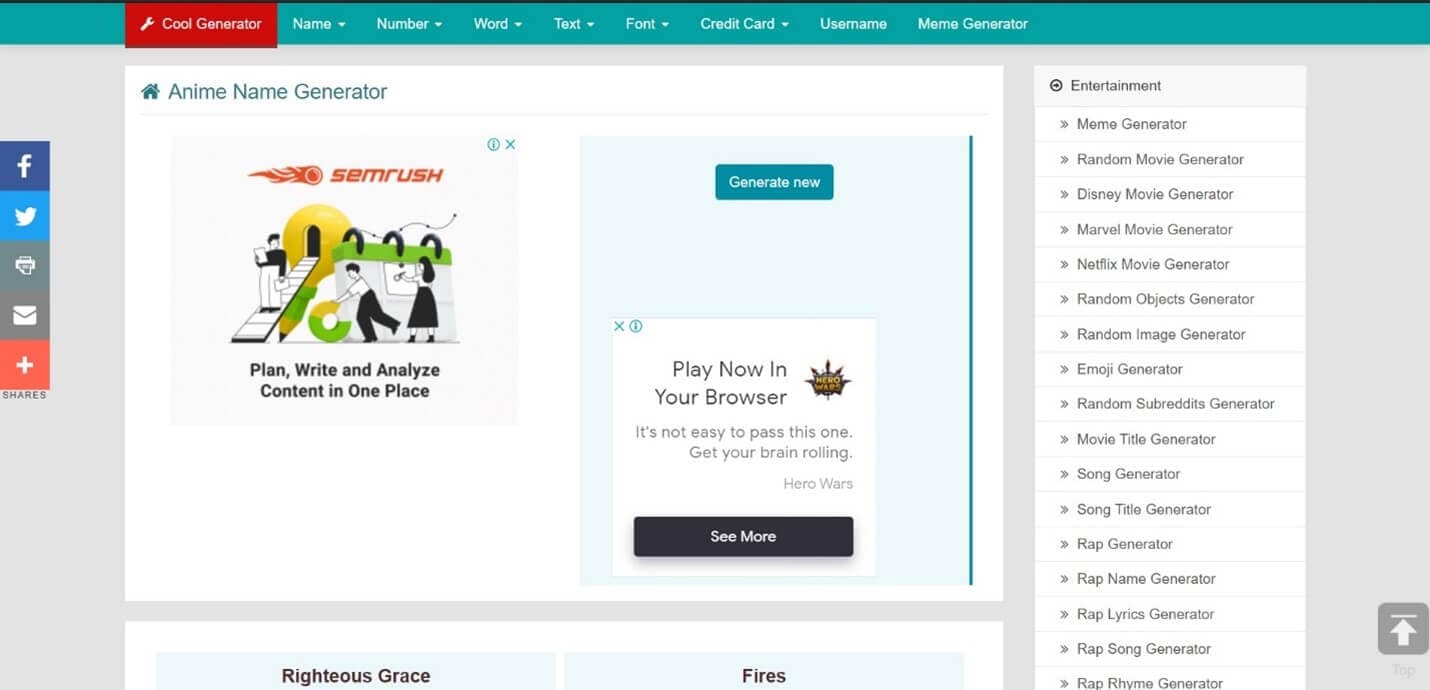
The Cool Generator is another simple anime name generator that can be used to create anime names, clan names, team names, etc. All the anime names generated by this tool are unique and represent different characteristics.
A list of 24 anime names will be displayed when you open the cool generator. You can choose any one of the names from it. If you are not satisfied with the names displayed, you can go for another set of 24 names by tapping on the Generate New tab displayed above.
3. Thestoryshack.com
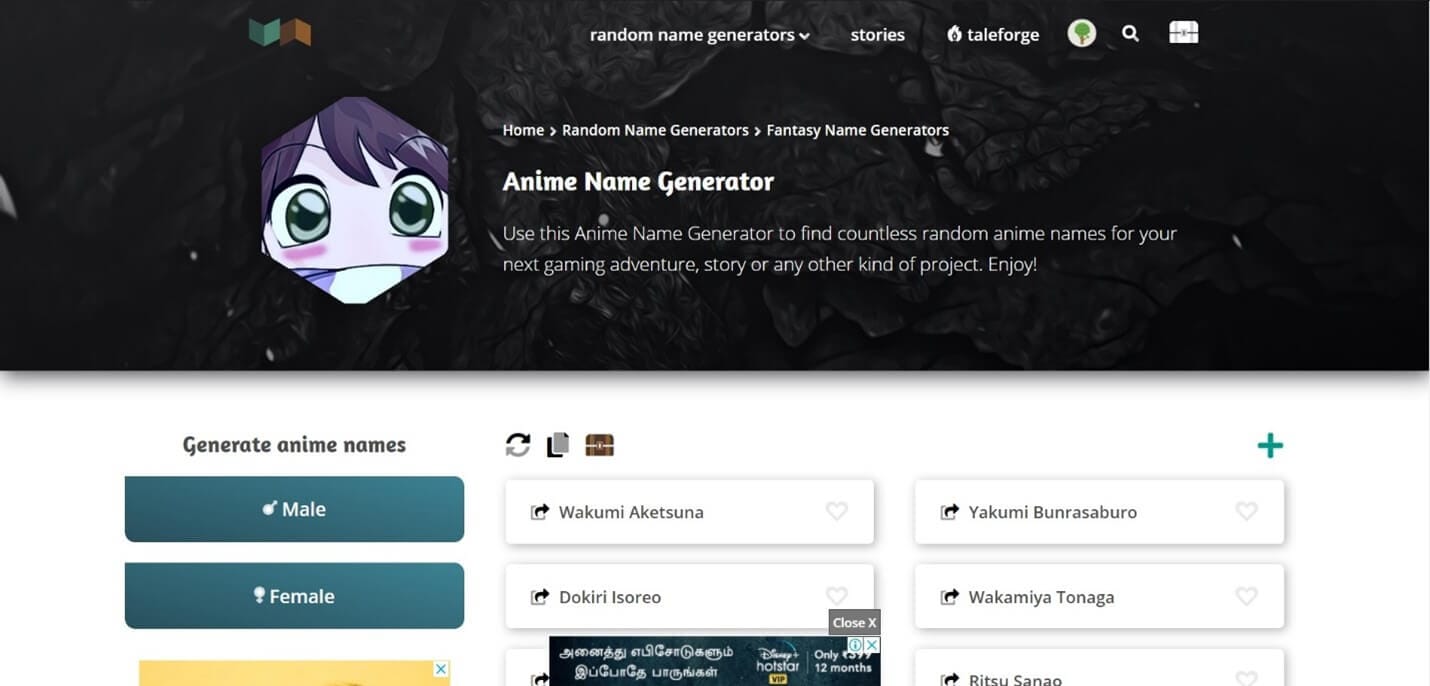
Thestoryshack.com is an awesome anime name generator that can provide you with countless anime names for your story, gaming adventure, or any other project. 6 unique names will be displayed on the page and you can go for more by clicking on the refresh tab.
This anime name-generating tool helps to choose between female and male character names very easily. They have also sorted the names into different categories elf names like elf names, dragon names, demon names, dwarf names, medieval names, Viking names, etc. for the convenience of the users.
4. Masterpiece Generator
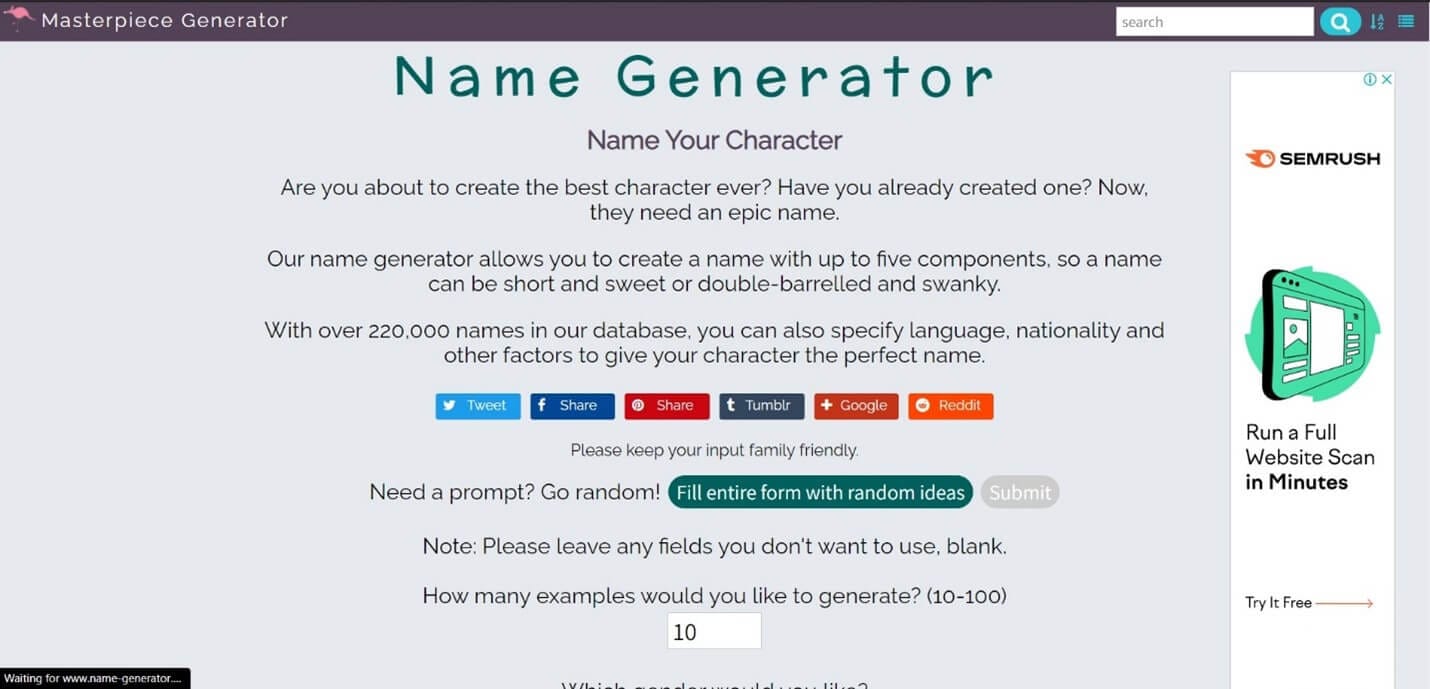
Masterpiece Generator is another free online tool that helps you to create epic anime names. This tool allows you to create names with a maximum of 5 components, and hence you can choose between short and sweet or long and swanky names.
This application takes into account a variety of factors like gender, character title, flavor, character type, birth year, nationality, etc. to create a list of names. Once you have givens your suggestion, a list of names will be displayed on the page after clicking on the Write me some character names tab towards the bottom.
5. Reedsy
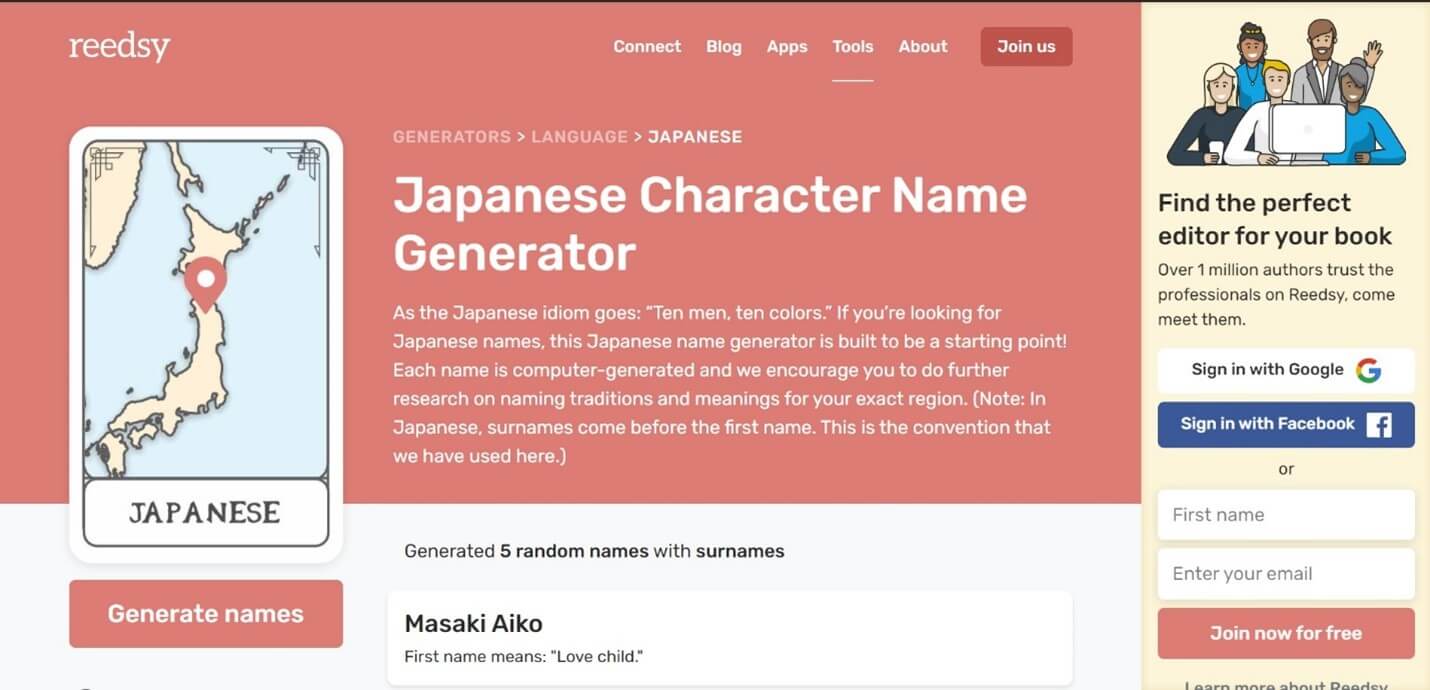
Reedsy is another tool that can generate cool Japanese anime character names for you. All the names are computer-generated and have something to do with their traditions.
A list of five Japanese names will be displayed once you open the page. The meanings of these names will also be mentioned for those who wish to choose names with specific meanings. You can choose the names between random, male, and female options. Clicking on the Generate names tab will always display a new set of names with the meanings.
6. Rumandmonkey.com
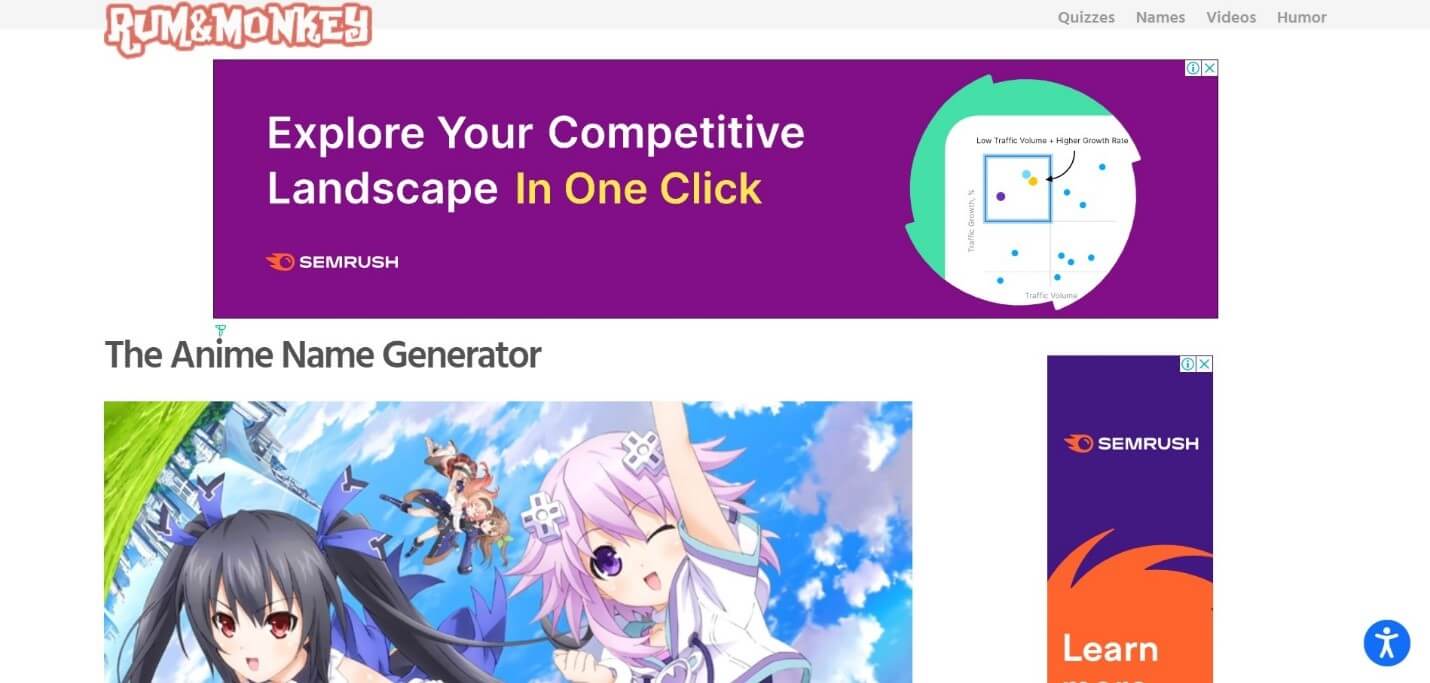
Rumandmonkey.com is a fun anime title generator that you can use to create appealing anime names. A small drawback is the number of ads that keep covering your display when you open the tool.
This anime name generator has classified the character names based on a different generation. You can choose between the greatest generation, baby boomer, generation x, millennials, and generation alpha categories. A variety of other questions will be asked on your likes and dislikes and an anime name will be displayed depending on the answers you have given. This tool only displays 1 name at a time and might require a little patience.
7. Quizony
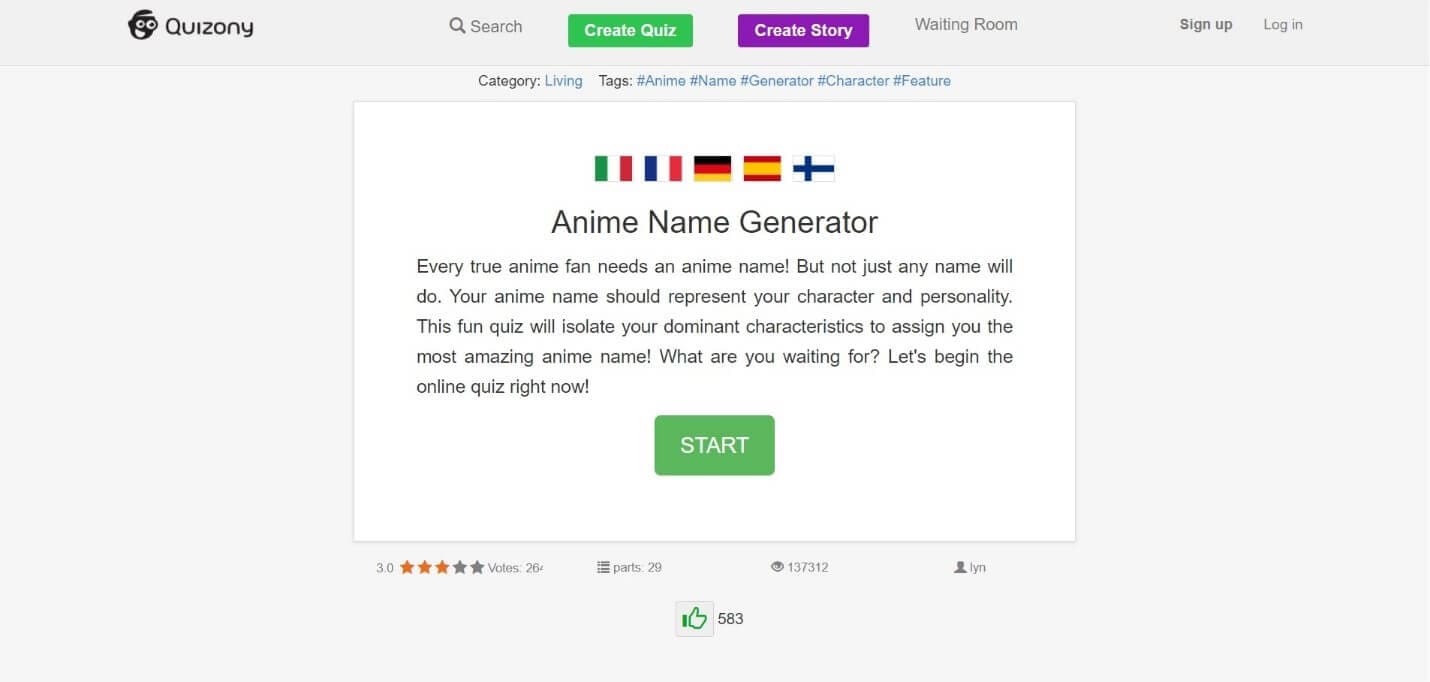
Quizony is a great anime name generator for anime fans out there. The anime names generated by this tool represent the personality and character of the individual.
A series of questions will be asked by this tool to have an idea of likes and dislikes. A small drawback is that about 29 questions must be answered before they provide you with anime names. Once all the questions are answered the tool will choose a unique name for you. This tool has a brilliant way of choosing names but is not a suitable option if you want more than one anime name.
8. Fun Generator
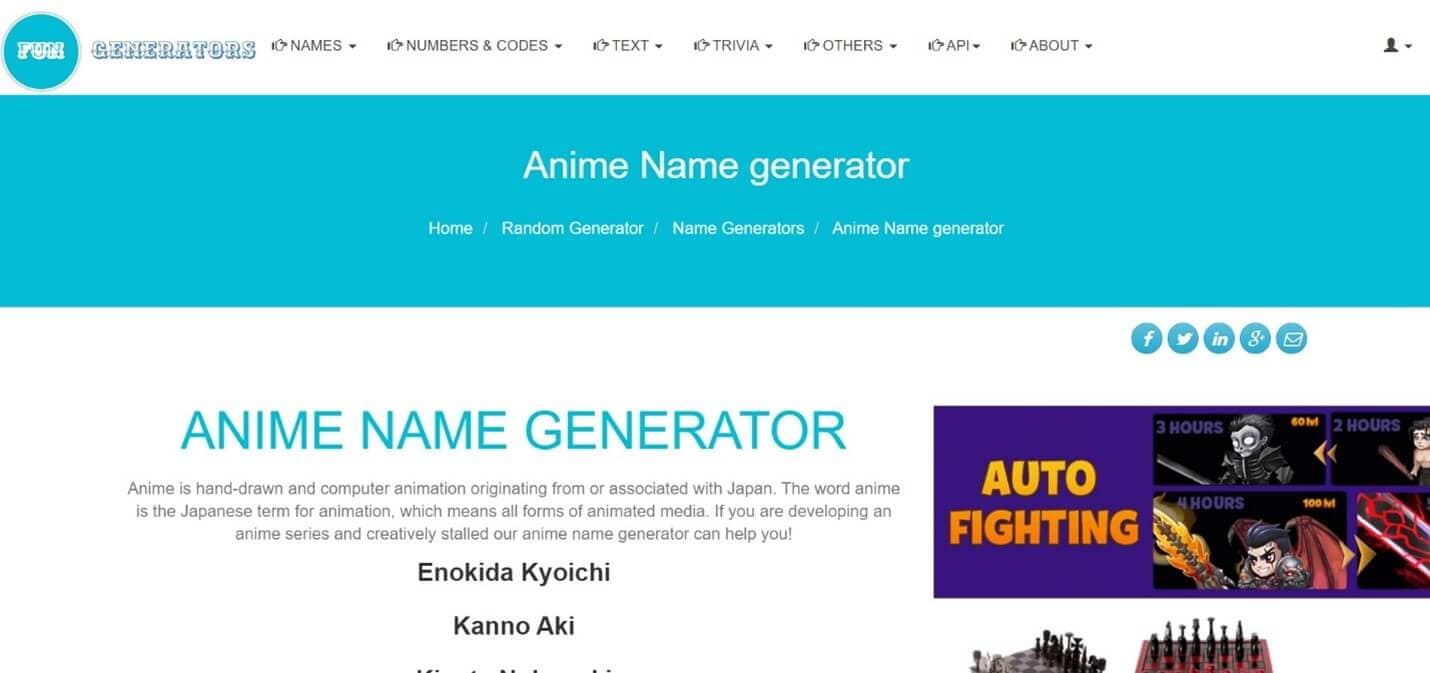
As the name indicates Fun Generator is a very good application for all the fun-seeking anime lovers out there. This tool allows you to choose between a variety of Japanese anime names for your character.
A list of 5 different anime character names will be displayed when you open the site. You can either choose any one of them or go for another set by clicking on the tabs below. They also have options to choose from random, male or female character names.
Conclusion
Anime names are used by many anime lovers all over the world as their user name, profile name, etc. most people tend to keep this name for a lifetime. But not everyone can create an anime name that defines them and which is already not taken.
This problem is solved by anime name generators that are freely available online nowadays. These anime name generators help to create unique anime names that are appealing and tailored to the character traits of the individual.
We have listed the best online anime title generators available above. Choose an attractive anime name for yourself and have fun.
Shanoon Cox
Shanoon Cox is a writer and a lover of all things video.
Follow @Shanoon Cox
Shanoon Cox
Mar 27, 2024• Proven solutions
An anime name generator is a cool and fun tool that is used by anime lovers all over the world. This tool helps to create attractive anime names for you depending on your interests in anime or your character traits.
Anime names are used for a variety of purposes by anime lovers. Most of them want a cool anime-related name for their YouTube channel, game profile, twitch profile, etc. and with a large number of users on these platforms, it is difficult to get a unique name.
Also, a name becomes a symbol that represents quality, appearance, shortcomings, personality, etc.
The anime name generators will generate unique anime-related names for the users to choose from. A cool anime name always will attract more audiences to whatever content they are displaying.
Top 8 Anime Name Generators Online
A cool anime name will always attract the attention of people no matter what platform you are on. But not all people are creative enough to create such a name of their own. That is where an anime name generator comes for help.
Let’s have a look at the top 8 anime name generators available online that can be used to create unique anime names.
1. Fantasy Name Generator
The Fantasy Name Generator is a free application that can provide up to 10 anime and manga character names. The names on this site are divided into 3 categories, namely real names, fake names, and nicknames or unique names. All the names provided are Japanese.
A list of 10 names will be listed on the website when you open it. You can easily choose between male and female character anime names. If you are not satisfied with the displayed list, simply click on the Male names of Females names tab and 10 new random names will be displayed.
2. Cool Generator
The Cool Generator is another simple anime name generator that can be used to create anime names, clan names, team names, etc. All the anime names generated by this tool are unique and represent different characteristics.
A list of 24 anime names will be displayed when you open the cool generator. You can choose any one of the names from it. If you are not satisfied with the names displayed, you can go for another set of 24 names by tapping on the Generate New tab displayed above.
3. Thestoryshack.com
Thestoryshack.com is an awesome anime name generator that can provide you with countless anime names for your story, gaming adventure, or any other project. 6 unique names will be displayed on the page and you can go for more by clicking on the refresh tab.
This anime name-generating tool helps to choose between female and male character names very easily. They have also sorted the names into different categories elf names like elf names, dragon names, demon names, dwarf names, medieval names, Viking names, etc. for the convenience of the users.
4. Masterpiece Generator
Masterpiece Generator is another free online tool that helps you to create epic anime names. This tool allows you to create names with a maximum of 5 components, and hence you can choose between short and sweet or long and swanky names.
This application takes into account a variety of factors like gender, character title, flavor, character type, birth year, nationality, etc. to create a list of names. Once you have givens your suggestion, a list of names will be displayed on the page after clicking on the Write me some character names tab towards the bottom.
5. Reedsy
Reedsy is another tool that can generate cool Japanese anime character names for you. All the names are computer-generated and have something to do with their traditions.
A list of five Japanese names will be displayed once you open the page. The meanings of these names will also be mentioned for those who wish to choose names with specific meanings. You can choose the names between random, male, and female options. Clicking on the Generate names tab will always display a new set of names with the meanings.
6. Rumandmonkey.com
Rumandmonkey.com is a fun anime title generator that you can use to create appealing anime names. A small drawback is the number of ads that keep covering your display when you open the tool.
This anime name generator has classified the character names based on a different generation. You can choose between the greatest generation, baby boomer, generation x, millennials, and generation alpha categories. A variety of other questions will be asked on your likes and dislikes and an anime name will be displayed depending on the answers you have given. This tool only displays 1 name at a time and might require a little patience.
7. Quizony
Quizony is a great anime name generator for anime fans out there. The anime names generated by this tool represent the personality and character of the individual.
A series of questions will be asked by this tool to have an idea of likes and dislikes. A small drawback is that about 29 questions must be answered before they provide you with anime names. Once all the questions are answered the tool will choose a unique name for you. This tool has a brilliant way of choosing names but is not a suitable option if you want more than one anime name.
8. Fun Generator
As the name indicates Fun Generator is a very good application for all the fun-seeking anime lovers out there. This tool allows you to choose between a variety of Japanese anime names for your character.
A list of 5 different anime character names will be displayed when you open the site. You can either choose any one of them or go for another set by clicking on the tabs below. They also have options to choose from random, male or female character names.
Conclusion
Anime names are used by many anime lovers all over the world as their user name, profile name, etc. most people tend to keep this name for a lifetime. But not everyone can create an anime name that defines them and which is already not taken.
This problem is solved by anime name generators that are freely available online nowadays. These anime name generators help to create unique anime names that are appealing and tailored to the character traits of the individual.
We have listed the best online anime title generators available above. Choose an attractive anime name for yourself and have fun.
Shanoon Cox
Shanoon Cox is a writer and a lover of all things video.
Follow @Shanoon Cox
Top 12 Illusion Gifs: Top Picks
Best 12 Illusion Gifs: Top Picks
An easy yet powerful editor
Numerous effects to choose from
Detailed tutorials provided by the official channel
Do you know that these are reaching heights and people are very happy in sharing them? If you are unaware of it, don’t worry and keep reading. Thorugh today’s post, we will discuss illusion GIF in detail yo make it easy for you to make up your mind and try your hands on it.
In this article
01 [What Is GIF Illustration?](#Part 1)
02 [Best 12 Illusion Gifs](#Part 2)
Part 1 What Is GIF Illustration?
GIFs are a form of digital media that is used to show animations and other types of visuals. It is a type of file format that can be created with different editing software. These are usually used for short videos or images on the internet and social media.
Furthermore, GIFs are an excellent way to create visual content for social media posts or as an animated overlay on a video.
These are now used as everything from advertisements to commentary from all walks of life. The users of GIFs seem to be endless! They can be used in many different ways, such as to add visual interest, provide context or even humor, and so on. It is totally on the user how they are considering it to make the things more relevant to the context for which they have created or shared the GIF.
Part 2 Best 12 Illusion Gifs
This curated list will help you to know the best Illusion GIF that is still ruling out the market. This includes:-
01Van Gogh Stare GIF
The Van Gogh Stare, also known as the “dazzle camouflage,” is an optical illusion created by artist Vincent van Gogh. It was likely intended to represent the eye’s instability and movement. The image has been used in a variety of ways, including on social media sites like Tumblr. In general, this GIF illusion is a demonstration of the Van Gogh Stare.
02This brain-busting rotation
We are all used to seeing the world around us in two dimensions. But what if we could see it in three dimensions? Well, now you can! This GIF shows a rotating 3D object that appears to be made of cubes. The illusion is created by the fact that the camera rotates around the object, but you can’t see it from every angle.
03This loop tea GIF
This GIF illusion is a perfect example of how our brain works. When we see something that doesn’t make sense, we try to make sense of it by filling in the gaps with what we believe it should look like. The GIF illusion consists of two frames. The first frame shows a woman drinking tea from a cup, and the second frame shows her drinking from an empty cup. When our brain tries to fill in the gaps, it assumes that the woman drank all of the tea and sees her as drinking from an empty cup even though she is actually drinking from a full one.
04No smkoing! Well, you should never
The GIF illusion consists of two images: one of a cloud and another of cauliflower. The animation starts with the cloud and then switches to the cauliflower. But if you take a closer look, you’ll notice that there’s actually no smoke in the first image, just the cauliflower. And it’s not really a head either - it’s just an ordinary cauliflower from behind.
The reason why this illusion works is that our brains are wired to see patterns and shapes in things that aren’t always there - for example, when we see faces in random objects or shapes in clouds. This GIF takes advantage of that by showing two images where these are
05The never-ending corridor
The GIF illusion is a rather simple illusion that takes advantage of the way our brains perceive motion. Our brains are programmed to see a moving object as a single object in order to make sense of the world around us. This means that when we see an object moving, we perceive it as one solid thing instead of many separate objects.
This GIF illusion is a perfect example of how the human brain works. The brain can’t process that the two images are different, and instead, it sees them as a single image.
06Now, this, the eye-pleaser
The illusion works on the principle of depth perception and how our eyes are not able to accurately process all of the information that they receive from our surroundings. The black lines on the white background make it seem like there are two rows of lines, but there’s only one row that appears to be moving back and forth.
07Commercial At design GIF
The GIF illusion is a simple design that tricks the brain into thinking that it is 3D. The design consists of two circles, one inside the other, with three arrows pointing inwards. The outside circle has a white background and the inside circle has a black background. When you look at this design from different angles, you will see that the arrows point outwards and not inwards as they should be doing.
08Wait what? Is this truly a reflection?
This illusion works because our brain recognizes that the mirror image is not what’s really happening and flips the image in our head to make it right-side up.
It’s also possible that we are tricked by the fact that we know mirrors flip images, so when we see an upside-down image in front of us, we automatically assume it’s just inverted.
09This haunting tableau (Not exactly a GIF but worth sharing)
The GIF illusion is a type of optical illusion that can be explained by the Gestalt Principles. The Gestalt Principles are guidelines for how we perceive and organize visual information. This optical illusion is created by overlapping two similar images on top of each other in the same place but with different colors. Our brain perceives this as a single image, and our eyes try to make sense of it by looking for visual cues in the image. When we focus on one image, it looks like a triangle with a red line going through it. But when we focus on the other image, it looks like an arrow pointing up that has been cut in half with a red line through it.
10This safety hazard
This GIF illusion is a safety hazard because it tricks the brain into thinking that the person in front of them is standing still. When you stare at this GIF for too long, the person will appear to be moving backward. This illusion can cause accidents if you believe that a person is still when they are actually approaching you.
11Welcome to the 3d World
It’s an illusion created by the use of perspective. The camera is positioned in such a way that it appears that the three-dimensional cube is only two-dimensional.
The camera is positioned in such a way that it appears that the three-dimensional cube is only two-dimensional.
12I will keep this table forever
The GIF illusion is an optical illusion that makes the table in the background appear to be bigger than it actually is. The table in front of the window appears to be smaller and closer to the viewer. There are two factors that make this illusion happen. One of them is perspective, which makes objects appear larger as they get closer and smaller as they get farther away. The other factor is size constancy, which makes objects look about the same size regardless of how far away they are from you.
Part 3 How Do You Make a GIF Illustration?
If you are someone who is curious to make a GIF illustration but have no clue how to make it, then the online portals are catering to all your needs. Right now, there are multiple tools available that will help you to create the illustration seamlessly. Among all of them, we suggest you try your hands on Filmora.
Wondershare Filmora Video Editor is one of the best tools available to make the gift illustration as you want. You just need to upload the content, and then you are all set to edit it at your convenience. The best part is the interface of the tool is very simple to understand, which simply means there will be no need for you to belong to any technical background to use this tool.

Wondershare Filmora - Best Video Editor for Mac/Windows
5,481,435 people have downloaded it.
Build unique custom animations without breaking a sweat.
Focus on creating epic stories and leave the details to Filmora’s auto features.
Start a creative adventure with drag & drop effects and endless possibilities.
Filmora simplifies advanced features to save you time and effort.
Filmora cuts out repetition so you can move on to your next creative breakthrough.
Along with creating the GIF files, it also help you to do the editing as you wanted. For example, if you are looking forward to reading on any text to the GIF file, you can also do it seamlessly. The interface will help you to understand how you can do it so that there will be no problem in creating the content as you want.
● Key Takeaways from This Episode →
● Filmora is the best tool to create illusion GIF.
●Illusion GIF are in use for advertisement.
●Creating illusion GIF is just a matter of few steps.
Do you know that these are reaching heights and people are very happy in sharing them? If you are unaware of it, don’t worry and keep reading. Thorugh today’s post, we will discuss illusion GIF in detail yo make it easy for you to make up your mind and try your hands on it.
In this article
01 [What Is GIF Illustration?](#Part 1)
02 [Best 12 Illusion Gifs](#Part 2)
Part 1 What Is GIF Illustration?
GIFs are a form of digital media that is used to show animations and other types of visuals. It is a type of file format that can be created with different editing software. These are usually used for short videos or images on the internet and social media.
Furthermore, GIFs are an excellent way to create visual content for social media posts or as an animated overlay on a video.
These are now used as everything from advertisements to commentary from all walks of life. The users of GIFs seem to be endless! They can be used in many different ways, such as to add visual interest, provide context or even humor, and so on. It is totally on the user how they are considering it to make the things more relevant to the context for which they have created or shared the GIF.
Part 2 Best 12 Illusion Gifs
This curated list will help you to know the best Illusion GIF that is still ruling out the market. This includes:-
01Van Gogh Stare GIF
The Van Gogh Stare, also known as the “dazzle camouflage,” is an optical illusion created by artist Vincent van Gogh. It was likely intended to represent the eye’s instability and movement. The image has been used in a variety of ways, including on social media sites like Tumblr. In general, this GIF illusion is a demonstration of the Van Gogh Stare.
02This brain-busting rotation
We are all used to seeing the world around us in two dimensions. But what if we could see it in three dimensions? Well, now you can! This GIF shows a rotating 3D object that appears to be made of cubes. The illusion is created by the fact that the camera rotates around the object, but you can’t see it from every angle.
03This loop tea GIF
This GIF illusion is a perfect example of how our brain works. When we see something that doesn’t make sense, we try to make sense of it by filling in the gaps with what we believe it should look like. The GIF illusion consists of two frames. The first frame shows a woman drinking tea from a cup, and the second frame shows her drinking from an empty cup. When our brain tries to fill in the gaps, it assumes that the woman drank all of the tea and sees her as drinking from an empty cup even though she is actually drinking from a full one.
04No smkoing! Well, you should never
The GIF illusion consists of two images: one of a cloud and another of cauliflower. The animation starts with the cloud and then switches to the cauliflower. But if you take a closer look, you’ll notice that there’s actually no smoke in the first image, just the cauliflower. And it’s not really a head either - it’s just an ordinary cauliflower from behind.
The reason why this illusion works is that our brains are wired to see patterns and shapes in things that aren’t always there - for example, when we see faces in random objects or shapes in clouds. This GIF takes advantage of that by showing two images where these are
05The never-ending corridor
The GIF illusion is a rather simple illusion that takes advantage of the way our brains perceive motion. Our brains are programmed to see a moving object as a single object in order to make sense of the world around us. This means that when we see an object moving, we perceive it as one solid thing instead of many separate objects.
This GIF illusion is a perfect example of how the human brain works. The brain can’t process that the two images are different, and instead, it sees them as a single image.
06Now, this, the eye-pleaser
The illusion works on the principle of depth perception and how our eyes are not able to accurately process all of the information that they receive from our surroundings. The black lines on the white background make it seem like there are two rows of lines, but there’s only one row that appears to be moving back and forth.
07Commercial At design GIF
The GIF illusion is a simple design that tricks the brain into thinking that it is 3D. The design consists of two circles, one inside the other, with three arrows pointing inwards. The outside circle has a white background and the inside circle has a black background. When you look at this design from different angles, you will see that the arrows point outwards and not inwards as they should be doing.
08Wait what? Is this truly a reflection?
This illusion works because our brain recognizes that the mirror image is not what’s really happening and flips the image in our head to make it right-side up.
It’s also possible that we are tricked by the fact that we know mirrors flip images, so when we see an upside-down image in front of us, we automatically assume it’s just inverted.
09This haunting tableau (Not exactly a GIF but worth sharing)
The GIF illusion is a type of optical illusion that can be explained by the Gestalt Principles. The Gestalt Principles are guidelines for how we perceive and organize visual information. This optical illusion is created by overlapping two similar images on top of each other in the same place but with different colors. Our brain perceives this as a single image, and our eyes try to make sense of it by looking for visual cues in the image. When we focus on one image, it looks like a triangle with a red line going through it. But when we focus on the other image, it looks like an arrow pointing up that has been cut in half with a red line through it.
10This safety hazard
This GIF illusion is a safety hazard because it tricks the brain into thinking that the person in front of them is standing still. When you stare at this GIF for too long, the person will appear to be moving backward. This illusion can cause accidents if you believe that a person is still when they are actually approaching you.
11Welcome to the 3d World
It’s an illusion created by the use of perspective. The camera is positioned in such a way that it appears that the three-dimensional cube is only two-dimensional.
The camera is positioned in such a way that it appears that the three-dimensional cube is only two-dimensional.
12I will keep this table forever
The GIF illusion is an optical illusion that makes the table in the background appear to be bigger than it actually is. The table in front of the window appears to be smaller and closer to the viewer. There are two factors that make this illusion happen. One of them is perspective, which makes objects appear larger as they get closer and smaller as they get farther away. The other factor is size constancy, which makes objects look about the same size regardless of how far away they are from you.
Part 3 How Do You Make a GIF Illustration?
If you are someone who is curious to make a GIF illustration but have no clue how to make it, then the online portals are catering to all your needs. Right now, there are multiple tools available that will help you to create the illustration seamlessly. Among all of them, we suggest you try your hands on Filmora.
Wondershare Filmora Video Editor is one of the best tools available to make the gift illustration as you want. You just need to upload the content, and then you are all set to edit it at your convenience. The best part is the interface of the tool is very simple to understand, which simply means there will be no need for you to belong to any technical background to use this tool.
Wondershare Filmora - Best Video Editor for Mac/Windows
5,481,435 people have downloaded it.
Build unique custom animations without breaking a sweat.
Focus on creating epic stories and leave the details to Filmora’s auto features.
Start a creative adventure with drag & drop effects and endless possibilities.
Filmora simplifies advanced features to save you time and effort.
Filmora cuts out repetition so you can move on to your next creative breakthrough.
Along with creating the GIF files, it also help you to do the editing as you wanted. For example, if you are looking forward to reading on any text to the GIF file, you can also do it seamlessly. The interface will help you to understand how you can do it so that there will be no problem in creating the content as you want.
● Key Takeaways from This Episode →
● Filmora is the best tool to create illusion GIF.
●Illusion GIF are in use for advertisement.
●Creating illusion GIF is just a matter of few steps.
Nurturing the Spirit Through the Top 10 Intellectual Anime Websites
Best 10 Anime Websites to Watch Dubbed Anime Free
Shanoon Cox
Mar 27, 2024• Proven solutions
Who hasn’t heard of all-time favorite Pokémon or Dragon Ball Z? Well, none! Whether you watch anime , fan or not, these two are the most popular anime of all time. These series have proven to be life-learning lessons with stories based on friendship, love, social values, harmony, and heroism. As a perfect pastime for kids and adults alike, anime has become a popular entertainment show.
What’s more lucrative is many of these websites offer free access to a wide range of anime movies , cartoons, and TV shows. Although the numbers are high; still, it isn’t easy to find free dubbed anime websites with quality content and video streaming. So, we have listed the best 10 websites to watch dubbed anime online and free:
- 1.123anime
- 2. Anime-Planet
- 3. 9Anime
- 4. Gogoanime
- 5. Dubbedanime.net
- 6. AnimeLand
- 7. Anime Lab
- 8. Crunchyroll
- 9. AniMixPlay
- 10. AnimeFever
![]()
A cross-platform for making videos anywhere for all creators

Why your video editing isn’t good enough? How about some creative inspo?
- 100 Million+ Users
- 150+ Countries and Regions
- 4 Million+ Social Media Followers
- 5 Million+ Stock Media for Use
* Secure Download

01 123anime
It is the most popular and best to watch free dubbed anime movies and TV shows. With millions of viewers every day, this anime site provides more than 10,000 anime, films, and videos with English subtitles and dubbing.
Here, you can find multiple Japanese anime movies and shows such as The Legend of Zelda, Ghost in Shell, and many others. Watch it online or download it for later viewing. Thanks to easy navigation and a clean user interface, the website is liked by teens and adults globally.
Fast streaming, no “clickable” mobile ads, and an extensive library make 123anime number one anime website on our list. Offering multiple viewing options, it caters to the varying needs of different viewer types.
02 Anime-Planet
Established in 2001, Anime-Planet collaborates with manga and other paid platforms such as Hulu to provide 45,000+ animation shows free of cost. Search through the extensive collection of Anime-Planet and other paid websites to fulfill your anime cravings.
Its intuitive and interactive interface makes anime consumption easy and fun for users of all ages. You can even create your list of anime shows and find recommendations based on your search, interests, and previously viewed videos.
You can also build a community of anime fans worldwide while also participating in forums and anime character-ranking platforms for a shared experience. With more than 11 million users per month, the platform is quite popular, where you can watch and stream videos without creating an account.
03 9Anime
It is one of the unique anime websites with high-quality video streaming with 1080p. You can watch anime movies and shows of various genres, including romance, comedy, drama, and action. Moreover, it also offers Original Video Animations, where you can watch non-commercial, authentic animations of all times.
With its easy search option, you can easily find the latest, trending, and most popular movies and anime shows. You can also filter videos based on seasons, language, year, and video quality. The website works in all major regions globally, including the US, UK, Philippines, Australia, Netherlands, Canada, Malaysia, and Singapore.
04 Gogoanime
Gogoanime is yet another free dubbed anime website with a fantastic viewing and video streaming experience. Its sleek interface and user-friendly navigation make it a top choice for frugal like us. You can watch and download the latest and the oldest anime shows collection; Gogoanime is for all anime fans.
The recent ones top the chart while the titles are arranged alphabetically, yearly, popularity, and release date for quick and easy search. It has anime videos, movies, and shows on horror, kids, action, cars, and games. You get to find the latest Chinese, dubbed animation shows free of cost.
Despite being free, the anime website doesn’t contain spammy and annoying ads.
05 Dubbedanime.net
Dubbedanime.net is a leading anime entertainment website with a massive collection of anime shows and videos. You can watch, stream and enjoy your favorite anime shows online free of cost.
The streaming is fast, and video quality is high; therefore, offering you a pleasant experience. However, it may contain few ads, but they are not pop-ups. That is why you have an uninterrupted watch time. Besides, you can even use adblockers for ad-free video streaming.
As the best free dubbed anime websites, millions of anime videos are uploaded daily. You can watch dubbed anime online as much as you want and search them through title name or release date.
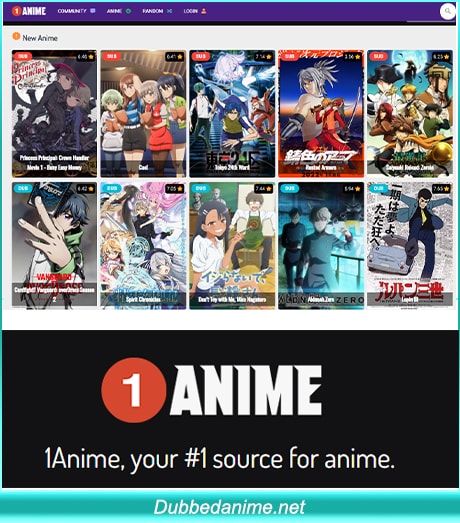
06 AnimeLand
It is the most popular platform with a wide range of English dubbed Japanese anime videos. Without creating an account or login ID, you can watch and download your favorite anime shows and movies without any disruptions.
Due to its high-quality videos between 480p-1080p HD, the platform offers an incomparable experience. Its 1.1 million viewers per month can access to latest and most recent animations. Naruto, One Piece, My Hero Academia and Attack of Titan with English dubbing are its most popular seasons.
You can find your favorite anime show on the Homepage or filter it based on Latest Updates, Dubbed List, and Movie List. Moreover, you can also search it manually by typing the title in the search bar. With its clean and simple navigation, the platform is easy and fun to use.
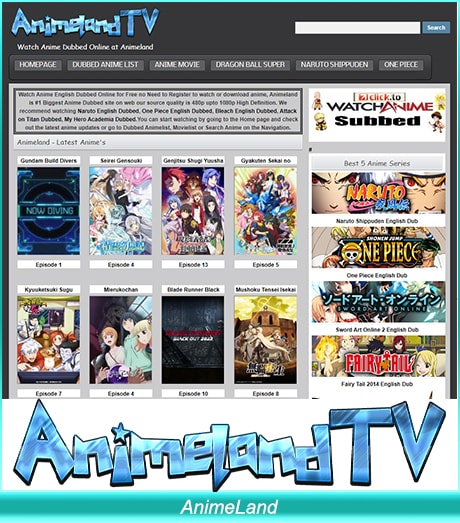
07 Anime Lab
Anime Lab showcases subbed and dubbed anime content for viewers in New Zealand and Australia only. With millions of videos in the gallery, the website hosts every known anime show that you can watch online.
Demon Slayer is its most popular Anime show among kids and adults for its riveting storyline, vivid graphics, and enthralling characters. You can find your favorite drama, idol, action, and horror anime videos in HD, making watch time fun and easy on the eyes.
Besides, it works on multiple devices, so you can binge-watch alone on your phone or have a movie night with friends. However, AnimeLab charges AUD 7.99 as a subscription fee to access shows broadcasted the same day.
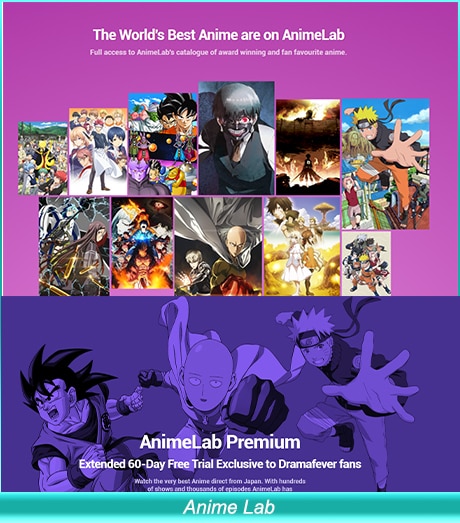
08 Crunchyroll
Crunchyroll is a veteran dubbed anime website credited for introducing anime culture in the western world. It offers access to the latest Asian dramas, anime series, and manga productions that you won’t find anywhere else.
You can use the free standard version, having a vast library of anime shows, movies, and games infiltrated with pop-up ads. However, you can subscribe for a premium version for $7.99-8.99 for an ad-free watch time.
Searching on the platform is easy and quick; you can find your favorite anime based on genre, popularity, and seasons. It boasts an online store for exciting anime merchandise and the latest updates on your favorite anime show, character, or other property. Crunchyroll is a flag bearer and on-stop shop for hardcore anime fans. The website is accessible in more than 180 countries.
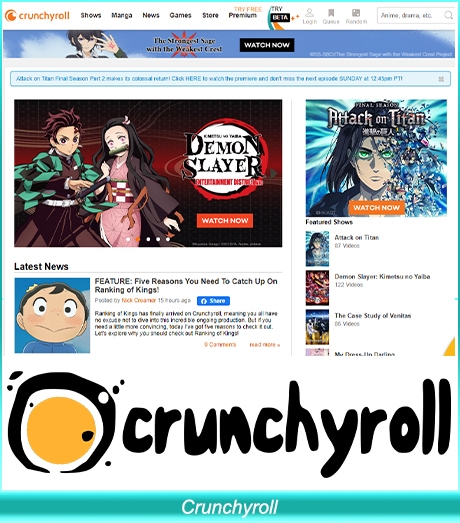
09 AniMixPlay
It is a free platform to watch dubbed anime online in English voiceover and subtitles. You can even create your list of favorite shows and popular choices that meet your preferences and interests. The website offers various streaming options for each anime show to find one that works best on your device.
Moreover, mobile owners can also schedule their watch time and list videos. Finding your favorite show is relatively easy as you can navigate through New Episodes, Updates, Recent, Popular, and Movie categories. Filter the list based on season, year, genre, stream type, and language.
If you’re not sure of your anime choice, read out the synopsis and OP/ED or watch the trailer.
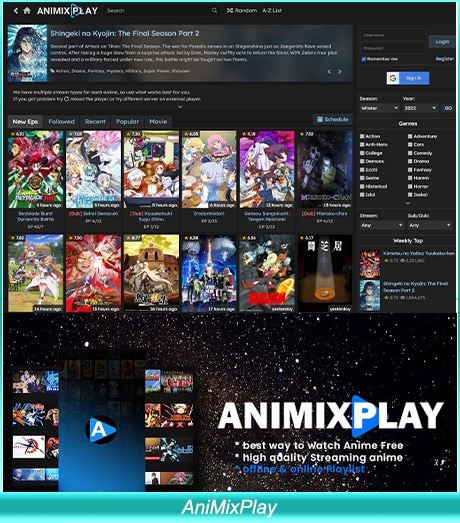
10 AnimeFever
Animefever is an easy-to-use platform with an extensive range of shows, videos, and movies. You can manually search for the title or filter the list based on genre, status, type, parental ratings, season, and year. This makes it a friendly platform for kids as they can automatically filter out adult and age-inappropriate content.
Having the latest collection of videos, shows, and movies, viewers can find anime that hasn’t yet been aired on TV or anywhere else. You can also schedule the showtime as per your convenience and free time to ensure you don’t miss the latest updates.
While guest watching is permissible on the site, registering your account ensures the platform remembers your choices and makes recommendations accordingly.
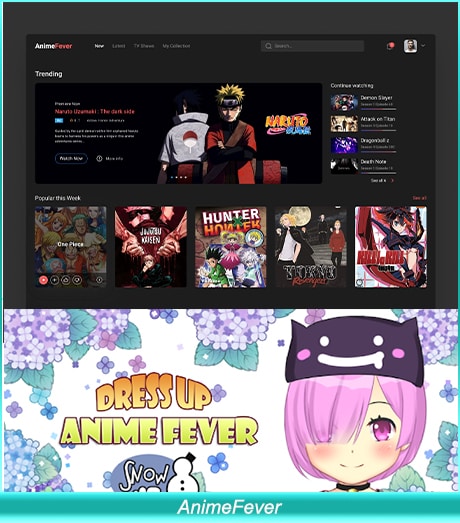
Bonus Tip-Record and Share Anime with Wondershare Filmora Editor
Wondershare Filmora, a video editor platform for anime enthusiasts to create high-quality, professional anime videos. Its one-click tools, striking templates, and presets make it easier to record visuals and voiceover dubbing.
Packed with an intuitive interface and video editing features, you can create amazing videos, irrespective of your experience level. You can download and install it on Windows 7/8/8.1/10, 64-bit computer, Mac OS X, and 10.11 and later. Its latest version offers an animated split-screen and Preview Render for a unique video-creation experience.
Having more than 300+ effects, you are sure to find one that suits your genre and anime type. Once you’ve created the video, burn it to the DVD, upload it on YouTube or any video channel, or transfer it to any other storage device. It’s the best free video editor tool for beginners and experts alike.


Why Should You Use Wondershare Filmora
- Convenient use
- All-in-one video editing feature
- Free access to tools, effects, and templates
- Powerful graphics
- Quick and easy dubbing and subbed
Summing Up
Chinese and Japanese anime is a popular and exciting genre in the entertainment industry with its strong storyline and lifelike popular cartoon characters . The free anime websites have further accentuated their popularity in foreign regions due to easy access to quality content.
Watch dubbed anime to experience the rich and conventional Japanese and Chinese culture. With martial arts being core to Japanese and Chinese tradition, you’re sure to experience action-packed fun. These free dubbed anime websites let you enjoy uncensored anime shows in your language and convenience. Our list offers multiple options to satiate your craving for anime shows and movies without spending a dime.
What are you waiting for? Try any or all of these and share your experience with us. Happy watching!
Shanoon Cox
Shanoon Cox is a writer and a lover of all things video.
Follow @Shanoon Cox
Shanoon Cox
Mar 27, 2024• Proven solutions
Who hasn’t heard of all-time favorite Pokémon or Dragon Ball Z? Well, none! Whether you watch anime , fan or not, these two are the most popular anime of all time. These series have proven to be life-learning lessons with stories based on friendship, love, social values, harmony, and heroism. As a perfect pastime for kids and adults alike, anime has become a popular entertainment show.
What’s more lucrative is many of these websites offer free access to a wide range of anime movies , cartoons, and TV shows. Although the numbers are high; still, it isn’t easy to find free dubbed anime websites with quality content and video streaming. So, we have listed the best 10 websites to watch dubbed anime online and free:
- 1.123anime
- 2. Anime-Planet
- 3. 9Anime
- 4. Gogoanime
- 5. Dubbedanime.net
- 6. AnimeLand
- 7. Anime Lab
- 8. Crunchyroll
- 9. AniMixPlay
- 10. AnimeFever
![]()
A cross-platform for making videos anywhere for all creators
Why your video editing isn’t good enough? How about some creative inspo?
- 100 Million+ Users
- 150+ Countries and Regions
- 4 Million+ Social Media Followers
- 5 Million+ Stock Media for Use
* Secure Download
01 123anime
It is the most popular and best to watch free dubbed anime movies and TV shows. With millions of viewers every day, this anime site provides more than 10,000 anime, films, and videos with English subtitles and dubbing.
Here, you can find multiple Japanese anime movies and shows such as The Legend of Zelda, Ghost in Shell, and many others. Watch it online or download it for later viewing. Thanks to easy navigation and a clean user interface, the website is liked by teens and adults globally.
Fast streaming, no “clickable” mobile ads, and an extensive library make 123anime number one anime website on our list. Offering multiple viewing options, it caters to the varying needs of different viewer types.
02 Anime-Planet
Established in 2001, Anime-Planet collaborates with manga and other paid platforms such as Hulu to provide 45,000+ animation shows free of cost. Search through the extensive collection of Anime-Planet and other paid websites to fulfill your anime cravings.
Its intuitive and interactive interface makes anime consumption easy and fun for users of all ages. You can even create your list of anime shows and find recommendations based on your search, interests, and previously viewed videos.
You can also build a community of anime fans worldwide while also participating in forums and anime character-ranking platforms for a shared experience. With more than 11 million users per month, the platform is quite popular, where you can watch and stream videos without creating an account.
03 9Anime
It is one of the unique anime websites with high-quality video streaming with 1080p. You can watch anime movies and shows of various genres, including romance, comedy, drama, and action. Moreover, it also offers Original Video Animations, where you can watch non-commercial, authentic animations of all times.
With its easy search option, you can easily find the latest, trending, and most popular movies and anime shows. You can also filter videos based on seasons, language, year, and video quality. The website works in all major regions globally, including the US, UK, Philippines, Australia, Netherlands, Canada, Malaysia, and Singapore.
04 Gogoanime
Gogoanime is yet another free dubbed anime website with a fantastic viewing and video streaming experience. Its sleek interface and user-friendly navigation make it a top choice for frugal like us. You can watch and download the latest and the oldest anime shows collection; Gogoanime is for all anime fans.
The recent ones top the chart while the titles are arranged alphabetically, yearly, popularity, and release date for quick and easy search. It has anime videos, movies, and shows on horror, kids, action, cars, and games. You get to find the latest Chinese, dubbed animation shows free of cost.
Despite being free, the anime website doesn’t contain spammy and annoying ads.
05 Dubbedanime.net
Dubbedanime.net is a leading anime entertainment website with a massive collection of anime shows and videos. You can watch, stream and enjoy your favorite anime shows online free of cost.
The streaming is fast, and video quality is high; therefore, offering you a pleasant experience. However, it may contain few ads, but they are not pop-ups. That is why you have an uninterrupted watch time. Besides, you can even use adblockers for ad-free video streaming.
As the best free dubbed anime websites, millions of anime videos are uploaded daily. You can watch dubbed anime online as much as you want and search them through title name or release date.
06 AnimeLand
It is the most popular platform with a wide range of English dubbed Japanese anime videos. Without creating an account or login ID, you can watch and download your favorite anime shows and movies without any disruptions.
Due to its high-quality videos between 480p-1080p HD, the platform offers an incomparable experience. Its 1.1 million viewers per month can access to latest and most recent animations. Naruto, One Piece, My Hero Academia and Attack of Titan with English dubbing are its most popular seasons.
You can find your favorite anime show on the Homepage or filter it based on Latest Updates, Dubbed List, and Movie List. Moreover, you can also search it manually by typing the title in the search bar. With its clean and simple navigation, the platform is easy and fun to use.
07 Anime Lab
Anime Lab showcases subbed and dubbed anime content for viewers in New Zealand and Australia only. With millions of videos in the gallery, the website hosts every known anime show that you can watch online.
Demon Slayer is its most popular Anime show among kids and adults for its riveting storyline, vivid graphics, and enthralling characters. You can find your favorite drama, idol, action, and horror anime videos in HD, making watch time fun and easy on the eyes.
Besides, it works on multiple devices, so you can binge-watch alone on your phone or have a movie night with friends. However, AnimeLab charges AUD 7.99 as a subscription fee to access shows broadcasted the same day.
08 Crunchyroll
Crunchyroll is a veteran dubbed anime website credited for introducing anime culture in the western world. It offers access to the latest Asian dramas, anime series, and manga productions that you won’t find anywhere else.
You can use the free standard version, having a vast library of anime shows, movies, and games infiltrated with pop-up ads. However, you can subscribe for a premium version for $7.99-8.99 for an ad-free watch time.
Searching on the platform is easy and quick; you can find your favorite anime based on genre, popularity, and seasons. It boasts an online store for exciting anime merchandise and the latest updates on your favorite anime show, character, or other property. Crunchyroll is a flag bearer and on-stop shop for hardcore anime fans. The website is accessible in more than 180 countries.
09 AniMixPlay
It is a free platform to watch dubbed anime online in English voiceover and subtitles. You can even create your list of favorite shows and popular choices that meet your preferences and interests. The website offers various streaming options for each anime show to find one that works best on your device.
Moreover, mobile owners can also schedule their watch time and list videos. Finding your favorite show is relatively easy as you can navigate through New Episodes, Updates, Recent, Popular, and Movie categories. Filter the list based on season, year, genre, stream type, and language.
If you’re not sure of your anime choice, read out the synopsis and OP/ED or watch the trailer.
10 AnimeFever
Animefever is an easy-to-use platform with an extensive range of shows, videos, and movies. You can manually search for the title or filter the list based on genre, status, type, parental ratings, season, and year. This makes it a friendly platform for kids as they can automatically filter out adult and age-inappropriate content.
Having the latest collection of videos, shows, and movies, viewers can find anime that hasn’t yet been aired on TV or anywhere else. You can also schedule the showtime as per your convenience and free time to ensure you don’t miss the latest updates.
While guest watching is permissible on the site, registering your account ensures the platform remembers your choices and makes recommendations accordingly.
Bonus Tip-Record and Share Anime with Wondershare Filmora Editor
Wondershare Filmora, a video editor platform for anime enthusiasts to create high-quality, professional anime videos. Its one-click tools, striking templates, and presets make it easier to record visuals and voiceover dubbing.
Packed with an intuitive interface and video editing features, you can create amazing videos, irrespective of your experience level. You can download and install it on Windows 7/8/8.1/10, 64-bit computer, Mac OS X, and 10.11 and later. Its latest version offers an animated split-screen and Preview Render for a unique video-creation experience.
Having more than 300+ effects, you are sure to find one that suits your genre and anime type. Once you’ve created the video, burn it to the DVD, upload it on YouTube or any video channel, or transfer it to any other storage device. It’s the best free video editor tool for beginners and experts alike.
Why Should You Use Wondershare Filmora
- Convenient use
- All-in-one video editing feature
- Free access to tools, effects, and templates
- Powerful graphics
- Quick and easy dubbing and subbed
Summing Up
Chinese and Japanese anime is a popular and exciting genre in the entertainment industry with its strong storyline and lifelike popular cartoon characters . The free anime websites have further accentuated their popularity in foreign regions due to easy access to quality content.
Watch dubbed anime to experience the rich and conventional Japanese and Chinese culture. With martial arts being core to Japanese and Chinese tradition, you’re sure to experience action-packed fun. These free dubbed anime websites let you enjoy uncensored anime shows in your language and convenience. Our list offers multiple options to satiate your craving for anime shows and movies without spending a dime.
What are you waiting for? Try any or all of these and share your experience with us. Happy watching!
Shanoon Cox
Shanoon Cox is a writer and a lover of all things video.
Follow @Shanoon Cox
How to Liven Up Your Animate Website on Scroll
How to Liven Up Your Animate Website on Scroll
An easy yet powerful editor
Numerous effects to choose from
Detailed tutorials provided by the official channel
“I am looking for the information about animate website on a scroll and how to use the parallax scrolling on the website. Can I get some reference websites and a video editor for editing the parallax videos?”

The animate website on scroll is a new and latest feature offered by the developers in the new websites. Here, in this article, we are going to discuss the animate scroll websites.
In this article
01 [The Benefits of Scroll Animation That Few People Know](#Part 1)
02 [Top 5 Scroll-to-Animate Effects in Online Animation](#Part 2)
03 [10 Websites With Inspiring Scrolling Animation](#Part 3)
Part 1 The Benefits of Scroll Animation That Few People Know
01 What is Scroll Animation?
Scroll animation is a feature offered by the website developers on the website where you will see the elements when you move the cursor on the website or when you scroll the webpage of the website.

Previously this concept was not much popular because sometimes website visitors can get confused with this feature but as per a few kinds of research, it is observed that this feature is more user friendly than the common websites. This technique also helps people to make the content more visible at the time of scrolling the website.
02 Why Should You Use On-Scroll Animation Effects?
There are many positive aspects of using the On-Scroll animation effects for your websites. When you use this animation on your website then you will see a wow factor on your website and your visitors will be happy while browsing.
#1: Visitors Never Lost while Navigating
In the on scroll animation effects when the visitors scroll your website then they will never feel lost and they can easily understand that where they started and ended up.
#2: Animate website on Scroll can attract the Visitor Attention to Call to Action
If you use the animate website on a scroll then your website visitors can get direct attention to the call to action buttons available on your webpage. It can easily attract the attention of visitors to any specific place where you want. On scroll, the animation is just like pointing at anyone with a finger. The working of this technique is that when a user starts browsing and scrolling on your website then it starts loading the next steps.
#3: It keeps Visitors Engaged
With the animate website on scroll whenever a visitor scrolls down to the webpages then they will find the interesting content in every scroll. It gives a very good view to the user than the static website content. Users show interest in reading the whole page.
#4: Scrolling Decrease the Page Loading Time
In the scroll animation users slowly scroll the website to find the content which helps you to decrease the loading time of a webpage. Scrolling always loads the elements one by one when they need.
Part 2 Top 5 Scroll-to-Animate Effects in Online Animation
01 Scroll Through Image to Change Text Parallax Effect
In the Scroll through Image effect, you will see the content of the webpage after scrolling through the image on the website and developed by codemyui.

02 Hero Book Cover Slide to Intro – Mobile Friendly
In this animation effect when you move the cursor on the image then the image will turn upside and you will be able to see the content written on the webpage.

03 Marquee Page Border Effect On Scroll using GSAP
Marquee page border effect as the name of this scroll effect tells about it that in this effect you will simply see the moving border when you scroll from all 4 sides. It gives a great look to your videos.

04 Scrollable Agency Portfolio Grid Design
Scrollable Agency Portfolio Grid Design effect is specially designed for the agencies. It gives a very creative look to the web pages. You can simply scroll the web pages from the right to the left side and then finally select the content using the call to action buttons.

05 Change Text Color and Side across Image on Scroll
This scrolling effect allows you to give a text-changing effect on your web pages. When a visitor scroll on your website pages then they will see the changes in the colors of the text which gives a superb view to your viewers.

Part 3 10 Websites with Inspiring Scrolling Animation
01 Jessandruss
Jessandruss is a wedding website developed using scrolling animation. On this website mainly the wedding story of Jess & Russ is presented by the website developers. This is an awesome design of the parallax scrolling where you can see their relationship story.

02 Fire Watch Game
Fire Watch Game website is one of the best examples of the Parallax scrolling website. On this website, developers have used around 6 layers which can be moved and show the sense of depth. On this website, parallax scrolling is not used on the whole site so you can only find it on the top of the homepage. This helps the website to make it user-friendly for the visitors and they can easily read it without any issue of the constant parallax scrolling.

03 Diesel Bad Guide
Diesel Bad guide is a one-page website that was designed for the launch of Diesel’s bad Fragrance. When visitors visit the website then they will see an image with the call to action button with the name “Bad Guide”. When you move the cursor on the call to action button you will hear a sound and after clicking you will be redirected to the product page where you can buy the fragrances. You can view the direction on the website to use it. You can use your mouse to drag the products from up to down and down to upside. This is completely developed using parallax scrolling.

04 ToyFight
ToyFight is the most popular and award-winning website where you can find thousands of cool features. This website is designed with the use of parallax scrolling and 3D technology. When you move the cursor on this website then the toys move a little bit in the background which is the effect of parallax scrolling. All pages of this website are designed using parallax scrolling.

05 New York Times: Snowfall
Snowfall is a webpage designed on the New York Times website shows that how the parallax scrolling is used to show a story related to the snowfall. On this webpage, they used parallax scrolling on the images and videos which show the tunnel creek avalanche. This story is very old and published in 2012 but still, this is the best example of parallax scrolling usage.

06 Dog studio
Dog studio is an awesome website developed using the parallax scrolling effect. In the background, you will see a 3D animated dog that continuously moves when you scroll on the website. It also changes the color of the dog when you hover the mouse on the titles of the website. The do position also changes as you scroll down the website.

07 Delassus Group
Delassus Group’s website is the most popular example of horizontal scrolling. Mostly all websites work in vertical scrolling while using parallax scrolling but in the case of the Delassus group website, you will see the website display its products horizontally in a very attractive way.
08 Louie Sellers
Recapafteruse website is a portfolio website which is designed by Louie Seller and they always use a very clever parallax scrolling effect to keep interesting the webpage for their visitors. Recapafteruse is their business name. On the website when you first start scrolling then the pen will uncap and when you finish scrolling and reach the end of the page then the pen will be closed again. It reflects his business name “RecapAfterUse”. This effect is used on every webpage of the website.

09 The story of The Goonies
Goonies website is another example of parallax scrolling. On this website when you visit the first page you will see the image with the water and mountains and after starting the scrolling you will start seeing the images of kids and after that credits page and finally the gallery page. This is a one-page website and parallax scrolling is used on the whole webpage.

10 Wondershare Filmora
Wondershare Filmora is advanced video editing software that helps you to edit the videos for your parallax scrolling websites. It offers you several advanced video editing options with the easiest-to-use interface. The software is available for windows as well as Mac users to edit the videos. With the help of Wondershare Filmora, you can easily edit the videos with cool features such as motion tracking, color matching, audio ducking, split-screen, using premade templates, controlling the video speed, etc. The Wondershare Filmora offers you basic to advanced level options for editing your videos for parallax scrolling with the easy-to-use interface so you can use it even you are a newbie in video editing without any issue.
Key Takeaways from This Episode
● This is all about the parallax scrolling website and its examples.
● There are many different high-tech blog sites are available that use different types of parallax scrolling animation designs to keep their users engaged.
● These look very attractive and you get the chance to get more viewers for your website.
● If you are looking for making the best animation video to use with your parallax scrolling website then we would like to suggest the Wondershare Filmora software as it can help you to create the best videos for your parallax scrolling website.
“I am looking for the information about animate website on a scroll and how to use the parallax scrolling on the website. Can I get some reference websites and a video editor for editing the parallax videos?”
The animate website on scroll is a new and latest feature offered by the developers in the new websites. Here, in this article, we are going to discuss the animate scroll websites.
In this article
01 [The Benefits of Scroll Animation That Few People Know](#Part 1)
02 [Top 5 Scroll-to-Animate Effects in Online Animation](#Part 2)
03 [10 Websites With Inspiring Scrolling Animation](#Part 3)
Part 1 The Benefits of Scroll Animation That Few People Know
01 What is Scroll Animation?
Scroll animation is a feature offered by the website developers on the website where you will see the elements when you move the cursor on the website or when you scroll the webpage of the website.
Previously this concept was not much popular because sometimes website visitors can get confused with this feature but as per a few kinds of research, it is observed that this feature is more user friendly than the common websites. This technique also helps people to make the content more visible at the time of scrolling the website.
02 Why Should You Use On-Scroll Animation Effects?
There are many positive aspects of using the On-Scroll animation effects for your websites. When you use this animation on your website then you will see a wow factor on your website and your visitors will be happy while browsing.
#1: Visitors Never Lost while Navigating
In the on scroll animation effects when the visitors scroll your website then they will never feel lost and they can easily understand that where they started and ended up.
#2: Animate website on Scroll can attract the Visitor Attention to Call to Action
If you use the animate website on a scroll then your website visitors can get direct attention to the call to action buttons available on your webpage. It can easily attract the attention of visitors to any specific place where you want. On scroll, the animation is just like pointing at anyone with a finger. The working of this technique is that when a user starts browsing and scrolling on your website then it starts loading the next steps.
#3: It keeps Visitors Engaged
With the animate website on scroll whenever a visitor scrolls down to the webpages then they will find the interesting content in every scroll. It gives a very good view to the user than the static website content. Users show interest in reading the whole page.
#4: Scrolling Decrease the Page Loading Time
In the scroll animation users slowly scroll the website to find the content which helps you to decrease the loading time of a webpage. Scrolling always loads the elements one by one when they need.
Part 2 Top 5 Scroll-to-Animate Effects in Online Animation
01 Scroll Through Image to Change Text Parallax Effect
In the Scroll through Image effect, you will see the content of the webpage after scrolling through the image on the website and developed by codemyui.
02 Hero Book Cover Slide to Intro – Mobile Friendly
In this animation effect when you move the cursor on the image then the image will turn upside and you will be able to see the content written on the webpage.
03 Marquee Page Border Effect On Scroll using GSAP
Marquee page border effect as the name of this scroll effect tells about it that in this effect you will simply see the moving border when you scroll from all 4 sides. It gives a great look to your videos.
04 Scrollable Agency Portfolio Grid Design
Scrollable Agency Portfolio Grid Design effect is specially designed for the agencies. It gives a very creative look to the web pages. You can simply scroll the web pages from the right to the left side and then finally select the content using the call to action buttons.
05 Change Text Color and Side across Image on Scroll
This scrolling effect allows you to give a text-changing effect on your web pages. When a visitor scroll on your website pages then they will see the changes in the colors of the text which gives a superb view to your viewers.
Part 3 10 Websites with Inspiring Scrolling Animation
01 Jessandruss
Jessandruss is a wedding website developed using scrolling animation. On this website mainly the wedding story of Jess & Russ is presented by the website developers. This is an awesome design of the parallax scrolling where you can see their relationship story.
02 Fire Watch Game
Fire Watch Game website is one of the best examples of the Parallax scrolling website. On this website, developers have used around 6 layers which can be moved and show the sense of depth. On this website, parallax scrolling is not used on the whole site so you can only find it on the top of the homepage. This helps the website to make it user-friendly for the visitors and they can easily read it without any issue of the constant parallax scrolling.
03 Diesel Bad Guide
Diesel Bad guide is a one-page website that was designed for the launch of Diesel’s bad Fragrance. When visitors visit the website then they will see an image with the call to action button with the name “Bad Guide”. When you move the cursor on the call to action button you will hear a sound and after clicking you will be redirected to the product page where you can buy the fragrances. You can view the direction on the website to use it. You can use your mouse to drag the products from up to down and down to upside. This is completely developed using parallax scrolling.
04 ToyFight
ToyFight is the most popular and award-winning website where you can find thousands of cool features. This website is designed with the use of parallax scrolling and 3D technology. When you move the cursor on this website then the toys move a little bit in the background which is the effect of parallax scrolling. All pages of this website are designed using parallax scrolling.
05 New York Times: Snowfall
Snowfall is a webpage designed on the New York Times website shows that how the parallax scrolling is used to show a story related to the snowfall. On this webpage, they used parallax scrolling on the images and videos which show the tunnel creek avalanche. This story is very old and published in 2012 but still, this is the best example of parallax scrolling usage.
06 Dog studio
Dog studio is an awesome website developed using the parallax scrolling effect. In the background, you will see a 3D animated dog that continuously moves when you scroll on the website. It also changes the color of the dog when you hover the mouse on the titles of the website. The do position also changes as you scroll down the website.
07 Delassus Group
Delassus Group’s website is the most popular example of horizontal scrolling. Mostly all websites work in vertical scrolling while using parallax scrolling but in the case of the Delassus group website, you will see the website display its products horizontally in a very attractive way.
08 Louie Sellers
Recapafteruse website is a portfolio website which is designed by Louie Seller and they always use a very clever parallax scrolling effect to keep interesting the webpage for their visitors. Recapafteruse is their business name. On the website when you first start scrolling then the pen will uncap and when you finish scrolling and reach the end of the page then the pen will be closed again. It reflects his business name “RecapAfterUse”. This effect is used on every webpage of the website.
09 The story of The Goonies
Goonies website is another example of parallax scrolling. On this website when you visit the first page you will see the image with the water and mountains and after starting the scrolling you will start seeing the images of kids and after that credits page and finally the gallery page. This is a one-page website and parallax scrolling is used on the whole webpage.
10 Wondershare Filmora
Wondershare Filmora is advanced video editing software that helps you to edit the videos for your parallax scrolling websites. It offers you several advanced video editing options with the easiest-to-use interface. The software is available for windows as well as Mac users to edit the videos. With the help of Wondershare Filmora, you can easily edit the videos with cool features such as motion tracking, color matching, audio ducking, split-screen, using premade templates, controlling the video speed, etc. The Wondershare Filmora offers you basic to advanced level options for editing your videos for parallax scrolling with the easy-to-use interface so you can use it even you are a newbie in video editing without any issue.
Key Takeaways from This Episode
● This is all about the parallax scrolling website and its examples.
● There are many different high-tech blog sites are available that use different types of parallax scrolling animation designs to keep their users engaged.
● These look very attractive and you get the chance to get more viewers for your website.
● If you are looking for making the best animation video to use with your parallax scrolling website then we would like to suggest the Wondershare Filmora software as it can help you to create the best videos for your parallax scrolling website.
Best 8 Tools Tell You How to Make Slideshows for Instagram
Top 8 Tools Tell You How to Make Slideshows for Instagram
An easy yet powerful editor
Numerous effects to choose from
Detailed tutorials provided by the official channel
Instagram slideshows land among the latest social media trends of fun and entertainment. Learn how to attract jaw dropping peer attention with creating the same!
In this article
01 [When Should You Use an Instagram Slideshow?](#Part 1)
02 [How to Make an Instagram Slideshow with Music?](#Part 2)
03 [8 Best Instagram Slideshow Apps for Creating Outstanding Slideshow](#Part 3)
Part 1 When Should You Use an Instagram Slideshow?
Revolutions in technology has opened doors to a plenty of new and exciting means of information sharing, entertainment and communication. Playing its part in the game, Instagram slideshow has emerged as an exciting means of quick and impactful content sharing. Diving deeper into the discussion, let us talk about the different areas of working with an Instagram slide show in the following section:
01Explanatory Product Demonstrations and Stepwise Tutorials
Considering the diverse media collaboration entertained by this social media platform, you get the liberty to include 10 media files of videos and images while creating a slideshow on Instagram. This is an affordably sufficient media space to demonstrate your newly launched product in front of the target audience.
The aforesaid characteristic of a slideshow for Instagram can be put to another use of creating detailed, step by step guides and product usage tutorials to create an increased and confident customer reach and brand applicability. A few examples include the presentations of recipes by food blogs and chefs, or a detailed look of the day’s outfit by fashion bloggers.
02Interactive Storytelling or Recreate an Event
Gone are the times when stories and events were restricted to a single image or video with a limited scope of understanding and explanation. You can now work with a combination of multiple images and videos to create more vivid and graphical descriptions of stories, narratives and events.
You can work on creating an engaging slideshow for Instagram to tell an amazing story, voice a narration from the beginning to the end, or share your best moments with your cherished audience, which will surely give them the feel of enjoying the adventure along with you.
03Create a Collection
You can now use a slide show for Instagram to design and present a collection of manifold ideas and products within a single post. You can improvise the collection with displaying a series of related products, showcasing a summary of your different blog posts through the week, or simply present a list of your most reliable inspirations, resources and influencers.
04Exciting Video Teasers
If you have a scheduled video release to entertain your audience, try working with interactive slideshows for Instagram to create some sensational teaser content of the upcoming release to imbibe a natural sense of curiosity within your audience.
You can experiment with releasing a mini photoshoot tour of your filming set, share close up progression details, or include a cliffhanger in the end of your Instagram slideshow to ensure the retrieval of your audience towards watching the release of the actual big content. You can use these short teasers as effective means of creating a campaign buzz, while building a closer connect with your audience.
Part 2 How to Make an Instagram Slideshow with Music?
By now, you must have gathered enough knowledge regarding the credibility of Instagram slideshows in catering to a diversity of commercial, professional and personal content sharing needs. Considering the same, you may conveniently feel motivated to try hands at creating stunning slideshow presentations for Instagram on your own.
Adhering to the concern, let us move ahead with our discussion, while talking about how to make a slideshow for Instagram and supplement the same with adaptable background music to develop amazing content masterpieces and share them with social media peers, while grabbing their obvious attention.
While there are a number of choices in the software market to choose your Instagram slideshow creator tool, the FlexClip tool can be a reliable option. Read though the following section to learn the slideshow creation process in the program with a comprehensive and stepwise tutorial guide:
Step 1: Download the Slideshow Creator Tool
Visit the official website of FlexClip to download and install the slideshow maker software in your preferred device.

Step 2: Start from Scratch
After a successful installation, proceed to launch the tool in your system and wait till the software greets you with its welcome interface. Here, you will have to reach to and tap the ‘Start to Create’ button to begin with the slideshow creation process. You can also select a preset template to work on your slideshow if nothing new clicks in your mind.
Step 3: Select an Aspect Ratio
In the tool’s creator window, navigate to the ‘Options Panel’ at the left and click on ‘More’ to select a suitable aspect ratio. Picking the 9:16 ratio would be a good choice.

Step 4: Upload Your Media
In the same ‘Options Panel’, click on ‘Media’ for dragging and dropping the desired video and image files from your device to the program’s media timeline, followed by applying them to the tool’s storyboard. You can alternatively, choose to directly work with media pages of any preset slideshow template.

Step 5: Customize Your Media
You can now proceed to improvise your media files with amazing texts, filters, stickers, emojis, widgets, etc., by clicking on specific object categories from the ‘Options Panel’.

Step 6: Include Seamless Transitions
Proceed to uplift your creation to the next level with the application of stunning image and video transitions. Navigate to the ‘Options Panel’ and tap ‘Elements’. A variety of transition effects will be displayed to choose from. Select the one you like to add it to your slideshow.

Step 7: Add a Background Music
An in line background audio is the best way to set the mood of your slideshow. Choose to add the same to your creation for making a more engaging impact on the audience. Visit the ‘Options Panel’ again and click on ‘Music’ to open the program’s audio library and select a perfect background music from the huge variety of choices, to include in your slideshow.

Step 8: Preview Your Creation
When you have finished customizing your slideshow, navigate to the top right corner of the editor’s storyboard and hit the ‘Preview’ button to visualize and ensure that your slideshow has everything at the right place. You can continue editing if there is a need to make some changes.
Step 9: Time to Save and Share!
When you are happy with your work, consider saving it either to your device or Google Dropbox, from where you can easily upload the same to your Instagram handle.
Part 3 Best Instagram Slideshow Apps for Creating Outstanding Slideshow
Social media is the talk of the trend in today’s times, which has extended its boundaries to visibly everything around us. Speaking in the light of the fact, slideshow presentations are no exception. Social media platforms today have come up with amazing tools and applications to create and share a stunning slideshow Instagram story with utmost ease and within an affordable time span.
Now that you have developed a comprehensive understanding of the credibility of working with Instagram slideshows and their creation process with the inclusion of complementary background music, let us dive into learning about some of the best and most popular Instagram apps for creating awesome slideshow presentations in the following section:
01Filme Lite
This tool lands among the leading user preferences to work on creating slideshow presentations. The application software is packed with a heap of latest features that form the Instagram trends in current times.
Apart from complementing your slideshow creations with tons of features, this slideshow maker for Instagram grants you the liberty to include your most loved videos and images within your presentation and customize them with a diverse range of effects, along with adjusting their play duration within the slideshow. Additional to image and video customization, you are also allowed to choose the image transition style that perfectly suits your content arrangement within the slides.
Working with the tool, you can be sure of getting an unparalleled slideshow creation experience with a very interactive and user oriented design interface, that is simple enough to be easily understood and worked upon by a newbie to the creative world.
02VivaVideo
If you are working on a detailed presentation and wish to spark up your creation with stunning varieties of jaw dropping special effects, consider creating your PowerPoint slideshows in this application. The tool’s effect library is a storehouse of the most amazing special effects that promise of transforming your slideshow into a visual masterpiece.
You can separately apply these effects to each of the slideshow images or choose to work on a combination of selected effects to include within a single video. Apart from this, you are free to choose an apt background music for your presentation slides from the extensive audio library of the software. The bottom line is; you are assured to a complete fun experience while creating slideshows with this tool.
03Movavi
If you are familiar enough with the fundamental concepts and the trivial anecdotes of working with slideshow presentations and want to take your graphic creativity to the next level, you can try hands at using the Movavi slideshow creator software to design high end PowerPoint presentations of professional quality. The best thing about the tool is, it works online and does not require a software download for usage concerns.
Along with creating online slideshow presentations with ease, the tool permits you to create online videos within minutes and instantly download the same for specific usage. You can further, pop up your presentation slides with wonderful transition and animation effects and also make adjustments in the play duration of each slide. The tool lets you choose and add a perfect background music to your presentation from its conveniently vast audio library.
04Slideshow Lab
If you have just landed into the world of creating slideshow presentations and are looking for easy solutions on how to make a slideshow on Instagram, consider working with this software to polish your design creativity. The simple and user cohesive interface of the tool is best for beginners to understand and get customary with the creation process, that takes the minimum possible time to render an appreciable PowerPoint presentation.
Talking about the slideshow design process, you will need to start with selecting a set of desired images, followed by uploading the same into the tool’s slideshow creator timeline. The next step is to arrange the images in the sequential order of appearance, select an appealing background music and apply smooth image transitions. When you are done with everything, proceed to save the presentation to your device.
05MoShow
While you can choose to create stunning slideshow presentations with almost any class of images, the aforesaid app works best to render Instagram images into a top rated Instagram photo slideshow without compromising with the high resolution image quality of Instagram photos. The application integrates motion pictures and lighting effects to transform the otherwise regular images into lively still captures.
Considering the credibility of the tool in overall user experience, its indeed a thumbs up from graphic creators across the globe, thanks to its smart and interactive interface, in time performance and outstanding creation outputs.
06InVideo Editor
Put an end to your search of effective solutions on how to do a slideshow on Instagram with the InVideo Editor, a smart video and graphic editor that can also be employed to adhere to the requirement of creating amazing slideshow presentations from Instagram media. While the creation process hardly takes a few minutes, you can work with the application to explore your editing creativity to the finest levels. The tool works well with any of your MacOs and Windows compatible devices.
The editor’s effects library is loaded with tons of graphic transitions and filters that are dedicated to enhance the contents of your presentation with utmost ease. You can add creative modifications to the slideshow media, such as, cut, crop and trim videos and images and add the most convincing music, overlays, fonts, etc., and enjoy an additional free access to hundreds of stock videos and slideshow templates.
07LightMV
This one is an online slideshow creator utility that works well with almost any operating system including Windows, iOS, Android and Mac. Essentially a cloud centered editor program, this tool caters to your high quality slideshow creation needs in the most effective way. The design process is quite simple, where you only need to add the images and videos, design your presentation and wait till everything comes to place.
What’s more appealing factor about the tool is that you will never need to download the program in your device or purchase a subscription plan to use the application. All you need to do is land into the tool’s website in your favorite browser and tap on the ‘Slideshow’ option to begin with the creation process. You can select from a heap of preset stunning slideshow templates to create the most enhanced PowerPoint presentation.
08Fliptastic
The Fliptastic slideshow creator app is exclusively developed to adhere to the graphic design concerns of iOS users. This one is a no cost graphic utility with a plethora of versatile features and considerable user backup. The app’s effect library is packed with a unique set of slideshow design templates, transitions, background music choices and filters that work to compliment your presentation with the subtlest look ever.
Paying a bit extra attention to the audio inclusion within the slides, the app offers you a range of free music files to work with, while additionally allowing you to upload and use one from your device or the internet.
09Creating Instagram Slideshows With Filmora
Talking exclusively within the domain of video creation and editing, the credibility of the Wondershare Filmora Video Editor software needs no introduction. Moving ahead with our discussion, let us learn about the process of creating awesome Instagram slideshows with Filmora in the following section:
Step 1: Download and Install the Program
To begin with addressing the concern of how to make a slideshow on Instagram story, navigate to the official Wondershare website and download the Wondershare Filmora Video Editor to your preferred system and proceed to install the same.
Wondershare Filmora - Best Video Editor for Mac/Windows
5,481,435 people have downloaded it.
Build unique custom animations without breaking a sweat.
Focus on creating epic stories and leave the details to Filmora’s auto features.
Start a creative adventure with drag & drop effects and endless possibilities.
Filmora simplifies advanced features to save you time and effort.
Filmora cuts out repetition so you can move on to your next creative breakthrough.
Step 2: Import Your Media
Launch the editor program and wait for the latter’s welcome screen to appear. Here, you need to import the images, videos and other media files to the editor timeline for including them in your slideshow. It is recommended to collect all the image and video files into one single folder before opening a new slideshow design project.
In the editor’s welcome screen, navigate to the ‘Media’ tab at the top left corner and click on the same to open the ‘Import’ menu. From here, you need to choose the ‘Import a Media Folder’ option, followed by navigating to the folder that contains the to be imported media files. When you have reached to the required folder, select it and tap ‘OK’ to import the same into the project timeline. When all the files have been imported, you can see them in the ‘Project Media’ panel.

Step 3: Timeline Positioning of Media Files
Reach to the ‘File’ menu and choose ‘Preferences’ from the latter’s dropdown menu. In the ‘Preferences’ window, hit the ‘Editing’ tab and tap on ‘Photo Preferences’. From the drop down menu that follows, choose the ‘Crop to Fit’ option to adjust the aspect ratio of your imported images in line with the slideshow project. In case your images have the 9:16 vertical aspect ratio, select the ‘Fit’ option to make a proper screen fit.

You can proceed to include the image zoom and camera pan features within your project by clicking on the ‘Pan & Zoom’ option. You can further, modify the preset durations of transitions, effects and photos in the ‘Editing’ tab itself before adding them to the editor timeline. Another way of doing the same is to drag the ends of the media files inward or outward, post the timeline adding process.

When you have finished making the required adjustments, navigate back the ‘Media Panel’ to include the imported media files within the project timeline. You can either click on the files to add them, or choose to ‘Drag and Drop’ the same at a preferred place within the timeline.
When all the images and videos have been added, proceed to arrange them in the desired order of appearance in the slideshow, followed by adjusting their screen time and play durations through any of the methods explained above.
Step 4: Add Transitions to Eliminate Hard Cuts
The smooth play of a slideshow is often distorted by hard cuts, which can be escaped by applying smooth transition effects to the slides. Consider exploring the ‘Transitions’ tab of Filmora to choose from a diversity of easily customizable transition effects and place them at the intersection point of the respective slides in the project timeline.
Instead of applying the same transition to every slide, prefer choosing the one that exclusively suits the content arrangement and flow within particular slides. This would save your slideshow from getting a repetitive look.

Post the timeline adding of a transition, you can double click on the same to reach the ‘Transition Setting Window’, where you are allowed to customize the play duration and select its ‘Transition Mode’. Play durations can alternatively be customised in the project timeline by dragging the slider in a left or right direction.
Step 5: Add Overlays and Filters for an Improvised Colour Scheme
To enhance the thematic appeal of your slideshow, consider desaturating the colours of the included images with the extensive range of visual effects and overlays available in the ‘Effects’ tab of the software’s editing timeline. Opening the tab, you are exposed to a series of ‘Filter and Overlay’ categories, that have further subdivisions of Light Leaks, Sepia Tone and Lomography.
To add a particular effect, place it in the timeline track above the desired clip or image. Observe the changes in the ‘Preview Panel’ and proceed to adjust the effect settings if required, by double clicking on the particular effect.

Step 6: Include Motion Graphic Elements
To supplement your slideshow with elegant motion graphics, navigate to the ‘Elements’ tab in the editor timeline. From here, you can access and choose any suitable motion graphic template from a diversity of available choices, to include within the project timeline. The step is completely optional and you should pay attention to the style of content presentation and the cause of creation of your slideshow when choosing to add these elements to the same.

Step 7: Record Voiceovers and Create Soundtracks
To record a voiceover for your slideshow, navigate to the ‘Media’ tab and tap the ‘Record’ dropdown menu. Click on ‘Record Voiceover’ in the list of options that appears. The ‘Record Audio’ icon pops up and you now need to select a microphone to be used in the recording process. When you are ready, tap the ‘Record’ button to let the recording begin.

You can now see your voice recording appear in the ‘Media’ tab with the previously imported media files, ready to be placed within the audio track of the project timeline. Filmora’s audio library is a storehouse of free access music and audio effects. To add one to your slideshow, navigate and click on the ‘Audio’ tab to select from the extensive Rock, Young & Bright, Electronic, etc., music subcategories till you get the perfect match for your presentation.

Once you have selected all the music tracks, place them one by one on the project timeline and move ahead with adjusting their play durations.
Step 8: Export Your Creation
When you are satisfied with your work, you can export the slideshow directly from Filmora to a number of media sharing platforms. All you need to do is, navigate to and tap the ‘Export’ button in the top right corner of the editor screen and proceed to set the resolution and frame rate, and select the output file format of your created slideshow in the ‘Export Window’ that appears.

When you are ready with everything, click on the ‘Export’ button at the bottom right corner of the screen to share your slideshow across different platforms, including YouTube, Instagram, Vimeo, etc.
The time required by Filmora to render your slideshow on the chosen platform will depend on the output file size. Considering the fact that larger files require a much longer time to be rendered, it would be a smart decision to limit the file size of your slideshow within 500 MB.
● Ending Thoughts →
● Instagram slideshows are exciting means of diving into fun-filled entertainment with your social media peers.
● When looking for solutions on how to create a slideshow on Instagram, there are loads of choices in the software market.
● Talking of best creator alternatives, you can pick the Wondershare Filmora slideshow developer program to make an amazing Insta story slideshow.
Instagram slideshows land among the latest social media trends of fun and entertainment. Learn how to attract jaw dropping peer attention with creating the same!
In this article
01 [When Should You Use an Instagram Slideshow?](#Part 1)
02 [How to Make an Instagram Slideshow with Music?](#Part 2)
03 [8 Best Instagram Slideshow Apps for Creating Outstanding Slideshow](#Part 3)
Part 1 When Should You Use an Instagram Slideshow?
Revolutions in technology has opened doors to a plenty of new and exciting means of information sharing, entertainment and communication. Playing its part in the game, Instagram slideshow has emerged as an exciting means of quick and impactful content sharing. Diving deeper into the discussion, let us talk about the different areas of working with an Instagram slide show in the following section:
01Explanatory Product Demonstrations and Stepwise Tutorials
Considering the diverse media collaboration entertained by this social media platform, you get the liberty to include 10 media files of videos and images while creating a slideshow on Instagram. This is an affordably sufficient media space to demonstrate your newly launched product in front of the target audience.
The aforesaid characteristic of a slideshow for Instagram can be put to another use of creating detailed, step by step guides and product usage tutorials to create an increased and confident customer reach and brand applicability. A few examples include the presentations of recipes by food blogs and chefs, or a detailed look of the day’s outfit by fashion bloggers.
02Interactive Storytelling or Recreate an Event
Gone are the times when stories and events were restricted to a single image or video with a limited scope of understanding and explanation. You can now work with a combination of multiple images and videos to create more vivid and graphical descriptions of stories, narratives and events.
You can work on creating an engaging slideshow for Instagram to tell an amazing story, voice a narration from the beginning to the end, or share your best moments with your cherished audience, which will surely give them the feel of enjoying the adventure along with you.
03Create a Collection
You can now use a slide show for Instagram to design and present a collection of manifold ideas and products within a single post. You can improvise the collection with displaying a series of related products, showcasing a summary of your different blog posts through the week, or simply present a list of your most reliable inspirations, resources and influencers.
04Exciting Video Teasers
If you have a scheduled video release to entertain your audience, try working with interactive slideshows for Instagram to create some sensational teaser content of the upcoming release to imbibe a natural sense of curiosity within your audience.
You can experiment with releasing a mini photoshoot tour of your filming set, share close up progression details, or include a cliffhanger in the end of your Instagram slideshow to ensure the retrieval of your audience towards watching the release of the actual big content. You can use these short teasers as effective means of creating a campaign buzz, while building a closer connect with your audience.
Part 2 How to Make an Instagram Slideshow with Music?
By now, you must have gathered enough knowledge regarding the credibility of Instagram slideshows in catering to a diversity of commercial, professional and personal content sharing needs. Considering the same, you may conveniently feel motivated to try hands at creating stunning slideshow presentations for Instagram on your own.
Adhering to the concern, let us move ahead with our discussion, while talking about how to make a slideshow for Instagram and supplement the same with adaptable background music to develop amazing content masterpieces and share them with social media peers, while grabbing their obvious attention.
While there are a number of choices in the software market to choose your Instagram slideshow creator tool, the FlexClip tool can be a reliable option. Read though the following section to learn the slideshow creation process in the program with a comprehensive and stepwise tutorial guide:
Step 1: Download the Slideshow Creator Tool
Visit the official website of FlexClip to download and install the slideshow maker software in your preferred device.
Step 2: Start from Scratch
After a successful installation, proceed to launch the tool in your system and wait till the software greets you with its welcome interface. Here, you will have to reach to and tap the ‘Start to Create’ button to begin with the slideshow creation process. You can also select a preset template to work on your slideshow if nothing new clicks in your mind.
Step 3: Select an Aspect Ratio
In the tool’s creator window, navigate to the ‘Options Panel’ at the left and click on ‘More’ to select a suitable aspect ratio. Picking the 9:16 ratio would be a good choice.
Step 4: Upload Your Media
In the same ‘Options Panel’, click on ‘Media’ for dragging and dropping the desired video and image files from your device to the program’s media timeline, followed by applying them to the tool’s storyboard. You can alternatively, choose to directly work with media pages of any preset slideshow template.
Step 5: Customize Your Media
You can now proceed to improvise your media files with amazing texts, filters, stickers, emojis, widgets, etc., by clicking on specific object categories from the ‘Options Panel’.
Step 6: Include Seamless Transitions
Proceed to uplift your creation to the next level with the application of stunning image and video transitions. Navigate to the ‘Options Panel’ and tap ‘Elements’. A variety of transition effects will be displayed to choose from. Select the one you like to add it to your slideshow.
Step 7: Add a Background Music
An in line background audio is the best way to set the mood of your slideshow. Choose to add the same to your creation for making a more engaging impact on the audience. Visit the ‘Options Panel’ again and click on ‘Music’ to open the program’s audio library and select a perfect background music from the huge variety of choices, to include in your slideshow.
Step 8: Preview Your Creation
When you have finished customizing your slideshow, navigate to the top right corner of the editor’s storyboard and hit the ‘Preview’ button to visualize and ensure that your slideshow has everything at the right place. You can continue editing if there is a need to make some changes.
Step 9: Time to Save and Share!
When you are happy with your work, consider saving it either to your device or Google Dropbox, from where you can easily upload the same to your Instagram handle.
Part 3 Best Instagram Slideshow Apps for Creating Outstanding Slideshow
Social media is the talk of the trend in today’s times, which has extended its boundaries to visibly everything around us. Speaking in the light of the fact, slideshow presentations are no exception. Social media platforms today have come up with amazing tools and applications to create and share a stunning slideshow Instagram story with utmost ease and within an affordable time span.
Now that you have developed a comprehensive understanding of the credibility of working with Instagram slideshows and their creation process with the inclusion of complementary background music, let us dive into learning about some of the best and most popular Instagram apps for creating awesome slideshow presentations in the following section:
01Filme Lite
This tool lands among the leading user preferences to work on creating slideshow presentations. The application software is packed with a heap of latest features that form the Instagram trends in current times.
Apart from complementing your slideshow creations with tons of features, this slideshow maker for Instagram grants you the liberty to include your most loved videos and images within your presentation and customize them with a diverse range of effects, along with adjusting their play duration within the slideshow. Additional to image and video customization, you are also allowed to choose the image transition style that perfectly suits your content arrangement within the slides.
Working with the tool, you can be sure of getting an unparalleled slideshow creation experience with a very interactive and user oriented design interface, that is simple enough to be easily understood and worked upon by a newbie to the creative world.
02VivaVideo
If you are working on a detailed presentation and wish to spark up your creation with stunning varieties of jaw dropping special effects, consider creating your PowerPoint slideshows in this application. The tool’s effect library is a storehouse of the most amazing special effects that promise of transforming your slideshow into a visual masterpiece.
You can separately apply these effects to each of the slideshow images or choose to work on a combination of selected effects to include within a single video. Apart from this, you are free to choose an apt background music for your presentation slides from the extensive audio library of the software. The bottom line is; you are assured to a complete fun experience while creating slideshows with this tool.
03Movavi
If you are familiar enough with the fundamental concepts and the trivial anecdotes of working with slideshow presentations and want to take your graphic creativity to the next level, you can try hands at using the Movavi slideshow creator software to design high end PowerPoint presentations of professional quality. The best thing about the tool is, it works online and does not require a software download for usage concerns.
Along with creating online slideshow presentations with ease, the tool permits you to create online videos within minutes and instantly download the same for specific usage. You can further, pop up your presentation slides with wonderful transition and animation effects and also make adjustments in the play duration of each slide. The tool lets you choose and add a perfect background music to your presentation from its conveniently vast audio library.
04Slideshow Lab
If you have just landed into the world of creating slideshow presentations and are looking for easy solutions on how to make a slideshow on Instagram, consider working with this software to polish your design creativity. The simple and user cohesive interface of the tool is best for beginners to understand and get customary with the creation process, that takes the minimum possible time to render an appreciable PowerPoint presentation.
Talking about the slideshow design process, you will need to start with selecting a set of desired images, followed by uploading the same into the tool’s slideshow creator timeline. The next step is to arrange the images in the sequential order of appearance, select an appealing background music and apply smooth image transitions. When you are done with everything, proceed to save the presentation to your device.
05MoShow
While you can choose to create stunning slideshow presentations with almost any class of images, the aforesaid app works best to render Instagram images into a top rated Instagram photo slideshow without compromising with the high resolution image quality of Instagram photos. The application integrates motion pictures and lighting effects to transform the otherwise regular images into lively still captures.
Considering the credibility of the tool in overall user experience, its indeed a thumbs up from graphic creators across the globe, thanks to its smart and interactive interface, in time performance and outstanding creation outputs.
06InVideo Editor
Put an end to your search of effective solutions on how to do a slideshow on Instagram with the InVideo Editor, a smart video and graphic editor that can also be employed to adhere to the requirement of creating amazing slideshow presentations from Instagram media. While the creation process hardly takes a few minutes, you can work with the application to explore your editing creativity to the finest levels. The tool works well with any of your MacOs and Windows compatible devices.
The editor’s effects library is loaded with tons of graphic transitions and filters that are dedicated to enhance the contents of your presentation with utmost ease. You can add creative modifications to the slideshow media, such as, cut, crop and trim videos and images and add the most convincing music, overlays, fonts, etc., and enjoy an additional free access to hundreds of stock videos and slideshow templates.
07LightMV
This one is an online slideshow creator utility that works well with almost any operating system including Windows, iOS, Android and Mac. Essentially a cloud centered editor program, this tool caters to your high quality slideshow creation needs in the most effective way. The design process is quite simple, where you only need to add the images and videos, design your presentation and wait till everything comes to place.
What’s more appealing factor about the tool is that you will never need to download the program in your device or purchase a subscription plan to use the application. All you need to do is land into the tool’s website in your favorite browser and tap on the ‘Slideshow’ option to begin with the creation process. You can select from a heap of preset stunning slideshow templates to create the most enhanced PowerPoint presentation.
08Fliptastic
The Fliptastic slideshow creator app is exclusively developed to adhere to the graphic design concerns of iOS users. This one is a no cost graphic utility with a plethora of versatile features and considerable user backup. The app’s effect library is packed with a unique set of slideshow design templates, transitions, background music choices and filters that work to compliment your presentation with the subtlest look ever.
Paying a bit extra attention to the audio inclusion within the slides, the app offers you a range of free music files to work with, while additionally allowing you to upload and use one from your device or the internet.
09Creating Instagram Slideshows With Filmora
Talking exclusively within the domain of video creation and editing, the credibility of the Wondershare Filmora Video Editor software needs no introduction. Moving ahead with our discussion, let us learn about the process of creating awesome Instagram slideshows with Filmora in the following section:
Step 1: Download and Install the Program
To begin with addressing the concern of how to make a slideshow on Instagram story, navigate to the official Wondershare website and download the Wondershare Filmora Video Editor to your preferred system and proceed to install the same.
Wondershare Filmora - Best Video Editor for Mac/Windows
5,481,435 people have downloaded it.
Build unique custom animations without breaking a sweat.
Focus on creating epic stories and leave the details to Filmora’s auto features.
Start a creative adventure with drag & drop effects and endless possibilities.
Filmora simplifies advanced features to save you time and effort.
Filmora cuts out repetition so you can move on to your next creative breakthrough.
Step 2: Import Your Media
Launch the editor program and wait for the latter’s welcome screen to appear. Here, you need to import the images, videos and other media files to the editor timeline for including them in your slideshow. It is recommended to collect all the image and video files into one single folder before opening a new slideshow design project.
In the editor’s welcome screen, navigate to the ‘Media’ tab at the top left corner and click on the same to open the ‘Import’ menu. From here, you need to choose the ‘Import a Media Folder’ option, followed by navigating to the folder that contains the to be imported media files. When you have reached to the required folder, select it and tap ‘OK’ to import the same into the project timeline. When all the files have been imported, you can see them in the ‘Project Media’ panel.
Step 3: Timeline Positioning of Media Files
Reach to the ‘File’ menu and choose ‘Preferences’ from the latter’s dropdown menu. In the ‘Preferences’ window, hit the ‘Editing’ tab and tap on ‘Photo Preferences’. From the drop down menu that follows, choose the ‘Crop to Fit’ option to adjust the aspect ratio of your imported images in line with the slideshow project. In case your images have the 9:16 vertical aspect ratio, select the ‘Fit’ option to make a proper screen fit.
You can proceed to include the image zoom and camera pan features within your project by clicking on the ‘Pan & Zoom’ option. You can further, modify the preset durations of transitions, effects and photos in the ‘Editing’ tab itself before adding them to the editor timeline. Another way of doing the same is to drag the ends of the media files inward or outward, post the timeline adding process.
When you have finished making the required adjustments, navigate back the ‘Media Panel’ to include the imported media files within the project timeline. You can either click on the files to add them, or choose to ‘Drag and Drop’ the same at a preferred place within the timeline.
When all the images and videos have been added, proceed to arrange them in the desired order of appearance in the slideshow, followed by adjusting their screen time and play durations through any of the methods explained above.
Step 4: Add Transitions to Eliminate Hard Cuts
The smooth play of a slideshow is often distorted by hard cuts, which can be escaped by applying smooth transition effects to the slides. Consider exploring the ‘Transitions’ tab of Filmora to choose from a diversity of easily customizable transition effects and place them at the intersection point of the respective slides in the project timeline.
Instead of applying the same transition to every slide, prefer choosing the one that exclusively suits the content arrangement and flow within particular slides. This would save your slideshow from getting a repetitive look.
Post the timeline adding of a transition, you can double click on the same to reach the ‘Transition Setting Window’, where you are allowed to customize the play duration and select its ‘Transition Mode’. Play durations can alternatively be customised in the project timeline by dragging the slider in a left or right direction.
Step 5: Add Overlays and Filters for an Improvised Colour Scheme
To enhance the thematic appeal of your slideshow, consider desaturating the colours of the included images with the extensive range of visual effects and overlays available in the ‘Effects’ tab of the software’s editing timeline. Opening the tab, you are exposed to a series of ‘Filter and Overlay’ categories, that have further subdivisions of Light Leaks, Sepia Tone and Lomography.
To add a particular effect, place it in the timeline track above the desired clip or image. Observe the changes in the ‘Preview Panel’ and proceed to adjust the effect settings if required, by double clicking on the particular effect.
Step 6: Include Motion Graphic Elements
To supplement your slideshow with elegant motion graphics, navigate to the ‘Elements’ tab in the editor timeline. From here, you can access and choose any suitable motion graphic template from a diversity of available choices, to include within the project timeline. The step is completely optional and you should pay attention to the style of content presentation and the cause of creation of your slideshow when choosing to add these elements to the same.
Step 7: Record Voiceovers and Create Soundtracks
To record a voiceover for your slideshow, navigate to the ‘Media’ tab and tap the ‘Record’ dropdown menu. Click on ‘Record Voiceover’ in the list of options that appears. The ‘Record Audio’ icon pops up and you now need to select a microphone to be used in the recording process. When you are ready, tap the ‘Record’ button to let the recording begin.
You can now see your voice recording appear in the ‘Media’ tab with the previously imported media files, ready to be placed within the audio track of the project timeline. Filmora’s audio library is a storehouse of free access music and audio effects. To add one to your slideshow, navigate and click on the ‘Audio’ tab to select from the extensive Rock, Young & Bright, Electronic, etc., music subcategories till you get the perfect match for your presentation.
Once you have selected all the music tracks, place them one by one on the project timeline and move ahead with adjusting their play durations.
Step 8: Export Your Creation
When you are satisfied with your work, you can export the slideshow directly from Filmora to a number of media sharing platforms. All you need to do is, navigate to and tap the ‘Export’ button in the top right corner of the editor screen and proceed to set the resolution and frame rate, and select the output file format of your created slideshow in the ‘Export Window’ that appears.
When you are ready with everything, click on the ‘Export’ button at the bottom right corner of the screen to share your slideshow across different platforms, including YouTube, Instagram, Vimeo, etc.
The time required by Filmora to render your slideshow on the chosen platform will depend on the output file size. Considering the fact that larger files require a much longer time to be rendered, it would be a smart decision to limit the file size of your slideshow within 500 MB.
● Ending Thoughts →
● Instagram slideshows are exciting means of diving into fun-filled entertainment with your social media peers.
● When looking for solutions on how to create a slideshow on Instagram, there are loads of choices in the software market.
● Talking of best creator alternatives, you can pick the Wondershare Filmora slideshow developer program to make an amazing Insta story slideshow.
Techniques for Making After Effects 2D Animation
Blender is a widely popular animation tool that designers primarily use to create 3D animations. It offers a full-scale editing panel and a plethora of features that allow designers to create visually enticing 3D animations for videos, games, and marketing purposes. But, can you use Blender to create 2D animations? Even though the tool is marketed as a 3D animation creator, it’s worth noting that one can use it for 2D animations as well. Now, the process may not be as straightforward as using a dedicated 2D animation creator, you can still get the job done using Blender. This will be pretty helpful if you are already a Blender user and want to create 2D animations for a project.
To help you along the way, we have put together a detailed guide on how to create Blender 2D animations and use them in your videos to make them look more stunning. So, without any further ado, let’s get started.
In this article
01 [Is Blender 2D Animation As Awesome AS 3D?](#Part 1)
02 [How to Mix 2D & 3D Animation in Blender?](#Part 2)
03 [5 Amazing Blender 2D Animation Examples](#Part 3)
Part 1 Is Blender 2D Animation As Awesome AS 3D?
There’s no arguing the fact that Blender is a remarkable tool for 3D animations. Its worldwide popularity is clear proof of what one can achieve while creating a 3D animation with Blender. But, the real question is - are Blender 2D animations as good as their 3D alternatives. Well, the answer is Yes! Blender has a built-in feature known as Grease Pencil that’s specifically designed to create 2D animations. With Grease Pencil, you can create different 2D layouts from scratch and turn them into visually appealing animations to engage the potential viewers.
Part 2 How to Mix 2D & 3D Animation in Blender?
So, how can you create 2D animations in Blender? Well, it depends! The process to create a 2D animation in Blender mainly depends on what you want to design. You can find different Blender 2D animation tutorials on YouTube and use them to get started with 2D animations in Blender. But, we would like to point out that there’s a generic process that’ll remain consistent in every situation. If you are also getting started with creating 2D animations in Blender, here’s the step-by-step process that’ll help you start sailing in the right direction and make the 2D animation designing a hassle-free task.
Step 1
First and foremost, launch Blender on your system and set it up to get started. On the home screen, click on “File>New” and then, select “2D Animation”.

Step 2
Now, click on the Grease Pencil tool and use it to draw any shape on the canvas. If you want to add multiple objects to the animation, you can also draw multiple shapes.

Step 3
The next step would be to apply the array modifier to these shapes, considering you want to add a specific movement to them. So, add an array modifier first and then apply it over the desired shapes.
Step 4
After you have applied the array modifier, go ahead and start adding colors to the animation. Keep in mind the more colors you use, the better the Blender 2D animation will appear at the end.

Step 5
Now, through the editing panel, right-click on the shape you’ve drawn on the screen and then, select “Rotation and Scale”. A separate editing window will pop up on your screen. Here you can customize the movement of the object by changing its scaling options through keyframing.
That’s it; your 2D animation is now ready and you can save it on your computer.
Part 3 5 Amazing Blender 2D Animation Tutorials
So, now that you know how to create Blender 2D animations, let’s take a look at a few of the 2D animation tutorials that’ll help you get started with your first animation. All these tutorials are available on YouTube and share a detailed insight into different elements of using Blender to create 2D animation.
1. Blender Guru’s Donut Tutorial
If you search Blender on YouTube, this will be the first video you’ll see in the search results. With 11 million views on YouTube, this Blender 2D animation tutorial is one of the most sought-after tutorials on the platforms.
This 14-minute long video will walk you through the step-by-step process of creating a dedicated 2D animation for a donut using different elements of Blender. What’s more interesting is that there’s a second part to this video that’ll help you move a step forward and dive into advanced editing. Basically, if you want to get familiar with Blender’s 2D animation architecture, this video will help you embark on the right track.
2. Blender Lighting Tutorial
Gleb Alexandrov is undoubtedly one of the most talented animation experts who has created hundreds of stunning animations during his career. In this video, he has shared his years of knowledge and expertise and explained different ways to use lighting in your Blender 2D animation.
If you have ever worked on animation or even a regular YouTube video in the past, you may already be familiar with the importance of lighting. If the lighting is right, the subjects look more stunning and the overall frame becomes visually engaging. If you also want to know how to use lighting in a 2D animation, this 19-minutes long video is your answer.
3. Blender Fundamentals
If you are an absolute beginner, it would be better to first familiarize yourself with different elements of the software. Without knowing what a particular tool can do, you’ll most likely struggle to pour your creativity into the Blender 2D animation. So, before working on your first 2D animation, make sure to take your time to go through these Blender 2D animation tutorials uploaded by the tech giant itself.
Keep in mind that it’s not a single video, but a series of episodes that’ll walk you through the basics of Blender and how to start with your first 2D/3D animation. If you are serious about working with Blender, this series is your one-stop solution to get familiar with the application.
4. Character Creation and Rigging
Every 2D animation requires at least one character that would act as the main subject of the animation. And, in case you are planning to create a 3D animation with extensive movement, you’ll also have to incorporate Rigging to ensure that any movement looks realistic.
This video is for anyone who has a basic understanding of 2D animation in Blender and wants to step up their game. Here you’ll learn how to design a specific character on the canvas and how to use rigging to configure its movement. Again, this is not a single video, but a series of episodes, which means it would be better if you sit with your coffee in your hand.
5. CG Geek’s 2D Animation Tutorial in Blender
Now, if you are specifically looking for a video that only talks about Blender 2D animations and nothing else, this tutorial by CG Geek is the most suitable option. In this video, CG Geek goes on explaining how to use the Grease Pencil feature in Blender for 2D animation. He has also explained how to keyframe your 2D animation on Blender’s timeline so that any movement looks as realistic as possible.
6. Wondershare Filmora - A Reliable Alternative to Blender for Video Editors
Now, if you are a video editor and only want to create an animation for one of your videos, it would not be a wise decision to use Blender. Why? Because the tool has a steep learning curve and it’s not worth investing your time if you only want to create a 10-seconds animation. So, what’s the next best solution?
The answer is Wondershare Filmora Video Editor . It’s a full-scale video editing tool that’s designed to help editors enhance their productivity through ready-to-use templates. It has a built-in media library where you’ll find dozens of animation templates. You can simply drag these templates to your timeline and customize them to match the overall theme of your video itself.
With its timeline-based editing panel, you’ll be able to speed up the overall editing process and create visually stunning videos in no time. The tool also has a stack of ready-to-use transitions, special effects, and sounds that you can apply to the video and improve the overall production quality. In short, if your only goal is to add a 2D animation to your video, it won’t be a wise decision to rely on Blender. Instead, download and install Wondershare Filmora Pro on your system and use it to edit the video.
For Win 7 or later (64-bit)
For macOS 10.12 or later
Key Takeaways from This Episode
● Even though Blender is a3D animation software, one can use it to create stunning 2D animations as well..
● Blender has a dedicated feature known as “Grease Pencil” that’ll allow you to create your 2D animations and customize them to make them look stunning.
● Despite its advanced features, Blender is difficult to use. So, if you are looking for an alternative to Blender (only if you want to create 2D animations for your videos), Wondershare Filmora Pro is the right solution.
02 [How to Mix 2D & 3D Animation in Blender?](#Part 2)
03 [5 Amazing Blender 2D Animation Examples](#Part 3)
Part 1 Is Blender 2D Animation As Awesome AS 3D?
There’s no arguing the fact that Blender is a remarkable tool for 3D animations. Its worldwide popularity is clear proof of what one can achieve while creating a 3D animation with Blender. But, the real question is - are Blender 2D animations as good as their 3D alternatives. Well, the answer is Yes! Blender has a built-in feature known as Grease Pencil that’s specifically designed to create 2D animations. With Grease Pencil, you can create different 2D layouts from scratch and turn them into visually appealing animations to engage the potential viewers.
Part 2 How to Mix 2D & 3D Animation in Blender?
So, how can you create 2D animations in Blender? Well, it depends! The process to create a 2D animation in Blender mainly depends on what you want to design. You can find different Blender 2D animation tutorials on YouTube and use them to get started with 2D animations in Blender. But, we would like to point out that there’s a generic process that’ll remain consistent in every situation. If you are also getting started with creating 2D animations in Blender, here’s the step-by-step process that’ll help you start sailing in the right direction and make the 2D animation designing a hassle-free task.
Step 1
First and foremost, launch Blender on your system and set it up to get started. On the home screen, click on “File>New” and then, select “2D Animation”.
Step 2
Now, click on the Grease Pencil tool and use it to draw any shape on the canvas. If you want to add multiple objects to the animation, you can also draw multiple shapes.
Step 3
The next step would be to apply the array modifier to these shapes, considering you want to add a specific movement to them. So, add an array modifier first and then apply it over the desired shapes.
Step 4
After you have applied the array modifier, go ahead and start adding colors to the animation. Keep in mind the more colors you use, the better the Blender 2D animation will appear at the end.
Step 5
Now, through the editing panel, right-click on the shape you’ve drawn on the screen and then, select “Rotation and Scale”. A separate editing window will pop up on your screen. Here you can customize the movement of the object by changing its scaling options through keyframing.
That’s it; your 2D animation is now ready and you can save it on your computer.
Part 3 5 Amazing Blender 2D Animation Tutorials
So, now that you know how to create Blender 2D animations, let’s take a look at a few of the 2D animation tutorials that’ll help you get started with your first animation. All these tutorials are available on YouTube and share a detailed insight into different elements of using Blender to create 2D animation.
1. Blender Guru’s Donut Tutorial
If you search Blender on YouTube, this will be the first video you’ll see in the search results. With 11 million views on YouTube, this Blender 2D animation tutorial is one of the most sought-after tutorials on the platforms.
This 14-minute long video will walk you through the step-by-step process of creating a dedicated 2D animation for a donut using different elements of Blender. What’s more interesting is that there’s a second part to this video that’ll help you move a step forward and dive into advanced editing. Basically, if you want to get familiar with Blender’s 2D animation architecture, this video will help you embark on the right track.
2. Blender Lighting Tutorial
Gleb Alexandrov is undoubtedly one of the most talented animation experts who has created hundreds of stunning animations during his career. In this video, he has shared his years of knowledge and expertise and explained different ways to use lighting in your Blender 2D animation.
If you have ever worked on animation or even a regular YouTube video in the past, you may already be familiar with the importance of lighting. If the lighting is right, the subjects look more stunning and the overall frame becomes visually engaging. If you also want to know how to use lighting in a 2D animation, this 19-minutes long video is your answer.
3. Blender Fundamentals
If you are an absolute beginner, it would be better to first familiarize yourself with different elements of the software. Without knowing what a particular tool can do, you’ll most likely struggle to pour your creativity into the Blender 2D animation. So, before working on your first 2D animation, make sure to take your time to go through these Blender 2D animation tutorials uploaded by the tech giant itself.
Keep in mind that it’s not a single video, but a series of episodes that’ll walk you through the basics of Blender and how to start with your first 2D/3D animation. If you are serious about working with Blender, this series is your one-stop solution to get familiar with the application.
4. Character Creation and Rigging
Every 2D animation requires at least one character that would act as the main subject of the animation. And, in case you are planning to create a 3D animation with extensive movement, you’ll also have to incorporate Rigging to ensure that any movement looks realistic.
This video is for anyone who has a basic understanding of 2D animation in Blender and wants to step up their game. Here you’ll learn how to design a specific character on the canvas and how to use rigging to configure its movement. Again, this is not a single video, but a series of episodes, which means it would be better if you sit with your coffee in your hand.
5. CG Geek’s 2D Animation Tutorial in Blender
Now, if you are specifically looking for a video that only talks about Blender 2D animations and nothing else, this tutorial by CG Geek is the most suitable option. In this video, CG Geek goes on explaining how to use the Grease Pencil feature in Blender for 2D animation. He has also explained how to keyframe your 2D animation on Blender’s timeline so that any movement looks as realistic as possible.
6. Wondershare Filmora - A Reliable Alternative to Blender for Video Editors
Now, if you are a video editor and only want to create an animation for one of your videos, it would not be a wise decision to use Blender. Why? Because the tool has a steep learning curve and it’s not worth investing your time if you only want to create a 10-seconds animation. So, what’s the next best solution?
The answer is Wondershare Filmora Video Editor . It’s a full-scale video editing tool that’s designed to help editors enhance their productivity through ready-to-use templates. It has a built-in media library where you’ll find dozens of animation templates. You can simply drag these templates to your timeline and customize them to match the overall theme of your video itself.
With its timeline-based editing panel, you’ll be able to speed up the overall editing process and create visually stunning videos in no time. The tool also has a stack of ready-to-use transitions, special effects, and sounds that you can apply to the video and improve the overall production quality. In short, if your only goal is to add a 2D animation to your video, it won’t be a wise decision to rely on Blender. Instead, download and install Wondershare Filmora Pro on your system and use it to edit the video.
For Win 7 or later (64-bit)
For macOS 10.12 or later
Key Takeaways from This Episode
● Even though Blender is a3D animation software, one can use it to create stunning 2D animations as well..
● Blender has a dedicated feature known as “Grease Pencil” that’ll allow you to create your 2D animations and customize them to make them look stunning.
● Despite its advanced features, Blender is difficult to use. So, if you are looking for an alternative to Blender (only if you want to create 2D animations for your videos), Wondershare Filmora Pro is the right solution.
Also read:
- 10 Classical Animated Cartoon Types With Examples
- Updated In 2024, Are You Head Over Heels With 3D Animation Design?
- Ways to Stop Animation From Looping in Unity
- New Is It That Easy to Make My Animated Character
- How to Combine Multiple GIFs Into One with GIF Combiner
- New 2024 Approved Top 10 Best and Fast Ways to Turn Image Into Gif
- Want to Make a Meme GIF? Heres How to Do for 2024
- 5 Must Try Ways to Add GIF in Text Message on Android
- Updated In 2024, Some Techniques for Creating Animated Logo That Few People Know About
- How to Draw A Skeleton Cartoon – A Step by Step Guide
- Updated What Is Motion Graphics
- Updated 10 Scary Anime Girls That Will Make You Creepy
- New How to Make Creative Animation Videos
- The Complete Guide to Whiteboard Animation for 2024
- In 2024, How to Obtain and Create Animated GIF Icons Like a Pro?
- New 2024 Approved Before You Learn 3D Animation Some Things You Should Know
- 2024 Approved Finding Some Different Ways to Animated Cartoon of Yourself
- New In 2024, 10 Cartoon Canvas Painting Ideas for Total Beginners
- Updated In 2024, 10 Cartoon Character Makers to Make Animated Characters
- How to Make a Video a Live Photo for 2024
- New 5 Websites with Animated Logos That Catch Your Eyes for 2024
- New Creative Ways to Create iPhone Text GIF for 2024
- Updated 2024 Approved The Coolest Anime Characters Ever| List of Top Favorites
- Updated 8 Blender 3D Animation Tutorials for 2024
- New 2024 Approved How to Create Photo Collage Frame for Free in Minutes?
- New In 2024, Top 10 Popular Cartoons You Forgot Existed
- Updated 5 Must Try Ways to Add and Send GIF in Text Message on Android for 2024
- Updated Best 15 2D Animation Software Free That Worth to Try
- Updated 2024 Approved Ways You Can Master to Find 10 Best Free Animated Text Generator
- In 2024, How to Migrate Android Data From Motorola Moto G84 5G to New Android Phone? | Dr.fone
- Best Pokemons for PVP Matches in Pokemon Go For Infinix Smart 8 | Dr.fone
- How Can I Use a Fake GPS Without Mock Location On Vivo X Flip? | Dr.fone
- In 2024, Different Methods To Unlock Your Apple iPhone 13 mini | Dr.fone
- Vivo Y100 5G Bootloop Problem, How to Fix it Without Data Loss | Dr.fone
- Does Life360 Notify When You Log Out On Poco M6 Pro 4G? | Dr.fone
- 8 Solutions to Fix Find My Friends Location Not Available On Oppo A58 4G | Dr.fone
- In 2024, How to Unlock Apple iPhone 13 Pro Passcode without iTunes without Knowing Passcode? | Dr.fone
- 8 Solutions to Solve YouTube App Crashing on Samsung Galaxy A25 5G | Dr.fone
- In 2024, Full Guide to Bypass Vivo Y200e 5G FRP
- How to Cast Samsung Galaxy M14 4G to Computer for iPhone and Android? | Dr.fone
- How to Detect and Stop mSpy from Spying on Your Oppo Reno 10 5G | Dr.fone
- In 2024, CatchEmAll Celebrate National Pokémon Day with Virtual Location On Google Pixel 7a | Dr.fone
- Wondering the Best Alternative to Hola On Samsung Galaxy XCover 7? Here Is the Answer | Dr.fone
- 6 Proven Ways to Unlock Realme C67 4G Phone When You Forget the Password
- In 2024, The Most Useful Tips for Pokemon Go Ultra League On Poco F5 Pro 5G | Dr.fone
- Pokemon Go No GPS Signal? Heres Every Possible Solution On Apple iPhone 12 Pro | Dr.fone
- In 2024, Pokemon Go No GPS Signal? Heres Every Possible Solution On Realme Narzo 60x 5G | Dr.fone
- 6 Proven Ways to Unlock Samsung Galaxy A54 5G Phone When You Forget the Password
- How to Upgrade iPhone XS without Losing Anything? | Dr.fone
- In 2024, Top 10 Best Spy Watches For your Samsung Galaxy S23 | Dr.fone
- The way to recover deleted contacts on Galaxy S24 without backup.
- Possible solutions to restore deleted pictures from Samsung Galaxy S24+.
- How to Spy on Text Messages from Computer & Xiaomi Redmi Note 12R | Dr.fone
- In 2024, Does Oppo Reno 9A Have Find My Friends? | Dr.fone
- 9 Solutions to Fix OnePlus Nord 3 5G System Crash Issue | Dr.fone
- How To Free Up iPhone 11 Pro Space | Dr.fone
- Solved Microsoft Excel 2019 File Error The document cannot be saved | Stellar
- In 2024, How to use iSpoofer on Google Pixel Fold? | Dr.fone
- Title: New In 2024, Why These 10+ Top Text Motion Templates Are Worth Your Attention
- Author: Elon
- Created at : 2024-05-19 03:05:58
- Updated at : 2024-05-20 03:05:58
- Link: https://animation-videos.techidaily.com/new-in-2024-why-these-10plus-top-text-motion-templates-are-worth-your-attention/
- License: This work is licensed under CC BY-NC-SA 4.0.
