
:max_bytes(150000):strip_icc():format(webp)/TheOscarsStatue-33f6c30d7ffd4694a4dd1d1113de57f5.jpg)
New Little Known Techniques of Motion Graphics in Premiere Pro for 2024
Little Known Techniques of Motion Graphics in Premiere Pro
Little Known Techniques of Motion Graphics in Premiere Pro
An easy yet powerful editor
Numerous effects to choose from
Detailed tutorials provided by the official channel
Video editing has recently gained momentum in content design, and with Motion Graphics Premiere Pro editing templates, it has all the fun in the house.
In this article
01 [5 Editing Motion Graphics Techniques in Adobe Premiere Pro](#Part 1)
02 [10 Free Motion Graphics Templates for Premiere Pro](#Part 2)
03 [How to Use Motion Graphics Templates in Premiere Pro](#Part 3)
Part 1 5 Editing Motion Graphics Techniques in Adobe Premiere Pro
A variety of editing techniques of motion graphics for Premiere Pro are ready to give a classy touch to your videos. Let’s brush up through the best you can have.
01Cropping Clips
Cropping your videos allows you to fit them into your required size frames. To remove any unwanted portions of your edits, crop them in adobe Premiere Pro with your desired aspect ratio to give that ‘just perfect’ look to your edits.
Start from importing and adding your footage to your project panel, followed by creating a fresh composition. Now, choose ‘Crop’ from the Effects panel to add it to your clip, either by double-clicking or dragging and dropping.
02Trimming Clips
If you want to adjust the ‘In and Out’ play back sequence of your edited clips, you can go for trimming them. You can trim your clips in the Source and Program monitors, or even in the Premiere Pro timeline. You can choose from the standard cut, jump cut, B-roll cut etc, to suit your editing needs and styles.
All you need to do is open the clip, mark the In and Out points, adjust their sequence with previous or next edits in your cue and that’s it. You can also use keyboard shortcuts for this purpose. However, you need to preset these shortcuts before you begin editing your clips.
03Adding Text
You can try adding simple and formatted texts to enhance your video outlook. This comes handy when you are aiming to deliver specific messages to your audience. You can add normal write-ups, callout quotations and customize your text in a number of exciting styles. Just go to the Type tool, format your text in the Text Box and you’re done!
04Audio Level Adjustment
Want to add spark to your clips with a synchronized audio visual effect? After you finish trimming and cropping, consider opting for an in-line audio adjustment. This will definitely enhance your video and take your craft to the next level.
All you need to do is select an audio clip, click on ‘Audio Gain’ in the drop down menu, set desired Decibel count in the Audio Gain Box and select ‘OK’.
05Exporting Videos
Once you are done with your video craft, you should certainly look forward to making it available for social exposure. To do this, select appropriate sequence constraints in the Export window, choose the export platform, format and Codec, make fine tuning and bit rate adjustments and finish export either in Premiere Pro or Media Encoder. You may also save these settings for your next exports.
Part 2 Free Motion Graphics Templates for Premiere Pro
Let’s have a look into your best choices of free motion graphic templates for Premiere Pro:
0114 Premiere Pro Lumetri Looks
Want to enhance your video creativity with that amazing Hollywood feel? You can undoubtedly opt for the Premiere Lumetri Looks template that gives you the liberty to provide a Hollywood oriented color scheme to your videos, just like those incredible color patterns one would see in Dr. Strangelove, The Martian and many more famous Hollywood flicks.

0215 Animated Lower Thirds
This template comes handy when you need to add lower thirds to your videos, either to introduce different content varieties or to objectify your video components. You can use this template with ease in your personal as well as commercial videos to give them that explicit professional touch.

03Horror Trailer Titles
If horror videos turn you on, use this template in video creations to customize them with that intense and scary feel! This template helps you add scary title slates that are just enough to add a terrifying quotient to your videos. From personal to professional, this template can add intensity to any video type.
04Instagram Stories Premiere Pro Template
This template is a definite catch for those Instagram lovers who constantly experiment to post engaging stories on the platform. If you want your IG stories to grab the talk, go for this animation template to customize photos and text so that they get the buzz among your followers.

05Dust Overlays
Comprising of studio-like effects, this template allows you to enhance your films with high quality dynamic animation in appealing texture variations. Use this template to create videos with those attractive misty backgrounds with cohesive variations in lighting with adjustable power effects.
06Travel Stories Premiere Pro Template
If you are into travel blogging and trying to add spunk to your stories and videos, this template is there to help you out with its catchy text animations and flowy transitions. Available in an upgraded configuration, this template is everything you need to make your travel blogs hover the trending charts.

07Digital Slideshow
Go for this template to add spark to your graphic presentations. Designed primarily for professional usage, it is equally effective in personal projects also. Developed by Evanto Elements, the company offers unlimited access on subscription.

08Free Quotes Premiere Pro Template
If you want to add animated quotes to your video creations, this template is a must try for you. Providing 6 quoting options and a ‘click to change’ text and color interface with convenient customizability keeps it among the top choices for hastle free motion editing.

09Cinematic Title Style Library
If you are bored with those conventional Premiere Pro titles but don’t want to invest time in creating styles of your own, you can use the modernized title styles from this library to enhance your creations with that intense cinematic feel. You can use them comfortably for personal and commercial purposes.

10Space Background Elements
This set of background templates is designed to provide realistic settings to video creators who work on science fiction and space oriented themes. Loaded with different real-time effects, this template provides the ultimate feel of a space travel in 4K.

Part 2 Alternatives to Premiere Pro: Filmora
If not Premiere Pro, you can go for Filmora as a dependable alternative. It’s an exquisite set of amazing and top-notch tools for creating g and editing videos. Wondershare introduced Filmora as an effective, easy-to-use editing software that’s equally caters to the editing pace of beginners as well as experts. You can use Filmora with Windows and macOS.
Packed with a range of appealing customization choices, Filmora comes to you in four principal versions:
● Wondershare Filmora Video Editor
Suitable for beginners, this is the basic and the simplest version having inbuilt editing templates. It’s desktop compatible software.
For Win 7 or later (64-bit)
For macOS 10.12 or later
● Filmora
Android and iOS compatibility in this version of Filmora brought video editing from PCs and laptops into smartphones.

● FilmoraScrn
This version allows you to record your editing screen if you’re a working on Windows.

Part 4 How to Use Motion Graphics Templates in Premiere Pro
After getting familiar with Premiere Pro editing and templates, let’s get into using these adobe premiere motion graphics templates for an exemplary video creating experience. Take up the following steps to get started.
● Go to Premiere Pro Essential Graphics Panel
In the Premiere Pro startup page, select ‘Window’ from the toolbar and select ‘Essential Graphics’ from the drop down menu.
● Add Motion Graphics Templates to Library
Click the ‘Import’ button present at the bottom in the right side of the Essential Graphics Panel. Go to and choose your downloaded motion graphics template file and select ‘Open’. Your file is added to the Essential Graphics Library.
● Drag-Drop the MOGRT to Timeline
‘Drag’ your motion graphics template from the library and ‘Drop’ it on your Timeline.
● Customize Your Template
Go to the ‘Edit’ option in the Essential Graphics Panel to look for customization choices available for your selected motion graphics adobe template.
● Key Takeaways from This Episode →
● Adobe Premiere Pro is an amazing video creation and editing tool that ensures to give a professional class to your edits. Be it personal creativity or professional expertise, this software is all set to give you a wholesome editing experience you will never forget.
● Loaded with an extensive variety of editing templates, available for free and on subscription, adobe premiere pro is a one stop access to all your editing concerns. Its customizable effects will certainly make your creations stand out in the league.
● Video editing is a high in demand craft of excellence. With advancements in software developments, the creative market offers you a pool of over the top editing software that is ready to give that classy spunk to your videos. So just your own from the pool and go on a spree of creating trend setting videos that never miss out on grabbing the attention of everyone around!
Video editing has recently gained momentum in content design, and with Motion Graphics Premiere Pro editing templates, it has all the fun in the house.
In this article
01 [5 Editing Motion Graphics Techniques in Adobe Premiere Pro](#Part 1)
02 [10 Free Motion Graphics Templates for Premiere Pro](#Part 2)
03 [How to Use Motion Graphics Templates in Premiere Pro](#Part 3)
Part 1 5 Editing Motion Graphics Techniques in Adobe Premiere Pro
A variety of editing techniques of motion graphics for Premiere Pro are ready to give a classy touch to your videos. Let’s brush up through the best you can have.
01Cropping Clips
Cropping your videos allows you to fit them into your required size frames. To remove any unwanted portions of your edits, crop them in adobe Premiere Pro with your desired aspect ratio to give that ‘just perfect’ look to your edits.
Start from importing and adding your footage to your project panel, followed by creating a fresh composition. Now, choose ‘Crop’ from the Effects panel to add it to your clip, either by double-clicking or dragging and dropping.
02Trimming Clips
If you want to adjust the ‘In and Out’ play back sequence of your edited clips, you can go for trimming them. You can trim your clips in the Source and Program monitors, or even in the Premiere Pro timeline. You can choose from the standard cut, jump cut, B-roll cut etc, to suit your editing needs and styles.
All you need to do is open the clip, mark the In and Out points, adjust their sequence with previous or next edits in your cue and that’s it. You can also use keyboard shortcuts for this purpose. However, you need to preset these shortcuts before you begin editing your clips.
03Adding Text
You can try adding simple and formatted texts to enhance your video outlook. This comes handy when you are aiming to deliver specific messages to your audience. You can add normal write-ups, callout quotations and customize your text in a number of exciting styles. Just go to the Type tool, format your text in the Text Box and you’re done!
04Audio Level Adjustment
Want to add spark to your clips with a synchronized audio visual effect? After you finish trimming and cropping, consider opting for an in-line audio adjustment. This will definitely enhance your video and take your craft to the next level.
All you need to do is select an audio clip, click on ‘Audio Gain’ in the drop down menu, set desired Decibel count in the Audio Gain Box and select ‘OK’.
05Exporting Videos
Once you are done with your video craft, you should certainly look forward to making it available for social exposure. To do this, select appropriate sequence constraints in the Export window, choose the export platform, format and Codec, make fine tuning and bit rate adjustments and finish export either in Premiere Pro or Media Encoder. You may also save these settings for your next exports.
Part 2 Free Motion Graphics Templates for Premiere Pro
Let’s have a look into your best choices of free motion graphic templates for Premiere Pro:
0114 Premiere Pro Lumetri Looks
Want to enhance your video creativity with that amazing Hollywood feel? You can undoubtedly opt for the Premiere Lumetri Looks template that gives you the liberty to provide a Hollywood oriented color scheme to your videos, just like those incredible color patterns one would see in Dr. Strangelove, The Martian and many more famous Hollywood flicks.
0215 Animated Lower Thirds
This template comes handy when you need to add lower thirds to your videos, either to introduce different content varieties or to objectify your video components. You can use this template with ease in your personal as well as commercial videos to give them that explicit professional touch.
03Horror Trailer Titles
If horror videos turn you on, use this template in video creations to customize them with that intense and scary feel! This template helps you add scary title slates that are just enough to add a terrifying quotient to your videos. From personal to professional, this template can add intensity to any video type.
04Instagram Stories Premiere Pro Template
This template is a definite catch for those Instagram lovers who constantly experiment to post engaging stories on the platform. If you want your IG stories to grab the talk, go for this animation template to customize photos and text so that they get the buzz among your followers.
05Dust Overlays
Comprising of studio-like effects, this template allows you to enhance your films with high quality dynamic animation in appealing texture variations. Use this template to create videos with those attractive misty backgrounds with cohesive variations in lighting with adjustable power effects.
06Travel Stories Premiere Pro Template
If you are into travel blogging and trying to add spunk to your stories and videos, this template is there to help you out with its catchy text animations and flowy transitions. Available in an upgraded configuration, this template is everything you need to make your travel blogs hover the trending charts.
07Digital Slideshow
Go for this template to add spark to your graphic presentations. Designed primarily for professional usage, it is equally effective in personal projects also. Developed by Evanto Elements, the company offers unlimited access on subscription.
08Free Quotes Premiere Pro Template
If you want to add animated quotes to your video creations, this template is a must try for you. Providing 6 quoting options and a ‘click to change’ text and color interface with convenient customizability keeps it among the top choices for hastle free motion editing.
09Cinematic Title Style Library
If you are bored with those conventional Premiere Pro titles but don’t want to invest time in creating styles of your own, you can use the modernized title styles from this library to enhance your creations with that intense cinematic feel. You can use them comfortably for personal and commercial purposes.
10Space Background Elements
This set of background templates is designed to provide realistic settings to video creators who work on science fiction and space oriented themes. Loaded with different real-time effects, this template provides the ultimate feel of a space travel in 4K.
Part 2 Alternatives to Premiere Pro: Filmora
If not Premiere Pro, you can go for Filmora as a dependable alternative. It’s an exquisite set of amazing and top-notch tools for creating g and editing videos. Wondershare introduced Filmora as an effective, easy-to-use editing software that’s equally caters to the editing pace of beginners as well as experts. You can use Filmora with Windows and macOS.
Packed with a range of appealing customization choices, Filmora comes to you in four principal versions:
● Wondershare Filmora Video Editor
Suitable for beginners, this is the basic and the simplest version having inbuilt editing templates. It’s desktop compatible software.
For Win 7 or later (64-bit)
For macOS 10.12 or later
● Filmora
Android and iOS compatibility in this version of Filmora brought video editing from PCs and laptops into smartphones.
● FilmoraScrn
This version allows you to record your editing screen if you’re a working on Windows.
Part 4 How to Use Motion Graphics Templates in Premiere Pro
After getting familiar with Premiere Pro editing and templates, let’s get into using these adobe premiere motion graphics templates for an exemplary video creating experience. Take up the following steps to get started.
● Go to Premiere Pro Essential Graphics Panel
In the Premiere Pro startup page, select ‘Window’ from the toolbar and select ‘Essential Graphics’ from the drop down menu.
● Add Motion Graphics Templates to Library
Click the ‘Import’ button present at the bottom in the right side of the Essential Graphics Panel. Go to and choose your downloaded motion graphics template file and select ‘Open’. Your file is added to the Essential Graphics Library.
● Drag-Drop the MOGRT to Timeline
‘Drag’ your motion graphics template from the library and ‘Drop’ it on your Timeline.
● Customize Your Template
Go to the ‘Edit’ option in the Essential Graphics Panel to look for customization choices available for your selected motion graphics adobe template.
● Key Takeaways from This Episode →
● Adobe Premiere Pro is an amazing video creation and editing tool that ensures to give a professional class to your edits. Be it personal creativity or professional expertise, this software is all set to give you a wholesome editing experience you will never forget.
● Loaded with an extensive variety of editing templates, available for free and on subscription, adobe premiere pro is a one stop access to all your editing concerns. Its customizable effects will certainly make your creations stand out in the league.
● Video editing is a high in demand craft of excellence. With advancements in software developments, the creative market offers you a pool of over the top editing software that is ready to give that classy spunk to your videos. So just your own from the pool and go on a spree of creating trend setting videos that never miss out on grabbing the attention of everyone around!
Ways to Stop Animation From Looping in Unity
How to Stop Animation from Looping in Unity
An easy yet powerful editor
Numerous effects to choose from
Detailed tutorials provided by the official channel
Unity is an IDE interface all designed exclusively for game developers. However, you can do much more with Unity than game development. But, our main concern here is something else than this subject. You’re looking for easy tutorials on Unity stop animation!

And luckily, we’ve got you covered as we’ve briefly explained how to perform Unity stop animation from looping and the steps to make a smooth animation.
In this article
01 [What is Unity Used for?](#Part 1)
02 [How to Stop Animation Playing in Loop in Unity?](#Part 2)
03 [How to Smooth an Animation in Unity?](#Part 3)
Part 1 What is Unity Used for?
Unity is a software tool friendly to all the game developers out there. This tool is used by the large community of game developers to power and create their game development projects. And, the software is more of a professional means and not a simple pared-down ‘game builder .’Unity also offers one of the most significant inbuilt features like rendering, physics, and collision detection. Thus, one of the powerful aspects of Unity is that game developers need not go out of the box and create everything from scratch. Instead, they are available with the physics engine required to develop games quickly. Another robust feature of Unity is that it includes an excellent ‘Asset Store’ where developers can upload their creations and showcase them to the whole community. So, that’s Unity and its uses in a broader scope!
Before we take you through the next section, it’s important to mention that Unity is also known as cross-platform IDE, where IDE stands for ‘integrated development environment.’ So, it can be called more of an interface with access to all the tools and resources required to develop games.
Apart from the game development, Unity is known for other excellent usage purposes as:
● Simulations
● Animation
● Architectural Visualization
● Previsualization for Film
● Interactive Experiences
Among these features only, we’ll describe Unity stop animation from looping in detail.
Part 2 How to Stop Animation Playing in Loop in Unity?
As we said, we’ll describe to you the most accessible definition of how to stop Animation in Unity. Thus, there are simple steps that we’d like to define firsthand before explaining the whole procedure with an image-centric step-by-step guide.
So, those simple steps to stop motion animation in After Effects in the loop also go like below:
Step 1 Go to the Project tab and select Animation.
Step 2 Open the Inspector tab.
Step 3 Uncheck the checkbox Loop Time, and you’re good to go!
We’ll describe the same, i.e., Unity stop animation from looping through the step guide below.
In this guide, we’ll explain right from applying the Animation so that you’d understand better. So, let’s begin without any further ado!
01Step 1 Delete animation folder
We have already created an animation folder in the folder named as own Animation, so click that folder, click the animation folder, and then another folder along with as shown below. Hold the Shift key and click another folder. Then, right-click the Delete tab as depicted below.
Similarly, you can also delete the Animation if you wish.

02Step 2 Create an animation for the subject
Now, you may have different subjects. We’re creating Animation on Mobile Joystick for reference, as shown below.

Now, hit the Create tab on the Unity panel below. Then, proceed to save your Animation in the folder you’ve already created for the same.

03Step 3 Give positions to the animation
Firstly, hit the red-icon button used for recording, as shown below.

Give the position on the left side after you click the button. And, then, clicking almost near to 3you can give the position to the right-hand side as shown below.

Now, the animation has been set. You can see the animation from left to right if you click the Play button. So, here, you can see the results of infinite loop animation, which won’t stop.

You can follow two ways to stop this Animation in Unity from looping, and we’ll describe both methods below.
04Step 4 Stop animation Unity Way 1
Go to the animation folder where you’ve created the animation and click the New Animation icon as shown below.

Now, you have to uncheck the Loop Time tab on the top-right corner of the Unity panel.

05Step 5 Stop animation Unity Way 2
Alternatively, you can click the Animator tab on the top of the Unity panel and double-tap the New Animation button. Then, it will also delete or uncheck the loop time, as shown below.

These were all the steps to stop animation Unity.
Part 3 How to Smooth an Animation in Unity?
After done with Unity stop animation, it’s time to smooth your Unity animation. Again, we will describe it simply if you’re used to the Unity platform and then with a step guide with respective screenshots.
So, stay tuned until the end to reveal the easy steps of smoothing an animation in Unity.
Select the Dopesheet at the bottom of the animation window. Then, you need to switch to the ‘Curves’ view once you create your Animation in the Dopesheet. These animation curves help you accelerate and decelerate animations so that the movement and other things can stop and start smoothly.
So, let’s begin with the step guide tutorial on the same as follows:
For reference, take an example of a metronome object imported from Blender to Unity. Here, we’ve grouped all the pendulum objects under one rotation so that when we move the pendulum, it pivots to the correct point, as shown below.

01Add the animator
So, the first step begins with adding the Animator component to the parent object. You can do this by clicking the Add Component tab on the Unity panel’s left side, searching for Animator, and clicking the Animator.
You will also need a controller to control the animations. Go to your animation folder, right-click, and select Create> Animator Controller tab.

Let’s call or give it a name metronome animator as shown below.
Then, you need to drag this into your animator component. Again, you need to go to your animations folder, right-click, select Create> Animations tab.
Now, give this a name pendulum full swing.
02Open the animator tab
Now, open the animator tab, drag this pendulum swing animation to that panel, and double-tap the yellow-colored New Animation button.

03Create an animation
With the game object selected, the animated metronome pendulum, in this case, we’d like to animate the X component of the rotation. So, you need to click Add Property> Transform> Rotation tab and click the + sign on its right, as shown below.
Now, click the plus sign automatically to set two keyframes, one at the beginning and one at the end. Now, click on end select all, and then delete for now.

04Add keyframes to rotate the pendulum
With the first set of keyframes and the pendulum all way to the right, go halfway and change the rotation to the left on the left panel of Unity. Then, add another keyframe.

05Slow down the animation
As you can observe, the Animation of this pendulum is in a straight line and feels unnatural to the eyes. Thus, we’re required to smooth this Animation now! For this purpose, go to the Curves; you can see the pink properties of rotation as going from one side to another.

Now, you need to adjust these pink curves. Start by adding a key to one of its sides, as shown below. After that, it is all on you how slow or fasts you want these values to be.
Here, you’re all done smoothing the animation in Unity after learning the stop-animation Unity tutorial.
You can even stop motion animation on Photoshop with the above tutorial.
06Bonus Tip:
We want to introduce an excellent video editor software called Filmora Video Editor . It is from the house of Wondershare, a well-known software company worldwide.

Wondershare Filmora - Best Video Editor for Mac/Windows
5,481,435 people have downloaded it.
Build unique custom animations without breaking a sweat.
Focus on creating epic stories and leave the details to Filmora’s auto features.
Start a creative adventure with drag & drop effects and endless possibilities.
Filmora simplifies advanced features to save you time and effort.
Filmora cuts out repetition so you can move on to your next creative breakthrough.
With Filmora, you can easily add Animation and edit your videos to make them look world-class. The latest version and new updates are eye-candy and quick fix for beginner video editors.
So, please pay a visit to the Filmora website and check out its Mac and Windows version for free today.
● Key Takeaways from This Episode →
● Learning the concept and usage of Unity
● A tutorial on how to stop animation in Unity from looping
● A tutorial on how to smooth animation in Unity
● Introduction to Filmora, the top-most video editor software for beginners.
Unity is an IDE interface all designed exclusively for game developers. However, you can do much more with Unity than game development. But, our main concern here is something else than this subject. You’re looking for easy tutorials on Unity stop animation!
And luckily, we’ve got you covered as we’ve briefly explained how to perform Unity stop animation from looping and the steps to make a smooth animation.
In this article
01 [What is Unity Used for?](#Part 1)
02 [How to Stop Animation Playing in Loop in Unity?](#Part 2)
03 [How to Smooth an Animation in Unity?](#Part 3)
Part 1 What is Unity Used for?
Unity is a software tool friendly to all the game developers out there. This tool is used by the large community of game developers to power and create their game development projects. And, the software is more of a professional means and not a simple pared-down ‘game builder .’Unity also offers one of the most significant inbuilt features like rendering, physics, and collision detection. Thus, one of the powerful aspects of Unity is that game developers need not go out of the box and create everything from scratch. Instead, they are available with the physics engine required to develop games quickly. Another robust feature of Unity is that it includes an excellent ‘Asset Store’ where developers can upload their creations and showcase them to the whole community. So, that’s Unity and its uses in a broader scope!
Before we take you through the next section, it’s important to mention that Unity is also known as cross-platform IDE, where IDE stands for ‘integrated development environment.’ So, it can be called more of an interface with access to all the tools and resources required to develop games.
Apart from the game development, Unity is known for other excellent usage purposes as:
● Simulations
● Animation
● Architectural Visualization
● Previsualization for Film
● Interactive Experiences
Among these features only, we’ll describe Unity stop animation from looping in detail.
Part 2 How to Stop Animation Playing in Loop in Unity?
As we said, we’ll describe to you the most accessible definition of how to stop Animation in Unity. Thus, there are simple steps that we’d like to define firsthand before explaining the whole procedure with an image-centric step-by-step guide.
So, those simple steps to stop motion animation in After Effects in the loop also go like below:
Step 1 Go to the Project tab and select Animation.
Step 2 Open the Inspector tab.
Step 3 Uncheck the checkbox Loop Time, and you’re good to go!
We’ll describe the same, i.e., Unity stop animation from looping through the step guide below.
In this guide, we’ll explain right from applying the Animation so that you’d understand better. So, let’s begin without any further ado!
01Step 1 Delete animation folder
We have already created an animation folder in the folder named as own Animation, so click that folder, click the animation folder, and then another folder along with as shown below. Hold the Shift key and click another folder. Then, right-click the Delete tab as depicted below.
Similarly, you can also delete the Animation if you wish.
02Step 2 Create an animation for the subject
Now, you may have different subjects. We’re creating Animation on Mobile Joystick for reference, as shown below.
Now, hit the Create tab on the Unity panel below. Then, proceed to save your Animation in the folder you’ve already created for the same.
03Step 3 Give positions to the animation
Firstly, hit the red-icon button used for recording, as shown below.
Give the position on the left side after you click the button. And, then, clicking almost near to 3you can give the position to the right-hand side as shown below.
Now, the animation has been set. You can see the animation from left to right if you click the Play button. So, here, you can see the results of infinite loop animation, which won’t stop.
You can follow two ways to stop this Animation in Unity from looping, and we’ll describe both methods below.
04Step 4 Stop animation Unity Way 1
Go to the animation folder where you’ve created the animation and click the New Animation icon as shown below.
Now, you have to uncheck the Loop Time tab on the top-right corner of the Unity panel.
05Step 5 Stop animation Unity Way 2
Alternatively, you can click the Animator tab on the top of the Unity panel and double-tap the New Animation button. Then, it will also delete or uncheck the loop time, as shown below.
These were all the steps to stop animation Unity.
Part 3 How to Smooth an Animation in Unity?
After done with Unity stop animation, it’s time to smooth your Unity animation. Again, we will describe it simply if you’re used to the Unity platform and then with a step guide with respective screenshots.
So, stay tuned until the end to reveal the easy steps of smoothing an animation in Unity.
Select the Dopesheet at the bottom of the animation window. Then, you need to switch to the ‘Curves’ view once you create your Animation in the Dopesheet. These animation curves help you accelerate and decelerate animations so that the movement and other things can stop and start smoothly.
So, let’s begin with the step guide tutorial on the same as follows:
For reference, take an example of a metronome object imported from Blender to Unity. Here, we’ve grouped all the pendulum objects under one rotation so that when we move the pendulum, it pivots to the correct point, as shown below.
01Add the animator
So, the first step begins with adding the Animator component to the parent object. You can do this by clicking the Add Component tab on the Unity panel’s left side, searching for Animator, and clicking the Animator.
You will also need a controller to control the animations. Go to your animation folder, right-click, and select Create> Animator Controller tab.
Let’s call or give it a name metronome animator as shown below.
Then, you need to drag this into your animator component. Again, you need to go to your animations folder, right-click, select Create> Animations tab.
Now, give this a name pendulum full swing.
02Open the animator tab
Now, open the animator tab, drag this pendulum swing animation to that panel, and double-tap the yellow-colored New Animation button.
03Create an animation
With the game object selected, the animated metronome pendulum, in this case, we’d like to animate the X component of the rotation. So, you need to click Add Property> Transform> Rotation tab and click the + sign on its right, as shown below.
Now, click the plus sign automatically to set two keyframes, one at the beginning and one at the end. Now, click on end select all, and then delete for now.
04Add keyframes to rotate the pendulum
With the first set of keyframes and the pendulum all way to the right, go halfway and change the rotation to the left on the left panel of Unity. Then, add another keyframe.
05Slow down the animation
As you can observe, the Animation of this pendulum is in a straight line and feels unnatural to the eyes. Thus, we’re required to smooth this Animation now! For this purpose, go to the Curves; you can see the pink properties of rotation as going from one side to another.
Now, you need to adjust these pink curves. Start by adding a key to one of its sides, as shown below. After that, it is all on you how slow or fasts you want these values to be.
Here, you’re all done smoothing the animation in Unity after learning the stop-animation Unity tutorial.
You can even stop motion animation on Photoshop with the above tutorial.
06Bonus Tip:
We want to introduce an excellent video editor software called Filmora Video Editor . It is from the house of Wondershare, a well-known software company worldwide.
Wondershare Filmora - Best Video Editor for Mac/Windows
5,481,435 people have downloaded it.
Build unique custom animations without breaking a sweat.
Focus on creating epic stories and leave the details to Filmora’s auto features.
Start a creative adventure with drag & drop effects and endless possibilities.
Filmora simplifies advanced features to save you time and effort.
Filmora cuts out repetition so you can move on to your next creative breakthrough.
With Filmora, you can easily add Animation and edit your videos to make them look world-class. The latest version and new updates are eye-candy and quick fix for beginner video editors.
So, please pay a visit to the Filmora website and check out its Mac and Windows version for free today.
● Key Takeaways from This Episode →
● Learning the concept and usage of Unity
● A tutorial on how to stop animation in Unity from looping
● A tutorial on how to smooth animation in Unity
● Introduction to Filmora, the top-most video editor software for beginners.
You Can Turn a TikTok Into a GIF Now
You Can Turn a TikTok Into a GIF Now. Here’s How
An easy yet powerful editor
Numerous effects to choose from
Detailed tutorials provided by the official channel
Want to add sharing flexibility to TikTok videos? Convert them into GIFs!
In this article
01 [What is GIF TikTok?](#Part 1)
02 [How to Make a GIF From a TikTok Video](#Part 2)
Part 1 What Is TikTok GIF?
In today’s IT enhanced lifestyle, having a profound reach on social media is the new name of popularity. Everyone out there is profusely keen on creating and sharing a plethora of content varieties; memes, videos, animations and what not, across social communities. However, TikTok videos lag behind in this race; often lack the ‘Share’ flexibility.
To match up, there are solutions to convert TikTok video into GIFs. A TikTok GIF is a short, impactful and to the point clip that’s here to share fun and exciting content in the most interesting ways. If you have a bunch of TikTok videos to share with your peers, but missing out on an effective sharing solution, you can conveniently look forward to convert those videos into catchy and interesting GIFs that will definitely hold the attention of your viewers.
Feel motivated? See through the rest of this article to know some quick and easy TikTok to GIF conversion tools and software!
Part 2 How to Make a GIF From a TikTok Video
When looking through solutions to create GIF TikTok videos, you will find a pool of methods and tools available on the internet. All you need to do is select the best one for yourself and get started with converting TikTok Videos into GIFs. Given below are some of the best solutions adhering to the aforesaid concern:
01Filmora
Wondershare Filmora Video Editor is one of the best application software to create a TikTok GIF. This is a simple and smart converter application that caters to your concern in just a few minutes. What’s best is that this app is absolutely free to use and is compatible with your PC, smartphone and a variety of other devices. Here’s how you can use Filmora to convert your TikTok videos into GIFs:

Step 1: Import Your Video
Start with importing a desired TikTok video file to the Filmora timeline. You can also ‘Drag and Drop’ the video file to the editor timeline. Using this application, you have the flexibility to import your clip in almost any video format.

Step 2: Edit Your Clip
Suited to your content preferences, you can edit and enhance your clips with a variety of effects, like, cut, trim, rotate, split, etc., and make appropriate speed adjustments. You can even include text messages to make your GIF more impactful.

Wondershare Filmora
Get started easily with Filmora’s powerful performance, intuitive interface, and countless effects!
Try It Free Try It Free Try It Free Learn More >

Step 3: Let’s Save and Share!
When you are happy, save your work using the .gif file extension. That’s it! You are ready to share your creation with your social media peers.

02TikTok’s Inbuilt GIF Converter
TikTok allows you to directly convert its videos into GIFs. You can use the TikTok application in your smartphone to take up the conversion process. All you need to do is follow the steps given below:
Step 1: Select Your TikTok Video
To get started, open the TikTok application in your smartphone and select the video you want to convert into GIF.
Step 2: Share the Video
Click the ‘Share’ icon at the right of the video screen.

Step 3: Format Selection
Scroll down to the bottom of the screen and choose the ‘Share as GIF’ option. This will automatically convert your TikTok video into GIF in a few seconds.

Step 4: Save and Export
Click on the ‘Save Image’ option to save the GIF in your phone’s gallery. You can also export your creation to different social media platforms.
03Wondershare UniConverter
This one is a handy toolbox loaded with a variety of features that allow you to play with your video creativity. Using this tool, you can quickly create GIF for TikTok and also fix the size and duration of the same. This software supports almost all video formats and comes with an inbuilt editor that you can use to add effects and make your GIFs all the more interesting. This is compatible with your Windows or MacOS PC.
Take the following steps to create GIFs from TikTok videos using this software:

Step 1: Download and Launch the Application
Download the Wondershare UniConverter application to your PC from the software’s official website.
Step 2: Open GIF Maker
In the app’s welcome screen, navigate to the ‘Toolbox’ tab and select ‘GIF Maker’ from the panel that gets displayed.
Step 3: Upload Your TikTok Video
In the next pop-up window, select ‘Video to GIF’ and click on the (+) icon in the centre. You can also click on ‘Add Files’ in the top left and choose a saved TikTok video from your PC to upload.

Step 4: Trim Your Video
Trim the uploaded video to the desired portion from where you wish to create the GIF and set adequate time frames for the same. You can even drag the video thumbnail slider to trim the video.

Step 5: Let’s Get Creating!
Set the final size and frame rate from the ‘Output Size’ and ‘Frame Rate’ tabs respectively. To save your creation, browse and choose the desired system folder by clicking on the ‘Save to:’ tab. Lastly, select ‘Create GIF’ to start the conversion process.

04Kapwing GIF Maker
There may be instances where you cannot save or share TikTok videos. To cut the rush in such cases, you can use Kapwing’s GIF Maker to convert videos from TikTok to GIF online. This one is a free video editing tool that works with almost all internet enabled smartphones and supports almost all common video formats. Here’s what you need to do for making GIFs from TikTok videos using this tool:
Step 1: Copy a Video Link
Search your desired TikTok video and click on the ‘Share’ icon. In the drop down menu, select ‘Copy Link’ to save the video link in your device memory. Once this happens, you will get a confirmation message that says, ‘Copied’.

Step 2: Open GIF Maker
Open the GIF Maker tool in your browser and paste the saved TikTok video link in the editor’s URL bar. This will automatically redirect you to the Kapwing Studio, where you have the liberty to trim, crop or split your video clip to the desired time frame. It is better to set a play span of 3-5 seconds.
You can trim the clip by dragging its ends or introduce cuts at specific points using the split button above the editor timeline. To make volume adjustments, select the video layer and click on ‘Edit Video’ and move the adjuster circle to the left or right to decrease, increase and mute the video volume.


Step 3: Download and Share Your Creation
To save your work, tap ‘Export Video’ at the top and select ‘Export as GIF’ from the drop down menu. Wait for the conversion process to finish and click ‘Download’. This will save the GIF to your device.
You will find a watermark at the corner of your clip. Click ‘Sign In to Remove the Watermark’ to remove it. A workspace for the present and later projects will be created, where you can save you work for a couple of days with Kapwing’s free version. To export your work to social media, click ‘Share’. You can even host your creation on websites. Just copy the video link and select ‘Embed’.

05TT Downloader
This one is another online tool you can use to create GIFs from TikTok videos. This is a quick converter tool that transforms TikTok videos to GIFs in 5 easy steps within minutes. It is a browser tool and does not require a software download. All you need to do is explained in the following steps:

Step 1:
Visit the official site of the tool.
Step 2:
Select ‘TikTok to GIF’ to get redirected to the TikTok to GIF Converter home page.
Step 3:
Copy and paste the desired TikTok video link in the converter’s URL bar. To proceed further, click on ‘Get Video’.

Step 4:
Trim your clip within a time frame of 1-10 seconds.
Step 5:
Click ‘Done’ to initiate the conversion process. Once it finishes, you can download the converted GIF to your device.
06MiniTool MovieMaker
You can prefer this tool to convert TikTok videos in your PC into GIFs. This tool gives you the liberty to trim, cut, reverse and rotate GIFs and even add text and filters to them. Here’s how you can use this tool to transform TikTok videos into interesting GIFs:
Step 1:
Download and install this GIF maker tool in your PC. Launch the same when you are done with the installation process.
Step 2:
In the converter window, import and add your desired TikTok clip into the converter timeline.

Step 3:
You are now free to edit and add text to your video.
Step 4:
Once you finish, tap ‘Export’ and choose your output format as GIF.
Step 5:
Hit ‘Export’ to let the conversion process begin.
● Key Takeaways from This Episode →
● TikTok videos often lack the save and share features, which is an obvious necessity of today’s social outlook.
● Varieties of online tools and software are available for converting TikTok videos to GIFs to increase the sharing flexibility.
● Filmora is a quick and intelligent choice to take up the conversion process within a catch of few clicks.
Want to add sharing flexibility to TikTok videos? Convert them into GIFs!
In this article
01 [What is GIF TikTok?](#Part 1)
02 [How to Make a GIF From a TikTok Video](#Part 2)
Part 1 What Is TikTok GIF?
In today’s IT enhanced lifestyle, having a profound reach on social media is the new name of popularity. Everyone out there is profusely keen on creating and sharing a plethora of content varieties; memes, videos, animations and what not, across social communities. However, TikTok videos lag behind in this race; often lack the ‘Share’ flexibility.
To match up, there are solutions to convert TikTok video into GIFs. A TikTok GIF is a short, impactful and to the point clip that’s here to share fun and exciting content in the most interesting ways. If you have a bunch of TikTok videos to share with your peers, but missing out on an effective sharing solution, you can conveniently look forward to convert those videos into catchy and interesting GIFs that will definitely hold the attention of your viewers.
Feel motivated? See through the rest of this article to know some quick and easy TikTok to GIF conversion tools and software!
Part 2 How to Make a GIF From a TikTok Video
When looking through solutions to create GIF TikTok videos, you will find a pool of methods and tools available on the internet. All you need to do is select the best one for yourself and get started with converting TikTok Videos into GIFs. Given below are some of the best solutions adhering to the aforesaid concern:
01Filmora
Wondershare Filmora Video Editor is one of the best application software to create a TikTok GIF. This is a simple and smart converter application that caters to your concern in just a few minutes. What’s best is that this app is absolutely free to use and is compatible with your PC, smartphone and a variety of other devices. Here’s how you can use Filmora to convert your TikTok videos into GIFs:
Step 1: Import Your Video
Start with importing a desired TikTok video file to the Filmora timeline. You can also ‘Drag and Drop’ the video file to the editor timeline. Using this application, you have the flexibility to import your clip in almost any video format.
Step 2: Edit Your Clip
Suited to your content preferences, you can edit and enhance your clips with a variety of effects, like, cut, trim, rotate, split, etc., and make appropriate speed adjustments. You can even include text messages to make your GIF more impactful.
Wondershare Filmora
Get started easily with Filmora’s powerful performance, intuitive interface, and countless effects!
Try It Free Try It Free Try It Free Learn More >
Step 3: Let’s Save and Share!
When you are happy, save your work using the .gif file extension. That’s it! You are ready to share your creation with your social media peers.
02TikTok’s Inbuilt GIF Converter
TikTok allows you to directly convert its videos into GIFs. You can use the TikTok application in your smartphone to take up the conversion process. All you need to do is follow the steps given below:
Step 1: Select Your TikTok Video
To get started, open the TikTok application in your smartphone and select the video you want to convert into GIF.
Step 2: Share the Video
Click the ‘Share’ icon at the right of the video screen.
Step 3: Format Selection
Scroll down to the bottom of the screen and choose the ‘Share as GIF’ option. This will automatically convert your TikTok video into GIF in a few seconds.
Step 4: Save and Export
Click on the ‘Save Image’ option to save the GIF in your phone’s gallery. You can also export your creation to different social media platforms.
03Wondershare UniConverter
This one is a handy toolbox loaded with a variety of features that allow you to play with your video creativity. Using this tool, you can quickly create GIF for TikTok and also fix the size and duration of the same. This software supports almost all video formats and comes with an inbuilt editor that you can use to add effects and make your GIFs all the more interesting. This is compatible with your Windows or MacOS PC.
Take the following steps to create GIFs from TikTok videos using this software:
Step 1: Download and Launch the Application
Download the Wondershare UniConverter application to your PC from the software’s official website.
Step 2: Open GIF Maker
In the app’s welcome screen, navigate to the ‘Toolbox’ tab and select ‘GIF Maker’ from the panel that gets displayed.
Step 3: Upload Your TikTok Video
In the next pop-up window, select ‘Video to GIF’ and click on the (+) icon in the centre. You can also click on ‘Add Files’ in the top left and choose a saved TikTok video from your PC to upload.
Step 4: Trim Your Video
Trim the uploaded video to the desired portion from where you wish to create the GIF and set adequate time frames for the same. You can even drag the video thumbnail slider to trim the video.
Step 5: Let’s Get Creating!
Set the final size and frame rate from the ‘Output Size’ and ‘Frame Rate’ tabs respectively. To save your creation, browse and choose the desired system folder by clicking on the ‘Save to:’ tab. Lastly, select ‘Create GIF’ to start the conversion process.
04Kapwing GIF Maker
There may be instances where you cannot save or share TikTok videos. To cut the rush in such cases, you can use Kapwing’s GIF Maker to convert videos from TikTok to GIF online. This one is a free video editing tool that works with almost all internet enabled smartphones and supports almost all common video formats. Here’s what you need to do for making GIFs from TikTok videos using this tool:
Step 1: Copy a Video Link
Search your desired TikTok video and click on the ‘Share’ icon. In the drop down menu, select ‘Copy Link’ to save the video link in your device memory. Once this happens, you will get a confirmation message that says, ‘Copied’.
Step 2: Open GIF Maker
Open the GIF Maker tool in your browser and paste the saved TikTok video link in the editor’s URL bar. This will automatically redirect you to the Kapwing Studio, where you have the liberty to trim, crop or split your video clip to the desired time frame. It is better to set a play span of 3-5 seconds.
You can trim the clip by dragging its ends or introduce cuts at specific points using the split button above the editor timeline. To make volume adjustments, select the video layer and click on ‘Edit Video’ and move the adjuster circle to the left or right to decrease, increase and mute the video volume.
Step 3: Download and Share Your Creation
To save your work, tap ‘Export Video’ at the top and select ‘Export as GIF’ from the drop down menu. Wait for the conversion process to finish and click ‘Download’. This will save the GIF to your device.
You will find a watermark at the corner of your clip. Click ‘Sign In to Remove the Watermark’ to remove it. A workspace for the present and later projects will be created, where you can save you work for a couple of days with Kapwing’s free version. To export your work to social media, click ‘Share’. You can even host your creation on websites. Just copy the video link and select ‘Embed’.
05TT Downloader
This one is another online tool you can use to create GIFs from TikTok videos. This is a quick converter tool that transforms TikTok videos to GIFs in 5 easy steps within minutes. It is a browser tool and does not require a software download. All you need to do is explained in the following steps:
Step 1:
Visit the official site of the tool.
Step 2:
Select ‘TikTok to GIF’ to get redirected to the TikTok to GIF Converter home page.
Step 3:
Copy and paste the desired TikTok video link in the converter’s URL bar. To proceed further, click on ‘Get Video’.
Step 4:
Trim your clip within a time frame of 1-10 seconds.
Step 5:
Click ‘Done’ to initiate the conversion process. Once it finishes, you can download the converted GIF to your device.
06MiniTool MovieMaker
You can prefer this tool to convert TikTok videos in your PC into GIFs. This tool gives you the liberty to trim, cut, reverse and rotate GIFs and even add text and filters to them. Here’s how you can use this tool to transform TikTok videos into interesting GIFs:
Step 1:
Download and install this GIF maker tool in your PC. Launch the same when you are done with the installation process.
Step 2:
In the converter window, import and add your desired TikTok clip into the converter timeline.
Step 3:
You are now free to edit and add text to your video.
Step 4:
Once you finish, tap ‘Export’ and choose your output format as GIF.
Step 5:
Hit ‘Export’ to let the conversion process begin.
● Key Takeaways from This Episode →
● TikTok videos often lack the save and share features, which is an obvious necessity of today’s social outlook.
● Varieties of online tools and software are available for converting TikTok videos to GIFs to increase the sharing flexibility.
● Filmora is a quick and intelligent choice to take up the conversion process within a catch of few clicks.
Best 10 Apps to Enhance Your Instagram Story Slideshow
Best 10 Apps to Enhance Your Instagram Story Slideshow
An easy yet powerful editor
Numerous effects to choose from
Detailed tutorials provided by the official channel
Instagram reels and stories have turned into convenient ways of exploring your video creation skills with fun. Read further to know about the top 10 apps to create amazing Insta story slideshows!
In this article
01 [What’s Instagram Story Slideshow](#Part 1)
02 [How to Use Instagram Slideshow?](#Part 2)
03 [Top 10 Apps for Making Instagram Story Slideshow (iOS & Android)](#Part 3)
04 [Tips for Enhancing Your Insta Story Slideshow](#Part 4)
Part 1 What’s Instagram Story Slideshow
With the growing influence of social media on the global life and work culture in today’s times, each and every event on such platforms becomes the new trend of the current IT impacted society. Speaking in the light of the newest developments, Instagram story slideshows have become the latest talk of the diverse range of social media communities across the web.
Since its entry into the communication galore, the Instagram application has emerged as an absolute favourite of social media freaks, thanks to its already captivating features. Moving ahead with its customary user appealing efforts, the latter has recently introduced the slideshow feature to upgrade and improvise its content stories and reels.
Working with the same, you can now integrate your otherwise simple and elementary Instagram stories into awesome slideshows. This visibly means that your conventional stories and reels on the app are now going to get that missing spark with a plethora of customizable motion graphic features. An Instagram story slideshow can work to earn you a huge number of followers, thus uplifting your social creativity quotient and entertainment appeal.
These creative 15 second snippets are appreciably the most amazing trends to increase your audience backup as a market organization, business enterprise, an influencer or as a rising star, all because of an excellent content presentation strategy and catchy outlook. Try hands at using this high end graphic presentation utility to attract the most awaited jaw dropping appreciation of your social media posts.
Part 2 How to Use Instagram Slideshow
Now that you are aware about the excitement and social buzz that your Instagram story slideshows can create with an immediate effect, the aforesaid reason is sufficient enough to motivate you towards diving deeper into the interesting ways of working with the feature to your maximum advantage. Adhering to the concern, let us proceed with learning about the most appealing trends to use an Instagram slideshow in the following section:
● Stepwise Tutorials and Visual Guides
The utility of Instagram slideshows to merge multiple images and videos together has blocked the interruption of additional feeds amid the content presentation, thus giving you the liberty to post a set of related videos and stills in one go, which can be of great help when you encounter a need to share tutorial videos, recipe follow ups and alike content that essentially requires a sequential presentation.
The Instagram stories slideshow can be useful to DIY creators who wish to demonstrate or guide their followers to create stunning examples of self-designed masterpieces. Posting step wise guides with clear cut instructions to work upon or use something, like that of a new product, can also be catered with an Instagram slideshow story.
● Product Advertising and Sale
If you are looking for impressive and cost effective solutions to launch your products among potential customers, consider taking the help of Instagram slideshows. The feature is known to deliver excellent results in the brand promotion of some particular products, such as jewelry and apparel design.
Jewelers, furniture retailers and textile designers can work with the slideshow to upload a series of images and videos for a clear and vivid demonstration of the product. Considering the fact that such commodities may greatly differ in their visual and actual appearance, the products can be shown through a variety of angles to facilitate viewers with the most comprehensive and an almost exact presentation of the different aspects that a product claims to have.

Part 3 Top 10 Apps for Making Instagram Story Slideshow (iOS & Android)
By now, you must have had a comprehensive understanding of the significance of Instagram story slideshows in uplifting different aspects of your content delivery, along with effectively addressing your diverse and large scale information sharing needs. Moving ahead with our discussion, let us browse through some of the best software solutions to create the most appealing Instagram story slideshows in the following section:
01SlideLab
Starting with the list the first application to look forward on creating over the top Instagram story slideshows with utmost ease. The software package is loaded with an extensive range of editing effects and filters, audio-visual transitions and supplementary design elements, that promise you of a high resolution, professional quality slideshow output.
Working with the software, you get the flexibility to conveniently customize the sequence in which the images would appear in the slideshow, with allowing a maximum screen display time of 3 seconds to each image. The created slideshows can be easily shared on various media handles and platforms, including Instagram, Facebook and YouTube.
While you can undertake a free trial of the tool, a paid subscription of the same costing $ 4.99 is required for accessing the complete range of features associated with the program. The software is however, exclusively compatible with iOS supported devices.
02VivaVideo
This one is an excellent video editor and graphic designer tool, which you can use to create and share amazing slideshows to complement your Instagram stories and feeds. Working with the aforesaid software program, you don’t need to worry about the concerns of device compatibility, as the program works well with your favorite MacOs and Windows supported systems and devices.
Talking of the specific features that the software promises to offer, you can use its built in camera to capture high resolution videos and supplement them with over 60 high end customization utilities, like sound effects and transitions, along with dubbing the video. The basic version of the tool is available for free usage and allows you to choose between the Pro and Quick modes, respectively for a high flexibility and an escalated automated response.
The free version is however, known to leave watermarks on the created videos, is stuffed with frequently appearing ads and permits a 5-minute presentation time. You can escape these hustles anytime by subscribing to the paid version of VivaVideo for $ 2.99.

03InShot
The InShot image and video editor program is another potential candidate to be employed as an Instagram story slideshow creator. The software’s effect library is packed with a heap of conveniently usable design elements and features to create the most beautiful Instagram slideshows. The app can be put to use for efficiently designing Instagram stories to address personal and professional concerns.
Some over the top features of the tool include, the flexibility to crop, trim, cut and merge video files, and uplift them with a range of effects, filters, transitions and backgrounds. The exclusive audio flexibility of the software allows you to add upbeat sound and music, while enabling a choice of fading music in and out.
The software additionally permits to adjust the speed control of your videos, making them run in a slow or fast motion as per the content requirement. There are also a variety of graphic elements, like, texts, emojis, stickers, etc., which you can add to your images and videos to make them more pronounced.

04StoryArt
Enjoying the highest user ratings on a number of leading software review platforms, the StoryArt software package lands among the most popular and preferred applications to work with creating slideshows for Instagram stories. The most appealing features of the software program include, an extensive range of more than 200 premade slideshow templates which can be directly edited to create amazing Instagram feeds and stories.
Other attractive features of the slideshow creator tool include, a plethora of design effects with varying diversities of fonts, colors, filters and around 20 elusive background themes, that are updated weekly with new additions. The program comes with a clean and responsive interface, is free to use and conforms with Windows and MacOs devices.
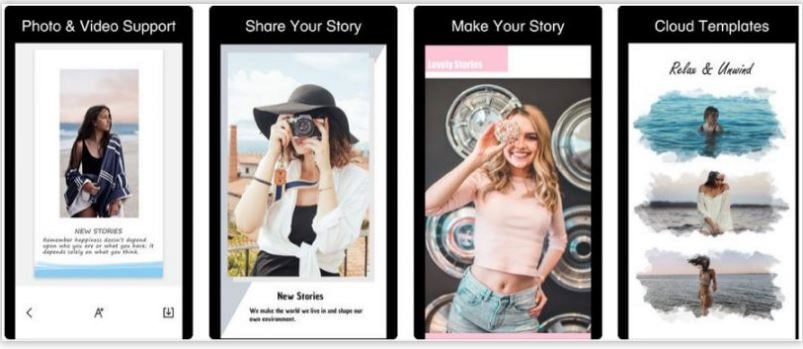
05Unfold
Unfold is quite a reliable software tool for creating elegant Instagram story slideshows from a storehouse of preset design templates, while adding a series of inline video and image editing effects to the same. The tool’s slideshow creator package comes with a mix of free and premium features, and does not require the account creation formality to begin working.
Major attractions of the program consist of 25 free and more than 60 premium slideshow design templates, 5 different font styles and upgraded text customizations, high resolution slideshow output and a direct share facility. You can prefer to download the software application from the various iOS and Android app stores, and work with the same on your preferred laptops, desktops and smartphones, without worrying about device compatibility.

06Canva
Canva is conveniently counted among the best Instagram slideshow maker tools and has the possibly the vastest inventory of over 60, 000 beautiful premade slideshow templates to create the mot captivating Instagram stories. Working with the tool, you are granted the liberty to select from a hoard of around 1 million stock images to set the most perfect background for the slideshow being created.
Additional features of the software comprise of high end image customization effects, fonts, transitions, texts and filters, with a never ending variety of frames, textures, icons, badges and stickers. If this is not enough, you get to access a diverse library of high end design elements, like, photo vignette, design grids, image enhancer and photo blur, to compliment your Instagram slideshow stories with the most cherished visual effects.
Talking of the platform cohesiveness, you can work with the tool through its desktop download as well as a free installation from any of the Android or Apple app stores.

07Adobe Spark
This one is a family of graphic design software and tools that conveniently boasts of its extensive credibility towards facilitating the creation of high resolution and engaging image and video slideshows to uplift the conventional feeds and stories of Instagram. Post the creation process, you can add a diversity of audio-visual effects, like, animations, sounds, fonts, text layouts, cutouts and design elements to further enhance your graphic artwork.
The application greets you with the most pleasing and easy to use workspace, which would never require you to be a graphic design expert to start working on the slideshows. If you are into creating video centered Instagram story slideshows, you can choose to work with animated videos and prefer to select the media from your device gallery as well as the software’s huge in-house video collection. The tool’s template library is a further amusement, with a countless number of story and message centered themes.
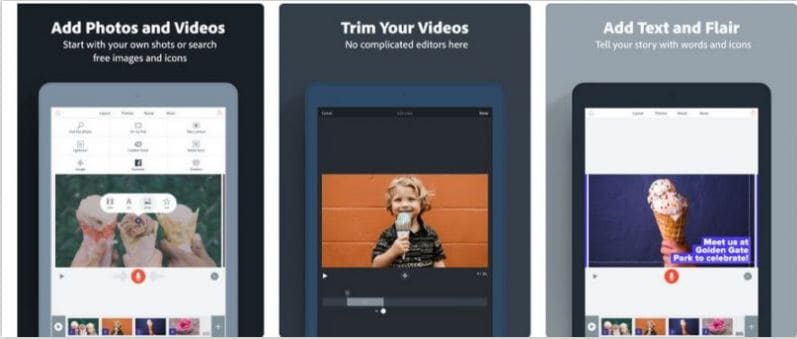
08PhotoGrid
If you are explicitly keen on creating video and photo collages for a jaw dropping Instagram story, consider working with the aforesaid application without a second thought. What’s more exciting is that the software comes with a huge set of over 300 pre made design templates to exclusively craft beautiful slideshows for Instagram stories on any iOS and Android device.
Talking of the app’s set of editing features, apart from being packed with multiple text fonts, over 60 image filters and 90 slideshow backgrounds, the most striking characteristic of the tool is, it permits you to clip an object from an image and remove the latter’s background. Other utilities of the software comprise of a real-time selfie camera, that clicks and automatically beautifies the captured image, beauty enhancing features that can apply and remove makeup from profile shots and selfies.
09Typorama
The next entry in the list is the Typorama software tool, which you can use to create text based slideshows for your Instagram stories. The software’s fonts library is full of elusive typographic designs to choose the best one that suits your content style and arrangement within the slideshow. When opting to work with this feature of the software, you will only need to select a suitable background and begin typing. That’s it!
Extending the text styling credibility of the tool a bit more, you can select from over 50 different typographic layouts and more than 100 typeface and font choices, a huge collection of story based quotes and a diversity of shadows, distortion effects and gradients to improvise your text. The program additionally consists of over 1000 stock templates, image filters, overlays and correction tools to enhance your slideshow background.
10Microsoft Hyperlapse
This one is an advanced slideshow creator program that allows you to design Instagram stories slideshow in time lapse. You can work with the tool to modify the slideshow speed up to 32 times ahead of the normal and create time lapse stories for a maximum of 20 minutes directly on your smartphone.
The app specializes in creating high end video slideshows for Instagram stories and feeds, while showing a great compatibility with high resolution videos. The working interface is super easy to understand and use, without requiring any over the top technical expertise. Feel free to use the app on any iOS or Android supported smartphone.
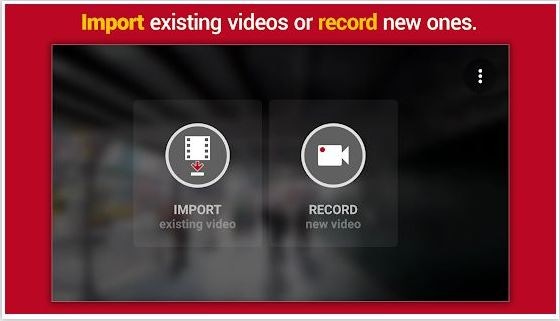
Part 4 Tips for Enhancing Your Insta Story Slideshow
By far, you have come a long way reading through the credibility, usage and tools to create Instagram story slideshow free of cost as well as though paid subscriptions. In the following section of this article, let us keep our focus on learning about some of the most amazing tips and tricks to upgrade your Insta story slideshow to the next level:
● A Compact Photo Album
Do you land among those social media freaks how want to share just every moment of your day with your peers, or are you confused on selecting the best photos and videos of a cherished event, vacation or bringing home a new utility and end up posting a heap of media on your social media handles?
If your answer is a guilty ‘Yes’, you can try on giving up the habit now by creating an Instagram story photo slideshow to share mini album of your most loved images from the event or vacation. You can use the feature to create a collection of amazing videos as well and share it too with your friends on social media without the guilt of becoming a feed-hog.
Want a practical experience of using Instagram slideshows? See through the following tutorial to understand the exact creation process:
Step 1: Choose the First Image
Begin with selecting the first image for your slideshow, just as you would ideally do for a normal, single image Instagram feed and long press the same.
Step 2: Confirming the Selection
Navigate to the bottom right corner of your selected image to locate a button similar to a photo slideshow. Tap the button to see a ‘1’ inscribed in a blue circle appear on your chosen image.
Step 3: Make Further Selections
You can now proceed to select other images or videos for the slideshow, in a similar fashion as the first one. You are allowed to include a maximum of 10 media files within the slideshow.
Step 4: Customize Your Creation
Tap the ‘Next’ button when you have finished making the required selections. The editor interface will now open to let you customize the selected images with a series of effects and filters, both one at a time, as well as the entire set altogether. You can also work with modifying the order of appearance of the photos and videos if required.
Step 5: The Final Touches
Once you are done with the editing process, continue to follow the remaining steps, as you would do to create a normal Instagram post. You can include captions, locations and tag your peers on the platform.
Step 6: Time to Share!
Your Instagram slideshow is ready to be posted. Upload it either to your feed or story to receive a hoard of likes and comments!
● Animated Text Overlays
If your Instagram story slideshows are missing out on the visual spunk, try complimenting their images and videos with animated transitions and text overlays. Short and quick animations are the best ways to enhance a slideshow story with an eye catching effect. Applying a variety of text overlays would help to keep the audience curious about the next visual delight.
● Prefer a Vertical Aspect Ratio
While the landscape mode tends to ward off certain portions of the visual media from a slideshow being played across multiple sized screens, using the portrait mode with a vertical aspect ratio suits best to almost every screen size. Taking care of this fact will ensure that your audience does not get distracted with the semi visible contents of the slideshow story.
● Choose Your Editing Effects Wisely
Regardless of the slideshow creation tool you prefer, there are a diversity of effects, templates, design elements and filters to uplift your craft with the perfect look. However, you should be cautious enough while making your choice so that the balance of colors, fonts and themes is affordably maintained, lest you would end up with a messy and loud Instagram story slideshow, that would not gather much appeal.
● Creating Instagram Story Slideshows with Wondershare Filmora
Wondershare Filmora Video Editor is the undisputed leader in creating awesome slideshows for Instagram stories, packed with a diverse number of graphic design tools. Beginning to discuss about the reserve of features that the software promises to offer, the app’s template library is a trunk of the most expressive and elegant slideshow backgrounds, themes and images.
For Win 7 or later (64-bit)
For macOS 10.12 or later
Moving further, the app has recently added the 1:1 aspect ratio to its image and video resolution alternatives to exclusively adhere to the slideshow design concern, allowing the perfect display of your craft across a variety of screen dimensions. Filmora, an advanced version of the basic Filmora editor program is known to most effectively cater to the concern of creating Instagram story slideshows.
Working with this slideshow creator program, you can explore your editing skills to your heart’s content and supplement the images and videos of your slideshow with the most expanded range of audio-visual effects, seamless animated transitions, text overlays, thematic backgrounds and creative image filters. The app comes to you absolutely free of cost and welcomes you with a pleasing and clean interface, and is compatible with all of your Mac, iOS and Windows supported devices and Android smartphones.
● Ending Thoughts →
● Instagram story slideshows are the newest trends of professional and commercial information sharing and personalized fun and entertainment.
● When looking through alternatives to create Instagram slideshow online or through an application software, there is a heap of creator tools.
● Pick the Wondershare Filmora slideshow creator program to design the most sparked up slideshows for your Instagram stories.
Instagram reels and stories have turned into convenient ways of exploring your video creation skills with fun. Read further to know about the top 10 apps to create amazing Insta story slideshows!
In this article
01 [What’s Instagram Story Slideshow](#Part 1)
02 [How to Use Instagram Slideshow?](#Part 2)
03 [Top 10 Apps for Making Instagram Story Slideshow (iOS & Android)](#Part 3)
04 [Tips for Enhancing Your Insta Story Slideshow](#Part 4)
Part 1 What’s Instagram Story Slideshow
With the growing influence of social media on the global life and work culture in today’s times, each and every event on such platforms becomes the new trend of the current IT impacted society. Speaking in the light of the newest developments, Instagram story slideshows have become the latest talk of the diverse range of social media communities across the web.
Since its entry into the communication galore, the Instagram application has emerged as an absolute favourite of social media freaks, thanks to its already captivating features. Moving ahead with its customary user appealing efforts, the latter has recently introduced the slideshow feature to upgrade and improvise its content stories and reels.
Working with the same, you can now integrate your otherwise simple and elementary Instagram stories into awesome slideshows. This visibly means that your conventional stories and reels on the app are now going to get that missing spark with a plethora of customizable motion graphic features. An Instagram story slideshow can work to earn you a huge number of followers, thus uplifting your social creativity quotient and entertainment appeal.
These creative 15 second snippets are appreciably the most amazing trends to increase your audience backup as a market organization, business enterprise, an influencer or as a rising star, all because of an excellent content presentation strategy and catchy outlook. Try hands at using this high end graphic presentation utility to attract the most awaited jaw dropping appreciation of your social media posts.
Part 2 How to Use Instagram Slideshow
Now that you are aware about the excitement and social buzz that your Instagram story slideshows can create with an immediate effect, the aforesaid reason is sufficient enough to motivate you towards diving deeper into the interesting ways of working with the feature to your maximum advantage. Adhering to the concern, let us proceed with learning about the most appealing trends to use an Instagram slideshow in the following section:
● Stepwise Tutorials and Visual Guides
The utility of Instagram slideshows to merge multiple images and videos together has blocked the interruption of additional feeds amid the content presentation, thus giving you the liberty to post a set of related videos and stills in one go, which can be of great help when you encounter a need to share tutorial videos, recipe follow ups and alike content that essentially requires a sequential presentation.
The Instagram stories slideshow can be useful to DIY creators who wish to demonstrate or guide their followers to create stunning examples of self-designed masterpieces. Posting step wise guides with clear cut instructions to work upon or use something, like that of a new product, can also be catered with an Instagram slideshow story.
● Product Advertising and Sale
If you are looking for impressive and cost effective solutions to launch your products among potential customers, consider taking the help of Instagram slideshows. The feature is known to deliver excellent results in the brand promotion of some particular products, such as jewelry and apparel design.
Jewelers, furniture retailers and textile designers can work with the slideshow to upload a series of images and videos for a clear and vivid demonstration of the product. Considering the fact that such commodities may greatly differ in their visual and actual appearance, the products can be shown through a variety of angles to facilitate viewers with the most comprehensive and an almost exact presentation of the different aspects that a product claims to have.
Part 3 Top 10 Apps for Making Instagram Story Slideshow (iOS & Android)
By now, you must have had a comprehensive understanding of the significance of Instagram story slideshows in uplifting different aspects of your content delivery, along with effectively addressing your diverse and large scale information sharing needs. Moving ahead with our discussion, let us browse through some of the best software solutions to create the most appealing Instagram story slideshows in the following section:
01SlideLab
Starting with the list the first application to look forward on creating over the top Instagram story slideshows with utmost ease. The software package is loaded with an extensive range of editing effects and filters, audio-visual transitions and supplementary design elements, that promise you of a high resolution, professional quality slideshow output.
Working with the software, you get the flexibility to conveniently customize the sequence in which the images would appear in the slideshow, with allowing a maximum screen display time of 3 seconds to each image. The created slideshows can be easily shared on various media handles and platforms, including Instagram, Facebook and YouTube.
While you can undertake a free trial of the tool, a paid subscription of the same costing $ 4.99 is required for accessing the complete range of features associated with the program. The software is however, exclusively compatible with iOS supported devices.
02VivaVideo
This one is an excellent video editor and graphic designer tool, which you can use to create and share amazing slideshows to complement your Instagram stories and feeds. Working with the aforesaid software program, you don’t need to worry about the concerns of device compatibility, as the program works well with your favorite MacOs and Windows supported systems and devices.
Talking of the specific features that the software promises to offer, you can use its built in camera to capture high resolution videos and supplement them with over 60 high end customization utilities, like sound effects and transitions, along with dubbing the video. The basic version of the tool is available for free usage and allows you to choose between the Pro and Quick modes, respectively for a high flexibility and an escalated automated response.
The free version is however, known to leave watermarks on the created videos, is stuffed with frequently appearing ads and permits a 5-minute presentation time. You can escape these hustles anytime by subscribing to the paid version of VivaVideo for $ 2.99.
03InShot
The InShot image and video editor program is another potential candidate to be employed as an Instagram story slideshow creator. The software’s effect library is packed with a heap of conveniently usable design elements and features to create the most beautiful Instagram slideshows. The app can be put to use for efficiently designing Instagram stories to address personal and professional concerns.
Some over the top features of the tool include, the flexibility to crop, trim, cut and merge video files, and uplift them with a range of effects, filters, transitions and backgrounds. The exclusive audio flexibility of the software allows you to add upbeat sound and music, while enabling a choice of fading music in and out.
The software additionally permits to adjust the speed control of your videos, making them run in a slow or fast motion as per the content requirement. There are also a variety of graphic elements, like, texts, emojis, stickers, etc., which you can add to your images and videos to make them more pronounced.
04StoryArt
Enjoying the highest user ratings on a number of leading software review platforms, the StoryArt software package lands among the most popular and preferred applications to work with creating slideshows for Instagram stories. The most appealing features of the software program include, an extensive range of more than 200 premade slideshow templates which can be directly edited to create amazing Instagram feeds and stories.
Other attractive features of the slideshow creator tool include, a plethora of design effects with varying diversities of fonts, colors, filters and around 20 elusive background themes, that are updated weekly with new additions. The program comes with a clean and responsive interface, is free to use and conforms with Windows and MacOs devices.
05Unfold
Unfold is quite a reliable software tool for creating elegant Instagram story slideshows from a storehouse of preset design templates, while adding a series of inline video and image editing effects to the same. The tool’s slideshow creator package comes with a mix of free and premium features, and does not require the account creation formality to begin working.
Major attractions of the program consist of 25 free and more than 60 premium slideshow design templates, 5 different font styles and upgraded text customizations, high resolution slideshow output and a direct share facility. You can prefer to download the software application from the various iOS and Android app stores, and work with the same on your preferred laptops, desktops and smartphones, without worrying about device compatibility.
06Canva
Canva is conveniently counted among the best Instagram slideshow maker tools and has the possibly the vastest inventory of over 60, 000 beautiful premade slideshow templates to create the mot captivating Instagram stories. Working with the tool, you are granted the liberty to select from a hoard of around 1 million stock images to set the most perfect background for the slideshow being created.
Additional features of the software comprise of high end image customization effects, fonts, transitions, texts and filters, with a never ending variety of frames, textures, icons, badges and stickers. If this is not enough, you get to access a diverse library of high end design elements, like, photo vignette, design grids, image enhancer and photo blur, to compliment your Instagram slideshow stories with the most cherished visual effects.
Talking of the platform cohesiveness, you can work with the tool through its desktop download as well as a free installation from any of the Android or Apple app stores.
07Adobe Spark
This one is a family of graphic design software and tools that conveniently boasts of its extensive credibility towards facilitating the creation of high resolution and engaging image and video slideshows to uplift the conventional feeds and stories of Instagram. Post the creation process, you can add a diversity of audio-visual effects, like, animations, sounds, fonts, text layouts, cutouts and design elements to further enhance your graphic artwork.
The application greets you with the most pleasing and easy to use workspace, which would never require you to be a graphic design expert to start working on the slideshows. If you are into creating video centered Instagram story slideshows, you can choose to work with animated videos and prefer to select the media from your device gallery as well as the software’s huge in-house video collection. The tool’s template library is a further amusement, with a countless number of story and message centered themes.
08PhotoGrid
If you are explicitly keen on creating video and photo collages for a jaw dropping Instagram story, consider working with the aforesaid application without a second thought. What’s more exciting is that the software comes with a huge set of over 300 pre made design templates to exclusively craft beautiful slideshows for Instagram stories on any iOS and Android device.
Talking of the app’s set of editing features, apart from being packed with multiple text fonts, over 60 image filters and 90 slideshow backgrounds, the most striking characteristic of the tool is, it permits you to clip an object from an image and remove the latter’s background. Other utilities of the software comprise of a real-time selfie camera, that clicks and automatically beautifies the captured image, beauty enhancing features that can apply and remove makeup from profile shots and selfies.
09Typorama
The next entry in the list is the Typorama software tool, which you can use to create text based slideshows for your Instagram stories. The software’s fonts library is full of elusive typographic designs to choose the best one that suits your content style and arrangement within the slideshow. When opting to work with this feature of the software, you will only need to select a suitable background and begin typing. That’s it!
Extending the text styling credibility of the tool a bit more, you can select from over 50 different typographic layouts and more than 100 typeface and font choices, a huge collection of story based quotes and a diversity of shadows, distortion effects and gradients to improvise your text. The program additionally consists of over 1000 stock templates, image filters, overlays and correction tools to enhance your slideshow background.
10Microsoft Hyperlapse
This one is an advanced slideshow creator program that allows you to design Instagram stories slideshow in time lapse. You can work with the tool to modify the slideshow speed up to 32 times ahead of the normal and create time lapse stories for a maximum of 20 minutes directly on your smartphone.
The app specializes in creating high end video slideshows for Instagram stories and feeds, while showing a great compatibility with high resolution videos. The working interface is super easy to understand and use, without requiring any over the top technical expertise. Feel free to use the app on any iOS or Android supported smartphone.
Part 4 Tips for Enhancing Your Insta Story Slideshow
By far, you have come a long way reading through the credibility, usage and tools to create Instagram story slideshow free of cost as well as though paid subscriptions. In the following section of this article, let us keep our focus on learning about some of the most amazing tips and tricks to upgrade your Insta story slideshow to the next level:
● A Compact Photo Album
Do you land among those social media freaks how want to share just every moment of your day with your peers, or are you confused on selecting the best photos and videos of a cherished event, vacation or bringing home a new utility and end up posting a heap of media on your social media handles?
If your answer is a guilty ‘Yes’, you can try on giving up the habit now by creating an Instagram story photo slideshow to share mini album of your most loved images from the event or vacation. You can use the feature to create a collection of amazing videos as well and share it too with your friends on social media without the guilt of becoming a feed-hog.
Want a practical experience of using Instagram slideshows? See through the following tutorial to understand the exact creation process:
Step 1: Choose the First Image
Begin with selecting the first image for your slideshow, just as you would ideally do for a normal, single image Instagram feed and long press the same.
Step 2: Confirming the Selection
Navigate to the bottom right corner of your selected image to locate a button similar to a photo slideshow. Tap the button to see a ‘1’ inscribed in a blue circle appear on your chosen image.
Step 3: Make Further Selections
You can now proceed to select other images or videos for the slideshow, in a similar fashion as the first one. You are allowed to include a maximum of 10 media files within the slideshow.
Step 4: Customize Your Creation
Tap the ‘Next’ button when you have finished making the required selections. The editor interface will now open to let you customize the selected images with a series of effects and filters, both one at a time, as well as the entire set altogether. You can also work with modifying the order of appearance of the photos and videos if required.
Step 5: The Final Touches
Once you are done with the editing process, continue to follow the remaining steps, as you would do to create a normal Instagram post. You can include captions, locations and tag your peers on the platform.
Step 6: Time to Share!
Your Instagram slideshow is ready to be posted. Upload it either to your feed or story to receive a hoard of likes and comments!
● Animated Text Overlays
If your Instagram story slideshows are missing out on the visual spunk, try complimenting their images and videos with animated transitions and text overlays. Short and quick animations are the best ways to enhance a slideshow story with an eye catching effect. Applying a variety of text overlays would help to keep the audience curious about the next visual delight.
● Prefer a Vertical Aspect Ratio
While the landscape mode tends to ward off certain portions of the visual media from a slideshow being played across multiple sized screens, using the portrait mode with a vertical aspect ratio suits best to almost every screen size. Taking care of this fact will ensure that your audience does not get distracted with the semi visible contents of the slideshow story.
● Choose Your Editing Effects Wisely
Regardless of the slideshow creation tool you prefer, there are a diversity of effects, templates, design elements and filters to uplift your craft with the perfect look. However, you should be cautious enough while making your choice so that the balance of colors, fonts and themes is affordably maintained, lest you would end up with a messy and loud Instagram story slideshow, that would not gather much appeal.
● Creating Instagram Story Slideshows with Wondershare Filmora
Wondershare Filmora Video Editor is the undisputed leader in creating awesome slideshows for Instagram stories, packed with a diverse number of graphic design tools. Beginning to discuss about the reserve of features that the software promises to offer, the app’s template library is a trunk of the most expressive and elegant slideshow backgrounds, themes and images.
For Win 7 or later (64-bit)
For macOS 10.12 or later
Moving further, the app has recently added the 1:1 aspect ratio to its image and video resolution alternatives to exclusively adhere to the slideshow design concern, allowing the perfect display of your craft across a variety of screen dimensions. Filmora, an advanced version of the basic Filmora editor program is known to most effectively cater to the concern of creating Instagram story slideshows.
Working with this slideshow creator program, you can explore your editing skills to your heart’s content and supplement the images and videos of your slideshow with the most expanded range of audio-visual effects, seamless animated transitions, text overlays, thematic backgrounds and creative image filters. The app comes to you absolutely free of cost and welcomes you with a pleasing and clean interface, and is compatible with all of your Mac, iOS and Windows supported devices and Android smartphones.
● Ending Thoughts →
● Instagram story slideshows are the newest trends of professional and commercial information sharing and personalized fun and entertainment.
● When looking through alternatives to create Instagram slideshow online or through an application software, there is a heap of creator tools.
● Pick the Wondershare Filmora slideshow creator program to design the most sparked up slideshows for your Instagram stories.
5 Websites with Animated Logos That Catch Your Eyes
5 Websites with Animated Logos That Can Catch Your Eyes
An easy yet powerful editor
Numerous effects to choose from
Detailed tutorials provided by the official channel
Animated logos could be difficult to make for someone who has no experience with animation. That is why we are here to tell you how you can make an attractive animated logo.
Learn more about websites with animated logos through this article.
In this article
01 [Why You Should Use Logo Animation](#Part 1)
02 [5 Awesome Ways to Use Logo Animation](#Part 2)
03 [6 of the Best Animated Logos](#Part 3)
04 [8 Websites with Premium Animated Logo Templates](#Part 4)
Part 1 Why You Should Use Logo Animation
Those who make it big are known to brave the storm. The ones who follow the crowd just turn out to be ordinary. However, those who innovate, rise to a higher level. Here is why you should go for a website with animated logo!
01They grab viewers attraction
The human mind chooses to believe in the supremacy of what appeals to them visually. It is highly important to grab the user’s attention in order to make a mark. Animated logos help your website to visually appeal to the viewer and grab his/her attention. Potential customers will tend to remember the logo of your website and this would directly impact the conversion rates of your website.

02Increase in brand awareness
Brand awareness is key to a website’s success. As we saw earlier, people often tend to remember brands by their logo and not name. An attractive animated logo will help you create a strong brand awareness among potential customers and help your brand gain popularity.
03Animated logos can convey more
A brand logo is supposed to be the identity of a brand. The logo should be capable enough of explaining your website’s understanding about the field. For instance, if your company is in the cyber security domain, the logo should be good enough to justify your company’s expertise. Animated logos help you establish trust by conveying more through the medium of a logo.

Part 2 4 Awesome Ways to Use Logo Animation
01They can serve as introductions to marketing videos
Video marketing is one of the most commonly used marketing techniques. Research suggested that about 99 percent of brands use video marketing in order to enhance their brand image. Starting of your video with an animated logo will not just look catchy but also make the video all the more professional.
02They can make great outros
Just like animated videos can serve as amazing introductory bits of the video, they can also be the perfect outros to videos. If you haven’t added your animated logo in the introduction of the video then they can be added at the end. This will lead to your viewers remembering your brand for a longer time.
03Look very attractive at trade shows
Trade shows are opportunities where websites and company owners can interact with investors and potential customers face to face. It’s an excellent opportunity to make your mark on the big stage. Logos of companies may be projected on the big screen in such events. At such events when you have just a few seconds to make a mark, you need your logo to grab the viewer’s attention. Hence, animated logos could be very useful.
04They could be a great addition to your company’s email signature
Emails are regarded as the 3rd largest information sources in the B2B industry. It is one of the largest means of communication and marketing. Email signatures have been around for years; however the traditional email signatures have now gone out of fashion. Contemporary email signatures include animated logos to leave a bigger impact on the receiver. Using animated logos, you can add grace to your email signatures and escape the ordinary.
Part 3 6 of the Best Animated Logos
01Mastercard
Mastercard is one of the first companies to use animated logos. The logo is simply fantastic due to the meaning it conveys without any complex animation. The animated logo involves the traditional venn diagram logo of mastercard morphing into several objects. These objects include everything from food to groceries to luxurious products. It basically includes the various kinds of commodities people buy using mastercards.
02Burger king
Another popular brand that uses animated logos is the american fast food giant, burger king. The logo is not highly flashy like we see in mastercard. However, the animated logo does obviously look more attention seeking than the conventional static logo. The logo shows the stacking of the different elements of the logo one by one over each other. This resembles the process of making a burger.
03Fedex
Another logo that would classify as a flashy animated logo is the fedex logo. Initially, fedex had experimented with several logos before sticking to the arrow logo which continues even today. The animated logo involves an arrow making the letter “Fedex” with its trajectory and then finally settling in between letters X and E. The logistics giant delivers couriers from one corner of the world to another, and the arrow symbolizes exactly that!
04Flickr
Flickr is a popular stock image and video hosting platform. Anyone can use the stock images and videos in their content. The logo starts with a blue and pink dot initially. These dots later expand in a whirlpool like motion. The logo starts off with the static logo before it expands. The idea is to show that the online stock image portal goes beyond limits and has every picture and video you’d need
05Bundle
Bundle is a popular app that offers its users rewards upon shopping from selected stores. These stores have an alliance with bundle and upon shopping from them, users seek reward points on the bundle app. The animated logo starts of with a pink screen which later converges to become a large “B” wrapped with a gifting ribbon. Although, the logo is pretty simple it does an amazing job at explaining the brand’s MSP and attracts customers.
06Google
The logo of google has evolved over the years. Google is almost synonymous to attractive logos and it comes up with attractive new logos every now and then. One of the newest logos, an animated one, is by far one of the most attractive animated logos. It aims to depict the numerous things users can search using “Google voice search”.
Part 4 5 Websites with Premium Animated Logo Templates
01RenderForest
There are several applications you can use for animating your next logo for your website. RenderForest is one such software that lets you explore multiple animated logo templates. The tool has an array of templates you can choose from. Each of the templates is unique in its own way and has its own charm. Additionally, the software also has a functionality using which you can animate your static logo using templates.
Developed and managed by Adobe, the editing application is a popular one. The software allows you to use several pre-made templates while animating. The animations that you can find on adobe spark are
02Adobe Spark
Adobe spark seamless and designed perfectly. Using adobe spark, you can give your animated logo a touch of class and perfection. Although the software is paid, it is worth every penny due to the numerous animation templates and video editing tools available.
03Design free logo
Another amazing tool for animation, design free logo is a complete animation tool that offers several animation templates. Additionally, the free software also lets users animate in 3 dimensions. The software is best suited for novice animators who have limited experience with animation. The software is very simple to use unlike its sophisticated counterparts.
04Logo maker plus
If you are looking for an android application that helps you create seamless animated logos, well logo maker plus is just the perfect application for you. The app has more than a 100 templates for animating your logo, hence making it the perfect app for those who want to perform basic animation. Additionally, the app also has multiple visual effects which would enable you to make catchy logos
05Animaker
The final software on this list of amazing softwares is animaker. The software works well to animate logos, presentations, and marketing videos. The software has more than 50 effects. Moreover, using this software you can add filters, effects and sound effects. The software also lets users upload the videos to facebook and youtube directly!
Final Thoughts
● Today, we took a look at a few of the best animated logos which you could idealize.
● Nowadays, even big brands are adopting animated logos.
● They help establish a brand image and take your brand to a higher level.
● We also saw a few softwares that could help you make an animated logo. Wish to make an animated logo? Head to any one of the websites and make your website with animated logos!
Animated logos could be difficult to make for someone who has no experience with animation. That is why we are here to tell you how you can make an attractive animated logo.
Learn more about websites with animated logos through this article.
In this article
01 [Why You Should Use Logo Animation](#Part 1)
02 [5 Awesome Ways to Use Logo Animation](#Part 2)
03 [6 of the Best Animated Logos](#Part 3)
04 [8 Websites with Premium Animated Logo Templates](#Part 4)
Part 1 Why You Should Use Logo Animation
Those who make it big are known to brave the storm. The ones who follow the crowd just turn out to be ordinary. However, those who innovate, rise to a higher level. Here is why you should go for a website with animated logo!
01They grab viewers attraction
The human mind chooses to believe in the supremacy of what appeals to them visually. It is highly important to grab the user’s attention in order to make a mark. Animated logos help your website to visually appeal to the viewer and grab his/her attention. Potential customers will tend to remember the logo of your website and this would directly impact the conversion rates of your website.
02Increase in brand awareness
Brand awareness is key to a website’s success. As we saw earlier, people often tend to remember brands by their logo and not name. An attractive animated logo will help you create a strong brand awareness among potential customers and help your brand gain popularity.
03Animated logos can convey more
A brand logo is supposed to be the identity of a brand. The logo should be capable enough of explaining your website’s understanding about the field. For instance, if your company is in the cyber security domain, the logo should be good enough to justify your company’s expertise. Animated logos help you establish trust by conveying more through the medium of a logo.
Part 2 4 Awesome Ways to Use Logo Animation
01They can serve as introductions to marketing videos
Video marketing is one of the most commonly used marketing techniques. Research suggested that about 99 percent of brands use video marketing in order to enhance their brand image. Starting of your video with an animated logo will not just look catchy but also make the video all the more professional.
02They can make great outros
Just like animated videos can serve as amazing introductory bits of the video, they can also be the perfect outros to videos. If you haven’t added your animated logo in the introduction of the video then they can be added at the end. This will lead to your viewers remembering your brand for a longer time.
03Look very attractive at trade shows
Trade shows are opportunities where websites and company owners can interact with investors and potential customers face to face. It’s an excellent opportunity to make your mark on the big stage. Logos of companies may be projected on the big screen in such events. At such events when you have just a few seconds to make a mark, you need your logo to grab the viewer’s attention. Hence, animated logos could be very useful.
04They could be a great addition to your company’s email signature
Emails are regarded as the 3rd largest information sources in the B2B industry. It is one of the largest means of communication and marketing. Email signatures have been around for years; however the traditional email signatures have now gone out of fashion. Contemporary email signatures include animated logos to leave a bigger impact on the receiver. Using animated logos, you can add grace to your email signatures and escape the ordinary.
Part 3 6 of the Best Animated Logos
01Mastercard
Mastercard is one of the first companies to use animated logos. The logo is simply fantastic due to the meaning it conveys without any complex animation. The animated logo involves the traditional venn diagram logo of mastercard morphing into several objects. These objects include everything from food to groceries to luxurious products. It basically includes the various kinds of commodities people buy using mastercards.
02Burger king
Another popular brand that uses animated logos is the american fast food giant, burger king. The logo is not highly flashy like we see in mastercard. However, the animated logo does obviously look more attention seeking than the conventional static logo. The logo shows the stacking of the different elements of the logo one by one over each other. This resembles the process of making a burger.
03Fedex
Another logo that would classify as a flashy animated logo is the fedex logo. Initially, fedex had experimented with several logos before sticking to the arrow logo which continues even today. The animated logo involves an arrow making the letter “Fedex” with its trajectory and then finally settling in between letters X and E. The logistics giant delivers couriers from one corner of the world to another, and the arrow symbolizes exactly that!
04Flickr
Flickr is a popular stock image and video hosting platform. Anyone can use the stock images and videos in their content. The logo starts with a blue and pink dot initially. These dots later expand in a whirlpool like motion. The logo starts off with the static logo before it expands. The idea is to show that the online stock image portal goes beyond limits and has every picture and video you’d need
05Bundle
Bundle is a popular app that offers its users rewards upon shopping from selected stores. These stores have an alliance with bundle and upon shopping from them, users seek reward points on the bundle app. The animated logo starts of with a pink screen which later converges to become a large “B” wrapped with a gifting ribbon. Although, the logo is pretty simple it does an amazing job at explaining the brand’s MSP and attracts customers.
06Google
The logo of google has evolved over the years. Google is almost synonymous to attractive logos and it comes up with attractive new logos every now and then. One of the newest logos, an animated one, is by far one of the most attractive animated logos. It aims to depict the numerous things users can search using “Google voice search”.
Part 4 5 Websites with Premium Animated Logo Templates
01RenderForest
There are several applications you can use for animating your next logo for your website. RenderForest is one such software that lets you explore multiple animated logo templates. The tool has an array of templates you can choose from. Each of the templates is unique in its own way and has its own charm. Additionally, the software also has a functionality using which you can animate your static logo using templates.
Developed and managed by Adobe, the editing application is a popular one. The software allows you to use several pre-made templates while animating. The animations that you can find on adobe spark are
02Adobe Spark
Adobe spark seamless and designed perfectly. Using adobe spark, you can give your animated logo a touch of class and perfection. Although the software is paid, it is worth every penny due to the numerous animation templates and video editing tools available.
03Design free logo
Another amazing tool for animation, design free logo is a complete animation tool that offers several animation templates. Additionally, the free software also lets users animate in 3 dimensions. The software is best suited for novice animators who have limited experience with animation. The software is very simple to use unlike its sophisticated counterparts.
04Logo maker plus
If you are looking for an android application that helps you create seamless animated logos, well logo maker plus is just the perfect application for you. The app has more than a 100 templates for animating your logo, hence making it the perfect app for those who want to perform basic animation. Additionally, the app also has multiple visual effects which would enable you to make catchy logos
05Animaker
The final software on this list of amazing softwares is animaker. The software works well to animate logos, presentations, and marketing videos. The software has more than 50 effects. Moreover, using this software you can add filters, effects and sound effects. The software also lets users upload the videos to facebook and youtube directly!
Final Thoughts
● Today, we took a look at a few of the best animated logos which you could idealize.
● Nowadays, even big brands are adopting animated logos.
● They help establish a brand image and take your brand to a higher level.
● We also saw a few softwares that could help you make an animated logo. Wish to make an animated logo? Head to any one of the websites and make your website with animated logos!
How to Create A GIF with Sound?
How to Create A GIF with Sound?

Shanoon Cox
Mar 27, 2024• Proven solutions
GIFs are simple animations without any sound. However, modern GIFs have the ability to carry audio and are more preferred. The technology is absolutely new, and you can even add music to GIF files. Today, we will explore the best tools to create GIFs with sound. You can also join the trend and share GIFs with audio bites with your friends and family.
Part 1: How to Create a GIF with Sound on Imgur?
Imgur is a popular image sharing platform . It’s also one of the oldest services, starting its journey way back in 2009.
You can upload images on Imgur and embed them on your websites or blogs. The service is really popular, thanks to forums like Reddit. People love to share images on Imgur, which is fast and convenient.
Now, you can also upload and watch GIFs on Imgur. The platform even introduced a new GIF format to make GIFs more smooth and reliable. Additionally, Imgur even lets you upload GIFs with sound through its iOS app.
You can watch the GIFs with audio from your computer and tablets. Soon, you will be able to access the feature from the Imgur Android app. The new GIFs are really catching on, and people love the sound bites that come along. GIFs with sound are more fun to watch, and you can also easily convey your message.
Here is how you can create and upload GIFs with sound on Imgur.
- Download and run the latest version of the Imgur iOS app from here: https://apps.apple.com/us/app/imgur-funny-meme-gif-maker/id639881495
- Now press the camera button and choose a video from your device. You can add only video files with sound for making a GIF with sound.
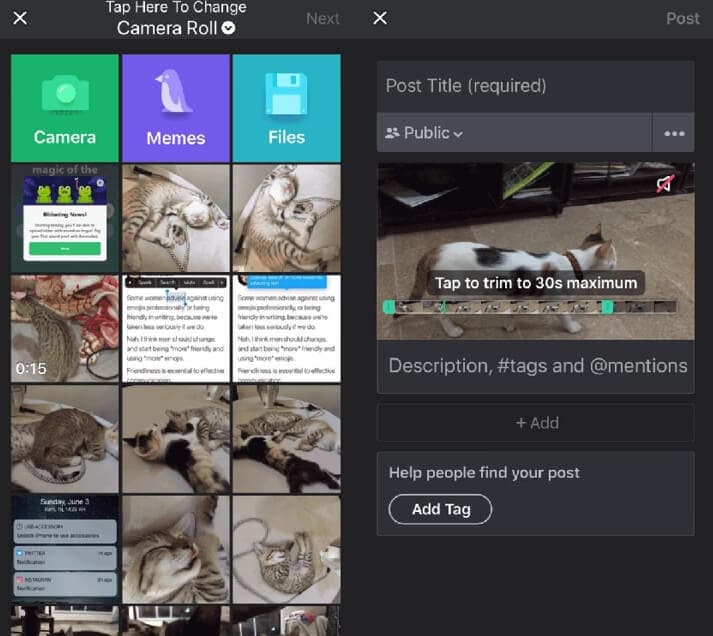
Note: Your GIF with audio cannot be more than 30-seconds long. Use the app the trim your video down to 30-seconds. If you want, you can even trim your video below 30-seconds.
- Now, press the speaker icon on the video to unmute the sound. You can next upload the video with sound and watch it as a GIF.
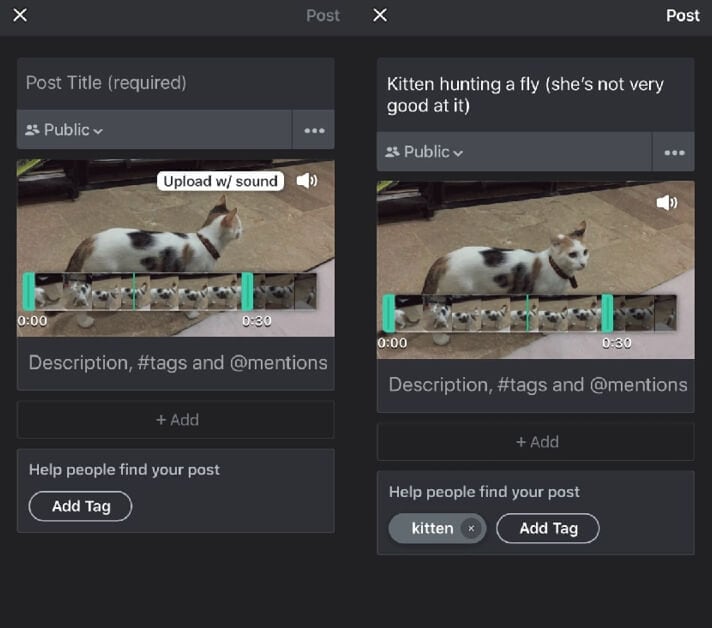
Part 2: How to Create GIF with sound on Gfycat?
Gfycat is one of the largest GIF sharing sites. You can find thousands of GIFs shared by users from all across the world. The GIFs are neatly sorted into categories so that you can find your favorite ones easily.
Gfycat was the pioneer in video to GIF conversion . It first offered the service in 2013 that took the internet by storm. Since then, Gfycat has been the choice of millions of people for sharing memes and short videos.
Gfycat now enables you to share GIFs with sound. You can upload any video and convert it to a GIF without sacrificing the sound. However, you can only upload only up to a minute of GIF that contains sound.
Follow the steps below to create your GIF with sound-
- Launch the Gfycat website and choose the video you want to convert. You can add files from your device or use URLs of video sites. Be sure to choose small file sizes for the best results.
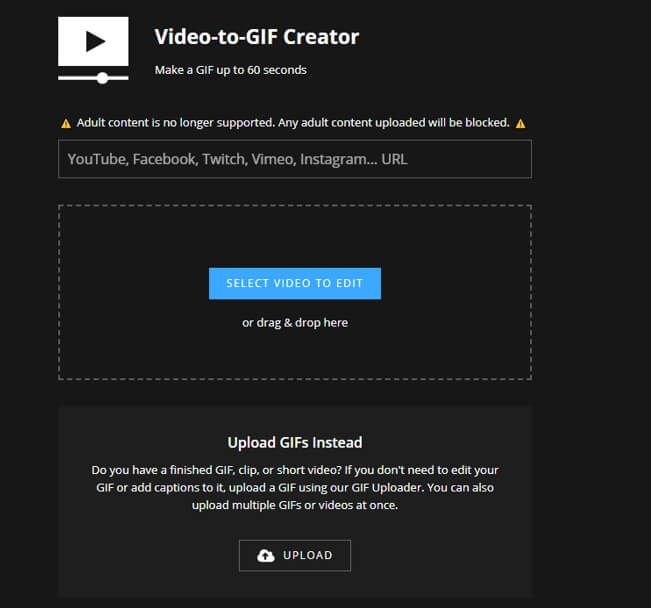
- You can now trim your video down to your desired length. Remember that adding sound will make the file size big. So, it pays to keep your GIFs short to 60 seconds. Use the sliders to select the portion of the video you want to convert and then click Continue.
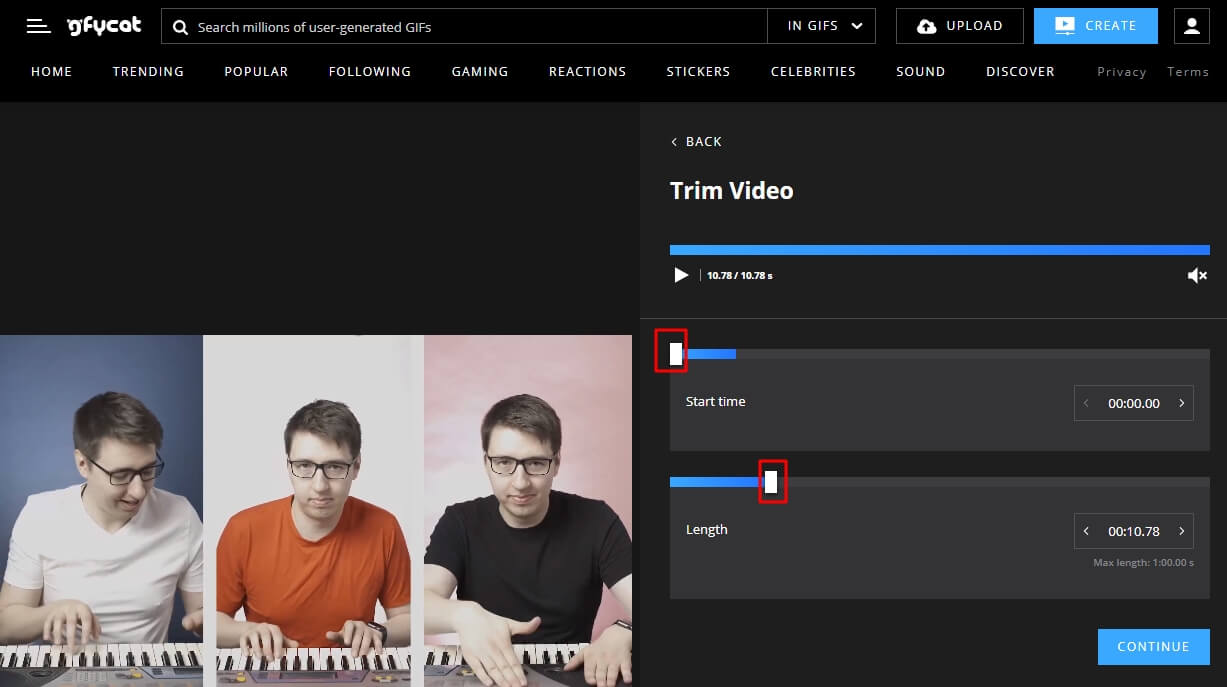
- Besides sound, Gfycat also lets you add texts and captions to your GIFs. You can move the slider to the proper time and then click ADD A CAPTION to add a new text box. If you don’t need to add text, click Continue and jump to the next step.
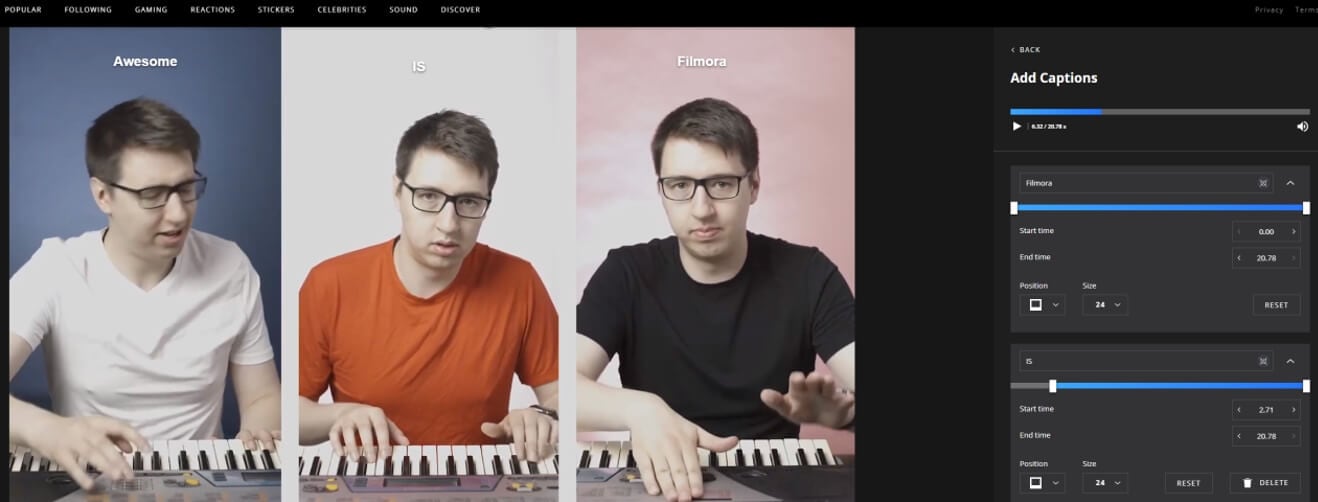
- Now comes the time to add titles and tags to your GIFs. To create and share the GIF with sound, remember to enable the Speaker icon. After you’re done, just click the FINISH button to upload your GIF with sound on Gfycat.
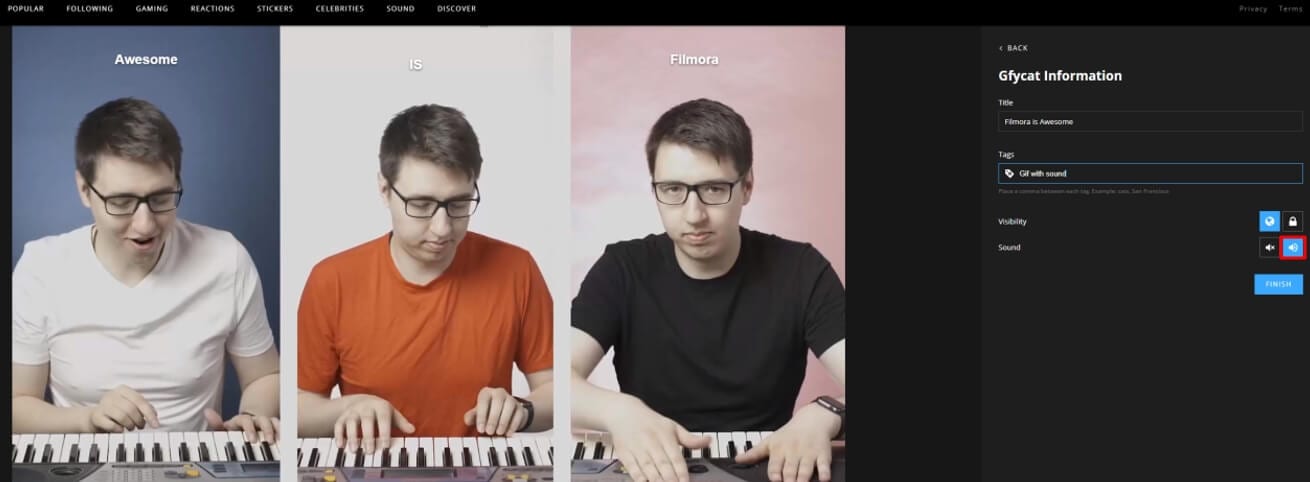
Part 3: How to Add Music And Sound Effect To GIFs With Filmora?
Filmora is a cutting-edge video and GIF editing software. Adding sound to GIFs is really easy and can be done in a few steps. You have several perks like-
1. Vast Audio Library
The Audio library brings you a royalty-free music and sound effect library. You can use a plethora of audio files, sound effects, and music for your GIFs without spending a cent. Besides, the Filmstock effect store provides more sound effects and music to try.
2. Optimum Sync
Filmora features advanced beat detection to detect the hits in the audio and generate markers, you can sync your audio with GIFs perfectly with the help of markers. You don’t have to worry about your GIFs appearing out of sync with your audio.
3. Provide Voiceover
You can use your voiceover for your GIFs to make them awesome. Just hook up your microphone and record your voice for ultimate enjoyment.
How to Add Sound to GIFs in Filmora Video Editor?
- The first step to adding music and sound effect to your GIF is to import them to your timeline.
- Then you can choose to add music and sound effect from the in-built audio library, or record your own voice.
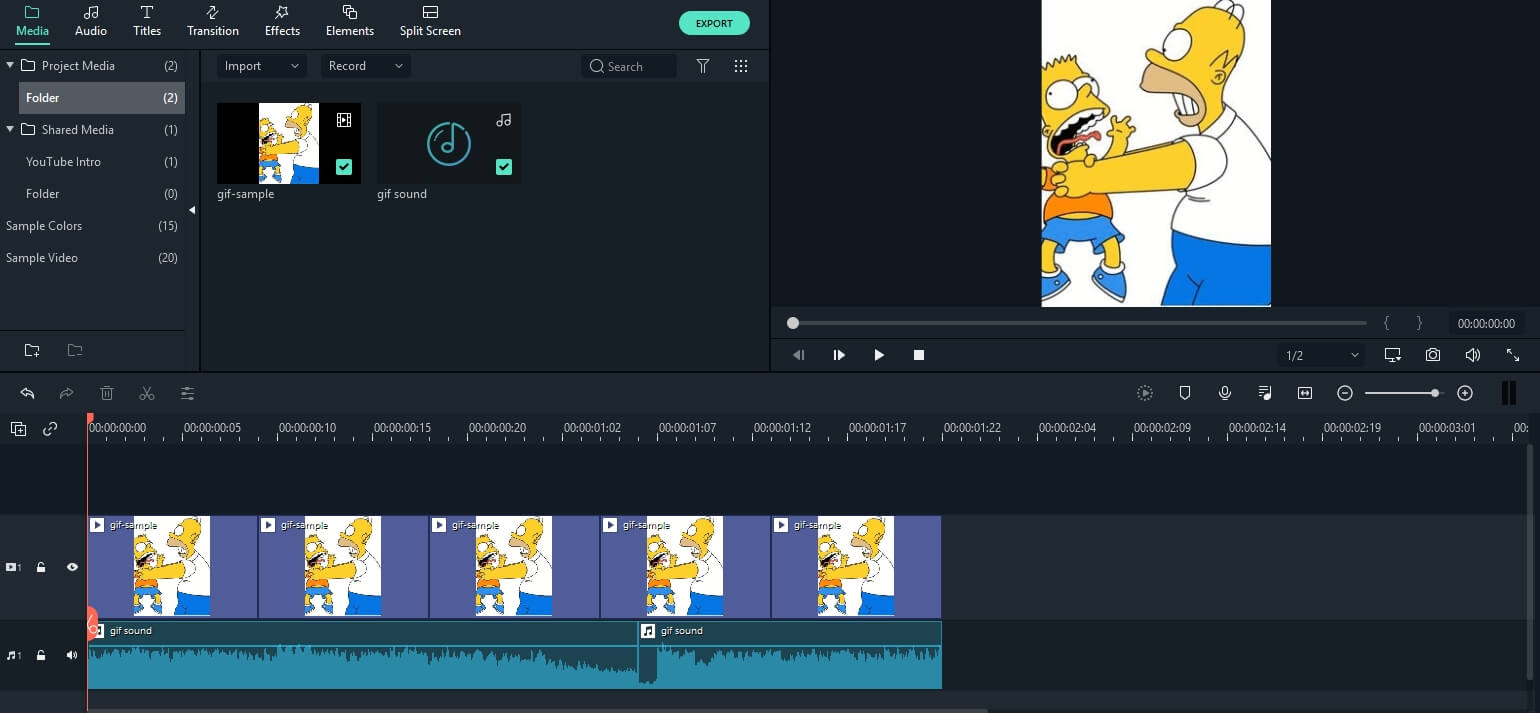
When you’re done, just export your gif file as a video in mp4 or other proper formats. You can also configure the resolution and bits for better results.
FIlmora is very user-friendly, and you don’t need to face any learning curve. You can quickly start adding audio and create GIFs with sound in minutes!
FAQ About Sound GIF
Where can I see GIFs with sound?
Presently, only a few platforms allow you to play GIFs with sounds. For that, you have to first embed an audio file in your image or use a video.
Some platforms like Giphy, Imgur, Gfycat, or Tenor let you watch GIFs with sound. You can also give YouTube a try and find GIFs with audio. Else, you can watch them on your mobiles or tablets.
Creating a GIF with sound is simple, quick and easy with Filmora. Have you tried it out yet?


Shanoon Cox
Shanoon Cox is a writer and a lover of all things video.
Follow @Shanoon Cox
Shanoon Cox
Mar 27, 2024• Proven solutions
GIFs are simple animations without any sound. However, modern GIFs have the ability to carry audio and are more preferred. The technology is absolutely new, and you can even add music to GIF files. Today, we will explore the best tools to create GIFs with sound. You can also join the trend and share GIFs with audio bites with your friends and family.
Part 1: How to Create a GIF with Sound on Imgur?
Imgur is a popular image sharing platform . It’s also one of the oldest services, starting its journey way back in 2009.
You can upload images on Imgur and embed them on your websites or blogs. The service is really popular, thanks to forums like Reddit. People love to share images on Imgur, which is fast and convenient.
Now, you can also upload and watch GIFs on Imgur. The platform even introduced a new GIF format to make GIFs more smooth and reliable. Additionally, Imgur even lets you upload GIFs with sound through its iOS app.
You can watch the GIFs with audio from your computer and tablets. Soon, you will be able to access the feature from the Imgur Android app. The new GIFs are really catching on, and people love the sound bites that come along. GIFs with sound are more fun to watch, and you can also easily convey your message.
Here is how you can create and upload GIFs with sound on Imgur.
- Download and run the latest version of the Imgur iOS app from here: https://apps.apple.com/us/app/imgur-funny-meme-gif-maker/id639881495
- Now press the camera button and choose a video from your device. You can add only video files with sound for making a GIF with sound.
Note: Your GIF with audio cannot be more than 30-seconds long. Use the app the trim your video down to 30-seconds. If you want, you can even trim your video below 30-seconds.
- Now, press the speaker icon on the video to unmute the sound. You can next upload the video with sound and watch it as a GIF.
Part 2: How to Create GIF with sound on Gfycat?
Gfycat is one of the largest GIF sharing sites. You can find thousands of GIFs shared by users from all across the world. The GIFs are neatly sorted into categories so that you can find your favorite ones easily.
Gfycat was the pioneer in video to GIF conversion . It first offered the service in 2013 that took the internet by storm. Since then, Gfycat has been the choice of millions of people for sharing memes and short videos.
Gfycat now enables you to share GIFs with sound. You can upload any video and convert it to a GIF without sacrificing the sound. However, you can only upload only up to a minute of GIF that contains sound.
Follow the steps below to create your GIF with sound-
- Launch the Gfycat website and choose the video you want to convert. You can add files from your device or use URLs of video sites. Be sure to choose small file sizes for the best results.
- You can now trim your video down to your desired length. Remember that adding sound will make the file size big. So, it pays to keep your GIFs short to 60 seconds. Use the sliders to select the portion of the video you want to convert and then click Continue.
- Besides sound, Gfycat also lets you add texts and captions to your GIFs. You can move the slider to the proper time and then click ADD A CAPTION to add a new text box. If you don’t need to add text, click Continue and jump to the next step.
- Now comes the time to add titles and tags to your GIFs. To create and share the GIF with sound, remember to enable the Speaker icon. After you’re done, just click the FINISH button to upload your GIF with sound on Gfycat.
Part 3: How to Add Music And Sound Effect To GIFs With Filmora?
Filmora is a cutting-edge video and GIF editing software. Adding sound to GIFs is really easy and can be done in a few steps. You have several perks like-
1. Vast Audio Library
The Audio library brings you a royalty-free music and sound effect library. You can use a plethora of audio files, sound effects, and music for your GIFs without spending a cent. Besides, the Filmstock effect store provides more sound effects and music to try.
2. Optimum Sync
Filmora features advanced beat detection to detect the hits in the audio and generate markers, you can sync your audio with GIFs perfectly with the help of markers. You don’t have to worry about your GIFs appearing out of sync with your audio.
3. Provide Voiceover
You can use your voiceover for your GIFs to make them awesome. Just hook up your microphone and record your voice for ultimate enjoyment.
How to Add Sound to GIFs in Filmora Video Editor?
- The first step to adding music and sound effect to your GIF is to import them to your timeline.
- Then you can choose to add music and sound effect from the in-built audio library, or record your own voice.
When you’re done, just export your gif file as a video in mp4 or other proper formats. You can also configure the resolution and bits for better results.
FIlmora is very user-friendly, and you don’t need to face any learning curve. You can quickly start adding audio and create GIFs with sound in minutes!
FAQ About Sound GIF
Where can I see GIFs with sound?
Presently, only a few platforms allow you to play GIFs with sounds. For that, you have to first embed an audio file in your image or use a video.
Some platforms like Giphy, Imgur, Gfycat, or Tenor let you watch GIFs with sound. You can also give YouTube a try and find GIFs with audio. Else, you can watch them on your mobiles or tablets.
Creating a GIF with sound is simple, quick and easy with Filmora. Have you tried it out yet?
Shanoon Cox
Shanoon Cox is a writer and a lover of all things video.
Follow @Shanoon Cox
Also read:
- 2024 Approved 6 Types of Animation You May Like
- The 10 Most Adorable Aesthetic Cartoon Characters of All Time
- New 10 Best Convert Video Between GIF Software High Quality for 2024
- Best 10 Photo Animator Templates for 2024
- Learn All About 3D Logo Animation and Templates
- New In 2024, How to Animate - Adobe Animate Tutorial for All
- How to Create Picsart Cartoon
- Updated All About Types of Motion Graphics
- How to Create Photo Collage Frame for Free in Minutes, In 2024
- New 2024 Approved How to Combine Multiple GIFs Into One with GIF Combiner
- New Tips That Show Anybody How to Get Awesome Background for Slideshow in PowerPoint
- 2024 Approved 5 Free Animated Gif Sources You Must Check
- Updated Pencil2D Animation Tutorial Overview for 2024
- Updated In 2024, Guide on How to Create GIF in WhatsApp iPhone
- New 2024 Approved Best 12 Illusion Gifs Top Picks
- Updated In 2024, Top 4 Websites to Get Anime Footage for Free
- Updated In 2024, Make Well Done Animated GIF
- Updated 2024 Approved The Definitive Guide to Whiteboard Animation
- New Secret Source to Make a Stop Motion Puppet
- 2024 Approved 10 Amazing Whiteboard Animation Video Examples You Need to Bookmark
- New 15 Forgotten Cartoon Characters of All Time for 2024
- New In 2024, 15 Top Pics Collage Apps
- New 2024 Approved Simple Shortcut to Convert Videos to Gifs on iPhone
- How to Convert Animated GIF From Video for 2024
- Updated How to Make Well Done Animated GIF By Yourself, In 2024
- Best Anti Tracker Software For Oppo Reno 11F 5G | Dr.fone
- In 2024, Hassle-Free Ways to Remove FRP Lock from OnePlus 12 Phones with/without a PC
- How to Track a Lost Vivo T2 5G for Free? | Dr.fone
- In 2024, How to Change Location On Facebook Dating for your Vivo V27 Pro | Dr.fone
- In 2024, Best Anti Tracker Software For Lava Agni 2 5G | Dr.fone
- All About Factory Reset, What Is It and What It Does to Your Motorola Moto G23? | Dr.fone
- In 2024, AddROM Bypass An Android Tool to Unlock FRP Lock Screen For your Oppo Reno 8T 5G
- In 2024, How To Leave a Life360 Group On Apple iPhone XS Without Anyone Knowing? | Dr.fone
- In 2024, 6 Ways To Transfer Contacts From Samsung Galaxy A23 5G to iPhone | Dr.fone
- For People Wanting to Mock GPS on Tecno Camon 20 Pro 5G Devices | Dr.fone
- Complete Guide to Hard Reset Your Realme GT 5 Pro | Dr.fone
- How to unlock a disable iPhone 12 Pro Max without itunes
- How to Fix Error 495 While Download/Updating Android Apps On Vivo Y78+ | Dr.fone
- Pokemon Go Error 12 Failed to Detect Location On Tecno Camon 20 Pro 5G? | Dr.fone
- Title: New Little Known Techniques of Motion Graphics in Premiere Pro for 2024
- Author: Elon
- Created at : 2024-05-19 03:05:42
- Updated at : 2024-05-20 03:05:42
- Link: https://animation-videos.techidaily.com/new-little-known-techniques-of-motion-graphics-in-premiere-pro-for-2024/
- License: This work is licensed under CC BY-NC-SA 4.0.
