
:max_bytes(150000):strip_icc():format(webp)/sofya-NomETWcv2Fo-unsplash-be3fc2855a7e477db0273993fd22e822.jpg)
New Pencil2D Animation Tutorial Overview for 2024
Pencil2D Animation Tutorial Overview
Animation is one of the trendiest technologies. The basics of animation were formulated in the 2000s from the moving page trick. The first few animators learned that animation is nothing but continuous switching of frames from one to another. One animated still is switched to another and then another in a quick sequence such that it makes a sequential moving frame. Today, animation has come a long way from where it started and today it is used for several commercials, tutorials, and even educational lecture videos. Pencil2D animation is an amazing animation tool that can be used by even neophytes. Want to learn more about 2d pencil animation and its super cool features? Well, you’re at the perfect place. Today we’ll be telling you more about pencil 2d animation and giving you a small overview of its usage.
In this article
01 [What is Pencil2D and How to Install?](#Part 1)
02 [Overview of the Application Interface](#Part 2)
03 [How to Create Animations with Pencil2D?](#Part 3)
Part 1 What is Pencil2D and How to Install?
2d pencil animation is popular open-source animation software. The software is pretty cool for those who are newly starting off with animation. The open-source software is available on all major operating systems including Windows, Mac OS, and Unix. Using this amazing software, we can make amazing cartoon characters using traditional cartoon-making techniques such as tracing drawing, skinning. Using this software, you can save animations in the native animation formats or extract the animation to PNG, JPG, or other formats. Wish to explore more about pencil 2d animation software? Follow the steps listed below in order to download the pencil2d animation software.
● Firstly, you need to ensure that your device has ample space on it.
● Next, you need to head to the official website of pencil2d.
● Further, you need to select your operating system. You can find different versions of the software, namely windows 7/8/10, windows XP/ Vista, Mac OS, and Linux
● Once downloaded, you need to start the installation setup. Note that this may take a while to download.
● Once downloaded, you can start familiarizing yourself with the software.
Part 2 Overview of the Application Interface
1. The brush tool
The brush tool must have reminded you of paint software in windows. The brush tool is a popular and highly utilitarian basic tool in Pencil2D animation software. You can either access it via the user interface or quickly access it by using the B key on your keyboard. As the name suggests, the brush tool is literally just a brush that allows you to draw and paint any sort of drawings of different shades, colors, and thickness. If you wish to change the color, you can find a color palette on the left side of the interface.

2. The eraser tool
You’ve a brush tool; it’s almost common sense that there’d be an eraser. The eraser tool has an eraser as its icon. If you wish to use the eraser, click on the eraser tool or simply click the E button on your keyboard. Once you’ve selected the tool, you need to simply hover over the parts you wish to erase.

3. Bucket tool
The bucket tool is another useful tool that you can find in the left tool pane of pencil 2d animation. The tool icon looks like a bucket and it is used to fill an entire area with a particular color. You can choose the color you’d like to fill from the color pallet available on the left side. Alternatively, you can also access the bucket tool by pressing the “K” key on your keyboard.

4. Custom colors
A cool feature that you can find on pencil 2d animation software is the custom color one. You can merge and mix colors according to your choice and create your own color. To do so, you need to click on the small color box that you’ll find at the top right of your screen. By doing so, a huge color wheel will appear on your screen. Now you can either enter values of the R, G, and B if you wish to merge different colors and make a new one or select a particular color from the huge color wheel that appears in front of you. These colors vary in gradient, shade, and a lot of different factors.

5. The Undo button
The Undo button is a highly useful functionality for the lazy ones who do not wish to erase the mistake they made. By undoing, the previous step gets reverted and you can start over again. The traditional undo shortcut, Ctrl+Z does work in the pencil 2d animation. Alternatively, you can also use the undo feature via the user interface. You can do so by heading over to the edit option in the topmost bar. The first option in the drop-down menu would be undo.

Part 3 How to Create Animations with Pencil2D?
Creating animations in pencil 2d is slightly sophisticated and certainly needs minimal practice. Follow the steps listed below in order to learn how to animate through pencil 2d to make your first animation.
1. Ensure that you’ve turned on your bitmap on the first frame
Animation works through quick switching of frame which makes it appear as though the object is in motion. By turning on the bitmap, pencil 2d animation ensures that you’ve no blank frames at the start of your animation.

2. Draw your animated character
Since you’re trying to animate, you need to have an animated character or object. Hence, the first step to making your first animation is by drawing the object or character that you wish to animate. Try to make the character as realistic as possible. To start with, maybe you can try animating just a stick figure; this is because animating a complex character is rather difficult for beginners.

3.The three circular buttons
Once you’re satisfied with the character you draw, you need to spot the 3 circular buttons which are arranged in the “+”,”-“,”+” order. By pressing the first “+” button, you can add an empty slide. If you click on the “-“ button, it will delete the most recent slide and if you click on the next “+” button, it will duplicate the current slide.

4.Repeat until you get an animation
Now that you know how to deal with multiple frames, you can continue creating frames and making the animated characters move by tweaking with the drawing in every frame. For instance, if you wish to show that the animated character is running, in one of the frames the left leg should be forward and in the next one, the right leg should be forward. Keep repeating this process of tweaking with frames until you’ve your desired animated video.

Now that we’ve seen the process of animation via Pencil2D, you must have realized that it’s pretty orthodox and complicated. Moreover, you cannot carry out rigging and other newer animation techniques. Hence, we introduce you to Wondershare Filmora Video Editor , your all in one animation making platform. Here you can animate without any hassle. Wondershare Filmora makes your job easier with multiple animation features, you needn’t even draw your animated character. You can simply import a custom-made character and rig the character. Further, you need not deal with multiple frames and personally pay attention to each frame. All in all, Filmora makes your job simple and your animations much more seamless.
For Win 7 or later (64-bit)
For macOS 10.12 or later
Key Takeaways from This Episode
● Animation is actively being used for multiple purposes.
● Today we took a look at one of the orthodox yet popular animation tools, Pencil2D.
● The Pencil2D animation tool offers you multiple functionalities and allows you to make animations.
● Next, we also took a look at Wondershare Filmora Pro, your one-stop shop for all animation needs. You can find multiple animation features here and it’s all so simple.
● What are you waiting for? Your next animation is just one click away.
02 [Overview of the Application Interface](#Part 2)
03 [How to Create Animations with Pencil2D?](#Part 3)
Part 1 What is Pencil2D and How to Install?
2d pencil animation is popular open-source animation software. The software is pretty cool for those who are newly starting off with animation. The open-source software is available on all major operating systems including Windows, Mac OS, and Unix. Using this amazing software, we can make amazing cartoon characters using traditional cartoon-making techniques such as tracing drawing, skinning. Using this software, you can save animations in the native animation formats or extract the animation to PNG, JPG, or other formats. Wish to explore more about pencil 2d animation software? Follow the steps listed below in order to download the pencil2d animation software.
● Firstly, you need to ensure that your device has ample space on it.
● Next, you need to head to the official website of pencil2d.
● Further, you need to select your operating system. You can find different versions of the software, namely windows 7/8/10, windows XP/ Vista, Mac OS, and Linux
● Once downloaded, you need to start the installation setup. Note that this may take a while to download.
● Once downloaded, you can start familiarizing yourself with the software.
Part 2 Overview of the Application Interface
1. The brush tool
The brush tool must have reminded you of paint software in windows. The brush tool is a popular and highly utilitarian basic tool in Pencil2D animation software. You can either access it via the user interface or quickly access it by using the B key on your keyboard. As the name suggests, the brush tool is literally just a brush that allows you to draw and paint any sort of drawings of different shades, colors, and thickness. If you wish to change the color, you can find a color palette on the left side of the interface.
2. The eraser tool
You’ve a brush tool; it’s almost common sense that there’d be an eraser. The eraser tool has an eraser as its icon. If you wish to use the eraser, click on the eraser tool or simply click the E button on your keyboard. Once you’ve selected the tool, you need to simply hover over the parts you wish to erase.
3. Bucket tool
The bucket tool is another useful tool that you can find in the left tool pane of pencil 2d animation. The tool icon looks like a bucket and it is used to fill an entire area with a particular color. You can choose the color you’d like to fill from the color pallet available on the left side. Alternatively, you can also access the bucket tool by pressing the “K” key on your keyboard.
4. Custom colors
A cool feature that you can find on pencil 2d animation software is the custom color one. You can merge and mix colors according to your choice and create your own color. To do so, you need to click on the small color box that you’ll find at the top right of your screen. By doing so, a huge color wheel will appear on your screen. Now you can either enter values of the R, G, and B if you wish to merge different colors and make a new one or select a particular color from the huge color wheel that appears in front of you. These colors vary in gradient, shade, and a lot of different factors.
5. The Undo button
The Undo button is a highly useful functionality for the lazy ones who do not wish to erase the mistake they made. By undoing, the previous step gets reverted and you can start over again. The traditional undo shortcut, Ctrl+Z does work in the pencil 2d animation. Alternatively, you can also use the undo feature via the user interface. You can do so by heading over to the edit option in the topmost bar. The first option in the drop-down menu would be undo.
Part 3 How to Create Animations with Pencil2D?
Creating animations in pencil 2d is slightly sophisticated and certainly needs minimal practice. Follow the steps listed below in order to learn how to animate through pencil 2d to make your first animation.
1. Ensure that you’ve turned on your bitmap on the first frame
Animation works through quick switching of frame which makes it appear as though the object is in motion. By turning on the bitmap, pencil 2d animation ensures that you’ve no blank frames at the start of your animation.
2. Draw your animated character
Since you’re trying to animate, you need to have an animated character or object. Hence, the first step to making your first animation is by drawing the object or character that you wish to animate. Try to make the character as realistic as possible. To start with, maybe you can try animating just a stick figure; this is because animating a complex character is rather difficult for beginners.
3.The three circular buttons
Once you’re satisfied with the character you draw, you need to spot the 3 circular buttons which are arranged in the “+”,”-“,”+” order. By pressing the first “+” button, you can add an empty slide. If you click on the “-“ button, it will delete the most recent slide and if you click on the next “+” button, it will duplicate the current slide.
4.Repeat until you get an animation
Now that you know how to deal with multiple frames, you can continue creating frames and making the animated characters move by tweaking with the drawing in every frame. For instance, if you wish to show that the animated character is running, in one of the frames the left leg should be forward and in the next one, the right leg should be forward. Keep repeating this process of tweaking with frames until you’ve your desired animated video.
Now that we’ve seen the process of animation via Pencil2D, you must have realized that it’s pretty orthodox and complicated. Moreover, you cannot carry out rigging and other newer animation techniques. Hence, we introduce you to Wondershare Filmora Video Editor , your all in one animation making platform. Here you can animate without any hassle. Wondershare Filmora makes your job easier with multiple animation features, you needn’t even draw your animated character. You can simply import a custom-made character and rig the character. Further, you need not deal with multiple frames and personally pay attention to each frame. All in all, Filmora makes your job simple and your animations much more seamless.
For Win 7 or later (64-bit)
For macOS 10.12 or later
Key Takeaways from This Episode
● Animation is actively being used for multiple purposes.
● Today we took a look at one of the orthodox yet popular animation tools, Pencil2D.
● The Pencil2D animation tool offers you multiple functionalities and allows you to make animations.
● Next, we also took a look at Wondershare Filmora Pro, your one-stop shop for all animation needs. You can find multiple animation features here and it’s all so simple.
● What are you waiting for? Your next animation is just one click away.
How to Cartoonize Photo Photoshop in Easy Steps
How to Cartoonize Photo Photoshop in Easy Steps
An easy yet powerful editor
Numerous effects to choose from
Detailed tutorials provided by the official channel
Cartoons, an already catchy entertainment source, can upgrade other media utilities on integration. Look through the easiest ways of creating cartoonize photo Photoshop stills!
In this article
01 [Types of Cartoon Effects in Photoshop](#Part 1)
02 [Easiest Ways to Cartoonize Photo in Photoshop](#Part 2)
03 [How to Use a Variety of Photoshop Special Effects to Create the Final Caricature Look](#Part 3)
Part 1 Types of Cartoon Effects in Photoshop
It is an absolute fun activity to explore your editing creativity in the realm of cartoonizing the otherwise ordinary still captures. Talking of the most convenient cartoon creator and editor applications, you can safely rely on the Photoshop Image Editor application to choose from a pool of cartoon editing effects for adding that spunky and funny element to your image files.
Presented in the following section, is a discussion of some of the most stunning and visibly amazing cartoon effects in the application’s Editor Library to cartoonize Photoshop images:
01Pop Art Photoshop Action
The effect is a predominantly preferred as a cartoon action Photoshop utility to caricaturize a normal image, along with customizing the same to change the colors and background of the original still capture for creating a brand new appearance with utmost ease. Apart from this, the aforesaid effect allows you to exclusively customize the globally acclaimed graphic masterpieces of Roy Lichtenstein. Working with the effect, you can edit a self-portrait or the favorite image of your pet to give the latter, a funny retro feel.

02Vintage Comic Creator
If the idea of sticking to just the creation of cartoon images is not enough to satisfy you, the Vintage Comic Creator effect allows you to expand your creativity level to work on cartoon based shape and text edits. You can use the effect to enhance an image logo or plain text with a comic book oriented text. A download of this cartoon effect template facilitates you with diversities of customizable layer styles, overlays and patterns.

03GTA Photoshop Action
This is a complete pleasure for the creative fan of Grand Theft Auto, the wicked chasing game series. Additional to creating a stark variety of edited cartoon stills, you are free to reinvent the aforesaid game’s most popular caricature edits, while using the GTA Photoshop Action editing filter. Launched by Indworks, the effect package consisting of 15 vibrant themes and 5 collage templates; promises a quick mimicry of your most cherished video and console games.

04Vector Paint Photoshop Action
The one is an amazing Photoshop effect for creating cartoon edits, which works through a merger of two different ingenious art themes or styles for transforming basic images into cartoonized stills.
The effect grants you the liberty to use varieties of art styles, such as, comic, photo retouching and energetic oil to obtain editing results comparable to that of any original photograph. The template is conveniently simple to use and assures you of quick results. All this, just at a nominal price of $6! Interesting, right?

05Ultra Realistic 3D Space Effect
Considering the fact of you being a space admirer, this one is the perfect image editor for you to add the vibrancy of stunning space elements and backgrounds within your cartoonized edits. The effect lets you play with the diverse range of customizable text and exciting caricature backgrounds. When downloading the template, you get a main setup file, a few editing examples and a web link to the free fonts present in the effect.

06Animated Zombie Grime Art Photoshop Action
Are you in love with the latest zombie grimes? If yes, then this action set is exclusive editor package for you. Working with the aforesaid image template, you can effortlessly add the perfect zombie theme to your cartoon edits, along with simultaneously creating a stunning animation, which you can use to enhance your video or GIF uploads on social media. Not forgetting the best part, you get a free access to this amazing utility.

Part 2 Easiest Ways to Cartoonize Photo in Photoshop
Having known about the amazing varieties of cartoonized editor templates in Photoshop, it is a natural instinct to feel motivated to create your own caricature images from normal capture stills. Addressing the concern of image transformation methods to turn a photo into a cartoon Photoshop, let us dive into some of the most affordable methods of creating cartoonized photos in the aforesaid editing application.
Talking of the most basic Photoshop tools for creating caricature images, you can start your editing spree with using the Graphic Tablet, Brush Tool, Layer Masks and a graphic pen to create amateur cartoonized edits from your still photographs, getting a full control on image tracing.
01Brush Tool
A few usage examples include working with a combination of the graphic tablet pen and the editor brushes to trace your image, using the brush in a masked or a fresh layer to avoid altering the actual image, and much more.
02Graphic Tablet
It is best to use the Photoshop Graphic Tablet for adhering to the concern of tracing cartoonized images. You can alternatively cater to the job with a trackpad, mouse, or even your hand. It is however, difficult to assure steady hand postures for image tracing, lest you are using a stylus pen.
03Pen Tool
Using the Pen Tool for cartoonizing your portrait, allows you to draw outlines along the desired figure within the image, along with its important elements, so that you can easily use these outlined paths to introduce different color blocks.
Similar to the Brush Tool, the Photoshop Pen utility grants you the freedom to vary the degree of detailing in your cartoon edit, from being highly expressive to only remaining around the shore. Working with the Pen Tool can, however be a bit tiring and time taking, with respect to the extent of detailing you wish to add to the caricature edits.
Additional to the aforementioned tools, you can also consider using the default image filters of the Photoshop application to get comparable results. This is an exclusively better option to choose, compared to the Pen Tool, when you are working without a Graphic Tablet. To get over the top realistic caricature renderings, you will need to supplement the use of Photoshop filters with the application’s editing channels and other adjustments.
Part 3 How to Use a Variety of Photoshop Special Effects to Create the Final Caricature Look
Considering the extensive discussion on the credibility of the Photoshop Image Editor application in the realm of creating stunning caricature images in high end resolution, let us proceed to learn about using the diversity of Photoshop’s special effects to get the last stage cartoonized appearance of ordinary still images.
User’s Guide to Create High End Cartoonized Look
The following tutorial is a stepwise explanation of the process to convert photo into cartoon Photoshop in the easiest possible way. Stick to the method for getting affordable results in a quick span.
Step 1: Download and Launch the Program
Visit the official website of Photoshop Image Editor for a free download of the software program in your system, followed by installing and launching the same in your device.
Step 2: Upload Your Image
On a successful launch of the editor program, you will be directed to the ‘Photoshop Editor’ window, where you are required to upload any desired still image from your device for creating a cartoonized edit. To do this, either simply add your image to the editor workspace using the ‘Drag and Drop’ method, or navigate to the ‘File’ tab in the top toolbar and click on ‘Open’ in the dropdown menu.
Step 3: Edge Enhancement
Once your image appears in the editor timeline, proceed to sharpen the edges of the face and body of the portrait. Start with navigating to and clicking on the ‘Filter’ option, followed by tapping on ‘Filter Gallery’ and selecting the ‘Artistic’ folder, where you need to choose the ‘Poster Edges’ option. Observe the effect of these setting on the portrait and make necessary changes.

Step 4: Background Setting
Ensure that the background and foreground of your image are set to white and black colors respectively. If not, proceed to adjust the same as required.

Step 5: Distorting the Edges
You now need to introduce some distortion in the edges of your portrait. Navigate to the ‘Filter’ option again, open the ‘Filter Gallery’ and choose ‘Torn Edges’ from the menu that drops down. Select the desired parameter values in accordance with your creative suitability.


Step 6: Using the Channels Panel
The next step is to select and copy your portrait using the ‘Ctrl + A’ and Ctrl + C commands respectively. Navigate to the ‘Channels’ panel at the right of the Photoshop workspace. At the panel’s bottom right, proceed with creating a new channel. It will be assigned the name ‘Alpha 1’ by Photoshop, which you are most welcome to change.


Step 7: Color Inversion
When you finish creating the channel, use the ‘Ctrl + V’ command to paste your portrait in the same. Proceed with inverting the image colors by navigating to the ‘Image’ option, followed by choosing the ‘Adjustment’ and ‘Invert’ options from the consecutive drop downs. Now, make a selection of the ‘White’ regions of your portrait by pressing the ‘Ctrl’ key and clicking on the ‘Alpha 1 Channel thumbnail.

Step 8: Layer Creation
Navigate to the ‘Layers’ panel at the right of the Photoshop workspace, and click on the ‘New Layer’ icon for creating a fresh layer. Fill the just created layer with black color, either by pressing ‘g’ from your system’s keyboard, or using the ‘Paint Bucket’ tool. Don’t forget to assign a suitable name to the layer.

Repeat the above process to create a separate layer and e fill the same with white color. The layer creation process is essential to separate the white and black colors of the actual image.

Step 10: Layer Dragging
In the ‘Layers’ panel, drag the ‘Black’ layer above the ‘White’ one.

Step 11: Creating Additional Layers
You are now required to create three more layers, with the same process as for the above two, for adding effects to the Skin, Clothes and Teeth/Eyes of the portrait. When you finish creation, assign suitable names to the layers, followed by dragging them below the ‘Black’ one within the ‘Layers’ panel.

Step 12: Color Selection and Application
Choose the respective colors for the clothes, skin and teeth/eyes of the cartoonized edit. To proceed with color application, navigate to the toolbar at the left of the Photoshop workspace and choose the ‘Brush Tool’. Finally, choose a particular layer and apply careful brush strokes to add color to the specific area of the portrait that you wish to edit. Follow the same process to add colors to the remaining layers to get the desired result in all areas of your cartoonized edit.

Step 13: Using the Gradient Tool
Navigate to the ‘Layers’ panel again and create a new ‘Gradient’ layer to further enhance your creation. You now need to select the ‘Gradient Tool’ from the toolbar at the left of the Photoshop workspace. The ‘Gradient Editor’ pops up with the continuously running ‘Gradient Bar’, as soon as you make the selection. Double click on the gradient boxes at both ends to select them, followed by making your color choices. Tap on ‘OK’ when you are satisfied with your work.

Step 14: Filling the Gradients
To proceed with gradient filling, press and hold the mouse button on the image at the bottom left and continue to drag the cursor to its top right corner. Leave the mouse and navigate to the ‘Layers’ panel for dragging and dropping the ‘Gradient’ layer above the ‘White’ layer.

You are now done with the process of creating a caricature edit from a normal still portrait. Your final image output will appear something like the following:

Cartoons, an already catchy entertainment source, can upgrade other media utilities on integration. Look through the easiest ways of creating cartoonize photo Photoshop stills!
In this article
01 [Types of Cartoon Effects in Photoshop](#Part 1)
02 [Easiest Ways to Cartoonize Photo in Photoshop](#Part 2)
03 [How to Use a Variety of Photoshop Special Effects to Create the Final Caricature Look](#Part 3)
Part 1 Types of Cartoon Effects in Photoshop
It is an absolute fun activity to explore your editing creativity in the realm of cartoonizing the otherwise ordinary still captures. Talking of the most convenient cartoon creator and editor applications, you can safely rely on the Photoshop Image Editor application to choose from a pool of cartoon editing effects for adding that spunky and funny element to your image files.
Presented in the following section, is a discussion of some of the most stunning and visibly amazing cartoon effects in the application’s Editor Library to cartoonize Photoshop images:
01Pop Art Photoshop Action
The effect is a predominantly preferred as a cartoon action Photoshop utility to caricaturize a normal image, along with customizing the same to change the colors and background of the original still capture for creating a brand new appearance with utmost ease. Apart from this, the aforesaid effect allows you to exclusively customize the globally acclaimed graphic masterpieces of Roy Lichtenstein. Working with the effect, you can edit a self-portrait or the favorite image of your pet to give the latter, a funny retro feel.
02Vintage Comic Creator
If the idea of sticking to just the creation of cartoon images is not enough to satisfy you, the Vintage Comic Creator effect allows you to expand your creativity level to work on cartoon based shape and text edits. You can use the effect to enhance an image logo or plain text with a comic book oriented text. A download of this cartoon effect template facilitates you with diversities of customizable layer styles, overlays and patterns.
03GTA Photoshop Action
This is a complete pleasure for the creative fan of Grand Theft Auto, the wicked chasing game series. Additional to creating a stark variety of edited cartoon stills, you are free to reinvent the aforesaid game’s most popular caricature edits, while using the GTA Photoshop Action editing filter. Launched by Indworks, the effect package consisting of 15 vibrant themes and 5 collage templates; promises a quick mimicry of your most cherished video and console games.
04Vector Paint Photoshop Action
The one is an amazing Photoshop effect for creating cartoon edits, which works through a merger of two different ingenious art themes or styles for transforming basic images into cartoonized stills.
The effect grants you the liberty to use varieties of art styles, such as, comic, photo retouching and energetic oil to obtain editing results comparable to that of any original photograph. The template is conveniently simple to use and assures you of quick results. All this, just at a nominal price of $6! Interesting, right?
05Ultra Realistic 3D Space Effect
Considering the fact of you being a space admirer, this one is the perfect image editor for you to add the vibrancy of stunning space elements and backgrounds within your cartoonized edits. The effect lets you play with the diverse range of customizable text and exciting caricature backgrounds. When downloading the template, you get a main setup file, a few editing examples and a web link to the free fonts present in the effect.
06Animated Zombie Grime Art Photoshop Action
Are you in love with the latest zombie grimes? If yes, then this action set is exclusive editor package for you. Working with the aforesaid image template, you can effortlessly add the perfect zombie theme to your cartoon edits, along with simultaneously creating a stunning animation, which you can use to enhance your video or GIF uploads on social media. Not forgetting the best part, you get a free access to this amazing utility.
Part 2 Easiest Ways to Cartoonize Photo in Photoshop
Having known about the amazing varieties of cartoonized editor templates in Photoshop, it is a natural instinct to feel motivated to create your own caricature images from normal capture stills. Addressing the concern of image transformation methods to turn a photo into a cartoon Photoshop, let us dive into some of the most affordable methods of creating cartoonized photos in the aforesaid editing application.
Talking of the most basic Photoshop tools for creating caricature images, you can start your editing spree with using the Graphic Tablet, Brush Tool, Layer Masks and a graphic pen to create amateur cartoonized edits from your still photographs, getting a full control on image tracing.
01Brush Tool
A few usage examples include working with a combination of the graphic tablet pen and the editor brushes to trace your image, using the brush in a masked or a fresh layer to avoid altering the actual image, and much more.
02Graphic Tablet
It is best to use the Photoshop Graphic Tablet for adhering to the concern of tracing cartoonized images. You can alternatively cater to the job with a trackpad, mouse, or even your hand. It is however, difficult to assure steady hand postures for image tracing, lest you are using a stylus pen.
03Pen Tool
Using the Pen Tool for cartoonizing your portrait, allows you to draw outlines along the desired figure within the image, along with its important elements, so that you can easily use these outlined paths to introduce different color blocks.
Similar to the Brush Tool, the Photoshop Pen utility grants you the freedom to vary the degree of detailing in your cartoon edit, from being highly expressive to only remaining around the shore. Working with the Pen Tool can, however be a bit tiring and time taking, with respect to the extent of detailing you wish to add to the caricature edits.
Additional to the aforementioned tools, you can also consider using the default image filters of the Photoshop application to get comparable results. This is an exclusively better option to choose, compared to the Pen Tool, when you are working without a Graphic Tablet. To get over the top realistic caricature renderings, you will need to supplement the use of Photoshop filters with the application’s editing channels and other adjustments.
Part 3 How to Use a Variety of Photoshop Special Effects to Create the Final Caricature Look
Considering the extensive discussion on the credibility of the Photoshop Image Editor application in the realm of creating stunning caricature images in high end resolution, let us proceed to learn about using the diversity of Photoshop’s special effects to get the last stage cartoonized appearance of ordinary still images.
User’s Guide to Create High End Cartoonized Look
The following tutorial is a stepwise explanation of the process to convert photo into cartoon Photoshop in the easiest possible way. Stick to the method for getting affordable results in a quick span.
Step 1: Download and Launch the Program
Visit the official website of Photoshop Image Editor for a free download of the software program in your system, followed by installing and launching the same in your device.
Step 2: Upload Your Image
On a successful launch of the editor program, you will be directed to the ‘Photoshop Editor’ window, where you are required to upload any desired still image from your device for creating a cartoonized edit. To do this, either simply add your image to the editor workspace using the ‘Drag and Drop’ method, or navigate to the ‘File’ tab in the top toolbar and click on ‘Open’ in the dropdown menu.
Step 3: Edge Enhancement
Once your image appears in the editor timeline, proceed to sharpen the edges of the face and body of the portrait. Start with navigating to and clicking on the ‘Filter’ option, followed by tapping on ‘Filter Gallery’ and selecting the ‘Artistic’ folder, where you need to choose the ‘Poster Edges’ option. Observe the effect of these setting on the portrait and make necessary changes.
Step 4: Background Setting
Ensure that the background and foreground of your image are set to white and black colors respectively. If not, proceed to adjust the same as required.
Step 5: Distorting the Edges
You now need to introduce some distortion in the edges of your portrait. Navigate to the ‘Filter’ option again, open the ‘Filter Gallery’ and choose ‘Torn Edges’ from the menu that drops down. Select the desired parameter values in accordance with your creative suitability.
Step 6: Using the Channels Panel
The next step is to select and copy your portrait using the ‘Ctrl + A’ and Ctrl + C commands respectively. Navigate to the ‘Channels’ panel at the right of the Photoshop workspace. At the panel’s bottom right, proceed with creating a new channel. It will be assigned the name ‘Alpha 1’ by Photoshop, which you are most welcome to change.
Step 7: Color Inversion
When you finish creating the channel, use the ‘Ctrl + V’ command to paste your portrait in the same. Proceed with inverting the image colors by navigating to the ‘Image’ option, followed by choosing the ‘Adjustment’ and ‘Invert’ options from the consecutive drop downs. Now, make a selection of the ‘White’ regions of your portrait by pressing the ‘Ctrl’ key and clicking on the ‘Alpha 1 Channel thumbnail.
Step 8: Layer Creation
Navigate to the ‘Layers’ panel at the right of the Photoshop workspace, and click on the ‘New Layer’ icon for creating a fresh layer. Fill the just created layer with black color, either by pressing ‘g’ from your system’s keyboard, or using the ‘Paint Bucket’ tool. Don’t forget to assign a suitable name to the layer.
Repeat the above process to create a separate layer and e fill the same with white color. The layer creation process is essential to separate the white and black colors of the actual image.
Step 10: Layer Dragging
In the ‘Layers’ panel, drag the ‘Black’ layer above the ‘White’ one.
Step 11: Creating Additional Layers
You are now required to create three more layers, with the same process as for the above two, for adding effects to the Skin, Clothes and Teeth/Eyes of the portrait. When you finish creation, assign suitable names to the layers, followed by dragging them below the ‘Black’ one within the ‘Layers’ panel.
Step 12: Color Selection and Application
Choose the respective colors for the clothes, skin and teeth/eyes of the cartoonized edit. To proceed with color application, navigate to the toolbar at the left of the Photoshop workspace and choose the ‘Brush Tool’. Finally, choose a particular layer and apply careful brush strokes to add color to the specific area of the portrait that you wish to edit. Follow the same process to add colors to the remaining layers to get the desired result in all areas of your cartoonized edit.
Step 13: Using the Gradient Tool
Navigate to the ‘Layers’ panel again and create a new ‘Gradient’ layer to further enhance your creation. You now need to select the ‘Gradient Tool’ from the toolbar at the left of the Photoshop workspace. The ‘Gradient Editor’ pops up with the continuously running ‘Gradient Bar’, as soon as you make the selection. Double click on the gradient boxes at both ends to select them, followed by making your color choices. Tap on ‘OK’ when you are satisfied with your work.
Step 14: Filling the Gradients
To proceed with gradient filling, press and hold the mouse button on the image at the bottom left and continue to drag the cursor to its top right corner. Leave the mouse and navigate to the ‘Layers’ panel for dragging and dropping the ‘Gradient’ layer above the ‘White’ layer.
You are now done with the process of creating a caricature edit from a normal still portrait. Your final image output will appear something like the following:
What Is the Best Collage Photo Grid Maker - Experts Choice
What is the Best Collage Photo Grid Maker - Experts Choice
An easy yet powerful editor
Numerous effects to choose from
Detailed tutorials provided by the official channel
Whether it is an Instagram collage grid, other social media sites, an online platform, a greeting card, or even a wall of your room, collages are everywhere. It is a great way to assemble multiple pictures into a single frame. Depending on your purpose, theme, and other factors, there are several different styles of collages that can be created like photo grid, shaped collage, polaroid collage, and more. One of the most classic and traditional styles is a photo grid collage. Taking the help of a dedicated collage-making app or a tool can help you create an amazing and eye-catchy collage in no time. Keep reading to learn more about collage photo grid and the best tools to create them.

In this article
01 [What is a photo grid?](#Part 1)
02 [Need for using special tools and apps to create a photo grid collage](#Part 2)
03 [Top 5 tools to create photo grid](#Part 3)
04 [Use stock images to enhance your photo grid](#Part 4)
Part 1 What is a photo grid?
When a special grid frame having a specific number of rows and columns is used for arranging photos, the created collage is known as a photo grid collage. These multiple added images will make them look like a single picture in a frame. A photo grid is one of the most classic styles of creating a collage that is also the most widely used one. You can never go wrong with a collage while arranging the pictures in a photo grid.
Part 2 Need for using special tools and apps to create a photo grid collage
Though creating a photo grid may look like a simple process which it is also, there are a lot of elements that go into creating an impressive and attractive collage. Adding the images of the correct size and orientation, adjusting the borders, customizing the frames, adding filters, adding text, are some of the many factors that help in creating a wonderful collage, and for this good collage-making tool or an app is required.
These special photo grid collage maker tools have built-in templates, designs, and support other features that help you create an interesting photo grid of your choice. Moreover, some of these programs also come with high-quality stock images that can be used in the grid to further enhance their overall looks.
Part 3 Top 5 tools to create photo grid
We have selected the top 5 grid collage maker tools that can be used to create a customized photo grid.
01Fotor
This is one of the best tools available for creating a photo grid using one of the several templates available. It is the Classic Collage style of this app that will let you create a customized grid where you can add the desired number of images and then edit the background, borders, and other elements. You can even add text, stickers, effects, and other interesting filters. Fotor is a free online tool that can be used from your browser and you just need to free sign-up using your Google, Facebook, or Apple account.

02FotoJet
This is another free-to-use browser-based tool that can be used for creating a photo grid. The interface of the tool is simple and there are multiple grid options to choose from depending on the number of images to be added. The spacing between the grids as well as the roundness of the margins can also be adjusted as desired. The tool also gives you the option to choose the added image file resolution. Text, clipart, and background to the collage can also be added and there is also a library of images that can be used. The created collage can be saved or can also be shared directly to Twitter, Pinterest, and Tumblr.

03Adobe Spark
This is one of the top collages making tools that can be used to design the desired collage in different styles including photo grid. Unlike other Adobe tools, the collage-making program is simple and quick to use and does not require advanced technical know-how. You simply need to create a free account for Adobe Creative Cloud and the collage-making features can be easily used. There are pre-set designs and templates available to match your theme and requirements. You can further make customization to other collage elements as needed.

04Photo Collage
This free-to-use online tool requires no software download or installation and allows creating a grid quickly and easily. The interface of the tool is user-friendly where you just need to browse and add the images or can simply drag and drop them as well. You can choose from multiple template options available and can also add text, effects, and stickers to the collage. Multiple image editing options are also supported like zoom, flip, transparency, and more.

05Canva
Free and simple to use, this is one of the most widely used collage-making tools that is available as a browser-based program as well as Android and iOS app. Several photo-grid templates in different styles are available at the site that lets you create the desired collage in no time. You can customize the selected templates by adding filters, texts, effects, and more elements available. A paid version of the tool with advanced features is also available.

Part 4 Use stock images to enhance your photo grid
Adding high-quality and interesting images to your photo grid will level up its overall look and make it eye-catchy. If you are running short of such interesting and bright images, no need to worry as several sites have a good collection of images that can be used. One such program that we recommend here to check the stock images is Wondershare Filmora. Though Filmora is an advanced Windows and Mac-based video editing software, there are multiple additional features supported one of them is a collection of images in an array of categories.
Depending on the theme of your photo grid, you can select the desired images and other media from Wondershare Filmora Video Editor . Additionally, the split-screen feature of the software will let you add and play multiple videos in a single frame that makes it look like a video collage.

Wondershare Filmora - Best Video Editor for Mac/Windows
5,481,435 people have downloaded it.
Build unique custom animations without breaking a sweat.
Focus on creating epic stories and leave the details to Filmora’s auto features.
Start a creative adventure with drag & drop effects and endless possibilities.
Filmora simplifies advanced features to save you time and effort.
Filmora cuts out repetition so you can move on to your next creative breakthrough.
● Key Takeaways from This Episode →
● A photo grid is a classic and traditional style of creating a collage.
● There are several online tools, software, and mobile apps available for creating interesting photo grids.
● Wondershare Filmora is a great site to get stock of images in different categories and for all types of video editing requirements.
Whether it is an Instagram collage grid, other social media sites, an online platform, a greeting card, or even a wall of your room, collages are everywhere. It is a great way to assemble multiple pictures into a single frame. Depending on your purpose, theme, and other factors, there are several different styles of collages that can be created like photo grid, shaped collage, polaroid collage, and more. One of the most classic and traditional styles is a photo grid collage. Taking the help of a dedicated collage-making app or a tool can help you create an amazing and eye-catchy collage in no time. Keep reading to learn more about collage photo grid and the best tools to create them.
In this article
01 [What is a photo grid?](#Part 1)
02 [Need for using special tools and apps to create a photo grid collage](#Part 2)
03 [Top 5 tools to create photo grid](#Part 3)
04 [Use stock images to enhance your photo grid](#Part 4)
Part 1 What is a photo grid?
When a special grid frame having a specific number of rows and columns is used for arranging photos, the created collage is known as a photo grid collage. These multiple added images will make them look like a single picture in a frame. A photo grid is one of the most classic styles of creating a collage that is also the most widely used one. You can never go wrong with a collage while arranging the pictures in a photo grid.
Part 2 Need for using special tools and apps to create a photo grid collage
Though creating a photo grid may look like a simple process which it is also, there are a lot of elements that go into creating an impressive and attractive collage. Adding the images of the correct size and orientation, adjusting the borders, customizing the frames, adding filters, adding text, are some of the many factors that help in creating a wonderful collage, and for this good collage-making tool or an app is required.
These special photo grid collage maker tools have built-in templates, designs, and support other features that help you create an interesting photo grid of your choice. Moreover, some of these programs also come with high-quality stock images that can be used in the grid to further enhance their overall looks.
Part 3 Top 5 tools to create photo grid
We have selected the top 5 grid collage maker tools that can be used to create a customized photo grid.
01Fotor
This is one of the best tools available for creating a photo grid using one of the several templates available. It is the Classic Collage style of this app that will let you create a customized grid where you can add the desired number of images and then edit the background, borders, and other elements. You can even add text, stickers, effects, and other interesting filters. Fotor is a free online tool that can be used from your browser and you just need to free sign-up using your Google, Facebook, or Apple account.
02FotoJet
This is another free-to-use browser-based tool that can be used for creating a photo grid. The interface of the tool is simple and there are multiple grid options to choose from depending on the number of images to be added. The spacing between the grids as well as the roundness of the margins can also be adjusted as desired. The tool also gives you the option to choose the added image file resolution. Text, clipart, and background to the collage can also be added and there is also a library of images that can be used. The created collage can be saved or can also be shared directly to Twitter, Pinterest, and Tumblr.
03Adobe Spark
This is one of the top collages making tools that can be used to design the desired collage in different styles including photo grid. Unlike other Adobe tools, the collage-making program is simple and quick to use and does not require advanced technical know-how. You simply need to create a free account for Adobe Creative Cloud and the collage-making features can be easily used. There are pre-set designs and templates available to match your theme and requirements. You can further make customization to other collage elements as needed.
04Photo Collage
This free-to-use online tool requires no software download or installation and allows creating a grid quickly and easily. The interface of the tool is user-friendly where you just need to browse and add the images or can simply drag and drop them as well. You can choose from multiple template options available and can also add text, effects, and stickers to the collage. Multiple image editing options are also supported like zoom, flip, transparency, and more.
05Canva
Free and simple to use, this is one of the most widely used collage-making tools that is available as a browser-based program as well as Android and iOS app. Several photo-grid templates in different styles are available at the site that lets you create the desired collage in no time. You can customize the selected templates by adding filters, texts, effects, and more elements available. A paid version of the tool with advanced features is also available.
Part 4 Use stock images to enhance your photo grid
Adding high-quality and interesting images to your photo grid will level up its overall look and make it eye-catchy. If you are running short of such interesting and bright images, no need to worry as several sites have a good collection of images that can be used. One such program that we recommend here to check the stock images is Wondershare Filmora. Though Filmora is an advanced Windows and Mac-based video editing software, there are multiple additional features supported one of them is a collection of images in an array of categories.
Depending on the theme of your photo grid, you can select the desired images and other media from Wondershare Filmora Video Editor . Additionally, the split-screen feature of the software will let you add and play multiple videos in a single frame that makes it look like a video collage.
Wondershare Filmora - Best Video Editor for Mac/Windows
5,481,435 people have downloaded it.
Build unique custom animations without breaking a sweat.
Focus on creating epic stories and leave the details to Filmora’s auto features.
Start a creative adventure with drag & drop effects and endless possibilities.
Filmora simplifies advanced features to save you time and effort.
Filmora cuts out repetition so you can move on to your next creative breakthrough.
● Key Takeaways from This Episode →
● A photo grid is a classic and traditional style of creating a collage.
● There are several online tools, software, and mobile apps available for creating interesting photo grids.
● Wondershare Filmora is a great site to get stock of images in different categories and for all types of video editing requirements.
10 Stunning Stop Motion Movies That You Should Not Miss
10 Stunning Stop Motion Movies That You Should Not Miss
An easy yet powerful editor
Numerous effects to choose from
Detailed tutorials provided by the official channel
We do have some recommendations for you. Even more than that, we’ve compiled a comprehensive guide on stop motion movies in hopes of introducing this often-forgotten art to those that may have never thought to appreciate it before.
Complete with an introduction, some examples of great stop motion animation movies and a peek at what the process is usually like for the professionals working on said movies.
In this article
01 [What Movies Use Stop Motion Animation?](#Part 1)
02 [Popular Stop Motion Movies You Might Wonder](#Part 2)
03 [Top 10 Stop Motion Animation Films](#Part 3)
04 [How to Make a Stop Motion Animation Movie](#Part 4)
Part 1 What Movies Use Stop Motion Animation?
First, that overview we promised. This will be a brief introduction to introduce certain key knowledge that you might not already know. Of course, for those who want to head straight to the recommendations, they can do so by skipping to of this article.
01What is a Stop Motion Movie?
The best way to introduce the concept of stop motion animation movies is to first reiterate that it is, literally, the oldest form of animation in film. This was what all the animators did before they figured out how to create the software required to make their characters come alive in a different way.
It involves a lot of crafting, a lot of maneuvering, a lot of careful and precise adjustments. To put it in the simplest way possible, it’s the process of taking a still image of a scene. And then introducing ‘motion’ by changing the elements of said scene, little by little, and taking a picture at every opportunity in between. So that all the still images come together to create the illusion of movement and motion.
02What is the Most Successful Stop Motion Movie?
There are plenty of answers that could be given in this case. Perhaps it should be the first-ever stop motion movie to be made? Which was “The Humpty Dumpty Circus” created by Blackton and Smith with their own daughter’s dolls.
You might also consider success by way of long-term watch ability. If so, then old classics like the “Nightmare Before Christmas” or “Rudolph the Reindeer.” And finally. You have “Chicken Run” which is considered the best performing stop motion movie of all time. Having earned somewhere around $17.5 million in its first, weekend showing.
Part 2 Popular Stop Motion Movies You Might Wonder
Now, how about some of the more popular stop motion practices to come out in the last couple of decades? Different from the stop motion movies of old but still the same at heart. What do we have to say about them?
01Lego Stop Motion Animation Movies
Well… Since our thoughts on the subject are distinctive, we thought to break it up. First starting with Lego Movie stop motion animation. This stop motion movie animation style, also called ‘Brickfilms’, is the practice of using Lego to create stop motion animation movies. It’s been around since the 1970s, but it was only 2003 that the first official film was released by Lego, who partnered up with a production company to create films for them.
It ended up being one of the best choices for them. Especially in terms of marketing their toy products, and the practice had only grown in popularity since, with both kids and adults alike finding joy in the end product.
023D Stop Motion Animation Movies
Alright, so how about 3D stop motion movies? How is it different from 3D animation movies and regular stop motion movies??? Well, it’s actually a bit of a tricky term. The 3D in this case is to differentiate it from regular 2D stop motion animation as you see in a lot of animated films from the East (where each image is hand-drawn to show motion).
In this case, props, objects, character models, and other materials are used in order to sculpt a 3D model of a scene, and pictures are taken to capture motion. The first of the movies of this style is called “Tune with Tomorrow” but you might be more familiar with the title “Coraline.”
Part 3 Top 10 Stop Motion Animation Films
Now for our list of the best stop motion animation movies of our time. This will be somewhat subjective, but also not. Every single one of the stop motion movies on this list is highly rated everywhere and has received rave reviews — making it worth taking the time to watch every single one of them when you have the time.
01Coraline (2009)
We mentioned this stop motion movie previously, but in case you haven’t already watched it, it’s a classic. The storytelling elements of “Coraline” really matched the stop motion style of animation. It was released in 2009 as a 3D movie and it shares the story of a little girl that finds joy and excitement in an alternate reality. Only to realize that it wasn’t all that it was chalked up to be.
02The Nightmare Before Christmas (1993)
“The Nightmare Before Christmas” (1993) is another stop motion animation movie that you might have already heard of before. It features the memorable character, Jack Skellington (the Pumpkin King of Halloweentown.) You can usually catch this film airing somewhere on television during the holiday season, as the story is all about Jack Skellington’s obsession with ruining Christmas.
03Chicken Run (1994)
This next stop motion movie, called “Chicken Run” (1994) was also mentioned before. It is, as was previously discussed, the highest performing stop motion animation movie on the big screen. It features quite a varied cast of chickens in a poultry farm all aiming to make an escape by learning how to fly.
04Fantastic Mr. Fox (2009)
The next film, released in the same year as “Coraline”, is called “Fantastic Mr. Fox.” This was directed by Wes Anderson, who goes on to tell the story of the main character, ‘Mr. Fox’ and how his misadventures involving some of the local farmers in the area got—not only himself—but also his family in danger.
05Rudolph the Red-Nosed Reindeer (1964)
Rudolph the Red-nosed Reindeer is another holiday classic. This one is a lot older than some of the films on this list but is no doubt just as well-known (and perhaps even more so when you consider the older generation.) Much like the nightmare before Christmas, you can usually find this film airing sometime during the holidays on any one channel.
06Kubo and The Two Strings (2016)
From the makers of Coraline is the stop motion animation movie, called “Kubo and The Two Strings” (2016). It tells the story of Kubo, who goes on a search for a suit of magical armor in an effort to destroy an evil plaguing him. It’s quite a beautiful film and is critically acclaimed for the level of effort that went in to making sure that it was produced in a way that honored the timeless art of stop motion.
07Alice (1988)
This next stop motion film is quite unique. It’s called “Alice” and it was released sometime in the late 1980s. The fun part of this story is that it begins with a live actress playing Alice. In fact, even the rabbit that leads her to wonderland, and eventually turns her into a porcelain doll, was a taxidermized hare that escaped from its display case. In this way, the stop motion aspect of the story is integrated in a fun way that matches the mood of the rest of the hypnotic story to come.
088. Mary and Max (2009)
Another stop motion movie that had been released in 2009 (a big year in stop motion animation) is called “Mary and Max.” This one tells the story of a young girl and man. One living in Australia and the other in America. The two characters form a penpal-ship that takes them through both personal growth and development, making it quite heartwarming.
09The Little Prince (2016)
Categorizing this film as ‘stop motion’ one gave us pause because, technically, only half of the film was done in the stop motion style. However, that doesn’t detract from the evident beauty in those scenes — which speaks not only of countless efforts but gives life to the exciting classic story of “The Little Prince.”
10Frankenweenie (2012)
Another classic that you might recognize is “Frankenweenie” which was released in 2012. It starts off quite grim, with a young boy bringing a dead dog back into life — only further adding to the goth aesthetic that the style of the characters is rocking.
Part 4 How to Make a Stop Motion Animation Movie
For the last part of this article, we move on to the promised ‘tutorial’. It won’t be all that comprehensive, but it should give you a better idea of how stop motion movies are created and the kind of effort and hours that are put into it. Perhaps it will inspire you to try your hand at the process yourself.
01Step 1. Get a Camera.
The first and most important part of setting up for a stop motion movie is to prepare your camera. As any little bit of jostling can cause a whole scene to look jarring, you’ll need to make sure that this is taken care of. Otherwise, you might be forced to redo a scene unnecessarily.
In this case, the invention of tripods turned out to be a major boon, as it kept the camera at the correct vantage view.
02Step 2. Prepare Materials for the Set.
Of course, as props and materials are important for bringing characters to life in a stop motion film, you’ll need some pre-prepared in order to start.
This can be Lego action figures (if you’re working on a Lego stop motion movie) or it can be a regular model or doll (if you’re working on a 3D animation stop motion animation movie.)

03Step 3. Prepare the Set.
For stop motion, it’s important that both the scene and the camera are kept in stable positions. After all, the background will be captured too.
And, to allow for that illusion of motion, it’s best if a still object is compared to one in motion. So, pay very careful when setting up your recording studio. It can make or break your project.
04Step 4. Choose Editing Software
For the last step, you’ll need to pick out an editing software that you can use in order to put together your still images and create a video.
For that, we recommend the professional Wondershare Filmora Video Editor . It’s all set up for professionals and beginners alike, allowing you the freedom to create characters that are both simple and complex with ease. In this case, of course, the goal is to put together your story through all the different frames that you captured in the process.
For Win 7 or later (64-bit)
For macOS 10.12 or later
● Key Takeaways from This Episode →
● Stop motion animation is a classic way of telling a story of fantastical characters and settings without having to draw everything frame by frame.
● It offers any film a very distinctive style that a lot of lovers of the classics find themselves constantly seeking out.
● If you go through the list that we organized out of some of the best stop motion movies in film history, you’ll notice that they’re all quite acclaimed for their masterful storytelling and fun graphics (which, before the creation of 3D animation as we know it today, was the height of entertainment.)
● This classic art form can be accomplished by just about anyone with the right equipment and a little bit of effort. It takes some patience, as we hoped to have explained in our tutorial, but the effort is worth the sense of fulfillment that comes when a story told in stills turns into a masterful animation that brings static objects and characters to life.
We do have some recommendations for you. Even more than that, we’ve compiled a comprehensive guide on stop motion movies in hopes of introducing this often-forgotten art to those that may have never thought to appreciate it before.
Complete with an introduction, some examples of great stop motion animation movies and a peek at what the process is usually like for the professionals working on said movies.
In this article
01 [What Movies Use Stop Motion Animation?](#Part 1)
02 [Popular Stop Motion Movies You Might Wonder](#Part 2)
03 [Top 10 Stop Motion Animation Films](#Part 3)
04 [How to Make a Stop Motion Animation Movie](#Part 4)
Part 1 What Movies Use Stop Motion Animation?
First, that overview we promised. This will be a brief introduction to introduce certain key knowledge that you might not already know. Of course, for those who want to head straight to the recommendations, they can do so by skipping to of this article.
01What is a Stop Motion Movie?
The best way to introduce the concept of stop motion animation movies is to first reiterate that it is, literally, the oldest form of animation in film. This was what all the animators did before they figured out how to create the software required to make their characters come alive in a different way.
It involves a lot of crafting, a lot of maneuvering, a lot of careful and precise adjustments. To put it in the simplest way possible, it’s the process of taking a still image of a scene. And then introducing ‘motion’ by changing the elements of said scene, little by little, and taking a picture at every opportunity in between. So that all the still images come together to create the illusion of movement and motion.
02What is the Most Successful Stop Motion Movie?
There are plenty of answers that could be given in this case. Perhaps it should be the first-ever stop motion movie to be made? Which was “The Humpty Dumpty Circus” created by Blackton and Smith with their own daughter’s dolls.
You might also consider success by way of long-term watch ability. If so, then old classics like the “Nightmare Before Christmas” or “Rudolph the Reindeer.” And finally. You have “Chicken Run” which is considered the best performing stop motion movie of all time. Having earned somewhere around $17.5 million in its first, weekend showing.
Part 2 Popular Stop Motion Movies You Might Wonder
Now, how about some of the more popular stop motion practices to come out in the last couple of decades? Different from the stop motion movies of old but still the same at heart. What do we have to say about them?
01Lego Stop Motion Animation Movies
Well… Since our thoughts on the subject are distinctive, we thought to break it up. First starting with Lego Movie stop motion animation. This stop motion movie animation style, also called ‘Brickfilms’, is the practice of using Lego to create stop motion animation movies. It’s been around since the 1970s, but it was only 2003 that the first official film was released by Lego, who partnered up with a production company to create films for them.
It ended up being one of the best choices for them. Especially in terms of marketing their toy products, and the practice had only grown in popularity since, with both kids and adults alike finding joy in the end product.
023D Stop Motion Animation Movies
Alright, so how about 3D stop motion movies? How is it different from 3D animation movies and regular stop motion movies??? Well, it’s actually a bit of a tricky term. The 3D in this case is to differentiate it from regular 2D stop motion animation as you see in a lot of animated films from the East (where each image is hand-drawn to show motion).
In this case, props, objects, character models, and other materials are used in order to sculpt a 3D model of a scene, and pictures are taken to capture motion. The first of the movies of this style is called “Tune with Tomorrow” but you might be more familiar with the title “Coraline.”
Part 3 Top 10 Stop Motion Animation Films
Now for our list of the best stop motion animation movies of our time. This will be somewhat subjective, but also not. Every single one of the stop motion movies on this list is highly rated everywhere and has received rave reviews — making it worth taking the time to watch every single one of them when you have the time.
01Coraline (2009)
We mentioned this stop motion movie previously, but in case you haven’t already watched it, it’s a classic. The storytelling elements of “Coraline” really matched the stop motion style of animation. It was released in 2009 as a 3D movie and it shares the story of a little girl that finds joy and excitement in an alternate reality. Only to realize that it wasn’t all that it was chalked up to be.
02The Nightmare Before Christmas (1993)
“The Nightmare Before Christmas” (1993) is another stop motion animation movie that you might have already heard of before. It features the memorable character, Jack Skellington (the Pumpkin King of Halloweentown.) You can usually catch this film airing somewhere on television during the holiday season, as the story is all about Jack Skellington’s obsession with ruining Christmas.
03Chicken Run (1994)
This next stop motion movie, called “Chicken Run” (1994) was also mentioned before. It is, as was previously discussed, the highest performing stop motion animation movie on the big screen. It features quite a varied cast of chickens in a poultry farm all aiming to make an escape by learning how to fly.
04Fantastic Mr. Fox (2009)
The next film, released in the same year as “Coraline”, is called “Fantastic Mr. Fox.” This was directed by Wes Anderson, who goes on to tell the story of the main character, ‘Mr. Fox’ and how his misadventures involving some of the local farmers in the area got—not only himself—but also his family in danger.
05Rudolph the Red-Nosed Reindeer (1964)
Rudolph the Red-nosed Reindeer is another holiday classic. This one is a lot older than some of the films on this list but is no doubt just as well-known (and perhaps even more so when you consider the older generation.) Much like the nightmare before Christmas, you can usually find this film airing sometime during the holidays on any one channel.
06Kubo and The Two Strings (2016)
From the makers of Coraline is the stop motion animation movie, called “Kubo and The Two Strings” (2016). It tells the story of Kubo, who goes on a search for a suit of magical armor in an effort to destroy an evil plaguing him. It’s quite a beautiful film and is critically acclaimed for the level of effort that went in to making sure that it was produced in a way that honored the timeless art of stop motion.
07Alice (1988)
This next stop motion film is quite unique. It’s called “Alice” and it was released sometime in the late 1980s. The fun part of this story is that it begins with a live actress playing Alice. In fact, even the rabbit that leads her to wonderland, and eventually turns her into a porcelain doll, was a taxidermized hare that escaped from its display case. In this way, the stop motion aspect of the story is integrated in a fun way that matches the mood of the rest of the hypnotic story to come.
088. Mary and Max (2009)
Another stop motion movie that had been released in 2009 (a big year in stop motion animation) is called “Mary and Max.” This one tells the story of a young girl and man. One living in Australia and the other in America. The two characters form a penpal-ship that takes them through both personal growth and development, making it quite heartwarming.
09The Little Prince (2016)
Categorizing this film as ‘stop motion’ one gave us pause because, technically, only half of the film was done in the stop motion style. However, that doesn’t detract from the evident beauty in those scenes — which speaks not only of countless efforts but gives life to the exciting classic story of “The Little Prince.”
10Frankenweenie (2012)
Another classic that you might recognize is “Frankenweenie” which was released in 2012. It starts off quite grim, with a young boy bringing a dead dog back into life — only further adding to the goth aesthetic that the style of the characters is rocking.
Part 4 How to Make a Stop Motion Animation Movie
For the last part of this article, we move on to the promised ‘tutorial’. It won’t be all that comprehensive, but it should give you a better idea of how stop motion movies are created and the kind of effort and hours that are put into it. Perhaps it will inspire you to try your hand at the process yourself.
01Step 1. Get a Camera.
The first and most important part of setting up for a stop motion movie is to prepare your camera. As any little bit of jostling can cause a whole scene to look jarring, you’ll need to make sure that this is taken care of. Otherwise, you might be forced to redo a scene unnecessarily.
In this case, the invention of tripods turned out to be a major boon, as it kept the camera at the correct vantage view.
02Step 2. Prepare Materials for the Set.
Of course, as props and materials are important for bringing characters to life in a stop motion film, you’ll need some pre-prepared in order to start.
This can be Lego action figures (if you’re working on a Lego stop motion movie) or it can be a regular model or doll (if you’re working on a 3D animation stop motion animation movie.)
03Step 3. Prepare the Set.
For stop motion, it’s important that both the scene and the camera are kept in stable positions. After all, the background will be captured too.
And, to allow for that illusion of motion, it’s best if a still object is compared to one in motion. So, pay very careful when setting up your recording studio. It can make or break your project.
04Step 4. Choose Editing Software
For the last step, you’ll need to pick out an editing software that you can use in order to put together your still images and create a video.
For that, we recommend the professional Wondershare Filmora Video Editor . It’s all set up for professionals and beginners alike, allowing you the freedom to create characters that are both simple and complex with ease. In this case, of course, the goal is to put together your story through all the different frames that you captured in the process.
For Win 7 or later (64-bit)
For macOS 10.12 or later
● Key Takeaways from This Episode →
● Stop motion animation is a classic way of telling a story of fantastical characters and settings without having to draw everything frame by frame.
● It offers any film a very distinctive style that a lot of lovers of the classics find themselves constantly seeking out.
● If you go through the list that we organized out of some of the best stop motion movies in film history, you’ll notice that they’re all quite acclaimed for their masterful storytelling and fun graphics (which, before the creation of 3D animation as we know it today, was the height of entertainment.)
● This classic art form can be accomplished by just about anyone with the right equipment and a little bit of effort. It takes some patience, as we hoped to have explained in our tutorial, but the effort is worth the sense of fulfillment that comes when a story told in stills turns into a masterful animation that brings static objects and characters to life.
Best Websites to Download Animated GIFs for Free
Best Websites to Download Animated GIFs for Free

Shanoon Cox
Mar 27, 2024• Proven solutions
The GIF stands for ‘Graphic Interchange Format’. It reduces the file size without affecting the quality factor of the image. You can create GIFs as still images and animated files according to your requirements. You can download free GIFs as effortlessly from the online platform. Most social media users use GIFs to convey their emotions to their friends and family members in an impressive way. The animated GIF gives realistic feelings of the message what you want to convey. Many social media apps like Facebook, Twitter, WhatsApp, etc users employ this gif for effective communication with their dear ones. In this article, you are going to learn:
- Part 1: 5 Types of Popular GIF Downloads
- Part 2: Best 10 Websites to Download Animated GIFs
- Part 3: Make Your GIF with Wondershare Filmora
You may also like:
Part 1: 5 Types of Popular GIF Downloads
Many people often use animated gifs when they chat on social media platforms. In this part, I summarized 5 kinds of GIFs that people like to use most. Let’s see them first!
1. Good Morning/Afternoon/Night gifs
It is the startup message for any kind of relationship. This type of GIF helps to make friends with strangers you meet in the online platform. You can greet one another with blossoming Good mornings GIFs. Similarly, you can end the day with sparkling Good night GIFs. These GIFs help you to build a good relationship in the online platform and you can find ample free GIFs download with greeting texts.
2. Happy Birthday gifs
This type of GIF is commonly used by people worldwide to wish their loved ones on their special day. Some GIFs reveal a good wish and fewer animated GIFs portray a comic type wish to bring a smile on the special occasion of their best ones.
3. Thank You gifs
There is an immense collection of free GIFs download of Thanking texts. People go for these GIFs to show their gratitude. You can find formal Thanking GIFs used for your office colleagues and informal Thanking GIFs to make fun with your closed ones on the social media.
![]()
A cross-platform for making videos anywhere for all creators

Why your video editing isn’t good enough? How about some creative inspo?
- 100 Million+ Users
- 150+ Countries and Regions
- 4 Million+ Social Media Followers
- 5 Million+ Stock Media for Use
* Secure Download

4. Happy New Year gifs
You can explore and download free GIFs wishing the new beginning of the year. This GIF contains texts and positive messages for a good start of a year. Many people download these GIFs from the cyberspace on December 31st to greet their loved ones worldwide.
5. Love& Kiss gifs
As you all know that people hesitate to convey their love in reality and hence the current generation young minds use love and kiss GIFs to convey their love to dear ones. It brings a better impression than mere words.
Part 2: Best 10 Websites to Download Animated GIFs
You would be excited if you design your favorite GIFs to share with your friends and family. Instead of a GIFs download, you can use best-animated GIFs tools to create a unique image and animated texts to convey your message with your lovable souls worldwide through cyberspace.
- 1. Giphy
- 2. Gifer
- 3. AnimatedImages.org
- 4. Reaction GIFs
- 5. Imgflip
- 6. GIFbin
- 7. Reddit
- 8. Gfycat
- 9. Tumblr
- 10. MotionElements
1. Giphy
It is an online tool to create and upload GIFs. There are built-in templates for a free download without any difficulty. You can create theme-based GIFs to suit the appropriate situation as per your needs.
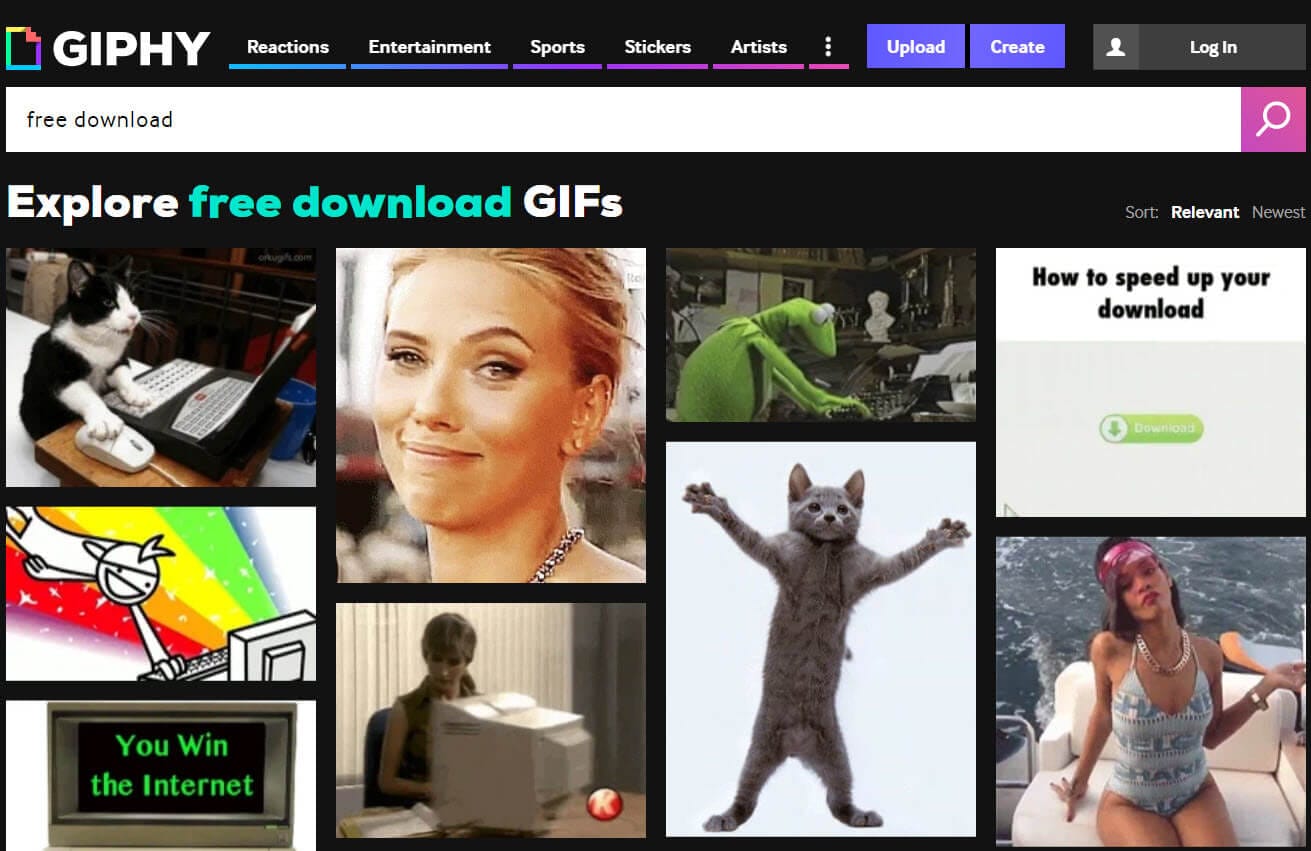
**Do I have to sign up?**--Yes, you need a sign up to make use of this tool using your Email address and password. You can also use your Facebook login and Apple account login for signup.
Is it free to download? --It is free to use but strictly prohibited for commercial purposes.
How many kinds of GIFs types available? --There are five kinds of GIFs types available. They are Reactions, Entertainment, Sports, Stickers and Artists, etc.
Highlights:
- User-friendly space to create GIFs
- You can upload your favorite clicks into the timeline to animate
- It allows you to download the images and videos from the online platform using the URLs. It permits links from YouTube and Vimeo.
2. Gifer
In this platform, you can create funny and interactive GIFs as per your needs effortlessly. Make use of this online environment to bring creativity to the words you wish to convey to your dear ones.
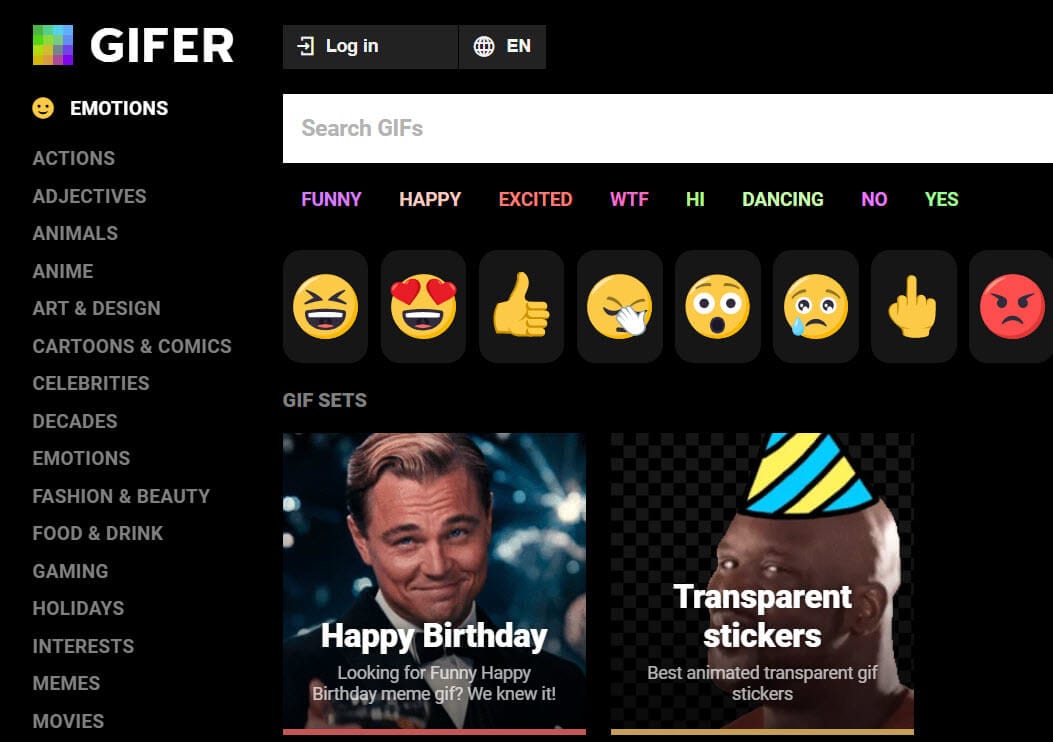
**Do I have to sign up?**--Yes, you have to sign up using Email Username and password or Facebook account to access the extended features of this application
**Is it free to download?**-- It is an online program to create your favorite GIFs
**How many kinds of GIFs types available?**-- More than 20 types of GIFs available at this platform
Highlights:
- You can easily download your desired GIFs template according to the GIFs type listed at the left side of the screen
- Easy to upload the GIFs from your local drive to animate
- The image files loads into the timeline quickly despite the file size
3. AnimatedImages.org
In this platform, you can find an ocean of animated GIFs flooded with stunning collections to suit your requirements without any compromises.

**Do I have to sign up?**--No need to sign up
**Is it free to download?**-- Free to download without any associated charges
**How many kinds of GIFs types available?**--More than 2000 categories of GIFs available at this platform
Highlights:
- Select the GIF category you wish to download the funny GIFs animated file
- The GIFs are listed out in an organized way for easy access to the users
- You can make free GIFs download effortlessly at this environment
4. Reaction GIFs
This online environment comprises of all types of reaction GIFs to use during appropriate situations. It is an exclusive platform portraying only the Reaction emotions.
**Do I have to sign up?**-- No, you do not have to sign up
**Is it free to download?**-- Yes, it is a free download
**How many kinds of GIFs types available?**-- There are 8 kinds of GIFs types available at this environment
Highlights
- Easy to access the right type of reaction GIFs at this platform
- You can find all types of reaction GIFs like Yes, No, Love, etc
- It has amazing collections of reaction GIFs in an organized manner
5. Imgflip
It is an online tool to create attractive GIFs for your needs. It is enough if you upload the images, arrange it, adjust the options, and generate the desired GIFs in no time.

**Do I have to sign up?**--Yes, you must sign up by creating a new account with the username and password else to make use of your Gmail account.
**Is it free to download?**--You can download the GIFs for free
**How many kinds of GIFs types available?**--You can create you won GIFs using the images, videos, website links, YouTube videos, etc
Highlights
- Easy to create GIFs using this online environment with explicit controls
- Quickly share the created GIF link to the social media network just by a single link
- Effortlessly upload the desired file to create stunning GIFs as per your needs.
6. GIFbin
In this online environment, you can download the built-in GIF templates of your choice in no time. The GIFs are available as a random collection and you can choose the right fit quickly according to your needs.
**Do I have to sign up?**--No, there is no signup process
**Is it free to download?**--Yes, you can download the GIFs free
**How many kinds of GIFs types available?**--The GIFs are organized in three tabs newest, top-rated, and viewed. There are no specific kind GIFs available. The GIFs are organized randomly.
Highlights:
- Excellent collections of built-in GIFs for free access
- Choose the desired tab named as newest, top-rated and viewed to access the desired GIFs
7. Reddit
A good collection of GIFs funnily portraying trendy stuff. Many GIFs are available on this platform to target hot happenings around the globe.
**Do I have to sign up?**--Yes, you must sign up with your Google account or Apple account else using your Email account.
**Is it free to download?**--Yes, free to download
**How many kinds of GIFs types available?**--There is no specific kinds but organized as Hot, New, and Top.
Highlights:
- You can find the latest and trendy GIFs with a funny message to convey
- Mostly used by social media users
- Easy to share your favorite GIFs in no time
8. Gfycat
In this online environment, you can create and download attractive GIFs according to your needs. This platform provides audio effects to the created GIFs to make the animation livelier.
**Do I have to sign up?**--Yes, you must sign up by creating a new Username and Password to access the desired features on this website.
**Is it free to download?**--You can download it easily without any cost
**How many kinds of GIFs types available?**--There are 8 types of GIFs such as Popular, Gaming, Reactions, Stickers, Celebrities, Sound, and Discover.
Highlights:
- You can create your GIFs in this online platform effortlessly
- Download the built-in GIFs easily from this website depending on your requirement
- you can upload the image from your local drive or you can paste the link from YouTube, Facebook, Twitch, Vimeo, Instagram, etc.
9. Tumblr
It is an excellent environment comprising trendy animated GIFs which suits your needs optimally. Download the animated link in your drive for free and use it on various social media on the chat platform effortlessly.
**Do I have to sign up?**--Yes, you need to sign up with Email, Password, and Username
**Is it free to download?**--You can download the animated GIFs into your local drive for free
**How many kinds of GIFs types available?**--The GIFs are organized with relevant searches like ‘Animals, Disney, Movie Stars, Marvel, Filmedit’ etc.
Highlights:
- A unique trending animated GIFs collection are available for free download
- You can also find audio related animated GIFs as templates in this online platform
- Easily reach out for the desired animated GIFs with a reliable search option.
10. MotionElements
It is a commercial platform with built-in animated GIFs collection displayed in an organized way. You can make a quick and uninterrupted download without any issues.
**Do I have to sign up?**--You must create an account with ‘First Name, Last Name, Email, and Password’.
**Is it free to download?**--You must purchase to access the best features in this online platform. The monthly subscription is $16.50 and $198 is billed annually. There is a credit package available depending on the number of downloads you make. The minimum credit package is 50 credits for $50.
**How many kinds of GIFs types available?**--There are 6 kinds of GIFs types are Popular, Aerial mode, Flowers, Sports, Architecture and Startup, etc.
Highlights:
- Customize the built-in GIFs templates available in this online platform
- Easily reach out for your desired GIFs using the search option
- Finest and quality animated GIFs serves the customer’s requirement aptly
Part 3: Make Your GIF with Wondershare Filmora
Wondershare Filmora is a sophisticated video editing software to bring creative changes to your image files in no time and make animated GIFs effortlessly. It is an extraordinary program customize and personalize your favorite pictures into animated GIFs to result in livelier emotions. It has a user-friendly interface and interacts with the users optimally displaying the explicit controls. It is enough if you follow the below steps to create stunning GIFs from your favorite clicks.


- First of all, you need to import the desired file into the timeline for creative changes.
- You can find a wide range of editing tools to make innovative changes in your file. The editing toolbox includes custom speed, crop, trim, split, combine, etc
- There are options to add texts and titles to your GIFs for more interactive results.
- Finally, export the edited GIFs by adjusting its resolution type into your local drive for future use.
It is compatible with all the audio and video formats like MP4, DAT, EVO, MKV, MPEG, AVI, etc and you can easily import the file into its timeline quickly. It is a free tool and you do not have to sign up to access the features in this program. This tool is available for Windows and Mac versions. Go to its official website and explore more the exciting facts of Wondershare Filmora’s GIF creator.
Conclusion
Thus, you had a nice informative journey on GIFs creators and how to download animated gifs for free at the cyberspace. There are ample platform allows you to download free GIFs quickly without any interruptions. Make use of the available sophisticated GIFs sources on the online environment and interact with your friends and family with funny GIFs on chat apps. And also, the Wondershare Filmora is a reliable platform to create animated GIFs with stunning editing tools and effects. Try out this program and feed your creativity with the right solution to obtain the desired outcomes. Always remember to use personal images to create GIFs on this tool and it is illegal to use copyrighted pictures or links for editing. Leave your comments and suggestions about this article and tune with us to explore exciting facts on the GIFs and animated interactive GIFs collections.
Shanoon Cox
Shanoon Cox is a writer and a lover of all things video.
Follow @Shanoon Cox
Shanoon Cox
Mar 27, 2024• Proven solutions
The GIF stands for ‘Graphic Interchange Format’. It reduces the file size without affecting the quality factor of the image. You can create GIFs as still images and animated files according to your requirements. You can download free GIFs as effortlessly from the online platform. Most social media users use GIFs to convey their emotions to their friends and family members in an impressive way. The animated GIF gives realistic feelings of the message what you want to convey. Many social media apps like Facebook, Twitter, WhatsApp, etc users employ this gif for effective communication with their dear ones. In this article, you are going to learn:
- Part 1: 5 Types of Popular GIF Downloads
- Part 2: Best 10 Websites to Download Animated GIFs
- Part 3: Make Your GIF with Wondershare Filmora
You may also like:
Part 1: 5 Types of Popular GIF Downloads
Many people often use animated gifs when they chat on social media platforms. In this part, I summarized 5 kinds of GIFs that people like to use most. Let’s see them first!
1. Good Morning/Afternoon/Night gifs
It is the startup message for any kind of relationship. This type of GIF helps to make friends with strangers you meet in the online platform. You can greet one another with blossoming Good mornings GIFs. Similarly, you can end the day with sparkling Good night GIFs. These GIFs help you to build a good relationship in the online platform and you can find ample free GIFs download with greeting texts.
2. Happy Birthday gifs
This type of GIF is commonly used by people worldwide to wish their loved ones on their special day. Some GIFs reveal a good wish and fewer animated GIFs portray a comic type wish to bring a smile on the special occasion of their best ones.
3. Thank You gifs
There is an immense collection of free GIFs download of Thanking texts. People go for these GIFs to show their gratitude. You can find formal Thanking GIFs used for your office colleagues and informal Thanking GIFs to make fun with your closed ones on the social media.
![]()
A cross-platform for making videos anywhere for all creators
Why your video editing isn’t good enough? How about some creative inspo?
- 100 Million+ Users
- 150+ Countries and Regions
- 4 Million+ Social Media Followers
- 5 Million+ Stock Media for Use
* Secure Download
4. Happy New Year gifs
You can explore and download free GIFs wishing the new beginning of the year. This GIF contains texts and positive messages for a good start of a year. Many people download these GIFs from the cyberspace on December 31st to greet their loved ones worldwide.
5. Love& Kiss gifs
As you all know that people hesitate to convey their love in reality and hence the current generation young minds use love and kiss GIFs to convey their love to dear ones. It brings a better impression than mere words.
Part 2: Best 10 Websites to Download Animated GIFs
You would be excited if you design your favorite GIFs to share with your friends and family. Instead of a GIFs download, you can use best-animated GIFs tools to create a unique image and animated texts to convey your message with your lovable souls worldwide through cyberspace.
- 1. Giphy
- 2. Gifer
- 3. AnimatedImages.org
- 4. Reaction GIFs
- 5. Imgflip
- 6. GIFbin
- 7. Reddit
- 8. Gfycat
- 9. Tumblr
- 10. MotionElements
1. Giphy
It is an online tool to create and upload GIFs. There are built-in templates for a free download without any difficulty. You can create theme-based GIFs to suit the appropriate situation as per your needs.
**Do I have to sign up?**--Yes, you need a sign up to make use of this tool using your Email address and password. You can also use your Facebook login and Apple account login for signup.
Is it free to download? --It is free to use but strictly prohibited for commercial purposes.
How many kinds of GIFs types available? --There are five kinds of GIFs types available. They are Reactions, Entertainment, Sports, Stickers and Artists, etc.
Highlights:
- User-friendly space to create GIFs
- You can upload your favorite clicks into the timeline to animate
- It allows you to download the images and videos from the online platform using the URLs. It permits links from YouTube and Vimeo.
2. Gifer
In this platform, you can create funny and interactive GIFs as per your needs effortlessly. Make use of this online environment to bring creativity to the words you wish to convey to your dear ones.
**Do I have to sign up?**--Yes, you have to sign up using Email Username and password or Facebook account to access the extended features of this application
**Is it free to download?**-- It is an online program to create your favorite GIFs
**How many kinds of GIFs types available?**-- More than 20 types of GIFs available at this platform
Highlights:
- You can easily download your desired GIFs template according to the GIFs type listed at the left side of the screen
- Easy to upload the GIFs from your local drive to animate
- The image files loads into the timeline quickly despite the file size
3. AnimatedImages.org
In this platform, you can find an ocean of animated GIFs flooded with stunning collections to suit your requirements without any compromises.
**Do I have to sign up?**--No need to sign up
**Is it free to download?**-- Free to download without any associated charges
**How many kinds of GIFs types available?**--More than 2000 categories of GIFs available at this platform
Highlights:
- Select the GIF category you wish to download the funny GIFs animated file
- The GIFs are listed out in an organized way for easy access to the users
- You can make free GIFs download effortlessly at this environment
4. Reaction GIFs
This online environment comprises of all types of reaction GIFs to use during appropriate situations. It is an exclusive platform portraying only the Reaction emotions.
**Do I have to sign up?**-- No, you do not have to sign up
**Is it free to download?**-- Yes, it is a free download
**How many kinds of GIFs types available?**-- There are 8 kinds of GIFs types available at this environment
Highlights
- Easy to access the right type of reaction GIFs at this platform
- You can find all types of reaction GIFs like Yes, No, Love, etc
- It has amazing collections of reaction GIFs in an organized manner
5. Imgflip
It is an online tool to create attractive GIFs for your needs. It is enough if you upload the images, arrange it, adjust the options, and generate the desired GIFs in no time.
**Do I have to sign up?**--Yes, you must sign up by creating a new account with the username and password else to make use of your Gmail account.
**Is it free to download?**--You can download the GIFs for free
**How many kinds of GIFs types available?**--You can create you won GIFs using the images, videos, website links, YouTube videos, etc
Highlights
- Easy to create GIFs using this online environment with explicit controls
- Quickly share the created GIF link to the social media network just by a single link
- Effortlessly upload the desired file to create stunning GIFs as per your needs.
6. GIFbin
In this online environment, you can download the built-in GIF templates of your choice in no time. The GIFs are available as a random collection and you can choose the right fit quickly according to your needs.
**Do I have to sign up?**--No, there is no signup process
**Is it free to download?**--Yes, you can download the GIFs free
**How many kinds of GIFs types available?**--The GIFs are organized in three tabs newest, top-rated, and viewed. There are no specific kind GIFs available. The GIFs are organized randomly.
Highlights:
- Excellent collections of built-in GIFs for free access
- Choose the desired tab named as newest, top-rated and viewed to access the desired GIFs
7. Reddit
A good collection of GIFs funnily portraying trendy stuff. Many GIFs are available on this platform to target hot happenings around the globe.
**Do I have to sign up?**--Yes, you must sign up with your Google account or Apple account else using your Email account.
**Is it free to download?**--Yes, free to download
**How many kinds of GIFs types available?**--There is no specific kinds but organized as Hot, New, and Top.
Highlights:
- You can find the latest and trendy GIFs with a funny message to convey
- Mostly used by social media users
- Easy to share your favorite GIFs in no time
8. Gfycat
In this online environment, you can create and download attractive GIFs according to your needs. This platform provides audio effects to the created GIFs to make the animation livelier.
**Do I have to sign up?**--Yes, you must sign up by creating a new Username and Password to access the desired features on this website.
**Is it free to download?**--You can download it easily without any cost
**How many kinds of GIFs types available?**--There are 8 types of GIFs such as Popular, Gaming, Reactions, Stickers, Celebrities, Sound, and Discover.
Highlights:
- You can create your GIFs in this online platform effortlessly
- Download the built-in GIFs easily from this website depending on your requirement
- you can upload the image from your local drive or you can paste the link from YouTube, Facebook, Twitch, Vimeo, Instagram, etc.
9. Tumblr
It is an excellent environment comprising trendy animated GIFs which suits your needs optimally. Download the animated link in your drive for free and use it on various social media on the chat platform effortlessly.
**Do I have to sign up?**--Yes, you need to sign up with Email, Password, and Username
**Is it free to download?**--You can download the animated GIFs into your local drive for free
**How many kinds of GIFs types available?**--The GIFs are organized with relevant searches like ‘Animals, Disney, Movie Stars, Marvel, Filmedit’ etc.
Highlights:
- A unique trending animated GIFs collection are available for free download
- You can also find audio related animated GIFs as templates in this online platform
- Easily reach out for the desired animated GIFs with a reliable search option.
10. MotionElements
It is a commercial platform with built-in animated GIFs collection displayed in an organized way. You can make a quick and uninterrupted download without any issues.
**Do I have to sign up?**--You must create an account with ‘First Name, Last Name, Email, and Password’.
**Is it free to download?**--You must purchase to access the best features in this online platform. The monthly subscription is $16.50 and $198 is billed annually. There is a credit package available depending on the number of downloads you make. The minimum credit package is 50 credits for $50.
**How many kinds of GIFs types available?**--There are 6 kinds of GIFs types are Popular, Aerial mode, Flowers, Sports, Architecture and Startup, etc.
Highlights:
- Customize the built-in GIFs templates available in this online platform
- Easily reach out for your desired GIFs using the search option
- Finest and quality animated GIFs serves the customer’s requirement aptly
Part 3: Make Your GIF with Wondershare Filmora
Wondershare Filmora is a sophisticated video editing software to bring creative changes to your image files in no time and make animated GIFs effortlessly. It is an extraordinary program customize and personalize your favorite pictures into animated GIFs to result in livelier emotions. It has a user-friendly interface and interacts with the users optimally displaying the explicit controls. It is enough if you follow the below steps to create stunning GIFs from your favorite clicks.
- First of all, you need to import the desired file into the timeline for creative changes.
- You can find a wide range of editing tools to make innovative changes in your file. The editing toolbox includes custom speed, crop, trim, split, combine, etc
- There are options to add texts and titles to your GIFs for more interactive results.
- Finally, export the edited GIFs by adjusting its resolution type into your local drive for future use.
It is compatible with all the audio and video formats like MP4, DAT, EVO, MKV, MPEG, AVI, etc and you can easily import the file into its timeline quickly. It is a free tool and you do not have to sign up to access the features in this program. This tool is available for Windows and Mac versions. Go to its official website and explore more the exciting facts of Wondershare Filmora’s GIF creator.
Conclusion
Thus, you had a nice informative journey on GIFs creators and how to download animated gifs for free at the cyberspace. There are ample platform allows you to download free GIFs quickly without any interruptions. Make use of the available sophisticated GIFs sources on the online environment and interact with your friends and family with funny GIFs on chat apps. And also, the Wondershare Filmora is a reliable platform to create animated GIFs with stunning editing tools and effects. Try out this program and feed your creativity with the right solution to obtain the desired outcomes. Always remember to use personal images to create GIFs on this tool and it is illegal to use copyrighted pictures or links for editing. Leave your comments and suggestions about this article and tune with us to explore exciting facts on the GIFs and animated interactive GIFs collections.
Shanoon Cox
Shanoon Cox is a writer and a lover of all things video.
Follow @Shanoon Cox
8 Top Motion Graphics Online Tools for Your Inspiration
8 Best Motion Graphics Online Tools for Your Inspiration
An easy yet powerful editor
Numerous effects to choose from
Detailed tutorials provided by the official channel
Are you looking for the correct answers about what is motion graphics or how to create motion graphics? If yes, then you are at the right place.
Here we will discuss about few best motion graphics online websites and how to create motion graphics video.
In this article
01 [The Power of Motion Graphics](#Part 1)
02 [Motion Graphics Online Courses You Should Learn](#Part 2)
03 [How to Make Motion Graphics in 5 Steps Easily?](#Part 3)
04 [How to Make a Studio-quality Motion Graphics Video](#Part 4)
Part 1 The Power of Motion Graphics
Motion graphics is actually a term which is generally used to describe the mix up of the animation and the graphic designs. People usage the motion graphics in the emotions videos and market their products as well. Motion graphics with the video on the landing page of your website increases the conversion rate by 8as compared to the other methods. Motion graphic videos of your products can simply display the idea of your business within few seconds to the target audience. The biggest reason of using the motion graphics now a day is that motions graphics can quickly the critical or complex business things in few seconds with the fast, simple and compelling way.
Part 2 Motion Graphics Online Courses You Should Learn
If you are newbie to the motion graphics then there are thousands of courses available over the internet which can help you to learn what motion graphic is and how to create your own motion graphic videos of your product and services. Here we are going to list a few courses.
01Creative Coding: Making Visuals with JavaScript
This is the first course which is mainly designed to learn to make the beautiful visuals using the JavaScript. This course is designed by Bruno Imbrizi. In this course you can also explore the coding fundamentals very easily. You can learn the things you need to setup before the programming concepts such as loops, arrays, variables and functions.

02Psychedelic Animation with Photoshop and After Effects
This motion graphics online course is designed by the Klarens Malluta which helps you to understand the aspect of Photoshop to create the beautiful motion graphic videos. Here, you can easily learn about creating colorful psychedelic animation for your motion graphics. With this course you can easily turn the simple photos in the retro futuristic artwork and connect the emotions of the target audience.

03Introduction to Design and Modeling with Blender
This motion graphics video course is presented by the Luis Arizaga which defines the making of characters and the designs in your videos. This course mainly focuses on the blender software which helps you to create powerful animate videos using the render, light, model and the other objects. This course also tells you that how to use the camera lights and create the materials for your motion graphic videos.

04Express Animation for Social Media with After Effects
This course is provided by the Yimbo Escárrega over the internet. With the help of this course you can learn about making your motion graphic online projects quickly in the record time to save your time. While learning this course you can create the beautiful animations quickly and easily with the graphics as well as the video content.

05#Creation of Animated Short Films in for Social Media
The creation of animated short films in for the social media course is presented by the Buda.tv which mainly helps you to learn creating the animated short films for your projects. This helps you to learn the concept from the starting to the end so you can easily understand the basic concepts as well as up to the execution of your video. This course starts with the meeting with Martin and Dalmiro who are the founders of the Buda.TV. Slowly they will start teaching you short films and finally you will be able to export the project with the specification provided by the Martin and Dalmiro.

Part 3 How to Make Motion Graphics in 5 Steps Easily?
Creating motion graphic videos requires you to have lots of designing skills without using any software. In the software’s generally there are premade templates available for mostly all kinds of categories. You can use them and directly apply with your videos with just few changes. If you are still unsure about how to start then you can follow the below steps in this part.
01Things to Prepare before Starting
● First of all you need to start with a creative story. This will help your animator and writer to understand their job easily. Make sure to include all information in the story.
● Make sure to hire a good promotion team in the starting itself because it will help you to get the view of your videos as much as you want.
Now, if you ready then please follow the below steps.
02Steps of Making Motion Graphics
Step 1 Write your Script with a Story
If you want to create good motion graphics video then the story is the first requirement for your motion graphic video. Make sure to choose a short story which defines and clear the motive of video. Mostly stories will be from the seconds to 3 minutes.
Step 2 Prepare for Storyboard for Visualize the Content
Now, you need to prepare the story with the help of your team members of the production and design team. This is the step where the final product will take place. In this step if you have any confusion then you must discuss it with the team because this is very important part of your motion graphic video.
Step 3 Turn your Creative Storyboard in the Design:
At this stage you can now turn your storyboard idea in the design. Here you have to choose the graphic designs of your video, style and color combination for your video. The best thing is that you can choose simple design because it gives a great impact on the video you are creating for your brand.
Once you are ready with the sketches of the storyboard you can easily translate the storyboard in the design what you want. Make sure to keep the things perfect because at this stage every effort will be for the final design.
Step 4 Create the Final Motion Graphic Video Design:
This stage is where you will start animating your designs to make to actual motion graphic video. Here, you need to take care about lots of things such as the style of animation in video, timing, music and the sound effects.
Part 4 How to Make a Studio-quality Motion Graphics Video
Wondershare Filmora Video Editor
Wondershare Filmora is motion graphics maker software which enables you to create best and perfect motion graphics videos within few seconds with the help of premade templates offered in the software. This program comes with the beautiful interface which is very easy to understand for all users and everyone can videos without any effort even if you are newbie to the animation industry. The program comes with several unique features such as motion tracking, key framing, color matching, audio ducking, green screen, split screen, video effects, audio effects and many more other features.
Wondershare Filmora - Best Video Editor for Mac/Windows
5,481,435 people have downloaded it.
Build unique custom animations without breaking a sweat.
Focus on creating epic stories and leave the details to Filmora’s auto features.
Start a creative adventure with drag & drop effects and endless possibilities.
Filmora simplifies advanced features to save you time and effort.
Filmora cuts out repetition so you can move on to your next creative breakthrough.
● Key Takeaways from This Episode →
● Generally, creating motion graphics videos for your products or services requires lots of efforts when you are going to create them first time. It takes lots of time and research for making the motion graphic videos.
● If you want to save your time and create the award winning motion graphic videos then we would like you to try the Wondershare Filmora because it quickly create best and perfect videos for your product or services promotions.
Are you looking for the correct answers about what is motion graphics or how to create motion graphics? If yes, then you are at the right place.
Here we will discuss about few best motion graphics online websites and how to create motion graphics video.
In this article
01 [The Power of Motion Graphics](#Part 1)
02 [Motion Graphics Online Courses You Should Learn](#Part 2)
03 [How to Make Motion Graphics in 5 Steps Easily?](#Part 3)
04 [How to Make a Studio-quality Motion Graphics Video](#Part 4)
Part 1 The Power of Motion Graphics
Motion graphics is actually a term which is generally used to describe the mix up of the animation and the graphic designs. People usage the motion graphics in the emotions videos and market their products as well. Motion graphics with the video on the landing page of your website increases the conversion rate by 8as compared to the other methods. Motion graphic videos of your products can simply display the idea of your business within few seconds to the target audience. The biggest reason of using the motion graphics now a day is that motions graphics can quickly the critical or complex business things in few seconds with the fast, simple and compelling way.
Part 2 Motion Graphics Online Courses You Should Learn
If you are newbie to the motion graphics then there are thousands of courses available over the internet which can help you to learn what motion graphic is and how to create your own motion graphic videos of your product and services. Here we are going to list a few courses.
01Creative Coding: Making Visuals with JavaScript
This is the first course which is mainly designed to learn to make the beautiful visuals using the JavaScript. This course is designed by Bruno Imbrizi. In this course you can also explore the coding fundamentals very easily. You can learn the things you need to setup before the programming concepts such as loops, arrays, variables and functions.
02Psychedelic Animation with Photoshop and After Effects
This motion graphics online course is designed by the Klarens Malluta which helps you to understand the aspect of Photoshop to create the beautiful motion graphic videos. Here, you can easily learn about creating colorful psychedelic animation for your motion graphics. With this course you can easily turn the simple photos in the retro futuristic artwork and connect the emotions of the target audience.
03Introduction to Design and Modeling with Blender
This motion graphics video course is presented by the Luis Arizaga which defines the making of characters and the designs in your videos. This course mainly focuses on the blender software which helps you to create powerful animate videos using the render, light, model and the other objects. This course also tells you that how to use the camera lights and create the materials for your motion graphic videos.
04Express Animation for Social Media with After Effects
This course is provided by the Yimbo Escárrega over the internet. With the help of this course you can learn about making your motion graphic online projects quickly in the record time to save your time. While learning this course you can create the beautiful animations quickly and easily with the graphics as well as the video content.
05#Creation of Animated Short Films in for Social Media
The creation of animated short films in for the social media course is presented by the Buda.tv which mainly helps you to learn creating the animated short films for your projects. This helps you to learn the concept from the starting to the end so you can easily understand the basic concepts as well as up to the execution of your video. This course starts with the meeting with Martin and Dalmiro who are the founders of the Buda.TV. Slowly they will start teaching you short films and finally you will be able to export the project with the specification provided by the Martin and Dalmiro.
Part 3 How to Make Motion Graphics in 5 Steps Easily?
Creating motion graphic videos requires you to have lots of designing skills without using any software. In the software’s generally there are premade templates available for mostly all kinds of categories. You can use them and directly apply with your videos with just few changes. If you are still unsure about how to start then you can follow the below steps in this part.
01Things to Prepare before Starting
● First of all you need to start with a creative story. This will help your animator and writer to understand their job easily. Make sure to include all information in the story.
● Make sure to hire a good promotion team in the starting itself because it will help you to get the view of your videos as much as you want.
Now, if you ready then please follow the below steps.
02Steps of Making Motion Graphics
Step 1 Write your Script with a Story
If you want to create good motion graphics video then the story is the first requirement for your motion graphic video. Make sure to choose a short story which defines and clear the motive of video. Mostly stories will be from the seconds to 3 minutes.
Step 2 Prepare for Storyboard for Visualize the Content
Now, you need to prepare the story with the help of your team members of the production and design team. This is the step where the final product will take place. In this step if you have any confusion then you must discuss it with the team because this is very important part of your motion graphic video.
Step 3 Turn your Creative Storyboard in the Design:
At this stage you can now turn your storyboard idea in the design. Here you have to choose the graphic designs of your video, style and color combination for your video. The best thing is that you can choose simple design because it gives a great impact on the video you are creating for your brand.
Once you are ready with the sketches of the storyboard you can easily translate the storyboard in the design what you want. Make sure to keep the things perfect because at this stage every effort will be for the final design.
Step 4 Create the Final Motion Graphic Video Design:
This stage is where you will start animating your designs to make to actual motion graphic video. Here, you need to take care about lots of things such as the style of animation in video, timing, music and the sound effects.
Part 4 How to Make a Studio-quality Motion Graphics Video
Wondershare Filmora Video Editor
Wondershare Filmora is motion graphics maker software which enables you to create best and perfect motion graphics videos within few seconds with the help of premade templates offered in the software. This program comes with the beautiful interface which is very easy to understand for all users and everyone can videos without any effort even if you are newbie to the animation industry. The program comes with several unique features such as motion tracking, key framing, color matching, audio ducking, green screen, split screen, video effects, audio effects and many more other features.
Wondershare Filmora - Best Video Editor for Mac/Windows
5,481,435 people have downloaded it.
Build unique custom animations without breaking a sweat.
Focus on creating epic stories and leave the details to Filmora’s auto features.
Start a creative adventure with drag & drop effects and endless possibilities.
Filmora simplifies advanced features to save you time and effort.
Filmora cuts out repetition so you can move on to your next creative breakthrough.
● Key Takeaways from This Episode →
● Generally, creating motion graphics videos for your products or services requires lots of efforts when you are going to create them first time. It takes lots of time and research for making the motion graphic videos.
● If you want to save your time and create the award winning motion graphic videos then we would like you to try the Wondershare Filmora because it quickly create best and perfect videos for your product or services promotions.
How to Make a Video a Live Photo 2023
How to Make a Video a Live Photo [2022]
An easy yet powerful editor
Numerous effects to choose from
Detailed tutorials provided by the official channel
Looking forward to turn your videos into live photos? Stay tuned to know how!
In this article
01 [How to Save Live Photos as a Video on iPhone/Ipad/Ipod](#Part 1)
02 [How to Turn a Video Into a Live Photo on iOS/Android](#Part 2)
Part 1 How to Save Live Photos as a Video on iPhone/Ipad/Ipod
Live photos are an amazing utility that allow you to save images as short moving snaps. Creating live photos is among the latest spunk of trendsetter stories, whether shared on social media platforms or created and saved just for fun, these definitely sound and look exciting, but that’s just one among the many things you can experiment on live photos.
Creating live photos takes you to a world of exciting features where you can explore your creativity in a number of ways, one of the easiest being turning live photos to videos. This comes handy when you need to share your live photos on platforms that do not have the compatibility to run live photos. If you are an iPhone user and wish to try your hands on experimenting with live photos, see through the following section of this article to learn how to turn live photo into video:
01Save as Video
Step 1: Launch the Photos App
In your iPhone, launch the ‘Photos’ app and navigate to ‘Albums’. All your live photos are present in the ‘Live Photos’ album.
Step 2: Format Selection
In latest versions (iOS 13v and above), you get a direct ‘Save as Video’ option in the ‘Photos’ application. Just click on that, and your live photo will be instantly saved in your iPhone gallery as a video. Here’s how you can use this feature:
● In the ‘Photos’ application, go to the ‘Live Photos’ album to select and open a desired live photo that you wish to convert to a video.
● Click on the ‘Share’ icon.

● Select ‘Save as Video’ from the drop down menu that displays sharing options.

Your created video will be saved in the ‘Photos’ application, next to the live photo you chose to turn into a video.
02iOS Shortcuts
This is a quicker way to save your live photos as videos in your iPhone. To use this feature, you first need to save the ‘Convert LivePhotos to Video’ shortcut in the ‘Shortcuts App’ gallery of your iPhone. You can do this by opening in your iOS internet browser.
Before using the above link, make sure to enable the ‘Allow Untrusted Shortcuts’ feature in your iPhone settings. You can do this as explained below:
● Reach to the ‘Settings’ application of your iPhone.
● Tap on ‘Shortcuts’ from the app’s welcome screen.
● Enable ‘Allow Untrusted Shortcuts’ with a toggle.

Having done that, here’s what you need to follow:
● Open the ‘Shortcuts’ application in your iOS device and tap the ‘Convert LivePhotos to Video’ shortcut.

● The ‘Live Photos’ album of your device opens up. Make a desired selection.

Your converted video gets automatically saved in the ‘Camera Roll’ folder of the ‘Photos’ application. Open the ‘Recents’ album to view your creation.
Part 2 How to Turn a Video Into a Live Photo on iOS/Android
Converting live photos to videos is fine, but going the other way round is all the more exciting and fun! You can even use these converted live photos as live screen wallpapers for your iOS and Android devices. If you are motivated to take up the excitement, look through the following methods to turn video into live photo:
01iOS Devices
Being an iOS user, you can choose among the following tools to convert video to live photo in your iPad, iPod or iPhone:
● Wondershare Filmora
Wondershare Filmora Video Editor is currently leading the software market among converter utilities that cater to various media conversion needs. This one is a free, smart, quick and convenient conversion tool that assures you of a hassle free video to live photo conversion in just a few clicks. What’s more interesting is, you don’t need to limit yourself with sticking to some particular video format, as Filmora conveniently supports almost all common ones.
Wondershare Filmora
Get started easily with Filmora’s powerful performance, intuitive interface, and countless effects!
Try It Free Try It Free Try It Free Learn More >

● IntoLive
This one is a third party application that allows you to convert videos into live photos, quickly and conveniently. This tool works well with devices having iOS 12.0 and later versions. All you have to do is follow the steps mentioned below:
Step 1:
Download the ‘IntoLive’ application from the Apple App Store.

Step 2:
Launch the same on your iOS device and grant the permission to access its ‘Photos’ Album.

Step 3:
In the ‘Videos’ section, choose the desired video that you wish to turn into a live photo.

Step 4:
An editor window will open up. Here, you can edit (cut, crop, trim, etc.) and add desired effects or filters to your selected video. Click on ‘Make’ at the top right when you finish the editing process.

Step 5:
If you have the paid version of the app, you can take up multiple repeats of your live photo; else you can use the free version with no repeats.

Step 6:
Once you are satisfied with the result, click on ‘Save Live Photo’. This will save your created live photo in your device’s gallery.

02VideoToLive
This is a free converter you can choose to turn video into live photo. This is a quite popular tool among iPhone users worldwide and is suitable for iOS versions 11.2 and later. You also have the liberty to share your created live photos on social media with this converter. Take the following steps to begin the conversion process:

Step 1:
Download the application from the Apple App Store and launch it on your iOS device.
Step 2:
Choose a video from your device gallery to convert it into a live photo.
Step 3:
In the video editor screen, crop the video to the preferred section that has to be converted into live photo. You can add video frames to your edited clip from the upper section of the editor screen.
Step 4:
Click on ‘Convert’ at the top right corner to initiate the conversion process.
03Android Devices
Live photos are undoubtedly known to add spark to your cherished moments, but the notch that puts these off with Android devices is that you can enjoy live photos on these devices only as live wallpapers.
Being an iPhone exclusive utility, Android devices lack the flexibility to capture live images. However, you can see them move on being set as live screen wallpapers. A handy alternative to this is converting a turn video into live photo and use it as live wallpaper. Here’s how you can take up the conversion process:
● TurnLive- Live Wallpaper
This one is a convenient, third party tool that lets you turn video into live photo in just a few quick steps. You can either use this application for free, or upgrade to the paid version to enjoy its premium features. To make amazing live photos from videos using this tool, you need to take up the steps given below:

Step 1: App Installation
To begin, visit the Google Playstore in your Android device and download the TurnLive- Live Wallpaper application. Next, you need install and launch the app in your device and accept its terms of service.
Step 2: Select a Video
Once you are done, click on the ‘Live Photo’ icon in the bottom of the app’s opening screen to reach the video selection page. Here, you need to choose ‘Video to Live Wallpaper’ option and grant the required app permissions to access your device’s camera and gallery. Select a desired video from the ones saved in your device and click ‘Done’ at the top right.
Step 3: Edit Your Video
You will now get directed to the app’s editor window, where you need to trim the selected video within a time frame of 1-5 seconds. To do this, select a cover frame within the clip and click ‘Next’. You can now use the video slider at the bottom to trim the clip. Adding suitable video effects and filters is also possible with this tool.
Step 4: It’s Almost Done!
When you finish editing, click ‘Next’ and choose the number of repeats for the created live photo. Wait for the conversion to finish and click on ‘My Wallpapers’ to view your creation.
Step 5: Download Your Live Photo!
Click ‘Download’ and tap ‘Clear’ in the app’s prompt message to remove your device’s current screen wallpaper. Next, allow the app to access your system settings. Once this finishes, tap ‘Clear’ again to download your creation. You will now get directed to a black screen tagged ‘DayTime LWP’. Click on ‘Set Wallpaper’ in this screen to make your live photo, the current wallpaper of your Android device.
● Video Live Wallpaper
This is another free app that you can use to your videos into amazing live photos in just 4 quick steps. All you need to do is explained in the following steps:
Step 1: download the Application
Download the Video Live Wallpaper application in your Android device from Google Playstore and proceed for its installation and launch.

Step 2: Select Your Video
In the app’s opening screen, click ‘Choose Video’ and grant app permissions to access your device’s media. Browse your video gallery to select a desired video that you wish to convert into a live photo.

Step 3: Edit Your Video
You will now get directed to the app’s editor screen. Here, you can explore your editing creativity to edit the selected video. Once you are happy, click the picture icon at the top right corner.

Step 4: Your Live Wallpaper is Ready!
To set the created live photo as your device screen wallpaper, select ‘Set as Wallpaper’ at the bottom right.

● Key Takeaways from This Episode →
● From cherishing moments to sharing them on social media, live photos can do it all.
● Being an iPhone exclusive utility, you need to create these from videos to enjoy them on other platforms and devices.
● Filmora is the best video to live photo converters, available as an easy, quick and convenient conversion tool.
Looking forward to turn your videos into live photos? Stay tuned to know how!
In this article
01 [How to Save Live Photos as a Video on iPhone/Ipad/Ipod](#Part 1)
02 [How to Turn a Video Into a Live Photo on iOS/Android](#Part 2)
Part 1 How to Save Live Photos as a Video on iPhone/Ipad/Ipod
Live photos are an amazing utility that allow you to save images as short moving snaps. Creating live photos is among the latest spunk of trendsetter stories, whether shared on social media platforms or created and saved just for fun, these definitely sound and look exciting, but that’s just one among the many things you can experiment on live photos.
Creating live photos takes you to a world of exciting features where you can explore your creativity in a number of ways, one of the easiest being turning live photos to videos. This comes handy when you need to share your live photos on platforms that do not have the compatibility to run live photos. If you are an iPhone user and wish to try your hands on experimenting with live photos, see through the following section of this article to learn how to turn live photo into video:
01Save as Video
Step 1: Launch the Photos App
In your iPhone, launch the ‘Photos’ app and navigate to ‘Albums’. All your live photos are present in the ‘Live Photos’ album.
Step 2: Format Selection
In latest versions (iOS 13v and above), you get a direct ‘Save as Video’ option in the ‘Photos’ application. Just click on that, and your live photo will be instantly saved in your iPhone gallery as a video. Here’s how you can use this feature:
● In the ‘Photos’ application, go to the ‘Live Photos’ album to select and open a desired live photo that you wish to convert to a video.
● Click on the ‘Share’ icon.
● Select ‘Save as Video’ from the drop down menu that displays sharing options.
Your created video will be saved in the ‘Photos’ application, next to the live photo you chose to turn into a video.
02iOS Shortcuts
This is a quicker way to save your live photos as videos in your iPhone. To use this feature, you first need to save the ‘Convert LivePhotos to Video’ shortcut in the ‘Shortcuts App’ gallery of your iPhone. You can do this by opening in your iOS internet browser.
Before using the above link, make sure to enable the ‘Allow Untrusted Shortcuts’ feature in your iPhone settings. You can do this as explained below:
● Reach to the ‘Settings’ application of your iPhone.
● Tap on ‘Shortcuts’ from the app’s welcome screen.
● Enable ‘Allow Untrusted Shortcuts’ with a toggle.
Having done that, here’s what you need to follow:
● Open the ‘Shortcuts’ application in your iOS device and tap the ‘Convert LivePhotos to Video’ shortcut.
● The ‘Live Photos’ album of your device opens up. Make a desired selection.
Your converted video gets automatically saved in the ‘Camera Roll’ folder of the ‘Photos’ application. Open the ‘Recents’ album to view your creation.
Part 2 How to Turn a Video Into a Live Photo on iOS/Android
Converting live photos to videos is fine, but going the other way round is all the more exciting and fun! You can even use these converted live photos as live screen wallpapers for your iOS and Android devices. If you are motivated to take up the excitement, look through the following methods to turn video into live photo:
01iOS Devices
Being an iOS user, you can choose among the following tools to convert video to live photo in your iPad, iPod or iPhone:
● Wondershare Filmora
Wondershare Filmora Video Editor is currently leading the software market among converter utilities that cater to various media conversion needs. This one is a free, smart, quick and convenient conversion tool that assures you of a hassle free video to live photo conversion in just a few clicks. What’s more interesting is, you don’t need to limit yourself with sticking to some particular video format, as Filmora conveniently supports almost all common ones.
Wondershare Filmora
Get started easily with Filmora’s powerful performance, intuitive interface, and countless effects!
Try It Free Try It Free Try It Free Learn More >
● IntoLive
This one is a third party application that allows you to convert videos into live photos, quickly and conveniently. This tool works well with devices having iOS 12.0 and later versions. All you have to do is follow the steps mentioned below:
Step 1:
Download the ‘IntoLive’ application from the Apple App Store.
Step 2:
Launch the same on your iOS device and grant the permission to access its ‘Photos’ Album.
Step 3:
In the ‘Videos’ section, choose the desired video that you wish to turn into a live photo.
Step 4:
An editor window will open up. Here, you can edit (cut, crop, trim, etc.) and add desired effects or filters to your selected video. Click on ‘Make’ at the top right when you finish the editing process.
Step 5:
If you have the paid version of the app, you can take up multiple repeats of your live photo; else you can use the free version with no repeats.
Step 6:
Once you are satisfied with the result, click on ‘Save Live Photo’. This will save your created live photo in your device’s gallery.
02VideoToLive
This is a free converter you can choose to turn video into live photo. This is a quite popular tool among iPhone users worldwide and is suitable for iOS versions 11.2 and later. You also have the liberty to share your created live photos on social media with this converter. Take the following steps to begin the conversion process:
Step 1:
Download the application from the Apple App Store and launch it on your iOS device.
Step 2:
Choose a video from your device gallery to convert it into a live photo.
Step 3:
In the video editor screen, crop the video to the preferred section that has to be converted into live photo. You can add video frames to your edited clip from the upper section of the editor screen.
Step 4:
Click on ‘Convert’ at the top right corner to initiate the conversion process.
03Android Devices
Live photos are undoubtedly known to add spark to your cherished moments, but the notch that puts these off with Android devices is that you can enjoy live photos on these devices only as live wallpapers.
Being an iPhone exclusive utility, Android devices lack the flexibility to capture live images. However, you can see them move on being set as live screen wallpapers. A handy alternative to this is converting a turn video into live photo and use it as live wallpaper. Here’s how you can take up the conversion process:
● TurnLive- Live Wallpaper
This one is a convenient, third party tool that lets you turn video into live photo in just a few quick steps. You can either use this application for free, or upgrade to the paid version to enjoy its premium features. To make amazing live photos from videos using this tool, you need to take up the steps given below:
Step 1: App Installation
To begin, visit the Google Playstore in your Android device and download the TurnLive- Live Wallpaper application. Next, you need install and launch the app in your device and accept its terms of service.
Step 2: Select a Video
Once you are done, click on the ‘Live Photo’ icon in the bottom of the app’s opening screen to reach the video selection page. Here, you need to choose ‘Video to Live Wallpaper’ option and grant the required app permissions to access your device’s camera and gallery. Select a desired video from the ones saved in your device and click ‘Done’ at the top right.
Step 3: Edit Your Video
You will now get directed to the app’s editor window, where you need to trim the selected video within a time frame of 1-5 seconds. To do this, select a cover frame within the clip and click ‘Next’. You can now use the video slider at the bottom to trim the clip. Adding suitable video effects and filters is also possible with this tool.
Step 4: It’s Almost Done!
When you finish editing, click ‘Next’ and choose the number of repeats for the created live photo. Wait for the conversion to finish and click on ‘My Wallpapers’ to view your creation.
Step 5: Download Your Live Photo!
Click ‘Download’ and tap ‘Clear’ in the app’s prompt message to remove your device’s current screen wallpaper. Next, allow the app to access your system settings. Once this finishes, tap ‘Clear’ again to download your creation. You will now get directed to a black screen tagged ‘DayTime LWP’. Click on ‘Set Wallpaper’ in this screen to make your live photo, the current wallpaper of your Android device.
● Video Live Wallpaper
This is another free app that you can use to your videos into amazing live photos in just 4 quick steps. All you need to do is explained in the following steps:
Step 1: download the Application
Download the Video Live Wallpaper application in your Android device from Google Playstore and proceed for its installation and launch.
Step 2: Select Your Video
In the app’s opening screen, click ‘Choose Video’ and grant app permissions to access your device’s media. Browse your video gallery to select a desired video that you wish to convert into a live photo.
Step 3: Edit Your Video
You will now get directed to the app’s editor screen. Here, you can explore your editing creativity to edit the selected video. Once you are happy, click the picture icon at the top right corner.
Step 4: Your Live Wallpaper is Ready!
To set the created live photo as your device screen wallpaper, select ‘Set as Wallpaper’ at the bottom right.
● Key Takeaways from This Episode →
● From cherishing moments to sharing them on social media, live photos can do it all.
● Being an iPhone exclusive utility, you need to create these from videos to enjoy them on other platforms and devices.
● Filmora is the best video to live photo converters, available as an easy, quick and convenient conversion tool.
Also read:
- Updated 2024 Approved Top 10 Best Photo to Animation Converters That Give You an Advantage
- Updated 12+ Stunning Instagram GIF Stickers
- Updated 2024 Approved Techniques on How to Make After Effects 2D Animation
- 2024 Approved Simple Shortcut to Convert Videos to Gifs on iPhone
- Updated Want to Make a Meme GIF for 2024
- New 2024 Approved Ways to Create an Animated Sticky Navbar
- Updated 2024 Approved Easy Cartoon Characters Drawing Tutorials for You Who Are Learning to Draw
- New 2024 Approved How to Turn Yourself Into a WhatsApp Cartoon
- New 2024 Approved Ways on How to Get Started in Stop Motion Claymation
- 2024 Approved 12 Animated Slideshow PowerPoint Templates and Tools to Make Them
- In 2024, How to Create Photo Collage Frame for Free in Minutes?
- How to Make Animation Characters with the Best Character Creators
- Updated 2024 Approved Why These 10+ Top Text Motion Templates Are Worth Your Attention
- In 2024, What Wikipedia Cant Tell You About the 10 Best Batman Cartoons
- Updated 2024 Approved 10 Trendy Free Logo Animation Templates
- Updated In 2024, 15 Forgotten Cartoon Characters of All Time You Used to Love
- Updated Handy Tips From Adobe Animate Rigging Tutorial for All Learners
- New Guide on How to Create GIF in WhatsApp iPhone for 2024
- New Apps to Animate Still Pictures Which Could Make Your Pictures Become Internet Sensation for 2024
- Updated Best GIF Maker Software for Windows and Mac
- New Top 10 3D Text Animation Templates for 2024
- New 10 Awesome Moving Animation PowerPoint Techniques for 2024
- Updated Adobe Auto Rigger Is AWESOME for 2024
- Updated The Secret Sauce for Making GIF Instagram Story More Aesthetic for 2024
- Interesting Fundamentals and Ultimate Guide to Animated Characters Drawings for 2024
- How to Change Google Play Location On Vivo V29e | Dr.fone
- Three Solutions to Hard Reset Honor Magic 6 Pro? | Dr.fone
- Unlock iPhone 6 Plus Without Passcode Easily
- In 2024, Mastering Android Device Manager The Ultimate Guide to Unlocking Your Vivo V30 Lite 5G Device
- How to Upgrade Apple iPhone 12 without Losing Any Data? | Dr.fone
- In 2024, How to Successfully Bypass iCloud Activation Lock on iPhone 14 Pro Max
- Fake Android Location without Rooting For Your Vivo S17t | Dr.fone
- 9 Quick Fixes to Unfortunately TouchWiz has stopped Of Nubia Red Magic 8S Pro | Dr.fone
- In 2024, How Do You Remove Restricted Mode on iPhone 12 Pro
- Reasons for Nokia C210 Stuck on Boot Screen and Ways To Fix Them | Dr.fone
- Vivo V29 Pro Stuck on Screen – Finding Solutions For Stuck on Boot | Dr.fone
- In 2024, Tips And Tricks To Tell if Your Apple iPhone 14 Pro Max Is Unlocked
- 9 Best Phone Monitoring Apps for Honor 100 | Dr.fone
- Title: New Pencil2D Animation Tutorial Overview for 2024
- Author: Elon
- Created at : 2024-05-19 03:05:46
- Updated at : 2024-05-20 03:05:46
- Link: https://animation-videos.techidaily.com/new-pencil2d-animation-tutorial-overview-for-2024/
- License: This work is licensed under CC BY-NC-SA 4.0.
