
:max_bytes(150000):strip_icc():format(webp)/GettyImages-839864362-59c51d1daf5d3a0010919ae9.jpg)
New The Only Guide Youll Ever Need to Learn That Make 2D Rigging Clear to You for 2024
The Only Guide You’ll Ever Need to Learn That Make 2D Rigging Clear to You
The Only Guide You’ll Ever Need to Learn That Make 2D Rigging Clear to You
An easy yet powerful editor
Numerous effects to choose from
Detailed tutorials provided by the official channel
If you’re looking to get a head start in 2D Rigging or 2D Animation in general, then this guide should get you to where you need to go.
We’ll be introducing 2D Rigging in a comprehensive way — perfect for beginners who aren’t familiar with the subject and want something more solid as their foundation.
In this article
01 [All You Need to Know About 2D Rigging](#Part 1)
02 [What is the Difference and Connection Between 2D and 3D](#Part 2)
03 [What Are the Best 2D Rigging Animation Tools?](#Part 3)
Part 1 All You Need to Know About Rigging
For this first part, we’re going to talk about Rigging in a general way. Think of it as an introduction to the subject. One that should, hopefully, set you off on the right foot. It should also help clarify things that you might need to know as we delve into deeper and more advanced subjects in the next sections of this article.
01What is the Meaning of Rigging in Animation?
Alright, so what does rigging 2D characters actually do? What meaning, or effect, does it have? These questions can be quickly answered with this: Rigging (whether it’s or 3D) is the practice of attaching ‘bones’ to a character model. Bones that, in the future, you can use to create motion.
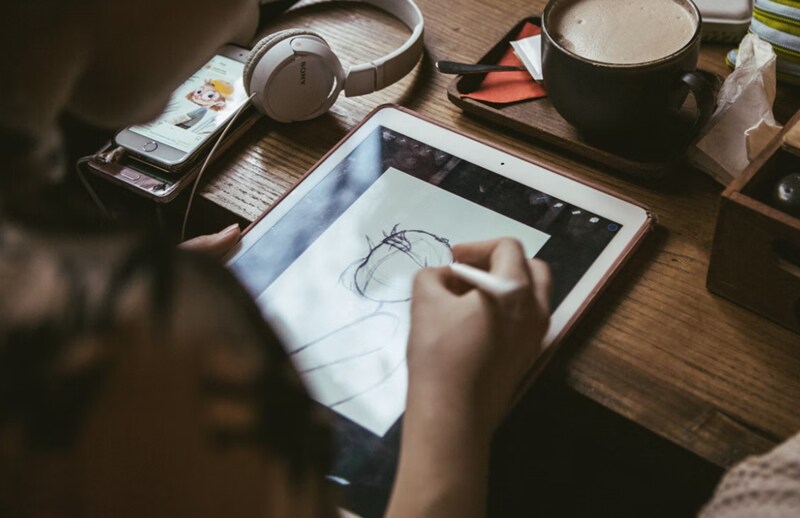
If you’re an artist, then you’re probably familiar with the concept of creating an initial sketch that you put the final drawing on top of — done with the sole purpose of creating a structure that will allow you to move forward more easily in your art.
That’s exactly what you do when Rigging. You’re building a structure that will allow you to easily create animated characters that you can move at will in the future.
02Why Use Animation?
Alright, so what’s the difference between creating a Face Rig and a Face Rig? Is there any? To answer this, the simple answer is, yes. There is quite the difference.
A lot of animators prefer to practice Animation over Animation because it is more traditional and requires less complicated software (not that it doesn’t come with complications of its own.) Specifically, animation requires quite a lengthy character creation and rigging process.
You should consider the subject more based on what project you’re working on. Things that you might want to keep in mind include your project timeline, project budget, character rig usability in the future, length of the project, and so on.
(There’s also a more in-depth breakdown of this in of this guide.)
03What is Animation Rigging Software?
Now, for the last section of this Rigging overview, let’s talk about Rigging Animation Software. You should be able to guess what it’s meant for, but how you can use it is a little different, especially with the many different varieties of Rigging Animation Software available.
We’ll be introducing some in the third part of this guide — so you can learn more about the differences there. For now, all you need to know is that it usually comes with advanced rigging and character deformer tools that you can use to easily (and efficiently) animate your characters.
Part 2 What is the Difference and Connection Between and 3D
As promised, this next section will be devoted to clarifying the differences and similarities between Animation and Animation. As we mentioned previously, most animators prefer Animation. But, more often than not, they switch between both forms in order to create something suitable for their current project.
01How and Animations Are Created
First, let’s talk about the process involved. In the end, this can be described simply as: it starts off the same, but then becomes significantly more and more dissimilar the further you go along. More specifically, whether you’re working on a or Animation, you usually start with working through your vision for the project.
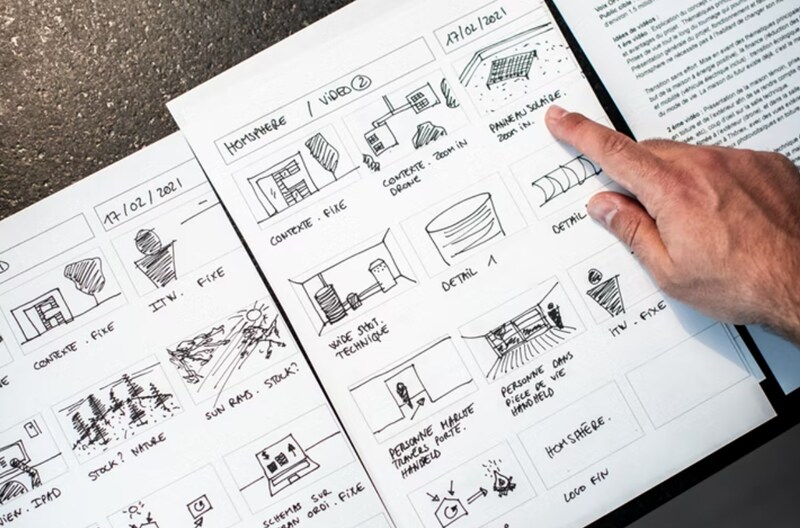
That means exploring ideas and creating hand-illustrated storyboards (which will serve as the foundation for the project as a whole). Then, the next steps involve media gathering (i.e., character creation, sound clips, voice-overs, sound effects, etc.) So that everything would be ready for the project.
This is when the difference starts. Animation involves hand-drawing characters in different poses and angles (with the standard being frames for a second) and can be completed with basic rigging (i.e., face rig for moving mouths or eyes). It’s normal in Animation as well for characters to remain static for several frames. While, with 3D, it is the exact opposite — the characters must be in constant motion so as to remain realistic (which can be done with extensive rigging.)
02Time Investments for Creating and Animations
Next, let’s talk about time investments. This can be a bit tricky to differentiate. Animations, as mentioned, are generally easier to create because it requires less rigging (but more drawings for certain scenes and angles makes it take more time). Meanwhile, Animation usually involves a front-heavy timeline — since you’re looking at intensive character creation and rigging. Once all this is set up though? The rest of the process is much faster than Animation.
You’ll also have to consider the work that you have to put in after your animations have been created. For example, the work you’ll need to put into finalizing your project with a video editor like Wondershare Filmora Video Editor (which would work great with animations especially, as it will allow you to actively add into the timeline as you go.)
For Win 7 or later (64-bit)
For macOS 10.12 or later
Part 3 What Are the Best Rigging Animation Tools?
For this final section of the guide, we’re finally moving on to our introduction to Rigging Animation Software. As mentioned, we’ve picked quite the variety to make sure that you have a good idea of how each will work. (A sample video has also been attached to make sure that you know what kind of projects can be created with these Rigging tools. Take the opportunity to explore those, too. If only for further edification.)
01Reallusion – Cartoon Animator 4
The first of the Rigging Animation Software on this list is Reallusion’s Cartoon Animator 4 (previously known as CrazyTalk Animator). This software was originally developed in order to allow everyone (from beginners to professionals) to create advanced animations with very little effort. To that end, it comes with a lot of motion templates and Auto Rig functions (i.e., audio lip-syncing) that the user can use to seriously cut down on the work required.
02Harmony ToonBoom
Harmony ToonBoom is well-known in the Rigging Animation Software industry. It’s the software that is used by many professionals. According to the Toon Boom Harmony website, this software was even used to create popular television shows like Rick and Morty, Bob’s Burgers, The Simpsons, and Futurama. It’s considerably more difficult to use for beginners, but it comes with many advanced functions that allow its users to create truly complex and beautiful Animations.
03Synfig Studio
The best thing about Synfig Studio (right from the onset), is that it is FREE. There are two versions of this tool — one that is ‘stable’ and the other in ‘development.’ The developmental version offers more advanced functions, of course, but for most beginners, the ‘stable’ version would serve just as well.
04Adobe Animate
Adobe Animate is software that belongs in Adobe’s long line of professional-level products. It’s a part of the classic ‘Adobe Suite.’ As a professional software, however, keep in mind that it might be more difficult to get used to at first (there’s a steep, learning curve right off the bat). But, if used correctly, it can be used to create quite impressive and eye-catching interactive animations (i.e., game content or website elements.)
05Animaker
Animaker is quite popular for beginners. It offers templates, so you can start off with an easy project if that’s what you’d like. But it also offers a lot of custom-creation tools that can be used for creating complex and professional Animations — although perhaps not at the level as the ones you might see from other alternatives (this software is most suitable for simple animations.)
06Moho Pro
Moho Pro (previously known as Anime Studio Pro) is a popular Animation program that fans of anime really love. This is one of the best software to use if you’re more interested in traditional animation (which involves a lot of free-hand drawing). Although, despite that fact, it has many advanced rigging functions as well (so you can create a mix of traditional and modern animation if you wish.)
07Pencil 2D
Pencil 2D, much like Synfig Studio, is FREE, cross-platform software. It’s quite old, but it’s matured over the years to include more and more functions (you might already be personally aware of it, in fact. It had its time to shine in the early 2010s.) The important thing to remember though is the fact that this is definitely more of a ‘traditional animation’ software. It does offer some basic rigging, but it’s best used by those who would prefer to practice the art of frame-by-frame animation.
08OpenToonz
OpenToonz is another free Rigging Animation Software (although it should be noted that there is a premium version, called Toonz, that is quite well known.) The best part about it is that it is a combination of software. One that you can use both for traditional animation and Animation. It’s also pretty easy to use, making it a good option for those just starting out.
● Key Takeaways from This Episode →
● 2D Rigging is the practice of creating ‘structure’ or ‘bones’ from which you can move characters or models. In these are usually ‘pins’ placed in bendable areas (i.e., the elbow, for bending the arm.)
● There are many differences between Animation and Animation. What you end up choosing should be decided by your project.
● Remember though, that Animations usually take longer to create even though Animations require more complex riggings.
● If you’re serious about getting into Rigging, make sure to consider the Rigging Animation Software that you choose to use very carefully. Each one has its own pros and cons.
If you’re looking to get a head start in 2D Rigging or 2D Animation in general, then this guide should get you to where you need to go.
We’ll be introducing 2D Rigging in a comprehensive way — perfect for beginners who aren’t familiar with the subject and want something more solid as their foundation.
In this article
01 [All You Need to Know About 2D Rigging](#Part 1)
02 [What is the Difference and Connection Between 2D and 3D](#Part 2)
03 [What Are the Best 2D Rigging Animation Tools?](#Part 3)
Part 1 All You Need to Know About Rigging
For this first part, we’re going to talk about Rigging in a general way. Think of it as an introduction to the subject. One that should, hopefully, set you off on the right foot. It should also help clarify things that you might need to know as we delve into deeper and more advanced subjects in the next sections of this article.
01What is the Meaning of Rigging in Animation?
Alright, so what does rigging 2D characters actually do? What meaning, or effect, does it have? These questions can be quickly answered with this: Rigging (whether it’s or 3D) is the practice of attaching ‘bones’ to a character model. Bones that, in the future, you can use to create motion.
If you’re an artist, then you’re probably familiar with the concept of creating an initial sketch that you put the final drawing on top of — done with the sole purpose of creating a structure that will allow you to move forward more easily in your art.
That’s exactly what you do when Rigging. You’re building a structure that will allow you to easily create animated characters that you can move at will in the future.
02Why Use Animation?
Alright, so what’s the difference between creating a Face Rig and a Face Rig? Is there any? To answer this, the simple answer is, yes. There is quite the difference.
A lot of animators prefer to practice Animation over Animation because it is more traditional and requires less complicated software (not that it doesn’t come with complications of its own.) Specifically, animation requires quite a lengthy character creation and rigging process.
You should consider the subject more based on what project you’re working on. Things that you might want to keep in mind include your project timeline, project budget, character rig usability in the future, length of the project, and so on.
(There’s also a more in-depth breakdown of this in of this guide.)
03What is Animation Rigging Software?
Now, for the last section of this Rigging overview, let’s talk about Rigging Animation Software. You should be able to guess what it’s meant for, but how you can use it is a little different, especially with the many different varieties of Rigging Animation Software available.
We’ll be introducing some in the third part of this guide — so you can learn more about the differences there. For now, all you need to know is that it usually comes with advanced rigging and character deformer tools that you can use to easily (and efficiently) animate your characters.
Part 2 What is the Difference and Connection Between and 3D
As promised, this next section will be devoted to clarifying the differences and similarities between Animation and Animation. As we mentioned previously, most animators prefer Animation. But, more often than not, they switch between both forms in order to create something suitable for their current project.
01How and Animations Are Created
First, let’s talk about the process involved. In the end, this can be described simply as: it starts off the same, but then becomes significantly more and more dissimilar the further you go along. More specifically, whether you’re working on a or Animation, you usually start with working through your vision for the project.
That means exploring ideas and creating hand-illustrated storyboards (which will serve as the foundation for the project as a whole). Then, the next steps involve media gathering (i.e., character creation, sound clips, voice-overs, sound effects, etc.) So that everything would be ready for the project.
This is when the difference starts. Animation involves hand-drawing characters in different poses and angles (with the standard being frames for a second) and can be completed with basic rigging (i.e., face rig for moving mouths or eyes). It’s normal in Animation as well for characters to remain static for several frames. While, with 3D, it is the exact opposite — the characters must be in constant motion so as to remain realistic (which can be done with extensive rigging.)
02Time Investments for Creating and Animations
Next, let’s talk about time investments. This can be a bit tricky to differentiate. Animations, as mentioned, are generally easier to create because it requires less rigging (but more drawings for certain scenes and angles makes it take more time). Meanwhile, Animation usually involves a front-heavy timeline — since you’re looking at intensive character creation and rigging. Once all this is set up though? The rest of the process is much faster than Animation.
You’ll also have to consider the work that you have to put in after your animations have been created. For example, the work you’ll need to put into finalizing your project with a video editor like Wondershare Filmora Video Editor (which would work great with animations especially, as it will allow you to actively add into the timeline as you go.)
For Win 7 or later (64-bit)
For macOS 10.12 or later
Part 3 What Are the Best Rigging Animation Tools?
For this final section of the guide, we’re finally moving on to our introduction to Rigging Animation Software. As mentioned, we’ve picked quite the variety to make sure that you have a good idea of how each will work. (A sample video has also been attached to make sure that you know what kind of projects can be created with these Rigging tools. Take the opportunity to explore those, too. If only for further edification.)
01Reallusion – Cartoon Animator 4
The first of the Rigging Animation Software on this list is Reallusion’s Cartoon Animator 4 (previously known as CrazyTalk Animator). This software was originally developed in order to allow everyone (from beginners to professionals) to create advanced animations with very little effort. To that end, it comes with a lot of motion templates and Auto Rig functions (i.e., audio lip-syncing) that the user can use to seriously cut down on the work required.
02Harmony ToonBoom
Harmony ToonBoom is well-known in the Rigging Animation Software industry. It’s the software that is used by many professionals. According to the Toon Boom Harmony website, this software was even used to create popular television shows like Rick and Morty, Bob’s Burgers, The Simpsons, and Futurama. It’s considerably more difficult to use for beginners, but it comes with many advanced functions that allow its users to create truly complex and beautiful Animations.
03Synfig Studio
The best thing about Synfig Studio (right from the onset), is that it is FREE. There are two versions of this tool — one that is ‘stable’ and the other in ‘development.’ The developmental version offers more advanced functions, of course, but for most beginners, the ‘stable’ version would serve just as well.
04Adobe Animate
Adobe Animate is software that belongs in Adobe’s long line of professional-level products. It’s a part of the classic ‘Adobe Suite.’ As a professional software, however, keep in mind that it might be more difficult to get used to at first (there’s a steep, learning curve right off the bat). But, if used correctly, it can be used to create quite impressive and eye-catching interactive animations (i.e., game content or website elements.)
05Animaker
Animaker is quite popular for beginners. It offers templates, so you can start off with an easy project if that’s what you’d like. But it also offers a lot of custom-creation tools that can be used for creating complex and professional Animations — although perhaps not at the level as the ones you might see from other alternatives (this software is most suitable for simple animations.)
06Moho Pro
Moho Pro (previously known as Anime Studio Pro) is a popular Animation program that fans of anime really love. This is one of the best software to use if you’re more interested in traditional animation (which involves a lot of free-hand drawing). Although, despite that fact, it has many advanced rigging functions as well (so you can create a mix of traditional and modern animation if you wish.)
07Pencil 2D
Pencil 2D, much like Synfig Studio, is FREE, cross-platform software. It’s quite old, but it’s matured over the years to include more and more functions (you might already be personally aware of it, in fact. It had its time to shine in the early 2010s.) The important thing to remember though is the fact that this is definitely more of a ‘traditional animation’ software. It does offer some basic rigging, but it’s best used by those who would prefer to practice the art of frame-by-frame animation.
08OpenToonz
OpenToonz is another free Rigging Animation Software (although it should be noted that there is a premium version, called Toonz, that is quite well known.) The best part about it is that it is a combination of software. One that you can use both for traditional animation and Animation. It’s also pretty easy to use, making it a good option for those just starting out.
● Key Takeaways from This Episode →
● 2D Rigging is the practice of creating ‘structure’ or ‘bones’ from which you can move characters or models. In these are usually ‘pins’ placed in bendable areas (i.e., the elbow, for bending the arm.)
● There are many differences between Animation and Animation. What you end up choosing should be decided by your project.
● Remember though, that Animations usually take longer to create even though Animations require more complex riggings.
● If you’re serious about getting into Rigging, make sure to consider the Rigging Animation Software that you choose to use very carefully. Each one has its own pros and cons.
12+ Stunning Instagram GIF Stickers
12+ Stunning Instagram GIF Stickers and How to Make & Find
An easy yet powerful editor
Numerous effects to choose from
Detailed tutorials provided by the official channel
Creating gif stickers for Instagram is an easy step. Know how to make Instagram gif stickers. Find Instagram gif stickers.
In this article
01 [What’s Top 12 Amazing Instagram GIF Stickers](#Part 1)
02 [Where to Find Instagram GIF Stickers](#Part 2)
03 [How to Make Instagram GIF Stickers](#Part 3)
Part 1 What’s Top 12 Amazing Instagram GIF Stickers
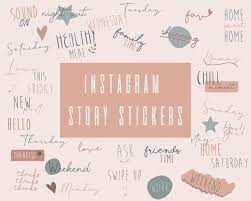
Instagram stories have become routine for every social media lover. Their day is never complete without a new and interesting story that their viewers love to watch and cannot wait for a new one. There are always some new updates on Instagram and to be in trend, it is a must to include some quirky and engaging content in the stories. The introduction of GIF to Instagram has made it easy for users to add some unique elements and content to their Instagram stories. GIF on Instagram has been powered by GIPHY. Several gifs have been uploaded and they can be searched easily on the search bar over Instagram. Instagram gif stickers are used by Instagram users to express their feelings and influence people. There are various gifs for different moods and occasions. So these gif stickers become a must-have element in Instagram stories.
So, let’s see some of the top 12 Amazing Instagram GIF Stickers that can make your Instagram story more engaging and interesting.
01THE UNCOMMON PLACE
The uncommon place is having a perfect set of gifs that are based on seasons. These gifs are best for nature lovers who wish to add some of them to their Instagram stories. This gif is created by a well-known designer and Illustrator from California called Katie Theirjung. This gif has spider web, candy for Halloween, flowers, stars, and some sayings. It has some cheerful gifs in warm colors. The uncommon place gif over morning Instagram stories can be pleasing and yet engaging.
02QUEENBEMONYEI
Girls, who are always active in handling their Instagram stories, love to search for Queenbemonyei. It has beautiful and the best Instagram gif stickers for girls to express their style and mood. It has a beautiful rich jewel tone and stickers of African-American women.
03OURSECOND
Instagram users who love the outdoors and update stuff on Instagram stories related to their outings, OURSECOND is the best kind of gif to make their Instagram stories more happening and interesting. Tress, campfire essential, tent, and natural stickers are available here. It can be searched easily by typing OURSEC and all the OURSECOND gifs will appear for applying.
04SCRIPTBYNORA
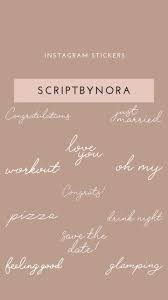
Sayings and cute words with Instagram stories are just amazing things to share. If you are fond of writing something catchy on your Instagram stories, SCRIPTBYNORA is the great place to get some great writing gifs. It includes days and seasons names like Sunday, Friday, summer night, playtime, saves the date, and many more gifs.
05NEUTRAL
Some cute colorful gifs can be obtained by searching NEUTRAL on Instagram. It is a great collection of some assorted cute stickers such as stars, hearts, decorative lights, sunshine, and many others. These gifs are a great way to beautify any Instagram stories.
06PAINT & BRUSH
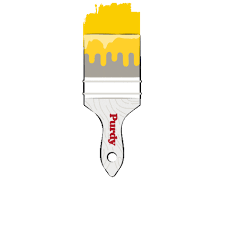
Paint and Brush Instagram gif sticker is good for the artists who keep on presenting something new to their viewers. They can be applied to the backgrounds of text and make them more attractive. Cute paint and brush stickers draw the attention of the viewers when they read the Instagram stories.
07GLADDEST
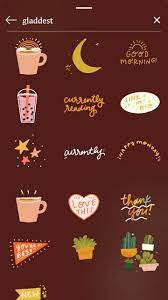
This Gif is created by Mac Ford, an illustrator in Vancouver. For those who want some sparkles and cute fonts, gladdest gifs are the best option. An amazing collection of party stuff, stars, music, heart, and some cute words in gladdest can make Instagram stories unique and stylish. New posts can be added on Instagram stories with cute gifs of gladdest. It can be searched easily by typing gladdest and all the gifs will pop up.
08AISFORAI

One of the most attractive Instagram sticker gif is Aisforai. This is very popular on GIPHY and has more than 20.5B GIF views. This is a special one as it relates to love and children. It shows that ‘love is all around them, even when their loved ones are not with them. To add them to Instagram stories, search Aisforai and get them for your stories.
09LAURENBLAIR
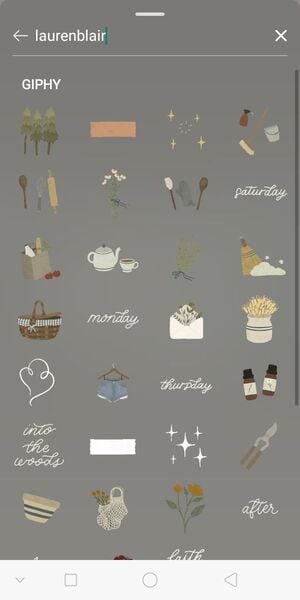
Laurenblair Gifs are perfect for posting outdoor and homely Instagram stories. It has an amazing collection of days and months. Gif of cottages and stuff that is good to post at the weekends and afternoon can be found here. Several stickers can pop up when one searches for Laurenblair at the Instagram account.
10 ODSANYU
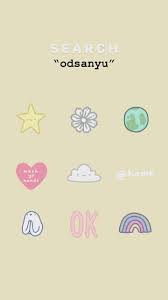
For those who love adventure, Odsanyu have several gifs perfect for adventurous Instagram stories. It contains hearts, smiley faces, and adventure time characters. Selling prints and illusions stickers of Odsanyu make the Instagram stories aesthetic.
1111. FLOWERINGWORDS
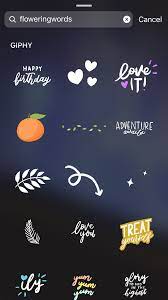
Flashing cursive words with some cute gifts can be used in creating attractive Instagram stories from floweringwords. These gifs are good when an Instagram user desires to make an engaging story during winters and celebrations. Hearts, cute sayings, and stars are included in it. They can be searched by typing Floweringwords are the search bar.
1212. PASTEL
The Instagram users who love simple, being, and white colors inside their Instagram stories, Pastel has all for them. Some of the cute gifs like animals, hearts, and birthdays are there to make Instagram stories more creative.
So, these are some of the top Instagram stickers which can make any Instagram story look cool and awesome.
Part 2 Where to Find Instagram GIF Stickers
Gif sticker Instagram has given a new level to the Instagram stories. The stickers have added more fun and interesting elements to every story posted over Instagram. It connects with the audience and helps a business to generate leads. But, there are several Instagram Gifs available, and finding the suitable one is very difficult. So, if you are wondering where to find Instagram gif stickers list. Here are some options where one can get their favorite Instagram stickers to bring life to the Instagram stories.
● Vipapier: It has vintage touch gifs and stickers. Flowers and cute words are available. Those who love vintage gifs to be included in their Instagram stories can search over Vipapier.
● Lidiaontheroad: Those who are looking for some motivational and inspirational gifs, it be searched on Lidiaontheroad.
● Ohlalalita: Cute Instagram stories can be made with Ohlalalita gifs. It can be searched by typing it on the search bar. It can make any picture or video attractive.
● Illustragabs: Funny and cheerful gifs can be searched at Illustragabs. For those who wish to make their Instagram stories funny and visually attractive, this is a great option.
● All things Lilly Anne: Instagram users who love creativity and add color combos to their Instagram stories can get it on all things Lilly Anne.
● Mikylacreates: Those who are looking for daisy and candy hearts to include in the Instagram stories; they can get the same at Mikylacreates.
● Greendotori: Short stories can be made interesting with some cute pictures of coffee, hearts, and stars. One can get it at Greendotori.
● Dindaps: Feminine lovers may get some amazing modern gifs at Dindaps. A lot of stickers will pop up when searching Dindaps at the search bar.
Apart from these, there are many other places where some trending gifs can be searched. Animated, sparkling, stylish, and attractive gifs can be used by taking them from great sources powered by GIPHY.
Part 3 How to Make Instagram GIF Stickers
Making Instagram stories filled with wonderful stickers and gif brings more followers and views. So, Instagram GIF stickers can be made in just a few simple steps. Let’s see it:
Apply for Giphy’s brand account: After uploading at least five GIFs, one can process having an account at GIPHY. The requirements can be read out and after approval, one can begin making gifs and uploading them.
Creating gif sticker through Filmora:
Wondershare Filmora Video Editor is a well-known professional video editing program. Bestowed with great features and being user-friendly, this is the best application for gif making. This is a good place where video editing, adding transition effects, captions can be done.
Filmora is easy-to-use digital creativity software that has taken advanced digital technology to take video, sound, and text to the next level with magical effects, interesting stickers, and filters. It has various simplified tools to make content engaging.
Following steps shall be followed to create a Gif over Filmora:
● Download the application Filmora and install it on your PC. Locate and select the media file from the PC and open it to import the Gif on the application.
● Click on +icon appearing at the thumbnail center. Click MATCH TO MEDIA for adding the file to the timeline.
● Move to the project setting and choose the aspect ratio from the drop-down list.
● Click on export from the media library, select the MP4 format. Perform other required adjustments and click on exports to convert gifs to Instagram videos. Open the Instagram app and upload the gif video to your profile.
● The other method of uploading and sharing gifs is through the GIPHY app. Any video which requires modification, the Filmora app can be used to trim it.
So, if you are looking for how to create gif stickers for Instagram, explore Filmora and create some amazing gifs from videos or videos from Gif. You can do it in simple steps with Filmora.
● Key Takeaways from This Episode →
● Instagram stories can be made more impactful with some effects, sparkles, good sayings, colorful stickers, and some cute pictures. All this is possible by adding some amazing gifs. Gifs are a great way to complement any text posted over Instagram stories. Some aesthetic Gifs can be found at the uncommon place, queenbemonyei,oursecond, scriptbynora, neutral, and many more.
● There are several gifs available for Instagram stories, but finding the best source is a must to create some engaging and customized stories. Based on the expressions and mood, there are many gifs that can guide the viewers. So, they can be accessed at Vipapier, Lidiaontheroad, Ohlalalita, Illustragabs, All things Lilly Anne, Mikylacreates, and many more sections.
● Attractive Gif can be created by following some simple steps. One of the great applications that can make your gif and stickers amazing for Instagram stories is Filmora.
Creating gif stickers for Instagram is an easy step. Know how to make Instagram gif stickers. Find Instagram gif stickers.
In this article
01 [What’s Top 12 Amazing Instagram GIF Stickers](#Part 1)
02 [Where to Find Instagram GIF Stickers](#Part 2)
03 [How to Make Instagram GIF Stickers](#Part 3)
Part 1 What’s Top 12 Amazing Instagram GIF Stickers
Instagram stories have become routine for every social media lover. Their day is never complete without a new and interesting story that their viewers love to watch and cannot wait for a new one. There are always some new updates on Instagram and to be in trend, it is a must to include some quirky and engaging content in the stories. The introduction of GIF to Instagram has made it easy for users to add some unique elements and content to their Instagram stories. GIF on Instagram has been powered by GIPHY. Several gifs have been uploaded and they can be searched easily on the search bar over Instagram. Instagram gif stickers are used by Instagram users to express their feelings and influence people. There are various gifs for different moods and occasions. So these gif stickers become a must-have element in Instagram stories.
So, let’s see some of the top 12 Amazing Instagram GIF Stickers that can make your Instagram story more engaging and interesting.
01THE UNCOMMON PLACE
The uncommon place is having a perfect set of gifs that are based on seasons. These gifs are best for nature lovers who wish to add some of them to their Instagram stories. This gif is created by a well-known designer and Illustrator from California called Katie Theirjung. This gif has spider web, candy for Halloween, flowers, stars, and some sayings. It has some cheerful gifs in warm colors. The uncommon place gif over morning Instagram stories can be pleasing and yet engaging.
02QUEENBEMONYEI
Girls, who are always active in handling their Instagram stories, love to search for Queenbemonyei. It has beautiful and the best Instagram gif stickers for girls to express their style and mood. It has a beautiful rich jewel tone and stickers of African-American women.
03OURSECOND
Instagram users who love the outdoors and update stuff on Instagram stories related to their outings, OURSECOND is the best kind of gif to make their Instagram stories more happening and interesting. Tress, campfire essential, tent, and natural stickers are available here. It can be searched easily by typing OURSEC and all the OURSECOND gifs will appear for applying.
04SCRIPTBYNORA
Sayings and cute words with Instagram stories are just amazing things to share. If you are fond of writing something catchy on your Instagram stories, SCRIPTBYNORA is the great place to get some great writing gifs. It includes days and seasons names like Sunday, Friday, summer night, playtime, saves the date, and many more gifs.
05NEUTRAL
Some cute colorful gifs can be obtained by searching NEUTRAL on Instagram. It is a great collection of some assorted cute stickers such as stars, hearts, decorative lights, sunshine, and many others. These gifs are a great way to beautify any Instagram stories.
06PAINT & BRUSH
Paint and Brush Instagram gif sticker is good for the artists who keep on presenting something new to their viewers. They can be applied to the backgrounds of text and make them more attractive. Cute paint and brush stickers draw the attention of the viewers when they read the Instagram stories.
07GLADDEST
This Gif is created by Mac Ford, an illustrator in Vancouver. For those who want some sparkles and cute fonts, gladdest gifs are the best option. An amazing collection of party stuff, stars, music, heart, and some cute words in gladdest can make Instagram stories unique and stylish. New posts can be added on Instagram stories with cute gifs of gladdest. It can be searched easily by typing gladdest and all the gifs will pop up.
08AISFORAI
One of the most attractive Instagram sticker gif is Aisforai. This is very popular on GIPHY and has more than 20.5B GIF views. This is a special one as it relates to love and children. It shows that ‘love is all around them, even when their loved ones are not with them. To add them to Instagram stories, search Aisforai and get them for your stories.
09LAURENBLAIR
Laurenblair Gifs are perfect for posting outdoor and homely Instagram stories. It has an amazing collection of days and months. Gif of cottages and stuff that is good to post at the weekends and afternoon can be found here. Several stickers can pop up when one searches for Laurenblair at the Instagram account.
10 ODSANYU
For those who love adventure, Odsanyu have several gifs perfect for adventurous Instagram stories. It contains hearts, smiley faces, and adventure time characters. Selling prints and illusions stickers of Odsanyu make the Instagram stories aesthetic.
1111. FLOWERINGWORDS
Flashing cursive words with some cute gifts can be used in creating attractive Instagram stories from floweringwords. These gifs are good when an Instagram user desires to make an engaging story during winters and celebrations. Hearts, cute sayings, and stars are included in it. They can be searched by typing Floweringwords are the search bar.
1212. PASTEL
The Instagram users who love simple, being, and white colors inside their Instagram stories, Pastel has all for them. Some of the cute gifs like animals, hearts, and birthdays are there to make Instagram stories more creative.
So, these are some of the top Instagram stickers which can make any Instagram story look cool and awesome.
Part 2 Where to Find Instagram GIF Stickers
Gif sticker Instagram has given a new level to the Instagram stories. The stickers have added more fun and interesting elements to every story posted over Instagram. It connects with the audience and helps a business to generate leads. But, there are several Instagram Gifs available, and finding the suitable one is very difficult. So, if you are wondering where to find Instagram gif stickers list. Here are some options where one can get their favorite Instagram stickers to bring life to the Instagram stories.
● Vipapier: It has vintage touch gifs and stickers. Flowers and cute words are available. Those who love vintage gifs to be included in their Instagram stories can search over Vipapier.
● Lidiaontheroad: Those who are looking for some motivational and inspirational gifs, it be searched on Lidiaontheroad.
● Ohlalalita: Cute Instagram stories can be made with Ohlalalita gifs. It can be searched by typing it on the search bar. It can make any picture or video attractive.
● Illustragabs: Funny and cheerful gifs can be searched at Illustragabs. For those who wish to make their Instagram stories funny and visually attractive, this is a great option.
● All things Lilly Anne: Instagram users who love creativity and add color combos to their Instagram stories can get it on all things Lilly Anne.
● Mikylacreates: Those who are looking for daisy and candy hearts to include in the Instagram stories; they can get the same at Mikylacreates.
● Greendotori: Short stories can be made interesting with some cute pictures of coffee, hearts, and stars. One can get it at Greendotori.
● Dindaps: Feminine lovers may get some amazing modern gifs at Dindaps. A lot of stickers will pop up when searching Dindaps at the search bar.
Apart from these, there are many other places where some trending gifs can be searched. Animated, sparkling, stylish, and attractive gifs can be used by taking them from great sources powered by GIPHY.
Part 3 How to Make Instagram GIF Stickers
Making Instagram stories filled with wonderful stickers and gif brings more followers and views. So, Instagram GIF stickers can be made in just a few simple steps. Let’s see it:
Apply for Giphy’s brand account: After uploading at least five GIFs, one can process having an account at GIPHY. The requirements can be read out and after approval, one can begin making gifs and uploading them.
Creating gif sticker through Filmora:
Wondershare Filmora Video Editor is a well-known professional video editing program. Bestowed with great features and being user-friendly, this is the best application for gif making. This is a good place where video editing, adding transition effects, captions can be done.
Filmora is easy-to-use digital creativity software that has taken advanced digital technology to take video, sound, and text to the next level with magical effects, interesting stickers, and filters. It has various simplified tools to make content engaging.
Following steps shall be followed to create a Gif over Filmora:
● Download the application Filmora and install it on your PC. Locate and select the media file from the PC and open it to import the Gif on the application.
● Click on +icon appearing at the thumbnail center. Click MATCH TO MEDIA for adding the file to the timeline.
● Move to the project setting and choose the aspect ratio from the drop-down list.
● Click on export from the media library, select the MP4 format. Perform other required adjustments and click on exports to convert gifs to Instagram videos. Open the Instagram app and upload the gif video to your profile.
● The other method of uploading and sharing gifs is through the GIPHY app. Any video which requires modification, the Filmora app can be used to trim it.
So, if you are looking for how to create gif stickers for Instagram, explore Filmora and create some amazing gifs from videos or videos from Gif. You can do it in simple steps with Filmora.
● Key Takeaways from This Episode →
● Instagram stories can be made more impactful with some effects, sparkles, good sayings, colorful stickers, and some cute pictures. All this is possible by adding some amazing gifs. Gifs are a great way to complement any text posted over Instagram stories. Some aesthetic Gifs can be found at the uncommon place, queenbemonyei,oursecond, scriptbynora, neutral, and many more.
● There are several gifs available for Instagram stories, but finding the best source is a must to create some engaging and customized stories. Based on the expressions and mood, there are many gifs that can guide the viewers. So, they can be accessed at Vipapier, Lidiaontheroad, Ohlalalita, Illustragabs, All things Lilly Anne, Mikylacreates, and many more sections.
● Attractive Gif can be created by following some simple steps. One of the great applications that can make your gif and stickers amazing for Instagram stories is Filmora.
How to Analyze an Editorial Cartoon Easily
How to Analyze an Editorial Cartoon
An easy yet powerful editor
Numerous effects to choose from
Detailed tutorials provided by the official channel
We all remember opening our daily newspaper and seeing a graphical representation of some new scoop or story that gives you a gist of what is happening, usually involving humor or sarcasm. That is what one would call and editorial cartoon and they are quite popular amongst newspapers, internet blogs and most recently, Social Media.
Some would even say that ‘Memes’ are an evolved form of editorial cartoons. They are funny, entertaining and can even portray some type of story. Editorial cartoons, in layman terms are a graphical approach to reflect the creator’s ideas. These are usually drawn on a tight deadline; hence feature simple caricatures and whimsical characters.
Cartoonists and hobbyists around the world can save on time using online tools to bring their ideas to life. Today, with some help from the right technology, anybody can try their hands in drawing amazing characters, combining both visual and verbal languages.
If you are someone who feels they have an amazing idea for a cartoon but lacks the skills to draw one can choose from a plethora of tools like Powtown, Photoshop or AI Artist to create amazing sketches and drawing, in half the time.
In this article
01 [Always Be Timely — Editorial Cartoons in a Snap](#Part 1)
02 [The 8 Best Apps to Turn Photos Into Cartoons and Sketches](#Part 2)
03 [How to Make 3D Cartoon From a Photo](#Part 3)
Part 1 Always Be Timely — Editorial Cartoons in a Snap
When a new idea pops into your head, we are usually overwhelmed or excited by its prospects of it that we forget to analyze its features before proceeding to turn it into a cartoon. Here are some tips to help you look into the details of your cartoon.
● Make a note of all the characters in your cartoon strip, what actions are they involved in and the dialogues that are being uttered.
● From which angle or whose angle the story is being told.
● Divide the cartoon design into four quadrants; Top Right & Left, Bottom Right & Left.
● Pay attention to key elements such as use of furniture, tools, technology or signs.
● Define traits like time of day, time of the year or time in history where the context is set.
● Keep in mind the audience you are reaching out to. You can ensure reliability the subtle use of intellect and humour.
Now that you have a clearer picture of what you are trying to depict it is best not to delay the idea and start cracking your creative eggs.
Beginners can use an easy tool like Powtoon, and its simple drag and drop interface to start making cartoons in just three simple steps. You can save up on a lot of time and get your cartoon ready for uploading to your new blog post.
Step 1: Set a Background for your Cartoon
Open the Powtoon Studio on your system and click on ‘Backgrounds’ located on the panel to your right. It will open up a vast library filled with ready to use backgrounds.
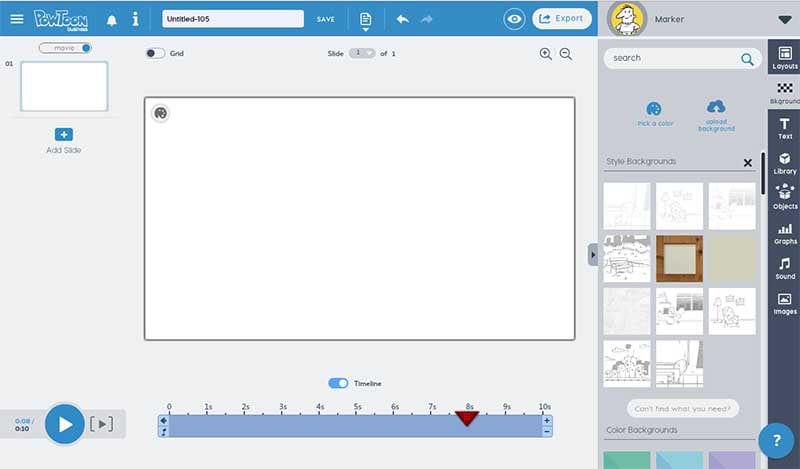
Select any you like to get started. It will intently appear on the board.
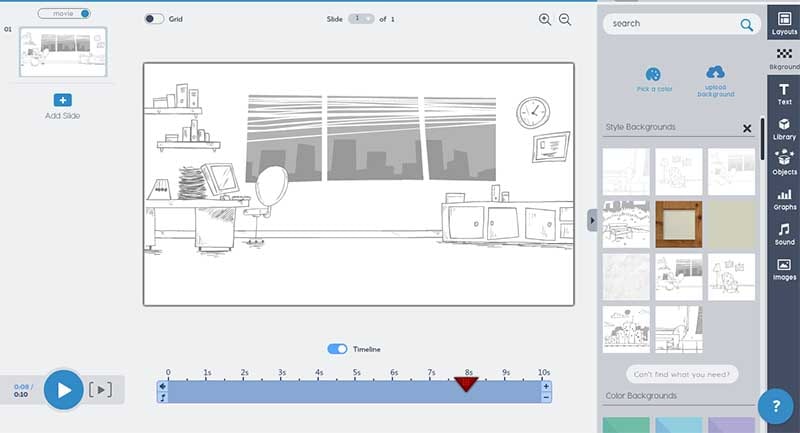
Step 2: Select the Characters for your Cartoon
Well, you have a setting and now it is time to place your characters in it. Click on the ‘Animated Character’ from the panel. Choose any template for your characters.
Step 3: Add the Text
There are various ways you can add dialogues, messages or texts to your cartoon. You can click on ‘Text’ and add a Quote Box or Dialogue Box. You can edit your text by simply clicking on the box.
Part 2 The 8 Best Apps to Turn Photos Into Cartoons and Sketches
01Photo Lab Picture Editor
Photolab is a great choice for turning your photos into a painting, sketch or a watercolor image. Along with filters you will get montages, borders and frames to make your art work more realistic. You will find all presets in the effects category. It also features filters like digital rain and jigsaw puzzle. Photolab can also be used as a photo editor as it is capable to perform color adjustment, rotate and crop.
Key Features:
● 800+ effects.
● E-card templates for special occasions.
● You can choose a photo from gallery or click one using the camera app.
02Prisma Photo Editor
Prisma has the magical ability to turn your photo or sketch into a Van Gogh or Picasso style painting. Wondering how? It has filters that are inspired by the eminent artist around the world. Choose a photo from your gallery and choose from exciting filters. Prisma also have cool editing tools that help you adjust the intensity of the filters applied if you want to.
Key Features
● Online App community.
● Similar to Instagram
● artistic filters.
03Paint Lab – Photo Cartoon
Paintlab features an easy to use interface and wide range of filters. With it you can turn any photos into a cartoon or a drawing just in few seconds. Once you are done editing you can share your final work on any social media platform directly from paintlab. It is compatible only with androids.
Key Fetaures
● Fast editing
● Perfect or beginners.
● Includes beautification and imperfection correction tools and effects.
04Cartoon Photo PRO
Using Cartoon Photo Pro alongside your photos you can also turn your videos into cartoon. Effects are artistic and customizable. Only downside it doesn’t come for free. It also has great ratings in Playstore.

Key Features
● User friendly interface
● Animates videos.
05Brushstroke
Brushstroke is ideal for editing and printing high resolution photos. The app comes with a paint directly option. It is not android compatible. The best feature is apart from filters and painting styles you can also pick the color palette and canvas surface.
Key Features
● You can sign your photos before printing
● Wide range of styles and sub-styles.
06Clip2Comic
If you like having fun and playing around we bet you would love an photo editing app that turn your close ones’ photo into caricatures. One tap can give you comic-book style drawing and sketches. This is one of best sketch and animation apps suggested for iPhone users. User friendly interface is an added bonus.
Key Features
● Live preview animation camera option.
● Carton-style photo effects.
07PhotoMania
PhotoMania is fun to use, if you want to try out different effects then you are at the right app. It has 400 presets in total including vintage looks and effects for sketches. PhotoMania has a collection of cool and exciting frames that you can add to your photos to make them more interesting. If you are someone who likes to send e-cards here you will get dozens of options. You can also utilize PhotoMania as a photo editor as it features the best exposure settings. And we know how important masking tool is, it helps you create neat photos, the app also has this amazing feature.
Key Features:
● Advanced photo editing tools and presets, for instance HDR and LOMO.
● It can also make your photo a painting.
● Adds textures and offers holiday templates.
08Toonme
Toonme has similar photo editing features like Clip2Comic. Only it is better. It has AI assistance that helps you create realistic effects. You can choose from the variety of styles and even tweak them to get a personalized style. Toonme is free to download but if you want use pro features you can subscribe to their monthly affordable package. Also, it is compatible with both iOS and Android devices.
Key Features:
● Offers hand-drawn effects.
● Offers numerous layouts that goes well with profile pictures even instagram stories.
● You can share your work with other Toonme Users.
Part 3 How to Make 3D Cartoon From a Photo
Do you know that animators used to hand sketch every frame and every detail that too with continuation? Thanks to our modern day technology we can take a snap of any object or person and turn that into a cartoon within few seconds. With the right amount of help and creativity you can create characters that are entertaining and engaging at the same time. Wondershare Filmora Video Editor can be used to create animated videos. Amazing features and filters save editing time while making the entire process flexible. Though we have already mentioned eight apps for sketching, animating and caricaturing your photos, Filmora is a complete package. Motion tracking, easy zoom in and out, masking, panning and color correction are some of the best features offered by this editing software. It can run on both PC and Mac. User friendly interface suits both professionals as well as beginner.
For Win 7 or later (64-bit)
For macOS 10.12 or later
● Ending Thoughts →
● Creating an animated video that stands as an exception is now simple and hassle-free.
● Never be afraid to experiment and explore amazing ways of story-telling.
● Things discussed so far will help you analyze and understand cartoons and animation.
We all remember opening our daily newspaper and seeing a graphical representation of some new scoop or story that gives you a gist of what is happening, usually involving humor or sarcasm. That is what one would call and editorial cartoon and they are quite popular amongst newspapers, internet blogs and most recently, Social Media.
Some would even say that ‘Memes’ are an evolved form of editorial cartoons. They are funny, entertaining and can even portray some type of story. Editorial cartoons, in layman terms are a graphical approach to reflect the creator’s ideas. These are usually drawn on a tight deadline; hence feature simple caricatures and whimsical characters.
Cartoonists and hobbyists around the world can save on time using online tools to bring their ideas to life. Today, with some help from the right technology, anybody can try their hands in drawing amazing characters, combining both visual and verbal languages.
If you are someone who feels they have an amazing idea for a cartoon but lacks the skills to draw one can choose from a plethora of tools like Powtown, Photoshop or AI Artist to create amazing sketches and drawing, in half the time.
In this article
01 [Always Be Timely — Editorial Cartoons in a Snap](#Part 1)
02 [The 8 Best Apps to Turn Photos Into Cartoons and Sketches](#Part 2)
03 [How to Make 3D Cartoon From a Photo](#Part 3)
Part 1 Always Be Timely — Editorial Cartoons in a Snap
When a new idea pops into your head, we are usually overwhelmed or excited by its prospects of it that we forget to analyze its features before proceeding to turn it into a cartoon. Here are some tips to help you look into the details of your cartoon.
● Make a note of all the characters in your cartoon strip, what actions are they involved in and the dialogues that are being uttered.
● From which angle or whose angle the story is being told.
● Divide the cartoon design into four quadrants; Top Right & Left, Bottom Right & Left.
● Pay attention to key elements such as use of furniture, tools, technology or signs.
● Define traits like time of day, time of the year or time in history where the context is set.
● Keep in mind the audience you are reaching out to. You can ensure reliability the subtle use of intellect and humour.
Now that you have a clearer picture of what you are trying to depict it is best not to delay the idea and start cracking your creative eggs.
Beginners can use an easy tool like Powtoon, and its simple drag and drop interface to start making cartoons in just three simple steps. You can save up on a lot of time and get your cartoon ready for uploading to your new blog post.
Step 1: Set a Background for your Cartoon
Open the Powtoon Studio on your system and click on ‘Backgrounds’ located on the panel to your right. It will open up a vast library filled with ready to use backgrounds.
Select any you like to get started. It will intently appear on the board.
Step 2: Select the Characters for your Cartoon
Well, you have a setting and now it is time to place your characters in it. Click on the ‘Animated Character’ from the panel. Choose any template for your characters.
Step 3: Add the Text
There are various ways you can add dialogues, messages or texts to your cartoon. You can click on ‘Text’ and add a Quote Box or Dialogue Box. You can edit your text by simply clicking on the box.
Part 2 The 8 Best Apps to Turn Photos Into Cartoons and Sketches
01Photo Lab Picture Editor
Photolab is a great choice for turning your photos into a painting, sketch or a watercolor image. Along with filters you will get montages, borders and frames to make your art work more realistic. You will find all presets in the effects category. It also features filters like digital rain and jigsaw puzzle. Photolab can also be used as a photo editor as it is capable to perform color adjustment, rotate and crop.
Key Features:
● 800+ effects.
● E-card templates for special occasions.
● You can choose a photo from gallery or click one using the camera app.
02Prisma Photo Editor
Prisma has the magical ability to turn your photo or sketch into a Van Gogh or Picasso style painting. Wondering how? It has filters that are inspired by the eminent artist around the world. Choose a photo from your gallery and choose from exciting filters. Prisma also have cool editing tools that help you adjust the intensity of the filters applied if you want to.
Key Features
● Online App community.
● Similar to Instagram
● artistic filters.
03Paint Lab – Photo Cartoon
Paintlab features an easy to use interface and wide range of filters. With it you can turn any photos into a cartoon or a drawing just in few seconds. Once you are done editing you can share your final work on any social media platform directly from paintlab. It is compatible only with androids.
Key Fetaures
● Fast editing
● Perfect or beginners.
● Includes beautification and imperfection correction tools and effects.
04Cartoon Photo PRO
Using Cartoon Photo Pro alongside your photos you can also turn your videos into cartoon. Effects are artistic and customizable. Only downside it doesn’t come for free. It also has great ratings in Playstore.
Key Features
● User friendly interface
● Animates videos.
05Brushstroke
Brushstroke is ideal for editing and printing high resolution photos. The app comes with a paint directly option. It is not android compatible. The best feature is apart from filters and painting styles you can also pick the color palette and canvas surface.
Key Features
● You can sign your photos before printing
● Wide range of styles and sub-styles.
06Clip2Comic
If you like having fun and playing around we bet you would love an photo editing app that turn your close ones’ photo into caricatures. One tap can give you comic-book style drawing and sketches. This is one of best sketch and animation apps suggested for iPhone users. User friendly interface is an added bonus.
Key Features
● Live preview animation camera option.
● Carton-style photo effects.
07PhotoMania
PhotoMania is fun to use, if you want to try out different effects then you are at the right app. It has 400 presets in total including vintage looks and effects for sketches. PhotoMania has a collection of cool and exciting frames that you can add to your photos to make them more interesting. If you are someone who likes to send e-cards here you will get dozens of options. You can also utilize PhotoMania as a photo editor as it features the best exposure settings. And we know how important masking tool is, it helps you create neat photos, the app also has this amazing feature.
Key Features:
● Advanced photo editing tools and presets, for instance HDR and LOMO.
● It can also make your photo a painting.
● Adds textures and offers holiday templates.
08Toonme
Toonme has similar photo editing features like Clip2Comic. Only it is better. It has AI assistance that helps you create realistic effects. You can choose from the variety of styles and even tweak them to get a personalized style. Toonme is free to download but if you want use pro features you can subscribe to their monthly affordable package. Also, it is compatible with both iOS and Android devices.
Key Features:
● Offers hand-drawn effects.
● Offers numerous layouts that goes well with profile pictures even instagram stories.
● You can share your work with other Toonme Users.
Part 3 How to Make 3D Cartoon From a Photo
Do you know that animators used to hand sketch every frame and every detail that too with continuation? Thanks to our modern day technology we can take a snap of any object or person and turn that into a cartoon within few seconds. With the right amount of help and creativity you can create characters that are entertaining and engaging at the same time. Wondershare Filmora Video Editor can be used to create animated videos. Amazing features and filters save editing time while making the entire process flexible. Though we have already mentioned eight apps for sketching, animating and caricaturing your photos, Filmora is a complete package. Motion tracking, easy zoom in and out, masking, panning and color correction are some of the best features offered by this editing software. It can run on both PC and Mac. User friendly interface suits both professionals as well as beginner.
For Win 7 or later (64-bit)
For macOS 10.12 or later
● Ending Thoughts →
● Creating an animated video that stands as an exception is now simple and hassle-free.
● Never be afraid to experiment and explore amazing ways of story-telling.
● Things discussed so far will help you analyze and understand cartoons and animation.
How to Combine Two/More GIFs Into One [GIF Mergers Offered]
How to Combine Multiple GIFs into One with GIF Combiner

Shanoon Cox
Mar 27, 2024• Proven solutions
Are you looking for a software tool to create animated GIFs? Go online, you will easily find so many with impressive editing abilities. There are so many interesting things that you can do with a collection of GIFs. Many professionals these days are trying new tricks to make classic small duration animated movies with interactive GIF creator tools .
The article below will provide you step by step guidance about how to merge or combine animated GIFs together.
We are going to discuss two methods where one GIF combiner can assist you to play GIFs side by side, whereas the other will tell you about playing another GIF in continuation after first. In the end, we will also let you know the three best GIF combiners you can use.
Keep reading.
If you are not able to use Photoshop due to its complicated interface and Ezgif is not a suitable tool for your device, then the best recommendation for your animated GIF creation needs is Wondershare Filmora .
This tool is designed with a user-friendly interface and it can easily assist you in the development of high-quality gifs. There are so many customization options associated with each design like color correction, speed adjustments, and overlays, etc.
Filmora offers compatibility over Windows as well as Mac devices so you can easily access it anywhere. Further, it can process more than 150 file formats so you need not worry about your selection. Simply download Wondershare Filmora for your desktop and get started with impressive GIF editing.
Download it now to have a try!
See how to make a cool GIF from a video with Wondershare Filmora.
 Download Mac Version ](https://tools.techidaily.com/wondershare/filmora/download/ )
Part 1: How to Combine/Merge Animated GIFs Into One
Method 1: Merge GIFs into one with Photoshop
Adobe Photoshop is one of the top-rated photo editing software tools and nowadays it is popularly being used for GIF combining. Using Photoshop, you can easily play multiple GIF images side by side on the screen. Here are a few simple to follow steps to accomplish this task:
Step 1: Import GIFs to combine
First of all, users need to launch Adobe Photoshop on their device and then import both GIF images to individual tabs. This task can be easily done using Drag and Drop tools. Resize both tabs so that you can view both images at a time on screen.
Step 2: Save GIF with name
Go to the Window menu and ensure that the Timeline option is marked in the drop-down menu.

Now open one empty file with height same as that of already imported GIF files. Save this file with any suitable name, for example Z.

Note: If you need a transparent view of your imported GIF images then go to Layer and select New and finally hit Layer option. You can now hide its bottom layer.
Step 3: Copy frames

Now move to the tab of the first GIF file and then to the timeline toolbar. On the top right corner of your screen, you will find the menu icon. Here you need to select and copy all frames.
Step 4: Paste your copy
It is time to move to GIF Z file, move to its timeline toolbar, and then select the menu icon from the top right corner of your screen. Paste your recently copied selection over here. Never forget to choose Paste Over selection option from Pop up Dialogue Box.
Step 5: Copy and paste
Simply repeat the process explained in Step 3 and 4 for the 2nd GIF image. After execution of these steps, your GIF Z file will be containing all layers of your imported GIF files but as you have pasted them one over another so it is important to separate their elements now.
Step 6: To make separation
To do this separation, go to GIF Z tab and then select layers of second GIF file and simply move them below the first GIF layer files. Users can now have a preview of both GIFs in the timeline window.

Step 7: Change image settings
After finalizing the best preview for your edited files, you can hit the file menu option and then save your project for device or web option. It will immediately open a dialogue box where users can easily specify their image quality and loop count details. Never forget to have one more preview before saving the final results.

Step 8: Save your project
As now you are done with all the editing tasks so it is time to hit the “Save” option and then provide your destination address to the modified file. Your animated GIF file is now ready to get uploaded on the internet.
Check this video to learn more on how to combine gifs with Photoshop
Method 2: Combine GIFs and Play one After Another
Many youngsters love to create impressive stories by just combining a few GIF images one after another in sequence. If you are also one of them then you should follow these steps discussed in the second method.
We are recommending Ezgif.com to complete this task with the easy to follow steps as discussed below:
You may also like: Top 26 Best Free GIF Makers Online >>
Step 1: Upload GIFs files
First of all, you need to upload your desired GIF files to the Ezgif.com platform. For fast selection of multiple files simply follow Ctrl key-based selection.
This tool also allows users to create a mixture of animated GIF files with simple still images even if they are of different file formats. The conversion process will be carried out automatically by this tool.
Step 2: Adjust frame
As soon as these files will get uploaded, you will find all frames on the editor window. Here you can easily adjust frame delays as well as their order. Note that, GIFs are often ordered in alphabetic order so while reorganizing your files, never forget to rename them accurately. Now hit the “Animate It” button and it will immediately prepare a small preview window on the screen.

Step 3: Optimize your GIFs
Ezgif.com provides a wide range of optimization options to users after this preview. You can easily adjust features as per your requirement by setting desired values for text, speed, effects, rotate, resize and crop, etc. If you do not want to make such changes then you can directly hit the save button. This software tool will take a few seconds to process your project and then a new GIF image with all defined frames will be generated. It will be containing all source images with your preferred ordered sequence. You can easily find it at your destination folder and use it further for entertainment.
Part 2: 3 Best GIF Combiners You Can Make GIFs
1. Filmora Meme Maker - Online GIF Combiner
If you want to combine GIFs online, the Filmora meme maker is your ultimate solution.
It helps you make images, GIFs and video memes directly without watermark. It is totally FREE to use and no signup. You can change text size, color and position to create caption when you are editing. You can also put text inside or outside in GIF.
Just with a few clicks, your GIF is done . Try Now!

2. GIPHY
GIPHY is a GIF combiner where you can find various GIF files to combine. All of the GIFs are funny and interesting to use for people who love to combine GIFs. There are some examples in this site, so you can have the inspiration to combine GIFs if you don’t know where to start. You also can find different styles: reaction, sports, artists and more.

3. PIXEL
If you don’t want to use Photoshop to combine GIFs, here we recommend using PIXEL. You can use it to make GIFs easily online. You can add more than one GIF at one time. Besides, this GIF combiner can also change the GIF size to fit your needs. After the editing is made, you need to click create animation to export GIFs. You should know that GIF size is 32×32 for PIXEL, and 64×64 for SUPER PIXEL.
![]()
Frequently Asked Questions About Combing GIFs
1. Can I Combine A Few Gifs?
Yes, you can. Any photo or video editing software that supports GIF file format allows you to combine one or more GIFs. For instance, Adobe Photoshop users can combine several GIF files and play them simultaneously next to each other, but this task can be overwhelming if you are not familiar with this photo editing software.
An online GIF combiner like Ezgif enables you to combine multiple GIFs from your web browser for free, which makes it a great option for anyone who doesn’t have access to a professional photo or video editing software.
2. How To Merge Several Animated GIFs?
Playing two or more GIFs one after another in a single file is easy, as you just have to arrange them in a way you want them to appear in the final version of the GIF on the editor’s timeline and then export your project as a GIF file.
What’s more, you will be able to remove the frames of the GIFs you don’t want to include in the output file or apply different filters and effects. However, the options you are going to have at your disposal depending on the GIF maker or video editing software you are using to merge several animated GIFs into a single file.
Shanoon Cox
Shanoon Cox is a writer and a lover of all things video.
Follow @Shanoon Cox
Shanoon Cox
Mar 27, 2024• Proven solutions
Are you looking for a software tool to create animated GIFs? Go online, you will easily find so many with impressive editing abilities. There are so many interesting things that you can do with a collection of GIFs. Many professionals these days are trying new tricks to make classic small duration animated movies with interactive GIF creator tools .
The article below will provide you step by step guidance about how to merge or combine animated GIFs together.
We are going to discuss two methods where one GIF combiner can assist you to play GIFs side by side, whereas the other will tell you about playing another GIF in continuation after first. In the end, we will also let you know the three best GIF combiners you can use.
Keep reading.
If you are not able to use Photoshop due to its complicated interface and Ezgif is not a suitable tool for your device, then the best recommendation for your animated GIF creation needs is Wondershare Filmora .
This tool is designed with a user-friendly interface and it can easily assist you in the development of high-quality gifs. There are so many customization options associated with each design like color correction, speed adjustments, and overlays, etc.
Filmora offers compatibility over Windows as well as Mac devices so you can easily access it anywhere. Further, it can process more than 150 file formats so you need not worry about your selection. Simply download Wondershare Filmora for your desktop and get started with impressive GIF editing.
Download it now to have a try!
See how to make a cool GIF from a video with Wondershare Filmora.
Download Mac Version ](https://tools.techidaily.com/wondershare/filmora/download/ )
Part 1: How to Combine/Merge Animated GIFs Into One
Method 1: Merge GIFs into one with Photoshop
Adobe Photoshop is one of the top-rated photo editing software tools and nowadays it is popularly being used for GIF combining. Using Photoshop, you can easily play multiple GIF images side by side on the screen. Here are a few simple to follow steps to accomplish this task:
Step 1: Import GIFs to combine
First of all, users need to launch Adobe Photoshop on their device and then import both GIF images to individual tabs. This task can be easily done using Drag and Drop tools. Resize both tabs so that you can view both images at a time on screen.
Step 2: Save GIF with name
Go to the Window menu and ensure that the Timeline option is marked in the drop-down menu.
Now open one empty file with height same as that of already imported GIF files. Save this file with any suitable name, for example Z.
Note: If you need a transparent view of your imported GIF images then go to Layer and select New and finally hit Layer option. You can now hide its bottom layer.
Step 3: Copy frames
Now move to the tab of the first GIF file and then to the timeline toolbar. On the top right corner of your screen, you will find the menu icon. Here you need to select and copy all frames.
Step 4: Paste your copy
It is time to move to GIF Z file, move to its timeline toolbar, and then select the menu icon from the top right corner of your screen. Paste your recently copied selection over here. Never forget to choose Paste Over selection option from Pop up Dialogue Box.
Step 5: Copy and paste
Simply repeat the process explained in Step 3 and 4 for the 2nd GIF image. After execution of these steps, your GIF Z file will be containing all layers of your imported GIF files but as you have pasted them one over another so it is important to separate their elements now.
Step 6: To make separation
To do this separation, go to GIF Z tab and then select layers of second GIF file and simply move them below the first GIF layer files. Users can now have a preview of both GIFs in the timeline window.
Step 7: Change image settings
After finalizing the best preview for your edited files, you can hit the file menu option and then save your project for device or web option. It will immediately open a dialogue box where users can easily specify their image quality and loop count details. Never forget to have one more preview before saving the final results.
Step 8: Save your project
As now you are done with all the editing tasks so it is time to hit the “Save” option and then provide your destination address to the modified file. Your animated GIF file is now ready to get uploaded on the internet.
Check this video to learn more on how to combine gifs with Photoshop
Method 2: Combine GIFs and Play one After Another
Many youngsters love to create impressive stories by just combining a few GIF images one after another in sequence. If you are also one of them then you should follow these steps discussed in the second method.
We are recommending Ezgif.com to complete this task with the easy to follow steps as discussed below:
You may also like: Top 26 Best Free GIF Makers Online >>
Step 1: Upload GIFs files
First of all, you need to upload your desired GIF files to the Ezgif.com platform. For fast selection of multiple files simply follow Ctrl key-based selection.
This tool also allows users to create a mixture of animated GIF files with simple still images even if they are of different file formats. The conversion process will be carried out automatically by this tool.
Step 2: Adjust frame
As soon as these files will get uploaded, you will find all frames on the editor window. Here you can easily adjust frame delays as well as their order. Note that, GIFs are often ordered in alphabetic order so while reorganizing your files, never forget to rename them accurately. Now hit the “Animate It” button and it will immediately prepare a small preview window on the screen.
Step 3: Optimize your GIFs
Ezgif.com provides a wide range of optimization options to users after this preview. You can easily adjust features as per your requirement by setting desired values for text, speed, effects, rotate, resize and crop, etc. If you do not want to make such changes then you can directly hit the save button. This software tool will take a few seconds to process your project and then a new GIF image with all defined frames will be generated. It will be containing all source images with your preferred ordered sequence. You can easily find it at your destination folder and use it further for entertainment.
Part 2: 3 Best GIF Combiners You Can Make GIFs
1. Filmora Meme Maker - Online GIF Combiner
If you want to combine GIFs online, the Filmora meme maker is your ultimate solution.
It helps you make images, GIFs and video memes directly without watermark. It is totally FREE to use and no signup. You can change text size, color and position to create caption when you are editing. You can also put text inside or outside in GIF.
Just with a few clicks, your GIF is done . Try Now!
2. GIPHY
GIPHY is a GIF combiner where you can find various GIF files to combine. All of the GIFs are funny and interesting to use for people who love to combine GIFs. There are some examples in this site, so you can have the inspiration to combine GIFs if you don’t know where to start. You also can find different styles: reaction, sports, artists and more.
3. PIXEL
If you don’t want to use Photoshop to combine GIFs, here we recommend using PIXEL. You can use it to make GIFs easily online. You can add more than one GIF at one time. Besides, this GIF combiner can also change the GIF size to fit your needs. After the editing is made, you need to click create animation to export GIFs. You should know that GIF size is 32×32 for PIXEL, and 64×64 for SUPER PIXEL.
![]()
Frequently Asked Questions About Combing GIFs
1. Can I Combine A Few Gifs?
Yes, you can. Any photo or video editing software that supports GIF file format allows you to combine one or more GIFs. For instance, Adobe Photoshop users can combine several GIF files and play them simultaneously next to each other, but this task can be overwhelming if you are not familiar with this photo editing software.
An online GIF combiner like Ezgif enables you to combine multiple GIFs from your web browser for free, which makes it a great option for anyone who doesn’t have access to a professional photo or video editing software.
2. How To Merge Several Animated GIFs?
Playing two or more GIFs one after another in a single file is easy, as you just have to arrange them in a way you want them to appear in the final version of the GIF on the editor’s timeline and then export your project as a GIF file.
What’s more, you will be able to remove the frames of the GIFs you don’t want to include in the output file or apply different filters and effects. However, the options you are going to have at your disposal depending on the GIF maker or video editing software you are using to merge several animated GIFs into a single file.
Shanoon Cox
Shanoon Cox is a writer and a lover of all things video.
Follow @Shanoon Cox
10 Best Tools to Make Pic Collage for Windows
10 Best Tools to Make Pic Collage for Windows
An easy yet powerful editor
Numerous effects to choose from
Detailed tutorials provided by the official channel
Collages are a great way to assemble all your favorite pictures in one place. You can share these collages with your friends, relatives, and dear ones or can also use them for posting on social media sites and other online platforms. Though creating a collage may sound simple, a lot of considerations need to be taken for creating an interesting and eye-catchy collage, and for this, a help of a professional tool can be taken. In the following parts of the topic, you can learn about the best tools for photo collage Windows 10 and other OS.

In the following parts of the topic, you can learn about the best tools for photo collage Windows 10 and other OS.
In this article
01 [Top 10 Pic Collage for Windows Tools](#Part 1)
02 [The Best Tool to Get Stock Images for Creating Collages](#Part 2)
Part 1 Top 10 Pic Collage for Windows Tools
Checkout the best collage for Windows below.
01PhotoPad Photo Editing Software
This is a complete photo editing tool supporting an array of features including the creation of a photo collage. This software from NCH software can let you add the desired images manually and also support using the auto grid to add an unlimited number of pictures. The tool also lets you choose the collage orientation size and set the background as needed.
Pros:
● Create collage Windows manually or automatically.
● Allows adding a background color, image, or from the available background options.
● Spacing and corners between the images can be selected.
● The size of the tool is small.
Cons:
● Stickers and filters to individual images cannot be added.
● Cannot choose a custom collage size.

02PhotoScapeX
Available for download on Windows 10 and higher versions this is another widely used photo editing tool that can also let you create collages manually as well as automatically. Multiple frames are available that can be selected as desired and there are additional features like adding filters, and also edit them in multiple ways.
Pros:
● Allows creating collage manually and automatically.
● Multiple editing tools for customization like filters, crop, zoom, doodle, and more.
● Picture alignment can be done in 3 modes- vertical, horizontal, and tile.
● Option to change and customize image size, spacing, margin, and others.
Cons:
● Limited photos can be added.
● The size of the tool is large in comparison to other tools.

03Phototastic Collage
This is free to use Windows-based tool that can create impressive collages in no time. Multiple designs, frames, and other options are available to create a customized collage as needed.
Pros:
● Multiple customization options are available for creating the desired collage.
● User-friendly and simple interface.
● An array of templates is available.
Cons:
● The free version has limited features.
● Limitation to the number of images that can be added.
● Ads in the app.

04PicCollage
Unleash your creativity by creating an interesting collage using this excellent collage-making app. There are multiple templates and customization options supports.
Pros
● Create collage manually or automatically
● The earlier created collage can be edited.
● Allows creating a collage in 3 options- grid, template, freestyle.
Cons
● Watermark on the created collage.
● The image size cannot be customized.

05Collage Maker-Photo Grid and Montage
Using this free Windows tool, you can create an interesting photo collage or a free-styled montage as needed. A wide range of layouts and templates are available that can be further customized to get the desired collage.
Pros:
● Free Windows software.
● Come with multiple filters, layout, and editing tools.
● The user interface is easy.
● Preview option available.
Cons:
● Performance glitches due to bugs.
● Custom collage size cannot be set.
● Watermark on the collage.

06Fotor
If you are looking for a simple and basic collage-making tool, Fotor is the right choice. Collage in the grid, freestyle, and photo-stitch style can be created and basic customization features are supported.
Pros:
● Simple to use tool that is apt for beginners.
● Border can be changed from a solid color to a background.
Cons:
● Customization options are limited.
● Border and the image size cannot be changed.

07El Collagero
Just like its name, this is an interesting Windows-based tool for creating a collage of your choice. A wide range of options for customization is available that can let you edit the images, choose a template and then also edit the file.
Pros:
● A wide range of templates and designs for collages is available.
● Allows adding text, symbols, and other elements.
● Created collage can be shared on social media sites.
Cons:
● In comparison to other professional tools, the functions are limited.

08Atlantas Photo Collage Studio
This Windows-based tool will let you create collages of all types and for all occasions. You can choose from over 100 templates that best match your collage theme and image content.
Pros:
● More than 100 templates for collage designs are available.
● The size of the layout can be changed.
● Multiple editing and customization options are supported like zoom, opacity selection, and more.
Cons:
● Limitation of adding 45 images.
● For the advanced functions, need to subscribe to the paid version.

09PhotoJoiner
Using this Windows tool, pick up your favorite images and turn them into a beautiful collage with customized design and style.
Pros:
● A simple and basic tool for creating a collage.
● Created collage can be saved or shared to the social media site.
● Change the order of the images, margins, and other aspects.
Cons
● Collage templates are limited.
● Advanced features are missing.

1010. Blend Photo
To create a collage of images with a blending effect, this is the right tool to use. Available for download on the Windows system this tool lets you create collages telling interesting stories.
Pros:
● Simple and easy collage-making tool.
● Add blending effect to your collages.
● Over 50 custom shapes for image cropping are available along with the option for free-hand cropping.
● Multiple filters can be added.
Cons:
● Limited Editing and customization options.

Part 2 The Best Tool to Get Stock Images for Creating Collages
Several times, the captured and stored images may not fit in the collage theme you wish to create and, in such situations, you can use the stock images available online at several sites. One of the best tools where you can check out the images in different categories is Wondershare Filmora. This versatile software from Wondershare Filmora Video Editor is an advanced video editing tool that also has a huge collection of stock media including images.
Additionally, the split-screen feature of the software can be used for creating a video collage. Available for Windows and Mac systems, Wondershare Filmora will look after all your advanced video editing and customized requirements.

Wondershare Filmora - Best Video Editor for Mac/Windows
5,481,435 people have downloaded it.
Build unique custom animations without breaking a sweat.
Focus on creating epic stories and leave the details to Filmora’s auto features.
Start a creative adventure with drag & drop effects and endless possibilities.
Filmora simplifies advanced features to save you time and effort.
Filmora cuts out repetition so you can move on to your next creative breakthrough.
● Key Takeaways from This Episode →
● Collage-making tools help in creating an interesting and eye-catchy collage in a hassle-free manner.
●Several Windows-based tools are available for quick download.
●Wondershare Filmora is a great software to find a collection of stock images in different categories.
Collages are a great way to assemble all your favorite pictures in one place. You can share these collages with your friends, relatives, and dear ones or can also use them for posting on social media sites and other online platforms. Though creating a collage may sound simple, a lot of considerations need to be taken for creating an interesting and eye-catchy collage, and for this, a help of a professional tool can be taken. In the following parts of the topic, you can learn about the best tools for photo collage Windows 10 and other OS.
In the following parts of the topic, you can learn about the best tools for photo collage Windows 10 and other OS.
In this article
01 [Top 10 Pic Collage for Windows Tools](#Part 1)
02 [The Best Tool to Get Stock Images for Creating Collages](#Part 2)
Part 1 Top 10 Pic Collage for Windows Tools
Checkout the best collage for Windows below.
01PhotoPad Photo Editing Software
This is a complete photo editing tool supporting an array of features including the creation of a photo collage. This software from NCH software can let you add the desired images manually and also support using the auto grid to add an unlimited number of pictures. The tool also lets you choose the collage orientation size and set the background as needed.
Pros:
● Create collage Windows manually or automatically.
● Allows adding a background color, image, or from the available background options.
● Spacing and corners between the images can be selected.
● The size of the tool is small.
Cons:
● Stickers and filters to individual images cannot be added.
● Cannot choose a custom collage size.
02PhotoScapeX
Available for download on Windows 10 and higher versions this is another widely used photo editing tool that can also let you create collages manually as well as automatically. Multiple frames are available that can be selected as desired and there are additional features like adding filters, and also edit them in multiple ways.
Pros:
● Allows creating collage manually and automatically.
● Multiple editing tools for customization like filters, crop, zoom, doodle, and more.
● Picture alignment can be done in 3 modes- vertical, horizontal, and tile.
● Option to change and customize image size, spacing, margin, and others.
Cons:
● Limited photos can be added.
● The size of the tool is large in comparison to other tools.
03Phototastic Collage
This is free to use Windows-based tool that can create impressive collages in no time. Multiple designs, frames, and other options are available to create a customized collage as needed.
Pros:
● Multiple customization options are available for creating the desired collage.
● User-friendly and simple interface.
● An array of templates is available.
Cons:
● The free version has limited features.
● Limitation to the number of images that can be added.
● Ads in the app.
04PicCollage
Unleash your creativity by creating an interesting collage using this excellent collage-making app. There are multiple templates and customization options supports.
Pros
● Create collage manually or automatically
● The earlier created collage can be edited.
● Allows creating a collage in 3 options- grid, template, freestyle.
Cons
● Watermark on the created collage.
● The image size cannot be customized.
05Collage Maker-Photo Grid and Montage
Using this free Windows tool, you can create an interesting photo collage or a free-styled montage as needed. A wide range of layouts and templates are available that can be further customized to get the desired collage.
Pros:
● Free Windows software.
● Come with multiple filters, layout, and editing tools.
● The user interface is easy.
● Preview option available.
Cons:
● Performance glitches due to bugs.
● Custom collage size cannot be set.
● Watermark on the collage.
06Fotor
If you are looking for a simple and basic collage-making tool, Fotor is the right choice. Collage in the grid, freestyle, and photo-stitch style can be created and basic customization features are supported.
Pros:
● Simple to use tool that is apt for beginners.
● Border can be changed from a solid color to a background.
Cons:
● Customization options are limited.
● Border and the image size cannot be changed.
07El Collagero
Just like its name, this is an interesting Windows-based tool for creating a collage of your choice. A wide range of options for customization is available that can let you edit the images, choose a template and then also edit the file.
Pros:
● A wide range of templates and designs for collages is available.
● Allows adding text, symbols, and other elements.
● Created collage can be shared on social media sites.
Cons:
● In comparison to other professional tools, the functions are limited.
08Atlantas Photo Collage Studio
This Windows-based tool will let you create collages of all types and for all occasions. You can choose from over 100 templates that best match your collage theme and image content.
Pros:
● More than 100 templates for collage designs are available.
● The size of the layout can be changed.
● Multiple editing and customization options are supported like zoom, opacity selection, and more.
Cons:
● Limitation of adding 45 images.
● For the advanced functions, need to subscribe to the paid version.
09PhotoJoiner
Using this Windows tool, pick up your favorite images and turn them into a beautiful collage with customized design and style.
Pros:
● A simple and basic tool for creating a collage.
● Created collage can be saved or shared to the social media site.
● Change the order of the images, margins, and other aspects.
Cons
● Collage templates are limited.
● Advanced features are missing.
1010. Blend Photo
To create a collage of images with a blending effect, this is the right tool to use. Available for download on the Windows system this tool lets you create collages telling interesting stories.
Pros:
● Simple and easy collage-making tool.
● Add blending effect to your collages.
● Over 50 custom shapes for image cropping are available along with the option for free-hand cropping.
● Multiple filters can be added.
Cons:
● Limited Editing and customization options.
Part 2 The Best Tool to Get Stock Images for Creating Collages
Several times, the captured and stored images may not fit in the collage theme you wish to create and, in such situations, you can use the stock images available online at several sites. One of the best tools where you can check out the images in different categories is Wondershare Filmora. This versatile software from Wondershare Filmora Video Editor is an advanced video editing tool that also has a huge collection of stock media including images.
Additionally, the split-screen feature of the software can be used for creating a video collage. Available for Windows and Mac systems, Wondershare Filmora will look after all your advanced video editing and customized requirements.
Wondershare Filmora - Best Video Editor for Mac/Windows
5,481,435 people have downloaded it.
Build unique custom animations without breaking a sweat.
Focus on creating epic stories and leave the details to Filmora’s auto features.
Start a creative adventure with drag & drop effects and endless possibilities.
Filmora simplifies advanced features to save you time and effort.
Filmora cuts out repetition so you can move on to your next creative breakthrough.
● Key Takeaways from This Episode →
● Collage-making tools help in creating an interesting and eye-catchy collage in a hassle-free manner.
●Several Windows-based tools are available for quick download.
●Wondershare Filmora is a great software to find a collection of stock images in different categories.
How to Create a Whiteboard Video Step by Step
How to Create a Whiteboard Video Step by Step
Shanoon Cox
Mar 27, 2024• Proven solutions
Drawings will always have a special place in storytelling. Whether you are demonstrating a new concept to a child, highlighting the features of a product to your bosses, or showcasing the intricacies of a marketing campaign, drawings make it easier for the audience to understand what is being said.
That is why it is so important to learn how to create whiteboard animation. When you learn how to create a whiteboard video with animate pictures app , you are in a unique position when it comes to selling your story, and convincing others of what you already know.
- Part1: What is Whiteboard Animation Video?
- Part2: How to Create Whiteboard Animation Videos?
- Part3: Useful Tips for Creating Whiteboard Animation
Part 1:What is Whiteboard Animation Video?
To understand the whiteboard animation video, we must go back to the beginning. Think about how professors illustrate different topics and equations using a whiteboard. They will write down the important words or formulas and then expand on that information through their lecture.
Whiteboard animation is taking those words, phrases and images to another level. Whiteboard animation is a series of events or videos that are created using 2D animation software . These videos can be showcased in any type of setting. You can upload them onto a social media site, show them as part of a presentation, or add them to a crowdfunding or product funding page.
When someone watches a whiteboard animation video, they see the series of images and graphics in sequential order, and there is usually a narration accompanying those images. These videos can be short, anywhere from 30 to 90 seconds. The idea is to deliver information in a clear, coherent and concise way.
To create whiteboard animation, the goal is to take complex concepts and information, and make it easy to understand. Now we can go into some detail about how to create a whiteboard video.
Part 2:How to Create Whiteboard Animation Videos?
Step 1: Write a Script
Much like a normal video or a short skit, there must be a script if a whiteboard animation video is to succeed. Having interesting images and information is great, but they are nothing without a coherent story.
It is not a blog post, storyboard or a set of bullet points. What you need is a proper script, which says everything in regards to the video. Why? Because then you will know precisely what images should be added in certain sections, what the narrator must say, and what transitions are necessary.

Step 2: Start with the Storyboard
Now you have a script. You have a clear idea of how you want your video to come across. It is time to start creating the storyboard. With a storyboard, you will be able to organize your thoughts much better. You can see how each frame comes onto the screen, and how one shot ties into the other.
When you create your storyboard, you will have a good idea about how your final product will look. If there are some transitions you are not happy with, this is the moment where you can make changes.

Step 3: Create Images
If you are a creative person, you will find this part very easy. It is all about creating fun and unique images that will help convey the information that you want to get across. Try to create memorable images that will excite your audience. The simpler, more distinctive and interesting you can make those images, the better your end result.

Step 4: Animate Those Images
Now you have your images, and it is time to find some coherence between those images and your script. You will have to time the animation for your images as you do not want things lingering on the screen for too long, or being seen for a brief second. It may be a good idea for you to speak out the narration as you are animating the images and timing their animation. It will help you with the timing.

Step 5: Record and Sync the Audio
The final step involves getting your audio. Every animated video must have narration as it helps to explain what is happening in the images that people are seeing. Record your audio, and ensure it is perfectly in sync with your content.

Part 3:Useful Tips for Creating Whiteboard Animation
Evoke Empathy
The goal of a whiteboard animation video is not just to explain information in a cold and impersonal way. You are hoping to make a connection with your audience. You want them to care about what you are showcasing. By evoking empathy, you will create the connection that you desire.
By adding emotional references, such as funny, lighthearted, cute or emotional moments, you will find your videos are getting a much better reception from the audience. People can relate to content better when it makes them feel things - especially if those feelings are positive.
Personalize the Images
Showing interesting images is a good start. But if you can personalize these images with graphics and color, your storyboard will look even better. Remember that your goal is to get people to stand up and take notice of the content that you are creating.
Conclusion
Now that we have gone over the entire process of creating a whiteboard animation video, we hope that you are ready to get started on your project. And if you are wondering how you will edit your video, we recommend Filmora . You can use it to make animation video by adding keyframes, so the animation will be smooth and natural. You just need to build a white plane to easily start making animation. Besides, color correction and audio mixer will raise up your explainer video to a new level. Download it to have a try (Free)!
Shanoon Cox
Shanoon Cox is a writer and a lover of all things video.
Follow @Shanoon Cox
Shanoon Cox
Mar 27, 2024• Proven solutions
Drawings will always have a special place in storytelling. Whether you are demonstrating a new concept to a child, highlighting the features of a product to your bosses, or showcasing the intricacies of a marketing campaign, drawings make it easier for the audience to understand what is being said.
That is why it is so important to learn how to create whiteboard animation. When you learn how to create a whiteboard video with animate pictures app , you are in a unique position when it comes to selling your story, and convincing others of what you already know.
- Part1: What is Whiteboard Animation Video?
- Part2: How to Create Whiteboard Animation Videos?
- Part3: Useful Tips for Creating Whiteboard Animation
Part 1:What is Whiteboard Animation Video?
To understand the whiteboard animation video, we must go back to the beginning. Think about how professors illustrate different topics and equations using a whiteboard. They will write down the important words or formulas and then expand on that information through their lecture.
Whiteboard animation is taking those words, phrases and images to another level. Whiteboard animation is a series of events or videos that are created using 2D animation software . These videos can be showcased in any type of setting. You can upload them onto a social media site, show them as part of a presentation, or add them to a crowdfunding or product funding page.
When someone watches a whiteboard animation video, they see the series of images and graphics in sequential order, and there is usually a narration accompanying those images. These videos can be short, anywhere from 30 to 90 seconds. The idea is to deliver information in a clear, coherent and concise way.
To create whiteboard animation, the goal is to take complex concepts and information, and make it easy to understand. Now we can go into some detail about how to create a whiteboard video.
Part 2:How to Create Whiteboard Animation Videos?
Step 1: Write a Script
Much like a normal video or a short skit, there must be a script if a whiteboard animation video is to succeed. Having interesting images and information is great, but they are nothing without a coherent story.
It is not a blog post, storyboard or a set of bullet points. What you need is a proper script, which says everything in regards to the video. Why? Because then you will know precisely what images should be added in certain sections, what the narrator must say, and what transitions are necessary.
Step 2: Start with the Storyboard
Now you have a script. You have a clear idea of how you want your video to come across. It is time to start creating the storyboard. With a storyboard, you will be able to organize your thoughts much better. You can see how each frame comes onto the screen, and how one shot ties into the other.
When you create your storyboard, you will have a good idea about how your final product will look. If there are some transitions you are not happy with, this is the moment where you can make changes.
Step 3: Create Images
If you are a creative person, you will find this part very easy. It is all about creating fun and unique images that will help convey the information that you want to get across. Try to create memorable images that will excite your audience. The simpler, more distinctive and interesting you can make those images, the better your end result.
Step 4: Animate Those Images
Now you have your images, and it is time to find some coherence between those images and your script. You will have to time the animation for your images as you do not want things lingering on the screen for too long, or being seen for a brief second. It may be a good idea for you to speak out the narration as you are animating the images and timing their animation. It will help you with the timing.
Step 5: Record and Sync the Audio
The final step involves getting your audio. Every animated video must have narration as it helps to explain what is happening in the images that people are seeing. Record your audio, and ensure it is perfectly in sync with your content.
Part 3:Useful Tips for Creating Whiteboard Animation
Evoke Empathy
The goal of a whiteboard animation video is not just to explain information in a cold and impersonal way. You are hoping to make a connection with your audience. You want them to care about what you are showcasing. By evoking empathy, you will create the connection that you desire.
By adding emotional references, such as funny, lighthearted, cute or emotional moments, you will find your videos are getting a much better reception from the audience. People can relate to content better when it makes them feel things - especially if those feelings are positive.
Personalize the Images
Showing interesting images is a good start. But if you can personalize these images with graphics and color, your storyboard will look even better. Remember that your goal is to get people to stand up and take notice of the content that you are creating.
Conclusion
Now that we have gone over the entire process of creating a whiteboard animation video, we hope that you are ready to get started on your project. And if you are wondering how you will edit your video, we recommend Filmora . You can use it to make animation video by adding keyframes, so the animation will be smooth and natural. You just need to build a white plane to easily start making animation. Besides, color correction and audio mixer will raise up your explainer video to a new level. Download it to have a try (Free)!
Shanoon Cox
Shanoon Cox is a writer and a lover of all things video.
Follow @Shanoon Cox
In-Depth Study of Cartoon Painting Starts From Learning to Draw It
In-depth Study of Cartoon Painting Starts from Learning to Draw It
An easy yet powerful editor
Numerous effects to choose from
Detailed tutorials provided by the official channel
Cartoon painting is slowly becoming popular due to its many benefits, especially easy cartoon canvas painting. For instance, it is pretty eye-grabbing, especially if your audience is children.

Thanks to the animation aspect, it has become relatively cheap to do advertisements with cartoons instead of real people.
In this article
01 [What Are Good Cartoons to Draw?](#Part 1)
02 [How Do You Draw a Cartoon Character for Beginners?](#Part 2)
03 [Is There Anything else You Can Do to Draw Cartoons More Quickly?](#Part 3)
Part 1 What Are Good Cartoons to Draw?
As far as good cartoons are concerned, expect about 5 popular types. These cartoons to draw include:
01 Illustrative Cartoons
They are the most suitable cartoons to draw when portraying particular ideas directly and simply.
The cartoons are primarily used in advertisements, teaching aids, and explaining stories. They also have text that explains them further.
It explains why they are common in school books, making them perfect for explaining content or subject.

02 Animated Cartoons
It is important to note that these cartoons are drawn using computers despite looking as if they are hand-drawn. One thing that makes them stand out is that they seem to be in action and movement.
As much as that’s how they seem from the viewer’s perspective, that’s far from the truth. They are just drawn in series, and since the first one will differ from the second one, there is that illusion of movement created.

03 Comic Strips or Panels
In most cases, these are regular features characterized by established or known characters and usually displayed in newspapers.
Just like the animated cartoons, they are showcased in series to tell or illustrate a story. The series of panels have words said by the various characters.
The words are usually in balloons, and a single comic strip may cover a single or double page of a newspaper.

04 Gag Cartoons
As the name gag suggests, these cartoons revolve around jokes. These single-paneled cartoons often make fun of human beings.
Through overstatements, humor resonates from what is drawn. They can either serve as entertainment or point out, if not make fun of, people, especially their mistakes and faults. Besides the cartoon, expect a caption that’s often a single sentence.

05 Editorial or Political Cartoons
These cartoons are also made for the newspapers. Expect them to be a single drawing on an editorial page. It sheds more light on a particular newspaper’s editorial comment.
As much as some have captions, that’s not always the case. Just like the gag cartoons, they ridicule people, but the editorial ones focus on celebrities.

Part 2 How Do You Draw a Cartoon Character for Beginners?
Even cartoon painting experts were once beginners. So, feel encouraged because you stand a chance also to become an expert in the long run. All you need to do is take the first step. Fortunately, we are here to hold your hand as you do so. So. Without further ado, let’s get started.
01 Cartoon Painting of a Young Character
These are the steps you need to follow when doing so:
Step 1Start with the face
The face is significant, especially when it comes to cartoon painting. It has complex as well as simple parts. For example, the face itself is pretty basic since you will need to begin with a circle.
After that, draw a horizontal and vertical line and ensure that they intersect in the middle.

Step 2Draw the eyes by drawing
Draw the eyes by drawing an oval and ensuring that the top side is slightly tilting to the side.
Do the same thing on the other side since the norm is a pair of eyes. The gap between the two should also be sensible.

Step 3Draw eyebrows
On the upper side of the eye, ensure that the lines are slightly thick. The eyebrows also need to be placed above the eyes, slightly above the thick line representing the eyelashes.

Step 4Draw jaw
After that, start shaping the jaw. Keep in mind that it plays a huge role in determining whether the character will look thin or fat. Additionally, how you draw the jaw determines whether the character will be old or young and how old or young the person will look.

Step 5Draw nose
Design the nose and ensure that you don’t put many details. The good thing about the nose is that a tip is enough to serve the purpose. Another common approach when drawing the nose is doing so as if you are viewing it from the side.

Step 6Draw mouth
Next, draw the mouth and consider the age of your character as you do so. If it is a child, despite the gender, stick to simplicity. You should also avoid drawing the lips. Preferably, go for the good, expressive trace since it never disappoints.

Step 7Draw ears
Proceed to the ears and in relation to whether the character is facing the camera or not. If your character is looking at the camera, you should see the front side view. Therefore, it won’t make sense to display the internal cavities in this case.

Step 8Draw haircut
Proceed to the ears and in relation to whether the character is facing the camera or not. If your character is looking at the camera, you should see the front side view. Therefore, it won’t make sense to display the internal cavities in this case.
As scary as it may look, you need not be an expert to make the haircut look perfect. Additionally, there is no constant way of drawing the haircut, and you are at liberty to practice as much creativity as possible.
Nevertheless, please don’t take it lightly since it can be quite descriptive. For instance, the hair is used to tell the personality of a character. Practice makes perfect, and you better keep doing it until you get it right. Ensure that what you draw shows the age and character of the cartoons to draw as perfectly as possible.
So far, our focus has been on a young character. However, that’s not always the case explaining why we will look at a cartoon painting of an old character.

02 Cartoon Paintings of an Old Character
If you want your character to look old, this is the way to go:
Step 1Old character draw a face
The face is no different from that of a young character. Start with the eyes and add their pupils, eyebrows and don’t forget to add wrinkles.
Since the character is old compared to the previous one, ensure that the eyebrows are thick. They should occupy more space of the forehead.

Step 2Old character make the chin
Make the chin longer too.

Step 3Old character draw the nose
Ensure that the nose design looks wider and larger since the character is old. To achieve that, make the nose look close to the eyes

Step 4Old character exaggerates mustache
Skip the mouth bit and instead go for a big, exaggerated mustache. That’s one common characteristic of an old character, especially male.

Step 5Draw hair
When it comes to hair, bald and side hair will play the trick perfectly. The nose is no different from that of a young character.

03 Cartoon Painting of a Female Character
So far, our focus has been on a male character. So, what do you do if you want to create a female one instead? These are some of the steps to follow as you do so.
The procedure is not that different. However, consider that women’s facial structures are more delicate than those of their male counterparts. Some of the things that stand out include long hair, a small nose, a thin chin, thin eyebrows, and large, expressive eyelashes. Large pupils will also do, especially if you are good at drawing.

Key Takeaways from This Episode
● There are five major types of cartoons to draw, animation, editorial, gag, illustrative and comic strips.
● Cartoon painting is not that hard, especially if you have a guide on how to go about it.
● If that turns out to be difficult, you can always go for the Filmora pro.
Cartoon painting is slowly becoming popular due to its many benefits, especially easy cartoon canvas painting. For instance, it is pretty eye-grabbing, especially if your audience is children.
Thanks to the animation aspect, it has become relatively cheap to do advertisements with cartoons instead of real people.
In this article
01 [What Are Good Cartoons to Draw?](#Part 1)
02 [How Do You Draw a Cartoon Character for Beginners?](#Part 2)
03 [Is There Anything else You Can Do to Draw Cartoons More Quickly?](#Part 3)
Part 1 What Are Good Cartoons to Draw?
As far as good cartoons are concerned, expect about 5 popular types. These cartoons to draw include:
01 Illustrative Cartoons
They are the most suitable cartoons to draw when portraying particular ideas directly and simply.
The cartoons are primarily used in advertisements, teaching aids, and explaining stories. They also have text that explains them further.
It explains why they are common in school books, making them perfect for explaining content or subject.
02 Animated Cartoons
It is important to note that these cartoons are drawn using computers despite looking as if they are hand-drawn. One thing that makes them stand out is that they seem to be in action and movement.
As much as that’s how they seem from the viewer’s perspective, that’s far from the truth. They are just drawn in series, and since the first one will differ from the second one, there is that illusion of movement created.
03 Comic Strips or Panels
In most cases, these are regular features characterized by established or known characters and usually displayed in newspapers.
Just like the animated cartoons, they are showcased in series to tell or illustrate a story. The series of panels have words said by the various characters.
The words are usually in balloons, and a single comic strip may cover a single or double page of a newspaper.
04 Gag Cartoons
As the name gag suggests, these cartoons revolve around jokes. These single-paneled cartoons often make fun of human beings.
Through overstatements, humor resonates from what is drawn. They can either serve as entertainment or point out, if not make fun of, people, especially their mistakes and faults. Besides the cartoon, expect a caption that’s often a single sentence.
05 Editorial or Political Cartoons
These cartoons are also made for the newspapers. Expect them to be a single drawing on an editorial page. It sheds more light on a particular newspaper’s editorial comment.
As much as some have captions, that’s not always the case. Just like the gag cartoons, they ridicule people, but the editorial ones focus on celebrities.
Part 2 How Do You Draw a Cartoon Character for Beginners?
Even cartoon painting experts were once beginners. So, feel encouraged because you stand a chance also to become an expert in the long run. All you need to do is take the first step. Fortunately, we are here to hold your hand as you do so. So. Without further ado, let’s get started.
01 Cartoon Painting of a Young Character
These are the steps you need to follow when doing so:
Step 1Start with the face
The face is significant, especially when it comes to cartoon painting. It has complex as well as simple parts. For example, the face itself is pretty basic since you will need to begin with a circle.
After that, draw a horizontal and vertical line and ensure that they intersect in the middle.
Step 2Draw the eyes by drawing
Draw the eyes by drawing an oval and ensuring that the top side is slightly tilting to the side.
Do the same thing on the other side since the norm is a pair of eyes. The gap between the two should also be sensible.
Step 3Draw eyebrows
On the upper side of the eye, ensure that the lines are slightly thick. The eyebrows also need to be placed above the eyes, slightly above the thick line representing the eyelashes.
Step 4Draw jaw
After that, start shaping the jaw. Keep in mind that it plays a huge role in determining whether the character will look thin or fat. Additionally, how you draw the jaw determines whether the character will be old or young and how old or young the person will look.
Step 5Draw nose
Design the nose and ensure that you don’t put many details. The good thing about the nose is that a tip is enough to serve the purpose. Another common approach when drawing the nose is doing so as if you are viewing it from the side.
Step 6Draw mouth
Next, draw the mouth and consider the age of your character as you do so. If it is a child, despite the gender, stick to simplicity. You should also avoid drawing the lips. Preferably, go for the good, expressive trace since it never disappoints.
Step 7Draw ears
Proceed to the ears and in relation to whether the character is facing the camera or not. If your character is looking at the camera, you should see the front side view. Therefore, it won’t make sense to display the internal cavities in this case.
Step 8Draw haircut
Proceed to the ears and in relation to whether the character is facing the camera or not. If your character is looking at the camera, you should see the front side view. Therefore, it won’t make sense to display the internal cavities in this case.
As scary as it may look, you need not be an expert to make the haircut look perfect. Additionally, there is no constant way of drawing the haircut, and you are at liberty to practice as much creativity as possible.
Nevertheless, please don’t take it lightly since it can be quite descriptive. For instance, the hair is used to tell the personality of a character. Practice makes perfect, and you better keep doing it until you get it right. Ensure that what you draw shows the age and character of the cartoons to draw as perfectly as possible.
So far, our focus has been on a young character. However, that’s not always the case explaining why we will look at a cartoon painting of an old character.
02 Cartoon Paintings of an Old Character
If you want your character to look old, this is the way to go:
Step 1Old character draw a face
The face is no different from that of a young character. Start with the eyes and add their pupils, eyebrows and don’t forget to add wrinkles.
Since the character is old compared to the previous one, ensure that the eyebrows are thick. They should occupy more space of the forehead.
Step 2Old character make the chin
Make the chin longer too.
Step 3Old character draw the nose
Ensure that the nose design looks wider and larger since the character is old. To achieve that, make the nose look close to the eyes
Step 4Old character exaggerates mustache
Skip the mouth bit and instead go for a big, exaggerated mustache. That’s one common characteristic of an old character, especially male.
Step 5Draw hair
When it comes to hair, bald and side hair will play the trick perfectly. The nose is no different from that of a young character.
03 Cartoon Painting of a Female Character
So far, our focus has been on a male character. So, what do you do if you want to create a female one instead? These are some of the steps to follow as you do so.
The procedure is not that different. However, consider that women’s facial structures are more delicate than those of their male counterparts. Some of the things that stand out include long hair, a small nose, a thin chin, thin eyebrows, and large, expressive eyelashes. Large pupils will also do, especially if you are good at drawing.
Key Takeaways from This Episode
● There are five major types of cartoons to draw, animation, editorial, gag, illustrative and comic strips.
● Cartoon painting is not that hard, especially if you have a guide on how to go about it.
● If that turns out to be difficult, you can always go for the Filmora pro.
Also read:
- Best 8 Tools Tell You How to Make Slideshows for Instagram
- New How to Liven Up Your Animate Website on Scroll for 2024
- New In 2024, Easy Cartoon Characters Drawing Tutorials for You Who Are Learning to Draw
- New Techniques for Creating Animated Logo That Few People Know About for 2024
- Before You Learn 3D Animation Things You Should Know for 2024
- 2024 Approved How to Find & Make Animated Christmas GIFs?
- Updated 2024 Approved Popular Female & Male Disney Cartoon Characters To Empower You
- New 2024 Approved How I Animate Discord Profile Pictures
- Updated How to Draw Skeleton Cartoon – A Step by Step Guide
- A Roster of 15 Best Disney Channel Cartoons for 2024
- Updated In 2024, Learn How to Draw Cartoons Step by Step with This Guide
- New How to Create an Animated Sticky Navbar
- Updated 12 Dubbed Anime Websites to Watch for Free
- Updated In 2024, A Roster of 15 Top Disney Channel Cartoons
- New In 2024, You Can Turn a TikTok Into a GIF Now
- Updated Before You Learn Facebook Slideshow 5 Things You Should Know How-TOS for 2024
- Updated 2024 Approved Top 12 Evil Cartoon Characters of All Time
- Top 12 Illusion Gifs Top Picks
- 10 Awesome Moving Animation PowerPoint Techniques
- 2024 Approved The Best Free 12 GIF Meme Maker at a Glance
- New Easy Cartoon Characters Drawing Tutorials for You Beginners
- Updated In 2024,
- New 2024 Approved What This Post Can Teach You About Clay Animation
- Updated 10 Best Romance Anime Movies You Need to Watch
- Updated How to Make a Video a Live Photo 2023
- Updated In 2024, Whats the Best 10 Photo Animator Templates That Bring Your Images to Life?
- Updated How to Make a Video a Live Photo for 2024
- 15 Forgotten Cartoon Characters of All Time You Used to Love
- Updated 8 Free GIF Animators to Make Your Own GIF for 2024
- 2024 Approved Useful Tips for Canva Animated Elements
- 7 Solutions to Fix Error Code 963 on Google Play Of Vivo V27 Pro | Dr.fone
- How to Fix the Soft Bricked Xiaomi Redmi K70 Pro? | Dr.fone
- In 2024, How Many Attempts To Unlock iPhone 12 | Dr.fone
- In 2024, How to Migrate Android Data From Xiaomi Redmi K70E to New Android Phone? | Dr.fone
- In 2024, How to Unlock Poco C51 Bootloader Easily
- In 2024, How To Factory Unlock Your Telstra iPhone 14 Plus
- In 2024, Easy Guide to ZTE Axon 40 Lite FRP Bypass With Best Methods
- How to Change Netflix Location to Get More Country Version On Vivo Y78 5G | Dr.fone
- In 2024, How To Track IMEI Number Of Samsung Galaxy S23 FE Through Google Earth?
- What Is AI Advertising? | Wondershare Virbo Glossary
- How to Recover deleted pictures on iPhone 15 Pro Max? 5 Best Solutions | Stellar
- In 2024, How to Change/Fake Your Samsung Galaxy XCover 6 Pro Tactical Edition Location on Viber | Dr.fone
- In 2024, How to Track ZTE Axon 40 Lite Location without Installing Software? | Dr.fone
- Top 10 Password Cracking Tools For Xiaomi Redmi 13C 5G
- How to Retrieve deleted photos on Infinix Hot 30 5G
- How to add your digital signature to a .xltx document
- Updated 2024 Approved Searching for Free Sports Streaming Sites? Look No Further
- Title: New The Only Guide Youll Ever Need to Learn That Make 2D Rigging Clear to You for 2024
- Author: Elon
- Created at : 2024-05-19 03:05:51
- Updated at : 2024-05-20 03:05:51
- Link: https://animation-videos.techidaily.com/new-the-only-guide-youll-ever-need-to-learn-that-make-2d-rigging-clear-to-you-for-2024/
- License: This work is licensed under CC BY-NC-SA 4.0.
