
:max_bytes(150000):strip_icc():format(webp)/how-to-use-a-mobile-boarding-pass-eb61458058f44011ad7ed012566127e4.jpg)
New Top 10 Apps to Enhance Your Instagram Story Slideshow for 2024
Top 10 Apps to Enhance Your Instagram Story Slideshow
Best 10 Apps to Enhance Your Instagram Story Slideshow
An easy yet powerful editor
Numerous effects to choose from
Detailed tutorials provided by the official channel
Instagram reels and stories have turned into convenient ways of exploring your video creation skills with fun. Read further to know about the top 10 apps to create amazing Insta story slideshows!
In this article
01 [What’s Instagram Story Slideshow](#Part 1)
02 [How to Use Instagram Slideshow?](#Part 2)
03 [Top 10 Apps for Making Instagram Story Slideshow (iOS & Android)](#Part 3)
04 [Tips for Enhancing Your Insta Story Slideshow](#Part 4)
Part 1 What’s Instagram Story Slideshow
With the growing influence of social media on the global life and work culture in today’s times, each and every event on such platforms becomes the new trend of the current IT impacted society. Speaking in the light of the newest developments, Instagram story slideshows have become the latest talk of the diverse range of social media communities across the web.
Since its entry into the communication galore, the Instagram application has emerged as an absolute favourite of social media freaks, thanks to its already captivating features. Moving ahead with its customary user appealing efforts, the latter has recently introduced the slideshow feature to upgrade and improvise its content stories and reels.
Working with the same, you can now integrate your otherwise simple and elementary Instagram stories into awesome slideshows. This visibly means that your conventional stories and reels on the app are now going to get that missing spark with a plethora of customizable motion graphic features. An Instagram story slideshow can work to earn you a huge number of followers, thus uplifting your social creativity quotient and entertainment appeal.
These creative 15 second snippets are appreciably the most amazing trends to increase your audience backup as a market organization, business enterprise, an influencer or as a rising star, all because of an excellent content presentation strategy and catchy outlook. Try hands at using this high end graphic presentation utility to attract the most awaited jaw dropping appreciation of your social media posts.
Part 2 How to Use Instagram Slideshow
Now that you are aware about the excitement and social buzz that your Instagram story slideshows can create with an immediate effect, the aforesaid reason is sufficient enough to motivate you towards diving deeper into the interesting ways of working with the feature to your maximum advantage. Adhering to the concern, let us proceed with learning about the most appealing trends to use an Instagram slideshow in the following section:
● Stepwise Tutorials and Visual Guides
The utility of Instagram slideshows to merge multiple images and videos together has blocked the interruption of additional feeds amid the content presentation, thus giving you the liberty to post a set of related videos and stills in one go, which can be of great help when you encounter a need to share tutorial videos, recipe follow ups and alike content that essentially requires a sequential presentation.
The Instagram stories slideshow can be useful to DIY creators who wish to demonstrate or guide their followers to create stunning examples of self-designed masterpieces. Posting step wise guides with clear cut instructions to work upon or use something, like that of a new product, can also be catered with an Instagram slideshow story.
● Product Advertising and Sale
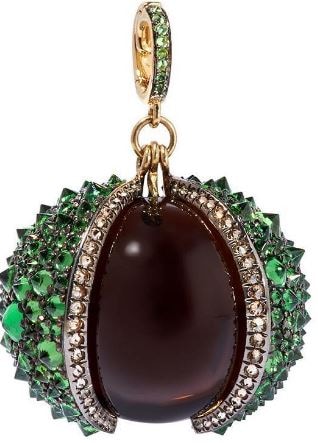
If you are looking for impressive and cost effective solutions to launch your products among potential customers, consider taking the help of Instagram slideshows. The feature is known to deliver excellent results in the brand promotion of some particular products, such as jewelry and apparel design.
Jewelers, furniture retailers and textile designers can work with the slideshow to upload a series of images and videos for a clear and vivid demonstration of the product. Considering the fact that such commodities may greatly differ in their visual and actual appearance, the products can be shown through a variety of angles to facilitate viewers with the most comprehensive and an almost exact presentation of the different aspects that a product claims to have.
Part 3 Top 10 Apps for Making Instagram Story Slideshow (iOS & Android)
By now, you must have had a comprehensive understanding of the significance of Instagram story slideshows in uplifting different aspects of your content delivery, along with effectively addressing your diverse and large scale information sharing needs. Moving ahead with our discussion, let us browse through some of the best software solutions to create the most appealing Instagram story slideshows in the following section:
01SlideLab
Starting with the list the first application to look forward on creating over the top Instagram story slideshows with utmost ease. The software package is loaded with an extensive range of editing effects and filters, audio-visual transitions and supplementary design elements, that promise you of a high resolution, professional quality slideshow output.
Working with the software, you get the flexibility to conveniently customize the sequence in which the images would appear in the slideshow, with allowing a maximum screen display time of 3 seconds to each image. The created slideshows can be easily shared on various media handles and platforms, including Instagram, Facebook and YouTube.
While you can undertake a free trial of the tool, a paid subscription of the same costing $ 4.99 is required for accessing the complete range of features associated with the program. The software is however, exclusively compatible with iOS supported devices.
02VivaVideo
This one is an excellent video editor and graphic designer tool, which you can use to create and share amazing slideshows to complement your Instagram stories and feeds. Working with the aforesaid software program, you don’t need to worry about the concerns of device compatibility, as the program works well with your favorite MacOs and Windows supported systems and devices.
Talking of the specific features that the software promises to offer, you can use its built in camera to capture high resolution videos and supplement them with over 60 high end customization utilities, like sound effects and transitions, along with dubbing the video. The basic version of the tool is available for free usage and allows you to choose between the Pro and Quick modes, respectively for a high flexibility and an escalated automated response.
The free version is however, known to leave watermarks on the created videos, is stuffed with frequently appearing ads and permits a 5-minute presentation time. You can escape these hustles anytime by subscribing to the paid version of VivaVideo for $ 2.99.

03InShot
The InShot image and video editor program is another potential candidate to be employed as an Instagram story slideshow creator. The software’s effect library is packed with a heap of conveniently usable design elements and features to create the most beautiful Instagram slideshows. The app can be put to use for efficiently designing Instagram stories to address personal and professional concerns.
Some over the top features of the tool include, the flexibility to crop, trim, cut and merge video files, and uplift them with a range of effects, filters, transitions and backgrounds. The exclusive audio flexibility of the software allows you to add upbeat sound and music, while enabling a choice of fading music in and out.
The software additionally permits to adjust the speed control of your videos, making them run in a slow or fast motion as per the content requirement. There are also a variety of graphic elements, like, texts, emojis, stickers, etc., which you can add to your images and videos to make them more pronounced.

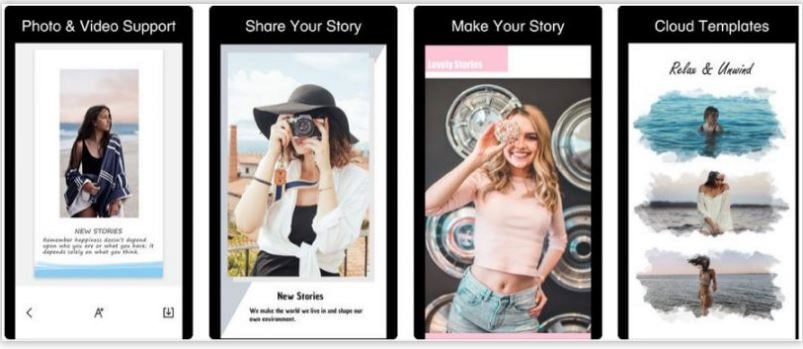
04StoryArt
Enjoying the highest user ratings on a number of leading software review platforms, the StoryArt software package lands among the most popular and preferred applications to work with creating slideshows for Instagram stories. The most appealing features of the software program include, an extensive range of more than 200 premade slideshow templates which can be directly edited to create amazing Instagram feeds and stories.
Other attractive features of the slideshow creator tool include, a plethora of design effects with varying diversities of fonts, colors, filters and around 20 elusive background themes, that are updated weekly with new additions. The program comes with a clean and responsive interface, is free to use and conforms with Windows and MacOs devices.
05Unfold
Unfold is quite a reliable software tool for creating elegant Instagram story slideshows from a storehouse of preset design templates, while adding a series of inline video and image editing effects to the same. The tool’s slideshow creator package comes with a mix of free and premium features, and does not require the account creation formality to begin working.
Major attractions of the program consist of 25 free and more than 60 premium slideshow design templates, 5 different font styles and upgraded text customizations, high resolution slideshow output and a direct share facility. You can prefer to download the software application from the various iOS and Android app stores, and work with the same on your preferred laptops, desktops and smartphones, without worrying about device compatibility.

06Canva
Canva is conveniently counted among the best Instagram slideshow maker tools and has the possibly the vastest inventory of over 60, 000 beautiful premade slideshow templates to create the mot captivating Instagram stories. Working with the tool, you are granted the liberty to select from a hoard of around 1 million stock images to set the most perfect background for the slideshow being created.
Additional features of the software comprise of high end image customization effects, fonts, transitions, texts and filters, with a never ending variety of frames, textures, icons, badges and stickers. If this is not enough, you get to access a diverse library of high end design elements, like, photo vignette, design grids, image enhancer and photo blur, to compliment your Instagram slideshow stories with the most cherished visual effects.
Talking of the platform cohesiveness, you can work with the tool through its desktop download as well as a free installation from any of the Android or Apple app stores.

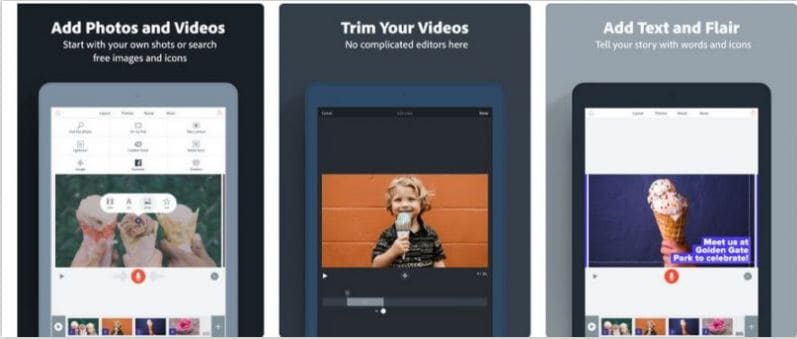
07Adobe Spark
This one is a family of graphic design software and tools that conveniently boasts of its extensive credibility towards facilitating the creation of high resolution and engaging image and video slideshows to uplift the conventional feeds and stories of Instagram. Post the creation process, you can add a diversity of audio-visual effects, like, animations, sounds, fonts, text layouts, cutouts and design elements to further enhance your graphic artwork.
The application greets you with the most pleasing and easy to use workspace, which would never require you to be a graphic design expert to start working on the slideshows. If you are into creating video centered Instagram story slideshows, you can choose to work with animated videos and prefer to select the media from your device gallery as well as the software’s huge in-house video collection. The tool’s template library is a further amusement, with a countless number of story and message centered themes.
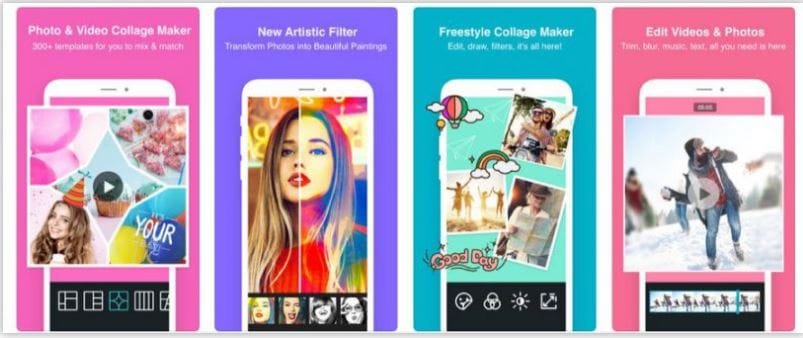
08PhotoGrid
If you are explicitly keen on creating video and photo collages for a jaw dropping Instagram story, consider working with the aforesaid application without a second thought. What’s more exciting is that the software comes with a huge set of over 300 pre made design templates to exclusively craft beautiful slideshows for Instagram stories on any iOS and Android device.
Talking of the app’s set of editing features, apart from being packed with multiple text fonts, over 60 image filters and 90 slideshow backgrounds, the most striking characteristic of the tool is, it permits you to clip an object from an image and remove the latter’s background. Other utilities of the software comprise of a real-time selfie camera, that clicks and automatically beautifies the captured image, beauty enhancing features that can apply and remove makeup from profile shots and selfies.
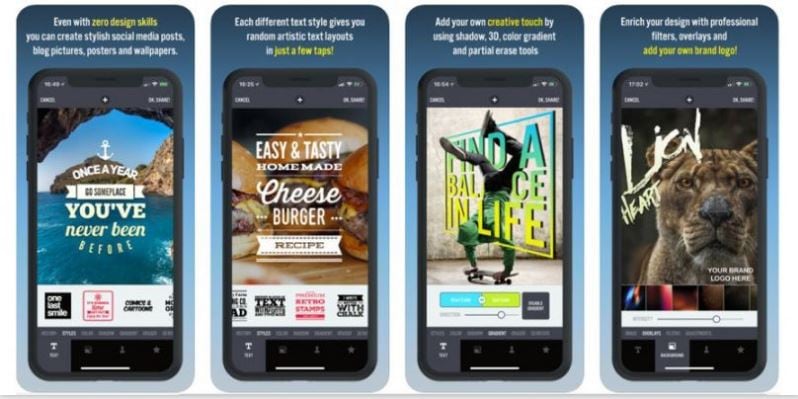
09Typorama
The next entry in the list is the Typorama software tool, which you can use to create text based slideshows for your Instagram stories. The software’s fonts library is full of elusive typographic designs to choose the best one that suits your content style and arrangement within the slideshow. When opting to work with this feature of the software, you will only need to select a suitable background and begin typing. That’s it!
Extending the text styling credibility of the tool a bit more, you can select from over 50 different typographic layouts and more than 100 typeface and font choices, a huge collection of story based quotes and a diversity of shadows, distortion effects and gradients to improvise your text. The program additionally consists of over 1000 stock templates, image filters, overlays and correction tools to enhance your slideshow background.
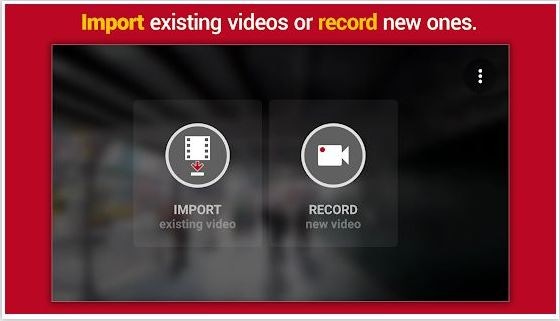
10Microsoft Hyperlapse
This one is an advanced slideshow creator program that allows you to design Instagram stories slideshow in time lapse. You can work with the tool to modify the slideshow speed up to 32 times ahead of the normal and create time lapse stories for a maximum of 20 minutes directly on your smartphone.
The app specializes in creating high end video slideshows for Instagram stories and feeds, while showing a great compatibility with high resolution videos. The working interface is super easy to understand and use, without requiring any over the top technical expertise. Feel free to use the app on any iOS or Android supported smartphone.
Part 4 Tips for Enhancing Your Insta Story Slideshow
By far, you have come a long way reading through the credibility, usage and tools to create Instagram story slideshow free of cost as well as though paid subscriptions. In the following section of this article, let us keep our focus on learning about some of the most amazing tips and tricks to upgrade your Insta story slideshow to the next level:
● A Compact Photo Album
Do you land among those social media freaks how want to share just every moment of your day with your peers, or are you confused on selecting the best photos and videos of a cherished event, vacation or bringing home a new utility and end up posting a heap of media on your social media handles?
If your answer is a guilty ‘Yes’, you can try on giving up the habit now by creating an Instagram story photo slideshow to share mini album of your most loved images from the event or vacation. You can use the feature to create a collection of amazing videos as well and share it too with your friends on social media without the guilt of becoming a feed-hog.
Want a practical experience of using Instagram slideshows? See through the following tutorial to understand the exact creation process:
Step 1: Choose the First Image
Begin with selecting the first image for your slideshow, just as you would ideally do for a normal, single image Instagram feed and long press the same.
Step 2: Confirming the Selection
Navigate to the bottom right corner of your selected image to locate a button similar to a photo slideshow. Tap the button to see a ‘1’ inscribed in a blue circle appear on your chosen image.
Step 3: Make Further Selections
You can now proceed to select other images or videos for the slideshow, in a similar fashion as the first one. You are allowed to include a maximum of 10 media files within the slideshow.
Step 4: Customize Your Creation
Tap the ‘Next’ button when you have finished making the required selections. The editor interface will now open to let you customize the selected images with a series of effects and filters, both one at a time, as well as the entire set altogether. You can also work with modifying the order of appearance of the photos and videos if required.
Step 5: The Final Touches
Once you are done with the editing process, continue to follow the remaining steps, as you would do to create a normal Instagram post. You can include captions, locations and tag your peers on the platform.
Step 6: Time to Share!
Your Instagram slideshow is ready to be posted. Upload it either to your feed or story to receive a hoard of likes and comments!
● Animated Text Overlays
If your Instagram story slideshows are missing out on the visual spunk, try complimenting their images and videos with animated transitions and text overlays. Short and quick animations are the best ways to enhance a slideshow story with an eye catching effect. Applying a variety of text overlays would help to keep the audience curious about the next visual delight.
● Prefer a Vertical Aspect Ratio
While the landscape mode tends to ward off certain portions of the visual media from a slideshow being played across multiple sized screens, using the portrait mode with a vertical aspect ratio suits best to almost every screen size. Taking care of this fact will ensure that your audience does not get distracted with the semi visible contents of the slideshow story.
● Choose Your Editing Effects Wisely
Regardless of the slideshow creation tool you prefer, there are a diversity of effects, templates, design elements and filters to uplift your craft with the perfect look. However, you should be cautious enough while making your choice so that the balance of colors, fonts and themes is affordably maintained, lest you would end up with a messy and loud Instagram story slideshow, that would not gather much appeal.
● Creating Instagram Story Slideshows with Wondershare Filmora
Wondershare Filmora Video Editor is the undisputed leader in creating awesome slideshows for Instagram stories, packed with a diverse number of graphic design tools. Beginning to discuss about the reserve of features that the software promises to offer, the app’s template library is a trunk of the most expressive and elegant slideshow backgrounds, themes and images.
For Win 7 or later (64-bit)
For macOS 10.12 or later
Moving further, the app has recently added the 1:1 aspect ratio to its image and video resolution alternatives to exclusively adhere to the slideshow design concern, allowing the perfect display of your craft across a variety of screen dimensions. Filmora, an advanced version of the basic Filmora editor program is known to most effectively cater to the concern of creating Instagram story slideshows.
Working with this slideshow creator program, you can explore your editing skills to your heart’s content and supplement the images and videos of your slideshow with the most expanded range of audio-visual effects, seamless animated transitions, text overlays, thematic backgrounds and creative image filters. The app comes to you absolutely free of cost and welcomes you with a pleasing and clean interface, and is compatible with all of your Mac, iOS and Windows supported devices and Android smartphones.
● Ending Thoughts →
● Instagram story slideshows are the newest trends of professional and commercial information sharing and personalized fun and entertainment.
● When looking through alternatives to create Instagram slideshow online or through an application software, there is a heap of creator tools.
● Pick the Wondershare Filmora slideshow creator program to design the most sparked up slideshows for your Instagram stories.
Instagram reels and stories have turned into convenient ways of exploring your video creation skills with fun. Read further to know about the top 10 apps to create amazing Insta story slideshows!
In this article
01 [What’s Instagram Story Slideshow](#Part 1)
02 [How to Use Instagram Slideshow?](#Part 2)
03 [Top 10 Apps for Making Instagram Story Slideshow (iOS & Android)](#Part 3)
04 [Tips for Enhancing Your Insta Story Slideshow](#Part 4)
Part 1 What’s Instagram Story Slideshow
With the growing influence of social media on the global life and work culture in today’s times, each and every event on such platforms becomes the new trend of the current IT impacted society. Speaking in the light of the newest developments, Instagram story slideshows have become the latest talk of the diverse range of social media communities across the web.
Since its entry into the communication galore, the Instagram application has emerged as an absolute favourite of social media freaks, thanks to its already captivating features. Moving ahead with its customary user appealing efforts, the latter has recently introduced the slideshow feature to upgrade and improvise its content stories and reels.
Working with the same, you can now integrate your otherwise simple and elementary Instagram stories into awesome slideshows. This visibly means that your conventional stories and reels on the app are now going to get that missing spark with a plethora of customizable motion graphic features. An Instagram story slideshow can work to earn you a huge number of followers, thus uplifting your social creativity quotient and entertainment appeal.
These creative 15 second snippets are appreciably the most amazing trends to increase your audience backup as a market organization, business enterprise, an influencer or as a rising star, all because of an excellent content presentation strategy and catchy outlook. Try hands at using this high end graphic presentation utility to attract the most awaited jaw dropping appreciation of your social media posts.
Part 2 How to Use Instagram Slideshow
Now that you are aware about the excitement and social buzz that your Instagram story slideshows can create with an immediate effect, the aforesaid reason is sufficient enough to motivate you towards diving deeper into the interesting ways of working with the feature to your maximum advantage. Adhering to the concern, let us proceed with learning about the most appealing trends to use an Instagram slideshow in the following section:
● Stepwise Tutorials and Visual Guides
The utility of Instagram slideshows to merge multiple images and videos together has blocked the interruption of additional feeds amid the content presentation, thus giving you the liberty to post a set of related videos and stills in one go, which can be of great help when you encounter a need to share tutorial videos, recipe follow ups and alike content that essentially requires a sequential presentation.
The Instagram stories slideshow can be useful to DIY creators who wish to demonstrate or guide their followers to create stunning examples of self-designed masterpieces. Posting step wise guides with clear cut instructions to work upon or use something, like that of a new product, can also be catered with an Instagram slideshow story.
● Product Advertising and Sale
If you are looking for impressive and cost effective solutions to launch your products among potential customers, consider taking the help of Instagram slideshows. The feature is known to deliver excellent results in the brand promotion of some particular products, such as jewelry and apparel design.
Jewelers, furniture retailers and textile designers can work with the slideshow to upload a series of images and videos for a clear and vivid demonstration of the product. Considering the fact that such commodities may greatly differ in their visual and actual appearance, the products can be shown through a variety of angles to facilitate viewers with the most comprehensive and an almost exact presentation of the different aspects that a product claims to have.
Part 3 Top 10 Apps for Making Instagram Story Slideshow (iOS & Android)
By now, you must have had a comprehensive understanding of the significance of Instagram story slideshows in uplifting different aspects of your content delivery, along with effectively addressing your diverse and large scale information sharing needs. Moving ahead with our discussion, let us browse through some of the best software solutions to create the most appealing Instagram story slideshows in the following section:
01SlideLab
Starting with the list the first application to look forward on creating over the top Instagram story slideshows with utmost ease. The software package is loaded with an extensive range of editing effects and filters, audio-visual transitions and supplementary design elements, that promise you of a high resolution, professional quality slideshow output.
Working with the software, you get the flexibility to conveniently customize the sequence in which the images would appear in the slideshow, with allowing a maximum screen display time of 3 seconds to each image. The created slideshows can be easily shared on various media handles and platforms, including Instagram, Facebook and YouTube.
While you can undertake a free trial of the tool, a paid subscription of the same costing $ 4.99 is required for accessing the complete range of features associated with the program. The software is however, exclusively compatible with iOS supported devices.
02VivaVideo
This one is an excellent video editor and graphic designer tool, which you can use to create and share amazing slideshows to complement your Instagram stories and feeds. Working with the aforesaid software program, you don’t need to worry about the concerns of device compatibility, as the program works well with your favorite MacOs and Windows supported systems and devices.
Talking of the specific features that the software promises to offer, you can use its built in camera to capture high resolution videos and supplement them with over 60 high end customization utilities, like sound effects and transitions, along with dubbing the video. The basic version of the tool is available for free usage and allows you to choose between the Pro and Quick modes, respectively for a high flexibility and an escalated automated response.
The free version is however, known to leave watermarks on the created videos, is stuffed with frequently appearing ads and permits a 5-minute presentation time. You can escape these hustles anytime by subscribing to the paid version of VivaVideo for $ 2.99.
03InShot
The InShot image and video editor program is another potential candidate to be employed as an Instagram story slideshow creator. The software’s effect library is packed with a heap of conveniently usable design elements and features to create the most beautiful Instagram slideshows. The app can be put to use for efficiently designing Instagram stories to address personal and professional concerns.
Some over the top features of the tool include, the flexibility to crop, trim, cut and merge video files, and uplift them with a range of effects, filters, transitions and backgrounds. The exclusive audio flexibility of the software allows you to add upbeat sound and music, while enabling a choice of fading music in and out.
The software additionally permits to adjust the speed control of your videos, making them run in a slow or fast motion as per the content requirement. There are also a variety of graphic elements, like, texts, emojis, stickers, etc., which you can add to your images and videos to make them more pronounced.
04StoryArt
Enjoying the highest user ratings on a number of leading software review platforms, the StoryArt software package lands among the most popular and preferred applications to work with creating slideshows for Instagram stories. The most appealing features of the software program include, an extensive range of more than 200 premade slideshow templates which can be directly edited to create amazing Instagram feeds and stories.
Other attractive features of the slideshow creator tool include, a plethora of design effects with varying diversities of fonts, colors, filters and around 20 elusive background themes, that are updated weekly with new additions. The program comes with a clean and responsive interface, is free to use and conforms with Windows and MacOs devices.
05Unfold
Unfold is quite a reliable software tool for creating elegant Instagram story slideshows from a storehouse of preset design templates, while adding a series of inline video and image editing effects to the same. The tool’s slideshow creator package comes with a mix of free and premium features, and does not require the account creation formality to begin working.
Major attractions of the program consist of 25 free and more than 60 premium slideshow design templates, 5 different font styles and upgraded text customizations, high resolution slideshow output and a direct share facility. You can prefer to download the software application from the various iOS and Android app stores, and work with the same on your preferred laptops, desktops and smartphones, without worrying about device compatibility.
06Canva
Canva is conveniently counted among the best Instagram slideshow maker tools and has the possibly the vastest inventory of over 60, 000 beautiful premade slideshow templates to create the mot captivating Instagram stories. Working with the tool, you are granted the liberty to select from a hoard of around 1 million stock images to set the most perfect background for the slideshow being created.
Additional features of the software comprise of high end image customization effects, fonts, transitions, texts and filters, with a never ending variety of frames, textures, icons, badges and stickers. If this is not enough, you get to access a diverse library of high end design elements, like, photo vignette, design grids, image enhancer and photo blur, to compliment your Instagram slideshow stories with the most cherished visual effects.
Talking of the platform cohesiveness, you can work with the tool through its desktop download as well as a free installation from any of the Android or Apple app stores.
07Adobe Spark
This one is a family of graphic design software and tools that conveniently boasts of its extensive credibility towards facilitating the creation of high resolution and engaging image and video slideshows to uplift the conventional feeds and stories of Instagram. Post the creation process, you can add a diversity of audio-visual effects, like, animations, sounds, fonts, text layouts, cutouts and design elements to further enhance your graphic artwork.
The application greets you with the most pleasing and easy to use workspace, which would never require you to be a graphic design expert to start working on the slideshows. If you are into creating video centered Instagram story slideshows, you can choose to work with animated videos and prefer to select the media from your device gallery as well as the software’s huge in-house video collection. The tool’s template library is a further amusement, with a countless number of story and message centered themes.
08PhotoGrid
If you are explicitly keen on creating video and photo collages for a jaw dropping Instagram story, consider working with the aforesaid application without a second thought. What’s more exciting is that the software comes with a huge set of over 300 pre made design templates to exclusively craft beautiful slideshows for Instagram stories on any iOS and Android device.
Talking of the app’s set of editing features, apart from being packed with multiple text fonts, over 60 image filters and 90 slideshow backgrounds, the most striking characteristic of the tool is, it permits you to clip an object from an image and remove the latter’s background. Other utilities of the software comprise of a real-time selfie camera, that clicks and automatically beautifies the captured image, beauty enhancing features that can apply and remove makeup from profile shots and selfies.
09Typorama
The next entry in the list is the Typorama software tool, which you can use to create text based slideshows for your Instagram stories. The software’s fonts library is full of elusive typographic designs to choose the best one that suits your content style and arrangement within the slideshow. When opting to work with this feature of the software, you will only need to select a suitable background and begin typing. That’s it!
Extending the text styling credibility of the tool a bit more, you can select from over 50 different typographic layouts and more than 100 typeface and font choices, a huge collection of story based quotes and a diversity of shadows, distortion effects and gradients to improvise your text. The program additionally consists of over 1000 stock templates, image filters, overlays and correction tools to enhance your slideshow background.
10Microsoft Hyperlapse
This one is an advanced slideshow creator program that allows you to design Instagram stories slideshow in time lapse. You can work with the tool to modify the slideshow speed up to 32 times ahead of the normal and create time lapse stories for a maximum of 20 minutes directly on your smartphone.
The app specializes in creating high end video slideshows for Instagram stories and feeds, while showing a great compatibility with high resolution videos. The working interface is super easy to understand and use, without requiring any over the top technical expertise. Feel free to use the app on any iOS or Android supported smartphone.
Part 4 Tips for Enhancing Your Insta Story Slideshow
By far, you have come a long way reading through the credibility, usage and tools to create Instagram story slideshow free of cost as well as though paid subscriptions. In the following section of this article, let us keep our focus on learning about some of the most amazing tips and tricks to upgrade your Insta story slideshow to the next level:
● A Compact Photo Album
Do you land among those social media freaks how want to share just every moment of your day with your peers, or are you confused on selecting the best photos and videos of a cherished event, vacation or bringing home a new utility and end up posting a heap of media on your social media handles?
If your answer is a guilty ‘Yes’, you can try on giving up the habit now by creating an Instagram story photo slideshow to share mini album of your most loved images from the event or vacation. You can use the feature to create a collection of amazing videos as well and share it too with your friends on social media without the guilt of becoming a feed-hog.
Want a practical experience of using Instagram slideshows? See through the following tutorial to understand the exact creation process:
Step 1: Choose the First Image
Begin with selecting the first image for your slideshow, just as you would ideally do for a normal, single image Instagram feed and long press the same.
Step 2: Confirming the Selection
Navigate to the bottom right corner of your selected image to locate a button similar to a photo slideshow. Tap the button to see a ‘1’ inscribed in a blue circle appear on your chosen image.
Step 3: Make Further Selections
You can now proceed to select other images or videos for the slideshow, in a similar fashion as the first one. You are allowed to include a maximum of 10 media files within the slideshow.
Step 4: Customize Your Creation
Tap the ‘Next’ button when you have finished making the required selections. The editor interface will now open to let you customize the selected images with a series of effects and filters, both one at a time, as well as the entire set altogether. You can also work with modifying the order of appearance of the photos and videos if required.
Step 5: The Final Touches
Once you are done with the editing process, continue to follow the remaining steps, as you would do to create a normal Instagram post. You can include captions, locations and tag your peers on the platform.
Step 6: Time to Share!
Your Instagram slideshow is ready to be posted. Upload it either to your feed or story to receive a hoard of likes and comments!
● Animated Text Overlays
If your Instagram story slideshows are missing out on the visual spunk, try complimenting their images and videos with animated transitions and text overlays. Short and quick animations are the best ways to enhance a slideshow story with an eye catching effect. Applying a variety of text overlays would help to keep the audience curious about the next visual delight.
● Prefer a Vertical Aspect Ratio
While the landscape mode tends to ward off certain portions of the visual media from a slideshow being played across multiple sized screens, using the portrait mode with a vertical aspect ratio suits best to almost every screen size. Taking care of this fact will ensure that your audience does not get distracted with the semi visible contents of the slideshow story.
● Choose Your Editing Effects Wisely
Regardless of the slideshow creation tool you prefer, there are a diversity of effects, templates, design elements and filters to uplift your craft with the perfect look. However, you should be cautious enough while making your choice so that the balance of colors, fonts and themes is affordably maintained, lest you would end up with a messy and loud Instagram story slideshow, that would not gather much appeal.
● Creating Instagram Story Slideshows with Wondershare Filmora
Wondershare Filmora Video Editor is the undisputed leader in creating awesome slideshows for Instagram stories, packed with a diverse number of graphic design tools. Beginning to discuss about the reserve of features that the software promises to offer, the app’s template library is a trunk of the most expressive and elegant slideshow backgrounds, themes and images.
For Win 7 or later (64-bit)
For macOS 10.12 or later
Moving further, the app has recently added the 1:1 aspect ratio to its image and video resolution alternatives to exclusively adhere to the slideshow design concern, allowing the perfect display of your craft across a variety of screen dimensions. Filmora, an advanced version of the basic Filmora editor program is known to most effectively cater to the concern of creating Instagram story slideshows.
Working with this slideshow creator program, you can explore your editing skills to your heart’s content and supplement the images and videos of your slideshow with the most expanded range of audio-visual effects, seamless animated transitions, text overlays, thematic backgrounds and creative image filters. The app comes to you absolutely free of cost and welcomes you with a pleasing and clean interface, and is compatible with all of your Mac, iOS and Windows supported devices and Android smartphones.
● Ending Thoughts →
● Instagram story slideshows are the newest trends of professional and commercial information sharing and personalized fun and entertainment.
● When looking through alternatives to create Instagram slideshow online or through an application software, there is a heap of creator tools.
● Pick the Wondershare Filmora slideshow creator program to design the most sparked up slideshows for your Instagram stories.
The Definitive Guide to Whiteboard Animation
The Definitive Guide to Whiteboard Animation
An easy yet powerful editor
Numerous effects to choose from
Detailed tutorials provided by the official channel
We think about moving videos with actors and actresses when we talk about motion. But, when we speak about doodle videos or drawn videos, we feel about whiteboard animation.
This article covers all the necessary information about whiteboard animation, Filmora whiteboard animation, whiteboard animation cost, etc. Under whiteboard animation, sketches adjust in a manner that results in continual animation reflection.
In this article
01 [What is Whiteboard Animation?](#Part 1)
02 [How Can Whiteboard Animation Be Used?](#Part 2)
03 [What is Whiteboard Animation Cost?](#Part 3)
04 [Some Whiteboard Animation Tools That Worth Using](#Part 4)
Part 1 What is Whiteboard Animation?

Whiteboard animation is a style that shows static watcher images getting drawn on the white screen. The graphics are at the core of a narration that walks the audience through the story by the draws. These animations are modest to understand, but they make us involved all of an impulsive.
Whiteboard animation could be a video in the middle of narration that walks the viewer through a story by viewing the illustrator’s hand drawing it onto a white background. Established in 2007, whiteboard animation may be a new and exciting way of communicating to the viewer in a very personal way.
It applies effects like time-lapse and stop-motion to bring stories to life. Its uses include internal and external television and internet advertisements, software and product demonstrations, whiteboard animation lectures and educational videos for all ages, and various artistic possibilities like untrue storytelling.
Whiteboard animation videos are traditionally made by simply recording the artist live as they draw the content for the video while at the same time reciting the story. An efficient technique in these visually-oriented times, but a tricky balancing act for even the most effective illustrators and speakers.
Part 2 How Can Whiteboard Animation Be Used?

While working with whiteboard animation for pc or going with whiteboard animation hand drawing in digital mode, it is important to understand how can whiteboard animation be used for? Let’s try to figure out that in the following points:
01Represent complex ideas in a simple way
A whiteboard video can offer assistance if the item or framework you need to portray is complex or exceedingly specialized. Individuals frequently get bored amid clarifications, and the more point by point those clarifications are, the harder it is to focus.
Whether you’re pushing an item on a press page or sharing a new trade prepare with your team, employing a high-quality whiteboard movement video to induce your point-over will keep up tall intrigued for as long as the video is playing. This can be because whiteboard liveliness is fast-moving, outwardly point by point, and frequently colorful, making them simple and fun to watch—for as long as it takes to clarify the thought.
02You can cover a part of your thoughts all at once
For reasons comparative to those displayed over, a whiteboard video is perfect on the off chance that you would like to cover an expansive sum of data within the introduction. With ideas unfolding visually as the storyteller portrays what’s going on, you’ll be able to get absent with counting a part of diverse thoughts within the same video without losing the watcher intrigued.
03You need to get other business attention
Did you know that whiteboard activity recordings are fair as compelling for Bshowcasing? The industrial-yet-casual look-and-feel of whiteboard activity loans itself astoundingly generously to a corporate environment.
Whiteboard movement administrations can donate you a noteworthy edge over competing companies once you approach other businesses along with your offer.
04You should maintain a strategic distance from awful performing artists at all costs
With whiteboard liveliness, you don’t ought to enlist on-screen characters to play in your video. This cruel noteworthy took a toll on reserve funds. Still, it can moreover spare you genuine embarrassment—good, persuading performing artists can be troublesome to find, and awful ones will have your group of onlookers wincing through the complete introduction. Movement ousts this issue inside and out.
05You plan to use social media marketing
If you need to utilize YouTube or social media advertisements for your promotion, whiteboard liveliness recordings alone will do the job. Individuals like them, so you’ve got a great chance of getting sees and clicks—and sales.
(Fun truth: Did you know there are 3billion looks conducted on YouTube alone each month? If you need your share of that activity, utilizing whiteboard activity recordings may be your best wager.)
06You want to create a story
On the off-chance that you need your video to tell a portion of your brand’s story, no one will do that way better than whiteboard movement administrations. Disney demonstrated that liveliness was an incredibly viable way to tell stories nearly a hundred years ago. Why not take after that convention?
07You want to use humor
When you need to consolidate humor into your video introduction, whiteboard activity is one of the most excellent ways to induce giggles. Novice performing artists can be unbalanced and irritating when they attempt to be clever on camera, but in whiteboard animation’s laid-back visual fashion, it can communicate humor immaculately.
08You need to reuse ancient sound substance
If you want to repurpose other sorts of the substance you’ve got lying around—say, a podcast scene or a discourse you gave—you can combine preexisting audio with whiteboard liveliness. This will assist you to capitalize on the substance you’ve as of now made, and it’ll undoubtedly breathe new life into it.
Part 3 What is Whiteboard Animation Cost?
Should you contract an artisan or fair do-it-yourself for whiteboard activity? Let’s have a conversation around sweat equity.
You can set up a video camera yourself and utilize video altering computer program to make a Whiteboard Liveliness. However, it’ll likely require a couple of weeks of your time, and your comes about will be far from a professional studio’s quality. Expect ineffectively drawn pictures and composed words that are unreadable.
Whiteboard activity program can be fetched as small as $50plus saves a couple of weeks of your time. These cheap programs utilize an inactive picture of a hand and clip craftsmanship. But the ultimate item isn’t unique, and its esteem is an excellent Control Point introduction.
Another choice is Adobe Eventual outcomes, an industry-standard activity program. It’s what they utilize to create National Commercials. It costs $16in any case, and learning the computer program requires a bachelor’s degree.
Part 4 Some Whiteboard Animation Tools That Worth Using
Whiteboard animation software or whiteboard animation app permits you to form whiteboard animation videos. Animation software offers a visual, drag-and-drop interface to simplify the designing process for creators.
Wondering what whiteboard animations are? They’re explainer videos where a hand sketches on a whiteboard. Before, this was manual, where a lecturer writes on a whiteboard. But because of whiteboard animation software, you don’t have to have a whiteboard or compose aboard again.
Whiteboard animation tool has built-in hand styles and virtual whiteboards that automatically process animation formation.
Wondershare Filmora Video Editor and Camtasia are some of the best videos altering computer programs with cool features compared to other competing video varying Software.
Wondershare Filmora
Get started easily with Filmora’s powerful performance, intuitive interface, and countless effects!
Try It Free Try It Free Try It Free Learn More >

Here are a few steps to follow for making whiteboard animation videos in Filmora and Camtasia:
01Write a Script

Much like a standard video or a brief skit, there must be a script if a whiteboard animation video succeeds. It is excellent to have compelling images and information, but without a logical story, they’re nothing.
It is not a blog, storyboard, or a collection of bullet points. You hope for a proper script, which says everything about the video. Why? Because then you’ll know precisely what images should be added further in specific segments, what the narrator must show, and what transitions are necessary.
02Start with the Storyboard
Now you have got a script, and you’ve got a clear idea of how you want your video to return across. It’s time to start out building the storyboard. With a storyboard, you may be able to sort out your thoughts far better. You’ll see how each frame comes onto the screen, and a unit of ammunition ties into the opposite.
When you create your storyboard, you may have a simple idea about how your final product will look. If there is some alteration you’re not proud of, this can be the instant where you’ll make changes.
03Create Images
You may find this part very easy if you’re a precise person. It’s all about crafting fun and unique images that will help deliver the data you want to bring across. Attempt to create striking photos which will excite your audience. The simpler, more distinctive, and attractive you’ll be able to make those images, the higher your end product.
04Animate Those Images
With your images drawn and in situ on the storyboard, it’s time to animate them. When animating your whiteboard animation video, confine in mind that every frame will likely show for no. quite seconds. This forces you to form every single movement count – with only some seconds per frame available, and quick movements are often preferable to extended scenes of stillness.
05Record and Sync the Audio
The audio is arguably one of the main essential parts of a whiteboard animation video. So, before recording the audio for any part of your project, practice reading through your script several times until you recognize it by memory and cannot struggle when speaking into the microphone during the particular recording process.
The final step involves getting your audio. Every animated video must have narration because it helps to elucidate what’s happening within the images that folks are seeing. Record your audio, and ensure it’s perfectly in sync with your content.
So, whether you are going with hand whiteboard animation and then modifying and animated with Filmora or the Camtasia whiteboard animation, both result in good whiteboard animation. Whereas, if looking for comprehensive video editing tools, the obvious choice will be Filmora.
● Key Takeaways from This Episode →
● In short, the article gives you the basic understanding of:
● What is meant by Whiteboard Animation?
● Different examples of whiteboard animation videos to explain the techniques
● Steps to apply whiteboard animation with Filmora
● Further, the article has explained Whiteboard Animation with different examples to clarify how it looks, and some websites may help you lead more about Whiteboard Animation videos. The most important question answered above is how to make videos ideally at Filmora. I hope your queries are explicit after reading this post.
We think about moving videos with actors and actresses when we talk about motion. But, when we speak about doodle videos or drawn videos, we feel about whiteboard animation.
This article covers all the necessary information about whiteboard animation, Filmora whiteboard animation, whiteboard animation cost, etc. Under whiteboard animation, sketches adjust in a manner that results in continual animation reflection.
In this article
01 [What is Whiteboard Animation?](#Part 1)
02 [How Can Whiteboard Animation Be Used?](#Part 2)
03 [What is Whiteboard Animation Cost?](#Part 3)
04 [Some Whiteboard Animation Tools That Worth Using](#Part 4)
Part 1 What is Whiteboard Animation?
Whiteboard animation is a style that shows static watcher images getting drawn on the white screen. The graphics are at the core of a narration that walks the audience through the story by the draws. These animations are modest to understand, but they make us involved all of an impulsive.
Whiteboard animation could be a video in the middle of narration that walks the viewer through a story by viewing the illustrator’s hand drawing it onto a white background. Established in 2007, whiteboard animation may be a new and exciting way of communicating to the viewer in a very personal way.
It applies effects like time-lapse and stop-motion to bring stories to life. Its uses include internal and external television and internet advertisements, software and product demonstrations, whiteboard animation lectures and educational videos for all ages, and various artistic possibilities like untrue storytelling.
Whiteboard animation videos are traditionally made by simply recording the artist live as they draw the content for the video while at the same time reciting the story. An efficient technique in these visually-oriented times, but a tricky balancing act for even the most effective illustrators and speakers.
Part 2 How Can Whiteboard Animation Be Used?
While working with whiteboard animation for pc or going with whiteboard animation hand drawing in digital mode, it is important to understand how can whiteboard animation be used for? Let’s try to figure out that in the following points:
01Represent complex ideas in a simple way
A whiteboard video can offer assistance if the item or framework you need to portray is complex or exceedingly specialized. Individuals frequently get bored amid clarifications, and the more point by point those clarifications are, the harder it is to focus.
Whether you’re pushing an item on a press page or sharing a new trade prepare with your team, employing a high-quality whiteboard movement video to induce your point-over will keep up tall intrigued for as long as the video is playing. This can be because whiteboard liveliness is fast-moving, outwardly point by point, and frequently colorful, making them simple and fun to watch—for as long as it takes to clarify the thought.
02You can cover a part of your thoughts all at once
For reasons comparative to those displayed over, a whiteboard video is perfect on the off chance that you would like to cover an expansive sum of data within the introduction. With ideas unfolding visually as the storyteller portrays what’s going on, you’ll be able to get absent with counting a part of diverse thoughts within the same video without losing the watcher intrigued.
03You need to get other business attention
Did you know that whiteboard activity recordings are fair as compelling for Bshowcasing? The industrial-yet-casual look-and-feel of whiteboard activity loans itself astoundingly generously to a corporate environment.
Whiteboard movement administrations can donate you a noteworthy edge over competing companies once you approach other businesses along with your offer.
04You should maintain a strategic distance from awful performing artists at all costs
With whiteboard liveliness, you don’t ought to enlist on-screen characters to play in your video. This cruel noteworthy took a toll on reserve funds. Still, it can moreover spare you genuine embarrassment—good, persuading performing artists can be troublesome to find, and awful ones will have your group of onlookers wincing through the complete introduction. Movement ousts this issue inside and out.
05You plan to use social media marketing
If you need to utilize YouTube or social media advertisements for your promotion, whiteboard liveliness recordings alone will do the job. Individuals like them, so you’ve got a great chance of getting sees and clicks—and sales.
(Fun truth: Did you know there are 3billion looks conducted on YouTube alone each month? If you need your share of that activity, utilizing whiteboard activity recordings may be your best wager.)
06You want to create a story
On the off-chance that you need your video to tell a portion of your brand’s story, no one will do that way better than whiteboard movement administrations. Disney demonstrated that liveliness was an incredibly viable way to tell stories nearly a hundred years ago. Why not take after that convention?
07You want to use humor
When you need to consolidate humor into your video introduction, whiteboard activity is one of the most excellent ways to induce giggles. Novice performing artists can be unbalanced and irritating when they attempt to be clever on camera, but in whiteboard animation’s laid-back visual fashion, it can communicate humor immaculately.
08You need to reuse ancient sound substance
If you want to repurpose other sorts of the substance you’ve got lying around—say, a podcast scene or a discourse you gave—you can combine preexisting audio with whiteboard liveliness. This will assist you to capitalize on the substance you’ve as of now made, and it’ll undoubtedly breathe new life into it.
Part 3 What is Whiteboard Animation Cost?
Should you contract an artisan or fair do-it-yourself for whiteboard activity? Let’s have a conversation around sweat equity.
You can set up a video camera yourself and utilize video altering computer program to make a Whiteboard Liveliness. However, it’ll likely require a couple of weeks of your time, and your comes about will be far from a professional studio’s quality. Expect ineffectively drawn pictures and composed words that are unreadable.
Whiteboard activity program can be fetched as small as $50plus saves a couple of weeks of your time. These cheap programs utilize an inactive picture of a hand and clip craftsmanship. But the ultimate item isn’t unique, and its esteem is an excellent Control Point introduction.
Another choice is Adobe Eventual outcomes, an industry-standard activity program. It’s what they utilize to create National Commercials. It costs $16in any case, and learning the computer program requires a bachelor’s degree.
Part 4 Some Whiteboard Animation Tools That Worth Using
Whiteboard animation software or whiteboard animation app permits you to form whiteboard animation videos. Animation software offers a visual, drag-and-drop interface to simplify the designing process for creators.
Wondering what whiteboard animations are? They’re explainer videos where a hand sketches on a whiteboard. Before, this was manual, where a lecturer writes on a whiteboard. But because of whiteboard animation software, you don’t have to have a whiteboard or compose aboard again.
Whiteboard animation tool has built-in hand styles and virtual whiteboards that automatically process animation formation.
Wondershare Filmora Video Editor and Camtasia are some of the best videos altering computer programs with cool features compared to other competing video varying Software.
Wondershare Filmora
Get started easily with Filmora’s powerful performance, intuitive interface, and countless effects!
Try It Free Try It Free Try It Free Learn More >
Here are a few steps to follow for making whiteboard animation videos in Filmora and Camtasia:
01Write a Script
Much like a standard video or a brief skit, there must be a script if a whiteboard animation video succeeds. It is excellent to have compelling images and information, but without a logical story, they’re nothing.
It is not a blog, storyboard, or a collection of bullet points. You hope for a proper script, which says everything about the video. Why? Because then you’ll know precisely what images should be added further in specific segments, what the narrator must show, and what transitions are necessary.
02Start with the Storyboard
Now you have got a script, and you’ve got a clear idea of how you want your video to return across. It’s time to start out building the storyboard. With a storyboard, you may be able to sort out your thoughts far better. You’ll see how each frame comes onto the screen, and a unit of ammunition ties into the opposite.
When you create your storyboard, you may have a simple idea about how your final product will look. If there is some alteration you’re not proud of, this can be the instant where you’ll make changes.
03Create Images
You may find this part very easy if you’re a precise person. It’s all about crafting fun and unique images that will help deliver the data you want to bring across. Attempt to create striking photos which will excite your audience. The simpler, more distinctive, and attractive you’ll be able to make those images, the higher your end product.
04Animate Those Images
With your images drawn and in situ on the storyboard, it’s time to animate them. When animating your whiteboard animation video, confine in mind that every frame will likely show for no. quite seconds. This forces you to form every single movement count – with only some seconds per frame available, and quick movements are often preferable to extended scenes of stillness.
05Record and Sync the Audio
The audio is arguably one of the main essential parts of a whiteboard animation video. So, before recording the audio for any part of your project, practice reading through your script several times until you recognize it by memory and cannot struggle when speaking into the microphone during the particular recording process.
The final step involves getting your audio. Every animated video must have narration because it helps to elucidate what’s happening within the images that folks are seeing. Record your audio, and ensure it’s perfectly in sync with your content.
So, whether you are going with hand whiteboard animation and then modifying and animated with Filmora or the Camtasia whiteboard animation, both result in good whiteboard animation. Whereas, if looking for comprehensive video editing tools, the obvious choice will be Filmora.
● Key Takeaways from This Episode →
● In short, the article gives you the basic understanding of:
● What is meant by Whiteboard Animation?
● Different examples of whiteboard animation videos to explain the techniques
● Steps to apply whiteboard animation with Filmora
● Further, the article has explained Whiteboard Animation with different examples to clarify how it looks, and some websites may help you lead more about Whiteboard Animation videos. The most important question answered above is how to make videos ideally at Filmora. I hope your queries are explicit after reading this post.
Finding The Best Animated Profile Picture Maker
DP Animation Maker Tutorial for Finding The Best Animated Profile Picture Maker
An easy yet powerful editor
Numerous effects to choose from
Detailed tutorials provided by the official channel
Social media is getting more and more competitive, and it’s crucial to make a good first impression. Animated profile pictures grab the user’s attention and give the added boost that helps you become different in a good way.
This article will show you the ten top animated profile picture makers using which you can create awesome profile pictures with ease.
In this article
01 [What does “PFP” mean?](#Part 1)
02 [The 10 Best Animated Profile Picture Makers for Making awesome profile pictures](#Part 2)
03 [What Happens if You Make Animated Video Instead of Pictures?](#Part 3)
Part 1 What does “PFP” mean?
PFP stands for “Picture For Profile” or, more commonly, “Profile Picture.” It is the first thing people see when they visit your profile on a social networking website. The profile owners typically upload their own images on Facebook, Twitter, Instagram, WhatsApp, and others at different times during the year or when anything significant happens.
Adding a photo gives your followers a chance to put a face to the name and an idea of what you look like. This allows them to better relate to you and creates a strong foundation for conversations and any other type of interactions.
Part 2 The 10 Best Animated Profile Picture Makers for Making awesome profile pictures
Animated profile pictures add fun and steal the show when you add them to your social accounts. What’s more, it can be much easier to create a WhatsApp animated profile picture when you’re using the right tool. Here in this post, we present you with the ten best animated profile picture makers for your reference and use.
01Canva
Canva lets you make an animated profile picture as simple as “drag and drop” without any creativity. Canva’s unique WYSIWYG animation technique makes it very straightforward to create your own avatar - making awesome animated gifs has never been simpler.
The UI is simple enough that even the smallest of details are well thought out. The captions are editable, so you easily customize the words appearing in each awesome gif.
Canva, one of the best animated profile picture makers, is a great alternative for those who prefer to work and create using the browser and without downloading and installing any software. You can also access Canva directly from any mobile device or tablet, making it convenient for you to share creative greetings and social media posts with your friends and loved ones.

●Pros:
● A near-unlimited number of stunning pre-built templates for a wide range of usage
● Beautiful and easy-to-use application interface
● The tool gets frequent bug fixes and updates with the latest features and even more templates
Cons:
● The free plan comes with a pretty meager cloud storage capacity
● No vector design is possible
● Lack of the ability to connect more than one Facebook login for those who handle personal and business pages separately
02Placeit
Are you looking for an easy way to make a simple but effective WhatsApp animated profile picture? Go to Placeit.net, and be creative with its wide range of customizable attractive pre-built templates.
Templates are hand-drawn and professionally designed. With thousands of animated templates, you can create a profile picture in a jiffy. Placeit lets you post fun and exciting photos that attract attention and grow your fanbase in no time.
Make your profile picture come to life with this one-of-a-kind animated profile picture maker! Using its proprietary image editor, you will be able to spread smiles, laughter, surprise, and much more right in seconds.

Pros:
● The overall UI is fairly streamlined – making an animated profile picture should take more than just a few clicks
● From color schemes to changing text fonts – everything is customizable
● Templates are ultra-high-quality
Cons:
● A bit expensive monthly plan
● Pay-per-item cost is definitely not affordable
● No option to add your own custom font
03PicMonkey
PicMonkey is a powerful yet simple online photo editor that lets you showcase your creativity and brand through animated profile pictures, cover photos, advertisements of all kinds, and more. In addition to its easy-to-learn features, PicMonkey offers endless possibilities for amateurs and professionals alike!
To be a meaningful part of the social media world, creating your own profile picture is not only fun but also a smart way to show your individuality. And with PicMonkey’s image editor, crafting the perfect profile picture doesn’t have to be complicated. With over 15 million users, PicMonkey is a leading photo editing software that has been helping individuals create drool-worthy designs in minutes.

Pros:
● The interface is user-friendly, and the tool offers an easy-to-learn feature set
● With a plethora of customizable in-built templates, you can generate some fresh animated profile pictures every time you try the app
● The developer keeps the tool updated with new resources and features always
Cons:
● You cannot work on more than one template simultaneously
● Lacks a proper and detailed user guide with useful tips
● Without paying for the Pro version, you can’t access some super-handy basic features
04Powerpuff Yourself
Are you looking for an easy way to make your own avatar? Powerpuff Yourself is a user-friendly tool that produces realistic anime avatars based on your photos. The features that you can expect are –
● Anime avatars, each with six different skin tones.
● Female or male avatars,
● Unique background based on your answers to the questions, and
● About 70 different hairstyles.
Make your very own anime avatar with this cute animated profile picture generator by simply selecting mouth, eyes, glasses, hair, and dress for your preferred character. After choosing the scene for the background, answer some questions about yourself and press the button to create your avatar!

Pros:
● Choose from a variety of combinations of face, eyes, hairstyles, clothes, and accessories
● Share your fresh customized avatar with just a single click
● Available in all major languages
Cons:
● No option to upload your own custom design
● The generated avatar can’t be white-labeled as the end result gets saved with the CN logo
● While the background can be animated, you are not allowed to animate the main character
05Pixlr
Change the way you see yourself on social networks With Pixlr. It is a free online profile picture maker, tablet, and mobile photo editor with all the amazing editing features one can expect only from professional tools like Photoshop. Ever wonder how your photos would look in black-and-white or what that flower in your hand looks like as a cartoon? Go to pixlr.com, log in with Facebook to create your free account, and you will be surprised by what you can do with its host of powerful self-edit features.
Complete your online persona with the help of Pixlr, now available on browser, Android, and iOS! Use the Pixlr app to take a picture and then, with a few taps or mouse clicks, enhance and decorate it. Add funny text, use special effects filters, crop and rotate, remove red-eye - it’s all there in one app! Make an impact with your profile picture and be recognized as an expert in your field.

Pros:
● Offers a simple yet powerful browser-based graphics editing experience
● A great collection of multipurpose templates designed to keep the modern social platforms in mind
● Plenty of super useful features are available in the free version
Cons:
● Some annoying glitches in the middle of editing while shifting from one tab to another
● A fair number of options work slowly due to bugs that need to be ironed out
● The doodle tool offers no “brush” feature
06Animate Me
Animate Me is a new application for iPhone that assists you with creating animated images. It has an easy-to-use interface to make animations with photos so that you can design your own animated image in a jiffy without any hassle.
The tool has two modes to create images. One of the modes is Edit mode, where you can edit your work immediately after you finish drawing. And another is Camera mode, which allows you to make a hand-drawn animation out of videos already shot. This dp animation maker tutorial can be easy for you to understand.
Touch, draw and share your animation - with Animate Me, there is no longer any need for professional graphics tools. Create animation from your photos, GIF files, or live camera action with just a touch, and share it with family and friends by email, message or post it to your Facebook wall.

Pros:
● Straightforward user interface
● Add images from your device or Facebook album or choose one from the app’s pre-built collection
● Add exciting cool features and cute sounds to your images
Cons:
● The free version of the tool has a limited number of options
● Frequent updates come with new bugs
● Some users complained of “bad words” even in the kid’s voice
07Picstun
Do you want to make awesome animated videos with your photos easily? Picstun is the best photo animator app in the Android market which can add powerful video effects to a picture free and instantaneously. It produces beautiful cartoon effects for your photos and video, allowing you to tell animated video stories in gorgeous styles instead of sharing static pictures.
You can learn this simple yet professional photo animator easily. Users of PicStun are able to create an animated video with a variety of over 3,000 pictures in various topics and animation effects.
The best thing about this application is that you can use your gallery images, too, on which the animation will be superimposed. There are many other nifty features in this next-generation picture animation maker tool. For instance, adding text, effects, music, and more right onto your pictures is possible directly from the application interface.

Pros:
● A wide range of animation effects are available
● Allows you to preview the result before you finally save it and share the same with the world
● One-click social network sharing
Cons:
● The application often crashes when trying to import multiple images into it
● A limited number of effects beg for an update with fresh animation possibilities
● Lacks proper instructions for the new users
08Loopsie
Loopsie allows you to create picture animation using your own photos. Add emojis, text, drawings, and speech bubbles to your photos in a matter of seconds to create amazing GIF images that can be used for messages or for sharing.
Are you tired of boring photos? This animated profile picture maker lets you animate your images! Just add one of the characters to your photo and give them an animated life. Loopsie supports video creation too! Add video clips and photos, pick a theme for your video, and Loopsie will do the work for you. Now, you can also hashtag on Facebook or Twitter to show off your design like the pros!

Pros:
● An easy-to-use interface offers a short learning curve
● The resolutions of end-results are readily social media compatible
● Can share on all major social networking sites directly within the app
Cons:
● While it allows the user to import their own videos, they get ranked randomly inside the app
● A new user can find it a little difficult to use the software without enough instruction set
● Recent updates added too many gimmicky filters without actually improving the experience much
09PFPmaker
PFPmaker is the original animated profile picture maker that allows adding eye-catching animations to your profile images on major social platforms like Instagram, Facebook, Twitter, and more. With PFPMaker, creating personalized animated gifs of yourself is a piece of cake. Simply decide what you want in your animation, upload some images (or take from the in-built collection inside the app), and PFPMaker will make it happen.
Increase your brand awareness, get more likes and shares, and drive more traffic to your website - all by making custom animated profile pictures using PFPmaker. Now you can create a professional identity in a matter of seconds and acquire new followers, fans, or customers!

Pros:
● Generates strikingly gorgeous animated profile images in seconds
● Its AI-powered background removal tool works awesomely well
● Loads of customization option makes this a cool nifty tool
Cons:
● No native Android or iOS app is available; everything is browser-based
● Competitors offer more animation possibilities
● While users can request a specific feature, it gets implemented rarely
10Animated GIF Maker
Animated GIF Maker is an online tool to create animated gif pictures from the user’s photos and images. The tool can convert image files up to 6MB in size, with a maximum of 5 frames. However, files greater than 3MB in size will not be displayed on the result page
Make a photo animation! Upload your own images, and Animated Gif Maker will merge them into a cool animated GIF. You can use this tool to create an animated profile picture for your social page or just have fun making short videos with your friends’ photos. Adjust the file format, resize the image and add text to your new animated picture – whatever way you want to customize the result is possible by this little tool!

Pros:
● Allows a user to upload more than one file at the same time
● Images can be converted into multiple formats easily
● Cropping and resizing the uploaded pictures is a breeze
Cons:
● File upload size restricted to 6 MB
● No native smartphone app
● The browser-based interface offers limited functionalities
Key Takeaways from This Episode
● Keeping your Facebook, Twitter, and other social profile photos fresh is vital if you want to make a good impression.
● Or perhaps you just want to have an image that is up to date and relevant. But have you ever tried to use an animated profile picture maker?
● If not, this is the right time you choose from one of our preferred tools from this article and surprise your friends with your new whatsapp animated profile picture today.
Social media is getting more and more competitive, and it’s crucial to make a good first impression. Animated profile pictures grab the user’s attention and give the added boost that helps you become different in a good way.
This article will show you the ten top animated profile picture makers using which you can create awesome profile pictures with ease.
In this article
01 [What does “PFP” mean?](#Part 1)
02 [The 10 Best Animated Profile Picture Makers for Making awesome profile pictures](#Part 2)
03 [What Happens if You Make Animated Video Instead of Pictures?](#Part 3)
Part 1 What does “PFP” mean?
PFP stands for “Picture For Profile” or, more commonly, “Profile Picture.” It is the first thing people see when they visit your profile on a social networking website. The profile owners typically upload their own images on Facebook, Twitter, Instagram, WhatsApp, and others at different times during the year or when anything significant happens.
Adding a photo gives your followers a chance to put a face to the name and an idea of what you look like. This allows them to better relate to you and creates a strong foundation for conversations and any other type of interactions.
Part 2 The 10 Best Animated Profile Picture Makers for Making awesome profile pictures
Animated profile pictures add fun and steal the show when you add them to your social accounts. What’s more, it can be much easier to create a WhatsApp animated profile picture when you’re using the right tool. Here in this post, we present you with the ten best animated profile picture makers for your reference and use.
01Canva
Canva lets you make an animated profile picture as simple as “drag and drop” without any creativity. Canva’s unique WYSIWYG animation technique makes it very straightforward to create your own avatar - making awesome animated gifs has never been simpler.
The UI is simple enough that even the smallest of details are well thought out. The captions are editable, so you easily customize the words appearing in each awesome gif.
Canva, one of the best animated profile picture makers, is a great alternative for those who prefer to work and create using the browser and without downloading and installing any software. You can also access Canva directly from any mobile device or tablet, making it convenient for you to share creative greetings and social media posts with your friends and loved ones.
●Pros:
● A near-unlimited number of stunning pre-built templates for a wide range of usage
● Beautiful and easy-to-use application interface
● The tool gets frequent bug fixes and updates with the latest features and even more templates
Cons:
● The free plan comes with a pretty meager cloud storage capacity
● No vector design is possible
● Lack of the ability to connect more than one Facebook login for those who handle personal and business pages separately
02Placeit
Are you looking for an easy way to make a simple but effective WhatsApp animated profile picture? Go to Placeit.net, and be creative with its wide range of customizable attractive pre-built templates.
Templates are hand-drawn and professionally designed. With thousands of animated templates, you can create a profile picture in a jiffy. Placeit lets you post fun and exciting photos that attract attention and grow your fanbase in no time.
Make your profile picture come to life with this one-of-a-kind animated profile picture maker! Using its proprietary image editor, you will be able to spread smiles, laughter, surprise, and much more right in seconds.
Pros:
● The overall UI is fairly streamlined – making an animated profile picture should take more than just a few clicks
● From color schemes to changing text fonts – everything is customizable
● Templates are ultra-high-quality
Cons:
● A bit expensive monthly plan
● Pay-per-item cost is definitely not affordable
● No option to add your own custom font
03PicMonkey
PicMonkey is a powerful yet simple online photo editor that lets you showcase your creativity and brand through animated profile pictures, cover photos, advertisements of all kinds, and more. In addition to its easy-to-learn features, PicMonkey offers endless possibilities for amateurs and professionals alike!
To be a meaningful part of the social media world, creating your own profile picture is not only fun but also a smart way to show your individuality. And with PicMonkey’s image editor, crafting the perfect profile picture doesn’t have to be complicated. With over 15 million users, PicMonkey is a leading photo editing software that has been helping individuals create drool-worthy designs in minutes.
Pros:
● The interface is user-friendly, and the tool offers an easy-to-learn feature set
● With a plethora of customizable in-built templates, you can generate some fresh animated profile pictures every time you try the app
● The developer keeps the tool updated with new resources and features always
Cons:
● You cannot work on more than one template simultaneously
● Lacks a proper and detailed user guide with useful tips
● Without paying for the Pro version, you can’t access some super-handy basic features
04Powerpuff Yourself
Are you looking for an easy way to make your own avatar? Powerpuff Yourself is a user-friendly tool that produces realistic anime avatars based on your photos. The features that you can expect are –
● Anime avatars, each with six different skin tones.
● Female or male avatars,
● Unique background based on your answers to the questions, and
● About 70 different hairstyles.
Make your very own anime avatar with this cute animated profile picture generator by simply selecting mouth, eyes, glasses, hair, and dress for your preferred character. After choosing the scene for the background, answer some questions about yourself and press the button to create your avatar!
Pros:
● Choose from a variety of combinations of face, eyes, hairstyles, clothes, and accessories
● Share your fresh customized avatar with just a single click
● Available in all major languages
Cons:
● No option to upload your own custom design
● The generated avatar can’t be white-labeled as the end result gets saved with the CN logo
● While the background can be animated, you are not allowed to animate the main character
05Pixlr
Change the way you see yourself on social networks With Pixlr. It is a free online profile picture maker, tablet, and mobile photo editor with all the amazing editing features one can expect only from professional tools like Photoshop. Ever wonder how your photos would look in black-and-white or what that flower in your hand looks like as a cartoon? Go to pixlr.com, log in with Facebook to create your free account, and you will be surprised by what you can do with its host of powerful self-edit features.
Complete your online persona with the help of Pixlr, now available on browser, Android, and iOS! Use the Pixlr app to take a picture and then, with a few taps or mouse clicks, enhance and decorate it. Add funny text, use special effects filters, crop and rotate, remove red-eye - it’s all there in one app! Make an impact with your profile picture and be recognized as an expert in your field.
Pros:
● Offers a simple yet powerful browser-based graphics editing experience
● A great collection of multipurpose templates designed to keep the modern social platforms in mind
● Plenty of super useful features are available in the free version
Cons:
● Some annoying glitches in the middle of editing while shifting from one tab to another
● A fair number of options work slowly due to bugs that need to be ironed out
● The doodle tool offers no “brush” feature
06Animate Me
Animate Me is a new application for iPhone that assists you with creating animated images. It has an easy-to-use interface to make animations with photos so that you can design your own animated image in a jiffy without any hassle.
The tool has two modes to create images. One of the modes is Edit mode, where you can edit your work immediately after you finish drawing. And another is Camera mode, which allows you to make a hand-drawn animation out of videos already shot. This dp animation maker tutorial can be easy for you to understand.
Touch, draw and share your animation - with Animate Me, there is no longer any need for professional graphics tools. Create animation from your photos, GIF files, or live camera action with just a touch, and share it with family and friends by email, message or post it to your Facebook wall.
Pros:
● Straightforward user interface
● Add images from your device or Facebook album or choose one from the app’s pre-built collection
● Add exciting cool features and cute sounds to your images
Cons:
● The free version of the tool has a limited number of options
● Frequent updates come with new bugs
● Some users complained of “bad words” even in the kid’s voice
07Picstun
Do you want to make awesome animated videos with your photos easily? Picstun is the best photo animator app in the Android market which can add powerful video effects to a picture free and instantaneously. It produces beautiful cartoon effects for your photos and video, allowing you to tell animated video stories in gorgeous styles instead of sharing static pictures.
You can learn this simple yet professional photo animator easily. Users of PicStun are able to create an animated video with a variety of over 3,000 pictures in various topics and animation effects.
The best thing about this application is that you can use your gallery images, too, on which the animation will be superimposed. There are many other nifty features in this next-generation picture animation maker tool. For instance, adding text, effects, music, and more right onto your pictures is possible directly from the application interface.
Pros:
● A wide range of animation effects are available
● Allows you to preview the result before you finally save it and share the same with the world
● One-click social network sharing
Cons:
● The application often crashes when trying to import multiple images into it
● A limited number of effects beg for an update with fresh animation possibilities
● Lacks proper instructions for the new users
08Loopsie
Loopsie allows you to create picture animation using your own photos. Add emojis, text, drawings, and speech bubbles to your photos in a matter of seconds to create amazing GIF images that can be used for messages or for sharing.
Are you tired of boring photos? This animated profile picture maker lets you animate your images! Just add one of the characters to your photo and give them an animated life. Loopsie supports video creation too! Add video clips and photos, pick a theme for your video, and Loopsie will do the work for you. Now, you can also hashtag on Facebook or Twitter to show off your design like the pros!
Pros:
● An easy-to-use interface offers a short learning curve
● The resolutions of end-results are readily social media compatible
● Can share on all major social networking sites directly within the app
Cons:
● While it allows the user to import their own videos, they get ranked randomly inside the app
● A new user can find it a little difficult to use the software without enough instruction set
● Recent updates added too many gimmicky filters without actually improving the experience much
09PFPmaker
PFPmaker is the original animated profile picture maker that allows adding eye-catching animations to your profile images on major social platforms like Instagram, Facebook, Twitter, and more. With PFPMaker, creating personalized animated gifs of yourself is a piece of cake. Simply decide what you want in your animation, upload some images (or take from the in-built collection inside the app), and PFPMaker will make it happen.
Increase your brand awareness, get more likes and shares, and drive more traffic to your website - all by making custom animated profile pictures using PFPmaker. Now you can create a professional identity in a matter of seconds and acquire new followers, fans, or customers!
Pros:
● Generates strikingly gorgeous animated profile images in seconds
● Its AI-powered background removal tool works awesomely well
● Loads of customization option makes this a cool nifty tool
Cons:
● No native Android or iOS app is available; everything is browser-based
● Competitors offer more animation possibilities
● While users can request a specific feature, it gets implemented rarely
10Animated GIF Maker
Animated GIF Maker is an online tool to create animated gif pictures from the user’s photos and images. The tool can convert image files up to 6MB in size, with a maximum of 5 frames. However, files greater than 3MB in size will not be displayed on the result page
Make a photo animation! Upload your own images, and Animated Gif Maker will merge them into a cool animated GIF. You can use this tool to create an animated profile picture for your social page or just have fun making short videos with your friends’ photos. Adjust the file format, resize the image and add text to your new animated picture – whatever way you want to customize the result is possible by this little tool!
Pros:
● Allows a user to upload more than one file at the same time
● Images can be converted into multiple formats easily
● Cropping and resizing the uploaded pictures is a breeze
Cons:
● File upload size restricted to 6 MB
● No native smartphone app
● The browser-based interface offers limited functionalities
Key Takeaways from This Episode
● Keeping your Facebook, Twitter, and other social profile photos fresh is vital if you want to make a good impression.
● Or perhaps you just want to have an image that is up to date and relevant. But have you ever tried to use an animated profile picture maker?
● If not, this is the right time you choose from one of our preferred tools from this article and surprise your friends with your new whatsapp animated profile picture today.
How to Animate Picture Online Without Learning From Scratch
How to Animate Picture Online Without Learning from Scratch
An easy yet powerful editor
Numerous effects to choose from
Detailed tutorials provided by the official channel
The Internet is flooded with thousands of tools that aim to provide the best-animated video. But trusting all of them every time is not a go-to thing for everyone.

If you also fall into the same category of people who are looking to add animation to designs but are not able to find the best tools, you are on the right page.
In this article
01 [Ready to Add Animation to Your Designs?](#Part 1)
02 [The Secret of Animating Pictures Online](#Part 2)
Part 1 Ready to Add Animation to Your Designs?
Here we are discussing the top three Animated picture maker that is used for creating different videos with differnt types of online picture tools. These are as follows:
1. Powtoon
Powtoon is an interactive yet simple tool available to add animation to designs. It has all the basic functions available for motion graphics that are useful for presentation. It has a variety of characters and animations available, along with simple textual animation. A user can easily prepare the video with full animation.
(This video indicates how to use the Powtoon tool for creating the best-animated videos, along with an example.)
1. Animaker
Animaker is one of the wonderful animation programs to add animation to designs in an interactive yet simple manner. It has all the best features integrated into it, which let a user create the video of their choice. It is safe to use and, being a web-based program, offers all the options.
(This video indicates how to use the Animaker tool for creating the best-animated videos, along with an example.)
3. Moovly
Moovly is also one of the best animation tools available to add animation to the content. On the main page, the “add content” option is available from where a user can simply update the video and add animation to it.
(This video indicates how to use the Moovly tool for creating the best-animated videos, along with an example.)
Note: These tools are among those that even a layman can use. But some users are still not happy with the interface of these animate picture online tools and feel like they are lacking features. For all those out there, we have some other options too.
Part 2 The Secret of Animating Pictures Online
The secret behind animating pictures online is to save time and effort. With the help of online tools, one can get the outcome with the help of inbuilt templates. There will be no need to install any application or plugin when they wish to add any particular animation to the content. Some tools you can consider using to add animation to designs are as follows:
1. Pixtellar
Pixtellar is a great tool that helps in creating animated videos and images too. Along with creating animated videos and images, one can easily create posters, logos, photo collages, and so on.
However, before using it, be sure to do the registration, as without it, using it is impossible. After registering, the steps you need to follow to use it are as follows:
Step 1Create from Scratch
Choose the template of your choice or click on “Create from Scratch”. Here we are choosing the templates.

Step 2Choose social media
It will be redirected to the next page where you will find out templates according to the selected category. (Here we choose social media).

Step 3Click on “Animate”
Choose any of them based on your preferences. You will head to the next page where you can do the editing as per your needs by clicking on “Animate”.

Step 4Save the image
After making the changes and adding the animations, you are all set to save the image. The “Save” button is right at the top of the page!

2. Adobe Spark
Adobe Spark is a tool that has pre-built templates available for adding animations to the designs. From adding animations to editing the image and video, all the options are featured in this. It also gives users an idea of how they can simply create the video and images with the help of animations and other effects.
However, when you are using it, registration is a must. After performing the registration, you are all set to use it. The steps you need to follow to use this tool are as follows:
Step 1Start editing
After completing the registration, you will reach the main page where you can choose the option of your choice and start editing. Here we have chosen the template option.

Step 2Create From This Template
It asks you to be sure and click on “Create From This Template.”

Step 3Do the editing
It takes a few seconds to present the same in front of you. On this page, you are all set to do the editing as per your needs.

Step 4Save the image
After doing all the editing, you are all set to save the image. The “Save” button is right there at the top. Click on it and save the image!

3. Crello or VistaCreate
Crello, which turns out to be VistaCreate, is one of the most famous tools for adding motion to images. It has almost 8,000+ animated designs and motion graphics available, which are helpful in creating eye-catching videos.
When you are using this feature, registration or sign-up is important. On the main page, the signup option is available, helping users do it. After that, the steps are as follows:
Step 1Click on the “Template”
On the home page, you can either create your own or click on the “Template” option available. (We chose the template option here).

Step 2Select the template
Now select the template of your choice. Here we have selected the Happy New Year one.

Step 3Do the editing as required
Now you are all set to do the editing as required. Here all the options are available, which help in adding all the basic to advanced details to the image. You can use it.

Step 4Download the image
After doing the editing, you are all set to download the image. The downloading button is right there at the top.

Key Takeaways from This Episode
● Animated videos are eye-catching, and tools are helpful in making them more enhanced.
● Animation tools are very easy to use and precisely make the video.
● Editing options are available in the tools, which are helpful in adding extra effects to the image.
● The tools are free to use with all the in-built templates and other features.
The Internet is flooded with thousands of tools that aim to provide the best-animated video. But trusting all of them every time is not a go-to thing for everyone.
If you also fall into the same category of people who are looking to add animation to designs but are not able to find the best tools, you are on the right page.
In this article
01 [Ready to Add Animation to Your Designs?](#Part 1)
02 [The Secret of Animating Pictures Online](#Part 2)
Part 1 Ready to Add Animation to Your Designs?
Here we are discussing the top three Animated picture maker that is used for creating different videos with differnt types of online picture tools. These are as follows:
1. Powtoon
Powtoon is an interactive yet simple tool available to add animation to designs. It has all the basic functions available for motion graphics that are useful for presentation. It has a variety of characters and animations available, along with simple textual animation. A user can easily prepare the video with full animation.
(This video indicates how to use the Powtoon tool for creating the best-animated videos, along with an example.)
1. Animaker
Animaker is one of the wonderful animation programs to add animation to designs in an interactive yet simple manner. It has all the best features integrated into it, which let a user create the video of their choice. It is safe to use and, being a web-based program, offers all the options.
(This video indicates how to use the Animaker tool for creating the best-animated videos, along with an example.)
3. Moovly
Moovly is also one of the best animation tools available to add animation to the content. On the main page, the “add content” option is available from where a user can simply update the video and add animation to it.
(This video indicates how to use the Moovly tool for creating the best-animated videos, along with an example.)
Note: These tools are among those that even a layman can use. But some users are still not happy with the interface of these animate picture online tools and feel like they are lacking features. For all those out there, we have some other options too.
Part 2 The Secret of Animating Pictures Online
The secret behind animating pictures online is to save time and effort. With the help of online tools, one can get the outcome with the help of inbuilt templates. There will be no need to install any application or plugin when they wish to add any particular animation to the content. Some tools you can consider using to add animation to designs are as follows:
1. Pixtellar
Pixtellar is a great tool that helps in creating animated videos and images too. Along with creating animated videos and images, one can easily create posters, logos, photo collages, and so on.
However, before using it, be sure to do the registration, as without it, using it is impossible. After registering, the steps you need to follow to use it are as follows:
Step 1Create from Scratch
Choose the template of your choice or click on “Create from Scratch”. Here we are choosing the templates.
Step 2Choose social media
It will be redirected to the next page where you will find out templates according to the selected category. (Here we choose social media).
Step 3Click on “Animate”
Choose any of them based on your preferences. You will head to the next page where you can do the editing as per your needs by clicking on “Animate”.
Step 4Save the image
After making the changes and adding the animations, you are all set to save the image. The “Save” button is right at the top of the page!
2. Adobe Spark
Adobe Spark is a tool that has pre-built templates available for adding animations to the designs. From adding animations to editing the image and video, all the options are featured in this. It also gives users an idea of how they can simply create the video and images with the help of animations and other effects.
However, when you are using it, registration is a must. After performing the registration, you are all set to use it. The steps you need to follow to use this tool are as follows:
Step 1Start editing
After completing the registration, you will reach the main page where you can choose the option of your choice and start editing. Here we have chosen the template option.
Step 2Create From This Template
It asks you to be sure and click on “Create From This Template.”
Step 3Do the editing
It takes a few seconds to present the same in front of you. On this page, you are all set to do the editing as per your needs.
Step 4Save the image
After doing all the editing, you are all set to save the image. The “Save” button is right there at the top. Click on it and save the image!
3. Crello or VistaCreate
Crello, which turns out to be VistaCreate, is one of the most famous tools for adding motion to images. It has almost 8,000+ animated designs and motion graphics available, which are helpful in creating eye-catching videos.
When you are using this feature, registration or sign-up is important. On the main page, the signup option is available, helping users do it. After that, the steps are as follows:
Step 1Click on the “Template”
On the home page, you can either create your own or click on the “Template” option available. (We chose the template option here).
Step 2Select the template
Now select the template of your choice. Here we have selected the Happy New Year one.
Step 3Do the editing as required
Now you are all set to do the editing as required. Here all the options are available, which help in adding all the basic to advanced details to the image. You can use it.
Step 4Download the image
After doing the editing, you are all set to download the image. The downloading button is right there at the top.
Key Takeaways from This Episode
● Animated videos are eye-catching, and tools are helpful in making them more enhanced.
● Animation tools are very easy to use and precisely make the video.
● Editing options are available in the tools, which are helpful in adding extra effects to the image.
● The tools are free to use with all the in-built templates and other features.
In-Depth Study of Cartoon Painting Starts From Learning to Draw It
In-depth Study of Cartoon Painting Starts from Learning to Draw It
An easy yet powerful editor
Numerous effects to choose from
Detailed tutorials provided by the official channel
Cartoon painting is slowly becoming popular due to its many benefits, especially easy cartoon canvas painting. For instance, it is pretty eye-grabbing, especially if your audience is children.

Thanks to the animation aspect, it has become relatively cheap to do advertisements with cartoons instead of real people.
In this article
01 [What Are Good Cartoons to Draw?](#Part 1)
02 [How Do You Draw a Cartoon Character for Beginners?](#Part 2)
03 [Is There Anything else You Can Do to Draw Cartoons More Quickly?](#Part 3)
Part 1 What Are Good Cartoons to Draw?
As far as good cartoons are concerned, expect about 5 popular types. These cartoons to draw include:
01 Illustrative Cartoons
They are the most suitable cartoons to draw when portraying particular ideas directly and simply.
The cartoons are primarily used in advertisements, teaching aids, and explaining stories. They also have text that explains them further.
It explains why they are common in school books, making them perfect for explaining content or subject.

02 Animated Cartoons
It is important to note that these cartoons are drawn using computers despite looking as if they are hand-drawn. One thing that makes them stand out is that they seem to be in action and movement.
As much as that’s how they seem from the viewer’s perspective, that’s far from the truth. They are just drawn in series, and since the first one will differ from the second one, there is that illusion of movement created.

03 Comic Strips or Panels
In most cases, these are regular features characterized by established or known characters and usually displayed in newspapers.
Just like the animated cartoons, they are showcased in series to tell or illustrate a story. The series of panels have words said by the various characters.
The words are usually in balloons, and a single comic strip may cover a single or double page of a newspaper.

04 Gag Cartoons
As the name gag suggests, these cartoons revolve around jokes. These single-paneled cartoons often make fun of human beings.
Through overstatements, humor resonates from what is drawn. They can either serve as entertainment or point out, if not make fun of, people, especially their mistakes and faults. Besides the cartoon, expect a caption that’s often a single sentence.

05 Editorial or Political Cartoons
These cartoons are also made for the newspapers. Expect them to be a single drawing on an editorial page. It sheds more light on a particular newspaper’s editorial comment.
As much as some have captions, that’s not always the case. Just like the gag cartoons, they ridicule people, but the editorial ones focus on celebrities.

Part 2 How Do You Draw a Cartoon Character for Beginners?
Even cartoon painting experts were once beginners. So, feel encouraged because you stand a chance also to become an expert in the long run. All you need to do is take the first step. Fortunately, we are here to hold your hand as you do so. So. Without further ado, let’s get started.
01 Cartoon Painting of a Young Character
These are the steps you need to follow when doing so:
Step 1Start with the face
The face is significant, especially when it comes to cartoon painting. It has complex as well as simple parts. For example, the face itself is pretty basic since you will need to begin with a circle.
After that, draw a horizontal and vertical line and ensure that they intersect in the middle.

Step 2Draw the eyes by drawing
Draw the eyes by drawing an oval and ensuring that the top side is slightly tilting to the side.
Do the same thing on the other side since the norm is a pair of eyes. The gap between the two should also be sensible.

Step 3Draw eyebrows
On the upper side of the eye, ensure that the lines are slightly thick. The eyebrows also need to be placed above the eyes, slightly above the thick line representing the eyelashes.

Step 4Draw jaw
After that, start shaping the jaw. Keep in mind that it plays a huge role in determining whether the character will look thin or fat. Additionally, how you draw the jaw determines whether the character will be old or young and how old or young the person will look.

Step 5Draw nose
Design the nose and ensure that you don’t put many details. The good thing about the nose is that a tip is enough to serve the purpose. Another common approach when drawing the nose is doing so as if you are viewing it from the side.

Step 6Draw mouth
Next, draw the mouth and consider the age of your character as you do so. If it is a child, despite the gender, stick to simplicity. You should also avoid drawing the lips. Preferably, go for the good, expressive trace since it never disappoints.

Step 7Draw ears
Proceed to the ears and in relation to whether the character is facing the camera or not. If your character is looking at the camera, you should see the front side view. Therefore, it won’t make sense to display the internal cavities in this case.

Step 8Draw haircut
Proceed to the ears and in relation to whether the character is facing the camera or not. If your character is looking at the camera, you should see the front side view. Therefore, it won’t make sense to display the internal cavities in this case.
As scary as it may look, you need not be an expert to make the haircut look perfect. Additionally, there is no constant way of drawing the haircut, and you are at liberty to practice as much creativity as possible.
Nevertheless, please don’t take it lightly since it can be quite descriptive. For instance, the hair is used to tell the personality of a character. Practice makes perfect, and you better keep doing it until you get it right. Ensure that what you draw shows the age and character of the cartoons to draw as perfectly as possible.
So far, our focus has been on a young character. However, that’s not always the case explaining why we will look at a cartoon painting of an old character.

02 Cartoon Paintings of an Old Character
If you want your character to look old, this is the way to go:
Step 1Old character draw a face
The face is no different from that of a young character. Start with the eyes and add their pupils, eyebrows and don’t forget to add wrinkles.
Since the character is old compared to the previous one, ensure that the eyebrows are thick. They should occupy more space of the forehead.

Step 2Old character make the chin
Make the chin longer too.

Step 3Old character draw the nose
Ensure that the nose design looks wider and larger since the character is old. To achieve that, make the nose look close to the eyes

Step 4Old character exaggerates mustache
Skip the mouth bit and instead go for a big, exaggerated mustache. That’s one common characteristic of an old character, especially male.

Step 5Draw hair
When it comes to hair, bald and side hair will play the trick perfectly. The nose is no different from that of a young character.

03 Cartoon Painting of a Female Character
So far, our focus has been on a male character. So, what do you do if you want to create a female one instead? These are some of the steps to follow as you do so.
The procedure is not that different. However, consider that women’s facial structures are more delicate than those of their male counterparts. Some of the things that stand out include long hair, a small nose, a thin chin, thin eyebrows, and large, expressive eyelashes. Large pupils will also do, especially if you are good at drawing.

Key Takeaways from This Episode
● There are five major types of cartoons to draw, animation, editorial, gag, illustrative and comic strips.
● Cartoon painting is not that hard, especially if you have a guide on how to go about it.
● If that turns out to be difficult, you can always go for the Filmora pro.
Cartoon painting is slowly becoming popular due to its many benefits, especially easy cartoon canvas painting. For instance, it is pretty eye-grabbing, especially if your audience is children.
Thanks to the animation aspect, it has become relatively cheap to do advertisements with cartoons instead of real people.
In this article
01 [What Are Good Cartoons to Draw?](#Part 1)
02 [How Do You Draw a Cartoon Character for Beginners?](#Part 2)
03 [Is There Anything else You Can Do to Draw Cartoons More Quickly?](#Part 3)
Part 1 What Are Good Cartoons to Draw?
As far as good cartoons are concerned, expect about 5 popular types. These cartoons to draw include:
01 Illustrative Cartoons
They are the most suitable cartoons to draw when portraying particular ideas directly and simply.
The cartoons are primarily used in advertisements, teaching aids, and explaining stories. They also have text that explains them further.
It explains why they are common in school books, making them perfect for explaining content or subject.
02 Animated Cartoons
It is important to note that these cartoons are drawn using computers despite looking as if they are hand-drawn. One thing that makes them stand out is that they seem to be in action and movement.
As much as that’s how they seem from the viewer’s perspective, that’s far from the truth. They are just drawn in series, and since the first one will differ from the second one, there is that illusion of movement created.
03 Comic Strips or Panels
In most cases, these are regular features characterized by established or known characters and usually displayed in newspapers.
Just like the animated cartoons, they are showcased in series to tell or illustrate a story. The series of panels have words said by the various characters.
The words are usually in balloons, and a single comic strip may cover a single or double page of a newspaper.
04 Gag Cartoons
As the name gag suggests, these cartoons revolve around jokes. These single-paneled cartoons often make fun of human beings.
Through overstatements, humor resonates from what is drawn. They can either serve as entertainment or point out, if not make fun of, people, especially their mistakes and faults. Besides the cartoon, expect a caption that’s often a single sentence.
05 Editorial or Political Cartoons
These cartoons are also made for the newspapers. Expect them to be a single drawing on an editorial page. It sheds more light on a particular newspaper’s editorial comment.
As much as some have captions, that’s not always the case. Just like the gag cartoons, they ridicule people, but the editorial ones focus on celebrities.
Part 2 How Do You Draw a Cartoon Character for Beginners?
Even cartoon painting experts were once beginners. So, feel encouraged because you stand a chance also to become an expert in the long run. All you need to do is take the first step. Fortunately, we are here to hold your hand as you do so. So. Without further ado, let’s get started.
01 Cartoon Painting of a Young Character
These are the steps you need to follow when doing so:
Step 1Start with the face
The face is significant, especially when it comes to cartoon painting. It has complex as well as simple parts. For example, the face itself is pretty basic since you will need to begin with a circle.
After that, draw a horizontal and vertical line and ensure that they intersect in the middle.
Step 2Draw the eyes by drawing
Draw the eyes by drawing an oval and ensuring that the top side is slightly tilting to the side.
Do the same thing on the other side since the norm is a pair of eyes. The gap between the two should also be sensible.
Step 3Draw eyebrows
On the upper side of the eye, ensure that the lines are slightly thick. The eyebrows also need to be placed above the eyes, slightly above the thick line representing the eyelashes.
Step 4Draw jaw
After that, start shaping the jaw. Keep in mind that it plays a huge role in determining whether the character will look thin or fat. Additionally, how you draw the jaw determines whether the character will be old or young and how old or young the person will look.
Step 5Draw nose
Design the nose and ensure that you don’t put many details. The good thing about the nose is that a tip is enough to serve the purpose. Another common approach when drawing the nose is doing so as if you are viewing it from the side.
Step 6Draw mouth
Next, draw the mouth and consider the age of your character as you do so. If it is a child, despite the gender, stick to simplicity. You should also avoid drawing the lips. Preferably, go for the good, expressive trace since it never disappoints.
Step 7Draw ears
Proceed to the ears and in relation to whether the character is facing the camera or not. If your character is looking at the camera, you should see the front side view. Therefore, it won’t make sense to display the internal cavities in this case.
Step 8Draw haircut
Proceed to the ears and in relation to whether the character is facing the camera or not. If your character is looking at the camera, you should see the front side view. Therefore, it won’t make sense to display the internal cavities in this case.
As scary as it may look, you need not be an expert to make the haircut look perfect. Additionally, there is no constant way of drawing the haircut, and you are at liberty to practice as much creativity as possible.
Nevertheless, please don’t take it lightly since it can be quite descriptive. For instance, the hair is used to tell the personality of a character. Practice makes perfect, and you better keep doing it until you get it right. Ensure that what you draw shows the age and character of the cartoons to draw as perfectly as possible.
So far, our focus has been on a young character. However, that’s not always the case explaining why we will look at a cartoon painting of an old character.
02 Cartoon Paintings of an Old Character
If you want your character to look old, this is the way to go:
Step 1Old character draw a face
The face is no different from that of a young character. Start with the eyes and add their pupils, eyebrows and don’t forget to add wrinkles.
Since the character is old compared to the previous one, ensure that the eyebrows are thick. They should occupy more space of the forehead.
Step 2Old character make the chin
Make the chin longer too.
Step 3Old character draw the nose
Ensure that the nose design looks wider and larger since the character is old. To achieve that, make the nose look close to the eyes
Step 4Old character exaggerates mustache
Skip the mouth bit and instead go for a big, exaggerated mustache. That’s one common characteristic of an old character, especially male.
Step 5Draw hair
When it comes to hair, bald and side hair will play the trick perfectly. The nose is no different from that of a young character.
03 Cartoon Painting of a Female Character
So far, our focus has been on a male character. So, what do you do if you want to create a female one instead? These are some of the steps to follow as you do so.
The procedure is not that different. However, consider that women’s facial structures are more delicate than those of their male counterparts. Some of the things that stand out include long hair, a small nose, a thin chin, thin eyebrows, and large, expressive eyelashes. Large pupils will also do, especially if you are good at drawing.
Key Takeaways from This Episode
● There are five major types of cartoons to draw, animation, editorial, gag, illustrative and comic strips.
● Cartoon painting is not that hard, especially if you have a guide on how to go about it.
● If that turns out to be difficult, you can always go for the Filmora pro.
What Is Still Motion Animation and How Does It Work?
What is Still Motion Animation and How Does It Work?
An easy yet powerful editor
Numerous effects to choose from
Detailed tutorials provided by the official channel
When we talk about motion, it makes us think about moves, but it refers to step motion when speaking about still-motion. So, in simple words, still motion animation refers to the animation that holds picture-to-picture motion animation.
This article covers all the relevant information related to still motion animation, paper motion animation, liquid motion animation. The name may vary, but such motions come under stop motion or still motion techniques to a great extent. That uses picture after picture or stopping camera process from reflecting animation to any inanimate objects or things. Under paper motion animation, images are adjusted in such a manner that results in continual animation reflection.
In this article
01 [Guide to Learn What is Still Motion Animation](#Part 1)
02 [6 Most Satisfying Still Motion Animation Examples](#Part 2)
03 [5 Inspiring Still Motion Animation Websites to Check Out](#Part 3)
04 [How Still Motion Are Animated at Filmora](#Part 4)
Part 1 Guide to Learn What is Still Motion Animation
Still motion animation is also known as walking motion animation and stalk motion animation used to boost a scene in animation. It comes in a frame-to-frame outlook. It can be a booster in horror movies, comedy, and thrillers. It used to express flashbacks, dreams, and summaries of a long scene. Sometimes it could be slower, faster, fade, blur or split frames to discover/show unconscious scenes.
Part 2 6 Most Satisfying Still Motion Animation examples
Before moving ahead with detailing how to process still motion animation, let’s try to understand it with some out-of-the-box examples to make you know what liquid motion animation is with the following criteria?
01Rudolph the Red-Nosed Reindeer

The famous, Rudolph, the Red-Nosed Reindeer, is a 19Christmas movie that shows stop motion animation first. The class one-hour program special mentions many people’s first exposure to the stop motion that Rudolph especially showed, Yukon Cornelius, Sam the snowman, etc. In everlasting memory of Rudolph, people still mention the Island of Misfit Toys and wonder what that seemingly-normal ragdoll is doing there.
02A town called Panic (2009)
Based on the Belgian puppet on a series of identical names, this demented feature seems to star the playthings you would find packed away with an old model plaything. The plot illustrates how boyish Cowboy and Indian want to offer a birthday gift to their housemate and seemingly surrogate parent, Horse, resulting in mishaps at birthday parties, the frozen north, and also the bottom of the ocean. The persistently surreal feature includes equine music teachers, giant robotic penguins, and livestock used as cannon-fodder. Still, instead of becoming overwhelming annoying, a town called Panic sustains its gleefulness over the long run.
03Chicken Run (1994)
Chicken Run is a still/stop motion animation comedy film produced by Pathe Aardman and Dreamwork animations. It’s a 20stop-motion animated movie. The plot focuses on a group of chickens who see poultry named Rocky as their hope to vacate the farm when their owners prepare to show them chicken meat tarts. He manages to help them in an adventurous, funny way which makes the movie best. Its sequel started developing in 2020.
04Mary and Max (2009)
Mary and Max are again a still-motion animation adult comedy-drama film. It is an Australian film written and directed by Adam Elliot, which shows the lives and friendships of two unlikely people. Elliot’s relationship inspires the movie with his friend. He has been writing when his friend had started for over twenty years.
05The Nightmare Before Christmas (1993)

The Nightmare Before Christmas is also known as Tim Burton’s Nightmare before Christmas. It is an American stop-motion animation movie. It shows a musical dark fantasy Halloween film directed by Henry Selick.
It depicts the story of Jack Skellington, the king of “Halloween Town,” who stumbles upon “Christmas town.” He becomes obsessive about celebrating the vacation.
06Fantastic Mr. Fox (2009)
Fantastic Mr. Fox is a comedy film based on stop motion animation directed by Wes Anderson, who co-wrote the screenplay with Noah Baumbach. It is an American 20movie. The project is predicated on the 19children’s novel of the identical name by Roald Dahl. The plot is the titular character Mr. Fox (Clooney), as his spree of thefts leads to his family, and later his community, eventually hunted down by three farmers called Boggis (Robin Hurlstone), Bunce (Hugo Guinness), and Bean (Michael Gambon).
Part 3 5 Inspiring Still Motion Animation Websites to Check out
Here, with your journey of paper motion animation, let’s try to explore some inspiring websites that support still motion animation with the following information:
01Dragonframe Blog
Dragonframe makes a picture capture computer program for halt movement. So, they are kind of specialists on the matter. And they keep a charming web journal around the subject. It supports Still motion animation accurately.
Dragonframe highlights the most recent and most noteworthy halt movement recordings of all sorts in their web journal. They incorporate pictures, video, and a brief compose-up on each one. It’s a fantastic source of motivation and a great way to find out what’s trending within the world of halt movement liveliness.
02Stop MotionAnimation.com
Here’s a thought, if you’re searching for stop movement activity assets, why not see to StopMotionAnimation.com?
StopMotionAnimation.com may be a community location for all things related to the procedure and craftsmanship shape. They have free instructional exercises just like the “The Unique Halt Movement Handbook” in web page shape, recordings that serve as motivation, and a message board that clients can sign up for and take portion in.
They indeed have their claim list of assets to purchase apparatuses and supplies to make your claim’s halt movement liveliness.
03Into film
Into Film isn’t a halt movement liveliness location. It’s a location around filmmaking in common, but one specific asset worth checking out for any wannabe halt movement animator.
That’s the “Introduction to Halt Movement Animation” PDF accessible for gratis download. Unquestionably choose this one up on the off chance that you’re unused to the art.
And at that point, hang around Into Film to memorize more recommendations on object motion animation and the craftsmanship of filmmaking.
04Animation Resources.org
Movement Assets could be a location committed to all sorts of movement procedures. They talk about hypotheses and methods and have a community program through the site.
But they, too, conversation a parcel approximately halt movement and the history of the craftsmanship frame. By searching for “stop motion“ on the location, you’ll get a list of the broad web journal posts on the subject and learn more approximately the roots of halt motion.
05AnimateClay.com

Whereas there are many ways to make halt movement animation, clay is one of the foremost well-known, much obliged in massive portion to Aardman Animation and their motion pictures like Wallace & Gromit.
AnimateClay.com could be an asset, particularly for claymation. They have a vast instructional exercise segment, news, holdings for acquiring supplies, and a podcast devoted to animating with clay.
Part 4How Still Motion Are Animated at Filmora?
Wondershare Filmora Video Editor is by far one of the best video altering computer program with cool highlights that compares to other competing video altering Softwares. Numerous video-altering programs claimed to offer proficiency come about; Filmora is one of some consumer-level devices that convey.

Wondershare Filmora - Best Video Editor for Mac/Windows
5,481,435 people have downloaded it.
Build unique custom animations without breaking a sweat.
Focus on creating epic stories and leave the details to Filmora’s auto features.
Start a creative adventure with drag & drop effects and endless possibilities.
Filmora simplifies advanced features to save you time and effort.
Filmora cuts out repetition so you can move on to your next creative breakthrough.
01Step 1: Start your video project
However, if you’re not an Animoto client, sign up for a free account to induce begun. Log in and press Make to start a modern video. Select Begin from Scratch, choose a topic and a perspective ratio.
02Step 2: Add a photo burst block
Another step is to tap on the little additional sign symbol at the foot of your workspace. This will open up the Include a Square window. Tap Burst on the left-hand side of the window. Animoto recordings are built by blending and coordinating pieces. The Burst square permits you to include a fast arrangement of up to pictures in your video.
You’ll be inquired to select a move. We prescribe the Difficult Cut move for a clean-looking halt movement effect.
03Step 3: Add your photos in the right order
Another, transfer the photographs that you shot for your halt movement and drag and drop them into the Photo Burst square. Make beyond any doubt you include them in consecutive arrange, from to begin with to last.
If you’ve got more than photos—the most significant number a single Photo Burst square accepts—that’s not an issue. Add a modern Photo Burst after the primary and proceed including your pictures.
04Step 4: Adjust your speed
Once your photographs get included, it’s time to set the speed. Tap the stopwatch symbol within the Burst square, and you’ll discover three-speed options—Slower, Quicker, and Auto. Press through to choose the speed that feels best to you.
05Step 5: Now, finalize your video
Once that’s done, you’re able to place the final finishing touches on your video. You can also add Blocks, text, and music from the library.
● Key Takeaways from This Episode →
● What is meant by Stop motion or still motion animation
● Different examples of paper motion animation to explain the techniques
● Steps to apply walking motion animation with Filmora
When we talk about motion, it makes us think about moves, but it refers to step motion when speaking about still-motion. So, in simple words, still motion animation refers to the animation that holds picture-to-picture motion animation.
This article covers all the relevant information related to still motion animation, paper motion animation, liquid motion animation. The name may vary, but such motions come under stop motion or still motion techniques to a great extent. That uses picture after picture or stopping camera process from reflecting animation to any inanimate objects or things. Under paper motion animation, images are adjusted in such a manner that results in continual animation reflection.
In this article
01 [Guide to Learn What is Still Motion Animation](#Part 1)
02 [6 Most Satisfying Still Motion Animation Examples](#Part 2)
03 [5 Inspiring Still Motion Animation Websites to Check Out](#Part 3)
04 [How Still Motion Are Animated at Filmora](#Part 4)
Part 1 Guide to Learn What is Still Motion Animation
Still motion animation is also known as walking motion animation and stalk motion animation used to boost a scene in animation. It comes in a frame-to-frame outlook. It can be a booster in horror movies, comedy, and thrillers. It used to express flashbacks, dreams, and summaries of a long scene. Sometimes it could be slower, faster, fade, blur or split frames to discover/show unconscious scenes.
Part 2 6 Most Satisfying Still Motion Animation examples
Before moving ahead with detailing how to process still motion animation, let’s try to understand it with some out-of-the-box examples to make you know what liquid motion animation is with the following criteria?
01Rudolph the Red-Nosed Reindeer
The famous, Rudolph, the Red-Nosed Reindeer, is a 19Christmas movie that shows stop motion animation first. The class one-hour program special mentions many people’s first exposure to the stop motion that Rudolph especially showed, Yukon Cornelius, Sam the snowman, etc. In everlasting memory of Rudolph, people still mention the Island of Misfit Toys and wonder what that seemingly-normal ragdoll is doing there.
02A town called Panic (2009)
Based on the Belgian puppet on a series of identical names, this demented feature seems to star the playthings you would find packed away with an old model plaything. The plot illustrates how boyish Cowboy and Indian want to offer a birthday gift to their housemate and seemingly surrogate parent, Horse, resulting in mishaps at birthday parties, the frozen north, and also the bottom of the ocean. The persistently surreal feature includes equine music teachers, giant robotic penguins, and livestock used as cannon-fodder. Still, instead of becoming overwhelming annoying, a town called Panic sustains its gleefulness over the long run.
03Chicken Run (1994)
Chicken Run is a still/stop motion animation comedy film produced by Pathe Aardman and Dreamwork animations. It’s a 20stop-motion animated movie. The plot focuses on a group of chickens who see poultry named Rocky as their hope to vacate the farm when their owners prepare to show them chicken meat tarts. He manages to help them in an adventurous, funny way which makes the movie best. Its sequel started developing in 2020.
04Mary and Max (2009)
Mary and Max are again a still-motion animation adult comedy-drama film. It is an Australian film written and directed by Adam Elliot, which shows the lives and friendships of two unlikely people. Elliot’s relationship inspires the movie with his friend. He has been writing when his friend had started for over twenty years.
05The Nightmare Before Christmas (1993)
The Nightmare Before Christmas is also known as Tim Burton’s Nightmare before Christmas. It is an American stop-motion animation movie. It shows a musical dark fantasy Halloween film directed by Henry Selick.
It depicts the story of Jack Skellington, the king of “Halloween Town,” who stumbles upon “Christmas town.” He becomes obsessive about celebrating the vacation.
06Fantastic Mr. Fox (2009)
Fantastic Mr. Fox is a comedy film based on stop motion animation directed by Wes Anderson, who co-wrote the screenplay with Noah Baumbach. It is an American 20movie. The project is predicated on the 19children’s novel of the identical name by Roald Dahl. The plot is the titular character Mr. Fox (Clooney), as his spree of thefts leads to his family, and later his community, eventually hunted down by three farmers called Boggis (Robin Hurlstone), Bunce (Hugo Guinness), and Bean (Michael Gambon).
Part 3 5 Inspiring Still Motion Animation Websites to Check out
Here, with your journey of paper motion animation, let’s try to explore some inspiring websites that support still motion animation with the following information:
01Dragonframe Blog
Dragonframe makes a picture capture computer program for halt movement. So, they are kind of specialists on the matter. And they keep a charming web journal around the subject. It supports Still motion animation accurately.
Dragonframe highlights the most recent and most noteworthy halt movement recordings of all sorts in their web journal. They incorporate pictures, video, and a brief compose-up on each one. It’s a fantastic source of motivation and a great way to find out what’s trending within the world of halt movement liveliness.
02Stop MotionAnimation.com
Here’s a thought, if you’re searching for stop movement activity assets, why not see to StopMotionAnimation.com?
StopMotionAnimation.com may be a community location for all things related to the procedure and craftsmanship shape. They have free instructional exercises just like the “The Unique Halt Movement Handbook” in web page shape, recordings that serve as motivation, and a message board that clients can sign up for and take portion in.
They indeed have their claim list of assets to purchase apparatuses and supplies to make your claim’s halt movement liveliness.
03Into film
Into Film isn’t a halt movement liveliness location. It’s a location around filmmaking in common, but one specific asset worth checking out for any wannabe halt movement animator.
That’s the “Introduction to Halt Movement Animation” PDF accessible for gratis download. Unquestionably choose this one up on the off chance that you’re unused to the art.
And at that point, hang around Into Film to memorize more recommendations on object motion animation and the craftsmanship of filmmaking.
04Animation Resources.org
Movement Assets could be a location committed to all sorts of movement procedures. They talk about hypotheses and methods and have a community program through the site.
But they, too, conversation a parcel approximately halt movement and the history of the craftsmanship frame. By searching for “stop motion“ on the location, you’ll get a list of the broad web journal posts on the subject and learn more approximately the roots of halt motion.
05AnimateClay.com
Whereas there are many ways to make halt movement animation, clay is one of the foremost well-known, much obliged in massive portion to Aardman Animation and their motion pictures like Wallace & Gromit.
AnimateClay.com could be an asset, particularly for claymation. They have a vast instructional exercise segment, news, holdings for acquiring supplies, and a podcast devoted to animating with clay.
Part 4How Still Motion Are Animated at Filmora?
Wondershare Filmora Video Editor is by far one of the best video altering computer program with cool highlights that compares to other competing video altering Softwares. Numerous video-altering programs claimed to offer proficiency come about; Filmora is one of some consumer-level devices that convey.
Wondershare Filmora - Best Video Editor for Mac/Windows
5,481,435 people have downloaded it.
Build unique custom animations without breaking a sweat.
Focus on creating epic stories and leave the details to Filmora’s auto features.
Start a creative adventure with drag & drop effects and endless possibilities.
Filmora simplifies advanced features to save you time and effort.
Filmora cuts out repetition so you can move on to your next creative breakthrough.
01Step 1: Start your video project
However, if you’re not an Animoto client, sign up for a free account to induce begun. Log in and press Make to start a modern video. Select Begin from Scratch, choose a topic and a perspective ratio.
02Step 2: Add a photo burst block
Another step is to tap on the little additional sign symbol at the foot of your workspace. This will open up the Include a Square window. Tap Burst on the left-hand side of the window. Animoto recordings are built by blending and coordinating pieces. The Burst square permits you to include a fast arrangement of up to pictures in your video.
You’ll be inquired to select a move. We prescribe the Difficult Cut move for a clean-looking halt movement effect.
03Step 3: Add your photos in the right order
Another, transfer the photographs that you shot for your halt movement and drag and drop them into the Photo Burst square. Make beyond any doubt you include them in consecutive arrange, from to begin with to last.
If you’ve got more than photos—the most significant number a single Photo Burst square accepts—that’s not an issue. Add a modern Photo Burst after the primary and proceed including your pictures.
04Step 4: Adjust your speed
Once your photographs get included, it’s time to set the speed. Tap the stopwatch symbol within the Burst square, and you’ll discover three-speed options—Slower, Quicker, and Auto. Press through to choose the speed that feels best to you.
05Step 5: Now, finalize your video
Once that’s done, you’re able to place the final finishing touches on your video. You can also add Blocks, text, and music from the library.
● Key Takeaways from This Episode →
● What is meant by Stop motion or still motion animation
● Different examples of paper motion animation to explain the techniques
● Steps to apply walking motion animation with Filmora
Best 10 Old Cartoons From Cartoon Network That You Miss
Top 10 Old Cartoons From Cartoon Network That You Miss
An easy yet powerful editor
Numerous effects to choose from
Detailed tutorials provided by the official channel
Right from our childhood days, we were drawn to the interesting late 80s cartoons shown on the old cartoon network. Watching them used to be quite fun and the best time pass after studying. At that time, the most popular and favorite were Disney cartoons.
Cartoon network was used to advertise mostly as a kids channel but it succeeded to please everyone by airing not only cartoons but also some good shows for teenagers and adults as well. It had introduced a lot of classics that defined childhood. But, now all we can do is watch the old episodes and wish we were young again.
We will refresh your memories of your childhood days with some of the most popular old Disney cartoons that you should not miss watching even today.
01**Dumbo
Rating: 7.3
Stars: 4
Do you remember Dumbo, that cute elephant baby with big ears? It was one of the shortest featured films by Disney. This animated old Disney shows cartoon had made an emotional connection with the kids as well as adults.
First, he gets separated from his mother after she tried to protect her baby from the kids who came to see him in the circus. Now, Dumbo was lonely but the Timothy, the mice never left his side. He helps Dumbo in achieving his highest potential. Later did Dumbo realizes that his ears give him the strength to fly, for which others ridiculed him all the time.
In the end, the movie gave the lesson of never giving up on our dreams and being as brave as possible to face this cruel world’s reality.
Votes: 128,942
02**Bambi
Rating: 7.3
Stars: 3.5
Bambi is a lively and engaging retelling of Disney’s characters and their adventures. It is the tale of a young deer that has yet to learn how to live in the great woods. The story revolves around his journey from his childhood days to adulthood. He learns about the forest and its inhabitants from his mother.
However, her demise changes Bambi’s life completely and this moment was the most heartbreaking part of the entire story. He grows spending time with Thumper and Flower and becomes wiser to the stag. These animated old cartoons from the cartoon network will keep your eyes glued to the screen. The movie was appreciated with many awards and achievements.
Votes: 139,750
03**Pinocchio
Rating: 7.5
Stars: 4.5
A classic tale of adventure, Pinocchio is a puppet whose nose grows when he lies. He was crafted by recognized by the carpenter Gepetoo and life was added by a fairy. This live-action Disney adaptation of the book by Carlo Collodi was a smash hit in Italy and was distributed by Disney to the old cartoon network website and other channels.
Each part of this animated cartoon won the heart of the audience including the whale climax, the theme song “when you wish upon a star”, and so on. The most iconic moment in this classic was Pinocchio saving Gepetto from the whale. Despite him being a disobedient character, it left many lessons to unfold for the kids.
Votes: 141,146
04**Snow White & the Seven Dwarves
Rating: 7.6
Stars: 3
Snow White & the Seven brought a revolution to the animated cinematic world. It was a beautiful fairy tale of a girl whose charm captured everyone’s heart in the kingdom including the dwarves. But, her wicked stepmother when asked her magic mirror who is fairest of all? It said about Snow White and this made her feel jealous.
She planned to kill her with a poisonous apple. However, Snow White survived as a kiss from her true love could save her. It was a classic Disney masterpiece loved by millions of fans around the world. Today also, this beloved title will make for a perfect addition to every family movie collection.
Votes: 194,392
05**The Jungle Book
Rating: 7.6
Stars: 4
Who can forget the epic character Mowgli, Bagheera, and Baloo in the jungle book? For several years, its series aired on the old cartoon network. His battle with the Shere Khan and quest to know about himself while spending time with his wolf siblings, all kept enchanting audiences. This is among the most loved old Disney channel cartoons of that time.
Even today, no one can refuse to watch it. It was also the last film produced by the Walt Disney house. Its movie has received several awards like the Peta innovation in Film Award, Academy Award, BAFTA Awards, and so on.
Votes: 177,666
06**Alice in Wonderland
Rating: 7.4
Stars: 3.5
Alice in Wonderland focuses on the story of a girl who fell asleep and dreams of falling into a white rabbit hole. She ends up landing in an animated world of fantastical creatures. As she follows the White Rabbit, she grows in size until she is finally small enough to enter a garden full of talking flowers and oversized insects.
After meeting the Mad Hatter, the Cheshire Cat, and other strange characters, Alice embarks on a series of adventures that take her to a tea party with the Mad Hatter, a tea party with the March Hare, and then a trial at the hands of the Queen of Hearts. She encounters many strange creatures on her journey. Her adventures go terrible at first but as she meets and spends time with them, things started going well.
Votes: 138,126
07**Cinderella
Rating: 7.3
Stars: 3
Cinderella is a classic tale filled with adventure, romance, and magic. When a young woman’s father unexpectedly passes away, her loving stepmother and step sisters neglect her.
But Cinderella finds comfort in her animal friends, like the mice Gus and Jaq who help her clean and cook, the lovable bird Juno, and especially the kind-hearted Fairy Godmother who helps make Cinderella’s dreams come true at a royal ball. Her fortune wasn’t in her favor but her luck turned out good eventually after meeting her Godmother who reunited her with a Prince.
The story of Cinderella makes us believe in the magic existing in the Universe. Somewhere, you have a silent well-wisher to chance your life.
Votes: 138,126
08**The Little Mermaid
Rating: 7.6
Stars: 3.5
The Little Mermaid is a wildly popular Disney animated film and a wonderful modern fairy tale. Ariel, the daughter of King Triton, has years to be in the world outside of the sea. She fell in love with the handsome Prince, Ariel soon finds out that they cannot be together because he is a human and she is a mermaid. So she makes a deal with Ursula, an evil sorceress to turn her into a human for three days on land.
She meets Flounder the fish, Sebastian the crab, and a host of other sea creatures. At times it’s just too much to handle but eventually, Ariel discovers her strength and that dreams do come true when you believe in yourself!
This cartoon won two academy awards for the “Under the sea” song. It was also the start of the Disney Renaissance period.
Votes: 254,253
09**The Lion King
Rating: 8.5
Stars: 4.5
The Lion King, a beloved animated movie of all time, bursts onto the cartoon channels in a visually spectacular way that touched hearts and captivated minds. You will experience the joy, excitement, and anticipation of Simba’s adventure-filled journey that is filled with humor, affection, and heart-racing excitement. He was about to succeed his father but uncle Scar killed him and made Simba responsible for his death. Some of the old cartoon channels kept showing this show for a long time.
Votes: 1,017,146
10**Tangled
Rating: 7.8
Stars: 3.5
Disney snatches you up and tugs at your heart with this tale about a little lost princess living in a secluded tower. She had long blonde hair and was finding a way to see the world that she knew nothing about it. You’ll get to know Rapunzel as you’ve never seen her before in this exciting one of the old Disney cartoons. This animated cartoon shows her struggle of living away from her parents and escaping the tower with the help of an intruder Flynn Rider.
Votes: 437,453
● Ending Thoughts →
● For a while, you can live your childhood again by watching Old Disney cartoons.
● Theyare immemorial and watching them even today leaves us connected.
● Thanks to the old cartoon network website keeping the legacy of cartoons going still today.
● But yeah, those classics aren’t aired anymore on cartoon networks so you can watch them through YouTube.
Best Claymation Shows That Make Your Memories Unforgettable
Best Claymation Shows That Make Your Memories Unforgettable
An easy yet powerful editor
Numerous effects to choose from
Detailed tutorials provided by the official channel
There are plenty of things that the 90s have given us. And when we revisit them now, it gives us an inimitable feeling of nostalgia which we would like to store forever with us. And one of the things that can bring back tons of cherished memories from the 90s is the claymation tv shows.
The claymation shows were called the clay animation shows. The reason for such a name was because the characters in the shows were made from malleable or deformable materials, especially out of clay. They have been one of the most revolutionary and entertaining components of that time.
These shows were one of the forms among the numerous forms of stop-motion animations. We will cover what these shows were about, their cast, and where you can watch them today. And in the following discussion, we will be discussing the ten best 90s claymation shows to bring back wonderful nostalgic memories.

Here is the list of the top claymation tv shows and all the information, including the sites and apps you can watch even today!
01Plasmo
Plasmo was an Australian science fiction TV series about a two and a half-year-old space orphan. The show first premiered in 199starring Abbe Holmes, Phillip Houghton and Pia Morley. You can watch this show on YouTube.

02Plonsters
The Plonsters was a show that premiered in 19which showed the characters Plif, Plops and Plummy, babble and morph, and their wonderful adventures. The show starred Ralph Thiekötter, and you can watch this show on Netflix and Tubi.
04Rex the Runt
Rex the Runt was a comedy show that premiered in 199The show was about the adventures of intrepid Rex and his plasticine companions. It starred about nine celebrities. Steve Box, Elisabeth Hadley, Andrew Jeffers, and Kevin Wrench were among them. You can watch this show even today on Amazon Prime.

05Mio Mao
Mia Mao first premiered in 197starring Derek Griffiths as cast. The show was about two plasticine kittens, Mia and Mao, exploring and finding different objects and animals who hide in their garden. You can watch this show on Amazon Prime.
06Celebrity Death
The Celebrity Deathmatch featured numerous celebrities who were shown as clay-animated characters. Their characters would have quite an intense fight in a boxing ring, and the match would be pretty different from the ordinary boxing matches.
Most of the boxing matches ended with the death of the celebrities, which was the reason for the show to get its name “Celebrity Deathmatch”. It was one of the most favourite and popular 9claymation shows on MTV, an absolute treat and entertainment to watch.
The show premiered on January 2199and it continued to air till the year 2007., with its final episode on March 3200Its cast included a series of celebrities, including Maurice Schlafer, Lean Maxwell, Mills Lane, David Wills, Steve Austin, Masasa Moyo and several other celebrities.
You can readily watch this show today on Amazon Instant Video, iTunes, Paramount+ or Amazon Prime Video.
07The Gumby Show
The Gumby Show was yet another popular tv show of the 9that premiered first on March 1195It featured a green-titular character, a humanoid that was a creation and the model of Art Clokey.
This character has been the reason behind two tv series, another feature-length movie and several other media. The ones to star in this tv show are Dal McKennon and Dick Beals. The show is about Gumby experiencing different adventures through various times and environments in history. The show also features his constant companion, a titular, red coloured talking pony named Pokey.
You can watch the show on Netflix and Amazon Prime.
08Pat & Mat
Pat & Mat was an entertaining and fun-to-watch television show of the 90s. The show first premiered in 19and starred David Nykl and Peter Alton, who played the role of Pat and Mat, respectively.
The show was about two neighbours, Pat and Mat, who faced self-created problems. And then, they solved these problems through any possible and impossible remedy.
You can watch this show now on Zee5 and Mx Player for free.
09Pingu
Pingu was a television show about a clumsy yet sweet penguin who lived with his family in the polar ice cap of Antarctica. Pingu, along with his seal friend Robby and sister, Punga, go on different adventures.
This show first premiered on May 2198with Carlo Bonomi, David Sant and Marcello Magni starring in it. You can watch the episodes of this unforgettable and entertaining tv show on ITV Hub and Amazon Prime.
10The Red and the Blue
The Red and the Blue was an Italian television series for children that first premiered in 197The show was about two antagonist clay shape-shifting characters who detected against an undifferentiated background, white.
The cast of this tv show included Carlo Bonomi, and you can see this show today on YouTube.
11The PJs
The PJs was a popular and loved tv show that premiered on 10th January 199About twenty celebrities were starring in this show, and naming a few among them were Eddie Murphy, Ja’Net DuBois, Loretta Devine, Shawn Michael Howard, Snoop Dog and many more.
The show was about Thurgood Stubbs, the superintendent of Lawrence Hilton-Jacobs housing project and lived with his wife, Muriel. This comedy show satirically featured the difficulties one faces in a big-city housing project, which the protagonist Thurgood Stubbs and his friends faced.
You can watch this show on Peacock Tv.
● Bonus:
Now, without video editing, these fantastic shows of the 9could not have been created. But To your surprise, you too can create such incredible videos effortlessly. And that can be possible through an efficient and effective video editing tool.
You can find innumerable video editing tools available in this present world, but you must choose the best. So, let us introduce you to the best video editing tool, with which you can showcase all your editing skills and creativity-Wondershare Filmora Video Editor !
We call this tool the best video editing tool because its numerous features make it the most proficient video editing tool. Let us now look into its numerous effective features below.
● Professional editing tools
Filmora is the video editing tool that incorporates all the professional editing features to make your videos of the best and the professional quality. The elements envelop every aspect of the finest quality video editing works, which brings out the best of skills and creativity in you.
● Easy to use
Although Filmora has every professional editing tool, you will face no difficulty figuring out how the tools work. Even if you are a beginner, you can effortlessly use this editing tool to not only initiate your video editing journey but also enrich your skills.
● Free trial
You need not buy the proceed features on your first try. You can readily avail of the free trial of Filmora and its paid features. And as you try and find the features pleasing, you can proceed to purchase the aid features.
● Personalize and edit your videos
You can avail of the various features such as rotating, cropping, trimming and splitting the videos to edit. Also, there are other features where you can change the speed of the videos. Therefore, the features you get in these tools are of the most proficient quality.
● Over 8effects
The Filmora editing tool offers you more than 8editing effects that will never make you feel lacking any features and effects you need. And this helps you in making the best videos most effortlessly.
● Get the tool on any devices
Filmora believes that editing skills should be made discoverable anywhere and everywhere. Thus, you can download or use this tool on any device that you use. So, you need not have any specific device to avail of this incredible video editing tool, and you can make and edit videos on any device you want.
● Key Takeaways from This Episode →
● These are the best ten claymation tv shows and series that you can watch even today to bring back all the memories and revisit your early days of the 90s. So, to wrap up our discussion, we would conclude by retracing the aspects and factors that we covered in our discussion. We had enveloped the following topics effectively.
● We discussed the claymation picture through a little interdiction.
● Then, we discussed the ten best claymation TV shows popular in the 90s. We discussed their stories, their casts, their premieres and also the sites and apps where you can watch them even today.
● Lastly, we introduced you to the best editing tool, Filmora, that will help you edit any video of your choice and explore your video editing skills with the finest professional features and infinite effects.
There are plenty of things that the 90s have given us. And when we revisit them now, it gives us an inimitable feeling of nostalgia which we would like to store forever with us. And one of the things that can bring back tons of cherished memories from the 90s is the claymation tv shows.
The claymation shows were called the clay animation shows. The reason for such a name was because the characters in the shows were made from malleable or deformable materials, especially out of clay. They have been one of the most revolutionary and entertaining components of that time.
These shows were one of the forms among the numerous forms of stop-motion animations. We will cover what these shows were about, their cast, and where you can watch them today. And in the following discussion, we will be discussing the ten best 90s claymation shows to bring back wonderful nostalgic memories.
Here is the list of the top claymation tv shows and all the information, including the sites and apps you can watch even today!
01Plasmo
Plasmo was an Australian science fiction TV series about a two and a half-year-old space orphan. The show first premiered in 199starring Abbe Holmes, Phillip Houghton and Pia Morley. You can watch this show on YouTube.
02Plonsters
The Plonsters was a show that premiered in 19which showed the characters Plif, Plops and Plummy, babble and morph, and their wonderful adventures. The show starred Ralph Thiekötter, and you can watch this show on Netflix and Tubi.
04Rex the Runt
Rex the Runt was a comedy show that premiered in 199The show was about the adventures of intrepid Rex and his plasticine companions. It starred about nine celebrities. Steve Box, Elisabeth Hadley, Andrew Jeffers, and Kevin Wrench were among them. You can watch this show even today on Amazon Prime.
05Mio Mao
Mia Mao first premiered in 197starring Derek Griffiths as cast. The show was about two plasticine kittens, Mia and Mao, exploring and finding different objects and animals who hide in their garden. You can watch this show on Amazon Prime.
06Celebrity Death
The Celebrity Deathmatch featured numerous celebrities who were shown as clay-animated characters. Their characters would have quite an intense fight in a boxing ring, and the match would be pretty different from the ordinary boxing matches.
Most of the boxing matches ended with the death of the celebrities, which was the reason for the show to get its name “Celebrity Deathmatch”. It was one of the most favourite and popular 9claymation shows on MTV, an absolute treat and entertainment to watch.
The show premiered on January 2199and it continued to air till the year 2007., with its final episode on March 3200Its cast included a series of celebrities, including Maurice Schlafer, Lean Maxwell, Mills Lane, David Wills, Steve Austin, Masasa Moyo and several other celebrities.
You can readily watch this show today on Amazon Instant Video, iTunes, Paramount+ or Amazon Prime Video.
07The Gumby Show
The Gumby Show was yet another popular tv show of the 9that premiered first on March 1195It featured a green-titular character, a humanoid that was a creation and the model of Art Clokey.
This character has been the reason behind two tv series, another feature-length movie and several other media. The ones to star in this tv show are Dal McKennon and Dick Beals. The show is about Gumby experiencing different adventures through various times and environments in history. The show also features his constant companion, a titular, red coloured talking pony named Pokey.
You can watch the show on Netflix and Amazon Prime.
08Pat & Mat
Pat & Mat was an entertaining and fun-to-watch television show of the 90s. The show first premiered in 19and starred David Nykl and Peter Alton, who played the role of Pat and Mat, respectively.
The show was about two neighbours, Pat and Mat, who faced self-created problems. And then, they solved these problems through any possible and impossible remedy.
You can watch this show now on Zee5 and Mx Player for free.
09Pingu
Pingu was a television show about a clumsy yet sweet penguin who lived with his family in the polar ice cap of Antarctica. Pingu, along with his seal friend Robby and sister, Punga, go on different adventures.
This show first premiered on May 2198with Carlo Bonomi, David Sant and Marcello Magni starring in it. You can watch the episodes of this unforgettable and entertaining tv show on ITV Hub and Amazon Prime.
10The Red and the Blue
The Red and the Blue was an Italian television series for children that first premiered in 197The show was about two antagonist clay shape-shifting characters who detected against an undifferentiated background, white.
The cast of this tv show included Carlo Bonomi, and you can see this show today on YouTube.
11The PJs
The PJs was a popular and loved tv show that premiered on 10th January 199About twenty celebrities were starring in this show, and naming a few among them were Eddie Murphy, Ja’Net DuBois, Loretta Devine, Shawn Michael Howard, Snoop Dog and many more.
The show was about Thurgood Stubbs, the superintendent of Lawrence Hilton-Jacobs housing project and lived with his wife, Muriel. This comedy show satirically featured the difficulties one faces in a big-city housing project, which the protagonist Thurgood Stubbs and his friends faced.
You can watch this show on Peacock Tv.
● Bonus:
Now, without video editing, these fantastic shows of the 9could not have been created. But To your surprise, you too can create such incredible videos effortlessly. And that can be possible through an efficient and effective video editing tool.
You can find innumerable video editing tools available in this present world, but you must choose the best. So, let us introduce you to the best video editing tool, with which you can showcase all your editing skills and creativity-Wondershare Filmora Video Editor !
We call this tool the best video editing tool because its numerous features make it the most proficient video editing tool. Let us now look into its numerous effective features below.
● Professional editing tools
Filmora is the video editing tool that incorporates all the professional editing features to make your videos of the best and the professional quality. The elements envelop every aspect of the finest quality video editing works, which brings out the best of skills and creativity in you.
● Easy to use
Although Filmora has every professional editing tool, you will face no difficulty figuring out how the tools work. Even if you are a beginner, you can effortlessly use this editing tool to not only initiate your video editing journey but also enrich your skills.
● Free trial
You need not buy the proceed features on your first try. You can readily avail of the free trial of Filmora and its paid features. And as you try and find the features pleasing, you can proceed to purchase the aid features.
● Personalize and edit your videos
You can avail of the various features such as rotating, cropping, trimming and splitting the videos to edit. Also, there are other features where you can change the speed of the videos. Therefore, the features you get in these tools are of the most proficient quality.
● Over 8effects
The Filmora editing tool offers you more than 8editing effects that will never make you feel lacking any features and effects you need. And this helps you in making the best videos most effortlessly.
● Get the tool on any devices
Filmora believes that editing skills should be made discoverable anywhere and everywhere. Thus, you can download or use this tool on any device that you use. So, you need not have any specific device to avail of this incredible video editing tool, and you can make and edit videos on any device you want.
● Key Takeaways from This Episode →
● These are the best ten claymation tv shows and series that you can watch even today to bring back all the memories and revisit your early days of the 90s. So, to wrap up our discussion, we would conclude by retracing the aspects and factors that we covered in our discussion. We had enveloped the following topics effectively.
● We discussed the claymation picture through a little interdiction.
● Then, we discussed the ten best claymation TV shows popular in the 90s. We discussed their stories, their casts, their premieres and also the sites and apps where you can watch them even today.
● Lastly, we introduced you to the best editing tool, Filmora, that will help you edit any video of your choice and explore your video editing skills with the finest professional features and infinite effects.
Best 15 Anime Shows That Are Great to Binge Watch
Best 15 Anime Shows That Are Great to Binge Watch

Shanoon Cox
Mar 27, 2024• Proven solutions
Anime shows are one of the most liked video content all over the world with a huge fan following of people from all age groups. People see it as one of the best ways to escape from real-world stress and have a relaxing time without having to worry about all the tensions and issues surrounding them.
Most anime shows have an engaging story, visual spectacle, and relatable characters which makes them very appealing to the audience. It is one of the best cures for a bad day and is something that can be watched alone or with family or friends.
Anime shows are also a character builder for children. They differentiate between good and bad, help to exercise their imaginations, and allows them to explore meaningful concepts.

So let’s have a look at some of the best anime shows that are enjoyed by people all over the world.
- Part 1: The 15 Best Anime Shows You Can Binge Watch
- Part 2: Bonus Tip-Record Anime Show and Share with Wondershare Filmora
The 15 Best Anime Shows You Can Binge Watch
If you are planning to binge-watch an anime show it must be worth the time you are spending on it. Watching a good anime series not only takes you through a wonderful and colorful journey with your favorite characters but also brightens your day.
So care must be taken to choose the best anime shows to binge-watch. So here we will list the best 15 anime shows that have a huge fan following across the globe, for your convenience. Please note that these anime shows have not been listed in any particular order and you can randomly pick any show depending on your theme of preference.
1. Fullmetal Alchemist: Brotherhood
The Fullmetal alchemist tells the story of two brothers Edward and Alphonse Elric who have survived a very serious magical accident. The brothers try to undo their mistakes and use alchemy to bring back their dead mother to life.
The brothers are continuously attempting magical and supernatural quests throughout the story. The magic and the psychological elements keep the audience glued to the show. The brothers trying to get back their bodies after an experiment gone wrong is very interesting to watch. The Brotherhood version is suitable for both kids and elders while the previous one was enjoyed more by kids.
2. Death Note
Death Note is about a high school kid named Light Yagima who finds a peculiar blank notebook, titled Death Note on the cover from the street. This notebook has the power to kill people in the way the owner of the book desires.
Light understands his responsibility and power and tries to create a safe world by eliminating all the criminals in the world. However, the police do not like the bodies piling up and the world’s best detective is hired to find the mass murderer. The cat and mouse game of light and the detective is very interesting to watch and the good storyline makes it very engaging.
3. Cowboy Bebop
Cowboy Bepop is one of the classic anime shows with a huge number of fans all over the world. This anime is about the life of bounty hunters in space and their adventures.
The story takes you through different planets and galaxies. Evil and dangerous ex-military officer on the planet Mars is trying to unleash nano-bots and the hero, Spike Spiegel and his crew have to find and stop him before it’s too late. Spike and his crew are fun to watch and the essence of bounty hunting and futuristic traveling adds to the plus points of this anime series.
4. Naruto
Naruto is about the life and adventures of a young ninja who is very hyperactive and trying to become the best ninja in Hokage, his village. This shows take the fans through different fights and challenges Naruto has to face while pushing himself to the top.
Another important aspect of this show is the characters in it. Every character is different and even the antagonists are portrayed perfectly. The story does not lag at all and keeps the audience excited and interested at all times. The fan following Naruto is huge and the popularity of this anime show has led to the creation of a variety of comics, products, games, and much more.
5. One Piece
One Piece is an interesting anime show with an overwhelming number of episodes to watch. The story takes you to the wonderful life of Monkey D. Luffy who is a young pirate and is on a treasure-hunting quest. He gained rubber-like properties after mistakenly eating a so-called Devil Fruit.
Luffy is in search of the legendry invaluable One Piece treasure that if claimed by him, will make him the Pirate King. One Piece is a very interesting adventurous anime that will take you through a rollercoaster of fun and joy. Most people prefer this series because of its large number of episodes and its consistency.
6. Attack on Titan
Attack on Titan is a theme that happens in the future where humans are on the brink of extinction. As much as horror some the idea is, it is equally interesting to watch. Humans are trying to escape the Titans that are huge humanoid creatures by hiding big walls.
The walls cannot keep the Titans away for long and the humans are attacked by them after a safe containment of about 100 years. Two kids who are the main focus of the story watch in horror as their loved ones are killed and vow to fight and survive this menace. The idea of humans hunted instead of being the hunters for once is something that makes this anime show interesting.
7. Sailor Moon
Sailor Moon is a classic anime show that has a huge impact on the current pop culture. This story is about a young underachieving school girl named Usagi Tsukino. She is a tailor-suited girl who meets a talking magical cat named Luna.
The cat gives her the ability to transfer into Sailor Moon, who is the magical alter ego of her. Sailor moon goes on different adventurous quests like battling evil forces and finding the moon princes. The adventurous path she chooses to defend the earth and the galaxy is very interesting to watch. This show has a total of 200 episodes which makes it one of the best options to binge-watch.
8. Parasyte
A seventeen-year-old Shinichi Izum is infected by a parasite from a different world and for survival, he and the parasite must learn to coexist in a single body. The parasites are capable of taking control of all human bodies once infected and pose a great threat to humanity.
The story shows humans being consumed by this parasite and the struggle of the boy to coexist will keep the viewers on the edge of their seats till the final episode. The change in character when the parasite takes over and the internal battles he has to fight will all keep you glued to the screen till the end.
9. Code Geass
Code Geass is a popular cult action show that follows Lelouch and his adventures. Lelouch is a dramatic guy with some goals that might be too big for himself.
The story evolves in the future where Japan has been invaded and conquered by the Brittania. Lelouch who has been exiled leads a resistance movement and calls themselves Black Knights. He and the Black Knights challenge the Britannia army as they took over his home. The politics and interaction of characters are very interesting and will keep the viewers engaged till the end.
10. Steins;Gate
Steins;Gates is a story that happens in 2010, Tokyo, and follows a self-proclaimed mad scientist named, Rintao Okabe. Okabe runs a Future Gadget Laboratory together with his friends Itaru Hashida and Mayuri Dhiina in his apartment.
The discovery of time travel by Okabe and his friends and what follows is interesting to watch. The team tries to use the technology they have created to stop an evil organization and its plans of destruction. The character of Okabe is liked by most viewers and his dialogs are something that stays in the mind.
11. Ghost in the Shell
Ghost in the Shell speaks about the consequences of unmonitored technological advances and sociological issues. This story also happens in the future where a cyber-criminal is wanted by the police for a large number of crimes, including the ghost hacking of humans with cyber brains
This story talks about the close involvement of humans and technology and how much humans depend on them in the future. This dependence is costing humans a lot and this show might make you think about whether if you are gaining from the technological advancements in the real world or losing a part of yourself. Being able to relate what’s happening in the show with the real world is what makes this show interesting.
12. Darker Than Black
Darker than Black talks about a time when 2 impenetrable fields appeared in South America and Japan. One gate was called Hell’s Gate and the other Heaven’s gate.
The purpose of the gates is unknown and the closer people get to gets, the more the laws of physics are defied. A lot of contractors are trying to find the mystery behind these gates and among them is Hei, and his assistant Yin who work for the syndicate. The mystery behind the gates and the attempts to solve it can keep you on your sofa without being bored for some days.
13. Dragon Ball Z
Dragon Ball Z is an active and fun-filled anime show with a cast of wonderful and entertaining characters. Apart from a large number of episodes, this show also has a prequel and two sequels if you are planning to binge-watch for a long time.
The show starts with Gokuu who is having a peaceful life with his family after winning the famous martial arts tournament. But the peace does not last long and ends with the arrival of Raditz who claims to be Goku’s brother. Raditz arrival follows numerous attacks from enemies of the outer world and the story goes on.
14. My Hero Academia
My Hero Academia is a very popular anime series and currently airing. The show follows Izuku Midoriya who is living in a world where people with superpowers exist.
But as you expect, Izuke is not the powerful kid in the world but is one of the very few without any superpowers. This is definitely not an advantage for Izuku whose dream is to become a hero one day. The uniqueness of the theme and the struggle of an ordinary guy admits extraordinary people to become a hero is something that has made this anime show popular.
15. Black Clover
Black Clover centers around a young boy named Asta who is born without any superpowers, which is very rare in the world he lives in. being ordinary does not stop Asta and he plans to become the Wizard Kind with the help of Yuno and the mages from Black Bulls.
A b friendship between Asta and Yuno is portrayed well in this series. This anime also shows the attempt of an ordinary boy to achieve the extraordinary.
Part 2: Bonus Tip-Record Anime Show and Share with Wondershare Filmora
Wondershare Filmora is a stunning video editor for both beginners and professionals. Its extensive video editing options can help you make short videos as well as high-quality movies easily.
Filmora can be also be used to record and share your favorite anime shows with your friends. The Record feature allows you to record any video on your screen in high quality and save it in whichever format you wish.


Let’s see how this can be done:
Step 1: Open Filmora on your device and select New Project.
Step 2: Go to the top bar and tap on File, then Record Media, and then on Record PC Screen.
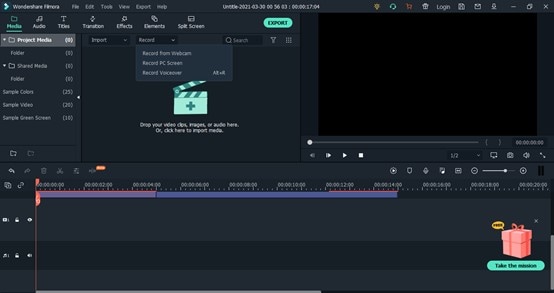
Step 3: A new window will pop up in which the video settings of the video to be recorded can be customized. This includes the frame size, audio device, selection of curser, etc.
Step 4: Hit the Red button when you are ready and the recording will begin with a countdown.
Step 5: Once the video is finished you can select Stop Recording from the desktop menu and the video will be automatically saved in the Screen Record folder.
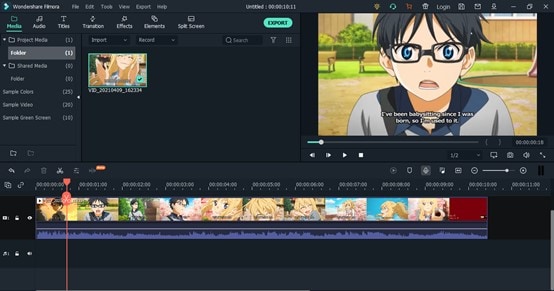
You can directly export the recoded anime show to your device or export it after editing it using Wondershare Filmora.

Conclusion
Anime shows are one of the most enjoyable forms of entertainment that are preferred both by kids and elders alike. Good animes take you to a different world where you forget about the stress and tensions of real life and have fun. Choosing an anime for Binge watching is very different than watching any anime on a regular day. As you are planning to spend a lot of time, you must be careful to choose among the best animes shows available.
You can record and share your favorite anime shows with your friends very easily with Filmora. While recording through Filmore video quality nor audio quality is lost and hence you enjoy the show to the fullest. Choose one of the shows we have mentioned for binge-watching and enjoy.
Shanoon Cox
Shanoon Cox is a writer and a lover of all things video.
Follow @Shanoon Cox
Shanoon Cox
Mar 27, 2024• Proven solutions
Anime shows are one of the most liked video content all over the world with a huge fan following of people from all age groups. People see it as one of the best ways to escape from real-world stress and have a relaxing time without having to worry about all the tensions and issues surrounding them.
Most anime shows have an engaging story, visual spectacle, and relatable characters which makes them very appealing to the audience. It is one of the best cures for a bad day and is something that can be watched alone or with family or friends.
Anime shows are also a character builder for children. They differentiate between good and bad, help to exercise their imaginations, and allows them to explore meaningful concepts.
So let’s have a look at some of the best anime shows that are enjoyed by people all over the world.
- Part 1: The 15 Best Anime Shows You Can Binge Watch
- Part 2: Bonus Tip-Record Anime Show and Share with Wondershare Filmora
The 15 Best Anime Shows You Can Binge Watch
If you are planning to binge-watch an anime show it must be worth the time you are spending on it. Watching a good anime series not only takes you through a wonderful and colorful journey with your favorite characters but also brightens your day.
So care must be taken to choose the best anime shows to binge-watch. So here we will list the best 15 anime shows that have a huge fan following across the globe, for your convenience. Please note that these anime shows have not been listed in any particular order and you can randomly pick any show depending on your theme of preference.
1. Fullmetal Alchemist: Brotherhood
The Fullmetal alchemist tells the story of two brothers Edward and Alphonse Elric who have survived a very serious magical accident. The brothers try to undo their mistakes and use alchemy to bring back their dead mother to life.
The brothers are continuously attempting magical and supernatural quests throughout the story. The magic and the psychological elements keep the audience glued to the show. The brothers trying to get back their bodies after an experiment gone wrong is very interesting to watch. The Brotherhood version is suitable for both kids and elders while the previous one was enjoyed more by kids.
2. Death Note
Death Note is about a high school kid named Light Yagima who finds a peculiar blank notebook, titled Death Note on the cover from the street. This notebook has the power to kill people in the way the owner of the book desires.
Light understands his responsibility and power and tries to create a safe world by eliminating all the criminals in the world. However, the police do not like the bodies piling up and the world’s best detective is hired to find the mass murderer. The cat and mouse game of light and the detective is very interesting to watch and the good storyline makes it very engaging.
3. Cowboy Bebop
Cowboy Bepop is one of the classic anime shows with a huge number of fans all over the world. This anime is about the life of bounty hunters in space and their adventures.
The story takes you through different planets and galaxies. Evil and dangerous ex-military officer on the planet Mars is trying to unleash nano-bots and the hero, Spike Spiegel and his crew have to find and stop him before it’s too late. Spike and his crew are fun to watch and the essence of bounty hunting and futuristic traveling adds to the plus points of this anime series.
4. Naruto
Naruto is about the life and adventures of a young ninja who is very hyperactive and trying to become the best ninja in Hokage, his village. This shows take the fans through different fights and challenges Naruto has to face while pushing himself to the top.
Another important aspect of this show is the characters in it. Every character is different and even the antagonists are portrayed perfectly. The story does not lag at all and keeps the audience excited and interested at all times. The fan following Naruto is huge and the popularity of this anime show has led to the creation of a variety of comics, products, games, and much more.
5. One Piece
One Piece is an interesting anime show with an overwhelming number of episodes to watch. The story takes you to the wonderful life of Monkey D. Luffy who is a young pirate and is on a treasure-hunting quest. He gained rubber-like properties after mistakenly eating a so-called Devil Fruit.
Luffy is in search of the legendry invaluable One Piece treasure that if claimed by him, will make him the Pirate King. One Piece is a very interesting adventurous anime that will take you through a rollercoaster of fun and joy. Most people prefer this series because of its large number of episodes and its consistency.
6. Attack on Titan
Attack on Titan is a theme that happens in the future where humans are on the brink of extinction. As much as horror some the idea is, it is equally interesting to watch. Humans are trying to escape the Titans that are huge humanoid creatures by hiding big walls.
The walls cannot keep the Titans away for long and the humans are attacked by them after a safe containment of about 100 years. Two kids who are the main focus of the story watch in horror as their loved ones are killed and vow to fight and survive this menace. The idea of humans hunted instead of being the hunters for once is something that makes this anime show interesting.
7. Sailor Moon
Sailor Moon is a classic anime show that has a huge impact on the current pop culture. This story is about a young underachieving school girl named Usagi Tsukino. She is a tailor-suited girl who meets a talking magical cat named Luna.
The cat gives her the ability to transfer into Sailor Moon, who is the magical alter ego of her. Sailor moon goes on different adventurous quests like battling evil forces and finding the moon princes. The adventurous path she chooses to defend the earth and the galaxy is very interesting to watch. This show has a total of 200 episodes which makes it one of the best options to binge-watch.
8. Parasyte
A seventeen-year-old Shinichi Izum is infected by a parasite from a different world and for survival, he and the parasite must learn to coexist in a single body. The parasites are capable of taking control of all human bodies once infected and pose a great threat to humanity.
The story shows humans being consumed by this parasite and the struggle of the boy to coexist will keep the viewers on the edge of their seats till the final episode. The change in character when the parasite takes over and the internal battles he has to fight will all keep you glued to the screen till the end.
9. Code Geass
Code Geass is a popular cult action show that follows Lelouch and his adventures. Lelouch is a dramatic guy with some goals that might be too big for himself.
The story evolves in the future where Japan has been invaded and conquered by the Brittania. Lelouch who has been exiled leads a resistance movement and calls themselves Black Knights. He and the Black Knights challenge the Britannia army as they took over his home. The politics and interaction of characters are very interesting and will keep the viewers engaged till the end.
10. Steins;Gate
Steins;Gates is a story that happens in 2010, Tokyo, and follows a self-proclaimed mad scientist named, Rintao Okabe. Okabe runs a Future Gadget Laboratory together with his friends Itaru Hashida and Mayuri Dhiina in his apartment.
The discovery of time travel by Okabe and his friends and what follows is interesting to watch. The team tries to use the technology they have created to stop an evil organization and its plans of destruction. The character of Okabe is liked by most viewers and his dialogs are something that stays in the mind.
11. Ghost in the Shell
Ghost in the Shell speaks about the consequences of unmonitored technological advances and sociological issues. This story also happens in the future where a cyber-criminal is wanted by the police for a large number of crimes, including the ghost hacking of humans with cyber brains
This story talks about the close involvement of humans and technology and how much humans depend on them in the future. This dependence is costing humans a lot and this show might make you think about whether if you are gaining from the technological advancements in the real world or losing a part of yourself. Being able to relate what’s happening in the show with the real world is what makes this show interesting.
12. Darker Than Black
Darker than Black talks about a time when 2 impenetrable fields appeared in South America and Japan. One gate was called Hell’s Gate and the other Heaven’s gate.
The purpose of the gates is unknown and the closer people get to gets, the more the laws of physics are defied. A lot of contractors are trying to find the mystery behind these gates and among them is Hei, and his assistant Yin who work for the syndicate. The mystery behind the gates and the attempts to solve it can keep you on your sofa without being bored for some days.
13. Dragon Ball Z
Dragon Ball Z is an active and fun-filled anime show with a cast of wonderful and entertaining characters. Apart from a large number of episodes, this show also has a prequel and two sequels if you are planning to binge-watch for a long time.
The show starts with Gokuu who is having a peaceful life with his family after winning the famous martial arts tournament. But the peace does not last long and ends with the arrival of Raditz who claims to be Goku’s brother. Raditz arrival follows numerous attacks from enemies of the outer world and the story goes on.
14. My Hero Academia
My Hero Academia is a very popular anime series and currently airing. The show follows Izuku Midoriya who is living in a world where people with superpowers exist.
But as you expect, Izuke is not the powerful kid in the world but is one of the very few without any superpowers. This is definitely not an advantage for Izuku whose dream is to become a hero one day. The uniqueness of the theme and the struggle of an ordinary guy admits extraordinary people to become a hero is something that has made this anime show popular.
15. Black Clover
Black Clover centers around a young boy named Asta who is born without any superpowers, which is very rare in the world he lives in. being ordinary does not stop Asta and he plans to become the Wizard Kind with the help of Yuno and the mages from Black Bulls.
A b friendship between Asta and Yuno is portrayed well in this series. This anime also shows the attempt of an ordinary boy to achieve the extraordinary.
Part 2: Bonus Tip-Record Anime Show and Share with Wondershare Filmora
Wondershare Filmora is a stunning video editor for both beginners and professionals. Its extensive video editing options can help you make short videos as well as high-quality movies easily.
Filmora can be also be used to record and share your favorite anime shows with your friends. The Record feature allows you to record any video on your screen in high quality and save it in whichever format you wish.
Let’s see how this can be done:
Step 1: Open Filmora on your device and select New Project.
Step 2: Go to the top bar and tap on File, then Record Media, and then on Record PC Screen.
Step 3: A new window will pop up in which the video settings of the video to be recorded can be customized. This includes the frame size, audio device, selection of curser, etc.
Step 4: Hit the Red button when you are ready and the recording will begin with a countdown.
Step 5: Once the video is finished you can select Stop Recording from the desktop menu and the video will be automatically saved in the Screen Record folder.
You can directly export the recoded anime show to your device or export it after editing it using Wondershare Filmora.
Conclusion
Anime shows are one of the most enjoyable forms of entertainment that are preferred both by kids and elders alike. Good animes take you to a different world where you forget about the stress and tensions of real life and have fun. Choosing an anime for Binge watching is very different than watching any anime on a regular day. As you are planning to spend a lot of time, you must be careful to choose among the best animes shows available.
You can record and share your favorite anime shows with your friends very easily with Filmora. While recording through Filmore video quality nor audio quality is lost and hence you enjoy the show to the fullest. Choose one of the shows we have mentioned for binge-watching and enjoy.
Shanoon Cox
Shanoon Cox is a writer and a lover of all things video.
Follow @Shanoon Cox
12 Animated Slideshow PowerPoint Templates
Animated Slideshow Powerpoint Templates and Tool to Make Them
An easy yet powerful editor
Numerous effects to choose from
Detailed tutorials provided by the official channel
If you are passionate about uplifting your graphic design skills with stunning animated slideshow creation, read here about the best PowerPoint templates!
In this article
01 [12 Cool Animated Slideshow PowerPoint Templates](#Part 1)
02 [5 Tools to Make Stunning Animated Slideshow PowerPoint](#Part 2)
Part 1 12 Cool Animated Slideshow PowerPoint Templates
Slideshows are an already appealing media of content presentation, which when supplemented with animated backgrounds, are bound to captivate attention. Considering the underlying reason, it should be noted that animated slideshows offer a more vivid and lively presentation of information, as compared to their static counterparts. Animated slideshows have the additional advantage of presenting the content in the exact and accurate tone that suits the grasping capability of the audience.
Talking of feasible solutions for creating high end animated slide show presentations, the software market has a diverse range of alternatives to choose from. However, Microsoft PowerPoint is a graphic presentation tool that almost everyone is familiar with. Limiting our discussion to the same, there are a diversity of animated slideshow PowerPoint templates, like that of Evanto Elements and GraphicRiver to design professionally outstanding animated slideshows.
If you are keen on trying hands at adding that extra spunk your ordinarily boring static presentations, spare time to read the following section of this article, which incorporates the features, utilities and merits of the top 12 design templates in GraphicRiver for creating animated slideshows in PowerPoint with utmost ease and within a quick time span:
01Parallax Ultimate PowerPoint Animated Template
Choosing this animated presentation template to design your slideshow projects will supplement tour creations with the most amazing parallax effect, including an additional list of tempting and trendy editing features, like, limitless color choices, high definition video resolution, master slide presentations, modern, elegant, fully animated, company oriented slides, with object animations and parallax transitions, 16:9 wide screen aspect ratio, handmade infographics and much more.

02Splash Animated PPT
This one is an excellent animated template to create elegant animated slideshow presentations that will make your design creativity stand out of the crowd. Working with the template entitles you of a matchless, professional quality slideshow animation PowerPoint project on account some exclusive features, like those of high definition screen resolution and widescreen image aspect ratio, light and dark presentation backgrounds etc.
Mentioning some additional credibility of using the template for creating animated slideshows, you get to access as many as 500 selected slides, vector line and social media icons, uniquely styled image masks, calendars and vector maps.
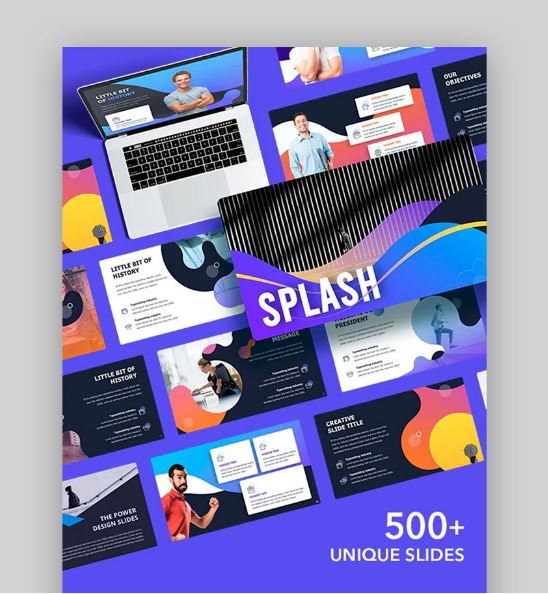
03Social Media Animated PowerPoint Templates
If your working constraints require an extensive use of social media information, consider using tis interactive PowerPoint template for designing social media compatible, premium quality, professional slideshows with animated graphics. Working with the template, you will get a complementary access to a pool of exciting slideshow features.
Talking of the specific utilities of the animated slideshow maker template, you can choose from over 50 slide layouts, light and dark backgrounds themes, enjoy a seamless, drag and drop workflow and easily edit grouped elements, along with modifying infographic elements in Excel sheets.
04Animated Slides Bundle for PowerPoint Presentation
This one is an interactive GraphicRiver PowerPoint animation slideshow maker template, which you can work with for a delivery of high end and illustrative animated slideshow presentations. The template facilitates its users with a diversity of graphic customization features, like that of visual transitions, custom reveals and objectified motions to your presentation slides, points and images.
The template promises you of a stunning, high quality and compelling slideshow output with an elegant presentation outlook. The template has a variety of inbuilt slide layouts, is easy to use and comes to you absolutely free of cost.
05Proposal PowerPoint Animated
If you are about to deliver a dynamic business presentation, consider working with this graphic tool to create your animoto slideshow in PowerPoint. Proposal PowerPoint Animated is an interactive animation template, designed exclusively for adhering to the concern of business centered content delivery.
You can create captivating motion stories with the conveniently editable slides and high end animated graphics of this PowerPoint template, thus ensuring a high pitched information conveyance to your target audience.
06DIY Animated PPT Promo Kit
Looking for the most feasible PowerPoint animated slideshow templates for slideshow creation generally refers to a time consuming web search. If you are a creativity freak and want to escape the aforesaid hustle, try hands at working with the DIY Animated PPT Promo Kit to create a customized animated slideshow template of your own.
Talking about the utilities, this interactive slideshow presentation kit is packed with a lot of professional features that are sufficient to give a hype to your normal quality slideshows and allows you to work with over 100 entirely customizable slides in 2 variable color schemes.
07Pitch Deck Animated Bundle
Using a pitch deck strategy is a common way of attracting fund credibility for your business for an appreciable revenue growth, which is often put to the additional use of addressing potential workers of the company on the latter’s crucial success factors. When working towards either of the purposes, using the aforesaid software bundle is a smart choice to showcase the exact content concerning your overall business concept to the target audience.
This one is preferably the best pitch deck template you could ever get. Though there is an appealing set of market choices, it is always an impressive decision to select the cream from the curd for ensuring high end results.
08Massive X Presentation Template for PowerPoint
When having a desire to access the credibility of slideshow templates though user reviews, this animated PowerPoint template is sure winner. Packed with an extensive library of over 960 exceptional slides in dark and light background themes, along with 20 preset color schemes, this graphic template is an absolute favorite of creative designers across the globe.
Choosing the template for catering to your animation centered slideshow creation needs opens a diversity of audio-visual customization features with an entirely free access and an easy to use working interface.

09Imperial Multipurpose PowerPoint Template
Living up to its name, this one is a multi-functional, free animated slideshow template that allows you to choose the perfect color scheme for your brand from more than 100 shade varieties, thus ensuring a high end transition flexibility. Prefer using this template to add a visual highlight to your slideshow presentations with a diversity of icons and customized animations.
If you have invested enough time looking for the best PowerPoint animation slideshow creator utility, end your search with the Imperial Multipurpose template that is available to you without asking for a penny from your pocket and welcomes you with the most interactive working environment.
10Minimal PowerPoint
The aforesaid slideshow template for creating animated presentations is a fundamental and clean graphic creation utility that comes with a wide range of more than 500 different sides and convenient to use drag and drop placeholders for seamless content inclusion. Additional features of the template consist of inbuilt calendars, charts, graphs and customized illustration components, suitable for a diverse set of industries.
This one is an interactive style PowerPoint animoto slideshow maker template that works best to infuse data and animation graphics together. You can use this graphic design tool without a second thought for delivering quality content with a cohesive slideshow presentation, of course without having to worry about any cost constraints.
11PowerPoint Animated Pro Pack- With Animated Slides
Using this animation slideshow template for your business presentations facilitates you with a series of interactive graphic modules within professionally compatible slides. You can use this high end template package to supplement your presentations with high quality animated motion diagrams.
Other appealing features of the package include a huge set of conveniently editable slides, with an extensive variety of PowerPoint compatible motion transitions, animations and many more surplus features to add the right amount of spark to your professional animated slideshow presentations.
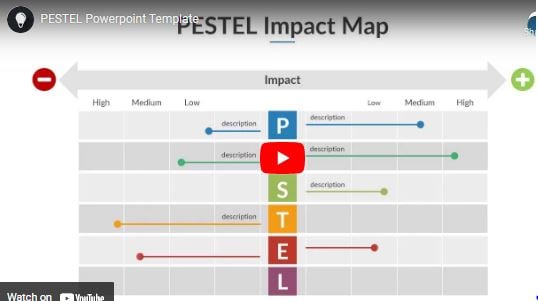
12Wow Slides for PowerPoint
If you are yet to reach to the perfect animated slideshow creator solution, consider sparing a thought about this wonderful PowerPoint template to cater to your animation design concerns. Available to you with a decent set of over 24 inbuilt color themes, this one is a perfect choice for working on webinar slides, business presentations and pitch decks.
Apart from elegantly beautiful collection of animations, you will find this slideshow template package to be a storehouse of elusive and explanatory charts, graphs, maps and icon packs, which you can use to add relevant statistical content to your presentations or give an enhanced and organized look to your slideshow project.
Part 2 5 Tools to Make Stunning Animated Slideshow PowerPoint
Having discussed about the most amazing animation slideshow templates for PowerPoint, let us now extend our talk to learn about some of the most preferred graphic tools to create high end and professionally expressive and stunning animation centered slideshow presentations in PowerPoint, considering the fact that such presentations are an important part of the ongoing business trends, which you should be aware of.
The following section presents a detailed discussion on the features, best application utilities, market reviews and usage guidelines of the top 5 animated slideshow creator tools:
01**Wondershare Filmora Video Editor **
For Win 7 or later (64-bit)
For macOS 10.12 or later
This one is possibly the best and an all in one software package that promises to address almost all of your graphic editing needs in the most affordable manner. Talking of the specific utility of creating animated slideshow presentations, Wondershare Filmora is dedicated towards delivering high end motion graphic slideshows of matchless professional excellence.
The tool is best in making audio infused, animated photo slideshows that are apt for comprehensive graphic proposals for top rated business projects. About the software’s pricing requirements, you can avail a free usage of the tool for free in its trial version for 7 days, following which, working with the tool will demand paid monthly and annual subscriptions of $9.99 and $19.99 respectively.
Pros
● Working with the tool, you are entitled to use a plethora of audio-visual effects and filters to enhance your presentations.
● The tool’s feature rich library has everything to design animated slideshows with high resolution output quality.
● The tool is known to support almost all popular audio, video and image file formats.
Cons
● The tool has a limited variety of fine-tuned utilities for effect tweaking.
● The features of chapter authoring and DVD menu are absent.
● Working with the tool, you may encounter occasional software crashes.
User’s Guide to Create Animated Slideshows in Wondershare Filmora
Having understood the basic functionalities and exceptional features of Filmora’s Animated Slideshow creator tool, let us see through the following section to get familiar to the knowhow of using the same for designing animation top rated slideshow presentations in a stepwise procedure:
Step 1: Download and Install the Software
Before getting though with the creation process, initiate a download of the slideshow creator program from the latter’s official website to any of your preferred Windows or iOS compatible devices.
Step 2: Add Your Images and Videos
Creating a slideshow presentation may require a set of multiple image and video files to the program’s graphic creator timeline. It is recommended to add your selections of the aforesaid files to a single folder before launching the software in your system.
Once you have finished making your selections, launch the program to reach its welcome interface, were you need to navigate and click on the ‘Media’ tab in the top toolbar. From the task options that appear, click on ‘Import a Media’. Next, you will be asked to browse through your device locations and choose the folder that contains your previously selected files to be used in the presentation you are about to create.
When you have found the required folder, tap on ‘OK’ to import the same to the new slideshow project in the Filmora timeline. All your selected files will be visible here after a successful import.
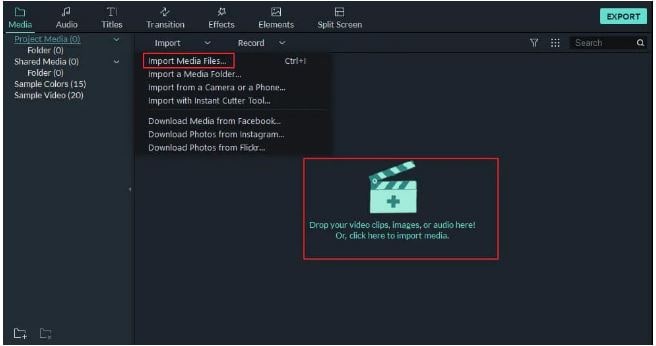
Step 3: Timeline Positioning of Media Files
Before working on the task of positioning the imported media files on the app’s timeline, navigate to the ‘File’ menu and choose the ‘Preferences’ option. As soon as the respective window pops up, reach to the ‘Editing’ tab at the top and select ‘Photo Placement’ from the drop down menu that follows.
In case your selected images do not have a matching aspect ratio with the program’s preset values, choose the ‘Crop to Fit’ option for removing the additional black bars from the selected images. For the requirement of adding camera pan and zoom movements to your images, select the ‘Pan & Zoom’ option in the ‘Preferences’ settings.
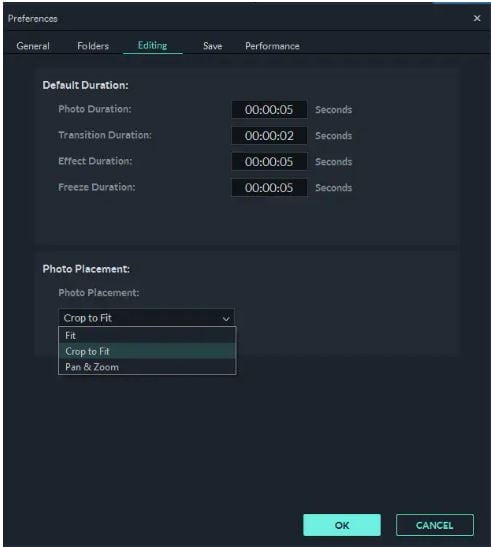
You can proceed to change the preset play durations of images, effects and transitions in the ‘Editing’ window itself. As an alternative you can adhere to the same task in the program’s timeline by dragging any one end of the media files in an outward or inward direction. The ‘Crop to Fit’ option may not give an affordable size in some cases where the images are set in a vertical 9:16 aspect ratio. Choose the ‘Fit’ option to set this issue straight.
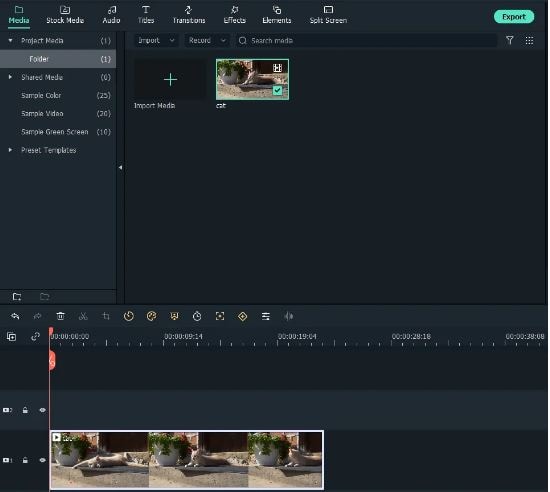
When you have finished making all the aforesaid adjustments, navigate to the Media panel again for adding the selected image files to the software’s timeline. Proceed with selecting a file and dragging and dropping the same at the desired position within the timeline. Continue repeating the process till all the images have been placed at their respective locations, and in the exact order of appearance in the slideshow. This should be followed by adjusting the image play durations using any one of the previously described methods.
Step 4: Escape Hard Cuts With Image Transitions
Hard cuts among different slides of a presentation break the flow of the slideshow. To escape this cringe, consider using a smooth transition effect within the slides of your project. To do this, navigate to the ‘Transitions’ tab in the top toolbar of Filmora’s project window and select a desired one from over 100 choices of customizable transitions.
You can now drop these transitions in the timeline at the exact intersection point of two image files. Avoid using the same transition for every hard cut to escape monotony. You can instead choose different transitions for each slide while observing its appearance in the clip.
After you are done with applying transitions to each slide, double click on a particular transition to open its ‘Transition Setting Window’ either for presetting the transition play duration or to choose a desired transition mode. You can also prefer a direct customization of the transition duration in the project timeline through a right or left dragging of any of its ends.
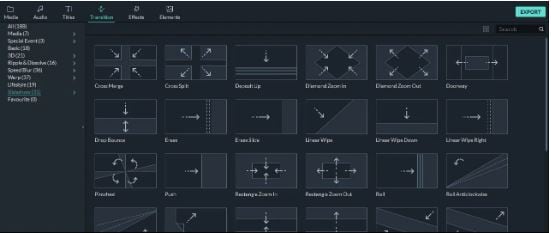
Step 5: Uplift Your Slideshow Colors With Overlays and Filters
Navigate to the top toolbar and hit the ‘Effects’ tab to choose from a diversity of visual effects that can be added to the slideshow images to supplement them with an increased vibrancy through color desaturation. These effects in the program’s library are categorized into classes of Overlays and Filters, with further subcategories of Sepia Tone, Light Leaks and Lomography and many more.
To apply these effects, just select and add them into a timeline track above the clip you wish to add the overlay or filter to. When you have applied the effects, observe the overall clip appearance in the ‘Preview Panel’. Double click on a particular effect to fine-tune the latter’s settings.
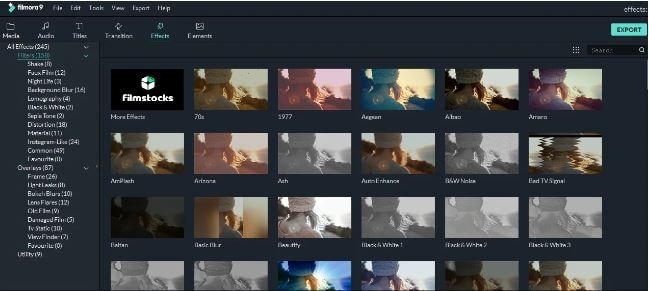
Step 6: Supplement Your Slides With Motion Graphic Elements
While motion graphics will undoubtedly enhance your animated slideshows, adding them to your presentation is purely optional, since most professional projects do not need a motion graphic element to escalate their presentation outlook. If, however, you choose to work on making these a part of your animated slideshow, Filmora lets you do that in its ‘Elements’ tab.
There is a plethora of motion graphic templates that you can select and add to the project timeline for a quick and vibrant upgrade of your presentation slides, but, at the same time, it becomes important to take care of the visual outlook and the underlying reason of creating the slideshow before you decide on adding these elements to your project.
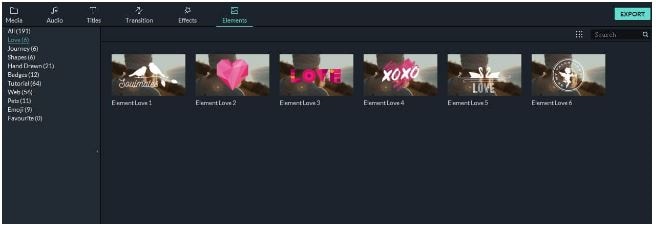
Step 7: Create Voiceovers and Record Soundtracks for Your Slideshow
Narration is a smart way to captivate the target audience within your slideshow, whether though a self-delivery or a recorded voiceover. If you decide on the second option, you can conveniently use the Filmora Slideshow Creator program to add voiceovers and soundtracks to your presentation.
To adhere to the purpose, navigate to the top toolbar and click on the ‘Media’ tab. From the options that appear, tap on the ‘Record’ menu that drops down, followed by selecting the ‘Record Voiceover’ option. As soon as the ‘Record Audio’ prompt pops up, select your desired microphone to be used in the recording process and click on the ‘Record’ button.
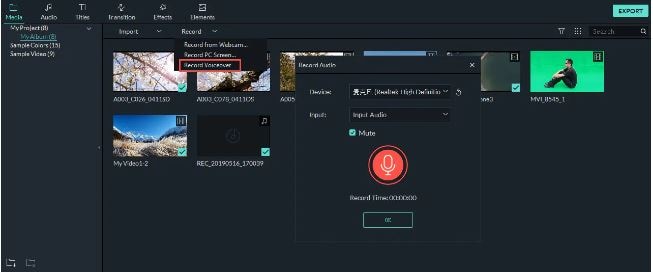
The recording that you have just created will appear in the ‘Media’ tab beside your all other imported audio-visual and image files, and you can add the same to any desired file with utmost ease. The Filmora library further allows you with a free access to its huge inventory of sound and audio effects. To apply these effects to your project, navigate to the ‘Audio’ tab and browse through impressive music categories, like, Young & Bright, Rock, Electronic, etc., to select the best matching audio for your slideshow.
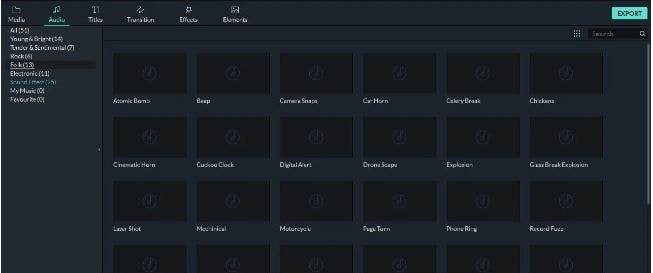
When you have made your selections, add all of them to the slideshow’s audio track in the project timeline and make suitable adjustments to their play durations.
Step 8: Export Your Creation
When your satisfied with your efforts till here, you have indeed created a wonderful animated slideshow presentation that should be exported to relevant platforms. Navigate to the ‘Export’ tab at the top right corner of the project timeline and click on the same. As soon as the utility window appears, choose a preferred file format, set a desired output resolution and fame rate for your presentation, followed by making a direct export of the same to your Vimeo or YouTube accounts.
The slideshow rendering time on different platforms may vary in cohesion with the specific presentation lengths, with larger file requiring a considerably longer time to get rendered than the smaller ones. It is advisable to limit the output file size within 500 MB for a quick rendering process.
02Canva
This one is an online animation slideshow creation tool that could certainly be your best choice to design high end professional presentations. Facilitating you with over 100 different slide design layouts, the tool additionally grants you the liberty to add your own images to the presentation being created, or even select suitable alternatives from Canva’s extensive image stack that has over 1 million apposite images to choose from.
You can make the best use of Canva to create promotional presentations to add extra emphasis on the brand of your company and product brand, which a compatible to a diverse variety of professional platforms for information sharing.
As far as the cost constraints of the tool are concerned, you get to access a free version of the tool for working on slideshow presentations for individual or small business units, while the graphics design needs of large scale professional corporations are suitably addressed by the utility’s Canva for Work version, which is equipped with high end team coordinated features with a 30-day free trial, along with monthly and annual subscription of $ 12.95 and $ 119.4 respectively.
Pros
● The tool allows you to add elusive texts, filters, fonts and images to the animated slides of your business presentation.
● Working with the tool, you can drag and drop an extensive variety of elements within your slideshow.
● Canva further allows you to create, upload and save the logo of your brand.
Cons
● The tool’s customer support is not quite welcoming.
● You need to add your phone number within the tool’s customer support interface for getting the required help.
● The tool’s working interface is somewhat confusing.
User’s Guide to Create Animated Slideshows in Canva
Let us see browse through the detailed, step by step process to quickly create amazing animated slideshow presentations using the Canva graphic design tool in the following section:
Step 1: Download and Install Canva
Visit the official site of the tool for a free download of the Canva slideshow creator software in any suitable iOS or Windows compatible desktops, laptops and PC systems.
Step 2: Choose Your Task
Undertake a launch of the downloaded program to reach the latter’s welcome page. Here, you need to navigate to the search bar at the top and type a keyword to select your task. For creating slideshow presentations, enter ‘Slideshow’ in the search tab.
In the drop down menu that follows, a list of the closest matching alternatives of your keyword will appear. Select ‘Slideshow Videos’ from the same.
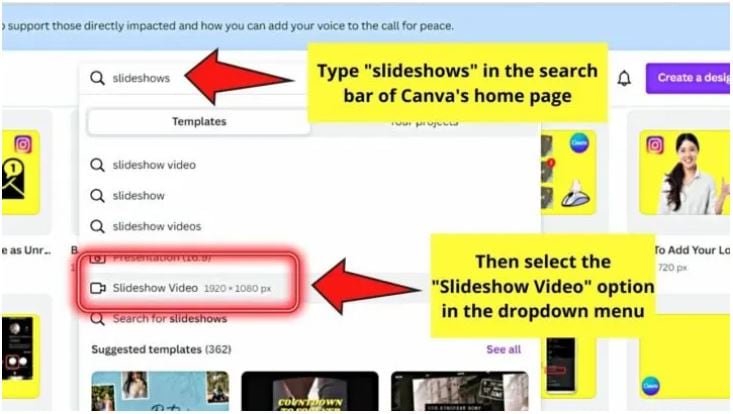
Step 3: Select a Template
The completion of Step 2 will take you to the program’s template library, where you can either work with creating a presentation of your own by clicking on the ‘Create a Blank Sideshow Video’ option, or choose any one from the finest collection of in built slideshow templates from the Canva library.
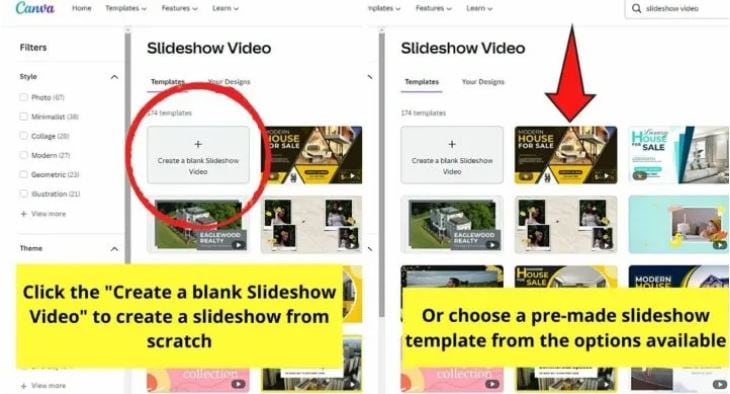
Step 4: Customize Your Template
After selecting the template, you will reach Canva’s slideshow editor page. Here you can customize your slideshow as per your preferences. To begin with, replace the preset images in the template with your selected ones.
You can either choose a set of images from the program’s inbuilt photo gallery or select the same from your device. Navigate to the ‘Tools Panel’ in the left and click on ‘Photos’ to work with the first method, or tap ‘Uploads’ in that very panel to apply the second.
When you have made your choice, click on ‘Upload Media’ to bring your selections to the tool’s editor timeline. This should be followed by dragging and dropping the images at appropriate places within the template.

Step 5: Crop the Images
Double click on any image and drag it sideways to crop the same within your preferred aspect ratio. When you are happy with the changes, click on ‘Done’ to apply them. You can additionally, customize the images with a variety of available effects at this stage.
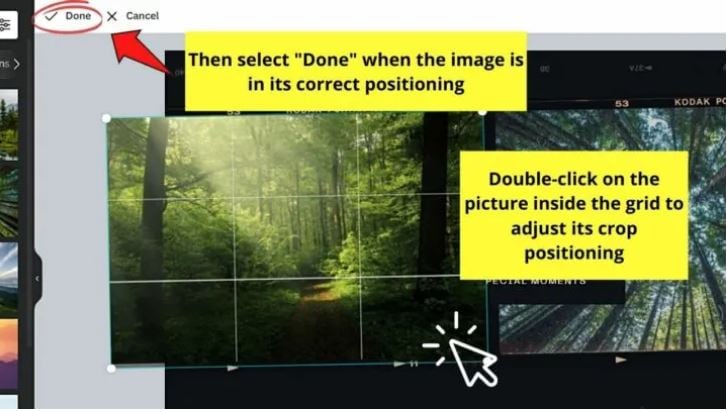
To proceed with the aforesaid process, choose the image you want to customize and select ‘Edit Image’ from the dropdown that appears. You will be directed to the ‘Edit Image Gallery’, where you can select the effect you want to complement your image with.
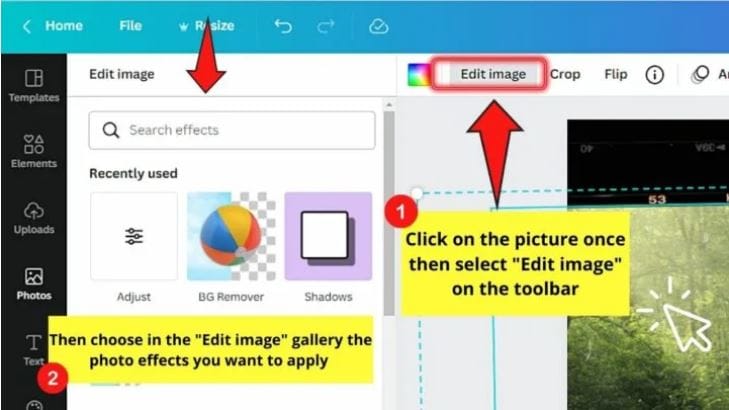
Step 6: Add Other Design Elements
Tap on ‘Elements’ in the ‘Tools Panel’ at the left to select a suitable component from a range of stickers, icons, illustrations and charts to add to your slideshow according to its creation theme.
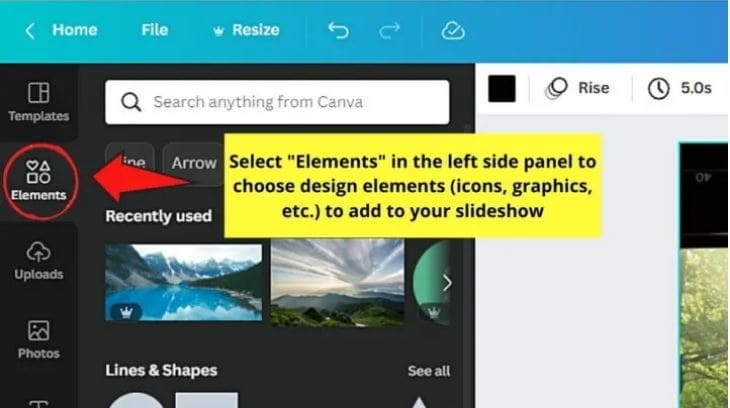
Step 7: Customize the Text
The template has some pre-written text, which you can change by double clicking inside the text boxes to highlight the already written text and edit the same as per your requirement. Press ‘T’ on your system’s keyboard for adding extra text boxes. You can also visit the ‘Editor Toolbar’ work with a variety of text formatting options, like, font size, style and color.
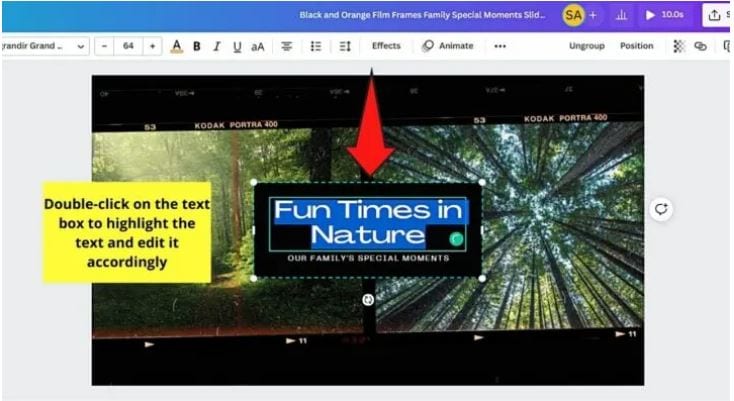
Step 8: Include Suitable Animations
To supplement your slideshow with stunning animations, select the image, element or text you wish to animate, followed by pressing the ‘Animate’ button. You will reach the ‘Animations Gallery’ for a selection of the desired text or page animation you want to add.
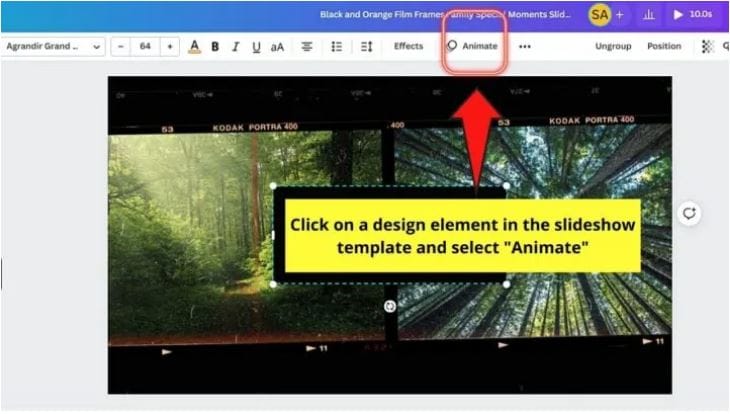
Once you have finalized your choice, click outside the gallery to apply your selected animation.
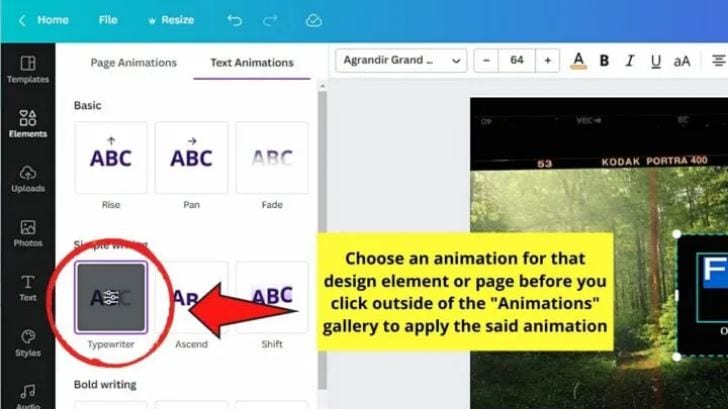
Step 9: Add the Perfect Sound
To uplift your presentation with an appealing music, navigate to the ‘Tools Panel’ at the left of the editor window and tap on ‘Audio’. A gallery of music clips will get displayed. Choose the one that best suits the theme of your animated presentation.
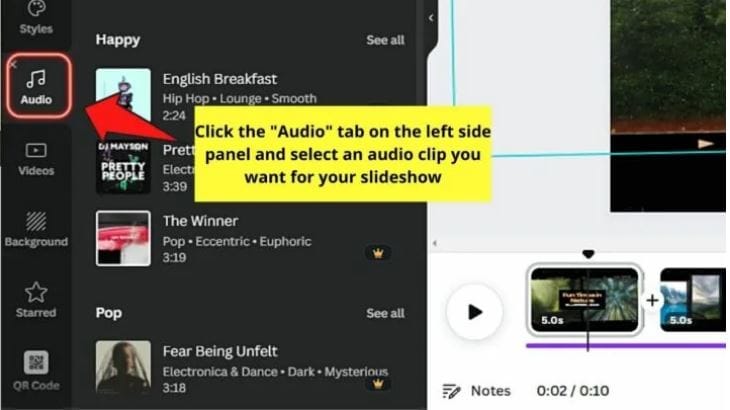
Step 10: Preview Your Creation
When you are done with creating the presentation, watch how it looks by navigating to the ‘Menu Bar’ at the top and clicking on the ‘Play’ button. When you have finished, click on ‘Close’ to reach the editor window.

Step 11: Set the Play Duration
To adjust the play duration of any slide, select it and navigate to the toolbar at the top left corner.
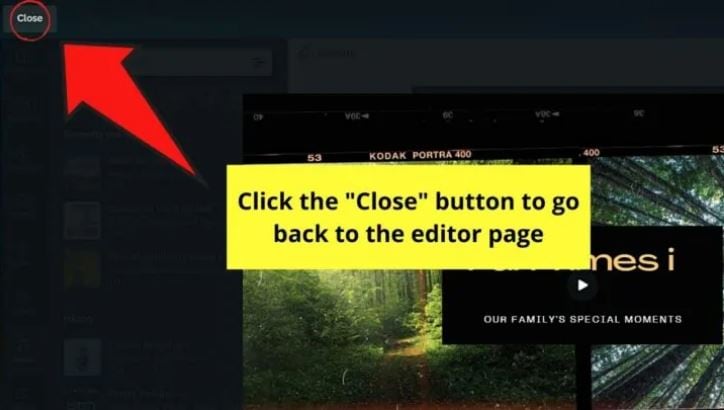
Click on ‘Edit Timing’ in the same and make suitable adjustments either by encoding the required number of seconds or dragging the duration slider.
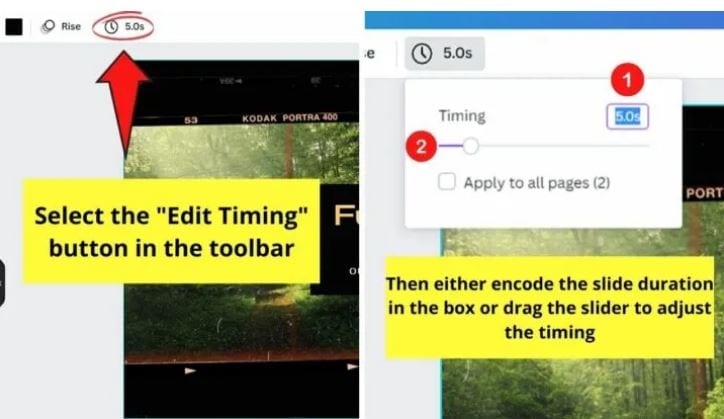
Step 12: Time to Download and Share!
Prefer previewing the slides one again to take a final look at your presentation. If you are happy with your work, navigate to and tap ‘Download’, followed by selecting the file type to save your creation locally to your device.
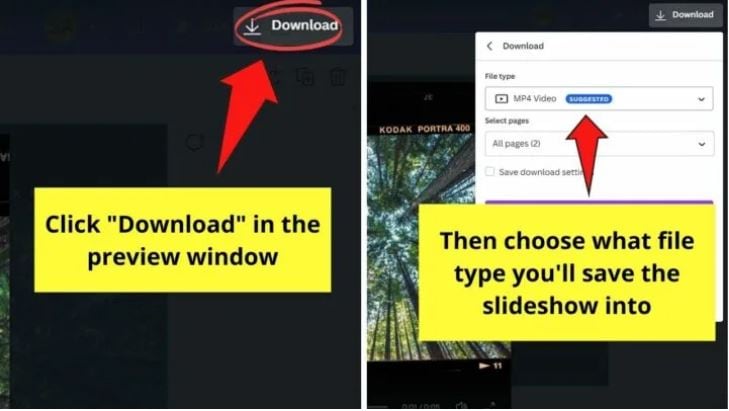
It is recommended to choose the ‘MP4 Video’ file format for saving audio enabled presentations. In case you want the background music to be included, either choose the ‘GIF’ format or download the slideshow as a PowerPoint presentation.
For a direct share of the animated slideshow, navigate to the ‘Menu Bar’ at the top and click on ‘Share’, followed by ‘All Options’ and lastly, tap ‘Present’.
03Keynote
This one is affordably the most convenient presentation tools if you are a user of iOS devices, and is a world class utility to create animated slideshow presentations. You can work with this tool to add an extra element of practicality to the otherwise customary business oriented animation slideshows with a diversity of effects, filters and transitions. The software is an ultimate best in adhering to real-time and remote event collaboration concerns of employees.
Concerning the pricing requirements, you can work with this slideshow creator tool for free if your usage concerns are restricted to a personal need. In an otherwise case, you can prefer buying the latter for a monthly investment of $ 99 and $ 299, respectively for business and enterprise based concerns.
Pros
● The Keynote program allows you a real-time, remote and revised access to the slideshow presentation.
● The program’s creator library is a storehouse of the most elegant and expressive slideshow templates and themes.
● The application greets you with a responsive and non-messy interface, with a decluttered toolbar.
Cons
● The program offers you a limited number of options to export your creations.
● You cannot work with the application on a Windows compatible device.
● If you are a regular PowerPoint user, working with the tool will require you a comprehensive learning of the usage pattern.
User’s Guide to Create Animated Slideshows in Keynote
Moving ahead with the discussion, let us understand the process of creating an animated slideshow presentation in Keynote though a step by step guide in the following section:
Step 1: Download the Keynote Slideshow Creator Tool
Start with initiating a free download of the tool from the official Apple website through your login credentials and proceed to install the same in your iOS device.
Step 2: Select a Presentation Theme
To start working on your slideshow presentation, you will require to choose a suitable theme. To do this, open the tool by clicking on its icon in the Launchpad, Applications folder or the Dock. The ‘Theme Chooser’ window pops up. In case this doesn’t happen, navigate to the bottom left corner of the screen and tap ‘New Document’.
In the ‘Theme Chooser’, you can either see through different categories or tap ‘All Themes’ to select the one you like. When you have found your preferred theme, open it by double clicking on the same.
You may either use the preset slide layout of the selected theme or use a different one by navigating to and clicking on ‘Format’ tab at the right side of the screen. You can now add your specific content in the presentation through adding new slides, text and images.
Click on the ‘+’ symbol in the theme toolbar to add a new slide followed by choosing its layout, double click inside the placeholder text to edit the same or drag and drop an image from your device gallery or the internet to replace the preset one in the template.
Step 3: Supplement Your Presentation With Objects
Proceed to add different slideshow objects in your creation by navigating to the ‘Object Toolbar’ at the top and selecting tables, charts, shapes, text boxes, comments, etc., that you wish to add in your presentation.
You can further make changes in the color, shadow and border of the object to improvise its appearance, or prefer applying a preset object style to enhance the overall object look to bring it in line with the slideshow theme. To do this, select the object and you will see its formatting options in the sidebar at the right. Click on the ‘Format Toolbar’ if the sidebar does not appear.
You can additionally, add layers to the slide objects, change their size or nest them within a shape or text box and link objects to switch to a new slide, open a related web page or email message.
Step 4: Add Audio-Visual Elements
Try adding suitable media elements to your creation by dragging a video or music file from your system either to a media placeholder or just anywhere within the slide. You can alternatively tap on the ‘Media’ icon in the top toolbar and choose ‘Music’ or ‘Movies’ from the dropdown that appears, followed by dragging the file with the previously explained method.
To add a soundtrack to the presentation, click on the ‘Soundtrack’ icon in the toolbar at the top, followed by clicking on the ‘Audio’ tab in the sidebar that appears. Next, tap the ‘+’ icon to select specific songs or playlists you want to add in the soundtrack.
Step 5: Add Stunning Animations
Start with selecting a slide to add the animation effect in the ‘Slide Navigator’. The ‘Animate’ sidebar appears, where you need to select the ‘Add an Effect’ option. Scroll down to view and choose a desired transition.
You can see a preview of the selected transition being played, with the slide navigator displaying a blue mark at the right corner of the slide to indicate the addition of a transition.
To change a previously selected transition, navigate to the sidebar at the top and tap ‘Change’ to select a new one. You can further, use the sidebar options to set the direction and transition play duration.
Step 6: Playing Your Slideshow
When satisfied with your effort, you can prefer playing the presentation, either in full screen or in a single window. If you choose to play in full screen, navigate to the ‘Play’ menu, click on the same and select ‘Full Screen’, followed by choosing the desired slide from where you wish the presentation to start in the slide navigator.
If you want to play the slideshow in a window, select a preferred slide in the slide navigator, go to the ‘Play’ menu at the top, click on the ‘Play’ tab, followed by choosing the ‘In Window’ option. The presentation will now start with the selected slide being played in one window and the presenter in the other.
In either of the above slideshow playing modes, press ‘Esc’ from your system’s keyboard to end the presentation playing process.
Step 7: Collaborating With Others
Working with the Keynote Slideshow Creator, you can collaborate with others to invite people to view and edit your presentation. To give a presentation access, you can either share a web link for a public access, or invite certain people having registered Apple credentials to view your creation. You can even give editing permissions to selected viewers or allow them to invite other people to collaborate.
04Powtoon
This one is a useful tool to create interactive business presentations for brand promotion and company recognition. Talking about the specific features of the tool, you can work with the utility to design an attractive logo for your company, import data and charts to your presentation, make adjustments in the color schemes of the slideshow, initiate infographic building and organize your slideshow into several sections.
The tool works best towards educating potential customers and clients about your company’s mainstream work profile and business. Sticking to the terms of utility pricing, you can begin with taking a free demo of the tool to access its credibility in cohesion with your specific needs. Following this, you can avail a monthly paid subscription of Powtoon, which has a price range of $ 19 to $ 59, according to the type and extent of features you choose to avail.
Pros
● You can add the details of your brand in the most expressive and appealing manner with the tool’s manifold design features.
● You can work with hundreds of preset slide designs to quickly create professionally sound animated slideshows.
● The tool is excellent in catering to your diverse slideshow design needs, when working for a large scale organizational setup.
Cons
● The tool is not a smart choice for individual or small scale business setups.
● The extensive variety of features results in a bit confusing and messy working interface.
● You can add a limited number of users to the monthly subscription plan of the tool.
User’s Guide to Create Animated Slideshows in Powtoon
For a better insight on how to create animated slideshows in Powtoon, let us go through the stepwise tutorial of the process in the following section:
Step 1: Launch the Online Tool
Visit the Powtoon official website to open the slideshow designer tool in any of your favorite internet browsers.
Powtoon Official Site Link: https://www.powtoon.com/index/
Step 2: Script Your Presentation
Start with creating a preset content for every slide of your presentation, based on the reason behind creating the slideshow, type and style of content presentation and so on.
Step 2: Add a Cohesive Background Music
You can complement your presentation with the perfect background music from the Powtoon library, from the web or even create your own voiceover recording through any preferred online text-to-voice recorder tool to voice the contents of your presentation. When you are done, upload your recording to the Powtoon editor to proceed with adding visual content to the presentation.
Step 3: Divide Your Presentation Slides
You can now add images, text and animations to your project in line with your presentation script. Choose suitable images from your device or from the web, add short, impactful texts and stunning animations from the Powtoon’s library to level up the appearance of your slideshow.
Step 4: Include Design Elements
Try adding additional elements like, graphics, background themes, animation styles, props, color schemes and other relevant characteristics to the slides.
Step 5: Time Your Presentation
In the last step, use the Powtoon timeline to set the sequence and time of appearance of different elements in each of your presentation slides. You can also hear the voiceover in the slideshow background to ensure the synchronization between the audio play and visual content appearance within the presentation.
05Visme
This one is a top grade cloud based professional tool for creating animated slideshow presentations with an affordably high visual credibility. Equipped with a drag and drop design workflow, the tool works effectively towards delivering intuitive and engaging animated slideshows for effective communication of business ideas and top rated brand promotion strategies.
The best usage of the tool lies in the creation of business presentations that are aimed at ensuring company oriented image collection and brand consistency. Talking of the tool’s pricing constraints, a single user subscription of the utility would cost you $ 20 on a monthly basis, which increases to $ 60 per month for a 3-user package.
It is a smart choice to take a free live demonstration of the tool to get a comprehensive understanding of the latter’s working technology.
Pros
● Extensive variety of colors, images and logos to complement your business presentations with elusive design elements.
● Promotes a viable consistency among multiple employee presentations
● The tool comes with an in built analytic system that keeps a track of the viewers of your slideshow presentations.
Cons
● The tool lacks some essential elements of slideshow design.
● The design features are mostly generic and do not cater to intense creation needs.
● The tool lacks a free trial facility.
User’s Guide to Create Animated Slideshows in Visme
In the following section is presented a stepwise procedure to create stunning animated slideshows in Visme with high end professional excellence and in the quickest time span:
Step 1: Download and Install the Program
Navigate to the official website of the Visme Slideshow Creator program to download and install the same in any of your preferred MacOs or Windows supported devices.
Visme Official Download Link: https://visme.co/blog/
Step 2: Start a New Project
You will need to create a Visme account to start working on the slideshow creation process. When you have created one, navigate to and click the ‘Create New Visme’ option in the tool’s opening screen to open a new project and assign a suitable name to it.
Step 3: Choose a Template
in the new project window that appears, click on ‘Presentations’ option at the top to see a library of slideshow templates being displayed. You can either, select a template from the library to edit or start an entirely new creation of your own.
Step 4: Make Color Schemes and Background Selections
To proceed with the selection of slide backgrounds and color schemes, you can either choose an exact color by entering its RGB code in the ‘Edit Colors’ option, or choose one from Google web pages using the ‘Chrome Eye Dropper’ tool.
Step 5: Add Shapes and Icons
You can supplement your slideshow with suitable design elements, like icons and shapes. All you need to do is navigate to the ‘Tools Panel’ in the left, click on the ‘All Shapes’ symbol and type a related keyword in the search bar to get a list of matching shapes to choose from.
Step 6: Insert and Format Text
You can now proceed with adding suitable text, titles and subtitles to the presentation slides. Again, visit the ‘Tools Panel’, tap the ‘T’ icon and click on ‘Add a Title’. A text box will be created within the slide, where you can add the required text. You can also format the same from the ‘Format Toolbar’ that gets displayed above the inserted text box.
Step 7: Add Photographic Slides
To include image slides, start with inserting a new slide in the presentation, flowed by once again navigating to the ‘Tools Panel’ in the left and clicking on the ‘Background’ icon. Choose a suitable color scheme and again, click on the ‘Images’ symbol in the ‘Tools Panel’. Here you can select any suitable image from the library that gets displayed.
Step 8: Link Your Slides
Link the sequential slides of your presentation with any suitable indicator, such as an arrow, so that clicking on the same takes the viewer to the successive slide. You can alternatively create ‘Hotspots’ to link the slides together.
Step 9: Publish and Share Your Presentation
When the final result makes you happy, navigate to the ‘Publish’ tab just above your slide window to open the presentation publishing interface. Here, you can choose from the options of a direct share, a site or blog embed or a local download of the presentation to your device.
● Ending Thoughts →
● Animated slideshow presentations land among the most trending ways to ensure a precise and engaging content delivery.
● The software market is packed with a diverse range of impressive slideshow creator tools with the most amazing features.
● When making your choice of the perfect animated slideshow designer tools, the Wondershare Filmora Slideshow Creator program is indeed a smart pick.
If you are passionate about uplifting your graphic design skills with stunning animated slideshow creation, read here about the best PowerPoint templates!
In this article
01 [12 Cool Animated Slideshow PowerPoint Templates](#Part 1)
02 [5 Tools to Make Stunning Animated Slideshow PowerPoint](#Part 2)
Part 1 12 Cool Animated Slideshow PowerPoint Templates
Slideshows are an already appealing media of content presentation, which when supplemented with animated backgrounds, are bound to captivate attention. Considering the underlying reason, it should be noted that animated slideshows offer a more vivid and lively presentation of information, as compared to their static counterparts. Animated slideshows have the additional advantage of presenting the content in the exact and accurate tone that suits the grasping capability of the audience.
Talking of feasible solutions for creating high end animated slide show presentations, the software market has a diverse range of alternatives to choose from. However, Microsoft PowerPoint is a graphic presentation tool that almost everyone is familiar with. Limiting our discussion to the same, there are a diversity of animated slideshow PowerPoint templates, like that of Evanto Elements and GraphicRiver to design professionally outstanding animated slideshows.
If you are keen on trying hands at adding that extra spunk your ordinarily boring static presentations, spare time to read the following section of this article, which incorporates the features, utilities and merits of the top 12 design templates in GraphicRiver for creating animated slideshows in PowerPoint with utmost ease and within a quick time span:
01Parallax Ultimate PowerPoint Animated Template
Choosing this animated presentation template to design your slideshow projects will supplement tour creations with the most amazing parallax effect, including an additional list of tempting and trendy editing features, like, limitless color choices, high definition video resolution, master slide presentations, modern, elegant, fully animated, company oriented slides, with object animations and parallax transitions, 16:9 wide screen aspect ratio, handmade infographics and much more.
02Splash Animated PPT
This one is an excellent animated template to create elegant animated slideshow presentations that will make your design creativity stand out of the crowd. Working with the template entitles you of a matchless, professional quality slideshow animation PowerPoint project on account some exclusive features, like those of high definition screen resolution and widescreen image aspect ratio, light and dark presentation backgrounds etc.
Mentioning some additional credibility of using the template for creating animated slideshows, you get to access as many as 500 selected slides, vector line and social media icons, uniquely styled image masks, calendars and vector maps.
03Social Media Animated PowerPoint Templates
If your working constraints require an extensive use of social media information, consider using tis interactive PowerPoint template for designing social media compatible, premium quality, professional slideshows with animated graphics. Working with the template, you will get a complementary access to a pool of exciting slideshow features.
Talking of the specific utilities of the animated slideshow maker template, you can choose from over 50 slide layouts, light and dark backgrounds themes, enjoy a seamless, drag and drop workflow and easily edit grouped elements, along with modifying infographic elements in Excel sheets.
04Animated Slides Bundle for PowerPoint Presentation
This one is an interactive GraphicRiver PowerPoint animation slideshow maker template, which you can work with for a delivery of high end and illustrative animated slideshow presentations. The template facilitates its users with a diversity of graphic customization features, like that of visual transitions, custom reveals and objectified motions to your presentation slides, points and images.
The template promises you of a stunning, high quality and compelling slideshow output with an elegant presentation outlook. The template has a variety of inbuilt slide layouts, is easy to use and comes to you absolutely free of cost.
05Proposal PowerPoint Animated
If you are about to deliver a dynamic business presentation, consider working with this graphic tool to create your animoto slideshow in PowerPoint. Proposal PowerPoint Animated is an interactive animation template, designed exclusively for adhering to the concern of business centered content delivery.
You can create captivating motion stories with the conveniently editable slides and high end animated graphics of this PowerPoint template, thus ensuring a high pitched information conveyance to your target audience.
06DIY Animated PPT Promo Kit
Looking for the most feasible PowerPoint animated slideshow templates for slideshow creation generally refers to a time consuming web search. If you are a creativity freak and want to escape the aforesaid hustle, try hands at working with the DIY Animated PPT Promo Kit to create a customized animated slideshow template of your own.
Talking about the utilities, this interactive slideshow presentation kit is packed with a lot of professional features that are sufficient to give a hype to your normal quality slideshows and allows you to work with over 100 entirely customizable slides in 2 variable color schemes.
07Pitch Deck Animated Bundle
Using a pitch deck strategy is a common way of attracting fund credibility for your business for an appreciable revenue growth, which is often put to the additional use of addressing potential workers of the company on the latter’s crucial success factors. When working towards either of the purposes, using the aforesaid software bundle is a smart choice to showcase the exact content concerning your overall business concept to the target audience.
This one is preferably the best pitch deck template you could ever get. Though there is an appealing set of market choices, it is always an impressive decision to select the cream from the curd for ensuring high end results.
08Massive X Presentation Template for PowerPoint
When having a desire to access the credibility of slideshow templates though user reviews, this animated PowerPoint template is sure winner. Packed with an extensive library of over 960 exceptional slides in dark and light background themes, along with 20 preset color schemes, this graphic template is an absolute favorite of creative designers across the globe.
Choosing the template for catering to your animation centered slideshow creation needs opens a diversity of audio-visual customization features with an entirely free access and an easy to use working interface.
09Imperial Multipurpose PowerPoint Template
Living up to its name, this one is a multi-functional, free animated slideshow template that allows you to choose the perfect color scheme for your brand from more than 100 shade varieties, thus ensuring a high end transition flexibility. Prefer using this template to add a visual highlight to your slideshow presentations with a diversity of icons and customized animations.
If you have invested enough time looking for the best PowerPoint animation slideshow creator utility, end your search with the Imperial Multipurpose template that is available to you without asking for a penny from your pocket and welcomes you with the most interactive working environment.
10Minimal PowerPoint
The aforesaid slideshow template for creating animated presentations is a fundamental and clean graphic creation utility that comes with a wide range of more than 500 different sides and convenient to use drag and drop placeholders for seamless content inclusion. Additional features of the template consist of inbuilt calendars, charts, graphs and customized illustration components, suitable for a diverse set of industries.
This one is an interactive style PowerPoint animoto slideshow maker template that works best to infuse data and animation graphics together. You can use this graphic design tool without a second thought for delivering quality content with a cohesive slideshow presentation, of course without having to worry about any cost constraints.
11PowerPoint Animated Pro Pack- With Animated Slides
Using this animation slideshow template for your business presentations facilitates you with a series of interactive graphic modules within professionally compatible slides. You can use this high end template package to supplement your presentations with high quality animated motion diagrams.
Other appealing features of the package include a huge set of conveniently editable slides, with an extensive variety of PowerPoint compatible motion transitions, animations and many more surplus features to add the right amount of spark to your professional animated slideshow presentations.
12Wow Slides for PowerPoint
If you are yet to reach to the perfect animated slideshow creator solution, consider sparing a thought about this wonderful PowerPoint template to cater to your animation design concerns. Available to you with a decent set of over 24 inbuilt color themes, this one is a perfect choice for working on webinar slides, business presentations and pitch decks.
Apart from elegantly beautiful collection of animations, you will find this slideshow template package to be a storehouse of elusive and explanatory charts, graphs, maps and icon packs, which you can use to add relevant statistical content to your presentations or give an enhanced and organized look to your slideshow project.
Part 2 5 Tools to Make Stunning Animated Slideshow PowerPoint
Having discussed about the most amazing animation slideshow templates for PowerPoint, let us now extend our talk to learn about some of the most preferred graphic tools to create high end and professionally expressive and stunning animation centered slideshow presentations in PowerPoint, considering the fact that such presentations are an important part of the ongoing business trends, which you should be aware of.
The following section presents a detailed discussion on the features, best application utilities, market reviews and usage guidelines of the top 5 animated slideshow creator tools:
01**Wondershare Filmora Video Editor **
For Win 7 or later (64-bit)
For macOS 10.12 or later
This one is possibly the best and an all in one software package that promises to address almost all of your graphic editing needs in the most affordable manner. Talking of the specific utility of creating animated slideshow presentations, Wondershare Filmora is dedicated towards delivering high end motion graphic slideshows of matchless professional excellence.
The tool is best in making audio infused, animated photo slideshows that are apt for comprehensive graphic proposals for top rated business projects. About the software’s pricing requirements, you can avail a free usage of the tool for free in its trial version for 7 days, following which, working with the tool will demand paid monthly and annual subscriptions of $9.99 and $19.99 respectively.
Pros
● Working with the tool, you are entitled to use a plethora of audio-visual effects and filters to enhance your presentations.
● The tool’s feature rich library has everything to design animated slideshows with high resolution output quality.
● The tool is known to support almost all popular audio, video and image file formats.
Cons
● The tool has a limited variety of fine-tuned utilities for effect tweaking.
● The features of chapter authoring and DVD menu are absent.
● Working with the tool, you may encounter occasional software crashes.
User’s Guide to Create Animated Slideshows in Wondershare Filmora
Having understood the basic functionalities and exceptional features of Filmora’s Animated Slideshow creator tool, let us see through the following section to get familiar to the knowhow of using the same for designing animation top rated slideshow presentations in a stepwise procedure:
Step 1: Download and Install the Software
Before getting though with the creation process, initiate a download of the slideshow creator program from the latter’s official website to any of your preferred Windows or iOS compatible devices.
Step 2: Add Your Images and Videos
Creating a slideshow presentation may require a set of multiple image and video files to the program’s graphic creator timeline. It is recommended to add your selections of the aforesaid files to a single folder before launching the software in your system.
Once you have finished making your selections, launch the program to reach its welcome interface, were you need to navigate and click on the ‘Media’ tab in the top toolbar. From the task options that appear, click on ‘Import a Media’. Next, you will be asked to browse through your device locations and choose the folder that contains your previously selected files to be used in the presentation you are about to create.
When you have found the required folder, tap on ‘OK’ to import the same to the new slideshow project in the Filmora timeline. All your selected files will be visible here after a successful import.
Step 3: Timeline Positioning of Media Files
Before working on the task of positioning the imported media files on the app’s timeline, navigate to the ‘File’ menu and choose the ‘Preferences’ option. As soon as the respective window pops up, reach to the ‘Editing’ tab at the top and select ‘Photo Placement’ from the drop down menu that follows.
In case your selected images do not have a matching aspect ratio with the program’s preset values, choose the ‘Crop to Fit’ option for removing the additional black bars from the selected images. For the requirement of adding camera pan and zoom movements to your images, select the ‘Pan & Zoom’ option in the ‘Preferences’ settings.
You can proceed to change the preset play durations of images, effects and transitions in the ‘Editing’ window itself. As an alternative you can adhere to the same task in the program’s timeline by dragging any one end of the media files in an outward or inward direction. The ‘Crop to Fit’ option may not give an affordable size in some cases where the images are set in a vertical 9:16 aspect ratio. Choose the ‘Fit’ option to set this issue straight.
When you have finished making all the aforesaid adjustments, navigate to the Media panel again for adding the selected image files to the software’s timeline. Proceed with selecting a file and dragging and dropping the same at the desired position within the timeline. Continue repeating the process till all the images have been placed at their respective locations, and in the exact order of appearance in the slideshow. This should be followed by adjusting the image play durations using any one of the previously described methods.
Step 4: Escape Hard Cuts With Image Transitions
Hard cuts among different slides of a presentation break the flow of the slideshow. To escape this cringe, consider using a smooth transition effect within the slides of your project. To do this, navigate to the ‘Transitions’ tab in the top toolbar of Filmora’s project window and select a desired one from over 100 choices of customizable transitions.
You can now drop these transitions in the timeline at the exact intersection point of two image files. Avoid using the same transition for every hard cut to escape monotony. You can instead choose different transitions for each slide while observing its appearance in the clip.
After you are done with applying transitions to each slide, double click on a particular transition to open its ‘Transition Setting Window’ either for presetting the transition play duration or to choose a desired transition mode. You can also prefer a direct customization of the transition duration in the project timeline through a right or left dragging of any of its ends.
Step 5: Uplift Your Slideshow Colors With Overlays and Filters
Navigate to the top toolbar and hit the ‘Effects’ tab to choose from a diversity of visual effects that can be added to the slideshow images to supplement them with an increased vibrancy through color desaturation. These effects in the program’s library are categorized into classes of Overlays and Filters, with further subcategories of Sepia Tone, Light Leaks and Lomography and many more.
To apply these effects, just select and add them into a timeline track above the clip you wish to add the overlay or filter to. When you have applied the effects, observe the overall clip appearance in the ‘Preview Panel’. Double click on a particular effect to fine-tune the latter’s settings.
Step 6: Supplement Your Slides With Motion Graphic Elements
While motion graphics will undoubtedly enhance your animated slideshows, adding them to your presentation is purely optional, since most professional projects do not need a motion graphic element to escalate their presentation outlook. If, however, you choose to work on making these a part of your animated slideshow, Filmora lets you do that in its ‘Elements’ tab.
There is a plethora of motion graphic templates that you can select and add to the project timeline for a quick and vibrant upgrade of your presentation slides, but, at the same time, it becomes important to take care of the visual outlook and the underlying reason of creating the slideshow before you decide on adding these elements to your project.
Step 7: Create Voiceovers and Record Soundtracks for Your Slideshow
Narration is a smart way to captivate the target audience within your slideshow, whether though a self-delivery or a recorded voiceover. If you decide on the second option, you can conveniently use the Filmora Slideshow Creator program to add voiceovers and soundtracks to your presentation.
To adhere to the purpose, navigate to the top toolbar and click on the ‘Media’ tab. From the options that appear, tap on the ‘Record’ menu that drops down, followed by selecting the ‘Record Voiceover’ option. As soon as the ‘Record Audio’ prompt pops up, select your desired microphone to be used in the recording process and click on the ‘Record’ button.
The recording that you have just created will appear in the ‘Media’ tab beside your all other imported audio-visual and image files, and you can add the same to any desired file with utmost ease. The Filmora library further allows you with a free access to its huge inventory of sound and audio effects. To apply these effects to your project, navigate to the ‘Audio’ tab and browse through impressive music categories, like, Young & Bright, Rock, Electronic, etc., to select the best matching audio for your slideshow.
When you have made your selections, add all of them to the slideshow’s audio track in the project timeline and make suitable adjustments to their play durations.
Step 8: Export Your Creation
When your satisfied with your efforts till here, you have indeed created a wonderful animated slideshow presentation that should be exported to relevant platforms. Navigate to the ‘Export’ tab at the top right corner of the project timeline and click on the same. As soon as the utility window appears, choose a preferred file format, set a desired output resolution and fame rate for your presentation, followed by making a direct export of the same to your Vimeo or YouTube accounts.
The slideshow rendering time on different platforms may vary in cohesion with the specific presentation lengths, with larger file requiring a considerably longer time to get rendered than the smaller ones. It is advisable to limit the output file size within 500 MB for a quick rendering process.
02Canva
This one is an online animation slideshow creation tool that could certainly be your best choice to design high end professional presentations. Facilitating you with over 100 different slide design layouts, the tool additionally grants you the liberty to add your own images to the presentation being created, or even select suitable alternatives from Canva’s extensive image stack that has over 1 million apposite images to choose from.
You can make the best use of Canva to create promotional presentations to add extra emphasis on the brand of your company and product brand, which a compatible to a diverse variety of professional platforms for information sharing.
As far as the cost constraints of the tool are concerned, you get to access a free version of the tool for working on slideshow presentations for individual or small business units, while the graphics design needs of large scale professional corporations are suitably addressed by the utility’s Canva for Work version, which is equipped with high end team coordinated features with a 30-day free trial, along with monthly and annual subscription of $ 12.95 and $ 119.4 respectively.
Pros
● The tool allows you to add elusive texts, filters, fonts and images to the animated slides of your business presentation.
● Working with the tool, you can drag and drop an extensive variety of elements within your slideshow.
● Canva further allows you to create, upload and save the logo of your brand.
Cons
● The tool’s customer support is not quite welcoming.
● You need to add your phone number within the tool’s customer support interface for getting the required help.
● The tool’s working interface is somewhat confusing.
User’s Guide to Create Animated Slideshows in Canva
Let us see browse through the detailed, step by step process to quickly create amazing animated slideshow presentations using the Canva graphic design tool in the following section:
Step 1: Download and Install Canva
Visit the official site of the tool for a free download of the Canva slideshow creator software in any suitable iOS or Windows compatible desktops, laptops and PC systems.
Step 2: Choose Your Task
Undertake a launch of the downloaded program to reach the latter’s welcome page. Here, you need to navigate to the search bar at the top and type a keyword to select your task. For creating slideshow presentations, enter ‘Slideshow’ in the search tab.
In the drop down menu that follows, a list of the closest matching alternatives of your keyword will appear. Select ‘Slideshow Videos’ from the same.
Step 3: Select a Template
The completion of Step 2 will take you to the program’s template library, where you can either work with creating a presentation of your own by clicking on the ‘Create a Blank Sideshow Video’ option, or choose any one from the finest collection of in built slideshow templates from the Canva library.
Step 4: Customize Your Template
After selecting the template, you will reach Canva’s slideshow editor page. Here you can customize your slideshow as per your preferences. To begin with, replace the preset images in the template with your selected ones.
You can either choose a set of images from the program’s inbuilt photo gallery or select the same from your device. Navigate to the ‘Tools Panel’ in the left and click on ‘Photos’ to work with the first method, or tap ‘Uploads’ in that very panel to apply the second.
When you have made your choice, click on ‘Upload Media’ to bring your selections to the tool’s editor timeline. This should be followed by dragging and dropping the images at appropriate places within the template.
Step 5: Crop the Images
Double click on any image and drag it sideways to crop the same within your preferred aspect ratio. When you are happy with the changes, click on ‘Done’ to apply them. You can additionally, customize the images with a variety of available effects at this stage.
To proceed with the aforesaid process, choose the image you want to customize and select ‘Edit Image’ from the dropdown that appears. You will be directed to the ‘Edit Image Gallery’, where you can select the effect you want to complement your image with.
Step 6: Add Other Design Elements
Tap on ‘Elements’ in the ‘Tools Panel’ at the left to select a suitable component from a range of stickers, icons, illustrations and charts to add to your slideshow according to its creation theme.
Step 7: Customize the Text
The template has some pre-written text, which you can change by double clicking inside the text boxes to highlight the already written text and edit the same as per your requirement. Press ‘T’ on your system’s keyboard for adding extra text boxes. You can also visit the ‘Editor Toolbar’ work with a variety of text formatting options, like, font size, style and color.
Step 8: Include Suitable Animations
To supplement your slideshow with stunning animations, select the image, element or text you wish to animate, followed by pressing the ‘Animate’ button. You will reach the ‘Animations Gallery’ for a selection of the desired text or page animation you want to add.
Once you have finalized your choice, click outside the gallery to apply your selected animation.
Step 9: Add the Perfect Sound
To uplift your presentation with an appealing music, navigate to the ‘Tools Panel’ at the left of the editor window and tap on ‘Audio’. A gallery of music clips will get displayed. Choose the one that best suits the theme of your animated presentation.
Step 10: Preview Your Creation
When you are done with creating the presentation, watch how it looks by navigating to the ‘Menu Bar’ at the top and clicking on the ‘Play’ button. When you have finished, click on ‘Close’ to reach the editor window.
Step 11: Set the Play Duration
To adjust the play duration of any slide, select it and navigate to the toolbar at the top left corner.
Click on ‘Edit Timing’ in the same and make suitable adjustments either by encoding the required number of seconds or dragging the duration slider.
Step 12: Time to Download and Share!
Prefer previewing the slides one again to take a final look at your presentation. If you are happy with your work, navigate to and tap ‘Download’, followed by selecting the file type to save your creation locally to your device.
It is recommended to choose the ‘MP4 Video’ file format for saving audio enabled presentations. In case you want the background music to be included, either choose the ‘GIF’ format or download the slideshow as a PowerPoint presentation.
For a direct share of the animated slideshow, navigate to the ‘Menu Bar’ at the top and click on ‘Share’, followed by ‘All Options’ and lastly, tap ‘Present’.
03Keynote
This one is affordably the most convenient presentation tools if you are a user of iOS devices, and is a world class utility to create animated slideshow presentations. You can work with this tool to add an extra element of practicality to the otherwise customary business oriented animation slideshows with a diversity of effects, filters and transitions. The software is an ultimate best in adhering to real-time and remote event collaboration concerns of employees.
Concerning the pricing requirements, you can work with this slideshow creator tool for free if your usage concerns are restricted to a personal need. In an otherwise case, you can prefer buying the latter for a monthly investment of $ 99 and $ 299, respectively for business and enterprise based concerns.
Pros
● The Keynote program allows you a real-time, remote and revised access to the slideshow presentation.
● The program’s creator library is a storehouse of the most elegant and expressive slideshow templates and themes.
● The application greets you with a responsive and non-messy interface, with a decluttered toolbar.
Cons
● The program offers you a limited number of options to export your creations.
● You cannot work with the application on a Windows compatible device.
● If you are a regular PowerPoint user, working with the tool will require you a comprehensive learning of the usage pattern.
User’s Guide to Create Animated Slideshows in Keynote
Moving ahead with the discussion, let us understand the process of creating an animated slideshow presentation in Keynote though a step by step guide in the following section:
Step 1: Download the Keynote Slideshow Creator Tool
Start with initiating a free download of the tool from the official Apple website through your login credentials and proceed to install the same in your iOS device.
Step 2: Select a Presentation Theme
To start working on your slideshow presentation, you will require to choose a suitable theme. To do this, open the tool by clicking on its icon in the Launchpad, Applications folder or the Dock. The ‘Theme Chooser’ window pops up. In case this doesn’t happen, navigate to the bottom left corner of the screen and tap ‘New Document’.
In the ‘Theme Chooser’, you can either see through different categories or tap ‘All Themes’ to select the one you like. When you have found your preferred theme, open it by double clicking on the same.
You may either use the preset slide layout of the selected theme or use a different one by navigating to and clicking on ‘Format’ tab at the right side of the screen. You can now add your specific content in the presentation through adding new slides, text and images.
Click on the ‘+’ symbol in the theme toolbar to add a new slide followed by choosing its layout, double click inside the placeholder text to edit the same or drag and drop an image from your device gallery or the internet to replace the preset one in the template.
Step 3: Supplement Your Presentation With Objects
Proceed to add different slideshow objects in your creation by navigating to the ‘Object Toolbar’ at the top and selecting tables, charts, shapes, text boxes, comments, etc., that you wish to add in your presentation.
You can further make changes in the color, shadow and border of the object to improvise its appearance, or prefer applying a preset object style to enhance the overall object look to bring it in line with the slideshow theme. To do this, select the object and you will see its formatting options in the sidebar at the right. Click on the ‘Format Toolbar’ if the sidebar does not appear.
You can additionally, add layers to the slide objects, change their size or nest them within a shape or text box and link objects to switch to a new slide, open a related web page or email message.
Step 4: Add Audio-Visual Elements
Try adding suitable media elements to your creation by dragging a video or music file from your system either to a media placeholder or just anywhere within the slide. You can alternatively tap on the ‘Media’ icon in the top toolbar and choose ‘Music’ or ‘Movies’ from the dropdown that appears, followed by dragging the file with the previously explained method.
To add a soundtrack to the presentation, click on the ‘Soundtrack’ icon in the toolbar at the top, followed by clicking on the ‘Audio’ tab in the sidebar that appears. Next, tap the ‘+’ icon to select specific songs or playlists you want to add in the soundtrack.
Step 5: Add Stunning Animations
Start with selecting a slide to add the animation effect in the ‘Slide Navigator’. The ‘Animate’ sidebar appears, where you need to select the ‘Add an Effect’ option. Scroll down to view and choose a desired transition.
You can see a preview of the selected transition being played, with the slide navigator displaying a blue mark at the right corner of the slide to indicate the addition of a transition.
To change a previously selected transition, navigate to the sidebar at the top and tap ‘Change’ to select a new one. You can further, use the sidebar options to set the direction and transition play duration.
Step 6: Playing Your Slideshow
When satisfied with your effort, you can prefer playing the presentation, either in full screen or in a single window. If you choose to play in full screen, navigate to the ‘Play’ menu, click on the same and select ‘Full Screen’, followed by choosing the desired slide from where you wish the presentation to start in the slide navigator.
If you want to play the slideshow in a window, select a preferred slide in the slide navigator, go to the ‘Play’ menu at the top, click on the ‘Play’ tab, followed by choosing the ‘In Window’ option. The presentation will now start with the selected slide being played in one window and the presenter in the other.
In either of the above slideshow playing modes, press ‘Esc’ from your system’s keyboard to end the presentation playing process.
Step 7: Collaborating With Others
Working with the Keynote Slideshow Creator, you can collaborate with others to invite people to view and edit your presentation. To give a presentation access, you can either share a web link for a public access, or invite certain people having registered Apple credentials to view your creation. You can even give editing permissions to selected viewers or allow them to invite other people to collaborate.
04Powtoon
This one is a useful tool to create interactive business presentations for brand promotion and company recognition. Talking about the specific features of the tool, you can work with the utility to design an attractive logo for your company, import data and charts to your presentation, make adjustments in the color schemes of the slideshow, initiate infographic building and organize your slideshow into several sections.
The tool works best towards educating potential customers and clients about your company’s mainstream work profile and business. Sticking to the terms of utility pricing, you can begin with taking a free demo of the tool to access its credibility in cohesion with your specific needs. Following this, you can avail a monthly paid subscription of Powtoon, which has a price range of $ 19 to $ 59, according to the type and extent of features you choose to avail.
Pros
● You can add the details of your brand in the most expressive and appealing manner with the tool’s manifold design features.
● You can work with hundreds of preset slide designs to quickly create professionally sound animated slideshows.
● The tool is excellent in catering to your diverse slideshow design needs, when working for a large scale organizational setup.
Cons
● The tool is not a smart choice for individual or small scale business setups.
● The extensive variety of features results in a bit confusing and messy working interface.
● You can add a limited number of users to the monthly subscription plan of the tool.
User’s Guide to Create Animated Slideshows in Powtoon
For a better insight on how to create animated slideshows in Powtoon, let us go through the stepwise tutorial of the process in the following section:
Step 1: Launch the Online Tool
Visit the Powtoon official website to open the slideshow designer tool in any of your favorite internet browsers.
Powtoon Official Site Link: https://www.powtoon.com/index/
Step 2: Script Your Presentation
Start with creating a preset content for every slide of your presentation, based on the reason behind creating the slideshow, type and style of content presentation and so on.
Step 2: Add a Cohesive Background Music
You can complement your presentation with the perfect background music from the Powtoon library, from the web or even create your own voiceover recording through any preferred online text-to-voice recorder tool to voice the contents of your presentation. When you are done, upload your recording to the Powtoon editor to proceed with adding visual content to the presentation.
Step 3: Divide Your Presentation Slides
You can now add images, text and animations to your project in line with your presentation script. Choose suitable images from your device or from the web, add short, impactful texts and stunning animations from the Powtoon’s library to level up the appearance of your slideshow.
Step 4: Include Design Elements
Try adding additional elements like, graphics, background themes, animation styles, props, color schemes and other relevant characteristics to the slides.
Step 5: Time Your Presentation
In the last step, use the Powtoon timeline to set the sequence and time of appearance of different elements in each of your presentation slides. You can also hear the voiceover in the slideshow background to ensure the synchronization between the audio play and visual content appearance within the presentation.
05Visme
This one is a top grade cloud based professional tool for creating animated slideshow presentations with an affordably high visual credibility. Equipped with a drag and drop design workflow, the tool works effectively towards delivering intuitive and engaging animated slideshows for effective communication of business ideas and top rated brand promotion strategies.
The best usage of the tool lies in the creation of business presentations that are aimed at ensuring company oriented image collection and brand consistency. Talking of the tool’s pricing constraints, a single user subscription of the utility would cost you $ 20 on a monthly basis, which increases to $ 60 per month for a 3-user package.
It is a smart choice to take a free live demonstration of the tool to get a comprehensive understanding of the latter’s working technology.
Pros
● Extensive variety of colors, images and logos to complement your business presentations with elusive design elements.
● Promotes a viable consistency among multiple employee presentations
● The tool comes with an in built analytic system that keeps a track of the viewers of your slideshow presentations.
Cons
● The tool lacks some essential elements of slideshow design.
● The design features are mostly generic and do not cater to intense creation needs.
● The tool lacks a free trial facility.
User’s Guide to Create Animated Slideshows in Visme
In the following section is presented a stepwise procedure to create stunning animated slideshows in Visme with high end professional excellence and in the quickest time span:
Step 1: Download and Install the Program
Navigate to the official website of the Visme Slideshow Creator program to download and install the same in any of your preferred MacOs or Windows supported devices.
Visme Official Download Link: https://visme.co/blog/
Step 2: Start a New Project
You will need to create a Visme account to start working on the slideshow creation process. When you have created one, navigate to and click the ‘Create New Visme’ option in the tool’s opening screen to open a new project and assign a suitable name to it.
Step 3: Choose a Template
in the new project window that appears, click on ‘Presentations’ option at the top to see a library of slideshow templates being displayed. You can either, select a template from the library to edit or start an entirely new creation of your own.
Step 4: Make Color Schemes and Background Selections
To proceed with the selection of slide backgrounds and color schemes, you can either choose an exact color by entering its RGB code in the ‘Edit Colors’ option, or choose one from Google web pages using the ‘Chrome Eye Dropper’ tool.
Step 5: Add Shapes and Icons
You can supplement your slideshow with suitable design elements, like icons and shapes. All you need to do is navigate to the ‘Tools Panel’ in the left, click on the ‘All Shapes’ symbol and type a related keyword in the search bar to get a list of matching shapes to choose from.
Step 6: Insert and Format Text
You can now proceed with adding suitable text, titles and subtitles to the presentation slides. Again, visit the ‘Tools Panel’, tap the ‘T’ icon and click on ‘Add a Title’. A text box will be created within the slide, where you can add the required text. You can also format the same from the ‘Format Toolbar’ that gets displayed above the inserted text box.
Step 7: Add Photographic Slides
To include image slides, start with inserting a new slide in the presentation, flowed by once again navigating to the ‘Tools Panel’ in the left and clicking on the ‘Background’ icon. Choose a suitable color scheme and again, click on the ‘Images’ symbol in the ‘Tools Panel’. Here you can select any suitable image from the library that gets displayed.
Step 8: Link Your Slides
Link the sequential slides of your presentation with any suitable indicator, such as an arrow, so that clicking on the same takes the viewer to the successive slide. You can alternatively create ‘Hotspots’ to link the slides together.
Step 9: Publish and Share Your Presentation
When the final result makes you happy, navigate to the ‘Publish’ tab just above your slide window to open the presentation publishing interface. Here, you can choose from the options of a direct share, a site or blog embed or a local download of the presentation to your device.
● Ending Thoughts →
● Animated slideshow presentations land among the most trending ways to ensure a precise and engaging content delivery.
● The software market is packed with a diverse range of impressive slideshow creator tools with the most amazing features.
● When making your choice of the perfect animated slideshow designer tools, the Wondershare Filmora Slideshow Creator program is indeed a smart pick.
10 Amazing Cartoon Music Examples You Need to Bookmark
10 Amazing Cartoon Music Examples You Need to Bookmark in 2022
An easy yet powerful editor
Numerous effects to choose from
Detailed tutorials provided by the official channel
If cartoon music turns you on, this is preferably the right place for you! Stay tuned to learn about the top 10 exciting alternatives of cartoon audios!
In this article
01 [Top 10 Cartoon Music](#Part 1)
02 [How to Add Cartoon Music in Video Editing Clips](#Part 2)
Part 1 Top 10 Cartoon Music
Talking of the fascinating and exciting world of cartoons, the subject is an evergreen source of entertainment for almost all age groups; after all, the essence of enjoying something cannot be limited within age boundaries. Diving into some specific details, the fundamental reason behind the extreme popularity of cartoon films and television series is, without any doubt, the stunning graphics and catchy background music.
Speaking of the sound credibility in particular, the following section presents a discussion on some of the choicest audio alternatives from cartoon media creations. If you have enjoyed the bliss of streaming those century old classic opera songs, you can easily relate to the entries in the upcoming list:
01Tales from the Vienna Woods
This was a masterpiece in the world of cartoon music, originally heard in the caricature series, A Corny Concerto in 1943, directed by Bob Clampett under the globally known Disney production house. The composition is essentially a repetition of Fantasia, which was released in 1940.
Talking about the exact music placement within the storyline, the inaugural audio segment, with a special emphasis on the ‘’wythm of woodwinds’’, when Porky Pig, the hero of the storyline, along with his obedient dog, traverses in search of Bugs.
Concerning on the popularity of the music, the latter has received positive music reviews from almost all the leading media critic platforms.
02The Blue Danube
Again an inclusion of the 1943 release, A corny Concerto, this was predominantly a comic version of the original track. It was used to complement the second stage of the storyline, where, a mother swan is seen humming the music to her little ones, giving the classic melody, the feel of a birdsong cover. As the audio swings in, the toddler Daffy Duck is seen paddling over an unwanted honking, while his mother is worried until everything ends up to be fine.
On the take of preference credibility, the music was quite well appreciated by the globally known media critics.
03Dance of the Comedians
This music piece originally belongs to the music album, The Bartered Bride, and was first used in Zoom and Bored in 1957, to uplift the combating theme of the cartoon series. While aptly supplementing the quest of Wile E. Coyote, the protagonist of the story, against Road Runner, his nasty opponent, the climax of the music turns out to be the most loved operas of Czech origin.
About the fan base of the audio snippet, the composition claimed welcoming responses from a worldwide audience.
04Minute Waltz in D-Flat
This one was an explicitly stunning piece of background audio, which was added to the Hyde and Hare cartoon series of 1955, to complement the latter’s storyline with the best suited sound effects.
Entering into the storyline, you will find Bugs, the cutest of rabbits, tends to locate a piano in Dr. Jekyll’s yard, and the latter being the most sophisticated lagomorph ever; begins to explore his musical skills on the instrument. Things however, take an unwanted turn when Mr. Hyde, the antagonist barges in with an attempt of destroying everything.
While the music piece came to be known as the favorite pick of Waltz lovers, the latter received considerable applaud from other media critics as well.
05Morning, Noon and Night in Vienna
This audio background was an exclusive media add-on to Baton Bunny, the 1959 released musical cartoon movies series, which was a further episode of Bugs’ journey that features this adorable, broad toothed rabbit, taking on a conducting task in the land of Vienna.
It is interesting to note that von Suppe, the developer of this music piece, also happened to work on a conducting profile, although on a comic note, the latter did not receive any appreciation for running behind odd smelling flies amid his performance!
Talking of the audience credibility, this one was a musical masterpiece, which received a large scale appreciation from listeners across the globe for featuring the most funny cartoon music ever!
06The Barber of Seville Overture
Like its aforesaid counterparts, this one was also an appreciated piece of audio, first heard in The Rabbit of Seville cartoon series, released in 1950. The musical luxury aims to compliment the combat Bugs, the adorable rabbit, against Elmer Fudd, the antagonist of the storyline, after the latter chases Bugs to a local stage. The music piece is a classic opera composition by Rossini that fails to miss out on a single beat or encounter a tempo breakdown.
The composition was fortunate enough to gain a positive critical acclaim from global audience as well as renowned critics of the artwork.
07Beethoven’s 7th
This music piece is an addition to the list of classic opera melodies by Beethoven. Talking of the inaugural release, the operatic audio was first heard in A Ham in a Role, the 1949 cartoon series. The storyline of the show talks of a speech fluent dog, longing for recognition in theatres commemorating the Shakespearean era, who is forced to lay back with his plans, thanks to the nasty pranks of the Goofy Gophers.
One of the antagonists attiring up like our poor dog, takes the credit of the efforts made by the latter and manages to get cast for a thrilling ghost scene in the Shakespearean tragedy of Hamlet.
Talking of the appreciation catered by the melody, the snippet was a somewhat strange composition, which made the critics, think of Beethoven being in a drunk state while creating the same.
08Traumerei Dreaming
This one is a short 38 seconds snippet on a tender theme, which runs to supplement the assumption of Bugs, the protagonist bunny as dead by Oalfish Canine, the latter’s newest opponent. The cult line of the music piece was gloomy enough to get a removal from the censor board, leading to a considerable edit of the audio before its theatrical showcase. The final audio was, however, still too heavy on the modernized audience to undertake.
As is evident, critics of the audio regard it to be a bit hefty, though the sound is somewhat appealing to opera lovers.
09Largo al Factotum
This high end opera was a rehearsal favorite of Giovanni Jones, the famous opera singer in The Long-Haired Hare, a well-known cartoon classic released in 1949. The star is supported in his streak by our adorable Bugs, who strums out loud on his banjo at a little distance.
All seemed well until Jones, in an annoyed state barges into break the poor rabbit’s instruments, while stretching him upwards through his long and pointed ears. The incident eventually transforms into war by the adorable bunny, who had been enraged by the time.
The music piece is catchy and captivating, considering the fact that it is a popular opera classic sung by a music star in the series.
10Johannes Brahms’ Hungarian Dances
This musical masterpiece was a part of the set of 21 Hungarian Dance compositions to supplement the country’s folk music. First heard in the cartoon series released under the name of Pigs in a Polka in 1943, the melody is essentially a miscellany of the aforesaid 21 music pieces, highlighting the catchiest elements from each.
Considering the fact that the musical delight is an assortment of some of the already best compositions, this excellent audio snippet was bound to receive a welcoming critical acclaim, and was greatly enjoyed by different sets of audiences across the world.
Part 2 How to Add Cartoon Music in Video Editing Clips
Having a significant insight of the stunning varieties of cartoon music, you can try hands at creating a masterpiece of your own by adding appealing caricature music to your video footage and clips. If you are concerned about the take away of the process, rest assured and see through the following section to understand the stepwise method to complement your video with appropriate cartoon music.
Before entering into the music adding process, let us have a formal acquaintance with Filmora, that is, the video editing software being used to cater to the aforesaid concern.
Wondershare Filmora Video Editor
Wondershare Filmora - Best Video Editor for Mac/Windows
5,481,435 people have downloaded it.
Build unique custom animations without breaking a sweat.
Focus on creating epic stories and leave the details to Filmora’s auto features.
Start a creative adventure with drag & drop effects and endless possibilities.
Filmora simplifies advanced features to save you time and effort.
Filmora cuts out repetition so you can move on to your next creative breakthrough.
To begin with, this one is the most reliable audio visual editing program, which you can use to add that extra spunk and a classic professional touch to your normal video footage. The software grants you complete liberty to explore your graphic editing skills and create visual masterpieces by choosing the perfect effects and filters from the latter’s extensive media library.
The program interface is the sweetest of all, making you cling to the editing fun in videos on a roll. Apart from this, the software is quick and smart, allowing you to create beautiful and stunning audio visual artworks within a few seconds.
User’s Guide to Add Cartoon Music to Video Clips in Filmora
Step 1: Download and Install Filmora
From the program’s official website, undertake a free download of Filmora into your MacOs or Windows supported PC or desktop.
Step 2: Import Your Video
After a successful installation of the Filmora Video Editor program in your system, proceed to launch the same in your device, followed by click on ‘Import’ in the app’s opening interface. This will allow you to select and upload any desired videos from your device to the program’s media album.
As an alternative, you can always prefer the ‘Drag and Drop’ method to upload selected video files. Your uploaded footage will be shown in the media panel at the left of the main editor window. Additional to video clips, you can also add still captures to complement them with appropriate audio.
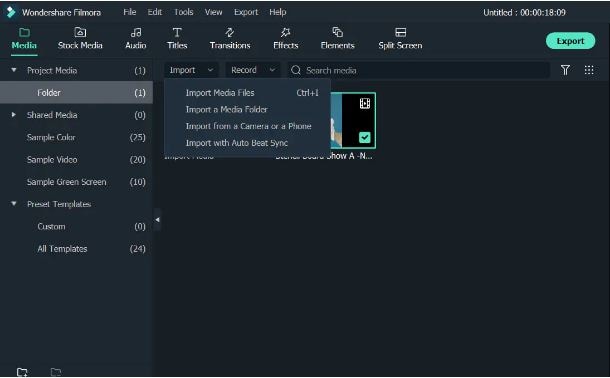
Step 3: Adding a Suitable Cartoon Music
Start with dragging the uploaded video files, one at a time, from Filmora’s media album to its timeline tracks. Take caution of the serial and non-redundant arrangement of the footage files in cohesion with the desired play sequence.
Next, proceed with adding the desired cartoon background music track above the already created video track, by using the conventional ‘Drag and Drop’ method. Check for any trimming requirements for adjusting the audio track length and position to be in concord with the video play time. While making position adjustments, you can simultaneously examine your changes in the editor’s ‘Preview Window’ and fine tune the same in real time.
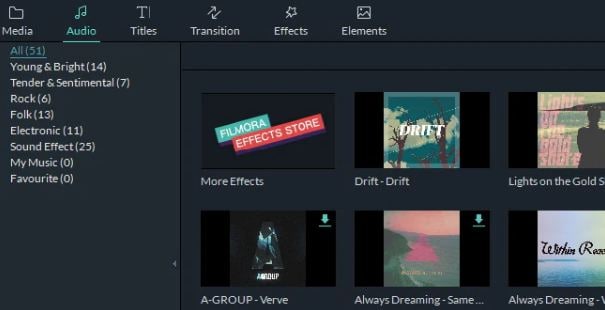
Step 4: Editing the Cartoon Music
To edit your music, open the audio editing panel by double clicking the music file in the editor’s audio track. The feature allows you to enhance your cartoon music track by adding a variety of sound effects, like, fade in, fade out, volume adjustment, pitch tuning and setting up the Audio Equalizer.
You can also try hands on making a slow motion or fast forward version of the footage by varying the audio speed, while applying the ‘Reverse Speed’ effect for a reverse playback of the audio.
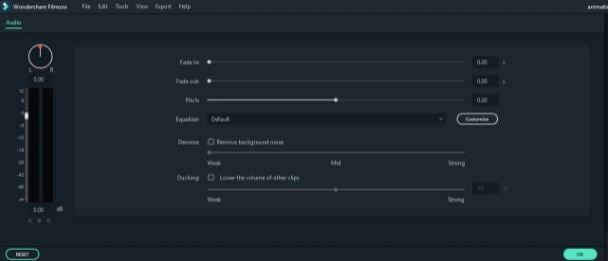
Step 5: Export Your Creation
When you are happy with your work, navigate to and click on the ‘Export’ tab at the bottom right corner of the program’s editor timeline. Save the edited cartoon music video to your device in any preferred file format in the pop-up window that appears next.
You can additionally create videos for iOS devices as well as upload your creations to various media sharing platforms, while also conveniently burning the same to a DVD for a television watch. For looping the cartoon music, just drag the audio clip to the exact length of the video footage.
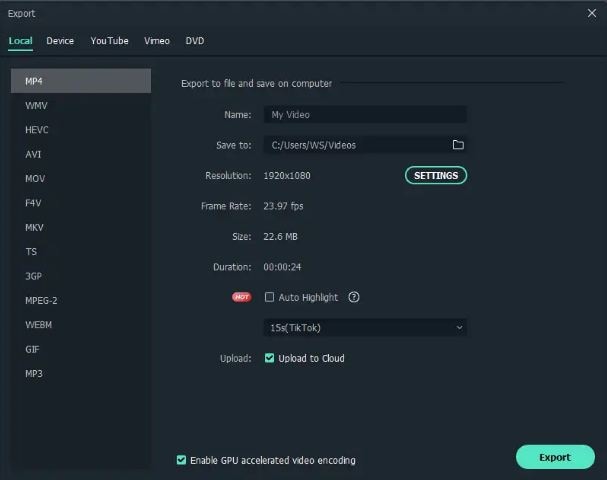
● Ending Thoughts →
● The extreme craze of cartoon music has achieved an evergreen essence over decades of release.
● Among the plethora of music varieties, some specific tracks have maintained a separate fan base.
● When experimenting on creating your own video edits with cartoon music, the Filmora Video Editor is the best tool you can pick.
If cartoon music turns you on, this is preferably the right place for you! Stay tuned to learn about the top 10 exciting alternatives of cartoon audios!
In this article
01 [Top 10 Cartoon Music](#Part 1)
02 [How to Add Cartoon Music in Video Editing Clips](#Part 2)
Part 1 Top 10 Cartoon Music
Talking of the fascinating and exciting world of cartoons, the subject is an evergreen source of entertainment for almost all age groups; after all, the essence of enjoying something cannot be limited within age boundaries. Diving into some specific details, the fundamental reason behind the extreme popularity of cartoon films and television series is, without any doubt, the stunning graphics and catchy background music.
Speaking of the sound credibility in particular, the following section presents a discussion on some of the choicest audio alternatives from cartoon media creations. If you have enjoyed the bliss of streaming those century old classic opera songs, you can easily relate to the entries in the upcoming list:
01Tales from the Vienna Woods
This was a masterpiece in the world of cartoon music, originally heard in the caricature series, A Corny Concerto in 1943, directed by Bob Clampett under the globally known Disney production house. The composition is essentially a repetition of Fantasia, which was released in 1940.
Talking about the exact music placement within the storyline, the inaugural audio segment, with a special emphasis on the ‘’wythm of woodwinds’’, when Porky Pig, the hero of the storyline, along with his obedient dog, traverses in search of Bugs.
Concerning on the popularity of the music, the latter has received positive music reviews from almost all the leading media critic platforms.
02The Blue Danube
Again an inclusion of the 1943 release, A corny Concerto, this was predominantly a comic version of the original track. It was used to complement the second stage of the storyline, where, a mother swan is seen humming the music to her little ones, giving the classic melody, the feel of a birdsong cover. As the audio swings in, the toddler Daffy Duck is seen paddling over an unwanted honking, while his mother is worried until everything ends up to be fine.
On the take of preference credibility, the music was quite well appreciated by the globally known media critics.
03Dance of the Comedians
This music piece originally belongs to the music album, The Bartered Bride, and was first used in Zoom and Bored in 1957, to uplift the combating theme of the cartoon series. While aptly supplementing the quest of Wile E. Coyote, the protagonist of the story, against Road Runner, his nasty opponent, the climax of the music turns out to be the most loved operas of Czech origin.
About the fan base of the audio snippet, the composition claimed welcoming responses from a worldwide audience.
04Minute Waltz in D-Flat
This one was an explicitly stunning piece of background audio, which was added to the Hyde and Hare cartoon series of 1955, to complement the latter’s storyline with the best suited sound effects.
Entering into the storyline, you will find Bugs, the cutest of rabbits, tends to locate a piano in Dr. Jekyll’s yard, and the latter being the most sophisticated lagomorph ever; begins to explore his musical skills on the instrument. Things however, take an unwanted turn when Mr. Hyde, the antagonist barges in with an attempt of destroying everything.
While the music piece came to be known as the favorite pick of Waltz lovers, the latter received considerable applaud from other media critics as well.
05Morning, Noon and Night in Vienna
This audio background was an exclusive media add-on to Baton Bunny, the 1959 released musical cartoon movies series, which was a further episode of Bugs’ journey that features this adorable, broad toothed rabbit, taking on a conducting task in the land of Vienna.
It is interesting to note that von Suppe, the developer of this music piece, also happened to work on a conducting profile, although on a comic note, the latter did not receive any appreciation for running behind odd smelling flies amid his performance!
Talking of the audience credibility, this one was a musical masterpiece, which received a large scale appreciation from listeners across the globe for featuring the most funny cartoon music ever!
06The Barber of Seville Overture
Like its aforesaid counterparts, this one was also an appreciated piece of audio, first heard in The Rabbit of Seville cartoon series, released in 1950. The musical luxury aims to compliment the combat Bugs, the adorable rabbit, against Elmer Fudd, the antagonist of the storyline, after the latter chases Bugs to a local stage. The music piece is a classic opera composition by Rossini that fails to miss out on a single beat or encounter a tempo breakdown.
The composition was fortunate enough to gain a positive critical acclaim from global audience as well as renowned critics of the artwork.
07Beethoven’s 7th
This music piece is an addition to the list of classic opera melodies by Beethoven. Talking of the inaugural release, the operatic audio was first heard in A Ham in a Role, the 1949 cartoon series. The storyline of the show talks of a speech fluent dog, longing for recognition in theatres commemorating the Shakespearean era, who is forced to lay back with his plans, thanks to the nasty pranks of the Goofy Gophers.
One of the antagonists attiring up like our poor dog, takes the credit of the efforts made by the latter and manages to get cast for a thrilling ghost scene in the Shakespearean tragedy of Hamlet.
Talking of the appreciation catered by the melody, the snippet was a somewhat strange composition, which made the critics, think of Beethoven being in a drunk state while creating the same.
08Traumerei Dreaming
This one is a short 38 seconds snippet on a tender theme, which runs to supplement the assumption of Bugs, the protagonist bunny as dead by Oalfish Canine, the latter’s newest opponent. The cult line of the music piece was gloomy enough to get a removal from the censor board, leading to a considerable edit of the audio before its theatrical showcase. The final audio was, however, still too heavy on the modernized audience to undertake.
As is evident, critics of the audio regard it to be a bit hefty, though the sound is somewhat appealing to opera lovers.
09Largo al Factotum
This high end opera was a rehearsal favorite of Giovanni Jones, the famous opera singer in The Long-Haired Hare, a well-known cartoon classic released in 1949. The star is supported in his streak by our adorable Bugs, who strums out loud on his banjo at a little distance.
All seemed well until Jones, in an annoyed state barges into break the poor rabbit’s instruments, while stretching him upwards through his long and pointed ears. The incident eventually transforms into war by the adorable bunny, who had been enraged by the time.
The music piece is catchy and captivating, considering the fact that it is a popular opera classic sung by a music star in the series.
10Johannes Brahms’ Hungarian Dances
This musical masterpiece was a part of the set of 21 Hungarian Dance compositions to supplement the country’s folk music. First heard in the cartoon series released under the name of Pigs in a Polka in 1943, the melody is essentially a miscellany of the aforesaid 21 music pieces, highlighting the catchiest elements from each.
Considering the fact that the musical delight is an assortment of some of the already best compositions, this excellent audio snippet was bound to receive a welcoming critical acclaim, and was greatly enjoyed by different sets of audiences across the world.
Part 2 How to Add Cartoon Music in Video Editing Clips
Having a significant insight of the stunning varieties of cartoon music, you can try hands at creating a masterpiece of your own by adding appealing caricature music to your video footage and clips. If you are concerned about the take away of the process, rest assured and see through the following section to understand the stepwise method to complement your video with appropriate cartoon music.
Before entering into the music adding process, let us have a formal acquaintance with Filmora, that is, the video editing software being used to cater to the aforesaid concern.
Wondershare Filmora Video Editor
Wondershare Filmora - Best Video Editor for Mac/Windows
5,481,435 people have downloaded it.
Build unique custom animations without breaking a sweat.
Focus on creating epic stories and leave the details to Filmora’s auto features.
Start a creative adventure with drag & drop effects and endless possibilities.
Filmora simplifies advanced features to save you time and effort.
Filmora cuts out repetition so you can move on to your next creative breakthrough.
To begin with, this one is the most reliable audio visual editing program, which you can use to add that extra spunk and a classic professional touch to your normal video footage. The software grants you complete liberty to explore your graphic editing skills and create visual masterpieces by choosing the perfect effects and filters from the latter’s extensive media library.
The program interface is the sweetest of all, making you cling to the editing fun in videos on a roll. Apart from this, the software is quick and smart, allowing you to create beautiful and stunning audio visual artworks within a few seconds.
User’s Guide to Add Cartoon Music to Video Clips in Filmora
Step 1: Download and Install Filmora
From the program’s official website, undertake a free download of Filmora into your MacOs or Windows supported PC or desktop.
Step 2: Import Your Video
After a successful installation of the Filmora Video Editor program in your system, proceed to launch the same in your device, followed by click on ‘Import’ in the app’s opening interface. This will allow you to select and upload any desired videos from your device to the program’s media album.
As an alternative, you can always prefer the ‘Drag and Drop’ method to upload selected video files. Your uploaded footage will be shown in the media panel at the left of the main editor window. Additional to video clips, you can also add still captures to complement them with appropriate audio.
Step 3: Adding a Suitable Cartoon Music
Start with dragging the uploaded video files, one at a time, from Filmora’s media album to its timeline tracks. Take caution of the serial and non-redundant arrangement of the footage files in cohesion with the desired play sequence.
Next, proceed with adding the desired cartoon background music track above the already created video track, by using the conventional ‘Drag and Drop’ method. Check for any trimming requirements for adjusting the audio track length and position to be in concord with the video play time. While making position adjustments, you can simultaneously examine your changes in the editor’s ‘Preview Window’ and fine tune the same in real time.
Step 4: Editing the Cartoon Music
To edit your music, open the audio editing panel by double clicking the music file in the editor’s audio track. The feature allows you to enhance your cartoon music track by adding a variety of sound effects, like, fade in, fade out, volume adjustment, pitch tuning and setting up the Audio Equalizer.
You can also try hands on making a slow motion or fast forward version of the footage by varying the audio speed, while applying the ‘Reverse Speed’ effect for a reverse playback of the audio.
Step 5: Export Your Creation
When you are happy with your work, navigate to and click on the ‘Export’ tab at the bottom right corner of the program’s editor timeline. Save the edited cartoon music video to your device in any preferred file format in the pop-up window that appears next.
You can additionally create videos for iOS devices as well as upload your creations to various media sharing platforms, while also conveniently burning the same to a DVD for a television watch. For looping the cartoon music, just drag the audio clip to the exact length of the video footage.
● Ending Thoughts →
● The extreme craze of cartoon music has achieved an evergreen essence over decades of release.
● Among the plethora of music varieties, some specific tracks have maintained a separate fan base.
● When experimenting on creating your own video edits with cartoon music, the Filmora Video Editor is the best tool you can pick.
Also read:
- Why These 10 Top Text Motion Templates Are Worth Your Attention for 2024
- New 2024 Approved 10 Best Convert Video Between GIF Software High Quality
- In 2024, Best Guide for Beginners on 2D Animation Making
- Updated 8 Top Motion Graphics Online Tools for Your Inspiration
- Updated In 2024, Top 12 Illusion Gifs Top Picks
- In 2024, 5 Photoshop Alternatives to Animate Logo
- Updated 10 Great Apps to Turn Funny Animated Images Into Comics
- Updated Animate Photo Online with These Awesome Tools for 2024
- Techniques for Creating Animated Logo That Few People Know About
- In 2024, How to Make Your GIF on WhatsApp in Simple Ways
- 12 Animated Slideshow PowerPoint Templates
- Top 10 Classical Animated Cartoon Types With Examples
- Updated Ways to Make Sure You Get the Most up to Date Cartoon Character Design Tips
- Updated 2024 Approved Adobe Animate Riggings Tutorial for You
- Updated In 2024, Creative Ways to Create iPhone Text GIF
- New In 2024, Why These 10 Top Text Motion Templates Are Worth Your Attention
- In 2024, Best Websites to Download Animated GIFs for Free-Free GIF Download
- In 2024, Tips for Animated Collage Maker
- New Top 10 Best Photo to Animation Converters That Give You an Advantage for 2024
- Updated 5 Websites with Animated Logos That Catch Your Eyes
- New 2024 Approved How to Create an Adobe Collage?
- Updated 2024 Approved Most Effective Tactics to Set WhatsApp Status
- New How-To Guide Secret Shortcut to Adobe Animate Character Tutorial for 2024
- Top 10 Classical Animated Cartoon Types With Examples for 2024
- Useful Tips for Canva Animated Elements
- New Top Claymation Shows That Make Your Memories Unforgettable
- Updated 2024 Approved Top Practices on Online 3D Avatar Creator
- Updated Why These 10 Top Text Motion Templates Are Worth Your Attention for 2024
- Updated 15 Best Collage Makers to Create Aesthetic Collages
- Updated Top 4 Websites to Get Anime Footage for Free
- New In 2024, How to Make 3D Cartoon of Yourself
- New Top 10 Animated Photo Collage Apps You Should Know
- New Top 10 Best Photo to Animation Converters for 2024
- 10 Must Watch Netflix Cartoon Series For You
- New Ways to Create an Adobe Collage
- Updated How to Make Photo Motion Effect Online?
- Updated 2024 Approved Top 12 2D Animation Studios All Should Check Out
- Updated In 2024, 12 Best Stop Motion Studios Worth Recommending
- Updated In 2024, How to Find Some Different Ways to Animated Cartoon of Yourself
- Top 20+ Best Free GIF Makers Online to Quickly Edit GIF
- New In 2024, How to Reduce GIF Size and Best GIF Resizers
- New 15 Best Video to GIF App on iPhone and Android for 2024
- In 2024, Top 5 Car Locator Apps for Samsung Galaxy A05 | Dr.fone
- New 2024 Approved Introduction of Virbo Online | Wondershare Virbo
- Latest Guide How To Bypass Samsung Galaxy S21 FE 5G (2023) FRP Without Computer
- How to Track HTC U23 Location without Installing Software? | Dr.fone
- In 2024, How to Change your Samsung Galaxy F14 5G Location on Twitter | Dr.fone
- In 2024, How to Transfer Contacts from Realme 11 Pro+ to Outlook | Dr.fone
- In 2024, Ways to stop parent tracking your ZTE Blade A73 5G | Dr.fone
- 11 Best Location Changers for Nokia C12 | Dr.fone
- Thinking About Changing Your Netflix Region Without a VPN On Realme V30? | Dr.fone
- Pokémon Go Cooldown Chart On Vivo Y27 4G | Dr.fone
- How to Downgrade iPhone 11 Pro to an Older iOS System Version? | Dr.fone
- Tips and Tricks for Setting Up your Vivo V27 Pro Phone Pattern Lock
- In 2024, How can I get more stardust in pokemon go On Nubia Red Magic 9 Pro+? | Dr.fone
- Title: New Top 10 Apps to Enhance Your Instagram Story Slideshow for 2024
- Author: Elon
- Created at : 2024-05-19 03:05:41
- Updated at : 2024-05-20 03:05:41
- Link: https://animation-videos.techidaily.com/new-top-10-apps-to-enhance-your-instagram-story-slideshow-for-2024/
- License: This work is licensed under CC BY-NC-SA 4.0.
