

New Top 7 Animated GIF Text Makers for 2024
Top 7 Animated GIF Text Makers
Versatile Video Editor - Wondershare Filmora
An easy yet powerful editor
Numerous effects to choose from
Detailed tutorials provided by the official channel
Arguably the hilarious moment of online communication, GIFs are a sequence of static images that throw a unique effect when strung together. They add excitement to social media posts, energy to email conversations, and even standard text, and usually create the internet (and this post) the funniest place to be.
Many people like to create GIFs on their websites, on digital platforms, or within their social media. We’ve collected a list of the best-animated GIF text makers around and reviewed them, so you don’t have to. You’ve come to the perfect article if you’re also one among them.
Top 7 Animated GIF Text Makers 2022
Without further ado, let’s jump in! Here are the five best-recommended websites or text GIF makers worth considering in 2021.
1. Bloggif
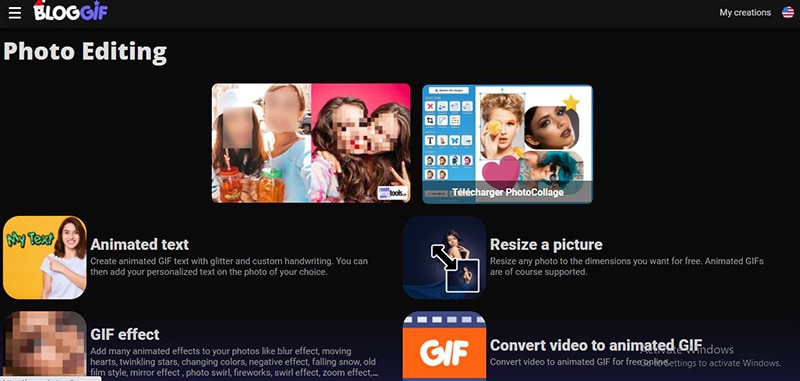
This site shows an appropriate GIF for just about anything you’re wondering. Based upon what you’re looking for, there are numerous ways to uncover a perfect match.
One way is to search among the dropdown menus on the main website’s interface. These menus allow users to surface GIFs such as animated text, resize a picture, GIF slideshow, GIF effect, and more.
2. Gfycat
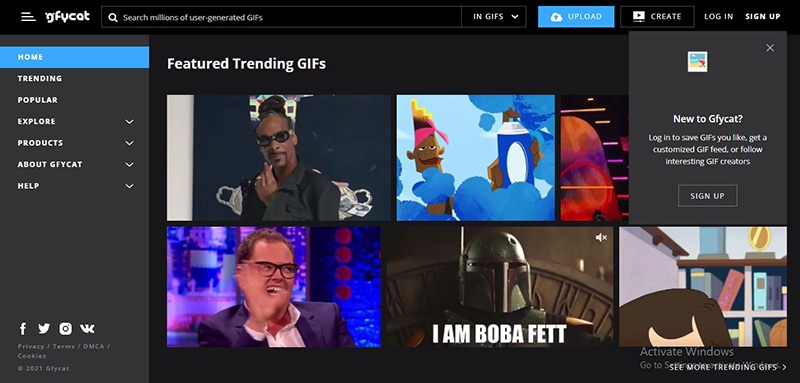
Gfycat is another online text GIF maker with millions of GIFs to dive into as a GIF text generator. Not only is it one of the highly famous GIF sites, but it has a simple animated GIF text maker to turn your favorite Vimeo, Twitter, and Twitch streams into your library of memes.
You can easily navigate its wide variety of GIFs from the search bar or left menu, select from the latest “Explore” or “Trending” section to look for multiple categories of stickers or GIFs.
3. GIPHY
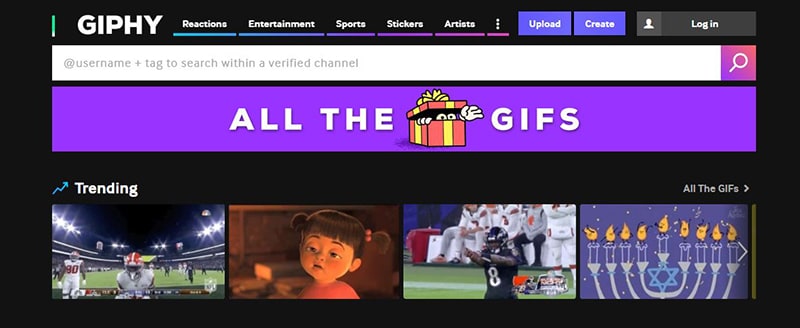
This is another go-to resource for text GIF maker hunting. Alex Chung and Jace Cooke launched it; GIPHY began as a search engine for GIFs. The platform has seen significant growth by introducing integrations, partnering with brands, and making browser extensions, and a lot more. (Check out GIPHY Labs to explore their expansion efforts.)
The best part? Looking for the database of GIFs couldn’t be easier: Users can browse categories — Music, Adjectives, Nature, Science, Nature, etc. — or seek out a specific phrase or a word using the search feature.
4. Make a GIF
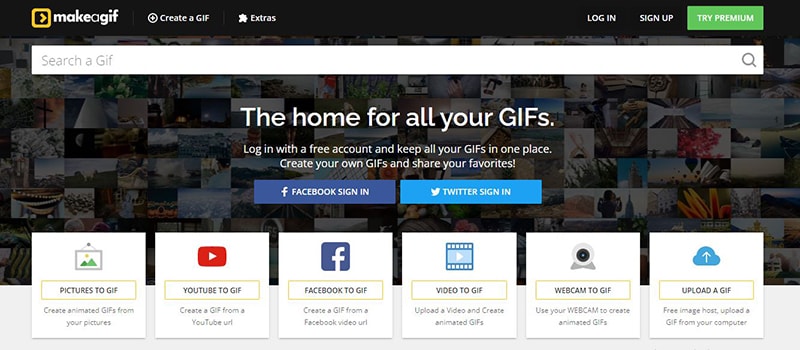
Make A GIF allows you to create a GIF from many images, a video from your computer, a Facebook or YouTube video, or directly from your webcam.
With this tool, it’s pretty simple to customize the order of the photos and rearrange them via drag-and-drop editor. You can also resize its images and create a personalized animation speed. In addition, there is a captioning tool included to add text on top of your GIF, but you can’t preview it before creating the GIF or change where the text GIF maker is displayed.
You can save the GIF to your PC and copy its URL to find it online once created. It further consists of options for making your GIF public, private, or unlisted. You can even link directly to the GIF file.
5. ImgFlip

ImgFlip displays a preview of your GIF during the creation, which is valuable. You can develop these GIFs from images, a GIF URL, a video URL, or a video you upload yourself.
Besides, you can alter animation delay, width, height, photo order, and quality for a GIF created with images. There’s also a crop option, text tool, and the ability to rotate the GIF, change the play count, reverse it, and change the background color.
You can download your GIF and share it over a few social media sites once done, or not post it online while setting it as private.
A watermark displayed on all GIFs created is here at Imgflip. Also, most of the custom settings for making a GIF from this GIF text generator are usable only if you subscribe to ImgFlip Pro.
Tip: Make animated GIF Text in video
Now you may be wandering to create your GIF. The market comes loaded with many websites, tools, and the above-mentioned animated GIF text makers.
Additionally, you can use Adobe Photoshop too or some other popular software for the purpose. If we talk about online tools, the above-mentioned animated text generator GIFs are the standard options.
It is also relatively easier to find text GIF maker online applications for smartphones or mobile devices. It is possible to develop gifs from the collection of still images or even from moving videos, and this task is much easier than anyone can perform. To execute this task with simplicity, we would like to recommend Wondershare Filmora

Wondershare Filmora - Best Video Editor for Mac/Windows
5,481,435 people have downloaded it.
Build unique custom animations without breaking a sweat.
Focus on creating epic stories and leave the details to Filmora’s auto features.
Start a creative adventure with drag & drop effects and endless possibilities.
Filmora simplifies advanced features to save you time and effort.
Filmora cuts out repetition so you can move on to your next creative breakthrough.
This recommendation is the most interactive yet simple to understand interface of this software tool. You can easily combine various stills into GIFs using Filmora or turn small videos into GIFs. The more exciting thing is that Filmora also helps in easy Gifs customization as users can add elements, overlays, text, etc., to their GIFs using this platform as the ideal animated GIF text maker.
How to make GIFs with Wondershare Filmora
Here are a few easy to execute steps to accomplish this operation:
Step 1 Upload media files
The primary task is to import some editable video files or collections of photos to the Wondershare Filmora’s timeline. This software tool is compatible with more than 150 media file formats to easily upload any of your images ranging somewhere between png, jpg, avi, mpg, wav, mkv, mp4, or WMV, etc.
For Win 7 or later (64-bit)
For macOS 10.12 or later
Step 2 Drag to timeline
Users can drag their image/video file and drop it on the timeline of Wondershare Filmora. Once your file goes there, it will be easily edited using a wide range of tools.

Step 3 Edit media files
There are unlimited editing elements and tools with numerous exciting features of Filmora.
Users can easily select among options like slow down, speed up, combine, rotate, split, crop, etc., to develop eye-catching video as per available content.
Step 4 Add text effect to GIF files
It is the right time to update text-based GIFs. There are certain small messages used that always appear suitable in GIFs.

Step 5 Save and export
Once you complete all these steps, save your file with a GIF extension and get it uploaded on social media platforms, if you wish so.

Conclusion
Thus, there are plenty of websites to choose from among animated GIF text makers when it comes to searching for some genuine yet cool GIFs. Whether you must send one to the email chain of your coworker’s birthday, or make your brother, Zayn, laugh at the dinner table, we hope this list helps narrow down your search for the perfect maker to create text GIF.
Arguably the hilarious moment of online communication, GIFs are a sequence of static images that throw a unique effect when strung together. They add excitement to social media posts, energy to email conversations, and even standard text, and usually create the internet (and this post) the funniest place to be.
Many people like to create GIFs on their websites, on digital platforms, or within their social media. We’ve collected a list of the best-animated GIF text makers around and reviewed them, so you don’t have to. You’ve come to the perfect article if you’re also one among them.
Top 7 Animated GIF Text Makers 2022
Without further ado, let’s jump in! Here are the five best-recommended websites or text GIF makers worth considering in 2021.
1. Bloggif
This site shows an appropriate GIF for just about anything you’re wondering. Based upon what you’re looking for, there are numerous ways to uncover a perfect match.
One way is to search among the dropdown menus on the main website’s interface. These menus allow users to surface GIFs such as animated text, resize a picture, GIF slideshow, GIF effect, and more.
2. Gfycat
Gfycat is another online text GIF maker with millions of GIFs to dive into as a GIF text generator. Not only is it one of the highly famous GIF sites, but it has a simple animated GIF text maker to turn your favorite Vimeo, Twitter, and Twitch streams into your library of memes.
You can easily navigate its wide variety of GIFs from the search bar or left menu, select from the latest “Explore” or “Trending” section to look for multiple categories of stickers or GIFs.
3. GIPHY
This is another go-to resource for text GIF maker hunting. Alex Chung and Jace Cooke launched it; GIPHY began as a search engine for GIFs. The platform has seen significant growth by introducing integrations, partnering with brands, and making browser extensions, and a lot more. (Check out GIPHY Labs to explore their expansion efforts.)
The best part? Looking for the database of GIFs couldn’t be easier: Users can browse categories — Music, Adjectives, Nature, Science, Nature, etc. — or seek out a specific phrase or a word using the search feature.
4. Make a GIF
Make A GIF allows you to create a GIF from many images, a video from your computer, a Facebook or YouTube video, or directly from your webcam.
With this tool, it’s pretty simple to customize the order of the photos and rearrange them via drag-and-drop editor. You can also resize its images and create a personalized animation speed. In addition, there is a captioning tool included to add text on top of your GIF, but you can’t preview it before creating the GIF or change where the text GIF maker is displayed.
You can save the GIF to your PC and copy its URL to find it online once created. It further consists of options for making your GIF public, private, or unlisted. You can even link directly to the GIF file.
5. ImgFlip
ImgFlip displays a preview of your GIF during the creation, which is valuable. You can develop these GIFs from images, a GIF URL, a video URL, or a video you upload yourself.
Besides, you can alter animation delay, width, height, photo order, and quality for a GIF created with images. There’s also a crop option, text tool, and the ability to rotate the GIF, change the play count, reverse it, and change the background color.
You can download your GIF and share it over a few social media sites once done, or not post it online while setting it as private.
A watermark displayed on all GIFs created is here at Imgflip. Also, most of the custom settings for making a GIF from this GIF text generator are usable only if you subscribe to ImgFlip Pro.
Tip: Make animated GIF Text in video
Now you may be wandering to create your GIF. The market comes loaded with many websites, tools, and the above-mentioned animated GIF text makers.
Additionally, you can use Adobe Photoshop too or some other popular software for the purpose. If we talk about online tools, the above-mentioned animated text generator GIFs are the standard options.
It is also relatively easier to find text GIF maker online applications for smartphones or mobile devices. It is possible to develop gifs from the collection of still images or even from moving videos, and this task is much easier than anyone can perform. To execute this task with simplicity, we would like to recommend Wondershare Filmora
Wondershare Filmora - Best Video Editor for Mac/Windows
5,481,435 people have downloaded it.
Build unique custom animations without breaking a sweat.
Focus on creating epic stories and leave the details to Filmora’s auto features.
Start a creative adventure with drag & drop effects and endless possibilities.
Filmora simplifies advanced features to save you time and effort.
Filmora cuts out repetition so you can move on to your next creative breakthrough.
This recommendation is the most interactive yet simple to understand interface of this software tool. You can easily combine various stills into GIFs using Filmora or turn small videos into GIFs. The more exciting thing is that Filmora also helps in easy Gifs customization as users can add elements, overlays, text, etc., to their GIFs using this platform as the ideal animated GIF text maker.
How to make GIFs with Wondershare Filmora
Here are a few easy to execute steps to accomplish this operation:
Step 1 Upload media files
The primary task is to import some editable video files or collections of photos to the Wondershare Filmora’s timeline. This software tool is compatible with more than 150 media file formats to easily upload any of your images ranging somewhere between png, jpg, avi, mpg, wav, mkv, mp4, or WMV, etc.
For Win 7 or later (64-bit)
For macOS 10.12 or later
Step 2 Drag to timeline
Users can drag their image/video file and drop it on the timeline of Wondershare Filmora. Once your file goes there, it will be easily edited using a wide range of tools.
Step 3 Edit media files
There are unlimited editing elements and tools with numerous exciting features of Filmora.
Users can easily select among options like slow down, speed up, combine, rotate, split, crop, etc., to develop eye-catching video as per available content.
Step 4 Add text effect to GIF files
It is the right time to update text-based GIFs. There are certain small messages used that always appear suitable in GIFs.
Step 5 Save and export
Once you complete all these steps, save your file with a GIF extension and get it uploaded on social media platforms, if you wish so.
Conclusion
Thus, there are plenty of websites to choose from among animated GIF text makers when it comes to searching for some genuine yet cool GIFs. Whether you must send one to the email chain of your coworker’s birthday, or make your brother, Zayn, laugh at the dinner table, we hope this list helps narrow down your search for the perfect maker to create text GIF.
Top 10 3D Text Animation Templates
Top 10 3D Text Animation Templates
An easy yet powerful editor
Numerous effects to choose from
Detailed tutorials provided by the official channel
“Where is everyone getting their 3D Text Animation templates?”
To answer this request, we’ve compiled a guide that not only teaches you how to create things like 3D Spinning Text (After Effects) but also gives you an idea of where you can find the kind of resources (i.e., 3D Text Animation templates and presets) that you need to get a head start on your projects.
In this article
01 [Top 10 3D Text Animation Templates ](#Part 1)
02 [How Do I Make 3D Text in After Effects?](#Part 2)
03 [The Best 10 Amazing 3D Text Animation Templates](#Part 3)
04 [Secrets to Learning More Animation Tactics](#Part 4)
Part 1 What’s 3D Text Animation?
Before anything else, let’s talk about text animation. Specifically, 3D Text Animation. The text that you’re reading now, is 2D Text. It’s static, and it lacks depth. It’s just letters on a screen. Meanwhile, 3D Text is usually built for motion, and thus, it has volume and depth — it’s almost tangible. Here’s what that looks like:

As you can see, even without actually moving, in the text shown in the image above, the potential for motion is there — it looks alive.
Now, you’ll see 3D text like this often in movies or promotions. Usually in the form of extravagant title cards or 3D text logo animation. They’re eye-catching, and because they’re 3D, you can play with them as much as you want to really add drama to your creations.
Part 2 How Do I Make 3D Text in After Effects?
As promised, this next section will teach you how to create 3D Text Animation in Adobe After Effects, which is a VFX and motion graphics software used by many animators to bring life to their text. You’ll notice that the following tutorial is really more about introducing the tools that you can use in order to create 3D Text Animation:
01Step 1. Add Your Text
The first thing that you have to do, of course, is to add your text! To do this, go to the ‘Tools’ panel, select the Type tool, and then select the ‘Composition’ panel. The composition is where you type your text!
With After Effects, you also have the following options:
● Change Text Font
● Adjust Text Size
● Adjust Text Color
● Shift Justification (Left, Middle, right)
And so on! Once you’re done with your text composition, it will be generated by After Effects into a layer that you can adjust as needed in the next steps.

01Step 2. Use Animation Presets
With your text now in a layer that you can add animations to… you’ve practically done a third of the job! Or even more than that if you decide to use the animation presets that are provided by After Effects.
These can be found by selecting ‘Browse Presets…’ on the ‘Animation’ tab (shown in the image below.) All you need to apply them is to drag and drop them onto your text layer.
Note: The first keyframe of this built-in text animation will be applied at the location of the Current Time Indicator (CTI), so make sure that you’ve adjusted that accordingly.

01Step 3. Per-Character Animation
If you’d like to personalize your text animation, After Effects does also give you the option to animate per character (or, per letter, in this case.)
This will give you more control over how you decided to animate your text. Of course, it does mean that it is slightly more complicated as well.
● To animate text per layer, select ‘animate’ on that layer and choose a parameter to start working on animations for.
● You’ll be able to previous (or scrub) through your animations in order to see if they are doing what you need them to do.
● You can also remove applied parameters in order to re-work your animation.

01Step 4. Add Graphic Elements to Text
If you really want to make your 3D Animation Text pop, Adobe After Effects also offers the tools needed to add Graphic Elements to your composition — which can be found at the top-most toolbar!

Part 3 The Best 10 Amazing 3D Text Animation Templates
Now, as promised, we’re also going to be introducing a couple of 3D text animation templates that you can try out for your own projects! Each template will have a link that you can go to in order to see what it looks like, as well as an explanation on how you can use it for your projects in the future!
01Real 3D Light Bulb Kit
The first Text Animation Template on our list is the “Logo Light Bulb” 3D Animation from Envato Elements. This one literally glows people! Making it perfect for a quirky, and yet still very impressive Title Card or Logo. Its design is very realistic, and you can also control how it flickers! For example, turning the bulbs on certain characters first, or turning them all off at once in the end.
023D Text Reveal
This next 3D Animation template is also from Envato Market. And, just like the first, it makes for quite the dramatic Title Card or Logo. With this template, your Text can literally zoom in to view while looking its best and sparkiest in High-Chrome.
033D Metallic Text Animation
Our next pick, the 3D Metallic text animation is another great one for those who are looking for something flashy — something that gives off the impression of being impressive right from the gate. Compared to the previous text animation template, this one has a more rugged kind of appearance. Perfect for those looking to promote something more fun rather than professional.
043D Text Box Animation Pack
The next one is a little less ‘impressive’ — in the sense that it isn’t as in your face as the other 3D animation templates that we’ve introduced thus far. And that’s exactly why the 3D Text Box Animation Pack deserves to be on this list! Its 3D spinning text (after effects) elements are very usable — in that it can work for a variety of individuals and styles. It has a more professional look as well. Making it perfect for corporations.
053D Text & Logo Boxes
This next one, the 3D Text & Logo Boxes pack is particularly perfect for 3D logos. The pack gives you several options for box size as well as text parameters. So, you can design your animated 3D Logo however you want and use it for future projects to give them even more dimension than before.
06The Light Bulb Kit
Our next pick, which is the ‘Light Bulb Kit’ also from Envato, is very similar to the first item on our list — in that it features text lit up by lightbulbs. However, it lends an extra bit of photo-realism to it. Less sparkle and more grain — which may exactly be what you want for your new title card or logo.
073D Text Templates
The 3D Text Templates is a very bright and pop-y template that is perfect for creating eye-catching promotions and advertisements. It’s very simple to use, which, again, maybe exactly what you want. Literally, the template will ask you to choose your own text and change the colors to suit that of your own brand, then you’re done!
083D Text Shapes Logo Reveal
The ‘3D Text Shapes Logo Reveal’ template is a pack of 3D text animations that you can use in order to add a little spin to your logo reveals (quite literally, in some cases!) It has a lot of personality to it, and a certain tech-y or science-y feel that would make it perfect for anyone looking for something more technical.
09Bold Titles
The ‘Bold Titles’ template is very loud and proud. But it has a bit of a retro-vibe to it as well. Making it stand out from some of the more minimalistic modern text animation styles that you see these days.
1010. Wave 3D Logo & Text
Looking for something simple and professional? Then the ‘Wave 3D Logo & Text’ template may just be the one for you. We put it last on this list, but it’s actually quite a strong contender. One that just about anyone (for just about any type of project they’re working on), should be able to get some use out of.
Key Takeaways from This Episode
● 3D Text Animation is the practice of bringing text to life! It gives dimension, depth, and, even, movement into what are usually very static properties!
● You see a lot of 3D Text Animation in big pictures these days. And you can start creating your own with the use of Adobe After Effects — a VFX and Motion Graphics Software that a lot of professionals use for their own text animation.
● Of course, if you don’t have the kind of time to create your own 3D Text Animations from scratch, you can always use templates instead! There are hundreds (if not thousands) of them available out there. It should be simple enough to find one that fits the kind of vibe you’re looking for.
● SECRET TIP! If you’re looking for an all-in-one kind of solution, you might want to consider Filmora Pro. It’s a video editor, first and foremost, but that’s not all it is — you can be using it today to start creating your own 3D Text Animations!
“Where is everyone getting their 3D Text Animation templates?”
To answer this request, we’ve compiled a guide that not only teaches you how to create things like 3D Spinning Text (After Effects) but also gives you an idea of where you can find the kind of resources (i.e., 3D Text Animation templates and presets) that you need to get a head start on your projects.
In this article
01 [Top 10 3D Text Animation Templates ](#Part 1)
02 [How Do I Make 3D Text in After Effects?](#Part 2)
03 [The Best 10 Amazing 3D Text Animation Templates](#Part 3)
04 [Secrets to Learning More Animation Tactics](#Part 4)
Part 1 What’s 3D Text Animation?
Before anything else, let’s talk about text animation. Specifically, 3D Text Animation. The text that you’re reading now, is 2D Text. It’s static, and it lacks depth. It’s just letters on a screen. Meanwhile, 3D Text is usually built for motion, and thus, it has volume and depth — it’s almost tangible. Here’s what that looks like:
As you can see, even without actually moving, in the text shown in the image above, the potential for motion is there — it looks alive.
Now, you’ll see 3D text like this often in movies or promotions. Usually in the form of extravagant title cards or 3D text logo animation. They’re eye-catching, and because they’re 3D, you can play with them as much as you want to really add drama to your creations.
Part 2 How Do I Make 3D Text in After Effects?
As promised, this next section will teach you how to create 3D Text Animation in Adobe After Effects, which is a VFX and motion graphics software used by many animators to bring life to their text. You’ll notice that the following tutorial is really more about introducing the tools that you can use in order to create 3D Text Animation:
01Step 1. Add Your Text
The first thing that you have to do, of course, is to add your text! To do this, go to the ‘Tools’ panel, select the Type tool, and then select the ‘Composition’ panel. The composition is where you type your text!
With After Effects, you also have the following options:
● Change Text Font
● Adjust Text Size
● Adjust Text Color
● Shift Justification (Left, Middle, right)
And so on! Once you’re done with your text composition, it will be generated by After Effects into a layer that you can adjust as needed in the next steps.
01Step 2. Use Animation Presets
With your text now in a layer that you can add animations to… you’ve practically done a third of the job! Or even more than that if you decide to use the animation presets that are provided by After Effects.
These can be found by selecting ‘Browse Presets…’ on the ‘Animation’ tab (shown in the image below.) All you need to apply them is to drag and drop them onto your text layer.
Note: The first keyframe of this built-in text animation will be applied at the location of the Current Time Indicator (CTI), so make sure that you’ve adjusted that accordingly.
01Step 3. Per-Character Animation
If you’d like to personalize your text animation, After Effects does also give you the option to animate per character (or, per letter, in this case.)
This will give you more control over how you decided to animate your text. Of course, it does mean that it is slightly more complicated as well.
● To animate text per layer, select ‘animate’ on that layer and choose a parameter to start working on animations for.
● You’ll be able to previous (or scrub) through your animations in order to see if they are doing what you need them to do.
● You can also remove applied parameters in order to re-work your animation.
01Step 4. Add Graphic Elements to Text
If you really want to make your 3D Animation Text pop, Adobe After Effects also offers the tools needed to add Graphic Elements to your composition — which can be found at the top-most toolbar!
Part 3 The Best 10 Amazing 3D Text Animation Templates
Now, as promised, we’re also going to be introducing a couple of 3D text animation templates that you can try out for your own projects! Each template will have a link that you can go to in order to see what it looks like, as well as an explanation on how you can use it for your projects in the future!
01Real 3D Light Bulb Kit
The first Text Animation Template on our list is the “Logo Light Bulb” 3D Animation from Envato Elements. This one literally glows people! Making it perfect for a quirky, and yet still very impressive Title Card or Logo. Its design is very realistic, and you can also control how it flickers! For example, turning the bulbs on certain characters first, or turning them all off at once in the end.
023D Text Reveal
This next 3D Animation template is also from Envato Market. And, just like the first, it makes for quite the dramatic Title Card or Logo. With this template, your Text can literally zoom in to view while looking its best and sparkiest in High-Chrome.
033D Metallic Text Animation
Our next pick, the 3D Metallic text animation is another great one for those who are looking for something flashy — something that gives off the impression of being impressive right from the gate. Compared to the previous text animation template, this one has a more rugged kind of appearance. Perfect for those looking to promote something more fun rather than professional.
043D Text Box Animation Pack
The next one is a little less ‘impressive’ — in the sense that it isn’t as in your face as the other 3D animation templates that we’ve introduced thus far. And that’s exactly why the 3D Text Box Animation Pack deserves to be on this list! Its 3D spinning text (after effects) elements are very usable — in that it can work for a variety of individuals and styles. It has a more professional look as well. Making it perfect for corporations.
053D Text & Logo Boxes
This next one, the 3D Text & Logo Boxes pack is particularly perfect for 3D logos. The pack gives you several options for box size as well as text parameters. So, you can design your animated 3D Logo however you want and use it for future projects to give them even more dimension than before.
06The Light Bulb Kit
Our next pick, which is the ‘Light Bulb Kit’ also from Envato, is very similar to the first item on our list — in that it features text lit up by lightbulbs. However, it lends an extra bit of photo-realism to it. Less sparkle and more grain — which may exactly be what you want for your new title card or logo.
073D Text Templates
The 3D Text Templates is a very bright and pop-y template that is perfect for creating eye-catching promotions and advertisements. It’s very simple to use, which, again, maybe exactly what you want. Literally, the template will ask you to choose your own text and change the colors to suit that of your own brand, then you’re done!
083D Text Shapes Logo Reveal
The ‘3D Text Shapes Logo Reveal’ template is a pack of 3D text animations that you can use in order to add a little spin to your logo reveals (quite literally, in some cases!) It has a lot of personality to it, and a certain tech-y or science-y feel that would make it perfect for anyone looking for something more technical.
09Bold Titles
The ‘Bold Titles’ template is very loud and proud. But it has a bit of a retro-vibe to it as well. Making it stand out from some of the more minimalistic modern text animation styles that you see these days.
1010. Wave 3D Logo & Text
Looking for something simple and professional? Then the ‘Wave 3D Logo & Text’ template may just be the one for you. We put it last on this list, but it’s actually quite a strong contender. One that just about anyone (for just about any type of project they’re working on), should be able to get some use out of.
Key Takeaways from This Episode
● 3D Text Animation is the practice of bringing text to life! It gives dimension, depth, and, even, movement into what are usually very static properties!
● You see a lot of 3D Text Animation in big pictures these days. And you can start creating your own with the use of Adobe After Effects — a VFX and Motion Graphics Software that a lot of professionals use for their own text animation.
● Of course, if you don’t have the kind of time to create your own 3D Text Animations from scratch, you can always use templates instead! There are hundreds (if not thousands) of them available out there. It should be simple enough to find one that fits the kind of vibe you’re looking for.
● SECRET TIP! If you’re looking for an all-in-one kind of solution, you might want to consider Filmora Pro. It’s a video editor, first and foremost, but that’s not all it is — you can be using it today to start creating your own 3D Text Animations!
The Complete Guide to Whiteboard Animation
The Definitive Guide to Whiteboard Animation
An easy yet powerful editor
Numerous effects to choose from
Detailed tutorials provided by the official channel
We think about moving videos with actors and actresses when we talk about motion. But, when we speak about doodle videos or drawn videos, we feel about whiteboard animation.
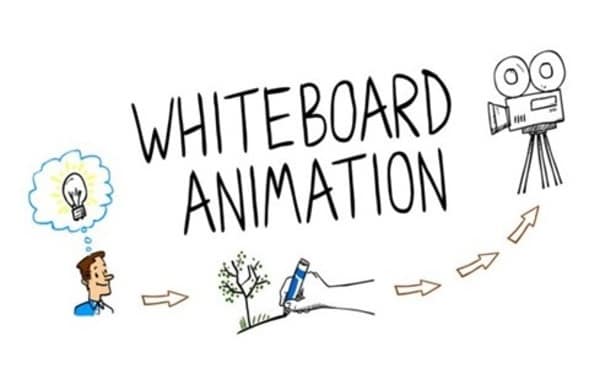
This article covers all the necessary information about whiteboard animation, Filmora whiteboard animation, whiteboard animation cost, etc. Under whiteboard animation, sketches adjust in a manner that results in continual animation reflection.
In this article
01 [What is Whiteboard Animation?](#Part 1)
02 [How Can Whiteboard Animation Be Used?](#Part 2)
03 [What is Whiteboard Animation Cost?](#Part 3)
04 [Some Whiteboard Animation Tools That Worth Using](#Part 4)
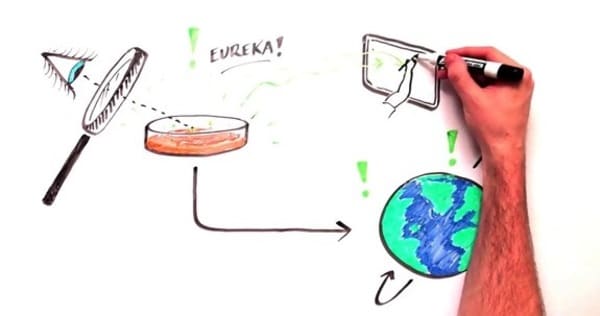
Part 1 What is Whiteboard Animation?

Whiteboard animation is a style that shows static watcher images getting drawn on the white screen. The graphics are at the core of a narration that walks the audience through the story by the draws. These animations are modest to understand, but they make us involved all of an impulsive.
Whiteboard animation could be a video in the middle of narration that walks the viewer through a story by viewing the illustrator’s hand drawing it onto a white background. Established in 2007, whiteboard animation may be a new and exciting way of communicating to the viewer in a very personal way.
It applies effects like time-lapse and stop-motion to bring stories to life. Its uses include internal and external television and internet advertisements, software and product demonstrations, whiteboard animation lectures and educational videos for all ages, and various artistic possibilities like untrue storytelling.
Whiteboard animation videos are traditionally made by simply recording the artist live as they draw the content for the video while at the same time reciting the story. An efficient technique in these visually-oriented times, but a tricky balancing act for even the most effective illustrators and speakers.
Part 2 How Can Whiteboard Animation Be Used?
While working with whiteboard animation for pc or going with whiteboard animation hand drawing in digital mode, it is important to understand how can whiteboard animation be used for? Let’s try to figure out that in the following points:
01Represent complex ideas in a simple way
A whiteboard video can offer assistance if the item or framework you need to portray is complex or exceedingly specialized. Individuals frequently get bored amid clarifications, and the more point by point those clarifications are, the harder it is to focus.
Whether you’re pushing an item on a press page or sharing a new trade prepare with your team, employing a high-quality whiteboard movement video to induce your point-over will keep up tall intrigued for as long as the video is playing. This can be because whiteboard liveliness is fast-moving, outwardly point by point, and frequently colorful, making them simple and fun to watch—for as long as it takes to clarify the thought.
02You can cover a part of your thoughts all at once
For reasons comparative to those displayed over, a whiteboard video is perfect on the off chance that you would like to cover an expansive sum of data within the introduction. With ideas unfolding visually as the storyteller portrays what’s going on, you’ll be able to get absent with counting a part of diverse thoughts within the same video without losing the watcher intrigued.
03You need to get other business attention
Did you know that whiteboard activity recordings are fair as compelling for Bshowcasing? The industrial-yet-casual look-and-feel of whiteboard activity loans itself astoundingly generously to a corporate environment.
Whiteboard movement administrations can donate you a noteworthy edge over competing companies once you approach other businesses along with your offer.
04You should maintain a strategic distance from awful performing artists at all costs
With whiteboard liveliness, you don’t ought to enlist on-screen characters to play in your video. This cruel noteworthy took a toll on reserve funds. Still, it can moreover spare you genuine embarrassment—good, persuading performing artists can be troublesome to find, and awful ones will have your group of onlookers wincing through the complete introduction. Movement ousts this issue inside and out.
05You plan to use social media marketing
If you need to utilize YouTube or social media advertisements for your promotion, whiteboard liveliness recordings alone will do the job. Individuals like them, so you’ve got a great chance of getting sees and clicks—and sales.
(Fun truth: Did you know there are 3billion looks conducted on YouTube alone each month? If you need your share of that activity, utilizing whiteboard activity recordings may be your best wager.)
06You want to create a story
On the off-chance that you need your video to tell a portion of your brand’s story, no one will do that way better than whiteboard movement administrations. Disney demonstrated that liveliness was an incredibly viable way to tell stories nearly a hundred years ago. Why not take after that convention?
07You want to use humor
When you need to consolidate humor into your video introduction, whiteboard activity is one of the most excellent ways to induce giggles. Novice performing artists can be unbalanced and irritating when they attempt to be clever on camera, but in whiteboard animation’s laid-back visual fashion, it can communicate humor immaculately.
08You need to reuse ancient sound substance
If you want to repurpose other sorts of the substance you’ve got lying around—say, a podcast scene or a discourse you gave—you can combine preexisting audio with whiteboard liveliness. This will assist you to capitalize on the substance you’ve as of now made, and it’ll undoubtedly breathe new life into it.
Part 3 What is Whiteboard Animation Cost?
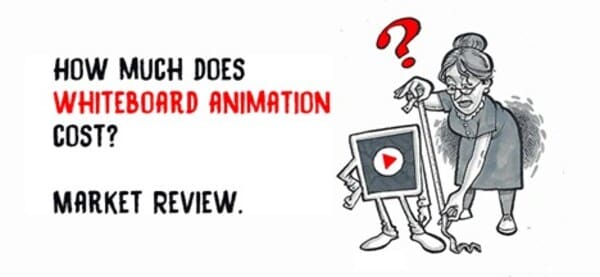
Should you contract an artisan or fair do-it-yourself for whiteboard activity? Let’s have a conversation around sweat equity.
You can set up a video camera yourself and utilize video altering computer program to make a Whiteboard Liveliness. However, it’ll likely require a couple of weeks of your time, and your comes about will be far from a professional studio’s quality. Expect ineffectively drawn pictures and composed words that are unreadable.
Whiteboard activity program can be fetched as small as $50plus saves a couple of weeks of your time. These cheap programs utilize an inactive picture of a hand and clip craftsmanship. But the ultimate item isn’t unique, and its esteem is an excellent Control Point introduction.
Another choice is Adobe Eventual outcomes, an industry-standard activity program. It’s what they utilize to create National Commercials. It costs $16in any case, and learning the computer program requires a bachelor’s degree.
Part 4 Some Whiteboard Animation Tools That Worth Using
Whiteboard animation software or whiteboard animation app permits you to form whiteboard animation videos. Animation software offers a visual, drag-and-drop interface to simplify the designing process for creators.
Wondering what whiteboard animations are? They’re explainer videos where a hand sketches on a whiteboard. Before, this was manual, where a lecturer writes on a whiteboard. But because of whiteboard animation software, you don’t have to have a whiteboard or compose aboard again.
Whiteboard animation tool has built-in hand styles and virtual whiteboards that automatically process animation formation.
Wondershare Filmora Video Editor and Camtasia are some of the best videos altering computer programs with cool features compared to other competing video varying Software.
Wondershare Filmora
Get started easily with Filmora’s powerful performance, intuitive interface, and countless effects!
Try It Free Try It Free Try It Free Learn More >
Here are a few steps to follow for making whiteboard animation videos in Filmora and Camtasia:
01Write a Script
Much like a standard video or a brief skit, there must be a script if a whiteboard animation video succeeds. It is excellent to have compelling images and information, but without a logical story, they’re nothing.
It is not a blog, storyboard, or a collection of bullet points. You hope for a proper script, which says everything about the video. Why? Because then you’ll know precisely what images should be added further in specific segments, what the narrator must show, and what transitions are necessary.
02Start with the Storyboard
Now you have got a script, and you’ve got a clear idea of how you want your video to return across. It’s time to start out building the storyboard. With a storyboard, you may be able to sort out your thoughts far better. You’ll see how each frame comes onto the screen, and a unit of ammunition ties into the opposite.
When you create your storyboard, you may have a simple idea about how your final product will look. If there is some alteration you’re not proud of, this can be the instant where you’ll make changes.
03Create Images
You may find this part very easy if you’re a precise person. It’s all about crafting fun and unique images that will help deliver the data you want to bring across. Attempt to create striking photos which will excite your audience. The simpler, more distinctive, and attractive you’ll be able to make those images, the higher your end product.
04Animate Those Images
With your images drawn and in situ on the storyboard, it’s time to animate them. When animating your whiteboard animation video, confine in mind that every frame will likely show for no. quite seconds. This forces you to form every single movement count – with only some seconds per frame available, and quick movements are often preferable to extended scenes of stillness.
05Record and Sync the Audio
The audio is arguably one of the main essential parts of a whiteboard animation video. So, before recording the audio for any part of your project, practice reading through your script several times until you recognize it by memory and cannot struggle when speaking into the microphone during the particular recording process.
The final step involves getting your audio. Every animated video must have narration because it helps to elucidate what’s happening within the images that folks are seeing. Record your audio, and ensure it’s perfectly in sync with your content.
So, whether you are going with hand whiteboard animation and then modifying and animated with Filmora or the Camtasia whiteboard animation, both result in good whiteboard animation. Whereas, if looking for comprehensive video editing tools, the obvious choice will be Filmora.
● Key Takeaways from This Episode →
● In short, the article gives you the basic understanding of:
● What is meant by Whiteboard Animation?
● Different examples of whiteboard animation videos to explain the techniques
● Steps to apply whiteboard animation with Filmora
● Further, the article has explained Whiteboard Animation with different examples to clarify how it looks, and some websites may help you lead more about Whiteboard Animation videos. The most important question answered above is how to make videos ideally at Filmora. I hope your queries are explicit after reading this post.
We think about moving videos with actors and actresses when we talk about motion. But, when we speak about doodle videos or drawn videos, we feel about whiteboard animation.
This article covers all the necessary information about whiteboard animation, Filmora whiteboard animation, whiteboard animation cost, etc. Under whiteboard animation, sketches adjust in a manner that results in continual animation reflection.
In this article
01 [What is Whiteboard Animation?](#Part 1)
02 [How Can Whiteboard Animation Be Used?](#Part 2)
03 [What is Whiteboard Animation Cost?](#Part 3)
04 [Some Whiteboard Animation Tools That Worth Using](#Part 4)
Part 1 What is Whiteboard Animation?
Whiteboard animation is a style that shows static watcher images getting drawn on the white screen. The graphics are at the core of a narration that walks the audience through the story by the draws. These animations are modest to understand, but they make us involved all of an impulsive.
Whiteboard animation could be a video in the middle of narration that walks the viewer through a story by viewing the illustrator’s hand drawing it onto a white background. Established in 2007, whiteboard animation may be a new and exciting way of communicating to the viewer in a very personal way.
It applies effects like time-lapse and stop-motion to bring stories to life. Its uses include internal and external television and internet advertisements, software and product demonstrations, whiteboard animation lectures and educational videos for all ages, and various artistic possibilities like untrue storytelling.
Whiteboard animation videos are traditionally made by simply recording the artist live as they draw the content for the video while at the same time reciting the story. An efficient technique in these visually-oriented times, but a tricky balancing act for even the most effective illustrators and speakers.
Part 2 How Can Whiteboard Animation Be Used?
While working with whiteboard animation for pc or going with whiteboard animation hand drawing in digital mode, it is important to understand how can whiteboard animation be used for? Let’s try to figure out that in the following points:
01Represent complex ideas in a simple way
A whiteboard video can offer assistance if the item or framework you need to portray is complex or exceedingly specialized. Individuals frequently get bored amid clarifications, and the more point by point those clarifications are, the harder it is to focus.
Whether you’re pushing an item on a press page or sharing a new trade prepare with your team, employing a high-quality whiteboard movement video to induce your point-over will keep up tall intrigued for as long as the video is playing. This can be because whiteboard liveliness is fast-moving, outwardly point by point, and frequently colorful, making them simple and fun to watch—for as long as it takes to clarify the thought.
02You can cover a part of your thoughts all at once
For reasons comparative to those displayed over, a whiteboard video is perfect on the off chance that you would like to cover an expansive sum of data within the introduction. With ideas unfolding visually as the storyteller portrays what’s going on, you’ll be able to get absent with counting a part of diverse thoughts within the same video without losing the watcher intrigued.
03You need to get other business attention
Did you know that whiteboard activity recordings are fair as compelling for Bshowcasing? The industrial-yet-casual look-and-feel of whiteboard activity loans itself astoundingly generously to a corporate environment.
Whiteboard movement administrations can donate you a noteworthy edge over competing companies once you approach other businesses along with your offer.
04You should maintain a strategic distance from awful performing artists at all costs
With whiteboard liveliness, you don’t ought to enlist on-screen characters to play in your video. This cruel noteworthy took a toll on reserve funds. Still, it can moreover spare you genuine embarrassment—good, persuading performing artists can be troublesome to find, and awful ones will have your group of onlookers wincing through the complete introduction. Movement ousts this issue inside and out.
05You plan to use social media marketing
If you need to utilize YouTube or social media advertisements for your promotion, whiteboard liveliness recordings alone will do the job. Individuals like them, so you’ve got a great chance of getting sees and clicks—and sales.
(Fun truth: Did you know there are 3billion looks conducted on YouTube alone each month? If you need your share of that activity, utilizing whiteboard activity recordings may be your best wager.)
06You want to create a story
On the off-chance that you need your video to tell a portion of your brand’s story, no one will do that way better than whiteboard movement administrations. Disney demonstrated that liveliness was an incredibly viable way to tell stories nearly a hundred years ago. Why not take after that convention?
07You want to use humor
When you need to consolidate humor into your video introduction, whiteboard activity is one of the most excellent ways to induce giggles. Novice performing artists can be unbalanced and irritating when they attempt to be clever on camera, but in whiteboard animation’s laid-back visual fashion, it can communicate humor immaculately.
08You need to reuse ancient sound substance
If you want to repurpose other sorts of the substance you’ve got lying around—say, a podcast scene or a discourse you gave—you can combine preexisting audio with whiteboard liveliness. This will assist you to capitalize on the substance you’ve as of now made, and it’ll undoubtedly breathe new life into it.
Part 3 What is Whiteboard Animation Cost?
Should you contract an artisan or fair do-it-yourself for whiteboard activity? Let’s have a conversation around sweat equity.
You can set up a video camera yourself and utilize video altering computer program to make a Whiteboard Liveliness. However, it’ll likely require a couple of weeks of your time, and your comes about will be far from a professional studio’s quality. Expect ineffectively drawn pictures and composed words that are unreadable.
Whiteboard activity program can be fetched as small as $50plus saves a couple of weeks of your time. These cheap programs utilize an inactive picture of a hand and clip craftsmanship. But the ultimate item isn’t unique, and its esteem is an excellent Control Point introduction.
Another choice is Adobe Eventual outcomes, an industry-standard activity program. It’s what they utilize to create National Commercials. It costs $16in any case, and learning the computer program requires a bachelor’s degree.
Part 4 Some Whiteboard Animation Tools That Worth Using
Whiteboard animation software or whiteboard animation app permits you to form whiteboard animation videos. Animation software offers a visual, drag-and-drop interface to simplify the designing process for creators.
Wondering what whiteboard animations are? They’re explainer videos where a hand sketches on a whiteboard. Before, this was manual, where a lecturer writes on a whiteboard. But because of whiteboard animation software, you don’t have to have a whiteboard or compose aboard again.
Whiteboard animation tool has built-in hand styles and virtual whiteboards that automatically process animation formation.
Wondershare Filmora Video Editor and Camtasia are some of the best videos altering computer programs with cool features compared to other competing video varying Software.
Wondershare Filmora
Get started easily with Filmora’s powerful performance, intuitive interface, and countless effects!
Try It Free Try It Free Try It Free Learn More >
Here are a few steps to follow for making whiteboard animation videos in Filmora and Camtasia:
01Write a Script
Much like a standard video or a brief skit, there must be a script if a whiteboard animation video succeeds. It is excellent to have compelling images and information, but without a logical story, they’re nothing.
It is not a blog, storyboard, or a collection of bullet points. You hope for a proper script, which says everything about the video. Why? Because then you’ll know precisely what images should be added further in specific segments, what the narrator must show, and what transitions are necessary.
02Start with the Storyboard
Now you have got a script, and you’ve got a clear idea of how you want your video to return across. It’s time to start out building the storyboard. With a storyboard, you may be able to sort out your thoughts far better. You’ll see how each frame comes onto the screen, and a unit of ammunition ties into the opposite.
When you create your storyboard, you may have a simple idea about how your final product will look. If there is some alteration you’re not proud of, this can be the instant where you’ll make changes.
03Create Images
You may find this part very easy if you’re a precise person. It’s all about crafting fun and unique images that will help deliver the data you want to bring across. Attempt to create striking photos which will excite your audience. The simpler, more distinctive, and attractive you’ll be able to make those images, the higher your end product.
04Animate Those Images
With your images drawn and in situ on the storyboard, it’s time to animate them. When animating your whiteboard animation video, confine in mind that every frame will likely show for no. quite seconds. This forces you to form every single movement count – with only some seconds per frame available, and quick movements are often preferable to extended scenes of stillness.
05Record and Sync the Audio
The audio is arguably one of the main essential parts of a whiteboard animation video. So, before recording the audio for any part of your project, practice reading through your script several times until you recognize it by memory and cannot struggle when speaking into the microphone during the particular recording process.
The final step involves getting your audio. Every animated video must have narration because it helps to elucidate what’s happening within the images that folks are seeing. Record your audio, and ensure it’s perfectly in sync with your content.
So, whether you are going with hand whiteboard animation and then modifying and animated with Filmora or the Camtasia whiteboard animation, both result in good whiteboard animation. Whereas, if looking for comprehensive video editing tools, the obvious choice will be Filmora.
● Key Takeaways from This Episode →
● In short, the article gives you the basic understanding of:
● What is meant by Whiteboard Animation?
● Different examples of whiteboard animation videos to explain the techniques
● Steps to apply whiteboard animation with Filmora
● Further, the article has explained Whiteboard Animation with different examples to clarify how it looks, and some websites may help you lead more about Whiteboard Animation videos. The most important question answered above is how to make videos ideally at Filmora. I hope your queries are explicit after reading this post.
15 Top Video to GIF App on iPhone and Android
15 Best Video to GIF App on iPhone and Android
An easy yet powerful editor
Numerous effects to choose from
Detailed tutorials provided by the official channel
In the last few years, GIF has taken the internet by storm and is present everywhere be it social media sites, messaging apps, blogs, or sites. Though there are several sites available from where you can download interesting GIFs, you can even create customized ones. Several apps for Android and iPhone are available using which the GIF can be created from video.

Using these apps, you can create good morning GIF video for WhatsApp , cute GIF, birthday GIF, and other.
In this article
01 [Top Gif Apps for Iphone](#Part 1)
02 [Top Apps for Android](#Part 2)
03 [Top Apps for Both Android and Iphone](#Part 3)
04 [Best Desktop Software to Create Customized Gif- Wondershare Filmora](#Part 4)
Part 1 Top GIF Apps for iPhone
Check the below app to turn video into GIF on your iPhone.
01GIF Maker
This is a free app with IAP that allows creating a GIF from videos as well as photos.
Key features: :
● Create GIFs, boomerangs, and memes using videos and photos.
● Allows creating GIFs using live cameras.
● Using this iPhone video to GIF app, loop videos can also be created.
● Multiple GIF editing options like adding text, adding filters, adjusting frame speed, adding emojis, artwork, and more.
● Allows sharing created GIFs to Facebook, Messenger, Instagram, and other sites.
● Free to use for the first 3 days after which a subscription of $9.99 has to be paid.
● Monthly and Lifetime subscriptions are available as well
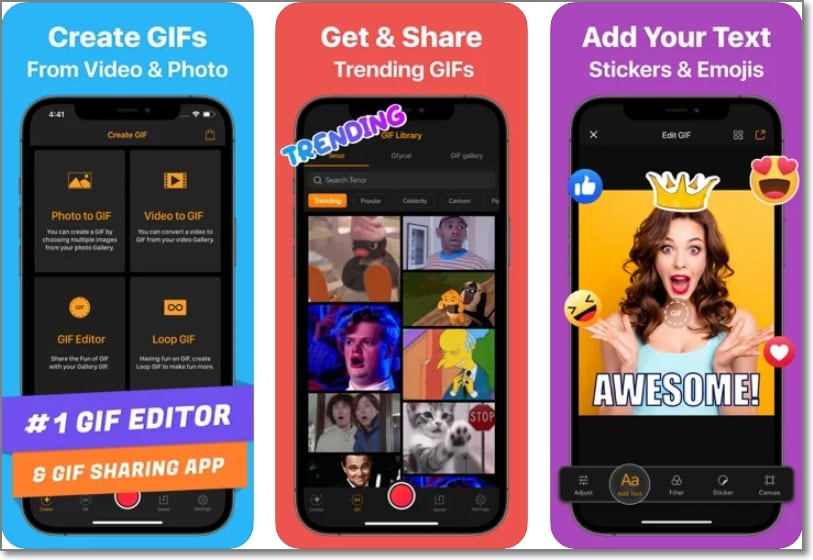
02Video to GIF
Developed by Ngo Ngoc Chien this is a popular app for the iPhone that is free and comes with IAP.
Key features:
● Allows creating a watermark-free GIF from the videos present on your phone.
● Videos can be recorded for creating a GIF.
● Option to use YouTube or any other online video for GIF creation.
● Comes with 15 image effect templates to create a GIF using photos.
● Additionally, live photos, as well as Burst photos can also be used for GIFs.
● Created GIFs can be shared to Twitter, Facebook, Instagram, Dropbox, Email, and other sites.
● Multiple editing options are supported like rotate, quality selection, reverse, and more.
● Option to save GIF as URL and also get URL of the created GIF.
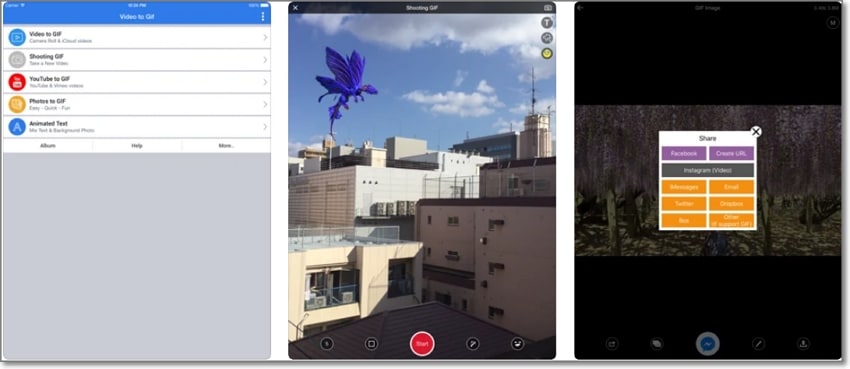
035Seconds App
With a 4.8 rating, this free app is designed by Eric Marschner and offers IAP as well.
Key features: :
● Allows creating a GIF from photos and videos present on your device.
● New images and videos can be captured for GIFs.
● GIFs can be imported from other sources and edited as needed.
● Multiple options for editing are supported like using filters, stickers, text, and more.
● Free app with a simple interface without any need for sign-ups.
● Allows sharing the created GIF as a file or as a link.
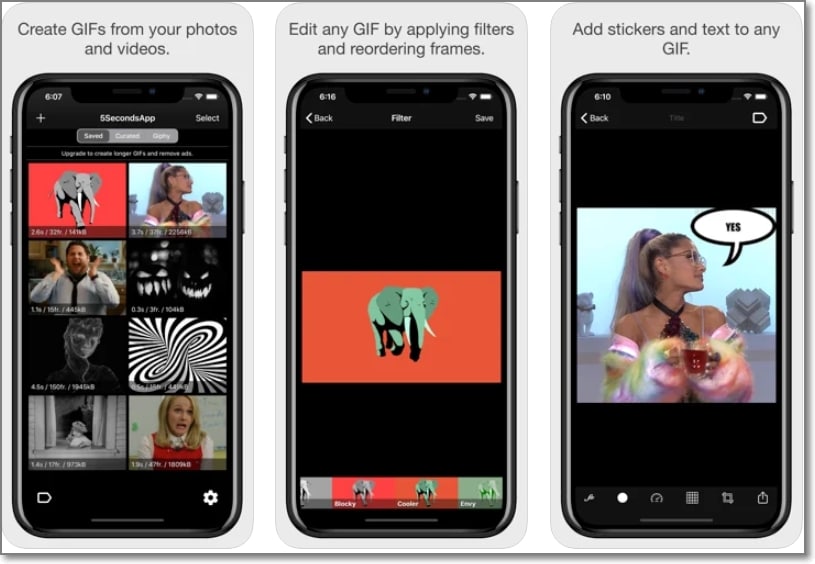
04Giffer Pro GIF Maker
With a 4 rating, this is a paid video to GIF converter app developed by Taber Buhl.
Key features:
● Allows creating interesting GIFs in larger and longer sizes.
● GIFs can be created using live video, photos, videos, burst photos, and other GIF frames.
● Simple to use with support to advanced features like adjusting frames, speed, position, and others.
● Allows creating different types of GIFs like stop motion, wiggle, time-lapse, seamless loop, reaction, and many more.
● Share created GIFs to social media sites like Instagram, Twitter, Tumblr, and others.
● Option to export GIFs as live photos and videos.
● Support multiple in-app camera modes, playback modes, and sharing options
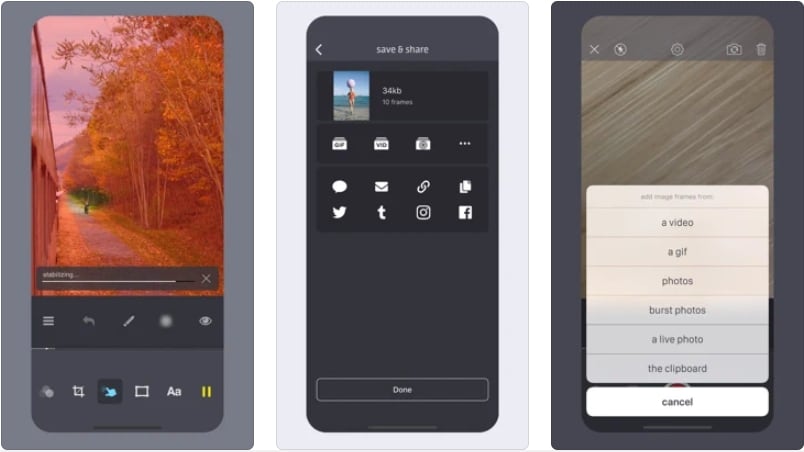
05Live GIF
Designed for iPhone and iPad, this is a paid app by Priime, Inc supporting multiple features.
Key features:
● Using this iOS app, Live Photos can be converted to videos and GIFs.
● Simple and intuitive interface without any complicated process.
● Allows sharing the created GIF to several sites like Twitter, iMessage, Facebook, and more.
● Compatible working with devices capable of taking Live Photos.
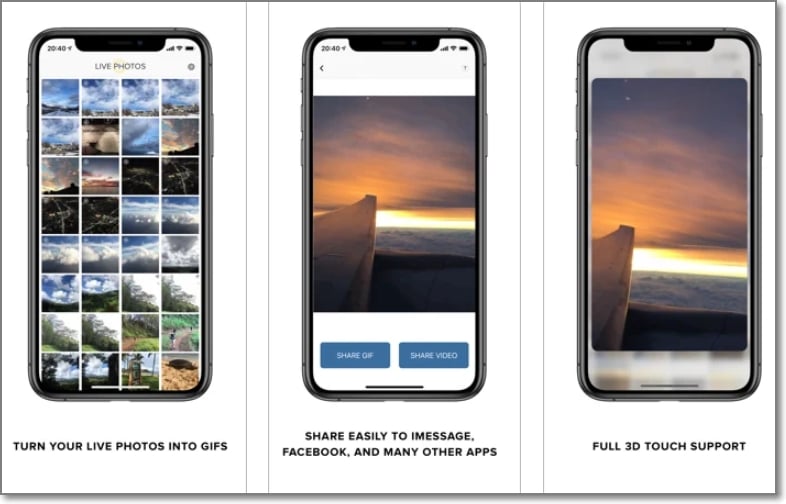
06Gifx
This is a paid app for iOS devices that comes with powerful features.
Key features:
● GIFs can be created using photos, videos, animated PNG files, bursts images, live photos, and other media.
● Stickers and annotations can be added to the GIF.
● Support multiple editing options like rearranging the frames, controlling the speed, and more.
● Option to share the GIF through MMS, email, and also clipboard.
● GIF files can be saved to the device as a video or animated PNG.
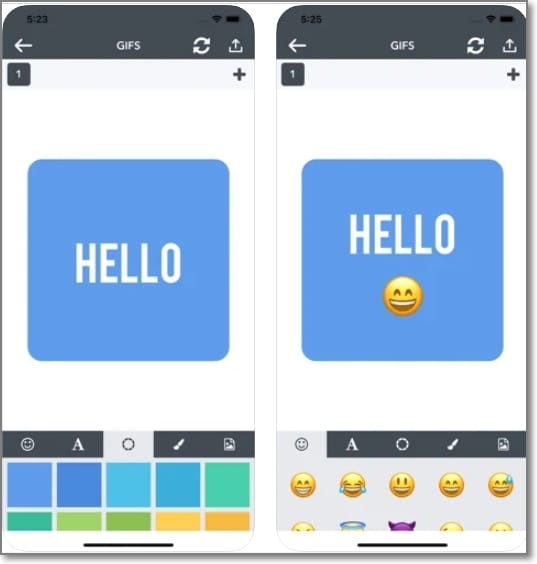
Part 2 Top Apps for Android
Below listed are the top apps for Android devices.
01Coub
This is a free video GIF maker app with a 4 rating that is simple to use.
Key features:
● Allows creating loops of videos from camera, YouTube, Library, and other sources.
● Allows trimming the video to choose the desired part.
● HD quality coubs are created in different formats like horizontal, vertical, and others.
● Created coubs appear on the subscriber’s timeline and channel.
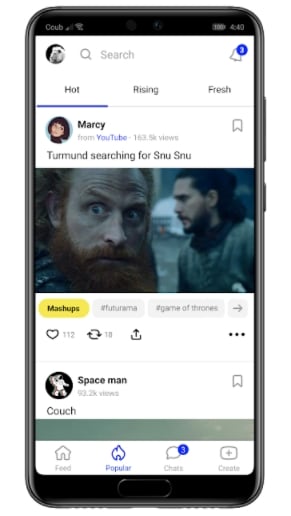
02GIF Camera
This is an easy-to-use app for Android devices to create GIFs.
Key features:
● Allows creating GIFs by recording a video using an Android camera.
● GIFs can be created for up to 10 seconds or less.
● Allows editing GIFs.
● Created GIFs can be saved to the phone or can also be shared directly on social media sites.
● Lightweight app with user-friendly interface.
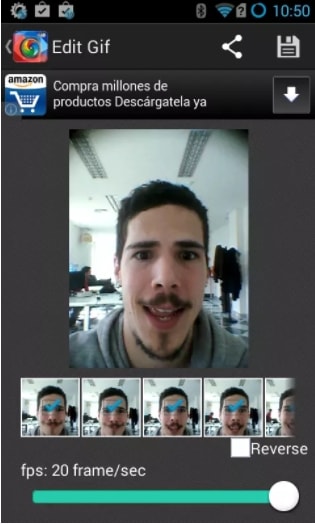
03Giphy Cam
This Android-based app from Giphy allows creating interesting GIFs. The app is free to use.
Key features:
● Create GIFs by recording videos using the Android camera.
● Support a wide range of editing tools like filters, text, special effects, and more.
● Intuitive interface that makes the process quick and simple.
● The created GIF animation can be saved to the system or can be shared with other apps as well.
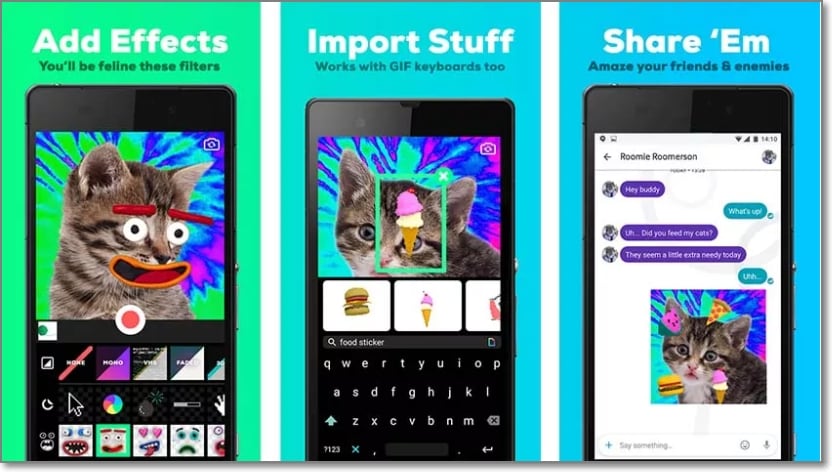
04GIF Maker
With a 4.7 rating, this is a free and powerful app for creating interesting GIFs.
Key features: :
● Allows creating GIFs using the videos clips on your device or by recording a live video.
● Option to record the screen video and create a GIF.
● Multiple images can also be used for creating a GIF file.
● A wide range of editing functions are supported like trim, crop, resize, filters, emoji, and more.
● High-quality GIFs can be created supporting up to 400 images and 50fps.
● Additional features include GIF compression, GIF to video conversion, selecting GIF background, sharing GIF on social media sites, and more.
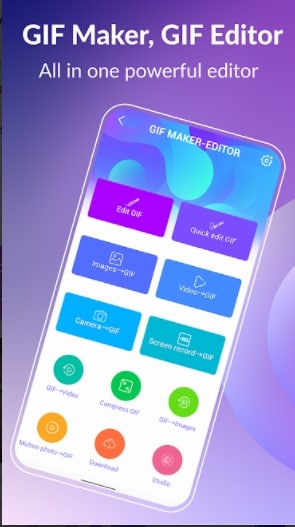
05GIFBoom
This app for Android devices is free to use and allows to quickly create GIFs.
Key features:
● Allows creating high-resolution GIFs.
● GIFs can be created using the images and videos on your phone.
● Live video can also be recorded for creating GIFs.
● GIFs can be sent over email, Twitter, Instagram, and other social media sites.
● Allows adding music to GIF files.
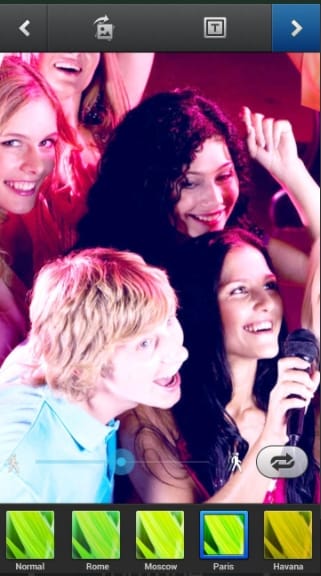
Part 3 Top Apps for Android and iPhone
There are a number of apps that are available for both Android and iOS platforms. These apps can be downloaded from their respective app stores. The top ones are enlisted below.
01Gif Me! Camera
This app for Android and iOS devices supports the quick creation of GIF files.
Key features:
● Allows creating GIFs using videos and images on the device.
● Option to add special effects, filters, and other elements.
● Option to import GIF from online services.
● Stop-motion, loop, time-lapse, and other animations can be created.
● Save the created GIF file to your device or share them over social media sites.
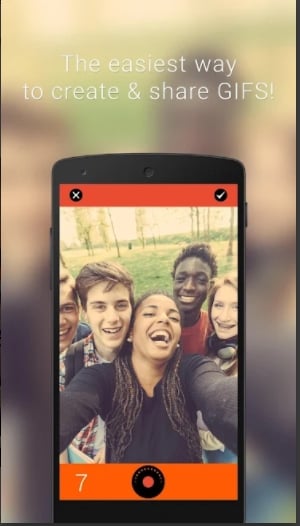
02Pixel Animator- GIF Maker
This Android and iOS-based app allow creating pixel-based GIF files.
Key features:
● Create pixel-based GIFs and art using an existing image or a cartoon.
● Allows adjusting the picture frame.
● Multiple options for editing the GIF animations.
● Share the created pixel over different sites and platforms.
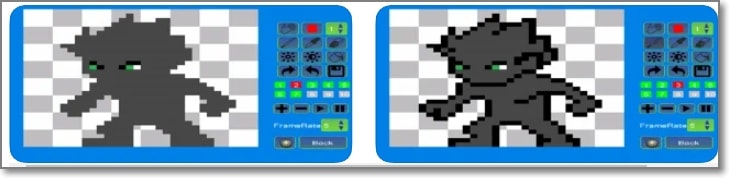
03GIF Toaster
This is a free app with an IAP option available for download on Android and iOS devices.
Key features:
● Simple to use app that can create GIFs from videos and images on the device.
● Support almost all popular media formats for creating GIF files.
● Allows creating GIFs using bursts, panoramas, as well as time-lapses.
● Facilitate creating photo collages as well.
● Simple and quick processing.

04GIPHY
When it comes to searching or creating a GIF this is the most popular and widely used app available for both Android and iOS devices.
Key features:
● Create GIFs by uploading videos or capturing one using the device camera.
● Allows creating stickers with custom face filters and text cartoons.
● Created stickers can be accessed from all GIPHY accessible places.
● Search from a huge library of GIFs and clips.
● Option to share GIF through email, Messenger, Instagram, Twitter, and other sites.
● Created animation can also be saved to the clipboard.
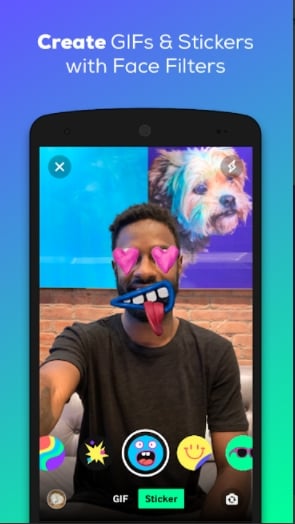
Part 4 Best Desktop Software To Create Customized Gif- Wondershare Filmora Video Editor
If you are looking for a desktop tool that can let you create customized GIFs using videos, Wondershare Filmora is the best choice. This software is available for download on Windows and Mac systems and supports creating a GIF from videos in all popular formats like MP4, MOV, MKV, and many others.
You can add filters, effects, and other elements to the GIF and can further customize them using features like trim, crop, and more.
Wondershare Filmora
Get started easily with Filmora’s powerful performance, intuitive interface, and countless effects!
Try It Free Try It Free Try It Free Learn More >
The process of creating a GIF is simple and quick where you just need to add the video, edit them and choose to save them as a GIF file which can be used anywhere as needed.
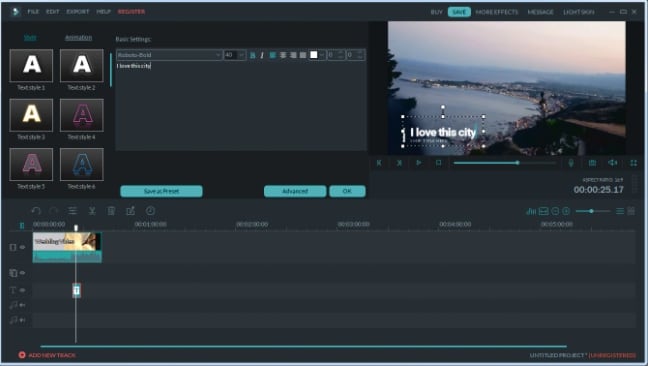
● Key Takeaways from This Episode →
●A wide range of apps is available for creating GIFs using videos.
●These apps are available for Android, as well as iOS devices and can be selected based on your requirements and budget.
●Wondershare Filmora is an excellent desktop software for creating a GIF using videos.
In the last few years, GIF has taken the internet by storm and is present everywhere be it social media sites, messaging apps, blogs, or sites. Though there are several sites available from where you can download interesting GIFs, you can even create customized ones. Several apps for Android and iPhone are available using which the GIF can be created from video.
Using these apps, you can create good morning GIF video for WhatsApp , cute GIF, birthday GIF, and other.
In this article
01 [Top Gif Apps for Iphone](#Part 1)
02 [Top Apps for Android](#Part 2)
03 [Top Apps for Both Android and Iphone](#Part 3)
04 [Best Desktop Software to Create Customized Gif- Wondershare Filmora](#Part 4)
Part 1 Top GIF Apps for iPhone
Check the below app to turn video into GIF on your iPhone.
01GIF Maker
This is a free app with IAP that allows creating a GIF from videos as well as photos.
Key features: :
● Create GIFs, boomerangs, and memes using videos and photos.
● Allows creating GIFs using live cameras.
● Using this iPhone video to GIF app, loop videos can also be created.
● Multiple GIF editing options like adding text, adding filters, adjusting frame speed, adding emojis, artwork, and more.
● Allows sharing created GIFs to Facebook, Messenger, Instagram, and other sites.
● Free to use for the first 3 days after which a subscription of $9.99 has to be paid.
● Monthly and Lifetime subscriptions are available as well
02Video to GIF
Developed by Ngo Ngoc Chien this is a popular app for the iPhone that is free and comes with IAP.
Key features:
● Allows creating a watermark-free GIF from the videos present on your phone.
● Videos can be recorded for creating a GIF.
● Option to use YouTube or any other online video for GIF creation.
● Comes with 15 image effect templates to create a GIF using photos.
● Additionally, live photos, as well as Burst photos can also be used for GIFs.
● Created GIFs can be shared to Twitter, Facebook, Instagram, Dropbox, Email, and other sites.
● Multiple editing options are supported like rotate, quality selection, reverse, and more.
● Option to save GIF as URL and also get URL of the created GIF.
035Seconds App
With a 4.8 rating, this free app is designed by Eric Marschner and offers IAP as well.
Key features: :
● Allows creating a GIF from photos and videos present on your device.
● New images and videos can be captured for GIFs.
● GIFs can be imported from other sources and edited as needed.
● Multiple options for editing are supported like using filters, stickers, text, and more.
● Free app with a simple interface without any need for sign-ups.
● Allows sharing the created GIF as a file or as a link.
04Giffer Pro GIF Maker
With a 4 rating, this is a paid video to GIF converter app developed by Taber Buhl.
Key features:
● Allows creating interesting GIFs in larger and longer sizes.
● GIFs can be created using live video, photos, videos, burst photos, and other GIF frames.
● Simple to use with support to advanced features like adjusting frames, speed, position, and others.
● Allows creating different types of GIFs like stop motion, wiggle, time-lapse, seamless loop, reaction, and many more.
● Share created GIFs to social media sites like Instagram, Twitter, Tumblr, and others.
● Option to export GIFs as live photos and videos.
● Support multiple in-app camera modes, playback modes, and sharing options
05Live GIF
Designed for iPhone and iPad, this is a paid app by Priime, Inc supporting multiple features.
Key features:
● Using this iOS app, Live Photos can be converted to videos and GIFs.
● Simple and intuitive interface without any complicated process.
● Allows sharing the created GIF to several sites like Twitter, iMessage, Facebook, and more.
● Compatible working with devices capable of taking Live Photos.
06Gifx
This is a paid app for iOS devices that comes with powerful features.
Key features:
● GIFs can be created using photos, videos, animated PNG files, bursts images, live photos, and other media.
● Stickers and annotations can be added to the GIF.
● Support multiple editing options like rearranging the frames, controlling the speed, and more.
● Option to share the GIF through MMS, email, and also clipboard.
● GIF files can be saved to the device as a video or animated PNG.
Part 2 Top Apps for Android
Below listed are the top apps for Android devices.
01Coub
This is a free video GIF maker app with a 4 rating that is simple to use.
Key features:
● Allows creating loops of videos from camera, YouTube, Library, and other sources.
● Allows trimming the video to choose the desired part.
● HD quality coubs are created in different formats like horizontal, vertical, and others.
● Created coubs appear on the subscriber’s timeline and channel.
02GIF Camera
This is an easy-to-use app for Android devices to create GIFs.
Key features:
● Allows creating GIFs by recording a video using an Android camera.
● GIFs can be created for up to 10 seconds or less.
● Allows editing GIFs.
● Created GIFs can be saved to the phone or can also be shared directly on social media sites.
● Lightweight app with user-friendly interface.
03Giphy Cam
This Android-based app from Giphy allows creating interesting GIFs. The app is free to use.
Key features:
● Create GIFs by recording videos using the Android camera.
● Support a wide range of editing tools like filters, text, special effects, and more.
● Intuitive interface that makes the process quick and simple.
● The created GIF animation can be saved to the system or can be shared with other apps as well.
04GIF Maker
With a 4.7 rating, this is a free and powerful app for creating interesting GIFs.
Key features: :
● Allows creating GIFs using the videos clips on your device or by recording a live video.
● Option to record the screen video and create a GIF.
● Multiple images can also be used for creating a GIF file.
● A wide range of editing functions are supported like trim, crop, resize, filters, emoji, and more.
● High-quality GIFs can be created supporting up to 400 images and 50fps.
● Additional features include GIF compression, GIF to video conversion, selecting GIF background, sharing GIF on social media sites, and more.
05GIFBoom
This app for Android devices is free to use and allows to quickly create GIFs.
Key features:
● Allows creating high-resolution GIFs.
● GIFs can be created using the images and videos on your phone.
● Live video can also be recorded for creating GIFs.
● GIFs can be sent over email, Twitter, Instagram, and other social media sites.
● Allows adding music to GIF files.
Part 3 Top Apps for Android and iPhone
There are a number of apps that are available for both Android and iOS platforms. These apps can be downloaded from their respective app stores. The top ones are enlisted below.
01Gif Me! Camera
This app for Android and iOS devices supports the quick creation of GIF files.
Key features:
● Allows creating GIFs using videos and images on the device.
● Option to add special effects, filters, and other elements.
● Option to import GIF from online services.
● Stop-motion, loop, time-lapse, and other animations can be created.
● Save the created GIF file to your device or share them over social media sites.
02Pixel Animator- GIF Maker
This Android and iOS-based app allow creating pixel-based GIF files.
Key features:
● Create pixel-based GIFs and art using an existing image or a cartoon.
● Allows adjusting the picture frame.
● Multiple options for editing the GIF animations.
● Share the created pixel over different sites and platforms.
03GIF Toaster
This is a free app with an IAP option available for download on Android and iOS devices.
Key features:
● Simple to use app that can create GIFs from videos and images on the device.
● Support almost all popular media formats for creating GIF files.
● Allows creating GIFs using bursts, panoramas, as well as time-lapses.
● Facilitate creating photo collages as well.
● Simple and quick processing.
04GIPHY
When it comes to searching or creating a GIF this is the most popular and widely used app available for both Android and iOS devices.
Key features:
● Create GIFs by uploading videos or capturing one using the device camera.
● Allows creating stickers with custom face filters and text cartoons.
● Created stickers can be accessed from all GIPHY accessible places.
● Search from a huge library of GIFs and clips.
● Option to share GIF through email, Messenger, Instagram, Twitter, and other sites.
● Created animation can also be saved to the clipboard.
Part 4 Best Desktop Software To Create Customized Gif- Wondershare Filmora Video Editor
If you are looking for a desktop tool that can let you create customized GIFs using videos, Wondershare Filmora is the best choice. This software is available for download on Windows and Mac systems and supports creating a GIF from videos in all popular formats like MP4, MOV, MKV, and many others.
You can add filters, effects, and other elements to the GIF and can further customize them using features like trim, crop, and more.
Wondershare Filmora
Get started easily with Filmora’s powerful performance, intuitive interface, and countless effects!
Try It Free Try It Free Try It Free Learn More >
The process of creating a GIF is simple and quick where you just need to add the video, edit them and choose to save them as a GIF file which can be used anywhere as needed.
● Key Takeaways from This Episode →
●A wide range of apps is available for creating GIFs using videos.
●These apps are available for Android, as well as iOS devices and can be selected based on your requirements and budget.
●Wondershare Filmora is an excellent desktop software for creating a GIF using videos.
Amazing Ideas About Creating Personalised WhatsApp GIF Sticker
Stunning Ideas About Creating Personalised WhatsApp GIF Sticker
An easy yet powerful editor
Numerous effects to choose from
Detailed tutorials provided by the official channel
WhatsApp has become the most popularly and widely used medium for text conversation and with the reach of the platform increasing every day, new features are added from time to time to keep the users hooked. In the same line, WhatsApp now allows creating customized animated GIF stickers to be used in the chats.
Animated stickers will let you express your feeling and thoughts through animations which will surely make the conversation more interesting. These stickers can be created on your Android as well as iPhone. The article below will help you to know the detailed process to create GIF sticker WhatsApp and also how these stickers can be used in your videos to make the videos more entertaining.
In this article
01 [How to Create Custom Animated WhatsApp Stickers on Android and iPhone](#Part 1)
02 [How to Use Custom Stickers in Filmora?](#Part 2)
Part 1 How to Create Custom Animated WhatsApp Stickers on Android and iPhone
Animated third-party stickers cannot be added directly to WhatsApp and thus you can create a customized one. To create these GIF stickers for WhatsApp, you would need the help of third-party apps.
For Android devices, one such popular app is the Sticker Maker app. For iPhone, we suggest using Sticker Maker Studio app.
Once these apps are installed on your device, GIF stickers can be made in no time.
Steps to make sticker GIF WhatsApp on Android phone
Step 1. Download, install and open the Sticker maker app on your Android device.
Step 2. Tap on the “Create a new sticker pack” option on your app.
Step 3. Give the desired name to your sticker pack and click on the Create button.
Step 4. To add the animated stickers, click on the created sticker pack.
Step 5. Next, click on the first box, and then from the menu choose the Select file option.

Step 6. Next, choose the video from your phone from which you wish to create a sticker. You can even add a GIF file. After the media file is added, the app will compress it and will turn it into an animated sticker automatically.
Step 7. Now, you need to add 3 animated stickers to the other boxes of the sticker app (as mentioned in step 5).
Note: Multiple stickers can be added using the same process.
Step 8. Click on the “Add to WhatsApp” button after a minimum of 3 stickers are added to the pack.
Step 9. Now, your stickers are ready. Open the WhatsApp chat and launch the sticker panel where you can see your created GIF stickers. Choose the sticker you want, add it to your chat, and send it.

Steps to make WhatsApp Sticker GIF on iPhone
Step 1. On your iPhone, download, install and launch the Sticker Maker Studio app from the app store.
Step 2. Choose the sticker pack and also the name of the author at the respective boxes and then click on the Create button.
Step 3. Next, click on the new sticker pack that is created.

Step 4. Multiple boxes will now appear from which you need to choose the first one and then
select the Files option.
Step 5. Choose the desired Video from your device from which sticker has to be created. You can also create GIF to WhatsApp sticker. Other stickers to the pack can be added similarly. The app will automatically convert the added file to a sticker.
Step 6. After the stickers are added (at least 3), click on the Add to WhatsApp button at the generated Tray icon.

Note: If you see your tray icon to be blank, click on it else there will be issues adding the stickers to the WhatsApp chat later. A tray icon can be selected from the images.
Step 7. Next, you will be asked if you wish to open WhatsApp, click on Okay.
Step 8. Now, to add the animated GIF stickers to WhatsApp, you need to click on the Save button and your stickers are ready to be used in the chat.

Part 2 How to Use Custom Stickers in Wondershare Filmora Video Editor ?
For Win 7 or later (64-bit)
For macOS 10.12 or later
Why use your customized GIF stickers only in WhatsApp chats when they can be used in Videos as well? Yes, using Wondershare Filmora software you can use your customized animated stickers in your videos as well to make them more eye-catchy and interesting. Additionally, you can also add the effects to your videos using the software.
Wondershare Filmora is a feature-packed that allows creating stunning and professional-looking videos using its wide range of functions like motion tracking, adding effects, color matching, noise enhancement, keyframe animations, adding captions, and much more.
The user-friendly interface makes the tool apt even for beginners.
Steps to add GIF animations to videos using Wondershare Filmora
Step 1. On your Windows or Mac system, launch the software and choose Media > Import> Import Media Files on the main interface.

Step 2. Next, choose and add the created animated sticker to the software interface. Alternatively, you can also select the sticker from Elements. Drag and drop the added sticker to the video.

Step 3. To adjust the parameters like the size and the rotation of the sticker, you need to double-click on the sticker at the timeline. Additionally, color adjustments can also be made and if needed, you can also add 3D motion.

Step 4. To change the size and the location of the sticker, you need to drag it accordingly in
the viewer panel.
Step 5. Next, at the Local tab, choose the video format, resolution, and desktop folder. Finally, click on the Export button to start processing.
Note: The created video can also be saved to DVD or can be uploaded to YouTube and Vimeo directly using the software.

● Key Takeaways from This Episode →
●The latest GIF sticker feature of WhatsApp allows adding interesting animations to your chats.
●To create customized GIF stickers on Android and iPhone, third-party apps have to be used.
●The customized stickers can also be added to your videos using Wondershare Filmora.
WhatsApp has become the most popularly and widely used medium for text conversation and with the reach of the platform increasing every day, new features are added from time to time to keep the users hooked. In the same line, WhatsApp now allows creating customized animated GIF stickers to be used in the chats.
Animated stickers will let you express your feeling and thoughts through animations which will surely make the conversation more interesting. These stickers can be created on your Android as well as iPhone. The article below will help you to know the detailed process to create GIF sticker WhatsApp and also how these stickers can be used in your videos to make the videos more entertaining.
In this article
01 [How to Create Custom Animated WhatsApp Stickers on Android and iPhone](#Part 1)
02 [How to Use Custom Stickers in Filmora?](#Part 2)
Part 1 How to Create Custom Animated WhatsApp Stickers on Android and iPhone
Animated third-party stickers cannot be added directly to WhatsApp and thus you can create a customized one. To create these GIF stickers for WhatsApp, you would need the help of third-party apps.
For Android devices, one such popular app is the Sticker Maker app. For iPhone, we suggest using Sticker Maker Studio app.
Once these apps are installed on your device, GIF stickers can be made in no time.
Steps to make sticker GIF WhatsApp on Android phone
Step 1. Download, install and open the Sticker maker app on your Android device.
Step 2. Tap on the “Create a new sticker pack” option on your app.
Step 3. Give the desired name to your sticker pack and click on the Create button.
Step 4. To add the animated stickers, click on the created sticker pack.
Step 5. Next, click on the first box, and then from the menu choose the Select file option.
Step 6. Next, choose the video from your phone from which you wish to create a sticker. You can even add a GIF file. After the media file is added, the app will compress it and will turn it into an animated sticker automatically.
Step 7. Now, you need to add 3 animated stickers to the other boxes of the sticker app (as mentioned in step 5).
Note: Multiple stickers can be added using the same process.
Step 8. Click on the “Add to WhatsApp” button after a minimum of 3 stickers are added to the pack.
Step 9. Now, your stickers are ready. Open the WhatsApp chat and launch the sticker panel where you can see your created GIF stickers. Choose the sticker you want, add it to your chat, and send it.
Steps to make WhatsApp Sticker GIF on iPhone
Step 1. On your iPhone, download, install and launch the Sticker Maker Studio app from the app store.
Step 2. Choose the sticker pack and also the name of the author at the respective boxes and then click on the Create button.
Step 3. Next, click on the new sticker pack that is created.
Step 4. Multiple boxes will now appear from which you need to choose the first one and then
select the Files option.
Step 5. Choose the desired Video from your device from which sticker has to be created. You can also create GIF to WhatsApp sticker. Other stickers to the pack can be added similarly. The app will automatically convert the added file to a sticker.
Step 6. After the stickers are added (at least 3), click on the Add to WhatsApp button at the generated Tray icon.
Note: If you see your tray icon to be blank, click on it else there will be issues adding the stickers to the WhatsApp chat later. A tray icon can be selected from the images.
Step 7. Next, you will be asked if you wish to open WhatsApp, click on Okay.
Step 8. Now, to add the animated GIF stickers to WhatsApp, you need to click on the Save button and your stickers are ready to be used in the chat.
Part 2 How to Use Custom Stickers in Wondershare Filmora Video Editor ?
For Win 7 or later (64-bit)
For macOS 10.12 or later
Why use your customized GIF stickers only in WhatsApp chats when they can be used in Videos as well? Yes, using Wondershare Filmora software you can use your customized animated stickers in your videos as well to make them more eye-catchy and interesting. Additionally, you can also add the effects to your videos using the software.
Wondershare Filmora is a feature-packed that allows creating stunning and professional-looking videos using its wide range of functions like motion tracking, adding effects, color matching, noise enhancement, keyframe animations, adding captions, and much more.
The user-friendly interface makes the tool apt even for beginners.
Steps to add GIF animations to videos using Wondershare Filmora
Step 1. On your Windows or Mac system, launch the software and choose Media > Import> Import Media Files on the main interface.
Step 2. Next, choose and add the created animated sticker to the software interface. Alternatively, you can also select the sticker from Elements. Drag and drop the added sticker to the video.
Step 3. To adjust the parameters like the size and the rotation of the sticker, you need to double-click on the sticker at the timeline. Additionally, color adjustments can also be made and if needed, you can also add 3D motion.
Step 4. To change the size and the location of the sticker, you need to drag it accordingly in
the viewer panel.
Step 5. Next, at the Local tab, choose the video format, resolution, and desktop folder. Finally, click on the Export button to start processing.
Note: The created video can also be saved to DVD or can be uploaded to YouTube and Vimeo directly using the software.
● Key Takeaways from This Episode →
●The latest GIF sticker feature of WhatsApp allows adding interesting animations to your chats.
●To create customized GIF stickers on Android and iPhone, third-party apps have to be used.
●The customized stickers can also be added to your videos using Wondershare Filmora.
Learn Pencil2D Animation Tutorial Overview
Animation is one of the trendiest technologies. The basics of animation were formulated in the 2000s from the moving page trick. The first few animators learned that animation is nothing but continuous switching of frames from one to another. One animated still is switched to another and then another in a quick sequence such that it makes a sequential moving frame. Today, animation has come a long way from where it started and today it is used for several commercials, tutorials, and even educational lecture videos. Pencil2D animation is an amazing animation tool that can be used by even neophytes. Want to learn more about 2d pencil animation and its super cool features? Well, you’re at the perfect place. Today we’ll be telling you more about pencil 2d animation and giving you a small overview of its usage.
In this article
01 [What is Pencil2D and How to Install?](#Part 1)
02 [Overview of the Application Interface](#Part 2)
03 [How to Create Animations with Pencil2D?](#Part 3)
Part 1 What is Pencil2D and How to Install?
2d pencil animation is popular open-source animation software. The software is pretty cool for those who are newly starting off with animation. The open-source software is available on all major operating systems including Windows, Mac OS, and Unix. Using this amazing software, we can make amazing cartoon characters using traditional cartoon-making techniques such as tracing drawing, skinning. Using this software, you can save animations in the native animation formats or extract the animation to PNG, JPG, or other formats. Wish to explore more about pencil 2d animation software? Follow the steps listed below in order to download the pencil2d animation software.
● Firstly, you need to ensure that your device has ample space on it.
● Next, you need to head to the official website of pencil2d.
● Further, you need to select your operating system. You can find different versions of the software, namely windows 7/8/10, windows XP/ Vista, Mac OS, and Linux
● Once downloaded, you need to start the installation setup. Note that this may take a while to download.
● Once downloaded, you can start familiarizing yourself with the software.
Part 2 Overview of the Application Interface
1. The brush tool
The brush tool must have reminded you of paint software in windows. The brush tool is a popular and highly utilitarian basic tool in Pencil2D animation software. You can either access it via the user interface or quickly access it by using the B key on your keyboard. As the name suggests, the brush tool is literally just a brush that allows you to draw and paint any sort of drawings of different shades, colors, and thickness. If you wish to change the color, you can find a color palette on the left side of the interface.

2. The eraser tool
You’ve a brush tool; it’s almost common sense that there’d be an eraser. The eraser tool has an eraser as its icon. If you wish to use the eraser, click on the eraser tool or simply click the E button on your keyboard. Once you’ve selected the tool, you need to simply hover over the parts you wish to erase.

3. Bucket tool
The bucket tool is another useful tool that you can find in the left tool pane of pencil 2d animation. The tool icon looks like a bucket and it is used to fill an entire area with a particular color. You can choose the color you’d like to fill from the color pallet available on the left side. Alternatively, you can also access the bucket tool by pressing the “K” key on your keyboard.

4. Custom colors
A cool feature that you can find on pencil 2d animation software is the custom color one. You can merge and mix colors according to your choice and create your own color. To do so, you need to click on the small color box that you’ll find at the top right of your screen. By doing so, a huge color wheel will appear on your screen. Now you can either enter values of the R, G, and B if you wish to merge different colors and make a new one or select a particular color from the huge color wheel that appears in front of you. These colors vary in gradient, shade, and a lot of different factors.

5. The Undo button
The Undo button is a highly useful functionality for the lazy ones who do not wish to erase the mistake they made. By undoing, the previous step gets reverted and you can start over again. The traditional undo shortcut, Ctrl+Z does work in the pencil 2d animation. Alternatively, you can also use the undo feature via the user interface. You can do so by heading over to the edit option in the topmost bar. The first option in the drop-down menu would be undo.

Part 3 How to Create Animations with Pencil2D?
Creating animations in pencil 2d is slightly sophisticated and certainly needs minimal practice. Follow the steps listed below in order to learn how to animate through pencil 2d to make your first animation.
1. Ensure that you’ve turned on your bitmap on the first frame
Animation works through quick switching of frame which makes it appear as though the object is in motion. By turning on the bitmap, pencil 2d animation ensures that you’ve no blank frames at the start of your animation.

2. Draw your animated character
Since you’re trying to animate, you need to have an animated character or object. Hence, the first step to making your first animation is by drawing the object or character that you wish to animate. Try to make the character as realistic as possible. To start with, maybe you can try animating just a stick figure; this is because animating a complex character is rather difficult for beginners.

3.The three circular buttons
Once you’re satisfied with the character you draw, you need to spot the 3 circular buttons which are arranged in the “+”,”-“,”+” order. By pressing the first “+” button, you can add an empty slide. If you click on the “-“ button, it will delete the most recent slide and if you click on the next “+” button, it will duplicate the current slide.

4.Repeat until you get an animation
Now that you know how to deal with multiple frames, you can continue creating frames and making the animated characters move by tweaking with the drawing in every frame. For instance, if you wish to show that the animated character is running, in one of the frames the left leg should be forward and in the next one, the right leg should be forward. Keep repeating this process of tweaking with frames until you’ve your desired animated video.

Now that we’ve seen the process of animation via Pencil2D, you must have realized that it’s pretty orthodox and complicated. Moreover, you cannot carry out rigging and other newer animation techniques. Hence, we introduce you to Wondershare Filmora Video Editor , your all in one animation making platform. Here you can animate without any hassle. Wondershare Filmora makes your job easier with multiple animation features, you needn’t even draw your animated character. You can simply import a custom-made character and rig the character. Further, you need not deal with multiple frames and personally pay attention to each frame. All in all, Filmora makes your job simple and your animations much more seamless.
For Win 7 or later (64-bit)
For macOS 10.12 or later
Key Takeaways from This Episode
● Animation is actively being used for multiple purposes.
● Today we took a look at one of the orthodox yet popular animation tools, Pencil2D.
● The Pencil2D animation tool offers you multiple functionalities and allows you to make animations.
● Next, we also took a look at Wondershare Filmora Pro, your one-stop shop for all animation needs. You can find multiple animation features here and it’s all so simple.
● What are you waiting for? Your next animation is just one click away.
02 [Overview of the Application Interface](#Part 2)
03 [How to Create Animations with Pencil2D?](#Part 3)
Part 1 What is Pencil2D and How to Install?
2d pencil animation is popular open-source animation software. The software is pretty cool for those who are newly starting off with animation. The open-source software is available on all major operating systems including Windows, Mac OS, and Unix. Using this amazing software, we can make amazing cartoon characters using traditional cartoon-making techniques such as tracing drawing, skinning. Using this software, you can save animations in the native animation formats or extract the animation to PNG, JPG, or other formats. Wish to explore more about pencil 2d animation software? Follow the steps listed below in order to download the pencil2d animation software.
● Firstly, you need to ensure that your device has ample space on it.
● Next, you need to head to the official website of pencil2d.
● Further, you need to select your operating system. You can find different versions of the software, namely windows 7/8/10, windows XP/ Vista, Mac OS, and Linux
● Once downloaded, you need to start the installation setup. Note that this may take a while to download.
● Once downloaded, you can start familiarizing yourself with the software.
Part 2 Overview of the Application Interface
1. The brush tool
The brush tool must have reminded you of paint software in windows. The brush tool is a popular and highly utilitarian basic tool in Pencil2D animation software. You can either access it via the user interface or quickly access it by using the B key on your keyboard. As the name suggests, the brush tool is literally just a brush that allows you to draw and paint any sort of drawings of different shades, colors, and thickness. If you wish to change the color, you can find a color palette on the left side of the interface.
2. The eraser tool
You’ve a brush tool; it’s almost common sense that there’d be an eraser. The eraser tool has an eraser as its icon. If you wish to use the eraser, click on the eraser tool or simply click the E button on your keyboard. Once you’ve selected the tool, you need to simply hover over the parts you wish to erase.
3. Bucket tool
The bucket tool is another useful tool that you can find in the left tool pane of pencil 2d animation. The tool icon looks like a bucket and it is used to fill an entire area with a particular color. You can choose the color you’d like to fill from the color pallet available on the left side. Alternatively, you can also access the bucket tool by pressing the “K” key on your keyboard.
4. Custom colors
A cool feature that you can find on pencil 2d animation software is the custom color one. You can merge and mix colors according to your choice and create your own color. To do so, you need to click on the small color box that you’ll find at the top right of your screen. By doing so, a huge color wheel will appear on your screen. Now you can either enter values of the R, G, and B if you wish to merge different colors and make a new one or select a particular color from the huge color wheel that appears in front of you. These colors vary in gradient, shade, and a lot of different factors.
5. The Undo button
The Undo button is a highly useful functionality for the lazy ones who do not wish to erase the mistake they made. By undoing, the previous step gets reverted and you can start over again. The traditional undo shortcut, Ctrl+Z does work in the pencil 2d animation. Alternatively, you can also use the undo feature via the user interface. You can do so by heading over to the edit option in the topmost bar. The first option in the drop-down menu would be undo.
Part 3 How to Create Animations with Pencil2D?
Creating animations in pencil 2d is slightly sophisticated and certainly needs minimal practice. Follow the steps listed below in order to learn how to animate through pencil 2d to make your first animation.
1. Ensure that you’ve turned on your bitmap on the first frame
Animation works through quick switching of frame which makes it appear as though the object is in motion. By turning on the bitmap, pencil 2d animation ensures that you’ve no blank frames at the start of your animation.
2. Draw your animated character
Since you’re trying to animate, you need to have an animated character or object. Hence, the first step to making your first animation is by drawing the object or character that you wish to animate. Try to make the character as realistic as possible. To start with, maybe you can try animating just a stick figure; this is because animating a complex character is rather difficult for beginners.
3.The three circular buttons
Once you’re satisfied with the character you draw, you need to spot the 3 circular buttons which are arranged in the “+”,”-“,”+” order. By pressing the first “+” button, you can add an empty slide. If you click on the “-“ button, it will delete the most recent slide and if you click on the next “+” button, it will duplicate the current slide.
4.Repeat until you get an animation
Now that you know how to deal with multiple frames, you can continue creating frames and making the animated characters move by tweaking with the drawing in every frame. For instance, if you wish to show that the animated character is running, in one of the frames the left leg should be forward and in the next one, the right leg should be forward. Keep repeating this process of tweaking with frames until you’ve your desired animated video.
Now that we’ve seen the process of animation via Pencil2D, you must have realized that it’s pretty orthodox and complicated. Moreover, you cannot carry out rigging and other newer animation techniques. Hence, we introduce you to Wondershare Filmora Video Editor , your all in one animation making platform. Here you can animate without any hassle. Wondershare Filmora makes your job easier with multiple animation features, you needn’t even draw your animated character. You can simply import a custom-made character and rig the character. Further, you need not deal with multiple frames and personally pay attention to each frame. All in all, Filmora makes your job simple and your animations much more seamless.
For Win 7 or later (64-bit)
For macOS 10.12 or later
Key Takeaways from This Episode
● Animation is actively being used for multiple purposes.
● Today we took a look at one of the orthodox yet popular animation tools, Pencil2D.
● The Pencil2D animation tool offers you multiple functionalities and allows you to make animations.
● Next, we also took a look at Wondershare Filmora Pro, your one-stop shop for all animation needs. You can find multiple animation features here and it’s all so simple.
● What are you waiting for? Your next animation is just one click away.
The Most Efficient Techniques to Make 3D Animation Character
The Most Efficient Techniques for You to Make 3D Animation Character
An easy yet powerful editor
Numerous effects to choose from
Detailed tutorials provided by the official channel
Character development can be referred to as the stages from making the concept to animation. Over the years, as the process becomes more accessible, the detail that the character artist can show on their characters becomes higher.
The person who designs the animation 3D character is usually the first person on a production to visualize the characters from the description given to them in a story.
In this article
01 [What is 3D Character Animation?](#Part 1)
02 [How to Create Your Animated Character in 3D](#Part 2)
03 [How to Create Attractive 3D Character Animation Video?](#Part 3)
Part 1 What is 3D Character Animation?
3D character animation creates three-dimensional images in a moving state. To develop character animation, you must involve your thoughts, emotions, and personalities.
A 3D character animation can function in a product video or external videos to explain a product or concept. You can also use animation modeling AutoDesk to animate your character with the addition of keyframes or by applying motion capture to your model. There are lots of websites or places to find 3D character Model and such sites include but are not limited to:
01TurboSquid
TurboSquid is a great website to look for easy 3D character animation models and offers you the ability to filter for television and movie characters or game characters and helps narrow down your search.
Quality: beginner to professional
Price: ranging from free to $100 for model collection
02CadNav
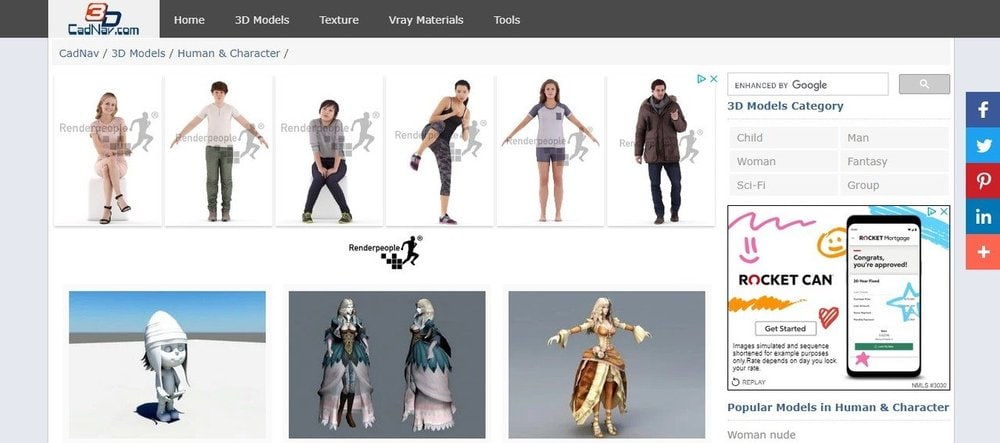
CadNav is a well-known site with lots of excellent models. But unfortunately, the side does not have proper search functionality, and the models are in a long list that you can filter by large crowd categories like the main character.
Quality: beginner to mid-range
Price: free
03CGTrader

CGTrader is a modeling site with numerous lists of 3D max-character animation models. The selection from this site is pretty expensive and of good quality.
Quality: beginner to professional
Price: ranging from free to $100 and $200 for model collection
044. DeviantArt
DeviantArt is a unique item mainly for artists to post the artwork in various mediums. The quality and prices of the models vary significantly since the platform is for artists to display their work and get public interest.
Quality: Varies
Price: Varies
05Steam
Steam has a good range of 3Ds max 3D animation character animation modeling Autodesk that is very useful. Although they tend not to much the extensive selection of some of the other sites listed, they have an animation and modeling section, which is helpful if you are looking for relevant software.
Quality: fairly high
Price: free
Part 2 How to Create Your Animated Character in 3D
3D is one of the ways to grab your visitor’s attention and convert them to lead, and 3D character designs add life to the characters.
Below are steps on how to create your 3D animation character:
01Step1: Make a Story
Brainstorm and work on the storyboard. Make sure you don’t forget to translate your ideas into visuals by creating a perfect story after brainstorming the idea for the animated topic.
02Step 2: Draw your Character
It’s time for you to design the characters, known as modeling. In these steps, you can draw and model the characters differently using the excellent animation software mentioned in this article. During designing, make sure you don’t rush the design texturing. Texture can be according to art’s concept, which you can assign to the model.
03Step 3: Process your Models
Once over with texturing, it is time for you to process with rigging and skinning. All the 3D rigged characters for animation can move from animators, while 3D models combine with a rigged skeleton in skinning. This step is because it controls the rig, which can easily change the 3D model. Animates the model, which is one of the most critical and time-consuming tasks which involves you adding life to your 3D character. More so, this affects you using a 3D application to ensure that the objects or models adjust according to your need.
04Step 4: Export and Share your 3D Character
Rendering the final output is the last in the 3D animation character. Once everything is complete, all information is translated into a file to combine all shots in a single frame. Then, the animated characters are exported and shared.
Part 3 How to Create Attractive 3D Character Animation Video?
To create a perfect 3D character animation video has been a very challenging aspect of 3D animation based on the highly competitive industry Filmora has proven to be one of the best tools in creating an easy 3D character animation video following the steps below:
01Step 1: Prepare a Script and Practice Storyboarding
Write a script of the animation video you want to make. The script gives you an insight into the base story, how it looks, who is talking to who, the dialogue, and at what time of the day it took place, most importantly, what your story characters are saying to one another.
Practice storyboarding, a sequence of images or movie shoes that helps you understand how exactly the story will feel on will look the camera angles and a flowchart of how everything looks. A storyboard can be of various types. It may be an outline, colorful, black and white, or something with complete details.
02Step 2: Add Voice and Start Animating
Creating an animated video without a voice might not be interesting, so always remember to add a voice-over to your animated movie.
You can start animating your video. The story determines the length of the video, and the process includes importing images and adding them to the timeline.
03Step 3: Prepare Final Mix and Export
This step requires you to assemble the voice records and prepare the final mix to add them to your animated video.
After the final editing, review it and export it to produce a 3D max character animation that you can then share on a social media platform for viewers.
Key Takeaways from This Episode
● Understanding what 3D Animation Character is
● Knowing How to Create Easy 3D Character Animation
● Learning How to Create Attractive 3D Rigged Character Animation
Character development can be referred to as the stages from making the concept to animation. Over the years, as the process becomes more accessible, the detail that the character artist can show on their characters becomes higher.
The person who designs the animation 3D character is usually the first person on a production to visualize the characters from the description given to them in a story.
In this article
01 [What is 3D Character Animation?](#Part 1)
02 [How to Create Your Animated Character in 3D](#Part 2)
03 [How to Create Attractive 3D Character Animation Video?](#Part 3)
Part 1 What is 3D Character Animation?
3D character animation creates three-dimensional images in a moving state. To develop character animation, you must involve your thoughts, emotions, and personalities.
A 3D character animation can function in a product video or external videos to explain a product or concept. You can also use animation modeling AutoDesk to animate your character with the addition of keyframes or by applying motion capture to your model. There are lots of websites or places to find 3D character Model and such sites include but are not limited to:
01TurboSquid
TurboSquid is a great website to look for easy 3D character animation models and offers you the ability to filter for television and movie characters or game characters and helps narrow down your search.
Quality: beginner to professional
Price: ranging from free to $100 for model collection
02CadNav
CadNav is a well-known site with lots of excellent models. But unfortunately, the side does not have proper search functionality, and the models are in a long list that you can filter by large crowd categories like the main character.
Quality: beginner to mid-range
Price: free
03CGTrader
CGTrader is a modeling site with numerous lists of 3D max-character animation models. The selection from this site is pretty expensive and of good quality.
Quality: beginner to professional
Price: ranging from free to $100 and $200 for model collection
044. DeviantArt
DeviantArt is a unique item mainly for artists to post the artwork in various mediums. The quality and prices of the models vary significantly since the platform is for artists to display their work and get public interest.
Quality: Varies
Price: Varies
05Steam
Steam has a good range of 3Ds max 3D animation character animation modeling Autodesk that is very useful. Although they tend not to much the extensive selection of some of the other sites listed, they have an animation and modeling section, which is helpful if you are looking for relevant software.
Quality: fairly high
Price: free
Part 2 How to Create Your Animated Character in 3D
3D is one of the ways to grab your visitor’s attention and convert them to lead, and 3D character designs add life to the characters.
Below are steps on how to create your 3D animation character:
01Step1: Make a Story
Brainstorm and work on the storyboard. Make sure you don’t forget to translate your ideas into visuals by creating a perfect story after brainstorming the idea for the animated topic.
02Step 2: Draw your Character
It’s time for you to design the characters, known as modeling. In these steps, you can draw and model the characters differently using the excellent animation software mentioned in this article. During designing, make sure you don’t rush the design texturing. Texture can be according to art’s concept, which you can assign to the model.
03Step 3: Process your Models
Once over with texturing, it is time for you to process with rigging and skinning. All the 3D rigged characters for animation can move from animators, while 3D models combine with a rigged skeleton in skinning. This step is because it controls the rig, which can easily change the 3D model. Animates the model, which is one of the most critical and time-consuming tasks which involves you adding life to your 3D character. More so, this affects you using a 3D application to ensure that the objects or models adjust according to your need.
04Step 4: Export and Share your 3D Character
Rendering the final output is the last in the 3D animation character. Once everything is complete, all information is translated into a file to combine all shots in a single frame. Then, the animated characters are exported and shared.
Part 3 How to Create Attractive 3D Character Animation Video?
To create a perfect 3D character animation video has been a very challenging aspect of 3D animation based on the highly competitive industry Filmora has proven to be one of the best tools in creating an easy 3D character animation video following the steps below:
01Step 1: Prepare a Script and Practice Storyboarding
Write a script of the animation video you want to make. The script gives you an insight into the base story, how it looks, who is talking to who, the dialogue, and at what time of the day it took place, most importantly, what your story characters are saying to one another.
Practice storyboarding, a sequence of images or movie shoes that helps you understand how exactly the story will feel on will look the camera angles and a flowchart of how everything looks. A storyboard can be of various types. It may be an outline, colorful, black and white, or something with complete details.
02Step 2: Add Voice and Start Animating
Creating an animated video without a voice might not be interesting, so always remember to add a voice-over to your animated movie.
You can start animating your video. The story determines the length of the video, and the process includes importing images and adding them to the timeline.
03Step 3: Prepare Final Mix and Export
This step requires you to assemble the voice records and prepare the final mix to add them to your animated video.
After the final editing, review it and export it to produce a 3D max character animation that you can then share on a social media platform for viewers.
Key Takeaways from This Episode
● Understanding what 3D Animation Character is
● Knowing How to Create Easy 3D Character Animation
● Learning How to Create Attractive 3D Rigged Character Animation
Also read:
- New Whats Music Video GIF & How to Add Music to GIF Files for 2024
- Updated 2024 Approved Top Tips for Effortless Unity 3D Animation
- New What Wikipedia Wont Tell You Specifically About Character Rigging for 2024
- Updated The Best 8 Places for High-Quality Royalty Free Gifs for 2024
- Updated Whats Rigging Animation and Why It Matters
- In 2024, Ways to Create an Animated Sticky Navbar
- Updated In 2024, Looking for Love Animated GIFs? Here Are 5 Free Sources For You
- New 2024 Approved How to Send and Add Snapchat GIFs 100 in Easy Way
- New Adobe Rigger Is AWESOME for 2024
- New In 2024, Incredible Ways to Find Suitable Animated Graphic Maker
- New How to Make a Video a Live Photo
- Updated How to Make a 3D Cartoon of Yourself for 2024
- Top 7 Best Free GIF Apps for Android
- New 2024 Approved 8 Blender 3D Animation Tutorials
- 6 Proven Ways to Dub Anime for Anime Voice Actor for 2024
- New In 2024, Tips on How to Learn Graphics Animation
- Updated In 2024, The Secret Sauce for Making GIF Instagram Story More Stunning
- Easy Shortcut to Convert Videos to Gifs on iPhone
- New Top 15 2D Animation Software Free That Worth to Try for 2024
- New 2024 Approved How to Get Started in Stop Motion Claymation
- Updated Ways You Can Master to Find 10 Best Free Animated Text Generator
- Updated In 2024, Create or Find Good Morning/Night GIFs
- New 2024 Approved Top 10 3D Text Animation Templates
- Updated In 2024, Methods to Make Photo Motion Effect Online?
- Updated In 2024, Some Must-Know Useful Lego Animation Ideas for You
- Fuel Creativity with 10 Awesome Collection of 2D Animation Examples
- Updated 8 Blender 3D Animation Tutorials for 2024
- In 2024, Step-by-Step Guide to Send Gif WhatsApp on Android
- Best 15 Anime Shows That Are Great to Binge Watch for 2024
- New In 2024, How To Animate Graphics in Canva
- 10 2D/3D Animation Tips & Tricks for You for 2024
- Updated 2024 Approved How to Animate - Adobe Animate Tutorial for All
- New In 2024, 10 Must Watch Netflix Cartoon Series For You
- New Best 10 Animated DP for WhatsApp
- New Tutorials to Make Animated Images – Even if Youre Just Starting Out for 2024
- Updated In 2024, Best 10 Anime Series of All Time | Watch Anime Online
- New 2024 Approved Amazing Ways to Find Suitable Animated Graphic Maker
- New How to Make Architecture Animation
- 2024 Approved Ways to Get the Most up to Date Cartoon Character Design Tips
- 2024 Approved Finding Some Different Ways to Animated Cartoon of Yourself
- Updated 10 Must Watch Netflix Cartoon Series
- New 15 Best Video to GIF App on iPhone and Android for 2024
- Updated Tutorials to Make Animated Images
- In 2024, 10 Stunning Stop Motion Movies That You Should Not Miss
- New The 15 Most Efficient Photo to Cartoon Apps for Android for 2024
- New Easy Shortcut to Convert Videos to Gifs on iPhone
- Updated How to Cartoonize Photo Photoshop in Easy Steps for 2024
- Updated In 2024, Ultimate Guide to Animated Characters Drawings
- New 15 Types of Cartoon Drawing Styles with Examples for 2024
- In 2024, Guide to Generating Speech in Different Languages With the Best Tools
- How to Change Google Play Location On Vivo Y100i Power 5G | Dr.fone
- Insert signature in .odt file
- How Can I Use a Fake GPS Without Mock Location On Google Pixel 8 Pro? | Dr.fone
- In 2024, Why Your WhatsApp Location is Not Updating and How to Fix On Oppo A38 | Dr.fone
- How To Erase an iPhone 11 Without Apple ID Password?
- 3 Effective Ways to Bypass Activation Lock on iPhone 15 Pro Max
- How to turn off the screen lock on my Nokia C110
- In 2024, How To Unlock Stolen Apple iPhone 11 Pro Max In Different Conditionsin | Dr.fone
- What Pokémon Evolve with A Dawn Stone For Tecno Spark 20C? | Dr.fone
- In 2024, What Is an AI Artist?
- In 2024, How to Transfer Contacts from Realme GT 3 To Phone | Dr.fone
- In 2024, How to Track Realme C67 5G by Phone Number | Dr.fone
- In 2024, Ways to stop parent tracking your Xiaomi Redmi Note 12T Pro | Dr.fone
- How to Unlock SIM Card on OnePlus Open online without jailbreak
- In 2024, Full Guide to Bypass Vivo Y27s FRP
- Best 10 Mock Location Apps Worth Trying On Tecno Pova 5 Pro | Dr.fone
- Recover your contacts after Magic 6 has been deleted.
- In 2024, Edit and Send Fake Location on Telegram For your Oppo A38 in 3 Ways | Dr.fone
- Pokémon Go Cooldown Chart On Nokia XR21 | Dr.fone
- In 2024, Bypass Activation Lock From iPhone 7 - 4 Easy Ways
- 15 Best Strongest Pokémon To Use in Pokémon GO PvP Leagues For Apple iPhone 11 Pro | Dr.fone
- In 2024, Unlock Your Oppo Find N3s Potential The Top 20 Lock Screen Apps You Need to Try
- Fix Vivo T2x 5G Android System Webview Crash 2024 Issue | Dr.fone
- What You Need To Know To Improve Your Realme Narzo N53 Hard Reset | Dr.fone
- Hassle-Free Ways to Remove FRP Lock on Nokia C300with/without a PC
- AddROM Bypass An Android Tool to Unlock FRP Lock Screen For your Xiaomi Redmi Note 13 Pro+ 5G
- The Ultimate Guide How to Bypass Swipe Screen to Unlock on Nubia Red Magic 8S Pro+ Device
- Android Unlock Code Sim Unlock Your Oppo A18 Phone and Remove Locked Screen
- What You Want To Know About Two-Factor Authentication for iCloud From your iPhone 15 Pro Max
- Methods to Change GPS Location On Samsung Galaxy A14 5G | Dr.fone
- Title: New Top 7 Animated GIF Text Makers for 2024
- Author: Elon
- Created at : 2024-06-15 11:22:59
- Updated at : 2024-06-16 11:22:59
- Link: https://animation-videos.techidaily.com/new-top-7-animated-gif-text-makers-for-2024/
- License: This work is licensed under CC BY-NC-SA 4.0.
