
:max_bytes(150000):strip_icc():format(webp)/relaxing-while-getting-his-studies-done-495857099-5a1ed8c5ec2f640037e369f4.jpg)
New Top 8 Tools Tell You How to Make Slideshows for Instagram for 2024
Top 8 Tools Tell You How to Make Slideshows for Instagram
Top 8 Tools Tell You How to Make Slideshows for Instagram
An easy yet powerful editor
Numerous effects to choose from
Detailed tutorials provided by the official channel
Instagram slideshows land among the latest social media trends of fun and entertainment. Learn how to attract jaw dropping peer attention with creating the same!
In this article
01 [When Should You Use an Instagram Slideshow?](#Part 1)
02 [How to Make an Instagram Slideshow with Music?](#Part 2)
03 [8 Best Instagram Slideshow Apps for Creating Outstanding Slideshow](#Part 3)
Part 1 When Should You Use an Instagram Slideshow?
Revolutions in technology has opened doors to a plenty of new and exciting means of information sharing, entertainment and communication. Playing its part in the game, Instagram slideshow has emerged as an exciting means of quick and impactful content sharing. Diving deeper into the discussion, let us talk about the different areas of working with an Instagram slide show in the following section:
01Explanatory Product Demonstrations and Stepwise Tutorials
Considering the diverse media collaboration entertained by this social media platform, you get the liberty to include 10 media files of videos and images while creating a slideshow on Instagram. This is an affordably sufficient media space to demonstrate your newly launched product in front of the target audience.
The aforesaid characteristic of a slideshow for Instagram can be put to another use of creating detailed, step by step guides and product usage tutorials to create an increased and confident customer reach and brand applicability. A few examples include the presentations of recipes by food blogs and chefs, or a detailed look of the day’s outfit by fashion bloggers.
02Interactive Storytelling or Recreate an Event
Gone are the times when stories and events were restricted to a single image or video with a limited scope of understanding and explanation. You can now work with a combination of multiple images and videos to create more vivid and graphical descriptions of stories, narratives and events.
You can work on creating an engaging slideshow for Instagram to tell an amazing story, voice a narration from the beginning to the end, or share your best moments with your cherished audience, which will surely give them the feel of enjoying the adventure along with you.
03Create a Collection
You can now use a slide show for Instagram to design and present a collection of manifold ideas and products within a single post. You can improvise the collection with displaying a series of related products, showcasing a summary of your different blog posts through the week, or simply present a list of your most reliable inspirations, resources and influencers.
04Exciting Video Teasers
If you have a scheduled video release to entertain your audience, try working with interactive slideshows for Instagram to create some sensational teaser content of the upcoming release to imbibe a natural sense of curiosity within your audience.
You can experiment with releasing a mini photoshoot tour of your filming set, share close up progression details, or include a cliffhanger in the end of your Instagram slideshow to ensure the retrieval of your audience towards watching the release of the actual big content. You can use these short teasers as effective means of creating a campaign buzz, while building a closer connect with your audience.
Part 2 How to Make an Instagram Slideshow with Music?
By now, you must have gathered enough knowledge regarding the credibility of Instagram slideshows in catering to a diversity of commercial, professional and personal content sharing needs. Considering the same, you may conveniently feel motivated to try hands at creating stunning slideshow presentations for Instagram on your own.
Adhering to the concern, let us move ahead with our discussion, while talking about how to make a slideshow for Instagram and supplement the same with adaptable background music to develop amazing content masterpieces and share them with social media peers, while grabbing their obvious attention.
While there are a number of choices in the software market to choose your Instagram slideshow creator tool, the FlexClip tool can be a reliable option. Read though the following section to learn the slideshow creation process in the program with a comprehensive and stepwise tutorial guide:
Step 1: Download the Slideshow Creator Tool
Visit the official website of FlexClip to download and install the slideshow maker software in your preferred device.

Step 2: Start from Scratch
After a successful installation, proceed to launch the tool in your system and wait till the software greets you with its welcome interface. Here, you will have to reach to and tap the ‘Start to Create’ button to begin with the slideshow creation process. You can also select a preset template to work on your slideshow if nothing new clicks in your mind.
Step 3: Select an Aspect Ratio
In the tool’s creator window, navigate to the ‘Options Panel’ at the left and click on ‘More’ to select a suitable aspect ratio. Picking the 9:16 ratio would be a good choice.

Step 4: Upload Your Media
In the same ‘Options Panel’, click on ‘Media’ for dragging and dropping the desired video and image files from your device to the program’s media timeline, followed by applying them to the tool’s storyboard. You can alternatively, choose to directly work with media pages of any preset slideshow template.

Step 5: Customize Your Media
You can now proceed to improvise your media files with amazing texts, filters, stickers, emojis, widgets, etc., by clicking on specific object categories from the ‘Options Panel’.

Step 6: Include Seamless Transitions
Proceed to uplift your creation to the next level with the application of stunning image and video transitions. Navigate to the ‘Options Panel’ and tap ‘Elements’. A variety of transition effects will be displayed to choose from. Select the one you like to add it to your slideshow.

Step 7: Add a Background Music
An in line background audio is the best way to set the mood of your slideshow. Choose to add the same to your creation for making a more engaging impact on the audience. Visit the ‘Options Panel’ again and click on ‘Music’ to open the program’s audio library and select a perfect background music from the huge variety of choices, to include in your slideshow.

Step 8: Preview Your Creation
When you have finished customizing your slideshow, navigate to the top right corner of the editor’s storyboard and hit the ‘Preview’ button to visualize and ensure that your slideshow has everything at the right place. You can continue editing if there is a need to make some changes.
Step 9: Time to Save and Share!
When you are happy with your work, consider saving it either to your device or Google Dropbox, from where you can easily upload the same to your Instagram handle.
Part 3 Best Instagram Slideshow Apps for Creating Outstanding Slideshow
Social media is the talk of the trend in today’s times, which has extended its boundaries to visibly everything around us. Speaking in the light of the fact, slideshow presentations are no exception. Social media platforms today have come up with amazing tools and applications to create and share a stunning slideshow Instagram story with utmost ease and within an affordable time span.
Now that you have developed a comprehensive understanding of the credibility of working with Instagram slideshows and their creation process with the inclusion of complementary background music, let us dive into learning about some of the best and most popular Instagram apps for creating awesome slideshow presentations in the following section:
01Filme Lite
This tool lands among the leading user preferences to work on creating slideshow presentations. The application software is packed with a heap of latest features that form the Instagram trends in current times.
Apart from complementing your slideshow creations with tons of features, this slideshow maker for Instagram grants you the liberty to include your most loved videos and images within your presentation and customize them with a diverse range of effects, along with adjusting their play duration within the slideshow. Additional to image and video customization, you are also allowed to choose the image transition style that perfectly suits your content arrangement within the slides.
Working with the tool, you can be sure of getting an unparalleled slideshow creation experience with a very interactive and user oriented design interface, that is simple enough to be easily understood and worked upon by a newbie to the creative world.
02VivaVideo
If you are working on a detailed presentation and wish to spark up your creation with stunning varieties of jaw dropping special effects, consider creating your PowerPoint slideshows in this application. The tool’s effect library is a storehouse of the most amazing special effects that promise of transforming your slideshow into a visual masterpiece.
You can separately apply these effects to each of the slideshow images or choose to work on a combination of selected effects to include within a single video. Apart from this, you are free to choose an apt background music for your presentation slides from the extensive audio library of the software. The bottom line is; you are assured to a complete fun experience while creating slideshows with this tool.
03Movavi
If you are familiar enough with the fundamental concepts and the trivial anecdotes of working with slideshow presentations and want to take your graphic creativity to the next level, you can try hands at using the Movavi slideshow creator software to design high end PowerPoint presentations of professional quality. The best thing about the tool is, it works online and does not require a software download for usage concerns.
Along with creating online slideshow presentations with ease, the tool permits you to create online videos within minutes and instantly download the same for specific usage. You can further, pop up your presentation slides with wonderful transition and animation effects and also make adjustments in the play duration of each slide. The tool lets you choose and add a perfect background music to your presentation from its conveniently vast audio library.
04Slideshow Lab
If you have just landed into the world of creating slideshow presentations and are looking for easy solutions on how to make a slideshow on Instagram, consider working with this software to polish your design creativity. The simple and user cohesive interface of the tool is best for beginners to understand and get customary with the creation process, that takes the minimum possible time to render an appreciable PowerPoint presentation.
Talking about the slideshow design process, you will need to start with selecting a set of desired images, followed by uploading the same into the tool’s slideshow creator timeline. The next step is to arrange the images in the sequential order of appearance, select an appealing background music and apply smooth image transitions. When you are done with everything, proceed to save the presentation to your device.
05MoShow
While you can choose to create stunning slideshow presentations with almost any class of images, the aforesaid app works best to render Instagram images into a top rated Instagram photo slideshow without compromising with the high resolution image quality of Instagram photos. The application integrates motion pictures and lighting effects to transform the otherwise regular images into lively still captures.
Considering the credibility of the tool in overall user experience, its indeed a thumbs up from graphic creators across the globe, thanks to its smart and interactive interface, in time performance and outstanding creation outputs.
06InVideo Editor
Put an end to your search of effective solutions on how to do a slideshow on Instagram with the InVideo Editor, a smart video and graphic editor that can also be employed to adhere to the requirement of creating amazing slideshow presentations from Instagram media. While the creation process hardly takes a few minutes, you can work with the application to explore your editing creativity to the finest levels. The tool works well with any of your MacOs and Windows compatible devices.
The editor’s effects library is loaded with tons of graphic transitions and filters that are dedicated to enhance the contents of your presentation with utmost ease. You can add creative modifications to the slideshow media, such as, cut, crop and trim videos and images and add the most convincing music, overlays, fonts, etc., and enjoy an additional free access to hundreds of stock videos and slideshow templates.
07LightMV
This one is an online slideshow creator utility that works well with almost any operating system including Windows, iOS, Android and Mac. Essentially a cloud centered editor program, this tool caters to your high quality slideshow creation needs in the most effective way. The design process is quite simple, where you only need to add the images and videos, design your presentation and wait till everything comes to place.
What’s more appealing factor about the tool is that you will never need to download the program in your device or purchase a subscription plan to use the application. All you need to do is land into the tool’s website in your favorite browser and tap on the ‘Slideshow’ option to begin with the creation process. You can select from a heap of preset stunning slideshow templates to create the most enhanced PowerPoint presentation.
08Fliptastic
The Fliptastic slideshow creator app is exclusively developed to adhere to the graphic design concerns of iOS users. This one is a no cost graphic utility with a plethora of versatile features and considerable user backup. The app’s effect library is packed with a unique set of slideshow design templates, transitions, background music choices and filters that work to compliment your presentation with the subtlest look ever.
Paying a bit extra attention to the audio inclusion within the slides, the app offers you a range of free music files to work with, while additionally allowing you to upload and use one from your device or the internet.
09Creating Instagram Slideshows With Filmora
Talking exclusively within the domain of video creation and editing, the credibility of the Wondershare Filmora Video Editor software needs no introduction. Moving ahead with our discussion, let us learn about the process of creating awesome Instagram slideshows with Filmora in the following section:
Step 1: Download and Install the Program
To begin with addressing the concern of how to make a slideshow on Instagram story, navigate to the official Wondershare website and download the Wondershare Filmora Video Editor to your preferred system and proceed to install the same.

Wondershare Filmora - Best Video Editor for Mac/Windows
5,481,435 people have downloaded it.
Build unique custom animations without breaking a sweat.
Focus on creating epic stories and leave the details to Filmora’s auto features.
Start a creative adventure with drag & drop effects and endless possibilities.
Filmora simplifies advanced features to save you time and effort.
Filmora cuts out repetition so you can move on to your next creative breakthrough.
Step 2: Import Your Media
Launch the editor program and wait for the latter’s welcome screen to appear. Here, you need to import the images, videos and other media files to the editor timeline for including them in your slideshow. It is recommended to collect all the image and video files into one single folder before opening a new slideshow design project.
In the editor’s welcome screen, navigate to the ‘Media’ tab at the top left corner and click on the same to open the ‘Import’ menu. From here, you need to choose the ‘Import a Media Folder’ option, followed by navigating to the folder that contains the to be imported media files. When you have reached to the required folder, select it and tap ‘OK’ to import the same into the project timeline. When all the files have been imported, you can see them in the ‘Project Media’ panel.

Step 3: Timeline Positioning of Media Files
Reach to the ‘File’ menu and choose ‘Preferences’ from the latter’s dropdown menu. In the ‘Preferences’ window, hit the ‘Editing’ tab and tap on ‘Photo Preferences’. From the drop down menu that follows, choose the ‘Crop to Fit’ option to adjust the aspect ratio of your imported images in line with the slideshow project. In case your images have the 9:16 vertical aspect ratio, select the ‘Fit’ option to make a proper screen fit.

You can proceed to include the image zoom and camera pan features within your project by clicking on the ‘Pan & Zoom’ option. You can further, modify the preset durations of transitions, effects and photos in the ‘Editing’ tab itself before adding them to the editor timeline. Another way of doing the same is to drag the ends of the media files inward or outward, post the timeline adding process.

When you have finished making the required adjustments, navigate back the ‘Media Panel’ to include the imported media files within the project timeline. You can either click on the files to add them, or choose to ‘Drag and Drop’ the same at a preferred place within the timeline.
When all the images and videos have been added, proceed to arrange them in the desired order of appearance in the slideshow, followed by adjusting their screen time and play durations through any of the methods explained above.
Step 4: Add Transitions to Eliminate Hard Cuts
The smooth play of a slideshow is often distorted by hard cuts, which can be escaped by applying smooth transition effects to the slides. Consider exploring the ‘Transitions’ tab of Filmora to choose from a diversity of easily customizable transition effects and place them at the intersection point of the respective slides in the project timeline.
Instead of applying the same transition to every slide, prefer choosing the one that exclusively suits the content arrangement and flow within particular slides. This would save your slideshow from getting a repetitive look.

Post the timeline adding of a transition, you can double click on the same to reach the ‘Transition Setting Window’, where you are allowed to customize the play duration and select its ‘Transition Mode’. Play durations can alternatively be customised in the project timeline by dragging the slider in a left or right direction.
Step 5: Add Overlays and Filters for an Improvised Colour Scheme
To enhance the thematic appeal of your slideshow, consider desaturating the colours of the included images with the extensive range of visual effects and overlays available in the ‘Effects’ tab of the software’s editing timeline. Opening the tab, you are exposed to a series of ‘Filter and Overlay’ categories, that have further subdivisions of Light Leaks, Sepia Tone and Lomography.
To add a particular effect, place it in the timeline track above the desired clip or image. Observe the changes in the ‘Preview Panel’ and proceed to adjust the effect settings if required, by double clicking on the particular effect.

Step 6: Include Motion Graphic Elements
To supplement your slideshow with elegant motion graphics, navigate to the ‘Elements’ tab in the editor timeline. From here, you can access and choose any suitable motion graphic template from a diversity of available choices, to include within the project timeline. The step is completely optional and you should pay attention to the style of content presentation and the cause of creation of your slideshow when choosing to add these elements to the same.

Step 7: Record Voiceovers and Create Soundtracks
To record a voiceover for your slideshow, navigate to the ‘Media’ tab and tap the ‘Record’ dropdown menu. Click on ‘Record Voiceover’ in the list of options that appears. The ‘Record Audio’ icon pops up and you now need to select a microphone to be used in the recording process. When you are ready, tap the ‘Record’ button to let the recording begin.

You can now see your voice recording appear in the ‘Media’ tab with the previously imported media files, ready to be placed within the audio track of the project timeline. Filmora’s audio library is a storehouse of free access music and audio effects. To add one to your slideshow, navigate and click on the ‘Audio’ tab to select from the extensive Rock, Young & Bright, Electronic, etc., music subcategories till you get the perfect match for your presentation.

Once you have selected all the music tracks, place them one by one on the project timeline and move ahead with adjusting their play durations.
Step 8: Export Your Creation
When you are satisfied with your work, you can export the slideshow directly from Filmora to a number of media sharing platforms. All you need to do is, navigate to and tap the ‘Export’ button in the top right corner of the editor screen and proceed to set the resolution and frame rate, and select the output file format of your created slideshow in the ‘Export Window’ that appears.

When you are ready with everything, click on the ‘Export’ button at the bottom right corner of the screen to share your slideshow across different platforms, including YouTube, Instagram, Vimeo, etc.
The time required by Filmora to render your slideshow on the chosen platform will depend on the output file size. Considering the fact that larger files require a much longer time to be rendered, it would be a smart decision to limit the file size of your slideshow within 500 MB.
● Ending Thoughts →
● Instagram slideshows are exciting means of diving into fun-filled entertainment with your social media peers.
● When looking for solutions on how to create a slideshow on Instagram, there are loads of choices in the software market.
● Talking of best creator alternatives, you can pick the Wondershare Filmora slideshow developer program to make an amazing Insta story slideshow.
Instagram slideshows land among the latest social media trends of fun and entertainment. Learn how to attract jaw dropping peer attention with creating the same!
In this article
01 [When Should You Use an Instagram Slideshow?](#Part 1)
02 [How to Make an Instagram Slideshow with Music?](#Part 2)
03 [8 Best Instagram Slideshow Apps for Creating Outstanding Slideshow](#Part 3)
Part 1 When Should You Use an Instagram Slideshow?
Revolutions in technology has opened doors to a plenty of new and exciting means of information sharing, entertainment and communication. Playing its part in the game, Instagram slideshow has emerged as an exciting means of quick and impactful content sharing. Diving deeper into the discussion, let us talk about the different areas of working with an Instagram slide show in the following section:
01Explanatory Product Demonstrations and Stepwise Tutorials
Considering the diverse media collaboration entertained by this social media platform, you get the liberty to include 10 media files of videos and images while creating a slideshow on Instagram. This is an affordably sufficient media space to demonstrate your newly launched product in front of the target audience.
The aforesaid characteristic of a slideshow for Instagram can be put to another use of creating detailed, step by step guides and product usage tutorials to create an increased and confident customer reach and brand applicability. A few examples include the presentations of recipes by food blogs and chefs, or a detailed look of the day’s outfit by fashion bloggers.
02Interactive Storytelling or Recreate an Event
Gone are the times when stories and events were restricted to a single image or video with a limited scope of understanding and explanation. You can now work with a combination of multiple images and videos to create more vivid and graphical descriptions of stories, narratives and events.
You can work on creating an engaging slideshow for Instagram to tell an amazing story, voice a narration from the beginning to the end, or share your best moments with your cherished audience, which will surely give them the feel of enjoying the adventure along with you.
03Create a Collection
You can now use a slide show for Instagram to design and present a collection of manifold ideas and products within a single post. You can improvise the collection with displaying a series of related products, showcasing a summary of your different blog posts through the week, or simply present a list of your most reliable inspirations, resources and influencers.
04Exciting Video Teasers
If you have a scheduled video release to entertain your audience, try working with interactive slideshows for Instagram to create some sensational teaser content of the upcoming release to imbibe a natural sense of curiosity within your audience.
You can experiment with releasing a mini photoshoot tour of your filming set, share close up progression details, or include a cliffhanger in the end of your Instagram slideshow to ensure the retrieval of your audience towards watching the release of the actual big content. You can use these short teasers as effective means of creating a campaign buzz, while building a closer connect with your audience.
Part 2 How to Make an Instagram Slideshow with Music?
By now, you must have gathered enough knowledge regarding the credibility of Instagram slideshows in catering to a diversity of commercial, professional and personal content sharing needs. Considering the same, you may conveniently feel motivated to try hands at creating stunning slideshow presentations for Instagram on your own.
Adhering to the concern, let us move ahead with our discussion, while talking about how to make a slideshow for Instagram and supplement the same with adaptable background music to develop amazing content masterpieces and share them with social media peers, while grabbing their obvious attention.
While there are a number of choices in the software market to choose your Instagram slideshow creator tool, the FlexClip tool can be a reliable option. Read though the following section to learn the slideshow creation process in the program with a comprehensive and stepwise tutorial guide:
Step 1: Download the Slideshow Creator Tool
Visit the official website of FlexClip to download and install the slideshow maker software in your preferred device.
Step 2: Start from Scratch
After a successful installation, proceed to launch the tool in your system and wait till the software greets you with its welcome interface. Here, you will have to reach to and tap the ‘Start to Create’ button to begin with the slideshow creation process. You can also select a preset template to work on your slideshow if nothing new clicks in your mind.
Step 3: Select an Aspect Ratio
In the tool’s creator window, navigate to the ‘Options Panel’ at the left and click on ‘More’ to select a suitable aspect ratio. Picking the 9:16 ratio would be a good choice.
Step 4: Upload Your Media
In the same ‘Options Panel’, click on ‘Media’ for dragging and dropping the desired video and image files from your device to the program’s media timeline, followed by applying them to the tool’s storyboard. You can alternatively, choose to directly work with media pages of any preset slideshow template.
Step 5: Customize Your Media
You can now proceed to improvise your media files with amazing texts, filters, stickers, emojis, widgets, etc., by clicking on specific object categories from the ‘Options Panel’.
Step 6: Include Seamless Transitions
Proceed to uplift your creation to the next level with the application of stunning image and video transitions. Navigate to the ‘Options Panel’ and tap ‘Elements’. A variety of transition effects will be displayed to choose from. Select the one you like to add it to your slideshow.
Step 7: Add a Background Music
An in line background audio is the best way to set the mood of your slideshow. Choose to add the same to your creation for making a more engaging impact on the audience. Visit the ‘Options Panel’ again and click on ‘Music’ to open the program’s audio library and select a perfect background music from the huge variety of choices, to include in your slideshow.
Step 8: Preview Your Creation
When you have finished customizing your slideshow, navigate to the top right corner of the editor’s storyboard and hit the ‘Preview’ button to visualize and ensure that your slideshow has everything at the right place. You can continue editing if there is a need to make some changes.
Step 9: Time to Save and Share!
When you are happy with your work, consider saving it either to your device or Google Dropbox, from where you can easily upload the same to your Instagram handle.
Part 3 Best Instagram Slideshow Apps for Creating Outstanding Slideshow
Social media is the talk of the trend in today’s times, which has extended its boundaries to visibly everything around us. Speaking in the light of the fact, slideshow presentations are no exception. Social media platforms today have come up with amazing tools and applications to create and share a stunning slideshow Instagram story with utmost ease and within an affordable time span.
Now that you have developed a comprehensive understanding of the credibility of working with Instagram slideshows and their creation process with the inclusion of complementary background music, let us dive into learning about some of the best and most popular Instagram apps for creating awesome slideshow presentations in the following section:
01Filme Lite
This tool lands among the leading user preferences to work on creating slideshow presentations. The application software is packed with a heap of latest features that form the Instagram trends in current times.
Apart from complementing your slideshow creations with tons of features, this slideshow maker for Instagram grants you the liberty to include your most loved videos and images within your presentation and customize them with a diverse range of effects, along with adjusting their play duration within the slideshow. Additional to image and video customization, you are also allowed to choose the image transition style that perfectly suits your content arrangement within the slides.
Working with the tool, you can be sure of getting an unparalleled slideshow creation experience with a very interactive and user oriented design interface, that is simple enough to be easily understood and worked upon by a newbie to the creative world.
02VivaVideo
If you are working on a detailed presentation and wish to spark up your creation with stunning varieties of jaw dropping special effects, consider creating your PowerPoint slideshows in this application. The tool’s effect library is a storehouse of the most amazing special effects that promise of transforming your slideshow into a visual masterpiece.
You can separately apply these effects to each of the slideshow images or choose to work on a combination of selected effects to include within a single video. Apart from this, you are free to choose an apt background music for your presentation slides from the extensive audio library of the software. The bottom line is; you are assured to a complete fun experience while creating slideshows with this tool.
03Movavi
If you are familiar enough with the fundamental concepts and the trivial anecdotes of working with slideshow presentations and want to take your graphic creativity to the next level, you can try hands at using the Movavi slideshow creator software to design high end PowerPoint presentations of professional quality. The best thing about the tool is, it works online and does not require a software download for usage concerns.
Along with creating online slideshow presentations with ease, the tool permits you to create online videos within minutes and instantly download the same for specific usage. You can further, pop up your presentation slides with wonderful transition and animation effects and also make adjustments in the play duration of each slide. The tool lets you choose and add a perfect background music to your presentation from its conveniently vast audio library.
04Slideshow Lab
If you have just landed into the world of creating slideshow presentations and are looking for easy solutions on how to make a slideshow on Instagram, consider working with this software to polish your design creativity. The simple and user cohesive interface of the tool is best for beginners to understand and get customary with the creation process, that takes the minimum possible time to render an appreciable PowerPoint presentation.
Talking about the slideshow design process, you will need to start with selecting a set of desired images, followed by uploading the same into the tool’s slideshow creator timeline. The next step is to arrange the images in the sequential order of appearance, select an appealing background music and apply smooth image transitions. When you are done with everything, proceed to save the presentation to your device.
05MoShow
While you can choose to create stunning slideshow presentations with almost any class of images, the aforesaid app works best to render Instagram images into a top rated Instagram photo slideshow without compromising with the high resolution image quality of Instagram photos. The application integrates motion pictures and lighting effects to transform the otherwise regular images into lively still captures.
Considering the credibility of the tool in overall user experience, its indeed a thumbs up from graphic creators across the globe, thanks to its smart and interactive interface, in time performance and outstanding creation outputs.
06InVideo Editor
Put an end to your search of effective solutions on how to do a slideshow on Instagram with the InVideo Editor, a smart video and graphic editor that can also be employed to adhere to the requirement of creating amazing slideshow presentations from Instagram media. While the creation process hardly takes a few minutes, you can work with the application to explore your editing creativity to the finest levels. The tool works well with any of your MacOs and Windows compatible devices.
The editor’s effects library is loaded with tons of graphic transitions and filters that are dedicated to enhance the contents of your presentation with utmost ease. You can add creative modifications to the slideshow media, such as, cut, crop and trim videos and images and add the most convincing music, overlays, fonts, etc., and enjoy an additional free access to hundreds of stock videos and slideshow templates.
07LightMV
This one is an online slideshow creator utility that works well with almost any operating system including Windows, iOS, Android and Mac. Essentially a cloud centered editor program, this tool caters to your high quality slideshow creation needs in the most effective way. The design process is quite simple, where you only need to add the images and videos, design your presentation and wait till everything comes to place.
What’s more appealing factor about the tool is that you will never need to download the program in your device or purchase a subscription plan to use the application. All you need to do is land into the tool’s website in your favorite browser and tap on the ‘Slideshow’ option to begin with the creation process. You can select from a heap of preset stunning slideshow templates to create the most enhanced PowerPoint presentation.
08Fliptastic
The Fliptastic slideshow creator app is exclusively developed to adhere to the graphic design concerns of iOS users. This one is a no cost graphic utility with a plethora of versatile features and considerable user backup. The app’s effect library is packed with a unique set of slideshow design templates, transitions, background music choices and filters that work to compliment your presentation with the subtlest look ever.
Paying a bit extra attention to the audio inclusion within the slides, the app offers you a range of free music files to work with, while additionally allowing you to upload and use one from your device or the internet.
09Creating Instagram Slideshows With Filmora
Talking exclusively within the domain of video creation and editing, the credibility of the Wondershare Filmora Video Editor software needs no introduction. Moving ahead with our discussion, let us learn about the process of creating awesome Instagram slideshows with Filmora in the following section:
Step 1: Download and Install the Program
To begin with addressing the concern of how to make a slideshow on Instagram story, navigate to the official Wondershare website and download the Wondershare Filmora Video Editor to your preferred system and proceed to install the same.
Wondershare Filmora - Best Video Editor for Mac/Windows
5,481,435 people have downloaded it.
Build unique custom animations without breaking a sweat.
Focus on creating epic stories and leave the details to Filmora’s auto features.
Start a creative adventure with drag & drop effects and endless possibilities.
Filmora simplifies advanced features to save you time and effort.
Filmora cuts out repetition so you can move on to your next creative breakthrough.
Step 2: Import Your Media
Launch the editor program and wait for the latter’s welcome screen to appear. Here, you need to import the images, videos and other media files to the editor timeline for including them in your slideshow. It is recommended to collect all the image and video files into one single folder before opening a new slideshow design project.
In the editor’s welcome screen, navigate to the ‘Media’ tab at the top left corner and click on the same to open the ‘Import’ menu. From here, you need to choose the ‘Import a Media Folder’ option, followed by navigating to the folder that contains the to be imported media files. When you have reached to the required folder, select it and tap ‘OK’ to import the same into the project timeline. When all the files have been imported, you can see them in the ‘Project Media’ panel.
Step 3: Timeline Positioning of Media Files
Reach to the ‘File’ menu and choose ‘Preferences’ from the latter’s dropdown menu. In the ‘Preferences’ window, hit the ‘Editing’ tab and tap on ‘Photo Preferences’. From the drop down menu that follows, choose the ‘Crop to Fit’ option to adjust the aspect ratio of your imported images in line with the slideshow project. In case your images have the 9:16 vertical aspect ratio, select the ‘Fit’ option to make a proper screen fit.
You can proceed to include the image zoom and camera pan features within your project by clicking on the ‘Pan & Zoom’ option. You can further, modify the preset durations of transitions, effects and photos in the ‘Editing’ tab itself before adding them to the editor timeline. Another way of doing the same is to drag the ends of the media files inward or outward, post the timeline adding process.
When you have finished making the required adjustments, navigate back the ‘Media Panel’ to include the imported media files within the project timeline. You can either click on the files to add them, or choose to ‘Drag and Drop’ the same at a preferred place within the timeline.
When all the images and videos have been added, proceed to arrange them in the desired order of appearance in the slideshow, followed by adjusting their screen time and play durations through any of the methods explained above.
Step 4: Add Transitions to Eliminate Hard Cuts
The smooth play of a slideshow is often distorted by hard cuts, which can be escaped by applying smooth transition effects to the slides. Consider exploring the ‘Transitions’ tab of Filmora to choose from a diversity of easily customizable transition effects and place them at the intersection point of the respective slides in the project timeline.
Instead of applying the same transition to every slide, prefer choosing the one that exclusively suits the content arrangement and flow within particular slides. This would save your slideshow from getting a repetitive look.
Post the timeline adding of a transition, you can double click on the same to reach the ‘Transition Setting Window’, where you are allowed to customize the play duration and select its ‘Transition Mode’. Play durations can alternatively be customised in the project timeline by dragging the slider in a left or right direction.
Step 5: Add Overlays and Filters for an Improvised Colour Scheme
To enhance the thematic appeal of your slideshow, consider desaturating the colours of the included images with the extensive range of visual effects and overlays available in the ‘Effects’ tab of the software’s editing timeline. Opening the tab, you are exposed to a series of ‘Filter and Overlay’ categories, that have further subdivisions of Light Leaks, Sepia Tone and Lomography.
To add a particular effect, place it in the timeline track above the desired clip or image. Observe the changes in the ‘Preview Panel’ and proceed to adjust the effect settings if required, by double clicking on the particular effect.
Step 6: Include Motion Graphic Elements
To supplement your slideshow with elegant motion graphics, navigate to the ‘Elements’ tab in the editor timeline. From here, you can access and choose any suitable motion graphic template from a diversity of available choices, to include within the project timeline. The step is completely optional and you should pay attention to the style of content presentation and the cause of creation of your slideshow when choosing to add these elements to the same.
Step 7: Record Voiceovers and Create Soundtracks
To record a voiceover for your slideshow, navigate to the ‘Media’ tab and tap the ‘Record’ dropdown menu. Click on ‘Record Voiceover’ in the list of options that appears. The ‘Record Audio’ icon pops up and you now need to select a microphone to be used in the recording process. When you are ready, tap the ‘Record’ button to let the recording begin.
You can now see your voice recording appear in the ‘Media’ tab with the previously imported media files, ready to be placed within the audio track of the project timeline. Filmora’s audio library is a storehouse of free access music and audio effects. To add one to your slideshow, navigate and click on the ‘Audio’ tab to select from the extensive Rock, Young & Bright, Electronic, etc., music subcategories till you get the perfect match for your presentation.
Once you have selected all the music tracks, place them one by one on the project timeline and move ahead with adjusting their play durations.
Step 8: Export Your Creation
When you are satisfied with your work, you can export the slideshow directly from Filmora to a number of media sharing platforms. All you need to do is, navigate to and tap the ‘Export’ button in the top right corner of the editor screen and proceed to set the resolution and frame rate, and select the output file format of your created slideshow in the ‘Export Window’ that appears.
When you are ready with everything, click on the ‘Export’ button at the bottom right corner of the screen to share your slideshow across different platforms, including YouTube, Instagram, Vimeo, etc.
The time required by Filmora to render your slideshow on the chosen platform will depend on the output file size. Considering the fact that larger files require a much longer time to be rendered, it would be a smart decision to limit the file size of your slideshow within 500 MB.
● Ending Thoughts →
● Instagram slideshows are exciting means of diving into fun-filled entertainment with your social media peers.
● When looking for solutions on how to create a slideshow on Instagram, there are loads of choices in the software market.
● Talking of best creator alternatives, you can pick the Wondershare Filmora slideshow developer program to make an amazing Insta story slideshow.
How to Animate - Adobe Animate Tutorial for All
How to Animate - Adobe Animate Tutorial for All
An easy yet powerful editor
Numerous effects to choose from
Detailed tutorials provided by the official channel
Now, since the tool has too many elements to understand, it’s always a good strategy to start your journey with a dedicated Adobe Animate CC tutorial.
In today’s guide, we are going to introduce a few of these tutorials so that you can easily start creating animations in Adobe Animate CC, even if you have zero prior experience with the software.
In this article
01 [Adobe Animate CC tutorial](#Part 1)
02 [How Do You Animate in Adobe Animation?](#Part 2)
03 [Other Rare Tutorials for Self-learning to Learn How to Animate](#Part 3)
Part 1 Is Adobe Animate Good for Beginners?
When people start their careers as graphic designers, they always struggle to pick the right tool to accompany them during their journey. Since there are too many options to choose from, beginners always end up comparing a tool with other available options. They even weigh the pros and cons of each animation software individually to make the best decision. The same is the case with Adobe Animate. Many beginners want to know if Adobe Animate is the right animation software to get started as a professional graphic designer.
Since the Adobe community continues to grow rapidly, you’ll also be able to find a variety of Adobe Animate tutorials quite easily.
So, as far as beginner-friendliness is concerned, Adobe Animate is a complete winner that anyone can use to create stunning animations, designs, and templates right on their PCs.
Part 2 How Do You Animate in Adobe Animation?
1. Introduction to Adobe Animate
For complete beginners, there’s nothing better than a one-stop tutorial that provides a detailed insight into the basics of Adobe Animate and helps them get familiar with different elements of the software.
Well, this 2 hours 30 minutes long YouTube Adobe Animate tutorial by TipTut is what you need to start your journey with the software. The tutorial involves everything, starting from the simple setup to creating your first animation. You can either download this tutorial on your system or watch it online to understand the basic workflow of Adobe Animate.
Key Features:
● Learn how to set up a project in Adobe Animate.
● Adjusting the elements (such as frame rate) of your first animation.
● Completing your first animation using colors, gestures, and simple movement.
2. Creating HTML Banner Ads
Apart from regular 2D animations, some designers also use Adobe Animate to create dedicated banner ads for their marketing campaigns using HTML 5. This will be a pretty useful Adobe Animate tutorial PDF for anyone who wants to join a marketing firm or plan exclusive marketing campaigns for his own products/services.
Key Features:
● Learn how to build HTML banner ads from scratch.
● Get familiar with the overall process of publishing a banner ad on platforms like Google AdWords.
● Understand how to keep the file size of a banner down to keep it optimized.
3. Animate CC Game Development
As we mentioned earlier, some people also use Adobe Animate to design games. If you want to follow the same career, this Adobe Animate CC tutorial is for you.
All the games developed in Adobe Animate are designed in HTML 5 and are usually web-based. By the end of this tutorial, you would have built a fully-functional game in Adobe Animate.
Key Features:
● Creating the game world.
● Understanding CreateJS Overview in Adobe Animate CC.
● Building in-game assets and configuring their unique features.
4. 2D Animation for Beginners
This is another useful Adobe Animate tutorial for all the beginners out there. Compiled by Walt Wonderwolk, the tutorial is separated into 12 parts in which he has explained different features of Adobe Animate in detail.
Key Features:
● Designing graphic vectors in Adobe Animate.
● Each feature is explained with a respective example.
● Learn how to add sounds to your animations to make them visually appealing.
5. Adobe Animate for Social Media
Being a feature-packed animation software, you can also use Adobe Animate to create content for your social media profiles. To do this, however, you must be familiar with all the necessary features of the tool. This 1.5 hours long tutorial will help you get familiar with features such as the tweening system that’ll help you turn regular social media posts into stunning animations.
Key Features:
● Designing simple assets and designs for social media.
● Exporting GIFs and Animated Videos.
● Customizing stills and motion graphics in Adobe Animate.
Key Takeaways from This Episode
● Adobe Animate boasts different applications, ranging from simple 2D animations to game designing
● Since Adobe Animation is an extensive software, it’ll always be a wise decision to get started with Adobe Animate tutorials.
● After you have compiled designs/animations in Adobe Animate, Wondershare Filmora Pro will help you enhance its overall quality.
Secret Source to Make a Stop Motion Puppet
Secret Source to Make a Stop Motion Puppetd
An easy yet powerful editor
Numerous effects to choose from
Detailed tutorials provided by the official channel
The significant difference between a stop-motion puppet and other types is that they have an armature inside. An armature is the puppet’s skeleton, a must to hold its position without sleeping for each captured frame. The stop motion puppet makeover should be precise to prevent it from breaking down or falling quickly. In addition, buying a stop-motion puppet armature might be pretty expensive, so making them by yourself is much more fun and cheaper.

To prevent any mishap during your stop-motion puppet making, your pupils should be as durable and lightweight as possible, and they must be designed based on what you will be doing and what kind of movement will be required of them. In essence, your story’s overall purpose for creating the animation will be the ultimate factor in how your character is built and designed.
In this article
01 [8 Popular Stop Motion Puppet Examples](#Part 1)
02 [How to Make a Stop Motion Puppet](#Part 2)
Part 1 8 Popular Stop Motion Puppet Examples
While wandering all through the web world, you will encounter many famous stop motion puppets. Some of them are very popular stop-motion puppets for sale, and this section of the article is about to explore eight (of them and what they stand for:
01Rudolph the Red-Nosed Reindeer

Rudolph, the Red-Nosed Reindeer, is a pleasant Christmas stop motion animated TV special in 19produced by video craft international limited. These figures starred in the perennially beloved stop motion animation Christmas special.
02Nestor the Long-Eared Christmas Donkey

The Long-Eared Christmas Donkey, Nestor is a Christmas stop motion animated TV special in 19produced by Rankin-Bass productions. The story is back in the Roman Empire days when miniature donkeys were born with very long years and kept getting into trouble. When the owner decides to throw him out of the stable, his mother sacrifices her life to save him from a blizzard.
03Santa Claus is Comin’ to Town

This is a stop-motion animation TV special in 19made by Rankin-bass productions. The story tells all about Santa Claus when he was a baby and growing up with the Kringles. The story is told and sang by a special delivery Kluger voiced by Fred Astaire.
04Negative Space
This one is one of the world’s wide appreciated and Oscar-nominated stop motion puppet animations that reflect the son and father relationship in an interactive way. It is a must to watch animation effects.

05Fantastic Mr. Fox

Fantastic Mr. Fox is a 20puppet animation movie that talks about an urban fox that cannot resist returning to his farm and must help his community survive the farmer’s retaliation.
06Coraline

Coraline is a 20Pope x animation TV series that talks about an adventurous 11-year-old girl that finds another strange world that is an idealized version of her frustrating home.
07The Nightmare before Christmas

The nightmare before Christmas is a puppet animation TV series that talks about Jack Skellington, the king of Halloween Town, and discovers Christmas town but his attempts to bring Christmas to his home result in confusion.
07Corpse bride

Corpse Bride is a puppet animated family TV series in 20talks about a shy groom practicing his wedding vow in the inadvertent presence of a deceased young woman as she rises from the grave, assuming that he has married her.
Part 2 How to Make a Stop Motion Puppet
Do you have a story, and you need some puppets to take the place of your actors, and you want to double in stop motion animation. The fact is there are different ways to create your Stop Motion Puppet, and as per your storyboard requirement, you can go with other methods. Such as, you can either use tools to build your puppet armature, otherwise can make some puppets from clothes and threads to give it a structure, else can use clay to assign a static puppet structure. It’s all your choice, so all in all what you need is:
● A Storyboard
● Puppet armature tools
● Camera setup
● Editing Software (in our case, we are going to use Wondershare Filmora Video Editor )
In this tutorial, we will be teaching you how to make stop-motion puppets in a way that is relatively cost-effective to produce durable means whose construction requires little or no time or extra equipment:
Wondershare Filmora - Best Video Editor for Mac/Windows
5,481,435 people have downloaded it.
Build unique custom animations without breaking a sweat.
Focus on creating epic stories and leave the details to Filmora’s auto features.
Start a creative adventure with drag & drop effects and endless possibilities.
Filmora simplifies advanced features to save you time and effort.
Filmora cuts out repetition so you can move on to your next creative breakthrough.
Materials:
● Ball head screws (M2.5)
● Small screws (M3)
● Ball head screws (2xand brass pipes whose diameter is less than ball head screws
● Brass plate (strips 2mm thick)
Tools:
● M3 thread tap
● M2.5 thread tap
● Screwdriver
● Pliers
● Drill press
● Drills of 2.5 mm, 2 mm, 3 mm
● Power sander
● Loctite
● File
● Bandsaw
Step
● Use the brass to mark the length of the bone
● Cut the tube according to the length
● Sandpaper or file it Square
● On both sides of the tube, use the tap to cause the tread
● Use the screws in the brass tube to screw the ball head

Step 2:
● On each sides of the brass strip, drill 2.5 mm holes
● Then, between holes of the holes you drill, drill 2.5 mm holes
● Between the other 2.5 mm holes, drill 3mm holes

Step 3:
● On the 2.5 mm holes on the sides, use the 3mm drill to create some cup
● With the 3 mm tap, cut the thread in the 2 mm holes in the middle

Step 4:
● Without damaging the holes, file the end of the strip with all the holes as close to the first 3
● From the strip, cut the parts with the first three holes
● Also, as close to the most used flyer to file the other side.
Note: Make sure you are careful while filing as this will get very hot

**Step 5:**Join all the parts together and make sure that the cup on the outer holes of the two plates is two words each other and tighten the bolts to hold the bones

Step 6: Join to strip of bras together and form a torso. Then cut the torso and form the feet

Step 7: When your puppet is the way you want it, lock teeth styles by fixing the ball head screw in place

Animation Editing:
Also, you can make a stop motion video on Filmora by considering the following factors:
● Camera Steadiness is a must for every shot you plan for Stop Motion Video. Shaking a camera is not good. Else, your video won’t be smooth.
● Ensure capture the shot under consistent light and prevent light exposure from changing on the object; otherwise, there will be inconsistency in the video.
● To make it easier, play the film in advance, as the more friends your video, the smoother the video will be.
Here are steps to make a stop motion video on Filmora:
Step 1 Place the camera steady and bring your object in the frame. Lightly move your things and capture the movement frame by frame.

Step 2 Download and start, or if you have already installed, run the Filmora program and choose a suitable frame rate in the project settings. After selecting the resolution, click on the file and go to the project setting.

Step 3 Now import the media file using the import option from the file menu and import the captured images.

Step 4 Adjust the menu’s preference or press the shortcut key Ctrl+Shift+, and a window will appear on your screen. Select the editing panel and change the photo duration between 0.2 to 0.5 seconds.

Step 5 Once done with all the settings and satisfied with the results, click on export and select your desired video format. Your video will be exported and saved in your library so you can share it with friends.

● Key Takeaways from This Episode →
● Get to know about what is stop motion puppets.
● Different examples of how dinosaur stop motion puppet or other puppet animation form works.
● The process to create your stop motion puppet and how Filmora will assist you in it.
The significant difference between a stop-motion puppet and other types is that they have an armature inside. An armature is the puppet’s skeleton, a must to hold its position without sleeping for each captured frame. The stop motion puppet makeover should be precise to prevent it from breaking down or falling quickly. In addition, buying a stop-motion puppet armature might be pretty expensive, so making them by yourself is much more fun and cheaper.
To prevent any mishap during your stop-motion puppet making, your pupils should be as durable and lightweight as possible, and they must be designed based on what you will be doing and what kind of movement will be required of them. In essence, your story’s overall purpose for creating the animation will be the ultimate factor in how your character is built and designed.
In this article
01 [8 Popular Stop Motion Puppet Examples](#Part 1)
02 [How to Make a Stop Motion Puppet](#Part 2)
Part 1 8 Popular Stop Motion Puppet Examples
While wandering all through the web world, you will encounter many famous stop motion puppets. Some of them are very popular stop-motion puppets for sale, and this section of the article is about to explore eight (of them and what they stand for:
01Rudolph the Red-Nosed Reindeer
Rudolph, the Red-Nosed Reindeer, is a pleasant Christmas stop motion animated TV special in 19produced by video craft international limited. These figures starred in the perennially beloved stop motion animation Christmas special.
02Nestor the Long-Eared Christmas Donkey
The Long-Eared Christmas Donkey, Nestor is a Christmas stop motion animated TV special in 19produced by Rankin-Bass productions. The story is back in the Roman Empire days when miniature donkeys were born with very long years and kept getting into trouble. When the owner decides to throw him out of the stable, his mother sacrifices her life to save him from a blizzard.
03Santa Claus is Comin’ to Town
This is a stop-motion animation TV special in 19made by Rankin-bass productions. The story tells all about Santa Claus when he was a baby and growing up with the Kringles. The story is told and sang by a special delivery Kluger voiced by Fred Astaire.
04Negative Space
This one is one of the world’s wide appreciated and Oscar-nominated stop motion puppet animations that reflect the son and father relationship in an interactive way. It is a must to watch animation effects.
05Fantastic Mr. Fox
Fantastic Mr. Fox is a 20puppet animation movie that talks about an urban fox that cannot resist returning to his farm and must help his community survive the farmer’s retaliation.
06Coraline
Coraline is a 20Pope x animation TV series that talks about an adventurous 11-year-old girl that finds another strange world that is an idealized version of her frustrating home.
07The Nightmare before Christmas
The nightmare before Christmas is a puppet animation TV series that talks about Jack Skellington, the king of Halloween Town, and discovers Christmas town but his attempts to bring Christmas to his home result in confusion.
07Corpse bride
Corpse Bride is a puppet animated family TV series in 20talks about a shy groom practicing his wedding vow in the inadvertent presence of a deceased young woman as she rises from the grave, assuming that he has married her.
Part 2 How to Make a Stop Motion Puppet
Do you have a story, and you need some puppets to take the place of your actors, and you want to double in stop motion animation. The fact is there are different ways to create your Stop Motion Puppet, and as per your storyboard requirement, you can go with other methods. Such as, you can either use tools to build your puppet armature, otherwise can make some puppets from clothes and threads to give it a structure, else can use clay to assign a static puppet structure. It’s all your choice, so all in all what you need is:
● A Storyboard
● Puppet armature tools
● Camera setup
● Editing Software (in our case, we are going to use Wondershare Filmora Video Editor )
In this tutorial, we will be teaching you how to make stop-motion puppets in a way that is relatively cost-effective to produce durable means whose construction requires little or no time or extra equipment:
Wondershare Filmora - Best Video Editor for Mac/Windows
5,481,435 people have downloaded it.
Build unique custom animations without breaking a sweat.
Focus on creating epic stories and leave the details to Filmora’s auto features.
Start a creative adventure with drag & drop effects and endless possibilities.
Filmora simplifies advanced features to save you time and effort.
Filmora cuts out repetition so you can move on to your next creative breakthrough.
Materials:
● Ball head screws (M2.5)
● Small screws (M3)
● Ball head screws (2xand brass pipes whose diameter is less than ball head screws
● Brass plate (strips 2mm thick)
Tools:
● M3 thread tap
● M2.5 thread tap
● Screwdriver
● Pliers
● Drill press
● Drills of 2.5 mm, 2 mm, 3 mm
● Power sander
● Loctite
● File
● Bandsaw
Step
● Use the brass to mark the length of the bone
● Cut the tube according to the length
● Sandpaper or file it Square
● On both sides of the tube, use the tap to cause the tread
● Use the screws in the brass tube to screw the ball head
Step 2:
● On each sides of the brass strip, drill 2.5 mm holes
● Then, between holes of the holes you drill, drill 2.5 mm holes
● Between the other 2.5 mm holes, drill 3mm holes
Step 3:
● On the 2.5 mm holes on the sides, use the 3mm drill to create some cup
● With the 3 mm tap, cut the thread in the 2 mm holes in the middle
Step 4:
● Without damaging the holes, file the end of the strip with all the holes as close to the first 3
● From the strip, cut the parts with the first three holes
● Also, as close to the most used flyer to file the other side.
Note: Make sure you are careful while filing as this will get very hot
**Step 5:**Join all the parts together and make sure that the cup on the outer holes of the two plates is two words each other and tighten the bolts to hold the bones
Step 6: Join to strip of bras together and form a torso. Then cut the torso and form the feet
Step 7: When your puppet is the way you want it, lock teeth styles by fixing the ball head screw in place
Animation Editing:
Also, you can make a stop motion video on Filmora by considering the following factors:
● Camera Steadiness is a must for every shot you plan for Stop Motion Video. Shaking a camera is not good. Else, your video won’t be smooth.
● Ensure capture the shot under consistent light and prevent light exposure from changing on the object; otherwise, there will be inconsistency in the video.
● To make it easier, play the film in advance, as the more friends your video, the smoother the video will be.
Here are steps to make a stop motion video on Filmora:
Step 1 Place the camera steady and bring your object in the frame. Lightly move your things and capture the movement frame by frame.
Step 2 Download and start, or if you have already installed, run the Filmora program and choose a suitable frame rate in the project settings. After selecting the resolution, click on the file and go to the project setting.
Step 3 Now import the media file using the import option from the file menu and import the captured images.
Step 4 Adjust the menu’s preference or press the shortcut key Ctrl+Shift+, and a window will appear on your screen. Select the editing panel and change the photo duration between 0.2 to 0.5 seconds.
Step 5 Once done with all the settings and satisfied with the results, click on export and select your desired video format. Your video will be exported and saved in your library so you can share it with friends.
● Key Takeaways from This Episode →
● Get to know about what is stop motion puppets.
● Different examples of how dinosaur stop motion puppet or other puppet animation form works.
● The process to create your stop motion puppet and how Filmora will assist you in it.
Tutorials for Animating Picture Online Without Learning From Scratch
How to Animate Picture Online Without Learning from Scratch
An easy yet powerful editor
Numerous effects to choose from
Detailed tutorials provided by the official channel
The Internet is flooded with thousands of tools that aim to provide the best-animated video. But trusting all of them every time is not a go-to thing for everyone.

If you also fall into the same category of people who are looking to add animation to designs but are not able to find the best tools, you are on the right page.
In this article
01 [Ready to Add Animation to Your Designs?](#Part 1)
02 [The Secret of Animating Pictures Online](#Part 2)
Part 1 Ready to Add Animation to Your Designs?
Here we are discussing the top three Animated picture maker that is used for creating different videos with differnt types of online picture tools. These are as follows:
1. Powtoon
Powtoon is an interactive yet simple tool available to add animation to designs. It has all the basic functions available for motion graphics that are useful for presentation. It has a variety of characters and animations available, along with simple textual animation. A user can easily prepare the video with full animation.
(This video indicates how to use the Powtoon tool for creating the best-animated videos, along with an example.)
1. Animaker
Animaker is one of the wonderful animation programs to add animation to designs in an interactive yet simple manner. It has all the best features integrated into it, which let a user create the video of their choice. It is safe to use and, being a web-based program, offers all the options.
(This video indicates how to use the Animaker tool for creating the best-animated videos, along with an example.)
3. Moovly
Moovly is also one of the best animation tools available to add animation to the content. On the main page, the “add content” option is available from where a user can simply update the video and add animation to it.
(This video indicates how to use the Moovly tool for creating the best-animated videos, along with an example.)
Note: These tools are among those that even a layman can use. But some users are still not happy with the interface of these animate picture online tools and feel like they are lacking features. For all those out there, we have some other options too.
Part 2 The Secret of Animating Pictures Online
The secret behind animating pictures online is to save time and effort. With the help of online tools, one can get the outcome with the help of inbuilt templates. There will be no need to install any application or plugin when they wish to add any particular animation to the content. Some tools you can consider using to add animation to designs are as follows:
1. Pixtellar
Pixtellar is a great tool that helps in creating animated videos and images too. Along with creating animated videos and images, one can easily create posters, logos, photo collages, and so on.
However, before using it, be sure to do the registration, as without it, using it is impossible. After registering, the steps you need to follow to use it are as follows:
Step 1Create from Scratch
Choose the template of your choice or click on “Create from Scratch”. Here we are choosing the templates.

Step 2Choose social media
It will be redirected to the next page where you will find out templates according to the selected category. (Here we choose social media).

Step 3Click on “Animate”
Choose any of them based on your preferences. You will head to the next page where you can do the editing as per your needs by clicking on “Animate”.

Step 4Save the image
After making the changes and adding the animations, you are all set to save the image. The “Save” button is right at the top of the page!

2. Adobe Spark
Adobe Spark is a tool that has pre-built templates available for adding animations to the designs. From adding animations to editing the image and video, all the options are featured in this. It also gives users an idea of how they can simply create the video and images with the help of animations and other effects.
However, when you are using it, registration is a must. After performing the registration, you are all set to use it. The steps you need to follow to use this tool are as follows:
Step 1Start editing
After completing the registration, you will reach the main page where you can choose the option of your choice and start editing. Here we have chosen the template option.

Step 2Create From This Template
It asks you to be sure and click on “Create From This Template.”

Step 3Do the editing
It takes a few seconds to present the same in front of you. On this page, you are all set to do the editing as per your needs.

Step 4Save the image
After doing all the editing, you are all set to save the image. The “Save” button is right there at the top. Click on it and save the image!

3. Crello or VistaCreate
Crello, which turns out to be VistaCreate, is one of the most famous tools for adding motion to images. It has almost 8,000+ animated designs and motion graphics available, which are helpful in creating eye-catching videos.
When you are using this feature, registration or sign-up is important. On the main page, the signup option is available, helping users do it. After that, the steps are as follows:
Step 1Click on the “Template”
On the home page, you can either create your own or click on the “Template” option available. (We chose the template option here).

Step 2Select the template
Now select the template of your choice. Here we have selected the Happy New Year one.

Step 3Do the editing as required
Now you are all set to do the editing as required. Here all the options are available, which help in adding all the basic to advanced details to the image. You can use it.

Step 4Download the image
After doing the editing, you are all set to download the image. The downloading button is right there at the top.

Key Takeaways from This Episode
● Animated videos are eye-catching, and tools are helpful in making them more enhanced.
● Animation tools are very easy to use and precisely make the video.
● Editing options are available in the tools, which are helpful in adding extra effects to the image.
● The tools are free to use with all the in-built templates and other features.
The Internet is flooded with thousands of tools that aim to provide the best-animated video. But trusting all of them every time is not a go-to thing for everyone.
If you also fall into the same category of people who are looking to add animation to designs but are not able to find the best tools, you are on the right page.
In this article
01 [Ready to Add Animation to Your Designs?](#Part 1)
02 [The Secret of Animating Pictures Online](#Part 2)
Part 1 Ready to Add Animation to Your Designs?
Here we are discussing the top three Animated picture maker that is used for creating different videos with differnt types of online picture tools. These are as follows:
1. Powtoon
Powtoon is an interactive yet simple tool available to add animation to designs. It has all the basic functions available for motion graphics that are useful for presentation. It has a variety of characters and animations available, along with simple textual animation. A user can easily prepare the video with full animation.
(This video indicates how to use the Powtoon tool for creating the best-animated videos, along with an example.)
1. Animaker
Animaker is one of the wonderful animation programs to add animation to designs in an interactive yet simple manner. It has all the best features integrated into it, which let a user create the video of their choice. It is safe to use and, being a web-based program, offers all the options.
(This video indicates how to use the Animaker tool for creating the best-animated videos, along with an example.)
3. Moovly
Moovly is also one of the best animation tools available to add animation to the content. On the main page, the “add content” option is available from where a user can simply update the video and add animation to it.
(This video indicates how to use the Moovly tool for creating the best-animated videos, along with an example.)
Note: These tools are among those that even a layman can use. But some users are still not happy with the interface of these animate picture online tools and feel like they are lacking features. For all those out there, we have some other options too.
Part 2 The Secret of Animating Pictures Online
The secret behind animating pictures online is to save time and effort. With the help of online tools, one can get the outcome with the help of inbuilt templates. There will be no need to install any application or plugin when they wish to add any particular animation to the content. Some tools you can consider using to add animation to designs are as follows:
1. Pixtellar
Pixtellar is a great tool that helps in creating animated videos and images too. Along with creating animated videos and images, one can easily create posters, logos, photo collages, and so on.
However, before using it, be sure to do the registration, as without it, using it is impossible. After registering, the steps you need to follow to use it are as follows:
Step 1Create from Scratch
Choose the template of your choice or click on “Create from Scratch”. Here we are choosing the templates.
Step 2Choose social media
It will be redirected to the next page where you will find out templates according to the selected category. (Here we choose social media).
Step 3Click on “Animate”
Choose any of them based on your preferences. You will head to the next page where you can do the editing as per your needs by clicking on “Animate”.
Step 4Save the image
After making the changes and adding the animations, you are all set to save the image. The “Save” button is right at the top of the page!
2. Adobe Spark
Adobe Spark is a tool that has pre-built templates available for adding animations to the designs. From adding animations to editing the image and video, all the options are featured in this. It also gives users an idea of how they can simply create the video and images with the help of animations and other effects.
However, when you are using it, registration is a must. After performing the registration, you are all set to use it. The steps you need to follow to use this tool are as follows:
Step 1Start editing
After completing the registration, you will reach the main page where you can choose the option of your choice and start editing. Here we have chosen the template option.
Step 2Create From This Template
It asks you to be sure and click on “Create From This Template.”
Step 3Do the editing
It takes a few seconds to present the same in front of you. On this page, you are all set to do the editing as per your needs.
Step 4Save the image
After doing all the editing, you are all set to save the image. The “Save” button is right there at the top. Click on it and save the image!
3. Crello or VistaCreate
Crello, which turns out to be VistaCreate, is one of the most famous tools for adding motion to images. It has almost 8,000+ animated designs and motion graphics available, which are helpful in creating eye-catching videos.
When you are using this feature, registration or sign-up is important. On the main page, the signup option is available, helping users do it. After that, the steps are as follows:
Step 1Click on the “Template”
On the home page, you can either create your own or click on the “Template” option available. (We chose the template option here).
Step 2Select the template
Now select the template of your choice. Here we have selected the Happy New Year one.
Step 3Do the editing as required
Now you are all set to do the editing as required. Here all the options are available, which help in adding all the basic to advanced details to the image. You can use it.
Step 4Download the image
After doing the editing, you are all set to download the image. The downloading button is right there at the top.
Key Takeaways from This Episode
● Animated videos are eye-catching, and tools are helpful in making them more enhanced.
● Animation tools are very easy to use and precisely make the video.
● Editing options are available in the tools, which are helpful in adding extra effects to the image.
● The tools are free to use with all the in-built templates and other features.
Best 15 Instant Classics Animated Cartoon Movies
Best 15 Instant Classics Animated Cartoon Movies
An easy yet powerful editor
Numerous effects to choose from
Detailed tutorials provided by the official channel
The animated characters let an individual experience a world that has certain things that hardly exist in reality.
Here we will share all the relatable details about the particular movie that will be helpful in deciding whether you wish to watch it or not.
In this article
01 [Which is the Best Animated Movie Ever?](#Part 1)
02 [We know how to animate. Do you?](#Part 2)
Part 1 Which is the Best Animated Movie Ever?
Let’s have a look at the best 15 classical animated cartoon movies that you should watch if you are an animation movie lover.
01 Toy Story 4
Toy Story 4 was released on June 21, 2019 in the United States and will be available for streaming on October 1, 2019.The IMDb rating for Toy Story 4 was 7.7 out of 10, and the Rotten Tomatoes rating was 97%. This movie ranks first among all the animated movies available till date. This is a movie from Walt Disney, and its gross revenue was $434 million.

02 Spider-Man: into the spider verse
Spider-Man: Into the Spider Verse was released in theatres on December 14, 2018 and started streaming on March 19, 2019. The IMDB rating for this movie is 8.4 out of 10 and the Rotten Tomatoes rating is 97%. This movie is from Sony Pictures Entertainment and Columbia Pictures. The gross revenue was $190.2 million.

03 Inside Out
Inside Out was released worldwide in theatres on June 19, 2015 and started streaming on November 3, 2015. This movie received an 8.1 IMDB rating out of 10, and the Rotten Tomatoes rating was 98%. It is from Walt Disney and has a gross revenue of $2 million.

04 COCO
Coco was released in theatres on November 22, 2017 and started streaming on February 13, 2018. The IMDB rating for this movie is 8.4 out of 10 and the Rotten Tomatoes rating is 97%. This movie is from Walt Disney. The gross revenue was $210.5 million.

05 Snow White and the Seven Dwarfs
Snow White and the Seven Dwarfs (1937) was released in theatres in 1937 and started streaming on Nov. 16, 2004. The IMDB rating for this movie is 7.6 out of 10 and the Rotten Tomatoes rating is 98%. This movie is from Walt Disney.

06 Incredibles 2
Incredibles 2 (2018) was released in theatres on June 15, 2018 and became available for streaming on November 6, 2018.The IMDB rating for this movie is 7.6 out of 10 and the Rotten Tomatoes rating is 97%. This movie is from Walt Disney. The gross revenue was $608.6 million.

07 Zootopia (2016)
Zootopia (2016) was released in theatres on March 4, 2016 and started streaming on June 7, 2016. The IMDB rating for this movie is 8.0 out of 10 and the Rotten Tomatoes rating is 98%. This movie is from Walt Disney. The gross revenue was $200 million.

08 Paddington 2 (2018)
Paddington 2 (2018) was released in theatres on Jan. 1, 2018 and started streaming on Apr. 24, 2018. The IMDB rating for this movie is 7.8 out of 10 and the Rotten Tomatoes rating is 99%. This movie is from Warner Bros. Pictures. The gross revenue was $38.4 million.

09 Up
Up was released in theatres on May 29, 2009 and started streaming on Nov. 10, 2009. The IMDB rating for this movie is 8.2 out of 10 and the Rotten Tomatoes rating is 98%. This movie is from Walt Disney and Pixar Animation Studios. The gross revenue was $78.2 million.

10 Toy Story 2 (1999)
Toy Story 2 (1999) was released in theatres on December 24, 1999 and started streaming on March 23, 2010. The IMDB rating for this movie is 7.9 out of 10 and the Rotten Tomatoes rating is 100%. This movie is from Walt Disney Pictures. The gross revenue was $245.9 million.

11 Toy Story 3 (2010)
Toy Story 3 (2010) was released in theatres on June 18, 2010 and started streaming on Nov. 2, 2010. The IMDB rating for this movie is 8.2 out of 10 and the Rotten Tomatoes rating is 98%. This movie is from Walt Disney. The gross revenue was $415.0 million.

12 Finding Dory (2016)
Finding Dory (2016) was released in theatres on June 17, 2016 and started streaming on Nov. 15, 2016. The IMDB rating for this movie is 7.3 out of 10 and the Rotten Tomatoes rating is 94%. This movie is from Sony Pictures Entertainment and Columbia Pictures. The gross revenue was $486.2 million.

13 Finding Nemo (2003)
Finding Nemo (2003) was released in theatres on May 30, 2003 and started streaming on Nov. 4, 2003. The IMDB rating for this movie is 8.1 out of 10 and the Rotten Tomatoes rating is 99%. This movie is from Walt Disney Pictures. The gross revenue was $110.2 million.

13 Pinocchio (1940)
Pinocchio (1940) was released in theatres on February 9, 1940 and started streaming on December 3, 2002. The IMDB rating for this movie is 8.4 out of 10 and the Rotten Tomatoes rating is 100%. This movie is from Walt Disney Pictures. The gross revenue was $18.7 million.

13 The LEGO Movie (2014)
The LEGO Movie (2014) was released in theatres on February 7, 2014 and started streaming on June 17, 2014. The IMDB rating for this movie is 7.7 out of 10 and the Rotten Tomatoes rating is 96%. This movie is from Warner Bros. Pictures. The gross revenue was $257.8 million.
The animated characters let an individual experience a world that has certain things that hardly exist in reality.
Here we will share all the relatable details about the particular movie that will be helpful in deciding whether you wish to watch it or not.
In this article
01 [Which is the Best Animated Movie Ever?](#Part 1)
02 [We know how to animate. Do you?](#Part 2)
Part 1 Which is the Best Animated Movie Ever?
Let’s have a look at the best 15 classical animated cartoon movies that you should watch if you are an animation movie lover.
01 Toy Story 4
Toy Story 4 was released on June 21, 2019 in the United States and will be available for streaming on October 1, 2019.The IMDb rating for Toy Story 4 was 7.7 out of 10, and the Rotten Tomatoes rating was 97%. This movie ranks first among all the animated movies available till date. This is a movie from Walt Disney, and its gross revenue was $434 million.
02 Spider-Man: into the spider verse
Spider-Man: Into the Spider Verse was released in theatres on December 14, 2018 and started streaming on March 19, 2019. The IMDB rating for this movie is 8.4 out of 10 and the Rotten Tomatoes rating is 97%. This movie is from Sony Pictures Entertainment and Columbia Pictures. The gross revenue was $190.2 million.
03 Inside Out
Inside Out was released worldwide in theatres on June 19, 2015 and started streaming on November 3, 2015. This movie received an 8.1 IMDB rating out of 10, and the Rotten Tomatoes rating was 98%. It is from Walt Disney and has a gross revenue of $2 million.
04 COCO
Coco was released in theatres on November 22, 2017 and started streaming on February 13, 2018. The IMDB rating for this movie is 8.4 out of 10 and the Rotten Tomatoes rating is 97%. This movie is from Walt Disney. The gross revenue was $210.5 million.
05 Snow White and the Seven Dwarfs
Snow White and the Seven Dwarfs (1937) was released in theatres in 1937 and started streaming on Nov. 16, 2004. The IMDB rating for this movie is 7.6 out of 10 and the Rotten Tomatoes rating is 98%. This movie is from Walt Disney.
06 Incredibles 2
Incredibles 2 (2018) was released in theatres on June 15, 2018 and became available for streaming on November 6, 2018.The IMDB rating for this movie is 7.6 out of 10 and the Rotten Tomatoes rating is 97%. This movie is from Walt Disney. The gross revenue was $608.6 million.
07 Zootopia (2016)
Zootopia (2016) was released in theatres on March 4, 2016 and started streaming on June 7, 2016. The IMDB rating for this movie is 8.0 out of 10 and the Rotten Tomatoes rating is 98%. This movie is from Walt Disney. The gross revenue was $200 million.
08 Paddington 2 (2018)
Paddington 2 (2018) was released in theatres on Jan. 1, 2018 and started streaming on Apr. 24, 2018. The IMDB rating for this movie is 7.8 out of 10 and the Rotten Tomatoes rating is 99%. This movie is from Warner Bros. Pictures. The gross revenue was $38.4 million.
09 Up
Up was released in theatres on May 29, 2009 and started streaming on Nov. 10, 2009. The IMDB rating for this movie is 8.2 out of 10 and the Rotten Tomatoes rating is 98%. This movie is from Walt Disney and Pixar Animation Studios. The gross revenue was $78.2 million.
10 Toy Story 2 (1999)
Toy Story 2 (1999) was released in theatres on December 24, 1999 and started streaming on March 23, 2010. The IMDB rating for this movie is 7.9 out of 10 and the Rotten Tomatoes rating is 100%. This movie is from Walt Disney Pictures. The gross revenue was $245.9 million.
11 Toy Story 3 (2010)
Toy Story 3 (2010) was released in theatres on June 18, 2010 and started streaming on Nov. 2, 2010. The IMDB rating for this movie is 8.2 out of 10 and the Rotten Tomatoes rating is 98%. This movie is from Walt Disney. The gross revenue was $415.0 million.
12 Finding Dory (2016)
Finding Dory (2016) was released in theatres on June 17, 2016 and started streaming on Nov. 15, 2016. The IMDB rating for this movie is 7.3 out of 10 and the Rotten Tomatoes rating is 94%. This movie is from Sony Pictures Entertainment and Columbia Pictures. The gross revenue was $486.2 million.
13 Finding Nemo (2003)
Finding Nemo (2003) was released in theatres on May 30, 2003 and started streaming on Nov. 4, 2003. The IMDB rating for this movie is 8.1 out of 10 and the Rotten Tomatoes rating is 99%. This movie is from Walt Disney Pictures. The gross revenue was $110.2 million.
13 Pinocchio (1940)
Pinocchio (1940) was released in theatres on February 9, 1940 and started streaming on December 3, 2002. The IMDB rating for this movie is 8.4 out of 10 and the Rotten Tomatoes rating is 100%. This movie is from Walt Disney Pictures. The gross revenue was $18.7 million.
13 The LEGO Movie (2014)
The LEGO Movie (2014) was released in theatres on February 7, 2014 and started streaming on June 17, 2014. The IMDB rating for this movie is 7.7 out of 10 and the Rotten Tomatoes rating is 96%. This movie is from Warner Bros. Pictures. The gross revenue was $257.8 million.
A Beginners Guide for Learning 3D Animation
A Beginners Guide for Learning 3D Animation
An easy yet powerful editor
Numerous effects to choose from
Detailed tutorials provided by the official channel
“I am still finding it difficult to go into animation even after covering some basic concepts of animation, hardware, software, books, and courses. Is there a way I can learn 3D animation and graphic design courses quickly and easily?”
This guide will show you what professional 3D animators go through and share how you can start your animation career. Sit back and enjoy this all-encompassing and educating guide to learn 3D Animation for beginners!
In this article
01 [Should You Study 3D Animation?](#Part 1)
02 [Top 5 Programs for 3D Animation](#Part 2)
03 [The Best 10 Online Courses to Learn 3D Animation for Beginners](#Part 3)
04 [Recommended 3D Animation Learning Books and Resources](#Part 4)
Part 1 Should You Study 3D Animation?
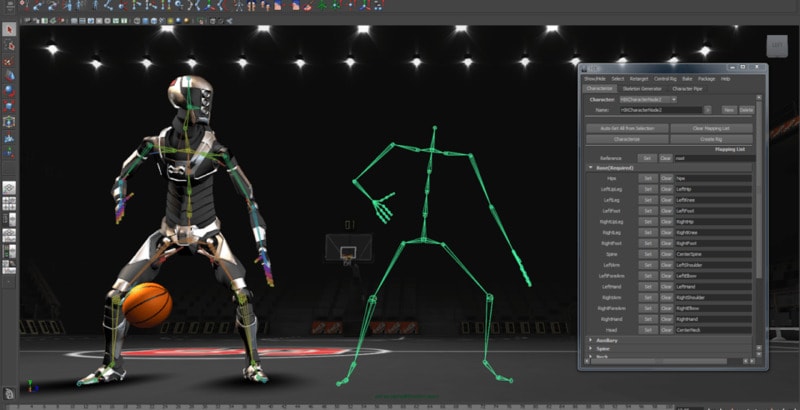
3D animation is a graphic design technique that uses motions to bring props, characters, objects, etc., to life. For a long time, 3D animation has created TV shows, films, and games, but now it is widely used to create materials for businesses that help them advertise their services and products. The most common usage of 3D animation is creating three-dimensional moving objects and placing them in a digital environment. There is software used to generate these objects specifically for 3D animation with 3D animation courses online for free to learn how to use such software. This software helps 3D animators to create the illusion of movement needed to bring these objects to life.
As the popularity of 3D animation begins to grow, its usage also increases. 3D animation can be useful for the following:
● Many businesses use 3D animation for presentation and more examples and graphics.
● 3D animation is used in real estate as many apartment complexes use it to create interior and exterior renders for their properties. 3D animation allows renters or buyers to view the property without visiting it.
● 3D animation can also be valuable in the medical industry to create exciting graphics for presentation.
You can divide the process of 3D animation into three primary phases:
● Modeling: The modeling stage is how characters or objects get created. This stage can include scanning natural objects into a computer or using a modeling tool. Both methods are helpful and outstanding. When you scan real-world objects into your computer, it saves a lot of time; creating a model entirely by yourself using a tool will give you control over the entire look. Irrespective of the methods used, textures must be added to the character or objects before moving to the next stage.
● Animation and layout: At this stage, the created models are animated and positioned into a particular scene, first determining a layout by creating a set and adding objects into it. The characters and things must be animated by assigning animation variables, and then models within the scene can be given life through motion capture and keyframing.
● Rendering: This stage is where the scene generates into the finished image by using a specific software as the process of rendering cannot be handled by a typical computer
For learning 3D animation, practice, to make yourself perfect for getting your 3D animation as smooth and precise as you would like it to take some time. If your set goal is to create 3D characters, you first need to know how to recreate people in a digital form. According to the 3D animation forum, it takes at least eight months to learn how to animate if only you spend about three to four hours every day. It takes firm dedication to learn 3D animation and graphic design courses.
Part 2 Top 5 Programs for 3D Animation
Aside from the three basic phases involved in 3D animation, there are other individual steps that and needed in 3D animation and 3D animation graphic design courses which include:
● Step 1: creating the story and conceptualizing
● Step 2: making the 3D models
● Step 3: rigging, texturing, and animation
● Step 4: setting up the cameras and lightning
● Step 5: rendering
● Step 6: applying special effects and compositing
● Step 7: editing, music, and Foley
● Step 8: the final output
The best part of 3D animation is finding free animation programs without watermarks that are very useful for creating content on Windows and Mac. These best 3D animation courses include:
01Filmora
For Win 7 or later (64-bit)
For macOS 10.12 or later
Wondershare Filmora Video Editor is a straightforward and powerful animation software to create 3D animated text, shapes, elements, or transitions you want for your videos with its 800+ stunning effects. This software comes with a keyframing, green screen, video stabilization, color tuning, split and zoom, amongst others, that help you create precise and smooth animation effects. Filmora program works perfectly on your Windows and Mac computer.
02Blender
Blender is an open-source, powerful 3D animation software for professional users. This animation software does not easily make an image and mission since it focuses on 3D. It takes your animation projects to a whole new level as this program works perfectly on your Mac computer.
03DAZ Studio
DAZ Studio is a potent and completely free tool for 3D animation creation that lets you create short videos whether you are using this for pleasure or business. This 3D animation creator is complicated to use, and 3D effects are at the core focus of this software. This software is highly compatible with Windows 64 bit, and you can build a model, render, and pose animation within the skin texture level.
04Terragen

Terragen is a completely free 3D animation program for Windows tablets and computers. It allows you to create a photo-realistic CG environment and 3D animation that you want. The featured image gallery on this software homepage will give you a profound idea of the outcome when you use the program.
05Anim8or
Anim8or Easy free 3D animation program supports 3D modeler and Truetype fonts to meet your advanced needs. This program is difficult for beginners but allows you to create a unique work according to your needs.
Part 3 The Best 10 Online Courses to Learn 3D Animation for Beginners
There are online 3D animation courses for beginners to learn from and these courses include:
01Introduction to Voxel Art for Character Design by Zach Soares
Price: $12.99
Certificate: Available upon completion of the course
02Psychedelic Animation with Photoshop and After Effects by Klarens Malluta
Price: $10.99
Certificate: Available upon completion of the course
032D and 3D Animation with After Effects and Cinema 4D by Andrea Gendusa
Price: $12.99
Certificate: Available upon completion of the course
04Blender for Beginners by Carlos Sifuentes Haro
Price: $9.99
Certificate: Available upon completion of the course
05Adobe After Effects for Beginners by Manuel Neto
Price: $9.99
Certificate: Available upon completion of the course
06Animation for Typographic Compositions by Holke 79
Price: $12.99
Certificate: Available upon completion of the course
07Adobe After Effects for Character Animation By Facundo López
Price: $9.99
Certificate: Available upon completion of the course
08Animation Techniques with 3D Effects in After Effects by Moncho Massé
Price: $10.99
Certificate: Available upon completion of the course
093D Typography: Playing with Color and Volume by Thomas Burden
Price: $12.99
Certificate: Available upon completion of the course
103D Animation for Non Animators with Cinema 4D by Zigor Samaniego

Price: $11.99
Certificate: Certificate upon completion of the course
Part 4 Part 4 Recommended 3D Animation Learning Books and Resources
Learn 3D animation with the best 3D animation courses, learning books, and resources. Books and Resources for learning 3D animation include but are not limited to:
● 3D Animation Essentials by Andy Beane
3D Animation Essentials by Andy Beane is a comprehensive book on the fundamentals and principles of 3D animation for films and video games.
● 3D Art Essential by Ami Chopine
3D Art Essential by Ami Chopine is all about the hows and whys of 3D animation and teachers why certain techniques and styles work for a particular project.
● Key Takeaways from This Episode →
● Understanding 3D Animation
● Top 5 Programs used for learning 3D Animation
● The Best 10 Online 3D Animation Courses for Beginners
● 3D Animation Graphic Design Courses, Learning Books and Resources
“I am still finding it difficult to go into animation even after covering some basic concepts of animation, hardware, software, books, and courses. Is there a way I can learn 3D animation and graphic design courses quickly and easily?”
This guide will show you what professional 3D animators go through and share how you can start your animation career. Sit back and enjoy this all-encompassing and educating guide to learn 3D Animation for beginners!
In this article
01 [Should You Study 3D Animation?](#Part 1)
02 [Top 5 Programs for 3D Animation](#Part 2)
03 [The Best 10 Online Courses to Learn 3D Animation for Beginners](#Part 3)
04 [Recommended 3D Animation Learning Books and Resources](#Part 4)
Part 1 Should You Study 3D Animation?
3D animation is a graphic design technique that uses motions to bring props, characters, objects, etc., to life. For a long time, 3D animation has created TV shows, films, and games, but now it is widely used to create materials for businesses that help them advertise their services and products. The most common usage of 3D animation is creating three-dimensional moving objects and placing them in a digital environment. There is software used to generate these objects specifically for 3D animation with 3D animation courses online for free to learn how to use such software. This software helps 3D animators to create the illusion of movement needed to bring these objects to life.
As the popularity of 3D animation begins to grow, its usage also increases. 3D animation can be useful for the following:
● Many businesses use 3D animation for presentation and more examples and graphics.
● 3D animation is used in real estate as many apartment complexes use it to create interior and exterior renders for their properties. 3D animation allows renters or buyers to view the property without visiting it.
● 3D animation can also be valuable in the medical industry to create exciting graphics for presentation.
You can divide the process of 3D animation into three primary phases:
● Modeling: The modeling stage is how characters or objects get created. This stage can include scanning natural objects into a computer or using a modeling tool. Both methods are helpful and outstanding. When you scan real-world objects into your computer, it saves a lot of time; creating a model entirely by yourself using a tool will give you control over the entire look. Irrespective of the methods used, textures must be added to the character or objects before moving to the next stage.
● Animation and layout: At this stage, the created models are animated and positioned into a particular scene, first determining a layout by creating a set and adding objects into it. The characters and things must be animated by assigning animation variables, and then models within the scene can be given life through motion capture and keyframing.
● Rendering: This stage is where the scene generates into the finished image by using a specific software as the process of rendering cannot be handled by a typical computer
For learning 3D animation, practice, to make yourself perfect for getting your 3D animation as smooth and precise as you would like it to take some time. If your set goal is to create 3D characters, you first need to know how to recreate people in a digital form. According to the 3D animation forum, it takes at least eight months to learn how to animate if only you spend about three to four hours every day. It takes firm dedication to learn 3D animation and graphic design courses.
Part 2 Top 5 Programs for 3D Animation
Aside from the three basic phases involved in 3D animation, there are other individual steps that and needed in 3D animation and 3D animation graphic design courses which include:
● Step 1: creating the story and conceptualizing
● Step 2: making the 3D models
● Step 3: rigging, texturing, and animation
● Step 4: setting up the cameras and lightning
● Step 5: rendering
● Step 6: applying special effects and compositing
● Step 7: editing, music, and Foley
● Step 8: the final output
The best part of 3D animation is finding free animation programs without watermarks that are very useful for creating content on Windows and Mac. These best 3D animation courses include:
01Filmora
For Win 7 or later (64-bit)
For macOS 10.12 or later
Wondershare Filmora Video Editor is a straightforward and powerful animation software to create 3D animated text, shapes, elements, or transitions you want for your videos with its 800+ stunning effects. This software comes with a keyframing, green screen, video stabilization, color tuning, split and zoom, amongst others, that help you create precise and smooth animation effects. Filmora program works perfectly on your Windows and Mac computer.
02Blender
Blender is an open-source, powerful 3D animation software for professional users. This animation software does not easily make an image and mission since it focuses on 3D. It takes your animation projects to a whole new level as this program works perfectly on your Mac computer.
03DAZ Studio
DAZ Studio is a potent and completely free tool for 3D animation creation that lets you create short videos whether you are using this for pleasure or business. This 3D animation creator is complicated to use, and 3D effects are at the core focus of this software. This software is highly compatible with Windows 64 bit, and you can build a model, render, and pose animation within the skin texture level.
04Terragen
Terragen is a completely free 3D animation program for Windows tablets and computers. It allows you to create a photo-realistic CG environment and 3D animation that you want. The featured image gallery on this software homepage will give you a profound idea of the outcome when you use the program.
05Anim8or
Anim8or Easy free 3D animation program supports 3D modeler and Truetype fonts to meet your advanced needs. This program is difficult for beginners but allows you to create a unique work according to your needs.
Part 3 The Best 10 Online Courses to Learn 3D Animation for Beginners
There are online 3D animation courses for beginners to learn from and these courses include:
01Introduction to Voxel Art for Character Design by Zach Soares
Price: $12.99
Certificate: Available upon completion of the course
02Psychedelic Animation with Photoshop and After Effects by Klarens Malluta
Price: $10.99
Certificate: Available upon completion of the course
032D and 3D Animation with After Effects and Cinema 4D by Andrea Gendusa
Price: $12.99
Certificate: Available upon completion of the course
04Blender for Beginners by Carlos Sifuentes Haro
Price: $9.99
Certificate: Available upon completion of the course
05Adobe After Effects for Beginners by Manuel Neto
Price: $9.99
Certificate: Available upon completion of the course
06Animation for Typographic Compositions by Holke 79
Price: $12.99
Certificate: Available upon completion of the course
07Adobe After Effects for Character Animation By Facundo López
Price: $9.99
Certificate: Available upon completion of the course
08Animation Techniques with 3D Effects in After Effects by Moncho Massé
Price: $10.99
Certificate: Available upon completion of the course
093D Typography: Playing with Color and Volume by Thomas Burden
Price: $12.99
Certificate: Available upon completion of the course
103D Animation for Non Animators with Cinema 4D by Zigor Samaniego
Price: $11.99
Certificate: Certificate upon completion of the course
Part 4 Part 4 Recommended 3D Animation Learning Books and Resources
Learn 3D animation with the best 3D animation courses, learning books, and resources. Books and Resources for learning 3D animation include but are not limited to:
● 3D Animation Essentials by Andy Beane
3D Animation Essentials by Andy Beane is a comprehensive book on the fundamentals and principles of 3D animation for films and video games.
● 3D Art Essential by Ami Chopine
3D Art Essential by Ami Chopine is all about the hows and whys of 3D animation and teachers why certain techniques and styles work for a particular project.
● Key Takeaways from This Episode →
● Understanding 3D Animation
● Top 5 Programs used for learning 3D Animation
● The Best 10 Online 3D Animation Courses for Beginners
● 3D Animation Graphic Design Courses, Learning Books and Resources
8 Top Motion Graphics Online Tools for Your Inspiration
8 Best Motion Graphics Online Tools for Your Inspiration
An easy yet powerful editor
Numerous effects to choose from
Detailed tutorials provided by the official channel
Are you looking for the correct answers about what is motion graphics or how to create motion graphics? If yes, then you are at the right place.
Here we will discuss about few best motion graphics online websites and how to create motion graphics video.
In this article
01 [The Power of Motion Graphics](#Part 1)
02 [Motion Graphics Online Courses You Should Learn](#Part 2)
03 [How to Make Motion Graphics in 5 Steps Easily?](#Part 3)
04 [How to Make a Studio-quality Motion Graphics Video](#Part 4)
Part 1 The Power of Motion Graphics
Motion graphics is actually a term which is generally used to describe the mix up of the animation and the graphic designs. People usage the motion graphics in the emotions videos and market their products as well. Motion graphics with the video on the landing page of your website increases the conversion rate by 8as compared to the other methods. Motion graphic videos of your products can simply display the idea of your business within few seconds to the target audience. The biggest reason of using the motion graphics now a day is that motions graphics can quickly the critical or complex business things in few seconds with the fast, simple and compelling way.
Part 2 Motion Graphics Online Courses You Should Learn
If you are newbie to the motion graphics then there are thousands of courses available over the internet which can help you to learn what motion graphic is and how to create your own motion graphic videos of your product and services. Here we are going to list a few courses.
01Creative Coding: Making Visuals with JavaScript
This is the first course which is mainly designed to learn to make the beautiful visuals using the JavaScript. This course is designed by Bruno Imbrizi. In this course you can also explore the coding fundamentals very easily. You can learn the things you need to setup before the programming concepts such as loops, arrays, variables and functions.

02Psychedelic Animation with Photoshop and After Effects
This motion graphics online course is designed by the Klarens Malluta which helps you to understand the aspect of Photoshop to create the beautiful motion graphic videos. Here, you can easily learn about creating colorful psychedelic animation for your motion graphics. With this course you can easily turn the simple photos in the retro futuristic artwork and connect the emotions of the target audience.

03Introduction to Design and Modeling with Blender
This motion graphics video course is presented by the Luis Arizaga which defines the making of characters and the designs in your videos. This course mainly focuses on the blender software which helps you to create powerful animate videos using the render, light, model and the other objects. This course also tells you that how to use the camera lights and create the materials for your motion graphic videos.

04Express Animation for Social Media with After Effects
This course is provided by the Yimbo Escárrega over the internet. With the help of this course you can learn about making your motion graphic online projects quickly in the record time to save your time. While learning this course you can create the beautiful animations quickly and easily with the graphics as well as the video content.

05#Creation of Animated Short Films in for Social Media
The creation of animated short films in for the social media course is presented by the Buda.tv which mainly helps you to learn creating the animated short films for your projects. This helps you to learn the concept from the starting to the end so you can easily understand the basic concepts as well as up to the execution of your video. This course starts with the meeting with Martin and Dalmiro who are the founders of the Buda.TV. Slowly they will start teaching you short films and finally you will be able to export the project with the specification provided by the Martin and Dalmiro.

Part 3 How to Make Motion Graphics in 5 Steps Easily?
Creating motion graphic videos requires you to have lots of designing skills without using any software. In the software’s generally there are premade templates available for mostly all kinds of categories. You can use them and directly apply with your videos with just few changes. If you are still unsure about how to start then you can follow the below steps in this part.
01Things to Prepare before Starting
● First of all you need to start with a creative story. This will help your animator and writer to understand their job easily. Make sure to include all information in the story.
● Make sure to hire a good promotion team in the starting itself because it will help you to get the view of your videos as much as you want.
Now, if you ready then please follow the below steps.
02Steps of Making Motion Graphics
Step 1 Write your Script with a Story
If you want to create good motion graphics video then the story is the first requirement for your motion graphic video. Make sure to choose a short story which defines and clear the motive of video. Mostly stories will be from the seconds to 3 minutes.
Step 2 Prepare for Storyboard for Visualize the Content
Now, you need to prepare the story with the help of your team members of the production and design team. This is the step where the final product will take place. In this step if you have any confusion then you must discuss it with the team because this is very important part of your motion graphic video.
Step 3 Turn your Creative Storyboard in the Design:
At this stage you can now turn your storyboard idea in the design. Here you have to choose the graphic designs of your video, style and color combination for your video. The best thing is that you can choose simple design because it gives a great impact on the video you are creating for your brand.
Once you are ready with the sketches of the storyboard you can easily translate the storyboard in the design what you want. Make sure to keep the things perfect because at this stage every effort will be for the final design.
Step 4 Create the Final Motion Graphic Video Design:
This stage is where you will start animating your designs to make to actual motion graphic video. Here, you need to take care about lots of things such as the style of animation in video, timing, music and the sound effects.
Part 4 How to Make a Studio-quality Motion Graphics Video
Wondershare Filmora Video Editor
Wondershare Filmora is motion graphics maker software which enables you to create best and perfect motion graphics videos within few seconds with the help of premade templates offered in the software. This program comes with the beautiful interface which is very easy to understand for all users and everyone can videos without any effort even if you are newbie to the animation industry. The program comes with several unique features such as motion tracking, key framing, color matching, audio ducking, green screen, split screen, video effects, audio effects and many more other features.
Wondershare Filmora - Best Video Editor for Mac/Windows
5,481,435 people have downloaded it.
Build unique custom animations without breaking a sweat.
Focus on creating epic stories and leave the details to Filmora’s auto features.
Start a creative adventure with drag & drop effects and endless possibilities.
Filmora simplifies advanced features to save you time and effort.
Filmora cuts out repetition so you can move on to your next creative breakthrough.
● Key Takeaways from This Episode →
● Generally, creating motion graphics videos for your products or services requires lots of efforts when you are going to create them first time. It takes lots of time and research for making the motion graphic videos.
● If you want to save your time and create the award winning motion graphic videos then we would like you to try the Wondershare Filmora because it quickly create best and perfect videos for your product or services promotions.
Are you looking for the correct answers about what is motion graphics or how to create motion graphics? If yes, then you are at the right place.
Here we will discuss about few best motion graphics online websites and how to create motion graphics video.
In this article
01 [The Power of Motion Graphics](#Part 1)
02 [Motion Graphics Online Courses You Should Learn](#Part 2)
03 [How to Make Motion Graphics in 5 Steps Easily?](#Part 3)
04 [How to Make a Studio-quality Motion Graphics Video](#Part 4)
Part 1 The Power of Motion Graphics
Motion graphics is actually a term which is generally used to describe the mix up of the animation and the graphic designs. People usage the motion graphics in the emotions videos and market their products as well. Motion graphics with the video on the landing page of your website increases the conversion rate by 8as compared to the other methods. Motion graphic videos of your products can simply display the idea of your business within few seconds to the target audience. The biggest reason of using the motion graphics now a day is that motions graphics can quickly the critical or complex business things in few seconds with the fast, simple and compelling way.
Part 2 Motion Graphics Online Courses You Should Learn
If you are newbie to the motion graphics then there are thousands of courses available over the internet which can help you to learn what motion graphic is and how to create your own motion graphic videos of your product and services. Here we are going to list a few courses.
01Creative Coding: Making Visuals with JavaScript
This is the first course which is mainly designed to learn to make the beautiful visuals using the JavaScript. This course is designed by Bruno Imbrizi. In this course you can also explore the coding fundamentals very easily. You can learn the things you need to setup before the programming concepts such as loops, arrays, variables and functions.
02Psychedelic Animation with Photoshop and After Effects
This motion graphics online course is designed by the Klarens Malluta which helps you to understand the aspect of Photoshop to create the beautiful motion graphic videos. Here, you can easily learn about creating colorful psychedelic animation for your motion graphics. With this course you can easily turn the simple photos in the retro futuristic artwork and connect the emotions of the target audience.
03Introduction to Design and Modeling with Blender
This motion graphics video course is presented by the Luis Arizaga which defines the making of characters and the designs in your videos. This course mainly focuses on the blender software which helps you to create powerful animate videos using the render, light, model and the other objects. This course also tells you that how to use the camera lights and create the materials for your motion graphic videos.
04Express Animation for Social Media with After Effects
This course is provided by the Yimbo Escárrega over the internet. With the help of this course you can learn about making your motion graphic online projects quickly in the record time to save your time. While learning this course you can create the beautiful animations quickly and easily with the graphics as well as the video content.
05#Creation of Animated Short Films in for Social Media
The creation of animated short films in for the social media course is presented by the Buda.tv which mainly helps you to learn creating the animated short films for your projects. This helps you to learn the concept from the starting to the end so you can easily understand the basic concepts as well as up to the execution of your video. This course starts with the meeting with Martin and Dalmiro who are the founders of the Buda.TV. Slowly they will start teaching you short films and finally you will be able to export the project with the specification provided by the Martin and Dalmiro.
Part 3 How to Make Motion Graphics in 5 Steps Easily?
Creating motion graphic videos requires you to have lots of designing skills without using any software. In the software’s generally there are premade templates available for mostly all kinds of categories. You can use them and directly apply with your videos with just few changes. If you are still unsure about how to start then you can follow the below steps in this part.
01Things to Prepare before Starting
● First of all you need to start with a creative story. This will help your animator and writer to understand their job easily. Make sure to include all information in the story.
● Make sure to hire a good promotion team in the starting itself because it will help you to get the view of your videos as much as you want.
Now, if you ready then please follow the below steps.
02Steps of Making Motion Graphics
Step 1 Write your Script with a Story
If you want to create good motion graphics video then the story is the first requirement for your motion graphic video. Make sure to choose a short story which defines and clear the motive of video. Mostly stories will be from the seconds to 3 minutes.
Step 2 Prepare for Storyboard for Visualize the Content
Now, you need to prepare the story with the help of your team members of the production and design team. This is the step where the final product will take place. In this step if you have any confusion then you must discuss it with the team because this is very important part of your motion graphic video.
Step 3 Turn your Creative Storyboard in the Design:
At this stage you can now turn your storyboard idea in the design. Here you have to choose the graphic designs of your video, style and color combination for your video. The best thing is that you can choose simple design because it gives a great impact on the video you are creating for your brand.
Once you are ready with the sketches of the storyboard you can easily translate the storyboard in the design what you want. Make sure to keep the things perfect because at this stage every effort will be for the final design.
Step 4 Create the Final Motion Graphic Video Design:
This stage is where you will start animating your designs to make to actual motion graphic video. Here, you need to take care about lots of things such as the style of animation in video, timing, music and the sound effects.
Part 4 How to Make a Studio-quality Motion Graphics Video
Wondershare Filmora Video Editor
Wondershare Filmora is motion graphics maker software which enables you to create best and perfect motion graphics videos within few seconds with the help of premade templates offered in the software. This program comes with the beautiful interface which is very easy to understand for all users and everyone can videos without any effort even if you are newbie to the animation industry. The program comes with several unique features such as motion tracking, key framing, color matching, audio ducking, green screen, split screen, video effects, audio effects and many more other features.
Wondershare Filmora - Best Video Editor for Mac/Windows
5,481,435 people have downloaded it.
Build unique custom animations without breaking a sweat.
Focus on creating epic stories and leave the details to Filmora’s auto features.
Start a creative adventure with drag & drop effects and endless possibilities.
Filmora simplifies advanced features to save you time and effort.
Filmora cuts out repetition so you can move on to your next creative breakthrough.
● Key Takeaways from This Episode →
● Generally, creating motion graphics videos for your products or services requires lots of efforts when you are going to create them first time. It takes lots of time and research for making the motion graphic videos.
● If you want to save your time and create the award winning motion graphic videos then we would like you to try the Wondershare Filmora because it quickly create best and perfect videos for your product or services promotions.
Also read:
- New 5 Different Animation Styles A Simple but Comprehensive Guide for 2024
- Updated 10 Cartoon Canvas Painting Ideas for Total Beginners
- Top 10 Sketch Animation Video Makers for 2024
- Updated 15 Top Collage Makers to Create Aesthetic Collages
- New 10 Best Convert Video Between GIF Software High Quality for 2024
- 2024 Approved Samples of Cartoon Character Face
- 2024 Approved OBS Animated Lower Thirds Alternatives
- Updated All About 3D Medical Animation And Its Uses
- Updated In 2024, How to Make a Video a Live Photo 2023
- Updated In 2024, The Best 10 Sketch Animation Video Makers
- Updated 15 Types of Cartoon Drawing Styles Examples for 2024
- New 2024 Approved Amazing Techniques of Motion Graphics in Premiere Pro
- Updated 21 Top Free Anime Websites to Watch Anime Online-Anime
- New 2024 Approved Little Known Techniques of Motion Graphics in Premiere Pro
- New 2024 Approved What Wikipedia Wont Tell You About Character Rigging
- New Animate Your Photo Online with These Awesome Tools
- In 2024, How to Use Pokémon Emerald Master Ball Cheat On Oppo A18 | Dr.fone
- Gmail Not Working on Samsung Galaxy S23 Ultra 7 Common Problems & Fixes | Dr.fone
- In 2024, How I Transferred Messages from Xiaomi Redmi 12 5G to iPhone 12/XS (Max) in Seconds | Dr.fone
- Ultimate Guide from Itel A70 FRP Bypass
- In 2024, How Many Attempts To Unlock Apple iPhone XR
- Top 10 Fixes for Phone Keep Disconnecting from Wi-Fi On Tecno Phantom V Flip | Dr.fone
- A Perfect Guide To Remove or Disable Google Smart Lock On Poco X5
- In 2024, Troubleshooting Error Connecting to the Apple ID Server From iPhone 11
- How to identify missing or malfunctioning drivers with Windows Device Manager in Windows 11 & 10
- How to Recover Deleted Data from iPhone 15 Pro Max using Stellar Data Recovery for iPhone? | Stellar
- How To Unbrick a Dead Samsung Galaxy S24 | Dr.fone
- In 2024, How Do You Remove Restricted Mode on Apple iPhone SE (2022) | Dr.fone
- In 2024, Change Location on Yik Yak For your Apple iPhone 8 to Enjoy More Fun | Dr.fone
- New Multiple Ways How To Remove iCloud Activation Lock On your Apple iPhone SE (2020)
- In 2024, How to Mirror Your Asus ROG Phone 8 Pro Screen to PC with Chromecast | Dr.fone
- Title: New Top 8 Tools Tell You How to Make Slideshows for Instagram for 2024
- Author: Elon
- Created at : 2024-05-19 03:05:53
- Updated at : 2024-05-20 03:05:53
- Link: https://animation-videos.techidaily.com/new-top-8-tools-tell-you-how-to-make-slideshows-for-instagram-for-2024/
- License: This work is licensed under CC BY-NC-SA 4.0.
