
:max_bytes(150000):strip_icc():format(webp)/GettyImages-944229620-9cff560054804b72a431e9492c7445b4.jpg)
New Ways You Can Master to Find 10 Best Free Animated Text Generator for 2024
Ways You Can Master to Find 10 Best Free Animated Text Generator
Ways You Can Master to Find 10 Best Free Animated Text Generator
An easy yet powerful editor
Numerous effects to choose from
Detailed tutorials provided by the official channel
We’ve compiled a list of some of the best text animation software and tools out there!
One for general, animated text generators, and the other for online text gif maker tools. Pick whichever suits your project and start working on a more professional look today.
In this article
01 [10 Best Animated Text Generators for 2021](#Part 1)
02 [8 Best Online Text GIF Generators to Make Animated Word GIFs](#Part 2)
03 [How to Use an Animated Text Generator to Make Stunning Videos?](#Part 3)
Part 1 10 Best Animated Text Generators for 2021
For our first list, as promised, we’ve compiled a list of some of the best-animated text generators for 2021. This is a general list of text animation software that you have to either download or install to use! If you want the online text animation maker list, that would be the one after this!
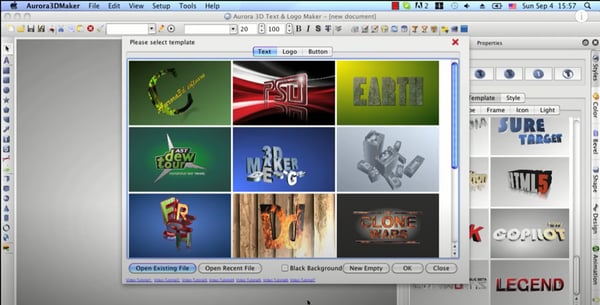
01Aurora: 3D Text Logo Maker
PRICE: FREE!
RATING: 4.5/5
The first animated text generator on our list is Aurora 3D. Aurora offers several different products, but the one that we’re focusing on today is their 3D Text & Logo maker, which you can use to create some pretty advanced text animations with no sweat (as well as logos, of course, as the name implies)! The software is available for both Mac and Windows OS computers and desktops.
02Animaker
PRICE: Basic Plan = $10 per month!
RATING: 4.9/5
If you’re looking for a more modern text animation maker, then Animaker might just be the one that you want! With this, you can create your 3D text animations from scratch, or choose from the dozens of templates and presets that they have for text, animated characters, icons, and other properties. This is more of a video editor than a strict text tool, but we thought it was important to give you a good variety. It’s also not FREE, but you can try it for free for a time so that you can check if it’s the one for you.

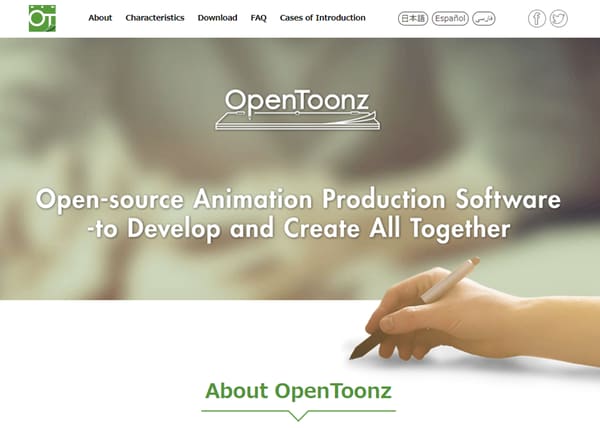
03OpenToonz
PRICE: Free
RATING: 4/5
OpenToonz is a free text animation software that you can use for both basic and advanced 2D animation. It comes in several different languages (including Spanish and Japanese) and is very useful for creating simple text animation from scratch — no complicated tools. Just create and go! (It is also available in both Mac and Windows!)
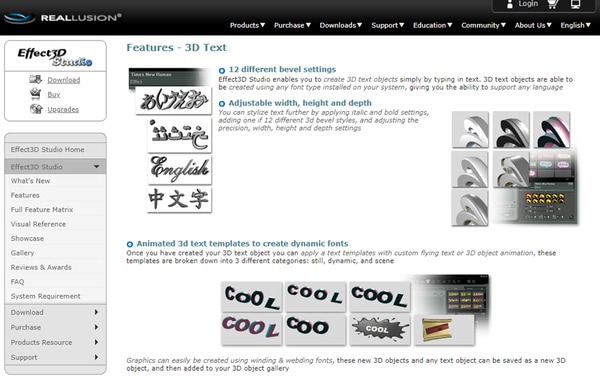
04Reallusion
PRICE: Free
RATING: 4/5
Reallusion is another open-source text gif maker that you can use if you’re looking for something quick-and-easy. It supports a ton of different fonts, as well as ways to control the width, height, dimension, and style of every single object inside of their 3D properties gallery — giving you a lot of options for customization without any added cost!
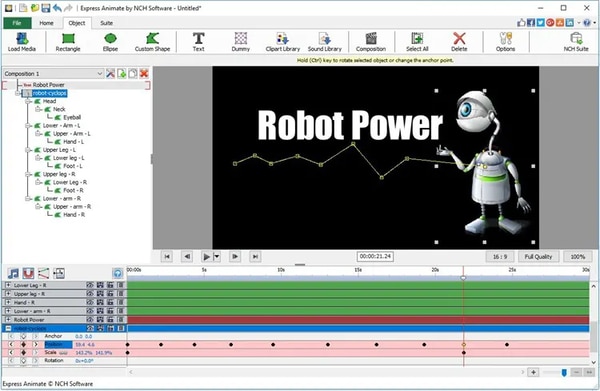
05Express Animate
PRICE: $60 (full license)
RATING: 4/5
Express Animate, just like Open Toonz, it is more of an animation tool than one strictly created for text animation. However, it does work for that purpose as well. So, if you’re willing to pay for the full license (which will cost $60), it could be a fairly good tool for you. Especially if you’re interested in trying out more complex animations in the future.
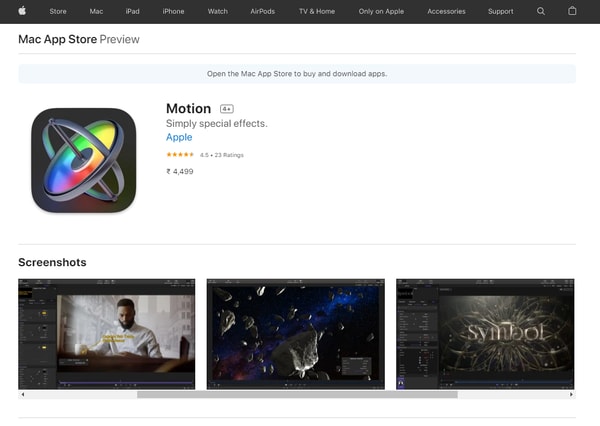
06Motion
PRICE: $47
RATING: 3.9/5
Motion is a Mac-only software. It is, just like some of the other options on this list, a great option for those looking for a tool that can help them with general animations (not just text animation — although it provides tools for that as well). The best part of Motion is undoubtedly its graphic library, where you have access to a ton of different presets and templates that you can use to simplify your text-animation-making.
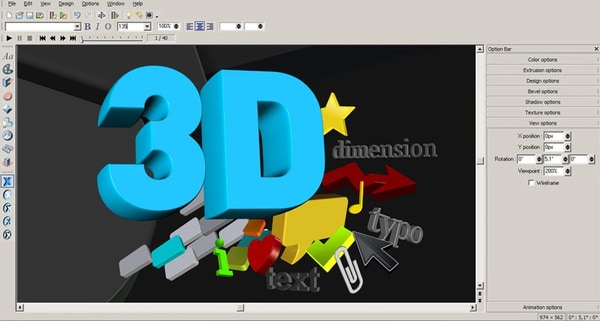
07Xara 3D Maker
PRICE: $39.99
RATING: 3.9/5
Xara is another one of our paid options. It also comes complete with a range of different templates and presets that you can use in order to simplify your animation-generating. And, if you end up disliking the product after you try it, they do offer a 30-day money-back guarantee that you can take advantage of to make sure that you get the most out of your purchase.
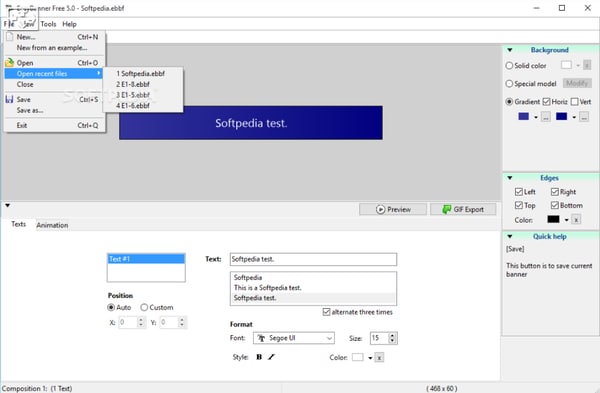
08Easy Banner
PRICE: FREE
RATING: 3.5/5
Easy Banner is a free animated text-banner-making software. It’s only available in Windows, and its uses are limited to created banners. However, if that’s what you’re looking for? Then there’s no reason not to try it out! Especially since it’s free, and it comes with some pretty advanced customization options for getting the exact look that you want on your text banners.
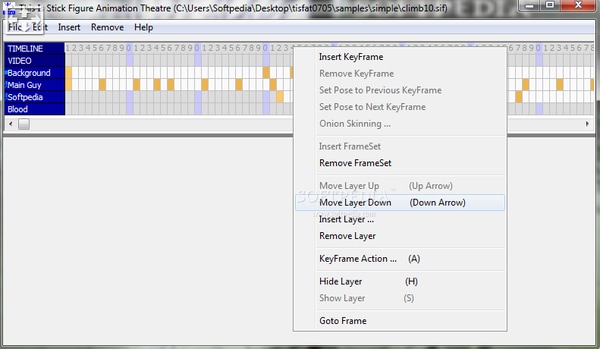
09Falco GIF Animator
PRICE: FREE
RATING: 3.5/5
Falco Gif Animator is from the same creators of the previous item on this list (Softpedia!) The two offer similar tools, but for different purposes. Whilst the previous tool was for the creation of animated-text banners, this one is a GIF maker for icons, cursors, logos, etc. It’s also FREE! So, if the project you’re working on is applicable to its available features? Then you should definitely try it!

10TISFAT
PRICE: Free
RATING: 3/5
TISFAT is the last of the tools that we have for you. It’s an open-source stick animation tool that you can use to create text animations in whatever style or format that you desire. Making it more customizable than some of the other Softpedia options we just introduced, but still, one to consider based on your own circumstances.
Part 2 8 Best Online Text GIF Generators to Make Animated Word GIFs
And so, we move on to our next list! Here’s where we introduce online solutions for animated text generation needs! So, all the tools on this list will not require any downloading, but they will require that you have internet while working!
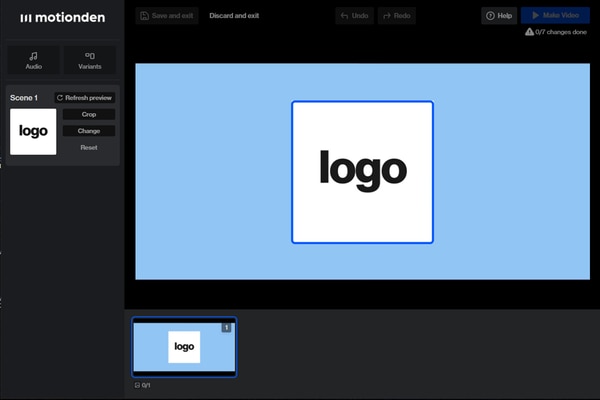
01MotionDen
| PROS | CONS |
|---|---|
| ● FREE version available● Large resources library● Easy-to-use video templates | ● Must upgrade to the premium version to export high-quality projects without a watermark.● The FREE version has a 5-video limit (you cannot work on any more projects than that).● Difficult to use for creating text animation from scratch. |
RATING: 4.8/5
MotionDen is a good entry point for text animation online solutions! It comes with tons of different templates that you can choose from to start working on your project immediately. MotionDen also offers a free version that you can test out for a limited number of times (one that gives you access to all their tools and their large resource library). So, you can decide to upgrade to their premium version whenever you want to (which will cost you around $29 per month!)
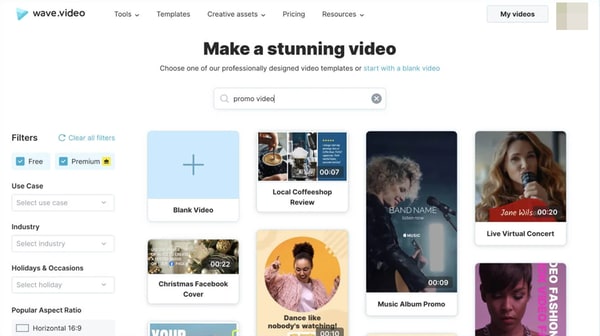
02Wave.Video
| PROS | CONS |
|---|---|
| ● FREE version is available for trying out its tools.● Vast library of animation properties for you to play around with.● Vast library of animation properties for you to play around with. | ● FREE version limits the length of your projects to 15 seconds.● You can also only create five video projects with the free version.● You can also only create five video projects with the free version. |
RATING: 4.5/5
Wave.Video, just like MotionDen, is a freemium software. You can try it out for free and start using their online video editing tools immediately to create short promos, logos, text gifs, etc. If you want access to some of its more advanced tools, however, you’ll need to pay the premium price ($24-48), which, to you, may or may not be worth the vast library of polished animation properties.
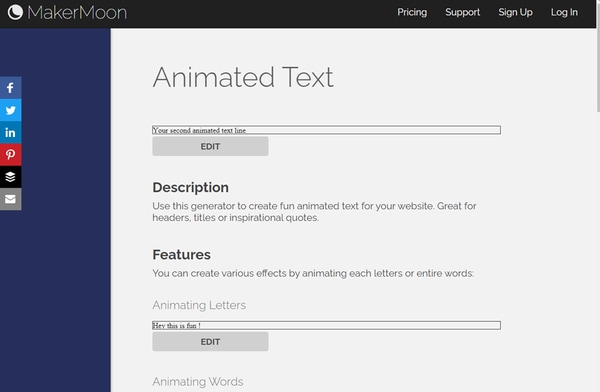
03MakerMoon
| PROS | CONS |
|---|---|
| ● Easy-to-use, and comes with templates and presets!● Advanced video editing tools that you can use to personalize your projects.● FREE plan is available. | ● The FREE version is limited in use.● You also cannot download high-quality projects without a watermark with the free version.● Basic animations only. |
RATING: 4.3/5
If you want to keep things simple, then MakerMoon might be your preferred choice for text animation. It is, like the previous picks, an online video maker, but one with the focus on creating text-centric projects, which you can personalize in a number of ways to create logos, banners, short videos, gifs, etc.
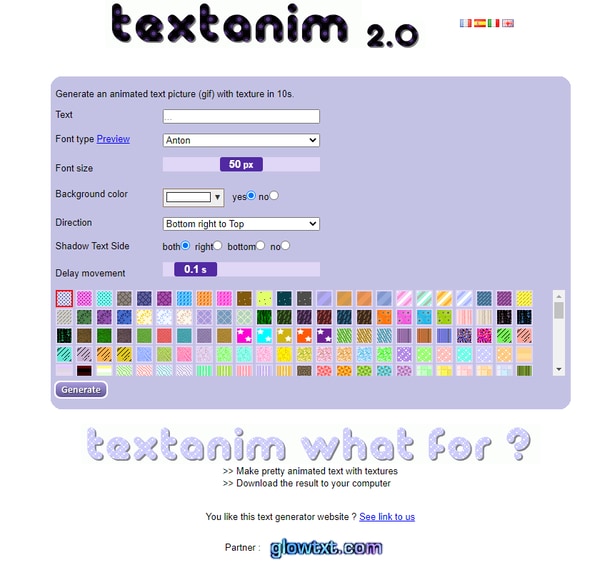
04Textanim
| PROS | CONS |
|---|---|
| ● FREE online GIF maker● A variety of different font style options● Animated Effects options | ● Output is GIF only.● Limited animations options.● Limited resource library. |
RATING: 4/5
Textanim is a very bubbly and glittery kind of gif-maker, made for a more specific kind of project. But, if it works, it works! Plus, it’s also the first completely FREE online gif maker on this list. So, you can test it out without having to make any commitments and use it literally anytime you feel like it. Unfortunately, though, it should be said that the animations here are mainly for effects (i.e., glowing, sparkling, etc.). The text won’t actually move. So, if that’s not what you’re looking for? Then it might not be for you.
05SnackThis
| PROS | CONS |
|---|---|
| ● FREE version for testing its tools and resources is available.● Lots of modern templates are available.● Editing tools for polishing projects. | ● If you’re using the FREE version, you will not be able to actually download your project.● You will also need to register to use it.● The customization options are limited. |
RATING: 4/5
SnackThis, unlike Textanim, is the type to cater to a wider array of users. Its templates are all very modern and professional-looking. So, if what you’re looking for is to create text banners, logos, icons, etc. for your business? Then this definitely is an option that you may want to consider. It’s pretty easy to use too! All you have to do is select the template that you want to use, and then edit it to match what you need.
06Animatron Studio
| PROS | CONS |
|---|---|
| ● More customizable functions.● Advanced video editing options.● Pre-made templates are available for easier animating. | ● FREE Version is limited.● Might be difficult for inexperienced animators.● Output formats are MP4 and GIF only. |
RATING: 3.9/5
Animatron Studio is the tool to use if what you’re looking for is customization. This tool is really better described as animation software, rather than a simple text generator. That means that you have more options than what you might see from other online text animation tools, but it also means that you’ll need to put in more effort to come up with a polished-looking end-product.

07Cool Text
| PROS | CONS |
|---|---|
| ● Easy and quick to use.● Various font customization options.● FREE to use. | ● Limited customizability.● Old-fashioned fonts. |
RATING: 3.5/5
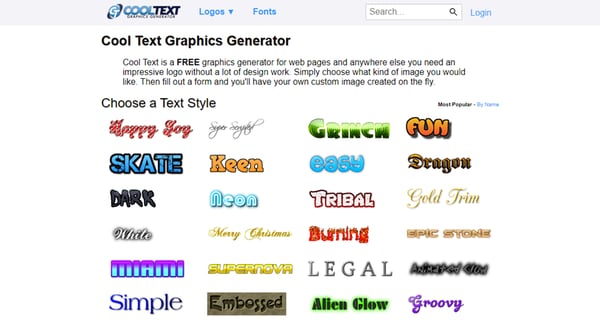
As a departure from the previous pick, we have Cool Text, which is its complete opposite! This is an older software and is definitely best described strictly as an animated text generator. With Cool Text, you can make logos or icons very easily. The options are, of course, more limited because of that, but it may very well be all you need based on the kind of project you’re working on.
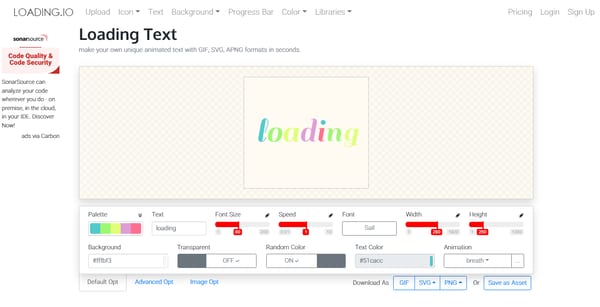
08Loading.io
| PROS | CONS |
|---|---|
| ● Lots of fonts customization options.● Three different output formats (svg., png., and gif).● Also pre-set animations to choose from. | ● The FREE version is limited.● It isn’t as advanced as some of the other tools on this list. |
RATING: 3.5/5
For our last online text animator, we have Loading.io. This one is a very simple, and very straightforward kind of tool. It’s also a freemium one, so you’ll have to pay in order to unlock some of its features, but it’s a solid contender for its customization tools, which gives a lot more options to choose from.
Part 3 How to Use an Animated Text Generator to Make Stunning Videos?
Now, if you need help making use of your finished animated text, icons, etc. Then you’ll probably need a video editor like Wondershare Filmora !
For Win 7 or later (64-bit)
For macOS 10.14 or later
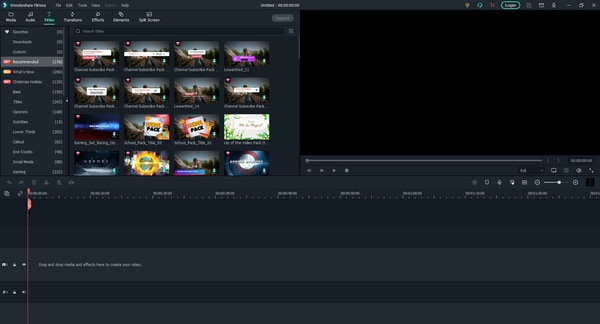
As you can see from the image shown above, Wondershare Filmora is a very sleek video editing software. It’s used by all sorts of professionals as well, as it comes with all kinds of resources and tools that you can use in order to create stunning videos (including, believe it or not, templates for animated text! So, if you want, you can even skip the animated text maker altogether and just get straight to using Filmora.)
Key Takeaways from This Episode
● There are various text animation generators in the market! Some of which you can download straight to your desktop or computer!
● There are also online GIF makers that you can use straight from your browser, leaving out all the hassle of having to download or install anything and helping you get straight to work!
● If you want to polish up your project some more, then consider using an advanced video editor like Filmora Pro to make sure that your work is sparkly clean!
We’ve compiled a list of some of the best text animation software and tools out there!
One for general, animated text generators, and the other for online text gif maker tools. Pick whichever suits your project and start working on a more professional look today.
In this article
01 [10 Best Animated Text Generators for 2021](#Part 1)
02 [8 Best Online Text GIF Generators to Make Animated Word GIFs](#Part 2)
03 [How to Use an Animated Text Generator to Make Stunning Videos?](#Part 3)
Part 1 10 Best Animated Text Generators for 2021
For our first list, as promised, we’ve compiled a list of some of the best-animated text generators for 2021. This is a general list of text animation software that you have to either download or install to use! If you want the online text animation maker list, that would be the one after this!
01Aurora: 3D Text Logo Maker
PRICE: FREE!
RATING: 4.5/5
The first animated text generator on our list is Aurora 3D. Aurora offers several different products, but the one that we’re focusing on today is their 3D Text & Logo maker, which you can use to create some pretty advanced text animations with no sweat (as well as logos, of course, as the name implies)! The software is available for both Mac and Windows OS computers and desktops.
02Animaker
PRICE: Basic Plan = $10 per month!
RATING: 4.9/5
If you’re looking for a more modern text animation maker, then Animaker might just be the one that you want! With this, you can create your 3D text animations from scratch, or choose from the dozens of templates and presets that they have for text, animated characters, icons, and other properties. This is more of a video editor than a strict text tool, but we thought it was important to give you a good variety. It’s also not FREE, but you can try it for free for a time so that you can check if it’s the one for you.
03OpenToonz
PRICE: Free
RATING: 4/5
OpenToonz is a free text animation software that you can use for both basic and advanced 2D animation. It comes in several different languages (including Spanish and Japanese) and is very useful for creating simple text animation from scratch — no complicated tools. Just create and go! (It is also available in both Mac and Windows!)
04Reallusion
PRICE: Free
RATING: 4/5
Reallusion is another open-source text gif maker that you can use if you’re looking for something quick-and-easy. It supports a ton of different fonts, as well as ways to control the width, height, dimension, and style of every single object inside of their 3D properties gallery — giving you a lot of options for customization without any added cost!
05Express Animate
PRICE: $60 (full license)
RATING: 4/5
Express Animate, just like Open Toonz, it is more of an animation tool than one strictly created for text animation. However, it does work for that purpose as well. So, if you’re willing to pay for the full license (which will cost $60), it could be a fairly good tool for you. Especially if you’re interested in trying out more complex animations in the future.
06Motion
PRICE: $47
RATING: 3.9/5
Motion is a Mac-only software. It is, just like some of the other options on this list, a great option for those looking for a tool that can help them with general animations (not just text animation — although it provides tools for that as well). The best part of Motion is undoubtedly its graphic library, where you have access to a ton of different presets and templates that you can use to simplify your text-animation-making.
07Xara 3D Maker
PRICE: $39.99
RATING: 3.9/5
Xara is another one of our paid options. It also comes complete with a range of different templates and presets that you can use in order to simplify your animation-generating. And, if you end up disliking the product after you try it, they do offer a 30-day money-back guarantee that you can take advantage of to make sure that you get the most out of your purchase.
08Easy Banner
PRICE: FREE
RATING: 3.5/5
Easy Banner is a free animated text-banner-making software. It’s only available in Windows, and its uses are limited to created banners. However, if that’s what you’re looking for? Then there’s no reason not to try it out! Especially since it’s free, and it comes with some pretty advanced customization options for getting the exact look that you want on your text banners.
09Falco GIF Animator
PRICE: FREE
RATING: 3.5/5
Falco Gif Animator is from the same creators of the previous item on this list (Softpedia!) The two offer similar tools, but for different purposes. Whilst the previous tool was for the creation of animated-text banners, this one is a GIF maker for icons, cursors, logos, etc. It’s also FREE! So, if the project you’re working on is applicable to its available features? Then you should definitely try it!
10TISFAT
PRICE: Free
RATING: 3/5
TISFAT is the last of the tools that we have for you. It’s an open-source stick animation tool that you can use to create text animations in whatever style or format that you desire. Making it more customizable than some of the other Softpedia options we just introduced, but still, one to consider based on your own circumstances.
Part 2 8 Best Online Text GIF Generators to Make Animated Word GIFs
And so, we move on to our next list! Here’s where we introduce online solutions for animated text generation needs! So, all the tools on this list will not require any downloading, but they will require that you have internet while working!
01MotionDen
| PROS | CONS |
|---|---|
| ● FREE version available● Large resources library● Easy-to-use video templates | ● Must upgrade to the premium version to export high-quality projects without a watermark.● The FREE version has a 5-video limit (you cannot work on any more projects than that).● Difficult to use for creating text animation from scratch. |
RATING: 4.8/5
MotionDen is a good entry point for text animation online solutions! It comes with tons of different templates that you can choose from to start working on your project immediately. MotionDen also offers a free version that you can test out for a limited number of times (one that gives you access to all their tools and their large resource library). So, you can decide to upgrade to their premium version whenever you want to (which will cost you around $29 per month!)
02Wave.Video
| PROS | CONS |
|---|---|
| ● FREE version is available for trying out its tools.● Vast library of animation properties for you to play around with.● Vast library of animation properties for you to play around with. | ● FREE version limits the length of your projects to 15 seconds.● You can also only create five video projects with the free version.● You can also only create five video projects with the free version. |
RATING: 4.5/5
Wave.Video, just like MotionDen, is a freemium software. You can try it out for free and start using their online video editing tools immediately to create short promos, logos, text gifs, etc. If you want access to some of its more advanced tools, however, you’ll need to pay the premium price ($24-48), which, to you, may or may not be worth the vast library of polished animation properties.
03MakerMoon
| PROS | CONS |
|---|---|
| ● Easy-to-use, and comes with templates and presets!● Advanced video editing tools that you can use to personalize your projects.● FREE plan is available. | ● The FREE version is limited in use.● You also cannot download high-quality projects without a watermark with the free version.● Basic animations only. |
RATING: 4.3/5
If you want to keep things simple, then MakerMoon might be your preferred choice for text animation. It is, like the previous picks, an online video maker, but one with the focus on creating text-centric projects, which you can personalize in a number of ways to create logos, banners, short videos, gifs, etc.
04Textanim
| PROS | CONS |
|---|---|
| ● FREE online GIF maker● A variety of different font style options● Animated Effects options | ● Output is GIF only.● Limited animations options.● Limited resource library. |
RATING: 4/5
Textanim is a very bubbly and glittery kind of gif-maker, made for a more specific kind of project. But, if it works, it works! Plus, it’s also the first completely FREE online gif maker on this list. So, you can test it out without having to make any commitments and use it literally anytime you feel like it. Unfortunately, though, it should be said that the animations here are mainly for effects (i.e., glowing, sparkling, etc.). The text won’t actually move. So, if that’s not what you’re looking for? Then it might not be for you.
05SnackThis
| PROS | CONS |
|---|---|
| ● FREE version for testing its tools and resources is available.● Lots of modern templates are available.● Editing tools for polishing projects. | ● If you’re using the FREE version, you will not be able to actually download your project.● You will also need to register to use it.● The customization options are limited. |
RATING: 4/5
SnackThis, unlike Textanim, is the type to cater to a wider array of users. Its templates are all very modern and professional-looking. So, if what you’re looking for is to create text banners, logos, icons, etc. for your business? Then this definitely is an option that you may want to consider. It’s pretty easy to use too! All you have to do is select the template that you want to use, and then edit it to match what you need.
06Animatron Studio
| PROS | CONS |
|---|---|
| ● More customizable functions.● Advanced video editing options.● Pre-made templates are available for easier animating. | ● FREE Version is limited.● Might be difficult for inexperienced animators.● Output formats are MP4 and GIF only. |
RATING: 3.9/5
Animatron Studio is the tool to use if what you’re looking for is customization. This tool is really better described as animation software, rather than a simple text generator. That means that you have more options than what you might see from other online text animation tools, but it also means that you’ll need to put in more effort to come up with a polished-looking end-product.
07Cool Text
| PROS | CONS |
|---|---|
| ● Easy and quick to use.● Various font customization options.● FREE to use. | ● Limited customizability.● Old-fashioned fonts. |
RATING: 3.5/5
As a departure from the previous pick, we have Cool Text, which is its complete opposite! This is an older software and is definitely best described strictly as an animated text generator. With Cool Text, you can make logos or icons very easily. The options are, of course, more limited because of that, but it may very well be all you need based on the kind of project you’re working on.
08Loading.io
| PROS | CONS |
|---|---|
| ● Lots of fonts customization options.● Three different output formats (svg., png., and gif).● Also pre-set animations to choose from. | ● The FREE version is limited.● It isn’t as advanced as some of the other tools on this list. |
RATING: 3.5/5
For our last online text animator, we have Loading.io. This one is a very simple, and very straightforward kind of tool. It’s also a freemium one, so you’ll have to pay in order to unlock some of its features, but it’s a solid contender for its customization tools, which gives a lot more options to choose from.
Part 3 How to Use an Animated Text Generator to Make Stunning Videos?
Now, if you need help making use of your finished animated text, icons, etc. Then you’ll probably need a video editor like Wondershare Filmora !
For Win 7 or later (64-bit)
For macOS 10.14 or later
As you can see from the image shown above, Wondershare Filmora is a very sleek video editing software. It’s used by all sorts of professionals as well, as it comes with all kinds of resources and tools that you can use in order to create stunning videos (including, believe it or not, templates for animated text! So, if you want, you can even skip the animated text maker altogether and just get straight to using Filmora.)
Key Takeaways from This Episode
● There are various text animation generators in the market! Some of which you can download straight to your desktop or computer!
● There are also online GIF makers that you can use straight from your browser, leaving out all the hassle of having to download or install anything and helping you get straight to work!
● If you want to polish up your project some more, then consider using an advanced video editor like Filmora Pro to make sure that your work is sparkly clean!
How to Make an Animated Travel Map Video?
How to Make an Animated Travel Map Video?

Benjamin Arango
Mar 27, 2024• Proven solutions
Animated travel map videos make it easy for the viewers to follow the routes from the source to destination locations right on the single screen. While the static maps would only allow the audience to see the markers from where the journey would start and is expected to end, the animated ones show the real-time movements and therefore look more interactive when viewed.
That said, here you will learn how to create an attractive and engaging animated travel map video using one of the easiest post-production applications, Wondershare Filmora, which is widely appreciated by amateurs and professionals throughout the globe. In another section, you will also learn about an alternative program that might be of some help in case you are more into online designing.
- Method 1: Make Animated Travel Map Videos with Location Video Maker - [Video Tutorial]
- Method 2: Make Interactive Animated Travel Map with Pictramap
- Method 3: Create Animated Travel Map Using Multidev
Method 1 Make Animated Travel Map Videos with Location Video Maker
The entire process of creating an animated travel map video in Wondershare’s Filmora is categorized into two parts, wherein the first part you will collect all the ingredients that are needed to get started, and in the second part you will actually make an animated map using the tools and features present in Filmora.
Watch a video tutorial to see how to make an animated map for a video:
For Win 7 or later (64-bit)
 Secure Download
For macOS 10.14 or later
Secure Download


Part 1: Prepare the Travel Map Materials
Following are the ingredients and the methods to collect them for animated travel map preparation:
Step 1: Get the Map
The first thing that you would need to prepare an animated map is an image of a realistic map. Thanks to Google and Microsoft, these things are now pretty easy to arrange. The process is given below:
- Launch your preferred web browser
- Type google.com in the address bar or the search box and hit Enter
- Scroll to zoom out so you can see the entire world map on one screen

- Type Snipping Tool in the Cortana search box present on the left side of the Taskbar
- Launch Snipping Tool, and use it to capture the screenshot of the map
Note: Snipping Tool is a built-in app in Windows 10 and is available for free. If you are using any other operating system, or have a different program to capture the screenshots, feel free to use it according to your convenience.
- Save the screenshot you captured as a JPG file on your PC
Step 2: Mark Out the Map Path
The next step in the process of preparing an animated travel map is to mark your route on it. To do so, you can use any of your preferred photo editing tools. However, to keep this illustration simple, Microsoft Paint is used here, and the method is given below:
- Right-click the screenshot you just captured
- Go to Open with on the context menu, and then click Paint from the submenu that appears
- Pick your preferred color from the pallet of the Paint interface. It is advisable to use an eye-catchy shade such as Red
- Use the Sphere shape tool to draw a circle over the source and destination locations on the map
- Use the Line tool to draw a line from the source point to the destination. Try giving the line a few turns to make it look realistic
- Go to File > Save As, and save the marked image with a different name
Note: Once this is done, you should have two image files of the map, i.e., one without the marks and one with it
Step 3: Download Some Travel Icons
Another important ingredient in an effective travel map animation is touring icons such as location marker image, a traveling medium symbol like a helicopter, airplane, car/bike (for short distances), etc. A couple of websites that offer royalty-free stock photos at absolutely no cost are listed below:
Note: Although the websites given above allow you to download and use their stock images and icons for free, you may need to give credits to the designers/creators of the symbols while using their objects. Therefore, you are suggested to check the Terms & Conditions and norms of usage of the elements before downloading and adding them to your projects.
Part 2: Make Animated Travel Map Videos with Filmora
After you have gathered all the necessary ingredients that are required to create a travel map animation, it is now time to get to work. The following instructions would guide you through the step-by-step process of preparing a decent and realistic animated travel map in Wondershare Filmora :
For Win 7 or later (64-bit)
Secure Download
For macOS 10.14 or later
Secure Download
Step 1: Import Ingredients to Filmora and Add Them to the Timeline
Launch the video editor on your computer, click anywhere inside the Media window at the upper-left area, and import all the images and icons that you collected earlier to program. Next, drag both the images of the map, i.e., with and without the marks to the Timeline, and ensure that they are of the same duration and are placed on the same track.

Note: Be sure to put the map without the marks first, and then the one with the marks. Also note that the images have the playback duration of 5 seconds in the Timeline by default, and this tenure can be reduced or increased by dragging the side handle of the media to the left or right respectively.
Step 2: Add Transition for Illusion of Route Appearance
Go to Transition from the standard toolbar at the top, locate the Erase Slide transition effect from the available presets, and place it in between the two image files that you earlier added to the Timeline. Next, click and drag either of the side handles of the transition to the end of the media clip. Notice how the other side of the effect is expanded in equal proportion.

Step 3: Preview and Export
Press the Spacebar on the keyboard to preview the video and see if the route appears as if it is being drawn on the map. Once the animation looks acceptable, click EXPORT from the top-center, go to the Local tab on the Export window, select MP4 from the formats list in the left, and click EXPORT from the bottom-right corner to export the current animation to MP4.
Step 4: Customize the Travel Map Media
Either start a new project and import the video of the map you exported in the previous step to the app and then to the Timeline, or remove the existing media from the Timeline in the same project, and add the exported video to it for convenience.

For Win 7 or later (64-bit)
Secure Download
For macOS 10.14 or later
Secure Download
Next, position the Skimmer (Playhead) a couple of frames before the one the route line appears and starts stretching from, and click the Split icon from the editing toolbar above the Timeline itself. Repeat this process for the other side of the media, i.e., position the Skimmer a couple of frames after the route line reaches the destination location, and click the Split icon again. Then remove the separated segments from both the sides by selecting them and pressing Delete on the keyboard, leaving only the portion where the animation is visible.

Optionally, right-click the media that is left behind in the Timeline, and go to Speed and Duration from the context menu. On the Custom Speed box, drag the Speed slider to the left to decrease the playback speed resulting in the increased duration of the media. Alternatively, you can manually enter a value in the Speed box to get precise tenure. Click OK when you are done.

Step 5: Add Animations to Travel Map
Right-click the media in the Timeline, and go to Add Animation from the context menu. Make sure that the Skimmer is on the first frame, and add several keyframes as explained below:
- Click Add to add the first keyframe

- Move a couple of frames further, and click Add one more time. Now, while you are on this second keyframe, use the Scale slider to zoom in to the map so the source location remains within focus.

- Next, move the Playhead further and add another keyframe a couple of frames before the route line hits the edge of the window.
- After this, move the Playhead again and position it where the route line reaches its destination location. Add another keyframe here as well, and move the map in the Preview window so the focus is now on the destination.
- Move the Playhead a few frames further, add another keyframe, and use the Scale slider to zoom a bit more into the map to make the entire animation look realistic. Click OK to save the changes.
Step 6: Add Icons and Titles, and Export the Project
Drag the image of the traveling medium to the Timeline, and place it on the frame the route line starts from. Make sure to place the image on the track above the map, and stretch it to the end so it remains visible throughout the animation. Next, use the method explained above to add keyframes to move the medium along with the route line from the source to the destination. Optionally, add the image of the location marker at the destination point, go to Transition, and add your preferred transition effect, preferably Dissolve, to the marker track in the Timeline so it looks as if it has appeared as the medium arrived the destination.
For Win 7 or later (64-bit)
Secure Download
For macOS 10.14 or later
Secure Download
Get back to the first frame in the Timeline, go to Titles on the standard toolbar, and add a title preset somewhere near the source location. Resize the text, change the format as needed, and add your preferred caption to it such as the start time, name, etc. Reduce the duration of the track so the title appears for a few frames, preferably before the map animation starts. Click OK when done. Repeat this process for the destination point as well.
Once everything is complete, click the Play button in the Preview window to review your work. If the video looks acceptable, click EXPORT from the top-center of the interface, and use the method explained earlier to export the animated travel map in your preferred format.
![]()
Method 2 How to Make Interactive Animated Travel Map with Pictramap
If you don’t want to install a dedicated animation software on your computer due to limited hardware resources or some other reason, there is an online solution called Pictramap to create a travel map animation using a web browser. The web app offers a lucrative interface that could be easily understood and worked with to produce an animated map for free.
The process to create an animated travel map with Pictramap is given below:
Step 1: Create a Project
Launch your favorite web browser, go to https://www.pictramap.com/ , click Create yours now, it’s free, and sign up to Pictramap using your preferred method. When you are on the Dashboard, enter a name in the field available under the My Projects section, and click Create to create a new project (the animated map).

Step 2: Define the Locations and Method of Commute
On the map, right-click the location you want to start your journey from, enter the name of the location or any other significant title, and click Add. Click the location marker, click the Travel Mode icon, and select your preferred mode of traveling. Repeat this process to mark the destination location as well.

Step 3: Preview the Animation
Click the View Animation button from the upper-right corner of the page to see the animated travel map.

Downsides of Using Pictramap to Create Animated Travel Map Video
Although Pictramap allows you to create a travel map animation with ease and extremely quickly, at the time of this writing, it offers no way of downloading the animation to your PC, and therefore it couldn’t be used in your projects.
If you are using Wondershare Filmora, you can use its built-in screen recording feature to record the animation that Pictramap plays, and then save the captured footage as MP4 or any other format on your computer. This video can then be imported to your projects for further uses.
![]()
A cross-platform for making videos anywhere for all creators

Why your video editing isn’t good enough? How about some creative inspo?
- 100 Million+ Users
- 150+ Countries and Regions
- 4 Million+ Social Media Followers
- 5 Million+ Stock Media for Use
* Secure Download

Method 3 How To Make Animated Travel Map Using Multidev
Multi.dev is still a new web-based application to build awesome animated maps, but it’s good! The application helps you create presentations about all your recent and previous trips. And the interface is also hassle-free.
So, follow this step-by-step guide to making animated maps with Multi.dev.
Step 1: Open Multi.dev
Visit Multi.dev from your internet browser.

Once the tool gets open, you will see a demo video. This example clip will have animated maps of different locations. So it is up to you whether to use the same example and edit the places you have been to or are planning to visit. Or, simply create a new animated map from scratch.
Step 2: Choose Your First Location
Take your mouse cursor on the left side of the application and type the first location in the search bar. As soon as you do it, you will see that the “travel arrow” will automatically begin from there. Likewise, type and select the next location through the search bar.
Once you type the location, you will see 8 travel modes, including airplane, bus, and train. You can select the same mode for all sites or a different mode for another place. Totally up to you!

Step 3: Select Map Themes
All your chosen places will be highlighted in the software’s minimalistic map.

Step 4: Download Map on Your Computer
If you’re happy with the animated map, click the “Create Video” button to save the animated map on your computer in a few minutes.


Contrarily, you can also share the animation by choosing the “Share Animation” option.
Conclusion
An animated travel map plays an important role to add a realistic touring effect to your motion picture projects. While you can use a web app like Pictramap to create such an animation online easily and for free, the limitations it comes along with might keep you from choosing this method.
Instead, you may want to get more inclined toward a dedicated post-production software like Wondershare Filmora that gives you full control over the process, and the freedom to choose your preferred format to export the animation to for independent usage.
For Win 7 or later (64-bit)
Secure Download
For macOS 10.14 or later
Secure Download
Benjamin Arango
Benjamin Arango is a writer and a lover of all things video.
Follow @Benjamin Arango
Benjamin Arango
Mar 27, 2024• Proven solutions
Animated travel map videos make it easy for the viewers to follow the routes from the source to destination locations right on the single screen. While the static maps would only allow the audience to see the markers from where the journey would start and is expected to end, the animated ones show the real-time movements and therefore look more interactive when viewed.
That said, here you will learn how to create an attractive and engaging animated travel map video using one of the easiest post-production applications, Wondershare Filmora, which is widely appreciated by amateurs and professionals throughout the globe. In another section, you will also learn about an alternative program that might be of some help in case you are more into online designing.
- Method 1: Make Animated Travel Map Videos with Location Video Maker - [Video Tutorial]
- Method 2: Make Interactive Animated Travel Map with Pictramap
- Method 3: Create Animated Travel Map Using Multidev
Method 1 Make Animated Travel Map Videos with Location Video Maker
The entire process of creating an animated travel map video in Wondershare’s Filmora is categorized into two parts, wherein the first part you will collect all the ingredients that are needed to get started, and in the second part you will actually make an animated map using the tools and features present in Filmora.
Watch a video tutorial to see how to make an animated map for a video:
For Win 7 or later (64-bit)
Secure Download
For macOS 10.14 or later
Secure Download
Part 1: Prepare the Travel Map Materials
Following are the ingredients and the methods to collect them for animated travel map preparation:
Step 1: Get the Map
The first thing that you would need to prepare an animated map is an image of a realistic map. Thanks to Google and Microsoft, these things are now pretty easy to arrange. The process is given below:
- Launch your preferred web browser
- Type google.com in the address bar or the search box and hit Enter
- Scroll to zoom out so you can see the entire world map on one screen
- Type Snipping Tool in the Cortana search box present on the left side of the Taskbar
- Launch Snipping Tool, and use it to capture the screenshot of the map
Note: Snipping Tool is a built-in app in Windows 10 and is available for free. If you are using any other operating system, or have a different program to capture the screenshots, feel free to use it according to your convenience.
- Save the screenshot you captured as a JPG file on your PC
Step 2: Mark Out the Map Path
The next step in the process of preparing an animated travel map is to mark your route on it. To do so, you can use any of your preferred photo editing tools. However, to keep this illustration simple, Microsoft Paint is used here, and the method is given below:
- Right-click the screenshot you just captured
- Go to Open with on the context menu, and then click Paint from the submenu that appears
- Pick your preferred color from the pallet of the Paint interface. It is advisable to use an eye-catchy shade such as Red
- Use the Sphere shape tool to draw a circle over the source and destination locations on the map
- Use the Line tool to draw a line from the source point to the destination. Try giving the line a few turns to make it look realistic
- Go to File > Save As, and save the marked image with a different name
Note: Once this is done, you should have two image files of the map, i.e., one without the marks and one with it
Step 3: Download Some Travel Icons
Another important ingredient in an effective travel map animation is touring icons such as location marker image, a traveling medium symbol like a helicopter, airplane, car/bike (for short distances), etc. A couple of websites that offer royalty-free stock photos at absolutely no cost are listed below:
Note: Although the websites given above allow you to download and use their stock images and icons for free, you may need to give credits to the designers/creators of the symbols while using their objects. Therefore, you are suggested to check the Terms & Conditions and norms of usage of the elements before downloading and adding them to your projects.
Part 2: Make Animated Travel Map Videos with Filmora
After you have gathered all the necessary ingredients that are required to create a travel map animation, it is now time to get to work. The following instructions would guide you through the step-by-step process of preparing a decent and realistic animated travel map in Wondershare Filmora :
For Win 7 or later (64-bit)
Secure Download
For macOS 10.14 or later
Secure Download
Step 1: Import Ingredients to Filmora and Add Them to the Timeline
Launch the video editor on your computer, click anywhere inside the Media window at the upper-left area, and import all the images and icons that you collected earlier to program. Next, drag both the images of the map, i.e., with and without the marks to the Timeline, and ensure that they are of the same duration and are placed on the same track.
Note: Be sure to put the map without the marks first, and then the one with the marks. Also note that the images have the playback duration of 5 seconds in the Timeline by default, and this tenure can be reduced or increased by dragging the side handle of the media to the left or right respectively.
Step 2: Add Transition for Illusion of Route Appearance
Go to Transition from the standard toolbar at the top, locate the Erase Slide transition effect from the available presets, and place it in between the two image files that you earlier added to the Timeline. Next, click and drag either of the side handles of the transition to the end of the media clip. Notice how the other side of the effect is expanded in equal proportion.
Step 3: Preview and Export
Press the Spacebar on the keyboard to preview the video and see if the route appears as if it is being drawn on the map. Once the animation looks acceptable, click EXPORT from the top-center, go to the Local tab on the Export window, select MP4 from the formats list in the left, and click EXPORT from the bottom-right corner to export the current animation to MP4.
Step 4: Customize the Travel Map Media
Either start a new project and import the video of the map you exported in the previous step to the app and then to the Timeline, or remove the existing media from the Timeline in the same project, and add the exported video to it for convenience.
For Win 7 or later (64-bit)
Secure Download
For macOS 10.14 or later
Secure Download
Next, position the Skimmer (Playhead) a couple of frames before the one the route line appears and starts stretching from, and click the Split icon from the editing toolbar above the Timeline itself. Repeat this process for the other side of the media, i.e., position the Skimmer a couple of frames after the route line reaches the destination location, and click the Split icon again. Then remove the separated segments from both the sides by selecting them and pressing Delete on the keyboard, leaving only the portion where the animation is visible.
Optionally, right-click the media that is left behind in the Timeline, and go to Speed and Duration from the context menu. On the Custom Speed box, drag the Speed slider to the left to decrease the playback speed resulting in the increased duration of the media. Alternatively, you can manually enter a value in the Speed box to get precise tenure. Click OK when you are done.
Step 5: Add Animations to Travel Map
Right-click the media in the Timeline, and go to Add Animation from the context menu. Make sure that the Skimmer is on the first frame, and add several keyframes as explained below:
- Click Add to add the first keyframe
- Move a couple of frames further, and click Add one more time. Now, while you are on this second keyframe, use the Scale slider to zoom in to the map so the source location remains within focus.
- Next, move the Playhead further and add another keyframe a couple of frames before the route line hits the edge of the window.
- After this, move the Playhead again and position it where the route line reaches its destination location. Add another keyframe here as well, and move the map in the Preview window so the focus is now on the destination.
- Move the Playhead a few frames further, add another keyframe, and use the Scale slider to zoom a bit more into the map to make the entire animation look realistic. Click OK to save the changes.
Step 6: Add Icons and Titles, and Export the Project
Drag the image of the traveling medium to the Timeline, and place it on the frame the route line starts from. Make sure to place the image on the track above the map, and stretch it to the end so it remains visible throughout the animation. Next, use the method explained above to add keyframes to move the medium along with the route line from the source to the destination. Optionally, add the image of the location marker at the destination point, go to Transition, and add your preferred transition effect, preferably Dissolve, to the marker track in the Timeline so it looks as if it has appeared as the medium arrived the destination.
For Win 7 or later (64-bit)
Secure Download
For macOS 10.14 or later
Secure Download
Get back to the first frame in the Timeline, go to Titles on the standard toolbar, and add a title preset somewhere near the source location. Resize the text, change the format as needed, and add your preferred caption to it such as the start time, name, etc. Reduce the duration of the track so the title appears for a few frames, preferably before the map animation starts. Click OK when done. Repeat this process for the destination point as well.
Once everything is complete, click the Play button in the Preview window to review your work. If the video looks acceptable, click EXPORT from the top-center of the interface, and use the method explained earlier to export the animated travel map in your preferred format.
![]()
Method 2 How to Make Interactive Animated Travel Map with Pictramap
If you don’t want to install a dedicated animation software on your computer due to limited hardware resources or some other reason, there is an online solution called Pictramap to create a travel map animation using a web browser. The web app offers a lucrative interface that could be easily understood and worked with to produce an animated map for free.
The process to create an animated travel map with Pictramap is given below:
Step 1: Create a Project
Launch your favorite web browser, go to https://www.pictramap.com/ , click Create yours now, it’s free, and sign up to Pictramap using your preferred method. When you are on the Dashboard, enter a name in the field available under the My Projects section, and click Create to create a new project (the animated map).
Step 2: Define the Locations and Method of Commute
On the map, right-click the location you want to start your journey from, enter the name of the location or any other significant title, and click Add. Click the location marker, click the Travel Mode icon, and select your preferred mode of traveling. Repeat this process to mark the destination location as well.
Step 3: Preview the Animation
Click the View Animation button from the upper-right corner of the page to see the animated travel map.
Downsides of Using Pictramap to Create Animated Travel Map Video
Although Pictramap allows you to create a travel map animation with ease and extremely quickly, at the time of this writing, it offers no way of downloading the animation to your PC, and therefore it couldn’t be used in your projects.
If you are using Wondershare Filmora, you can use its built-in screen recording feature to record the animation that Pictramap plays, and then save the captured footage as MP4 or any other format on your computer. This video can then be imported to your projects for further uses.
![]()
A cross-platform for making videos anywhere for all creators
Why your video editing isn’t good enough? How about some creative inspo?
- 100 Million+ Users
- 150+ Countries and Regions
- 4 Million+ Social Media Followers
- 5 Million+ Stock Media for Use
* Secure Download
Method 3 How To Make Animated Travel Map Using Multidev
Multi.dev is still a new web-based application to build awesome animated maps, but it’s good! The application helps you create presentations about all your recent and previous trips. And the interface is also hassle-free.
So, follow this step-by-step guide to making animated maps with Multi.dev.
Step 1: Open Multi.dev
Visit Multi.dev from your internet browser.
Once the tool gets open, you will see a demo video. This example clip will have animated maps of different locations. So it is up to you whether to use the same example and edit the places you have been to or are planning to visit. Or, simply create a new animated map from scratch.
Step 2: Choose Your First Location
Take your mouse cursor on the left side of the application and type the first location in the search bar. As soon as you do it, you will see that the “travel arrow” will automatically begin from there. Likewise, type and select the next location through the search bar.
Once you type the location, you will see 8 travel modes, including airplane, bus, and train. You can select the same mode for all sites or a different mode for another place. Totally up to you!
Step 3: Select Map Themes
All your chosen places will be highlighted in the software’s minimalistic map.
Step 4: Download Map on Your Computer
If you’re happy with the animated map, click the “Create Video” button to save the animated map on your computer in a few minutes.
Contrarily, you can also share the animation by choosing the “Share Animation” option.
Conclusion
An animated travel map plays an important role to add a realistic touring effect to your motion picture projects. While you can use a web app like Pictramap to create such an animation online easily and for free, the limitations it comes along with might keep you from choosing this method.
Instead, you may want to get more inclined toward a dedicated post-production software like Wondershare Filmora that gives you full control over the process, and the freedom to choose your preferred format to export the animation to for independent usage.
For Win 7 or later (64-bit)
Secure Download
For macOS 10.14 or later
Secure Download
Benjamin Arango
Benjamin Arango is a writer and a lover of all things video.
Follow @Benjamin Arango
Ways to Stop Animation From Looping in Unity
How to Stop Animation from Looping in Unity
An easy yet powerful editor
Numerous effects to choose from
Detailed tutorials provided by the official channel
Unity is an IDE interface all designed exclusively for game developers. However, you can do much more with Unity than game development. But, our main concern here is something else than this subject. You’re looking for easy tutorials on Unity stop animation!

And luckily, we’ve got you covered as we’ve briefly explained how to perform Unity stop animation from looping and the steps to make a smooth animation.
In this article
01 [What is Unity Used for?](#Part 1)
02 [How to Stop Animation Playing in Loop in Unity?](#Part 2)
03 [How to Smooth an Animation in Unity?](#Part 3)
Part 1 What is Unity Used for?
Unity is a software tool friendly to all the game developers out there. This tool is used by the large community of game developers to power and create their game development projects. And, the software is more of a professional means and not a simple pared-down ‘game builder .’Unity also offers one of the most significant inbuilt features like rendering, physics, and collision detection. Thus, one of the powerful aspects of Unity is that game developers need not go out of the box and create everything from scratch. Instead, they are available with the physics engine required to develop games quickly. Another robust feature of Unity is that it includes an excellent ‘Asset Store’ where developers can upload their creations and showcase them to the whole community. So, that’s Unity and its uses in a broader scope!
Before we take you through the next section, it’s important to mention that Unity is also known as cross-platform IDE, where IDE stands for ‘integrated development environment.’ So, it can be called more of an interface with access to all the tools and resources required to develop games.
Apart from the game development, Unity is known for other excellent usage purposes as:
● Simulations
● Animation
● Architectural Visualization
● Previsualization for Film
● Interactive Experiences
Among these features only, we’ll describe Unity stop animation from looping in detail.
Part 2 How to Stop Animation Playing in Loop in Unity?
As we said, we’ll describe to you the most accessible definition of how to stop Animation in Unity. Thus, there are simple steps that we’d like to define firsthand before explaining the whole procedure with an image-centric step-by-step guide.
So, those simple steps to stop motion animation in After Effects in the loop also go like below:
Step 1 Go to the Project tab and select Animation.
Step 2 Open the Inspector tab.
Step 3 Uncheck the checkbox Loop Time, and you’re good to go!
We’ll describe the same, i.e., Unity stop animation from looping through the step guide below.
In this guide, we’ll explain right from applying the Animation so that you’d understand better. So, let’s begin without any further ado!
01Step 1 Delete animation folder
We have already created an animation folder in the folder named as own Animation, so click that folder, click the animation folder, and then another folder along with as shown below. Hold the Shift key and click another folder. Then, right-click the Delete tab as depicted below.
Similarly, you can also delete the Animation if you wish.

02Step 2 Create an animation for the subject
Now, you may have different subjects. We’re creating Animation on Mobile Joystick for reference, as shown below.

Now, hit the Create tab on the Unity panel below. Then, proceed to save your Animation in the folder you’ve already created for the same.

03Step 3 Give positions to the animation
Firstly, hit the red-icon button used for recording, as shown below.

Give the position on the left side after you click the button. And, then, clicking almost near to 3you can give the position to the right-hand side as shown below.

Now, the animation has been set. You can see the animation from left to right if you click the Play button. So, here, you can see the results of infinite loop animation, which won’t stop.

You can follow two ways to stop this Animation in Unity from looping, and we’ll describe both methods below.
04Step 4 Stop animation Unity Way 1
Go to the animation folder where you’ve created the animation and click the New Animation icon as shown below.

Now, you have to uncheck the Loop Time tab on the top-right corner of the Unity panel.

05Step 5 Stop animation Unity Way 2
Alternatively, you can click the Animator tab on the top of the Unity panel and double-tap the New Animation button. Then, it will also delete or uncheck the loop time, as shown below.

These were all the steps to stop animation Unity.
Part 3 How to Smooth an Animation in Unity?
After done with Unity stop animation, it’s time to smooth your Unity animation. Again, we will describe it simply if you’re used to the Unity platform and then with a step guide with respective screenshots.
So, stay tuned until the end to reveal the easy steps of smoothing an animation in Unity.
Select the Dopesheet at the bottom of the animation window. Then, you need to switch to the ‘Curves’ view once you create your Animation in the Dopesheet. These animation curves help you accelerate and decelerate animations so that the movement and other things can stop and start smoothly.
So, let’s begin with the step guide tutorial on the same as follows:
For reference, take an example of a metronome object imported from Blender to Unity. Here, we’ve grouped all the pendulum objects under one rotation so that when we move the pendulum, it pivots to the correct point, as shown below.

01Add the animator
So, the first step begins with adding the Animator component to the parent object. You can do this by clicking the Add Component tab on the Unity panel’s left side, searching for Animator, and clicking the Animator.
You will also need a controller to control the animations. Go to your animation folder, right-click, and select Create> Animator Controller tab.

Let’s call or give it a name metronome animator as shown below.
Then, you need to drag this into your animator component. Again, you need to go to your animations folder, right-click, select Create> Animations tab.
Now, give this a name pendulum full swing.
02Open the animator tab
Now, open the animator tab, drag this pendulum swing animation to that panel, and double-tap the yellow-colored New Animation button.

03Create an animation
With the game object selected, the animated metronome pendulum, in this case, we’d like to animate the X component of the rotation. So, you need to click Add Property> Transform> Rotation tab and click the + sign on its right, as shown below.
Now, click the plus sign automatically to set two keyframes, one at the beginning and one at the end. Now, click on end select all, and then delete for now.

04Add keyframes to rotate the pendulum
With the first set of keyframes and the pendulum all way to the right, go halfway and change the rotation to the left on the left panel of Unity. Then, add another keyframe.

05Slow down the animation
As you can observe, the Animation of this pendulum is in a straight line and feels unnatural to the eyes. Thus, we’re required to smooth this Animation now! For this purpose, go to the Curves; you can see the pink properties of rotation as going from one side to another.

Now, you need to adjust these pink curves. Start by adding a key to one of its sides, as shown below. After that, it is all on you how slow or fasts you want these values to be.
Here, you’re all done smoothing the animation in Unity after learning the stop-animation Unity tutorial.
You can even stop motion animation on Photoshop with the above tutorial.
06Bonus Tip:
We want to introduce an excellent video editor software called Filmora Video Editor . It is from the house of Wondershare, a well-known software company worldwide.

Wondershare Filmora - Best Video Editor for Mac/Windows
5,481,435 people have downloaded it.
Build unique custom animations without breaking a sweat.
Focus on creating epic stories and leave the details to Filmora’s auto features.
Start a creative adventure with drag & drop effects and endless possibilities.
Filmora simplifies advanced features to save you time and effort.
Filmora cuts out repetition so you can move on to your next creative breakthrough.
With Filmora, you can easily add Animation and edit your videos to make them look world-class. The latest version and new updates are eye-candy and quick fix for beginner video editors.
So, please pay a visit to the Filmora website and check out its Mac and Windows version for free today.
● Key Takeaways from This Episode →
● Learning the concept and usage of Unity
● A tutorial on how to stop animation in Unity from looping
● A tutorial on how to smooth animation in Unity
● Introduction to Filmora, the top-most video editor software for beginners.
Unity is an IDE interface all designed exclusively for game developers. However, you can do much more with Unity than game development. But, our main concern here is something else than this subject. You’re looking for easy tutorials on Unity stop animation!
And luckily, we’ve got you covered as we’ve briefly explained how to perform Unity stop animation from looping and the steps to make a smooth animation.
In this article
01 [What is Unity Used for?](#Part 1)
02 [How to Stop Animation Playing in Loop in Unity?](#Part 2)
03 [How to Smooth an Animation in Unity?](#Part 3)
Part 1 What is Unity Used for?
Unity is a software tool friendly to all the game developers out there. This tool is used by the large community of game developers to power and create their game development projects. And, the software is more of a professional means and not a simple pared-down ‘game builder .’Unity also offers one of the most significant inbuilt features like rendering, physics, and collision detection. Thus, one of the powerful aspects of Unity is that game developers need not go out of the box and create everything from scratch. Instead, they are available with the physics engine required to develop games quickly. Another robust feature of Unity is that it includes an excellent ‘Asset Store’ where developers can upload their creations and showcase them to the whole community. So, that’s Unity and its uses in a broader scope!
Before we take you through the next section, it’s important to mention that Unity is also known as cross-platform IDE, where IDE stands for ‘integrated development environment.’ So, it can be called more of an interface with access to all the tools and resources required to develop games.
Apart from the game development, Unity is known for other excellent usage purposes as:
● Simulations
● Animation
● Architectural Visualization
● Previsualization for Film
● Interactive Experiences
Among these features only, we’ll describe Unity stop animation from looping in detail.
Part 2 How to Stop Animation Playing in Loop in Unity?
As we said, we’ll describe to you the most accessible definition of how to stop Animation in Unity. Thus, there are simple steps that we’d like to define firsthand before explaining the whole procedure with an image-centric step-by-step guide.
So, those simple steps to stop motion animation in After Effects in the loop also go like below:
Step 1 Go to the Project tab and select Animation.
Step 2 Open the Inspector tab.
Step 3 Uncheck the checkbox Loop Time, and you’re good to go!
We’ll describe the same, i.e., Unity stop animation from looping through the step guide below.
In this guide, we’ll explain right from applying the Animation so that you’d understand better. So, let’s begin without any further ado!
01Step 1 Delete animation folder
We have already created an animation folder in the folder named as own Animation, so click that folder, click the animation folder, and then another folder along with as shown below. Hold the Shift key and click another folder. Then, right-click the Delete tab as depicted below.
Similarly, you can also delete the Animation if you wish.
02Step 2 Create an animation for the subject
Now, you may have different subjects. We’re creating Animation on Mobile Joystick for reference, as shown below.
Now, hit the Create tab on the Unity panel below. Then, proceed to save your Animation in the folder you’ve already created for the same.
03Step 3 Give positions to the animation
Firstly, hit the red-icon button used for recording, as shown below.
Give the position on the left side after you click the button. And, then, clicking almost near to 3you can give the position to the right-hand side as shown below.
Now, the animation has been set. You can see the animation from left to right if you click the Play button. So, here, you can see the results of infinite loop animation, which won’t stop.
You can follow two ways to stop this Animation in Unity from looping, and we’ll describe both methods below.
04Step 4 Stop animation Unity Way 1
Go to the animation folder where you’ve created the animation and click the New Animation icon as shown below.
Now, you have to uncheck the Loop Time tab on the top-right corner of the Unity panel.
05Step 5 Stop animation Unity Way 2
Alternatively, you can click the Animator tab on the top of the Unity panel and double-tap the New Animation button. Then, it will also delete or uncheck the loop time, as shown below.
These were all the steps to stop animation Unity.
Part 3 How to Smooth an Animation in Unity?
After done with Unity stop animation, it’s time to smooth your Unity animation. Again, we will describe it simply if you’re used to the Unity platform and then with a step guide with respective screenshots.
So, stay tuned until the end to reveal the easy steps of smoothing an animation in Unity.
Select the Dopesheet at the bottom of the animation window. Then, you need to switch to the ‘Curves’ view once you create your Animation in the Dopesheet. These animation curves help you accelerate and decelerate animations so that the movement and other things can stop and start smoothly.
So, let’s begin with the step guide tutorial on the same as follows:
For reference, take an example of a metronome object imported from Blender to Unity. Here, we’ve grouped all the pendulum objects under one rotation so that when we move the pendulum, it pivots to the correct point, as shown below.
01Add the animator
So, the first step begins with adding the Animator component to the parent object. You can do this by clicking the Add Component tab on the Unity panel’s left side, searching for Animator, and clicking the Animator.
You will also need a controller to control the animations. Go to your animation folder, right-click, and select Create> Animator Controller tab.
Let’s call or give it a name metronome animator as shown below.
Then, you need to drag this into your animator component. Again, you need to go to your animations folder, right-click, select Create> Animations tab.
Now, give this a name pendulum full swing.
02Open the animator tab
Now, open the animator tab, drag this pendulum swing animation to that panel, and double-tap the yellow-colored New Animation button.
03Create an animation
With the game object selected, the animated metronome pendulum, in this case, we’d like to animate the X component of the rotation. So, you need to click Add Property> Transform> Rotation tab and click the + sign on its right, as shown below.
Now, click the plus sign automatically to set two keyframes, one at the beginning and one at the end. Now, click on end select all, and then delete for now.
04Add keyframes to rotate the pendulum
With the first set of keyframes and the pendulum all way to the right, go halfway and change the rotation to the left on the left panel of Unity. Then, add another keyframe.
05Slow down the animation
As you can observe, the Animation of this pendulum is in a straight line and feels unnatural to the eyes. Thus, we’re required to smooth this Animation now! For this purpose, go to the Curves; you can see the pink properties of rotation as going from one side to another.
Now, you need to adjust these pink curves. Start by adding a key to one of its sides, as shown below. After that, it is all on you how slow or fasts you want these values to be.
Here, you’re all done smoothing the animation in Unity after learning the stop-animation Unity tutorial.
You can even stop motion animation on Photoshop with the above tutorial.
06Bonus Tip:
We want to introduce an excellent video editor software called Filmora Video Editor . It is from the house of Wondershare, a well-known software company worldwide.
Wondershare Filmora - Best Video Editor for Mac/Windows
5,481,435 people have downloaded it.
Build unique custom animations without breaking a sweat.
Focus on creating epic stories and leave the details to Filmora’s auto features.
Start a creative adventure with drag & drop effects and endless possibilities.
Filmora simplifies advanced features to save you time and effort.
Filmora cuts out repetition so you can move on to your next creative breakthrough.
With Filmora, you can easily add Animation and edit your videos to make them look world-class. The latest version and new updates are eye-candy and quick fix for beginner video editors.
So, please pay a visit to the Filmora website and check out its Mac and Windows version for free today.
● Key Takeaways from This Episode →
● Learning the concept and usage of Unity
● A tutorial on how to stop animation in Unity from looping
● A tutorial on how to smooth animation in Unity
● Introduction to Filmora, the top-most video editor software for beginners.
Tutorial on Making Unity 2D Animation
Beginner Tutorial on Making Unity 2D Animation
An easy yet powerful editor
Numerous effects to choose from
Detailed tutorials provided by the official channel
Now, ideally, Unity is considered to be a suitable tool for 3D games that have too many animated elements. But, this doesn’t mean that you cannot design 2D animations with Unity.
In this guide, we are going to show you how to get started with 2D animations in Unity and incorporate them into your games to enhance the overall gameplay.
In this article
01 [Can Unity Be Used for 2D Animation?](#Part 1)
02 [How Do You Make a 2D Animation in Unity?](#Part 2)
Part 1 Can Unity Be Used for 2D Animation?
First, things first; can Unity be used for 2D animations. The answer is Yes! Being a full-scale gaming engine, developers/designers can use Unity to create stunning Unity 2D animations for their games. The tool has dedicated 2D animation packages that contain all the elements you’ll need to create high-quality 2D animations for your games.
Keep in mind that for each object, you’ll have to create a separate 2D sprite sheet and use it to configure the 2D animation. However, there are other 2D animation packages that you can install, using sprite sheets is the most common method to get the job done. The latest versions of Unity also offer a dedicated Stripe library where you can add multiple Stripe Sheets and it becomes relatively easier to manage them.
With the Sprite library, 2D animations with Unity becomes a hassle-free job. Designers can even manage dozens of 2D animations without any hassle. The Sprite editor will also let you control the overall movement of different moving objects in your animation and make it look more sleek. In general, if you are planning to create 2D animations for your videos or even a dedicated mobile game, Unity can be a suitable software for the job.
Part 2 How Do You Make a 2D Animation in Unity?
To create a 2D animation with Unity, the first step would be to create a dedicated Sprite sheet. Now, you can use a wide variety of third-party programs to create the desired Sprite sheet. In general, it depends on the project requirements and the personal preferences of the designer himself. However, whichever tool you use to create the Stripe sheets, make sure that the final image is a transparent PNG file as it’ll make your job much easier while animating objects in Unity.
After you have successfully designed the stripe (a transparent image file) in an external application, the next step would be to import it to Unity. When you import the Stripe file, make sure to create a separate Sprite folder so that you can easily manage all these files in one place. Also, a dedicated Stripe folder will allow you to keep a check on each Stripe file in a hassle-free manner.

While importing 2D animations into Unity, you can also configure its settings to ensure that it matches the overall game design. Ideally, we recommend keeping the Pixels Per Unit to the same size as all your visual components. This will allow you to maintain the desired consistency throughout the project and make it visually enticing.
Now, before proceeding any further, make sure to switch to the “Stripe Editor” window. With the “Stripe Editor”, you’ll be able to control the overall settings of each animation individually and control the movement to make it look crisper. In the Stripe window, you can also adjust the slice settings and save your work to avoid any potential data loss.
At this point, you can move towards creating the 2D animation with Unity. To do this, you’ll have to bring both the Animation and the Animator tabs to UnityParts editing panel. You can make them visible by tapping the “Windows” option on your screen.

That’s it; a timeline-based editing panel will appear on your screen. From here onwards, you can get started with animating the object. Each animation will depend on your specific game requirements. So, feel free to unleash your creativity and use different elements of Unity to bring your 2D animations to life.
Part 3 Part 3 Creating 2D Animations for Your Videos - An Effective Solution for Video Editors
Now, when it comes to creating 2D animations for videos, you may not want to use a tool like Unity to get the job done. Why? Because Unity is more suitable for animating objects for games. Not to mention, Unity has a steep learning curve and if you are not an experienced Unity developer, you may fail to create a 2D animation properly.
So, if you only need a 2D animation for videos, we have a better alternative for the job. Instead of Unity, you can use Wondershare Filmora Video Editor for the job. It’s a full-scale video editing software that’s specifically designed to edit high-quality videos. Whether you are a YouTube or simply edit videos for your clients, using Wondershare Filmora will help you showcase your creativity more effectively.

Filmora has a built-in media library that offers a plethora of ready-to-use animation templates as well as video effects. You can import these animations into your video with a single click and enhance the overall quality of the video to drive better engagement. These animations are also customizable, which means you can tweak their appearance to match the overall theme of your video itself. The media player also offers audio effects that’ll make your videos more dramatic.
And, finally, you’ll also find a wide variety of advanced editing options such as keyframing, motion detection, and green screen editing. All these features will allow you to uplift the production quality of your videos and engage potential viewers more effectively.
For Win 7 or later (64-bit)
For macOS 10.12 or later
A few key features of Filmora that make it the most reliable video editing software include:
● Thousands of ready-to-use animation templates and video effects
● Easy-to-use timeline-based editing panel
● Dedicated audio editor to control the sound quality
● Cross-platform compatibility
So, if you are also planning to launch a high-scale video for YouTube or any other platform by adding
Key Takeaways from This Episode
● Creating 2D animations with Unity is possible, however, you must be an expert game developer with extensive experience in Unity game development
● To create Unity 2D animations, you’ll have to use Sprite Sheets and then import them into Unity to turn them into animation.
● Now, if you are a regular video editor and only want to create 2D animations for videos, you can also use full-scale software such as Wondershare Filmora Pro.
Now, ideally, Unity is considered to be a suitable tool for 3D games that have too many animated elements. But, this doesn’t mean that you cannot design 2D animations with Unity.
In this guide, we are going to show you how to get started with 2D animations in Unity and incorporate them into your games to enhance the overall gameplay.
In this article
01 [Can Unity Be Used for 2D Animation?](#Part 1)
02 [How Do You Make a 2D Animation in Unity?](#Part 2)
Part 1 Can Unity Be Used for 2D Animation?
First, things first; can Unity be used for 2D animations. The answer is Yes! Being a full-scale gaming engine, developers/designers can use Unity to create stunning Unity 2D animations for their games. The tool has dedicated 2D animation packages that contain all the elements you’ll need to create high-quality 2D animations for your games.
Keep in mind that for each object, you’ll have to create a separate 2D sprite sheet and use it to configure the 2D animation. However, there are other 2D animation packages that you can install, using sprite sheets is the most common method to get the job done. The latest versions of Unity also offer a dedicated Stripe library where you can add multiple Stripe Sheets and it becomes relatively easier to manage them.
With the Sprite library, 2D animations with Unity becomes a hassle-free job. Designers can even manage dozens of 2D animations without any hassle. The Sprite editor will also let you control the overall movement of different moving objects in your animation and make it look more sleek. In general, if you are planning to create 2D animations for your videos or even a dedicated mobile game, Unity can be a suitable software for the job.
Part 2 How Do You Make a 2D Animation in Unity?
To create a 2D animation with Unity, the first step would be to create a dedicated Sprite sheet. Now, you can use a wide variety of third-party programs to create the desired Sprite sheet. In general, it depends on the project requirements and the personal preferences of the designer himself. However, whichever tool you use to create the Stripe sheets, make sure that the final image is a transparent PNG file as it’ll make your job much easier while animating objects in Unity.
After you have successfully designed the stripe (a transparent image file) in an external application, the next step would be to import it to Unity. When you import the Stripe file, make sure to create a separate Sprite folder so that you can easily manage all these files in one place. Also, a dedicated Stripe folder will allow you to keep a check on each Stripe file in a hassle-free manner.
While importing 2D animations into Unity, you can also configure its settings to ensure that it matches the overall game design. Ideally, we recommend keeping the Pixels Per Unit to the same size as all your visual components. This will allow you to maintain the desired consistency throughout the project and make it visually enticing.
Now, before proceeding any further, make sure to switch to the “Stripe Editor” window. With the “Stripe Editor”, you’ll be able to control the overall settings of each animation individually and control the movement to make it look crisper. In the Stripe window, you can also adjust the slice settings and save your work to avoid any potential data loss.
At this point, you can move towards creating the 2D animation with Unity. To do this, you’ll have to bring both the Animation and the Animator tabs to UnityParts editing panel. You can make them visible by tapping the “Windows” option on your screen.
That’s it; a timeline-based editing panel will appear on your screen. From here onwards, you can get started with animating the object. Each animation will depend on your specific game requirements. So, feel free to unleash your creativity and use different elements of Unity to bring your 2D animations to life.
Part 3 Part 3 Creating 2D Animations for Your Videos - An Effective Solution for Video Editors
Now, when it comes to creating 2D animations for videos, you may not want to use a tool like Unity to get the job done. Why? Because Unity is more suitable for animating objects for games. Not to mention, Unity has a steep learning curve and if you are not an experienced Unity developer, you may fail to create a 2D animation properly.
So, if you only need a 2D animation for videos, we have a better alternative for the job. Instead of Unity, you can use Wondershare Filmora Video Editor for the job. It’s a full-scale video editing software that’s specifically designed to edit high-quality videos. Whether you are a YouTube or simply edit videos for your clients, using Wondershare Filmora will help you showcase your creativity more effectively.
Filmora has a built-in media library that offers a plethora of ready-to-use animation templates as well as video effects. You can import these animations into your video with a single click and enhance the overall quality of the video to drive better engagement. These animations are also customizable, which means you can tweak their appearance to match the overall theme of your video itself. The media player also offers audio effects that’ll make your videos more dramatic.
And, finally, you’ll also find a wide variety of advanced editing options such as keyframing, motion detection, and green screen editing. All these features will allow you to uplift the production quality of your videos and engage potential viewers more effectively.
For Win 7 or later (64-bit)
For macOS 10.12 or later
A few key features of Filmora that make it the most reliable video editing software include:
● Thousands of ready-to-use animation templates and video effects
● Easy-to-use timeline-based editing panel
● Dedicated audio editor to control the sound quality
● Cross-platform compatibility
So, if you are also planning to launch a high-scale video for YouTube or any other platform by adding
Key Takeaways from This Episode
● Creating 2D animations with Unity is possible, however, you must be an expert game developer with extensive experience in Unity game development
● To create Unity 2D animations, you’ll have to use Sprite Sheets and then import them into Unity to turn them into animation.
● Now, if you are a regular video editor and only want to create 2D animations for videos, you can also use full-scale software such as Wondershare Filmora Pro.
Top 3 Ways to Create Gif with Great 3D Gif Maker
Top 3 Ways to Create Gif Images with Great 3D Gif Maker
An easy yet powerful editor
Numerous effects to choose from
Detailed tutorials provided by the official channel
If what you’re searching for is a 3D GIF Maker, then we’ve got your back. Below, we’ve not only listed the three best ways to create 3D animated GIFs, but we’ve also included a brief tutorial that you can reference when creating your very own GIF images.
In this article
01 [Best 3 Ways to Create 3D Animated GIFs](#Part 1)
02 [Create 3D animated GIFs online with Filmora](#Part 2)
Part 1 Best 3 Ways to Create 3D Animated GIFs
First off, as promised, we have a brief list of some 3D GIF Maker tools that you can try. We’ve made sure to pick a unique set of 3D GIF Maker tools and 3D GIF Generator tools in order to give you a variety to choose from. It won’t be the most comprehensive list, but it should help you on your way to understanding how these 3D GIF makers usually work and how you can use them in order to create GIF images that you can share with your friends, family, and colleagues.
01 Wondershare Filmora Video Editor
The first 3D GIF Maker on our list is Filmora. It’s probably not the first one that you’d naturally think of as a 3D GIF Maker, seeing as it was developed to be more than that. But, it doesn’t discount the fact that it can be used in order to create and edit your own GIFs.
Wondershare Filmora is available for both Windows and Mac users. It allows you to create a GIF with images or video easily and even gives you the tools needed to edit and perfect it before you export it for use (a process that we’ll be showing off in more detail in the tutorial section below if you’re interested in learning more.)
For Win 7 or later (64-bit)
For macOS 10.12 or later
022. Adobe Photoshop
Adobe Photoshop, much like Filmora, is probably not, first and foremost, considered a mere 3D GIF Maker. However, it doesn’t erase its 3D GIF Creator functions. This tool, if used correctly, can make just about anything you want.
The process of using it, of course, is a little fussier than other alternatives (you’ll probably want to look up a more detailed explanation on the subject), but the fussiness does also mean that you can control every detail of your project and get it to look exactly how you want it to look.
03EaseUS Video Editor
Similar to Filmora, EaseUS Video Editor is an advanced video editing tool that you can use as a 3D GIF Creator quite easily. It comes built-in with templates, filters, design elements, transition effects, music, and so much more — allowing you to freely design your GIF images so that they can be ready for publishing right off the bat.
The beauty of it, of course, is that, much like with all the other options that we introduced today, you can use the program for more than just 3D GIF creation after the fact — opening yourself up for different and more complex projects in the future (be they image, audio, or video-related.)
Part 2 Create 3D Animated Gifs Online With Wondershare Filmora Video Editor
Now, as promised, we’ve also included a tutorial that you can follow along with to create your own 3D Animated GIFs with the tool, Wondershare Filmora Video Editor . With this tool, we’ll be showing you the basic way to do it (by using a premade video that you can edit and then convert into GIF format). But, feel free to explore the tool and use it as you wish (i.e., as a 3D spinning GIF creator, 3D rotating text GIF maker, 3D cube GIF maker, and so on.)
01Step 1: Launch Filmora Video Editor
First things first, launch the 3D GIF maker that you intend to use. In our case, that is Filmora (a screenshot has been provided below for your edification and reference. We’ll be using Filmora as our example.)
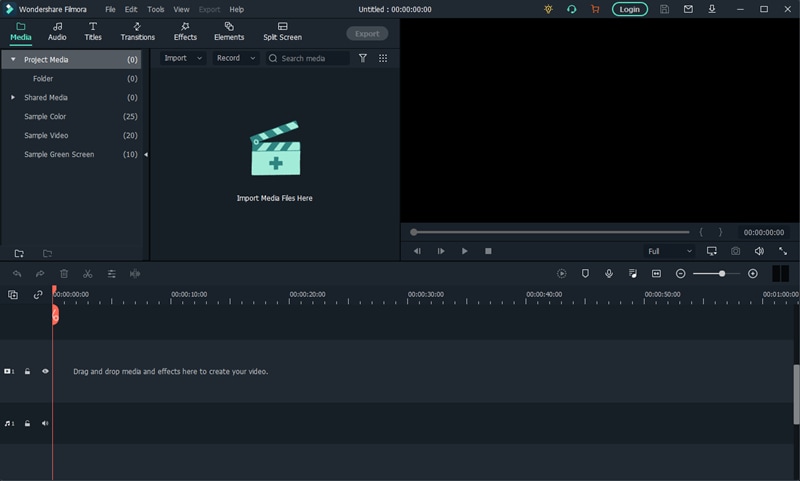
02Step 2: Upload File(s)
Next, upload the file or files that you want to turn into a GIF.
As mentioned in the introduction, we’ll be using a pre-made video, but you can use whatever you wish (i.e., images). In order to upload, we clicked the File tab (pointed out in the image below) and selected Import Media > Import Media File. However, you can also drag and drop your file(s) on the designated area of the UI..
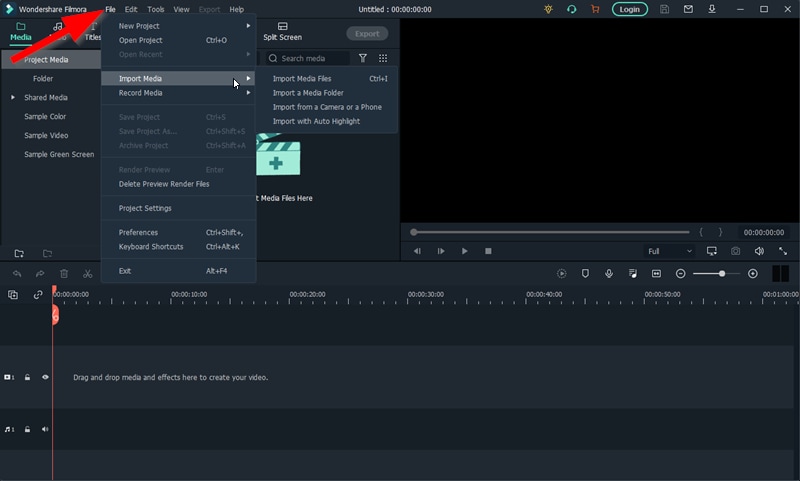
03Step 3: Drag Uploaded Media to Timeline
To create a GIF withFilmora , you’ll need to first create a video. Don’t worry, this is simple. Just drag and drop the media that you want to use onto the timeline.
Note: Any uploaded media will be in the media folder (marked [1] in the image below). Drag media from there onto the timeline (marked [2] in the image below) in order to create a video.
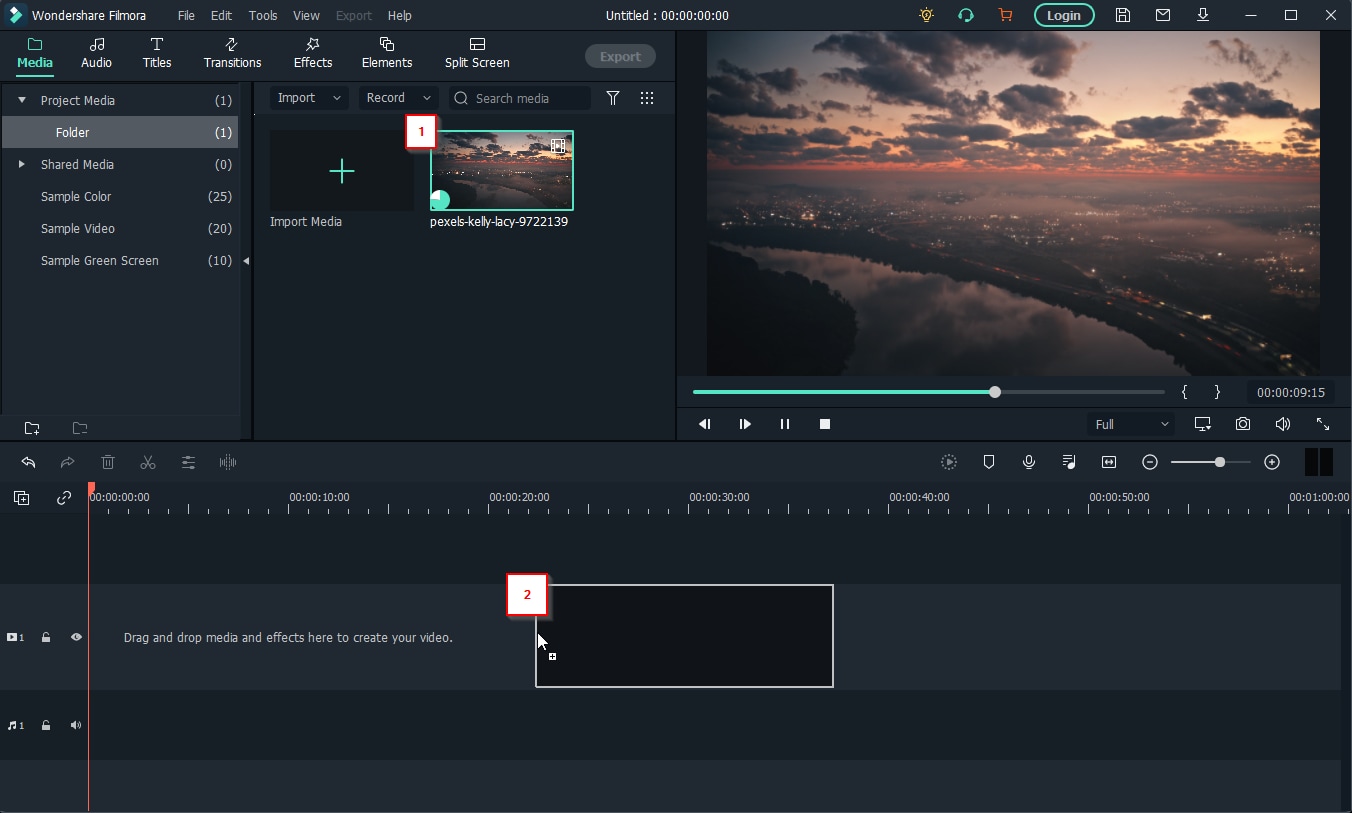
04Step 4: (Optional) Edit Video
If you want, take this opportunity to work on your video some more before converting it into a GIF. Filmora is set up to help you with this. Providing all the following features:
●Trim or Cut features to trim down the video.
●Add Text or audio to video.
●Use templates, filters, or other elements to design videos.
●Add transitions for better video flow.
And then some. In our case, we used the ‘Trim’ feature to cut down our video for a cleaner look.
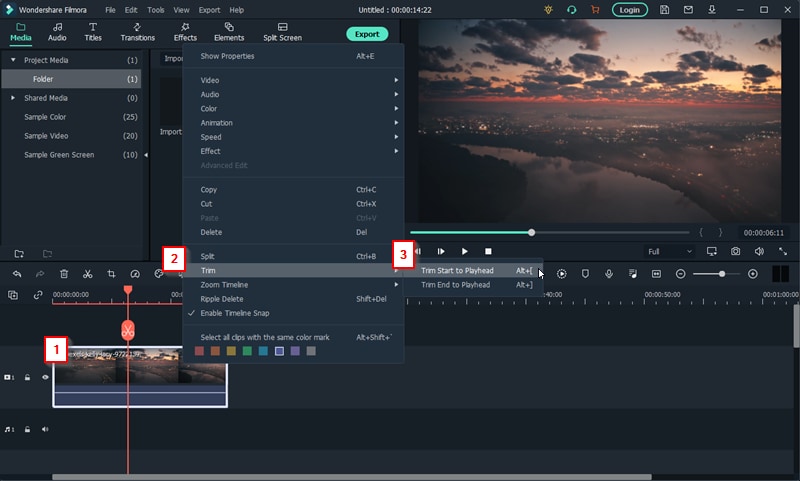
05Step 5: Create Video > GIF
Once you’re done editing your video, you can now convert it to a GIF.
This is easy enough to do. Just click the ‘Export’ tab and select the ‘Create Video’ option. That will allow you to choose to convert your finished video into a GIF file that you can share with your friends.
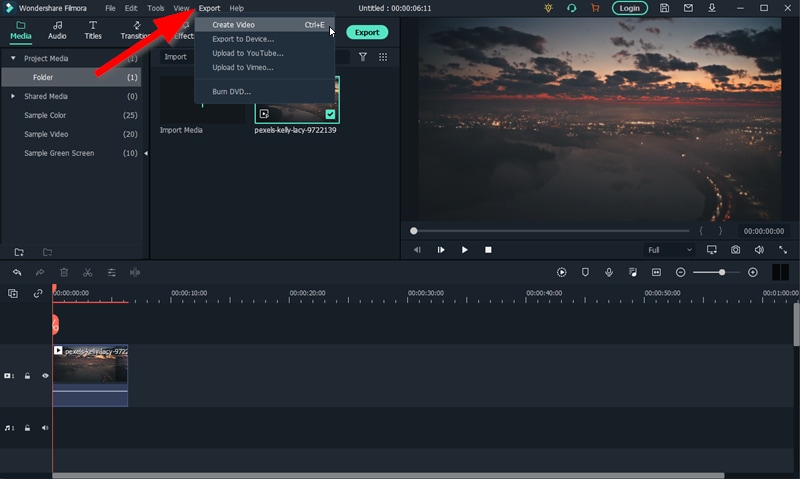
● Key Takeaways from This Episode →
● GIFs are a great way of sharing fun moments with friends and family. And, these days, it’s easier than ever to create them.
● There are 3D GIF Makers available everywhere online. Each one is a little different, of course. But capable of allowing you to create GIFs with images and videos that you can eventually share.
● One such example is the 3D GIF Maker, Filmora. It was the first one that we introduced on our list of the best 3D GIf Makers.
● We also included a tutorial on how you can use Filmora as a 3D GIF Generator for your reference. You can try out the program today if you like. Wondershare offers a FREE trial that you can use in order to explore the many functions of the software before you commit to buying out the perpetual license or signing up for one of their subscription packages.
If what you’re searching for is a 3D GIF Maker, then we’ve got your back. Below, we’ve not only listed the three best ways to create 3D animated GIFs, but we’ve also included a brief tutorial that you can reference when creating your very own GIF images.
In this article
01 [Best 3 Ways to Create 3D Animated GIFs](#Part 1)
02 [Create 3D animated GIFs online with Filmora](#Part 2)
Part 1 Best 3 Ways to Create 3D Animated GIFs
First off, as promised, we have a brief list of some 3D GIF Maker tools that you can try. We’ve made sure to pick a unique set of 3D GIF Maker tools and 3D GIF Generator tools in order to give you a variety to choose from. It won’t be the most comprehensive list, but it should help you on your way to understanding how these 3D GIF makers usually work and how you can use them in order to create GIF images that you can share with your friends, family, and colleagues.
01 Wondershare Filmora Video Editor
The first 3D GIF Maker on our list is Filmora. It’s probably not the first one that you’d naturally think of as a 3D GIF Maker, seeing as it was developed to be more than that. But, it doesn’t discount the fact that it can be used in order to create and edit your own GIFs.
Wondershare Filmora is available for both Windows and Mac users. It allows you to create a GIF with images or video easily and even gives you the tools needed to edit and perfect it before you export it for use (a process that we’ll be showing off in more detail in the tutorial section below if you’re interested in learning more.)
For Win 7 or later (64-bit)
For macOS 10.12 or later
022. Adobe Photoshop
Adobe Photoshop, much like Filmora, is probably not, first and foremost, considered a mere 3D GIF Maker. However, it doesn’t erase its 3D GIF Creator functions. This tool, if used correctly, can make just about anything you want.
The process of using it, of course, is a little fussier than other alternatives (you’ll probably want to look up a more detailed explanation on the subject), but the fussiness does also mean that you can control every detail of your project and get it to look exactly how you want it to look.
03EaseUS Video Editor
Similar to Filmora, EaseUS Video Editor is an advanced video editing tool that you can use as a 3D GIF Creator quite easily. It comes built-in with templates, filters, design elements, transition effects, music, and so much more — allowing you to freely design your GIF images so that they can be ready for publishing right off the bat.
The beauty of it, of course, is that, much like with all the other options that we introduced today, you can use the program for more than just 3D GIF creation after the fact — opening yourself up for different and more complex projects in the future (be they image, audio, or video-related.)
Part 2 Create 3D Animated Gifs Online With Wondershare Filmora Video Editor
Now, as promised, we’ve also included a tutorial that you can follow along with to create your own 3D Animated GIFs with the tool, Wondershare Filmora Video Editor . With this tool, we’ll be showing you the basic way to do it (by using a premade video that you can edit and then convert into GIF format). But, feel free to explore the tool and use it as you wish (i.e., as a 3D spinning GIF creator, 3D rotating text GIF maker, 3D cube GIF maker, and so on.)
01Step 1: Launch Filmora Video Editor
First things first, launch the 3D GIF maker that you intend to use. In our case, that is Filmora (a screenshot has been provided below for your edification and reference. We’ll be using Filmora as our example.)
02Step 2: Upload File(s)
Next, upload the file or files that you want to turn into a GIF.
As mentioned in the introduction, we’ll be using a pre-made video, but you can use whatever you wish (i.e., images). In order to upload, we clicked the File tab (pointed out in the image below) and selected Import Media > Import Media File. However, you can also drag and drop your file(s) on the designated area of the UI..
03Step 3: Drag Uploaded Media to Timeline
To create a GIF withFilmora , you’ll need to first create a video. Don’t worry, this is simple. Just drag and drop the media that you want to use onto the timeline.
Note: Any uploaded media will be in the media folder (marked [1] in the image below). Drag media from there onto the timeline (marked [2] in the image below) in order to create a video.
04Step 4: (Optional) Edit Video
If you want, take this opportunity to work on your video some more before converting it into a GIF. Filmora is set up to help you with this. Providing all the following features:
●Trim or Cut features to trim down the video.
●Add Text or audio to video.
●Use templates, filters, or other elements to design videos.
●Add transitions for better video flow.
And then some. In our case, we used the ‘Trim’ feature to cut down our video for a cleaner look.
05Step 5: Create Video > GIF
Once you’re done editing your video, you can now convert it to a GIF.
This is easy enough to do. Just click the ‘Export’ tab and select the ‘Create Video’ option. That will allow you to choose to convert your finished video into a GIF file that you can share with your friends.
● Key Takeaways from This Episode →
● GIFs are a great way of sharing fun moments with friends and family. And, these days, it’s easier than ever to create them.
● There are 3D GIF Makers available everywhere online. Each one is a little different, of course. But capable of allowing you to create GIFs with images and videos that you can eventually share.
● One such example is the 3D GIF Maker, Filmora. It was the first one that we introduced on our list of the best 3D GIf Makers.
● We also included a tutorial on how you can use Filmora as a 3D GIF Generator for your reference. You can try out the program today if you like. Wondershare offers a FREE trial that you can use in order to explore the many functions of the software before you commit to buying out the perpetual license or signing up for one of their subscription packages.
Top 7 Animated GIF Text Makers
Versatile Video Editor - Wondershare Filmora
An easy yet powerful editor
Numerous effects to choose from
Detailed tutorials provided by the official channel
Arguably the hilarious moment of online communication, GIFs are a sequence of static images that throw a unique effect when strung together. They add excitement to social media posts, energy to email conversations, and even standard text, and usually create the internet (and this post) the funniest place to be.
Many people like to create GIFs on their websites, on digital platforms, or within their social media. We’ve collected a list of the best-animated GIF text makers around and reviewed them, so you don’t have to. You’ve come to the perfect article if you’re also one among them.
Top 7 Animated GIF Text Makers 2022
Without further ado, let’s jump in! Here are the five best-recommended websites or text GIF makers worth considering in 2021.
1. Bloggif
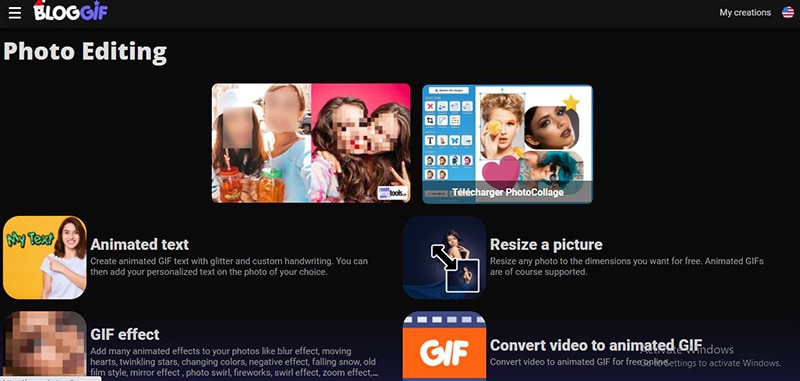
This site shows an appropriate GIF for just about anything you’re wondering. Based upon what you’re looking for, there are numerous ways to uncover a perfect match.
One way is to search among the dropdown menus on the main website’s interface. These menus allow users to surface GIFs such as animated text, resize a picture, GIF slideshow, GIF effect, and more.
2. Gfycat
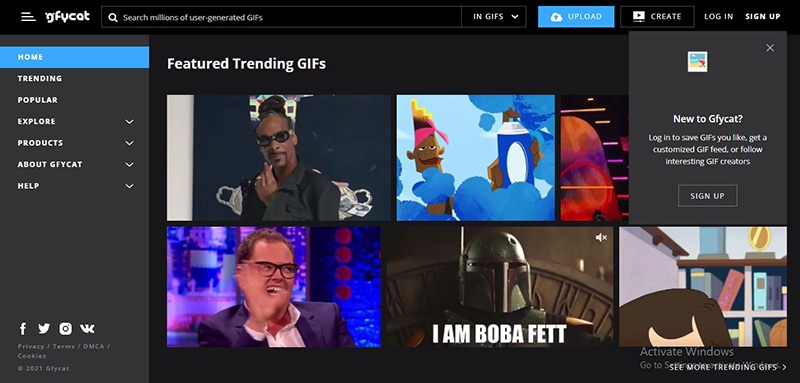
Gfycat is another online text GIF maker with millions of GIFs to dive into as a GIF text generator. Not only is it one of the highly famous GIF sites, but it has a simple animated GIF text maker to turn your favorite Vimeo, Twitter, and Twitch streams into your library of memes.
You can easily navigate its wide variety of GIFs from the search bar or left menu, select from the latest “Explore” or “Trending” section to look for multiple categories of stickers or GIFs.
3. GIPHY
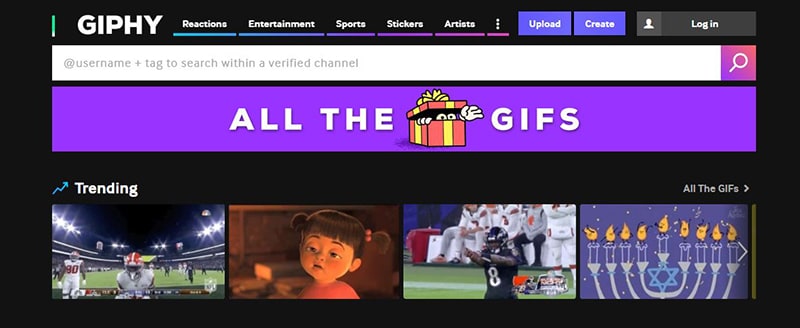
This is another go-to resource for text GIF maker hunting. Alex Chung and Jace Cooke launched it; GIPHY began as a search engine for GIFs. The platform has seen significant growth by introducing integrations, partnering with brands, and making browser extensions, and a lot more. (Check out GIPHY Labs to explore their expansion efforts.)
The best part? Looking for the database of GIFs couldn’t be easier: Users can browse categories — Music, Adjectives, Nature, Science, Nature, etc. — or seek out a specific phrase or a word using the search feature.
4. Make a GIF
Make A GIF allows you to create a GIF from many images, a video from your computer, a Facebook or YouTube video, or directly from your webcam.
With this tool, it’s pretty simple to customize the order of the photos and rearrange them via drag-and-drop editor. You can also resize its images and create a personalized animation speed. In addition, there is a captioning tool included to add text on top of your GIF, but you can’t preview it before creating the GIF or change where the text GIF maker is displayed.
You can save the GIF to your PC and copy its URL to find it online once created. It further consists of options for making your GIF public, private, or unlisted. You can even link directly to the GIF file.
5. ImgFlip

ImgFlip displays a preview of your GIF during the creation, which is valuable. You can develop these GIFs from images, a GIF URL, a video URL, or a video you upload yourself.
Besides, you can alter animation delay, width, height, photo order, and quality for a GIF created with images. There’s also a crop option, text tool, and the ability to rotate the GIF, change the play count, reverse it, and change the background color.
You can download your GIF and share it over a few social media sites once done, or not post it online while setting it as private.
A watermark displayed on all GIFs created is here at Imgflip. Also, most of the custom settings for making a GIF from this GIF text generator are usable only if you subscribe to ImgFlip Pro.
Tip: Make animated GIF Text in video
Now you may be wandering to create your GIF. The market comes loaded with many websites, tools, and the above-mentioned animated GIF text makers.
Additionally, you can use Adobe Photoshop too or some other popular software for the purpose. If we talk about online tools, the above-mentioned animated text generator GIFs are the standard options.
It is also relatively easier to find text GIF maker online applications for smartphones or mobile devices. It is possible to develop gifs from the collection of still images or even from moving videos, and this task is much easier than anyone can perform. To execute this task with simplicity, we would like to recommend Wondershare Filmora

Wondershare Filmora - Best Video Editor for Mac/Windows
5,481,435 people have downloaded it.
Build unique custom animations without breaking a sweat.
Focus on creating epic stories and leave the details to Filmora’s auto features.
Start a creative adventure with drag & drop effects and endless possibilities.
Filmora simplifies advanced features to save you time and effort.
Filmora cuts out repetition so you can move on to your next creative breakthrough.
This recommendation is the most interactive yet simple to understand interface of this software tool. You can easily combine various stills into GIFs using Filmora or turn small videos into GIFs. The more exciting thing is that Filmora also helps in easy Gifs customization as users can add elements, overlays, text, etc., to their GIFs using this platform as the ideal animated GIF text maker.
How to make GIFs with Wondershare Filmora
Here are a few easy to execute steps to accomplish this operation:
Step 1 Upload media files
The primary task is to import some editable video files or collections of photos to the Wondershare Filmora’s timeline. This software tool is compatible with more than 150 media file formats to easily upload any of your images ranging somewhere between png, jpg, avi, mpg, wav, mkv, mp4, or WMV, etc.
For Win 7 or later (64-bit)
For macOS 10.12 or later
Step 2 Drag to timeline
Users can drag their image/video file and drop it on the timeline of Wondershare Filmora. Once your file goes there, it will be easily edited using a wide range of tools.

Step 3 Edit media files
There are unlimited editing elements and tools with numerous exciting features of Filmora.
Users can easily select among options like slow down, speed up, combine, rotate, split, crop, etc., to develop eye-catching video as per available content.
Step 4 Add text effect to GIF files
It is the right time to update text-based GIFs. There are certain small messages used that always appear suitable in GIFs.

Step 5 Save and export
Once you complete all these steps, save your file with a GIF extension and get it uploaded on social media platforms, if you wish so.

Conclusion
Thus, there are plenty of websites to choose from among animated GIF text makers when it comes to searching for some genuine yet cool GIFs. Whether you must send one to the email chain of your coworker’s birthday, or make your brother, Zayn, laugh at the dinner table, we hope this list helps narrow down your search for the perfect maker to create text GIF.
Arguably the hilarious moment of online communication, GIFs are a sequence of static images that throw a unique effect when strung together. They add excitement to social media posts, energy to email conversations, and even standard text, and usually create the internet (and this post) the funniest place to be.
Many people like to create GIFs on their websites, on digital platforms, or within their social media. We’ve collected a list of the best-animated GIF text makers around and reviewed them, so you don’t have to. You’ve come to the perfect article if you’re also one among them.
Top 7 Animated GIF Text Makers 2022
Without further ado, let’s jump in! Here are the five best-recommended websites or text GIF makers worth considering in 2021.
1. Bloggif
This site shows an appropriate GIF for just about anything you’re wondering. Based upon what you’re looking for, there are numerous ways to uncover a perfect match.
One way is to search among the dropdown menus on the main website’s interface. These menus allow users to surface GIFs such as animated text, resize a picture, GIF slideshow, GIF effect, and more.
2. Gfycat
Gfycat is another online text GIF maker with millions of GIFs to dive into as a GIF text generator. Not only is it one of the highly famous GIF sites, but it has a simple animated GIF text maker to turn your favorite Vimeo, Twitter, and Twitch streams into your library of memes.
You can easily navigate its wide variety of GIFs from the search bar or left menu, select from the latest “Explore” or “Trending” section to look for multiple categories of stickers or GIFs.
3. GIPHY
This is another go-to resource for text GIF maker hunting. Alex Chung and Jace Cooke launched it; GIPHY began as a search engine for GIFs. The platform has seen significant growth by introducing integrations, partnering with brands, and making browser extensions, and a lot more. (Check out GIPHY Labs to explore their expansion efforts.)
The best part? Looking for the database of GIFs couldn’t be easier: Users can browse categories — Music, Adjectives, Nature, Science, Nature, etc. — or seek out a specific phrase or a word using the search feature.
4. Make a GIF
Make A GIF allows you to create a GIF from many images, a video from your computer, a Facebook or YouTube video, or directly from your webcam.
With this tool, it’s pretty simple to customize the order of the photos and rearrange them via drag-and-drop editor. You can also resize its images and create a personalized animation speed. In addition, there is a captioning tool included to add text on top of your GIF, but you can’t preview it before creating the GIF or change where the text GIF maker is displayed.
You can save the GIF to your PC and copy its URL to find it online once created. It further consists of options for making your GIF public, private, or unlisted. You can even link directly to the GIF file.
5. ImgFlip
ImgFlip displays a preview of your GIF during the creation, which is valuable. You can develop these GIFs from images, a GIF URL, a video URL, or a video you upload yourself.
Besides, you can alter animation delay, width, height, photo order, and quality for a GIF created with images. There’s also a crop option, text tool, and the ability to rotate the GIF, change the play count, reverse it, and change the background color.
You can download your GIF and share it over a few social media sites once done, or not post it online while setting it as private.
A watermark displayed on all GIFs created is here at Imgflip. Also, most of the custom settings for making a GIF from this GIF text generator are usable only if you subscribe to ImgFlip Pro.
Tip: Make animated GIF Text in video
Now you may be wandering to create your GIF. The market comes loaded with many websites, tools, and the above-mentioned animated GIF text makers.
Additionally, you can use Adobe Photoshop too or some other popular software for the purpose. If we talk about online tools, the above-mentioned animated text generator GIFs are the standard options.
It is also relatively easier to find text GIF maker online applications for smartphones or mobile devices. It is possible to develop gifs from the collection of still images or even from moving videos, and this task is much easier than anyone can perform. To execute this task with simplicity, we would like to recommend Wondershare Filmora
Wondershare Filmora - Best Video Editor for Mac/Windows
5,481,435 people have downloaded it.
Build unique custom animations without breaking a sweat.
Focus on creating epic stories and leave the details to Filmora’s auto features.
Start a creative adventure with drag & drop effects and endless possibilities.
Filmora simplifies advanced features to save you time and effort.
Filmora cuts out repetition so you can move on to your next creative breakthrough.
This recommendation is the most interactive yet simple to understand interface of this software tool. You can easily combine various stills into GIFs using Filmora or turn small videos into GIFs. The more exciting thing is that Filmora also helps in easy Gifs customization as users can add elements, overlays, text, etc., to their GIFs using this platform as the ideal animated GIF text maker.
How to make GIFs with Wondershare Filmora
Here are a few easy to execute steps to accomplish this operation:
Step 1 Upload media files
The primary task is to import some editable video files or collections of photos to the Wondershare Filmora’s timeline. This software tool is compatible with more than 150 media file formats to easily upload any of your images ranging somewhere between png, jpg, avi, mpg, wav, mkv, mp4, or WMV, etc.
For Win 7 or later (64-bit)
For macOS 10.12 or later
Step 2 Drag to timeline
Users can drag their image/video file and drop it on the timeline of Wondershare Filmora. Once your file goes there, it will be easily edited using a wide range of tools.
Step 3 Edit media files
There are unlimited editing elements and tools with numerous exciting features of Filmora.
Users can easily select among options like slow down, speed up, combine, rotate, split, crop, etc., to develop eye-catching video as per available content.
Step 4 Add text effect to GIF files
It is the right time to update text-based GIFs. There are certain small messages used that always appear suitable in GIFs.
Step 5 Save and export
Once you complete all these steps, save your file with a GIF extension and get it uploaded on social media platforms, if you wish so.
Conclusion
Thus, there are plenty of websites to choose from among animated GIF text makers when it comes to searching for some genuine yet cool GIFs. Whether you must send one to the email chain of your coworker’s birthday, or make your brother, Zayn, laugh at the dinner table, we hope this list helps narrow down your search for the perfect maker to create text GIF.
5 Websites with Animated Logos That Catch Your Eyes
5 Websites with Animated Logos That Can Catch Your Eyes
An easy yet powerful editor
Numerous effects to choose from
Detailed tutorials provided by the official channel
Animated logos could be difficult to make for someone who has no experience with animation. That is why we are here to tell you how you can make an attractive animated logo.
Learn more about websites with animated logos through this article.
In this article
01 [Why You Should Use Logo Animation](#Part 1)
02 [5 Awesome Ways to Use Logo Animation](#Part 2)
03 [6 of the Best Animated Logos](#Part 3)
04 [8 Websites with Premium Animated Logo Templates](#Part 4)
Part 1 Why You Should Use Logo Animation
Those who make it big are known to brave the storm. The ones who follow the crowd just turn out to be ordinary. However, those who innovate, rise to a higher level. Here is why you should go for a website with animated logo!
01They grab viewers attraction
The human mind chooses to believe in the supremacy of what appeals to them visually. It is highly important to grab the user’s attention in order to make a mark. Animated logos help your website to visually appeal to the viewer and grab his/her attention. Potential customers will tend to remember the logo of your website and this would directly impact the conversion rates of your website.

02Increase in brand awareness
Brand awareness is key to a website’s success. As we saw earlier, people often tend to remember brands by their logo and not name. An attractive animated logo will help you create a strong brand awareness among potential customers and help your brand gain popularity.
03Animated logos can convey more
A brand logo is supposed to be the identity of a brand. The logo should be capable enough of explaining your website’s understanding about the field. For instance, if your company is in the cyber security domain, the logo should be good enough to justify your company’s expertise. Animated logos help you establish trust by conveying more through the medium of a logo.
Part 2 4 Awesome Ways to Use Logo Animation
01They can serve as introductions to marketing videos
Video marketing is one of the most commonly used marketing techniques. Research suggested that about 99 percent of brands use video marketing in order to enhance their brand image. Starting of your video with an animated logo will not just look catchy but also make the video all the more professional.
02They can make great outros
Just like animated videos can serve as amazing introductory bits of the video, they can also be the perfect outros to videos. If you haven’t added your animated logo in the introduction of the video then they can be added at the end. This will lead to your viewers remembering your brand for a longer time.
03Look very attractive at trade shows
Trade shows are opportunities where websites and company owners can interact with investors and potential customers face to face. It’s an excellent opportunity to make your mark on the big stage. Logos of companies may be projected on the big screen in such events. At such events when you have just a few seconds to make a mark, you need your logo to grab the viewer’s attention. Hence, animated logos could be very useful.
04They could be a great addition to your company’s email signature
Emails are regarded as the 3rd largest information sources in the B2B industry. It is one of the largest means of communication and marketing. Email signatures have been around for years; however the traditional email signatures have now gone out of fashion. Contemporary email signatures include animated logos to leave a bigger impact on the receiver. Using animated logos, you can add grace to your email signatures and escape the ordinary.
Part 3 6 of the Best Animated Logos
01Mastercard
Mastercard is one of the first companies to use animated logos. The logo is simply fantastic due to the meaning it conveys without any complex animation. The animated logo involves the traditional venn diagram logo of mastercard morphing into several objects. These objects include everything from food to groceries to luxurious products. It basically includes the various kinds of commodities people buy using mastercards.
02Burger king
Another popular brand that uses animated logos is the american fast food giant, burger king. The logo is not highly flashy like we see in mastercard. However, the animated logo does obviously look more attention seeking than the conventional static logo. The logo shows the stacking of the different elements of the logo one by one over each other. This resembles the process of making a burger.
03Fedex
Another logo that would classify as a flashy animated logo is the fedex logo. Initially, fedex had experimented with several logos before sticking to the arrow logo which continues even today. The animated logo involves an arrow making the letter “Fedex” with its trajectory and then finally settling in between letters X and E. The logistics giant delivers couriers from one corner of the world to another, and the arrow symbolizes exactly that!
04Flickr
Flickr is a popular stock image and video hosting platform. Anyone can use the stock images and videos in their content. The logo starts with a blue and pink dot initially. These dots later expand in a whirlpool like motion. The logo starts off with the static logo before it expands. The idea is to show that the online stock image portal goes beyond limits and has every picture and video you’d need
05Bundle
Bundle is a popular app that offers its users rewards upon shopping from selected stores. These stores have an alliance with bundle and upon shopping from them, users seek reward points on the bundle app. The animated logo starts of with a pink screen which later converges to become a large “B” wrapped with a gifting ribbon. Although, the logo is pretty simple it does an amazing job at explaining the brand’s MSP and attracts customers.
06Google
The logo of google has evolved over the years. Google is almost synonymous to attractive logos and it comes up with attractive new logos every now and then. One of the newest logos, an animated one, is by far one of the most attractive animated logos. It aims to depict the numerous things users can search using “Google voice search”.
Part 4 5 Websites with Premium Animated Logo Templates
01RenderForest
There are several applications you can use for animating your next logo for your website. RenderForest is one such software that lets you explore multiple animated logo templates. The tool has an array of templates you can choose from. Each of the templates is unique in its own way and has its own charm. Additionally, the software also has a functionality using which you can animate your static logo using templates.
Developed and managed by Adobe, the editing application is a popular one. The software allows you to use several pre-made templates while animating. The animations that you can find on adobe spark are
02Adobe Spark
Adobe spark seamless and designed perfectly. Using adobe spark, you can give your animated logo a touch of class and perfection. Although the software is paid, it is worth every penny due to the numerous animation templates and video editing tools available.
03Design free logo
Another amazing tool for animation, design free logo is a complete animation tool that offers several animation templates. Additionally, the free software also lets users animate in 3 dimensions. The software is best suited for novice animators who have limited experience with animation. The software is very simple to use unlike its sophisticated counterparts.
04Logo maker plus
If you are looking for an android application that helps you create seamless animated logos, well logo maker plus is just the perfect application for you. The app has more than a 100 templates for animating your logo, hence making it the perfect app for those who want to perform basic animation. Additionally, the app also has multiple visual effects which would enable you to make catchy logos
05Animaker
The final software on this list of amazing softwares is animaker. The software works well to animate logos, presentations, and marketing videos. The software has more than 50 effects. Moreover, using this software you can add filters, effects and sound effects. The software also lets users upload the videos to facebook and youtube directly!
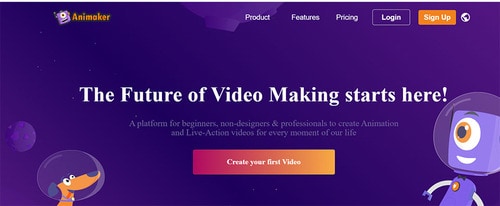
Final Thoughts
● Today, we took a look at a few of the best animated logos which you could idealize.
● Nowadays, even big brands are adopting animated logos.
● They help establish a brand image and take your brand to a higher level.
● We also saw a few softwares that could help you make an animated logo. Wish to make an animated logo? Head to any one of the websites and make your website with animated logos!
Animated logos could be difficult to make for someone who has no experience with animation. That is why we are here to tell you how you can make an attractive animated logo.
Learn more about websites with animated logos through this article.
In this article
01 [Why You Should Use Logo Animation](#Part 1)
02 [5 Awesome Ways to Use Logo Animation](#Part 2)
03 [6 of the Best Animated Logos](#Part 3)
04 [8 Websites with Premium Animated Logo Templates](#Part 4)
Part 1 Why You Should Use Logo Animation
Those who make it big are known to brave the storm. The ones who follow the crowd just turn out to be ordinary. However, those who innovate, rise to a higher level. Here is why you should go for a website with animated logo!
01They grab viewers attraction
The human mind chooses to believe in the supremacy of what appeals to them visually. It is highly important to grab the user’s attention in order to make a mark. Animated logos help your website to visually appeal to the viewer and grab his/her attention. Potential customers will tend to remember the logo of your website and this would directly impact the conversion rates of your website.
02Increase in brand awareness
Brand awareness is key to a website’s success. As we saw earlier, people often tend to remember brands by their logo and not name. An attractive animated logo will help you create a strong brand awareness among potential customers and help your brand gain popularity.
03Animated logos can convey more
A brand logo is supposed to be the identity of a brand. The logo should be capable enough of explaining your website’s understanding about the field. For instance, if your company is in the cyber security domain, the logo should be good enough to justify your company’s expertise. Animated logos help you establish trust by conveying more through the medium of a logo.
Part 2 4 Awesome Ways to Use Logo Animation
01They can serve as introductions to marketing videos
Video marketing is one of the most commonly used marketing techniques. Research suggested that about 99 percent of brands use video marketing in order to enhance their brand image. Starting of your video with an animated logo will not just look catchy but also make the video all the more professional.
02They can make great outros
Just like animated videos can serve as amazing introductory bits of the video, they can also be the perfect outros to videos. If you haven’t added your animated logo in the introduction of the video then they can be added at the end. This will lead to your viewers remembering your brand for a longer time.
03Look very attractive at trade shows
Trade shows are opportunities where websites and company owners can interact with investors and potential customers face to face. It’s an excellent opportunity to make your mark on the big stage. Logos of companies may be projected on the big screen in such events. At such events when you have just a few seconds to make a mark, you need your logo to grab the viewer’s attention. Hence, animated logos could be very useful.
04They could be a great addition to your company’s email signature
Emails are regarded as the 3rd largest information sources in the B2B industry. It is one of the largest means of communication and marketing. Email signatures have been around for years; however the traditional email signatures have now gone out of fashion. Contemporary email signatures include animated logos to leave a bigger impact on the receiver. Using animated logos, you can add grace to your email signatures and escape the ordinary.
Part 3 6 of the Best Animated Logos
01Mastercard
Mastercard is one of the first companies to use animated logos. The logo is simply fantastic due to the meaning it conveys without any complex animation. The animated logo involves the traditional venn diagram logo of mastercard morphing into several objects. These objects include everything from food to groceries to luxurious products. It basically includes the various kinds of commodities people buy using mastercards.
02Burger king
Another popular brand that uses animated logos is the american fast food giant, burger king. The logo is not highly flashy like we see in mastercard. However, the animated logo does obviously look more attention seeking than the conventional static logo. The logo shows the stacking of the different elements of the logo one by one over each other. This resembles the process of making a burger.
03Fedex
Another logo that would classify as a flashy animated logo is the fedex logo. Initially, fedex had experimented with several logos before sticking to the arrow logo which continues even today. The animated logo involves an arrow making the letter “Fedex” with its trajectory and then finally settling in between letters X and E. The logistics giant delivers couriers from one corner of the world to another, and the arrow symbolizes exactly that!
04Flickr
Flickr is a popular stock image and video hosting platform. Anyone can use the stock images and videos in their content. The logo starts with a blue and pink dot initially. These dots later expand in a whirlpool like motion. The logo starts off with the static logo before it expands. The idea is to show that the online stock image portal goes beyond limits and has every picture and video you’d need
05Bundle
Bundle is a popular app that offers its users rewards upon shopping from selected stores. These stores have an alliance with bundle and upon shopping from them, users seek reward points on the bundle app. The animated logo starts of with a pink screen which later converges to become a large “B” wrapped with a gifting ribbon. Although, the logo is pretty simple it does an amazing job at explaining the brand’s MSP and attracts customers.
06Google
The logo of google has evolved over the years. Google is almost synonymous to attractive logos and it comes up with attractive new logos every now and then. One of the newest logos, an animated one, is by far one of the most attractive animated logos. It aims to depict the numerous things users can search using “Google voice search”.
Part 4 5 Websites with Premium Animated Logo Templates
01RenderForest
There are several applications you can use for animating your next logo for your website. RenderForest is one such software that lets you explore multiple animated logo templates. The tool has an array of templates you can choose from. Each of the templates is unique in its own way and has its own charm. Additionally, the software also has a functionality using which you can animate your static logo using templates.
Developed and managed by Adobe, the editing application is a popular one. The software allows you to use several pre-made templates while animating. The animations that you can find on adobe spark are
02Adobe Spark
Adobe spark seamless and designed perfectly. Using adobe spark, you can give your animated logo a touch of class and perfection. Although the software is paid, it is worth every penny due to the numerous animation templates and video editing tools available.
03Design free logo
Another amazing tool for animation, design free logo is a complete animation tool that offers several animation templates. Additionally, the free software also lets users animate in 3 dimensions. The software is best suited for novice animators who have limited experience with animation. The software is very simple to use unlike its sophisticated counterparts.
04Logo maker plus
If you are looking for an android application that helps you create seamless animated logos, well logo maker plus is just the perfect application for you. The app has more than a 100 templates for animating your logo, hence making it the perfect app for those who want to perform basic animation. Additionally, the app also has multiple visual effects which would enable you to make catchy logos
05Animaker
The final software on this list of amazing softwares is animaker. The software works well to animate logos, presentations, and marketing videos. The software has more than 50 effects. Moreover, using this software you can add filters, effects and sound effects. The software also lets users upload the videos to facebook and youtube directly!
Final Thoughts
● Today, we took a look at a few of the best animated logos which you could idealize.
● Nowadays, even big brands are adopting animated logos.
● They help establish a brand image and take your brand to a higher level.
● We also saw a few softwares that could help you make an animated logo. Wish to make an animated logo? Head to any one of the websites and make your website with animated logos!
Also read:
- What This Post Can Teach You About Clay Animation
- 2024 Approved Top 10 Sketch Animation Video Makers
- Learn Disney Cartoon Drawing to See Disney Magic Moments for 2024
- Updated 2024 Approved The Only Guide Youll Need to Learn About GIF Video Downloader
- In 2024, The Definitive Guide to Whiteboard Animation
- Learn Easy Blender Rigging in Only 2 Minutes for 2024
- New Whats Rigging Animation and Why It Matters
- Updated How to Make Animated Videos for Business Simple Guide
- Updated In 2024, How-To Guide Make Animation Characters with the Best Animated Character Creators
- New Some Must-Know Useful Lego Animation Ideas for 2024
- New In 2024, 12 Dubbed Anime Websites to Watch for Free
- Updated In 2024, How to Animate - Adobe Animate Tutorias
- New How To Learn Cartoon Sketch Drawing— Pencil Sketch for Beginners for 2024
- 12 Animated Slideshow PowerPoint Templates for 2024
- New In 2024, 12 Aesthetic GIF Instagram for Marketers and Creatives
- 2024 Approved OBS Animated Lower Thirds Alternatives
- Updated How to Become a Motion Graphic Designer for 2024
- Updated In 2024, What Is the Meaning of Motion Graphics
- Updated 2024 Approved 5 Different Animation Styles A Simple but Comprehensive Guide
- New In 2024, How to Animate Image on Scroll
- Complete Guide to Send Gif WhatsApp on Android for 2024
- Updated Learn Simple Blender Rigging in Only 2 Minutes for 2024
- 2024 Approved What Wikipedia Wont Tell You Specifically About Character Rigging
- What Is Still Motion Animation for 2024
- New How to Make Animated Videos for Business – an Ultimate Guide for 2024
- New In 2024, What This Post Can Teach You About Clay Animation
- New Top 10 3D Text Animation Templates for 2024
- Updated 20 Free After Effects Logo Reveal Templates You Will Want to Know for 2024
- New The Ultimate Cheatsheet to 15 Adobe Animate Alternatives
- Top 10 Websites to Download Anime Subtitles for Free for 2024
- Updated Nurturing the Spirit Through the Top 10 Intellectual Anime Websites for 2024
- New How to Make an Animation With 7 Steps
- How to Make Animation Characters with the Best Character Creators for 2024
- 2024 Approved Tutorials for Animating Picture Online Without Learning From Scratch
- In 2024, 10 Best Romance Anime Movies You Need to Watch
- The Best 8 Places for High-Quality Royalty Free Gifs
- In 2024, How to Reset Apple ID and Apple Password From Apple iPhone 15
- In 2024, 5 Easy Ways to Copy Contacts from Samsung Galaxy A15 5G to iPhone 14 and 15 | Dr.fone
- In 2024, How To Transfer Data from Apple iPhone 15 Pro Max to New iPhone 15 | Dr.fone
- 6 Proven Ways to Unlock OnePlus Ace 2V Phone When You Forget the Password
- How to Hard Reset Nokia C110 Without Password | Dr.fone
- Life360 Circle Everything You Need to Know On Xiaomi Redmi K70E | Dr.fone
- In 2024, Resolve Your Apple iPhone 8 Plus Keeps Asking for Outlook Password | Dr.fone
- How To Transfer WhatsApp From iPhone 8 Plus to Android? | Dr.fone
- In 2024, Change Location on Yik Yak For your Motorola Moto G24 to Enjoy More Fun | Dr.fone
- How To Reset the Security Questions of Your Apple ID On Your iPhone 15 Plus
- How does the stardust trade cost In pokemon go On Tecno Spark 20 Pro? | Dr.fone
- How To Unlock Realme Note 50 Phone Without Password?
- In 2024, Guide to Mirror Your Poco X5 Pro to Other Android devices | Dr.fone
- In 2024, Disabled Apple iPhone SE (2020) How to Unlock a Disabled Apple iPhone SE (2020)?
- 7 Ways to Unlock a Locked Vivo T2 Pro 5G Phone
- How to Sign .jpeg Online with DigiSigner
- What to Do if Google Play Services Keeps Stopping on Vivo X100 Pro | Dr.fone
- Unlock Xiaomi 13T Pro Phone Password Without Factory Reset Full Guide Here
- In 2024, Here are Some Pro Tips for Pokemon Go PvP Battles On Vivo Y77t | Dr.fone
- Honor V Purse Screen Unresponsive? Heres How to Fix It | Dr.fone
- Solved Mac Doesnt Recognize my iPhone 15 Pro Max | Stellar
- How to Factory Reset Infinix Zero 30 5G without Losing Data | Dr.fone
- In 2024, The Magnificent Art of Pokemon Go Streaming On Realme C67 4G? | Dr.fone
- iPhone Data Recovery Software
- In 2024, How to Cast Infinix Note 30 Screen to PC Using WiFi | Dr.fone
- Does find my friends work on Infinix Note 30 | Dr.fone
- Forgotten The Voicemail Password Of Tecno Spark Go (2024)? Try These Fixes
- In 2024, Downloading SamFw FRP Tool 3.0 for Samsung Galaxy Z Flip 5
- How To Remove or Bypass Knox Enrollment Service On Vivo Y56 5G
- 10 Best Fake GPS Location Spoofers for Samsung Galaxy S23 FE | Dr.fone
- Title: New Ways You Can Master to Find 10 Best Free Animated Text Generator for 2024
- Author: Elon
- Created at : 2024-05-19 03:05:56
- Updated at : 2024-05-20 03:05:56
- Link: https://animation-videos.techidaily.com/new-ways-you-can-master-to-find-10-best-free-animated-text-generator-for-2024/
- License: This work is licensed under CC BY-NC-SA 4.0.
