
:max_bytes(150000):strip_icc():format(webp)/how-to-set-up-a-ps5-5088641-1bcc6bca24cd460bb2b276fdeb6cb830.jpg)
The 15 Most Efficient Photo to Cartoon Apps for Android
The 15 Most Efficient Photo to Cartoon Apps for Android
The 15 Most Efficient Photo to Cartoon Apps for Android
An easy yet powerful editor
Numerous effects to choose from
Detailed tutorials provided by the official channel
It’s usually better to start with a free cartoon app for Android, whether you want to make a cartoon avatar of yourself or add humorous cartoons and live artistic effects to your photos.
In today’s digital age, your smartphone can serve as a portable cartoon picture editor, allowing you to apply cool and artistic effects to new or current photos. Finding an excellent cartoon-making app for Android is difficult because there are so many unique possibilities.
To assist you, we’ve compiled a list of the top cartoon picture apps for Android and iPhone that can help you turn your photo into a cartoon in seconds. Let’s get started without further ado.
In this article
01 [10 Apps to Kickstart Your Need to Photo to Cartoon](#Part 1)
02 [Top 5 iOS Apps to Turn Photo into Cartoon](#Part 2)
Part 1 Apps to Kickstart Your Need to Photo to Cartoon
In this part, you will have a chance to familiarize yourself with the best cartoon apps for Android, along with all the relevant information that matches your need.
01Cartoon Photo Editor
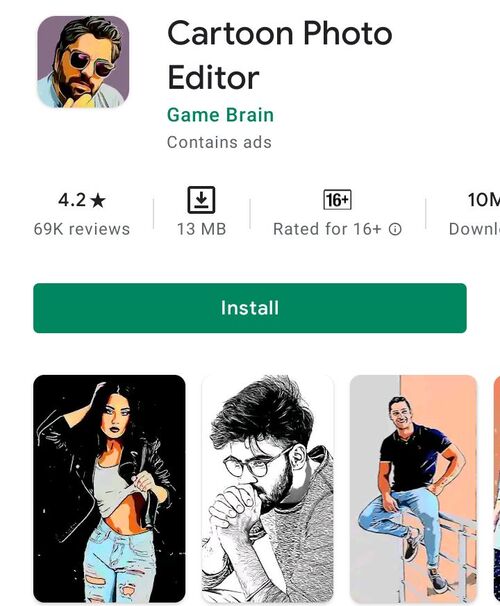
This free image to cartoon app has been a favorite for many years, making it an obvious choice for the top slot.
This cartoon pic software could be the ideal choice for you to add fantastic artistic and cartoon effects to your new or current photos.
Features:
• Add fantastic cartoon effects to your phone’s gallery photos.
• With a single tap of your finger, save images or take an image instantly.
• The autofocus feature (click anywhere on the screen)
• Several eye-catching effects, including a cartoon, oil painting, thermal vision, drawing, and more.
Compatibility:- Android 4.4 or above
Rating: 4.2
Price:- Free
02Camart – Cartoon Photo
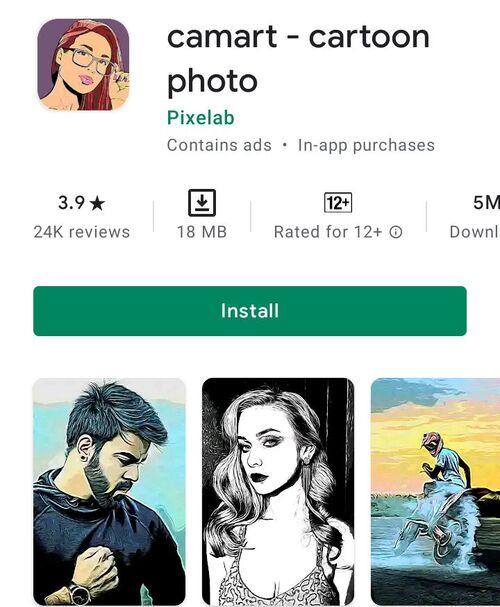
This one is extensively used photos to cartoon picture apps for Android users.
Cartoon Photo is the ideal program for instantly applying the most spectacular cartoon effects to your images!
With an intelligent cartoon camera, you can effortlessly turn your most fabulous selfies and recorded films into live paints.
Features:
• Use your phone’s camera to take photos, selfies, and movies, then apply real-time artistic effects.
• There are many fantastic artistic filters to pick from (cartoon, pencil, comics, sketch, oil painting, watercolor, and many more).
• Use autofocus, pinch to zoom, and more by tapping on the screen.
• Email or post photos to popular social networking sites to share with your friends.
Compatibility:- Android 4.4 or above
Price:- Free
Rating: 3.9
03Cartoon Pictures – Cartoon Photo Editor
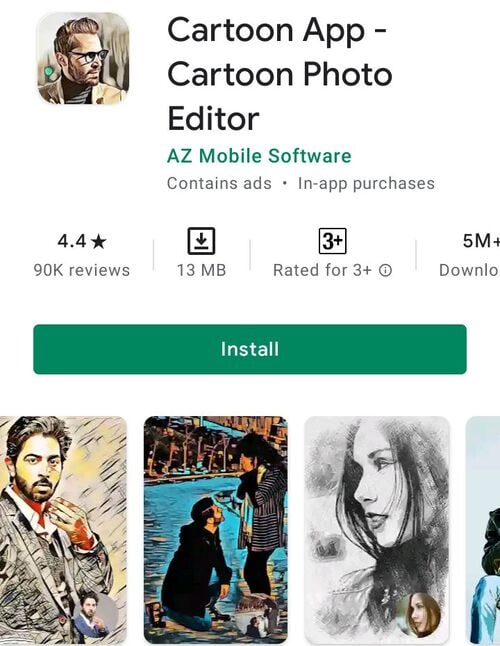
Cartoon Pictures - Cartoon Photo Editor makes as the best Android photos to cartoon apps for adding cartoon effects, oil paintings, and canvas artwork.
It has a wide range of cartoon animation effects, pencil sketch effects, smooth art filters, and painting effects that will transform your regular photos into beautiful works of art.
Features:
• A cartoon picture conversion program with a beautiful look.
• Hundreds of incredible cartoon photo effects
• A powerful selfie camera that allows you to edit photos in real-time.
• Post your sketch styles and artwork to social media sites like Facebook, Instagram, Pinterest, and Twitter.
Compatibility:- Android 5.0 or later
Price:- Free
Rating: 4.4
04Cartoon Photo – Pictures Cartoon Drawing
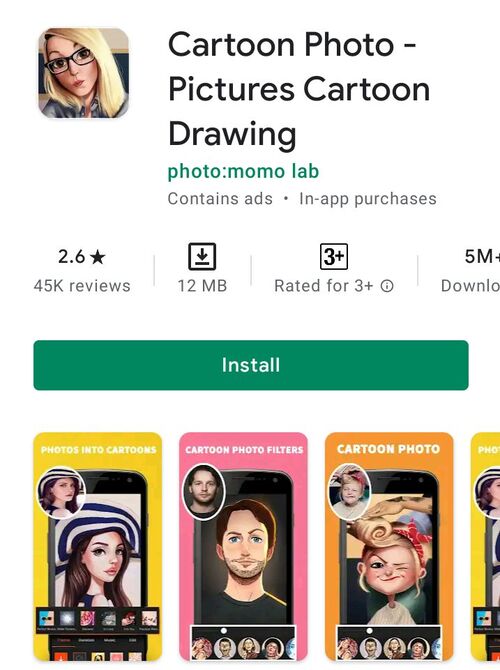
It combines all distinctive cartoon effects and art filters into one software, allowing you to instantly transform your photographs into grey cartoons, smooth pencil sketches and drawings, oil paintings, and pixel art.
Although the Google Play market is overflowing with cartoon-type editing apps, this is the best cartoon-making app for Android. You can now be your cartoonist.
Features:
• Create cartoon drawings from any new or old photos.
• Selfie camera with powerful cartoon snaps, creative photo combining, and cartoon filters
• A plethora of contemporary artistic filters to pick from (cartoon yourself, a cartoon photo maker, photo to caricature, and many more)
Compatibility:- Android 4.1 or above
Price:- Free
Rating: 2.6
05Cartoon Photo Editor – Pencil Sketch Art
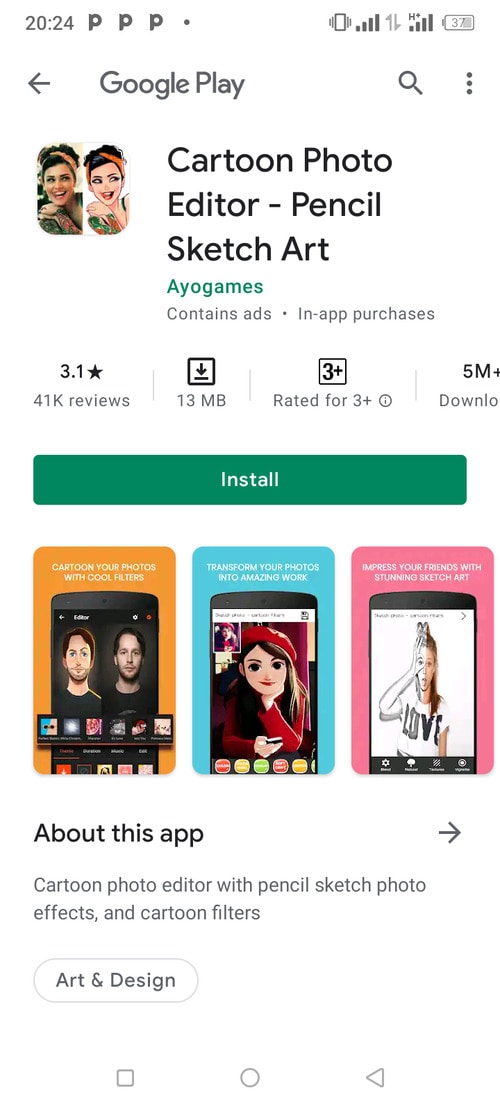
If you need a way to turn your favorite photos into cartoon drawings, this cartoon camera is the way to go.
This most excellent comedy picture software attempts to provide a plethora of fantastic cartoon graphics filters to help your photos stand out.
Features:
• Create cartoons and oil paintings from any photo
• Use the ‘Cartoon yourself’ function to turn your images into masterpieces.
• Photo editor for cartoons/photo creator for cartoons
Compatibility:- Requires 4.1 or more Android
Price:- Free
Rating: 3.1
06Art Camera – Cartoon, Pencil Sketch Art Effect Photo
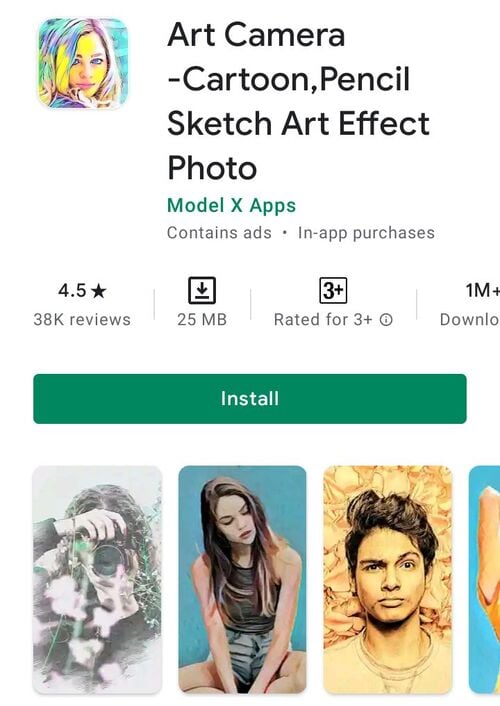
Do you enjoy sketching? This greatest photo to cartoon app from Model X is a must-have for everyone who wants to add pencil sketches and fantastic artistic and cartoon effects to existing photos.
It also serves as a useful photo organizer, allowing you to organize and manage your photos using date and time tags. With the help of our top-rated convert photo to cartoon app, you can now be the center of attention.
Features:
• A vast range of picture effects and filters inspired by oil paintings and cartoons
• A plethora of photo editing and adjusting options, such as contrast, brightness, and saturation
• UHD camera, HD selfie, auto-focus, HDR, and silent capture mode, among other features.
Compatibility:- Android 4.2+
Price:- Free
Rating: 4.5
07Tooncam – Cartoon, Pencil Sketch Pic
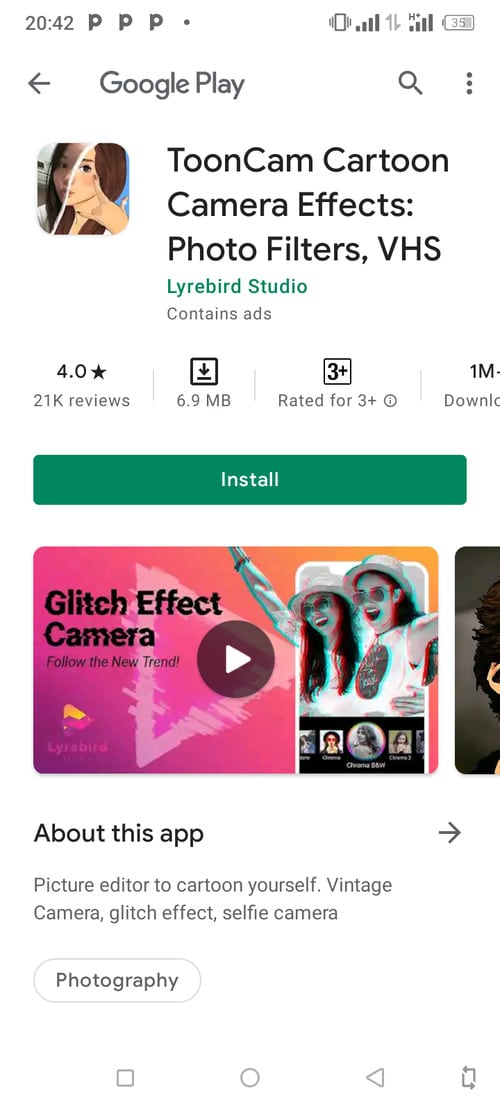
Do you want to make cartoons out of your most extraordinary selfies? If that’s the case, the finest cartoon picture editor app for Android is all you’ll need. What could be better than Tooncam?
With this picture-to cartoon app at your disposal, you can quickly turn your images into spectacular cartoons.
Features:
• With a few clicks of your finger, make fantastic web-based comics.
• Transforms your regular photos into adorable cartoon selfies
• More than 15 different cartoon effects
Compatibility:- Android 4.4+ and iOS
Price:- Free
Rating: 4.0
08Prisma Art Effect Photo Editor
Prisma was the most popular cartoon animation app on the market only a few years ago. Even though this app isn’t as famous as it once was, it still has some absorbing art filters that can make your shot look like some of history’s greatest artists created it.
The best part is that new filters come every day, so you’ll never run out of cartoon photo ideas. Furthermore, the software has various special photo effects and the ability to save your works in both SD and HD resolution.
Features:
● Every day, you get new cartoon effects.
● You will get more than 300 filters.
● Cartooning is the only option.
● Easily cartoon the photo.
Price: Free, though in-app purchases
Compatibility: Android
Ratings: 4.6
09Cartoon Yourself
Even if you can’t record videos or shoot images with the Cartoon Yourself app for Android, it’s still a good option to quickly turn a photo into a cartoon. Select a picture with the ‘Add a Photo’ button, then hit the ‘Apply Effect’ button to begin browsing the app’s extensive library of stickers and cartoon effects.
After the photo has been cartoonized, you can save it to your phone or share it on social media with your friends. The Cartoon Yourself app also provides basic photo editing features, such as cropping, mirroring, and rotating images.
Features:
● For novices, a primary and easy-to-use photo-to-cartoon app
● It has some excellent and lovely cartoon effects.
● Limited Free filters and effects
Price: Free, but with in-app purchases.
Compatibility: Android
Rating: 3.1
10Painnt – Art & Cartoon Filters
Painnt is easily one of the greatest cartoons yourself apps on the market, with over a thousand filters and effects. Because this picture editor allows you to change the transparency, saturation, and brightness of all your images, you can manipulate them in almost any way you desire. Painnt is also a creative community where you can find and meet others who share your art interests.
However, the accessible version of the program limits the size of the photos you may export, and you must subscribe to one of the subscription plans to process pictures in HD. The cost of a yearly subscription is only $9.99.
Features:
• Version is updated regularly to include more filters.
• Change the parameters of the cartoon filters to make them your own.
• Advanced AI technology.
Price: Free(in-app purchases)
Compatibility: Android
Rating: 3.8
Part 2 Top 5 iOS Apps to Turn Photo into Cartoon
Here, we have some of the best iOS applications that will assist you in turning photos into cartoons quickly.
01Cartoon Yourself Video Effects
Even if you aren’t a fan of the best cartoon video maker app download for iOS, this incredible photo-to cartoon app will convert you into one.
It features a user-friendly screen and an extensive range of amusing picture effects to help you build a cartoon avatar of yourself.
Features:
• Convert any snapshot of a person into an animated animation.
• Use a variety of authentic facial expressions (squint eyes, flirty wink, sad face, nice smile, etc.)
• Use dozens of humorous photo effects to turn your face into an alien, hideous, bulb-headed person, and more.
02Cartoon Camera Free
Apart from the Cartoon and Pencil Sketch effects, this little program doesn’t offer anything else. You may either use photos from your phone or take new ones and turn them into fantastic cartoons. The images you modify with the Cartoon Camera Free app can be saved to your camera roll or shared on social media.
However, because the process of turning your photos into cartoons is fully automated, you won’t have much control over how the final version of your cartoon photo will appear.
Features
● You can quickly draw a caricature of yourself on your phone.
● This fantastic photo-to cartoon tool will provide you with a realistic cartoon effect in real-time.
● It is updated regularly. Thus, you won’t use the most recent effects.
03Photo To Cartoon Yourself Edit
Photo To Cartoon Yourself is a popular cartoon photo programs, allowing you to create avatars or a cartoon of yourself quickly.
Capture a photo from your phone’s gallery or take a fresh one with the camera and turn it into a fantastic cartoon straight away for free. It is the most powerful program on this list for converting a photo into a cartoon AVATAR with the least amount of work and time. Furthermore, it includes many fascinating elements that will give your shot a realistic cartoon ethos.
Features:
● Choose images from your photo library.
● Turn your images into cartoons and send them via email.
● No picture shrinking or stretching; create cartoon images in high definition in seconds.
● Free to access
04Clip2Comic & Caricature Maker
Clip2Comic & Caricature Maker comes with a friendly interface that works wonders while converting a photo into caricatures, sketches, or cartoons.
Clip2Comic also allows you to make your cartoon videos in a matter of seconds using its real-time preview camera.
Features:
• Choose an image or video clip from your photo album to use.
• A wide range of free cartoon, drawing, caricature, and poster effects are available.
• Customization tools allow you to tweak your image’s outlines and blacks.
• Use several color filters to put your cartoon faces in the appropriate mood.
05MomentCam Cartoons & Stickers
MomentCam allows you to create your bitmoji based on your preferences. MomentCam is one of the most popular photo-to-cartoon apps on the market right now, with over 300 million downloads.
It allows you to create personalized emoticons and funny cartoons to convey your emotions in the most amusing way imaginable. Thousands of realistic effects and filters are available to give your shot an authentic cartoon feel. You can make a better version of yourself with MomentCam.
MomentCam may be at the bottom of the list of the best cartoon camera applications for iPhone and iPad, but it is well worth a look.
Features:
● Turn yourself into witty cartoons and glistening emoticons.
● Add text bubbles to some jokes and phrases to make your cartoons more entertaining
● Alter your caricatures’ facial expressions.
● You can get great prizes by sharing your amusing creations with millions of people all around the world.
****Wondershare Filmora Video Editor - Best Application**
With the rise in popularity of cartoonizing photo apps for Android, we’d like to introduce you to a fantastic app that will assist you in creating cartoon animation. Following its incredible characteristics in no time. Wondershare Filmora Animation software is a new Wondershare product that includes several downloadable animated characters and elements.
Most significantly, this software offers a user-friendly interface, an intelligent editing workflow, is lightweight, has a quick video rendering speed, and much more.
● Ending Thoughts →
● Now that you’ve found the best cartoon video maker app for Android, choose the one that’s right for you. Whether on Android or iOS devices, these animation movie creators will turn the world upside down in just a few clicks, so give it a try today!
● You can also try out a fantastic app, Filmora. It is a perfect cartoon-making app for Android and iOS. Change your photo to cartoon in a few clicks.
It’s usually better to start with a free cartoon app for Android, whether you want to make a cartoon avatar of yourself or add humorous cartoons and live artistic effects to your photos.
In today’s digital age, your smartphone can serve as a portable cartoon picture editor, allowing you to apply cool and artistic effects to new or current photos. Finding an excellent cartoon-making app for Android is difficult because there are so many unique possibilities.
To assist you, we’ve compiled a list of the top cartoon picture apps for Android and iPhone that can help you turn your photo into a cartoon in seconds. Let’s get started without further ado.
In this article
01 [10 Apps to Kickstart Your Need to Photo to Cartoon](#Part 1)
02 [Top 5 iOS Apps to Turn Photo into Cartoon](#Part 2)
Part 1 Apps to Kickstart Your Need to Photo to Cartoon
In this part, you will have a chance to familiarize yourself with the best cartoon apps for Android, along with all the relevant information that matches your need.
01Cartoon Photo Editor
This free image to cartoon app has been a favorite for many years, making it an obvious choice for the top slot.
This cartoon pic software could be the ideal choice for you to add fantastic artistic and cartoon effects to your new or current photos.
Features:
• Add fantastic cartoon effects to your phone’s gallery photos.
• With a single tap of your finger, save images or take an image instantly.
• The autofocus feature (click anywhere on the screen)
• Several eye-catching effects, including a cartoon, oil painting, thermal vision, drawing, and more.
Compatibility:- Android 4.4 or above
Rating: 4.2
Price:- Free
02Camart – Cartoon Photo
This one is extensively used photos to cartoon picture apps for Android users.
Cartoon Photo is the ideal program for instantly applying the most spectacular cartoon effects to your images!
With an intelligent cartoon camera, you can effortlessly turn your most fabulous selfies and recorded films into live paints.
Features:
• Use your phone’s camera to take photos, selfies, and movies, then apply real-time artistic effects.
• There are many fantastic artistic filters to pick from (cartoon, pencil, comics, sketch, oil painting, watercolor, and many more).
• Use autofocus, pinch to zoom, and more by tapping on the screen.
• Email or post photos to popular social networking sites to share with your friends.
Compatibility:- Android 4.4 or above
Price:- Free
Rating: 3.9
03Cartoon Pictures – Cartoon Photo Editor
Cartoon Pictures - Cartoon Photo Editor makes as the best Android photos to cartoon apps for adding cartoon effects, oil paintings, and canvas artwork.
It has a wide range of cartoon animation effects, pencil sketch effects, smooth art filters, and painting effects that will transform your regular photos into beautiful works of art.
Features:
• A cartoon picture conversion program with a beautiful look.
• Hundreds of incredible cartoon photo effects
• A powerful selfie camera that allows you to edit photos in real-time.
• Post your sketch styles and artwork to social media sites like Facebook, Instagram, Pinterest, and Twitter.
Compatibility:- Android 5.0 or later
Price:- Free
Rating: 4.4
04Cartoon Photo – Pictures Cartoon Drawing
It combines all distinctive cartoon effects and art filters into one software, allowing you to instantly transform your photographs into grey cartoons, smooth pencil sketches and drawings, oil paintings, and pixel art.
Although the Google Play market is overflowing with cartoon-type editing apps, this is the best cartoon-making app for Android. You can now be your cartoonist.
Features:
• Create cartoon drawings from any new or old photos.
• Selfie camera with powerful cartoon snaps, creative photo combining, and cartoon filters
• A plethora of contemporary artistic filters to pick from (cartoon yourself, a cartoon photo maker, photo to caricature, and many more)
Compatibility:- Android 4.1 or above
Price:- Free
Rating: 2.6
05Cartoon Photo Editor – Pencil Sketch Art
If you need a way to turn your favorite photos into cartoon drawings, this cartoon camera is the way to go.
This most excellent comedy picture software attempts to provide a plethora of fantastic cartoon graphics filters to help your photos stand out.
Features:
• Create cartoons and oil paintings from any photo
• Use the ‘Cartoon yourself’ function to turn your images into masterpieces.
• Photo editor for cartoons/photo creator for cartoons
Compatibility:- Requires 4.1 or more Android
Price:- Free
Rating: 3.1
06Art Camera – Cartoon, Pencil Sketch Art Effect Photo
Do you enjoy sketching? This greatest photo to cartoon app from Model X is a must-have for everyone who wants to add pencil sketches and fantastic artistic and cartoon effects to existing photos.
It also serves as a useful photo organizer, allowing you to organize and manage your photos using date and time tags. With the help of our top-rated convert photo to cartoon app, you can now be the center of attention.
Features:
• A vast range of picture effects and filters inspired by oil paintings and cartoons
• A plethora of photo editing and adjusting options, such as contrast, brightness, and saturation
• UHD camera, HD selfie, auto-focus, HDR, and silent capture mode, among other features.
Compatibility:- Android 4.2+
Price:- Free
Rating: 4.5
07Tooncam – Cartoon, Pencil Sketch Pic
Do you want to make cartoons out of your most extraordinary selfies? If that’s the case, the finest cartoon picture editor app for Android is all you’ll need. What could be better than Tooncam?
With this picture-to cartoon app at your disposal, you can quickly turn your images into spectacular cartoons.
Features:
• With a few clicks of your finger, make fantastic web-based comics.
• Transforms your regular photos into adorable cartoon selfies
• More than 15 different cartoon effects
Compatibility:- Android 4.4+ and iOS
Price:- Free
Rating: 4.0
08Prisma Art Effect Photo Editor
Prisma was the most popular cartoon animation app on the market only a few years ago. Even though this app isn’t as famous as it once was, it still has some absorbing art filters that can make your shot look like some of history’s greatest artists created it.
The best part is that new filters come every day, so you’ll never run out of cartoon photo ideas. Furthermore, the software has various special photo effects and the ability to save your works in both SD and HD resolution.
Features:
● Every day, you get new cartoon effects.
● You will get more than 300 filters.
● Cartooning is the only option.
● Easily cartoon the photo.
Price: Free, though in-app purchases
Compatibility: Android
Ratings: 4.6
09Cartoon Yourself
Even if you can’t record videos or shoot images with the Cartoon Yourself app for Android, it’s still a good option to quickly turn a photo into a cartoon. Select a picture with the ‘Add a Photo’ button, then hit the ‘Apply Effect’ button to begin browsing the app’s extensive library of stickers and cartoon effects.
After the photo has been cartoonized, you can save it to your phone or share it on social media with your friends. The Cartoon Yourself app also provides basic photo editing features, such as cropping, mirroring, and rotating images.
Features:
● For novices, a primary and easy-to-use photo-to-cartoon app
● It has some excellent and lovely cartoon effects.
● Limited Free filters and effects
Price: Free, but with in-app purchases.
Compatibility: Android
Rating: 3.1
10Painnt – Art & Cartoon Filters
Painnt is easily one of the greatest cartoons yourself apps on the market, with over a thousand filters and effects. Because this picture editor allows you to change the transparency, saturation, and brightness of all your images, you can manipulate them in almost any way you desire. Painnt is also a creative community where you can find and meet others who share your art interests.
However, the accessible version of the program limits the size of the photos you may export, and you must subscribe to one of the subscription plans to process pictures in HD. The cost of a yearly subscription is only $9.99.
Features:
• Version is updated regularly to include more filters.
• Change the parameters of the cartoon filters to make them your own.
• Advanced AI technology.
Price: Free(in-app purchases)
Compatibility: Android
Rating: 3.8
Part 2 Top 5 iOS Apps to Turn Photo into Cartoon
Here, we have some of the best iOS applications that will assist you in turning photos into cartoons quickly.
01Cartoon Yourself Video Effects
Even if you aren’t a fan of the best cartoon video maker app download for iOS, this incredible photo-to cartoon app will convert you into one.
It features a user-friendly screen and an extensive range of amusing picture effects to help you build a cartoon avatar of yourself.
Features:
• Convert any snapshot of a person into an animated animation.
• Use a variety of authentic facial expressions (squint eyes, flirty wink, sad face, nice smile, etc.)
• Use dozens of humorous photo effects to turn your face into an alien, hideous, bulb-headed person, and more.
02Cartoon Camera Free
Apart from the Cartoon and Pencil Sketch effects, this little program doesn’t offer anything else. You may either use photos from your phone or take new ones and turn them into fantastic cartoons. The images you modify with the Cartoon Camera Free app can be saved to your camera roll or shared on social media.
However, because the process of turning your photos into cartoons is fully automated, you won’t have much control over how the final version of your cartoon photo will appear.
Features
● You can quickly draw a caricature of yourself on your phone.
● This fantastic photo-to cartoon tool will provide you with a realistic cartoon effect in real-time.
● It is updated regularly. Thus, you won’t use the most recent effects.
03Photo To Cartoon Yourself Edit
Photo To Cartoon Yourself is a popular cartoon photo programs, allowing you to create avatars or a cartoon of yourself quickly.
Capture a photo from your phone’s gallery or take a fresh one with the camera and turn it into a fantastic cartoon straight away for free. It is the most powerful program on this list for converting a photo into a cartoon AVATAR with the least amount of work and time. Furthermore, it includes many fascinating elements that will give your shot a realistic cartoon ethos.
Features:
● Choose images from your photo library.
● Turn your images into cartoons and send them via email.
● No picture shrinking or stretching; create cartoon images in high definition in seconds.
● Free to access
04Clip2Comic & Caricature Maker
Clip2Comic & Caricature Maker comes with a friendly interface that works wonders while converting a photo into caricatures, sketches, or cartoons.
Clip2Comic also allows you to make your cartoon videos in a matter of seconds using its real-time preview camera.
Features:
• Choose an image or video clip from your photo album to use.
• A wide range of free cartoon, drawing, caricature, and poster effects are available.
• Customization tools allow you to tweak your image’s outlines and blacks.
• Use several color filters to put your cartoon faces in the appropriate mood.
05MomentCam Cartoons & Stickers
MomentCam allows you to create your bitmoji based on your preferences. MomentCam is one of the most popular photo-to-cartoon apps on the market right now, with over 300 million downloads.
It allows you to create personalized emoticons and funny cartoons to convey your emotions in the most amusing way imaginable. Thousands of realistic effects and filters are available to give your shot an authentic cartoon feel. You can make a better version of yourself with MomentCam.
MomentCam may be at the bottom of the list of the best cartoon camera applications for iPhone and iPad, but it is well worth a look.
Features:
● Turn yourself into witty cartoons and glistening emoticons.
● Add text bubbles to some jokes and phrases to make your cartoons more entertaining
● Alter your caricatures’ facial expressions.
● You can get great prizes by sharing your amusing creations with millions of people all around the world.
****Wondershare Filmora Video Editor - Best Application**
With the rise in popularity of cartoonizing photo apps for Android, we’d like to introduce you to a fantastic app that will assist you in creating cartoon animation. Following its incredible characteristics in no time. Wondershare Filmora Animation software is a new Wondershare product that includes several downloadable animated characters and elements.
Most significantly, this software offers a user-friendly interface, an intelligent editing workflow, is lightweight, has a quick video rendering speed, and much more.
● Ending Thoughts →
● Now that you’ve found the best cartoon video maker app for Android, choose the one that’s right for you. Whether on Android or iOS devices, these animation movie creators will turn the world upside down in just a few clicks, so give it a try today!
● You can also try out a fantastic app, Filmora. It is a perfect cartoon-making app for Android and iOS. Change your photo to cartoon in a few clicks.
Interesting Fundamentals and Ultimate Guide to Animated Characters Drawings
Interesting Fundamentals and Ultimate Guide to Animated Characters Drawings
An easy yet powerful editor
Numerous effects to choose from
Detailed tutorials provided by the official channel
Cartoon character have stamped their faces in our hearts from childhood. A cartoon artist represents a cartoon or a natural person’s unique features with simple shapes accurately to recognize the person with the drawing and does not require a lot of patience to do this. The goal of the cartoon is to attract, and the child should get attracted when they see a cartoon image as well as adults. Though the sparkle may appear a little dull, it remains unaltered.
Let us grab a chance to recreate our cartoon characters with easy tutorials about animated characters to draw. In addition to that, you will learn about basic drawing exercises to lead into cool animated characters to draw through this guide in a step-by-step manner.
In this article
01 [What Do I Need to Start Learning Animated Characters Drawings? ](#Part 1)
02 [6 Cartoon Characters that Anyone Can Draw (Provided with Free Video Tutorials)](#Part 2)
03 [4 Best Drawing Exercises for Creating Cartoon Characters](#Part 3)
Part 1 What Do I Need to Start Learning Animated Characters Drawings?
There are many software’s available, and anyone can create an animated character drawing, but still, the art of creating a perfect character needs a master. You don’t have to be a Disney-grade animator to make it; start with simple minor characters. Animation is the art of bringing a 3D illustrated cartoon into life. It is created by projecting a sequence of images one after the other immediately. Let us discuss the essential things you need to note before animating characters.
●Timeline is the most important for animation. Depending on the software, you have various options to change the duration and add effects.
●Animation is generally preferable in 24 frames per second, which means the total number of people in the frame for one second.
●There are two types of working they are one’s and two’s. 2D Animation is usually done in two’s, whereas 3D Animation is in one’s.
●In hand-drawn animations, keyframes are more critical to maintain. The keyframe is the position for the cartoon as per animator has decided.
●Breakdowns combine one or two keyframes, which decide the motion in between the keys.
●In-betweens are all the frames that come between to smooth the motion—automatically generated by the computer to move from key to key.
●Composting is creating or joining two or more images to create a single cartoon frame.
Part 2 6 Cartoon Characters that Anyone can Draw (With free Video Tutorials)
We will discuss animated characters to draw in hand. There are many cartoon characters, but we will look into six cartoon character drawings with their tutorial videos.
01 Smurfette
Smurfette stands out as the lone female Smurf in the entire bunch of blue critters around the village area. One of the rare designs with long hair and a dress is hers. Her design is a lot of fun to sketch.
So, in general, it’s best to work through the lesson as is, then turn it into Brainy, Papa, Joker, or even Smurf.
01Angelica Pickles
Angelica Pickles is one of the most challenging characters to depict from The Rugrats. But her design is so intricate that getting it proper will give you a true sense of accomplishment. Her pigtails, like her leggings, might be challenging to master, so keep practicing.
03Yogi Bear
Yogi Bear is a cartoon character on the sweeter side of the comic animal variety. Yogi Bear is a beloved character from Jellystone Park. As long as you get his tie and collar just right, this guy is a breeze to draw.
04Magilla Gorilla
Magilla Gorilla is another bizarre creature from Hanna-catalog. Barbera’s Because he comes with a bow tie, a little cap, and suspenders, this design is a little more complicated. Not to mention his enormous clown shoes. These small details can be a pain to draw, but Magilla is a very charming gorilla.
05Top Cat
Even further back in time, in the 1960s, there was the ever-popular Top Cat. He’s wearing a cap and a button-down vest, and he’s making some reasonably fancy dances. Give Top Cat a shot if you like The Flintstones’ basic Hanna-Barbera art style.
<
06Helga. G. Pataki
Helga is another character with some wacky hair. There’s a lot that’s bizarre about her. And half the fun of drawing her is figuring out how to do it. Just keep an eye on her head since getting it correct, especially with her rectangle hairdo, can be a little odd.
These are some of the cool animated characters to draw.
Part 3 4 Best Drawing Exercise for Creating Cartoon Characters
You’ll learn how to create cartoon characters individually, including their faces, hair, and facial expressions.
01How to Draw Cartoon Characters
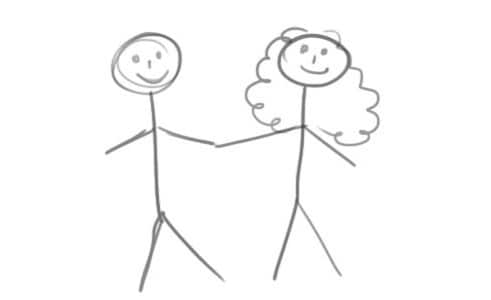
We’ll go through the fundamentals of human perception before getting into cartoon face drawing. Humans have a unique ability to synthesize the details that make up a structure or object in highly complicated ways into fundamental and simple ones. We can express everything with a few curves and geometric forms in this way. In cartoon face, we need to identify the character just by looking like looking at the below picture a girl and a boy.
02Here, you will learn How to Draw a Cartoon Face
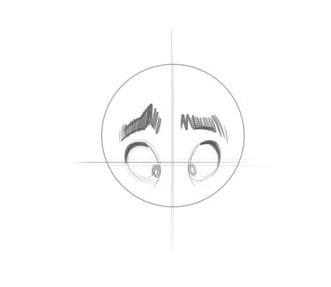
Let us begin with a sketch of a cartoon face. A circle is a basic cartoon shape. All you need is a circle. As seen in the image below, draw a vertical and horizontal line intersecting at the center.
Let us have a look at how to make cartoon eyeballs. Draw an oval shape with a slight lean to the side at the top for the eyes. Repeat on the other side.
Slightly thicken the characteristic to represent our character eyelashes at the top of the circle, place the brows above the eyelashes to create a shocking appearance, draw both pupils to the center in the same direction.
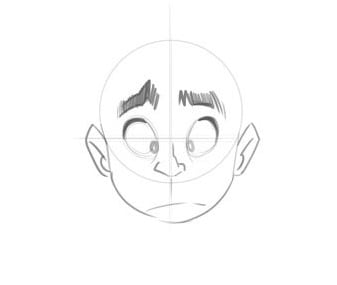
When creating a nose from the front, it’s typical to leave off many details. Even if you merely sketch its tip, it will likely provide a convincing impact. Drawing only one side of the nose is also quite frequent. Children’s mouths are extremely simple in cartoon style, regardless of gender.
The ears are viewed from the front; therefore, the internal holes are not visible. The circle has already established the shape of our head.
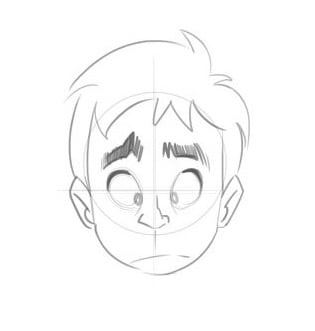
03Let’s learn about How to Draw a Cartoon Hair
Keep in mind that our characters’ hair is essential for identifying their personalities, and it can also indicate their age. So, all we need is an effortless and playful haircut to bring our boy to life. Because there is no particular method for drawing hair, you’ll have to experiment until you find the perfect look. Look for photo references on the internet! Take a look at a magazine shoot or a Google search.
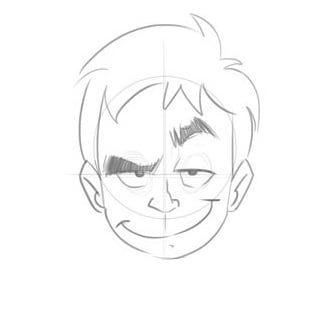
03How to Draw Characters with different Facial Expressions
By simply following the instructions below, you’ll notice that you can completely transform his expression: Lowering one brow and raising the other, eyelashes are used to cut the eyes in half, putting a smile on the face one side is higher.
To stay under the eyelashes, move the eye pupils up. That’s all there is to it! With just a few tweaks, we achieved the desired result. The circular form of the eyes, hair, ears, nose, chin and the circular shape of the ears are all the same! It’s that simple!
While working in cartooning or video making, Wondershare Wondershare Filmora Video Editor comes out with pros in mind, which can effortlessly convert conventional films into cartoon videos. If you want greater control over your cartoon video, you may also use keyframing to create it. You can fine-tune the parameters in Effects to achieve the best results. You can even change the Animation color after it has been created. It also allows you to use different text themes to showcase your videos.
We propose Wondershare Filmora Video Editor , in this case, to create animation videos by adding keyframes, resulting in a smooth and natural animation. To get started with Animation, all you need is a white plane. Aside from that, color correction and an audio mixer will take your animation video to the next level.
For Win 7 or later (64-bit)
For macOS 10.12 or later
● Key Takeaways from This Episode →
● Learn what are the key elements to make animation videos using software
● Tutorial on how to draw a cartoon character accurately
● In comparison, Wondershare Wondershare Filmora Video Editor is superior in making animation videos.
Cartoon character have stamped their faces in our hearts from childhood. A cartoon artist represents a cartoon or a natural person’s unique features with simple shapes accurately to recognize the person with the drawing and does not require a lot of patience to do this. The goal of the cartoon is to attract, and the child should get attracted when they see a cartoon image as well as adults. Though the sparkle may appear a little dull, it remains unaltered.
Let us grab a chance to recreate our cartoon characters with easy tutorials about animated characters to draw. In addition to that, you will learn about basic drawing exercises to lead into cool animated characters to draw through this guide in a step-by-step manner.
In this article
01 [What Do I Need to Start Learning Animated Characters Drawings? ](#Part 1)
02 [6 Cartoon Characters that Anyone Can Draw (Provided with Free Video Tutorials)](#Part 2)
03 [4 Best Drawing Exercises for Creating Cartoon Characters](#Part 3)
Part 1 What Do I Need to Start Learning Animated Characters Drawings?
There are many software’s available, and anyone can create an animated character drawing, but still, the art of creating a perfect character needs a master. You don’t have to be a Disney-grade animator to make it; start with simple minor characters. Animation is the art of bringing a 3D illustrated cartoon into life. It is created by projecting a sequence of images one after the other immediately. Let us discuss the essential things you need to note before animating characters.
●Timeline is the most important for animation. Depending on the software, you have various options to change the duration and add effects.
●Animation is generally preferable in 24 frames per second, which means the total number of people in the frame for one second.
●There are two types of working they are one’s and two’s. 2D Animation is usually done in two’s, whereas 3D Animation is in one’s.
●In hand-drawn animations, keyframes are more critical to maintain. The keyframe is the position for the cartoon as per animator has decided.
●Breakdowns combine one or two keyframes, which decide the motion in between the keys.
●In-betweens are all the frames that come between to smooth the motion—automatically generated by the computer to move from key to key.
●Composting is creating or joining two or more images to create a single cartoon frame.
Part 2 6 Cartoon Characters that Anyone can Draw (With free Video Tutorials)
We will discuss animated characters to draw in hand. There are many cartoon characters, but we will look into six cartoon character drawings with their tutorial videos.
01 Smurfette
Smurfette stands out as the lone female Smurf in the entire bunch of blue critters around the village area. One of the rare designs with long hair and a dress is hers. Her design is a lot of fun to sketch.
So, in general, it’s best to work through the lesson as is, then turn it into Brainy, Papa, Joker, or even Smurf.
01Angelica Pickles
Angelica Pickles is one of the most challenging characters to depict from The Rugrats. But her design is so intricate that getting it proper will give you a true sense of accomplishment. Her pigtails, like her leggings, might be challenging to master, so keep practicing.
03Yogi Bear
Yogi Bear is a cartoon character on the sweeter side of the comic animal variety. Yogi Bear is a beloved character from Jellystone Park. As long as you get his tie and collar just right, this guy is a breeze to draw.
04Magilla Gorilla
Magilla Gorilla is another bizarre creature from Hanna-catalog. Barbera’s Because he comes with a bow tie, a little cap, and suspenders, this design is a little more complicated. Not to mention his enormous clown shoes. These small details can be a pain to draw, but Magilla is a very charming gorilla.
05Top Cat
Even further back in time, in the 1960s, there was the ever-popular Top Cat. He’s wearing a cap and a button-down vest, and he’s making some reasonably fancy dances. Give Top Cat a shot if you like The Flintstones’ basic Hanna-Barbera art style.
<
06Helga. G. Pataki
Helga is another character with some wacky hair. There’s a lot that’s bizarre about her. And half the fun of drawing her is figuring out how to do it. Just keep an eye on her head since getting it correct, especially with her rectangle hairdo, can be a little odd.
These are some of the cool animated characters to draw.
Part 3 4 Best Drawing Exercise for Creating Cartoon Characters
You’ll learn how to create cartoon characters individually, including their faces, hair, and facial expressions.
01How to Draw Cartoon Characters
We’ll go through the fundamentals of human perception before getting into cartoon face drawing. Humans have a unique ability to synthesize the details that make up a structure or object in highly complicated ways into fundamental and simple ones. We can express everything with a few curves and geometric forms in this way. In cartoon face, we need to identify the character just by looking like looking at the below picture a girl and a boy.
02Here, you will learn How to Draw a Cartoon Face
Let us begin with a sketch of a cartoon face. A circle is a basic cartoon shape. All you need is a circle. As seen in the image below, draw a vertical and horizontal line intersecting at the center.
Let us have a look at how to make cartoon eyeballs. Draw an oval shape with a slight lean to the side at the top for the eyes. Repeat on the other side.
Slightly thicken the characteristic to represent our character eyelashes at the top of the circle, place the brows above the eyelashes to create a shocking appearance, draw both pupils to the center in the same direction.
When creating a nose from the front, it’s typical to leave off many details. Even if you merely sketch its tip, it will likely provide a convincing impact. Drawing only one side of the nose is also quite frequent. Children’s mouths are extremely simple in cartoon style, regardless of gender.
The ears are viewed from the front; therefore, the internal holes are not visible. The circle has already established the shape of our head.
03Let’s learn about How to Draw a Cartoon Hair
Keep in mind that our characters’ hair is essential for identifying their personalities, and it can also indicate their age. So, all we need is an effortless and playful haircut to bring our boy to life. Because there is no particular method for drawing hair, you’ll have to experiment until you find the perfect look. Look for photo references on the internet! Take a look at a magazine shoot or a Google search.
03How to Draw Characters with different Facial Expressions
By simply following the instructions below, you’ll notice that you can completely transform his expression: Lowering one brow and raising the other, eyelashes are used to cut the eyes in half, putting a smile on the face one side is higher.
To stay under the eyelashes, move the eye pupils up. That’s all there is to it! With just a few tweaks, we achieved the desired result. The circular form of the eyes, hair, ears, nose, chin and the circular shape of the ears are all the same! It’s that simple!
While working in cartooning or video making, Wondershare Wondershare Filmora Video Editor comes out with pros in mind, which can effortlessly convert conventional films into cartoon videos. If you want greater control over your cartoon video, you may also use keyframing to create it. You can fine-tune the parameters in Effects to achieve the best results. You can even change the Animation color after it has been created. It also allows you to use different text themes to showcase your videos.
We propose Wondershare Filmora Video Editor , in this case, to create animation videos by adding keyframes, resulting in a smooth and natural animation. To get started with Animation, all you need is a white plane. Aside from that, color correction and an audio mixer will take your animation video to the next level.
For Win 7 or later (64-bit)
For macOS 10.12 or later
● Key Takeaways from This Episode →
● Learn what are the key elements to make animation videos using software
● Tutorial on how to draw a cartoon character accurately
● In comparison, Wondershare Wondershare Filmora Video Editor is superior in making animation videos.
How to Cartoonize Photo Photoshop in Simple Steps
How to Cartoonize Photo Photoshop in Easy Steps
An easy yet powerful editor
Numerous effects to choose from
Detailed tutorials provided by the official channel
Cartoons, an already catchy entertainment source, can upgrade other media utilities on integration. Look through the easiest ways of creating cartoonize photo Photoshop stills!
In this article
01 [Types of Cartoon Effects in Photoshop](#Part 1)
02 [Easiest Ways to Cartoonize Photo in Photoshop](#Part 2)
03 [How to Use a Variety of Photoshop Special Effects to Create the Final Caricature Look](#Part 3)
Part 1 Types of Cartoon Effects in Photoshop
It is an absolute fun activity to explore your editing creativity in the realm of cartoonizing the otherwise ordinary still captures. Talking of the most convenient cartoon creator and editor applications, you can safely rely on the Photoshop Image Editor application to choose from a pool of cartoon editing effects for adding that spunky and funny element to your image files.
Presented in the following section, is a discussion of some of the most stunning and visibly amazing cartoon effects in the application’s Editor Library to cartoonize Photoshop images:
01Pop Art Photoshop Action
The effect is a predominantly preferred as a cartoon action Photoshop utility to caricaturize a normal image, along with customizing the same to change the colors and background of the original still capture for creating a brand new appearance with utmost ease. Apart from this, the aforesaid effect allows you to exclusively customize the globally acclaimed graphic masterpieces of Roy Lichtenstein. Working with the effect, you can edit a self-portrait or the favorite image of your pet to give the latter, a funny retro feel.

02Vintage Comic Creator
If the idea of sticking to just the creation of cartoon images is not enough to satisfy you, the Vintage Comic Creator effect allows you to expand your creativity level to work on cartoon based shape and text edits. You can use the effect to enhance an image logo or plain text with a comic book oriented text. A download of this cartoon effect template facilitates you with diversities of customizable layer styles, overlays and patterns.

03GTA Photoshop Action
This is a complete pleasure for the creative fan of Grand Theft Auto, the wicked chasing game series. Additional to creating a stark variety of edited cartoon stills, you are free to reinvent the aforesaid game’s most popular caricature edits, while using the GTA Photoshop Action editing filter. Launched by Indworks, the effect package consisting of 15 vibrant themes and 5 collage templates; promises a quick mimicry of your most cherished video and console games.

04Vector Paint Photoshop Action
The one is an amazing Photoshop effect for creating cartoon edits, which works through a merger of two different ingenious art themes or styles for transforming basic images into cartoonized stills.
The effect grants you the liberty to use varieties of art styles, such as, comic, photo retouching and energetic oil to obtain editing results comparable to that of any original photograph. The template is conveniently simple to use and assures you of quick results. All this, just at a nominal price of $6! Interesting, right?

05Ultra Realistic 3D Space Effect
Considering the fact of you being a space admirer, this one is the perfect image editor for you to add the vibrancy of stunning space elements and backgrounds within your cartoonized edits. The effect lets you play with the diverse range of customizable text and exciting caricature backgrounds. When downloading the template, you get a main setup file, a few editing examples and a web link to the free fonts present in the effect.

06Animated Zombie Grime Art Photoshop Action
Are you in love with the latest zombie grimes? If yes, then this action set is exclusive editor package for you. Working with the aforesaid image template, you can effortlessly add the perfect zombie theme to your cartoon edits, along with simultaneously creating a stunning animation, which you can use to enhance your video or GIF uploads on social media. Not forgetting the best part, you get a free access to this amazing utility.

Part 2 Easiest Ways to Cartoonize Photo in Photoshop
Having known about the amazing varieties of cartoonized editor templates in Photoshop, it is a natural instinct to feel motivated to create your own caricature images from normal capture stills. Addressing the concern of image transformation methods to turn a photo into a cartoon Photoshop, let us dive into some of the most affordable methods of creating cartoonized photos in the aforesaid editing application.
Talking of the most basic Photoshop tools for creating caricature images, you can start your editing spree with using the Graphic Tablet, Brush Tool, Layer Masks and a graphic pen to create amateur cartoonized edits from your still photographs, getting a full control on image tracing.
01Brush Tool
A few usage examples include working with a combination of the graphic tablet pen and the editor brushes to trace your image, using the brush in a masked or a fresh layer to avoid altering the actual image, and much more.
02Graphic Tablet
It is best to use the Photoshop Graphic Tablet for adhering to the concern of tracing cartoonized images. You can alternatively cater to the job with a trackpad, mouse, or even your hand. It is however, difficult to assure steady hand postures for image tracing, lest you are using a stylus pen.
03Pen Tool
Using the Pen Tool for cartoonizing your portrait, allows you to draw outlines along the desired figure within the image, along with its important elements, so that you can easily use these outlined paths to introduce different color blocks.
Similar to the Brush Tool, the Photoshop Pen utility grants you the freedom to vary the degree of detailing in your cartoon edit, from being highly expressive to only remaining around the shore. Working with the Pen Tool can, however be a bit tiring and time taking, with respect to the extent of detailing you wish to add to the caricature edits.
Additional to the aforementioned tools, you can also consider using the default image filters of the Photoshop application to get comparable results. This is an exclusively better option to choose, compared to the Pen Tool, when you are working without a Graphic Tablet. To get over the top realistic caricature renderings, you will need to supplement the use of Photoshop filters with the application’s editing channels and other adjustments.
Part 3 How to Use a Variety of Photoshop Special Effects to Create the Final Caricature Look
Considering the extensive discussion on the credibility of the Photoshop Image Editor application in the realm of creating stunning caricature images in high end resolution, let us proceed to learn about using the diversity of Photoshop’s special effects to get the last stage cartoonized appearance of ordinary still images.
User’s Guide to Create High End Cartoonized Look
The following tutorial is a stepwise explanation of the process to convert photo into cartoon Photoshop in the easiest possible way. Stick to the method for getting affordable results in a quick span.
Step 1: Download and Launch the Program
Visit the official website of Photoshop Image Editor for a free download of the software program in your system, followed by installing and launching the same in your device.
Step 2: Upload Your Image
On a successful launch of the editor program, you will be directed to the ‘Photoshop Editor’ window, where you are required to upload any desired still image from your device for creating a cartoonized edit. To do this, either simply add your image to the editor workspace using the ‘Drag and Drop’ method, or navigate to the ‘File’ tab in the top toolbar and click on ‘Open’ in the dropdown menu.
Step 3: Edge Enhancement
Once your image appears in the editor timeline, proceed to sharpen the edges of the face and body of the portrait. Start with navigating to and clicking on the ‘Filter’ option, followed by tapping on ‘Filter Gallery’ and selecting the ‘Artistic’ folder, where you need to choose the ‘Poster Edges’ option. Observe the effect of these setting on the portrait and make necessary changes.

Step 4: Background Setting
Ensure that the background and foreground of your image are set to white and black colors respectively. If not, proceed to adjust the same as required.

Step 5: Distorting the Edges
You now need to introduce some distortion in the edges of your portrait. Navigate to the ‘Filter’ option again, open the ‘Filter Gallery’ and choose ‘Torn Edges’ from the menu that drops down. Select the desired parameter values in accordance with your creative suitability.


Step 6: Using the Channels Panel
The next step is to select and copy your portrait using the ‘Ctrl + A’ and Ctrl + C commands respectively. Navigate to the ‘Channels’ panel at the right of the Photoshop workspace. At the panel’s bottom right, proceed with creating a new channel. It will be assigned the name ‘Alpha 1’ by Photoshop, which you are most welcome to change.


Step 7: Color Inversion
When you finish creating the channel, use the ‘Ctrl + V’ command to paste your portrait in the same. Proceed with inverting the image colors by navigating to the ‘Image’ option, followed by choosing the ‘Adjustment’ and ‘Invert’ options from the consecutive drop downs. Now, make a selection of the ‘White’ regions of your portrait by pressing the ‘Ctrl’ key and clicking on the ‘Alpha 1 Channel thumbnail.

Step 8: Layer Creation
Navigate to the ‘Layers’ panel at the right of the Photoshop workspace, and click on the ‘New Layer’ icon for creating a fresh layer. Fill the just created layer with black color, either by pressing ‘g’ from your system’s keyboard, or using the ‘Paint Bucket’ tool. Don’t forget to assign a suitable name to the layer.

Repeat the above process to create a separate layer and e fill the same with white color. The layer creation process is essential to separate the white and black colors of the actual image.

Step 10: Layer Dragging
In the ‘Layers’ panel, drag the ‘Black’ layer above the ‘White’ one.

Step 11: Creating Additional Layers
You are now required to create three more layers, with the same process as for the above two, for adding effects to the Skin, Clothes and Teeth/Eyes of the portrait. When you finish creation, assign suitable names to the layers, followed by dragging them below the ‘Black’ one within the ‘Layers’ panel.

Step 12: Color Selection and Application
Choose the respective colors for the clothes, skin and teeth/eyes of the cartoonized edit. To proceed with color application, navigate to the toolbar at the left of the Photoshop workspace and choose the ‘Brush Tool’. Finally, choose a particular layer and apply careful brush strokes to add color to the specific area of the portrait that you wish to edit. Follow the same process to add colors to the remaining layers to get the desired result in all areas of your cartoonized edit.

Step 13: Using the Gradient Tool
Navigate to the ‘Layers’ panel again and create a new ‘Gradient’ layer to further enhance your creation. You now need to select the ‘Gradient Tool’ from the toolbar at the left of the Photoshop workspace. The ‘Gradient Editor’ pops up with the continuously running ‘Gradient Bar’, as soon as you make the selection. Double click on the gradient boxes at both ends to select them, followed by making your color choices. Tap on ‘OK’ when you are satisfied with your work.

Step 14: Filling the Gradients
To proceed with gradient filling, press and hold the mouse button on the image at the bottom left and continue to drag the cursor to its top right corner. Leave the mouse and navigate to the ‘Layers’ panel for dragging and dropping the ‘Gradient’ layer above the ‘White’ layer.

You are now done with the process of creating a caricature edit from a normal still portrait. Your final image output will appear something like the following:

Cartoons, an already catchy entertainment source, can upgrade other media utilities on integration. Look through the easiest ways of creating cartoonize photo Photoshop stills!
In this article
01 [Types of Cartoon Effects in Photoshop](#Part 1)
02 [Easiest Ways to Cartoonize Photo in Photoshop](#Part 2)
03 [How to Use a Variety of Photoshop Special Effects to Create the Final Caricature Look](#Part 3)
Part 1 Types of Cartoon Effects in Photoshop
It is an absolute fun activity to explore your editing creativity in the realm of cartoonizing the otherwise ordinary still captures. Talking of the most convenient cartoon creator and editor applications, you can safely rely on the Photoshop Image Editor application to choose from a pool of cartoon editing effects for adding that spunky and funny element to your image files.
Presented in the following section, is a discussion of some of the most stunning and visibly amazing cartoon effects in the application’s Editor Library to cartoonize Photoshop images:
01Pop Art Photoshop Action
The effect is a predominantly preferred as a cartoon action Photoshop utility to caricaturize a normal image, along with customizing the same to change the colors and background of the original still capture for creating a brand new appearance with utmost ease. Apart from this, the aforesaid effect allows you to exclusively customize the globally acclaimed graphic masterpieces of Roy Lichtenstein. Working with the effect, you can edit a self-portrait or the favorite image of your pet to give the latter, a funny retro feel.
02Vintage Comic Creator
If the idea of sticking to just the creation of cartoon images is not enough to satisfy you, the Vintage Comic Creator effect allows you to expand your creativity level to work on cartoon based shape and text edits. You can use the effect to enhance an image logo or plain text with a comic book oriented text. A download of this cartoon effect template facilitates you with diversities of customizable layer styles, overlays and patterns.
03GTA Photoshop Action
This is a complete pleasure for the creative fan of Grand Theft Auto, the wicked chasing game series. Additional to creating a stark variety of edited cartoon stills, you are free to reinvent the aforesaid game’s most popular caricature edits, while using the GTA Photoshop Action editing filter. Launched by Indworks, the effect package consisting of 15 vibrant themes and 5 collage templates; promises a quick mimicry of your most cherished video and console games.
04Vector Paint Photoshop Action
The one is an amazing Photoshop effect for creating cartoon edits, which works through a merger of two different ingenious art themes or styles for transforming basic images into cartoonized stills.
The effect grants you the liberty to use varieties of art styles, such as, comic, photo retouching and energetic oil to obtain editing results comparable to that of any original photograph. The template is conveniently simple to use and assures you of quick results. All this, just at a nominal price of $6! Interesting, right?
05Ultra Realistic 3D Space Effect
Considering the fact of you being a space admirer, this one is the perfect image editor for you to add the vibrancy of stunning space elements and backgrounds within your cartoonized edits. The effect lets you play with the diverse range of customizable text and exciting caricature backgrounds. When downloading the template, you get a main setup file, a few editing examples and a web link to the free fonts present in the effect.
06Animated Zombie Grime Art Photoshop Action
Are you in love with the latest zombie grimes? If yes, then this action set is exclusive editor package for you. Working with the aforesaid image template, you can effortlessly add the perfect zombie theme to your cartoon edits, along with simultaneously creating a stunning animation, which you can use to enhance your video or GIF uploads on social media. Not forgetting the best part, you get a free access to this amazing utility.
Part 2 Easiest Ways to Cartoonize Photo in Photoshop
Having known about the amazing varieties of cartoonized editor templates in Photoshop, it is a natural instinct to feel motivated to create your own caricature images from normal capture stills. Addressing the concern of image transformation methods to turn a photo into a cartoon Photoshop, let us dive into some of the most affordable methods of creating cartoonized photos in the aforesaid editing application.
Talking of the most basic Photoshop tools for creating caricature images, you can start your editing spree with using the Graphic Tablet, Brush Tool, Layer Masks and a graphic pen to create amateur cartoonized edits from your still photographs, getting a full control on image tracing.
01Brush Tool
A few usage examples include working with a combination of the graphic tablet pen and the editor brushes to trace your image, using the brush in a masked or a fresh layer to avoid altering the actual image, and much more.
02Graphic Tablet
It is best to use the Photoshop Graphic Tablet for adhering to the concern of tracing cartoonized images. You can alternatively cater to the job with a trackpad, mouse, or even your hand. It is however, difficult to assure steady hand postures for image tracing, lest you are using a stylus pen.
03Pen Tool
Using the Pen Tool for cartoonizing your portrait, allows you to draw outlines along the desired figure within the image, along with its important elements, so that you can easily use these outlined paths to introduce different color blocks.
Similar to the Brush Tool, the Photoshop Pen utility grants you the freedom to vary the degree of detailing in your cartoon edit, from being highly expressive to only remaining around the shore. Working with the Pen Tool can, however be a bit tiring and time taking, with respect to the extent of detailing you wish to add to the caricature edits.
Additional to the aforementioned tools, you can also consider using the default image filters of the Photoshop application to get comparable results. This is an exclusively better option to choose, compared to the Pen Tool, when you are working without a Graphic Tablet. To get over the top realistic caricature renderings, you will need to supplement the use of Photoshop filters with the application’s editing channels and other adjustments.
Part 3 How to Use a Variety of Photoshop Special Effects to Create the Final Caricature Look
Considering the extensive discussion on the credibility of the Photoshop Image Editor application in the realm of creating stunning caricature images in high end resolution, let us proceed to learn about using the diversity of Photoshop’s special effects to get the last stage cartoonized appearance of ordinary still images.
User’s Guide to Create High End Cartoonized Look
The following tutorial is a stepwise explanation of the process to convert photo into cartoon Photoshop in the easiest possible way. Stick to the method for getting affordable results in a quick span.
Step 1: Download and Launch the Program
Visit the official website of Photoshop Image Editor for a free download of the software program in your system, followed by installing and launching the same in your device.
Step 2: Upload Your Image
On a successful launch of the editor program, you will be directed to the ‘Photoshop Editor’ window, where you are required to upload any desired still image from your device for creating a cartoonized edit. To do this, either simply add your image to the editor workspace using the ‘Drag and Drop’ method, or navigate to the ‘File’ tab in the top toolbar and click on ‘Open’ in the dropdown menu.
Step 3: Edge Enhancement
Once your image appears in the editor timeline, proceed to sharpen the edges of the face and body of the portrait. Start with navigating to and clicking on the ‘Filter’ option, followed by tapping on ‘Filter Gallery’ and selecting the ‘Artistic’ folder, where you need to choose the ‘Poster Edges’ option. Observe the effect of these setting on the portrait and make necessary changes.
Step 4: Background Setting
Ensure that the background and foreground of your image are set to white and black colors respectively. If not, proceed to adjust the same as required.
Step 5: Distorting the Edges
You now need to introduce some distortion in the edges of your portrait. Navigate to the ‘Filter’ option again, open the ‘Filter Gallery’ and choose ‘Torn Edges’ from the menu that drops down. Select the desired parameter values in accordance with your creative suitability.
Step 6: Using the Channels Panel
The next step is to select and copy your portrait using the ‘Ctrl + A’ and Ctrl + C commands respectively. Navigate to the ‘Channels’ panel at the right of the Photoshop workspace. At the panel’s bottom right, proceed with creating a new channel. It will be assigned the name ‘Alpha 1’ by Photoshop, which you are most welcome to change.
Step 7: Color Inversion
When you finish creating the channel, use the ‘Ctrl + V’ command to paste your portrait in the same. Proceed with inverting the image colors by navigating to the ‘Image’ option, followed by choosing the ‘Adjustment’ and ‘Invert’ options from the consecutive drop downs. Now, make a selection of the ‘White’ regions of your portrait by pressing the ‘Ctrl’ key and clicking on the ‘Alpha 1 Channel thumbnail.
Step 8: Layer Creation
Navigate to the ‘Layers’ panel at the right of the Photoshop workspace, and click on the ‘New Layer’ icon for creating a fresh layer. Fill the just created layer with black color, either by pressing ‘g’ from your system’s keyboard, or using the ‘Paint Bucket’ tool. Don’t forget to assign a suitable name to the layer.
Repeat the above process to create a separate layer and e fill the same with white color. The layer creation process is essential to separate the white and black colors of the actual image.
Step 10: Layer Dragging
In the ‘Layers’ panel, drag the ‘Black’ layer above the ‘White’ one.
Step 11: Creating Additional Layers
You are now required to create three more layers, with the same process as for the above two, for adding effects to the Skin, Clothes and Teeth/Eyes of the portrait. When you finish creation, assign suitable names to the layers, followed by dragging them below the ‘Black’ one within the ‘Layers’ panel.
Step 12: Color Selection and Application
Choose the respective colors for the clothes, skin and teeth/eyes of the cartoonized edit. To proceed with color application, navigate to the toolbar at the left of the Photoshop workspace and choose the ‘Brush Tool’. Finally, choose a particular layer and apply careful brush strokes to add color to the specific area of the portrait that you wish to edit. Follow the same process to add colors to the remaining layers to get the desired result in all areas of your cartoonized edit.
Step 13: Using the Gradient Tool
Navigate to the ‘Layers’ panel again and create a new ‘Gradient’ layer to further enhance your creation. You now need to select the ‘Gradient Tool’ from the toolbar at the left of the Photoshop workspace. The ‘Gradient Editor’ pops up with the continuously running ‘Gradient Bar’, as soon as you make the selection. Double click on the gradient boxes at both ends to select them, followed by making your color choices. Tap on ‘OK’ when you are satisfied with your work.
Step 14: Filling the Gradients
To proceed with gradient filling, press and hold the mouse button on the image at the bottom left and continue to drag the cursor to its top right corner. Leave the mouse and navigate to the ‘Layers’ panel for dragging and dropping the ‘Gradient’ layer above the ‘White’ layer.
You are now done with the process of creating a caricature edit from a normal still portrait. Your final image output will appear something like the following:
OBS Animated Lower Thirds Alternatives
OBS Animated Lower Thirds Alternatives
An easy yet powerful editor
Numerous effects to choose from
Detailed tutorials provided by the official channel
It’s worth noting that people commonly use built-in OBS animated lower thirds for the job, but you can also use other editing tools to create custom animations and import them in your OBS Livestream.
This guide will walk you through everything you need to know about OBS animated lower thirds and their best alternatives you can use in 2022 and beyond.
In this article
01 [What are Lower Thirds in Animation?](#Part 1)
02 [How To Set Up An Animated Lower Third In OBS Studio](#Part 2)
03 [8 AMAZING OBS Animated Lower Thirds Alternatives](#Part 3)
Part 1 What is Lower Thirds in Animation?
To put it in simple words, a lower third is simply a graphic overlay that appears on top of the actual footage. As the name implies, the contents of the lower third usually occur at the lower end of the screen, but streamers can also configure the OBS settings to change their position within the screen. Ideally, lower third animations are utilized to give a context of the overall video.
Let’s say you are life streaming your GTA V gameplay on YouTube. So, to help first-time viewers get the overall context, you can add GTA-related elements in the lower third animation and maximize viewer acquisition. In addition to this, you can also use OBS animated lower-thirds to display exclusive offers and discounts throughout the live stream.
Part 2 How To Set Up An Animated Lower Third In OBS Studio
So, now that you know the major benefits of using animated lower thirds in OBS studio, let’s understand how to set them up to make your live streams more engaging. It’s worth noting that OBS works around the concept of layers that you can manage individually to run your live streams. So, to add an animated lower third in OBS studio, all you have to do is add a dedicated layer and place it right above the video layer.
When it comes to setting up the lower-third, you’ll first need to create the graphics you want to display on top of the live streams. You can use Photoshop to design a custom lower-third animation if you are a professional designer. But, if you have just stepped into the world of live streams and don’t have any prior experience with Photoshop, you can also purchase one of the ready-to-use lower-third packages and import them directly to OBS.
Either way, it would be crucial to ensure that your OBS animated lower-third graphics do not interfere with the actual video. Why? Because this will make the video look more cluttered, and you’ll end up losing potential viewers.
Here’s a YouTube video that’ll walk you through the step-by-step procedure of creating lower-third animations in OBS Studio.
Part 3 8 AMAZING OBS Animated Lower Thirds Alternatives
While OBS is a great tool to add lower-third animations to your live streams, it has its fair share of drawbacks. For instance, OBS has a pretty complicated interface, which means if you are an absolute beginner, you may not easily set up your live streams. Not to mention, OBS is heavy software - so if you don’t have a high-configuration system, you won’t be able to run the tool at all.
So, what’s your next best option? Fortunately, there are several OBS alternatives that you can use to set up OBS animated lower-third graphics and enhance the overall quality of your live streams. To make your job easier, we have cherry-picked 8 of the most reliable OBS alternatives that you can use to add lower-third animations to a Livestream video.
01Wirecast

Like OBS, Wirecast is a popular video streaming platform that many content creators use to live stream on their social media handles. It also offers a layer-based architecture, which means users can add multiple layers separately and manage them through an easy-to-navigate panel.
One of the key reasons Wirecast is an ideal choice to add animated lower-third graphics to your live streams is its built-in collections. The tool already has several ready-to-integrate lower-third animations that one could import into their project without any hassle.
Pros:
● Built-in lower-third graphic templates
● Easy-to-use Interface
● Switch between multiple camera angles with one click
Cons:
● Unlike OBS Studio, Wirecast isn’t available for free
Why Do We Recommend Wirecast?
Wirecast is a fully functional video streaming platform where you can easily manage all your live streams. Wirecast offers far better functionality than OBS Studio despite having a relatively easy-to-use UI.
02vMix

vMix is a feature-rich video production software that offers everything one would need to create stunning videos. However, it also has a dedicated live stream manager to manage your live streams, switch between multiple camera angles, and add overlay animations to keep the viewers engaged. Unlike OBS Studio, vMix doesn’t have a layering system, which means you can overlay multiple channels easily.
As far as OBS animated lower-thirds are concerned, there are different ways you can add these animations to your live streams. You can either import dedicated PSD files, embed HTML codes, or choose one of the ready-to-use lower-third templates to do the job. In either case, vMix will help you add stunning lower-third animations within a few minutes.
Pros:
● Full-scale video production software
● Built-in support for audio mixing
● Add and Manage Multiple Camera Inputs
Cons:
● If you want to relish all the benefits of vMix, you would have to purchase its pro version, which costs $1200. As compared to other available options, vMix is significantly expensive.
Why Do We Recommend vMix?
vMix is ideal for users who want to upgrade from OBS and can spend $1200 on a live stream manager. It’ll provide everything you need to live stream across different social media platforms.
03Restream Studio

Restream Studio is a browser-based live stream tool that offers an easy-to-navigate panel to manage your live streams. Restream is ideal for beginners who don’t want to spend a hefty amount on their live streaming software. With restream, you can upload your brand logos, graphic overlays, and text details and save them in the “Favorites” tab for future use.
This way, whenever you are live streaming, you can directly choose one of these overlays and switch between them easily. The tool also has a dedicated “Hide/Show” button that’ll allow you to change the display status of the lower-third animations.
Pros:
● Cross-platform Compatibility
● Ideal for Beginners and Novice YouTubers
● Save Multiple Graphic Overlays for Future Use
Cons:
● You won’t get any advanced functionality like Wirecast or OBS Studio
Why Do We Recommend Restream Studio?
Restream Studio is the perfect solution for users who don’t want to get overwhelmed with the complex features of OBS Studio. With its browser-friendly UI, you’ll be able to run Restream Studio across different platforms and add OBS animated lower-third graphics to your live streams easily.
04Lightstream

Lightstream is another free live stream manager that offers many features to execute hassle-free live streams across different platforms, including YouTube, Facebook, and Twitch. Even though the tool doesn’t provide advanced features like OBS Studio or Wirecast, it has everything you require to stream live on your social media handles. One of the key features of Lightstream is that you can add multiple scenes/overlays and switch between them with a single click.
Pros:
● Being open-source, Lightstream is available for free
● Lightstream is a cloud-based tool, which means it offers cross-platform compatibility
● Easy to set up, even if you are a beginner
Cons:
● Lacks advanced editing features
Why Do We Recommend Lightstream?
Lightstream is the most reliable live stream manager for users looking for a simple and cross-platform tool to manage live streams and add overlays.
05Adobe Photoshop

Before you act surprised, let us clarify that Adobe Photoshop isn’t an alternative to OBS Studio. However, you can use it to create customized overlays and lower-third graphics to add a personal touch to your live streams. Suppose you are already familiar with Photoshop and have been using it for a few years. In that case, it’ll allow you to design personalized text overlays, graphics, animations, and logos for your live streams.
And, once you have successfully designed the lower-third overlays, you can use any of the live stream managers to add them to your live streams.
Pros:
● Design custom overlays for your social media live streams
● Offers advanced editing options to customize logos and lower-third graphics
Cons:
● Photoshop has a steep learning curve, and if you are not an experienced designer, you won’t be able to design custom overlays
Why Do We Recommend Adobe Photoshop?
Adobe Photoshop is a reliable choice for creators who find the built-in media libraries of a live stream manager limited. With Photoshop, you’ll be able to design custom overlays for your live streams.
06ShareX

ShareX is also an open-source screen recorder and lives stream manager that offers all the OBS features you’ll need to manage your live streams and add multiple lower-third overlays. The only downside of ShareX is that it has a complicated user interface. Even if you have used OBS in the past, you’ll find ShareX’s user interface relatively complex. So, you should only sign up for ShareX if you are comfortable with complex user interfaces.
Pros:
● Upload and save pictures, videos, logos for lower-third overlays
● Record your entire screen or a specific window
● Assign hotkeys to switch between multiple windows during the Livestream
Cons:
● The user interface isn’t as friendly as other available options
Why Do We Recommend ShareX?
ShareX is an ideal OBS animated lower-third alternative for users who need a free-of-cost solution to manage their live streams.
07Canva

Again, Canva doesn’t support live stream management at all. However, like Adobe Photoshop, you can use Canva to create stunning lower-third overlays for your Livestream sessions. The major benefit of using Canva is that it has thousands of pre-made templates that you can import to your design with one click. All these templates are fully customizable - so you’ll be able to design custom lower-third overlays for your live streams.
Pros:
● Comparatively less complicated than Adobe Photoshop
● Canva is affordable
● Being a web-based designing tool, you can access Canva on any device
Cons:
● The premium version of Canva is relatively expensive than its competitors.
Why Do We Recommend Canva?
Canva is a one-stop solution for content creators looking for an additional designing tool to create custom OBS animated lower thirds for their live streams.
Key Takeaways from This Episode
● OBS animated lower-thirds are one of the most effective ways to share the context of a live stream with your viewers
● With OBS Studio, you have the liberty to import custom animated lower-third animations and overlays and add them to the live stream through its layered architecture
● Apart from OBS Studio, there are several other tools (such as Wondershare Filmora Pro) to add animated lower-thirds to live streams.
It’s worth noting that people commonly use built-in OBS animated lower thirds for the job, but you can also use other editing tools to create custom animations and import them in your OBS Livestream.
This guide will walk you through everything you need to know about OBS animated lower thirds and their best alternatives you can use in 2022 and beyond.
In this article
01 [What are Lower Thirds in Animation?](#Part 1)
02 [How To Set Up An Animated Lower Third In OBS Studio](#Part 2)
03 [8 AMAZING OBS Animated Lower Thirds Alternatives](#Part 3)
Part 1 What is Lower Thirds in Animation?
To put it in simple words, a lower third is simply a graphic overlay that appears on top of the actual footage. As the name implies, the contents of the lower third usually occur at the lower end of the screen, but streamers can also configure the OBS settings to change their position within the screen. Ideally, lower third animations are utilized to give a context of the overall video.
Let’s say you are life streaming your GTA V gameplay on YouTube. So, to help first-time viewers get the overall context, you can add GTA-related elements in the lower third animation and maximize viewer acquisition. In addition to this, you can also use OBS animated lower-thirds to display exclusive offers and discounts throughout the live stream.
Part 2 How To Set Up An Animated Lower Third In OBS Studio
So, now that you know the major benefits of using animated lower thirds in OBS studio, let’s understand how to set them up to make your live streams more engaging. It’s worth noting that OBS works around the concept of layers that you can manage individually to run your live streams. So, to add an animated lower third in OBS studio, all you have to do is add a dedicated layer and place it right above the video layer.
When it comes to setting up the lower-third, you’ll first need to create the graphics you want to display on top of the live streams. You can use Photoshop to design a custom lower-third animation if you are a professional designer. But, if you have just stepped into the world of live streams and don’t have any prior experience with Photoshop, you can also purchase one of the ready-to-use lower-third packages and import them directly to OBS.
Either way, it would be crucial to ensure that your OBS animated lower-third graphics do not interfere with the actual video. Why? Because this will make the video look more cluttered, and you’ll end up losing potential viewers.
Here’s a YouTube video that’ll walk you through the step-by-step procedure of creating lower-third animations in OBS Studio.
Part 3 8 AMAZING OBS Animated Lower Thirds Alternatives
While OBS is a great tool to add lower-third animations to your live streams, it has its fair share of drawbacks. For instance, OBS has a pretty complicated interface, which means if you are an absolute beginner, you may not easily set up your live streams. Not to mention, OBS is heavy software - so if you don’t have a high-configuration system, you won’t be able to run the tool at all.
So, what’s your next best option? Fortunately, there are several OBS alternatives that you can use to set up OBS animated lower-third graphics and enhance the overall quality of your live streams. To make your job easier, we have cherry-picked 8 of the most reliable OBS alternatives that you can use to add lower-third animations to a Livestream video.
01Wirecast
Like OBS, Wirecast is a popular video streaming platform that many content creators use to live stream on their social media handles. It also offers a layer-based architecture, which means users can add multiple layers separately and manage them through an easy-to-navigate panel.
One of the key reasons Wirecast is an ideal choice to add animated lower-third graphics to your live streams is its built-in collections. The tool already has several ready-to-integrate lower-third animations that one could import into their project without any hassle.
Pros:
● Built-in lower-third graphic templates
● Easy-to-use Interface
● Switch between multiple camera angles with one click
Cons:
● Unlike OBS Studio, Wirecast isn’t available for free
Why Do We Recommend Wirecast?
Wirecast is a fully functional video streaming platform where you can easily manage all your live streams. Wirecast offers far better functionality than OBS Studio despite having a relatively easy-to-use UI.
02vMix
vMix is a feature-rich video production software that offers everything one would need to create stunning videos. However, it also has a dedicated live stream manager to manage your live streams, switch between multiple camera angles, and add overlay animations to keep the viewers engaged. Unlike OBS Studio, vMix doesn’t have a layering system, which means you can overlay multiple channels easily.
As far as OBS animated lower-thirds are concerned, there are different ways you can add these animations to your live streams. You can either import dedicated PSD files, embed HTML codes, or choose one of the ready-to-use lower-third templates to do the job. In either case, vMix will help you add stunning lower-third animations within a few minutes.
Pros:
● Full-scale video production software
● Built-in support for audio mixing
● Add and Manage Multiple Camera Inputs
Cons:
● If you want to relish all the benefits of vMix, you would have to purchase its pro version, which costs $1200. As compared to other available options, vMix is significantly expensive.
Why Do We Recommend vMix?
vMix is ideal for users who want to upgrade from OBS and can spend $1200 on a live stream manager. It’ll provide everything you need to live stream across different social media platforms.
03Restream Studio
Restream Studio is a browser-based live stream tool that offers an easy-to-navigate panel to manage your live streams. Restream is ideal for beginners who don’t want to spend a hefty amount on their live streaming software. With restream, you can upload your brand logos, graphic overlays, and text details and save them in the “Favorites” tab for future use.
This way, whenever you are live streaming, you can directly choose one of these overlays and switch between them easily. The tool also has a dedicated “Hide/Show” button that’ll allow you to change the display status of the lower-third animations.
Pros:
● Cross-platform Compatibility
● Ideal for Beginners and Novice YouTubers
● Save Multiple Graphic Overlays for Future Use
Cons:
● You won’t get any advanced functionality like Wirecast or OBS Studio
Why Do We Recommend Restream Studio?
Restream Studio is the perfect solution for users who don’t want to get overwhelmed with the complex features of OBS Studio. With its browser-friendly UI, you’ll be able to run Restream Studio across different platforms and add OBS animated lower-third graphics to your live streams easily.
04Lightstream
Lightstream is another free live stream manager that offers many features to execute hassle-free live streams across different platforms, including YouTube, Facebook, and Twitch. Even though the tool doesn’t provide advanced features like OBS Studio or Wirecast, it has everything you require to stream live on your social media handles. One of the key features of Lightstream is that you can add multiple scenes/overlays and switch between them with a single click.
Pros:
● Being open-source, Lightstream is available for free
● Lightstream is a cloud-based tool, which means it offers cross-platform compatibility
● Easy to set up, even if you are a beginner
Cons:
● Lacks advanced editing features
Why Do We Recommend Lightstream?
Lightstream is the most reliable live stream manager for users looking for a simple and cross-platform tool to manage live streams and add overlays.
05Adobe Photoshop
Before you act surprised, let us clarify that Adobe Photoshop isn’t an alternative to OBS Studio. However, you can use it to create customized overlays and lower-third graphics to add a personal touch to your live streams. Suppose you are already familiar with Photoshop and have been using it for a few years. In that case, it’ll allow you to design personalized text overlays, graphics, animations, and logos for your live streams.
And, once you have successfully designed the lower-third overlays, you can use any of the live stream managers to add them to your live streams.
Pros:
● Design custom overlays for your social media live streams
● Offers advanced editing options to customize logos and lower-third graphics
Cons:
● Photoshop has a steep learning curve, and if you are not an experienced designer, you won’t be able to design custom overlays
Why Do We Recommend Adobe Photoshop?
Adobe Photoshop is a reliable choice for creators who find the built-in media libraries of a live stream manager limited. With Photoshop, you’ll be able to design custom overlays for your live streams.
06ShareX
ShareX is also an open-source screen recorder and lives stream manager that offers all the OBS features you’ll need to manage your live streams and add multiple lower-third overlays. The only downside of ShareX is that it has a complicated user interface. Even if you have used OBS in the past, you’ll find ShareX’s user interface relatively complex. So, you should only sign up for ShareX if you are comfortable with complex user interfaces.
Pros:
● Upload and save pictures, videos, logos for lower-third overlays
● Record your entire screen or a specific window
● Assign hotkeys to switch between multiple windows during the Livestream
Cons:
● The user interface isn’t as friendly as other available options
Why Do We Recommend ShareX?
ShareX is an ideal OBS animated lower-third alternative for users who need a free-of-cost solution to manage their live streams.
07Canva
Again, Canva doesn’t support live stream management at all. However, like Adobe Photoshop, you can use Canva to create stunning lower-third overlays for your Livestream sessions. The major benefit of using Canva is that it has thousands of pre-made templates that you can import to your design with one click. All these templates are fully customizable - so you’ll be able to design custom lower-third overlays for your live streams.
Pros:
● Comparatively less complicated than Adobe Photoshop
● Canva is affordable
● Being a web-based designing tool, you can access Canva on any device
Cons:
● The premium version of Canva is relatively expensive than its competitors.
Why Do We Recommend Canva?
Canva is a one-stop solution for content creators looking for an additional designing tool to create custom OBS animated lower thirds for their live streams.
Key Takeaways from This Episode
● OBS animated lower-thirds are one of the most effective ways to share the context of a live stream with your viewers
● With OBS Studio, you have the liberty to import custom animated lower-third animations and overlays and add them to the live stream through its layered architecture
● Apart from OBS Studio, there are several other tools (such as Wondershare Filmora Pro) to add animated lower-thirds to live streams.
15 Best Video to GIF App on iPhone and Android
15 Best Video to GIF App on iPhone and Android
An easy yet powerful editor
Numerous effects to choose from
Detailed tutorials provided by the official channel
In the last few years, GIF has taken the internet by storm and is present everywhere be it social media sites, messaging apps, blogs, or sites. Though there are several sites available from where you can download interesting GIFs, you can even create customized ones. Several apps for Android and iPhone are available using which the GIF can be created from video.

Using these apps, you can create good morning GIF video for WhatsApp , cute GIF, birthday GIF, and other.
In this article
01 [Top Gif Apps for Iphone](#Part 1)
02 [Top Apps for Android](#Part 2)
03 [Top Apps for Both Android and Iphone](#Part 3)
04 [Best Desktop Software to Create Customized Gif- Wondershare Filmora](#Part 4)
Part 1 Top GIF Apps for iPhone
Check the below app to turn video into GIF on your iPhone.
01GIF Maker
This is a free app with IAP that allows creating a GIF from videos as well as photos.
Key features: :
● Create GIFs, boomerangs, and memes using videos and photos.
● Allows creating GIFs using live cameras.
● Using this iPhone video to GIF app, loop videos can also be created.
● Multiple GIF editing options like adding text, adding filters, adjusting frame speed, adding emojis, artwork, and more.
● Allows sharing created GIFs to Facebook, Messenger, Instagram, and other sites.
● Free to use for the first 3 days after which a subscription of $9.99 has to be paid.
● Monthly and Lifetime subscriptions are available as well
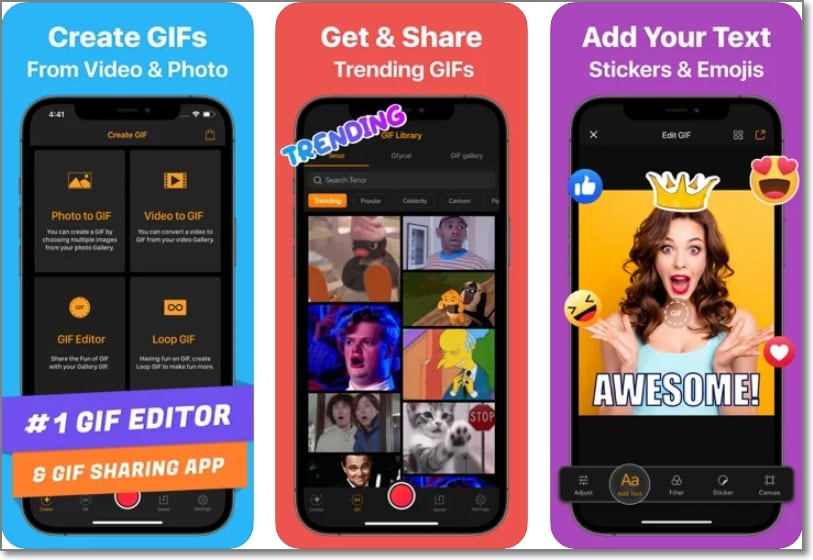
02Video to GIF
Developed by Ngo Ngoc Chien this is a popular app for the iPhone that is free and comes with IAP.
Key features:
● Allows creating a watermark-free GIF from the videos present on your phone.
● Videos can be recorded for creating a GIF.
● Option to use YouTube or any other online video for GIF creation.
● Comes with 15 image effect templates to create a GIF using photos.
● Additionally, live photos, as well as Burst photos can also be used for GIFs.
● Created GIFs can be shared to Twitter, Facebook, Instagram, Dropbox, Email, and other sites.
● Multiple editing options are supported like rotate, quality selection, reverse, and more.
● Option to save GIF as URL and also get URL of the created GIF.
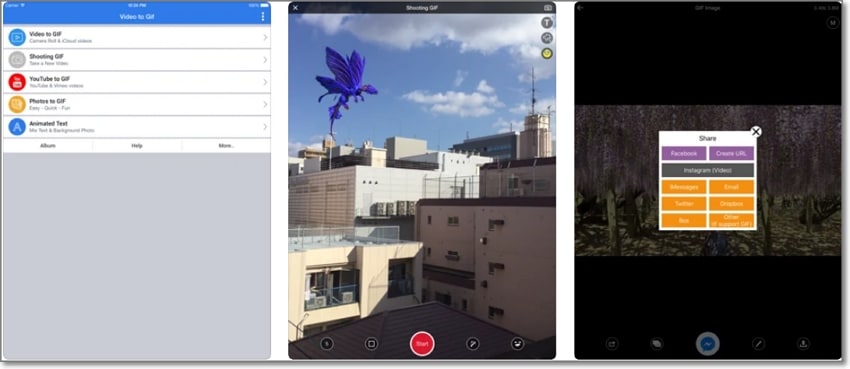
035Seconds App
With a 4.8 rating, this free app is designed by Eric Marschner and offers IAP as well.
Key features: :
● Allows creating a GIF from photos and videos present on your device.
● New images and videos can be captured for GIFs.
● GIFs can be imported from other sources and edited as needed.
● Multiple options for editing are supported like using filters, stickers, text, and more.
● Free app with a simple interface without any need for sign-ups.
● Allows sharing the created GIF as a file or as a link.
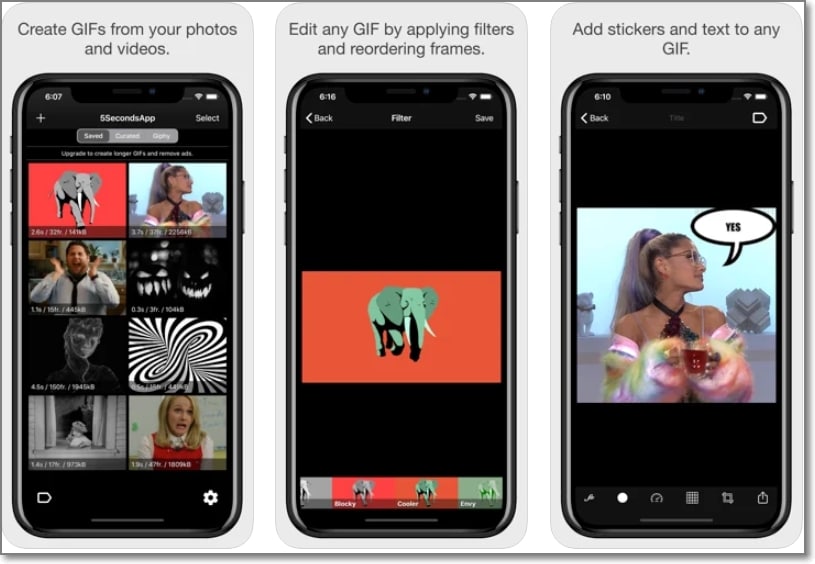
04Giffer Pro GIF Maker
With a 4 rating, this is a paid video to GIF converter app developed by Taber Buhl.
Key features:
● Allows creating interesting GIFs in larger and longer sizes.
● GIFs can be created using live video, photos, videos, burst photos, and other GIF frames.
● Simple to use with support to advanced features like adjusting frames, speed, position, and others.
● Allows creating different types of GIFs like stop motion, wiggle, time-lapse, seamless loop, reaction, and many more.
● Share created GIFs to social media sites like Instagram, Twitter, Tumblr, and others.
● Option to export GIFs as live photos and videos.
● Support multiple in-app camera modes, playback modes, and sharing options
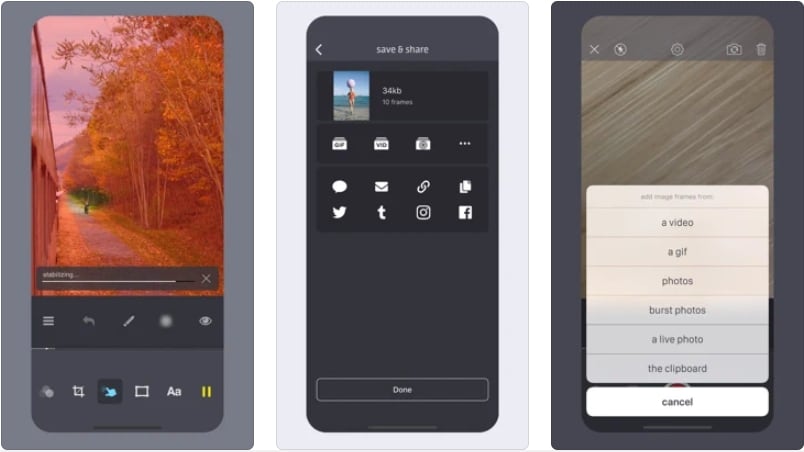
05Live GIF
Designed for iPhone and iPad, this is a paid app by Priime, Inc supporting multiple features.
Key features:
● Using this iOS app, Live Photos can be converted to videos and GIFs.
● Simple and intuitive interface without any complicated process.
● Allows sharing the created GIF to several sites like Twitter, iMessage, Facebook, and more.
● Compatible working with devices capable of taking Live Photos.
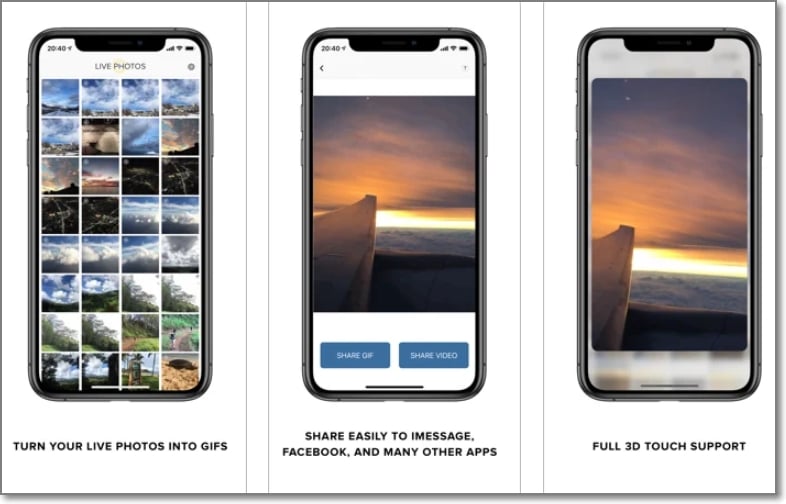
06Gifx
This is a paid app for iOS devices that comes with powerful features.
Key features:
● GIFs can be created using photos, videos, animated PNG files, bursts images, live photos, and other media.
● Stickers and annotations can be added to the GIF.
● Support multiple editing options like rearranging the frames, controlling the speed, and more.
● Option to share the GIF through MMS, email, and also clipboard.
● GIF files can be saved to the device as a video or animated PNG.
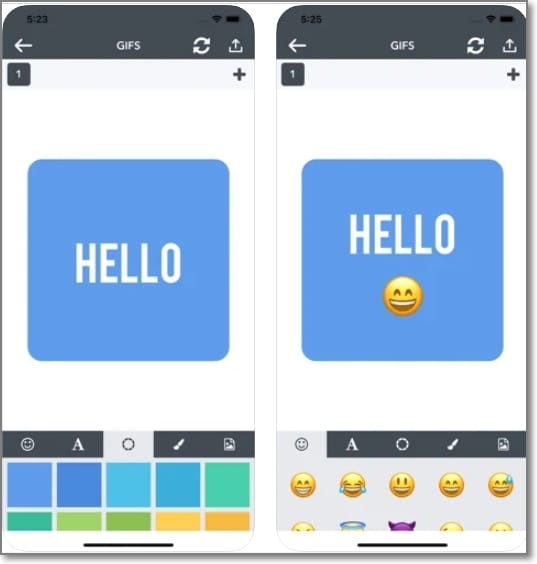
Part 2 Top Apps for Android
Below listed are the top apps for Android devices.
01Coub
This is a free video GIF maker app with a 4 rating that is simple to use.
Key features:
● Allows creating loops of videos from camera, YouTube, Library, and other sources.
● Allows trimming the video to choose the desired part.
● HD quality coubs are created in different formats like horizontal, vertical, and others.
● Created coubs appear on the subscriber’s timeline and channel.
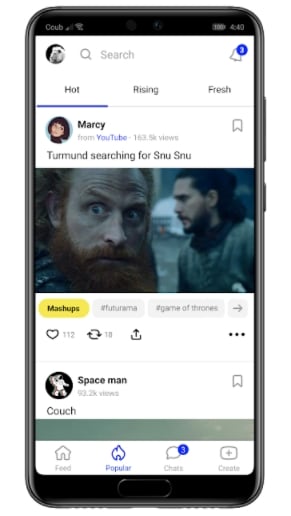
02GIF Camera
This is an easy-to-use app for Android devices to create GIFs.
Key features:
● Allows creating GIFs by recording a video using an Android camera.
● GIFs can be created for up to 10 seconds or less.
● Allows editing GIFs.
● Created GIFs can be saved to the phone or can also be shared directly on social media sites.
● Lightweight app with user-friendly interface.
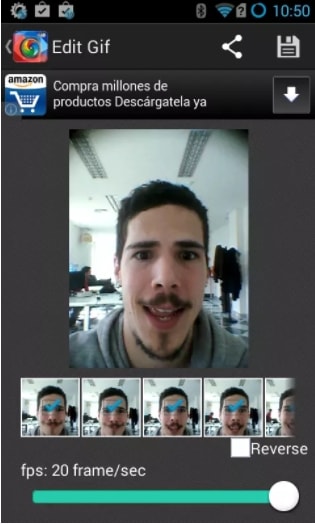
03Giphy Cam
This Android-based app from Giphy allows creating interesting GIFs. The app is free to use.
Key features:
● Create GIFs by recording videos using the Android camera.
● Support a wide range of editing tools like filters, text, special effects, and more.
● Intuitive interface that makes the process quick and simple.
● The created GIF animation can be saved to the system or can be shared with other apps as well.
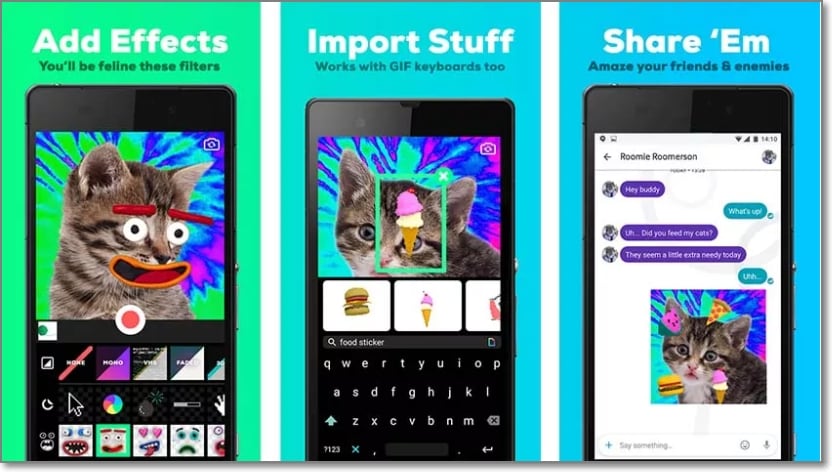
04GIF Maker
With a 4.7 rating, this is a free and powerful app for creating interesting GIFs.
Key features: :
● Allows creating GIFs using the videos clips on your device or by recording a live video.
● Option to record the screen video and create a GIF.
● Multiple images can also be used for creating a GIF file.
● A wide range of editing functions are supported like trim, crop, resize, filters, emoji, and more.
● High-quality GIFs can be created supporting up to 400 images and 50fps.
● Additional features include GIF compression, GIF to video conversion, selecting GIF background, sharing GIF on social media sites, and more.
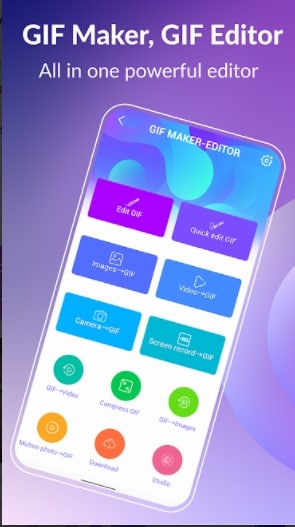
05GIFBoom
This app for Android devices is free to use and allows to quickly create GIFs.
Key features:
● Allows creating high-resolution GIFs.
● GIFs can be created using the images and videos on your phone.
● Live video can also be recorded for creating GIFs.
● GIFs can be sent over email, Twitter, Instagram, and other social media sites.
● Allows adding music to GIF files.
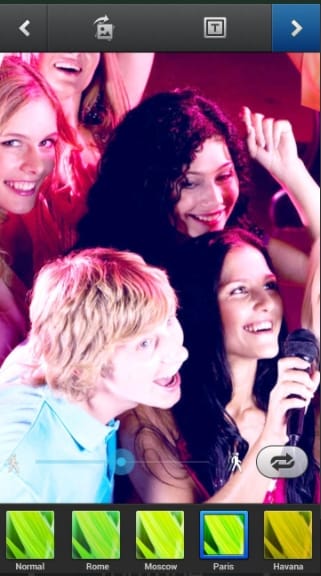
Part 3 Top Apps for Android and iPhone
There are a number of apps that are available for both Android and iOS platforms. These apps can be downloaded from their respective app stores. The top ones are enlisted below.
01Gif Me! Camera
This app for Android and iOS devices supports the quick creation of GIF files.
Key features:
● Allows creating GIFs using videos and images on the device.
● Option to add special effects, filters, and other elements.
● Option to import GIF from online services.
● Stop-motion, loop, time-lapse, and other animations can be created.
● Save the created GIF file to your device or share them over social media sites.
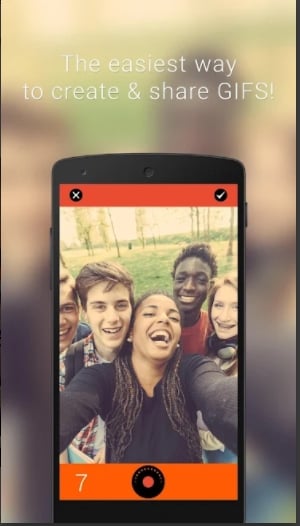
02Pixel Animator- GIF Maker
This Android and iOS-based app allow creating pixel-based GIF files.
Key features:
● Create pixel-based GIFs and art using an existing image or a cartoon.
● Allows adjusting the picture frame.
● Multiple options for editing the GIF animations.
● Share the created pixel over different sites and platforms.
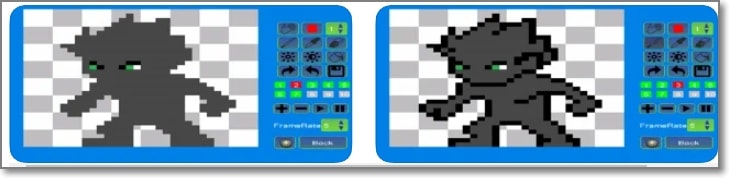
03GIF Toaster
This is a free app with an IAP option available for download on Android and iOS devices.
Key features:
● Simple to use app that can create GIFs from videos and images on the device.
● Support almost all popular media formats for creating GIF files.
● Allows creating GIFs using bursts, panoramas, as well as time-lapses.
● Facilitate creating photo collages as well.
● Simple and quick processing.

04GIPHY
When it comes to searching or creating a GIF this is the most popular and widely used app available for both Android and iOS devices.
Key features:
● Create GIFs by uploading videos or capturing one using the device camera.
● Allows creating stickers with custom face filters and text cartoons.
● Created stickers can be accessed from all GIPHY accessible places.
● Search from a huge library of GIFs and clips.
● Option to share GIF through email, Messenger, Instagram, Twitter, and other sites.
● Created animation can also be saved to the clipboard.
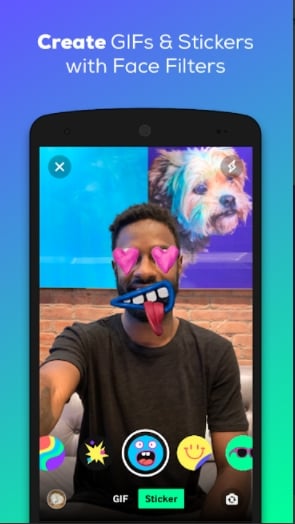
Part 4 Best Desktop Software To Create Customized Gif- Wondershare Filmora Video Editor
If you are looking for a desktop tool that can let you create customized GIFs using videos, Wondershare Filmora is the best choice. This software is available for download on Windows and Mac systems and supports creating a GIF from videos in all popular formats like MP4, MOV, MKV, and many others.
You can add filters, effects, and other elements to the GIF and can further customize them using features like trim, crop, and more.
Wondershare Filmora
Get started easily with Filmora’s powerful performance, intuitive interface, and countless effects!
Try It Free Try It Free Try It Free Learn More >

The process of creating a GIF is simple and quick where you just need to add the video, edit them and choose to save them as a GIF file which can be used anywhere as needed.
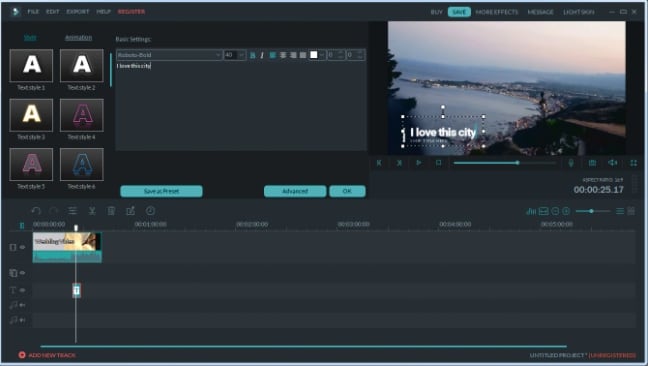
● Key Takeaways from This Episode →
●A wide range of apps is available for creating GIFs using videos.
●These apps are available for Android, as well as iOS devices and can be selected based on your requirements and budget.
●Wondershare Filmora is an excellent desktop software for creating a GIF using videos.
In the last few years, GIF has taken the internet by storm and is present everywhere be it social media sites, messaging apps, blogs, or sites. Though there are several sites available from where you can download interesting GIFs, you can even create customized ones. Several apps for Android and iPhone are available using which the GIF can be created from video.
Using these apps, you can create good morning GIF video for WhatsApp , cute GIF, birthday GIF, and other.
In this article
01 [Top Gif Apps for Iphone](#Part 1)
02 [Top Apps for Android](#Part 2)
03 [Top Apps for Both Android and Iphone](#Part 3)
04 [Best Desktop Software to Create Customized Gif- Wondershare Filmora](#Part 4)
Part 1 Top GIF Apps for iPhone
Check the below app to turn video into GIF on your iPhone.
01GIF Maker
This is a free app with IAP that allows creating a GIF from videos as well as photos.
Key features: :
● Create GIFs, boomerangs, and memes using videos and photos.
● Allows creating GIFs using live cameras.
● Using this iPhone video to GIF app, loop videos can also be created.
● Multiple GIF editing options like adding text, adding filters, adjusting frame speed, adding emojis, artwork, and more.
● Allows sharing created GIFs to Facebook, Messenger, Instagram, and other sites.
● Free to use for the first 3 days after which a subscription of $9.99 has to be paid.
● Monthly and Lifetime subscriptions are available as well
02Video to GIF
Developed by Ngo Ngoc Chien this is a popular app for the iPhone that is free and comes with IAP.
Key features:
● Allows creating a watermark-free GIF from the videos present on your phone.
● Videos can be recorded for creating a GIF.
● Option to use YouTube or any other online video for GIF creation.
● Comes with 15 image effect templates to create a GIF using photos.
● Additionally, live photos, as well as Burst photos can also be used for GIFs.
● Created GIFs can be shared to Twitter, Facebook, Instagram, Dropbox, Email, and other sites.
● Multiple editing options are supported like rotate, quality selection, reverse, and more.
● Option to save GIF as URL and also get URL of the created GIF.
035Seconds App
With a 4.8 rating, this free app is designed by Eric Marschner and offers IAP as well.
Key features: :
● Allows creating a GIF from photos and videos present on your device.
● New images and videos can be captured for GIFs.
● GIFs can be imported from other sources and edited as needed.
● Multiple options for editing are supported like using filters, stickers, text, and more.
● Free app with a simple interface without any need for sign-ups.
● Allows sharing the created GIF as a file or as a link.
04Giffer Pro GIF Maker
With a 4 rating, this is a paid video to GIF converter app developed by Taber Buhl.
Key features:
● Allows creating interesting GIFs in larger and longer sizes.
● GIFs can be created using live video, photos, videos, burst photos, and other GIF frames.
● Simple to use with support to advanced features like adjusting frames, speed, position, and others.
● Allows creating different types of GIFs like stop motion, wiggle, time-lapse, seamless loop, reaction, and many more.
● Share created GIFs to social media sites like Instagram, Twitter, Tumblr, and others.
● Option to export GIFs as live photos and videos.
● Support multiple in-app camera modes, playback modes, and sharing options
05Live GIF
Designed for iPhone and iPad, this is a paid app by Priime, Inc supporting multiple features.
Key features:
● Using this iOS app, Live Photos can be converted to videos and GIFs.
● Simple and intuitive interface without any complicated process.
● Allows sharing the created GIF to several sites like Twitter, iMessage, Facebook, and more.
● Compatible working with devices capable of taking Live Photos.
06Gifx
This is a paid app for iOS devices that comes with powerful features.
Key features:
● GIFs can be created using photos, videos, animated PNG files, bursts images, live photos, and other media.
● Stickers and annotations can be added to the GIF.
● Support multiple editing options like rearranging the frames, controlling the speed, and more.
● Option to share the GIF through MMS, email, and also clipboard.
● GIF files can be saved to the device as a video or animated PNG.
Part 2 Top Apps for Android
Below listed are the top apps for Android devices.
01Coub
This is a free video GIF maker app with a 4 rating that is simple to use.
Key features:
● Allows creating loops of videos from camera, YouTube, Library, and other sources.
● Allows trimming the video to choose the desired part.
● HD quality coubs are created in different formats like horizontal, vertical, and others.
● Created coubs appear on the subscriber’s timeline and channel.
02GIF Camera
This is an easy-to-use app for Android devices to create GIFs.
Key features:
● Allows creating GIFs by recording a video using an Android camera.
● GIFs can be created for up to 10 seconds or less.
● Allows editing GIFs.
● Created GIFs can be saved to the phone or can also be shared directly on social media sites.
● Lightweight app with user-friendly interface.
03Giphy Cam
This Android-based app from Giphy allows creating interesting GIFs. The app is free to use.
Key features:
● Create GIFs by recording videos using the Android camera.
● Support a wide range of editing tools like filters, text, special effects, and more.
● Intuitive interface that makes the process quick and simple.
● The created GIF animation can be saved to the system or can be shared with other apps as well.
04GIF Maker
With a 4.7 rating, this is a free and powerful app for creating interesting GIFs.
Key features: :
● Allows creating GIFs using the videos clips on your device or by recording a live video.
● Option to record the screen video and create a GIF.
● Multiple images can also be used for creating a GIF file.
● A wide range of editing functions are supported like trim, crop, resize, filters, emoji, and more.
● High-quality GIFs can be created supporting up to 400 images and 50fps.
● Additional features include GIF compression, GIF to video conversion, selecting GIF background, sharing GIF on social media sites, and more.
05GIFBoom
This app for Android devices is free to use and allows to quickly create GIFs.
Key features:
● Allows creating high-resolution GIFs.
● GIFs can be created using the images and videos on your phone.
● Live video can also be recorded for creating GIFs.
● GIFs can be sent over email, Twitter, Instagram, and other social media sites.
● Allows adding music to GIF files.
Part 3 Top Apps for Android and iPhone
There are a number of apps that are available for both Android and iOS platforms. These apps can be downloaded from their respective app stores. The top ones are enlisted below.
01Gif Me! Camera
This app for Android and iOS devices supports the quick creation of GIF files.
Key features:
● Allows creating GIFs using videos and images on the device.
● Option to add special effects, filters, and other elements.
● Option to import GIF from online services.
● Stop-motion, loop, time-lapse, and other animations can be created.
● Save the created GIF file to your device or share them over social media sites.
02Pixel Animator- GIF Maker
This Android and iOS-based app allow creating pixel-based GIF files.
Key features:
● Create pixel-based GIFs and art using an existing image or a cartoon.
● Allows adjusting the picture frame.
● Multiple options for editing the GIF animations.
● Share the created pixel over different sites and platforms.
03GIF Toaster
This is a free app with an IAP option available for download on Android and iOS devices.
Key features:
● Simple to use app that can create GIFs from videos and images on the device.
● Support almost all popular media formats for creating GIF files.
● Allows creating GIFs using bursts, panoramas, as well as time-lapses.
● Facilitate creating photo collages as well.
● Simple and quick processing.
04GIPHY
When it comes to searching or creating a GIF this is the most popular and widely used app available for both Android and iOS devices.
Key features:
● Create GIFs by uploading videos or capturing one using the device camera.
● Allows creating stickers with custom face filters and text cartoons.
● Created stickers can be accessed from all GIPHY accessible places.
● Search from a huge library of GIFs and clips.
● Option to share GIF through email, Messenger, Instagram, Twitter, and other sites.
● Created animation can also be saved to the clipboard.
Part 4 Best Desktop Software To Create Customized Gif- Wondershare Filmora Video Editor
If you are looking for a desktop tool that can let you create customized GIFs using videos, Wondershare Filmora is the best choice. This software is available for download on Windows and Mac systems and supports creating a GIF from videos in all popular formats like MP4, MOV, MKV, and many others.
You can add filters, effects, and other elements to the GIF and can further customize them using features like trim, crop, and more.
Wondershare Filmora
Get started easily with Filmora’s powerful performance, intuitive interface, and countless effects!
Try It Free Try It Free Try It Free Learn More >
The process of creating a GIF is simple and quick where you just need to add the video, edit them and choose to save them as a GIF file which can be used anywhere as needed.
● Key Takeaways from This Episode →
●A wide range of apps is available for creating GIFs using videos.
●These apps are available for Android, as well as iOS devices and can be selected based on your requirements and budget.
●Wondershare Filmora is an excellent desktop software for creating a GIF using videos.
Tips for Animated Collage Maker
Versatile Video Editor - Wondershare Filmora
An easy yet powerful editor
Numerous effects to choose from
Detailed tutorials provided by the official channel
Using collections of pictures, you can create a collage and animate it to excite the audience. The animated collage maker eases this task and aids in creating the collage as a pro editor. Manually, you would have seen many images pasted on a single sheet conveying a meaningful message overall. A similar scenario happens when you do them digitally. You can build a collage with the help of a wide range of images. Mostly these are used to excite the viewers during special occasions like parties, anniversaries.

For the official purpose, the animated collage occupies the business webpages to enlighten the website visitors about the products and services. The animated collage has dual purposes that meet your personal and professional needs. In this article, you will learn about the animated collage making tools in detail and the best way in creating them efficiently. Choose the best program that satisfies your needs with more customizing properties. Scroll down to discover the best applications to build a collage that serves your needs precisely.
In this article
01 What is an animated collage maker?
02 Best 4 animated collage maker tools
Part 1: What is an animated collage maker?
The animated collage maker is a sophisticated program that imports the desired images into the working space and animate them using the in-built options. Before applying the animations to the collage, you can edit the images and bring the best out of your captures. The animated collage will convey a meaningful message to the audience. Here, you can add texts, pictures to express your emotions in the animation. If you closely watch the digital market, you will come across a wide range of applications serving this animation as per your requirements.

Every tool is unique and comprised of intellectual animation effects to include in your files to acquire the desired outcomes. You can also try collage making with the captured videos too. Any media files are sufficient to create a collage to attract the audience. Check for the compatibility of file formats when you choose any tool to perform this activity.
Part 2: Best 4 animated collage maker tools
In this section, you will learn about the unique tools that assist in making a collage using the media files and inserting your favorite animations to enhance interaction with the viewers. Every application is unique and they provide different elements to serve your design needs. Both the professionals and newbie users can try the below-discussed tools without any hesitation. They offer a simple environment and you can work on your images confidently to build interactive files for your needs.
The below discussion gives you valuable insights on the tools and the efficient way to employ them while creating a meaningful collage for your requirements. Surf them carefully and try the app that inspires you a lot.
2.1 Photos.google.com
The Google platform serves you with the making of collages using the captured media files. Step into this environment to create a collage for your needs hassle-free. First, go to photos.google.com and log in to your Google account. Then, click Utilities and press ‘Create new -> Animation or Collage’. Add the images from its storage space and tap the ‘Create’ button. It is a simple method and you can create a collage in no time. Without downloading any application, you can build an animated collage for your requirements. You can use any number of images during the making of the collage process.

There are options to include videos too. You can choose the perfect files as per your desires. It is a built-in application provided by Google to build their collage by including the stored images or videos in this virtual space.
**2.2 Canva
The Canva is an incredible program that offers excellent editing options on the media files. You can either make a video or image collage using this platform. While making the collage, you can add texts to convey a thousand meanings to the audience. Use the animated collage files to narrate stories based on your theme. Canva is widely used by professionals and you can use it to create a collage for official and personal use. The fabulous template collections give you a wow feeling when you step into the working space. The sophisticated environment and the controls are explicitly visible for quick reach.

To create a collage using Canva, launch the application and choose the base template for this process from its libraries. Then, navigate the folders and select the media files to upload them into this design interface. Next, customize it by adding stickers, changing the colors, inserting texts to add flavors to the existing content. Edit the videos with basic customizing options like trim, crop, and rotate. Finally, tap the create a video collage button to build an animated collage file in MP4 format. Download it and use them on any platform flawlessly.
**2.3 Filmora
The Filmora is a sophisticated tool that creates miracles with the media files. You can use this application as an editor in modifying the details precisely to enhance its appearance. Using the image and video files you can create a wide range of GIFs and other animated images in no time. This platform offers excellent editing options to grab the attention of the audience. It serves as a reliable program for professionals to make the best out of the captured images.
Wondershare Filmora - Best Video Editor for Mac/Windows
5,481,435 people have downloaded it.
Unleash your imagination while customizing the media files
It has a simple interface and aids you in personalizing the pictures limitlessly.
The built-in templates and toolbox excite you when performing miraculous changes to your images and videos.
Export and import the files effortlessly despite file sizes and locations.
The availability of the tutorials guides even a newbie to use all its functionalities precisely.
You can use the customizing elements to animate the GIFs and include texts and overlays as per your needs. It is an excellent application that performs beyond your expectations.
**2.4 Kizoa
It is an online **animated collage maker that serves you with dozens of templates. You can either create a collage from scratch or use the in-built templates to make your work easy. Step into its website and log in to build your favorite collage using the collection of media files. Choose the templates and upload the images or videos. You can add some effects to enhance its movements and finally click the create button to complete the process. Make an instant share to desired media platform using the export option. It is a fabulous online tool that offers you a comfortable space to bring wonders to your images. Create an interactive and animated collage to entertain the audience to the core. Use this program without any hesitation because the automated wizard will guide you to proceed forward with the respective pop-up messages.

These are the ideal and productive animated collage maker tools that excel in the digital space. They are reliable and you can opt for them even without any second thought. The online and offline programs aid in making the best out of the captured media files. Choose the one that meets your needs and proceed with the making of the animated collage to entertain your guests during special occasions.
**Conclusion
Thus, this article had given you enlightening insights about the best - animated collage makers at the online platform. The above-discussed applications are highly performable and they serve your needs without any excuses. Use the Filmora app to perform multitasking on your media files and add extra detail to your animated images or videos with the help of the in-built elements. Stay connected with this article to discover new horizons about the collage maker tools.
Using collections of pictures, you can create a collage and animate it to excite the audience. The animated collage maker eases this task and aids in creating the collage as a pro editor. Manually, you would have seen many images pasted on a single sheet conveying a meaningful message overall. A similar scenario happens when you do them digitally. You can build a collage with the help of a wide range of images. Mostly these are used to excite the viewers during special occasions like parties, anniversaries.
For the official purpose, the animated collage occupies the business webpages to enlighten the website visitors about the products and services. The animated collage has dual purposes that meet your personal and professional needs. In this article, you will learn about the animated collage making tools in detail and the best way in creating them efficiently. Choose the best program that satisfies your needs with more customizing properties. Scroll down to discover the best applications to build a collage that serves your needs precisely.
In this article
01 What is an animated collage maker?
02 Best 4 animated collage maker tools
Part 1: What is an animated collage maker?
The animated collage maker is a sophisticated program that imports the desired images into the working space and animate them using the in-built options. Before applying the animations to the collage, you can edit the images and bring the best out of your captures. The animated collage will convey a meaningful message to the audience. Here, you can add texts, pictures to express your emotions in the animation. If you closely watch the digital market, you will come across a wide range of applications serving this animation as per your requirements.
Every tool is unique and comprised of intellectual animation effects to include in your files to acquire the desired outcomes. You can also try collage making with the captured videos too. Any media files are sufficient to create a collage to attract the audience. Check for the compatibility of file formats when you choose any tool to perform this activity.
Part 2: Best 4 animated collage maker tools
In this section, you will learn about the unique tools that assist in making a collage using the media files and inserting your favorite animations to enhance interaction with the viewers. Every application is unique and they provide different elements to serve your design needs. Both the professionals and newbie users can try the below-discussed tools without any hesitation. They offer a simple environment and you can work on your images confidently to build interactive files for your needs.
The below discussion gives you valuable insights on the tools and the efficient way to employ them while creating a meaningful collage for your requirements. Surf them carefully and try the app that inspires you a lot.
2.1 Photos.google.com
The Google platform serves you with the making of collages using the captured media files. Step into this environment to create a collage for your needs hassle-free. First, go to photos.google.com and log in to your Google account. Then, click Utilities and press ‘Create new -> Animation or Collage’. Add the images from its storage space and tap the ‘Create’ button. It is a simple method and you can create a collage in no time. Without downloading any application, you can build an animated collage for your requirements. You can use any number of images during the making of the collage process.
There are options to include videos too. You can choose the perfect files as per your desires. It is a built-in application provided by Google to build their collage by including the stored images or videos in this virtual space.
**2.2 Canva
The Canva is an incredible program that offers excellent editing options on the media files. You can either make a video or image collage using this platform. While making the collage, you can add texts to convey a thousand meanings to the audience. Use the animated collage files to narrate stories based on your theme. Canva is widely used by professionals and you can use it to create a collage for official and personal use. The fabulous template collections give you a wow feeling when you step into the working space. The sophisticated environment and the controls are explicitly visible for quick reach.
To create a collage using Canva, launch the application and choose the base template for this process from its libraries. Then, navigate the folders and select the media files to upload them into this design interface. Next, customize it by adding stickers, changing the colors, inserting texts to add flavors to the existing content. Edit the videos with basic customizing options like trim, crop, and rotate. Finally, tap the create a video collage button to build an animated collage file in MP4 format. Download it and use them on any platform flawlessly.
**2.3 Filmora
The Filmora is a sophisticated tool that creates miracles with the media files. You can use this application as an editor in modifying the details precisely to enhance its appearance. Using the image and video files you can create a wide range of GIFs and other animated images in no time. This platform offers excellent editing options to grab the attention of the audience. It serves as a reliable program for professionals to make the best out of the captured images.
Wondershare Filmora - Best Video Editor for Mac/Windows
5,481,435 people have downloaded it.
Unleash your imagination while customizing the media files
It has a simple interface and aids you in personalizing the pictures limitlessly.
The built-in templates and toolbox excite you when performing miraculous changes to your images and videos.
Export and import the files effortlessly despite file sizes and locations.
The availability of the tutorials guides even a newbie to use all its functionalities precisely.
You can use the customizing elements to animate the GIFs and include texts and overlays as per your needs. It is an excellent application that performs beyond your expectations.
**2.4 Kizoa
It is an online **animated collage maker that serves you with dozens of templates. You can either create a collage from scratch or use the in-built templates to make your work easy. Step into its website and log in to build your favorite collage using the collection of media files. Choose the templates and upload the images or videos. You can add some effects to enhance its movements and finally click the create button to complete the process. Make an instant share to desired media platform using the export option. It is a fabulous online tool that offers you a comfortable space to bring wonders to your images. Create an interactive and animated collage to entertain the audience to the core. Use this program without any hesitation because the automated wizard will guide you to proceed forward with the respective pop-up messages.
These are the ideal and productive animated collage maker tools that excel in the digital space. They are reliable and you can opt for them even without any second thought. The online and offline programs aid in making the best out of the captured media files. Choose the one that meets your needs and proceed with the making of the animated collage to entertain your guests during special occasions.
**Conclusion
Thus, this article had given you enlightening insights about the best - animated collage makers at the online platform. The above-discussed applications are highly performable and they serve your needs without any excuses. Use the Filmora app to perform multitasking on your media files and add extra detail to your animated images or videos with the help of the in-built elements. Stay connected with this article to discover new horizons about the collage maker tools.
How-To Guide: Secret Shortcut to Adobe Animate Character Tutorial
How-to Guide: Secret Shortcut to Adobe Animate Character Tutorial
An easy yet powerful editor
Numerous effects to choose from
Detailed tutorials provided by the official channel
Whether you are a beginner or an experienced graphics designer, you can use Adobe Character Animator to animate 2D characters easily. But, if you are an absolute beginner, it might take a few weeks to get familiar with the software’s features/workflow.

Irrespective of your experience with the tool, this Adobe animate character tutorial will help you get started and edit visually appealing animated shorts.
In this article
01 [How Do I Animate a Character in Adobe Animation?](#Part 1)
02 [Is Adobe Character Animator Easy to Use?](#Part 2)
03 [How to Rig a Simple Character | Adobe Animate Tutorial](#Part 3)
04 [One-Stop Solution to Edit High-Quality Videos in Every Situation](#Part 4)
Part 1 How Do I Animate a Character in Adobe Animation?
1. Start With a Script
If you want to create an animation that engages the customers, you must always start your journey with a script. Like a short movie, even an animated sketch requires a script. It’ll set the tone for the entire animation and help you start sailing in the right direction.

If you have a full production team, the writers will take care of scriptwriting and you’ll just have to suggest a few changes in between. But, if you are working on your own, you’ll have to handle the script writing all-by-yourself. In any case, however, make sure to start by crafting a beautiful script with an amazing storyline.
2. Record the Voiceover
The next step in our Adobe Animate character tutorial is recording the voiceover for the video. Unless you are planning to create a GIF animation, you would need a dedicated voiceover for your animated video to make it more appealing.

Now, before you even begin with animating the character, recording the audio will help you clear out one task from the list. To record the voiceover, you can try different types of audio recording software and equipment.
3. Start Creating the Character
At this point in our Adobe animate character tutorial, we are ready to design the actual character itself. To do this, launch Adobe Character Animator on your system. On its home screen, you’ll see a tab containing different types of characters (along with their dedicated Photoshop and Illustrator versions). Click on any of these characters and it’ll automatically open in the editing panel of Adobe character animator.

Now, you can start with animating the character. In the top-left corner, you’ll see two different options, i.e., “
If you double-tap the “Scene” tab the character will open up in a real-time environment where it’ll react to your movement and speech. Make sure that the webcam stays turned on throughout the process. Then, simply press the “Record” button and start recording the entire scene for your animation.
Part 2 Is Adobe Character Animator Easy to Use?
That’s how you can animate a character in Adobe character animator and create visually stunning animations. However, many beginners want to know if it’s easy to use Adobe character animator. The answer is Yes! With Character Animator, Adobe has developed a relatively easy-to-use interface that anyone can use easily.
Part 3 How to Rig a Simple Character | Adobe Animate Tutorial
Now, if you aspire to become a skilled graphic designer, here are a few tutorials that’ll help you get started with Adobe Character Animator and explore all its features.
1. Getting Started With Adobe Character Animator
This 15 minutes Adobe animate character tutorial by Okay Samurai is the best thing you’ll find on the Internet, especially if you are a complete beginner and want to learn different elements of the software.
2. Creating Illustrator Puppet
Adobe Character Animator lets users create both Illustrator and Photoshop puppets. If you want to become an expert in the former, this hour-long YouTube video is the best tutorial for you.
3. Getting Started With Advanced Rigging
This is another useful Adobe Animate character tutorial that’s exclusively designed to help editors understand the basics of creating a character such as “Surr”. For people who don’t know, it’s a free character in the Illustrator puppet library that you can directly import into your project.
4. Animation Workflow in Adobe Character Animator
If you are looking for an all-in-one tutorial to understand the entire workflow of working with the software, this tutorial by Okay Samurai is the best place to get started.
5. Adding an Illustrator Puppet on Live Footage
In this tutorial, you’ll understand how you can create an Illustrator puppet and add it to real-life footage, even when there’s camera movement.
6. Using the Walk Behavior in Adobe Character Animator
This tutorial will be the perfect knowledge hub. In this tutorial, you’ll learn about the basics of using the walk behavior in Adobe Character Animator and how to apply it to different characters to make it walk across the scene.
7. Creating and Implementing Replays
Replays are one of the most powerful (and one of the latest) features of Adobe Character Animator. With Replays, you can record a gesture/movement and apply a trigger to use it anytime you want throughout the animation. This tutorial will help you understand how to implement the replays in the software and use them to craft the perfect storyline.
8. Cartoon Workflow in Character Animator
Thanks to this amazing 1 hour 40 minutes long Adobe animate character tutorial, you’ll be able to get familiar with the complete workflow of pairing the software with other tools and compiling a cartoon animation at the end using Adobe After Effects.
9. Running an Animated Livestream
If you are a YouTuber or have your own Instagram brand, this will be a pretty exciting way to engage with your audience. Simply use the livestream feature, create a stunning 2D character, and interact with your audience in a more interactive manner.
10. Working With Adobe Fresco and Character Animator
This is also a useful Adobe character animate tutorial by David Werner that’ll help you understand how to use both Adobe Fresco and Character Animator together. After this tutorial, you’ll be able to import your Fresco drawings into Character Animator and customize them to create visually engaging animations.
Key Takeaways from This Episode
● Adobe Character Animator is among the most powerful animation tools you can use in 2021 to create stunning animations
● You should always start designing an animation in Character Animator by writing dedicated scripts.
● You can also pair Adobe Character Animator with other Adobe editing tools such as Illustrator, Photoshop, and Adobe Fresco
Whether you are a beginner or an experienced graphics designer, you can use Adobe Character Animator to animate 2D characters easily. But, if you are an absolute beginner, it might take a few weeks to get familiar with the software’s features/workflow.
Irrespective of your experience with the tool, this Adobe animate character tutorial will help you get started and edit visually appealing animated shorts.
In this article
01 [How Do I Animate a Character in Adobe Animation?](#Part 1)
02 [Is Adobe Character Animator Easy to Use?](#Part 2)
03 [How to Rig a Simple Character | Adobe Animate Tutorial](#Part 3)
04 [One-Stop Solution to Edit High-Quality Videos in Every Situation](#Part 4)
Part 1 How Do I Animate a Character in Adobe Animation?
1. Start With a Script
If you want to create an animation that engages the customers, you must always start your journey with a script. Like a short movie, even an animated sketch requires a script. It’ll set the tone for the entire animation and help you start sailing in the right direction.
If you have a full production team, the writers will take care of scriptwriting and you’ll just have to suggest a few changes in between. But, if you are working on your own, you’ll have to handle the script writing all-by-yourself. In any case, however, make sure to start by crafting a beautiful script with an amazing storyline.
2. Record the Voiceover
The next step in our Adobe Animate character tutorial is recording the voiceover for the video. Unless you are planning to create a GIF animation, you would need a dedicated voiceover for your animated video to make it more appealing.
Now, before you even begin with animating the character, recording the audio will help you clear out one task from the list. To record the voiceover, you can try different types of audio recording software and equipment.
3. Start Creating the Character
At this point in our Adobe animate character tutorial, we are ready to design the actual character itself. To do this, launch Adobe Character Animator on your system. On its home screen, you’ll see a tab containing different types of characters (along with their dedicated Photoshop and Illustrator versions). Click on any of these characters and it’ll automatically open in the editing panel of Adobe character animator.
Now, you can start with animating the character. In the top-left corner, you’ll see two different options, i.e., “
If you double-tap the “Scene” tab the character will open up in a real-time environment where it’ll react to your movement and speech. Make sure that the webcam stays turned on throughout the process. Then, simply press the “Record” button and start recording the entire scene for your animation.
Part 2 Is Adobe Character Animator Easy to Use?
That’s how you can animate a character in Adobe character animator and create visually stunning animations. However, many beginners want to know if it’s easy to use Adobe character animator. The answer is Yes! With Character Animator, Adobe has developed a relatively easy-to-use interface that anyone can use easily.
Part 3 How to Rig a Simple Character | Adobe Animate Tutorial
Now, if you aspire to become a skilled graphic designer, here are a few tutorials that’ll help you get started with Adobe Character Animator and explore all its features.
1. Getting Started With Adobe Character Animator
This 15 minutes Adobe animate character tutorial by Okay Samurai is the best thing you’ll find on the Internet, especially if you are a complete beginner and want to learn different elements of the software.
2. Creating Illustrator Puppet
Adobe Character Animator lets users create both Illustrator and Photoshop puppets. If you want to become an expert in the former, this hour-long YouTube video is the best tutorial for you.
3. Getting Started With Advanced Rigging
This is another useful Adobe Animate character tutorial that’s exclusively designed to help editors understand the basics of creating a character such as “Surr”. For people who don’t know, it’s a free character in the Illustrator puppet library that you can directly import into your project.
4. Animation Workflow in Adobe Character Animator
If you are looking for an all-in-one tutorial to understand the entire workflow of working with the software, this tutorial by Okay Samurai is the best place to get started.
5. Adding an Illustrator Puppet on Live Footage
In this tutorial, you’ll understand how you can create an Illustrator puppet and add it to real-life footage, even when there’s camera movement.
6. Using the Walk Behavior in Adobe Character Animator
This tutorial will be the perfect knowledge hub. In this tutorial, you’ll learn about the basics of using the walk behavior in Adobe Character Animator and how to apply it to different characters to make it walk across the scene.
7. Creating and Implementing Replays
Replays are one of the most powerful (and one of the latest) features of Adobe Character Animator. With Replays, you can record a gesture/movement and apply a trigger to use it anytime you want throughout the animation. This tutorial will help you understand how to implement the replays in the software and use them to craft the perfect storyline.
8. Cartoon Workflow in Character Animator
Thanks to this amazing 1 hour 40 minutes long Adobe animate character tutorial, you’ll be able to get familiar with the complete workflow of pairing the software with other tools and compiling a cartoon animation at the end using Adobe After Effects.
9. Running an Animated Livestream
If you are a YouTuber or have your own Instagram brand, this will be a pretty exciting way to engage with your audience. Simply use the livestream feature, create a stunning 2D character, and interact with your audience in a more interactive manner.
10. Working With Adobe Fresco and Character Animator
This is also a useful Adobe character animate tutorial by David Werner that’ll help you understand how to use both Adobe Fresco and Character Animator together. After this tutorial, you’ll be able to import your Fresco drawings into Character Animator and customize them to create visually engaging animations.
Key Takeaways from This Episode
● Adobe Character Animator is among the most powerful animation tools you can use in 2021 to create stunning animations
● You should always start designing an animation in Character Animator by writing dedicated scripts.
● You can also pair Adobe Character Animator with other Adobe editing tools such as Illustrator, Photoshop, and Adobe Fresco
Also read:
- New 18 Best Tools and Services to Create Animated Videos for Business 2023 for 2024
- Updated 2024 Approved 15 Types of Cartoon Drawing Styles with Examples
- 2024 Approved In-Depth Study of Cartoon Painting Starts
- New 2024 Approved How to Make an Animation With 7 Steps
- New The Only Guide Youll Ever Need to Learn About GIF Video Downloader
- 2024 Approved Ways to Create Animated Clipart in PowerPoint
- Updated In 2024, Best 15 2D Animation Software Free That Worth to Try
- 2024 Approved Ways to Master to Find 10 Best Free Animated Text Generator
- New In 2024, Beginner Tutorial on Making Unity 2D Animation
- Learn Disney Cartoon Drawing to See Disney Magic Moments for 2024
- Updated In 2024, Techniques for Creating Animated Logo That Few People Know About
- How to Find & Make Animated Christmas GIFs, In 2024
- New 2024 Approved Learn What Are Differences Between 2D And 3D Animation
- In 2024, What Is the Best Collage Photo Grid Maker - Experts Choice
- How to Make Animated Videos for Business – an Ultimate Guide for 2024
- In 2024, Samples of Cartoon Character Face to Inspire You
- New 2024 Approved Everything You Need to Know About Becoming a Motion Graphic Designer
- In 2024, Top 15 Greatest Claymation Movies of All Time
- Updated How to Turn Yourself Into WhatsApp Cartoon for 2024
- New 2024 Approved Is It That Easy to Make My Own Animated Character?
- New 2024 Approved Before You Learn Facebook Slideshow 5 Things You Should Know How-TOS
- 2024 Approved How to Animate Image on Scroll
- New 2024 Approved The 10 Most Adorable Aesthetic Cartoon Characters
- New 10 Realistic Cartoon Characters You Would Run Away From if You Met in Real Life
- New 2024 Approved How to Animate - Adobe Animate Tutorias
- 18 Best Tools and Services to Create Animated Videos for Your Business for 2024
- How to Unlock Apple iPhone XS Max, Apples New iPhone
- How to Repair corrupt MP4 and AVI files of Infinix Hot 30i with Video Repair Utility on Mac?
- In 2024, 6 Proven Ways to Unlock Samsung Galaxy S23 Tactical Edition Phone When You Forget the Password
- In 2024, The Best Android Unlock Software For Vivo Y55s 5G (2023) Device Top 5 Picks to Remove Android Locks
- How To Check if Your Sony Xperia 1 V Is Unlocked
- In 2024, Downloading SamFw FRP Tool 3.0 for Nokia C12 Plus
- All Must-Knows to Use Fake GPS GO Location Spoofer On Oppo A1x 5G | Dr.fone
- In 2024, How to Remove an AirTag from Your Apple ID Account From iPhone 15?
- Does Life360 Notify When You Log Out On Samsung Galaxy A25 5G? | Dr.fone
- Getting the Pokemon Go GPS Signal Not Found 11 Error in Oppo K11x | Dr.fone
- In 2024, How to Unlock SIM Card on Vivo S17e online without jailbreak
- In 2024, Latest way to get Shiny Meltan Box in Pokémon Go Mystery Box On Poco M6 Pro 5G | Dr.fone
- In 2024, 6 Ways To Transfer Contacts From Itel P40+ to iPhone | Dr.fone
- In 2024, 5 Most Effective Methods to Unlock Apple iPhone SE (2022) in Lost Mode
- How To Fix Apple ID Verification Code Not Working From Apple iPhone 7
- Title: The 15 Most Efficient Photo to Cartoon Apps for Android
- Author: Elon
- Created at : 2024-05-19 03:04:26
- Updated at : 2024-05-20 03:04:26
- Link: https://animation-videos.techidaily.com/the-15-most-efficient-photo-to-cartoon-apps-for-android/
- License: This work is licensed under CC BY-NC-SA 4.0.
