

Top 10 Best Batman Anime Movies 2024 Updated
The 10 Best Batman Anime Movies- 2024 Updated
The 10 Best Batman Anime Movies- 2024 Updated

Shanoon Cox
Mar 27, 2024• Proven solutions
Batman is one of the most popular and long-lasting characters in DC animated movies. There can always be an argument on Marvel and DC movies. Although, DC remains the king regards to animated movies. DC animated movies are better coordinated with live-action scenes. Each story features different aspects of Gotham city and its issues.
Batman or “Bruce Wayne” is an orphan billionaire living a carefree life. Yet, he leads the gods and exceptional ones like they do not matter much. The technology and the will Batman demonstrates are peculiar. No wonder Batman animated movies are one of the bestselling of all time. I could even say, in the early 90s, Batman was the most favorite hero of DC animated movies.
10 Best Batman Anime Movies-2024 List
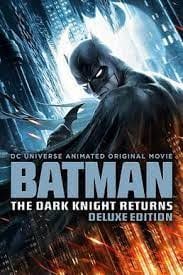
- 1. The Dark Knight Returns
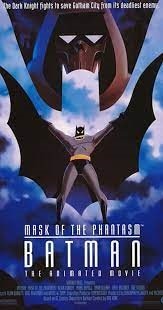
- 2. Batman: Mask of the Phantasm
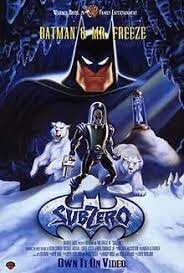
- 3. Batman: Subzero
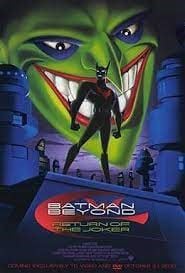
- 4. Batman Beyond: Return of the Joker
- 5. Batman Ninja
- 6. Batman: Under the Red Hood
- 7. Batman year one
- 8. Batman: Gotham Knight
- 9. The Batman vs. Dracula
- 10. Batman: Mystery of the Batwoman
1. The Dark Knight Returns
The top of the list is Dark Knight Returns anime. What makes this animated Batman so exceptional are his rules and consciousness. Batman goes beyond his limits to save his beloved city. But on top of all, Batman avoids making a public appearance. The movie is entertaining and less dark scenes, mostly targeting the younger generation.
However, when Gotham becomes the prey of mafias, gang wars, and Joker, Batman comes out of retirement or what looked like a retirement. Although Batman was criticized by the public and even hunted by authorities, he still came back, making him the “Dark Knight.” However, in the end, it seems that Bruce Wayne dies, but still, the true fate of Batman is unknown.
2. Batman: Mask of the Phantasm
This animated movie is more or less about the journey of the orphan Bruce Wayne to Batman. It demonstrates his childhood life and how he plans to become a masked vigilante. Unable to make sense of the tragedy, Bruce tries to stop robberies and thefts. Thus, trying to control his anger but couldn’t make much impact. This dark, grim, and thrilling anime is one of the finest anime movies.
In the meantime, he becomes deeply attached to Andrea Beaumont, who could somewhat console him. However, she leaves Bruce all broken. Bruce mysteriously leaves his beloved home city in a quest to find the true purpose of his life and comebacks as a symbol of hope for his beloved city.
3. Batman: Subzero
Mr. Freeze, who is the ex-enemy of Batman, finds himself in a devastating position. A tragic accident puts his wife in a life-and-death situation. Being heartbroken, Mr. Freeze comes back to Gotham city only to find out that Barbara Gordan can only save his wife.
He kidnaps Barbara and on-bards her on the plan to save his wife. In the meantime, Batman and Robbin learn the whereabouts of Barbara. Batman rescues Barbara while pledging Mr. Freeze to save his dying wife. This demonstrates the perfect example of how high Batman holds justice and rules.
4. Batman Beyond: Return of the Joker
Joker is the most despised enemy of all. He knows Batman too well and even has some instincts about his identity. On top of that, Joker isn’t much afraid of Batman. Batman is so much fed-up by Joker doesn’t even want to believe that he is alive. Even after the Joker interrupts the live press conference.
Batman investigates and tries to join pieces to understand how it is possible? Meanwhile, the Joker equips himself with high-tech weapons and armed satellites. Joker devises a plan to kill Bruce and puts it into motion. Joker and Batman make one of the best duos of animated movies.
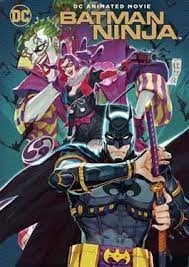
5. Batman Ninja
This animated movie demonstrates the courage of Batman. Even after being defeated multiple times, he still doesn’t back down from saving his beloved Gotham. Fortunately, In the end, he succeeds.
The movie’s plot is twisted with time travel through Grodd’s Quake Engine time, which sends Batman to feudal Japan. This animated Batman laearns ninja techniques to defeat his deadliest enemies. In Batman Ninja’s animated movie, Batman and bat-clan had to face multiple enemies all at once, making their positions vulnerable.
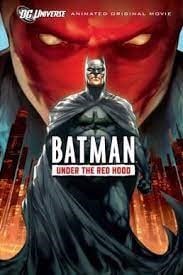
6. Batman: Under the Red Hood
Batman has pledged himself to his rules that he follows them with all his heart, even if it costs him his dear friend. Being confused about the identity of the red hood, Batman visits Joker in Arkham Asylum, who denies any involvement.
Red hood tries to kill Black Mask and damages his drug business. Joker promises Red hood for his freedom to the Black Mask. However, Joker tricks the Black Mask and destroys all the drug lords along with Black Mask. In all of this, Batman confronts Ra’s al Gul to know more about the Red Hood and who is underneath it.
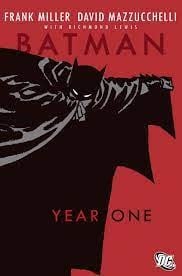
7. Batman year one
A lot of comic and anime fans started loving the batman character after this particular anime. Based on the first year of Bruce Wayne’s life as a batman, the serial shows his trouble with the police and public. The first episode starts with Jim Gordan and Batman walking down a street with all the crimes and robberies in the city.
Also, the plot revolves around Jim Gordan’s life and how he is trying so hard to make a difference in the police department. As police were involved in doing deals with monsters like Falcone and Fish Mooney.
As a lot of fans might already know, Jim and Batman were always friends from the beginning. Coming back from the training, Bruce still has to decide something that will scare his enemies. So, he comes up with the bat sign. The character of the Cat woman is also introduced in it, and it was amazing how dark and toned they made her. Not to forget, this dc animated movie is scripted by Frank Miller David Mazzucchelli, so it is connected to the Dark Knight rises.
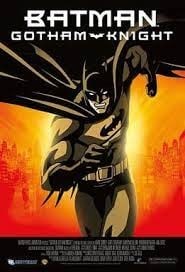
8. Batman: Gotham Knight
No, this is not Dark Knight; it is the sixth sequel of the batman anime series. An underrated DC animated movie. This anime itself is consisting of six chapters. The animation is very stylish and a little bit distracting. Like, Batman was a fat, healthy man. However, this shows him weirdly slim and fit. The first chapter is the most interesting with full of action and thrilling.
Chapters 2 and 3 are full of the mysterious part of Batman’s life. The entire island feels full of psychotic maniacs. Lucious Fox and Bruce Wayne are working together in this part, testing the new bat gear. The 4th and 5th sequel is all about how detective Gordan is convinced to believe Batman, yet cannot trust him. The 6th part contains the most positively animated scenes when Batman saves Jim Gordan’s life. Each sequel gives off the unique character and abilities of batman.
9. The Batman vs. Dracula
There is no age limit for batman animated movies. Even, adults enjoy super amuzing dance and stunts of joker in this anime. All he do is dancing around barefoot, laughing maniacally, and annoying batman with his tricks. Batman faces a strange supernatural villain in this anime. The storyline starts in Arkham Asylum, from where the Joker escapes. As soon as Batman gets a signal about it, he goes hunting for the Joker. The details in the Joker’s dressing and outfit are beyond amazing. Although, the show has some flaws, as the penguin meets Joker a little too early. In search of finding some hidden treasure, the penguin wakes up Dracula.

10. Batman: Mystery of the Batwoman
The Batwoman scene starts when she tries to stop a truck full of drugs and robbers with her excellent skills, and Batman arrives at the location. In this Batman animated movie, the penguin owns a toy factory. The animated batwoman has some extraordinary, unrealistic skills which successfully gain batman attention. The story lies in the secrecy of Batwoman and other corrupted Dons of Gotham city.
Bonus Tip-Record Batman Animated Movie and Share
In the older days, all the movies came on a CD or DVD. Luckily, now you can record and watch all the dc animated movies or batman anime movies and watch them later too or share with your friends. Wondershare Filmora is extraordinary software that allows you to screen record and edit videos.


You can download it for windows 7, 8, 10 also for iOS. Surely, it is an ideal replacement for windows movie maker. The features and tools are handy, anyone with simple computer-operating skills can learn it. Wondershare Filmora supports all kinds of audio, video, and photo formats. Either share your screen recorded videos directly on any social media platform or save them on your PC, Wondershare Filmora has made It super easy. Plus, you can burn a disk, make ISO files, download HD videos. Managing and accessing videos, along with editing is hassle-free. The interface is intuitive and user-friendly. Some of the top features are listed below.
Features:
- Record your PC screen
- Edit and trim videos
- Add effects to your video.
- Merge the saved videos.
- Noise removal feature.
- Music library.
- Thousands of filters.
Conclusion
No wonder, DC has made super exciting anime and characters like Wonder Woman and Superman but Batman remains the all-time favorite of millions of Dc fans. The action, detail, and thrill of animated movies are super thrilling.
The quality of animation and video varies significantly as some of these Batman animated movies were released in the early 90s. You can watch all the above-listed batman animated movies and record with wonder share Filmora.
Shanoon Cox
Shanoon Cox is a writer and a lover of all things video.
Follow @Shanoon Cox
Shanoon Cox
Mar 27, 2024• Proven solutions
Batman is one of the most popular and long-lasting characters in DC animated movies. There can always be an argument on Marvel and DC movies. Although, DC remains the king regards to animated movies. DC animated movies are better coordinated with live-action scenes. Each story features different aspects of Gotham city and its issues.
Batman or “Bruce Wayne” is an orphan billionaire living a carefree life. Yet, he leads the gods and exceptional ones like they do not matter much. The technology and the will Batman demonstrates are peculiar. No wonder Batman animated movies are one of the bestselling of all time. I could even say, in the early 90s, Batman was the most favorite hero of DC animated movies.
10 Best Batman Anime Movies-2024 List
- 1. The Dark Knight Returns
- 2. Batman: Mask of the Phantasm
- 3. Batman: Subzero
- 4. Batman Beyond: Return of the Joker
- 5. Batman Ninja
- 6. Batman: Under the Red Hood
- 7. Batman year one
- 8. Batman: Gotham Knight
- 9. The Batman vs. Dracula
- 10. Batman: Mystery of the Batwoman
1. The Dark Knight Returns
The top of the list is Dark Knight Returns anime. What makes this animated Batman so exceptional are his rules and consciousness. Batman goes beyond his limits to save his beloved city. But on top of all, Batman avoids making a public appearance. The movie is entertaining and less dark scenes, mostly targeting the younger generation.
However, when Gotham becomes the prey of mafias, gang wars, and Joker, Batman comes out of retirement or what looked like a retirement. Although Batman was criticized by the public and even hunted by authorities, he still came back, making him the “Dark Knight.” However, in the end, it seems that Bruce Wayne dies, but still, the true fate of Batman is unknown.
2. Batman: Mask of the Phantasm
This animated movie is more or less about the journey of the orphan Bruce Wayne to Batman. It demonstrates his childhood life and how he plans to become a masked vigilante. Unable to make sense of the tragedy, Bruce tries to stop robberies and thefts. Thus, trying to control his anger but couldn’t make much impact. This dark, grim, and thrilling anime is one of the finest anime movies.
In the meantime, he becomes deeply attached to Andrea Beaumont, who could somewhat console him. However, she leaves Bruce all broken. Bruce mysteriously leaves his beloved home city in a quest to find the true purpose of his life and comebacks as a symbol of hope for his beloved city.
3. Batman: Subzero
Mr. Freeze, who is the ex-enemy of Batman, finds himself in a devastating position. A tragic accident puts his wife in a life-and-death situation. Being heartbroken, Mr. Freeze comes back to Gotham city only to find out that Barbara Gordan can only save his wife.
He kidnaps Barbara and on-bards her on the plan to save his wife. In the meantime, Batman and Robbin learn the whereabouts of Barbara. Batman rescues Barbara while pledging Mr. Freeze to save his dying wife. This demonstrates the perfect example of how high Batman holds justice and rules.
4. Batman Beyond: Return of the Joker
Joker is the most despised enemy of all. He knows Batman too well and even has some instincts about his identity. On top of that, Joker isn’t much afraid of Batman. Batman is so much fed-up by Joker doesn’t even want to believe that he is alive. Even after the Joker interrupts the live press conference.
Batman investigates and tries to join pieces to understand how it is possible? Meanwhile, the Joker equips himself with high-tech weapons and armed satellites. Joker devises a plan to kill Bruce and puts it into motion. Joker and Batman make one of the best duos of animated movies.
5. Batman Ninja
This animated movie demonstrates the courage of Batman. Even after being defeated multiple times, he still doesn’t back down from saving his beloved Gotham. Fortunately, In the end, he succeeds.
The movie’s plot is twisted with time travel through Grodd’s Quake Engine time, which sends Batman to feudal Japan. This animated Batman laearns ninja techniques to defeat his deadliest enemies. In Batman Ninja’s animated movie, Batman and bat-clan had to face multiple enemies all at once, making their positions vulnerable.
6. Batman: Under the Red Hood
Batman has pledged himself to his rules that he follows them with all his heart, even if it costs him his dear friend. Being confused about the identity of the red hood, Batman visits Joker in Arkham Asylum, who denies any involvement.
Red hood tries to kill Black Mask and damages his drug business. Joker promises Red hood for his freedom to the Black Mask. However, Joker tricks the Black Mask and destroys all the drug lords along with Black Mask. In all of this, Batman confronts Ra’s al Gul to know more about the Red Hood and who is underneath it.
7. Batman year one
A lot of comic and anime fans started loving the batman character after this particular anime. Based on the first year of Bruce Wayne’s life as a batman, the serial shows his trouble with the police and public. The first episode starts with Jim Gordan and Batman walking down a street with all the crimes and robberies in the city.
Also, the plot revolves around Jim Gordan’s life and how he is trying so hard to make a difference in the police department. As police were involved in doing deals with monsters like Falcone and Fish Mooney.
As a lot of fans might already know, Jim and Batman were always friends from the beginning. Coming back from the training, Bruce still has to decide something that will scare his enemies. So, he comes up with the bat sign. The character of the Cat woman is also introduced in it, and it was amazing how dark and toned they made her. Not to forget, this dc animated movie is scripted by Frank Miller David Mazzucchelli, so it is connected to the Dark Knight rises.
8. Batman: Gotham Knight
No, this is not Dark Knight; it is the sixth sequel of the batman anime series. An underrated DC animated movie. This anime itself is consisting of six chapters. The animation is very stylish and a little bit distracting. Like, Batman was a fat, healthy man. However, this shows him weirdly slim and fit. The first chapter is the most interesting with full of action and thrilling.
Chapters 2 and 3 are full of the mysterious part of Batman’s life. The entire island feels full of psychotic maniacs. Lucious Fox and Bruce Wayne are working together in this part, testing the new bat gear. The 4th and 5th sequel is all about how detective Gordan is convinced to believe Batman, yet cannot trust him. The 6th part contains the most positively animated scenes when Batman saves Jim Gordan’s life. Each sequel gives off the unique character and abilities of batman.
9. The Batman vs. Dracula
There is no age limit for batman animated movies. Even, adults enjoy super amuzing dance and stunts of joker in this anime. All he do is dancing around barefoot, laughing maniacally, and annoying batman with his tricks. Batman faces a strange supernatural villain in this anime. The storyline starts in Arkham Asylum, from where the Joker escapes. As soon as Batman gets a signal about it, he goes hunting for the Joker. The details in the Joker’s dressing and outfit are beyond amazing. Although, the show has some flaws, as the penguin meets Joker a little too early. In search of finding some hidden treasure, the penguin wakes up Dracula.
10. Batman: Mystery of the Batwoman
The Batwoman scene starts when she tries to stop a truck full of drugs and robbers with her excellent skills, and Batman arrives at the location. In this Batman animated movie, the penguin owns a toy factory. The animated batwoman has some extraordinary, unrealistic skills which successfully gain batman attention. The story lies in the secrecy of Batwoman and other corrupted Dons of Gotham city.
Bonus Tip-Record Batman Animated Movie and Share
In the older days, all the movies came on a CD or DVD. Luckily, now you can record and watch all the dc animated movies or batman anime movies and watch them later too or share with your friends. Wondershare Filmora is extraordinary software that allows you to screen record and edit videos.
You can download it for windows 7, 8, 10 also for iOS. Surely, it is an ideal replacement for windows movie maker. The features and tools are handy, anyone with simple computer-operating skills can learn it. Wondershare Filmora supports all kinds of audio, video, and photo formats. Either share your screen recorded videos directly on any social media platform or save them on your PC, Wondershare Filmora has made It super easy. Plus, you can burn a disk, make ISO files, download HD videos. Managing and accessing videos, along with editing is hassle-free. The interface is intuitive and user-friendly. Some of the top features are listed below.
Features:
- Record your PC screen
- Edit and trim videos
- Add effects to your video.
- Merge the saved videos.
- Noise removal feature.
- Music library.
- Thousands of filters.
Conclusion
No wonder, DC has made super exciting anime and characters like Wonder Woman and Superman but Batman remains the all-time favorite of millions of Dc fans. The action, detail, and thrill of animated movies are super thrilling.
The quality of animation and video varies significantly as some of these Batman animated movies were released in the early 90s. You can watch all the above-listed batman animated movies and record with wonder share Filmora.
Shanoon Cox
Shanoon Cox is a writer and a lover of all things video.
Follow @Shanoon Cox
Guide on Creating GIF in WhatsApp iPhone
2024 Guide on How to Create GIF in WhatsApp iPhone
An easy yet powerful editor
Numerous effects to choose from
Detailed tutorials provided by the official channel
Standing for Graphics Interchange Format, GIF is short animated images that you can see all over social media sites and other online platforms. These interesting animations can also be shared during your conversations on WhatsApp.

So, if you too are looking for ways to create as well as send GIFs on WhatsApp iPhone, you are on the right page. Keep reading to know all the possible ways to send WhatsApp GIFs on iPhone.
In this article
01 [How to send WhatsApp GIF from the integrated library on iPhone](#Part 1)
02 [How to send Live Photos as WhatsApp GIF on iPhone](#Part 2)
03 [How to create WhatsApp GIF using videos on iPhone](#Part 3)
04 [How to create excellent GIF effortlessly using Wondershare Filmora- All in One video editing software](#Part 4)
Part 1 How to send WhatsApp GIF from the integrated library on iPhone
If you have the latest version of WhatsApp installed on your phone, you can easily and quickly send the GIF from the integrated library having a collection of GIFs in several categories. The steps to send GIF in WhatsApp iPhone are as below.
Step 1. On your iPhone, launch WhatsApp and open the contact or a group to which you wish to send the GIF.
Step 2. Click on the Stickers icon at the typing section and then choose the GIF option at the bottom.
Step 3. Multiple GIFs in different categories will appear. You can further search for the desired GIF using a keyword at the search icon at the bottom-left corner. The list of the Recents and the Favorites can also be searched using their respective icons.
Note: To save any particular GIF in the favorites list, tap and hold the GIF and then click on Add To Favorites option.
StepTap on the selected GIF and then click on the Send icon at the bottom-right corner. Your WhatsApp GIF iPhone will be sent.

Part 2 How to send Live Photos as WhatsApp GIF on iPhone
Live Photos on your iPhone can also be sent as GIFs in WhatsApp conversations and the steps for the same are as below.
Note: The feature is available for users having iPhone 6 or later versions.
Step 1.Open the WhatsApp contact on your iPhone to whom you wish to send the GIF. Click on the + icon and then choose the option of Photo & Video Library.
Step 2. Search for the Live photo in your gallery and then press it. When the image pops out, slide upwards and then click on the Select as GIF option.
Step 3. Tap on the Send icon to share the selected Live photo as GIF.

Part 3 How to create WhatsApp GIF using videos on iPhone
In addition to the integrated library, you can also convert the videos on your iPhone to GIF and share them on WhatsApp. To be used as GIF, the length of the videos cannot be more than 6 seconds. Thus, for a larger video, you need to trim it to be under 6 seconds. Steps to get the task done are as follows.
Step 1.Launch WhatsApp on your iPhone and select the contact to which you want to share the GIF. Next, click on + sign and then choose Photo & Video Library option.
Step 2.Select the desired video from your phone gallery.
Step 3.After the video is added, an editing screen will open. Here you can trim the video to make it under 6 seconds using the slider at the top. Further changes can be made like adding a sticker, text, or making a freehand drawing.
Step 4.After all customizations are done, click on the GIF button.
Step 5.Finally, tap on the Send icon at the bottom-right corner to send the edited video as GIF.

Part 4 How to create excellent GIF effortlessly using Wondershare Filmora- All in One video editing software
WhatsApp in your iPhone has a built-in option to create GIFs using the videos on the device. Though the process is simple, the option for editing and customizations are limited. So, if you want to create GIFs using videos online and with advanced editing tools, we suggest using Wondershare Filmora Video Editor .
This all-in-one video editing software will let you edit and customize your files in several ways and in a few simple steps, your desired GIF will be ready.
Wondershare Filmora
Get started easily with Filmora’s powerful performance, intuitive interface, and countless effects!
Try It Free Try It Free Try It Free Learn More >

Key features of the software
● Add media files in all ley formats like MP4, MOV, MKV, PNG, and others to create GIFs.
● Simple and quick steps for creating the desired animation.
● Allows to customize the GIF using functions like slow-down, crop, rotate, and many more.
● Allows adding text, voice, and other elements.
● Option to share the created GIF to Vimeo, and YouTube directly.
● Software support to all latest Windows and Mac systems.
Steps to create WhatsApp GIF using Wondershare Filmora.
Step 1.Open the installed software on your system and import the desired images and videos from your system.
Step 2.Drag and drop the added videos and images to the timeline.

Step 3.Edit the file using features like crop, rotate, split, and others.
Step 4.Add text and other elements as needed.

Step 5.At the Local tab, save the customized media as GIF. Select the file name and the destination and then finally, click on the EXPORT button to start processing.
● Key Takeaways from This Episode →
●Gifs for WhatsApp iPhone can be added from the integrated library.
●Live Photos, as well as videos, can also be used to create and share them as GIF.
●For creating interesting and funny GIF in a hassle-free manner, Wondershare Filmora works as the best software.
Standing for Graphics Interchange Format, GIF is short animated images that you can see all over social media sites and other online platforms. These interesting animations can also be shared during your conversations on WhatsApp.
So, if you too are looking for ways to create as well as send GIFs on WhatsApp iPhone, you are on the right page. Keep reading to know all the possible ways to send WhatsApp GIFs on iPhone.
In this article
01 [How to send WhatsApp GIF from the integrated library on iPhone](#Part 1)
02 [How to send Live Photos as WhatsApp GIF on iPhone](#Part 2)
03 [How to create WhatsApp GIF using videos on iPhone](#Part 3)
04 [How to create excellent GIF effortlessly using Wondershare Filmora- All in One video editing software](#Part 4)
Part 1 How to send WhatsApp GIF from the integrated library on iPhone
If you have the latest version of WhatsApp installed on your phone, you can easily and quickly send the GIF from the integrated library having a collection of GIFs in several categories. The steps to send GIF in WhatsApp iPhone are as below.
Step 1. On your iPhone, launch WhatsApp and open the contact or a group to which you wish to send the GIF.
Step 2. Click on the Stickers icon at the typing section and then choose the GIF option at the bottom.
Step 3. Multiple GIFs in different categories will appear. You can further search for the desired GIF using a keyword at the search icon at the bottom-left corner. The list of the Recents and the Favorites can also be searched using their respective icons.
Note: To save any particular GIF in the favorites list, tap and hold the GIF and then click on Add To Favorites option.
StepTap on the selected GIF and then click on the Send icon at the bottom-right corner. Your WhatsApp GIF iPhone will be sent.
Part 2 How to send Live Photos as WhatsApp GIF on iPhone
Live Photos on your iPhone can also be sent as GIFs in WhatsApp conversations and the steps for the same are as below.
Note: The feature is available for users having iPhone 6 or later versions.
Step 1.Open the WhatsApp contact on your iPhone to whom you wish to send the GIF. Click on the + icon and then choose the option of Photo & Video Library.
Step 2. Search for the Live photo in your gallery and then press it. When the image pops out, slide upwards and then click on the Select as GIF option.
Step 3. Tap on the Send icon to share the selected Live photo as GIF.
Part 3 How to create WhatsApp GIF using videos on iPhone
In addition to the integrated library, you can also convert the videos on your iPhone to GIF and share them on WhatsApp. To be used as GIF, the length of the videos cannot be more than 6 seconds. Thus, for a larger video, you need to trim it to be under 6 seconds. Steps to get the task done are as follows.
Step 1.Launch WhatsApp on your iPhone and select the contact to which you want to share the GIF. Next, click on + sign and then choose Photo & Video Library option.
Step 2.Select the desired video from your phone gallery.
Step 3.After the video is added, an editing screen will open. Here you can trim the video to make it under 6 seconds using the slider at the top. Further changes can be made like adding a sticker, text, or making a freehand drawing.
Step 4.After all customizations are done, click on the GIF button.
Step 5.Finally, tap on the Send icon at the bottom-right corner to send the edited video as GIF.
Part 4 How to create excellent GIF effortlessly using Wondershare Filmora- All in One video editing software
WhatsApp in your iPhone has a built-in option to create GIFs using the videos on the device. Though the process is simple, the option for editing and customizations are limited. So, if you want to create GIFs using videos online and with advanced editing tools, we suggest using Wondershare Filmora Video Editor .
This all-in-one video editing software will let you edit and customize your files in several ways and in a few simple steps, your desired GIF will be ready.
Wondershare Filmora
Get started easily with Filmora’s powerful performance, intuitive interface, and countless effects!
Try It Free Try It Free Try It Free Learn More >
Key features of the software
● Add media files in all ley formats like MP4, MOV, MKV, PNG, and others to create GIFs.
● Simple and quick steps for creating the desired animation.
● Allows to customize the GIF using functions like slow-down, crop, rotate, and many more.
● Allows adding text, voice, and other elements.
● Option to share the created GIF to Vimeo, and YouTube directly.
● Software support to all latest Windows and Mac systems.
Steps to create WhatsApp GIF using Wondershare Filmora.
Step 1.Open the installed software on your system and import the desired images and videos from your system.
Step 2.Drag and drop the added videos and images to the timeline.
Step 3.Edit the file using features like crop, rotate, split, and others.
Step 4.Add text and other elements as needed.
Step 5.At the Local tab, save the customized media as GIF. Select the file name and the destination and then finally, click on the EXPORT button to start processing.
● Key Takeaways from This Episode →
●Gifs for WhatsApp iPhone can be added from the integrated library.
●Live Photos, as well as videos, can also be used to create and share them as GIF.
●For creating interesting and funny GIF in a hassle-free manner, Wondershare Filmora works as the best software.
What Are Differences Between 2D And 3D Animation
What Are Differences Between 2D And 3D Animation
An easy yet powerful editor
Numerous effects to choose from
Detailed tutorials provided by the official channel
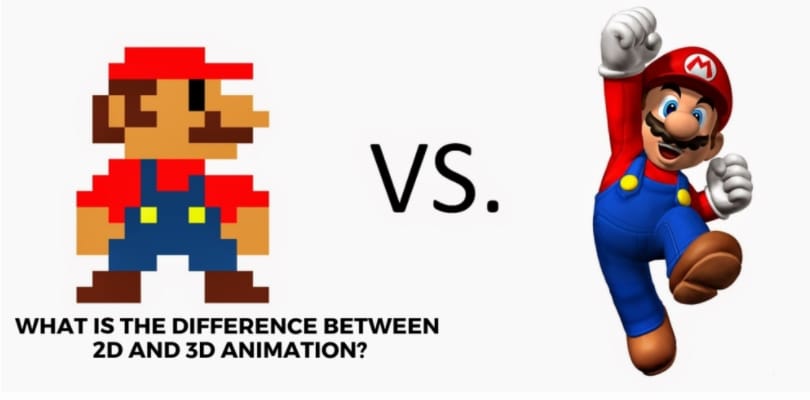
Creating an animation requires multiple processes and tasks to get that final result that we enjoy on the screen. Irrespective of the type of animations like stop-motion, sketch, computer, and others, all of them majorly falls under two main categories- 2D animation and 3D animation. The popular cartoons like Mickey Mouse, Tom & Jerry, and others that became an integral part of all childhood were 2D animations and with technological advancement and 3D animation in use, they are more like aged-veterans.
Toy Story was the first 3D animation movie and after that, there is no stopping. Though 3D animations are more interesting and engaging, they are fields where 2D animations work better. This article will help you to learn in detail about 2D 3D animation, their differences, uses, and other aspects.
In this article
01 [Definition of 2D Animation 3D Animation?](#Part 1)
02 [Key Differences Between 2D Animations and 3D Animations](#Part 2)
03 [Selecting Between 2D Animation and 3D Animation?](#Part 3)
04 [Merging 2D Animation and 3D Animation](#Part 4)
Part 1 Part Definition Of 2D And 3D Animation
012D Animation
The traditional method of animation is termed 2D animation and it has been in use for a long time. A 2D animated video has multiple images in different positions which when moved quickly one after the other simulates a movement. The flipping of the images creates an illusion of movement. Earlier 2D animations were created using hands but now there is advanced computer software that can create these animations in just a few simple clicks. The term 2D means 2 dimensional which means that an image for the animation can be moved in two-dimensional space that is X-axis and Y-axis.
023D Animation
In simplest terms, a 3D animation is an animation that is created in three-dimensional space which makes the characters and objects appear realistic and lively. Thus, a 3D animation has height, width as well as depth. These animations are more complex and the process of creating them is totally different from that of 2D animations. Though 3D animations are used in different industries and platforms these days, majorly they can be found for creating movies, games, and cartoons.
Part 2 Part Key Differences Between 2d Animations and 3d Animations
The major difference between a 2D animation and 3D animation lies in the final appearance. While a 2D animation appears like a flat animation which can be an image or a photograph at a fast movement while a 3D animation looks like real objects that can be seen from all angles and have their front, back, top, as well as the bottom.
The table below will differentiate both these animations on various parameters.
| Features/Type of Animation | 2D Animation | 3D Animation |
|---|---|---|
| Full-Form | Two-dimensional | Three-dimensional |
| Meaning | These animations with 2-dimensional objects appear to be moving when the images are moved at a fast speed. | The objects and characters in these animations look more realistic as their appear in 3-dimensional space. |
| Supported Aspects and axis | Length and height (X-axis and Y-axis) | Length, height, and width (X-axis, Y-axis and Z-axis) |
| Appearance | Appear as flat | Appear lively and realistic |
| Basic elements | It’s all about frames | The animation is all about movements |
| Axis | Images appear at X-axis, and Y axis | Objects appear at X-axis, Y-axis, and Z-axis. |
| Use and target audience | Used for social media sites, demos, animated whiteboard videos, and similar others. | Used for movies, cartoons, video games. |
| Use of software | Hand-drawn images or computer-generated images can be used. | Complex software is needed. |
| Cost | Cheaper than 3D animations | Expensive |
| Examples | Snow White, The Jungle Book, Mickey Mouse, Tom & Jerry, and more. | The Toy Story, Transformers, Incredibles, and more. |
Part 3 Selecting Between 2D Animation and 3D Animation?
Confused between 2D animation and 3D animation? Several factors can be considered to select between the two types of animations. Major ones are enlisted below.
● Target audience: For general explanation and use, 2D animations are a good choice as they are interesting, engaging, and also pocket-friendly. If the target audience is professional people that need in-depth and important information about something, 3D animations are a better choice.
● Availability of software: There are different software used for different types of animations. The availability of the software can also be a deciding factor for selecting between a 2D animation or 3D animation.
● Budget: This is another important factor to be considered. Since 3D animation requires more complex tools and procedures, creating them is expensive. So, depending on how much you are willing to spend, you can choose between the two.
Part 4 Part Merging 2D Animation and 3D Animation
Why choose one, when both can be used? Yes, to get the best of both worlds, 2D animations can be used along with 3D animations depending on the type of the project. Both the styles can be adjusted as per the requirements and for this, good professional software is needed.
We here suggest Wondershare Filmora Video Editor as the best tool as it not only comes equipped with all the latest features but the entire process is also quick and hassle-free. Majorly working as an excellent video editing software, the program supports multiple functions supporting animated videos. Using this Windows and Mac-based tool yon create dynamic animated videos and also edit them and customize them to suit your requirements.
For Win 7 or later (64-bit)
For macOS 10.12 or later
Key features of the software
● Create interesting and engaging animated and other videos using more than 100 media layers, composting tools, and dynamic effects.
● Apply motion elements, filters, and transitions for dynamic videos.
● Audio functions like background noise removal, audio equalizer, keyframe audio editing, and others are supported.
● Fast import, export, and rendering.
● Option to preview the files in high resolution.
● Features like fisheye correction, speed control, stabilization, advanced color correction, 3D LUTs, and others are supported.
● Additional supported functions include import from social media sites, portrait support, camera shake, audio-mixing, screen recording, auto-crop, and others.
● Windows and Mac support.
● Key Takeaways from This Episode →
● 2D and 3D animation are the two major types of animations created for different uses.
● A 2D animation appears in two-dimensional space while a 3D animation appears in a three-dimensional space and looks livelier and more realistic.
● Both 2D and 3D animations can be merged using professional software like Wondershare Filmora Video Editor that supports a wide range of other functions as well.
Why These 10+ Top Text Motion Templates Are Worth Your Attention
Why These 10+ Top Text Motion Templates Are Worth Your Attention
An easy yet powerful editor
Numerous effects to choose from
Detailed tutorials provided by the official channel
If you’re looking to add some ‘text in motion‘ to your video projects, then you’ve come to the right place! We’ve listed some of our favorite Text Motion After Effects and Text Motion Graphics Premiere Pro templates that you can use to get a head start in the realm of adding motion into text! (As a bonus, we’ve also included an overview on text motion and some of the best text motion graphics tutorials that you can refer to when trying out the templates we’ve recommended.)
In this article
01 [What’s Text Motion?](#Part 1)
02 [10 Best Text Motion After Effects](#Part 2)
03 [Tutorials for Making Great Text Motion](#Part 3)
Part 1 What’s Text Motion?
Alright, first of all, let’s answer the big question! Text Motion, what is it and why should you be adding it to your projects ASAP? Well, in regards to the former, the answer is simple: text motion graphics is literally text animation that you can add to your projects to give it an extra bit of life and make it more show-stealing!
In regards to the latter, the answer is in its description! After all, why wouldn’t you want your projects to be able to capture more attention?

Have a look at the screenshot above that we included of an example project on the video editor, Wondershare Filmora . As you can see, we inserted text in motion at the very start. And despite being a still screenshot of said text motion graphics, the preview is eye-catching even when paused!
This is the kind of project that you can do yourself with the right templates and the right video editor. We’ve got your back on the first in the list coming up. And, as for the second, we recommend that you try out Filmora! It is, as you can see, quite an expansive software. One that will allow you to truly make the most of the text motion graphics you’ll be able to create at the end of this article.
Part 2 10 Best Text Motion After Effects
Alright, now let’s move on to our promised Text Motion Graphics After Effects and Text Motion Graphics Premiere Pro templates. We’ve tried our best to pick a variety out for you so that you can have a good selection to choose from! You should also take the time to explore the different platforms where these templates are offered in case you end up needing a different look!
01Clean and Elegant Corporate Identity – Text Reveal (Mogrt)
The first on this list is the ‘Clean and Elegant Corporate Identity — Text Reveal’ by Mogrt. The title is quite explanatory in and of itself, but just in case you’re confused, it’s a template that was designed for professionals and brands to establish their corporate identity. The font is very modern in design, and it comes with several flare variations so that the reveal works out in the way that you want it to.
Other aspects, like the shadow blur, opacity, particle size (for the reveal), and text glossiness are also adjustable and can be changed at will based on your standards.
02Multipurpose Clean 3D Text to Title
The next text motion template is the ‘Multipurpose Clean 3D Text to Title’ also created by Mogrt. This one is text motion graphics that you can use for Premiere Pro and, with proper customization, and be used for just about anything that you want! It’s a very multi-purpose kind of graphic, one that you can maybe sneak in as an advert or for announcing celebrations or anniversaries!
As a final note, if you want to use this graphic as text motion for after effects , it is available for that as well!
03Simple Motion Text | Premiere Pro
This next template, the ‘Simple Motion Text’ graphic, is one that is available for both Premiere Pro and After Effects (though the link we’ve provided is for the Premiere Pro version!) As the name implies, the animation is quite simple, which may be exactly what you want, in any case. It certainly makes it very versatile (especially as you can change font style and color as you will). Making it the perfect template for a beginner that’s just starting out and doesn’t want anything too complicated.
0430 Glitch Text Presets For Premiere Pro | Mogrt
This next template, the ‘30 Glitch Text Presets’ by Mogrt is a Premiere Pro exclusive! It’s also quite fun in its particulars. As a template, it’s not as versatile as the one that we introduced previously, since the ‘glitch’ effect gives off quite the unique vibes, but that doesn’t make it any less potent at catching the eyes of your audience!
The best part, in this case, is that it comes with 30 pre-sets, all with fitting glitch sound effects (included in the pack) that you can use. Of course, there are other customization functions as well, including font style, color, transparency, and so on.
05Comic Bubbles MOGRT
Again, this next templated, called ‘Comic Bubbles’, kind of has its own unique vibe, making it inflexible in some ways but also more fun if that’s the kind of look that you’re looking for. Which, in this case, are literal ‘Comic’ text bubbles, like you would see in your old 90s comic (loud, pop-y, and with lots of bright colors!) The only difference from that to this is that these comic text bubbles move, allowing you to create ‘punchy’ text in between animated projects.
For your reference, there are 80 different comic bubbles included in the pack. All of which are easy to customize and will allow you to adjust colors, text, and transition effects (have a look at the video that we’ve linked if you want to see it in action!)
06Smoke To Text Reveal (Mogrt)
This next template, ‘Smoke to Text Reveal’ is another one that serves a very particular need. To help with visualization, the text motion graphics are at first obscured by smoke before it bubbles up into a crisp, modern text reveal! It’s perfect for those looking for underwater-themed text motion graphics. Or those who want to serve a hint of mystery with the smoke effect.
This is Text Motion Graphics - Premiere Pro. And the best part about it is that you can customize the text and the background at will — allowing you to truly make the template your own and make the most out of the smoke-to-reveal effect.
07Text Messages Toolkit
Want to appeal to the Gen Z audience? Then, the ‘text messages toolkit’ might be a fun text motion graphics for you to try. As you can perhaps surmise from the name, it’s a template that you can use in order to create ‘text message’ interactions. It’s customizable too! You can change the text box color, size, transparency, and just have a ball pimping it out of that’s what you want.
08Large Text Title Block
With the ‘large text title block’ template, you have the flexibility of the naturally more modern and minimalistic design, allowing you to use it for a wide variety of different projects. It works especially well for advertisements, if you’re wondering about potential uses, or as transition graphics between text to video!
09Blueprint Titles
Want something that’s a little quirkier? Or, perhaps, instructional? Then the ‘Blueprint Titles’ template is one that you can consider. As you can perhaps guess from the name, it allows you to create text motion graphics in a style that is similar to the kind of blueprints you usually see when working with design or architecture.
10Dynamic Minimalism
Sometimes, simple really is best! And, this next template, the ‘Dynamic Minimalism’ text motion after effects and text motion graphics premiere pro template is one that you might want in your arsenal just for the sake of your simpler projects! The kit comes with 30 different animations, as well as other customization functions that you can play around with to add a little personality to what are otherwise very minimalistic designs.
Part 3 Tutorials for Making Great Text Motion
For the last part of this article, we’ll be introducing some tutorials that you can refer to while trying out the templates that we recommended! We’ve pulled all of this from YouTube so that you can start learning immediately! And, of course, a variety has been chosen so that you can get your info from more than one source.
01Smooth Professional Text Animation in Premiere Pro - TUTORIAL
The first tutorial we have for you was created by Ignace Aleya on YouTube. This tutorial is a ‘Premiere Pro’ tutorial that focuses on helping beginners and intermediate users alike in understanding the ways of text motion graphics. He offers some pretty good pointers and tricks on keeping the quality of your work high. And the way that he shares his knowledge is pretty solid too! Allowing you to both watch and enjoy the video.
02Easy Title Motion Graphics
This next tutorial is about text motion graphics while working in Adobe After Effects. Like the previous tutorial, it will teach you the basics of using templates! It was posted by SonduckFilm, and the video covers five different “Easy Title Motion Graphics” as examples! Altogether, it’s a great choice if what you’re looking for is tips on making the most out of the templates we introduced on our list.
03Basic Logo Animations
Next, we have a tutorial from the YouTube content creator, Broken! This one is on the subject of both simple and complex logo animations that you can create when working on establishing a brand. It’s a great video for beginners and is quite informative on the subject of customization.
● Key Takeaways from This Episode →
● What is text motion and why do you need to start using it for your own projects ASAP? Well, text motion graphics are, basically, text animation! They’re eye-catching and informative at the same time, making them a great vessel for getting a message across to your audience.
● If you want to start creating text motion graphics yourself, we suggest starting with templates first! At least then, you’ll be able to make yourself comfortable while learning about the opportunities available to you.
● There are many different templates out there that you can try. Some are multi-purpose, some not. We’ve chosen a variety to introduce to you in of this article! Complete with a list of some tutorials in that you can refer to no matter what kind of project you’re working on.
If you’re looking to add some ‘text in motion‘ to your video projects, then you’ve come to the right place! We’ve listed some of our favorite Text Motion After Effects and Text Motion Graphics Premiere Pro templates that you can use to get a head start in the realm of adding motion into text! (As a bonus, we’ve also included an overview on text motion and some of the best text motion graphics tutorials that you can refer to when trying out the templates we’ve recommended.)
In this article
01 [What’s Text Motion?](#Part 1)
02 [10 Best Text Motion After Effects](#Part 2)
03 [Tutorials for Making Great Text Motion](#Part 3)
Part 1 What’s Text Motion?
Alright, first of all, let’s answer the big question! Text Motion, what is it and why should you be adding it to your projects ASAP? Well, in regards to the former, the answer is simple: text motion graphics is literally text animation that you can add to your projects to give it an extra bit of life and make it more show-stealing!
In regards to the latter, the answer is in its description! After all, why wouldn’t you want your projects to be able to capture more attention?
Have a look at the screenshot above that we included of an example project on the video editor, Wondershare Filmora . As you can see, we inserted text in motion at the very start. And despite being a still screenshot of said text motion graphics, the preview is eye-catching even when paused!
This is the kind of project that you can do yourself with the right templates and the right video editor. We’ve got your back on the first in the list coming up. And, as for the second, we recommend that you try out Filmora! It is, as you can see, quite an expansive software. One that will allow you to truly make the most of the text motion graphics you’ll be able to create at the end of this article.
Part 2 10 Best Text Motion After Effects
Alright, now let’s move on to our promised Text Motion Graphics After Effects and Text Motion Graphics Premiere Pro templates. We’ve tried our best to pick a variety out for you so that you can have a good selection to choose from! You should also take the time to explore the different platforms where these templates are offered in case you end up needing a different look!
01Clean and Elegant Corporate Identity – Text Reveal (Mogrt)
The first on this list is the ‘Clean and Elegant Corporate Identity — Text Reveal’ by Mogrt. The title is quite explanatory in and of itself, but just in case you’re confused, it’s a template that was designed for professionals and brands to establish their corporate identity. The font is very modern in design, and it comes with several flare variations so that the reveal works out in the way that you want it to.
Other aspects, like the shadow blur, opacity, particle size (for the reveal), and text glossiness are also adjustable and can be changed at will based on your standards.
02Multipurpose Clean 3D Text to Title
The next text motion template is the ‘Multipurpose Clean 3D Text to Title’ also created by Mogrt. This one is text motion graphics that you can use for Premiere Pro and, with proper customization, and be used for just about anything that you want! It’s a very multi-purpose kind of graphic, one that you can maybe sneak in as an advert or for announcing celebrations or anniversaries!
As a final note, if you want to use this graphic as text motion for after effects , it is available for that as well!
03Simple Motion Text | Premiere Pro
This next template, the ‘Simple Motion Text’ graphic, is one that is available for both Premiere Pro and After Effects (though the link we’ve provided is for the Premiere Pro version!) As the name implies, the animation is quite simple, which may be exactly what you want, in any case. It certainly makes it very versatile (especially as you can change font style and color as you will). Making it the perfect template for a beginner that’s just starting out and doesn’t want anything too complicated.
0430 Glitch Text Presets For Premiere Pro | Mogrt
This next template, the ‘30 Glitch Text Presets’ by Mogrt is a Premiere Pro exclusive! It’s also quite fun in its particulars. As a template, it’s not as versatile as the one that we introduced previously, since the ‘glitch’ effect gives off quite the unique vibes, but that doesn’t make it any less potent at catching the eyes of your audience!
The best part, in this case, is that it comes with 30 pre-sets, all with fitting glitch sound effects (included in the pack) that you can use. Of course, there are other customization functions as well, including font style, color, transparency, and so on.
05Comic Bubbles MOGRT
Again, this next templated, called ‘Comic Bubbles’, kind of has its own unique vibe, making it inflexible in some ways but also more fun if that’s the kind of look that you’re looking for. Which, in this case, are literal ‘Comic’ text bubbles, like you would see in your old 90s comic (loud, pop-y, and with lots of bright colors!) The only difference from that to this is that these comic text bubbles move, allowing you to create ‘punchy’ text in between animated projects.
For your reference, there are 80 different comic bubbles included in the pack. All of which are easy to customize and will allow you to adjust colors, text, and transition effects (have a look at the video that we’ve linked if you want to see it in action!)
06Smoke To Text Reveal (Mogrt)
This next template, ‘Smoke to Text Reveal’ is another one that serves a very particular need. To help with visualization, the text motion graphics are at first obscured by smoke before it bubbles up into a crisp, modern text reveal! It’s perfect for those looking for underwater-themed text motion graphics. Or those who want to serve a hint of mystery with the smoke effect.
This is Text Motion Graphics - Premiere Pro. And the best part about it is that you can customize the text and the background at will — allowing you to truly make the template your own and make the most out of the smoke-to-reveal effect.
07Text Messages Toolkit
Want to appeal to the Gen Z audience? Then, the ‘text messages toolkit’ might be a fun text motion graphics for you to try. As you can perhaps surmise from the name, it’s a template that you can use in order to create ‘text message’ interactions. It’s customizable too! You can change the text box color, size, transparency, and just have a ball pimping it out of that’s what you want.
08Large Text Title Block
With the ‘large text title block’ template, you have the flexibility of the naturally more modern and minimalistic design, allowing you to use it for a wide variety of different projects. It works especially well for advertisements, if you’re wondering about potential uses, or as transition graphics between text to video!
09Blueprint Titles
Want something that’s a little quirkier? Or, perhaps, instructional? Then the ‘Blueprint Titles’ template is one that you can consider. As you can perhaps guess from the name, it allows you to create text motion graphics in a style that is similar to the kind of blueprints you usually see when working with design or architecture.
10Dynamic Minimalism
Sometimes, simple really is best! And, this next template, the ‘Dynamic Minimalism’ text motion after effects and text motion graphics premiere pro template is one that you might want in your arsenal just for the sake of your simpler projects! The kit comes with 30 different animations, as well as other customization functions that you can play around with to add a little personality to what are otherwise very minimalistic designs.
Part 3 Tutorials for Making Great Text Motion
For the last part of this article, we’ll be introducing some tutorials that you can refer to while trying out the templates that we recommended! We’ve pulled all of this from YouTube so that you can start learning immediately! And, of course, a variety has been chosen so that you can get your info from more than one source.
01Smooth Professional Text Animation in Premiere Pro - TUTORIAL
The first tutorial we have for you was created by Ignace Aleya on YouTube. This tutorial is a ‘Premiere Pro’ tutorial that focuses on helping beginners and intermediate users alike in understanding the ways of text motion graphics. He offers some pretty good pointers and tricks on keeping the quality of your work high. And the way that he shares his knowledge is pretty solid too! Allowing you to both watch and enjoy the video.
02Easy Title Motion Graphics
This next tutorial is about text motion graphics while working in Adobe After Effects. Like the previous tutorial, it will teach you the basics of using templates! It was posted by SonduckFilm, and the video covers five different “Easy Title Motion Graphics” as examples! Altogether, it’s a great choice if what you’re looking for is tips on making the most out of the templates we introduced on our list.
03Basic Logo Animations
Next, we have a tutorial from the YouTube content creator, Broken! This one is on the subject of both simple and complex logo animations that you can create when working on establishing a brand. It’s a great video for beginners and is quite informative on the subject of customization.
● Key Takeaways from This Episode →
● What is text motion and why do you need to start using it for your own projects ASAP? Well, text motion graphics are, basically, text animation! They’re eye-catching and informative at the same time, making them a great vessel for getting a message across to your audience.
● If you want to start creating text motion graphics yourself, we suggest starting with templates first! At least then, you’ll be able to make yourself comfortable while learning about the opportunities available to you.
● There are many different templates out there that you can try. Some are multi-purpose, some not. We’ve chosen a variety to introduce to you in of this article! Complete with a list of some tutorials in that you can refer to no matter what kind of project you’re working on.
How to Make Your Own GIF on WhatsApp in Simple Ways
How to Make Your Own GIF on WhatsApp in Simple Ways
An easy yet powerful editor
Numerous effects to choose from
Detailed tutorials provided by the official channel
The feature of adding a GIF to your conversations on WhatsApp has been rolled out for a long and these animations add liveliness to your chats. On your iPhone as well as Android devices, there is an integrated library of these GIFs in several categories that can be used.
Additionally, you can even make your own GIF using the videos on your WhatsApp in a few simple steps. Learn all about these GIFs and how to make your own GIF on WhatsApp.
In this article
01 [How to send GIF from the integrated library on WhatsApp](#Part 1)
02 [How to create WhatsApp GIF using Videos on Android and iPhone](#Part 2)
03 [How to create an excellent GIF using Wondershare Filmora](#Part 3)
Part 1 How to send GIF from the integrated library on WhatsApp
Your iPhone, as well as Android devices, has a library of GIFs that can be used to search for the desired animations. The steps for sharing these GIFs are as follows.
Step 1. Launch WhatsApp on your smartphone and open the chat to which you wish to send the GIF. On your Android phone, click on the smiley emoji and then select GIF options from the bottom of the screen and the library of the animations will open.
On your iPhone, to open the library of GIF, click on the sticker icon.
Step 2. You can choose from available GIF and even search for the desired one using the keyword at the search icon.
Step 3. Tap on the selected GIF and then click on the Send button that will share the animation to the chat.
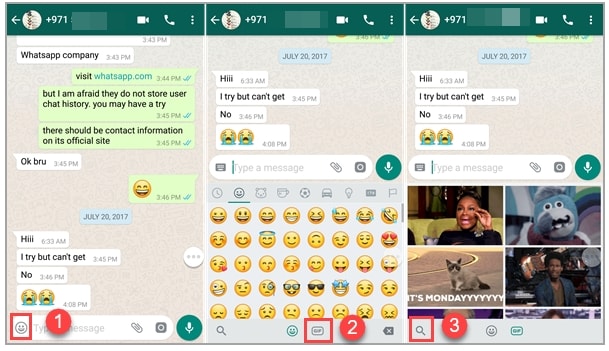
Part 2 How to create WhatsApp GIF using Videos on Android and iPhone
In addition to the library, WhatsApp also allows creating GIF animations using the videos on the device. (For iPhone users, even Live Photos can be used). For a video to be used as GIF, it cannot be more than 6 seconds. So, the longer videos need to be trimmed to under 6 seconds.
Steps to create custom GIF WhatsApp using videos
Step 1. Open the WhatsApp chat on your phone where you want to send the GIF. Click on the camera icon and then select the video from your device’s gallery. Alternatively, you can also record a live video to create a GIF.
Step 2. After the video is added, trim it down under 6 seconds using the slider at the top. You can add text to the video using the Caption option.
Step 3. Next, click on the GIF button that will convert the added video into GIF. Finally, click on the Send button at the bottom-right corner.
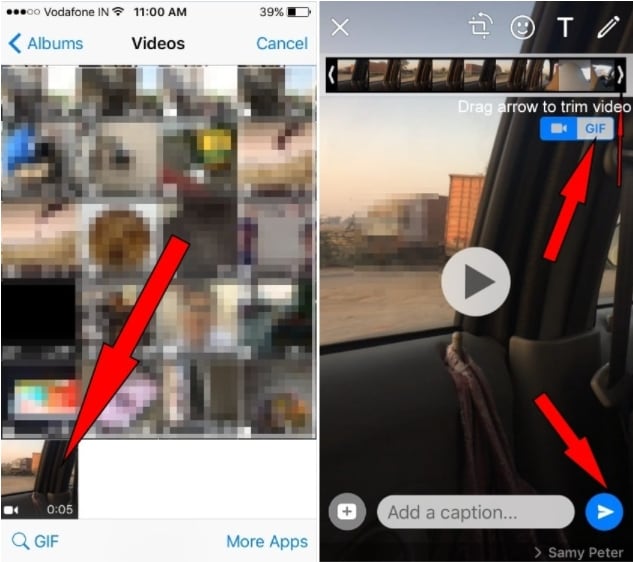
Part 3 How to create an excellent GIF using Wondershare Filmora
Though iPhone and Android, both allow creating a GIF from videos on your device, the option for customizations is limited. So, if you want to create your own GIF using images and videos, Wondershare Filmora will work as the best software. This versatile tool supports all key media formats like JPG, PNG, MP4, MKV, MOV, and others for creating GIF animations.
The overall process is fast as well as simple where you just need to add the media files, edit them and choose to save them as GIFs. Using Wondershare Filmora Video Editor , multiple customizations can be done, like rotating, trimming, adding texts, adding sounds, speed-up, adding elements, and more.
Wondershare Filmora
Get started easily with Filmora’s powerful performance, intuitive interface, and countless effects!
Try It Free Try It Free Try It Free Learn More >
Steps to create GIF using Wondershare Filmora
StepLaunch the Wondershare software on your system and add the local media files from which you wish to create a GIF.
Step 1. Next, drag and drop the files to the timeline of the software.

Step 2. Using the editing tools, you can customize the added files.
Step 3. Add texts, and effects as needed using the functions at the software.

Step 4. Next, at the Local tab choose the GIF option, select the desired file name and the system location to save the file. Finally, click on the EXPORT button to start the file processing.
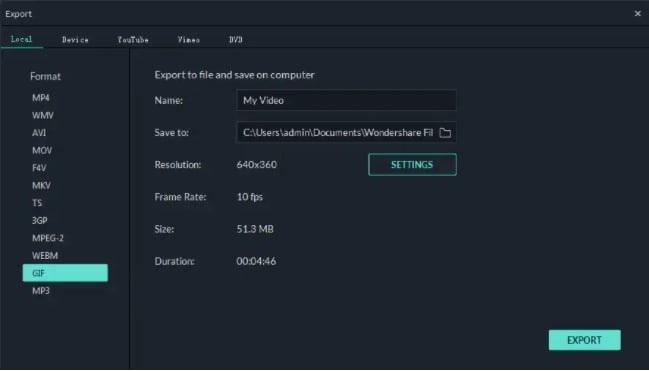
● Key Takeaways from This Episode →
●GIF animations can be added from the integrated library at Android and iPhone devices.
●Using the local videos on the phone, GIF can also be created.
●For creating an excellent and professional-looking GIF, Wondershare Filmora works as one of the best tools that is simple and quick to use.
The feature of adding a GIF to your conversations on WhatsApp has been rolled out for a long and these animations add liveliness to your chats. On your iPhone as well as Android devices, there is an integrated library of these GIFs in several categories that can be used.
Additionally, you can even make your own GIF using the videos on your WhatsApp in a few simple steps. Learn all about these GIFs and how to make your own GIF on WhatsApp.
In this article
01 [How to send GIF from the integrated library on WhatsApp](#Part 1)
02 [How to create WhatsApp GIF using Videos on Android and iPhone](#Part 2)
03 [How to create an excellent GIF using Wondershare Filmora](#Part 3)
Part 1 How to send GIF from the integrated library on WhatsApp
Your iPhone, as well as Android devices, has a library of GIFs that can be used to search for the desired animations. The steps for sharing these GIFs are as follows.
Step 1. Launch WhatsApp on your smartphone and open the chat to which you wish to send the GIF. On your Android phone, click on the smiley emoji and then select GIF options from the bottom of the screen and the library of the animations will open.
On your iPhone, to open the library of GIF, click on the sticker icon.
Step 2. You can choose from available GIF and even search for the desired one using the keyword at the search icon.
Step 3. Tap on the selected GIF and then click on the Send button that will share the animation to the chat.
Part 2 How to create WhatsApp GIF using Videos on Android and iPhone
In addition to the library, WhatsApp also allows creating GIF animations using the videos on the device. (For iPhone users, even Live Photos can be used). For a video to be used as GIF, it cannot be more than 6 seconds. So, the longer videos need to be trimmed to under 6 seconds.
Steps to create custom GIF WhatsApp using videos
Step 1. Open the WhatsApp chat on your phone where you want to send the GIF. Click on the camera icon and then select the video from your device’s gallery. Alternatively, you can also record a live video to create a GIF.
Step 2. After the video is added, trim it down under 6 seconds using the slider at the top. You can add text to the video using the Caption option.
Step 3. Next, click on the GIF button that will convert the added video into GIF. Finally, click on the Send button at the bottom-right corner.
Part 3 How to create an excellent GIF using Wondershare Filmora
Though iPhone and Android, both allow creating a GIF from videos on your device, the option for customizations is limited. So, if you want to create your own GIF using images and videos, Wondershare Filmora will work as the best software. This versatile tool supports all key media formats like JPG, PNG, MP4, MKV, MOV, and others for creating GIF animations.
The overall process is fast as well as simple where you just need to add the media files, edit them and choose to save them as GIFs. Using Wondershare Filmora Video Editor , multiple customizations can be done, like rotating, trimming, adding texts, adding sounds, speed-up, adding elements, and more.
Wondershare Filmora
Get started easily with Filmora’s powerful performance, intuitive interface, and countless effects!
Try It Free Try It Free Try It Free Learn More >
Steps to create GIF using Wondershare Filmora
StepLaunch the Wondershare software on your system and add the local media files from which you wish to create a GIF.
Step 1. Next, drag and drop the files to the timeline of the software.
Step 2. Using the editing tools, you can customize the added files.
Step 3. Add texts, and effects as needed using the functions at the software.
Step 4. Next, at the Local tab choose the GIF option, select the desired file name and the system location to save the file. Finally, click on the EXPORT button to start the file processing.
● Key Takeaways from This Episode →
●GIF animations can be added from the integrated library at Android and iPhone devices.
●Using the local videos on the phone, GIF can also be created.
●For creating an excellent and professional-looking GIF, Wondershare Filmora works as one of the best tools that is simple and quick to use.
How to Animate Image on Scroll
How to Animate Image on Scroll and Text on Scroll?
An easy yet powerful editor
Numerous effects to choose from
Detailed tutorials provided by the official channel
Over the years, web designers have tried different tactics to make their websites visually engaging. From marquee tags to animated navigation bars, designers tried everything they could to enhance the overall visual appearance of their websites.
One such tactic - that even brands like Sony and Apple - followed was image-on-scroll and text-on-scroll animations.
In this article
01 [How to Make Scroll Image Animation Like Apple?](#Part 1)
02 [How to Create a Scrolling Text Animation (Infinite Loop)](#Part 2)
Part 1 How to Make Scroll Image Animation Like Apple?
First, let’s take a look at different ways to make scroll-image animation like Apple. An image-on-scroll animation is an animation playback that appears on images as you continue to scroll down a website. You can use multiple methods to implement scroll image animations on your website.
01Use Filmora
Wondershare Filmora Video Editor is a feature-packed video editing tool that’s designed to help video editors create high-quality videos in a hassle-free manner. The tool offers a timeline-based interface that streamlines the entire video editing process and helps professionals execute complex video editing tasks in no time. In addition to its basic editing features, Filmora also offers advanced editing functions including color grading, motion tracking, and keyframing. It means you can easily turn your RAW footage into high-quality videos without any hassle.
Using Wondershare Filmora to animate images on scroll will be an ideal solution if you want to integrate a visually appealing element to your website. Let’s walk you through the step-by-step procedure of using Wondershare Filmora to create image-on-scroll animations.

Wondershare Filmora - Best Video Editor for Mac/Windows
5,481,435 people have downloaded it.
Build unique custom animations without breaking a sweat.
Focus on creating epic stories and leave the details to Filmora’s auto features.
Start a creative adventure with drag & drop effects and endless possibilities.
Filmora simplifies advanced features to save you time and effort.
Filmora cuts out repetition so you can move on to your next creative breakthrough.
Step 1 - Launch Filmora on your system and import the video/image that you want to edit. Then, load the selected file to Filmora’s timeline to proceed further.
Step 2 - Now, double-tap the video/image. This will launch the editing panel on your screen. Here, switch to the “Animation” panel.

Step 3 - Here you can either select “Presets” or click the “Customize” tab to create a custom animation through keyframing.

Step 4 - If you want to save time, however, it would be better to choose the “Presets” tab. Then, select the preset that you want to use.
Step 5 - Now, drag the selected preset to the timeline. Again, double-tap the preset layer. An editing panel will appear on your screen. Here you can adjust different elements of the preset to customize its playback.

So, that’s everything you need to know about animating image-on-scroll using Wondershare Filmora.
02Use ScrollSequence
Now, if you are not a professional editor or don’t want to overcomplicate things, you can use ScrollSequence to add image-on-scroll animation to your website. For readers who don’t know, ScrollSequence is a built-in WordPress plugin that you can directly install in your WordPress manager. The tool offers hundreds of ready-to-use animation templates that you can integrate and customize without any hassle.
All the templates offer complete customization, which means you can adjust the animation playback, import your own media files, and even customize the text. It’s worth understanding that this method will only work if you are using WordPress as the CMS platform for your website. ScrollSequence is only available as a WordPress plugin and you won’t be able to use it with any other website builder
03Write Your Own JavaScript Code
Finally, you can also write your own JavaScript code to animate image-on-scroll. However, this method will be a bit complicated as you would require technical expertise to write dedicated JavaScript scripts to animate image-on-scroll. If you choose this solution, you’ll have to start with writing HTML and CSS codes. This will help you style your web page in the beginning. And, once the web design is up and ready, you can move towards writing the JavaScript code to animate image-on-scroll in your web page.
Part 2 How to Create a Scrolling Text Animation (Infinite Loop)
Like image-on-scroll, text-on-scroll is another popular way to add visually appealing animations to your web designs. Text-on-scroll animations work the same way as image-on-scroll animations - the only difference is that these types of animations focus on the text playback instead of images. Again, you can use different methods to animate text on scroll and make your website’s content run in an infinite loop.
Some of these methods include:
01Use Filmora
Thanks to Filmora’s advanced editing panel, you can also use it to animate text within the videos. This will be an ideal solution for users who want to add videos with dedicated text banners and titles on their websites. With Filmora, you’ll be able to animate the text and make custom transitions in a hassle-free manner. Let’s walk you through the detailed procedure of using Wondershare Filmora to add text animation to your videos.
Step 1 - Open Filmora on your system and load the video into its timeline.
Step 2 - Double-tap the video file, and switch to the “Titles” tab. You’ll see a list of different title templates on your screen. Browse through these results and drag the desired template to the timelines. Make sure to adjust the title layer right above the video layer.

Step 3 - Again, double-click the title layer and you’ll see a dedicated text editor on your screen. Here enter the text that you want to display within the video. You can also select text size, orientation, and font to personalize its appearance.
Step 4 - Finally, switch to the “Animation” tab at the left sidebar. Choose any of these animation templates and the text within the video will be animated automatically.

So, that’s how you can use Filmora to animate text-on-scroll to improve the overall visual appearance of your website videos.
02Scroll-Text-Animations for Single Words
Another way to implement scroll-text animations is to modify the HTML & CSS code of your website. Again, this method will only be feasible if you have prior coding experience and know how to write well-optimized code.

The easiest way to animate text scrolls is through single-line animations. In this situation, only one line gets displayed at any particular time, which automatically gets switched to the next one as soon as you scroll down the cursor. If you are planning to create simple text-based animations, this method will help you get the job done easily.
Key Takeaways from This Episode
● You can animate image-on-scroll and text-on-scroll to enhance the overall visual appearance of your websites and make them more engaging for the end-users.
● If you are planning to upload dedicated videos on your website, you can use Wondershare Filmora, a fully-functional video editing tool, to animate both images and text through an easy-to-navigate editing panel.
● You should only opt for the coding method if you are an experienced coder and have worked on HTML/CSS/JavaScript projects in the past.
Over the years, web designers have tried different tactics to make their websites visually engaging. From marquee tags to animated navigation bars, designers tried everything they could to enhance the overall visual appearance of their websites.
One such tactic - that even brands like Sony and Apple - followed was image-on-scroll and text-on-scroll animations.
In this article
01 [How to Make Scroll Image Animation Like Apple?](#Part 1)
02 [How to Create a Scrolling Text Animation (Infinite Loop)](#Part 2)
Part 1 How to Make Scroll Image Animation Like Apple?
First, let’s take a look at different ways to make scroll-image animation like Apple. An image-on-scroll animation is an animation playback that appears on images as you continue to scroll down a website. You can use multiple methods to implement scroll image animations on your website.
01Use Filmora
Wondershare Filmora Video Editor is a feature-packed video editing tool that’s designed to help video editors create high-quality videos in a hassle-free manner. The tool offers a timeline-based interface that streamlines the entire video editing process and helps professionals execute complex video editing tasks in no time. In addition to its basic editing features, Filmora also offers advanced editing functions including color grading, motion tracking, and keyframing. It means you can easily turn your RAW footage into high-quality videos without any hassle.
Using Wondershare Filmora to animate images on scroll will be an ideal solution if you want to integrate a visually appealing element to your website. Let’s walk you through the step-by-step procedure of using Wondershare Filmora to create image-on-scroll animations.
Wondershare Filmora - Best Video Editor for Mac/Windows
5,481,435 people have downloaded it.
Build unique custom animations without breaking a sweat.
Focus on creating epic stories and leave the details to Filmora’s auto features.
Start a creative adventure with drag & drop effects and endless possibilities.
Filmora simplifies advanced features to save you time and effort.
Filmora cuts out repetition so you can move on to your next creative breakthrough.
Step 1 - Launch Filmora on your system and import the video/image that you want to edit. Then, load the selected file to Filmora’s timeline to proceed further.
Step 2 - Now, double-tap the video/image. This will launch the editing panel on your screen. Here, switch to the “Animation” panel.
Step 3 - Here you can either select “Presets” or click the “Customize” tab to create a custom animation through keyframing.
Step 4 - If you want to save time, however, it would be better to choose the “Presets” tab. Then, select the preset that you want to use.
Step 5 - Now, drag the selected preset to the timeline. Again, double-tap the preset layer. An editing panel will appear on your screen. Here you can adjust different elements of the preset to customize its playback.
So, that’s everything you need to know about animating image-on-scroll using Wondershare Filmora.
02Use ScrollSequence
Now, if you are not a professional editor or don’t want to overcomplicate things, you can use ScrollSequence to add image-on-scroll animation to your website. For readers who don’t know, ScrollSequence is a built-in WordPress plugin that you can directly install in your WordPress manager. The tool offers hundreds of ready-to-use animation templates that you can integrate and customize without any hassle.
All the templates offer complete customization, which means you can adjust the animation playback, import your own media files, and even customize the text. It’s worth understanding that this method will only work if you are using WordPress as the CMS platform for your website. ScrollSequence is only available as a WordPress plugin and you won’t be able to use it with any other website builder
03Write Your Own JavaScript Code
Finally, you can also write your own JavaScript code to animate image-on-scroll. However, this method will be a bit complicated as you would require technical expertise to write dedicated JavaScript scripts to animate image-on-scroll. If you choose this solution, you’ll have to start with writing HTML and CSS codes. This will help you style your web page in the beginning. And, once the web design is up and ready, you can move towards writing the JavaScript code to animate image-on-scroll in your web page.
Part 2 How to Create a Scrolling Text Animation (Infinite Loop)
Like image-on-scroll, text-on-scroll is another popular way to add visually appealing animations to your web designs. Text-on-scroll animations work the same way as image-on-scroll animations - the only difference is that these types of animations focus on the text playback instead of images. Again, you can use different methods to animate text on scroll and make your website’s content run in an infinite loop.
Some of these methods include:
01Use Filmora
Thanks to Filmora’s advanced editing panel, you can also use it to animate text within the videos. This will be an ideal solution for users who want to add videos with dedicated text banners and titles on their websites. With Filmora, you’ll be able to animate the text and make custom transitions in a hassle-free manner. Let’s walk you through the detailed procedure of using Wondershare Filmora to add text animation to your videos.
Step 1 - Open Filmora on your system and load the video into its timeline.
Step 2 - Double-tap the video file, and switch to the “Titles” tab. You’ll see a list of different title templates on your screen. Browse through these results and drag the desired template to the timelines. Make sure to adjust the title layer right above the video layer.
Step 3 - Again, double-click the title layer and you’ll see a dedicated text editor on your screen. Here enter the text that you want to display within the video. You can also select text size, orientation, and font to personalize its appearance.
Step 4 - Finally, switch to the “Animation” tab at the left sidebar. Choose any of these animation templates and the text within the video will be animated automatically.
So, that’s how you can use Filmora to animate text-on-scroll to improve the overall visual appearance of your website videos.
02Scroll-Text-Animations for Single Words
Another way to implement scroll-text animations is to modify the HTML & CSS code of your website. Again, this method will only be feasible if you have prior coding experience and know how to write well-optimized code.
The easiest way to animate text scrolls is through single-line animations. In this situation, only one line gets displayed at any particular time, which automatically gets switched to the next one as soon as you scroll down the cursor. If you are planning to create simple text-based animations, this method will help you get the job done easily.
Key Takeaways from This Episode
● You can animate image-on-scroll and text-on-scroll to enhance the overall visual appearance of your websites and make them more engaging for the end-users.
● If you are planning to upload dedicated videos on your website, you can use Wondershare Filmora, a fully-functional video editing tool, to animate both images and text through an easy-to-navigate editing panel.
● You should only opt for the coding method if you are an experienced coder and have worked on HTML/CSS/JavaScript projects in the past.
Tutorial Guide to Animate Pictures in Canva
Versatile Video Editor - Wondershare Filmora
An easy yet powerful editor
Numerous effects to choose from
Detailed tutorials provided by the official channel
With the rapid rise of social media worldwide, animated posts (like GIFs) are becoming famous. They have become a replacement to other modes like JPEG and .Png
Famous designing tools like Canva introduced an animation feature in the light of its popularity. The feature allows you to step up your social media game and creates animated visuals in a blink! It is also efficient for both professional and amateur users.
Besides social media content, Canva is also useful to design birthday cards, event invites, inspirational quotes, and more! Let’s learn about how to animate pictures in Canva in detail.
In this article
01 What Canva Pictures Can Be Used For?
02 How to Animate Pictures in Canva?
03 Tips: Animate Pictures In Video
Part 1: What Canva Pictures Can Be Used For?
Be it for marketing campaigns or projects, Canva is the best tool for all designing work. It is a foolproof platform where you do not need prior designing experience. Canva is useful for

Social media/Instagram Posts: You can build your Instagram presence by creating posts through Canva. It has multiple templates and features to make alluring Instagram posts. It also has drag-and-drop free images to add customized designs to the template.
Facebook Covers: You can make Facebook covers on Canva by choosing a layout and adding other elements. You can include colors, fonts, and pictures on the cover. Canva has templates for all themes, moods, and styles!
Event Invites: Canva has hundreds of free layouts and libraries to create event invites. You can choose the appropriate template and incorporate party-oriented photos, icons, stickers, illustrations, and graphics. It also has a personalizing option to add personal pictures and artwork in the editor.
Inspirational Quotes: Canva allows you to curate inspirational quotes and dispense motivation in people. It has templates to modify the elements like font size, text size, borders, images, and more!
Collages: It helps create a collage where you can combine multiple pictures in one frame. Canva offers various grids with a capacity of 12 pictures and different sizes.
Part 2: How to Animate Pictures in Canva?
Canva helps you add instant animation in presentations, social media posts, and more. To know how to animate images in Canva, follow the below steps:

Step 1: Add Static Elements
Start by creating an image through static elements. To make the design attractive, you can add sample texts, illustrations, doodles, and other entities.
Try to stimulate your creativity and come up with a layout beforehand. If possible, sketch on paper and replicate the same.
Step 2: Animate Your Design
Take a final glance at the layout. Make sure it’s perfect. Once all the elements are placed as per your design, it’s time to animate them. For that:
- Click on the white background page
- Go to the “Toolbar” section
- Select the “Animate” button
Step 3: Select Page Animation Style
Canva offers six animation styles, where five are for free users, and one is for pro users. To access the five animation styles, follow these steps.
- Press the “Animate” Button
- Select “Page Animations”
- There you will find options like Block, Pan, Fade, Rise, and Tumble
- Select the style as per your design
Step 4: Preview and Download
After selecting a page animation style, it will preview the effect. If you find it good, move on to downloading the GIF. Here’s how to do so
- Go to the “Toolbar” option (present on your upper right hand)
- Choose GIF as the file type
- Check the page number and verify if it’s correct
- Press the “Done” button
Step 5: Final GIF
After clicking on the “Done” button, your GIF will be downloaded. You will be able to see a display for five seconds. If you want to edit the image after this, click on the time button (near the “Animate” button).
So, that was all about how to animate a photo in Canva.
Drawbacks of Canva
Despite efficient features and easy interface, there are certain areas where Canva lacks. This includes
- It does not have any local file storage.
- As too many people use Canva, your template may look the same as others.
- Some of its best features are not free to access.
- The mobile app version lacks certain elements and features.
Out of all these drawbacks, repetitions of templates are a big issue. That’s because everyone wants their posts to look unique and irreplaceable. However, common Canva templates may prevent that from happening.
Fortunately, there are ways to combat such issues. Let’s learn about them in the next section.
Tips: Animate Pictures In Video
You can also animate pictures in the video to make them more lively. For that, you can use Wondershare Filmora Pro Video Editor. It’s also efficient if you don’t know how to animate a picture in Canva:
Wondershare Filmora Video Editor
Filmora by Wondershare is a video editing software that helps you build custom animations easily. It has auto features to make epic stories and posts.
Wondershare Filmora
Get started easily with Filmora’s powerful performance, intuitive interface, and countless effects!
Try It Free Try It Free Try It Free Learn More about Filmora>
Its drag and drop effect makes designing simple and quick. Due to its outstanding attributes, options, and styles, Filmora has 77+ million happy users!
It’s a power-packed integration of functionality, performance, and more! In fact, it resolves the repeated template issue of Canva. The software has top-notch functions and innovative filters that add authenticity to the designs.
Till now, you learned about how to animate a picture on Canva. Now, let’s comprehend the right way to use Filmora for animating and adding images in the video.
Before using, make sure to update the software to its latest version. Follow separate methods for both Windows and Mac.
For Win
Step 1: Adding Image to Video Track
With Filmora, adding images to video is a matter of seconds! Start by:
- Identify the position where you want to add the image and place the Playhead there.
- Right-click on the picture from the media library. Click on the “Insert” option. Your image will be added. Select the “Append” option, if you want to add an image at the video end.

Note: How to Remove Black Bars around the Image?
- Go to “Settings” from the File section.
- Click on the “Editing” tab and select “Photo Placement.”
- Choose from the “Crop to Fit” or “Pan To Zoom” option. The black bars will be removed.
To add the image in between the video clip, split them. Now, add the image between the split parts.
Step 2: Add Images as Overlays
To add images as overlays, drag the image to a video track above the main track. The main track consists of your video.
Track 1 (or the track with a video clip) is the base of your video. If you add anything else, it will be displayed above this track as video track 2, 3, and so on. Overall, you can add 100 video tracks.
Step 3: Edit Your Image
If you know how to animate an image in Canva, editing images on Filmora is even easier. You can try the following methods:
Animate Your Images
- To add animation presets to the image, click on the image twice.
- Go to the “Animation Tab” and look for an animation preset.
- Drag the presets to the image for its effect

Make Image Color Adjustments
- Double-click on the image
- Go to the “Color” tab and then the “Color” section
- Customize the temperature, saturation, brightness, etc., as per your need.
- Press Ok.
Change Image Duration
You can increase the image duration to more than the default timing of 5 seconds. For that:
- Click on the image and select the “Duration” option.
- Go to the “Duration Setting” panel.
- Add the new duration timing.

Adjust Position, Rotate/Flip, and Opacity
- You can resize the image position through the circles and squares at the image edges.
- To flip or rotate the image, double-click on the picture. From the “Image Panel,” go to “Transform” and then click on “Rotate.” You can choose either “Horizontal Flip” or “Vertical Flip” to flip the images.
- Double-click on the image and click on the “Composting” option to add opacity. You can choose the blending mode or adjust the “Opacity” accordingly.

For Mac
Filmora for Mac comes with a drag and drop feature to add transitions, animated titles, and effects. You can start a new project from scratch by clicking on “New Project”. The entire process is the same as that for Windows users.
To apply animation in the images, use the motion effects option. For that,
- Click on the Image
- Go to Motion Tab
- Select a motion effect
- Double-click to apply the effect

Conclusion
So that’s how to animate photos in Canva. Hopefully, our steps will help you revamp your posts like a pro! If not Canva, you can use its alternative Filmora. It’s equally prominent, user-friendly, and feature-rich.
Versatile Video Editor - Wondershare Filmora
An easy yet powerful editor
Numerous effects to choose from
Detailed tutorials provided by the official channel
With the rapid rise of social media worldwide, animated posts (like GIFs) are becoming famous. They have become a replacement to other modes like JPEG and .Png
Famous designing tools like Canva introduced an animation feature in the light of its popularity. The feature allows you to step up your social media game and creates animated visuals in a blink! It is also efficient for both professional and amateur users.
Besides social media content, Canva is also useful to design birthday cards, event invites, inspirational quotes, and more! Let’s learn about how to animate pictures in Canva in detail.
In this article
01 What Canva Pictures Can Be Used For?
02 How to Animate Pictures in Canva?
03 Tips: Animate Pictures In Video
Part 1: What Canva Pictures Can Be Used For?
Be it for marketing campaigns or projects, Canva is the best tool for all designing work. It is a foolproof platform where you do not need prior designing experience. Canva is useful for
Social media/Instagram Posts: You can build your Instagram presence by creating posts through Canva. It has multiple templates and features to make alluring Instagram posts. It also has drag-and-drop free images to add customized designs to the template.
Facebook Covers: You can make Facebook covers on Canva by choosing a layout and adding other elements. You can include colors, fonts, and pictures on the cover. Canva has templates for all themes, moods, and styles!
Event Invites: Canva has hundreds of free layouts and libraries to create event invites. You can choose the appropriate template and incorporate party-oriented photos, icons, stickers, illustrations, and graphics. It also has a personalizing option to add personal pictures and artwork in the editor.
Inspirational Quotes: Canva allows you to curate inspirational quotes and dispense motivation in people. It has templates to modify the elements like font size, text size, borders, images, and more!
Collages: It helps create a collage where you can combine multiple pictures in one frame. Canva offers various grids with a capacity of 12 pictures and different sizes.
Part 2: How to Animate Pictures in Canva?
Canva helps you add instant animation in presentations, social media posts, and more. To know how to animate images in Canva, follow the below steps:
Step 1: Add Static Elements
Start by creating an image through static elements. To make the design attractive, you can add sample texts, illustrations, doodles, and other entities.
Try to stimulate your creativity and come up with a layout beforehand. If possible, sketch on paper and replicate the same.
Step 2: Animate Your Design
Take a final glance at the layout. Make sure it’s perfect. Once all the elements are placed as per your design, it’s time to animate them. For that:
- Click on the white background page
- Go to the “Toolbar” section
- Select the “Animate” button
Step 3: Select Page Animation Style
Canva offers six animation styles, where five are for free users, and one is for pro users. To access the five animation styles, follow these steps.
- Press the “Animate” Button
- Select “Page Animations”
- There you will find options like Block, Pan, Fade, Rise, and Tumble
- Select the style as per your design
Step 4: Preview and Download
After selecting a page animation style, it will preview the effect. If you find it good, move on to downloading the GIF. Here’s how to do so
- Go to the “Toolbar” option (present on your upper right hand)
- Choose GIF as the file type
- Check the page number and verify if it’s correct
- Press the “Done” button
Step 5: Final GIF
After clicking on the “Done” button, your GIF will be downloaded. You will be able to see a display for five seconds. If you want to edit the image after this, click on the time button (near the “Animate” button).
So, that was all about how to animate a photo in Canva.
Drawbacks of Canva
Despite efficient features and easy interface, there are certain areas where Canva lacks. This includes
- It does not have any local file storage.
- As too many people use Canva, your template may look the same as others.
- Some of its best features are not free to access.
- The mobile app version lacks certain elements and features.
Out of all these drawbacks, repetitions of templates are a big issue. That’s because everyone wants their posts to look unique and irreplaceable. However, common Canva templates may prevent that from happening.
Fortunately, there are ways to combat such issues. Let’s learn about them in the next section.
Tips: Animate Pictures In Video
You can also animate pictures in the video to make them more lively. For that, you can use Wondershare Filmora Pro Video Editor. It’s also efficient if you don’t know how to animate a picture in Canva:
Wondershare Filmora Video Editor
Filmora by Wondershare is a video editing software that helps you build custom animations easily. It has auto features to make epic stories and posts.
Wondershare Filmora
Get started easily with Filmora’s powerful performance, intuitive interface, and countless effects!
Try It Free Try It Free Try It Free Learn More about Filmora>
Its drag and drop effect makes designing simple and quick. Due to its outstanding attributes, options, and styles, Filmora has 77+ million happy users!
It’s a power-packed integration of functionality, performance, and more! In fact, it resolves the repeated template issue of Canva. The software has top-notch functions and innovative filters that add authenticity to the designs.
Till now, you learned about how to animate a picture on Canva. Now, let’s comprehend the right way to use Filmora for animating and adding images in the video.
Before using, make sure to update the software to its latest version. Follow separate methods for both Windows and Mac.
For Win
Step 1: Adding Image to Video Track
With Filmora, adding images to video is a matter of seconds! Start by:
- Identify the position where you want to add the image and place the Playhead there.
- Right-click on the picture from the media library. Click on the “Insert” option. Your image will be added. Select the “Append” option, if you want to add an image at the video end.
Note: How to Remove Black Bars around the Image?
- Go to “Settings” from the File section.
- Click on the “Editing” tab and select “Photo Placement.”
- Choose from the “Crop to Fit” or “Pan To Zoom” option. The black bars will be removed.
To add the image in between the video clip, split them. Now, add the image between the split parts.
Step 2: Add Images as Overlays
To add images as overlays, drag the image to a video track above the main track. The main track consists of your video.
Track 1 (or the track with a video clip) is the base of your video. If you add anything else, it will be displayed above this track as video track 2, 3, and so on. Overall, you can add 100 video tracks.
Step 3: Edit Your Image
If you know how to animate an image in Canva, editing images on Filmora is even easier. You can try the following methods:
Animate Your Images
- To add animation presets to the image, click on the image twice.
- Go to the “Animation Tab” and look for an animation preset.
- Drag the presets to the image for its effect
Make Image Color Adjustments
- Double-click on the image
- Go to the “Color” tab and then the “Color” section
- Customize the temperature, saturation, brightness, etc., as per your need.
- Press Ok.
Change Image Duration
You can increase the image duration to more than the default timing of 5 seconds. For that:
- Click on the image and select the “Duration” option.
- Go to the “Duration Setting” panel.
- Add the new duration timing.
Adjust Position, Rotate/Flip, and Opacity
- You can resize the image position through the circles and squares at the image edges.
- To flip or rotate the image, double-click on the picture. From the “Image Panel,” go to “Transform” and then click on “Rotate.” You can choose either “Horizontal Flip” or “Vertical Flip” to flip the images.
- Double-click on the image and click on the “Composting” option to add opacity. You can choose the blending mode or adjust the “Opacity” accordingly.
For Mac
Filmora for Mac comes with a drag and drop feature to add transitions, animated titles, and effects. You can start a new project from scratch by clicking on “New Project”. The entire process is the same as that for Windows users.
To apply animation in the images, use the motion effects option. For that,
- Click on the Image
- Go to Motion Tab
- Select a motion effect
- Double-click to apply the effect
Conclusion
So that’s how to animate photos in Canva. Hopefully, our steps will help you revamp your posts like a pro! If not Canva, you can use its alternative Filmora. It’s equally prominent, user-friendly, and feature-rich.
Versatile Video Editor - Wondershare Filmora
An easy yet powerful editor
Numerous effects to choose from
Detailed tutorials provided by the official channel
Also read:
- Updated Best 10 Old Cartoons From Cartoon Network That You Miss
- In 2024, Is Blender 2D Animation As Awesome As 3D?
- In 2024, Top 12 Video to GIF Converters High Quality to Check Out
- New How to Make Well Done Animated GIF By Yourself, In 2024
- New In 2024, Learn All About 3D Logo Animation and Templates
- New Have You Seen the Facebook Cartoon App Everyones Using Recently for 2024
- All About 3D Medical Animation And Its Uses for 2024
- 2024 Approved 5 Must Try Ways to Add GIF in Text Message on Android
- Updated 10 Cartoon Character Makers to Create Animated Characters for 2024
- New 2024 Approved Before You Learn 3D Animation Things You Should Know
- Updated 6 Types of Animation You May Like
- New Why These 10+ Top Text Motion Templates Are Worth Your Attention
- Updated 2024 Approved Great Ways to Make Claymation Videos
- In 2024, The Ultimate Cheatsheet to 15 Adobe Animate Alternatives
- New 2024 Approved How to Make a Photoshop Collage in Simple Steps
- Updated In 2024, Top 10 Sketch Animation Video Makers
- Updated In 2024, Popular Tips on Learning Animate Rigging
- New 2024 Approved The Secret Sauce for Making GIF Instagram Story More Aesthetic
- Updated Best GIF to Video Converters for 2024
- New Top 10 Animated Photo Collage Apps You Should Know
- New In 2024, Top 3 Ways to Create Gif with Great 3D Gif Maker
- New 2024 Approved Animated Collage Maker Tips
- How To Create Pinterest Slideshow in Simple Ways
- New In 2024, Christmas Is Coming! How to Find & Make Animated Christmas GIFs?
- Updated A Beginners Guide to Explain What 3D Animation Is for 2024
- In 2024, Full Guide to Bypass Oppo F25 Pro 5G FRP
- In 2024, Why Apple Account Disabled From your iPhone 12 Pro? How to Fix
- In 2024, Unlock Your Realme C33 2023 Phone with Ease The 3 Best Lock Screen Removal Tools
- Hacks to do pokemon go trainer battles For Motorola Moto G84 5G | Dr.fone
- In 2024, 8 Ways to Transfer Photos from Nokia C12 Pro to iPhone Easily | Dr.fone
- Planning to Use a Pokemon Go Joystick on Apple iPhone 12? | Dr.fone
- The Ever-Changing Era of AI Video Translation A Reality to Be Fulfilled for 2024
- 11 Best Location Changers for Motorola Moto E13 | Dr.fone
- Fixes for Apps Keep Crashing on Vivo S17 Pro | Dr.fone
- In 2024, How to Bypass FRP on Xiaomi Redmi K70?
- Why Your WhatsApp Location is Not Updating and How to Fix On Samsung Galaxy M54 5G | Dr.fone
- The Best 8 VPN Hardware Devices Reviewed On Oppo K11x | Dr.fone
- How To Fix iPhone SE (2022) Unavailable Issue With Ease | Dr.fone
- How Do You Get Sun Stone Evolutions in Pokémon For Poco M6 5G? | Dr.fone
- What To Do When Motorola Defy 2 Has Black Screen of Death? | Dr.fone
- New Easy Ways to Translate TikTok Videos for 2024
- Bypass Tools to Bypass Lock Screen(P40+)
- Top 15 Augmented Reality Games Like Pokémon GO To Play On Realme C67 4G | Dr.fone
- Hacks to do pokemon go trainer battles For Vivo V30 | Dr.fone
- Title: Top 10 Best Batman Anime Movies 2024 Updated
- Author: Elon
- Created at : 2024-06-08 05:07:39
- Updated at : 2024-06-09 05:07:39
- Link: https://animation-videos.techidaily.com/top-10-best-batman-anime-movies-2024-updated/
- License: This work is licensed under CC BY-NC-SA 4.0.
