
:max_bytes(150000):strip_icc():format(webp)/podcasts-safeforkids-5b2f3dd4eb97de0036d9f87b.jpg)
Top 10 Video to GIF Converters Top Picks for 2024
Top 10 Video to GIF Converters: Top Picks
Best 10 Video to GIF Converters: Top Picks
An easy yet powerful editor
Numerous effects to choose from
Detailed tutorials provided by the official channel
Having trouble converting your videos to GIF? Browse the top 10 converters to sort this out!
In this article
01 [Why GIFs are Widely Used and Popular?](#Part 1)
02 [Top 10 Ways to Turn Video into GIF](#Part 2)
Part 1 Why GIFs are Widely Used and Popular?
If you take a poll on the watch preference of GIF versus videos, most of votes you get would be in favor of watching GIFs. There are obvious reasons to the fact that anyone would prefer watching a GIF over a video, irrespective of its length. Some major ones that make it quite annoying to watch videos include the following:
● To begin with, you need to turn the video on and off, depending on your choice of watching a video or surfing through stories and feeds, failing which you get to hear additional sounds through your feed from the already running video. You further need to stop the music or go for a volume control in case you are not interested to watch the video.
● Most of the videos you run turn up to be irrelevant or uninteresting through the middle, but you don’t have a choice to make bit adjustments. If however possible, the method is not quite convenient. You may need to visit a different site in case you run a video that is not integrated with webpage of your searched content, wait for the portal’s interface to load or watch an advertisement.
● GIFs, on the other hand, do not require pausing or turning off, and run automatically. You also don’t need to mute any sounds. These ensure to-the-point message delivery and don’t divert your attention from the primary content you visit the webpage for.
Owing to the above, most of us are now much interested to convert videos to GIFs for an exact, impactful and to the point content creation and sharing. See through the next sections of this article to learn about the best video to GIF conversion tools and software.
Part 1 Top 10 Ways to Turn Video into GIF
Considering the credibility of GIFs, you may often require to convert your long videos into short and content specific GIFs. Given below are the 10 best methods to cater to the need of video to GIF conversion:
01Filmora
Wondershare Filmora Video Editor is one among the most popular and easy methods to convert videos to GIFs. It is compatible with almost all common video formats and is loaded with a plethora of exciting effects and editing tools. Take the following steps to create GIFs from videos using this application:
Wondershare Filmora
Get started easily with Filmora’s powerful performance, intuitive interface, and countless effects!
Try It Free Try It Free Try It Free Learn More >


Step 1: Import Your Video
Launch Filmora and import your desired video in the app’s welcome window. To do this, click on ‘New Project’ followed by ‘Import’ option from the drop down menu to add your video to the Filmora.

Step 2: Timeline Dragging
Add your video to the app’s timeline using the ‘Drag and Drop’ method. You can also extract video frames by taking screenshots and merge these images into your GIF from the media library.

Step 3: Explore Your Editing Skills
You can now edit the imported video in the timeline using a range of interesting effects. Crop, trim, split or make speed adjustments to give your video a catchy look.

Step 4: Include Messages
Try adding texts and supplementary elements to deliver impactful messages through your creation.

Step 5: It’s Time to Share!
Click ‘Export’ to save your GIF to your device. You are now ready to post your work in your social communities to get the most deserved attention of your peers!

02YouTube to GIF
This one is a simple and user-friendly video to GIF converter. You can convert videos to GIFs from your PC or other online platforms with this converter. The converter allows you to play with a variety of editing effects to make your creation more interesting. All you need to do is the following:
● In the video URL bar, type ‘gif’ after ‘www.’ and you will be redirected to converter’s working window. Set the GIF time interval or apply specific effects using the tools from the panel in the left of the working window.


● To set the video time frame, highlight it in the video timeline. Set the desired interval using the ‘Start Time’ and ‘End Time’ options.

● To add a new visual effect, select it from the menu. Below the video timeline, a row of parameters will get displayed. Set the effect parameters to make desired changes.
● Click ‘Create GIF’. In the ‘Settings’ menu, you can rename and add tags to your creation and even make it private.

● That’s it! You can download your GIF now. You may get a converter purchase offer for enabling advanced features. While most users prefer sticking to the free version, it is up to you whether to decline or accept the purchase offer.
● The ‘Download’ feature is exclusive to registered users. However, if you don’t prefer creating an account, just open the GIF download link in a separate tab’s ‘Direct Link’ row. Alternatively, you can replace ‘gif’ with ‘conv’ in the video URL bar and choose ‘Convert to GIF’. However, this process may take some extra minutes.

03Giphy GIF Maker
This is an editing tool that you can use to convert video to GIF online. This one is a reliable converter tool with a user-cohesive interface. It is a simple video editor that is available to you for free. All you need to do is mentioned below:
Step 1: Load your Video
Go to the official app website and paste your desired video link in the search bar. Your video gets uploaded to the app’s editor screen. Specify the time frame and check out your GIF’s preview.

Step 2: Let’s Go Editing!
Select ‘Continue to Decorate’ to edit your GIF with texts, effects, frames and filters. You can even go for a straight upload if your video doesn’t require customization.

Step 3: Time to Share!
Select ‘Continue to Upload’ and add required tags. Tap ‘Upload to Giphy’ to make a social media post or add it to the app’s website through a specific share code.
04Wondershare TunesGo
This is an effective video to GIF creator tool, loaded with extensive features. You can use this application to convert videos, live photos and multiple snaps into interesting GIFs. TunesGo gives you the freedom to edit your work in your own style with a variety of effects. Here’s what you need to do:

Step 1: Launch TunesGo
Download, install and launch the app into your PC. You may be asked for a device connection setup, but you can skip that in case GIF creation is your only requirement.

Step 2: Upload your Video
In the app’s welcome screen, navigate to ‘Toolbox’ at the top. From the drop down interface, choose ‘GIF Maker’. In the new window that pops-up next, click on ‘Add’ to upload the desired video to the app from your PC.

Step 3: Let’s Create!
Set the required time frame for your GIF in the app’s timeline and tap the ‘Create GIF’ button to start the conversion process. On completion, your work gets automatically saved in the ‘Pictures’ folder in your PC. You can also customize your target location.

05Vimeo
Vimeo is also a quick, 3-stepvideo to GIF converter. However, you need to have a Vimeo account to take up the conversion process. This is an easy and hassle free GIF creator, that adheres to your creation needs within minutes. Here’s what you need to do:
Step 1: Upload Your Video
Log in to your Vimeo account. In the opening window, select ’Upload’ from the toolbar at the top. ‘Drag and Drop’ or click ‘Choose Files’ to upload the desired video from your device.

Step 2: Create Your GIF
After you are done uploading the video, select ‘Create a GIF’ from the sidebar at the left. You will be directed to the GIF Editor window. Select a loop section from the video and set a time frame of maximum 6 seconds in the video timeline. Now click ‘Create GIF’.


Step 3: Export Your Creation
Your GIF is ready to download and share. You can also embed your GIF by generating embed codes for specific platforms.
06 Adobe Photoshop
This one is one f the most popular editing applications you can use to make GIF out of video. It’s simple and user-friendly interface does not require you to possess a Photoshop mastery for the conversion purpose. Here’s what you need to follow:
Step 1: Search Your Video
Find a video of your choice from a desired platform. In case you want a YouTube video, add ‘ss’ prior to the video’s service name in YouTube’s URL bar.
STEP 2: Edit Your Video
Use any preferable video splitters and editors to crop, trim and add interesting effects to your video and set a maximum time frame of 3 seconds.
Step 3: Create GIF
Open your edited video in Adobe Photoshop and tap ‘File Import-Video frames into layers’.

Step 4: Adjust Settings
Make required setting adjustments and click on ‘File-Save for Web’. Try adjusting image resolution and color range if your file size exceeds 10 MB.

Step 5: Save Your Work
In the ’Files’ tab at the top, select ‘Save’ and choose the ‘.gif’ extension in the ‘File Type’ dialog box to save your creation to your PC.
07Convertio
This converter provides a simple, 3-step process to create GIF from video. Either use it as a browser extension or download it from Google Chrome Webstore. Take the following steps to convert videos to GIF online.
● Upload your desired video to the service timeline. You can either choose files directly or ‘Drag and Drop’ them from your device.
● Select ‘Convert’ to make GIF from your uploaded video.
● Tap ‘Download’ to save your creation.

You can use this service to make different format conversions. However, this converter does not allow you to edit or add effects your GIF.
08MakeAGif
You can use this tool as a GIF video maker online to create, exchange and share GIFs on different platforms. Additionally, you also get the flexibility to use already saved images in your device to add them to your GIF. The app’s basic version allows you to create GIFs without watermarks. To add watermarks, you will need an account on the app. To convert videos to GIFs using this tool, you should take the following steps:
Step 1: Upload Your Video
In the app’s welcome screen, click on ‘Video to GIF’ and upload a desired video in the editor timeline. Add effects and make speed and time frame adjustments. When satisfied, tap ‘Continue to Publishing’.

Step 2: Add Names and Tags
In the publishing window, give a suitable name and add required tags to your edited video to make it easily identifiable. When you are done, click on ‘Create a GIF’ from the bottom right.

Step 3: Ready to Share!
You can now share your created GIF across social media platforms.

09Adobe Premiere
Similar to Adobe Photoshop, Adobe Premiere too is quite a preferred application for creating GIFs from videos. This is a simple, quick and free application that converts your videos to GIFs in a span of few minutes. Here’s what you need to do to go about the process:

Step 1: Edit your Video
Add a video of your choice in the Adobe Premiere timeline and play with your editing creativity to add desired effects and filters to it. Make sure to set requisite time frames to your edit.

Step 2: Prepare an Export
Click into the app’s video timeline, and prepare a file export using the following path:
File> Export> Media

Step 3: Settings Adjustments
In the Media Export window, navigate to the ‘Format’ tab. From the drop down menu, choose ‘Animated GIF’. Here, you can add your gif file, select its target destination and adjust the required settings.

Step 4: Export Your Work
Click ‘Export’ to share your creation on social media or click on ‘Queue’ to send your GIF to a specific media encoder.

1010. Movavi Video Converter
This is one of the latest video converter software you can rely on to make GIF from video files. This software allows you to create top quality animated GIFs and is compatible with a variety of video formats. Using this converter, you can create amazing GIFs in 5 quick steps: here’s what you need to follow:
Step 1: Download and Install the Software
To begin, download the converter software from its official site and adhere to the user instructions to install the same in your system.
Step 2: Upload Your Video
In the software’s opening window, click on ‘Add Media’ followed by ‘Add Video’ and select a desired video from your system to upload on the Movavi video timeline.

Step 3: Trim Your Video
Select ‘Edit’ from the right of your video file. In the editing window, specify the initial cut of the video by displacing the marker to the desired point. Click on ‘Scissors’ to add multiple cut points to your video. You can even drag the cut points around the editor timeline. Choose the unvented sections and click ‘Trash Can’. When the result satisfies you, click ‘Done’.

Step 4: Choose a Conversion Format
Navigate to the ‘Images’ tab and select ‘GIF’ and set an adequate size for the GIF. Here, you can adjust quality, frame size and rate and resize method using the ‘Cogwheel’ tool.

Step 5: Let’s Get Converting!
Tap ‘Convert’ and wait for the conversion to finish. You will be automatically directed to the folder where your converted files get saved.

● Key Takeaways from This Episode →
● GIFs are short, to the point and convenient to access, providing exact and impactful message delivery.
● The software market is flooded with a variety of editing tools to convert your dull videos to catchy GIFs.
● Filmora is a quick and smart editing tool that envisages your GIF creating experience with a range of exciting features.
Having trouble converting your videos to GIF? Browse the top 10 converters to sort this out!
In this article
01 [Why GIFs are Widely Used and Popular?](#Part 1)
02 [Top 10 Ways to Turn Video into GIF](#Part 2)
Part 1 Why GIFs are Widely Used and Popular?
If you take a poll on the watch preference of GIF versus videos, most of votes you get would be in favor of watching GIFs. There are obvious reasons to the fact that anyone would prefer watching a GIF over a video, irrespective of its length. Some major ones that make it quite annoying to watch videos include the following:
● To begin with, you need to turn the video on and off, depending on your choice of watching a video or surfing through stories and feeds, failing which you get to hear additional sounds through your feed from the already running video. You further need to stop the music or go for a volume control in case you are not interested to watch the video.
● Most of the videos you run turn up to be irrelevant or uninteresting through the middle, but you don’t have a choice to make bit adjustments. If however possible, the method is not quite convenient. You may need to visit a different site in case you run a video that is not integrated with webpage of your searched content, wait for the portal’s interface to load or watch an advertisement.
● GIFs, on the other hand, do not require pausing or turning off, and run automatically. You also don’t need to mute any sounds. These ensure to-the-point message delivery and don’t divert your attention from the primary content you visit the webpage for.
Owing to the above, most of us are now much interested to convert videos to GIFs for an exact, impactful and to the point content creation and sharing. See through the next sections of this article to learn about the best video to GIF conversion tools and software.
Part 1 Top 10 Ways to Turn Video into GIF
Considering the credibility of GIFs, you may often require to convert your long videos into short and content specific GIFs. Given below are the 10 best methods to cater to the need of video to GIF conversion:
01Filmora
Wondershare Filmora Video Editor is one among the most popular and easy methods to convert videos to GIFs. It is compatible with almost all common video formats and is loaded with a plethora of exciting effects and editing tools. Take the following steps to create GIFs from videos using this application:
Wondershare Filmora
Get started easily with Filmora’s powerful performance, intuitive interface, and countless effects!
Try It Free Try It Free Try It Free Learn More >
Step 1: Import Your Video
Launch Filmora and import your desired video in the app’s welcome window. To do this, click on ‘New Project’ followed by ‘Import’ option from the drop down menu to add your video to the Filmora.
Step 2: Timeline Dragging
Add your video to the app’s timeline using the ‘Drag and Drop’ method. You can also extract video frames by taking screenshots and merge these images into your GIF from the media library.
Step 3: Explore Your Editing Skills
You can now edit the imported video in the timeline using a range of interesting effects. Crop, trim, split or make speed adjustments to give your video a catchy look.
Step 4: Include Messages
Try adding texts and supplementary elements to deliver impactful messages through your creation.
Step 5: It’s Time to Share!
Click ‘Export’ to save your GIF to your device. You are now ready to post your work in your social communities to get the most deserved attention of your peers!
02YouTube to GIF
This one is a simple and user-friendly video to GIF converter. You can convert videos to GIFs from your PC or other online platforms with this converter. The converter allows you to play with a variety of editing effects to make your creation more interesting. All you need to do is the following:
● In the video URL bar, type ‘gif’ after ‘www.’ and you will be redirected to converter’s working window. Set the GIF time interval or apply specific effects using the tools from the panel in the left of the working window.
● To set the video time frame, highlight it in the video timeline. Set the desired interval using the ‘Start Time’ and ‘End Time’ options.
● To add a new visual effect, select it from the menu. Below the video timeline, a row of parameters will get displayed. Set the effect parameters to make desired changes.
● Click ‘Create GIF’. In the ‘Settings’ menu, you can rename and add tags to your creation and even make it private.
● That’s it! You can download your GIF now. You may get a converter purchase offer for enabling advanced features. While most users prefer sticking to the free version, it is up to you whether to decline or accept the purchase offer.
● The ‘Download’ feature is exclusive to registered users. However, if you don’t prefer creating an account, just open the GIF download link in a separate tab’s ‘Direct Link’ row. Alternatively, you can replace ‘gif’ with ‘conv’ in the video URL bar and choose ‘Convert to GIF’. However, this process may take some extra minutes.
03Giphy GIF Maker
This is an editing tool that you can use to convert video to GIF online. This one is a reliable converter tool with a user-cohesive interface. It is a simple video editor that is available to you for free. All you need to do is mentioned below:
Step 1: Load your Video
Go to the official app website and paste your desired video link in the search bar. Your video gets uploaded to the app’s editor screen. Specify the time frame and check out your GIF’s preview.
Step 2: Let’s Go Editing!
Select ‘Continue to Decorate’ to edit your GIF with texts, effects, frames and filters. You can even go for a straight upload if your video doesn’t require customization.
Step 3: Time to Share!
Select ‘Continue to Upload’ and add required tags. Tap ‘Upload to Giphy’ to make a social media post or add it to the app’s website through a specific share code.
04Wondershare TunesGo
This is an effective video to GIF creator tool, loaded with extensive features. You can use this application to convert videos, live photos and multiple snaps into interesting GIFs. TunesGo gives you the freedom to edit your work in your own style with a variety of effects. Here’s what you need to do:
Step 1: Launch TunesGo
Download, install and launch the app into your PC. You may be asked for a device connection setup, but you can skip that in case GIF creation is your only requirement.
Step 2: Upload your Video
In the app’s welcome screen, navigate to ‘Toolbox’ at the top. From the drop down interface, choose ‘GIF Maker’. In the new window that pops-up next, click on ‘Add’ to upload the desired video to the app from your PC.
Step 3: Let’s Create!
Set the required time frame for your GIF in the app’s timeline and tap the ‘Create GIF’ button to start the conversion process. On completion, your work gets automatically saved in the ‘Pictures’ folder in your PC. You can also customize your target location.
05Vimeo
Vimeo is also a quick, 3-stepvideo to GIF converter. However, you need to have a Vimeo account to take up the conversion process. This is an easy and hassle free GIF creator, that adheres to your creation needs within minutes. Here’s what you need to do:
Step 1: Upload Your Video
Log in to your Vimeo account. In the opening window, select ’Upload’ from the toolbar at the top. ‘Drag and Drop’ or click ‘Choose Files’ to upload the desired video from your device.
Step 2: Create Your GIF
After you are done uploading the video, select ‘Create a GIF’ from the sidebar at the left. You will be directed to the GIF Editor window. Select a loop section from the video and set a time frame of maximum 6 seconds in the video timeline. Now click ‘Create GIF’.
Step 3: Export Your Creation
Your GIF is ready to download and share. You can also embed your GIF by generating embed codes for specific platforms.
06 Adobe Photoshop
This one is one f the most popular editing applications you can use to make GIF out of video. It’s simple and user-friendly interface does not require you to possess a Photoshop mastery for the conversion purpose. Here’s what you need to follow:
Step 1: Search Your Video
Find a video of your choice from a desired platform. In case you want a YouTube video, add ‘ss’ prior to the video’s service name in YouTube’s URL bar.
STEP 2: Edit Your Video
Use any preferable video splitters and editors to crop, trim and add interesting effects to your video and set a maximum time frame of 3 seconds.
Step 3: Create GIF
Open your edited video in Adobe Photoshop and tap ‘File Import-Video frames into layers’.
Step 4: Adjust Settings
Make required setting adjustments and click on ‘File-Save for Web’. Try adjusting image resolution and color range if your file size exceeds 10 MB.
Step 5: Save Your Work
In the ’Files’ tab at the top, select ‘Save’ and choose the ‘.gif’ extension in the ‘File Type’ dialog box to save your creation to your PC.
07Convertio
This converter provides a simple, 3-step process to create GIF from video. Either use it as a browser extension or download it from Google Chrome Webstore. Take the following steps to convert videos to GIF online.
● Upload your desired video to the service timeline. You can either choose files directly or ‘Drag and Drop’ them from your device.
● Select ‘Convert’ to make GIF from your uploaded video.
● Tap ‘Download’ to save your creation.
You can use this service to make different format conversions. However, this converter does not allow you to edit or add effects your GIF.
08MakeAGif
You can use this tool as a GIF video maker online to create, exchange and share GIFs on different platforms. Additionally, you also get the flexibility to use already saved images in your device to add them to your GIF. The app’s basic version allows you to create GIFs without watermarks. To add watermarks, you will need an account on the app. To convert videos to GIFs using this tool, you should take the following steps:
Step 1: Upload Your Video
In the app’s welcome screen, click on ‘Video to GIF’ and upload a desired video in the editor timeline. Add effects and make speed and time frame adjustments. When satisfied, tap ‘Continue to Publishing’.
Step 2: Add Names and Tags
In the publishing window, give a suitable name and add required tags to your edited video to make it easily identifiable. When you are done, click on ‘Create a GIF’ from the bottom right.
Step 3: Ready to Share!
You can now share your created GIF across social media platforms.
09Adobe Premiere
Similar to Adobe Photoshop, Adobe Premiere too is quite a preferred application for creating GIFs from videos. This is a simple, quick and free application that converts your videos to GIFs in a span of few minutes. Here’s what you need to do to go about the process:
Step 1: Edit your Video
Add a video of your choice in the Adobe Premiere timeline and play with your editing creativity to add desired effects and filters to it. Make sure to set requisite time frames to your edit.
Step 2: Prepare an Export
Click into the app’s video timeline, and prepare a file export using the following path:
File> Export> Media
Step 3: Settings Adjustments
In the Media Export window, navigate to the ‘Format’ tab. From the drop down menu, choose ‘Animated GIF’. Here, you can add your gif file, select its target destination and adjust the required settings.
Step 4: Export Your Work
Click ‘Export’ to share your creation on social media or click on ‘Queue’ to send your GIF to a specific media encoder.
1010. Movavi Video Converter
This is one of the latest video converter software you can rely on to make GIF from video files. This software allows you to create top quality animated GIFs and is compatible with a variety of video formats. Using this converter, you can create amazing GIFs in 5 quick steps: here’s what you need to follow:
Step 1: Download and Install the Software
To begin, download the converter software from its official site and adhere to the user instructions to install the same in your system.
Step 2: Upload Your Video
In the software’s opening window, click on ‘Add Media’ followed by ‘Add Video’ and select a desired video from your system to upload on the Movavi video timeline.
Step 3: Trim Your Video
Select ‘Edit’ from the right of your video file. In the editing window, specify the initial cut of the video by displacing the marker to the desired point. Click on ‘Scissors’ to add multiple cut points to your video. You can even drag the cut points around the editor timeline. Choose the unvented sections and click ‘Trash Can’. When the result satisfies you, click ‘Done’.
Step 4: Choose a Conversion Format
Navigate to the ‘Images’ tab and select ‘GIF’ and set an adequate size for the GIF. Here, you can adjust quality, frame size and rate and resize method using the ‘Cogwheel’ tool.
Step 5: Let’s Get Converting!
Tap ‘Convert’ and wait for the conversion to finish. You will be automatically directed to the folder where your converted files get saved.
● Key Takeaways from This Episode →
● GIFs are short, to the point and convenient to access, providing exact and impactful message delivery.
● The software market is flooded with a variety of editing tools to convert your dull videos to catchy GIFs.
● Filmora is a quick and smart editing tool that envisages your GIF creating experience with a range of exciting features.
How to Make 3D Cartoon of Yourself
How to Make a 3D Cartoon of Yourself
An easy yet powerful editor
Numerous effects to choose from
Detailed tutorials provided by the official channel
From among the several trends that emerged on Social Media, making a 3D cartoon of yourself is probably the most popular.
Learning how to make 3D cartoons may just be in the height of demand in the near future.
In this article
01 [What is AI Artist? Plus how to cartoon yourself with it ](#Part 1)
02 [How to Create a 3D Cartoon of Yourself for Meta ](#Part 2)
03 [How to make 3D Cartoon From a Photo ](#Part 3)
04 [Five 3D cartoon Disney-Fied yourself apps ](#Part 4)
05 [More New Useful Tools to Upgrade Your Animation/Cartoon](#Part 5)
Part 1 What is AI Artist? Plus how to cartoon yourself with it
We all remember the Cartoon filter challenge on Facebook, right? Everyone was excited to transform themselves into a cartoon. The options of making personalized cartoon representations of yourself was pretty limited back then. With the Voila AI artist app you can choose at least 3 different cartoon variations of yourself.

The Voila AI artist app can be downloaded from the Apple App store and Android Play Store. You can use the app for free but for faster editing and an ad free experience, you will need to upgrade to the paid version. Other than just creating a cartoon of yourself, you can also create renaissance portraits and caricatures.
● Step 1: Download the Voila AI artist App for your device, and complete the installation process. Allow the app to access your Phone’s Camera rolling permission.
● Step 2: Select the style option you want to use. What we are using here is 3D cartoon (other options: 2D Cartoon, Caricature & and the rest). Touch the arrow and start.
● Step 3: Now, with your camera roll open, click a new one or choose from your gallery. You can also find a celebrities option where you can search for celebrities. This generates a four-grid choice. If you are using the free version, then be prepared to encounter one or two ads. After a few seconds, you can exit out and get back to your images.
● Step 4: You will receive a composite grid of four options; your original image, plus three cartoon representations (Royalty 3D, Baby 3D & Cartoon 3D). Here, you can select the option you like the most and start editing. Locate the up arrow button to immediately share on your preferred social media or simply save a copy in your device.
If the AI artist app has any paid and premium version, upon subscribing you will get ad free & watermark free animated representations.
Part 2 How to Create a 3D Cartoon of Yourself for Meta
Facebook only recently rebranded themselves as Meta. This has now started the rush to create a live virtual interaction space, and big companies like Microsoft and Nvidia are now competing with each other to bridge the gap.
Soon, activities like convening meetings, attending live events or even dating online would take place in virtual environments. So best be prepared for the future by creating a 3D avatar for yourself.
Your virtual avatar would be able to interact with the real world through a virtual platform by using VR headsets and other tech. Sensing your virtual presence would be almost the same as the real world for your peers and colleagues. You can attend a meeting without ever having to travel.
The process behind creating a 3D cartoon of yourself for Meta platforms starts by establishing a facial rig which is like a framework for the cartoon animations to sit on. These days, most apps come with automatic FACS facial rigging which is why certain Instagram filters like the Puppy nose filter was possible.
Presently, creating a complete 3D virtual model of yourself is a bit complicated to do on your own but soon this service will be automated in an app for you.
Part 3 How to make 3D Cartoon From a Photo
Photoshop is no doubt one of the most influential digital assets that allow you to do virtually anything with your photos. Of course, this includes turning your photos into 3D cartoon.
There are advanced techniques and tools you can use to retouch your image to achieve an animated like look for your portraits.
Of course, you can find multiple Photoshop hacks online but the following guide can give you an easy to follow idea of how to go about creating your own 3D cartoon out of an image.

Note; These steps are to be perceived as a simplified overview of your objectives when editing on Photoshop;
● To start out on turning your image into a 3D character, you need to learn how to create layers and then stack them on each other.
● You can then ‘liquify’ these layers to form a mould for your image.
● Apply skin softening techniques to take away the realistic features of the photo before working on turning it into a cartoon.
● Now you can start focus on applying the details to features like eyes, hair, nose and facial lines on your cartoon image.
● You can also change the colour of any individual features on your image. This method is applicable in making caricatures of your photo as well.
Part 4 Five 3D cartoon Disney-Fied yourself apps
Vibrant colours, gorgeous large eyes and shiny hair – pretty much sums up every Disney character you have ever seen. Now, everyone is obsessed with making their own Disney avatar and for good reason. You can use it as filter or upload it on your profile. Here are some of the most in-trend AI powered 3D Disneyfied apps you can use;
01Voila AI Artist

The Voila AI Artist app was released back in March of 2021 and has been the rage among Disneyfied apps. To clarify, the app has nothing to do with the Disney animation company but is perceived by users as the most successful app for disneyfication. Its on-board AI can create 3D and 2D renderings for your image along with hand drawn caricatures. You can download the app on App Store and Google Play.
02ToonMe

The next best app on our Disneyfied list is ToonMe. It also uses AI to turn photos into Disney Characters. The app keeps updating new cartoonish filters which you can use over your images. There are various other features which you can try as well like recreating your photos into classic vectors. The results are of extraordinary quality and can be uploaded on Instagram. You can download the app for free from Play store and App store.
03Snapchat

Snapchat has been around for some time now so you might already have it on your phone. Snapchat offers a vast range of filters and effects that of course includes Disneyfied filters and 3D cartoon images. You can look for them on the Snapchat search bar. New filters keep popping up every day which you can apply over your own images.
04Prisma

Prisma is a notoriously well know pop photo editor – which means it makes your photos ‘pop’. You can use it to edit photos on both Android and iPhone. It also comes with its own range of filters for turning your photos into cartoon images. There are hundreds of variations to choose from so you will definitely be spoilt for choices.
05Clip2Comic Cartoon

This app is only available on the App stores and is well known among iPhone users for turning photos into cartoons and caricatures. It is not exactly a Disneyfied app but it has a plethora of filters and a combination of editing tools to help personalize your 3D photos and comics. You can also directly upload these photos to your Social Media Accounts.
Key Takeaways from This Episode
● With the help of AI and other amazing features, you can use your everyday pictures to make a 3D cartoon of yourself.
● The Metaverse is her and soon we all will be interacting in a virtual space. So best learn how to rig your face with an animation filter.
● Apps like Voila AI artist, you can disneyfy your images quite easily. Explore dozens of such filters and effects with Disneyfied apps.
From among the several trends that emerged on Social Media, making a 3D cartoon of yourself is probably the most popular.
Learning how to make 3D cartoons may just be in the height of demand in the near future.
In this article
01 [What is AI Artist? Plus how to cartoon yourself with it ](#Part 1)
02 [How to Create a 3D Cartoon of Yourself for Meta ](#Part 2)
03 [How to make 3D Cartoon From a Photo ](#Part 3)
04 [Five 3D cartoon Disney-Fied yourself apps ](#Part 4)
05 [More New Useful Tools to Upgrade Your Animation/Cartoon](#Part 5)
Part 1 What is AI Artist? Plus how to cartoon yourself with it
We all remember the Cartoon filter challenge on Facebook, right? Everyone was excited to transform themselves into a cartoon. The options of making personalized cartoon representations of yourself was pretty limited back then. With the Voila AI artist app you can choose at least 3 different cartoon variations of yourself.
The Voila AI artist app can be downloaded from the Apple App store and Android Play Store. You can use the app for free but for faster editing and an ad free experience, you will need to upgrade to the paid version. Other than just creating a cartoon of yourself, you can also create renaissance portraits and caricatures.
● Step 1: Download the Voila AI artist App for your device, and complete the installation process. Allow the app to access your Phone’s Camera rolling permission.
● Step 2: Select the style option you want to use. What we are using here is 3D cartoon (other options: 2D Cartoon, Caricature & and the rest). Touch the arrow and start.
● Step 3: Now, with your camera roll open, click a new one or choose from your gallery. You can also find a celebrities option where you can search for celebrities. This generates a four-grid choice. If you are using the free version, then be prepared to encounter one or two ads. After a few seconds, you can exit out and get back to your images.
● Step 4: You will receive a composite grid of four options; your original image, plus three cartoon representations (Royalty 3D, Baby 3D & Cartoon 3D). Here, you can select the option you like the most and start editing. Locate the up arrow button to immediately share on your preferred social media or simply save a copy in your device.
If the AI artist app has any paid and premium version, upon subscribing you will get ad free & watermark free animated representations.
Part 2 How to Create a 3D Cartoon of Yourself for Meta
Facebook only recently rebranded themselves as Meta. This has now started the rush to create a live virtual interaction space, and big companies like Microsoft and Nvidia are now competing with each other to bridge the gap.
Soon, activities like convening meetings, attending live events or even dating online would take place in virtual environments. So best be prepared for the future by creating a 3D avatar for yourself.
Your virtual avatar would be able to interact with the real world through a virtual platform by using VR headsets and other tech. Sensing your virtual presence would be almost the same as the real world for your peers and colleagues. You can attend a meeting without ever having to travel.
The process behind creating a 3D cartoon of yourself for Meta platforms starts by establishing a facial rig which is like a framework for the cartoon animations to sit on. These days, most apps come with automatic FACS facial rigging which is why certain Instagram filters like the Puppy nose filter was possible.
Presently, creating a complete 3D virtual model of yourself is a bit complicated to do on your own but soon this service will be automated in an app for you.
Part 3 How to make 3D Cartoon From a Photo
Photoshop is no doubt one of the most influential digital assets that allow you to do virtually anything with your photos. Of course, this includes turning your photos into 3D cartoon.
There are advanced techniques and tools you can use to retouch your image to achieve an animated like look for your portraits.
Of course, you can find multiple Photoshop hacks online but the following guide can give you an easy to follow idea of how to go about creating your own 3D cartoon out of an image.
Note; These steps are to be perceived as a simplified overview of your objectives when editing on Photoshop;
● To start out on turning your image into a 3D character, you need to learn how to create layers and then stack them on each other.
● You can then ‘liquify’ these layers to form a mould for your image.
● Apply skin softening techniques to take away the realistic features of the photo before working on turning it into a cartoon.
● Now you can start focus on applying the details to features like eyes, hair, nose and facial lines on your cartoon image.
● You can also change the colour of any individual features on your image. This method is applicable in making caricatures of your photo as well.
Part 4 Five 3D cartoon Disney-Fied yourself apps
Vibrant colours, gorgeous large eyes and shiny hair – pretty much sums up every Disney character you have ever seen. Now, everyone is obsessed with making their own Disney avatar and for good reason. You can use it as filter or upload it on your profile. Here are some of the most in-trend AI powered 3D Disneyfied apps you can use;
01Voila AI Artist
The Voila AI Artist app was released back in March of 2021 and has been the rage among Disneyfied apps. To clarify, the app has nothing to do with the Disney animation company but is perceived by users as the most successful app for disneyfication. Its on-board AI can create 3D and 2D renderings for your image along with hand drawn caricatures. You can download the app on App Store and Google Play.
02ToonMe
The next best app on our Disneyfied list is ToonMe. It also uses AI to turn photos into Disney Characters. The app keeps updating new cartoonish filters which you can use over your images. There are various other features which you can try as well like recreating your photos into classic vectors. The results are of extraordinary quality and can be uploaded on Instagram. You can download the app for free from Play store and App store.
03Snapchat
Snapchat has been around for some time now so you might already have it on your phone. Snapchat offers a vast range of filters and effects that of course includes Disneyfied filters and 3D cartoon images. You can look for them on the Snapchat search bar. New filters keep popping up every day which you can apply over your own images.
04Prisma
Prisma is a notoriously well know pop photo editor – which means it makes your photos ‘pop’. You can use it to edit photos on both Android and iPhone. It also comes with its own range of filters for turning your photos into cartoon images. There are hundreds of variations to choose from so you will definitely be spoilt for choices.
05Clip2Comic Cartoon
This app is only available on the App stores and is well known among iPhone users for turning photos into cartoons and caricatures. It is not exactly a Disneyfied app but it has a plethora of filters and a combination of editing tools to help personalize your 3D photos and comics. You can also directly upload these photos to your Social Media Accounts.
Key Takeaways from This Episode
● With the help of AI and other amazing features, you can use your everyday pictures to make a 3D cartoon of yourself.
● The Metaverse is her and soon we all will be interacting in a virtual space. So best learn how to rig your face with an animation filter.
● Apps like Voila AI artist, you can disneyfy your images quite easily. Explore dozens of such filters and effects with Disneyfied apps.
How to Reduce GIF Size and Best GIF Resizers
How to Reduce GIF Size and Best GIF Resizers

Shanoon Cox
Mar 27, 2024• Proven solutions
With the increasing popularity of Smartphones, people these days are experiencing all new things with lots of excitement. And GIFs are always the most interesting content for them. When we talk about limited band width and fast loading time solutions then GIFs are the first options in front of our eyes. These files use to have small size so they can be transferred and downloaded with ease and at faster rate. If you are interested to know about various resizing concepts related to GIFs then the article below can be helpful for you.
How to reduce GIF size?
There are so many things that contribute in managing overall size of GIFs. The list includes the colour count inside, dimensions of images that you have used for development of GIFs and number of frames included inside one GIF folder. In case if it is an animated GIF then size may increase accordingly. Somehow, if you become able to optimize your Gifs then it is much easier to share them over internet.
Photoshop is a great tool to edit your image, including gif images. Here we are going to show you how to make your GIF smaller in Photoshop.
1. Crop away any extra space around the image:
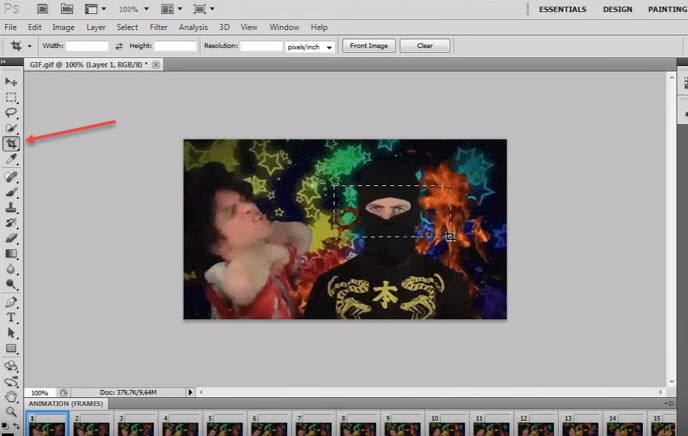
Image source: youtube.com
The very first task for users is to bring your GIF video file onto Photoshop timeline. Sometimes, it is not essential to update whole series of your GIF animation to the library, the GIF can be simply trimmed at timeline panel. One needs to turn on loop option and then be active enough to allocate the right place to trim your video.
2. Reduce dimensions of Output:

Image source: google.com
Those who are working on Photoshop CC 2017 version will be able to develop GIFs by simply executing Explore As option from menu. To do this, they need to move to files and then from drop down menu select Export as. Soon a menu will open where you need to choose your output file format as GIF and adjust weight and height parameter to reduce physical dimensions of your image.
In case if you are using Adobe Photoshop Elements 14 then on its interface, users need to move to File and then hit Save for Web option. It will help to open a Save for Web type dialogue box immediately, on this new window you can apply desired changes to physical dimensions of your content, reduce color information and apply dithering etc.
3. Adjust number of colors in image:
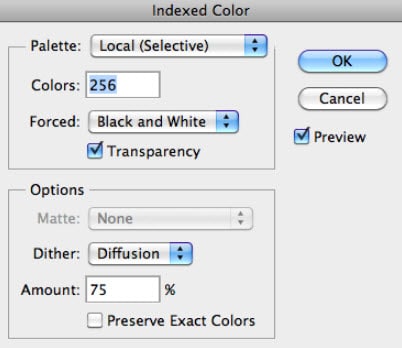
Image source: google.com
One of the most useful tricks for marketers is to optimize size of their GIF images by adjusting total number of colours to it. It can be done using color table tool that assists in easy selection and de-selection. This table use to contain about 256 unique colours and all of them use to contain 8 bit wide information. The best recommendation for good quality and small seize GIFs is to limit colours up to 64 only or keep then less than this. But sometimes your original videos may ask you for increment in color information.
Tips:
During GIF size reduction process, you will have to go through color number selections in the series of 256, 128, 64, 32, 16, 8, 4, 2, 1 etc. Use the smaller side of scale to get best results during optimization process.
- Users can also reduce number of frames in their GIFs.
- Never forget to avoid dithering as it may help to improve appearance of images.
- It is essential work with loss less compression algorithms otherwise huge loss in information will be carried out.
- Interlacing is not good option for your GIFs as it causes significant increase in overall file size.
Best GIF resizers
Those who are searching for some alternatives to Photoshop for creation of GIF images can move towards the list below:
2. FileOptimizer:
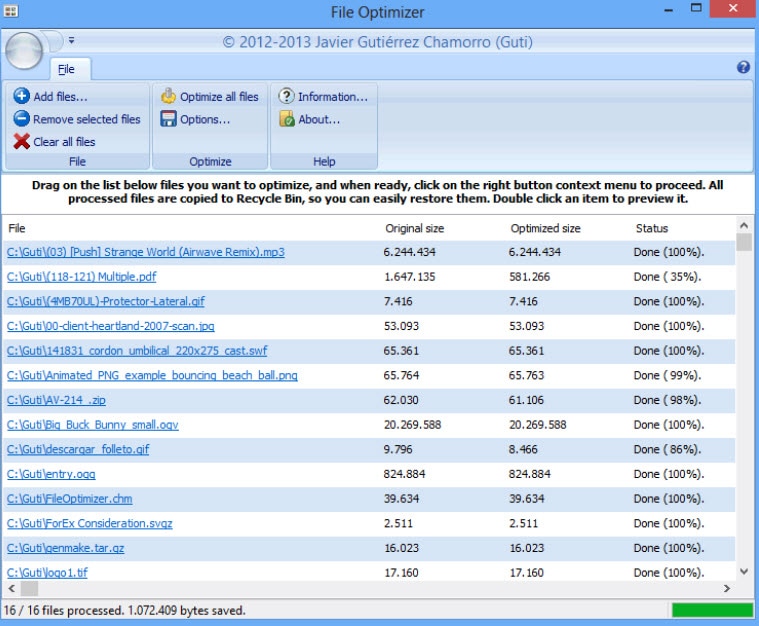
This is an advanced optimization tool for GIF sets as it can shrink output file using its multiple recompressing procedures. It can help to compress audio, video as well as other documents with popular file sizes like JPG, GMP, PNG and TIFF etc.
3. FileMinimizer Pictures:
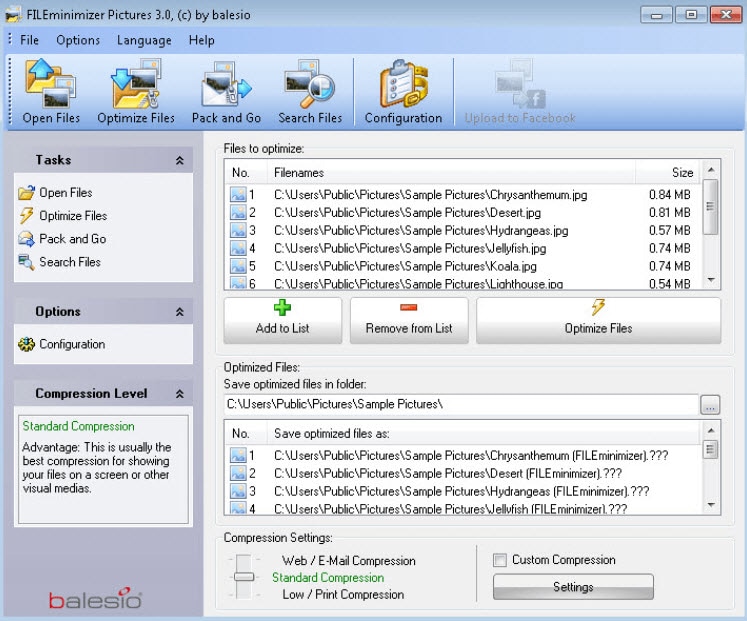
It can compress GIF images up to 98% with its classic optimization techniques. It generally follows 4 compression levels but sometimes may go through several levels to generate smaller GIFs but even without losing quality. It works only on Windows platform.
4. RIOT:
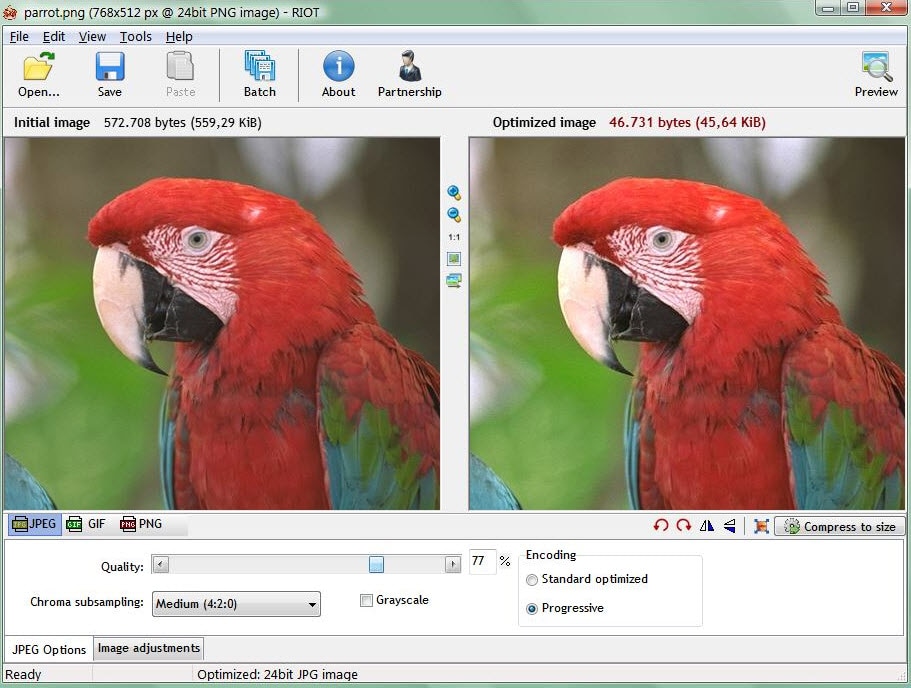
Here RIOT stands for Radical Image Optimization Tool that can adjust so many feature parameters for GIFs along with file size compressions. This optimizer makes use of matadeta settings, color information etc to reduce overall file size.
5. GifftingTool:
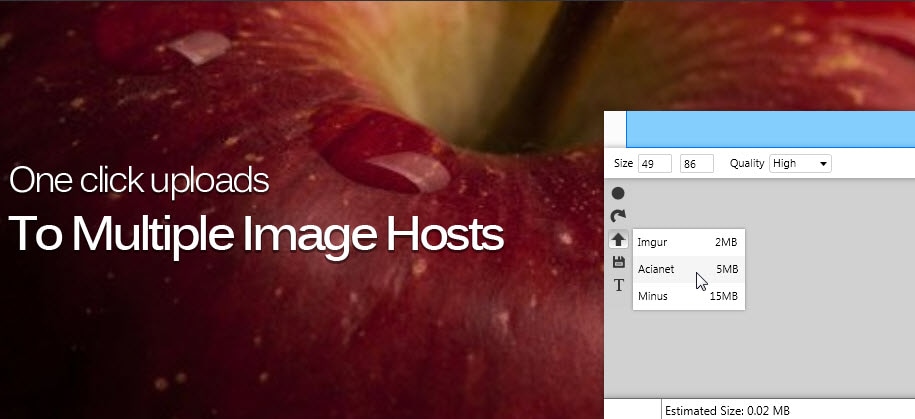
BY simply optimizing repetitive colours and pixels from GIF frames, this tool can easily provides loss less optimization solution. It can be used to adjust image cropping, reversing, merging, looping and filtering needs.
6. GIF Optimizer:
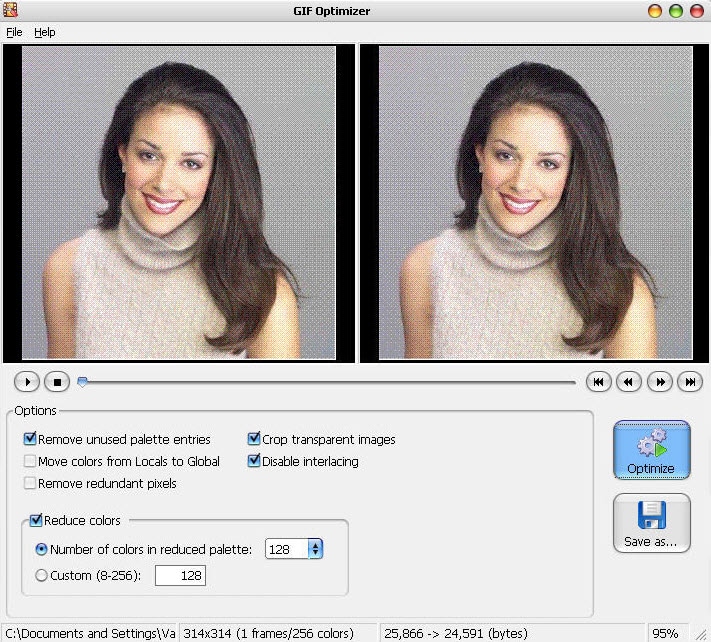
This is specially designed one click type GIF optimizer that can provide compression up to 90%. It also assists to reduce the total load time for GIF with reduction in file size.
7. Ezgif.com – Online:

This online GIF image editor can shrink your image by simply reducing its colour information. Users can easily minimize file size for about 30% using this tool that has features like crop, resize etc.
8. Conpressor.io – Online:
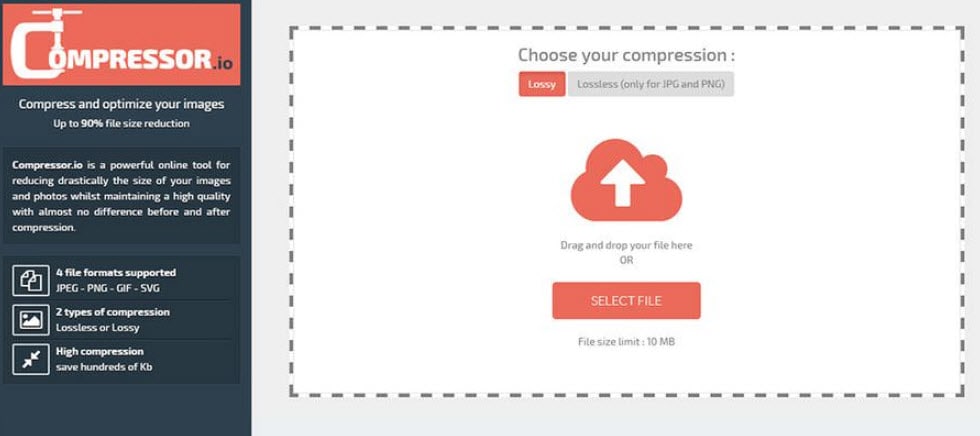
This online web app can assist users to compress their image to smallest size segment even without decaying overall quality. You can easily process SVG, PNG, GIF and JPG file formats over here.
9. Picasion.com – Online:

It helps to reduce overall weight of GIFs so that they can be easily uploaded over internet.
10. GIF Reducer:
Reducer can easily shrink GIF file so that it web loading times can be increased instantly.
11. Resizeimage.net:
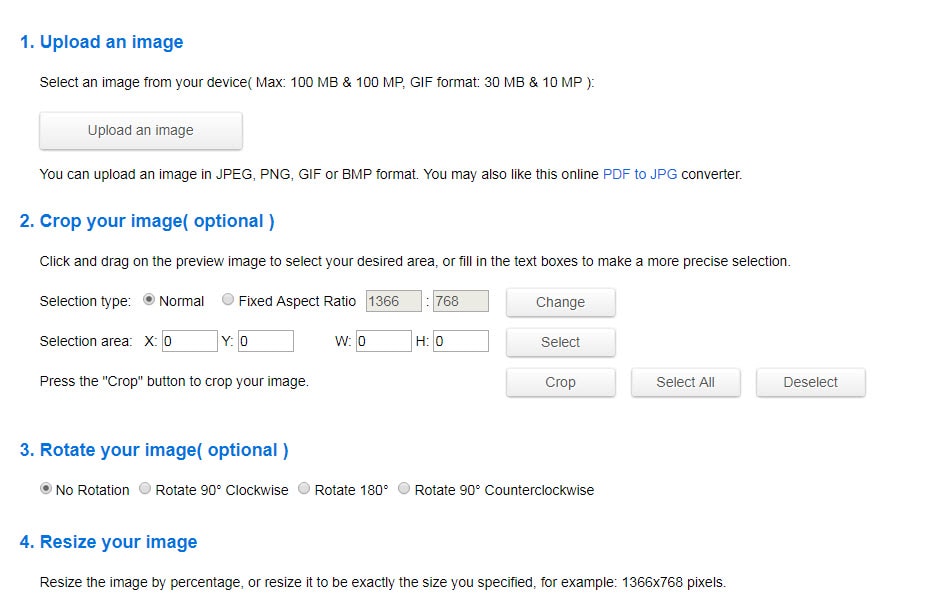
Use this tool to get impressive results for your GIF optimization and it can process almost all file formats to make things easily workable for users.
Conclusion
If you want to make a GIF online, Filmora meme maker is your ultimate solution. It helps you make image, GIF and video memes directly without watermark. It is totally FREE to use and no sign up. You can change text size, color and position to create caption when you are editing. You can also put text inside or outside in GIF. Just with a few clicks, your GIF is done . Try it now!
Shanoon Cox
Shanoon Cox is a writer and a lover of all things video.
Follow @Shanoon Cox
Shanoon Cox
Mar 27, 2024• Proven solutions
With the increasing popularity of Smartphones, people these days are experiencing all new things with lots of excitement. And GIFs are always the most interesting content for them. When we talk about limited band width and fast loading time solutions then GIFs are the first options in front of our eyes. These files use to have small size so they can be transferred and downloaded with ease and at faster rate. If you are interested to know about various resizing concepts related to GIFs then the article below can be helpful for you.
How to reduce GIF size?
There are so many things that contribute in managing overall size of GIFs. The list includes the colour count inside, dimensions of images that you have used for development of GIFs and number of frames included inside one GIF folder. In case if it is an animated GIF then size may increase accordingly. Somehow, if you become able to optimize your Gifs then it is much easier to share them over internet.
Photoshop is a great tool to edit your image, including gif images. Here we are going to show you how to make your GIF smaller in Photoshop.
1. Crop away any extra space around the image:
Image source: youtube.com
The very first task for users is to bring your GIF video file onto Photoshop timeline. Sometimes, it is not essential to update whole series of your GIF animation to the library, the GIF can be simply trimmed at timeline panel. One needs to turn on loop option and then be active enough to allocate the right place to trim your video.
2. Reduce dimensions of Output:
Image source: google.com
Those who are working on Photoshop CC 2017 version will be able to develop GIFs by simply executing Explore As option from menu. To do this, they need to move to files and then from drop down menu select Export as. Soon a menu will open where you need to choose your output file format as GIF and adjust weight and height parameter to reduce physical dimensions of your image.
In case if you are using Adobe Photoshop Elements 14 then on its interface, users need to move to File and then hit Save for Web option. It will help to open a Save for Web type dialogue box immediately, on this new window you can apply desired changes to physical dimensions of your content, reduce color information and apply dithering etc.
3. Adjust number of colors in image:
Image source: google.com
One of the most useful tricks for marketers is to optimize size of their GIF images by adjusting total number of colours to it. It can be done using color table tool that assists in easy selection and de-selection. This table use to contain about 256 unique colours and all of them use to contain 8 bit wide information. The best recommendation for good quality and small seize GIFs is to limit colours up to 64 only or keep then less than this. But sometimes your original videos may ask you for increment in color information.
Tips:
During GIF size reduction process, you will have to go through color number selections in the series of 256, 128, 64, 32, 16, 8, 4, 2, 1 etc. Use the smaller side of scale to get best results during optimization process.
- Users can also reduce number of frames in their GIFs.
- Never forget to avoid dithering as it may help to improve appearance of images.
- It is essential work with loss less compression algorithms otherwise huge loss in information will be carried out.
- Interlacing is not good option for your GIFs as it causes significant increase in overall file size.
Best GIF resizers
Those who are searching for some alternatives to Photoshop for creation of GIF images can move towards the list below:
2. FileOptimizer:
This is an advanced optimization tool for GIF sets as it can shrink output file using its multiple recompressing procedures. It can help to compress audio, video as well as other documents with popular file sizes like JPG, GMP, PNG and TIFF etc.
3. FileMinimizer Pictures:
It can compress GIF images up to 98% with its classic optimization techniques. It generally follows 4 compression levels but sometimes may go through several levels to generate smaller GIFs but even without losing quality. It works only on Windows platform.
4. RIOT:
Here RIOT stands for Radical Image Optimization Tool that can adjust so many feature parameters for GIFs along with file size compressions. This optimizer makes use of matadeta settings, color information etc to reduce overall file size.
5. GifftingTool:
BY simply optimizing repetitive colours and pixels from GIF frames, this tool can easily provides loss less optimization solution. It can be used to adjust image cropping, reversing, merging, looping and filtering needs.
6. GIF Optimizer:
This is specially designed one click type GIF optimizer that can provide compression up to 90%. It also assists to reduce the total load time for GIF with reduction in file size.
7. Ezgif.com – Online:
This online GIF image editor can shrink your image by simply reducing its colour information. Users can easily minimize file size for about 30% using this tool that has features like crop, resize etc.
8. Conpressor.io – Online:
This online web app can assist users to compress their image to smallest size segment even without decaying overall quality. You can easily process SVG, PNG, GIF and JPG file formats over here.
9. Picasion.com – Online:
It helps to reduce overall weight of GIFs so that they can be easily uploaded over internet.
10. GIF Reducer:
Reducer can easily shrink GIF file so that it web loading times can be increased instantly.
11. Resizeimage.net:
Use this tool to get impressive results for your GIF optimization and it can process almost all file formats to make things easily workable for users.
Conclusion
If you want to make a GIF online, Filmora meme maker is your ultimate solution. It helps you make image, GIF and video memes directly without watermark. It is totally FREE to use and no sign up. You can change text size, color and position to create caption when you are editing. You can also put text inside or outside in GIF. Just with a few clicks, your GIF is done . Try it now!
Shanoon Cox
Shanoon Cox is a writer and a lover of all things video.
Follow @Shanoon Cox
Why These 10+ Top Text Motion Templates Are Worth Your Attention
Why These 10+ Top Text Motion Templates Are Worth Your Attention
An easy yet powerful editor
Numerous effects to choose from
Detailed tutorials provided by the official channel
If you’re looking to add some ‘text in motion‘ to your video projects, then you’ve come to the right place! We’ve listed some of our favorite Text Motion After Effects and Text Motion Graphics Premiere Pro templates that you can use to get a head start in the realm of adding motion into text! (As a bonus, we’ve also included an overview on text motion and some of the best text motion graphics tutorials that you can refer to when trying out the templates we’ve recommended.)
In this article
01 [What’s Text Motion?](#Part 1)
02 [10 Best Text Motion After Effects](#Part 2)
03 [Tutorials for Making Great Text Motion](#Part 3)
Part 1 What’s Text Motion?
Alright, first of all, let’s answer the big question! Text Motion, what is it and why should you be adding it to your projects ASAP? Well, in regards to the former, the answer is simple: text motion graphics is literally text animation that you can add to your projects to give it an extra bit of life and make it more show-stealing!
In regards to the latter, the answer is in its description! After all, why wouldn’t you want your projects to be able to capture more attention?

Have a look at the screenshot above that we included of an example project on the video editor, Wondershare Filmora . As you can see, we inserted text in motion at the very start. And despite being a still screenshot of said text motion graphics, the preview is eye-catching even when paused!
This is the kind of project that you can do yourself with the right templates and the right video editor. We’ve got your back on the first in the list coming up. And, as for the second, we recommend that you try out Filmora! It is, as you can see, quite an expansive software. One that will allow you to truly make the most of the text motion graphics you’ll be able to create at the end of this article.
Part 2 10 Best Text Motion After Effects
Alright, now let’s move on to our promised Text Motion Graphics After Effects and Text Motion Graphics Premiere Pro templates. We’ve tried our best to pick a variety out for you so that you can have a good selection to choose from! You should also take the time to explore the different platforms where these templates are offered in case you end up needing a different look!
01Clean and Elegant Corporate Identity – Text Reveal (Mogrt)
The first on this list is the ‘Clean and Elegant Corporate Identity — Text Reveal’ by Mogrt. The title is quite explanatory in and of itself, but just in case you’re confused, it’s a template that was designed for professionals and brands to establish their corporate identity. The font is very modern in design, and it comes with several flare variations so that the reveal works out in the way that you want it to.
Other aspects, like the shadow blur, opacity, particle size (for the reveal), and text glossiness are also adjustable and can be changed at will based on your standards.
02Multipurpose Clean 3D Text to Title
The next text motion template is the ‘Multipurpose Clean 3D Text to Title’ also created by Mogrt. This one is text motion graphics that you can use for Premiere Pro and, with proper customization, and be used for just about anything that you want! It’s a very multi-purpose kind of graphic, one that you can maybe sneak in as an advert or for announcing celebrations or anniversaries!
As a final note, if you want to use this graphic as text motion for after effects , it is available for that as well!
03Simple Motion Text | Premiere Pro
This next template, the ‘Simple Motion Text’ graphic, is one that is available for both Premiere Pro and After Effects (though the link we’ve provided is for the Premiere Pro version!) As the name implies, the animation is quite simple, which may be exactly what you want, in any case. It certainly makes it very versatile (especially as you can change font style and color as you will). Making it the perfect template for a beginner that’s just starting out and doesn’t want anything too complicated.
0430 Glitch Text Presets For Premiere Pro | Mogrt
This next template, the ‘30 Glitch Text Presets’ by Mogrt is a Premiere Pro exclusive! It’s also quite fun in its particulars. As a template, it’s not as versatile as the one that we introduced previously, since the ‘glitch’ effect gives off quite the unique vibes, but that doesn’t make it any less potent at catching the eyes of your audience!
The best part, in this case, is that it comes with 30 pre-sets, all with fitting glitch sound effects (included in the pack) that you can use. Of course, there are other customization functions as well, including font style, color, transparency, and so on.
05Comic Bubbles MOGRT
Again, this next templated, called ‘Comic Bubbles’, kind of has its own unique vibe, making it inflexible in some ways but also more fun if that’s the kind of look that you’re looking for. Which, in this case, are literal ‘Comic’ text bubbles, like you would see in your old 90s comic (loud, pop-y, and with lots of bright colors!) The only difference from that to this is that these comic text bubbles move, allowing you to create ‘punchy’ text in between animated projects.
For your reference, there are 80 different comic bubbles included in the pack. All of which are easy to customize and will allow you to adjust colors, text, and transition effects (have a look at the video that we’ve linked if you want to see it in action!)
06Smoke To Text Reveal (Mogrt)
This next template, ‘Smoke to Text Reveal’ is another one that serves a very particular need. To help with visualization, the text motion graphics are at first obscured by smoke before it bubbles up into a crisp, modern text reveal! It’s perfect for those looking for underwater-themed text motion graphics. Or those who want to serve a hint of mystery with the smoke effect.
This is Text Motion Graphics - Premiere Pro. And the best part about it is that you can customize the text and the background at will — allowing you to truly make the template your own and make the most out of the smoke-to-reveal effect.
07Text Messages Toolkit
Want to appeal to the Gen Z audience? Then, the ‘text messages toolkit’ might be a fun text motion graphics for you to try. As you can perhaps surmise from the name, it’s a template that you can use in order to create ‘text message’ interactions. It’s customizable too! You can change the text box color, size, transparency, and just have a ball pimping it out of that’s what you want.
08Large Text Title Block
With the ‘large text title block’ template, you have the flexibility of the naturally more modern and minimalistic design, allowing you to use it for a wide variety of different projects. It works especially well for advertisements, if you’re wondering about potential uses, or as transition graphics between text to video!
09Blueprint Titles
Want something that’s a little quirkier? Or, perhaps, instructional? Then the ‘Blueprint Titles’ template is one that you can consider. As you can perhaps guess from the name, it allows you to create text motion graphics in a style that is similar to the kind of blueprints you usually see when working with design or architecture.
10Dynamic Minimalism
Sometimes, simple really is best! And, this next template, the ‘Dynamic Minimalism’ text motion after effects and text motion graphics premiere pro template is one that you might want in your arsenal just for the sake of your simpler projects! The kit comes with 30 different animations, as well as other customization functions that you can play around with to add a little personality to what are otherwise very minimalistic designs.
Part 3 Tutorials for Making Great Text Motion
For the last part of this article, we’ll be introducing some tutorials that you can refer to while trying out the templates that we recommended! We’ve pulled all of this from YouTube so that you can start learning immediately! And, of course, a variety has been chosen so that you can get your info from more than one source.
01Smooth Professional Text Animation in Premiere Pro - TUTORIAL
The first tutorial we have for you was created by Ignace Aleya on YouTube. This tutorial is a ‘Premiere Pro’ tutorial that focuses on helping beginners and intermediate users alike in understanding the ways of text motion graphics. He offers some pretty good pointers and tricks on keeping the quality of your work high. And the way that he shares his knowledge is pretty solid too! Allowing you to both watch and enjoy the video.
02Easy Title Motion Graphics
This next tutorial is about text motion graphics while working in Adobe After Effects. Like the previous tutorial, it will teach you the basics of using templates! It was posted by SonduckFilm, and the video covers five different “Easy Title Motion Graphics” as examples! Altogether, it’s a great choice if what you’re looking for is tips on making the most out of the templates we introduced on our list.
03Basic Logo Animations
Next, we have a tutorial from the YouTube content creator, Broken! This one is on the subject of both simple and complex logo animations that you can create when working on establishing a brand. It’s a great video for beginners and is quite informative on the subject of customization.
● Key Takeaways from This Episode →
● What is text motion and why do you need to start using it for your own projects ASAP? Well, text motion graphics are, basically, text animation! They’re eye-catching and informative at the same time, making them a great vessel for getting a message across to your audience.
● If you want to start creating text motion graphics yourself, we suggest starting with templates first! At least then, you’ll be able to make yourself comfortable while learning about the opportunities available to you.
● There are many different templates out there that you can try. Some are multi-purpose, some not. We’ve chosen a variety to introduce to you in of this article! Complete with a list of some tutorials in that you can refer to no matter what kind of project you’re working on.
If you’re looking to add some ‘text in motion‘ to your video projects, then you’ve come to the right place! We’ve listed some of our favorite Text Motion After Effects and Text Motion Graphics Premiere Pro templates that you can use to get a head start in the realm of adding motion into text! (As a bonus, we’ve also included an overview on text motion and some of the best text motion graphics tutorials that you can refer to when trying out the templates we’ve recommended.)
In this article
01 [What’s Text Motion?](#Part 1)
02 [10 Best Text Motion After Effects](#Part 2)
03 [Tutorials for Making Great Text Motion](#Part 3)
Part 1 What’s Text Motion?
Alright, first of all, let’s answer the big question! Text Motion, what is it and why should you be adding it to your projects ASAP? Well, in regards to the former, the answer is simple: text motion graphics is literally text animation that you can add to your projects to give it an extra bit of life and make it more show-stealing!
In regards to the latter, the answer is in its description! After all, why wouldn’t you want your projects to be able to capture more attention?
Have a look at the screenshot above that we included of an example project on the video editor, Wondershare Filmora . As you can see, we inserted text in motion at the very start. And despite being a still screenshot of said text motion graphics, the preview is eye-catching even when paused!
This is the kind of project that you can do yourself with the right templates and the right video editor. We’ve got your back on the first in the list coming up. And, as for the second, we recommend that you try out Filmora! It is, as you can see, quite an expansive software. One that will allow you to truly make the most of the text motion graphics you’ll be able to create at the end of this article.
Part 2 10 Best Text Motion After Effects
Alright, now let’s move on to our promised Text Motion Graphics After Effects and Text Motion Graphics Premiere Pro templates. We’ve tried our best to pick a variety out for you so that you can have a good selection to choose from! You should also take the time to explore the different platforms where these templates are offered in case you end up needing a different look!
01Clean and Elegant Corporate Identity – Text Reveal (Mogrt)
The first on this list is the ‘Clean and Elegant Corporate Identity — Text Reveal’ by Mogrt. The title is quite explanatory in and of itself, but just in case you’re confused, it’s a template that was designed for professionals and brands to establish their corporate identity. The font is very modern in design, and it comes with several flare variations so that the reveal works out in the way that you want it to.
Other aspects, like the shadow blur, opacity, particle size (for the reveal), and text glossiness are also adjustable and can be changed at will based on your standards.
02Multipurpose Clean 3D Text to Title
The next text motion template is the ‘Multipurpose Clean 3D Text to Title’ also created by Mogrt. This one is text motion graphics that you can use for Premiere Pro and, with proper customization, and be used for just about anything that you want! It’s a very multi-purpose kind of graphic, one that you can maybe sneak in as an advert or for announcing celebrations or anniversaries!
As a final note, if you want to use this graphic as text motion for after effects , it is available for that as well!
03Simple Motion Text | Premiere Pro
This next template, the ‘Simple Motion Text’ graphic, is one that is available for both Premiere Pro and After Effects (though the link we’ve provided is for the Premiere Pro version!) As the name implies, the animation is quite simple, which may be exactly what you want, in any case. It certainly makes it very versatile (especially as you can change font style and color as you will). Making it the perfect template for a beginner that’s just starting out and doesn’t want anything too complicated.
0430 Glitch Text Presets For Premiere Pro | Mogrt
This next template, the ‘30 Glitch Text Presets’ by Mogrt is a Premiere Pro exclusive! It’s also quite fun in its particulars. As a template, it’s not as versatile as the one that we introduced previously, since the ‘glitch’ effect gives off quite the unique vibes, but that doesn’t make it any less potent at catching the eyes of your audience!
The best part, in this case, is that it comes with 30 pre-sets, all with fitting glitch sound effects (included in the pack) that you can use. Of course, there are other customization functions as well, including font style, color, transparency, and so on.
05Comic Bubbles MOGRT
Again, this next templated, called ‘Comic Bubbles’, kind of has its own unique vibe, making it inflexible in some ways but also more fun if that’s the kind of look that you’re looking for. Which, in this case, are literal ‘Comic’ text bubbles, like you would see in your old 90s comic (loud, pop-y, and with lots of bright colors!) The only difference from that to this is that these comic text bubbles move, allowing you to create ‘punchy’ text in between animated projects.
For your reference, there are 80 different comic bubbles included in the pack. All of which are easy to customize and will allow you to adjust colors, text, and transition effects (have a look at the video that we’ve linked if you want to see it in action!)
06Smoke To Text Reveal (Mogrt)
This next template, ‘Smoke to Text Reveal’ is another one that serves a very particular need. To help with visualization, the text motion graphics are at first obscured by smoke before it bubbles up into a crisp, modern text reveal! It’s perfect for those looking for underwater-themed text motion graphics. Or those who want to serve a hint of mystery with the smoke effect.
This is Text Motion Graphics - Premiere Pro. And the best part about it is that you can customize the text and the background at will — allowing you to truly make the template your own and make the most out of the smoke-to-reveal effect.
07Text Messages Toolkit
Want to appeal to the Gen Z audience? Then, the ‘text messages toolkit’ might be a fun text motion graphics for you to try. As you can perhaps surmise from the name, it’s a template that you can use in order to create ‘text message’ interactions. It’s customizable too! You can change the text box color, size, transparency, and just have a ball pimping it out of that’s what you want.
08Large Text Title Block
With the ‘large text title block’ template, you have the flexibility of the naturally more modern and minimalistic design, allowing you to use it for a wide variety of different projects. It works especially well for advertisements, if you’re wondering about potential uses, or as transition graphics between text to video!
09Blueprint Titles
Want something that’s a little quirkier? Or, perhaps, instructional? Then the ‘Blueprint Titles’ template is one that you can consider. As you can perhaps guess from the name, it allows you to create text motion graphics in a style that is similar to the kind of blueprints you usually see when working with design or architecture.
10Dynamic Minimalism
Sometimes, simple really is best! And, this next template, the ‘Dynamic Minimalism’ text motion after effects and text motion graphics premiere pro template is one that you might want in your arsenal just for the sake of your simpler projects! The kit comes with 30 different animations, as well as other customization functions that you can play around with to add a little personality to what are otherwise very minimalistic designs.
Part 3 Tutorials for Making Great Text Motion
For the last part of this article, we’ll be introducing some tutorials that you can refer to while trying out the templates that we recommended! We’ve pulled all of this from YouTube so that you can start learning immediately! And, of course, a variety has been chosen so that you can get your info from more than one source.
01Smooth Professional Text Animation in Premiere Pro - TUTORIAL
The first tutorial we have for you was created by Ignace Aleya on YouTube. This tutorial is a ‘Premiere Pro’ tutorial that focuses on helping beginners and intermediate users alike in understanding the ways of text motion graphics. He offers some pretty good pointers and tricks on keeping the quality of your work high. And the way that he shares his knowledge is pretty solid too! Allowing you to both watch and enjoy the video.
02Easy Title Motion Graphics
This next tutorial is about text motion graphics while working in Adobe After Effects. Like the previous tutorial, it will teach you the basics of using templates! It was posted by SonduckFilm, and the video covers five different “Easy Title Motion Graphics” as examples! Altogether, it’s a great choice if what you’re looking for is tips on making the most out of the templates we introduced on our list.
03Basic Logo Animations
Next, we have a tutorial from the YouTube content creator, Broken! This one is on the subject of both simple and complex logo animations that you can create when working on establishing a brand. It’s a great video for beginners and is quite informative on the subject of customization.
● Key Takeaways from This Episode →
● What is text motion and why do you need to start using it for your own projects ASAP? Well, text motion graphics are, basically, text animation! They’re eye-catching and informative at the same time, making them a great vessel for getting a message across to your audience.
● If you want to start creating text motion graphics yourself, we suggest starting with templates first! At least then, you’ll be able to make yourself comfortable while learning about the opportunities available to you.
● There are many different templates out there that you can try. Some are multi-purpose, some not. We’ve chosen a variety to introduce to you in of this article! Complete with a list of some tutorials in that you can refer to no matter what kind of project you’re working on.
Make Well Done Animated GIF
Versatile Video Editor - Wondershare Filmora
An easy yet powerful editor
Numerous effects to choose from
Detailed tutorials provided by the official channel
GIF refers to Graphics Interchange Format, and you can generally discover this animated graphic image on web pages. You will see them like a twirling icon or a banner or just a few letters that go huge like magic. Note that well done animated GIF file mentions as a GIF89a, and this single file is helpful to contain various images inside a particular folder.
Moreover, these well-done animated GIF files are excellent for social media platforms, ad banners, and web pages.
They also want to add many funny words, bringing in interesting front outcomes at all times. Of course, it all boils down to the experience you wish to gain, but GIFs are always great to share online, and they bring in tons of fantastic fun moments that you can enjoy with your family.
Today, we will explore the ideal tool to create well done animated GIF along with a well-framed animated GIF tutorial. So, let’s join the trend and share the same with your friends and family.
In this article
01 [Make well done animated GIF with Filmora](#Part 1)
02 [Samples for Well Done Animated GIF](#Part 2)
Part 1 Make well done animated GIF with Filmora
You may easily find multiples of GIF files over different social media channels. These day’s people are using them mainly to entertain the audience on their channels or pages. They are also active in use for active conversations in other replies or comments.
Lots of people use GIFs to convey unique reactions on the internet on various channels. They are also valuable for illustrations, and one of the most prominent implications is in the business world for marketing requirements. It allows explaining your business products with increased user engagement and entertainment. The artistic world of GIFs can quickly boost your customers online.
It is possible to create well-done animated GIFs from still images or even from moving videos. This task is pretty straightforward than anyone can perform. To execute this task with much simplicity, we would like to recommend Wondershare Filmora for you.
Wondershare Filmora
Get started easily with Filmora’s powerful performance, intuitive interface, and countless effects!
Try It Free Try It Free Try It Free Learn More >
Using Filmora, you can quickly transform small videos into GIFs or combine several stills into GIFs. The more exciting thing is that Filmora also allows easy GIF customization as users can add different elements, overlays, text, etc., to their GIFs using the Filmora platform.
With Filmora, no matter what video formats you get, including FLV, MKV, WMV, MP4, etc. You can also introduce various advanced elements, animations, overlays, text to customize your GIFs.
Yet, if you are looking for an animated GIF tutorial, Filmora makes it all convenient for you. It assists you in creating an image, video memes, and GIFs directly without a watermark. It is FREE to use and has no signup.
You can change text size, position, and color to create a caption during the editing process. Then, just with a few clicks, your GIF is done. Try it now!
How to make GIFs with Wondershare Filmora
Here are a few simple steps to accomplish this task:
Step 1 Upload video or an image
Primarily, you have to import some editable video files or a collection of photos to the timeline of Wondershare Filmora.
Step 2 Drag to timeline
You can drag their imported media in Step 1 and drop it on the Filmora timeline.

Step 3 Edit media files
There are tons of editing options with pretty cool Filmora features. Users can easily choose among options like speed up, slow down, combine, rotate, crop, split, etc., to create a compelling video as per the content available.
Step 4 Add text effect to GIF files
It is the right time to update text-based information GIFs. Few text messages always appear good in GIFs. Or, you can add other elements here like sound, etc.

Step 5 Save and export
Once you have finished all the steps, save your file with a GIF extension and get ready to upload it on various social media platforms.

Part 2 Samples for Well Done Animated GIF
They say that an image is worth looking at a thousand words, so you must consider an animated GIF even more regarding this statement. In the current scenario, email marketers are revamping the boundaries of email design by including well-done animated GIFs to showcase their services and products in action.
Here is a collection of 5 beautiful samples of well-done animated GIFs in email marketing that proved to be very creative, engaging, and colorful.
1. ShoeMint
This cute GIF syncs pretty well with the ShoeMint’s email marketing template’s title – “C’mon, Get Happy!.” You can smile when you see the colorful socks swaying in a carefree manner.
2. Mr. Porter
This is an animated fireplace in the email marketing newsletter of Mr. Porter. It gives a pretty cozy and warm feel and atmosphere to the entire image, which is what they’re looking for or wandering for with the casual clothes the man is wearing.
3. American Apparel
American Apparel sells “power washed” T-shirts to make them “super soft.”
This critical merit would not attract many users if it weren’t for simulating the animated GIF of the T-shirts getting washed in an imaginary washing machine.
4. Looper
One of the major motion pictures was Looper, that introduced us to the world’s first “official” GIF movie poster when the film premiered. The clock GIF inside the first O is exclusively creative, and the incredible animated dust effect suggests that both characters are fading away due to the events in the movie.
5. West Elm
West Elm offers modern furniture and various home decorations. In this email newsletter, they are presenting a selection of lamps, and what better way to showcase them than a GIF of them turning on at the same time.
Thus, these were the top five samples of our animated GIF tutorial you can take cue from right away.
Versatile Video Editor - Wondershare Filmora
An easy yet powerful editor
Numerous effects to choose from
Detailed tutorials provided by the official channel
Conclusion
While the lots of GIF makers available might prove to be good at times, they won’t be able to provide the value you want all the time. That’s what makes Wondershare Filmora an ideal pick to use for finishing well done animated GIF and one that will undoubtedly deliver on its promise. Creating a well-done animated GIF is simple, easy, and quick with Filmora. Have you tried it out yet?
GIF refers to Graphics Interchange Format, and you can generally discover this animated graphic image on web pages. You will see them like a twirling icon or a banner or just a few letters that go huge like magic. Note that well done animated GIF file mentions as a GIF89a, and this single file is helpful to contain various images inside a particular folder.
Moreover, these well-done animated GIF files are excellent for social media platforms, ad banners, and web pages.
They also want to add many funny words, bringing in interesting front outcomes at all times. Of course, it all boils down to the experience you wish to gain, but GIFs are always great to share online, and they bring in tons of fantastic fun moments that you can enjoy with your family.
Today, we will explore the ideal tool to create well done animated GIF along with a well-framed animated GIF tutorial. So, let’s join the trend and share the same with your friends and family.
In this article
01 [Make well done animated GIF with Filmora](#Part 1)
02 [Samples for Well Done Animated GIF](#Part 2)
Part 1 Make well done animated GIF with Filmora
You may easily find multiples of GIF files over different social media channels. These day’s people are using them mainly to entertain the audience on their channels or pages. They are also active in use for active conversations in other replies or comments.
Lots of people use GIFs to convey unique reactions on the internet on various channels. They are also valuable for illustrations, and one of the most prominent implications is in the business world for marketing requirements. It allows explaining your business products with increased user engagement and entertainment. The artistic world of GIFs can quickly boost your customers online.
It is possible to create well-done animated GIFs from still images or even from moving videos. This task is pretty straightforward than anyone can perform. To execute this task with much simplicity, we would like to recommend Wondershare Filmora for you.
Wondershare Filmora
Get started easily with Filmora’s powerful performance, intuitive interface, and countless effects!
Try It Free Try It Free Try It Free Learn More >
Using Filmora, you can quickly transform small videos into GIFs or combine several stills into GIFs. The more exciting thing is that Filmora also allows easy GIF customization as users can add different elements, overlays, text, etc., to their GIFs using the Filmora platform.
With Filmora, no matter what video formats you get, including FLV, MKV, WMV, MP4, etc. You can also introduce various advanced elements, animations, overlays, text to customize your GIFs.
Yet, if you are looking for an animated GIF tutorial, Filmora makes it all convenient for you. It assists you in creating an image, video memes, and GIFs directly without a watermark. It is FREE to use and has no signup.
You can change text size, position, and color to create a caption during the editing process. Then, just with a few clicks, your GIF is done. Try it now!
How to make GIFs with Wondershare Filmora
Here are a few simple steps to accomplish this task:
Step 1 Upload video or an image
Primarily, you have to import some editable video files or a collection of photos to the timeline of Wondershare Filmora.
Step 2 Drag to timeline
You can drag their imported media in Step 1 and drop it on the Filmora timeline.
Step 3 Edit media files
There are tons of editing options with pretty cool Filmora features. Users can easily choose among options like speed up, slow down, combine, rotate, crop, split, etc., to create a compelling video as per the content available.
Step 4 Add text effect to GIF files
It is the right time to update text-based information GIFs. Few text messages always appear good in GIFs. Or, you can add other elements here like sound, etc.
Step 5 Save and export
Once you have finished all the steps, save your file with a GIF extension and get ready to upload it on various social media platforms.
Part 2 Samples for Well Done Animated GIF
They say that an image is worth looking at a thousand words, so you must consider an animated GIF even more regarding this statement. In the current scenario, email marketers are revamping the boundaries of email design by including well-done animated GIFs to showcase their services and products in action.
Here is a collection of 5 beautiful samples of well-done animated GIFs in email marketing that proved to be very creative, engaging, and colorful.
1. ShoeMint
This cute GIF syncs pretty well with the ShoeMint’s email marketing template’s title – “C’mon, Get Happy!.” You can smile when you see the colorful socks swaying in a carefree manner.
2. Mr. Porter
This is an animated fireplace in the email marketing newsletter of Mr. Porter. It gives a pretty cozy and warm feel and atmosphere to the entire image, which is what they’re looking for or wandering for with the casual clothes the man is wearing.
3. American Apparel
American Apparel sells “power washed” T-shirts to make them “super soft.”
This critical merit would not attract many users if it weren’t for simulating the animated GIF of the T-shirts getting washed in an imaginary washing machine.
4. Looper
One of the major motion pictures was Looper, that introduced us to the world’s first “official” GIF movie poster when the film premiered. The clock GIF inside the first O is exclusively creative, and the incredible animated dust effect suggests that both characters are fading away due to the events in the movie.
5. West Elm
West Elm offers modern furniture and various home decorations. In this email newsletter, they are presenting a selection of lamps, and what better way to showcase them than a GIF of them turning on at the same time.
Thus, these were the top five samples of our animated GIF tutorial you can take cue from right away.
Versatile Video Editor - Wondershare Filmora
An easy yet powerful editor
Numerous effects to choose from
Detailed tutorials provided by the official channel
Conclusion
While the lots of GIF makers available might prove to be good at times, they won’t be able to provide the value you want all the time. That’s what makes Wondershare Filmora an ideal pick to use for finishing well done animated GIF and one that will undoubtedly deliver on its promise. Creating a well-done animated GIF is simple, easy, and quick with Filmora. Have you tried it out yet?
Top 10 Classical Animated Cartoon Types With Examples
10 Classical Animated Cartoon Types With Examples
An easy yet powerful editor
Numerous effects to choose from
Detailed tutorials provided by the official channel
In today’s time, animation has advanced way more and we can name more than one series, starting from “BoJack Horseman” to “The Flintstones” which can be simply termed as a funny cartoon.
In this article, we will look at the 10 best classical animated cartoon types along with relevant examples to help you understand.
In this article
01 [The Best Animated Series of All Time](#Part 1)
02 [Anyway We Can Create Animation Ourselves?](#Part 2)
Part 1 The Best Animated Series of All Time
Here are 10 classical animated cartoon types with an example for each of them. A lot of us have our earliest TV memories tied to an animated series or the nostalgia of one of the very popular 90s cartoons. In this list, you might as well find one of those funny cartoons or even one of your very favorite Disney cartoons.
01 Doug (1991-1994)
For people who were more into Nickelodeon than Disney/ABC, Doug was one of the most popular 90s cartoons. The funny cartoon show was rated to be one of the most relatable goobers on children’s TV. Along with that, the funny cartoon was known for the ingenuity and creative character names like Doug Funnie, Patti Mayonnaise, Skeeter, Porkchop, Tippi Dink, Roger Klotz, and Mosquito Valentine.
02 Popeye The Sailor (1960-1963)
“Popeye” initially started out as a comic strip in newspapers, but after the theatrical short features started airing on TV during the 1950s, soon 220 cartoons were created in just two years, making it one of the most popular television shows of all time. It had rudimentary animation and focused on the popularity of the character “Popeye the Sailor” which is still a very well-known character.
03 Pokemon (1997-Present)
It’s that good and it keeps going on. Pokemon was initially a series of games for the Nintendo Gameboy and from there it grew to be immensely popular where children across the globe simply loved the cute cartoon characters in the show. The Japanese pocket monsters became an integral part of life when the animated television series started airing.
04 Dexter’s Laboratory (1996-2003)
In 1996 Cartoon Network audiences were introduced to a show named Dexter’s Laboratory with Dexter as the primary character of the cartoon show. The boy genius had a massive hidden laboratory under his house. Every episode would feature Dexter planning an exciting experiment which was a favorite of kids. The series is one of the highest-rated series on the Cartoon Network and it also received a Primetime Emmy Award in 1996.
05 Alvin and the Chipmunks (1983-1990)
Alvin and the Chipmunks have been known since the 1960s. Although the show “Alvin and the Chipmunks’’ became popular on NBC in 1983. It featured three main characters: Alvin, Simon, and the loveable Theodore who got into all kinds of hijinks. The series had a large following, especially after the Chip-ettes, female versions of the Chipmunks, were introduced.
06 Scooby Doo, Where Are You! (1969-1970)

Barely any other two-season title has ever become as popular as “Scooby Doo, Where Are You!” The animation franchise is existent even today. The main attraction of this very funny cartoon was the cowardly Great Dane with a speech impediment. The dog solved crimes with teen friends and perfectly captured the imaginations of children as well as teenagers with subtle horror elements and some really hilarious catchphrases.
07 The Flintstones (1960-1966)

The Flintstones is inspired by “The Honeymooners’’ and was also the first animated series released in primetime. It was also the most successful one of its kind until “The Simpsons” was released 30 years later. The popularity of the series was because of its satirical take on modern suburban culture through the use of absurd, anachronistic elements in a Stone Age setting.
08 The Simpsons (1987-1990)

The Simpsons are simply one of the most popular and revolutionary 90s cartoons. It became a cultural juggernaut during its time and has been rated highly by viewers of all ages. The series emphasizes animation which has increased its appeal to modern viewers.
09 Sealab 2021 (2000-2005)
Sealab 2021 is one of Adult Swim’s initial launches of cartoons. It follows a forgotten ’70s adventure cartoon that turns the environmentally-friendly adventure into a blend of workplace resentments and absurd humor.
10 Teen Titans Go (2013- Present)
This is one of the modern and fast-paced animated series with jokes infused in every quarter of a minute. The funny cartoon animation is popular for its pop-culture references, sly hits at the DC universe, and a well-presented set of self-deprecating jokes.
Part 2 Anyway We Can Create Animation Ourselves?
There can be a number of reasons why you may need to create an animation. With modern technology, it is very easy and possible to quickly and effectively create animations suited for your purposes. Before you go on to creating animations, you need to know about the 5 key kinds of animation popular in modern times. They are:
3D computer animation
Traditional animation
Stop motion
2D Vector-based animation
Motion graphics
No matter which one you are going to create, what you need is an efficient and versatile tool like the Wondershare Filmora . This tool is an advanced and highly functional tool that is used and recommended by professionals all across the globe. The tool enables you to create all kinds of animations with increased ease. The video editing tool comes with a vast range of professional tools that can help you create the perfect video for storytelling.
With Filmora you can create animations just as you imagine. With a range of customization options, you can actually, “breathe life into your clips.” Amongst the key features of the tools, the mentionable ones are:
Motion tracking
A vast range of animation options
Ease in and ease out features
Pan and zoom
A range of text styles and editing options to adjust lights and flares warps and distorts, etc.
Filmora is the perfect tool to bring your imagination to life and express your cinematic flair. The vast range of tools and easy usability help you make the most of your venture and create the perfect animations for your purposes, seamlessly and really quickly.
Key Takeaways from This Episode
● Animation is a vast and versatile field. With the advancement of computer technology and the transformation of the animation industry, we have moved far ahead with our approaches than where we were with the 90s cartoons.
● This article has brought forward the various animation styles that have been a part of the animation industry.
● From the old funny cartoons to the latest dramatic animated web series, you have read about it all to help you better understand the distinctions and the evolution of animation over time.
● Along with BoJack Horseman or just one of the popular Disney cartoons, you have also read about how to create your own animations all by yourself. Filmora Pro is the perfect tool for making animations for a variety of purposes, including marketing videos.
● We hope all of that information will help you make the most of your animation venture!
In today’s time, animation has advanced way more and we can name more than one series, starting from “BoJack Horseman” to “The Flintstones” which can be simply termed as a funny cartoon.
In this article, we will look at the 10 best classical animated cartoon types along with relevant examples to help you understand.
In this article
01 [The Best Animated Series of All Time](#Part 1)
02 [Anyway We Can Create Animation Ourselves?](#Part 2)
Part 1 The Best Animated Series of All Time
Here are 10 classical animated cartoon types with an example for each of them. A lot of us have our earliest TV memories tied to an animated series or the nostalgia of one of the very popular 90s cartoons. In this list, you might as well find one of those funny cartoons or even one of your very favorite Disney cartoons.
01 Doug (1991-1994)
For people who were more into Nickelodeon than Disney/ABC, Doug was one of the most popular 90s cartoons. The funny cartoon show was rated to be one of the most relatable goobers on children’s TV. Along with that, the funny cartoon was known for the ingenuity and creative character names like Doug Funnie, Patti Mayonnaise, Skeeter, Porkchop, Tippi Dink, Roger Klotz, and Mosquito Valentine.
02 Popeye The Sailor (1960-1963)
“Popeye” initially started out as a comic strip in newspapers, but after the theatrical short features started airing on TV during the 1950s, soon 220 cartoons were created in just two years, making it one of the most popular television shows of all time. It had rudimentary animation and focused on the popularity of the character “Popeye the Sailor” which is still a very well-known character.
03 Pokemon (1997-Present)
It’s that good and it keeps going on. Pokemon was initially a series of games for the Nintendo Gameboy and from there it grew to be immensely popular where children across the globe simply loved the cute cartoon characters in the show. The Japanese pocket monsters became an integral part of life when the animated television series started airing.
04 Dexter’s Laboratory (1996-2003)
In 1996 Cartoon Network audiences were introduced to a show named Dexter’s Laboratory with Dexter as the primary character of the cartoon show. The boy genius had a massive hidden laboratory under his house. Every episode would feature Dexter planning an exciting experiment which was a favorite of kids. The series is one of the highest-rated series on the Cartoon Network and it also received a Primetime Emmy Award in 1996.
05 Alvin and the Chipmunks (1983-1990)
Alvin and the Chipmunks have been known since the 1960s. Although the show “Alvin and the Chipmunks’’ became popular on NBC in 1983. It featured three main characters: Alvin, Simon, and the loveable Theodore who got into all kinds of hijinks. The series had a large following, especially after the Chip-ettes, female versions of the Chipmunks, were introduced.
06 Scooby Doo, Where Are You! (1969-1970)
Barely any other two-season title has ever become as popular as “Scooby Doo, Where Are You!” The animation franchise is existent even today. The main attraction of this very funny cartoon was the cowardly Great Dane with a speech impediment. The dog solved crimes with teen friends and perfectly captured the imaginations of children as well as teenagers with subtle horror elements and some really hilarious catchphrases.
07 The Flintstones (1960-1966)
The Flintstones is inspired by “The Honeymooners’’ and was also the first animated series released in primetime. It was also the most successful one of its kind until “The Simpsons” was released 30 years later. The popularity of the series was because of its satirical take on modern suburban culture through the use of absurd, anachronistic elements in a Stone Age setting.
08 The Simpsons (1987-1990)
The Simpsons are simply one of the most popular and revolutionary 90s cartoons. It became a cultural juggernaut during its time and has been rated highly by viewers of all ages. The series emphasizes animation which has increased its appeal to modern viewers.
09 Sealab 2021 (2000-2005)
Sealab 2021 is one of Adult Swim’s initial launches of cartoons. It follows a forgotten ’70s adventure cartoon that turns the environmentally-friendly adventure into a blend of workplace resentments and absurd humor.
10 Teen Titans Go (2013- Present)
This is one of the modern and fast-paced animated series with jokes infused in every quarter of a minute. The funny cartoon animation is popular for its pop-culture references, sly hits at the DC universe, and a well-presented set of self-deprecating jokes.
Part 2 Anyway We Can Create Animation Ourselves?
There can be a number of reasons why you may need to create an animation. With modern technology, it is very easy and possible to quickly and effectively create animations suited for your purposes. Before you go on to creating animations, you need to know about the 5 key kinds of animation popular in modern times. They are:
3D computer animation
Traditional animation
Stop motion
2D Vector-based animation
Motion graphics
No matter which one you are going to create, what you need is an efficient and versatile tool like the Wondershare Filmora . This tool is an advanced and highly functional tool that is used and recommended by professionals all across the globe. The tool enables you to create all kinds of animations with increased ease. The video editing tool comes with a vast range of professional tools that can help you create the perfect video for storytelling.
With Filmora you can create animations just as you imagine. With a range of customization options, you can actually, “breathe life into your clips.” Amongst the key features of the tools, the mentionable ones are:
Motion tracking
A vast range of animation options
Ease in and ease out features
Pan and zoom
A range of text styles and editing options to adjust lights and flares warps and distorts, etc.
Filmora is the perfect tool to bring your imagination to life and express your cinematic flair. The vast range of tools and easy usability help you make the most of your venture and create the perfect animations for your purposes, seamlessly and really quickly.
Key Takeaways from This Episode
● Animation is a vast and versatile field. With the advancement of computer technology and the transformation of the animation industry, we have moved far ahead with our approaches than where we were with the 90s cartoons.
● This article has brought forward the various animation styles that have been a part of the animation industry.
● From the old funny cartoons to the latest dramatic animated web series, you have read about it all to help you better understand the distinctions and the evolution of animation over time.
● Along with BoJack Horseman or just one of the popular Disney cartoons, you have also read about how to create your own animations all by yourself. Filmora Pro is the perfect tool for making animations for a variety of purposes, including marketing videos.
● We hope all of that information will help you make the most of your animation venture!
What Wikipedia Won’t Tell You About Character Rigging
What Wikipedia Won’t Tell You Specifically About Character Rigging
An easy yet powerful editor
Numerous effects to choose from
Detailed tutorials provided by the official channel
The function of character rigging can easily be compared to that of bones, muscles and joints. They act as skeletons to virtual animations. You can also imagine them as strings used on dolls. These digitalized bones function inter-connectedly in a 3D animation.
In this article
01 [Intro to Character Rigging](#Part 1)
02 [8 Tips for Character Rigging](#Part 2)
03 [10 Best Character Rigging Services to Buy Online](#Part 3)
04 [How to Make 3d Character Rig? Are There Any Plugins or Easy](#Part 4)
Part 1 Intro to Character Rigging
As you already know by now that the process of rigging a character can be quite a tedious task. It involves a lot of creative thinking, precision and a keen eye to notice all the small details.
Once you have a model character to work on, riggers set off to creating a skeleton to match the character. These skele-animations can be used to move the entire model as if tugging on strings (not literally).
The movement of the chain of skeletons or rigs is interdependent. Which means if you pull on any one bone, it moves all the other bones in the same sequence. Similar to how bones move within the human body.
Riggers use programs and tools to create a series of bone like structures that can deformed and animated freely according to the preference of the animators.
Movements like positioning, curving and rotation can be recorded and then played back in the animation.
This requires the rigger to constantly coordinate between modelers, animators till the end of the project. This entire process can take weeks or even months.
Amazingly enough, its 20and there are online tools and tutorials you can use to easily learn complex animations like they make in large scale movies and games.
Part 2 8 Tips for Character Rigging
01The Right Rig for the Job
Rigging is a skill all animators gets good at overtime. The more you practice the more familiar you are with the tools you are using. It will also help you understand that not all rigs are meant for the same set of movements.
You need to be able to discern what rig is it that you need and discard what you don’t. If the rig is being used in a game, then the focus will be more on the experience while for movies its attention.
02Deformers for Facial Rigging
Constructing a realistic facial rig can be quite a task but is indeed satisfying once finished. Human facial features require a great degree of flexibility which is why using a variety of deformers for different parts of the face. They are better suited for creating joints over the face and can be done more quickly.
03IK and FK
Though you can use one without the other, it is best to use both of them in an animation. You can’t work without both arms can you? Applying both Inverse and Forward Kinematics in your rig design can help it make more stylistic.
04Learn Python and Maya API: Learn Python and Maya API
If you wish to take your rigging skills to the next level then learning Maya API and Python are great millstones. This way, you can create high quality and sophisticated rigs with high intense flexibility on Maya. Also, Python allows you to write new scripts for PlugIns.
05Delegate to an Animator
After rigging for several hours it is easy to feel like you are only seeing from one perspective. Get in touch with an animator earlier on in the project can help you get feedback to stay consistent in the rigging process.
06Learn Web Technologies: Learn Web Technologies
To be a good animator or rigging specialist involves a lot of learning. Animation technology is constantly changing therefore it is highly recommended to stay up to date with the latest web technologies. Learning HTML, Java Script and CSS is becoming vital to being a part of the gaming world.
07Use Scalable Tools
Not all the characters or objects you rig are going to be of the same size. Selecting the right rigging software is crucial for you to be able to scale your animations. You won’t need to use everything, just the tools that serve your purpose.
08Use a Clean Interface
If you have ever heard of the phrase ‘clean workplace – cleaner work’ then you should know how an untidy interface can affect your workflow. This won’t necessarily change the results but can surely better your experience.
Part 3 Best Character Rigging Services to Buy Online
Don’t feel confused about where to begin. The first step to get into rigging is to master a software, any software, here are of the best ones you can choose from;
01Maya
Offers the best animation features on the market.

02Blender
Vast variety of tools for sculpting, rigging or VFX.

03Modo
Has a more simplified approach towards modelling and rigging.

043ds Max
Leverages high flexibility and ease of use to riggers.
05Sculptris
Excellentfor beginners who need a gateway software to start art.

06ZBrush
Lets you work on your sculpting skills with digital clay.

07Cheetah 3D
Developed by Macintosh to be an easy to learn modelling software.

08Rhinoceros 3D
Harbours a mathematical approach to modelling and modular design.

09Fusion 360
Offers a wide range of simulation tools.

10Cinema 4D
Recognized by professionals for well-equipped arsenal of digital rendering.

Part 4 How to Make Character Rig? Are There Any Plugins or Easy
How to Make Character Rig? Are There Any Plugins or Easy
When we imagine animation, most of the time we are baffled by the end product? But what really goes on behind the mesmerizing colors and whimsical characters.
The basic is of course building rigs to support the entire movement of the character and confine it to actual physical laws that makes it almost a mimic of reality. The entire process of rigging rather simplifies the path to achieve that goal.
In Cinema, character rigging has multiple layers that goes into creating the entire skeleton animation. Setting up a character rig can take anywhere between a few hours or a few days. It probably takes mainstream movies ten times that time.
Let us break down the process of making a rig so that it is simpler to understand.
The process;
Weight Painting: An integral part of the entire rigging process. Although, weight painting can be rendered automatically by the software that you are using, but that can end up making the animation look less realistic. You can instead fine tune the weight of each bone in the rig. You can also copy similar looking bones and apply them to different mesh and repurpose them to function differently.
Placing Bones: After designing a bone structure of character, you can copy the same and use it for similar characters. This is why in games and animation, you notice characters with similar features and traits.
Inverse Kinematics: Not all bones are meant to move in a forward direction. This is why inverses Kinematics are applied to certain bones like the legs, shoulders or even a dragon’s tail. Setting up the IK of your rig would keep specific bones pointed in the right direction so as to make the animation look more natural.
Applying Constraints: The physical realm is built with restrictions. There are things you can do or can’t do according to the natural order of things so as to make your character movement more naturalistic.
Simulation Skeletons: Now comes the part where the magic happens. After fully completing a skeletal animation you can now simulate the motion over the mesh and record the result of the simulation through a series of frames.
Create an animated movie: You can play back the simulation in an animation software such as Blender and then create your own animated movie with Filmora with its easy drag and drop interface. Movies are a collage of frames, so you need to animate according to the fps you want for your video.
Facial Rigs: Facial expressions are more complex than whole body movements. It requires the attention dedicated to a project of its own. Here is where you can play with deforming shapes together to replicate facial muscle movement.
● Key Takeaways from This Episode →
● Rigging has become science in its own right but that does not mean you can’t be artistic with it.
● What you should remember that creating skeletal animation is all about movement and applying physical restrictions to it.
● Start simple and practice until you master the most complex features of any of the top rigging software services raging in the market.
The function of character rigging can easily be compared to that of bones, muscles and joints. They act as skeletons to virtual animations. You can also imagine them as strings used on dolls. These digitalized bones function inter-connectedly in a 3D animation.
In this article
01 [Intro to Character Rigging](#Part 1)
02 [8 Tips for Character Rigging](#Part 2)
03 [10 Best Character Rigging Services to Buy Online](#Part 3)
04 [How to Make 3d Character Rig? Are There Any Plugins or Easy](#Part 4)
Part 1 Intro to Character Rigging
As you already know by now that the process of rigging a character can be quite a tedious task. It involves a lot of creative thinking, precision and a keen eye to notice all the small details.
Once you have a model character to work on, riggers set off to creating a skeleton to match the character. These skele-animations can be used to move the entire model as if tugging on strings (not literally).
The movement of the chain of skeletons or rigs is interdependent. Which means if you pull on any one bone, it moves all the other bones in the same sequence. Similar to how bones move within the human body.
Riggers use programs and tools to create a series of bone like structures that can deformed and animated freely according to the preference of the animators.
Movements like positioning, curving and rotation can be recorded and then played back in the animation.
This requires the rigger to constantly coordinate between modelers, animators till the end of the project. This entire process can take weeks or even months.
Amazingly enough, its 20and there are online tools and tutorials you can use to easily learn complex animations like they make in large scale movies and games.
Part 2 8 Tips for Character Rigging
01The Right Rig for the Job
Rigging is a skill all animators gets good at overtime. The more you practice the more familiar you are with the tools you are using. It will also help you understand that not all rigs are meant for the same set of movements.
You need to be able to discern what rig is it that you need and discard what you don’t. If the rig is being used in a game, then the focus will be more on the experience while for movies its attention.
02Deformers for Facial Rigging
Constructing a realistic facial rig can be quite a task but is indeed satisfying once finished. Human facial features require a great degree of flexibility which is why using a variety of deformers for different parts of the face. They are better suited for creating joints over the face and can be done more quickly.
03IK and FK
Though you can use one without the other, it is best to use both of them in an animation. You can’t work without both arms can you? Applying both Inverse and Forward Kinematics in your rig design can help it make more stylistic.
04Learn Python and Maya API: Learn Python and Maya API
If you wish to take your rigging skills to the next level then learning Maya API and Python are great millstones. This way, you can create high quality and sophisticated rigs with high intense flexibility on Maya. Also, Python allows you to write new scripts for PlugIns.
05Delegate to an Animator
After rigging for several hours it is easy to feel like you are only seeing from one perspective. Get in touch with an animator earlier on in the project can help you get feedback to stay consistent in the rigging process.
06Learn Web Technologies: Learn Web Technologies
To be a good animator or rigging specialist involves a lot of learning. Animation technology is constantly changing therefore it is highly recommended to stay up to date with the latest web technologies. Learning HTML, Java Script and CSS is becoming vital to being a part of the gaming world.
07Use Scalable Tools
Not all the characters or objects you rig are going to be of the same size. Selecting the right rigging software is crucial for you to be able to scale your animations. You won’t need to use everything, just the tools that serve your purpose.
08Use a Clean Interface
If you have ever heard of the phrase ‘clean workplace – cleaner work’ then you should know how an untidy interface can affect your workflow. This won’t necessarily change the results but can surely better your experience.
Part 3 Best Character Rigging Services to Buy Online
Don’t feel confused about where to begin. The first step to get into rigging is to master a software, any software, here are of the best ones you can choose from;
01Maya
Offers the best animation features on the market.
02Blender
Vast variety of tools for sculpting, rigging or VFX.
03Modo
Has a more simplified approach towards modelling and rigging.
043ds Max
Leverages high flexibility and ease of use to riggers.
05Sculptris
Excellentfor beginners who need a gateway software to start art.
06ZBrush
Lets you work on your sculpting skills with digital clay.
07Cheetah 3D
Developed by Macintosh to be an easy to learn modelling software.
08Rhinoceros 3D
Harbours a mathematical approach to modelling and modular design.
09Fusion 360
Offers a wide range of simulation tools.
10Cinema 4D
Recognized by professionals for well-equipped arsenal of digital rendering.
Part 4 How to Make Character Rig? Are There Any Plugins or Easy
How to Make Character Rig? Are There Any Plugins or Easy
When we imagine animation, most of the time we are baffled by the end product? But what really goes on behind the mesmerizing colors and whimsical characters.
The basic is of course building rigs to support the entire movement of the character and confine it to actual physical laws that makes it almost a mimic of reality. The entire process of rigging rather simplifies the path to achieve that goal.
In Cinema, character rigging has multiple layers that goes into creating the entire skeleton animation. Setting up a character rig can take anywhere between a few hours or a few days. It probably takes mainstream movies ten times that time.
Let us break down the process of making a rig so that it is simpler to understand.
The process;
Weight Painting: An integral part of the entire rigging process. Although, weight painting can be rendered automatically by the software that you are using, but that can end up making the animation look less realistic. You can instead fine tune the weight of each bone in the rig. You can also copy similar looking bones and apply them to different mesh and repurpose them to function differently.
Placing Bones: After designing a bone structure of character, you can copy the same and use it for similar characters. This is why in games and animation, you notice characters with similar features and traits.
Inverse Kinematics: Not all bones are meant to move in a forward direction. This is why inverses Kinematics are applied to certain bones like the legs, shoulders or even a dragon’s tail. Setting up the IK of your rig would keep specific bones pointed in the right direction so as to make the animation look more natural.
Applying Constraints: The physical realm is built with restrictions. There are things you can do or can’t do according to the natural order of things so as to make your character movement more naturalistic.
Simulation Skeletons: Now comes the part where the magic happens. After fully completing a skeletal animation you can now simulate the motion over the mesh and record the result of the simulation through a series of frames.
Create an animated movie: You can play back the simulation in an animation software such as Blender and then create your own animated movie with Filmora with its easy drag and drop interface. Movies are a collage of frames, so you need to animate according to the fps you want for your video.
Facial Rigs: Facial expressions are more complex than whole body movements. It requires the attention dedicated to a project of its own. Here is where you can play with deforming shapes together to replicate facial muscle movement.
● Key Takeaways from This Episode →
● Rigging has become science in its own right but that does not mean you can’t be artistic with it.
● What you should remember that creating skeletal animation is all about movement and applying physical restrictions to it.
● Start simple and practice until you master the most complex features of any of the top rigging software services raging in the market.
Also read:
- 15 Best Stop Motion Animation Kits to Fuel Creativity
- Updated Know All About Animated Business Logos and the Best Tools to Create One for 2024
- In 2024, Top 10 Old Cartoons From Cartoon Network That You Miss
- New How To Animate Graphics in Canva for 2024
- In 2024, 20 Free After Effects Logo Reveal Templates
- New 2024 Approved 15 Top Pics Collage Apps
- Updated In 2024, 10 Great Moving Animation PowerPoint Techniques
- Updated Why These 10+ Top Text Motion Templates Are Worth Your Attention
- New Ways to Create Animated Clipart in PowerPoint
- 2024 Approved Simple Shortcut to Convert Videos to Gifs on iPhone
- New 10 Best Photoshop Cartoon Effects For Creatives
- Updated 2024 Approved You Can Turn a TikTok Into a GIF Now
- New 2024 Approved 8 Free GIF Animators to Make Your Own GIF
- 2024 Approved 18 Best Tools and Services to Create Animated Videos for Business 2023
- 10 Stunning Stop Motion Movies That You Should Not Miss for 2024
- Updated In 2024, Secret Shortcut to Adobe Animate Character Tutorial
- Guide How To Unbrick a Bricked Poco X5 Phone | Dr.fone
- A Step-by-Step Guide on Using ADB and Fastboot to Remove FRP Lock from your Samsung Galaxy A15 4G
- 11 Best Location Changers for Realme GT 3 | Dr.fone
- In 2024, FRP Hijacker by Hagard Download and Bypass your Vivo V27 Pro FRP Locks
- In 2024, The Ultimate Guide to Get the Rare Candy on Pokemon Go Fire Red On Nokia 130 Music | Dr.fone
- 3 Ways to Fake GPS Without Root On Motorola Edge+ (2023) | Dr.fone
- How To Recover iPhone 8 Plus Data From iTunes? | Dr.fone
- In 2024, Top 10 Best Spy Watches For your Poco X6 Pro | Dr.fone
- How to Fix Error 495 While Download/Updating Android Apps On OnePlus Ace 2V | Dr.fone
- Why is iPogo not working On Apple iPhone XS Max? Fixed | Dr.fone
- In 2024, How To Leave a Life360 Group On Samsung Galaxy S23+ Without Anyone Knowing? | Dr.fone
- Fixing Persistent Pandora Crashes on Samsung Galaxy A14 4G | Dr.fone
- Title: Top 10 Video to GIF Converters Top Picks for 2024
- Author: Elon
- Created at : 2024-05-19 03:05:07
- Updated at : 2024-05-20 03:05:07
- Link: https://animation-videos.techidaily.com/top-10-video-to-gif-converters-top-picks-for-2024/
- License: This work is licensed under CC BY-NC-SA 4.0.
