
:max_bytes(150000):strip_icc():format(webp)/Apple-Watch-Ultra-2-23e8ec3e4ee04c6e98c9d654a35f59ec.jpg)
Top 12 Illusion Gifs Top Picks for 2024
Top 12 Illusion Gifs: Top Picks
Best 12 Illusion Gifs: Top Picks
An easy yet powerful editor
Numerous effects to choose from
Detailed tutorials provided by the official channel
Do you know that these are reaching heights and people are very happy in sharing them? If you are unaware of it, don’t worry and keep reading. Thorugh today’s post, we will discuss illusion GIF in detail yo make it easy for you to make up your mind and try your hands on it.
In this article
01 [What Is GIF Illustration?](#Part 1)
02 [Best 12 Illusion Gifs](#Part 2)
Part 1 What Is GIF Illustration?
GIFs are a form of digital media that is used to show animations and other types of visuals. It is a type of file format that can be created with different editing software. These are usually used for short videos or images on the internet and social media.
Furthermore, GIFs are an excellent way to create visual content for social media posts or as an animated overlay on a video.
These are now used as everything from advertisements to commentary from all walks of life. The users of GIFs seem to be endless! They can be used in many different ways, such as to add visual interest, provide context or even humor, and so on. It is totally on the user how they are considering it to make the things more relevant to the context for which they have created or shared the GIF.
Part 2 Best 12 Illusion Gifs
This curated list will help you to know the best Illusion GIF that is still ruling out the market. This includes:-
01Van Gogh Stare GIF
The Van Gogh Stare, also known as the “dazzle camouflage,” is an optical illusion created by artist Vincent van Gogh. It was likely intended to represent the eye’s instability and movement. The image has been used in a variety of ways, including on social media sites like Tumblr. In general, this GIF illusion is a demonstration of the Van Gogh Stare.
02This brain-busting rotation
We are all used to seeing the world around us in two dimensions. But what if we could see it in three dimensions? Well, now you can! This GIF shows a rotating 3D object that appears to be made of cubes. The illusion is created by the fact that the camera rotates around the object, but you can’t see it from every angle.
03This loop tea GIF
This GIF illusion is a perfect example of how our brain works. When we see something that doesn’t make sense, we try to make sense of it by filling in the gaps with what we believe it should look like. The GIF illusion consists of two frames. The first frame shows a woman drinking tea from a cup, and the second frame shows her drinking from an empty cup. When our brain tries to fill in the gaps, it assumes that the woman drank all of the tea and sees her as drinking from an empty cup even though she is actually drinking from a full one.
04No smkoing! Well, you should never
The GIF illusion consists of two images: one of a cloud and another of cauliflower. The animation starts with the cloud and then switches to the cauliflower. But if you take a closer look, you’ll notice that there’s actually no smoke in the first image, just the cauliflower. And it’s not really a head either - it’s just an ordinary cauliflower from behind.
The reason why this illusion works is that our brains are wired to see patterns and shapes in things that aren’t always there - for example, when we see faces in random objects or shapes in clouds. This GIF takes advantage of that by showing two images where these are
05The never-ending corridor
The GIF illusion is a rather simple illusion that takes advantage of the way our brains perceive motion. Our brains are programmed to see a moving object as a single object in order to make sense of the world around us. This means that when we see an object moving, we perceive it as one solid thing instead of many separate objects.
This GIF illusion is a perfect example of how the human brain works. The brain can’t process that the two images are different, and instead, it sees them as a single image.
06Now, this, the eye-pleaser
The illusion works on the principle of depth perception and how our eyes are not able to accurately process all of the information that they receive from our surroundings. The black lines on the white background make it seem like there are two rows of lines, but there’s only one row that appears to be moving back and forth.
07Commercial At design GIF
The GIF illusion is a simple design that tricks the brain into thinking that it is 3D. The design consists of two circles, one inside the other, with three arrows pointing inwards. The outside circle has a white background and the inside circle has a black background. When you look at this design from different angles, you will see that the arrows point outwards and not inwards as they should be doing.
08Wait what? Is this truly a reflection?
This illusion works because our brain recognizes that the mirror image is not what’s really happening and flips the image in our head to make it right-side up.
It’s also possible that we are tricked by the fact that we know mirrors flip images, so when we see an upside-down image in front of us, we automatically assume it’s just inverted.
09This haunting tableau (Not exactly a GIF but worth sharing)
The GIF illusion is a type of optical illusion that can be explained by the Gestalt Principles. The Gestalt Principles are guidelines for how we perceive and organize visual information. This optical illusion is created by overlapping two similar images on top of each other in the same place but with different colors. Our brain perceives this as a single image, and our eyes try to make sense of it by looking for visual cues in the image. When we focus on one image, it looks like a triangle with a red line going through it. But when we focus on the other image, it looks like an arrow pointing up that has been cut in half with a red line through it.
10This safety hazard
This GIF illusion is a safety hazard because it tricks the brain into thinking that the person in front of them is standing still. When you stare at this GIF for too long, the person will appear to be moving backward. This illusion can cause accidents if you believe that a person is still when they are actually approaching you.
11Welcome to the 3d World
It’s an illusion created by the use of perspective. The camera is positioned in such a way that it appears that the three-dimensional cube is only two-dimensional.
The camera is positioned in such a way that it appears that the three-dimensional cube is only two-dimensional.
12I will keep this table forever
The GIF illusion is an optical illusion that makes the table in the background appear to be bigger than it actually is. The table in front of the window appears to be smaller and closer to the viewer. There are two factors that make this illusion happen. One of them is perspective, which makes objects appear larger as they get closer and smaller as they get farther away. The other factor is size constancy, which makes objects look about the same size regardless of how far away they are from you.
Part 3 How Do You Make a GIF Illustration?
If you are someone who is curious to make a GIF illustration but have no clue how to make it, then the online portals are catering to all your needs. Right now, there are multiple tools available that will help you to create the illustration seamlessly. Among all of them, we suggest you try your hands on Filmora.
Wondershare Filmora Video Editor is one of the best tools available to make the gift illustration as you want. You just need to upload the content, and then you are all set to edit it at your convenience. The best part is the interface of the tool is very simple to understand, which simply means there will be no need for you to belong to any technical background to use this tool.

Wondershare Filmora - Best Video Editor for Mac/Windows
5,481,435 people have downloaded it.
Build unique custom animations without breaking a sweat.
Focus on creating epic stories and leave the details to Filmora’s auto features.
Start a creative adventure with drag & drop effects and endless possibilities.
Filmora simplifies advanced features to save you time and effort.
Filmora cuts out repetition so you can move on to your next creative breakthrough.
Along with creating the GIF files, it also help you to do the editing as you wanted. For example, if you are looking forward to reading on any text to the GIF file, you can also do it seamlessly. The interface will help you to understand how you can do it so that there will be no problem in creating the content as you want.
● Key Takeaways from This Episode →
● Filmora is the best tool to create illusion GIF.
●Illusion GIF are in use for advertisement.
●Creating illusion GIF is just a matter of few steps.
Do you know that these are reaching heights and people are very happy in sharing them? If you are unaware of it, don’t worry and keep reading. Thorugh today’s post, we will discuss illusion GIF in detail yo make it easy for you to make up your mind and try your hands on it.
In this article
01 [What Is GIF Illustration?](#Part 1)
02 [Best 12 Illusion Gifs](#Part 2)
Part 1 What Is GIF Illustration?
GIFs are a form of digital media that is used to show animations and other types of visuals. It is a type of file format that can be created with different editing software. These are usually used for short videos or images on the internet and social media.
Furthermore, GIFs are an excellent way to create visual content for social media posts or as an animated overlay on a video.
These are now used as everything from advertisements to commentary from all walks of life. The users of GIFs seem to be endless! They can be used in many different ways, such as to add visual interest, provide context or even humor, and so on. It is totally on the user how they are considering it to make the things more relevant to the context for which they have created or shared the GIF.
Part 2 Best 12 Illusion Gifs
This curated list will help you to know the best Illusion GIF that is still ruling out the market. This includes:-
01Van Gogh Stare GIF
The Van Gogh Stare, also known as the “dazzle camouflage,” is an optical illusion created by artist Vincent van Gogh. It was likely intended to represent the eye’s instability and movement. The image has been used in a variety of ways, including on social media sites like Tumblr. In general, this GIF illusion is a demonstration of the Van Gogh Stare.
02This brain-busting rotation
We are all used to seeing the world around us in two dimensions. But what if we could see it in three dimensions? Well, now you can! This GIF shows a rotating 3D object that appears to be made of cubes. The illusion is created by the fact that the camera rotates around the object, but you can’t see it from every angle.
03This loop tea GIF
This GIF illusion is a perfect example of how our brain works. When we see something that doesn’t make sense, we try to make sense of it by filling in the gaps with what we believe it should look like. The GIF illusion consists of two frames. The first frame shows a woman drinking tea from a cup, and the second frame shows her drinking from an empty cup. When our brain tries to fill in the gaps, it assumes that the woman drank all of the tea and sees her as drinking from an empty cup even though she is actually drinking from a full one.
04No smkoing! Well, you should never
The GIF illusion consists of two images: one of a cloud and another of cauliflower. The animation starts with the cloud and then switches to the cauliflower. But if you take a closer look, you’ll notice that there’s actually no smoke in the first image, just the cauliflower. And it’s not really a head either - it’s just an ordinary cauliflower from behind.
The reason why this illusion works is that our brains are wired to see patterns and shapes in things that aren’t always there - for example, when we see faces in random objects or shapes in clouds. This GIF takes advantage of that by showing two images where these are
05The never-ending corridor
The GIF illusion is a rather simple illusion that takes advantage of the way our brains perceive motion. Our brains are programmed to see a moving object as a single object in order to make sense of the world around us. This means that when we see an object moving, we perceive it as one solid thing instead of many separate objects.
This GIF illusion is a perfect example of how the human brain works. The brain can’t process that the two images are different, and instead, it sees them as a single image.
06Now, this, the eye-pleaser
The illusion works on the principle of depth perception and how our eyes are not able to accurately process all of the information that they receive from our surroundings. The black lines on the white background make it seem like there are two rows of lines, but there’s only one row that appears to be moving back and forth.
07Commercial At design GIF
The GIF illusion is a simple design that tricks the brain into thinking that it is 3D. The design consists of two circles, one inside the other, with three arrows pointing inwards. The outside circle has a white background and the inside circle has a black background. When you look at this design from different angles, you will see that the arrows point outwards and not inwards as they should be doing.
08Wait what? Is this truly a reflection?
This illusion works because our brain recognizes that the mirror image is not what’s really happening and flips the image in our head to make it right-side up.
It’s also possible that we are tricked by the fact that we know mirrors flip images, so when we see an upside-down image in front of us, we automatically assume it’s just inverted.
09This haunting tableau (Not exactly a GIF but worth sharing)
The GIF illusion is a type of optical illusion that can be explained by the Gestalt Principles. The Gestalt Principles are guidelines for how we perceive and organize visual information. This optical illusion is created by overlapping two similar images on top of each other in the same place but with different colors. Our brain perceives this as a single image, and our eyes try to make sense of it by looking for visual cues in the image. When we focus on one image, it looks like a triangle with a red line going through it. But when we focus on the other image, it looks like an arrow pointing up that has been cut in half with a red line through it.
10This safety hazard
This GIF illusion is a safety hazard because it tricks the brain into thinking that the person in front of them is standing still. When you stare at this GIF for too long, the person will appear to be moving backward. This illusion can cause accidents if you believe that a person is still when they are actually approaching you.
11Welcome to the 3d World
It’s an illusion created by the use of perspective. The camera is positioned in such a way that it appears that the three-dimensional cube is only two-dimensional.
The camera is positioned in such a way that it appears that the three-dimensional cube is only two-dimensional.
12I will keep this table forever
The GIF illusion is an optical illusion that makes the table in the background appear to be bigger than it actually is. The table in front of the window appears to be smaller and closer to the viewer. There are two factors that make this illusion happen. One of them is perspective, which makes objects appear larger as they get closer and smaller as they get farther away. The other factor is size constancy, which makes objects look about the same size regardless of how far away they are from you.
Part 3 How Do You Make a GIF Illustration?
If you are someone who is curious to make a GIF illustration but have no clue how to make it, then the online portals are catering to all your needs. Right now, there are multiple tools available that will help you to create the illustration seamlessly. Among all of them, we suggest you try your hands on Filmora.
Wondershare Filmora Video Editor is one of the best tools available to make the gift illustration as you want. You just need to upload the content, and then you are all set to edit it at your convenience. The best part is the interface of the tool is very simple to understand, which simply means there will be no need for you to belong to any technical background to use this tool.
Wondershare Filmora - Best Video Editor for Mac/Windows
5,481,435 people have downloaded it.
Build unique custom animations without breaking a sweat.
Focus on creating epic stories and leave the details to Filmora’s auto features.
Start a creative adventure with drag & drop effects and endless possibilities.
Filmora simplifies advanced features to save you time and effort.
Filmora cuts out repetition so you can move on to your next creative breakthrough.
Along with creating the GIF files, it also help you to do the editing as you wanted. For example, if you are looking forward to reading on any text to the GIF file, you can also do it seamlessly. The interface will help you to understand how you can do it so that there will be no problem in creating the content as you want.
● Key Takeaways from This Episode →
● Filmora is the best tool to create illusion GIF.
●Illusion GIF are in use for advertisement.
●Creating illusion GIF is just a matter of few steps.
Top 10 Video to GIF Converters: Top Picks
Best 10 Video to GIF Converters: Top Picks
An easy yet powerful editor
Numerous effects to choose from
Detailed tutorials provided by the official channel
Having trouble converting your videos to GIF? Browse the top 10 converters to sort this out!
In this article
01 [Why GIFs are Widely Used and Popular?](#Part 1)
02 [Top 10 Ways to Turn Video into GIF](#Part 2)
Part 1 Why GIFs are Widely Used and Popular?
If you take a poll on the watch preference of GIF versus videos, most of votes you get would be in favor of watching GIFs. There are obvious reasons to the fact that anyone would prefer watching a GIF over a video, irrespective of its length. Some major ones that make it quite annoying to watch videos include the following:
● To begin with, you need to turn the video on and off, depending on your choice of watching a video or surfing through stories and feeds, failing which you get to hear additional sounds through your feed from the already running video. You further need to stop the music or go for a volume control in case you are not interested to watch the video.
● Most of the videos you run turn up to be irrelevant or uninteresting through the middle, but you don’t have a choice to make bit adjustments. If however possible, the method is not quite convenient. You may need to visit a different site in case you run a video that is not integrated with webpage of your searched content, wait for the portal’s interface to load or watch an advertisement.
● GIFs, on the other hand, do not require pausing or turning off, and run automatically. You also don’t need to mute any sounds. These ensure to-the-point message delivery and don’t divert your attention from the primary content you visit the webpage for.
Owing to the above, most of us are now much interested to convert videos to GIFs for an exact, impactful and to the point content creation and sharing. See through the next sections of this article to learn about the best video to GIF conversion tools and software.
Part 1 Top 10 Ways to Turn Video into GIF
Considering the credibility of GIFs, you may often require to convert your long videos into short and content specific GIFs. Given below are the 10 best methods to cater to the need of video to GIF conversion:
01Filmora
Wondershare Filmora Video Editor is one among the most popular and easy methods to convert videos to GIFs. It is compatible with almost all common video formats and is loaded with a plethora of exciting effects and editing tools. Take the following steps to create GIFs from videos using this application:
Wondershare Filmora
Get started easily with Filmora’s powerful performance, intuitive interface, and countless effects!
Try It Free Try It Free Try It Free Learn More >


Step 1: Import Your Video
Launch Filmora and import your desired video in the app’s welcome window. To do this, click on ‘New Project’ followed by ‘Import’ option from the drop down menu to add your video to the Filmora.

Step 2: Timeline Dragging
Add your video to the app’s timeline using the ‘Drag and Drop’ method. You can also extract video frames by taking screenshots and merge these images into your GIF from the media library.

Step 3: Explore Your Editing Skills
You can now edit the imported video in the timeline using a range of interesting effects. Crop, trim, split or make speed adjustments to give your video a catchy look.

Step 4: Include Messages
Try adding texts and supplementary elements to deliver impactful messages through your creation.

Step 5: It’s Time to Share!
Click ‘Export’ to save your GIF to your device. You are now ready to post your work in your social communities to get the most deserved attention of your peers!

02YouTube to GIF
This one is a simple and user-friendly video to GIF converter. You can convert videos to GIFs from your PC or other online platforms with this converter. The converter allows you to play with a variety of editing effects to make your creation more interesting. All you need to do is the following:
● In the video URL bar, type ‘gif’ after ‘www.’ and you will be redirected to converter’s working window. Set the GIF time interval or apply specific effects using the tools from the panel in the left of the working window.


● To set the video time frame, highlight it in the video timeline. Set the desired interval using the ‘Start Time’ and ‘End Time’ options.

● To add a new visual effect, select it from the menu. Below the video timeline, a row of parameters will get displayed. Set the effect parameters to make desired changes.
● Click ‘Create GIF’. In the ‘Settings’ menu, you can rename and add tags to your creation and even make it private.

● That’s it! You can download your GIF now. You may get a converter purchase offer for enabling advanced features. While most users prefer sticking to the free version, it is up to you whether to decline or accept the purchase offer.
● The ‘Download’ feature is exclusive to registered users. However, if you don’t prefer creating an account, just open the GIF download link in a separate tab’s ‘Direct Link’ row. Alternatively, you can replace ‘gif’ with ‘conv’ in the video URL bar and choose ‘Convert to GIF’. However, this process may take some extra minutes.

03Giphy GIF Maker
This is an editing tool that you can use to convert video to GIF online. This one is a reliable converter tool with a user-cohesive interface. It is a simple video editor that is available to you for free. All you need to do is mentioned below:
Step 1: Load your Video
Go to the official app website and paste your desired video link in the search bar. Your video gets uploaded to the app’s editor screen. Specify the time frame and check out your GIF’s preview.

Step 2: Let’s Go Editing!
Select ‘Continue to Decorate’ to edit your GIF with texts, effects, frames and filters. You can even go for a straight upload if your video doesn’t require customization.

Step 3: Time to Share!
Select ‘Continue to Upload’ and add required tags. Tap ‘Upload to Giphy’ to make a social media post or add it to the app’s website through a specific share code.
04Wondershare TunesGo
This is an effective video to GIF creator tool, loaded with extensive features. You can use this application to convert videos, live photos and multiple snaps into interesting GIFs. TunesGo gives you the freedom to edit your work in your own style with a variety of effects. Here’s what you need to do:

Step 1: Launch TunesGo
Download, install and launch the app into your PC. You may be asked for a device connection setup, but you can skip that in case GIF creation is your only requirement.

Step 2: Upload your Video
In the app’s welcome screen, navigate to ‘Toolbox’ at the top. From the drop down interface, choose ‘GIF Maker’. In the new window that pops-up next, click on ‘Add’ to upload the desired video to the app from your PC.

Step 3: Let’s Create!
Set the required time frame for your GIF in the app’s timeline and tap the ‘Create GIF’ button to start the conversion process. On completion, your work gets automatically saved in the ‘Pictures’ folder in your PC. You can also customize your target location.

05Vimeo
Vimeo is also a quick, 3-stepvideo to GIF converter. However, you need to have a Vimeo account to take up the conversion process. This is an easy and hassle free GIF creator, that adheres to your creation needs within minutes. Here’s what you need to do:
Step 1: Upload Your Video
Log in to your Vimeo account. In the opening window, select ’Upload’ from the toolbar at the top. ‘Drag and Drop’ or click ‘Choose Files’ to upload the desired video from your device.

Step 2: Create Your GIF
After you are done uploading the video, select ‘Create a GIF’ from the sidebar at the left. You will be directed to the GIF Editor window. Select a loop section from the video and set a time frame of maximum 6 seconds in the video timeline. Now click ‘Create GIF’.


Step 3: Export Your Creation
Your GIF is ready to download and share. You can also embed your GIF by generating embed codes for specific platforms.
06 Adobe Photoshop
This one is one f the most popular editing applications you can use to make GIF out of video. It’s simple and user-friendly interface does not require you to possess a Photoshop mastery for the conversion purpose. Here’s what you need to follow:
Step 1: Search Your Video
Find a video of your choice from a desired platform. In case you want a YouTube video, add ‘ss’ prior to the video’s service name in YouTube’s URL bar.
STEP 2: Edit Your Video
Use any preferable video splitters and editors to crop, trim and add interesting effects to your video and set a maximum time frame of 3 seconds.
Step 3: Create GIF
Open your edited video in Adobe Photoshop and tap ‘File Import-Video frames into layers’.

Step 4: Adjust Settings
Make required setting adjustments and click on ‘File-Save for Web’. Try adjusting image resolution and color range if your file size exceeds 10 MB.

Step 5: Save Your Work
In the ’Files’ tab at the top, select ‘Save’ and choose the ‘.gif’ extension in the ‘File Type’ dialog box to save your creation to your PC.
07Convertio
This converter provides a simple, 3-step process to create GIF from video. Either use it as a browser extension or download it from Google Chrome Webstore. Take the following steps to convert videos to GIF online.
● Upload your desired video to the service timeline. You can either choose files directly or ‘Drag and Drop’ them from your device.
● Select ‘Convert’ to make GIF from your uploaded video.
● Tap ‘Download’ to save your creation.

You can use this service to make different format conversions. However, this converter does not allow you to edit or add effects your GIF.
08MakeAGif
You can use this tool as a GIF video maker online to create, exchange and share GIFs on different platforms. Additionally, you also get the flexibility to use already saved images in your device to add them to your GIF. The app’s basic version allows you to create GIFs without watermarks. To add watermarks, you will need an account on the app. To convert videos to GIFs using this tool, you should take the following steps:
Step 1: Upload Your Video
In the app’s welcome screen, click on ‘Video to GIF’ and upload a desired video in the editor timeline. Add effects and make speed and time frame adjustments. When satisfied, tap ‘Continue to Publishing’.

Step 2: Add Names and Tags
In the publishing window, give a suitable name and add required tags to your edited video to make it easily identifiable. When you are done, click on ‘Create a GIF’ from the bottom right.

Step 3: Ready to Share!
You can now share your created GIF across social media platforms.

09Adobe Premiere
Similar to Adobe Photoshop, Adobe Premiere too is quite a preferred application for creating GIFs from videos. This is a simple, quick and free application that converts your videos to GIFs in a span of few minutes. Here’s what you need to do to go about the process:

Step 1: Edit your Video
Add a video of your choice in the Adobe Premiere timeline and play with your editing creativity to add desired effects and filters to it. Make sure to set requisite time frames to your edit.

Step 2: Prepare an Export
Click into the app’s video timeline, and prepare a file export using the following path:
File> Export> Media

Step 3: Settings Adjustments
In the Media Export window, navigate to the ‘Format’ tab. From the drop down menu, choose ‘Animated GIF’. Here, you can add your gif file, select its target destination and adjust the required settings.

Step 4: Export Your Work
Click ‘Export’ to share your creation on social media or click on ‘Queue’ to send your GIF to a specific media encoder.

1010. Movavi Video Converter
This is one of the latest video converter software you can rely on to make GIF from video files. This software allows you to create top quality animated GIFs and is compatible with a variety of video formats. Using this converter, you can create amazing GIFs in 5 quick steps: here’s what you need to follow:
Step 1: Download and Install the Software
To begin, download the converter software from its official site and adhere to the user instructions to install the same in your system.
Step 2: Upload Your Video
In the software’s opening window, click on ‘Add Media’ followed by ‘Add Video’ and select a desired video from your system to upload on the Movavi video timeline.

Step 3: Trim Your Video
Select ‘Edit’ from the right of your video file. In the editing window, specify the initial cut of the video by displacing the marker to the desired point. Click on ‘Scissors’ to add multiple cut points to your video. You can even drag the cut points around the editor timeline. Choose the unvented sections and click ‘Trash Can’. When the result satisfies you, click ‘Done’.

Step 4: Choose a Conversion Format
Navigate to the ‘Images’ tab and select ‘GIF’ and set an adequate size for the GIF. Here, you can adjust quality, frame size and rate and resize method using the ‘Cogwheel’ tool.

Step 5: Let’s Get Converting!
Tap ‘Convert’ and wait for the conversion to finish. You will be automatically directed to the folder where your converted files get saved.

● Key Takeaways from This Episode →
● GIFs are short, to the point and convenient to access, providing exact and impactful message delivery.
● The software market is flooded with a variety of editing tools to convert your dull videos to catchy GIFs.
● Filmora is a quick and smart editing tool that envisages your GIF creating experience with a range of exciting features.
Having trouble converting your videos to GIF? Browse the top 10 converters to sort this out!
In this article
01 [Why GIFs are Widely Used and Popular?](#Part 1)
02 [Top 10 Ways to Turn Video into GIF](#Part 2)
Part 1 Why GIFs are Widely Used and Popular?
If you take a poll on the watch preference of GIF versus videos, most of votes you get would be in favor of watching GIFs. There are obvious reasons to the fact that anyone would prefer watching a GIF over a video, irrespective of its length. Some major ones that make it quite annoying to watch videos include the following:
● To begin with, you need to turn the video on and off, depending on your choice of watching a video or surfing through stories and feeds, failing which you get to hear additional sounds through your feed from the already running video. You further need to stop the music or go for a volume control in case you are not interested to watch the video.
● Most of the videos you run turn up to be irrelevant or uninteresting through the middle, but you don’t have a choice to make bit adjustments. If however possible, the method is not quite convenient. You may need to visit a different site in case you run a video that is not integrated with webpage of your searched content, wait for the portal’s interface to load or watch an advertisement.
● GIFs, on the other hand, do not require pausing or turning off, and run automatically. You also don’t need to mute any sounds. These ensure to-the-point message delivery and don’t divert your attention from the primary content you visit the webpage for.
Owing to the above, most of us are now much interested to convert videos to GIFs for an exact, impactful and to the point content creation and sharing. See through the next sections of this article to learn about the best video to GIF conversion tools and software.
Part 1 Top 10 Ways to Turn Video into GIF
Considering the credibility of GIFs, you may often require to convert your long videos into short and content specific GIFs. Given below are the 10 best methods to cater to the need of video to GIF conversion:
01Filmora
Wondershare Filmora Video Editor is one among the most popular and easy methods to convert videos to GIFs. It is compatible with almost all common video formats and is loaded with a plethora of exciting effects and editing tools. Take the following steps to create GIFs from videos using this application:
Wondershare Filmora
Get started easily with Filmora’s powerful performance, intuitive interface, and countless effects!
Try It Free Try It Free Try It Free Learn More >
Step 1: Import Your Video
Launch Filmora and import your desired video in the app’s welcome window. To do this, click on ‘New Project’ followed by ‘Import’ option from the drop down menu to add your video to the Filmora.
Step 2: Timeline Dragging
Add your video to the app’s timeline using the ‘Drag and Drop’ method. You can also extract video frames by taking screenshots and merge these images into your GIF from the media library.
Step 3: Explore Your Editing Skills
You can now edit the imported video in the timeline using a range of interesting effects. Crop, trim, split or make speed adjustments to give your video a catchy look.
Step 4: Include Messages
Try adding texts and supplementary elements to deliver impactful messages through your creation.
Step 5: It’s Time to Share!
Click ‘Export’ to save your GIF to your device. You are now ready to post your work in your social communities to get the most deserved attention of your peers!
02YouTube to GIF
This one is a simple and user-friendly video to GIF converter. You can convert videos to GIFs from your PC or other online platforms with this converter. The converter allows you to play with a variety of editing effects to make your creation more interesting. All you need to do is the following:
● In the video URL bar, type ‘gif’ after ‘www.’ and you will be redirected to converter’s working window. Set the GIF time interval or apply specific effects using the tools from the panel in the left of the working window.
● To set the video time frame, highlight it in the video timeline. Set the desired interval using the ‘Start Time’ and ‘End Time’ options.
● To add a new visual effect, select it from the menu. Below the video timeline, a row of parameters will get displayed. Set the effect parameters to make desired changes.
● Click ‘Create GIF’. In the ‘Settings’ menu, you can rename and add tags to your creation and even make it private.
● That’s it! You can download your GIF now. You may get a converter purchase offer for enabling advanced features. While most users prefer sticking to the free version, it is up to you whether to decline or accept the purchase offer.
● The ‘Download’ feature is exclusive to registered users. However, if you don’t prefer creating an account, just open the GIF download link in a separate tab’s ‘Direct Link’ row. Alternatively, you can replace ‘gif’ with ‘conv’ in the video URL bar and choose ‘Convert to GIF’. However, this process may take some extra minutes.
03Giphy GIF Maker
This is an editing tool that you can use to convert video to GIF online. This one is a reliable converter tool with a user-cohesive interface. It is a simple video editor that is available to you for free. All you need to do is mentioned below:
Step 1: Load your Video
Go to the official app website and paste your desired video link in the search bar. Your video gets uploaded to the app’s editor screen. Specify the time frame and check out your GIF’s preview.
Step 2: Let’s Go Editing!
Select ‘Continue to Decorate’ to edit your GIF with texts, effects, frames and filters. You can even go for a straight upload if your video doesn’t require customization.
Step 3: Time to Share!
Select ‘Continue to Upload’ and add required tags. Tap ‘Upload to Giphy’ to make a social media post or add it to the app’s website through a specific share code.
04Wondershare TunesGo
This is an effective video to GIF creator tool, loaded with extensive features. You can use this application to convert videos, live photos and multiple snaps into interesting GIFs. TunesGo gives you the freedom to edit your work in your own style with a variety of effects. Here’s what you need to do:
Step 1: Launch TunesGo
Download, install and launch the app into your PC. You may be asked for a device connection setup, but you can skip that in case GIF creation is your only requirement.
Step 2: Upload your Video
In the app’s welcome screen, navigate to ‘Toolbox’ at the top. From the drop down interface, choose ‘GIF Maker’. In the new window that pops-up next, click on ‘Add’ to upload the desired video to the app from your PC.
Step 3: Let’s Create!
Set the required time frame for your GIF in the app’s timeline and tap the ‘Create GIF’ button to start the conversion process. On completion, your work gets automatically saved in the ‘Pictures’ folder in your PC. You can also customize your target location.
05Vimeo
Vimeo is also a quick, 3-stepvideo to GIF converter. However, you need to have a Vimeo account to take up the conversion process. This is an easy and hassle free GIF creator, that adheres to your creation needs within minutes. Here’s what you need to do:
Step 1: Upload Your Video
Log in to your Vimeo account. In the opening window, select ’Upload’ from the toolbar at the top. ‘Drag and Drop’ or click ‘Choose Files’ to upload the desired video from your device.
Step 2: Create Your GIF
After you are done uploading the video, select ‘Create a GIF’ from the sidebar at the left. You will be directed to the GIF Editor window. Select a loop section from the video and set a time frame of maximum 6 seconds in the video timeline. Now click ‘Create GIF’.
Step 3: Export Your Creation
Your GIF is ready to download and share. You can also embed your GIF by generating embed codes for specific platforms.
06 Adobe Photoshop
This one is one f the most popular editing applications you can use to make GIF out of video. It’s simple and user-friendly interface does not require you to possess a Photoshop mastery for the conversion purpose. Here’s what you need to follow:
Step 1: Search Your Video
Find a video of your choice from a desired platform. In case you want a YouTube video, add ‘ss’ prior to the video’s service name in YouTube’s URL bar.
STEP 2: Edit Your Video
Use any preferable video splitters and editors to crop, trim and add interesting effects to your video and set a maximum time frame of 3 seconds.
Step 3: Create GIF
Open your edited video in Adobe Photoshop and tap ‘File Import-Video frames into layers’.
Step 4: Adjust Settings
Make required setting adjustments and click on ‘File-Save for Web’. Try adjusting image resolution and color range if your file size exceeds 10 MB.
Step 5: Save Your Work
In the ’Files’ tab at the top, select ‘Save’ and choose the ‘.gif’ extension in the ‘File Type’ dialog box to save your creation to your PC.
07Convertio
This converter provides a simple, 3-step process to create GIF from video. Either use it as a browser extension or download it from Google Chrome Webstore. Take the following steps to convert videos to GIF online.
● Upload your desired video to the service timeline. You can either choose files directly or ‘Drag and Drop’ them from your device.
● Select ‘Convert’ to make GIF from your uploaded video.
● Tap ‘Download’ to save your creation.
You can use this service to make different format conversions. However, this converter does not allow you to edit or add effects your GIF.
08MakeAGif
You can use this tool as a GIF video maker online to create, exchange and share GIFs on different platforms. Additionally, you also get the flexibility to use already saved images in your device to add them to your GIF. The app’s basic version allows you to create GIFs without watermarks. To add watermarks, you will need an account on the app. To convert videos to GIFs using this tool, you should take the following steps:
Step 1: Upload Your Video
In the app’s welcome screen, click on ‘Video to GIF’ and upload a desired video in the editor timeline. Add effects and make speed and time frame adjustments. When satisfied, tap ‘Continue to Publishing’.
Step 2: Add Names and Tags
In the publishing window, give a suitable name and add required tags to your edited video to make it easily identifiable. When you are done, click on ‘Create a GIF’ from the bottom right.
Step 3: Ready to Share!
You can now share your created GIF across social media platforms.
09Adobe Premiere
Similar to Adobe Photoshop, Adobe Premiere too is quite a preferred application for creating GIFs from videos. This is a simple, quick and free application that converts your videos to GIFs in a span of few minutes. Here’s what you need to do to go about the process:
Step 1: Edit your Video
Add a video of your choice in the Adobe Premiere timeline and play with your editing creativity to add desired effects and filters to it. Make sure to set requisite time frames to your edit.
Step 2: Prepare an Export
Click into the app’s video timeline, and prepare a file export using the following path:
File> Export> Media
Step 3: Settings Adjustments
In the Media Export window, navigate to the ‘Format’ tab. From the drop down menu, choose ‘Animated GIF’. Here, you can add your gif file, select its target destination and adjust the required settings.
Step 4: Export Your Work
Click ‘Export’ to share your creation on social media or click on ‘Queue’ to send your GIF to a specific media encoder.
1010. Movavi Video Converter
This is one of the latest video converter software you can rely on to make GIF from video files. This software allows you to create top quality animated GIFs and is compatible with a variety of video formats. Using this converter, you can create amazing GIFs in 5 quick steps: here’s what you need to follow:
Step 1: Download and Install the Software
To begin, download the converter software from its official site and adhere to the user instructions to install the same in your system.
Step 2: Upload Your Video
In the software’s opening window, click on ‘Add Media’ followed by ‘Add Video’ and select a desired video from your system to upload on the Movavi video timeline.
Step 3: Trim Your Video
Select ‘Edit’ from the right of your video file. In the editing window, specify the initial cut of the video by displacing the marker to the desired point. Click on ‘Scissors’ to add multiple cut points to your video. You can even drag the cut points around the editor timeline. Choose the unvented sections and click ‘Trash Can’. When the result satisfies you, click ‘Done’.
Step 4: Choose a Conversion Format
Navigate to the ‘Images’ tab and select ‘GIF’ and set an adequate size for the GIF. Here, you can adjust quality, frame size and rate and resize method using the ‘Cogwheel’ tool.
Step 5: Let’s Get Converting!
Tap ‘Convert’ and wait for the conversion to finish. You will be automatically directed to the folder where your converted files get saved.
● Key Takeaways from This Episode →
● GIFs are short, to the point and convenient to access, providing exact and impactful message delivery.
● The software market is flooded with a variety of editing tools to convert your dull videos to catchy GIFs.
● Filmora is a quick and smart editing tool that envisages your GIF creating experience with a range of exciting features.
Have You Seen the Facebook Cartoon App Everyone’s Using Lately
Have You Seen the Facebook Cartoon App Everyone’s Using Lately
An easy yet powerful editor
Numerous effects to choose from
Detailed tutorials provided by the official channel
Facebook cartooning has lately gained momentum in the realm of social media entertainment. Level up your graphic skills with the most recent cartoon app for Facebook!
In this article
01 [How to Make a Facebook Avatar](#Part 1)
02 [Facebook: How to Do the Cartoon Filter Challenge](#Part 2)
Part 1 How to Make a Facebook Avatar
Cartooning and caricature drawing has earned an ultimate preference of graphic designers since times as old as the retro cartoon strips to the modern day digitally created caricaturized avatars, which have by now imbibed usage credibility within almost any and every sector, regardless of the central theme of pr productivity.
Owing to their highly expressive avatars and the inherent ability to transmit information via a characteristic fun element, these have become potential sources of information sharing and entertainment. When it comes to social media, these graphic masterpieces become more vibrant and exportable. Talking of the current trends, caricature avatars on the Facebook cartoon app have created a buzz among the users of the app.
This one is a recently launched feature of Facebook that allows you to cartoonize your real time image with a diversity of customization options. Diving into the creation pool, see through the following section to learn the knowhow of creating amazing caricature avatars using the Facebook app:
User’s Guide to Create a Facebook Avatar
Step 1: You Need the Facebook Application
As the first step, you will need to download and launch the Facebook app in your preferred Android, Windows or MacOs device.
Step 2: Setting Up the Utility
After a successful launch of the app in your device, navigate to the bottom right corner of Facebook’s welcome interface and tap the ‘Three Lines’ icon.

Step 3: Choosing Your Avatar
As you tap on the icon mentioned in Step 2, a drop down menu appears. Click on the ‘See More’ option in the menu and tap ‘Avatars’ in the list of options that follows.

Step 4: Do as Directed
Once you have selected the ‘Avatar’ feature, a number of prompts will appear sin series, asking you to make selections of your hair style, skin tone and related features for customization. In case you are not able to locate all the options, tap the bar at the top of each option and also below your progressing avatar.


Step 5: Adding Further Details
You can additionally explore your editing creativity by customizing the eye, nose and body shape, eyebrows and outfit of your avatar.


Step 6: Almost There!
When you are satisfied with the look of your avatar, navigate to upper right corner of the app screen and click on the ‘Checkmark’ to finalize your changes. Go for a comparison of the created avatar with your real time photo by clicking on the ‘Selfie’ button beneath your avatar.

Step 7: Share Your Work
The created avatars get automatically saved locally in your device; from you can share and export them to any media sharing platforms, like amplifying your chat comments or sending stickers in different apps with utmost convenience using the ‘Share’ button.


Part 2 Facebook: How to Do the Cartoon Filter Challenge
Now that you are accustomed to the fun and excitement of creating cartoonized avatars on the cartoon app on Facebook, it would be an absolute merry to try hands on taking up the trending Facebook Cartoon Filter Challenge, which is the current buzz on social media. Let us enter into the challenge with the quick and easy process discussed in the following section:
Steps to Take Up the Cartoon Filter Challenge
Step 1: Download the Required Application
Begin with downloading the Voila AI Artist Cartoon Photo application to your system by visiting the latter’s official website.
Step 2: Launch the Application
Post a successful installation, launch the app in your system and tap ‘3D Cartoon’ in the latter’s opening interface.
Step 3: Grant App Permissions
You will now be asked to grant certain access permissions by the app to use your device media. Grant the same by tapping the ‘Allow Access’ option, followed by clicking on ‘Select Photos’.
Step 4: Make Your Selection
Browse your device gallery to choose a desired photo for cartoonizing.
Step 5: View the Transformation
When you are done with selecting and uploading the photo, tap on the same to let the app transform your selection to a caricature image grid.
Step 6: Save Your Avatar
Once the conversion process is over, navigate to the ’Arrow’ in the right corner of the screen to save your caricature image in your device gallery.
Step 7: Ready to Export
Saving your work permits you to export and share your creation on Facebook.
Filmora Cartoon Creator
Creating cartoonized images is already an absolute fun, which gets further leveled up when you pick the Wondershare Filmora Video Editor Cartoon Creator to work on caricature avatars. This one is an excellent choice to adhere to the purpose of making and customizing cartoonized versions of real time photos. Launched by Wondershare, the Filmora app is known to not only create, but also texturise and beautify your cartoon avatars with its extensive effects library in almost no time.
For Win 7 or later (64-bit)
For macOS 10.12 or later
● Ending Thoughts →
● Facebook has recently introduced a new cartoon avatar feature that creates cartoonized versions of your real-time photos.
● You can take part in the Cartoon Filter Challenge on Facebook to create and share amazing cartoon images.
● You can alternatively depend on the Filmora Cartoon Creator app to create and customize cartoon avatars within a blink.
Facebook cartooning has lately gained momentum in the realm of social media entertainment. Level up your graphic skills with the most recent cartoon app for Facebook!
In this article
01 [How to Make a Facebook Avatar](#Part 1)
02 [Facebook: How to Do the Cartoon Filter Challenge](#Part 2)
Part 1 How to Make a Facebook Avatar
Cartooning and caricature drawing has earned an ultimate preference of graphic designers since times as old as the retro cartoon strips to the modern day digitally created caricaturized avatars, which have by now imbibed usage credibility within almost any and every sector, regardless of the central theme of pr productivity.
Owing to their highly expressive avatars and the inherent ability to transmit information via a characteristic fun element, these have become potential sources of information sharing and entertainment. When it comes to social media, these graphic masterpieces become more vibrant and exportable. Talking of the current trends, caricature avatars on the Facebook cartoon app have created a buzz among the users of the app.
This one is a recently launched feature of Facebook that allows you to cartoonize your real time image with a diversity of customization options. Diving into the creation pool, see through the following section to learn the knowhow of creating amazing caricature avatars using the Facebook app:
User’s Guide to Create a Facebook Avatar
Step 1: You Need the Facebook Application
As the first step, you will need to download and launch the Facebook app in your preferred Android, Windows or MacOs device.
Step 2: Setting Up the Utility
After a successful launch of the app in your device, navigate to the bottom right corner of Facebook’s welcome interface and tap the ‘Three Lines’ icon.
Step 3: Choosing Your Avatar
As you tap on the icon mentioned in Step 2, a drop down menu appears. Click on the ‘See More’ option in the menu and tap ‘Avatars’ in the list of options that follows.
Step 4: Do as Directed
Once you have selected the ‘Avatar’ feature, a number of prompts will appear sin series, asking you to make selections of your hair style, skin tone and related features for customization. In case you are not able to locate all the options, tap the bar at the top of each option and also below your progressing avatar.
Step 5: Adding Further Details
You can additionally explore your editing creativity by customizing the eye, nose and body shape, eyebrows and outfit of your avatar.
Step 6: Almost There!
When you are satisfied with the look of your avatar, navigate to upper right corner of the app screen and click on the ‘Checkmark’ to finalize your changes. Go for a comparison of the created avatar with your real time photo by clicking on the ‘Selfie’ button beneath your avatar.
Step 7: Share Your Work
The created avatars get automatically saved locally in your device; from you can share and export them to any media sharing platforms, like amplifying your chat comments or sending stickers in different apps with utmost convenience using the ‘Share’ button.
Part 2 Facebook: How to Do the Cartoon Filter Challenge
Now that you are accustomed to the fun and excitement of creating cartoonized avatars on the cartoon app on Facebook, it would be an absolute merry to try hands on taking up the trending Facebook Cartoon Filter Challenge, which is the current buzz on social media. Let us enter into the challenge with the quick and easy process discussed in the following section:
Steps to Take Up the Cartoon Filter Challenge
Step 1: Download the Required Application
Begin with downloading the Voila AI Artist Cartoon Photo application to your system by visiting the latter’s official website.
Step 2: Launch the Application
Post a successful installation, launch the app in your system and tap ‘3D Cartoon’ in the latter’s opening interface.
Step 3: Grant App Permissions
You will now be asked to grant certain access permissions by the app to use your device media. Grant the same by tapping the ‘Allow Access’ option, followed by clicking on ‘Select Photos’.
Step 4: Make Your Selection
Browse your device gallery to choose a desired photo for cartoonizing.
Step 5: View the Transformation
When you are done with selecting and uploading the photo, tap on the same to let the app transform your selection to a caricature image grid.
Step 6: Save Your Avatar
Once the conversion process is over, navigate to the ’Arrow’ in the right corner of the screen to save your caricature image in your device gallery.
Step 7: Ready to Export
Saving your work permits you to export and share your creation on Facebook.
Filmora Cartoon Creator
Creating cartoonized images is already an absolute fun, which gets further leveled up when you pick the Wondershare Filmora Video Editor Cartoon Creator to work on caricature avatars. This one is an excellent choice to adhere to the purpose of making and customizing cartoonized versions of real time photos. Launched by Wondershare, the Filmora app is known to not only create, but also texturise and beautify your cartoon avatars with its extensive effects library in almost no time.
For Win 7 or later (64-bit)
For macOS 10.12 or later
● Ending Thoughts →
● Facebook has recently introduced a new cartoon avatar feature that creates cartoonized versions of your real-time photos.
● You can take part in the Cartoon Filter Challenge on Facebook to create and share amazing cartoon images.
● You can alternatively depend on the Filmora Cartoon Creator app to create and customize cartoon avatars within a blink.
Create or Find Good Morning/Night GIFs
Versatile Video Editor - Wondershare Filmora
An easy yet powerful editor
Numerous effects to choose from
Detailed tutorials provided by the official channel
Do you want to wish your friends and family some heartful greetings every morning or night? Like you, many other people also look for good morning and night GIF images to meet their requirements. Since there can be limited sources for animated GIFs, you might find getting some new and unique images hard. That’s why I will let you know how to come up with some good night/morning animated GIFs in this post and share some reliable resources to download them.

In this article
01 [Create Good Morning/Night GIF Images with Adobe Photoshop](#Part 1)
02 [Create Stunning Good Morning or Night GIFs with Filmora](#Part 2)
03 [Create Animated Good Morning/Night GIFs with Canva](#Part 3)
04 [Find Readily Available Good Morning/Night GIFs](#Part 4)
Part 1 Create Good Morning/Night GIF Images with Adobe Photoshop
If you are familiar with Adobe Photoshop or are willing to learn it, you can also use its assistance to create good morning/night GIF images. Even though the application is mostly used to edit images, it can also help you develop all kinds of funny good morning/night GIFs.
To do that, you need to work on different layers in Photoshop and then merge them as a single frame to provide a more animated appeal. Here are some basic steps that you can follow to come up with anime good night or morning GIFs.
Step 1 Launch Photoshop and Load Media Assets
You can start by launching Adobe Photoshop on your system and visiting its File > Scripts section to load your media files.
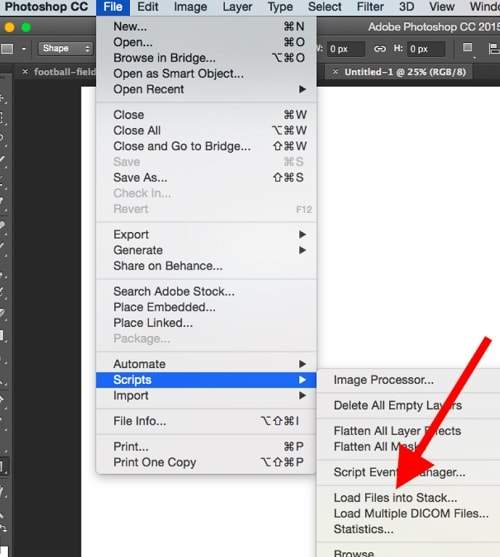
Step 2 Start working on Animated GIFs in Photoshop
Now, to come up with a funny good morning/night GIF, you can go to its Menu > Layer and choose to create a new layer.
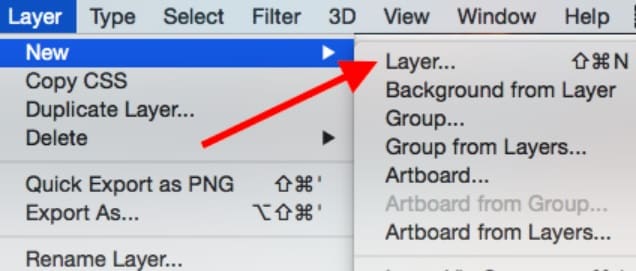
Since it is recommended to have a timeline for your media, you can go to its Window > Timeline to get a timeline view at the bottom.
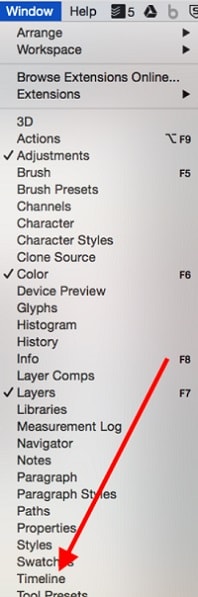
Afterward, you can go to the timeline at the bottom panel and choose work on frame animations to create any good morning/night animation.
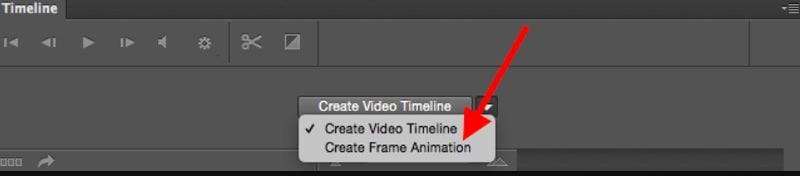
You can now duplicate your files or adjust them on the timeline to develop an animated GIF. Afterward, you can go to its properties to create a new layer for your frames and then merge them.
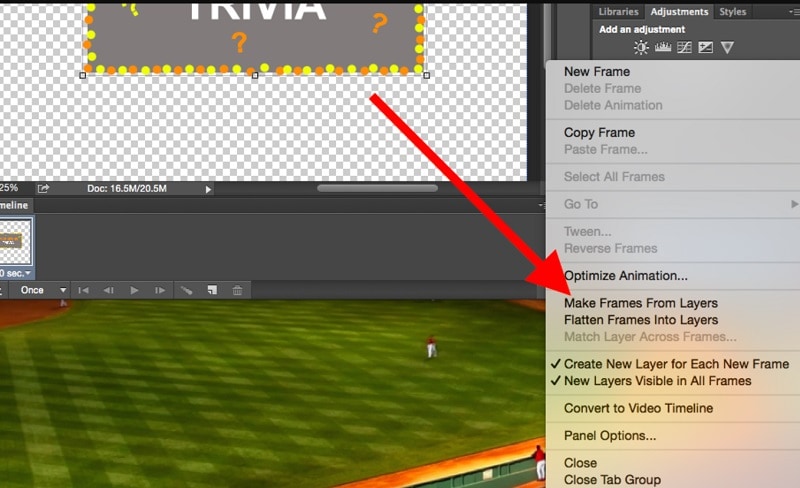
Step 3 Make Final Adjustments to your Animated GIFs
As you would have different good morning/night GIF funny animations, you can right-click on the timeline and set up their respective durations.
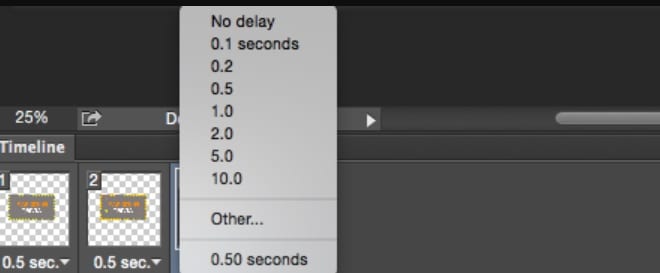
Besides that, you can also right-click any frame and select how many times it would be repeated.
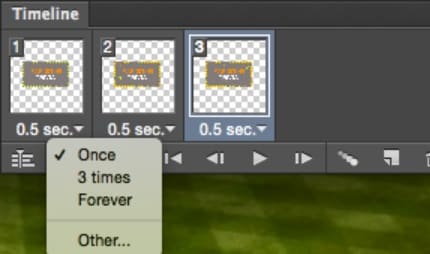
Step 4 Export the Media file as a GIF from Photoshop
After making all the edits, you can go to its File > Export feature and save your good night/morning GIF images in a compatible format (to be published on the web).
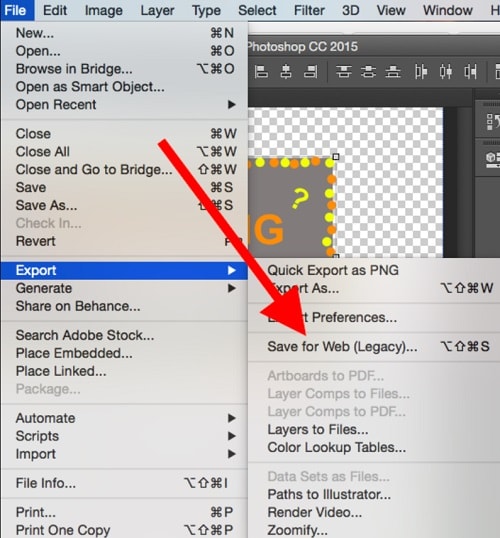
Part 2 Create Stunning Good Morning or Night GIFs with Filmora
Since Photoshop can be quite complicated to learn, you can consider using Wondershare Filmora to create videos and GIFs of all sorts. It is a multitrack timeline editing application that offers a wide range of editing options that are super easy to use. Apart from that, you will also get access to a wide range of media assets and effects that you can readily use to create good morning/night animated GIFs.
Wondershare Filmora
Get started easily with Filmora’s powerful performance, intuitive interface, and countless effects!
Try It Free Try It Free Try It Free Learn More >
Step 1 Launch Filmora and Load your Files to Create GIFs
You can start by launching Wondershare Filmora on your system and just drag and drop your media files to its interface. Besides that, you can also go to its File > Import menu to browse and load your media files (like morning or night images).

Step 2 Come up with Engaging GIFs using Filmora
Afterward, you can drop these media assets to the timeline at the bottom in a preferred format and start editing them. For instance, you can hover the cursor at the side to use the trimmer tool to clip any unwanted part from the video clip.

You can also select any media file and go to its properties to perform all kinds of actions on the selected media file like scaling, repositioning, flipping, rotating, and so on.

Many people would like to write quotes and messages on their good night/morning GIF images. In this case, you can go to the “Titles” section of Filmora to add different caption effects to your videos.

Besides that, you can also explore a wide range of transitions, stickers, overlays, filters, and numerous other visual effects that you can readily add to your animated good morning/night GIFs.

Step 3 Save your good morning or night GIFs on Filmora
After working on your anime good night/morning GIF, you can click on the “Export” button from the top and choose to save the media file in a GIF format on your system.

Part 3 Create Animated Good Morning/Night GIFs with Canva
Canva is one of the most user-friendly online solutions that you can use to come up with graphics of different styles. From social media posts to posters and video clips to logos, Canva can help you develop all types of customized designs. A while back, it has added a dedicated option to create and edit animations that would let you come up with some stunning good morning/night GIF images.
Step 1 Select a Project Type or Template of Canva
At first, you can go to the official website of Canva and choose to work on a template of your choice. Here, you can look for GIFs readily available on Canva or work on an empty canvas.
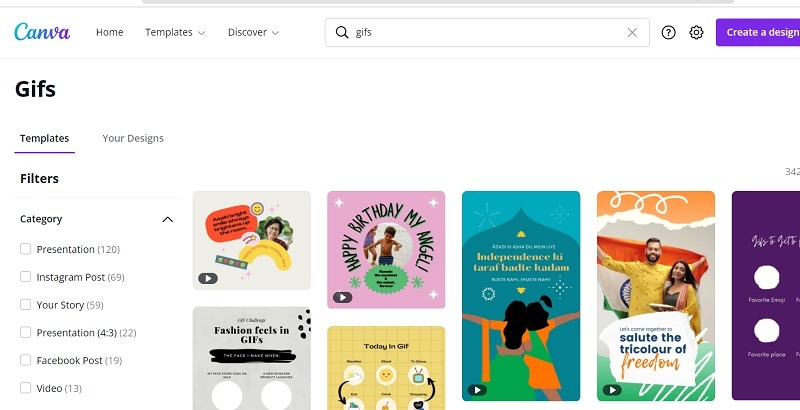
Step 2 Customize your Good Morning/Night GIF on Canva
From the sidebar, you can drag and drop various elements, captions, borders, and other objects to develop an animated good morning/night GIF. Several other features in Canva would let you customize and edit your GIFs easily.
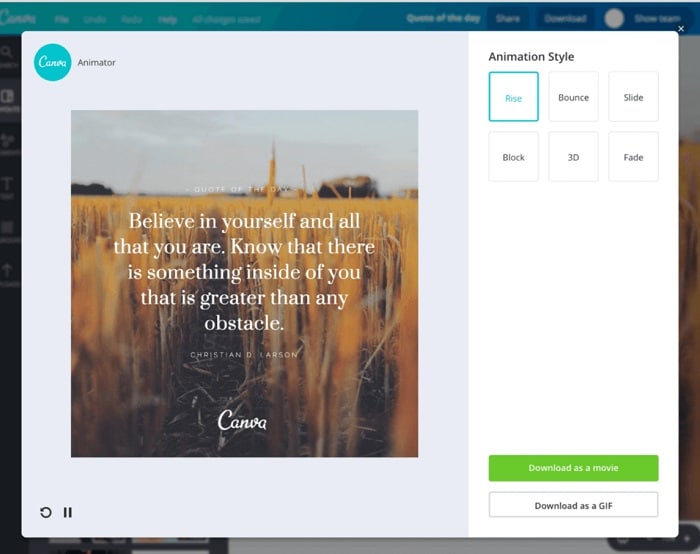
Step 3 Export your Designs as GIFs from Canva
That’s it! After working on all the features of your good night/morning funny GIFs, you can click on the “Export” button from the top and save your GIF on your system’s local storage from Canva.
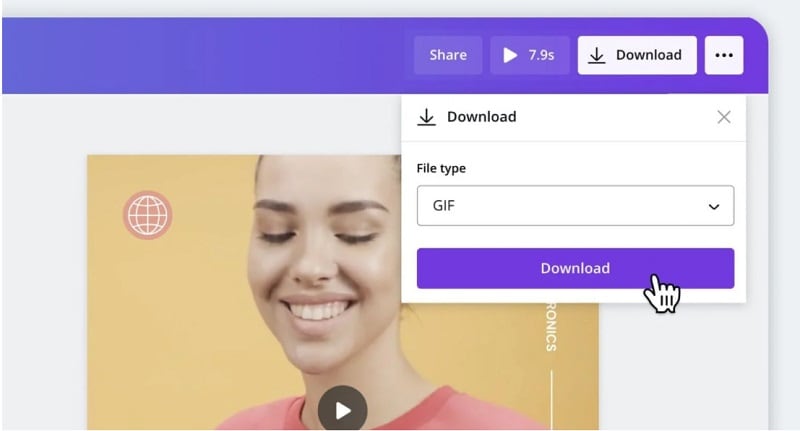
Part 4 Find Readily Available Good Morning/Night GIFs
If you are running short on time and can’t come up with any good morning/night animated GIF, then you can pick them from the following resources:
1. Tenor
Tenor is certainly one of the most prominent websites to find GIFs and stickers of all kinds. Therefore, you can head to its official website and look for good morning/night animations by entering relevant keywords on the search bar. Later, you can download the GIF or directly share its link with others.
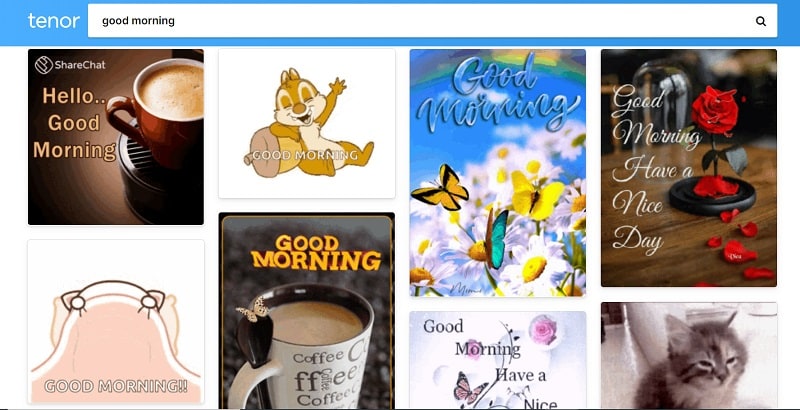
2. Giphy
Like Tenor, Giphy is another popular source where you can find hundreds of good night/morning funny GIFs. The website is quite easy to navigate and will let you see all kinds of GIFs by entering appropriate keywords. Later, you can directly copy the URL of the GIF and share it with others on platforms like WhatsApp and Instagram.
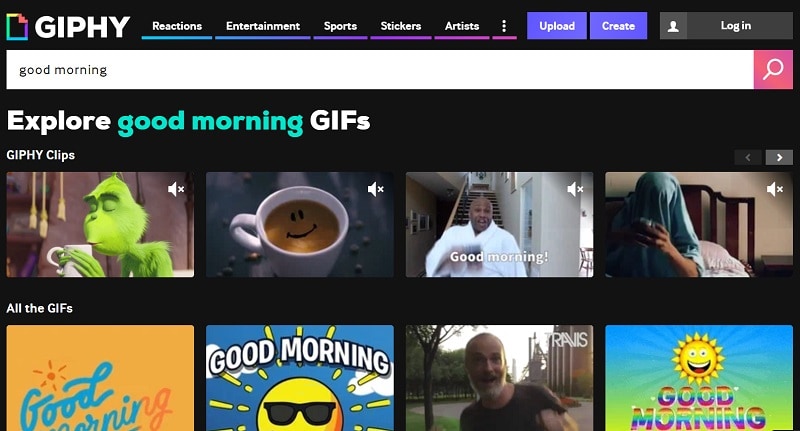
3. Gifer
Lastly, you can also explore Gifer to find an extensive collection of inspiring or funny good night/morning GIFs. The website has already listed GIFs in different categories that you can explore to save time or can enter keywords on the search bar to find appropriate content.
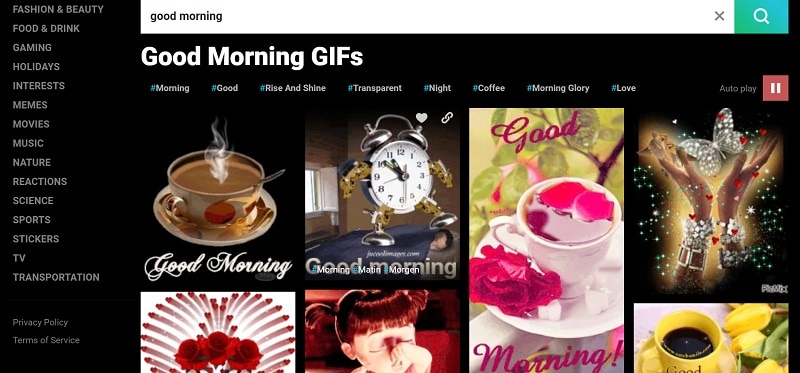
Wondershare Filmora
Get started easily with Filmora’s powerful performance, intuitive interface, and countless effects!
Try It Free Try It Free Try It Free Learn More >
AI Portrait – The best feature of Wondershare Filmora for gameplay editing
The AI Portrait is a new add-on in Wondershare Filmora. It can easily remove video backgrounds without using a green screen or chroma key, allowing you to add borders, glitch effects, pixelated, noise, or segmentation video effects.

Conclusion
After reading this guide, I’m sure that you can easily pick or create all kinds of good night/morning GIFs. While Photoshop can make animated good morning/night GIFs, it is certainly not that user-friendly. That’s why I would recommend using a reliable and friendly application like Wondershare Filmora to meet your requirements. The media-editing tool has an extensive range of assets and offers tons of high-end features to come up with all sorts of inspiring, romantic, or funny good morning/night GIFs.
Do you want to wish your friends and family some heartful greetings every morning or night? Like you, many other people also look for good morning and night GIF images to meet their requirements. Since there can be limited sources for animated GIFs, you might find getting some new and unique images hard. That’s why I will let you know how to come up with some good night/morning animated GIFs in this post and share some reliable resources to download them.
In this article
01 [Create Good Morning/Night GIF Images with Adobe Photoshop](#Part 1)
02 [Create Stunning Good Morning or Night GIFs with Filmora](#Part 2)
03 [Create Animated Good Morning/Night GIFs with Canva](#Part 3)
04 [Find Readily Available Good Morning/Night GIFs](#Part 4)
Part 1 Create Good Morning/Night GIF Images with Adobe Photoshop
If you are familiar with Adobe Photoshop or are willing to learn it, you can also use its assistance to create good morning/night GIF images. Even though the application is mostly used to edit images, it can also help you develop all kinds of funny good morning/night GIFs.
To do that, you need to work on different layers in Photoshop and then merge them as a single frame to provide a more animated appeal. Here are some basic steps that you can follow to come up with anime good night or morning GIFs.
Step 1 Launch Photoshop and Load Media Assets
You can start by launching Adobe Photoshop on your system and visiting its File > Scripts section to load your media files.
Step 2 Start working on Animated GIFs in Photoshop
Now, to come up with a funny good morning/night GIF, you can go to its Menu > Layer and choose to create a new layer.
Since it is recommended to have a timeline for your media, you can go to its Window > Timeline to get a timeline view at the bottom.
Afterward, you can go to the timeline at the bottom panel and choose work on frame animations to create any good morning/night animation.
You can now duplicate your files or adjust them on the timeline to develop an animated GIF. Afterward, you can go to its properties to create a new layer for your frames and then merge them.
Step 3 Make Final Adjustments to your Animated GIFs
As you would have different good morning/night GIF funny animations, you can right-click on the timeline and set up their respective durations.
Besides that, you can also right-click any frame and select how many times it would be repeated.
Step 4 Export the Media file as a GIF from Photoshop
After making all the edits, you can go to its File > Export feature and save your good night/morning GIF images in a compatible format (to be published on the web).
Part 2 Create Stunning Good Morning or Night GIFs with Filmora
Since Photoshop can be quite complicated to learn, you can consider using Wondershare Filmora to create videos and GIFs of all sorts. It is a multitrack timeline editing application that offers a wide range of editing options that are super easy to use. Apart from that, you will also get access to a wide range of media assets and effects that you can readily use to create good morning/night animated GIFs.
Wondershare Filmora
Get started easily with Filmora’s powerful performance, intuitive interface, and countless effects!
Try It Free Try It Free Try It Free Learn More >
Step 1 Launch Filmora and Load your Files to Create GIFs
You can start by launching Wondershare Filmora on your system and just drag and drop your media files to its interface. Besides that, you can also go to its File > Import menu to browse and load your media files (like morning or night images).
Step 2 Come up with Engaging GIFs using Filmora
Afterward, you can drop these media assets to the timeline at the bottom in a preferred format and start editing them. For instance, you can hover the cursor at the side to use the trimmer tool to clip any unwanted part from the video clip.
You can also select any media file and go to its properties to perform all kinds of actions on the selected media file like scaling, repositioning, flipping, rotating, and so on.
Many people would like to write quotes and messages on their good night/morning GIF images. In this case, you can go to the “Titles” section of Filmora to add different caption effects to your videos.
Besides that, you can also explore a wide range of transitions, stickers, overlays, filters, and numerous other visual effects that you can readily add to your animated good morning/night GIFs.
Step 3 Save your good morning or night GIFs on Filmora
After working on your anime good night/morning GIF, you can click on the “Export” button from the top and choose to save the media file in a GIF format on your system.
Part 3 Create Animated Good Morning/Night GIFs with Canva
Canva is one of the most user-friendly online solutions that you can use to come up with graphics of different styles. From social media posts to posters and video clips to logos, Canva can help you develop all types of customized designs. A while back, it has added a dedicated option to create and edit animations that would let you come up with some stunning good morning/night GIF images.
Step 1 Select a Project Type or Template of Canva
At first, you can go to the official website of Canva and choose to work on a template of your choice. Here, you can look for GIFs readily available on Canva or work on an empty canvas.
Step 2 Customize your Good Morning/Night GIF on Canva
From the sidebar, you can drag and drop various elements, captions, borders, and other objects to develop an animated good morning/night GIF. Several other features in Canva would let you customize and edit your GIFs easily.
Step 3 Export your Designs as GIFs from Canva
That’s it! After working on all the features of your good night/morning funny GIFs, you can click on the “Export” button from the top and save your GIF on your system’s local storage from Canva.
Part 4 Find Readily Available Good Morning/Night GIFs
If you are running short on time and can’t come up with any good morning/night animated GIF, then you can pick them from the following resources:
1. Tenor
Tenor is certainly one of the most prominent websites to find GIFs and stickers of all kinds. Therefore, you can head to its official website and look for good morning/night animations by entering relevant keywords on the search bar. Later, you can download the GIF or directly share its link with others.
2. Giphy
Like Tenor, Giphy is another popular source where you can find hundreds of good night/morning funny GIFs. The website is quite easy to navigate and will let you see all kinds of GIFs by entering appropriate keywords. Later, you can directly copy the URL of the GIF and share it with others on platforms like WhatsApp and Instagram.
3. Gifer
Lastly, you can also explore Gifer to find an extensive collection of inspiring or funny good night/morning GIFs. The website has already listed GIFs in different categories that you can explore to save time or can enter keywords on the search bar to find appropriate content.
Wondershare Filmora
Get started easily with Filmora’s powerful performance, intuitive interface, and countless effects!
Try It Free Try It Free Try It Free Learn More >
AI Portrait – The best feature of Wondershare Filmora for gameplay editing
The AI Portrait is a new add-on in Wondershare Filmora. It can easily remove video backgrounds without using a green screen or chroma key, allowing you to add borders, glitch effects, pixelated, noise, or segmentation video effects.
Conclusion
After reading this guide, I’m sure that you can easily pick or create all kinds of good night/morning GIFs. While Photoshop can make animated good morning/night GIFs, it is certainly not that user-friendly. That’s why I would recommend using a reliable and friendly application like Wondershare Filmora to meet your requirements. The media-editing tool has an extensive range of assets and offers tons of high-end features to come up with all sorts of inspiring, romantic, or funny good morning/night GIFs.
[Top 10] Best and Fast Ways to Turn Image Into Gif
[Top 10] Best and Fast Ways to Turn Image into Gif
An easy yet powerful editor
Numerous effects to choose from
Detailed tutorials provided by the official channel
There are in fact ways to turn an image into GIF easily We’ll be showing off a couple of some of the easier ways below, including in-depth tutorials of some of the best methods so that you will no longer have to be troubled.
These tutorials, of course, will focus on teaching you how to create GIF from photos If that’s something you’re interested in, continue reading
In this article
01 [Why GIF?](#Part 1)
02 [How to Add an Image to a GIF?](#Part 2)
Part 1 Why GIF?
Before we move on to the tutorials, let’s do a brief account on GIF files We’ve also answered some of the more common questions regarding using a GIF image maker below for your edification
But, first: Why GIF? Well, it all comes down to what you’re looking for A lot of people use GIF files to create animated icons that they can use for their accounts. Some just genuinely want to create a GIF file that they can share with their friends and families (either for a laugh or something else) GIF files are a convenient vessel for doing this because they have a lot of flexibility and are accepted by most platforms
01Why Gif from My Images Are Blurry?
One of the biggest issues people tend to have when turning an image into GIF is that they come out of the process with a blurry end-product. No one wants that But, how are you supposed to avoid it? Well, it all depends on the tool that you’re using and your initial picture For the former, it’s best to review the upload requirements of your chosen GIF maker to get a better end result. For the latter, it’s best to pick a good, high-quality GIF creator for a better outcome
02There Are Jaggy Strokes Around Gif?
Another issue that you might suffer from while trying to create GIFs from photos is jaggy or raggedy strokes around the GIF when converted. These occur often with GIF makers that support transparency If you find these happening to you, adjust the transparency settings to get rid of the white pixel outline around your converted GIF.
Part 2 How to Add an Image to a GIF?
Now it’s finally time for the tutorials that we promised at the beginning of this article These tutorials will range from online to software solutions — so that you can get a clear idea of what you can expect from all these different GIF makers. To be more specific, we’ll be demonstrating with an online images to GIF converter, how to create animated GIF photoshop, and how to easily turn any image into GIF with the photo GIF creator, Wondershare Filmora Video Editor.
01Image to GIF: How to Turn Photos into Animated GIFs
For our first tutorial, we’re going to be demonstrating how to create GIF from photos with an online photo GIF creator More specifically, we’ll be demonstrating with Loading.IO, which is an online tool that you can use to create animated icons for your profiles or on your video content It comes with several animation options and other settings that you can use to quickly create GIFs from photos
**Step 1: Go to Loading.IO
Of course, we start off this tutorial by opening the GIF maker. In this case, since the tool is hosted online, that’s as easy as opening the link that we’ve provided below It will take you directly to the online GIF creator.
URL: https://loading.io/animation/icon/

**Step 2: Upload Photo
Once on-site, it’s time to upload the photo that you want to turn into a GIF As this is an icon creator, you should pick a photo with the proper parameters
To upload your icon for animating, select the ‘Upload’ button and browse your computer or your Google Drive for the image in question.

**Step 3: Choose animation Style
Next, choose how you want the uploaded photo to be animated Loading.IO offers a couple of animations that you can choose from Including the ‘beat’ animation, which is what we choose for our example

**Step 4: Adjust Settings
This step is technically optional, as there are default settings already prepared if you have no other specifications for your image-turned GIF. But, if you want, you can adjust certain settings for a better outcome
For example, you can speed up the animation with the ‘Speed’ slider. Or, you can increase the number of times the GIF loops by adjusting the ‘Repeat’ slider. Test out a couple of settings to get the best result

**Step 5: Download as GIF
To wrap things up, it’s time to download your finished animation Loading.IO gives several options for this. But, of course, in our case, we choose to ‘Download As: GIF’

02How to Make an Animated GIF in Photoshop [Tutorial]
For the next tutorial, we’ll be showing you how to use Photoshop to create and edit an animated GIF This process is fairly lengthy and is not recommended for beginners. But, it is a very professional method of creating an animated GIF — one that will allow you to control every step of the process (which may be exactly what you want)
**Step 1: Import Images into an Image Stack
First, starting on a new product, upload the images that you want to turn into a GIF into a photoshop ‘Image Stack’. This can be done by clicking the ‘File’ tab and selecting the ‘Scripts > Load Files into Stack…’ option
Afterward, a pop-up window will appear where you will be prompted to browse your computer for the aforementioned images Click ‘OK’ when done

**Step 2: Organize Layers
Check the ‘Layers’ panel for the images that you uploaded and organize them based on how you want them to appear for your animated GIF

**Step 3: (Optional) Import Video
If you want to work on a video to turn into a GIF instead, you can do such by selecting the ‘File’ tab and clicking on the ‘Import > Video Frames to Layers…’ option. This will get you to the same place shown in Step 2
Note: Just be careful that you do not transfer an image that is too long Photoshop may not be able to properly break it down, if so.

**Step 4: Open Timeline Then Create Frame Animation
Next, in order to start working on your animation, open the Timeline Window This can be done by clicking the ‘Window’ tab and selecting ‘Timeline’
With the ‘Timeline’ Window now open, select the ‘Create Frame Animation’ option to begin working

**Step 5: Make Frame from Layers
In order to transfer your uploaded images from the ‘Layers’ panel to your timeline, select the ‘Menu’ option on the top-right hand corner of the ‘Timeline’ window and select the ‘Make Frames From Layers’ option

**Step 6: Preview Animation and Adjust as Needed
To preview your animation, click the ‘Play’ button This is the best time to check that your frames have been organized correctly If they are not, you can adjust them by dragging and dropping them on the timeline.
OR, you can use the ‘Reverse Frames’ option if your animation has been completely flipped around

**Step 7: Create an Animation Loop
In order to be a proper looped GIF, the animation should repeat endlessly You can make sure of this by changing the ‘Repeat’ option to ‘Forever’ (as is shown in the image below).

**Step 8: Export Finished Animation to Gif
In order to finish turning your image into GIF, you’ll need to export it in the proper format This is possible by selecting the ‘File’ tab and then clicking the ‘Export > Save for Web (Legacy)…’ option
A pop-up window should appear where you can control export settings Do so in order to ensure that you have the best outcome

03How To Make an Animated GIF in Wondershare Filmora Video Editor (Fast & Easy)
For Win 7 or later (64-bit)
For macOS 10.12 or later
For our last tutorial, we’ll be showing you how to make an animated GIF with the use of Wondershare Wondershare Filmora Video Editor . Filmora is a video editor, one that is used by professionals all over to produce high-quality content And, of course, as a video editor, it works just as well as a GIF maker. One that you can use to create images into a GIF easily
**Step 1: Launch Filmora
First, download and install Filmora If you want to follow along with this demonstration, you can Wondershare offers a FREE trial where you can test out all of the software’s functions before making a commitment

Step 2: Upload Video to Turn into GIF
For this next step, we do something akin to what we did earlier with Photoshop. And that is to upload images or a video to fit into a timeline
This process is started by first uploading images, which you can do by clicking the ‘File’ tab and selecting the ‘Import Media > Import Media Files’ option

**Step 3: Drag Media to Timeline
With Filmora, the ‘Timeline’ window is already open Also, you won’t have to do anything complicated to get your media onto the said timeline. Just drag and drop it from the Media library (as is shown in the image below).

**Step 4: Edit or Adjust GIF
Before moving forward, you should take this chance to make adjustments to the media that you uploaded into your timeline There are many things that you can do at this stage so feel free to experiment
For our example, we cut down the video that we uploaded by using the ‘Trim’ option (which you can find by right-clicking on video media).

**Step 5: Export into GIF
Finally, to finish us off, we export our finished GIF This can be done by selecting the ‘Export’ tab and then clicking the ‘Create Video’ option A pop-up window will appear where you can adjust export settings

● Key Takeaways from This Episode →
● GIFs are fun and easy-to-share content It’s accepted by most platforms and can even be used to create professional, animated icons to be added to video content
● The process of turning an image into a GIF can be a bit tricky. But, don’t worry, so long as you start with high-quality media and use a reliable Photo-GIF Creator, then you should be fine
● If you’re struggling with turning your images into GIFs, check out one of the tutorials that we’ve offered We specifically chose the three GIF creators that we demonstrated to offer multiple methods that you can choose from
There are in fact ways to turn an image into GIF easily We’ll be showing off a couple of some of the easier ways below, including in-depth tutorials of some of the best methods so that you will no longer have to be troubled.
These tutorials, of course, will focus on teaching you how to create GIF from photos If that’s something you’re interested in, continue reading
In this article
01 [Why GIF?](#Part 1)
02 [How to Add an Image to a GIF?](#Part 2)
Part 1 Why GIF?
Before we move on to the tutorials, let’s do a brief account on GIF files We’ve also answered some of the more common questions regarding using a GIF image maker below for your edification
But, first: Why GIF? Well, it all comes down to what you’re looking for A lot of people use GIF files to create animated icons that they can use for their accounts. Some just genuinely want to create a GIF file that they can share with their friends and families (either for a laugh or something else) GIF files are a convenient vessel for doing this because they have a lot of flexibility and are accepted by most platforms
01Why Gif from My Images Are Blurry?
One of the biggest issues people tend to have when turning an image into GIF is that they come out of the process with a blurry end-product. No one wants that But, how are you supposed to avoid it? Well, it all depends on the tool that you’re using and your initial picture For the former, it’s best to review the upload requirements of your chosen GIF maker to get a better end result. For the latter, it’s best to pick a good, high-quality GIF creator for a better outcome
02There Are Jaggy Strokes Around Gif?
Another issue that you might suffer from while trying to create GIFs from photos is jaggy or raggedy strokes around the GIF when converted. These occur often with GIF makers that support transparency If you find these happening to you, adjust the transparency settings to get rid of the white pixel outline around your converted GIF.
Part 2 How to Add an Image to a GIF?
Now it’s finally time for the tutorials that we promised at the beginning of this article These tutorials will range from online to software solutions — so that you can get a clear idea of what you can expect from all these different GIF makers. To be more specific, we’ll be demonstrating with an online images to GIF converter, how to create animated GIF photoshop, and how to easily turn any image into GIF with the photo GIF creator, Wondershare Filmora Video Editor.
01Image to GIF: How to Turn Photos into Animated GIFs
For our first tutorial, we’re going to be demonstrating how to create GIF from photos with an online photo GIF creator More specifically, we’ll be demonstrating with Loading.IO, which is an online tool that you can use to create animated icons for your profiles or on your video content It comes with several animation options and other settings that you can use to quickly create GIFs from photos
**Step 1: Go to Loading.IO
Of course, we start off this tutorial by opening the GIF maker. In this case, since the tool is hosted online, that’s as easy as opening the link that we’ve provided below It will take you directly to the online GIF creator.
URL: https://loading.io/animation/icon/
**Step 2: Upload Photo
Once on-site, it’s time to upload the photo that you want to turn into a GIF As this is an icon creator, you should pick a photo with the proper parameters
To upload your icon for animating, select the ‘Upload’ button and browse your computer or your Google Drive for the image in question.
**Step 3: Choose animation Style
Next, choose how you want the uploaded photo to be animated Loading.IO offers a couple of animations that you can choose from Including the ‘beat’ animation, which is what we choose for our example
**Step 4: Adjust Settings
This step is technically optional, as there are default settings already prepared if you have no other specifications for your image-turned GIF. But, if you want, you can adjust certain settings for a better outcome
For example, you can speed up the animation with the ‘Speed’ slider. Or, you can increase the number of times the GIF loops by adjusting the ‘Repeat’ slider. Test out a couple of settings to get the best result
**Step 5: Download as GIF
To wrap things up, it’s time to download your finished animation Loading.IO gives several options for this. But, of course, in our case, we choose to ‘Download As: GIF’
02How to Make an Animated GIF in Photoshop [Tutorial]
For the next tutorial, we’ll be showing you how to use Photoshop to create and edit an animated GIF This process is fairly lengthy and is not recommended for beginners. But, it is a very professional method of creating an animated GIF — one that will allow you to control every step of the process (which may be exactly what you want)
**Step 1: Import Images into an Image Stack
First, starting on a new product, upload the images that you want to turn into a GIF into a photoshop ‘Image Stack’. This can be done by clicking the ‘File’ tab and selecting the ‘Scripts > Load Files into Stack…’ option
Afterward, a pop-up window will appear where you will be prompted to browse your computer for the aforementioned images Click ‘OK’ when done
**Step 2: Organize Layers
Check the ‘Layers’ panel for the images that you uploaded and organize them based on how you want them to appear for your animated GIF
**Step 3: (Optional) Import Video
If you want to work on a video to turn into a GIF instead, you can do such by selecting the ‘File’ tab and clicking on the ‘Import > Video Frames to Layers…’ option. This will get you to the same place shown in Step 2
Note: Just be careful that you do not transfer an image that is too long Photoshop may not be able to properly break it down, if so.
**Step 4: Open Timeline Then Create Frame Animation
Next, in order to start working on your animation, open the Timeline Window This can be done by clicking the ‘Window’ tab and selecting ‘Timeline’
With the ‘Timeline’ Window now open, select the ‘Create Frame Animation’ option to begin working
**Step 5: Make Frame from Layers
In order to transfer your uploaded images from the ‘Layers’ panel to your timeline, select the ‘Menu’ option on the top-right hand corner of the ‘Timeline’ window and select the ‘Make Frames From Layers’ option
**Step 6: Preview Animation and Adjust as Needed
To preview your animation, click the ‘Play’ button This is the best time to check that your frames have been organized correctly If they are not, you can adjust them by dragging and dropping them on the timeline.
OR, you can use the ‘Reverse Frames’ option if your animation has been completely flipped around
**Step 7: Create an Animation Loop
In order to be a proper looped GIF, the animation should repeat endlessly You can make sure of this by changing the ‘Repeat’ option to ‘Forever’ (as is shown in the image below).
**Step 8: Export Finished Animation to Gif
In order to finish turning your image into GIF, you’ll need to export it in the proper format This is possible by selecting the ‘File’ tab and then clicking the ‘Export > Save for Web (Legacy)…’ option
A pop-up window should appear where you can control export settings Do so in order to ensure that you have the best outcome
03How To Make an Animated GIF in Wondershare Filmora Video Editor (Fast & Easy)
For Win 7 or later (64-bit)
For macOS 10.12 or later
For our last tutorial, we’ll be showing you how to make an animated GIF with the use of Wondershare Wondershare Filmora Video Editor . Filmora is a video editor, one that is used by professionals all over to produce high-quality content And, of course, as a video editor, it works just as well as a GIF maker. One that you can use to create images into a GIF easily
**Step 1: Launch Filmora
First, download and install Filmora If you want to follow along with this demonstration, you can Wondershare offers a FREE trial where you can test out all of the software’s functions before making a commitment
Step 2: Upload Video to Turn into GIF
For this next step, we do something akin to what we did earlier with Photoshop. And that is to upload images or a video to fit into a timeline
This process is started by first uploading images, which you can do by clicking the ‘File’ tab and selecting the ‘Import Media > Import Media Files’ option
**Step 3: Drag Media to Timeline
With Filmora, the ‘Timeline’ window is already open Also, you won’t have to do anything complicated to get your media onto the said timeline. Just drag and drop it from the Media library (as is shown in the image below).
**Step 4: Edit or Adjust GIF
Before moving forward, you should take this chance to make adjustments to the media that you uploaded into your timeline There are many things that you can do at this stage so feel free to experiment
For our example, we cut down the video that we uploaded by using the ‘Trim’ option (which you can find by right-clicking on video media).
**Step 5: Export into GIF
Finally, to finish us off, we export our finished GIF This can be done by selecting the ‘Export’ tab and then clicking the ‘Create Video’ option A pop-up window will appear where you can adjust export settings
● Key Takeaways from This Episode →
● GIFs are fun and easy-to-share content It’s accepted by most platforms and can even be used to create professional, animated icons to be added to video content
● The process of turning an image into a GIF can be a bit tricky. But, don’t worry, so long as you start with high-quality media and use a reliable Photo-GIF Creator, then you should be fine
● If you’re struggling with turning your images into GIFs, check out one of the tutorials that we’ve offered We specifically chose the three GIF creators that we demonstrated to offer multiple methods that you can choose from
Nurturing the Spirit Through the Top 10 Intellectual Anime Websites
Best 10 Anime Websites to Watch Dubbed Anime Free

Shanoon Cox
Mar 27, 2024• Proven solutions
Who hasn’t heard of all-time favorite Pokémon or Dragon Ball Z? Well, none! Whether you watch anime , fan or not, these two are the most popular anime of all time. These series have proven to be life-learning lessons with stories based on friendship, love, social values, harmony, and heroism. As a perfect pastime for kids and adults alike, anime has become a popular entertainment show.
What’s more lucrative is many of these websites offer free access to a wide range of anime movies , cartoons, and TV shows. Although the numbers are high; still, it isn’t easy to find free dubbed anime websites with quality content and video streaming. So, we have listed the best 10 websites to watch dubbed anime online and free:
- 1.123anime
- 2. Anime-Planet
- 3. 9Anime
- 4. Gogoanime
- 5. Dubbedanime.net
- 6. AnimeLand
- 7. Anime Lab
- 8. Crunchyroll
- 9. AniMixPlay
- 10. AnimeFever
![]()
A cross-platform for making videos anywhere for all creators

Why your video editing isn’t good enough? How about some creative inspo?
- 100 Million+ Users
- 150+ Countries and Regions
- 4 Million+ Social Media Followers
- 5 Million+ Stock Media for Use
* Secure Download

01 123anime
It is the most popular and best to watch free dubbed anime movies and TV shows. With millions of viewers every day, this anime site provides more than 10,000 anime, films, and videos with English subtitles and dubbing.
Here, you can find multiple Japanese anime movies and shows such as The Legend of Zelda, Ghost in Shell, and many others. Watch it online or download it for later viewing. Thanks to easy navigation and a clean user interface, the website is liked by teens and adults globally.
Fast streaming, no “clickable” mobile ads, and an extensive library make 123anime number one anime website on our list. Offering multiple viewing options, it caters to the varying needs of different viewer types.
02 Anime-Planet
Established in 2001, Anime-Planet collaborates with manga and other paid platforms such as Hulu to provide 45,000+ animation shows free of cost. Search through the extensive collection of Anime-Planet and other paid websites to fulfill your anime cravings.
Its intuitive and interactive interface makes anime consumption easy and fun for users of all ages. You can even create your list of anime shows and find recommendations based on your search, interests, and previously viewed videos.
You can also build a community of anime fans worldwide while also participating in forums and anime character-ranking platforms for a shared experience. With more than 11 million users per month, the platform is quite popular, where you can watch and stream videos without creating an account.
03 9Anime
It is one of the unique anime websites with high-quality video streaming with 1080p. You can watch anime movies and shows of various genres, including romance, comedy, drama, and action. Moreover, it also offers Original Video Animations, where you can watch non-commercial, authentic animations of all times.
With its easy search option, you can easily find the latest, trending, and most popular movies and anime shows. You can also filter videos based on seasons, language, year, and video quality. The website works in all major regions globally, including the US, UK, Philippines, Australia, Netherlands, Canada, Malaysia, and Singapore.
04 Gogoanime
Gogoanime is yet another free dubbed anime website with a fantastic viewing and video streaming experience. Its sleek interface and user-friendly navigation make it a top choice for frugal like us. You can watch and download the latest and the oldest anime shows collection; Gogoanime is for all anime fans.
The recent ones top the chart while the titles are arranged alphabetically, yearly, popularity, and release date for quick and easy search. It has anime videos, movies, and shows on horror, kids, action, cars, and games. You get to find the latest Chinese, dubbed animation shows free of cost.
Despite being free, the anime website doesn’t contain spammy and annoying ads.
05 Dubbedanime.net
Dubbedanime.net is a leading anime entertainment website with a massive collection of anime shows and videos. You can watch, stream and enjoy your favorite anime shows online free of cost.
The streaming is fast, and video quality is high; therefore, offering you a pleasant experience. However, it may contain few ads, but they are not pop-ups. That is why you have an uninterrupted watch time. Besides, you can even use adblockers for ad-free video streaming.
As the best free dubbed anime websites, millions of anime videos are uploaded daily. You can watch dubbed anime online as much as you want and search them through title name or release date.
06 AnimeLand
It is the most popular platform with a wide range of English dubbed Japanese anime videos. Without creating an account or login ID, you can watch and download your favorite anime shows and movies without any disruptions.
Due to its high-quality videos between 480p-1080p HD, the platform offers an incomparable experience. Its 1.1 million viewers per month can access to latest and most recent animations. Naruto, One Piece, My Hero Academia and Attack of Titan with English dubbing are its most popular seasons.
You can find your favorite anime show on the Homepage or filter it based on Latest Updates, Dubbed List, and Movie List. Moreover, you can also search it manually by typing the title in the search bar. With its clean and simple navigation, the platform is easy and fun to use.
07 Anime Lab
Anime Lab showcases subbed and dubbed anime content for viewers in New Zealand and Australia only. With millions of videos in the gallery, the website hosts every known anime show that you can watch online.
Demon Slayer is its most popular Anime show among kids and adults for its riveting storyline, vivid graphics, and enthralling characters. You can find your favorite drama, idol, action, and horror anime videos in HD, making watch time fun and easy on the eyes.
Besides, it works on multiple devices, so you can binge-watch alone on your phone or have a movie night with friends. However, AnimeLab charges AUD 7.99 as a subscription fee to access shows broadcasted the same day.
08 Crunchyroll
Crunchyroll is a veteran dubbed anime website credited for introducing anime culture in the western world. It offers access to the latest Asian dramas, anime series, and manga productions that you won’t find anywhere else.
You can use the free standard version, having a vast library of anime shows, movies, and games infiltrated with pop-up ads. However, you can subscribe for a premium version for $7.99-8.99 for an ad-free watch time.
Searching on the platform is easy and quick; you can find your favorite anime based on genre, popularity, and seasons. It boasts an online store for exciting anime merchandise and the latest updates on your favorite anime show, character, or other property. Crunchyroll is a flag bearer and on-stop shop for hardcore anime fans. The website is accessible in more than 180 countries.
09 AniMixPlay
It is a free platform to watch dubbed anime online in English voiceover and subtitles. You can even create your list of favorite shows and popular choices that meet your preferences and interests. The website offers various streaming options for each anime show to find one that works best on your device.
Moreover, mobile owners can also schedule their watch time and list videos. Finding your favorite show is relatively easy as you can navigate through New Episodes, Updates, Recent, Popular, and Movie categories. Filter the list based on season, year, genre, stream type, and language.
If you’re not sure of your anime choice, read out the synopsis and OP/ED or watch the trailer.
10 AnimeFever
Animefever is an easy-to-use platform with an extensive range of shows, videos, and movies. You can manually search for the title or filter the list based on genre, status, type, parental ratings, season, and year. This makes it a friendly platform for kids as they can automatically filter out adult and age-inappropriate content.
Having the latest collection of videos, shows, and movies, viewers can find anime that hasn’t yet been aired on TV or anywhere else. You can also schedule the showtime as per your convenience and free time to ensure you don’t miss the latest updates.
While guest watching is permissible on the site, registering your account ensures the platform remembers your choices and makes recommendations accordingly.
Bonus Tip-Record and Share Anime with Wondershare Filmora Editor
Wondershare Filmora, a video editor platform for anime enthusiasts to create high-quality, professional anime videos. Its one-click tools, striking templates, and presets make it easier to record visuals and voiceover dubbing.
Packed with an intuitive interface and video editing features, you can create amazing videos, irrespective of your experience level. You can download and install it on Windows 7/8/8.1/10, 64-bit computer, Mac OS X, and 10.11 and later. Its latest version offers an animated split-screen and Preview Render for a unique video-creation experience.
Having more than 300+ effects, you are sure to find one that suits your genre and anime type. Once you’ve created the video, burn it to the DVD, upload it on YouTube or any video channel, or transfer it to any other storage device. It’s the best free video editor tool for beginners and experts alike.


Why Should You Use Wondershare Filmora
- Convenient use
- All-in-one video editing feature
- Free access to tools, effects, and templates
- Powerful graphics
- Quick and easy dubbing and subbed
Summing Up
Chinese and Japanese anime is a popular and exciting genre in the entertainment industry with its strong storyline and lifelike popular cartoon characters . The free anime websites have further accentuated their popularity in foreign regions due to easy access to quality content.
Watch dubbed anime to experience the rich and conventional Japanese and Chinese culture. With martial arts being core to Japanese and Chinese tradition, you’re sure to experience action-packed fun. These free dubbed anime websites let you enjoy uncensored anime shows in your language and convenience. Our list offers multiple options to satiate your craving for anime shows and movies without spending a dime.
What are you waiting for? Try any or all of these and share your experience with us. Happy watching!
Shanoon Cox
Shanoon Cox is a writer and a lover of all things video.
Follow @Shanoon Cox
Shanoon Cox
Mar 27, 2024• Proven solutions
Who hasn’t heard of all-time favorite Pokémon or Dragon Ball Z? Well, none! Whether you watch anime , fan or not, these two are the most popular anime of all time. These series have proven to be life-learning lessons with stories based on friendship, love, social values, harmony, and heroism. As a perfect pastime for kids and adults alike, anime has become a popular entertainment show.
What’s more lucrative is many of these websites offer free access to a wide range of anime movies , cartoons, and TV shows. Although the numbers are high; still, it isn’t easy to find free dubbed anime websites with quality content and video streaming. So, we have listed the best 10 websites to watch dubbed anime online and free:
- 1.123anime
- 2. Anime-Planet
- 3. 9Anime
- 4. Gogoanime
- 5. Dubbedanime.net
- 6. AnimeLand
- 7. Anime Lab
- 8. Crunchyroll
- 9. AniMixPlay
- 10. AnimeFever
![]()
A cross-platform for making videos anywhere for all creators
Why your video editing isn’t good enough? How about some creative inspo?
- 100 Million+ Users
- 150+ Countries and Regions
- 4 Million+ Social Media Followers
- 5 Million+ Stock Media for Use
* Secure Download
01 123anime
It is the most popular and best to watch free dubbed anime movies and TV shows. With millions of viewers every day, this anime site provides more than 10,000 anime, films, and videos with English subtitles and dubbing.
Here, you can find multiple Japanese anime movies and shows such as The Legend of Zelda, Ghost in Shell, and many others. Watch it online or download it for later viewing. Thanks to easy navigation and a clean user interface, the website is liked by teens and adults globally.
Fast streaming, no “clickable” mobile ads, and an extensive library make 123anime number one anime website on our list. Offering multiple viewing options, it caters to the varying needs of different viewer types.
02 Anime-Planet
Established in 2001, Anime-Planet collaborates with manga and other paid platforms such as Hulu to provide 45,000+ animation shows free of cost. Search through the extensive collection of Anime-Planet and other paid websites to fulfill your anime cravings.
Its intuitive and interactive interface makes anime consumption easy and fun for users of all ages. You can even create your list of anime shows and find recommendations based on your search, interests, and previously viewed videos.
You can also build a community of anime fans worldwide while also participating in forums and anime character-ranking platforms for a shared experience. With more than 11 million users per month, the platform is quite popular, where you can watch and stream videos without creating an account.
03 9Anime
It is one of the unique anime websites with high-quality video streaming with 1080p. You can watch anime movies and shows of various genres, including romance, comedy, drama, and action. Moreover, it also offers Original Video Animations, where you can watch non-commercial, authentic animations of all times.
With its easy search option, you can easily find the latest, trending, and most popular movies and anime shows. You can also filter videos based on seasons, language, year, and video quality. The website works in all major regions globally, including the US, UK, Philippines, Australia, Netherlands, Canada, Malaysia, and Singapore.
04 Gogoanime
Gogoanime is yet another free dubbed anime website with a fantastic viewing and video streaming experience. Its sleek interface and user-friendly navigation make it a top choice for frugal like us. You can watch and download the latest and the oldest anime shows collection; Gogoanime is for all anime fans.
The recent ones top the chart while the titles are arranged alphabetically, yearly, popularity, and release date for quick and easy search. It has anime videos, movies, and shows on horror, kids, action, cars, and games. You get to find the latest Chinese, dubbed animation shows free of cost.
Despite being free, the anime website doesn’t contain spammy and annoying ads.
05 Dubbedanime.net
Dubbedanime.net is a leading anime entertainment website with a massive collection of anime shows and videos. You can watch, stream and enjoy your favorite anime shows online free of cost.
The streaming is fast, and video quality is high; therefore, offering you a pleasant experience. However, it may contain few ads, but they are not pop-ups. That is why you have an uninterrupted watch time. Besides, you can even use adblockers for ad-free video streaming.
As the best free dubbed anime websites, millions of anime videos are uploaded daily. You can watch dubbed anime online as much as you want and search them through title name or release date.
06 AnimeLand
It is the most popular platform with a wide range of English dubbed Japanese anime videos. Without creating an account or login ID, you can watch and download your favorite anime shows and movies without any disruptions.
Due to its high-quality videos between 480p-1080p HD, the platform offers an incomparable experience. Its 1.1 million viewers per month can access to latest and most recent animations. Naruto, One Piece, My Hero Academia and Attack of Titan with English dubbing are its most popular seasons.
You can find your favorite anime show on the Homepage or filter it based on Latest Updates, Dubbed List, and Movie List. Moreover, you can also search it manually by typing the title in the search bar. With its clean and simple navigation, the platform is easy and fun to use.
07 Anime Lab
Anime Lab showcases subbed and dubbed anime content for viewers in New Zealand and Australia only. With millions of videos in the gallery, the website hosts every known anime show that you can watch online.
Demon Slayer is its most popular Anime show among kids and adults for its riveting storyline, vivid graphics, and enthralling characters. You can find your favorite drama, idol, action, and horror anime videos in HD, making watch time fun and easy on the eyes.
Besides, it works on multiple devices, so you can binge-watch alone on your phone or have a movie night with friends. However, AnimeLab charges AUD 7.99 as a subscription fee to access shows broadcasted the same day.
08 Crunchyroll
Crunchyroll is a veteran dubbed anime website credited for introducing anime culture in the western world. It offers access to the latest Asian dramas, anime series, and manga productions that you won’t find anywhere else.
You can use the free standard version, having a vast library of anime shows, movies, and games infiltrated with pop-up ads. However, you can subscribe for a premium version for $7.99-8.99 for an ad-free watch time.
Searching on the platform is easy and quick; you can find your favorite anime based on genre, popularity, and seasons. It boasts an online store for exciting anime merchandise and the latest updates on your favorite anime show, character, or other property. Crunchyroll is a flag bearer and on-stop shop for hardcore anime fans. The website is accessible in more than 180 countries.
09 AniMixPlay
It is a free platform to watch dubbed anime online in English voiceover and subtitles. You can even create your list of favorite shows and popular choices that meet your preferences and interests. The website offers various streaming options for each anime show to find one that works best on your device.
Moreover, mobile owners can also schedule their watch time and list videos. Finding your favorite show is relatively easy as you can navigate through New Episodes, Updates, Recent, Popular, and Movie categories. Filter the list based on season, year, genre, stream type, and language.
If you’re not sure of your anime choice, read out the synopsis and OP/ED or watch the trailer.
10 AnimeFever
Animefever is an easy-to-use platform with an extensive range of shows, videos, and movies. You can manually search for the title or filter the list based on genre, status, type, parental ratings, season, and year. This makes it a friendly platform for kids as they can automatically filter out adult and age-inappropriate content.
Having the latest collection of videos, shows, and movies, viewers can find anime that hasn’t yet been aired on TV or anywhere else. You can also schedule the showtime as per your convenience and free time to ensure you don’t miss the latest updates.
While guest watching is permissible on the site, registering your account ensures the platform remembers your choices and makes recommendations accordingly.
Bonus Tip-Record and Share Anime with Wondershare Filmora Editor
Wondershare Filmora, a video editor platform for anime enthusiasts to create high-quality, professional anime videos. Its one-click tools, striking templates, and presets make it easier to record visuals and voiceover dubbing.
Packed with an intuitive interface and video editing features, you can create amazing videos, irrespective of your experience level. You can download and install it on Windows 7/8/8.1/10, 64-bit computer, Mac OS X, and 10.11 and later. Its latest version offers an animated split-screen and Preview Render for a unique video-creation experience.
Having more than 300+ effects, you are sure to find one that suits your genre and anime type. Once you’ve created the video, burn it to the DVD, upload it on YouTube or any video channel, or transfer it to any other storage device. It’s the best free video editor tool for beginners and experts alike.
Why Should You Use Wondershare Filmora
- Convenient use
- All-in-one video editing feature
- Free access to tools, effects, and templates
- Powerful graphics
- Quick and easy dubbing and subbed
Summing Up
Chinese and Japanese anime is a popular and exciting genre in the entertainment industry with its strong storyline and lifelike popular cartoon characters . The free anime websites have further accentuated their popularity in foreign regions due to easy access to quality content.
Watch dubbed anime to experience the rich and conventional Japanese and Chinese culture. With martial arts being core to Japanese and Chinese tradition, you’re sure to experience action-packed fun. These free dubbed anime websites let you enjoy uncensored anime shows in your language and convenience. Our list offers multiple options to satiate your craving for anime shows and movies without spending a dime.
What are you waiting for? Try any or all of these and share your experience with us. Happy watching!
Shanoon Cox
Shanoon Cox is a writer and a lover of all things video.
Follow @Shanoon Cox
Simple Guide to Create New and Exciting Blackboard Animation
Dead Simple Guide to Create New and Exciting Blackboard Animation
An easy yet powerful editor
Numerous effects to choose from
Detailed tutorials provided by the official channel
Yes, it is definitely possible In fact, it couldn’t be easier. A lot of the ‘whiteboard animation’ generators also work as blackboard animation generators.
In this guide, we hope to shed some light on the subject so that everyone can have an easier time approaching the matter of creating a blackboard project on their own.
In this article
01 [Is Blackboard Animation Outdated?](#Part 1)
02 [How to Combine Modern Needs with Blackboard Animation?](#Part 2)
03 [How to Create a Blackboard Animation in ONE DAY?](#Part 3)
Part 1 Is Blackboard Animation Outdated?
Blackboard animation some may say is as outdated as the concept of ‘blackboards’ themselves. After all, nowadays, whiteboards are the standard for presenting information in a school setting — with many preferring the ease of using dry-erase markers over the more unwieldy chalk.
However, unlike the inconveniences of using an actual chalkboard, chalkboard animation is not so different from whiteboard animation In fact, it’s just given a different look. One that may be exactly what you’re looking for — especially if you’re looking to get in touch with the older generation (who would no doubt be more familiar with the concept.)

Part 2 How to Combine Modern Needs with Blackboard Animation?
But alright, so how do you make it so that your blackboard animation is just as suited for the modern generation as it is for the older generation?? Well, that’s easy really. You’ll need images Or, rather, you’ll need visuals outside of just the plain text that is usually associated with chalkboard animation.
With the right kind of visuals to go along with your informational text, you can boost the effectiveness of your chalkboard animation video and make it more palatable. Perfectly in line with the modern needs of the era.

Part 3 How to Create a Blackboard Animation in ONE DAY?
Alright, so onto actually talking about how you can go about creating a chalkboard animation video Take note, this is going to be an ‘overview’ kind of tutorial. We’ve also decided to choose a more ‘custom’ method, rather than using one of the premium blackboard animation generators (which usually require you to pay a steep price in order to gain access to a media library.)
01Step 1. Pick Your Software
The first step in creating chalkboard animation is to pick the software that you want to use This can be something more ‘animation-specific’, like After Effects. Or something more ‘video-editing-specific’ like Filmora.
Again, because this is meant to be more of a ‘general’ tutorial, we won’t be showing you exactly how to use whatever editing software you decide to use in order to create your blackboard animation videos. But, as a general kind of advice, it would be best that you pick a video editor like Wondershare Filmora Video Editor that offers a Timeline feature that will allow you to quickly put together a project

02Step 2. Create a Storyboard
Next, to make the actual blackboard animation creation process go smoother, it’s important that you create a storyboard that will outline the video that you want to create
The more detailed this storyboard is, the better Although, of course, you don’t necessarily have to draw every single frame of your chalkboard animation beforehand. Just sketch out the general idea. It will help make sure that you won’t have to rush about making all sorts of corrections in the future

03Step 3. Draw Characters
For this step, we say ‘characters’ and use the word ‘draw.’ But really, this is a very open kind of step where we encourage you to put together all media that you will need to make your project into a reality This is where the storyboard really helps. After all, with that, you have an idea of exactly what kind of characters, settings, music, audio, etc. you’ll need for each scene (if not each frame)
If you’re not the ‘drawing’ type, by the way, there are both FREE and premium media libraries that you can take advantage of to use for your project It might be difficult to find matching art styles at first. But, if you’re really particular about that, then you can always find a freelance digital artist to design with a specific style in mind

04Step 4. Put Together Project
Last of all, of course, is the process of putting everything together. Do you have your software? Great Launch it and create a new project Do you have your storyboard? That’s also great Now you have an idea where each character and setting will go
In the image below, we’re only showing the start of a potential project. We’ve only added one image to the timeline But, as you can see, with the use of Filmora, even this one image can be turned into a video

● Key Takeaways from This Episode →
● Blackboards are naturally associated with learning This makes blackboard animation videos a great method of sharing information with an audience. Whether you’re doing it to promote your services/goods or just genuinely looking to impart knowledge to another
● Some may think that blackboards are outdated — for the mere fact that blackboards themselves are considered outdated when compared to whiteboards — but that doesn’t make them any less effective at getting a message across so long as you include the right kind of visuals
● In our brief ‘overview’ tutorial, we expand on the subject of blackboard animation some more. Be warned, it’s not the kind of project you should go into if you’re not prepared for the work Longer projects, especially, will require quite a bit of elbow grease to get done.
● Still, there’s something satisfying about a well-done chalkboard animation video that will not only be a joy to create but also, hopefully, catch the attention of your audience as well.
Yes, it is definitely possible In fact, it couldn’t be easier. A lot of the ‘whiteboard animation’ generators also work as blackboard animation generators.
In this guide, we hope to shed some light on the subject so that everyone can have an easier time approaching the matter of creating a blackboard project on their own.
In this article
01 [Is Blackboard Animation Outdated?](#Part 1)
02 [How to Combine Modern Needs with Blackboard Animation?](#Part 2)
03 [How to Create a Blackboard Animation in ONE DAY?](#Part 3)
Part 1 Is Blackboard Animation Outdated?
Blackboard animation some may say is as outdated as the concept of ‘blackboards’ themselves. After all, nowadays, whiteboards are the standard for presenting information in a school setting — with many preferring the ease of using dry-erase markers over the more unwieldy chalk.
However, unlike the inconveniences of using an actual chalkboard, chalkboard animation is not so different from whiteboard animation In fact, it’s just given a different look. One that may be exactly what you’re looking for — especially if you’re looking to get in touch with the older generation (who would no doubt be more familiar with the concept.)
Part 2 How to Combine Modern Needs with Blackboard Animation?
But alright, so how do you make it so that your blackboard animation is just as suited for the modern generation as it is for the older generation?? Well, that’s easy really. You’ll need images Or, rather, you’ll need visuals outside of just the plain text that is usually associated with chalkboard animation.
With the right kind of visuals to go along with your informational text, you can boost the effectiveness of your chalkboard animation video and make it more palatable. Perfectly in line with the modern needs of the era.
Part 3 How to Create a Blackboard Animation in ONE DAY?
Alright, so onto actually talking about how you can go about creating a chalkboard animation video Take note, this is going to be an ‘overview’ kind of tutorial. We’ve also decided to choose a more ‘custom’ method, rather than using one of the premium blackboard animation generators (which usually require you to pay a steep price in order to gain access to a media library.)
01Step 1. Pick Your Software
The first step in creating chalkboard animation is to pick the software that you want to use This can be something more ‘animation-specific’, like After Effects. Or something more ‘video-editing-specific’ like Filmora.
Again, because this is meant to be more of a ‘general’ tutorial, we won’t be showing you exactly how to use whatever editing software you decide to use in order to create your blackboard animation videos. But, as a general kind of advice, it would be best that you pick a video editor like Wondershare Filmora Video Editor that offers a Timeline feature that will allow you to quickly put together a project
02Step 2. Create a Storyboard
Next, to make the actual blackboard animation creation process go smoother, it’s important that you create a storyboard that will outline the video that you want to create
The more detailed this storyboard is, the better Although, of course, you don’t necessarily have to draw every single frame of your chalkboard animation beforehand. Just sketch out the general idea. It will help make sure that you won’t have to rush about making all sorts of corrections in the future
03Step 3. Draw Characters
For this step, we say ‘characters’ and use the word ‘draw.’ But really, this is a very open kind of step where we encourage you to put together all media that you will need to make your project into a reality This is where the storyboard really helps. After all, with that, you have an idea of exactly what kind of characters, settings, music, audio, etc. you’ll need for each scene (if not each frame)
If you’re not the ‘drawing’ type, by the way, there are both FREE and premium media libraries that you can take advantage of to use for your project It might be difficult to find matching art styles at first. But, if you’re really particular about that, then you can always find a freelance digital artist to design with a specific style in mind
04Step 4. Put Together Project
Last of all, of course, is the process of putting everything together. Do you have your software? Great Launch it and create a new project Do you have your storyboard? That’s also great Now you have an idea where each character and setting will go
In the image below, we’re only showing the start of a potential project. We’ve only added one image to the timeline But, as you can see, with the use of Filmora, even this one image can be turned into a video
● Key Takeaways from This Episode →
● Blackboards are naturally associated with learning This makes blackboard animation videos a great method of sharing information with an audience. Whether you’re doing it to promote your services/goods or just genuinely looking to impart knowledge to another
● Some may think that blackboards are outdated — for the mere fact that blackboards themselves are considered outdated when compared to whiteboards — but that doesn’t make them any less effective at getting a message across so long as you include the right kind of visuals
● In our brief ‘overview’ tutorial, we expand on the subject of blackboard animation some more. Be warned, it’s not the kind of project you should go into if you’re not prepared for the work Longer projects, especially, will require quite a bit of elbow grease to get done.
● Still, there’s something satisfying about a well-done chalkboard animation video that will not only be a joy to create but also, hopefully, catch the attention of your audience as well.
Also read:
- Updated In 2024, How I Animate Discord Profile Pictures
- In 2024, How to Analyze an Editorial Cartoon Easily
- Updated In 2024, 12 Captivating Websites with Triggered Animate on Scroll Examples
- 2024 Approved FREE Best Anime Streaming Sites to Download Anime
- New 2024 Approved Tips for GIF to Animated PNG You Should Know
- In 2024, 10 Awesome Moving Animation PowerPoint Techniques
- Updated Types of Cartoon Styles You May Use for Your Next Marketing Project
- Updated Top 12 Illusion Gifs Top Picks
- New 2024 Approved Complete Guide to Send Gif WhatsApp on Android
- In 2024, Popular Female & Male Disney Cartoon Characters
- Top 10 Animated Photo Collage Apps You Should Know for 2024
- In 2024, You Can Turn a TikTok Into a GIF Now
- New In 2024, Amazing Techniques of Motion Graphics in Premiere Pro
- New 2024 Approved Great Ways to Make Claymation Videos
- Updated How to Create Your Avatar Free
- Updated Best Websites to Download Animated GIFs for Free for 2024
- 10 Scary Anime Girls That Will Make You Creepy
- Updated 2024 Approved Tutorials to Make Animated Images – Even if Youre Just Starting Out
- Updated In 2024, 5 Free Animated Gif Sources You Must Check
- Updated Have You Seen the Facebook Cartoon App Everyones Using Recently
- New In 2024, 10 Realistic Cartoon Characters You Will Run Away From if You Met in R
- New 2024 Approved Best 15 Greatest Claymation Movies of All Time
- New 2024 Approved 10 Creative Wallpaper Collage Ideas and Photos
- 10 Best Animation Makers for Kids to Have Fun for 2024
- In 2024, 10 Classical Animated Cartoon Types With Examples
- 2024 Approved 10 2D/3D Animation Tips & Tricks for You
- Updated 2024 Approved Tips That Show Anybody How to Get Awesome Background for Slideshow in PowerPoint
- Updated Top 7 Best Animated Lyric Video Software for FREE for 2024
- Updated 2024 Approved 10 Top Tools to Make Pic Collage for Windows
- Updated In-Depth Study of Cartoon Painting Starts for 2024
- Updated Nurturing Mind, Heart, and Soul on the Top 5 Anime Streaming Sanctuaries
- 2024 Approved Fuel Creativity with 10 Awesome Collection of 2D Animation Examples
- Updated In 2024, How to Send and Add Snapchat GIFs 100 The Easy Way
- Updated 2024 Approved Top 15 Male Anime Characters By Voting
- Top 5 Xiaomi Redmi K70E Bypass FRP Tools for PC That Actually Work
- In 2024, Set Your Preferred Job Location on LinkedIn App of your Nokia C12 | Dr.fone
- How to Unlock SIM Card on Oppo K11x online without jailbreak
- Ways To Find Unlocking Codes For Vivo X100 Pro Phones
- In 2024, How to Cast Itel S23 Screen to PC Using WiFi | Dr.fone
- In 2024, How to Successfully Bypass iCloud Activation Lock from Apple iPhone 12 Pro Max
- Tips and Tricks for Setting Up your Xiaomi Redmi 12 5G Phone Pattern Lock
- In 2024, How To Reset the Security Questions of Your Apple ID From Your iPhone 8
- In 2024, How to Reset Apple ID and Apple Password On iPhone 14
- In 2024, How to Screen Mirroring Realme Narzo 60 5G? | Dr.fone
- How to Unlock T-Mobile iPhone 15 Pro Max online without SIM Card?
- In 2024, 8 Ways to Transfer Photos from Xiaomi Redmi Note 13 Pro 5G to iPhone Easily | Dr.fone
- In 2024, 3 Effective Methods to Fake GPS location on Android For your Oppo K11x | Dr.fone
- The way to get back lost music from Nord N30 SE
- In 2024, Why Apple Account Disabled From your iPhone 7? How to Fix
- In 2024, How to Show Wi-Fi Password on Infinix Note 30
- A Perfect Guide To Remove or Disable Google Smart Lock On Realme Narzo N55
- Is GSM Flasher ADB Legit? Full Review To Bypass Your Tecno Spark 10 Pro Phone FRP Lock
- In 2024, 9 Mind-Blowing Tricks to Hatch Eggs in Pokemon Go Without Walking On Lava Blaze Pro 5G | Dr.fone
- In 2024, 2 Ways to Monitor Xiaomi Redmi Note 12 5G Activity | Dr.fone
- Title: Top 12 Illusion Gifs Top Picks for 2024
- Author: Elon
- Created at : 2024-05-19 03:04:55
- Updated at : 2024-05-20 03:04:55
- Link: https://animation-videos.techidaily.com/top-12-illusion-gifs-top-picks-for-2024/
- License: This work is licensed under CC BY-NC-SA 4.0.
