
:max_bytes(150000):strip_icc():format(webp)/football-referee-signaling-touchdown-in-stadium-599944339-5a84cb9e875db900367df025.jpg)
Top Claymation Shows That Make Your Memories Unforgettable
Top Claymation Shows That Make Your Memories Unforgettable
Best Claymation Shows That Make Your Memories Unforgettable
An easy yet powerful editor
Numerous effects to choose from
Detailed tutorials provided by the official channel
There are plenty of things that the 90s have given us. And when we revisit them now, it gives us an inimitable feeling of nostalgia which we would like to store forever with us. And one of the things that can bring back tons of cherished memories from the 90s is the claymation tv shows.
The claymation shows were called the clay animation shows. The reason for such a name was because the characters in the shows were made from malleable or deformable materials, especially out of clay. They have been one of the most revolutionary and entertaining components of that time.
These shows were one of the forms among the numerous forms of stop-motion animations. We will cover what these shows were about, their cast, and where you can watch them today. And in the following discussion, we will be discussing the ten best 90s claymation shows to bring back wonderful nostalgic memories.

Here is the list of the top claymation tv shows and all the information, including the sites and apps you can watch even today!
01Plasmo
Plasmo was an Australian science fiction TV series about a two and a half-year-old space orphan. The show first premiered in 199starring Abbe Holmes, Phillip Houghton and Pia Morley. You can watch this show on YouTube.

02Plonsters
The Plonsters was a show that premiered in 19which showed the characters Plif, Plops and Plummy, babble and morph, and their wonderful adventures. The show starred Ralph Thiekötter, and you can watch this show on Netflix and Tubi.
04Rex the Runt
Rex the Runt was a comedy show that premiered in 199The show was about the adventures of intrepid Rex and his plasticine companions. It starred about nine celebrities. Steve Box, Elisabeth Hadley, Andrew Jeffers, and Kevin Wrench were among them. You can watch this show even today on Amazon Prime.

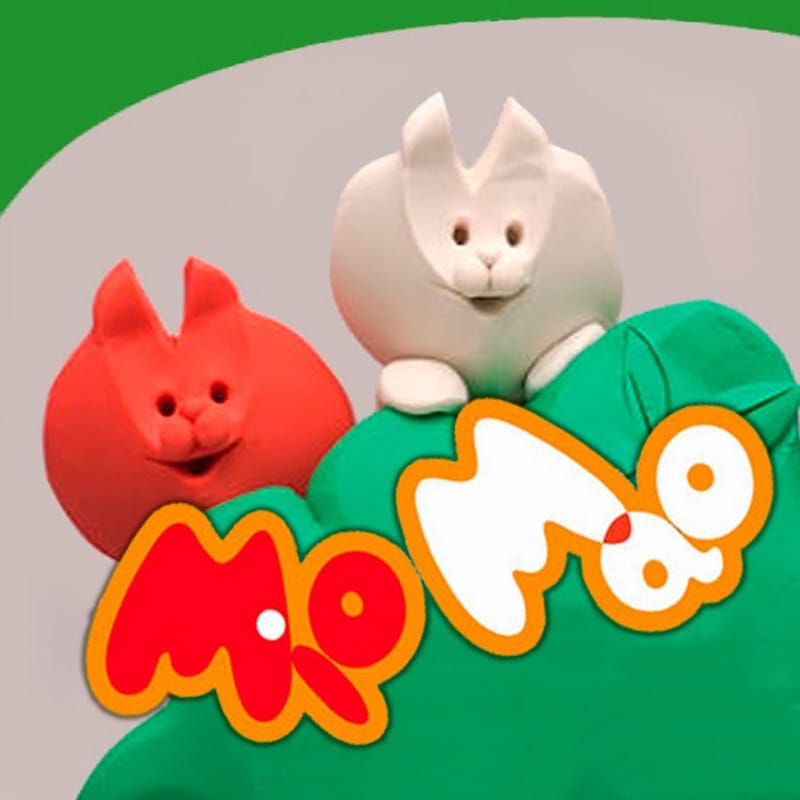
05Mio Mao
Mia Mao first premiered in 197starring Derek Griffiths as cast. The show was about two plasticine kittens, Mia and Mao, exploring and finding different objects and animals who hide in their garden. You can watch this show on Amazon Prime.
06Celebrity Death
The Celebrity Deathmatch featured numerous celebrities who were shown as clay-animated characters. Their characters would have quite an intense fight in a boxing ring, and the match would be pretty different from the ordinary boxing matches.
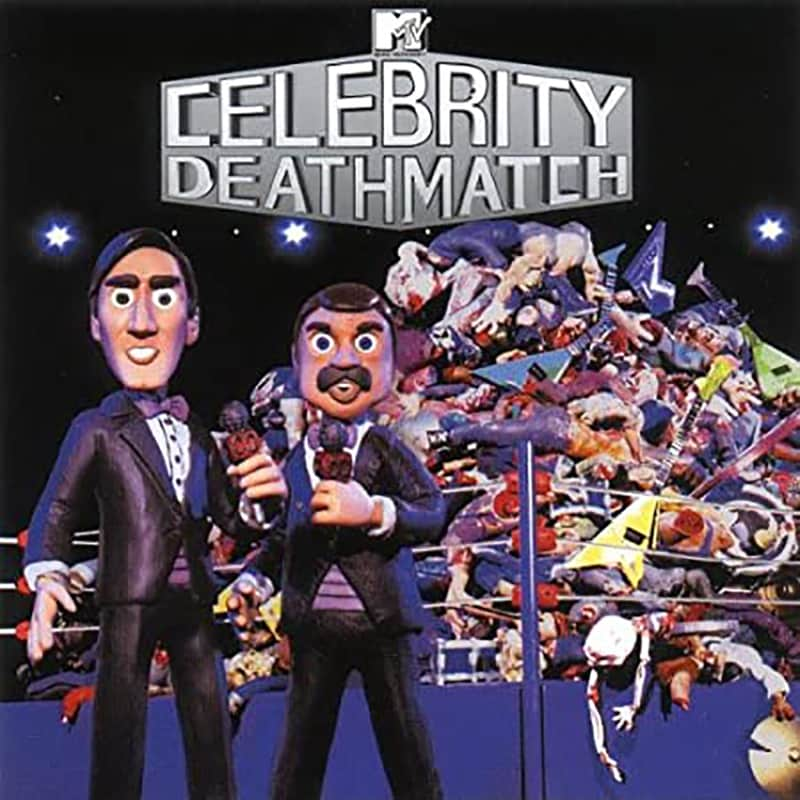
Most of the boxing matches ended with the death of the celebrities, which was the reason for the show to get its name “Celebrity Deathmatch”. It was one of the most favourite and popular 9claymation shows on MTV, an absolute treat and entertainment to watch.
The show premiered on January 2199and it continued to air till the year 2007., with its final episode on March 3200Its cast included a series of celebrities, including Maurice Schlafer, Lean Maxwell, Mills Lane, David Wills, Steve Austin, Masasa Moyo and several other celebrities.
You can readily watch this show today on Amazon Instant Video, iTunes, Paramount+ or Amazon Prime Video.
07The Gumby Show
The Gumby Show was yet another popular tv show of the 9that premiered first on March 1195It featured a green-titular character, a humanoid that was a creation and the model of Art Clokey.
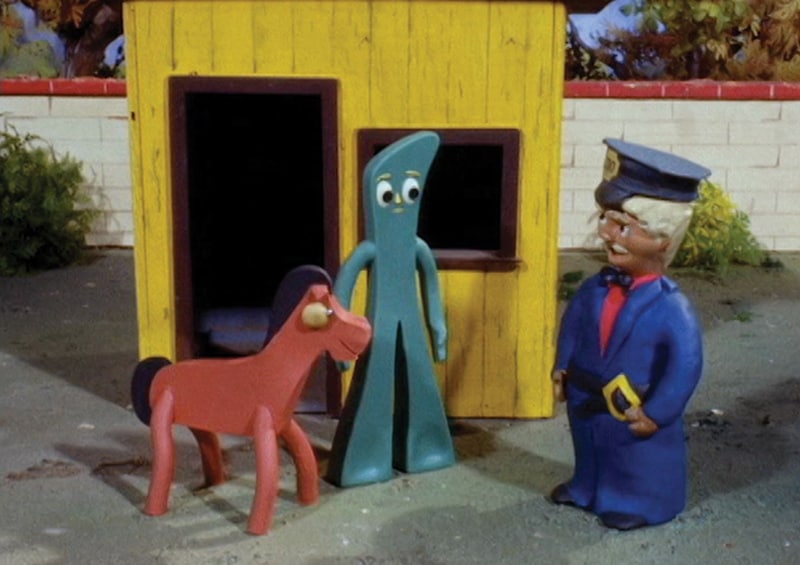
This character has been the reason behind two tv series, another feature-length movie and several other media. The ones to star in this tv show are Dal McKennon and Dick Beals. The show is about Gumby experiencing different adventures through various times and environments in history. The show also features his constant companion, a titular, red coloured talking pony named Pokey.
You can watch the show on Netflix and Amazon Prime.
08Pat & Mat
Pat & Mat was an entertaining and fun-to-watch television show of the 90s. The show first premiered in 19and starred David Nykl and Peter Alton, who played the role of Pat and Mat, respectively.
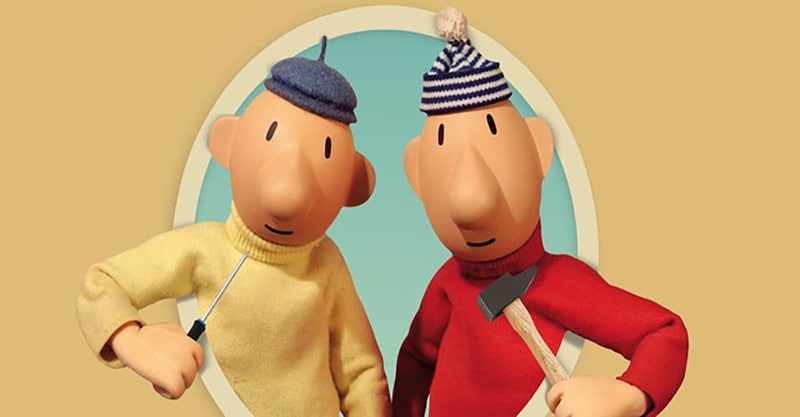
The show was about two neighbours, Pat and Mat, who faced self-created problems. And then, they solved these problems through any possible and impossible remedy.
You can watch this show now on Zee5 and Mx Player for free.
09Pingu
Pingu was a television show about a clumsy yet sweet penguin who lived with his family in the polar ice cap of Antarctica. Pingu, along with his seal friend Robby and sister, Punga, go on different adventures.
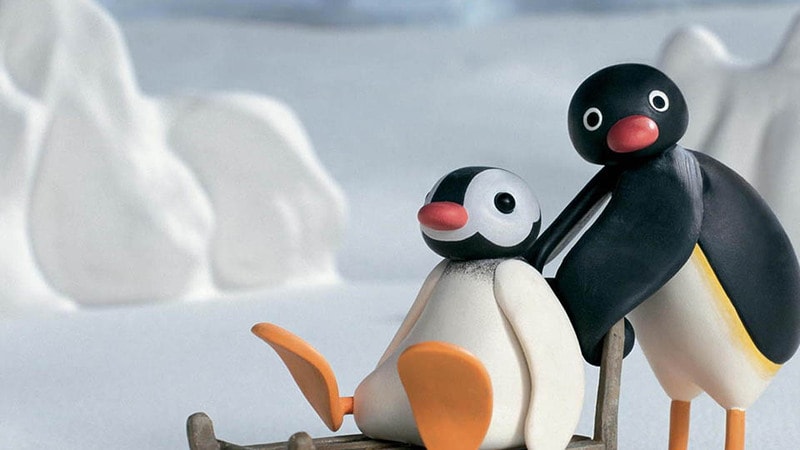
This show first premiered on May 2198with Carlo Bonomi, David Sant and Marcello Magni starring in it. You can watch the episodes of this unforgettable and entertaining tv show on ITV Hub and Amazon Prime.
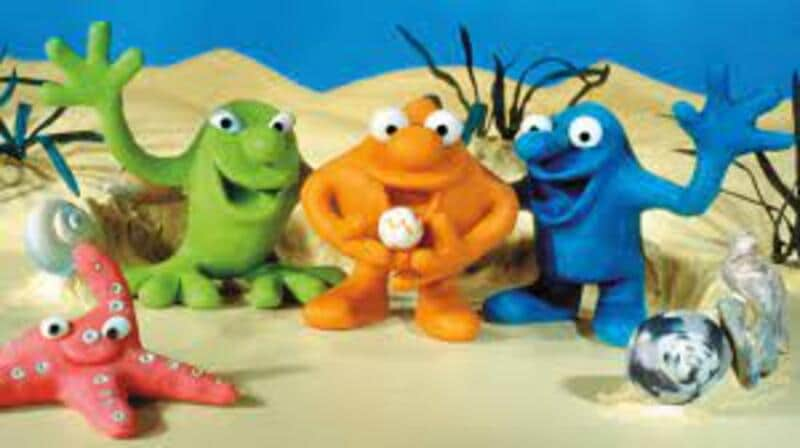
10The Red and the Blue
The Red and the Blue was an Italian television series for children that first premiered in 197The show was about two antagonist clay shape-shifting characters who detected against an undifferentiated background, white.
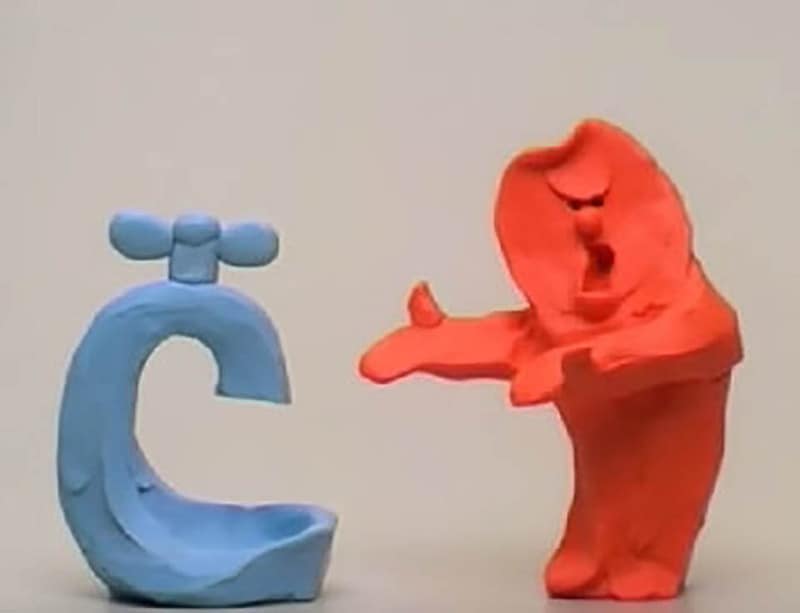
The cast of this tv show included Carlo Bonomi, and you can see this show today on YouTube.
11The PJs
The PJs was a popular and loved tv show that premiered on 10th January 199About twenty celebrities were starring in this show, and naming a few among them were Eddie Murphy, Ja’Net DuBois, Loretta Devine, Shawn Michael Howard, Snoop Dog and many more.
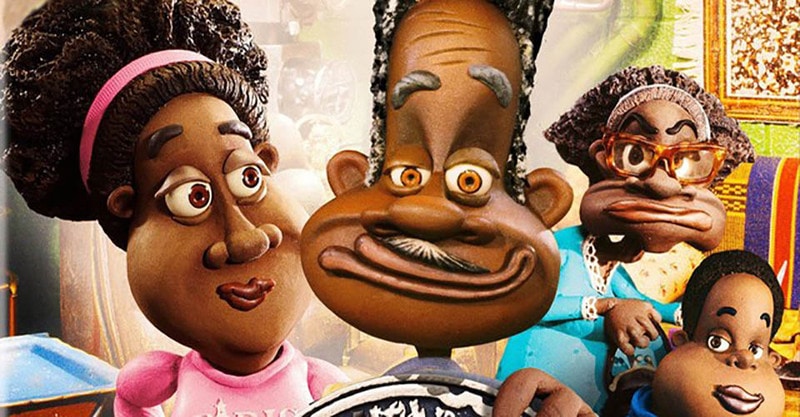
The show was about Thurgood Stubbs, the superintendent of Lawrence Hilton-Jacobs housing project and lived with his wife, Muriel. This comedy show satirically featured the difficulties one faces in a big-city housing project, which the protagonist Thurgood Stubbs and his friends faced.
You can watch this show on Peacock Tv.
● Bonus:
Now, without video editing, these fantastic shows of the 9could not have been created. But To your surprise, you too can create such incredible videos effortlessly. And that can be possible through an efficient and effective video editing tool.
You can find innumerable video editing tools available in this present world, but you must choose the best. So, let us introduce you to the best video editing tool, with which you can showcase all your editing skills and creativity-Wondershare Filmora Video Editor !
We call this tool the best video editing tool because its numerous features make it the most proficient video editing tool. Let us now look into its numerous effective features below.
● Professional editing tools
Filmora is the video editing tool that incorporates all the professional editing features to make your videos of the best and the professional quality. The elements envelop every aspect of the finest quality video editing works, which brings out the best of skills and creativity in you.
● Easy to use
Although Filmora has every professional editing tool, you will face no difficulty figuring out how the tools work. Even if you are a beginner, you can effortlessly use this editing tool to not only initiate your video editing journey but also enrich your skills.
● Free trial
You need not buy the proceed features on your first try. You can readily avail of the free trial of Filmora and its paid features. And as you try and find the features pleasing, you can proceed to purchase the aid features.
● Personalize and edit your videos
You can avail of the various features such as rotating, cropping, trimming and splitting the videos to edit. Also, there are other features where you can change the speed of the videos. Therefore, the features you get in these tools are of the most proficient quality.
● Over 8effects
The Filmora editing tool offers you more than 8editing effects that will never make you feel lacking any features and effects you need. And this helps you in making the best videos most effortlessly.
● Get the tool on any devices
Filmora believes that editing skills should be made discoverable anywhere and everywhere. Thus, you can download or use this tool on any device that you use. So, you need not have any specific device to avail of this incredible video editing tool, and you can make and edit videos on any device you want.
● Key Takeaways from This Episode →
● These are the best ten claymation tv shows and series that you can watch even today to bring back all the memories and revisit your early days of the 90s. So, to wrap up our discussion, we would conclude by retracing the aspects and factors that we covered in our discussion. We had enveloped the following topics effectively.
● We discussed the claymation picture through a little interdiction.
● Then, we discussed the ten best claymation TV shows popular in the 90s. We discussed their stories, their casts, their premieres and also the sites and apps where you can watch them even today.
● Lastly, we introduced you to the best editing tool, Filmora, that will help you edit any video of your choice and explore your video editing skills with the finest professional features and infinite effects.
There are plenty of things that the 90s have given us. And when we revisit them now, it gives us an inimitable feeling of nostalgia which we would like to store forever with us. And one of the things that can bring back tons of cherished memories from the 90s is the claymation tv shows.
The claymation shows were called the clay animation shows. The reason for such a name was because the characters in the shows were made from malleable or deformable materials, especially out of clay. They have been one of the most revolutionary and entertaining components of that time.
These shows were one of the forms among the numerous forms of stop-motion animations. We will cover what these shows were about, their cast, and where you can watch them today. And in the following discussion, we will be discussing the ten best 90s claymation shows to bring back wonderful nostalgic memories.
Here is the list of the top claymation tv shows and all the information, including the sites and apps you can watch even today!
01Plasmo
Plasmo was an Australian science fiction TV series about a two and a half-year-old space orphan. The show first premiered in 199starring Abbe Holmes, Phillip Houghton and Pia Morley. You can watch this show on YouTube.
02Plonsters
The Plonsters was a show that premiered in 19which showed the characters Plif, Plops and Plummy, babble and morph, and their wonderful adventures. The show starred Ralph Thiekötter, and you can watch this show on Netflix and Tubi.
04Rex the Runt
Rex the Runt was a comedy show that premiered in 199The show was about the adventures of intrepid Rex and his plasticine companions. It starred about nine celebrities. Steve Box, Elisabeth Hadley, Andrew Jeffers, and Kevin Wrench were among them. You can watch this show even today on Amazon Prime.
05Mio Mao
Mia Mao first premiered in 197starring Derek Griffiths as cast. The show was about two plasticine kittens, Mia and Mao, exploring and finding different objects and animals who hide in their garden. You can watch this show on Amazon Prime.
06Celebrity Death
The Celebrity Deathmatch featured numerous celebrities who were shown as clay-animated characters. Their characters would have quite an intense fight in a boxing ring, and the match would be pretty different from the ordinary boxing matches.
Most of the boxing matches ended with the death of the celebrities, which was the reason for the show to get its name “Celebrity Deathmatch”. It was one of the most favourite and popular 9claymation shows on MTV, an absolute treat and entertainment to watch.
The show premiered on January 2199and it continued to air till the year 2007., with its final episode on March 3200Its cast included a series of celebrities, including Maurice Schlafer, Lean Maxwell, Mills Lane, David Wills, Steve Austin, Masasa Moyo and several other celebrities.
You can readily watch this show today on Amazon Instant Video, iTunes, Paramount+ or Amazon Prime Video.
07The Gumby Show
The Gumby Show was yet another popular tv show of the 9that premiered first on March 1195It featured a green-titular character, a humanoid that was a creation and the model of Art Clokey.
This character has been the reason behind two tv series, another feature-length movie and several other media. The ones to star in this tv show are Dal McKennon and Dick Beals. The show is about Gumby experiencing different adventures through various times and environments in history. The show also features his constant companion, a titular, red coloured talking pony named Pokey.
You can watch the show on Netflix and Amazon Prime.
08Pat & Mat
Pat & Mat was an entertaining and fun-to-watch television show of the 90s. The show first premiered in 19and starred David Nykl and Peter Alton, who played the role of Pat and Mat, respectively.
The show was about two neighbours, Pat and Mat, who faced self-created problems. And then, they solved these problems through any possible and impossible remedy.
You can watch this show now on Zee5 and Mx Player for free.
09Pingu
Pingu was a television show about a clumsy yet sweet penguin who lived with his family in the polar ice cap of Antarctica. Pingu, along with his seal friend Robby and sister, Punga, go on different adventures.
This show first premiered on May 2198with Carlo Bonomi, David Sant and Marcello Magni starring in it. You can watch the episodes of this unforgettable and entertaining tv show on ITV Hub and Amazon Prime.
10The Red and the Blue
The Red and the Blue was an Italian television series for children that first premiered in 197The show was about two antagonist clay shape-shifting characters who detected against an undifferentiated background, white.
The cast of this tv show included Carlo Bonomi, and you can see this show today on YouTube.
11The PJs
The PJs was a popular and loved tv show that premiered on 10th January 199About twenty celebrities were starring in this show, and naming a few among them were Eddie Murphy, Ja’Net DuBois, Loretta Devine, Shawn Michael Howard, Snoop Dog and many more.
The show was about Thurgood Stubbs, the superintendent of Lawrence Hilton-Jacobs housing project and lived with his wife, Muriel. This comedy show satirically featured the difficulties one faces in a big-city housing project, which the protagonist Thurgood Stubbs and his friends faced.
You can watch this show on Peacock Tv.
● Bonus:
Now, without video editing, these fantastic shows of the 9could not have been created. But To your surprise, you too can create such incredible videos effortlessly. And that can be possible through an efficient and effective video editing tool.
You can find innumerable video editing tools available in this present world, but you must choose the best. So, let us introduce you to the best video editing tool, with which you can showcase all your editing skills and creativity-Wondershare Filmora Video Editor !
We call this tool the best video editing tool because its numerous features make it the most proficient video editing tool. Let us now look into its numerous effective features below.
● Professional editing tools
Filmora is the video editing tool that incorporates all the professional editing features to make your videos of the best and the professional quality. The elements envelop every aspect of the finest quality video editing works, which brings out the best of skills and creativity in you.
● Easy to use
Although Filmora has every professional editing tool, you will face no difficulty figuring out how the tools work. Even if you are a beginner, you can effortlessly use this editing tool to not only initiate your video editing journey but also enrich your skills.
● Free trial
You need not buy the proceed features on your first try. You can readily avail of the free trial of Filmora and its paid features. And as you try and find the features pleasing, you can proceed to purchase the aid features.
● Personalize and edit your videos
You can avail of the various features such as rotating, cropping, trimming and splitting the videos to edit. Also, there are other features where you can change the speed of the videos. Therefore, the features you get in these tools are of the most proficient quality.
● Over 8effects
The Filmora editing tool offers you more than 8editing effects that will never make you feel lacking any features and effects you need. And this helps you in making the best videos most effortlessly.
● Get the tool on any devices
Filmora believes that editing skills should be made discoverable anywhere and everywhere. Thus, you can download or use this tool on any device that you use. So, you need not have any specific device to avail of this incredible video editing tool, and you can make and edit videos on any device you want.
● Key Takeaways from This Episode →
● These are the best ten claymation tv shows and series that you can watch even today to bring back all the memories and revisit your early days of the 90s. So, to wrap up our discussion, we would conclude by retracing the aspects and factors that we covered in our discussion. We had enveloped the following topics effectively.
● We discussed the claymation picture through a little interdiction.
● Then, we discussed the ten best claymation TV shows popular in the 90s. We discussed their stories, their casts, their premieres and also the sites and apps where you can watch them even today.
● Lastly, we introduced you to the best editing tool, Filmora, that will help you edit any video of your choice and explore your video editing skills with the finest professional features and infinite effects.
Top 8 Tools Tell You How to Make Slideshows for Instagram
Top 8 Tools Tell You How to Make Slideshows for Instagram
An easy yet powerful editor
Numerous effects to choose from
Detailed tutorials provided by the official channel
Instagram slideshows land among the latest social media trends of fun and entertainment. Learn how to attract jaw dropping peer attention with creating the same!
In this article
01 [When Should You Use an Instagram Slideshow?](#Part 1)
02 [How to Make an Instagram Slideshow with Music?](#Part 2)
03 [8 Best Instagram Slideshow Apps for Creating Outstanding Slideshow](#Part 3)
Part 1 When Should You Use an Instagram Slideshow?
Revolutions in technology has opened doors to a plenty of new and exciting means of information sharing, entertainment and communication. Playing its part in the game, Instagram slideshow has emerged as an exciting means of quick and impactful content sharing. Diving deeper into the discussion, let us talk about the different areas of working with an Instagram slide show in the following section:
01Explanatory Product Demonstrations and Stepwise Tutorials
Considering the diverse media collaboration entertained by this social media platform, you get the liberty to include 10 media files of videos and images while creating a slideshow on Instagram. This is an affordably sufficient media space to demonstrate your newly launched product in front of the target audience.
The aforesaid characteristic of a slideshow for Instagram can be put to another use of creating detailed, step by step guides and product usage tutorials to create an increased and confident customer reach and brand applicability. A few examples include the presentations of recipes by food blogs and chefs, or a detailed look of the day’s outfit by fashion bloggers.
02Interactive Storytelling or Recreate an Event
Gone are the times when stories and events were restricted to a single image or video with a limited scope of understanding and explanation. You can now work with a combination of multiple images and videos to create more vivid and graphical descriptions of stories, narratives and events.
You can work on creating an engaging slideshow for Instagram to tell an amazing story, voice a narration from the beginning to the end, or share your best moments with your cherished audience, which will surely give them the feel of enjoying the adventure along with you.
03Create a Collection
You can now use a slide show for Instagram to design and present a collection of manifold ideas and products within a single post. You can improvise the collection with displaying a series of related products, showcasing a summary of your different blog posts through the week, or simply present a list of your most reliable inspirations, resources and influencers.
04Exciting Video Teasers
If you have a scheduled video release to entertain your audience, try working with interactive slideshows for Instagram to create some sensational teaser content of the upcoming release to imbibe a natural sense of curiosity within your audience.
You can experiment with releasing a mini photoshoot tour of your filming set, share close up progression details, or include a cliffhanger in the end of your Instagram slideshow to ensure the retrieval of your audience towards watching the release of the actual big content. You can use these short teasers as effective means of creating a campaign buzz, while building a closer connect with your audience.
Part 2 How to Make an Instagram Slideshow with Music?
By now, you must have gathered enough knowledge regarding the credibility of Instagram slideshows in catering to a diversity of commercial, professional and personal content sharing needs. Considering the same, you may conveniently feel motivated to try hands at creating stunning slideshow presentations for Instagram on your own.
Adhering to the concern, let us move ahead with our discussion, while talking about how to make a slideshow for Instagram and supplement the same with adaptable background music to develop amazing content masterpieces and share them with social media peers, while grabbing their obvious attention.
While there are a number of choices in the software market to choose your Instagram slideshow creator tool, the FlexClip tool can be a reliable option. Read though the following section to learn the slideshow creation process in the program with a comprehensive and stepwise tutorial guide:
Step 1: Download the Slideshow Creator Tool
Visit the official website of FlexClip to download and install the slideshow maker software in your preferred device.

Step 2: Start from Scratch
After a successful installation, proceed to launch the tool in your system and wait till the software greets you with its welcome interface. Here, you will have to reach to and tap the ‘Start to Create’ button to begin with the slideshow creation process. You can also select a preset template to work on your slideshow if nothing new clicks in your mind.
Step 3: Select an Aspect Ratio
In the tool’s creator window, navigate to the ‘Options Panel’ at the left and click on ‘More’ to select a suitable aspect ratio. Picking the 9:16 ratio would be a good choice.

Step 4: Upload Your Media
In the same ‘Options Panel’, click on ‘Media’ for dragging and dropping the desired video and image files from your device to the program’s media timeline, followed by applying them to the tool’s storyboard. You can alternatively, choose to directly work with media pages of any preset slideshow template.

Step 5: Customize Your Media
You can now proceed to improvise your media files with amazing texts, filters, stickers, emojis, widgets, etc., by clicking on specific object categories from the ‘Options Panel’.

Step 6: Include Seamless Transitions
Proceed to uplift your creation to the next level with the application of stunning image and video transitions. Navigate to the ‘Options Panel’ and tap ‘Elements’. A variety of transition effects will be displayed to choose from. Select the one you like to add it to your slideshow.

Step 7: Add a Background Music
An in line background audio is the best way to set the mood of your slideshow. Choose to add the same to your creation for making a more engaging impact on the audience. Visit the ‘Options Panel’ again and click on ‘Music’ to open the program’s audio library and select a perfect background music from the huge variety of choices, to include in your slideshow.

Step 8: Preview Your Creation
When you have finished customizing your slideshow, navigate to the top right corner of the editor’s storyboard and hit the ‘Preview’ button to visualize and ensure that your slideshow has everything at the right place. You can continue editing if there is a need to make some changes.
Step 9: Time to Save and Share!
When you are happy with your work, consider saving it either to your device or Google Dropbox, from where you can easily upload the same to your Instagram handle.
Part 3 Best Instagram Slideshow Apps for Creating Outstanding Slideshow
Social media is the talk of the trend in today’s times, which has extended its boundaries to visibly everything around us. Speaking in the light of the fact, slideshow presentations are no exception. Social media platforms today have come up with amazing tools and applications to create and share a stunning slideshow Instagram story with utmost ease and within an affordable time span.
Now that you have developed a comprehensive understanding of the credibility of working with Instagram slideshows and their creation process with the inclusion of complementary background music, let us dive into learning about some of the best and most popular Instagram apps for creating awesome slideshow presentations in the following section:
01Filme Lite
This tool lands among the leading user preferences to work on creating slideshow presentations. The application software is packed with a heap of latest features that form the Instagram trends in current times.
Apart from complementing your slideshow creations with tons of features, this slideshow maker for Instagram grants you the liberty to include your most loved videos and images within your presentation and customize them with a diverse range of effects, along with adjusting their play duration within the slideshow. Additional to image and video customization, you are also allowed to choose the image transition style that perfectly suits your content arrangement within the slides.
Working with the tool, you can be sure of getting an unparalleled slideshow creation experience with a very interactive and user oriented design interface, that is simple enough to be easily understood and worked upon by a newbie to the creative world.
02VivaVideo
If you are working on a detailed presentation and wish to spark up your creation with stunning varieties of jaw dropping special effects, consider creating your PowerPoint slideshows in this application. The tool’s effect library is a storehouse of the most amazing special effects that promise of transforming your slideshow into a visual masterpiece.
You can separately apply these effects to each of the slideshow images or choose to work on a combination of selected effects to include within a single video. Apart from this, you are free to choose an apt background music for your presentation slides from the extensive audio library of the software. The bottom line is; you are assured to a complete fun experience while creating slideshows with this tool.
03Movavi
If you are familiar enough with the fundamental concepts and the trivial anecdotes of working with slideshow presentations and want to take your graphic creativity to the next level, you can try hands at using the Movavi slideshow creator software to design high end PowerPoint presentations of professional quality. The best thing about the tool is, it works online and does not require a software download for usage concerns.
Along with creating online slideshow presentations with ease, the tool permits you to create online videos within minutes and instantly download the same for specific usage. You can further, pop up your presentation slides with wonderful transition and animation effects and also make adjustments in the play duration of each slide. The tool lets you choose and add a perfect background music to your presentation from its conveniently vast audio library.
04Slideshow Lab
If you have just landed into the world of creating slideshow presentations and are looking for easy solutions on how to make a slideshow on Instagram, consider working with this software to polish your design creativity. The simple and user cohesive interface of the tool is best for beginners to understand and get customary with the creation process, that takes the minimum possible time to render an appreciable PowerPoint presentation.
Talking about the slideshow design process, you will need to start with selecting a set of desired images, followed by uploading the same into the tool’s slideshow creator timeline. The next step is to arrange the images in the sequential order of appearance, select an appealing background music and apply smooth image transitions. When you are done with everything, proceed to save the presentation to your device.
05MoShow
While you can choose to create stunning slideshow presentations with almost any class of images, the aforesaid app works best to render Instagram images into a top rated Instagram photo slideshow without compromising with the high resolution image quality of Instagram photos. The application integrates motion pictures and lighting effects to transform the otherwise regular images into lively still captures.
Considering the credibility of the tool in overall user experience, its indeed a thumbs up from graphic creators across the globe, thanks to its smart and interactive interface, in time performance and outstanding creation outputs.
06InVideo Editor
Put an end to your search of effective solutions on how to do a slideshow on Instagram with the InVideo Editor, a smart video and graphic editor that can also be employed to adhere to the requirement of creating amazing slideshow presentations from Instagram media. While the creation process hardly takes a few minutes, you can work with the application to explore your editing creativity to the finest levels. The tool works well with any of your MacOs and Windows compatible devices.
The editor’s effects library is loaded with tons of graphic transitions and filters that are dedicated to enhance the contents of your presentation with utmost ease. You can add creative modifications to the slideshow media, such as, cut, crop and trim videos and images and add the most convincing music, overlays, fonts, etc., and enjoy an additional free access to hundreds of stock videos and slideshow templates.
07LightMV
This one is an online slideshow creator utility that works well with almost any operating system including Windows, iOS, Android and Mac. Essentially a cloud centered editor program, this tool caters to your high quality slideshow creation needs in the most effective way. The design process is quite simple, where you only need to add the images and videos, design your presentation and wait till everything comes to place.
What’s more appealing factor about the tool is that you will never need to download the program in your device or purchase a subscription plan to use the application. All you need to do is land into the tool’s website in your favorite browser and tap on the ‘Slideshow’ option to begin with the creation process. You can select from a heap of preset stunning slideshow templates to create the most enhanced PowerPoint presentation.
08Fliptastic
The Fliptastic slideshow creator app is exclusively developed to adhere to the graphic design concerns of iOS users. This one is a no cost graphic utility with a plethora of versatile features and considerable user backup. The app’s effect library is packed with a unique set of slideshow design templates, transitions, background music choices and filters that work to compliment your presentation with the subtlest look ever.
Paying a bit extra attention to the audio inclusion within the slides, the app offers you a range of free music files to work with, while additionally allowing you to upload and use one from your device or the internet.
09Creating Instagram Slideshows With Filmora
Talking exclusively within the domain of video creation and editing, the credibility of the Wondershare Filmora Video Editor software needs no introduction. Moving ahead with our discussion, let us learn about the process of creating awesome Instagram slideshows with Filmora in the following section:
Step 1: Download and Install the Program
To begin with addressing the concern of how to make a slideshow on Instagram story, navigate to the official Wondershare website and download the Wondershare Filmora Video Editor to your preferred system and proceed to install the same.

Wondershare Filmora - Best Video Editor for Mac/Windows
5,481,435 people have downloaded it.
Build unique custom animations without breaking a sweat.
Focus on creating epic stories and leave the details to Filmora’s auto features.
Start a creative adventure with drag & drop effects and endless possibilities.
Filmora simplifies advanced features to save you time and effort.
Filmora cuts out repetition so you can move on to your next creative breakthrough.
Step 2: Import Your Media
Launch the editor program and wait for the latter’s welcome screen to appear. Here, you need to import the images, videos and other media files to the editor timeline for including them in your slideshow. It is recommended to collect all the image and video files into one single folder before opening a new slideshow design project.
In the editor’s welcome screen, navigate to the ‘Media’ tab at the top left corner and click on the same to open the ‘Import’ menu. From here, you need to choose the ‘Import a Media Folder’ option, followed by navigating to the folder that contains the to be imported media files. When you have reached to the required folder, select it and tap ‘OK’ to import the same into the project timeline. When all the files have been imported, you can see them in the ‘Project Media’ panel.

Step 3: Timeline Positioning of Media Files
Reach to the ‘File’ menu and choose ‘Preferences’ from the latter’s dropdown menu. In the ‘Preferences’ window, hit the ‘Editing’ tab and tap on ‘Photo Preferences’. From the drop down menu that follows, choose the ‘Crop to Fit’ option to adjust the aspect ratio of your imported images in line with the slideshow project. In case your images have the 9:16 vertical aspect ratio, select the ‘Fit’ option to make a proper screen fit.

You can proceed to include the image zoom and camera pan features within your project by clicking on the ‘Pan & Zoom’ option. You can further, modify the preset durations of transitions, effects and photos in the ‘Editing’ tab itself before adding them to the editor timeline. Another way of doing the same is to drag the ends of the media files inward or outward, post the timeline adding process.

When you have finished making the required adjustments, navigate back the ‘Media Panel’ to include the imported media files within the project timeline. You can either click on the files to add them, or choose to ‘Drag and Drop’ the same at a preferred place within the timeline.
When all the images and videos have been added, proceed to arrange them in the desired order of appearance in the slideshow, followed by adjusting their screen time and play durations through any of the methods explained above.
Step 4: Add Transitions to Eliminate Hard Cuts
The smooth play of a slideshow is often distorted by hard cuts, which can be escaped by applying smooth transition effects to the slides. Consider exploring the ‘Transitions’ tab of Filmora to choose from a diversity of easily customizable transition effects and place them at the intersection point of the respective slides in the project timeline.
Instead of applying the same transition to every slide, prefer choosing the one that exclusively suits the content arrangement and flow within particular slides. This would save your slideshow from getting a repetitive look.

Post the timeline adding of a transition, you can double click on the same to reach the ‘Transition Setting Window’, where you are allowed to customize the play duration and select its ‘Transition Mode’. Play durations can alternatively be customised in the project timeline by dragging the slider in a left or right direction.
Step 5: Add Overlays and Filters for an Improvised Colour Scheme
To enhance the thematic appeal of your slideshow, consider desaturating the colours of the included images with the extensive range of visual effects and overlays available in the ‘Effects’ tab of the software’s editing timeline. Opening the tab, you are exposed to a series of ‘Filter and Overlay’ categories, that have further subdivisions of Light Leaks, Sepia Tone and Lomography.
To add a particular effect, place it in the timeline track above the desired clip or image. Observe the changes in the ‘Preview Panel’ and proceed to adjust the effect settings if required, by double clicking on the particular effect.

Step 6: Include Motion Graphic Elements
To supplement your slideshow with elegant motion graphics, navigate to the ‘Elements’ tab in the editor timeline. From here, you can access and choose any suitable motion graphic template from a diversity of available choices, to include within the project timeline. The step is completely optional and you should pay attention to the style of content presentation and the cause of creation of your slideshow when choosing to add these elements to the same.

Step 7: Record Voiceovers and Create Soundtracks
To record a voiceover for your slideshow, navigate to the ‘Media’ tab and tap the ‘Record’ dropdown menu. Click on ‘Record Voiceover’ in the list of options that appears. The ‘Record Audio’ icon pops up and you now need to select a microphone to be used in the recording process. When you are ready, tap the ‘Record’ button to let the recording begin.

You can now see your voice recording appear in the ‘Media’ tab with the previously imported media files, ready to be placed within the audio track of the project timeline. Filmora’s audio library is a storehouse of free access music and audio effects. To add one to your slideshow, navigate and click on the ‘Audio’ tab to select from the extensive Rock, Young & Bright, Electronic, etc., music subcategories till you get the perfect match for your presentation.

Once you have selected all the music tracks, place them one by one on the project timeline and move ahead with adjusting their play durations.
Step 8: Export Your Creation
When you are satisfied with your work, you can export the slideshow directly from Filmora to a number of media sharing platforms. All you need to do is, navigate to and tap the ‘Export’ button in the top right corner of the editor screen and proceed to set the resolution and frame rate, and select the output file format of your created slideshow in the ‘Export Window’ that appears.

When you are ready with everything, click on the ‘Export’ button at the bottom right corner of the screen to share your slideshow across different platforms, including YouTube, Instagram, Vimeo, etc.
The time required by Filmora to render your slideshow on the chosen platform will depend on the output file size. Considering the fact that larger files require a much longer time to be rendered, it would be a smart decision to limit the file size of your slideshow within 500 MB.
● Ending Thoughts →
● Instagram slideshows are exciting means of diving into fun-filled entertainment with your social media peers.
● When looking for solutions on how to create a slideshow on Instagram, there are loads of choices in the software market.
● Talking of best creator alternatives, you can pick the Wondershare Filmora slideshow developer program to make an amazing Insta story slideshow.
Instagram slideshows land among the latest social media trends of fun and entertainment. Learn how to attract jaw dropping peer attention with creating the same!
In this article
01 [When Should You Use an Instagram Slideshow?](#Part 1)
02 [How to Make an Instagram Slideshow with Music?](#Part 2)
03 [8 Best Instagram Slideshow Apps for Creating Outstanding Slideshow](#Part 3)
Part 1 When Should You Use an Instagram Slideshow?
Revolutions in technology has opened doors to a plenty of new and exciting means of information sharing, entertainment and communication. Playing its part in the game, Instagram slideshow has emerged as an exciting means of quick and impactful content sharing. Diving deeper into the discussion, let us talk about the different areas of working with an Instagram slide show in the following section:
01Explanatory Product Demonstrations and Stepwise Tutorials
Considering the diverse media collaboration entertained by this social media platform, you get the liberty to include 10 media files of videos and images while creating a slideshow on Instagram. This is an affordably sufficient media space to demonstrate your newly launched product in front of the target audience.
The aforesaid characteristic of a slideshow for Instagram can be put to another use of creating detailed, step by step guides and product usage tutorials to create an increased and confident customer reach and brand applicability. A few examples include the presentations of recipes by food blogs and chefs, or a detailed look of the day’s outfit by fashion bloggers.
02Interactive Storytelling or Recreate an Event
Gone are the times when stories and events were restricted to a single image or video with a limited scope of understanding and explanation. You can now work with a combination of multiple images and videos to create more vivid and graphical descriptions of stories, narratives and events.
You can work on creating an engaging slideshow for Instagram to tell an amazing story, voice a narration from the beginning to the end, or share your best moments with your cherished audience, which will surely give them the feel of enjoying the adventure along with you.
03Create a Collection
You can now use a slide show for Instagram to design and present a collection of manifold ideas and products within a single post. You can improvise the collection with displaying a series of related products, showcasing a summary of your different blog posts through the week, or simply present a list of your most reliable inspirations, resources and influencers.
04Exciting Video Teasers
If you have a scheduled video release to entertain your audience, try working with interactive slideshows for Instagram to create some sensational teaser content of the upcoming release to imbibe a natural sense of curiosity within your audience.
You can experiment with releasing a mini photoshoot tour of your filming set, share close up progression details, or include a cliffhanger in the end of your Instagram slideshow to ensure the retrieval of your audience towards watching the release of the actual big content. You can use these short teasers as effective means of creating a campaign buzz, while building a closer connect with your audience.
Part 2 How to Make an Instagram Slideshow with Music?
By now, you must have gathered enough knowledge regarding the credibility of Instagram slideshows in catering to a diversity of commercial, professional and personal content sharing needs. Considering the same, you may conveniently feel motivated to try hands at creating stunning slideshow presentations for Instagram on your own.
Adhering to the concern, let us move ahead with our discussion, while talking about how to make a slideshow for Instagram and supplement the same with adaptable background music to develop amazing content masterpieces and share them with social media peers, while grabbing their obvious attention.
While there are a number of choices in the software market to choose your Instagram slideshow creator tool, the FlexClip tool can be a reliable option. Read though the following section to learn the slideshow creation process in the program with a comprehensive and stepwise tutorial guide:
Step 1: Download the Slideshow Creator Tool
Visit the official website of FlexClip to download and install the slideshow maker software in your preferred device.
Step 2: Start from Scratch
After a successful installation, proceed to launch the tool in your system and wait till the software greets you with its welcome interface. Here, you will have to reach to and tap the ‘Start to Create’ button to begin with the slideshow creation process. You can also select a preset template to work on your slideshow if nothing new clicks in your mind.
Step 3: Select an Aspect Ratio
In the tool’s creator window, navigate to the ‘Options Panel’ at the left and click on ‘More’ to select a suitable aspect ratio. Picking the 9:16 ratio would be a good choice.
Step 4: Upload Your Media
In the same ‘Options Panel’, click on ‘Media’ for dragging and dropping the desired video and image files from your device to the program’s media timeline, followed by applying them to the tool’s storyboard. You can alternatively, choose to directly work with media pages of any preset slideshow template.
Step 5: Customize Your Media
You can now proceed to improvise your media files with amazing texts, filters, stickers, emojis, widgets, etc., by clicking on specific object categories from the ‘Options Panel’.
Step 6: Include Seamless Transitions
Proceed to uplift your creation to the next level with the application of stunning image and video transitions. Navigate to the ‘Options Panel’ and tap ‘Elements’. A variety of transition effects will be displayed to choose from. Select the one you like to add it to your slideshow.
Step 7: Add a Background Music
An in line background audio is the best way to set the mood of your slideshow. Choose to add the same to your creation for making a more engaging impact on the audience. Visit the ‘Options Panel’ again and click on ‘Music’ to open the program’s audio library and select a perfect background music from the huge variety of choices, to include in your slideshow.
Step 8: Preview Your Creation
When you have finished customizing your slideshow, navigate to the top right corner of the editor’s storyboard and hit the ‘Preview’ button to visualize and ensure that your slideshow has everything at the right place. You can continue editing if there is a need to make some changes.
Step 9: Time to Save and Share!
When you are happy with your work, consider saving it either to your device or Google Dropbox, from where you can easily upload the same to your Instagram handle.
Part 3 Best Instagram Slideshow Apps for Creating Outstanding Slideshow
Social media is the talk of the trend in today’s times, which has extended its boundaries to visibly everything around us. Speaking in the light of the fact, slideshow presentations are no exception. Social media platforms today have come up with amazing tools and applications to create and share a stunning slideshow Instagram story with utmost ease and within an affordable time span.
Now that you have developed a comprehensive understanding of the credibility of working with Instagram slideshows and their creation process with the inclusion of complementary background music, let us dive into learning about some of the best and most popular Instagram apps for creating awesome slideshow presentations in the following section:
01Filme Lite
This tool lands among the leading user preferences to work on creating slideshow presentations. The application software is packed with a heap of latest features that form the Instagram trends in current times.
Apart from complementing your slideshow creations with tons of features, this slideshow maker for Instagram grants you the liberty to include your most loved videos and images within your presentation and customize them with a diverse range of effects, along with adjusting their play duration within the slideshow. Additional to image and video customization, you are also allowed to choose the image transition style that perfectly suits your content arrangement within the slides.
Working with the tool, you can be sure of getting an unparalleled slideshow creation experience with a very interactive and user oriented design interface, that is simple enough to be easily understood and worked upon by a newbie to the creative world.
02VivaVideo
If you are working on a detailed presentation and wish to spark up your creation with stunning varieties of jaw dropping special effects, consider creating your PowerPoint slideshows in this application. The tool’s effect library is a storehouse of the most amazing special effects that promise of transforming your slideshow into a visual masterpiece.
You can separately apply these effects to each of the slideshow images or choose to work on a combination of selected effects to include within a single video. Apart from this, you are free to choose an apt background music for your presentation slides from the extensive audio library of the software. The bottom line is; you are assured to a complete fun experience while creating slideshows with this tool.
03Movavi
If you are familiar enough with the fundamental concepts and the trivial anecdotes of working with slideshow presentations and want to take your graphic creativity to the next level, you can try hands at using the Movavi slideshow creator software to design high end PowerPoint presentations of professional quality. The best thing about the tool is, it works online and does not require a software download for usage concerns.
Along with creating online slideshow presentations with ease, the tool permits you to create online videos within minutes and instantly download the same for specific usage. You can further, pop up your presentation slides with wonderful transition and animation effects and also make adjustments in the play duration of each slide. The tool lets you choose and add a perfect background music to your presentation from its conveniently vast audio library.
04Slideshow Lab
If you have just landed into the world of creating slideshow presentations and are looking for easy solutions on how to make a slideshow on Instagram, consider working with this software to polish your design creativity. The simple and user cohesive interface of the tool is best for beginners to understand and get customary with the creation process, that takes the minimum possible time to render an appreciable PowerPoint presentation.
Talking about the slideshow design process, you will need to start with selecting a set of desired images, followed by uploading the same into the tool’s slideshow creator timeline. The next step is to arrange the images in the sequential order of appearance, select an appealing background music and apply smooth image transitions. When you are done with everything, proceed to save the presentation to your device.
05MoShow
While you can choose to create stunning slideshow presentations with almost any class of images, the aforesaid app works best to render Instagram images into a top rated Instagram photo slideshow without compromising with the high resolution image quality of Instagram photos. The application integrates motion pictures and lighting effects to transform the otherwise regular images into lively still captures.
Considering the credibility of the tool in overall user experience, its indeed a thumbs up from graphic creators across the globe, thanks to its smart and interactive interface, in time performance and outstanding creation outputs.
06InVideo Editor
Put an end to your search of effective solutions on how to do a slideshow on Instagram with the InVideo Editor, a smart video and graphic editor that can also be employed to adhere to the requirement of creating amazing slideshow presentations from Instagram media. While the creation process hardly takes a few minutes, you can work with the application to explore your editing creativity to the finest levels. The tool works well with any of your MacOs and Windows compatible devices.
The editor’s effects library is loaded with tons of graphic transitions and filters that are dedicated to enhance the contents of your presentation with utmost ease. You can add creative modifications to the slideshow media, such as, cut, crop and trim videos and images and add the most convincing music, overlays, fonts, etc., and enjoy an additional free access to hundreds of stock videos and slideshow templates.
07LightMV
This one is an online slideshow creator utility that works well with almost any operating system including Windows, iOS, Android and Mac. Essentially a cloud centered editor program, this tool caters to your high quality slideshow creation needs in the most effective way. The design process is quite simple, where you only need to add the images and videos, design your presentation and wait till everything comes to place.
What’s more appealing factor about the tool is that you will never need to download the program in your device or purchase a subscription plan to use the application. All you need to do is land into the tool’s website in your favorite browser and tap on the ‘Slideshow’ option to begin with the creation process. You can select from a heap of preset stunning slideshow templates to create the most enhanced PowerPoint presentation.
08Fliptastic
The Fliptastic slideshow creator app is exclusively developed to adhere to the graphic design concerns of iOS users. This one is a no cost graphic utility with a plethora of versatile features and considerable user backup. The app’s effect library is packed with a unique set of slideshow design templates, transitions, background music choices and filters that work to compliment your presentation with the subtlest look ever.
Paying a bit extra attention to the audio inclusion within the slides, the app offers you a range of free music files to work with, while additionally allowing you to upload and use one from your device or the internet.
09Creating Instagram Slideshows With Filmora
Talking exclusively within the domain of video creation and editing, the credibility of the Wondershare Filmora Video Editor software needs no introduction. Moving ahead with our discussion, let us learn about the process of creating awesome Instagram slideshows with Filmora in the following section:
Step 1: Download and Install the Program
To begin with addressing the concern of how to make a slideshow on Instagram story, navigate to the official Wondershare website and download the Wondershare Filmora Video Editor to your preferred system and proceed to install the same.
Wondershare Filmora - Best Video Editor for Mac/Windows
5,481,435 people have downloaded it.
Build unique custom animations without breaking a sweat.
Focus on creating epic stories and leave the details to Filmora’s auto features.
Start a creative adventure with drag & drop effects and endless possibilities.
Filmora simplifies advanced features to save you time and effort.
Filmora cuts out repetition so you can move on to your next creative breakthrough.
Step 2: Import Your Media
Launch the editor program and wait for the latter’s welcome screen to appear. Here, you need to import the images, videos and other media files to the editor timeline for including them in your slideshow. It is recommended to collect all the image and video files into one single folder before opening a new slideshow design project.
In the editor’s welcome screen, navigate to the ‘Media’ tab at the top left corner and click on the same to open the ‘Import’ menu. From here, you need to choose the ‘Import a Media Folder’ option, followed by navigating to the folder that contains the to be imported media files. When you have reached to the required folder, select it and tap ‘OK’ to import the same into the project timeline. When all the files have been imported, you can see them in the ‘Project Media’ panel.
Step 3: Timeline Positioning of Media Files
Reach to the ‘File’ menu and choose ‘Preferences’ from the latter’s dropdown menu. In the ‘Preferences’ window, hit the ‘Editing’ tab and tap on ‘Photo Preferences’. From the drop down menu that follows, choose the ‘Crop to Fit’ option to adjust the aspect ratio of your imported images in line with the slideshow project. In case your images have the 9:16 vertical aspect ratio, select the ‘Fit’ option to make a proper screen fit.
You can proceed to include the image zoom and camera pan features within your project by clicking on the ‘Pan & Zoom’ option. You can further, modify the preset durations of transitions, effects and photos in the ‘Editing’ tab itself before adding them to the editor timeline. Another way of doing the same is to drag the ends of the media files inward or outward, post the timeline adding process.
When you have finished making the required adjustments, navigate back the ‘Media Panel’ to include the imported media files within the project timeline. You can either click on the files to add them, or choose to ‘Drag and Drop’ the same at a preferred place within the timeline.
When all the images and videos have been added, proceed to arrange them in the desired order of appearance in the slideshow, followed by adjusting their screen time and play durations through any of the methods explained above.
Step 4: Add Transitions to Eliminate Hard Cuts
The smooth play of a slideshow is often distorted by hard cuts, which can be escaped by applying smooth transition effects to the slides. Consider exploring the ‘Transitions’ tab of Filmora to choose from a diversity of easily customizable transition effects and place them at the intersection point of the respective slides in the project timeline.
Instead of applying the same transition to every slide, prefer choosing the one that exclusively suits the content arrangement and flow within particular slides. This would save your slideshow from getting a repetitive look.
Post the timeline adding of a transition, you can double click on the same to reach the ‘Transition Setting Window’, where you are allowed to customize the play duration and select its ‘Transition Mode’. Play durations can alternatively be customised in the project timeline by dragging the slider in a left or right direction.
Step 5: Add Overlays and Filters for an Improvised Colour Scheme
To enhance the thematic appeal of your slideshow, consider desaturating the colours of the included images with the extensive range of visual effects and overlays available in the ‘Effects’ tab of the software’s editing timeline. Opening the tab, you are exposed to a series of ‘Filter and Overlay’ categories, that have further subdivisions of Light Leaks, Sepia Tone and Lomography.
To add a particular effect, place it in the timeline track above the desired clip or image. Observe the changes in the ‘Preview Panel’ and proceed to adjust the effect settings if required, by double clicking on the particular effect.
Step 6: Include Motion Graphic Elements
To supplement your slideshow with elegant motion graphics, navigate to the ‘Elements’ tab in the editor timeline. From here, you can access and choose any suitable motion graphic template from a diversity of available choices, to include within the project timeline. The step is completely optional and you should pay attention to the style of content presentation and the cause of creation of your slideshow when choosing to add these elements to the same.
Step 7: Record Voiceovers and Create Soundtracks
To record a voiceover for your slideshow, navigate to the ‘Media’ tab and tap the ‘Record’ dropdown menu. Click on ‘Record Voiceover’ in the list of options that appears. The ‘Record Audio’ icon pops up and you now need to select a microphone to be used in the recording process. When you are ready, tap the ‘Record’ button to let the recording begin.
You can now see your voice recording appear in the ‘Media’ tab with the previously imported media files, ready to be placed within the audio track of the project timeline. Filmora’s audio library is a storehouse of free access music and audio effects. To add one to your slideshow, navigate and click on the ‘Audio’ tab to select from the extensive Rock, Young & Bright, Electronic, etc., music subcategories till you get the perfect match for your presentation.
Once you have selected all the music tracks, place them one by one on the project timeline and move ahead with adjusting their play durations.
Step 8: Export Your Creation
When you are satisfied with your work, you can export the slideshow directly from Filmora to a number of media sharing platforms. All you need to do is, navigate to and tap the ‘Export’ button in the top right corner of the editor screen and proceed to set the resolution and frame rate, and select the output file format of your created slideshow in the ‘Export Window’ that appears.
When you are ready with everything, click on the ‘Export’ button at the bottom right corner of the screen to share your slideshow across different platforms, including YouTube, Instagram, Vimeo, etc.
The time required by Filmora to render your slideshow on the chosen platform will depend on the output file size. Considering the fact that larger files require a much longer time to be rendered, it would be a smart decision to limit the file size of your slideshow within 500 MB.
● Ending Thoughts →
● Instagram slideshows are exciting means of diving into fun-filled entertainment with your social media peers.
● When looking for solutions on how to create a slideshow on Instagram, there are loads of choices in the software market.
● Talking of best creator alternatives, you can pick the Wondershare Filmora slideshow developer program to make an amazing Insta story slideshow.
10 Top Tools to Make Pic Collage for Windows
10 Best Tools to Make Pic Collage for Windows
An easy yet powerful editor
Numerous effects to choose from
Detailed tutorials provided by the official channel
Collages are a great way to assemble all your favorite pictures in one place. You can share these collages with your friends, relatives, and dear ones or can also use them for posting on social media sites and other online platforms. Though creating a collage may sound simple, a lot of considerations need to be taken for creating an interesting and eye-catchy collage, and for this, a help of a professional tool can be taken. In the following parts of the topic, you can learn about the best tools for photo collage Windows 10 and other OS.

In the following parts of the topic, you can learn about the best tools for photo collage Windows 10 and other OS.
In this article
01 [Top 10 Pic Collage for Windows Tools](#Part 1)
02 [The Best Tool to Get Stock Images for Creating Collages](#Part 2)
Part 1 Top 10 Pic Collage for Windows Tools
Checkout the best collage for Windows below.
01PhotoPad Photo Editing Software
This is a complete photo editing tool supporting an array of features including the creation of a photo collage. This software from NCH software can let you add the desired images manually and also support using the auto grid to add an unlimited number of pictures. The tool also lets you choose the collage orientation size and set the background as needed.
Pros:
● Create collage Windows manually or automatically.
● Allows adding a background color, image, or from the available background options.
● Spacing and corners between the images can be selected.
● The size of the tool is small.
Cons:
● Stickers and filters to individual images cannot be added.
● Cannot choose a custom collage size.

02PhotoScapeX
Available for download on Windows 10 and higher versions this is another widely used photo editing tool that can also let you create collages manually as well as automatically. Multiple frames are available that can be selected as desired and there are additional features like adding filters, and also edit them in multiple ways.
Pros:
● Allows creating collage manually and automatically.
● Multiple editing tools for customization like filters, crop, zoom, doodle, and more.
● Picture alignment can be done in 3 modes- vertical, horizontal, and tile.
● Option to change and customize image size, spacing, margin, and others.
Cons:
● Limited photos can be added.
● The size of the tool is large in comparison to other tools.

03Phototastic Collage
This is free to use Windows-based tool that can create impressive collages in no time. Multiple designs, frames, and other options are available to create a customized collage as needed.
Pros:
● Multiple customization options are available for creating the desired collage.
● User-friendly and simple interface.
● An array of templates is available.
Cons:
● The free version has limited features.
● Limitation to the number of images that can be added.
● Ads in the app.

04PicCollage
Unleash your creativity by creating an interesting collage using this excellent collage-making app. There are multiple templates and customization options supports.
Pros
● Create collage manually or automatically
● The earlier created collage can be edited.
● Allows creating a collage in 3 options- grid, template, freestyle.
Cons
● Watermark on the created collage.
● The image size cannot be customized.

05Collage Maker-Photo Grid and Montage
Using this free Windows tool, you can create an interesting photo collage or a free-styled montage as needed. A wide range of layouts and templates are available that can be further customized to get the desired collage.
Pros:
● Free Windows software.
● Come with multiple filters, layout, and editing tools.
● The user interface is easy.
● Preview option available.
Cons:
● Performance glitches due to bugs.
● Custom collage size cannot be set.
● Watermark on the collage.

06Fotor
If you are looking for a simple and basic collage-making tool, Fotor is the right choice. Collage in the grid, freestyle, and photo-stitch style can be created and basic customization features are supported.
Pros:
● Simple to use tool that is apt for beginners.
● Border can be changed from a solid color to a background.
Cons:
● Customization options are limited.
● Border and the image size cannot be changed.

07El Collagero
Just like its name, this is an interesting Windows-based tool for creating a collage of your choice. A wide range of options for customization is available that can let you edit the images, choose a template and then also edit the file.
Pros:
● A wide range of templates and designs for collages is available.
● Allows adding text, symbols, and other elements.
● Created collage can be shared on social media sites.
Cons:
● In comparison to other professional tools, the functions are limited.

08Atlantas Photo Collage Studio
This Windows-based tool will let you create collages of all types and for all occasions. You can choose from over 100 templates that best match your collage theme and image content.
Pros:
● More than 100 templates for collage designs are available.
● The size of the layout can be changed.
● Multiple editing and customization options are supported like zoom, opacity selection, and more.
Cons:
● Limitation of adding 45 images.
● For the advanced functions, need to subscribe to the paid version.

09PhotoJoiner
Using this Windows tool, pick up your favorite images and turn them into a beautiful collage with customized design and style.
Pros:
● A simple and basic tool for creating a collage.
● Created collage can be saved or shared to the social media site.
● Change the order of the images, margins, and other aspects.
Cons
● Collage templates are limited.
● Advanced features are missing.

1010. Blend Photo
To create a collage of images with a blending effect, this is the right tool to use. Available for download on the Windows system this tool lets you create collages telling interesting stories.
Pros:
● Simple and easy collage-making tool.
● Add blending effect to your collages.
● Over 50 custom shapes for image cropping are available along with the option for free-hand cropping.
● Multiple filters can be added.
Cons:
● Limited Editing and customization options.

Part 2 The Best Tool to Get Stock Images for Creating Collages
Several times, the captured and stored images may not fit in the collage theme you wish to create and, in such situations, you can use the stock images available online at several sites. One of the best tools where you can check out the images in different categories is Wondershare Filmora. This versatile software from Wondershare Filmora Video Editor is an advanced video editing tool that also has a huge collection of stock media including images.
Additionally, the split-screen feature of the software can be used for creating a video collage. Available for Windows and Mac systems, Wondershare Filmora will look after all your advanced video editing and customized requirements.
Wondershare Filmora - Best Video Editor for Mac/Windows
5,481,435 people have downloaded it.
Build unique custom animations without breaking a sweat.
Focus on creating epic stories and leave the details to Filmora’s auto features.
Start a creative adventure with drag & drop effects and endless possibilities.
Filmora simplifies advanced features to save you time and effort.
Filmora cuts out repetition so you can move on to your next creative breakthrough.
● Key Takeaways from This Episode →
● Collage-making tools help in creating an interesting and eye-catchy collage in a hassle-free manner.
●Several Windows-based tools are available for quick download.
●Wondershare Filmora is a great software to find a collection of stock images in different categories.
Collages are a great way to assemble all your favorite pictures in one place. You can share these collages with your friends, relatives, and dear ones or can also use them for posting on social media sites and other online platforms. Though creating a collage may sound simple, a lot of considerations need to be taken for creating an interesting and eye-catchy collage, and for this, a help of a professional tool can be taken. In the following parts of the topic, you can learn about the best tools for photo collage Windows 10 and other OS.
In the following parts of the topic, you can learn about the best tools for photo collage Windows 10 and other OS.
In this article
01 [Top 10 Pic Collage for Windows Tools](#Part 1)
02 [The Best Tool to Get Stock Images for Creating Collages](#Part 2)
Part 1 Top 10 Pic Collage for Windows Tools
Checkout the best collage for Windows below.
01PhotoPad Photo Editing Software
This is a complete photo editing tool supporting an array of features including the creation of a photo collage. This software from NCH software can let you add the desired images manually and also support using the auto grid to add an unlimited number of pictures. The tool also lets you choose the collage orientation size and set the background as needed.
Pros:
● Create collage Windows manually or automatically.
● Allows adding a background color, image, or from the available background options.
● Spacing and corners between the images can be selected.
● The size of the tool is small.
Cons:
● Stickers and filters to individual images cannot be added.
● Cannot choose a custom collage size.
02PhotoScapeX
Available for download on Windows 10 and higher versions this is another widely used photo editing tool that can also let you create collages manually as well as automatically. Multiple frames are available that can be selected as desired and there are additional features like adding filters, and also edit them in multiple ways.
Pros:
● Allows creating collage manually and automatically.
● Multiple editing tools for customization like filters, crop, zoom, doodle, and more.
● Picture alignment can be done in 3 modes- vertical, horizontal, and tile.
● Option to change and customize image size, spacing, margin, and others.
Cons:
● Limited photos can be added.
● The size of the tool is large in comparison to other tools.
03Phototastic Collage
This is free to use Windows-based tool that can create impressive collages in no time. Multiple designs, frames, and other options are available to create a customized collage as needed.
Pros:
● Multiple customization options are available for creating the desired collage.
● User-friendly and simple interface.
● An array of templates is available.
Cons:
● The free version has limited features.
● Limitation to the number of images that can be added.
● Ads in the app.
04PicCollage
Unleash your creativity by creating an interesting collage using this excellent collage-making app. There are multiple templates and customization options supports.
Pros
● Create collage manually or automatically
● The earlier created collage can be edited.
● Allows creating a collage in 3 options- grid, template, freestyle.
Cons
● Watermark on the created collage.
● The image size cannot be customized.
05Collage Maker-Photo Grid and Montage
Using this free Windows tool, you can create an interesting photo collage or a free-styled montage as needed. A wide range of layouts and templates are available that can be further customized to get the desired collage.
Pros:
● Free Windows software.
● Come with multiple filters, layout, and editing tools.
● The user interface is easy.
● Preview option available.
Cons:
● Performance glitches due to bugs.
● Custom collage size cannot be set.
● Watermark on the collage.
06Fotor
If you are looking for a simple and basic collage-making tool, Fotor is the right choice. Collage in the grid, freestyle, and photo-stitch style can be created and basic customization features are supported.
Pros:
● Simple to use tool that is apt for beginners.
● Border can be changed from a solid color to a background.
Cons:
● Customization options are limited.
● Border and the image size cannot be changed.
07El Collagero
Just like its name, this is an interesting Windows-based tool for creating a collage of your choice. A wide range of options for customization is available that can let you edit the images, choose a template and then also edit the file.
Pros:
● A wide range of templates and designs for collages is available.
● Allows adding text, symbols, and other elements.
● Created collage can be shared on social media sites.
Cons:
● In comparison to other professional tools, the functions are limited.
08Atlantas Photo Collage Studio
This Windows-based tool will let you create collages of all types and for all occasions. You can choose from over 100 templates that best match your collage theme and image content.
Pros:
● More than 100 templates for collage designs are available.
● The size of the layout can be changed.
● Multiple editing and customization options are supported like zoom, opacity selection, and more.
Cons:
● Limitation of adding 45 images.
● For the advanced functions, need to subscribe to the paid version.
09PhotoJoiner
Using this Windows tool, pick up your favorite images and turn them into a beautiful collage with customized design and style.
Pros:
● A simple and basic tool for creating a collage.
● Created collage can be saved or shared to the social media site.
● Change the order of the images, margins, and other aspects.
Cons
● Collage templates are limited.
● Advanced features are missing.
1010. Blend Photo
To create a collage of images with a blending effect, this is the right tool to use. Available for download on the Windows system this tool lets you create collages telling interesting stories.
Pros:
● Simple and easy collage-making tool.
● Add blending effect to your collages.
● Over 50 custom shapes for image cropping are available along with the option for free-hand cropping.
● Multiple filters can be added.
Cons:
● Limited Editing and customization options.
Part 2 The Best Tool to Get Stock Images for Creating Collages
Several times, the captured and stored images may not fit in the collage theme you wish to create and, in such situations, you can use the stock images available online at several sites. One of the best tools where you can check out the images in different categories is Wondershare Filmora. This versatile software from Wondershare Filmora Video Editor is an advanced video editing tool that also has a huge collection of stock media including images.
Additionally, the split-screen feature of the software can be used for creating a video collage. Available for Windows and Mac systems, Wondershare Filmora will look after all your advanced video editing and customized requirements.
Wondershare Filmora - Best Video Editor for Mac/Windows
5,481,435 people have downloaded it.
Build unique custom animations without breaking a sweat.
Focus on creating epic stories and leave the details to Filmora’s auto features.
Start a creative adventure with drag & drop effects and endless possibilities.
Filmora simplifies advanced features to save you time and effort.
Filmora cuts out repetition so you can move on to your next creative breakthrough.
● Key Takeaways from This Episode →
● Collage-making tools help in creating an interesting and eye-catchy collage in a hassle-free manner.
●Several Windows-based tools are available for quick download.
●Wondershare Filmora is a great software to find a collection of stock images in different categories.
Best 15 Classics Animated Cartoon Movies
Best 15 Instant Classics Animated Cartoon Movies
An easy yet powerful editor
Numerous effects to choose from
Detailed tutorials provided by the official channel
The animated characters let an individual experience a world that has certain things that hardly exist in reality.
Here we will share all the relatable details about the particular movie that will be helpful in deciding whether you wish to watch it or not.
In this article
01 [Which is the Best Animated Movie Ever?](#Part 1)
02 [We know how to animate. Do you?](#Part 2)
Part 1 Which is the Best Animated Movie Ever?
Let’s have a look at the best 15 classical animated cartoon movies that you should watch if you are an animation movie lover.
01 Toy Story 4
Toy Story 4 was released on June 21, 2019 in the United States and will be available for streaming on October 1, 2019.The IMDb rating for Toy Story 4 was 7.7 out of 10, and the Rotten Tomatoes rating was 97%. This movie ranks first among all the animated movies available till date. This is a movie from Walt Disney, and its gross revenue was $434 million.

02 Spider-Man: into the spider verse
Spider-Man: Into the Spider Verse was released in theatres on December 14, 2018 and started streaming on March 19, 2019. The IMDB rating for this movie is 8.4 out of 10 and the Rotten Tomatoes rating is 97%. This movie is from Sony Pictures Entertainment and Columbia Pictures. The gross revenue was $190.2 million.

03 Inside Out
Inside Out was released worldwide in theatres on June 19, 2015 and started streaming on November 3, 2015. This movie received an 8.1 IMDB rating out of 10, and the Rotten Tomatoes rating was 98%. It is from Walt Disney and has a gross revenue of $2 million.

04 COCO
Coco was released in theatres on November 22, 2017 and started streaming on February 13, 2018. The IMDB rating for this movie is 8.4 out of 10 and the Rotten Tomatoes rating is 97%. This movie is from Walt Disney. The gross revenue was $210.5 million.

05 Snow White and the Seven Dwarfs
Snow White and the Seven Dwarfs (1937) was released in theatres in 1937 and started streaming on Nov. 16, 2004. The IMDB rating for this movie is 7.6 out of 10 and the Rotten Tomatoes rating is 98%. This movie is from Walt Disney.

06 Incredibles 2
Incredibles 2 (2018) was released in theatres on June 15, 2018 and became available for streaming on November 6, 2018.The IMDB rating for this movie is 7.6 out of 10 and the Rotten Tomatoes rating is 97%. This movie is from Walt Disney. The gross revenue was $608.6 million.

07 Zootopia (2016)
Zootopia (2016) was released in theatres on March 4, 2016 and started streaming on June 7, 2016. The IMDB rating for this movie is 8.0 out of 10 and the Rotten Tomatoes rating is 98%. This movie is from Walt Disney. The gross revenue was $200 million.

08 Paddington 2 (2018)
Paddington 2 (2018) was released in theatres on Jan. 1, 2018 and started streaming on Apr. 24, 2018. The IMDB rating for this movie is 7.8 out of 10 and the Rotten Tomatoes rating is 99%. This movie is from Warner Bros. Pictures. The gross revenue was $38.4 million.

09 Up
Up was released in theatres on May 29, 2009 and started streaming on Nov. 10, 2009. The IMDB rating for this movie is 8.2 out of 10 and the Rotten Tomatoes rating is 98%. This movie is from Walt Disney and Pixar Animation Studios. The gross revenue was $78.2 million.

10 Toy Story 2 (1999)
Toy Story 2 (1999) was released in theatres on December 24, 1999 and started streaming on March 23, 2010. The IMDB rating for this movie is 7.9 out of 10 and the Rotten Tomatoes rating is 100%. This movie is from Walt Disney Pictures. The gross revenue was $245.9 million.

11 Toy Story 3 (2010)
Toy Story 3 (2010) was released in theatres on June 18, 2010 and started streaming on Nov. 2, 2010. The IMDB rating for this movie is 8.2 out of 10 and the Rotten Tomatoes rating is 98%. This movie is from Walt Disney. The gross revenue was $415.0 million.

12 Finding Dory (2016)
Finding Dory (2016) was released in theatres on June 17, 2016 and started streaming on Nov. 15, 2016. The IMDB rating for this movie is 7.3 out of 10 and the Rotten Tomatoes rating is 94%. This movie is from Sony Pictures Entertainment and Columbia Pictures. The gross revenue was $486.2 million.

13 Finding Nemo (2003)
Finding Nemo (2003) was released in theatres on May 30, 2003 and started streaming on Nov. 4, 2003. The IMDB rating for this movie is 8.1 out of 10 and the Rotten Tomatoes rating is 99%. This movie is from Walt Disney Pictures. The gross revenue was $110.2 million.

13 Pinocchio (1940)
Pinocchio (1940) was released in theatres on February 9, 1940 and started streaming on December 3, 2002. The IMDB rating for this movie is 8.4 out of 10 and the Rotten Tomatoes rating is 100%. This movie is from Walt Disney Pictures. The gross revenue was $18.7 million.

13 The LEGO Movie (2014)
The LEGO Movie (2014) was released in theatres on February 7, 2014 and started streaming on June 17, 2014. The IMDB rating for this movie is 7.7 out of 10 and the Rotten Tomatoes rating is 96%. This movie is from Warner Bros. Pictures. The gross revenue was $257.8 million.
The animated characters let an individual experience a world that has certain things that hardly exist in reality.
Here we will share all the relatable details about the particular movie that will be helpful in deciding whether you wish to watch it or not.
In this article
01 [Which is the Best Animated Movie Ever?](#Part 1)
02 [We know how to animate. Do you?](#Part 2)
Part 1 Which is the Best Animated Movie Ever?
Let’s have a look at the best 15 classical animated cartoon movies that you should watch if you are an animation movie lover.
01 Toy Story 4
Toy Story 4 was released on June 21, 2019 in the United States and will be available for streaming on October 1, 2019.The IMDb rating for Toy Story 4 was 7.7 out of 10, and the Rotten Tomatoes rating was 97%. This movie ranks first among all the animated movies available till date. This is a movie from Walt Disney, and its gross revenue was $434 million.
02 Spider-Man: into the spider verse
Spider-Man: Into the Spider Verse was released in theatres on December 14, 2018 and started streaming on March 19, 2019. The IMDB rating for this movie is 8.4 out of 10 and the Rotten Tomatoes rating is 97%. This movie is from Sony Pictures Entertainment and Columbia Pictures. The gross revenue was $190.2 million.
03 Inside Out
Inside Out was released worldwide in theatres on June 19, 2015 and started streaming on November 3, 2015. This movie received an 8.1 IMDB rating out of 10, and the Rotten Tomatoes rating was 98%. It is from Walt Disney and has a gross revenue of $2 million.
04 COCO
Coco was released in theatres on November 22, 2017 and started streaming on February 13, 2018. The IMDB rating for this movie is 8.4 out of 10 and the Rotten Tomatoes rating is 97%. This movie is from Walt Disney. The gross revenue was $210.5 million.
05 Snow White and the Seven Dwarfs
Snow White and the Seven Dwarfs (1937) was released in theatres in 1937 and started streaming on Nov. 16, 2004. The IMDB rating for this movie is 7.6 out of 10 and the Rotten Tomatoes rating is 98%. This movie is from Walt Disney.
06 Incredibles 2
Incredibles 2 (2018) was released in theatres on June 15, 2018 and became available for streaming on November 6, 2018.The IMDB rating for this movie is 7.6 out of 10 and the Rotten Tomatoes rating is 97%. This movie is from Walt Disney. The gross revenue was $608.6 million.
07 Zootopia (2016)
Zootopia (2016) was released in theatres on March 4, 2016 and started streaming on June 7, 2016. The IMDB rating for this movie is 8.0 out of 10 and the Rotten Tomatoes rating is 98%. This movie is from Walt Disney. The gross revenue was $200 million.
08 Paddington 2 (2018)
Paddington 2 (2018) was released in theatres on Jan. 1, 2018 and started streaming on Apr. 24, 2018. The IMDB rating for this movie is 7.8 out of 10 and the Rotten Tomatoes rating is 99%. This movie is from Warner Bros. Pictures. The gross revenue was $38.4 million.
09 Up
Up was released in theatres on May 29, 2009 and started streaming on Nov. 10, 2009. The IMDB rating for this movie is 8.2 out of 10 and the Rotten Tomatoes rating is 98%. This movie is from Walt Disney and Pixar Animation Studios. The gross revenue was $78.2 million.
10 Toy Story 2 (1999)
Toy Story 2 (1999) was released in theatres on December 24, 1999 and started streaming on March 23, 2010. The IMDB rating for this movie is 7.9 out of 10 and the Rotten Tomatoes rating is 100%. This movie is from Walt Disney Pictures. The gross revenue was $245.9 million.
11 Toy Story 3 (2010)
Toy Story 3 (2010) was released in theatres on June 18, 2010 and started streaming on Nov. 2, 2010. The IMDB rating for this movie is 8.2 out of 10 and the Rotten Tomatoes rating is 98%. This movie is from Walt Disney. The gross revenue was $415.0 million.
12 Finding Dory (2016)
Finding Dory (2016) was released in theatres on June 17, 2016 and started streaming on Nov. 15, 2016. The IMDB rating for this movie is 7.3 out of 10 and the Rotten Tomatoes rating is 94%. This movie is from Sony Pictures Entertainment and Columbia Pictures. The gross revenue was $486.2 million.
13 Finding Nemo (2003)
Finding Nemo (2003) was released in theatres on May 30, 2003 and started streaming on Nov. 4, 2003. The IMDB rating for this movie is 8.1 out of 10 and the Rotten Tomatoes rating is 99%. This movie is from Walt Disney Pictures. The gross revenue was $110.2 million.
13 Pinocchio (1940)
Pinocchio (1940) was released in theatres on February 9, 1940 and started streaming on December 3, 2002. The IMDB rating for this movie is 8.4 out of 10 and the Rotten Tomatoes rating is 100%. This movie is from Walt Disney Pictures. The gross revenue was $18.7 million.
13 The LEGO Movie (2014)
The LEGO Movie (2014) was released in theatres on February 7, 2014 and started streaming on June 17, 2014. The IMDB rating for this movie is 7.7 out of 10 and the Rotten Tomatoes rating is 96%. This movie is from Warner Bros. Pictures. The gross revenue was $257.8 million.
Great Ways to Make Claymation Videos
Ways You Can Master to Make Claymation Videos
An easy yet powerful editor
Numerous effects to choose from
Detailed tutorials provided by the official channel
Claymation videos appear to be more appealing as compared to other graphical or pictorial videos we create. However, some people still believe that making such a video is not their forte and that they cannot achieve mastery in the field.
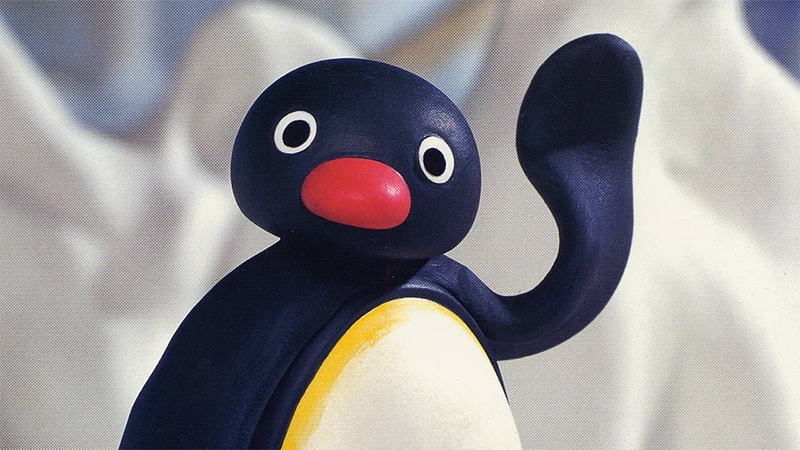
So, if you have the same question and want to learn how to make a claymation video quickly and easily, stay tuned with us. In this article, we are covering all the relevant details to help you create the best claymation video possible and the outcome will be as expected. Let’s get started!
In this article
01 [What is Claymation and How It Works](#Part 1)
02 [History of Claymation Movies](#Part 2)
03 [6 Best Claymation Videos of All Time](#Part 3)
04 [How to Make Claymation Videos](#Part 4)
Part 1 What is Claymation and How It Works
With the name Claymation, you might be thinking that there is a use of clay in creating such videos. Well, you are right. These videos are representations of stop-motion animation, which is created with the help of plasticine clay.
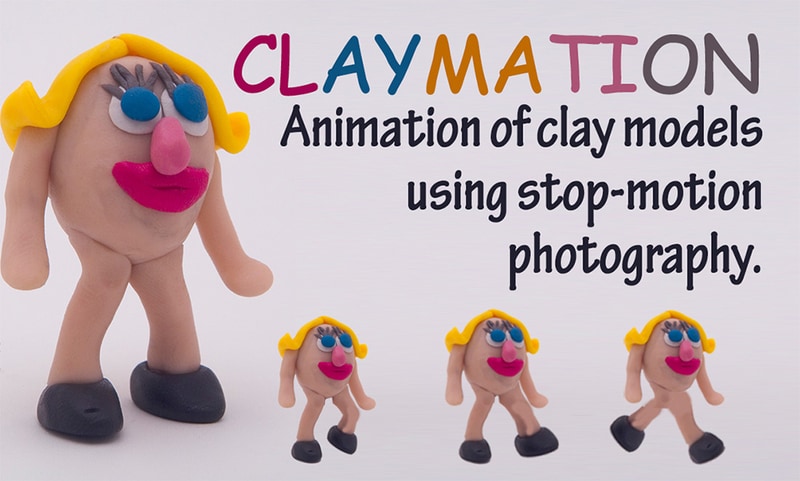
The use of platicsine is not only restricted to the animated characters, but these are also considered for creating the ultimate surroundings. The videos are recorded in such a manner that synchronization must be established with background and character, and viewers will be able to enjoy the same. After creating the videos, they are played in quick succession to get the right appearance of the movement.
Part 2 History of Claymation Movies
01The Beginning of Claymation Movies
Well, you will be surprised to know that the Claymation videos came into existence after the introduction of plasticine. It was founded in 189and since then, clamaytion videos have been able to find their way to silver screens. In earlier times, people used to dip their toes into color and then try to create artwork. But with innovation, the process has been changed and the oldest known extant clay animation film is Long Live the Bull (1926) by Joseph Sunn. The main procedure for creating this film is Claymation.

In the 190as well, there were some productions going on considering the claymation work, and some turned out to be successful, while some had no existence after that. For example, “Animated Putty” (1911), a historic feature by Walter R. Booth, dates back. So, yes, one can consider that this has existed for a very long time.
025 Famous Claymation Examples Over the Years
If we start exploring through some of the best examples of the past, you will be surprised to know that there are some claymation videos that still hit the top of the list of best movies around. These are as follows:
● The Nightmare Before Christmas
● The Life Aquatic with Steve Zissou
● Coraline
● The PJs
And there are some more that excel at utilizing claymation and teaching users how to make a claymation video. Some movies belong to the comedy genre, and some are related to fiction only through having a combination of friendship and others.
03A Look into the Art of Claymation for Film and Video Projects
Claymation has been around for a long time, and it’s becoming more popular. Small projects and big budget features alike are finding new and innovative ways to combine traditional models with other digital filmmaking methodologies like character animation, green screens, etc.
You can see that the team behind Missing Link went to great lengths to create an incredible looking production. They used both practical rigging systems and green screens as props. They used live-action footage and computer animation for more complex water and action sequences. All of them make it more appealing to the audience.
There are a lot of different ways you might want to get into claymation. Hand-drawn stop animation has seen an increase in popularity lately, with people looking for new ways to explore it. Drawing frames by hand is a really satisfying experience, not only because you have the chance to explore your interests and have some fun with them, but also because it pushes you creatively to explore new limits.
So yes, it is right to conclude that there is a great scope for claymation video production and one must be aware of claymation animators to try their hands on it.
Part 3 6 Best Claymation Videos of All Time
People have the curiosity to know the best claymation videos all the time. Well, according to us, the videos you can consider are as follows:
01The Boxtrolls
The Boxtrolls turned out to be one of the best Claymation movies produced to date.The response that was received was not overwhelming, but it came up with a unique setting of clay models and the animation given to this movie was perfect. Also, it received the chance to be premiered during the Venice Film Festival 2014.
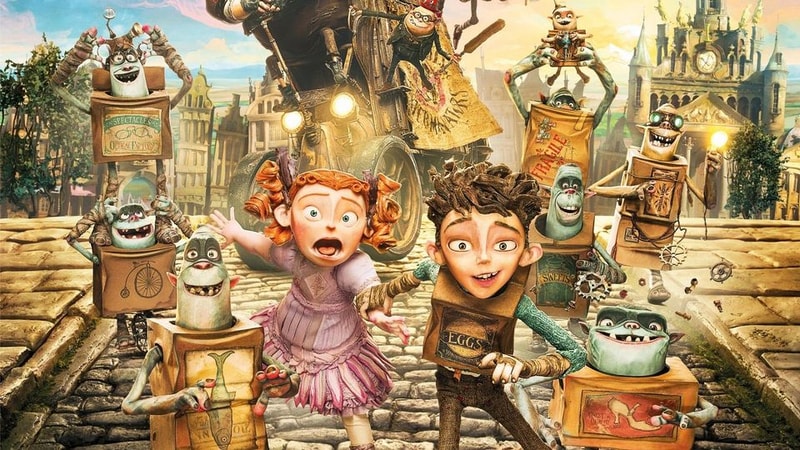
02Paranorman
Paranorman is among those claymation movies which cannot be the result of the dark effort put in by the producers. This movie focuses on children. It has different characters integrated, and the printed faces for each character have been utilized. This movie set good records, and children were very happy after seeing it on screen.
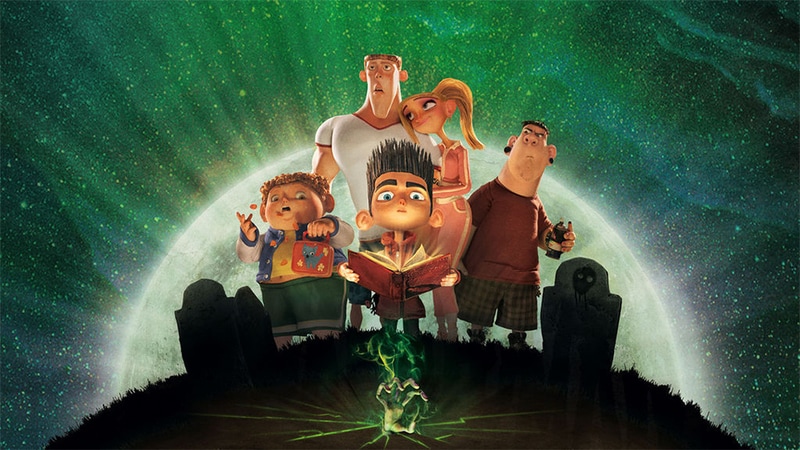
03Chicken run
Chicken Run was not the well-known Claymation video of the time, which was intended to be original cinematic peace. There was collaboration between Dreamworks and others to get this exceptional movie available on screen. The storey was so heart-touching, it’s no wonder it received a good response. Due to the availability of technology at that time, this movie was not able to set good records, but after it, most people are aware of the same.
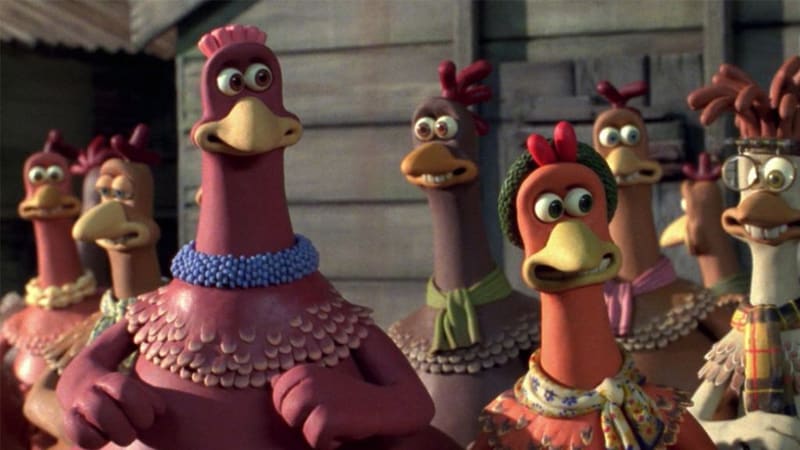
04Consuming Spirits
Consuming spirits come into consideration in 201and it is a story about three residents of a small rust belt town. They are somewhere, living an interconnected life, and things are not fine with them. Also, they are confused about how to fix things for a better lifestyle.

05A town called panic
A town called Panic came into existence in 200and it is an animated movie about a cowboy and an Indian. They are planning to construct a barbecue pit for the birthday but are facing a lot of difficulties in doing so. But somehow they managed to do so. The concept of this movie is quite different as compared to other Claymation movies.
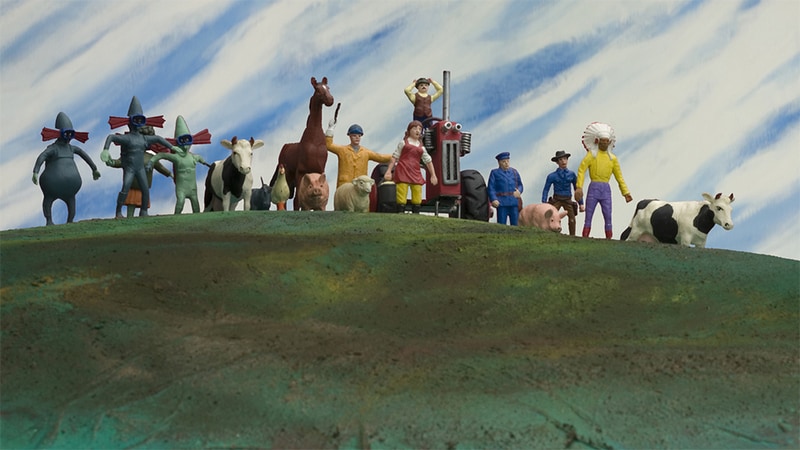
06The Year without a Santa Claus
The Year without a Santa Claus came into existence in 200This movie is focused on the spot where Santa Claus has taken off for the year and others are trying to save Christmas after this announcement. There is a lot more integrated in this movie to watch.
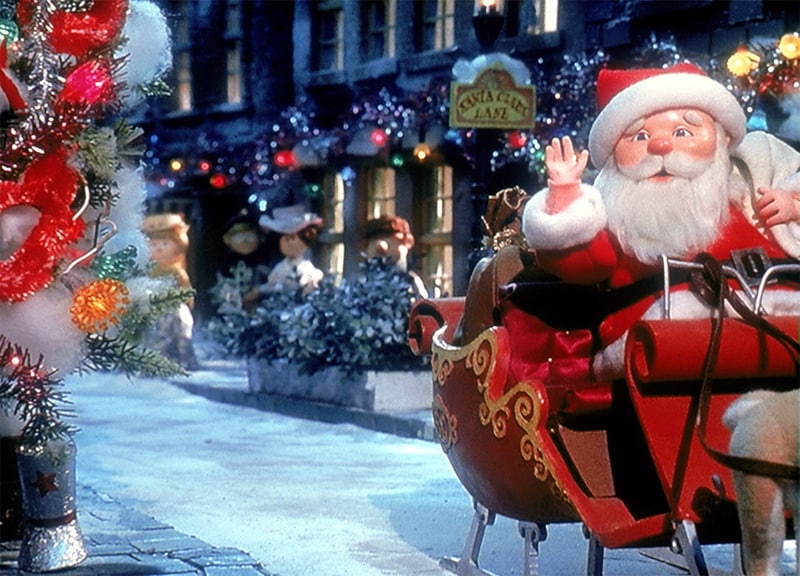
Part 4 How to Make Claymation Videos
If you are looking forward to trying your hands on claymation videos, do it now as this is very simple. For this, you only require a claymation animator like Wondershare Filmora Video Editor for the same. But before choosing it out, be sure to know the steps that will help you make the video easily.
Wondershare Filmora
Get started easily with Filmora’s powerful performance, intuitive interface, and countless effects!
Try It Free Try It Free Try It Free Learn More >

The steps you need to follow are:
Step 1 Make yourself available to the Claymation Animator (you can use Filmora for this task) and sign up for it.
Step 2 Now, to start the project, you need to lockout the photos that are under consideration for creating the project.
Step 3 Arrange all the photos in a sequential order or say whatever you want, and do the editing, considering the speed and other effects.
Step 4 After setting up the effects, review the same for finalization.
Step 5 After finalizing the effects, save the same.
These are the simple steps to follow if you want to create Claymation videos.
Well, as we have discussed Filmora, this is one of the best tools available to help you create claymation videos easily. This tool has an easy-to-use and navigate interface and will assist you in achieving your desired results.
Also, you will be happy to know that an abundance of features have been added to it, making it one of the most considerable tools to have. So, yes, if you are looking for how to create claymation videos, try it now and be ready to get the expected outcome.
● Key Takeaways from This Episode →
● Claymation videos are getting more digitalized.
● Filmora is one of the best claymation animators to use.
● Claymation videos can be edited easily and customised by the user easily.
Claymation videos appear to be more appealing as compared to other graphical or pictorial videos we create. However, some people still believe that making such a video is not their forte and that they cannot achieve mastery in the field.
So, if you have the same question and want to learn how to make a claymation video quickly and easily, stay tuned with us. In this article, we are covering all the relevant details to help you create the best claymation video possible and the outcome will be as expected. Let’s get started!
In this article
01 [What is Claymation and How It Works](#Part 1)
02 [History of Claymation Movies](#Part 2)
03 [6 Best Claymation Videos of All Time](#Part 3)
04 [How to Make Claymation Videos](#Part 4)
Part 1 What is Claymation and How It Works
With the name Claymation, you might be thinking that there is a use of clay in creating such videos. Well, you are right. These videos are representations of stop-motion animation, which is created with the help of plasticine clay.
The use of platicsine is not only restricted to the animated characters, but these are also considered for creating the ultimate surroundings. The videos are recorded in such a manner that synchronization must be established with background and character, and viewers will be able to enjoy the same. After creating the videos, they are played in quick succession to get the right appearance of the movement.
Part 2 History of Claymation Movies
01The Beginning of Claymation Movies
Well, you will be surprised to know that the Claymation videos came into existence after the introduction of plasticine. It was founded in 189and since then, clamaytion videos have been able to find their way to silver screens. In earlier times, people used to dip their toes into color and then try to create artwork. But with innovation, the process has been changed and the oldest known extant clay animation film is Long Live the Bull (1926) by Joseph Sunn. The main procedure for creating this film is Claymation.
In the 190as well, there were some productions going on considering the claymation work, and some turned out to be successful, while some had no existence after that. For example, “Animated Putty” (1911), a historic feature by Walter R. Booth, dates back. So, yes, one can consider that this has existed for a very long time.
025 Famous Claymation Examples Over the Years
If we start exploring through some of the best examples of the past, you will be surprised to know that there are some claymation videos that still hit the top of the list of best movies around. These are as follows:
● The Nightmare Before Christmas
● The Life Aquatic with Steve Zissou
● Coraline
● The PJs
And there are some more that excel at utilizing claymation and teaching users how to make a claymation video. Some movies belong to the comedy genre, and some are related to fiction only through having a combination of friendship and others.
03A Look into the Art of Claymation for Film and Video Projects
Claymation has been around for a long time, and it’s becoming more popular. Small projects and big budget features alike are finding new and innovative ways to combine traditional models with other digital filmmaking methodologies like character animation, green screens, etc.
You can see that the team behind Missing Link went to great lengths to create an incredible looking production. They used both practical rigging systems and green screens as props. They used live-action footage and computer animation for more complex water and action sequences. All of them make it more appealing to the audience.
There are a lot of different ways you might want to get into claymation. Hand-drawn stop animation has seen an increase in popularity lately, with people looking for new ways to explore it. Drawing frames by hand is a really satisfying experience, not only because you have the chance to explore your interests and have some fun with them, but also because it pushes you creatively to explore new limits.
So yes, it is right to conclude that there is a great scope for claymation video production and one must be aware of claymation animators to try their hands on it.
Part 3 6 Best Claymation Videos of All Time
People have the curiosity to know the best claymation videos all the time. Well, according to us, the videos you can consider are as follows:
01The Boxtrolls
The Boxtrolls turned out to be one of the best Claymation movies produced to date.The response that was received was not overwhelming, but it came up with a unique setting of clay models and the animation given to this movie was perfect. Also, it received the chance to be premiered during the Venice Film Festival 2014.
02Paranorman
Paranorman is among those claymation movies which cannot be the result of the dark effort put in by the producers. This movie focuses on children. It has different characters integrated, and the printed faces for each character have been utilized. This movie set good records, and children were very happy after seeing it on screen.
03Chicken run
Chicken Run was not the well-known Claymation video of the time, which was intended to be original cinematic peace. There was collaboration between Dreamworks and others to get this exceptional movie available on screen. The storey was so heart-touching, it’s no wonder it received a good response. Due to the availability of technology at that time, this movie was not able to set good records, but after it, most people are aware of the same.
04Consuming Spirits
Consuming spirits come into consideration in 201and it is a story about three residents of a small rust belt town. They are somewhere, living an interconnected life, and things are not fine with them. Also, they are confused about how to fix things for a better lifestyle.
05A town called panic
A town called Panic came into existence in 200and it is an animated movie about a cowboy and an Indian. They are planning to construct a barbecue pit for the birthday but are facing a lot of difficulties in doing so. But somehow they managed to do so. The concept of this movie is quite different as compared to other Claymation movies.
06The Year without a Santa Claus
The Year without a Santa Claus came into existence in 200This movie is focused on the spot where Santa Claus has taken off for the year and others are trying to save Christmas after this announcement. There is a lot more integrated in this movie to watch.
Part 4 How to Make Claymation Videos
If you are looking forward to trying your hands on claymation videos, do it now as this is very simple. For this, you only require a claymation animator like Wondershare Filmora Video Editor for the same. But before choosing it out, be sure to know the steps that will help you make the video easily.
Wondershare Filmora
Get started easily with Filmora’s powerful performance, intuitive interface, and countless effects!
Try It Free Try It Free Try It Free Learn More >
The steps you need to follow are:
Step 1 Make yourself available to the Claymation Animator (you can use Filmora for this task) and sign up for it.
Step 2 Now, to start the project, you need to lockout the photos that are under consideration for creating the project.
Step 3 Arrange all the photos in a sequential order or say whatever you want, and do the editing, considering the speed and other effects.
Step 4 After setting up the effects, review the same for finalization.
Step 5 After finalizing the effects, save the same.
These are the simple steps to follow if you want to create Claymation videos.
Well, as we have discussed Filmora, this is one of the best tools available to help you create claymation videos easily. This tool has an easy-to-use and navigate interface and will assist you in achieving your desired results.
Also, you will be happy to know that an abundance of features have been added to it, making it one of the most considerable tools to have. So, yes, if you are looking for how to create claymation videos, try it now and be ready to get the expected outcome.
● Key Takeaways from This Episode →
● Claymation videos are getting more digitalized.
● Filmora is one of the best claymation animators to use.
● Claymation videos can be edited easily and customised by the user easily.
Top 10 3D Text Animation Templates
Top 10 3D Text Animation Templates
An easy yet powerful editor
Numerous effects to choose from
Detailed tutorials provided by the official channel
“Where is everyone getting their 3D Text Animation templates?”
To answer this request, we’ve compiled a guide that not only teaches you how to create things like 3D Spinning Text (After Effects) but also gives you an idea of where you can find the kind of resources (i.e., 3D Text Animation templates and presets) that you need to get a head start on your projects.
In this article
01 [Top 10 3D Text Animation Templates ](#Part 1)
02 [How Do I Make 3D Text in After Effects?](#Part 2)
03 [The Best 10 Amazing 3D Text Animation Templates](#Part 3)
04 [Secrets to Learning More Animation Tactics](#Part 4)
Part 1 What’s 3D Text Animation?
Before anything else, let’s talk about text animation. Specifically, 3D Text Animation. The text that you’re reading now, is 2D Text. It’s static, and it lacks depth. It’s just letters on a screen. Meanwhile, 3D Text is usually built for motion, and thus, it has volume and depth — it’s almost tangible. Here’s what that looks like:

As you can see, even without actually moving, in the text shown in the image above, the potential for motion is there — it looks alive.
Now, you’ll see 3D text like this often in movies or promotions. Usually in the form of extravagant title cards or 3D text logo animation. They’re eye-catching, and because they’re 3D, you can play with them as much as you want to really add drama to your creations.
Part 2 How Do I Make 3D Text in After Effects?
As promised, this next section will teach you how to create 3D Text Animation in Adobe After Effects, which is a VFX and motion graphics software used by many animators to bring life to their text. You’ll notice that the following tutorial is really more about introducing the tools that you can use in order to create 3D Text Animation:
01Step 1. Add Your Text
The first thing that you have to do, of course, is to add your text! To do this, go to the ‘Tools’ panel, select the Type tool, and then select the ‘Composition’ panel. The composition is where you type your text!
With After Effects, you also have the following options:
● Change Text Font
● Adjust Text Size
● Adjust Text Color
● Shift Justification (Left, Middle, right)
And so on! Once you’re done with your text composition, it will be generated by After Effects into a layer that you can adjust as needed in the next steps.

01Step 2. Use Animation Presets
With your text now in a layer that you can add animations to… you’ve practically done a third of the job! Or even more than that if you decide to use the animation presets that are provided by After Effects.
These can be found by selecting ‘Browse Presets…’ on the ‘Animation’ tab (shown in the image below.) All you need to apply them is to drag and drop them onto your text layer.
Note: The first keyframe of this built-in text animation will be applied at the location of the Current Time Indicator (CTI), so make sure that you’ve adjusted that accordingly.

01Step 3. Per-Character Animation
If you’d like to personalize your text animation, After Effects does also give you the option to animate per character (or, per letter, in this case.)
This will give you more control over how you decided to animate your text. Of course, it does mean that it is slightly more complicated as well.
● To animate text per layer, select ‘animate’ on that layer and choose a parameter to start working on animations for.
● You’ll be able to previous (or scrub) through your animations in order to see if they are doing what you need them to do.
● You can also remove applied parameters in order to re-work your animation.

01Step 4. Add Graphic Elements to Text
If you really want to make your 3D Animation Text pop, Adobe After Effects also offers the tools needed to add Graphic Elements to your composition — which can be found at the top-most toolbar!

Part 3 The Best 10 Amazing 3D Text Animation Templates
Now, as promised, we’re also going to be introducing a couple of 3D text animation templates that you can try out for your own projects! Each template will have a link that you can go to in order to see what it looks like, as well as an explanation on how you can use it for your projects in the future!
01Real 3D Light Bulb Kit
The first Text Animation Template on our list is the “Logo Light Bulb” 3D Animation from Envato Elements. This one literally glows people! Making it perfect for a quirky, and yet still very impressive Title Card or Logo. Its design is very realistic, and you can also control how it flickers! For example, turning the bulbs on certain characters first, or turning them all off at once in the end.
023D Text Reveal
This next 3D Animation template is also from Envato Market. And, just like the first, it makes for quite the dramatic Title Card or Logo. With this template, your Text can literally zoom in to view while looking its best and sparkiest in High-Chrome.
033D Metallic Text Animation
Our next pick, the 3D Metallic text animation is another great one for those who are looking for something flashy — something that gives off the impression of being impressive right from the gate. Compared to the previous text animation template, this one has a more rugged kind of appearance. Perfect for those looking to promote something more fun rather than professional.
043D Text Box Animation Pack
The next one is a little less ‘impressive’ — in the sense that it isn’t as in your face as the other 3D animation templates that we’ve introduced thus far. And that’s exactly why the 3D Text Box Animation Pack deserves to be on this list! Its 3D spinning text (after effects) elements are very usable — in that it can work for a variety of individuals and styles. It has a more professional look as well. Making it perfect for corporations.
053D Text & Logo Boxes
This next one, the 3D Text & Logo Boxes pack is particularly perfect for 3D logos. The pack gives you several options for box size as well as text parameters. So, you can design your animated 3D Logo however you want and use it for future projects to give them even more dimension than before.
06The Light Bulb Kit
Our next pick, which is the ‘Light Bulb Kit’ also from Envato, is very similar to the first item on our list — in that it features text lit up by lightbulbs. However, it lends an extra bit of photo-realism to it. Less sparkle and more grain — which may exactly be what you want for your new title card or logo.
073D Text Templates
The 3D Text Templates is a very bright and pop-y template that is perfect for creating eye-catching promotions and advertisements. It’s very simple to use, which, again, maybe exactly what you want. Literally, the template will ask you to choose your own text and change the colors to suit that of your own brand, then you’re done!
083D Text Shapes Logo Reveal
The ‘3D Text Shapes Logo Reveal’ template is a pack of 3D text animations that you can use in order to add a little spin to your logo reveals (quite literally, in some cases!) It has a lot of personality to it, and a certain tech-y or science-y feel that would make it perfect for anyone looking for something more technical.
09Bold Titles
The ‘Bold Titles’ template is very loud and proud. But it has a bit of a retro-vibe to it as well. Making it stand out from some of the more minimalistic modern text animation styles that you see these days.
1010. Wave 3D Logo & Text
Looking for something simple and professional? Then the ‘Wave 3D Logo & Text’ template may just be the one for you. We put it last on this list, but it’s actually quite a strong contender. One that just about anyone (for just about any type of project they’re working on), should be able to get some use out of.
Key Takeaways from This Episode
● 3D Text Animation is the practice of bringing text to life! It gives dimension, depth, and, even, movement into what are usually very static properties!
● You see a lot of 3D Text Animation in big pictures these days. And you can start creating your own with the use of Adobe After Effects — a VFX and Motion Graphics Software that a lot of professionals use for their own text animation.
● Of course, if you don’t have the kind of time to create your own 3D Text Animations from scratch, you can always use templates instead! There are hundreds (if not thousands) of them available out there. It should be simple enough to find one that fits the kind of vibe you’re looking for.
● SECRET TIP! If you’re looking for an all-in-one kind of solution, you might want to consider Filmora Pro. It’s a video editor, first and foremost, but that’s not all it is — you can be using it today to start creating your own 3D Text Animations!
“Where is everyone getting their 3D Text Animation templates?”
To answer this request, we’ve compiled a guide that not only teaches you how to create things like 3D Spinning Text (After Effects) but also gives you an idea of where you can find the kind of resources (i.e., 3D Text Animation templates and presets) that you need to get a head start on your projects.
In this article
01 [Top 10 3D Text Animation Templates ](#Part 1)
02 [How Do I Make 3D Text in After Effects?](#Part 2)
03 [The Best 10 Amazing 3D Text Animation Templates](#Part 3)
04 [Secrets to Learning More Animation Tactics](#Part 4)
Part 1 What’s 3D Text Animation?
Before anything else, let’s talk about text animation. Specifically, 3D Text Animation. The text that you’re reading now, is 2D Text. It’s static, and it lacks depth. It’s just letters on a screen. Meanwhile, 3D Text is usually built for motion, and thus, it has volume and depth — it’s almost tangible. Here’s what that looks like:
As you can see, even without actually moving, in the text shown in the image above, the potential for motion is there — it looks alive.
Now, you’ll see 3D text like this often in movies or promotions. Usually in the form of extravagant title cards or 3D text logo animation. They’re eye-catching, and because they’re 3D, you can play with them as much as you want to really add drama to your creations.
Part 2 How Do I Make 3D Text in After Effects?
As promised, this next section will teach you how to create 3D Text Animation in Adobe After Effects, which is a VFX and motion graphics software used by many animators to bring life to their text. You’ll notice that the following tutorial is really more about introducing the tools that you can use in order to create 3D Text Animation:
01Step 1. Add Your Text
The first thing that you have to do, of course, is to add your text! To do this, go to the ‘Tools’ panel, select the Type tool, and then select the ‘Composition’ panel. The composition is where you type your text!
With After Effects, you also have the following options:
● Change Text Font
● Adjust Text Size
● Adjust Text Color
● Shift Justification (Left, Middle, right)
And so on! Once you’re done with your text composition, it will be generated by After Effects into a layer that you can adjust as needed in the next steps.
01Step 2. Use Animation Presets
With your text now in a layer that you can add animations to… you’ve practically done a third of the job! Or even more than that if you decide to use the animation presets that are provided by After Effects.
These can be found by selecting ‘Browse Presets…’ on the ‘Animation’ tab (shown in the image below.) All you need to apply them is to drag and drop them onto your text layer.
Note: The first keyframe of this built-in text animation will be applied at the location of the Current Time Indicator (CTI), so make sure that you’ve adjusted that accordingly.
01Step 3. Per-Character Animation
If you’d like to personalize your text animation, After Effects does also give you the option to animate per character (or, per letter, in this case.)
This will give you more control over how you decided to animate your text. Of course, it does mean that it is slightly more complicated as well.
● To animate text per layer, select ‘animate’ on that layer and choose a parameter to start working on animations for.
● You’ll be able to previous (or scrub) through your animations in order to see if they are doing what you need them to do.
● You can also remove applied parameters in order to re-work your animation.
01Step 4. Add Graphic Elements to Text
If you really want to make your 3D Animation Text pop, Adobe After Effects also offers the tools needed to add Graphic Elements to your composition — which can be found at the top-most toolbar!
Part 3 The Best 10 Amazing 3D Text Animation Templates
Now, as promised, we’re also going to be introducing a couple of 3D text animation templates that you can try out for your own projects! Each template will have a link that you can go to in order to see what it looks like, as well as an explanation on how you can use it for your projects in the future!
01Real 3D Light Bulb Kit
The first Text Animation Template on our list is the “Logo Light Bulb” 3D Animation from Envato Elements. This one literally glows people! Making it perfect for a quirky, and yet still very impressive Title Card or Logo. Its design is very realistic, and you can also control how it flickers! For example, turning the bulbs on certain characters first, or turning them all off at once in the end.
023D Text Reveal
This next 3D Animation template is also from Envato Market. And, just like the first, it makes for quite the dramatic Title Card or Logo. With this template, your Text can literally zoom in to view while looking its best and sparkiest in High-Chrome.
033D Metallic Text Animation
Our next pick, the 3D Metallic text animation is another great one for those who are looking for something flashy — something that gives off the impression of being impressive right from the gate. Compared to the previous text animation template, this one has a more rugged kind of appearance. Perfect for those looking to promote something more fun rather than professional.
043D Text Box Animation Pack
The next one is a little less ‘impressive’ — in the sense that it isn’t as in your face as the other 3D animation templates that we’ve introduced thus far. And that’s exactly why the 3D Text Box Animation Pack deserves to be on this list! Its 3D spinning text (after effects) elements are very usable — in that it can work for a variety of individuals and styles. It has a more professional look as well. Making it perfect for corporations.
053D Text & Logo Boxes
This next one, the 3D Text & Logo Boxes pack is particularly perfect for 3D logos. The pack gives you several options for box size as well as text parameters. So, you can design your animated 3D Logo however you want and use it for future projects to give them even more dimension than before.
06The Light Bulb Kit
Our next pick, which is the ‘Light Bulb Kit’ also from Envato, is very similar to the first item on our list — in that it features text lit up by lightbulbs. However, it lends an extra bit of photo-realism to it. Less sparkle and more grain — which may exactly be what you want for your new title card or logo.
073D Text Templates
The 3D Text Templates is a very bright and pop-y template that is perfect for creating eye-catching promotions and advertisements. It’s very simple to use, which, again, maybe exactly what you want. Literally, the template will ask you to choose your own text and change the colors to suit that of your own brand, then you’re done!
083D Text Shapes Logo Reveal
The ‘3D Text Shapes Logo Reveal’ template is a pack of 3D text animations that you can use in order to add a little spin to your logo reveals (quite literally, in some cases!) It has a lot of personality to it, and a certain tech-y or science-y feel that would make it perfect for anyone looking for something more technical.
09Bold Titles
The ‘Bold Titles’ template is very loud and proud. But it has a bit of a retro-vibe to it as well. Making it stand out from some of the more minimalistic modern text animation styles that you see these days.
1010. Wave 3D Logo & Text
Looking for something simple and professional? Then the ‘Wave 3D Logo & Text’ template may just be the one for you. We put it last on this list, but it’s actually quite a strong contender. One that just about anyone (for just about any type of project they’re working on), should be able to get some use out of.
Key Takeaways from This Episode
● 3D Text Animation is the practice of bringing text to life! It gives dimension, depth, and, even, movement into what are usually very static properties!
● You see a lot of 3D Text Animation in big pictures these days. And you can start creating your own with the use of Adobe After Effects — a VFX and Motion Graphics Software that a lot of professionals use for their own text animation.
● Of course, if you don’t have the kind of time to create your own 3D Text Animations from scratch, you can always use templates instead! There are hundreds (if not thousands) of them available out there. It should be simple enough to find one that fits the kind of vibe you’re looking for.
● SECRET TIP! If you’re looking for an all-in-one kind of solution, you might want to consider Filmora Pro. It’s a video editor, first and foremost, but that’s not all it is — you can be using it today to start creating your own 3D Text Animations!
You Can Turn a TikTok Into a GIF Now. Here’s How
You Can Turn a TikTok Into a GIF Now. Here’s How
An easy yet powerful editor
Numerous effects to choose from
Detailed tutorials provided by the official channel
Want to add sharing flexibility to TikTok videos? Convert them into GIFs!
In this article
01 [What is GIF TikTok?](#Part 1)
02 [How to Make a GIF From a TikTok Video](#Part 2)
Part 1 What Is TikTok GIF?
In today’s IT enhanced lifestyle, having a profound reach on social media is the new name of popularity. Everyone out there is profusely keen on creating and sharing a plethora of content varieties; memes, videos, animations and what not, across social communities. However, TikTok videos lag behind in this race; often lack the ‘Share’ flexibility.
To match up, there are solutions to convert TikTok video into GIFs. A TikTok GIF is a short, impactful and to the point clip that’s here to share fun and exciting content in the most interesting ways. If you have a bunch of TikTok videos to share with your peers, but missing out on an effective sharing solution, you can conveniently look forward to convert those videos into catchy and interesting GIFs that will definitely hold the attention of your viewers.
Feel motivated? See through the rest of this article to know some quick and easy TikTok to GIF conversion tools and software!
Part 2 How to Make a GIF From a TikTok Video
When looking through solutions to create GIF TikTok videos, you will find a pool of methods and tools available on the internet. All you need to do is select the best one for yourself and get started with converting TikTok Videos into GIFs. Given below are some of the best solutions adhering to the aforesaid concern:
01Filmora
Wondershare Filmora Video Editor is one of the best application software to create a TikTok GIF. This is a simple and smart converter application that caters to your concern in just a few minutes. What’s best is that this app is absolutely free to use and is compatible with your PC, smartphone and a variety of other devices. Here’s how you can use Filmora to convert your TikTok videos into GIFs:

Step 1: Import Your Video
Start with importing a desired TikTok video file to the Filmora timeline. You can also ‘Drag and Drop’ the video file to the editor timeline. Using this application, you have the flexibility to import your clip in almost any video format.

Step 2: Edit Your Clip
Suited to your content preferences, you can edit and enhance your clips with a variety of effects, like, cut, trim, rotate, split, etc., and make appropriate speed adjustments. You can even include text messages to make your GIF more impactful.

Wondershare Filmora
Get started easily with Filmora’s powerful performance, intuitive interface, and countless effects!
Try It Free Try It Free Try It Free Learn More >
Step 3: Let’s Save and Share!
When you are happy, save your work using the .gif file extension. That’s it! You are ready to share your creation with your social media peers.

02TikTok’s Inbuilt GIF Converter
TikTok allows you to directly convert its videos into GIFs. You can use the TikTok application in your smartphone to take up the conversion process. All you need to do is follow the steps given below:
Step 1: Select Your TikTok Video
To get started, open the TikTok application in your smartphone and select the video you want to convert into GIF.
Step 2: Share the Video
Click the ‘Share’ icon at the right of the video screen.

Step 3: Format Selection
Scroll down to the bottom of the screen and choose the ‘Share as GIF’ option. This will automatically convert your TikTok video into GIF in a few seconds.

Step 4: Save and Export
Click on the ‘Save Image’ option to save the GIF in your phone’s gallery. You can also export your creation to different social media platforms.
03Wondershare UniConverter
This one is a handy toolbox loaded with a variety of features that allow you to play with your video creativity. Using this tool, you can quickly create GIF for TikTok and also fix the size and duration of the same. This software supports almost all video formats and comes with an inbuilt editor that you can use to add effects and make your GIFs all the more interesting. This is compatible with your Windows or MacOS PC.
Take the following steps to create GIFs from TikTok videos using this software:

Step 1: Download and Launch the Application
Download the Wondershare UniConverter application to your PC from the software’s official website.
Step 2: Open GIF Maker
In the app’s welcome screen, navigate to the ‘Toolbox’ tab and select ‘GIF Maker’ from the panel that gets displayed.
Step 3: Upload Your TikTok Video
In the next pop-up window, select ‘Video to GIF’ and click on the (+) icon in the centre. You can also click on ‘Add Files’ in the top left and choose a saved TikTok video from your PC to upload.

Step 4: Trim Your Video
Trim the uploaded video to the desired portion from where you wish to create the GIF and set adequate time frames for the same. You can even drag the video thumbnail slider to trim the video.

Step 5: Let’s Get Creating!
Set the final size and frame rate from the ‘Output Size’ and ‘Frame Rate’ tabs respectively. To save your creation, browse and choose the desired system folder by clicking on the ‘Save to:’ tab. Lastly, select ‘Create GIF’ to start the conversion process.

04Kapwing GIF Maker
There may be instances where you cannot save or share TikTok videos. To cut the rush in such cases, you can use Kapwing’s GIF Maker to convert videos from TikTok to GIF online. This one is a free video editing tool that works with almost all internet enabled smartphones and supports almost all common video formats. Here’s what you need to do for making GIFs from TikTok videos using this tool:
Step 1: Copy a Video Link
Search your desired TikTok video and click on the ‘Share’ icon. In the drop down menu, select ‘Copy Link’ to save the video link in your device memory. Once this happens, you will get a confirmation message that says, ‘Copied’.

Step 2: Open GIF Maker
Open the GIF Maker tool in your browser and paste the saved TikTok video link in the editor’s URL bar. This will automatically redirect you to the Kapwing Studio, where you have the liberty to trim, crop or split your video clip to the desired time frame. It is better to set a play span of 3-5 seconds.
You can trim the clip by dragging its ends or introduce cuts at specific points using the split button above the editor timeline. To make volume adjustments, select the video layer and click on ‘Edit Video’ and move the adjuster circle to the left or right to decrease, increase and mute the video volume.


Step 3: Download and Share Your Creation
To save your work, tap ‘Export Video’ at the top and select ‘Export as GIF’ from the drop down menu. Wait for the conversion process to finish and click ‘Download’. This will save the GIF to your device.
You will find a watermark at the corner of your clip. Click ‘Sign In to Remove the Watermark’ to remove it. A workspace for the present and later projects will be created, where you can save you work for a couple of days with Kapwing’s free version. To export your work to social media, click ‘Share’. You can even host your creation on websites. Just copy the video link and select ‘Embed’.

05TT Downloader
This one is another online tool you can use to create GIFs from TikTok videos. This is a quick converter tool that transforms TikTok videos to GIFs in 5 easy steps within minutes. It is a browser tool and does not require a software download. All you need to do is explained in the following steps:

Step 1:
Visit the official site of the tool.
Step 2:
Select ‘TikTok to GIF’ to get redirected to the TikTok to GIF Converter home page.
Step 3:
Copy and paste the desired TikTok video link in the converter’s URL bar. To proceed further, click on ‘Get Video’.

Step 4:
Trim your clip within a time frame of 1-10 seconds.
Step 5:
Click ‘Done’ to initiate the conversion process. Once it finishes, you can download the converted GIF to your device.
06MiniTool MovieMaker
You can prefer this tool to convert TikTok videos in your PC into GIFs. This tool gives you the liberty to trim, cut, reverse and rotate GIFs and even add text and filters to them. Here’s how you can use this tool to transform TikTok videos into interesting GIFs:
Step 1:
Download and install this GIF maker tool in your PC. Launch the same when you are done with the installation process.
Step 2:
In the converter window, import and add your desired TikTok clip into the converter timeline.

Step 3:
You are now free to edit and add text to your video.
Step 4:
Once you finish, tap ‘Export’ and choose your output format as GIF.
Step 5:
Hit ‘Export’ to let the conversion process begin.
● Key Takeaways from This Episode →
● TikTok videos often lack the save and share features, which is an obvious necessity of today’s social outlook.
● Varieties of online tools and software are available for converting TikTok videos to GIFs to increase the sharing flexibility.
● Filmora is a quick and intelligent choice to take up the conversion process within a catch of few clicks.
Want to add sharing flexibility to TikTok videos? Convert them into GIFs!
In this article
01 [What is GIF TikTok?](#Part 1)
02 [How to Make a GIF From a TikTok Video](#Part 2)
Part 1 What Is TikTok GIF?
In today’s IT enhanced lifestyle, having a profound reach on social media is the new name of popularity. Everyone out there is profusely keen on creating and sharing a plethora of content varieties; memes, videos, animations and what not, across social communities. However, TikTok videos lag behind in this race; often lack the ‘Share’ flexibility.
To match up, there are solutions to convert TikTok video into GIFs. A TikTok GIF is a short, impactful and to the point clip that’s here to share fun and exciting content in the most interesting ways. If you have a bunch of TikTok videos to share with your peers, but missing out on an effective sharing solution, you can conveniently look forward to convert those videos into catchy and interesting GIFs that will definitely hold the attention of your viewers.
Feel motivated? See through the rest of this article to know some quick and easy TikTok to GIF conversion tools and software!
Part 2 How to Make a GIF From a TikTok Video
When looking through solutions to create GIF TikTok videos, you will find a pool of methods and tools available on the internet. All you need to do is select the best one for yourself and get started with converting TikTok Videos into GIFs. Given below are some of the best solutions adhering to the aforesaid concern:
01Filmora
Wondershare Filmora Video Editor is one of the best application software to create a TikTok GIF. This is a simple and smart converter application that caters to your concern in just a few minutes. What’s best is that this app is absolutely free to use and is compatible with your PC, smartphone and a variety of other devices. Here’s how you can use Filmora to convert your TikTok videos into GIFs:
Step 1: Import Your Video
Start with importing a desired TikTok video file to the Filmora timeline. You can also ‘Drag and Drop’ the video file to the editor timeline. Using this application, you have the flexibility to import your clip in almost any video format.
Step 2: Edit Your Clip
Suited to your content preferences, you can edit and enhance your clips with a variety of effects, like, cut, trim, rotate, split, etc., and make appropriate speed adjustments. You can even include text messages to make your GIF more impactful.
Wondershare Filmora
Get started easily with Filmora’s powerful performance, intuitive interface, and countless effects!
Try It Free Try It Free Try It Free Learn More >
Step 3: Let’s Save and Share!
When you are happy, save your work using the .gif file extension. That’s it! You are ready to share your creation with your social media peers.
02TikTok’s Inbuilt GIF Converter
TikTok allows you to directly convert its videos into GIFs. You can use the TikTok application in your smartphone to take up the conversion process. All you need to do is follow the steps given below:
Step 1: Select Your TikTok Video
To get started, open the TikTok application in your smartphone and select the video you want to convert into GIF.
Step 2: Share the Video
Click the ‘Share’ icon at the right of the video screen.
Step 3: Format Selection
Scroll down to the bottom of the screen and choose the ‘Share as GIF’ option. This will automatically convert your TikTok video into GIF in a few seconds.
Step 4: Save and Export
Click on the ‘Save Image’ option to save the GIF in your phone’s gallery. You can also export your creation to different social media platforms.
03Wondershare UniConverter
This one is a handy toolbox loaded with a variety of features that allow you to play with your video creativity. Using this tool, you can quickly create GIF for TikTok and also fix the size and duration of the same. This software supports almost all video formats and comes with an inbuilt editor that you can use to add effects and make your GIFs all the more interesting. This is compatible with your Windows or MacOS PC.
Take the following steps to create GIFs from TikTok videos using this software:
Step 1: Download and Launch the Application
Download the Wondershare UniConverter application to your PC from the software’s official website.
Step 2: Open GIF Maker
In the app’s welcome screen, navigate to the ‘Toolbox’ tab and select ‘GIF Maker’ from the panel that gets displayed.
Step 3: Upload Your TikTok Video
In the next pop-up window, select ‘Video to GIF’ and click on the (+) icon in the centre. You can also click on ‘Add Files’ in the top left and choose a saved TikTok video from your PC to upload.
Step 4: Trim Your Video
Trim the uploaded video to the desired portion from where you wish to create the GIF and set adequate time frames for the same. You can even drag the video thumbnail slider to trim the video.
Step 5: Let’s Get Creating!
Set the final size and frame rate from the ‘Output Size’ and ‘Frame Rate’ tabs respectively. To save your creation, browse and choose the desired system folder by clicking on the ‘Save to:’ tab. Lastly, select ‘Create GIF’ to start the conversion process.
04Kapwing GIF Maker
There may be instances where you cannot save or share TikTok videos. To cut the rush in such cases, you can use Kapwing’s GIF Maker to convert videos from TikTok to GIF online. This one is a free video editing tool that works with almost all internet enabled smartphones and supports almost all common video formats. Here’s what you need to do for making GIFs from TikTok videos using this tool:
Step 1: Copy a Video Link
Search your desired TikTok video and click on the ‘Share’ icon. In the drop down menu, select ‘Copy Link’ to save the video link in your device memory. Once this happens, you will get a confirmation message that says, ‘Copied’.
Step 2: Open GIF Maker
Open the GIF Maker tool in your browser and paste the saved TikTok video link in the editor’s URL bar. This will automatically redirect you to the Kapwing Studio, where you have the liberty to trim, crop or split your video clip to the desired time frame. It is better to set a play span of 3-5 seconds.
You can trim the clip by dragging its ends or introduce cuts at specific points using the split button above the editor timeline. To make volume adjustments, select the video layer and click on ‘Edit Video’ and move the adjuster circle to the left or right to decrease, increase and mute the video volume.
Step 3: Download and Share Your Creation
To save your work, tap ‘Export Video’ at the top and select ‘Export as GIF’ from the drop down menu. Wait for the conversion process to finish and click ‘Download’. This will save the GIF to your device.
You will find a watermark at the corner of your clip. Click ‘Sign In to Remove the Watermark’ to remove it. A workspace for the present and later projects will be created, where you can save you work for a couple of days with Kapwing’s free version. To export your work to social media, click ‘Share’. You can even host your creation on websites. Just copy the video link and select ‘Embed’.
05TT Downloader
This one is another online tool you can use to create GIFs from TikTok videos. This is a quick converter tool that transforms TikTok videos to GIFs in 5 easy steps within minutes. It is a browser tool and does not require a software download. All you need to do is explained in the following steps:
Step 1:
Visit the official site of the tool.
Step 2:
Select ‘TikTok to GIF’ to get redirected to the TikTok to GIF Converter home page.
Step 3:
Copy and paste the desired TikTok video link in the converter’s URL bar. To proceed further, click on ‘Get Video’.
Step 4:
Trim your clip within a time frame of 1-10 seconds.
Step 5:
Click ‘Done’ to initiate the conversion process. Once it finishes, you can download the converted GIF to your device.
06MiniTool MovieMaker
You can prefer this tool to convert TikTok videos in your PC into GIFs. This tool gives you the liberty to trim, cut, reverse and rotate GIFs and even add text and filters to them. Here’s how you can use this tool to transform TikTok videos into interesting GIFs:
Step 1:
Download and install this GIF maker tool in your PC. Launch the same when you are done with the installation process.
Step 2:
In the converter window, import and add your desired TikTok clip into the converter timeline.
Step 3:
You are now free to edit and add text to your video.
Step 4:
Once you finish, tap ‘Export’ and choose your output format as GIF.
Step 5:
Hit ‘Export’ to let the conversion process begin.
● Key Takeaways from This Episode →
● TikTok videos often lack the save and share features, which is an obvious necessity of today’s social outlook.
● Varieties of online tools and software are available for converting TikTok videos to GIFs to increase the sharing flexibility.
● Filmora is a quick and intelligent choice to take up the conversion process within a catch of few clicks.
Also read:
- 12 Aesthetic GIF Instagram for Marketers and Creatives
- New You Can Turn a TikTok Into a GIF Now for 2024
- 2024 Approved What Wikipedia Cant Tell You About the 10 Best Batman Cartoons
- Updated In 2024, Amazing Ways to Find Suitable Animated Graphic Maker
- New How to Create Animated Video on Canva for 2024
- New 2024 Approved How to Reduce GIF Size and Best GIF Resizers
- New In 2024, 15 Best Stop Motion Animation Kits to Fuel Creativity
- New How to Make Whiteboard Animation Videos
- New How to Make an Animation With 7 Steps for 2024
- 2024 Approved Create or Find Good Morning/Night GIFs
- New What Is Still Motion Animation?
- Updated Tutorials for Animating Picture Online Without Learning From Scratch
- How to Insert a GIF Into Powerpoint
- New In 2024, Learn How to Make Architecture Animation
- 2024 Approved How To Learn Cartoon Sketch Drawing
- 2024 Approved Ways to Create Animated Clipart in PowerPoint
- Updated 2024 Approved Top 10 Best and Fast Ways to Turn Image Into Gif
- Updated How to Create Benime Whiteboard Animation on Android
- New 2024 Approved Fuel Your Creativity with 10 Awesome Collection of 2D Animation Examples
- Best 15 Instant Classics Animated Cartoon Movies
- Updated 12+ Stunning Instagram GIF Stickers for 2024
- Updated In 2024, Create Animated Video on Canva
- 2024 Approved 10 Amazing Whiteboard Animation Video Examples You Need to Bookmark
- Updated Animated Collage Maker Tips for 2024
- Updated All About Types of Motion Graphics for 2024
- New In 2024, Top 10 Popular Cartoons You Forgot Existed
- New In 2024, 10 Top Tools to Make Pic Collage for Windows
- New Can I Still Do Animated Logo Design Without Design Skills?
- Updated In 2024, The 10 Most Adorable Aesthetic Cartoon Characters of All Time
- New Simple Guide to Create New and Exciting Blackboard Animation
- In 2024, How to Draw Cartoons Step by Step with This Guide
- Top 20+ Best Free GIF Makers Online to Quickly Edit GIF
- New Secrets to Make 2D Game Animation for 2024
- New You Can Turn a TikTok Into a GIF Now
- Updated In 2024, How to Make a Video a Live Photo 2023
- Updated Top 10 Apps to Enhance Your Instagram Story Slideshow
- Updated 2024 Approved 15 Best Stop Motion Animation Kits to Fuel Creativity
- Updated 2024 Approved 5 Websites with Animated Logos That Catch Your Eyes
- Updated Top 3 Ways to Create Gif Images with Great 3D Gif Maker for 2024
- New Tips for GIF to Animated PNG You Should Know for 2024
- Updated In 2024,
- New Tips on How to Get Awesome Background for Slideshow in PowerPoint for 2024
- In 2024, 5 Must Try Ways to Add and Send GIF in Text Message on Android
- Fixing Persistent Pandora Crashes on Lava Blaze 2 Pro | Dr.fone
- In 2024, How To Unlock SIM Cards Of Lava Blaze Pro 5G Without PUK Codes
- Vivo V30 Not Receiving Texts? 10 Hassle-Free Solutions Here | Dr.fone
- In 2024, Chrome Video Translators Top 5 Video Translation Chrome Extensions
- How to Unlock Samsung Galaxy A25 5G Phone without Any Data Loss
- How Do I Stop Someone From Tracking My Xiaomi Redmi Note 12R? | Dr.fone
- How to Unlock Itel P55+ Phone Password Without Factory Reset?
- How to Reset a Xiaomi Redmi Note 12 Pro 4G Phone That Is Locked | Dr.fone
- How to Fix Pokemon Go Route Not Working On Vivo Y27 5G? | Dr.fone
- In 2024, How to Unlock SIM Card on Apple iPhone XS Max online without jailbreak
- AVCHD on Motorola -convert MTS for Motorola
- How to Fix when Apple Account Locked From iPhone 13?
- In 2024, The Best Android SIM Unlock Code Generators Unlock Your Nokia C110 Phone Hassle-Free
- In 2024, Ultimate Guide on Lenovo ThinkPhone FRP Bypass
- What is Geo-Blocking and How to Bypass it On Nokia G22? | Dr.fone
- 7 Ways to Unlock a Locked Oppo A78 Phone
- In 2024, Full Guide to Unlock iPhone 15 with iTunes
- How to Change Your Motorola Moto G84 5G Location on life360 Without Anyone Knowing? | Dr.fone
- Possible ways to recover deleted files from Xiaomi Redmi Note 13 Pro+ 5G
- How To Revive Your Bricked Vivo X100 in Minutes | Dr.fone
- How to Transfer Videos from Samsung Galaxy A14 4G to iPad | Dr.fone
- In 2024, Trouble with Apple iPhone SE Swipe-Up? Try These 11 Solutions | Dr.fone
- How To Fix OEM Unlock Missing on Nokia G22?
- Top IMEI Unlokers for Your OnePlus Nord CE 3 5G Phone
- In 2024, How to Bypass iPhone 13 Pro Max Passcode Easily Video Inside | Dr.fone
- How To Transfer WhatsApp From Apple iPhone 7 Plus to Android/iOS? | Dr.fone
- In 2024, How to Change Vivo X90S Location on Skout | Dr.fone
- In 2024, 3 Ways for Android Pokemon Go Spoofing On OnePlus Nord N30 SE | Dr.fone
- Can I Bypass a Forgotten Phone Password Of Samsung Galaxy M34?
- Title: Top Claymation Shows That Make Your Memories Unforgettable
- Author: Elon
- Created at : 2024-05-19 03:04:23
- Updated at : 2024-05-20 03:04:23
- Link: https://animation-videos.techidaily.com/top-claymation-shows-that-make-your-memories-unforgettable/
- License: This work is licensed under CC BY-NC-SA 4.0.
