
:max_bytes(150000):strip_icc():format(webp)/coverjointwitter-6f13b51d1be04d8bb3f5221ef5a057c7.jpg)
Tutorials to Make Animated Images – Even if Youre Just Starting Out
Tutorials to Make Animated Images – Even if You’re Just Starting Out
Tutorials to Make Animated Images – Even if You’re Just Starting out
An easy yet powerful editor
Numerous effects to choose from
Detailed tutorials provided by the official channel
Not to mention, if you animate pictures, you’ll be able to stand apart in the crowd and maximize your brand exposure. By creating animated happy birthday images, you’ll be able to bring life to the still images.
In this guide, we’ll walk you through different ways to make animated images. Read this guide and you’ll be able to animate your images without any hassle.
In this article
01 [What are Animated Pictures?](#Part 1)
02 [Is It Possible to Animate Pictures On Your Own?](#Part 2)
03 [5 Best Tools to Make Animated Pictures](#Part 3)
Part 1 What are Animated Pictures?
For readers who aren’t familiar with animated images, here’s what you need to know. An animated image (also referred to as GIF) is designed by adding motion to a still image. Remember all the funny cat memes you see on Instagram? Well, they are a great example of animated images.
However, it’s important to understand that the applications of animated images aren’t only limited to social media and marketing. You can even animate your family photos and add life to those 20-year old pictures you’ve been saving forever. Not to mention, you can also create animated images of your favorite superhero movie. Love the Justice League starcast? Simply pick your favorite superhero and you’ll get stunning Justice League animated images.
Part 2 Is It Possible to Animate Pictures On Your Own?
When it comes to animating images, the majority of users want to know if it’s at all possible to create animated images by themselves. Even though animating an image is a tedious task, it’s safe to say that you can do it without any external help.
Of course, if you choose a tool like Adobe Photoshop to do the job, you’ll be out of luck because of the steep learning curve. But, there are hundreds of other alternatives you can use to animate pictures. There are ready-to-use 3D photo animators online that’ll allow you to animate any image within a few seconds. These tools are equipped with pre-installed animation templates that you can apply to any image and bring life to them.
Part 3 4 Best Tools to Make Animated Pictures
So, now that you know the key benefits of animated pictures, let’s take a look at the seven best tools you can use to create stunning animated images. To ensure we provide you with a diverse list of photo animators, we have included both platform-dependent and cross-platform solutions to the list.
01Motion Leap
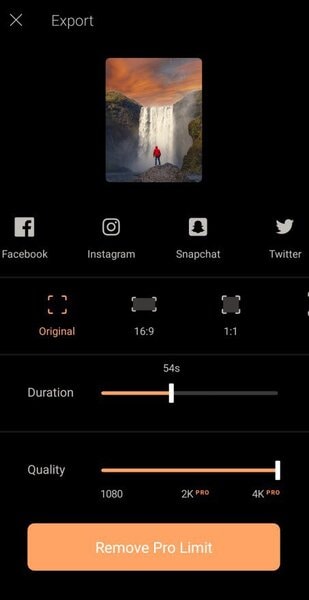
Motion Leap is a free 3D motion graphics generator that works on the Android platform. The tool offers an easy-to-use interface that editors can utilize to turn their still images into dedicated videos that play in loop. One of the major advantages of using Motion Leap for animating images is that it doesn’t leave a watermark on your pictures, even if you are using the free version of the tool. In fact, the free version offers all the necessary tools you’ll need to create animated pictures.
Since Motion Leap works on mobile, you don’t have to fire up your laptop every time you want to create an animated picture. Simply launch the app on your smartphone and you’ll be able to animate pictures right away. As of now, the only downside of Motion Leap is that it doesn’t save the output in GIF format, unless you have purchased the premium version.
Key Features:
● Add motion graphics by simply dragging objects on your screen
● Freeze specific areas within the image and apply dedicated filters
● Built-in editing panel to adjust different elements such as exposure, contrast, highlights, etc.
● Motion Leap is affordable
02Animate Me
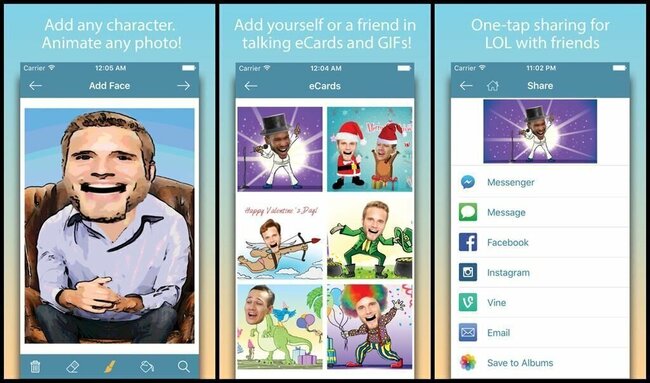
Animate Me is an exclusive iOS 3D photo animator that you can install on your iDevices and animate different types of images instantly. Though the app isn’t targeted towards professional marketers, it’s a fun tool if you want to animate your family photos or create happy birthday animated images. The app is available for free, which means you can create fun animated pictures without paying a single penny.
In addition to animating pictures, you can also use Animate Me to animate videos and create visually appealing eCards. In case you don’t know, e-Cards are used to communicate with others in a fun manner. With dozens of built-in e-card templates, you’ll be able to create high-quality e-cards right away. These templates support complete customization - so you can also use your face to customize the e-card.
Key Features of Animate Me:
● Hundreds of ready-to-use e-card templates
● Add sound effects to the characters used in an e-card
● Animate images and videos right on your smartphone
03Gyazo
Gyazo is a desktop-based screen capture tool that’s primarily designed to capture full or a specific portion of the screen. The tool is available for Windows, macOS, and Linux, which means you can use it across all desktop platforms without any hassle.
Apart from capturing screens, you can also use Gyazo to turn screen captures into dedicated GIFs with a single click. It’s worth noting that you won’t get any advanced editing options like other tools mentioned in the list, but Gyazo is still a reliable tool for users who want to animate screenshots.
Key Features:
● Capture screens and turn them into GIFs
● Animate pictures for free
● Available for Windows, macOS, and Linux
04GIFmaker.me
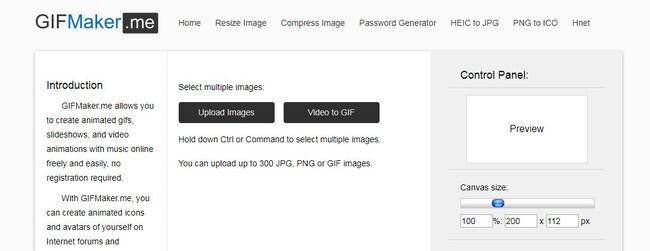
GIFMaker.me is an online 3D photo animator that’s primarily designed to turn regular images into GIFs. Being an online tool, you have the liberty to access GIFmaker.me across different platforms, be it mobile or desktop. The online editor offers an easy-to-use interface and provides an array of built-in features that you can use to create stunning GIFs.
All you have to do is decide the motion by dragging the subjects across the screen and the tool will automatically replicate it in a loop. Apart from creating GIFs from still images, you can also use GIFmaker to add animations to your videos. The tool has several ready-to-use animation templates that you can apply to your videos with the simple drag-&-drop functionality.
Key Features:
● Merge multiple images to create a custom GIF
● Reduce the size or reverse the motion of a particular GIF
● No sign-in required. You can start creating animated images directly with GIFmaker.me
Key Takeaways from This Episode
● Animated pictures can be used in different situations, be it for marketing purposes or simply for fun
● With dedicated tools, you can animate pictures all by yourself - without any professional assistance
● Wondershare Filmora Pro is an ideal video editing tool that provides a plethora of animation templates that you can apply to both videos and images.
Not to mention, if you animate pictures, you’ll be able to stand apart in the crowd and maximize your brand exposure. By creating animated happy birthday images, you’ll be able to bring life to the still images.
In this guide, we’ll walk you through different ways to make animated images. Read this guide and you’ll be able to animate your images without any hassle.
In this article
01 [What are Animated Pictures?](#Part 1)
02 [Is It Possible to Animate Pictures On Your Own?](#Part 2)
03 [5 Best Tools to Make Animated Pictures](#Part 3)
Part 1 What are Animated Pictures?
For readers who aren’t familiar with animated images, here’s what you need to know. An animated image (also referred to as GIF) is designed by adding motion to a still image. Remember all the funny cat memes you see on Instagram? Well, they are a great example of animated images.
However, it’s important to understand that the applications of animated images aren’t only limited to social media and marketing. You can even animate your family photos and add life to those 20-year old pictures you’ve been saving forever. Not to mention, you can also create animated images of your favorite superhero movie. Love the Justice League starcast? Simply pick your favorite superhero and you’ll get stunning Justice League animated images.
Part 2 Is It Possible to Animate Pictures On Your Own?
When it comes to animating images, the majority of users want to know if it’s at all possible to create animated images by themselves. Even though animating an image is a tedious task, it’s safe to say that you can do it without any external help.
Of course, if you choose a tool like Adobe Photoshop to do the job, you’ll be out of luck because of the steep learning curve. But, there are hundreds of other alternatives you can use to animate pictures. There are ready-to-use 3D photo animators online that’ll allow you to animate any image within a few seconds. These tools are equipped with pre-installed animation templates that you can apply to any image and bring life to them.
Part 3 4 Best Tools to Make Animated Pictures
So, now that you know the key benefits of animated pictures, let’s take a look at the seven best tools you can use to create stunning animated images. To ensure we provide you with a diverse list of photo animators, we have included both platform-dependent and cross-platform solutions to the list.
01Motion Leap
Motion Leap is a free 3D motion graphics generator that works on the Android platform. The tool offers an easy-to-use interface that editors can utilize to turn their still images into dedicated videos that play in loop. One of the major advantages of using Motion Leap for animating images is that it doesn’t leave a watermark on your pictures, even if you are using the free version of the tool. In fact, the free version offers all the necessary tools you’ll need to create animated pictures.
Since Motion Leap works on mobile, you don’t have to fire up your laptop every time you want to create an animated picture. Simply launch the app on your smartphone and you’ll be able to animate pictures right away. As of now, the only downside of Motion Leap is that it doesn’t save the output in GIF format, unless you have purchased the premium version.
Key Features:
● Add motion graphics by simply dragging objects on your screen
● Freeze specific areas within the image and apply dedicated filters
● Built-in editing panel to adjust different elements such as exposure, contrast, highlights, etc.
● Motion Leap is affordable
02Animate Me
Animate Me is an exclusive iOS 3D photo animator that you can install on your iDevices and animate different types of images instantly. Though the app isn’t targeted towards professional marketers, it’s a fun tool if you want to animate your family photos or create happy birthday animated images. The app is available for free, which means you can create fun animated pictures without paying a single penny.
In addition to animating pictures, you can also use Animate Me to animate videos and create visually appealing eCards. In case you don’t know, e-Cards are used to communicate with others in a fun manner. With dozens of built-in e-card templates, you’ll be able to create high-quality e-cards right away. These templates support complete customization - so you can also use your face to customize the e-card.
Key Features of Animate Me:
● Hundreds of ready-to-use e-card templates
● Add sound effects to the characters used in an e-card
● Animate images and videos right on your smartphone
03Gyazo
Gyazo is a desktop-based screen capture tool that’s primarily designed to capture full or a specific portion of the screen. The tool is available for Windows, macOS, and Linux, which means you can use it across all desktop platforms without any hassle.
Apart from capturing screens, you can also use Gyazo to turn screen captures into dedicated GIFs with a single click. It’s worth noting that you won’t get any advanced editing options like other tools mentioned in the list, but Gyazo is still a reliable tool for users who want to animate screenshots.
Key Features:
● Capture screens and turn them into GIFs
● Animate pictures for free
● Available for Windows, macOS, and Linux
04GIFmaker.me
GIFMaker.me is an online 3D photo animator that’s primarily designed to turn regular images into GIFs. Being an online tool, you have the liberty to access GIFmaker.me across different platforms, be it mobile or desktop. The online editor offers an easy-to-use interface and provides an array of built-in features that you can use to create stunning GIFs.
All you have to do is decide the motion by dragging the subjects across the screen and the tool will automatically replicate it in a loop. Apart from creating GIFs from still images, you can also use GIFmaker to add animations to your videos. The tool has several ready-to-use animation templates that you can apply to your videos with the simple drag-&-drop functionality.
Key Features:
● Merge multiple images to create a custom GIF
● Reduce the size or reverse the motion of a particular GIF
● No sign-in required. You can start creating animated images directly with GIFmaker.me
Key Takeaways from This Episode
● Animated pictures can be used in different situations, be it for marketing purposes or simply for fun
● With dedicated tools, you can animate pictures all by yourself - without any professional assistance
● Wondershare Filmora Pro is an ideal video editing tool that provides a plethora of animation templates that you can apply to both videos and images.
How to Cartoonize Photo Photoshop in Easy Steps
How to Cartoonize Photo Photoshop in Easy Steps
An easy yet powerful editor
Numerous effects to choose from
Detailed tutorials provided by the official channel
Cartoons, an already catchy entertainment source, can upgrade other media utilities on integration. Look through the easiest ways of creating cartoonize photo Photoshop stills!
In this article
01 [Types of Cartoon Effects in Photoshop](#Part 1)
02 [Easiest Ways to Cartoonize Photo in Photoshop](#Part 2)
03 [How to Use a Variety of Photoshop Special Effects to Create the Final Caricature Look](#Part 3)
Part 1 Types of Cartoon Effects in Photoshop
It is an absolute fun activity to explore your editing creativity in the realm of cartoonizing the otherwise ordinary still captures. Talking of the most convenient cartoon creator and editor applications, you can safely rely on the Photoshop Image Editor application to choose from a pool of cartoon editing effects for adding that spunky and funny element to your image files.
Presented in the following section, is a discussion of some of the most stunning and visibly amazing cartoon effects in the application’s Editor Library to cartoonize Photoshop images:
01Pop Art Photoshop Action
The effect is a predominantly preferred as a cartoon action Photoshop utility to caricaturize a normal image, along with customizing the same to change the colors and background of the original still capture for creating a brand new appearance with utmost ease. Apart from this, the aforesaid effect allows you to exclusively customize the globally acclaimed graphic masterpieces of Roy Lichtenstein. Working with the effect, you can edit a self-portrait or the favorite image of your pet to give the latter, a funny retro feel.

02Vintage Comic Creator
If the idea of sticking to just the creation of cartoon images is not enough to satisfy you, the Vintage Comic Creator effect allows you to expand your creativity level to work on cartoon based shape and text edits. You can use the effect to enhance an image logo or plain text with a comic book oriented text. A download of this cartoon effect template facilitates you with diversities of customizable layer styles, overlays and patterns.

03GTA Photoshop Action
This is a complete pleasure for the creative fan of Grand Theft Auto, the wicked chasing game series. Additional to creating a stark variety of edited cartoon stills, you are free to reinvent the aforesaid game’s most popular caricature edits, while using the GTA Photoshop Action editing filter. Launched by Indworks, the effect package consisting of 15 vibrant themes and 5 collage templates; promises a quick mimicry of your most cherished video and console games.

04Vector Paint Photoshop Action
The one is an amazing Photoshop effect for creating cartoon edits, which works through a merger of two different ingenious art themes or styles for transforming basic images into cartoonized stills.
The effect grants you the liberty to use varieties of art styles, such as, comic, photo retouching and energetic oil to obtain editing results comparable to that of any original photograph. The template is conveniently simple to use and assures you of quick results. All this, just at a nominal price of $6! Interesting, right?

05Ultra Realistic 3D Space Effect
Considering the fact of you being a space admirer, this one is the perfect image editor for you to add the vibrancy of stunning space elements and backgrounds within your cartoonized edits. The effect lets you play with the diverse range of customizable text and exciting caricature backgrounds. When downloading the template, you get a main setup file, a few editing examples and a web link to the free fonts present in the effect.

06Animated Zombie Grime Art Photoshop Action
Are you in love with the latest zombie grimes? If yes, then this action set is exclusive editor package for you. Working with the aforesaid image template, you can effortlessly add the perfect zombie theme to your cartoon edits, along with simultaneously creating a stunning animation, which you can use to enhance your video or GIF uploads on social media. Not forgetting the best part, you get a free access to this amazing utility.

Part 2 Easiest Ways to Cartoonize Photo in Photoshop
Having known about the amazing varieties of cartoonized editor templates in Photoshop, it is a natural instinct to feel motivated to create your own caricature images from normal capture stills. Addressing the concern of image transformation methods to turn a photo into a cartoon Photoshop, let us dive into some of the most affordable methods of creating cartoonized photos in the aforesaid editing application.
Talking of the most basic Photoshop tools for creating caricature images, you can start your editing spree with using the Graphic Tablet, Brush Tool, Layer Masks and a graphic pen to create amateur cartoonized edits from your still photographs, getting a full control on image tracing.
01Brush Tool
A few usage examples include working with a combination of the graphic tablet pen and the editor brushes to trace your image, using the brush in a masked or a fresh layer to avoid altering the actual image, and much more.
02Graphic Tablet
It is best to use the Photoshop Graphic Tablet for adhering to the concern of tracing cartoonized images. You can alternatively cater to the job with a trackpad, mouse, or even your hand. It is however, difficult to assure steady hand postures for image tracing, lest you are using a stylus pen.
03Pen Tool
Using the Pen Tool for cartoonizing your portrait, allows you to draw outlines along the desired figure within the image, along with its important elements, so that you can easily use these outlined paths to introduce different color blocks.
Similar to the Brush Tool, the Photoshop Pen utility grants you the freedom to vary the degree of detailing in your cartoon edit, from being highly expressive to only remaining around the shore. Working with the Pen Tool can, however be a bit tiring and time taking, with respect to the extent of detailing you wish to add to the caricature edits.
Additional to the aforementioned tools, you can also consider using the default image filters of the Photoshop application to get comparable results. This is an exclusively better option to choose, compared to the Pen Tool, when you are working without a Graphic Tablet. To get over the top realistic caricature renderings, you will need to supplement the use of Photoshop filters with the application’s editing channels and other adjustments.
Part 3 How to Use a Variety of Photoshop Special Effects to Create the Final Caricature Look
Considering the extensive discussion on the credibility of the Photoshop Image Editor application in the realm of creating stunning caricature images in high end resolution, let us proceed to learn about using the diversity of Photoshop’s special effects to get the last stage cartoonized appearance of ordinary still images.
User’s Guide to Create High End Cartoonized Look
The following tutorial is a stepwise explanation of the process to convert photo into cartoon Photoshop in the easiest possible way. Stick to the method for getting affordable results in a quick span.
Step 1: Download and Launch the Program
Visit the official website of Photoshop Image Editor for a free download of the software program in your system, followed by installing and launching the same in your device.
Step 2: Upload Your Image
On a successful launch of the editor program, you will be directed to the ‘Photoshop Editor’ window, where you are required to upload any desired still image from your device for creating a cartoonized edit. To do this, either simply add your image to the editor workspace using the ‘Drag and Drop’ method, or navigate to the ‘File’ tab in the top toolbar and click on ‘Open’ in the dropdown menu.
Step 3: Edge Enhancement
Once your image appears in the editor timeline, proceed to sharpen the edges of the face and body of the portrait. Start with navigating to and clicking on the ‘Filter’ option, followed by tapping on ‘Filter Gallery’ and selecting the ‘Artistic’ folder, where you need to choose the ‘Poster Edges’ option. Observe the effect of these setting on the portrait and make necessary changes.

Step 4: Background Setting
Ensure that the background and foreground of your image are set to white and black colors respectively. If not, proceed to adjust the same as required.

Step 5: Distorting the Edges
You now need to introduce some distortion in the edges of your portrait. Navigate to the ‘Filter’ option again, open the ‘Filter Gallery’ and choose ‘Torn Edges’ from the menu that drops down. Select the desired parameter values in accordance with your creative suitability.


Step 6: Using the Channels Panel
The next step is to select and copy your portrait using the ‘Ctrl + A’ and Ctrl + C commands respectively. Navigate to the ‘Channels’ panel at the right of the Photoshop workspace. At the panel’s bottom right, proceed with creating a new channel. It will be assigned the name ‘Alpha 1’ by Photoshop, which you are most welcome to change.


Step 7: Color Inversion
When you finish creating the channel, use the ‘Ctrl + V’ command to paste your portrait in the same. Proceed with inverting the image colors by navigating to the ‘Image’ option, followed by choosing the ‘Adjustment’ and ‘Invert’ options from the consecutive drop downs. Now, make a selection of the ‘White’ regions of your portrait by pressing the ‘Ctrl’ key and clicking on the ‘Alpha 1 Channel thumbnail.

Step 8: Layer Creation
Navigate to the ‘Layers’ panel at the right of the Photoshop workspace, and click on the ‘New Layer’ icon for creating a fresh layer. Fill the just created layer with black color, either by pressing ‘g’ from your system’s keyboard, or using the ‘Paint Bucket’ tool. Don’t forget to assign a suitable name to the layer.

Repeat the above process to create a separate layer and e fill the same with white color. The layer creation process is essential to separate the white and black colors of the actual image.

Step 10: Layer Dragging
In the ‘Layers’ panel, drag the ‘Black’ layer above the ‘White’ one.

Step 11: Creating Additional Layers
You are now required to create three more layers, with the same process as for the above two, for adding effects to the Skin, Clothes and Teeth/Eyes of the portrait. When you finish creation, assign suitable names to the layers, followed by dragging them below the ‘Black’ one within the ‘Layers’ panel.

Step 12: Color Selection and Application
Choose the respective colors for the clothes, skin and teeth/eyes of the cartoonized edit. To proceed with color application, navigate to the toolbar at the left of the Photoshop workspace and choose the ‘Brush Tool’. Finally, choose a particular layer and apply careful brush strokes to add color to the specific area of the portrait that you wish to edit. Follow the same process to add colors to the remaining layers to get the desired result in all areas of your cartoonized edit.

Step 13: Using the Gradient Tool
Navigate to the ‘Layers’ panel again and create a new ‘Gradient’ layer to further enhance your creation. You now need to select the ‘Gradient Tool’ from the toolbar at the left of the Photoshop workspace. The ‘Gradient Editor’ pops up with the continuously running ‘Gradient Bar’, as soon as you make the selection. Double click on the gradient boxes at both ends to select them, followed by making your color choices. Tap on ‘OK’ when you are satisfied with your work.

Step 14: Filling the Gradients
To proceed with gradient filling, press and hold the mouse button on the image at the bottom left and continue to drag the cursor to its top right corner. Leave the mouse and navigate to the ‘Layers’ panel for dragging and dropping the ‘Gradient’ layer above the ‘White’ layer.

You are now done with the process of creating a caricature edit from a normal still portrait. Your final image output will appear something like the following:

Cartoons, an already catchy entertainment source, can upgrade other media utilities on integration. Look through the easiest ways of creating cartoonize photo Photoshop stills!
In this article
01 [Types of Cartoon Effects in Photoshop](#Part 1)
02 [Easiest Ways to Cartoonize Photo in Photoshop](#Part 2)
03 [How to Use a Variety of Photoshop Special Effects to Create the Final Caricature Look](#Part 3)
Part 1 Types of Cartoon Effects in Photoshop
It is an absolute fun activity to explore your editing creativity in the realm of cartoonizing the otherwise ordinary still captures. Talking of the most convenient cartoon creator and editor applications, you can safely rely on the Photoshop Image Editor application to choose from a pool of cartoon editing effects for adding that spunky and funny element to your image files.
Presented in the following section, is a discussion of some of the most stunning and visibly amazing cartoon effects in the application’s Editor Library to cartoonize Photoshop images:
01Pop Art Photoshop Action
The effect is a predominantly preferred as a cartoon action Photoshop utility to caricaturize a normal image, along with customizing the same to change the colors and background of the original still capture for creating a brand new appearance with utmost ease. Apart from this, the aforesaid effect allows you to exclusively customize the globally acclaimed graphic masterpieces of Roy Lichtenstein. Working with the effect, you can edit a self-portrait or the favorite image of your pet to give the latter, a funny retro feel.
02Vintage Comic Creator
If the idea of sticking to just the creation of cartoon images is not enough to satisfy you, the Vintage Comic Creator effect allows you to expand your creativity level to work on cartoon based shape and text edits. You can use the effect to enhance an image logo or plain text with a comic book oriented text. A download of this cartoon effect template facilitates you with diversities of customizable layer styles, overlays and patterns.
03GTA Photoshop Action
This is a complete pleasure for the creative fan of Grand Theft Auto, the wicked chasing game series. Additional to creating a stark variety of edited cartoon stills, you are free to reinvent the aforesaid game’s most popular caricature edits, while using the GTA Photoshop Action editing filter. Launched by Indworks, the effect package consisting of 15 vibrant themes and 5 collage templates; promises a quick mimicry of your most cherished video and console games.
04Vector Paint Photoshop Action
The one is an amazing Photoshop effect for creating cartoon edits, which works through a merger of two different ingenious art themes or styles for transforming basic images into cartoonized stills.
The effect grants you the liberty to use varieties of art styles, such as, comic, photo retouching and energetic oil to obtain editing results comparable to that of any original photograph. The template is conveniently simple to use and assures you of quick results. All this, just at a nominal price of $6! Interesting, right?
05Ultra Realistic 3D Space Effect
Considering the fact of you being a space admirer, this one is the perfect image editor for you to add the vibrancy of stunning space elements and backgrounds within your cartoonized edits. The effect lets you play with the diverse range of customizable text and exciting caricature backgrounds. When downloading the template, you get a main setup file, a few editing examples and a web link to the free fonts present in the effect.
06Animated Zombie Grime Art Photoshop Action
Are you in love with the latest zombie grimes? If yes, then this action set is exclusive editor package for you. Working with the aforesaid image template, you can effortlessly add the perfect zombie theme to your cartoon edits, along with simultaneously creating a stunning animation, which you can use to enhance your video or GIF uploads on social media. Not forgetting the best part, you get a free access to this amazing utility.
Part 2 Easiest Ways to Cartoonize Photo in Photoshop
Having known about the amazing varieties of cartoonized editor templates in Photoshop, it is a natural instinct to feel motivated to create your own caricature images from normal capture stills. Addressing the concern of image transformation methods to turn a photo into a cartoon Photoshop, let us dive into some of the most affordable methods of creating cartoonized photos in the aforesaid editing application.
Talking of the most basic Photoshop tools for creating caricature images, you can start your editing spree with using the Graphic Tablet, Brush Tool, Layer Masks and a graphic pen to create amateur cartoonized edits from your still photographs, getting a full control on image tracing.
01Brush Tool
A few usage examples include working with a combination of the graphic tablet pen and the editor brushes to trace your image, using the brush in a masked or a fresh layer to avoid altering the actual image, and much more.
02Graphic Tablet
It is best to use the Photoshop Graphic Tablet for adhering to the concern of tracing cartoonized images. You can alternatively cater to the job with a trackpad, mouse, or even your hand. It is however, difficult to assure steady hand postures for image tracing, lest you are using a stylus pen.
03Pen Tool
Using the Pen Tool for cartoonizing your portrait, allows you to draw outlines along the desired figure within the image, along with its important elements, so that you can easily use these outlined paths to introduce different color blocks.
Similar to the Brush Tool, the Photoshop Pen utility grants you the freedom to vary the degree of detailing in your cartoon edit, from being highly expressive to only remaining around the shore. Working with the Pen Tool can, however be a bit tiring and time taking, with respect to the extent of detailing you wish to add to the caricature edits.
Additional to the aforementioned tools, you can also consider using the default image filters of the Photoshop application to get comparable results. This is an exclusively better option to choose, compared to the Pen Tool, when you are working without a Graphic Tablet. To get over the top realistic caricature renderings, you will need to supplement the use of Photoshop filters with the application’s editing channels and other adjustments.
Part 3 How to Use a Variety of Photoshop Special Effects to Create the Final Caricature Look
Considering the extensive discussion on the credibility of the Photoshop Image Editor application in the realm of creating stunning caricature images in high end resolution, let us proceed to learn about using the diversity of Photoshop’s special effects to get the last stage cartoonized appearance of ordinary still images.
User’s Guide to Create High End Cartoonized Look
The following tutorial is a stepwise explanation of the process to convert photo into cartoon Photoshop in the easiest possible way. Stick to the method for getting affordable results in a quick span.
Step 1: Download and Launch the Program
Visit the official website of Photoshop Image Editor for a free download of the software program in your system, followed by installing and launching the same in your device.
Step 2: Upload Your Image
On a successful launch of the editor program, you will be directed to the ‘Photoshop Editor’ window, where you are required to upload any desired still image from your device for creating a cartoonized edit. To do this, either simply add your image to the editor workspace using the ‘Drag and Drop’ method, or navigate to the ‘File’ tab in the top toolbar and click on ‘Open’ in the dropdown menu.
Step 3: Edge Enhancement
Once your image appears in the editor timeline, proceed to sharpen the edges of the face and body of the portrait. Start with navigating to and clicking on the ‘Filter’ option, followed by tapping on ‘Filter Gallery’ and selecting the ‘Artistic’ folder, where you need to choose the ‘Poster Edges’ option. Observe the effect of these setting on the portrait and make necessary changes.
Step 4: Background Setting
Ensure that the background and foreground of your image are set to white and black colors respectively. If not, proceed to adjust the same as required.
Step 5: Distorting the Edges
You now need to introduce some distortion in the edges of your portrait. Navigate to the ‘Filter’ option again, open the ‘Filter Gallery’ and choose ‘Torn Edges’ from the menu that drops down. Select the desired parameter values in accordance with your creative suitability.
Step 6: Using the Channels Panel
The next step is to select and copy your portrait using the ‘Ctrl + A’ and Ctrl + C commands respectively. Navigate to the ‘Channels’ panel at the right of the Photoshop workspace. At the panel’s bottom right, proceed with creating a new channel. It will be assigned the name ‘Alpha 1’ by Photoshop, which you are most welcome to change.
Step 7: Color Inversion
When you finish creating the channel, use the ‘Ctrl + V’ command to paste your portrait in the same. Proceed with inverting the image colors by navigating to the ‘Image’ option, followed by choosing the ‘Adjustment’ and ‘Invert’ options from the consecutive drop downs. Now, make a selection of the ‘White’ regions of your portrait by pressing the ‘Ctrl’ key and clicking on the ‘Alpha 1 Channel thumbnail.
Step 8: Layer Creation
Navigate to the ‘Layers’ panel at the right of the Photoshop workspace, and click on the ‘New Layer’ icon for creating a fresh layer. Fill the just created layer with black color, either by pressing ‘g’ from your system’s keyboard, or using the ‘Paint Bucket’ tool. Don’t forget to assign a suitable name to the layer.
Repeat the above process to create a separate layer and e fill the same with white color. The layer creation process is essential to separate the white and black colors of the actual image.
Step 10: Layer Dragging
In the ‘Layers’ panel, drag the ‘Black’ layer above the ‘White’ one.
Step 11: Creating Additional Layers
You are now required to create three more layers, with the same process as for the above two, for adding effects to the Skin, Clothes and Teeth/Eyes of the portrait. When you finish creation, assign suitable names to the layers, followed by dragging them below the ‘Black’ one within the ‘Layers’ panel.
Step 12: Color Selection and Application
Choose the respective colors for the clothes, skin and teeth/eyes of the cartoonized edit. To proceed with color application, navigate to the toolbar at the left of the Photoshop workspace and choose the ‘Brush Tool’. Finally, choose a particular layer and apply careful brush strokes to add color to the specific area of the portrait that you wish to edit. Follow the same process to add colors to the remaining layers to get the desired result in all areas of your cartoonized edit.
Step 13: Using the Gradient Tool
Navigate to the ‘Layers’ panel again and create a new ‘Gradient’ layer to further enhance your creation. You now need to select the ‘Gradient Tool’ from the toolbar at the left of the Photoshop workspace. The ‘Gradient Editor’ pops up with the continuously running ‘Gradient Bar’, as soon as you make the selection. Double click on the gradient boxes at both ends to select them, followed by making your color choices. Tap on ‘OK’ when you are satisfied with your work.
Step 14: Filling the Gradients
To proceed with gradient filling, press and hold the mouse button on the image at the bottom left and continue to drag the cursor to its top right corner. Leave the mouse and navigate to the ‘Layers’ panel for dragging and dropping the ‘Gradient’ layer above the ‘White’ layer.
You are now done with the process of creating a caricature edit from a normal still portrait. Your final image output will appear something like the following:
How to Create Photo Collage Frame for Free in Minutes?
How to Create Photo Collage Frame for Free in Minutes?
An easy yet powerful editor
Numerous effects to choose from
Detailed tutorials provided by the official channel
Decoration of pictures and collages can be done by making beautiful and stylish frames. A family picture or collage can be beautified by adding an attractive frame to it. Know about Best App for Photo Frames Online so you can create photo collages easily in minutes.
In this article
01 [How Do You Make a Collage Picture Frame?](#Part 1)
02 [What is the Best App for Photo Frames?](#Part 2)
Part 1 How Do You Make a Collage Picture Frame?
A beautiful collage without a stylish frame will not be attractive. When a family collage is accompanied by an artistic frame, it adds beauty to it and will be an attraction point for the visitors in the home. Wondering where to get it from? You can do it easily through some most popular apps. Yes, you can get your photo collage framed by yourself.

A wall can be decorated with collage picture frames by following just a few simple steps. Let’s begin with!!!
● Selection of the place where the collage frame is required to be hung: The place should be selected based on certain factors such as being easily approachable, proper lighting, and matching with the theme of the home. The place should be sufficient to add on some more picture frames in the future. The wall picture collage frames shall be created based on the room themes like kid’s room, living room, or bedroom. The position of the frames should be marked with tape so that the exact dimension can be known.
● 2. Select the online application to create frames: There are many applications available online that offer pictures collage frames. Choose one application as per the interest and explore it over the phone or desktop. There are various collage picture frame templates available at the application.
● 3. Uploading the pictures: Select the frame that is best for the picture. The frames shall be selected as per the size of the collage. Several pictures can be selected to make a collage and fix the frame. The frame style can be changed that suits best to the picture or collage. A family picture can be uploaded to create a beautiful and perfect size family photo frame collage.
● 4. Customization: The Photo Collage Frame can be even made better with customization over online applications. Text and style can be included in the frames to give it a better look. Grid frame for picture collage is also available which can be created that fits perfectly to the pictures.
● 5. A collage photo frame is ready to hang on the wall & share: The photo collage with frame can be downloaded from the application. A beautiful picture frame collage wall can be hung in the living room or can be shared online with family and friends to print the same. More frames can be added in the future by choosing the same theme and customization.
Part 2 Part2 what is the Best App for Photo Frames?
Selecting the best App for a photo frame enhances the appearance of any ordinary picture. Some of the top Applications used for frame collage wall are as mentioned:

02 PhotoDirector
This app is popular due to its great AI tools, attractive picture effects, and advanced color control. It has a massive collection of frames that fits perfectly for a single picture as well as a collage. The style options of frames available on the app are classic, modern, and whimsical. Animation and glitch effects add an extra feature to this app.
Pros:
1. Wide range of frames is available.
2. It is easy to use as it can work on Android, iOS, macOS, and Windows devices.
3. Free version is available and photo frames can be shared over social media platforms.
Cons:
1. a Large number of editing options makes it confusing.
2. Fewer features are available.
3. Difficulty in finding plug-in features.

03PicsArt-Our Choice
PicsArt-Our Choice app is having a good combination best photo frames and multi-functional photo editing tools. Clip art, text option, frame editing, and making attractive collages make this app a masterpiece. This app can be used over smartphones and the pictures can be easily shared over social media platforms.
Pros:
1. Availability of tools to make clipart and collages.
2. Option to edit frames and objects.
3. Fully packed with a lot of stickers, frames, and filter options.
Cons:
1. The processing of images is slower.
2. Frequent ads disturb the process of editing and frame creation.
3. The application requires more space on downloading over the phone

04 PicFrame
This application has features to combine multiple pictures in one frame and the created frames can be easily shared over social media platforms. A great artwork can be done by using advanced tools such as filters, attractive frames, and drawing tools. The adjustable photo effects, background patterns and fully customized frames allow creating some attractive pictures and collage frame design.
Pros:
1. Option to save pictures in different resolutions.
2. Great tools for reshaping pictures and wide frame patterns
3. Work also on iPhone and iPad.
Cons:
1. With more new and advanced apps, it has become slightly outdated.
2. It closes very frequently, so sometimes work done on the application is lost.
3. Time to create frames is longer.

05Photo Grid
Photo Grid is an App that offers great photo editing features with more than three hundred layouts to give an attractive look to a picture. The users can transform their various pictures into beautiful collages. Filters, stickers, makeup tools, animated emoticons, and customized background features have made this app a bit popular. Extra pages can be added and the Lightbox feature makes it good for presentation.
Pros:
1. Massive collection of photo frames with customized features
2. Easy to use.
3. Various photo editing option
Cons:
1. It comes with various ads that trouble making frames and collages.
2. Lot of flexibility is not there regarding making videos with pictures.
3. Own frames cannot be created.

06ImgLabs
ImgLabs is one of the best applications to decorate photos and add creativity to them. Easy editing, beautify and stickers can be done over pictures and can be easily shared over Instagram and Facebook. More than twenty images can be added along with beautiful frames through this app. Cool photo filters, drawing tools, collage photo frame design tools, and texture effects make it a great photo frame application.
Pros:
1. The Android and iOS versions of the app are easy to use.
2. Attractive blurring and background effects give an attractive look to the images and picture frames.
3. Well-developed photo editing tools are available.
Cons:
1. The frames available are less as compared to other photo & frame editing applications.
2. Difference in functions is noticed in iOS and Android apps.
3. Installation issues in photo edit and stickers

So, these were some of the applications that offer to make some creative photo edits, collages, and frames. Turning to high definition of pictures and frames, most of the applications are coming up with new and advanced features to give the best picture experience to people. One of the applications which any creative person loves to use is Filmora.
****Wondershare Filmora Video Editor ** that creates attractive and professional quality videos for both business and personal purposes. It transforms the video by adding various stylish effects. One can edit the clips, add watermarks, and can adjust the brightness of the videos in simple steps. A wide range of stickers, animated texts, sound effects, filters, and inserting colorful borders over videos make it a great app.
For Win 7 or later (64-bit)
For macOS 10.12 or later
The videos can be made in different file formats such as mp4, wmv, avi, gif, and mp3 and can be easily shared over social media platforms. This app has great importance for business as it offers various facilities such as Multi-channel marketing, social advertising, and social promotion. It is good for user and brand management also.
So, making any video from pictures or movies through Filmora app will be an amazing idea. With advanced texting, color tuning, and 3D effects, one can be so creative. Even Filmora can be used to create video projects.
● Key Takeaways from This Episode →
● Simple pictures or collages can be taken to next level by adding alluring frames to them. With advanced drawing tools, pictures, and light effects, a stylish collage photo frame design can be created online. It allows bringing so many memories of people in one beautiful frame.
● Photo frame collage wall can be created over many applications. There are Android applications that offer many advanced features required to give a fine touch to the pictures, collages, and frames. They can be used and frames for family pictures can be made easily by following simple steps.
● he selection of the application should be made based on the several options available with the app. For example, an app that has easy to use, is good for all devices, has great editing features, eye-catching eye work and mesmerizing effect shall be preferred.
● So, try some amazing and advanced online Apps to create beautiful picture frames for you and your family now!!!
Decoration of pictures and collages can be done by making beautiful and stylish frames. A family picture or collage can be beautified by adding an attractive frame to it. Know about Best App for Photo Frames Online so you can create photo collages easily in minutes.
In this article
01 [How Do You Make a Collage Picture Frame?](#Part 1)
02 [What is the Best App for Photo Frames?](#Part 2)
Part 1 How Do You Make a Collage Picture Frame?
A beautiful collage without a stylish frame will not be attractive. When a family collage is accompanied by an artistic frame, it adds beauty to it and will be an attraction point for the visitors in the home. Wondering where to get it from? You can do it easily through some most popular apps. Yes, you can get your photo collage framed by yourself.
A wall can be decorated with collage picture frames by following just a few simple steps. Let’s begin with!!!
● Selection of the place where the collage frame is required to be hung: The place should be selected based on certain factors such as being easily approachable, proper lighting, and matching with the theme of the home. The place should be sufficient to add on some more picture frames in the future. The wall picture collage frames shall be created based on the room themes like kid’s room, living room, or bedroom. The position of the frames should be marked with tape so that the exact dimension can be known.
● 2. Select the online application to create frames: There are many applications available online that offer pictures collage frames. Choose one application as per the interest and explore it over the phone or desktop. There are various collage picture frame templates available at the application.
● 3. Uploading the pictures: Select the frame that is best for the picture. The frames shall be selected as per the size of the collage. Several pictures can be selected to make a collage and fix the frame. The frame style can be changed that suits best to the picture or collage. A family picture can be uploaded to create a beautiful and perfect size family photo frame collage.
● 4. Customization: The Photo Collage Frame can be even made better with customization over online applications. Text and style can be included in the frames to give it a better look. Grid frame for picture collage is also available which can be created that fits perfectly to the pictures.
● 5. A collage photo frame is ready to hang on the wall & share: The photo collage with frame can be downloaded from the application. A beautiful picture frame collage wall can be hung in the living room or can be shared online with family and friends to print the same. More frames can be added in the future by choosing the same theme and customization.
Part 2 Part2 what is the Best App for Photo Frames?
Selecting the best App for a photo frame enhances the appearance of any ordinary picture. Some of the top Applications used for frame collage wall are as mentioned:
02 PhotoDirector
This app is popular due to its great AI tools, attractive picture effects, and advanced color control. It has a massive collection of frames that fits perfectly for a single picture as well as a collage. The style options of frames available on the app are classic, modern, and whimsical. Animation and glitch effects add an extra feature to this app.
Pros:
1. Wide range of frames is available.
2. It is easy to use as it can work on Android, iOS, macOS, and Windows devices.
3. Free version is available and photo frames can be shared over social media platforms.
Cons:
1. a Large number of editing options makes it confusing.
2. Fewer features are available.
3. Difficulty in finding plug-in features.
03PicsArt-Our Choice
PicsArt-Our Choice app is having a good combination best photo frames and multi-functional photo editing tools. Clip art, text option, frame editing, and making attractive collages make this app a masterpiece. This app can be used over smartphones and the pictures can be easily shared over social media platforms.
Pros:
1. Availability of tools to make clipart and collages.
2. Option to edit frames and objects.
3. Fully packed with a lot of stickers, frames, and filter options.
Cons:
1. The processing of images is slower.
2. Frequent ads disturb the process of editing and frame creation.
3. The application requires more space on downloading over the phone
04 PicFrame
This application has features to combine multiple pictures in one frame and the created frames can be easily shared over social media platforms. A great artwork can be done by using advanced tools such as filters, attractive frames, and drawing tools. The adjustable photo effects, background patterns and fully customized frames allow creating some attractive pictures and collage frame design.
Pros:
1. Option to save pictures in different resolutions.
2. Great tools for reshaping pictures and wide frame patterns
3. Work also on iPhone and iPad.
Cons:
1. With more new and advanced apps, it has become slightly outdated.
2. It closes very frequently, so sometimes work done on the application is lost.
3. Time to create frames is longer.
05Photo Grid
Photo Grid is an App that offers great photo editing features with more than three hundred layouts to give an attractive look to a picture. The users can transform their various pictures into beautiful collages. Filters, stickers, makeup tools, animated emoticons, and customized background features have made this app a bit popular. Extra pages can be added and the Lightbox feature makes it good for presentation.
Pros:
1. Massive collection of photo frames with customized features
2. Easy to use.
3. Various photo editing option
Cons:
1. It comes with various ads that trouble making frames and collages.
2. Lot of flexibility is not there regarding making videos with pictures.
3. Own frames cannot be created.
06ImgLabs
ImgLabs is one of the best applications to decorate photos and add creativity to them. Easy editing, beautify and stickers can be done over pictures and can be easily shared over Instagram and Facebook. More than twenty images can be added along with beautiful frames through this app. Cool photo filters, drawing tools, collage photo frame design tools, and texture effects make it a great photo frame application.
Pros:
1. The Android and iOS versions of the app are easy to use.
2. Attractive blurring and background effects give an attractive look to the images and picture frames.
3. Well-developed photo editing tools are available.
Cons:
1. The frames available are less as compared to other photo & frame editing applications.
2. Difference in functions is noticed in iOS and Android apps.
3. Installation issues in photo edit and stickers
So, these were some of the applications that offer to make some creative photo edits, collages, and frames. Turning to high definition of pictures and frames, most of the applications are coming up with new and advanced features to give the best picture experience to people. One of the applications which any creative person loves to use is Filmora.
****Wondershare Filmora Video Editor ** that creates attractive and professional quality videos for both business and personal purposes. It transforms the video by adding various stylish effects. One can edit the clips, add watermarks, and can adjust the brightness of the videos in simple steps. A wide range of stickers, animated texts, sound effects, filters, and inserting colorful borders over videos make it a great app.
For Win 7 or later (64-bit)
For macOS 10.12 or later
The videos can be made in different file formats such as mp4, wmv, avi, gif, and mp3 and can be easily shared over social media platforms. This app has great importance for business as it offers various facilities such as Multi-channel marketing, social advertising, and social promotion. It is good for user and brand management also.
So, making any video from pictures or movies through Filmora app will be an amazing idea. With advanced texting, color tuning, and 3D effects, one can be so creative. Even Filmora can be used to create video projects.
● Key Takeaways from This Episode →
● Simple pictures or collages can be taken to next level by adding alluring frames to them. With advanced drawing tools, pictures, and light effects, a stylish collage photo frame design can be created online. It allows bringing so many memories of people in one beautiful frame.
● Photo frame collage wall can be created over many applications. There are Android applications that offer many advanced features required to give a fine touch to the pictures, collages, and frames. They can be used and frames for family pictures can be made easily by following simple steps.
● he selection of the application should be made based on the several options available with the app. For example, an app that has easy to use, is good for all devices, has great editing features, eye-catching eye work and mesmerizing effect shall be preferred.
● So, try some amazing and advanced online Apps to create beautiful picture frames for you and your family now!!!
Ultimate Guide to Animated Characters Drawings
Interesting Fundamentals and Ultimate Guide to Animated Characters Drawings
An easy yet powerful editor
Numerous effects to choose from
Detailed tutorials provided by the official channel
Cartoon character have stamped their faces in our hearts from childhood. A cartoon artist represents a cartoon or a natural person’s unique features with simple shapes accurately to recognize the person with the drawing and does not require a lot of patience to do this. The goal of the cartoon is to attract, and the child should get attracted when they see a cartoon image as well as adults. Though the sparkle may appear a little dull, it remains unaltered.
Let us grab a chance to recreate our cartoon characters with easy tutorials about animated characters to draw. In addition to that, you will learn about basic drawing exercises to lead into cool animated characters to draw through this guide in a step-by-step manner.
In this article
01 [What Do I Need to Start Learning Animated Characters Drawings? ](#Part 1)
02 [6 Cartoon Characters that Anyone Can Draw (Provided with Free Video Tutorials)](#Part 2)
03 [4 Best Drawing Exercises for Creating Cartoon Characters](#Part 3)
Part 1 What Do I Need to Start Learning Animated Characters Drawings?
There are many software’s available, and anyone can create an animated character drawing, but still, the art of creating a perfect character needs a master. You don’t have to be a Disney-grade animator to make it; start with simple minor characters. Animation is the art of bringing a 3D illustrated cartoon into life. It is created by projecting a sequence of images one after the other immediately. Let us discuss the essential things you need to note before animating characters.
●Timeline is the most important for animation. Depending on the software, you have various options to change the duration and add effects.
●Animation is generally preferable in 24 frames per second, which means the total number of people in the frame for one second.
●There are two types of working they are one’s and two’s. 2D Animation is usually done in two’s, whereas 3D Animation is in one’s.
●In hand-drawn animations, keyframes are more critical to maintain. The keyframe is the position for the cartoon as per animator has decided.
●Breakdowns combine one or two keyframes, which decide the motion in between the keys.
●In-betweens are all the frames that come between to smooth the motion—automatically generated by the computer to move from key to key.
●Composting is creating or joining two or more images to create a single cartoon frame.
Part 2 6 Cartoon Characters that Anyone can Draw (With free Video Tutorials)
We will discuss animated characters to draw in hand. There are many cartoon characters, but we will look into six cartoon character drawings with their tutorial videos.
01 Smurfette
Smurfette stands out as the lone female Smurf in the entire bunch of blue critters around the village area. One of the rare designs with long hair and a dress is hers. Her design is a lot of fun to sketch.
So, in general, it’s best to work through the lesson as is, then turn it into Brainy, Papa, Joker, or even Smurf.
01Angelica Pickles
Angelica Pickles is one of the most challenging characters to depict from The Rugrats. But her design is so intricate that getting it proper will give you a true sense of accomplishment. Her pigtails, like her leggings, might be challenging to master, so keep practicing.
03Yogi Bear
Yogi Bear is a cartoon character on the sweeter side of the comic animal variety. Yogi Bear is a beloved character from Jellystone Park. As long as you get his tie and collar just right, this guy is a breeze to draw.
04Magilla Gorilla
Magilla Gorilla is another bizarre creature from Hanna-catalog. Barbera’s Because he comes with a bow tie, a little cap, and suspenders, this design is a little more complicated. Not to mention his enormous clown shoes. These small details can be a pain to draw, but Magilla is a very charming gorilla.
05Top Cat
Even further back in time, in the 1960s, there was the ever-popular Top Cat. He’s wearing a cap and a button-down vest, and he’s making some reasonably fancy dances. Give Top Cat a shot if you like The Flintstones’ basic Hanna-Barbera art style.
<
06Helga. G. Pataki
Helga is another character with some wacky hair. There’s a lot that’s bizarre about her. And half the fun of drawing her is figuring out how to do it. Just keep an eye on her head since getting it correct, especially with her rectangle hairdo, can be a little odd.
These are some of the cool animated characters to draw.
Part 3 4 Best Drawing Exercise for Creating Cartoon Characters
You’ll learn how to create cartoon characters individually, including their faces, hair, and facial expressions.
01How to Draw Cartoon Characters
We’ll go through the fundamentals of human perception before getting into cartoon face drawing. Humans have a unique ability to synthesize the details that make up a structure or object in highly complicated ways into fundamental and simple ones. We can express everything with a few curves and geometric forms in this way. In cartoon face, we need to identify the character just by looking like looking at the below picture a girl and a boy.
02Here, you will learn How to Draw a Cartoon Face
Let us begin with a sketch of a cartoon face. A circle is a basic cartoon shape. All you need is a circle. As seen in the image below, draw a vertical and horizontal line intersecting at the center.
Let us have a look at how to make cartoon eyeballs. Draw an oval shape with a slight lean to the side at the top for the eyes. Repeat on the other side.
Slightly thicken the characteristic to represent our character eyelashes at the top of the circle, place the brows above the eyelashes to create a shocking appearance, draw both pupils to the center in the same direction.
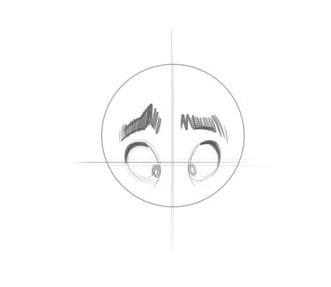
When creating a nose from the front, it’s typical to leave off many details. Even if you merely sketch its tip, it will likely provide a convincing impact. Drawing only one side of the nose is also quite frequent. Children’s mouths are extremely simple in cartoon style, regardless of gender.
The ears are viewed from the front; therefore, the internal holes are not visible. The circle has already established the shape of our head.
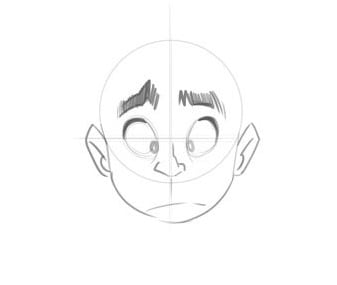
03Let’s learn about How to Draw a Cartoon Hair
Keep in mind that our characters’ hair is essential for identifying their personalities, and it can also indicate their age. So, all we need is an effortless and playful haircut to bring our boy to life. Because there is no particular method for drawing hair, you’ll have to experiment until you find the perfect look. Look for photo references on the internet! Take a look at a magazine shoot or a Google search.
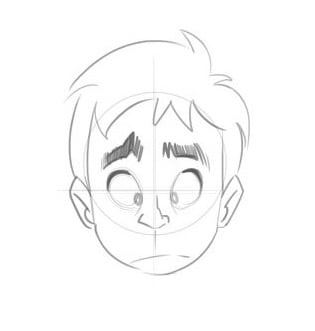
03How to Draw Characters with different Facial Expressions
By simply following the instructions below, you’ll notice that you can completely transform his expression: Lowering one brow and raising the other, eyelashes are used to cut the eyes in half, putting a smile on the face one side is higher.
To stay under the eyelashes, move the eye pupils up. That’s all there is to it! With just a few tweaks, we achieved the desired result. The circular form of the eyes, hair, ears, nose, chin and the circular shape of the ears are all the same! It’s that simple!
While working in cartooning or video making, Wondershare Wondershare Filmora Video Editor comes out with pros in mind, which can effortlessly convert conventional films into cartoon videos. If you want greater control over your cartoon video, you may also use keyframing to create it. You can fine-tune the parameters in Effects to achieve the best results. You can even change the Animation color after it has been created. It also allows you to use different text themes to showcase your videos.
We propose Wondershare Filmora Video Editor , in this case, to create animation videos by adding keyframes, resulting in a smooth and natural animation. To get started with Animation, all you need is a white plane. Aside from that, color correction and an audio mixer will take your animation video to the next level.
For Win 7 or later (64-bit)
For macOS 10.12 or later
● Key Takeaways from This Episode →
● Learn what are the key elements to make animation videos using software
● Tutorial on how to draw a cartoon character accurately
● In comparison, Wondershare Wondershare Filmora Video Editor is superior in making animation videos.
Cartoon character have stamped their faces in our hearts from childhood. A cartoon artist represents a cartoon or a natural person’s unique features with simple shapes accurately to recognize the person with the drawing and does not require a lot of patience to do this. The goal of the cartoon is to attract, and the child should get attracted when they see a cartoon image as well as adults. Though the sparkle may appear a little dull, it remains unaltered.
Let us grab a chance to recreate our cartoon characters with easy tutorials about animated characters to draw. In addition to that, you will learn about basic drawing exercises to lead into cool animated characters to draw through this guide in a step-by-step manner.
In this article
01 [What Do I Need to Start Learning Animated Characters Drawings? ](#Part 1)
02 [6 Cartoon Characters that Anyone Can Draw (Provided with Free Video Tutorials)](#Part 2)
03 [4 Best Drawing Exercises for Creating Cartoon Characters](#Part 3)
Part 1 What Do I Need to Start Learning Animated Characters Drawings?
There are many software’s available, and anyone can create an animated character drawing, but still, the art of creating a perfect character needs a master. You don’t have to be a Disney-grade animator to make it; start with simple minor characters. Animation is the art of bringing a 3D illustrated cartoon into life. It is created by projecting a sequence of images one after the other immediately. Let us discuss the essential things you need to note before animating characters.
●Timeline is the most important for animation. Depending on the software, you have various options to change the duration and add effects.
●Animation is generally preferable in 24 frames per second, which means the total number of people in the frame for one second.
●There are two types of working they are one’s and two’s. 2D Animation is usually done in two’s, whereas 3D Animation is in one’s.
●In hand-drawn animations, keyframes are more critical to maintain. The keyframe is the position for the cartoon as per animator has decided.
●Breakdowns combine one or two keyframes, which decide the motion in between the keys.
●In-betweens are all the frames that come between to smooth the motion—automatically generated by the computer to move from key to key.
●Composting is creating or joining two or more images to create a single cartoon frame.
Part 2 6 Cartoon Characters that Anyone can Draw (With free Video Tutorials)
We will discuss animated characters to draw in hand. There are many cartoon characters, but we will look into six cartoon character drawings with their tutorial videos.
01 Smurfette
Smurfette stands out as the lone female Smurf in the entire bunch of blue critters around the village area. One of the rare designs with long hair and a dress is hers. Her design is a lot of fun to sketch.
So, in general, it’s best to work through the lesson as is, then turn it into Brainy, Papa, Joker, or even Smurf.
01Angelica Pickles
Angelica Pickles is one of the most challenging characters to depict from The Rugrats. But her design is so intricate that getting it proper will give you a true sense of accomplishment. Her pigtails, like her leggings, might be challenging to master, so keep practicing.
03Yogi Bear
Yogi Bear is a cartoon character on the sweeter side of the comic animal variety. Yogi Bear is a beloved character from Jellystone Park. As long as you get his tie and collar just right, this guy is a breeze to draw.
04Magilla Gorilla
Magilla Gorilla is another bizarre creature from Hanna-catalog. Barbera’s Because he comes with a bow tie, a little cap, and suspenders, this design is a little more complicated. Not to mention his enormous clown shoes. These small details can be a pain to draw, but Magilla is a very charming gorilla.
05Top Cat
Even further back in time, in the 1960s, there was the ever-popular Top Cat. He’s wearing a cap and a button-down vest, and he’s making some reasonably fancy dances. Give Top Cat a shot if you like The Flintstones’ basic Hanna-Barbera art style.
<
06Helga. G. Pataki
Helga is another character with some wacky hair. There’s a lot that’s bizarre about her. And half the fun of drawing her is figuring out how to do it. Just keep an eye on her head since getting it correct, especially with her rectangle hairdo, can be a little odd.
These are some of the cool animated characters to draw.
Part 3 4 Best Drawing Exercise for Creating Cartoon Characters
You’ll learn how to create cartoon characters individually, including their faces, hair, and facial expressions.
01How to Draw Cartoon Characters
We’ll go through the fundamentals of human perception before getting into cartoon face drawing. Humans have a unique ability to synthesize the details that make up a structure or object in highly complicated ways into fundamental and simple ones. We can express everything with a few curves and geometric forms in this way. In cartoon face, we need to identify the character just by looking like looking at the below picture a girl and a boy.
02Here, you will learn How to Draw a Cartoon Face
Let us begin with a sketch of a cartoon face. A circle is a basic cartoon shape. All you need is a circle. As seen in the image below, draw a vertical and horizontal line intersecting at the center.
Let us have a look at how to make cartoon eyeballs. Draw an oval shape with a slight lean to the side at the top for the eyes. Repeat on the other side.
Slightly thicken the characteristic to represent our character eyelashes at the top of the circle, place the brows above the eyelashes to create a shocking appearance, draw both pupils to the center in the same direction.
When creating a nose from the front, it’s typical to leave off many details. Even if you merely sketch its tip, it will likely provide a convincing impact. Drawing only one side of the nose is also quite frequent. Children’s mouths are extremely simple in cartoon style, regardless of gender.
The ears are viewed from the front; therefore, the internal holes are not visible. The circle has already established the shape of our head.
03Let’s learn about How to Draw a Cartoon Hair
Keep in mind that our characters’ hair is essential for identifying their personalities, and it can also indicate their age. So, all we need is an effortless and playful haircut to bring our boy to life. Because there is no particular method for drawing hair, you’ll have to experiment until you find the perfect look. Look for photo references on the internet! Take a look at a magazine shoot or a Google search.
03How to Draw Characters with different Facial Expressions
By simply following the instructions below, you’ll notice that you can completely transform his expression: Lowering one brow and raising the other, eyelashes are used to cut the eyes in half, putting a smile on the face one side is higher.
To stay under the eyelashes, move the eye pupils up. That’s all there is to it! With just a few tweaks, we achieved the desired result. The circular form of the eyes, hair, ears, nose, chin and the circular shape of the ears are all the same! It’s that simple!
While working in cartooning or video making, Wondershare Wondershare Filmora Video Editor comes out with pros in mind, which can effortlessly convert conventional films into cartoon videos. If you want greater control over your cartoon video, you may also use keyframing to create it. You can fine-tune the parameters in Effects to achieve the best results. You can even change the Animation color after it has been created. It also allows you to use different text themes to showcase your videos.
We propose Wondershare Filmora Video Editor , in this case, to create animation videos by adding keyframes, resulting in a smooth and natural animation. To get started with Animation, all you need is a white plane. Aside from that, color correction and an audio mixer will take your animation video to the next level.
For Win 7 or later (64-bit)
For macOS 10.12 or later
● Key Takeaways from This Episode →
● Learn what are the key elements to make animation videos using software
● Tutorial on how to draw a cartoon character accurately
● In comparison, Wondershare Wondershare Filmora Video Editor is superior in making animation videos.
4 Things You Need to Know About Pinterest GIF
4 Things You Should Know About Pinterest GIF
An easy yet powerful editor
Numerous effects to choose from
Detailed tutorials provided by the official channel
Emojis formerly reigned supreme, but GIFs and memes have since supplanted them. When you add a GIF to a conversation, it becomes more exciting. GIFs are considerably better at communicating our feelings, and they deserve credit for that. Pinterest, like other social networking sites and chat apps, enables GIFs. Pinterest is a photo-sharing website where you can find home decor ideas, recipes, fashion inspiration, DIY projects, and more.
Compared to a static image, adding a GIF to Pinterest conveys more information. You can make GIFs for your DIY projects or use them to display all sides of a cushion, which would typically require many images. But what if you like a GIF you found on Pinterest? What’s the best way to get it? That is what we will demonstrate here. This article will show how to download Pinterest GIFs to your computer and mobile device.
In this article
01 [Are There Gifs on Pinterest?](#Part 1)
02 [How to Get Pinterest GIF Downloader](#Part 2)
03 [How to Get an Animated GIF on Pinterest](#Part 3)
Part 1 Are There Gifs on Pinterest?
You can submit GIF and animated GIF images from your computer or the Internet to Pinterest. Because the pictures on your board aren’t animated, you might conclude that animated GIFs don’t work on Pinterest. When you click on the photos and open them on their respective Web pages, they become animated. Because images posted from websites do not save on Pinterest’s servers, they are not animated. You can’t do anything if Pinterest doesn’t animate a GIF.
Part 2 How to Get Pinterest GIF Downloader
Compared to a static image, adding a GIF to Pinterest conveys more information. You can make GIFs for your DIY projects or use them to display all sides of a cushion, which would typically require many images.
But what if you’re a Pinterest fan of a GIF? What’s the best way to get it? That is what we will demonstrate here. We’ll show you how to complete a Pinterest GIF video download to your computer and mobile device in this session.
Let’s get started.
01How to Download Pinterest Videos Using Mobile?
Here are simple steps to follow to achieve this:
Make use of the native download button
Step 1: Select GIF to download
Go to the selected GIF and click it.
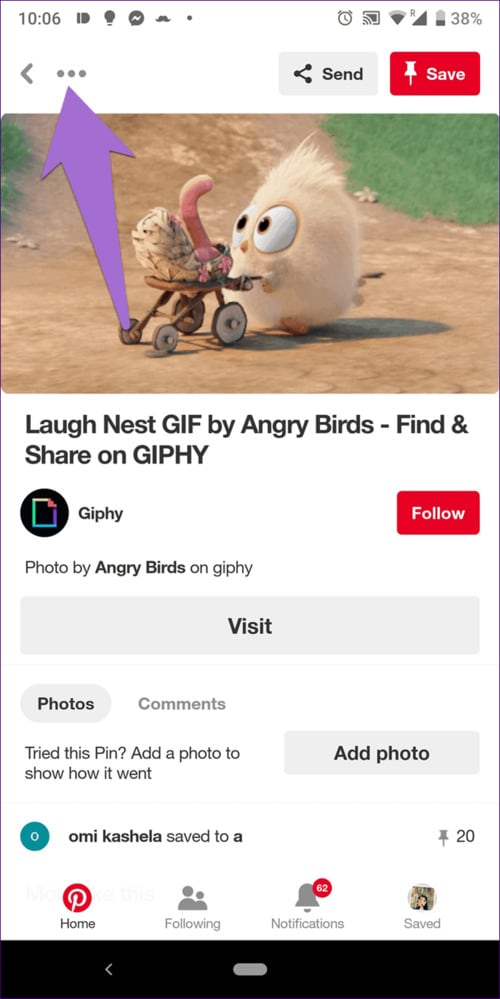
Step 2: Download Image
Click the three-dot icon at the top from the menu and select Download image.

Step 3: Notification
After the image gets saved, you will receive a notification at the bottom. The freshly downloaded GIF will appear in your gallery or camera roll when you open it.
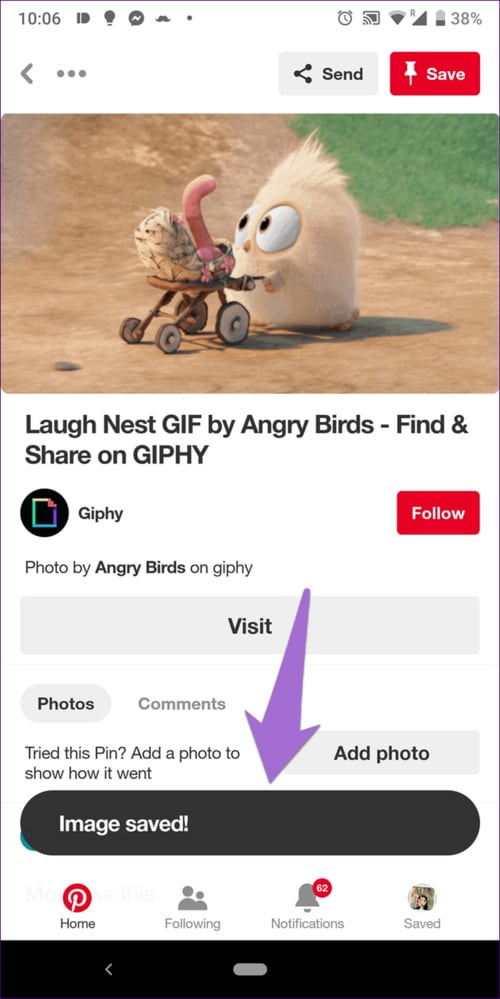
02How to Download Pinterest Videos by Computer?
Follow these simple step guides to achieve this:
Step 1: Open selected GIF
On your computer, open the GIF you want to use.
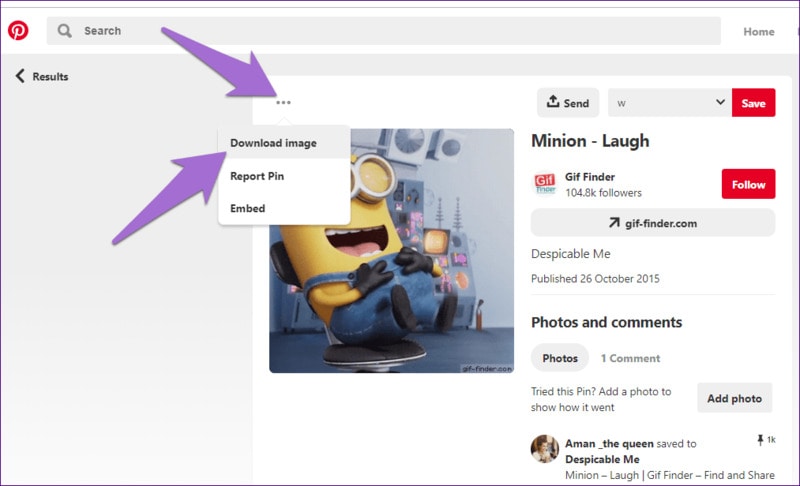
Step 2: Select Download
Select Download image from the menu by clicking on the three-dot icon above the GIF.
Step 3: Alternative
If the download option isn’t available for any reason, you’ll have to rely on the company’s
website. To do so, click on the GIF’s link.
You’ll reach the GIF’s host site. Right-click on the GIF and choose to Save image as… from the menu that appears. Ensure that the extension is . GIF. In some circumstances, you will have the opportunity to download the video.
Part 3 How to Get an Animated GIF on Pinterest
Save a picture from the Web to your hard drive before pinning it; GIFs pinned from Web pages are not animated. Open the Web page with the image you want to pin, then right-click the image and opt “Save as” to save it to a folder on your computer. You can save pictures off the Web in all major Web browsers, including Google Chrome, Mozilla Firefox, and Internet Explorer. Log in to Pinterest select “Upload a Pin” from the “+” menu. Select the animated GIF from your hard drive by clicking the “Choose Image” button. Click “Pin It” after selecting the board you wish to pin the image.
How to Upload a GIF to Pinterest
Now that you know how to download Pinterest GIFs, you may want to consider posting GIFs to Pinterest as well. Unfortunately, you cannot upload GIFs from mobile apps. To upload a GIF to your Pinterest account, you’ll need to utilize a computer.
If you have a GIF file on your computer, follow these instructions to add it.
Step 1: Log in to your Pinterest account
Log in to your Pinterest account, then go to the bottom of the page to the add icon. From the menu, choose to Create a Pin.
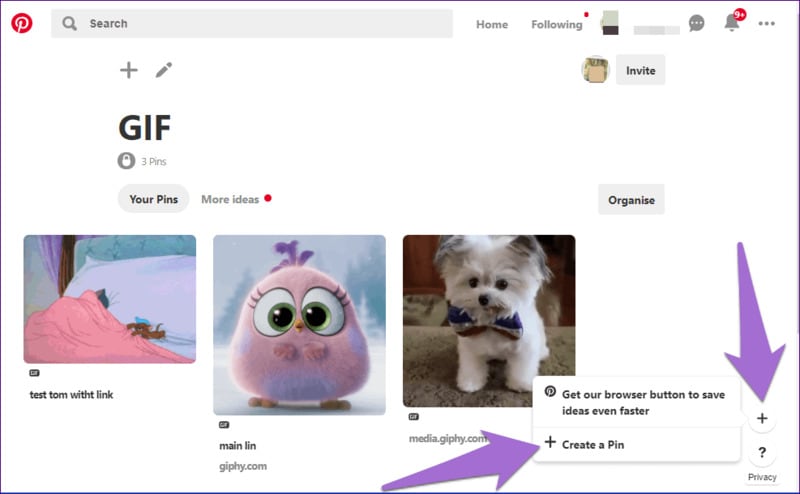
Step 2: Upload GIF
Drag and drop the GIF or upload it onto the pin creation screen from your computer.
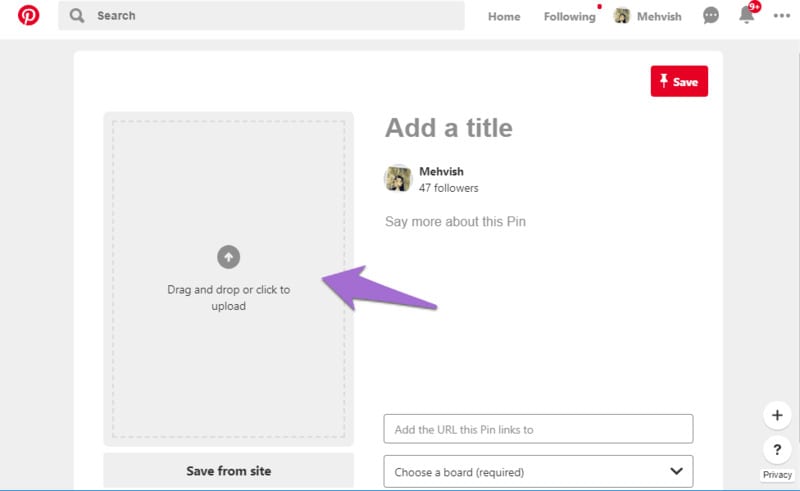
Step 3: Save GIF
When the GIF appears on the next screen, describe it and select a board for the pin. Finally, press the Save button.
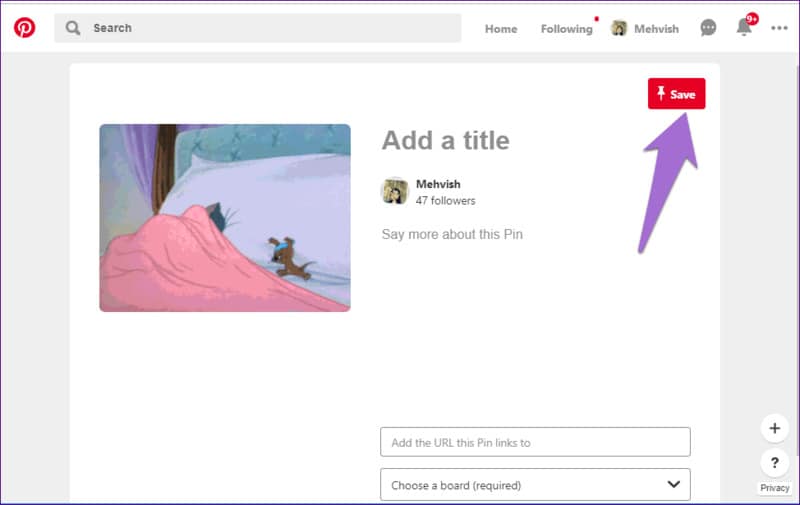
To save a file with the.GIF extension, you’ll need to use a GIF Pinterest downloader software or an application usable both online and offline. Wondershare Filmora is the most popular programs for this work because of the following benefits: it is elementary to use, and anyone can handle who isn’t technically inclined.
Wondershare Filmora Video Editor can convert Pinterest video to GIF from various video formats, including.wmv,.mp4,.mkv,.evo,.dat,.wav,.mpeg, and.avi, so you don’t have to worry about compatibility.
Wondershare Filmora
Get started easily with Filmora’s powerful performance, intuitive interface, and countless effects!
Try It Free Try It Free Try It Free Learn More >

The most important thing to know about Filmora video editing software is that it allows users to edit GIF files is one of the preferable programs for this task due to its advantages. It is elementary to use and is operational by any nontechnical person.
● Key Takeaways from This Episode →
● Now have learned how to easily download GIFs from Pinterest using Pinterest GIF downloader. By sincerely following the simple tips listed above, you can easily download video on GIF from Pinterest using any device on your mobile phone or your PC.
● However, Wondershare Filmora is one app that can meet all your needs to create a unique Pinterest GIF. And to top is all it is easy to use for none professionals
Emojis formerly reigned supreme, but GIFs and memes have since supplanted them. When you add a GIF to a conversation, it becomes more exciting. GIFs are considerably better at communicating our feelings, and they deserve credit for that. Pinterest, like other social networking sites and chat apps, enables GIFs. Pinterest is a photo-sharing website where you can find home decor ideas, recipes, fashion inspiration, DIY projects, and more.
Compared to a static image, adding a GIF to Pinterest conveys more information. You can make GIFs for your DIY projects or use them to display all sides of a cushion, which would typically require many images. But what if you like a GIF you found on Pinterest? What’s the best way to get it? That is what we will demonstrate here. This article will show how to download Pinterest GIFs to your computer and mobile device.
In this article
01 [Are There Gifs on Pinterest?](#Part 1)
02 [How to Get Pinterest GIF Downloader](#Part 2)
03 [How to Get an Animated GIF on Pinterest](#Part 3)
Part 1 Are There Gifs on Pinterest?
You can submit GIF and animated GIF images from your computer or the Internet to Pinterest. Because the pictures on your board aren’t animated, you might conclude that animated GIFs don’t work on Pinterest. When you click on the photos and open them on their respective Web pages, they become animated. Because images posted from websites do not save on Pinterest’s servers, they are not animated. You can’t do anything if Pinterest doesn’t animate a GIF.
Part 2 How to Get Pinterest GIF Downloader
Compared to a static image, adding a GIF to Pinterest conveys more information. You can make GIFs for your DIY projects or use them to display all sides of a cushion, which would typically require many images.
But what if you’re a Pinterest fan of a GIF? What’s the best way to get it? That is what we will demonstrate here. We’ll show you how to complete a Pinterest GIF video download to your computer and mobile device in this session.
Let’s get started.
01How to Download Pinterest Videos Using Mobile?
Here are simple steps to follow to achieve this:
Make use of the native download button
Step 1: Select GIF to download
Go to the selected GIF and click it.
Step 2: Download Image
Click the three-dot icon at the top from the menu and select Download image.
Step 3: Notification
After the image gets saved, you will receive a notification at the bottom. The freshly downloaded GIF will appear in your gallery or camera roll when you open it.
02How to Download Pinterest Videos by Computer?
Follow these simple step guides to achieve this:
Step 1: Open selected GIF
On your computer, open the GIF you want to use.
Step 2: Select Download
Select Download image from the menu by clicking on the three-dot icon above the GIF.
Step 3: Alternative
If the download option isn’t available for any reason, you’ll have to rely on the company’s
website. To do so, click on the GIF’s link.
You’ll reach the GIF’s host site. Right-click on the GIF and choose to Save image as… from the menu that appears. Ensure that the extension is . GIF. In some circumstances, you will have the opportunity to download the video.
Part 3 How to Get an Animated GIF on Pinterest
Save a picture from the Web to your hard drive before pinning it; GIFs pinned from Web pages are not animated. Open the Web page with the image you want to pin, then right-click the image and opt “Save as” to save it to a folder on your computer. You can save pictures off the Web in all major Web browsers, including Google Chrome, Mozilla Firefox, and Internet Explorer. Log in to Pinterest select “Upload a Pin” from the “+” menu. Select the animated GIF from your hard drive by clicking the “Choose Image” button. Click “Pin It” after selecting the board you wish to pin the image.
How to Upload a GIF to Pinterest
Now that you know how to download Pinterest GIFs, you may want to consider posting GIFs to Pinterest as well. Unfortunately, you cannot upload GIFs from mobile apps. To upload a GIF to your Pinterest account, you’ll need to utilize a computer.
If you have a GIF file on your computer, follow these instructions to add it.
Step 1: Log in to your Pinterest account
Log in to your Pinterest account, then go to the bottom of the page to the add icon. From the menu, choose to Create a Pin.
Step 2: Upload GIF
Drag and drop the GIF or upload it onto the pin creation screen from your computer.
Step 3: Save GIF
When the GIF appears on the next screen, describe it and select a board for the pin. Finally, press the Save button.
To save a file with the.GIF extension, you’ll need to use a GIF Pinterest downloader software or an application usable both online and offline. Wondershare Filmora is the most popular programs for this work because of the following benefits: it is elementary to use, and anyone can handle who isn’t technically inclined.
Wondershare Filmora Video Editor can convert Pinterest video to GIF from various video formats, including.wmv,.mp4,.mkv,.evo,.dat,.wav,.mpeg, and.avi, so you don’t have to worry about compatibility.
Wondershare Filmora
Get started easily with Filmora’s powerful performance, intuitive interface, and countless effects!
Try It Free Try It Free Try It Free Learn More >
The most important thing to know about Filmora video editing software is that it allows users to edit GIF files is one of the preferable programs for this task due to its advantages. It is elementary to use and is operational by any nontechnical person.
● Key Takeaways from This Episode →
● Now have learned how to easily download GIFs from Pinterest using Pinterest GIF downloader. By sincerely following the simple tips listed above, you can easily download video on GIF from Pinterest using any device on your mobile phone or your PC.
● However, Wondershare Filmora is one app that can meet all your needs to create a unique Pinterest GIF. And to top is all it is easy to use for none professionals
5 Ways You Never Heard of for Converting MP4 to GIF in Photoshop
5 Techniques You Never heard of for Converting MP4 to GIF in Photoshop
An easy yet powerful editor
Numerous effects to choose from
Detailed tutorials provided by the official channel
When someone mentions a GIF, what comes to your mind? Some people can picture what it means but wouldn’t describe that match. So, before we discuss how to convert mp4 to gif in Photoshop, it would be wise to define it briefly. First of all, GIF stands for Graphics Interchange Format. Its file format is a compressed image, and it is most suitable for animation. We all know that an animated GIF comprises a series of many still images. However, since these images play sequentially, it may appear as if they are in motion. It is that movement illusion that makes the animation effect come about.
When someone mentions a GIF, what comes to your mind? Some people can picture what it means but wouldn’t describe that match. So, before we discuss how to convert mp4 to gif in Photoshop, it would be wise to define it briefly. First of all, GIF stands for Graphics Interchange Format. Its file format is a compressed image, and it is most suitable for animation. We all know that an animated GIF comprises a series of many still images. However, since these images play sequentially, it may appear as if they are in motion. It is that movement illusion that makes the animation effect come about.
In this article
01 [How to Convert Video to GIF in Photoshop - Easy Way](#Part 1)
02 [How to Create Animated GIFs from Video without Photoshop](#Part 2)
Part 1 How to Convert Video to GIF in Photoshop - Easy Way
If you want to convert video to GIF in Photoshop, here is a discussion of the easy way to go about it.
Step 1: Ensure that the Dimensions are Right
When you start to convert mp4 to GIF using Photoshop, it is important to highlight some things that need to be done before anything else. Ensure that you set the resolution and dimensions right. Failure to do saw will see the size of your video determine that of your GIF. Beneath such occurrences, you may find yourself having a GIF that’s too large, and its quality leaves a lot to be desired.
The dimensions you choose will depend on what you are working on at any one particular time. For instance, a 720 x 300 layout is recommended for a banner ad GIF. If there is something that one can’t stress enough is the importance of ensuring that you use pixels. As for the resolution, keep in mind that a low resolution translates to a small file size. In this case, you are at privilege to choose between two units, pixels and inches.
Additionally, set the color mode. Since GIFs are meant for screens, ensure that you select the RGB color mode. Finally, click on Create, which opens a new document, and start following these steps to convert Mp4 to GIF Photoshop.
Step 2: Import the Video you want to convert from MP4 to GIF Photoshop
Remember that we already opened Photoshop by pressing Create. Now, the next thing would be to navigate to File followed by Import before selecting the Video Frames to Layers option.

Step 3: Set Up the Following Settings Accordingly
After choosing the video file, choose Open, and a dialogue box with several options and a preview of the video appears.

The radio buttons give you two options to choose from. The “From Beginning to End” is the ideal choice if you want the whole video to be converted to GIF. However, if you want to focus on a section of the video, select “Selected Range Only.” On the other hand, the checkbox allows you to limit the video to 2 frames. Simply tick it, and Photoshop will automatically ensure that only two frames of the video are left.
Last but not least, check the “Make Frame Animation” checkbox. Once all these settings are set as recommended and depending on preference, Photoshop will export your video as several frames. In the event that the program crashes, all is not lost. You can fix it by reducing the video’s quality and then try importing it.
Step 4: Edit the GIF
Photoshop also gives you several options to help you edit your frames to perfection. In most cases, these settings are ideal for manipulating the quality of your GIF. Interestingly, it is possible to preview how the GIF will look before committing to any change. So expect two panes, right and left. The left one allows you to see the preview, whereas its right counterpart helps you edit.

Alternatively, select one of the preset choices. If you do so, there is no requirement The bottom line is that the tool makes to make any changes. That doesn’t mean you can’t choose a Preset option and then edit it to your preferences. Expect the quality of the GIF to decrease and the size to be relatively small. Right below the Preset, don’t forget to confirm that the selected option is GIF.
Step 5: Save the GIF
Once satisfied by the GIF created, save these frames as animated GIFs. Go to File, then Export, followed by Save for Web (Legacy).

That’s how to convert Mp4 to GIF in simple steps.
Part 2 How to Create Animated GIFs from Video without Photoshop
Alternatively, you can opt to convert Mp4 to GIF using Wondershare Filmora Video Editor . It is yet another tool suitable for creating animated GIFs using videos and photos. It allows the user to customize GIF images using overlays, text, animation, and elements. When it is over, you are at liberty to export it to your computer or any other common portable storage device. The bottommost line is that the tool makes it easy to use whenever necessary. The icing on the cake is the fact that you don’t have to sign up or pay a premium. In case you are wondering, it is also easy to use. All you got to do is to follow these steps.

Wondershare Filmora - Best Video Editor for Mac/Windows
5,481,435 people have downloaded it.
Build unique custom animations without breaking a sweat.
Focus on creating epic stories and leave the details to Filmora’s auto features.
Start a creative adventure with drag & drop effects and endless possibilities.
Filmora simplifies advanced features to save you time and effort.
Filmora cuts out repetition so you can move on to your next creative breakthrough.
Step 1: Import the Videos
Ensure that the videos you import are editable lest that will be a waste of time. Its design makes it compatible with a wide range of formats, including wmv, mkv, mp4, wav, mpeg, avi, jpg, and png. Since it is among the compatible formats, don’t hesitate to use Filmora to convert GIF to mp4 and vice versa instead of Photoshop.
Step 2: Drag the videos to Filmora timeline
Keep in mind that Filmora has a long list of tools you can use to edit your videos. However, you can also use them on a video that’s on its timeline. To drop them there, all you have to do is drag them to the timeline.

Step 3: Edit the File
The list of ways of editing your videos is long. Some of your options are split, crop, combine, slow down, and speed up the GIFs, to mention a few. So, pick the options that fit your situation the best. Ensure that the end product is as good as possible by using these features to the best level.
Step 4: Add Various Text Effects
In most cases, images and videos aren’t enough. You may want to add text to enhance what you want to achieve with the GIF. To do so, you can always introduce text, and trust me, it never disappoints. In addition to text, you can also add sound at this stage. Again, it is something that does GIFs the justice they deserve.

Step 5: Save and Export the GIF
When all is stated and done, you will have to save and export the GIFs so that you can use them accordingly. For instance, you can share them with friends via social media. Ensure that the extension you use is the GIF.
● Key Takeaways from This Episode →
● Based on the above discussion, it is possible to convert mp4 to GIF. As a matter of fact, it is quite easy, and you don’t need to be an expert to get it done.
●Rest assured that the video will become a GIF with a few clicks. Then, you can go ahead and use it as you may wish.
●On one side, you can use Photoshop. It is a tool designed to perform such tasks.
●If you choose it, use the above guide and follow each of the steps. It is quite detailed to the extent that you won’t get stuck along the way.
●On the other hand, you can also use Wondershare Filmora. It is yet another application that converts MP4 to GIF excellently.
When someone mentions a GIF, what comes to your mind? Some people can picture what it means but wouldn’t describe that match. So, before we discuss how to convert mp4 to gif in Photoshop, it would be wise to define it briefly. First of all, GIF stands for Graphics Interchange Format. Its file format is a compressed image, and it is most suitable for animation. We all know that an animated GIF comprises a series of many still images. However, since these images play sequentially, it may appear as if they are in motion. It is that movement illusion that makes the animation effect come about.
When someone mentions a GIF, what comes to your mind? Some people can picture what it means but wouldn’t describe that match. So, before we discuss how to convert mp4 to gif in Photoshop, it would be wise to define it briefly. First of all, GIF stands for Graphics Interchange Format. Its file format is a compressed image, and it is most suitable for animation. We all know that an animated GIF comprises a series of many still images. However, since these images play sequentially, it may appear as if they are in motion. It is that movement illusion that makes the animation effect come about.
In this article
01 [How to Convert Video to GIF in Photoshop - Easy Way](#Part 1)
02 [How to Create Animated GIFs from Video without Photoshop](#Part 2)
Part 1 How to Convert Video to GIF in Photoshop - Easy Way
If you want to convert video to GIF in Photoshop, here is a discussion of the easy way to go about it.
Step 1: Ensure that the Dimensions are Right
When you start to convert mp4 to GIF using Photoshop, it is important to highlight some things that need to be done before anything else. Ensure that you set the resolution and dimensions right. Failure to do saw will see the size of your video determine that of your GIF. Beneath such occurrences, you may find yourself having a GIF that’s too large, and its quality leaves a lot to be desired.
The dimensions you choose will depend on what you are working on at any one particular time. For instance, a 720 x 300 layout is recommended for a banner ad GIF. If there is something that one can’t stress enough is the importance of ensuring that you use pixels. As for the resolution, keep in mind that a low resolution translates to a small file size. In this case, you are at privilege to choose between two units, pixels and inches.
Additionally, set the color mode. Since GIFs are meant for screens, ensure that you select the RGB color mode. Finally, click on Create, which opens a new document, and start following these steps to convert Mp4 to GIF Photoshop.
Step 2: Import the Video you want to convert from MP4 to GIF Photoshop
Remember that we already opened Photoshop by pressing Create. Now, the next thing would be to navigate to File followed by Import before selecting the Video Frames to Layers option.
Step 3: Set Up the Following Settings Accordingly
After choosing the video file, choose Open, and a dialogue box with several options and a preview of the video appears.
The radio buttons give you two options to choose from. The “From Beginning to End” is the ideal choice if you want the whole video to be converted to GIF. However, if you want to focus on a section of the video, select “Selected Range Only.” On the other hand, the checkbox allows you to limit the video to 2 frames. Simply tick it, and Photoshop will automatically ensure that only two frames of the video are left.
Last but not least, check the “Make Frame Animation” checkbox. Once all these settings are set as recommended and depending on preference, Photoshop will export your video as several frames. In the event that the program crashes, all is not lost. You can fix it by reducing the video’s quality and then try importing it.
Step 4: Edit the GIF
Photoshop also gives you several options to help you edit your frames to perfection. In most cases, these settings are ideal for manipulating the quality of your GIF. Interestingly, it is possible to preview how the GIF will look before committing to any change. So expect two panes, right and left. The left one allows you to see the preview, whereas its right counterpart helps you edit.
Alternatively, select one of the preset choices. If you do so, there is no requirement The bottom line is that the tool makes to make any changes. That doesn’t mean you can’t choose a Preset option and then edit it to your preferences. Expect the quality of the GIF to decrease and the size to be relatively small. Right below the Preset, don’t forget to confirm that the selected option is GIF.
Step 5: Save the GIF
Once satisfied by the GIF created, save these frames as animated GIFs. Go to File, then Export, followed by Save for Web (Legacy).
That’s how to convert Mp4 to GIF in simple steps.
Part 2 How to Create Animated GIFs from Video without Photoshop
Alternatively, you can opt to convert Mp4 to GIF using Wondershare Filmora Video Editor . It is yet another tool suitable for creating animated GIFs using videos and photos. It allows the user to customize GIF images using overlays, text, animation, and elements. When it is over, you are at liberty to export it to your computer or any other common portable storage device. The bottommost line is that the tool makes it easy to use whenever necessary. The icing on the cake is the fact that you don’t have to sign up or pay a premium. In case you are wondering, it is also easy to use. All you got to do is to follow these steps.
Wondershare Filmora - Best Video Editor for Mac/Windows
5,481,435 people have downloaded it.
Build unique custom animations without breaking a sweat.
Focus on creating epic stories and leave the details to Filmora’s auto features.
Start a creative adventure with drag & drop effects and endless possibilities.
Filmora simplifies advanced features to save you time and effort.
Filmora cuts out repetition so you can move on to your next creative breakthrough.
Step 1: Import the Videos
Ensure that the videos you import are editable lest that will be a waste of time. Its design makes it compatible with a wide range of formats, including wmv, mkv, mp4, wav, mpeg, avi, jpg, and png. Since it is among the compatible formats, don’t hesitate to use Filmora to convert GIF to mp4 and vice versa instead of Photoshop.
Step 2: Drag the videos to Filmora timeline
Keep in mind that Filmora has a long list of tools you can use to edit your videos. However, you can also use them on a video that’s on its timeline. To drop them there, all you have to do is drag them to the timeline.
Step 3: Edit the File
The list of ways of editing your videos is long. Some of your options are split, crop, combine, slow down, and speed up the GIFs, to mention a few. So, pick the options that fit your situation the best. Ensure that the end product is as good as possible by using these features to the best level.
Step 4: Add Various Text Effects
In most cases, images and videos aren’t enough. You may want to add text to enhance what you want to achieve with the GIF. To do so, you can always introduce text, and trust me, it never disappoints. In addition to text, you can also add sound at this stage. Again, it is something that does GIFs the justice they deserve.
Step 5: Save and Export the GIF
When all is stated and done, you will have to save and export the GIFs so that you can use them accordingly. For instance, you can share them with friends via social media. Ensure that the extension you use is the GIF.
● Key Takeaways from This Episode →
● Based on the above discussion, it is possible to convert mp4 to GIF. As a matter of fact, it is quite easy, and you don’t need to be an expert to get it done.
●Rest assured that the video will become a GIF with a few clicks. Then, you can go ahead and use it as you may wish.
●On one side, you can use Photoshop. It is a tool designed to perform such tasks.
●If you choose it, use the above guide and follow each of the steps. It is quite detailed to the extent that you won’t get stuck along the way.
●On the other hand, you can also use Wondershare Filmora. It is yet another application that converts MP4 to GIF excellently.
Best GIF Croppers: How to Crop an Animated GIF
Best GIF Croppers: How to Crop an Animated GIF

Shanoon Cox
Mar 27, 2024• Proven solutions
Cropping an animated gif is quite different from cropping still images. Fortunately, there are also some free and easy to use croppers that can help you realize it. Read on to find the best 5 GIF croppers, and the how-to steps are listed in detail.
Top 5 Best GIF Croppers
#1 Wondershare Filmora
Wondershare Filmora is an easy-to-use yet powerful video editing software that allows you to edit GIF files, like cropping, reversing, rotating, splitting, cutting, add text and overlays, etc.
How to crop gifs with Filmora
- Import gif file into the program
- Drag it into the timeline
- Right click on the gif clip, choose “Crop and Zoom”
- Drag the rectangle frame to crop the gif
- Hit the play button to preview the result. Hit OK when you get the image you want
- Click “Export”, choose “GIF” as the export format. You can change the resolution, frame rate and bit rate of the gif
- Export and save
 Download Mac Version ](https://tools.techidaily.com/wondershare/filmora/download/ )
Pros:
- It allows you to adjust the cropping domain accurately, and you can preview the result before export.
- An all in one editor that not only allows you to crop your GIF image, but also to convert gif to video (video to gif), add text and effects to a gif file , correct color for gif images, etc.
- Share to Facebook directly
Cons:
- It might be a little bit heavy if you just want to crop a GIF image.
#2 GIFS.COM
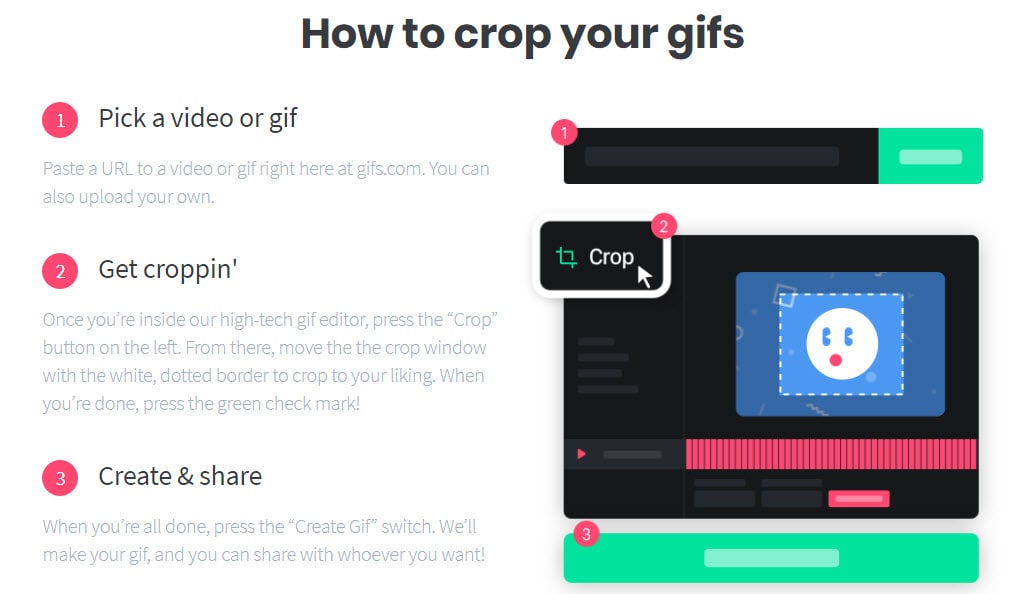
An online site designed for GIF editing, you can find lots of interesting gifs made by other users on this site.
How to crop gif with GIFS.COM
- Upload the gif file to the website, or paste the URL of the file
- Choose Crop
- Drag the highlighted area over the part you want to be in the final gif
- All the darker area will be removed
- Drag the left angle to resize
- Click Save, Create GIF
- Save or Share
Pros:
- Beautiful interface and easy to use
- Allow you to blur, flip the gif
- Allows you to post the GIF directly on Facebook, Twitter, Pinterest, etc
Cons:
- Some effects can’t be previewed
- You have to sign in to export the gif
#3 EZGIF.COM

Another simple online tool for cropping and slicing animated GIF, PNG and WebP.
How to crop gifs with EZGIF.COM
- Upload image from your computer or paste an URL, click Upload
- Choose the Crop tool, drag a rectangle over the image
- Set the image width, height and adjust the aspect ratio
- Hit “Crop it”
Pros:
- Allows you resize, rotate, adjust speed, and add text/overlays
- Can’t share on Twitter, Facebook directly
Cons:
- The final output result is not very accurate
#4 ILOVEIMAGE.COM
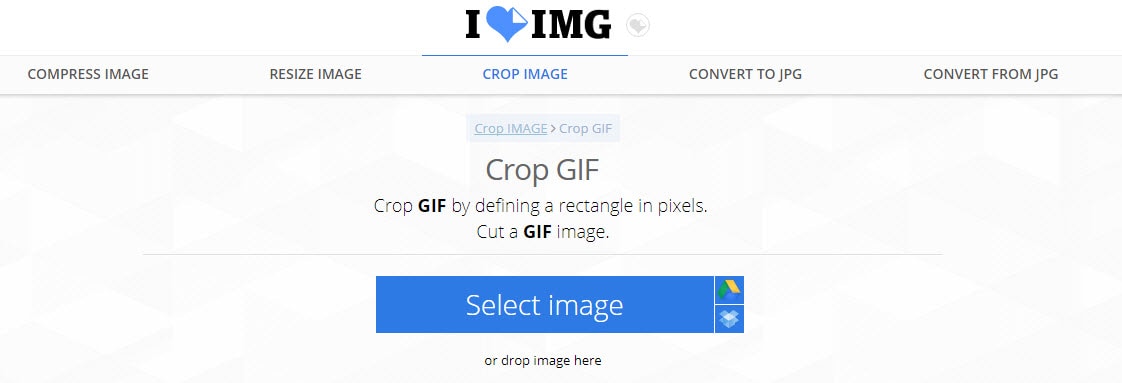
A very tiny online tool that can help you crop GIFs quickly and easily
How to crop gif with ILOVEIMG.COM
- Select a GIF file from desktop, Google Drive, and Dropbox
- Drag the rectangle to crop the image
- Hit “Crop image”
- The final result will be downloaded automatically, you can also copy the image link if you want to share it with others.
Pros:
- Very easy to use
- Light and rapid
Cons:
- Some editing options are missing
- Can’t preview the result before downloading
#5 GIFGIFS.COM
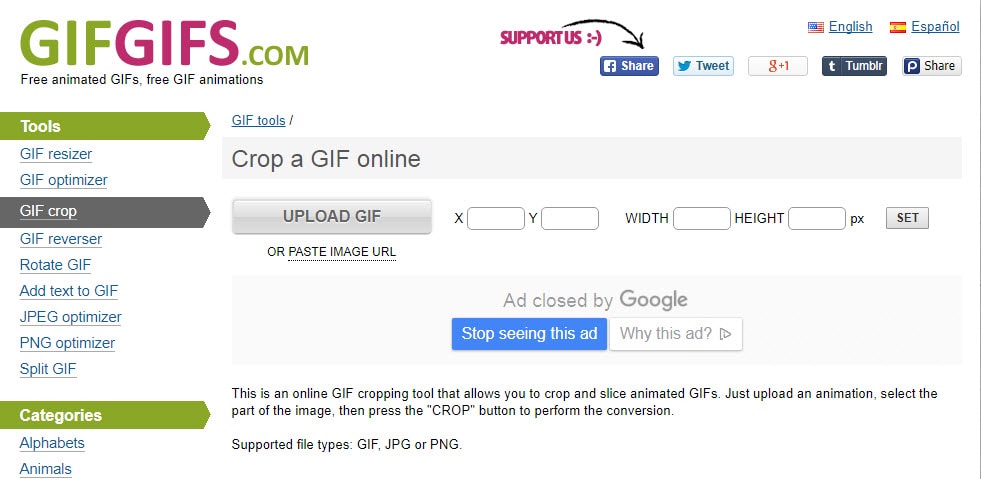
This is an online GIF editor that helps you crop and slice animated GIFs
How to use GIFGIFS.COM to crop gifs
- Select the part of the image that you want to crop
- Press the “Crop” button
- A second later, a preview window will appear under the original image. Click “Download the result” to export the cropped gif image.
Pros:
- No need to download a program, free
- You can also resize, optimize, reverse, rotate, add text, split the gifs
Cons:
- The final output result is not very accurate
- Progress can be slow due to internet connection
Frequently Asked Questions About Cropping GIFs
1. How To Crop A GIF?
Web and desktop-based GIF makers and video editing software products make cropping a GIF a routine action. However, the exact steps you will need to take in order to crop a GIF file, depend on the GIF maker or video editing software you choose.
In most cases, you will just have to click on the Crop option, specify the area of the image you want to remove and confirm that you want to create a GIF. It is essential to keep in mind that cropping a GIF can alter its aspect ratio.
2. How To Reduce A GIF’s Size?
Increasing or decreasing the size of a GIF takes only a few moments of your time. You need to go through a few easy steps to resize a GIF online, since you just have to upload a file to the platform of your choosing, specify by how much you want to reduce the GIF’s size and then wait for the task to be completed.
In addition, reducing the number of frames a GIF contains will impact the size of the file, as the size of a GIF file increases with each new frame, you add to a GIF.
3. How To Crop A GIF To A Circle?
Whether or not you can crop a GIF into a circle, depends on the cropping tools the app you are using offers. Some GIF makers allow you to choose the shape to which you are going to crop a GIF, while others don’t provide this option.
Using Filmora’s mask features is probably one of the easiest ways to crop a GIF to a circle, as you simply have to apply the mask to the footage and specify which parts of the GIF’s frames are going to be removed. What’s more, you can choose the shape of the mask in Filmora which enables you to crop GIFs into a variety of different shapes.
Conclusion
If you want to make a GIF online, Filmora meme maker is your ultimate solution. It helps you make images, GIFs and video memes directly without watermark. It is totally FREE to use and no signup. You can change text size, color and position to create caption when you are editing. You can also put text inside or outside in GIF.
Shanoon Cox
Shanoon Cox is a writer and a lover of all things video.
Follow @Shanoon Cox
Shanoon Cox
Mar 27, 2024• Proven solutions
Cropping an animated gif is quite different from cropping still images. Fortunately, there are also some free and easy to use croppers that can help you realize it. Read on to find the best 5 GIF croppers, and the how-to steps are listed in detail.
Top 5 Best GIF Croppers
#1 Wondershare Filmora
Wondershare Filmora is an easy-to-use yet powerful video editing software that allows you to edit GIF files, like cropping, reversing, rotating, splitting, cutting, add text and overlays, etc.
How to crop gifs with Filmora
- Import gif file into the program
- Drag it into the timeline
- Right click on the gif clip, choose “Crop and Zoom”
- Drag the rectangle frame to crop the gif
- Hit the play button to preview the result. Hit OK when you get the image you want
- Click “Export”, choose “GIF” as the export format. You can change the resolution, frame rate and bit rate of the gif
- Export and save
Download Mac Version ](https://tools.techidaily.com/wondershare/filmora/download/ )
Pros:
- It allows you to adjust the cropping domain accurately, and you can preview the result before export.
- An all in one editor that not only allows you to crop your GIF image, but also to convert gif to video (video to gif), add text and effects to a gif file , correct color for gif images, etc.
- Share to Facebook directly
Cons:
- It might be a little bit heavy if you just want to crop a GIF image.
#2 GIFS.COM
An online site designed for GIF editing, you can find lots of interesting gifs made by other users on this site.
How to crop gif with GIFS.COM
- Upload the gif file to the website, or paste the URL of the file
- Choose Crop
- Drag the highlighted area over the part you want to be in the final gif
- All the darker area will be removed
- Drag the left angle to resize
- Click Save, Create GIF
- Save or Share
Pros:
- Beautiful interface and easy to use
- Allow you to blur, flip the gif
- Allows you to post the GIF directly on Facebook, Twitter, Pinterest, etc
Cons:
- Some effects can’t be previewed
- You have to sign in to export the gif
#3 EZGIF.COM
Another simple online tool for cropping and slicing animated GIF, PNG and WebP.
How to crop gifs with EZGIF.COM
- Upload image from your computer or paste an URL, click Upload
- Choose the Crop tool, drag a rectangle over the image
- Set the image width, height and adjust the aspect ratio
- Hit “Crop it”
Pros:
- Allows you resize, rotate, adjust speed, and add text/overlays
- Can’t share on Twitter, Facebook directly
Cons:
- The final output result is not very accurate
#4 ILOVEIMAGE.COM
A very tiny online tool that can help you crop GIFs quickly and easily
How to crop gif with ILOVEIMG.COM
- Select a GIF file from desktop, Google Drive, and Dropbox
- Drag the rectangle to crop the image
- Hit “Crop image”
- The final result will be downloaded automatically, you can also copy the image link if you want to share it with others.
Pros:
- Very easy to use
- Light and rapid
Cons:
- Some editing options are missing
- Can’t preview the result before downloading
#5 GIFGIFS.COM
This is an online GIF editor that helps you crop and slice animated GIFs
How to use GIFGIFS.COM to crop gifs
- Select the part of the image that you want to crop
- Press the “Crop” button
- A second later, a preview window will appear under the original image. Click “Download the result” to export the cropped gif image.
Pros:
- No need to download a program, free
- You can also resize, optimize, reverse, rotate, add text, split the gifs
Cons:
- The final output result is not very accurate
- Progress can be slow due to internet connection
Frequently Asked Questions About Cropping GIFs
1. How To Crop A GIF?
Web and desktop-based GIF makers and video editing software products make cropping a GIF a routine action. However, the exact steps you will need to take in order to crop a GIF file, depend on the GIF maker or video editing software you choose.
In most cases, you will just have to click on the Crop option, specify the area of the image you want to remove and confirm that you want to create a GIF. It is essential to keep in mind that cropping a GIF can alter its aspect ratio.
2. How To Reduce A GIF’s Size?
Increasing or decreasing the size of a GIF takes only a few moments of your time. You need to go through a few easy steps to resize a GIF online, since you just have to upload a file to the platform of your choosing, specify by how much you want to reduce the GIF’s size and then wait for the task to be completed.
In addition, reducing the number of frames a GIF contains will impact the size of the file, as the size of a GIF file increases with each new frame, you add to a GIF.
3. How To Crop A GIF To A Circle?
Whether or not you can crop a GIF into a circle, depends on the cropping tools the app you are using offers. Some GIF makers allow you to choose the shape to which you are going to crop a GIF, while others don’t provide this option.
Using Filmora’s mask features is probably one of the easiest ways to crop a GIF to a circle, as you simply have to apply the mask to the footage and specify which parts of the GIF’s frames are going to be removed. What’s more, you can choose the shape of the mask in Filmora which enables you to crop GIFs into a variety of different shapes.
Conclusion
If you want to make a GIF online, Filmora meme maker is your ultimate solution. It helps you make images, GIFs and video memes directly without watermark. It is totally FREE to use and no signup. You can change text size, color and position to create caption when you are editing. You can also put text inside or outside in GIF.
Shanoon Cox
Shanoon Cox is a writer and a lover of all things video.
Follow @Shanoon Cox
Also read:
- Updated 2024 Approved 6 Proven Ways to Dub Anime for Anime Voice Actor
- In 2024, Create Animated Video on Canva
- 2024 Approved Best Websites to Download Animated GIFs for Free
- Updated 2024 Approved 8 Free GIF Animators to Make Your Own GIF
- Updated In 2024, How to Combine Multiple GIFs Into One with GIF Combiner
- In 2024, 10 Photoshop Cartoon Effects For Creatives
- In 2024, Pencil2D Animation Tutorial Overview
- 2024 Approved How to Animate - Adobe Animate Tutorias
- New In 2024, The Coolest Anime Characters Ever| List of Top Favorites
- New The Secret Sauce for Making GIF Instagram Story More Aesthetic for 2024
- New 2024 Approved OBS Animated Lower Thirds Alternatives
- New Whats the Best 10 Photo Animator Templates That Bring Your Images to Life?
- New In 2024, Top 10 Cartoon Canvas Painting Ideas for Total Beginners
- Updated Top 12 2D Animation Studios All Should Check Out
- Updated Tutorials to Make Animated Images – Even if Youre Just Starting Out
- New How to Make Well Done Animated GIF By Yourself, In 2024
- In 2024, A Roster of 15 Best Disney Channel Cartoons
- 2024 Approved 8 Top Motion Graphics Online Tools for Your Inspiration
- New 2024 Approved How to Make Well Done Animated GIF By Yourself?
- In 2024, Change Location on Yik Yak For your Samsung Galaxy A14 5G to Enjoy More Fun | Dr.fone
- In 2024, How to Mirror Honor X9b to Mac? | Dr.fone
- Thinking About Changing Your Netflix Region Without a VPN On Poco C65? | Dr.fone
- Easy Guide How To Bypass Tecno Pova 5 Pro FRP Android 10/11/12/13
- How to Update iPhone 12 without Losing Data? | Dr.fone
- Different Methods for Resetting Samsung Galaxy S21 FE 5G (2023) Phones with Screen Locked and Not | Dr.fone
- 3 Best Tools to Hard Reset Xiaomi Redmi Note 13 5G | Dr.fone
- Possible ways to recover deleted files from Xiaomi
- In 2024, How to Unlock Apple iPhone 6s Plus Passcode without Computer? | Dr.fone
- How to Factory Reset Oppo A2 in 5 Easy Ways | Dr.fone
- In 2024, Fixing Foneazy MockGo Not Working On Honor Magic 5 Lite | Dr.fone
- What You Want To Know About Two-Factor Authentication for iCloud From your iPhone 12 Pro
- Title: Tutorials to Make Animated Images – Even if Youre Just Starting Out
- Author: Elon
- Created at : 2024-05-19 03:04:27
- Updated at : 2024-05-20 03:04:27
- Link: https://animation-videos.techidaily.com/tutorials-to-make-animated-images-even-if-youre-just-starting-out/
- License: This work is licensed under CC BY-NC-SA 4.0.
